Mega Man (NES) — Complete Campaign Walkthrough (North America, 1987)
Step-by-step walkthrough for the original 1987 North American NES release of Mega Man. This guide covers stage order advice, detailed routes for all six Robot Master stages, how to use each acquired weapon, the fixed Wily Fortress sequence, boss strategies, recovery from common failures and concrete completion checks to see the true ending.

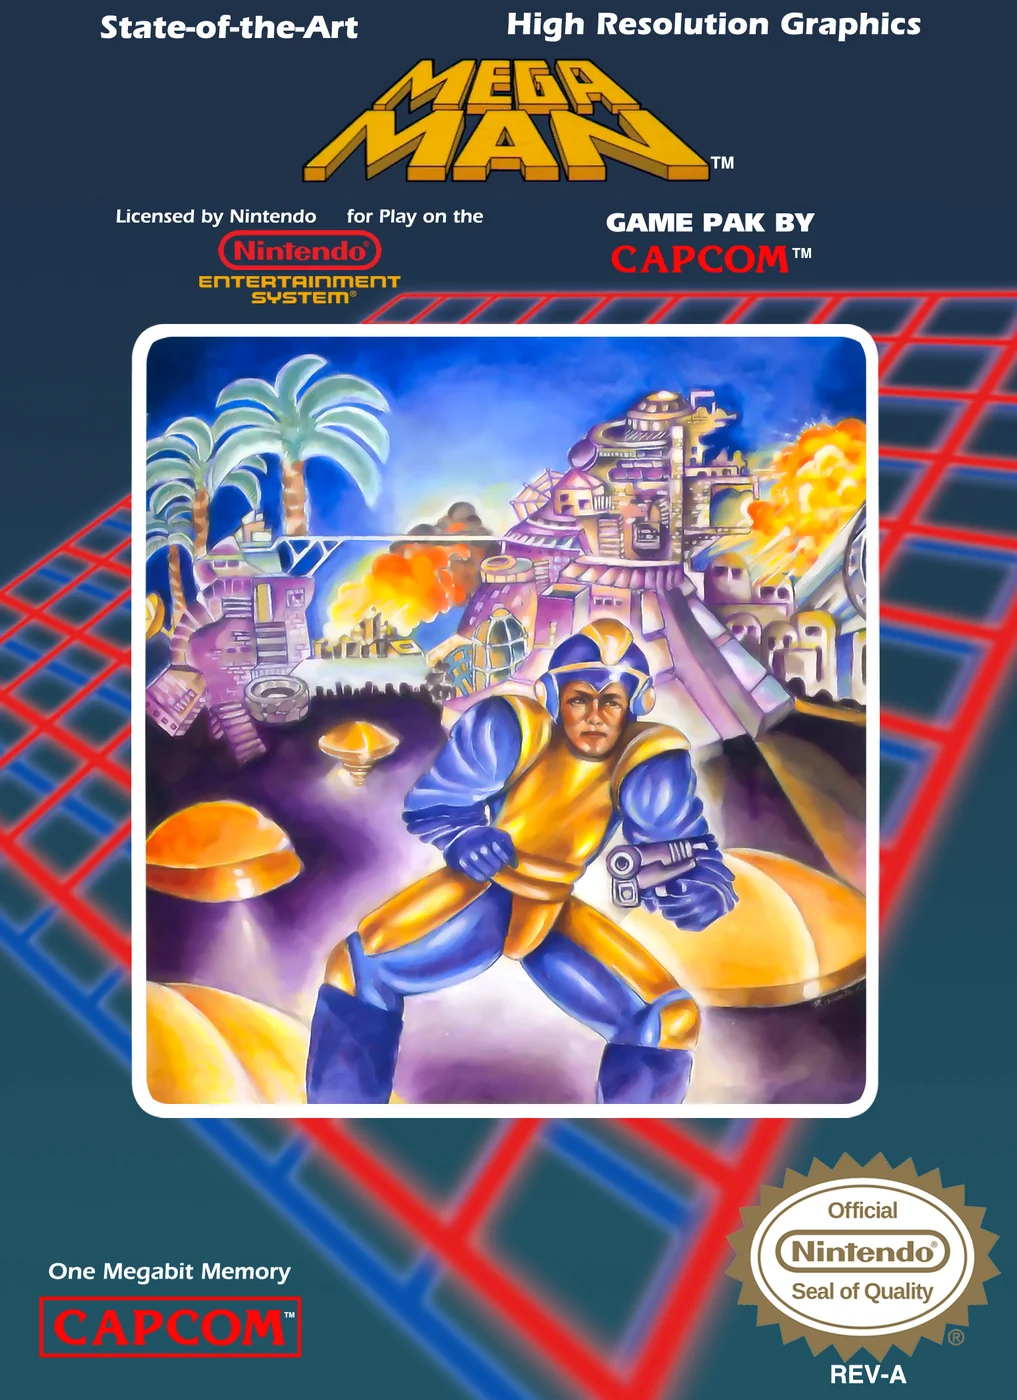
Find a copy
Mega Man Nintendo Entertainment System
We may earn a commission if you buy through these links, at no extra cost to you. As an Amazon Associate I earn from qualifying purchases.
Opens retailer search results. Check the model, edition, seller, availability and current price before buying.
Before you begin
You are about to run the original Mega Man for the NES (North American 1987 release).
The game gives you freedom to pick any Robot Master first, but a clear weakness chain exists between their special weapons — following a recommended order will make later bosses and the Wily fortress substantially easier.
Expect tight platforming, pattern-based bosses and limited check‑pointing; the guide focuses on reproducible tactics and damage control.
Follow each stage section exactly: landmark descriptions, enemy hazards, safe ledges, and the boss method.
If you hit a wall in any room, the guide lists fallbacks (different weapons or positioning) and how to recover from mistakes without losing lives unnecessarily.
Use the preparation checklist before your first run to reduce repeat deaths and to practice each weapon's effect on the next boss.
Set yourself up for the run
Play with the NES controller layout you expect to use and map jump and shoot to buttons you can press precisely — Mega Man’s jump timing is strict and consistent.
Practice single-tap and charged timing (if using reproductions/emulators with a charge option, note original game uses immediate shot only).
Expect no mid-stage save or native password system on the cartridge; runs are handled with continues and lives.
If you use an emulator, enable save states only for practice; do not rely on them for intended-route learning.
Learn the weapon weakness chain before starting.
A recommended, low-friction route is: Bomb Man → Guts Man → Cut Man → Elec Man → Ice Man → Fire Man.
This order gives accessible weaknesses for each next Robot Master.
(The guide explains alternatives if you prefer a different route.)
Conserve energy: many Robot Master rooms and later Wily encounters are designed to punish repeated hits.
Learn enemy spawn points and where health pickups appear so you decide when to press forward or retreat to a safer position and retry.
Familiarize yourself with the Yellow Devil fight pattern and the common fortress hazards (disappearing floors, crushers, fixed projectiles).
The guide contains explicit timing windows and landing zones you should practice in a safe spot before attempting the full fortress.
If playing on original hardware, ensure the system is stable and controller is responsive.
If playing a compilation or re-release, check the edition differences (the guide targets the original NES mechanics; remakes/remasters can change physics or boss behavior).
Have patience for the Elec Man stage: many players find it among the hardest due to enemy placement and required precise movement; practice the jump-and-shoot rhythm in that stage before committing to a full run.
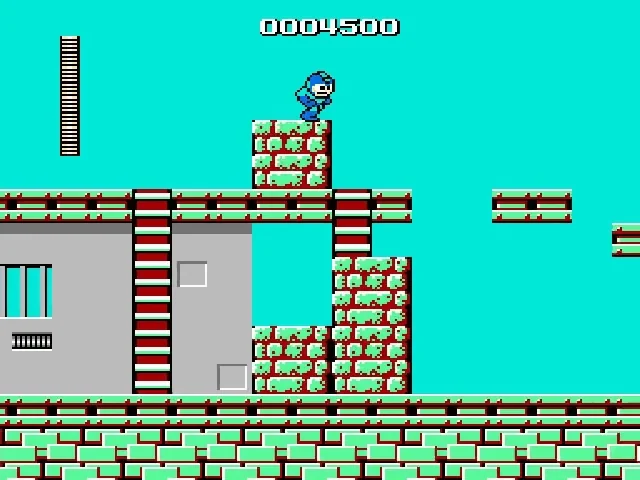
Stage Select & Weakness Chain — planning your first run
The original North American NES release of Mega Man lets you choose the six Robot Master stages in any order. A weakness route reduces the difficulty of the boss fights, but it is not mandatory: every Robot Master can be defeated with the Mega Buster. For a first campaign, Bomb Man to Guts Man to Cut Man to Elec Man to Ice Man to Fire Man is a practical route because each victory supplies a useful answer for the next major fight. Before entering Dr. Wily’s fortress, collect the Magnet Beam in Elec Man’s stage and preserve the weapons needed for the fortress bosses.
Learn the six Robot Master matchups
The original NES weakness chain is: Cut Man is vulnerable to Guts Man’s Super Arm; Guts Man is vulnerable to Bomb Man’s Hyper Bomb; Ice Man is vulnerable to Elec Man’s Thunder Beam; Bomb Man is vulnerable to Fire Man’s Fire Storm; Fire Man is vulnerable to Ice Man’s Ice Slasher; and Elec Man is vulnerable to Cut Man’s Rolling Cutter.
These are the main intended weaknesses, not restrictions. The Mega Buster remains a usable fallback against every Robot Master, although Elec Man is particularly dangerous without Rolling Cutter because his attacks are fast and his contact damage is punishing.
- Cut Man — Super Arm
- Guts Man — Hyper Bomb
- Ice Man — Thunder Beam
- Bomb Man — Fire Storm
- Fire Man — Ice Slasher
- Elec Man — Rolling Cutter
Follow the recommended low-friction route
Begin with Bomb Man. His stage is a reasonable opening choice because the boss can be defeated with the Mega Buster, so you do not need a prior special weapon. Keep moving through the stage carefully, and enter the boss room with enough health to survive a mistake rather than spending all of your energy fighting minor enemies.
After Bomb Man falls, select Guts Man and use Hyper Bomb. The weapon’s delayed explosion makes it awkward for ordinary platforming, but it is a strong answer to Guts Man and shortens a fight that can otherwise be difficult for a new player. Do not throw Hyper Bombs continuously; place them where Guts Man will land or pass over them.
Next, fight Cut Man with Super Arm. Super Arm is situational because it requires removable blocks and cannot be used freely in every room, but it is the intended counter here. Once Cut Man is defeated, take Rolling Cutter to Elec Man. Fire during Elec Man’s jumps or approach movements, then retreat rather than standing close to him after a missed shot.
Defeat Elec Man and use Thunder Beam against Ice Man. Thunder Beam is a strong boss weapon and is worth conserving after the Ice Man battle because it is one of the better tools for the first Wily fortress stage. Finish the Robot Master sequence with Fire Man, using Ice Slasher to interrupt or damage him while avoiding his flame attacks.
- Bomb Man with the Mega Buster, then collect Hyper Bomb.
- Guts Man with Hyper Bomb, then collect Super Arm.
- Cut Man with Super Arm, then collect Rolling Cutter.
- Elec Man with Rolling Cutter, then collect Thunder Beam.
- Ice Man with Thunder Beam, then collect Ice Slasher.
- Fire Man with Ice Slasher, then collect Fire Storm.
Collect the Magnet Beam before Wily’s fortress
The Magnet Beam is separate from the six Robot Master weapons and is found in Elec Man’s stage. It is behind removable blocks. Return to Elec Man’s stage after obtaining Super Arm, or use Thunder Beam to clear the blocks, then collect the item before entering Wily’s fortress. The Magnet Beam creates temporary platforms and is required for a progression section in the fortress; defeating all six Robot Masters is not enough if you have skipped it.
If your chosen order reaches Elec Man before Cut Man or Guts Man, you may need to defeat Elec Man with the Mega Buster first, then revisit his stage after obtaining Super Arm or Thunder Beam. The stage is selectable again, so a missed Magnet Beam can be recovered before starting Wily’s stages. Treat this item as required progress, not an optional bonus.
- Elec Man’s stage has been revisited if necessary.
- The blocks protecting the Magnet Beam have been removed.
- The Magnet Beam is visible in your inventory before selecting Dr. Wily.
Know which weapons to preserve
Rolling Cutter is useful against Elec Man and can attack along an arcing path, but it is not a universal replacement for the Mega Buster. Hyper Bomb is mainly valuable for Guts Man because its delayed detonation makes it unreliable against ordinary moving enemies. Super Arm is primarily a block-moving tool and a boss weapon for Cut Man.
Thunder Beam deserves special attention. It is the planned answer to Ice Man and is also highly effective against Yellow Devil in Wily Stage 1. Ice Slasher is chiefly needed for Fire Man and can freeze certain hazards or enemies, so avoid spending it casually before that fight. Fire Storm is the intended answer to Bomb Man and is also useful later against the first form of Dr. Wily’s machine.
Weapon energy is limited, and the original game does not automatically refill every special weapon after each fortress stage. Use the Mega Buster on ordinary enemies whenever practical. Switch to a special weapon when it opens a route, defeats a dangerous enemy safely, or is required for a planned boss encounter.
- Use the Mega Buster for routine enemies whenever it is safe.
- Preserve Thunder Beam for Ice Man and Yellow Devil if possible.
- Preserve Fire Storm for Bomb Man and the first Wily Machine phase.
- Keep Super Arm available for block puzzles and the CWU-01P fortress encounter.
Choose an alternate order without losing the plan
Start with Cut Man if you want a relatively direct opening stage. The Mega Buster is sufficient for the boss, after which Rolling Cutter gives you the intended answer to Elec Man. From there, use Thunder Beam on Ice Man, Ice Slasher on Fire Man, Fire Storm on Bomb Man, and Hyper Bomb on Guts Man. This route delays the construction-site stage and is a good choice if Cut Man’s platforming feels more comfortable than Bomb Man’s stage.
Start with Ice Man if you prefer to obtain Ice Slasher early. You must defeat Ice Man with the Mega Buster, then use Ice Slasher against Fire Man. Continue with Fire Storm against Bomb Man, Hyper Bomb against Guts Man, Super Arm against Cut Man, and Rolling Cutter against Elec Man. This order can make Fire Man easier sooner, but Ice Man’s slippery stage and boss fight are less forgiving without Thunder Beam.
Starting with Elec Man is possible for experienced players who want Thunder Beam immediately, but it is the least comfortable opening in this plan. Elec Man’s stage contains demanding vertical platforming, and the boss is fast when fought with the Mega Buster. Choose this route only if you already know the stage or want to accept a difficult first boss for an early Thunder Beam.
No route is mandatory. If a boss is costing repeated lives, use the Mega Buster fallback, learn the stage pattern, and return to the weakness chain on the next selection. The goal is to arrive at Wily’s fortress with all six weapons, the Magnet Beam, and enough health and energy to adapt.
- Use Cut Man first for a simpler opening and an early Elec Man counter.
- Use Ice Man first if early Ice Slasher is more valuable to your plan.
- Use Elec Man first only if you are prepared for a difficult Buster-only boss fight.
- Return to the weakness chain after any Buster opening.
Prepare for the fortress transition
After the six Robot Masters are defeated, confirm that all six weapons are available and that the Magnet Beam has been collected. Restore health before the final Robot Master door whenever possible, and do not enter the fortress after spending most of your important weapon energy on minor enemies.
Wily’s fortress has four stages. The first contains Yellow Devil, which is especially vulnerable to Thunder Beam. The second contains Cut Man and Elec Man rematches followed by the Clone Machine. The third contains the CWU-01P bubble enemies, for which Super Arm is important after the initial targets. The fourth contains the Bomb Man, Fire Man, Ice Man, and Guts Man rematches in sequence, followed by the two Wily Machine phases.
There is no full automatic weapon refill between fortress stages, so resource planning matters. The fortress does provide recovery opportunities, including a full energy refill item late in the final stage, but do not assume that a particular small capsule or extra life will appear when needed. Enter with the intended weapons stocked and use the Mega Buster on routine enemies whenever possible.
- All six Robot Master weapons are acquired.
- The Magnet Beam is acquired in Elec Man’s stage.
- Health is restored before entering Wily’s fortress.
- Thunder Beam, Super Arm, Fire Storm, Rolling Cutter, and Ice Slasher are not needlessly depleted.
- You know that Cut Man and Elec Man rematch in Wily Stage 2, while Bomb Man, Fire Man, Ice Man, and Guts Man rematch in Wily Stage 4.
Before you move on
- The inventory contains Super Arm, Hyper Bomb, Rolling Cutter, Thunder Beam, Ice Slasher, and Fire Storm.
- The Magnet Beam has been collected from Elec Man’s stage by removing the blocks that surround it.
- You can identify the intended weakness for all six Robot Masters.
- You have a usable plan for Yellow Devil, the CWU-01P encounter, the Wily rematches, and both Wily Machine phases.
- Health is restored before entering Wily’s fortress, and the key fortress weapons have not been exhausted on ordinary enemies.
Cut Man stage — route, hazards and boss method
Cut Man’s stage is a vertical platforming course built around ladders, turret timing, returning Rolling Cutters and moving Suzy enemies. The route below works whether Cut Man is your first Robot Master or you arrive with Guts Man’s Super Arm. Super Arm makes the boss much easier, but the Mega Buster remains a dependable fallback in the original North American NES release.
1. Cross the opening blocks and climb toward the first turret rooms
From the stage entrance, move right and jump across the opening blocks. A blue Blader approaches near the first ladder. Shoot it if it comes into your line, or jump over it and climb once the ladder area is clear. The nearby Super Arm blocks are useful only if you already have Guts Man’s weapon; they are not required for normal movement through this opening.
Continue across the raised platforms and stairs. Several Bladers occupy different heights, so avoid making a long blind jump while one is approaching. Use the platforms as separate landing points, then take the ladder upward. If a Blader follows from below, keep moving toward the next ladder instead of turning around on a narrow ledge.
- Clear or bypass the opening Bladers before committing to a jump.
- Use the raised blocks and stairs as individual landing points.
- Do not spend Super Arm energy unless throwing a block makes the crossing safer.
2. Handle the first turret screens
At the first turret screen, move to the left side of the upper platform and fire upward while jumping. The turret can be damaged when its opening is exposed, so time your shots for that firing window rather than wasting ammunition against its closed shell. Once it is destroyed, jump the gap and climb the ladder on the next side.
The following screen contains additional turrets. Work upward one platform at a time, firing whenever a turret opens. You can sometimes use the nearest ladder to bypass one turret, but do not jump into a higher ledge while another turret is actively firing. A fall usually sends you back toward the preceding screen, so recovering your position is preferable to forcing a risky jump.
- Attack turrets only while their openings are exposed.
- Pause on a platform after each ladder transition.
- If you fall, re-enter the screen carefully instead of rushing the same jump.
3. Pass the first Rolling Cutter machine and the Screw enemies
After the turret rooms, climb into the section with the machine that launches Rolling Cutters. The cutter travels away from the machine and then returns along its route. Do not cross as soon as the blade passes your position; wait until the return trip has cleared the lane. Staying near the center of a platform gives you more room to react and reduces the chance of being knocked into a pit.
Continue right past the machine and the small hopping enemies. When the flying Screw enemies begin moving across the route, let them pass over you when possible. Shoot them as they reverse direction and come back toward you. Climb the stairs and use the next Super Arm block as a stepping stone for the gap if necessary, then descend toward the Suzy rooms.
- Treat every Rolling Cutter as a two-way projectile.
- Stand away from platform edges during the return trip.
- Let Screws pass overhead, then shoot them as they come back.
4. Clear the first Suzy rooms without being surrounded
The Suzy enemies move horizontally or vertically and are safest when attacked from a stable floor. Destroy the low Suzy first when it comes within range. In the next arrangement, wait until the moving Suzies line up favorably before jumping or throwing a weapon. If you have Hyper Bomb, it can clear grouped Suzies, but its delayed explosion is not necessary for progress; the Mega Buster is safer when you have room to retreat.
Climb through the ladder section after the first group. In the room with several Suzies, a Super Arm block can remove multiple enemies if you have the weapon and a clear throwing angle. Otherwise, wait for the lowest enemies to move away, climb only when the ladder is not blocked, and use short jumps to avoid contact. Do not remain beneath a vertically moving Suzy while trying to line up a shot.
- Attack Suzies from the floor whenever possible.
- Climb during a gap in the enemy’s movement rather than jumping through contact.
- Use Super Arm or Hyper Bomb for groups only when the throw is safe.
5. Descend through the final approach
At the upper end of the Suzy section, continue right past the next Rolling Cutter machine and deal with the Bladers on the stairs and ledges. Shoot the nearest Blader before dropping if it is positioned over your landing point. After the drop, check the small recess to the left for the large energy capsule documented in this part of the route, particularly if earlier turret or Suzy hits reduced your health.
From the lower section, descend the ladders carefully. A Flying Met appears during the descent; avoid fighting it on a ladder. Move to solid ground, then continue down and across the platforms. On the final screen, a Hopper guards the route. Wait for its high jump, run underneath, and keep moving toward the boss gate rather than trying to trade contact damage.
- Take the large energy capsule after the second blade-machine section if needed.
- Fight or evade enemies from solid ground, not while climbing.
- Pass the Hopper under its high jump and avoid stopping beneath it.
6. Clear the enemy-filled boss gate
Cut Man’s boss gate contains Screw enemies that emerge from the floor and ceiling and fire in several directions. Move across the gap to the ladder, then descend while watching the central and side positions. Fire as each Screw appears. The safest approach is to remove the enemies before walking beneath them; do not sprint through the gate while they are active, because a hit can knock you into the gap or into another Screw.
Once all three gate enemies are destroyed, enter the doorway. Equip Super Arm before entering if you intend to use the two blocks in Cut Man’s room. If you do not have Super Arm, keep the Mega Buster equipped and enter with as much health as possible.
- Destroy the floor and ceiling Screws before crossing their firing lanes.
- Watch the central ceiling position as well as the floor enemies.
- Equip Super Arm before entering only if you have chosen that boss method.
7. Defeat Cut Man with Super Arm
Cut Man’s room contains two Super Arm blocks. Each successful block hit removes half of his health, so both blocks must connect. Pick up the first block and move away from Cut Man. When he jumps or is committed to a landing, throw the block into his path. Do not stand on or beside the block while Cut Man is approaching; contact damage and the Rolling Cutter can trap you against the room edge.
After throwing the first block, track the Rolling Cutter until it has completed its return path. Move to the second block only during a clear opening, then repeat the process. A short hop can help you throw while Cut Man is airborne, but do not jump directly into the blade. If either block misses, switch to the Mega Buster rather than assuming another block will appear; the room provides only the two intended blocks.
- Make both Super Arm blocks count.
- Throw during Cut Man’s jump or committed landing.
- Avoid the Rolling Cutter on both its outward and return paths.
- Switch to the Mega Buster immediately after a missed block.
8. Defeat Cut Man with the Mega Buster
The Mega Buster can finish the fight without any special weapon. Stay on the floor with enough room behind you and fire as Cut Man approaches. Repeated hits push him backward and can interrupt his advance. When he throws the Rolling Cutter, prioritize avoiding the blade; it may require a second jump or repositioning because it returns after passing you.
If Cut Man drives you toward a wall, do not keep firing from a trapped position. Walk or jump across the room during the next safe opening, then resume shooting from a wider distance. If a cutter forces you backward, let the full projectile cycle end before advancing again. This pacing prevents a single missed dodge from becoming repeated contact damage.
- Maintain a retreat path behind Mega Man.
- Dodge the complete cutter flight, including the return.
- Reposition across the room if Cut Man corners you.
- Resume firing only after the blade has cleared the area.
Before you move on
- Cut Man’s health is empty and the stage-clear sequence awards the Rolling Cutter.
- The stage-select screen returns with Cut Man defeated and Rolling Cutter added to the weapon inventory.
- If using the recommended Bomb Man to Guts Man to Cut Man route, both Super Arm blocks connected, or the Mega Buster was used to finish after a missed block.
- The stage is complete when Mega Man has returned to the stage-select screen rather than merely reaching the boss room.
Guts Man stage — rock platforming and boss control
Guts Man’s construction stage is short, but its opening conveyor-platform section is one of the original NES game’s most demanding jumps. If you followed Bomb Man first, Hyper Bomb is Guts Man’s weakness and can defeat him in only a few successful hits. The stage itself is cleared with the normal arm cannon, careful platform timing, and conservative handling of the Hopper and boss hallway.
1. Clear the opening staircase and line up the conveyor platforms
Climb the opening staircase and deal with the three Met enemies one at a time. Wait for each helmet to open, then fire before it launches its shot. Do not rush past them: taking damage here makes the platform section much harder because the first safe recovery opportunities are far ahead.
At the top, three platforms travel along separate conveyor belts above a bottomless pit. The platforms are not simply moving ledges; the belts contain gaps that can drop you. Watch the small support ball beneath a platform to judge its position, and remain toward the platform’s left side while riding whenever possible.
Jump onto the first platform and ride it toward the right. Let the second platform pass underneath rather than jumping to it immediately. When the first platform reaches the right side, jump onto the second platform as that platform is moving left. This gives you time to prepare for the first belt gap.
- Defeat the three opening Mets before attempting the platform section.
- Watch the platform’s support ball and keep toward the left side while riding.
- Use the first platform to reach the second from the right; do not make an early shortcut.
2. Cross all three belts without overcorrecting
On the second platform, treat each belt gap like a normal jump. Begin the jump as the platform approaches the opening and let the platform catch you on the far side. Continue riding and waiting for a favorable alignment rather than trying to leap directly to the third platform.
Move to the third platform when it reaches the left side of its belt. The final belt contains several evenly spaced gaps. Jump each opening with a steady rhythm, landing back on the same platform after every gap. Staying calm is more important than moving quickly; a late correction usually sends Mega Man into the pit.
When the third platform reaches solid ground, run to the right edge and make the final jump. Once safely across, continue right instead of stopping near the edge, where the incoming Bladers can force you backward.
- Use the second platform’s gaps as short, controlled jumps.
- Wait for the third platform to reach a favorable left-side position.
- Jump the final belt gaps one at a time and land on the platform after each jump.
3. Handle the Bladers, Met Miners, and spikes
The next open area contains Bladers. Destroy the first few if they approach directly, but do not remain in the open longer than necessary. When one begins a dive, step or run away from its approach, then turn and fire as it passes. Continue right and climb the platforms; the Bladers stop pressuring you once you reach the upper section, where an Energy Pellet can restore health.
Met Miners guard the following construction area. Their shields leave them vulnerable while they throw pickaxes. Stand far enough away to see the throw, then run underneath the pickaxe while firing. Move up the platforms, defeat the next Met Miner, and continue right.
One Met Miner can remove a platform from beneath you. Defeat it before attempting the spike crossing. Jump over the spikes only after the enemy is no longer controlling the platform, then cross the solid ground and defeat the next Met Miner before dropping to the lower section.
- Use open space to bait Blader dives instead of jumping unpredictably around them.
- Attack Met Miners while their shields are lowered for a pickaxe throw.
- Defeat the platform-removing enemy before crossing the spikes.
4. Use the lower drops and defeat the Hopper
When the upper section ends and you begin dropping, avoid unnecessary movement during the first descent. Holding left lets Mega Man land on a lower platform with an Energy Pellet instead of dropping directly into danger. From that platform, the left-side drop can lead to a high platform with an extra life, but the jump to the life is difficult and optional. Do not sacrifice the run for it.
After the drop, you meet the jumping Hopper. Keep firing the normal arm cannon from the left side. If the Hopper jumps high enough, run underneath it to reach its right side; if it jumps low, remain ready to take damage rather than jumping into it. The objective is to get past it, not to preserve every point of health.
The Hopper guards the entrance to the boss hallway. Once past it, enter the corridor and fire continuously while moving right. The hallway contains Met enemies in the original NES game, so keep shooting rather than treating the corridor as a safe room.
- Take the Energy Pellet during the controlled descent when needed.
- Treat the extra life as optional because its recovery jump is difficult.
- Use the Hopper’s high jump as the opening to run underneath it.
5. Defeat Guts Man with Hyper Bomb
If Bomb Man was defeated first, equip Hyper Bomb before entering the boss room. Guts Man begins on the lower level while Mega Man stands on raised blocks. Keep this height advantage and do not drop down unnecessarily.
Guts Man repeatedly jumps across the room. His landing produces an earthquake that knocks Mega Man off his feet. Jump shortly before Guts Man lands, not immediately after he leaves the ground; jumping too early can leave you grounded when the shock occurs. Fire a Hyper Bomb during the jump or while Guts Man is recovering from a landing. The bomb’s delayed detonation is useful here because Guts Man moves slowly enough to remain near it.
After the earthquake, Guts Man catches a block and throws it toward the lower area. The block breaks into debris that spreads outward. Move to a safe side of the room and jump over the debris when it reaches ground level. Avoid standing directly beneath Guts Man when he lands, since the earthquake and the following projectile can combine into consecutive hits.
Three successful Hyper Bomb hits are documented as enough to defeat him, though a missed bomb is harmless if you preserve your spacing. If Guts Man reaches your raised position, give ground. Do not attempt to pass through him. If he continues toward you, jump over him only when there is clear space and move to the opposite side.
- Stay on the raised starting blocks when possible.
- Jump just before Guts Man lands to avoid the earthquake.
- Use Hyper Bomb during jump and recovery windows, then dodge the spreading debris.
- Give ground if Guts Man climbs onto your platform.
6. Finish the stage and recover from a failed attempt
If you arrive without Hyper Bomb, Guts Man can still be defeated with the normal arm cannon. The battle takes longer, so prioritize the same pattern: stay elevated, fire while he jumps, jump just before his landings, and avoid the thrown-block debris. The weakness weapon is helpful, not mandatory.
If you lose a life, re-clear the stage with the platform section as the main priority. Do not spend Hyper Bomb on ordinary enemies unless doing so prevents a likely death. Use the Energy Pellet area and any natural drops you encounter, but treat the optional extra life as a bonus rather than part of the required route.
After Guts Man is defeated, the stage-clear sequence awards Super Arm. The original NES game uses this name for the weapon; it allows Mega Man to lift and throw designated Super Arm blocks in later areas. Return to the stage-select screen before choosing the next Robot Master stage.
- Reserve Hyper Bomb for Guts Man if using the Bomb Man route.
- Use the normal arm cannon if Hyper Bomb energy is unavailable.
- Confirm that the reward screen grants Super Arm before leaving the stage.
Before you move on
- Guts Man’s health bar is emptied and the stage-clear sequence begins.
- The reward screen grants Super Arm, the original NES name for Guts Man’s weapon.
- The stage-select screen returns with Guts Man defeated, allowing progression to another Robot Master stage.
Ice Man stage — slippery hazards and projectile traps
In the original North American NES release, Ice Man’s stage is built around slippery floors, two Vanish Block rooms and a long Foot Holder crossing over a bottomless pit. The safest route is to enter after Elec Man, carry the Magnet Beam from Elec Man’s stage, and reserve Thunder Beam for Ice Man. The stage is still completable without Magnet Beam, but the Foot Holder section becomes substantially less forgiving.
1. Enter with Thunder Beam and Magnet Beam ready
The recommended route reaches Ice Man after Elec Man. Select the Magnet Beam when crossing the stage’s difficult platform sections, then switch to Thunder Beam before the boss door. Thunder Beam is Ice Man’s weakness, and three successful hits are enough to defeat him in the original NES version.
Magnet Beam energy is limited, so do not spend it casually on ordinary enemies or on a jump that can be made normally. Use it mainly for the second Vanish Block room and the Foot Holder gap. If you do not have Magnet Beam, the stage remains possible, but you must rely on the fixed block patterns and the moving Foot Holder platforms.
- Thunder Beam is available for the boss.
- Magnet Beam is available if you want the safest route through the platforming.
- Enter with enough health to survive a mistake during the Foot Holder section.
2. Cross the opening ice and water rooms
Move right through the opening rooms and expect Crazy Razy enemies. Shoot their upper body before they split whenever possible; dealing with the separated pieces at close range is riskier on the slippery floor. When you land on ice, remember that Mega Man continues to slide after releasing the direction. A short jump is the quickest way to stop and re-center before another jump.
The water portions contain swimming Pepe enemies and Gabyoalls on the floor. Clear the immediate enemy in front of you, then advance rather than standing in one place while Pepes enter from the side. Water does not give Mega Man a special high-buoyancy jump in this NES game, so use the same deliberate jump timing as on normal ground, allowing for the hazards around the landing area.
At the end of the opening route, drop down through the passage and take the health refill near the Adhering Suzies if you need it. Do not slide into the enemies while trying to collect it; clear the area first, then make the pickup.
- Use short jumps to stop sliding.
- Shoot Crazy Razy enemies before they split.
- Clear Pepes and Gabyoalls before committing to the next jump.
- Take the early health refill only after the surrounding enemies are safe.
3. Solve the first Vanish Block room
The first block puzzle is reached through the drop after the opening rooms. Vanish Blocks appear and disappear in a fixed sequence. Watch the pattern from the safe floor before jumping. If you are not using Magnet Beam, climb by moving from one visible block to the next and aim for the upper-right exit.
Land near the center of each block. Because Mega Man slides on the ice, an edge landing can carry him into the gap even when the jump was otherwise correct. If a block disappears before you can use it, return to the previous stable surface and wait for the sequence rather than forcing a late jump.
Magnet Beam can create a temporary staircase and bypass much of this room. Fire it from stable ground, hold the attack input long enough to make the platform you need, and avoid spending additional energy once the next solid ledge is reachable.
- Observe the fixed block pattern before moving.
- Aim for block centers and correct sliding with short jumps.
- Use Magnet Beam as a staircase only when it saves a dangerous jump.
4. Clear the second Vanish Block room and reach the Foot Holders
After the next drop, you enter another Vanish Block room. Without Magnet Beam, step onto the first available blocks near the right side to gain height, then continue toward the upper-right exit as the sequence opens. With Magnet Beam, use the early blocks for height and place a temporary ledge that lets you reach the exit without waiting through every part of the pattern.
The next landmark is the long bottomless gap crossed by Foot Holders. If you lack Magnet Beam, wait on solid ground until the nearest Foot Holder moves close enough to board safely. Ride it rather than jumping after a platform that is moving away, and avoid its side projectiles. Several jumps are required, so wait for the next Foot Holder when the landing would be marginal.
With Magnet Beam, ride the first Foot Holder only as needed, then create temporary platforms from stable ground across the gap. Hold the attack button to extend each platform, but do not fire while Mega Man is still sliding or standing on an unsafe edge. Keep the platforms high enough to avoid many of the Pepes that fly through the latter half of the crossing.
- Use the second block room’s right side as the height-building route.
- Board Foot Holders only when they approach the landing height.
- Use Magnet Beam from stable footing and conserve energy between platforms.
- Avoid Pepes rather than stopping in midair to fight them.
5. Take the documented recovery items
A weapon-energy refill is available partway through the Foot Holder crossing. Reach it only if doing so does not jeopardize the crossing; it is useful for restoring Magnet Beam or Thunder Beam energy, but the stage does not require collecting it.
After reaching solid ground on the far side, move right to the next drop and hold left during the descent. This leads to a narrow alcove containing an extra life. Continue holding left as you fall farther to reach a lower alcove with health and weapon-energy refills. Let Mega Man settle on each ledge before moving, because sliding off immediately can turn a successful recovery into a death.
If you miss an alcove, continue down the route instead of trying to reverse direction in midair. The recovery items are optional, and the lower path still leads to the final Big Eye and boss corridor.
- Treat the mid-gap weapon refill as optional.
- Hold left during the documented extra-life descent.
- Collect the lower health and weapon refills only after landing securely.
- Continue downward if an alcove is missed.
6. Pass the final corridor and defeat Ice Man
At the bottom, deal with the Big Eye by firing while it approaches, then move underneath it when it jumps high enough. The slippery floor makes retreating harder, so do not let it push you against the left side. Proceed right through the gate and defeat the Pepes in the short corridor before the second gate.
Equip Thunder Beam before entering the boss room. Ice Man jumps and fires six Ice Slashers in three height lanes. The recurring sequence is high, middle, low, followed by low, middle, high. Stay near the left side, watch the height of the incoming projectile, and jump only when necessary. The shots travel slowly enough that a controlled jump can pass over a low projectile without moving into Ice Man.
Fire Thunder Beam during or just after Ice Man’s jump. Three clean hits defeat him. A short hop while firing is a practical way to connect without standing directly in front of him, but prioritize avoiding the projectile wave over forcing a shot. Do not assume the room ends instantly when Ice Man is defeated; a projectile already on screen can still reach Mega Man before the victory transition.
Without Thunder Beam, use the Mega Buster. Keep to one side, fire as Ice Man descends or approaches, then create space before the next projectile group. The fight takes longer, so avoid cornering yourself and do not trade contact damage for a hurried shot. Bomb Man’s weapon is another documented damaging option, but Thunder Beam is the reliable weakness.
- Defeat the Big Eye before entering the final corridor.
- Enter the boss room with Thunder Beam selected when possible.
- Recognize the six-shot high-middle-low, low-middle-high pattern.
- Confirm Ice Man’s defeat and obtain Ice Slasher at the stage-clear transition.
Before you move on
- Ice Man is defeated and the stage-clear transition returns to the Robot Master selection screen.
- Ice Slasher has been added to Mega Man’s weapon inventory.
- The optional mid-gap refill, extra life and lower refill alcove are not required for completion; reaching the stage-clear transition is the required result.
Bomb Man stage — timed explosives and boss positioning
Bomb Man’s stage is a reasonable early choice in the original North American NES release, but its pits and explosive hazards punish hurried jumps. Advance from one secure platform to the next, wait for Bombombombs to finish scattering their fragments, and use the high ledges to bypass dangerous ground defenses. The stage contains a documented energy capsule during the ladder section, but ordinary recovery drops are not guaranteed. Bomb Man is weak to Fire Storm; the Mega Buster is also a dependable way to win if you are starting the campaign with no special weapon.
1. Clear the opening platforms and Kamadoma
At the stage entrance, move right across the first rise and shoot the hopping Kamadoma before crossing the platform they occupy. Fire from the ground or from the near side of the next ledge instead of jumping directly into them. Once the immediate enemies are gone, continue right and use deliberate jumps over the first gaps.
The opening section is not a race. Keep Mega Man near the center of each landing area so the next jump begins from stable ground. If an enemy is approaching the far side of a platform, wait for it to move or destroy it before committing to the jump. A missed landing here can cost more health than simply pausing for a moment.
- Destroy or wait out each Kamadoma before crossing its platform.
- Begin every gap jump from solid ground rather than the edge of a slope.
- Keep enough room to react when the next enemy enters the screen.
2. Cross the Bombombomb pits
The first major hazards are pits from which Bombombombs rise. These blue explosive enemies launch upward and then split into four damaging fragments. Do not waste shots trying to destroy them. Watch the launch, then move across only after the fragments have passed and the landing area is clear.
Use the upper ledges beside the pits whenever the layout gives you that option. The high route keeps Mega Man away from the ground turrets and gives the fragments more room to pass below or around him. If a Bombombomb rises while you are already approaching a gap, stop on the nearest safe section instead of improvising a long jump over both the pit and the explosion.
There are several early pits, including two with Bombombombs and additional gaps that can be crossed normally. Treat each one as a separate timing problem. Do not assume that clearing one explosion makes the next pit safe; wait for the next launch pattern before advancing.
- Treat Bombombombs as invulnerable hazards.
- Use the high ledges to reduce contact with ground defenses.
- Wait for fragments to disperse before jumping across each pit.
- Never enter a spike or pit route merely to avoid one explosion.
3. Use the upper route around the ground defenses
After the initial Bombombomb sequence, continue right through the area guarded by Screwdrivers and other ordinary enemies. Shoot enemies as they enter range, then climb the ladder when the route rises. The safest general approach is to stay on the upper ledges whenever possible, because the ground-level turrets can make a hurried crossing more dangerous than a short wait.
During the ladder climb, take your time. Enemies can knock Mega Man away from the ladder, turning a controlled ascent into repeated damage or a fall. Climb only when the immediate side of the ladder is clear, and stop on a platform if you need to reset the screen’s enemy timing. A health-energy capsule is documented in this section; collect it when you need it, but do not take a risky jump solely to reach it.
- Prefer high ledges over the ground-turret route.
- Shoot Screwdrivers before they can force you off a platform.
- Climb in short, controlled portions and pause on safe platforms.
- Use the documented energy capsule only when the surrounding route is safe.
4. Defeat the upper Blasters and Sniper Joe
At the top of the ladder, several Blasters occupy the route to the right. Clear the enemies on the left side of the next screen before advancing, then move right only after the firing lane is open. Keep Mega Man grounded while shooting when possible; jumping under pressure can place him directly in the path of another projectile.
Sniper Joe guards the approach to the boss door. Watch his shield cycle and fire when he exposes himself. Do not leap onto or through him while the shield is raised. Stand at a distance that lets you retreat from his attack, shoot during the opening, and then advance after he has finished the defensive motion. If you take a hit, use the resulting invulnerability to move past the encounter rather than staying in front of him for another exchange.
- Clear the upper Blasters before entering the next firing lane.
- Attack Sniper Joe only when his shield is open.
- Keep a retreat path behind Mega Man until Sniper Joe is defeated or safely passed.
5. Take the boss hallway drop carefully
Enter the boss door after Sniper Joe is cleared. In the hallway beyond, move to the right and descend through the vertical section toward Bomb Man’s arena. Adhering Suzys appear during the descent, so keep Mega Man near the ladder or central safe area and shoot when a Suzy’s movement brings it into range. The hallway is short, but its enemies can remove health before the actual fight if you rush.
There is no extra requirement for entering the arena. If Fire Man has already been defeated, select Fire Storm before entering. If Bomb Man is your first Robot Master, enter with the Mega Buster and rely on movement rather than trying to force a special-weapon strategy you do not have.
- Expect enemies during the descent after the first boss door.
- Do not drop through the hallway without checking for Adhering Suzys.
- Select Fire Storm only if you already possess it; otherwise keep the Mega Buster equipped.
6. Defeat Bomb Man with Fire Storm
Bomb Man jumps around the room and throws Hyper Bombs toward Mega Man. The bombs do not damage immediately on contact; the explosion is the danger. After he throws, move away from the bomb’s landing point and keep traveling until the blast has finished. Avoid standing at the extreme edge of the room, because Bomb Man can reduce your room to maneuver and force a collision or trap you beside an explosion.
Fire Storm is Bomb Man’s weakness. Fire when Bomb Man is landing or moving across the floor, then reposition rather than waiting beside him. Its surrounding flame effect can punish a close approach, but it does not replace the need to dodge. If Bomb Man jumps over Mega Man, running underneath him is usually safer than trying to stop his jump from the front, provided the landing area is clear.
If a Hyper Bomb lands near you, continue moving away instead of turning back immediately for another shot. The explosion has a delay, giving you time to create distance. Keep alternating between attack and repositioning until his health is empty. Fire Storm reduces the number of successful hits required, but reckless close-range attacks can still cause a double knockout if Bomb Man is defeated while a nearby bomb is exploding.
- Attack with Fire Storm during Bomb Man’s landings or floor movement.
- Move away from every Hyper Bomb before its delayed explosion.
- Run beneath a high jump when the opposite side of the room is open.
- Keep away from the walls so you retain a retreat route.
7. Use the Mega Buster if Bomb Man is first
The Mega Buster is a valid fallback and requires no special preparation. Keep firing while retreating, then reverse direction when Bomb Man jumps over you or begins to corner you. Do not remain directly in front of him after firing; the goal is to make him spend his movement crossing the room while you preserve space.
If you are hit, use the brief invulnerability period to reposition rather than trading repeated contact damage. When your health is low, prioritize avoiding the next explosion over landing one more shot. Once Bomb Man is defeated, complete the normal victory sequence to receive Hyper Bomb. There is no separate collection step and no penalty for winning with the Mega Buster.
- Use retreat-and-counter movement with the Mega Buster.
- Prioritize avoiding explosions when health is low.
- Confirm that Hyper Bomb is added to the weapon inventory after the results sequence.
Before you move on
- Bomb Man’s results screen appears after the boss is defeated.
- Hyper Bomb is available in Mega Man’s weapon inventory.
- The game returns to the Robot Master selection screen with Bomb Man marked as cleared.
Fire Man stage — flame jets, vertical hazards and boss rhythm
The original North American NES Fire Man stage is built around Screw Drivers, flame heads, floor-mounted fire towers, lava gaps and timed fire emitters. Ice Slasher is the intended tool for the fire towers and is also Fire Man’s weakness, but it does not grant a special movement ability or permanently disable the hazards. Work from solid ledges, watch each hazard cycle before advancing, and treat every lava pit as instantly fatal. Preserve enough health and Ice Slasher energy for the boss, then defeat Fire Man with repeated Ice Slasher shots and controlled forward jumps.
1. Climb through the opening Screw Driver section
From the entrance, move right along the initial linear route. Jump over the small moving spike hazards and stop on solid ground before each Screw Driver activates. Fire as the enemy rises, then continue only after the lane ahead is clear. The safest pauses are the flat floor sections immediately before ladders and the ledges at the tops of the early climbs.
Follow the ladders upward and keep firing toward enemies that can appear from above. Do not stand beneath a Screw Driver while climbing; reach the next ledge, step aside, and attack from level ground. The opening is a good place to conserve Ice Slasher energy because ordinary enemies can be handled with the Mega Buster.
- Advance from one solid floor or ladder landing to the next.
- Jump over the moving spike hazards instead of trying to rush through them.
- Destroy Screw Drivers from a ledge or floor rather than directly beneath them.
- Keep Ice Slasher available for the fire towers and the boss.
2. Descend to the lava area
After reaching the upper portion, the route bends back down and to the right. Continue through the descending screens until the large lava crossing. Fiery Changkeys rise from the pits, travel upward, and angle back down toward Mega Man. Watch one enemy complete its arc before committing to a jump, then cross onto the next solid platform during the gap.
The floor-mounted fire towers pulse vertically. When a tower’s flame is extended, do not jump through it. Wait until the flame subsides, fire an Ice Slasher shot, and use the frozen tower as a temporary foothold if the next platform cannot be reached from the floor. Jump from the frozen tower promptly; it is a traversal aid, not a permanent platform.
Use the first stable platform after each jump as a reset point. If a Changkey approaches while you are standing on a platform, shoot it before attempting the next jump. A miss into the lava is a death, not a source of recoverable damage, so do not try to shoot while falling in hopes of reducing the impact.
- Watch the Changkey arc before leaving each platform.
- Freeze a fire tower only when it is needed for the next jump.
- Aim for the next solid platform, not the edge of the fire tower.
- If Mega Man is knocked toward a pit, steer toward the nearest solid ledge; a fall into the pit cannot be recovered.
3. Climb the right-side ladders and cross the second fire section
At the far side of the lava area, take the ladder upward. The next vertical screens combine ladders, flame heads and fire towers. Stay on the ladder until the flame head has passed, or step onto the previous solid ledge and let the hazard complete its movement. Do not jump from a ladder into a fire tower that has just extended.
Continue upward, then follow the route through another hazardous lava section. Cross from platform to platform with short, deliberate jumps. The landing zones are the solid platforms between the fire towers; stop on each one rather than attempting to clear the entire gap in a single leap. If a visible energy capsule is safe to reach, take it only after the nearby flame-head pattern has cleared. Defeated flame heads can also produce recovery capsules, but do not assume a particular drop will appear.
The following route leads upward again. Use Ice Slasher on any fire tower that blocks the next ledge, then move immediately to the higher solid landing. The weapon is limited, so do not fire at towers that are already inactive and not part of your route.
- Pause on solid ladder landings when flame heads are descending.
- Use short jumps between the lava platforms.
- Take a refill only when the surrounding hazards are inactive.
- Do not assume every defeated enemy will drop health or weapon energy.
4. Pass the timed fire blocks and racing fire hazards
After the ladder sequence, reach the section where stationary blocks emit fire along fixed paths. Watch a complete cycle from a safe ledge. Move during the gap after a burst, land on the next solid section, and stop before the following emitter. Short jumps give more control than long running jumps and make it easier to brake before the next flame.
The next screens contain large fire shots moving through a vent-like route. Treat the first safe floor or ledge after the hazard as the target; do not leap forward without seeing where Mega Man will land. Ice Slasher can freeze the fire obstacle when it is in a reachable position, allowing a safer passage, but it is not necessary to spend energy if a clear timing gap is available.
If damage knocks Mega Man toward a pit, hold toward the nearest visible ledge and jump only if the ledge can actually be reached. If the pit is already beneath him, the life is lost; there is no descending recovery sequence. After a death, replay the stage from its normal restart point and use the previously observed hazard cycles rather than rushing the same section.
- Observe the fire-block cycle before moving.
- Target the next solid landing zone after each burst.
- Use Ice Slasher on a racing fire obstacle only when it materially improves the crossing.
- Treat every pit as fatal and plan jumps around visible ledges.
5. Clear the final enemy rooms and reach Fire Man
Continue through the upper route and the staggered screens containing Killer Bombs. Keep moving while firing horizontally, but stop on a solid platform before making a jump over an enemy. In the final approach, Gabyoalls move along the floors and Changkeys return as aerial threats. Eliminate or wait out the enemy that controls your landing area before committing to the next jump.
Enter the boss gate and proceed through the Screw Driver corridor. The ceiling enemies activate as Mega Man passes beneath them. Move through the corridor in controlled bursts, firing forward; if several activate together, retreat to the previous clear floor instead of standing under the group. The far end leads to the second gate and Fire Man’s room.
Before entering, equip Ice Slasher and check your health. There is no mid-stage checkpoint that lets you skip directly to the boss after a failed attempt. Reaching the door with more health is more valuable than clearing every optional enemy.
- Use the solid sections between staggered platforms as stopping points.
- Watch both floor movement and aerial Changkeys before jumping.
- Pass the Screw Driver corridor without lingering underneath enemies.
- Select Ice Slasher before the second boss gate.
6. Defeat Fire Man with Ice Slasher or the Mega Buster
Fire Man stays mostly on his side of the room and repeatedly fires Fire Storm projectiles. Each volley can leave a small flame beneath Mega Man, so jumping straight upward is dangerous: the projectile may be avoided while the landing spot remains hazardous. Use a short forward jump over the incoming fire and continue moving so Mega Man lands away from the flame.
Fire Ice Slasher as you approach or pass Fire Man. It is his weakness, and seven successful Ice Slasher hits defeat him according to the documented boss method. Keep firing rather than waiting for a special freeze animation; the safe opening comes from clearing the projectile and maintaining space, not from assuming the boss is immobilized. If Fire Man jumps away because Mega Man gets too close, keep moving and attack again from the open side of the room.
The Mega Buster is also viable, especially with high health. Fire between jumps, avoid standing still beneath the volley, and prioritize survival over trying to land a shot during every attack cycle. If Fire Man corners you, jump over him during the next clear opening and reverse direction after landing on a flame-free section. Defeating him awards Fire Storm and returns Mega Man to the Robot Master selection screen.
- Use forward jumps instead of vertical jumps in place.
- Watch for the small flame left beneath Mega Man after Fire Storm volleys.
- Land seven Ice Slasher hits for the documented weakness method.
- Use the Mega Buster as a fallback when Ice Slasher energy is low.
- Confirm the victory when Fire Man is defeated and Fire Storm is awarded.
Before you move on
- Fire Man has been defeated in the original NES stage.
- The victory sequence awards Fire Storm to the weapon inventory.
- Mega Man returns to the Robot Master selection screen, confirming that the stage is complete.
- For fortress preparation, retain useful Ice Slasher energy because frozen fire towers are used in the first Wily stage.
Elec Man stage — high-voltage enemies and precision platforming
Elec Man’s stage is a mostly vertical tower of ladders, electrical emitters, disappearing blocks, flying Watchers, Gabyoall floor enemies, and narrow platforms. The safest approach is to clear enemies from solid ground, climb in short sections, and use Rolling Cutter for threats that are difficult to reach. If Guts Man has already been defeated, collect the Magnet Beam before entering the boss room. It is a required utility weapon for later fortress progression and also makes several difficult platforming sections much safer.
Clear the opening floor and first ladder screens
At the beginning of the stage, three Gabyoall move along the floor. Use Rolling Cutter if you have it, firing from a safe distance and waiting for the blade to return before advancing. The Mega Buster can also handle them, but do not rush past an enemy that is still approaching because contact can push Mega Man into the next hazard.
Take the ladder on the right after the opening enemies are cleared. More Gabyoall appear before the next ladder. Eliminate them from the platform whenever possible. When a ladder is beside a floor enemy, wait until the enemy has moved away before climbing; being hit while climbing knocks Mega Man down and usually forces the section to be repeated.
- Use Rolling Cutter on Gabyoall when its energy is available.
- Clear enemies before committing to a ladder.
- Do not climb directly into an enemy above the ladder.
Time the electrical platforms and Watchers
The next screens contain platforms or blocks that discharge horizontal electrical currents. These are timing hazards, not enemies to defeat. Stand on the solid side of the screen, watch the current pass, and move through only during the safe interval. Avoid lingering on a ladder beside an active electrical emitter because a hit sends Mega Man down the shaft.
The following ladder sections introduce Watchers arriving from above and below. Fight them from the nearest solid platform rather than trying to shoot while hanging on the ladder. Prioritize the Watchers coming from above, since they can reach Mega Man’s position while he is still climbing. After the first group is gone, continue upward and repeat the same procedure on the next ladder screen.
- Wait for an electrical discharge to finish before crossing.
- Shoot Watchers from stable ground whenever possible.
- Clear enemies above the ladder before climbing into their path.
Cross the disappearing blocks and choose the safer continuation
Near the top of the initial tower, the route reaches blocks that appear and disappear. Move only when the next block is visible and use the center of each block as the launch point for the next jump. If you need weapon energy, the left ladder leads toward weapon-energy pickups. If your reserves are adequate, the right-hand route is the documented continuation and is slightly easier overall, although it still requires careful timing.
After the disappearing-block section, continue across the fixed blocks toward the next ladder. Watch for enemies entering from the sides before jumping. A hit during a jump can send Mega Man into a gap, so clear the screen first whenever there is a safe place to stand.
- Use the center of each visible block for jumps.
- Take the left route only when the weapon-energy recovery is useful.
- Do not jump toward a block while it is disappearing.
Reach the Magnet Beam chamber
Continue upward through the next ladder rooms while dealing with Watchers from solid platforms. Electrical beams appear again near the upper portion. At the top, take the ladder on the far left. This leads to the chamber containing the Magnet Beam, which is blocked by Super Arm blocks.
Equip Super Arm and remove the blocking pieces. The Magnet Beam then becomes available to collect. This step requires Super Arm from Guts Man. If you entered Elec Man’s stage without Super Arm, complete the stage and return after obtaining it; do not treat the blocked chamber as optional if you intend to finish the original campaign.
After collecting the Magnet Beam, use it to create a temporary platform that lets you leave the chamber and reach the nearby ladder. The beam consumes weapon energy when used, so make short platforms when a short crossing is sufficient. Continue upward and right across the block platforms to the next ladder.
- Reach the chamber through the far-left upper ladder.
- Equip Super Arm and remove the blocking pieces.
- Collect Magnet Beam before entering the boss room.
- Use only as much Magnet Beam energy as each crossing requires.
Handle the upper electrical rooms and Big Eye
The upper route repeats the main hazards: electrical emitters, ladders, Watchers, and narrow blocks. Clear enemies from the platform below before climbing. When an electrical beam blocks the route, wait on the solid floor, let it pass, and then climb or jump through the opening. Do not attempt to absorb a hit to gain height; a knockback can cost more health than the delay would have.
Near the boss approach, a Big Eye occupies the route. The Magnet Beam can create a bridge over it, allowing Mega Man to bypass the enemy rather than fight at close range. If you do not use the beam, wait for the Big Eye to jump high enough to pass underneath, then move through quickly. Continue to the ladder and use the final electrical openings to reach the boss gate.
- Use Magnet Beam to bypass Big Eye when weapon energy allows.
- Do not fight on a ladder while a Watcher is approaching.
- Keep Rolling Cutter equipped before the final ladder section.
Defeat Elec Man with Rolling Cutter
Elec Man is weak to Rolling Cutter. He moves rapidly across the room and fires Thunder Beam in three directions: forward, upward, and downward. The forward beam is the immediate threat, while contact damage is also dangerous because the fight gives little room for trading hits.
At the start, face Elec Man and throw Rolling Cutter as he approaches. Immediately move toward the open side of the room and prepare to jump over the incoming Thunder Beam. Because Rolling Cutter returns to Mega Man, a well-timed throw can damage Elec Man on both the outward and returning paths. Do not stand still waiting for the return; preserve room to evade the boss and his beam.
Three effective Rolling Cutter hits are normally enough to win. If the first throw misses, stop trying to force a second hit while Elec Man is touching distance away. Jump away, let him cross the room, and attack during the next approach. The battle should be treated as a short attack-and-evade exchange rather than a sustained firefight.
- Equip Rolling Cutter before entering the boss room.
- Throw as Elec Man approaches, then move away.
- Jump over the forward Thunder Beam.
- Use the returning blade for a possible second hit.
- Do not corner yourself or trade contact damage.
Fallback method with the Mega Buster
Elec Man can be defeated with the Mega Buster if Rolling Cutter is unavailable, but the fight is less forgiving. Stay near one side of the room without pressing completely into the corner. When Elec Man approaches and begins the firing sequence, shoot while moving away, then jump over the forward Thunder Beam. Use single shots or short bursts so that movement remains possible.
The Mega Buster method is based on hit-and-retreat positioning: let Elec Man cross toward you, fire during the approach, and immediately create distance. Do not chase him across the room or continue firing while standing underneath him. If health is low, prioritize surviving the beam over landing every possible shot.
A life loss returns Mega Man to the stage rather than providing a permanent boss checkpoint. Re-clear the tower conservatively, and do not spend all Rolling Cutter or Magnet Beam energy on ordinary enemies. If the Magnet Beam was missed, the stage must be replayed with Super Arm available before the item can be collected.
- Use hit-and-retreat movement with the Mega Buster.
- Keep an escape lane open on both sides of the boss room.
- Reserve special-weapon energy for the boss and Magnet Beam route.
- If the Magnet Beam was missed, replay Elec Man’s stage with Super Arm.
Before you move on
- Elec Man is defeated and Thunder Beam is added to Mega Man’s weapon inventory.
- The Magnet Beam has been collected from the blocked chamber using Super Arm.
- The stage-clear transition returns Mega Man to the Robot Master selection screen.
- The player can reproduce the route through the opening Gabyoall screens, electrical ladder sections, Magnet Beam chamber, Big Eye approach, and boss room without relying on deliberate damage trades.
Robot Master rematches and preparing for Wily
The original NES Mega Man places its Robot Master rematches in two Wily Fortress stages rather than presenting a selectable boss-rush room. Wily Fortress Stage 2 contains Cut Man, Elec Man and then Copy Robot. Wily Fortress Stage 4 contains Bomb Man, Fire Man, Ice Man and Guts Man in a fixed order. Before entering the fortress, collect Magnet Beam in Elec Man’s stage and refill the weapons needed for Yellow Devil, the rematches and the final fights.
Finish the required preparation before entering Wily Fortress
After defeating all six Robot Masters, revisit Elec Man’s stage if you did not collect the Magnet Beam. The hidden item is behind three blocks in the middle portion of the stage; use Super Arm to remove the blocks and take the weapon. The Magnet Beam creates temporary platforms and is required for the normal route through Wily Fortress Stage 1. It is not merely a shortcut for the fortress.
Use the stage-select screen to replay completed stages before committing to Wily’s base. There are no save points or automatic weapon refills between fortress stages. Enter with a full or nearly full health bar, and make sure the weapons you plan to use are not empty. The most important reserves are Thunder Beam for Yellow Devil, Fire Storm for several fortress encounters, Rolling Cutter for Elec Man’s rematch, Ice Slasher for Fire Man’s rematch and Hyper Bomb for Guts Man’s rematch.
The original NES game has no Energy Tanks, so health management matters more than in later Mega Man games. Ordinary enemies can drop health or weapon energy, but do not depend on an exact number of drops. The safest preparation is to replay a stage you know well, refill naturally, and avoid spending special weapons on routine enemies when the Mega Buster will do the job.
- All six Robot Masters are defeated.
- Magnet Beam is in the inventory.
- Super Arm is available if the Magnet Beam still needs to be collected.
- Thunder Beam, Fire Storm, Rolling Cutter, Ice Slasher and Hyper Bomb have usable energy.
- You enter with strong health rather than relying on a later emergency refill.
Clear Wily Fortress Stage 2 in its fixed order
Stage 2 begins with precarious platforms and enemies that can knock Mega Man into a pit. Move slowly across the opening screens and eliminate threats before committing to a jump. Before the two small weapon-energy capsules, look for the concealed opening in the floor. Drop through it to reach the Cut Man rematch. The rematch room does not contain the boulders used in Cut Man’s original stage, so use Fire Storm or the Mega Buster. Fire Storm is the more efficient special-weapon choice, but do not risk damage by forcing a difficult shot.
After defeating Cut Man, fall through the left side of the room and continue through the fortress exterior. Destroy the cannons from a safe position, then enter Elec Man’s room. Rolling Cutter is the reliable weakness weapon carried over from the original Elec Man battle. Throw it while Elec Man is approaching or jumping; its return path can score another hit if the positioning is favorable. If Rolling Cutter is low, use the Mega Buster and keep moving rather than spending the last shots carelessly.
The stage does not end after Elec Man. Continue downward through the ladder and enemy sections to the Copy Robot room. Copy Robot imitates the weapon currently equipped, so select the Mega Buster before entering if you want the simplest pattern to manage. Fire while moving, avoid standing directly in its path and do not let it corner you. Thunder Beam and Fire Storm also damage Copy Robot, but the Mega Buster preserves those weapons for later fights. If you die during this battle, the restart point is close to the room, so re-enter without wasting energy on the preceding screens.
- Cut Man is defeated first.
- Elec Man is defeated second, preferably with Rolling Cutter.
- Copy Robot is defeated after the two Robot Master rematches.
- The Mega Buster is selected for Copy Robot if conserving special-weapon energy.
- You continue to Wily Fortress Stage 3 instead of treating Elec Man as the stage’s final encounter.
Use the Stage 2 recovery opportunity without gambling
After leaving Elec Man’s room, descend through the ladder section and watch for the extra-life pickup across a gap. Use Magnet Beam to create the platform needed to reach it. This is a documented bonus route and a useful way to repair a run, but do not sacrifice a life trying to collect it if your Magnet Beam positioning is poor. The fortress can still be completed without taking that extra life.
The small weapon-energy capsules near the hidden Cut Man route are useful before the rematch, especially if Fire Storm is low. Collect them only when the surrounding enemies are under control. If the room is unsafe, proceed with the Mega Buster instead of repeatedly crossing a hazard for a minor refill. Stage 2 is also a good place to practice switching weapons from the pause menu because the required sequence alternates between special-weapon opportunities and ordinary combat.
- The extra life after the Elec Man section is recognized as optional.
- Magnet Beam is used for the gap rather than for unnecessary platform creation.
- Weapon capsules are collected conservatively.
- No special weapon is emptied against ordinary fortress enemies.
Prepare for the fixed Wily Fortress Stage 4 sequence
Wily Fortress Stage 4 contains a weapon-energy capsule near the upper portion of the stage and a documented recovery area before the boss teleporter. After navigating the cannons and moving platform, look for the pair of small blocks holding an extra life and a special refill item. Collecting the refill restores Mega Man’s health and weapon energy, making it the strongest documented preparation point in the fortress. If you need to refill more than once, the nearby energy capsule can be made to reappear by moving farther right and returning, as described in established NES walkthroughs. Do not assume every ordinary enemy drop will reproduce this result.
After the recovery area, enter the teleporter room. The teleporters are not selectable in a free-choice boss rush; they send Mega Man through a fixed sequence: Bomb Man, Fire Man, Ice Man and Guts Man. Plan your weapon use before entering each room. Use Hyper Bomb against Bomb Man, Ice Slasher against Fire Man, Fire Storm against Ice Man and Hyper Bomb against Guts Man. Because Hyper Bomb is awkward and must detonate after landing, throw it into the space where the boss is going to move rather than directly at a rapidly jumping target.
If a weakness weapon is empty, the Mega Buster remains a valid fallback. It is better to take a longer, controlled fight than to waste health trying to land an unreliable Hyper Bomb. After each rematch, pause briefly to confirm the next weapon before entering the following teleporter. The rooms are consecutive, so accidental weapon selection can cost health even when the boss itself is familiar.
- The Stage 4 recovery area is identified before entering the teleporter room.
- Health and weapon energy are restored when the refill item can be reached safely.
- The fixed rematch order is Bomb Man, Fire Man, Ice Man and Guts Man.
- Hyper Bomb is reserved for Bomb Man and Guts Man.
- Ice Slasher is reserved for Fire Man and Fire Storm for Ice Man.
Practice the Yellow Devil and conserve the final reserves
Before beginning the fortress, practice the Yellow Devil’s fixed body-piece pattern in Wily Fortress Stage 1. The pieces always travel in the same sequence. Stand near the side where the body is reforming, jump only over the low pieces and remain still when a piece passes overhead. When the body reforms, the eye opens briefly and is vulnerable to Thunder Beam. Fire once during the opening, then return immediately to the dodge position. Thunder Beam is the most efficient conventional weapon for the encounter; the Mega Buster, Fire Storm and Rolling Cutter are fallback choices but require more successful cycles.
Do not spend Thunder Beam freely on fortress enemies if Yellow Devil is still ahead. Similarly, retain enough Fire Storm for the later fortress fights and enough Super Arm for the Wily Fortress Stage 3 bubble-bot encounter. The Stage 4 refill can restore the inventory if reached, but it is safer to treat that item as insurance rather than as permission to waste weapons earlier.
A useful practice drill is to clear the Yellow Devil approach without taking damage, then repeat the first few body-piece cycles while identifying the low pieces. Next, rehearse the Stage 2 sequence by entering Cut Man with Fire Storm, switching to Rolling Cutter for Elec Man and selecting the Mega Buster for Copy Robot. Finally, rehearse the Stage 4 weapon order on the pause screen until the sequence is automatic. These drills reduce menu mistakes without requiring speculative farming.
- The Yellow Devil pattern can be recognized without improvising every jump.
- Thunder Beam is reserved for the Yellow Devil.
- The Stage 2 sequence is practiced as Cut Man, Elec Man and Copy Robot.
- The Stage 4 sequence is practiced as Bomb Man, Fire Man, Ice Man and Guts Man.
- Super Arm is preserved for the later fortress bubble-bot encounter.
Before you move on
- Wily Fortress Stage 2 is cleared by defeating Cut Man, Elec Man and Copy Robot in that order.
- The Stage 2 extra-life route has been considered, with Magnet Beam used only if the gap can be crossed safely.
- Wily Fortress Stage 4 is reached with enough weapon energy to attempt the fixed Bomb Man, Fire Man, Ice Man and Guts Man sequence.
- The Stage 4 recovery area has been used or deliberately bypassed without confusing it with a guaranteed enemy-drop farm.
- Thunder Beam remains available for Yellow Devil, and Super Arm remains available for the Stage 3 bubble-bot encounter.
- The player is ready to continue into the final Wily stages with the fortress rematches completed and the correct weapons preserved.
Wily Stage 1 — entrance hazards and the Yellow Devil encounter
Wily Stage 1 is the first of the four fortress stages in the original North American NES Mega Man. Its route requires the Magnet Beam obtained in Elec Man’s stage and is much safer if Ice Slasher, Super Arm and Thunder Beam are available. The level’s boss is Yellow Devil, which separates into nineteen pieces and crosses the room in a fixed sequence. Learn the movement pattern, attack only when the eye opens, and conserve enough health and Thunder Beam energy to survive repeated attempts.
Prepare before entering Wily Stage 1
After defeating all six Robot Masters, select Dr. Wily’s fortress and enter its first stage. Confirm that the Magnet Beam was collected in Elec Man’s stage. The intended route through the final platform section cannot be completed reliably without it. If you missed the Magnet Beam, return to Elec Man’s stage before committing to the fortress run: use Super Arm to remove the blocks covering the item, then collect it.
Keep Ice Slasher, Super Arm, Magnet Beam and Thunder Beam available. Ice Slasher can freeze the large jumping enemies near the entrance and can stop flame pillars temporarily. Super Arm is needed to remove the large blocks that obstruct the route. Magnet Beam is reserved for the spike-crossing and final climb. Thunder Beam should be saved primarily for Yellow Devil.
The NES version has no E-Tanks, so enter with full health whenever possible. Weapon energy capsules restore the weapon currently equipped, not every weapon at once. Switch to the weapon you want to refill before collecting one.
- Magnet Beam collected in Elec Man’s stage.
- Super Arm, Ice Slasher and Thunder Beam available.
- Health restored before entering the fortress.
- Magnet Beam and Thunder Beam energy conserved.
Get past the three Big Eyes
Move right from the stage entrance until the first Big Eye approaches. These large jumping enemies cannot be defeated normally, so do not try to trade shots with them. Wait for one to make a high jump, then walk underneath it while it is above Mega Man. Continue using the same timing for the next two Big Eyes.
Ice Slasher provides a safer alternative. Fire while a Big Eye is airborne to freeze it, then pass underneath during the pause. Do not spend Ice Slasher energy on every jump if you are comfortable waiting; the weapon is more valuable later for flame pillars and emergency crowd control.
Keep Mega Man near the side of the passage until the Big Eye has clearly committed to its jump. Advancing too early can make the enemy land on top of you or push you into the next hazard. If damaged, slow down rather than trying to rush the remaining entrance enemies.
- Wait for high jumps instead of forcing a pass.
- Use Ice Slasher only when a Big Eye blocks a safe opening.
- Avoid contact damage before reaching the fortress interior.
Use Super Arm and Ice Slasher in the upper rooms
After the Big Eyes, large Super Arm blocks obstruct the route. Equip Super Arm, stand beside a block and lift it, then throw it away from the passage. Clear only the blocks necessary to open the path; unnecessary throws waste time and can create awkward enemy positions.
Proceed to the ladder and wait for the flame pillars before climbing. The flames activate in a repeating cycle. Let a pillar retract, then move through its opening rather than attempting to climb while the flame is active. Ice Slasher can freeze a pillar, creating a longer opening if the timing is uncomfortable.
At the top, follow the platforms across the room and climb the next ladder. Kamadoma enemies may approach near the upper part of the climb. Shoot them from the platform or use Thunder Beam’s broad coverage if they are positioned above or below you. Do not remain on the ladder while an enemy is entering your space; climb down or finish the enemy before continuing.
- Clear the required blocks with Super Arm.
- Cross flame pillars during their inactive interval.
- Handle Kamadoma before reaching the ladder’s top.
Cross the Killer Bomb and Foot Holder section
Continue right until another Super Arm block section. Clear the blocks, then descend the ladder. The next passage contains a Killer Bomb and spikes. The Killer Bomb travels into the area and explodes, so wait on solid ground for it to pass or detonate before making the jump across the spike gap. Do not let contact with the enemy knock Mega Man onto the spikes; spikes cause an instant death.
Drop to the lower route and descend the next ladder. You will reach Foot Holders, the moving platforms used in Ice Man’s stage. Let each platform approach before stepping onto it. Small corrections are safer than long jumps, and waiting for the next Foot Holder is preferable to jumping while its position is uncertain.
The Magnet Beam can supplement or replace the Foot Holder route. Fire a short platform over a difficult gap, step onto it, and continue to the next solid ledge. Do not place a platform so far away that Mega Man cannot jump back to safety. If a Foot Holder moves out of reach, wait for its return instead of chasing it over the spikes.
- Wait for the Killer Bomb to clear before jumping.
- Use Foot Holders patiently and avoid rushed transfers.
- Use short Magnet Beam platforms only where they improve the crossing.
Refill Magnet Beam energy and make the final climb
After the Foot Holder crossing, collect the weapon capsule while Magnet Beam is equipped. The capsule restores the currently selected weapon. Move back through the nearby route and return if another refill is needed; the capsule can reappear after the screen transition. This is the safest documented way to restore Magnet Beam energy before the final climb.
Climb the ladder and enter the room with the tall ledges. Use Magnet Beam to create a platform from the lower area to the raised ledge, then climb onto the ladder above. From the upper ledge, place another Magnet Beam platform to reach the next ladder. The exact platform length is less important than leaving Mega Man a solid landing position and enough energy for the second placement.
Once Mega Man reaches the upper ladder, climb and move right into Yellow Devil’s room. Equip Thunder Beam before crossing the boss-door threshold. If Thunder Beam energy is low, refill it at the capsule only after Magnet Beam has been restored; the final climb takes priority because running out of Magnet Beam can force a restart.
- Magnet Beam is refilled before the final climb.
- Reach the upper ladder without spending energy on unnecessary platforms.
- Thunder Beam is equipped before entering Yellow Devil’s room.
Survive Yellow Devil’s fixed movement pattern
Yellow Devil does not begin as a complete body. Nineteen pieces travel across the room one at a time, assemble into the boss, and then separate again. The order is fixed in the original NES game, so the encounter becomes more manageable as you recognize the height of each incoming piece.
Stay on the floor for pieces passing overhead. Jump only when a piece is travelling through Mega Man’s level. Avoid large, panicked jumps: a full jump can collide with a second piece or place Mega Man beneath the next low piece. The later pieces arrive with less reaction time, so watch the incoming piece rather than staring at the boss’s former position.
If a piece has already passed Mega Man, move toward the side behind the remaining pieces when possible. This reduces the chance of being struck by a second piece crossing the room. Keep enough space to avoid the boss when it finishes assembling; do not stand directly against the far wall if the completed body will overlap that position.
- Treat the sequence as memorization rather than random movement.
- Stay grounded for high pieces.
- Use small, deliberate jumps for low pieces.
- Avoid the completed body at the side of the room.
Attack the eye and choose a fallback weapon
When Yellow Devil finishes assembling, its eye opens and it fires a shot. This is the attack window. Jump over or away from the eye shot while firing Thunder Beam at the exposed eye. Thunder Beam is the primary weakness and defeats the boss in seven successful hits when each shot connects during a separate opening.
The eye may appear high enough that the Arm Cannon cannot reach it comfortably. Thunder Beam’s wide attack makes those openings much easier to hit. If Thunder Beam energy is exhausted, the Arm Cannon remains a valid fallback but requires substantially more successful hits. Rolling Cutter and Fire Storm can also damage Yellow Devil, though they are less efficient than Thunder Beam and should be used only if necessary.
Do not fire repeatedly while the body is assembling. The boss is not vulnerable during that movement, and wasted shots do not replace the need to dodge the pieces. After each hit, immediately return to the next disassembly sequence. A slow victory with the Arm Cannon is safer than taking contact damage while trying to force an extra shot.
- Fire only when the eye is open.
- Use Thunder Beam for the normal seven-hit method.
- Switch to Arm Cannon, Rolling Cutter or Fire Storm only as a fallback.
- Resume dodging immediately after every attack.
Recover after dying
The original NES version does not place Mega Man at the Yellow Devil room after a death. If Mega Man is defeated during the boss fight, the stage must be replayed from its earlier route. There is no password or fortress save point in this game, so conserve lives by treating the first attempts as pattern practice rather than rushing the entrance.
On the next approach, use the opening Big Eyes as a health check. If they cost substantial health, slow down and use Ice Slasher. At the flame pillars, freeze a difficult column rather than accepting damage. At the Killer Bomb, wait for a safe opening instead of jumping while the enemy is active. Refill Magnet Beam energy before the final climb and enter Yellow Devil with full or near-full health.
If you lose all lives, the game returns you to the title screen, but the fortress can be selected again after restarting the campaign. A completed Robot Master stage does not need to be replayed merely because the current attempt ended; the immediate objective is to re-enter Wily’s fortress and repeat Stage 1. Once Yellow Devil is defeated, the stage-clear display appears and Wily Stage 2 becomes the next fortress stage.
- Expect to replay the approach after a boss death.
- Use the entrance and flame sections to preserve health.
- Refill Magnet Beam before attempting the final climb again.
- Confirm the stage-clear display after Yellow Devil is defeated.
Before you move on
- Yellow Devil’s health reaches zero.
- The boss defeat animation and stage-clear score display appear.
- The fortress progression advances to Wily Stage 2.
- The guide’s Wily Stage 1 objective is complete only after the player has both reached the boss room and cleared Yellow Devil.
Wily Stage 2 — mid-fortress platform gauntlet and minibosses
Wily Stage 2 of the original North American NES release is a short but demanding fortress route through exposed platforms, two Robot Master rematches, vertical enemy gauntlets, and Copy Robot. Weapon energy does not refill automatically between fortress stages, so reserve the important weapons and use the fixed energy pickups carefully. The required sequence is Cut Man, Elec Man, then Copy Robot.
1. Enter with the correct weapons selected
Before entering, make sure Rolling Cutter, Fire Storm, Ice Slasher, Thunder Beam, and Magnet Beam have useful reserves. Rolling Cutter is the key weapon for the Elec Man rematch. Fire Storm is the safest primary weapon for Copy Robot. Magnet Beam is needed for the optional weapon-energy route and the extra-life pickup in this stage, and it remains important elsewhere in the fortress.
Use the Mega Buster against ordinary enemies whenever the terrain permits. Do not spend Super Arm on routine targets; there are no Super Arm blocks in the Cut Man rematch, and conserving limited energy is more valuable than clearing a minor enemy quickly. Fixed weapon-energy capsules are useful, but enemy drops are not a reliable refill plan.
- Carry Rolling Cutter for Elec Man.
- Reserve Fire Storm for Copy Robot if possible.
- Keep Magnet Beam available for the refill and extra-life route.
- Use the Mega Buster against ordinary enemies.
2. Cross the opening platforms
From the starting platform, move right and deal with the Bunby Helis one at a time. Shoot the first enemy before committing to the next jump. On each following platform, stop near the middle, face the next enemy, and fire before moving again. The enemies can knock Mega Man off the narrow platforms, so landing safely is more important than maintaining forward momentum.
When you reach the small lower platform, collect the visible energy pickup if you need it, then jump back upward and continue right. At the next enclosed section, use Magnet Beam to make a temporary bridge across the false or inaccessible floor toward the two small weapon-energy capsules. Prioritize Magnet Beam first if it was used to reach the capsules; use the second pickup on Rolling Cutter, Fire Storm, or another weapon that is genuinely low. Walk back left after collecting the refills. The apparent floor gives way and drops you into the Cut Man rematch.
- Clear each Bunby Heli before the next jump.
- Use platform centers as recovery positions.
- Use Magnet Beam only when needed to reach the fixed refill area.
- Do not rush across the false floor.
3. Defeat the Cut Man rematch
Cut Man's room has no Super Arm blocks, so the weapon that made the original fight easy is unavailable here. Fire Storm is the strongest practical choice, while Ice Slasher and the Mega Buster are valid alternatives. Avoid using Rolling Cutter as your main plan for this fight.
Cut Man jumps around the room and throws his Rolling Cutter, which travels out and returns like a boomerang. Wait for the blade to pass, jump over its return path if necessary, and attack while Cut Man is landing or moving toward you. Fire Storm is especially useful because its flame shield can still connect even when the initial fireball misses. Keep enough room behind Mega Man to retreat; being trapped against a wall makes the returning cutter much harder to avoid.
After Cut Man is defeated, move left and drop through the floor. This is the intended route, not a missed platform.
- Do not expect Super Arm blocks in this rematch.
- Use Fire Storm, Ice Slasher, or the Mega Buster.
- Treat the Rolling Cutter as a returning projectile.
- Drop through the left-side floor after winning.
4. Cross the middle platform section and reach Elec Man
After the drop, cross the platforms while dealing with Screw Drivers. They are less dangerous when you land, turn, and shoot from stable ground instead of trying to attack during a jump. Continue right until you reach solid ground and another group of fixed weapon-energy capsules. Refill Magnet Beam first if it is low, then restore Rolling Cutter or Fire Storm according to your remaining plan.
Drop through the next false floor to enter the Elec Man rematch. Equip Rolling Cutter before falling. Elec Man remains extremely fast, and his Thunder Beam can attack horizontally and vertically. Rolling Cutter is the practical weakness and can defeat him in only a few successful hits.
Start attacking as soon as the fight begins, then create distance by moving toward the left side of the room. Jump over the Thunder Beam when it travels along the floor, and fire Rolling Cutter while Elec Man is closing in or recovering from a jump. The Super Arm blocks in the room are not worth depending on; treat them as obstacles and concentrate on movement. If Rolling Cutter is empty, use the Mega Buster with short attack-and-retreat exchanges rather than standing still.
- Refill from the fixed capsules before dropping into the rematch.
- Equip Rolling Cutter before entering Elec Man's room.
- Jump over floor-level Thunder Beams.
- Use Mega Buster hit-and-retreat tactics if Rolling Cutter is unavailable.
5. Descend through the Bombombomb and Adhering Suzy sections
After Elec Man, drop through the next opening and prepare for Bombombombs rising from the pits. Their pieces split after the initial movement, so do not jump directly into them. Stand on a secure ledge, watch the bomb's path, and move through after it passes. Shoot only when a clear line is available; unnecessary firing can distract you from the next landing.
Continue to the ladder and descend into the Adhering Suzy area. These side-stepping enemies are safer to remove than to bypass because they can occupy the landing space at the bottom of the ladder. Thunder Beam is useful here because its multiple directions can clear enemies on nearby levels, but use it only when a Suzy blocks the route or creates an unavoidable collision risk. Continue downward, then handle the Blasters in the next section from stable ground. Fire, wait for their shots to pass, and advance between volleys.
- Watch Bombombomb trajectories before moving over pits.
- Clear Adhering Suzies near ladders and landings.
- Use Thunder Beam selectively rather than emptying it on every enemy.
- Take the Blaster section one safe firing position at a time.
6. Defeat Copy Robot
Copy Robot is at the end of the stage. It changes to the weapon Mega Man currently has equipped, so choose the weapon before entering the room. Fire Storm is the safest general option because its knockback lets you keep pressure on the copy and limits its opportunity to counterattack. The Mega Buster is a dependable fallback when Fire Storm energy is too low.
Jump and fire Fire Storm as Copy Robot approaches, then continue moving rather than waiting beside the clone. Maintain enough space to avoid contact and repeat the attack while Copy Robot is being pushed back. If you use Thunder Beam, Copy Robot will also use Thunder Beam, making the exchange much harder to dodge unless you are deliberately using the original game's pause exploit. For a normal run, avoid that matchup. The Mega Buster takes longer but gives you a predictable projectile and avoids mirroring a dangerous special weapon.
Copy Robot largely follows Elec Man's movement style, so the same rule applies: jump over a closing attack, fire while moving away, and do not allow the clone to pin you against a wall.
- Select Fire Storm before entering whenever its energy is adequate.
- Use the Mega Buster if special energy is scarce.
- Do not choose Thunder Beam unless you are prepared for Copy Robot to mirror it.
- Keep moving after every attack.
7. Recover from failure and confirm completion
A death during the platform route should be treated as a full-stage setback: the safe plan is to expect a restart at the beginning and repeat both Robot Master rematches. Preserve health before each drop, because losing at Elec Man or Copy Robot can cost the entire route rather than only the last screen. Reuse the fixed weapon-energy areas instead of gambling on random enemy drops, and do not spend lives attempting risky shortcuts across the opening platforms.
The stage is complete when Cut Man, Elec Man, and Copy Robot have all been defeated and Mega Man automatically proceeds to Wily Stage 3. Check your remaining Fire Storm, Rolling Cutter, Thunder Beam, and Magnet Beam energy before continuing; the fortress does not automatically refill weapons between stages.
- Plan for a full restart if you die before clearing the stage.
- Repeat the fixed refill route instead of relying on random drops.
- Confirm that Copy Robot is destroyed and Wily Stage 3 begins.
- Review weapon reserves before moving on.
Before you move on
- Cut Man has been defeated in the first rematch room.
- Elec Man has been defeated after the second false-floor drop.
- Copy Robot has been defeated using Fire Storm or the Mega Buster, with Thunder Beam used only as a deliberate advanced option.
- The game automatically transitions to Wily Stage 3.
- Weapon reserves have been checked before continuing through the fortress.
Wily Stage 3 — gauntlet to the last fortress rooms
Wily Stage 3 in the original North American NES release is a short enemy gauntlet followed by the CWU-01P battle. The route has three practical sections: descend the opening shaft, cross the rightward sewer passage, then survive the water-current tunnel. The boss room contains four throwable blocks and seven CWU-01P units. Use the Mega Buster on the first three units, then use Super Arm blocks against the last four while treating the blocks as both weapons and temporary platforms.
1. Prepare before entering Wily Stage 3
Enter with health as high as practical and make sure Super Arm has usable energy. Super Arm is the required weapon for the safest CWU-01P strategy, because each thrown block can destroy one of the later units. Do not spend that energy casually in the approach.
Select the Mega Buster for the stage itself. The opening enemies can be bypassed or defeated with normal shots, and the water-current corridor requires continuous firing rather than a slow special-weapon setup. If the previous Wily stage left you low on health or weapon energy, a Continue after a death restores your resources and lets you retry the stage from its beginning.
- Health is preferably near full.
- Super Arm has enough energy to use the four boss-room blocks.
- Mega Buster is equipped for the approach.
- Do not plan on leaving the fortress to refill between Wily stages.
2. Descend the opening enemy shaft
At the entrance, destroy or pass the Adhering Suzy enemies and move to the downward route. The shaft uses narrow ledges and enemy fire to punish hesitation, so take each drop when the next landing is clear instead of trying to eliminate every enemy on screen.
Screw Driver enemies appear during the descent. Let their shots pass, then drop or move across the next opening. Use the Mega Buster while advancing, but do not stand directly underneath an enemy waiting for a perfect shot. The reliable objective is to reach the bottom with enough health for the forced corridor ahead, not to clear the shaft completely.
This section does not contain crushers. If you miss a ledge, prioritize landing on the next available platform rather than making a desperate corrective jump through an enemy. The shaft’s danger comes from overlapping projectiles and contact damage.
- Move downward instead of lingering on each ledge.
- Shoot Screw Drivers with the Mega Buster when they obstruct the route.
- Take controlled drops after checking the next landing.
- Do not waste Super Arm on shaft enemies.
3. Cross the lower passage
At the bottom, travel right through the horizontal enemy passage. Continue firing at chest height and jump only when a Pepe, projectile or other enemy blocks the floor. Enemies behind you are no longer important; forward progress is safer than retreating into a previously cleared screen.
Keep your movement deliberate around the Screw Drivers and other fixed threats. If you take one hit, continue toward the next opening instead of backing into a second enemy. The passage leads directly toward the large tunnel where the current begins, so conserve health for that forced-movement section.
Do not assume that every enemy will drop health or weapon energy. If a useful capsule appears, collect it only when doing so does not force you backward into danger. The stage can be completed without relying on a particular drop.
- Keep moving right through the lower passage.
- Fire continuously at enemies directly ahead.
- Ignore enemies that are safely behind you.
- Treat energy drops as helpful but not guaranteed.
4. Survive the water-current tunnel
Continue right until the large water surge begins pushing Mega Man toward the far end of the tunnel. The current prevents a dependable retreat, so hold right and fire repeatedly. Pepes and Killer Bombs enter this corridor; alternate between short jumps and grounded movement to keep shots aligned with them.
Shoot the enemies before they reach your position, but do not stop to chase a target that has moved behind you. The safest rhythm is forward movement, repeated Mega Buster shots and a short jump whenever an enemy occupies the floor or approaches at Mega Man’s height. If an enemy drops weapon energy, open the subscreen only when Mega Man is not about to collide with another enemy or projectile.
There is no crusher sequence in this stage and no need for a special movement trick. The current itself is the timing hazard: reversing direction usually leaves Mega Man exposed while the tunnel continues forcing him right. At the far end, enter the small passage to the CWU-01P room.
- Hold right while the water pushes Mega Man.
- Keep firing the Mega Buster throughout the tunnel.
- Use short, purposeful jumps against Pepes and Killer Bombs.
- Collect a drop only when the route is temporarily clear.
5. Establish the CWU-01P pattern
The boss room contains four blocks positioned around the chamber and openings through which the CWU-01P units enter. Seven units appear one after another. Each travels around the room in a looping path and fires small bubble projectiles. Every defeated unit makes the next one faster, so the later targets are substantially harder to handle with ordinary shots.
Begin near the left side rather than standing in the middle of the room. Watch the first unit’s route, fire as it crosses your horizontal line and use the nearby blocks as temporary platforms when the unit circles low. Do not immediately throw every block. The blocks are the reliable answer to the faster half of the encounter.
For the first three units, use the Mega Buster. Shoot while the unit passes rather than chasing it around the room. Jump over a low pass, then turn and fire as it crosses back. Staying toward the left gives you time to see the entry and avoids being trapped between the moving unit and the right wall.
- Start near the left side of the boss room.
- Use the Mega Buster against the first three CWU-01Ps.
- Shoot during crossings instead of pursuing the unit.
- Use blocks as platforms when the movement path becomes crowded.
6. Use Super Arm on the final four units
After the third CWU-01P is destroyed, switch to Super Arm. Lift a nearby block and throw it across the unit’s travel path. A direct block hit destroys a CWU-01P immediately, making this much safer than trying to outshoot the accelerated units.
Use one block per later unit and keep the remaining blocks available until the next target commits to a predictable pass. Do not throw upward at random. Wait until the unit is moving across the lower or middle part of the room, then release the block into its route. If a block is also needed as a platform, let the unit pass first and use the block to reposition before throwing it.
Keep Mega Man away from the extreme right edge. If a unit approaches from above or behind, jump over it and return toward the left rather than making a long pursuit. If all blocks are gone, return to the Mega Buster and use short jumps, firing whenever the final unit crosses the lower half of the room.
- Switch to Super Arm after the first three units.
- Throw blocks across the unit’s established travel path.
- Keep at least one unthrown block available while learning the next unit’s route.
- Use short jumps and Mega Buster shots if no blocks remain.
7. Recovery after a death or Game Over
A normal death or Continue places you back at the beginning of Wily Stage 3, so repeat the shaft and sewer route without trying to fight every enemy. The retry restores the stage resources, making a patient second attempt preferable to spending Super Arm before the boss.
If you reach a Game Over and choose Stage Select, the fortress sequence does not preserve your Wily Stage 3 position. You must begin the fortress again at Wily Stage 1. Use Continue whenever you still have that option and are committed to finishing the current fortress run.
Once CWU-01P is defeated, the game proceeds directly to Wily Stage 4. The next stage is the final fortress stage and contains the remaining Robot Master rematches followed by the final Dr. Wily battle, so leave the boss room with the stage-clear transition completed before treating the chapter as finished.
- Retry from the beginning of Wily Stage 3 after a normal death.
- Use Continue rather than Stage Select when preserving fortress progress matters.
- Confirm the CWU-01P defeat and automatic transition to Wily Stage 4.
Before you move on
- The opening shaft has been cleared without spending Super Arm on ordinary enemies.
- The lower passage and water-current tunnel are complete, and Mega Man has entered the CWU-01P room.
- All seven CWU-01P units have been defeated, using the Mega Buster for the first three and Super Arm blocks for the later units when possible.
- The stage-clear transition appears and the game advances automatically to Wily Stage 4.
- Wily Stage 4 is now available as the next fortress stage; Dr. Wily has not yet been defeated, so the overall campaign is not complete until that final stage and ending are cleared.
Wily Stage 4 & Dr. Wily — final machines and ending sequence
Wily Fortress Stage 4 is the final stage of the original North American NES Mega Man. It begins with a short hazard section, leads to a 1-Up and the full-restoration Yashichi, then sends Mega Man through four Robot Master rematches in a fixed order before the two phases of Wily Machine 1. CWU-01P is not part of this stage; that seven-unit encounter must already have been cleared at the end of Wily Fortress Stage 3.
1. Prepare before entering Wily Fortress Stage 4
The Yashichi in this stage restores all health and all special-weapon energy, so the opening rooms are less important than reaching that item safely. Once it is collected, preserve the weapons needed for the rematches and final battle.
The useful lineup is Fire Storm for Bomb Man and Wily Machine 1’s first phase, Ice Slasher for Fire Man, Thunder Beam for Ice Man, Hyper Bomb for Guts Man, and Rolling Cutter for the second Wily Machine phase. Bomb Man is not dramatically vulnerable to one weapon in the rematch, but Fire Storm is a practical choice. Do not spend these weapons casually before the Yashichi unless an ordinary enemy is blocking a dangerous route.
- Fire Storm is available for Bomb Man and Wily Machine 1’s first phase.
- Ice Slasher, Thunder Beam, and Hyper Bomb are available for the rematches.
- Rolling Cutter is preserved for the second Wily Machine phase if possible.
- CWU-01P was cleared in Wily Fortress Stage 3 before entering this stage.
2. Cross the opening platforming rooms
At the entrance, Watchers and floor spikes create the first major danger. Shoot the Watchers from outside their firing lanes, wait for their shots to finish, and then advance. Short, deliberate jumps are safer than trying to cross the spike-lined floor in one movement.
Continue through the small-platform and vertical sections without rushing the gaps. The later moving platforms resemble the platforms from Guts Man’s stage. Let a platform return to a useful position before committing to a jump. At the broken section of the rail, use the small platform above the gap as your landing target. Magnet Beam can provide temporary platforms if you have enough energy and do not trust the jump.
- Trigger Watchers before entering their attack range.
- Cross spike floors with controlled jumps.
- Wait for moving platforms instead of forcing blind leaps.
- Use Magnet Beam only when it makes the broken-platform section safer.
3. Collect the 1-Up and Yashichi
After the moving-platform section, search the item area to the right before climbing away. The area contains a 1-Up and the Yashichi. The Yashichi is the critical resource point: it completely restores Mega Man’s health and every special-weapon meter.
Collect the 1-Up if the approach is safe, then take the Yashichi before continuing. Because the item is placed before the rematches, it is better to treat it as preparation for the entire final sequence rather than entering the teleporter with depleted weapons. After collecting the items, return to the route and climb toward the teleporter room.
- Search to the right before leaving the item area.
- Collect the 1-Up when it can be reached without a reckless jump.
- Collect the Yashichi for a full health and weapon refill.
- Enter the teleporter with the rematch weapons ready.
4. Clear the four Robot Master rematches
The fixed order is Bomb Man, Fire Man, Ice Man, then Guts Man. There is no healing break between these encounters, so avoid contact damage and switch weapons immediately after each victory.
Use Fire Storm against Bomb Man while keeping enough distance to walk away from his arcing bombs. Against Fire Man, equip Ice Slasher and jump over his flame attacks, firing during the opening after he commits to an attack. Against Ice Man, use Thunder Beam as he lands or begins his projectile pattern; his shots are slow enough to jump over if you keep moving.
Guts Man is last. Use Hyper Bomb and place the blast where he will land rather than throwing repeatedly from the teleporter corner. Jump when he lands to avoid the ground tremor. When the ceiling rock appears, be ready for the three-way split after he throws it. If he corners you near the teleporter, pass underneath him instead of staying trapped against the wall.
- Bomb Man: use Fire Storm.
- Fire Man: use Ice Slasher.
- Ice Man: use Thunder Beam.
- Guts Man: use Hyper Bomb.
- Do not expect health restoration between rematches.
5. Reach and use the final corridor checkpoint
After defeating Guts Man, enter the teleporter at the right. The quiet corridor beyond it is the second and final checkpoint in the game. A large weapon-energy refill appears before the final boss door. Use it on Fire Storm if that weapon is not full; otherwise restore the weapon most important to your planned final-battle attempts.
If Mega Man dies during either Wily Machine phase, he returns to this corridor instead of repeating the four rematches. Re-enter with Fire Storm selected for the first phase and Rolling Cutter ready for the second. If a Game Over sends you back to the beginning of Stage 4, repeat the opening route and collect the Yashichi again.
- Reach the corridor after the Guts Man rematch.
- Use the large weapon-energy refill before the final door.
- Confirm that Fire Storm and Rolling Cutter have useful reserves.
- Remember that a normal death here does not restart the rematch sequence.
6. Defeat Wily Machine 1, first phase
Wily’s saucer connects to the larger machine. The vulnerable target is the front cannon or glove-like fixture, not the general body. The cannon fires heavy projectiles in an arc aimed at Mega Man’s horizontal position, so keep moving left and right rather than standing still.
Fire Storm is the most efficient weapon for this phase. Fire at the cannon from range, then use the surrounding flame shield when jumping close beneath the fixture. A well-timed close attack can let both the Fire Storm projectile and its shield damage the target. Continue changing position as the machine floats across the room; do not remain underneath the cannon after it fires.
- Aim at the front cannon or glove-like fixture.
- Keep moving when the arcing projectile is launched.
- Use Fire Storm from range and during close jump attacks.
- Do not mistake the destruction of the cannon for the end of the fight.
7. Defeat Wily Machine 1, second phase
After the outer casing breaks, Wily is exposed inside a smaller machine with a larger cannon. This phase does not depend on a single exclusive weakness, but Rolling Cutter is the most practical weapon because one throw can strike the machine multiple times as it travels and returns.
The cannon launches an orb that loops in a circular path. It fires toward the position where Mega Man is standing, so begin running to the right as soon as the orb is launched. Once the shot has passed, move back left, jump near the cannon’s height, and throw Rolling Cutter. Return to a safe side of the room before the next launch. If the cutter is depleted, Thunder Beam or the Mega Buster can finish the phase, but they are generally less efficient.
- Run away immediately when the looping orb is fired.
- Use Rolling Cutter near the cannon’s height.
- Move back to a safe side before the next orb cycle.
- Use Thunder Beam or the Mega Buster only as fallback options.
8. Recover after a failed final-battle attempt
A death during either Wily Machine phase returns Mega Man to the final corridor checkpoint. Refill the most important weapon if necessary and repeat only the final battle. The four rematches are not required again unless a Game Over removes the checkpoint progression.
If a Game Over returns you to the stage entrance, rebuild the run conservatively. Reclaim the Yashichi, avoid spending the rematch weapons on ordinary enemies, and use the fixed weakness order. Before trying Wily again, change the position or timing that caused the previous death rather than simply repeating the same attack sequence.
- After an ordinary death, restart from the final corridor.
- After a Game Over, collect the Yashichi again.
- Preserve Fire Storm and Rolling Cutter for the two final phases.
- Adjust movement timing before spending another life.
9. Confirm the campaign completion
The full campaign is complete only after the earlier CWU-01P encounter in Wily Fortress Stage 3, the four Stage 4 rematches, and both phases of Wily Machine 1 have been cleared. Destroying the first machine casing is only the midpoint of the final battle.
After the second phase is defeated, Dr. Wily exits and the game proceeds into its original NES ending sequence. Let the post-battle scenes and credits continue. The fortress destruction, Mega Man’s return journey, and the closing credit sequence are the concrete confirmation that the original campaign has been completed.
- CWU-01P was defeated at the end of Wily Fortress Stage 3.
- Stage 4 rematches were cleared in this order: Bomb Man, Fire Man, Ice Man, Guts Man.
- Both phases of Wily Machine 1 were defeated.
- Wily exited after the final hit.
- The fortress destruction, ending epilogue, and closing credits played to completion.
Before you move on
- Wily Fortress Stage 3’s seven-unit CWU-01P encounter is cleared before Stage 4 begins.
- Wily Fortress Stage 4’s opening hazards are crossed and the Yashichi is collected.
- Bomb Man, Fire Man, Ice Man, and Guts Man are defeated in the fixed rematch order.
- The final corridor checkpoint is reached and the weapon-energy refill is used before the boss door.
- Wily Machine 1’s first cannon phase and exposed second phase are both destroyed.
- Dr. Wily exits and the original NES ending sequence, fortress destruction, return journey, and credits play to completion.
Optional runs: no-continue challenges, low-weapon runs and practice drills
Once the original NES campaign is familiar, optional challenges can turn difficult rooms into repeatable skills. The cartridge has no save or password system, so a conventional full-run challenge is played in one uninterrupted session. However, after losing all lives, the game offers Continue or Stage Select; define your rule before starting so a recovery choice does not quietly change the challenge. For practice, use repeated stage attempts on original hardware, or permit save states and rewind only when those tools are part of the stated rules.
1. Establish a normal-clear baseline
First complete the six Robot Master stages, collect the Magnet Beam in Elec Man’s stage, clear all four Wily fortress stages and defeat Dr. Wily using the normal weapon route. The Magnet Beam is not merely a convenience in this edition: it is needed to pass required Wily fortress obstacles. It is obtained in Elec Man’s stage after you have Super Arm from Guts Man or Thunder Beam from Elec Man.
Record the stage where each attempt ends, the number of lives remaining, the weapon that was depleted and the specific obstacle that caused the failure. Separate movement failures from combat failures. A missed moving platform needs a different drill from an empty Ice Slasher meter or a poor boss matchup.
- Complete all six Robot Master stages in one sitting.
- Collect the Magnet Beam before entering Wily’s fortress.
- Record three repeatable failure points instead of judging the entire run by its final death.
2. Build a no-continue challenge
Use the standard weakness route and allow every weapon. Define no-continue as finishing the campaign without selecting Continue after a game over. A death that consumes one life does not end the attempt; running out of lives and choosing Continue does. If you want a stricter version, treat any game over as a failed run, even if you return to the stage select screen instead.
Scale the challenge rather than beginning with the entire campaign. First clear the six Robot Masters without a game over. Next, add Wily Stage 1 and Yellow Devil. Then attempt the complete fortress sequence. During early practice, restart only when your stated rule requires it; otherwise use each life to learn the next approach. Do not power off between sessions if your rule is an uninterrupted clear.
- Baseline: six Robot Masters without selecting Continue.
- Intermediate: reach and defeat Yellow Devil in the same sitting.
- Full challenge: clear all four Wily stages and Dr. Wily without selecting Continue.
3. Use practical low-weapon rules
Do not label a run simply “Buster-only” unless you have specified exceptions. In the original NES game, required block barriers and the Magnet Beam route make a completely strict, glitchless Mega Buster-only campaign an unsuitable beginner goal. A practical rule is “Mega Buster for every Robot Master boss,” while allowing utility weapons for required barriers. A harder version allows special weapons only for barriers and fortress bosses.
Begin with one stage and its boss. Defeat Bomb Man with the Mega Buster, then repeat Guts Man and Cut Man without their weaknesses. Add Elec Man or Ice Man only after the earlier fights are consistent. Write the rule before beginning and do not change it after a death. If you allow pause-based weapon techniques, record that separately from a glitchless run.
- Complete one Robot Master stage and boss under the written restriction.
- Clear all six Robot Master bosses with the same restriction.
- State every allowed exception before adding Wily fortress stages.
4. Drill Yellow Devil without relying on a trick
On original hardware, Yellow Devil cannot be selected independently, so reach Wily Stage 1 repeatedly and treat the approach as part of the drill. During the fight, first practice survival rather than attacking. The body breaks into pieces and crosses the room in a fixed sequence; learn the jump rhythm and return to a consistent landing position after each crossing.
After you can survive several complete crossings, add one attack when the eye is exposed. Continue attacking only when the movement remains reliable. Thunder Beam is the documented weakness, while the Mega Buster is a slower fallback. If your challenge permits the original pause technique, track those attempts separately from clean attempts so your results remain comparable.
- Survive three consecutive Yellow Devil crossings in practice.
- Reach the exposed eye without taking contact damage.
- Defeat Yellow Devil twice before including the fight in a full no-continue attempt.
5. Drill Elec Man’s stage and boss
Repeat Elec Man’s stage in sections: the opening beam-and-ladder climb, the flying-enemy areas, the vertical platforming and the final approach. Stop below each electric beam, wait for its regular firing window, then climb. In flying-enemy rooms, shoot from a stable ledge before advancing; do not jump into an unseen enemy merely to maintain speed.
For Elec Man, practice hit-and-retreat movement with the Mega Buster first. Fire when he is committed to an attack, then move to a safer side or use the room’s raised blocks to improve your firing angle. Rolling Cutter is the intended weakness, but a Buster clear is useful for low-weapon practice. If the fight repeatedly costs most of your health, return to the stage and practice the final rooms rather than repeating full fortress attempts.
- Reach Elec Man’s room with the stage hazards under control.
- Defeat Elec Man three times under the selected weapon rule.
- Repeat the stage after the boss becomes consistent so the approach does not remain a hidden weakness.
6. Drill the fortress as a resource route
Practice each Wily stage from its entrance, because the NES version does not provide a standalone boss-training menu. Keep a written weapon plan: reserve Magnet Beam for required platforming, save Super Arm blocks for the CWU-01P encounter, and avoid spending a limited weapon merely to shorten an easy enemy group. CWU-01P is normally handled by defeating the first three bubbles with the Mega Buster and using the four blocks on the remaining four.
For Wily Stage 4, rehearse the Robot Master rematches in their fixed sequence and note which weapon is reserved for each. The final machines follow immediately afterward, so enter the stage with a health and energy plan rather than treating every rematch as an isolated fight.
- Reach each Wily boss without wasting the weapon reserved for it.
- Practice the CWU-01P resource split until the four blocks are available for the final bubbles.
- Complete the Wily fortress in one sitting before adding a time restriction.
7. Add time goals only after consistency
Do not choose an arbitrary target. Time three ordinary successful clears using the same route and weapon order, then use the slowest successful result as the first benchmark. Reduce the target in small steps only after two stable clears at the current goal. Keep glitchless attempts separate from attempts that permit the original pause technique, emulator rewind or save states.
Abort a time attempt when repeated deaths come from the same room. Return to that stage and drill the obstacle until the movement is repeatable. Speed should remove unnecessary hesitation, not replace safe jumps with guesses.
- Record three completed runs or stage splits before setting a target.
- Keep route, weapon order and allowed techniques unchanged during comparison.
- Lower the benchmark only after two stable clears at the current target.
Before you move on
- No-continue completion: defeat all six Robot Masters, clear Wily Stages 1 through 4 and defeat Dr. Wily in one uninterrupted session without selecting Continue after a game over.
- Low-weapon completion: finish the predeclared Robot Master or fortress restrictions while using only the written exceptions; do not alter the rules after a death.
- Practice completion: survive and defeat Yellow Devil repeatedly, clear Elec Man’s stage and boss under the selected rule, and pass the Wily resource route without relying on a lucky attempt.
- Time-goal completion: beat a personal benchmark established from successful runs while preserving the same route, weapon order and technique restrictions.
- Campaign completion remains the original NES ending sequence after Dr. Wily’s defeat; a practice clear or partial challenge does not replace the main-game completion requirement.
References for this chapter
- Mega Man — StrategyWiki walkthrough
- Mega Man/Gameplay — StrategyWiki
- Mega Man/Wily Fortress 1 — StrategyWiki
- Mega Man/Weapons — StrategyWiki
- Mega Man — Guide and Walkthrough, NES, by glass_soul
- CWU-01P — MMKB
- Mega Man — NES instruction manual transcription
- Mega Man (1987 video game) — release and version overview
Appendix — controls, weapon effects and developer/edition notes
This appendix is for the original Capcom Mega Man cartridge released for the Nintendo Entertainment System in North America as NES-MN-USA in December 1987. It explains the original controller layout, weapon selection, Robot Master weapon relationships, the separate Magnet Beam tool and the differences that matter when using a later port or remake.
Confirm the targeted edition
The guide targets Mega Man for the original Nintendo Entertainment System, North American release code NES-MN-USA, published by Capcom in December 1987. The game begins with six selectable Robot Master stages: Cut Man, Guts Man, Ice Man, Bomb Man, Fire Man and Elec Man. After those six victories, Mega Man enters Dr. Wily’s four fortress stages and the final battle.
This is the first NES Mega Man game. It does not use the eight-Robot-Master structure found in most later numbered entries. The Japanese release is titled Rockman, but the North American cartridge uses Mega Man. The different title does not change the six-boss structure or the weapon relationships covered here.
Check the title screen, cartridge label or release information before applying this appendix. Mega Man Powered Up for PSP is an expanded remake, while Mega Man: The Wily Wars is an altered 16-bit version. Neither should be used as a substitute for the original NES mechanics.
- The game is Mega Man, not Mega Man Powered Up or Mega Man: The Wily Wars.
- The platform is the original NES release.
- The cartridge or release listing identifies the North American product as NES-MN-USA.
- The opening selection screen contains six Robot Master stages.
Use the original NES controller
Press A to jump and B to fire the currently equipped weapon. Use Left and Right on the Control Pad to move. Press Up or Down when standing at a ladder to climb or descend it. Mega Man can shoot while standing, walking or jumping, so ordinary combat is built around short jumps, repositioning and repeated B-button attacks.
Press Start to open the weapon-selection screen. Move the selection cursor with the Control Pad, then press Start again to return to play with the chosen weapon. Pressing Start while Mega Man is on a ladder can leave him unable to continue climbing when the game resumes, so change weapons before entering a ladder whenever possible.
Press Select to pause the game. On an original NES controller, Select is the pause button and Start is the weapon-menu button. A modern port, emulator or collection may map these functions to different physical buttons, but the actions should remain distinct.
The original game has no slide, charged Mega Buster shot, Rush support, password system or E-Tank inventory. Do not import movement or resource assumptions from later Mega Man games. The default arm cannon, often called the Mega Buster in modern discussion, has unlimited ammunition. The original English materials also describe it as Mega Man’s plasma weapon or arm cannon.
- A is jump.
- B is attack.
- Start opens weapon selection.
- Select pauses.
- No slide or charged shot is available in the original NES game.
Manage health, weapon energy and special weapons
Defeating a Robot Master adds that boss’s Special Weapon permanently for the remainder of the run. Special Weapons consume their own energy supply. Weapon-energy capsules restore the weapon currently equipped when the capsule is collected, while ordinary energy capsules restore Mega Man’s life meter. Enemy drops are not a guaranteed refill plan, so preserve special-weapon energy when the Mega Buster can handle a normal enemy safely.
The Magnet Beam is different from the six Robot Master weapons. It is found during Elec Man’s stage and creates temporary platforms. It is a stage-progression tool, not a Robot Master reward and not part of the six-boss weakness table. If a route requires the Magnet Beam, collect it before leaving Elec Man’s stage.
- Robot Master victories add weapons to the selection screen.
- Special Weapons and health use separate energy supplies.
- The Mega Buster has unlimited ammunition.
- The Magnet Beam is a separate stage tool found in Elec Man’s stage.
Robot Master weapon effects table
Weapon received — primary effective Robot Master target:
Rolling Cutter, received from Cut Man — Elec Man.
Super Arm, received from Guts Man — Cut Man. Cut Man’s room contains usable blocks, allowing Super Arm to serve as both the weakness weapon and the relevant room interaction.
Ice Slasher, received from Ice Man — Fire Man.
Hyper Bomb, received from Bomb Man — Guts Man.
Fire Storm, received from Fire Man — Bomb Man.
Thunder Beam, received from Elec Man — Ice Man.
The commonly recommended chain is Bomb Man, Guts Man, Cut Man, Elec Man, Ice Man and Fire Man. That order gives Hyper Bomb for Guts Man, Super Arm for Cut Man, Rolling Cutter for Elec Man, Thunder Beam for Ice Man and Ice Slasher for Fire Man. Fire Storm then provides the normal weakness for Bomb Man if the player starts elsewhere or revisits the stage later. Other Robot Master orders are valid because the stage-select screen permits free choice; the listed route is a convenience rather than a rule.
- Hyper Bomb is the primary weakness for Guts Man.
- Super Arm is the primary weakness for Cut Man.
- Rolling Cutter is the primary weakness for Elec Man.
- Thunder Beam is the primary weakness for Ice Man.
- Ice Slasher is the primary weakness for Fire Man.
- Fire Storm is the primary weakness for Bomb Man.
Understand special-weapon behavior in practice
Rolling Cutter travels forward and returns, making it useful when an enemy’s position allows both portions of the path to connect. Super Arm depends on movable blocks and cannot be treated like a conventional projectile in every room. Ice Slasher freezes selected enemies or hazards and is especially important against Fire Man. Hyper Bomb must land before detonating, so it is less convenient against fast targets. Fire Storm launches a fireball while briefly surrounding Mega Man with a protective fire effect. Thunder Beam fires in three directions and is valuable for targets above or below Mega Man as well as for its documented boss weaknesses.
The weapons are not interchangeable in stage navigation. Ice Slasher can freeze certain obstacles, Super Arm moves designated blocks, Thunder Beam attacks multiple vertical lanes and the Magnet Beam creates temporary platforms. Use the Mega Buster for routine enemies whenever possible and reserve limited energy for bosses, required obstacles and fortress encounters.
- Weapon effects are those of the original NES game.
- Super Arm is not a general-purpose projectile.
- The Magnet Beam is not included in the Robot Master weakness chart.
- Weapon energy is conserved for rooms where a special effect is necessary.
Separate the NES game from later releases
Mega Man Powered Up adds new Robot Masters, redesigned stages, additional playable characters and new modes. Mega Man: The Wily Wars changes presentation and portions of the original game. Collection releases may add save states, rewind, button remapping, display filters or other conveniences. Those features belong to the host release and are not part of the 1987 NES cartridge.
The weapon relationships in this appendix are intended for the original NES version and are also useful when a collection faithfully emulates that version. If the goal is an unassisted original-style clear, do not rely on rewind, save states, turbo fire or selectable difficulty unless the challenge rules specifically allow them.
- No Powered Up-exclusive Robot Masters or modes are being used.
- No Wily Wars stage changes are being treated as NES mechanics.
- Collection conveniences are recognized as external features.
- The original six-weapon weakness chain is being used.
Before you move on
- You can identify A as jump, B as fire, Start as weapon selection and Select as pause.
- You can name all six Robot Masters and the weapon each one awards.
- You can match Hyper Bomb to Guts Man, Super Arm to Cut Man, Rolling Cutter to Elec Man, Thunder Beam to Ice Man, Ice Slasher to Fire Man and Fire Storm to Bomb Man.
- You know that the Magnet Beam is found in Elec Man’s stage and is separate from the Robot Master weapons.
- You have confirmed that your target is the North American NES release NES-MN-USA from December 1987, not Powered Up or The Wily Wars.
- You can distinguish original NES mechanics from save states, rewind, remapping and other later-release conveniences.
References for this chapter
- Capcom Town — Mega Man original game page and manual
- Mega Man — Guide and Walkthrough, NES, by MetroidMoo
- Mega Man — Strategy Guide, NES, by MoonSaultKid
- Mega Man — Boss Weakness reference, NES, by Warhawk
- Mega Man release information for NES
- Mega Man (1987 video game) — release and version overview
Finishing up
You have defeated the six Robot Masters (Cut Man, Guts Man, Ice Man, Bomb Man, Fire Man, Elec Man) and claimed their weapons.
You have cleared all Wily fortress stages in sequence and beaten the Yellow Devil encounter(s) to reach Dr.
Wily.
You have defeated Dr.
Wily’s final machine(s) and watched the game’s ending sequence.
You can reproduce the core tactics in each Robot Master stage: safe routes, boss patterns and at least one reliable weapon method for each boss.
You have recovered from a failed attempt in a fortress stage using the fallback strategies specified (weapon swaps, platform timing, and controlled retreat).
Optional completion: you can clear the entire campaign without using continues, or while using only the Mega Buster for at least half the Robot Masters (advanced challenges explained in the final chapters).
Choose your next gameScreenshots & video
Game imagery for reference. Follow the written chapters above for the route and strategies.
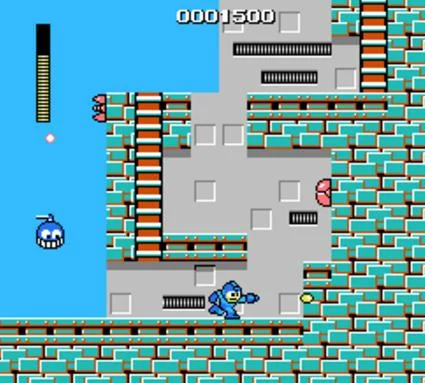
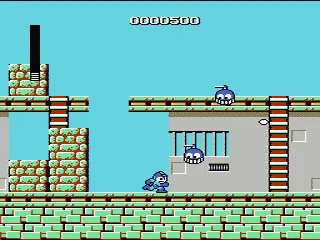
Sources & references
Our original guide draws on the references below. Check the edition at the top of this page before following controls or unlock requirements.
- Mega Man — StrategyWiki walkthrough
- Mega Man/Wily Fortress 1 — StrategyWiki
- Mega Man/Elec Man — StrategyWiki
- Mega Man — Guide and Walkthrough, NES, by MetroidMoo
- Capcom Town — Mega Man original game page and manual
- Mega Man — NES instruction manual transcription
- Mega Man — Guide and Walkthrough for NES by Meowthnum1
- Mega Man/Cut Man — StrategyWiki
- Mega Man NES Instruction Manual
- Mega Man/Guts Man — StrategyWiki
- Mega Man — Guide and Walkthrough — NES — GameFAQs, Chapter Two: Guts Man
- Mega Man — Guide and Walkthrough — NES — UltimaterializerX
- Mega Man NES Guide and Walkthrough PDF
- Mega Man — Guide and Walkthrough — NES — By NeoChozo
- Chapter Five: Ice Man — Mega Man Walkthrough & Guide for NES
- Ice Man’s Stage — Walkthrough
- Mega Man (1987 video game) — release and version overview
- Chapter One: Bomb Man — Mega Man Walkthrough & Guide
- Mega Man — Guide and Walkthrough — GameFAQs, Atom_Edge
- Mega Man — StrategyWiki
- Mega Man release information for NES
- Chapter Four: Elec Man — Mega Man Walkthrough & Guide
- Mega Man/Wily Fortress 4 — StrategyWiki
- Mega Man — Boss Weakness reference, NES, by Warhawk
- Chapter Seven: Wily Stage 1 — Mega Man Walkthrough & Guide — GameFAQs
- Mega Man/Wily Fortress 2 — StrategyWiki
- Mega Man — Guide and Walkthrough, NES, by glass_soul
- Wily Stage 3 — Mega Man Legacy Collection Walkthrough
- Mega Man/Wily Fortress 3 — StrategyWiki
- Mega Man NES Boss Guide — RetroMaggedon Gaming
- Mega Man NES Walkthrough: Dr. Wily Stage 4
- Mega Man/Gameplay — StrategyWiki
- Mega Man/Weapons — StrategyWiki
- CWU-01P — MMKB
- Mega Man — Strategy Guide, NES, by MoonSaultKid
About the game & collecting notes
- Platform
- Nintendo Entertainment System
Step-by-step walkthrough for the original 1987 North American NES release of Mega Man. This guide covers stage order advice, detailed routes for all six Robot Master stages, how to use each acquired weapon, the fixed Wily Fortress sequence, boss strategies, recovery from common failures and concrete completion checks to see the true ending.
Darryl Polo
Darryl Polo loves tinkering with emulation and revisiting retro games. He enjoys exploring how old favorites play on different setups and sharing what he learns along the way. At Joking Joystick, he writes about the games, hardware, and small discoveries that keep the hobby fun.
Our editorial standardsFound a step that needs another look? Help us improve this guide.