
Mega Man X (SNES, USA) — Complete Campaign Walkthrough
A player-focused walkthrough for the original Super Nintendo Entertainment System release of Mega Man X (USA). Step-by-step stage guidance, upgrade and collectible routing, boss strategies, Sigma Fortress navigation, and a 100% completion checklist to take X from the highway opening to the final Sigma confrontation.


Find a copy
Mega Man X Super Nintendo Entertainment System
We may earn a commission if you buy through these links, at no extra cost to you. As an Amazon Associate I earn from qualifying purchases.
Opens retailer search results. Check the model, edition, seller, availability and current price before buying.
Before you begin
You are X, the Maverick Hunter who must fight through eight Maverick stages, gather upgrades, and push into Sigma’s Fortress to stop Sigma and his followers.
This guide focuses on clear, practical routes: what to collect, which stages to tackle when, how to use upgrades, and reliable boss approaches so you can finish the original SNES campaign.
Play at your own pace.
The game allows stage choice for the eight Mavericks, but some upgrades change stage hazards and open hidden areas.
This guide gives two stage-routing philosophies (upgrade-oriented and weakness-oriented), then walks each Maverick stage, the fortress, and all boss fights through to the final Sigma encounter.
Set yourself up for the run
Confirm you are playing the original SNES (USA) release.
The North American release date is January 19, 1994 (the game first released in Japan on December 17, 1993).
Use the SNES cartridge/manual or an official re-release edition only if you want modern conveniences; this guide covers original SNES mechanics and item placement.
Familiarize yourself with the basic controls: running, jumping, charged X‑Buster shots, wall cling/slide, and how dash works once you have the Leg (Foot) upgrade.
Practice charged shots and wall cling in early stages.
Decide your route: upgrade-oriented (prioritizes getting helmet/legs/arm/body and early tanks) or weakness-oriented (traditional rockman order using boss weaknesses).
This guide explains both and lists the practical pros and cons for each.
Expect eight Maverick stages plus Sigma’s Fortress.
Some stage hazards and shortcuts change after you beat particular Mavericks; plan revisits if you want every hidden item.
Set a soft target: finishing the main story requires reaching Sigma and winning his final fight.
If you want 100% (all Heart Tanks, all Sub Tanks and all four armor capsules) follow the guide’s collectible routing and the final checklist.
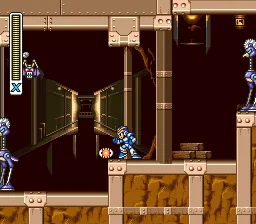
Starting out — route philosophies and quick goals
After the opening highway, Mega Man X gives you free access to eight Maverick stages. The most practical first destination is Chill Penguin because the stage contains the Leg upgrade, which gives X his dash and makes the rest of the game substantially easier to navigate. From there, choose between an upgrade-oriented route for early mobility and armor improvements or the traditional weakness chain for easier boss fights. Both routes can complete the main campaign, and neither should be treated as the only correct order.
1. Complete the opening highway and reach stage select
The highway introduction is a linear stage that teaches the basic controls. Move right, charge the X-Buster while walking, and use wall jumps to climb vertical sections. The opening Ride Armor encounter with Vile is a story confrontation rather than a normal boss fight that you are expected to win with the starting equipment. Survive the encounter and continue through the cutscene sequence.
Once the opening sequence ends, the eight Maverick portraits appear on the stage-select screen. You may choose any of them, but the first choice affects how easily you move through the remaining stages and how soon you can collect optional upgrades.
- Finish the highway stage.
- Practice charging the X-Buster and wall jumping.
- Reach the eight-Maverick stage-select screen.
2. Begin with Chill Penguin for the Leg upgrade
Select Chill Penguin first for the most forgiving general-purpose opening. His Snow Mountain stage contains the Leg capsule in the upper section of the base. Proceed through the early snowmobile and ice-platform rooms, climb into the interior, and take the capsule when the route reaches it. Dr. Light grants X the dash immediately.
The dash is performed with the dash button or by quickly double-tapping a direction, depending on the controller setup. Combine it with a jump to perform a dash jump, which carries X farther than a normal jump. Practice this before leaving the stage: dash jumps are central to reaching later Heart Tanks, crossing wide gaps, and handling several moving-platform sections.
The Leg upgrade is the practical foundation of a normal campaign. The game does not present a separate inventory gate that checks for the boots before opening Sigma’s Fortress, so do not describe them as a formal fortress key. Nevertheless, taking them first is the reliable, intended way to avoid unnecessary difficulty and to prepare for optional collection.
- Defeat Chill Penguin or at least reach the capsule safely before attempting repeated stage routes.
- Collect the Leg capsule.
- Confirm that dash jumps work before moving on.
3. Use the upgrade-oriented route for a comfortable first clear
For early permanent upgrades, use this sequence: Chill Penguin, Storm Eagle, Flame Mammoth, Spark Mandrill, Armored Armadillo, Launch Octopus, Boomer Kuwanger, and Sting Chameleon. Chill Penguin supplies the Leg upgrade, Storm Eagle’s airport contains the Head capsule, and Flame Mammoth’s factory contains the Arm capsule. Sting Chameleon’s forest contains the Body capsule, so that defensive upgrade arrives later in this route.
The Head upgrade lets X break designated blocks by jumping into them from below. The Arm upgrade improves the charged X-Buster and becomes especially valuable in later stages and the fortress. The Body upgrade reduces damage taken. These are permanent armor parts, not temporary power-ups, and they are optional for merely reaching the ending but required for a full armor collection.
This route is comfortable rather than universally optimal. It gives you movement, block-breaking, stronger charged shots, and several useful stage items early, but some Heart Tanks still require a weapon, a stage-state change, or a later revisit.
- Chill Penguin: collect the Leg capsule.
- Storm Eagle: collect the Head capsule.
- Flame Mammoth: collect the Arm capsule.
- Sting Chameleon: collect the Body capsule if pursuing full armor completion.
4. Follow the weakness chain when boss fights are the priority
The traditional weakness-oriented order is Chill Penguin, Spark Mandrill, Armored Armadillo, Launch Octopus, Boomer Kuwanger, Sting Chameleon, Storm Eagle, and Flame Mammoth. The weapons awarded by the defeated Mavericks form a chain: Shotgun Ice is effective against Spark Mandrill, Electric Spark against Armored Armadillo, Rolling Shield against Launch Octopus, Homing Torpedo against Boomer Kuwanger, Boomerang Cutter against Sting Chameleon, Chameleon Sting against Storm Eagle, and Storm Tornado against Flame Mammoth. Flame Wave is effective against Chill Penguin if you return to him later.
This order prioritizes boss weaknesses, but it delays several armor parts and Sub Tanks. Use it if you are comfortable revisiting stages or if learning the boss fights is more important than collecting upgrades early. You can also leave the route at any time: the stage-select screen remains available until all eight Mavericks are defeated.
- Use Shotgun Ice against Spark Mandrill when following the chain.
- Use each newly acquired weapon against the next appropriate Maverick.
- Switch to another stage if a boss is blocking progress.
5. Account for stage changes when planning revisits
Defeated Mavericks can alter other stages. Chill Penguin’s defeat freezes the lava and fire hazards in portions of Flame Mammoth’s factory, making that stage safer. Storm Eagle’s defeat shuts down the electrical hazards in Spark Mandrill’s power plant. Launch Octopus’s defeat changes the water conditions in Sting Chameleon’s forest. These changes affect traversal and certain item routes, so a stage that looks difficult or hazardous may become more manageable after the related boss is defeated.
Do not force every visible item on the first visit. A Heart Tank may require the dash, a charged special weapon, a stage-state change, or a particular route through a Ride Armor section. Record the location, finish the stage if necessary, and return with the correct tool. This is faster and safer than repeatedly sacrificing lives against a route you cannot yet complete.
- Revisit Flame Mammoth after Chill Penguin if the lava section is causing trouble.
- Revisit Spark Mandrill after Storm Eagle if electrical hazards are obstructing progress.
- Revisit Sting Chameleon after Launch Octopus if its altered stage layout is needed for an item.
6. Prepare for the fortress after all eight Mavericks
After the eight Maverick bosses are defeated, the Sigma portrait replaces the empty position on the stage-select screen. Before selecting it, restore X’s health and fill the Sub Tanks by replaying completed stages. The Armored Armadillo and Launch Octopus stages are useful places to refill because their enemy and energy layouts are comparatively convenient.
For a standard, glitch-free campaign, confirm that X has the Leg upgrade before entering the fortress. This is a practical preparation check, not a claim that the stage-select screen performs a hard boots check. The dash makes the fortress platforming more manageable and is also essential to many full-completion routes.
If your goal is 100 percent, track eight Heart Tanks, four Sub Tanks, and the four armor capsules separately. The main campaign only requires defeating the eight Mavericks, clearing the four fortress stages, defeating Sigma, and watching the ending.
- All eight Mavericks are defeated.
- The Leg upgrade is collected and usable.
- Health is restored and Sub Tanks are filled as far as practical.
- For collection, track eight Heart Tanks, four Sub Tanks, and four armor capsules separately.
- Select Sigma’s Fortress only after preparing your resources.
Before you move on
- The highway introduction is complete and the eight Maverick stages are available.
- Chill Penguin has been selected first or deliberately postponed with a clear reason.
- The Leg capsule has been collected for a normal movement-focused run.
- You have chosen either the upgrade-oriented order or the weakness-oriented order according to your immediate goal.
- For a full-completion run, you have begun separate tracking for eight Heart Tanks, four Sub Tanks, and four armor capsules.
- All eight Mavericks are defeated before entering Sigma’s Fortress.
References for this chapter
Controls, movement, and core mechanics
Mega Man X’s original Super Nintendo gameplay is built around charged X-Buster shots, wall-kicks, ground dashes, and four armor upgrades. Learn these systems before attempting difficult optional pickups, because several Heart Tanks, Sub-Tanks, and armor capsules are placed behind movement or weapon requirements. The directions below use the North American SNES control layout and the original release’s system-status screen.
Learn the original SNES controls
Use the Control Pad to move X and climb ladders. Press B to jump. Press Y to fire the X-Buster; hold Y to charge it and release Y to fire the stored shot. Press A to run or dash after the Foot Part has been installed. You can also dash by pressing forward twice quickly. Press L or R to cycle through available special weapons. Press Start to open and close the system-status screen. Select has no regular gameplay function in this version.
Test each action in a safe area before entering a difficult room. Fire several normal shots, hold Y until the weapon visibly changes color, and release it. Jump against a wall while holding toward it, then press B repeatedly to climb. After obtaining a special weapon, use L or R to select it before entering a hazardous section or boss room.
- Y fires and charges the X-Buster.
- B jumps and performs wall-kicks.
- A dashes after the Foot Part is installed.
- L and R cycle through acquired weapons.
- Start opens the system-status screen.
- Select is not used for normal gameplay.
Charge the X-Buster before an opening appears
Hold Y without releasing it to charge the X-Buster. The shot passes through charge levels while the button remains held, and releasing Y fires the stored attack. Charged shots are larger and stronger than normal pellets, making them useful against durable enemies and bosses whose vulnerable windows are brief.
Begin charging while crossing an empty stretch, climbing a wall, or waiting for an enemy to finish an attack. Release the shot when the target becomes vulnerable instead of starting the charge after the opening has already begun. Before obtaining the Arm Part, X has his normal charge levels. The Arm Part adds the powerful Spiral Shot and also allows special weapons to be charged.
- Hold Y until the shot visibly changes before releasing it.
- Carry a charged shot into a room when the approach is safe.
- Use charged shots against armored or durable enemies.
- After obtaining the Arm Part, test both the enhanced X-Buster and charged special weapons.
Use wall cling and wall-kicks for movement and defense
Press toward a wall while airborne to cling to it. X slides down the wall more slowly than he falls through open air, giving you time to watch platforms, projectiles, and enemies. Press B while holding toward the wall to spring away from it. By alternating between two safe walls, X can climb a vertical shaft without returning to the floor.
Wall movement is also a defensive tool. If a ground enemy approaches, jump to a safe wall instead of trying to pass through it. From the wall, fire horizontally, release a charged shot, or jump away after the enemy’s attack has passed. Wall cling is not invulnerability: spikes, projectiles, contact attacks, and hazards attached to the wall can still damage X. Leave a dangerous wall immediately rather than treating it as a permanent refuge.
- Climb between two safe walls without touching the floor.
- Use a wall to slow a fall before committing to the next platform.
- Avoid clinging to walls covered by spikes or moving hazards.
- Combine wall-kicks with charged shots in vertical rooms.
Install the Foot Part and learn the dash
The Foot Part is in Chill Penguin’s stage, on the normal route through the stage. Once the capsule installs it, press A while X is on the ground to dash. A dash can also be performed by tapping the movement direction twice quickly. Dashing immediately before jumping produces a dash-jump with greater horizontal distance than a normal jump.
The dash is a ground movement ability, not an unlimited air dash. Once X is airborne, pressing A repeatedly will not provide continued midair movement. Use dash-jumps to clear wider gaps, cross conveyor sections, escape charging enemies, and reach ledges that a normal jump cannot reach. The Foot Part is strongly recommended for normal play and is important for a complete item route, but it is not a formal requirement for entering or completing Sigma’s Fortress.
- Dash across a flat floor with A.
- Perform a dash-jump over a gap.
- Do not expect repeated midair dashes.
- Record the Foot Part as collected after leaving the Chill Penguin capsule.
Understand the four armor Parts
The Head Part is in Storm Eagle’s stage. It lets X break specific overhead blocks or objects by jumping into them. Use it when a ceiling barrier is visibly designed to be struck from below. It does not provide a general map, reveal every hidden room, or automatically protect X from all falling hazards.
The Arm Part is normally found in Flame Mammoth’s stage. It adds the third X-Buster charge level, producing the Spiral Shot, and lets X charge acquired special weapons. If the capsule is missed, the original game provides a later opportunity to receive the upgrade from Zero during the first Sigma’s Fortress stage, but collecting it in Flame Mammoth’s stage makes the remaining Maverick stages easier.
The Body Part is hidden in Sting Chameleon’s stage and reduces damage taken. It does not prevent knockback, contact damage, spikes, pits, or other environmental hazards. The Foot Part grants the dash described above. The four Parts are permanent upgrades and are required for a complete armor collection.
- Foot Part: Chill Penguin’s stage; grants the dash.
- Head Part: Storm Eagle’s stage; breaks designated overhead objects.
- Arm Part: Flame Mammoth’s stage, with a later Zero opportunity if missed.
- Body Part: Sting Chameleon’s stage; reduces incoming damage.
Use Heart Tanks and Sub-Tanks as separate resources
A Heart Tank permanently increases X’s maximum life energy. The original SNES game has eight Heart Tanks, generally one associated with each Maverick stage. Some are immediately reachable, while others require a weapon, the Foot Part, the Head Part, or a stage-state change caused by defeating another Maverick. If a pickup is beyond X’s current abilities, note its location and return later instead of spending lives on an unreliable attempt.
A Sub-Tank stores life energy for later use. When X collects life-energy capsules while his life meter is full, the excess is transferred to an available Sub-Tank. There are four Sub-Tanks in the original game. To use one, press Start to open the system-status screen, highlight a filled Sub-Tank with the Control Pad, and press Y. The stored energy then transfers to X’s main life meter. A partially filled tank can be topped up with more life-energy capsules.
Before entering Sigma’s Fortress, revisit an earlier stage and fill every Sub-Tank you own. Stored energy is most valuable when learning a fortress boss pattern or recovering before a late phase. Heart Tanks increase how much damage X can take in one life; Sub-Tanks provide separate healing reserves and do not permanently increase maximum health.
- Confirm that collecting a Heart Tank increases the maximum life meter.
- Fill Sub-Tanks with excess life-energy capsules.
- Press Start, highlight a filled Sub-Tank, and press Y to use it.
- Collect all eight Heart Tanks and all four Sub-Tanks for the full item checklist.
- Refill the Sub-Tanks before beginning Sigma’s Fortress.
Before you move on
- X can fire and charge the X-Buster reliably while standing, jumping, and clinging to a wall.
- X can perform a ground dash and a dash-jump after collecting the Foot Part.
- The Foot, Head, Arm, and Body Parts are recorded as collected when pursuing the complete armor set.
- All eight Heart Tanks and four Sub-Tanks are collected for a 100% item run.
- A filled Sub-Tank can be selected from the Start menu and activated with Y.
- Every Sub-Tank is filled before entering Sigma’s Fortress.
- X can clear vertical shafts with alternating wall-kicks without relying on save states, rewind, or a re-release feature.
Chill Penguin — stage hazards, key pickups and boss approach
Chill Penguin is a practical first Maverick stage in the original North American Super Nintendo release. The Leg Parts capsule is placed directly on the normal route, making this stage the earliest reliable source of X’s dash. The stage’s Heart Tank is optional on the first visit and requires a return trip after Flame Mammoth is defeated and Fire Wave is obtained.
Advance through the opening mountain route
Move right from the starting point and handle the woodcutter robot, bats and wheel enemies one group at a time. Jump over the woodcutter’s log, land behind him and fire while he is facing away. For the bats and wheel enemies, charge the X-Buster before approaching a new ledge and clear enemies that guard your landing area.
Continue through the first wall-climbing sections. Hold against the wall to control X’s descent instead of trying to correct a missed jump in midair. If a wheel enemy is positioned beside a landing point, destroy it before committing to the next jump. Preserving health here makes the boss room much more forgiving.
- Defeat or bypass the woodcutter before climbing onward.
- Use wall-cling to control descents through the vertical sections.
- Clear enemies near landing points before making long jumps.
Collect the Leg Parts
Follow the main route through the cave and climbing areas until you reach Dr. Light’s capsule. The capsule is visible on the normal path and is not a hidden optional pickup. Enter it to receive the Leg Parts.
The Leg Parts grant X the dash. On the ground, dash while moving; in the air, a dash jump carries X farther than a normal jump. Practice both abilities in the safe area after leaving the capsule. The dash improves nearly every later stage and is particularly useful for optional item routes.
- Enter Dr. Light’s capsule and receive the Leg Parts.
- Confirm that X can dash on the ground.
- Practice a dash jump before continuing through the stage.
Use the Ride Armor without treating pits as safe
After the Leg Parts capsule, continue past the floating enemies and the ostrich-like robot until you reach a Ride Armor. Enter the armor and use its punches to remove clustered enemies and its jump to cross rough sections.
The Ride Armor protects X from ordinary contact damage, but pits remain dangerous. Do not drive over an edge simply because the armor is intact. If the armor is destroyed or abandoned, continue on foot; losing it does not prevent completion of the stage.
- Use Ride Armor punches against groups of enemies.
- Treat every pit as lethal, even while piloting the armor.
- Continue on foot if the Ride Armor is lost.
Return for the Chill Penguin Heart Tank
The Heart Tank requires a later visit. First defeat Flame Mammoth and obtain Fire Wave. Then return to Chill Penguin’s stage and proceed to the section where the Ride Armor is available near the cave entrance.
Use the Ride Armor to jump from the raised column toward the upper route. At the height of the jump, dismount and use X’s wall-cling and wall-jump movement to reach the roof above the cave. If you miss the dismount, re-enter the area and try again rather than abandoning the attempt.
On the upper route, look for the second wasp-spawning igloo. Destroy that second igloo with Fire Wave. The Heart Tank is exposed inside the destroyed structure; collect it before leaving the upper route. The first wasp-spawning igloo is not the target for this pickup.
If the Ride Armor is destroyed before you reach the upper route, leave and restart the stage. The required combination is the Ride Armor jump for access, followed by a dismount and Fire Wave on the second wasp-spawning igloo.
- Return only after defeating Flame Mammoth and receiving Fire Wave.
- Bring the Ride Armor to the cave-entrance section.
- Dismount at the upper route and reach the cave roof.
- Destroy the second wasp-spawning igloo with Fire Wave.
- Collect the Heart Tank exposed inside that second igloo.
Clear the final approach
After the Ride Armor area, continue through the snowball-thrower and cave sections. Some snowballs grow into larger rolling hazards, so jump over them rather than trying to fight while standing in their path. Clear enemies guarding the final approach and collect any health pickups that appear.
Before entering the boss room, charge the X-Buster if you are using the default weapon. If Flame Mammoth has already been defeated, equip Fire Wave because it is Chill Penguin’s weakness and interrupts his actions. Chill Penguin can still be defeated with the X-Buster on a first visit.
- Jump over enlarged rolling snowballs.
- Enter the boss room with a charged X-Buster when using the default weapon.
- Equip Fire Wave if it is available.
Defeat Chill Penguin
Chill Penguin slides across the floor as a primary attack. Jump over the slide and avoid landing directly beside him, since he can reverse direction or begin another attack immediately. He also fires a spread of ice shots; cling to a wall to avoid the projectiles, then move away when the pattern ends.
He can create two small ice penguins that act as both a shield and a moving hazard. Stay on a wall or jump over them when they cross the arena. During his snowstorm attack, the wind pushes X across the room, so use wall-cling, wall-jumps or a dash to preserve space instead of standing in the center.
Chill Penguin also jumps to the ceiling handle. Move laterally while he is above you and attack during his descent or after he returns to the floor. With the X-Buster, use fully charged shots after a slide, after the ice-penguin attack or during his recovery. Avoid point-blank firing while he is moving across the floor.
With Fire Wave equipped, attack while he is grounded or recovering. The weapon deals heavy damage and interrupts his current action, allowing another attack if X remains at a safe distance. Continue jumping over slides and ice penguins instead of trading contact damage. After his health is depleted, complete the weapon-acquisition sequence and confirm that Shotgun Ice has been added to X’s weapon list.
- Jump over each ground slide.
- Use walls to avoid the spread ice shots.
- Keep away from the ice penguins when the snowstorm begins.
- Attack after the ceiling movement or during recovery.
- Confirm receipt of Shotgun Ice after the victory sequence.
Before you move on
- The Leg Parts capsule has been entered and X can dash on the ground and during jumps.
- Chill Penguin has been defeated and Shotgun Ice has been added to X’s weapon list.
- For optional completion, Flame Mammoth has been defeated, Fire Wave has been obtained, and the second wasp-spawning igloo in Chill Penguin’s stage has been destroyed to expose the Heart Tank.
- The Heart Tank has been collected before leaving the stage.
- The stage remains available for revisits after the boss clear, so missing the Heart Tank on the first visit does not block the campaign.
Storm Eagle — aerial arena tactics and the Head (Helmet) upgrade
Storm Eagle’s airport stage is an excellent second destination after Chill Penguin. The Leg upgrade from Chill Penguin is required for the optional Heart Tank and Helmet capsule, while the Sub Tank can be collected without a special weapon. The stage combines moving lifts, open-air platforms, cannons, falling hazards and strong wind that can push X into a bottomless drop. Storm Eagle is weak to Chameleon Sting, but charged X-Buster shots are sufficient if you have not yet reached Sting Chameleon.
1. Enter after Chill Penguin and prepare for open-air platforming
Select Storm Eagle’s stage after completing Chill Penguin if you are following the upgrade-oriented route. The Leg upgrade gives X the Dash and is needed for the stage’s Heart Tank and Helmet capsule. You can still defeat Storm Eagle without the Dash, but several optional routes will remain inaccessible or much harder to reach.
Keep the X-Buster charged whenever you have safe footing. Charged shots remove many flying enemies and cannons quickly, and they are more useful here than rushing with repeated uncharged shots. Most major mistakes in this stage are falls rather than ordinary enemy damage, so secure each platform before committing to the next jump.
- The Leg upgrade is available before attempting the Heart Tank or Helmet capsule.
- The X-Buster is charged before exposed platform sections.
- You are treating every gap below the airship as a lethal hazard.
2. Ride the opening lifts and collect the Heart Tank
Move right through the opening until you reach the group of moving lifts. Ride the lifts upward through their loop and remain on the highest lift when it reaches the top of the route. From there, dash-jump left across the gap toward the roof above the beginning of the stage.
The Heart Tank is on that upper-left route. It increases X’s maximum life energy and is optional for the campaign, but it is required for a full-collection run. If the jump fails, wait for the lift cycle to return instead of attempting repeated blind jumps while enemies are active.
- The highest opening lift has been reached.
- X has dash-jumped left from the top of the lift route.
- The Heart Tank has been collected and the maximum life bar has increased.
3. Use the rising pillar to reach the Sub Tank
Continue through the opening area until you find a cannon mounted on a pillar that rises and lowers. Destroy the cannon, then stand on the pillar and let it carry X upward toward the glass control tower.
Shoot the tower’s front window to open the entrance and jump inside. A large robot occupies the room. Defeat it from a safe position, using charged shots whenever possible, then collect the Sub Tank in the room. The Sub Tank does not increase X’s maximum life. It stores excess life energy that can later be spent from the weapon-selection screen.
- The cannon on the rising pillar has been destroyed.
- The glass control tower has been opened.
- The large robot has been defeated or safely cleared.
- The Sub Tank has been collected.
4. Cross the exposed platforms and cannon sections
Return to the main route and proceed through the airport’s exposed sections. Floating platforms carry enemies across open gaps, while cannons and pillar-mounted turrets fire into the landing areas. Destroy enemies before jumping whenever possible, and wait for moving platforms to reach a predictable position rather than jumping early.
Use wall-clinging to slow a fall and correct your position against vertical surfaces. When a cannon blocks the route, fire from the side or from a lower platform, then move immediately after attacking. Do not stand beneath a cannon while charging if the next platform is already beginning to move away.
- Enemies on floating platforms are cleared before long jumps.
- Each platform sequence ends with X standing on solid ground.
- No jump is started while an enemy is positioned to interrupt the landing.
5. Reach the Helmet capsule from the tall scaffold
After crossing the section with floating platforms, climb the tall scaffold or tower. At the upper part of this structure, do not simply continue along the visible route. Drop down on the right side into the concealed lower area.
From the lower area, use a Dash Jump to reach the ledge on the right. Shoot the row of explosive gas canisters repeatedly. When the canisters are destroyed, the blocked passage opens and leads to Dr. Light’s capsule. Enter the capsule to receive the Helmet upgrade.
The Helmet upgrade does not display a stage map. Its practical function is allowing X to destroy certain breakable blocks by striking them with his head, which opens routes and collectibles in later stages. If X falls into a fatal gap while attempting this detour, the capsule must be collected on another visit.
- X has dropped from the scaffold into the concealed lower section.
- The right-hand ledge has been reached with a Dash Jump.
- The explosive canisters have been destroyed.
- The Light capsule has been entered and the Helmet upgrade received.
6. Clear the final airport approach
Continue right after the Helmet capsule and work through the remaining platforms and gun emplacements. Use lower ledges as cover from heavy cannons, fire upward or sideways, and avoid staying in one firing lane while charging.
Before entering the boss door, refill life with safe enemy drops if necessary and prepare either Chameleon Sting or the X-Buster. The boss gate begins the Storm Eagle battle immediately, so do not enter while carelessly jumping over the last gap.
- The Helmet upgrade is secured before the boss fight.
- A charged X-Buster or Chameleon Sting is ready.
- X reaches the boss gate with enough life to survive a mistake.
7. Defeat Storm Eagle by controlling the wind
Storm Eagle is weak to Chameleon Sting, obtained from Sting Chameleon. If you have that weapon, fire it whenever Storm Eagle approaches or finishes an attack. Without it, use charged X-Buster shots; the fight takes longer but does not require a special weapon.
Storm Eagle can flap his wings or generate a strong tornado that pushes X toward the edge of the platform. Stay near the center and dash against the push. Do not hug either wall, because the wind can carry X off the airship before there is time to recover.
He also launches an egg that hatches into small homing birds. Shoot the egg when possible. If the birds hatch, keep moving and jump over them rather than allowing them to surround X. Storm Eagle’s diving attack comes from off-screen; move across the arena instead of waiting at one edge, then fire after he completes the pass.
Storm Eagle’s attacks leave opportunities for charged shots, especially after a dive or while he is repositioning. Continue prioritizing footing over damage. Once his life is depleted, X receives Storm Tornado, which is particularly useful against Flame Mammoth and is also effective for clearing groups of enemies.
- Storm Eagle has been defeated with Chameleon Sting or charged X-Buster shots.
- Storm Tornado is available in the weapon menu.
- The stage-clear screen returns X to stage selection.
Before you move on
- Storm Eagle is defeated and Storm Tornado is present in the weapon menu.
- The Helmet capsule has been collected from the hidden route below the tall scaffold.
- For optional completion, the Heart Tank above the opening lifts and the Sub Tank inside the glass control tower are both collected.
- The chapter is complete even if the optional items were skipped, provided X reached the boss gate, defeated Storm Eagle and received Storm Tornado.
Flame Mammoth — factory hazards, X-Buster upgrade and lava interactions
Flame Mammoth's Factory stage contains the Arm Parts, a Heart Tank, and a Sub Tank. Defeat Chill Penguin first if you want the safest route to the Heart Tank, then use the Leg Parts and Head Parts to collect the other upgrades before fighting Flame Mammoth. Storm Tornado is the boss's weakness, while the X-Buster remains a dependable fallback.
1. Enter after Chill Penguin when collecting the stage items
Flame Mammoth can be selected at any time, but defeating Chill Penguin first freezes the molten material in parts of the Factory stage. This is the intended safe route to the Heart Tank in the large open room. The stage remains completable without that change, but collecting the Heart Tank becomes much more dangerous because the lower route is over lethal molten material.
The Leg Parts from Chill Penguin are required for the stage's dash-jump routes. Bring the Head Parts from Storm Eagle if you intend to collect every item during this visit: the Head Parts are needed to break the remaining blocks above the Arm Parts capsule and are also required for the Sub Tank route.
- Defeat Chill Penguin before attempting the Heart Tank if possible.
- Have the Leg Parts for dash jumps.
- Have the Head Parts for the Arm Parts and Sub Tank routes.
2. Cross the opening factory machinery
Move right through the opening conveyor sections and machinery. The belts change X's footing, while oil patches slow him and can leave him exposed to nearby enemies. Clear enemies from a distance with charged X-Buster shots, then cross each conveyor with a deliberate jump or dash instead of standing still and allowing the belt to carry you.
Use walls as temporary safe positions when the floor is crowded. Wall-clinging also gives you time to watch moving machinery and enemy cycles. Do not rush beneath falling tools or through an oil patch merely because the next platform is visible; wait for the immediate hazard to pass, then dash across.
- Clear enemies before stepping onto a conveyor whenever practical.
- Jump or dash across oil rather than walking through it.
- Use wall-clings to wait out machinery cycles.
3. Enter the large open Dig Labour room
After the conveyor sections, you will drop into a large open room populated by Dig Labours that throw pickaxes. This room contains all three stage pickups: the Heart Tank is at the lower-right, the Arm Parts are above the central area, and the Sub Tank is toward the upper-left.
Defeat the Dig Labours before making the longer jumps. Their pickaxes can interrupt X in midair, and taking a hit over molten material can turn a successful route into an instant death. If you are collecting items, treat this room as a set of separate routes rather than trying to grab everything during one uncontrolled climb.
- Recognize the large room with Dig Labours and multiple ledges.
- Clear enemies before attempting the item jumps.
- Use the room's platforms to reset your position after a failed jump.
4. Collect the Heart Tank at the lower-right
From the room's lower route, travel toward the bottom-right corner. After Chill Penguin has been defeated, the molten material is frozen, allowing X to cross or dash over it and reach the Heart Tank safely. Drop only after confirming that the surface is frozen; an unfrozen surface is lethal.
The tank is beneath the main green walkway in the same broad room. Collect it, then verify that the maximum life meter has increased. If the floor is still molten, leave the item for a later revisit instead of spending lives or Sub Tanks on an unsafe attempt.
- Reach the lower-right portion of the large room.
- Confirm the molten floor has frozen before crossing it.
- Collect the Heart Tank and verify the larger life meter.
5. Reach the Arm Parts capsule
The Arm Parts capsule is above the large room, behind a ceiling of breakable blocks. Stand on the platform at the left side of the block formation and perform a carefully timed dash jump toward the blocks. The goal is to catch the lower edge of the formation; immediately wall-jump and use the Head Parts to break through the blocks above you.
This jump is precise because an ordinary jump does not provide enough horizontal reach. If X falls, return to the left platform and try again rather than jumping from a lower or misaligned ledge. Once the blocks are cleared, climb into the hidden passage and enter Dr. Light's capsule.
The Arm Parts add a third X-Buster charge level, producing the pink Spiral Shot, and allow X to charge special weapons. They are a major offensive upgrade, but Flame Mammoth does not have to be defeated immediately after obtaining them.
- Find the ceiling-block formation above the large room.
- Use a dash jump from the left platform.
- Use the Head Parts to break the upper blocks.
- Enter the capsule and receive the Arm Parts.
6. Collect the Sub Tank in the upper-left route
From the same large room, climb the ledges toward the upper-left. Continue upward until you reach the topmost platform, identifiable by an extra life and two Metall C-15 enemies. Destroy the enemies, then dash-jump left to the wall and wall-jump through the breakable blocks.
The Sub Tank is behind those blocks. This route requires the Leg Parts for the dash jump and the Head Parts to break the blocks. Collecting the tank stores the item permanently; it must still be filled later by collecting life energy while X's normal life meter is full.
- Climb to the upper-left platform with the extra life.
- Destroy both Metall C-15 enemies before attempting the jump.
- Dash-jump left and break through the blocks with the Head Parts.
- Collect the Sub Tank.
7. Prepare for the boss room
Continue right after collecting the items and enter Flame Mammoth's arena. The boss fights on a conveyor belt. His jumps create a ground shock when he lands, knocking X down if X is standing on the floor at that moment. Flame Mammoth also fires small arcing flames, releases oil slicks, and uses his trunk to reverse the conveyor's direction.
Stay on a wall or in the air when he is about to land. If you are on the floor, dash beneath him and jump before the landing shock reaches you, but do not remain underneath him after he lands. When the conveyor reverses, reposition immediately so it does not carry you into the corner.
- Enter with the Arm Parts if you collected them.
- Keep a recovery item available if your life is low.
- Watch Flame Mammoth's jump rather than focusing only on his position.
8. Defeat Flame Mammoth with Storm Tornado
Storm Tornado is Flame Mammoth's weakness. Fire it when he is jumping or during the recovery after he lands, then return to a wall or the opposite side of the arena. Charged Storm Tornado shots are especially useful because the weapon's vertical reach can hit him while X clings to a wall.
If Storm Tornado energy is low, charged X-Buster shots can still win the fight, but you must avoid the landing shock more carefully. The Boomerang Cutter can also sever Flame Mammoth's trunk, preventing him from reversing the conveyor or throwing oil, but that option is only available after Boomer Kuwanger has been defeated and is not required.
After Flame Mammoth's life bar is emptied, the stage ends and X receives Fire Wave.
- Use Storm Tornado as the primary weapon.
- Stay airborne or on a wall when Flame Mammoth lands.
- Avoid standing in oil slicks when a flame attack is coming.
- Confirm that Fire Wave appears in X's weapon list after victory.
Before you move on
- Flame Mammoth is defeated and Fire Wave appears in X's weapon list.
- The Arm Parts capsule has been collected, giving X the third X-Buster charge level and the ability to charge special weapons.
- For a full clear of this stage, the Heart Tank, Sub Tank, and Arm Parts are all present in X's inventory.
- The Heart Tank was collected from the lower-right of the large Dig Labour room after Chill Penguin froze the molten floor.
- The Sub Tank was collected from the upper-left block route using the Leg Parts and Head Parts.
- X can consistently reach and survive the boss arena without relying on a glitch.
Spark Mandrill — power plant puzzles and weakness exploitation
Spark Mandrill’s Power Plant is built around ladders, darkened rooms, fast flying enemies, and electrical hazards. Storm Eagle’s defeat changes the stage: the crashed airship cuts power to parts of the plant and makes the opening route safer. The stage contains one Heart Tank and one Sub Tank. Shotgun Ice is Spark Mandrill’s weakness and can repeatedly freeze him, turning the boss fight into a controlled timing exercise.
Prepare the route and weapons
Enter with the Dash upgrade if you intend to collect the Heart Tank. You receive that upgrade in Chill Penguin’s stage, and the Spark Mandrill Heart Tank is designed around a dash-jump. Equip Shotgun Ice before entering the boss room if Chill Penguin has already been defeated.
Storm Tornado is the preferred weapon for the stage miniboss. Charged X-Buster shots remain useful against ordinary enemies, especially the stationary launchers and fast flying enemies in the dark rooms.
Defeating Storm Eagle before entering this stage is helpful but not mandatory. His crashed airship damages the power plant, removing several electrical floor hazards in the opening section and weakening the miniboss.
- Have Shotgun Ice available for Spark Mandrill.
- Have the Dash upgrade before attempting the Heart Tank.
- Use Storm Tornado against the stage miniboss if you have defeated Storm Eagle.
Take the normal opening route
From the entrance, move right and climb the first ladders. When the route presents an upper ladder and a descending ladder, take the upper route for normal stage progression. The descending route is the Sub Tank detour and is easier to handle separately when you already have Boomerang Cutter.
Continue through the ladder rooms, destroying enemies before climbing into the next section. The plant periodically becomes dark. In darkness, slow down at every ledge and ladder junction; the screen gives you less warning before pits and incoming enemies.
The crescent-shaped flying enemies are especially dangerous when the room is dark. Fire rapidly as soon as X lands on a new platform or reaches a different elevation. A quick X-Buster shot can remove them before they collide with you.
- Use the upper ladder at the first major split for the main route.
- Stop before blind drops in darkened rooms.
- Fire immediately after reaching a new platform to clear fast flyers.
Collect the Sub Tank on a return visit
The Sub Tank is near the beginning of the stage. From the first descending ladder, travel right until the tank is visible behind a wall. It cannot be collected by simply jumping into the wall.
Equip Boomerang Cutter, stand near the wall, jump, and throw the uncharged weapon so its arc curves down toward the tank. The boomerang grabs the Sub Tank and returns it to X. This is the final Sub Tank in the original SNES game, so leave the item for a later revisit if you do not yet have Boomerang Cutter.
Do not confuse this item with the Heart Tank near the end of the stage. The Sub Tank is an early detour; the Heart Tank is on the route after the later ladder and turtle-enemy section.
- The Sub Tank is optional for stage completion.
- Boomerang Cutter is required for the reliable retrieval method.
- Do not count the Sub Tank as collected until it visibly disappears from its position.
Defeat the Bubble Machine miniboss
After the dark opening sections, continue through the ladders and enter the miniboss room. The Bubble Machine hangs from the ceiling and releases bubbles across the floor. Touching a bubble traps X temporarily and leaves him open to further damage.
Climb one wall to stay away from the bubbles, then fire Storm Tornado through the boss. The weapon can hit repeatedly as it passes through the machine. Keep moving between the walls rather than standing beneath the boss for long periods.
If the miniboss reaches toward X, jump over the extending claw and continue firing as you reposition. If Storm Eagle has not been defeated, the encounter is more dangerous because the plant retains more of its electrical threats. After the machine is destroyed, continue right through the door.
- Do not stand on the floor among the bubbles.
- Use the walls to avoid the boss and its claw.
- Save health for Spark Mandrill instead of spending a Sub Tank here unless necessary.
Take the Heart Tank near the end
Later, after the biker enemies and ladder sections, you will reach a descending ladder with a wall on the right. Do not immediately climb down. Climb the right wall to reveal the Heart Tank on a small ledge in the upper-right corner.
To reach it, dash-jump away from the right wall, then quickly turn back toward the wall and use the remaining jump height to grab the ledge. The timing is demanding because the ledge is positioned behind the wall’s normal climbing line.
If you miss, fall back safely and try again. The Heart Tank increases X’s maximum life energy, but it is not required to defeat Spark Mandrill. You can also return after collecting other upgrades, although the Dash upgrade is the essential requirement for the intended route.
- Confirm the Heart Tank has disappeared after collection.
- Do not descend the ladder until you have decided whether to attempt the pickup.
- Use a dash-jump and direction change rather than an ordinary wall-jump.
Cross the final rooms
After the Heart Tank area, descend and continue right through the large turtle robots and the remaining ladder rooms. Storm Tornado is effective against the large enemies blocking the path, but charged X-Buster shots are sufficient if you want to conserve special-weapon energy.
The final dark section again contains fast crescent-shaped enemies. Fire as you land, then move deliberately across each ledge. At the end, defeat the remaining walker enemies and enter the boss gate.
Before crossing the gate, refill with any nearby energy that appears and equip Shotgun Ice. Spark Mandrill’s weakness is more valuable than a full special-weapon gauge, but entering with a reasonable amount of Shotgun Ice makes the freeze-lock strategy easier.
- Clear the turtle and walker enemies before entering the boss room.
- Equip Shotgun Ice at the boss gate.
- Keep enough life energy for contact mistakes during the opening attack.
Freeze Spark Mandrill with Shotgun Ice
Spark Mandrill can dash along the floor, jump across the room, move along the ceiling cables, and strike the floor to send two electric sparks outward. The sparks travel along the floor and then climb the walls, so jump over them rather than relying on a wall cling.
Fire an uncharged Shotgun Ice shot as soon as the fight begins or as Mandrill approaches. A successful hit freezes him and interrupts his current action. Wait for the freeze to end, then fire again as he becomes vulnerable. Repeating this timing can prevent him from completing most of his attack cycle.
If he starts a dash before the next Shotgun Ice shot is ready, jump over him or climb a wall and change sides early. Do not stay on a wall when he collides with it, because the impact can knock X off and cause contact damage. When he climbs the ceiling, keep moving and fire Shotgun Ice so the shot can connect directly or after bouncing from a wall.
Without Shotgun Ice, use charged X-Buster shots from mid-range. Attack after his dash, jump, or floor-spark motion and retreat before he reaches X. After the final hit, Spark Mandrill awards the Electric Spark weapon.
- Jump over the two floor sparks after the boss’s ground strike.
- Fire Shotgun Ice again as soon as the freeze ends.
- Use wall movement to escape dashes, not to remain beside the wall collision point.
- Confirm that Electric Spark appears on the weapon screen after victory.
Before you move on
- Spark Mandrill is defeated and the weapon-acquisition screen awards Electric Spark.
- The stage-clear result appears and Spark Mandrill’s icon is marked defeated on the Maverick screen.
- For stage-item completion, the early Sub Tank behind the wall has been retrieved with Boomerang Cutter.
- For stage-item completion, the Heart Tank near the descending ladder has been collected.
- If either item was inaccessible, record the missing pickup for a later revisit instead of treating the stage as fully collected.
Armored Armadillo — gallery and industrial mine stage
Armored Armadillo’s underground stage is built around red mine carts, Mole Borer machines, spike pits, and narrow wall-jump sections. The stage contains one Sub Tank and one Heart Tank. The Sub Tank can be collected on the first visit without a special weapon. The Heart Tank is easiest with Flame Wave from Flame Mammoth, although rapid X-Buster fire can also destroy the second Mole Borer quickly enough. Electric Spark from Spark Mandrill is Armored Armadillo’s weakness and removes his defensive armor when used after his rolling attack.
1. Ride the first mine cart and jump before the drop
Move right from the entrance and jump onto the red mine cart. Let it carry you through the opening enemies instead of trying to stop and fight everything. The cart destroys enemies along its route, but it cannot cross the large drop near the end of the track.
When the cart begins to fall toward the pit, jump off immediately. Land on the platform or wall on the far side, then clear the nearby bats and bird robots before continuing right. If you miss the jump, restart the stage or use the next attempt to leave the cart slightly earlier; waiting until the cart is already over the pit is too late.
- Board the first red mine cart.
- Jump off as the track begins to descend into the large pit.
- Clear the enemies after landing before entering the next passage.
2. Collect the Sub Tank behind the first Mole Borer
Continue until the floor opens into a deep shaft containing the first large drilling machine, the Mole Borer. Drop down, but immediately climb back up the wall or return to the upper ledge so the machine passes beneath you safely. Do not remain on the bottom directly in its path.
After the Mole Borer has moved away, enter the passage it came from. The Sub Tank is positioned to the left of the machine’s starting area, behind the route it clears. Collect it, then continue right. If you miss the timing, the item remains available on a later visit; it is not consumed by the machine.
- Wait above or beside the first Mole Borer instead of standing in its path.
- Enter the machine’s starting passage after it moves away.
- Collect the Sub Tank before continuing through the mine.
3. Cross the enemy and spike rooms with controlled wall jumps
The following rooms contain bats, birds, Metools, and narrow passages. Charge the X-Buster before approaching a Metool, then fire when its helmet opens. If the corridor is too narrow for a safe shot, jump over it rather than trading contact damage.
When the route drops toward spikes, use the walls to control your descent and climb back up. Spikes are instant-death hazards, so do not commit to a jump while an enemy is pushing you toward them. Shoot only when doing so will not cost control of X’s position.
- Use charged shots against Metools when their faces are exposed.
- Prioritize wall control over killing every enemy.
- Treat every spike pit as an instant-death hazard.
4. Destroy the second Mole Borer to reach the Heart Tank
Later, the stage drops you into another passage with a second large Mole Borer. The Heart Tank is on a ledge ahead, but the machine can destroy part of the wall needed to reach it. Begin firing as soon as you fall into the machine’s area and keep shooting rapidly.
Flame Wave is the easiest method if you have already defeated Flame Mammoth: equip it before dropping down and hold the attack on the machine while staying close enough for the flame to connect. You can also destroy the machine with rapid uncharged X-Buster shots if you react quickly. A charged shot alone is not the important part; sustained damage before the machine reaches the ledge is what preserves the route.
Once the Mole Borer is destroyed, climb the remaining wall and jump onto the ledge containing the Heart Tank. If the machine reaches the ledge first and breaks the necessary section, the Heart Tank is out of reach for that attempt. Finish the stage and revisit it after obtaining Flame Wave.
- Prepare Flame Wave or rapid X-Buster fire before dropping toward the second Mole Borer.
- Destroy the machine before it damages the wall beneath the Heart Tank.
- Climb to the ledge and collect the Heart Tank.
- Mark the stage for a revisit if the ledge was destroyed.
5. Complete the final mine-cart ride
After the Heart Tank section, continue through the passage and climb to the final red mine cart. Ride it through the tunnel. Near the exit, several bird robots appear; shoot them with ordinary X-Buster shots so they cannot collide with you during the final jump.
As the cart reaches the end of the track and launches toward the open space, jump off before it leaves the tunnel. Aim for the ledge on the opposite side, using a wall catch if the landing is short. The boss door is on that ledge. Enter only after checking your health and selecting Electric Spark if you have it.
- Shoot the birds near the end of the final cart ride.
- Jump from the cart as it launches from the tunnel.
- Reach the ledge containing Armored Armadillo’s door.
6. Remove Armored Armadillo’s armor with Electric Spark
Armored Armadillo begins by curling into a ball and ricocheting around the room. While his armor is closed, ordinary attacks are blocked or deflected. Stay mobile and watch the angle of each rebound rather than firing repeatedly into the shell.
When he finishes the roll and lands, fire Electric Spark. A normal Electric Spark is sufficient; it does not need to be charged. The hit removes his armor and leaves him vulnerable during later movement, including his rolling form. Continue firing Electric Spark when he stops or when a clear shot is available.
If you do not have Electric Spark, use charged X-Buster shots during the brief openings after his roll or while he is firing. This takes longer but is reliable if you avoid contact. Do not stand directly beneath him when he opens the cannon in his head; climb a wall or move to the opposite side to avoid the sequence of four energy shots.
- Equip Electric Spark before entering the arena.
- Wait for the rolling attack to finish, then strike the stopped boss.
- Use wall climbs or wall jumps to avoid the four head-cannon shots.
- Use charged X-Buster shots as the fallback method.
7. Confirm the stage reward
After Armored Armadillo is defeated, the stage-clear screen appears and X receives the Rolling Shield weapon. The boss defeat is required for main-campaign progress, while the Sub Tank and Heart Tank are optional survivability upgrades. If either item was missed, revisit the stage before entering Sigma’s Fortress if you are pursuing full collection.
- Armored Armadillo is defeated.
- Rolling Shield appears in X’s weapon list.
- The stage-clear screen appears.
- The Sub Tank and Heart Tank are recorded as collected or marked for later recovery.
Before you move on
- The Armored Armadillo stage-clear screen appears.
- Rolling Shield has been added to X’s available weapons.
- The Sub Tank behind the first Mole Borer has been collected if pursuing full completion.
- The Heart Tank near the second Mole Borer has been collected, or the stage is marked for a revisit with Flame Wave.
- Armored Armadillo was defeated with Electric Spark or, if necessary, charged X-Buster shots.
References for this chapter
- Mega Man X/Armored Armadillo — StrategyWiki
- Mega Man X — Guide and Walkthrough — Super Nintendo — By X
- Mega Man X – Guide and Walkthrough, item locations and Hadouken procedure
- Mega Man X – Guide and Walkthrough, complete item route and Heart Tank locations
- Mega Man X SNES Boss Guide — RetroMaggedon Gaming
Launch Octopus — underwater stage navigation and Homing Torpedo use
Launch Octopus’s ocean facility is an underwater stage built around buoyant movement, spike-lined passages, current-producing minibosses, and several aquatic enemies. The required Heart Tank route begins at the large Cruiziler submarine: destroy the Cruiziler, remain with its wreckage as it falls through the floor, defeat the Utuboros sea-serpent in the lower cavern, then enter the passage that opens to the right and collect the Heart Tank. Launch Octopus is weak to Rolling Shield. Boomerang Cutter is an alternative utility weapon because three hits remove his tentacles and disable several attacks. Defeating him awards Homing Torpedo and floods part of Sting Chameleon’s stage for a later Heart Tank visit.
Enter the ocean facility and control underwater movement
Move right through the opening surface section, defeating the small aquatic enemies and Mega Tortoises. Continue across the early spike hazards and descend into the underwater route. X jumps higher and travels farther underwater than on dry ground, so avoid holding the jump button longer than necessary near spikes. Use short jumps, wall contact, and controlled horizontal movement to stop X from drifting into hazards.
Sea Attackers rise from underwater openings in groups, pause briefly, then curve or roll toward X. Shoot the one directly in front of you before attempting a jump, then keep moving so the remaining enemies do not approach from behind. If a jump carries X too far, touch a wall to slow the descent and adjust before landing.
- Enter the underwater section with as much health as possible.
- Destroy Sea Attackers near jump routes before committing to a crossing.
- Use walls to control X’s height and stop unwanted underwater drift.
Defeat the first Anglerge
Continue through the underwater corridors until the first Anglerge blocks the route. Anglerge can push or pull X with a water-current attack and launches eel-like torpedoes that turn through the room. The currents can carry X toward walls or spike pits, so fight from a position with room to move in both directions.
Use charged X-Buster shots when the torpedoes emerge, and keep changing height while firing. When the current begins, dash or move against it rather than allowing X to be carried into a hazard. The small light on Anglerge can be destroyed, but the main body is the important target. You do not need a special weapon for this encounter.
- Watch for the current before starting a jump.
- Destroy torpedoes that would trap X near spikes.
- Use charged shots when Anglerge exposes its body.
Pass the middle machinery and reach the Cruiziler
After the first Anglerge, continue through the machinery and aquatic-enemy sections. You will encounter additional current hazards, Gulpfer enemies, and upward water jets. Gulpfer can inhale X and hold him while draining health; if X is caught, fire repeatedly to escape instead of panicking or wasting time trying to jump free.
Use the upward jets to reach the higher route and continue until the large Cruiziler submarine appears. This missile-launching vessel is the key landmark for the stage Heart Tank. Stand on or near its safer upper surface, avoid the bombs it releases, and fire repeatedly at its exposed target. Clear nearby flying enemies if they interfere with your footing.
- Break free quickly if a Gulpfer inhales X.
- Use the water jets to reach the Cruiziler route.
- Identify the Cruiziler as the required Heart Tank landmark.
Follow the Cruiziler wreckage into the lower cavern
When the Cruiziler is destroyed, do not immediately leave through the upper route. Stay with the wreckage as it sinks. The falling submarine breaks through the floor and opens the lower cavern. Avoid stray bombs during the descent and be ready for spike-lined terrain after the wreckage settles.
Move right from the wreckage to enter the lower cavern and fight the Utuboros sea-serpent. Only its head and tail are vulnerable; shots against the middle of its body will not damage it. You can stand on its body while firing at the head or tail, but jump over the head when it changes direction and avoid landing in the spikes below. Boomerang Cutter is effective against this miniboss, and Storm Tornado can also deal with it efficiently if available.
- Remain with the Cruiziler as it falls through the floor.
- Enter the lower cavern to the right of the wreckage.
- Damage only the Utuboros head or tail.
- Avoid falling into spikes when the sea-serpent changes direction.
Collect Launch Octopus’s Heart Tank
After the first post-Cruiziler Utuboros is defeated, continue right through the newly opened passage. The Heart Tank is in the room beyond the miniboss, not behind a second Anglerge. Collect it before backtracking. This item increases X’s maximum life energy and is one of the eight Heart Tanks in the original SNES game.
Once the Heart Tank is secured, return left to the Cruiziler wreckage and climb upward through the route that was previously blocked. The stage continues from the upper side of the wreckage. Do not confuse this item with the separate Heart Tank in Sting Chameleon’s stage, which becomes accessible after Launch Octopus is defeated.
- Defeat the Utuboros after the Cruiziler falls.
- Enter the opened passage to the right.
- Collect the Heart Tank in the room beyond that miniboss.
- Backtrack to the Cruiziler wreckage after collecting it.
Clear the final rooms and prepare for the boss
Continue right and upward from the wreckage. A later Utuboros emerges from the sand and may briefly burrow underground. Watch for disturbed sand to anticipate where it will surface, then strike its head or tail. Afterward, proceed through the Gulpfer section toward the boss door. Destroy the lower Gulpfer first if several are arranged vertically, because it blocks the safest route forward.
Conserve special-weapon energy for Launch Octopus. Normal enemies can be handled with the X-Buster, and charged shots are useful against enemies positioned above or below X. Before entering the boss room, equip Rolling Shield if Armored Armadillo has already been defeated.
- Watch the sand for the later Utuboros’s emergence point.
- Destroy the Gulpfer blocking the lower route to the boss door.
- Preserve Rolling Shield energy for the boss fight.
- Enter the arena with a charged X-Buster available as a backup.
Defeat Launch Octopus with Rolling Shield
Rolling Shield is Launch Octopus’s main weakness. He fires missile and torpedo patterns from his tentacles, and some of those projectiles can destroy a Rolling Shield before it reaches him. Stay near a wall or along the edge of the arena, let the projectile pattern pass, then dash-jump over Launch Octopus and fire Rolling Shield as X passes behind him. A charged Rolling Shield can provide defensive coverage, but do not stand still and allow the boss to collide with X.
Launch Octopus’s most dangerous sequence begins with a long leap followed by a whirlpool. As soon as he starts that setup, move or dash in the opposite direction. If X is caught, the boss grabs him and drains health while restoring his own energy. Keep moving and use a Sub Tank only when the remaining health is too low to survive another exchange.
If Boomer Kuwanger has already been defeated, equip Boomerang Cutter and hit Launch Octopus three times. The attacks remove his tentacles, preventing the whirlpool and tentacle-based projectile attacks. Finish him with charged X-Buster shots or remaining Rolling Shield energy. If Rolling Shield runs out, prioritize survival and use charged X-Buster shots after each attack pattern rather than attempting unsafe close-range hits.
- Use Rolling Shield after missile patterns or during a clear approach.
- Dash away immediately when the whirlpool sequence begins.
- Use Boomerang Cutter three times if you want to remove the tentacles.
- Reserve a Sub Tank for a dangerous low-health situation.
- Switch to charged X-Buster shots if Rolling Shield energy is exhausted.
Confirm the reward and the later stage change
Defeating Launch Octopus awards Homing Torpedo, which tracks nearby enemies. Its charged form produces a larger attack pattern when the Arm Part is available. The game then returns to the password screen before Stage Select.
Launch Octopus’s defeat also puts water into a lower section of Sting Chameleon’s stage. On a later visit, use that changed area to reach Sting Chameleon’s hidden Heart Tank. This stage change is optional for completing Launch Octopus’s stage but required for collecting every Heart Tank.
- Confirm that Homing Torpedo appears in X’s weapon inventory.
- Record the password if continuing later.
- Mark Sting Chameleon’s flooded lower area for a future revisit.
- Verify that the Launch Octopus Heart Tank was collected after the Cruiziler and Utuboros sequence.
Before you move on
- Launch Octopus’s stage is complete when Launch Octopus is defeated and Homing Torpedo is added to X’s inventory.
- For the stage Heart Tank, confirm that the Cruiziler was destroyed, its wreckage fell through the floor, the first lower-cavern Utuboros was defeated, and the passage to the right was entered before collecting the tank.
- The first Anglerge is only an earlier stage obstacle and is not the required gatekeeper for the Heart Tank.
- If pursuing full collection, record that Sting Chameleon’s lower flooded area must be revisited after Launch Octopus is defeated.
- If the boss repeatedly defeats X, refill health and weapon energy in an earlier stage, then return with Rolling Shield equipped. If Rolling Shield is unavailable or runs out, use charged X-Buster shots and prioritize escaping the whirlpool over dealing constant damage.
References for this chapter
- Mega Man X 100% Completion Guide — Super Nintendo — NeoChozo, GameFAQs
- Mega Man X – Guide and Walkthrough, complete item route and Heart Tank locations
- Mega Man X — Guide and Walkthrough — GameFAQs
- Mega Man X — Boss Guide — Brother_Reed, GameFAQs
- Mega Man X guide — HonestGamers Guides
- Mega Man X/Launch Octopus — StrategyWiki
Boomer Kuwanger — tower ascent, Heart Tank and boss tactics
Boomer Kuwanger’s Tower Stage is a vertical climb through shielded robots, wall-mounted cannons, laser barriers, elevators, Slide Cannons and Ladder Yadders. The stage’s Heart Tank is on a high exterior ledge at the top floor, immediately before the route returns inside for the final climb. A normal jump is not the dependable way to collect it. On a revisit, Boomerang Cutter retrieves the Heart Tank from below; charged Shotgun Ice provides an alternate route when the Arm Part is available. Homing Torpedo, earned from Launch Octopus, is Boomer Kuwanger’s weakness and makes the boss fight considerably easier.
1. Prepare before entering the Tower Stage
If Launch Octopus has been defeated, equip Homing Torpedo for the boss encounter. The missiles track Boomer Kuwanger while he teleports around the arena, allowing you to attack without predicting his exact landing position. Use the X-Buster or charged shots against ordinary enemies so that Homing Torpedo energy remains available for the boss.
The Leg Part from Chill Penguin is strongly recommended. The dash improves long jumps, makes several platforming sections more forgiving and gives X a better way to escape Boomer Kuwanger’s ground attacks. The stage can be completed without the Leg Part, but the climb is less forgiving. If you are collecting everything, plan either to return with Boomerang Cutter or to collect the Heart Tank after obtaining the Arm Part and Shotgun Ice setup.
- Equip Homing Torpedo if Launch Octopus is defeated.
- Use the Leg Part for dash jumps and emergency repositioning.
- Preserve Homing Torpedo energy for Boomer Kuwanger.
- Plan a return visit for the Heart Tank unless the charged Shotgun Ice method is available.
2. Climb the opening ladder rooms
Move through the first interior rooms and deal with the shielded robots from a distance. When a robot throws its mace or shield, jump over the outgoing projectile and wait for its return path before advancing. A fully charged X-Buster shot can damage it during an opening, but do not stand beside it and trade contact damage.
You will also encounter wall-mounted enemies and cannons. Attack them when they expose themselves, then climb only after the immediate route is clear. If an enemy occupies a ladder, shoot it from below or from the opposite wall before committing to the climb. Taking a hit while climbing can drop X back into an earlier hazard and force you to repeat the room.
- Jump over both the outgoing and returning shield projectile.
- Attack wall-mounted enemies during their exposed windows.
- Clear enemies from ladders before climbing.
3. Cross the laser-barrier rooms
The laser rooms combine beam barriers with flying enemies and narrow openings. Watch at least one cycle before moving so you can identify the safe interval. With the Leg Part, dash through an opening when the landing area is clear. Without the dash, wait for the beam to deactivate and cross with a normal jump rather than forcing movement through an active barrier.
Do not stop in the center of a laser room to fight every enemy. Move from one safe pocket to the next and shoot only enemies that block the route. If a beam activates behind X, continue forward toward the next safe area instead of turning around inside its path. Wall-clinging can stabilize a jump, but it does not protect X from an active laser.
- Watch the laser cycle before crossing.
- Use a dash or carefully timed jump through each opening.
- Move between safe pockets instead of fighting in the beam’s path.
4. Ride the elevator through the upper interior
Continue upward until you reach the rising elevator section. Mega Tortoises and their falling mines can knock X off a ladder, so wait for a mine to pass before climbing. Charged shots help remove the turtles before they crowd the route.
The elevator platforms have dangerous spiked undersides. Remain on safe ledges or on the upper surfaces of the platforms, and do not jump beneath them or cling to their lower edges. Helicopter enemies can be ignored when they are not blocking the route. Move through the safe gaps as the elevator rises and continue until X reaches the exterior tower.
- Time ladder movement around falling mines.
- Avoid the undersides of the rising elevator platforms.
- Ignore flying enemies that do not block progress.
5. Climb the exterior tower
The exterior section uses Slide Cannons as temporary platforms and places Ladder Yadders around the climbing route. Wait for a Slide Cannon platform to extend, use it to reach the next ladder or ledge, and move away before it retracts or creates a new hazard. Shoot a Ladder Yadder before climbing its ladder, or wall-jump around it if the room gives you enough space.
Advance in short sections rather than rushing upward. When a platform is extended, jump onto it, reach the next safe wall or ladder and prepare for the next cycle. Continue to the top exterior floor. The Heart Tank is located here, on a high ledge before the route turns back inside.
- Treat Slide Cannon platforms as temporary footing.
- Shoot or bypass Ladder Yadders before climbing.
- Reach the top exterior floor before entering the final interior section.
- Look for the Heart Tank on the high ledge before the route returns inside.
6. Collect the Tower Stage Heart Tank
The Heart Tank is on the high exterior tower section at the top floor, immediately before the stage sends X back inside for the final climb. It is visible from the route but is positioned beyond an ordinary jump. If you do not yet have the required weapon setup, leave it for a revisit rather than wasting lives on an unreliable jump.
The most dependable method is to defeat Boomer Kuwanger, replay the Tower Stage and return to this same exterior location with Boomerang Cutter equipped. Stand at the indicated firing position below or across from the ledge and throw Boomerang Cutter so its curved path reaches the Heart Tank and brings it back to X. This is the standard revisit method for the original SNES stage.
A first-visit alternative uses charged Shotgun Ice. The Arm Part is required to create the charged ice platform. Charge Shotgun Ice until it produces the rideable ice platform, board it and let it carry X toward the right-hand ledge. Jump from the platform as it passes the Heart Tank’s position, then land on the ledge and collect the item. If the platform setup is unavailable, postpone the Heart Tank and return with Boomerang Cutter.
- Confirm the Heart Tank is on the high exterior tower ledge.
- Use Boomerang Cutter on a revisit for the reliable method.
- Use charged Shotgun Ice only when the Arm Part is available.
- Verify that X’s maximum life energy increases after collection.
7. Finish the final interior climb
After collecting the Heart Tank or marking its location, enter the tower and climb the final interior section. Turning cannons, flying platforms and wall-mounted blasters create narrow movement windows. Destroy enemies that block a ladder, but otherwise prioritize reaching the next safe platform. Use wall-clinging to control descent and dash jumps to cross gaps without lingering below cannons.
Before entering the boss gate, assess X’s health and weapon energy. Homing Torpedo is more valuable than ordinary weapon energy for the boss, so avoid spending it on the final approach unless an enemy prevents progress. Use a Sub Tank only when it will preserve the attempt rather than for minor contact damage.
- Cross the final interior platform rooms without lingering under cannons.
- Use wall-cling and dash jumps to control vertical movement.
- Reach the boss gate with sufficient health and Homing Torpedo energy.
8. Defeat Boomer Kuwanger
Homing Torpedo is Boomer Kuwanger’s weakness. Fire when he appears, then keep moving while the missile tracks him. His main attacks are the thrown Boomerang Cutter, a fast ground dash, teleporting movement and Dead Lift. Dead Lift occurs when X is grounded and Boomer Kuwanger reaches him at close range; Kuwanger grabs X with his horns and throws him upward into the ceiling.
The safest general approach is to use the walls and change sides whenever Kuwanger approaches. Wall-clinging keeps X off the floor and reduces the chance of Dead Lift, but the returning Boomerang Cutter can still strike X on the wall. When he throws the cutter, jump or move to the opposite side and account for the blade’s return path instead of waiting in a corner.
Continue firing Homing Torpedo whenever the boss is vulnerable. If the weapon energy runs out, use charged X-Buster shots as Kuwanger appears or finishes a dash. Fire from a distance, then retreat to a wall. Do not remain directly beside him and do not repeatedly use one corner as a permanent hiding place.
- Use Homing Torpedo as the primary weapon.
- Stay on the walls or jump when Kuwanger approaches for Dead Lift.
- Relocate before the returning Boomerang Cutter reaches your position.
- Use charged X-Buster shots if Homing Torpedo energy is exhausted.
9. Confirm the reward and future uses
Defeating Boomer Kuwanger awards Boomerang Cutter and clears the Tower Stage. The game then reaches the password or stage-select transition, depending on the immediate screen flow. Boomerang Cutter is useful for collecting this stage’s Heart Tank on a revisit, retrieving the Sub Tank in Spark Mandrill’s stage and exploiting Sting Chameleon’s weakness.
Defeating Launch Octopus does not alter Boomer Kuwanger’s attack pattern or create a special Tower Stage layout change. Its relevant benefit is Homing Torpedo, which is Boomer Kuwanger’s weakness weapon.
- Confirm that Boomerang Cutter appears in the weapon inventory.
- Confirm that the Tower Stage is cleared.
- Record the Heart Tank as collected or return later with Boomerang Cutter.
- Use Boomerang Cutter later for the Spark Mandrill Sub Tank and Sting Chameleon.
Before you move on
- Boomer Kuwanger is defeated and Boomerang Cutter appears in the weapon inventory.
- The Tower Stage is cleared and the game proceeds to its password or stage-select transition.
- For optional collection progress, the Heart Tank on the high exterior tower ledge has been collected with Boomerang Cutter or with charged Shotgun Ice using the Arm Part.
- For 100 percent progress, Boomerang Cutter is available for the Spark Mandrill Sub Tank and will be used against Sting Chameleon.
References for this chapter
- Mega Man X/Boomer Kuwanger – StrategyWiki stage and revisit information
- Mega Man X 100% Completion Guide — Super Nintendo — NeoChozo, GameFAQs
- Mega Man X – Guide and Walkthrough, Heart Tank and stage item routes
- Mega Man X – Guide and Walkthrough, complete item route and Heart Tank locations
- Mega Man X Walkthrough – MMKB fortress boss strategies
Sting Chameleon — camouflage, flooded caves and the Body Armor
Sting Chameleon’s forest stage contains one Heart Tank and the Body Armor capsule. The Heart Tank is available after Launch Octopus has been defeated, because the lower cave is then flooded. To reach it, enter the lower cave, use the Head Part to break the obstructing rock blocks by jumping into them, then stand on the small platform beneath the opened passage and dash-jump across the water. The Leg Part is still needed for the dash-jump. The Body Armor follows a separate upper route that requires the Leg Part and a fight with RT-55J.
1. Prepare the required upgrades
Bring the Foot or Leg Part from Chill Penguin’s stage. It is required for the dash-jump used to reach the Heart Tank and for the upper route leading to the Body Armor.
Bring the Head Part from Storm Eagle’s stage for the flooded lower cave. The rock blocks blocking the Heart Tank passage must be broken by jumping into them with the helmet ability; ordinary wall-kicks do not replace this requirement.
Defeat Launch Octopus before attempting the Heart Tank. His defeat floods the lower cave and provides the buoyancy needed for the crossing. If you enter while the cave is dry, clear the stage or collect the Body Armor, then return after defeating Launch Octopus.
Boomerang Cutter, earned from Boomer Kuwanger, is Sting Chameleon’s weakness and is also a useful option against the stage’s miniboss. It is helpful but not required for either pickup.
- Leg Part obtained.
- Head Part obtained.
- Launch Octopus defeated before collecting the Heart Tank.
- Boomerang Cutter available if desired.
2. Cross the opening forest
Move right from the entrance and deal with the Planty enemies before crossing their firing range. A charged X-Buster shot can remove a Planty and its small worm projectile together. Continue past the Axe Max enemies and approach the cave entrance.
Use the cave entrance and the high ground above it as landmarks. The lower branch leads to the Heart Tank after the cave is flooded. The upper branch leads to the Body Armor and RT-55J. Stop before dropping into either branch so you can choose the pickup you are ready to claim.
- Planty enemies cleared or safely bypassed.
- Axe Max contact attacks avoided.
- Cave entrance and upper ledge identified.
3. Collect the Heart Tank
Before entering the lower branch, confirm that Launch Octopus has been defeated. Drop into the pit immediately before the cave entrance and descend into the flooded lower section.
Move to the rock blocks obstructing the passage. Equip the Head Part and jump upward into the blocks to break them. Continue breaking the blocking pieces until the route is open. Do not try to destroy these blocks with side wall-kicks; the required action is a Head Part jump.
After opening the passage, stand on the small platform beneath it. Face right and perform a dash-jump across the water. The flooded cave’s buoyancy keeps X airborne long enough to reach the opposite ledge and collect the Heart Tank.
Dash-jump back toward the small platform and climb out through the cave route. The Heart Tank permanently increases X’s maximum life energy.
- Flooded lower cave reached after defeating Launch Octopus.
- Head Part used to break the obstructing rock blocks.
- Small platform beneath the opened passage reached.
- Dash-jump across the buoyant water completed.
- Heart Tank collected.
4. Reach the Body Armor capsule
Return to the high ground near the cave entrance. From the upper side of the entrance, use the Leg Part to perform a dash-jump onto the wall above the cave. Climb into the upper area and continue right.
The route seals when RT-55J enters. Keep your distance and watch its grappling claws. Its head is the dependable target. Fire when the head is exposed, then move away before the claw reaches X.
When RT-55J jumps toward you, dash underneath it or dash-jump over it from a wall. Avoid standing directly beside the machine, where the returning claw and body contact can cause consecutive hits. Charged X-Buster shots or Boomerang Cutter are suitable attacks; preserve enough room to retreat rather than trading damage.
After RT-55J is defeated, enter the Light Capsule to receive the Body Armor. The armor permanently reduces damage from ordinary attacks.
- Upper cave route reached with a Leg Part dash-jump.
- RT-55J’s head hit during its vulnerable openings.
- Grappling claws and jumping body attacks avoided.
- Light Capsule entered and Body Armor obtained.
5. Finish the stage
Return to the main route and continue right. In the rocky tunnel, watch for enemies that resemble falling rocks until they land. Pause at narrow ledges, let the enemy reveal itself, and fire before advancing.
Continue through the forest and swamp sections. A Ride Armor appears on the route; use it to clear ordinary enemies and move through dangerous ground, but leave it before entering the boss doors because it cannot enter Sting Chameleon’s arena.
- Rock-disguised enemies exposed before crossing narrow ledges.
- Ride Armor used where helpful.
- Ride Armor abandoned before the boss chamber.
- Boss doors reached.
6. Defeat Sting Chameleon
Equip Boomerang Cutter if available. When Sting Chameleon clings to a wall or hangs from the ceiling, fire the cutter to knock him down and interrupt the position. This limits his movement and creates repeated attack opportunities.
When he hangs from the ceiling, spikes fall through changing parts of the arena. Keep moving, use the walls to change height, and avoid standing directly beneath him. When he becomes camouflaged and fires tail spikes, track the distortion, jump over the projectiles and wait for him to become visible before attacking.
Do not rush into close range. Sting Chameleon’s tongue can grab X and pull him into damaging contact. If Boomerang Cutter is unavailable, use charged X-Buster shots and concentrate on survival rather than rapid damage.
When the health bar is empty, Sting Chameleon is defeated and Chameleon Sting is added to the weapon menu. Its charged form can also provide temporary protection, making it useful during later difficult sections.
- Boomerang Cutter used to interrupt wall or ceiling positions when available.
- Falling spikes and tail projectiles avoided.
- Tongue-grab range avoided.
- Boss health bar emptied.
- Chameleon Sting obtained.
Before you move on
- Sting Chameleon is defeated and Chameleon Sting is available in the weapon menu.
- Launch Octopus was defeated before the flooded lower cave was entered for the Heart Tank.
- The obstructing Heart Tank passage blocks were broken with the Head Part by jumping into them.
- The Heart Tank was collected from the ledge across the buoyant flooded passage.
- The upper route was reached with the Leg Part and RT-55J was defeated.
- The Body Armor capsule was entered and the Body Armor was obtained.
- The stage-select screen shows Sting Chameleon as defeated rather than an active Maverick target.
Collectibles, armor capsules, Heart Tanks and Sub Tanks — full routing
The original Super Nintendo release of Mega Man X contains four armor capsules, eight Heart Tanks, and four Sub-Tanks. Each Maverick stage contains one Heart Tank. The armor capsules are found in Chill Penguin, Storm Eagle, Flame Mammoth, and Sting Chameleon’s stages. The Sub-Tanks are in Storm Eagle, Spark Mandrill, Flame Mammoth, and Armored Armadillo’s stages. Several items require a previous boss defeat, a special weapon, the Head or Leg Parts, or a stage-state change. Collect all four armor parts, all eight Heart Tanks, all four Sub-Tanks, and all eight Maverick weapons before attempting the optional Hadouken secret.
Collect the four armor capsules
The Leg Parts capsule is in Chill Penguin’s stage, in the ice cavern with the rotating spike-wheel hazards. It is placed directly on the route and cannot be missed during a normal clear. Collect it before leaving. The Leg Parts give X the dash, which is essential for long jumps and makes nearly every later collection route safer.
The Head Parts capsule is in Storm Eagle’s stage after the vertical platform section. Climb the narrow metal structure, but do not immediately jump to the upper platform. Drop to the far side and dash-jump to the ledge with the flammable tanks. Destroy the tanks to reveal the entrance to the capsule room. The Head Parts let X break designated overhead blocks by jumping into them and protect him from falling-rock hazards. They do not provide a general stage map.
The X-Buster, also called the Arm Parts, is in Flame Mammoth’s stage near the beginning. After the conveyor-belt section, reach the large room with platforms and the breakable blocks overhead. From the appropriate platform, use a dash-jump to strike through the blocks and climb to the capsule. The upgrade provides a stronger charged X-Buster shot and allows X to charge his Maverick weapons.
The Body Parts capsule is in Sting Chameleon’s stage before the cave entrance and above the Heart Tank route. Climb the rock path and enter the enclosed arena. Defeat the RT-55J mini-boss by targeting its head. Once it is destroyed, the capsule rises from the ground. The Body Parts reduce incoming damage and are useful in the fortress, but they are not required to enter Sigma’s stages.
- Leg Parts: Chill Penguin stage
- Head Parts: Storm Eagle stage
- X-Buster or Arm Parts: Flame Mammoth stage
- Body Parts: Sting Chameleon stage
Collect the eight Heart Tanks
There is one Heart Tank in every Maverick stage. Each Heart Tank increases X’s maximum Life Energy by two units. These are permanent upgrades, not Sub-Tank refills.
In Chill Penguin’s stage, use the Ride Armor through the later cave section until a blue pillar prevents it from continuing. Climb out, reach the ledge above the caves with a dash-jump, and go left to the two wasp-spawning igloos. Use Fire Wave to destroy the second igloo. The Heart Tank is inside. Because Fire Wave comes from Flame Mammoth, this is normally a return visit after defeating that boss.
In Storm Eagle’s stage, ride the platforms at the beginning to their highest point. From there, make a large dash-jump left onto the roof of the starting building. The Heart Tank is on that roof.
In Flame Mammoth’s stage, defeat Chill Penguin first. His defeat freezes the molten floor in this stage. In the large area with platforms and Dig Labors, follow the lower route beneath the walkway and collect the Heart Tank that would otherwise be inaccessible over the lava.
In Spark Mandrill’s stage, continue through the dark section until after a Mega Tortoise. The Heart Tank is on a high ledge at the far right. Reach it with wall jumps and a dash-jump, or use Boomerang Cutter to pull it toward X if the angle is difficult.
In Armored Armadillo’s stage, destroy the second spiked Mole Borer before it reaches the rock formation beside the Heart Tank. Fire Wave damages it quickly, although charged X-Buster shots can also work. If the machine breaks the formation first, the tank becomes too high to reach during that attempt, so return and try again.
In Launch Octopus’s stage, board the Cruiziler, the missile-launching ship on the surface. Destroy it so the wreck drops through the floor and exposes the underwater cavern. Proceed through the cavern and defeat the Sea Snake encounter. After the encounter is defeated, enter the newly opened room to the right and collect the Heart Tank.
In Boomer Kuwanger’s stage, continue to the upper exterior section of the tower near the top floor. The Heart Tank is visible on a high ledge in the upper-right portion of the screen. Stand at the firing position and use Boomerang Cutter so the projectile curves around and retrieves it. If you have the X-Buster upgrade and Shotgun Ice, a fully charged Shotgun Ice sled provides an alternate method: fire it from the room to the left, ride the sled, and jump toward the ledge as it passes beneath the Heart Tank. The item is on the high exterior tower route, not on the small platform before the tower entrance in the original SNES arrangement. If you use Boomerang Cutter, collecting it after defeating Boomer Kuwanger is the simplest approach because the weapon is then available naturally from the stage-select route.
- Chill Penguin: second wasp-spawning igloo above the Ride Armor route; use Fire Wave
- Storm Eagle: roof above the opening platform section
- Flame Mammoth: lower route through the frozen-lava area after defeating Chill Penguin
- Spark Mandrill: high right ledge after the Mega Tortoise
- Armored Armadillo: destroy the second Mole Borer before it breaks the Heart Tank alcove
- Launch Octopus: Cruiziler wreck, then defeat the Sea Snake encounter
- Boomer Kuwanger: high exterior tower section near the top floor; use Boomerang Cutter or charged Shotgun Ice
- Sting Chameleon: water-filled pit before the cave after defeating Launch Octopus
Find all four Sub-Tanks
Sub-Tanks store surplus Life Energy. When X is at full health, later energy capsules fill an available Sub-Tank instead of being wasted. A full Sub-Tank restores X’s current Life Energy when used from the status screen, and it can be refilled after use. Energy picked up while X is injured heals X first, so refill the tanks by collecting energy while the Life Energy meter is full.
The Storm Eagle Sub-Tank is in the building near the beginning of the stage. Ride the rising platform to the windows, shoot the glass, enter the building, defeat the Gun Volt, and collect the Sub-Tank behind it.
The Spark Mandrill Sub-Tank is near the early branch. Take the lower route from the ladder split and continue right until the tank appears behind a wall or pipe. Use Boomerang Cutter to curve the weapon around the obstruction and retrieve it.
The Flame Mammoth Sub-Tank is in the large platform-and-Dig-Labor room. Climb to the upper-left area, pass the Mettools, and use a dash-jump to reach the left wall. Break the overhead blocks with the Head Parts and enter the hidden section containing the tank.
The Armored Armadillo Sub-Tank is in the mine section after the first large spiked Mole Borer breaks through a wall. Cling to the wall and let the machine pass, then enter the cavity it came from. The Sub-Tank is inside. Launch Octopus’s stage does not contain a Sub-Tank in the original SNES arrangement; its hidden item is the Heart Tank described above.
- Storm Eagle: building behind the Gun Volt
- Spark Mandrill: lower branch, retrieved with Boomerang Cutter
- Flame Mammoth: upper-left block route in the Dig-Labor room
- Armored Armadillo: cavity behind the first large Mole Borer
Use a practical collection order
For a low-backtracking run, clear Chill Penguin first and take the Leg Parts. Defeat Storm Eagle next, then collect the Storm Eagle Heart Tank, Sub-Tank, and Head Parts during the same visit. Defeat Flame Mammoth afterward, collect the X-Buster, and make the Flame Mammoth Heart Tank and Sub-Tank pass with Chill Penguin’s stage-state change already active.
Defeat Boomer Kuwanger when convenient and use Boomerang Cutter to retrieve the Spark Mandrill Sub-Tank. If the Boomer Kuwanger Heart Tank was not collected earlier with charged Shotgun Ice, return to the upper exterior tower section after obtaining Boomerang Cutter and fire from the proper position so the weapon curves to the tank. Defeat Launch Octopus before the final Sting Chameleon collection pass, because the water-filled pit is required for Sting Chameleon’s Heart Tank.
Return to Armored Armadillo if the second Mole Borer destroys the Heart Tank alcove before you can reach it. Do not enter Sigma’s Fortress until the armor inventory, Heart Tank count, Sub-Tank count, and Maverick weapon list have been checked. Fill the Sub-Tanks by revisiting a stage with frequent energy drops while X is at full health.
- Obtain Leg Parts before attempting long dash-jumps
- Obtain Fire Wave before the Chill Penguin Heart Tank
- Obtain Head Parts before the Flame Mammoth X-Buster and Sub-Tank routes
- Defeat Chill Penguin before collecting Flame Mammoth’s Heart Tank
- Obtain Boomerang Cutter before relying on the Spark Mandrill Sub-Tank route or the easiest Boomer Kuwanger Heart Tank method
- Defeat Launch Octopus before collecting Sting Chameleon’s Heart Tank
Optional Hadouken preparation
The Hadouken capsule is separate from the four armor capsules. Before it can appear in the original SNES game, defeat all eight Mavericks and obtain all eight Maverick weapons, all four armor parts, all eight Heart Tanks, and all four Sub-Tanks.
Return to Armored Armadillo’s stage and play through to the final mine-cart section before the boss door. After the cart’s large jump, climb above the boss entrance to the high ledge containing the large energy capsule. Collect the energy, then leave the attempt or deliberately allow X to lose the life so the stage can be entered again. Repeat the qualifying visit to this ledge until the energy capsule is replaced by Dr. Light’s Hadouken capsule. Do not rely on a fixed number of visits; reports and guides document variation in the number of qualifying visits, so the practical completion check is that the capsule has appeared and been collected.
The Hadouken is optional. X must have full Life Energy to use it. On the standard SNES arrangement, perform down, down-forward, forward, then press the X-Buster button. It is not required to defeat Sigma or view the ending.
- All eight Mavericks defeated
- All eight Maverick weapons obtained
- All eight Heart Tanks collected
- All four Sub-Tanks collected
- All four armor parts collected
- Armored Armadillo’s final ledge revisited until the Hadouken capsule appears
- X has full Life Energy when attempting the Hadouken input
Before you move on
- The armor inventory contains Leg Parts, Head Parts, X-Buster or Arm Parts, and Body Parts.
- Eight Heart Tanks have been collected, one from each Maverick stage, and X’s maximum Life Energy has increased accordingly.
- Four Sub-Tanks are visible in the status screen: Storm Eagle, Spark Mandrill, Flame Mammoth, and Armored Armadillo.
- All eight Maverick weapons are available.
- For the optional secret, the Armored Armadillo final ledge eventually produces the Hadouken capsule after the full collection requirements are satisfied.
- For main-campaign completion, defeat Sigma and watch the ending. The Hadouken is not required.
Sigma’s Fortress — approach, checkpoints and required prerequisites
After all eight Mavericks are defeated, Sigma’s portrait replaces the empty position on the stage-select screen. Select it to begin the four-stage fortress campaign. The Dash upgrade from Chill Penguin is not a strict entry requirement, but it makes several fortress jumps much safer and should be considered essential preparation for a normal first playthrough. Complete each fortress stage carefully, refill supplies between stages when needed, and do not expect the original SNES password system to work like modern internal checkpoints.
Unlock Sigma’s Fortress and finish preparation first
Defeat all eight Maverick bosses. Once every portrait has been cleared, the empty lower-right position on the stage-select screen changes to Sigma’s portrait. Select that portrait only after collecting any missed Heart Tanks, Sub Tanks or armor capsules that you still want.
The fortress contains four stages. After completing a fortress stage, the game returns you to the stage-select screen. This gives you an opportunity to revisit a regular Maverick stage before selecting Sigma again. Use that opportunity rather than entering the next fortress stage with depleted resources.
The original SNES version does not provide a modern save slot for every room or boss checkpoint inside the fortress. A password can preserve ordinary campaign information, but you should not rely on it to resume at an internal fortress checkpoint after shutting down. Treat each selected fortress stage as an attempt that must be completed from its beginning.
- All eight Maverick portraits are cleared.
- Sigma’s portrait is visible on the stage-select screen.
- Desired Heart Tanks, Sub Tanks and armor capsules have been collected before entry.
- You are prepared to complete the current fortress stage without relying on an internal save point.
Bring the Dash upgrade, but understand its actual status
The Leg upgrade, commonly called the Dash Boots, is obtained in Chill Penguin’s stage near the beginning of the level. It gives X the ground dash and dash-jump, which greatly improves his ability to cross gaps, reach moving platforms and correct his position during fortress platforming.
This upgrade is strongly recommended, not a literal fortress-entry requirement. Do not describe the fortress as locked behind the Dash Boots, and do not assume a player using a password or restricted route is unable to attempt it. Without the dash, however, several jumps become harder and the opening section of Fortress Stage 1 is less forgiving.
The Body Armor is also valuable because it reduces damage, while the Arm upgrade improves charged attacks. If the Arm upgrade was missed in Flame Mammoth’s stage, Zero can provide it during Fortress Stage 1 after the Vile sequence. That fallback means the fortress is still completable even if the factory capsule was skipped.
- Dash upgrade obtained if possible.
- Body Armor obtained if available.
- Arm upgrade obtained in Flame Mammoth’s stage, or be prepared to receive it from Zero in Fortress Stage 1.
- Charged X-Buster use is comfortable before entering.
Fill Sub Tanks and restore health before selecting Sigma
Fill every Sub Tank before entering the fortress. Armored Armadillo’s stage and Launch Octopus’s stage are practical places to gather energy, because their enemy layouts provide repeated opportunities to collect health capsules. Choose whichever stage you can clear safely with your current weapons.
Restore X’s health completely before selecting Sigma. Check special-weapon energy as well, especially if you plan to use Chameleon Sting for temporary invulnerability, Rolling Shield for protection during platforming or Homing Torpedo for the Boomer Kuwanger rematch.
Sub Tanks are stored energy, not automatic healing. After a fortress stage is completed, X’s regular health and weapon ammunition are restored when he returns to the stage-select screen, but Sub Tanks should not be assumed to refill. Refill them in a regular Maverick stage before continuing if they were used.
- All intended Sub Tanks are full.
- X’s regular health is full.
- Rolling Shield, Chameleon Sting and Homing Torpedo have enough energy for the planned route.
- You know which regular stage you will revisit if another refill is needed.
Clear the opening of Fortress Stage 1
At the start of Fortress Stage 1, Zero speaks with X and then creates a diversion while X infiltrates the fortress. Proceed through the first enemy section without taking unnecessary contact damage. Chameleon Sting can let you pass a dense group safely when charged; use it only if the weapon energy is worth the protection.
The first major hazard is a vertical climb over a bottomless pit using moving platforms. Flying enemies try to knock X from the platforms. Wait for the platforms to approach instead of jumping early, and use wall-cling control to stabilize each landing. A charged Rolling Shield surrounds X with a protective barrier and is particularly useful here because it reduces the danger from enemies striking during the jumps.
Once inside the fortress, continue through the turret and ladder sections. Clear enemies before climbing whenever possible. Do not leap blindly from the top of a ladder; check the next platform and avoid allowing a small hit to push X into a pit.
- The opening pit section is crossed without spending unnecessary health.
- Moving platforms are used deliberately rather than approached with blind jumps.
- A charged Rolling Shield is available if flying enemies are causing knockback.
- You reach the first boss door with enough health for the Vile sequence.
Know the Fortress Stage 1 boss sequence
Fortress Stage 1 first leads to Vile. The encounter begins with Vile in his Ride Armor, and Zero intervenes during the sequence. After Zero destroys the armor, X fights Vile directly. Use the X-Buster or Homing Torpedo and prioritize safe positioning over rapid attacks. If you did not collect the Arm upgrade in Flame Mammoth’s stage, Zero supplies it after the Vile encounter.
After Vile, continue through the stage to the Boomer Kuwanger rematch. His weakness remains Homing Torpedo. Keep moving, use wall jumps to avoid being trapped by his charge and fire when he pauses or approaches the wall. Do not spend all your Homing Torpedo energy on ordinary enemies before reaching him.
The stage ends with Bospider. Its body moves along the upper track while dropping toward X, creating a changing pattern of web lines across the room. Watch the line pattern before committing to a jump, move to an open lane and attack during safe openings. A charged X-Buster is dependable; conserve special-weapon energy if you are more comfortable with the standard weapon.
- Vile’s Ride Armor sequence and direct fight are cleared.
- Boomer Kuwanger is defeated in the rematch.
- Bospider is defeated.
- Fortress Stage 1 returns you to the stage-select screen.
Use the return to stage select as your practical checkpoint
After Fortress Stage 1 is cleared, confirm that the game has returned to the stage-select screen before making further plans. At this point you may revisit a regular Maverick stage to restore Sub Tanks, health and weapon energy. Do this immediately if the first fortress stage consumed important reserves.
Selecting Sigma again continues the fortress campaign with the next available fortress stage. There is no need to search the completed stage for a hidden save room, optional branch or permanent internal checkpoint. The useful preparation point is the stage-select screen between fortress stages.
For the remaining fortress stages, keep at least one Sub Tank in reserve for an unfamiliar boss room, use wall cling to control vertical drops, and wait for moving platforms rather than forcing long jumps. Completion of Stage 1 is not the end of the campaign; all four fortress stages must be cleared before the final Sigma battles become available.
- Fortress Stage 1 is cleared and the stage-select screen is visible again.
- Sub Tanks are refilled before continuing if any were used.
- Health and special weapons are restored.
- You understand that all four fortress stages must be completed before the final Sigma battle sequence.
Before you move on
- All eight Maverick portraits are defeated and Sigma’s portrait appears on the stage-select screen.
- The Dash upgrade has been collected if following the recommended normal route, although its absence does not prevent fortress entry.
- Sub Tanks, health and important weapon energy are prepared before entry.
- Fortress Stage 1’s opening platform section is cleared.
- Vile’s Ride Armor sequence and direct fight are cleared.
- Boomer Kuwanger’s rematch is cleared.
- Bospider is defeated.
- The game returns to the stage-select screen after Fortress Stage 1, confirming that the stage is complete.
- The remaining three fortress stages are selected and cleared before attempting the final Sigma battles.
References for this chapter
Vile (mid-game confrontation) — the rematch and patterns
Vile appears in Sigma Fortress Stage 1 in two consecutive phases. The first is a scripted Ride Armor confrontation that cannot be completed by defeating the machine normally. After X is reduced to critical health and caught by Vile’s paralysis projectile, Zero intervenes and destroys the Ride Armor. X then fights Vile on foot with a restored life bar. Rolling Shield is Vile’s listed weakness, while Homing Torpedo, Storm Tornado, or charged X-Buster shots are dependable alternatives. There is no checkpoint immediately after this fight, so prepare Sub Tanks and weapon energy before entering the fortress.
Prepare before entering Sigma Fortress Stage 1
Fill your Sub Tanks before selecting Sigma’s fortress. The Ride Armor sequence is scripted, and the game restores X’s life before the armorless Vile fight, so do not waste a Sub Tank trying to preserve damage taken during the first confrontation.
Set up Rolling Shield if you defeated Armored Armadillo. It is Vile’s weakness and gives the shortest, most controlled fight when you can land repeated shots. Homing Torpedo is another strong choice because it tracks Vile as he crosses the room. Storm Tornado and charged X-Buster shots are valid fallback options if the preferred weapons are unavailable or low on energy.
If you did not collect the Arm capsule in Flame Mammoth’s stage, do not restart the campaign just for that upgrade. Zero can award the Arm upgrade after the Vile sequence. If you already collected it, the story proceeds without a second copy.
- Fill Sub Tanks before entering Sigma Fortress.
- Bring Rolling Shield, Homing Torpedo, Storm Tornado, or charged X-Buster capability.
- Do not spend recovery items during the scripted Ride Armor phase.
- Remember that the Arm upgrade can be awarded after the battle if it was missed earlier.
Reach the scripted Ride Armor confrontation
Enter Sigma Fortress Stage 1 and cross the opening floating-platform section over the pit. Continue through the interior rooms until the route leads to the chamber where Vile has captured Zero and is using the Ride Armor.
This is not a normal boss fight with a victory condition based on emptying Vile’s machine life bar. The objective is to survive long enough for the scripted sequence to occur. Keep X away from the Ride Armor’s body and avoid trading contact damage for unnecessary shots.
Vile’s Ride Armor can charge across the room, strike at close range, and fire the projectile that immobilizes X. Use wall-clinging to delay a charge or create separation, but do not let X remain trapped against a wall when Vile closes in. The battle advances after X is reduced to critical health and the paralysis shot catches him.
- Reach the chamber containing Zero and Vile’s Ride Armor.
- Treat the Ride Armor phase as scripted rather than a conventional victory fight.
- Avoid contact, charges, and unnecessary weapon use.
- Allow the sequence to advance when X is immobilized.
Let Zero destroy the Ride Armor
Once X is paralyzed, the cutscene takes control. Zero breaks free, attacks Vile, and destroys the Ride Armor. X is then released for the actual boss fight, and his life bar is restored before the armorless encounter begins.
Because this transition is fixed, taking damage before it does not create a permanent disadvantage for the next phase unless X loses a life. The useful goal is therefore to reach the trigger without spending Sub Tanks or exhausting the weapon energy you intend to use against Vile on foot.
- Wait for the paralysis sequence to trigger.
- Allow Zero’s intervention to play out.
- Confirm that X’s life is restored before the armorless battle begins.
Defeat Vile on foot
Vile’s on-foot attacks are built around movement control. He can run or dash across the floor, jump over X, fire yellow paralysis projectiles, and jump while dropping bombs. The paralysis projectiles do not function as ordinary damage shots; if one catches X, movement is disabled and Vile gains an opportunity to collide with or attack him.
Keep the fight near the center of the room. When Vile runs across the floor, jump over him or dash through him if you have enough space. Do not stand directly beneath him when he jumps, because his bombs fall from above and their follow-up shots travel along the floor. Move away from the landing area, then turn and fire as he crosses the arena or finishes an attack.
Use Rolling Shield whenever Vile is moving through a predictable lane or has just crossed the room. Fire, then immediately return your attention to evasion instead of waiting beside the projectile. Homing Torpedo is easier to connect when Vile is moving unpredictably, since you can fire while concentrating on wall movement and jumps. Charged X-Buster shots are also reliable, particularly when weapon energy is low. The fight is safer when you accept a slower pace and avoid contact rather than chasing every opening.
- Jump over Vile’s ground dash or dash through it when there is room.
- Jump over the yellow paralysis projectile.
- Move away from Vile’s bomb drop and the shots that travel along the floor.
- Use Rolling Shield for the weakness advantage, or Homing Torpedo and charged X-Buster shots as alternatives.
- Keep the battle centered so the walls remain available for escape.
Recover after failure
If X loses a life during the armorless fight, there is no immediate post-Vile checkpoint that returns him directly to the second phase. Use the available continue and replay the fortress section from its current restart point. The Ride Armor confrontation must be repeated before reaching the on-foot battle again.
If the attempt becomes a game over, refill before making another serious run. Revisit an earlier Maverick stage from the game’s available restart or stage-selection flow and collect health and weapon-energy drops. Armored Armadillo’s stage is a practical place to gather ordinary recovery drops, while the best refill location depends on which weapon you plan to use and how much energy remains. Enter Sigma Fortress again only after restoring the Sub Tanks and selected weapon.
On the next attempt, treat the opening section as preparation rather than a race. Preserve health through the floating platforms and interior rooms, then use the scripted Ride Armor phase without spending recovery items. This leaves the restored life bar and your stored energy available for Vile’s real fight and the rest of the fortress stage.
- Do not expect a checkpoint directly after Vile.
- Replay the preceding fortress section after a failed attempt.
- Refill Sub Tanks and weapon energy outside the fortress when necessary.
- Preserve resources during the scripted Ride Armor sequence.
Confirm the encounter is complete
The encounter is complete only after the armorless Vile’s life bar is emptied and the post-battle scene begins. Zero is found badly damaged afterward. Continue through the fortress route rather than expecting Vile to return as the stage’s ordinary final boss.
Check the Arm upgrade during this transition. If the Arm capsule was already collected in Flame Mammoth’s stage, no additional upgrade is needed. If it was missed, Zero provides the Arm upgrade after Vile is defeated. After the scene, proceed through the remaining Sigma Fortress Stage 1 rooms and prepare for the fortress boss sequence.
- Zero has destroyed the Ride Armor.
- The armorless Vile has been defeated.
- The post-battle scene with Zero has played.
- The route into the rest of Sigma Fortress Stage 1 is open.
- The Arm upgrade is confirmed either from Flame Mammoth’s capsule or Zero’s post-battle award.
Before you move on
- The Ride Armor phase has advanced through X’s paralysis and Zero’s intervention.
- X’s life bar was restored before the armorless fight.
- The armorless Vile has been defeated.
- The post-battle Zero scene has completed.
- The fortress route after the Vile encounter is accessible.
- The Arm upgrade has been collected earlier or awarded by Zero afterward.
Sigma Fortress — Maverick rematches, stage bosses and final approach
Sigma’s Fortress contains four stages, but the first three are boss gauntlets rather than single-boss levels. In the original Super Nintendo release, the required order is Vile, Boomer Kuwanger and Bospider in Stage 1; Chill Penguin, Storm Eagle and Rangda Bangda in Stage 2; Armored Armadillo, Sting Chameleon, Spark Mandrill, Launch Octopus, Flame Mammoth and D-Rex in Stage 3; and Velguarder in Stage 4. Sigma follows Velguarder as a separate sequence of final battles. Prepare your Sub Tanks and preserve the weapons needed for the later stage bosses, because fortress progress is not resumed from a mid-stage password after a failed attempt.
1. Prepare for the four-stage fortress run
Defeat all eight Mavericks before selecting Sigma’s Fortress. Restore X’s life energy and fill as many Sub Tanks as possible in the regular stages. The fortress stages must be cleared as a continuous endgame run; passwords retain regular-stage equipment and collected upgrades, but they do not provide a normal checkpoint that returns you halfway through the fortress after turning the game off or losing the run.
Keep the weapons for the major fortress weaknesses available. The most useful assignments are Shotgun Ice for Bospider, Spark Mandrill and Velguarder; Chameleon Sting for Rangda Bangda; Boomerang Cutter for Sting Chameleon and D-Rex; Electric Spark for Armored Armadillo; Rolling Shield for Launch Octopus; and Storm Tornado for Flame Mammoth. The Maverick rematches can be beaten with the X-Buster, so avoid spending all of these weapons on ordinary enemies before their doors.
Use safe rooms and enemy drops to recover whenever the stage layout permits it. In Stage 3, the room after Spark Mandrill is useful for replenishing Sub Tanks by defeating enemies, leaving the room and returning. Stage 4 also contains enemies near the opening that can be used for recovery before Velguarder. These opportunities do not replace careful weapon conservation, but they can make a failed attempt easier to rebuild.
- Defeat all eight Mavericks before entering the fortress.
- Fill Sub Tanks and restore life energy before the first fortress stage.
- Keep Shotgun Ice, Chameleon Sting and Boomerang Cutter available for the major fortress bosses.
- Remember that passwords do not resume a fortress attempt from the middle.
2. Clear Fortress Stage 1: Vile, Boomer Kuwanger and Bospider
The first fortress stage begins with the required Vile encounter. Use the movement and weapon plan covered for Vile’s fortress appearance: stay patient, avoid being trapped by his dash and projectile patterns, and use Rolling Shield or another reliable damage option rather than trading contact hits. After the fight, continue through the stage and reach the next boss door for the Boomer Kuwanger rematch.
Homing Torpedo is the practical weapon against Boomer Kuwanger. Keep moving between the walls, because his teleport-and-charge behavior can punish X if he remains in one corner. Fire when he appears or after he completes a charge, then return to a wall or open floor position instead of chasing him into a bad angle. If Homing Torpedo energy is low, charged X-Buster shots are a safe fallback.
Bospider waits at the end of the stage. It moves down a set of vertical web tracks and may release smaller spiders before making its descent. The boss is vulnerable only when the red center is exposed near the floor. Shotgun Ice is its weakness. Watch the web route, move away from the landing point, then turn and fire as the center opens. Dash away immediately after the shot. Do not stand beneath Bospider waiting for the opening, because a direct landing causes heavy damage. The boss moves more quickly as its health falls, so shorten the exchange to one shot and one retreat late in the fight.
- Defeat Vile before proceeding through Stage 1.
- Defeat the Boomer Kuwanger rematch before entering Bospider’s room.
- Strike Bospider’s exposed red center with Shotgun Ice and retreat after each hit.
3. Clear Fortress Stage 2: Chill Penguin, Storm Eagle and Rangda Bangda
Chill Penguin is the first rematch in Stage 2. Fire Wave is his weakness, but its short range makes charged X-Buster shots a dependable alternative if you do not want to spend weapon energy. Bait his belly slide, jump or dash over him, and attack during the recovery after he crosses the room. Continue carefully after the fight because a Ride Armor encounter follows in the stage route.
Storm Eagle is the second rematch. Use the X-Buster if you want to conserve Chameleon Sting for Rangda Bangda. Dash through or away from his swoops, then fire when he lands or finishes a pass. The rematch gives you less room to rely on a risky turnaround shot, so prioritize avoiding the dive over forcing damage during the approach.
Rangda Bangda fills the final room with two eyes, a central nose and instant-death spikes across the lower area. Chameleon Sting is the recommended weapon. The eyes open one at a time and attack with different movements or projectiles; fire at an exposed eye, then return to a wall rather than crossing the room unnecessarily. When the walls move inward, stay attached to a wall and wall-jump only when the active eye or nose leaves a safe route. After both eyes are destroyed, the room closes permanently and the nose remains as the final target, so preserve enough health to finish while clinging above the spikes. Survival is more important than trying to damage every part during one opening.
- Defeat Chill Penguin before the Storm Eagle rematch.
- Defeat Storm Eagle before entering Rangda Bangda’s room.
- Destroy both eyes and the nose without touching the spiked floor.
- Save enough Chameleon Sting energy to finish the final nose section.
4. Clear Fortress Stage 3: five Maverick rematches and D-Rex
Stage 3 is the largest fortress rematch sequence. The required order is Armored Armadillo, Sting Chameleon, Spark Mandrill, Launch Octopus and Flame Mammoth. Use Electric Spark on Armored Armadillo to break through his rolling defense, then continue attacking after the armor is removed. Use Boomerang Cutter on Sting Chameleon, but avoid spending more energy than necessary because Boomerang Cutter is required for D-Rex.
Use Shotgun Ice on Spark Mandrill and keep the fight away from the corners where his jumps and ground attacks can trap X. After Spark Mandrill, take advantage of the nearby recovery room if you need Sub Tank energy. Launch Octopus follows the water section; Rolling Shield is a useful weapon for the rematch, while Boomerang Cutter can sever his tentacles if you have enough energy. Flame Mammoth comes next. Storm Tornado deals strong damage, and Boomerang Cutter can remove his trunk, but conserve Boomerang Cutter whenever possible for the stage boss.
D-Rex is a two-part machine, and only the upper head can be damaged. Equip Boomerang Cutter and aim at the head rather than the lower vehicle section. When the two sections separate, the lower part moves across the room while the head may descend or attack independently. Move through the gap only when it is clearly open; otherwise remain near a wall and wait for the parts to separate again. When D-Rex joins and prepares the large energy ball, dash under it if the timing is clear, or use a wall jump to make the boss fire before you commit to crossing. The lower section can knock X from a wall, while the upper section can crush him if he stands on the lower body, so do not treat that surface as permanently safe. Charged Boomerang Cutter shots shorten the fight, but uncharged shots are safer when you need to keep moving.
- Defeat the rematches in this order: Armored Armadillo, Sting Chameleon, Spark Mandrill, Launch Octopus and Flame Mammoth.
- Preserve Boomerang Cutter energy for D-Rex.
- Target D-Rex’s upper head only.
- Avoid being crushed between the two sections or knocked from a wall by the lower section.
5. Defeat Velguarder in Fortress Stage 4 and reach Sigma
Fortress Stage 4 is a short climb followed by Velguarder, Sigma’s wolf-like guardian. Climb the walls while avoiding the enemies emerging from the openings, then use the recovery opportunities near the stage entrance if your Sub Tanks are not full. Velguarder is not a Sigma form and defeating it does not finish the fortress; it is the required guardian immediately before the separate Sigma encounters.
Shotgun Ice is Velguarder’s weakness. At the start, watch its first leap and use the wall space to avoid being cornered. When Velguarder runs across the room, wall-jump over it rather than trying to stand in its path. It can fire ice projectiles in an arc and can also use a long flame attack, so change walls when it pauses instead of clinging to one side throughout the entire pattern. Fire Shotgun Ice after a landing or after the boss completes an attack, then resume climbing or cross to the opposite wall.
If Shotgun Ice energy is low, charged X-Buster shots provide a slower but reliable fallback. Do not spend a Sub Tank merely because Velguarder reaches the middle of the room; use one when your remaining health would not survive a mistake or when the fight is close to completion. Once Velguarder is defeated, Sigma appears and the game proceeds to the separate humanoid Sigma and final machine battles. Those encounters are the next stage of the campaign, not part of Velguarder’s fight.
- Reach Velguarder after climbing Fortress Stage 4.
- Use Shotgun Ice or controlled charged X-Buster shots.
- Use wall-jumps to avoid leaps, flames and arcing ice attacks.
- Confirm that Sigma appears after Velguarder falls.
Before you move on
- Fortress Stage 1 is complete only after Vile, Boomer Kuwanger and Bospider are defeated.
- Fortress Stage 2 is complete only after Chill Penguin, Storm Eagle and Rangda Bangda are defeated.
- Fortress Stage 3 is complete only after Armored Armadillo, Sting Chameleon, Spark Mandrill, Launch Octopus, Flame Mammoth and D-Rex are defeated.
- Fortress Stage 4 is complete when Velguarder is defeated and Sigma appears.
- The chapter’s fortress-progression objectives are complete when all required rematches and the four stage bosses have been cleared; defeating Sigma and viewing the ending remains the separate final-battles completion goal.
Sigma: multi-form final battles and reliable victory patterns
The final encounter in the original North American Super Nintendo release is a continuous three-boss sequence: Velguarder, caped humanoid Sigma, and Wolf Sigma. There is no separate refill between these fights, so arrive with strong life energy and stocked Sub Tanks. Shotgun Ice is Velguarder’s weakness, Electric Spark is effective against humanoid Sigma, and Wolf Sigma’s head can be damaged by uncharged Rolling Shield shots or fully charged X-Buster shots.
Prepare in Sigma’s final fortress stage
The fourth Sigma fortress stage is a short vertical climb rather than a conventional platforming level. Creeper enemies repeatedly emerge from dispensers along the walls. Use this section to restore life energy and fill Sub Tanks before entering the boss gate. Charged Rolling Shield shots can destroy the Creepers while you remain mobile, and the enemies can be farmed if you need additional recovery.
Equip Shotgun Ice for Velguarder, Electric Spark for humanoid Sigma, and Rolling Shield for Wolf Sigma. Keep the weapons available in the inventory before entering the gate. The final battles follow one another without a stage-select break, so a mistake in the last form can force you to repeat the earlier fights.
- Life energy is full or close to full.
- Shotgun Ice, Electric Spark, and Rolling Shield have useful reserves.
- Sub Tanks are filled as far as your available tanks allow.
- You are prepared to repeat the sequence if a life is lost.
Defeat Velguarder with Shotgun Ice
Velguarder opens the sequence. Its main movements are a direct leap or charge, wall-kick movement between the sides of the room, and projectile attacks. Its fire attack travels in an upward arc along a wall, while its electrical projectiles also follow an upward arc. Do not stay pressed against a wall when Velguarder begins a fire attack, because the flames can travel up that wall.
Use Shotgun Ice while dashing from one side of the room to the other. Fire as Velguarder approaches or finishes a jump, then keep moving rather than waiting beside it for the hit confirmation. Shotgun Ice is the weakness and is safer than trying to trade contact damage at close range. Charged X-Buster shots are a fallback if Shotgun Ice energy is low, but preserve Sub Tanks whenever the fight remains under control.
Wall-clinging can help evade a leap, but do not remain stationary at the top of a wall. Drop or cross the room when Velguarder begins a wall-kick pattern or sends fire upward.
- Velguarder is defeated with Shotgun Ice or a controlled charged X-Buster fallback.
- No Sub Tank is used unless the alternative is losing the life.
- Enough health remains to withstand a mistake during humanoid Sigma.
Use Electric Spark against caped Sigma
After Velguarder falls, Sigma removes his cape and fights with a beam saber. Electric Spark is his weakness. Sigma can block attacks with the saber while standing on the ground, so avoid firing directly into a grounded saber swing. His other attacks include a fast dash and slash, a wall-kick pattern, and a forehead machine-gun attack that sends tracking projectiles toward X.
A reliable pattern begins by moving to the left wall and climbing it. Wait for Sigma to begin his wall-kick movement. As he travels up the wall or crosses the middle of the room, drop or reposition and release Electric Spark when he is exposed. A second shot can be timed just before he lands, when the saber is less useful for blocking the attack. Then return to the wall and repeat the pattern.
If Sigma dashes across the room, do not remain at the height where he will collide with X. Drop down, dash beneath him when possible, and climb the opposite wall. If he fires the tracking forehead projectiles, keep moving rather than trying to stand in one corner. The objective is to finish this form with enough health and weapon energy for Wolf Sigma, not to force extra attacks during an unsafe opening.
- Electric Spark is used for the main damage.
- Sigma’s saber blocks are avoided by attacking during wall movement or just before landing.
- At least one Sub Tank remains for the Wolf Sigma fight whenever possible.
Reach Wolf Sigma’s head using the hands
Humanoid Sigma’s body is destroyed, but his head joins a large wolf-shaped battle body. Wolf Sigma’s head is the only vulnerable target. The two hands descend into the arena and serve as temporary platforms, but their claws and electrical attacks can cause heavy damage. Do not stand underneath a descending hand.
Wait for a hand to come down, then jump onto it and move toward its outer edge. From the hand, fire uncharged Rolling Shield shots toward the head. In the original SNES version, uncharged Rolling Shield is the recommended weapon because it damages the head more effectively than ordinary Buster fire. A fully charged X-Buster is the other confirmed damaging option if Rolling Shield energy runs low.
The hand rotates while X is standing on it. Keep watching the hand instead of focusing only on the boss’s health. When the hand begins a dangerous movement or becomes electrified, jump away and return to the floor or wall. Re-enter the hand platform after it settles into a usable position. Do not chase the head from the floor; ordinary shots aimed at the large body do not provide a substitute target.
- Only the head is treated as the damage target.
- Rolling Shield is fired uncharged from a hand platform.
- A fully charged X-Buster is reserved as the fallback weapon.
- You leave an electrified or moving hand before it carries X into the head or claws.
Avoid Wolf Sigma’s attack patterns and spend Sub Tanks deliberately
Wolf Sigma’s hands can punch downward, emit electrical shocks, and move around the arena. The head can send a wave of plasma projectiles across the floor and release a broad flame attack. Watch the head’s animation before committing to a jump. If a floor-level attack is coming, use a wall to escape its path; if the electrical attack reaches upward, climb past the dangerous height or retreat from the hand instead of waiting beneath it.
Use short, purposeful jumps. Jump only to mount a hand, fire at the head, or leave a platform that has become unsafe. Repeated blind jumping makes it easier to collide with a claw or electrical discharge. If X is hit, prioritize landing in a safe area before attempting another attack.
Use a Sub Tank when the remaining life is low enough that another major hit would end the attempt. Do not spend all recovery early in the humanoid fight, but do not hold every tank until death is unavoidable. Wolf Sigma’s attacks inflict substantial damage, so recovery is part of the intended strategy rather than a sign that the fight has gone wrong.
- Wolf Sigma’s floor attacks are escaped with wall movement or controlled repositioning.
- Sub Tanks are used before critical health becomes a guaranteed death.
- The head is struck during safe hand-platform openings until the battle body is destroyed.
Recover from failure and verify the ending
A death during the final sequence does not place X directly at the form that defeated him. You must work through the final fortress approach and repeat the preceding boss fights. On the next attempt, use the vertical Creeper section before the boss gate to restore life and refill Sub Tanks, then protect those resources through Velguarder and humanoid Sigma.
If Wolf Sigma is the problem, spend an attempt learning the hand movement without trying to maximize every shot. Wait for the hand to descend, mount it, fire Rolling Shield at the head, and retreat as soon as the hand becomes dangerous. Once that movement is familiar, add more attacks during each safe platform window.
The main campaign is complete only after Wolf Sigma is destroyed and X reaches the ending sequence. Defeating Velguarder or humanoid Sigma alone does not count. Let the ending play after the final battle so the game’s campaign conclusion is clearly reached.
- Velguarder is defeated.
- Caped humanoid Sigma is defeated.
- Wolf Sigma’s battle body is destroyed.
- The ending sequence appears after the final form is defeated.
Before you move on
- Velguarder has been defeated with Shotgun Ice, charged X-Buster shots, or another controlled fallback.
- Humanoid Sigma has been defeated using Electric Spark or charged X-Buster tactics.
- Wolf Sigma’s head and battle body have been destroyed using uncharged Rolling Shield or fully charged X-Buster shots.
- The ending sequence begins after the final battle.
- Full upgrades, all tanks, and the Hadouken are optional advantages and are not required for this campaign clear.
Endgame: completion checklist, Hadouken secret and post-clear tips
Finish Sigma Fortress, verify the North American Super Nintendo campaign ending, then confirm every armor part, Heart Tank, and Sub Tank. The Hadouken is an optional secret that requires the full set of Maverick weapons and permanent upgrades, followed by repeated returns to the upper ledge at the end of Armored Armadillo’s stage.
1. Finish Sigma Fortress and confirm the campaign ending
After defeating all eight Mavericks, select Sigma Fortress from the stage-select screen. The fortress campaign contains the final bosses, but it does not contain the eight Maverick-stage Heart Tanks, four Sub Tanks, or four armor capsules. If you are pursuing the complete item checklist, collect those items before entering the fortress or return to the Maverick stages after a failed attempt.
The final fortress stage begins with Velguarder, Sigma’s dog-like guardian. Shotgun Ice is effective against it. Keep moving between the floor and walls, avoid standing directly underneath when it launches a flame attack, and use wall-clings to escape its charges. If Velguarder fires the ice attack, watch the projectiles’ arc and move through the open space rather than trading contact damage.
After Velguarder, fight Sigma in his humanoid sword form. Electric Spark is his weakness. Stay alert near the walls, wait for Sigma to jump or move across the arena, then pass underneath him and fire as he becomes vulnerable. Do not remain on a wall when Sigma is positioned to collide with X. His attacks repeat predictably, so preserve Sub Tanks for damage that would otherwise end the attempt.
The final battle is Sigma’s large clawed machine. Rolling Shield is the listed weakness. The rotating claws act as temporary platforms that let X reach Sigma’s head. Remain near the safer side of a claw, fire when the head is accessible, and jump to the opposite claw when the current one moves across the arena or begins an electrical attack. Watch for the energy-ball, flame, and lightning patterns. Defeating this form triggers the ending sequence.
- All eight Maverick bosses are defeated.
- Velguarder is defeated.
- Humanoid Sigma is defeated.
- The large clawed Sigma machine is defeated.
- The ending sequence appears.
2. Verify the four armor upgrades
The original SNES release has four permanent armor parts. Check them individually rather than assuming that entering Sigma Fortress proves the set is complete. The Leg upgrade is in Chill Penguin’s stage. The Head upgrade is in Storm Eagle’s stage. The Arm upgrade is in Flame Mammoth’s stage. The Body upgrade is in Sting Chameleon’s stage.
The Leg capsule is located in the mountain route of Chill Penguin’s stage. The Head capsule is reached in Storm Eagle’s tower section. The Arm capsule is in the upper factory area of Flame Mammoth’s stage, where the required route uses the stage’s breakable blocks and movement upgrades. The Body capsule is above the cave section of Sting Chameleon’s stage after the RT-55J encounter; use the upper route and dash-jump to reach the capsule room.
If you missed a capsule, select the corresponding Maverick stage again. Collected armor parts remain permanently obtained after leaving a stage. The parts are not temporary equipment and do not need to be reselected after each stage.
- Leg upgrade collected in Chill Penguin’s stage.
- Head upgrade collected in Storm Eagle’s stage.
- Arm upgrade collected in Flame Mammoth’s stage.
- Body upgrade collected in Sting Chameleon’s stage.
3. Confirm all eight Heart Tanks
There is one Heart Tank in each Maverick stage. Regular life-energy pickups do not count. The life bar gains its complete maximum extension only after all eight Heart Tanks have been collected.
Chill Penguin’s Heart Tank is in the early igloo route. Return after obtaining Flame Mammoth’s Fire Wave and use it to clear the obstruction. Storm Eagle’s Heart Tank is reached by dash-jumping left from the upper rotating-platform section. Flame Mammoth’s tank is at the far right of the large Dig Labor room; defeating Chill Penguin freezes the lava and makes the route accessible.
Armored Armadillo’s Heart Tank is beside the second Mole Borer. Reach the area before the machine destroys the access route, then collect the tank. Launch Octopus’s Heart Tank is reached by making the missile-launching Cruiziler break through the floor and then clearing the nearby underwater route.
Spark Mandrill’s Heart Tank is beyond the first Mega Tortoise. Use the wall and dash-jump route to reach the upper-right platform; the Boomerang Cutter can retrieve it if the jump is difficult. Boomer Kuwanger’s Heart Tank is on the high exterior tower section at the top floor, before the route returns inside. Revisit with the Boomerang Cutter, stand far enough away for the weapon to curve around the structure, and fire so it retrieves the tank. If you have the Flame Mammoth Arm upgrade, a fully charged Shotgun Ice platform can also carry X to the tank’s ledge.
Sting Chameleon’s Heart Tank is in the flooded pit near the cave entrance. Defeat Launch Octopus first so the pit contains water, use the Helmet upgrade to break through the obstructing blocks, and dash-jump across the water to the tank.
- Chill Penguin Heart Tank collected.
- Storm Eagle Heart Tank collected.
- Flame Mammoth Heart Tank collected.
- Armored Armadillo Heart Tank collected.
- Launch Octopus Heart Tank collected.
- Boomer Kuwanger Heart Tank collected from the high exterior tower section at the top floor.
- Spark Mandrill Heart Tank collected.
- Sting Chameleon Heart Tank collected.
4. Confirm all four Sub Tanks and refill them when needed
The four Sub Tanks are in Storm Eagle, Spark Mandrill, Flame Mammoth, and Armored Armadillo’s stages. Collection status and stored energy are separate: a Sub Tank can be collected while empty and filled later by collecting life energy while X’s normal health is full.
In Storm Eagle’s stage, ride the rising platform toward the glass-fronted building, shoot through the windows, defeat the Gun Volt, and collect the Sub Tank inside. In Spark Mandrill’s stage, take the lower route at the early ladder junction and follow the dead-end passage. The tank is lodged inside the wall and can be retrieved with the Boomerang Cutter.
In Flame Mammoth’s stage, use the upper-left route through the Dig Labor room, climb the wall, break through the blocks, and enter the side passage. In Armored Armadillo’s stage, drop into the first Mole Borer pit and climb the wall while the machine passes; the Sub Tank is in the space behind it.
Before another Sigma Fortress attempt, revisit stages and fill the tanks by collecting life energy while X’s normal health is full. Full Sub Tanks are useful for the fortress, but stored energy is not a separate requirement for the Hadouken capsule.
- Storm Eagle Sub Tank collected.
- Spark Mandrill Sub Tank collected.
- Flame Mammoth Sub Tank collected.
- Armored Armadillo Sub Tank collected.
- Sub Tanks refilled if preparing for Sigma Fortress.
5. Collect every Maverick weapon before attempting the secret
Each defeated Maverick grants one weapon. The Hadouken requirements include the complete set, so check the inventory before returning to Armored Armadillo’s stage. The weapons are Shotgun Ice, Storm Tornado, Fire Wave, Electric Spark, Rolling Shield, Homing Torpedo, Boomerang Cutter, and Chameleon Sting.
The eight Maverick weapons are separate from the usual four-armor, eight-Heart-Tank, and four-Sub-Tank item checklist. They are nevertheless required for the Hadouken attempt. If a weapon is missing, return to the corresponding stage and defeat that Maverick before beginning the Armored Armadillo visits.
- All eight Maverick weapons are obtained.
- All four armor parts are obtained.
- All eight Heart Tanks are obtained.
- All four Sub Tanks are obtained.
6. Obtain and use the Hadouken
After collecting all eight Maverick weapons, all four armor parts, all eight Heart Tanks, and all four Sub Tanks, select Armored Armadillo’s stage. Proceed through the mine-cart route to the final open area before the boss door. When the cart launches into the open section, jump off and cling to the right wall. Climb to the upper ledge above the boss entrance, where the normal large energy pickup appears. Do not enter the boss door.
Leave the stage and repeat the qualifying Armored Armadillo run until the secret capsule appears on the required return. The established SNES procedure uses repeated visits to this end ledge; the capsule appears after the qualifying sequence rather than on the first visit. If it does not appear, recheck every Maverick weapon, armor part, Heart Tank, and Sub Tank, then repeat the route. The Sub Tanks do not need to be full.
Enter Dr. Light’s capsule to receive the Hadouken. To fire it, select the X-Buster, stand on the ground with full health, and perform Down, Down-Forward, Forward, then press the fire button. The Hadouken is optional and is not required to defeat Sigma or view the ending.
- The complete set of eight Maverick weapons is collected before the secret attempt.
- The four armor parts, eight Heart Tanks, and four Sub Tanks are collected.
- The Armored Armadillo end-stage ledge above the boss entrance is reached without entering the boss door.
- The qualifying end-stage visits are repeated until the Dr. Light capsule appears.
- The capsule is entered and the Hadouken is obtained.
- X fires the Hadouken with the X-Buster selected, standing on the ground, and at full health.
Before you move on
- Main campaign complete: all eight Mavericks are defeated, Velguarder is defeated, both humanoid Sigma and the final clawed machine are defeated, and the ending is displayed.
- Core 100 percent item completion: all four armor parts, all eight Heart Tanks, and all four Sub Tanks are collected.
- Hadouken preparation complete: all eight Maverick weapons are also collected.
- Optional secret complete: the Dr. Light capsule appears in Armored Armadillo’s stage, X enters it, and X successfully performs the Hadouken at full health with the X-Buster selected.
References for this chapter
- Mega Man X – Guide and Walkthrough, Heart Tank and stage item routes
- Mega Man X – Guide and Walkthrough, item locations and Hadouken procedure
- Mega Man X – Guide and Walkthrough, complete item route and Heart Tank locations
- Mega Man X/Boomer Kuwanger – StrategyWiki stage and revisit information
- Mega Man X Walkthrough – MMKB fortress boss strategies
- Mega Man X instruction manual
Finishing up
You have reached the canonical ending when you defeat the final Wolf Sigma battle and watch the ending sequence shown by the game — this concludes the main campaign.
Main-campaign preparation check: the Leg upgrade is strongly recommended because it makes fortress movement and later collection routes much easier, but it is not a formal requirement for entering or completing Sigma’s Fortress.
Optional 100% check: collect all eight Heart Tanks, all four Sub-Tanks, all four armor upgrade capsules (Head, Arm/X-Buster, Body, Leg), and all eight Maverick weapons.
If you want to unlock the game’s optional Hadouken secret, collect the full item set and follow the Armored Armadillo ledge procedure described in the collectibles chapter; do not rely on an unverified fixed visit count.
Choose your next gameScreenshots & video
Game imagery for reference. Follow the written chapters above for the route and strategies.
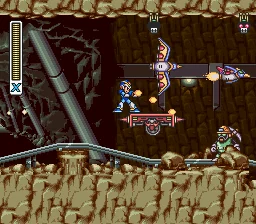

Sources & references
Our original guide draws on the references below. Check the edition at the top of this page before following controls or unlock requirements.
- Mega Man X – Guide and Walkthrough, Heart Tank and stage item routes
- Mega Man X 100% Completion Guide — Super Nintendo — NeoChozo, GameFAQs
- Mega Man X/Walkthrough — StrategyWiki
- Mega Man X/Chill Penguin — StrategyWiki
- Armor Parts — Mega Man X, MMKB
- Mega Man X — Guide and Walkthrough, GameFAQs
- Mega Man X instruction manual
- Mega Man X — Guide and Walkthrough — GameFAQs
- Mega Man X — Guide and Walkthrough, GameFAQs, Mortortex
- Mega Man X — Item FAQ, Super Nintendo
- Mega Man X – Guide and Walkthrough, complete item route and Heart Tank locations
- Mega Man X Walkthrough – MMKB fortress boss strategies
- Mega Man X SNES Boss Guide — RetroMaggedon Gaming
- Mega Man X — Storm Eagle — StrategyWiki
- Mega Man X guide — Upgrades — HonestGamers Guides
- Mega Man X – Guide and Walkthrough, item locations and Hadouken procedure
- Mega Man X — Guide and Walkthrough — Super Nintendo — By X
- Mega Man X — Bosses reference
- Mega Man X/Armored Armadillo — StrategyWiki
- Mega Man X — Boss Guide — Brother_Reed, GameFAQs
- Mega Man X guide — HonestGamers Guides
- Mega Man X/Launch Octopus — StrategyWiki
- Mega Man X/Boomer Kuwanger – StrategyWiki stage and revisit information
- Mega Man X — Original Game Manual, Capcom Town
- Mega Man X/Sting Chameleon — StrategyWiki
- Mega Man X — Guide and Walkthrough — Super Nintendo — By CRESPO99
- Mega Man X/Sigma Stage 1 — StrategyWiki
- Mega Man X/Sigma Stage 3 — StrategyWiki
- Mega Man X/Sigma Stage 4 — StrategyWiki
- Mega Man X — Guide and Walkthrough — Warhawk, GameFAQs
About the game & collecting notes
- Platform
- Super Nintendo Entertainment System
A player-focused walkthrough for the original Super Nintendo Entertainment System release of Mega Man X (USA). Step-by-step stage guidance, upgrade and collectible routing, boss strategies, Sigma Fortress navigation, and a 100% completion checklist to take X from the highway opening to the final Sigma confrontation.
Darryl Polo
Darryl Polo loves tinkering with emulation and revisiting retro games. He enjoys exploring how old favorites play on different setups and sharing what he learns along the way. At Joking Joystick, he writes about the games, hardware, and small discoveries that keep the hobby fun.
Our editorial standardsFound a step that needs another look? Help us improve this guide.