Mega Man 3 (NES, USA) — Complete Campaign Walkthrough
Step-by-step campaign coverage for the original Nintendo Entertainment System release of Mega Man 3 (USA). Wily confrontation. Practical tactics, stage objectives, recoveries and a clear completion checklist are included.

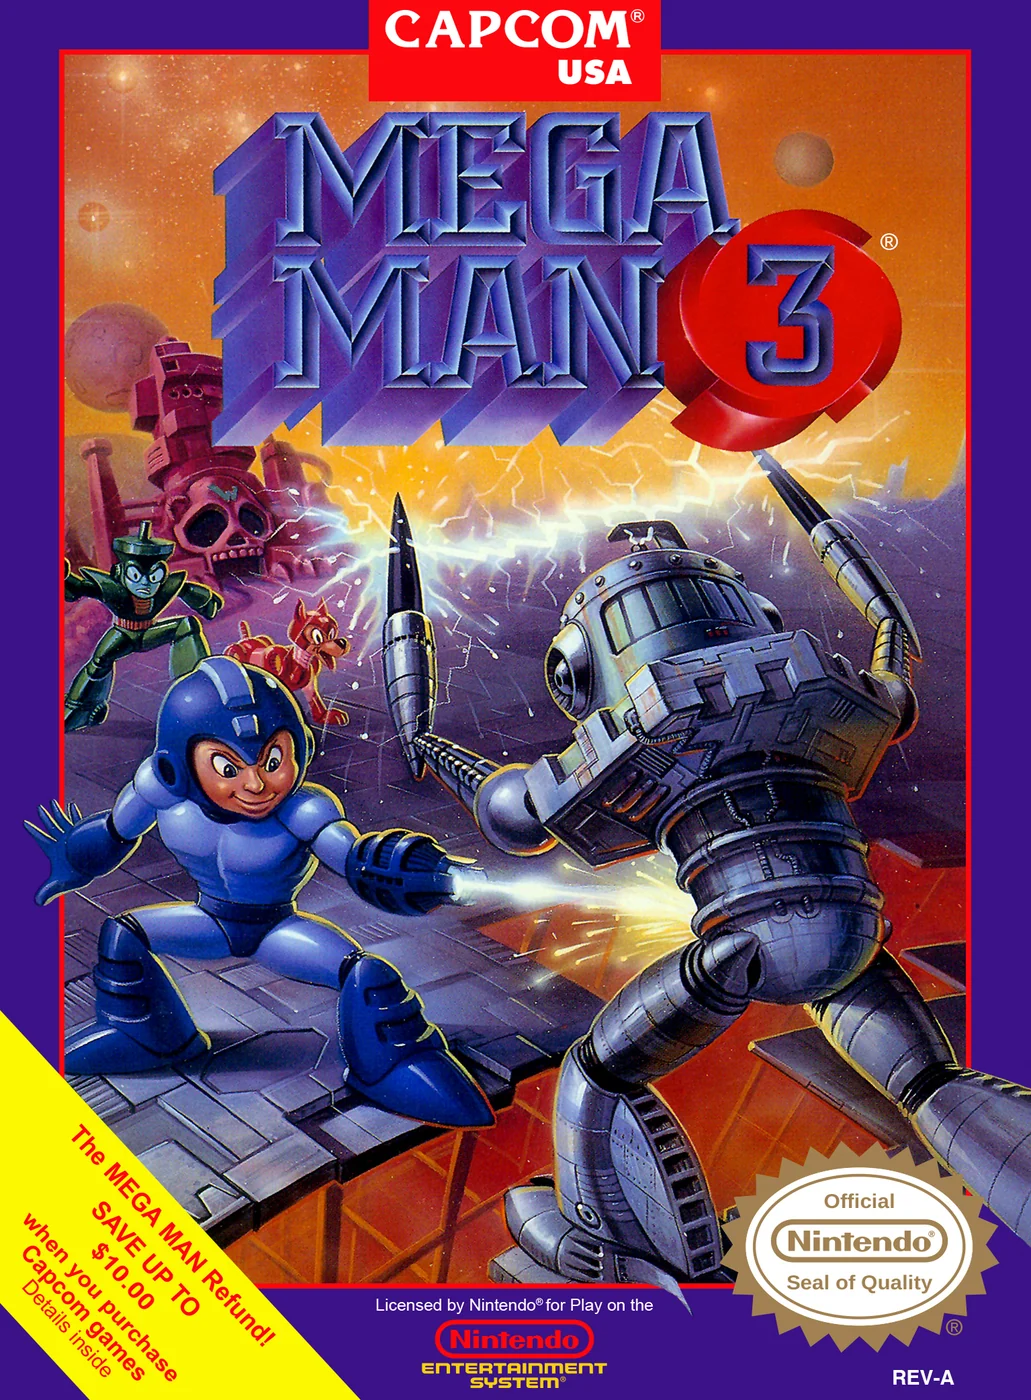
Find a copy
Mega Man 3 Nintendo Entertainment System
We may earn a commission if you buy through these links, at no extra cost to you. As an Amazon Associate I earn from qualifying purchases.
Opens retailer search results. Check the model, edition, seller, availability and current price before buying.
Before you begin
You are about to play the original NES Mega Man 3 (USA).
Play in fixed-screen / linear mode: choose a Robot Master stage from the stage select, learn the special weapon you earn for beating that boss, then use those weapons to make later stages easier.
New to this entry are the slide maneuver and the companion unit Rush; both are central to movement and survival.
The game provides a password system at the end of stages so you can resume progress between sessions.
This walkthrough directs you through a safe and practical campaign route, stage-by-stage objectives, common hazards and how to recover when you fail (life management, E-Tanks and the password system).
I include explicit chapter goals so you can follow along while playing; consult the source references for detailed damage charts and exact boss-weapon effectiveness when you want to optimize boss order or perform low-resource runs.
Set yourself up for the run
Learn the controls and key mechanics before attempting a Robot Master stage — movement, jump, shoot, slide, and Rush transformations.
The slide is a core survival tool in many stages and boss rooms.
Understand resource items: special weapon ammo (limited), E-Tanks (refill life), extra lives and health pickups.
Save important E-Tanks for Wily fortress encounters and the final fight.
Use the password system to record progress after clearing stages.
The original NES release supplies a stage/password screen at each stage completion — write the password down or photograph it before powering off.
Aim to collect at least one E-Tank and several extra lives from Robot Master stages before starting the Doc Robot revisits; these stages are more punishing and often combine two boss encounters in one level.
Practice the slide and Rush Kit maneuvers in a stage you find easy: sliding under low obstacles and using Rush Coil/Jet/Marine as appropriate will prevent many deaths later.
When you unlock new special weapons, check the damage chart/reference (sources below) to learn which bosses they hurt best — following weakness chains reduces trial-and-error and conserves ammo/E-Tanks.
Expect the Wily fortress to be the hardest, and avoid wasting your best resources (full E-Tanks, precious extra lives) on optional stage exploration if you are low on supplies.
Save most E-Tanks for Wily runs and last bosses.
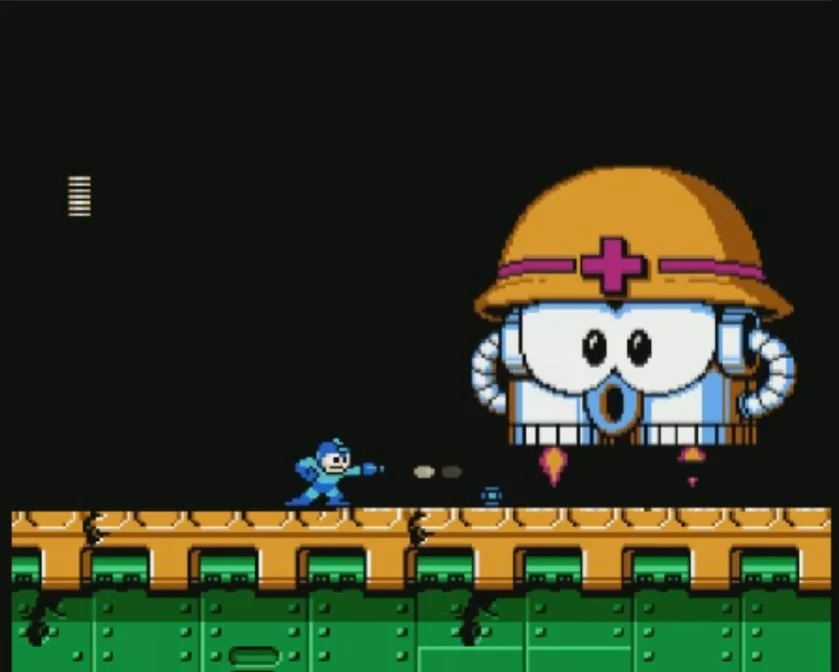
Core controls, movement and Rush basics
Mega Man 3 on the original North American NES uses a compact control scheme, but the slide and Rush equipment must be handled deliberately. Learn the controls before attempting difficult Robot Master stages, use the Mega Buster for routine enemies, and spend Rush or special-weapon energy only when it solves a real movement or combat problem.
Confirm the NES controls and weapon screen
Use Left and Right on the Control Pad to move. Use Up and Down to climb ladders and move the cursor through menus. Press A to jump and B to fire the Mega Buster or the currently selected weapon. Press Start during a stage to open the Weapons Box. Move the cursor with the Control Pad, then press Start again to equip the highlighted weapon. Select is not used for normal gameplay in the original NES control layout.
The original Mega Man 3 does not provide the charged Mega Buster found in later entries. Your standard weapon is the ordinary arm cannon, so progress depends on positioning, repeated shots, and movement rather than charging a stronger attack. Begin in an early Robot Master stage and confirm that you can jump, shoot, climb, pause, and return to play without accidentally selecting the wrong weapon.
- Verify that A jumps and B fires.
- Open the Weapons Box with Start and return to the stage.
- Select the Arm Cannon before entering an unfamiliar room.
Use the slide correctly
To slide, hold Down together with Left or Right, then press A. Mega Man moves forward in a low posture, allowing him to pass beneath low openings and avoid some attacks that would catch him during a normal jump. Keep the direction held through the move so the slide travels where intended. The slide ends on its own; prepare to jump or stop when Mega Man returns to normal height.
Do not treat the slide as a firing stance. In this NES game, the slide is primarily a movement and evasion action, so fire before entering the slide or after it ends. Practice the sequence on safe ground: run toward a low opening, press Down and the direction, tap A to begin the slide, then jump immediately after clearing the opening if the next obstacle requires it. Avoid starting a slide at the edge of a pit, because its forward momentum can carry you beyond a safe landing.
- Slide under a low opening without colliding with it.
- Repeat the slide while facing both directions.
- Practice slide-then-jump before using the sequence near spikes or pits.
- Fire before or after the slide instead of assuming the slide allows normal shooting.
Use Rush Coil for height
Rush Coil is available from the beginning of the game. Equip it through the Weapons Box, press B to summon Rush, and jump onto the springboard. The bounce launches Mega Man upward and can reach ledges, ladders, and pickups that a normal jump cannot. The original manual identifies Rush Coil as the springboard form for high jumps.
Clear nearby enemies first and summon Coil on stable ground. Stand far enough from a pit that the bounce cannot immediately send you into it, then look at the target ledge before jumping. Rush Coil is a support tool, not a replacement for normal movement; many rooms are safer when crossed with ordinary jumps and the Mega Buster.
- Summon Rush Coil on a flat, safe surface.
- Use it to reach a higher ledge or ladder.
- Check the landing area before jumping from the springboard.
Use Rush Marine after Shadow Man
Defeating Shadow Man grants Rush Marine. Select the Marine form in an underwater section and press B to summon Rush as a submarine. Use the Control Pad to steer through the water and B to fire. Marine is intended for aquatic areas, not ordinary dry-floor traversal.
Move slowly when approaching spikes, narrow passages, or enemies entering from the edge of the screen. Because Marine changes Mega Man's movement and position, leave room before changing direction. If the route is safe without Marine, conserve its energy and use normal movement instead.
- Defeat Shadow Man before expecting Rush Marine in a normal progression run.
- Summon Marine only in an underwater section.
- Steer in all available directions before committing to a narrow route.
Use Rush Jet after Needle Man
Defeating Needle Man grants Rush Jet. Equip it from the Weapons Box and press B to summon the jet platform. Ride it through open areas and guide it with the Control Pad across long gaps, spikes, and routes that ordinary jumps cannot cross. The manual describes Rush Jet as the aerial form and confirms that the Control Pad steers it.
Rush Jet consumes limited Rush energy. Before summoning it, identify where you need to land and whether the next screen will require continued movement. Avoid spending it to bypass a safe series of platforms. Near ceilings, walls, and enemies, make small steering corrections rather than holding a direction continuously. Use Jet in a boss room only when the room or encounter specifically permits it and the movement creates a clear advantage.
- Obtain Rush Jet by defeating Needle Man.
- Identify the destination before launching.
- Use short steering corrections near hazards.
- Check Rush energy before committing to a long crossing.
Manage health, weapon energy, lives, and passwords
The Weapons Box displays Mega Man's health, remaining lives or chances, special-weapon energy, Rush energy, and reserve Energy Tanks. Pause before a boss door and confirm that the weapon you intend to use has enough energy. Use the Mega Buster against ordinary enemies whenever practical, saving effective special weapons for bosses or sections where they provide a genuine safety benefit.
Energy Pellets restore health, while weapon-energy items refill selected special weapons. An Energy Tank is a reserve healing item; use it when a boss attempt or dangerous fortress section has reduced your health substantially, not immediately after a minor hit. The original manual explains that defeating a Robot Master presents a password. Write it down before selecting another stage so a failed attempt does not erase the progress you need.
If you lose a life, identify the cause before repeating the room. A failed slide, premature Rush Coil launch, or wasteful Rush Jet crossing usually improves when you slow down, clear enemies with the Mega Buster, and use the support form only at the intended obstacle. Passwords let you resume from a completed Robot Master checkpoint, but they do not replace careful resource management during a current stage.
- Pause before every boss door and inspect health and weapon energy.
- Use the Mega Buster for routine enemies when possible.
- Reserve Energy Tanks for major damage or difficult late-game attempts.
- Record the password after each Robot Master victory.
Before you move on
- You can move, climb, jump, shoot, pause, and select the Arm Cannon without hesitation.
- You can perform a directional slide using Down, Left or Right, and A.
- You can clear a low opening and transition safely into a jump.
- You can summon Rush Coil and use its springboard from stable ground.
- You know that Rush Marine is obtained from Shadow Man and is used underwater.
- You know that Rush Jet is obtained from Needle Man and is used for controlled aerial travel.
- You inspect health, special-weapon energy, Rush energy, and Energy Tanks before a boss fight.
- You use the Mega Buster for routine enemies and conserve special weapons for meaningful obstacles or bosses.
- You record Robot Master passwords and can resume a completed section after losing a life or ending a session.
Boss-selection strategy and weakness loops
Mega Man 3’s eight Robot Masters form two main weakness chains. The five-boss chain runs through Top Man, Shadow Man, Spark Man, Magnet Man, and Hard Man. The three-boss chain links Needle Man, Snake Man, and Gemini Man. Because each chain is circular, the first boss in either group must be defeated with the Mega Buster or a less efficient weapon. For a newcomer, Top Man is the most forgiving starting point. Afterward, use the weakness chain and obtain Rush upgrades early enough to make later stages safer.
1. Learn the two primary weakness chains
The first chain is Hard Knuckle against Top Man, Top Spin against Shadow Man, Shadow Blade against Spark Man, Spark Shock against Magnet Man, and Magnet Missile against Hard Man. The second chain is Needle Cannon against Snake Man, Search Snake against Gemini Man, and Gemini Laser against Needle Man.
These are practical primary weaknesses, not a requirement that every boss be fought in one exact order. Mega Man 3 allows several alternate weapons to inflict useful damage, and Top Man and Snake Man are both reasonable Mega Buster openings. The chains simply show how one defeated Robot Master supplies the most efficient weapon for the next target.
- Remember the five-boss chain: Hard Knuckle, Top Spin, Shadow Blade, Spark Shock, Magnet Missile.
- Remember the three-boss chain: Needle Cannon, Search Snake, Gemini Laser.
- Do not spend the weapon needed for the next boss on ordinary enemies unless a refill is nearby.
2. Use Top Man as the easiest opening
Select Top Man first if you want a straightforward stage and a boss that can be defeated with the Mega Buster. Top Man launches three tops that descend toward Mega Man’s position, then spins across the room. Wait for the tops to begin descending and slide under them when necessary. Jump over Top Man during his spinning charge; he cannot be damaged while he is spinning.
When Top Man stops, fire Mega Buster shots during the recovery portion of his pattern. Hard Knuckle is his primary weakness, but you cannot have it on a first-stage attempt, so the Mega Buster is the intended practical option. Victory awards Top Spin, which is primarily valuable for the Shadow Man fight rather than ordinary stage use.
- Enter Top Man’s stage with the Mega Buster equipped.
- Slide under descending tops instead of jumping into their paths.
- Jump over Top Man’s spinning charge and attack only after he stops.
- Keep most of the newly acquired Top Spin energy for Shadow Man.
3. Defeat Shadow Man with controlled Top Spin attacks
Shadow Man is the immediate target after Top Man if you are following the five-boss chain. His primary weakness is Top Spin, but the weapon requires Mega Man to jump into the boss and press the attack button while airborne. This is a close-contact attack, so do not repeatedly collide with Shadow Man without watching his position. A missed Top Spin attempt can cost health and weapon energy quickly.
Shadow Man moves aggressively, slides, jumps, and throws Shadow Blades. Stay near the center of the room when possible, watch for his approach, and use Top Spin only when your jump will intersect him safely. If your Top Spin energy runs out, finish with the Mega Buster rather than wasting time attempting empty attacks. Defeating Shadow Man awards Shadow Blade and unlocks Rush Marine, which is useful in underwater portions of Gemini Man’s stage.
- Equip Top Spin before entering Shadow Man’s room.
- Jump and press the attack button to activate the weapon; simply touching the boss is not enough.
- Avoid spending Top Spin on routine enemies before the boss.
- Collect Shadow Blade and confirm that Rush Marine is available afterward.
4. Continue through Spark Man, Magnet Man, and Hard Man
Use Shadow Blade against Spark Man. His room has uneven floor sections, and he alternates between running or jumping and releasing an electrical burst across the room. Slide or jump through the burst, then fire Shadow Blade when he is moving across a reachable section of the floor. Do not remain underneath him when he jumps toward your position.
Spark Man awards Spark Shock, the primary weakness for Magnet Man. Magnet Man jumps and fires missiles that home toward Mega Man; he can also pull Mega Man toward himself with his magnetic attack. Fire Spark Shock during a clear opening, then retreat before the missiles or a magnetic pull reaches you. Magnet Missile is the reward and the primary weapon against Hard Man.
Hard Man’s main threats are his jumping body-slam and the Hard Knuckles he throws. Move away from the landing point, jump or slide past the projectiles as appropriate, and fire Magnet Missile after he lands or during a recovery window. This completes the five-boss chain and gives you Hard Knuckle, which is the most efficient weapon against Top Man if you ever revisit that fight.
- Use Shadow Blade on Spark Man.
- Use Spark Shock on Magnet Man.
- Use Magnet Missile on Hard Man.
- Keep a Mega Buster fallback for every boss in case the intended weapon is depleted.
5. Handle the Needle, Snake, and Gemini chain separately
A reliable way to begin the second chain is to fight Needle Man with the Mega Buster, then use Needle Cannon against Snake Man. Needle Man jumps frequently and extends his head toward Mega Man, so keep moving and fire between his jumps. Snake Man’s room has pits and a central raised section. Avoid chasing him across the room; fire Needle Cannon while jumping over the Search Snakes he sends along the floor.
Snake Man awards Search Snake, the primary weakness for Gemini Man. Gemini Man and his clone move around the room while firing. Shoot Search Snake along the floor and concentrate on maintaining a safe position instead of trying to chase the correct twin. Once the clone disappears, continue firing Search Snake while avoiding Gemini Man’s direct shots. Gemini Laser is the primary weakness for Needle Man, so use it if Needle Man remains unfinished. Aim at close range because a missed Gemini Laser can bounce around the room and prevent an immediate follow-up shot.
- Defeat Needle Man with the Mega Buster if you begin this chain.
- Use Needle Cannon against Snake Man.
- Use Search Snake against Gemini Man.
- Use Gemini Laser against Needle Man, preferably from a controlled close-range position.
6. Recommended newcomer order and alternate routing
For a newcomer who wants both Rush upgrades early, use this order: Top Man, Shadow Man, Needle Man, Snake Man, Gemini Man, Spark Man, Magnet Man, and Hard Man. Top Man supplies Top Spin for Shadow Man. Shadow Man supplies Rush Marine for Gemini Man’s underwater sections. Needle Man supplies Rush Jet, which helps with long gaps and difficult disappearing-platform sequences. Needle Cannon then defeats Snake Man, Search Snake defeats Gemini Man, Shadow Blade remains available for Spark Man, and Spark Shock and Magnet Missile finish the five-boss chain.
A simpler weakness-chain order is Top Man, Shadow Man, Spark Man, Magnet Man, Hard Man, Needle Man, Snake Man, and Gemini Man. It follows the large chain first and then the smaller chain, but it postpones Rush Jet until after most of the stages where it can help. Magnet Man is also a valid opening choice because the Mega Buster deals useful damage to him, but his stage is less forgiving than Top Man’s for a first attempt.
- Choose your route before entering the first stage.
- Prioritize Rush Marine before Gemini Man if underwater navigation is difficult.
- Prioritize Rush Jet before Magnet Man or other stages with long gaps if platforming is your main weakness.
- Do not treat the alternate orders as separate editions or mandatory requirements.
7. Preserve and refill the correct weapon
Pause regularly and check the energy bar for the weapon required by the next boss. Special weapons have separate limited reserves; the Mega Buster does not consume special-weapon energy. Use the Mega Buster against ordinary enemies whenever practical, especially in stages where the boss weapon is difficult to refill.
When collecting a weapon-energy capsule, select the special weapon or Rush adapter that you want to refill before touching the capsule. The capsule is applied to the currently selected special weapon or adapter, not automatically to the weapon you intend to use later. This is particularly important for Top Spin, Rush Jet, and Gemini Laser, whose energy can disappear quickly during failed attempts.
If a boss weapon is empty, use the Mega Buster and focus on survival rather than restarting immediately. The weakness route reduces damage and shortens fights, but it is not worth taking avoidable hits merely to force a special-weapon attack.
- Check the next boss’s weakness before starting a stage.
- Select the desired weapon before collecting a weapon-energy capsule.
- Use the Mega Buster for routine enemies when safe.
- Enter the boss room with both a special-weapon plan and a Mega Buster fallback.
Before you move on
- All eight Robot Masters are defeated.
- The weapon box contains Top Spin, Shadow Blade, Spark Shock, Magnet Missile, Hard Knuckle, Needle Cannon, Search Snake, and Gemini Laser.
- Rush Marine is available after Shadow Man and Rush Jet is available after Needle Man.
- You can identify Hard Knuckle as Top Man’s primary weakness, Top Spin as Shadow Man’s, Shadow Blade as Spark Man’s, Spark Shock as Magnet Man’s, Magnet Missile as Hard Man’s, Needle Cannon as Snake Man’s, Search Snake as Gemini Man’s, and Gemini Laser as Needle Man’s.
- The weapon-energy capsule rule has been applied successfully: capsules refill the currently selected special weapon or Rush adapter.
- You are ready to enter the Doc Robot sequence without needing to defeat any remaining Robot Master for a required weapon.
References for this chapter
- Mega Man 3/Weapons and Bosses — StrategyWiki
- Mega Man 3/Walkthrough — StrategyWiki
- Mega Man 3 — Controls
- Mega Man 3 (NES) Boss Guide — RetroMaggedon Gaming
- Mega Man 3 — Boss Guide, GameFAQs FAQ by CMoriarty
- Mega Man 3 — Guide and Walkthrough — NES — Doc Robot, Break Man and Wily Castle
- Mega Man 3 Data Base — Damage Data
Magnet Man — stage approach and boss tactics
Magnet Man is a suitable opening stage in the original North American NES release of Mega Man 3. The stage combines bottomless pits, Mag Fly enemies that interfere with jumps, magnetic platforms and a disappearing-block climb. The Mega Buster is enough to clear the stage and defeat Magnet Man, so conserve Spark Shock or Shadow Blade ammunition if you already obtained one of those weapons. Completing the stage awards Magnet Missile, which is the primary weapon for Hard Man.
1. Cross the opening ledges and Mag Fly section
Move right from the starting point and watch the Mag Fly enemies above the ledges. Some stay too high to matter, but others descend near the gaps and can disrupt a jump. Shoot the lower Mag Flies before crossing, then move to the middle of each safe ledge before the next one passes overhead. Their magnetic effect can pull Mega Man slightly off course, so avoid jumping while one is directly above a narrow landing.
Clear each gap with a normal jump rather than rushing. If a Mag Fly begins pulling Mega Man during a jump, concentrate on reaching the next solid ledge instead of trying to correct repeatedly in midair. Once you reach the ladder, take it downward; this is the route to the stage’s sub-boss rather than an upper detour.
- Shoot Mag Flies that descend into the jump path.
- Stand near the center of safe ledges before the next magnetic enemy arrives.
- Take the first ladder downward.
2. Defeat Proto Man and drop into the lower route
The ladder leads to a Proto Man encounter. Use the Mega Buster and keep enough space to react to his jumps. When Proto Man jumps toward Mega Man, slide underneath him if the timing is safe, then turn and fire. Continue attacking until he teleports away; there is no visible health meter, so judge the fight by the number of successful hits and his departure.
After the encounter, an opening appears on the far-left side. Drop through it to continue. Do not search for an alternate upper route after Proto Man leaves; the opened passage is the required path.
- Use Mega Buster shots against Proto Man.
- Slide under his jumps instead of attempting close contact.
- Drop through the opened left-side passage after he withdraws.
3. Handle Giant Springer, Peterchy and the magnetic platforms
The next rooms contain Giant Springer enemies. They launch blue missiles that are attracted toward Mega Man. Fire at the Springer from a position that leaves room to retreat, then destroy any missile that remains on screen if it threatens the route. The Shadow Blade is useful here if available, but the Mega Buster is sufficient and saves special-weapon energy for later.
Continue through the rooms containing Peterchy enemies and magnetic devices. Defeat Peterchy from a distance before approaching the magnet. When a magnet begins pulling Mega Man, jump over it or move through its influence only after the nearby enemy has been cleared. A health capsule and a weapon-energy capsule are available on a higher side route before the disappearing-block section. Take the detour when health or weapon energy is low; skip it when reaching the boss quickly is more valuable than the recovery.
- Leave retreat space when fighting Giant Springer.
- Destroy threatening missiles rather than jumping blindly past them.
- Use the optional health and weapon-energy route when needed.
4. Climb through the disappearing blocks
The next section uses blocks that appear and vanish in a repeating sequence over pits. Stop on a secure platform and watch the cycle before committing to the first jump. The route alternates between blocks appearing to the left, right and above, so do not jump toward an empty position simply because it was occupied during the previous cycle.
Use short jumps and land near the center of each block. In the portion containing a magnet, account for the pull before jumping; being dragged toward an edge can turn a correct jump into a fall. If a block disappears while Mega Man is airborne, continue toward the next visible platform rather than stopping. After the final group, climb upward to the next enemy corridor.
- Observe at least one complete block cycle from safety.
- Use short, controlled jumps.
- Counteract the magnet before landing near an edge.
5. Clear New Shotman and reach the boss gate
At the top of the block section, New Shotman guards the route. Stand on the nearby platform, let its shots pass, and fire while it is exposed. A jump-and-fire approach works, but do not leap into the enemy’s body or into a projectile. Once New Shotman is defeated, the nearby ladder leads to an optional health capsule below. Collect it if necessary, then return upward and continue.
A Giant Springer appears before the boss gate. Fight it from the edge of the platform, destroy dangerous missiles, and enter the gate with the Mega Buster selected unless you have prepared Spark Shock or Shadow Blade. The stage itself does not require Rush or a special weapon, and ordinary enemies can be cleared without spending valuable boss ammunition.
- Defeat New Shotman before crossing the upper corridor.
- Take the optional health capsule only when it improves your chances of surviving the boss.
- Preserve special-weapon ammunition for Magnet Man if using a weakness weapon.
6. Defeat Magnet Man
Magnet Man’s standard pattern begins with a short jump, followed by a larger jump. He then makes a high jump and fires three Magnet Missiles before landing and moving back across the room. Keep enough distance that the first jump does not land directly on Mega Man, then slide under the larger jump when the route is clear. Attack after he lands or during the brief opening before he begins the next movement.
The Magnet Missiles curve toward Mega Man. Slide beneath them when they are low, or move to a clear side of the room and let them pass before turning back to attack. Magnet Man sometimes replaces the missile sequence with a magnetic-pull attack. During that state, hold the direction opposite Magnet Man and keep moving. He cannot be damaged while the magnetic pull is active, so do not waste shots; wait until the effect ends and resume the pattern.
Spark Shock is the primary weakness, and Shadow Blade also deals effective damage. Fire only when Magnet Man is vulnerable, then immediately reposition. If neither weapon is available, the Mega Buster works reliably because his movement is readable. Do not attempt to pass through him during a jump; slide underneath only when you have confirmed that his landing path is clear.
- Stay far enough away to react to the opening jumps.
- Slide under the Magnet Missiles or move to a clear side of the room.
- Run against the magnetic pull and wait until Magnet Man becomes vulnerable.
- Use Spark Shock first, Shadow Blade as an alternative, or the Mega Buster if necessary.
7. Claim Magnet Missile and continue the campaign
When Magnet Man’s life meter is depleted, the stage-clear sequence awards Magnet Missile. Confirm that it appears in the weapon list before returning to stage select. Magnet Missile is the intended effective weapon against Hard Man, so Magnet Man’s stage can serve as the opening point for a route through Hard Man next.
If you used an E-Tank, note the reduced reserve before starting the next stage. The Magnet Man stage is complete once the weapon-reward sequence has finished and the stage-select screen returns.
- Magnet Man is defeated.
- Magnet Missile is awarded and selectable.
- The stage-select screen is available again.
- If an E-Tank was used, account for the reduced reserve before proceeding.
Before you move on
- The Magnet Man stage-clear sequence has played.
- Magnet Missile is present in Mega Man’s weapon inventory.
- The stage-select screen allows another Robot Master stage to be chosen.
- The next planned target can be Hard Man, where Magnet Missile is the primary effective weapon.
- The route remains viable if Magnet Man was defeated with the Mega Buster or without using an E-Tank.
Hard Man — stage approach and boss tactics
Hard Man’s industrial mine stage combines swarming bees, indestructible bear traps, vertical enemy rooms, Proto Man’s most awkward encounter in this route, and a hazardous boss fight. A practical route is to defeat Magnet Man first, then enter with Magnet Missile available. The weapon is Hard Man’s weakness, but the stage contains several situations where conserving it is more valuable than clearing every enemy.
1. Prepare before selecting Hard Man
Choose Hard Man after defeating Magnet Man if you are following the recommended weakness route. Magnet Missile is the most useful weapon for the boss, so check its energy before entering and avoid spending it casually during the stage. The Mega Buster is adequate for ordinary enemies, while Shadow Blade can help against targets that are awkward to reach from the ground.
Hard Man’s stage includes health capsules, weapon-energy drops, and an Energy Tank on an upper route. These resources can stabilize a difficult attempt, but do not take a dangerous detour merely to collect one. The main objective is to reach the boss with enough health to survive Proto Man and enough Magnet Missile energy to finish Hard Man.
- Enter with Magnet Missile available.
- Use the Mega Buster for routine enemies when practical.
- Take recovery items only when the route is safe.
2. Cross the opening bee and Wanaaan section
Have Su Bee enemies appear near the beginning of the stage. If you continue moving away from them, you can often scroll them off-screen before they release their small bees. If a swarm is already active, keep moving and shoot the smaller bees as they descend into your path rather than stopping beneath the larger enemy.
The green floor openings contain Wanaaan, the bear-trap enemies. They cannot be destroyed. Move past their openings and jump over the traps when they rise. Sliding is useful under a low obstruction or when a trap blocks the normal running route, but check the landing area first. A second trap or a regular enemy can punish a blind slide.
- Run away from the first Have Su Bee when possible.
- Destroy small bees only when they enter a safe firing line.
- Never waste ammunition trying to destroy Wanaaan.
3. Use Rush Coil around the first Hammer Joe
After the opening trap area, climb through the vertical section until Hammer Joe blocks the route. The elevated position makes a normal attack awkward, so use Rush Coil to reach the ledge near him if you want to defeat him. Wait until his eye opens before firing, then retreat or land on a secure platform before he attacks again.
Defeating Hammer Joe is optional. If you only need to proceed, avoid lingering in the danger zone and continue upward. Do not spend Magnet Missile on this encounter unless you are deliberately using it to make the room safer; every unnecessary shot reduces the supply reserved for Hard Man.
- Call Rush Coil only when you have a visible landing position.
- Attack Hammer Joe during his vulnerable eye-opening period.
- Skip the fight if you do not need the room cleared.
4. Handle the Returning Monkeys and upper climb
The next vertical area contains Returning Monking enemies. One can be attacked while it hangs from the ceiling. Another drops and then jumps, so watch its movement before committing to a jump or ladder climb. Move through these rooms in short advances, clearing only the enemy that actually blocks your next landing.
You will later reach another Hammer Joe and more vertical platforms. A health capsule is available near this portion if you need it. Continue upward, then drop into the lower passage and slide beneath the obstruction. When you reach the raised platform, aim at the top of the Pickelman Bull if you choose to fight it; otherwise, move past it when the path is clear.
- Do not rush beneath a Returning Monking as it drops.
- Clear only enemies that threaten the next landing.
- Use the lower passage after dropping from the upper ladder.
5. Take or skip the Energy Tank route
At the fork after the Pickelman Bull, the upper route leads to an Energy Tank. Reaching it requires another Pickelman Bull encounter, followed by a climb past a Metall DX. If your health and lives are in good condition, take the upper route and collect the tank. If you are already damaged, the extra fight may cost more health than the tank is worth, so use the lower route instead.
Near the upper section, Wanaaan and another Have Su Bee make the passage dangerous. Keep moving and do not remain on a platform waiting for the swarm to line up. After climbing, descend the ladder to reach Proto Man’s room.
- Use the upper route for the Energy Tank only when you can handle the extra enemies.
- Avoid stopping beneath Have Su Bee.
- Descend the ladder after the final upper-platform section.
6. Defeat Proto Man and use the recovery opening
Proto Man’s encounter in Hard Man’s stage is less forgiving than a flat-room fight because the arena does not remain evenly floored. Fire the Mega Buster whenever he pauses, keep enough distance to react to his shots, and avoid chasing him into a corner. Magnet Missile is unnecessary here; conserve it for the Robot Master.
After taking enough damage, Proto Man retreats and the middle of the room opens. Drop through the opening, then move right to collect the health capsule if you need it. Continue down the ladder, deal with the Bikky in the next section, and pass through the boss gate.
- Use the Mega Buster against Proto Man.
- Do not spend Magnet Missile in the sub-boss room.
- Collect the health capsule after the central floor opens if needed.
7. Learn Hard Man’s attack cycle
Hard Man begins by firing two Hard Knuckles. The projectiles travel toward Mega Man and can curve back after reaching the wall, so do not treat the first dodge as the end of the attack. Keep moving and watch both the missiles and Hard Man’s position.
He then jumps toward Mega Man’s last location and crashes down. Avoid being beneath him, because the body press causes heavy contact damage and the landing creates a ground shock that can stun Mega Man. Stay toward one side of the room without trapping yourself against the wall. The safest attack opportunity comes after he lands and pauses before beginning the next sequence.
- Dodge both Hard Knuckles before moving in.
- Do not stand beneath Hard Man during his jump.
- Treat the landing shock as a separate hazard from body contact.
8. Finish Hard Man with Magnet Missile
Equip Magnet Missile and fire after Hard Man completes an attack, especially during the brief recovery after his landing. The missile homes toward him, allowing you to attack without standing directly underneath his body. After firing, reposition immediately and prepare for the next pair of Hard Knuckles or jump.
If Magnet Missile runs out, continue with the Mega Buster using the same rhythm: evade the missiles, avoid the body press, and fire during recovery. The fight is slower but remains possible. Use the Energy Tank only when it prevents a likely death rather than to recover from a minor mistake. Victory awards Hard Knuckle and completes the stage.
- Reserve Magnet Missile for the boss whenever possible.
- Fire during Hard Man’s recovery period.
- Confirm that Hard Knuckle appears in the weapon inventory after victory.
Before you move on
- Hard Man’s stage is cleared and Hard Man is marked as defeated on the stage-select screen.
- Hard Knuckle is available in Mega Man’s weapon inventory.
- Proto Man’s encounter has been completed and the route through the boss gate has been used.
- Magnet Missile was used against Hard Man, or the boss was defeated with the Mega Buster after Magnet Missile energy was exhausted.
Top Man — stage approach and boss tactics
Top Man is a good opening choice in the original North American NES version of Mega Man 3. The stage uses narrow platforms, ladder transitions, Top dispensers, Tama enemies that release yarn, Komasaburo hazards and a final crossing over moving tops. The boss has a short repeating pattern and is weak to Hard Knuckle, although the Mega Buster is effective because Top Man takes increased damage from it compared with many other Robot Masters.
1. Clear the opening platforms
Move right through the opening platforms and defeat the Bolton and Nutton enemies before they can join into a larger moving formation. When another pair appears on the higher platform, wait until the pieces finish connecting, then shoot them before continuing. This is safer than jumping through the formation and risking contact damage.
Continue across the stair-shaped platforms and handle the next Bolton and Nutton group together with the nearby Mechakkero. Use short jumps and stop on each platform to fire. Do not rush across the upper route simply because the first screens are open; enemies become harder to avoid when you are still repositioning from a jump.
Take a visible health pickup if your life meter is not full. At the ladder, pause before climbing so you do not arrive in the next room while an enemy is already moving into the landing area.
- Destroy Bolton and Nutton formations before they crowd a platform.
- Deal with Mechakkero from a stable ledge rather than jumping into it.
- Use short jumps and pause at ladder landings.
- Take the health pickup when it is useful.
2. Work through the first dispenser and ladder section
In the lower section, advance toward the Top dispenser and destroy the tops it releases before climbing farther up the stair-shaped route. If several tops are bouncing at once, wait on the previous step and fire until the path is clear. Breaking the dispenser itself is helpful, but clearing the enemies immediately around it is the priority.
Use the ladder route to reach the next area. After descending, watch for the Tama enemy. Aim at its face and keep firing while staying clear of the yarn it sends across the room. If the yarn is destroyed, the Tama may release fleas, so keep moving until the enemy and its follow-up hazards are gone.
Continue through the ladder transitions carefully. When a room gives you a small ledge or a broad floor, use it as a reset point before entering the next enemy group. The stage is more forgiving when each screen is cleared in sections instead of being crossed while enemies remain behind you.
- Clear Top enemies before climbing the dispenser staircase.
- Aim for the Tama’s face.
- Avoid yarn and any fleas released after it is destroyed.
- Pause on safe ledges after ladder transitions.
3. Defeat the second Tama and handle the upper route
The next Tama appears in a room with more maneuvering space. Stay far enough away to react to the yarn, but keep firing so the enemy cannot control the entire floor. Jump over the yarn when necessary rather than trying to outrun it at close range.
After the Tama is defeated, climb the route and prepare for the Metal DX that comes down from above. Do not jump onto the upper platform until the enemy has been dealt with. Once the path is clear, use the block platforms to reach the ladder on the opposite side.
At the next upper section, a Komasaburo blocks the route. Use the slide to pass through its low attack pattern and create space, then fire when you have a clear line. Avoid forcing your way through while standing directly in front of it. The slide is the important movement tool here; Mega Man 3 does not give Mega Man a separate dash action.
- Keep the second Tama from controlling the whole room with yarn.
- Defeat Metal DX before climbing onto its platform.
- Use the slide around Komasaburo.
- Do not substitute a dash input for the NES slide.
4. Cross the final moving tops
After the Komasaburo section, reach the edge of the final gap. The top-shaped platforms move vertically and must be used as temporary footholds. Wait for a platform to rise into a dependable position, land near its center, then prepare the next jump. Do not jump immediately after touching a top if its movement is still carrying you toward the edge.
Keep your jumps controlled and avoid unnecessary shots while crossing. A fall sends you back through the approach, so preserving health is more valuable than taking a risky shortcut. Rush Jet is not necessary for this section and can make the crossing less predictable if activated by mistake.
After reaching solid ground, proceed to the boss gate. If Hard Man has already been defeated, equip Hard Knuckle before entering. Otherwise, use the Mega Buster and rely on the boss pattern rather than spending an unavailable weapon or entering with a mistaken weakness assumption.
- Treat each top as a temporary platform, not solid ground.
- Wait for a stable launch position before jumping again.
- Do not use Rush Jet unless you have a specific recovery plan.
- Equip Hard Knuckle if it is available.
5. Defeat Top Man
Top Man begins by launching three tops into the air. They descend toward the position Mega Man occupied when they were released, so move or slide after the launch. Sliding is a reliable way to avoid the tops when they come down because it changes your position without committing you to a high jump.
After the tops land, Top Man spins across the room. He cannot be damaged during this spinning movement, so do not waste shots on him while he is charging. Jump over him or move to the opposite side, then turn back toward him as the charge ends.
Attack during the recovery between his spin and the next top launch. Hard Knuckle is the primary weakness and takes him down quickly with several accurate hits. The Mega Buster is also dependable, especially for a first-stage attempt. Needle Cannon and Top Spin can damage him as well, but neither is necessary if Hard Knuckle or the Buster is available.
If you take a hit, retreat instead of trying to trade contact damage. Wait for the next three-top cycle, slide away from the marked position and attack after the spin. When Top Man’s health is depleted, collect the stage reward and verify that Top Spin has been added to the weapon menu. Top Spin is useful in later fights, particularly against Shadow Man, but it is not itself a required progression key.
- Move away from the position marked by the three-top launch.
- Slide beneath the descending tops when appropriate.
- Do not attack during Top Man’s spinning charge.
- Fire Hard Knuckle or Mega Buster shots after the charge ends.
- Confirm that Top Spin appears after the victory.
Before you move on
- Top Man’s stage is cleared and the game returns to the Robot Master selection screen.
- Top Spin is listed in Mega Man’s acquired weapons.
- Top Spin can be selected from the weapon menu on a later stage.
- If Hard Man was defeated earlier, Hard Knuckle remains available for later boss fights.
- The stage has been completed without relying on mechanics from remakes, later Mega Man games or non-NES editions.
Shadow Man — stage approach and boss tactics
Shadow Man's stage is a dark, uneven route built around drops, Holograns that temporarily darken the background, aggressive ground enemies and a final sequence of small-platform jumps. Move in short sections, clear enemies before committing to a jump, and preserve health and Top Spin energy for Shadow Man. Top Spin is the primary weakness, but the Mega Buster remains usable if you prefer a longer, more defensive fight.
Prepare before selecting Shadow Man
The straightforward route is to defeat Top Man first and bring Top Spin into Shadow Man's stage. Top Spin is Shadow Man's primary weakness, although its short range and unusual activation make it easy to waste. Enter with as much Top Spin energy as possible and keep an E-Tank available if your inventory allows it.
Rush Jet is not normally obtained during Shadow Man's stage. In the original NES release, Needle Man awards Rush Jet. Some versions of the game also permit an optional weapon-selection exploit after Shadow Man has been defeated: a weapon capsule can be collected while Rush Jet is selected through the menu cursor even though Needle Man has not yet been cleared. Do not plan the required route around this trick, and do not confuse it with a normal stage pickup.
Use the Mega Buster for ordinary enemies unless a special weapon clearly makes a section safer. Your main priorities are reliable health, a usable Top Spin reserve and enough lives to retry the boss without repeating unnecessary risks.
- Defeat Top Man first if you want Shadow Man's primary weakness.
- Bring Top Spin with as much energy as practical.
- Treat the early Rush Jet access as optional and unnecessary for completion.
- Keep an E-Tank for the boss whenever possible.
Drop through the opening and clear the first ground section
At the start, walk off the opening ledge and descend rather than trying to fight every enemy from the upper edge. A New Shotman appears near the first landing. Pass it carefully or destroy it once you have a clear shot, then continue downward.
At the bottom, several Mechakkero enemies occupy the route. Shoot them before crossing their space so their movement cannot knock you into the next drop. A Pickelman Bull appears before another descent. Let it approach, jump over its attack when needed and fire while it is recovering. Do not immediately step into the next opening after landing; first make sure the lower area is clear.
- Pass the New Shotman without jumping into its firing lane.
- Clear the Mechakkero enemies before crossing the ground section.
- Deal with the Pickelman Bull before taking the next drop.
Defeat Proto Man and use the opened passage
After the next descent, Proto Man appears as the stage's sub-boss. Fight him with the Mega Buster. Keep firing while moving, jump over his shots and use the slide to pass beneath him when he jumps across the room. Avoid standing directly in front of him for a prolonged exchange, because contact and projectile damage add up quickly.
When Proto Man has taken enough damage, he teleports away and the far-left opening becomes available. Move through that opening and descend. If you lose this encounter, repeat it with shorter movements and controlled shots instead of chasing him. The room is easier when you preserve a clear lane for jumping and sliding.
- Enter the Proto Man room with enough health for several mistakes.
- Use the far-left opening after Proto Man leaves.
- Use the Mega Buster rather than spending Top Spin energy here.
Handle the Hologran darkness sections
The next area contains Peterchys and Holograns. A Hologran changes the background to a dark night scene, reducing visibility while the enemies and platforms remain active. The Hologran itself is a priority target when it can be reached safely, but do not jump blindly just to destroy it.
Advance one platform at a time. Peterchys can interfere with your footing, while Walking Bombs approach along the route and should be destroyed quickly when they enter a clear firing lane. After each darkened section, wait long enough to identify the next platform and enemy position before moving on. The background can return to normal and darken again, so never assume the passage is permanently safe after one Hologran disappears.
- Stay on a secure platform when the screen darkens.
- Destroy approaching Walking Bombs before they force you backward.
- Shoot Peterchys before making a small or uneven jump.
- Use the Mega Buster to conserve Top Spin.
Cross the weapon-capsule and small-platform section
After the series of Holograns, descend to the area containing weapon-energy capsules. Take a refill if Top Spin is low and the approach is safe; otherwise, avoid unnecessary contact with the Mechakkero enemies nearby. Continue right and descend through the next route.
The following passage requires jumps across small platforms while Parasyus descend from above. Watch the upper part of the screen before every jump. If a Parasyu is entering your landing area, wait on the current platform or shoot it before committing. Move patiently rather than attempting to clear several platforms in one jump. After reaching the far side, defeat or bypass the Mechakkero, then prepare for the Yanbows near the boss corridor.
- Collect a safe weapon-energy refill if Top Spin needs it.
- Check for descending Parasyus before each small-platform jump.
- Clear the Mechakkero at the far side before continuing.
- Approach the boss gate only after dealing with the Yanbows.
Read Shadow Man's attacks
Shadow Man does not follow a simple fixed cycle. He can run or jump toward Mega Man, slide across the floor and stop to throw two large Shadow Blades. Keep enough room to see which action he has begun. Do not chase him continuously from wall to wall, because closing distance carelessly turns his movement into contact damage.
Jump over his ordinary run and slide approaches. When he throws the Shadow Blades, choose the response that matches their height: jump when there is room above them, or slide beneath a low projectile when jumping would collide with it. After he completes a movement or lands from a jump, use that brief opportunity to attack and then restore your spacing.
- Watch the attack before reacting.
- Jump over his run and slide approaches.
- Avoid cornering yourself against a wall.
- Use controlled attacks after his movement or landing.
Use Top Spin carefully or finish with the Mega Buster
With Top Spin equipped, wait until Shadow Man is committed to an approach. Jump toward him and activate Top Spin while Mega Man is airborne and close enough to make contact. The weapon can inflict heavy damage, but activating it too early or from too far away wastes energy and leaves you vulnerable. After each attempt, move away and reset your position rather than repeatedly spinning without a clear target.
If Top Spin is difficult to control, use the Mega Buster. Fire after Shadow Man lands or finishes a slide, then jump over his next approach. Shadow Blade is also an effective weapon against him, but it is normally unavailable before this first victory. Use an E-Tank once the fight has become a close exchange and your health is low; there is little value in saving it while allowing a nearly defeated Mega Man to be finished by one mistake.
When Shadow Man is defeated, collect the Shadow Blade capsule. The victory also grants Rush Marine in the normal progression. Shadow Blade is useful in later stages, including the recommended fight against Spark Man.
- Activate Top Spin only during a close, committed approach.
- Stop using Top Spin if its energy is too low to finish the fight.
- Use the Mega Buster defensively if Top Spin attempts are missing.
- Collect Shadow Blade after Shadow Man explodes.
- Confirm that Rush Marine has been added to the available support abilities.
Before you move on
- Shadow Man is defeated and the Shadow Blade is added to the weapon menu.
- Rush Marine is available after the victory in the normal progression.
- Shadow Man's portrait is cleared on the stage-select screen.
- The next Robot Master stage remains available, and Shadow Blade can be selected for later fights, including Spark Man.
References for this chapter
Spark Man — stage approach and boss tactics
Spark Man’s NES stage combines electric barriers, spike ceilings, rising platforms, falling scrap and narrow ledges. The safest approach is to remove enemies before they interfere with jumps, use Shadow Blade selectively, and treat every moving platform as a timed escape rather than a place to stand. Shadow Blade is Spark Man’s primary weakness on the original NES release, and defeating him awards Spark Shock.
Prepare before entering
Restore Mega Man’s health before selecting Spark Man’s stage. If Shadow Man has already been defeated, select Shadow Blade before entering or switch to it as soon as the first enemy group appears. It is the most efficient weapon for Spark Man, but do not spend its entire reserve on ordinary enemies.
Rush Coil is useful for the elevated pickup area and for recovering from a shortfall on a difficult jump. It is not needed for every screen. Rush Jet is not required for the normal route, so conserve its energy rather than using it through ordinary platforming.
The stage contains weapon-energy opportunities, but a safe route is more valuable than a risky detour. Enter with enough health to survive mistakes and keep Shadow Blade energy for the boss room.
- Health restored before stage entry.
- Shadow Blade selected or available in the weapon box.
- Shadow Blade energy reserved for Spark Man.
- Rush Coil available if an elevated ledge or pickup is worth taking.
Clear the opening enemy screens
At the start, climb to the upper ledge and deal with the eye-walker enemy before advancing. Shadow Blade is a useful answer because it can be aimed in several directions; otherwise, climb carefully and fire when the enemy is exposed rather than waiting directly beneath it.
In the next area, ceiling hatches release Elec’n enemies. One Elec’n at a time emerges from each hatch, and an enemy can pause above you before releasing sparks in several directions. Destroy it before crossing the screen when possible. If it begins its electrical burst, move to the side of its position instead of standing directly underneath it.
Electric Gabyoalls appear as paired barriers, with one on the floor and one above. They periodically create an electric line between themselves. They are not ordinary enemies that can be cleared with gunfire. Watch the cycle, then jump across the lower unit during the safe interval. Do not rush into the pair while the electrical connection is active.
- Upper eye-walker handled before it disrupts movement.
- Elec’n enemies cleared or allowed to finish their burst before the next jump.
- Electric Gabyoalls crossed during a safe opening instead of attacked.
Pass Hammer Joe and the rising platforms
Hammer Joe can block frontal shots with its shield. Wait for its eye to open, then fire with the Mega Buster or Shadow Blade and immediately prepare for the thrown hammer. Do not stand close enough to trade contact damage for a shot; the vulnerable opening is brief but repeatable.
The following room contains pink arrow platforms beneath ceiling spikes. Stepping onto one makes it rise. Treat each platform as temporary transport: move onto it, watch the next platform, and step or jump away when Mega Man is level with a safe landing point. Remaining on the platform too long carries him into the spikes.
When the route places a bolt enemy beside the platforms, remove the bolt before committing to the next jump. If a jump is not lined up, return to the previous platform rather than forcing the landing. Once a rising platform has returned to its lower position, it is safe to use again, but stepping on it starts the upward movement again.
- Hammer Joe attacked only while its eye is open.
- Every arrow platform abandoned before reaching the ceiling spikes.
- Bolt enemies cleared before difficult platform transitions.
Use the middle section to recover and control the pace
After the rising-platform sequence, move quickly past the next electrical barrier and climb toward the upper route. A Metdozer guards an area containing useful weapon and health energy; use Rush Coil if needed to reach the ledge safely, but do not summon Rush where there is not enough room for him to appear.
The vertical drop that follows is not yet lined with wall spikes, so stay centered and avoid unnecessary side movement. At the bottom, falling scrap begins dropping from ceiling chutes. When the first piece lands, jump and slide over the pile or pass through the opening before the next piece falls. If two pieces collect, destroy them promptly and then keep moving so the next drop does not trap Mega Man.
Do not waste Shadow Blade on every minor target in this section. Use the Mega Buster for safe, stationary enemies and reserve the special weapon for enemies that threaten a jump or for Spark Man.
- Optional energy pickup taken only when the route is safe.
- Vertical shaft crossed without unnecessary side movement.
- Falling scrap passed by timing movement instead of waiting beneath the chutes.
- Shadow Blade reserve preserved.
Cross the final platform sequence
Near the boss gate, collect the small weapon capsules if doing so does not expose Mega Man to the nearby hazards. Equip Shadow Blade before using the final arrow platform. Advance a short distance first so the bolt appears in a manageable position, then destroy it before jumping.
Jump from the rising platform to the next safe pillar with a controlled, low jump. If the landing is uncertain, return to the platform or the previous ledge rather than drifting into the gap. At the last rising platform, be ready to retreat to the previous platform while dealing with the final bolt. Once the route is clear, climb to the boss door.
Enter with usable health and enough Shadow Blade energy for repeated attacks. If the approach has consumed most of Mega Man’s health, a deliberate reset through a lost life is safer than spending an E-Tank on a preventable platforming mistake.
- Final bolts removed before committing to jumps.
- Low, controlled jumps used near the pillars and ceiling hazards.
- Boss room entered with health and Shadow Blade energy remaining.
Defeat Spark Man
Spark Man’s room has uneven raised sections, making body contact a serious risk. He moves and jumps across the room, then stops to release eight small sparks in different directions. Avoid the burst with a short jump or a slide followed by repositioning; do not jump so high that Mega Man collides with an upper spark.
He then sends a larger spark across the room. Stay near a central step or another position that gives room to move, watch the projectile’s height, and slide beneath it when the path permits. If sliding would place Mega Man against Spark Man, move to the opposite side instead. The goal is to avoid both the projectile and the boss’s landing body.
Fire Shadow Blade when Spark Man is moving through a predictable jump or immediately after he completes an attack. Do not stand still and fire repeatedly in the cramped room. After each shot, relocate so the next jump does not land on Mega Man. If Shadow Blade is unavailable, use Mega Buster shots while prioritizing evasion; the fight is longer but the same movement pattern remains readable.
When Spark Man is defeated, collect Spark Shock. The stage is complete once the game returns to the Robot Master selection screen and Spark Man is marked as defeated.
- Eight-way spark burst avoided with a short jump or controlled movement.
- Large spark passed underneath or avoided by changing sides.
- Shadow Blade used during movement or recovery windows.
- Spark Shock collected after victory.
Before you move on
- Spark Man’s stage has been cleared and the game returns to the Robot Master selection screen.
- Spark Man is marked as defeated on the selection screen.
- Spark Shock is present in Mega Man’s weapon inventory.
- The next stage can be selected without replaying Spark Man’s stage.
- If following the common weakness route, Spark Shock is now available for Magnet Man, while Shadow Blade can be conserved for later boss and stage encounters.
Snake Man — stage approach and boss tactics
Snake Man’s stage is a reasonable early target in the original North American NES release of Mega Man 3. The route is built around robotic snake enemies, two Big Snakey encounters, a tower climb, and a final sequence of moving platforms in the clouds. Needle Cannon is the preferred weapon against Snake Man, but the boss can also be defeated with the Mega Buster if you learn his repeatable movement pattern. Victory awards Search Snake, which is the intended weapon for Gemini Man.
1. Choose your approach and preserve health
You can enter Snake Man’s stage before collecting another Robot Master weapon, but the recommended route is to defeat Needle Man first and bring Needle Cannon into this stage. Needle Cannon is Snake Man’s primary weakness and shortens the boss fight. If Snake Man is your first selection, use the Mega Buster and treat the stage as a controlled practice run rather than forcing a fast clear.
The stage contains two surprise boxes and three large Energy Capsules, but these rewards are not worth a life lost to a blind jump. Take health or weapon energy when it is safely reachable. Before entering the boss room, prioritize having enough health to survive several contacts and projectiles over collecting every item.
- Bring Needle Cannon if following the recommended weakness route.
- Take safe Energy Capsules, but do not risk a life for a questionable pickup.
- Do not expect Rush Coil to help on this stage if Snake Man is your first Robot Master; defeating Snake Man is what awards that support ability.
2. Clear the opening snake formations
The opening areas are filled with small snake-head enemies placed around ledges, ladders, and platforms. Watch their firing rhythm instead of jumping straight into them. When a small snake head opens its eyes and fires, either move to a safe ledge or answer with shots during its exposed window. In cramped spaces, sliding beneath a low attack is safer than jumping into another enemy above you.
Dada enemies hop in irregular patterns but can be destroyed with a normal shot. Fire as one approaches instead of pursuing it across the platform. Jamacy enemies can also appear around ladders and ledges; pause before climbing if one is entering your path. The stage’s early danger comes mainly from enemy placement, so stopping briefly to reset the screen is usually safer than running continuously.
- Watch the small snake heads before committing to a jump.
- Use ledges to separate enemy groups and regain control of the screen.
- Shoot Dada enemies before they force you toward a pit or ladder.
3. Defeat the first Big Snakey
The first Big Snakey is a large mechanical snake-head encounter. Its body occupies much of the screen, so keep Mega Man in a position where a jump can clear the head without carrying you into another hazard. Fire repeatedly at the exposed head while it approaches, then jump over it when its movement is committed. After clearing it, turn and continue firing as it moves away.
Do not stand directly underneath the mouth as it rises or advances. If the boss pushes you toward an edge, prioritize getting back to solid ground instead of squeezing in another shot. Once the encounter ends, move carefully through the next group of ordinary enemies; the stage does not become harmless immediately after the sub-boss.
- Keep enough horizontal room to jump over the large head.
- Aim at the exposed head, not the body or empty space beneath it.
- Return to a stable platform before rushing into the next enemy group.
4. Survive the second Big Snakey and climb the tower
A second Big Snakey appears later in the snake-filled section. Use the same basic method: maintain room to move, jump over the committed approach, and fire at the head while it is exposed. Avoid taking unnecessary contact damage merely to finish the encounter quickly. A dropped recovery item is useful only if you can collect it without a blind leap.
After the second large snake, continue upward through the tower. Small enemies around ladders can knock Mega Man off a ledge, so clear the immediate area before climbing whenever possible. If you are damaged, slow down rather than trying to compensate with a risky jump. The goal is to arrive at the cloud section with enough health to survive a missed platform or an enemy collision.
- Expect a second Big Snakey; do not relax after the first one.
- Clear enemies near ladders before climbing through their firing lanes.
- Leave unsafe recovery items behind.
5. Cross the cloud platforms
The upper section changes from solid tower platforms to moving platforms suspended in the clouds. This is the stage’s main instant-death hazard. Wait until the next platform is moving into a predictable position, then aim for its center. Do not jump immediately after landing unless the route requires it; a brief pause helps you confirm the next platform’s direction and prevents overcorrecting.
Cloud enemies and Bomb Flier formations can distract you during these jumps. Shoot only when an enemy or projectile threatens your landing. Hitting some flying enemies can create an additional moving threat, so platform timing should remain your first priority. Use Rush Coil only if you have already judged the destination and need extra reach; activating it without a clear landing plan can send Mega Man past the platform.
Once you reach solid ground after the cloud sequence, continue through the final corridor and enter the boss room. There is no need to spend special-weapon energy on ordinary enemies immediately before the fight unless they are blocking a safe route.
- Wait for moving platforms instead of taking maximum-distance jumps on instinct.
- Aim for platform centers and confirm the next movement before jumping again.
- Use Rush Coil only for a clearly planned extension.
6. Defeat Snake Man
Snake Man’s room has a W-shaped floor with a raised central section and pits beside it. He repeatedly runs across the room, jumps over the uneven floor, and changes height as he travels. Do not chase him from side to side. Hold a position near the entrance side or beside one of the safer sections near the central rise, then let him approach and pass through your firing lane.
When Snake Man commits to a jump, jump over him or move through the available safe space rather than meeting him in the center. Fire as he travels away or just after he lands. This timing is more reliable than firing while he is passing directly through Mega Man, when contact damage can interrupt the exchange.
Snake Man periodically releases small Search Snakes that travel along the floor and climb walls. Jump over them, then return to your chosen position. Needle Cannon is the preferred weapon, but short Mega Buster bursts are sufficient if you do not have it. The fight rewards repetition: survive each approach, avoid the floor snakes, and attack during the recovery portion of his movement instead of trying to force damage during every opening.
- Use the room’s entrance-side area or a safe section beside the central rise as your reference point.
- Jump over Snake Man when his movement is committed, then fire as he moves away.
- Jump over the Search Snakes and reset your position.
- Use Needle Cannon for the primary weakness, or the Mega Buster if necessary.
7. Collect Search Snake and continue the campaign
Defeating Snake Man awards Search Snake. The weapon sends crawling projectiles along the ground, allowing attacks against targets that are difficult to reach with a straight horizontal shot. Its required progression use is against Gemini Man, so preserve Search Snake energy when you are preparing to follow the Snake Man to Gemini Man route.
After the victory screen, confirm that Search Snake has been added to the weapon inventory before leaving stage select. Snake Man is now permanently cleared for the current run, and you can move to the next Robot Master without replaying the stage. If you are following the recommended weakness chain, select Gemini Man next and use Search Snake for that boss.
- The victory screen awards Search Snake.
- Search Snake appears in the weapon inventory after returning to stage select.
- Select Gemini Man next if following the recommended first-loop route.
Before you move on
- Snake Man is defeated and the victory screen awards Search Snake.
- Search Snake is visible in the weapon inventory at stage select.
- The Snake Man stage no longer appears as an uncleared objective for the current run.
- If following the suggested weakness route, Gemini Man is available as the next target and Search Snake is ready for that fight.
Gemini Man — stage approach and boss tactics
Gemini Man’s stage begins with pits and egg enemies that can either obstruct the route or serve as temporary platforms. After a Proto Man encounter, the route descends through caves and underwater hazards before reaching a large robot and the boss room. Rush Marine, obtained from Shadow Man, makes the water section safer, while Rush Jet can also cross the spike-filled passages. Search Snake, obtained from Snake Man, is Gemini Man’s intended weakness; Shadow Blade is a reliable alternative if you are following a route that reaches Gemini Man before Snake Man.
1. Preserve the egg platforms in the opening section
Move carefully through the first outdoor screens. The egg-shaped enemies can be destroyed, but some of them are positioned over pits and can function as temporary platforms. Do not shoot every egg automatically. Before firing, check whether the egg is blocking the route or is the only safe surface for the next jump.
When an egg is over a pit, use it as a stepping point if the timing is comfortable. If you destroy too many of these platforms, you may need Rush Coil to recover the lost height. Make each jump from a controlled position rather than running toward the edge while enemies are active.
- Leave useful egg platforms intact until you know they are no longer needed.
- Use Rush Coil only when the normal route has become unsafe or unreachable.
- Clear enemies near landing points before committing to a jump.
2. Cross the first pits and use Proto Man as a landmark
Continue through the early pit section by watching the next landing area before jumping. Gemini Man’s stage is more forgiving when you stop briefly to identify the enemy placement, especially where flying enemies or egg-launching enemies overlap a platform.
Proto Man appears near the transition into the cave. This is not a normal boss battle in this stage; he opens the way forward. Once the route is clear, descend into the underground section and treat the entrance as a useful landmark if you need to restart the stage.
- Look ahead before every major pit jump.
- Do not waste health trying to force a jump through an enemy group.
- Use Proto Man’s appearance to confirm that the opening section is complete.
3. Clear the cave without letting enemies crowd the ledges
The cave route places enemies around narrow ledges, ladders, and uneven platforms. Use the Mega Buster for ordinary targets and fire only when an enemy is actually blocking progress. If several enemies occupy the same ledge, retreat to the previous safe surface and remove them one at a time instead of jumping into the group.
Some enemies emerge when you shoot bubbles in the environment. Approach these bubbles with the same caution as an enemy generator: fire only when you are ready for the object that appears, then wait for a safe opening before advancing. On cramped ledges, a short retreat is usually safer than trying to pass while the screen is crowded.
- Use the Mega Buster for routine cave enemies.
- Expect some bubbles to release enemies when shot.
- Back away when multiple enemies overlap a narrow ledge.
4. Cross the underwater hazards with Rush Marine or Rush Jet
The water section contains spike hazards that make ordinary movement difficult. If you have defeated Shadow Man, select Rush Marine and use it to travel through the submerged route with more control. Keep a clear space ahead of the submarine and do not accelerate into a new screen before you can see the next obstacle.
Rush Jet can also be used to cross the dangerous water-spike passages. Choose the form that you control more reliably and conserve its energy for the actual spike crossings rather than spending it on ordinary movement. If the route offers a safe platform where you can leave the water, dismount or change strategy there instead of using support-unit energy unnecessarily.
- Use Rush Marine for the submerged route when available.
- Use Rush Jet as an alternative for spike-filled crossings.
- Do not spend all support-unit energy before the final water hazards.
5. Defeat the large robot before the boss gate
Near the end of the stage, a large robot blocks the route before Gemini Man. Use the nearby ladder or elevated position to attack while reducing the amount of time you spend directly beside it. Clear the enemy’s shots, fire during the opening, and retreat when the robot’s movement closes the safe space.
After this encounter, check your health and weapon selection before entering the boss room. If you are using Search Snake, make sure its energy is sufficient for repeated attacks. If you have only a small amount of missing health, do not spend an E-Tank merely to enter the room; save it for a failed attempt or a later fortress fight.
- Use the ladder or elevated position to create safer attack angles.
- Refill or conserve Search Snake before the boss.
- Enter the room with enough health to survive a few pattern mistakes.
6. Handle Gemini Man’s opening split
Gemini Man begins by dividing into two bodies that jump around the room. Stand near the center while learning the pattern, then jump over the body that approaches your position. Avoid chasing either one; the safest damage comes from firing while maintaining room to move.
The two bodies react to your attacks, so do not hold the fire button continuously when you are still learning the timing. Search Snake travels along the floor and is the intended weakness. Fire when one body is low enough for the snake to reach it, then immediately reposition to avoid contact or a retaliatory shot. Both bodies can be involved in the exchange, and the false body can disappear after being hit, so concentrate on surviving the pattern rather than trying to identify a muzzle-flash tell.
- Stay near the center while learning the jump cycle.
- Jump over the approaching body instead of chasing it.
- Fire Search Snake from a position that leaves room to retreat.
7. Finish the single-body phase and collect Gemini Laser
After the split phase, Gemini Man fights as one body and moves more aggressively. He fires the Gemini Laser, which rebounds from the room’s walls. Do not jump simply because the laser appears; watch its path and move through the open space after it passes. Avoid standing against a wall where a rebound can cover your escape route.
Continue using Search Snake when Gemini Man is on or near the floor. If Search Snake runs out, use Shadow Blade if you have it, or switch to the Mega Buster and attack in short bursts. Fire after Gemini Man lands or completes an attack, then return to a position with room to dodge.
Defeating Gemini Man awards the Gemini Laser. Confirm the weapon appears in the inventory before selecting the next stage.
- Track the rebounding laser instead of reacting with blind jumps.
- Attack during Gemini Man’s recovery or landing windows.
- Confirm that Gemini Laser is added to the weapon inventory.
Before you move on
- Gemini Man is defeated and the game returns to the stage-select screen.
- Gemini Laser appears in the weapon inventory.
- You have passed the opening egg-platform section, the Proto Man transition, the underwater hazards, and the large robot before the boss.
- You can recognize the boss sequence: Gemini Man splits into two jumping bodies, then continues alone while firing a rebounding laser.
- Any remaining Search Snake, Shadow Blade, health, and support-unit energy are available for the next stage or for a later retry.
Needle Man — stage approach and boss tactics
Needle Man’s NES stage is a deliberate platforming run built around drilling enemies, shielded Cannons, vertical ladders and timed Needle Press hazards. Use the Mega Buster to control ordinary enemies, Rush Coil to reach the Energy Tank and high ledges, and the Gemini Laser if you already defeated Gemini Man. Needle Man is weak to Gemini Laser and also takes effective damage from Needle Cannon, but the latter is unavailable until this fight is over. Defeating him awards both Needle Cannon and Rush Jet.
Prepare before selecting the stage
Needle Man can be selected from the Robot Master screen at any time. If Gemini Man is already defeated, equip Gemini Laser before entering the boss room. Its bouncing shots can damage Needle Man even when the first impact misses, but the weapon has limited energy and its path is not always immediate. Keep the Mega Buster selected for most of the stage so that you do not waste special-weapon ammunition on routine enemies.
Rush Coil is available before Needle Man is defeated and is the useful Rush form for this stage. Rush Jet is not available during the initial clear; it is the reward for defeating Needle Man. Enter with a strong health reserve, and save an E-Tank for the boss if the platforming has already cost substantial health.
- Use the Mega Buster against ordinary enemies.
- Equip Gemini Laser before entering the boss room if Gemini Man is defeated.
- Use Rush Coil for difficult vertical jumps and the Energy Tank route.
- Do not expect or plan around Rush Jet during the stage itself.
Clear the opening Hari Harry formations
The first stretch places Hari Harry enemies along the route. They can roll toward Mega Man after approaching, so stop at a safe distance and fire before they reach the edge of their attack range. A higher platform contains another Hari Harry; jump and shoot while rising, then land only after confirming that the enemy has been destroyed or has already rolled past.
Continue right through the next Hari Harry group rather than jumping blindly over each enemy. If one begins rolling while Mega Man is close, either destroy it with a quick shot or retreat to create enough room for another attack. The goal is to reach the ladder with health intact, not to move through this opening as quickly as possible.
- Fire at Hari Harry before it reaches rolling distance.
- Do not jump into an enemy on a higher ledge.
- Retreat briefly if a rolling Hari Harry reaches close range.
Work through the Cannon and Metall DX platforms
Descend the ladder and move across the middle platform. A Metall DX occupies the lower route, while a Cannon waits farther along. Cannons can only be damaged while their front shield is open and they are preparing to fire. Stand at a distance, wait for the opening, then shoot and move away from the projectile rather than trying to force damage while the shield is closed.
Several Cannons appear in succession. Use the same rhythm for each one: approach until it activates, fire during the opening, then drop or move only after its shot has passed. After the Cannon section, a Metall DX blocks the way. Let its helmet close before moving under or around it, then use the available platforms to climb toward the next section.
The upper platforms introduce Yambow enemies that descend into Mega Man’s path. Stop near the platform edge, let a Yambow come down, and shoot it when it begins flying toward you. Continue across the platforms, defeat the next Metall DX, and repeat the same approach for the following Yambow before dropping to the ladder area.
- Attack Cannons only while their shields are open.
- Do not stand in front of a Cannon after firing.
- Let Yambows descend before committing to the next jump.
- Use each landing as a pause point to read the next enemy placement.
Time the Needle Press corridor
The next section is controlled by Needle Press hazards that move vertically through the route. At the first press, wait for it to rise, then slide beneath it. Continue through the corridor by repeating that timing rather than trying to outrun the presses. After descending the ladder, move right and slide through the low passage when the press has lifted.
More presses follow in groups. Watch the complete movement cycle before crossing: move only when the needles are high enough for Mega Man to pass, and stop in the open space between hazards if necessary. At the platform sequence near the edge, one of the middle platforms has a Needle Press above it. Jump onto that platform while the press is retracting, then immediately jump onward rather than lingering underneath it.
The slide is the safest way through the low sections, but it does not make Mega Man invulnerable. Begin the slide with enough distance to clear the press and avoid stopping directly below the descending needles.
- Wait for a Needle Press to rise before sliding underneath.
- Use the spaces between presses to reset your timing.
- Cross the middle platform quickly when its press retracts.
- Do not treat sliding as protection from contact damage.
Climb to the Energy Tank and boss gate
After the Needle Press corridor, climb the ladder and deal with the Hari Harry at the upper section. It may roll toward Mega Man even if you fire immediately, so move to the higher ground and create room rather than trying to trade contact damage.
The Energy Tank is above this area. Stand on the high ground, summon Rush Coil and time the jump so that the spring launches Mega Man toward the tank while avoiding the needles fired by the Hari Harry. Take the tank only if the route is under control; it is a useful recovery item, but falling while trying to collect it can cost more health than it restores.
Continue upward after collecting or bypassing the tank. Hammer Joes occupy the ladder route. Climb only far enough to expose each Hammer Joe, wait for its shielded attack cycle, then fire when it opens. At the upper platform, defeat or pass the Bikky and proceed right to the boss gate.
- Use Rush Coil to reach the Energy Tank.
- Avoid chasing the tank while Hari Harry’s needles are covering the landing area.
- Handle Hammer Joes from ladder edges instead of climbing directly into them.
- Clear the final Bikky before entering the boss room.
Defeat Needle Man with controlled movement
Needle Man’s main pattern combines jumps, airborne Needle Cannon shots and a ground-level Needle Hammer attack. At the start, move into firing range and attack, then return your attention to his landing position. He can jump to different heights, so do not assume that every jump will pass cleanly over Mega Man.
With Gemini Laser equipped, fire when Needle Man is moving through a predictable line, especially during or just after a jump. A shot that misses the first contact may bounce off the room and strike him later, so avoid immediately wasting another shot before checking whether the laser is still traveling. Jumping while firing can help place the first laser along his path, but do not jump so close that you land on him.
With the Mega Buster, use short firing bursts while maintaining space. Shoot as he lands or during the brief interval before his next movement, then reposition. When he remains on the ground and prepares the Needle Hammer, move away from the attack lane rather than trying to fire through it. If he jumps toward your side, slide underneath only when the jump is high enough to clear Mega Man; otherwise retreat and wait for the next cycle.
The compact room rewards survival over constant attacking. Give up a shot if taking it would trap you against a wall. Use an E-Tank before health becomes critical, because one mistimed Needle Cannon volley or contact hit can end the attempt quickly.
- Track Needle Man’s landing point before moving.
- Attack during landing and recovery windows.
- Use Gemini Laser carefully because its shots bounce through the room.
- Avoid standing beneath a low jump or in the Needle Hammer lane.
- Use an E-Tank before the fight becomes unrecoverable.
Collect the rewards and confirm completion
After Needle Man is defeated, the results sequence awards Needle Cannon and Rush Jet. Needle Cannon is a forward-firing weapon that can be used against Snake Man and later progression targets. Rush Jet provides controlled horizontal travel and is valuable for long gaps in later stages, but it is not a substitute for precise movement in tight rooms.
The chapter is complete when the stage-clear sequence has finished, Needle Cannon appears in the weapon inventory and Rush Jet is available from the Rush selection. If you are stopping for the session, record the password after returning to the stage-select screen.
- Needle Man is defeated.
- Needle Cannon appears in the weapon inventory.
- Rush Jet is available as a Rush transformation.
- The game returns to the Robot Master selection screen.
Before you move on
- Needle Man is defeated and the stage-clear sequence completes.
- Needle Cannon is selectable from the weapon menu.
- Rush Jet is available in the Rush selection.
- The Robot Master selection screen returns with Needle Man cleared.
Doc Robot revisited stages — overview and priorities (Spark, Needle, Gemini and Shadow revisits)
After all eight original Robot Masters are defeated, four altered stages become available on the stage-select screen. Each revisited stage contains two Doc Robot encounters modeled on Mega Man 2 Robot Masters. The stages may be completed in any order, but all four are mandatory. Needle Man's stage contains Air Man and Crash Man; Gemini Man's stage contains Flash Man and Bubble Man; Spark Man's stage contains Metal Man and Quick Man; and Shadow Man's stage contains Wood Man and Heat Man. Doc Robot victories provide no weapons or other permanent equipment, so enter with the relevant weapons refilled and conserve energy for both boss rooms.
1. Prepare before entering the revisited stages
Confirm that Magnet Man, Hard Man, Top Man, Shadow Man, Spark Man, Snake Man, Gemini Man and Needle Man have all been defeated. The four altered stages then appear on the stage-select screen. There is no required order, so start with the stage whose hazards and weapon matchups you handle most reliably.
Refill Mega Man's health and the special weapons needed for the selected route. The important weapons for this sequence are Magnet Missile, Hard Knuckle, Top Spin, Search Snake, Spark Shock, Gemini Laser, Needle Cannon and Shadow Blade. Use the Mega Buster against ordinary enemies whenever it is safe. When collecting a weapon-energy capsule, select the weapon you want to refill before touching the capsule; the capsule restores the currently selected weapon rather than automatically choosing the weapon you need.
Do not expect a new weapon after either Doc Robot in a stage. These encounters are progression gates. E-Tanks and extra lives are useful, but do not risk a life for an optional pickup if the detour leaves you poorly prepared for the two boss rooms. If you are stopping between stages, use the game's normal password or continuation system and record the stage-selection state it gives you.
- All eight original Robot Masters are defeated.
- The weapons needed for the chosen Doc Robot stage are refilled.
- Weapon-energy capsules are collected with the intended weapon selected.
- At least one E-Tank is available if possible.
2. Needle Man revisit — Air Man and Crash Man
Needle Man's altered stage contains difficult pit crossings, collapsing structures and descending Needle Press hazards. Slide beneath the presses when their active path is too low to jump safely. In the long open crossing, use Rush Jet only when the route requires sustained aerial travel. Keep Mega Man at a controlled height and avoid abrupt direction changes, because falling during this section costs a life and can force you to repeat a large portion of the stage.
The first boss is Air Man. Use Spark Shock or Magnet Missile. Magnet Missile can track Air Man while you concentrate on avoiding the tornadoes, while Spark Shock is useful when Air Man crosses into a predictable firing lane. Watch the height of the tornado pattern: jump over high attacks and use a low slide only when the attack is low enough to pass overhead. Fire during Air Man's movement or landing windows, then return to a safe position instead of chasing him.
Continue through the redesigned stage to Crash Man. Use Hard Knuckle or Top Spin. Hard Knuckle is the more controllable option because it can be fired as Crash Man jumps or advances. Top Spin can deal heavy damage during a carefully timed approach, but do not activate it while Crash Man is already in contact range. After each attack, move away from the returning Crash Bomber and avoid allowing the fight to become trapped against a wall.
- Needle Presses are passed with slides or carefully timed jumps.
- Rush Jet is reserved for the long aerial crossing.
- Air Man is attacked with Spark Shock or Magnet Missile.
- Crash Man is attacked with Hard Knuckle or Top Spin.
- Both Doc Robots are defeated before leaving the stage.
3. Shadow Man revisit — Wood Man and Heat Man
Shadow Man's altered stage combines narrow platforms, spike hazards, lava-adjacent jumps and sections where platforms disappear or become unsafe soon after Mega Man lands. Stop before each lava crossing and begin jumps from stable ground. Use the slide to pass low threats, but do not slide toward a pit without checking the landing area. Enter the first boss room with as much health as practical because the second half of the stage leaves little room for recovery.
The first boss is Wood Man. Use Needle Cannon or Hard Knuckle. Needle Cannon provides direct, repeatable hits when the Leaf Shield is open. Hard Knuckle is also a practical choice when you can fire from a stable position and allow the slow projectile to connect. Do not attack into the active Leaf Shield. Wait for the shield to be thrown or otherwise leave an opening, fire, then immediately prepare for the falling leaves and repositioning that follow.
The second boss is Heat Man. Use Shadow Blade or Hard Knuckle. Shadow Blade is easier to deploy while maintaining distance, while Hard Knuckle rewards deliberate timing when Heat Man approaches or lands. Keep space behind Mega Man, watch for the fire attack that creates ground hazards, and avoid being pinned against either wall. If Hard Knuckle is selected, fire before Heat Man reaches point-blank range so the projectile has time to connect.
- Lava crossings begin from stable platforms.
- Needle Cannon or Hard Knuckle is reserved for Wood Man.
- Shadow Blade or Hard Knuckle is reserved for Heat Man.
- The boss fights are kept away from the walls whenever possible.
4. Spark Man revisit — Metal Man and Quick Man
The Spark Man revisit uses moving platforms, vertical drops, electrical hazards and cramped passages. Watch a platform cycle before committing to a jump. Normal jumps and slides are usually safer than Rush Jet in narrow areas. Use Rush Coil only where the extra height gives a controlled landing, and never summon it beside a pit without enough room for Mega Man to recover.
Metal Man is vulnerable to Magnet Missile or Hard Knuckle. Magnet Missile can track him while you focus on avoiding the Metal Blades. Hard Knuckle is slower but effective if fired while Metal Man is committed to a jump or landing. Keep the center of the room available for evasive movement and do not stand directly below his landing path.
Quick Man can be attacked with Gemini Laser or Search Snake. Gemini Laser requires deliberate positioning because its path can be awkward in the room. Search Snake is easier to use while moving because it travels along the floor. Stay near the open center, fire when Quick Man commits to a run or landing, and immediately create room for the returning boomerangs.
- Moving platforms are observed before each jump.
- Magnet Missile or Hard Knuckle is ready for Metal Man.
- Gemini Laser or Search Snake is ready for Quick Man.
- Quick Man is not fought from a corner unless avoiding an immediate attack requires it.
5. Gemini Man revisit — Flash Man and Bubble Man
The Gemini Man revisit includes water, uneven ground and enemy groups placed around narrow ledges. Shoot from a distance instead of chasing enemies onto unsafe platforms. In submerged sections, use Rush Marine only when it improves control or makes a hazardous passage safer; ordinary swimming is preferable when the route is open and uncomplicated. Leave room to turn before walls or underwater hazards.
Flash Man can be attacked with Needle Cannon or Gemini Laser. Needle Cannon gives straightforward, repeatable hits while Mega Man tracks Flash Man's position. Gemini Laser is also effective, but its bouncing path requires attention to the room's geometry. Maintain distance, avoid standing beneath Flash Man when he is descending and move away from the wall after each attack.
Bubble Man is vulnerable to Spark Shock or Shadow Blade. Spark Shock works well when Bubble Man moves through a predictable lane. Shadow Blade is more flexible because it can be thrown while jumping or moving and can reach different heights. Keep the battle centered, avoid standing directly below descending bubbles and leave room to retreat after firing.
- Rush Marine is used only where it improves underwater control.
- Needle Cannon or Gemini Laser is ready for Flash Man.
- Spark Shock or Shadow Blade is ready for Bubble Man.
- The boss room remains open enough for retreat and jumping.
6. Complete the sequence and continue to Break Man
Clear all four revisited stages: Needle Man contains Air Man and Crash Man; Gemini Man contains Flash Man and Bubble Man; Spark Man contains Metal Man and Quick Man; and Shadow Man contains Wood Man and Heat Man. Each stage has two required Doc Robot encounters. Defeating only the first boss does not clear the stage.
The Doc Robots do not add Quick Boomerang, Leaf Shield, Bubble Lead, Atomic Fire or any other copied Mega Man 2 weapon to Mega Man's inventory. The practical reward is simply removal of that progression gate. Use the Mega Buster against ordinary enemies where possible, and collect weapon-energy capsules with the weapon selected that you intend to refill.
After the fourth revisited stage is cleared, the game proceeds to the Break Man encounter. Defeat or complete that encounter to open the route toward the Wily Fortress. Before starting the fortress sequence, replenish health and weapon energy where the game permits and record the available continuation information if you need to stop.
- All four revisited stages are cleared.
- Air Man, Crash Man, Flash Man, Bubble Man, Metal Man, Quick Man, Wood Man and Heat Man are defeated.
- No copied Mega Man 2 weapon appears in the inventory.
- Break Man appears after the Doc Robot sequence is completed.
Before you move on
- Needle Man, Gemini Man, Spark Man and Shadow Man revisited stages are all cleared.
- All eight Doc Robots have been defeated: Air Man, Crash Man, Flash Man, Bubble Man, Metal Man, Quick Man, Wood Man and Heat Man.
- The game grants no copied Mega Man 2 weapons after the sequence.
- Break Man appears, confirming that the route to the Wily Fortress is available.
References for this chapter
- Mega Man 3 — Guide and Walkthrough — NES — Doc Robot, Break Man and Wily Castle
- Mega Man 3/Weapons and Bosses — StrategyWiki
- Mega Man 3/Doc Man in Shadow stage — StrategyWiki
- Mega Man 3 (U) — Annotated ca65 Disassembly
- Mega Man 3 Data Base — Damage Data
- Mega Man 3 — Guide and Walkthrough — NES — By TBaker
Break Man encounter and checkpoint to Wily fortress
After the four Doc Robot revisited stages are complete, the Break Man mini-stage becomes available. This short battle uses the same general arena and movement style as the earlier Proto Man encounters. Break Man has no special-weapon weakness in the original North American NES release, so use the Mega Buster, slide beneath his approaches, and fire during his walking and recovery windows. Once he retreats, record the Wily-fortress password. That password begins the castle assault with nine E-Tanks, making it the intended late-game checkpoint.
Confirm that Break Man is available
Complete the Doc Robot stages in the Needle Man, Gemini Man, Spark Man and Shadow Man stage areas. These revisited stages are mandatory progression, and each contains two Doc Robot battles based on Mega Man 2 bosses. They do not award new weapons, so your available weapons remain the eight Robot Master weapons earned earlier.
After the fourth revisited stage is finished, the stage-select display changes and Break Man appears as the next destination. Select him from the stage screen. There is no further Robot Master stage between the Doc Robot sequence and this encounter.
The Break Man area is a compact battle section rather than a full platforming stage. Its ground layout resembles the Hard Man boss arena. Do not expect a normal level route, hidden E-Tank, weapon capsule or extra-life detour before the fight.
- Needle, Gemini, Spark and Shadow revisited stages are complete.
- The four revisited-stage symbols are no longer available as unfinished objectives.
- Break Man is shown as the next selectable destination.
Enter with the Mega Buster equipped
Break Man has no effective special-weapon weakness in this NES encounter. Select the Mega Buster before entering and do not spend weapon energy testing Shadow Blade, Hard Knuckle, Top Spin or another Robot Master weapon. The Mega Buster is unlimited, while special-weapon energy will matter during the Wily stages.
The battle does not display a conventional visible life meter, but Break Man must still take repeated successful hits before he retreats. Keep firing whenever he is walking within a useful line of fire. The objective is not to discover a weakness; it is to maintain safe spacing while landing ordinary cannon shots.
- Mega Buster is selected before the room loads.
- No special-weapon energy is being spent on Break Man.
- You are firing from a controlled distance rather than attacking at point-blank range.
Handle his movement and approach
Break Man moves across the arena and attacks with forward shots and contact damage. Stay near the central portion of the floor so you have room to react in either direction. Fire as he crosses your line, then continue watching his position instead of walking directly into him.
When Break Man approaches on the ground, slide beneath him. Start the slide while holding the direction of travel, and resume firing after Mega Man has passed clear. Sliding is safer than trying to jump over every approach because a late jump can collide with his body or place Mega Man too close to his next attack.
If he jumps across the room, keep moving underneath or away from his landing point. Do not chase him into a corner. After he lands or finishes a forward movement, turn toward him and return to the Mega Buster rhythm. The practical pattern is fire while he is exposed, slide when he closes the distance, then create space before the next exchange.
- Use the central floor area as a reaction zone.
- Slide under ground-level approaches instead of forcing close jumps.
- Fire after Break Man lands, turns, or completes a forward movement.
- Avoid being trapped against either edge of the arena.
Recover from damage or a failed attempt
If Break Man hits Mega Man, move away before trying to trade another shot. The arena is short, but retreating to the opposite side gives you time to recognize his next approach. Do not stand beside him attempting to win through contact damage; his body contact causes heavy damage compared with his normal shots.
There are no stage pickups to restore health or weapon energy during this encounter. If Mega Man dies, repeat the short battle and use the next attempt to improve the timing of the slide. Because the fight does not require a special weapon, the main resource being protected is your remaining lives and health for the transition into the fortress.
Do not use an E-Tank simply to continue a bad point-blank exchange. Use one only if surviving the current attempt is more valuable than preserving it and Break Man is already close to defeat. The later password supplies the intended fortress E-Tank reserve, so the safest approach is still to avoid unnecessary damage here.
- Create distance after taking a hit.
- Do not expect health, weapon-energy or E-Tank pickups in the mini-stage.
- Use the Mega Buster on every attempt.
- Avoid wasting an E-Tank when the exchange can be reset safely.
Defeat Break Man and follow the transition
Continue the fire-and-slide pattern until Break Man has taken enough Mega Buster hits to leave the arena. He retreats rather than giving Mega Man a Robot Master weapon. This encounter is a progression gate and story transition, not an additional weapon-acquisition stage.
Allow the post-battle scene to finish. Dr. Wily's theft of Gamma is revealed, and the route to Wily's castle opens. Do not assume that Break Man grants a new Rush form or changes the weapon inventory; neither happens here.
- Break Man retreats after repeated Mega Buster hits.
- No weapon screen appears for Break Man.
- The Wily castle route becomes the next required destination.
Record the Wily-fortress password
Write down the password presented after the Break Man progression. Check every red and blue mark before leaving the password screen. The Wily checkpoint password places Mega Man at the front of the castle with nine E-Tanks, giving you the intended reserve for the linear fortress sequence.
The Wily fortress is not treated like the Robot Master stage select. Passwords used after entering the castle return you to the beginning of the Wily sequence rather than resuming inside a later fortress stage. Plan to clear the castle stages in one continuous run once you begin the assault.
Because the password supplies nine E-Tanks, do not risk replaying completed Doc Robot sections merely to reach Break Man with a particular tank count. Before selecting the first Wily stage, confirm that your password is recorded and that you understand the fortress run will carry your weapon-energy decisions from one stage to the next.
- The post-Break Man password is written down exactly.
- The password indicates the Wily-fortress checkpoint with the late-game E-Tank reserve.
- You understand that fortress passwords restart the castle sequence rather than resuming a later stage.
- The next selected destination is Wily's first fortress stage.
Before you move on
- All four Doc Robot revisited stages are cleared.
- Break Man is defeated with the Mega Buster and retreats from the arena.
- The transition revealing the route to Dr. Wily's castle has played.
- The Wily-fortress password has been recorded accurately.
- The player is ready to select the first Wily fortress stage, with the password checkpoint providing nine E-Tanks.
Wily Fortress — stages 1–4: hazards, Holograph Mega Mans and the Robot Master rematch
After Break Man, Mega Man enters a fixed six-stage Wily Fortress sequence. Stages 1 and 2 contain Kamegoro Maker and Yellow Devil Mk-II, Stage 3 ends with the Holograph Mega Mans, and Stage 4 finishes with Junk Golem rooms followed by all eight Robot Master rematches. The fortress does not return you to stage select, so conserve Hard Knuckle, Search Snake, Top Spin, Spark Shock, Shadow Blade and Rush Jet for the encounters ahead. When Stage 4 is complete, the next destination is Wily Fortress Stage 5, where Spark Shock and Hard Knuckle are especially important.
Prepare before entering Wily Fortress
Refill Mega Man's life and the weapons needed for the fortress before starting. Hard Knuckle is required for breakable barriers and is the recommended weapon against Yellow Devil Mk-II. Shadow Blade is the practical weapon for Kamegoro Maker. Search Snake is the safest choice for the Holograph Mega Mans. Keep Rush Jet available for the long spike crossing in Stage 2 and for recovery during later platforming.
Also preserve Spark Shock, Hard Knuckle, Shadow Blade and Top Spin for the final fortress stages. Spark Shock is needed for the first phase of Wily Machine 3, while Hard Knuckle is useful against its exposed upper target. Shadow Blade or Top Spin are valuable against Gamma. Rush forms consume energy while active, so do not spend Rush Jet on optional pickups if doing so risks running out before a required crossing.
- Hard Knuckle has enough energy for required barriers and Yellow Devil Mk-II.
- Shadow Blade has enough energy for Kamegoro Maker.
- Search Snake, Spark Shock, Top Spin and Rush Jet are not nearly empty.
- At least one E-Tank is reserved for a boss or a dangerous fortress section.
Clear Wily Fortress Stage 1
Stage 1 begins outdoors. Use Rush Coil to reach the optional extra life on the left if you can make the jump reliably, then return to the main route. Proceed right over the stepped platforms and defeat or bypass the Top Shooters before climbing. Near the ladder at the right, jump to the platform beyond it to collect the visible E-Tank. This refill is worth taking, but do not force the jump while enemies are firing.
Descend into the sewer-like section. The underwater passage contains Penpen enemies, but Rush Marine is not required. Move with short jumps, let a Penpen pass before entering a narrow opening, and avoid lingering in the enemy's path. Rush Marine can make the section more comfortable, but its energy is better saved if normal movement is under control.
After the water, Hard Knuckle breaks the green barriers that protect optional pickups. Use it first on any barrier required by the route; the extra life and upper weapon-energy items are not mandatory. Continue through the narrow rooms and handle Hammer Joe from a safe ledge or ladder rather than jumping directly beneath its hammers.
The final approach uses appearing blocks over spikes. Wait for a complete, usable sequence and cross with controlled jumps. Do not rush the first opening, because a missed landing sends Mega Man into the spikes and may force the whole stage to be repeated.
Kamegoro Maker remains near the top of the room while it releases turtle-shaped Kamegoro enemies. Equip Shadow Blade and attack each turtle as it enters the room. The maker itself is not the target; destroy the released turtles. After a turtle is defeated, its shell remains dangerous, so move away instead of walking into the shell while preparing for the next one. If Shadow Blade is unavailable, the Mega Buster can finish the fight, but the encounter will take longer. When the released turtle sequence is destroyed, Stage 1 ends.
- The opening E-Tank is collected only after the approach is safe.
- The underwater route is crossed without wasting Rush Marine energy.
- Hard Knuckle is reserved for required barriers before optional pickups.
- The appearing-block section is crossed safely.
- Kamegoro Maker is defeated by destroying its released turtles with Shadow Blade or the Mega Buster.
Cross Wily Fortress Stage 2 and defeat Yellow Devil Mk-II
Stage 2 opens with red platforms that separate after Mega Man stands on them. Treat each platform as temporary footing. Jump toward the next platform as the current one begins to split instead of waiting for it to reform. The left-side extra life is optional; take the detour only if you can return to the main climb without losing the platform cycle.
The Wanaan enemies on the green grates can clamp onto Mega Man if he remains in place. Keep moving across the grates, slide when the ceiling permits, and do not stop directly beneath an active Wanaan. After this section, reach the long spike crossing and activate Rush Jet from a stable platform. This crossing is a required use of Rush Jet in the original NES route.
Two E-Tanks are visible during the Rush Jet section. They are optional. Collect them only if the flight path remains controlled and you can land safely on the far side. Do not steer into spikes for a refill. Once across, restore life or weapon energy if safe, then enter the boss room.
Yellow Devil Mk-II separates into pieces that travel across the room before reforming. Stay grounded when the next fragment is low, slide beneath low pieces, and jump only for fragments that pass above Mega Man's reach. Watch the order and height of the pieces instead of trying to attack during the crossing. When the body reforms and the eye opens, equip Hard Knuckle and hit the eye during the safe attack window. Two Hard Knuckle shots can be placed during a suitable cycle, but survival is more important than forcing an extra shot.
If Hard Knuckle is empty, use the Mega Buster and concentrate on learning the fragment route. Defeating Yellow Devil Mk-II advances the fortress to Stage 3.
- Red platforms are used as temporary footing.
- The optional left-side extra life is skipped if it threatens the climb.
- Rush Jet is preserved for the mandatory spike crossing.
- Yellow Devil Mk-II is attacked only when its eye is exposed.
- The fortress advances to Stage 3.
Navigate Wily Fortress Stage 3's platform rooms
Stage 3 begins with a short forced-support section. Use Rush Coil or Rush Jet to reach the upper route, then continue through the rooms containing New Shotmen and breakable barriers. New Shotmen can fire horizontally or in an arc, so eliminate them from a distance before climbing past their position.
Hard Knuckle breaks the green barriers in this stage. Some barriers protect weapon-energy items and other pickups, but the pickups are optional. A visible E-Tank appears in a tight passage after the early New Shotman rooms; slide into it if the approach is safe. Do not spend most of your Hard Knuckle energy on optional barriers before confirming that you have enough for later fortress needs.
The next section contains Holograns that obscure parts of the room with darkness. Destroy the Holograns before attempting difficult jumps, especially when a platform or pickup is hard to see. Walking Bombs can be cleared with Search Snake, while a Bikky is easier to hit while it is airborne. Hammer Joe can usually be bypassed or attacked from a position where its thrown hammers cannot reach.
Near the end, several rooms use moving platforms over spikes. The platforms travel in repeating paths, and the safe route is to jump between them while staying away from the spike-lined edges. Wait for a platform to approach instead of jumping early. In the final platform room, use the small moving ledges to reach the upper ladder and boss gate. A Rush Jet can help with positioning, but do not spend all of its energy before the final room.
- New Shotmen are cleared before climbing into their firing lanes.
- Hard Knuckle is not exhausted on optional barriers.
- Holograns are destroyed before attempting obscured platform jumps.
- The moving-platform rooms are crossed without touching the spike-lined sides.
- The boss room is entered with Search Snake available.
Defeat the Holograph Mega Mans
The boss room contains three Mega Man figures on separate platforms. Only one is vulnerable at a time; the other two are decoys. The vulnerable figure changes as the copies reappear, so do not waste shots by assuming that the same platform remains correct.
Equip Search Snake. Fire it along the floor when the three figures appear. The snake travels across the room and climbs walls, making it the most reliable original-NES method for locating and damaging the vulnerable copy without importing mechanics from the later Wily Wars remake. Keep Mega Man moving so the copies' direct shots and contact damage do not trap him against a wall.
If Search Snake is low, use the Mega Buster to test the figures and continue firing at the copy that can be damaged. Top Spin is also effective, but it requires close contact and is much riskier on the separated platforms; use it only if you already understand the approach and have spare energy. Do not attack blindly with Top Spin and fall from a platform.
When the vulnerable copy is destroyed, the battle continues with the remaining holographic figures until the encounter is finished. There is no Robot Master weapon reward. After the victory, use the exit to proceed to Stage 4.
- The vulnerable copy is identified rather than attacking all three indiscriminately.
- Search Snake is used as the primary weapon.
- Top Spin is treated as an optional close-range alternative, not as a required remake technique.
- All Holograph Mega Mans are defeated.
- The fortress proceeds to Stage 4.
Cross Stage 4's Junk Golem rooms
Stage 4 is shorter than the preceding fortress stages, but the Junk Golems can punish careless movement. They throw heavy debris across compact rooms. Equip Top Spin when a Golem blocks the route; it is especially effective against them. If you prefer not to approach, bait the thrown debris, jump over it, and advance during the recovery window.
The stage contains small weapon-energy pickups and larger W-capsules. Take them when they are safely positioned, but do not spend life energy reaching an item in a room where a Junk Golem is still active. Continue through the corridors until the teleport-room entrance. The stage does not have a conventional single boss; the teleport system begins the eight-boss rematch sequence.
- Junk Golems are defeated with Top Spin or bypassed after their debris passes.
- Weapon-energy pickups are collected only when the room is safe.
- The teleport-room entrance is reached with Hard Knuckle, Search Snake and the rematch weapons available.
Complete the eight Robot Master rematches
The teleport room allows Mega Man to select the Robot Masters through the teleport hatches. A practical weapon order is Needle Man with Gemini Laser, Gemini Man with Search Snake, Snake Man with Needle Cannon, Top Man with Hard Knuckle, Shadow Man with Top Spin, Spark Man with Shadow Blade, Magnet Man with Spark Shock, and Hard Man with Magnet Missile. This plan uses the established weakness chain and keeps the Mega Buster as a fallback if a weapon is too low.
The order is not mandatory, and each Robot Master is also vulnerable to his own weapon. That fallback matters if a weakness weapon is nearly empty. Fight the difficult patterns while Mega Man is still healthy, then use easier encounters later if you need time to recover. Shadow Man and Needle Man are less forgiving than Snake Man or Top Man, so do not assume the visible hatch arrangement is the best personal order.
After every rematch, collect the large weapon-energy capsule before entering the next teleport. Select the weapon that needs the refill before taking the capsule so the energy goes to the intended weapon. Use the smaller energy capsules in the surrounding rooms for Hard Knuckle, Top Spin, Search Snake or other weapons needed later. Do not spend the final reserves simply to shorten a rematch; the next fortress stage contains Wily Machine 3.
Needle Man throws rapid needles and can be handled with Gemini Laser from a distance. Gemini Man is vulnerable to Search Snake, which can track across the floor. Snake Man can be controlled with Needle Cannon or the Mega Buster by staying outside his landing path. Hard Knuckle handles Top Man, while Top Spin is the practical choice for Shadow Man if you can make short, deliberate contact attacks. Shadow Blade handles Spark Man, Spark Shock handles Magnet Man, and Magnet Missile handles Hard Man.
Once all eight rematches are defeated, leave through the exit at the bottom-right of the teleport room. Collect the extra life and any safe weapon-energy items afterward, especially energy for Hard Knuckle and Spark Shock. Then enter Wily Fortress Stage 5. Keep Spark Shock, Hard Knuckle, Rush Jet, Shadow Blade and Top Spin as full as possible for the Wily Machine and Gamma encounters that follow.
- All eight Robot Masters are defeated in the teleport room.
- Large weapon-energy capsules are assigned to the weapon that needs them.
- The listed weakness plan is used where energy permits.
- Hard Knuckle, Spark Shock, Shadow Blade and Top Spin are not needlessly exhausted.
- The exit at the bottom-right is used after the final rematch.
- Stage 5 begins with the weapons needed for Wily Machine 3 and the later Gamma fight.
Before you move on
- Kamegoro Maker has been defeated in Wily Fortress Stage 1.
- Yellow Devil Mk-II has been defeated in Stage 2.
- The Holograph Mega Mans have been defeated in Stage 3.
- All eight Robot Master rematches and the Junk Golem section in Stage 4 have been cleared.
- The exit from the teleport room has been reached.
- Wily Fortress Stage 5 has started with Spark Shock and Hard Knuckle available, while Shadow Blade, Top Spin and Rush Jet have been preserved as much as possible.
Wily Fortress — final machine(s) and Gamma
Wily Fortress Stage 5 ends with Wily Machine No. 3. Stage 6 is a short item room followed by Gamma, whose battle changes after the head section breaks. Preserve Spark Shock and Hard Knuckle for Wily Machine No. 3, then keep Shadow Blade or Hard Knuckle for Gamma’s first phase and Top Spin or Search Snake for the final cockpit attack.
Clear Wily Fortress Stage 5 and prepare for Wily Machine No. 3
Continue through Wily Fortress Stage 5 until the final boss door. The stage contains weapon-energy pickups before the machine, so use them to restore Spark Shock and Hard Knuckle whenever possible. Rush Jet is useful for the second phase, but do not spend its energy unnecessarily on ordinary enemies if you can complete the approach without it.
Before entering the boss room, check Mega Man’s health, weapon energy and E-Tanks. The next stage is separate from this encounter, but the game does not justify assuming that every resource is automatically restored between stages. Treat the machine as its own checkpoint and make sure the weapons needed for both phases are available.
- Restore Spark Shock before the boss door.
- Keep Hard Knuckle available for the second phase.
- Preserve Rush Jet if you plan to use it as an escape route.
- Check health and E-Tanks before entering.
Destroy the machine’s first form
Wily Machine No. 3 moves on two large legs. In its first form, the vulnerable target is the cannon hanging beneath the body, not the upper shell. Equip Spark Shock and jump toward the machine, firing at the cannon while Mega Man descends. The cannon’s shots travel in arcs, so keep moving and jump over projectiles that pass high. If a shot travels low, use a slide when there is enough floor space rather than jumping into it.
Stay aware of the legs as the machine advances. Do not stand directly beneath the body longer than necessary, and do not waste shots against the armor above the cannon. The standard strategy takes several successful Spark Shock hits; once the cannon is destroyed, the machine changes behavior for the second phase.
- Aim every attack at the hanging cannon.
- Use Spark Shock as the main first-phase weapon.
- Jump over high projectiles and slide under low ones when safe.
- Avoid lingering between the machine’s legs.
Defeat Wily Machine No. 3’s second form
After the cannon is destroyed, Wily remains in the machine and the dome over the cockpit becomes the target. The machine walks across the room, and each step is followed by a downward swoop. Equip Hard Knuckle and fire before the machine reaches the low point, because the fist travels slowly and must be in flight when the dome becomes exposed. Aim high enough for the fist to reach the cockpit rather than the legs or body armor.
Rush Jet is an alternative if you have enough energy. Ride above the floor and fire toward Wily while staying clear of the machine’s feet and ground-level attacks. Move horizontally instead of hovering directly over the machine, since the body can rise into Mega Man’s position. Hard Knuckle is the more direct weapon plan, while Rush Jet gives additional room to escape if the timing of the swoop is difficult.
When the machine explodes, Stage 5 is complete. Do not describe this as the same room as Gamma. Continue to Fortress Stage 6 and reassess your resources there.
- Target the dome over Wily’s cockpit.
- Fire Hard Knuckle before the machine reaches its low point.
- Use Rush Jet only if its remaining energy supports the fight.
- Confirm that Wily Fortress Stage 5 is cleared before proceeding.
Enter Wily Fortress Stage 6 and collect the available supplies
Stage 6 is a short item-focused area before the final battle. Move through it carefully and collect the recovery items that are safely accessible, including weapon energy and the available life or E-Tank pickups. The exact value of the recovery is less important than entering the final room with the weapons required for both Gamma phases.
Inspect health, weapon energy and E-Tanks after entering Stage 6 instead of assuming an automatic refill or reset. Prioritize Hard Knuckle and Shadow Blade for Gamma’s first phase, then make sure Top Spin or Search Snake has enough energy for Wily’s cockpit. Rush Jet can help with positioning on the approach, but it is not the weapon that defeats the final cockpit phase.
- Collect safe recovery items in Stage 6.
- Inspect current health and E-Tanks.
- Restore Hard Knuckle or Shadow Blade if needed.
- Preserve Top Spin or Search Snake for the second phase.
Break Gamma’s first phase
Gamma fills most of the boss room, and its head section fires projectiles downward. The first target is the exposed head area or the small robot mounted on that section, not the surrounding armor. Shadow Blade is effective from below: stand beneath the head, jump and fire upward, then return to a safe position as the projectiles descend.
Hard Knuckle is another effective choice. Reach the right-side platform and aim upward at the head, firing when the target is exposed. The slow fist makes positioning important, so attack after the immediate projectile pattern gives you room. Continue until the head section breaks and Dr. Wily appears in the cockpit. Do not spend Top Spin or Search Snake here if you still have enough Shadow Blade or Hard Knuckle energy, because those weapons are valuable in the final phase.
- Attack the exposed head section or mounted robot.
- Use Shadow Blade from below or Hard Knuckle from the right platform.
- Retreat after each attack if falling projectiles threaten Mega Man.
- Preserve Top Spin or Search Snake for Wily.
Defeat Wily in Gamma’s final phase
When Wily appears, Gamma continues attacking while its arm sweeps across the room and projectiles come from the cockpit. The arm is dangerous enough to cause an immediate defeat, so avoid waiting on the lower floor when it approaches. Use the platforms to create a route toward the cockpit and watch the arm’s movement before committing to a jump.
Top Spin is the fast method and can defeat Wily with one successful contact. Wait for the arm to provide access to the upper-right platform, then jump toward the cockpit with Top Spin active. Make the contact only when the route is clear; a premature jump can put Mega Man in the arm’s path or leave him below the platforms.
Search Snake is the slower ranged alternative. From the upper-right platform, jump toward the cockpit and fire Search Snake when Mega Man is close enough and high enough for the snake to reach the target. Return to a platform, avoid the next arm sweep and repeat. This requires several successful attacks, so do not expect a single Search Snake to finish the fight. If an attempt misses, prioritize survival and platform recovery over immediately firing again.
Once Wily’s cockpit is struck and Gamma is defeated, the fortress sequence ends and the game begins its ending. Continue through the ending text and credits to confirm completion of the main campaign.
- Use the platforms to stay clear of Gamma’s arm.
- Use Top Spin for the fast one-hit cockpit attack.
- Use Search Snake as the slower repeated-hit alternative.
- Do not remain on the lower floor during an arm sweep.
- Confirm that the ending text and credits appear.
Before you move on
- The cannon beneath Wily Machine No. 3 is destroyed with Spark Shock or another verified effective weapon.
- The dome over Wily’s cockpit is destroyed and Wily Fortress Stage 5 is cleared.
- Gamma’s exposed head section is destroyed.
- Wily’s cockpit is defeated with Top Spin or repeated Search Snake hits.
- The ending sequence begins after Gamma and Wily are defeated.
- The game reaches its ending text and credits, confirming completion of the main campaign.
Defeating Dr. Wily — final tips and ending sequence
The final NES fortress battle begins with Wily Machine 3 and continues directly into Gamma. Use Spark Shock on the machine’s lower cannon, then Hard Knuckle or Rush Jet against its exposed cockpit. During Gamma’s first phase, attack the exposed head with Shadow Blade or Hard Knuckle until it breaks away and Dr. Wily appears. In the final phase, Top Spin can defeat Wily’s cockpit with one successful contact, while Search Snake provides a slower ranged option. After the final hit, allow the collapse, rescue, epilogue and credits to play so the main campaign is fully completed.
Prepare before entering the final boss room
The last fortress stage has an item area immediately before the final battle. Collect the available items, then check your health and weapon meters before crossing into the boss room. The most valuable reserves are Spark Shock for Wily Machine 3’s first phase, Hard Knuckle for its cockpit and Gamma’s head, and either Top Spin or Search Snake for the final Gamma phase. Rush Jet is also useful against the machine’s cockpit, but it is not required for the entire fight.
Preserve Top Spin and Search Snake once the final fortress stage begins. Do not spend either weapon on ordinary enemies unless doing so is necessary to survive. Keep at least one Energy Tank available if possible, but do not take avoidable damage while trying to preserve minor pickups. The objective is to enter the boss room with enough health and weapon energy to complete several consecutive phases, not merely to reach the first machine.
- Spark Shock has enough energy for the lower cannon.
- Hard Knuckle is available for the machine or Gamma’s head.
- Top Spin or Search Snake has been preserved for Dr. Wily’s cockpit.
- Health and remaining Energy Tanks have been checked before the boss door.
Destroy the lower cannon of Wily Machine 3
At the start of the Wily Machine 3 battle, target the large gun turret mounted beneath the machine. Equip Spark Shock, jump and fire downward as Mega Man descends toward the turret. Repeat the jump-and-fire pattern while watching the shots released by the cannon. The lower turret is the intended target in this phase; firing at the main body does not advance the fight efficiently.
The cannon sends rotating shots across the room. Keep moving between attacks and jump over the projectiles when they approach at Mega Man’s height. If the machine’s movement pushes you toward a wall, move away early so the next shot does not trap you. Concentrate on destroying the cannon rather than trying to damage several parts at once. Once the lower cannon is destroyed, the machine changes to its exposed-cockpit phase.
- The lower gun turret has been destroyed.
- Spark Shock was used on the turret rather than wasted on unrelated enemies.
- Enough health remains for the cockpit phase.
Attack the exposed cockpit
After the lower turret is gone, Dr. Wily’s cockpit becomes the target while the machine moves on its large legs. Hard Knuckle is the direct weapon choice. Fire before the machine completes its downward movement so the slow projectile reaches the cockpit while it is exposed. The timing is predictive: launch the fist before the cockpit reaches its lowest point rather than waiting until it is directly above Mega Man.
Rush Jet provides an alternative in the original NES version. Ride near the upper part of the room, keep away from the machine’s legs and fire toward the cockpit while steering clear of the body and its shots. Do not fly directly underneath the machine as it drops. Search Snake is another possible weapon for this phase, but Hard Knuckle is the more practical reserve if you have it available. When the machine is destroyed, the game moves immediately into the Gamma battle.
- The Wily Machine 3 cockpit has been destroyed.
- Hard Knuckle, Search Snake or Rush Jet remains available for the machine’s vulnerable phase.
- You are ready for Gamma without assuming the game has ended.
Defeat Gamma’s first phase
Gamma’s blue head occupies the upper portion of the room and fires groups of shots toward Mega Man. The right-side platform provides a useful attack position, although you can also fight from below the head. Prioritize avoiding the incoming shots and keep a stable position instead of jumping repeatedly without a clear attack opportunity.
Use Shadow Blade and jump while throwing blades upward at Gamma’s exposed head. Hard Knuckle is another effective option if you retained its energy and can reach the elevated target. Continue attacking the exposed head section until it breaks away and Dr. Wily appears. Do not treat this as the end of the battle: the cockpit phase begins immediately after the head is destroyed. Save Top Spin for the phase that follows unless the situation leaves no other option.
- Gamma’s head is the active target.
- Shadow Blade or Hard Knuckle is equipped.
- The head’s shot pattern is being avoided before each attack.
- The head section has broken away and Dr. Wily has appeared.
Defeat Dr. Wily inside Gamma
When the head is destroyed, Dr. Wily appears in a cockpit while a large spiked arm sweeps through the lower part of the room. Treat contact with the spikes as fatal. Begin from the right-side platform when possible and wait for the arm to move into position. The flat top of the hand can be used as a temporary step to reach the higher platform, but do not touch the spikes along its edges.
Top Spin is the fastest solution. From the elevated position, jump toward Wily’s cockpit and activate Top Spin so Mega Man contacts the cockpit during the spin. One successful contact defeats this phase on the original NES version. This is a direct-contact attack, so wait for a clean route rather than jumping blindly through the arm.
Search Snake is the slower ranged alternative. From the platform, fire Search Snake toward Wily’s cockpit, then return to a safe position before the spiked arm reaches you. Repeat the attack until the cockpit is destroyed. Search Snake requires multiple successful attacks, so maintain control of Mega Man’s position and avoid dropping into the lower hazard area.
- Dr. Wily’s cockpit is visible after Gamma’s head has broken away.
- The spiked arm is being treated as a fatal hazard.
- Top Spin is selected for the fast contact method, or Search Snake is selected for the ranged method.
- The cockpit has been struck and the final battle has ended.
Recover after a failed attempt
If Mega Man dies, replay the final fortress section with a specific inventory plan. Refill Spark Shock, Hard Knuckle, Shadow Blade, Top Spin and Search Snake whenever safe energy pickups allow it. Use an Energy Tank for a genuine boss mistake or a low-health attempt, not for ordinary enemies that can be bypassed.
During Gamma’s first phase, dodge before firing and avoid spending Top Spin. During the second phase, wait for the spiked arm to provide a safe route to the upper platform. If using Search Snake, fire from the platform and retreat instead of trying to remain close to Wily’s cockpit.
A password can restore progress, but it should not be treated as a guarantee that every weapon meter, Energy Tank or life count from the failed attempt will be unchanged. After continuing, check the resumed stage and rebuild the required reserves before entering the final room.
- The current password or restart point has been recorded if needed.
- The final weapons have been replenished where possible.
- An Energy Tank remains available if the restored attempt permits it.
Watch the ending and verify completion
Once Dr. Wily’s cockpit is hit, Gamma is destroyed and the fortress-collapse sequence begins. Do not reset immediately. Allow the automatic collapse sequence to continue until Proto Man rescues Mega Man. The game then proceeds to its ending epilogue and credits.
The main campaign is complete only after the final boss has been defeated and the ending sequence has played. Viewing Gamma’s defeat alone is not enough for the completion check. Let the epilogue and credits continue before powering off or resetting.
- Wily Machine 3’s lower cannon and exposed cockpit have been destroyed.
- Gamma’s head has been defeated.
- Dr. Wily’s cockpit has been defeated during Gamma’s second phase.
- The fortress-collapse sequence has played.
- Proto Man has rescued Mega Man.
- The ending epilogue and credits have been viewed.
Before you move on
- The lower cannon and exposed cockpit of Wily Machine 3 have been destroyed.
- Gamma’s head has been defeated and has broken away.
- Dr. Wily’s cockpit has been defeated during Gamma’s second phase.
- The fortress-collapse and Proto Man rescue sequences have played.
- The ending epilogue and credits have been viewed.
Optional goals and 100% completion notes
The original North American NES release of Mega Man 3 has no percentage counter, item checklist, or formal 100% reward. Treat a complete campaign as defeating the eight Robot Masters, clearing the four mandatory Doc Robot revisits, defeating Break Man, completing all six Wily Fortress stages, defeating Wily Machine No. 3, defeating Gamma and Dr. Wily, and watching the ending and credits. Extra lives, E-Tanks, weapon refills, password planning and challenge runs are optional goals that make later attempts safer and more consistent.
1. Define the actual completion target
Start by defeating Magnet Man, Hard Man, Top Man, Shadow Man, Spark Man, Snake Man, Gemini Man and Needle Man. Each defeated Robot Master awards a weapon, but the original NES game does not record a separate percentage or item-completion total.
After the first eight stages, four revisited stages become available: Needle Man, Shadow Man, Spark Man and Gemini Man. These stages are mandatory even though their Doc Robot encounters do not award new weapons. Each revisited stage contains two fights based on Robot Masters from Mega Man 2.
After all four revisited stages are cleared, Break Man appears on the stage-selection route. Defeat him to open Wily Fortress. The fortress is a six-stage linear sequence. Wily Fortress stage 5 ends with Wily Machine No. 3. Wily Fortress stage 6 contains Gamma followed by the final Dr. Wily encounter. The campaign is not complete until the final battle triggers the ending and credits.
- Defeat all eight original Robot Masters.
- Clear the Needle, Shadow, Spark and Gemini Doc Robot stages.
- Defeat Break Man.
- Complete Wily Fortress stages 1 through 6.
- Defeat Wily Machine No. 3.
- Defeat Gamma and Dr. Wily.
- Watch the ending and credits.
2. Collect reliable E-Tanks before Wily Fortress
Several regular stages contain fixed E-Tanks that are useful preparation rather than mandatory objectives. Hard Man's stage has an E-Tank on an upper route in its forked section. Gemini Man's stage contains E-Tanks in and after the Rush Marine portion, while Needle Man's stage has another beyond the Needle Press section. Only take these detours when the surrounding movement is repeatable; an E-Tank is not worth repeatedly losing lives.
The Needle Doc Robot revisit also contains an E-Tank after a difficult mid-stage route. Because this stage is mandatory, you can combine item practice with required progression, but do not treat the pickup as a condition for success. Clear the stage first if necessary, then return on a later attempt to make the route reliable.
Wily Fortress contains further fixed E-Tanks, including opportunities in the early fortress stages and near the beginning of the final stage. Collect one when it is directly on a controlled route, but avoid turning a successful fortress run into a risky detour for a single item. The goal is to enter the later bosses with enough resources, not to maximize a hidden score that the game does not track.
- Take the Hard Man E-Tank when the upper route is consistent.
- Collect the Gemini Man and Needle Man E-Tanks only when their movement sections are under control.
- Practice the Needle Doc Robot E-Tank route separately if it causes repeated deaths.
- Collect fortress E-Tanks when they do not compromise the attempt.
3. Build lives and health without reckless farming
Gemini Man's stage contains a fixed 1-Up on a route reached after Proto Man removes an obstruction. The stage also has a surprise can in its water section. These items can help, but their exact contents are not guaranteed, so do not plan a fortress attempt around receiving a particular drop.
Wily Fortress stage 1 includes a 1-Up behind green barriers. Use Hard Knuckle to break through when you have enough weapon energy, then retreat safely rather than rushing into the next hazard. Enemy groups can also produce health, weapon energy or occasional extra lives, but these drops are random and should be treated as incidental recovery.
A practical reserve is more valuable than a theoretical maximum. Take a fixed 1-Up when the route can be repeated, but stop farming once you have enough lives and E-Tanks to make a serious progression attempt. Losing several lives while pursuing one item can leave you less prepared than if you had simply continued.
- Practice the Gemini Man 1-Up route before relying on it.
- Use Hard Knuckle for the Wily Fortress stage 1 barrier route when appropriate.
- Treat surprise-can contents and enemy drops as uncertain.
- Stop farming once the next attempt has a useful reserve.
4. Refill the weapon that matters before taking a capsule
Weapon-energy capsules restore the weapon currently equipped. Before collecting a small or large weapon capsule, switch to the weapon you intend to refill. This is particularly useful in the Doc Robot stages, where entering a boss room without the intended weakness weapon can make the fight much longer.
Use the Mega Buster against ordinary enemies whenever the route permits. Preserve Shadow Blade, Magnet Missile, Hard Knuckle, Needle Cannon, Search Snake and other special weapons for bosses, barriers or formations they handle efficiently. Rush Coil, Rush Marine and Rush Jet should also be treated as route resources instead of being spent casually.
The eight Robot Master rematches in Wily Fortress stage 4 provide recovery opportunities after individual fights. Choose an order that alternates difficult and easier encounters when possible, then use each refill deliberately before the next transporter. Preserving weapon energy and E-Tanks here makes Wily Machine No. 3, Gamma and Dr. Wily safer.
- Equip the intended weapon before touching a weapon-energy capsule.
- Use the Mega Buster for expendable enemies when possible.
- Preserve Rush Jet for required crossings and Rush Coil for mandatory vertical routes.
- Use rematch recovery to prepare for later bosses rather than wasting full meters.
5. Use a consistent route for replay practice
Mega Man 3 has separate weakness chains rather than one perfectly continuous route. A useful learning order is Top Man, Shadow Man, Spark Man, Magnet Man, Hard Man, Needle Man, Snake Man and Gemini Man. Top Spin helps against Shadow Man, Shadow Blade helps against Spark Man, Spark Shock helps against Magnet Man, Magnet Missile helps against Hard Man, Needle Cannon helps against Snake Man and Search Snake helps against Gemini Man.
This route does not make every fight effortless. A weakness weapon still requires accurate movement and does not prevent contact damage. If a weapon is difficult to use, finish the boss with the Mega Buster rather than wasting all of the special weapon's energy. The purpose of a route is to reduce trial and error, not to eliminate the need to learn each arena.
Keep the same order while learning stage layouts and boss patterns. Afterward, impose a personal restriction such as no E-Tanks, no deaths or Mega Buster use against selected bosses. The cartridge does not track these goals, so write the rule down before beginning.
- Use one fixed boss order while learning the campaign.
- Preserve each weakness weapon for its intended boss before spending it elsewhere.
- Practice Buster-only attempts separately from weakness-route attempts.
- Record challenge rules before starting a replay.
6. Set personal goals after the first clear
After reaching the ending once, optional goals can include collecting every fixed E-Tank and safe 1-Up, completing the campaign without E-Tanks, finishing without deaths or defeating selected bosses with the Mega Buster. These are player-imposed challenges, not requirements recognized by the original NES game.
Use passwords to practice one progression point at a time, but do not assume a password preserves every temporary condition from the previous attempt. Record the password together with remaining E-Tanks, lives, weapon energy and the next intended stage. This prevents a password from creating a false impression that every resource has been preserved exactly.
For an item-focused replay, maintain a written list of fixed pickups and mark an item only after collecting it safely. The game supplies no separate reward for completing such a list. The definitive campaign check remains the same: defeat the final bosses and reach the ending and credits.
- Complete one normal campaign before adding restrictions.
- Decide whether E-Tanks, weakness weapons, passwords and deaths are allowed in the challenge.
- Track resources separately from the password itself.
- Confirm that the ending and credits appear rather than stopping after Dr. Wily is defeated.
Before you move on
- All eight Robot Master icons are cleared and all eight Robot Master weapons have been awarded.
- The Needle, Shadow, Spark and Gemini Doc Robot stages are complete.
- Break Man has been defeated.
- Wily Fortress stages 1 through 6 are complete.
- Wily Machine No. 3 has been defeated.
- Gamma has been defeated.
- Dr. Wily has been defeated.
- The ending and credits appear.
- For an item-focused replay, written notes identify the fixed E-Tanks and 1-Ups collected without treating unsafe detours as required.
References for this chapter
- Mega Man 3/Walkthrough — StrategyWiki
- Mega Man 3/Items — StrategyWiki
- Mega Man 3/Weapons and Bosses — StrategyWiki
- Mega Man 3/Passwords — StrategyWiki
- Mega Man 3 — Guide and Walkthrough — NES — Warhawk
- Mega Man 3 — Guide and Walkthrough — NES — Humanvegetable
- Mega Man 3 (NES) Boss Guide — RetroMaggedon Gaming
Finishing up
You have finished the main campaign when Gamma and Dr. Wily are defeated and the ending sequence and credits have played.
Confirm completion by allowing the fortress-collapse scene, Proto Man rescue, Dr. Light epilogue, ending text and credits to finish.
If you need to resume a partial run, use the password associated with the relevant completed progression point. The Wily-fortress password starts the castle assault from its beginning; it does not resume inside a later fortress stage.
If you reach Wily Fortress under-resourced, restart from an earlier Robot Master or Doc Robot password and collect safe supplies before entering again. You cannot backtrack from inside the fortress to farm items.
Choose your next gameScreenshots & video
Game imagery for reference. Follow the written chapters above for the route and strategies.

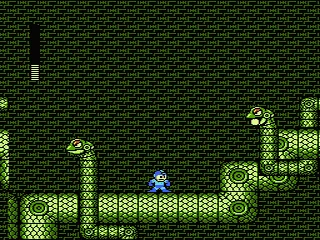
Sources & references
Our original guide draws on the references below. Check the edition at the top of this page before following controls or unlock requirements.
- Mega Man 3 — Capcom Town Original Game Manual
- Mega Man 3 Manual — VGMuseum
- Mega Man 3 — Controls
- Mega Man 3/Items — StrategyWiki
- Mega Man 3 — Guide and Walkthrough — NES — Doc Robot, Break Man and Wily Castle
- Mega Man 3 NES instruction manual
- Mega Man 3/Weapons and Bosses — StrategyWiki
- Mega Man 3/Walkthrough — StrategyWiki
- Mega Man 3 (NES) Boss Guide — RetroMaggedon Gaming
- Mega Man 3 — Boss Guide, GameFAQs FAQ by CMoriarty
- Mega Man 3 Data Base — Damage Data
- Chapter One: Magnet Man — Mega Man 3 Walkthrough & Guide
- Mega Man 3 — Guide and Walkthrough — NES — Break Man and Wily Castle Password
- Chapter Two: Hard Man — Mega Man 3 Guide and Walkthrough (NES)
- Mega Man 3 — Guide and Walkthrough — NES — Masvega
- Mega Man 3 Walkthrough — Spark Man’s Stage
- Mega Man 3 — Chapter Three: Top Man Walkthrough
- Chapter Four: Shadow Man - Mega Man 3 Walkthrough & Guide - GameFAQs
- Mega Man 3/Shadow Man - StrategyWiki
- Mega Man 3 Instruction Manual — NES USA
- Mega Man 3/Spark Man — StrategyWiki
- Mega Man 3/Snake Man — StrategyWiki
- Mega Man 3 Robot Master List: Snake Man — Capcom News
- Mega Man 3/Gemini Man — StrategyWiki
- Mega Man 3 — Guide and Walkthrough — Meowthnum1, GameFAQs
- Chapter Eight: Needle Man - Mega Man 3 Walkthrough & Guide - GameFAQs
- Mega Man 3 — StrategyWiki
- Mega Man 3/Doc Man in Shadow stage — StrategyWiki
- Mega Man 3 (U) — Annotated ca65 Disassembly
- Mega Man 3 — Guide and Walkthrough — NES — By TBaker
- Mega Man 3 — Guide and Walkthrough — NES — Chapter Thirteen: Break Man
- Mega Man 3 — MMHP Game Hints
- Mega Man 3/Wily Fortress 3 — StrategyWiki
- Mega Man 3/Wily Fortress 4 — StrategyWiki
- Mega Man 3 — Guide and Walkthrough — NES — Warhawk
- Mega Man 3 - Guide and Walkthrough - NES - By Gbness
- Wily Castle (Mega Man 3)
- NES Instruction Manuals: Mega Man 3
- Mega Man 3/Wily Fortress 6 — StrategyWiki
- Mega Man 3 — Guide and Walkthrough — NES — Humanvegetable
- Mega Man 3/Passwords — StrategyWiki
About the game & collecting notes
- Platform
- Nintendo Entertainment System
Step-by-step campaign coverage for the original Nintendo Entertainment System release of Mega Man 3 (USA). Wily confrontation. Practical tactics, stage objectives, recoveries and a clear completion checklist are included.
Darryl Polo
Darryl Polo loves tinkering with emulation and revisiting retro games. He enjoys exploring how old favorites play on different setups and sharing what he learns along the way. At Joking Joystick, he writes about the games, hardware, and small discoveries that keep the hobby fun.
Our editorial standardsFound a step that needs another look? Help us improve this guide.