Mega Man 2 (Nintendo Entertainment System, USA) — Complete Campaign Walkthrough
Step-by-step directions to complete Mega Man 2's original NES (USA) release: recommended boss order, stage-by-stage tactics, item and E-Tank guidance, full Wily Fortress route and final-battle methods. Designed for first-time players and veterans who need concrete routes, recovery tactics and a clear completion checklist to reach the canonical ending.

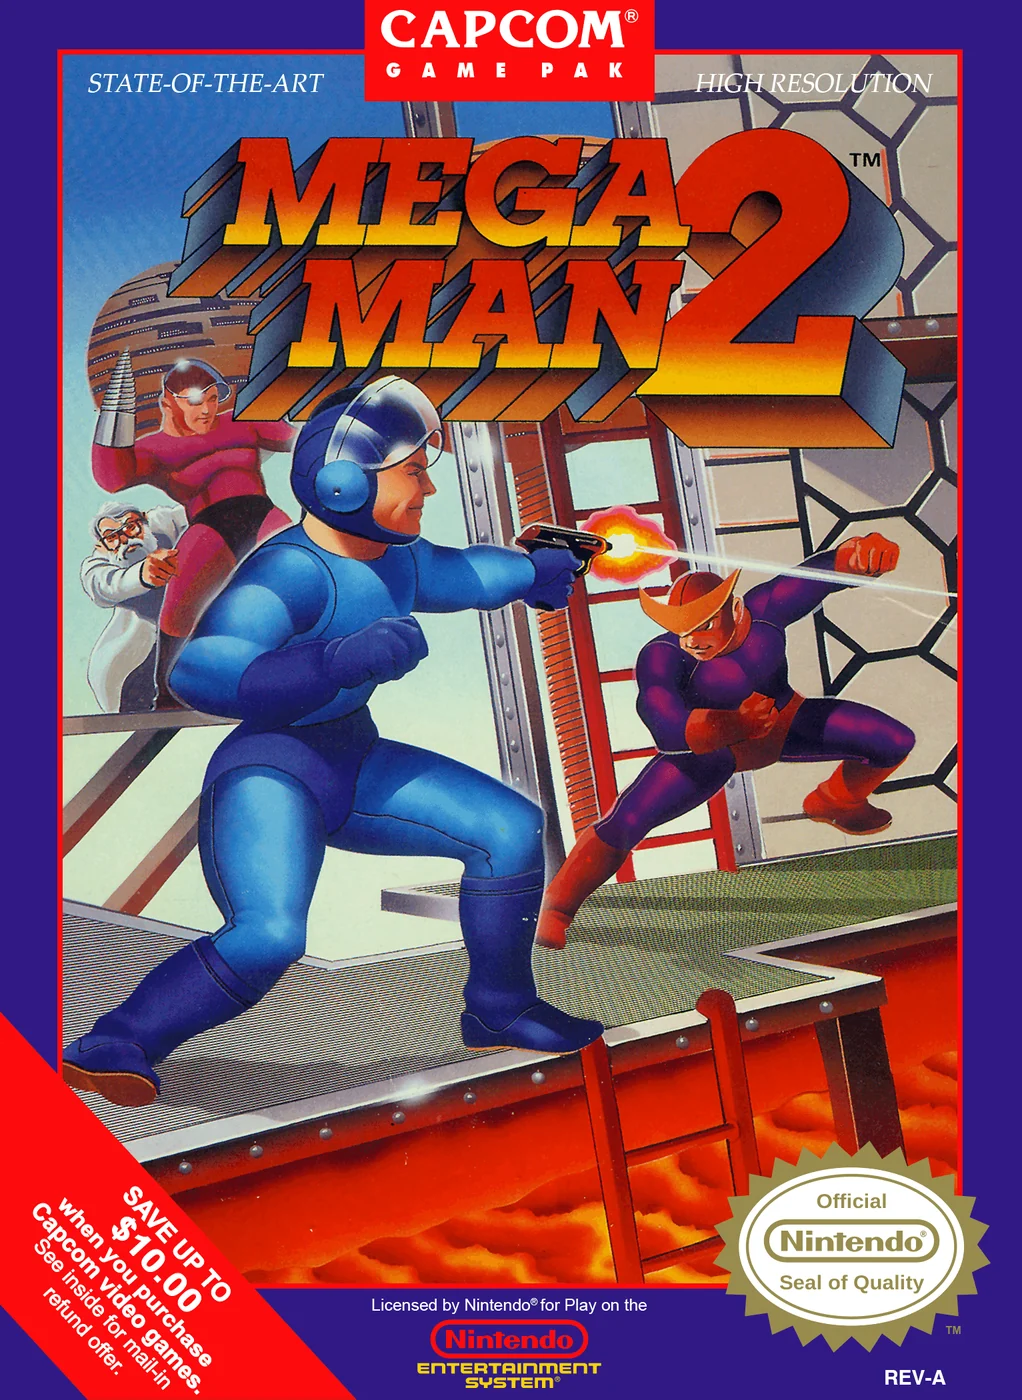
Find a copy
Mega Man 2 Nintendo Entertainment System
We may earn a commission if you buy through these links, at no extra cost to you. As an Amazon Associate I earn from qualifying purchases.
Opens retailer search results. Check the model, edition, seller, availability and current price before buying.
Before you begin
Mega Man 2 uses a simple NES control scheme: the Control Pad moves, A jumps, B fires, Start opens weapon-selection screen 1, and Select advances to weapon-selection screen 2 while the weapon menu is open. The original NES release has no charged Mega Buster, crouch, dash or separate run command.
Start with Metal Man, then use the recommended boss route to obtain Metal Blade, Time Stopper, Item-2, Crash Bomber, Bubble Lead, Atomic Fire and Leaf Shield before entering Dr. Wily’s fortress.
This walkthrough gives playable stage routes, boss tactics, required fortress weapons, recovery options and a completion check that ends only after the Alien is defeated and the ending sequence begins.
Use ordinary Mega Buster shots for standard combat, conserve special-weapon energy for confirmed weaknesses and mandatory fortress obstacles, and treat Crash Bomber as essential for Boobeam Trap. Any Crash Bomber energy remaining afterward is useful against Wily Machine No. 2, but the final machine battle also includes verified fallback options using other available weapons.
Set yourself up for the run
Use the NES controls: Control Pad to move and operate ladders, A to jump, B to fire, Start to open the weapon-selection screen and Select to advance between its two pages.
Do not look for a charged Mega Buster, crouch, dash or separate run command; none exists in the original NES Mega Man 2 release.
Practice short jumps, ladder alignment, moving-platform timing and controlled single shots before entering the Robot Master stages.
Use the recommended boss order: Metal Man, Flash Man, Quick Man, Air Man, Crash Man, Bubble Man, Heat Man and Wood Man.
Defeat Air Man for Item-2 before relying on the safer route through Heat Man’s disappearing-block lava crossing.
Defeat Flash Man for Time Stopper before Quick Man if the Force Beam sections are the main obstacle.
Reserve Crash Bomber first for the mandatory Boobeam Trap barriers and emitters. Do not assume a fixed amount will remain afterward for Wily Machine No. 2.
Prepare Atomic Fire or Metal Blade for Wily Machine No. 2’s armored first phase, using whichever weapon has been preserved and can be connected reliably. Prepare Air Shooter, Metal Blade, Quick Boomerang or any remaining Crash Bomber for the exposed second phase.
Keep Bubble Lead available for the Alien battle; it is the only weapon that damages that final encounter.
Items 1, 2 and 3 remain in the inventory after acquisition, but each activation consumes energy from its own gauge.
Collect safe E-Tanks when practical, remembering that the original NES inventory holds a maximum of four.
Record the password after completing the Robot Master sequence, but remember that a fortress restart begins at Wily Stage 1 rather than resuming at a later castle stage.
Enter Wily’s fortress prepared for the complete sequence: Stages 1-4, Robot Master rematches, both phases of Wily Machine No. 2 and the final Alien stage.
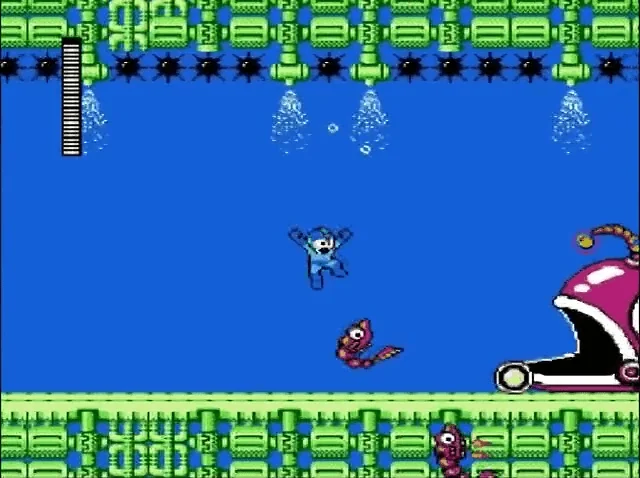
Getting Started: Controls, Menu and Basic Movement
Mega Man 2 on the original North American Nintendo Entertainment System uses a compact control scheme, but its weapon menu has an important two-page layout. The Control Pad moves Mega Man and navigates menus, A jumps, B fires, Start opens weapon-selection screen 1 or confirms a choice, and Select advances from weapon-selection screen 1 to screen 2 while the weapon menu is open. There is no charged Mega Buster, crouch, dash, or separate run command in this edition. Learn the menu before entering a Robot Master stage, then practice short jumps, ladder alignment, single shots and moving-platform timing with the Mega Buster.
Learn the NES controller layout
Use Left and Right on the Control Pad to move Mega Man. Press Up or Down when Mega Man is aligned with a ladder to climb or descend it. Press A to jump and B to fire the currently selected weapon. The Control Pad is also used to move the cursor through the weapon-selection screens and to choose a weapon or item.
Mega Man fires in the direction he is facing, so turn toward an enemy before pressing B. There is no separate running button: holding Left or Right simply produces continuous horizontal movement. The original NES release also has no charged Mega Buster, crouch command or dash input. Holding B does not create a stronger shot. It fires ordinary repeated attacks subject to the game’s normal firing limit.
Use the standard Mega Buster while learning an unfamiliar room. It does not consume weapon energy, so it is the safest tool for practicing enemy spacing, ladder approaches and jump timing. Save special weapons for a clearly identified weakness, a difficult obstacle or a section where their properties provide a real advantage.
- The Control Pad moves Mega Man and navigates the weapon menu.
- A jumps.
- B fires the selected weapon.
- Up and Down operate ladders when Mega Man is aligned with them.
- The NES version has no charge shot, crouch, dash or dedicated run command.
Open and navigate the two-page weapon menu
Press Start during a stage to open weapon-selection screen 1. The action is paused while the weapon-selection screen is displayed. Use the Control Pad to highlight an entry. Press Select while the menu is open to advance to weapon-selection screen 2, which contains the remaining weapons and items as they become available. Select is the page-advance command in the weapon menu; do not treat it as a separate gameplay pause button.
When the intended weapon or item is highlighted, press Start to confirm it and return to the stage. Start therefore has two menu functions: it opens weapon-selection screen 1 during gameplay and confirms the highlighted selection after you have navigated to the desired entry. If you need to return to the first page, use the menu’s on-screen navigation rather than repeatedly pressing buttons at random; check which page and entry are highlighted before confirming.
Practice the complete sequence in a safe area: press Start, identify the current page, use the Control Pad to move the cursor, press Select to reach the second page when necessary, highlight the Mega Buster or a special weapon, and press Start to confirm. The same procedure is required for usable items such as Item-1, Item-2 and Item-3 after they have been acquired. Weapon selection is essential during stages and boss fights, so build the habit before danger is nearby.
- Press Start to open weapon-selection screen 1.
- Use the Control Pad to move the cursor.
- Press Select while the menu is open to advance to weapon-selection screen 2.
- Highlight the required weapon or item.
- Press Start to confirm the selection and return to play.
- Do not use Select as a separate plain-pause command.
Practice single shots and short hops
At the beginning of a Robot Master stage, stop near the first safe group of enemies and tap B for several individual Mega Buster shots. Repeat the exercise while walking. Mega Man can fire while moving, but controlled taps make enemy spacing easier to read and leave you ready to jump or stop at a platform edge. Continuous firing is not automatically safer, especially when a projectile or moving enemy requires a precise response.
Use short jumps to clear ordinary enemies and their shots. Press A for the immediate obstacle, hold the destination direction, and land before deciding on the next action. Avoid jumping repeatedly simply because the button is available. Unnecessary jumps can carry Mega Man into an enemy, onto a moving hazard or beyond the safe landing area.
If an enemy passes behind you, turn around before firing. When there is room, walk away, turn, and shoot instead of jumping blindly. Keep the Mega Buster equipped while learning a section, then switch from the weapon menu only when a special weapon has a specific purpose. This also prevents accidental energy loss from firing a weapon that you did not intend to select.
- Fire individual Mega Buster shots while standing still.
- Fire individual shots while walking.
- Use a short jump to clear one enemy or projectile.
- Turn toward an enemy before firing.
- Keep the Mega Buster equipped until a special weapon is needed.
Handle ladders, ledges, pits and moving platforms
Approach a ladder slowly and align Mega Man with it before pressing Up or Down. At the top or bottom, pause long enough to identify the platform or ledge where Mega Man will emerge. Do not immediately walk or jump away if an enemy or pit is waiting on the other side. A badly timed exit can send Mega Man straight into a hazard.
Moving platforms follow fixed routes, but the timing differs between stages. When a route is unfamiliar, watch one complete cycle before committing. Stand near the platform’s center whenever possible, then move toward the destination as the platform reaches a useful launch position. Press A near the edge rather than jumping immediately after landing; this preserves room for correction.
Mega Man 2 contains pits, disappearing blocks, conveyor-like surfaces, saws and other stage-specific hazards. Treat a pit as fatal unless a visible platform, ladder or required item route clearly crosses it. There is no dash-jump technique in this edition. For a longer normal jump, hold the direction of the destination before pressing A and continue holding it through the jump. The extra reach comes from ordinary horizontal movement, not from a hidden run or dash input.
- Align Mega Man with a ladder before pressing Up or Down.
- Watch an unfamiliar moving platform through a full cycle.
- Stand near the platform center when possible.
- Hold the destination direction through a long normal jump.
- Do not attempt to cross a pit without a visible route or required item.
Prepare before a Robot Master fight
Before entering a boss room, decide whether to begin with the Mega Buster or a known weakness weapon. If the desired weapon is not equipped, open the menu before crossing into the room, navigate to the correct page, highlight the weapon and press Start to confirm. This is safer than trying to change equipment after the boss has already begun its first attack cycle.
If the boss pattern is unfamiliar, begin with the Mega Buster and observe the movement from a safe position. When there is a genuine opening, press Start, use the Control Pad to navigate, press Select if the weapon is on screen 2, and press Start again to confirm. Return to the Mega Buster when the special weapon is no longer needed so its energy remains available for a later obstacle or weakness.
Do not wait for a charge shot or search for a crouch command during a boss attack. Neither exists in the original NES Mega Man 2. Success depends on ordinary shots, correct weapon selection, deliberate jumps and positioning. If you need to stop before navigating the menu, move to a safe platform first; the weapon screen is the intended way to pause action while changing equipment.
- Choose the starting weapon before entering the boss room.
- Open the menu from a safe position.
- Use Select to reach screen 2 when the desired weapon or item is there.
- Confirm the highlighted selection with Start.
- Return to the Mega Buster when conserving special-weapon energy is important.
Before you move on
- You can identify the Control Pad as movement and menu navigation, A as jump, B as fire, Start as the weapon-menu and confirmation button, and Select as the command that advances to weapon-selection screen 2 while the menu is open.
- You can open weapon-selection screen 1, navigate with the Control Pad, advance to screen 2 with Select, highlight a weapon or item and confirm it with Start.
- You can return to the Mega Buster without confusing the two menu pages.
- You can defeat a basic enemy with a short hop and a controlled shot without relying on continuous fire.
- You can align Mega Man with a ladder, climb safely and wait through a moving-platform cycle before jumping.
- You understand that longer jumps use ordinary horizontal movement and that this NES edition has no charge shot, crouch, dash or separate run button.
- You can enter a Robot Master room with the intended weapon equipped and change weapons through the two-page Start-menu system when necessary.
Recommended Boss Order and Resource Strategy
The original North American NES release lets you choose the eight Robot Master stages in any order. A practical newcomer route is Metal Man, Flash Man, Quick Man, Air Man, Crash Man, Bubble Man, Heat Man, then Wood Man. Metal Man provides the highly versatile Metal Blade immediately, Flash Man provides Time Stopper before the dangerous Quick Man laser corridors, and Air Man provides Item-2 before Heat Man’s disappearing-block sequence. The eight main-stage weapon and Item gauges are fully restored whenever one of those stages begins, so you do not need to carry special-weapon energy from one Robot Master stage to the next. You still need to manage energy during each individual stage, and fortress stages require stricter conservation because the automatic restoration rule does not apply between them.
1. Start with Metal Man for Metal Blade
Select Metal Man first and enter the stage with the Mega Buster. The level uses conveyor belts, moving platforms and instant-death saw hazards, but no special weapon is required to reach the boss. Make short, deliberate jumps rather than chasing enemies across moving platforms. On a conveyor, begin correcting your position before the belt carries you toward a pit or saw. If an enemy can be passed safely, do not stop on a dangerous belt just to destroy it.
Metal Man can be defeated with the Mega Buster. Fire single shots, then jump over his Metal Blades and avoid standing directly in his path. His conveyor changes direction during the fight, so keep checking whether the floor is pulling you toward him or away from him. When he jumps, focus first on avoiding the blade and his landing position; attack during the opening after he lands.
Defeating Metal Man awards Metal Blade. This is the most useful early weapon for the recommended route because it fires in eight directions. It can hit enemies above, below or beside Mega Man without requiring exact platform alignment. Use it against dangerous enemies and awkwardly placed targets, but there is no need to conserve its gauge for the next Robot Master stage: all special-weapon and Item gauges are restored at the beginning of each of the eight main stages. Conservation still matters if you are using Metal Blade repeatedly inside Metal Man’s stage.
- Defeat Metal Man with the Mega Buster.
- Receive Metal Blade.
- Test horizontal, vertical and diagonal Metal Blade shots in a safe area.
- Use special-weapon energy carefully inside the stage, but do not worry about carrying the gauge into the next Robot Master stage.
2. Defeat Flash Man before Quick Man
Choose Flash Man next and use Metal Blade for both ordinary enemies and the boss when convenient. Flash Man’s stage includes slippery surfaces and routes where careless movement can send Mega Man into a hazard. Keep jumps controlled on the ice, avoid fighting enemies in exposed positions when you can safely pass them, and use Metal Blade’s angled shots to attack enemies from a safer floor or platform.
Flash Man awards Time Stopper and Item-3. Time Stopper freezes the surrounding action while its energy drains, and once activated it cannot be manually cancelled. Treat it as a planned resource rather than a normal projectile. Item-3 is a separate permanent ability that creates a temporary platform which can climb a wall after being launched into it. It is useful in selected vertical passages but is not required for every screen.
The key reason for taking Flash Man before Quick Man is that Time Stopper can neutralize much of Quick Man’s laser hazard section. If you already know the laser timing, you can complete the corridor manually and save Time Stopper for the boss. If the corridor is causing repeated deaths, use Time Stopper for that section instead. The main-stage gauge restoration means Time Stopper begins full when you enter Quick Man’s stage, regardless of how much of it you used in Flash Man’s stage.
- Defeat Flash Man with Metal Blade or the Mega Buster.
- Confirm that Time Stopper and Item-3 have been awarded.
- Plan whether Time Stopper will be used for Quick Man’s laser corridor or the boss.
- Remember that the Time Stopper gauge is restored when Quick Man’s main stage begins.
3. Enter Quick Man with a deliberate laser plan
Select Quick Man after Flash Man. The early laser corridors are the main reason for this placement. Watch the repeating pattern before committing to a jump. Move in short bursts, wait for a safe opening and cross with a controlled jump rather than making a long leap simply because the next platform is visible.
If the timing is not yet reliable, activate Time Stopper immediately before the dangerous laser section and keep moving while the hazards are frozen. Do not spend it on routine enemies beforehand. If you choose to save it for the boss, use manual timing through the corridor and take each screen as a sequence of short, repeatable movements. The goal is consistency, not speed.
Quick Man jumps, throws boomerangs and makes rapid horizontal runs. Stay near the center of the room so you have room to jump over a dash without being trapped against a wall. Fire the Mega Buster or Metal Blade when he crosses your height, then prioritize escaping his approach over chasing him. Time Stopper can remove a substantial portion of his health, but finishing with the Mega Buster or Metal Blade is a valid fallback if the weapon was used in the stage.
- Complete the laser corridor with Time Stopper or reliable manual timing.
- Avoid spending Time Stopper on minor enemies before the section that needs it.
- Fight Quick Man with Time Stopper, the Mega Buster or Metal Blade according to the resources you have.
- Use an E-Tank only when it is likely to convert the attempt into a clear.
4. Take Air Man for Air Shooter and Item-2
After Quick Man, select Air Man. Use the Mega Buster; Leaf Shield is not yet available on this route. Air Man fires groups of tornadoes that occupy much of the room and push Mega Man backward. Watch the lowest tornado in each group. A short jump can clear it, but jumping without checking the higher tornadoes may cause a collision. Continue moving carefully so the wind does not pin you against the wall.
Defeating Air Man awards Air Shooter and Item-2. Air Shooter sends three rising tornadoes forward and is the recommended weapon for Crash Man. Item-2 is a permanent ability, not a single-use pickup. When activated, it creates a jet platform that moves straight ahead until its energy runs out or it reaches an obstruction. Give it a clear launch path, then board it promptly.
Item-2 is particularly valuable before Heat Man because it can carry Mega Man across the long disappearing-block section above lethal terrain. It also helps with selected gaps and optional pickups elsewhere. Deploy it from stable ground whenever possible. A platform launched too close to a wall or hazard may disappear before Mega Man can use it.
- Defeat Air Man with the Mega Buster.
- Confirm Air Shooter and Item-2 in the weapon and Item screens.
- Practice deploying and boarding Item-2 from solid ground.
- Use Item-2 to reduce the risk of Heat Man’s disappearing-block section if that sequence is unreliable.
5. Defeat Crash Man with Air Shooter
Enter Crash Man’s stage with Air Shooter available for the boss. Metal Blade is effective against ordinary vertical-stage enemies, while Air Shooter should be treated as the preferred boss weapon. Because the gauge will be restored when the stage begins, you do not need to preserve Air Shooter from the previous stage; you do need to avoid wasting all of it before reaching the boss.
Crash Man bounces around the room and throws bombs that attach to surfaces before exploding. Fire Air Shooter when he jumps into your line, then keep moving so an attached bomb does not trap you against a wall. Do not stand directly beneath his landing point. If the fight becomes crowded, prioritize a clean escape route before taking the next shot.
Crash Bomber is awarded only after Crash Man is defeated. It attaches to solid surfaces and detonates after a delay. Preserve its energy for fortress progression, especially the Boobeam Trap. Crash Bomber is not available during Crash Man’s stage, and Crash Man does not award Rush Coil; the post-boss reward is Crash Bomber alone.
- Defeat Crash Man with Air Shooter or the Mega Buster.
- Receive Crash Bomber after the boss fight.
- Avoid using Crash Bomber on ordinary enemies during later stages unless a route specifically requires it.
- Remember that Crash Bomber conservation matters for Wily Fortress, not for the transition between Robot Master stages.
6. Finish with Bubble Man, Heat Man and Wood Man
Take Bubble Man next and use Metal Blade. Underwater movement gives Mega Man higher jumps, but the stage contains spikes that kill on contact. Control the height of each jump and check the ceiling before rising. Metal Blade can attack enemies at multiple elevations while Mega Man remains on a safer platform. Bubble Lead is awarded after the boss and should be reserved for the final Alien encounter.
Select Heat Man after Bubble Man and use Bubble Lead. Heat Man’s fireballs create temporary flame pillars when they strike the floor. Move through the gaps with short hops instead of waiting in a narrow space. Bubble Lead travels along the floor and is the intended weapon for this fight. Heat Man awards Atomic Fire and Item-1.
Item-1 creates a rising platform and is useful in selected vertical passages. Atomic Fire has multiple charge levels: hold the attack button to build a stronger shot, then release it when a durable target is exposed. The larger charge consumes more energy, so use it for bosses or critical targets rather than ordinary enemies. Since the next Robot Master stage begins with restored weapon gauges, you can use the appropriate weapon without trying to carry the remaining Heat Man energy into Wood Man.
Finish with Wood Man and use a fully charged Atomic Fire when his Leaf Shield is down. He releases falling leaves, throws the shield around the room and advances with jumps. Fire after the shield has been thrown, then reposition for the next cycle. If Atomic Fire is empty or the charge timing is uncomfortable, Metal Blade is a dependable backup. Wood Man awards Leaf Shield, completing the eight special weapons and Items from the main stages.
- Defeat Bubble Man with Metal Blade and receive Bubble Lead.
- Defeat Heat Man with Bubble Lead and receive Atomic Fire and Item-1.
- Use Item-2 to make Heat Man’s disappearing-block section safer if necessary.
- Defeat Wood Man with Atomic Fire or Metal Blade.
- Preserve Bubble Lead for the final Alien encounter.
7. Manage energy, E-Tanks and passwords by game section
The original NES instruction manual states that weapon and Item gauges are fully restored at the beginning of each of the eight main stages. This means a depleted Metal Blade gauge after Metal Man does not remain depleted when Flash Man’s stage begins, and spending Time Stopper in Flash Man’s stage does not leave it empty when Quick Man’s stage begins. The Mega Buster never consumes weapon energy and remains available at all times.
Within a stage, weapon-energy pickups restore only the weapon or Item currently equipped when the pickup is collected. If you need to refill Air Shooter, equip Air Shooter before taking the capsule. Do not collect a weapon-energy capsule while another weapon is active and assume the desired weapon will be restored automatically.
E-Tanks are optional life-energy reserves and the original game allows a maximum of four in the inventory. Use one when it is likely to carry you through a boss or a decisive hazard sequence. Do not spend every tank on a first attempt that can instead be improved by changing the boss order or practicing one obstacle. The reset between Robot Master stages also makes it more practical to attempt a difficult stage with the correct weapon rather than forcing a depleted gauge.
After clearing a Robot Master stage or receiving a Game Over, record the password if you need a recovery point. Passwords preserve acquired weapons and Items, but a password produced after a Game Over in Dr. Wily’s fortress returns Mega Man to the beginning of the fortress rather than the later fortress stage. The fortress should therefore be entered with a plan for Crash Bomber, Bubble Lead and the weapons needed by the fortress bosses. Unlike the eight main stages, do not assume a fresh full weapon gauge at every fortress-stage transition.
- Confirm that all eight Robot Masters are defeated.
- Confirm that all eight special weapons and Items have been awarded.
- Use weapon-energy pickups only while the weapon or Item you intend to refill is equipped.
- Use E-Tanks as deliberate attempts to secure a boss or major hazard section.
- Record the password after the main-stage clear if a restart may be needed.
- Enter Wily Fortress with Crash Bomber reserved for Boobeam Trap and Bubble Lead reserved for the Alien.
Before you move on
- Metal Blade, Time Stopper, Air Shooter, Item-2, Crash Bomber, Bubble Lead, Atomic Fire, Item-1 and Leaf Shield have been awarded by defeated Robot Masters.
- All eight Robot Master stages are cleared and Dr. Wily’s fortress is selectable.
- Quick Man’s laser route has been completed using Time Stopper or reliable manual timing.
- The player understands that the eight main stages begin with restored special-weapon and Item gauges, while Wily Fortress requires conservation across its linked stages.
- Crash Bomber remains available for fortress progression, and Bubble Lead is reserved for the Alien.
- The password has been recorded if a restart is needed, with the understanding that a fortress Game Over returns the player to the fortress entrance.
- The player is ready to begin the fixed Wily Fortress sequence rather than selecting another Robot Master stage.
Metal Man Stage — Objective: Gain Metal Blade and Reach Boss
Metal Man is a strong opening choice in the original North American NES release. The stage teaches conveyor-belt timing, falling Press hazards and careful movement around pits. You can collect one E-Tank safely during the opening conveyor section. A second E-Tank appears later below a wide pit, but it is an optional Item-2 pickup rather than a normal jump. Clear the route with the Mega Buster, defeat Metal Man, then confirm and practice the newly awarded Metal Blade.
Cross the opening conveyors and collect the first E-Tank
Move right from the starting point and jump the first narrow gap. The next conveyor pulls toward the left, back toward the pit you just crossed, so keep jumping in short controlled hops while holding right. Do not simply run across it: the belt can carry Mega Man off the edge faster than expected.
The first E-Tank is in this early conveyor section, in the gap between the lower conveyor and the higher route. Continue right along the lower belt to reach it, then return left and work back around to the upper conveyor. Take the tank only when you can see the landing area clearly. It is a useful optional resource, but falling into the pit costs a life and is not worth forcing while learning the stage.
- Jump the first gap from the opening right-moving conveyor.
- Counter the left-moving belt with short hops while holding right.
- Collect the first E-Tank only after confirming the landing route.
- Return to the upper conveyor after taking the tank.
Time the Press traps one cycle at a time
The upper conveyor route passes beneath several heavy Press traps suspended from chains. A Press drops when Mega Man approaches, then rises more slowly. Wait until the Press is rising and the opening beneath it is visibly clear before moving through. The chain and the Press both count as hazards, so do not jump into the chain while trying to pass.
Use the arrows and the belt movement to judge your position, but give priority to the Press cycle. Move only to the next safe section, then stop and watch the next trap. If a Press has just fallen, waiting for it to begin rising is safer than trying to squeeze beneath it on the way down. Fire ordinary Mega Buster shots at nearby enemies, but do not chase a target into the next trap.
- Let each Press fall before advancing beneath it.
- Pass while the Press is rising, not while it is descending.
- Avoid touching the chain as well as the Press.
- Advance from one safe section to the next instead of rushing the whole sequence.
Handle the Mole and Pierobot sections without overcommitting
After the Press sequence, the route returns to conveyors and solid platforms populated by Moles. Moles emerge from the floor and ceiling, so keep moving and fire ahead of you rather than stopping directly over a likely emergence point. If a health capsule appears, take it only when the surrounding platform is secure; a recovery item is not worth falling into a pit.
Later, Pierobots drop onto moving gears and attack from above. Shoot the Pierobot or its gear as it enters your path, then wait for the next one before stepping onto the following conveyor. Several appear in succession, and moving too quickly can put one directly on top of Mega Man. Use single Mega Buster shots and short jumps to maintain control.
- Watch for Moles from both the floor and ceiling.
- Shoot or avoid Pierobots before stepping onto their gears.
- Keep moving through enemy sections, but do not outrun the screen.
- Take health pickups only from stable ground.
Climb past Blockys and Springers
The later solid-ground section contains Pierobots followed by Blockys. Shoot a Blocky when its face is exposed, then back away from the pieces and wait for it to re-form before firing again. If the walkway is narrow, jumping over the Blocky is often safer than standing beside it and trading contact damage.
Continue to the pit and jump to the next platform. Springers move slowly until they share Mega Man’s platform, at which point they rush toward him. Let a Springer approach, jump over it, and continue upward. Near the higher ledges, draw the next Springer toward you before jumping; this prevents it from reaching the landing point at the same time as Mega Man. After the final Springer, climb to the boss gate.
- Fire at Blocky when its face is exposed.
- Back away while Blocky re-forms instead of touching its pieces.
- Bait each Springer onto your platform, then jump over it.
- Center Mega Man on the upper ledges before making the next jump.
Decide whether to take the second E-Tank
The second E-Tank is below a wide pit in the later half of the stage. It is not part of the normal route. If you drop down to collect it without Item-2, the opposite ledge is too far away for a normal return jump, so the pickup costs a life. Leave it behind on a first attempt.
If you already defeated Air Man and obtained Item-2, you can use the rocket platform to cross the gap after collecting the tank. Deploy Item-2 from the ledge, board it, and steer across the opening toward the far side. Because Item-2 is limited by weapon energy and can carry Mega Man into danger, use it only when the crossing is aligned. The E-Tank is helpful but never required to defeat Metal Man or progress through the game.
- Treat the second E-Tank as optional.
- Do not drop for it without Item-2 unless you deliberately accept losing a life.
- Use Item-2 only after lining up the crossing from the ledge.
- Skip the pickup if the attempt is costing lives or leaving you unable to reach the boss.
Defeat Metal Man with the Mega Buster
The original NES Mega Man 2 does not have a charged Mega Buster, so enter the boss room with the ordinary arm cannon selected. Metal Man can be defeated reliably with repeated standard shots. The floor conveyor changes direction during the fight; a screen flash signals the change, so immediately correct your position instead of continuing to hold the same direction.
Metal Man repeatedly jumps and throws Metal Blades. When he jumps over Mega Man, keep moving and avoid contact on the landing. When he jumps more vertically, watch the blades and move or jump through the safe space rather than standing still. Fire when he is crossing your line or has landed within range. Staying active near the center of the room gives more room to react than being pinned against a wall.
If you later return during the Robot Master refights, Metal Blade is an effective weapon against Metal Man, but it is unavailable during this first encounter. Quick Boomerang is another effective special weapon in a later fight; neither is necessary for the initial clear.
- Enter with the standard Mega Buster; there is no charge-shot mechanic.
- Fire repeatedly as Metal Man crosses the room or lands in range.
- Watch the screen flash for the conveyor-direction change.
- Avoid Metal Man’s body on both his jumps and landings.
- Use an E-Tank only when it gives you a realistic chance to finish the fight.
Confirm and practice Metal Blade
After Metal Man is defeated, the victory screen awards Metal Blade. Return to the stage-select screen, open the weapon-selection menu and confirm that the Metal Blade icon is available. On the original NES version, Metal Blade can be fired in eight directions: horizontal, vertical and diagonal. Hold the desired direction before pressing the fire button, then adjust your position rather than wasting shots trying to correct a poorly aimed blade.
Test the weapon on ordinary enemies in the next stage. Its wide directional coverage is especially useful against enemies on raised ledges, below Mega Man or approaching from awkward angles. Metal Blade consumes little weapon energy, but do not empty the gauge on harmless targets. Keep enough available for difficult platforming sections and the planned Flash Man fight.
- Confirm Metal Blade appears in the weapon-selection menu.
- Practice horizontal, vertical and diagonal shots on ordinary enemies.
- Use directional aiming instead of jumping unnecessarily to line up targets.
- Preserve some Metal Blade energy for later stage hazards and bosses.
- Continue only after Metal Man’s weapon is available for the next route.
Before you move on
- Metal Man is defeated and the victory screen awards Metal Blade.
- Metal Blade is visible in the weapon-selection menu after returning to stage select.
- You have tested Metal Blade’s horizontal, vertical or diagonal aiming on ordinary enemies.
- The first E-Tank has been collected if safely reachable, or deliberately skipped without affecting progression.
- The later E-Tank has been left behind unless you already have Item-2 and can cross the gap safely.
- You are ready to use Metal Blade in the next stage without relying on an incorrect charge-shot mechanic.
Flash Man Stage — Objective: Secure Time Stopper and Item-3
Flash Man’s stage uses slippery floors, misleading drops, Shotmen, Mech Joes and Guard Joes. Follow the lower route through the opening, use the side passage after the first Mech Joe to avoid unnecessary danger, and take the optional Energy Tank from the small-platform section before backtracking to the boss route. Metal Blade is the most convenient weapon for both the stage and Flash Man. Victory awards Time Stopper and Item-3, which are required tools for the recommended Quick Man route and useful in later item-based platforming sections.
1. Enter with Metal Blade ready
Equip Metal Blade before entering, or be prepared to select it immediately. Its eight-direction firing makes it useful against enemies positioned above or below Mega Man, and it handles the stage’s awkward ledges more safely than relying only on the Mega Buster. Flash Man can also be damaged by Crash Bomber, but Metal Blade is the better practical choice when following a route that obtained Metal Man’s weapon first.
The stage floor is slippery. Mega Man continues moving briefly after you release a direction, so approach narrow platforms and enemies with short taps rather than holding toward them. If you land while sliding, jump again from the safe part of the platform instead of trying to brake at its edge. Time Stopper is not available yet, so do not plan around using it in this stage.
- Have Metal Blade available before entering.
- Use short directional taps on icy floors.
- Do not spend weapon energy expecting to use Time Stopper here.
2. Clear the opening Shotmen and take the lower route
Move right until the first Shotman begins firing. Drop to the lower path and defeat it from a position where its shots are easier to avoid. Once the lane is clear, continue right rather than trying to pass the enemy while sliding. Shotmen farther along the opening route are often positioned above Mega Man, so use upward or diagonal Metal Blade shots before jumping beneath them.
The route rises and drops several times. When a Shotman is on an upper platform, jump only after checking the platform’s landing space. If you slide past an enemy, stop on the next broad floor before turning around; reversing direction while still moving can carry Mega Man into the enemy or the edge of a platform.
- Drop below the first Shotman before attacking if necessary.
- Use diagonal or upward Metal Blade shots against elevated enemies.
- Regain control on a broad floor before reversing direction.
3. Reach the first Mech Joe and use the side passage
Continue right, jumping to the platform occupied by another Shotman when the route requires it. From there, descend through the opening and proceed toward the large red-and-purple walker, the Mech Joe. The Mech Joe is dangerous at close range because it can jump toward Mega Man and fire when Mega Man is out of reach. Attack from the edge of the available floor, or move through the opening beneath and beside the route if you can avoid a direct confrontation.
After the descent, follow the passage near the wall rather than making unnecessary jumps across the enemy area. This lets you continue downward with less exposure. Keep firing Metal Blade at enemies positioned on the platforms below, since the diagonal aim can remove them before Mega Man lands beside them.
- Identify the large walker as a Mech Joe.
- Avoid standing directly beneath or beside it while sliding.
- Use the wall-side passage to continue downward when available.
4. Descend through the lower enemy sections
Continue down the long drops and prepare for the small enemies that fire boomerang-like projectiles. These enemies can be removed quickly with Metal Blade. Fire from a lower or offset position rather than jumping directly into their attack lane. After each drop, wait briefly for Mega Man to stop before committing to the next jump.
A further Mech Joe appears in the lower route. If you fight it, concentrate on destroying the walker first, then deal with the Guard Joe that emerges from it. The Guard Joe uses a shield and can only be hit when the shield is lowered. If the fight is costing too much health, use the surrounding platforms and openings to pass safely rather than forcing repeated close-range attacks.
- Use Metal Blade on the boomerang-firing enemies.
- Wait for Mega Man to settle after each drop.
- Remember that a defeated Mech Joe can release a Guard Joe.
5. Collect the optional Energy Tank
After the lower descent, the route reaches a platforming section with several small ledges and an Energy Tank on the far platform. The Energy Tank is optional, but it is worth taking if you can perform the jumps consistently. Start each jump from a stable position and avoid carrying excessive horizontal speed into the landing. The slippery surface makes a sequence of short, controlled jumps safer than one long running leap.
Once you collect the Energy Tank, turn back across the same platforms. Do not assume the ledge provides a second route forward. Return to the opening and drop down to rejoin the main path. If Mega Man falls or loses a life before clearing the stage, the current attempt is restarted; the pickup is not a permanent inventory change simply because it was collected during a failed run.
- Take the Energy Tank only if the ledge sequence is reliable.
- Backtrack across the same platforms after collecting it.
- Treat the tank as a resource for the successful attempt, not as a permanent upgrade.
6. Pass the final Mech Joe and reach the boss door
After dropping back to the lower route, deal with or bypass the next Mech Joe. If you destroy it, be ready for the Guard Joe that follows. Use the open floor to jump over the walker if it advances too close, then attack from the opposite side. Do not try to slide beneath it unless the route is completely clear; the stage’s ice can make the timing unreliable.
Continue right across the final small platforms. The boss door is reached through the upper part of this last section, so line up each jump before moving. Refill health or weapon energy from any safe drops if they appear, then enter with Metal Blade selected.
- Defeat or safely bypass the final Mech Joe.
- Expect a Guard Joe after destroying a Mech Joe.
- Use deliberate jumps on the final platforms before the boss door.
7. Defeat Flash Man with Metal Blade
Flash Man moves back and forth through a room with uneven floor levels. He approaches Mega Man, jumps, fires shots and periodically activates his Time Stopper. The freeze temporarily prevents Mega Man from moving while Flash Man continues the attack sequence. Enter the fight from a position away from Flash Man’s body so the freeze does not leave you directly beside him.
Fire Metal Blade repeatedly and use its angled shots when Flash Man is on a different level. When he approaches, jump over him rather than attempting to outrun him across the slippery floor. After his Time Stopper ends, immediately create distance and resume firing. There is no reliable need to make him use the freeze at a particular moment; the safer plan is simply to maintain space and take every normal-time opening.
Crash Bomber is another effective weapon against Flash Man, but it costs more energy and is less convenient for this recommended order. If Metal Blade energy is depleted, the Mega Buster can still finish the fight with careful jumping and spacing.
- Use Metal Blade as the primary weapon.
- Jump over Flash Man when he closes the distance.
- Resume movement and firing as soon as his freeze ends.
- Use Crash Bomber only as an alternative if needed.
8. Confirm Time Stopper and Item-3
Defeating Flash Man awards Time Stopper and Item-3. Time Stopper freezes enemies and hazards while its weapon energy drains, and Mega Man cannot fire another weapon during the freeze. The effect lasts until the weapon’s active duration ends, so reserve it for a dangerous hazard rather than activating it casually against ordinary enemies. Its most important immediate use is the instant-kill beam section in Quick Man’s stage, where it can freeze the beams long enough to cross part of the route.
Item-3 is a wall-climbing platform. When deployed, it travels until it contacts a wall; Mega Man can then jump onto it and ride it upward. Its uses are largely determined by the game’s level layouts, especially vertical shafts and narrow crossings. It is not a general-purpose platform that can be placed anywhere, so deploy it only when a suitable wall is present and the next landing area is visible.
Before entering Quick Man’s stage, select Time Stopper in a safe area and confirm that its energy drains continuously and that Mega Man cannot attack while the effect is active. Practice Item-3 by deploying it beside a wall, jumping onto it after it reaches the wall, and dismounting at a safe ledge.
- Confirm that Time Stopper appears in the weapon inventory.
- Confirm that Item-3 is available in the item selection screen.
- Remember that Time Stopper drains continuously and prevents firing.
- Use Item-3 only where it can contact and climb a wall.
Before you move on
- Flash Man’s stage is cleared and the stage-select screen is available again.
- Time Stopper is listed among Mega Man’s acquired weapons.
- Item-3 is available in the item selection screen.
- You can activate Time Stopper and observe its continuous energy drain without attempting to fire during the freeze.
- You can deploy Item-3 beside a wall, ride it upward and dismount at a safe ledge.
- The optional Energy Tank is present in the successful run only if you collected it and completed the stage afterward.
Quick Man Stage — Objective: Learn the Saw-blade Timings and Use Time Stopper
Quick Man’s stage is built around instant-kill Force Beams, vertical drops, a dark Changkey Maker room and narrow timing windows. Flash Man’s Time Stopper can freeze the Force Beams, but it is also Quick Man’s weakness, so decide whether to spend it on the back half of the stage or save it for the boss. The stage has an optional extra life and E-Tank route before the checkpoint. Defeating Quick Man awards the Quick Boomerang. The North American NES release has Normal and Difficult settings, so weapon damage can differ between those settings; this guide avoids relying on an exact Time Stopper damage amount.
Prepare before entering Quick Man’s stage
The most useful preparation is a full Time Stopper obtained from Flash Man. Equip the Mega Buster or Metal Blade for the ordinary enemies near the beginning, and decide before entering whether you want Time Stopper for the laser rooms or for Quick Man. Time Stopper freezes the stage hazards while its weapon energy drains, and the Mega Buster is unavailable during the effect.
If you are following the safer resource route, attempt the opening Force Beam section without Time Stopper and reserve the weapon for the long second section or the boss. If you already know the manual route, save the meter for Quick Man. Item-2 and Item-3 are not required for the normal path through this stage. Item-3 can help reach the optional opening extra life, but it is not a progression requirement.
- Enter with Time Stopper as full as possible if Flash Man has already been defeated.
- Use the Mega Buster or Metal Blade for ordinary enemies.
- Choose whether Time Stopper is primarily for the Force Beams or Quick Man.
Cross the opening drops and collect the optional supplies
Move right through the opening rooms and drop through the first vertical passages. Scworms appear during the early descent; bypass them when possible instead of stopping to fight. At the first Force Beam section, the beams extend from the walls and destroy Mega Man on contact. Watch the cycle from a safe ledge, then drop or move during the opening rather than making a blind long jump.
Continue through the next drops and avoid the Springer enemies as much as practical. The route bends toward a right-side room containing an extra life and an E-Tank. Both pickups are optional. Take them only when the approach is under control; missing them is better than sacrificing a life to force the collection. After the pickup room, drop down to reach the checkpoint before the dark section.
- Bypass Scworms when fighting them would delay the descent.
- Use the Force Beam cycle rather than rushing into the next opening.
- Collect the extra life and E-Tank only if the route is stable.
- Drop past the pickup area to activate the checkpoint.
Move through the dark Changkey Maker room
After the checkpoint, the room becomes dark. Three Changkey Makers generate Changkeys, and destroying them can remove the light they provide. Keep moving right and jump if Mega Man appears to stop against a wall or low obstruction. Air Shooter is useful because its tornadoes cover different heights, while Metal Blade is effective against enemies placed above or below the normal firing line.
Do not stop to farm every health or weapon-energy capsule. Advance steadily and destroy only enemies that block the next landing. When the room returns to a more readable layout, prepare for the longer Force Beam section ahead. Enter it with as much health and Time Stopper energy as you can preserve.
- Use Air Shooter or Metal Blade against awkwardly placed Changkeys.
- Keep moving through the dark room instead of waiting for every enemy.
- Do not waste weapon energy farming minor enemies.
Learn the long second Force Beam section
Treat the back half as a sequence of separate screens rather than one uninterrupted sprint. From the first drop, move left to clear the platform, then head right after the next descent. Continue by weaving between the staggered ledges; later screens reverse the required direction, sending you left for a drop, then right past ledges before another leftward descent. The exact landing position matters more than holding one direction for the entire sequence.
Use short directional corrections during each fall. If Mega Man lands on a platform, immediately prepare for the next opening instead of waiting for another full beam cycle. Ignore weapon-energy refills that require a dangerous reversal. If manual timing remains inconsistent, activate Time Stopper late enough to cover the difficult back half, then move continuously while the beams are frozen. The stage can be completed without using it, but this is the section where it provides the greatest safety benefit.
- Practice one laser screen at a time.
- Use short directional corrections during falls.
- Reserve Time Stopper for the back section if manual attempts are failing.
- Do not spend a life chasing a risky weapon-energy refill.
Clear the final armored enemies and enter the boss room
After the last laser drops, two Sniper Armors block the approach. Use Air Shooter if available; its arcing tornadoes can strike the armor while Mega Man remains at a safer distance. Destroy each armor and then defeat the exposed Sniper Joe before advancing. Repeat the process for the second encounter and pass through the boss gate.
If you used Time Stopper in the laser section, check the meter before entering. The boss is still beatable without it, but Time Stopper is Quick Man’s primary weakness. Do not spend Crash Bomber or Atomic Fire on these routine encounters unless survival requires it; both are more valuable elsewhere.
- Use Air Shooter against the Sniper Armors when available.
- Defeat both armored encounters before entering the boss room.
- Check your health and Time Stopper energy before starting Quick Man.
Defeat Quick Man and claim the Quick Boomerang
Quick Man leaps around the staggered room, changes position rapidly and throws three Quick Boomerangs that travel outward and return. Avoid standing directly under him, move away from his landing position and do not chase him across the room. Fire Mega Buster shots when he passes within a safe firing lane. Survival is more important than maintaining continuous fire.
If you reserved Time Stopper for the boss, activate it when Quick Man is in a dangerous position or at the start of the encounter. It substantially damages him, but the exact result depends on the North American difficulty setting, so do not plan around a fixed fraction of his life. When normal time returns, switch to the Mega Buster, Air Shooter or another verified available weapon and finish the fight. Air Shooter is a practical alternative if Time Stopper was spent in the stage.
After victory, Quick Man awards the Quick Boomerang. Return to the stage-select screen and confirm that Quick Man’s portrait is cleared and the Quick Boomerang is present in the weapon inventory before choosing the next stage.
- Avoid Quick Man’s landing position and returning boomerangs.
- Use Time Stopper if reserved for the boss, without relying on an exact damage percentage.
- Resume Mega Buster or verified special-weapon attacks after Time Stopper ends.
- Confirm that Quick Boomerang appears in the weapon inventory.
Before you move on
- Quick Man is defeated and his portrait is cleared on the stage-select screen.
- The Quick Boomerang is present in the weapon inventory after the victory sequence.
- The optional extra life and E-Tank were collected only if that route was completed safely; neither pickup is required for stage completion.
- You can return to the stage-select screen and choose another Robot Master stage with Quick Boomerang available.
- If Time Stopper was used against Quick Man, its meter has drained and Quick Man has taken substantial damage before the final attacks; no exact damage percentage is required.
Air Man Stage — Objective: Gain Air Shooter and Item-2
Air Man's stage is a short but dangerous course above the clouds. Most deaths come from missed landings, enemies that interrupt jumps, or wind that pushes Mega Man from narrow platforms. Move in small, deliberate sections, clear enemies before committing to a jump, and use the cloud-riding enemies as platforms only after their attacks have stopped. Leaf Shield is Air Man's primary weakness, but the Mega Buster is reliable if you prioritize survival. Defeating Air Man awards both Air Shooter and Item-2 in the original NES release.
Prepare before entering
If Leaf Shield is available, equip it before the boss fight, but use the Mega Buster for most of the stage. Metal Blade is useful for enemies positioned above or below your landing route, although conserving its energy is sensible if it will be needed later.
There is little margin for recovery over the clouds. Treat every jump as a separate action: stop, identify the next platform, check whether an enemy is occupying the landing area, then jump. Do not hold Right continuously through the stage, because many platforms are short enough to make a running jump overshoot them.
- Use the Mega Buster for ordinary traversal and save special-weapon energy where possible.
- Stop at the center or safer side of each platform before planning the next jump.
- If you reach the boss door with very low health, replaying the stage is safer than trying to win by trading damage.
Cross the opening Goblin section
At the first major gap, a large Goblin appears and forms a series of temporary platforms. Wait until the screws or side parts retract before jumping onto its head. Jumping too early causes damage and can send Mega Man into the pit. Petit Goblins emerge from the sides, so do not rush across the main Goblin immediately after landing.
Advance from one Goblin to the next with short, controlled jumps. Let the next Goblin appear before committing to a long leap. If a Petit Goblin is blocking the landing point, shoot it or wait for it to move rather than trying to pass through it in midair.
- Wait for the Goblin's harmful side parts to retract.
- Use short jumps between the temporary platforms.
- Clear Petit Goblins that occupy the next landing position.
Use the cloud platforms carefully
The next section introduces Kaminari Goro enemies riding clouds. Defeat each one from a stable platform, then use the cloud it leaves behind to continue. Do not jump toward an active enemy while it is attacking; a hit during this section usually means falling rather than merely losing health.
After the cloud sequence, continue right across the solid platform and deal with Pipi enemies. Shoot the eggs they drop before they hatch whenever possible. A Pipi, its egg, or a hatchling can interrupt a jump and knock Mega Man into a pit.
- Defeat each Kaminari Goro before using its cloud as a platform.
- Treat the cloud as a temporary stepping stone and plan the next landing immediately.
- Shoot Pipi eggs before they become hatchlings.
Drop through the lower route and cross the final platforms
When the route drops downward, watch for Scworms near the lower path. They can be avoided by moving past them carefully, but do not leap blindly through the cloud cover. After the drop, move right until another Goblin sequence begins and repeat the same procedure: wait for safe Goblin timing, then jump only to a visible landing point.
The final platform section combines pits, Pipi enemies and Matasaburo wind enemies. Matasaburo can push Mega Man backward, making a jump much harder than it appears. Shoot it from firm footing if it is close enough; otherwise, wait for a calmer opening or move to the next platform before the gust becomes dangerous. Keep clearing Pipi eggs and hatchlings before jumping. Continue right across the last platforms to reach solid ground and the boss door.
- Do not jump through cloud cover without confirming the next platform.
- Fight Matasaburo from stable footing when possible.
- Clear Pipi threats before attempting the final jumps.
Defeat Air Man
Air Man fires groups of tornadoes across the room and then sends them toward Mega Man. Their position varies, and a tornado at ground level can block Mega Man's shots, so do not stand still and fire through every pattern. Jump over the low tornado when necessary, avoid being pushed into a corner, and keep moving toward a safe firing position.
After a sequence of tornado attacks, Air Man jumps across the room to the opposite side. This movement is the clearest attack opportunity because the tornadoes are no longer filling the route between you and him. Fire the Mega Buster during this opening, then prepare for the next set of tornadoes. The pattern repeats, so survival and repeated safe attacks are more important than chasing him across the room.
- Identify the low tornado before deciding whether to jump.
- Avoid firing when a tornado is directly between Mega Man and Air Man.
- Use Air Man's cross-room jump as the main Mega Buster attack window.
Use Leaf Shield when available and claim the rewards
Leaf Shield is Air Man's primary weakness. Create the shield after a tornado volley has passed or while Air Man is beginning his jump, then move toward him or move in his direction to launch the leaves. The shield is safest when used during an open attack window; activating it while tornadoes are already between Mega Man and Air Man may waste the attack or leave Mega Man exposed.
If Leaf Shield is unavailable, continue with the Mega Buster. Air Man can be defeated without a special weapon by jumping over the dangerous low tornadoes and firing during the gaps in his pattern. Taking one hit is not automatically fatal; use the temporary invincibility after damage to reposition instead of jumping immediately into another tornado.
After Air Man is defeated, the stage-clear reward grants Air Shooter and Item-2 automatically. Air Shooter fires three small tornadoes that spread slightly and rise, making it useful against airborne enemies and effective against Crash Man. Item-2 creates a horizontal jet platform. Jump onto it after deploying it, then ride it forward until its energy is exhausted or it reaches a wall. Use Item-2 only after checking that the route ahead is clear of spikes, walls and enemies.
- Use Leaf Shield during an open movement window rather than into an active tornado spread.
- Use the Mega Buster safely if Leaf Shield is unavailable.
- Confirm Air Shooter and Item-2 after the stage-clear sequence.
- Test Item-2 over a safe area before relying on it near hazards.
Before you move on
- Air Man is defeated and the stage-clear sequence finishes.
- Air Shooter is present in the weapon-selection screen.
- Item-2 is present in the item-selection portion of the menu and creates a forward-moving jet platform when activated.
- You can identify the Goblin, Kaminari Goro, Pipi and Matasaburo sections well enough to replay the stage without blind jumps.
- You are ready to use Air Shooter against Crash Man and Item-2 for long horizontal crossings, especially the disappearing-block section in Heat Man's stage.
Crash Man Stage — Objective: Obtain Crash Bomber and Use It Conservatively
Crash Man’s stage is a vertical tower built around ladders, Telly enemies, Neo Metalls, moving rail platforms, Blocky formations, Pipi birds, Shotmen and Prop-Tops. Use Metal Blade for ordinary enemies and preserve Air Shooter for Crash Man, whose jumps make the rising tornadoes easy to connect when timed correctly. Refill Air Shooter near the boss entrance, defeat Crash Man, and collect Crash Bomber. Crash Bomber is awarded only after the boss and is not available for opening a route inside this stage.
1. Enter with Metal Blade and Air Shooter ready
Select Metal Blade before entering. Its horizontal and angled shots are useful in the ladder rooms because you can attack enemies above or below the next platform without jumping into them. Use it for most of the stage and avoid spending Air Shooter on ordinary enemies unless you need it to clear an immediate threat.
Keep Air Shooter available for Crash Man. It is his weakness, but the weapon consumes energy for each shot and missed tornadoes reduce the margin for error. Crash Bomber cannot be used anywhere in this stage because Crash Man awards it only after the boss is defeated. Item-2 can assist with optional pickups, but it is not needed to reach the boss.
- Select Metal Blade before entering.
- Preserve Air Shooter for Crash Man.
- Do not search for a Crash Bomber route inside the stage.
2. Climb through the opening ladder rooms
The opening rooms contain pipes that continually produce Telly enemies. Move upward promptly instead of waiting to destroy every enemy. Shoot the Telly closest to your next ladder, then climb as soon as the route is safe. Remaining on one screen gives more enemies time to appear and can make the ladder approach more dangerous.
When a Telly is above or below the next ledge, use an angled Metal Blade shot from stable ground. This lets you clear the enemy without jumping into its path. If a Telly is already moving toward you on a narrow ledge, retreat briefly, fire, and resume climbing after it is gone.
- Clear the Telly blocking your next ladder.
- Use angled Metal Blade shots from the ledge.
- Keep climbing instead of lingering to clear every spawn.
3. Defeat the Neo Metalls and ride the rail platforms
Neo Metalls guard the transition into the next vertical section. They can be damaged only while their helmets are raised. Stand at a safe distance, fire when an eye is exposed, and be ready for the spread of bullets that follows. Do not jump into a Neo Metall while its helmet is closed.
The following rooms use moving platforms that travel along increasingly complicated rails. Board each platform and stay near its center while watching for Telly enemies approaching from the side. Fire before a Telly reaches the platform whenever possible. Jump only when the platform is near the ladder or ledge you need; leaving early can drop Mega Man below the route and force a lengthy recovery.
Leaf Shield can protect Mega Man while he remains stationary on a moving platform, but Metal Blade is the general-purpose choice for the stage. Item-1 or Item-2 can help with some platforming and pickup routes, yet neither is required for normal completion.
- Attack Neo Metalls only while their helmets are open.
- Stay near the center of each moving platform.
- Jump toward the exit ladder only when the platform is close.
4. Pass Blocky and decide whether to take the first optional pickup route
A Blocky formation occupies the route after the rail-platform section. Attack its exposed eye and watch the pieces it throws as the formation separates. Metal Blade lets you keep attacking while adjusting your position, but wait for falling pieces to clear before moving underneath it.
The next vertical area contains energy pickups and an optional E-Tank route. If you have Item-2 and the landing is clear, use the jet platform to reach the lower pickup area and then return toward the upper route. Deploy it only after confirming the direction of the next ladder. If the movement feels unsafe, skip the E-Tank and continue upward; it is optional and is not required to defeat Crash Man.
- Destroy Blocky’s eye before crossing below it.
- Collect weapon energy only when the landing area is safe.
- Use Item-2 for the optional route only when the return path is clear.
5. Climb past Pipi birds and Shotmen
Continue through the ladder rooms while watching for Pipi birds entering from the sides. They drop eggs that can hatch into smaller enemies. Destroy the bird or egg when it blocks the ladder, but do not wait unnecessarily for every egg to disappear. If eggs are already falling toward the platform, stay on the lower ledge until the immediate path is clear.
Shotmen positioned above ladders can fire downward at an angle. Attack from below with Metal Blade, watch the shot pass, and climb during the opening. In the upper section, ladder choices lead toward additional optional pickups and eventually converge near the final approach. Treat the E-Tank opportunity as optional; losing a life while forcing the detour is worse than entering the boss room without it.
- Clear Pipi birds or eggs that threaten the next ladder.
- Attack Shotmen from below when possible.
- Skip an optional E-Tank if the landing or ladder approach is uncertain.
6. Refill Air Shooter before the boss door
Prop-Tops patrol the final approach by moving away and then diving back toward Mega Man. Wait for one to leave the landing area before crossing. Do not jump through a Prop-Top merely to collect a small pickup; being knocked backward can send Mega Man down the vertical route.
A large weapon-energy capsule appears near the final room. If Air Shooter is not full, collect the capsule after dealing with the nearby threat and before entering the boss corridor. Equip Air Shooter immediately before the boss door. The refill gives you a strong supply for the fight, but you still need accurate timing because missed shots waste energy.
- Wait for Prop-Tops to move away from the landing.
- Collect the large weapon-energy capsule if Air Shooter needs it.
- Equip Air Shooter before entering Crash Man’s room.
7. Defeat Crash Man with timed Air Shooter shots
Crash Man runs across the room and jumps when Mega Man fires. While airborne, he throws a Crash Bomber diagonally. If the bomb attaches to the floor or wall without hitting Mega Man directly, it remains in place briefly before exploding. Move away from the attached bomb immediately and do not stand beside it waiting for another shot.
Let Crash Man approach before firing. Air Shooter is easier to connect when he is close because the tornadoes rise through his jump. A reliable pattern is to move toward one side of the room, wait for Crash Man to close in, fire Air Shooter as he jumps, and continue moving away from the bomb he leaves behind.
Do not fire repeatedly from the opposite side of the room. The tornadoes can miss while Crash Man still gets time to cross the arena. If Air Shooter runs low or Crash Man survives after the available tornadoes are used, switch to the Mega Buster. Fire when Crash Man lands or crosses the room, then keep moving away from each bomb. The Mega Buster is slower but can finish the fight.
- Fire Air Shooter when Crash Man is nearby and airborne.
- Move away from every bomb that attaches to the floor or wall.
- Use the Mega Buster if Air Shooter cannot deliver the final hits.
8. Collect Crash Bomber and prepare for later fortress use
After Crash Man is defeated, collect the weapon capsule. The post-boss reward is Crash Bomber only. Open the weapon-selection screen and confirm that the C weapon is available before leaving the stage.
Crash Bomber launches an explosive projectile that attaches to a wall or other target surface before detonating. The delayed explosion makes it different from Metal Blade: fire only when the target and your escape route are both clear, then move away from the blast area. Do not spend it freely on ordinary enemies because its energy is limited.
Later stages use Crash Bomber against specific walls and fortress barriers, including the mandatory barriers associated with the Boobeam Trap route. Those fortress sections require careful energy management. Crash Bomber does not open a required shortcut inside Crash Man’s own stage, so finish this level using the Mega Buster, Metal Blade, Air Shooter and any Items already obtained.
- Collect the post-boss weapon capsule.
- Confirm Crash Bomber in the weapon-selection screen.
- Save Crash Bomber energy for vulnerable walls, barriers and required fortress encounters.
Before you move on
- Crash Man has been defeated and the post-boss weapon capsule has been collected.
- Crash Bomber is visible in the weapon-selection screen.
- You can fire Crash Bomber at a safe wall or target surface and move away before it detonates.
- You understand that Crash Bomber is reserved for later vulnerable walls and fortress barriers rather than ordinary enemies throughout this stage.
- If Air Shooter ran out during the boss fight, Crash Man was finished with the Mega Buster rather than requiring a restart.
Bubble Man Stage — Objective: Secure Bubble Lead and look for E-Tanks
Bubble Man’s stage begins above water, then shifts into a long underwater section where Mega Man jumps unusually high and falls slowly. The main hazards are falling platforms, ceiling spikes, enemy projectiles and narrow drops between spike columns. Enter with Metal Blade if possible; its eight firing directions make the underwater enemies and Bubble Man much safer. The original NES USA stage has no normal E-Tank pickup on its standard route, so do not make blind drops searching for one. Clear the stage safely, defeat Bubble Man, and save the new Bubble Lead for Heat Man and other specific encounters.
1. Clear the opening Kerogs
Drop to the first platform on the right and stand near its center. The large Kerog remains in place while releasing three small frogs. Destroy the small frogs as needed, but leave one alive when possible. If all three disappear, the large Kerog produces another group, while leaving one alive gives you more room to attack the parent enemy.
After the first Kerog is defeated, jump to the next platform and repeat the process. On the following platform, move beneath the small frogs if necessary and attack the large Kerog from close range. Keep your jumps short; the goal is to reach the right side without being pushed into an awkward leap.
- Stand near the middle of each opening platform.
- Leave one small frog alive when that makes the large Kerog easier to attack.
- Do not jump toward the next platform while several small frogs are crossing your path.
2. Cross the falling platforms
After the Kerog section, you will reach a series of short platforms that drop a moment after Mega Man lands on them. Keep moving right and jump again as soon as each landing is secure. Do not stop to fight every enemy during this sequence; hesitation is more dangerous than taking a longer jump.
Reach the solid ground at the far side, then prepare for the drop into the next area. Move toward the left side before falling and select Metal Blade. The Hermit Crabs below are easiest to handle from a distance or from the upper ledge.
- Move immediately across every temporary platform.
- Favor forward progress over optional enemy kills.
- Equip Metal Blade before dropping toward the crab enemies.
3. Handle the first crab area and enter the water
Drop down along the left side and attack the Hermit Crab on the lower level. In the Normal setting of the North American NES release, a standard shot can destroy these crabs directly. In Hard mode, a shot removes the shell first, so continue attacking the exposed crab with Metal Blade or another suitable low-angle attack. Keep away from the shell if it is knocked loose, because it can still cause contact damage.
Clear the other crabs from a safe position before dropping into the water. Metal Blade is the best general weapon here because it can fire horizontally, upward and diagonally, allowing you to attack without making unnecessary jumps.
- Distinguish Normal-mode one-shot crabs from Hard-mode shell behavior.
- Watch for a loose shell after a crab is hit in Hard mode.
- Clear the nearby enemies before committing to the underwater descent.
4. Learn the underwater movement
Underwater, Mega Man’s jump reaches much higher than on dry ground and his fall is slower. This makes the ceiling spikes especially dangerous. Tap the jump button for short rises and release it early; a full jump can carry Mega Man directly into the spikes above.
Advance through the first underwater platforms with Metal Blade equipped. Fire in the direction of incoming enemies rather than jumping over them. When Shrinks begin appearing from a Kingfish, keep Mega Man on the floor whenever possible and use horizontal or diagonal shots to clear the approach.
- Use short taps instead of full underwater jumps.
- Release the jump button early beneath a low ceiling.
- Attack enemies from the ground whenever the route permits.
5. Defeat the first Kingfish and cross the Jellyfish corridor
The first Kingfish remains near the edge of the screen and continuously releases Shrinks. Its vulnerable target is the light on top of its head. Stand far enough away to aim Metal Blade diagonally upward at the light, then alternate with horizontal shots to remove Shrinks before they reach you. Enemy drops can sometimes restore health or weapon energy, but do not remain in danger longer than necessary.
Continue right into the low-ceiling Jellyfish section. Clear the nearest Jellyfish before each jump, then make one controlled movement and stop. When a ledge ends beside spikes, walk or inch off while holding the direction of travel instead of making a full jump. This keeps Mega Man aligned with the safer part of the fall.
- Target the Kingfish’s light rather than its body.
- Use diagonal Metal Blade shots on the Kingfish and horizontal shots on Shrinks.
- Clear nearby Jellyfish before jumping.
- Walk off dangerous ledges when the layout allows it.
6. Drop through the spike columns and defeat the second Kingfish
Near the end of the Jellyfish corridor, the route leads between vertical columns of spikes. Position Mega Man in the center of the opening before dropping. If you are not aligned, a jump or sideways drift can send you into the spikes and return you to an earlier underwater checkpoint.
The second Kingfish is placed in a much tighter room. Stay on the floor and do not make a large jump. Fire upward or diagonally at the light and use horizontal Metal Blade shots to stop the Shrinks. If a Shrink reaches you, taking a normal hit is safer than jumping into the surrounding spikes.
- Center Mega Man before falling between the spike columns.
- Remain grounded during the second Kingfish encounter.
- Do not chase enemies upward in the confined room.
7. Clear the returning Kerogs and crab platforms
After the second Kingfish, continue right and drop into another Kerog section. Use Metal Blade to attack the large enemies from below or from the side, and fire upward when the small frogs appear. Defeat both Kerogs before climbing out of the water.
The final stretch is above water and consists of platforms with Crabs falling from above. The Crabs alternate their landing sides. Watch the next Crab’s position before jumping: if it is descending on the side toward which you are moving, wait for it to land or destroy it first. Jump only after the landing platform is clear, then settle before making the next jump.
- Use directional shots so the Kerogs do not force unnecessary jumps.
- Watch which side each Crab is approaching from.
- Make one platform jump at a time and wait for Mega Man to settle.
8. Defeat Bubble Man and claim Bubble Lead
Equip Metal Blade before entering the boss room. The room is underwater and its ceiling is lined with spikes, so avoid full jumps. Bubble Man begins near the lower-right area, fires bouncing Bubble Leads and moves toward the upper portion of the room. Position yourself so the first bouncing Bubble Lead passes over your head; the remaining bubbles generally follow a similar path.
Attack with Metal Blade while Bubble Man is moving across the room. Fire horizontally when he is near your height and diagonally or vertically when he rises. Stay low and make only the movement needed to avoid the bubbles. His ordinary shots are less dangerous than the bouncing Bubble Leads, so prioritize keeping clear of the bubble pattern rather than making a risky jump to avoid every small projectile.
After Bubble Man is defeated, collect Bubble Lead. It travels along the floor, jumping slightly before rolling forward until it hits an enemy or obstacle. Its most important immediate use is Heat Man’s weakness. It is also useful in selected later encounters, including the final Alien battle, but Metal Blade remains the better choice for ordinary stage enemies.
- Enter the boss room with Metal Blade selected.
- Avoid full jumps throughout the fight.
- Let the first bouncing Bubble Lead pass over Mega Man rather than jumping into the ceiling.
- Confirm that Bubble Lead has been added to the weapon menu after victory.
Before you move on
- Bubble Man is defeated and Bubble Lead is present in the weapon menu.
- The stage-clear result appears after leaving the boss room.
- The original NES password screen appears if you continue through the password prompt.
- Before entering Heat Man’s stage, verify that Bubble Lead has enough energy for the boss fight and avoid spending it on routine enemies.
- If your goal is a reliable Wily run, leave Bubble Man’s stage with your remaining lives intact rather than risking an unsupported E-Tank detour.
Heat Man Stage — Objective: Get Atomic Fire and Use It Against Armored Targets
Heat Man’s stage combines lava pits, Telly enemies, Springers, Sniper Armor, and disappearing Yoku Blocks. Bubble Lead is Heat Man’s weakness, while Item-2 provides the safest route across the long lava crossing near the end. Clear the platforming patiently, avoid spending Crash Bombs for convenience, and finish the boss fight with enough health to claim both Atomic Fire and Item-1.
1. Prepare before entering
Bring Bubble Lead for the boss. Item-2 is strongly recommended because it lets you bypass the longest disappearing-block and lava section, but the stage remains completable without it if you learn the block pattern. Metal Blade is useful against Telly enemies because it can be fired at several angles, while the Mega Buster is adequate for most ordinary encounters.
Do not treat Atomic Fire as a weapon you can conserve before obtaining it; Heat Man is the stage reward. Enter with as much health as practical and avoid unnecessary special-weapon use. If you have already defeated Air Man, keep Item-2 available in the weapon menu before reaching the final lava crossing.
- Bubble Lead is available for the boss.
- Item-2 is available if Air Man has already been defeated.
- Avoid unnecessary weapon-energy use during the opening sections.
2. Cross the opening lava pits
Move right across the first solid platforms and clear each lava gap with a controlled running jump. Green Helis and other flying enemies can interfere with your landing, so do not carry a jump farther than necessary. Land on solid ground, take a moment to identify the next platform, and then continue.
Telly enemies begin dropping from openings in the walls. Shoot them while they are approaching, or let them pass before committing to the next jump. Metal Blade is convenient here, but the Mega Buster works if you fire from a stable platform. Staying directly below a wall opening invites a collision, so move away after each enemy appears.
- Treat each lava pit as a separate jump.
- Use solid platforms as recovery points.
- Clear or bypass Telly enemies before jumping toward narrow ledges.
3. Move through the rock platforms and Springers
Continue across the raised platforms while watching for Tellys entering from above and from wall openings. Wait for an enemy to reveal its movement before jumping toward the next platform. Taking a small delay is safer than landing on an enemy or being pushed into lava.
Springers appear in the platforming section before the ladder descent. Quick Boomerang can remove them efficiently, but jumping over one is also safe when the landing area is clear. Check the lower ledge before climbing down because an enemy can be positioned beneath the ladder.
- Keep the next landing visible before jumping.
- Do not chase enemies near the edge of a lava pit.
- Reach the first disappearing-block room with enough health to survive a mistake.
4. Solve the first disappearing-block section
The disappearing blocks appear in a fixed repeating sequence. Watch the next block appear before moving, then use short jumps rather than full-height leaps. Mega Man can fall if he jumps before the next block is active, and a late jump can carry him into a block that is about to vanish.
The safest method is deliberate rather than fast: step onto a block, identify the next active block, and jump only when the route is clear. If you lose a life while learning the sequence, restart the attempt instead of spending an E-Tank. Once the order is familiar, this section becomes a timing exercise rather than a reaction test.
- Watch the block cycle when the pattern is unfamiliar.
- Use short, controlled jumps.
- Land near the center of each block whenever possible.
5. Clear the middle section without wasting Crash Bombs
After the first disappearing-block room, continue through the vertical platforms and additional Telly encounters. Eliminate enemies before jumping when the terrain allows it. Some walls contain destructible sections that can be opened with Crash Bomber, but these passages are optional. They can reduce a platforming detour, yet Crash Bombs are limited and more valuable in later fortress encounters.
Do not assume every breakable wall must be opened. If the normal route is safe and familiar, continue without spending Crash Bombs. If you do use one, stand far enough away to avoid the explosion and wait for the passage to clear before moving through it.
- Use Metal Blade or the Mega Buster against Tellys.
- Reserve Crash Bomber for a genuinely dangerous or time-consuming obstacle.
- Do not enter a narrow passage while a Crash Bomber is still detonating.
6. Cross the final lava route
Near the end of the stage, the route reaches a long lava crossing beneath more disappearing blocks. If Item-2 is available, stand on solid ground at the edge, deploy it, and ride it horizontally to the far side. Do not activate it while falling, and avoid unnecessary jumps while riding. Item-2 gives you a safer route across the gap, but contact with enemies can still knock Mega Man into the lava.
Without Item-2, use the appearing blocks in the same deliberate manner as the earlier room. Wait for each required block, make short jumps, and do not rush because the pit is an instant-death hazard. On the far side, descend the ladder and prepare for the Sniper Armor encounter.
- Deploy Item-2 from stable ground if using it.
- Stay centered while riding across the lava.
- If proceeding without Item-2, memorize the block sequence before attempting a fast crossing.
7. Defeat the Sniper Armor and enter the boss room
At the bottom of the ladder, confront the Sniper Armor. Keep your distance, avoid its shots and jumping movement, and attack when its position gives you a clear opening. Air Shooter is useful if available, but the Mega Buster and Metal Blade can also finish the encounter. Afterward, continue down the next ladder and move through the short final corridor to Heat Man’s door.
Before entering, select Bubble Lead. If your health is low, consider whether an earlier checkpoint attempt would be safer than spending an E-Tank immediately. The boss is vulnerable to a consistent repeatable pattern, so preserving health for the fight is more valuable than clearing the last corridor quickly.
- Defeat the Sniper Armor before continuing downward.
- Equip Bubble Lead before the boss door.
- Enter the room with enough health to survive a mistimed jump.
8. Defeat Heat Man with Bubble Lead
Heat Man begins by firing three Atomic Fire projectiles in an arcing spread. The fireballs land as short flame pillars, so move away from their landing positions and be ready to jump over the remaining gaps. When Heat Man is hit, he turns into a moving fireball and charges toward the position where Mega Man was standing when the charge began.
Fire Bubble Lead, immediately move away from your original position, and jump over Heat Man as he crosses the room. After he passes, turn and fire again when the shot will connect safely. Repeat this sequence rather than standing still and trading contact damage. The important timing is to move after your attack: waiting in place allows the charge to reach the location Heat Man targeted.
Bubble Lead is the intended weakness and makes the fight considerably shorter. The Mega Buster can also be used if Bubble Lead energy is unavailable, but it gives Heat Man more opportunities to fire and charge. Do not use Crash Bomber in this battle; it is not a reliable damage option for Heat Man in the original NES release.
- Use Bubble Lead as the primary attack.
- Move away from the position targeted by Heat Man’s charge.
- Jump over the charging fireball and attack again only after he passes.
Before you move on
- Heat Man is defeated and Atomic Fire is added to the weapon inventory.
- Item-1 is awarded alongside Atomic Fire after the boss victory.
- Atomic Fire can be selected and charged by holding the fire button before release.
- The Heat Man stage is complete, leaving the remaining Robot Master stages or the Wily fortress available according to the current stage-select progress.
Wood Man Stage — Objective: Learn Leaf Shield Behavior and Exit Route
Wood Man’s original NES stage is a forest route filled with Battons, Robbits, Frienders, Monkings, Bird Bombers, Pipi enemies and Kukku runners. Metal Blade is the most useful general weapon because its diagonal and vertical shots reach enemies above and below Mega Man. No Item-1, Item-2, Item-3 or Energy Tank detour is required to finish the stage. Heat Man’s Atomic Fire is Wood Man’s principal weakness: one fully charged shot defeats him on Normal, while Difficult requires two fully charged shots. If Atomic Fire is unavailable, use Metal Blade during Wood Man’s exposed moments. After victory, Leaf Shield protects Mega Man while he remains still and launches in the direction pressed.
1. Enter with Metal Blade equipped
Select Metal Blade before entering the stage. Its diagonal and vertical firing angles are especially useful against Battons in the trees, Robbits on the ground and enemies positioned on branches or ledges. You do not need any of the three Items to complete this stage, so there is no reason to spend Item energy while exploring the route.
Move right through the opening forest area. Battons remain closed until they activate; wait for one to open, then destroy it with a Metal Blade. Robbits hop toward Mega Man and fire carrot-shaped projectiles. Shoot them before they reach a ledge or corner where their jump can force you into a poor landing.
- Equip Metal Blade before starting.
- Wait for Battons to open before attacking.
- Destroy Robbits before they can pressure you near a ledge.
2. Descend through the Batton and Friender section
At the end of the first outdoor section, take the ladder downward. More Battons occupy the vertical passage. Climb or descend in controlled movements and attack only after a Batton opens. Avoid moving directly beneath one while climbing, because contact damage is easy to take when Mega Man cannot jump normally.
Continue downward into the Friender encounters. Friender is a fire-breathing dog robot that sends flames along the floor. Stand far enough away to see the attack, use a raised ledge when one is available, and wait for the fire to pass before advancing. If a flame reaches Mega Man, jump over it rather than trying to rush through the enemy.
- Move carefully around Battons in the vertical shaft.
- Use height differences against Friender when available.
- Advance after the fire attack ends instead of trading contact damage.
3. Clear the remaining Frienders safely
Treat the Friender rooms as timing challenges. Keep enough distance to see the fire attack, jump only when necessary, and fire during the opening after the flames finish. Metal Blade’s diagonal shots can hit from a safer elevation, reducing the need to stand directly in front of the enemy.
If Time Stopper is already available, it can help bypass some Friender encounters, but it is not required for this stage. Saving it for Quick Man’s saw corridors is generally more valuable. Continue to the ladder after the Friender section and climb back toward the outdoor canopy.
- Do not jump blindly into a fire arc.
- Use diagonal Metal Blade shots from safe elevations.
- Save Time Stopper unless it is needed to recover from a mistake.
4. Cross the canopy enemies
When you return outside, Monking enemies swing from branches and leap toward Mega Man. Stand at a distance to trigger the jump, then let the enemy commit to its leap before moving underneath or attacking it. Do not chase a Monking across the screen; staying on solid ground makes its approach easier to read.
Bird Bombers and Pipi enemies can create additional airborne threats by releasing small enemies or eggs. Shoot the parent enemy when the shot is safe, but prioritize remaining on a solid platform. Health or weapon-energy drops may appear, but collect them only after the area is clear so that a refill does not lure you into an active enemy.
- Trigger Monking jumps from a safe distance.
- Prioritize solid footing over chasing enemies.
- Collect drops only after nearby enemies are inactive.
5. Follow the interior hallway
Enter the enclosed route and take the ladder downward. The interior rooms contain isolated Robbits and straightforward platforms. Clear each Robbit before advancing, especially if your health is low; the narrow rooms leave less space to dodge its jump and carrot projectile.
There is no required Item or Energy Tank pickup in the original NES USA Wood Man stage. Ordinary health and weapon-energy drops can be collected when safe, but do not make blind jumps or spend an Item searching for a mandatory detour. Leaf Shield also does not open a required hidden route in this stage.
- Clear Robbits one room at a time.
- Take only safe ordinary refills.
- Continue forward without searching for a required secret route.
6. Pass the final Kukku group
Near the end of the stage, Kukku enemies run toward Mega Man and commonly leap over a stationary player. A safe approach is to stop when one approaches, let it jump over you, and then walk right after it passes. Shoot only when a Kukku lands in a position that blocks the route.
Avoid panic jumps. Jumping unnecessarily can place Mega Man directly beneath a charging Kukku or into the next enemy. Once the final group has passed, continue to the boss door. If you plan to use Atomic Fire, select it before entering the room and make sure enough energy remains for the required charged attacks.
- Stop and let Kukku enemies jump over you.
- Avoid jumping into a charging Kukku.
- Reach the boss door with as much health and Atomic Fire energy as possible.
7. Defeat Wood Man
Wood Man begins by surrounding himself with a Leaf Shield and sending four leaves upward. As the leaves fall, he throws the shield horizontally across the room. Move into a gap between the falling leaves, then jump over the shield only when it approaches. Jumping too early can put Mega Man into a falling leaf or leave him in the shield’s path.
After the shield has been thrown and Wood Man is exposed, attack immediately. On Normal difficulty, release one fully charged Atomic Fire during this vulnerable opening to defeat him. On Difficult, one charged shot is not enough; continue the pattern and land a second fully charged Atomic Fire during a later exposed phase. If Atomic Fire is unavailable or depleted, use Metal Blade during the same openings and repeat patiently. Do not waste attacks against the active shield unless using a weapon strategy specifically confirmed for that purpose.
- Move between the falling leaves.
- Jump over the thrown shield as it reaches Mega Man.
- On Normal, use one fully charged Atomic Fire during an exposed phase.
- On Difficult, plan for two fully charged Atomic Fire shots.
- Use Metal Blade during exposed phases if Atomic Fire is unavailable.
8. Claim and understand Leaf Shield
After Wood Man is defeated, the game awards Leaf Shield and records the stage clear. Leaf Shield surrounds Mega Man while he remains stationary. Pressing a direction launches the leaves in that direction, so movement changes the barrier into an attack. The shield is useful against groups of smaller enemies, particularly airborne enemies, but it is not permanent protection.
Leaf Shield does not make Mega Man immune to every projectile, contact attack or environmental hazard. It disappears when Mega Man moves, and launching it removes the stationary barrier. Test it in a later stage against a low-risk enemy rather than wasting energy in a dangerous room.
- Confirm Leaf Shield is listed in the weapon menu.
- Remember that standing still keeps the shield around Mega Man.
- Remember that directional movement launches the leaves.
- Do not rely on Leaf Shield against every projectile or contact hazard.
Before you move on
- Wood Man is defeated and Leaf Shield appears in the weapon menu.
- The stage-clear password screen appears after the boss battle.
- On Normal, the charged Atomic Fire tactic was used as a one-shot option; on Difficult, a second charged shot was available or another exposed-phase weapon was used.
- The game returns to Stage Select with Wood Man’s portrait cleared.
- Leaf Shield remains around Mega Man while stationary and launches when a direction is pressed.
- No Item-1, Item-2, Item-3 or Energy Tank detour was required to complete the stage.
Items, E-Tanks and Shortcuts — What to Collect and Where to Use Them
Items 1, 2 and 3 are permanent transport abilities awarded by Robot Master victories. Each activation consumes the selected Item’s weapon energy, so plan the launch point and preserve enough energy for mandatory hazards. E-Tanks completely restore Mega Man’s life and can be carried four at a time. Collect safe, repeatable tanks before Dr. Wily’s fortress, but do not trade lives or essential weapon energy for an unpracticed detour.
Understand the three Items and their energy costs
Defeating Heat Man awards Item-1, defeating Air Man awards Item-2, and defeating Flash Man awards Item-3. These abilities remain available for the rest of the game. They are not one-use pickups; using one spends energy from that Item’s gauge, and weapon-energy capsules restore only the currently equipped weapon or Item.
Item-1 creates a small platform that rises vertically. Up to three Item-1 platforms can exist at the same time, and each disappears after a limited period. Use them as a temporary staircase, to pass through certain false floors, or to reach a ledge that is too high for a normal jump. Place the first platform close enough to the next landing that you can jump immediately, then add the next platform only after confirming the previous one will not disappear before you reach it.
Item-2 creates a jet sled that moves rapidly in a straight horizontal path. It begins moving shortly after deployment, so jump aboard immediately. It cannot be steered, and the ride ends when the Item-2 energy is exhausted or the sled hits an obstacle. Stand at the correct launch point, face the intended direction, and inspect the landing area before firing. A poorly positioned launch can strand you over spikes or force you to spend another Item-2 activation.
Item-3 produces a small platform that bounces until it contacts a wall, then climbs that wall. It is useful in tall shafts and on vertical surfaces where Item-1 cannot be placed conveniently. When Item-3 reaches the top of the wall, or when Mega Man jumps off, it reverses and travels back down. Do not fire it into open space and expect it to become a usable platform; it needs a wall to attach to.
- Item-1 is the rising platform from Heat Man.
- Item-2 is the straight-moving jet sled from Air Man.
- Item-3 is the wall-climbing platform from Flash Man.
- All three remain in the inventory and consume weapon energy when activated.
- Check the route and landing point before using an Item.
Collect the safe Metal Man stage rewards with Item-2
Metal Man’s stage contains two confirmed E-Tank opportunities. The first is near the beginning, beneath the opening conveyor route. Follow the lower conveyor and collect the tank before continuing upward. This pickup does not require an Item and is a reliable way to begin building a reserve.
A second E-Tank appears later, below the Blocky enemies near the end of the stage. Without Item-2, dropping for this tank can leave Mega Man unable to reach the ledge on the opposite side. Do not attempt it as a blind jump. After defeating Air Man and obtaining Item-2, reach the area above the tank, deploy the sled in the correct direction, ride across the pit, collect the E-Tank, and use another Item-2 to return to the main route if necessary. Practice the launch and landing before spending the tank route during a low-life attempt.
Item-2 also reaches the high conveyor and Extra Life in the middle portion of Metal Man’s stage. From the conveyor section, deploy the sled toward the elevated route, jump aboard, and dismount on the high conveyor. This is optional; take it only when the launch position and landing are familiar. The E-Tank is the more valuable detour when deciding which reward deserves the weapon energy.
- Take the opening Metal Man E-Tank whenever the route is clean.
- Use Item-2 for the later Metal Man E-Tank instead of making a blind sacrifice jump.
- The Metal Man Extra Life is optional and should not cost a life or the energy needed for the later tank.
- Carry enough Item-2 energy for both the outward crossing and the return route.
Use Item-2 for Heat Man’s mandatory hazard
Heat Man’s stage contains a long lava section built around disappearing blocks. Item-2 provides the safest consistent solution. Reach the small platform before the lava, confirm that the route ahead is clear, deploy Item-2 to the right, and jump onto it immediately. Remain aboard until you can dismount onto solid ground near the far side.
Do not activate Item-2 several screens early. The sled begins moving on its own and cannot be corrected after launch, so an early activation can waste energy before the actual lava crossing. If you miss the sled, retry the section rather than burning additional activations without a clear launch position.
The disappearing-block route can be completed with precise jumps, but it is considerably less forgiving. If you are learning the stage, preserve Item-2 energy specifically for this crossing. Do not spend the gauge clearing ordinary enemies unless doing so prevents immediate damage or death.
- Enter the Heat Man lava section with Item-2 energy available.
- Launch from the final safe platform before the lava.
- Jump aboard immediately and dismount only at a confirmed solid landing.
- Avoid wasting Item-2 energy on minor enemies before the crossing.
Use Item-1 and Item-3 for vertical access
Item-1 is the preferred tool for broad vertical climbs. Build a short staircase rather than firing platforms randomly. Stand near the side of the screen or ledge where the next platform must appear, deploy one, ride or jump from it, and place the next only when the route remains visible. Because only three platforms can be active, a fourth deployment removes the oldest platform; time the sequence so you do not lose the platform supporting your return.
Item-3 is valuable before and after Item-1 is obtained when a wall provides a controlled route upward. Fire it so that it reaches the wall, then ride it upward and jump off at the required ledge. If you pass the ledge, wait for the platform to reverse or jump off before it carries you into a ceiling or hazard.
Wily Castle uses both Items in ways that reward preparation. Item-3 is used on tall walls, while Item-1 handles certain high ledges and false-floor routes. Refill the selected Item before entering a section that clearly depends on it. A full life bar does not compensate for arriving at a required wall or platform route with an empty Item gauge.
- Use Item-1 for open vertical climbs and temporary staircases.
- Use Item-3 only when a wall is available for attachment.
- Remember that Item-3 reverses at the top or after Mega Man dismounts.
- Refill the required Item before entering a mandatory transport section.
Build an E-Tank reserve before Dr. Wily’s fortress
An E-Tank completely restores Mega Man’s life when selected from the weapon screen. The original NES release allows a maximum of four E-Tanks. If the inventory is already full, collecting another tank does not increase the stock, so do not take a lethal risk for an unusable duplicate.
Aim to enter Dr. Wily’s fortress with at least one E-Tank, and preferably two or more if the collection routes are reliable. The fortress contains additional confirmed tanks, including tanks in its second, third and fourth stages, but those rewards are placed near spikes, Crash Blocks, Item-2 crossings or other hazards. Treat them as optional recovery opportunities rather than guaranteed supplies.
Use an E-Tank when the refill gives you a realistic chance to finish the current boss or dangerous section. Using one after a minor hit is usually wasteful, especially when the stage still contains weapon-energy refills or a checkpoint restart would let you try again. Before a Wily boss, check your life, E-Tank stock and the special weapon needed for the encounter. If a failed attempt would leave you without the weapon energy required for mandatory progress, restart the route and rebuild instead of spending every tank on a losing fight.
- Carry no more than four E-Tanks.
- Enter Wily Castle with at least one reserve whenever possible.
- Use an E-Tank from the weapon screen when life is low.
- Do not risk a lethal detour for a fifth tank or an unpracticed pickup.
- Treat Wily-stage E-Tanks as optional rewards until their approach is consistent.
Before you move on
- Item-1, Item-2 and Item-3 are present in the weapon-selection inventory after defeating Heat Man, Air Man and Flash Man.
- You understand that Item activations consume weapon energy but do not remove the Items from the inventory.
- You have collected the safe opening E-Tank in Metal Man’s stage, or you have a specific replacement plan for reaching Wily with a reserve.
- You can use Item-2 to cross the later Metal Man pit, collect the E-Tank, and return without relying on a blind jump.
- You can cross Heat Man’s lava and disappearing-block section with a deliberate Item-2 launch.
- You know whether the next route requires Item-1, Item-2, Item-3 or Crash Bomber and have preserved enough energy for that mandatory obstacle.
- You enter Dr. Wily’s fortress with at least one E-Tank whenever possible, rather than relying on risky optional pickups.
Wily Fortress Approach — Preparation and Layout Overview
After defeating all eight Robot Masters, enter Dr. Wily’s six-stage fortress with every Item unlocked and a deliberate weapon-energy plan. The most important preparation is preserving Crash Bomber for Boobeam Trap in Wily Stage 4, keeping Bubble Lead for the Alien in Wily Stage 6, and retaining a dependable weapon for both phases of Wily Machine No. 2. The fortress proceeds in a fixed order, and the password system can restore the pre-fortress state but cannot select a later Wily stage.
Finish the Robot Masters and record the password
Defeat all eight Robot Masters before entering Dr. Wily’s fortress. When the password screen appears, record it before continuing. The password preserves your defeated Robot Masters, acquired weapons and Items, and E-Tank count, but it does not preserve current weapon gauges, spent E-Tanks, lives or progress made inside the fortress.
The fortress must be cleared in order. Wily Stage 1 ends with the Mecha Dragon, Wily Stage 2 with Picopico-kun, Wily Stage 3 with Guts Tank, and Wily Stage 4 with Boobeam Trap. Wily Stage 5 contains the eight Robot Master rematches followed by Wily Machine No. 2. Wily Stage 6 contains the acid-cavern approach and the Alien.
There are no passwords that select Wily Stage 2, Wily Stage 3, the Boobeam Trap room, the rematch room, Wily Machine No. 2 or the Alien stage. If a game over sends you back to the start of the fortress, use the recorded password to restore your equipment and begin the sequence again.
- All eight Robot Masters are defeated.
- The password shown after the final Robot Master is recorded.
- You understand that a fortress restart begins at Wily Stage 1.
Confirm the Items and reserve final-stage weapons
Confirm that Item-1, Item-2 and Item-3 are available. Item-1 creates temporary rising platforms, Item-2 is a horizontally moving rocket platform, and Item-3 carries Mega Man upward along a wall. Activating one spends its weapon energy, but the Item remains permanently unlocked. Avoid using an Item merely to bypass an ordinary enemy when a required traversal section is approaching.
Keep Bubble Lead available for the Alien. In the original NES version, the Alien is vulnerable to Bubble Lead, so do not spend the weapon freely during Wily Stage 2 or the Robot Master rematches. Picopico-kun can be defeated with Bubble Lead, but use only as much as necessary and check the remaining gauge before leaving that fight.
Prepare Atomic Fire or Metal Blade for the armored phase of Wily Machine No. 2. Do not rely on a universal shot count. Instead, attack the vulnerable front of the machine during safe openings, watch the arc and bouncing projectiles, and use whichever of those weapons still has enough energy and feels reliable in the current attempt. Atomic Fire is powerful but expensive; Metal Blade is a useful fallback because it can be fired repeatedly and aimed at different heights.
For the exposed phase, Air Shooter and any Crash Bomber remaining after Boobeam Trap are practical choices. Metal Blade and Quick Boomerang are also valid reserve options when the preferred weapons are empty. The objective is to enter the machine fight with at least one dependable attack option rather than assuming Crash Bomber will survive the fortress stage 4 boss.
- Item-1, Item-2 and Item-3 are unlocked.
- Bubble Lead has enough energy for the Alien.
- Atomic Fire or Metal Blade is available for the armored machine phase.
- Air Shooter, remaining Crash Bomber, Metal Blade or Quick Boomerang is available for the exposed phase.
- Crash Bomber is treated as optional after Boobeam Trap rather than required for Wily Machine No. 2.
Preserve Crash Bomber for Boobeam Trap
Do not spend Crash Bomber on routine enemies, convenience walls or optional pickups during Wily Stages 1 through 3. The weapon is required in Wily Stage 4, where the barriers and wall-mounted emitters of Boobeam Trap must be destroyed with Crash Bomber. A missed or unnecessary shot can leave too little ammunition for the complete boss room.
Use the Mega Buster, Metal Blade, Quick Boomerang, Bubble Lead and movement Items for ordinary fortress progress. Wily Stage 1 uses Item-3 to cross the raised structures and Item-1 to reach the upper ladder route before the Mecha Dragon. Wily Stage 2 requires Item-2 for the long spike crossing and later uses Item-3 for a wall ascent. Wily Stage 3 uses water movement, spike navigation and careful enemy handling; none of those sections requires Crash Bomber.
Some optional pickups in Wily Stages 2 and 3 are behind Crash Bomber walls. Skip them if reaching them would reduce the supply needed for Boobeam Trap. A useful E-Tank is not worth entering the boss room without enough ammunition to destroy every required barrier and emitter.
Before entering Boobeam Trap, collect any safe Crash Bomber energy available in the approach and inspect the room before firing. Destroy only the barriers that block the route or protect the emitters. If the first attempt fails after several wasted shots, accept the life loss and retry from the checkpoint rather than spending every E-Tank on an attempt that cannot finish.
- Crash Bomber is preserved through Wily Stages 1, 2 and 3.
- Item-2 is saved for the required Wily Stage 2 spike crossing.
- Optional Crash Bomber walls and pickups are skipped when ammunition is more important.
- Safe weapon-energy refills are collected before Boobeam Trap.
- Every Crash Bomber shot in the boss room is planned before firing.
Handle the fortress hazards deliberately
The fortress combines narrow shafts, spikes, false floors, moving platforms, water physics, ladder transitions, conveyor-like movement and enemies triggered by entering or moving through a room. When a room loads, stop on stable ground and identify the next landing point. Short controlled jumps are safer than long leaps near spikes or moving machinery.
In Wily Stage 1, destroy the birds and their eggs before they interfere with the building crossings. Equip Item-3 to pass the raised structures, then use Metal Blade against the ground enemies. At the right side, use Item-3 to climb and take the ladder route. Item-1 creates the platforms needed to reach the upper ladder. Equip Quick Boomerang for the Mecha Dragon chase, keep moving across the blocks and prioritize staying on a usable platform over firing constantly.
In Wily Stage 2, use Item-2 from stable ground and ride across the spike field. Wait for the correct ladder instead of jumping early. The stage contains optional rewards behind Crash Bomber walls; leave them alone if the weapon gauge is low. Continue through the narrow passages, use Item-3 for the later wall ascent and use Item-1 only where it creates a necessary crossing. Defeat Picopico-kun with Bubble Lead while preserving a reserve for the Alien.
In Wily Stage 3, the water increases Mega Man’s jump height, so control the descent rather than making hurried jumps. Watch for large fish enemies emerging from holes because contact can knock Mega Man into nearby spikes. Use Metal Blade to clear approach enemies and Quick Boomerang or another dependable attack against Guts Tank. Do not spend Crash Bomber in this stage unless a route is absolutely necessary; the required priority remains Boobeam Trap.
After the Boobeam Trap, enter the Robot Master rematch room and choose an order that uses plentiful weapons first. Preserve Bubble Lead for the Alien and keep Atomic Fire or Metal Blade available for Wily Machine No. 2. After all eight rematches, use the central teleporter to begin the machine fight.
- New rooms are surveyed before movement begins.
- Item-3 and Item-1 are used deliberately in Wily Stage 1.
- Item-2 is reserved for the Wily Stage 2 spike crossing.
- Bubble Lead use against Picopico-kun does not exhaust the Alien reserve.
- Crash Bomber is still available when entering Boobeam Trap.
Recover from a failed fortress attempt
Identify whether the failure came from movement, health management or weapon conservation. If a life was lost to a missed jump, practice the section with the Mega Buster rather than immediately spending an E-Tank. Use an E-Tank when the extra health is likely to complete a boss attempt you already understand, not to cover repeated exploratory mistakes.
If Crash Bomber is low before Boobeam Trap, collect safe weapon-energy pickups in the approach and refill it before entering the boss room whenever possible. Atomic Fire, Metal Blade and Air Shooter cannot substitute for Crash Bomber against the Boobeam barriers and emitters. If too many bombs were wasted, accept the life loss and retry from the checkpoint instead of committing all remaining E-Tanks to an unwinnable attempt.
Destroyed Boobeam barriers remain destroyed when Mega Man loses a life and returns to the stage checkpoint, making a careful retry easier during the same run. A game over removes that progress and returns the fortress attempt to Wily Stage 1. Use the restart to rebuild supplies and execute a cleaner conservation plan.
If Boobeam Trap consumes the entire Crash Bomber gauge, continue with the alternate Wily Machine plan. Attack the armored machine’s vulnerable front during safe openings with Atomic Fire or Metal Blade, choosing the weapon that remains available and controllable. Do not depend on a fixed number of shots or assume that either weapon will always finish the phase under every difficulty setting and resource state. For the exposed phase, use Air Shooter or any remaining Crash Bomber when possible; Metal Blade and Quick Boomerang remain practical alternatives.
After Wily Machine No. 2, continue into Wily Stage 6. Cross the acid cavern while watching the ceiling drops, enter the Alien room with Bubble Lead available and fire while avoiding contact. Defeating the machine is not the completion point. The run is complete only after the Alien is defeated, Dr. Wily’s surrender scene appears, the seasonal ending journey plays and the credits are displayed.
- The cause of each death is identified before spending an E-Tank.
- Crash Bomber is refilled before another Boobeam attempt whenever possible.
- Atomic Fire or Metal Blade is retained for the armored machine phase.
- Air Shooter, remaining Crash Bomber, Metal Blade or Quick Boomerang is available for the exposed phase.
- Bubble Lead remains available before entering the Alien room.
- The surrender scene, seasonal ending sequence and credits are displayed.
Before you move on
- All eight Robot Masters are defeated and the fortress password is recorded.
- Item-1, Item-2 and Item-3 are unlocked with usable energy.
- Crash Bomber is preserved for Wily Stage 4 and used successfully against Boobeam Trap.
- Bubble Lead remains available for the Alien.
- Atomic Fire or Metal Blade is available for the armored Wily Machine No. 2 phase.
- Air Shooter, remaining Crash Bomber, Metal Blade or Quick Boomerang is available for the exposed machine phase.
- The six Wily stages are cleared in order.
- The Alien is defeated with Bubble Lead.
- Dr. Wily’s surrender scene, the seasonal ending journey and the credits are displayed.
Wily Castle: Stage 1 — Traps, Platforming and Mini-bosses
Wily Castle Stage 1 begins outside the fortress and combines Item-3 wall climbs, tight ladder rooms, a difficult Item-1 platform sequence, and a chase across disappearing suspended blocks. There is no separate mid-stage boss. The stage boss is the Mecha Dragon, which can be defeated safely with the Mega Buster or more quickly with Quick Boomerang. Preserve Crash Bomber and Atomic Fire because neither is needed for this stage and both are more valuable later in the fortress.
Prepare before entering the fortress
Wily Castle does not provide passwords that resume progress from a later fortress stage. A password can restore your acquired weapons and Items, but a new fortress attempt begins at the first Wily stage. Refill health and weapon energy before entering if the stage-select screen allows it, then make sure Item-1, Item-3, and Quick Boomerang are available.
Equip Metal Blade for the approach. It is useful against airborne enemies and Scworms because it can be fired in several directions. Keep Crash Bomber and Atomic Fire unused. They are not required for the route or the Mecha Dragon, and preserving them gives you better options in later Wily encounters.
- Enter with Item-1 and Item-3 available.
- Have Quick Boomerang ready for the Mecha Dragon if you plan to use its weakness.
- Equip Metal Blade for the opening route.
- Preserve Crash Bomber and Atomic Fire.
Cross the opening area and climb the first tower
Move right through the opening exterior area. Pipis fly overhead and release eggs that fall toward the ground. Shoot the Pipis with Metal Blade when convenient, or destroy the eggs before they land. Do not stop beneath an active Pipis unless you have room to avoid the falling egg.
The first gray tower blocks the ground route. Use Item-3 beside the wall and ride its moving platform upward until you can cross to the other side. Item-3 consumes weapon energy each time it creates a platform, so deploy it from a stable position and move off promptly. You do not need to spend Crash Bomber on the tower.
After crossing the tower, a Scworm travels along the ground. Metal Blade is useful here because you can fire at an angle while moving. Keep moving if the Scworm is approaching; there is no need to fight it at point-blank range.
- Destroy Pipis or their eggs before they become a second hazard.
- Use Item-3 to cross the first gray tower.
- Avoid wasting Crash Bomber on ordinary obstacles.
- Defeat or bypass the first Scworm safely.
Cross the second tower and reach the wall ladder
Continue right through the next open section. A second gray tower blocks the path, so repeat the Item-3 climb. Start the platform close enough to the wall that Mega Man can step onto it without a long jump, then ride upward and move across the top.
A further Scworm guards the route after the tower. Use Metal Blade or the Mega Buster while backing away from it. The required path continues to the right and then reaches another vertical wall where Item-3 is needed again to reach a ladder.
An optional 1-Up can be reached near this wall, but it is not required. If you attempt it, make sure you have enough Item-3 energy to return to the required ladder. Skipping the pickup is safer than losing a life and restarting the entire stage.
- Use Item-3 for the second tower and the later wall climb.
- Treat the 1-Up as optional.
- Keep enough Item-3 energy for the required ladder.
- Do not stand directly in front of a moving Scworm.
Climb through the Sniper Joe rooms
Climb the first ladder into the fortress wall. Returning Sniper Joes occupy narrow rooms on the ascent. Their shields block frontal shots while they are guarding, so wait for the shield to move aside before firing. If a shot is about to hit, climb down temporarily rather than trying to force an attack.
Continue to the next ladder room and use the same method against the next Sniper Joe. The narrow layout makes patience more important than rapid firing. Jumping blindly while a Sniper Joe is preparing a shot can knock Mega Man from the ladder or into the lower hazard.
Near the upper part of the climb, a Springer patrols the route. Wait for it to move away or pass through its jump cycle before stepping onto the next ledge. A weapon-energy refill is available in this general ascent route; collect it when the screen is safe, with priority given to restoring Item-1 if its meter is low.
- Wait for Sniper Joe shields to open.
- Use the ladder to retreat from incoming shots.
- Time the Springer instead of jumping into it.
- Restore Item-1 energy if a safe refill is available.
Reach the separated ladder with Item-1
At the upper ladder section, the required ladder is separated from Mega Man by open space. Equip Item-1 from a stable ledge and deploy a platform, then ride it upward and use additional platforms to reach the ladder. Item-1 platforms disappear after a short time, so keep moving rather than waiting on one.
The exact launch position matters. Stand near the side of the ledge that gives the platform a direct route toward the separated ladder, and deploy the next platform only after Mega Man has landed securely. If a platform disappears before you reach the ladder, do not panic: reposition on the remaining ledge and create another one while Item-1 energy remains.
Telly enemies may enter during the climb. They are usually safer to avoid than to fight. Fire only when one blocks the ladder or the next landing, then resume climbing immediately.
- Begin the Item-1 sequence from stable ground.
- Use successive platforms without lingering.
- Keep enough Item-1 energy for the final gap.
- Ignore Tellies unless one blocks the route.
Cross the suspended blocks and trigger the boss
After the ladder, move right into the large hangar. Small suspended blocks span a bottomless gap. Use short, controlled jumps and keep moving as the screen advances. Long committed jumps are risky because the Mecha Dragon appears behind Mega Man and begins destroying or displacing the route.
When the dragon appears, continue right instead of turning around to attack immediately. Reach the group of three blocks at the far side. The battle begins once Mega Man reaches this area, and the blocks provide the footing needed to avoid the dragon's fireballs and contact damage.
- Use short jumps across the suspended blocks.
- Keep moving when the Mecha Dragon appears.
- Reach the three-block battle area before concentrating on attacks.
- Avoid falling while trying to turn and fire.
Defeat the Mecha Dragon
Quick Boomerang is an effective weakness against the Mecha Dragon. Stand on the upper block and fire toward the dragon's head whenever it is within range. The Mega Buster also works and is a reliable fallback if you want to conserve Quick Boomerang energy for another purpose.
The dragon fires projectiles while moving across the gap. If a fireball knocks Mega Man from the upper block, land on the middle block and jump back up when the next opening appears. Do not chase the dragon toward the edge of the platform. Staying on the upper or middle block is more important than maintaining uninterrupted fire.
The boss has no separate shield phase or hidden requirement. Continue attacking the head while avoiding fireballs and contact. Once its health is depleted, the stage-clear transition begins and the next fortress stage becomes available.
- Use Quick Boomerang for the fast weakness strategy or the Mega Buster for the safe fallback.
- Aim at the dragon's head.
- Recover to the middle or upper block after knockback.
- Do not spend Crash Bomber or Atomic Fire here.
Before you move on
- The Mecha Dragon is defeated and the stage-clear transition begins.
- The next Wily Castle stage is available after the transition.
- Crash Bomber and Atomic Fire remain available for later fortress stages.
- You can repeat the route by using Item-3 on the tower and wall sections, Item-1 for the separated ladder, and controlled jumps across the suspended blocks.
- You understand that a fortress password restores equipment but does not resume from a later point inside Wily Castle.
Wily Castle Stages 2-4: Picopico-kun, Guts Tank and Boobeam Trap
After Wily Stage 1, continue through Wily Castle Stages 2, 3 and 4 in sequence. Stage 2 requires Item-2 for its opening spike crossing and Item-3 for the vertical Press section before Picopico-kun. Stage 3 is a short spike-and-water course ending in Guts Tank. Stage 4 contains false floors and moving hazards before Boobeam Trap, whose five emitters can only be damaged by Crash Bomber. Enter Stage 4 with a full Crash Bomber gauge and avoid optional barriers so the standard seven-shot solution remains available.
1. Prepare before Wily Stage 2
Wily Castle stages are consecutive. After clearing Stage 1, the game sends Mega Man directly into Stage 2; there is no fortress stage-selection screen. If a game over occurs, the password continues fortress progress from the beginning of the fortress rather than selecting Stage 2, Stage 3 or Stage 4 directly.
Keep Item-2 available for the opening spike crossing. You will also need Item-3 later in the stage for the vertical wall beside the Press hazards. Preserve Bubble Lead for Picopico-kun and avoid spending Crash Bomber before Boobeam Trap. Weapon energy is not automatically restored between fortress stages, so collect safe refills but do not make dangerous detours for minor ammunition.
- Have Item-2 ready at the opening spike field.
- Keep Item-3 available for the Press-wall section.
- Preserve Bubble Lead for Picopico-kun.
- Avoid using Crash Bomber before Wily Stage 4.
2. Cross the Wily Stage 2 spike field
Move right from the starting area and deal with the Prop-Tops without standing near the platform edge. At the long spike field, activate Item-2 at the edge and board the jet platform immediately. Stay on it while it travels over the spikes.
Two ladders appear during the crossing. Pass the first ladder and jump to the second ladder. The second ladder leads to an optional reward route containing an E-Tank, an extra life and weapon-energy capsules. Descend carefully and take only the refills you can reach safely. The first ladder leads toward a route with Crash Bomber barriers, so leave those barriers intact unless you have a specific reason to take that detour.
After collecting the optional rewards, descend through the Shotman section. Wait for the firing pattern to change before moving down a ladder, and avoid dropping into the spikes while trying to reach every capsule.
- Activate Item-2 at the edge of the spike field.
- Pass the first ladder and use the second ladder.
- Treat the E-Tank, extra life and capsules as optional.
- Do not spend Crash Bomber on optional barriers.
3. Cross the Mole and Press sections
Continue downward and right through the Mole rooms. Moles can appear from the floor and knock Mega Man into a pit, so stay away from platform edges and fire only when a target is safely exposed. Weapon or health refills may appear in this area; collect them only when the room is secure.
At the Press section, approach each moving crusher and let it descend before waiting for it to rise. Cross beneath one Press at a time rather than running through several openings. The later vertical wall section is cleared with Item-3. Deploy Item-3 against the wall, ride it upward and time the movement so Mega Man passes beneath each Press as it rises. Item-1 is not the required transport item for this verified route.
After the Presses, climb down the ladder and make small horizontal adjustments through the spike-lined descent. A large refill can be reached on an optional path, but the central drop leads toward the boss and is safer if your health is low. Equip Bubble Lead before entering the boss room.
- Use non-Crash weapons against the Moles and Shotmen.
- Wait for each Press to rise before crossing.
- Use Item-3 for the vertical wall section.
- Do not substitute Item-1 for the required Item-3 traversal.
- Equip Bubble Lead before Picopico-kun.
4. Defeat Picopico-kun
Picopico-kun is formed from pairs of blocks that detach from the room’s walls, floor or ceiling. The separate blocks cannot be damaged. Wait until the pair joins into a complete unit, then hit it with Bubble Lead. One Bubble Lead destroys one completed unit in the original NES release.
Stay near the center or move toward the safer side indicated by the incoming formation. Jump over the blocks when they approach, then fire Bubble Lead as soon as the unit has assembled and is within range. For a floor-level formation, jump first and shoot while airborne. Do not chase a unit into a wall; let it move toward you so you retain room to jump.
The formations become faster and less forgiving as the fight continues. After each hit, return to a position where the next pair can be seen assembling. Destroy all fourteen completed units. When the fourteenth unit disappears, the game advances to Wily Stage 3.
- Attack only after the blocks have joined.
- Use Bubble Lead for the completed unit.
- Jump over floor-level formations before firing.
- Keep room to retreat from the next formation.
- Defeat all fourteen units.
5. Cross Wily Stage 3
Wily Stage 3 is short but places spikes around its important jumps. At the beginning, descend through the main route. Optional Crash Bomber barriers can lead to extra supplies, but skip them while preserving ammunition for Boobeam Trap. The stage does not require those rewards.
Use the Mega Buster or Metal Blade against ordinary enemies and move carefully through the early spike rooms. In the water section, Mega Man’s jump arc changes, so use short, deliberate jumps instead of large corrections. Big Fish can leap from pits after you land near them; move away from the edge promptly.
Continue through the underwater spike platforms and the later descent. Line up each landing before jumping, make only the small left or right corrections needed to avoid spikes and do not linger at the edge of a platform. Near the end, follow the route that moves right and then back left before exiting the water. Defeat the three Shotmen before the boss door with the Mega Buster or Metal Blade.
- Skip optional Crash Bomber barriers.
- Use controlled jumps in the water section.
- Move away from pit edges because of Big Fish.
- Make the final right-then-left route adjustment.
- Defeat the three Shotmen with a non-Crash weapon.
6. Defeat Guts Tank
Wait for Guts Tank to enter the room completely. Its head is the vulnerable target, and the front deck is the safe attack position because it raises Mega Man high enough to fire at the head.
Equip Quick Boomerang and jump onto the raised front section of the tank. Fire upward at the head while continuing to jump as needed. Quick Boomerang is the preferred weapon because it damages the boss without consuming Crash Bomber ammunition. The tank fires an arcing shot and can release Metalls from its body; avoid the projectiles and jump back onto the front deck if you are knocked away.
Atomic Fire can also damage Guts Tank, but its charge timing and energy cost make it less convenient. Crash Bomber works, but using it here can leave too little ammunition for Boobeam Trap. Defeat Guts Tank with Quick Boomerang whenever possible, then proceed directly to Wily Stage 4.
- Wait for the tank to enter fully.
- Stand on the raised front deck.
- Aim Quick Boomerang at the head.
- Avoid the arcing shot and Metalls.
- Do not spend Crash Bomber unless the attempt is otherwise lost.
7. Traverse Wily Stage 4 and prepare Boobeam Trap
Wily Stage 4 uses false floors, vertical ladders, moving platforms, Neo Metalls, Sniper Joes and Sniper Armor. Use Metal Blade, Mega Buster or Leaf Shield on ordinary enemies. Bubble Lead can reveal some false-floor behavior, but do not waste Crash Bomber merely testing surfaces.
In false-floor rooms, identify the solid route before committing to a jump. Item-1 is useful for crossing difficult vertical sections. On moving platforms, step off before the platform pushes Mega Man into a wall or hazard. Take nearby weapon-energy capsules only when you can do so without losing health or falling.
Before the boss door, refill Crash Bomber to maximum if possible. The reliable standard solution assumes seven shots: five emitter shots and two shots for the necessary blocking walls. Do not count on retaining Crash Bomber for Wily Machine No. 2; prepare Atomic Fire, Metal Blade or Air Shooter as later fallback options.
- Use non-Crash weapons against normal enemies.
- Use Item-1 for difficult vertical movement when needed.
- Avoid optional Crash Bomber barriers.
- Refill Crash Bomber before the boss room.
- Enter expecting the standard route to use all seven shots.
8. Defeat Boobeam Trap with the standard seven-shot route
Boobeam Trap has five stationary emitters. They flash before firing, and their projectiles cross the room rapidly. Only Crash Bomber damages the emitters. The standard route uses five emitter shots and two wall shots, leaving no room for a missed or wasted shot.
First activate Item-1 to reach the central or upper ledge. From there, fire the first Crash Bomber at the upper emitter commonly identified as Boobeam 2. Drop toward the lower platform while avoiding the synchronized projectiles.
Use the second Crash Bomber on the wall protecting the lower-left emitter, commonly identified as Boobeam 1. Immediately fire the third Crash Bomber at that newly exposed emitter. From the lower platform, jump and fire the fourth Crash Bomber at the central emitter, Boobeam 3.
Move across the upper side of the room and fire the fifth Crash Bomber at the opposite emitter, Boobeam 4. Use Item-3 to climb the wall and reach the lower-right section. Fire the sixth Crash Bomber at the wall protecting Boobeam 5, then use the seventh and final shot on that emitter.
Some experienced players combine an explosion’s area of effect with a nearby wall and emitter, but the placement is exact. Treat that as an advanced ammunition-saving technique, not part of the dependable first-attempt route.
- Use Item-1 to reach the upper ledge.
- Destroy the upper emitter first.
- Use one shot on the lower-left wall and one on its emitter.
- Destroy the central and opposite emitters.
- Use Item-3 to reach the lower-right section.
- Destroy the final wall and then the final emitter.
- Do not rely on a combined explosion unless you have practiced it.
9. Recover after a failed Boobeam attempt
If Crash Bomber reaches zero before all five emitters are destroyed, another weapon cannot finish Boobeam Trap. Do not spend an E-Tank in an unwinnable attempt. Let Mega Man fall or take the defeat and retry from the available fortress checkpoint.
On the retry, pass through the final Stage 4 rooms again and collect safe weapon-energy drops with Crash Bomber equipped. Any wall destroyed during the failed attempt remains open during the retry, reducing the number of wall shots needed, but every remaining wall still has to be removed before its protected emitter can be attacked.
If the attempt ends in a game over, use the password shown by the game to resume the fortress from its beginning. The password does not select Wily Stage 2, Stage 3 or Stage 4 directly. Rebuild the run through the fortress, avoid optional Crash Bomber barriers and enter Boobeam Trap with a full gauge.
After all five emitters are destroyed, the game advances to Wily Stage 5, which contains the Robot Master rematches and Wily Machine No. 2. Bubble Lead is still needed later against the Alien, so clearing Boobeam Trap does not complete the game.
- Do not continue an unwinnable Boobeam attempt without Crash Bomber energy.
- Retry through the final Stage 4 section and refill before the boss.
- Expect a fortress password to restart from the fortress beginning.
- Do not expect direct selection of Wily Stage 2, 3 or 4.
- Confirm that Wily Stage 5 begins after Boobeam Trap.
- Preserve Bubble Lead for the later Alien battle.
Before you move on
- Wily Stage 2 has been cleared with Item-2 across the opening spikes and Item-3 through the vertical Press-wall section.
- The optional second-ladder rewards were collected only if they could be taken safely.
- Picopico-kun has been defeated after destroying all fourteen completed units.
- Wily Stage 3 has been cleared through the underwater spike section and final descent.
- Guts Tank has been defeated by attacking its head from the front deck.
- Wily Stage 4 has been traversed without wasting Crash Bomber on optional barriers.
- All five Boobeam emitters and the two necessary blocking walls have been destroyed.
- The standard seven-shot route has been completed, or a practiced combined explosion has saved ammunition without leaving a wall or emitter intact.
- The game advances to Wily Stage 5, confirming that Stages 2, 3 and 4 are complete.
- Bubble Lead remains available for the Alien encounter later in the fortress.
References for this chapter
- MEGA MAN 2 — Nintendo instruction manual
- Chapter Ten: Wily Stage 2 — Mega Man 2 Walkthrough and Guide, NES
- Chapter Eleven: Wily Stage 3 — Mega Man 2 Walkthrough and Guide, NES
- Chapter Twelve: Wily Stage 4 — Mega Man 2 Walkthrough and Guide, NES
- Mega Man 2 Walkthrough
- Boobeam Trap — MMKB
- Mega Man 2 NES Boss Guide
Wily Castle Stage 5 and Stage 6: Robot Master Rematches, Wily Machine No. 2 and Alien
After Wily Castle Stage 4, Stage 5 begins in the teleport room for the eight Robot Master rematches. Once all eight are defeated, the central route leads to both phases of Wily Machine No. 2. Preserve Bubble Lead for Stage 6, because it is the only weapon that damages the Alien in the original NES release. Use preserved Atomic Fire or Metal Blade against the armored machine during safe openings, then use Air Shooter, residual Crash Bomber, Metal Blade or Quick Boomerang against the exposed phase when available. After the machine is destroyed, continue through the acid cavern, defeat the Alien and allow the surrender scene, walk-home sequence and credits to play.
1. Prepare in the Wily teleport room
Stage 5 starts in a room with eight teleporters, each leading to one Robot Master rematch. There is no ordinary platforming section before the rematches. You may use the teleporters in any order, so choose an order that protects the weapons needed for the two Wily Machine phases and the Alien.
Reserve Bubble Lead for Stage 6. It is needed against the Alien, and using it casually in the rematches can leave the final battle impossible to finish without a reset or resource recovery. Preserve Atomic Fire if possible for the armored machine. Metal Blade is the most useful general-purpose reserve because it is efficient against many rematches and can also serve as a fallback against the machine.
Crash Bomber is normally depleted or nearly depleted by the Boobeam Trap in Wily Stage 4, so do not build the entire plan around having it. If any remains, keep it for the exposed machine phase. Air Shooter is another useful option there. Check health and weapon energy between rematches with the pause menu, and use the large refill that appears after a defeated Robot Master when it restores an important weapon or brings your health back up.
- All eight rematch teleporters are available.
- Bubble Lead is being conserved for Stage 6.
- Atomic Fire or Metal Blade is available for the armored machine plan.
- Air Shooter, Metal Blade, Quick Boomerang or residual Crash Bomber is available for the exposed phase.
- Useful health and weapon-energy refills have been collected.
2. Clear the eight Robot Master rematches
The rematches use the same general boss behaviors as the original Robot Master fights. Use the Mega Buster or Metal Blade where practical, and avoid spending Bubble Lead, Atomic Fire and Crash Bomber unless a particular fight is going badly. Every completed rematch provides a large energy refill, so use the refill to rebuild a weapon that matters for the final battles rather than automatically topping off a weapon you will not use.
Metal Man can be handled with Metal Blade, which ends the fight efficiently. Use Metal Blade or the Mega Buster against Flash Man, and keep moving while watching for his stopping-time attack. Against Bubble Man, jump over him and fire upward as he rises. Heat Man can be defeated with the Mega Buster or Quick Boomerang, leaving Atomic Fire available for the machine.
Against Wood Man, attack after the Leaf Shield cycle creates an opening. Do not use Leaf Shield against him because it can restore his health. Air Man can be handled with careful Mega Buster shots while you move around his tornado pattern. Against Crash Man, fire Air Shooter as he jumps if you have enough energy; otherwise use controlled Mega Buster attacks. Quick Man can be defeated with the Mega Buster by jumping over his charges and boomerangs. Time Stopper is optional and should not be spent merely for convenience if you still need other resources.
- All eight Robot Masters are defeated again.
- Bubble Lead remains reserved and usable.
- Atomic Fire has not been spent unnecessarily.
- At least one reliable weapon remains for the exposed machine.
- Health and weapon refills have been used where they improve the final attempt.
3. Open the route to Wily Machine No. 2
After the eighth rematch, return to the teleport room. The central route becomes available and leads to Wily Machine No. 2. There is no additional stage-select screen between the rematches and the machine, and Stage 6 follows immediately after the machine battle.
Equip Atomic Fire before entering if you plan to use it against the armored phase. If Atomic Fire is low, select Metal Blade instead and prepare to attack during safe openings. Keep Bubble Lead unused. Also confirm that Air Shooter, Metal Blade, Quick Boomerang or any remaining Crash Bomber is available for the exposed phase.
- All eight rematches are complete.
- The central route is open.
- Bubble Lead remains reserved for the Alien.
- Atomic Fire or Metal Blade is ready for the armored phase.
- A usable exposed-phase weapon remains available.
4. Defeat the armored Wily Machine No. 2 phase
The armored machine moves horizontally while firing large energy shots in an arcing path. Stay far enough from the machine to read the projectile, then jump over it without being pushed into the edge of the room. Do not stand directly beneath the machine or force an attack when its front is out of reach.
Use preserved Atomic Fire during safe openings when the vulnerable front of the machine is reachable. Release the shot only when it can connect; wasting Atomic Fire on poor timing can leave too little energy for the remainder of the fight. If Atomic Fire is unavailable or does not finish the phase, use Metal Blade during the same openings. Metal Blade is a dependable fallback and does not require a fixed number of hits to be effective.
The exact number of attacks needed depends on the weapon, difficulty setting, and whether shots connect cleanly, so do not rely on a universal Normal- or Difficult-mode shot count. Prioritize surviving the arcing shots over forcing damage. Use an E-Tank when it gives you a realistic chance to complete the phase and continue attacking. When the outer armor is destroyed, the exposed phase begins immediately; the machine battle is not over.
- The arcing projectile pattern is identified.
- Atomic Fire is used only during safe, reachable openings when available.
- Metal Blade is used as the fallback when Atomic Fire is low or exhausted.
- No fixed shot-count assumption is being used.
- The armored phase is destroyed without spending Bubble Lead.
5. Defeat the exposed machine phase
The exposed phase keeps moving laterally and sends bouncing projectiles across the floor. Watch the first bounce before committing to a jump, and avoid being cornered. This phase is dangerous because several shots can occupy the floor at once, so attack during an opening rather than trying to fire continuously while trapped.
Air Shooter is a strong option when its energy remains. Fire as the exposed cockpit moves into a favorable position so the rising tornadoes can reach it. If Crash Bomber survived the Boobeam Trap, place it so the moving cockpit enters the blast rather than moving away from it. Crash Bomber is especially valuable here, but its remaining energy is not guaranteed.
Metal Blade and Quick Boomerang are also usable damage options for the exposed phase. Metal Blade can be fired repeatedly and angled toward the moving target. Quick Boomerang is short-ranged, so use it only when the cockpit is close enough and the projectile pattern gives you room to attack. Select the weapon with the most dependable remaining energy rather than insisting on one method.
Use an E-Tank when the machine is close to defeat or when it creates enough health to survive a clear follow-up attack. Destroying the exposed cockpit completes Wily Stage 5, but the game immediately continues to Wily Stage 6.
- The bouncing floor-projectile pattern is recognized.
- Air Shooter is used when its energy and firing position make it practical.
- Residual Crash Bomber is used only if it remains after Wily Stage 4.
- Metal Blade or Quick Boomerang is available as a fallback.
- The exposed cockpit is destroyed.
6. Cross the acid cavern in Wily Stage 6
Stage 6 begins with a fall into a short cavern containing no ordinary enemies. Land on the solid ground, then move right while watching for acid drops from the ceiling. The drops arrive as isolated hazards, close pairs and groups that become tighter in the narrow sections.
Treat each group as its own timing problem. Let a drop or group pass, move into the cleared space and stop before the next pattern reaches Mega Man. Short controlled movements are safer than sprinting through the entire passage. Continue right through the lower and raised portions of the cavern, then drop to the final approach and enter the boss gate.
There is no required alternate route in this passage. Avoid unnecessary backtracking because the hazard timing is easier to read when you continue in one direction. Before entering the final room, equip Bubble Lead and confirm that it has enough energy for repeated attempts. If the gauge is nearly empty, the attempt is not properly prepared: the Alien cannot be damaged by the Mega Buster or the other special weapons.
- The opening fall is controlled.
- Acid drops are crossed one timing group at a time.
- Mega Man continues right without needless backtracking.
- The final boss door is reached.
- Bubble Lead has a usable reserve before the Alien fight.
7. Defeat the Alien with airborne Bubble Lead shots
The Alien travels around the room in a repeating figure-eight or infinity-shaped path and fires shots toward Mega Man. Keep moving so the aimed shots do not pin you against a wall, but do not chase directly into the Alien because contact causes heavy damage.
Bubble Lead is the only weapon that damages this boss. The bubbles travel along the floor, so a shot fired while Mega Man is standing will usually pass underneath the Alien. Wait for the Alien to descend toward the center or another low part of its route.
When the Alien enters a low, repeatable contact window, jump and fire Bubble Lead while airborne. The goal is for the bubble to meet the Alien as it descends, not to jump into the boss. Land, move away from the incoming shot and wait for the next low opening. Fire only when the Alien is low enough to be reached so that the limited Bubble Lead energy is not wasted.
Use an E-Tank if necessary, preferably after moving into a position from which you can resume the pattern. Continue until the Alien is destroyed. The hologram then breaks apart and exposes Dr. Wily's deception, but allow the following ending sequence to continue instead of resetting immediately.
- The Alien's looping path is observed before attacking.
- Only Bubble Lead is used for damage.
- Bubble Lead is fired during airborne low-position openings.
- Direct contact is avoided.
- Bubble Lead energy is conserved between successful openings.
- The Alien is defeated.
8. Watch the complete ending
Defeating Wily Machine No. 2 is not the completion point. You must cross Wily Stage 6 and defeat the Alien with Bubble Lead before the ending begins.
After the Alien is destroyed, Dr. Wily's deception is revealed and the surrender scene plays. Mega Man then walks home through the changing seasons before the staff credits. Do not reset after the Alien fight. Let the surrender scene, walk-home sequence and credits finish.
- All eight Robot Master rematches are defeated.
- Both phases of Wily Machine No. 2 are defeated.
- The acid cavern is crossed.
- The Alien is defeated with airborne Bubble Lead shots.
- Dr. Wily's surrender scene appears.
- Mega Man's journey-home sequence plays.
- The staff credits appear.
Before you move on
- All eight Robot Master rematches in the Wily teleport room are defeated.
- The central route opens after the rematches.
- The armored Wily Machine No. 2 phase is defeated with preserved Atomic Fire or Metal Blade used during safe openings, without relying on a fixed universal hit count.
- The exposed Wily Machine No. 2 phase is defeated with Air Shooter, residual Crash Bomber, Metal Blade, Quick Boomerang or another verified usable option.
- The acid cavern is crossed.
- The Alien is defeated using airborne Bubble Lead shots timed to its low movement windows.
- Dr. Wily's surrender scene appears.
- Mega Man's journey-home sequence plays.
- The staff credits appear.
References for this chapter
- MEGA MAN 2 — Nintendo NES instruction manual
- Chapter Thirteen: Wily Stage 5 — Mega Man 2 Walkthrough & Guide — NES — Warhawk
- Chapter Fourteen: Wily Stage 6 — Mega Man 2 Walkthrough & Guide — NES — Warhawk
- Mega Man 2 — Guide and Walkthrough — NES — brian_sulpher
- Mega Man 2 — Guide and Walkthrough — NES — CMoriarty
- Mega Man 2 NES Boss Guide
- Mega Man 2 — MMHP Game Hints
Recovery, Troubleshooting and Advanced Tactics
When a difficult section causes repeated deaths, identify the first failure, change the preparation route if necessary and practice only the specific timing or attack pattern that is blocking progress. On the original Nintendo Entertainment System release, password recovery does not place Mega Man at a later Wily fortress stage. Once the fortress sequence begins, a restart or fortress game over requires rebuilding the run from Wily Stage 1 with the acquired weapons and Items. The late-game resource plan should reserve Crash Bomber for Boobeam Trap, protect Bubble Lead for Alien Wily and keep Atomic Fire or Metal Blade available for the armored phase of Wily Machine No. 2. The exposed phase can be handled with Air Shooter, any remaining Crash Bomber or Metal Blade.
Diagnose the failure before restarting
After a death, identify the first event that made the attempt unlikely to succeed. A missed disappearing block, a laser-room mistake or contact with an enemy is an execution problem. Reaching a boss with an empty weakness weapon, too little health or no Bubble Lead is a preparation problem. These require different responses, so repeating the same full attempt without naming the cause usually spends lives without improving the next run.
For a platforming failure, return with the Mega Buster equipped and practice the jump rhythm without spending an E-Tank. For a resource failure, change the route or weapon assignments before returning. A player struggling with Quick Man should defeat Flash Man first and decide whether Time Stopper will be reserved for the laser rooms or the boss. A player struggling with Wily Machine No. 2 should preserve Atomic Fire or Metal Blade for the armored phase and enter the exposed phase with Air Shooter, residual Crash Bomber or Metal Blade still available.
- Name the first failed action, not merely the screen where Mega Man died.
- Classify the problem as timing, positioning, health, boss knowledge or weapon energy.
- Make one concrete adjustment for the next attempt.
- If weapon energy is the problem, rebuild the preparation route instead of spending E-Tanks on an unwinnable fight.
Recover from Quick Man with a deliberate Time Stopper plan
If Quick Man’s instant-death laser rooms are the main obstacle, leave the stage and defeat Flash Man first. Time Stopper can freeze the laser hazards, allowing Mega Man to cross the dangerous sections without executing the complete timing route. Activate it immediately before the section that consistently causes deaths rather than wasting its energy on easy enemies near the beginning of the stage.
Time Stopper can also damage Quick Man, but using it through the laser section may leave little or no energy for the boss. Decide before entering the stage which problem is more dangerous. If the laser route is already reliable, save Time Stopper for the boss. Otherwise, use it for the laser section and finish Quick Man with the Mega Buster or another weapon whose damage has been confirmed. Do not assume that reaching the boss with an empty Time Stopper gauge makes the attempt impossible; the Mega Buster remains usable, but the fight requires more deliberate positioning.
Item-2 from Air Man and Item-3 from Flash Man can assist with selected gaps and vertical crossings elsewhere in the game. Deploy an Item only when the destination and movement direction are visible. If an Item sends Mega Man into a worse position, return to ordinary jumps and practice that section without spending weapon energy.
- Defeat Flash Man before Quick Man if the laser rooms are the main blocker.
- Choose in advance whether Time Stopper is for the laser section or the boss.
- Do not activate Time Stopper early and assume enough energy will remain for the entire stage.
- Use Item-2 or Item-3 only after confirming the landing area and direction of travel.
Use Metal Blade angles instead of jumping into danger
Metal Blade fires in eight directions, including upward and downward diagonals. Choose the firing direction from Mega Man’s current position instead of spraying while moving. From below a ledge, fire upward or upward-diagonal blades. From above a low enemy, fire downward. If an enemy is behind Mega Man at an awkward height, turn before firing rather than jumping into contact damage.
This technique is especially useful against enemies on stairs, narrow platforms and elevated ledges in Wily’s fortress. Stand outside the enemy’s contact range, select the required angle and fire while keeping Mega Man on stable ground. The goal is to remove threats before entering their movement space. Use the Mega Buster when it is sufficient so Metal Blade remains available for difficult fortress rooms and as a possible Wily Machine fallback.
Practice in a Robot Master stage with simple enemies. Make one pass using an upward-diagonal shot and another using a downward-diagonal shot. The useful skill is recognizing the direction from Mega Man’s position, not memorizing one screen. The same principle helps during Wily Machine No. 2: wait for a safe opening, stand where the projectiles can be crossed, then fire at the front or exposed target without jumping into the machine.
- Practice one upward-diagonal and one downward-diagonal Metal Blade shot.
- Stand outside contact range before selecting the angle.
- Use the Mega Buster when it is safe so Metal Blade remains available for Wily.
- Choose the angle before jumping at a low or airborne target.
- Keep Metal Blade available as a valid fallback against Wily Machine No. 2.
Separate Boobeam Trap from the Wily Machine resource plan
Crash Bomber is required for Boobeam Trap, so treat every Crash Bomber shot before that encounter as part of the fortress budget. Do not spend the weapon on minor enemies or optional obstacles if doing so leaves too little energy for the emitters and barriers in the boss room. Enter Wily Stage 4 with the gauge restored as fully as possible and fire only after confirming the next target and landing position.
Item-1 and Item-3 can make selected movements safer, but they do not remove the need to plan the entire Boobeam encounter. Before each explosion, identify the next platform and the next emitter. A misplaced shot can strand Mega Man or force an additional use of Crash Bomber. The encounter may consume most or all of the weapon gauge, so remaining Crash Bomber must be treated as a bonus rather than a guaranteed part of the next boss strategy.
Plan Wily Machine No. 2 separately. In the armored phase, use preserved Atomic Fire when a safe charge-and-release opportunity is available, or use Metal Blade for a more repeatable approach. Do not rely on a fixed damage amount or a universal number of shots: weapon energy, difficulty setting, missed attacks and the timing of the attack cycle all affect the result. Atomic Fire is powerful but slow to charge and consumes substantial energy, while Metal Blade allows more frequent attacks and is a dependable fallback.
The machine’s projectiles sweep across the floor and curve upward near the far side of the room. Watch an attack cycle, move through the gaps and attack the front of the machine during a safe opening. After the armored phase is removed, use Air Shooter if it was preserved. Remaining Crash Bomber can also be effective when enough energy survived Boobeam Trap. Metal Blade remains a valid fallback against the exposed phase, although it requires repeated accurate hits while Mega Man avoids the machine’s movement and projectiles.
Do not restart solely because Crash Bomber was exhausted by Boobeam Trap. Restart only when the remaining health and weapon plan cannot reliably defeat both machine phases. If Air Shooter or Metal Blade is available and the attack pattern is understood, continue the attempt.
- Reserve Crash Bomber for the required Boobeam Trap targets.
- Avoid spending Crash Bomber on minor fortress obstacles before Wily Stage 4.
- Use preserved Atomic Fire or Metal Blade against the armored Wily Machine phase.
- Do not promise a fixed Atomic Fire damage result or shot count.
- Use Air Shooter or residual Crash Bomber against the exposed phase when available.
- Use Metal Blade as a valid fallback against the exposed phase.
- Treat remaining Crash Bomber after Boobeam Trap as helpful but not guaranteed.
Use E-Tanks only when they convert knowledge into progress
An E-Tank restores Mega Man’s health to full, but it does not restore weapon energy. Use one when health is the immediate problem and the next attack pattern is understood well enough that the refill is likely to produce a clear. Do not spend one merely because Mega Man has taken damage before an unfamiliar platform sequence or while the required weapon is already empty.
If a mini-boss or Wily Machine repeatedly consumes every E-Tank, abandon that attempt rather than trading health for uncertain progress. Review the attack cycle, rebuild the route and return with the necessary weapon energy. The Wily fortress cannot be selected stage by stage through a later password, so plan for the complete sequence from Wily Stage 1. A fortress game over or restart is a signal to improve resource management, not a way to preserve late-stage progress.
Alien Wily is the final encounter after Wily Machine No. 2. Bubble Lead is the weapon that damages this boss, so confirm that it has usable energy before entering the room. An E-Tank cannot solve an empty Bubble Lead gauge because E-Tanks restore life only. During the Robot Master rematches, use each boss’s practical weakness while avoiding unnecessary Bubble Lead expenditure. If Bubble Lead is empty before Alien Wily, restart the fortress run rather than entering an unwinnable battle.
- Use an E-Tank for health, never as a weapon-energy refill.
- Do not spend the entire supply on an unfamiliar mini-boss pattern.
- Preserve Bubble Lead during the Robot Master rematches and machine fight.
- If Bubble Lead is empty before Alien Wily, restart from Wily Stage 1.
- Do not assume a fortress password resumes a later fortress stage.
- Continue after Boobeam Trap if Air Shooter or Metal Blade leaves a viable machine plan.
Before you move on
- You can identify whether a failed attempt was caused by timing, positioning, health or weapon energy before restarting.
- You can clear Quick Man’s laser section through practiced timing or with a deliberately saved Time Stopper activation.
- You can use Metal Blade’s diagonal directions to attack enemies above or below Mega Man without jumping into contact damage.
- You can reach Boobeam Trap with Crash Bomber reserved for the required emitters and understand that the encounter may consume most or all of the weapon gauge.
- You can enter Wily Machine No. 2 with preserved Atomic Fire or Metal Blade for the armored phase without relying on a fixed damage result or shot count.
- You can enter the exposed machine phase with Air Shooter, residual Crash Bomber or Metal Blade and understand the tradeoffs among those options.
- You understand that fortress recovery begins at Wily Stage 1 rather than a later fortress stage.
- You enter the final Alien battle with Bubble Lead available and enough health or E-Tanks for a planned recovery.
- You defeat Alien Wily, view Dr. Wily’s surrender and deception sequence, and remain through the ending journey and credits, confirming completion of the original NES game.
Finishing up
Completion is reached when Wily Machine No. 2 is defeated, the final cavern is crossed, the Alien hologram is defeated with Bubble Lead, Dr. Wily’s surrender scene appears and the ending sequence and credits begin.
Before entering Wily’s fortress, defeat all eight Robot Masters and confirm that the required weapons and Items are available.
Clear Wily Castle Stages 1-4, defeat the eight Robot Master rematches, defeat both phases of Wily Machine No. 2, then clear the final Alien stage.
Continues and passwords are valid recovery tools; using them does not invalidate completion. A fortress password restores broad preparation but does not place Mega Man at a later fortress stage.
Optional goals include collecting safe E-Tanks and Items, but they are not required for the canonical ending.
Choose your next gameScreenshots & video
Game imagery for reference. Follow the written chapters above for the route and strategies.
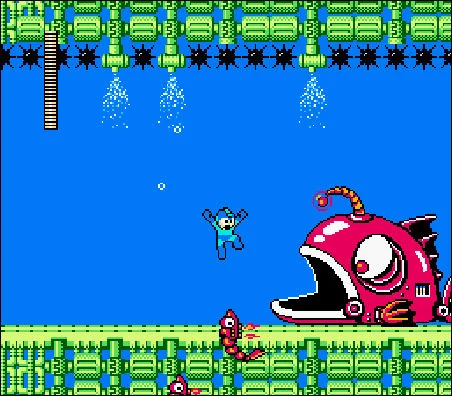
Sources & references
Our original guide draws on the references below. Check the edition at the top of this page before following controls or unlock requirements.
- MEGA MAN 2 — Capcom Original Game Manual
- MEGA MAN 2 — Nintendo instruction manual
- Mega Man 2 Walkthrough & Guide — Controls
- Mega Man 2 — Guide and Walkthrough — NES — UltimaterializerX
- Mega Man 2 NES Boss Guide
- Chapter One: Metal Man - Mega Man 2 Walkthrough & Guide - GameFAQs
- Mega Man 2 guide — Metal Man stage
- Mega Man 2/Metal Man — StrategyWiki
- Mega Man 2 — Boss Guide - NES - GameFAQs
- MEGA MAN 2 — Nintendo NES instruction manual
- Chapter Three: Flash Man — Mega Man 2 Walkthrough & Guide
- Mega Man 2 — Guide and Walkthrough — NES — NeoChozo
- Mega Man 2 — Enemy/Boss Guide — NES — By Vesperas
- Mega Man 2 — Guide and Walkthrough — NES — CMoriarty
- Chapter Six: Quick Man — Mega Man 2 Walkthrough & Guide
- Mega Man 2 — Guide and Walkthrough — NES — brian_sulpher
- Mega Man 2/Quick Man — StrategyWiki
- Chapter Five: Air Man — Mega Man 2 Walkthrough & Guide
- Mega Man 2/Air Man — StrategyWiki
- Mega Man II/Crash Man — StrategyWiki
- Chapter Seven: Crash Man — Mega Man 2 Walkthrough & Guide
- Mega Man 2 — Guide and Walkthrough, NES, Bubble Man chapter
- Mega Man 2/Bubble Man — StrategyWiki
- Mega Man II 2 Map Selection — labeled NES maps
- Chapter Eight: Heat Man — Mega Man 2 Walkthrough & Guide
- Heat Man Stage — MMKB
- Mega Man 2 Data Base — Weapons and Items
- Chapter Thirteen: Wily Stage 5 — Mega Man 2 Walkthrough & Guide — NES — Warhawk
- Mega Man 2 — Password Mechanics
- Chapter Nine: Wily Stage 1 — Mega Man 2 Walkthrough & Guide
- Mega Man 2 — Guide and Walkthrough, Wily Stage One
- Mega Man 2/Wily Fortress 1 — StrategyWiki
- Mega Man 2 Weapons — StrategyWiki
- Chapter Ten: Wily Stage 2 — Mega Man 2 Walkthrough and Guide, NES
- Chapter Eleven: Wily Stage 3 — Mega Man 2 Walkthrough and Guide, NES
- Chapter Twelve: Wily Stage 4 — Mega Man 2 Walkthrough and Guide, NES
- Mega Man 2 Walkthrough
- Boobeam Trap — MMKB
- Chapter Fourteen: Wily Stage 6 — Mega Man 2 Walkthrough & Guide — NES — Warhawk
- Mega Man 2 — MMHP Game Hints
About the game & collecting notes
- Platform
- Nintendo Entertainment System
Step-by-step directions to complete Mega Man 2's original NES (USA) release: recommended boss order, stage-by-stage tactics, item and E-Tank guidance, full Wily Fortress route and final-battle methods. Designed for first-time players and veterans who need concrete routes, recovery tactics and a clear completion checklist to reach the canonical ending.
Darryl Polo
Darryl Polo loves tinkering with emulation and revisiting retro games. He enjoys exploring how old favorites play on different setups and sharing what he learns along the way. At Joking Joystick, he writes about the games, hardware, and small discoveries that keep the hobby fun.
Our editorial standardsFound a step that needs another look? Help us improve this guide.