
Marvel's Wolverine (PlayStation 5) — Complete Campaign Walkthrough (Standard Edition)
Step-by-step walkthrough for the original PlayStation 5 Standard Edition campaign, covering all 30 story missions in verified order from Back in Action in Telambang through Brave New World in Madripoor. It provides required routes, combat and boss guidance, mission transitions, failure recovery, and optional collectible separation without treating Nightmare content as mandatory for the campaign.


Find a copy
Marvel's Wolverine Sony PlayStation 5
We may earn a commission if you buy through these links, at no extra cost to you. As an Amazon Associate I earn from qualifying purchases.
Opens retailer search results. Check the model, edition, seller, availability and current price before buying.
Before you begin
This walkthrough covers Marvel’s Wolverine on PlayStation 5 Standard Edition from Back in Action through the completion of Brave New World and the ending sequence.
Follow the chapters in order and use the exact mission names and transitions as progression checks. The route covers all 30 story missions, including Homecoming, the five Japan missions after In the Shadows, and the final Brave New World epilogue.
Required story actions are separated from optional Material Crates, Whisky Bottles, Nightmare Doors, Nightmare Trials, XP Caches, and trophy cleanup.
Mission Replay can become available before the campaign ending after the first Homecoming Nightmare Trial; post-game cleanup and New Game Plus are discussed separately from the chronological campaign route.
Set yourself up for the run
Use the default combat difficulty or the difficulty appropriate for your experience; no specific difficulty is required for story progression.
Learn the combat, dodge, parry, Rage, healing, traversal, and Feral Senses prompts shown by the game. Do not rely on universal control claims when a contextual prompt is displayed.
Spend available upgrade resources when the menu identifies useful survivability, healing, Rage, or crowd-control improvements, but do not treat a named upgrade as mandatory unless the mission requires it.
Follow the active objective and scent trail. Optional collectibles and Nightmare Doors are not prerequisites for the main route.
If defeated, use the restart or latest checkpoint offered by the game. Do not promise a specific checkpoint location unless the relevant mission coverage verifies it.
After Homecoming’s first Nightmare Trial unlocks Mission Replay, use the Nightmare Cabin bed for cleanup when available. Check the installed version and official Insomniac support notes before troubleshooting a progression blocker.
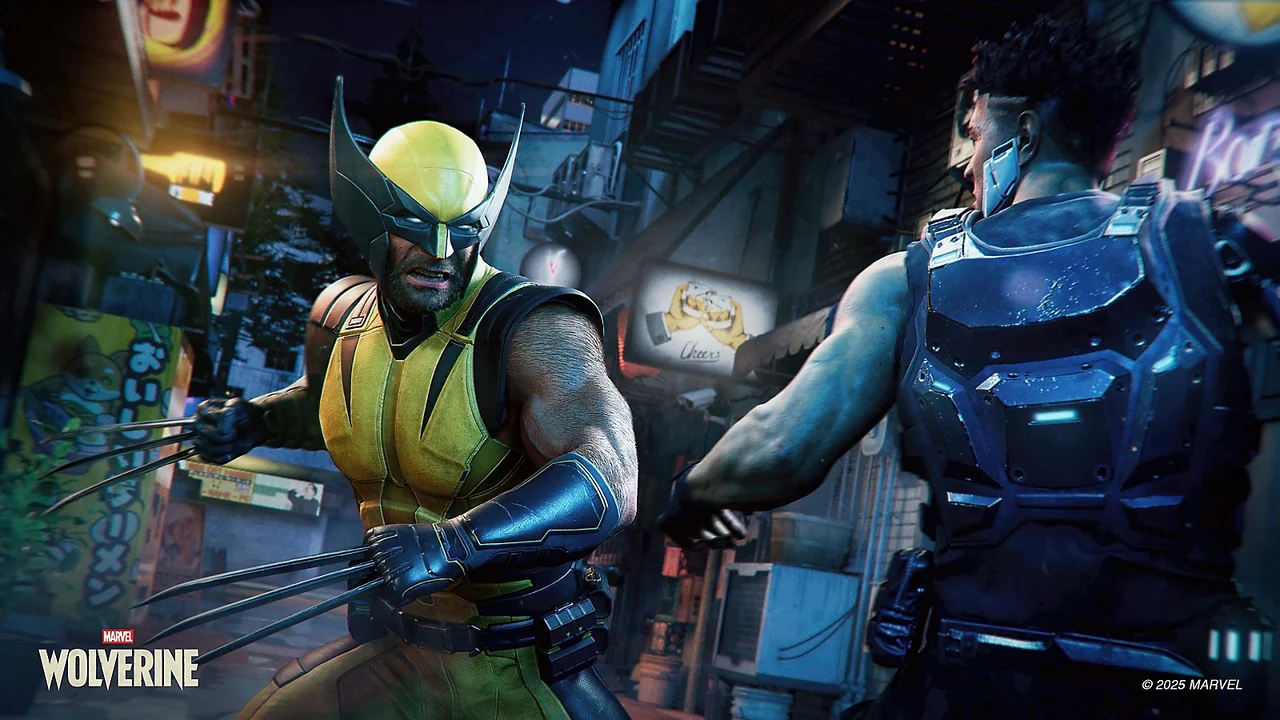
Prologue — Telambang: Back in Action
Back in Action is the opening Telambang mission and teaches combat, stealth, Enhanced Senses and traversal. Follow the HUD through the Trask outpost, destroy the anti-aircraft gun, cross the jungle toward the crash site, then follow Sabretooth up the cliff and through the Reaver-held gate. Enter the mock town through the watchtower roof, inspect the body and audio clue, destroy the nearby Mutant Alarm, and use Enhanced Senses from the balcony to reveal every remaining alarm. Clear the patrols attached to each marked alarm and destroy them all. The final alarm triggers Omega Red’s missile attack. Sprint continuously through the town and reach the sewer entrance. Sewer exploration and the next objective belong to A Debt Repaid, not this mission.

1. Enter the Trask outpost and follow the combat tutorial
After the opening flashback, Logan drops into the Trask outpost. Follow the displayed prompt to release his claws, then move forward along the obvious route. The first encounters are deliberately linear, so concentrate on the tutorial prompts rather than looking for side paths.
Use the prompted leap and basic attacks against the opening guards. When the game introduces parries, wait for an ordinary attack and follow the parry prompt shown on screen. When a distant soldier fires, follow the displayed dodge prompt and close the distance. Do not substitute a remembered button mapping if your control layout or accessibility settings differ.
Continue through the burning compound as the HUD marks the next objective. Build Rage by attacking and defeating enemies, then spend it when several opponents surround Logan or when an encounter begins to overwhelm you. Saving Rage for a crowded exchange is more useful than using it on the final weak enemy in a room. Complete every tutorial prompt because this opening section establishes the combat actions used throughout the campaign.
- Release Logan’s claws when prompted.
- Complete the opening leap and basic-attack tutorials.
- Follow the displayed parry prompt against an ordinary attack.
- Follow the displayed dodge prompt against the first ranged threat.
- Advance through the outpost using the HUD objective.
- Use Rage during a pressured encounter.
2. Reach and destroy the anti-aircraft gun
Fight forward through the outpost until the objective leads to the anti-aircraft gun. Clear the soldiers around the platform, climb to the weapon and complete the on-screen interaction sequence to destroy it. Keep the camera moving during the fight so distant shooters do not remain outside your view.
A cutscene and a knockdown introduce Last Stand. Follow the recovery prompt immediately when it appears, then use the resulting opening to clear the remaining guards. If you are defeated in this arena, choose the restart or checkpoint option provided by the game and repeat the latest encounter. There is no need to restart the campaign from the beginning.
- Reach the anti-aircraft gun platform.
- Defeat the soldiers defending it.
- Complete the interaction sequence that destroys the gun.
- Use Last Stand when its recovery prompt appears.
- Restart from the offered checkpoint if defeated.
3. Cross the jungle and rejoin Sabretooth
After the outpost sequence, Logan lands above a guard in the jungle. Follow the displayed stealth-takedown prompt, then remain in the tall grass while moving toward the crash-site fire. Use Enhanced Senses when introduced to pick up the blue scent trail and keep the objective route visible.
Stealth is useful but not mandatory. If a patrol detects Logan, continue by fighting the alerted enemies; detection does not fail Back in Action. A truck brings reinforcements to the crash site. Clear them to trigger the Sabretooth scene, then defeat the ambush that follows. When the game presents the Tornado Spin prompt, use it to create space if the group closes around Logan.
Follow Sabretooth to the rear of the area. Cut through the vines, climb the cliff with the displayed traversal prompts and move through the upper route until Reavers block the security gate. Their attacks can arrive in strings, so follow the displayed parry prompt for each ordinary hit and wait for the stagger opening before committing to a full attack sequence. After the gate is clear, climb the watchtower at the edge of the area.
- Perform the first prompted stealth takedown.
- Use Enhanced Senses to follow the blue scent trail.
- Clear the truck reinforcements and the following ambush.
- Use Tornado Spin when the game prompts it or when surrounded.
- Follow Sabretooth across the cliff route.
- Defeat the Reavers at the security gate.
- Climb the watchtower.
4. Enter the mock town and clear the Mutant Alarms
Drop from the watchtower onto the roof with the opening and enter Trask’s mock suburban town. Inspect the body on the floor and examine the nearby audio clue. Destroy the red-glowing Mutant Alarm beside the investigation area before continuing.
Break through the yellow door with the prompted Thrust Kick to reach the balcony. Activate Enhanced Senses there. The ability marks the remaining required alarms with blue indicators across the town. Use those markers as the authority for the route rather than searching unmarked buildings for a hidden trigger.
Move between the marked locations through the routes the town provides: street level, rooftops, balconies and the drainage pipe. Some alarms are easier to reach from above, so climb when a blue marker is above your current position instead of forcing through the nearest building. Each marked alarm is associated with Reaver and Trask patrols. You may approach quietly or allow detection and fight openly; neither approach prevents progress.
After every marked alarm has been destroyed, check the HUD before leaving the area. The mission does not advance while a required blue-marked alarm remains active. The alarm by the body and all remaining alarms revealed from the balcony form the required objective set.
- Enter the mock town through the watchtower roof.
- Inspect the body.
- Examine the audio clue.
- Destroy the Mutant Alarm beside the investigation area.
- Reach the balcony through the yellow door.
- Activate Enhanced Senses.
- Use the blue markers to locate every remaining required alarm.
- Clear the attached patrols and destroy every marked alarm.
5. Survive the missile escape and finish Back in Action
Destroying the final required Mutant Alarm summons Omega Red’s gunship and begins the escape. Start sprinting as soon as the missile attack begins. This is a forced movement sequence, not a combat arena, so do not stop to fight, inspect buildings or collect materials.
Keep following the route through the mock town toward the sewer entrance. The gas station and diner area are landmarks near the end of the run, but continue moving rather than pausing there. Follow any displayed slide or traversal prompts and maintain forward momentum until Logan reaches the drainage pipe.
If a missile kills Logan, select the restart or checkpoint option offered by the game and repeat the escape. The key failure condition is stopping in the open; the reliable approach is to keep sprinting continuously until the sewer entrance is reached.
Back in Action is complete when the escape reaches the sewer entrance and the next mission begins. Do not continue this chapter’s guide into the flooded sewer route: following the blue trail underground is part of A Debt Repaid.
- Destroy the final required Mutant Alarm.
- Begin sprinting immediately when the gunship attack starts.
- Do not stop to fight or explore during the escape.
- Follow the route through the gas station and diner area.
- Reach the sewer entrance and complete the drainage-pipe transition.
- Use the offered checkpoint restart if the missile sequence is failed.
- Confirm that the next objective is A Debt Repaid.
Before you move on
- The anti-aircraft gun has been destroyed.
- Logan has crossed the jungle route and reached the crash site.
- The Sabretooth sequence and following ambush are complete.
- The Reavers at the security gate have been defeated.
- Logan has climbed the watchtower and entered the mock town.
- The body and audio clue have been inspected.
- The alarm beside the investigation area has been destroyed.
- Enhanced Senses has revealed the remaining required alarm markers from the balcony.
- Every required marked Mutant Alarm has been destroyed.
- The missile escape has been completed without stopping until the sewer entrance.
- The next mission objective is A Debt Repaid.
Telambang — A Debt Repaid and Last Meal
A Debt Repaid follows Back in Action through the Telambang sewers, Trask’s laboratory, the mock town, and Essex’s prison block. Use Enhanced Senses to follow the blue scent trail, climb out of the sewer, and stay with Mystique through the lab. In Trask’s inhibitor trap, destroy all four orange units before finishing the Reavers. Continue through the prison route, break shields with Thrust Kick, destroy the corridor inhibitors and Mutant Detectors, then escort Essex to the waiting chopper. Last Meal begins with Omega Red’s attack. Parry his readable ordinary tentacle strings, dodge the unblockable double-chain strike and thrown debris, and punish stagger or recovery windows. Repeat the pattern through the crash-site phase, complete the finishing prompts and sample sequence, then watch the rescue transition. Telambang is complete when the Canada title card appears and Homecoming becomes the next story mission.
1. Follow the sewer trail and reach the exit
A Debt Repaid begins after Back in Action. In the flooded sewer, activate Enhanced Senses and follow the blue scent trail past the bodies and inhibitor-collared mutants. The trail leads to a climbable wall. Climb to the upper level, pass the body pile, and deal with the two soldiers there. Stealth is optional; being detected changes the encounter into open combat but does not fail the mission.
After the soldiers are down, climb the wall ahead and continue to the grate. Open it to leave the sewer. There is no confirmed switch hunt or timed puzzle in this section, so use the scent trail and climbable surfaces rather than searching the flooded floor for an alternate route.
- Start A Debt Repaid after Back in Action.
- Use Enhanced Senses to follow the blue scent trail.
- Climb to the upper sewer level.
- Defeat or bypass the two soldiers.
- Climb to and open the exit grate.
2. Follow Mystique through Trask’s laboratory
The sewer exit leads into a Trask facility where Mystique joins Logan. Follow her through the laboratory and clear the ground-floor enemies. When the route turns upstairs, defeat the next group before moving onward. Keep Mystique in sight; the mission route remains linear and the white-lit path marks the intended direction.
A blue terminal on the upper floor can be inspected for optional notes. It is not required for progression. After the room is clear, follow the white lights to the gate. Mystique opens it, and the following scene triggers Bolivar Trask’s inhibitor trap.
- Enter the Trask facility.
- Follow Mystique through the ground floor.
- Clear the upstairs encounter.
- Inspect the blue terminal only if desired.
- Follow the white-lit route to the gate.
3. Disable the inhibitor trap before clearing the Reavers
The trap room contains four orange inhibitor units that weaken Logan and suppress important recovery options. Do not remain focused on the Reavers while the units are active. Use a crowd-control attack to create room, move around the chamber, and destroy each orange unit. The units are positioned around the room, including the corners, so keep circling if enemies block the direct path.
After all four inhibitors are destroyed, finish the Reavers. Destroying the final unit does not complete the encounter by itself. If the room becomes crowded, retreat briefly to create space, then return to the remaining enemies rather than trading damage beside an active inhibitor.
- Locate all four orange inhibitor units.
- Create space with crowd control.
- Destroy every inhibitor.
- Clear the remaining Reavers.
- Continue only after the trap-room encounter ends.
4. Defend Mystique and reach the prison route
Follow Mystique into the next laboratory section. When she works at a computer, protect her from the incoming enemies. Prioritize the distant gunman first because ranged fire can interrupt Mystique while the closer enemies approach. Once the gunman is down, clear the remaining attackers.
Interact with the computer when the objective appears. The resulting video feed shows Trask shooting Essex. When control returns, move across the balcony and continue through the facility. The route then sends Logan back toward the mock town and the large white prison building.
- Follow Mystique to the computer room.
- Defend her while she works.
- Eliminate the distant gunman early.
- Interact with the computer.
- Cross the balcony and continue toward the prison.
5. Cross the mock town and open Essex’s cell
Run through the mock town toward the large white building. When Sabretooth opens the gate, slide underneath it and enter the red hall. Two soldiers attack with grenades; close the distance while avoiding the explosions, then defeat them.
The prison route introduces shielded and armoured Reavers. Use Thrust Kick when an enemy raises a shield, and respond to red-marked attacks by dodging rather than attempting to parry them. The corridor before Essex’s holding room contains more orange inhibitors. Destroy them directly or use enemy positioning to knock attackers into them, then clear the survivors and open the security door.
- Reach the large white prison building.
- Slide beneath Sabretooth’s raised gate.
- Defeat the grenade-throwing soldiers.
- Break shield defenses with Thrust Kick.
- Destroy the corridor inhibitors.
- Open Essex’s holding room.
6. Escort Essex to the waiting chopper
After the cell sequence, escort Essex through the hole in the wall and break the yellow barrier ahead. In the red room, destroy the Mutant Detectors to open the exit. Do not wait for a hidden switch; the detectors are the required objective.
Leave the prison and fight through the exterior streets toward the waiting chopper. When you reach it, Omega Red pulls Essex away and Last Meal begins. The Telambang route does not insert a separate refinery mission between A Debt Repaid and Last Meal.
- Leave Essex’s cell through the wall opening.
- Break the yellow barrier.
- Destroy the Mutant Detectors.
- Fight through the exterior streets.
- Reach the chopper.
- Allow Last Meal to begin.
7. Defeat Omega Red in the first phase
Omega Red’s ordinary tentacle string is the main opportunity to build his stagger bar. Watch the readable left strike, right strike, and downward slam, and parry those regular attacks as they arrive. When the stagger bar fills and he is dazed, move in for a full claw combo before backing away.
A longer sequence ends with an unblockable double-chain attack. Parry the readable portions of the string, then dodge the final double chain when it receives the red or unblockable warning. If Omega Red leaps away and throws debris, move clear before it lands. When he glows red at close range, create distance instead of continuing to attack.
Do not attack into his tentacle guard. Heal during a safe recovery window, not while he is actively extending a combo. Depleting the first health bar triggers the life-drain scene and moves the fight outside to the crash site.
- Parry ordinary readable tentacle strikes.
- Build the stagger bar before committing to damage.
- Dodge the unblockable double-chain attack.
- Avoid thrown debris and red-marked attacks.
- Punish stagger or recovery windows.
- Expect the scripted transition to the crash site.
8. Finish the crash-site phase and verify Telambang completion
The crash-site phase uses the same basic rhythm: read the ordinary tentacle strings, parry their regular hits, avoid the unblockable finisher, and attack after Omega Red is staggered or misses. Avoid standing directly in front of him after a string because his grab can restore health. If the grab connects, complete the on-screen escape sequence immediately.
A cutscene involving airplane wreckage changes the arena flow during the phase. Reposition after the scene and resume the same stagger-and-punish cycle. When Omega Red’s health is depleted, complete the finishing prompts. Logan then collects the story-required sample for Essex while the Reavers arrive, and Mystique and Sabretooth handle the rescue transition.
Watch the following scenes until the Canada title card appears. The story then moves to the Essex Institute and Homecoming becomes the next active mission. That title-card transition is the practical completion check for the Telambang chapter.
- Repeat the parry, stagger, and punish cycle at the crash site.
- Avoid Omega Red’s health-restoring grab.
- Adapt after the airplane-wreckage sequence.
- Complete every finishing prompt.
- Complete the sample sequence.
- Watch the rescue transition.
- Confirm the Canada title card and Homecoming handoff.
Before you move on
- The blue sewer trail has been followed and Logan has exited through the grate.
- Mystique’s laboratory route and the inhibitor trap are complete.
- All four main trap-room inhibitors are destroyed and the remaining Reavers are defeated.
- The computer sequence is complete and Logan has reached the prison route.
- Essex’s cell is open, the corridor inhibitors and Mutant Detectors are destroyed, and Logan reaches the chopper.
- Last Meal has started and Omega Red has been defeated in both phases.
- The finishing prompts and story sample sequence are complete.
- The rescue transition has played and the Canada title card has appeared.
- Homecoming at the Essex Institute is the next active story mission.
Canada — Homecoming and The One That Got Away
Complete Homecoming and The One That Got Away in Canada. Homecoming sends Logan through the Essex Institute, where he reunites with Walter and Mystique, follows Essex into a Nightmare Door, recovers a memory, gathers two supply crates, and crafts a suit. The Enemy of My Enemy is part of Homecoming’s required route, but its top medal conditions are optional. The One That Got Away begins with the ruined hideout investigation and follows a scent trail through industrial sites, a lumberyard, a railyard, the docks, and a Trask transport operation. The final sequence is a scripted motorcycle pursuit that becomes a series of moving-truck fights before the Skullbuster encounter. Can’t Outrun the Past appears during the route near a small river; entering and completing the trial is optional, and its Adamantium time is not needed for story progress. The chapter is complete when the rescue sequence and closing vehicle scenes finish and Raise Some Hell becomes the next active mission.
Mission 4: Enter the Essex Institute and reach Walter
After the opening Telambang missions, follow the objective through the Yukon institute toward Walter’s laboratory. Continue along the marked route until the game directs you to the obstruction blocking the way. Interact with it to clear the passage, then enter the laboratory and speak with Walter. The institute’s files, recordings, and other highlighted objects provide optional lore; inspect them only if you want the extra information.
Leave the laboratory and find Mystique in the main lobby. Speak with her, then go upstairs toward Logan’s room. When the room route is blocked, activate Feral Senses and follow the highlighted trail to the nearby temporary room. Feral Senses is the tracking tool used throughout these missions, so follow its trail rather than searching every room manually.
- Reach Walter’s laboratory.
- Clear the obstruction on the route to the lab.
- Speak with Walter.
- Talk to Mystique in the lobby.
- Use Feral Senses to reach Logan’s temporary room.
Follow Essex into the first Nightmare Door
Interact with the whisky bottle beside the bed in Logan’s temporary room. This advances the scene and begins Essex’s memory sequence. When Essex’s projection appears, follow it through the institute and continue along the linear route until Logan enters the Nightmare Door sequence.
Inside the snowy memory area, follow the illuminated path toward the cabin. If purple roots block the distant structure, turn back toward the nearby archway and use the open route into the cabin. Interact with the memory fragment inside to begin The Enemy of My Enemy. The trial is part of Homecoming’s required progression, although its best medal conditions are optional.
- Interact with the whisky bottle.
- Follow Essex’s projection.
- Reach the snowy memory area.
- Enter the cabin.
- Interact with the memory fragment to start The Enemy of My Enemy.
Complete The Enemy of My Enemy and recover Logan’s memory
Fight through the Reaver encounters in the trial area and follow the objective prompts. Build Rage by attacking continuously, then use the available Rage state against clustered enemies rather than spending it immediately on isolated targets. The higher medal challenge asks for specific Rage-tier kills and a fast completion, but you only need to clear the trial to continue the story.
After the combat challenge, follow the objective back to the memory area. Cut through the purple roots covering the memory and interact with the freed fragment. Complete the Adaptations tutorial and equip an available adaptation when the game asks you to do so. Follow the exit route to return to the institute.
- Clear The Enemy of My Enemy.
- Free the memory from the purple roots.
- Complete the Adaptations tutorial.
- Equip an available adaptation.
- Return to the Essex Institute.
Gather Walter’s supply crates and craft a suit
Speak with Walter after returning to the laboratory to receive the supply-crate objective. Collect the first crate from the nearby storage area indicated by the objective marker, then return to Walter. The second crate is upstairs near Victor’s room. Activate Feral Senses to follow the trail, crouch when the route takes you past the sleeping Sabretooth, and avoid waking him before reaching the marked room.
Collect the second crate and return to Walter with the materials. Open the Gear menu when prompted and craft the suit the game makes available. The suit-crafting sequence is required; optional equipment or cosmetic choices do not need to be completed for the campaign. Continue through the following scene until control transfers to The One That Got Away.
- Speak with Walter after the memory sequence.
- Collect the first supply crate.
- Use Feral Senses to locate the second crate.
- Sneak past Sabretooth without waking him.
- Return the materials to Walter.
- Craft the available suit.
- Confirm that The One That Got Away begins.
Mission 5: Investigate the ruined hideout and follow the trail
At the start of The One That Got Away, investigate the ruined hideout. Interact with the headphones, examine the damaged sofa, and inspect the nearby device or phone evidence when the objective marks it. Once the investigation is complete, climb through the upper route: use the stairs, cross the gap with the hanging bar, reach the attic, climb out, and exit through the upper window.
On the roof, activate Feral Senses and follow the red-haired mutant’s trail across the industrial area. Continue through the marked traversal route and use the zipline into the guarded lumberyard. Defeat the enemies, then resume tracking. In the warehouse, use the upper route and marked platforms to cross the section. If combat breaks out, eliminate the nearby guards before attempting the next traversal prompt.
- Investigate the headphones.
- Search the sofa and nearby device.
- Escape through the upper window.
- Follow the scent trail across the industrial area.
- Use the zipline into the lumberyard.
- Clear the lumberyard and warehouse encounters.
Reach the shipyard and rescue the captured mutants
Continue following the trail through the railyard. Climb to the marked balcony, trigger the scene, and drop into the combat area. Clear the guards, then proceed through the dock route. Investigate the marked Trask transports when the objective changes, and follow the trail toward the trapped mutants.
At the waterfront, use the marked traversal points to reach the crane route and board the ship. Fight through the ship’s interior until the story introduces Jean Grey and the captured mutants. Remain in the active combat area and defeat the Reavers. When the battle and rescue scene finish, follow the next objective toward the motorcycle rather than attempting to backtrack through the ship.
- Reach the railyard balcony.
- Defeat the guards below.
- Investigate the marked Trask transports.
- Follow the trail to the waterfront.
- Cross the crane route.
- Board the ship.
- Defeat the Reavers alongside Jean Grey.
Survive the motorcycle pursuit and moving-truck sequence
Take the motorcycle and pursue the convoy. Hold R2 to accelerate. When the game presents the brake prompt for the vehicle crossing your path, use L2. Pull alongside the marked convoy vehicles and use Square when prompted to slash tires or damage the vehicle. The highway route is scripted, so follow the convoy and respond to the displayed prompts instead of searching for a different road.
The motorcycle is eventually destroyed as part of the set piece. Continue along the muddy forest route, avoid the trees, and follow the traversal prompts to reach the cliff. Logan then jumps onto the moving flatbed. Fight near the middle of each vehicle, where there is more room to dodge, and avoid being pushed against the outer rails. Clear the enemies on each truck and use the prompts to transfer to the next vehicle.
- Hold R2 during the pursuit.
- Use L2 for the prompted braking sequence.
- Use Square to attack the convoy vehicles.
- Continue after the scripted motorcycle destruction.
- Cross the muddy forest route.
- Jump onto the moving flatbed.
- Defeat the enemies on the convoy trucks.
Defeat the Reaver Commando and Skullbuster
Continue across the convoy until Logan reaches the snowy log truck. Defeat the Reaver Commando and the accompanying guards, then interact with the marked restraints holding the logs. Cutting them releases the logs and removes the pursuing armored vehicles from the route.
When the armored transport attacks, follow the traversal prompts to cling to its front, move beneath it, and attach the winch line. Use the prompts carefully; if you fail a traversal or combat section, reload the latest checkpoint and repeat the current segment rather than restarting the chapter. Board the main transport, drop into the cargo area, and fight Skullbuster in the confined arena. Dodge out of the direct attack line, use short punish windows, and avoid being trapped against the walls.
After Skullbuster falls, complete the mutant-rescue sequence and remain in control until the final vehicle scenes finish. The mission does not end at the boss’s defeat. When the next story objective becomes Raise Some Hell, the handoff is complete.
- Reach the snowy log truck.
- Defeat the Reaver Commando.
- Cut the restraints holding the logs.
- Attach the winch line to the armored transport.
- Board the main transport.
- Defeat Skullbuster.
- Complete the mutant rescue.
- Wait for Raise Some Hell to become the next active mission.
Optional Nightmare Trial: Can’t Outrun the Past
During The One That Got Away, continue following the trail after the early Reaver encounters until you reach the small river area. Purple roots and a Nightmare Door mark the route. The door is encountered during the mission, but the timed trial itself is optional for main-story completion. Enter it only if you want the challenge or the related completion progress.
The trial is a traversal course with shipping containers, swing bars, climbing sections, and ziplines. Follow the illuminated route and keep moving; there are no combat waves to clear. Falling causes a reset to a checkpoint and costs time. Completing the course under 57 seconds earns the Adamantium rating, but any successful completion is sufficient for the optional trial. After leaving, resume the scent trail toward the railyard and continue the main mission.
- Reach the river and Nightmare Door.
- Enter Can’t Outrun the Past only if desired.
- Complete the traversal course.
- Aim for under 57 seconds only for Adamantium.
- Leave the trial and resume the main scent trail.
Before you move on
- Homecoming is complete when Logan has recovered the memory, completed the Adaptations tutorial, delivered both supply crates to Walter, crafted the available suit, and transitioned into The One That Got Away.
- The One That Got Away begins with the ruined-hideout investigation and the trail through the industrial area.
- Logan has crossed the lumberyard, warehouse, railyard, docks, and ship route.
- The Jean Grey rescue battle is complete.
- The motorcycle pursuit, forest transition, and moving-truck encounters are complete.
- The Reaver Commando has been defeated and the winch-line transport sequence has been completed.
- Skullbuster has been defeated inside the main transport.
- The mutant rescue and closing vehicle scenes have finished.
- Raise Some Hell is the next active story mission, confirming the chapter handoff.
- If attempted, Can’t Outrun the Past is recorded as optional Nightmare Trial progress; its Adamantium rating is not required for the main story.
The Refinery — Raise Some Hell Arena and Heavy-Enemy Tactics
Raise Some Hell is Mission 6, the third Canada mission, and starts immediately after The One That Got Away. Logan follows the captured mutants’ trail into a snowbound Trask refinery, learns Hot Claws, investigates the office, defends Jean Grey while she protects the prisoners, destroys three assembly consoles, and escapes as the facility collapses. The main route includes the refinery approach, osmium-blocked entrance, molten-metal room, office investigation, Jean’s defense arena, machinery section, and laser-filled escape. Optional progress consists of four Material Crates, one Nightmare Door for Hunting the Hunter, and the Cold Lake Whisky Bottle. Recycled is a separate trophy earned by kicking a Reaver into molten metal. After the escape and closing scene at Mystique’s jet, the next story mission is Strays.
1. Begin after The One That Got Away and reach the refinery
Raise Some Hell begins directly after The One That Got Away, with Logan following the convoy crash and heading toward the Trask refinery where the captured mutants are being held. Move through the opening snowfield using the tree branches if you want a stealthier approach. Logan can jump from branch to branch and perform takedowns from above, but stealth is not required; you can also fight the Reaver scouts and continue along the ground.
The first Material Crate is in the snowy sniper section after the opening patrol. Drop down and search the left side of the area. The second is nearby: return to the lower path and follow the frozen stream to its end. These crates are optional and do not affect the story objective. Continue toward the refinery after dealing with or bypassing the patrols.
- Start from the end of The One That Got Away.
- Use the branches to bypass or divide the opening Reavers if desired.
- Search the snowy sniper area for Material Crate 1.
- Follow the frozen stream to Material Crate 2.
- Continue to the refinery approach.
2. Enter through the conveyor route
At the refinery, the main entrance is sealed with osmium. Do not search for a key or try to force the blocked door. Look to the left of the entrance for the conveyor-belt route and use it to get inside. Once inside, locate the open hatch in the floor and drop through it to reach the next section.
Follow the scent trail through the facility. When enemies appear, remove snipers and other ranged threats before allowing the melee group to surround you. Use the open floor and nearby cover to break line of sight, then return to the trail once the encounter is clear.
- Ignore the osmium-sealed main door.
- Enter through the conveyor belt on the left.
- Use the open floor hatch inside the facility.
- Follow the scent trail toward the captured mutants.
- Clear ranged enemies before committing to prolonged melee.
3. Track the mutants, learn Hot Claws, and collect optional items
Continue following the trail through the refinery rooms. Logan eventually reaches a larger combat area containing Reavers, shielded enemies, dual-blade enemies, Trask Guards, and snipers. Use stealth if an opening is available, but do not remain exposed to sniper fire while fighting the ground group. After the area is cleared, proceed through the upper route and the molten-metal section until a scene introduces Hot Claws.
The molten vat provides an optional environmental-kill opportunity. During active combat, position a Reaver near the vat and hold Square to kick the enemy into the molten metal. The Recycled trophy unlocks when the Reaver is defeated this way. This action is not required for story progress, and it cannot be completed as a stealth takedown.
After the Hot Claws sequence, continue outside into the container yard. Follow the purple roots to the Nightmare Door and enter Hunting the Hunter if you want the optional trial. When you return, collect Material Crate 4 from the back of the nearby truck. The Cold Lake Whisky Bottle is in the same courtyard behind a yellow door that can be broken through.
- Follow the mutant scent trail through the refinery.
- Prioritize snipers and ranged units in the larger combat room.
- Complete the Hot Claws introduction.
- Kick a Reaver into the molten vat during combat for Recycled, if desired.
- Find the purple-root route to the Hunting the Hunter Nightmare Door.
- Collect the truck crate and Cold Lake Whisky Bottle in the container courtyard.
4. Investigate the office and start the rescue fight
Leave the optional Nightmare area and return to the story route. Climb through the refinery’s vertical traversal section until you reach the high window into the office or laboratory area. Inspect the papers on the desk, then interact with the computer beside the blast shield. Both interactions are part of the required investigation; inspecting only one does not advance the objective.
After the investigation, destroy the monitor or complete the prompted interaction that triggers the next scene. Logan drops into the arena where Jean Grey is shielding the captured mutants. Prepare for several enemy waves rather than spending every powerful ability on the first group.
- Return from the optional courtyard to the main route.
- Reach the high office window.
- Inspect the papers on the desk.
- Use the computer beside the blast shield.
- Trigger the scene that begins Jean’s defense.
5. Defend Jean and defeat the Cyborg
Fight alongside Jean while she protects the caged mutants. The arena sends several waves of Trask forces and Reavers, including snipers and leader-marked enemies. Eliminate snipers whenever they appear, then thin the ordinary melee enemies before committing to a durable target. Leader enemies can keep pressure on the arena, so do not let them remain behind the main group.
Use Rage when multiple enemies collapse on Jean or when a wave combines ranged attackers with shielded or dual-blade units. If the center becomes crowded, retreat toward the arena edge, defeat the nearest pursuers, and re-enter once the group spreads. Grab and throw attacks are useful for creating space, while environmental attacks can interrupt enemies without locking Logan into a long combo.
After the waves, a Cyborg enters with additional enemies. It uses a three-hit sequence that ends in a stronger powered strike, along with a ground slam and a reckless attack that can be parried. Dodge the ground slam and avoid standing directly in front of the powered attack. Parry the reckless attack when its opening is clear, then punish during recovery. Defeat the Cyborg and its support enemies, approach the cage, and interact with it to free Leech and the other captives.
- Keep snipers and leaders from attacking Jean or the cage unchecked.
- Use Rage for crowded waves rather than spending it immediately.
- Dodge the Cyborg’s ground slam.
- Parry its reckless attack when the opening appears.
- Defeat the Cyborg and all remaining enemies.
- Interact with the cage to free Leech and the other mutants.
6. Destroy the three assembly consoles
After the rescue, follow Jean into the machinery area. Fight the Reavers and the Cyborg around the first control point, then follow Jean to the left and destroy the first console. Use the nearby railing and swing bar to reach the next platform.
Continue across the machinery. Jump to the pipe, then use the moving yellow robotic hand to reach the balcony containing the second console. Destroy it before moving on. The objective requires three consoles, so do not leave after the first or second panel.
From the second console, jump to the nearby pipe and wait for Jean to block the flame jet. Swing across to her side, clear the Trask Guards and Reavers, and reach the central platform. Destroy the third and final console. This completes the assembly-console objective and starts the refinery’s destruction sequence.
- Destroy console 1 beside Jean’s route.
- Use the pipe and moving yellow robotic hand to reach console 2.
- Wait for Jean to block the flame jet.
- Clear the guards and Reavers near the central platform.
- Destroy console 3 to trigger the escape.
7. Escape the collapsing refinery and hand off to Strays
Once the consoles are destroyed, follow Jean through the escape route. The facility includes laser-filled rooms and additional enemy encounters. Keep moving between active beams instead of standing in their paths. You can knock enemies into the lasers, but only do so when you have enough space to avoid being trapped by the same hazard.
Continue through the successive combat areas until the metal structures collapse and the game changes to a traversal sequence. Run forward and complete the prompted jumps and movement actions. This section is largely about maintaining momentum; if you fail, use the checkpoint and repeat the same forward route rather than searching the destroyed rooms for another path.
Complete the final traversal and follow the story sequence to Mystique’s jet. The refinery-destruction scene and the Hell Raisers trophy confirm that Raise Some Hell is complete. The next story mission is Strays, so do not expect a Madripoor transition here.
- Follow Jean through the laser rooms.
- Use beams against enemies only when the position is safe.
- Survive the successive encounters after the console sequence.
- Complete the collapse and traversal section.
- Reach Mystique’s jet and watch the closing scene.
- Confirm that Strays becomes the next story mission.
Before you move on
- The captured mutants, including Leech, have been freed from the cage.
- All three assembly consoles have been destroyed.
- Logan and Jean complete the machinery and refinery-destruction sequence.
- The laser-room encounters and collapsing-structure traversal are complete.
- Logan reaches Mystique’s jet and the refinery outro plays.
- The Hell Raisers trophy appears or the mission-completion state is recorded.
- Strays is available as the next story mission.
- Optional cleanup, if desired, shows four Material Crates, one Nightmare Door, and one Cold Lake Whisky Bottle in the mission tracker; Recycled is earned separately through the molten-metal kill.
Canada — Strays and Leech’s Drawing Trail
Mission 7, Strays, begins after Raise Some Hell and leads into Something Much Stronger. Follow Jean through the Essex Institute, speak with Leech at his locked bedroom door, and take the cat drawing he slides underneath it. Then use Feral Senses to follow Leech’s scent trail through the institute and locate the remaining drawings. The confirmed landmarks are the library and study area, the lounge and bookshelf route, and the final corridor area near the laboratory and armory. Do not force a particular pickup order if the trail directs you differently. Once all four drawings are collected, return to Leech and answer “A PURR-fect storm.” Follow him and Jean to Walter’s lab, complete the Helix Engine hallucination sequence, and leave the institute. Strays has one optional Material Crate and one optional Blood Debt Whisky Bottle; neither blocks the campaign.
Follow Jean to Leech’s locked bedroom door
At the start of Strays, stay with Jean as she leads Logan through the Essex Institute. Continue along the marked route until you reach Leech’s locked bedroom door, then interact with it and speak to him through the door. He explains that his drawings contain the clues to his password.
Take the pink cat drawing that Leech pushes under the door. This starts the investigation objective. Activate Feral Senses after the conversation and look for the colored scent trail on the floor. The trail is the intended route through the building, so use it whenever the objective marker covers a large area.
Strays does not require a timed rescue, containment task, sample extraction or mandatory clinic sequence. You can pause to listen to Jean or inspect nearby institute areas without failing the objective.
- Reach Leech’s locked bedroom door.
- Speak with Leech.
- Pick up the cat drawing.
- Activate Feral Senses and reveal the scent trail.
Use the scent trail to search the institute
Follow the trail away from Leech’s corridor and down into the main institute area. Continue through the lobby and toward the library and study landmarks. One of the remaining drawings is a pirate ship labeled The Clawed Barnacle, placed on the floor near a statue in the library or adjoining study route. Search the floor when the trail stops instead of looking only at walls or shelves.
The route then leads through the lounge and bookshelf area. Inspect the floor when the trail bends or pauses; the wave-and-birds drawing is marked with the clue “nine lives for the seven seas.” If the objective does not update, reactivate Feral Senses and retrace the last section of trail rather than entering unrelated rooms.
The walkthrough descriptions disagree about the exact order of the pirate-ship and wave drawings, so do not treat one as a mandatory first pickup. The game’s trail and the nearby landmarks are the reliable instructions. Collect each sheet when the interaction prompt appears and wait for the drawing objective to register.
- Follow the trail through the lobby toward the library and study.
- Find the pirate-ship drawing near the statue.
- Search the lounge or bookshelf route for the wave drawing.
- Confirm that each pickup updates the objective.
Find the storm drawing and optional collectibles
Continue following the scent trail through the institute’s connecting rooms toward the laboratory and armory end of the route. The storm-cloud drawing has an A+ marking and is mounted on a wall or cabinet rather than lying on the floor. Let Feral Senses guide you to the exact interaction prompt; do not leave the area simply because the general objective marker appears complete.
While this route is open, you can collect the optional Blood Debt Whisky Bottle in the laboratory area and the mission’s one Material Crate near the armory-side doorway. These items provide progression materials but are not required to open Leech’s door or finish the story mission. If you are following only the campaign, continue after the storm drawing is registered.
Strays has no Nightmare Door. The pause-menu mission tracker can be used to confirm the optional totals, but a missing crate or bottle does not prevent the next story objective.
- Use Feral Senses to reach the final drawing area.
- Inspect the A+ storm-cloud drawing.
- Collect Blood Debt if desired.
- Collect the optional Material Crate if desired.
- Confirm all four drawings are registered.
Return to Leech and solve the bedroom riddle
Follow the scent trail back to Leech’s door after the fourth drawing registers. Interact with the door and speak with him again. The correct answer is A PURR-fect storm. You do not need to enter a manual sequence beyond selecting or confirming that answer when Logan presents it.
If the answer is unavailable, one of the drawings has not registered. Reopen Feral Senses, retrace the trail through the library, lounge and final corridor areas, and check for an interaction prompt. Do not keep guessing before all four drawings are collected; the door remains locked until the investigation is complete.
Leech’s response and the cleared lock are the confirmation that the riddle is solved. The objective changes to following Leech, and he runs toward the laboratory.
- Return to Leech’s door.
- Choose A PURR-fect storm.
- Confirm that the lock clears.
- Follow Leech toward Walter’s laboratory.
Follow Leech to Walter’s lab and complete the hallucination
Follow Leech and Jean through the institute to Walter’s laboratory. The story sequence there introduces the Helix Engine fragment and temporarily affects Logan’s normal healing. Continue through the conversations and interact with the device when prompted.
Control then shifts into a playable hallucination in a dark, red-lit corridor. Fight through the soldiers and keep advancing along the only available route until the sequence ends. This is scripted progression, not a timed rescue or containment section. If you are defeated, use the latest checkpoint and repeat the corridor while conserving healing opportunities until the transition occurs.
When Logan wakes in Walter’s laboratory, continue through the closing dialogue and follow the exit route. The mission finishes when Logan leaves the Essex Institute and the story moves on to the next Canada mission.
- Reach Walter’s laboratory.
- Complete the Helix Engine interaction.
- Clear the playable hallucination corridor.
- Wake in Walter’s laboratory.
- Follow Logan out of the Essex Institute.
Verify the handoff to Something Much Stronger
Strays is complete when the laboratory sequence has ended, Logan has left the institute, and the next story transition begins. The next mandatory mission is Something Much Stronger, not a clinic or research-rescue chapter.
For optional cleanup, check the Strays tracker for one Material Crate and one Whisky Bottle. If either item was missed, use Chapter Select from the Nightmare Cabin when that feature is available and replay Strays. The campaign does not require replaying the mission to advance.
The story handoff is confirmed when Something Much Stronger appears as the next mission or its opening sequence begins. At that point, the Strays main-story route is finished.
- Logan has left the Essex Institute.
- Something Much Stronger is the next story mission.
- Optional tracker shows Material Crates 1/1 and Whisky Bottles 1/1 if collecting them.
- Use Chapter Select later only for missed optional items.
Before you move on
- Leech has accepted A PURR-fect storm and opened his door.
- All four drawings have registered in the investigation objective.
- The Helix Engine laboratory sequence and playable hallucination are complete.
- Logan has woken in Walter’s laboratory and left the Essex Institute.
- Something Much Stronger has appeared or begun as the next mission.
- The optional tracker shows Material Crates 1/1 and Whisky Bottles 1/1 if both collectibles were collected.
Berserker Unleashed — High-Intensity Combat and Rage Management
Mission 8, Something Much Stronger, follows Mission 7, Strays, and closes the Canada section before Mission 9, Knock Knock. Logan travels through the snow to his cabin, frees an injured wolf, follows its tracks, and investigates the cabin until Jean Grey arrives. After the cabin is attacked, Logan must locate invisible or cloaked Reaver Hunters in tall grass and snow while avoiding ability-suppressing mines. The encounter expands into several Reaver waves and ends with a heavily armored Reaver Crusher. The Berserker Unleashed trophy is earned through normal story progression when Logan enters Berserker Rage; this is not a separate boss fight. The mission has six optional tracked collectibles: four Material Crates, one Whisky Bottle, and one Nightmare Door. None is permanently missable.
1. Begin Mission 8 and follow the snowy route
Something Much Stronger begins immediately after Strays. Follow the marked path toward Logan’s cabin. The route is mostly linear, but the first two collectibles are placed beside the opening streams, so search each side path before continuing toward the injured animal.
When you reach the first stream, look to the right for a climbable tree. Climb it and jump to the adjacent ledge to collect Material Crate 1. Return to the stream and continue forward until you reach the next watercourse. A cave opens on the right; climb inside to collect the Whisky Bottle Not Dead Yet.
The four Material Crates, one Whisky Bottle, and one Nightmare Door are optional for the main story. If you are only completing the campaign, continue along the marked route after checking these locations.
- Confirm that Strays was the preceding mission.
- Reach the first stream.
- Optional: collect Material Crate 1.
- Optional: collect Not Dead Yet in the cave.
- Continue toward the injured animal.
2. Free the wolf and enter the Nightmare Door if desired
Follow the objective until you find the injured wolf trapped among roots. Interact with it and complete the on-screen prompts to free it. After the rescue, use the wolf’s tracks as your landmark whenever the objective path becomes difficult to see.
Continue forward until you find additional roots leading toward a small wooden structure. The purple portal inside is the Nightmare Door for Fallen on Hard Times. Entering it starts an optional traversal trial rather than a combat arena. Complete it now if you want the mission collectible recorded, or leave it for mission replay later.
The trial is separate from story progress. A missed jump or failed attempt does not block the campaign; return to the main route after the results screen or retry from the trial interface.
- Free the trapped wolf.
- Follow the wolf’s tracks.
- Optional: enter Fallen on Hard Times.
- Return to the snowy route after the trial.
3. Collect the remaining crates and reach the cabin
Continue toward the lake. Before running up the fallen tree, search the left side near the ice and collect Material Crate 2. At the next split, take the right branch downhill to the fishing hut. Material Crate 3 is directly in front of the hut. Return to the split and take the other branch to resume the critical path.
Proceed uphill until an avalanche blocks the normal route. Use the high fallen trunk to cross above the obstruction, then climb the steep rock wall. When Logan’s cabin comes into view, stop outside and turn right to collect Material Crate 4 before entering.
These four crates complete the mission’s Material Crate tracker. The route is still available after the story through the Nightmare Cabin, so missing one does not require restarting the campaign.
- Optional: collect Material Crate 2 near the lake.
- Optional: collect Material Crate 3 at the fishing hut.
- Cross the fallen trunk above the avalanche.
- Climb the rock wall.
- Optional: collect Material Crate 4 beside the cabin.
- Reach the cabin entrance.
4. Investigate the cabin and trigger Jean’s arrival
Inside the cabin, investigate the available scent and interaction points instead of waiting for a combat prompt. Stoke the fireplace, inspect the photograph and shelves, and search the wall cabinet. The cabinet contains the key needed for the footlocker.
Use the key on the footlocker and continue the investigation until Logan finds the whiskey. Sitting down to drink it triggers the knock at the door and Jean Grey’s arrival. These cabin interactions are required to advance, but they are not part of the six tracked collectibles for the mission.
There is no special skill, suit, or upgrade required to enter the cabin sequence. If you have Materials or Ability Points available, prioritize general survivability or utility, but do not delay the story for an optional purchase.
- Inspect the cabin’s interactive clues.
- Search the wall cabinet.
- Take the footlocker key.
- Open the footlocker.
- Drink the whiskey and trigger Jean Grey’s arrival.
5. Locate and defeat the invisible Hunters
After the cabin scene, an explosion separates Logan from Jean and places him in the surrounding woodland. The objective changes to locating and defeating the Hunters. These enemies can be difficult to see, but their footsteps and movement can still be detected with Wolverine’s senses.
Move through the tall grass and use the trees for cover. Approach isolated Hunters for stealth takedowns when possible. Watch the ground for the yellow indicators from ability-suppressing mines and route around them rather than charging through unexplored grass.
If the encounter becomes an open fight, keep moving and remove the cloaked Hunters before allowing the surrounding Reaver force to build up. The Hunter objective is not complete until the required enemies are defeated and the game updates the objective.
- Use Wolverine’s senses to identify Hunter movement.
- Approach through grass or around trees where possible.
- Avoid the yellow mine indicators.
- Defeat the invisible or cloaked Hunters.
- Wait for the next combat wave to begin.
6. Survive the Reaver assault and armored Crusher
Once the Hunters are dealt with, the encounter expands into a larger Reaver assault. Do not spend the entire fight locked onto one target. Keep enough space to react to ranged fire and mine placements, and use Rage when several enemies surround Logan or when you need to break through a crowded section.
The final pressure comes from a heavily armored Reaver Crusher. Treat it as the priority once it enters the fight, but continue moving so standard enemies cannot trap Logan against the edge of the clearing. Use parries or dodges according to the attack prompts, then punish the openings after its committed strikes. The mission does not require a separate Berserker boss strategy or a conventional boss health-bar encounter.
If you are defeated, repeat the fight from the latest restart point. Clear the Hunters more methodically, avoid crossing mine indicators, and save Rage for the densest portion of the Reaver waves rather than spending it during the first isolated takedown.
- Clear the Reaver reinforcement waves.
- Maintain room to maneuver around the mines.
- Use Rage during the most crowded part of the assault.
- Defeat the armored Reaver Crusher.
- Wait for player control to end.
7. Confirm Berserker Unleashed and move to Knock Knock
The Berserker Unleashed trophy is tied to Logan entering Berserker Rage during normal progression through Something Much Stronger. It is not a separate optional arena, and you do not need to defeat a named Berserker boss to earn it. Continue through the final combat and story scenes until the trophy registers.
After the last wave, the remaining scenes resolve the attack on Logan’s cabin and advance the story toward Madripoor. Let the closing scenes finish rather than quitting immediately after the combat objective clears. Mission 9, Knock Knock, becomes the next story mission.
For the campaign, completion is confirmed when Something Much Stronger has ended and Knock Knock is available as the next active mission. For optional mission completion, check the tracker in the pause menu or Nightmare Cabin.
- Enter Berserker Rage during the story sequence.
- Finish the final Reaver encounter.
- Allow the aftermath scenes to complete.
- Confirm that Knock Knock is the next mission.
- Optional: verify Nightmare Doors 1/1, Material Crates 4/4, and Whisky Bottles 1/1.
Before you move on
- Mission 7, Strays, has been completed and Mission 8, Something Much Stronger, has begun.
- The injured wolf has been freed and its tracks have been followed toward the cabin.
- The cabin investigation has been completed and Jean Grey’s arrival has triggered.
- The invisible or cloaked Hunters have been defeated without leaving the objective unfinished.
- The Reaver reinforcement waves and armored Reaver Crusher have been cleared.
- Logan has entered Berserker Rage and the Berserker Unleashed trophy has registered.
- The aftermath scenes have finished and Knock Knock is available next.
- Optional full mission tracking reads Nightmare Doors 1/1, Material Crates 4/4, and Whisky Bottles 1/1.
Madripoor Streets — Stealth, Crowd Control and Mid-Level Encounters
Knock Knock and Mutant Detected form the first two missions of Madripoor’s opening sequence. In Knock Knock, follow Sabretooth through Lowtown, destroy Trask’s turrets and vehicles, take down the power-station pillars before attacking its core, destroy the signal relay, and survive the escape. Mutant Detected sends Logan and Mystique into Trask’s secret facility. Enter 0514 at the story elevator, follow Trask’s trail, destroy the mutant-inhibitor controls, survive the laser-controlled arena behind cover, investigate Bay 7, and escape through the propulsion tunnel. Stealth can reduce pressure against isolated guards, but detection does not fail the mission. The 0291 and 5413 keypads open optional resource rooms, not required story routes. Finish when Trask’s trail leads into For Our Future; do not include the Sentinel Prototype fight or the later Princess Bar mission here.
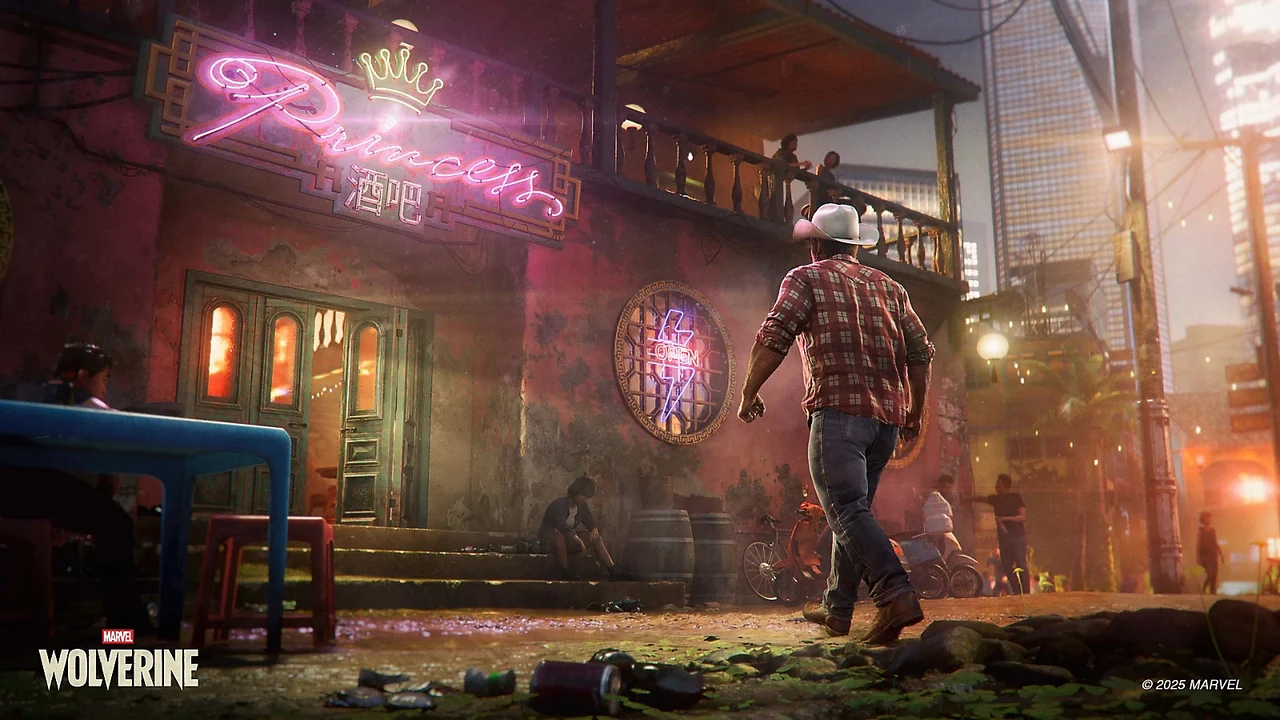
Knock Knock: Push through Lowtown to Trask Tower
Follow Sabretooth through Lowtown toward Trask Tower. The route advances through several combat waves, so stay near Sabretooth after each fight until the next objective appears. When turrets join an encounter, destroy them first or break line of sight before committing to the melee group. Their sustained fire makes it harder to read Reaver attacks and heavy-enemy tells.
At the tower approach, defeat the guards and disable the armed vehicles blocking the entrance. Enter the building and follow the objective marker down the elevator shaft. At the power-station core, destroy the supporting pillars before attacking the core itself; the core becomes a valid completion target only after the supports are gone.
Continue upward with Sabretooth and watch the elevated platforms for snipers. Follow the marker to the signal relay and destroy it. After the cutscene, escape through Trask’s reinforcements. Explosive barrels during this retreat can give Logan Hot Claws, so use them when several ordinary enemies are grouped or when a tougher enemy is already staggered. The mission ends after the escape cutscene, and the game moves to Mutant Detected.
- Stay with Sabretooth between combat waves.
- Destroy turrets before focusing on nearby melee enemies.
- Disable the armed vehicles at the tower entrance.
- Destroy the power-station pillars before attacking the core.
- Watch elevated platforms for snipers.
- Use explosive barrels during the escape when they can affect multiple enemies.
Mutant Detected: Enter Trask’s secret facility
Move forward at the start of the mission, then turn left at the end of the approach to reach the locked story door and elevator route. Enter 0514 at the keypad. This is the progression code for the facility elevator; the other Mutant Detected codes belong to optional collectible rooms. After the door opens, break through and slide down the elevator shaft.
Follow Mystique through the facility toward the security office. Stealth is useful but optional. Crouch through side areas or perform isolated takedowns when you want to preserve health, but detection does not invalidate the mission. If the alarm activates, move into a wider space and fight normally. Standard guards are the safest targets for grabs, throws, and takedowns. Use those crowd-control options to reduce the number of enemies around you before dealing with armored or stagger-resistant opponents.
When a brute appears, parry its readable yellow attack if you are comfortable with the timing. Evade red attacks instead of trying to trade through them. If ranged enemies are active, clear or disrupt them before focusing on the brute. Environmental impacts and short attacks can create room when a heavy enemy closes the distance.
- Enter 0514 at the story elevator keypad.
- Treat stealth as optional rather than a restart requirement.
- Use ordinary guards for takedowns, grabs, and throws.
- Parry readable yellow brute attacks when safe.
- Evade red attacks.
- Disrupt ranged enemies before committing to a heavy enemy.
Disable the inhibitors and survive the laser arena
Continue toward the security office and defeat the assault team blocking the route. In the inhibitor area, destroy the blue-marked control panels powering the mutant inhibitors. Prioritize the panels whenever the arena gives you access to them; leaving them active increases the pressure of the following encounters and prevents the objective from advancing.
Work downward through the facility toward Bay 7. During the laser sequence, fight from behind the available blockades and stay out of the red sweep lanes. When a blockade is destroyed, do not remain in the open to finish a combo. Keep moving around the arena until new cover becomes available, then re-engage from a safer angle.
Mystique eventually takes control of the laser system. Leave her a clear firing lane rather than standing between her and the target. Logan should handle enemies that reach his position or threaten to interrupt her. Her laser support is especially valuable against Reavers and brutes, while ordinary enemies can be controlled with throws, short attacks, and environmental impacts.
- Destroy the blue-marked inhibitor control panels.
- Use blockades during the laser encounter.
- Relocate when cover is destroyed.
- Leave Mystique room to line up laser shots.
- Prioritize enemies threatening Logan or interrupting Mystique.
Bay 7 and the propulsion-tunnel handoff
Continue to the bottom floor and investigate Bay 7. Speak with Mystique when the required interaction appears, then wait for the next objective to activate before leaving the area. Bay 7 is also a safe point to check nearby corners for optional materials if you are collecting, but the collectibles are not required for the campaign.
After the Bay 7 sequence, follow the blue trail and continue through the facility. The 0291 keypad opens an optional Material Crate room after Mystique opens the route; it is not required to advance. If you want the resource, take the first available left toward the keypad and enter 0291, then return to the main trail.
After the propulsion-tunnel sequence, the optional 5413 room can be reached in the later work area with forklifts and large containers. Break the obstructing crate, enter 5413, and follow the scent trail through the floor vent to the small laboratory for the Whisky Bottle. This detour is also optional. For story progress, continue following Trask’s trail after the tunnel and complete the tracking objective. When the handoff to For Our Future occurs, stop this chapter; the Sentinel Prototype fight belongs to that next mission.
- Complete the required Bay 7 investigation and Mystique interaction.
- Use 0291 only if you want the optional Material Crate.
- Use 5413 only if you want the optional Whisky Bottle.
- Keep moving through the propulsion tunnel while health drains.
- Follow Trask’s trail after the tunnel.
- End when For Our Future begins.
Before you move on
- Knock Knock is complete after the signal relay is destroyed, the escape sequence ends, and its closing cutscene plays.
- Mutant Detected is complete after the inhibitor controls are destroyed, the laser sequence is survived, Bay 7 is investigated, the propulsion tunnel is escaped, and Trask’s trail leads into For Our Future.
- The 0291 Material Crate and 5413 Whisky Bottle rooms are optional and are not required for campaign completion.
- Do not use the Sentinel Prototype battle or the later Princess Bar sequence as completion requirements for this chapter.
Prototype Sentinel Encounter — Large-Scale Threats and Mechanical Boss Windows
For Our Future is a dedicated Sentinel Prototype boss mission at Trask’s facility in Madripoor. The encounter has two phases: first inside the hangar, then outside in a ruined street. Attack the yellow armor panels on the Sentinel’s arms rather than its torso, legs, or hands. Wait for an arm to remain planted after a slam, then use Triangle to close the distance and attack the exposed panel until the armor breaks away. Mystique’s R1 support shot creates a safer stagger window. After enough damage, climb the planted arm and complete the on-screen prompts to sever it. In the outdoor phase, avoid larger missile zones and faster laser attacks while focusing on the remaining arm. When the Sentinel charges its super-laser, run behind Sabretooth’s armoured vehicle for cover. Finish the remaining arm damage, complete the final climb prompts, and wait through the closing scene. The mission is complete when the next objective becomes One Last Mission.
1. Start For Our Future and identify the boss objective
For Our Future begins immediately after Mutant Detected at Trask’s facility in Madripoor. The mission contains no exploration route or required collectible sweep; its main objective is to defeat the Sentinel Prototype. After the opening scene with Bolivar Trask, the machine activates inside the hangar and the boss encounter begins.
The Sentinel’s body is not a normal damage target. Concentrate on the yellow armor panels on its arms. Attacking the torso, legs, or hands wastes openings and exposes Logan to unnecessary counterattacks. Stay mobile around the sides of the arena rather than standing directly in front of the machine.
- Confirm that Defeat the Sentinel Prototype is the active objective.
- Move toward the side of the arena instead of remaining in front of the machine.
- Target the yellow arm panels, not the torso or legs.
2. Attack a planted arm in the hangar
The Sentinel uses several arm attacks, including single slams, quick two-slam sequences, punches followed by slams, sweeping hand movements, and overhead strikes. Red circles and lines mark many impact areas. Dodge or sprint away from the marked zone and watch the arm after the attack finishes.
Do not rush in after the first slam automatically. The Sentinel can immediately perform a second slam or sweep. Approach only when the arm remains on the ground and its movement has stopped. Press Triangle to lunge toward the arm, then attack the yellow forearm armor with claws and available skills.
Continue striking until the armor is removed and the machinery beneath it is exposed. Once the machine begins moving again, retreat and wait for another safe planted-arm opening. The goal is repeated, controlled damage rather than an uninterrupted combo.
- Evade the first impact marker and check for a follow-up slam.
- Approach only when the arm stays planted.
- Use Triangle to close distance quickly.
- Break the arm panel and attack the exposed machinery.
- Retreat when the Sentinel resumes its attack.
3. Use Mystique’s support window
Mystique assists during the hangar phase. When the R1 support prompt appears, activate it to call in her shot. The attack staggers the Sentinel and creates a longer opportunity to reach and damage the arm panel.
Use the stagger to attack the current arm target rather than wandering to another part of the machine. If the Sentinel is sweeping its lasers or preparing a major slam, prioritize survival and repositioning. The support shot is most useful when it lets you safely reach the exposed panel or extend an existing damage window.
The Sentinel also uses eye lasers and missile attacks. Leave red lines, circles, and other marked danger areas immediately. Do not attempt to parry its major mechanical attacks; dodge and sprint are the reliable responses for this encounter.
- Activate the R1 Mystique prompt when it appears.
- Use the stagger to reach the targeted arm.
- Leave laser paths and marked impact zones.
- Dodge major attacks instead of trying to parry them.
4. Sever the first arm and enter the outdoor phase
After enough damage, the Sentinel punches down and leaves the damaged arm in a climbable position. Approach the planted arm and use the displayed interaction prompt. Follow the on-screen button prompts to climb onto the machine and sever the arm.
A cutscene then moves the fight outside into a ruined Hightown street. This transition is scripted; there is no alternate route or optional objective to complete between phases. The Sentinel loses access to attacks that require both arms, but the outdoor arena gives it more room for missile barrages and faster ranged attacks.
- Wait for the planted-arm interaction prompt.
- Complete the climb and severing prompts.
- Let the transition scene finish before moving into the second phase.
- Confirm that the fight has changed to the outdoor arena.
5. Focus on the remaining arm while managing Reavers
In the outdoor phase, Sabretooth joins the fight and Reavers add pressure around the arena. Keep the Sentinel as the primary objective. Remove nearby ranged Reavers or enemies that are interrupting every approach, then return immediately to the remaining arm.
The same attack cycle still applies: evade the slam or sweep, confirm that the arm remains planted, lunge in with Triangle, and attack the yellow panel. The outdoor Sentinel leaves the arm exposed for less time, so do not chase damage through a new laser or missile warning.
If Logan is defeated during this phase, the restart returns to the outdoor checkpoint rather than forcing a repeat of the hangar. Use the retry to improve positioning and patience rather than changing the objective order.
- Keep the Sentinel as the main target.
- Eliminate nearby ranged threats when they prevent an approach.
- Wait for the remaining arm to stay planted.
- Use the outdoor checkpoint if the phase is failed.
6. Avoid the outdoor laser and missile attacks
The outdoor phase adds larger missile barrages, quick laser projectiles, lock-on pressure, and more aggressive hand attacks. Red or orange warning zones show where missiles are about to land. Leave the marked areas before continuing your attack.
The Sentinel can fire eye lasers while the arm is resting on the ground, so a stationary arm is not automatically safe. If the machine’s eyes glow or a laser warning appears, abandon the combo and dodge. The remaining arm will provide another opening after the attack ends.
When Sabretooth and the other allies create space, use that time to approach the panel rather than trying to clear every enemy in the arena. The mission does not require a full defeat of every supporting enemy before the boss can be damaged.
- Leave every missile marker before it detonates.
- Dodge quick eye-laser projectiles as soon as they are telegraphed.
- Do not assume a planted arm is safe while the Sentinel is firing lasers.
- Return to the arm after each hazard sequence.
7. Use the armoured vehicle during the super-laser
At low health, the Sentinel charges a powerful laser from its remaining arm. This is not a damage window. Sabretooth enters with an armoured vehicle; run behind the vehicle and remain there until the super-laser fires and the attack ends.
Do not stay in front of the machine to finish a combo. The charged laser can defeat Logan quickly, so abandon attacks as soon as the charge becomes clear. After the beam has passed, follow the displayed prompt to let Sabretooth launch Logan toward the Sentinel. This scripted sequence deals substantial damage to the remaining arm.
- Recognize the charged arm laser as a defensive sequence.
- Run behind Sabretooth’s armoured vehicle.
- Stay in cover until the beam has fired.
- Complete the post-beam launch prompt.
8. Complete the final climb and hand off to One Last Mission
After the remaining arm has taken enough damage, the Sentinel becomes increasingly aggressive and leaves shorter attack windows. Avoid unnecessary hits and continue using the planted-arm strategy until the machine punches down and the final climb prompt appears.
Approach the arm, complete the displayed climb and takedown prompts, and allow the scripted defeat sequence to finish. The boss health bar disappears when the encounter is over. Watch the following story scene rather than leaving as soon as the final input ends.
For Our Future is complete when the closing scene finishes and the game starts One Last Mission. This confirms the Sentinel encounter and this mission only; it does not complete the wider Madripoor chapter or the campaign.
- Damage the remaining arm until the final climb prompt appears.
- Complete every displayed climb and takedown input.
- Confirm that the Sentinel health bar disappears.
- Watch the closing scene through the objective transition.
- Verify that One Last Mission becomes the next main mission.
Before you move on
- The first yellow arm panel has been destroyed.
- The first climb and arm-severing prompts have been completed.
- The outdoor phase has begun with the remaining arm still active.
- The remaining arm panel and exposed machinery have been damaged.
- The charged super-laser has been survived using Sabretooth’s armoured vehicle.
- The final climb and takedown prompts have been completed.
- The Sentinel Prototype health bar has disappeared.
- The closing scene has finished.
- One Last Mission is now the active next main mission.
Madripoor Arrival — One Last Mission, the Princess Bar, and Walter’s Abduction
Mission 12, One Last Mission, is the fourth and final mission of Madripoor’s first visit. It follows Knock Knock, Mutant Detected, and For Our Future, then leads into Jetlag. Begin in Lowtown’s Princess Bar and complete the required conversations with Raven, Victor, Walter, and Mystique. In Walter’s upstairs room, choose The Dark End of the Street by James Carr from the three records. After Walter’s jukebox conversation, leave the bar and follow Jean’s scent trail. A Nightmare Door and a Material Crate are available on this route. Jean’s conversation is interrupted by an explosion, sending Logan across the rooftops after the Hand. Defeat the courtyard ninjas, then follow Walter’s trail toward the Essex transition. Walter’s escape is scripted and cannot be prevented. The mission’s optional completion totals are three Material Crates, one Whisky Bottle, and one Nightmare Door.
1. Enter the Princess Bar and prepare your upgrades
Start the mission in Lowtown and follow the objective marker into the Princess Bar. This is a contained mission hub, not a permanent open-world district with a separate vendor or fast-travel network. The bar’s conversations and mission objectives control when the route opens.
Before leaving the opening area, open the pause menu and review the available Suits, Techniques, Special Techniques, and Adaptations screens. Spend materials on an available suit craft if you have enough; Material Crates feed the suit-crafting progression that improves Logan’s health. Spend Technique Points on broadly useful combat options rather than cosmetic choices. A survival-focused option such as Healing Strike is a strong early priority once its level requirement is met, while Rage tiers provide Last Stand-style recovery and stronger finishers as they unlock.
Adaptations are separate from Techniques. Use any unlocked survival or regeneration-focused adaptation when you expect a long combat sequence, and use a finisher or crowd-control option when the slot is available. The mission does not require a particular build, so do not delay the story while farming materials.
- Confirm the mission name is One Last Mission.
- Enter the Princess Bar in Lowtown.
- Review Suits, Techniques, Special Techniques, and Adaptations from the pause menu.
- Spend available materials or Technique Points on survival and combat improvements if desired.
2. Complete the Princess Bar conversations
The opening conversation objectives can be completed in different orders, but the following route keeps the optional pickup close to its related scene. Go upstairs and step onto the balcony to speak with Victor. The conversation becomes an arm-wrestling prompt sequence and ends with the same story result regardless of the prompts.
After Victor leaves, turn around and collect The Old Man Whisky Bottle from the balcony railing. This is the mission’s only Whisky Bottle. It is optional for story progress but contributes to the Adaptation progression tracked by the game.
Continue to Walter’s room at the far end of the upstairs corridor. Inspect the three records until the correct title is available. The choices are Exclusive Blend by Keith Mansfield, Modern Art by Gerhard Trede, and The Dark End of the Street by James Carr. Select and play The Dark End of the Street by James Carr. The Ace of Spades card with the I.O.U. Remy LeBeau note is an optional inspection and does not solve the record objective.
Return downstairs and speak with Raven at the bar. Complete her conversation, then answer Walter’s follow-up call at the jukebox. Walter’s jukebox conversation is required before the scent-trail objective appears.
- Speak with Victor on the balcony.
- Collect The Old Man Whisky Bottle if desired.
- Inspect Walter’s three records.
- Play The Dark End of the Street by James Carr.
- Speak with Raven downstairs.
- Complete Walter’s jukebox conversation.
3. Collect the bar crate and trigger the Jean objective
Before leaving the Princess Bar, go through the ground-floor doorway behind the bar and pass the bead curtain into the back hallway. The first Material Crate is against the wall in this rear area. Collect it if you want the mission’s full material total; it is not required to advance.
Speak with Mystique behind the bar after the other conversations. Her scene closes the hub portion of the mission. When the objective changes to finding Jean, leave the Princess Bar and activate feral senses.
Follow Jean’s scent trail through the Madripoor streets. The trail climbs and doubles back, so stay with the highlighted route rather than searching for a different exit. The path ends at a balcony overlooking the city, where Jean is waiting.
During this outdoor route, watch for stairs leading upward. Instead of taking the direct stairs, use the left-hand stairs that descend toward the water to reach the second Material Crate. This pickup is optional and can also be recovered later through Chapter Select.
- Collect the Material Crate behind the ground-floor bead curtain if desired.
- Speak with Mystique behind the bar.
- Leave the Princess Bar after the objective changes.
- Follow Jean’s scent trail to the balcony.
- Take the left-hand stairs toward the water for the second Material Crate if desired.
4. Complete the optional Nightmare Door or continue to Jean
The mission’s Nightmare Door is on the route toward Jean. Look for purple roots around a doorway near the main path after leaving the bar. Entering it starts Last Stand at Cold Pines, a multi-wave gauntlet. It is optional and temporarily replaces the story route with a challenge arena.
If you enter the trial, survive each wave and choose the available Idol effect between waves. Favor an option that supports your current weakness: healing or survivability is safer when health is low, while damage or crowd-control benefits are useful when you are consistently surviving. Return to the mission route after completing or exiting the trial.
If you only want story progress, ignore the purple-rooted doorway and continue following the scent trail. The Nightmare Door does not block Jean’s balcony or the later Hand pursuit.
- Decide whether to enter Last Stand at Cold Pines.
- Complete the gauntlet if pursuing optional progress.
- Return to the main route after the trial.
- Reach Jean’s balcony and complete the conversation.
5. Chase the Hand and clear the courtyard
An explosion interrupts Jean’s conversation and changes the objective to pursuing Walter’s kidnappers. Follow the marked rooftop route using the available ledges, jumps, and zip-lines. This is a traversal chase, so continue toward the objective marker instead of returning to the Princess Bar.
The route ends at a courtyard where Hand ninjas attack. Keep moving around the arena and eliminate enemies that are surrounding Logan. Ranged pressure and enemies attacking from behind should take priority over chasing a single target. Use crowd-control Special Techniques when several ninjas group together, and spend Rage when it prevents a dangerous collapse or quickly removes a cluster.
The fight does not change the story outcome. After the courtyard battle, the Hand escapes with Walter by speedboat. Logan cannot prevent the abduction, and defeating every enemy only completes the combat requirement. If you fail the chase or courtyard encounter, reload the latest checkpoint and repeat the marked route; there is no alternate rescue outcome to pursue.
- Follow the Hand across the rooftops.
- Use the marked traversal route and zip-lines.
- Defeat the Hand ninjas in the courtyard.
- Use Rage for a dangerous cluster or emergency recovery.
- Expect Walter’s escape to remain scripted.
6. Follow Walter’s trail and complete Mission 12
After the courtyard sequence, continue with the objective to pick up Walter’s trail. When the scent trail is available, activate feral senses and follow it. If the scent disappears, keep moving forward along the objective route until Logan reaches the small white pickup van and can identify the blood trail leading away from it.
The third Material Crate is during this post-chase Hand section. After the combat encounter and the impalement tutorial, move down the pier on the left and follow it to the end. Collect the crate if you are completing the mission tracker.
Continue following the objective after the Hand encounter. The mission advances into the Nathaniel Essex office transition and then hands off to the next main-story mission, Jetlag. Walter’s abduction and the Essex transition are the completion beats; do not return to the Princess Bar looking for another way to alter the scene.
For optional completion, open the pause-menu tracker before leaving the mission. One Last Mission is fully cleared when it shows Material Crates 3/3, Whisky Bottle 1/1, and Nightmare Door 1/1. Missed items can be recovered later through the Nightmare Cabin’s Chapter Select.
- Follow Walter’s trail after the courtyard fight.
- Use feral senses again after reaching the white pickup van.
- Collect the third Material Crate at the end of the left-side pier if desired.
- Reach the Essex office transition.
- Confirm the next main-story mission is Jetlag.
- Check the optional tracker if pursuing 100 percent.
Before you move on
- The active mission was One Last Mission, Mission 12.
- Knock Knock, Mutant Detected, and For Our Future were completed before this mission.
- Victor, Walter, Raven, and Mystique were spoken to in the Princess Bar.
- The Dark End of the Street by James Carr was selected and played.
- Walter’s jukebox conversation was completed.
- Logan followed Jean’s scent trail to the balcony.
- The Hand rooftop pursuit and courtyard fight were completed.
- Walter’s scripted escape occurred.
- Logan followed Walter’s trail and reached the Essex office transition.
- The next main-story mission, Jetlag, appeared.
- For optional completion, the tracker shows Material Crates 3/3, Whisky Bottle 1/1, and Nightmare Door 1/1.
Team X and the Hand — Japan Missions 13–16
After One Last Mission, Japan begins with Jetlag, followed by Get Angry, Bad Blood, and In the Shadows. Jetlag is a linear aircraft escape, crash, and Tokyo arrival sequence. Get Angry follows Jean’s trail through Shinjuku and the Sleepy Kiss bar, then continues through the underground Hand route. Bad Blood sends Logan across the rooftops to Shiro’s penthouse, where protruding book spines reveal keypad code 1924. In the Shadows starts at the arcade, leads through a mutant-detector hunt, and continues via a blood trail, Hand shrine, ramen truck, and construction-site hideout. The chapter ends only after Walter is rescued, the Fist Hand is defeated, and Logan returns to Shiro’s apartment. Death Comes to Death begins immediately afterward. Collectibles and trophy interactions are optional and can be recovered later through Mission Replay.
1. Start Jetlag after One Last Mission
When One Last Mission finishes, follow the transition into Mission 13, Jetlag. This is the start of the Japan sequence. The opening takes place aboard a military cargo plane with Logan and Jean, and the route is linear, so stay with the marked objective rather than looking for an alternate path.
Fight through the Hand inside the cargo hold, then continue the set piece after Logan is thrown outside the aircraft. Climb back into the damaged fuselage and clear the remaining enemies while moving around the open sections of the plane. The fights are player-controlled, but the aircraft damage, falls, and crash beats are scripted. Save Rage for crowded sections instead of spending it immediately on the first group.
After Jean reaches the cockpit, follow the on-screen prompts through the crash. Once Logan reaches the wreckage and the sequence moves into Tokyo, stay on the marked route and complete the motorcycle chase into Kabukicho. Jetlag contains no listed Material Crates, Whisky Bottles, or Nightmare Doors, so do not delay the story searching the plane or crash site.
The optional Ground Control trophy can be attempted during the aircraft fight by knocking three enemies through the open fuselage sections. It is not required for mission completion. If you fail the chase or a combat section, restart from the latest checkpoint and repeat the marked set piece. Jetlag ends when Logan reaches Kabukicho and the next mission loads.
- Transition from One Last Mission into Jetlag.
- Clear the Hand from the cargo plane.
- Return to the damaged fuselage after being thrown outside.
- Complete the crash sequence and Tokyo motorcycle chase.
- Reach Kabukicho.
2. Follow Jean’s trail through Get Angry
Mission 14, Get Angry, begins in Shinjuku. Follow the objective through the streets and use Feral Senses when the trail or an investigation prompt becomes difficult to see. The required route includes Hand encounters and a sniper confrontation before Logan reaches the location shown in Jean’s vision.
Enter the Sleepy Kiss bar when the marker directs you there. The bar is required, and the route continues downstairs into the underground section. The unusual bathroom interaction, Whisky Bottle, Nightmare Door, and other exploration rewards are optional. If you want the bathroom trophy interaction, complete it before leaving the bar area.
Continue through the underground rooms and defeat the Hand ambushes. When the hallucination route blocks progress, destroy the marked incense burners as instructed; this clears the illusion and opens the next passage. Follow the objective through the elevator and newly opened route rather than returning to the streets you already cleared.
The direct fights remain under player control, while the vision scenes, elevator transitions, and mission handoffs are scripted. Keep some Rage for the larger underground encounters, prioritize ranged Hand attackers, and use the surrounding space to avoid being boxed in. Get Angry ends when the investigation advances to the rooftop pursuit that begins Bad Blood.
- Follow Jean’s trail through Shinjuku.
- Reach the Sleepy Kiss bar.
- Complete the required underground route.
- Destroy the marked incense burners when the illusion blocks progress.
- Clear the Hand ambushes and advance into Bad Blood.
3. Reach Shiro’s penthouse in Bad Blood
Mission 15, Bad Blood, begins with Logan and Jean leaving the previous Hand encounter. Follow the red scent trail after the fleeing Chunin. Use launch points, swing bars, ropes, and rooftops to maintain the pursuit until it reaches the marketplace.
The marketplace becomes a required arena fight. Defeat the Hand ambush before continuing; remaining on the rooftops does not bypass the encounter. After the scene, meet Jean outside Shiro’s building and use the exterior route instead of searching for a front entrance. Climb the scaffolding and ledges, use the blue lift when Jean raises it, and follow the traversal prompts toward the penthouse.
Optional rewards are placed along this climb, including Material Crates, a Whisky Bottle, and a Nightmare Door. They do not affect the story. If you fall or fail the ambush, restart from the latest checkpoint and repeat the pursuit or climb.
Inside the penthouse, inspect the required evidence in the living area. Once the scent trail appears, follow it upstairs to the keypad beside the wardrobe. The keypad cannot be solved from the scent trail because of the overlapping prints. Examine the bookshelf and note the numbers on the protruding book spines from left to right. Enter 1924. In the hidden room, inspect the weapons and the ring beneath the portrait to trigger the scene with Shiro.
Bad Blood ends after that investigation scene. The next mission is In the Shadows; there is no separate hub objective that must be completed between them.
- Chase the Chunin through the rooftops.
- Defeat the marketplace Hand ambush.
- Reach Shiro’s building through the exterior climbing route.
- Follow the penthouse investigation clues.
- Read the protruding bookshelf numbers.
- Enter 1924 at the keypad.
- Inspect the hidden room and trigger the Shiro scene.
4. Investigate the arcade and rescue Walter in In the Shadows
Mission 16, In the Shadows, starts with Logan and Jean approaching the arcade in Shinjuku. Enter with Jean and investigate the active arcade machine in the main room. Interacting with it reveals the hidden room; there is no need to search for a second street entrance.
In the hidden room, examine the Helix Engine drawing, the blood vials, the mutant detector, and the map on the desk. The map updates the objective and triggers a Hand ambush in the arcade. Fight through the waves, giving priority to ranged attackers and the Hand Leader when he appears. Destroying the claw machines is an optional trophy interaction, not a story requirement.
Return to the street and locate the first mutant detector. Do not attack only the visible detector. Follow its cable to the connected power box and destroy that box. Repeat the same process for the other detectors. One cable leads upward across the rooftops, and another enters a building. Use Feral Senses and the objective marker to stay on the route when the cable crosses rooftops or changes elevation.
After the detector sequence, survive the Hand attack and follow the wounded enemy’s blood trail. The trail ends at a concealed brick-wall entrance. Use Feral Senses to find the interaction point, open the passage, and descend into the Hand shrine. Defeat the enemies below, then inspect the required documents, recordings, and shrine clues until the food scent appears. Follow it outside to the ramen truck. Interact with the truck to reach the construction site.
At the construction site, clear the Hand guards before taking the elevator to the lower hideout. Search the lower room for the painting, pinboard, laptop, and related evidence. After the recording advances the objective, use the newly opened door and rope route to return outside. Follow the music from the recording to the yellow building, climb to its roof, and enter through the open hidden door.
The final arena begins with regular Hand forces. After they are reduced, the Fist Hand arrives. Its attacks include ground eruptions, a purple projectile stream, a jumping slam with area damage, a summoned blade, empowered strikes, and a fast multi-hit combo. Keep moving around the arena instead of standing directly in front of it. When additional Hand members drop into the fight, clear them promptly so they cannot surround Logan, then return to the Fist Hand during its recovery windows. Rage is most useful after the reinforcements arrive or when the Fist is exposed.
Defeating the Fist Hand is not the end of the mission. Finish the remaining Hand enemies, then follow the rooftop route and use the zipline. Drop to the marked intermediate rooftop if you want the optional Material Crate, then continue to Shiro’s building. Enter the apartment and complete the closing scene. This ends the chapter and hands off directly to Mission 17, Death Comes to Death.
- Enter the arcade with Jean.
- Use the active arcade machine to reveal the hidden room.
- Inspect the Helix Engine drawing, blood vials, detector, and map.
- Defeat the arcade ambush.
- Destroy every detector’s connected power box.
- Follow the blood trail to the concealed Hand shrine.
- Use the ramen truck to reach the construction site.
- Clear the hideout and follow the music to Walter.
- Defeat the Fist Hand and the remaining Hand forces.
- Return to Shiro’s apartment.
- Confirm that Death Comes to Death becomes available.
Before you move on
- Jetlag is complete after the plane crash, Tokyo arrival, and Kabukicho chase.
- Get Angry has advanced through the Sleepy Kiss bar, underground route, illusion section, and required Hand fights.
- Bad Blood is complete after the rooftop pursuit, Shiro’s penthouse investigation, code 1924, and hidden-room scene.
- In the Shadows has completed the arcade investigation and all detector power-box objectives.
- The blood trail, Hand shrine, ramen-truck transfer, and construction-site hideout route are complete.
- Walter has been rescued and the Fist Hand plus remaining Hand forces are defeated.
- Logan has returned to Shiro’s apartment and the closing scene has played.
- Death Comes to Death is shown as the next available mission.
Japan After In the Shadows — Death Comes to Death through Sinister Tidings, Then Madripoor Return
Complete Missions 17–21 in Japan before beginning the return to Madripoor. Death Comes to Death takes Logan and Jean through Harada Garden Tower, the Hand’s bathhouse, the Helix Engine investigation, and the Helix Claws unlock. We Were Wrong follows the stolen engine through Shinjuku and ends with a Hand Invoker fight. Hell Followed With Him moves to Mount Haku, where Logan and Jean infiltrate the Hand’s shrine. Death’s Match is the Lady Deathstrike boss mission. Sinister Tidings closes the Japan chapter from Shiro’s penthouse and unlocks Way Down Low. The remaining route is Way Down Low, Roll the Dice, Field Test, Red Right Hand, Don’t Go Gentle, and I’m Still Here. Optional crates, Whisky Bottles, and Nightmare Doors are not required for story progress, but the Japan and Lowtown materials are useful for survivability and combat upgrades.
1. Death Comes to Death: reach Harada Garden Tower
Start from the rooftop and move left around the air-conditioning units if you want the first Material Crate. Return to the starting point, jump across the suspended platforms, cross the narrow footbridge, and climb to the next roof. Defeat the Hand lookout, then drop to the terrace below.
Use the tall grass around the restaurant to approach the Hand ninjas quietly. Clear the rooftop lookout and the final guard near the experience statue before entering the restaurant. Listen to the Hand conversation about Jean, then interact with the wall vent to trigger the ambush. Defeat the attackers to open the next objective.
Go through the kitchen, climb onto the freezer, and cut open the upper door. Pick up the Hand of God Whisky Bottle on the route, then drop through the floor hatch and quietly remove the two ninjas before checking the security footage.
- Reach Harada Garden Tower.
- Clear the restaurant ambush.
- Search the kitchen and freezer route.
- Collect Hand of God if desired.
- Check the security footage.
2. Investigate the Helix Engine and survive the tower fight
After the security footage, inspect the nearby invitation if you want the extra dialogue, then descend the stairs and enter the gate. The second Material Crate is behind a pipe on the right. The purple roots in this area lead to the Rockbottom Blues Nightmare Door; enter it only if you want the optional traversal trial.
Continue through the nearby water and cut through the grating to reach the baths. Sneak past the first Hand ninja, inspect the bodies, and then defeat the reinforcements. Steam obscures enemy sightlines, so use it to separate the group or fight from the edge of the room.
After the battle, follow the drag marks to the solid wall and slash through it. Before using the elevator, search the dead end to its right for the third Material Crate. Open the elevator shaft, use the rope to climb, and enter the gallery.
- Inspect the Helix Engine evidence.
- Enter the baths.
- Defeat the Hand reinforcements.
- Find the drag marks and hidden passage.
- Collect all three Material Crates if desired.
- Enter the gallery.
3. Defeat the Fist and unlock the Helix Claws
The gallery contains a fast Fist enemy using a kusarigama. Its magic pools can trap Logan, and its echoes explode after a delay, so keep moving instead of holding position. Parry its readable melee strikes to create a stun, or punish the recovery after a magic attack.
When ranged ninjas appear on the balcony, zip up and eliminate them before returning to the Fist. Continue clearing the added ninjas while taking short attacks against the Fist. When the chase begins, follow Deathstrike’s red scent trail and complete the displayed prompts rather than stopping to search.
The pursuit ends in a shadow-filled arena. The Helix Claws unlock during this sequence as a cooldown ability. Use the area attack whenever it is available, especially when the shadow enemies surround Logan. Defeating the final wave completes Death Comes to Death and unlocks We Were Wrong.
- Defeat the kusarigama Fist.
- Clear the balcony ninjas.
- Follow Deathstrike’s scent trail.
- Complete the chase prompts.
- Unlock and use the Helix Claws.
- Defeat the shadow attackers.
4. We Were Wrong: track the stolen Helix Engine
Follow Jean through the convenience store and then follow the glowing drag marks outside. The first Material Crate is behind the Alchemax truck on the opening street. Continue to the chained arcade entrance, use Jean’s telekinetic lift to expose the climbing point, climb to the roof, and enter through the vent.
Inside the arcade, take the upper path to the left and quietly remove the Hand guard. Cut the yellow rope holding Saturn to drop it onto the enemies below if you want the Saturn Slam trophy. After the fight, inspect the glowing glyph where Saturn fell and follow the footprints through the next door.
When Jean clears the rubble, follow the footprints through the streets. Take the left fork behind the truck for the Revolto Whisky Bottle, then return to the trail. After the wounded woman scene, defeat the Hand attackers, prioritizing the leader. At the overturned car, search the alley to the left for another Material Crate before climbing the stairs behind the vehicle.
- Follow Jean through the store.
- Collect the opening street crate.
- Enter the arcade through the roof vent.
- Drop Saturn if pursuing the optional trophy.
- Inspect the glyph.
- Collect Revolto and the street-route crate if desired.
5. Recover the Helix Engine from the warehouse
Continue through the courtyard and follow the footprints through the broken wall. Search behind the truck and wooden crates for the fourth Material Crate. The damaged doorway cannot be used directly, so climb the white shipping containers and enter the warehouse through the open upper window.
During the stealth section, Jean can stun small groups while Logan remains undetected. Use that opening to remove the two enemies on the upper level, then drop down for a stealth kill on the Fist before fighting the survivors. When Jean opens the next door, the room pulls Logan back into a fight against two kusarigama Fists; defeat both before proceeding.
Descend the stairs and take the fifth Material Crate from the left side behind the wooden boxes. Enter the loading bay and approach the truck carrying the Helix Engine. The Hand Invoker uses a three-hit power combo, ground-pound area attacks, and a dragging sweep. When it teleports and summons tethered shadow ninjas, defeat the summons first to stun the Invoker, then attack during the opening. Defeating it triggers the story scene and unlocks Hell Followed With Him.
- Enter the warehouse through the upper window.
- Use Jean’s stun during stealth.
- Defeat the two kusarigama Fists.
- Collect the basement crate.
- Defeat the Hand Invoker.
- Confirm Hell Followed With Him is available.
6. Hell Followed With Him: infiltrate Mount Haku
Take Shiro’s motorcycle to Mount Haku and follow the blue footprints through the abandoned village. At the first fork, follow Jean to the kneeling position, then search behind the house on the left for the first Material Crate. Continue to the memorial and climb the stairs near the archery targets for the second crate.
Move through the forest and clear the Hand guards blocking the stronghold. The third crate is on the right side of the grassy enemy field near the water. Keep to the perimeter when possible so ranged attackers do not surround you. After the courtyard fight begins, save Berserker Rage for the dense wave and the Hand Invoker that follows it.
During the cliff climb, let Jean hold the stone platforms in place and continue toward the hut. Before following the objective away from the hut, look below the balcony and follow the blue scent trail to the rocks and barrels for the Itsu Single Malt Whisky Bottle. Enter the shrine and take the fourth Material Crate immediately to the left.
- Reach Mount Haku.
- Collect the two village crates.
- Clear the forest and courtyard guards.
- Collect the field crate.
- Collect Itsu Single Malt during the cliff climb.
- Collect the shrine-entry crate.
- Reach the shrine interior.
7. Death’s Match: defeat Lady Deathstrike
Death’s Match is the required Lady Deathstrike encounter at Mount Haku. Enter the arena and keep enough distance to read her sword attacks, but do not retreat continuously; her dash attacks close space quickly. In the first phase, parry blue-indicator sword strings and dodge red unblockable attacks sideways. Sword projectiles are also easier to avoid with a lateral dodge than by moving straight backward.
Punish only after a successful parry or a clearly finished attack string. Use short claw combos, then disengage before Deathstrike recovers. When she is disarmed, the second phase begins and she relies on faster adamantium-claw attacks, lunges, and longer close-range strings.
Save Rage for the second phase. Continue parrying safe claw strikes, dodge red attacks, and use the strongest burst attack during the brief stagger windows. If she enters an aggression surge, stop trading and concentrate on survival until the pressure ends. The victory cutscene completes Death’s Match and leads into Sinister Tidings.
- Enter the Deathstrike arena.
- Parry safe sword strings.
- Dodge red attacks and sword projectiles sideways.
- Punish only during recovery windows.
- Save Rage for the claw phase.
- Defeat Lady Deathstrike.
8. Sinister Tidings: close the Japan chapter
After Death’s Match, Logan wakes in Shiro’s penthouse. Leave the bed and go directly to the bathroom. Interact with the sink, or use the alcohol interaction, to trigger the mirror scene. The apartment’s optional route does not fully activate until this scene has played.
Enter the upstairs display room containing Hand memorabilia and open the Material Crate. Then follow the purple roots to the upstairs balcony and enter the Crucible of Tears Nightmare Door. The trial is optional; leave it for later if you are following the story. If you attempt it, preserve Rage for the later waves and use area attacks when armored enemies compress the arena.
When finished, return downstairs and speak with Jean and Shiro in the kitchen. Their briefing about Lowtown and Essex ends the Japan chapter and unlocks Way Down Low. Sinister Tidings contains one Material Crate and one Nightmare Door, with no Whisky Bottle.
- Trigger the penthouse mirror scene.
- Collect the hidden Material Crate.
- Enter Crucible of Tears if desired.
- Speak with Jean and Shiro downstairs.
- Confirm Way Down Low is the next required mission.
9. Way Down Low: regroup with Jean and reach the Arsenal
Begin in Lowtown and follow Jean through the Reaver-controlled streets. At each civilian checkpoint, clear the Reavers and open the transport trucks; the route does not advance until the required checkpoint is secured. After the first checkpoint, use the severed hand to open the locked route and continue through the streets.
When the sniper opens fire, climb to the sniper’s position and search the nearby platform before leaving if you want the first Wild Canadian Whisky. Continue toward the radio tower, following Jean across the rooftops. After the radio contact, ride the zipwire down and search the next rooftop terrace for the Little Uncle Whisky Bottle.
The Blood in the Jungle Nightmare Door appears directly ahead after the zipwire section. It is optional. Continue through the radio-tower route and meet Jean at the Arsenal to complete Way Down Low. The mission contains one Nightmare Door, four Material Crates, and two Whisky Bottles.
- Free the civilians at the required checkpoints.
- Use the severed hand to open the route.
- Reach the sniper position.
- Reach the radio tower.
- Collect both optional Whisky Bottles if desired.
- Complete the Arsenal meeting.
10. Roll the Dice, Field Test, and Red Right Hand
Enter Hightown as Patch during Roll the Dice and follow the casino objective to the dance floor. Before using the service elevator, visit the upstairs bar and speak with the bartender if you want the Blood and Bourbon Whisky Bottle. Once the disguise sequence ends, fight through the restricted back rooms, defeat the Reavers, and use the service elevator. The Nightmare Door is in the back-room route before the elevator.
Field Test returns to Lowtown. Follow the streets to the fish market and defeat each Sentinel group instead of trying to sprint past active combat zones. Use cover against ranged fire, free the captured civilians when prompted, and continue to Dream Street Theatre. After the truck set piece, clear the warehouse and look near the forward path for the Captain Terror Whisky Bottle. Destroy the turret vehicle before finishing the remaining Sentinel units.
Red Right Hand is the Sabretooth fight in the market. Keep him in view, parry safe blue-indicator attacks, and dodge heavy or red attacks. Use short punishments after his claw strings and save Rage for a confirmed recovery window. Destroying the market stalls is optional; defeating Sabretooth is the only story requirement.
- Reach the casino dance floor as Patch.
- Clear the casino back rooms.
- Use the service elevator.
- Clear the Field Test Sentinel routes.
- Free the captured civilians.
- Defeat the turret vehicle.
- Defeat Sabretooth in Red Right Hand.
11. Don’t Go Gentle, then I’m Still Here
Don’t Go Gentle is a linear memory-focused story mission. Follow the active objectives through each memory transition and complete the forced encounters. Do not waste time searching for collectibles in this mission; the route is intended to be followed from one story beat to the next.
Start I’m Still Here in Lowtown and clear the opening Sentinel route. Investigate Tyger’s bar, then continue to the noodle bar and inspect the required clues. Before leaving the early route, enter the Princess Bar through the hole in the red building and go upstairs for the Ol’ Canucklehead Whisky Bottle.
Continue through the larger Sentinel battle, using cover to remove ranged pressure before committing to melee. Follow Jean to the power plant and complete the final investigation. The mission contains one Nightmare Door, five Material Crates, and one Whisky Bottle. The Nightmare Door appears on the main route after a large enemy area, with roots leading to the right.
- Complete Don’t Go Gentle.
- Clear the opening I’m Still Here Sentinels.
- Investigate Tyger’s bar.
- Search the noodle bar.
- Collect Ol’ Canucklehead if desired.
- Reach the power plant.
- Complete the final investigation.
12. Prepare for This Was the Dream
Spend all available upgrade points before starting This Was the Dream unless you are deliberately saving for a specific unlocked node. Prioritize one survivability improvement and one reliable burst or finisher option. The materials from Hell Followed With Him, We Were Wrong, Way Down Low, and I’m Still Here are the most useful optional pickups in this section because they support suit and combat upgrades.
Nightmare Doors are optional and do not gate the next story mission. If you want extra ability points, prioritize Rockbottom Blues, Crucible of Tears, Blood in the Jungle, Run the Tables, and Edge of a Knife according to the missions you have already cleared. Mission Replay through the Nightmare Cabin is the recovery option for missed crates, bottles, or doors; do not restart the campaign for a missed pickup.
The chapter is complete when I’m Still Here has ended, the next mission shown is This Was the Dream, and no intended upgrade points remain unspent. This is not the final assault checkpoint. This Was the Dream, No Coming Back, and Brave New World still follow.
- Finish I’m Still Here.
- Confirm This Was the Dream is available.
- Spend unassigned upgrade points.
- Prioritize survivability and burst damage.
- Leave optional collectibles for Mission Replay if necessary.
- Do not mistake this transition for campaign completion.
Before you move on
- Death Comes to Death is complete and the Helix Claws are available.
- We Were Wrong is complete and the Hand Invoker has been defeated.
- Hell Followed With Him is complete and the Mount Haku shrine sequence has ended.
- Death’s Match is complete and Lady Deathstrike has been defeated.
- Sinister Tidings is complete and the briefing with Jean and Shiro has unlocked Way Down Low.
- Way Down Low is complete through the Arsenal meeting.
- Roll the Dice is complete through the casino service elevator.
- Field Test is complete through Dream Street Theatre and the turret-vehicle encounter.
- Sabretooth has been defeated in Red Right Hand.
- Don’t Go Gentle has been completed.
- I’m Still Here is complete through the power-plant investigation.
- This Was the Dream is shown as the next required story mission.
- Optional collectibles have either been collected or intentionally reserved for Mission Replay.
- Available upgrade points have been spent or deliberately reserved for a specific unlocked node.
Penultimate Act — Infiltration, Multi-Stage Arenas and Confrontations
Mission 28, This Was The Dream, follows I’m Still Here and leads directly into No Coming Back. The mission begins with Reaver fights and a bell-tower ascent before shifting through Essex-related hallucinations, Tyger’s bar, a facility, and Team X memory sequences. Its mandatory objective is to advance through each changing scene and set Walter free. The mission contains one optional Nightmare Door, Savage Showdown, and three Material Crates; it has no Whisky Bottles and no final boss arena. Finish the Walter sequence and remain in the mission until the completion transition appears. The next story mission is No Coming Back, which contains the Nathaniel Essex finale.
Begin Mission 28 after I’m Still Here
Start only when the mission title reads This Was The Dream. This is Mission 28 in the campaign order, immediately after I’m Still Here. Follow the active objective through the opening Reaver encounters. The route is linear, so a blocked passage normally means that the current combat encounter has not been cleared yet.
Use the arena edges to avoid being surrounded, interrupt ranged attackers when they are exposed, and keep a healing option available for the next encounter. If you are defeated, reload the checkpoint presented by the game and repeat the room rather than trying to force past an uncleared fight.
When the objective sends Logan toward the top of the structure, follow the marked traversal route. Do not leave the opening area looking for a separate mission path; the tower climb becomes available only after the required fights are complete.
- The mission title is This Was The Dream.
- The opening Reaver encounters are defeated.
- The objective points toward the top of the structure.
- The bell-tower route is available.
Climb the bell tower and decide whether to enter Savage Showdown
Continue to the bell-tower sequence and use the traversal prompt to ride the bell upward. After the Reaver fight in the crypt-like area near the beginning, look for the purple roots that lead to the Nightmare Door. The door is named Savage Showdown.
Savage Showdown is optional and does not block the main story. Enter it if you want to record the Nightmare Door or earn its trial reward. The trial uses combat waves, so begin it only if your health and Rage resources are in good condition. If you are pursuing the campaign only, leave the door and continue the marked route.
After the bell ride, regain control and check to the right of the doorway outside. The first Material Crate is located there. Collect it before continuing because the next hallucination sequence changes the surrounding area.
- The bell-tower traversal is complete.
- Savage Showdown is entered if desired.
- Material Crate 1 is collected if desired.
- The objective continues beyond the tower.
Follow the Essex hallucinations into the facility
Continue through the changing memory scenes until the objective reads Essex, what did you do? The hallucination transitions are controlled progression sections rather than open areas. Follow the active objective, visible traversal prompts, and the route opened by the current scene.
After the Tyger’s bar sequence, Logan reaches a facility and breaks through a window. Drop into the laboratory area and turn left after landing. Material Crate 2 is in that direction. Collect it before following the objective onward.
Proceed through the facility and Team X memory sections in the order presented. If a door does not open, finish the nearby encounter or interaction and wait for the objective to update. Do not spend time searching for alternate entrances in the hallucination areas; the game advances through scripted transitions.
- The objective reads Essex, what did you do?
- The Tyger’s bar sequence is complete.
- The facility is reached through the broken-window route.
- Material Crate 2 is collected if desired.
Complete the institute sequence and find the final crate
Continue through the later Essex and Team X scenes until Jean creates a passage through a breached wall. After moving through that opening, turn left and climb the stairs. Material Crate 3 is at the top of the stairs. This is the final Material Crate in Mission 28.
Return to the active objective after collecting the crate. The remaining route continues through the institute and memory sections; progress is controlled by the current scene, combat encounter, and story interaction rather than by optional exploration.
If a combat room becomes crowded, retreat toward the entrance or another open section instead of fighting with your back against the far wall. Use Rage for a dangerous group or a heavy enemy that prevents safe movement, but do not spend every healing resource before the Walter objective.
- The breached-wall route is completed.
- The left-hand stairway is climbed.
- Material Crate 3 is collected if desired.
- The story route through the institute continues.
Set Walter free and secure the handoff to No Coming Back
Follow the final story objectives until Logan reaches the Walter sequence. Complete the interaction that sets Walter free, then allow the following dialogue and cutscenes to finish. Freeing Walter awards the Small Mercies story trophy.
This mission does not contain the campaign’s final boss or a final arena. No Coming Back is the next mission and contains the Nathaniel Essex confrontation. Keep at least one healing option available when you leave This Was The Dream so you are not entering the finale immediately after exhausting all recovery resources in the optional trial or preceding fights.
Do not quit during the Walter release sequence or during the mission-completion transition. The practical checkpoint for this chapter is the completed mission record and the appearance of No Coming Back as the next story mission. If you missed the Nightmare Door or any crate, they can be recovered later through Mission Replay from the Nightmare Cabin.
- Walter has been set free.
- Small Mercies has registered or the corresponding story scene has completed.
- This Was The Dream is marked complete.
- No Coming Back is available as the next story mission.
Verify the penultimate-act completion state
Open the campaign or mission tracker after the completion transition and confirm that Mission 28, This Was The Dream, is recorded as finished. The optional target count for this mission is one Nightmare Door and three Material Crates. There are no Whisky Bottles in this mission.
If you are checking only main-story progress, the required result is Walter’s release followed by the handoff to No Coming Back. The optional collectibles do not determine whether the campaign advances.
Before starting the finale, spend any available upgrade points that improve survivability or reliable burst damage, then begin No Coming Back from the newly available story marker. Mission 29 is the correct place to cover the final arena, Nathaniel Essex’s mechanics, and the post-boss transition.
- Mission 28 is marked complete.
- The tracker shows one Nightmare Door if Savage Showdown was completed.
- The tracker shows three Material Crates if the optional pickups were collected.
- The Whisky Bottle count for This Was The Dream is zero.
- No Coming Back is displayed or selectable as the next story mission.
Before you move on
- Mission 28, This Was The Dream, is marked complete in the campaign or mission tracker.
- Walter has been released and the Small Mercies trophy or equivalent story-completion notification has registered.
- The mission tracker shows one Nightmare Door, three Material Crates, and zero Whisky Bottles if the optional content was fully cleared.
- No Coming Back is displayed or available as Mission 29.
- The player is ready to begin the final-assault chapter without confusing Mission 28’s Walter sequence with the Nathaniel Essex finale.
Final Assault and Epilogue — No Coming Back and Brave New World
Mission 29, No Coming Back, is the Shinjuku finale against Nathaniel Essex. The battle has three phases: a direct Essex duel, a Master Mold interruption while Jean Grey and Sunfire deal with the machine, and a final Essex duel with faster, more demanding attacks. Essex’s purple forcefield nullifies ordinary attacks, so wait for it to drop and follow the on-screen combat prompts: use the displayed parry prompt for blue, purple, or yellow parryable attacks, and use the displayed dodge prompt for red attacks, ranged energy, and Master Mold hazards. Duplicates are distractions; keep the active Essex in view and punish confirmed openings with Techniques or Rage. Defeating Essex completes the main-story climax, but continue into Mission 30, Brave New World, in Lowtown. Finish the epilogue, allow the ending sequence and credits to progress, then preserve the post-story save. Mission Replay, the Nightmare Cabin, and New Game Plus are post-story features and should be checked separately from the campaign-completion requirement.
1. Prepare before entering No Coming Back
Before launching Mission 29, spend unused upgrade points and Technique Points. Use abilities you already know rather than rebuilding your entire loadout immediately before the finale. Prioritize survivability, a dependable healing option, and Techniques that can be activated safely after a stagger or during a clear recovery window.
The final fight tests defensive timing more than constant aggression. Check the pause-menu control display if you have remapped the controller, and rely on the combat prompts shown during the fight instead of assuming a particular button layout. Keep the save that precedes the finale available until both final missions and the post-story state have been verified.
- Start Mission 29: No Coming Back.
- Spend unused upgrade and Technique Points.
- Equip a familiar defensive and healing setup.
- Check the current displayed controls if the layout was remapped.
- Keep the pre-final save available.
2. Reach Essex and handle the opening duel
Follow the marked story route through Shinjuku until Nathaniel Essex appears. The encounter begins as a direct duel. Essex can raise a purple forcefield that prevents normal attacks from producing useful damage. When the shield is active, stop attacking and watch his next commitment instead of trying to break through it. Wait for the field to fall or for a confirmed opening before starting a combo.
Read the attack indicator before choosing a defense. Use the displayed parry prompt when the attack is marked as blue, purple, or yellow and the game identifies it as parryable. Use the displayed dodge prompt for red attacks, which are not parry opportunities. Follow the same dodge prompt for ranged purple energy and other attacks that the game marks for evasion.
Essex can create duplicates during the encounter. Do not chase every copy around the arena. Keep the Essex who is actively attacking as your main target. Strike a duplicate only if it blocks your view, closes off an escape route, or prevents you from reaching the real Essex. The objective is to maintain a clear defensive position, not to waste time clearing every distraction. These forcefield, duplicate, and three-phase elements are consistent across the post-launch boss walkthroughs.
- Follow the Shinjuku story route.
- Stop attacking while the purple forcefield is active.
- Use the displayed parry prompt for blue, purple, or yellow parryable attacks.
- Use the displayed dodge prompt for red attacks and ranged energy.
- Prioritize the active Essex over unnecessary duplicates.
- Reduce the first health segment to trigger the next phase.
3. Punish only confirmed openings
Successful parries build Essex’s stagger pressure and create a short punish window. After a successful defense, use a controlled claw combo or an equipped Technique, then disengage before his recovery ends. Commit to a longer sequence only while the forcefield is down and Essex has clearly finished an attack string.
Use Rage during a confirmed stagger, after a long committed attack sequence, or while Essex is recovering and cannot immediately counter. Do not spend Rage into the forcefield. Save enough healing capacity for the Master Mold phase, but do not wait until Logan is nearly defeated before recovering. Heal after creating distance, following a successful dodge, or during another clearly safe gap.
- Punish successful defenses without overcommitting.
- Use Rage only during a confirmed opening.
- Avoid spending Techniques against the forcefield.
- Heal during a safe separation.
- Prepare for the Master Mold transition.
4. Survive the Master Mold interruption
After enough damage, the fight shifts into its second phase and Master Mold joins the battle. Jean Grey and Sunfire engage the machine while Essex remains an immediate threat. Keep Essex as the main target unless the objective temporarily changes. The machine creates marked danger areas in the arena; move away as soon as the warning appears and do not finish a combo inside a marked zone.
Essex’s attacks continue during this phase and can overlap with Master Mold hazards. Read each prompt separately. Use the displayed parry prompt for a blue, purple, or yellow attack identified as parryable. Use the displayed dodge prompt for red attacks, ranged energy, and the machine’s marked blast zones. A successful defense against Essex does not protect Logan from a simultaneous Master Mold hazard, so keep moving after each response.
If a duplicate blocks an escape path, hit it once if necessary and resume repositioning. Use Techniques after Essex completes a string or while he is recovering. Spend Rage if it will shorten the phase or rescue a failing attempt, but do not stop watching the arena warnings. Continue until the Master Mold sequence ends and the fight returns to Essex.
- Keep Essex as the primary target.
- Leave every marked Master Mold danger zone immediately.
- Use the displayed parry prompt for parryable attacks.
- Use the displayed dodge prompt for red attacks and machine hazards.
- Destroy only duplicates that obstruct movement or visibility.
- Continue until Master Mold leaves the active encounter.
5. Finish the final Essex duel
When the Master Mold pressure ends, Essex returns to a direct confrontation for the third phase. His attack strings are faster and less forgiving, so do not press the parry input automatically against every movement. Wait for the displayed prompt: parry blue, purple, or yellow attacks identified as parryable, and dodge red attacks with the displayed dodge prompt.
Watch for charged ranged energy. When Essex prepares a larger purple blast, move sideways or diagonally using the displayed dodge prompt so Logan is not left in its path. Keep the fight on open ground whenever possible. This gives you more room to read the indicators and prevents a dodge from carrying Logan into another hazard or duplicate.
The final phase is the correct time to spend remaining Rage and Techniques, but still wait for a stagger, a completed sword sequence, or another clear recovery. Reduce Essex’s final health segment to trigger the defeat scene. Mission 29 is the final major boss mission and is listed as the campaign’s main-story completion point, but the ordered playable route continues into Brave New World.
- Read each displayed attack prompt before defending.
- Parry only blue, purple, or yellow attacks identified as parryable.
- Dodge red attacks and charged ranged energy.
- Avoid attacking into the forcefield if it returns.
- Use remaining Rage during a confirmed opening.
- Drain Essex’s final health segment and allow the defeat transition.
6. Complete Mission 30, Brave New World
Do not quit immediately after the Essex victory notification. Allow the defeat scene and automatic transition to finish. The next listed mission is Brave New World, the final playable story mission in Lowtown. Follow the objective markers through the remaining narrative sequence and complete every required interaction or movement prompt shown by the game.
Brave New World has no listed collectibles in the current mission guides, so remain on the story route rather than detouring for cleanup. Complete the epilogue and allow the ending scenes and credits to proceed. Although No Coming Back contains the final major boss, the campaign route is not fully complete until Brave New World has also been recorded.
- Allow the No Coming Back defeat transition to finish.
- Continue into Mission 30: Brave New World.
- Follow the Lowtown story objectives.
- Complete the epilogue mission.
- Allow the ending scenes and credits to progress.
7. Verify the completed campaign save
After the ending sequence has progressed, return to the campaign or mission interface and verify that No Coming Back and Brave New World are both marked complete. Preserve this post-story save before beginning mission cleanup, replaying Nightmare Trials, or starting another campaign.
The Nightmare Cabin is the post-story hub used for mission selection and Nightmare Trial access. Interacting with its bed provides mission replay in the current post-launch coverage. This is a useful confirmation that the post-story state loaded, but it is separate from the basic requirement to finish the main story and credits.
Check New Game Plus separately. Current post-launch guides agree that it is a post-story feature, but differ on whether the final Nightmare Trial is part of the unlock sequence. If the installed game displays a Nightmare Trial requirement, follow the requirement shown there. Do not use New Game Plus visibility as the sole definition of campaign completion. The concrete check is that both final missions are complete, the ending and credits have progressed, and the completed post-story save remains intact.
- Confirm the ending sequence and credits have progressed.
- Verify No Coming Back is complete.
- Verify Brave New World is complete.
- Confirm the Nightmare Cabin or equivalent post-story hub is available.
- Confirm Mission Replay is accessible if you want to verify post-story access.
- Check the installed game’s displayed New Game Plus requirement separately.
- Preserve the completed campaign save.
Before you move on
- Mission 29, No Coming Back, is marked complete.
- Mission 30, Brave New World, is marked complete.
- The ending sequence and credits have progressed.
- The post-story save has loaded successfully.
- The Nightmare Cabin or equivalent post-story hub is available.
- Mission Replay is accessible if the game has unlocked it in the installed version.
- New Game Plus has been checked separately against the requirement displayed by the installed game.
- The completed campaign save remains preserved.
Epilogue & Credits — Verifying Completion and Unlocks
Complete Mission 29, No Coming Back, then continue into Mission 30, Brave New World, the final listed playable mission. No Coming Back contains the final boss and the One More Story main-story trophy sequence, but the requested campaign completion check should not stop there: finish Brave New World, allow the ending and credits to run, and wait for the post-story save. Afterward, use the Nightmare Cabin to inspect mission replay and other post-game activities. Mission Replay may be available before the finale through Nightmare content, so it is not itself proof that the campaign is finished. New Game Plus is optional for this chapter’s goal: inspect the installed game’s post-story menu and follow any prerequisite it displays rather than assuming it is available from the same save state. Nightmare Doors, Nightmare Trials, Best There Is, Repressed Memories, collectibles, and other trophy cleanup remain separate from the standard story-ending check.
1. Finish No Coming Back and record the Essex encounter
Continue the campaign into Mission 29, No Coming Back. Follow the objective marker through the final confrontation and defeat Nathaniel Essex. This is the encounter associated with A Sinister End. The One More Story trophy is tied to completion of the main-story finale sequence, but the mission list still presents Brave New World afterward, so do not close the game immediately after the Essex fight.
When the encounter ends, follow every immediate objective and scripted transition. Wait for the next mission state, checkpoint, or save indicator to finish before returning to the title screen. If the game returns to a menu unexpectedly, load the newest campaign save and confirm that No Coming Back is marked complete before continuing.
- No Coming Back is marked complete.
- Nathaniel Essex has been defeated.
- A Sinister End appears in the PlayStation trophy list or notification.
- The game has advanced beyond the Essex encounter and saved the result.
2. Complete Brave New World as the final listed playable mission
Start Mission 30, Brave New World, when it becomes available after No Coming Back. Complete its required objectives and continue through the closing story sequence. Current mission-order coverage lists Brave New World as the final playable mission, while independent trophy coverage identifies No Coming Back as the mission where the main-story trophy unlocks. For a complete campaign walkthrough, treat both facts as relevant: No Coming Back contains the climax, and Brave New World is the final listed story entry that follows it.
Do not leave during an opening cutscene, scripted transition, or temporary loss of control. Continue until the mission reports completion or the game moves into its ending flow. The completion point is not merely reaching Brave New World; it is finishing its required objectives and allowing the resulting story transition to occur.
- Brave New World has started after No Coming Back.
- Every required objective in Brave New World is complete.
- The final mission completion state or ending transition appears.
- The campaign has advanced into its closing sequence.
3. Watch the ending and credits, then wait for the post-story save
Allow the ending scenes and credits to play through without closing the application. Do not select Mission Replay, begin another run, or shut down the console while the finale is still transitioning. The reliable completion point for this chapter is after Brave New World has ended, the credits have finished, and the game has returned to its post-story state.
Remain in the post-story flow long enough for the campaign save to update. If a save icon or other saving indicator appears, wait until it clears. This protects the completed campaign state and prevents a player from mistaking the Essex victory or the start of Brave New World for the final recorded completion.
- No Coming Back is complete.
- Brave New World is complete.
- The ending scenes have finished.
- The credits have been allowed to finish.
- The post-story state has loaded.
- The completed campaign has been saved after the finale.
4. Verify the main story separately from optional completion
Check the mission list or campaign records and confirm that both No Coming Back and Brave New World are complete. Then check the PlayStation trophy list for One More Story. A Sinister End confirms the Essex encounter, but it is not the complete campaign test. If trophy synchronization is delayed, wait for the console to synchronize and recheck the list from the completed campaign save.
Do not use the overall percentage as the only test. Collectibles, Nightmare Doors, Nightmare Trials, and other optional activities can remain unfinished after the story and may keep the percentage below 100 percent. The main-story check is the combination of the two final mission records, the completed ending flow, the credits, and the saved post-story state.
- No Coming Back appears as complete.
- Brave New World appears as complete.
- One More Story is unlocked or visible after synchronization.
- The ending and credits have finished.
- Remaining percentage is identified as optional progress where applicable.
5. Open Mission Replay from the Nightmare Cabin
After the finale, enter the Nightmare Cabin from the post-story menu or the available Nightmare interface. Interact with the bed to open the mission list. Select a completed mission to review its completion information and replay it for missed Material Crates, Whisky Bottles, Nightmare Doors, or mission-specific trophies.
Mission Replay is not a dependable completion marker because current coverage reports that it can become available before the end of the campaign through Nightmare content. After the story, however, the Nightmare Cabin is the normal place to select completed missions. Replaying a mission is separate from continuing the chronological campaign and does not replace the requirement to finish Brave New World for this chapter's goal.
Use the cabin's separate Nightmare Trial interface for trials. Do not confuse the bed-based mission list with the shelf or other interface used for Nightmare activities.
- The Nightmare Cabin is accessible.
- The bed opens the mission list.
- Completed missions show replay or completion information.
- The bed is used for campaign mission replay.
- Nightmare Trials are accessed through their separate cabin interface.
6. Inspect New Game Plus without using it as the story completion test
New Game Plus is not required for the stated main-story goal. After confirming the completed campaign save, inspect the post-story menu for a New Game Plus option. If the installed version displays the option immediately, review the source campaign, difficulty, carryover information, and any warning before confirming. If it displays a prerequisite, complete that displayed requirement first rather than assuming the mode is already available.
Some launch coverage describes New Game Plus as a day-one feature, while later mission-order coverage reports a prerequisite involving the final Nightmare Trial. Because the installed game and updates control the actual menu state, use the requirement shown by the game as the authority. Preserve the completed campaign before starting another run, especially if the setup screen warns about creating or replacing a save.
- The main-story completion state is confirmed before checking New Game Plus.
- The post-story menu has been inspected.
- Any displayed New Game Plus prerequisite has been identified.
- The correct completed campaign is selected as the source.
- The original completed save remains preserved.
7. Keep Nightmare Door content separate from the standard ending
Nightmare Doors and Nightmare Trials are optional content. They are not required to defeat Essex, finish Brave New World, watch the standard ending, see the credits, or confirm One More Story. Track them separately if pursuing additional trophies, materials, or the optional Repressed Memories sequence.
Current post-launch guides describe a hidden Best There Is trial that becomes available after the required Nightmare Door progress. If it does not appear, check the Nightmare Door and trial records instead of replaying the final story missions without a reason. Do not treat an unavailable optional epilogue as evidence that the standard campaign failed to register.
- Nightmare Door progress is tracked separately.
- Nightmare Trials are not being used as the main-story completion test.
- Best There Is is pursued only if its displayed requirements are met.
- Repressed Memories is recorded as optional progress.
8. Troubleshoot a missing trophy or post-game feature
If One More Story, the Nightmare Cabin, Mission Replay, or a post-story menu option does not appear, first wait for saving and PlayStation trophy synchronization to finish. Reload the newest completed campaign save and verify both final mission records. Do not delete the save while investigating.
Check the installed game version and apply pending updates. Insomniac's official Game Updates section is the appropriate place to review progression fixes and current patch information; do not assume the game itself contains a complete patch-note browser. The September 15, 2026 update notes specifically document fixes for progression issues involving Jean in Japan and sliding under a prison door in Telambang.
Only replay the finale after preserving the completed campaign file and checking current support information. A patch can address a blocker, but it does not replace the required actions: complete No Coming Back, complete Brave New World, allow the ending and credits to finish, and wait for the post-story save.
- The game is updated.
- Current Insomniac support information has been checked.
- The completed campaign save is preserved.
- No Coming Back and Brave New World are rechecked.
- The finale is replayed only after the save state is protected.
Before you move on
- No Coming Back and its Essex encounter are complete.
- Brave New World is complete.
- The ending sequence has finished.
- The credits have been allowed to finish.
- The post-story campaign state has been saved.
- One More Story is unlocked or visible in the PlayStation trophy list.
- No Coming Back and Brave New World appear as completed in the mission records.
- The Nightmare Cabin is accessible.
- The bed opens Mission Replay.
- New Game Plus has been checked as an optional post-story feature, with any displayed prerequisite followed before use.
- Nightmare Door trials and Repressed Memories are identified as optional rather than required for campaign completion.
Optional Completion — Collectibles, Challenges and 100% Guidance
Use the game's collectible tracker to clean up Material Crates, Whisky Bottles, Nightmare Doors, XP Caches, suit upgrades, Adaptations, and trophy-specific interactions after or during the campaign. The three main collectible categories serve different purposes: Material Crates provide suit-crafting materials, Whisky Bottles contribute to Adaptation progress, and the 14 ordinary Nightmare Doors open scored trials. None of the main collectibles are permanently missable. Once Chapter Select is available, replay missions from the Nightmare Cabin's bed and use each mission's individual tracker to identify unfinished items. Complete every ordinary Nightmare Trial to at least Bronze if you want the related completion trophy, then finish the separate post-story Best There Is trial and follow its resulting scent trail. Keep the completed story save until the ending, optional progress, and desired trophy notifications have been verified.
1. Separate the collectible categories before starting a cleanup run
Track Material Crates, Whisky Bottles, and Nightmare Doors on separate lines. They do not function as one shared inventory: crates provide materials for suit crafting, bottles contribute AP and Adaptation progression, and Nightmare Doors lead to separate scored trials. The game records these categories independently, so a full tracker in one category does not prove that the other two are complete.
Use the pause-menu tracker and the Nightmare Cabin's mission list rather than relying on a handwritten numerical total. Mark every mission as either complete or checked for having no collectibles. This matters for early Telambang missions and other story chapters that may show no item entries; an empty mission is different from one you have not yet reviewed.
Keep Nightmare Door discovery and Nightmare Trial completion as two separate tasks. Finding the purple-root entrance registers the door, but the associated trial still needs its own result. Record the trial's rating after completing it.
- Track crates, bottles, and Nightmare Doors separately.
- Use the installed game's global collectible tracker.
- Use each mission's individual tracker for missing items.
- Mark missions with no collectibles as checked.
- Record Nightmare Door discoveries separately from trial results.
2. Unlock and use Chapter Select from the Nightmare Cabin
Continue the campaign until the game has opened Chapter Select. Current post-launch walkthrough coverage places this unlock after the second Nightmare Door, but the installed game should be treated as the final authority: when the Chapter Select or Nightmare Cabin option appears, use that menu rather than restarting the campaign for a missed item.
From the title screen, select Nightmare Cabin when available and interact with the bed. The bed opens the mission list and shows completion information for individual missions. Select a completed mission with an incomplete tracker entry, then load it at the desired difficulty. Discovered Nightmare Trials can also be replayed from the cabin, but their doors must first be found during the associated story mission.
Mission Replay is a cleanup tool, not a substitute for discovering a door. If a trial is absent from the cabin, replay the mission whose tracker still lacks that Nightmare Door, follow the purple roots, and interact with the entrance before trying to select the trial directly.
- Wait for Chapter Select or Nightmare Cabin to become available.
- Enter Nightmare Cabin from the title-screen option when possible.
- Interact with the bed to open the mission list.
- Choose missions using their incomplete tracker entries.
- Discover a Nightmare Door before attempting to replay its trial.
3. Clean up one mission at a time
Begin with the mission list, not with a random chapter. Select the shortest mission showing an incomplete category, then follow its normal objective route until the missing item appears. Material Crates usually sit in side rooms, elevated ledges, corners, or behind breakable objects. Whisky Bottles are commonly found by following Logan's scent trail. Nightmare Doors are signposted by purple roots that lead from the main route to the entrance.
After collecting an item, pause and verify that the relevant mission entry or global category counter has changed. The collectible itself carries into persistent progress, but the replayed mission's story completion is a separate matter. Do not assume that merely seeing an item during a replay updated the tracker.
You may leave a replay after the item has registered, but the safest routine is to continue until a dependable checkpoint or clear mission update, then return to the cabin and verify the entry. If the tracker remains incomplete, reload the same mission and confirm that you selected the correct title rather than another chapter in the same region.
- Select only missions with incomplete tracker entries.
- Follow the mission route to the missing item.
- Confirm the pickup or door discovery in the tracker.
- Reach a dependable checkpoint or visible mission update when practical.
- Recheck the cabin list before moving to another mission.
4. Use the game's detection tools during cleanup
Enable Settings, Visuals, Collectibles and Interacts Shader if a crate, bottle, or other interactable is difficult to see. This accessibility setting outlines relevant objects and is especially useful in dark rooms, side chambers, and areas with visual clutter.
Whisky Bottles produce a scent trail when Logan is close. Follow the trail rather than searching every nearby room at random. Material Crates give a noticeable blue visual pulse or outline when you are within range. Nightmare Doors use purple-root growth as their environmental marker and are generally placed near the directed route rather than in completely disconnected areas.
If already unlocked, equip Crate Finder and Whisky Finder Adaptations before loading a replay. These improve long-range detection and can mark items through obstructions. Still compare every apparent highlight with the mission tracker; a visual cue alone does not prove that the item is currently uncollected.
- Turn on Collectibles and Interacts Shader when visibility is poor.
- Follow Logan's scent trail for nearby Whisky Bottles.
- Search for the blue pulse or outline around Material Crates.
- Look for purple roots leading to Nightmare Doors.
- Equip Crate Finder and Whisky Finder when available.
5. Finish the ordinary Nightmare Trials before Best There Is
The campaign contains 14 ordinary Nightmare Doors. Discovering all of them does not automatically complete their trials. Enter every discovered trial from the door or the Nightmare Cabin and earn at least Bronze if you are pursuing the related trophy or completion objective. Higher ratings are optional unless you are targeting a personal score or a reward that specifically requires them.
Best There Is is separate from the ordinary Nightmare Door count. It becomes available in the post-story Nightmare Cabin after the required ordinary Nightmare Trial progress. Select the Best There Is challenge from the cabin's trial display and complete it to the required Bronze threshold.
After the trial, leave the cabin and follow the resulting scent trail or objective. Continue until the hidden-memory sequence registers. Check for the resulting trophy or progress notification before beginning another replay, because the trial completion and the hidden-memory objective are separate completion steps.
- Discover all 14 ordinary Nightmare Doors.
- Complete every ordinary trial to at least Bronze for trophy completion.
- Open the post-story Nightmare Cabin after the campaign.
- Complete Best There Is separately.
- Follow the post-trial scent trail until the hidden-memory progress registers.
6. Finish XP Cache, suit, Adaptation, and mission-specific objectives
Destroy XP Caches as you encounter them during the story. The completion requirement is based on the cache counter, not on finding every cache in the game. If the counter is short after the campaign, replay missions with dense combat and destroy additional caches; post-launch walkthroughs report that replayed missions provide further opportunities and that there are more than enough caches for the requirement.
Spend Material Crate resources in the Suits menu rather than leaving the currency unused. The Health-upgrade trophy depends on crafting enough standard suits to complete the associated Health progression, not merely on collecting crates. Check the Suits menu after each cleanup pass and craft newly available standard suits when the required materials are ready.
Use the Adaptation menu to monitor AP and Adaptation progression from Whisky Bottles and Nightmare activities. Do not infer the Adaptation requirement from the number of bottles or doors found. Combat trophies, environmental interactions, and mission-specific actions also remain separate; consult the relevant mission tracker or trophy list and perform them during replay if necessary.
Keep the original completed campaign save until the ending, collectible trackers, ordinary trials, Best There Is, hidden-memory sequence, XP Cache counter, suit requirement, Adaptation target, and desired mission-specific trophies have all been checked. New Game Plus is not required for collectible cleanup or the trophy objectives described here.
- Reach the installed game's required XP Cache counter.
- Craft enough standard suits to complete the Health-upgrade requirement.
- Check Adaptation progression in the Adaptation menu.
- Complete combat and mission-specific interaction objectives separately.
- Verify the completed campaign save before starting New Game Plus.
Before you move on
- The global tracker shows no unfinished Material Crates, Whisky Bottles, or Nightmare Doors.
- The mission list shows no incomplete collectible entries in missions intended for cleanup.
- All 14 ordinary Nightmare Doors have been discovered.
- All ordinary Nightmare Trials have at least the required Bronze result if trophy completion is intended.
- Best There Is has appeared in the post-story Nightmare Cabin and has been completed.
- The hidden-memory or Repressed Memories objective is registered.
- The installed game's XP Cache counter has reached its required value if full trophy completion is intended.
- The standard-suit Health-upgrade requirement is complete.
- The Adaptation-level requirement is complete.
- Mission-specific combat and interaction objectives have been checked separately.
- The completed campaign save still records the story ending before another run begins.
Post-launch Notes — Patches, DLC Expectations and New Game+ Tips
Update Marvel’s Wolverine before replaying missions or troubleshooting progression. Insomniac’s v1.001.005 hotfix, published September 19, 2026, addresses some crashes and reduces the opacity of Scent Trail and Audio Sense indicators. The earlier v.01.001.004 update fixed documented English voice playback, a Japan mission issue involving Jean Grey, and a Telambang prison-door blocker. After finishing the campaign, protect the completed save before using Mission Replay, Nightmare Challenges, or New Game Plus. Mission Replay, Nightmare Challenges, New Game Plus, exclusive Techniques, and Level Caps are confirmed features, but unspecified carryover rules must be checked in-game. Standard Edition contains the base game only; Digital Deluxe and pre-order rewards are optional edition-specific content.

Update the game before replaying a mission
From the PS5 home screen, highlight Marvel’s Wolverine, press the Options button, choose Check for Update, and install the newest version offered by the console. As of September 20, 2026, Insomniac’s Game Updates page lists v1.001.005, published September 19, 2026. Its confirmed changes are fixes for some common crashes and reduced opacity for the Scent Trail and Audio Sense indicators. If the console offers a later version, install that version instead.
If you are troubleshooting a story problem, update first, then use Continue, Load Game, or the relevant replay option. Do not immediately delete the save or overwrite your only completed-campaign slot. If the problem remains after updating, note the mission name, objective, and current save state before contacting Insomniac support.
- Check for updates from the PS5 home-screen Options menu.
- Install the newest version offered by the console.
- Reload the affected checkpoint or restart the mission after installation finishes.
- Keep the completed-campaign save available while testing.
Use the documented fixes for known launch problems
Update v.01.001.004 specifically fixed an issue where English voice-over would not play when the console language was not English, an issue where Jean Grey could drop off during a Japan mission, and an issue where Logan could not slide beneath a prison door in Telambang. Use that update or any later version when diagnosing those problems.
These notes do not establish that every affected save repairs itself automatically. After installing the update, reload the affected checkpoint or restart the affected mission if the game does not resume correctly. If the objective remains blocked, preserve the save and use Insomniac’s support request process rather than repeatedly advancing from a possibly damaged state.
- Use v.01.001.004 or later for the documented voice, Japan, and Telambang issues.
- Reload or restart the affected mission after updating.
- Do not assume a patch automatically repairs every existing progression state.
- Keep a copy or separate slot for the completed campaign where possible.
Check official channels for future changes
Use Insomniac’s Game Updates page for version numbers, hotfixes, and confirmed changes. Use the official PlayStation Blog and PlayStation Store listing for announced features, edition contents, and post-launch notices. Check the publication date and version number rather than relying on an old launch-week guide.
Insomniac says it is evaluating further improvements to Senses and exploring toggleable options for a future update. That statement is not confirmation that a complete Scent Trail or Audio Sense disable option is available now. Treat future DLC, balance changes, new accessibility controls, and mode changes as unconfirmed until an official announcement identifies them.
- Read the official version number and publication date.
- Use Insomniac support for technical issues.
- Use PlayStation channels for confirmed features and edition information.
- Do not present proposed options or future DLC as released content.
Protect the completed campaign before post-game modes
After the ending and credits, return to the campaign or title menu and confirm that the completed campaign save is still visible. If the game provides multiple save slots, reserve one for the finished campaign and use another for experiments. This is a precaution before entering Mission Replay, Nightmare Challenges, or New Game Plus.
Before changing modes, record your difficulty, equipped Techniques, Adaptations, available upgrade points, suit, claw appearance, and relevant accessibility settings. This record is only a reference. Do not assume that any of these items transfer, reset, or remain synchronized between modes until the game’s menus state the rule.
- Confirm the completed campaign save before starting another mode.
- Use a separate slot for replay or New Game Plus when possible.
- Record your current build and difficulty.
- Do not overwrite the only save that proves campaign completion.
Start New Game Plus after the campaign and verify its rules
Use New Game Plus only after completing the main campaign. The official feature announcement confirms New Game Plus, exclusive Techniques, and Level Caps, but it does not publish a complete table of carryover rules. Before confirming the new run, read the in-game mode description and inspect the upgrade, collectible, and mission menus.
Check each category separately: Techniques, Adaptations, materials, upgrade points, outfits, claw appearances, collectibles, challenge progress, difficulty, and mission availability. If the game offers respec or refund controls, read the displayed refund behavior before committing. Do not rely on an unofficial claim that everything carries over or that everything resets.
- Complete the campaign before entering New Game Plus.
- Read the in-game New Game Plus description.
- Verify each carryover category individually.
- Keep the finished campaign save untouched until the new run is working.
Test combat changes after a patch
If a future update mentions enemy health, enemy damage, Rage, Healing Factor, Techniques, Adaptations, difficulty, or combat behavior, load a protected save and use Mission Replay or another repeatable encounter. Keep the same difficulty, loadout, and enemy type for the first comparison. Observe broad results such as stagger speed, damage taken, Rage generation, and defensive timing.
Change only one Technique, Adaptation, or setting at a time. If enemies deal more damage, test survivability before rebuilding the entire loadout. If fights take longer, compare stagger and crowd-control performance before spending all available resources. Stop if a save disappears or a mission will not advance; install the newest patch and contact official support instead of repeatedly replaying a questionable state.
- Use the same encounter for before-and-after comparisons.
- Change one build element at a time.
- Compare stagger, damage, Rage generation, and defensive response.
- Stop testing if progression or save data appears damaged.
Keep Standard Edition advice separate from bonus content
The Standard Edition contains Marvel’s Wolverine. The Digital Deluxe Edition adds five exclusive suits, five exclusive claws, four Technique Points, the Classic Brown Suit early unlock, the Reflective Claws early unlock, and four PlayStation avatars. Pre-order rewards are listed separately and include early access to the Classic Brown Suit and Reflective Claws, one Technique Point, and four PlayStation avatars.
None of those edition-specific rewards should be treated as required for the Standard Edition campaign or New Game Plus. Use base-game Techniques, Adaptations, upgrades, and earned rewards when describing a Standard Edition build. Treat bonus suits and claws as optional presentation items unless the game explicitly identifies a gameplay requirement.
- Confirm the player owns the Standard Edition before applying bonus-content advice.
- Separate Digital Deluxe rewards from pre-order incentives.
- Do not make bonus suits, claws, or Technique Points campaign requirements.
- Base recommendations on content available in the Standard Edition.
Before you move on
- The game is updated to the newest version offered by the PS5.
- The player recognizes v1.001.005 as the September 19, 2026 hotfix for some crashes and reduced Scent Trail and Audio Sense opacity.
- The documented v.01.001.004 fixes are used for the English voice, Japan Jean Grey, and Telambang prison-door issues.
- The completed campaign save remains available before Mission Replay, Nightmare Challenges, or New Game Plus begins.
- New Game Plus is started only after the campaign and its in-game rules have been checked.
- Exclusive Techniques and Level Caps are treated as confirmed, while unspecified carryover behavior remains unclaimed.
- Standard Edition, Digital Deluxe, and pre-order content are clearly separated.
- Future DLC, balance changes, and Senses toggles are not presented as confirmed without an official announcement.
Finishing up
For this guide’s campaign goal, complete all 30 story missions in order: finish No Coming Back, then complete Brave New World, allow the ending sequence and credits to play, and let the post-story state save.
Use the campaign or Mission Replay interface to confirm that both No Coming Back and Brave New World are marked complete. Treat Mission Replay, Nightmare Cabin, New Game Plus, trophies, and the optional Nightmare epilogue as separate verification checks.
The main-story goal does not require all collectibles, Nightmare Trials, XP Caches, trophies, or the hidden Repressed Memories epilogue.
Choose your next gameScreenshots & video
Game imagery for reference. Follow the written chapters above for the route and strategies.
About the game & collecting notes
- Platform
- Sony PlayStation 5
Step-by-step walkthrough for the original PlayStation 5 Standard Edition campaign, covering all 30 story missions in verified order from Back in Action in Telambang through Brave New World in Madripoor. It provides required routes, combat and boss guidance, mission transitions, failure recovery, and optional collectible separation without treating Nightmare content as mandatory for the campaign.
Darryl Polo
Darryl Polo loves tinkering with emulation and revisiting retro games. He enjoys exploring how old favorites play on different setups and sharing what he learns along the way. At Joking Joystick, he writes about the games, hardware, and small discoveries that keep the hobby fun.
Our editorial standardsFound a step that needs another look? Help us improve this guide.
