
Marvel's Spider-Man (PlayStation 4) — Complete Campaign Walkthrough & Optional 100% Completion (original 2018 release)
A player-focused campaign walkthrough for the original PlayStation 4 release of Marvel’s Spider-Man. Follow verified progression through the main story to its finale, then use the optional chapters to complete the original base-game side missions, district activities, collectibles, research stations, enemy bases, crimes, Taskmaster challenges and Black Cat Stakeouts. The guide also separates district 100% from the additional goal of unlocking every base-game suit, suit power, suit mod, gadget and gadget upgrade, while excluding The City That Never Sleeps and later remaster content.


Find a copy
Marvel's Spider-Man PlayStation 4
We may earn a commission if you buy through these links, at no extra cost to you. As an Amazon Associate I earn from qualifying purchases.
Opens retailer search results. Check the model, edition, seller, availability and current price before buying.
Before you begin
This guide takes you step-by-step through Marvel’s Spider-Man for PlayStation 4 (original 2018 release) from the opening heist through the final act and credits, with separate, practical chapters for optional full base-game completion.
You’ll get clear objectives, mid-mission checkpoints, common hazards and recovery tactics so you can complete required story missions reliably and clean up optional activities afterward without mixing in remaster or DLC mechanics.
Play through at your preferred pace: follow the main-story chapters consecutively to reach the ending quickly, or interleave side activities to farm tokens, gadgets and suit unlocks.
Optional chapters explain how to methodically clear collectibles, research stations, enemy bases and Taskmaster challenges, plus strategies for combat, traversal and stealth that apply to the PS4 original build.
Set yourself up for the run
Confirm you are playing the original PS4 release (not the PS5/PC remaster) so you follow PS4-era mechanics, enemy balance and control mapping.
Familiarize yourself with traversal and the web-swinging basics in the opening missions — movement and momentum are the foundation for exploration and combat recovery.
Learn core combat tools early: light/heavy attacks, web throws, aerial finishers, gadgets (web grenades, trip mines, etc.) and gadgets’ upgrade prerequisites before spending tokens.
Avoid spending Base/Challenge tokens immediately—save them until you can afford the gear and suits you want; this reduces late-game grind for tokens needed to craft favored suits.
(Token spending strategy is especially relevant for base-game 100% completion.)
Use the in-game map to unlock fast-travel points as you acquire Research Stations and complete story checkpoints; this saves repeated long trips across Manhattan.
Set the difficulty that matches your comfort; you can complete the entire story on any difficulty, but higher difficulties increase enemy durability and encounter complexity.
Keep an eye on mission prompts that introduce new enemy types and counter mechanics (stun guns, shields, flamethrowers) — adapt gadget loadouts and skill choices to counter them.

Preparation and HUD/Controls (PS4 original)
Before starting the campaign, set a comfortable difficulty, test the camera and learn the original PS4 control layout. The core combat loop is Square for attacks, Circle for dodging, Triangle for Web Strike, R1 for the selected gadget and L1 for the gadget wheel. Traversal uses X to jump or Web Zip, R2 to swing or sprint, and L2 plus R2 to Zip to Point. Use R3 to display the current objective, scan nearby surroundings and reveal useful activity during free roam; it is not a camera-recenter button. The map is opened with the Touch Pad and is the reliable place to inspect story missions, districts and unlocked optional activities. When a fight becomes crowded, dodge the danger warning, move vertically, identify ranged enemies and return with a Web Strike, gadget or environmental throw.
Choose a difficulty and test the camera before committing to the campaign
At the opening menus, choose the difficulty that matches the way you want to play. Friendly reduces combat pressure, Amazing is the balanced starting choice, and Spectacular demands more careful dodging and positioning. Difficulty can be changed later through the Settings menu, so you do not need to restart the campaign if the current setting is uncomfortable. The story route and mission order remain the same when you change difficulty.
Open the Settings menu and adjust camera sensitivity in small steps rather than making a large change immediately. Test the setting while moving through the first city traversal and during the opening combat. If the camera swings past targets while you are turning, lower the sensitivity. If it feels slow when tracking enemies or looking for a perch, raise it. Leave tutorials and control prompts enabled until the movement and combat actions become familiar.
- Choose Friendly, Amazing or Spectacular according to your preferred challenge.
- Test camera movement during both traversal and combat.
- Keep tutorials and control prompts enabled while learning the layout.
Memorize the primary movement and combat controls
Use the left stick to move and the right stick to control the camera. Press X to jump or perform a Web Zip when the appropriate traversal prompt is available. Hold R2 to sprint and to swing after jumping. When you are aiming at a highlighted traversal point, hold L2 and R2 together to Zip to Point. This is the dependable way to move quickly to a wall, ledge, pole or other marked point during traversal and combat repositioning.
Press Square for Spider-Man's normal attack. Press Triangle to perform a Web Strike toward a targeted enemy or to complete a contextual action when the game displays that prompt. Press Circle to dodge or roll. When the danger indicator appears around Spider-Man's head, dodge immediately instead of trying to finish the current attack string. Press L3 near an edge to perch, or while airborne to dive when the relevant traversal state allows it.
Press R3 to show the current objectives and scan the nearby environment. R3 is not a camera-recenter command; use the right stick to turn the camera. If you lose the route after a cutscene, tap R3, look for the highlighted objective information and then follow the yellow story marker or the visible traversal prompts.
- X: jump or Web Zip when available.
- R2: sprint and swing.
- L2 plus R2: Zip to Point.
- Square: standard attack.
- Triangle: Web Strike or contextual action.
- Circle: dodge or roll.
- R3: show objectives and scan the nearby environment.
Open and use the original PS4 gadget wheel
Hold L1 to open the gadget wheel, then move the right stick toward the gadget you want. Release L1 after selecting it and press R1 to fire the equipped gadget. The original PS4 release uses L1 for selection and R1 for firing; do not apply the later remaster control option that moves the wheel to R1 unless you are playing a different edition.
Once you have selected and used two different gadgets, double-tap L1 to switch between the current gadget and the previously used gadget. This is useful when alternating between two tools during a wave. If the shortcut appears not to do anything, select two different gadgets through the wheel first, then fire each one before trying the double tap again.
You can use L1 together with R1 to yank or throw a nearby environmental object when a suitable object and target are available. This is separate from opening the gadget wheel: holding L1 alone selects a gadget, while pressing L1 and R1 together performs the environmental throw input. Use environmental objects when enemies are grouped or when you need to interrupt a dangerous attacker.
- Hold L1 and select a gadget with the right stick.
- Press R1 to fire the selected gadget.
- Double-tap L1 to swap with the previously used gadget after two gadgets are selected.
- Use L1 plus R1 for an available environmental yank or throw.
Read health, Focus, gadgets and ammunition
Spider-Man's health and Focus are shown in the combat HUD. Focus builds through successful attacks and supports both healing and finishers. Press Down on the D-pad to heal when sufficient Focus is available. A finisher is performed with Triangle and Circle together when the finisher prompt is active. Use healing before health reaches a critical level; waiting until the last moment risks being interrupted by a ranged shot or melee attack.
The HUD also shows the ammunition or charges for the currently available gadgets and web shooters. Check these indicators before starting another enemy wave, especially if you have been relying on one crowd-control gadget. Gadget charges and web ammunition are gameplay resources, not permanent mission limits, so continue attacking and repositioning rather than abandoning a fight because one tool is empty.
Focus is earned most consistently by staying active without taking hits. Dodging gunfire, launching enemies into the air and maintaining attacks build Focus while reducing the chance of being surrounded. When several enemies are present, reserve a finisher for a high-threat opponent or use healing if Spider-Man's health has dropped substantially.
- Watch health and Focus during every combat wave.
- Press Down on the D-pad to heal when the Focus requirement is met.
- Press Triangle and Circle together when a finisher prompt is available.
- Check gadget charges before relying on a particular tool.
Understand objective markers, the map and nearby activity
The active story objective is shown as a yellow marker in the world and on the map. After a conversation or cutscene, follow that marker rather than continuing toward an old destination. The Touch Pad opens the map, where you can inspect districts, story missions and optional activities that have been revealed. You can place a map marker on an available destination when you want a route to a particular activity instead of the current story objective.
The game reveals optional content progressively. Crimes and other nearby activities can appear as alerts while you are moving through the city, and R3 can scan the surrounding area for relevant points of interest. Depending on the current HUD display and activity, nearby indicators may appear in the radar or minimap area. Use the main map to confirm the activity and district rather than assuming every alert is part of the story.
During the opening missions, follow the yellow story objective unless an optional activity is directly on your route. Crimes are optional interruptions, not requirements for continuing the main campaign. If you leave free roam for a story mission, finish the active objective before searching for side activities; the game will return you to free exploration when that story sequence allows it.
- Follow the yellow story marker for campaign progress.
- Use the Touch Pad to inspect the full map and optional activities.
- Use R3 to scan nearby surroundings and refresh objective information.
- Treat crimes and other alerts as optional unless the mission explicitly requires them.
Recover when a fight becomes crowded
When the danger indicator flashes, press Circle and move away from the incoming attack. If several enemies are surrounding Spider-Man, press X to jump and use L2 plus R2 on a highlighted point to reach a wall, ledge or other vertical position. This creates space and lets you identify the source of gunfire before re-entering the encounter.
Prioritize ranged enemies and anyone using a dangerous weapon. Approach them with a Web Strike, use a gadget to interrupt the group, or throw a nearby object with L1 plus R1 when the environment provides one. Environmental throws and gadget attacks are especially useful when ordinary melee strikes would leave Spider-Man exposed to a second enemy.
If you lose track of Spider-Man in a crowded arena, stop attacking for a moment, dodge toward open space and use the right stick to restore your view of the arena. Re-enter with an aerial attack, Web Strike or gadget instead of trading repeated ground blows. If health is low, create distance first and then heal with Down on the D-pad rather than attempting a risky finishing combo.
- Dodge immediately when the danger indicator appears.
- Use X and L2 plus R2 to move vertically and escape a crowd.
- Deal with ranged or high-threat enemies before ordinary melee enemies.
- Use Web Strike, gadgets and environmental throws to re-enter safely.
- Create distance before healing.
Before you move on
- You can jump or Web Zip with X, swing and sprint with R2, and Zip to Point with L2 plus R2.
- You can attack with Square, Web Strike with Triangle, dodge with Circle and use R3 to display objectives and scan nearby activity.
- You can open the gadget wheel with L1, fire with R1 and quick-switch between the current and previous gadgets by double-tapping L1 after selecting two gadgets.
- You know that Down on the D-pad heals when Focus is available and that Triangle plus Circle performs a finisher when prompted.
- You can open the map with the Touch Pad, follow the yellow story marker and distinguish optional crimes from required story objectives.
- You can escape a crowded fight by dodging, moving vertically, identifying ranged enemies and returning with a gadget, Web Strike or environmental throw.
References for this chapter
- Marvel’s Spider-Man — Insomniac Games official page
- Marvel's Spider-Man/Controls — StrategyWiki
- How to quick-switch gadgets in combat? — Marvel's Spider-Man PS4 discussion
- Controls - Becoming Spider-Man - The Basics — Gamer Guides
- The Main Event — Main Story Walkthrough — Gamer Guides
- Marvel's Spider-Man Complete Controls Guide for PS4 & PS5 — Outsider Gaming
Act I — The Heist and Opening Missions: Swinging in, basic combat, first collectibles
The original PS4 base campaign begins with Clearing the Way, followed by The Main Event, My OTHER Other Job and Keeping the Peace. The Heist is not the opening mission; it is a later City That Never Sleeps downloadable episode. Use the first missions to learn swinging, wall movement, web attacks, dodging, focus, finishers and environmental takedowns. Keeping the Peace introduces surveillance towers, crimes and the first backpack, while My OTHER Other Job introduces Peter’s lab projects and the skill tree. Collect the story-route backpack and stop nearby crimes, but leave broad collectible cleanup until more of the map and upgrade systems are available. Research Stations arrive later through Harry’s Passion Project, and their fast-travel usefulness depends on the story unlock rather than simply reaching the rooftop.
1. Begin Clearing the Way and reach Fisk Tower
The original PS4 story opens with Clearing the Way. Follow the yellow objective marker across the rooftops and construction area rather than trying to explore the city. Hold R2 to swing, steer with the left stick and release or press X near the end of a swing when you need to change height or direction. If Spider-Man loses momentum, press X to jump toward a wall or rooftop, then continue from that higher position.
At the construction site, enter the marked combat area. The first Fisk enemies are basic melee thugs, making this a safe place to practise Square attacks, Circle dodges and Triangle web strikes. A web strike closes distance and can place Spider-Man near a target quickly. When an enemy is beside a wall, vehicle or other solid object, web him into that surface if the prompt is available. Environmental attacks and takedowns remove enemies without requiring a long ground combo.
Do not leave the marked tutorial route to search for backpacks. Clearing the Way is a controlled introduction to traversal and combat, and optional city activities are not the priority until the story opens the wider map.
- Complete the traversal route to the Fisk construction site.
- Practise attacks, dodges, web strikes and environmental web attacks.
- Stay on the mission route and leave optional collectibles for later.
2. Advance through The Main Event and use vertical movement
The Main Event continues inside Fisk Tower. Move from the entrance toward the elevator area and follow the objective marker to the upper floors. The mission introduces the Focus meter: attacking builds Focus, aerial attacks build it efficiently, and a full Focus segment can be spent on a finisher with Triangle plus Circle when close to a vulnerable enemy. Focus can also be used to heal with Down on the D-pad, so do not spend every available finisher if your health is falling.
When the police elevators are disabled, open the elevator shaft and climb the wall. Press toward the wall to crawl upward; holding R2 lets Spider-Man run up the surface more quickly. Enter the vent when Triangle appears, follow the linear duct and exit at the next marked opening. At the balcony, use L2 and R2 together for a point launch to cross directly to the enemies or platform indicated by the marker.
The server-room approach contains a stealth section. Stay on the upper route, use the marked perches and perform silent takedowns only when the prompt appears. If the room becomes alerted, stop trying to preserve stealth: retreat vertically, web-zip away from the group and re-enter the fight from above. The mission’s final encounter leads into the Fisk boss sequence. During Fisk’s arena fight, dodge his attacks, throw the highlighted environmental objects back at him and attack after he is staggered. Use finishers on the accompanying thugs when available so they cannot surround you.
After the boss sequence and escape, allow the story scenes to finish. The campaign then moves to Peter’s second job and begins introducing the city systems.
- Use Focus for finishers or healing instead of ignoring the meter.
- Climb the elevator shaft and follow the vent route to the server-room approach.
- Use stealth where practical, but switch to vertical combat if detected.
- Defeat Fisk and complete the escape sequence.
3. Complete My OTHER Other Job and spend the first skill point
When My OTHER Other Job begins, travel to Otto’s lab and enter through the marked entrance. This mission temporarily controls Peter inside the laboratory. Inspect the prosthetic arm, then complete the circuit project by placing and rotating pieces so the current reaches the destination. Later projects may require matching the displayed voltage; use only the pieces that satisfy the puzzle’s stated requirement.
Move on to the spectrograph station and complete the matching-pattern project. These laboratory activities are separate from street combat and award XP or research-related progress. If additional projects are available in the lab, they are optional at this point; complete the required projects, then follow the exit marker.
A skill point becomes available around this early progression. Open the Skill Tree and purchase one available node. Any branch is usable, but a new player who wants safer fights should favour early Defender or Webslinger options that improve combat survival or aerial movement. The game does not require one specific branch to continue.
- Enter Otto’s lab through the marked entrance.
- Complete the required circuit and spectrograph projects.
- Spend the newly available skill point before leaving the lab.
- Return to Spider-Man and begin Keeping the Peace.
4. Repair the first surveillance towers in Keeping the Peace
Keeping the Peace starts at the police station. Go to the first marked surveillance tower and interact with its panel. The tower puzzle shows coloured waveforms; use the left and right sticks to adjust the white waveform until it matches the coloured signal. The exact stick positions vary by puzzle, so compare the shapes rather than moving both sticks randomly.
After restoring the first tower, follow the new marker to the roof and use R3 to scan the area. This establishes the police-network activity loop and begins locating nearby crimes. At the first crime, approach the marked group and open with a web strike or aerial attack. Enemies with firearms require immediate dodging; use the Spider-Sense warning and disarm gunmen with the prompted web attack when the reticle is available.
A brute appears in this early sequence. Do not stand in front of him trading punches. Clear ordinary thugs first if the group is crowded, then dodge the brute’s heavy attack and punish him after the swing. Webbing him to a wall or object is useful when the environment permits it. Once the crime is complete, collect the Crime Token and return to the tower route.
- Repair the first surveillance tower by matching the waveforms.
- Scan for the nearby crime after restoring the tower.
- Disarm or disable gunmen quickly.
- Keep moving around the brute instead of trading ground attacks.
5. Collect the first backpack during Keeping the Peace
After the next surveillance-tower objective, follow the green activity marker to the nearby rooftop. The backpack is webbed to a wall and emits an audible tracking signal as you approach. Interact with it to collect the first backpack. This story-route backpack awards a Backpack Token, XP and a short memory item from Peter’s past; it also teaches how the backpack icons are represented around the city.
This is the correct point to establish a light collectible routine. Collect the story backpack and, if another backpack or landmark is directly beside your current route, take the short detour. Do not sweep every visible icon yet. Tokens will later be used for suits, gadgets and upgrades, but the opening story is still unlocking systems and map activities.
Continue to the remaining surveillance towers. Each tower uses the same waveform-matching idea, but the stick positions differ. When all required towers and the mission’s crimes are complete, follow the final objective and let Keeping the Peace conclude.
- Reach the green rooftop activity marker.
- Investigate and collect the first backpack.
- Receive the Backpack Token and XP reward.
- Finish the remaining tower and crime objectives.
6. Continue the story before broad cleanup and later research activities
After Keeping the Peace, follow the yellow story markers through the next Act I missions. Landmarks and other activities become available as the map expands. A landmark interaction uses the camera: equip it with Up on the D-pad, aim with the camera controls and take the photograph when the framing prompt confirms the correct subject. Treat the first landmark as a tutorial, not as a signal to clear every district immediately.
Harry’s Passion Project occurs later in Act I, after several additional missions. It introduces the first Research Station activity. At the station, read the task description before moving: the introductory station requires tracking and photographing pollution sources at different heights, so use swinging, wall movement and web-zips to reach the indicated plume. Completing the station awards a Research Token and registers the activity on the map.
Research Stations can become useful travel anchors, but do not assume that merely opening one immediately enables subway fast travel. Continue the story until fast travel is unlocked, then use the map or an available subway location to shorten long returns. Until that point, keep momentum by swinging between rooftops and use web-zips whenever Spider-Man begins to lose height.
- Follow the yellow story marker after Keeping the Peace.
- Complete the first landmark tutorial when the story presents it.
- Reach Harry’s Passion Project later in Act I before expecting Research Stations.
- Use the map to separate story, crime and collectible markers.
- Wait for the story’s fast-travel unlock before relying on subway travel.
Before you move on
- Clearing the Way and The Main Event are complete, including the Fisk Tower escape and Fisk boss sequence.
- My OTHER Other Job is complete, and at least one skill point has been spent.
- Keeping the Peace is complete, including the required surveillance towers and early crime encounters.
- The first backpack has been collected from the rooftop route during Keeping the Peace.
- The story has advanced into the wider Act I map progression, with yellow story markers and optional activities visible.
- Harry’s Passion Project has not been treated as an opening mission; it is completed later when the story introduces Research Stations.
References for this chapter
- Marvel's Spider-Man Walkthrough & Guide — Fisk Hideout — GameFAQs
- Keeping the Peace — Marvel’s Spider-Man Walkthrough & Guide, GameFAQs
- Something Old, Something New — Marvel's Spider-Man Walkthrough & Guide, GameFAQs PS4
- Harry’s Passion Project — Marvel’s Spider-Man Walkthrough, Neoseeker
- Marvel’s Spider-Man/Backpacks — StrategyWiki
- Marvel’s Spider-Man Swings to PS4 September 7 — PlayStation.Blog
Act I continued — Midtown & Fisk introduction: stealth basics, Fisk Hideouts
After The Main Event, My OTHER Other Job and Keeping the Peace, Peter reaches Something Old, Something New and follows Yuri’s lead to a Fisk construction site in Greenwich. The resulting Fisk Hideout is a required early story encounter, not an optional activity: clearing its six waves advances the campaign to Landmarking. The mission introduces Impact Web, perch and Web Strike takedowns, base bonus objectives and Base Tokens. Thin the opening group from above, then prepare for open combat once the hideout becomes alerted. Prioritize firearms, attack shielded guards from behind or after a dodge-through, and launch or web stun-baton guards before committing to close-range combos. The bonus objectives—web five enemies to walls and perform ten finishers—are optional. Missed objectives can be attempted during a later replay of the completed hideout.

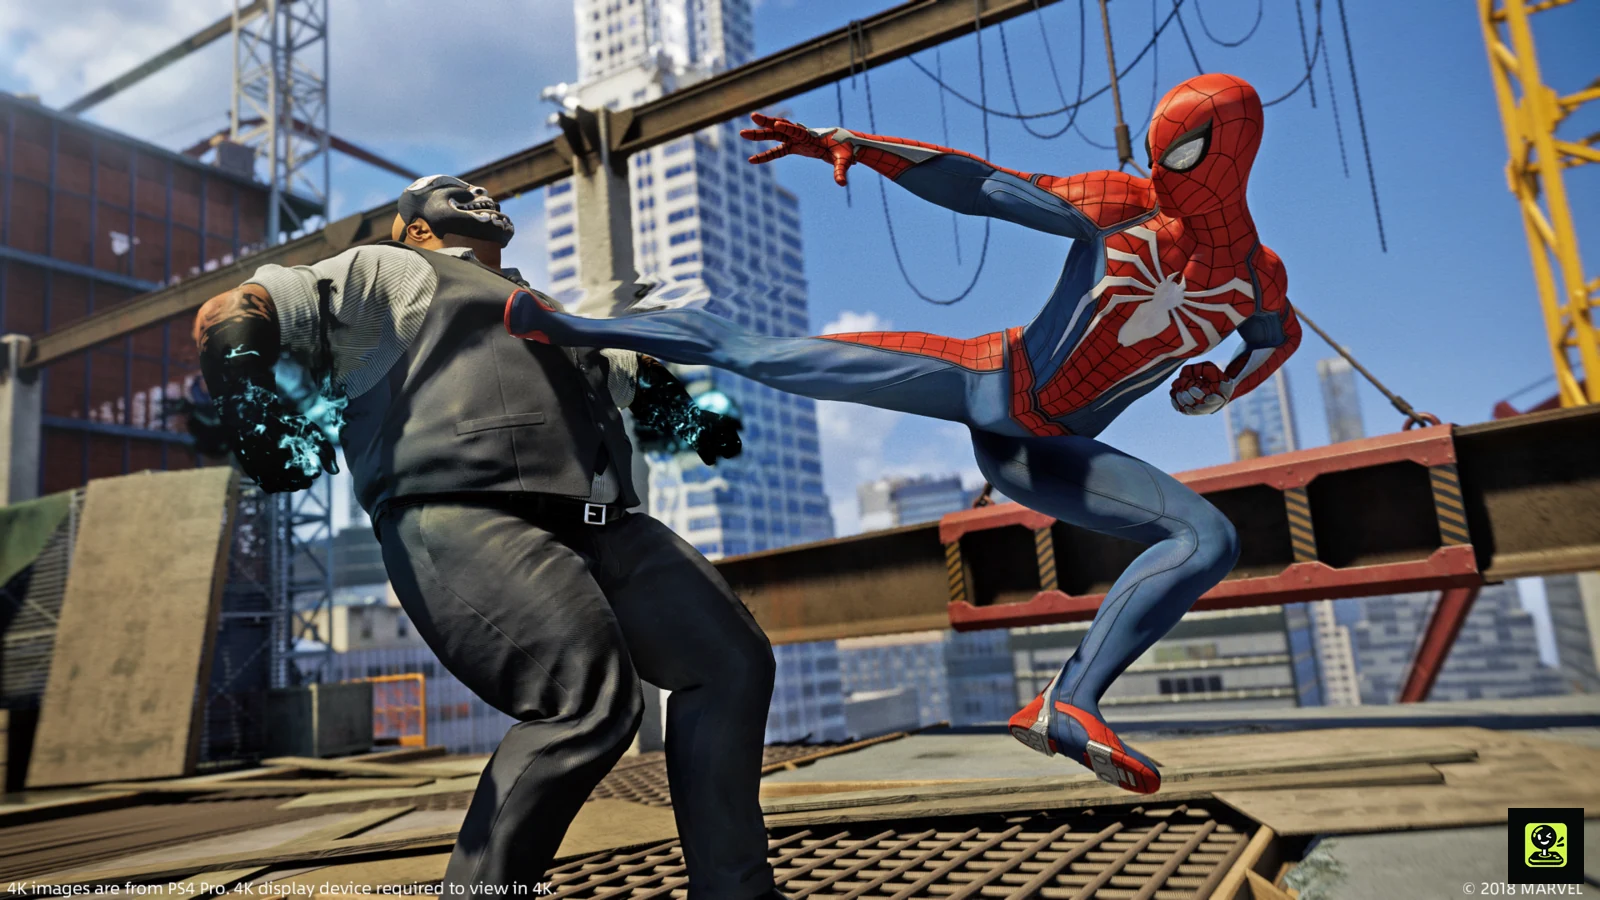
Reach the required Greenwich construction-site encounter
Continue the main story through The Main Event, My OTHER Other Job and Keeping the Peace. When Something Old, Something New directs Spider-Man toward Fisk’s construction operation, follow the marked objective to the construction site in Greenwich. This encounter is part of the campaign route and must be cleared before the next story objective, Landmarking, becomes available.
At the site, the game introduces the Impact Web gadget through an on-screen tutorial. Follow the displayed crafting instruction rather than leaving the area or attempting to use a later gadget. Once Impact Web is available, hold L1 to open the gadget wheel, move the right stick to select it and release L1. Press R1 to fire the selected gadget. Impact Web can rapidly pin an ordinary enemy to a nearby wall or other solid surface, or knock the target backward when no suitable surface is behind it.
Before attacking, look over the construction area. Upper beams, walls and vertical supports provide perches, web-zip destinations and retreat routes. The encounter begins with an opportunity to use stealth, but the objective is ultimately to defeat all six waves. Do not treat a failed stealth attempt as a mission failure; the hideout is designed to continue as a combat encounter once the guards are alerted.
- Something Old, Something New has directed Spider-Man to the Greenwich construction site.
- The on-screen tutorial has been followed to obtain Impact Web.
- Impact Web can be selected with the L1 gadget wheel and fired with R1.
- Upper beams, walls and retreat routes have been identified before the first attack.
Thin the opening group from above
Use R3 to scan the construction site and reveal nearby enemies. Move between upper perches and wait for a guard to become isolated. Press Square when the perch-takedown prompt appears, or press Triangle for a Web Strike when Spider-Man is positioned to strike from a distance. These attacks reduce the first group before the main brawl begins.
Use Impact Web on enemies standing near walls or other solid surfaces. The hideout has an optional bonus objective for webbing five enemies to walls, so the opening group is a convenient place to make progress. The enemy used during the initial Impact Web tutorial may not count toward that bonus objective, so continue pinning additional guards rather than assuming the tutorial action completed the requirement.
Watch the warning indicators around Spider-Man. If a guard begins investigating, move to another perch or wait for the search to pass. If the enemies fully detect Spider-Man, abandon stealth and fight from a mobile position. The first wave can be thinned quietly, but the later waves transition into open combat; trying to remain hidden through the entire six-wave activity wastes time and leaves Spider-Man vulnerable to gunfire.
- R3 has been used to scan the area.
- The first group has been reduced with perch or Web Strike takedowns where practical.
- Additional enemies have been pinned to walls if pursuing the bonus objective.
- Stealth has been treated as an opening advantage, not a requirement for all six waves.
Prioritize firearms when combat begins
When detection is broken, keep moving around the perimeter rather than standing in the center of the construction site. Spider-Sense warns of incoming attacks; press Circle to dodge, then continue the combo only after the immediate threat has passed. Gunmen should usually be addressed early because their shots interrupt attacks and remove health from outside the melee group.
Use Web Strike to close distance on a shooter or Impact Web to pin that shooter beside a wall. If no solid surface is available, dodge toward cover or move vertically until a better angle appears. Web-zip to a wall or beam when several enemies surround Spider-Man, then re-enter the fight from above or from the side.
Aerial attacks are safer than extended ground exchanges against a mixed group. Hold Square to launch a nearby enemy, then continue the aerial combo while watching for Spider-Sense warnings. Use environmental throw prompts whenever an object can interrupt a cluster or create room. Save gadget uses for gunmen, dense groups and dangerous targets rather than spending every charge on a single harmless melee guard.
- Gunmen are identified and pressured early.
- Circle is used in response to Spider-Sense warnings.
- Web-zip movement is used to escape encirclement or change attack angles.
- Environmental objects and Impact Web are used to interrupt high-threat targets.
Counter shields and stun batons
Shielded guards block ordinary frontal strikes. Do not repeatedly attack the shield. Dodge through or around the guard with Circle and attack the unprotected back, or move over the enemy to reach a safer angle. Once behind the shield, use ordinary strikes, an aerial launch or web attacks before the guard turns back toward Spider-Man.
Stun-baton guards punish careless close-range attacks. Hold Square to launch a nearby baton user, then continue the attack while the enemy is airborne. Webbing the guard before engaging is another safe option when a wall or solid surface is nearby. If other enemies are close enough to interrupt the launch, dodge away first or use a gadget to separate the group.
As the waves progress, keep the camera moving so firearms, shield users and baton users do not disappear behind Spider-Man. If a target is buried in the crowd, do not force a frontal combo. Web-zip to a wall, turn toward the group and re-enter with an aerial attack, Web Strike or environmental throw.
- Shielded guards are attacked from behind or after a dodge-through.
- Stun-baton guards are launched or webbed before sustained melee attacks.
- Ranged enemies remain visible while Spider-Man moves around the arena.
- Crowded targets are separated before attempting a close-range sequence.
Survive all six waves and complete the optional bonuses if desired
The Greenwich Fisk Hideout is cleared by defeating six waves of Fisk’s men. After each wave, take a short moment to relocate to a wall, beam or open section of the site. Scan with R3, identify the next gunmen and avoid rushing directly into the center of the incoming group.
The two bonus objectives are to perform ten finishers and web five enemies to walls. Finishers become available when the Focus meter is sufficiently charged and the prompt appears. Build Focus with uninterrupted attacks, aerial combos and safe dodges, then use finishers on dangerous targets or when the crowd begins to close in. These objectives are not required to advance the story, but each completed bonus objective adds an extra Base Token to the hideout reward.
If an objective is missed, continue fighting and finish the six waves. The completed hideout can be replayed from its map marker, allowing the bonus objectives to be attempted later. During the first clear, survival and wave completion matter more than forcing a finisher while Spider-Man is surrounded or spending health to reach a wall-pin opportunity.
- All six enemy waves have been defeated.
- Five additional enemies have been webbed to walls if pursuing that bonus objective.
- Ten finishers have been performed if pursuing that bonus objective.
- Any missed bonus objective has been left for a later replay rather than risking the campaign clear.
Confirm the story transition to Landmarking
After the final wave is defeated, wait for the hideout completion screen and record the Base Tokens awarded. Clearing the hideout grants the normal Base Token reward, while the two completed bonus objectives provide additional Base Tokens. These rewards help with later suit, gadget and upgrade purchases, but the bonus rewards are not required to continue the campaign.
Return to free roam and follow the next marked story objective, Landmarking. This is the correct progression after the Greenwich construction-site hideout. The Main Event is an earlier campaign mission and should not be placed after this encounter.
For later Fisk Hideouts, use the same broad routine—scan from above, remove isolated enemies, deal with firearms quickly, bypass shields, launch or web stun-baton guards and use vertical movement when the arena becomes crowded. Later hideouts can contain different enemy combinations, so adapt the priority order to the weapons actually present rather than assuming every base uses the same group.
- The six-wave hideout completion screen has appeared.
- Base Tokens from the clear and any completed bonus objectives have been recorded.
- Landmarking is the next marked story objective.
- The Main Event is correctly recognized as an earlier mission.
- The campaign has advanced without requiring DLC, remaster content or later-game gadgets.
Before you move on
- The required Greenwich construction-site Fisk Hideout has been cleared through all six enemy waves.
- Impact Web has been obtained and can be selected with L1 and fired with R1.
- The player has used perch or Web Strike takedowns during the opening stealth section.
- Firearms are being prioritized when open combat begins.
- Shielded guards can be bypassed with repositioning, while stun-baton guards can be launched or webbed before attacking.
- The optional objectives—web five enemies to walls and perform ten finishers—are either complete or intentionally reserved for replay.
- The next story marker is Landmarking, not The Main Event.
- The chapter remains limited to the original 2018 PS4 release and does not require DLC or remaster-specific content.
References for this chapter
- Something Old, Something New — Marvel's Spider-Man Walkthrough & Guide, GameFAQs PS4
- Fisk Hideout — Marvel's Spider-Man Walkthrough & Guide, GameFAQs PS4
- Fisk Hideout — Marvel's Spider-Man PS4 Main Story Walkthrough, Gamer Guides
- Fisk Hideout — Marvel's Spider-Man Walkthrough, Neoseeker
- Marvel's Spider-Man/Fisk Hideout — StrategyWiki
Managing Side Activity: Crimes, Challenges and Early Token Economy
Crimes and other side activities are optional during the main campaign, but they provide the tokens needed for suits, gadgets, suit mods and gadget upgrades. Crimes begin after the Keeping the Peace mission and become easier to track as surveillance coverage is restored. Later story progress adds new criminal factions and more dangerous enemy combinations, so the activity roster expands during the campaign. Stop for a nearby crime when you are already travelling through the area or when you need Crime Tokens for a planned purchase; ignore distant alerts while following a story objective. There are six base-game token types, and they are not interchangeable. Check the exact requirement for a suit or upgrade before spending scarce categories. Complete convenient crimes, collectibles and research activities between story missions, then use the map and district progress screens to finish anything remaining after the ending.
1. Unlock and recognise ambient crimes
Ambient crimes become available after completing Keeping the Peace. During that mission, Spider-Man begins restoring the city’s surveillance coverage. As surveillance towers are activated, crimes in covered areas can be identified on the map and approached through the nearby marker. Until a relevant tower is active, a crime may be harder to locate or may not appear as a normal map event.
Crime events are optional. They do not block the main story, and ignoring one does not permanently remove the activity from the game. The same general crime system continues to generate events later, so you do not need to abandon a story mission to chase an alert on the opposite side of Manhattan.
Story progress expands the available crime roster. Early events involve ordinary thugs; later portions of the campaign introduce crimes involving the Inner Demons, escaped prisoners and Sable mercenaries. This changes the enemy groups and equipment you face, but there is no need to treat every later crime as a formal level-scaling test. Prepare for the faction and enemy mix shown in the event rather than grinding every alert immediately.
- Complete Keeping the Peace before expecting ordinary crime markers.
- Activate surveillance towers to improve crime visibility in each area.
- Treat crimes as optional interruptions, not required story objectives.
- Expect additional factions and enemy combinations as the campaign advances.
2. Decide whether to stop a crime or continue the story
Stop for a crime when its marker is close to your current route, when you are already travelling through that district, or when a Crime Token will complete a specific suit, gadget or upgrade requirement. A nearby event can usually be handled without meaningful detour because Spider-Man can reach it quickly by web-swinging or web-zipping between buildings.
Continue toward the main objective when the crime is far away, when a mission has placed you inside a tightly scripted sequence, or when you are trying to preserve the campaign’s pacing. The game keeps producing opportunities, and later free-roam remains available for cleanup. Chasing every alert as soon as it appears creates unnecessary backtracking and can delay access to more useful activities unlocked by the next story mission.
Before entering a crime, approach the marker and press R3 to display its bonus objectives. These can ask for actions such as using a particular attack, avoiding damage or defeating enemies in a specified way. Treat the objectives as optional rewards: complete them when they fit your normal approach, but do not turn a simple street fight into a risky attempt at all three.
- Prioritise crimes already near your waypoint.
- Ignore distant alerts during a story sequence.
- Press R3 before the fight to review bonus objectives.
- Use the map after missions to identify convenient remaining crimes.
3. Know what each token type funds
Backpack Tokens come from finding Spider-Man’s backpacks. Landmark Tokens come from photographing marked locations. Crime Tokens come from stopping ambient crimes. Base Tokens come from clearing enemy bases. Challenge Tokens come from Taskmaster’s combat, stealth, traversal and related challenge activities. Research Tokens come from research stations, science minigames and pigeon-related research activities. These are the six base-game token categories relevant to suits, gadgets, suit mods and upgrades.
Tokens are separate resources rather than one shared pool. A large total of one category cannot replace a missing category in a crafting requirement. Open the Suits, Gadgets or Suit Mods menu before spending and identify the next item you actually want. This prevents the common mistake of spending all of one category on a cosmetic item and then lacking that same category for a practical upgrade.
Research Stations have an additional practical benefit: after a station’s activity is completed, its location becomes a fast-travel point. That makes research work especially useful when you are beginning a district cleanup route, even if you do not immediately need every Research Token.
- Backpack: collect marked backpacks.
- Landmark: photograph marked locations.
- Crime: stop active street crimes.
- Base: clear enemy bases.
- Challenge: complete Taskmaster activities.
- Research: complete stations and related research activities.
- Check exact token requirements before crafting.
4. Spend early rewards without creating a shortage
Use early Backpack and Crime rewards on upgrades that improve ordinary play: survivability, gadget capacity, crowd control or a suit ability you expect to use often. There is no single mandatory purchase order, because the best choice depends on your skill build and difficulty setting, but practical combat improvements generally help more often than unlocking several cosmetic suits at once.
Keep Base and Challenge Tokens in reserve until you have identified a purchase that uses them. Base Tokens are earned from clearing specific enemy bases, while Challenge Tokens depend on challenge completion and performance. You can revisit challenges later with more skills and gadgets, so a low early score does not prevent story completion. Likewise, do not clear a base merely because its tokens are available if you have no current use for them and the activity would pull you far from your route.
Do not hoard every token indefinitely. For a campaign playthrough, spend when an upgrade clearly improves your next stretch of missions. For 100% completion, steadily clear activities and buy the remaining unlocks as their requirements become affordable. The important safeguard is to inspect the requirement panel first and avoid spending a scarce category on an item you do not intend to use.
- Choose a target upgrade before spending.
- Prioritise useful combat or gadget improvements during the story.
- Reserve Base and Challenge Tokens for planned purchases.
- Do not delay all spending if an upgrade will immediately improve survival.
5. Complete crimes by breaking up the enemy formation
At the start of a crime, identify ranged attackers, enemies separated from the main group and nearby walls or throwable objects. If the crowd surrounds Spider-Man, web-zip to a wall, rooftop or lamp post to regain vertical space. Re-enter with an aerial attack or target an isolated enemy instead of standing in the middle of several attackers.
Use web attacks to pin exposed enemies to walls or other surfaces when the environment allows it. Environmental throws are useful for interrupting clustered enemies and creating a moment to move. If an enemy begins a dangerous attack, dodge out of the line of fire rather than trying to finish the current strike. A short retreat followed by an aerial re-entry is safer than trading damage while surrounded.
Prioritise the threat that can disrupt the fight from a distance, then remove isolated targets with web-based or aerial takedowns. Do not chase a bonus objective if it forces you into crossfire. The main reward comes from stopping the crime, while optional objectives provide additional tokens only when their conditions are met.
- Locate ranged enemies and isolated targets first.
- Use walls and rooftops to reset distance.
- Pin enemies to surfaces when possible.
- Throw nearby objects to interrupt groups.
- Dodge instead of standing in an enemy cluster.
- Use R3 to confirm which bonus objectives remain.
6. Understand repeated crime rewards and failure recovery
A completed crime normally awards one Crime Token. Its optional objectives can add further rewards, with the full set allowing up to three Crime Tokens for that crime type or reward progression. In the original PS4 game, these bonus objectives are tracked cumulatively by crime type. After the relevant objectives have already been completed, a later crime of the same type may award only the standard token even if the on-screen event looks similar.
This is why repeatedly stopping crimes is useful for obtaining additional standard Crime Tokens, but it is not an unlimited way to earn every bonus reward again. If the crime display shows that objectives have already been fulfilled, concentrate on completing the event safely rather than trying to reproduce an old bonus condition.
If Spider-Man is defeated during a crime, the event can end for the moment or restart from a checkpoint depending on where the failure occurs. The missed event is not a permanent campaign loss; another crime can appear later. After a failed attempt, approach from above, use a crowd-control gadget if available, or simply continue the story and return when the activity reappears.
- Expect one standard Crime Token from a completed crime.
- Complete unclaimed bonus objectives when they are safe to attempt.
- Do not assume every repeat restores all bonus rewards.
- After failure, change your entry angle or loadout before retrying.
- Remember that missed crimes can return later.
7. Use a repeatable campaign and cleanup routine
After each major story mission, open the map and check the district around your next objective. Handle nearby crimes and collectibles while travelling, then inspect the Suits, Gadgets, Suit Mods and Skills menus. Select one practical next purchase instead of spending tokens randomly.
For a district cleanup route, activate surveillance coverage, complete nearby research work when available, collect convenient backpacks and landmarks, and stop crimes that appear along the route. Bases and challenges can wait until you have the skills and gadgets that make them comfortable. This order reduces unnecessary traversal because research stations also provide fast-travel points after completion.
After the story ending, use the district progress panels to identify unfinished activities. Clear one district at a time and compare the remaining icons with your token requirements. When the desired suits, gadgets and mods are unlocked and the chosen district categories show complete, move to the next district rather than repeatedly crossing the whole city.
- Review the map after story missions.
- Choose one next upgrade before spending.
- Use research stations to add fast-travel options during cleanup.
- Clear districts methodically instead of chasing random icons.
- Use district progress panels to verify optional completion.
Before you move on
- You know that ordinary crimes become available after Keeping the Peace and are tracked through surveillance coverage.
- You can distinguish Backpack, Landmark, Crime, Base, Challenge and Research Tokens.
- You inspect the next suit, gadget, mod or upgrade requirement before spending scarce tokens.
- You can view crime bonus objectives with R3 and understand that they may award additional tokens.
- You can complete a typical crime by separating enemies, using web-zip movement, dodging and exploiting environmental throws.
- You know that missed or failed crimes can return later rather than permanently blocking completion.
- For optional cleanup, the map and district progress panels show no remaining activities in the categories you intend to complete.
References for this chapter
- Marvel's Spider-Man Walkthrough & Guide — Crimes, GameFAQs
- Research Stations — Marvel’s Spider-Man Walkthrough & Guide
- How to Get Crime Tokens in Spider-Man, Prima Games
- Spider-Man tokens: How to get them and what they do, PC Gamer
- Marvel's Spider-Man (2018) Trophy Guide & Roadmap — PowerPyx
- Marvel’s Spider-Man releases on 7th September, Collector’s Edition revealed and more — PlayStation.Blog
Act II — Demons & Sable: New enemy behaviours and midgame mission flow
Act II changes the combat rhythm with Inner Demons, heavier ranged pressure and, later, Silver Sable’s armored forces. Follow the main missions from Dual Purpose through Reflection, then complete Out of the Frying Pan... to finish the act’s major escalation. Dual Purpose unlocks the Trip Mine and Demon Warehouse activities. Research Stations are useful for XP, Research Tokens and eventual fast travel, but you do not need to clear every district before continuing. During this chapter, prioritize ranged attackers, whip users, jetpack troops and armored Sable agents instead of attacking the nearest enemy. The original PS4 campaign does not require a separate flamethrower-or-gas counter in this sequence, so do not import enemy categories from another edition or guide. Use Perfect Dodge, aerial attacks against suitable targets, Electric Web, Web Bomb, Trip Mine and environmental throws to control mixed groups. Sable Outposts and Prisoner Camps become available after Out of the Frying Pan..., not at the start of Act II.
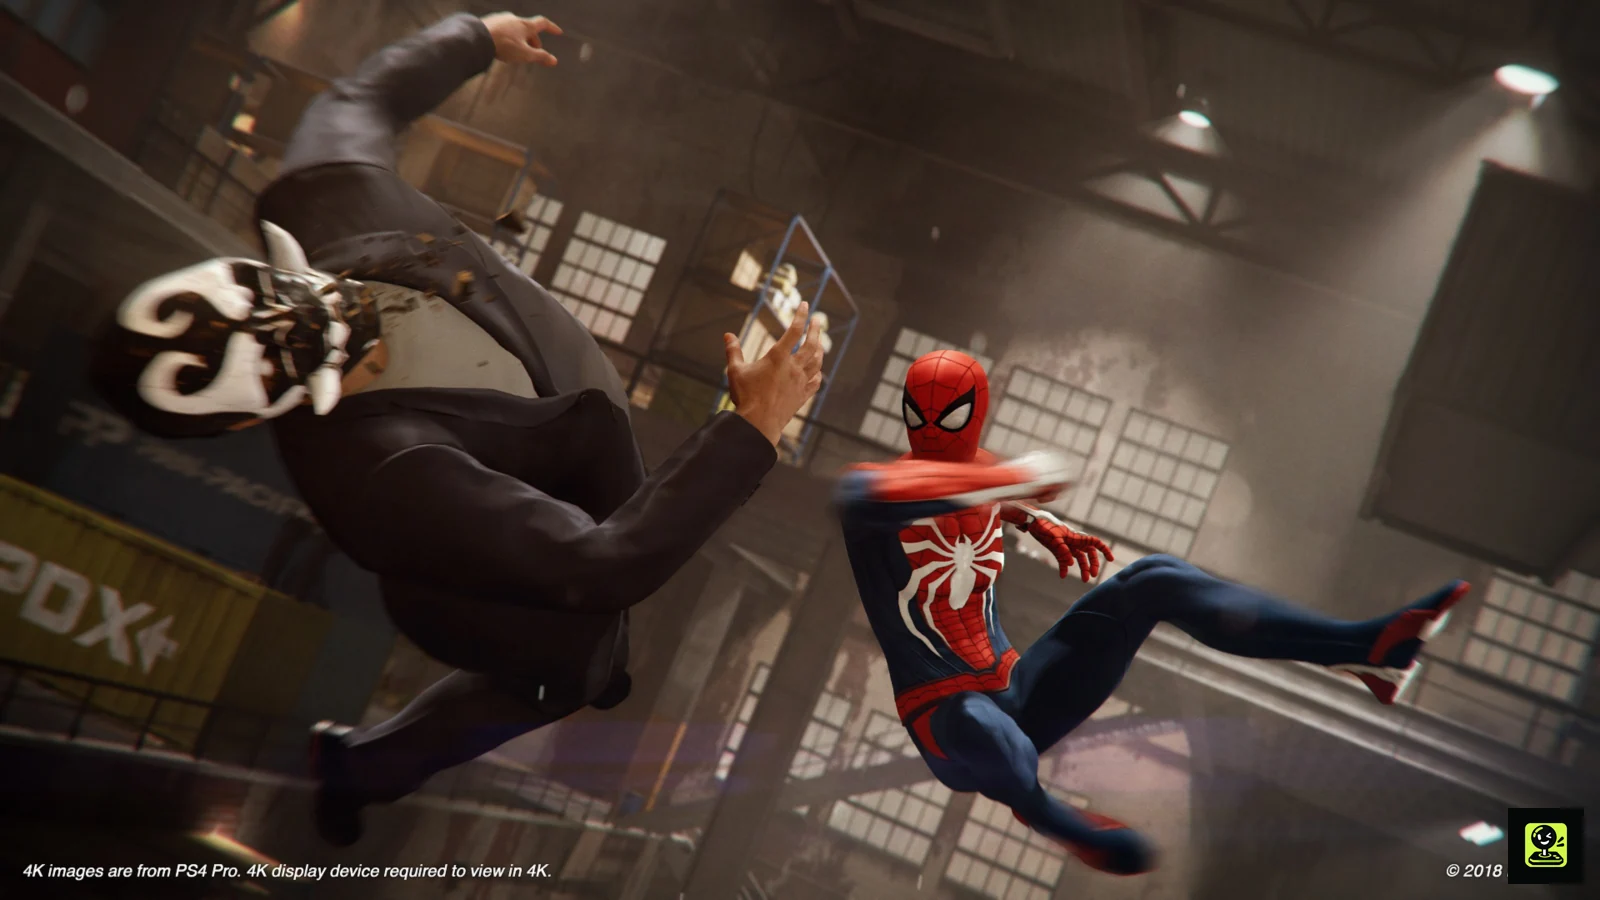
Complete Dual Purpose and unlock the Trip Mine
Travel to the recycling center and begin from the higher surfaces around the first Demon group. Use perch takedowns where the game marks them safe, and use a web distraction to separate a guard from a pair. If stealth fails, leave the center of the yard immediately and fight around walls, vehicles and elevated surfaces rather than standing among every enemy.
Inside the facility, scan for the junction boxes and use Electric Web on each one. Follow the wires and check behind crates or other obstructions when a box is not immediately visible. After entering the evidence room, inspect the marked evidence until the objective advances, then travel to Consolidated Shipping.
The game introduces the Trip Mine at Consolidated Shipping. Use it on the marked target first, then use mines or distractions to split the remaining guards. Eliminate the snipers before committing to open combat. In the office, inspect the paperwork and the map on the wall. The map unlocks Demon Warehouses, which are optional bases that award Base Tokens.
When the Whip Demon appears outside, do not continue a long ground combo. Throw a nearby object, use a Perfect Dodge, or web the enemy to a surface when possible, then attack during the opening. Finish the following Demon wave to complete the mission and trigger the Silver Sable story introduction.
- Use high ground and distractions during the opening stealth section.
- Activate every junction box with Electric Web.
- Inspect the office map to unlock Demon Warehouses.
- Use throwables or Perfect Dodge against the Whip Demon.
Handle Inner Demon weapons in the correct order
Inner Demons combine ordinary melee fighters with rocket launchers, snipers, whip users and Brutes. Remove rocket launchers and snipers first whenever the arena permits it. Their attacks interrupt combos and can drain health while Spider-Man is focused on a nearby target.
Whip Demons are dangerous when you remain airborne beside them. Break away when the whip user enters the fight, then use a throwable or Perfect Dodge to create an opening. Basic enemies can be launched and kept in the air, but aerial attacks are not a universal answer to every Demon type.
Against Brutes, web them repeatedly before attempting a throw, or use environmental objects and gadgets to build control. If the group surrounds you, web-zip to a wall or rooftop, wait for the ranged threats to reveal themselves, and re-enter from an angle that keeps the main group in front of you. A Web Bomb is valuable when several enemies are close together; Trip Mine is better for separating patrols or attaching two enemies to one another.
- Target rockets and snipers before ordinary melee enemies.
- Break off aerial strings near Whip Demons.
- Use Brute webbing and environmental attacks instead of repeated punches.
- Retreat vertically when the group surrounds you.
Spend midgame skill points on defense, aerial control and finishers
Perfect Dodge is a strong priority in the Defender tree if it is not already unlocked. Watch for the blue Spider-Sense indicator and press Circle at the last moment. Dodge Window makes the timing more forgiving and helps against gunfire, melee attacks and whip strikes. Additional Defender improvements that improve Focus or survivability are worthwhile before the later multi-wave missions.
In the Webslinger tree, prioritize skills that improve air launches, aerial control and aerial finishers. Ordinary enemies are easier to manage when they are kept away from ground weapons, and aerial attacks help build Focus without standing in the middle of the formation. Do not force aerial attacks against whip users or armored enemies that can interrupt them.
Keep Electric Web and Trip Mine available before major fights. Web Bomb is a strong crowd-control option if it is already unlocked, while Impact Web remains useful for removing an exposed enemy against a wall. Spend tokens on upgrades that improve control or gadget capacity before buying a purely cosmetic suit if a difficult mission is causing repeated failures.
- Unlock or improve Perfect Dodge and Dodge Window.
- Prioritize aerial control for ordinary enemies.
- Carry one crowd-control gadget and one single-target control gadget.
- Favor useful gadget capacity upgrades over unnecessary cosmetic spending.
Use Sable counters when the story introduces their forces
Sable soldiers become a serious combat presence during the later Act II missions. Their armored agents can resist ordinary web control, so do not waste repeated Web Shooter shots on a protected target. Electric Web can temporarily disable armored agents, while environmental throws, hard knockdowns and attacks that launch or slam them create more dependable openings.
Sable jetpack units stay airborne and can attack from outside your immediate combo. Use Web Strike to reach them, then continue the aerial attack or web them before using the throw prompt when available. Trip Mine is useful against an exposed jetpack soldier, but do not assume it will control every armored Sable target.
Sable drones and ranged units increase the pressure on the ground. Destroy or disable the airborne or long-range threat before spending Focus on a finisher against a basic soldier. When Demons and Sable forces occupy the same arena, let their attacks divide the group if the mission allows it, then remove whichever faction has the most dangerous ranged support.
The original PS4 Act II sequence does not need a separate flamethrower-or-gas enemy procedure. Treat the verified threats—armor, jetpacks, drones, rockets, snipers, whips and Brutes—as the important counters for this chapter rather than importing labels from another game or later content.
- Use Electric Web or hard knockdowns against armored Sable agents.
- Reach jetpack units with Web Strike or Trip Mine.
- Prioritize airborne and ranged threats.
- Do not rely on ordinary webs against web-resistant armor.
Clear only a compact activity cluster during Act II
After Dual Purpose unlocks Demon Warehouses, open the map and choose activities close to the next yellow story marker. A Research Station is a good first stop because its mission awards Research Tokens and XP. After fast travel becomes available later in the campaign, completed Research Stations can also serve as fast-travel destinations; completing one does not by itself mean the entire fast-travel system is already active.
If you need Base Tokens, clear one nearby Demon Warehouse after the Research Station. Complete its bonus objectives only when they fit your normal combat plan; they are optional and are not required for the main story. Collect a Backpack or Landmark while swinging between activities, and stop for a Crime when it is directly on the route or when you specifically need Crime Tokens.
Do not treat Sable Outposts or Prisoner Camps as required Act II activities at this point. They become available after Out of the Frying Pan..., when the city situation changes. Likewise, Taskmaster challenges are optional and can be postponed until more skills and gadgets are available. Two or three nearby activities are enough to improve the build without turning every story transition into a full district clear.
- Use Research Stations for XP, Research Tokens and future travel convenience.
- Clear a Demon Warehouse only when Base Tokens or practice are useful.
- Leave Sable Outposts and Prisoner Camps until they unlock after Out of the Frying Pan....
- Return to the yellow story marker after the chosen local activities.
Finish Act II through Out of the Frying Pan... and recover from failure
Continue the main missions in order: Hidden Agenda, A Fresh Start, Dinner Date, Up the Water Spout..., What’s in the Box?, Back to School, Spider-Hack, Uninvited, Strong Connections, First Day, Collision Course, The One That Got Away, Breakthrough, Reflection, then Out of the Frying Pan.... The final mission in this sequence moves the action to the prison escape and introduces prisoner enemies, including armed units, Brutes, shields, stun batons and fire hazards. Prioritize rocket launchers and snipers, avoid standing in burning areas, and use Web Bomb or environmental objects when several prisoners cluster together.
During the later chase sections, follow the objective route rather than trying to fight the major villains encountered in the set pieces. When the game places Spider-Man on a wall or in a vertical chase, keep moving and use the indicated dodge direction to avoid incoming attacks. These sequences are progression events, not optional combat arenas.
If a wave defeats you, the PS4 release returns you to a recent checkpoint with the story objective intact. Before retrying, change one factor: equip Electric Web or Web Bomb, buy a defensive skill, attack ranged enemies first, or begin from a higher surface. Spend Focus on healing after a dodge, gadget stun or takedown has created space instead of waiting until Spider-Man is surrounded. If necessary, complete a nearby Research Station, Crime or Demon Warehouse for XP and tokens before returning.
- Complete Reflection, then continue to Out of the Frying Pan....
- During the prison mission, remove rockets and snipers before basic inmates.
- Avoid fire and use gadgets against clustered prisoners.
- Change the opening approach after repeated failures.
- Confirm the next Act III story marker appears after the prison sequence.
Before you move on
- Dual Purpose is complete and the Trip Mine is available.
- Demon Warehouses are visible on the map after inspecting the Consolidated Shipping office map.
- The main missions from Hidden Agenda through Reflection are complete.
- Out of the Frying Pan... is complete, including the prison-break sequence.
- The next Act III mission marker appears after the prison sequence.
- At least one defensive skill and one aerial-control or finisher skill have been purchased if skill points were available.
- Any Research Station or Demon Warehouse cleanup performed during Act II was optional and did not replace the required main missions.
References for this chapter
- Dual Purpose - Marvel’s Spider-Man Walkthrough and Guide, Neoseeker
- Dual Purpose - Marvel’s Spider-Man Walkthrough and Guide, GameFAQs
- Out of the Frying Pan... - Marvel’s Spider-Man Walkthrough and Guide, Neoseeker
- Out of the Frying Pan - Marvel’s Spider-Man Walkthrough and Guide, GameFAQs
- Research Stations — Marvel’s Spider-Man Walkthrough & Guide
- Gadgets - Marvel’s Spider-Man Walkthrough and Guide, GameFAQs
- Marvel’s Spider-Man Walkthrough and Guide, Neoseeker
Midstory Side Missions and Character Beats (MJ, Miles, supporting arcs)
Mary Jane and Miles chapters are mandatory when they appear as yellow story missions. They cannot be bypassed, and completing them returns control to Peter and advances the campaign. The principal playable-character sections include Dinner Date, Uninvited, First Day and The One That Got Away, with other story missions placing you in investigation or stealth situations without Spider-Man’s full combat kit. Move slowly, scan patrols before leaving cover, use distractions to separate guards and follow the marked objective instead of trying to clear every area. Miles’s First Day introduces his hacking app for radios, signs, drones and vehicles. Optional blue side missions, including Tombstone’s chain and the corrupted-student missions, can be completed between story chapters or after the credits. They provide XP and activity rewards but are not required to finish the campaign.
Identify mandatory character chapters and optional side missions
Yellow story markers are required. When the campaign starts a Mary Jane or Miles chapter, enter the marked location and complete the sequence before expecting the next main objective. The game’s base campaign contains several playable-character missions among its 44 main missions; these are part of the story rather than optional blue activities.
The most useful midstory examples are Dinner Date, where MJ investigates a criminal work site; Uninvited, where she infiltrates a Sable base in Central Park; First Day, where Miles travels to the F.E.A.S.T. center; and The One That Got Away, which begins with Peter investigating Martin Li’s getaway car before shifting to MJ at Grand Central Terminal. Other missions, such as Spider-Hack, are Spider-Man investigation missions and should not be mislabeled as Miles chapters.
- Follow yellow story markers for every mandatory MJ or Miles chapter.
- Treat blue district icons as optional unless the game explicitly makes one the active story objective.
- Do not search for a bypass when control changes away from Peter.
Use the campaign sequence without unnecessary detours
During the middle of the campaign, continue the yellow missions through The Mask, A Day to Remember, Financial Shock, Wheels within Wheels, Home Sweet Home, the stakeout and Martin Li investigation missions. The game then moves through Dual Purpose, Hidden Agenda, A Fresh Start, Dinner Date, Up the Water Spout, What’s in the Box?, Back to School, Spider-Hack, Uninvited, Strong Connections and First Day before the later Devil’s Breath missions.
You do not need to complete every blue activity immediately after it appears. A practical order is to finish the newly available story mission, open the map, and complete one nearby side mission or activity if it is on your route. Then return to the next yellow marker. This keeps XP and tokens coming without sending you across Manhattan repeatedly. If the next side mission is far away, leave it for postgame free roam; the base-game side missions remain available after the story.
- Complete the active yellow mission before pursuing distant optional content.
- Use nearby blue missions for efficient XP and token gains.
- Leave unfinished optional chains available for post-credits cleanup.
Clear Dinner Date by controlling sight lines
When MJ reaches the work site in Dinner Date, stay behind cover and let the nearby thug move away before advancing. Use the marked distraction object to pull guards away from the route, then follow the objective path without touching cardboard boxes or broken glass. These hazards can reveal MJ and force a checkpoint restart.
At the generator, wait until the guard moves to investigate. Circle around the safe side of the generator, continue toward the marked barrels and inspect them. After the scene opens the office route, distract the guard near the entrance, enter the office, photograph the blueprints behind the motorcycle and take the GPS transmitter from the desk. MJ exits automatically after the objective is complete.
- Use distractions one guard at a time.
- Avoid glass and movable clutter while crossing the work site.
- Photograph the blueprints and collect the GPS transmitter before leaving.
Infiltrate the Sable base during Uninvited
Uninvited places MJ in Sable’s Central Park base while she searches for Charles Standish. Begin by staying behind the barrier and waiting for the first guard to leave. Use MJ’s available distraction device on the open space near the stairs, then move behind the distracted guard and climb upward.
Follow the objective markers through the tents and equipment areas. Generators and toolboxes create openings, but activate or disturb them only after confirming that the nearest patrol will investigate instead of facing MJ. When a truck or group of guards blocks the route, wait for the patrol to move, use the marked distraction and pass through the open side of the area. At the objective screens, stop to take the required photographs before continuing toward the tent.
- Stay behind cover until the next guard is separated.
- Use generators, toolboxes and the distraction device to redirect patrols.
- Take the required photographs before leaving each investigation area.
Complete First Day with Miles’s hacking app
First Day begins with Spider-Man helping Miles at the F.E.A.S.T. center. After the opening fight, Miles takes control. Aim at the radio with L2 and hold R1 to hack it, then move toward the Sable checkpoint. Hack the nearby drone to create a way over the barricade instead of approaching the guards directly.
Near the taxi, use the hackable sign as a diversion and cross the small fence. You can take the scaffolding route, but watch the drone patrols and hack each drone as you approach. Before dropping toward the guard, hack the nearby truck so the guard investigates it. Cross the barrier, enter F.E.A.S.T. and speak with Peter. The mission ends after the conversation and escort sequence.
- Hack the radio, checkpoint drone, sign and truck when prompted.
- Use the scaffolding route only while monitoring drone patrols.
- Reach F.E.A.S.T. and speak with Peter to finish the chapter.
Survive The One That Got Away’s Grand Central section
After Peter investigates Martin Li’s car, control switches to MJ at Grand Central Terminal. Inspect the Osborn displays, then move to the marked location. During the conversation with Spider-Man, identify the drones and select a safe exit point when prompted. Use the nearby tablet to disable the surveillance route after Spider-Man creates the distraction.
Proceed through the terminal by separating Demons with MJ’s distraction tool, then call for Spider-Man’s assistance when the prompt appears. During the device interaction, trace and remove the wires in the order indicated by the puzzle rather than guessing. After the hostages begin moving, stay away from the center of the terminal, where rocket fire is concentrated. Use the balcony and side positions to eliminate dangerous ranged enemies before returning to the main floor and following Martin Li’s escape route.
- Identify the drones and safe exit point during MJ’s planning prompts.
- Separate enemies before requesting Spider-Man’s assist takedown.
- Use elevated cover during the rocket-launcher encounter.
Recover after detection and schedule optional arcs
If MJ or Miles is detected, retreat toward the last known safe cover instead of running into an unexplored section. If the alert has already spread through the area, reload the checkpoint and change one variable: wait for a patrol to turn, use a different distraction, or take the outer route. Checkpoint restarts do not remove tokens or completed activity rewards.
Once free roam returns, optional blue missions can be completed in any convenient order. Tombstone’s chain begins with Tombstone: On the Move in Greenwich and continues through investigations and combat encounters; the corrupted-student missions include College Buddies, Tick Tock, Over His Head, A Matter of Debate and Home Team Advantage. These are base-game side missions, not The City That Never Sleeps DLC. Complete them near your current district for XP and activity progress, or postpone them until after the final story mission.
- Reload when an alert makes the route unsafe rather than forcing a failed attempt.
- Complete optional chains when nearby, not necessarily at first unlock.
- Confirm that Tombstone and corrupted-student missions are listed under the base-game side content.
Confirm completion and story advancement
A mandatory character chapter is complete when its final objective and transition scene finish, control returns to Peter or the next story segment begins, and the yellow objective updates. Check the Missions menu if you are unsure whether you are looking at a story chapter or an optional chain.
For this chapter’s completion target, all mandatory MJ and Miles sequences encountered during the campaign should be marked complete, including Dinner Date, Uninvited, First Day and The One That Got Away. Optional missions are complete only when their final encounter, investigation or reward sequence ends. Afterward, the map may still contain blue activities; that is normal and confirms that optional content was not accidentally required for story progression.
- The mandatory character mission is marked complete in the Missions menu.
- A new yellow story objective appears after the sequence.
- Any chosen blue side chain reaches its final objective and reward.
- Remaining map activities are treated as optional postgame cleanup.
Before you move on
- Dinner Date, Uninvited, First Day and The One That Got Away are complete in the main Missions list when encountered in the campaign.
- The next yellow story marker appears after each mandatory character sequence.
- Optional chains such as Tombstone or the corrupted-student missions show their final objective completed if chosen.
- Free roam remains available for unfinished base-game side missions after the credits.
- No DLC mission chain is required for this chapter’s original PS4 base-game campaign goal.
References for this chapter
- Marvel’s Spider-Man Walkthrough & Guide (PS4) — Main Mission List and Edition-Specific Walkthrough
- Dinner Date — Marvel’s Spider-Man Walkthrough & Guide (PS4)
- Uninvited — Marvel’s Spider-Man Walkthrough & Guide (PS4)
- First Day — Marvel’s Spider-Man Walkthrough & Guide (PS4)
- The One That Got Away — Marvel’s Spider-Man Walkthrough & Guide (PS4)
- Side Missions — Marvel’s Spider-Man Walkthrough & Guide
- Marvel’s Spider-Man Missions — Base-Game Mission List
Base Clear Strategy: Demon Warehouses, Fisk Hideouts, Sable Outposts
Enemy bases are repeatable combat activities that award Base Tokens and count toward district completion. The original PS4 campaign has four types: Fisk Hideouts, Demon Warehouses, Sable Outposts and Prisoner Camps. Each base gives one token for clearing all waves and displays two optional bonus objectives that can award one additional token each. Before starting, inspect those objectives and prepare gadgets that match them when practical. Open with stealth takedowns and perch attacks to reduce the first group, then switch to mobile crowd control once the base enters wave combat. Keep ranged attackers and rocket carriers from firing freely, isolate brutes and other heavy enemies, and use walls, rooftops and web-zips whenever the ground becomes crowded. Clear the base first if an objective becomes dangerous; completed bases can be replayed for unfinished objectives. Base Tokens are useful for suits, suit powers and gadget upgrades, but optional objectives are not required for ordinary completion.
1. Identify the base and prepare before entering
The four base types unlock during the campaign. Fisk Hideouts use a crown icon, Demon Warehouses use a demon-mask icon, Sable Outposts use an S-shaped symbol, and Prisoner Camps use a barbed-wire marker. Their factions differ, but the basic objective is the same: defeat the waves and complete the base activity.
Highlight the base on the map and read both bonus objectives before beginning. They may ask for actions such as finishers, aerial attacks, environmental throws, stealth takedowns or particular gadget uses. Treat them as optional targets rather than requirements for starting or finishing the base. If an objective does not fit your current skills or equipment, clear the base safely and return later.
Use a general-purpose loadout with at least one crowd-control or immobilising gadget and one option for a dangerous single target. Web Bomb can help control a cluster when available, while Impact Web is useful near walls and other surfaces. Electric Web is effective for isolating or briefly disabling a selected enemy. Suit powers that improve healing, crowd control or gadget availability are practical choices, but no single loadout is mandatory.
- Confirm the faction and base icon.
- Read both bonus objectives before starting.
- Equip one crowd-control option and one single-target option.
- Remember that bonus objectives are optional for the base clear.
2. Scout the outside and thin the first group
Approach from above and press R3 to scan the area. Look for isolated enemies, elevated guards, ranged attackers and targets whose removal will not be seen by nearby opponents. Perch on walls, signs, beams or rooftops, then use stealth takedowns, perch takedowns or web attacks that attach an enemy to a nearby surface.
Move around the outer edge instead of dropping into the middle immediately. Watch the awareness indicators before committing to a takedown. If another guard has a clear view, change perches or wait for the patrol to separate. A quiet opening removes threats without spending health or Focus and gives you more room when the first combat wave starts.
Do not force a stealth attempt after several enemies have already detected you. Once the base has shifted into open combat, use stealth movement only to reposition or reach a safer angle. The objective is to enter the wave phase with fewer enemies nearby, not to remain hidden at all costs.
- Scan from above before entering.
- Remove isolated enemies first.
- Check whether another guard can see the takedown.
- Stop forcing stealth after detection becomes widespread.
3. Start each combat wave from the edge
When open combat begins, move away from the centre of the group. Swing to a wall, web-zip upward or jump over the nearest attackers so you can see the arena and incoming projectiles. Start by disabling or separating a small group, then concentrate on one side of the arena rather than striking whichever enemy is closest.
Use ordinary attacks to build Focus when safe, but spend finishers when a high-threat enemy is isolated or when the crowd is closing around you. Environmental throws can interrupt groups and may satisfy a bonus objective at the same time. Web enemies to walls or other surfaces when the arena gives you a clear attachment point.
Keep moving between attacks. If several enemies surround you, dodge through the group and web-zip to a wall or rooftop. Re-enter with an aerial attack or web strike after the nearest enemies have separated. This is safer than standing in place and trying to trade ground hits while ranged enemies attack from outside the camera view.
- Leave the centre when a wave begins.
- Separate groups before committing to a long combo.
- Use Focus finishers on dangerous or isolated enemies.
- Use vertical surfaces as recovery points.
4. Remove ranged support before wrestling heavy enemies
Ranged enemies should usually be handled before you commit to a prolonged fight with a brute or other heavy target. Pistols, rifles and rocket launchers can continue damaging Spider-Man while he is focused on a different opponent. Dodge incoming fire, close the distance with a web strike or web-zip, and disable the ranged attacker with a takedown, web attack or environmental hit.
Rocket carriers deserve immediate attention because their shots can disrupt attacks and force you to abandon a finisher. Watch the Spider-Sense warning and dodge rather than trying to finish a ground combo through incoming fire. If a turret is mounted on an enemy vehicle or appears during a particular encounter, treat it as another ranged threat: avoid its firing lane and remove or disable the carrier when the opportunity is safe. Do not search for a universal alarm-control step, because ordinary bases do not use one fixed alarm procedure.
Brutes require patience. Do not repeatedly attack their protected front while other enemies are active. Use the dodge prompt when their heavy attack is telegraphed, attack during recovery, and use gadgets or environmental objects to create space. Shielded and baton-equipped enemies are easier to handle when attacked from the air or after their defensive attack has been avoided. Isolate them rather than allowing them to remain inside a crowd.
- Prioritise rockets and other ranged support.
- Watch the Spider-Sense warning instead of staring only at the target.
- Treat encounter-specific turrets as ranged threats, not universal base objectives.
- Attack brutes during openings and avoid careless frontal combos.
5. Adapt to the faction and its wave layout
Fisk Hideouts are an early base type and generally provide the clearest introduction to the base format. Their construction-site layouts often provide walls, vertical surfaces and throwable objects for stealth and environmental objectives. Demon Warehouses introduce more dangerous armed groups and tighter indoor or warehouse spaces, so use gadgets before the crowd closes in.
Prisoner Camps are established after the prison outbreak and are open-air areas. Their enemies can include dangerous ranged weapons, so use rooftops, cover and constant movement instead of remaining in the centre. Sable Outposts become available after Sable turns hostile and use trained agents with stronger ranged support and more demanding formations. Start from the outside, remove elevated threats, and preserve a gadget or Focus finisher for the densest wave.
These are tactical tendencies, not rigid scripts. Enemy groups and bonus objectives vary by base. Keep checking the arena and change targets when a new rocket carrier, shielded enemy or heavy unit enters the fight.
- Use construction-site objects in Fisk Hideouts.
- Expect ranged pressure in Prisoner Camps.
- Approach Sable Outposts from the perimeter and watch elevated threats.
- Change priorities when reinforcements enter.
6. Finish the base, then claim or replay its rewards
Continue until every enemy wave is defeated and the base-completion result appears. The normal completion reward is one Base Token. Each of the two bonus objectives can provide one additional Base Token, giving a maximum of three tokens from that base. The objectives must be completed during the activity; simply clearing the waves does not complete them automatically.
If an objective is nearly finished but attempting it would risk defeat, survive first. After the base is captured, it remains available for replay through its completed map marker. Return later to complete any unfinished objective. A bonus objective that was already completed does not award its token again, so replaying is for missed objectives, practice and combat enjoyment rather than unlimited token farming.
Base Tokens can be spent on eligible suits, suit powers and gadget upgrades. For campaign progress, favour upgrades that improve crowd control, gadget use or survivability. Cosmetic suits are still useful for completion goals, but do not spend every token on optional purchases if you are trying to unlock a particular suit or upgrade soon.
- Wait for the base-completion result.
- Verify whether zero, one or two bonus objectives were completed.
- Replay the base later for unfinished objectives.
- Reserve tokens for the suits, suit powers or gadgets you actually want.
Before you move on
- The base-completion result appears after all enemy waves are defeated.
- The map shows the base as captured or completed.
- The reward screen or activity result confirms the Base Token earned for completion.
- For Ace the Base, complete both bonus objectives during one base activity; they can be the objectives at any single base.
- For broader original PS4 cleanup, the district progress panel shows the relevant Fisk Hideouts, Demon Warehouses, Sable Outposts and Prisoner Camps completed.
- If a base still has an unfinished bonus objective, replay its completed map marker and complete that objective during the next run.
References for this chapter
Research Stations, Pigeons and Photo Landmarks — how to complete them efficiently
Research Stations, ordinary Landmark photographs and Howard’s pigeons provide Research Tokens, experience and useful fast-travel destinations. Unlock ordinary Landmarks through Landmarking, then begin Helping Howard after Couch Surfing and leaving the shelter. For efficient cleanup, work in district clusters: complete an available Research Station first, use it as a future fast-travel point, then photograph nearby Landmarks and handle any pigeon chase in the same area. Research Stations have different objectives, including sample collection, pollution investigation, signal tracking, circuit work, cloaked-drone destruction and movement routes, so follow the active objective and its progress meter rather than using one method for every station. The final Upper West Side Research Station is unlocked after the other stations are complete. Secret Photo Ops are separate from ordinary Landmarks: the original PS4 release contains 50, they do not award Landmark Tokens or count toward district 100%, and they are not required for the base-game trophy set. At level 50, equip the Proximity Sensor suit mod to reveal nearby hidden-photo icons on the minimap. Photograph all 50 to unlock the ESU Suit, then verify that collection through its separate counter and the equipment menu.
Unlock the activity chains before beginning a full cleanup
Complete the Landmarking story mission before attempting ordinary Landmark photographs. The mission introduces the in-game camera and activates the Landmark activity. When you reach a marked Landmark, press Up on the D-pad to equip the camera, hold L2 to aim and wait for the viewfinder to accept the subject before pressing R1.
Helping Howard becomes available after completing Couch Surfing and leaving the shelter. Howard is in Chinatown, on a rooftop beside the F.E.A.S.T. center. Speak with him to begin the chain. This places the pigeon objectives around Manhattan; they are optional for story progression, so they will not appear before the side mission is started.
Research Stations become available through the campaign. The final Upper West Side station is a special case: it does not appear as a normal unfinished icon until the other Research Stations have been completed. If the district panel shows an additional station but the map appears to be missing it, finish every visible station first and then revisit Upper West Side. Do not assume that this final station is permanently bugged or requires DLC.
- Complete Landmarking before pursuing ordinary Landmark Tokens.
- Finish Couch Surfing, leave the shelter and speak with Howard in Chinatown.
- Complete every visible Research Station before searching for the final Upper West Side station.
- Recheck the map and district panel after completing the other stations.
Use Research Stations as the backbone of district routes
When clearing a district, start with its available Research Station. Entering a station provides a Research Token, and completing its activity provides additional Research Tokens and experience. After completion, the station functions as a fast-travel destination once fast travel is available, making it a useful hub for nearby cleanup.
Research Stations do not all use the same minigame. Read the objective on the left side of the screen and follow the current marker. Depending on the station, Spider-Man may need to gather samples, investigate pollution, track a signal, solve a circuit, repair equipment, destroy cloaked drones or complete a movement route. The objective marker and progress display are more reliable than trying to apply a remembered route from another station.
For sample, pollution and search tasks, remain inside the highlighted area and move between the marked targets. Watch any contamination, smog or hazard meter; if it rises, move out of the danger zone and approach the next target from a safer angle. For tracking tasks, follow the signal indicator instead of swinging toward a distant-looking landmark. For circuit or equipment tasks, finish the current interaction before leaving the station area.
For aerial or movement objectives, begin at the marked starting point. Use shorter swings, web-zips and wall movement to preserve height and line up with the next marker. If the progress meter stops, return to the last active marker and approach it again. Taking an unmarked shortcut can leave the objective incomplete even when Spider-Man reaches the general destination. If you fail, restart from the station prompt and follow the displayed sequence again rather than abandoning the activity.
- Complete Research Stations before nearby collectibles when planning a route.
- Read the active objective instead of assuming every station is identical.
- Monitor progress and hazard meters throughout the task.
- Return to the last active marker if progress stops.
- Confirm the completion message, reward and fast-travel availability before leaving.
Photograph ordinary Landmarks quickly and correctly
Select a Landmark icon on the map and travel to the named building, monument, sign or other feature. Stand far enough away to see the subject clearly, press Up on the D-pad to equip Spider-Man’s in-game camera and hold L2 to aim. Move the reticle until the viewfinder turns green, then press R1 to take the photograph.
If the viewfinder does not turn green, change position rather than repeatedly pressing the shutter. You may be facing the wrong side of the structure, aiming at a nearby building or standing too close for the game to identify the subject. Rooftops, open plazas and street corners usually provide a cleaner angle than the base of a tall building.
A photograph taken in the separate pause-menu Photo Mode does not register as a Landmark. Wait for the reward notification after pressing R1. Ordinary Landmarks provide Landmark Tokens and experience and are included in district activity progress. They are efficient to combine with Research Stations because you can photograph a nearby subject immediately after completing the station without beginning another combat encounter.
Use the map to select the next nearby Landmark rather than crossing the entire city. A practical route is Research Station first, then the closest Landmark icons in the same district, followed by any pigeon marker that lies along the route. Repeat this pattern district by district to reduce unnecessary swinging.
- Select an ordinary Landmark icon from the map.
- Use the camera activated with Up on the D-pad.
- Hold L2 until the viewfinder turns green.
- Press R1 while the subject is accepted.
- Confirm the Landmark Token and experience notification.
- Do not use pause-menu Photo Mode for Landmark progress.
Catch Howard’s pigeons without losing the route
After Helping Howard is active, select a pigeon marker from the map and travel to its starting location. The pigeon will not be captured immediately when Spider-Man reaches the marker. It takes off and follows a repeatable route, so the first attempt is also an opportunity to learn the turns and the point where the chase usually becomes difficult.
Maintain a moderate height above the streets. Keep the blue target trail or marker in view, use shorter swings around corners and avoid dropping to street level where traffic and buildings can force detours. If the pigeon disappears behind dense buildings, gain height, face the marker and resume the chase rather than searching randomly.
When Spider-Man closes the distance, the capture prompt appears. Hold L1 and R1 together to web the pigeon. If the chase fails, return to the starting marker and try again; the route is consistent, so adjust the corner where you lost proximity instead of changing the entire approach.
Each pigeon provides experience and one Research Token. Completing the full chain provides the side-mission completion reward. The pigeon objectives are checked through the mission list and their map markers, not solely through the district activity panel, so inspect both when confirming that Helping Howard is finished.
- Start each chase from its active Helping Howard marker.
- Maintain height and keep the target trail visible.
- Use controlled swings near corners and tall buildings.
- Hold L1 and R1 when the capture prompt appears.
- Confirm the Research Token reward after each successful catch.
- Check the mission list for the final Helping Howard completion.
Complete Secret Photo Ops as a separate equipment objective
Secret Photo Ops are not ordinary Landmarks. The original PS4 release contains 50 hidden photographs scattered through Manhattan. They do not appear as standard activities on the main map, do not award ordinary Landmark Tokens and do not increase district 100% progress. They are also not required for the base-game trophy set or the ordinary all-suits trophy.
Every Secret Photo Op uses the same in-game camera as an ordinary Landmark. Press Up on the D-pad, hold L2 and frame the subject until the viewfinder turns green, then press R1. The game records the photograph through a separate hidden-photo counter, so the lack of a new map icon is normal.
The efficient locator becomes available at level 50. Equip the Proximity Sensor suit mod and travel through districts while watching the minimap. When Spider-Man is close to an undiscovered Secret Photo Op, a camera icon appears on the minimap. This is a proximity indicator, not a permanent ordinary map marker. Sweep one neighborhood at a time, stop when the camera icon appears and search the nearby buildings, signs or monuments for the valid angle.
After each accepted photograph, check the on-screen counter. If the counter does not increase, the image was not a valid Secret Photo Op; reposition and try again. Completing all 50 automatically unlocks the ESU Suit. Check the suits menu after the final accepted photograph. The ESU Suit is a separate collection reward and should not be used as a condition for district completion or the base-game trophy set.
- Reach level 50 before relying on the Proximity Sensor method.
- Equip the Proximity Sensor suit mod.
- Use the normal camera, not pause-menu Photo Mode.
- Confirm that the separate counter increases after every accepted photograph.
- Reach 50/50 to unlock the ESU Suit.
- Verify the ESU Suit in the equipment menu.
- Keep Secret Photo Ops separate from district 100% and Landmark Tokens.
Verify the cleanup with the correct progress screens
After completing a group of stations and Landmarks, reopen the map and inspect the district panel. Research Stations and ordinary Landmarks are district activities. The panel confirms those categories, while the mission list confirms whether Howard’s pigeon chain still has an active objective.
For a compact cleanup loop, complete the available Research Station, use it as a fast-travel hub, photograph nearby ordinary Landmarks and then catch a pigeon if one is in the same district. Move to the next district only after the current group is checked. Continue the main story if a station or mission has not yet appeared, then revisit the map after the relevant progression point.
Use separate completion checks for separate goals. District panels confirm ordinary activity progress. The Secret Photo Op counter confirms hidden photographs. The equipment menu confirms the ESU Suit. A district may show 100% while hidden photographs remain incomplete, and all ordinary Landmarks may be finished without unlocking the ESU Suit.
For the chapter’s activities to be complete, every Research Station should award its final reward and function as a fast-travel destination, every ordinary Landmark should have an accepted photograph, Helping Howard should have no remaining pigeon marker and the Secret Photo Op counter should read 50 if the ESU Suit is part of the equipment goal.
- All Research Stations are complete and usable as fast-travel destinations.
- All ordinary Landmark icons have accepted photographs and paid their rewards.
- Helping Howard has no remaining pigeon objective.
- The final Upper West Side Research Station has been checked after the others.
- District panels show the desired ordinary activity completion.
- The Secret Photo Op counter reads 50 when pursuing the ESU Suit.
- The ESU Suit appears in the equipment menu after the 50th accepted photo.
- No DLC or remaster-exclusive activity has been counted.
Before you move on
- Every Research Station has been completed and its final reward has appeared.
- The final Upper West Side station has been completed after the other stations.
- All ordinary base-game Landmark icons have accepted photographs and awarded their rewards.
- Helping Howard has no remaining pigeon objective and the mission chain is complete.
- District panels show the intended ordinary activity progress.
- The Secret Photo Op counter reads 50 when pursuing the ESU Suit.
- The ESU Suit is unlocked in the equipment menu after the 50th Secret Photo Op.
- Secret Photo Ops have not been counted toward district 100%, Landmark Tokens or the base-game trophy set.
- No DLC, remaster-exclusive or later-edition photo activity has been included.
References for this chapter
- Research Stations — Marvel’s Spider-Man Walkthrough & Guide
- Side Missions — Marvel’s Spider-Man Walkthrough & Guide
- Helping Howard — Marvel’s Spider-Man Walkthrough
- ESU Suit — Marvel’s Spider-Man Walkthrough
- Marvel's Spider-Man (2018) Trophy Guide & Roadmap — PowerPyx
- Helping Howard — Marvel’s Spider-Man Wiki
Benchmarks & Challenges (Taskmaster) — scoring, ranks and improving performance
Taskmaster Challenges begin after What’s in the Box? The original PS4 base game has 16 activities: four Bomb, four Drone, four Stealth and four Combat. Each challenge has Amazing, Spectacular and Ultimate performance tiers. The reward is cumulative: Amazing grants 1 Challenge Token, improving that result to Spectacular adds 2, and improving Spectacular to Ultimate adds 3, for up to 6 tokens from one challenge. Complete every challenge once for Challenge Finder and district completion. The four format trophies require Spectacular or better in one challenge of each type, while Master’s Education requires Ultimate in any one challenge. The first Taskmaster ambush is optional and normally follows five completed challenges. After all 16 are completed, a second rooftop encounter becomes available. If you lose either encounter, successfully complete any Taskmaster Challenge again—even one already completed—to trigger another attempt.
1. Unlock the activities and identify each challenge type
Complete the main mission What’s in the Box? to begin the Taskmaster sequence. The first available markers are Bomb and Drone activities. Complete the available challenges and continue the related Taskmaster sequence; Combat and Stealth challenges become available later rather than appearing as a complete set immediately.
Open the map and use its activity legend to identify each marker before travelling. Bomb Challenges test rapid bomb disposal, Drone Challenges require pursuit and target collection, Stealth Challenges require undetected takedowns, and Combat Challenges measure arena-fight performance.
The original PS4 base game contains 16 Taskmaster Challenges: four Bomb, four Drone, four Stealth and four Combat. A result of Amazing is enough to count a challenge as completed. A low-ranked first attempt can therefore satisfy the completion requirement while you return later for better token rewards.
- Complete What’s in the Box?.
- Confirm Taskmaster markers in the map legend.
- Learn whether each marker is Bomb, Drone, Stealth or Combat.
- Complete all 16 once if pursuing Challenge Finder or district completion.
2. Track cumulative Challenge Token rewards
Each challenge has three performance levels: Amazing, Spectacular and Ultimate. The rewards accumulate as you improve the same activity. Amazing grants 1 Challenge Token. Improving that result to Spectacular adds 2 more tokens. Improving Spectacular to Ultimate adds 3 more. A challenge taken from Amazing through Ultimate can therefore provide 6 tokens in total.
Do not assume that a higher result replaces the earlier reward. If you earn Spectacular on your first attempt, the game accounts for the lower tier and the Spectacular improvement. If you later reach Ultimate, the Ultimate improvement adds its own reward. The practical result is that replaying a challenge can still be worthwhile after it has already been completed.
Challenge Finder requires one completion of each of the 16 activities, not a high score in every activity. The four challenge-format trophies require Spectacular or better in one Bomb, one Combat, one Stealth and one Drone Challenge. Master’s Education requires an Ultimate result in any single Taskmaster Challenge.
- Amazing grants 1 token.
- Improving to Spectacular adds 2 tokens.
- Improving to Ultimate adds 3 tokens.
- One challenge can provide up to 6 cumulative tokens.
- Use Amazing as the minimum completion target.
- Pursue Ultimate only where the extra tokens or trophy are useful.
3. Decide when to attempt higher ranks
Use an early attempt to learn the route, enemy layout or patrol pattern. Bomb and Drone Challenges become more manageable when you have stronger traversal skills and are comfortable correcting Spider-Man’s direction with web-zips. Combat and Stealth Challenges benefit from additional gadgets, improved Focus generation, larger gadget capacity and stronger finishers.
Useful combat loadouts include Web Bomb for holding groups, Electric Web for interrupting clustered enemies and Concussion Blast for creating space. Spider-Drones can also distract or damage groups. These tools are most effective when they solve a specific problem, such as stopping ranged enemies or preserving a combo, rather than being fired randomly.
After a weak result, identify the main cause before replaying. Missed targets suggest a route or camera problem. A broken combat combo suggests a poor opening or delayed target selection. Lost health suggests that ranged threats or dangerous melee enemies were left active too long. Correct one weakness at a time instead of repeating the same attempt without a change.
- Learn the activity before pursuing Ultimate.
- Use crowd-control gadgets with a clear purpose.
- Improve traversal control before farming movement challenges.
- Change the route when missed targets cause the low score.
- Change enemy priority when health or combo performance is the problem.
4. Clear Combat Challenges with speed and control
Combat Challenges place Spider-Man in an arena with successive enemy groups. Move as soon as the activity begins and avoid allowing enemies to surround you. Open on an isolated target, then combine melee attacks with web attacks, aerial launches, environmental throws, gadgets and finishers.
Prioritise enemies that can control the arena from a distance, including firearm and rocket users. Web Bomb can restrain several enemies while you remove a dangerous target. Electric Web interrupts clustered enemies, and environmental objects can stagger groups without requiring a long melee exchange. When the arena becomes crowded, move vertically and use walls or elevated positions to reset your angle.
Combat scoring rewards rapid defeats, health preservation and combo performance. Maintain the combo when doing so is safe, but do not accept damage merely to keep the counter alive. Use a finisher when it removes a high-threat enemy or restores enough control to continue attacking safely. If the final result is poor, determine whether speed, health or combo continuity was the limiting factor.
- Move immediately when the arena opens.
- Remove ranged and high-threat enemies early.
- Mix melee, aerial attacks, webs, gadgets and environmental attacks.
- Use finishers to regain control of crowded waves.
- Protect health without taking unnecessary risks for the combo.
5. Learn Bomb Challenge routes before chasing the highest rank
Bomb Challenges place three bombs around a limited section of Manhattan and start a timer. On the first run, locate all three and observe the cleanest order between them. The nearest bomb is not always the fastest first target if another order creates straighter swing lines or better launch positions.
At each bomb, approach the interaction point and use L1 plus R1 to throw it into the air. Repeatedly press R1 to web the airborne bomb until the game confirms that it has been secured. Do not leave early; an incomplete interaction costs both time and score.
Use web-swinging through open streets and web-zips to correct your line toward building edges. Preserve height whenever possible and avoid unnecessary landings. If repeated attempts stall at the same result, change the bomb order or your launch point rather than trying to perform the same inefficient route faster.
- Locate all three bombs during the practice attempt.
- Use L1 plus R1 to launch each bomb.
- Repeatedly press R1 until the bomb is fully webbed.
- Start moving immediately after confirmation.
- Change the route or launch point if the score stops improving.
6. Maintain target chains in Drone Challenges
Drone Challenges require Spider-Man to pursue a moving drone and pass through the blue target groups around the surveillance cameras it drops. Follow the target groups rather than focusing only on the drone. Missing a target can reduce the result more than taking a slightly wider, controlled line.
Begin each swing early and stay above street level when the route permits. Use web-zips for measured corrections instead of sharp last-second turns beside a target. During practice, memorise the order of the camera groups and the building edges that give you the best launch positions.
At the end of the route, close on the drone and complete the on-screen destruction interaction. If the result is weak, identify whether the loss came from missed targets, broken momentum, a late launch or a slow final approach. Drone scores generally improve through route memory and early positioning rather than frantic corrections at the end.
- Follow the dropped target groups, not only the drone.
- Pass through target groups in sequence whenever possible.
- Maintain height and correct direction early.
- Memorise camera-group order during practice.
- Reach the final drone promptly and complete the destruction interaction.
7. Use patrol knowledge in Stealth Challenges
Stealth Challenges place Spider-Man in a marked area and reward fast takedowns without detection. Begin by identifying isolated enemies, safe perches and patrol routes. Start with enemies separated from the main group, then work inward as patrols move. Perch takedowns and web strikes let you reduce the group without dropping into the centre of the area.
Check the safety indicator before committing to a takedown. When the environment allows it, web defeated enemies to walls or elevated surfaces so another patrol cannot discover them. Move between safe perches and wait for patrols to pass rather than forcing an unsafe attack.
If Spider-Man is detected, break line of sight immediately by moving to a nearby wall or roof. Let the alert decrease before resuming from another angle. When the area enters full combat, restarting is usually more efficient for a high-rank attempt. The failed run still reveals which patrol or takedown caused the detection.
- Study isolated enemies and patrol routes first.
- Confirm the safety indicator before each takedown.
- Hide defeated enemies when patrols can discover them.
- Break line of sight immediately after detection.
- Restart a fully detected run when pursuing a high rank.
8. Complete the Taskmaster encounters and recover after a loss
After five completed Taskmaster Challenges, continue moving through Manhattan until the first Taskmaster ambush occurs. This encounter is optional for the main campaign and does not replace any challenge marker. Losing it does not permanently remove the encounter.
Complete all 16 challenge markers to make the later rooftop confrontation available. This fight is separate from the challenge requirements: it does not replace completion of the 16 activities, the four Spectacular-or-better format results, or an Ultimate result for Master’s Education.
If you lose either Taskmaster encounter, replay and successfully complete any Taskmaster Challenge to trigger another encounter. The challenge does not need to be new or unfinished. A completed activity can be selected from the map and replayed; after a successful completion, Taskmaster can appear again even if all 16 original challenges have already been cleared. Repeat this recovery step until the encounter is won.
For additional Challenge Tokens, replay activities that are close to the next rank and have a specific improvement plan. Bomb results usually improve through route order and movement lines. Drone results improve through memorised camera chains. Stealth results improve through patrol knowledge and takedown order. Combat results improve through faster crowd control and better protection of health and combo performance.
Use the district progress panel to verify completed Taskmaster activities. Do not count Screwball challenges from The City That Never Sleeps DLC toward the original PS4 base-game Taskmaster checklist.
- Complete five challenges to allow the first optional ambush to occur.
- Complete all 16 original challenges once.
- If an encounter is lost, replay and successfully complete any Taskmaster Challenge.
- Use a completed challenge if no unfinished marker remains.
- Defeat the later rooftop Taskmaster encounter if pursuing Master of Masters.
- Keep Screwball DLC challenges separate from the original Taskmaster activities.
Before you move on
- What’s in the Box? is complete and Taskmaster markers are available.
- All 16 original PS4 Taskmaster Challenges have been completed once if pursuing Challenge Finder or district completion.
- Amazing, Spectacular and Ultimate improvements have been counted cumulatively rather than as replacement rewards.
- The first ambush has been treated as optional.
- If either Taskmaster encounter was lost, a replayed and successfully completed challenge was used to trigger another encounter.
- The later rooftop Taskmaster encounter is complete if pursuing Master of Masters.
- At least one Bomb, Combat, Stealth and Drone Challenge has a Spectacular-or-better result if pursuing the four format trophies.
- At least one Taskmaster Challenge has an Ultimate result if pursuing Master’s Education.
- Any remaining replay attempt has a specific plan based on route, speed, combo, health, target collection or detection.
- Challenge Tokens have been recorded before spending them on intended original PS4 base-game equipment.
References for this chapter
- Taskmaster Challenges — Marvel's Spider-Man Walkthrough & Guide — GameFAQs
- Marvel's Spider-Man (2018) Trophy Guide & Roadmap — PowerPyx
- What's in the Box? — Marvel's Spider-Man Walkthrough — Neoseeker
- Marvel’s Spider-Man/Challenges — StrategyWiki
- Taskmaster Challenges — Marvel’s Spider-Man — GameFAQs Game of the Year Edition Guide
Boss Fights & Major Encounters — patterns and recovery
Bosses in the original 2018 PlayStation 4 campaign are built around readable attacks and scripted openings rather than ordinary damage races. Dodge first, create an opening with webs, a throwable object or the arena, then punish briefly before repositioning. Kingpin, Shocker, Electro, Vulture, Rhino, Scorpion, Mister Negative and Doctor Octopus each use a different version of this rhythm. Electro and Vulture, followed by Rhino and Scorpion, are paired fights, so keep both threats visible and avoid committing to long combos. Tombstone and Taskmaster are optional. Taskmaster’s first ambush occurs after five completed Taskmaster Challenges; his final fight becomes available after all 16 are completed. If the final Taskmaster fight is lost, successfully complete any Taskmaster Challenge, including one already cleared, to summon the rematch. Healing consumes Focus, while aerial attacks and finishers help rebuild it.

Prepare before a boss checkpoint
Enter difficult encounters with full health and as much Focus as possible. Focus can heal Spider-Man or power finishers, so avoid spending every bar immediately if the next phase contains several enemies. Aerial attacks build Focus efficiently, but do not stay airborne so long that you lose sight of projectiles or a second boss.
Use a flexible gadget loadout. Web Shooters are reliable for ordinary web-staggers, while Impact Web, Electric Web, Web Bomb and Suspension Matrix can help with crowd control when unlocked. A large boss may resist a direct gadget hit, so use gadgets after an opening, against an exposed component or on supporting enemies. Useful skills include aerial combat, Focus generation, healing improvements and finishers that can remove groups quickly.
The basic controls remain consistent throughout these encounters: Circle dodges, Triangle performs Web Strike, Square attacks, L1 plus R1 throws or pulls down highlighted environmental objects, and Triangle plus Circle performs a finisher when the prompt appears. The white Spider-Sense warning signals an incoming attack. Dodge it instead of extending a ground combo.
- Begin with full health and a reserve of Focus.
- Carry Web Shooters and at least one crowd-control or impact gadget.
- Identify the arena object, support enemy or boss state that creates the next opening.
Use the common rhythm: evade, open, punish, reposition
Most bosses announce attacks through Spider-Sense and visible movement. Dodge across or around the attack rather than backing straight away, especially when a sweeping strike or shockwave covers the space in front of the boss. After the attack misses, look for the actual opening: a Triangle prompt, a highlighted object, a boss recovering from a charge, a lowered shield or an exposed machine.
When the opening appears, use Web Strike, a web burst, a throwable or the contextual interaction first. Follow with a short melee string, an aerial combo or a finisher. Leave immediately when the opening ends. Web-zip to another side of the arena, use a wall or jump away so the next attack does not catch Spider-Man during recovery.
In paired fights, keep the camera wide and reposition whenever one enemy leaves the screen. An off-camera boss can still attack. Heal with Focus during a safe opening rather than waiting until one more hit could end the attempt.
- Dodge before attacking.
- Use the highlighted arena interaction when the game presents it.
- End each punish with enough distance to see the next attack.
Defeat Kingpin and Shocker through their scripted openings
During the Fisk Tower battle, deal with Kingpin’s turrets first. Dodge their fire, web a turret with R1, then hold L1 plus R1 to pull it from its position and throw it through the bulletproof glass. When Kingpin attacks directly, use webs until the Triangle Web Strike prompt appears, then close in for a short combo. Ordinary attacks are ineffective while he is protected, so do not trade Square attacks with him.
After Kingpin moves the battle into the larger room, clear his henchmen before returning to the web-and-combo cycle. Use Focus to heal if necessary. When Kingpin grabs Spider-Man, follow the on-screen prompts, including the dodge and later Web Strike instructions. Missing a prompt does not require a new strategy; resume dodging and webbing until another opening appears.
Shocker’s early phases center on evasion. Dodge his attacks until the broad shockwave leaves his protection down. During that opening, hold L1 plus R1 to throw a highlighted object at him, then attack. In the later phase, jump or zip to a wall to avoid the larger shockwave, get behind him while he is committed and throw an object. In the final phase, Shocker is trapped beneath the chandelier. Dodge until he pauses, then pull down the highlighted chandelier pieces with L1 plus R1. Repeat until the encounter ends.
- Kingpin: remove the turrets, web him, use the Triangle prompt and punish briefly.
- Shocker: wait for the protection to drop before throwing objects.
- Do not waste ordinary attacks against a protected boss.
Control the Electro and Vulture team fight
Electro activates power generators around the arena. When a generator becomes active, use the Web Shooters to disable it before trying to continue the attack. Once Electro is exposed, web him and use a short combo, then move before the next electrical attack begins.
Vulture’s approaches are telegraphed by his movement and blade attacks. Dodge his dive or close attack, then use the Triangle follow-up when prompted, or web him and attack while he is vulnerable. Do not chase Vulture in a straight line while Electro is active. Reposition around the arena and wait for a clear opening.
Keep both enemies visible whenever possible. If they attack simultaneously, prioritize the threat that is off to the side of the camera or the one creating an arena hazard. A finisher on an exposed enemy can reduce the time spent managing both attack patterns and restore health through Focus.
- Disable active generators when Electro powers them.
- Dodge Vulture’s approach before using Triangle or webs.
- Avoid committing to a combo while the other boss is out of view.
Defeat Rhino and Scorpion by separating their threats
At the start of the paired battle, use Rhino’s charge against the arena. Stand near a highlighted destructible object, wait for him to commit, then dodge away and hold L1 plus R1 to pull the object down onto him. The stagger creates the safe melee window. Do not stand in front of Rhino longer than necessary and do not try to stop his charge with ordinary attacks.
Scorpion is the more disruptive target after he enters because of his ranged venom attacks. Focus on him whenever he is available. Dodge his projectiles and lunges, use R1 to web him, then use Triangle to close the distance and attack. Rhino may collide with Scorpion during a charge, but treat that as a bonus rather than a required part of the strategy.
After Scorpion is defeated, return to the container-and-charge method against Rhino. When the arena changes or the current object is destroyed, move to another highlighted object instead of fighting beside the old one.
- Use destructible objects against Rhino.
- Prioritize Scorpion after he joins the encounter.
- Finish Scorpion before settling into Rhino’s slower pattern.
Handle Mister Negative and Doctor Octopus
Mister Negative’s required combat encounters emphasize evasion. Dodge his attacks until he becomes tired or the Triangle prompt appears, then use Web Strike and attack. Throw nearby objects when the interaction is available. When he summons demons or fills the area with negative-energy hazards, keep moving and wait for the next tired state instead of forcing melee damage through the hazard.
Doctor Octopus’ battle on Oscorp Tower combines sweeping arm strikes, thrown debris, ranged attacks and arena hazards. Stay mobile near the outer portion of the arena without trapping yourself against the edge. Dodge across sweeping attacks, watch for the Spider-Sense warning when an arm pulls back, and use highlighted objects or web interactions when they become available. After each stagger, use Web Strike, a short combo or a finisher, then disengage.
Later phases add more debris and hazardous space. Follow the safe route around the arena and treat each successful stagger as a limited damage opportunity. When Octavius throws several pieces of debris, evade the sequence and wait for the next available interaction instead of rushing forward. The encounter ends through its closing scripted sequence and prompts. A missed prompt or failed attempt sends Spider-Man back to the relevant encounter checkpoint rather than erasing campaign progress.
- Mister Negative: evade until tired, then use Triangle and attack.
- Doctor Octopus: avoid arm sweeps, debris and edge traps.
- Preserve Focus for healing or a finisher during the later phases.
Complete optional Tombstone and Taskmaster encounters
Tombstone is tied to the three-part side mission chain Tombstone: On the Move, Tombstone: What’s He Building in There… and Tombstone: Let’s Get Ready To…. The final encounter begins with Tombstone and adds henchmen. Defeat the henchmen when they appear, continue attacking Tombstone until the counter-drug removes his powered state, then throw objects in the room at him to create further openings. Tombstone is optional for the main campaign and can be completed after the story.
Taskmaster’s first fight is triggered after five Taskmaster Challenges have been completed. He ambushes Spider-Man while he is travelling through the city, and the encounter takes place on a rooftop. Use nearby throwables with L1 plus R1, or evade his attacks and punish after his own opening. Direct web attacks are not a dependable way to start this fight. Once Taskmaster is staggered, use a short combo and disengage when Spider-Sense warns of a counterattack. The first encounter may end with Taskmaster retreating; that retreat is part of the encounter and is not a failure.
Complete all 16 Taskmaster Challenges to unlock the second and final Taskmaster fight. Use the same stun-and-punish rhythm: throw objects when available, evade his attacks, avoid long ordinary combos and react to his counters. If you lose this final fight, it is not permanently blocked. Return to any Taskmaster Challenge and complete it successfully. The challenge may be one that was already cleared; it does not need to be a previously unfinished challenge, and no new rank is required for the rematch to trigger. After the successful challenge, Taskmaster will initiate the fight again. Repeat the encounter until he is defeated.
- Tombstone requires his three side missions and the counter-drug phase.
- The first Taskmaster ambush occurs after five completed challenges.
- The final Taskmaster fight becomes available after all 16 challenges are complete.
- After losing the final fight, successfully complete any Taskmaster Challenge, including an already-cleared one, to trigger the rematch.
- Neither Taskmaster encounter is required to reach the story ending.
Recover after a failed attempt
A failed boss attempt returns Spider-Man to the encounter’s checkpoint or restart point. Progress completed before that checkpoint remains complete, while the current boss phase must be replayed. Before retrying, change one meaningful variable: equip a crowd-control gadget, spend a skill point on Focus or survivability, lower the difficulty, or deliberately slow down during the first phase to learn the warning signals.
Use the failure pattern to choose the adjustment. Repeated projectile damage usually means the camera is losing track of an attacker or Spider-Man is standing in an exposed lane. Repeated melee damage usually means the dodge is late or the combo continues after the opening ends. Damage in paired fights usually means both bosses are attacking from opposite sides. Dying late often means Focus and gadgets were spent too early; preserve one healing option for the next phase.
For Taskmaster specifically, a failed final fight does not require finishing the remaining incomplete challenges. Complete any one Taskmaster Challenge successfully, even if it was already cleared, and wait for the rematch encounter to trigger. If the challenge itself fails, retry that challenge until it is completed successfully.
After two unchanged failures, make a targeted alteration instead of repeating the same attempt. Identify whether the cause was timing, camera control, positioning, a missed environmental opening or depleted resources. Confirm that the next checkpoint or phase transition has been reached before leaving the mission.
- Change the loadout, skill, difficulty or positioning after repeated failures.
- Separate timing problems from camera, positioning and resource problems.
- After losing final Taskmaster, complete any already-cleared or unfinished challenge successfully for the rematch.
- Do not treat a Taskmaster retreat or a failed attempt as permanent progression loss.
Before you move on
- The required story encounters are complete: Kingpin, Shocker, the required Mister Negative encounters, Electro and Vulture, Rhino and Scorpion, and Doctor Octopus.
- The final Doctor Octopus encounter has completed its closing cutscene and the game has returned to the post-story state or free roam.
- For optional base-game completion, Tombstone’s three-mission chain and final fight are complete if that side story is being pursued.
- For optional Taskmaster completion, the first ambush after five completed challenges has occurred, all 16 Taskmaster Challenges are complete, and the second Taskmaster fight has been won.
- If the final Taskmaster fight was lost earlier, a successful repeat of any Taskmaster Challenge has triggered the rematch and the rematch has been defeated.
- After a failed attempt, the player can identify the cause—late dodge, missed environmental opening, poor camera control, bad paired-fight positioning or depleted resources—and make a targeted adjustment.
References for this chapter
- Marvel's Spider-Man - Game of the Year Edition Walkthrough & Guide - Walkthrough
- I got beat by Taskmaster. What now? - Marvel's Spider-Man Q&A for PlayStation 4
- Marvel's Spider-Man (2018) Trophy Guide & Roadmap — PowerPyx
- Spider-Man PS4: How to Beat Electro & Vulture
- Spider-Man PS4: How to Beat Taskmaster
Act III and the Final Missions — pacing, mission order and approaching the climax
Out of the Frying Pan is the final Act II mission and should already be complete when Act III begins. The Act III sequence is ...Into the Fire, Picking Up the Trail, Streets of Poison, Supply Run, Heavy Hitter, Step Into My Parlor, The Heart of the Matter and Pax in Bello. Optional activities can be completed before the finale or after the ending. The final upgrade warning appears when you reach the lab at the start of Pax in Bello; spend tokens and set your loadout before entering. The finale forces the Anti-Ock Suit and pits Spider-Man against Doctor Octavius in several phases involving webbing, dodging, projectile counters and airborne traversal over a burning arena. Complete the ending scenes and credits, then verify that free roam has returned before beginning base-game cleanup.
1. Start Act III after the prison-break continuity point
Out of the Frying Pan is the final Act II mission. It covers the prison breakout and leads directly into the late-game emergency, so do not search for it as a new Act III objective or attempt to repeat it in the campaign route.
Act III begins with ...Into the Fire. From there, follow the required main-mission sequence: Picking Up the Trail, Streets of Poison, Supply Run, Heavy Hitter, Step Into My Parlor, The Heart of the Matter and finally Pax in Bello. Use the yellow main-mission marker as your primary route even when crimes, collectibles and other activities are visible nearby.
The late story mixes escaped prisoners, Demons and Sable forces. Follow the marked objective through traversal, investigation, rescue and combat sections. Nearby crimes are not required for story progress, so interrupt the sequence only when you deliberately want extra experience, tokens or practice.
- Confirm that Out of the Frying Pan is already complete before beginning this chapter.
- Begin Act III with ...Into the Fire.
- Follow the yellow main-mission marker instead of clearing every nearby activity.
2. Choose a cleanup point before the final mission
You do not need full district completion, every challenge, every collectible or every optional side mission to reach the ending. If you want an uninterrupted first ending run, complete optional content after Step Into My Parlor and before starting The Heart of the Matter, or leave it all for after the story.
Research Stations, bases and outposts are useful priorities when you want more tokens and experience for final upgrades. Side missions, Backpacks, ordinary Landmarks, Black Cat Stakeouts, Taskmaster Challenges and crimes can be completed in whichever order is convenient. Their completion is separate from the required Act III mission sequence.
Pax in Bello is the last main mission. The opening of that mission provides the final opportunity to buy upgrades before the lab sequence begins. You can still complete base-game activities after the ending, so postponing cleanup does not block the campaign conclusion. The City That Never Sleeps remains separate DLC and is not part of this route.
- Finish any optional character mission you want to experience before the ending.
- Use remaining activities to gain tokens or skill points if your preferred upgrades are unfinished.
- Do not count DLC missions as part of the original campaign sequence.
3. Clear The Heart of the Matter in a controlled order
The Heart of the Matter begins with a guarded approach to the facility. Use rooftops, lamp posts and perch points to remove isolated Demons quietly. Deal with the two snipers first when possible, then separate the ground patrols with web shots or wait for them to move apart before using stealth takedowns.
When Silver Sable’s forces arrive, the encounter becomes open combat. Jet-pack enemies and other ranged attackers should be your first targets because they can restrain Spider-Man or leave explosive hazards on the ground. Web-zip to airborne enemies, keep dodging, and heal with Down on the D-pad before your health becomes critical.
Follow the damaged path into the facility, avoiding the black infected areas. The final section is another Mister Negative encounter. Dodge his energy waves and weapon attacks until the game exposes an opening, then use the Triangle web-zip prompt and a short combo. When his ground-pound wave is telegraphed by his wide arm position, jump over it rather than trying to dodge along the ground. Shadow demons and other summoned threats should be removed before returning to Mister Negative.
- Remove the elevated snipers before starting the main courtyard fight.
- Prioritise jet-pack and ranged Sable enemies when the reinforcement wave begins.
- Jump over Mister Negative’s ground-pound wave and attack only during stagger openings.
4. Prepare before entering Pax in Bello
After The Heart of the Matter, the next main mission is Pax in Bello. Travel to the marked lab entrance and read the warning before passing through the door. This is the final pre-finale opportunity to purchase available suit and gadget upgrades, assign suit mods, select gadgets and adjust difficulty.
Choose a dependable campaign loadout rather than a setup designed only for a particular challenge. Health, Focus generation, aerial-combat skills and crowd-control gadgets are broadly useful. Electric Web, Web Bomb, Impact Web and other interruption tools can create breathing room, while ordinary Web Shooters are essential during the Doctor Octavius fight.
Pax in Bello equips the Anti-Ock Suit during the story. Its suit power restores gadget ammunition, but it does not permanently replace your normal suit collection. You are not required to own a specific optional suit or finish district activities before entering the lab.
- Spend desired tokens before crossing the lab entrance.
- Assign suit mods and gadgets you can use reliably under pressure.
- Enter only when you are ready to remain in the final story sequence for a while.
5. Defeat Doctor Octavius by creating safe openings
The opening rooftop phase is defensive. Watch Spider-Sense warnings, circle the arena and dodge the mechanical-arm attacks instead of standing directly in front of Doctor Octavius. Fire the Web Shooters repeatedly when he is exposed. Once enough webbing has accumulated, the Triangle prompt allows a web-zip attack; follow it with a short close-range combo before he breaks away.
When Octavius moves to the upper structure, the arena floor becomes hazardous. Keep moving through the air with swings and web-zips rather than standing on the burning surface. When he throws debris, use the prompted web interaction to catch and return it. Returned debris creates the opening for another web-zip attack.
The battle returns to the roof for another cycle of dodging, webbing and projectile counters. Use the Anti-Ock Suit power when gadget ammunition is low or when you need several control tools in succession, but do not waste every charge at once. Preserve enough web-based options to interrupt later openings.
The final phase moves to the side of the building and changes the rhythm. Normal gadget tactics are no longer the main solution. Follow Spider-Sense warnings, dodge laterally and use short Square attack strings only after Octavius commits to an attack. Heal with Down on the D-pad when the suit’s damage state indicates that another hit would be dangerous.
- Web Octavius until the Triangle web-zip prompt appears.
- Catch and return thrown debris when the prompt is displayed.
- Stay airborne while the upper arena floor is burning.
- Use dodges and short attacks instead of forcing gadgets during the final phase.
6. Finish the ending and verify post-story access
After the final Doctor Octavius phase, continue through the remaining prompts, cutscenes and ending sequence rather than quitting immediately after the combat victory. Pax in Bello is the final main mission, and its completion records the campaign conclusion.
Remain through the ending scenes and credits if your goal is to finish the original campaign cleanly. Additional story material may appear around the credits sequence. When the game restores control in Manhattan, open the map and progress panels to confirm that the final mission is recorded and that normal free roam is available again.
Post-story free roam lets you finish base-game side missions, crimes, collectibles, bases, challenges, suits, gadgets and upgrades without replaying the finale. If an activity is not immediately visible, check the district progress panels and map filters before assuming the save failed. DLC episodes and their activities remain outside this base-game chapter.
- Pax in Bello is marked complete.
- The ending scenes and credits have played.
- Control has returned to Manhattan free roam.
- The map and progress panels show the remaining base-game cleanup activities.
Before you move on
- Out of the Frying Pan was already complete before Act III began.
- The Act III missions ...Into the Fire, Picking Up the Trail, Streets of Poison, Supply Run, Heavy Hitter, Step Into My Parlor, The Heart of the Matter and Pax in Bello are complete.
- The final Doctor Octavius encounter, ending scenes and credits have been completed.
- Control has returned to Manhattan free roam with campaign progress retained.
- For optional completion, use the in-game map and district panels to verify desired base-game activities, suits, gadgets and upgrades without counting DLC content.
References for this chapter
- Marvel's Spider-Man Walkthrough & Guide — PS4 mission list and Pax in Bello
- Marvel's Spider-Man Walkthrough & Guide — PS4 mission list and The Heart of the Matter
- Marvel’s Spider-Man releases on 7th September, Collector’s Edition revealed and more — PlayStation.Blog
- Pax In Bello — Spider-Man PS4 ending and Doctor Octavius walkthrough
Post-credits: Free-roam cleanup and methodical 100% base-game completion
After the original PS4 campaign ends, free-roam remains available for cleanup. Track three goals separately: district 100 percent, ordinary base-game equipment purchases, and every original base-game suit, including the hidden ESU Suit. Clear one district at a time through its Map checklist. Complete Research Stations early to expand fast travel, then finish side missions, collectibles, bases, faction crimes and Taskmaster Challenges. Secret Photo Ops are separate hidden photographs: they do not appear as ordinary district activities, do not affect district percentages and are not required for the base-game trophy set. They are required only for the optional goal of obtaining every original base-game suit. At level 50, equip the Proximity Sensor, photograph all 50 hidden subjects and verify the separate counter until the ESU Suit unlocks. Reserve Base and Challenge Tokens until you know which purchases remain. Both Taskmaster encounters are optional; if you lose either one, replay and successfully complete any Taskmaster Challenge to make the encounter appear again. Exclude The City That Never Sleeps DLC and remaster-only content.
Confirm the post-story state and choose the completion goal
Complete the final story mission, allow the ending sequence and credits to finish, and confirm that the save has returned you to ordinary Manhattan free-roam. Unfinished original base-game activities remain available after the campaign, so a second playthrough is not required for cleanup.
Choose the target you are tracking. District 100 percent means completing the ordinary activities listed in each district panel. Ordinary equipment completion means obtaining the available original suits, gadgets, gadget upgrades and suit mods that use tokens or story-related unlocks. Obtaining every original base-game suit is a separate, broader goal because it includes the hidden ESU Suit, which comes from Secret Photo Ops rather than a normal district activity.
For this chapter, count only the original PS4 base game: Backpacks, Landmarks, Black Cat Stakeouts, Howard’s Pigeons, Research Stations, faction crimes, Fisk Hideouts, Demon Warehouses, Sable Outposts, Prisoner Camps and Taskmaster Challenges. Exclude The City That Never Sleeps DLC, including The Heist, Turf Wars and Silver Lining, along with their Screwball activities, suits and challenges. Secret Photo Ops are also separate from district 100 percent and the base-game trophy set, although all 50 are required for the optional every-base-game-suit goal.
- The final story mission is complete.
- The ending sequence and credits have finished.
- Free-roam is available again.
- The intended completion goal is identified.
- DLC and remaster-only content is excluded.
Use the district panels as the ordinary cleanup authority
Open the Map and select a district to view its completion percentage and category checklist. Work through one district at a time rather than crisscrossing Manhattan. Activate any unopened Surveillance Tower first, because revealed icons make ordinary cleanup easier to audit.
Before leaving the district, record every unfinished category. Do not infer completion merely from an apparently empty map: one missing side mission, base, crime, collectible, Research Station or Taskmaster Challenge can keep the panel below 100 percent.
Some activities appear only after story or side-mission progression. Complete available missions in the Missions menu, then revisit the district if a category remains absent. Helping Howard unlocks Howard’s Pigeons. The Upper West Side Research Station is progression-gated; return to that district after the other Research Stations have been completed.
- Every district has been opened on the Map screen.
- Surveillance Towers are activated where needed.
- Unfinished ordinary categories are recorded.
- Available prerequisite missions are complete.
- Upper West Side is revisited after the other Research Stations are finished.
Complete Research Stations before longer collectible routes
Complete every available Research Station as it fits into your district route. Enter the station, interact with its equipment and follow the active objective. Research activities can involve traversal, environmental investigation, hazard avoidance or laboratory tasks, so use the displayed marker and finish the activity rather than merely visiting the location.
After completion, confirm that the station shows its finished status and that its fast-travel point is available. A location can be visited without satisfying the activity, so fast-travel access alone is not enough if the district panel still lists the Research Station. On the map, a completed station should show its completion indicator rather than only the fast-travel arrows.
When the other stations are complete, return to Upper West Side and finish its previously locked station. The resulting fast-travel network shortens later routes between collectibles, bases, crimes, side missions and challenge locations.
- All available Research Stations are completed.
- Completed stations show their finished status.
- Research fast-travel points are available for later routes.
- The gated Upper West Side station is completed after the others.
Clear ordinary collectibles and side missions by district
Collect Backpacks and photograph ordinary Landmarks while moving through the selected district. For a Landmark, equip the camera, frame the required structure until the targeting indicator confirms the subject, and take the photograph. Black Cat Stakeouts are separate map activities: locate the hidden cat figure through the camera and photograph it, then complete the resulting base-game mission chain when it becomes available.
Complete every base-game side mission shown in the Missions menu or district map. Some chains unlock later in the story or require an earlier mission, so revisit the menu if the district remains below 100 percent after its visible icons are gone. Helping Howard must be completed before his pigeon activities become available.
Keep token categories separate in your notes. Backpack, Landmark, Crime, Base, Research and Challenge Tokens are different resources. District completion does not convert one token type into another, and spending a category early can leave you needing more activities of that same type for a later suit, gadget or upgrade.
- Backpacks are collected.
- Ordinary Landmarks are photographed.
- Base-game Black Cat Stakeouts and their follow-up mission are complete.
- Helping Howard is complete.
- Howard’s Pigeons are completed.
- All base-game side missions are finished.
Clear bases and finish required faction crimes
Complete every ordinary base icon in the selected district: Fisk Hideouts, Demon Warehouses, Sable Outposts and Prisoner Camps. At the beginning of each base, read the optional objectives. The base counts when its waves are defeated and the encounter is completed; bonus objectives improve the Base Token reward but are not additional district activities.
For consistent clears, begin with stealth takedowns when possible, remove isolated high-threat enemies, and use web-based crowd control or environmental objects when waves group together. If a bonus objective fails, finish the base unless you specifically need its extra tokens. Repeating every failed bonus is slower than completing another activity and returning later.
Faction crimes are random encounters rather than fixed collectibles. When a crime alert appears in the district being cleared, respond and complete the displayed objective. The district panel tracks the required crime progress. Once that requirement is satisfied, further crimes can continue spawning for free-roam and extra Crime Tokens; those repeat events do not mean the district is incomplete.
- All Fisk Hideouts are complete.
- All Demon Warehouses are complete.
- All Sable Outposts are complete.
- All Prisoner Camps are complete.
- Required faction-crime progress is complete.
- Repeat crimes are treated as optional token opportunities.
Finish Taskmaster Challenges and track cumulative rewards
Complete all 16 original base-game Taskmaster Challenges if you want full ordinary activity cleanup. The four types are Combat, Drone, Bomb and Stealth. A challenge counts for district completion at the minimum Amazing result; higher ranks are optional unless you need additional Challenge Tokens or are pursuing score goals.
The rewards are cumulative by rank. Amazing grants 1 Challenge Token. Reaching Spectacular grants 3 total from that challenge, adding 2 more. Reaching Ultimate grants 6 total, adding 3 more. Improving a challenge later grants only the newly reached tier; replaying a rank already earned does not pay again. Reaching Ultimate immediately still grants the cumulative total of 6.
After five completed challenges, the first Taskmaster encounter becomes available. After all 16 challenges are completed, the final Taskmaster encounter becomes available. Both encounters are optional for district 100 percent and ordinary cleanup, but defeat them if you want the complete Taskmaster sequence.
If you lose either encounter, do not search for an unfinished challenge or rely on an unrelated activity to trigger the rematch. Replay any Taskmaster Challenge and successfully complete it. The encounter can then reappear even when all 16 challenges are already marked complete. If the encounter does not appear immediately, finish the successful challenge, return to free-roam and check the map for the new encounter marker.
- All 16 base-game challenges are completed once for ordinary activity completion.
- Amazing is reached on every challenge needed for district completion.
- Improved ranks are tracked as cumulative rewards.
- The first Taskmaster encounter is defeated only if desired.
- The final Taskmaster encounter is defeated only if desired.
- After a lost encounter, a Taskmaster Challenge is replayed and successfully completed to trigger the rematch.
Complete all 50 Secret Photo Ops for the hidden ESU Suit
Secret Photo Ops are not ordinary Landmarks. They do not appear as normal map activities, do not fill a district category and are not required for district 100 percent or the base-game trophy set. Pursue them separately only if your goal is to obtain every original base-game suit.
Reach level 50, open the Suit Mods menu and purchase the Proximity Sensor. Equip it before searching. Nearby Secret Photo Ops then appear as camera icons on the mini-map, although you still need to travel close to reveal them. Without the mod, a Secret Photo Op can also be found manually while exploring.
When a camera icon appears, move close enough for the subject to be framed. Press Up on the D-pad to equip the camera, hold L2 to aim and press R1 to take the photograph once the framing indicator confirms the target. Check the separate Secret Photo Op counter after each successful photograph. Use that counter, not the ordinary Landmark total, and compare it with a reliable 50-location list if the final count is short.
After the 50th photograph, verify that the separate counter reaches 50 of 50 and open the Suits menu. The ESU Suit should unlock automatically. Record it as a hidden-suit completion, not as evidence that a district has reached or failed to reach 100 percent.
- Level 50 has been reached.
- The Proximity Sensor is purchased and equipped.
- The camera is used for each Secret Photo Op.
- The separate counter reaches 50 of 50.
- The ESU Suit unlocks in the Suits menu.
- Secret Photo Ops remain separate from district totals and Landmark totals.
Spend remaining tokens and perform the final verification
Before final purchases, inspect the Suits, Gadgets and Suit Mods menus. If you want ordinary equipment completion, obtain every remaining original PS4 suit, gadget, gadget upgrade and suit mod whose requirements have been met. Reserve Base and Challenge Tokens until you have checked the purchase list, because spending them early can require additional bases or improved challenge ranks.
For district completion, return to the Map and inspect every district panel. Each original base-game district should display 100 percent with no unfinished ordinary categories. If one is short, inspect the panel category by category. Common causes include a gated Research Station, an incomplete side-mission chain, a missing base, an unfulfilled crime requirement or an unfinished Taskmaster Challenge. A missing Secret Photo Op is not the cause of a district remaining below 100 percent.
For the broadest optional completion goal, verify three records independently: every district at 100 percent, every ordinary original base-game equipment item obtained or identified as DLC, and every original base-game suit obtained, including the ESU Suit. Do not count The City That Never Sleeps suits or activities, and do not include remaster-only additions.
- Every original base-game district displays 100 percent.
- All ordinary base-game side activities are complete.
- All Research Stations show completed status.
- All 16 Taskmaster Challenges are complete.
- The desired Taskmaster encounters are complete, if pursued.
- Original base-game equipment is checked separately.
- The ESU Suit is unlocked when every original base-game suit is the goal.
- DLC and remaster-only content is excluded.
Before you move on
- The final story mission, ending sequence and credits are complete, with free-roam available afterward.
- Every original base-game district displays 100 percent on the Map screen.
- All ordinary base-game side missions, Backpacks, Landmarks, Black Cat Stakeouts, Howard’s Pigeons, Research Stations, bases, required crimes and Taskmaster Challenges are complete.
- The first and final Taskmaster encounters are complete only when pursuing the optional full Taskmaster sequence.
- If either Taskmaster encounter was lost, a Taskmaster Challenge was replayed and successfully completed before checking for the rematch.
- All ordinary original base-game suits, gadgets, gadget upgrades and suit mods have been checked separately.
- All 50 Secret Photo Ops are complete, the separate counter reaches 50 of 50 and the ESU Suit is unlocked when pursuing every original base-game suit.
- DLC-exclusive activities, suits and remaster-only additions are excluded.
References for this chapter
- Marvel's Spider-Man (2018) Trophy Guide & Roadmap — PowerPyx
- How to unlock the secret ESU suit in Marvel’s Spider-Man for PlayStation 4 — Android Central
- What's in the Box? — Marvel's Spider-Man Walkthrough — Neoseeker
- Taskmaster Challenges - Marvel's Spider-Man Wiki
- A Research Station in the Upper West Side is locked
- Marvel's Spider-Man – Post Launch Content Revealed
Suits, Gadgets and Skill Builds — which to prioritise for campaign vs. 100%
The original PS4 release does not require one specific suit, gadget arrangement or skill route. Build around reliable Focus generation, safe aerial combat, defensive timing and crowd control. Unlock practical equipment before buying every costume, but remember that crafting a suit also unlocks its associated suit power. The costume’s appearance and equipped power are separate, so you can wear a preferred suit while using a different power. For campaign progress, use Focus, web control and Finishers to reduce pressure in ordinary fights, then change powers and mods for stealth sections, bases, ranged-heavy encounters and bosses. For 100% completion, vary your activities so Backpack, Crime, Base, Challenge, Landmark and Research Tokens do not become a late bottleneck. District completion and the Undies suit are separate from the optional goal of buying every base-game suit and upgrade.
1. Start with Perfect Dodge, Focus generation and aerial control
The skill tree becomes available after The Main Event. Begin with Defender’s Perfect Dodge. Press Circle when the Spider-Sense indicator turns blue to evade at the last moment and automatically fire a web shot at the attacker. A successful Perfect Dodge also generates bonus Focus, giving you a safer route to healing and Finishers. Follow it with Perfect Hit if you regularly press Square as an attack lands, then take Combo Booster when you want high combo counts to produce Focus more quickly.
Dodge Window is a strong follow-up for players who struggle with the timing. Last Stand is a useful safety net later in the Defender branch, while Chain Finisher is valuable in bases and multi-wave fights once you can reach it. These are defensive and Focus-related tools rather than direct health upgrades, so do not wait for a nonexistent health node. Your actual health improvement comes from leveling, suit mods, healing with Focus and avoiding damage.
Invest in Webslinger’s Air Marshal when aerial combat is part of your normal routine. Air attacks deal more damage and generate more Focus, and the separation created by Air Launch keeps Spider-Man away from melee groups. Air Yank helps bring enemies into the air, while Bunker Buster lets a Swing Kick knock down shield enemies. For traversal, Point Launch Boost, Quick Recovery and Charge Jump improve movement, but combat skills should come first if a story encounter is giving you trouble.
- Unlock Perfect Dodge early and practice it against ordinary street crimes.
- Use Dodge Window if the Perfect Dodge timing is difficult.
- Take Air Marshal and Air Yank when you rely on aerial attacks to isolate targets.
- Do not search for a direct health skill; use Focus, healing and suit mods instead.
2. Use a small group of dependable gadgets
Keep Web Shooters in regular use. Rapid web fire can pin enemies to walls and remove a threat without spending Focus. Upgrade their recharge or capacity when those improvements fit your token supply, especially if you often end fights by webbing enemies to nearby surfaces.
Impact Web is your best direct answer to an isolated dangerous enemy near a wall, ledge or other solid surface. It immediately knocks the target back and constrains them. It is not a general-purpose projectile to waste against enemies standing in open space. When its later upgrade is available, a struck enemy can spread webbing to nearby allies, making it more useful against a tight group.
Electric Web is the simplest emergency crowd-control tool. Target one enemy in a compact group; the stun can spread to nearby enemies, creating time to heal, reposition or perform a Finisher. Web Bomb does not require a direct hit. Aim at the floor or another surface where enemies are about to pass, then let its area effect constrain anyone who enters it. Web Bomb is strongest after you draw enemies into a narrow space or cluster them with movement.
Spider-Drone, Trip Mine, Concussive Blast and Suspension Matrix are worthwhile when a mission or challenge suits them, but you do not need every upgrade immediately. A practical general campaign set is Web Shooters, Impact Web, Electric Web and Web Bomb. Add Trip Mine for patrol routes and stealth setups, or Spider-Drone when you need unattended pressure while surrounded.
- Use Impact Web against isolated threats with a wall or ledge behind them.
- Use Electric Web when a compact group is about to overwhelm you.
- Place Web Bomb on the route enemies must cross rather than firing it at a scattered crowd.
- Upgrade ammunition or recharge for gadgets you actually spend during fights.
3. Separate suit appearance, suit power and suit mods
After the story unlocks suit crafting, suits provide more than appearance: crafting one also unlocks its associated suit power. Once powers are available, you can equip a different power from the suit you are wearing. This means you can keep the Classic Suit, Advanced Suit or another preferred appearance while using a power that fits the next encounter.
Battle Focus is a reliable default for a campaign run because it rapidly generates Focus for a short period. Use it when you need healing, several Finishers or a quick recovery during a difficult wave. Web Blossom is effective when enemies surround you and you need immediate area control. Spider-Bro, Electric Punch, Rock Out, Iron Arms and other powers are situational choices for crowd disruption, damage or enemy displacement. Do not activate a power merely because its meter is full; save it for a dense wave, a dangerous ranged group or a boss vulnerability window.
Suit mods should answer a recurring problem. Battle Tech makes gadget attacks generate Focus, Kinetic Power Cells increase Focus generation, Webbed Striker improves Focus from web attacks, First Aid improves healing from Focus, and Threat Sensors slows time after a Perfect Dodge. Scavenger can help replenish gadgets after Finishers. Use defensive options such as Gel Padding or Ballistic Inserts when incoming melee or firearm damage is your main problem. Equip Silent Step for stealth sections rather than carrying it through every open fight.
- Choose the suit power for the encounter and the costume for appearance.
- Use Battle Focus as a safe general-purpose power until another power solves a specific problem.
- Pair gadget-heavy play with Battle Tech or a similar Focus-support mod.
- Use First Aid, Threat Sensors or defensive mods according to your repeated failure point.
4. Spend tokens in a practical order
During the campaign, prioritize upgrades that improve the way you already fight. A small set of gadget upgrades, useful suit mods and selected suit powers will help more than buying every newly unlocked costume. Do not spend all of one token type on suits if the same token type is needed for the gadget upgrade you rely on. Check the crafting screen before committing tokens, because each item shows its required activity rewards and level requirement.
Gadgets are introduced through story progress, but their upgrades require tokens. Suits and suit mods also use tokens, while skill points come from leveling rather than activities. Vary your map activities so you earn different token types naturally. Backpacks and crimes are convenient early sources, while bases and challenges can become the limiting categories for later equipment. Completing easier Taskmaster challenges during the story reduces the amount of Challenge Token cleanup after the credits; return later for difficult ranks when more skills and gadgets are available.
There is no permanent mistake in an early purchase. Continuing to level eventually provides enough skill points to unlock the skill trees, and free roam remains available after the story. Before the final missions, make sure you have one Focus or survival setup, a reliable wall-control gadget, an area-control gadget and enough familiarity with your preferred dodge and aerial routines.
- Buy functional upgrades before low-priority costume purchases.
- Inspect level and token requirements before spending.
- Clear varied activities instead of farming only one token category.
- Complete manageable challenges during the story and save high-rank attempts for later if necessary.
5. Build separate campaign and cleanup loadouts
For ordinary story combat, use Battle Focus or another Focus-oriented power with mods that improve Focus, healing or gadget access. Open with Electric Web or Web Bomb when enemies group together, then use aerial attacks to isolate a target and spend Focus on a Finisher or healing. Against shield enemies, use Dodge Under or Bunker Buster rather than repeatedly striking the shield. Against firearms, stay mobile, use Perfect Dodge and return projectiles when the prompt appears. Against brutes, web them, use a Finisher when available or use aerial and environmental attacks to avoid trading blows.
For stealth missions, equip Silent Step if detection is a consistent problem and use web distractions before moving between vantage points. Spider-Man stealth sections can usually recover after detection by leaving the immediate area, reaching a perch and waiting for patrols to separate. Do not keep a stealth mod equipped for a combat arena where it provides no benefit.
For 100% completion, do not confuse the in-game district percentage with an obligation to buy every optional upgrade immediately. A district reaches full completion by clearing its listed activities and collectibles. The Undies suit is awarded for completing the game’s base-game 100% requirement, while the separate completionist goal of unlocking every base-game suit, suit power, suit mod, gadget upgrade and skill requires spending the relevant rewards and earning enough XP. Keep a running list of uncrafted items and clear the activity type that supplies the missing token.
- Campaign loadout: Focus power, one wall-control gadget, one area-control gadget and at least one healing route.
- Stealth loadout: Silent Step if needed, plus web distractions and perch awareness.
- Ranged-heavy fights: Perfect Dodge, Threat Sensors or Ballistic Inserts if available.
- Cleanup loadout: track missing token types and complete the matching activities.
Before you move on
- Perfect Dodge, a dependable Focus or Finisher route and at least one aerial combat option are unlocked.
- The active loadout includes Web Shooters plus a reliable single-target control gadget and a reliable group-control gadget.
- At least one suit power is reserved for Focus or recovery, while other powers are available for crowd control, damage or specialized encounters.
- The in-game map and district panels show the activities and collectibles required for each district have been cleared if pursuing base-game 100% completion.
- If pursuing every base-game upgrade, the crafting menus show no remaining non-DLC suits, suit mods, gadget upgrades or skills that you intend to unlock, and the required token types have been earned.
- The PS4-original guide scope excludes suits and content that belong only to The City That Never Sleeps DLC or later remaster additions.
References for this chapter
- Marvel’s Spider-Man — Insomniac Games official page
- Skill Tree — Marvel's Spider-Man Walkthrough & Guide — GameFAQs
- Suit Mods — Marvel's Spider-Man Walkthrough & Guide — GameFAQs
- Gadgets — Marvel's Spider-Man Walkthrough & Guide — GameFAQs
- Spider-Man PS4 Gadget Guide — All The Right Tools For The Job — GameSpot
- Marvel's Spider-Man: Gadgets description — Gamepressure
- List of Suits — Marvel's Spider-Man — Gamer Guides
Taskmaster & High-Rank Challenge Farming — route, combos and score improvement
Taskmaster Challenges become available after the story mission What's in the Box? and consist of four Bomb, four Drone, four Stealth and four Combat activities in the original PS4 base game. Each challenge has Amazing, Spectacular and Ultimate performance tiers. The rewards are cumulative: Amazing awards 1 Challenge Token, improving to Spectacular adds 2, and improving to Ultimate adds 3, for up to 6 tokens from one activity. Complete every challenge once for Challenge Finder, earn Spectacular or better in one challenge of each type for the four format trophies, and earn Ultimate once for Master's Education. Learn every route before farming. For a lost Taskmaster encounter, successfully complete any Taskmaster Challenge again, even one already completed, to summon the rematch.
Unlock the challenges and make a learning pass
During What's in the Box?, follow the objective to the suspicious box on the Hell's Kitchen rooftop and inspect it. Taskmaster's message begins the challenge sequence, and the nearby activity is a Bomb Challenge. At each bomb, press L1 and R1 together to throw it into the air, then repeatedly press R1 to web it before moving to the next location. Use this first attempt to learn the interaction and route instead of immediately forcing Ultimate.
After the activity icons appear, identify the Bomb, Drone, Stealth and Combat challenges on the map. Four of each type are part of the original PS4 base game. Make one attempt at every available activity before repeatedly farming a single course. This reveals which routes are comfortable with your current skills and which should wait for stronger gadgets, suit powers or traversal abilities.
- Complete What's in the Box? and inspect the Hell's Kitchen challenge box.
- Finish the introductory Bomb Challenge.
- Locate the Bomb, Drone, Stealth and Combat activities.
- Make a learning attempt before repeatedly pursuing high ranks.
Understand ranks and cumulative token rewards
Each challenge has three performance milestones. The first Amazing result awards 1 Challenge Token. Improving that same challenge to Spectacular adds 2 more, giving 3 tokens from the activity in total. Improving it again to Ultimate adds 3 more, giving a maximum of 6. If you reach Spectacular or Ultimate immediately, the game credits the lower milestones as part of the cumulative reward; you do not need to deliberately earn a lower rank first.
Challenge Tokens from a previously earned rank are not awarded again when you replay the activity at the same or a lower result. For that reason, use the displayed rank and token total to decide whether a replay is worthwhile. Repeating an activity is useful for improving an unearned milestone, practicing a route, or satisfying the condition needed to bring Taskmaster back after a lost encounter.
Complete all 16 challenges once at any passing result for Challenge Finder. The format trophies require Spectacular or better in one Bomb, one Combat, one Stealth and one Drone Challenge. Master's Education requires an Ultimate result in any one challenge; Ultimate is not required on all 16.
- Amazing awards 1 token.
- Improving to Spectacular adds 2, for 3 total from that challenge.
- Improving to Ultimate adds 3, for 6 total from that challenge.
- Complete all 16 challenges for Challenge Finder.
- Earn Spectacular or better in each format if pursuing the four format trophies.
- Earn Ultimate once anywhere if pursuing Master's Education.
Prepare for Combat Challenges
Combat scores are influenced by defeat speed, remaining health and the final combo. Open by disrupting the most dangerous isolated enemy, such as a gunman, rocket carrier or heavy weapon user. Web Bomb, Electric Web and Suspension Matrix can interrupt groups while you reposition. Keep moving between targets so enemies do not surround Spider-Man.
Maintain the combo with ordinary attacks, air launches, web attacks, environmental throws and quick movement. Dodge whenever the Spider-Sense warning appears. Use Finishers when they remove a dangerous enemy or prevent incoming damage; refusing to spend a Finisher only to preserve the combo can cost more health and time than it saves. When enemies spread out, use Web Strike, point launches or aerial movement to cross the arena quickly.
Impact Web is especially useful when an enemy is near a wall or other surface, while Spider-Drone can add pressure as you reposition. For the first clear, prioritize survival and completing every wave. Return for Spectacular or Ultimate after unlocking more combat skills, gadgets and suit powers.
- Disrupt a high-threat enemy or group at the start.
- Keep moving and preserve the combo without accepting unnecessary damage.
- Use Finishers and environmental attacks to end dangerous waves quickly.
- Return later if stronger equipment makes the higher rank more practical.
Clear Stealth Challenges through planned takedowns
Begin from a perch and study patrol routes, sightlines and the safety indicator before attacking. Remove a target whose takedown will not expose Spider-Man to nearby enemies. Perch Takedowns and web-based takedowns provide reliable openings. After each elimination, move toward the next protected target instead of wandering through the arena.
If an enemy becomes suspicious, break line of sight with a web zip or climb to another perch. Allow the search to settle, then continue if the remaining time still supports the intended rank. Restart only when the lost time makes the target unrealistic. On later attempts, repeat the same target order and minimize climbing between takedowns.
A short, repeatable route is better than a complicated sequence that saves a few seconds but risks detection. A multi-target gadget or Spider-Bro can help when it preserves the stealth condition, but do not introduce unnecessary effects that scatter enemies or force extra movement.
- Scan patrols and sightlines before the first takedown.
- Choose a target order that limits travel and climbing.
- Break line of sight when suspicion begins.
- Repeat a reliable route before attempting a faster, riskier sequence.
Improve Bomb Challenge routes
Bomb Challenges place three bombs across a compact section of the city and judge both speed and how effectively each bomb is webbed. On the first attempt, establish the bomb order and the best launch points. After securing one bomb, leave immediately for the next marker. Point launches and short swings usually preserve momentum better than dropping to street level.
At each location, approach until the interaction is available, press L1 and R1 together to throw the bomb upward, then repeatedly press R1 until the webbing step is complete. Do not leave while the bomb is still insufficiently webbed. A fast route cannot compensate for an incomplete disarm.
For higher ranks, look toward the next marker before finishing the current interaction and launch as soon as control returns. If you miss a turn, correct with a web zip or point launch instead of making a wide circuit. The exact rank requirements differ by activity, so rely on the result shown after the attempt rather than applying one universal score.
- Learn the three-bomb order during the first attempt.
- Use L1 and R1 to throw each bomb upward.
- Complete the repeated R1 webbing step before leaving.
- Preserve height and correct missed turns with point launches or web zips.
Follow Drone routes without losing height
Drone Challenges require Spider-Man to chase a moving drone, collect the blue targets around the cameras it drops, and finish close enough to destroy the drone when it stops. Follow the drone's route rather than improvising a separate path. Start from a high anchor point and use point launches to cut corners while keeping the next target visible.
Look ahead to the next turn before passing through the current target. Leave each camera immediately after collecting it instead of circling for a better angle. If a target is missed, regain height and continue toward the next marker rather than diving blindly. A controlled recovery may still produce a passing result.
When the drone lands, approach quickly and use the displayed attack prompt to destroy it. Later attempts should focus on smoother exits from each camera, fewer unnecessary swings and arriving at the final stop close enough to finish without delay. Use the aim function when it helps line up a point launch or target without sacrificing control of the route.
- Keep the drone and next target in view.
- Collect blue camera targets in sequence whenever possible.
- Regain height after a missed target instead of dropping to street level.
- Arrive near the stopped drone so the final attack is immediate.
Farm selectively and complete the Taskmaster chain
For practical token farming, repeat a challenge that reliably reaches Spectacular. That result pays the Amazing milestone plus the additional Spectacular milestone, for 3 total tokens from the activity. Improve selected reliable challenges to Ultimate when you need the additional 3-token milestone. There is no need to force Ultimate on every activity for Challenge Finder or the trophy set.
After five completed challenges, Taskmaster ambushes Spider-Man for the first optional fight. Keep your distance, watch the Spider-Sense warning, dodge his attacks and use environmental throwables to stun or open him for a combo. Suit powers and Finishers can shorten his vulnerable windows. If he retreats or you lose the encounter, do not assume the fight is permanently missed.
To summon the rematch after losing a Taskmaster encounter, replay and successfully complete any Taskmaster Challenge. The activity may already be marked completed; it does not have to be a newly discovered challenge or a higher rank. After all 16 challenges have been completed, the later Taskmaster encounter becomes available. If that encounter is lost, successfully complete any Taskmaster Challenge again, including an already-completed one, to trigger the rematch condition.
Review the map after the learning pass and after each farming session. An Amazing result completes the activity for all-16 challenge purposes, but unearned Spectacular or Ultimate milestones remain available for additional tokens.
- Complete all 16 challenge icons once.
- Use reliable Spectacular results for a 3-token total per improved challenge.
- Improve selected activities to Ultimate for the additional 3-token milestone and 6-token maximum.
- Earn one Spectacular-or-better result in each format if pursuing the four format trophies.
- Earn one Ultimate result anywhere if pursuing Master's Education.
- Defeat Taskmaster in the later encounter.
- After losing an encounter, successfully complete any Taskmaster Challenge again, including one already completed, to summon the rematch.
Before you move on
- All 16 original PS4 Taskmaster challenges show a completed result: four Bomb, four Drone, four Stealth and four Combat.
- Challenge Finder is satisfied when every challenge has been completed once at any passing rank.
- One Bomb, one Combat, one Stealth and one Drone challenge show Spectacular or Ultimate if the four format trophies are desired.
- At least one challenge shows Ultimate if Master's Education is desired.
- The later Taskmaster encounter has been completed.
- If an encounter was lost, a Taskmaster Challenge was successfully completed again to trigger and finish the rematch.
- The intended Challenge Tokens have been earned: each Amazing milestone gives 1, each Spectacular improvement adds 2, and each Ultimate improvement adds 3.
- No original base-game Taskmaster activity remains unfinished on the map or in district progress.
- DLC challenge activities and remaster-only additions have not been counted toward this PS4 base-game chapter.
References for this chapter
- Taskmaster Challenges — Marvel's Spider-Man Walkthrough & Guide — GameFAQs
- What's in the Box? — Marvel's Spider-Man Walkthrough — Neoseeker
- Marvel's Spider-Man FAQ/Walkthrough — Neoseeker Walkthroughs
- Marvel's Spider-Man (2018) Trophy Guide & Roadmap — PowerPyx
- How to defeat Taskmaster — Master of Masters Trophy Guide — Marvel's Spider-Man PS4
- I got beat by Taskmaster. What now? — GameFAQs
Failure Recovery and Checkpoint Strategy — what to do after a mission fail
The original PlayStation 4 release usually lets you recover from a failed story section by reloading the most recent checkpoint. Use that option deliberately: determine whether the problem was positioning, enemy priority, stealth timing or a missed tutorial prompt, then change one part of the approach before retrying. Checkpoint placement is mission-dependent, and optional activities such as many base encounters may restart from the beginning after death. If a mission remains difficult, leave it only when the game has returned you to ordinary Manhattan free roam. Complete a few nearby crimes, backpacks, landmarks or research activities, then spend the resulting XP and tokens on a targeted upgrade. For a genuinely stuck objective, reload the checkpoint once, then return to the title screen and load the newest stable save rather than repeatedly forcing the same broken state. Completion means the objective advances, the mission-complete notice or next story scene appears, and the game returns to normal exploration when that mission is finished.
1. Reload the most recent checkpoint first
When Spider-Man is defeated or a scripted objective fails, pause with the Options button and choose Reload Last Checkpoint when that command is available. In the original PS4 release, this is the normal first recovery method for a failed story section. It is faster than abandoning the mission and starting the entire sequence again.
Do not assume that every mission reloads at the same location. Story checkpoints are tied to scripted progress, so one attempt may return you to the beginning of a combat wave while another returns you before a chase, stealth room or interaction. Watch the objective text after loading and confirm that the game has restored the expected section before moving on.
Before retrying, identify the actual cause of failure. A death from rockets or gunfire requires threat prioritisation and movement; a stealth failure requires a safer route; a missed tutorial action may simply require completing the on-screen instruction. Changing the diagnosis is more useful than repeating the same opening.
- Pause with Options and select Reload Last Checkpoint when available.
- Read the restored objective before acting.
- Change your response to the cause of failure instead of repeating the same sequence.
2. Make one targeted menu change between attempts
If the mission allows access to the pause menus, inspect the Suits, Suit Mods, Gadgets and Skills screens before the next attempt. A defensive mod can help if ordinary attacks are draining your health, while a Focus-oriented or gadget-oriented setup is useful when the encounter is decided by healing, takedowns or crowd control. Select a suit power that addresses the problem rather than changing equipment at random.
Spend an available skill point if a relevant node is ready. Aerial attacks, improved dodge options, stronger takedowns and Focus-related upgrades are broadly useful, but the correct choice depends on why the attempt failed. If a mission has locked the equipment menus, or if the current sequence does not permit a loadout change, continue with the current setup and change your positioning or target order instead.
Difficulty can be changed from Settings when the game permits it. Treat this as a legitimate recovery option if the encounter is preventing progress, not as a requirement for completion. Lowering difficulty does not repair a broken objective, so use it for survivability and continue troubleshooting separately if the mission state is not advancing.
- Change one suit mod, suit power, gadget choice or skill when the menus are available.
- Use a defensive or Focus-focused setup if health management caused the failure.
- Change difficulty only when needed for progress, and do not mistake it for a fix for a stuck objective.
3. Stabilize combat before attacking again
At the start of a retry, avoid standing in the center of a group. Use a web-zip to reach a wall, roof or other elevated position when the arena allows it, then re-enter with an aerial attack, web strike or targeted gadget. If several enemies close around you, disengage vertically and reset your view of the arena instead of trying to trade damage on the ground.
Respond to the Spider-Sense warning before extending a combo. A timely dodge prevents many avoidable hits and can create an opening for a counterattack or perfect-dodge effect. Keep moving through the arena, and use environmental objects or web attacks to separate opponents rather than allowing every enemy to attack at once.
Prioritise threats that force movement or interrupt actions. Ranged attackers, rocket launchers and enemies with disruptive weapons can make the rest of the group more dangerous, so interrupt them with web attacks, environmental throws, gadgets or a quick takedown when possible. Against a dense crowd, spend gadgets to create space and preserve a route to safety rather than saving every charge for the final enemy.
- Leave the center of a crowd before restarting a long combo.
- Dodge when Spider-Sense warns of an incoming attack.
- Interrupt ranged and disruptive enemies before low-threat targets.
4. Rebuild the opening of stealth missions
For MJ, Miles or Spider-Man stealth sections, use the checkpoint reload to study the patrol pattern instead of immediately repeating the failed route. Remain concealed long enough to see which guards move together, which guard is isolated and which areas are watched by more than one enemy. Start with a takedown only when the target is not visible to another guard.
Use cover, distractions and the available environmental interaction to separate enemies. Move only after the patrol has created a safe gap, and leave yourself an escape direction before committing to an interaction. A route that is slightly slower but keeps cover is safer than crossing an open lane to reach the closest target.
If detection occurs, do not automatically sprint through the objective area. Break line of sight, move behind cover and wait for the search to settle if the mission permits recovery. Some sections fail immediately when the player is detected, while others transition into a combat or escape sequence. Follow the current objective and do not assume that every stealth segment has the same detection rules.
- Watch one patrol cycle after reloading before moving.
- Separate guards with cover or distractions.
- If detection does not immediately fail the mission, break line of sight before trying again.
5. Farm only after free roam returns
If the game has returned you to ordinary Manhattan free roam, strengthen Spider-Man before attempting the mission again. Complete a few nearby crimes, collect accessible backpacks or landmarks, or finish an available research activity. These activities provide XP and tokens that can be converted into skills, gadgets, suit mods or suit powers. Choose activities near an unlocked fast-travel point so the return trip stays short.
Do not assume that you can leave every active mission through the map. If the mission is still running and the game has not restored free roam, use Reload Last Checkpoint and solve the encounter from inside the mission. Trying to force the map open during a locked sequence can waste time or leave the mission in an awkward state.
Farm only for an upgrade that addresses the failure. If health is the issue, improve survivability or Focus generation; if groups are the issue, improve crowd control or gadget capacity; if stealth is the issue, use a stealth-supporting mod where available. Return to the mission marker as soon as the targeted improvement is made.
- Confirm that Manhattan free roam is active before doing side activities.
- Choose nearby XP and token sources instead of clearing an entire district.
- Return to the mission after obtaining the upgrade that solves the diagnosed problem.
6. Recover from a repeating or broken mission state
If Reload Last Checkpoint reproduces a missing interaction, frozen enemy, absent objective marker or unresponsive scripted event, try the reload once more after allowing the scene to finish loading. Check that no tutorial prompt is waiting for a required action; tutorial sections can pause progression until the displayed input is completed.
If the state remains broken, return to the title screen and load the newest stable manual or autosave available in your game slot. The original PS4 release should not be treated as having the same selectable BACKUP-save workflow documented for newer Insomniac titles, so do not promise yourself a separate backup file. Before confirming any load, note the current mission name and objective and make sure you understand which progress may be lost.
After loading, verify the objective text and mission marker before retrying. If the same issue persists across a checkpoint reload and a stable save, close and relaunch the game, then try the mission again from that clean state. Do not repeatedly force a visibly broken checkpoint when a stable save is available.
- Reload once more after the scene has fully loaded.
- Use the newest stable manual or autosave only if the checkpoint remains broken.
- Verify the mission objective after loading before resuming normal retries.
Before you move on
- The active objective advances after the successful retry.
- The next objective marker, scripted scene or mission transition appears normally.
- A mission-complete notification appears, or the game returns to ordinary Manhattan free roam after the final story sequence.
- Any skill, gadget, suit-mod or suit-power changes made before the successful attempt remain available afterward.
- If the problem was a stuck state, the same interaction or objective also works after the next reload or normal mission transition.
References for this chapter
- Marvel’s Spider-Man releases on 7th September, Collector’s Edition revealed and more — PlayStation.Blog
- Marvel’s Spider-Man — Insomniac Games official page
- Marvel's Spider-Man FAQ/Walkthrough — Neoseeker Walkthroughs
- Do the Fisk Hideout Missions have checkpoints? — GameFAQs PS4 Q&A
- I am stuck or can’t progress the game — Insomniac Support
Afterword: PS4 original vs later remasters and DLC
This chapter defines the scope of the Marvel’s Spider-Man guide. It covers the original PlayStation 4 release from September 7, 2018, including its base-game campaign and optional base-game activities. It excludes The City That Never Sleeps DLC and Marvel’s Spider-Man Remastered on PlayStation 5 or PC. The minimum completion target is the final base-game story mission, its ending sequence, credits and return to post-story free roam. Optional completion must be tracked as separate goals: district activity progress, the original base-game trophy requirements, obtaining every original base-game suit and equipment item, and unlocking the hidden ESU Suit. The ESU Suit comes from all 50 Secret Photo Ops and is not required for district 100%, the base-game trophy set or the A Suit For All Seasons trophy. If you change editions or begin the DLC, use edition-specific requirements rather than carrying over PS4 assumptions.
Confirm the release and completion target
This guide applies to Marvel’s Spider-Man for PlayStation 4, the original game released on September 7, 2018. It includes the standard PS4 release and PS4 Pro presentation of that game. PS4 Pro resolution or performance options do not turn it into Marvel’s Spider-Man Remastered; the Remastered release is a separate edition with its own technical and presentation changes.
Choose your completion target before beginning cleanup. The minimum target is the original campaign through its final story mission, concluding scenes, credits and restored post-story free roam. Optional completion has several independent checks. District 100% measures the activities recorded by the in-game district progress panels. The base-game trophy set has its own requirements, including the trophy for purchasing the original suit list and the trophy for completing all districts. Obtaining every original base-game suit, suit power, suit mod, gadget and gadget upgrade is a broader equipment goal that should be checked in the relevant menus. The ESU Suit is a separate hidden-suit objective.
- The game is Marvel’s Spider-Man for PS4, not Marvel’s Spider-Man Remastered.
- The campaign target is the original base-game story.
- District 100%, the base-game trophy set, equipment completion and ESU Suit completion are tracked separately.
Keep The City That Never Sleeps separate
The City That Never Sleeps is downloadable content for Marvel’s Spider-Man, not part of the original base-game campaign route. Its three story chapters are The Heist, Turf Wars and Silver Lining. They add separate story missions, challenges, enemy encounters, suits and rewards. Do not include their missions or activities in the base-game route, district tally or original campaign completion check.
A Game of the Year Edition may include the full game and access to this DLC, but the included add-on remains a separate post-launch story arc. If the DLC tab or its missions are visible, leave them out of the base-game checklist. Finish the original campaign and its optional cleanup first, then begin the DLC as a separate project if desired.
- The Heist, Turf Wars and Silver Lining are excluded from the original campaign target.
- DLC suits, activities, challenges and rewards are not required for base-game district completion.
- Use a separate guide for The City That Never Sleeps.
Do not transfer Remastered assumptions to PS4
Marvel’s Spider-Man Remastered is a separate version rather than a graphics-only setting for the original PS4 game. Insomniac documents upgraded character and environment presentation, ray-traced reflections, faster loading, DualSense features and a recast Peter Parker face model for the Remastered release. The Remastered package also includes the PS4 DLC and can contain edition-specific content and presentation differences.
When playing the original PS4 release, follow the PS4 control layout, original activity categories, original map-progress panels and original equipment checklist. Do not add Remastered-only suits, later-edition presentation changes or hardware features to the PS4 completion target. If you move to PS5 or PC Remastered, begin a separate checklist and verify that version’s menus, trophy requirements, equipment list and progression displays before continuing.
- Use PS4 controls and PS4 activity categories.
- Do not count Remastered-only content toward the PS4 target.
- Start a separate route when changing to PS5 or PC Remastered.
Finish the campaign cleanly
The base-game story target is complete after the final story mission has been cleared and the concluding scenes have played. Let the ending sequence and credits continue instead of closing the application immediately after the final combat encounter. The practical confirmation is that control returns to Manhattan and post-story free roam is available again.
Once free roam returns, open the map and progress information. Remaining crimes, collectibles, research stations, enemy bases, challenges, side missions and equipment purchases do not mean the story failed to complete. You do not need to restart the campaign because optional activities remain unfinished. Continue from the restored post-story save and clean up the map at your own pace.
- The final base-game story mission is marked complete.
- The concluding scenes and credits have played.
- Control has returned to post-story Manhattan free roam.
- Remaining map activities are treated as optional cleanup, not missing story progress.
Complete district, trophy and equipment cleanup
For ordinary base-game cleanup, work district by district and use the in-game progress display to identify remaining backpacks, landmarks, research stations, Black Cat activities, pigeon objectives, enemy bases, Taskmaster Challenges, side missions and required crimes. Complete the activities recorded for each district, then verify the district and overall progress panels. This is the correct check for district completion, but it is not a replacement for checking equipment menus or the PlayStation trophy list.
Keep the goals distinct. District 100% is the in-game completion requirement represented by the district progress panels. The original base-game trophy set has its own requirements, including I Heart Manhattan for completing all districts and A Suit For All Seasons for purchasing the applicable original suits. The optional goal of obtaining every original base-game suit is an equipment check in the suits menu, while completing every suit power, suit mod, gadget and gadget upgrade requires checking those separate menus. Completing one of these goals does not automatically prove the others.
After activity cleanup, inspect the suits, suit powers, suit mods, gadgets and gadget-upgrade menus. Unlock or purchase the original PS4 equipment required for your chosen equipment goal. Story completion does not automatically purchase every item, and district 100% does not by itself prove that every optional equipment item has been obtained.
Treat the ESU Suit as a separate hidden-suit goal. It is unlocked by finding and photographing all 50 Secret Photo Ops. These photographs are not ordinary Landmark activities and are not represented as standard district map icons. They do not count as a required component of district 100%, and they are not required for the base-game trophy set or the A Suit For All Seasons trophy. At level 50, equip the Proximity Sensor suit mod to help reveal nearby Secret Photo Ops on the minimap. Use the camera to frame each hidden subject and confirm the Secret Photo Op counter after each successful photograph. When the counter reaches 50, verify that the ESU Suit has unlocked in the suits menu.
If the goal is every original base-game suit, perform two separate checks: first confirm the ordinary original PS4 suits through the suits menu and the relevant base-game equipment requirements; then separately confirm all 50 Secret Photo Ops and the ESU Suit. Do not infer either result from district 100% or from the base-game trophy screen alone.
- The intended base-game districts show the desired completion state in the map progress panels.
- The original base-game trophy requirements are complete if trophy completion is the target.
- Ordinary original PS4 suits, suit powers, suit mods, gadgets and gadget upgrades are checked in their menus.
- The Secret Photo Op counter reaches 50/50 if the hidden-suit goal is desired.
- The ESU Suit is visible and unlocked in the suits menu.
- DLC-only and Remastered-only items are excluded.
Before you move on
- For the minimum goal, the original PS4 final story mission is complete, the ending and credits have played, and post-story free roam is available.
- For ordinary optional completion, the intended base-game district and activity progress panels are complete.
- For trophy completion, the original base-game trophy requirements are satisfied independently of the ESU Suit.
- For equipment completion, the desired original PS4 suits, suit powers, suit mods, gadgets and gadget upgrades are unlocked or purchased.
- For the separate hidden-suit goal, all 50 Secret Photo Ops are complete and the ESU Suit is unlocked.
- The final tally excludes The City That Never Sleeps and PS5 or PC Remastered additions.
References for this chapter
- Marvel’s Spider-Man — Insomniac Games official page
- What is different in Marvel’s Spider-Man Remastered from the original game? — Insomniac Support
- Does Marvel’s Spider-Man Remastered include The City That Never Sleeps DLC from the PS4 game? — Insomniac Support
- How do I access The City That Never Sleeps DLC? — Insomniac Support
- Marvel’s Spider-Man: The City That Never Sleeps — PlayStation Store
- How to unlock the secret ESU suit in Marvel’s Spider-Man for PlayStation 4 — Android Central
- Trophies — Marvel’s Spider-Man Walkthrough & Guide — GameFAQs
Finishing up
Main campaign completed: all required original base-game story missions are finished, the final story scenes and credits have played, and post-story Manhattan free-roam is available.
Optional base-game district completion: every original base-game district shows 100%, including its required side missions, Backpacks, Landmarks, Black Cat Stakeouts, Howard’s Pigeons, Research Stations, faction crimes, Fisk Hideouts, Demon Warehouses, Sable Outposts, Prisoner Camps and Taskmaster Challenges.
Optional base-game equipment completion: every non-DLC suit, suit power, suit mod, gadget and gadget upgrade available in the original PS4 release has been unlocked or purchased with the required tokens and progression.
Taskmaster trophy completion, if desired: complete all 16 original Taskmaster Challenges once for Challenge Finder; earn a Spectacular-or-better result in at least one Bomb, Drone, Stealth and Combat Challenge for the four format trophies; and earn an Ultimate result on any one challenge for Master's Education.
No base-game story or trophy progress is permanently missable; remaining original base-game activities can be completed in post-story free-roam. DLC and remaster content are outside this completion target.
If only the story ending is wanted, verify that Pax in Bello is complete, the ending and credits have played, and no main-story mission remains in the Missions menu.
Choose your next gameScreenshots & video
Game imagery for reference. Follow the written chapters above for the route and strategies.


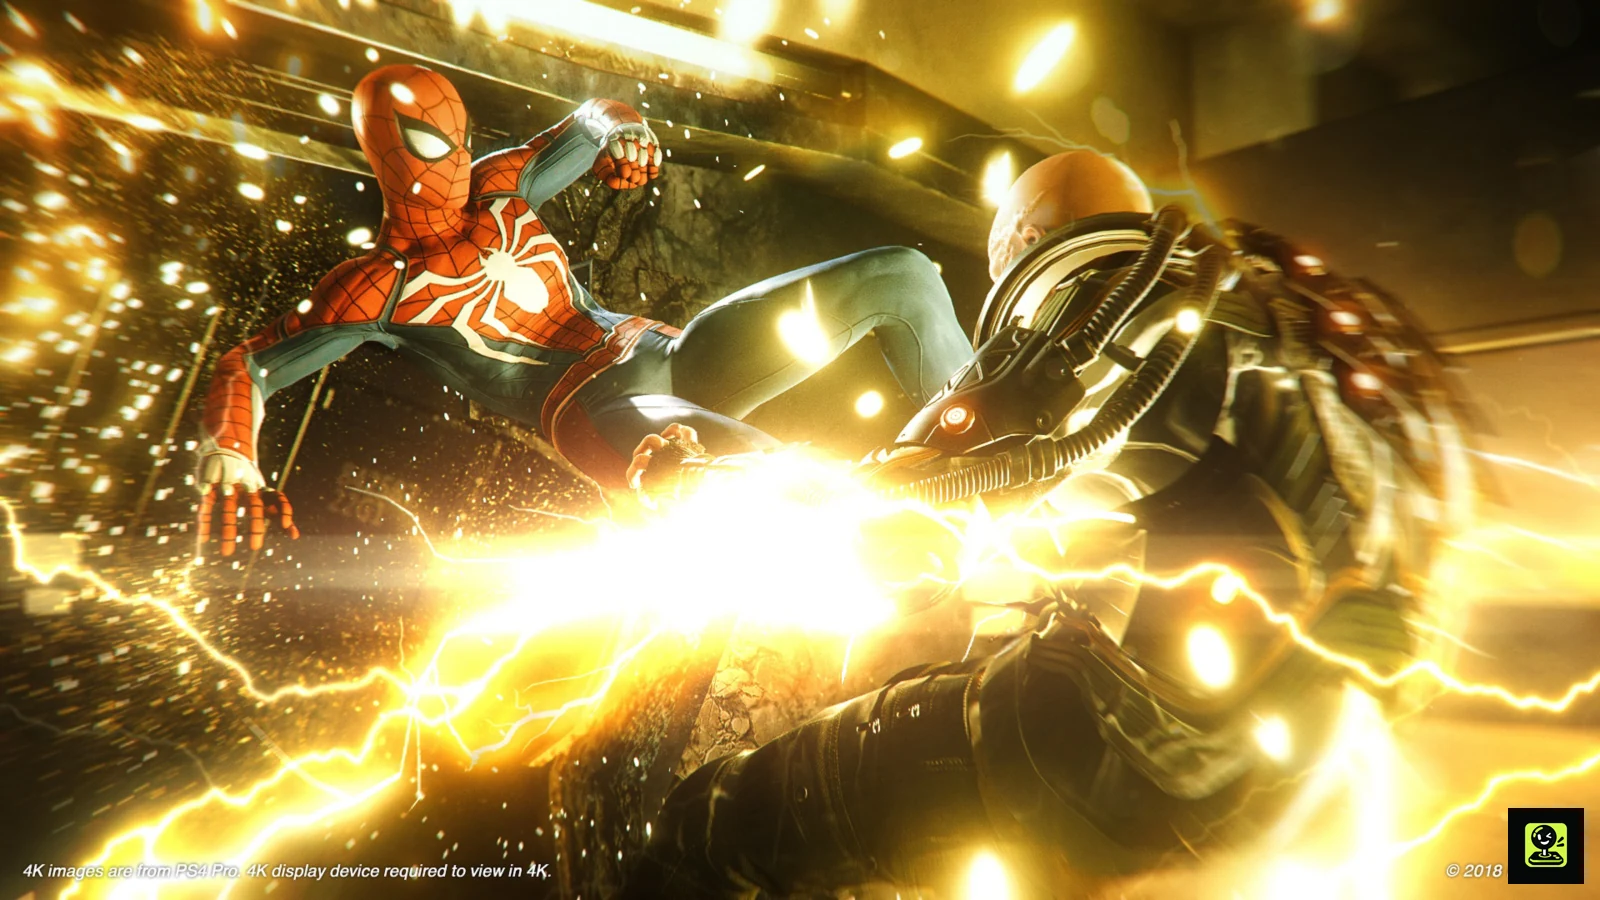
Sources & references
Our original guide draws on the references below. Check the edition at the top of this page before following controls or unlock requirements.
- Marvel’s Spider-Man — Insomniac Games official page
- Marvel's Spider-Man/Controls — StrategyWiki
- How to quick-switch gadgets in combat? — Marvel's Spider-Man PS4 discussion
- Controls - Becoming Spider-Man - The Basics — Gamer Guides
- The Main Event — Main Story Walkthrough — Gamer Guides
- Marvel's Spider-Man Complete Controls Guide for PS4 & PS5 — Outsider Gaming
- Marvel's Spider-Man Walkthrough & Guide — Fisk Hideout — GameFAQs
- Keeping the Peace — Marvel’s Spider-Man Walkthrough & Guide, GameFAQs
- Something Old, Something New — Marvel's Spider-Man Walkthrough & Guide, GameFAQs PS4
- Harry’s Passion Project — Marvel’s Spider-Man Walkthrough, Neoseeker
- Marvel’s Spider-Man/Backpacks — StrategyWiki
- Marvel’s Spider-Man Swings to PS4 September 7 — PlayStation.Blog
- Fisk Hideout — Marvel's Spider-Man Walkthrough & Guide, GameFAQs PS4
- Fisk Hideout — Marvel's Spider-Man PS4 Main Story Walkthrough, Gamer Guides
- Fisk Hideout — Marvel's Spider-Man Walkthrough, Neoseeker
- Marvel's Spider-Man/Fisk Hideout — StrategyWiki
- Marvel's Spider-Man Walkthrough & Guide — Crimes, GameFAQs
- Research Stations — Marvel’s Spider-Man Walkthrough & Guide
- How to Get Crime Tokens in Spider-Man, Prima Games
- Spider-Man tokens: How to get them and what they do, PC Gamer
- Marvel's Spider-Man (2018) Trophy Guide & Roadmap — PowerPyx
- Marvel’s Spider-Man releases on 7th September, Collector’s Edition revealed and more — PlayStation.Blog
- Dual Purpose - Marvel’s Spider-Man Walkthrough and Guide, Neoseeker
- Dual Purpose - Marvel’s Spider-Man Walkthrough and Guide, GameFAQs
- Out of the Frying Pan... - Marvel’s Spider-Man Walkthrough and Guide, Neoseeker
- Out of the Frying Pan - Marvel’s Spider-Man Walkthrough and Guide, GameFAQs
- Gadgets - Marvel’s Spider-Man Walkthrough and Guide, GameFAQs
- Marvel’s Spider-Man Walkthrough and Guide, Neoseeker
- Marvel’s Spider-Man Walkthrough & Guide (PS4) — Main Mission List and Edition-Specific Walkthrough
- Dinner Date — Marvel’s Spider-Man Walkthrough & Guide (PS4)
- Uninvited — Marvel’s Spider-Man Walkthrough & Guide (PS4)
- First Day — Marvel’s Spider-Man Walkthrough & Guide (PS4)
- The One That Got Away — Marvel’s Spider-Man Walkthrough & Guide (PS4)
- Side Missions — Marvel’s Spider-Man Walkthrough & Guide
- Marvel’s Spider-Man Missions — Base-Game Mission List
- Marvel's Spider-Man/Bases — StrategyWiki
- Spider-Man PS4 How to Get Base Tokens — Attack of the Fanboy
- Marvel's Spider-Man PS4 Construction Sites — GameRevolution
- Helping Howard — Marvel’s Spider-Man Walkthrough
- ESU Suit — Marvel’s Spider-Man Walkthrough
- Helping Howard — Marvel’s Spider-Man Wiki
- Taskmaster Challenges — Marvel's Spider-Man Walkthrough & Guide — GameFAQs
- What's in the Box? — Marvel's Spider-Man Walkthrough — Neoseeker
- Marvel’s Spider-Man/Challenges — StrategyWiki
- Taskmaster Challenges — Marvel’s Spider-Man — GameFAQs Game of the Year Edition Guide
- Marvel's Spider-Man - Game of the Year Edition Walkthrough & Guide - Walkthrough
- I got beat by Taskmaster. What now? - Marvel's Spider-Man Q&A for PlayStation 4
- Spider-Man PS4: How to Beat Electro & Vulture
- Spider-Man PS4: How to Beat Taskmaster
- Marvel's Spider-Man Walkthrough & Guide — PS4 mission list and Pax in Bello
- Marvel's Spider-Man Walkthrough & Guide — PS4 mission list and The Heart of the Matter
- Pax In Bello — Spider-Man PS4 ending and Doctor Octavius walkthrough
- How to unlock the secret ESU suit in Marvel’s Spider-Man for PlayStation 4 — Android Central
- Taskmaster Challenges - Marvel's Spider-Man Wiki
- A Research Station in the Upper West Side is locked
- Marvel's Spider-Man – Post Launch Content Revealed
- Skill Tree — Marvel's Spider-Man Walkthrough & Guide — GameFAQs
- Suit Mods — Marvel's Spider-Man Walkthrough & Guide — GameFAQs
- Gadgets — Marvel's Spider-Man Walkthrough & Guide — GameFAQs
- Spider-Man PS4 Gadget Guide — All The Right Tools For The Job — GameSpot
- Marvel's Spider-Man: Gadgets description — Gamepressure
- List of Suits — Marvel's Spider-Man — Gamer Guides
- Marvel's Spider-Man FAQ/Walkthrough — Neoseeker Walkthroughs
- How to defeat Taskmaster — Master of Masters Trophy Guide — Marvel's Spider-Man PS4
- I got beat by Taskmaster. What now? — GameFAQs
- Do the Fisk Hideout Missions have checkpoints? — GameFAQs PS4 Q&A
- I am stuck or can’t progress the game — Insomniac Support
- What is different in Marvel’s Spider-Man Remastered from the original game? — Insomniac Support
- Does Marvel’s Spider-Man Remastered include The City That Never Sleeps DLC from the PS4 game? — Insomniac Support
- How do I access The City That Never Sleeps DLC? — Insomniac Support
- Marvel’s Spider-Man: The City That Never Sleeps — PlayStation Store
- Trophies — Marvel’s Spider-Man Walkthrough & Guide — GameFAQs
About the game & collecting notes
- Platform
- PlayStation 4
A player-focused campaign walkthrough for the original PlayStation 4 release of Marvel’s Spider-Man. Follow verified progression through the main story to its finale, then use the optional chapters to complete the original base-game side missions, district activities, collectibles, research stations, enemy bases, crimes, Taskmaster challenges and Black Cat Stakeouts. The guide also separates district 100% from the additional goal of unlocking every base-game suit, suit power, suit mod, gadget and gadget upgrade, while excluding The City That Never Sleeps and later remaster content.
Darryl Polo
Darryl Polo loves tinkering with emulation and revisiting retro games. He enjoys exploring how old favorites play on different setups and sharing what he learns along the way. At Joking Joystick, he writes about the games, hardware, and small discoveries that keep the hobby fun.
Our editorial standardsFound a step that needs another look? Help us improve this guide.