
Lunar: The Silver Star (Sega CD, USA) — Complete Campaign Walkthrough
Complete Burg's opening preparations, recruit Ramus, obtain Alex's Dagger and Heavy Clothes from the basement chest, buy Luna's Sling, collect the Old Ring from Ramus's house, learn the field menu and saving procedure, train near the Stone Monument, and reach the sealed White Dragon Cave entrance. End before using the Old Ring or entering the cave; Quark and all interior cave events belong to Chapter 2.

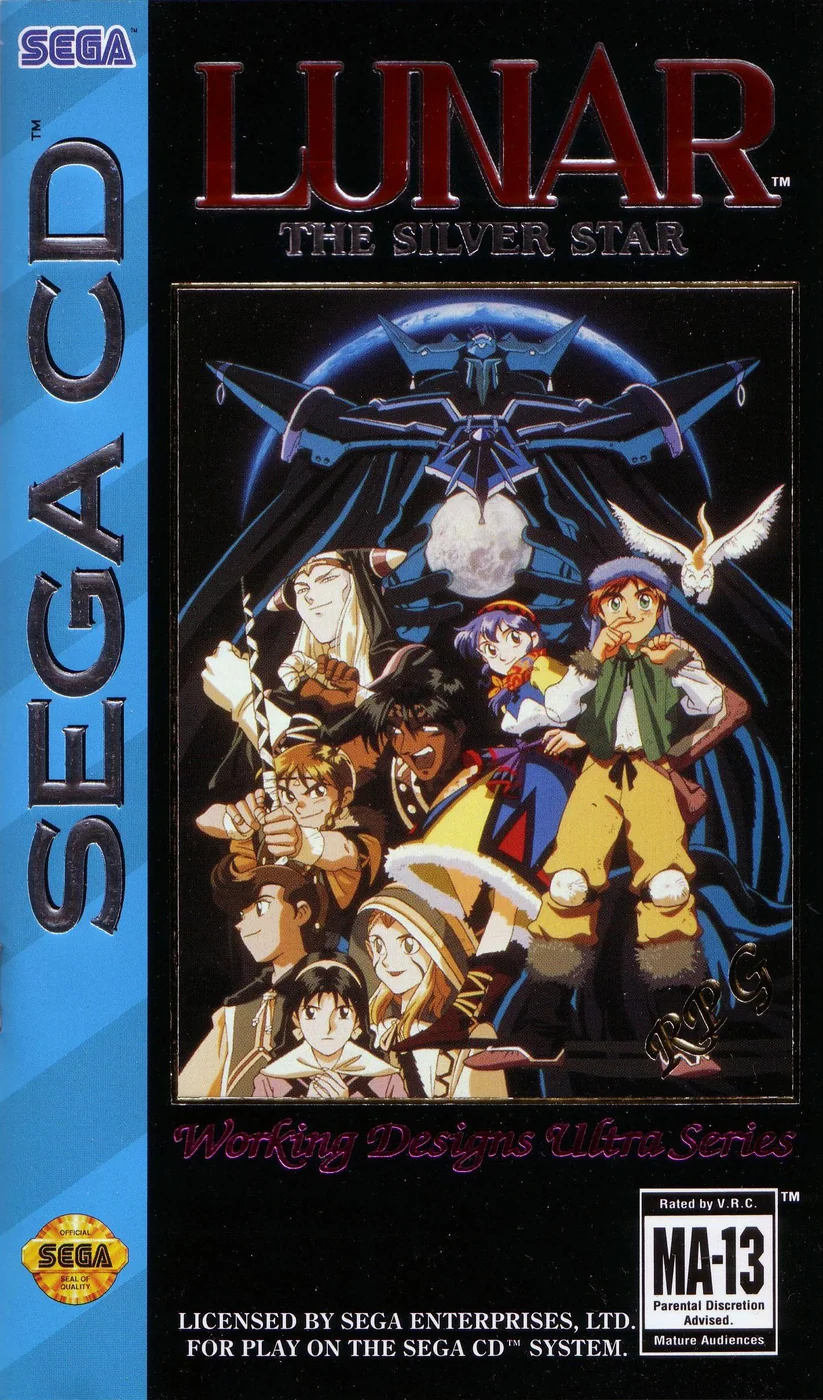
Find a copy
Lunar: The Silver Star Sega CD
We may earn a commission if you buy through these links, at no extra cost to you. As an Amazon Associate I earn from qualifying purchases.
Opens retailer search results. Check the model, edition, seller, availability and current price before buying.
Before you begin
This walkthrough covers the original North American Sega CD release in one continuous progression order.
Follow the required campaign chapters ch01 through ch14 in ID order. Chapter 15 is an optional retry reference, not a campaign step. Chapter 16 is a final completion checklist to use after the ch14 ending sequence, not a second route.
Required dungeons, bosses, scripted party changes and point-of-no-return preparation are separated from optional treasure and shopping.
The final sequence is not a single battle: Xenobia, the first Ghaleon fight, the transformed Magic Emperor and Alex's harp ascent all occur consecutively in Ghaleon's Palace.
Set yourself up for the run
Use frequent manual saves, preserving separate files before major dungeons and before the tenth-floor false Luna scene.
Do not enter the Grindery until all earlier required story events, Dragonmaster equipment, final shopping and optional errands are complete.
Treat party changes as scripted. Do not search for party-leader checks or alternate Dragon trial branches unless the game explicitly changes the active roster.
Keep recovery items distributed among several characters because the final sequence does not provide a normal town resupply between the consecutive boss battles.
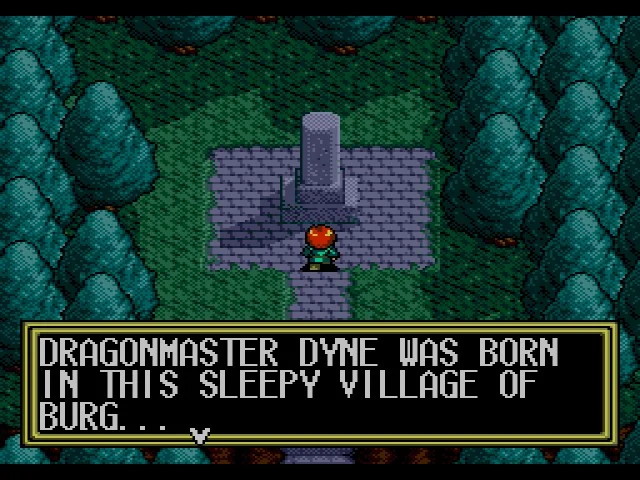
Chapter 1 — Burg: Start, Basics and the First Quest
Complete Burg's opening preparations, recruit Ramus, obtain Alex's Dagger and Heavy Clothes, equip Luna with a Sling, collect the Old Ring from Ramus's house, learn the field menu and saving routine, train near the early recovery landmarks, and reach the sealed White Dragon Cave entrance. Stop before using the Old Ring or entering the cave's interior sequence.
1. Finish the opening scenes and bring Luna into the party
After the opening sequence at Dyne's Monument, return to Burg and speak with the townspeople before leaving. The opening conversations direct Alex toward Burg Springs, where he finds Luna and practices the Goddess Festival song with her. During this scene, Nall reveals that Alex and Ramus intend to visit the White Dragon Cave. Luna is worried about the danger but agrees to accompany Alex.
Return to Burg after Luna joins. The village conversations are mostly introductory, but completing the spring scene is necessary before the household and equipment events advance. If you try to hurry directly toward the village exit, the next required scenes may not yet be available.
- Visit Burg Springs and complete Alex and Luna's conversation.
- Allow Nall to reveal the plan to visit the White Dragon Cave.
- Return to Burg after Luna joins the expedition.
2. Open the basement chest and equip Alex
Return to Alex's house and go downstairs to the basement. The chest in the room is locked at first. Speak with Alex's father upstairs to receive the Chest Key, then return to the basement and open the chest. It contains Alex's Dagger and Heavy Clothes.
Equip both items immediately. The Dagger is Alex's early weapon, and the Heavy Clothes provide his initial protection for the Caldor Island journey. Afterward, go to the village entrance and speak with Ramus. He joins the party there, completing the initial expedition group.
Do not leave Burg before recruiting Ramus. The Old Ring search and the early equipment checks are intended to be completed after the party has assembled.
- Receive the Chest Key from Alex's father.
- Open the basement chest.
- Take Alex's Dagger and Heavy Clothes.
- Equip both items on Alex.
- Speak with Ramus at the village edge and recruit him.
3. Get the Old Ring and Luna's Sling
After Ramus joins, enter his house, the largest house in Burg. Search the left cabinet to obtain the Old Ring. Keep it in the inventory; it is the story item needed for the ice barrier at the White Dragon Cave entrance. It is not found inside the cave and is not obtained from Quark.
Visit Burg's weapon shop, which is now open. The shop sells a Dagger, Short Sword and Sling. Buy the Sling for Luna and equip it. The Sling is the appropriate early weapon for her in this Sega CD route.
If your remaining silver permits, improve Ramus with practical equipment such as a Dagger, Heavy Clothes, Gloves and a Garbage Can Lid. These upgrades are useful but secondary to obtaining Luna's weapon, keeping the Old Ring and preserving money for recovery items. Do not spend all your silver on optional gear before the party is ready to travel.
- Search the left cabinet in Ramus's house.
- Obtain and retain the Old Ring.
- Buy and equip Luna's Sling.
- Give Ramus useful basic equipment if you can afford it.
4. Learn the field menu, status screen and saving routine
Press C while moving around the field to open the game menu. Use the directional pad to move through commands, A to select, and B to cancel. Start does not open the normal game menu in this release.
Use Equip to verify each character's weapon and clothing. Use Status to inspect current and maximum HP, current and maximum MP, level and combat statistics. This is especially useful before leaving Burg: Alex should have the Dagger and Heavy Clothes, Luna should have the Sling, and Ramus should not be left without practical equipment.
Use the save command from the field menu whenever you return to a safe area. Make a Burg-area save before training, then save again after recovering and completing the final equipment check. If you are using original hardware, also ensure that the Sega CD system has usable save memory before relying on a new file.
- Open the menu with C.
- Confirm the button functions: A selects, B cancels and C opens the menu.
- Inspect HP, MP, equipment and status for Alex, Luna and Ramus.
- Create a Burg-area save before the world-map trip.
5. Train near the Stone Monument and recover for free
Leave Burg and fight several groups around Caldor Island instead of rushing straight to the cave. Early enemies include Dung Beetles, Flytrappers and Albino Baboons. Ramus is strong at this point, while Alex can deliver multiple physical strikes. Use ordinary attacks against weaker groups and avoid letting the party remain at low HP after a fight.
The Stone Monument near Burg provides a free HP recovery point. Approach it and press A when prompted. A small shrine to Althena near the White Dragon Cave restores both HP and MP, so use the shrine before attempting the entrance if the party has spent resources on the journey.
A party around level 6 or 7 is a comfortable preparation point for the opening cave route, but no exact level is required to trigger the story. Return to Burg after training, buy a Short Sword for Alex if you can afford it, and carry a modest supply of Herbs or Meal Rations. Keep enough silver for essential equipment and recovery items.
- Fight early Caldor Island enemies until they are manageable.
- Use the Stone Monument for free HP recovery.
- Use the Althena shrine near the cave to restore HP and MP.
- Return to Burg and save after the final equipment check.
- Carry recovery items without sacrificing required equipment purchases.
6. Reach the sealed White Dragon Cave entrance
From Burg, follow the accessible world-map route around the mountain range toward the southern cave area. The cave is reached by going around the mountains rather than trying to pass directly through them. Follow the path until you reach the shrine near the White Dragon Cave approach.
Heal at the shrine if necessary, then walk to the cave entrance and examine the large ice barrier. The entrance is sealed, and the Old Ring is required because its heat can remove the obstruction. Confirm that the Old Ring is in the inventory and ready for use.
Stop at this point. Do not select or use the Old Ring yet, do not enter the cave and do not begin the route to the Wooden Shield, Quark's chamber, the Dragon Ring or the Dragon Diamond. Those events belong to Chapter 2.
- Follow the mountain route from Burg to the White Dragon Cave area.
- Heal at the nearby shrine if needed.
- Examine the sealed ice barrier at the cave entrance.
- Confirm that the Old Ring is ready for use.
- Stop before using the Old Ring or entering the cave interior.
Before you move on
- Alex has the Dagger and Heavy Clothes from the basement chest.
- Ramus has joined the party at the village entrance.
- Luna has a Sling purchased from Burg's weapon shop.
- The Old Ring is in the party inventory and ready for use.
- The C-button menu, Equip command and Status screen have been checked.
- A Burg-area save exists after the opening equipment and training preparations.
- The party has trained near a free recovery landmark and reached the White Dragon Cave area.
- The sealed White Dragon Cave entrance has been examined.
- The Old Ring has not yet been used, and the party has not started the cave's interior sequence.
Chapter 2 — Dragon Cave and the First Trials
Enter the White Dragon Cave from Burg using the Old Ring, follow the compact route to Quark, and complete the required conversations. In the original North American Sega CD release, Quark gives Alex the Dragon Ring during the first White Dragon Cave sequence; there is no required interior Albino Baboon ice puzzle and no Dragon Ring chest to retrieve. After Quark gives Ramus the Dragon Diamond, return to Burg, heal, and make a fresh save before the diamond-sale events begin.
Travel from Burg to the White Dragon Cave
Start from Burg after the opening preparation in the previous chapter. Alex, Luna and Ramus should already be in the party, and Alex should have his early equipment from his parents. If you have not yet searched Ramus's house for the Old Ring, do that before leaving town. The Old Ring is required to remove the ice barrier at the cave entrance.
Leave Burg and travel northeast, then follow the mountain range around toward the southern side. An Althena shrine stands near the cave route. Use it before entering if the party has lost HP or MP while training. The shrine is a safe recovery point for repeated trips, and returning to Burg is also practical if you need more Herbs or better equipment.
The White Dragon Cave is just northwest of the shrine. Enter the cave and use the Old Ring when the entrance ice blocks the way. If the entrance remains sealed, do not search the deeper cave for another solution; return to Burg and obtain the Old Ring from Ramus's house.
- The Old Ring is in the inventory.
- The Althena shrine near the cave has been used if recovery was needed.
- The entrance ice has been removed with the Old Ring.
- The party has entered the White Dragon Cave.
Follow the initial cave route
The first section of the cave is a straightforward path toward Quark. From the entrance, go left to find the chest containing the Wood Shield. This shield is not required to trigger the story, but it is a useful early defense upgrade, so equip it on Alex if his current shield is weaker or he has none equipped.
Continue downward through the connected passages. When you reach the lower section, take the upward route at the T-junction and then go left. Side passages contain Herbs; collect them when the route is safe, since they help preserve Luna's MP for recovery during the cave.
Continue through the passage leading toward the stairs. In the later fork near Quark's chamber, take the right-hand branch to the door. The left-hand route is not needed to trigger the White Dragon Cave sequence. If a screen transition makes the route difficult to read, use the landmarks in order: entrance, Wood Shield chest, lower T-junction, Herb passages, stairs, then the final right-hand branch.
The original Sega CD cave route does not require an Old Ring to be used anywhere beyond the entrance, and it does not require the player to lure an Albino Baboon into interior ice blocks. Albino Baboons are enemies in this area, but they are not the solution to a required cave puzzle in this release.
- The Wood Shield has been collected if desired.
- Alex has been equipped with the Wood Shield when appropriate.
- The party has passed the lower T-junction by taking the upward route and then left.
- The final branch before Quark was taken to the right.
- No time has been spent searching for a required interior ice-breaking puzzle.
Manage encounters and recover safely
White Dragon Cave contains random encounters, including Slimes, Mutant Flies, Synapse Guards and Albino Baboons. Albino Baboons are more dangerous than the weakest cave enemies at low levels, so do not allow the party to enter several encounters in poor condition. If Luna has enough MP, use her healing when a character is approaching danger rather than waiting until the next hit could defeat them.
Use normal attacks against ordinary groups and reserve Luna's MP for healing or for difficult enemies. Herbs are useful for restoring small amounts of HP without spending MP. If an enemy group is taking too long to defeat, prioritize the most dangerous target first instead of allowing several enemies to survive and accumulate damage.
There is no conventional boss fight in the cave before Quark. If the party is low on HP, nearly out of Herbs, or has spent most of Luna's MP, retreat through the cleared route. Use the shrine outside the entrance or return to Burg for a full recovery. The cave can be revisited without losing the story progress already completed.
A modest amount of training around the nearby recovery points makes this section safer. The exact level is less important than entering with enough healing capacity and equipment to survive the stronger encounters. Do not force a low-resource attempt merely because Quark's chamber is close.
- Luna's MP is being preserved for healing.
- Herbs are being used for minor recovery.
- The party is retreating when HP, MP or supplies become unsafe.
- The player understands that Quark is a scripted story encounter, not a conventional boss battle.
Complete the Quark sequence
Enter the chamber at the end of the route and move upward to meet Quark, the White Dragon. The encounter is noncombat. Let the scene play through as Quark recognizes Alex's resemblance to Dragonmaster Dyne and discusses Alex's ambition to become a Dragonmaster.
Continue the conversation until Quark gives Alex the Dragon Ring. In the original Sega CD sequence, this is a direct story reward. Do not leave the chamber expecting to find the ring in a deeper ice-bound chest, and do not attempt to use an Albino Baboon to open a route that is not part of this version's progression.
Speak with Quark again after the first exchange. The follow-up dialogue concerns Luna and Quark's recognition of her. Continue advancing the conversation until Ramus raises the subject of the Dragon Diamond. Quark then gives Ramus the Dragon Diamond, and the party receives the associated experience reward.
Confirm both key items before leaving: the Dragon Ring should be in Alex's inventory, and the Dragon Diamond should be in the party's inventory. If Ramus has not yet received the diamond, continue the conversation instead of exiting the chamber.
- The Quark scene has finished.
- Alex has received the Dragon Ring directly from Quark.
- The follow-up dialogue about Luna has played.
- Ramus has received the Dragon Diamond.
- The associated experience reward has been awarded.
- Both key items are present before the return trip.
Return to Burg and preserve the pre-sale save
Retrace the route to the cave entrance and leave the White Dragon Cave. Use the nearby shrine if the party needs recovery before crossing the overworld. Then return to Burg by following the mountain route back toward town.
Once inside Burg, heal the party and confirm that the Dragon Ring and Dragon Diamond remain in the inventory. Make a fresh save before entering the item-shop sequence that begins the next story development. Ramus will attempt to sell the Dragon Diamond, but the shopkeeper cannot pay enough for it and points the party toward Meribia.
This chapter ends with the party in Burg, recovered and saved before the sale sequence. Do not trigger the diamond sale, begin Weird Woods, repair the bridge, obtain Father's Letter, travel to Saith or relight the lighthouse in this chapter. Those events follow from the prepared Burg save.
- The cave has been exited.
- The Dragon Ring and Dragon Diamond are in the inventory.
- The party has returned to Burg.
- The party has been healed.
- A new save exists before the Dragon Diamond sale sequence.
- Weird Woods and bridge repair have not begun.
Before you move on
- The Old Ring was used to open the White Dragon Cave entrance.
- The party entered the cave from the Burg route.
- The Wood Shield was collected if desired and equipped on Alex when appropriate.
- The party reached Quark through the cave's normal route.
- Quark gave Alex the Dragon Ring directly.
- Quark gave Ramus the Dragon Diamond after the follow-up dialogue.
- The party exited the cave and returned to Burg.
- The party was healed and a save was made before the Dragon Diamond sale sequence.
References for this chapter
- RPGClassics — Lunar: The Silver Star Sega CD Walkthrough, White Dragon Cave
- Lunar: The Silver Star Sega CD Item Pages — Alex's Harp
- RPGClassics — Lunar: The Silver Star Sega CD White Dragon Cave Map
- GameFAQs — Lunar: The Silver Star Guide and Walkthrough, Sega CD, by Exdeath
- GameFAQs — Lunar: The Silver Star Guide and Walkthrough, Sega CD, by MoonSaultKid
Chapter 3 — Saith and Ship Passage: Meeting Allies
Repair the route from Burg to Saith, obtain passage to Meribia, and complete the first mainland crisis. This chapter covers the Woodcutter Axe, Father's Letter, Nash's recruitment, the Sea Chart and lighthouse, Luna's departure, Dross's theft, Alex's first magic, the Water Dragon, Dross's compensation, Ramus's permanent departure and Nash's reunion. Finish by saving at the Fountain of Transfer without entering the Trial Cave.
1. Recover the Woodcutter Axe and repair the bridge
After the Dragon Diamond has been obtained from Quark and returned to Burg, leave town through the western route. Visit the woodsman's log cabin. He explains that the bridge toward Saith cannot be repaired because his Woodcutter Axe is in a shed inside Weird Woods.
Return to the world map and follow the river north, then northwest, to Weird Woods. Enter the forest and follow the available path toward the area where Laike is standing. The tool shed is nearby. Speak with Laike when the scene occurs, then enter the shed and take the Woodcutter Axe. Do not equip it; it is a quest item.
Leave the woods and return to the woodsman's cabin. Hand over the axe so he can repair the bridge. The route from Burg toward Saith is now open. If the forest battles have reduced your party's health, use the nearby recovery point before continuing.
- Visit the woodsman west of Burg.
- Enter Weird Woods.
- Speak with Laike when his scene occurs.
- Take the Woodcutter Axe from the tool shed.
- Return the axe to the woodsman.
- Confirm that the bridge toward Saith is repaired.
2. Obtain Father's Letter and travel to Saith
Return to Burg after the bridge is repaired. Ramus temporarily leaves to ask his parents for permission to continue. Go to Alex's house and speak with Alex's father to receive Father's Letter. Then speak with Alex's mother and choose the response that confirms Alex has decided to leave. In the North American Working Designs script, this response provides a 500-Silver advance.
Use the money selectively. A Short Sword for Ramus is a useful purchase, but retain enough Silver for recovery items and later equipment. Return to the entrance of Burg and rejoin Ramus.
Cross the repaired bridge and follow the route along the river to Saith. Killer Wasps and Grousers appear on the way, so heal before either character reaches critical HP. Enter Saith and save before beginning the captain's sequence.
- Receive Father's Letter from Alex's father.
- Complete Alex's mother's departure conversation.
- Collect the 500-Silver advance if offered.
- Rejoin Ramus at Burg's entrance.
- Cross the repaired bridge.
- Reach Saith.
- Heal and save in Saith.
3. Recruit Nash and recover the Sea Chart
Go to the house beside Saith's dock and speak with the captain outside. He explains that he lost the Sea Chart and that an Old Hag in the mountains northwest of Saith now has it. Enter the dock house and show Father's Letter to the person at the counter. This completes the permission requirement, although the captain's errand must still be resolved before sailing.
Inside the same house, speak with the young student near the counter. This is Nash. Continue the conversation until he joins the party. Nash brings the Water Cane, which is the item needed for the Old Hag's exchange.
Travel northwest from Saith to the Old Hag's house. Give her Nash's Water Cane and receive the Sea Chart. The exchange consumes the cane, so do not sell or discard it before reaching her.
Return to Saith and give the Sea Chart to the captain. He then gives Alex a Flint and explains that the lighthouse north of town must be relit before the ship can depart. If you need equipment, Saith's weapon shop can improve the early party, but do not spend so much that you lack recovery items for the lighthouse and the mainland.
- Speak with the captain near Saith's dock.
- Show Father's Letter inside the dock house.
- Recruit Nash in Saith.
- Receive Nash's Water Cane.
- Visit the Old Hag northwest of Saith.
- Exchange the Water Cane for the Sea Chart.
- Return the Sea Chart to the captain.
- Receive the Flint.
4. Relight the lighthouse and leave with the ship
Before entering the lighthouse, speak with the attendant near the steps to restore HP and MP. The climb is short, with Mutant Flies and Escargotgos as the principal hazards. Pick up the Leather Clothes on the second floor if they improve Ramus's defense. The Sling near the beacon is optional.
Continue to the top floor and use the Flint at the beacon. The original North American Sega CD sequence has no separate mandatory lighthouse boss; reaching the beacon and relighting it completes the objective.
Return to Saith after the beacon is lit. Remove Luna's equipment before starting the final departure, because she remains behind and will not travel to Meribia. Speak with the captain, then go to the pier and allow the farewell scene to finish. Alex, Ramus and Nash sail to Meribia.
- Recover at the lighthouse attendant.
- Reach the lighthouse beacon.
- Use the Flint at the beacon.
- Return to Saith.
- Remove Luna's equipment.
- Speak with the captain again.
- Go to the pier.
- Complete Luna's farewell.
- Arrive in Meribia.
5. Trigger Dross's theft and awaken Alex's magic
When the party reaches Meribia, Nash leaves temporarily to explore the city and Ramus searches for a buyer for the Dragon Diamond. Visit Master Mel's mansion in the northeast and speak with the accessible people there. Then go to the jeweler and speak with Dross. Agree to sell the Dragon Diamond. Dross takes the diamond without paying and escapes through the opening that leads into the Meribian Sewers.
Follow the immediate conversations around the jeweler until the sewer route is established. Alex cannot reliably fight the sewer monsters with physical attacks alone. Go to Black Rose Street on Meribia's western side and enter the northern magic shop. Speak with the man behind the counter to awaken Alex's magic. Alex learns Flame; Ramus cannot awaken magic, and Nash does not rejoin yet.
Leave Meribia through the eastern exit and follow the road directly east to Althena's Shrine. Use the shrine to restore HP and MP. Fight around the shrine if Alex needs more experience for Flamer, then buy recovery supplies such as Jasmines and Starlights. Save before returning to the jeweler's sewer entrance.
- Visit Master Mel's mansion.
- Speak with Dross at the jeweler.
- Agree to sell the Dragon Diamond.
- Confirm Dross's escape into the sewers.
- Go to the northern magic shop on Black Rose Street.
- Awaken Alex's magic and learn Flame.
- Recover at Althena's Shrine.
- Buy recovery supplies.
- Save before entering the sewers.
6. Clear the Meribian Sewers and defeat the Water Dragon
Enter the Meribian Sewers through the opening connected to the jeweler's shop. The regular enemies are highly resistant to conventional attacks, so have Alex use Flame or Flamer. Ramus contributes little damage here and can use Flee in ordinary encounters when you want to conserve resources. Keep Starlights available for Alex's MP and Jasmines for emergency healing.
From the entrance, continue downward and follow the main route until the first significant fork. Take the right-hand route toward the crossroads. Go upward first to collect the Starlight, then return to the crossroads and take the route to the right. At the next split, take the first descending path. Continue down and left, then take the last branch leading left. Follow the passages around to the T-shaped section and go right to reach another Starlight chest. The Sega CD sewer map can be used to confirm the forks if you lose your bearings.
Restore Alex's HP and MP before the boss approach. The Water Dragon has 250 HP and is affected by magic; the established safe plan is for Alex to cast Flame while Ramus either flees, heals Alex with a Jasmine, or restores Alex's MP with a Starlight. The dragon's flame-breath attack can remove roughly 20 to 30 HP, so do not let Alex remain near defeat range. If Ramus is defeated, Alex can still win by healing himself and continuing to cast magic.
After the victory, descend to Dross's hideout and collect the nearby Starlights before speaking with him.
- Enter through the jeweler's sewer opening.
- Use Alex's magic against regular sewer enemies.
- Keep Starlights and Jasmines available.
- Follow the main sewer route to the boss door.
- Restore HP and MP before the battle.
- Defeat the 250-HP Water Dragon with Alex's magic.
- Collect the nearby Starlights after the battle.
- Reach Dross's hideout.
7. Take Dross's maximum payment and complete the party change
Dross first offers 1,000 Silver. Reject the offer. He then offers 2,000 Silver; reject that as well. When he offers 3,000 Silver, accept it. This is the maximum compensation available in this sequence. Ramus takes half of the accepted payment, leaving Alex with 1,500 Silver.
Leave the sewers through the jeweler's route. Before speaking with Nash at the entrance area, remove the equipment you want to keep from Ramus. Nash is waiting there and offers to guide Alex toward Vane so Alex can study magic. Accept the offer. Ramus permanently leaves, and Nash rejoins the party.
Transfer useful equipment from Ramus to Nash before departing. His old gloves and clothes can help, and a bow is a practical weapon upgrade. Check Alex and Nash's equipment, then visit Master Mel's mansion and report that Dross has been defeated if you want to complete that optional follow-up. It does not replace any required progression.
Leave Meribia and heal at Althena's Shrine. From the shrine, follow the road south without taking side roads. The Fountain of Transfer is near the mountain range. Reach it, heal if necessary and save. Do not enter the Trial Cave; that dungeon and its bosses begin the next chapter.
- Reject the 1,000-Silver offer.
- Reject the 2,000-Silver offer.
- Accept the 3,000-Silver compensation.
- Confirm Ramus receives half of the payment.
- Remove Ramus's equipment before the permanent departure.
- Speak with Nash near the jeweler.
- Accept Nash's offer to travel toward Vane.
- Confirm Nash has rejoined.
- Check and equip Nash's replacement gear.
- Optionally report Dross's defeat to Master Mel.
- Heal at Althena's Shrine.
- Reach and save at the Fountain of Transfer.
- Do not enter the Trial Cave.
Before you move on
- Woodcutter Axe recovered from Weird Woods.
- Woodcutter Axe returned and bridge repaired.
- Father's Letter received.
- Saith reached.
- Nash recruited in Saith with the Water Cane.
- Water Cane exchanged with the Old Hag for the Sea Chart.
- Sea Chart returned to the captain.
- Flint received.
- Lighthouse beacon lit with the Flint.
- Luna's equipment removed.
- Farewell at the pier completed.
- Voyage to Meribia completed.
- Dross escaped through the jeweler's sewer opening.
- Alex's magic awakened before entering the Meribian Sewers.
- Water Dragon defeated.
- 1,000- and 2,000-Silver offers rejected and 3,000-Silver compensation accepted.
- Ramus permanently departed.
- Nash reunited.
- Fountain of Transfer reached and saved.
- Trial Cave not yet entered.
Chapter 4 — Meribia / Vane: City Events and the Grindery Foreshadowing
Begin with the Meribian Sewers and Water Dragon sequence already finished. Ramus has permanently left, Nash has rejoined Alex, and the party has reached the Fountain of Transfer south of Meribia. Alex must pass the Cave of Trial alone, enter Vane, accept Ghaleon's investigation of the false Dragonmaster on Lann Island, defeat the Raptors sent by Zoc and return to Vane. The second half covers Alex's imprisonment, Mia's escape plan, the Silver Spire, Althena's Mirror, the glass door in the Cave of Trial and the Crystal Tower. The chapter ends after Xenobia is exposed, both Pipers are defeated, Ghaleon sends the party toward Quark and the group has returned to Vane's warp pad.
Begin at the Fountain of Transfer
This chapter starts after the Meribian Sewers and Water Dragon events, after Dross has paid his compensation, after Ramus has left permanently and after Nash has rejoined Alex. Do not repeat those scenes. Before entering the Fountain of Transfer, heal Alex and Nash, save, and make sure Alex has practical equipment and enough recovery items for a solo dungeon. Nash should have a useful weapon, armor and accessories because he will be needed after Alex reaches Vane.
The Fountain of Transfer is south of Meribia. Enter it and step onto the transfer circle. Nash explains that first-time visitors to Vane must complete the Cave of Trial. He leaves and warps ahead, leaving Alex to take the trial alone. Save before using the circle; this is the last convenient preparation point before the solo section.
- The Meribian Sewers and Water Dragon are already complete.
- Ramus has permanently left the party.
- Nash is with Alex.
- The party is healed and saved at the Fountain of Transfer.
- Alex has entered the Cave of Trial alone.
Navigate the Cave of Trial
A man near the beginning of the Cave of Trial can restore Alex. Use him whenever Alex is hurt rather than consuming recovery items unnecessarily. Take the Calm Herb from the chest near the opening, then follow the main route through the first floor. The Leepers, Dead Poles, Death 'Shrooms and Mutant Turtles in this trial are resistant to ordinary physical attacks, so rely on Alex's magic. Flamer is the dependable answer for groups; conserve enough MP for the Bronze Dogs and Truffle Troubler.
The cave is maze-like, but the progression route continues upward from the opening area. Search the accessible side paths for the Holy Flute and Chain Mail. The Holy Flute is a valuable party-recovery item, and the Chain Mail is a meaningful defensive upgrade for Alex. Equip the Chain Mail when you obtain it. If Alex has learned a stronger fire spell by this point, use it against the later trial enemies and bosses, but do not spend all MP on routine encounters.
Near the Bronze Dogs, use the nearby recovery opportunity and enter with enough MP for several area attacks. The trial does not become a normal party dungeon if Alex is defeated; Nash does not return to help inside it.
- The Calm Herb has been collected.
- Alex is using magic against the trial monsters.
- The Holy Flute has been collected if the chest was reached.
- The Chain Mail has been collected and equipped.
- Alex has recovered before the Bronze Dogs.
Defeat the Bronze Dogs and Truffle Troubler
The Bronze Dogs are a group of four and are best handled with repeated Flamer casts. Their numbers make them dangerous if Alex spends turns on ordinary attacks, so use area magic immediately. If Alex needs to avoid an incoming turn, Flee can create distance before the next spell, but the main objective is to end the group quickly.
After the Bronze Dogs, continue upward and collect the nearby recovery supplies. The next large floor contains the Chain Mail route and additional recovery items if they were not already collected. Follow the passages toward the open boss room, heal before entering and keep Alex's HP above the danger point.
Truffle Troubler is fought alone. Use Flame or the strongest dependable fire spell, then use Flee when the enemy closes the distance. When it is far enough away, resume casting. If it reaches Alex, its multiple attacks can remove a large portion of his HP in one turn. The Chain Mail reduces the risk but does not make close-range trading safe. Use the Cave of Trial healer or saved recovery items before the fight rather than trying to conserve everything.
After Truffle Troubler falls, speak with the man guarding the exit. Alex receives the trial reward experience and the way into Vane opens. Proceed through the exit and finish the arrival scene. Once Alex is in Vane, save at the first available opportunity rather than assuming the dungeon exit itself created a save.
- All four Bronze Dogs have been defeated.
- Truffle Troubler has been defeated.
- Alex survived the solo trial.
- The trial exit has opened.
- Alex has reached Vane and made a new save.
Explore Vane and receive Ghaleon's assignment
Check Vane's weapon, armor and item shops before beginning the story events. Buy the best practical equipment you can afford, with Alex's weapon as a useful priority and recovery supplies still more important than expensive accessories. Nash will be waiting in Vane after Alex completes the trial, so plan to equip him before leaving for Lann.
Visit the Silver Spire and speak with Mia Ausa. She explains that her mother, Lemia, has been behaving strangely and has been sending people to prison. Go to the Magic Guild and find Nash, then follow the sequence that brings Alex before Ghaleon. Speak with Ghaleon's assistant, Glumm, when directed. Glumm gives Alex the assignment to investigate a supposed new Dragonmaster in Lann.
Talk to Nash and invite him to accompany Alex. Equip Nash with his best available gear; an Ice Cane is a useful purchase if Vane's shop offers it and the party can afford it. Do not leave Vane until the Ghaleon and Glumm conversations have completed, because the Lann objective is not active before that sequence.
- Alex has checked Vane's shops.
- Mia has been met in the Silver Spire.
- Nash has been found in the Magic Guild.
- Glumm has delivered Ghaleon's assignment.
- Nash has joined Alex for the trip to Lann.
Visit Nanza Barrier, then travel to Lann
Leave Vane by the western route and visit Nanza Barrier before going to Lann. Speak with the people inside and inspect the western exit. The guard refuses passage without Kyle's permission. The barrier visit establishes the later route, but Chapter 4 does not include the completed Nanza crossing or Kyle's permanent recruitment. Do not pay the demanded protection fee or try to force the story past the guard.
Leave Nanza and follow the northwest road to Lann. Enter the mayor's house and speak with Jessica. She recognizes that a genuine Dragonmaster would not be stealing food from the village and offers to investigate. Accept her help. Jessica joins temporarily for the Lann Island sequence.
Before taking the boat, use Lann's shops to replace weak equipment and buy practical recovery items. The boat access is in the southwest part of the village. Speak with the boat owner; Jessica's intervention makes the trip possible. The party is then taken to Lann Island, where the island cave begins.
- Nanza Barrier has been visited.
- The western crossing has not been completed.
- Kyle has not been recruited as a permanent party member.
- Jessica has joined temporarily.
- The Lann Island boat sequence has been triggered.
Clear Lann Island and defeat the Raptors
Use the recovery point outside or near the island cave before entering. The cave contains Great Lions, Mutant Ants and Monocrops. Mutant Ants can attack repeatedly, and Monocrops can inflict heavy physical damage, so eliminate dangerous groups rather than letting several enemies survive. Jessica should use Calm Litany when the party's HP falls, but she can attack while Alex and Nash are healthy.
Search the cave for the Chain Helmet and Wind Essence. Equip the Chain Helmet on Alex if it improves his current protection. Keep the Wind Essence as an emergency escape item; it is useful because Alex does not yet have the later dungeon-escape options that become available through additional party abilities.
At the end of the cave, Zoc claims to be a Dragonmaster but sends Raptors to fight in his place. This is the required boss encounter in the original North American Sega CD release. Zoc himself is not the direct target. Use Alex and Nash's regular attacks to focus on one Raptor at a time. Jessica should use Calm Litany whenever multiple characters are injured and attack only when healing is not urgent. Avoid automatic tactics if you need her to heal on a particular turn.
After the Raptors are defeated, allow the scene with Zoc to finish. His apology and departure are required. Return to Lann and let the village dialogue, including the Phacia scene, play out. Jessica then leaves the temporary party. Heal and save before beginning the return trip to Vane.
- The island recovery point has been used.
- The Chain Helmet has been collected.
- The Wind Essence has been retained unless needed for an emergency escape.
- The Raptors have been defeated.
- Zoc's apology and departure have completed.
- Jessica has left the temporary party.
Return to Vane and escape the prison
Return to Vane through the route you used earlier. The completed Lann assignment triggers an audience with Lemia. Speak with the required guild characters and allow the scene to proceed. Lemia identifies Alex as a false Dragonmaster and orders him imprisoned. This is a scripted event and is not a failure state.
Inside the prison, Mia and Nall arrange Alex's escape. Mia provides the Prison Key and explains that Althena's Mirror may reveal what has happened to Lemia. Use the key on the accessible cells while leaving the prison. One cell remains sealed during this sequence; it is not opened here, so do not waste time trying to force it.
Mia uses the Dragon Ring to break the charm restricting the Silver Spire. Finish the escape dialogue, then restore Alex's HP and MP before entering the tower. The party's exact positioning can change during the event, so continue speaking with Mia and Nall until the escape scene has fully concluded.
- The Lann assignment is complete.
- Lemia has imprisoned Alex.
- Mia and Nall have initiated the escape.
- The Prison Key has been obtained and used on the accessible cells.
- The sealed cell remains unopened.
- The Dragon Ring has broken the Silver Spire's restriction.
Climb the Silver Spire and obtain Althena's Mirror
Enter the Silver Spire after Mia opens the route. The tower contains Ghosts, Hummingbyrds and Air Elementals. Ordinary attacks are generally safer for preserving MP here; do not spend Alex's entire supply of magic on routine enemies. Use recovery items when necessary and keep enough resources for the later Cave of Trial and Crystal Tower sequences.
Search the upper floors for the Vigor Peach, Seed of Vigor and Herb of Althena. These are valuable recovery items and should not be sold. Also retain the Magic Robe. It can be assigned to a magic user for the next major dungeon and is more useful than its sale value.
At the top of the Silver Spire, open the central chest to obtain Althena's Mirror. Leave the tower, heal and save before returning to the Cave of Trial. Do not attempt the Crystal Tower immediately without opening the glass route; Mia must use the Mirror-related progression to open that route from the bottom of the trial cave.
- The Silver Spire route has been opened with the Dragon Ring.
- The Vigor Peach, Seed of Vigor and Herb of Althena have been retained if collected.
- The Magic Robe has been retained.
- Althena's Mirror has been obtained.
- The party is healed and saved before returning to the Cave of Trial.
Open the glass door and enter Crystal Tower
Return to the bottom of the Cave of Trial with Mia present. Go to the large glass-like door that blocked Alex during the first trial. Mia opens it with the required magic. Follow the newly accessible passage toward Crystal Tower. Nash has gone ahead and rejoins before the tower climb; make sure the reunion dialogue has completed before entering the dungeon.
Equip the party for a difficult magic-focused dungeon. Alex should use his strongest practical weapon and armor, Mia should retain the Magic Robe if it is the best available option, and Nash should have his strongest cane or bow, robe and accessories. Crystal Tower enemies appear in large groups and can inflict considerable damage, so use effective group magic when necessary but preserve MP for the upper floors.
Climb until the upper recovery area. The walkthrough sources identify the sixth floor as the intended point to restore HP and MP with recovery items and save. Use that preparation point before proceeding to the Star Chamber. Talk to the nearby people, then speak with Ghaleon. He allows Alex and the others to watch the ceremony even though the surrounding dialogue warns against entering the chamber.
Speak with the apparent Lemia. Mia uses Althena's Mirror, revealing that the woman is Xenobia, leader of the Vile Tribe. Xenobia disappears and summons two Pipers. This is the required battle after the reveal in the Sega CD version.
Fight the Pipers manually and defeat them one at a time. Alex should use dependable attacks against the selected target. Nash can use Thunder Bomb or another effective thunder spell while both Pipers remain, then switch to single-target damage after one falls. Mia should prioritize healing; use offensive magic only when the party is stable. The Pipers have substantial HP for this point in the game, so preserve enough recovery resources for several rounds rather than expecting an immediate victory.
- Mia has opened the glass door at the bottom of the Cave of Trial.
- Nash has rejoined before the Crystal Tower climb.
- The party has reached the upper recovery area.
- HP and MP have been restored and the game has been saved.
- Xenobia has been revealed.
- Both Pipers have been defeated.
Finish the Crystal Tower sequence and end the chapter
After the Pipers are defeated, Nash and Mia leave the immediate battle scene. Speak with Nash and Mia as required. They discuss the missing real Lemia, and these conversations must be completed before the next story trigger.
Speak with Ghaleon after talking with both of them. He explains that the White Dragon may help the party prepare against the Vile Tribe and directs Alex to meet him in Meribia for the voyage toward Burg and Quark. This is the end-of-chapter story objective; do not begin the later Quark, Burg or post-Crystal-Tower route here.
Go downstairs in Crystal Tower and speak with the middle woman to use the warp-out route. The party returns to Vane's warp pad. Speak with the old man there to restore HP and MP, then leave Vane. Make a fresh save after this recovery. The next chapter begins with the Meribia transition and the events leading toward Ghaleon's voyage.
- Nash has been spoken to after the Piper battle.
- Mia has been spoken to after the Piper battle.
- Ghaleon has been spoken to afterward.
- Ghaleon has directed the party toward Meribia and Quark.
- The group has warped back to Vane.
- The old man at the warp pad has restored HP and MP.
- A fresh save exists before the Meribia transition.
Before you move on
- The chapter began after the Meribian Sewers, Water Dragon, Dross compensation, Ramus departure, Nash reunion and Fountain of Transfer setup.
- Alex completed the Cave of Trial alone.
- The Bronze Dogs and Truffle Troubler were defeated.
- Alex entered Vane and received Ghaleon's Lann investigation through the Magic Guild sequence.
- Nanza Barrier was visited without completing the later crossing.
- Jessica joined temporarily, Lann Island was cleared and the Raptors were defeated.
- Zoc's apology and departure sequence completed, and Jessica left the party.
- Alex was imprisoned by Lemia and escaped with Mia and Nall.
- The Prison Key was used on the accessible cells.
- The Silver Spire restriction was broken with the Dragon Ring.
- Althena's Mirror was obtained.
- Mia opened the Cave of Trial glass door.
- Nash rejoined before the Crystal Tower climb.
- Xenobia was exposed in the Star Chamber.
- Both Pipers were defeated.
- Nash and Mia were spoken to after the battle.
- Ghaleon directed the party toward Meribia and Quark.
- The group warped back to Vane, healed at the warp pad and made a fresh save before the next chapter.
References for this chapter
- RPGClassics — Lunar: The Silver Star Sega CD Walkthrough, The Trial
- RPGClassics — Lunar: The Silver Star Sega CD Walkthrough, Revealing the Vile Tribe
- GameFAQs — Lunar: The Silver Star Guide and Walkthrough, Sega CD, by MoonSaultKid
- GameFAQs — Lunar: The Silver Star Guide and Walkthrough, Sega CD, by Exdeath
- RPGClassics — Lunar: The Silver Star Sega CD Maps
Chapter 5 — Frontier and Dragon Trials: Securing Dragon Blessings
After the Crystal Tower events, Alex travels with Ghaleon to Burg and the White Dragon Cave. Ghaleon's betrayal leaves Alex with the White Dragon's Wings and Dragon Bolt, but the Wings cannot be used for town travel until Alex defeats the Vile Tribe soldiers on the return route and the disguised soldiers in his parents' house. The party then regroups in Meribia and Vane, recruits Kyle at Nanza Barrier, and enters the eastern mainland. Complete the Iluk and Reza objectives, recover the Wings, obtain the Rain Cloud and Giant Root, reach Damon's Spire by sea turtle, and clear Red Dragon Cave. The chapter ends after the Red Dragon Shield is obtained, Dragon Fire is learned, and Meryod's bridge is repaired.
Complete the Meribia overnight scene and Ghaleon's voyage
After the Crystal Tower events, return to Meribia and go upstairs to Master Mel's quarters. Speak with Mel, Ghaleon, Jessica and the other people gathered there. Talk to Mel again and ask to stay overnight. Alex's dream about Luna being taken must play before the departure sequence can continue.
The next morning, go to the Meribia dock and speak with Ghaleon. The boat carries Alex and Ghaleon to Saith. Before leaving, replace obsolete equipment and stock practical recovery items, but do not spend so much Silver that you cannot buy equipment and supplies after reaching the eastern mainland.
- The conversations at Master Mel's quarters are complete.
- The overnight scene and Alex's dream have played.
- Ghaleon has been spoken to at the Meribia dock.
- The voyage to Saith has completed.
Return to Burg and trigger Quark's betrayal
From Saith, travel through Weird Woods toward Burg. Ghaleon must be accompanying Alex for the required scenes to occur. Visit Alex's parents, then go to Burg Springs and speak with Luna. These Burg conversations establish the return sequence before the White Dragon Cave event advances.
Enter the White Dragon Cave with Ghaleon and follow the route to Quark's chamber. The betrayal and Quark's defeat occur automatically as part of the story. Continue into the next room after Quark's chamber instead of leaving the cave immediately.
- Weird Woods has been crossed on the return to Burg.
- Alex's parents and Burg Springs have been visited with Ghaleon present.
- Ghaleon has accompanied Alex into the White Dragon Cave.
- Quark's betrayal has occurred.
Collect the White Dragon's Wings and survive the return
In the room after Quark's chamber, take the White Dragon's Wings. Alex learns Dragon Bolt when he collects them. The Wings are not yet usable for ordinary town travel, so continue on foot toward Burg.
A forced battle against six Vile Tribe Soldiers occurs during the return. The larger soldiers have more HP than the flying soldiers. Use Dragon Bolt to clear the group efficiently, but keep Alex's HP high and avoid spending MP on unnecessary fights before this encounter. If Alex is in danger afterward, heal before entering his house.
Burg is empty because the villagers have been sent to Talon Mine. Enter Alex's house and fight the two Vile Tribe Soldiers disguised as his parents. After both encounters are defeated, the Wings become usable for travel between towns.
- The White Dragon's Wings were collected in the room after Quark's chamber.
- Alex learned Dragon Bolt.
- The six Vile Tribe Soldiers were defeated.
- The two disguised soldiers in Alex's house were defeated.
- The Wings became usable for town travel.
Regroup in Meribia and Vane, then cross Nanza Barrier
Use the Wings to travel to Meribia and speak with Jessica at Master Mel's quarters. Then use the Wings to reach Vane and go to the Magic Guild Mansion. Mia and Nash rejoin Alex there.
Go to Glumm's quarters and examine Ghaleon's diary. This is a required story action, not an optional document; it establishes Ghaleon's plan and advances the route to Nanza Barrier.
Travel to Nanza Barrier after the party has reunited. Speak with Kyle at the entrance. Jessica must be in the party for Kyle to join. After he joins, enter the Barrier and follow the passage to the eastern exit. Kyle can open the red treasure chests that were inaccessible earlier, so return for missed chests only if you have already completed the required crossing and want optional equipment.
Before entering, heal in Meribia or Vane and update the party's equipment. Demon Wolves, Lava Worms and Count Antula resist magic, so Alex and Kyle's normal attacks are dependable while Mia and Jessica preserve recovery magic. There is no special leader requirement for the Barrier: use a durable front line and keep the two support characters safe.
- Jessica, Mia and Nash have reunited with Alex.
- Ghaleon's diary has been examined.
- Kyle was recruited at Nanza.
- Nanza Barrier was crossed.
- The party is healed and equipped for the eastern mainland.
Complete the Iluk and Reza objectives
After crossing Nanza Barrier, travel east to Iluk. Visit the collector in the southeast house and the inventor in the northeast house. The collector explains the Rain Cloud objective, while the inventor explains that his balloon needs a Giant Root before it can reach Damon's Spire.
Continue to Reza. The Dragon's Wings are stolen automatically when the party enters town. Ask around until the route to the Thieves' Guild becomes clear. In the Guild lobby, have Kyle open the locked chest to obtain the Thief's Crest. The Crest allows the party to enter the Guild below.
Return to the Guild lobby and speak with Laike about Ghaleon and the Vile Tribe. His information sends Alex back to the Iluk collector. Revisit the collector so the Rain Cloud objective advances, then return to Reza and buy the Rain Cloud from the Thieves' Guild. Afterward, speak with the thief upstairs who has the Wings. His conversation explains that Xenobia enchanted him and ordered him to steal them, after which the Wings are recovered.
Reza is the best practical resupply point before the Eastern Desert and Damon's Spire. Upgrade equipment where affordable and carry healing and MP-restoring items. Do not expect the Wings to be available during the desert and balloon objectives; they are restored only after the thief conversation.
- The Iluk collector and balloon inventor objectives were started.
- The Wings were stolen on entering Reza.
- Kyle opened the Guild chest.
- The Thief's Crest was obtained.
- Laike was consulted in the Guild lobby.
- The Iluk collector was revisited.
- The Rain Cloud was purchased in the Thieves' Guild.
- The Wings were recovered in Reza.
Obtain the Giant Root and survive the balloon crash
Return to Iluk and speak with the inventor after the Rain Cloud sequence has advanced. Travel east into the Eastern Desert and fight Man-Eating Plants until one drops a Giant Root. The drop is not guaranteed from each battle. These enemies resist magic, so Alex and Kyle's normal attacks are economical; heal between fights if necessary.
Give the Giant Root to the inventor. Enter the completed balloon and allow the flight sequence to run. The balloon passes over the volcano and Damon's Spire, then the wind forces it toward Reza and it crash-lands. The crash is scripted and does not mean the Giant Root handoff failed.
After the crash, finish the necessary conversations in Reza. Heal and resupply before traveling northeast to Meryod. Keep the Wings available for town travel after the Reza recovery sequence.
- A Giant Root was obtained from a Man-Eating Plant in the Eastern Desert.
- The Giant Root was given to the balloon inventor.
- The balloon launched.
- The scripted balloon crash occurred.
- The required post-crash dialogue was completed.
Trigger Meryod's collapse and reach Damon's Spire
Travel northeast from Reza to Meryod. Attempt to cross the incomplete bridge in the northern part of town. The bridge collapses and scatters the party around Meryod. Find the separated members and speak with them until everyone is reunited: Kyle is in the pub, Jessica is in the house southwest of the pub, Nash is near the armor shop, and Mia is at the lower docks.
Visit the carpenter and ask about repairing the bridge. He cannot complete the work yet. Then go to the pub and speak with the man who has visited Damon's Spire. He explains that the route begins south of Reza through a narrow mountain path leading to a floating green island near the coast.
Use the Wings to return to Reza, then travel southwest through the mountain path. Stand near the floating green island and press a button to play Alex's Harp. The island moves and reveals itself as a giant sea turtle, which carries the party to Damon's Spire. The Harp action is the required landmark interaction; do not search for a ship route.
In Damon's Spire, reach the basement and operate the switches to change the gate arrangement. Use the altered gates to reach the Spire Key, then return to the upper floors and unlock Damon's chamber. Speak with Damon to advance the Red Dragon route. Save outside or near the tower entrance before proceeding if possible.
- The Meryod bridge collapsed.
- The scattered party was reunited.
- The carpenter was consulted.
- The tavern informant was consulted.
- Alex's Harp summoned the sea turtle.
- Damon's Spire was reached.
- The Spire Key was obtained.
- Damon was consulted.
Clear Red Dragon Cave and open the Stadius route
After speaking with Damon, use the Wings to return to Damon's Spire and leave by the western route toward the volcano. At the lava flow outside Red Dragon Cave, use the Rain Cloud. The cooled lava opens the entrance to the cave.
Red Dragon Cave is built around multiple staircases and looping branches. Track the routes you have checked so you do not repeatedly return to the same rooms. Earth Elementals can hit repeatedly with physical attacks, while Wasteoids can put party members to sleep. Prioritize dangerous groups, use Jessica's Mental Litany or Holy Smoke to remove sleep, and preserve enough MP for the later rooms.
At the end of the cave, complete the Red Dragon sequence and take the Red Dragon Shield. Alex learns Dragon Fire when he obtains the shield. There is no separate combat requirement to unlock the shield beyond completing the cave's Red Dragon event.
Return to Meryod and speak with the carpenter again. The bridge is now repaired, opening the eastward route toward Stadius Zone and Lyton. Before leaving, heal, restore MP, save and purchase practical upgrades. Meryod's Samurai Blade, Steel Armor, Steel Shield and Steel Helmet are useful upgrades for the appropriate party members, while the next chapter begins with the Stadius and Lyton route.
- Damon's Spire was completed before attempting the volcano route.
- The Rain Cloud was used at the Red Dragon Cave entrance.
- Red Dragon Cave was cleared.
- The Red Dragon sequence was completed.
- The Red Dragon Shield was obtained and equipped.
- Alex learned Dragon Fire.
- The Meryod bridge was repaired.
- The eastward Stadius route opened.
- The party was healed, equipped and saved before Lyton.
Before you move on
- Meribia overnight scene completed
- Ghaleon's voyage to Saith completed
- Weird Woods crossed on the return to Burg
- Alex's parents and Burg Springs visited with Ghaleon present
- Ghaleon accompanied Alex into the White Dragon Cave
- Quark's betrayal occurred
- The White Dragon's Wings were collected in the room after Quark's chamber
- Alex learned Dragon Bolt
- The six Vile Tribe Soldiers were defeated
- The two disguised Vile Tribe Soldiers in Alex's house were defeated
- The Wings became usable for town travel
- Jessica, Mia and Nash reunited
- Ghaleon's diary was examined
- Kyle was recruited at Nanza
- Nanza Barrier was crossed
- The Iluk collector and balloon inventor objectives were completed
- The Wings were recovered in Reza
- The Thief's Crest was obtained
- The Rain Cloud was purchased
- A Giant Root was obtained and given to the balloon inventor; the balloon launched and crashed; the Meryod bridge collapsed and the scattered party was reunited; the carpenter and tavern informant were consulted; Alex's Harp summoned the sea turtle; the Spire Key was obtained; Damon was consulted; Damon's Spire was completed; the Rain Cloud was used at Red Dragon Cave; the Red Dragon sequence was completed; the Red Dragon Shield was obtained and equipped; Alex learned Dragon Fire; the Meryod bridge was repaired; the eastward Stadius route opened; the party was healed, equipped and saved before Lyton.
Chapter 6 — The Blue Dragon and Key Bosses
After the Red Dragon sequence, cross the Stadius Zone to Lyton, lift the village's river curse, enter the original Sega CD Blue Dragon Cave through the waterfall and defeat Brainiac. Collect the Blue Dragon Helmet and learn Dragon Tear, then allow the scripted theft by Nash and Xenobia. Continue to Tamur and recruit Laike for the temporary Myght route. Laike leaves when Alex exits Tamur through the south gate; after Alex returns to Tamur, Laike can be recruited again. Only after this second recruitment should you complete Tempest's mandatory challenge and enter Myght's Lab. After the rooftop confrontation with Ghaleon, return to Tamur and allow Laike to leave permanently. End with Alex in Tamur, ready for the next regrouping sequence at Laike's home. Do not begin Nash's reunion, the Pao disease sequence or the Frontier route here.
1. Cross the Stadius Zone to Lyton
After obtaining the Red Dragon Shield, return to Meryod and use the repaired bridge to reach the eastern side of the continent. Check Meryod's equipment shop before leaving and replace outdated weapons or armor where practical. From the bridge, follow the mountain route north, then continue east toward the river. Lyton is the village beside the river and waterfall.
The Stadius Zone has stronger enemies than the areas around Meryod. Use Alex and Kyle for dependable physical damage and reserve the casters' MP for groups or emergencies. If the party arrives in Lyton injured, recover before starting the village event. Save before speaking to the magician so the river sequence and the cave approach can be retried without repeating a long overland trip.
- Return to Meryod after the Red Dragon sequence.
- Cross the repaired bridge.
- Check Meryod's equipment before leaving.
- Follow the northern mountain route and then the river route to Lyton.
- Heal and save before speaking with the village magician.
2. Lift Lyton's curse and open the waterfall route
Enter Lyton and find the magician in the building north of the village's recovery point. Speak with him and identify yourself as Alex when prompted. The magician recognizes Alex and removes the curse affecting the river and the village's music.
Leave Lyton by the northern route. Once the curse is lifted, small rocks appear in the river and provide a crossing. Continue north, cross the rocks and enter the waterfall. This is the entrance to the original North American Sega CD Blue Dragon Cave. If the rocks are still blocking the route, return to the magician and repeat the conversation before leaving the village.
- Speak with the magician north of Lyton's recovery point.
- Identify Alex when asked.
- Confirm that the river curse has been removed.
- Cross the newly accessible rocks in the river.
- Enter the waterfall north of Lyton.
3. Navigate the Blue Dragon Cave
The original Sega CD Blue Dragon Cave uses the waterfall route and its conventional cave layout. Do not substitute the Blue Dragon Shrine, pool maze or other later-version dungeon structure. From the entrance, go left to collect the Sage's Clothes, then return to the main route. Go down, take the second upward path on the far-left side and use the stairs.
On the next floor, go down and right, then follow the passage upward to the stairs. Continue through the lower section, go left and then all the way up to the next stairway. In the confusing upper section, go right and take the fourth path leading downward. Continue down and take the second path leading right. When you reach the flat wall, go down to the fork and take the left path to the Holy Shield. The Sage's Clothes and Holy Shield are useful equipment pickups, but do not delay the story if random encounters are becoming dangerous.
Dragon Fish should be handled with magic because ordinary weapon attacks are inefficient. Ghoul Fish can confuse party members, so avoid relying on a full physical attack plan when they are present. Keep the party's HP high while navigating, then heal and save before entering the large room in the lower-right area, where Brainiac waits.
- Collect the Sage's Clothes near the cave entrance.
- Use attack magic against Dragon Fish.
- Watch for confusion from Ghoul Fish.
- Follow the upper route to the Holy Shield.
- Heal and save before Brainiac's room.
4. Defeat Brainiac
Brainiac waits in the large room near the lower-right portion of the cave. His most important attack is Waterfall, which damages the entire party. He can also attack repeatedly in one turn. Enter with full HP and enough MP for Alex's Dragon Fire and repeated healing.
Use Alex's Dragon Fire as the main opening attack while MP permits. Kyle should use normal attacks and may use Sidestep when physical damage is becoming dangerous. Nash should use his strongest available thunder attack. Mia can use a dependable offensive spell or support spell, while Jessica should heal whenever a character reaches an unsafe HP range instead of waiting until several characters are near defeat.
Because Waterfall hits the whole party, recover immediately after heavy group damage. If healing is already covered, have a threatened character defend rather than taking another low-HP offensive turn. Preserve revival items for an actual defeat when possible. Once Brainiac is defeated, continue to the dragon altar instead of leaving the cave.
- Enter Brainiac's battle with the party fully healed.
- Use Alex's Dragon Fire early.
- Use Nash's strongest available thunder attack.
- Use Kyle's defensive skill or defend when physical damage is threatening.
- Prioritize group recovery after Waterfall.
- Preserve revival items unless they are genuinely needed.
5. Collect the Blue Dragon reward and survive the betrayal
After Brainiac falls, continue right to the dragon altar. Use the stairs, speak with the Blue Dragon spirit and then approach the altar to receive the Blue Dragon Helmet. Alex learns Dragon Tear and the party receives the event's experience reward. Do not leave the cave before completing this altar sequence.
When the party attempts to depart, Xenobia appears and orders Nash to take the helmet. Nash takes it and leaves with Xenobia; this theft is scripted. Do not search for a second helmet or repeat the Brainiac battle. Exit the cave, return through Lyton and follow the narrow southern route toward Tamur.
- Defeat Brainiac.
- Speak with the Blue Dragon spirit.
- Receive the Blue Dragon Helmet.
- Confirm that Dragon Tear is in Alex's spell list.
- Allow the Nash and Xenobia theft scene to finish.
- Exit the cave and travel toward Tamur.
6. Recruit Laike, then let him leave at Tamur's south gate
Enter Tamur after leaving Lyton and cross the bridge toward the upper part of town. Check the item shop and sell unwanted equipment if necessary. Go up the stairs and enter the first house to find Laike. Speak with him about becoming a Dragonmaster and reaching the floating Goddess' Tower. Laike explains that Myght may be able to construct a flying machine and offers to guide Alex.
Accept Laike's offer. Alex and Laike become the active pair while Kyle, Jessica and Mia remain behind. Laike is exceptionally strong, so he can handle ordinary encounters while Alex conserves resources. Do not proceed directly to Tempest or Myght's Lab yet.
Exit Tamur through the south gate. Laike leaves the party immediately when Alex leaves through this gate, leaving Alex alone. This is the required first Laike timing. Alex may now train alone around Lyton if desired, where the encounters provide useful experience. Use the nearby recovery point when MP is low, and do not spend scarce revival items during optional training.
- Reach Tamur after the Blue Dragon Cave sequence.
- Find Laike in the house above the bridge.
- Accept Laike's offer to guide Alex.
- Confirm that Kyle, Jessica and Mia remain behind.
- Exit Tamur through the south gate.
- Confirm that Laike has left and Alex is alone.
- Optional: train Alex around Lyton and recover as needed.
7. Return to Tamur and recruit Laike again
After any optional training, return to Tamur. Speak with Laike again in his house and recruit him for the second time. This second recruitment is required before Tempest's challenge and the Myght's Lab sequence. Do not treat the first Tamur conversation as sufficient; Laike must leave at the south gate and then be picked up again.
With Alex and Laike reunited, save in Tamur before going to the north gate. The active pair is now correct for the mandatory challenge and the laboratory route.
- Return to Tamur after Laike's first departure.
- Speak with Laike again in his house.
- Confirm that Laike has rejoined Alex.
- Save before starting Tempest's challenge.
8. Complete Tempest's mandatory challenge
Go to Tamur's north gate and speak with the couple just below it, Tempest and Fresca. Speak with Tempest again after the introductory conversation. He is looking for skilled warriors and challenges Alex to prove his strength.
The challenge is a mandatory solo fight for Alex. Use Alex's strongest reliable attack and heal when his HP becomes unsafe. This is a controlled test rather than a normal dungeon boss, so avoid spending rare recovery items unless the battle goes badly. After the fight, Tempest acknowledges Alex's strength and the story opens the route toward Myght's Lab.
Do not begin the Pao or Frontier route after the challenge. Save again before leaving Tamur for the laboratory.
- Return to Tamur with Laike recruited for the second time.
- Go to the north gate.
- Speak with Tempest and Fresca.
- Speak with Tempest again to trigger the challenge.
- Defeat Tempest with Alex alone.
- Save before entering Myght's Lab.
9. Enter Myght's Lab and speak with Myght twice
Leave Tamur through the north gate and follow the route east and then north to Myght's Lab. Alex and Laike are both active during this visit. Let Laike handle ordinary encounters when practical and conserve Alex's MP for emergencies. The laboratory uses a pipe-like layout with stairs, chutes and drops. Some holes return you to earlier sections, so do not enter every opening without checking its direction.
From the entrance, go up to the stairs. Follow the first route right, down and left to the fork, then go up. At the next choice, go down and left through the connected passages, then continue upward to the stairs. On the upper route, take the upward branch at the fork, continue to the crossings, go right and use the second upward path. Continue right, down and around the crossing, then use the right-side chute. Avoid the chute in the middle of the lower area and take the stairs back upward. Follow the next crossing left, continue straight and take the chute. Use the first path to the right, then the second path left and the first path up. Take the stairs, go right, then follow the down, right, down and right route to the stairs leading to Myght.
Speak with Myght once and he orders Alex and Laike to leave. Speak with him a second time. Laike then explains that Alex needs a flying machine to reach Goddess' Tower, and Myght agrees to build a hot-air balloon. The balloon is not completed during this visit.
- Travel east and north from Tamur to Myght's Lab.
- Keep Alex and Laike together during this visit.
- Use the stairs, chutes and pipe crossings carefully.
- Reach Myght's chamber.
- Speak with Myght twice.
- Confirm that Myght agrees to build the balloon.
10. Trigger Ghaleon's rooftop scene, return to Tamur and end the chapter
After Myght agrees to build the balloon, go to the laboratory roof. Ghaleon appears and confronts Laike. Allow the complete scene to play; it is required progress. Ghaleon attempts to persuade Laike to join him, but Laike refuses and remains committed to Alex's cause.
After the scene, return through the laboratory. Go back to the third-floor route and use the nearby chute to exit. Walk to Tamur rather than attempting to use Dragon Wings during this sequence. Before entering town, unequip Laike's equipment if you want to keep those items available for the permanent party. Re-enter Tamur and allow the departure scene to finish. Laike leaves permanently at this point.
When control returns, Alex is in Tamur without Laike. Stop here and save. The next chapter begins with the regrouping sequence at Laike's home, followed by Nash's return and the route toward Pao. Do not begin those events in this chapter.
- Reach Myght's rooftop after the second Laike recruitment and Tempest challenge.
- Allow Ghaleon's rooftop appearance to finish.
- Descend through the laboratory and exit by the internal route.
- Walk back to Tamur.
- Unequip Laike before entering town if desired.
- Re-enter Tamur and confirm that Laike has left permanently.
- Save in Tamur before visiting Laike's home in the next chapter.
Before you move on
- The Stadius Zone has been crossed from Meryod to Lyton.
- Lyton's magician has recognized Alex and lifted the river curse.
- The waterfall entrance to the original Sega CD Blue Dragon Cave has been opened.
- The Sage's Clothes and Holy Shield have been collected if safely accessible.
- Brainiac has been defeated.
- The Blue Dragon Helmet has been collected.
- Dragon Tear is present in Alex's spell list.
- The Xenobia and Nash betrayal scene has completed.
- Tamur has been reached and its equipment checked.
- Laike has initially joined Alex.
- Alex has exited Tamur through the south gate and Laike has left the party.
- Alex has returned to Tamur and recruited Laike again.
- Tempest and Fresca have been spoken to near the north gate.
- Tempest's mandatory solo challenge has been completed.
- Myght's Lab has been entered with Alex and Laike together.
- Myght has been spoken to twice and agreed to build the balloon.
- Ghaleon's rooftop appearance has played.
- Alex and Laike have returned to Tamur.
- Laike has left the active party permanently.
- Alex is saved in Tamur and is ready to begin the next chapter's regrouping sequence at Laike's home.
Chapter 7 — Pao, Dark Cave and the Frontier Route
Begin after Tempest's challenge, the first Myght's Lab visit, Ghaleon's rooftop appearance and Laike's departure. Return to Laike's home, reunite with Nash and recover Alex's Blue Dragon Helmet. Travel to Pao, obtain the Goddess' Seal from Grimzol's Cave, cure the prairie disease, receive the Mirage Potion and restore the Fountain of Transferrance. Cross Dark Cave into the Frontier, collect the Hero's Crest and Dyne's Sword from the Cadin-side Black Dragon Cave, clear Talon Mine, free Burg's prisoners and show the crest to Marke's elder. Stop after the Dragon Shrine passage opens and save in Marke before entering the deeper Black Dragon route.
Return to Laike's home and reunite the party
Chapter 6 ends after Tempest's challenge, the first visit to Myght's Lab, Ghaleon's rooftop appearance and Laike's departure. Do not repeat those scenes or make another required stop in Vane. Return to Tamur, then travel to Laike's home. After the scripted conversation, Nash returns with information about the Frontier and the dried Fountain of Transferrance.
Continue speaking with Nash until the reunion is complete. He explains that the fountain between Meryod and Lyton is the route to the Frontier, but its water has dried up. Nash also returns Alex's Blue Dragon Helmet after escaping Xenobia. Equip it on Alex if it improves his current helmet, check the active roster and heal before leaving.
The next objective is Pao, not the Frontier itself. The village elder of the prairie has the item needed to restore the fountain, but the disease sequence must be resolved first. If you have equipment that belonged to Laike, check your inventory before continuing; Laike is no longer part of the regular party.
- Tempest's challenge is complete.
- The first Myght's Lab visit and Ghaleon's rooftop scene are complete.
- Laike has left the active party.
- The party has returned to Laike's home.
- Nash has rejoined and explained the dried fountain route.
- Nash has returned the Blue Dragon Helmet.
- Alex has the helmet equipped if appropriate.
- The party is healed and ready for the prairie.
Reach Pao and activate the Goddess' Seal objective
Travel to the prairie north of Tamur and follow the route east to Pao. Speak with the villagers to learn that a monster in a northern cave spread the disease and that the Goddess' Seal was used to contain it. The village medic gives the practical objective: recover the seal from Grimzol's Cave so the sick villagers can be cured.
During this sequence Mia collapses, and Jessica stays behind to care for her. Alex, Nash and Kyle continue toward the cave, while Tempest has already gone ahead. Do not expect Jessica or Mia to be available for the Grimzol battle.
Heal before leaving Pao and carry recovery items for the reduced party. Grimzol's Cave contains difficult encounters, so save before entering if a save point is available. The required route is Pao, Grimzol's Cave, the Goddess' Seal, the cure and the Mirage Potion; do not attempt the fountain or Dark Cave first.
- Reach the prairie north of Tamur.
- Travel east to Pao.
- Speak with the villagers about the disease and northern cave.
- Speak with the village medic.
- Confirm that Mia has collapsed and Jessica remains behind.
- Heal and save before Grimzol's Cave.
Explore Grimzol's Cave and defeat the Inca God
Leave Pao by the northern route and enter Grimzol's Cave. Tempest is partway through the cave and joins the party during the required progression. You cannot complete the route without him. The cave's enemies are dangerous: Slice o' Dead can inflict several rapid hits, while Slicer can deal heavy single-target damage. Retreat and recover if the reduced party is nearing defeat.
Collect the Pixie's Bow, Pixie's Whip and Insane Sword along the route. Give the bow to Nash and equip the Insane Sword on Kyle if it is better than his current weapon. Tempest can use the Pixie's Whip during the cave, but remove his equipment before returning to Pao if you want to keep it after the story event.
The Inca God, called Grimzol by the walkthrough material, is on the third level. Kyle can use Insane Sword to strengthen Alex, while Alex and Tempest attack and Nash uses his strongest available offensive skill. Preserve Alex's MP for Calm Litany or emergency recovery. Grimzol attacks four times per turn, so heal before several characters fall into danger rather than waiting for a knockout.
Defeat Grimzol to receive the Goddess' Seal. Leave the cave and return directly to Pao. Do not continue into the Frontier from this point; the cure and Mirage Potion are still required.
- Allow Tempest to join inside Grimzol's Cave.
- Collect Pixie's Bow.
- Collect Pixie's Whip.
- Collect Insane Sword.
- Equip the best available weapons on Alex, Nash, Kyle and Tempest.
- Reach the third-floor boss area.
- Defeat the Inca God, Grimzol.
- Receive the Goddess' Seal.
Cure Pao and receive the Mirage Potion
Return to Pao with the Goddess' Seal. Remove Tempest's equipment before the village sequence if you want to retain it. Give the seal to the medicine woman. The cure restores the villagers, but Tempest is punished for breaking the village law and leaves the regular party.
After the cure, revive Jessica and Mia and speak with them so they rejoin the group. Then speak with the chief. He awakens and takes Alex to the village well, where he gives Alex the Mirage Potion. Do not leave Pao until this item is in the inventory.
Heal and save after the event. Confirm that Alex, Nash, Kyle, Jessica and Mia are available before traveling back toward Meryod. Tempest's temporary participation is over, so do not plan the Dark Cave party around him.
- Give the Goddess' Seal to the medicine woman.
- Complete the cure sequence.
- Allow Tempest's punishment scene to finish.
- Revive and reunite Jessica and Mia.
- Speak with the chief.
- Receive the Mirage Potion at the well.
- Heal and save in Pao.
Restore the Fountain of Transferrance and cross Dark Cave
Return to the Fountain of Transferrance between Meryod and Lyton. Use the Mirage Potion at the fountain. This restores the teleportation route to Dark Cave, which is the required route to the barren Frontier.
Enter Dark Cave with the full party healed. Cursed Faces and Spider Crabs are notable threats, and repeated encounters can consume Alex's MP. Use area magic when it prevents more damage than ordinary attacks, but do not spend all recovery resources on routine fights. Retreat through the fountain route if the party is badly depleted.
Follow the main route through Dark Cave and exit into the Frontier. The Frontier has frequent encounters and no normal daylight, so recover in Cadin before beginning the next dungeon if necessary. Save before entering the Cadin-side Black Dragon Cave or Talon Mine.
- Reach the Fountain of Transferrance.
- Use the Mirage Potion.
- Enter Dark Cave through the restored route.
- Manage HP and MP against Cursed Faces and Spider Crabs.
- Reach the Frontier.
- Recover and save before the Frontier dungeons.
Visit Cadin and collect the Hero's Crest and Dyne's Sword
Cadin lies west of the Dark Cave exit. Speak with the townspeople to learn that the Black Dragon Cave is nearby, then travel east to its Cadin-side entrance. This first visit is limited to the accessible section; the deeper shrine route is not available until Marke's elder accepts the Hero's Crest.
Search the accessible cave route for the Hero's Crest and Dyne's Sword. The crest is the required progression item for opening the deeper Black Dragon route from Marke. Dyne's Sword is a strong upgrade for Alex until Althena's Sword becomes available, so equip it if it improves his attack.
Do not try to complete the Black Dragon encounter during this visit. After collecting both items, return to the Frontier and travel south from the cave toward Talon Mine. Save before entering the mine, because the next section contains two required boss battles and frequent encounters.
- Reach Cadin west of Dark Cave.
- Speak with the townspeople.
- Enter the Cadin-side Black Dragon Cave entrance.
- Collect the Hero's Crest.
- Collect Dyne's Sword.
- Equip Dyne's Sword on Alex if it is an upgrade.
- Save before Talon Mine.
Clear Talon Mine and free Burg's prisoners
Enter Talon Mine south of the Cadin-side Black Dragon Cave with the party healed and enough recovery items. Ghaleon and Xenobia have forced Burg's residents to work there for the iron needed to build the Grindery. Follow the mine route toward its guarded exit.
The first required boss is the Wolf Commander. If Wolf Guards accompany him, defeat the associates first with quick physical attacks, then concentrate on the commander. His battle axe can remove a large amount of one character's HP, so heal that character before the next turn rather than allowing the damage to accumulate.
After the commander is defeated, continue to the Dragon Tank. The tank is vulnerable to magic. Use Alex's Dragon Tear, Nash's Thunder Thrust, Mia's Flameria and Kyle's Sybillium if he has learned it. Jessica should heal as needed and can use Camp Defender when the tank's attacks threaten the whole party. Do not rely exclusively on ordinary physical attacks, and preserve enough MP to recover after the fight.
When the Dragon Tank is defeated, the commander allows the prisoners to leave. Confirm that the Burg residents have been released before leaving the mine. Recover before crossing the Frontier to Marke.
- Enter Talon Mine south of the Black Dragon Cave.
- Defeat the Wolf Commander.
- Defeat the Dragon Tank.
- Use magic as the primary damage plan against the Dragon Tank.
- Use healing or Camp Defender when the tank's attacks threaten the party.
- Confirm that Burg's prisoners have been released.
Show the Hero's Crest to Marke's elder and stop before the deeper route
Leave Talon Mine and travel west to Marke. Speak with the elder immediately and show him the Hero's Crest. He opens the Dragon Shrine passage leading to the deeper section of Black Dragon Cave. The crest must be accepted before that route becomes available.
Before entering the shrine, check Marke's equipment and item shops. Saint Clothes and Silver Claw are strong equipment choices for Jessica at this stage and should be purchased if affordable. Check other supplies as needed, but no separate blacksmith event is required for progression.
Heal and save in Marke after the elder opens the passage. This is the completion point for Chapter 7. Do not enter the Dragon Shrine, fight the Black Dragon, collect the Black Dragon Armor, learn Dragon Quake, travel to Ruid or enter Taben's Tower until Chapter 8.
- Reach Marke after clearing Talon Mine.
- Speak with Marke's elder.
- Show the Hero's Crest.
- Confirm that the Dragon Shrine passage opens.
- Check Marke's shops.
- Purchase Saint Clothes and Silver Claw for Jessica if affordable.
- Heal and save in Marke before entering the Dragon Shrine.
Before you move on
- Tempest's challenge, the first Myght's Lab visit, Ghaleon's rooftop scene and Laike's departure were completed before this chapter.
- The party has regrouped at Laike's home.
- Nash has rejoined and returned the Blue Dragon Helmet.
- Pao's disease has been cured with the Goddess' Seal.
- Jessica and Mia have rejoined the party.
- Tempest has left the regular party.
- The chief has given Alex the Mirage Potion.
- The Fountain of Transferrance has been restored.
- The party has crossed Dark Cave and reached the Frontier.
- The Hero's Crest and Dyne's Sword have been collected from the Cadin-side Black Dragon Cave.
- The Wolf Commander has been defeated in Talon Mine.
- The Dragon Tank has been defeated in Talon Mine.
- Burg's prisoners have been released.
- Marke's elder has accepted the Hero's Crest and opened the Dragon Shrine passage.
- Marke's equipment shops have been checked, with Saint Clothes and Silver Claw purchased for Jessica if affordable.
- A fresh save exists in Marke before entering the Dragon Shrine and deeper Black Dragon route.
References for this chapter
Chapter 8 — Ruid, Taben's Tower and the Dragonmaster Route
Begin from Chapter 7's completed Marke save, with the Hero's Crest already accepted and the Dragon Shrine passage open. Clear the deeper Black Dragon Cave, defeat the Black Dragon, collect the Black Dragon Armor and learn Dragon Quake. Return to Marke for Ruid's Key, enter Ruid and defeat the three Knight Tanks in Taben's Tower. Follow the Grindery through Talon, witness Vane's destruction and attempt the protected entrance. After waking in Reza's Thieves' Bazaar, complete the required regrouping conversations, speak with Laike, launch Myght's balloon and crash at Goddess Tower. Stop immediately before speaking with the Dragon Angels; their trial, Alex's Dragonmaster transformation, Holy Light and Althena's Sword belong to Chapter 9.
Start from Marke and enter the deeper Black Dragon route
Load the completed Marke save from Chapter 7. The elder has already accepted the Hero's Crest and opened the Dragon Shrine passage, so do not repeat that event. Heal in Marke, make a normal menu save and check that the party has HP recovery, MP recovery and revival supplies before entering the cave.
Use the open shrine passage to reach the deeper section of the Black Dragon Cave. The route is divided across floors B1 through B6. Use each stairway and major junction as a landmark. Treasure branches can lead away from the main route, so return to the last recognizable junction if a side path does not advance toward the lower floors.
- The Hero's Crest handoff is complete.
- The Dragon Shrine passage is open.
- The party is healed and saved in Marke.
- Recovery and revival supplies are available.
Cross the deeper Black Dragon Cave
From the deeper cave entrance, go down, left and up to the first stairs. Continue through the next floor, descend and take the left route. At the fork, use the upper-left path, then continue left and down until you reach the next stairway.
The next floor contains Kyle's Insane Armor. From the entrance, go down-left until the wall stops you, then move down and right. Take the second path upward and follow it to a fork. Go down to collect Insane Armor. Return to the point where the second upward path began, go right to the wall, then down and left to the next stairs. The armor is optional for story progress but is Kyle's strongest armor available in this section, so collect it if you can do so without exhausting supplies.
On the following floor, go down and take the first route to the right. Continue down and right until the corridor runs straight right. Take the first upward branch and follow the winding route to the stairs. Continue to the next level, then heal and save before entering the large chamber. The floor shakes when the Black Dragon encounter begins.
- The deeper Black Dragon Cave was entered through the open shrine passage.
- The B1-to-B6 route was followed toward the lower chamber.
- Insane Armor was collected if the optional branch was taken.
- The party reached the boss area with recovery resources remaining.
Defeat the Black Dragon and claim the Black Dragon Armor
Restore HP and MP before entering the large chamber. Use Alex's strongest reliable Dragon attack or physical attack, Kyle's Sybillium while it remains effective, Nash's Thunder Thrust or strongest dependable offense and Mia's strongest offensive spell. Jessica should heal whenever a character is in danger and may use Magic Camp when the party can safely spend a turn improving endurance.
Do not plan around Dragon Quake during this battle. Alex learns Dragon Quake only after the armor pickup that follows the victory. Keep characters above knockout range instead of waiting until several party members need healing at once. Use recovery or revival items immediately when a character is in serious danger.
After the Black Dragon falls, continue through the room beyond the battlefield and enter the Black Dragon Altar. Collect the Black Dragon Armor. This completes Alex's Dragon Armor set and teaches Dragon Quake. Check Alex's magic list before leaving so the new spell is confirmed. The party also receives the battle's experience reward at this point.
- The Black Dragon was defeated.
- The Black Dragon Altar was entered.
- Black Dragon Armor was collected.
- Alex learned Dragon Quake.
- Alex's magic list was checked before leaving.
Return to Marke and receive Ruid's Key
Leave the cave and return to Marke. Go to the elder's house and speak with the escaped girl. Continue through the complete conversation: she explains that she escaped from Ruid with Luna's help and gives Alex a duplicate key. Do not stop after the first exchange, because Ruid's Key is the required progression item.
Speak with the elder after receiving the key and continue his follow-up dialogue. Heal, save and equip Alex with the Black Dragon Armor before traveling onward. Ruid's Key opens the front gate of Ruid.
- The escaped girl was spoken with until Ruid's Key was received.
- The elder's follow-up dialogue was completed.
- Ruid's Key is in the inventory.
- Alex is wearing the Black Dragon Armor.
- The party is healed and saved before traveling to Ruid.
Enter Ruid and reach Taben
Travel to Ruid, the gated town south of Marke, and use Ruid's Key at the entrance. Speak with the townspeople if necessary to finish the town's setup, then enter Taben's Tower at the top of the town.
Taben's Tower is filled with mechanical enemies that are resistant to ordinary weapons. Use Dragon Quake and dependable offensive magic against durable or grouped targets, while preserving enough MP for the boss. Follow the stair routes upward. On the upper route, collect the Holy Clothes chest if you want the equipment upgrade, then continue to the central room and speak with Taben.
Speaking with Taben triggers the mandatory battle against three Knight Tanks. Recover as fully as possible before starting his conversation.
- Ruid was opened with Ruid's Key.
- The required town setup was completed.
- Taben's Tower was entered.
- Taben was reached at the top.
- The party was recovered before the boss trigger.
Defeat the three Knight Tanks
The boss encounter contains three Knight Tanks. Alex should use Dragon Quake, Kyle should use Sybillium, Nash should use Thunder Thrust and Mia should use Landquake or another strong area spell. Jessica should heal whenever the party is in danger rather than waiting for every character to need recovery.
The tanks are strong against ordinary weapons, so avoid spending repeated turns on weak physical attacks. Maintain magical pressure, use recovery items before a character is knocked out and keep Jessica available for emergency healing. After the victory, the Grindery begins moving.
- All three Knight Tanks were defeated.
- The party left Taben's Tower.
- The Grindery began moving.
- The party was ready to follow the tracks.
Follow the Grindery through Talon and trigger the Reza transition
Leave Ruid and follow the Grindery's tracks until they end. Continue through the Frontier to Talon. When the party leaves Talon, the scripted scene shows Ghaleon using Althena's power to destroy Vane.
Approach the Grindery and attempt to enter it. Althena's barrier rejects Alex, and the party loses consciousness. This failed entrance attempt is required. Do not search the ruined Silver Spire for a controllable late-game dungeon, and do not expect a new Dragon Wings reward during this sequence.
- The Grindery trail was followed from Ruid.
- Talon was reached.
- Vane's destruction was witnessed.
- The protected Grindery entrance was attempted.
- The party was sent to Reza after the failed entry.
Complete the Reza Thieves' Bazaar regrouping
After awakening in Reza's Thieves' Bazaar, allow the opening conversation to finish. The Insane Helmet sold by the far-left merchant is an optional improvement for Kyle and is not required for story progress.
Complete the regrouping conversations in order. Go upstairs and speak with the women, then go downstairs and speak with the men. Return upstairs and speak with the women again so they rejoin the party. Go downstairs once more and speak with the men to complete the scene. Leaving after only one round of conversations can prevent the sequence from advancing.
When the party is reunited, Laike appears and announces that Myght's balloon is ready. This is the correct time to check equipment, heal and prepare supplies. The story then directs Alex to Myght's Lab.
- The party awoke in Reza's Thieves' Bazaar.
- The women upstairs were spoken with.
- The men downstairs were spoken with.
- The women were revisited and rejoined the party.
- The men were spoken with again and the regrouping finished.
- Laike appeared and announced that the balloon was ready.
Visit Myght's Lab, launch the balloon and reach Goddess Tower
Travel to Myght's Lab only after the Bazaar regrouping and Laike's appearance are complete. Speak with Myght and continue through his dialogue. When Alex climbs toward the balloon launch area, Xenobia interrupts the departure. Laike intervenes in the scripted scene; Alex is not required to win a normal Xenobia battle here.
Continue until the party boards the balloon. During the flight toward Goddess Tower, the Grindery damages the balloon and the party crash-lands at the base of the tower. Enter Goddess Tower on foot.
The tower's floors use an X-shaped layout. From the entrance, take the upper-right path to the stairs. On the next floor, use the upper-left route. On the third floor, the lower-left path contains Sage's Cane, while the stairs continue from the lower-right route. On the fifth floor, proceed upward through the central route. At the upper area, move right toward the image of Althena and continue to the chamber above.
Before speaking with the Dragon Angels, collect the reachable pre-trial chest supplies. This includes the Seed of Vigor needed for Alex's upcoming solo battle and the chest containing Goddess' Cane on the route used by the original Sega CD walkthrough. Sage's Cane and Goddess' Cane are separate items: Sage's Cane is the earlier tower pickup, while Goddess' Cane is the weapon that can be equipped or handed to Mia after the Dragon Angels trial.
Heal with available items and make a normal menu save before speaking with the Dragon Angels. Stop at the upper chamber. Do not begin the solo trial, award Dragonmaster status, teach Holy Light or collect Althena's Sword in this chapter.
- Myght's Lab was visited after the Reza regrouping sequence.
- Xenobia's scripted interruption occurred.
- Laike intervened.
- The balloon launched and crashed at Goddess Tower.
- Goddess Tower was entered on foot.
- Reachable pre-trial chests, including Goddess' Cane when present on the route, were collected before speaking with the Dragon Angels.
- Sage's Cane was distinguished from Goddess' Cane.
- The party was healed and a normal save was made before the Dragon Angels conversation.
- The Dragon Angels trial was not started.
Before you move on
- The completed Marke save was used with the Hero's Crest already accepted and the Dragon Shrine passage open.
- The deeper Black Dragon Cave was cleared.
- The Black Dragon was defeated.
- Black Dragon Armor was collected.
- Alex learned Dragon Quake.
- The escaped girl gave Alex Ruid's Key.
- Ruid was entered and Taben's Tower was cleared.
- All three Knight Tanks were defeated.
- The Grindery tracks were followed through Talon.
- Vane's destruction was witnessed.
- The protected Grindery entrance was attempted.
- The party awoke in Reza's Thieves' Bazaar.
- The Bazaar conversations reunited the party.
- Laike appeared and directed Alex toward Myght's Lab.
- Myght's balloon was prepared and launched.
- Xenobia's scripted interruption occurred.
- The balloon crashed at Goddess Tower.
- Goddess Tower was entered on foot; reachable pre-trial chests, including Goddess' Cane when present on the route, were collected before speaking with the Dragon Angels; the Dragon Angels trial was not started, and the cane's post-trial equip or handoff to Mia remains for Chapter 9.
References for this chapter
- RPGClassics — Lunar: The Silver Star Sega CD Walkthrough, Part 14
- RPGClassics.com — Lunar: The Silver Star Sega CD Walkthrough, Final Palace and Ending
- RPGClassics — Lunar: The Silver Star Sega CD Maps, Marke Black Dragon Cave
- GameFAQs — Lunar: The Silver Star Guide and Walkthrough, Sega CD, by MoonSaultKid
Chapter 9 — Dragon Angels, Althena's Sword and Final Preparation
Begin after the balloon has crash-landed near Goddess Tower. The Reza recovery, Myght's Lab balloon launch, Xenobia's rooftop interruption and the crash are already complete. Climb Goddess Tower, collect the reachable supplies around the Dragon Angels chamber, and defeat the Dragon Angels in Alex's mandatory solo trial. Alex then becomes a Dragonmaster, learns Holy Light and receives Althena's Sword. Complete the required checks at Myght's Lab, Vane and Burg, return to Meribia for Ramus's free late-game supplies, and make a clean preparation save. Do not open the Grindery barrier in this chapter.
1. Enter Goddess Tower and follow the ascent
After the balloon crash, enter Goddess Tower and heal before climbing. The tower's enemies are strong enough to punish a weakened party, so use Herbs of Althena when necessary rather than risking a defeat and repeating the entire ascent.
The floors use broad X-shaped layouts. From the entrance, take the upper-right path to the stairs. On the next floor, use the upper-left route. On the third floor, take the lower-left branch to reach the tower treasure, then return to the junction and use the lower-right route toward the stairs. Continue through the fifth floor by moving up through the central-right route. On the last regular floor, travel to the right and follow the path toward the chamber with the image of Althena.
The tower is effectively linear once these landmarks are recognized. Preserve a save from before the ascent if possible, because the Dragon Angels trial removes the rest of the party and must be fought with Alex alone.
- The party has entered Goddess Tower after the balloon crash.
- The party is healed before beginning the ascent.
- The third-floor treasure branch has been checked.
- The upper chamber with the image of Althena has been reached.
2. Open the reachable chests and prepare Alex for the trial
Before speaking with the Dragon Angels, open the reachable chests near the upper chamber. Secure the Seed of Vigor before starting the trial; it is the important MP recovery item for Alex's solo battle. The nearby tower treasure also includes recovery equipment, and Goddess' Cane may be collected during this preparation. Do not treat the cane's timing as a reason to skip any reachable chest, and do not require it as a condition for beginning the trial.
Restore Alex's HP and MP completely. Equip the Dragon equipment available to him, including the Dragon Helmet, Dragon Shield, Dragon Armor and Dragon's Wings. Put the Seed of Vigor and Herbs of Althena where they can be selected quickly from the item menu. The other party members' equipment is irrelevant during the trial because they will not participate.
Keep the pre-tower save if possible. If the ascent leaves Alex weakened, heal before approaching the angels. The battle is short when Alex is prepared, but there is no normal party rotation or mid-trial resupply to cover a poor opening.
- The reachable chests near the Dragon Angels chamber have been opened.
- The Seed of Vigor is in Alex's inventory or otherwise immediately available.
- Alex is at full HP and MP.
- Alex's available Dragon equipment is equipped.
- A backup save from before the tower ascent is preserved if possible.
3. Defeat the Dragon Angels in Alex's solo battle
Speak with the Dragon Angels only after Alex is ready. The encounter becomes a one-on-two fight, and the other party members are unavailable. Alex must handle his own damage, healing and MP recovery.
Dragon Quake is the primary attack. A conservative opening is to use Flee on the first round, then cast Dragon Quake repeatedly. This opening is optional; if Alex is at a strong level, beginning with Dragon Quake is also reasonable. The Dragon Angels' physical attacks are the main danger, while Thunder Thrust can produce heavy damage. If Alex's HP becomes unsafe, use an Herb of Althena immediately instead of gambling on another attack.
The battle commonly ends after about five Dragon Quake casts, although Alex's level and damage rolls can change the total. When MP runs low, use the Seed of Vigor. Starlights and Silver Lights are not substitutes for the large MP recovery needed here. If Alex has exhausted his magic after using the Seed, continue with his strongest physical attack and keep healing whenever necessary.
After the victory, the Dragon Angels give Alex their blessing. He becomes Dragonmaster Alex and learns Holy Light. Obtain Althena's Sword and equip it immediately. If Goddess' Cane was collected from the reachable tower treasure, equip it or give it to Mia after the trial; the cane does not need to be excluded from the pre-trial chest sweep. Speak with the Dragon Angels again to finish the explanation about Luna and Nall, then leave the chamber and make a new save.
- Alex has defeated both Dragon Angels alone.
- Alex has received the Dragon Angels' blessing.
- Alex has become Dragonmaster Alex.
- Holy Light is available in Alex's spell list.
- Althena's Sword has been obtained and equipped.
- Goddess' Cane has been equipped or given to Mia if it was collected.
- A post-trial save has been created.
4. Complete the required post-trial world checks
Exit Goddess Tower by foot. Use the Dragon's Wings to travel to Myght's Lab and speak with Myght. He explains that the Grindery operates using steam power and should be sought near a large body of water. This conversation establishes the next objective.
Use the Dragon's Wings to visit Vane. The city is destroyed after Ghaleon's attack, so this is a story-state check rather than a shopping stop. Then travel to Burg and confirm that the townspeople have returned. Complete these visits after Alex becomes Dragonmaster and before making the final Meribia preparation save.
After Myght's Lab, Vane and Burg have been checked, travel to Meribia. Do not open the Grindery barrier yet. Meribia is the final preparation town because Ramus has returned to Dross's former shop and will provide supplies without charge.
- Myght has explained the Grindery's steam-powered operation.
- The destroyed Vane has been visited.
- Burg has been visited after the townspeople return.
- The party has reached Meribia after completing all three checks.
5. Collect Ramus's free supplies and prepare the party
Enter Ramus's shop in Meribia and collect the available late-game stock for free. Prioritize Herbs of Althena for HP recovery and Silver Lights for MP recovery. Take useful revival and support items as available, but do not rely on a fixed quantity unless your own inventory requires it.
Keep Althena's Sword equipped on Alex. Retain his Dragon Armor, Dragon Shield, Dragon Helmet and Dragon's Wings, along with the Iron Gauntlet if it is part of his current setup. For the other characters, use their strongest available weapons, armor and accessories. A practical arrangement is Insane Sword and Insane Armor for Kyle, Silver Claw and Saint Clothes for Jessica, Pixie's Bow and Holy Clothes for Nash, and Goddess' Cane with strong defensive clothing for Mia when the cane is available.
Heal the whole party before leaving Meribia. Organize Herbs of Althena, Silver Lights, Seeds of Vigor and revival items so they can be selected without searching through the inventory. Keep both the post-trial save and a separate Meribia preparation save. The first protects the Dragon Angels victory; the second is the clean starting point for the Grindery chapter.
- Ramus's free stock has been collected.
- Herbs of Althena and Silver Lights are available.
- Althena's Sword is equipped by Alex.
- Alex retains the Dragon equipment needed for the Grindery barrier.
- The party is healed and recovery items are easy to access.
- The post-trial save and Meribia preparation save remain intact.
6. Locate the Grindery and stop before the barrier
Leave Meribia and travel north across the darkened overworld. Fight only when useful for experience or spell preparation. Run from encounters that consume too much HP or MP, because the next chapter begins inside the Grindery and its mechanical enemies are demanding.
Locate the stopped Grindery north of Meribia. Before approaching the entrance, check Alex's equipment screen. He must have Althena's Sword and the complete Dragon equipment setup, including the Dragon's Wings, equipped for the barrier sequence. If any piece has been replaced, restore the required equipment before trying to enter.
Stop outside the barrier. Do not interact with it in this chapter. Chapter 10 begins when Alex breaks through the barrier and enters the Grindery's pipe-and-bridge route.
- The Grindery has been located north of Meribia.
- The party carries HP recovery, MP recovery and revival supplies.
- Alex has Althena's Sword and the complete Dragon equipment equipped.
- The final Meribia preparation save remains intact.
- The Grindery barrier has not been opened.
Before you move on
- The Dragon Angels have been defeated in Alex's solo battle.
- Alex has received the Dragon Angels' blessing and become Dragonmaster Alex.
- Holy Light is available to Alex.
- Althena's Sword has been obtained and equipped by Alex.
- Goddess' Cane has been equipped or given to Mia if it was collected before or after the trial.
- Myght's Lab, Vane and Burg have been checked after the trial.
- Ramus's free recovery supplies have been collected in Meribia.
- Alex has the equipment required for the Grindery barrier, including the Dragon Helmet, Dragon Shield, Dragon Armor and Dragon's Wings, along with Althena's Sword.
- A post-trial backup save and a final Meribia preparation save remain available.
- The Grindery has been located north of Meribia, but its barrier has not been opened.
References for this chapter
Chapter 10 — Mid-boss: Imperial Forces and Mechanical Foes
Begin from Chapter 9’s completed final Meribia preparation save, after the Dragon Angels trial, final equipment checks, preparation visits and Ramus’s free supplies are complete. Verify Alex’s Dragon equipment and the party’s recovery supplies, preserve the outside save, enter the stopped Grindery north of Meribia, cross its opening pipe-and-bridge floors and reach the fifth-floor furnace. Defeat the Fire Elementals there, then confirm that the Grindery stops and the furnace route opens. Stop before the Lagoon Goon blockades, Tempest and Fresca’s intervention, the garden recovery area and Ghaleon’s Palace.
Start from the completed Meribia preparation save
Load the save made at the end of Chapter 9, after the final Meribia preparation has been completed. The Myght’s Lab, Vane, Burg and Ramus’s shop sequences should already be finished. Do not retrace those events here.
Before leaving Meribia, make a short readiness check rather than beginning another preparation route. Open Alex’s equipment screen and confirm that he has the late-game Dragon equipment needed for the Grindery entrance, including the White Dragon Wings. The complete equipment set used for the final approach includes Althena’s Sword, Dragon Armor, Iron Gauntlet, Dragon Shield and Dragon Helmet.
Heal the party and check the recovery supply. Prioritize full-party healing items, revival items and enough MP-restoring resources for the Grindery and the Fire Elementals. You do not need to defeat every random formation. Preserve the Meribia save until the party has entered the Grindery successfully and the furnace encounter is complete.
- The Chapter 9 final Meribia preparation save has been loaded.
- The Myght’s Lab, Vane, Burg and Ramus’s shop preparation sequence is already complete.
- Alex’s Dragon equipment, including the White Dragon Wings, has been verified.
- The party is healed and recovery supplies have been checked.
- A save outside the Grindery remains preserved.
Enter the stopped Grindery
Leave Meribia and travel north. The Grindery is stopped in the area north of the city. Approach its entrance and try to enter. Alex breaks through the barrier only when the required Dragon equipment is equipped.
If the barrier does not open, do not look for another entrance. Return to the equipment screen and check Alex’s Dragon items, especially the White Dragon Wings, then approach the entrance again. A failed attempt does not require replaying the preceding story scenes.
Once inside, retain the outside save. The Grindery contains difficult mechanical encounters, and clearing every formation is unnecessary. Run from Knight Tanks or Dragon Tanks when the battle would cost more HP, MP or revival items than the experience is worth. Against ordinary groups, focus on the most dangerous attacker first. If a formation includes a support or disruptive enemy, remove that enemy before spreading damage across durable machines. Use area magic only when it efficiently damages several targets.
- The stopped Grindery north of Meribia has been reached.
- Alex has broken through the entrance barrier.
- The party is inside the Grindery.
- The outside preparation save remains available.
Cross the opening pipe-and-bridge floors
The opening Grindery floors form a pipe, fence, bridge and staircase maze. Use staircases as your main landmarks. From the entrance, work toward the lower section, move right to the pipe and follow it upward. Continue upward and right until reaching a fenced area. Take the route downward, turn right and go upward to the stairs.
On the next section, go down, left, up and left. Cross the two bridges, continue downward and follow the passage to the next staircase. The following pipe area begins by moving right. Follow the route downward, take the second right-hand passage upward and then go left toward the stairs. Continue through the pipes and use the staircase at the far right.
After returning to another lower floor, travel right and then up to find the next staircase. In the next bridge-and-pipe section, move down across the bridge, go left and up, cross the bridge to the left, then continue up and left. Take the second route downward, then the first left. Follow the corridor to another bridge and use the second upward route to reach the stairs.
The mechanical enemies in these sections are costly if the party is already damaged. Use ordinary attacks when they are enough, reserve stronger spells for dense or threatening formations and flee whenever a battle would compromise the party’s condition before the furnace. Jessica should preserve enough MP to heal after a bad encounter, while Mia and Nash should avoid spending their entire reserves on routine groups.
- The first pipe-and-fence section has been crossed.
- The two-bridge section has been completed.
- The next staircase has been located.
- Unfavorable Knight Tank or Dragon Tank encounters have been avoided when necessary.
- The party has been healed before continuing upward.
Follow the upper route to the furnace
On the next floor, move right and then up to find another staircase. The route returns to a pipe-heavy section. From its entrance, go right, down and take the leftward route. Continue toward the lower part of the floor, move right toward the lower-right corner, then backtrack left and go upward as far as the passage allows. Turn left and go up at the end of the route.
The large flames identify the fifth-floor furnace area. Heal before approaching them and confirm that Alex, Kyle, Jessica, Nash and Mia are alive and ready. Avoid using the strongest spells on the final random encounters. Ordinary attacks are preferable when they are sufficient, and fleeing is preferable to spending major MP on an unfavorable formation.
Approach the flames to trigger the Fire Elementals encounter. This is the required mid-boss event for the chapter. If the party reaches the furnace in poor condition, retreat only if the route allows it safely; otherwise use the preserved outside save rather than exhausting the inventory before the battle begins.
- The upper pipe route has been followed to the fifth-floor furnace.
- The party has conserved MP during the final approach.
- The active party is healed before the flames are approached.
- The Fire Elementals encounter has been triggered.
Defeat the Fire Elementals
The Fire Elementals are strong enough to punish an unprepared party, but the encounter’s attack pattern gives you time to maintain a steady healing rhythm. Begin with a balanced plan: Alex uses Holy Light, Kyle uses Sybillium, Nash uses Thunder Thrust, Mia uses Landquake and Jessica concentrates on healing. These assignments are a starting pattern, not a requirement; Jessica should heal whenever the party’s HP makes attacking unsafe.
Do not allow Jessica to become unable to act after a heavy attack. If a recovery item saves an action or allows Jessica to handle a more urgent need, use the item rather than preserving it at the cost of a possible defeat. Keep the party’s HP high enough to survive the next enemy turn, especially when several members have already been damaged.
When Alex or Kyle begins to run low on MP, change to a conservation plan. Jessica can use Cascade Litany on Alex when restoring his MP is more valuable than another attack. Kyle can use Kiai Slice to raise his physical damage, after which Alex and Kyle can attack normally. Nash and Mia should continue using their stronger attacks only while enough MP remains for healing, recovery and the route after the furnace.
If a character is defeated, stabilize the living party before attempting a revival unless the next enemy turn is unlikely to threaten them. The aim is to defeat the Fire Elementals while retaining useful healing, revival and MP-restoring supplies for the remaining Grindery sequence. Do not spend the entire inventory to preserve a preferred attack rotation.
- Alex uses Holy Light while its MP cost is justified.
- Kyle uses Sybillium early and changes to Kiai Slice when conserving MP.
- Nash and Mia use strong attacks without exhausting the party’s reserves.
- Jessica prioritizes healing and revival when required.
- The Fire Elementals have been defeated.
Confirm the route opening and stop the chapter
After the Fire Elementals are defeated, the Grindery stops and the route through the furnace opens. Continue only far enough to confirm that the newly available passage and stairs can be used. This verifies the chapter’s required objective.
Stop before proceeding to the outside section and the repeated Lagoon Goon blockades. The three blockade attempts, Tempest and Fresca’s intervention, the garden, the lower-left recovery pixie, the Tower Key route and Ghaleon’s Palace belong to later chapters.
Keep the original outside save as a fallback. If the game permits a safe post-battle save without advancing into the next event sequence, use a separate save rather than overwriting the Meribia preparation file. The important completion point is that the Fire Elementals are defeated, the Grindery has stopped and the furnace route is open.
- The Fire Elementals have been defeated.
- The Grindery has stopped.
- The furnace route and its stairs have opened.
- The chapter ends before the Lagoon Goon blockades.
- The chapter ends before Tempest and Fresca appear.
- The chapter ends before the garden and Ghaleon’s Palace.
Before you move on
- The Chapter 9 final Meribia preparation save was used as the starting point.
- The player verified Alex’s Dragon equipment, including the White Dragon Wings, without repeating the earlier preparation route.
- The North American Sega CD Grindery was entered north of Meribia.
- The opening pipe-and-bridge floors were crossed and the fifth-floor furnace was reached.
- The Fire Elementals encounter was defeated using a damage-and-healing plan appropriate to the original Sega CD release.
- The Grindery stopped and the furnace route opened after the Fire Elementals were defeated.
- The chapter ended before the Lagoon Goon blockades, Tempest and Fresca’s intervention, the garden recovery area, the Tower Key sequence and Ghaleon’s Palace.
Chapter 11 — Rescue Sequences, NPC Choices and Branch Points
Begin after defeating the Fire Elementals in the Grindery furnace and opening the route beyond it. Fight through the three Lagoon Goon blockades, allow Tempest and Fresca to intervene, enter Ghaleon’s garden, and use the lower-left recovery pixie. Optional pixie conversations can be viewed in the garden, but no garden dialogue creates a branching ending. Finish with the party healed and prepared in the garden. Do not enter Ghaleon’s Palace in this chapter; the Tower Key, Palace route, healing pool, and tenth-floor save belong to Chapter 12.
Leave the furnace and reach the guarded passage
Start after the Fire Elementals have been defeated and the Grindery furnace route has opened. Continue through the furnace and use the stairs beyond it. Follow the upper Grindery route until it leads outside toward Ghaleon’s garden.
The intervening floors contain dangerous mechanical enemies, including Dragon Tanks and Knight Tanks. You do not need to defeat every ordinary encounter. Run when the party is damaged or when an encounter is consuming too much MP. The objective is to reach the guarded passage, not to clear every room.
Before approaching the guards, restore as much HP and MP as possible. Distribute Herbs of Althena and other emergency items among more than one character so a single knockout does not remove all access to recovery. Preserve enough healing and offensive magic for the repeated forced battles ahead.
- The Fire Elementals have been defeated.
- The furnace route beyond the battle is open.
- The stairs beyond the furnace have been used.
- The party has reached the guarded outside passage.
- Healing items and MP have been preserved for repeated forced battles.
Defeat the first Lagoon Goon blockade
Approach the guards at the outside passage to trigger the first forced Lagoon Goon battle. The encounter contains eight Lagoon Goons. Defeat them, then allow the following scene to finish. The party is returned to the Grindery automatically; this is scripted progression, not a failed attempt and not evidence that a switch was missed.
Use Alex and Kyle for dependable physical damage against individual targets. Jessica should prioritize healing when the party is being worn down. Nash and Mia can use efficient offensive magic, but avoid emptying their MP during the first blockade. Area attacks are useful when several Goons are already weakened, but do not spend every high-cost spell immediately.
After the automatic return, heal before approaching the passage again. Use ordinary recovery where possible and keep revival items for a character who is needed to restore the party’s momentum.
- The first Lagoon Goon blockade has been defeated.
- The automatic return to the Grindery has finished.
- The party has recovered before the second attempt.
- Most high-value revival and healing items remain available.
Complete the second and third blockades
Return to the same guarded passage and try to advance again. The second Lagoon Goon battle begins and again returns the party to the Grindery after victory. Recover, then approach the passage a third time to trigger the final blockade battle.
Treat the three battles as one extended resource test. Focus physical attacks on weakened enemies, use area magic only when it prevents the group from being overwhelmed, and keep Jessica ready to heal. If Jessica is incapacitated, another character should be able to use an Herb of Althena or a revival item.
After the third blockade is defeated, allow the complete automatic scene to play. Tempest and Fresca arrive and hold off the guards. Their intervention is the required story trigger that makes the next approach succeed. There is no alternate dialogue choice or hidden switch to activate.
- The second Lagoon Goon blockade has been defeated.
- The party has recovered after the second automatic return.
- The third Lagoon Goon blockade has been defeated.
- The automatic Tempest and Fresca intervention has finished.
- The party is ready to approach the passage again.
Enter Ghaleon’s garden
Approach the guarded passage after Tempest and Fresca have intervened. The guards no longer force the party back into the Grindery, so Alex and the party can enter Ghaleon’s garden.
The garden contains several captured pixies. Their conversations are optional and do not determine the ending or unlock a different route. Speak with them if you want the additional dialogue, but do not search for a moral choice or a required response.
The important recovery landmark is the pixie in the lower-left portion of the garden. Walk to that area and use the pixie to restore the party. This recovery is the intended preparation point after the Fire Elementals and three forced Lagoon Goon battles.
- The passage has been approached after the Tempest and Fresca scene.
- The party has entered Ghaleon’s garden.
- Optional pixie conversations have been viewed if desired.
- The lower-left recovery pixie has been used when recovery is needed.
Finish in the recovered garden
After using the recovery pixie, inspect the active party, equipment, and supplies. Confirm that Alex and the current physical attackers have suitable equipment, and keep Herbs of Althena distributed among several characters. The next chapter begins with Ghaleon’s Palace, so this is the correct time to make sure the party is fully restored.
Do not enter Ghaleon’s Palace yet. The Palace entrance is in the garden, but the Tower Key, the eighth-floor healing pool, the locked ninth-floor route, and the tenth-floor save are Chapter 12 objectives.
If the route remains blocked, verify the sequence in order: defeat the first Lagoon Goon group, return and defeat the second, return and defeat the third, allow the automatic Tempest and Fresca intervention to finish, then approach the passage once more. When the party is in the garden and the lower-left pixie has restored it, Chapter 11 is complete.
- All three Lagoon Goon blockades are complete.
- Tempest and Fresca have finished holding off the guards.
- The party is in Ghaleon’s garden.
- The lower-left recovery pixie has restored the party if needed.
- Equipment, active members, and emergency supplies have been checked.
- Ghaleon’s Palace has not been entered.
Before you move on
- The Fire Elementals have been defeated and the furnace route has opened.
- The party reached the outside passage above the Grindery.
- The first Lagoon Goon blockade was defeated.
- The second Lagoon Goon blockade was defeated.
- The third Lagoon Goon blockade was defeated.
- Tempest and Fresca appeared automatically and held off the guards.
- The party entered Ghaleon’s garden through the opened route.
- Optional pixie conversations were handled if desired.
- The lower-left recovery pixie was used when necessary.
- The party is recovered and prepared in the garden.
- Ghaleon’s Palace has not been entered; the Tower Key route is reserved for Chapter 12.
Chapter 12 — Ghaleon’s Palace: Tower Key, Healing Pool and Last Save
Begin in Ghaleon’s garden after Chapter 11’s recovery sequence. Enter the Palace from the upper-middle section of the garden, collect the Tower Key from the seventh floor, restore the party at the eighth-floor healing pool, unlock the ninth-floor route and save on the tenth floor before advancing the false Luna scene. This chapter ends at that tenth-floor save. Xenobia, both Ghaleon battles and the harp ascent belong to the following chapters.
1. Enter Ghaleon’s Palace from the recovered garden
Chapter 11 ends with Tempest and Fresca holding back Ghaleon’s guards and the party inside the garden. If you have not already done so, visit the recovery pixie in the lower-left portion of the garden before entering the Palace. This restores the party and gives you the safest starting point for the climb.
The Palace entrance is in the upper-middle section of the garden. Walk through the garden paths and enter the structure there. Do not treat the Palace as part of the garden sequence: once you cross the entrance, the objective changes to finding the Tower Key and reaching the upper floors.
Before entering, check the active party’s weapons, armor and accessories. Give the best defensive equipment to the characters you intend to use after the tenth-floor save. Keep Herbs of Althena and revival items available to multiple characters when possible, so a single incapacitated character does not leave the party without dependable recovery. Preserve MP during ordinary encounters whenever normal attacks or low-cost abilities are sufficient.
Keep two saves if your hardware or emulator allows it: one from before entering the Palace and a new one on the tenth floor. The Palace route is repeatable, but the tenth-floor save is the valuable retry point for the events immediately ahead.
- The lower-left garden pixie has restored the party.
- The Palace entrance in the upper-middle garden has been located.
- The party’s weapons, armor and accessories have been checked.
- Healing and revival items are available for the final sequence.
- A separate pre-Palace backup save remains intact.
2. Find the Tower Key on the seventh floor
Enter the Palace and take the available stair routes upward until you reach the fourth floor. The early floors use similar layouts, so identify each floor by its stairs rather than trying to follow a straight line through the rooms.
On the fourth floor, use the staircase on the right side that leads upward. Continue climbing until you reach the ninth floor. On the ninth floor, enter the upper room and use the staircase there to descend. Follow this route downward until you reach the seventh floor.
The Tower Key is in a chest on the seventh floor. Open the chest and take it. This is required progress: the key opens the locked route on the ninth floor, and there is no alternate item or garden event that replaces it.
If you lose your bearings, confirm the sequence before continuing: climb to the fourth floor, take the right-side staircase upward, reach the ninth floor, use the staircase in its upper room to descend, then continue to the seventh-floor chest. Do not leave the Palace after collecting the key; the healing pool and locked-door route are the next objectives.
- The fourth floor has been reached.
- The right-side fourth-floor staircase has been used.
- The ninth-floor upper-room staircase has been used to descend.
- The seventh-floor chest has been opened.
- The Tower Key is in the inventory.
3. Use the eighth-floor healing pool
After collecting the Tower Key, retrace the route back to the ninth floor. From the ninth floor, descend one level to the eighth floor. Enter the lower room on the eighth floor and use the healing pool.
The pool restores the party before the locked-door climb. Take advantage of it fully: check every character’s HP and MP, confirm the intended equipment and review the remaining Herbs of Althena and revival items. The pool is the best recovery point in the Palace, but it does not make the tenth-floor save a healing save, so continue carrying emergency supplies.
Use support magic conservatively. If a defensive spell is useful against the upcoming fights, preserve enough MP to cast it after the tenth-floor save rather than spending all of it against weak Palace enemies. Likewise, do not use rare revival or high-value recovery items merely to finish an ordinary encounter at full HP when the pool is available.
Once the party is restored, return to the seventh floor by the stair route. You will use a different staircase there for the second ascent.
- The party has returned to the ninth floor after collecting the key.
- The eighth-floor lower room has been reached.
- The healing pool has been used.
- HP, MP, equipment and remaining supplies have been checked.
- Enough recovery resources remain for the battles after the tenth-floor save.
4. Unlock the ninth-floor route and climb to the save point
From the eighth floor, descend to the seventh floor. On the seventh floor, locate the staircase on the left side that leads upward. Follow the connected route until you reach the locked door on the ninth floor.
Use the Tower Key on the locked ninth-floor door. Continue through the opened route and climb the stairs beyond it. This is the key’s required use. If the door will not open, verify that the Tower Key was taken from the seventh-floor chest before searching for another path.
Handle random battles efficiently during this final climb. Use normal attacks or low-cost abilities when they are adequate, heal dangerous injuries instead of allowing a character to enter the upper room near defeat, and keep the main healer’s MP available. The save point on the tenth floor preserves your position but does not restore the party.
Before entering the upper room on the tenth floor, make sure the party is in fighting condition. If the climb has gone badly, return to the eighth-floor pool rather than triggering the scene while weakened.
- The party has descended from the healing pool to the seventh floor.
- The left-side seventh-floor staircase has been found.
- The locked door on the ninth floor has been reached.
- The Tower Key has opened the door.
- The upper route toward the tenth floor has been entered.
5. Create the final Palace save before the false Luna scene
Continue upward to the tenth floor and enter its upper room. The character who appears to be Luna is waiting there, but do not advance the conversation immediately. First use the save point in the tenth-floor area.
Create a fresh tenth-floor save in a separate slot from the pre-Palace backup. This is the principal retry save for the next sequence. Keeping the earlier save prevents you from having to repeat the Palace route if you later want to change equipment, supplies or party preparation.
After saving, speak to the apparent Luna to advance the scene. The first exchange establishes that the party is too late. Continue the conversation when prompted; the figure reveals herself as Xenobia, and the battle begins. Xenobia is not part of this chapter’s completion requirement. Stop after the tenth-floor save if you are following the chapter division.
The correct completion state is therefore a healed, equipped party standing at the tenth-floor save point, with the apparent Luna conversation still unadvanced and the separate pre-Palace save preserved. Chapter 13 begins when you use this save and proceed into the Xenobia sequence.
- The tenth-floor upper room has been reached.
- A fresh save exists before speaking to the apparent Luna.
- The pre-Palace backup save remains intact.
- The party is healed and equipped for the following battles.
- Xenobia and both Ghaleon battles have not been started.
Before you move on
- Chapter 12 began from Ghaleon’s garden after the Chapter 11 recovery sequence.
- Ghaleon’s Palace was entered from the upper-middle garden area.
- The Tower Key was collected from the seventh-floor chest.
- The eighth-floor lower-room healing pool was used.
- The locked ninth-floor door was opened with the Tower Key.
- The tenth-floor upper room was reached.
- A fresh tenth-floor save was created before advancing the apparent Luna conversation.
- A separate pre-Palace backup save remains intact.
- The party is ready to begin the Xenobia sequence without repeating the Palace route.
Chapter 13 — Ghaleon's Palace: Xenobia and the First Ghaleon Battle
Begin from the upper-room save on the tenth floor of Ghaleon's Palace. This chapter covers the two-stage apparent Luna conversation, the Xenobia battle, the first winnable battle against Ghaleon, and the Dragon Angels scene that leads to Ghaleon's transformation into the Magic Emperor. The transformed Magic Emperor battle, Alex's harp, the lightning ascent, Luna's rescue, the ending and the credits belong to Chapter 14. Preserve the tenth-floor save because the final encounters are connected and there is no dependable ordinary resupply point between them.
Load and prepare from the tenth-floor save
Load the save in the upper room on the tenth floor of Ghaleon's Palace. The Tower Key, the locked ninth-floor route and the eighth-floor healing pool should already be complete. Do not return to the Grindery's pipe maze, furnace, Lagoon Goon blockades or garden; those sections are finished before this chapter begins.
Check the active party's equipment, HP and MP before approaching Luna. Equip the strongest available weapons and armor, organize Herbs of Althena and revival items for quick use, and keep this tenth-floor save intact. It is the practical retry point for the Xenobia and Ghaleon sequence.
Use the save as your fallback if the party is already badly depleted. There is no dependable town, shop or ordinary healing stop between this preparation point and the first Ghaleon battle. The Palace route ahead is short, but the battles are consecutive and the final scene does not provide a convenient reset.
- Load the upper-room save on the tenth floor.
- Check active-party HP, MP and equipment.
- Put healing and revival items in accessible inventory positions.
- Preserve the tenth-floor save before beginning the scene.
Complete the apparent Luna conversation in the required order
Walk up to the apparent Luna in the upper room and speak to her once. Advance the dialogue until the game returns control to Alex. Do not treat this first conversation as the complete event.
When control returns, walk back to the apparent Luna and speak to her a second time. This second conversation is required: it reveals that the figure is Xenobia. If you leave the room or expect Xenobia to appear without talking again, the sequence will not proceed as intended.
After the reveal, speak directly to Xenobia. That conversation starts the Xenobia battle. There is no need to search the floor for another trigger, repeat the Tower Key route or return to the healing pool before fighting her.
This is the original North American Sega CD sequence. Do not substitute the expanded sorceress events, character scenes or final-battle presentation from later remakes.
- Speak to the apparent Luna the first time.
- Wait for control to return to Alex.
- Speak to the apparent Luna a second time.
- Confirm that the second conversation reveals Xenobia.
- Speak directly to Xenobia to start the battle.
Defeat Xenobia while preserving resources
Xenobia is a dangerous physical attacker and can strike multiple times in a turn. She can also use Good Luck, which may confuse a party member, and Water Fang, which adds a significant magical threat. Watch the party's condition rather than waiting until several members are near defeat.
Use ordinary weapon attacks as the main offense. This conserves MP for the Ghaleon battle that follows immediately. Alex and Kyle should attack when they are healthy; use their turns for items or recovery when confusion, low HP or a fallen ally makes offense unsafe. Nash and Mia can attack while the party is stable, but they should not spend unnecessary MP on an encounter that is best handled economically.
Jessica should heal proactively. If Good Luck confuses a healer or damage dealer, cure the condition when that character's next action is important. Use Herbs of Althena when a character is in danger instead of trying to preserve every item. A character that falls should be revived before the party resumes a normal attack rotation.
Before delivering the final damage, bring the party as close to fighting condition as possible. Xenobia has a substantial HP total and her repeated attacks can leave the party battered even during a successful battle. When she is defeated, the story moves the party to the eleventh floor.
- Expect repeated physical attacks and multiple hits.
- Watch for Good Luck confusion.
- Prepare for Water Fang.
- Favor normal attacks over expensive spells.
- Heal before multiple party members become critical.
- Revive fallen characters before returning to offense.
- Finish the battle with the party ready for Ghaleon.
Collect the eleventh-floor treasure and prepare for Ghaleon
After Xenobia is defeated, the party is warped to the eleventh floor. Collect the accessible treasure in this area before speaking with Ghaleon if you can do so safely. The treasure is optional for story progression, but it is the available opportunity to gather supplies or equipment before the next battle.
Use Herbs of Althena and other recovery items after the Xenobia fight. Restore the party's HP first. Restore MP only where it will materially help the upcoming battle, since there is no dependable new shop or town resupply point here.
Do not mistake the treasure route for a new save point or healing facility. Keep the tenth-floor save preserved. Once you speak with Ghaleon, the first winnable Ghaleon battle begins, so do not initiate the conversation while the party is still in poor condition.
- Continue to the eleventh floor after Xenobia's defeat.
- Collect reachable treasure before speaking with Ghaleon.
- Heal the party with available items.
- Keep the tenth-floor save untouched.
- Speak with Ghaleon only after preparing for another immediate battle.
Win the first Ghaleon battle
Speak with Ghaleon to begin the first battle. This encounter is winnable and must be completed to advance. Ghaleon relies heavily on powerful physical attacks and can hit multiple times in a turn, so a character left at low HP may be defeated before the next recovery action.
Use Alex and Kyle as the primary attackers. Alex should attack consistently, while Kyle can use Sybillium early and then Kiai Slice before returning to attacks if that fits his current MP. Jessica should use Cascade Litany on Alex when the party can safely spare the turn, then switch to healing whenever damage makes recovery more urgent.
Nash can use Thunder Thrust for damage. Mia can use Byebye Air or another useful offensive action while the party is stable, but she should help with recovery through items if the group starts losing turns to damage. The exact order matters less than maintaining a functioning healer and at least two reliable damage sources.
Revive a fallen character before continuing a routine attack plan, especially if Jessica, Alex or Kyle is incapacitated. Spend recovery items when necessary. This is the first of the two Ghaleon encounters, not the final battle, so do not burn every resource on unnecessary spell use, but do not risk a defeat merely to preserve items.
- Speak with Ghaleon to start the battle.
- Use Alex and Kyle for sustained damage.
- Consider Sybillium and Kiai Slice for Kyle's early turns.
- Use Jessica's support magic and healing according to party condition.
- Use Nash's offensive magic while preserving the party's recovery ability.
- Revive fallen members before continuing offense.
- Remember that this is not the transformed Magic Emperor battle.
Advance to the Magic Emperor reveal and stop
After the first Ghaleon battle, control returns briefly. Heal immediately with Herbs of Althena or other available items, and restore MP where practical. Use a Seed of Vigor on a character who spent heavily if one is available, but do not assume that a new shop, save point or full healing station will appear before the next encounter.
Continue upward through the scripted Palace sequence. The screen shifts to the Althena and Luna scene, and the Dragon Angels attempt to remove the spell controlling Luna. Their intervention fails when Ghaleon destroys them and reveals his transformed Magic Emperor form.
Stop once the transformation reveal is complete. Do not begin the transformed Magic Emperor battle in this chapter. Do not repeat the tenth-floor Luna scene, the Xenobia battle, the eleventh-floor treasure route or the Tower Key path. Chapter 14 begins with the transformed battle and covers the subsequent recovery, Alex's harp, the lightning ascent, Luna's rescue, the ending and the credits.
- Heal immediately after the first Ghaleon battle.
- Restore important MP or use recovery items as needed.
- Continue through the Althena and Luna scene.
- Witness the Dragon Angels' failed intervention.
- Confirm Ghaleon's transformation into the Magic Emperor.
- Stop before the transformed battle and harp ascent.
Before you move on
- The upper-room tenth-floor Ghaleon's Palace save was loaded.
- The party's equipment, HP, MP, healing items and revival items were checked.
- The apparent Luna was spoken to once.
- Control returned to Alex and the apparent Luna was spoken to a second time.
- The second conversation revealed Xenobia.
- Xenobia was spoken to directly and the battle began.
- Xenobia was defeated while accounting for repeated physical attacks, Good Luck confusion and Water Fang.
- The party was healed as much as practical after the Xenobia battle.
- The party reached the eleventh floor and collected reachable treasure before speaking with Ghaleon.
- The first winnable Ghaleon battle was defeated.
- The party was healed and important MP was restored as much as possible.
- The Althena and Luna scene continued to the Dragon Angels' failed intervention.
- Ghaleon revealed his transformed Magic Emperor form.
- The chapter ended before the transformed Magic Emperor battle, Alex's harp, the lightning ascent, Luna's rescue and the credits.
References for this chapter
- RPGClassics.com — Lunar: The Silver Star Sega CD Walkthrough, Final Palace and Ending
- RPGClassics.com — Lunar: The Silver Star Bosses
- RPGClassics Lunar: The Silver Star Maps, Ghaleon's Palace
- Hardcore Gaming 101, Lunar: The Silver Star
- GameFAQs — Lunar: The Silver Star Guide and Walkthrough, Sega CD, by MoonSaultKid
Chapter 14 — Final Battle: Magic Emperor, Harp Ascent and Ending
The transformed Magic Emperor is the final winnable battle in the original North American Sega CD campaign. After defeating him, Alex must recover, use his Harp before climbing the lightning-struck path, reach Luna and allow the ending and credits to finish. Defeating the Magic Emperor alone does not complete the campaign.
Preserve the final retry point and prepare for the battle
The transformed Magic Emperor follows the first Ghaleon battle without returning the party to a normal dungeon route. The tenth-floor save made before speaking with the apparent Luna is therefore the practical retry point for the entire final sequence. If the party is defeated, reload that save and repeat the apparent Luna conversation, the Xenobia battle, the first Ghaleon battle and the transformed Magic Emperor battle.
Before entering the final confrontation, restore the active party and inspect everyone's equipment. Alex should be using the strongest Dragonmaster equipment available, including Althena's Sword and the Dragon equipment obtained during the campaign. Distribute healing, revival and MP-recovery items among several characters instead of placing every item on one person. Use recovery items whenever they prevent a defeat; there is no later ordinary dungeon route that requires conserving them.
- Preserve the tenth-floor save before speaking with the apparent Luna.
- Heal the active party before the final chamber.
- Equip Alex's strongest Dragonmaster equipment.
- Distribute healing, revival and MP-recovery items across several characters.
- Keep the tenth-floor save intact for a complete retry.
Defeat the transformed Magic Emperor
The original North American Sega CD Magic Emperor is a sustained damage-and-recovery battle. He can teleport, use dangerous strong magic or other powerful attacks, and strike party members with powerful physical attacks. Do not plan around a single guaranteed weakness or assume that one offensive sequence will end the fight quickly.
Alex should use his strongest Dragon ability while his MP lasts. Kyle should use his strongest dependable physical technique. Nash should use his most reliable offensive action. Jessica should serve as the primary healer and recover the party whenever its condition becomes dangerous. When nobody urgently needs healing, Mia can use a reliable offensive or support action. Do not commit Mia to a debuff routine if the effect is uncertain or if the party needs immediate recovery.
If Alex runs out of Dragon magic, have Jessica support him with recovery magic when necessary and let Alex use his strongest normal attacks. Keep the party's HP high enough to survive another heavy attack. After a severe magical or physical hit, healing takes priority over maintaining an offensive rotation.
If one character falls, stabilize the surviving party first, then use a revival item or spell when doing so will not leave the rest of the group exposed. Spend recovery items freely when the alternative is losing the battle and returning to the tenth-floor save.
- Expect dangerous strong magic or attacks.
- Expect teleportation and powerful physical attacks.
- Use Alex's Dragon abilities before switching him to normal attacks.
- Keep Jessica available as the main healer.
- Let Mia use a reliable offensive or support action when healing is not needed.
- Heal promptly after heavy attacks.
- Revive fallen characters after the remaining party is stable.
Recover Alex after the victory
The campaign does not end when the transformed Magic Emperor falls. After the battle, Alex becomes the only controllable character for the final approach. Speak with Jessica before starting up the path. In the original North American Sega CD sequence, this interaction provides Alex's available post-battle recovery for the next stage.
When control returns to Alex, confirm his condition and use any remaining healing items if he still needs recovery. Do not search for a shop, chest, healing pool or dependable save point. The game proceeds directly into the final ascent, and the practical retry point remains the preserved tenth-floor save.
- Defeat the transformed Magic Emperor.
- Speak with Jessica after the battle.
- Confirm Alex's available recovery before leaving.
- Use a healing item if Alex still needs recovery.
- Do not expect a normal save point before the ascent.
Use Alex's Harp before the lightning ascent
When control returns to Alex, open the item menu and use Alex's Harp before taking the first steps up the lightning-struck path. The Harp is mandatory for this North American Sega CD sequence because it reduces the damage from Althena's lightning and helps restore Luna's memory. Without it, the repeated strikes can defeat Alex very quickly.
After using the Harp, move upward along the path. This is not a normal battle, so there is no enemy target or party command sequence. Watch Alex's HP after each lightning strike. If the item menu is available and his health becomes unsafe, use a healing item before continuing. The Harp reduces the lightning damage but does not make Alex invulnerable.
If Alex falls during the ascent, reload the preserved tenth-floor save and repeat the complete final sequence. Do not assume that defeating the Magic Emperor creates a nearby retry point.
- Open the item menu before moving up the path.
- Use Alex's Harp before the first ascent steps.
- Move upward after the Harp has been played.
- Check Alex's HP after lightning strikes.
- Heal during the ascent whenever Alex's HP becomes unsafe and the item menu is available.
- Reload the tenth-floor save if the ascent fails.
Reach Luna and allow the ending and credits to play
Continue up the lightning path until Alex reaches Luna. The Harp and Alex's connection with her break Ghaleon's control, allowing Luna to return to herself. Reaching Luna is an essential completion event; defeating the Magic Emperor by itself is not enough.
When the rescue scene begins, do not reset or turn off the game. Allow the remaining dialogue, ending sequence and credits to play completely. Keep the tenth-floor save until the credits have finished in case the final sequence needs to be attempted again. Once Luna has returned to herself and the credits have run, there is no further required dungeon, boss or campaign objective.
- Alex reaches the top of the lightning path.
- Alex reaches Luna.
- Ghaleon's control over Luna is broken.
- Luna returns to herself.
- The ending sequence begins.
- The credits play completely.
- The tenth-floor pre-final save remains preserved.
Before you move on
- The transformed Magic Emperor has been defeated.
- Alex has received the available post-battle recovery by speaking with Jessica, with items used as a fallback if necessary.
- Alex's Harp has been used before the lightning ascent.
- Alex has survived the lightning path and reached Luna.
- Ghaleon's control over Luna has been broken.
- Luna has returned to herself.
- The ending sequence has begun.
- The credits have played completely.
- The tenth-floor pre-final save remains preserved.
Optional Endgame Troubleshooting — Retry Reference Only
Use this section only as a retry reference after a failed final sequence or to confirm the event order from a preserved tenth-floor save in Ghaleon's Palace. It is not a second campaign route. The original North American Sega CD sequence is the apparent Luna scene, Xenobia, the first winnable Ghaleon battle, the transformed Magic Emperor, Alex's recovery, the Harp ascent and the ending. The practical retry point is the tenth-floor save made before speaking with the apparent Luna.
Preserve the tenth-floor retry point
Keep a separate save on the tenth floor of Ghaleon's Palace before speaking with the apparent Luna. This is the useful retry point because the Tower Key route, the eighth-floor healing pool and the climb to the upper room are already complete. You will still need to repeat Xenobia and both Ghaleon battles, but you will not need to repeat the Grindery, the Lagoon Goon encounters, the garden recovery area or the Palace climb.
Before making the backup, use the healing pool on the eighth floor. Check equipment, confirm that the active party is ready and stock recovery items from the supplies obtained earlier. Preserve the file before starting the Luna conversation, and do not replace it after Xenobia or after either Ghaleon battle. There is no dependable ordinary save or town resupply break during the remaining sequence.
If an attempt fails, reload this file. The retry begins at the correct final trigger and avoids replaying the earlier endgame route.
- A separate save exists on the tenth floor before the apparent-Luna conversation.
- The eighth-floor healing pool has been used before making the backup.
- The backup has not been overwritten after Xenobia or either Ghaleon battle.
- The party is healed, equipped and carrying recovery and revival supplies.
Use the exact apparent-Luna dialogue order
Enter the upper room on the tenth floor and speak with the apparent Luna once. When control returns, speak with her a second time. That second conversation reveals that she is Xenobia. No hidden choice or alternate entrance is required for this sequence.
After Xenobia appears, speak directly to Xenobia to begin the battle. Do not leave the room searching for another trigger.
The late-game combat group is Alex, Kyle, Jessica, Nash and Mia. Luna is central to the scene but is not restored as a normal combat-party member for these encounters. Confirm that the strongest equipment is assigned to the active fighters and that Jessica's healing magic is available before beginning.
- The first conversation with the apparent Luna has occurred.
- Control has returned and the apparent Luna has been addressed a second time.
- Xenobia has been revealed and spoken to directly.
- The active combat party is checked before the first battle.
Defeat Xenobia and the first Ghaleon form
Xenobia is a required and winnable boss in the original North American Sega CD release. Her documented special attacks include confusion and a damaging water-based attack, while her physical attacks can strike repeatedly. Use normal weapon attacks as the default plan so that Alex's, Nash's and Mia's magic, along with high-value recovery items, remain available for Ghaleon.
Jessica should heal whenever the party becomes unsafe. If confusion affects a character, restore control as soon as practical rather than allowing that character to waste turns or harm allies. Do not let the fight become unnecessarily long, but avoid spending your strongest resources unless the battle is already in danger of being lost.
After Xenobia falls, continue into Ghaleon's chamber. The first Ghaleon form is a winnable battle, not a scripted defeat. His attacks are heavily physical and can deal substantial damage over repeated turns. Keep Jessica focused on recovery, use the party's reliable damage options and spend resources when necessary rather than allowing several characters to reach critical HP.
When the first Ghaleon form falls, heal and restore the party with the abilities and items still available. The game does not return you to the world map, open a shop or provide a normal save before the transformed Magic Emperor. Keep the tenth-floor backup untouched.
- Xenobia has been defeated.
- The first, winnable Ghaleon form has been defeated.
- The party has been healed and restored as far as available items and abilities allow.
- The tenth-floor backup remains preserved.
Continue through the Dragon Angels scene and defeat the transformed Magic Emperor
After the first Ghaleon battle, continue upward through the scripted sequence. The Dragon Angels attempt to remove the spell from Luna, but their intervention fails. Ghaleon survives and reveals the transformed Magic Emperor. This is the final combat encounter, not a victory scene.
The transformed Magic Emperor uses powerful magic and physical attacks and can move out of position through teleportation. Treat every round as dangerous. Heal before several characters become critically weakened, and revive fallen members promptly when the battle can still be recovered.
Use Alex's Dragon abilities while he has MP, Kyle's dependable physical damage, Nash's strongest reliable offense, Mia's support or offense when no one needs help and Jessica's healing. Preserve enough recovery and revival capacity to survive a bad turn rather than spending everything immediately. Exact commands are less important than maintaining party health and keeping the battle from becoming prolonged.
If the transformed Magic Emperor defeats the party, reload the preserved tenth-floor save. Xenobia, the first Ghaleon battle, the failed Dragon Angels intervention and the final battle must all be replayed from that file, but the Grindery and Palace approach do not.
- The Dragon Angels' failed intervention has occurred.
- The transformed Magic Emperor has appeared.
- The transformed Magic Emperor has been defeated.
- The tenth-floor retry file remains available if another attempt is needed.
Heal Alex, play the Harp and complete the ending sequence
After the transformed Magic Emperor is defeated, Alex becomes the only controllable character for the ascent. When control returns, speak with Jessica to heal Alex before attempting the lightning path. This is the available recovery interaction immediately after the final battle.
Play Alex's Harp before starting up the stairs. The Harp reduces the damage from Althena's lightning; it does not restore HP and does not make Alex immune. Its required use here is separate from its earlier story use at Damon's Spire.
Climb while watching Alex's remaining HP. The Harp reduces the lightning damage, but Alex can still be defeated if he begins the ascent in poor condition or ignores the damage. Once the ascent begins, there is no ordinary party-management route to return to.
At the top, Alex reaches Luna and breaks the spell. Reaching Luna is not the complete completion check by itself. Allow the ending sequence and credits to play fully. Keep the tenth-floor backup until the credits have finished if you want a quick retry point.
- Jessica has healed Alex after the transformed Magic Emperor battle.
- Alex's Harp has been played before the ascent.
- Alex has climbed through the lightning and reached Luna.
- The ending sequence has begun.
- The credits have played.
- The pre-final tenth-floor backup remains preserved.
Before you move on
- The separate tenth-floor save from before the apparent-Luna dialogue remains preserved.
- The apparent Luna has been addressed once.
- The apparent Luna has been addressed a second time after control returns.
- Xenobia has been revealed and defeated.
- The first Ghaleon form has been defeated.
- The Dragon Angels' intervention has failed.
- The transformed Magic Emperor has been defeated.
- Jessica has healed Alex after the final battle.
- Alex has played the Harp before climbing.
- Alex has reached Luna.
- The ending has begun and the credits have played.
- A pre-final backup save remains available after completion.
Chapter 16 — Final Palace Sequence, Luna, Ending and Credits
This is the final completion checklist for the North American Working Designs Sega CD release of Lunar: The Silver Star. Begin with the preserved save on the tenth floor of Ghaleon’s Palace, before approaching the apparent Luna. The campaign is not complete after Xenobia, after Ghaleon’s first winnable battle, or after the transformed Magic Emperor falls. You must restore Alex, speak with Jessica, play Alex’s Harp before the lightning ascent, reach Luna, and allow the ending and credits to finish. Keep the tenth-floor save untouched until the entire sequence has been confirmed.
1. Preserve the tenth-floor retry save
Use a separate save on the tenth floor of Ghaleon’s Palace, before speaking to the apparent Luna. The Tower Key, the locked ninth-floor route, and the eighth-floor healing pool should already be complete from the preceding chapter; this final checklist does not repeat that navigation.
Keep this file in its own save slot. The remaining sequence runs through Xenobia, both Ghaleon battles, Alex’s recovery, and the ascent. If you create another save later, use a different slot so the pre-final retry remains available.
- A tenth-floor save exists before the apparent Luna scene.
- The backup occupies a separate save slot.
- The backup will not be overwritten until the ending and credits are confirmed.
2. Complete the apparent-Luna conversations and defeat Xenobia
Approach the apparent Luna on the tenth floor and speak with her once. When control returns, speak with her a second time. This second conversation reveals Xenobia. After the reveal, speak to Xenobia again to trigger the battle; the revelation scene is not itself the battle trigger.
Xenobia can use Good Luck to confuse the party and can use Water Fang, in addition to repeated physical attacks. Favor normal weapon attacks so Alex and the other characters preserve MP for Ghaleon. Keep HP out of danger, cure confusion when it disrupts damage or healing, and use ordinary recovery items rather than spending major offensive magic unnecessarily.
After Xenobia is defeated, continue through the following scenes and move toward Ghaleon. Do not treat this victory as campaign completion. The party still has to win the first Ghaleon battle and the transformed Magic Emperor battle.
- The first apparent-Luna conversation has occurred.
- Control returned and the second apparent-Luna conversation has occurred.
- Xenobia was revealed before the battle was triggered.
- Xenobia has been defeated.
- Good Luck confusion and Water Fang were accounted for.
- Important MP and recovery supplies remain available.
3. Defeat Ghaleon’s first winnable form
Speak with Ghaleon after Xenobia’s defeat to begin the first winnable Ghaleon battle. This form relies mainly on powerful repeated physical attacks. Use Alex and Kyle for dependable damage, while Jessica, Mia, and Nash provide healing, support, and offensive magic according to the party’s condition.
Jessica should heal whenever repeated strikes put a character in danger. Alex can attack or use an appropriate Dragon ability, Kyle can maintain physical pressure, and Nash and Mia can spend MP on useful offensive or support spells without emptying every reserve. Revive a fallen healer or principal attacker promptly if the loss threatens the battle.
When this Ghaleon form is defeated, the Dragon Angels attempt to intervene. Their intervention is part of the scripted story and is not a second controllable Dragon Angels battle. Continue through the scene until Ghaleon reveals his transformed Magic Emperor form.
- The first winnable Ghaleon battle is complete.
- The Dragon Angels’ intervention was treated as a scripted sequence.
- The transformed Magic Emperor has appeared.
- The tenth-floor retry save remains preserved.
4. Defeat the transformed Magic Emperor
The transformed Magic Emperor is the final controllable party battle. He uses dangerous magic, can teleport, and can deliver powerful physical attacks. Keep the strategy general for this original Sega CD encounter; do not import remake-specific phases, attack lists, HP values, or party mechanics.
Use Alex’s strongest dependable Dragon ability while his MP lasts. Kyle should maintain reliable damage, Nash can use suitable offensive magic, and Jessica should prioritize healing and defensive support whenever the party takes serious damage. Mia should use reliable offense or support when the party is stable, but recovery takes priority over maintaining a particular setup.
If Alex runs low on offensive MP, have Jessica support him while he switches to normal attacks. Preserve enough recovery for the post-battle solo sequence. The battle leads directly into the story scenes with Luna and the Dragon Angels, and Alex will soon be separated from the party.
- The transformed Magic Emperor has been defeated.
- His dangerous magic, teleportation, and powerful attacks were accounted for.
- Alex’s Harp remains available for the ascent.
- No remake-specific final phase or mechanic was assumed.
5. Heal Alex, play the Harp, and survive the ascent
After the transformed Magic Emperor is defeated and control returns, Alex is alone. Speak with Jessica before beginning the ascent to use the Sega CD version’s post-battle healing interaction. If Alex still needs recovery, use the healing items remaining in his inventory as a fallback.
Before moving up the lightning-struck ramp, open Alex’s item list and use Alex’s Harp. In the North American Sega CD release, playing the Harp before the climb reduces the damage from Althena’s lightning. Do not wait until Alex has already begun climbing; activate the protection first.
Move Alex up the ramp while watching his HP. This is not a conventional battle, and you should not rely on a nearby ordinary save as a safety point. If Alex is defeated, reload the preserved tenth-floor save and repeat the final sequence. At the top, the spell over Luna is broken and Luna returns to normal.
- Alex is alone after the Magic Emperor battle.
- Jessica has been spoken to for the post-battle healing interaction.
- Alex has been healed, with items used as a fallback if necessary.
- Alex’s Harp was played before the ascent began.
- Alex survived the lightning damage and reached Luna.
- The spell controlling Luna was broken.
6. Confirm the ending and credits
After Alex reaches Luna, allow the rescue scene and ending presentation to continue without resetting the Sega CD or returning to the title screen. Reaching Luna completes the final story action, but the campaign completion requirement also includes allowing the ending and credits to play fully.
When the credits have finished, retain the untouched tenth-floor save. It remains the practical retry point for the apparent-Luna conversations, Xenobia, both Ghaleon battles, the Jessica recovery step, the Harp use, and the lightning ascent. Do not overwrite it before confirming the credits.
- The Luna rescue scene has played.
- The ending presentation has completed.
- The credits have finished.
- The untouched tenth-floor pre-final save remains available.
- No remake-specific final requirement was substituted for the Sega CD sequence.
Before you move on
- The first apparent-Luna conversation has been triggered.
- The second apparent-Luna conversation has occurred after control returned.
- Xenobia has been revealed and defeated.
- Ghaleon’s first winnable battle has been defeated.
- The transformed Magic Emperor has been defeated.
- Jessica has been spoken to for Alex’s post-battle healing interaction.
- Alex has been restored, using items as a fallback if necessary.
- Alex has used his Harp before climbing the lightning-damaged ramp.
- Alex has reached Luna.
- The spell controlling Luna has been broken.
- The ending sequence has played.
- The credits have finished.
- The untouched tenth-floor pre-final save remains preserved.
Finishing up
The campaign is complete when Xenobia has been defeated, Ghaleon's first form has been defeated, the transformed Magic Emperor has been defeated, Alex has played the harp before climbing the final ramp, Alex has reached Luna, and the ending and credits have played. Preserve the pre-final save instead of overwriting it.
Choose your next gameScreenshots & video
Game imagery for reference. Follow the written chapters above for the route and strategies.
Sources & references
Our original guide draws on the references below. Check the edition at the top of this page before following controls or unlock requirements.
- RPGClassics — Lunar: The Silver Star Sega CD Walkthrough, White Dragon Cave
- GameFAQs — Lunar: The Silver Star Guide and Walkthrough, Sega CD, by MoonSaultKid
- RPGClassics.com - Lunar:TSS Shrine Shops Page
- Lunar: The Silver Star Sega CD Item Pages — Alex's Harp
- RPGClassics — Lunar: The Silver Star Sega CD White Dragon Cave Map
- GameFAQs — Lunar: The Silver Star Guide and Walkthrough, Sega CD, by Exdeath
- RPGClassics — Lunar: The Silver Star Sega CD Walkthrough, Meribian Sewers
- RPGClassics — Lunar: The Silver Star Sega CD Meribian Sewers Map
- RPGClassics — Lunar: The Silver Star Sega CD Walkthrough, The Trial
- RPGClassics — Lunar: The Silver Star Sega CD Walkthrough, Revealing the Vile Tribe
- RPGClassics — Lunar: The Silver Star Sega CD Maps
- RPGClassics Lunar: The Silver Star walkthrough, Path to Damon's Spire
- RPGClassics Lunar: The Silver Star maps, Damon's Spire
- Lunar: The Silver Star Sega CD walkthrough index
- RPGClassics Lunar: The Silver Star Sega CD Walkthrough — Stadius Zone
- RPGClassics Lunar: The Silver Star Sega CD Walkthrough — Myght's Lab and subsequent route
- RPGClassics.com - Lunar:TSS Talon Mines Map
- RPGClassics.com — Lunar: The Silver Star Bosses
- RPGClassics — Lunar: The Silver Star Sega CD Walkthrough, Part 14
- RPGClassics.com — Lunar: The Silver Star Sega CD Walkthrough, Final Palace and Ending
- RPGClassics — Lunar: The Silver Star Sega CD Maps, Marke Black Dragon Cave
- RPGClassics Lunar: The Silver Star Shrine — Goddess' Tower Map
- Lunar: The Silver Star — FAQ — Sega CD — By LArruda
- RPGClassics Lunar: The Silver Star — Grindery Maps
- RPGClassics Lunar: The Silver Star — Enemies
- RPGClassics Lunar: The Silver Star Maps, Ghaleon's Palace
- Hardcore Gaming 101, Lunar: The Silver Star
- Lunar: The Silver Star Sega CD Manual Scan
About the game & collecting notes
- Platform
- Sega CD
Complete Burg's opening preparations, recruit Ramus, obtain Alex's Dagger and Heavy Clothes from the basement chest, buy Luna's Sling, collect the Old Ring from Ramus's house, learn the field menu and saving procedure, train near the Stone Monument, and reach the sealed White Dragon Cave entrance. End before using the Old Ring or entering the cave; Quark and all interior cave events belong to Chapter 2.
Darryl Polo
Darryl Polo loves tinkering with emulation and revisiting retro games. He enjoys exploring how old favorites play on different setups and sharing what he learns along the way. At Joking Joystick, he writes about the games, hardware, and small discoveries that keep the hobby fun.
Our editorial standardsFound a step that needs another look? Help us improve this guide.