
Lunar: Silver Star Story Complete (PlayStation, North America) — Complete Campaign Walkthrough
Step-by-step walkthrough for the North American PlayStation release of Lunar: Silver Star Story Complete (Working Designs, 1999). This guide covers starting a new game, all required party recruitment, key story dungeons, boss approaches (including the final Ghaleon confrontation), optional side-content, and concrete completion checks so you can finish the canonical ending on the PS1 edition.


Find a copy
Lunar: Silver Star Story Complete Sony PlayStation
We may earn a commission if you buy through these links, at no extra cost to you. As an Amazon Associate I earn from qualifying purchases.
Opens retailer search results. Check the model, edition, seller, availability and current price before buying.
Before you begin
You are playing the North American PlayStation release of Lunar: Silver Star Story Complete (Working Designs, 1999).
This walkthrough is written specifically for that edition and its PlayStation controls, save behaviour and item/party balance.
Follow the ordered route chapters to progress through every required story location, recruit the essential characters for the PS1 edition, and reach the game's true ending without detours that could leave you stuck.
The walkthrough separates required progress from optional rewards.
Each chapter lists concrete objectives and must-cover actions (for example, where and when party members join, critical items to acquire before certain scenes, how to prepare for boss fights).
Optional content (bromides, collector’s extras, side-challenges) is grouped into its own chapters so you can skip it and still finish the campaign.
Set yourself up for the run
Use a PlayStation memory card and keep at least two normal in-game save files: one before major story events or dungeons and one rotating progress backup.
Save manually whenever you control the party, including towns, the world map, and dungeons. Do not rely on autosaves or emulator save states as the only backup.
At startup, configure only the available presentation settings, such as sound mode, message advance, message speed, DualShock shock, and spell-name display. The PlayStation release does not provide general button remapping.
If you are using original hardware, confirm that the memory card is recognized and keep the same card available when changing from Disc 1 to Disc 2.
If you intentionally import demo data, verify the Ocarina’s holder and the altered early weapon reward before continuing; choose a normal New Game for the standard opening.
Stock ordinary healing items, MP restoratives, revives, and status cures as they become available. Distribute items to individual characters before battles because reserve storage cannot be accessed during combat.
Upgrade active characters’ weapons and armor at major towns, but preserve enough Silver for recovery supplies and mandatory late-game purchases.
Treat Bromides, red-chest rewards, bathing scenes, package extras, and the Rememberizer as optional. Keep separate missable-content saves if collecting them.
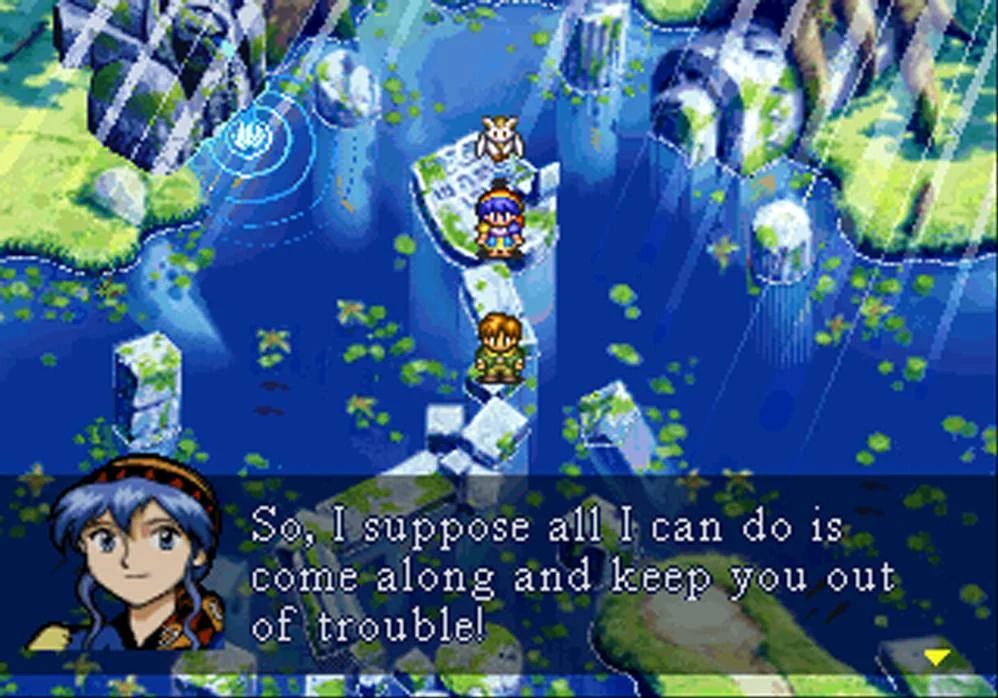
Starting Out: Setup, Save Strategy, and UI
Set up the North American Working Designs PlayStation release, learn the fixed controls and configurable presentation options, and establish a dependable manual-save routine before beginning the adventure. This chapter applies to the original two-disc PlayStation edition, not the Sega Saturn release, Japanese version, PSP remake, or later remasters.
Confirm the edition and prepare normal saves
Use the North American PlayStation release of Lunar: Silver Star Story Complete published by Working Designs. The edition is identified by its PlayStation discs and Working Designs localization. Do not apply control, menu, or item-transfer instructions from later remake versions without checking them against this release.
The game uses ordinary PlayStation memory-card saves. Saving is a manual action rather than an automatic backup after every battle or story scene. Before choosing New Game, insert a recognized memory card with enough available space for several Lunar files. If you are using an emulator, maintain a stable memory-card image and create normal in-game saves instead of relying exclusively on emulator save states.
Use at least three save slots. Keep one untouched file as a baseline, use a second for ordinary progress, and reserve a third for dungeon entrances, bosses, major story events, or experiments with optional content. The game supports multiple save files on a card, so rotating files is safer than repeatedly replacing the only current save.
- Confirm that the PlayStation memory card is recognized before starting.
- Leave room for multiple Lunar save files.
- Keep the first reliable Burg save as a protected baseline.
- Use separate active and backup slots rather than one constantly overwritten file.
Learn the fixed PlayStation controls
The directional buttons move Alex during exploration and move the cursor through menus. The X button confirms choices, opens chests, speaks with people, searches objects, and accepts commands. The Square button opens the normal party menu. Select also opens the menu and can close it when appropriate.
Triangle returns to the previous menu or cancels the current selection. Circle cancels menu choices and serves as a shortcut to the save screen during normal exploration. L1 and R1 change the displayed character in status, item, and equipment screens; during exploration they display the party status bar. The analog controller is supported for movement.
During battles, R2 toggles the DualShock Shock setting and L2 toggles the display of spell names. These shortcuts correspond to the same presentation settings available through the Options menu.
The in-game Options screen does not provide a button-remapping function. X, Circle, Square, Triangle, Select, and the shoulder-button functions cannot be reassigned through the game. The Name Spells setting controls whether spell names are shown in combat; it is not a voice-volume or voice-muting control.
- Open the menu with Square or Select.
- Use Circle to test the direct save-screen shortcut.
- Use Triangle to back out of a menu.
- Use L1 and R1 to switch between characters in menu screens.
- Do not search for a button-remapping option that the game does not provide.
Review the Options menu through Nall
After Alex is controllable, open the party menu and select Nall. Choose System, then Options. The North American PlayStation release provides six presentation settings in this screen.
Sound switches between Stereo and Mono. Change Lines selects whether Equipment or Item entries appear first when browsing Nall’s inventory. Message Advance switches between Auto and Manual. Auto advances dialogue after a delay, while Manual leaves each text advance under your control.
Message Speed offers Fast, Regular, and Slow. Shock enables or disables DualShock vibration. Name Spells enables or disables spell-name display during battles. These settings affect presentation and convenience; they do not alter the campaign route or character abilities.
Manual Message Advance is useful if you want to read every line without a timed advance. Stereo is appropriate for normal stereo equipment, while Mono can help if the two channels are being combined incorrectly by your display or audio setup. Set Shock and Name Spells according to personal preference.
- Set Sound to Stereo or Mono for your equipment.
- Choose Auto or Manual Message Advance.
- Choose Fast, Regular, or Slow Message Speed.
- Set Shock according to whether vibration is wanted.
- Set Name Spells according to whether combat spell names should appear.
- Review Change Lines if you prefer Equipment or Item entries to appear first.
Create the baseline Burg save
Once you have control of Alex in Burg, open the menu and select Nall, System, and Save. Alternatively, press Circle during normal exploration to reach the save screen directly. Select an empty slot and wait for the save operation to finish before leaving the screen.
Keep this file untouched as your opening baseline. It gives you a safe return point if you later want to test the demo-data transfer, restart the opening with different equipment decisions, or recover from an accidental overwrite. After saving, use the normal Load screen to confirm that the file appears with the expected location and progress information.
Create your active progress file only after confirming that the baseline loads correctly. Save again before leaving Burg if you have changed equipment, moved items between characters, or want a second recovery point before the White Dragon Cave.
- Save in Burg as soon as normal control is available.
- Confirm that the file appears in the Load list.
- Protect the first successful save as the baseline.
- Create a separate active file before entering the opening dungeon.
Rotate saves around dangerous progress
Save whenever you regain control of the party in towns, on the world map, or inside dungeons. Use one active slot for routine progress and another before entering a dungeon, approaching a boss, beginning a long story sequence, or testing a one-time event.
Inside a dungeon, save after a major route milestone or immediately before a difficult encounter when the game returns control to you. If a story sequence temporarily removes control, wait until exploration resumes before saving. This prevents you from depending on an earlier file that may be far from the current objective.
After returning safely to town, save the completed route in a separate slot before preparing for the next destination. Keep the untouched baseline until the opening section is no longer a concern.
- Save before major dungeons and bosses.
- Keep two rotating active files.
- Save again after a long dungeon or story sequence.
- Never overwrite both recent files in the same risky moment.
Handle optional demo-data importing carefully
A completed save from the separate Lunar: Silver Star Story Complete demo can be loaded by the retail game when beginning a new game. Choose this only if you deliberately want to continue that demo file. A normal New Game starts the retail opening without importing demo progress.
Importing the demo data changes the early weapon reward. Alex receives Silver Darts instead of the Sling. Silver Darts can be obtained later, but the Sling is not otherwise obtainable, so players seeking every possible weapon should start a normal new game rather than load the demo clear data.
The transfer also has a specific Ocarina risk. Before saving the demo file for transfer, confirm that Alex, not Nall, is holding the Ocarina. If Nall holds it in the demo save, the full game may not let you transfer it back to Alex. Alex needs the Ocarina later when he must proceed without Nall. If the item is assigned incorrectly, reload the demo, move the Ocarina to Alex, save the corrected demo file, and then begin the retail transfer again.
After importing, inspect Alex’s inventory and create a fresh retail save in a separate slot. If you do not have a verified demo save, or if you want the standard opening and the Sling, choose normal New Game.
- Import demo data only when the transfer is intentional.
- Verify that Alex holds the Ocarina before creating the demo transfer save.
- Check whether Alex received Silver Darts instead of the Sling.
- Create a new retail save after confirming the transfer.
- Choose normal New Game for the standard opening and the otherwise unobtainable Sling.
Before you move on
- The North American Working Designs PlayStation edition is confirmed.
- The memory card or memory-card image is available and has room for several saves.
- You can open the party menu, reach Nall’s System and Options screens, and save normally.
- You can use Circle to reach the save screen during exploration.
- Sound, Change Lines, Message Advance, Message Speed, Shock, and Name Spells have been reviewed.
- You understand that the core PlayStation buttons cannot be remapped in-game.
- A protected baseline Burg save and at least one separate active save exist.
- If demo data was imported, Alex holds the Ocarina and the Silver Darts-versus-Sling result has been checked.
- A normal in-game save has been confirmed before entering the White Dragon Cave.
References for this chapter
- Lunar: Silver Star Story Complete — Guide and Walkthrough by Erdrick77, PlayStation version
- Lunar: Silver Star Story Complete Walkthrough & Guide - PlayStation - By RPGamer
- Lunar: Silver Star Story Complete — Guide and Walkthrough by cnick, PlayStation version
- Lunar: Silver Star Story Complete - Guide and Walkthrough - PlayStation - By AndrewC
Burg and Dragon's Cave: The Opening Sequence
Finish Burg’s opening events, clear the White Dragon Cave, return the Dragon Ring to Quark for the Dragon Diamond, then follow the required route through Weird Woods, Saith, Old Hag’s Forest, Hispaniola and the first Meribia visit. Defeat the Aqua Lizard in the Meribian Sewers, obtain Phacia’s application, clear the item-restricted Cave of Trials and enter Vane.
Complete Burg’s opening preparation
After the opening scenes, go to the northeastern spring area and let the conversation with Luna finish. Return to Alex’s house and speak with his parents. Alex receives the Dagger and Flame Ring, while Luna receives the Sling. Equip these immediately. Search the basement and open its four chests for early supplies, including an Herb, Dragonfly Wing, Star Light and Angel’s Tear.
Meet Ramus at Burg’s western entrance and leave town when the story directs you. Buy only practical early equipment and several Herbs. Do not spend heavily on accessories yet; the next towns provide better upgrades quickly. Save from the normal field menu before departing and keep this Burg save as a baseline in a separate file.
- Luna, Ramus and Nall are with Alex.
- Alex has the Dagger and Flame Ring equipped.
- Luna has the Sling equipped.
- The four basement chests have been opened.
- A Burg baseline save exists.
Clear the White Dragon Cave and complete Quark’s trial
Select the White Dragon Cave from the world map. The Flame Ring melts the entrance ice. The cave’s enemies include Slimes, Mutant Flies, Synapse Guards and Albino Baboons. Albino Baboons are dangerous at this point, so avoid unnecessary fights and return to Burg for healing or equipment if Alex’s party is struggling.
Search the opening rooms for the Herbs before proceeding farther. Continue until you reach Quark’s chamber and speak with him. Quark restores the party and explains that the Dragon Ring must be recovered before he will give Ramus the Dragon Diamond. Save after this restoration. If you return to Burg for supplies, use the Dragonfly Wing to return to the cave entrance.
Leave Quark’s chamber through the newly available route. In the ice-barrier rooms, approach an Albino Baboon so it charges in a straight line, then step aside and let it smash the ice. Do not treat these enemies as ordinary battles. Use them to open the passages and reach the chests. One contains a Star Light, another contains the Dragon Ring, and a later chest contains 250 Silver.
After taking the Dragon Ring, return to Quark’s chamber and speak with him. Quark accepts the ring and awards the Dragon Diamond. The diamond is a story reward, not a separate chest item. Leave the cave through the southern route, using the Dragonfly Wing if the return trip has become unsafe. Heal at Burg’s Althena statue and save again.
- The entrance ice was melted with the Flame Ring.
- The required ice barriers were broken by Albino Baboons.
- The Dragon Ring was collected from its chest.
- The Dragon Ring was returned to Quark.
- Quark awarded the Dragon Diamond.
- The party has returned to Burg and been healed.
Open the route through Weird Woods, Saith and Old Hag’s Forest
After returning to Burg, visit the item shop and complete the required conversations at Alex’s house. The first attempt to leave through Weird Woods is stopped by fog. Return home when the story sends you back, finish the dialogue and leave with the party the following morning.
Enter Weird Woods from the world map. Luna’s song clears the fog. Continue through the forest until the clearing where goblins and gorgons attack. Laike appears during this event. After the scene, take the western exit and continue to Saith.
In Saith, speak with the captain at the port and learn that the Sea Chart is missing. Go to the bar and play Brett’s coin game. Ramus eventually exposes Brett’s cheating and Brett explains that the chart was traded to the Old Hag. Speaking to Brett again can provide the optional Fortune Cane for Luna.
Leave Saith and travel north to Old Hag’s Forest. Reach the house at the top and complete the exchange involving the Water Cane and the Sea Chart. Nash joins temporarily during this sequence. Poison can occur in the forest, so carry Antidotes and cure poison promptly. Return to Saith with the chart.
- The failed fog attempt has occurred.
- Luna has cleared Weird Woods.
- The Laike encounter is complete.
- Brett’s coin event is finished.
- The Sea Chart has been recovered from Old Hag’s Forest.
- Nash has joined for the forest sequence.
Defeat the Saline Slimer and cross Hispaniola
Back in Saith, speak with the captain at the dock and agree to deal with the creature attacking the ship. Heal at the town’s Althena statue, upgrade weapons and armor if affordable, then approach the ship to begin the Saline Slimer battle.
Normal attacks are unreliable against the slime. Use Alex’s Vigor followed by Sword Dance when available. Luna should use Cascade Song on Alex and heal whenever the party is threatened. Ramus can attack, defend or use recovery items. Do not waste MP on weak attacks before Alex is prepared; the slime can recover from damage and may encase a character with its mucus attack.
After the Saline Slimer is defeated, Luna initially returns to Burg, but she rejoins when the Hispaniola departs. Speak with the passengers and crew, then speak with Luna at the rear of the second deck as the story requires. Complete the nighttime ship event and continue to the bow when the ship reaches Meribia. The ship shop sells Soap, which is optional but useful for later side content.
- The captain’s ship event has been triggered.
- The Saline Slimer has been defeated.
- Luna has rejoined the traveling party.
- The Hispaniola voyage is complete.
- The party has arrived in Meribia.
Sell the Dragon Diamond and clear the Meribian Sewers
Explore Meribia, then visit Master Mel’s mansion in the northeast and complete the required conversations. Return to Dross’s jewelry shop and agree to sell the Dragon Diamond. Dross takes the diamond and escapes through the rear route, opening the sewer sequence. Before entering, use the shops on Black Rose Street to improve Alex’s equipment and confirm that his offensive magic is available.
Enter the sewers through Dross’s route. Follow the bridges and operate the wall switches to lower them. At the lower waterway, use the branching passages to reach the switches and the exit bridge. The dungeon contains Herbs, Antidotes, Star Lights and Silver. The locked red chest is not available during this visit; leave it for a later return after obtaining the Thieves’ Crest.
Near the end, collect the recovery items around Dross, heal as much as possible and save if the game permits. Confront Dross to begin the Aqua Lizard battle. Use Vigor and Sword Dance with Alex, while Luna heals and Ramus attacks or supplies items. The Aqua Lizard can poison a character and use a strong fire attack. Use Antidotes quickly and spend a Star Light before Alex’s MP is exhausted if Sword Dance is carrying the fight.
After victory, the Dragon Diamond is recovered and Ramus’s Meribia business concludes. Return through the sewer route, then revisit the accessible area below Mel’s mansion if you want the currently reachable optional chests. Nash rejoins after the sewer events, while Ramus remains in Meribia. Remove equipment from Ramus if you want to reuse it before leaving.
- Dross has taken the Dragon Diamond.
- The sewer bridges have been lowered with the switches.
- The locked red chest has been left for later.
- The Aqua Lizard has been defeated.
- The Dragon Diamond has been recovered.
- Nash has rejoined the party.
- Ramus has remained in Meribia.
Obtain Phacia’s application and clear the Cave of Trials
Leave Meribia and travel to the Transmission Spring. The attendant refuses access until Phacia gives permission. Travel to Althena’s Shrine, enter and continue north until the scene with Phacia begins. She issues the application. Return to the Transmission Spring and deliver it.
Nash leaves before Alex and Luna enter the Cave of Trials. Heal fully and make a separate save. The Cave of Trials has three sections and does not allow item use inside. Herbs, Star Lights and Angel’s Tears in the inventory cannot compensate for poor preparation, so rely on Luna’s healing and the healing attendants placed through the route. Use the available healers whenever practical and conserve Luna’s MP for the later rooms.
Proceed through the cave, collecting the Silver and other supplies if desired. The required boss is Truffle Troubler. Enter the final section with Alex and Luna at full HP and MP. Have Alex cast Vigor, then use Sword Dance whenever possible. Luna should heal every round unless both characters are safe; use her offensive magic only when recovery is under control. If either character is incapacitated, items cannot revive them, so reload the pre-cave save rather than entering with depleted resources.
After defeating Truffle Troubler, take the chest containing the Healing Ring. Equip it on Alex or Luna. Exit through the eastern route, speak with the attendant and enter Vane. The Magic Guild events begin immediately after this transition.
- Phacia has issued the application.
- The application was delivered at the Transmission Spring.
- Nash left before the Cave of Trials.
- The item restriction was observed.
- Truffle Troubler was defeated.
- The Healing Ring was collected.
- The exit attendant opened the route into Vane.
Before you move on
- Alex, Luna, Ramus and Nall completed the Burg and White Dragon Cave opening.
- Quark received the Dragon Ring and awarded the Dragon Diamond.
- The party traveled through Weird Woods, Saith, Old Hag’s Forest and Hispaniola.
- Dross’s theft led to the Meribian Sewers, and the Aqua Lizard was defeated.
- Phacia’s application was delivered at the Transmission Spring.
- The Cave of Trials was cleared, Truffle Troubler was defeated, the Healing Ring was collected and Vane is accessible.
References for this chapter
- Lunar: Silver Star Story Complete - Guide and Walkthrough - PlayStation - By _SeeD_
- Lunar: Silver Star Story Complete - Guide and Walkthrough - PlayStation - By AndrewC
- Lunar: Silver Star Story Complete Walkthrough & Guide - PlayStation - By RPGamer
- Lunar Walkthrough: Burg and White Dragon Cave, Flactem Guides
- Lunar: Silver Star Story Complete / Touch Walkthrough, Part 5: Meribia and Meribian Sewers
Vane, the Magic School, and Meeting Nash/Mia
Begin this chapter immediately after completing the Cave of Trials. The party should already have defeated the cave boss, collected the Healing Ring if desired, and spoken to the attendant at the eastern exit so the route into Vane is open. Enter the floating city, complete the Magic Guild scenes involving Nash, Mia Ausa, Luna, and Ghaleon, then re-equip Nash and leave through the southern platform for Nanza Pass and the investigation in Lann.
Enter Vane after the Cave of Trials
This chapter starts at the end of the Cave of Trials, not at the earlier Transmission Spring application sequence. After defeating the cave boss, collect the Healing Ring in the room to the west if you have not already done so. The ring restores a small amount of HP to its wearer at the start of each battle round, making it useful on Alex or Luna during the next stretch.
Leave the cave through the eastern route. Speak with the man behind the counter at the exit, then use the available passage to enter Vane. If you are still standing at the Transmission Spring, the Cave of Trials is not complete yet; speak with the attendant and finish the trial before following this chapter.
Vane is the first major town where the party can make several useful preparations at once. Heal before entering the Magic Guild, and save once you have control in the city. The next story route continues through Nanza Pass and Lann, so keeping a save at Vane gives you a safe recovery point if the upcoming dungeon or town sequence goes badly.
- Defeat the Cave of Trials boss.
- Collect the Healing Ring if you want the optional recovery accessory.
- Reach the eastern cave exit.
- Speak with the exit attendant.
- Enter Vane and save in town.
Use Vane's services before the guild scenes
When you arrive in Vane, inspect the city before entering the Magic Guild. The Althena statue in the northern part of town provides healing, so use it before the guild sequence if the Cave of Trials left either character injured or low on MP. Vane also has weapon, armor, and item shops. Compare the displayed equipment with what Alex and Luna currently have and purchase practical upgrades that you can afford.
Do not spend all of your silver on expensive accessories simply because they are new. The upcoming Nanza route contains battles and trapped chests, while Lann and the following island sequence will introduce more equipment and recovery needs. Prioritize weapons, armor, Healing Herbs, and a modest supply of MP recovery over luxury purchases.
The library east of the main area is optional. You can inspect it for background material and a hidden small-silver pickup, but it is not required to activate the guild events. The required destination is the Magic Guild in the northern part of Vane.
- Heal at Vane's Althena statue.
- Check the weapon, armor, and item shops.
- Buy affordable upgrades and recovery supplies.
- Save before entering the Magic Guild.
- Enter the Magic Guild in northern Vane.
Let Nash take Luna upstairs
Nash is waiting at the Magic Guild entrance. Speak with him and allow the opening scene to finish. He takes Luna to another room so she can rest, temporarily leaving Alex and Nall to move through the building. This is a required event; do not leave Vane looking for another route after Nash departs.
Once control returns, explore only as much of the guild as you need. The progression route begins at the entryway and uses the left-side staircase. Go up those stairs and enter the room at the top, then continue west into the bedroom. This is the route to Mia's introduction.
The bedroom scene is required for progress. Afterward, you may reenter the room and examine the bed or dresser for optional dialogue involving Nash, but those examinations are not needed to advance. If you do not see the expected scene, return to the entryway and confirm that Nash's initial conversation and Luna's departure have fully played out.
- Speak with Nash at the guild entrance.
- Allow Nash to take Luna away to rest.
- Return control to Alex and Nall.
- Use the left staircase from the entryway.
- Enter the upper room and continue west into the bedroom.
Meet Mia Ausa
Continue through the bedroom to meet Mia Ausa, the daughter of Lemia Ausa and a senior figure in Vane's Magic Guild. The scene establishes Mia's importance to the guild and introduces her relationship with Nash. Nash then arrives and reacts to finding Alex and Nall in Mia's room.
Mia is essential to the story, but she does not immediately become a freely selectable traveling party member during this first Vane visit. Treat this as a required story introduction rather than a recruitment screen. Continue through the dialogue until Nash leads the party back toward the guild's main area.
After the scene, return to the entryway. Do not try to reach Ghaleon's office through the town streets or by using the transport platform. The next scene is triggered from inside the guild by taking the opposite staircase.
- Complete the scene with Mia in the bedroom.
- Let Nash interrupt and lead the party away.
- Return to the guild entryway.
- Do not leave Vane before the Luna and Ghaleon scenes are complete.
Speak with Luna and Ghaleon
From the guild entryway, use the eastern staircase. Speak with Luna in the room or landing where she is waiting. Either available dialogue choice continues the story, so choose whichever response you prefer and proceed through the resulting scenes.
The guild sequence then brings Alex to Ghaleon, one of the former Four Heroes and the leading magician of Vane. Ghaleon gives Alex a specific assignment: travel to the fishing village of Lann and investigate the report of a Dragonmaster operating there. This is the next main-story objective.
The Lann assignment is not optional. Do not attempt to reach another continent or search for a different town from Vane. The game expects you to return to the Transfer Spring and then select Nanza Pass from the world map. Nash becomes available to the traveling party again after the guild scenes finish, so wait until control returns before shopping for him.
- Use the eastern staircase from the guild entryway.
- Speak with Luna.
- Complete the scene with Ghaleon.
- Receive the investigation assignment for Lann.
- Wait until Nash is restored to the traveling party.
Re-equip Nash and leave for Nanza Pass
Once control returns in Vane, revisit the shops. Nash is now back in the party, so equip him with the best weapon, armor, and accessory combination currently available. He is a rear-line magic user and benefits from defensive equipment as much as from a stronger weapon. Give him some Healing Herbs and MP recovery rather than placing every consumable on Alex or Luna.
Recheck Alex and Luna as well. The Vane shops offer useful upgrades, but do not feel compelled to buy the two very expensive necklaces unless you have earned unusually large amounts of silver. Ordinary weapon and armor upgrades are the better priority for a normal campaign route.
Heal at the Althena statue and save in Vane. Then leave through the southern platform. The transport returns the party to the Transfer Spring. Exit to the world map and select Nanza Pass. The eastern section contains trapped chests that can inflict confusion, and the route eventually leads through Nanza to the western pass and Lann, where the next chapter's events begin.
If you accidentally return to the world map before the guild scenes are finished, reenter Vane and return to the Magic Guild. The correct completion state is not merely reaching the city; Luna and Ghaleon's scenes must have played, Nash must be back in the party, and the Lann investigation must be active.
- Equip Nash after he rejoins.
- Recheck Alex's and Luna's equipment.
- Restock healing and MP recovery items.
- Heal and save in Vane.
- Leave from the southern platform.
- Return through the Transfer Spring.
- Select Nanza Pass on the world map.
Before you move on
- The Cave of Trials is complete and the party has entered Vane.
- Alex and Nall reached Mia's bedroom through the left staircase in the Magic Guild.
- The required Mia and Nash scene has finished.
- Alex spoke with Luna using the eastern staircase route.
- Ghaleon gave the assignment to investigate the alleged Dragonmaster in Lann.
- Nash has rejoined the traveling party and has been equipped.
- The party has healed and saved in Vane.
- The party left through the southern platform, returned to the Transfer Spring, and selected Nanza Pass.
Hull, Harbors and Kyle/Jessica Encounters
After the Magic Guild sends Alex to investigate the supposed Dragonmaster near Lann, cross Nanza Pass, resolve the Nanza Barrier checkpoint, recruit Jessica temporarily in Lann, and defeat Fake Dragonmaster Zoc on Lann Island. Kyle is introduced during the Nanza Barrier sequence, but he is not yet a usable party member. After Jessica leaves, return through Nanza to Vane and continue the story into the next major dungeon sequence.
Prepare in Vane before leaving for Nanza
Complete the Magic Guild scenes that follow the visit with Ghaleon. When you regain control after the guild events, Nash is available again and the next objective is to investigate the Dragonmaster reported near Lann. Do not leave Vane until Alex, Luna, and Nash have current weapons and armor, because Nanza Pass has stronger enemies than the areas immediately around Vane.
Heal at the Althena Statue, save, and buy a supply of basic healing items. Carry MP restoration if you have it, but do not spend all of your silver on accessories. Nash's offensive magic is useful against groups, while Luna should preserve MP for healing. Alex remains the dependable single-target attacker. If you need experience, the Cave of Trial is an optional stop before departing; it is not required for story progress.
- Nash is present in the party again.
- Alex, Luna, and Nash have current equipment.
- The party is healed and a Vane save has been created.
Cross Nanza Pass and enter the Nanza Barrier
Leave Vane through the southern transport and follow the world-map route toward the western mountain pass. In Nanza Pass, take the main route west and north, then continue through the mountain paths toward the barrier. Several treasure chests contain small amounts of silver or Herbs, but some chests trigger battles. Open them only when the party is healthy enough to handle an ambush.
At the Nanza Barrier, speak with the guard at the entrance. Showing that you are traveling with the Magic Guild allows you into the settlement, but the western gate will not open until you investigate the whereabouts of Kyle, the barrier's leader. Kyle is not recruited here. He is first introduced as the leader who is asleep in the jail area after an argument with Jessica.
- Reach the Nanza Barrier from Vane.
- Speak with the entrance guard.
- Do not expect Kyle to become a party member yet.
Find Kyle without waking him
Enter the barrier settlement and speak with the residents to learn where Kyle went. Check the north tower first, then the east tower. The tower conversation directs you toward the cafeteria in the underground section. Speak with the people there, then go to Kyle's room and talk with the man outside it. You will learn that Kyle has been locked in a jail cell and is sleeping off his argument.
Go to the jail area and examine Kyle in the cell. The guard stops you from waking him and offers a compromise: leave Kyle alone and the barrier gate will be opened. Accept the arrangement rather than searching for another recruitment trigger. Return to the gate and pass through once the guard allows it. There is no shop in the barrier, so finish your equipment and item purchases before entering Nanza Pass.
- Search the north and east towers.
- Check the cafeteria and Kyle's room.
- Examine Kyle in the jail cell.
- Accept the guard's condition and open the route to Lann.
Travel from the barrier to Lann
Continue west and south through the second section of Nanza Pass. The enemies are more dangerous than the early-game groups, so run from fights when the party is losing too much HP or MP. Use the Althena Statue in the barrier before leaving if necessary. A Star Light and smaller recovery items can be collected along the route, but the main objective is reaching Lann without exhausting the party.
When you exit the pass, follow the world map north to the riverside town of Lann. Heal at the town's Althena Statue and save immediately. Visit the shops before triggering the story scene so you can purchase current equipment for the characters who will enter the island mission. Jessica is about to join temporarily, and she may begin with weaker equipment than the party's current shop tier.
- Exit Nanza Pass into the Lann region.
- Heal and save at Lann's Althena Statue.
- Check Lann's weapon, armor, and item shops.
Recruit Jessica temporarily and arrange the boat
Enter the central building in Lann and listen to the discussion about the new Dragonmaster. Jessica is the girl addressing the townspeople. Speak with her when the scene directs you to do so, and accept her offer to investigate the supposed Dragonmaster. Jessica joins for this mission only; she is not a permanent late-game party member at this point.
After Jessica joins, go to the docks and speak with the boatman on the far western side. He takes the group to Lann Island. Before boarding, equip Jessica with the best available weapon and armor she can use, confirm that her healing spells are available, and carry a few healing items. Nash remains useful for lightning-based damage, while Jessica should heal when Luna cannot keep up with incoming damage.
- Trigger Jessica's speech in Lann.
- Confirm that Jessica has temporarily joined.
- Equip Jessica before boarding.
- Speak with the western boatman.
Cross Lann Island and defeat Fake Dragonmaster Zoc
On Lann Island, follow the route toward the tent in the northwest portion of the swamp. Avoid the discolored swamp water whenever possible because walking through it drains HP. Some chests are traps that cause temporary control confusion, so open suspicious chests only when the party is in good condition. Save and restore HP and MP before approaching the tent.
Speak with the man beside the tent to begin the Fake Dragonmaster Zoc battle. Have Alex use his strongest reliable attack, let Nash use lightning magic, and use Luna and Jessica for healing whenever the party's HP drops. Jessica can attack during safe rounds, but keeping her available as a healer is more important than squeezing out small amounts of physical damage. Zoc's fake dragon is defeated during the encounter, after which the story resolves the deception.
After the battle, return to Lann by boat. The post-battle scenes introduce Phacia and reveal that Jessica's immediate objective is elsewhere. Jessica leaves the party after the Lann events, so do not spend money expecting her to remain available for the next route.
- Reach the northwest tent on Lann Island.
- Save and restore HP and MP before the boss.
- Defeat Fake Dragonmaster Zoc.
- Return to Lann and confirm Jessica has left.
Return through Nanza to Vane
After the Lann scenes, travel back through the Nanza route. You may collect missed chests on the return trip, but no additional recruitment event occurs here. Kyle is still not a usable party member. Heal at the barrier's statue, then continue through the pass and use the transport route back to Vane.
On returning to Vane, Nash leaves briefly to report to the Magic Guild. Heal and save before entering the guild's Grand Hall. The next story sequence leads to the false Lemia confrontation, Alex's imprisonment, Mia's rescue attempt, and the Crystal Tower objective. At that later point, Mia, Nash, and the masked prisoner become involved in the next party sequence. Kyle's actual recruitment occurs later, after the party returns to Nanza and encounters Xenobia's attack; it is not part of the initial Lann investigation.
- Jessica has left after the Lann resolution.
- The party has returned through Nanza to Vane.
- A fresh Vane save exists before entering the next guild event.
- Kyle's later recruitment has not been incorrectly marked as complete.
Before you move on
- The Vane investigation objective has been completed and the party has crossed Nanza Pass.
- The Nanza Barrier gate has been opened by following the Kyle search sequence without waking him.
- Jessica joined in Lann, traveled to Lann Island, and participated in the defeat of Fake Dragonmaster Zoc.
- Jessica has left after the return to Lann.
- The party has returned to Vane and saved before the next Magic Guild and Crystal Tower events.
- Kyle has been correctly identified as introduced but not yet recruited in this chapter.
Midgame Shrines and the Star Chamber Events
The Crystal Tower sequence begins after Alex is imprisoned in Vane and Mia, Nall, and the masked prisoner free him. You must obtain Althena’s Mirror, recruit Nash at the tower entrance, climb through a weapon-sealed dungeon, and defeat four Ultragoyles in the Star Chamber. The dungeon is manageable if you preserve MP, keep armor equipped, and let Mia, Nash, and Luna handle most of the magical work.
Unlock the Crystal Tower objective
After the events at the Magic Guild in Vane, Alex wakes in a jail cell. Wait for Mia and Nall to arrive and release him. Mia gives Alex Althena’s Mirror and joins the party. Before leaving the jail, speak with the masked prisoner in the neighboring cell. Mia recognizes that the mask is suppressing the prisoner’s memories, and the prisoner provides the clue that leads to the Crystal Tower.
Let Mia open the prisoner’s cell and bring the woman along. Visit the relevant rooms in the Magic Guild before going to the tower entrance, including Ghaleon’s room if you want to complete the available dialogue. Then leave the Grand Hall and approach the blue doors to the east. Nash arrives before you enter and joins the party. Save immediately after he joins; this is the safest starting point for the dungeon.
- Alex has received Althena’s Mirror.
- The masked prisoner has been released from her cell.
- Nash has joined at the blue Crystal Tower doors.
- A manual save exists before entering the tower.
Prepare in Vane before entering
The Crystal Tower is not permanently sealed against retreat, so you can leave and use an Althena statue or town facilities if your supplies are poor. However, enemies return after you leave, which means a healing trip creates another climb through the dungeon. Buy Healing Nuts or equivalent healing supplies if you are short, and carry MP restoration and revival items for the upper floors.
Use a balanced setup. Alex is the main all-purpose character, Mia supplies dependable area magic and support, and Nash provides additional offensive magic. The tower removes weapon use, so armor becomes especially important. Upgrade armor before entering, but do not remove armor when the game explains the restriction. Keep at least one Star Light or another MP-restoring item available for the final approach, and reserve Angel’s Tears or other revival items for the Ultragoyle battle.
- Armor is upgraded and equipped.
- Healing items are stocked.
- At least one MP-restoring item is reserved for the upper floors.
- At least one revival item is available for the scripted battle.
- The party is saved outside the tower before the first attempt.
Enter the tower and handle the weapon seal
When the party enters, Althena’s magic prevents weapons from being used inside the Crystal Tower. Unequip Alex’s sword and the weapons belonging to Mia and Nash if the game has not already removed them automatically. Do not unequip armor. The restriction is on weapons, not protective gear, and removing armor needlessly increases incoming damage.
The tower’s regular enemies include Reflectors, Plasma Fiends, Blood Lords, and Neutronitors. Let Mia and Nash use efficient offensive spells against groups or enemies that are resistant to weakened physical attacks. Alex should conserve MP where possible, use Vigor and Sword Dance if those abilities are available, and carry healing or MP-restoration items for emergencies. Do not spend your strongest spells on every isolated encounter; the upper section and the Ultragoyles are the important fights.
- Weapons are unequipped or disabled.
- Armor remains equipped on every active character.
- Mia and Nash are handling most routine magical damage.
- Alex has healing and restoration items available in his item slots.
Climb the lower and middle floors
From the entrance, proceed north and use either route into the next area. Continue upward through the connected rooms, taking the side paths when they lead to visible treasure. The tower’s branching layout is easier to manage if you prioritize upward stairs first, then return along the same floor for unopened chests before taking the next ascent.
On the floor with several exits, take the left-side route far enough to collect the Star Light, then return and use the right-side route to collect the silver and the Angel Ring. The Angel Ring provides a one-time automatic resurrection effect when its condition is met, making it useful for the upcoming boss sequence. After collecting those items, return to the branching room and take the central route upward.
Continue through the next rooms toward the southern exit and the upper stairways. You will find additional silver on the way. Use regular attacks, low-cost abilities, and efficient spells against ordinary enemies, but heal before advancing whenever the party has taken substantial damage. If you must leave to recover, expect the regular encounters to have returned when you climb again.
- The Star Light has been collected.
- The silver chests have been collected if you want the available money.
- The Angel Ring has been collected before the final ascent.
- The party is healed before approaching Luna’s singing.
Reach the Star Chamber
Follow the upper stair route until you hear Luna singing. This audio cue confirms that the Star Chamber is close. Stop before entering the final room and restore HP and MP. Check that Mia and Nash have their strongest practical spells available, Alex has Vigor or Sword Dance if learned, and the party has healing and revival items ready.
Enter the Star Chamber to trigger the confrontation involving Luna, the masked woman, Lemia, Royce, Phacia, and Ghaleon. Althena’s Mirror is used during the scene. The deception is exposed, and the encounter against four Ultragoyles begins. Do not reset or leave during the dialogue transition; the battle and the following story scenes are triggered automatically.
- The party enters the chamber at full or near-full HP.
- Mia and Nash have enough MP for repeated offensive spells.
- The available revival and MP-restoration items are ready for use.
- The identity-reveal scene has finished and the Ultragoyle battle has begun.
Defeat the four Ultragoyles
The four Ultragoyles can attack repeatedly, so this battle is dangerous if the party enters without MP or healing. Have Luna use Tranquil Song regularly to restore party HP. If the party is already badly injured, heal immediately rather than trying to maintain maximum damage every round.
Use Mia’s Blizzard against the Ultragoyles and Nash’s Thunder Bomb when available. Alex should use Vigor to improve his output and then Sword Dance or another reliable ability if learned. If Alex’s weapon restriction prevents your preferred physical option from performing well, switch him to support items and use the casters as the primary damage dealers. Use a Star Light as soon as an important caster is running low rather than waiting until that character can no longer act.
Focus on maintaining the healing rhythm while reducing the group steadily. If a character falls, revive promptly unless the remaining party can safely finish the encounter in the next round. The Angel Ring may prevent one defeat, but do not rely on it as your only recovery plan.
- Luna is using Tranquil Song or another reliable healing action.
- Mia is using Blizzard or another effective area spell.
- Nash is using Thunder Bomb or dependable offensive magic.
- The four Ultragoyles are defeated.
- The party survives the battle with enough resources to continue the story scenes.
Finish the Star Chamber sequence
Remain through the post-battle dialogue and the return sequence. Mia and Nash do not remain with Alex for the entire following section, so do not waste time trying to reorganize the party during the transition. Once control returns, create a new save rather than relying only on the pre-tower file.
If you want the optional Phacia Bromide on the PlayStation release, check the northern room of Althena’s Shrine near Vane after the Crystal Tower events and before advancing to the next major Meribia sequence. This reward is optional and is not required to continue the campaign, but the opportunity is missable after the story moves forward.
- The post-battle scenes have completed.
- Control has returned after the Crystal Tower sequence.
- A new save has been created after the events.
- The Phacia Bromide has been collected if optional rewards are being tracked.
Before you move on
- Althena’s Mirror was obtained from Mia in the Vane jail sequence.
- The masked prisoner was freed and Nash joined at the blue Crystal Tower entrance.
- The party climbed the Crystal Tower with weapons unequipped and armor retained.
- The Star Light and Angel Ring were collected if the optional tower treasure was desired.
- The Star Chamber identity scene was completed.
- All four Ultragoyles were defeated with Luna present.
- The post-battle return scenes finished and a new save was created.
- The optional Phacia Bromide was obtained from Althena’s Shrine before advancing, if collecting missable rewards.
References for this chapter
- Lunar: Silver Star Story Complete - Guide and Walkthrough - PlayStation - By _SeeD_
- Lunar: Silver Star Story Complete – Guide and Walkthrough, HReinhart
- Lunar: Silver Star Story Complete — Guide and Walkthrough by Spleener, PlayStation version
- Lunar: Silver Star Story Complete — Guide and Walkthrough by cnick, PlayStation version
- Lunar Walkthrough: Crystal Tower
- Lunar Walkthrough: After the Crystal Tower
Meribia, Ramus, and Side-quests that Matter
Begin after the Crystal Tower aftermath, when Ghaleon asks Alex to accompany him to Quark. Complete the Meribia departure, Saith and Burg route, Quark’s betrayal, the White Dragon Wings sequence, the attack on Meribia, and the return to Vane. After the Vile Crustacean battle, reunite with Mia and Nash, receive Lemia’s instructions, recruit Kyle at Nanza Barrier, and finish on the southern route toward Reza, Althena’s Spring, and Meryod Woods. The earlier Dragon Diamond, Meribian Sewers, Aqua Lizard, Old Hag’s Forest, and opening White Dragon Cave objectives are not repeated here.
1. Complete the Crystal Tower aftermath and travel to Quark
After the Crystal Tower scenes, finish the required conversations in Vane and accept Ghaleon’s request to accompany him to Quark. If you are collecting optional Bromides, check Althena’s Shrine during this post-Crystal Tower window and speak with the appropriate woman near the shrine area. This reward is optional and does not affect the campaign.
Return to Meribia and enter Mel’s Mansion. Speak with Mel, Jessica, and Ghaleon until the overnight scene occurs. When morning comes, leave the mansion and go to the harbor. Speak with Ghaleon at the boat to travel to Saith.
This is a required return to Meribia, not a repeat of the first Meribia chapter. Do not detour to the Meribian Sewers or attempt to redo the Aqua Lizard route.
- Finish the Crystal Tower aftermath.
- Check Althena’s Shrine for the optional Bromide if desired.
- Complete the Mel’s Mansion conversations.
- Speak with Ghaleon at the harbor.
- Save before boarding or immediately after arriving in Saith.
2. Cross Saith and Weird Woods, then resolve Quark’s betrayal
After arriving in Saith, enter the indicated building and speak with the man inside if you want the available silver. Leave town and follow the world-map route through Weird Woods toward Burg. Ghaleon accompanies Alex during this section, so conserve Alex’s MP for difficult encounters and avoid unnecessary detours.
Continue through Burg to the White Dragon Cave and enter Quark’s chamber. The required event is the confrontation with Quark. Ghaleon reveals his betrayal, takes Luna, and leaves Alex incapacitated. Alex wakes in Burg after the scene.
Before leaving Alex’s house, search the basement bookshelves for Luna’s Bromide 2 if you want the optional collectible. Then go to Dyne’s Monument and speak with Laike. Laike gives Alex the White Dragon Wings, which provide the fast route between towns for the remainder of this section. Save in Burg before using them.
- Travel from Saith through Weird Woods and Burg.
- Reach Quark’s chamber.
- Complete Ghaleon’s betrayal and Luna’s capture.
- Collect Luna’s Bromide 2 from the basement if desired.
- Speak with Laike at Dyne’s Monument.
- Receive the White Dragon Wings and save.
3. Use the White Dragon Wings to save Meribia
Use the White Dragon Wings to travel directly to Meribia. This is the required first destination after receiving them; do not go to Vane before completing the Meribia attack sequence. Alex arrives during the Vile Tribe assault and joins Jessica in the opening battles.
Move through the accessible streets toward Mel’s Mansion. The barricades force you to follow the open route, so do not waste time searching blocked districts. Use the nearby Althena statue for recovery when necessary, and run from avoidable encounters if Alex and Jessica are low on HP or MP.
Enter Mel’s Mansion and reach the gym on the upper floor. Trigger the scene with Xenobia and Mel. Mel is turned to stone, and Jessica joins Alex permanently after the event. Before leaving town, visit Black Rose Street and speak with the appropriate person if you want Royce’s Bromide. This reward is optional and has no bearing on Jessica’s recruitment.
- Use the White Dragon Wings to reach Meribia.
- Complete the opening battle with Jessica.
- Reach Mel’s Mansion through the open streets.
- Trigger the gym scene with Xenobia and Mel.
- Confirm that Jessica has joined permanently.
- Collect Royce’s Bromide if desired.
4. Return to Vane and defeat the Vile Crustacean
After Jessica joins, use the White Dragon Wings to travel to Vane. The Vile Crustacean battle begins as the party reaches the city and finds Mia and Nash unable to overcome the monster with ordinary spell damage. Save before entering Vane if possible, because the encounter is forced and a defeat sends you back to your previous save.
Use Alex’s dependable sword skills and maintain his attack support when practical. Jessica should prioritize healing, while Mia and Nash contribute damage or support without exhausting all of their MP. If Alex’s MP becomes low, use a Star Light or another MP-restoring item rather than allowing his strongest attacks to disappear from the rotation.
After the battle, speak with Mia and Nash in the Magic Guild until they rejoin Alex. Then speak with Lemia. She explains that the party must seek the Red Dragon and directs Alex toward the route beyond Nanza. No examination of a diary, desk, room, or hidden document is required for this transition.
- Save before entering Vane if possible.
- Defeat the Vile Crustacean.
- Speak with Mia and Nash until they rejoin.
- Speak with Lemia and receive the Red Dragon objective.
- Heal and restock before going to Nanza Barrier.
5. Trigger the Nanza Barrier event and recruit Kyle
Travel to Nanza Barrier using the White Dragon Wings. Enter the barrier and trigger the scene in which Xenobia and her monsters confront the apparently helpless woman. The scene reveals Kyle’s identity and starts the forced battle against the Scythe Masters.
Kyle handles the battle himself. His Power Sweep is especially useful because it can strike the group at once. After the encounter, Xenobia withdraws and the story establishes Kyle as the barrier’s leader. Speak with Kyle again when the game permits to make his recruitment official.
Before that final conversation, search the bedroom beneath the barrier for Jessica’s Bromide 4 if you are collecting one-time optional items. This pickup is separate from the required recruitment. Once Kyle joins, heal at the local Althena statue and save before crossing south.
- Reach Nanza Barrier after Lemia’s briefing.
- Complete the Xenobia and Scythe Master event.
- Win the forced Kyle battle.
- Collect Jessica’s Bromide 4 before recruiting Kyle if desired.
- Speak with Kyle again and confirm his recruitment.
- Heal and save before leaving south.
6. Cross southern Nanza and reach Meryod Woods
Leave Nanza Barrier through the southern exit and cross the next Nanza Pass area. Follow the path south to the Marius Zone and continue to Reza. A scene in Reza automatically steals the White Dragon Wings, so the loss cannot be prevented. Enter the Thieves’ Guild and speak with the bartender, then speak with Laike in the bar as required by the town sequence.
The bartender explains that Kyle must pass the guild’s test and sends the party toward Meryod. Before leaving Reza, upgrade Kyle’s equipment and buy healing or status-recovery items if the inventory is low. Do not begin the Thieves’ Guild test yet; that belongs to the next chapter.
On the world map, visit Althena’s Spring if desired. It is an optional recovery and scene location, and soap is needed for the bathing scenes. Then enter Meryod Woods. Follow the marked path north, taking side paths only for optional chests, and leave through the northern exit toward Meryod. Save before beginning the Meryod and Damon’s Spire objectives.
- Cross the southern Nanza route.
- Reach Reza and trigger the theft of the White Dragon Wings.
- Speak with the Thieves’ Guild bartender.
- Speak with Laike in Reza.
- Equip Kyle and restock practical items.
- Visit Althena’s Spring if desired.
- Cross Meryod Woods and reach its Meryod-side exit.
- Save before starting the next chapter’s Meryod events.
Before you move on
- The Crystal Tower aftermath and Ghaleon’s Quark request are complete.
- The Meribia mansion, harbor, Saith, Burg, and Quark scenes are complete.
- Quark has been defeated and Luna has been taken.
- Laike has given Alex the White Dragon Wings.
- The attacked Meribia sequence and Mel’s gym scene are complete.
- Jessica has joined the party permanently.
- The Vile Crustacean has been defeated.
- Mia and Nash have rejoined the party.
- Lemia has given the Red Dragon objective.
- The Xenobia encounter at Nanza Barrier is complete.
- Kyle has joined the party.
- The party has crossed south from Nanza and reached or crossed Meryod Woods.
- The party is ready to begin the Meryod, Thieves’ Guild, and Damon’s Spire objectives in the next chapter.
- Optional Bromides, red-chest returns, and later Ramus rewards remain clearly separate from required progress.
References for this chapter
- Lunar: Silver Star Story Complete - Guide and Walkthrough - PlayStation - By AndrewC
- Lunar: Silver Star Story Complete — Guide and Walkthrough by Erdrick77, PlayStation version
- Lunar: Silver Star Story Complete – Guide and Walkthrough, HReinhart
- Lunar: Silver Star Story Complete Walkthrough & Guide - PlayStation - By RPGamer
- Lunar: Silver Star Story Complete / Touch Walkthrough, Part 10: Assembling the Team
Consolidating the Party: Skills, Magic and Equipment
Use this chapter as a recurring party-management reference throughout the PlayStation Working Designs campaign. The active roster changes repeatedly, so equipment and battle-item assignments should be checked whenever a character joins, leaves, or returns. Alex remains the constant party member, while Luna, Ramus, Nash, Mia, Jessica and Kyle are available during different parts of the story. Do not treat the final party or final Ramus supply visit as complete here; those belong to the late-game preparation covered in Chapters 11–12.
Understand each character's combat job
Alex is always available and should receive first priority for practical weapon upgrades. His ordinary attack remains useful when conserving MP, while Sword Dance is his reliable single-target damage command. Vigor raises Alex's attack power and is a strong opening action in difficult boss fights before using Sword Dance. Explosion Staff and Flash Cut are more useful when several enemies are grouped together, but do not spend Alex's MP on area attacks automatically if a boss is the immediate threat.
Jessica is the party's most dependable dedicated healer once she is available. Keep her armor current and protect her ability to act. In ordinary battles she can attack when the party is healthy, but during dangerous fights her first responsibilities are healing, revival and status recovery. Give her direct access to the supplies needed for those jobs instead of leaving every recovery item in reserve storage.
Mia is an offensive and supportive spellcaster. Her magic is useful against groups and her defensive or enhancement spells help the party survive extended encounters. Her equipment should keep her alive through enemy area attacks, even when she begins behind the front line. Nash is another magical attacker and can provide emergency item support when Jessica is busy healing. His lower physical durability makes current armor and a sensible rear position especially valuable.
Kyle is the second major physical attacker when he is present. His Power Up increases his attack power and Power Slash provides strong single-target damage. Re-equip him whenever he returns after a story absence; do not assume that gear from an earlier chapter is still adequate. Temporary allies such as Ramus or Luna should be equipped well enough for their available sections, but do not divert scarce money from Alex or the characters who remain important in the next dungeon.
- Prioritize Alex's weapon upgrades because he is always present.
- Keep Jessica's armor current and reserve her turns for healing when necessary.
- Use Mia and Nash for magical damage, support and emergency item use.
- Re-equip Kyle immediately when he returns to the active roster.
- Review temporary-character equipment without sacrificing funds needed for permanent party members.
Check the formation after every party change
Open the party menu and use Nall's Formation option before a major dungeon or forced battle. Formation changes the party's starting positions, so place Alex and Kyle toward the front when physical attacks are the main source of damage. Put Jessica, Mia and Nash farther back when the battlefield and enemy arrangement make distance useful.
Formation is not a substitute for defense. Rear positions do not prevent area attacks, spells or enemies that move across the battlefield. If a story scene changes the available roster, inspect the formation again; a layout intended for five characters may be unsuitable when only three or four are present. Also check the arrangement after a character returns, since the game may not preserve the setup you expected.
For normal encounters, use positioning to reduce unnecessary contact while letting Alex and Kyle reach targets efficiently. For bosses, choose positions that allow the healer and spellcasters to act without wasting movement, but prioritize survival over an ideal damage arrangement.
- Inspect Formation before each major dungeon and boss sequence.
- Place Alex and Kyle forward when they are serving as the main physical attackers.
- Keep Jessica, Mia and Nash away from avoidable direct contact.
- Recheck the layout after every forced party change or character return.
- Remember that formation does not block party-wide attacks.
Spend money on weapons and armor before luxury accessories
When funds are limited, replace the active physical attackers' outdated weapons first. Alex should receive priority because he is always present. When Kyle is part of the active roster, bring his weapon up to the current practical town or dungeon standard rather than leaving him with an old weapon from an earlier section.
Upgrade armor next, starting with characters who are taking the most damage and then Jessica. A healer with obsolete armor can be defeated before acting, turning a recoverable mistake into a failed battle. Mia and Nash also need current robes or other compatible armor because enemy area attacks can reach them regardless of their starting position.
Treat accessories as a matchup decision rather than an automatic purchase. Defense is useful for characters receiving frequent physical damage, while accessories with status protection, resistance, agility, attack, wisdom or other special effects may be better for a specific dungeon. Keep rare or unusual equipment in Nall's reserve until you have checked who can use it and what its effect does. Do not sell an accessory merely because its displayed defense is lower than a newer item.
- Buy Alex's best practical weapon before spending heavily on optional upgrades.
- Update Kyle's weapon and armor when he rejoins.
- Keep Jessica's armor current before buying expensive accessories.
- Compare special accessory effects rather than judging only the defense value.
- Retain rare equipment until its user and effect are understood.
Move battle supplies out of Nall's storage
Each character has a personal battle-item inventory, while Nall carries reserve items and equipment outside combat. Items left with Nall cannot be selected during a fight, so open the item screen before entering a dungeon and transfer the supplies that the active party may need.
Give Jessica Healing Nuts, revival items and status cures so she can recover the party without relying entirely on magic. Give Mia or Nash MP-restoring items and at least one emergency recovery option, since either may need to support Jessica during a difficult encounter. Alex and Kyle can carry a small number of healing or revival items so a physical attacker can recover an ally when the healer is incapacitated or must spend the turn restoring HP.
Do not fill every character's inventory with one item type. Distribute supplies according to the dungeon's hazards and leave enough space for items found during the route. After a difficult battle, check whether one character has consumed most of a shared category and redistribute from Nall before continuing. The earlier this routine becomes habitual, the less likely a boss fight is to fail because the needed item was technically owned but inaccessible.
- Transfer required battle items from Nall to the active characters.
- Give Jessica healing, revival and status-recovery supplies.
- Give Mia or Nash MP restoration and emergency recovery options.
- Carry some recovery items on Alex or Kyle for healer emergencies.
- Redistribute supplies after long battles or major dungeon sections.
Apply the routine before every upcoming dungeon
Before entering a major area, restore HP and MP at an inn or another available recovery point. Inspect every active character's weapon, armor, accessory and personal items. Save before the entrance or before a sequence that prevents easy retreat. If a character has just joined, visit the nearest shop and compare that character's equipment with the current equipment tier.
Use the roster the story provides rather than trying to force a permanent lineup. A balanced temporary group normally includes at least one reliable physical attacker, one healer or recovery source, and one magic or support character. When the full late-game roster is available, Alex and Kyle provide physical pressure, Jessica handles healing, and Mia and Nash provide magical damage, support and backup item use. The exact active lineup can still change during scripted sequences.
This general routine is separate from final preparation. The complete endgame party and the last Ramus restock occur after the Grindery-related events and are handled in Chapters 11–12. Do not mark the campaign's final supply visit as completed merely because this chapter's equipment and inventory checks are finished.
- Restore HP and MP before entering.
- Inspect every active character's weapon, armor, accessory and battle items.
- Save before the dungeon or forced sequence.
- Use a balanced roster appropriate to the characters currently available.
- Keep needed supplies with characters rather than Nall.
- Reserve final-party and post-Grindery preparation for Chapters 11–12.
Before you move on
- Alex has the strongest practical weapon currently affordable or available and armor appropriate to the current route.
- Every active character has been checked for outdated weapons, armor and accessories.
- Kyle is re-equipped whenever he returns to the party.
- Jessica has enough healing MP and personally held recovery or revival items for the next section.
- Mia and Nash have current magical equipment and access to MP-restoring or emergency recovery items when they are active.
- Formation has been inspected after the latest party change.
- Necessary battle supplies have been moved from Nall's reserve to individual character inventories.
- A save exists before the next major dungeon or forced sequence.
- The player understands that final-party equipment and the last Ramus restock are deferred to Chapters 11–12, not completed in this chapter.
References for this chapter
Preparing for Major Showdowns: Item Lists and Buffs
Build a practical supply of healing, revival, MP-restoration, and status-removal items before difficult dungeons and bosses. Distribute those supplies to the characters who will actually act in battle, because Nall’s reserve is not a shared battle inventory. Use ordinary purchases and dungeon treasure during the midgame, then complete the separate free Ramus refill after the Grindery events. That later refill provides Healing Nuts, Star Lights, Angel’s Tears, and Holy Water; Silver Lights must be obtained separately.
1. Build a practical recovery kit
Healing Nuts restore 150 HP to one ally and should be your main item-based HP recovery for long dungeon sections. Herbs restore only 50 HP, so they are useful early but should not be your primary late-game supply. Angel’s Tears revive one defeated ally with full HP. Antidotes cure poison, Cleansing Water cures paralysis, and Holy Water removes status conditions.
Before a serious dungeon, a practical target is roughly 10 Healing Nuts and at least 3 Angel’s Tears shared among the active party. These are convenience targets rather than mandatory requirements. Adjust them according to your funds, treasure finds, available healing points, and willingness to retreat.
Carry the condition cures relevant to the next area. Give at least one likely-to-act character the remedy for a status effect that could disable your healer or main attacker. Do not leave every cure with Nall and assume it can be retrieved after combat has already started.
- Use Healing Nuts as the normal item-based HP recovery for extended exploration.
- Carry Angel’s Tears before bosses and forced sequences with several battles.
- Bring Antidotes, Cleansing Water, or Holy Water when the upcoming area uses those conditions.
- Do not enter a difficult late-game dungeon with Herbs as your only HP recovery.
2. Separate routine MP recovery from emergency MP recovery
Star Lights restore 30–40 MP to one ally. Use them for moderate MP shortages when a caster can still contribute but needs additional reserves before the next major encounter. Silver Lights restore all MP to one ally and are much more valuable during a long boss sequence, after a caster is nearly empty, or before the final approach where returning to town is inconvenient.
Do not plan on Ramus replacing Silver Lights later. The post-Grindery free refill does not include them, and the established shop listings do not support treating Silver Lights as a normal purchasable item. Retain Silver Lights found in treasure or received through progression, and use them deliberately.
Put MP restoratives on the characters who can use them during combat. A Star Light or Silver Light left only in Nall’s reserve cannot rescue a caster who reaches zero MP in battle.
- Use Star Lights for moderate MP shortages.
- Reserve Silver Lights for nearly empty casters or decisive battles.
- Distribute MP items among active characters before entering a boss area.
- Do not spend full-MP restoratives on routine fights when ordinary attacks or inexpensive spells are sufficient.
3. Treat the later Ramus refill as a separate preparation step
Do not mark the final supply as complete during this general-preparation chapter. After the Grindery events, the party regroups in Meribia before the final route. During that preparation sequence, visit Ramus and take the free supplies he offers.
Ramus’s post-Grindery free stock consists of Healing Nuts, Star Lights, Angel’s Tears, and Holy Water. Silver Lights are not included. Retain or obtain those separately before committing to Althena’s Fortress and the final battles.
When that late-game window opens, collect the free supplies first, distribute them to the characters who may need them, and make a separate save before leaving town. Until then, continue buying ordinary supplies and collecting dungeon treasure for the midgame shrines, dragon areas, Frontier, and Grindery.
- Treat the post-Grindery Ramus visit as a later final-preparation step.
- Collect his free Healing Nuts, Star Lights, Angel’s Tears, and Holy Water.
- Check Silver Lights separately because they are not part of Ramus’s free stock.
- Complete the actual final refill in Chapters 11–12, not in this general preparation chapter.
- Save after the final refill and before committing to the last route.
4. Move combat items out of Nall’s reserve
Each character has a personal inventory for battle items. Nall carries reserve supplies, but his storage cannot be opened from the battle menu. Before a boss or long no-return sequence, open the party menu and inspect every active character individually.
Give the primary healer several Healing Nuts and at least one Angel’s Tear. Put Star Lights on the casters whose magic is central to the encounter, such as Mia, Nash, Jessica, or Alex according to the current party. Physical attackers should also carry at least one revival item and one or two Healing Nuts so they can help recover the party if the main healer is incapacitated.
Do not fill every slot with one item type. Leave room for an emergency revival, HP recovery, MP restoration, or condition cure. If the party composition changes, repeat the check; a newly joined or returning character will not necessarily have the supplies assigned to someone else.
- Inspect every active character’s personal item slots.
- Keep revival items on more than one character when possible.
- Place Star Lights on the casters who will use them.
- Leave room for emergency healing and status cures.
- Recheck item assignments whenever the party changes.
5. Plan a short opening support rotation
Decide what the first two rounds should accomplish before selecting commands. Alex can use Vigor to raise his attack power. Kyle can use Power Up, with Power Drive available when the encounter and party state justify additional physical damage. Mia’s Ice Shell is useful when incoming damage makes defense more urgent than immediate offense.
Jessica should prioritize Saint Litany, healing, revival, and status recovery rather than attacking merely to fill a turn. Nash can use offensive magic while the party is stable, but preserve enough MP for the later phase. If Jessica is the only reliable healer available, do not spend her early turns on unnecessary damage.
Use only the support effects that matter for the encounter. One preparation round can be worthwhile, but repeatedly applying buffs while HP is falling is dangerous. Once the important attack or defense improvements are active, switch to damage, healing, revival, status removal, or MP recovery.
- Choose the main attack and defensive buffs before the fight begins.
- Use Vigor, Power Up, Power Drive, or Ice Shell only when the encounter justifies them.
- Keep Jessica focused on sustain when she is the party’s main healer.
- Stop buffing when another support turn would leave the party vulnerable.
- Preserve enough MP for healing and recovery later in the battle.
6. Preserve supplies for the dangerous phase
Heal before a character reaches a point where the boss can defeat them with one more action. If an ally falls, revive that character promptly with an Angel’s Tear and restore HP before leaving them exposed. Cure paralysis, poison, or another disabling condition as soon as it removes an important turn; waiting for the healer can create a second emergency.
Restore MP before the healer or support caster loses the ability to act reliably. Use a Star Light for a moderate shortage and a Silver Light when a key caster is nearly empty or the battle has entered its decisive phase. Do not spend every recovery item during the opening rounds simply because the party is taking damage. Difficult battles often become more dangerous later, when revival and MP supplies matter most.
Use items proactively rather than hoarding them until defeat is nearly certain. At the same time, reserve at least one Angel’s Tear and one substantial MP restoration for the dangerous late phase whenever your inventory permits. The exact amount depends on the dungeon, party level, and boss, so treat this as risk management rather than a fixed requirement.
- Heal before the next boss action can become lethal.
- Revive essential allies immediately and heal them afterward.
- Cure disabling status effects before they remove another crucial turn.
- Use Star Lights for moderate MP shortages and Silver Lights for decisive shortages.
- Keep at least one revival item and one major MP restoration for the late phase when possible.
Before you move on
- Every active character has been checked for battle items.
- The party has a practical stock of Healing Nuts, several Star Lights, and Angel’s Tears distributed across multiple characters.
- Status cures have been assigned according to the next dungeon’s hazards.
- Silver Lights have been retained or obtained separately because they are not part of Ramus’s free post-Grindery supply.
- The opening two rounds of the next major boss have a defined plan for attack buffs, defensive support, healing, and damage.
- The party knows which character will provide sustained healing and revival, which characters will deal reliable damage, and which members will provide support or magic.
- The final Ramus refill is not marked complete until the post-Grindery preparation window covered in Chapters 11–12.
- Before the final dungeon, Ramus’s free Healing Nuts, Star Lights, Angel’s Tears, and Holy Water have been collected, Silver Lights have been checked separately, and a new save has been made.
Key Mid-to-Late Dungeons: Route, Events and Puzzles
This chapter begins immediately after the Nanza Barrier hostage event has been completed and Kyle has joined the party. If that event has not occurred, return to Vane after Jessica’s permanent recruitment, defeat the Vile Crustacean, speak with Mia and Nash, then speak with Lemia and travel to the eastern side of Nanza Barrier. After Kyle joins, follow the southern route through Althena’s Spring and Meryod Woods. Complete Damon’s Spire and the Thieves’ Guild sequence, recover the Dragon Wings, build the balloon, and clear the Red, Blue, and Black Dragon routes. Then repair Myght’s airship, cross to the Frontier, complete Talon Mine, Cadin, and Ruid, return to Vane, activate the Silver Spire, and create a separate save before entering the Grindery.
Confirm the opening state and reach Meryod
The required starting state is that Jessica has permanently joined, the Vile Crustacean has been defeated in Vane, Mia and Nash have rejoined, Lemia has given the next dragon objective, and Kyle has been rescued at Nanza Barrier. Do not repeat the hostage battle if Kyle is already in the party. If Kyle is missing, return to the eastern side of Nanza Barrier and complete the Xenobia hostage scene before continuing.
After Kyle joins, leave through the southern Nanza route and travel toward Reza. Continue south toward Althena’s Spring and the Meryod Woods. Althena’s Spring is optional, but it is a useful landmark and a place to use soap if you want the bathing scenes. In Meryod Woods, head north to the exit. Take the side paths for the two treasure chests if you want the money, then enter Meryod, heal at the Althena statue, equip the current party, and save.
In Meryod, speak with the local test-giver and cross the damaged bridge to trigger the town event. After the party is separated, find the other members and speak with Kyle in the pub. This gives the party the objective of reaching Damon’s Spire. Buy current armor and useful rings before leaving. The return route through Meryod Woods triggers the Plaster Mel encounter; defeat it before entering Damon’s Spire.
- Kyle is already recruited, or the eastern Nanza hostage event has been completed.
- The party has crossed the southern Nanza route, Althena’s Spring area, and Meryod Woods.
- Meryod’s bridge event is complete and the party has regrouped.
- Plaster Mel has been defeated before entering Damon’s Spire.
Clear Damon’s Spire and obtain the Thieves’ Guide
Enter Damon’s Spire south of Meryod Woods. Mia must read the Old Notebook so Damon permits entry. The tower uses floor switches and room connections rather than a simple straight path. Activate the required red tiles on each floor, save whenever the game allows it, and use special attacks against Rufus enemies because ordinary attacks are ineffective against them in this PlayStation route.
Damon’s tests have fixed story answers. On the first question about the origin of the world, choose Mia; the answer is magic. On the second question about what controls force, choose Nash; the answer is skill. When you encounter the injured man, choose to help him so Jessica can heal him. When Damon asks which party member is least helpful, refuse to surrender anyone and select the response equivalent to keeping the whole party.
At the sculpture test, the party must create the priceless treasure represented by Luna. Complete the clay scene with Luna as the chosen subject. Damon then grants access to his chamber and gives the party the Thieves’ Guide. Reading the tower’s books is optional for campaign progress, but the guide itself is required. Return to Reza and give the guide to the bartender in the Thieves’ Guild. Receive the Thieves’ Crest and enter the Bazaar. Speak with the thief who has the Dragon Wings to recover them; he also provides soap and later offers equipment.
- Mia has read the Old Notebook at Damon’s Spire.
- The first answer is Mia and magic.
- The second answer is Nash and skill.
- The injured man is helped.
- No party member is surrendered.
- The sculpture test uses Luna.
- The Thieves’ Guide, Thieves’ Crest, and Dragon Wings have been obtained.
Build the balloon and complete Red Dragon Cave
After the Reza guild sequence, the party receives the balloon blueprint through the events involving Royce and Lily’s grandfather. Take the blueprint to the inventor in Iluk. Follow the directions into Iluk Field and capture the required Fluffy Bug. Return to the inventor and allow the overnight construction scene to finish. Heal, restock, and save before boarding the balloon.
Enter Red Dragon Cave by balloon. The dungeon’s fire-based enemies are best handled with water- or ice-based attacks and equipment. Use the available save opportunities and restore before crossing the most dangerous flame sections. Collect useful treasure only when it does not risk exhausting the party’s MP and healing items.
Continue through the cave until the scripted Royce sequence and the required battle occur. Use defensive or offensive buffs early, have Alex and Kyle use reliable special attacks, let Mia exploit ice or water magic, and keep Jessica available for healing. Restore MP before the final approach. After the event, receive the Red Dragon Shield, leave the cave, and complete the balloon crash sequence. The party returns through Reza and Meryod before continuing north toward Lyton.
- The Fluffy Bug has been captured and delivered to the Iluk inventor.
- The balloon has been completed.
- Red Dragon Cave is cleared and the Red Dragon Shield has been received.
- The party has returned through Reza and Meryod toward Lyton.
Repair Lyton Shrine and clear Blue Dragon Shrine
Enter Lyton and speak with the villagers and the resident who explains the shrine problem. Enter the northeastern shrine, avoid the cracked floor sections, and follow the passages to the room with movable stones. Place the stones over the far-left and far-right holes. Return to Lyton, speak with the northern resident, and go to the lake.
Allow the other characters’ singing attempts to occur, then have Alex play the Ocarina when the scene directs you to do so. The Blue Dragon Shrine appears. Save before entering. Inside, use the correct water staircases rather than assuming every pool is safe; false routes trigger battles and disappear. Follow the active route through the shrine, collect the useful chests when the path is safe, and reach the Blue Dragon’s chamber.
Complete the Blue Dragon event and obtain the Blue Dragon Helmet. Exit the shrine, return through Lyton, and continue east toward Tamur Pass.
- The Lyton Shrine stones cover the far-left and far-right holes.
- Alex has played the Ocarina at the lake.
- The Blue Dragon Shrine has been traversed.
- The Blue Dragon Helmet has been obtained.
Cross Tamur Pass, visit Myght’s Tower, and reach Pao
Cross Tamur Pass and complete the scripted enemy encounters. Continue to Tamur, buy current equipment, heal, and save. Leave through the northern exit and follow Laike to Myght’s Tower.
At the tower entrance, use the four doors in this order: Planet, Star, Sun, Moon. Take the left elevator upward, follow the connected doors through the maze, and reach Myght’s laboratory. Speak with Myght to begin the airship project, then return to Tamur.
After the Tamur scenes, go to the northern exit and resolve the Tempest and Fresca event. Continue through the forest route with the Dragon Pendant. In the Lost Woods, follow the scene’s directions to the clearing, return when Kyle identifies the route, and choose to rest when the party reaches the campsite. The forest group then opens the way to Pao.
In Pao, speak with the villagers and enter Tempest’s tent. After the Dark Songstress event, speak with the village elder and receive permission to enter Black Dragon Fortress.
- Tamur Pass is complete.
- Myght’s Tower has been cleared with the Planet, Star, Sun, Moon order.
- Myght has agreed to build the airship.
- The Dragon Pendant has been obtained.
- The Lost Woods route has opened.
- Pao has granted permission to enter Black Dragon Fortress.
Clear Black Dragon Fortress and obtain the Master Sword
Enter Black Dragon Fortress and follow the upper route. Several chests are traps or are not worth the MP loss, so open only the useful chests unless you have a specific collection goal. Collect the Black Dragon Armor and other major equipment, restore HP and MP, and save before the final ascent.
The scripted transformation turns Alex into Dragonmaster Alex and restores the party. Use Alex’s strongest Dragonmaster sword technique, Kyle’s reliable special attack, Nash’s strongest available magic, and Tempest’s Flash Arrow. Jessica is not present for the main battle, so distribute healing items and use recovery magic or items before multiple characters become critical. Defeat the Black Dragon and watch the Magic Emperor’s escape sequence.
Leave the fortress, return to Pao, and speak with the party members in Tempest’s tent. After the reunion, speak with Tempest again to receive the Master Sword. This is a required progression reward. Before accepting the final airship departure, create a separate save if you want a safe point for optional town visits, red chests, Bromides, shops, and other side content.
- The Black Dragon Armor has been obtained.
- Alex has become Dragonmaster Alex.
- The Black Dragon has been defeated.
- The Master Sword has been received from Tempest.
- A separate pre-Frontier save exists.
Repair the airship and clear Talon Mine
Return to Myght’s Tower and complete the airship scenes. When the first engine is destroyed, return to Reza. Speak with the Thieves’ Guild bartender or guildmaster before dealing with the person beside the balloon; this is the route that avoids the large replacement-engine charge. Take the engine back to Myght and finish the airship repairs. Insert Disc 2 when prompted.
After landing in the Frontier, travel east to Talon and speak with the residents before entering the mine. In Talon Mine, talk to the workers and continue until the cave-in event occurs. Choose to return and help. This is required for the rescue sequence and gives the party a valuable recovery point. Continue through the mine, using the Althena statue and save opportunities before the later scripted confrontation.
When Xenobia captures Mia and Jessica, follow the staged duel sequence. Do not treat the first exchange as a normal boss battle. When the scene gives Alex a choice about Kyle, refuse to fight him. Kyle then frees the prisoners and the Shadow Spectre battle begins. Use Alex’s buffs and sword skills, Kyle’s strongest special attacks, Mia’s offensive magic, and Jessica’s healing. Cure disabling status effects promptly.
- The replacement engine was obtained through the guild route.
- The airship has been repaired and Disc 2 has been inserted.
- The trapped miner was rescued in Talon Mine.
- The staged duel was resolved by refusing to fight Kyle.
- The Shadow Spectre has been defeated.
Obtain Green Earth, clear Ruid, and unlock the Grindery route
After Talon Mine, approach Ruid and confirm that its entrance is sealed. Leave the crater and enter Cadin to the south. Speak with Phacia and choose to believe her. Receive the password Green Earth; do not attempt to force the Ruid entrance before obtaining it.
Enter Ruid with the password and follow the fortress route. Collect the Fire Armlet, Tri-Ring, and other useful treasure when the path is safe. Save and restore before the upper battle. The Magic Masher is best handled with buffs, reliable sword techniques, and Mia’s effective elemental magic. Keep Jessica healing and use MP-restoring items before the party reaches empty reserves.
After the Magic Masher is defeated, follow Taben to the platform and watch the Grindery launch. Walk back through Ruid and cross the tracks to the airship. Return to Vane and complete the evacuation and Silver Spire scenes. Nash must be recovered at the Transmission Spring before the party can proceed through the Silver Spire. When Vane’s magic has disrupted the Grindery’s protection, stop and create a separate save before entering the Grindery. The next chapter begins with final-dungeon preparation.
- Cadin has provided the password Green Earth.
- Ruid was entered only after receiving the password.
- The Magic Masher has been defeated.
- The Grindery has launched.
- The party has returned to Vane.
- The Silver Spire event has been completed.
- A separate pre-Grindery save has been created.
Before you move on
- Kyle is in the party and the southern Nanza route, Althena’s Spring area, and Meryod Woods have been crossed.
- Meryod’s bridge event and Plaster Mel encounter are complete.
- Damon’s Spire is complete, Luna was used for the successful sculpture test, and Damon granted the Thieves’ Guide.
- The Thieves’ Crest and Dragon Wings have been obtained in Reza.
- The Iluk balloon sequence is complete and the Red Dragon Shield has been received.
- Lyton Shrine and Blue Dragon Shrine are complete, with the Blue Dragon Helmet obtained.
- Myght’s Tower and the Lost Woods route are complete.
- Black Dragon Fortress is complete, Alex is Dragonmaster, and the Master Sword has been received.
- The airship has been repaired and the party has reached the Frontier.
- Talon Mine, the trapped-miner rescue, and the Shadow Spectre battle are complete.
- Cadin has provided Green Earth, Ruid is complete, and the Magic Masher has been defeated.
- The Grindery has launched, Vane’s Silver Spire event is complete, and a separate pre-Grindery save exists.
Optional Content: Bromides, Collector Extras, and One-Shot Treasures
The North American Working Designs PlayStation release contains thirteen optional Bromides. They can be viewed as inventory items and provide only a small Wisdom bonus when equipped, so none is required for the main campaign, final dungeon, Ghaleon, or the ending. Several are tied to narrow story windows. Keep a normal campaign save, a separate optional-content save, and a pre-final-dungeon save if you want room to recover from a missed collectible.
1. Set up a safe collection routine
Use two memory-card slots for this content. Keep one file for ordinary campaign progress and another for optional collection before entering a city, dungeon, or story sequence with a known Bromide window. Save again immediately after receiving each Bromide. This prevents a missed conversation from forcing a long replay.
The Bromides are inventory items rather than required key items. You may use them to view their artwork, equip them for their minor Wisdom bonus, or leave them stored. Do not sell or discard them while sorting equipment. If your only goal is the canonical ending, skip them and spend your Silver on weapons, armor, revives, and MP recovery instead.
- Maintain a normal campaign save and an optional-content save.
- Save after every missable Bromide.
- Do not sacrifice final equipment or restorative supplies for cosmetic collectibles.
2. Collect the early and midgame Bromides
Mia’s Bromide 1 is equipped on Nash when he first joins. Remove it from his accessory slot if you want to inspect it, but do not confuse it with a later pickup.
After Kyle defeats Xenobia’s minions in Nanza, do not speak to Kyle to recruit him yet. Go downstairs to the sleeping area and examine Kyle’s bed. This is Jessica’s Bromide 4. Speaking to Kyle first closes this opportunity.
Once Kyle has joined, travel to Althena’s Shrine and speak with the blue-haired Jessica admirer in the northern section. Talk to him as required to receive Jessica’s Bromide 1. This is optional and does not alter Kyle’s recruitment.
After the White Dragon Wings have been obtained, return to Burg and examine the shelves in the basement of Alex’s house before taking the Wings to Meribia. This gives Luna’s Bromide 2. The timing matters: do not postpone the search until after the next major route has advanced.
- Mia’s Bromide 1: Nash’s inventory when he joins.
- Jessica’s Bromide 4: Kyle’s bed in Nanza before recruiting Kyle.
- Jessica’s Bromide 1: northern Althena’s Shrine after Kyle joins.
- Luna’s Bromide 2: Alex’s basement after receiving the White Dragon Wings and before taking them to Meribia.
3. Handle the later story windows in the correct order
After Master Mel is turned to stone, go directly to Black Rose Street in Meribia and speak with the appropriate magician or Royce admirer to receive Royce’s Bromide. Collect it before traveling to Vane.
After the Vile Tribe members reveal their identities and the Crystal Tower sequence is complete, return to the northern part of Althena’s Shrine before returning to Meribia. Speak with the priest or shrine attendant there to receive Phacia’s Bromide.
Jessica’s Bromide 2 has a two-stage condition. During the Lann and Dragonmaster Zoc portion of the story, return to Lann and speak with the boatman before defeating Zoc so the later flag is set. After Nash damages the airship, but before heading to the Frontier, return to Lann and speak with the boatman again to receive the Bromide.
After the Grindery leaves Talon Mine, return to the mine before leaving the area. Speak with the miner connected to the earlier rescue to receive Xenobia’s Bromide. This is a direct story-window reward in the PlayStation release.
- Royce’s Bromide: Black Rose Street after Mel becomes stone and before traveling to Vane.
- Phacia’s Bromide: northern Althena’s Shrine after the Vile Tribe revelation and before returning to Meribia.
- Jessica’s Bromide 2: trigger the Lann boatman condition before Zoc, then collect it at Lann after the airship damage and before the Frontier.
- Xenobia’s Bromide: the saved miner in Talon Mine after the Grindery departs and before leaving.
4. Collect Mia’s later Bromides and the epilogue rewards
Mia’s Bromide 4 is available after Nash damages the airship. Before agreeing to leave for the Frontier, go to Iluk and examine the easel or speak with the man in the northeastern house. The event gives you the Bromide.
Mia’s Bromide 2 is not an initial peaceful-Vane reward. After the later Grindery and Frontier sequence brings the party back to Vane for the evacuation, enter the eastern classroom before retrieving Nash. Speak with the boy gathering supplies. He gives Mia’s Bromide 2. Do not retrieve Nash first, and do not enter the Silver Spire before taking the item.
When Ramus first joins the party, pay the 30-Silver debt requested by the man outside Burg’s item shop. This flag enables the two Bromides sold by Ramus during the playable epilogue. At the end of the game, after the party returns to Meribia, speak with Ramus to receive Luna’s Bromide 1 and check his shop for Mia’s Bromide 3 and Jessica’s Bromide 3. Each costs 5,000 Silver.
Collect the epilogue Bromides before speaking with Laike at the harbor to end the playable epilogue. If Ramus does not offer the expected stock, reload the pre-epilogue save and confirm that the 30-Silver payment was made earlier.
- Mia’s Bromide 4: Iluk after the airship damage and before leaving for the Frontier.
- Mia’s Bromide 2: eastern classroom during the later Vane evacuation, before retrieving Nash or entering the Silver Spire.
- Pay Ramus’s 30-Silver debt early in the game.
- Receive Luna’s Bromide 1 and purchase Mia’s Bromide 3 and Jessica’s Bromide 3 from Ramus during the epilogue.
5. Treat other extras as optional collection goals
Locked red chests can be opened after obtaining the Thieves Crest during the mandatory story route. Their contents include equipment, Silver, consumables, and other useful items, but none is required for the ending. Mark earlier red chests and revisit them after obtaining the Crest rather than wasting time trying to open them early.
The bathing scenes require soap and are presentation extras. Soap can be bought aboard the Hispaniola early, with additional bars obtained later. Saving soap for both bathing locations is a collector goal, not a campaign requirement.
The Rememberizer, when obtained or purchased through the appropriate late-game event, lets you replay viewed anime sequences. The Making Of Lunar disc and its Lords of Lunar bonus game are package extras outside the campaign. Neither affects story completion.
For an ending-only run, stop optional collecting at the final pre-dungeon save. For a full collectible attempt, retain that save so you can return for red chests, missed scenes, or money-dependent purchases without replaying the final act.
- Return to red chests after obtaining the Thieves Crest.
- Treat bathing scenes and the Rememberizer as optional presentation content.
- Keep a pre-final-dungeon save for missed one-time rewards.
- Do not confuse package-disc extras with PlayStation campaign objectives.
Before you move on
- The inventory contains thirteen Bromides: Mia 1 through 4, Luna 1 and 2, Jessica 1 through 4, plus Phacia, Royce, and Xenobia.
- Mia’s Bromide 2 was collected from the eastern classroom during the later Vane evacuation before Nash was retrieved.
- Jessica’s Bromide 2 was triggered through the earlier Lann boatman conversation and collected from the boatman after the airship damage and before the Frontier.
- Luna’s Bromide 2 was collected from Alex’s basement after receiving the White Dragon Wings and before taking them to Meribia.
- The 30-Silver Ramus payment was made, Luna’s Bromide 1 was received during the epilogue, and Mia’s Bromide 3 and Jessica’s Bromide 3 were checked in Ramus’s shop.
- A separate pre-final-dungeon save remains available.
- For an ending-only run, the campaign can proceed without any Bromide or collector extra once final equipment and restorative items are ready.
References for this chapter
- Lunar: Silver Star Story Complete — Guide and Walkthrough by Erdrick77, PlayStation version
- Lunar: Silver Star Story Complete - Guide and Walkthrough - PlayStation - By AndrewC
- Lunar: Silver Star Story Complete — Secret Items FAQ by AAllard, PlayStation version
- Lunar: Silver Star Story Complete - Bromides Q&A, PlayStation
Late-Game Shops, Final Upgrades and Money Management
After completing the Grindery, the game gives you a short preparation window in Meribia before the final route begins. Use it to collect any conditional accessories, take Ramus’s free recovery supplies, inspect the last shops, equip the best story rewards, distribute items to the characters who will actually use them, and create a separate save before returning to Laike. The strongest late-game equipment is split between shops, Black Dragon Fortress, the Grindery, Althena’s Fortress, and Goddess Tower, so do not assume that spending all of your Silver in Tamur produces a complete final loadout.
1. Collect the three conditional accessories before the Grindery
These three rewards must be prepared before entering the Grindery for the first time. If you accepted the Lann elder’s earlier honorary-citizen offer, return to Lann and speak to him again for Ghaleon’s Tear. If you spoke with Lily enough times during the first Reza and Thieves’ Guild sequence, return to Reza and speak with Lily for the Gale Ring. Then return to Damon’s Spire, reached most conveniently from Iluk, and speak with Damon several times to receive the Hell Ring.
Ghaleon’s Tear lets normal attacks strike every enemy, while the Gale Ring adds one normal attack. The Hell Ring halves MP costs. These are optional rewards, not main-story requirements, but they are among the best preparation items available before the final sequence. Give the Hell Ring to a character who repeatedly spends MP, such as Alex, Mia, or Jessica. Use the Gale Ring on a physical attacker and Ghaleon’s Tear on a character who benefits from attacking groups without repositioning.
- Return to Lann for Ghaleon’s Tear if the honorary-citizen condition was completed.
- Return to Reza and speak with Lily for the Gale Ring if her earlier dialogue condition was completed.
- Visit Damon’s Spire for the Hell Ring.
- Complete these visits before the first Grindery entry.
2. Spend Silver in Tamur only on meaningful upgrades
Tamur is the major late-game shopping stop before the final sequence. Its useful equipment includes Great Sword, Wind Sword, Judgment Mace, Holy Bow, Silver Armor, Radiance Clothes, Saint’s Robe, Spirit Robe, Dragon Armlet, Lucky Bandanna, and Protection Ring. The shop’s listed prices are high, so compare each item with the equipment already in your inventory instead of replacing every slot automatically. Tamur’s equipment is valuable as an interim upgrade, but several stronger pieces are obtained as dungeon treasures.
Prioritize weapons for characters who are active in your normal party, then replace armor where the defensive increase is substantial. Do not spend your entire reserve on accessories if that leaves you without Healing Nuts or Angel’s Tears. Protection Ring is a reliable defensive purchase, but Barrier Ring, Spirit Talisman, and other stronger defensive accessories are obtained elsewhere. Pao is the final supply stop rather than a full equipment shop; it sells Healing Nuts, Star Lights, Angel’s Tears, and Holy Water.
- Check Tamur’s stock before beginning the final route.
- Buy only upgrades that improve the characters you will actually use.
- Keep a Silver reserve for recovery items and unexpected equipment gaps.
- Use Pao for recovery supplies, not as a replacement for the final dungeon treasure route.
3. Track Alex’s story equipment accurately
Alex’s late weapons are acquired through story progression and treasure rather than one final shop purchase. The Crystal Sword is found in Goddess Tower. After Black Dragon Fortress, Tempest gives Alex the Master Sword in Pao. Later, during the events after the Grindery, Alex receives Althena’s Sword at Dyne’s Memorial. Equip each replacement as soon as it is available, with Althena’s Sword taking priority once received because it provides strong attack power, an additional attack, and HP regeneration while equipped.
Alex’s Dragon Armor is obtained in Black Dragon Fortress. His Dragon Shield is tied to the Red Dragon Cave sequence, not Black Dragon Fortress. Keep both equipped when available unless a later item has a clearly superior verified effect. Before the final dungeon, inspect Alex’s weapon, armor, shield, headgear, and accessory separately; the game’s equipment categories make it easy to upgrade one slot while overlooking another.
- Equip Crystal Sword when found in Goddess Tower.
- Equip Master Sword after Tempest gives it to Alex in Pao.
- Equip Althena’s Sword after the post-Grindery Dyne Memorial events.
- Equip Dragon Armor from Black Dragon Fortress.
- Equip Dragon Shield from the Red Dragon Cave sequence.
4. Prepare Kyle, Nash, Mia, and Jessica for the final route
Kyle’s late equipment is obtained mainly from the final story areas. Keep his best currently owned sword and armor equipped until the next verified treasure is found. The final equipment references list Insane Sword, Insane Armor, and Insane Shield as late upgrades; do not search for an Insane Sword in a shop or spend 25,000 Silver expecting to purchase it. Replace Kyle’s equipment when the relevant treasure appears, and remember that some late items have different names from equipment in other Lunar versions.
Nash’s final bow progression ends with Starlight Bow, and his strongest robe is Sage’s Robe. Mia’s late weapon progression ends with Dragon Cane, followed by Aegis Robe for armor. Jessica’s late equipment includes Holy Mace and Holy Clothes. Holy Mace is especially useful because it regenerates HP while equipped. The final areas also contain important armlets, wristbands, headgear, and accessories, so leave room in the inventory and check every chest rather than rushing directly through the story rooms.
- Give Nash his best available bow and Sage’s Robe when obtained.
- Replace Mia’s Wind Cane with Dragon Cane when the latter is found.
- Equip Mia’s Aegis Robe when obtained.
- Equip Jessica’s Holy Mace and Holy Clothes when found.
- Recheck shields, armlets, headgear, and accessories after every late-dungeon treasure.
5. Use defensive accessories deliberately
Barrier Ring is a strong general-purpose defensive accessory because it raises both defense and magical endurance. Spirit Talisman halves damage from enemy attacks and is valuable on the character most exposed to direct hits. Protection Ring raises defense and is a reasonable Tamur purchase if no better option is available. Devil Pendant improves magical resistance. Hell Ring is usually more valuable on a high-cost caster than on a character who rarely uses MP.
Gale Ring and Ghaleon’s Tear are offensive choices rather than universal defensive choices. Do not equip both automatically; choose according to the character’s role and whether you need extra single-target attacks or attack-all normal strikes. Keep at least one status-protection option available if your inventory contains one, and reserve Angel Ring or Tri-Ring for a character vulnerable to revival or status problems.
- Use Barrier Ring on a character who needs both physical and magical defense.
- Use Spirit Talisman on the character taking the most direct damage.
- Assign Hell Ring to a frequent caster.
- Choose Gale Ring or Ghaleon’s Tear according to the character’s attack role.
6. Restock at Ramus and create the final preparation save
After the Grindery events, you wake in Meribia. Follow the story conversations between the pub and the palace until Laike’s preparation scene is ready, but complete your optional returns before agreeing to proceed with him. Visit Ramus’s Shop during this window. Ramus provides unlimited free Healing Nuts, Star Lights, Angel’s Tears, and Holy Water. He does not provide free Silver Lights, so preserve any Silver Lights already collected and do not count on Ramus to replace them.
Items used in battle belong to individual characters rather than a shared automatic pool. Distribute Healing Nuts, Star Lights, Angel’s Tears, Holy Water, and your existing Silver Lights among the active party. Give more MP recovery to the characters responsible for repeated spellcasting, and give revives to characters who can survive long enough to use them. Heal fully, inspect every active character, and save in a separate slot before returning to Laike. After the final conversations, Alex receives Althena’s Sword; equip it immediately, then enter Althena’s Fortress only when the party and inventory are ready.
- Finish Lann, Reza, and Damon accessory returns before the Grindery if possible.
- Visit Ramus after the post-Grindery regrouping.
- Collect free Healing Nuts, Star Lights, Angel’s Tears, and Holy Water.
- Do not list Silver Lights as part of Ramus’s free stock.
- Distribute items to the characters who will use them.
- Create a separate save before returning to Laike and entering the final route.
Before you move on
- The three conditional accessory visits have been completed, or their earlier prerequisites are known to have been missed.
- Alex has Althena’s Sword, Dragon Armor, Dragon Shield, and the best currently obtained defensive equipment.
- Kyle, Nash, Mia, and Jessica have their best currently obtained weapons and armor, with late treasure upgrades equipped as they are found.
- Tamur and Pao have been checked before the final route.
- Ramus’s free Healing Nuts, Star Lights, Angel’s Tears, and Holy Water have been collected.
- Existing Silver Lights have been preserved and distributed manually rather than attributed to Ramus.
- The party is fully healed, recovery items are distributed to active characters, and a separate save exists before returning to Laike and entering Althena’s Fortress.
Final Dungeon: Route, Save Points and Encounter Flow
The PlayStation Working Designs release has two connected endgame sequences. First, enter the Grindery through Althena’s Shrine, clear its pipe-and-chute maze, defeat the Magic Emperor, and complete the forced scripted Ghaleon encounter. The party then returns to Meribia for its final broad preparation window. Speaking with Laike starts the automatic Burg and Althena’s Fortress route. Within the fortress, defeat Royce, solve four fixed Goddess Tower sequences, defeat Xenobia, and save with the final party fully equipped before the winnable Ghaleon battle in the next chapter. Star Lights restore MP only. Healing Nuts restore HP, while Silver Lights restore all MP.
Restock in Meribia before entering the Grindery
After the Frontier events and the return to Vane, use the Dragon Wings to reach Meribia. Visit Ramus and completely restore the active party before continuing. Once the Grindery sequence begins, you cannot return to the world map until its story events and battles are complete.
Equip current weapons, armor, and useful accessories. Move Healing Nuts, Star Lights, Silver Lights, Angel’s Tears, and status-recovery items onto characters who can act in battle. Nall’s stored inventory is not a substitute for personal combat inventory when a character is incapacitated.
This is the last convenient pre-Grindery window for optional return rewards that require earlier conditions. If you earned honorary citizenship in Lann, collect Ghaleon’s Tear from the mayor. Visit Lily in Reza for the Gale Ring, and return to Damon’s Spire for the Hell Ring. These rewards are optional, but the relevant visits must be completed before entering the Grindery for the first time. Save in Meribia, then travel to Althena’s Shrine and continue toward the Grindery.
- Restore HP and MP for the active party.
- Equip current weapons, armor, and accessories.
- Distribute healing, revival, status, and MP-restoration items among active characters.
- Collect any optional Lann, Reza, or Damon’s Spire rewards you still want.
- Save before entering the Althena’s Shrine and Grindery route.
Enter the Grindery and clear the lower floors
Approach the Grindery south of Althena’s Shrine. After the surrounding battles and story scenes, enter the fortress. The lower Grindery is a maze of tubes, pipes, bridges, and chutes. Transfers are often one-way, so inspect nearby branches for treasure before using the next tube.
The dungeon contains Healing Nuts, Silver Lights, an Angel Ring, Saint Clothes, an Insane Shield, a Stone Bracelet, a Healing Ring, a Holy Bandanna, an Insane Helmet, a Phantom Ribbon, and a Star Light. Equip useful upgrades as soon as the intended character can use them. Star Lights are MP restoratives, not HP restoratives; reserve them for a character whose magic supply is running low.
Follow the tube route through the first floors, then continue toward the section containing Quark and the Garden. The Garden contains an Althena statue that restores the party. Use it before entering the upper Grindery Quarters. Do not spend rare MP items when the statue can restore the party for free.
- Search side branches before taking a pipe or chute.
- Collect and equip useful Grindery equipment.
- Use the Althena statue in the Garden.
- Keep at least one revival item and one MP-restoration item for the upper section.
- Save at the available opportunity before the Magic Emperor sequence.
Finish the Grindery and defeat the scripted Magic Emperor
From the Garden, enter the Grindery Quarters. Follow the stairs through the successive floors: the first stair route is to the south, the next is to the north, and the following route continues south. When you reach the sealed door, Phacia opens it and remains behind while Royce and Xenobia confront her. Continue through the doorway to the Magic Emperor’s chamber.
Restore HP and MP and save before entering the chamber. The Magic Emperor is a genuine battle, but this is not the final Ghaleon fight. Begin with Alex’s Vigor, Kyle’s Power Up, Mia’s support or Power Drive, Nash’s Thunderbolt, and Jessica’s Saint Litany or healing. Once the party is strengthened, use Alex’s Sword Dance, Kyle’s Power Slash, Nash’s Thunderbolt, Mia’s Flame Bomb or another effective attack, and Jessica’s healing. Preserve enough MP to recover from a bad round.
After the Magic Emperor is defeated, proceed north to Luna. The following Ghaleon encounter is scripted to end in defeat. Do not waste the full stock of Angel’s Tears or Silver Lights attempting to win it. Follow the scenes until Nall uses the White Dragon Wings and the party returns to Meribia.
- Heal and save before the Magic Emperor.
- Use buffs before committing to repeated physical skills.
- Treat the post-Magic Emperor Ghaleon battle as scripted.
- Do not spend the entire supply of revives or MP restoratives in the forced defeat sequence.
- Confirm that the party has returned to Meribia before beginning the next preparation step.
Regroup in Meribia and begin the automatic fortress route
After Alex wakes in Meribia, go downstairs and speak with Mia and Jessica in Mel’s chamber. Then visit the pub and speak with Nash and Kyle. Return with Mia and Jessica so the reunion conversation can finish. Laike then tells Alex to prepare.
Visit Ramus before leaving. He provides unlimited free Healing Nuts, Star Lights, Angel’s Tears, and Holy Water at this point. Healing Nuts restore HP, Star Lights restore MP only, Angel’s Tears revive fallen allies, and Holy Water handles applicable status problems. Silver Lights are not part of this free supply, so preserve and distribute the Silver Lights obtained elsewhere.
Save in Meribia before speaking with Laike to depart. When ready, speak with him and follow the automatic scenes in Burg. Remove Althena’s Sword from the monument when prompted. Nall then transforms, and the party flies automatically to Althena’s Fortress.
- Complete the Meribia reunion conversations.
- Take the free Ramus supply.
- Keep Silver Lights available for large MP refills.
- Save before speaking with Laike to depart.
- Equip Althena’s Sword on Alex when it becomes available.
Clear Althena’s Fortress and defeat Royce
Enter Althena’s Fortress and advance through the lower floors. Rooms with red doors are opened by defeating the distinctive enemy controlling the barrier; ordinary enemies in those rooms are not always required. Search the fortress for Silver Lights, the Holy Mace, Insane Armor, an Angel’s Tear, Holy Clothes, the Aegis Robe, Dragon Cane, and Starlight Bow. Equip each useful upgrade on the appropriate character.
After the false Luna scene, Royce casts a spell that causes two party members to begin subsequent battles asleep. Reach the recovery point before Royce, restore HP and MP, and save. If the party loses, reload this save; the sleeping pair can differ, so the opening condition may be more favorable on another attempt.
Royce is weak to Ice. Use Alex’s Vigor and Sword Dance, Kyle’s Power Up and Power Slash, Mia’s Ice attack or support, Nash’s Thunderbolt or items, and Jessica’s healing. If Jessica is awake, Saint Litany is useful; if she is asleep, prioritize immediate damage and recovery instead. When Royce is defeated, save and continue upward. A Goddess statue is nearby, so do not consume valuable MP restoratives merely to recover after the battle.
- Defeat the barrier-controlling enemies when red doors seal the route.
- Collect and equip the fortress upgrades.
- Save before Royce.
- Expect two characters to begin early post-spell battles asleep.
- Use Ice against Royce and reload if the opening party condition is unfavorable.
- Save after Royce.
Complete Goddess Tower sequences one and two
After Royce, heal at the nearby statue and enter the Goddess Tower section. The first puzzle is fixed. Activate the four floor buttons in this exact order: White, Red, Blue, Black. Their positions are White at the lower right, Red at the lower left, Blue at the upper left, and Black at the upper right. After all four are activated, use the central portal.
The second puzzle is also fixed. Step onto the portals in this exact order: White, Red, Blue, Black. Climb the stairs after the sequence opens the route. Do not assume that the first two sequences are the only color instructions in the tower; the third and fourth sequences use different fixed orders.
- Heal before entering the Goddess Tower puzzles.
- First sequence: White, Red, Blue, Black.
- Second sequence: White, Red, Blue, Black.
- Use the central portal or opened route after each completed sequence.
Complete Goddess Tower sequences three and four
The third sequence is the armament-and-treasure section. Use the fixed order Blue, Black, Red, White. Take the Blue portal first, activate the switch in its room, and collect the chest if desired. Return and repeat with Black, then Red, then White. The associated optional equipment includes Sage’s Robe, Detonator Armlet, Spook Armlet, and Insane Sword. The switch in each side room must be activated before returning through its portal.
The fourth sequence is another fixed switch sequence. Use the buttons in this exact order: Red, Black, White, Blue. The North American clue text can misleadingly present a different color statement, so do not wait for a changing glow, infer a random order, or treat the sequence as dependent on the current playthrough. Follow Red, Black, White, Blue exactly.
After the fourth sequence, continue toward the upper floors. If a bridge or route seems closed, verify that every required switch in the current sequence was activated before leaving its side room. The fixed orders are, in order: first White-Red-Blue-Black; second White-Red-Blue-Black; third Blue-Black-Red-White; fourth Red-Black-White-Blue.
- Third sequence: Blue, Black, Red, White.
- Activate each side-room switch before returning through its portal.
- Fourth sequence: Red, Black, White, Blue.
- Ignore the misleading final clue text and use the verified fixed order.
- Do not treat any of the four sequences as random or run-dependent.
- Collect optional tower equipment only after the required switch is activated.
Reach the upper tower and defeat Xenobia
Continue through the upper floors, defeating the enemies that control barriers and searching the side paths for the Spirit Talisman and Silver Lights. Use the Althena statue on the tenth floor to restore HP and MP. Save there before the final upper-tower section.
During the illusion scenes, move Alex toward Luna whenever the game returns control to him. Continue until the scene resolves and Xenobia becomes the required boss. Restore before entering the battle and keep a recovery item on more than one active character.
Xenobia can inflict Stone and punish a tightly grouped formation. Spread the party when a line attack threatens several characters. Alex should use Vigor and Sword Dance, Kyle should use Power Up and Power Slash, Mia should use Flame Bomb, Power Drive, or support magic, and Jessica should heal and remove status effects. Dragon Healing restores HP but does not cure Stone; use Cleanse Litany or Holy Water for Stone. Nash can use Thunderbolt or items as needed.
- Use the tenth-floor statue before continuing.
- Save before Xenobia.
- Move Alex toward Luna during the controllable illusion scenes.
- Spread the formation against line attacks.
- Use Cleanse Litany or Holy Water for Stone.
- Preserve at least one Angel’s Tear and one Silver Light if possible.
Recover and save before the final Ghaleon battle
After Xenobia is defeated, restore HP and MP immediately and save at the next available opportunity. The next chapter covers the winnable final Ghaleon battle, so do not mistake the earlier scripted Ghaleon defeat after the Magic Emperor for the campaign’s final confrontation.
Move important supplies out of Nall’s reserve and onto characters who can act. Give Healing Nuts to more than one character, distribute Angel’s Tears so a single knockout cannot strand the party’s revival supply, and place Silver Lights or Star Lights with characters who are likely to survive and use items. Remember that Silver Lights restore all MP, while Star Lights restore MP only.
Equip the strongest available weapons, armor, and survival accessories. Confirm that Alex has Althena’s Sword and that each active character has usable recovery items. Continue through the final door only after the party is restored, saved, and prepared for the final battle sequence.
- Defeat Xenobia.
- Restore full HP and MP afterward.
- Save after Xenobia or at the next available checkpoint.
- Move critical supplies out of Nall’s reserve.
- Keep recovery items on multiple active characters.
- Enter the final chamber with revives and MP restoratives still available.
Before you move on
- The Grindery has been entered and cleared through its Garden recovery point, upper route, Magic Emperor battle, and forced Ghaleon sequence.
- The party has regrouped in Meribia, completed the reunion scenes, checked Ramus’s free supply, and departed automatically with Laike.
- Althena’s Fortress has been cleared and Royce has been defeated.
- The first Goddess Tower sequence was completed in White-Red-Blue-Black order.
- The second Goddess Tower sequence was completed in White-Red-Blue-Black order.
- The third Goddess Tower sequence was completed in Blue-Black-Red-White order.
- The fourth Goddess Tower sequence was completed in Red-Black-White-Blue order.
- Xenobia has been defeated.
- The party has restored HP and MP and saved after Xenobia or at the next available checkpoint.
- The final chamber has been reached with current equipment, distributed recovery items, revives, and MP restoratives still available.
References for this chapter
- Lunar Walkthrough: The Grindery
- Lunar Walkthrough: Regrouping for Althena’s Fortress
- Lunar Walkthrough: Althena’s Fortress: Entry and Royce
- Lunar Walkthrough: Althena’s Fortress: Upper Tower and Xenobia
- Lunar: Silver Star Story Complete — Guide and Walkthrough by Erdrick77, PlayStation version
- Lunar: Silver Star Story Complete - Guide and Walkthrough - PlayStation - By _SeeD_
Final Boss (Ghaleon): Patterns, Strategy and Recovery
The winnable final Ghaleon battle takes place at the top of Althena’s Fortress after the Royce and Xenobia encounters. It is separate from the earlier Grindery battle against the Magic Emperor, which is a scripted story encounter and does not finish the campaign. Ghaleon acts twice per round, uses damaging area attacks, can instantly kill one character with Fate Sword, and can temporarily protect himself with Chaos Shield. Enter with the complete five-person party, distribute recovery items instead of leaving them in Nall’s reserve, preserve Alex’s MP for emergency support, and create a separate save after Xenobia. After defeating Ghaleon, save at the first available opportunity, then use Alex’s Ocarina immediately as the climb toward Luna begins.
Prepare after Xenobia
After Xenobia is defeated, take the available recovery opportunity and verify that Alex, Kyle, Jessica, Mia, and Nash are restored before entering Ghaleon’s area. Make a manual save and keep it separate from earlier fortress files. This is the correct retry point for the final battle, but it is not a replacement for the post-Ghaleon save described below.
Check every character’s weapon, armor, and accessory. Put Healing Nuts and Angel’s Tears into the inventories of several active characters rather than concentrating all recovery on Jessica. Give Silver Lights or other MP-restoring items to the characters who will actually cast them, especially Alex, Mia, Nash, and Jessica. Items left in Nall’s reserve cannot be selected during combat, so move the supplies you expect to use before entering the chamber.
Alex should retain enough MP for White Dragon Protect and Dragon Healing. Jessica should be ready to heal or revive instead of relying entirely on items. Do not enter with only one revival source or with the assumption that the battle will end quickly; Ghaleon’s two actions per round make a seemingly safe opening turn dangerous.
- The party is restored after Xenobia.
- A separate post-Xenobia save exists.
- All five active characters have been re-equipped.
- Healing and revival items are distributed among multiple characters.
- MP-restoring items are in active inventories.
- Alex retains MP for White Dragon Protect or Dragon Healing.
Separate the two Ghaleon encounters
The Grindery battle against the Magic Emperor is not the final victory. It can be fought normally, but the following scenes reveal that the confrontation was not the true final battle. The story then forces the party through the next sequence, so do not spend every important late-game recovery item there simply because the encounter appears to be the finale.
The true winnable fight occurs later in Althena’s Fortress, after Royce and Xenobia. The final strategy in this chapter applies to that later battle. If the earlier Magic Emperor battle gives you trouble, restore the party and adjust equipment or levels, but remember that winning it does not complete the campaign.
- The Grindery Magic Emperor encounter is treated as a scripted story event.
- The best recovery supplies are reserved for the fortress battle.
- The final strategy is used after Xenobia, not during the first Ghaleon encounter.
Open with buffs, then settle into damage
At the start of the final battle, use the party’s reliable enhancement spells if Ghaleon has not yet created an immediate crisis. Alex can use Vigor, Kyle can use Power Up, Mia can use Power Drive on a primary attacker, Nash can use Thunderbolt, and Jessica can establish Saint Litany. Do not delay healing for the sake of completing every buff. Because Ghaleon acts twice, a damaged party can become unable to recover before the next turn.
Once the opening setup is active, Alex should normally use Sword Dance and Kyle should use Power Slash. Nash should use Thunderbolt while his MP remains practical. Mia can use Flame Bomb or continue support and MP management. Jessica should prioritize healing and revival. If a character is defeated early, stabilize the surviving party before rebuilding every enhancement; a living character with reduced attack power is more useful than a dead character whose buff would have been restored.
- Alex uses Vigor when the opening is safe.
- Kyle uses Power Up before relying on Power Slash.
- Jessica establishes Saint Litany when healing is not urgent.
- Nash uses Thunderbolt while he has useful MP.
- Mia retains enough MP or items for support.
Recognize Ghaleon’s dangerous actions
Ghaleon acts twice each round and can combine different attacks. His documented actions include Inferno, Nitro Dagger, Rock ’n Roll, Tornado, physical attacks, Siphon Soul, Hell Wave, Worm Crush, Fate Sword, and Chaos Shield. Tornado pulls the party toward the center, leaving characters grouped together for subsequent area attacks. Spread-out positioning is useful at the start, but be ready for that arrangement to be disrupted.
Siphon Soul damages the party while restoring HP to Ghaleon. Continue applying reliable damage instead of treating his recovery as a reason to abandon offense. Hell Wave is a major multi-target threat, while Worm Crush damages a group. Heal immediately when several characters are weakened, because Ghaleon may follow one area attack with another action before the party can recover.
Fate Sword is the instant-death attack in the North American PlayStation walkthrough terminology. Some older references label the same threat Fate Storm, but use Fate Sword when following this edition-specific chapter. Revive the victim as soon as the party can survive the next Ghaleon actions. If the party is already near defeat, protect or heal first, then revive on the safest available turn.
- Ghaleon’s two actions are considered every round.
- The party is healed after heavy area damage.
- Siphon Soul’s healing is expected and countered with continued offense.
- A Fate Sword victim is revived promptly when safe.
- The party does not remain weakened while everyone attacks.
Use White Dragon Protect without wasting Alex’s MP
White Dragon Protect is most valuable when Ghaleon is preparing a powerful offensive spell or when several characters are already vulnerable to magical damage. Use it to block one threatening applicable spell, not as complete protection from the entire round. Ghaleon can follow a protected spell with a physical attack or another action, so continue healing after the protection succeeds.
Do not cast White Dragon Protect against every ordinary attack. Alex also needs MP for Dragon Healing, and exhausting him early can remove the party’s best emergency recovery option. When the party is healthy, Sword Dance is usually the better action. When a major spell leaves multiple characters close to defeat, protection can be worth more than one attack.
- White Dragon Protect is reserved for dangerous magic or crisis turns.
- Healing continues after the protection effect succeeds.
- Alex’s MP is not spent on unnecessary protection casts.
- Dragon Healing remains available for a multi-character emergency.
Maintain the recovery loop and break Chaos Shield
Use this repeatable routine after the opening: Alex uses Sword Dance unless protection, Dragon Healing, revival, or an item is more urgent. Kyle uses Power Slash unless recovery is needed. Nash uses Thunderbolt or restores MP. Mia uses Flame Bomb, Power Drive, or an item. Jessica heals, revives, maintains Saint Litany when appropriate, or uses an item. When two or more characters are badly injured, Dragon Healing can restore the group while Jessica handles another emergency or prepares for the next round.
Use Silver Lights before a caster reaches zero MP. A powerless healer or attacker is more dangerous than a reduced inventory. Keep at least one revival option and one MP-restoring item available for the late battle whenever possible, but do not allow characters to die merely to preserve supplies.
When Ghaleon raises Chaos Shield, continue using reliable attacks. The shield absorbs a substantial amount of damage before disappearing, so attacks may appear ineffective while it is active. Keep Sword Dance, Power Slash, Thunderbolt, and Flame Bomb going as appropriate while Jessica manages recovery. Once the shield is gone, resume the normal damage-and-healing cycle. Reapply lost buffs only when the party is stable; never postpone an urgent heal or revival to recreate the entire setup.
- Jessica prioritizes healing and revival under pressure.
- Dragon Healing is used when group damage is too severe for ordinary healing.
- MP is restored before a caster becomes unusable.
- At least one late emergency revival is preserved when possible.
- Chaos Shield is worn down through continued attacks.
- Alex and Kyle return to reliable damage whenever the party is stable.
Save after victory and use the Ocarina immediately
When Ghaleon is defeated, follow the game’s immediate instructions and save at the first opportunity. This post-Ghaleon save is the preferred recovery file because the following Luna staircase sequence can kill Alex. Do not overwrite it until the staircase and the next story transition have progressed successfully.
After saving, move toward the staircase leading to Luna. As Alex begins the ascent, use the Ocarina immediately. Do not wait for a later cue or for Alex to reach the top. In the Working Designs PlayStation release, failing to play the Ocarina can result in Alex being killed during the ascent. Make sure it is available to Alex rather than left in another character’s inventory, particularly if the save originated from the PlayStation demo transfer situation.
If the staircase sequence fails, reload the post-Ghaleon save first. Only when no valid post-Ghaleon save exists should you reload the post-Xenobia file, defeat Ghaleon again, and save immediately afterward. After the Ocarina sequence succeeds, continue through Luna’s scenes and the Meribia epilogue; Ghaleon’s defeat alone is not the completion point.
- Ghaleon is defeated in the later Althena’s Fortress battle.
- A post-Ghaleon save is created when the game permits it.
- Alex begins the staircase with the Ocarina available.
- The Ocarina is used immediately as the ascent begins.
- Alex survives and reaches Luna.
- The story proceeds to the Meribia epilogue.
Before you move on
- The later Ghaleon battle at Althena’s Fortress ends in a normal victory sequence.
- A post-Ghaleon save is created when possible.
- Alex uses the Ocarina immediately at the beginning of the Luna staircase ascent.
- Alex survives the staircase sequence and reaches Luna.
- The game transitions into the Meribia epilogue.
- The epilogue continues into the ending sequence and credits.
References for this chapter
- Lunar: Silver Star Story Complete - Guide and Walkthrough - PlayStation - By AndrewC
- Lunar: Silver Star Story Complete — Guide and Walkthrough by Spleener, PlayStation version
- Lunar: Silver Star Story Complete — Guide and Walkthrough by Erdrick77, PlayStation version
- Lunar: Silver Star Story Complete - Guide and Walkthrough - PlayStation - By AChilds
- Lunar: Silver Star Story Complete / Touch Walkthrough, Part 26: Althena’s Fortress
Finishing the Fight and Triggering the Ending
The North American Working Designs PlayStation campaign continues after the winnable Ghaleon battle. Save at the first available opportunity, then complete the scripted Luna staircase by using Alex’s Ocarina when the musical cue begins. After the rescue, control returns to Meribia for a playable epilogue. The farewell conversations and final Bromides are optional, but Laike’s harbor conversation is required to begin the ending, credits, and PlayStation outtakes.
1. Preserve the final approach and protect the Ocarina
Before entering the final chamber, keep a separate save from the last recovery point. This file protects the final battle if the fight goes badly and preserves a fallback in case the post-battle staircase is mishandled. Restore HP and MP, then distribute Healing Nuts, Silver Lights, Angel’s Tears, and other useful items among the active characters rather than leaving everything in Nall’s reserve.
Confirm that Alex has Alex’s Ocarina in his own inventory before beginning the final sequence. The Ocarina is needed during the solo Luna rescue event in this Working Designs PlayStation release. A save affected by the earlier demo-transfer behavior can create an inventory problem if the item was moved to Nall, so do not rely on Nall’s storage for this step.
- A pre-final-chamber save is preserved.
- Alex has Alex’s Ocarina in his personal inventory.
- The active party has restored HP and MP.
- Healing and revival items have been distributed to characters who can use them.
2. Defeat Ghaleon and save at the first opportunity
Complete the winnable final Ghaleon battle using the preparation described in the final-boss chapter. Keep the party alive rather than saving every recovery item for an imagined later battle. Jessica should prioritize healing and revival, Alex should use Dragon Healing when the whole party is in danger, and Silver Lights should be used before the party’s healers are unable to cast.
When Ghaleon is defeated, allow the immediate victory dialogue and scripted scenes to proceed until the game permits normal saving. Save immediately in a new slot. The PlayStation release can still produce a Game Over during the Luna staircase sequence after the final battle, so this save is the correct recovery point. Keep the earlier pre-final-chamber file as well.
- The winnable final Ghaleon battle is complete.
- The game has returned to a state where normal saving is available.
- A new post-Ghaleon save has been created.
- The earlier final-dungeon save remains intact.
3. Use Alex’s Ocarina during the Luna staircase event
Continue through the first scripted scenes after the battle until Alex begins the ascent toward Luna. When the staircase attack and Ocarina music cue occur, open the inventory and use Alex’s Ocarina immediately. Do not wait for Alex to absorb several attacks, and do not treat the staircase as a normal battle that can be won by attacking or repeatedly healing.
Playing the Ocarina supplies the required musical response and allows Alex to proceed. The item should disappear from his inventory after use. If Alex is defeated, reload the post-Ghaleon save and repeat the sequence instead of replaying the final battle. If the Ocarina is not available to Alex, reload an earlier save that still has it; do not overwrite the only recoverable file.
- Alex has reached the Luna staircase.
- The Ocarina music cue has occurred.
- Alex’s Ocarina has been used from his inventory.
- Alex reaches Luna without a Game Over.
4. Finish the Luna rescue scenes
After the Ocarina succeeds, continue up the staircase and approach Luna when movement is available. The remaining rescue sequence is scripted. Let the dialogue, music, animation, and tower scenes play without resetting the game.
When the rescue concludes, the game returns control to Alex in Meribia for the playable epilogue. This is not a New Game Plus transition and does not send the party back into the final dungeon.
- The Ocarina rescue scene has completed.
- The tower’s remaining scripted scenes have played.
- Control has returned to Meribia.
- The playable epilogue has begun.
5. Create a separate Meribia epilogue save
Save as soon as free control returns in Meribia, using a separate memory-card slot from the post-Ghaleon file. Keep both saves. The post-Ghaleon file protects the final battle and staircase route; the Meribia file lets you revisit optional rewards and conversations without replaying the final dungeon.
If you want the epilogue rewards, visit Ramus’s shop. Talk to Ramus until he gives Alex Luna’s Bromide 1. If the early 30 Silver debt requirement was fulfilled, Mia’s Bromide 3 and Jessica’s Bromide 3 can also be purchased there for 5,000 Silver each. These Bromides are optional and do not determine whether the ending will trigger.
- A separate Meribia epilogue save exists.
- The post-Ghaleon save remains available.
- Luna’s Bromide 1 has been collected if wanted.
- The optional Mia and Jessica Bromides have been purchased if their prerequisite was met and they are wanted.
6. Visit optional farewell scenes only if desired
The Meribia epilogue includes optional farewell conversations. For the main group scenes, visit Mia, Nash, and Lemia on Black Rose Street, then visit Mel’s mansion to speak with Jessica, Kyle, and Mel. These conversations add dialogue but are not required to complete the campaign or unlock the ending.
Additional optional conversations are available near Meribia’s northern entrance with Phacia and at the tavern with Tempest and Fresca. You may complete these visits, collect the epilogue Bromides, and make any desired purchases before leaving, but none of them is a required farewell route. If you are focused only on completion, proceed to Laike after saving and skip the optional visits.
- Optional Black Rose Street conversations are complete if wanted.
- Optional Mel’s mansion conversations are complete if wanted.
- Optional Phacia and tavern conversations are complete if wanted.
- The Meribia epilogue save is preserved before departure.
7. Speak with Laike and allow the ending to finish
When you are ready to end the playable epilogue, go to the harbor and speak with Laike. Continue the conversation until Alex selects the response indicating that he is ready to go home. Laike’s harbor departure conversation is the required trigger for the final ending sequence; the other Meribia visits are not prerequisites.
Allow the departure scene, ending animation, credits, and Working Designs PlayStation outtakes to play through. Do not reset the console or interrupt the disc during the sequence if you still need to view the ending. The game does not automatically begin a New Game Plus campaign. Afterward, retain the Meribia epilogue save for revisiting optional content and the post-Ghaleon save for repeating the final approach.
- Laike has been spoken to at the harbor.
- The final departure response has been selected.
- The ending sequence has begun.
- The credits have played.
- The PlayStation outtakes have played or reached their final screen.
Before you move on
- The final Ghaleon battle has been won.
- A post-Ghaleon save was created at the first available opportunity.
- Alex used the Ocarina during the Luna staircase event.
- The Luna rescue sequence completed without a Game Over.
- Control returned to Meribia.
- A separate Meribia epilogue save was created.
- Optional Bromides and farewell conversations were completed if desired.
- Laike’s final harbor departure response was selected.
- The ending sequence and credits played.
- The Working Designs PlayStation outtakes played or reached their final screen.
References for this chapter
- Lunar Walkthrough: Final Battles and Epilogue
- Lunar Reference: Rememberizer and Ending Outtakes
- Lunar Reference: Return Visits and Optional Rewards
- Lunar: Silver Star Story Complete — Guide and Walkthrough by Erdrick77, PlayStation version
- Lunar: Silver Star Story Complete - Guide and Walkthrough - PlayStation - By _SeeD_
- Lunar: Silver Star Story Complete - Guide and Walkthrough - PlayStation - By AChilds
- Lunar: Silver Star Story Complete — Guide and Walkthrough by cnick, PlayStation version
Post-Game and Epilogue Content
After defeating the winnable final Ghaleon battle in the North American Working Designs PlayStation release, complete the Luna staircase sequence, return to Meribia, and save again before exploring the optional epilogue. Ramus provides Luna’s Bromide 1, while Mia’s Bromide 3 and Jessica’s Bromide 3 are available only when the early Ramus debt flag was set. The Rememberizer is not an epilogue recovery item in this edition: its verified collection window is after Alex becomes Dragonmaster and before leaving for the Frontier. Optional farewell conversations can be completed before speaking with Laike. Campaign completion requires Laike’s departure trigger followed by the ending and credits; the PlayStation release also continues into its outtakes.
1. Save after Ghaleon and complete the Luna staircase
After winning the final, winnable Ghaleon battle, use the first available save opportunity. Winning the battle does not immediately make the route safe: the following Luna staircase sequence can still result in a Game Over if Alex is left exposed to the attacks. Keep this save separate from the later Meribia epilogue save.
Continue through the post-battle scenes until Alex is alone and begins ascending toward Luna. Keep Alex’s Ocarina available. As the staircase attack sequence begins, open the inventory and use the Ocarina immediately. Do not wait through additional attacks or assume that a later prompt will appear. The game’s music and attack sequence provide the cue, but the safe procedure is to use the Ocarina at the start of the ascent sequence.
After the Ocarina is used, continue up the staircase and allow the Luna dialogue and scenes to play. The Ocarina disappears from the usable inventory as part of the event. No second Ocarina is required.
- Defeat the winnable final Ghaleon battle.
- Save at the first available opportunity afterward.
- Confirm that Alex still has the Ocarina.
- Use the Ocarina as the Luna staircase sequence begins.
- Continue through the Luna scenes.
2. Save in Meribia before ending the epilogue
When the Luna sequence finishes and control returns in Meribia, open the menu and create a second manual save. Keep both files. The post-Ghaleon save protects the final battle and staircase, while the Meribia save protects the optional conversations and late Bromide checks.
You can explore Meribia after regaining control. Speaking with Laike at the harbor ends the playable epilogue and begins the departure sequence, so complete any optional checks and conversations before speaking with him.
The Meribia save is not a universal recovery point for earlier missables. Bromides, red-chest rewards, and event rewards tied to earlier story windows may require a separate save from the relevant part of the campaign.
- Regain control in Meribia.
- Create a separate Meribia epilogue save.
- Retain the post-Ghaleon save.
- Delay speaking with Laike until optional epilogue content is complete.
3. Check Ramus for the epilogue Bromides
Enter Ramus’s shop and speak with him until he gives you Luna’s Bromide 1. This reward is available during the playable epilogue and should be collected before speaking with Laike.
After receiving Luna’s Bromide 1, check whether Mia’s Bromide 3 and Jessica’s Bromide 3 are available for purchase. Each costs 5,000 Silver. The two paid Bromides depend on the early event in which Alex pays Ramus’s 30 Silver debt. If the debt flag was not set, repeatedly speaking with Ramus will not restore the rewards; reload an earlier save only if you want to replay the relevant opening section.
Do not treat the epilogue as a late collection window for the Rememberizer. In the North American PlayStation release, return to Ramus after Alex becomes Dragonmaster and before leaving for the Frontier. Ramus gives the Rememberizer during that earlier cleanup period. It replays animated sequences already viewed during the current playthrough, but it is not required for the ending and cannot be safely assumed to become available after Ghaleon.
- Receive Luna’s Bromide 1 from Ramus.
- Check for Mia’s Bromide 3.
- Check for Jessica’s Bromide 3.
- Have 10,000 Silver available if both paid Bromides are wanted.
- Confirm that the Rememberizer was obtained before leaving for the Frontier.
4. Complete optional Meribia farewells
The farewell route is optional and is not required to trigger the ending. If you want the closing dialogue, visit Black Rose Street and speak with Mia, Nash, and Lemia. Then go to Mel’s Mansion and speak with Jessica, Kyle, and Mel.
Travel toward the northern city entrance to see Phacia. You can also visit the port bar and speak with Tempest and Fresca. These conversations provide optional closing scenes and do not open another dungeon or change the required ending route.
Complete these visits before speaking with Laike. If you only want to finish the campaign, you may skip them and proceed directly to the departure trigger after checking the rewards you want.
- Speak with Mia, Nash, and Lemia on Black Rose Street if desired.
- Speak with Jessica, Kyle, and Mel at Mel’s Mansion if desired.
- Visit Phacia if desired.
- Visit Tempest and Fresca at the port bar if desired.
5. Trigger the departure and watch the ending
When the Ramus checks and any desired farewell conversations are finished, return to the harbor and speak with Laike. Select the response confirming that Alex is ready to leave. This is the required departure trigger for campaign completion.
Make sure the Meribia save is secure before selecting that response. After Laike’s departure conversation begins, ordinary epilogue exploration is no longer the priority. Reload the Meribia save if you need to revisit Ramus or repeat an optional conversation.
Allow the departure scenes, ending sequence, and credits to finish without resetting the console. The North American PlayStation release continues into voice-actor outtakes after the ending material. Viewing the ending and credits is the completion goal; the optional farewells are not required.
- Finish desired Ramus rewards and checks.
- Complete desired optional farewells.
- Speak with Laike at the harbor.
- Select the departure response.
- Watch the ending sequence and credits.
- Allow the PlayStation outtakes to finish.
6. Recover earlier missed content from the correct save
Use the Meribia epilogue save for Luna’s Bromide 1, any available debt-dependent Bromides, optional farewell conversations, and another attempt at the departure sequence. Do not use it as proof that all earlier optional content remains obtainable.
Earlier Bromides and red-chest rewards have their own collection windows. The Rememberizer belongs to the post-Dragonmaster, pre-Frontier cleanup period, while several Bromides require immediate searches or conversations before advancing a specific event. If one of those rewards is missing, load a save from before its deadline rather than repeatedly checking the epilogue.
Keep a pre-final-dungeon save as well as the post-Ghaleon and Meribia saves. These files preserve access to final preparation, the staircase sequence, the optional epilogue rewards, and earlier missable content without requiring an entire replay.
After the credits and outtakes finish, the Working Designs PlayStation campaign is complete. This edition does not open a substantial post-game dungeon or New Game Plus campaign. Do not import post-game features from later remakes into this route.
- Retain a pre-final-dungeon save.
- Retain the post-Ghaleon save.
- Retain the Meribia epilogue save.
- Use earlier saves for closed Bromide, red-chest, and story-event windows.
- Confirm that the ending, credits, and outtakes have finished.
Before you move on
- Ghaleon has been defeated in the winnable final battle.
- A save exists immediately after Ghaleon and before the Luna staircase sequence.
- Alex used the Ocarina at the start of the staircase attack sequence.
- The Luna scenes completed and control returned to Alex in Meribia.
- A separate Meribia epilogue save exists.
- Ramus was checked for Luna’s Bromide 1.
- The Rememberizer was obtained before leaving for the Frontier, or its earlier collection window was intentionally skipped.
- Mia’s Bromide 3 and Jessica’s Bromide 3 were purchased if the early debt flag was active and the rewards were wanted.
- Desired optional Meribia farewell conversations were completed, if wanted.
- Laike was spoken to at the harbor and the departure response was selected.
- The ending and credits finished.
- The PlayStation outtakes finished.
- A pre-final-dungeon or pre-departure save remains available for optional-content recovery.
References for this chapter
- Lunar Walkthrough: Final Battles and Epilogue
- Lunar Reference: Rememberizer and Ending Outtakes
- Lunar: Silver Star Story Complete - Guide and Walkthrough - PlayStation - By AndrewC
- Lunar: Silver Star Story Complete — Guide and Walkthrough by Spleener, PlayStation version
- Lunar: Silver Star Story Complete Walkthrough & Guide - PlayStation - By RPGamer
100% Optional Checklist and Troubleshooting
The North American Working Designs PlayStation release contains 13 bromides. They are optional collectibles with small Wisdom bonuses for the appropriate characters and an artwork display when used, but none is required to defeat Ghaleon or view the ending. The safest approach is to keep separate manual saves, follow the event windows in order, and preserve a pre-final-dungeon file. Do not use Saturn, PSP, Japanese, or later remaster instructions interchangeably with this PlayStation checklist.
Use a three-save system before chasing missables
Keep three rotating manual saves: a normal progress file, a backup made before a major town event, and a late-game file before entering the final dungeon. Save before leaving a town after a major story scene, especially when a character joins, an airship event occurs, Mel is changed, or the Grindery moves.
The PlayStation game does not provide modern autosave protection. Do not overwrite the only file that predates an event while checking a room or NPC. If a bromide does not appear, reload the backup from before the relevant story transition rather than repeatedly testing a save made after the opportunity closed.
- Maintain a normal file, an event-backup file, and a pre-final file.
- Keep the pre-final file after completing the campaign.
- Never overwrite the only save from before a bromide window.
Secure the early bromides and their prerequisites
Mia's Bromide 1 is already equipped by Nash when he joins. Check Nash's inventory and do not discard or sell it. Mia's Bromide 2 is obtained from the student in the eastern classroom of Vane during the evacuation sequence, before you retrieve Nash. Go to the eastern classroom and speak to the student at the rear desk until the bromide is awarded; do this before proceeding to Nash's location.
When Ramus first joins, pay the man connected with Ramus's debt near the upper part of Burg's weapon-shop area the requested 30 Silver. This early payment sets up Ramus's later epilogue stock for Mia's Bromide 3 and Jessica's Bromide 3. For maximum safety, make the payment before leaving Burg for the Weird Woods rather than relying on a later opportunity.
- Mia's Bromide 1: Nash's starting inventory.
- Mia's Bromide 2: eastern classroom in Vane during the evacuation, before retrieving Nash.
- Pay Ramus's 30-Silver debt near the Burg weapon shop before leaving Burg.
- Keep a backup save after confirming the debt payment.
Complete the Kyle, Lann, and shrine windows
After Kyle joins, visit Althena's Shrine before leaving for the Frontier. Speak repeatedly to the blue-haired admirer or shrine NPC at the north end of the shrine to receive Jessica's Bromide 1. Do not postpone this until after the Frontier sequence.
Jessica's Bromide 4 is in Nanza. After Kyle drives away Xenobia's minions, do not speak to Kyle yet. Go downstairs to the sleeping area and examine the correct bed, then return to Kyle and continue the story.
Jessica's Bromide 2 requires two stages. Before defeating Dragonmaster Zoc, return to Lann and speak to the boatman at the dock until he gives the required setup dialogue. After Nash destroys the airship engine, return to Lann during the pre-Frontier window and speak to the boatman again to receive the bromide. If the setup conversation was skipped, do not assume the later visit will work.
- Jessica's Bromide 1: Althena's Shrine after Kyle joins and before the Frontier.
- Jessica's Bromide 4: Kyle's bed in Nanza before speaking to Kyle after the minion battle.
- Jessica's Bromide 2: activate the Lann boatman condition before defeating Zoc, then collect it after the airship engine is destroyed.
- Save before the airship sequence so the Lann route can be repeated if necessary.
Collect the midgame event bromides in their actual locations
After Nash destroys the airship engine, go to Iluk before leaving for the Frontier. Enter the northeast house and speak to the man associated with Mia's photographs, or examine the relevant easel when prompted, to receive Mia's Bromide 4. This is an event reward, not a Ramus purchase.
After Mel is turned to stone, go directly to Black Rose Street in Meribia before traveling to Vane. Speak repeatedly with the man associated with Royce until he gives Royce's Bromide. This opportunity is tied to the immediate aftermath of Mel's transformation.
After the Vile Tribe sisters reveal their identities, return to Althena's Shrine before going back to Meribia. Speak to Phacia's assistant at the northern part of the shrine to receive Phacia's Bromide.
After the Grindery rolls away, return to Talon Mine before leaving the area. Speak with the miners in the rescued-worker settlement until the purple miner gives Xenobia's Bromide. These three rewards are found through story-timed NPC conversations, not ordinary Ramus stock.
- Mia's Bromide 4: Iluk after the airship engine is destroyed and before the Frontier.
- Royce's Bromide: Black Rose Street after Mel is turned to stone and before traveling to Vane.
- Phacia's Bromide: Althena's Shrine after the sisters' revelation and before returning to Meribia.
- Xenobia's Bromide: Talon Mine after the Grindery leaves and before departing the area.
Finish the Luna and Ramus bromides during the epilogue
After obtaining the White Dragon Wings and returning to Burg with Ghaleon, wake in Alex's home and search the shelves in the basement for Luna's Bromide 2. This is a narrow story-state check, so do it before moving on with the Dragon Wings route.
After Luna is saved and the game enters its epilogue, speak with Ramus. He gives Luna's Bromide 1. If the 30-Silver debt condition was completed earlier, check Ramus's special stock and purchase Mia's Bromide 3 and Jessica's Bromide 3 for 5,000 Silver each. Confirm each purchase in the inventory before leaving the shop.
The epilogue is still part of the playable pre-ending state. Do not assume there is a post-credits shop phase or a guaranteed post-ending save. Keep the pre-final file, complete Ramus's conversations and purchases, then visit Laike and follow the final departure sequence when you are ready to end the game.
- Luna's Bromide 2: Alex's basement shelves after returning to Burg with Ghaleon.
- Luna's Bromide 1: speak with Ramus during the epilogue after Luna is saved.
- Mia's Bromide 3 and Jessica's Bromide 3: buy them from Ramus for 5,000 Silver each when his epilogue stock is available.
- Reserve at least 10,000 Silver if you want both expensive purchases.
- Save before the final departure if you want to preserve the epilogue state.
Separate required completion from optional collection
The complete optional target is all 13 bromides: four for Mia, two for Luna, four for Jessica, and one each for Phacia, Royce, and Xenobia. They provide only minor Wisdom benefits and artwork displays. They are not needed for the final dungeon, Ghaleon, the ending scenes, or the credits.
If your goal is only to finish the campaign, stop pursuing bromides when the backtracking becomes disruptive and continue the story. If your goal is collection, use the checklist in order and do not rely on a later remake's locations. The Working Designs PlayStation release has event conditions that differ from some Japanese, Saturn, PSP, and remastered references.
- Verify 13 bromides in the inventory: Mia 1-4, Luna 1-2, Jessica 1-4, Phacia, Royce, and Xenobia.
- Treat the bromides as optional equipment and collectibles.
- Do not import later-remake-only dungeons, bosses, or item locations into this checklist.
Recover from a missed trigger or stalled event
If an NPC does not respond, finish every current dialogue, leave the building, re-enter, and speak to the NPC again. Some conversations require repeated interaction. If the reward still does not appear, reload the save made before entering the town or before the triggering story event, then repeat the route without taking unrelated actions first.
For the Lann bromide, verify both the pre-Zoc setup conversation and the post-airship collection visit. For the epilogue purchases, verify that the 30-Silver debt was paid and that Luna has been saved. If a time-limited bromide is absent after its window, use the earlier backup; do not assume the item will automatically return later.
If a dungeon or event appears stuck, confirm that the previous required battle, chest, switch, or conversation was completed. Restore HP and MP, re-equip characters after a forced party change, and test the route from a second manual save without overwriting the last working file.
- Reload from before the relevant event, not merely from inside the affected room.
- Repeat all required dialogue until it begins repeating.
- Keep the last functioning save untouched while troubleshooting.
- Use a second save slot before testing an uncertain route.
Verify the ending and preserve the correct completion files
After defeating Ghaleon, allow the immediate dialogue and ending scenes to play without resetting the console. If the sequence fails to begin, retry from a clean manual save before the battle. Check the disc for dirt or damage and, on replacement hardware or emulation, retry using stable disc-reading settings rather than relying on a quick-save state.
The campaign completion check is the defeat of Ghaleon followed by the ending sequence and credits. Preserve the pre-final-dungeon file even after viewing the ending, because it is the reliable recovery point for missed one-time events. If the game offers a save at your stopping point, keep it in a separate slot, but do not depend on a post-credits state to restore missed bromides.
- Defeat Ghaleon.
- Watch the complete ending sequence and credits.
- Keep the pre-final-dungeon save permanently.
- If the ending fails, retry from a clean manual save before the final battle.
Before you move on
- For ordinary campaign completion, Ghaleon has been defeated and the ending scenes and credits have played.
- For bromide completion, the inventory contains Mia's Bromides 1-4, Luna's Bromides 1-2, Jessica's Bromides 1-4, Phacia's Bromide, Royce's Bromide, and Xenobia's Bromide.
- The Lann boatman prerequisite and later collection step have both been completed for Jessica's Bromide 2.
- Ramus's 30-Silver debt was paid early, and his epilogue conversations and special stock were checked after Luna was saved.
- A pre-final-dungeon save remains available for recovery or a second collection pass.
References for this chapter
- Lunar: Silver Star Story Complete — Guide and Walkthrough by Erdrick77, PlayStation version
- Lunar: Silver Star Story Complete — Secret Items FAQ by AAllard, PlayStation version
- Lunar: Silver Star Story Complete — Guide and Walkthrough by cnick, PlayStation version
- Lunar: Silver Star Story Complete — Guide and Walkthrough by Spleener, PlayStation version
- Lunar Reference: Bromides
Finishing up
You have defeated the winnable final Ghaleon battle, saved when the PlayStation release permits it, completed the Luna staircase sequence by using Alex’s Ocarina as the ascent begins, returned to Meribia, spoken with Laike at the harbor to begin the departure, and watched the ending sequence and credits. The Meribia epilogue save remains the practical recovery file for optional rewards and farewell conversations; those conversations are optional and are not required for campaign completion. Do not assume the PlayStation release creates a special cleared-game save after the credits.
Choose your next gameScreenshots & video
Game imagery for reference. Follow the written chapters above for the route and strategies.
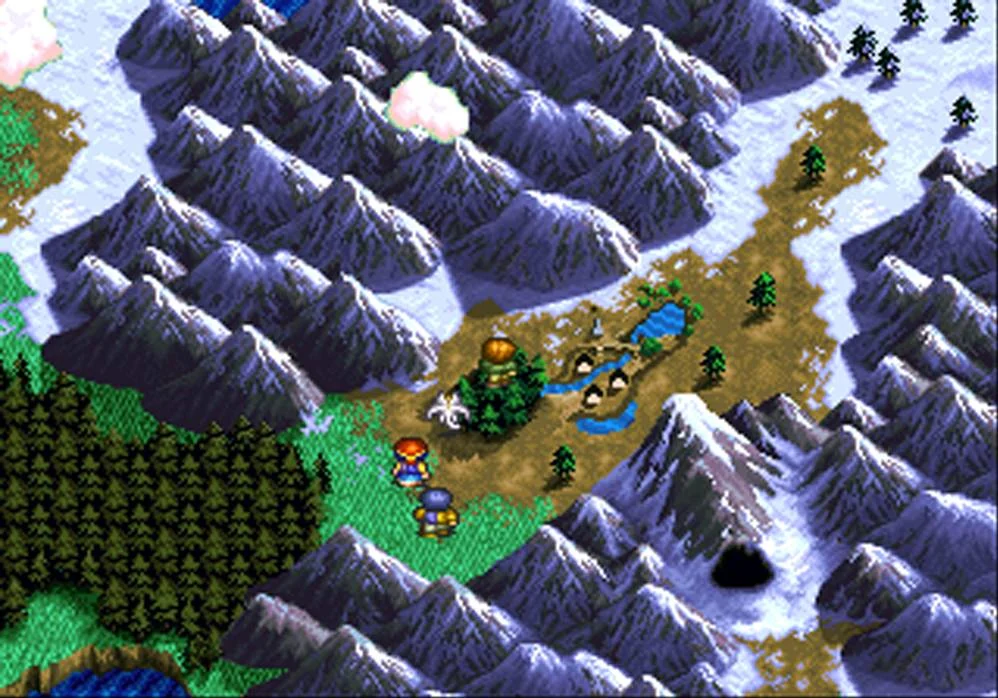
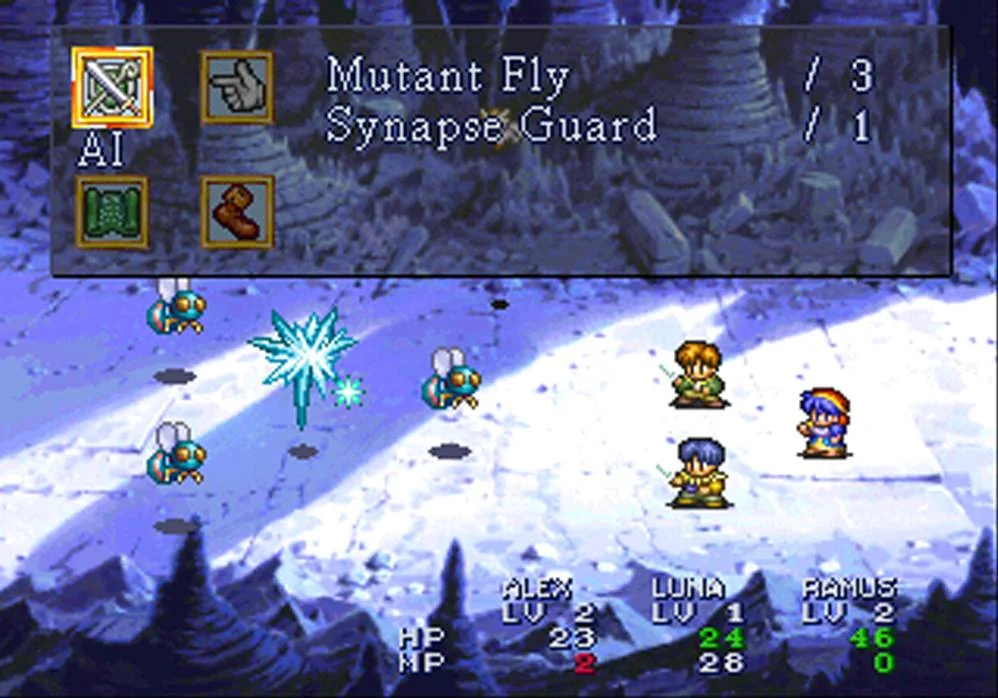
Sources & references
Our original guide draws on the references below. Check the edition at the top of this page before following controls or unlock requirements.
- Lunar: Silver Star Story Complete — Guide and Walkthrough by Erdrick77, PlayStation version
- Lunar: Silver Star Story Complete Walkthrough & Guide - PlayStation - By RPGamer
- Lunar: Silver Star Story Complete — Guide and Walkthrough by cnick, PlayStation version
- Lunar: Silver Star Story Complete - Guide and Walkthrough - PlayStation - By AndrewC
- Lunar: Silver Star Story Complete - Guide and Walkthrough - PlayStation - By _SeeD_
- Lunar Walkthrough: Burg and White Dragon Cave, Flactem Guides
- Lunar: Silver Star Story Complete / Touch Walkthrough, Part 5: Meribia and Meribian Sewers
- Lunar: Silver Star Story Complete - Guide and Walkthrough - PlayStation - By Tan_Yong_Hua
- Lunar: Silver Star Story Complete – Guide and Walkthrough, HReinhart
- Lunar: Silver Star Story Complete — Guide and Walkthrough by Spleener, PlayStation version
- Lunar Walkthrough: Crystal Tower
- Lunar Walkthrough: After the Crystal Tower
- Lunar: Silver Star Story Complete / Touch Walkthrough, Part 10: Assembling the Team
- Lunar Reference: Mechanics and Status Effects
- Lunar Reference: Magic and Abilities
- Lunar Reference: Equipment
- Lunar: Silver Star Story Complete - Guide and Walkthrough - PlayStation - By AChilds
- RPGClassics.com - Lunar:SSSC Item Pages
- RPGClassics.com - Lunar:SSSC Shrine Shops Page
- Lunar Walkthrough: Final Battles and Epilogue
- Lunar: Silver Star Story Complete FAQs, Walkthroughs, and Guides for PlayStation
- Lunar: Silver Star Story Complete — Secret Items FAQ by AAllard, PlayStation version
- Lunar: Silver Star Story Complete - Bromides Q&A, PlayStation
- Lunar Walkthrough: Regrouping for Althena’s Fortress
- Lunar Shop Reference
- Lunar: Silver Star Story Complete – Guide and Walkthrough – PlayStation – PeTeRL90
- Lunar Silver Star Story Complete / Touch Walkthrough, Part 24: Prepping for the Grindery
- Lunar Walkthrough: The Grindery
- Lunar Walkthrough: Althena’s Fortress: Entry and Royce
- Lunar Walkthrough: Althena’s Fortress: Upper Tower and Xenobia
- Lunar: Silver Star Story Complete / Touch Walkthrough, Part 26: Althena’s Fortress
- Lunar Reference: Rememberizer and Ending Outtakes
- Lunar Reference: Return Visits and Optional Rewards
- Lunar Reference: Bromides
About the game & collecting notes
- Platform
- Sony PlayStation
Step-by-step walkthrough for the North American PlayStation release of Lunar: Silver Star Story Complete (Working Designs, 1999). This guide covers starting a new game, all required party recruitment, key story dungeons, boss approaches (including the final Ghaleon confrontation), optional side-content, and concrete completion checks so you can finish the canonical ending on the PS1 edition.
Darryl Polo
Darryl Polo loves tinkering with emulation and revisiting retro games. He enjoys exploring how old favorites play on different setups and sharing what he learns along the way. At Joking Joystick, he writes about the games, hardware, and small discoveries that keep the hobby fun.
Our editorial standardsFound a step that needs another look? Help us improve this guide.