
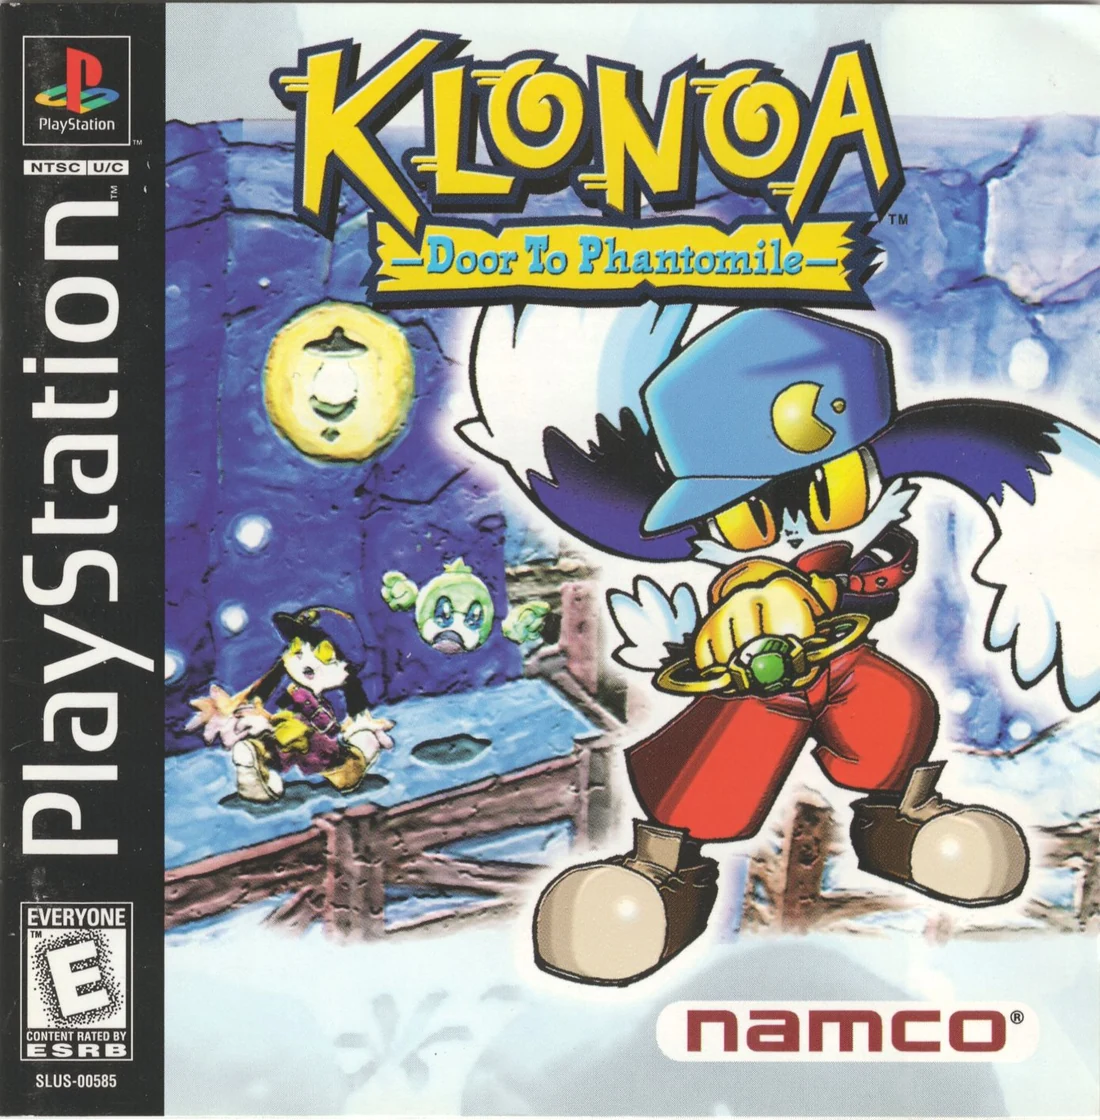
Klonoa: Door to Phantomile — PlayStation (North American, original) Campaign Walkthrough
Complete the original North American PlayStation campaign through Visions 1-1 through 6-2, defeat Ghadius, clear the separate Final Vision against Nahatomb, and watch the complete ending and credits. Optional post-game completion covers all 72 Phantomilian rescues, the unlocked Extra Vision, and the 150-Dream-Stone replay records for the ordinary stages.

Find a copy
Klonoa: Door to Phantomile Sony PlayStation
We may earn a commission if you buy through these links, at no extra cost to you. As an Amazon Associate I earn from qualifying purchases.
Opens retailer search results. Check the model, edition, seller, availability and current price before buying.
Before you begin
You are using the original North American PlayStation edition of Klonoa: Door to Phantomile, identified by its North American retail release rather than a Wii remake or later remaster.
This walkthrough assumes the original PS1 controls and mechanics: D-pad movement and depth-facing, X or Triangle to jump, Square or Circle for the Wind Bullet and throws, enemy-assisted double-jumps, Dream Stones, Mirror Spirits, Ngapako Eggs and Phantomilian rescues.
The North American PlayStation release arrived on March 10, 1998; the Japanese release preceded it on December 11, 1997.
The campaign has six numbered Visions with two stages each, followed by a separate Final Vision. It does not contain a numbered Vision 7.
This guide targets the original North American PlayStation release and excludes mechanics and completion requirements introduced by the Wii remake or later remasters.
Set yourself up for the run
Verify that you are running the original North American PlayStation release, not the Wii remake or Phantasy Reverie Series version.
Familiarize yourself with the original controls: D-pad movement and depth-facing, X or Triangle to jump and float, Square or Circle to fire the Wind Bullet or throw a captured enemy, and Start to pause.
Practice capturing an enemy, using it for an enemy-assisted double-jump, releasing it, and then floating during the descent.
Learn the 2.5D layout: ordinary movement follows the stage route, while foreground/background facing is used for doors, switches, eggs and some enemy throws.
Learn the HUD and stage-result records for hearts, lives, keys, Memory Clocks, Dream Stones and Phantomilian rescues.
Activate Memory Clocks before dangerous sections. Treat them as temporary in-level checkpoints, not permanent Memory Card saves.
Save campaign progress from the World Map or save screen when the game presents that option, especially before replaying stages for optional records.
For optional completion, track both objectives separately: rescue all 72 Phantomilians to unlock Extra Vision, and replay ordinary stages toward their 150-Dream-Stone records. Mirror Spirits are tools for Dream Stone routes, not a separate story-ending requirement.
Preparation and Core Mechanics
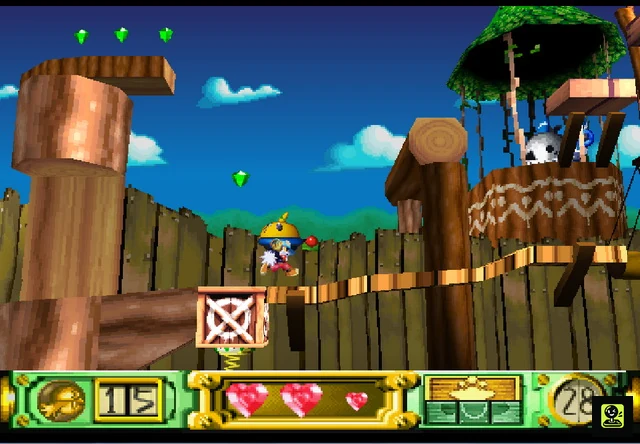
This chapter covers the original North American Sony PlayStation release of Klonoa: Door to Phantomile, not the Wii remake or later remastered editions. The original game uses the digital D-pad for movement and foreground/background facing, X or Triangle for jumping and floating, Square or Circle for the Wind Bullet, and Start for pausing. Klonoa’s ring captures unprotected enemies, lets him perform an enemy-assisted double-jump, and turns the captured enemy into a projectile. Learn the six-part health display, lives, keys, Memory Clocks, Dream Stones, Mirror Spirits, Ngapoko Eggs, and Phantomilian rescue indicators. Story progress does not require optional Dream Stones, Phantomilians, Mirror Spirits, or most Ngapako Egg rewards. Activate checkpoints before dangerous sections, preserve a usable enemy when a higher platform is nearby, and leave risky collectibles for Vision Clear replays if collecting them would cost a life.
Use the original PlayStation controls
Move Klonoa left or right with Left and Right on the D-pad. Press Up to face toward the background and Down to face toward the foreground. The game’s paths are presented as a side-scrolling route with separate foreground and background lanes, so facing is not cosmetic: it determines which enemy, object, door, or platform edge Klonoa can interact with. When a door is aligned with Klonoa, press Up to enter it. Do not assume that the analog stick, pressure-sensitive movement, or remake-specific control options exist in this North American PS1 release.
Press X or Triangle to jump. Continue holding the jump button after a normal jump, an enemy-assisted double-jump, or a damage bounce to float briefly and extend Klonoa’s horizontal travel. Press Square or Circle to fire the Wind Bullet. When an enemy has been captured, the same button throws it instead of firing a new shot. Press Start to pause. In story windows, X advances text, Circle can fast-forward text, and Start skips forward according to the game’s normal story controls.
- Move with the digital D-pad.
- Use Up and Down to change Klonoa’s foreground/background facing.
- Use X or Triangle for jumping and floating.
- Use Square or Circle for the Wind Bullet and for throwing a captured enemy.
- Use Start before examining a difficult platforming setup.
Capture enemies and perform the double-jump
Stand close to an ordinary unprotected enemy and face it before pressing Square or Circle. The Wind Bullet inflates the target; when it is pulled into Klonoa’s ring, it is captured and carried. With the enemy held, press X or Triangle to jump and press the jump button again while airborne to perform the enemy-assisted double-jump. Hold the button after the second jump when you need to float across a gap or correct your landing.
Use a captured enemy in one of two ways. Throw it with Square or Circle to defeat another enemy, strike a switch, break an obstacle, or open an Ngapoko Egg when the stage requires that interaction. Alternatively, keep it beside Klonoa and use it as the second jump. Do not throw away the only nearby enemy before checking whether the next ledge is above normal jump height. Many areas provide a respawning enemy, so after a missed throw or jump, return to that enemy’s safe location instead of trying to force the same gap without the required tool.
A double-jump can also be aimed into the foreground or background. Face the required lane before jumping, then use the second jump to reach the matching platform or object. If Klonoa is drifting too far, release the jump button earlier rather than holding the float through the entire arc.
- Capture an enemy from close range.
- Keep the enemy for a double-jump when the next ledge is high.
- Throw captured enemies at targets instead of firing the Wind Bullet at them.
- Change facing before a lane-specific jump.
Read health and lives
The original HUD displays three large pink hearts, with each heart divided into two health levels. A normal enemy or hazard hit removes one level. When all six health levels are gone, Klonoa loses a life. Falling into a hole or dark abyss costs a life immediately regardless of remaining health. Health is restored after completing a level, while hearts found during a level restore health only up to the three-heart maximum.
Small pink Heart items restore one health level. Large gold Heart items restore several health levels and are especially valuable before a long hazard section or boss approach. Because the exact large-heart value is inconsistently reported by surviving reference guides, treat the item as substantial recovery rather than relying on a disputed number. The gold Klonoa-head coin is an Extra Life and increases the life counter. The original game’s life counter does not exceed 99.
After taking damage, move clear of the enemy or hazard before trying to capture another target. Repeated contact can remove the remaining health quickly. If an optional route contains a heart but requires a dangerous blind jump, preserve the life and return during a Vision Clear replay.
- Read the bottom-center HUD as six health levels grouped into three hearts.
- Use small Hearts for minor recovery and large gold Hearts for substantial recovery.
- Collect Extra Life coins when the route is safe.
- Treat a bottomless fall as an immediate life loss.
Activate Memory Clocks before dangerous sections
A Memory Clock appears as an alarm clock inside a floating bubble. Hit the bubble with the Wind Bullet to activate it; the alarm sound confirms the checkpoint. If Klonoa subsequently loses a life, the activated clock provides a point from which to continue instead of forcing a restart from the beginning of the entire level.
Activate every Memory Clock you pass, with priority given to clocks before moving platforms, carts, water routes, enemy chains, long vertical climbs, and boss entrances. Activate the clock before attempting an optional Phantomilian or Ngapoko Egg route whenever possible. If the attempt fails, use the checkpoint rather than repeating the preceding section. The pause menu’s Retry command is different: it abandons the current attempt and restarts the Vision from its beginning.
- Pop the Memory Clock bubble rather than walking past it.
- Activate a clock before a risky optional route.
- Use the last clock before a boss approach whenever one is available.
- Do not confuse a checkpoint with the pause-menu Retry command.
Handle keys and optional collection items
Klonoa can carry one key at a time. A key opens a locked door marked with a key symbol when Klonoa walks into the door while carrying it. If a key is placed above, below, or in another lane, look for the intended enemy double-jump, moving platform, spring, whirlwind, or Up/Down facing change. A locked door can lead to required progress or an optional room, so do not assume that every key door is mandatory.
Dream Stones are optional collectibles. Green stones are worth one and blue stones are worth five in normal collection. Mirror Spirits are blue spirits inside bubbles; striking one temporarily doubles the value of nearby Dream Stones. Green stones count as two during the effect, while blue stones change into higher-value purple stones. Activate the Mirror Spirit immediately before its associated stone route, then collect the nearby group before the effect ends. Dream Stones are not required to clear the story route.
Ngapoko Eggs are green-and-white containers. The Wind Bullet does not open them directly. Capture an enemy, position Klonoa in the correct foreground or background lane, and throw the enemy into the egg. Documented egg rewards include green Dream Stones, blue Dream Stones, an Extra Life, or a Phantomilian. If an egg is suspended over a pit, activate a nearby Memory Clock first and confirm that the required enemy can be safely obtained.
Phantomilians are optional prisoners shown in bubbles or released from Ngapoko Eggs. Each Vision part tracks its rescued Phantomilians with indicators on the level-completion information. Story progression does not require rescuing them, but all 72 are needed for the optional Extra Vision. Do not sacrifice a life for one during the first clear; replay the stage later through Vision Clear.
- Carry a key to the matching locked door.
- Use Mirror Spirits immediately before nearby Dream Stones.
- Open Ngapoko Eggs with thrown captured enemies.
- Treat Dream Stones and Phantomilians as optional on a first story clear.
- Use Vision Clear for safe cleanup after the campaign.
Save progress and replay cleared stages
Between Vision parts, use the World Map and its save function as the normal between-stage progress point. The World Map is not the post-game replay-record menu. After the campaign is complete, return to the title screen, choose Continue, and then select Vision Clear. Vision Clear allows cleared parts to be replayed and provides the place to check Dream Stone results and Phantomilian progress for individual stages.
For the main campaign, the practical completion sequence is to clear Visions 1-1 through 6-2, defeat Ghadius, complete the separate Final Vision against Nahatomb, and allow the ending and credits to play. Extra Vision is optional and is unlocked by rescuing all 72 Phantomilians; it is not a numbered Vision 7 and is not required for the normal ending.
- Save between stages through the World Map function.
- Do not use the World Map as the replay-record screen.
- After finishing the game, use title screen, Continue, then Vision Clear.
- Confirm the ending and credits before treating the main campaign as complete.
Before you move on
- You can move and change foreground/background facing with the D-pad.
- You can capture an enemy, hold it, perform an enemy-assisted double-jump, float to a ledge, and throw the enemy at a target.
- You can identify the six health levels, three-heart maximum, Extra Life coin, key, Memory Clock, Dream Stones, Mirror Spirit, Ngapoko Egg, and Phantomilian indicators.
- You activate Memory Clocks before dangerous sections and understand that they provide a recovery point after death.
- You know that Dream Stones, Mirror Spirits, Phantomilians, and most Ngapoko Egg rewards are optional during the first story clear.
- You can save between stages through the World Map.
- You know the exact post-game replay route: title screen, Continue, then Vision Clear.
- You understand that the main ending requires Nahatomb’s Final Vision and the complete ending and credits, while Extra Vision is optional.
Vision 1 — Prologue: Breezegale and Gunston Mine
Vision 1 introduces the original PlayStation controls, Wind Bullet captures, enemy-assisted double jumps, floating, Memory Clocks, and foreground/background aiming. Vision 1-1 begins in Breezegale, where the direct route crosses the opening bridge, uses Zippoe enemies and Fan Grass, passes through Balue's Tower, and ends at a cave after the Gondola and Spiker sections. Vision 1-2 moves into Gunston Mine. Its route crosses Spikers and Updrafts, uses Shield Moos to reach an Ngapako Egg, passes through a safe Rail Car section, then continues through Giant Moo, Mewmew, and collapsing-wall sections before reaching Rongo Lango. Optional Phantomilians, Dream Stones, Mirror Spirits, Ngapako Eggs, hearts, and extra lives can be collected without affecting campaign progression. Rongo Lango has four health points and must be hit four times by throwing captured Moos at his exposed back. After the boss, Bell Hill's story scene plays and the game advances to Vision 2-1.
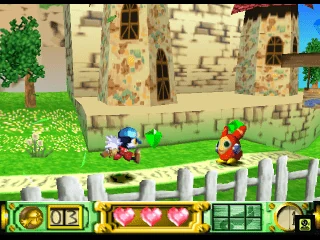
1. Establish the original PlayStation controls and the first Breezegale route
Use the D-pad to move left or right. Press Up to face toward the background and enter a door; press Down to face toward the foreground. X or Triangle jumps, and holding that button while descending lets Klonoa float. Square or Circle fires the Wind Bullet. When the Wind Bullet hits an ordinary enemy, Klonoa inflates and holds it; press Square or Circle again to throw it. Press X or Triangle while holding an enemy to perform the enemy-assisted double jump. Klonoa cannot float while he is still holding an enemy, so release or throw it before trying to extend a jump. Start pauses the game.
After the opening scene, move right and capture the first Moo. Use it for the elevated Dream Stone if you want the item, then continue right. Capture the Moo that drops from the castle and throw it into the next Moo. A further Moo can be thrown into the background Ngapako Egg for an optional Dream Stone. Face toward the background before throwing so the enemy reaches the egg.
Cross the bridge and capture the green Tepon only if you want its Dream Stones. At the far side, capture the charging Zippoe and throw it into the first Phantomilian bubble. Continue along the lower path until the ground dips. Wait near the low point, capture the fast Zippoe, and use the enemy-assisted double jump to reach the upper ledge. Take the nearby small heart if needed. Capture the next Zippoe and use it to activate the Memory Clock before continuing.
- X or Triangle jumps and floats; Square or Circle fires and throws.
- Practice one enemy-assisted double jump before the whirlwind section.
- The first Phantomilian is released with a thrown Zippoe.
- The first Memory Clock is reached after the dipped-path Zippoe jump.
2. Cross the Breezegale whirlwind and enter Balue's Tower
From the Memory Clock, move onto the upper ledge and use a Moo against the nearby Moo. Capture the Zippoe that follows and enter the whirlwind. At the top of the updraft, use the Zippoe for a double jump. Drift slightly left during the jump, then fire the Wind Bullet while descending to release the second Phantomilian. If you miss, wait for another Zippoe to appear on the right side of the whirlwind.
At the edge of the upper path, jump left and hold X or Triangle during the descent to float onto the lower platform. Capture the sliding Moo before it reaches you, throw it into the next Moo, and use the returning enemy for the higher bubble. Capture a bouncing Boin and throw it into the other Boin. The next Moo can be used for the enemy-assisted jump to the third Phantomilian. Enter the door by pressing Up while facing it.
Inside Balue's Tower, simply follow the unfinished passage through the story scene and continue until you exit on the other side. Vision 1-1 has no required key gate on this direct route; do not delay the campaign looking for a key.
- Use the whirlwind to gain height before the Zippoe double jump.
- Float only after beginning the normal jump and starting to descend.
- The tower door is entered with Up, not with a key.
- The third Phantomilian is reached with the respawning Moo after the Boin section.
3. Finish Breezegale through the Spikers and Gondola
After leaving the tower, activate the Memory Clock outside. Use the nearby Moo for height, then capture the Flying Moo during the descent and double-jump to the fourth Phantomilian. Use another Flying Moo to reach the raised left-hand route. At the first Spiker, wait until it has lowered and begun rising, then move underneath it. At the group of three Spikers, wait until all three are visibly above the ground before crossing. Do not rush this section; a normal jump is less reliable than waiting for the opening.
Board the Gondola at the end of the path. During its ascent, fire the Wind Bullet at the fifth Phantomilian bubble. At the upper route, pass the Spikers and activate the Memory Clock. The extra life below can be collected by jumping back toward the previous area, but it is optional; missing it does not stop progression.
Return to the lower path near Balue's Tower and move left. Release the sixth Phantomilian with the Wind Bullet as you pass its bubble. Drop to the lower route, avoid the Spiker and the charging Zippoe, then run through the opening in the wall to clear Vision 1-1. The stage-clear screen confirms Breezegale is complete.
- Use the Flying Moo for the fourth Phantomilian and the Gondola bubble.
- Wait for Spikers to rise before passing beneath them.
- The Gondola is the required route to the upper section.
- The cave opening after the final Zippoe ends Vision 1-1.
4. Reach Gunston Mine's Rail Car in Vision 1-2
At the start of Gunston Mine, drop to the brown pillars below the first gap. Cross the pillars by jumping while the Spikers are traveling downward, then continue left past the alternating Moo and Zippoe spawns. Ride the Updraft to the upper path and move right to release the first Phantomilian.
Return to the lower route near the beginning and jump the gap toward the right. Avoid the Shield Moo and the Zippoe following from behind, then ride the next Updrafts to the upper platform. Approach the Shield Moos from behind because their shields repel frontal Wind Bullets. Capture one Shield Moo and throw it into the other. Capture the surviving Shield Moo and throw it into the foreground Ngapako Egg to release the second Phantomilian. Cross the gap for the heart, then use the three Boins: throw the first into the second and use the third for a double jump to the ledge. Enter the door.
Activate the Memory Clock and board the Rail Car. The car carries Klonoa through the mine and cannot be fallen from during this sequence. When it reaches the end and appears to break apart, remain aboard; the crash is scripted and does not damage Klonoa. Activate the next Memory Clock after the crash and continue through the doorway.
- Jump between pillars while the Spikers descend.
- Never attack a Shield Moo directly from its front.
- Use two Shield Moos to reach the second Phantomilian.
- Stay on the Rail Car through its scripted collapse.
5. Clear the cavern, Giant Moo, and Mewmew sections
After the Rail Car, use the Fan Grass to reach the upper-left platform, then take the lower path and ride the next Fan Grass to the upper-right platform. Release the third Phantomilian, drop beside the doorway, and enter the cavern. Activate the Memory Clock. Approach the Giant Moo until the Shield Moo appears, capture the Shield Moo from behind, and throw it into the Giant Moo to clear the route. At the far end, capture the Flying Moo and use it to release the fourth Phantomilian, then return through the left door.
Follow the upper platforms, drop at the end, and move left across the gap. Avoid the charging Zippoes and the Shield Moo, then enter the next doorway. Activate the Memory Clock and cross the Updrafts. When a Mewmew releases bouncing projectiles, wait for the attack to pass, jump over the projectiles, and capture Mewmew while it is exposed. Throw the captured Mewmew into the next Mewmew, then capture another and throw it into the background Ngapako Egg for the fifth Phantomilian.
Continue right and collect the extra life if the jump is safe. Reach the upper route, capture the Shield Moo from behind, and throw it into the X-marked stone slab. The slab falls and creates the bridge. Activate the Memory Clock, cross the bridge, and use the advancing Zippoes to reach the final Phantomilian bubble. After releasing it, jump near the bubble's former position to reveal the hidden Ngapako Egg and break it for an extra life. Use the nearby Boins to collect the available hearts before entering the cave.
- The Giant Moo is cleared with a thrown Shield Moo.
- Wait through Mewmew's bouncing-projectile attack before capturing it.
- The X-marked slab must be knocked down to create the final bridge.
- Collect the final hearts before starting the boss scene.
6. Defeat Rongo Lango and confirm the chapter's completion
Rongo Lango has four health points and cannot be damaged by the Wind Bullet. At the beginning, capture the Moo on the left and throw it into Rongo Lango's back for the first hit. After the boss recovers, keep some distance and capture another Moo. When Rongo Lango performs the high jumping attack, run so the boss jumps over Klonoa or lands ahead of him, then throw the Moo into the exposed back.
Rongo Lango may fall forward when Klonoa stays in front or spin its tail when Klonoa stands too close behind. Retreat instead of hugging the boss. When the tail strikes the ground, jump over the traveling shockwave. When the boss spins and sends rainbow rings across the arena, jump over the rings. After each special attack, capture a fresh Moo and wait for the next rear-facing opening.
Four successful Moo throws deplete the health bar. If Klonoa is hit, use the brief post-hit float to correct the landing, move away, and wait for another Moo rather than attempting an immediate throw. After the boss is defeated, allow the Bell Hill story sequence to play. The game then advances toward Vision 2-1. For post-game stage records, use Vision Clear from the title screen through Continue after completing the game; do not rely on the World Map for those records.
- Rongo Lango's health bar reaches zero after four rear hits.
- Jump over the shockwave and rainbow rings.
- The Bell Hill story scene plays after the boss.
- Vision 2-1 becomes the next available campaign stage.
Before you move on
- Breezegale, Vision 1-1, ends at the cave opening after the final Zippoe.
- Gunston Mine, Vision 1-2, reaches Bell Hill after the final cave route.
- Rongo Lango's boss health reaches zero after four thrown-Moo hits.
- The post-boss Bell Hill story scene plays and the route to Vision 2-1 opens.
- Optional progress can be checked through the Phantomilian panel and, after campaign completion, through Vision Clear accessed from the title screen via Continue.
- The complete campaign still requires Visions 1-1 through 6-2, Ghadius, the separate Final Vision against Nahatomb, and the full ending and credits.
References for this chapter
- Klonoa: Door to Phantomile — Original North American PlayStation Manual
- Klonoa: Door to Phantomile — Guide and Walkthrough, PlayStation, Save_Some_FACE
- Vision 1-1: The Beginnings of Gale — Breezegale Walkthrough
- Vision 1-2: The Diva and the Dark Spirit — Gunston Mine Walkthrough
- Klonoa: Door to Phantomile — Guide and Walkthrough, PlayStation, BJange
Vision 2 — Forlock’s Dying Forest and Jugpot
Vision 2-1 crosses Forlock’s dying forest, where Spikeshield Moos, Shellies, Bombers, Mouseys, moving leaves, and water hazards require careful enemy use. Capture creatures for double-jumps, activate Memory Clocks before difficult sections, and use the key obtained after the cutscene to open the locked door near the end. Vision 2-2 travels through Jugpot’s rising fountains, moving platforms, water streams, and backwards waterfall. Its story route ends at the background switch and the Pamela and King Seadoph battle. The boss is defeated by capturing Seadoph and throwing him into Pamela four times. Dream Stones, Mirror Spirits, Phantomilians, Ngapako Eggs, hearts, and Extra Lives are optional and are not required to unlock later Visions.
1. Enter Forlock and cross the first forest hazards
Move right from the start and jump over the first Spikeshield Moo. Capture it after clearing its charge, then throw it away so it cannot block the narrow path. Continue over the gap and drop into the small recess, where a Shellie moves rapidly between the walls. Wait until it briefly exposes itself, then capture or avoid it.
Continue past the Bomber and its falling spiked projectiles. When the next Spikeshield Moo charges, capture it and use it on the nearby Ngapako Egg if desired; this produces optional Dream Stones rather than required progress. Proceed right to the swinging Mousey. Capture it after avoiding the Bomber’s attack, then use its double-jump to reach the higher ledges. A Tepon provides the lift needed to reach the first Phantomilian, but rescuing it is optional for the story route. Return to the main path and activate the Memory Clock before continuing.
- Jump over the first Spikeshield Moo before attempting to capture it.
- Wait for Shellie to expose itself instead of trying to grab it while it is rolling between walls.
- Activate the first Memory Clock before the moving-leaf section.
2. Use the leaves and open the first locked section
Continue right past the Bomber and Moo, then ride the moving leaves across the gap. Let each leaf settle beneath Klonoa before jumping to the next one; holding forward continuously can carry you beyond the landing point. On the lower route, capture the Spikeshield Moo and use it on the Ngapako Egg if you want the optional Phantomilian. If the attempt fails, a Moo respawns nearby, allowing another try.
Use the respawning Moo for a double-jump to the upper path. Continue through the door, then climb the ledges and enter the next door. Use the Tepon to reach the Extra Life and Memory Clock if safe. The same Tepon can help you reach the nearby Ngapako Egg containing an optional Phantomilian. Return to the previous ledge, deal with Mousey and Shellie, and use another Shellie as a double-jump tool to reach the next door.
A cutscene follows. When it ends, Klonoa receives a key. Walk into the locked door to open it, then continue right. Use the Moo in this section to reach the heart if needed. A second Moo appears on the left; use it to activate the next Memory Clock, then return right and pass the Spikeshield Moo into the following door.
- Use a respawning Moo rather than risking a long jump without a double-jump resource.
- Collect the key after the cutscene before attempting the locked door.
- Treat the Phantomilians and Extra Life in this section as optional.
3. Climb the Shellie spiral and reach the leaf platforms
At the Shellie spiral, remain clear of the rolling enemies until one exposes itself. Capture it and throw it into the two Ngapako Eggs. One egg contains an optional Phantomilian and the other contains a golden heart. Continue down the spiral, avoiding Shellies, and use the Tepon to reach the higher ledge.
Wait for the Mewmew to finish releasing its bombs before capturing it. Use Mewmew on the Ngapako Egg to obtain the next key, then ride the leaf to the door and enter. Activate the Memory Clock immediately inside. Capture the swinging Mousey by facing toward the lane from which it approaches, then throw it into the Spikeshield Moo on the right.
Jump near the next egg to reveal it, then get behind the Spikeshield Moo and use the enemy to break the egg. The contents are optional Dream Stones. When the Spikeshield Moo on the left reaches you, capture it but do not throw it. Ride the leaf to the right, face left, and wait until the leaf is level with the egg containing the Phantomilian. Throw the captured Moo into the egg, then jump to the next leaf when the landing is safe.
- Wait out Shellie’s exposed opening before capturing it.
- Do not throw away the Spikeshield Moo needed for the leaf-platform egg.
- Use the key from Mewmew to open the next door.
4. Finish Vision 2-1 through the Bomber pair
Cross the next two leaves and land on the path beyond them. A Spikeshield Moo waits on the small ledge; capture it or repeatedly hit its shield with the Wind Bullet to push it away. Continue across the leaves while avoiding the two Bombers. Activate the Memory Clock beneath the mushroom before attempting the final lower section.
Climb onto the mushroom, remove or bypass the Moo, then drop down for the final optional Phantomilian. Bombers continue attacking while you are below, so make the rescue quickly and return to the upper ledge. Jump over the descending Spiker, avoid the next Spiker, and take the heart on the small ledge only if the approach is safe.
The Mirror Spirit near the exit is optional. Follow the fleeing Bomber while avoiding its bombs, then capture it when it slows or turns. Throw it into the next Bomber to clear both enemies. Jump the final gap and continue right into the cutscene. The Vision 2-1 Clear message confirms completion.
- Activate the Memory Clock beneath the mushroom.
- Do not pursue the Mirror Spirit if it costs health or a life.
- Use the fleeing Bomber against the second Bomber before crossing the final gap.
5. Begin Jugpot and reach the first two interior areas
In Vision 2-2, move right and remove the Moo on the moving platform. Use the rising fountain to reach the ledge on the left. Wait for the first Dabby to finish throwing bombs, then capture it and throw it into the next Dabby after that enemy completes its own attack. Continue over the fountain and watch the short scene.
After the scene, climb the right-hand ledges and let the Shield Moo approach. Drop back one ledge, wait for it to turn, then capture it and activate the Memory Clock. Return left, capture the Moo on the moving platform, and remain on the platform as it travels right. Near the Dream Stones, use the Moo’s double-jump to reach and pop the nearby bubble containing the first optional Phantomilian.
Return left and wait safely while the Dabby attacks. Capture the recurring Flish and throw it into the Dabby, then capture the respawning Flish again and use it to double-jump over the Moo. Descend to the second optional Phantomilian, then climb back up and enter the door.
- Use the fountain as a lift rather than jumping away from it early.
- Wait for Dabby’s bomb throw before capturing it.
- Use the recurring Flish as a renewable double-jump resource.
6. Cross the moving platforms, fountains, and tree section
Activate the Memory Clock inside the door. Move left, defeat or bypass the Dabby, and take the heart if needed. Capture the Moo on the moving platform and use the upper-left route. Wait for the Spiker to move away, then double-jump to the Extra Life and third optional Phantomilian. If the jump fails, use the respawning Flish to try again.
Take the lower route left, climb the ledges, activate the next Memory Clock, and exit. Capture a Flish and use it to double-jump over the waiting Moo, then enter the door for the fourth optional Phantomilian. Return upward and move right. Capture the Moo near the rising fountain but keep it; do not throw it away.
Ride the fountain and jump across the two trees. Use the captured Moo’s double-jump to reach the path on the right. Activate the Memory Clock, cross the next fountain gap, then drop into the water route. Jump and briefly float over the large spiked balls while continuing right. Use the recurring Flish to double-jump over the Moos, then use the Shield Moo to reach the next door.
- Keep the captured Moo through the two-tree crossing.
- Use short floats over the large spiked balls instead of stopping beneath them.
- Use Flish whenever a normal jump cannot reach the next ledge.
7. Ride the backwards waterfall and trigger the boss
Activate the foreground Memory Clock and capture the Shield Moo. Move left and jump around the background to reveal the Ngapako Egg; break it for an optional heart. Continue along the lower route, ride the moving platform when it rises near the left ledge, and reach the fifth optional Phantomilian if desired. Return to the bottom path and follow the fountains and tunnel left.
At the backwards waterfall, activate the Memory Clock and let the current carry Klonoa. Flying Moos flee, but Spikers appear when the water flattens and slows. Jump over them, then avoid the additional Spikers after the next drop. Activate the Memory Clock at the end of the ride.
Capture a Shield Moo and throw it at the Giantshield Moo when the larger enemy’s back is turned. Climb the small ledge and wait for another opening. Inflate the Giantshield Moo with the Wind Bullet, then use the Shield Moo for a double-jump from the inflated giant enemy to the upper ledge. Move left for the golden heart and final optional Phantomilian, then wait for the Shield Moo to respawn so you can return to the upper path.
Continue left, use another Shield Moo to reach the high route, and ride the final fountain and water stream. Dodge the Spikers, climb the ledges, and take the Extra Life on the third ledge only if the jump is safe. Go through the door. After the exterior scene, move left and press the switch in the background. The following scene leads directly to the boss.
- Jump over Spikers during the slowed portions of the water ride.
- Use the Shield Moo only when the Giantshield Moo is facing away.
- Press the background switch after the exterior cutscene to begin the boss.
8. Defeat Pamela and King Seadoph
The arena is almost circular, with the upper area producing giant spiked balls. Pamela and King Seadoph move together and jump toward Klonoa. Stay near the lower part of the arena and keep moving. Jump over the spiked balls instead of trying to fight while they pass through the arena.
When Seadoph becomes reachable, capture him with the Wind Bullet. Line up with Pamela and throw Seadoph into her while she is exposed in the center or during one of her diving attacks. Throws are easiest from the lower section of the arena; aiming from a high curve can cause Seadoph to pass above or below Pamela.
Pamela’s spinning attack has a wider reach. Avoid it completely and wait for another cycle. When Seadoph leaves Pamela and rides one of the hazards, Pamela may release bubbles that rise and descend through the arena. Pop bubbles threatening your landing with the Wind Bullet or move through a clear gap, then capture Seadoph when he passes close enough.
Repeat the capture-and-throw cycle. Four successful throws of King Seadoph into Pamela break the spell and end the fight. Wait for the Vision 2-2 Clear message and the following story sequence before treating Vision 2 as complete.
- Capture King Seadoph, not Pamela.
- Throw Seadoph into Pamela four times.
- Avoid Pamela’s spinning attack.
- Jump over the spiked balls and remove bubbles that threaten your landing.
- Confirm the Vision 2-2 Clear message after the boss sequence.
Before you move on
- Vision 2-1 is complete when the final Bomber pair has been cleared, the exit cutscene has played, and the Vision 2-1 Clear message appears.
- Vision 2-2 is complete when the backwards-waterfall route is finished, the background switch has been pressed, Pamela and King Seadoph have been defeated, and the Vision 2-2 Clear message appears.
- The boss requires four successful throws of King Seadoph into Pamela. This is the required story action; optional collectibles are not necessary.
- The next available story destination confirms that Vision 2 has cleared. To review stage records after finishing the campaign, complete the game, choose Continue from the title screen, then choose Vision Clear.
- A first campaign run does not require a full Dream Stone total, every Phantomilian, or the Mirror Spirit puzzles.
Vision 3 — Forlock Reborn and the Tree Mansion of Machinery
Vision 3-1 returns to Forlock after the water route is restored. Activate the gondola, obtain the two keys hidden in Ngapako Eggs, unlock the required doors and survive the rail-car Spiker section. The final gondola route carries Klonoa into the Tree Mansion. Vision 3-2 begins with a Boomie-operated hammer and wooden platform, then moves through mansion doors, machinery, timed barriers and Joka’s challenge. The two Flying Moo double-jumps must be chained to reach Joka and obtain his key. After striking the mansion switches left, right and centre, cross the upper machinery route and reach Granny’s house. Gelg Bolm has five health points. Capture Moos, use the Jump Platforms and strike the exposed core from above during the boss’s charge. Optional Phantomilians, Dream Stones, hearts and the extra life are not needed to unlock Vision 4.
1. Restore the Forlock route in Vision 3-1
Run right past the first two Jump Platforms and the gap. Use the third Jump Platform to reach the upper path between the two Crates, then continue right to the inactive Gondola. Run left so the Moo and Armored Moo emerge from behind the background fence. Wind Bullet the Moo, jump over the Armored Moo and throw the captured Moo at the left Crate. Follow the opened path around the tree and enter the hut containing the Forlock Guard.
Return right to the Gondola. On the way, avoid the Spiked Balls and Spring Moo, then ride upward. At the next wooden platform, activate the Memory Clock before continuing. Ride the Gondola into the background and look for the opening to the upper route. Capture the Moo, use its double jump to reach the higher path and throw it at the Ngapako Egg. The Egg reveals the first key. Return to the Gondola and head back toward the foreground.
Use the upper route to free Phantomilian Prisoner 1 if desired, then drop to the lower path and unlock the first locked door. In the next area, activate the Memory Clock, ride the Gondola into the background and move right past the Spiker. Capture Dabby and use it to break the Crate above the hole. Drop through the opening, free Prisoner 2 if collecting optional rescues and use the Jump Platforms to return to the upper route.
Continue to the upper section and activate the next Memory Clock. Capture the Spring Moo near the end of the path and throw it at the Crate in the background tree. Aim carefully so the throw does not strike the Armored Moos below. Return by Gondola, take the left path and drop through the hole. Use Dabby to reach the area around Prisoner 3, then capture a Moo and throw it at the overhead Crate to reveal the second key.
Ride the Gondola into the background. Drop into the area with the Shellies and throw one at the Flower Bud to reveal an Ngapako Egg. Use another Shellie on the Egg if you are collecting Prisoner 4. For the bridge, capture a Flying Moo and use its double jump to reach the archway. Throw the Flying Moo at the Giant Armored Moo, then Wind Bullet the Giant Armored Moo and jump over it to continue.
Proceed down the lower route and use the three Jump Platforms to reach the tree recess. A Moo inside the tree can be used to expose the Flower Bud containing an optional extra life. For the required route, use the available Moo and Armored Moo to break the Crate, then take the revealed path back toward the locked door. The next area drops Klonoa onto a rail car. Activate the Memory Clock before the Spiker sequence. Jump over the first group, move between the second group, jump through the opening in the circular third group and shift sides for the final faster groups. The final pattern is safest if you stay on the side opposite each incoming cluster.
After the rail car, capture the Spring Moo and use the Jump Platform to reach the upper route. Capture Dabby, use it to remove the Giant Armored Moo and throw Dabby at the switch behind it. Ride the Gondola upward. Use the respawning Flying Moo to free the final optional prisoner and perform the required double jumps across the upper path. When the route ends, the Forlock Guard summons a floating wooden platform. Ride it into Vision 3-2.
- Take the first key from the Ngapako Egg in the background Gondola section.
- Take the second key from the Crate above the Dabby route.
- Unlock the lower door and complete the rail-car Spiker section.
- Use Dabby on the switch and ride the Gondola to the final upper path.
- Reach the dead end where the Forlock Guard summons the floating wooden platform.
2. Start the Tree Mansion machinery
At the start of Vision 3-2, run right and Wind Bullet the Boomie. Stand in front of the small opening in the background fence and throw Boomie through it. Move away immediately. Boomie flashes before detonating, and the explosion can damage Klonoa. The blast activates the switch and causes the hammer to strike the wooden platform.
Ride the wooden platform right. When it stops beside the door, get off and enter. Run right, jump through the ceiling opening and enter the door on the right to go inside the tree. Cross the bridge, pass through the next door and continue to the inactive Rolling Log beside the key. Jump across the log, collect the key and return outside to the wooden platform.
Ride the platform to the next route, then move left past the Boomies and leave through the door. Activate the Memory Clock to the right before beginning the upper-platform section. This key is used later for the mansion’s locked route; do not waste time searching this opening area for a second key.
- Throw Boomie through the background fence opening.
- Move clear before Boomie detonates.
- Collect the key beside the inactive Rolling Log.
- Activate the Memory Clock after returning outside.
3. Open the route toward Joka
Cross the gap and quickly capture Dabby. Throw Dabby at the jumping Moo, then use the wooden platforms to reach the upper path. Capture Monkey Moo and throw it backward at Phantomilian Prisoner 1 if you are pursuing optional rescues. Continue left past the Spikers and Giant Shielded Moo.
Wait for the Flying Moo to appear near the cycling Spiker. Capture it, use the Jump Platform to reach the upper path and run to the end. Turn to face right and throw the Flying Moo at the switch. This opens the hole and changes the door route. Return right, drop through the hole, pass through the opened fence and use the Jump Platform to reach the door.
In the next room, move quickly beneath the green Dream Stone. Capture Boomie, jump and throw it at the Ngapako Egg to free Prisoner 2 if desired. Enter the door on the right. In the following area, move left past Boomie and Shellie. Throw the next Boomie at Prisoner 3 if collecting it, then continue through the door at the far left.
Activate the Memory Clock and follow the upper path left. Capture the Boomie that appears, cross the gap and drop to the lower route. Throw Boomie to the left, immediately return to the gap and fall to the lower path. Run left through the temporary opening before the explosion cycle closes the route. This brings you to Joka’s challenge room.
- Use Dabby to clear the jumping Moo.
- Use Flying Moo on the switch to open the hole and door.
- Use Boomie on the Ngapako Egg beneath the green Dream Stone.
- Reach Joka’s challenge room through the temporary opening.
4. Take Joka’s key and restart the mansion
In Joka’s room, wait for the two Flying Moos to appear. Capture the first one, immediately perform its double jump, then capture the second Flying Moo and double-jump again toward Joka’s high platform. The sequence must be chained while airborne; do not land between the two captures. If the attempt fails, wait for the Flying Moos to return and reset the jump rather than attempting a low-probability recovery.
Joka drops the key after the scene. Collect it, then float from the ledge toward Prisoner 4 and Wind Bullet the prisoner before falling if you are collecting rescues. Leave the room and return to the outdoor area with the red-framed locked door. Unlock it with Joka’s key.
Inside the mechanism room, strike the three switches in this exact order: left, right, centre. The tree machinery restarts and opens the upper route. Activate the Memory Clock on the right, then return outside. Jump over the door, run right and enter the tree through the door at the far end.
- Chain both Flying Moo double-jumps without landing.
- Collect Joka’s key.
- Strike the switches left, right, centre.
- Activate the Memory Clock after the machinery restarts.
5. Cross the upper mansion route
Cross the bridge and enter the next door. Drop beside the Jump Platform and enter the first door on the right. In the following room, jump over the wooden platform and use the door on the opposite side. If you step onto the platform, you will have to ride it across the room, so use the door directly when the route is clear.
Continue through the gap and bridge doors until you reach the Rolling Log. Ride the log while waiting for the Gondola to descend, then board the Gondola and ride toward Prisoner 5. Jump onto the Conveyor Belt to the left, turn around and Wind Bullet Prisoner 5. Activate the Memory Clock before crossing the Spinning Platforms, Conveyor Belts and Spikers. Enter the left-hand door.
Drop onto the descending Conveyor Belt. At the correct height, jump up and Wind Bullet Prisoner 6 if you are pursuing the optional rescue, then land on the Rolling Log below. Ride the wooden platform upward and leave the mansion. Outside, pass the Giant Shielded Moo and run right while avoiding the Giant Spiked Balls. Enter the final door and ride the central wooden platform to Granny’s house.
The extra life and gold heart near the final approach are optional. Take them only if the route is stable. Missing either item does not prevent the boss, the Granny scene or access to Vision 4-1.
- Use the opposite door instead of taking the unnecessary wooden-platform ride.
- Free Prisoners 5 and 6 only if pursuing optional completion.
- Activate the Memory Clock before the Spinning Platform and Conveyor Belt section.
- Reach Granny’s house after the Giant Spiked Ball route.
6. Defeat Gelg Bolm
Gelg Bolm has five health points and can be damaged only through the exposed core in its centre. Stay near one side of the arena and wait for a Moo to enter from the background. Wind Bullet the Moo, then stand on a Jump Platform. When Gelg Bolm charges across the arena, jump high and perform the double jump as the boss passes underneath. The captured Moo strikes the exposed core.
If a charge begins before a Moo is available, use the Jump Platform to clear Gelg Bolm and wait for another Moo. Do not attempt ordinary Wind Bullet attacks against the boss. After the opening exchanges, Gelg Bolm uses a small fireball. Jump from the Jump Platform and float over it. The later large fireball requires more height, so use a platform-assisted double jump or jump from the platform and float until the projectile passes.
For the jump-slam, watch Gelg Bolm’s shadow. The shadow swings while the boss tracks Klonoa. When the shadow stops swinging, move away because the landing is imminent. Keep the expected landing point away from the Jump Platform so the platform remains available for the next attack. After Gelg Bolm lands, obtain another Moo and prepare the next overhead strike.
Later, Gelg Bolm turns magenta and charges faster. The same method remains dependable: stay at an edge, capture a Moo, use the Jump Platform and strike the exposed core during the charge. Repeat until all five health points are removed. The boss defeat leads into the Granny scene and unlocks Vision 4-1. No separate action is required to continue.
- Use captured Moos for core attacks rather than ordinary Wind Bullet shots.
- Use the Jump Platform to gain the height needed for each overhead hit.
- Read the shadow to evade the jump-slam.
- Float over the small fireball and use greater height for the large fireball.
- Deplete all five health points and allow the post-boss Granny scene to finish.
Before you move on
- Vision 3-1 is complete when the Forlock Guard summons the floating wooden platform and the transition into the Tree Mansion begins.
- Vision 3-2 is complete when Gelg Bolm’s five-point health bar reaches zero and the Granny scene finishes.
- Vision 4-1 should become available after the post-boss conversation sends Klonoa toward the Wind Ruins.
- For ordinary progress, use the World Map and its normal save procedure separately from stage replay selection.
- After completing the campaign, return to the title screen, choose Continue and use Vision Clear to replay cleared stages and inspect their 150-Dream-Stone records. Do not look for a separate post-game “Clear Vision map” on the World Map.
References for this chapter
- Vision 3-1: Rebirth of the Forest ~Forlock, The Tree Village~ — Klonoa: Door to Phantomile Walkthrough & Guide
- Vision 3-2: The Stopped Gear — Klonoa: Door to Phantomile Walkthrough & Guide
- Klonoa: Door to Phantomile — Guide and Walkthrough, PlayStation, Save_Some_FACE
- Klonoa: Door to Phantomile — PlayStation Manual
Vision 4 — The Ruin of the Wind Kingdom and Leviathan's Ice Cavern
Vision 4 has two stages. Vision 4-1 climbs the ruined Wind Kingdom using Flying Moos, Spindles, Roped Platforms and Wooden Swings. Vision 4-2 crosses Leviathan's Ice Cavern through water streams, updrafts, Green Boulders and a return route through the skeleton chambers. The required route does not depend on collecting every Dream Stone or using Mirror Spirit. Each stage contains six Phantomilians for optional rescue completion. After Vision 4-2, Baladium is fought on a swinging bridge. Capture Flying Moos during the backward swing and throw them at the pairs of crystals on Baladium's body. Read the wing color to avoid the current hazard, then repeat until all eight crystals are destroyed. The post-battle sequence sends Klonoa toward Vision 5-1.
Vision 4-1: Enter the ruined Wind Kingdom
Move right past the first two Moos and capture the third. Use it to double-jump over the Spindle beneath the blue Dream Stone. Continue through the corridor, capture the Moo blocking the path, and climb toward the Flying Moo on the right. Capture the Flying Moo and use its double-jump to reach the upper path.
Capture the next Flying Moo and use it to cross the Spindle beneath the second blue Dream Stone. When the Spindle moves away, run left through the door. Activate the Memory Clock inside. Mirror Spirit is optional; leave it alone if you are following the campaign route only.
- Use the original PlayStation controls: D-pad movement and lane positioning, X or Triangle to jump and float, and Square or Circle for the Wind Bullet and throws.
- Activate the first Memory Clock before beginning the vertical ruins section.
- The early Dream Stones are optional and do not block the exit.
Rescue the first four Phantomilians
Go left while carrying the Moo, then double-jump to the ledge on the right. Capture the Flying Moo on the left and use it to climb when the Spindle is clear. Capture the ordinary Moo ahead and double-jump over the next Spindle. Capture the Flying Moo across the gap and land beside Phantomilian 1. Use another Flying Moo to reach the upper platform, then jump over Phantomilian 1 and fire the Wind Bullet while passing above the bubble.
Capture another Flying Moo, reach the platform with the door, turn around, and jump toward the hole in the ruin. Enter the hole and wait for the two Flying Moos. Use the first for a double-jump, then immediately use the second to gain enough height to free Phantomilian 2 on the left. Return to the previous area, jump over the Flying Moo, float to the door and enter the ruins.
Activate the Giant Shielded Moo and run right along the lower route. When a Spindle drops into the path, turn around, capture the Moo behind you, then return and double-jump over the obstruction. Leave through the door. Outside, use the Giant Shielded Moo while moving left past Glibz's spiked balls. Capture Glibz after it fires, then use the thin platforms to reach Phantomilian 3.
From the upper platform, jump and float left. Wait for Glibz to fire, cross to the upper route, capture Glibz and throw it into the Moo ahead. Capture the Flying Moo that appears, jump toward Phantomilian 4 and use the enemy double-jump to reach the next platform while firing at the bubble. Enter the door after freeing it.
- Phantomilians 1 through 4 are optional but required for the six-rescue stage result.
- Re-capture enemies as needed; do not try to carry one enemy through the entire section.
- Use the float after an enemy double-jump to correct your landing position.
Cross the Roped Platforms and Wooden Swings
At the next section, capture one Plowm and throw it into the other. Activate the Memory Clock on the left. Drop to the lower path and wait for Burnie's orb to shine before moving near it. When the fire ring spreads, capture Burnie and throw it into the background Ngapako Egg for an extra life.
Continue right past the Spikers and Moos until Summy appears near the broken arch. Use a Plowm against its partner, then step onto the Roped Platform. Jump again immediately after landing; waiting too long can drop Klonoa below the route. Activate the Memory Clock at the far end.
Capture the Flying Moo, land on the Roped Platform and immediately double-jump to the next path. Capture the Moo on the following platform, use the rope and double-jump to the upper route for the green Dream Stone, then continue upward. Capture the Flying Moo and use it to reach the high platform on the left for the extra life. Return to the main path and run right through the tree.
At the Wooden Swings, activate the Memory Clock. Wait for each swing to travel fully left before jumping and floating to the next. On the third swing, free Phantomilian 5 when the platform is beside the bubble. At the final swing, wait until it reaches the Flying Moo, capture that enemy, turn around and throw it at Phantomilian 6. Jump left from the swing and enter the exit door.
- The Ngapako Egg must be broken with a captured enemy.
- Phantomilians 5 and 6 are the final optional rescues in Vision 4-1.
- If a swing is missed, wait for it to return instead of attempting a blind jump.
Vision 4-2: Ride the streams into Leviathan's Ice Cavern
Run right down the four slopes while avoiding Moos and Spikers. On the final slope, capture a Moo. If it escapes, run back up and let another Moo slide toward you. Walk to the suspicious shadow beside the door to reveal an invisible Ngapako Egg, then break it with the captured Moo for a small Heart.
Enter the cave and activate the Memory Clock before entering the water stream. Ride left and fire the Wind Bullet at Phantomilian 1 as you pass. Capture the Flying Moo ahead and use it for the extra life before the opening. Outside, continue left, jump over three Spikers, ride the next stream downward and free Phantomilian 2 just before the opening. Use the nearby green Dream Stone as a visual landmark, not as a requirement.
- Activate the Memory Clock before the first stream because missed stream rescues require a retry.
- The invisible Ngapako Egg is beside the door shadow at the start of Vision 4-2.
- Phantomilians 1 and 2 are positioned during the stream rides.
Clear the Green Boulder and updraft route
Back inside, activate the next Memory Clock and run right. When Burnie appears beside the Green Boulder, wait for its orb and fire ring, then capture it and throw it into the boulder. At the next boulder, capture the Moo and ride the updraft to the upper route. Jump over the Spindle and Green Boulder, capture a Plowm, and use it to clear the lower obstruction.
Fire the Wind Bullet at Phantomilian 3 on the upper route. Capture a Moo and throw it into the Green Boulder on the left, then ride the updraft back up. Capture another Plowm and throw it at the boulder near the switch. Fire at the switch to destroy the Pink Boulder, jump right through the opening, and activate the Memory Clock.
At the skeleton, capture Burnie and use the platforms to climb. Capture the first Flying Moo, double-jump, then immediately capture and use the next Flying Moo for a second lift. Ride the updraft to the door. In the next room, ride the updrafts left and free Phantomilian 4. Float toward the extra life, fall through the opening, and use the door to return to the previous area. The lower skeleton route is optional for Dream Stones and can be skipped.
- Phantomilian 3 is reached from the upper Green Boulder route.
- Phantomilian 4 is in the updraft room beyond the skeleton door.
- The lower skeleton area is optional and does not block Baladium.
Complete the return route and rescue Phantomilians 5 and 6
From the return door, jump across the platforms, capture the Flying Moo and double-jump toward the updraft. Drop left for the extra life, then ride the remaining updrafts. Capture the Moo on the upper route, use it to reach the door, ride the next updraft and fall right to capture the Flying Moo. Fire at Phantomilian 5 below, then return through the door.
On the final return, capture the Moo below and double-jump to the upper path. Cross the falling bones one at a time. While landing on the third bone, capture the Flying Moo, turn around and throw it into Phantomilian 6. If the attempt fails, wait for the bone to regenerate and try again. Ride the updrafts to the Green Boulder, capture the Flying Moo that appears, throw it at the boulder and go through the opening and door. Run right through the homecoming sequence to begin the boss encounter.
- Phantomilians 5 and 6 complete the optional six-rescue route for Vision 4-2.
- Do not wait on a falling bone; move as soon as the next bone becomes available.
- The route ends at home before the Baladium battle.
Defeat Baladium on the swinging bridge
Baladium has eight crystal targets arranged in four pairs: upper left, upper right, lower left and lower right. During the backward swing, move to a Flying Moo, capture it, and hold it until the bridge swings back toward Baladium. Throw near the center of a crystal pair to destroy both targets at once when the angle is favorable. A poorly centered throw may destroy only one crystal.
Read Baladium's wing color before crossing. Yellow summons a Zagard that advances and charges; jump over it. Purple sends flying bombs toward the background; avoid their lines during the return swing. Blue creates pillars between Klonoa and Baladium; move through the open spaces, remembering that the pillars clear after a backward swing. Red places stationary bombs near Baladium; avoid their alignment as you return.
Use one Flying Moo per swing instead of trying to hold an enemy across multiple cycles. After each throw, prioritize survival, float away from hazards if necessary, and wait for the next Flying Moo. Repeat until all eight crystals are destroyed and the eight-point boss health is depleted. The following scene resolves the ruined Wind Kingdom story and carries Klonoa toward Vision 5-1.
- All eight crystals are destroyed and Baladium's health reaches zero.
- The post-battle story sequence plays before Vision 5-1 becomes available.
- The main campaign does not require all Dream Stones or Phantomilians in Vision 4.
Before you move on
- Vision 4-1 ends after the Wooden Swing route and its exit door.
- Vision 4-2 ends after the return through the ice cavern and the homecoming sequence.
- Baladium's eight crystals are destroyed and the boss health display reaches zero.
- The story sequence after Baladium finishes and the route to Vision 5-1 becomes available.
- For optional rescue completion, each Vision 4 stage shows six Phantomilians rescued.
- For later Dream Stone review, return to the title screen, choose Continue, and open Vision Clear; do not use the World Map as the Dream Stone-record screen.
References for this chapter
- Vision 4-1: A Village in Danger — GuideVault
- Vision 4-2: A Lull in the Wind — The Leviathan's Ice Cavern — Klonoa: Door to Phantomile Walkthrough & Guide
- Klonoa: Door to Phantomile — Guide and Walkthrough, PlayStation, Save_Some_FACE
- Klonoa Door To Phantomile — All Phantomilians Vision 4-1 Locations Guide
- Klonoa: Door to Phantomile — PlayStation Cheats and Unlockables
Vision 5 — Coronia: Temple of the Sun
Vision 5-1 takes place in Coronia’s Temple of the Sun. Recover the Red, Blue, Green, and Yellow Orbs from their four branches, then use the restored elevator to reach Vision 5-2. The branches use lava, Burners, Floating Platforms, Rolling Wheels, background switches, enemy double-jumps, and Armored Moo chains. In Vision 5-2, daylight restores normal enemies that can be captured, while Eclipse enemies are invulnerable; use Gold Platforms during darkness and wait for light when a normal enemy is required. Joka has 8 HP. His first three successful captured-Moo hits trigger the first Eclipse. During each Eclipse, restore every floor panel to yellow. After daylight returns, keep landing captured-Moo hits until the remaining health is exhausted rather than assuming every later daylight phase lasts exactly three hits.
1. Enter the Altar Room and choose an Orb branch
After Pamela leaves Klonoa at Coronia, run right and enter the tunnel. The drop leads to the Temple of the Sun’s Altar Room, where four empty altars mark the Red, Blue, Green, and Yellow branches. The branches can be completed in any order; the route below uses Red, Blue, Green, then Yellow.
Before throwing an enemy, check the next platform, switch, background target, or Burner. Several sections provide one enemy for a required double-jump, so avoid spending it on an optional target unless another enemy is clearly available.
- Enter the Altar Room.
- Identify the four colored branch entrances.
- Preserve enemies needed for the next double-jump or background switch.
2. Recover the Red Orb
Enter the red-marked branch and ride the Floating Platform across the gap. Near the lava, Wind Bullet the Flying Moo and double-jump over the first Phantomilian prisoner to reach the opposite side. Enter the red door, activate the Memory Clock, and wait for the Burner to retract before crossing.
Capture the Moo beyond the Burner and take it onto the Metal Platform. During the ride, throw the Moo at the cross-marked Metal Plate in the background. At the far side, jump onto the Rolling Wheel, capture the Fifi that rises from the lava, and throw it at the second cross-marked plate. Cross the lowered plates, then collect the Red Orb.
After the Orb, climb right and activate the Memory Clock below the Spiker. Near the next Burner, wait for the ordinary Moo in the repeating enemy cycle. Capture it and double-jump past the Burner while its flames are low. Activate the next Memory Clock and enter the tunnel to return to the Altar Room. The Red Orb is placed automatically.
- Use the Flying Moo to cross the first gap.
- Knock down both cross-marked Metal Plates.
- Use the ordinary Moo for the final Burner double-jump.
- Confirm that the Red Orb is shining in the Altar Room.
3. Recover the Blue Orb
Take the blue entrance and ride the first Floating Platform across the gap. After the blue sign, Wind Bullet the two Algores, cross the lava, and wait for the foreground Floating Platform. On the next ledge, capture the nearby Moo and throw it at the Armored Moo to break its armor. If the damaged enemy remains on the ledge, finish it and use the captured enemy against the Ngapoko Egg in the background to free the optional prisoner.
Continue the Armored Moo chain by throwing captured enemies at the next armored target. Ride the Floating Platform into the background, cross the lava after the Burner deactivates, and wait for Glibz to finish firing its spiked projectiles before climbing to the Blue Orb.
Take the left return route. Wind Bullet the Algore near the Burner and throw it at the matching Algore beside the Ngapoko Egg if you want the optional rescue. Wait for the Moo from the background, capture it, and throw it at the egg. Activate the Memory Clock and enter the tunnel to return to the altar.
- Break the first Armored Moo before continuing.
- Wait for both the Burner and Glibz cycles.
- Use the background throws for the optional Ngapoko Egg.
- Confirm that the Blue Orb is installed.
4. Recover the Green Orb
Enter the green branch, ride the Floating Platform across the gap, and go through the door. Run left and activate the Giant Shielded Moo beside the platform. Ride down to the lower route, capture the ordinary Moo, place it on the Jump Platform, and throw it at the background switch. This opens the nearby metal door.
Take the upper route to the left, avoiding Algore’s spiked projectiles. Stop before the Burner, capture the ordinary Moo, and double-jump to the higher green-marked path. Move right into the small space beyond the Burner, capture the Flying Moo, and double-jump to the upper path beside the Giant Shielded Moo.
Activate the Giant Shielded Moo and use the nearby Jump Platform to clear the low Burner flames. Enter the door, activate the Memory Clock, and capture the Flying Moo. Drop beside the Spiker over the lava, double-jump over it, and Wind Bullet the switch on the opposite side. Wait for the Flying Moo to return, capture it, cross back over the Spiker, and enter the opened lower door.
Activate the switch inside, return through the door, and use the Flying Moo to reach the higher doorway. In the next section, activate the Memory Clock, drop toward the optional Phantomilian and 1UP if desired, then quickly capture a Fifi and throw it at the first Armored Moo. Continue throwing each damaged Armored Moo at the next one until the corridor is clear. Collect the Green Orb, activate the Memory Clock, and take the tunnel back to the Altar Room.
- Activate the Giant Shielded Moo at the start.
- Use the ordinary Moo on the first background switch.
- Use the Flying Moo to reach the second switch section.
- Return through the opened door before clearing the Armored Moo chain.
- Confirm that the Green Orb is shining.
5. Recover the Yellow Orb
Enter the yellow branch and repeat the opening setup: activate the Giant Shielded Moo, ride down to the lower route, capture the ordinary Moo, and use the Jump Platform to throw it at the background switch. Take the upper route, avoid the Algore projectiles, and use the Moo to double-jump to the higher yellow-marked path.
Run left past the two Algores and drop through the hole at the end. Wait for the Burner to deactivate, then jump onto the second Rolling Wheel. Capture the Flying Moo and double-jump toward the upper path. The 1UP is optional. Return to the Rolling Wheel and cross the next Burner during its low-flame cycle.
On the next platform, wait for the Spear Moo. Capture it, then double-jump across the gap to the right when the first Burner is low. Capture a Flying Moo and double-jump over the Ngapako Egg beneath the ledge if you want the optional rescue. Capture another Flying Moo to reach the upper-right path.
Continue right to the Yellow Orb. Activate the Memory Clock and wait for the Burner to clear before entering the return tunnel. The Yellow Orb is installed automatically.
- Use the ordinary Moo for the opening switch.
- Drop through the hole and use the Rolling Wheels.
- Reserve the Spear Moo for the later gap.
- Use Flying Moos for the optional egg and upper route.
- Confirm that the Yellow Orb is installed.
6. Activate the elevator
When all four Orbs are installed, all four altars shine and the rear door opens. Enter the Elevator Room, run right, and activate the background switch. Board the elevator after it starts. It carries Klonoa into Vision 5-2, Between Light and Darkness.
- Verify that all four altars are shining.
- Activate the Elevator Room switch.
- Ride the elevator into Vision 5-2.
7. Cross the daylight and Eclipse sections
Vision 5-2 alternates between daylight and darkness. In daylight, normal enemies can be captured. During an Eclipse, Ground Eclipses are unaffected by the Wind Bullet and Sky Eclipses can only be stunned. Neither type can be captured or defeated. Use the Gold Platforms during darkness, and wait for daylight whenever the route requires a normal enemy.
At the opening, capture an Algore and throw it at Glibz. Drop through the holes after the Burner deactivates, capture the Moo, and throw it at the background switch to remove the pillar. Use the Burner to reach the right-hand path. When darkness begins, jump across the Gold Platforms; from the second platform, look left and jump across to the first optional Phantomilian. Continue with the Jump Platform, switch, and pillar route into the door.
Use Memory Clocks as route markers. During daylight, capture Flying Moos for high paths and use Floating Platforms through Burner sections. During darkness, follow the Gold Platforms to elevated ledges and avoid trying to clear Eclipse enemies. The route continues through elevator and tunnel sections using switches, Flying Moo double-jumps, Glibz throws, and a Smork thrown at a background switch. If you fall, repeat the current cycle from the respawn point instead of forcing a jump while the required platform is absent.
Near the end, use the switches to activate the elevators and open the final tunnel. Ride the last Floating Platform past the Burners, activate the final switch, and take the elevator to the summit where Joka is waiting.
- Capture normal enemies only during daylight.
- Stun Sky Eclipses only when necessary.
- Do not try to capture or defeat Eclipse enemies.
- Use Gold Platforms during darkness.
- Reach Joka’s summit arena.
8. Defeat Joka
Joka has 8 HP, and daylight is the damage phase. Stand near the arena crystals and wait for a Moo to appear. Capture it and throw it at Joka when his rotating gloves are not blocking his body. Reposition after each attempt so the gloves and his movement do not trap Klonoa.
The first three successful captured-Moo hits trigger the first Eclipse. During the Eclipse, Joka cannot be damaged. Eclipse enemies appear and the floor panels change color. Run over every panel until all of them have returned to yellow. Keep moving around the arena, jump or float over sweeping arm attacks, and avoid lingering in the center. Ground Eclipses cannot be affected; Sky Eclipses can be stunned but are not damage targets.
When every panel is yellow, daylight returns and Joka becomes vulnerable again. Capture another Moo and keep throwing it at him until the remaining health is removed. Do not assume that each later daylight phase ends after exactly three hits: the three-hit transition applies to the first daylight sequence, while subsequent successful hits must be continued until Joka’s remaining HP is exhausted. Restore every panel again whenever the next Eclipse begins.
After the final successful hits, the defeat scene begins and the game advances toward Vision 6.
- Throw captured Moos only when Joka’s body is exposed.
- Use the first three successful hits to trigger the first Eclipse.
- Restore every Eclipse floor panel to yellow.
- After daylight returns, continue attacking until Joka’s remaining health is depleted.
- Confirm that Joka’s defeat scene begins and the game advances toward Vision 6.
Before you move on
- The Red, Blue, Green, and Yellow Orbs are installed and shining in the Altar Room.
- The rear door opens after all four Orbs are returned.
- The Elevator Room switch is activated and the elevator carries Klonoa into Vision 5-2.
- Daylight sections are used for captures, while Eclipse sections are crossed with Gold Platforms and enemy avoidance.
- Joka’s first three successful captured-Moo hits trigger the first Eclipse.
- Every Eclipse floor panel is restored to yellow before daylight returns.
- After each restoration, enough additional captured-Moo hits are landed to remove Joka’s remaining health.
- Joka’s defeat scene begins and the game advances toward Vision 6.
References for this chapter
- Vision 5-1: The Four Orbs — Klonoa: Door to Phantomile Walkthrough and Guide
- Vision 5-2: Between Light and Darkness - High Above Coronia - Klonoa: Door to Phantomile Walkthrough and Guide
- Klonoa: Door to Phantomile — PlayStation Manual
- Klonoa: Door to Phantomile — Guide and Walkthrough, PlayStation, BJange
- Klonoa: Door to Phantomile — Introductory Any% Guide
Vision 6 — Cress, the Moon Kingdom and the Prism Corridor
Vision 6-1, The Legendary Kingdom, sends Klonoa through Cress using color-matched crystal barriers, Green Balls, Floating Platforms, Crystal Platforms and enemy-assisted double jumps. The required route activates the Red, Blue, Green, Yellow and White Crystals, then rides the elevator into Vision 6-2. Optional Phantomilian Prisoners, Dream Stones, Ngapako Eggs and 1UPs can be skipped without blocking story progress. Vision 6-2, The Time of Restoration, loops through three Sand Stream routes and three timed switch rooms. Complete each switch puzzle quickly, raise the Red, Green and Blue Pillars, and enter the Moon door. Ghadius has three mask phases: throw four Death Moos during Blue Mask, four during Red Mask and two during Green Mask. His defeat automatically begins the separate Final Vision, where Nahatomb is fought.
1. Enter Cress and cross the Green Ball section
Begin Vision 6-1 by running right, dropping to the lower path and climbing the Crystal Platforms. At the top, take the door on the right. Climb the ledges toward the upper-left side, deliberately drop from the left ledge and enter the lower door.
Activate the Memory Clock on the right. Wind Bullet the Moo that falls with a Green Ball, jump onto the ball and ride it toward the next ledge. Capture a Flying Moo and throw it into the Moo approaching on another Green Ball. Continue treating the Green Balls as moving footholds and Flying Moos as disposable projectiles. Near the end, capture a Flying Moo, double-jump and Wind Bullet Phantomilian Prisoner 1.
Return to the upper path and run right until you fall through the hole. Follow the Armored Moo riding a Green Ball. When it falls away, capture a Flying Moo and throw it into the Armored Moo approaching from the opposite side. Capture the Armored Moo and use it to free Phantomilian Prisoner 2. Capture another Flying Moo and double-jump to the upper ledge containing the Giant Shielded Moo and Red Crystal.
- Activate the first Memory Clock.
- Use Flying Moos for the elevated jumps; do not try to carry the Armored Moo through the entire section.
- Prisoners 1 and 2 are optional and are not required to open the route.
2. Activate the Red and Blue Crystals
Activate the Memory Clock beside the Red Crystal, then Wind Bullet the Red Crystal. The Red Statues across Cress disappear. Run through the opened statue route, jump to the ledge above the door and cross to the right-hand path. Enter the large doorway, then take the door that was blocked by a Red Statue. Continue right and drop through the corridor to the next door.
Activate the next Memory Clock. Wind Bullet the three Summy enemies while descending to the lower route. Continue past the Plowms and Moo, then enter the door at the end. Ride the Floating Platform upward and free Phantomilian Prisoner 3 as it passes. At the top, remove the Summy and ride the Floating Platforms across the gaps. The route shifts between foreground and background: ride the first platform across, use the next to reach the background platform, then take the following platform left. The 1UP is optional; collect it only when the return platform is safely aligned.
After crossing, Wind Bullet the Summy on the ledge and activate the Memory Clock. Wind Bullet the Blue Crystal to remove the Blue Statues. Pass the opened statue route, cross the upper gap and enter the large door. Continue left through the door that had the Blue Statue, then run right and drop through the following corridor.
- Fire the Red Crystal before attempting Red Statue doors.
- Free Prisoner 3 from the rising Floating Platform if pursuing optional completion.
- Fire the Blue Crystal after the Plowm and Floating Platform section.
- Do not risk a life for the 1UP if the return platform has already moved away.
3. Use Boomies to open the Green route
Activate the Memory Clock in the Boomie room. Wind Bullet the first Boomie and throw it against the right wall so it falls beside the group below. Wait for the explosions to clear the lower route. Capture another Boomie and throw it past the Spiker so it detonates the Boomie on the platform to the right. Cross to the platform below the Green Dream Stone, remove the nearby Boomie and continue through the next room.
In the next room, Wind Bullet the Boomie near the entrance and jump close enough to the Boomie on the Crystal Platform to double-jump over it. Land on the Crystal Platform, cross to the next platform and use another Boomie for the double-jump to Phantomilian Prisoner 4. Wind Bullet the prisoner, then throw a Boomie across the gap toward the Boomie beside the Spiker. Double-jump back onto the Crystal Platform.
In the following room, throw the nearest Boomie into the group ahead. Clear the remaining Boomies, then throw the last one at the Spiker above the Green Crystal. This activates the Green Crystal and removes the Green Statues. Activate the Memory Clock beyond the opened barrier.
Run right and up the ledges. Throw a Boomie into the Flying Moo group surrounding Phantomilian Prisoner 5, then immediately Wind Bullet the prisoner before the enemies return. Throw another Boomie at the Ngapako Egg to reveal the 1UP. Pass the Green Statue route, jump to the left platform and run left past the Plowms. Wind Bullet the Summy above and use it for the double-jump to the door.
- Free Prisoners 4 and 5 only if collecting optional Phantomilians.
- Use Boomies promptly because they are unsafe to carry across narrow platforms.
- The Green Dream Stone is optional and lies beneath the Boomie route.
- The Green Crystal removes Green Statues; it does not open the elevator.
4. Open the Yellow route and ride the elevator
Follow the opened Green Statue route, drop from the ledge and use the lower-left door. Activate the Memory Clock and run left past the Yellow Crystal Platforms to the next room. Jump onto the first Yellow Crystal Platform and then the next platform. Capture the Flying Moo, drop toward the second Yellow Crystal Platform and double-jump to the platform on the right. Capture another Flying Moo and climb the Blue Crystal Platforms while staying on the right side.
Free Phantomilian Prisoner 6 from the final Blue Crystal Platform. Follow the Blue Crystal Platforms to the upper path. Jump onto the Blue Crystal Platform beside the Yellow Crystal, capture a Flying Moo and throw it into the Yellow Crystal. The Yellow Statues disappear. Pass through the newly opened Yellow Statue route.
Activate the next Memory Clock and clear the Plowms. Use a Flying Moo to double-jump over the Boomie, then drop through the holes to the lower route. Jump right onto the Yellow Crystal Platform and cross left through the platforms. Continue over the Blue Crystal Platforms and use the door at the end. Climb to the upper path, enter the large doorway and go left through the opened Blue Statue door. Cross the platforms formerly blocked by Yellow Statues and continue right.
Activate the final Memory Clock in this section and climb the Blue Crystal Platforms. Follow the upper route to the right and Wind Bullet the White Crystal. Its destruction removes the Force Field around the elevator. Step onto the elevator to enter Vision 6-2, The Time of Restoration.
- The White Crystal is the required trigger for the elevator.
- The Yellow Crystal must be activated with a thrown Flying Moo.
- Prisoner 6 is optional and is located on the last Blue Crystal Platform.
- Vision 6-1 ends when the elevator carries Klonoa upward.
5. Complete the first timed switch room
At the beginning of Vision 6-2, run left through the opening route, climb the platforms and reach the Floating Platform. Enter the upper door, run right and activate the Memory Clock beside the lowered Red Pillar. Enter the Red Door to the left.
Cross the Crystal Platforms and use a Flying Moo double-jump to reach Phantomilian Prisoner 1. Continue right through the upper route and enter the next door. Activate the Memory Clock across the small hole. Drop through the hole beside the two Spring Moos, run left from the lower path, follow the Spiker and drop through the next hole. Run left to free Prisoner 2, then return to the Spring Moo area and run right to the Ngapako Egg.
Continue right past the Boomer and use a Flying Moo to hit the background switch in the hole. Enter the first timed switch room. Wait below the upper opening for the Spear Moo to charge, dodge it and capture it. From the left platform, throw it at the right switch. Immediately Wind Bullet the left switch, capture the Flying Moo, double-jump to the center switch and Wind Bullet it. All three switches must be active before the first resets; the left door then opens.
Ride the Sand Stream to the Floating Platform. It carries you back toward the first major gap from the opening route. Run left over the next two gaps, ride the next Floating Platform upward and use the door. Run right past the raised Red Pillar, activate the Memory Clock beside the lowered Green Pillar and enter the Green Door.
- The first switch order is right, left, center.
- Do not pause after activating the first switch.
- Prisoners 1 and 2 are optional.
- The Sand Stream is a return route, not a dead end.
6. Clear the second and third switch routes
In the Green Door route, cross the Crystal Platforms to the large gap. Let the pursuing Moos approach, capture one and use it to start the crossing. Double-jump across toward the Crystal Platform, then capture the Flying Moo ahead and use consecutive double-jumps to reach Prisoner 3 on the left side. Wind Bullet the prisoner and land on the Crystal Platform before continuing right.
In the next room, throw the first Moo into the second, capture the Giant Moo and use it as a jumping platform to reach the Floating Platform. Capture the Flying Moo and double-jump past the Spikers to the right platform. Activate the Memory Clock, cross the Blue and Yellow Crystal Platforms and remove the Boomer. The Ngapako Egg above the Yellow Crystal Platform contains an optional 1UP. Drop to the lower route, free Prisoner 4 and use the nearby Moo and Flying Moo to reach the upper path.
Ride the Floating Platform across the hole, remove the Boomer and drop through the next hole. Wind Bullet the Flying Moo in the background and throw it repeatedly at the Gold Armored Moo until it is defeated. Climb the Floating Platforms and Blue Crystal Platforms. From the upper Floating Platform, throw a Flying Moo at the background switch, then drop to the lower path and enter the revealed hole.
Activate the Memory Clock and enter the second timed switch room. Keep the Giant Moo inflated while waiting for the Shielded Moo. Capture the Shielded Moo, jump onto the Giant Moo and ride the Floating Platform. At its rightmost position, throw the Shielded Moo at the right switch. Immediately capture the Flying Moo and throw it at the left switch as the platform travels back. Jump down and Wind Bullet the remaining switch. The left door opens.
Ride the Sand Stream back toward the second major gap, pass the raised Red and Green Pillars and enter the Blue Door. Cross the Crystal Platforms and free Prisoner 5. Continue into the Spindle rooms. Jump over the first Spindles, then use the Spring Moos and Floating Platform above the Giant Spindle. Ride to the Spring Moo, capture it and double-jump over the Spindle to destroy it. On the lower route, throw a Spear Moo at Prisoner 6, then throw another Spear Moo at the background switch. Drop through the revealed hole.
Climb the alternating Floating Platforms, removing each Boomer before the next jump. Activate the Memory Clock and enter the third timed switch room. From the left, capture a Flying Moo, double-jump to the upper Flying Moo and reach the left platform. Wind Bullet the left switch, then fall through the center and Wind Bullet the center switch before the Flying Moo returns. From the right, repeat the upper-platform route and Wind Bullet the right switch. The left door opens.
Ride the final Sand Stream and Floating Platform back toward the third major gap. Pass the raised Red, Green and Blue Pillars and enter the Moon door.
- The second timed room uses the right switch, then left switch, then the remaining switch.
- In the third room, activate left and center from the left side, then right from the right side.
- Prisoners 3 through 6 are optional.
- The three Sand Stream returns connect the switch rooms to the major gaps; use them to avoid retracing the entire stage.
7. Defeat Ghadius and continue to the Final Vision
After entering the Moon door, ride the Floating Platform upward and run right. Collect the approach 1UP only if the route is safe, then enter the door to reach Ghadius in the Wheel of Woe. Ghadius has 10 health points and changes masks after losing 4 and 8 points.
During Blue Mask, three teleportation orbs move with the Wheel. Keep running and jumping in the direction of rotation so the orbs do not force Klonoa outside the arena. Avoid the Dark Spirit Orbs and capture the Death Moos as they approach. Throw four Death Moos at Ghadius to remove the Blue Mask.
During Red Mask, the attached teleportation orbs disappear, but bouncing teleportation orbs remain in the arena. Three short flame pillars cross the Wheel, each carrying Death Moos. Capture and throw four Death Moos at Ghadius. If both Death Moos from one pillar are removed, that pillar becomes another bouncing teleportation orb, so keep moving after each throw.
During Green Mask, Ghadius creates a moving triangle of Green Crystals containing three Death Moos. The formation damages Klonoa while enclosed. Watch the direction of Ghadius's hand motion and align with the Green Crystal that is approaching. Wind Bullet the crystal to break the formation, then capture the released Death Moos and throw two of them at Ghadius. The second successful throw defeats him.
If Klonoa is hit, stop chasing the boss and stay mobile around the Wheel. Wait for the next safe Death Moo or crystal opening instead of attempting a risky recovery jump through a teleportation orb. When Ghadius falls, allow the transition to finish. The game automatically begins the separate Final Vision, where Nahatomb is fought.
- Blue Mask: four Death Moo hits.
- Red Mask: four Death Moo hits.
- Green Mask: two Death Moo hits after breaking the crystal formation.
- Ghadius is not the final boss of the campaign.
- The automatic transition into the Final Vision confirms that Vision 6-2 has been cleared.
Before you move on
- Vision 6-1 is cleared when the White Crystal's Force Field disappears and the elevator carries Klonoa into Vision 6-2.
- Vision 6-2 is cleared after the Moon door route and Ghadius battle are completed.
- Ghadius must receive four Death Moo hits in Blue Mask, four in Red Mask and two in Green Mask.
- The automatic transition into the separate Final Vision confirms that Vision 6-2 is complete.
- The main campaign is not complete until Nahatomb is defeated and the complete ending and credits have played.
- For optional progress, return to the title screen after clearing the game, choose Continue and use Vision Clear to replay stages and check their Dream Stone records. Re-enter stages to rescue missed Phantomilians or improve a 150-Dream-Stone result. The 72-Phantomilian Extra Vision remains optional and is not required for the main ending.
References for this chapter
- Vision 6-1: The Legendary Kingdom — Cress, the Moon Kingdom — Klonoa: Door to Phantomile Walkthrough and Guide
- Vision 6-2: The Time of Restoration - The Prism Corridor - Klonoa: Door to Phantomile Walkthrough and Guide
- Final Vision: The Dream at Nightmare's End — Klonoa: Door to Phantomile Walkthrough and Guide
- Klonoa: Door to Phantomile — PlayStation Manual
Final Vision — The Phantomile Core and Final Approach
The Final Vision, The Dream at Nightmare’s End, follows Vision 6-2 and is the separate finale of the original North American PlayStation release. It is not a numbered Vision 7. The encounter with Nahatomb has three required phases. In phase one, capture Death Moos and load all five Moon Cannons, first using Nahatomb’s shockwave to remove the armor from three Armored Death Moos. In phase two, throw Death Moos at four fixed crystals, then strike the moving crystal twice while avoiding the eye laser. In phase three, cross unstable platforms and load the five Moon Cannons again. After the second synchronized cannon volley, use the Wind Bullet to fire Huepow at Nahatomb. Let the restoration scenes and credits finish; that confirms the main campaign clear. Rescuing all 72 Phantomilians unlocks the optional Extra Vision. Completing that stage with its 150-Dream-Stone result provides its separate fireworks or ending effect, while Balue’s Music Tower mini-game is the relevant Music Test unlock condition.
1. Enter the separate Final Vision
Complete Vision 6-2, The Time of Restoration, and continue through the story scenes in the Prism Corridor. The leaders gather above Cress with the Moon Cannons, and Klonoa is carried into the final battle. On the original North American PlayStation release, this is the Final Vision after six numbered Visions; it is not Vision 7.
There is no ordinary platforming route before Nahatomb. You do not need to collect keys, open stage doors, or complete a Dream Stone route before the boss. The fight begins after the introductory scenes, and Death Moos serve as ammunition for the Moon Cannons.
Use the original Wind Bullet controls to capture each Death Moo. A captured enemy can be carried briefly, thrown into a cannon or crystal, or used for a double jump. Keep your movement deliberate: the final arena punishes long chases, and a missed enemy is less important than staying on the platform and waiting for the next safe opening.
The battle has three distinct phases. Phase one and phase three are ammunition-delivery sections. Phase two is a direct Wind Bullet section against Nahatomb’s crystals. When the arena changes, stop applying the previous phase’s strategy and identify the new objective before moving.
- Finish Vision 6-2 before entering the finale.
- Treat this as the separate Final Vision, not a numbered Vision 7.
- Use Death Moos as ammunition and preserve safe footing.
2. Phase one — load the five Moon Cannons
Nahatomb begins by launching three Armored Death Moos and one ordinary Death Moo. Move toward the ordinary Death Moo, capture it with the Wind Bullet, and throw it into one of the unloaded Moon Cannons. This is the first required delivery. Do not try to damage Nahatomb directly; the phase advances only after the cannons are filled.
After the first delivery, stay near the Armored Death Moos while watching Nahatomb’s fist. When the fist glows and slams down, a shockwave travels across the platform. Jump over the shockwave. Its impact removes the armor from the three Armored Death Moos, turning them into usable Death Moos.
Capture the exposed Death Moos one at a time and throw them into the remaining unloaded cannons. Keep the enemies from spreading across the arena when possible. If Nahatomb begins extending its tongue, move away from the mouth and jump over the sweep. Being caught wastes the window needed to deliver the remaining ammunition.
The shockwave and tongue attacks can disrupt your route, so do not hold an enemy while attempting a risky jump. Capture only when you have a clear line to a cannon. If an enemy is lost, wait for another safe opportunity rather than crossing the entire arena under attack pressure.
When all five Moon Cannons are loaded, the leaders fire simultaneously. The volley does not finish Nahatomb. A shockwave follows, the environment is absorbed, and the battle changes to phase two.
- Deliver the ordinary Death Moo to a Moon Cannon.
- Jump over the fist shockwave to remove the three Armored Death Moos’ armor.
- Deliver the three newly exposed Death Moos and complete all five cannon loads.
- Wait for the synchronized cannon volley and the phase transition.
3. Phase two — destroy the four fixed crystals and the moving crystal
The arena changes and Nahatomb attacks with an eye laser that sweeps across the platform. Death Moos appear near the center. Capture one, then throw it at the crystal currently positioned around the arena’s upper-left, upper-right, lower-left, or lower-right area.
Destroy the four fixed crystals before dealing with the final moving crystal. Use the middle of the platform as a starting point, but do not stand there through a laser sweep. When the beam approaches, jump over it or move through a clear gap, then capture another Death Moo and set up the next throw.
A missed throw is not worth a blind chase. Let the enemy disappear if it lands near the laser’s path, then wait for the next Death Moo at the center. The arena is safer when you make short, planned throws rather than trying to recover every projectile immediately.
After the four fixed crystals are destroyed, Nahatomb summons one moving crystal that travels across the battlefield. Follow its movement and throw Death Moos when it enters a clear line. The moving crystal requires two successful hits. The first hit only damages it; capture another Death Moo and land the second hit while continuing to avoid the eye laser.
The second successful hit destroys the moving crystal and exposes Nahatomb’s interior. The arena then shatters and Klonoa is sent onto separated platforms. This is a transition into phase three, not the end of the fight.
- Avoid the sweeping eye laser by jumping or moving through clear space.
- Destroy all four fixed crystals.
- Hit the moving crystal twice.
- Prepare for separated platforms as the arena breaks apart.
4. Phase three — reload the five Moon Cannons
The leaders reappear behind separated platforms with their Moon Cannons. Nahatomb now absorbs sections of the arena. Platforms that flash white are about to shatter, so leave them immediately and move toward a stable platform or the next Death Moo.
Death Moos appear whenever no usable Death Moo remains on the platforms. Capture one, jump toward the next platform, and use the captured enemy’s double-jump to cross a gap. When a Moon Cannon is below or across the gap, throw the Death Moo downward or forward so it enters the cannon. Land safely before attempting the next capture.
Do not jump blindly into a gap when an Armored Death Moo is approaching. Nahatomb launches these armored enemies during the phase, and colliding with one during a crossing can knock Klonoa from the route. Watch the enemy’s movement first, then make the jump when the path is clear.
Nahatomb also sends Rainbow Rings across the platforms. These travel across the arena in the same general manner as Rongo Lango’s ring attack. Jump over them rather than trying to outrun them on a narrow platform.
The hazards become more severe as additional Moon Cannons are loaded. More platforms can be absorbed and more Rainbow Rings can appear. Ignore optional positioning and focus on the next cannon delivery. If a platform flashes white beneath you, prioritize escape over capturing an enemy.
Repeat the capture, double-jump, and throw sequence until all five Moon Cannons are loaded. The leaders then fire together, leaving Nahatomb ready for the final Wind Bullet action.
- Leave flashing-white platforms before they shatter.
- Use captured Death Moos for double jumps and cannon deliveries.
- Avoid Armored Death Moos during crossings.
- Jump over Rainbow Rings.
- Load all five Moon Cannons for the second synchronized volley.
5. Fire Huepow and watch the complete ending
After the second five-cannon volley, Huepow tells Klonoa to fire him at Nahatomb. Use the Wind Bullet to capture and launch Huepow at the exposed boss. This is the finishing action. The Moon Cannons weaken Nahatomb, but they do not complete the battle by themselves.
After Nahatomb is destroyed, allow the story scenes to continue. Lephise’s restoration, the return to Breezegale, Klonoa and Huepow’s closing scenes, and the credits are all part of the campaign ending. Do not reset immediately after the boss explosion.
The main campaign is complete when the ending has played through the credits. There is no additional numbered Vision 7 required after this point. If the ending does not appear, confirm that Huepow was fired with the Wind Bullet and that the game was allowed to proceed past the post-battle scenes.
Optional completion is separate from the story clear. Rescuing all 72 Phantomilians unlocks the Extra Vision, also known as Klonoa’s Grand Gale Strategy or Balue’s Tower, on the stage-select screen. Completing that bonus stage with the 150-Dream-Stone result produces its separate fireworks or ending effect. The Music Test is a different reward associated with completing Balue’s Music Tower mini-game, not with the 150-Dream-Stone result alone.
- Fire Huepow at Nahatomb with the Wind Bullet.
- Let the restoration and closing story scenes play.
- Allow the credits to finish.
- Confirm Extra Vision only as an optional post-game unlock after all 72 Phantomilian rescues.
- Treat the 150-Dream-Stone Extra Vision result and the Music Test as separate rewards.
Before you move on
- Vision 6-2 has been completed and the separate Final Vision has been entered.
- All five Moon Cannons fire during phase one.
- The four fixed crystals are destroyed during phase two.
- The moving crystal is struck twice and destroyed.
- All five Moon Cannons fire during phase three.
- Huepow is launched into Nahatomb with the Wind Bullet.
- Lephise’s restoration and the closing story scenes play.
- The credits finish without resetting the console.
- The main campaign is complete; no numbered Vision 7 is required.
- For optional completion, all 72 Phantomilians are rescued and Extra Vision appears on the stage-select screen.
- For the optional bonus effect, complete Extra Vision with its 150-Dream-Stone result.
- For the Music Test, complete Balue’s Music Tower mini-game and check the resulting menu or options unlock.
References for this chapter
- Final Vision: The Dream at Nightmare's End — Klonoa: Door to Phantomile Walkthrough and Guide
- Klonoa: Door to Phantomile — Introductory Any% Guide
- Klonoa: Door to Phantomile — PlayStation Manual
- Klonoa: Door to Phantomile — PlayStation Cheats and Unlockables
- Klonoa: Door to Phantomile — Guide and Walkthrough, PlayStation, BJange
Dream Stones, Mirror Spirits and Optional Secrets
Dream Stones, Phantomilians, Mirror Spirits and Ngapako Eggs are separate objectives. During the first campaign, the Dream Stone counter carries between stages, so that run does not create a separate permanent score for every Vision. After finishing the game, return to the title screen, select Continue, and choose Vision Clear. Replay stages from that menu to establish their individual Dream Stone records and inspect their saved results. The verified target is 150 Dream Stones for each replayable ordinary stage. Mirror Spirits temporarily double nearby Dream Stones: green stones count as two and blue stones count as ten while the effect is active. Release a Mirror Spirit with the Wind Bullet, then collect the flashing stones before the spirit disappears. Release Phantomilians with the Wind Bullet. Break Ngapako Eggs by throwing a captured enemy into them. Six Phantomilians are available in each ordinary stage, for 72 in total. The Final Vision is a separate endgame sequence and is not treated as an ordinary 150-Dream-Stone replay stage.
Separate the optional objectives before you begin
A Dream Stone is a score item. A Phantomilian is a prisoner sealed in a bubble. A Mirror Spirit is a blue fairy in a bubble that temporarily doubles nearby Dream Stones after you hit it with the Wind Bullet. An Ngapako Egg is a container that must be broken by throwing a captured enemy into it. Its reward can be a Dream Stone, an extra life or a Phantomilian, so an egg is not itself proof of a Dream Stone result.
On the first campaign run, collect safe items and continue toward the next door. The running counter can carry from one stage into the next and can award extra lives, but it does not establish the individual replay records used for optional completion. Do not judge a stage by the number shown during the story route.
- Use the Wind Bullet on Phantomilian bubbles and Mirror Spirit bubbles.
- Throw captured enemies into Ngapako Eggs.
- Treat the first campaign counter as temporary progress, not a stage record.
Unlock and use Vision Clear correctly
Complete the campaign, including the Final Vision and its ending sequence. Then return to the title screen rather than selecting a stage from an in-progress continuation. Choose Continue, then select Vision Clear. This is the replay menu for selecting completed Visions individually and checking their stored Dream Stone and Phantomilian results.
Choose one ordinary stage from Vision Clear and replay it from the beginning. Its Dream Stone total is then recorded independently instead of carrying into the next stage. The confirmed optional target is 150 Dream Stones in each replayable ordinary stage. A stage-select result reaching 150 is the completion check; there is no need to pursue a higher exceptional total once that target is recorded.
- Finish the game before looking for individual stage records.
- Use Title Screen, Continue, Vision Clear.
- Replay each ordinary stage separately and verify its saved 150-Dream-Stone result.
Vision 1: early Mirror Spirit routes
Vision 1-1 places its useful optional route on the lower path near the later Spiker sections. Keep a usable enemy if the elevated Dream Stones require a double-jump. When the Mirror Spirit is in reach, hit its bubble, then sweep the nearby lower and upper stone groups without detouring into hazards. If the spirit disappears before the full group is collected, finish the stage and restart from Vision Clear instead of risking the remaining life for one item.
In Vision 1-2, the important route is the cavern containing the Giant Muu, Shield Moo, Flying Moo and Mirror Spirit. For the largest possible total, do not destroy the Giant Muu before activating the spirit. Get past it by taking the necessary damage, using the close-contact inflation maneuver, or waiting for a safe opening. Bring the Shield Moo or another suitable enemy into position, release the Mirror Spirit, then collect the first flashing columns. Capture the Flying Moo for the next double-jump, recover the Shield Moo when it returns, and use the Giant Muu area to collect the additional stones before leaving the cavern. The exceptional 157 total is optional; 150 is the required replay target.
- Vision 1-1: preserve an enemy for the elevated stones near its Mirror Spirit.
- Vision 1-2: leave the Giant Muu alive until the Mirror Spirit route is complete.
- Use Vision Clear to retry the cavern without affecting story progress.
Vision 2: Forlock and Jugpot
In Vision 2-1, carry a creature to the platform overlooking the Giant Muu and Mirror Spirit. The floating leaves provide the height needed to bring the creature into position. Release the spirit while standing where you can immediately collect the nearby columns. Move through the next doorway without delay; with correct timing, the Giant Muu's stones and the first stones in the following room can also be doubled. The exceptional route can exceed 150, but the saved target remains 150.
In Vision 2-2, use the reversed-waterfall route and reach the stone arches with a Flying Moo available. Activate the Memory Clock before attempting the dangerous crossing. Hit the Mirror Spirit during the Flying Moo double-jump, then continue through the nearby stone groups while the multiplier remains active. Do not stop to fight enemies that are not blocking the route. If the current carries you past an item, restart from Vision Clear rather than assuming the stream can be reversed.
- Vision 2-1: bring a creature into the Giant Muu and spirit area.
- Vision 2-1: continue through the next doorway immediately after the spirit activation.
- Vision 2-2: activate the spirit while crossing the stone arches with Flying Moo.
Visions 3 and 4: prepare the route before activating the spirit
In Vision 3-1, follow the forest, gondola, crate and rail-car route until the optional stone trail around the Mirror Spirit. Preserve a creature through the preceding platform section, then activate the spirit only when the adjoining upper and lower paths are open. Check both lanes before entering the next door. A missed group is safer to recover on a full replay than by attempting a blind return through the machinery.
In Vision 3-2, the optional route is tied to the mansion's machinery, doors, switches and moving platforms. Do not spend a Boomie or other useful enemy on a nonessential target if the next switch or elevated stone group still requires it. Open the route first, then hit the Mirror Spirit and collect the flashing stones while the machinery is in its accessible state.
In Vision 4-1, preserve an enemy through the early Flying Moo, Spindle and vertical rope-platform sections. The useful spirit route is reached after the early Moo and Flying Moo sequence, around the Memory Clock and the following elevated platforms. Activate the spirit before sweeping the vertical stone groups, using Flying Moo double-jumps where the path requires them.
In Vision 4-2, reach the Memory Clock before the water-stream section. The current carries Klonoa through the ice cavern, so collect the local stones while the Mirror Spirit is active and use the stream openings, Green Boulders and later platforms to continue. Do not count on walking backward against the current after missing a group.
- Keep a capture through the machinery and vertical routes.
- Use Memory Clocks before the dangerous Vision 4 collection sections.
- Restart the individual stage if a current or moving platform carries you past a stone group.
Visions 5 and 6: timed branches and moving routes
Vision 5-1 is divided into orb branches. The most demanding optional route is in the Yellow Orb section. Reach the right wheel, capture the Flying Moo and wait until the right flame column is at a favorable height. Double-jump left to release the Mirror Spirit, collect the left column on the descent, recapture the Flying Moo, then return toward the wheel. Use the next double-jump to collect the middle and right columns, clear the flame when it is low, and take the nearby airborne stones before using the enemy to reach safety. This route can produce an exceptional total above 150, but 150 is sufficient.
In Vision 5-2, distinguish daylight enemies from Eclipse hazards. Ground Eclipse enemies cannot be affected normally by the Wind Bullet, while Sky Eclipse enemies can be stunned but are not ordinary collection tools. Activate a local Mirror Spirit only when the associated platform route is ready. During darkness, use Gold Platforms and restore the floor panels as required instead of chasing stones through an unsafe section.
In Vision 6-1, preserve Flying Moos through the Green Ball, colored-crystal and elevator routes. Match the required crystal colors before entering optional side paths, then activate the Mirror Spirit when the next crystal-platform route is accessible. In Vision 6-2, prepare the Sand Stream, looping platforms and timed-switch rooms first. Trigger the spirit only when the moving route will carry Klonoa through its nearby flashing groups without requiring a dangerous backtrack.
- Vision 5-1: use the Yellow Orb Flying Moo route for its extra stones.
- Vision 5-2: do not treat Eclipse enemies as ordinary captured enemies.
- Visions 6-1 and 6-2: open the route before activating the local Mirror Spirit.
Ngapako Eggs, Phantomilians and safe replays
Search both foreground and background lanes for Ngapako Eggs. An egg may be hidden behind an apparently empty jump, an unusual platform arrangement or a lane change. Face the egg, capture a suitable enemy and throw that enemy into the container. If the reward is not the item you need, record the result separately: an egg can provide a Dream Stone, an extra life or a Phantomilian.
Each ordinary stage contains six Phantomilians. Use the Wind Bullet to release visible prisoner bubbles. If a prisoner is inside an Ngapako Egg, break the egg with a thrown enemy before leaving the area. The Vision Clear result screen is the reliable place to compare prisoner progress and Dream Stone progress. Replay the whole stage when a prisoner or egg is missed; do not assume the first campaign run stored a separate stage record.
- Confirm six rescued Phantomilians in each ordinary stage for the 72-prisoner objective.
- Use the result screen to distinguish prisoners from Dream Stones.
- Replay from Vision Clear when an egg or prisoner is missed.
Final Vision and optional completion check
Do not assign the Final Vision an ordinary 150-Dream-Stone requirement. It is the separate endgame sequence after Vision 6-2. During the Nahatomb approach, use captured Death Moos to load the Moon Cannons, cross the collapsing platforms carefully and avoid the environmental hazards that appear between cannon sequences. Continue until all five cannons are loaded, then follow the final firing sequence and use the Wind Bullet on Huepow when the game presents the opportunity.
For main-story completion, defeat Nahatomb and allow the complete ending and credits to play. Return to the title screen, choose Continue and confirm that Vision Clear is available. For optional completion, use Vision Clear to verify 150 Dream Stones in every ordinary replayable stage and six rescued Phantomilians in every ordinary stage. Extra Vision is unlocked by rescuing all 72 Phantomilians and is optional to the main ending.
- Defeat Nahatomb after loading all five Moon Cannons.
- Allow the ending and credits to finish.
- Confirm Vision Clear through Title Screen, Continue.
- Verify 150 Dream Stones for every ordinary replayable stage.
- Verify six Phantomilians in every ordinary stage and access Extra Vision if pursuing the optional goal.
Before you move on
- Complete all ordinary Visions from 1-1 through 6-2.
- Defeat the six numbered Vision bosses and then defeat Nahatomb in the separate Final Vision.
- Allow the complete ending and credits to play.
- Return to the title screen, select Continue, and confirm that Vision Clear is available.
- Replay every ordinary stage from Vision Clear and verify its saved result reaches 150 Dream Stones.
- Verify six rescued Phantomilians in every ordinary stage when pursuing the 72-prisoner objective.
- Confirm Extra Vision access after rescuing all 72 Phantomilians if pursuing optional completion.
References for this chapter
- Klonoa: Door to Phantomile — PlayStation Manual
- Klonoa: Door to Phantomile — Mini-FAQ, ruyeyama
- Klonoa: Door to Phantomile — Guide and Walkthrough, PlayStation, Save_Some_FACE
- Klonoa: Door to Phantomile — Walkthrough & Guide, GuideVault
- Vision 2-1: Deep in the Dying Forest — GuideVault
- Vision 4-1: A Village in Danger — GuideVault
- Vision 5-1: The Four Orbs — GameFAQs discussion reference
Boss Index and Tactics (All Vision Bosses)
The original North American PlayStation campaign has six regular boss encounters followed by Nahatomb’s separate three-phase Final Vision: Rongo Lango, Pamela and Seadoph, Gelg Bolm, Baladium, Joka, Ghadius, and Nahatomb. Rongo Lango must be struck from behind, Seadoph must be thrown at Pamela, Gelg Bolm must be hit from above, Baladium’s crystals must be destroyed, Joka alternates between daylight attacks and Eclipse tile restoration, and Ghadius changes his arena and enemy setup between masks. Joka has 8 health points: the first three captured-Moo hits trigger the initial Eclipse, while later daylight phases require enough further hits to deplete his remaining health. Nahatomb requires five Moon Cannon loads, a crystal-destruction phase, five more cannon loads, and a final Wind Bullet shot containing Huepow. Preserve hearts before each boss, use arena enemies for attacks rather than risky platforming, and wait for the next enemy spawn after a missed throw.
Prepare before every boss
The original PlayStation release does not provide a boss-select menu during a normal campaign. Before entering the final door of a Vision, collect hearts and extra lives that are safely on the route, but do not spend a life chasing an optional secret. Health and lives should be treated as resources for the encounter itself, especially before Ghadius and Nahatomb.
Use the Wind Bullet to capture the arena enemy, then throw it only after the boss finishes its current attack. A captured enemy can also give Klonoa a double-jump, but spending it for height may leave no projectile for the next opening. If a throw misses, retreat from the boss, survive the next attack cycle, and wait for another enemy rather than following the missed projectile into danger.
Most boss arenas provide repeated enemy spawns. Treat each spawn as a new attempt: position yourself first, watch the boss’s movement, then capture and throw. After taking a hit, move to the outer part of the arena or to a safe platform until the active attack ends. If the arena supplies a heart, take it only when you can reach it without crossing an active hazard.
- Enter with the highest safely available heart total.
- Keep enough room to see the boss and the next enemy spawn.
- Do not trade a life for an optional collectible before the battle.
- After a failed throw, survive until the next usable enemy appears.
Vision 1-2: Rongo Lango
Rongo Lango is vulnerable from behind. Capture a Moo supplied in the circular arena and throw it into his rear when he is not flashing. The hit causes him to move forward and briefly exposes the vulnerable area. Follow at a safe distance, capture the next Moo, and wait until he turns away or finishes a leap before throwing again.
When Rongo Lango jumps repeatedly toward Klonoa, move away and let him pass over you, then attack from behind as he lands. When he slams the ground and sends rainbow shockwaves across the arena, jump over the rings instead of trying to outrun them on the same level. Do not throw while the boss is flashing; wait for the flash to end and for another clear rear angle.
Four confirmed rear hits defeat Rongo Lango. If you are hit, move toward the outside of the arena, allow the next shockwave or body attack to finish, and resume only when a Moo is available. This is a pattern-dodging fight with no switch or platform mechanism.
- Capture Moos and throw them at Rongo Lango’s rear.
- Wait until the boss stops flashing before attacking again.
- Jump over the rainbow shockwaves.
- Confirm four successful rear hits.
Vision 2-2: Pamela and Seadoph
Pamela and Seadoph occupy an almost circular arena. Seadoph is the required projectile: capture him when he comes within reach and throw him at Pamela. Do not waste attempts throwing ordinary arena enemies at her. Pamela can be struck while she is in the center or during a diving attack, but wait until her movement leaves Seadoph in a reachable position.
The upper part of the arena is dangerous because large spiked balls emerge there. Stay on the lower paths whenever possible. Pamela’s attacks include dives, a wider spinning dive, and bubbles that rise and descend through the arena. Avoid the spinning dive rather than trying to capture Seadoph through it. If bubbles block the lower route, break or evade the nearest one with the Wind Bullet and continue circling until Seadoph is exposed.
After a successful hit, return to the lower path and wait for a clean capture. Four successful Seadoph throws end the encounter. If a throw misses, do not chase Seadoph into the upper hazard area; keep moving around the lower route until he returns to a safe position.
- Capture Seadoph, not Pamela, as the attack projectile.
- Use the lower route to avoid the upper spiked-ball hazard.
- Avoid the spinning dive before attempting another capture.
- Allow four successful hits to finish the battle.
Vision 3-2: Gelg Bolm
Gelg Bolm’s weak point is the middle of his body, and it can only be struck from above. Move toward the right side of the arena, capture a Moo, and use one of the middle springs to launch upward. Carry the Moo over Gelg Bolm, then double-jump so the captured enemy is thrown downward onto his center.
The first part repeats until two hits have been registered. If Gelg Bolm reaches the spring before you have a Moo, use the spring to clear him and wait for the next enemy. After the first two hits, a large rolling fruit crosses the arena. Stand near a spring, jump, and float until the fruit passes below you.
Gelg Bolm then jumps toward Klonoa. Stand near, but not directly beside, a middle spring. When he begins descending, run away from the landing point, capture a Moo, spring over him, and perform the downward throw. In the faster phase, begin the spring jump earlier and keep more distance from the landing area. The battle continues to require overhead throws, so preserve a Moo when a safe spring opportunity is approaching.
- Carry a Moo above Gelg Bolm before throwing downward.
- Use the springs to clear the boss and rolling fruit.
- Avoid standing directly beside a spring when Gelg Bolm lands.
- Do not attempt a side-on throw; only the overhead hit is effective.
Vision 4-2: Baladium
Baladium is defeated by destroying the eight colored crystals on its body. Flying Moos appear around the arena. Capture one and throw it toward the space between adjacent crystals; a well-placed projectile can break two at once, but a safe single-crystal hit is preferable to standing in a hazard while searching for a perfect angle.
The crystals that remain determine which attacks Baladium can use. Purple wings send bombs across the arena, yellow wings produce a Zagard that approaches and charges, blue wings create pillars, and red wings place explosive bombs in front of the boss. Move to the open side of the arena, jump over a charging Zagard, and avoid crossing active pillars or bomb lines.
After each attack finishes, capture the next Flying Moo and target a remaining crystal. If Klonoa is hit, retreat to the outer edge and wait for the current hazard to clear. Do not stand beneath Baladium while waiting for an enemy, and do not force a center-line throw when a safer crystal is available.
- Destroy all eight body crystals.
- Use Flying Moos as projectiles.
- Read the remaining wing colors to anticipate hazards.
- Recover at the arena edge after taking damage.
Vision 5-2: Joka
Joka has 8 health points and alternates between daylight attack phases and Eclipse phases. During daylight, capture the available Moo and throw it at Joka. His hands can block or distort the apparent throw angle, so wait until he finishes walking or an attack before releasing the projectile. The first three successful captured-Moo hits remove the opening portion of his health and trigger the initial Eclipse.
During the Eclipse, the enemies cannot be captured and Joka cannot be attacked normally. Run across the floor tiles to change them back to yellow while avoiding Eclipse enemies and Joka’s arms. Eclipse Joka can swing one arm across part of the arena, slam an arm downward while moving across the floor, and later swing both arms across the entire battlefield. Jump or float over an arm when possible, then continue restoring the nearest unyellow tiles.
You must restore every floor tile to yellow before daylight returns. When all tiles are yellow, the Eclipse disappears and Joka returns to his normal form. Capture another Moo and continue attacking during daylight. The later daylight phases do not automatically end after three hits; keep landing successful captured-Moo hits until the remaining health is depleted, then complete the next Eclipse restoration if one occurs.
If you are struck during the Eclipse, stop chasing distant tiles until the current arm pattern passes, then work methodically from your current position. Prioritize survival and nearby tiles over crossing the whole arena under an active sweep.
- Attack Joka only during daylight.
- Use the first three successful captured-Moo hits to trigger the initial Eclipse.
- Do not try to capture Eclipse enemies.
- Restore every floor tile to yellow before daylight returns.
- During later daylight phases, continue successful captured-Moo hits until Joka’s remaining health is depleted.
- Survive each Eclipse arm pattern before crossing for distant tiles.
Vision 6-2: Ghadius
Ghadius fights on the Wheel of Woe and changes the arena setup after taking damage. In the Blue Mask phase, keep moving with the wheel, avoid the teleportation orbs, and capture the Death Moos that approach. Throw them toward Ghadius’s center. Do not allow a projectile to collide with another enemy before it reaches the boss, and avoid the dark orbs and flame pillars.
After four successful Death Moo hits, Ghadius changes to the Red Mask phase. Death Moos are carried on short bouncing pillars. Capture one when it comes within reach and throw it toward the boss while continuing to move around the wheel. Let the bouncing hazards pass before attempting the next capture. Four additional successful hits bring the total to eight and advance the encounter to the Green Mask phase.
In the Green Mask phase, Ghadius traps Death Moos inside a triangle of green supports. Use captured enemies to break the green supports, then capture the released Death Moos and throw them at Ghadius before they disappear. If a teleporter moves Klonoa away from the main wheel, use another teleporter to return to the active arena instead of trying to attack from the wrong area. The phase requires two successful Death Moo hits after the earlier eight, for ten hits total.
- Follow the Wheel of Woe instead of standing still.
- Avoid teleportation orbs during the Blue Mask phase.
- Use the bouncing pillars to reach Death Moos in the Red Mask phase.
- Break the green triangle supports before attacking in the Green Mask phase.
- Complete four Blue Mask, four Red Mask, and two Green Mask hits.
Final Vision: Nahatomb
Nahatomb’s Final Vision has three connected phases. In the first, five Moon Cannons must be loaded with Death Moos. Nahatomb launches three Armored Death Moos and one ordinary Death Moo. Capture the ordinary Death Moo and throw it into an empty cannon. Then stay near the armored enemies and wait for Nahatomb’s shockwave to break their armor. Capture each exposed Death Moo and throw it into the remaining cannons before the next shockwave destroys the opportunity.
Nahatomb also uses a tongue sweep and a full-platform shockwave. Avoid the tongue by moving away from the mouth, and jump over or otherwise avoid the shockwave when it crosses the platform. Once all five cannons are loaded, the leaders fire and the second phase begins.
In the second phase, Nahatomb sweeps the platform with an eye laser and summons four fixed crystals. Death Moos appear near the middle. Capture and throw them into the four crystals while jumping over the laser or moving between its safe gaps. After the four fixed crystals are destroyed, a final crystal travels across the arena. Strike that moving crystal twice with Death Moos to expose Nahatomb’s vulnerable body. Do not use a deliberate death or reset; survive the laser and repeat the capture-and-throw process.
The third phase takes place on shattered platforms. Nahatomb absorbs platforms, causing flashing-white platforms to disappear, and releases rainbow rings like Rongo Lango’s shockwaves. Run toward the next Death Moo, avoid flashing platforms, and capture the enemy before a Moon Cannon passes beneath Klonoa. Double-jump over a gap and throw the Death Moo downward into the cannon. Armored Death Moos may appear when no ordinary Death Moo is available, so avoid jumping across a gap when one is about to collide with Klonoa.
As more cannons are loaded, more platforms disappear and more rainbow rings are released. Keep moving toward stable platforms, jump over the rings, and use the next available Death Moo rather than waiting in one location. After all five cannons are loaded, the leaders fire. Huepow then becomes the final projectile: use the Wind Bullet to fire Huepow at Nahatomb. Remain in control through the resulting cinematic, ending sequence, and credits.
- Load all five Moon Cannons in the first phase.
- Destroy four fixed crystals and hit the moving crystal twice in the second phase.
- Use downward throws to load the cannons across the shattered platforms.
- Fire Huepow at Nahatomb after the leaders’ final cannon attack.
- Allow the ending and credits to play.
Before you move on
- Confirm that Rongo Lango, Pamela and Seadoph, Gelg Bolm, Baladium, Joka, and Ghadius have been defeated in Visions 1-2 through 6-2.
- For Joka, confirm that the initial three-hit daylight sequence triggered the first Eclipse, every Eclipse floor was restored to yellow, and enough later daylight hits were landed to deplete all 8 health points.
- Enter the separate Final Vision and complete all three Nahatomb phases.
- Fire Huepow at Nahatomb after the five leaders complete the final Moon Cannon attack.
- Remain in control through the final scripted events, ending cinematic, and credits rather than resetting immediately after the last hit.
- Save the cleared campaign to the PlayStation memory card after returning to the campaign or Vision screen.
References for this chapter
- Klonoa: Door to Phantomile — PlayStation Manual
- Vision 6-2: The Time of Restoration - The Prism Corridor - Klonoa: Door to Phantomile Walkthrough and Guide
- Final Vision: The Dream at Nightmare's End — Klonoa: Door to Phantomile Walkthrough and Guide
- Vision 5-2: Between Light and Darkness - High Above Coronia - Klonoa: Door to Phantomile Walkthrough and Guide
- Klonoa: Door to Phantomile — Guide and Walkthrough, PlayStation, Save_Some_FACE
Recovery, Checkpoints and Handling Deaths
In the original North American PlayStation release, Memory Clocks are temporary in-level checkpoints and Memory Card saves are made from the World Map. Activate each clock by popping its bubble; after Klonoa loses a life, the game returns him to the most recently activated checkpoint in that stage. A checkpoint does not replace a permanent save. When a stage is cleared, the World Map appears and the current progress can be written to the Memory Card. If all Klonoas are lost, Continue resumes from the latest saved data rather than from an unsaved Memory Clock. Use hearts and spare enemies to stabilize dangerous sections, and abandon optional Dream Stones, eggs or prisoner rescues when collecting them risks the life needed to reach the next checkpoint or finish the stage.
Activate the Memory Clock before every dangerous section
A Memory Clock appears as a clock inside a floating bubble. Pop the bubble with the Wind Bullet or a suitable action and wait for its activation effect before moving on. The clock is the stage’s temporary restart point. The game places several along longer routes, commonly after a door, at the end of a rail-cart or water-flow sequence, before a vertical platforming section, or near the final approach to a boss.
Treat each activated clock as a new starting line. If you die after reaching it, you normally return there rather than restarting the whole stage. You will have to repeat the short section after the clock, including enemy encounters and moving-platform timing, so pause on the first safe floor and identify which enemy or platform is needed before attempting the next jump. Do not assume that passing close to the bubble activates it; make contact with the clock bubble and confirm the activation sound or animation.
In a long stage, the practical checkpoint route is the sequence of clocks you encounter: the first clock before or after the opening puzzle, the clocks following cart, gondola or current sections, the clock inside the final door sequence, and the last clock before the boss approach. If a death sends you farther back than expected, you missed a clock or did not activate it. Revisit the nearest safe platform and deliberately touch the bubble before continuing.
- Pop every Memory Clock bubble on the main route.
- Wait for the activation effect before leaving the area.
- After a death, identify which clock was active and rebuild the next section from there.
Recover health without gambling a life
The original game displays three hearts divided into six health segments. Small heart items restore one segment, while larger gold hearts restore three segments. Health cannot exceed the normal three-heart maximum. Collect a heart when it is on the safe route, especially immediately after a checkpoint or before a boss door. Do not cross a hazardous gap solely to recover one missing segment; a death costs a life and can erase the opportunity to reach the next checkpoint.
If you are hurt in a multi-platform room, stop at the broadest platform available. Clear or avoid nearby enemies, wait for moving platforms to return, and use the float to correct the descent rather than holding forward through an uncertain landing. When an enemy respawns on a safe ledge, capture it there and reserve it for the next double jump. A captured enemy is often more valuable than a Dream Stone cluster because it can prevent a fall and preserve the current life.
When a safe heart is behind you, backtrack only to the last stable platform. Do not reverse across a moving rail, current, spring chain or narrow ledge while damaged. If the route forward contains the next clock, proceed carefully and accept that optional items may need to wait for a replay.
- Think of the three hearts as six separate health segments.
- Take small or gold hearts from safe platforms before difficult sequences.
- Keep a usable captured enemy when the next gap requires a double jump.
- Never cross a dangerous route only for a low-value health pickup.
Backtrack from a failed puzzle attempt
If Klonoa is still alive after missing a jump, stop trying to rescue the attempt in midair. Land on the nearest broad platform, face the safe direction, and wait for the moving object to return. In a rail-cart section, remain centered or move to the safer end of the cart and concentrate on surviving until the next clock. In water-flow or rising-fountain sections, return to the previous ledge instead of fighting the current from an awkward position.
For a failed enemy chain, walk back to the last respawning enemy. Capture a fresh enemy, then repeat the jump from a stable takeoff point. Do not throw the only available enemy at a minor obstacle if the following platform is reachable only with a double jump. If an enemy has disappeared after a mistake, move far enough away for the area to reset, or use the alternate route and a respawning enemy described by the level’s layout.
Foreground and background doors are another safe recovery option. Return to the last door or lane-change point you can identify, then re-enter the section with the correct facing. A missed optional room is not a failure of the campaign route. Keys, required doors and the next Memory Clock take priority over Dream Stones, Ngapoko’s Eggs, Mirror Spirits and prisoner bubbles.
- Return to a broad platform after a missed jump.
- Wait for moving platforms and enemies to reset into a readable pattern.
- Use a nearby door or lane-change point to regain position.
- Leave optional secrets for a replay if the route becomes unsafe.
Understand lives, death and Game Over
A fall into an abyss costs a life immediately. Enemy contact and other hazards remove health segments; when all six segments are gone, Klonoa loses a life. Extra-life items increase the life reserve, but they do not replace checkpoint discipline. If you die after activating a Memory Clock, restart from that clock. If no clock has been activated, expect to restart from the stage entrance or an earlier stage-defined point.
If the life reserve reaches zero, the game displays Game Over and offers Continue. Continue is tied to the latest permanent save, not the latest temporary checkpoint. Any progress made after the last World Map save may need to be repeated, including a cleared stage if you left the map without writing the data. This is why a risky secret attempt should never begin before the campaign save is secure.
After a death, first determine whether you are at a Memory Clock or the stage entrance. If you are at a clock, repeat the short section methodically. If you are at the entrance, stop attempting optional routes until you reach and activate the next checkpoint.
- Treat a pitfall as an immediate life loss.
- Use the checkpoint restart when available instead of changing the route impulsively.
- After Game Over, remember that Continue uses the last Memory Card save.
- Secure campaign progress before replaying a stage for secrets.
Save at the World Map after clearing a stage
The World Map appears after a stage is cleared. This is the reliable permanent save point in the North American PlayStation release. Press the indicated confirmation button from the World Map to reach the Save screen, choose the Memory Card file, and confirm that the data has finished writing before switching off the console.
Save after every completed stage when practical, and always save before replaying an earlier Vision for Dream Stones, Mirror Spirits, Ngapoko’s Eggs or prisoner rescues. A replay should begin only after the latest campaign milestone is safely stored. If the replay ends in Game Over, Continue will return to that saved campaign state, not to the temporary checkpoint from the replay.
Before entering the next Vision, verify the expected destination or story progress on the World Map. If the map has not appeared, the stage is not finished yet; continue through the exit or required boss sequence. If a save fails, do not overwrite the only good file until the Memory Card problem is resolved.
- Wait for the World Map after clearing the stage.
- Write the current game to the Memory Card from the Save screen.
- Save the campaign before replaying any completed Vision.
- Confirm the next destination is available before leaving the map.
Before you move on
- Activate a Memory Clock, intentionally lose a life afterward, and confirm that Klonoa restarts from that checkpoint.
- Clear a stage, wait for the World Map, open the Save screen and confirm the Memory Card write completes.
- After a Game Over, use Continue and verify that the game returns to the latest World Map save rather than the unsaved checkpoint.
- Before entering the next Vision, confirm that the expected destination is visible on the World Map and that the save has been performed.
References for this chapter
- Klonoa: Door to Phantomile — PlayStation Manual
- Klonoa: Door to Phantomile — Original North American PlayStation Manual
- Klonoa: Door to Phantomile — Guide and Walkthrough, PlayStation, Save_Some_FACE
- Klonoa: Door to Phantomile — Walkthrough & Guide, GuideVault
- Klonoa: Door to Phantomile – PlayStation version details and controls
Platforming Precision: Floats, Double-Jumps and Lane Changes
On the original North American PlayStation release, Klonoa uses the D-pad for movement and depth-facing, X or Triangle to jump and flap, and Square or Circle for the Wind Bullet and enemy throws. A captured enemy provides an airborne double-jump, but it does not allow Klonoa to flap while he is holding it. Use the first jump to line up with an enemy, capture it with the Wind Bullet, then press the jump button again while airborne. After the enemy is kicked away, hold the jump button during descent to flap and fine-tune the landing. Up faces the background and enters doorways; Down faces the foreground. Depth changes and attacks can also be performed during jumps, so use the D-pad to align with background or foreground objects before firing. The safest platforming rhythm is prepare, jump, capture, double-jump, release the enemy, then float only after the second jump has begun.
Configure and read the original controls
Use Left and Right on the D-pad to move. Up turns Klonoa toward the background and enters a doorway when he is correctly aligned with it; Down turns him toward the foreground. The default jump buttons are X and Triangle. Square and Circle fire the Wind Bullet, then throw a captured enemy when one is being held. Start pauses the game and controls cutscene skipping. The Options screen can change button assignments, so if your copy has been customized, confirm the layout before relying on these defaults.
The original manual separates jumping from flapping. Press X or Triangle to jump. While Klonoa is falling, continue holding that button to flap his ears and remain airborne briefly. Flapping is available once during a normal jump and cannot be performed while Klonoa is holding an enemy. This distinction matters: use the enemy for height first, then begin the float after the enemy has been kicked away.
- Left and Right move Klonoa.
- Up faces the background and enters doorways; Down faces the foreground.
- X or Triangle jumps; holding it during descent flaps.
- Square or Circle fires the Wind Bullet or throws a held enemy.
- Do not try to flap while holding an enemy.
Set up an ordinary jump and controlled float
Before jumping, stop at a stable launch point and face the direction of travel. Take a short adjustment step so Klonoa is not already walking off the edge, then tap X for a short jump. If the target is lower or close, release the button and let Klonoa descend normally. If the target is farther away, hold X during the falling half of the arc to flap and extend the jump horizontally.
For a narrow platform, do not hold the jump button from takeoff through landing. Begin the float after Klonoa has risen, steer toward the platform with Left or Right, and release X while Klonoa is above the platform rather than beyond it. The remaining descent will place him more accurately. If a moving platform is approaching, aim for where it is now. Use a short hop when it is moving toward Klonoa and a longer float when it is moving away. Waiting for the next pass is safer than trying to reverse direction after overshooting.
- Launch from a stable position.
- Tap for short jumps and hold only during descent when extra distance is needed.
- Release the float above the intended landing area.
- Aim for a moving platform’s current position, not where it will be later.
Use the capture-to-double-jump sequence
The reliable sequence is: jump toward an enemy, fire Square or Circle when the enemy is in front of the Wind Bullet, then press X or Triangle again while Klonoa is airborne and holding the inflated enemy. The second press kicks the enemy downward and gives Klonoa a higher jump. It is not necessary to wait until the absolute peak of the first jump; capture when the enemy is close enough to hit cleanly, then use the second jump while still rising or beginning to fall.
After the double-jump starts, steer toward the target ledge. Once the enemy has been kicked away, hold X during the descent only if additional horizontal travel is needed. For a platform directly above, release early. For an offset platform, hold briefly while steering, then release before crossing the platform’s center. If the enemy is needed to strike a switch or egg afterward, do not throw it first; the double-jump consumes the held enemy, so arrange a second enemy or a respawn before committing to the elevation attempt.
- Jump toward the enemy instead of firing from excessive distance.
- Capture when the enemy is close and in front of the ring.
- Press jump again while airborne and holding the enemy.
- Only begin a normal float after the enemy has been kicked away.
- Preserve a second enemy when the route needs both height and a projectile.
Chain two enemy-assisted jumps
Some high routes require two consecutive double-jumps. Vision 3-2 provides a clear example: after opening the route toward Joka, wait for the two Flying Moos to appear. Jump and Wind Bullet the first Flying Moo, immediately press the jump button for the first double-jump, then fire at the next Flying Moo during that airborne movement. Press jump again to use the second enemy and reach the high platform beside Joka. This is a sequence of two separate captures, not one enemy used twice.
Keep the D-pad pointed toward the next enemy and avoid drifting too far sideways after the first double-jump. If the second Flying Moo is not in range, land safely and wait for the cycle to repeat. Once the high platform is reached, collect the key and use the following drop to line up with the nearby Phantomilian. During the descent, face the prisoner and fire the Wind Bullet before falling past it. This demonstrates why direction changes during jumps are important: Klonoa can face inward or outward and attack while airborne.
- Use one Flying Moo for each double-jump.
- Keep the second enemy within Wind Bullet range during the first jump.
- If the second capture fails, land and wait for the enemies to return.
- Turn toward airborne prisoners or objects before firing during a descent.
Change foreground and background lanes deliberately
Depth is controlled with Up and Down rather than analog movement. Up faces the background and is also the doorway command; Down faces the foreground. Stand near the doorway or object, adjust Left or Right until Klonoa is lined up with it, then press Up for a background doorway. If the doorway is in front, face Down first when necessary, then move into the object’s lane. A doorway can appear visually close while remaining inaccessible because Klonoa is facing the wrong depth.
Check both lanes before leaving an area containing a key, unusual decoration, isolated platform, Ngapoko Egg, or prisoner bubble. Use a nearby platform edge or enemy as a visual reference. If Up does nothing, do not assume the control failed: move a small step left or right, face the doorway again, and retry. During a jump, Klonoa can also face inward or outward and fire into the foreground or background, which is useful for hitting switches and prisoners without landing in the target lane.
- Align horizontally before changing depth.
- Use Up for background-facing and doorway entry; use Down to face foreground.
- Inspect the opposite lane around keys, eggs, prisoners, and odd scenery.
- Use airborne facing and Wind Bullet shots for objects in another lane.
Recover from missed timing without losing a life
After a missed jump, return to the last solid platform instead of making repeated midair corrections. If the required enemy fell away or moved off-screen, wait for it to respawn. Vision 3-2’s two-Flying-Moo section is designed around this kind of timing: a failed first capture is safer to reset than to replace with a blind leap. Re-establish the launch position, watch the enemy’s approach, and repeat the capture-double-jump sequence.
When a Memory Clock has been activated, treat it as the recovery point for that portion of the stage. If Klonoa passes out, the game restores the items and position associated with the last clock. Use hearts before attempting a difficult chain, and abandon optional Dream Stones when collecting them would force a risky jump. A completed route with health and lives intact is preferable to losing progress while trying to preserve one bonus item.
- Return to solid ground after a failed attempt.
- Wait for enemy respawns instead of forcing a blind jump.
- Use the latest Memory Clock as the recovery reference.
- Take a heart before repeating a difficult sequence when one is available.
- Skip optional items if they threaten the route or remaining lives.
Before you move on
- You can complete a short jump without floating, then extend a longer jump by holding X or Triangle during descent.
- You can jump toward a Moo or Flying Moo, capture it with Square or Circle, press X or Triangle while airborne, and land on a raised ledge.
- You can perform two consecutive enemy-assisted double-jumps by capturing a second enemy during the first airborne sequence.
- You can release the held enemy before floating and understand that normal flapping is unavailable while the enemy is in hand.
- You can align with a background doorway, press Up, and enter it without relying on an on-screen prompt.
- You can inspect foreground and background lanes for keys, eggs, prisoners, and switches.
- After a failed attempt, you can return to solid ground, wait for a respawning enemy, and retry from the latest Memory Clock instead of sacrificing a life.
Hidden Rooms, Ngapako’s Eggs and Memory Clock Strategies
The original North American PlayStation release hides optional rewards in alternate depth lanes, isolated platforms, suspicious gaps and areas that require an enemy double-jump. Ngapako’s Eggs are opened by throwing a captured enemy into them, and each egg has a fixed reward that may be Dream Stones, a heart, a 1UP, a key or a Phantomilian Prisoner. Memory Clocks are in-stage checkpoints: activate one before a dangerous secret route, but do not confuse it with a memory-card save. Mirror Spirits temporarily double the value of Dream Stones collected while they remain active and matter mainly when replaying a stage for its 150-Dream-Stone result. During the first campaign, the Dream Stone total carries from one level into the next, so it is not a reliable per-stage record. After the ending, use Continue from the title screen to enter Vision Clear and replay stages individually. The World Map that appears after clearing a stage is a separate progress and saving screen, not the same system as Vision Clear.
1. Read the stage for secret-route clues
Treat the main route as only one possible path. Investigate isolated enemies, platforms positioned above the running line, short dead ends, unusual gaps, doors in the opposite depth lane and empty-looking spaces that can be reached with an enemy double-jump. These locations commonly conceal Ngapako’s Eggs, Dream Stones, extra lives or Phantomilian Prisoners. A suspicious space does not always contain a reward, so do not spend a life forcing every gap.
At a locked door, search the nearby area before assuming the key is farther ahead. Check the foreground and background lanes, the underside of the previous platform and the space above the last safe ledge. If a moving platform or current is involved, wait for a stable alignment and inspect the route in both directions. Many optional items are placed just before or just after a required landmark, so a short backtrack is safer than a blind forward jump.
- Inspect unusual spaces above, below and beside the main path.
- Check both depth lanes near locked doors and lane transitions.
- Use isolated enemies as possible tools for reaching secrets.
2. Open Ngapako’s Eggs without sacrificing the route
To open an Ngapako’s Egg, capture an enemy with the Wind Bullet, hold it, and throw it into the egg. A Wind Bullet by itself does not break the egg. Before throwing, look beyond the egg and identify whether the same enemy is needed for a double-jump, a switch, a second egg or a nearby Phantomilian. If another enemy is present, use the first one on the egg and keep the replacement for movement.
Egg rewards are fixed by location rather than randomly selected during play. Depending on the egg, the reward can be Dream Stones, a heart, a 1UP, a key or a Phantomilian Prisoner. The stage walkthrough documents examples of eggs that give hearts, keys, extra lives, Dream Stones and prisoners. After the throw, wait for the reward to appear and confirm what you received before leaving. If a key or prisoner does not appear, the throw may have missed the egg or you may have struck a different object.
- Carry a captured enemy into the egg area.
- Check whether the enemy is needed for the next platforming action.
- Wait for and identify the reward after the egg breaks.
3. Search foreground and background lanes methodically
At every unusual junction, move into the available depth lane and inspect both directions before continuing. A key, egg or prisoner may be hidden behind the route that leads toward its locked door, making a short return trip necessary. Look especially around springs, currents, gondolas, moving platforms and doors, where the camera can make a nearby alternate lane easy to overlook.
Do not change lanes from the edge of a moving platform or while a current is carrying Klonoa toward a hazard. Land on a broad platform first, then face toward the foreground or background and make the transition. If you land in the wrong lane, retreat to the last secure platform instead of trying to correct the mistake over a pit. Some eggs are invisible until Klonoa jumps near their intended position, so test open-looking spaces with a controlled jump when the surrounding platform is safe.
- Inspect the opposite lane at doors, springs and currents.
- Search behind the previous platform when a key is missing.
- Reveal suspected hidden eggs only from stable ground.
4. Activate Memory Clocks before risky optional routes
Memory Clocks are floating clock bubbles that establish an in-stage continuation point when you pop them. Activate one as soon as you reach it, especially before a long current, a one-way descent, a moving-platform crossing, a dangerous enemy throw or a secret requiring several consecutive jumps. If Klonoa loses a life, the activated clock lets you resume near that section instead of replaying the entire stage from the beginning.
After respawning, first reach a stable platform and observe which enemies and platforms have returned. Do not immediately repeat the failed throw while moving or while surrounded by hazards. A checkpoint may restore a different enemy arrangement than the one used to set up an optional Dream Stone route, so during a high-score replay you may need to use an earlier Memory Clock. This is a route-planning issue, not a bug or a permanent loss of the collectible.
- Pop the nearest Memory Clock before entering a secret route.
- Stabilize after respawning before repeating the failed action.
- Use an earlier checkpoint if the later one removes a needed setup.
5. Use Mirror Spirits for Dream Stone replays
A Mirror Spirit is released by striking its bubble. While the spirit remains active, Dream Stones collected during its effect count for double value. The spirit leaves after a limited period, so the intended route is the nearby group of stones arranged around or immediately after it. Do not activate the spirit and then wander through unrelated sections; the timer can expire before the valuable group is collected.
For a 150-Dream-Stone attempt, arrive with the required enemy already available whenever possible. Release the spirit only when you are positioned to move through the collection route, then use the enemy for the necessary double-jump without pausing unnecessarily. A Mirror Spirit does not create a checkpoint and does not protect the attempt from a fall. Activate a Memory Clock beforehand, but remember that the checkpoint and the multiplier are separate effects.
- Release the Mirror Spirit only when ready to collect its nearby route.
- Prioritize reachable stones while the effect is active.
- Do not treat a Mirror Spirit as a checkpoint or permanent upgrade.
6. Replay stages and verify optional progress
For a missed egg, remember the landmark immediately before it: a locked door, spring, current, gondola, moving platform, enemy group or Memory Clock. Replay the stage and travel directly to that landmark, then inspect the alternate lane and nearby vertical spaces. Preserve the enemy type required for the egg instead of using it on routine enemies. If an egg gives a key, use that key only after checking whether another nearby route contains a prisoner or Dream Stone group.
The ordinary World Map appears after clearing a stage and shows stage-related progress before the game proceeds to its save screen. It is separate from the post-game Vision Clear system. After the campaign and ending are complete, return to the title screen, choose Continue, and use Vision Clear to select individual stages and inspect their replay records. Because Dream Stones carry across levels during the initial campaign, use Vision Clear—not the first-playthrough counter—to judge whether a particular replayable stage reached its 150-Dream-Stone result.
- Replay from a remembered landmark rather than searching the whole stage blindly.
- Confirm each egg’s actual reward immediately after opening it.
- Use Continue and Vision Clear after the ending for per-stage replay records.
- Keep World Map progression and Vision Clear stage selection conceptually separate.
Before you move on
- Replay each ordinary Vision after clearing the campaign and inspect alternate lanes, isolated platforms, concealed vertical spaces and suspicious dead ends.
- Confirm each targeted Ngapako’s Egg by observing its actual reward: Dream Stones, a heart, a 1UP, a key or a Phantomilian Prisoner as applicable.
- Use Continue and Vision Clear from the title screen to inspect individual stage records after the ending has been completed.
- For maximum optional completion, reach the 150-Dream-Stone result for every replayable ordinary stage and rescue every Phantomilian Prisoner.
- Use Memory Clocks to reduce repeated traversal during optional attempts, while using the World Map and its save screen separately from Vision Clear stage selection.
Final Completion Checklist and Post-Game Notes
The original North American PlayStation release has six numbered Visions with two stages each, followed by a separate Final Vision. The main campaign is complete only after clearing Visions 1-1 through 6-2, defeating Ghadius, finishing the Final Vision against Nahatomb, and allowing the ending and credits to play. There is no numbered Vision 7. After the ending, use Continue and Vision Clear to replay ordinary stages and inspect their Phantomilian and Dream Stone records. The World Map is the normal between-stage campaign and save screen, not the post-game replay checklist. Optional completion consists of rescuing all 72 Phantomilians to unlock Klonoa's Grand Gale Strategy, then reaching 150 Dream Stones in every ordinary replayable stage.
1. Confirm the campaign structure
The original PlayStation campaign contains twelve ordinary stages: Visions 1-1 through 6-2. Each numbered Vision has two parts, with the second part leading to that Vision's boss. Vision 6-2, The Time of Restoration, is the final numbered stage and ends with the fight against Ghadius.
After Ghadius is defeated, the game proceeds to the separate Final Vision, The Dream at Nightmare's End. This is the thirteenth story stage, but it is not a numbered Vision 7. Treat the campaign as six numbered Vision pairs followed by one Final Vision.
For the main-story check, verify that Vision 6-1, Vision 6-2, and the Final Vision have all been completed. Earlier stage-clear marks are not enough because the concluding ending sequence occurs only after Nahatomb is defeated.
- Visions 1-1 through 5-2 are cleared.
- Vision 6-1 and Vision 6-2 are cleared.
- Ghadius has been defeated.
- The separate Final Vision has been completed.
- No numbered Vision 7 is expected.
2. Finish Nahatomb and allow the ending to complete
Enter the Final Vision and follow its approach to the Nahatomb battle. Preserve health during the approach, but do not treat this as another ordinary collectible stage. The required objective is to complete the boss sequence.
Nahatomb has three phases. In the first, capture the usable Death Moos with the Wind Bullet and load them into the Moon Cannons. Avoid the tongue sweeps and platform-wide shockwaves. Continue collecting and loading Death Moos until all five cannons are filled; the five leaders then fire together.
The second phase takes place inside Nahatomb. Use the Wind Bullet against the four fixed crystals, then continue attacking the moving crystal that appears after them. Avoid the eye-laser attacks with jumps, floating, and movement across the available platform. Destroying only the first four crystals does not finish this phase; the moving target must also be broken.
The third phase returns to the exterior arena on platforms that Nahatomb can destroy. Flashing platforms are about to disappear, so move toward a stable platform before committing to the next jump. Capture Death Moos and use their double-jump ability to cross gaps and drop them into the remaining Moon Cannons. The number of collapsing platforms and rainbow rings increases as more cannons are loaded, so keep moving and avoid Armored Death Moos. Reload all five cannons.
After the final cannon sequence, control returns to Klonoa. Fire Huepow at Nahatomb with the Wind Bullet. Then allow the post-battle scenes and credits to play without resetting. The aftermath, Song of Rebirth sequence, departure scene, and credits are part of the complete campaign ending.
- All five Moon Cannons were loaded in the first phase.
- The four fixed crystals were destroyed in the interior phase.
- The moving crystal was destroyed before leaving the interior phase.
- All five cannons were loaded during the collapsing-platform phase.
- Huepow was fired at Nahatomb with the Wind Bullet.
- The complete aftermath and credits played.
3. Use the correct post-game replay route
The World Map appears during normal campaign progression. It is used to move between ordinary stages and reach the normal campaign save screen. Use that screen for regular memory-card saves while progressing through the story.
Do not use the ordinary World Map as the post-game replay checklist. After completing the game, return to the title screen, choose Continue, load the completed file, and select Vision Clear. Vision Clear is the post-completion selection used to replay ordinary stages and inspect their stored Phantomilian and Dream Stone records.
If Vision Clear is unavailable, first verify that the Final Vision was completed and that the ending sequence reached its conclusion. Reload the last usable campaign file and complete the Final Vision again if necessary, then return to the title screen and check Continue once more.
- The completed campaign file is available on the intended memory card.
- Continue loads the completed file.
- Vision Clear is available through the completed-file route.
- The ordinary stages can be selected for replay.
4. Verify the 72-Phantomilian objective
Use Vision Clear to review the Phantomilian result for each of the twelve ordinary stages. Do not rely only on memory from the first campaign run. Select a stage with missing residents, replay it, and rescue the Phantomilians still trapped in bubbles or other containers.
The optional target is 72 rescued Phantomilians across Visions 1-1 through 6-2. Phantomilian rescue and Dream Stone collection are separate records. A stage can have every resident rescued while still lacking its perfect Dream Stone result, or it can have a strong Dream Stone total while one resident remains missing.
When all 72 Phantomilians are recorded, check Vision Clear for the extra stage Klonoa's Grand Gale Strategy, also called the Extra Vision. It is optional post-game content and is not required for the ordinary ending, Nahatomb's defeat, or the main credits. Do not count the Final Vision as one of the twelve ordinary stages in the 72-resident total.
- All twelve ordinary stage records have been inspected.
- All 72 Phantomilians are recorded as rescued.
- Klonoa's Grand Gale Strategy is visible in Vision Clear.
- The Extra Vision is treated as optional post-game content.
5. Verify the 150-Dream-Stone records
The optional Dream Stone goal is 150 Dream Stones in every ordinary replayable stage. Use Vision Clear to select stages individually and inspect each stored result after replaying it. First-run pickups do not provide a dependable per-stage certification because Dream Stones collected during the initial campaign can carry between stages.
Green Dream Stones are worth one and blue Dream Stones are worth five. Activate the Mirror Spirit when it appears so nearby stones increase in value. Before leaving an area, search around the spirit and check alternate lanes, doors, background routes, enemy-assisted platforms, and cannon branches for stones outside the direct path.
The in-stage counter can wrap after passing 99, so a temporary low displayed number is not proof that progress was lost. The practical completion check is the stored record shown for that individual stage in Vision Clear. Review all twelve ordinary stages separately and confirm 150 in each. The Final Vision is excluded from the ordinary-stage 150-stone list.
Do not use an unsupported intermediate threshold as a completion requirement. The relevant ordinary-stage target is 150 Dream Stones per stage. If you pursue the Extra Vision's own perfect result, treat it as a separate optional objective.
- Every ordinary stage has been replayed from Vision Clear as needed.
- Each ordinary stage shows 150 Dream Stones in its stored record.
- Mirror Spirits were used to maximize nearby Dream Stone values.
- The Final Vision is excluded from the ordinary-stage 150-stone check.
- No 130-stone threshold is being used as a requirement.
6. Finish optional content and confirm the completed file
After all 72 Phantomilians are rescued and the Extra Vision is unlocked, complete Klonoa's Grand Gale Strategy if you want the optional challenge. Its Dream Stone result is separate from the twelve ordinary-stage records. Completing it is not required for the main campaign ending.
Use Vision Clear to replay stages and inspect their stored Phantomilian and Dream Stone records. Do not assume that an optional replay must return to the ordinary World Map or to the normal campaign Save Game screen before its record can be checked. The World Map remains the normal between-stage campaign and save screen, not a required post-game certification step.
For a final verification, reload the completed file through Continue and confirm that Vision Clear remains available. A fully completed main-story file should show the six numbered Vision pairs cleared, Ghadius defeated, the Final Vision completed, Nahatomb defeated, and the complete ending and credits viewed. Optional completion additionally requires all 72 Phantomilians, access to the Extra Vision, and 150 Dream Stones recorded for every ordinary replayable stage.
- The completed main-story file reloads successfully.
- Vision Clear remains available after reloading.
- All twelve ordinary stages remain selectable.
- The complete ending and credits have been viewed.
- The 72-Phantomilian total and Extra Vision are confirmed if pursuing optional completion.
- Every ordinary replayable stage shows 150 Dream Stones if pursuing full Dream Stone completion.
Before you move on
- Main campaign: Visions 1-1 through 6-2 are cleared.
- Final Vision: Nahatomb is defeated through all three phases.
- Final action: Huepow is fired at Nahatomb with the Wind Bullet.
- Ending: the complete aftermath, Song of Rebirth sequence, departure, and credits have played.
- Post-game access: Continue loads the completed file and exposes Vision Clear.
- Optional Phantomilian goal: all 72 Phantomilians are rescued and the Extra Vision is accessible.
- Optional Dream Stone goal: every ordinary replayable stage shows 150 Dream Stones in its Vision Clear record.
- File check: reloading the completed file still exposes Vision Clear and the stored stage records.
References for this chapter
Finishing up
Main campaign completion: Visions 1-1 through 6-2 are cleared, Ghadius is defeated, the separate Final Vision is completed, Nahatomb is defeated, and the complete ending and credits have played.
Optional Phantomilian completion: all 72 Phantomilians have been rescued and Extra Vision is available from the post-game Vision Clear selection.
Optional Dream Stone completion: every ordinary replayable stage has reached its 150-Dream-Stone result in Vision Clear stage selection, accessed from the title screen through Continue after completing the game.
Confirmed controls: you can capture and throw enemies, perform enemy-assisted double-jumps, float after releasing an enemy, and use the Wind Bullet in midair.
All required bosses have been defeated. Optional Extra Vision completion is separate from the main campaign and is not required for the ending.
Choose your next gameScreenshots & video
Game imagery for reference. Follow the written chapters above for the route and strategies.
Sources & references
Our original guide draws on the references below. Check the edition at the top of this page before following controls or unlock requirements.
- Klonoa: Door to Phantomile — PlayStation Manual
- Klonoa: Door to Phantomile — Guide and Walkthrough, PlayStation, Save_Some_FACE
- Klonoa: Door to Phantomile — Walkthrough & Guide, GuideVault
- Klonoa: Door to Phantomile – PlayStation version details and controls
- Klonoa: Door to Phantomile — Original North American PlayStation Manual
- Vision 1-1: The Beginnings of Gale — Breezegale Walkthrough
- Vision 1-2: The Diva and the Dark Spirit — Gunston Mine Walkthrough
- Klonoa: Door to Phantomile — Guide and Walkthrough, PlayStation, BJange
- Introductory Any% Guide — Klonoa: Door to Phantomile
- Vision 3-1: Rebirth of the Forest ~Forlock, The Tree Village~ — Klonoa: Door to Phantomile Walkthrough & Guide
- Vision 3-2: The Stopped Gear — Klonoa: Door to Phantomile Walkthrough & Guide
- Vision 4-1: A Village in Danger — GuideVault
- Vision 4-2: A Lull in the Wind — The Leviathan's Ice Cavern — Klonoa: Door to Phantomile Walkthrough & Guide
- Klonoa Door To Phantomile — All Phantomilians Vision 4-1 Locations Guide
- Klonoa: Door to Phantomile — PlayStation Cheats and Unlockables
- Vision 5-1: The Four Orbs — Klonoa: Door to Phantomile Walkthrough and Guide
- Vision 5-2: Between Light and Darkness - High Above Coronia - Klonoa: Door to Phantomile Walkthrough and Guide
- Klonoa: Door to Phantomile — Introductory Any% Guide
- Vision 6-1: The Legendary Kingdom — Cress, the Moon Kingdom — Klonoa: Door to Phantomile Walkthrough and Guide
- Vision 6-2: The Time of Restoration - The Prism Corridor - Klonoa: Door to Phantomile Walkthrough and Guide
- Final Vision: The Dream at Nightmare's End — Klonoa: Door to Phantomile Walkthrough and Guide
- Klonoa: Door to Phantomile — Mini-FAQ, ruyeyama
- Vision 2-1: Deep in the Dying Forest — GuideVault
- Vision 5-1: The Four Orbs — GameFAQs discussion reference
About the game & collecting notes
- Platform
- Sony PlayStation
Complete the original North American PlayStation campaign through Visions 1-1 through 6-2, defeat Ghadius, clear the separate Final Vision against Nahatomb, and watch the complete ending and credits. Optional post-game completion covers all 72 Phantomilian rescues, the unlocked Extra Vision, and the 150-Dream-Stone replay records for the ordinary stages.
Darryl Polo
Darryl Polo loves tinkering with emulation and revisiting retro games. He enjoys exploring how old favorites play on different setups and sharing what he learns along the way. At Joking Joystick, he writes about the games, hardware, and small discoveries that keep the hobby fun.
Our editorial standardsFound a step that needs another look? Help us improve this guide.