
Golden Sun (Game Boy Advance) — Complete Campaign Walkthrough (USA / Europe)
Step-by-step walkthrough for the original Golden Sun on Nintendo Game Boy Advance, covering the mandatory route from Vale through Sol Sanctum, Vault, Goma Cave, Bilibin, Kolima, Mercury Lighthouse, Mogall Forest, Xian, Altin, Lamakan Desert, Kalay, Tolbi, Colosso, Suhalla Desert, Suhalla Gate, Lalivero, Babi Lighthouse, Tunnel Ruins, the true Venus Lighthouse and the ending sequence. The Fuchin Temple and Fuchin Falls Cave detour is optional for the ending but recommended for Force, Zephyr and its rewards. Optional coverage includes all 28 first-game Djinn, Crossbone Isle, Deadbeard, equipment cleanup and Clear Data transfer preparation. Lemuria, Jupiter Lighthouse, Mars Lighthouse, summon tablets and other The Lost Age content are excluded or clearly labeled sequel-only.

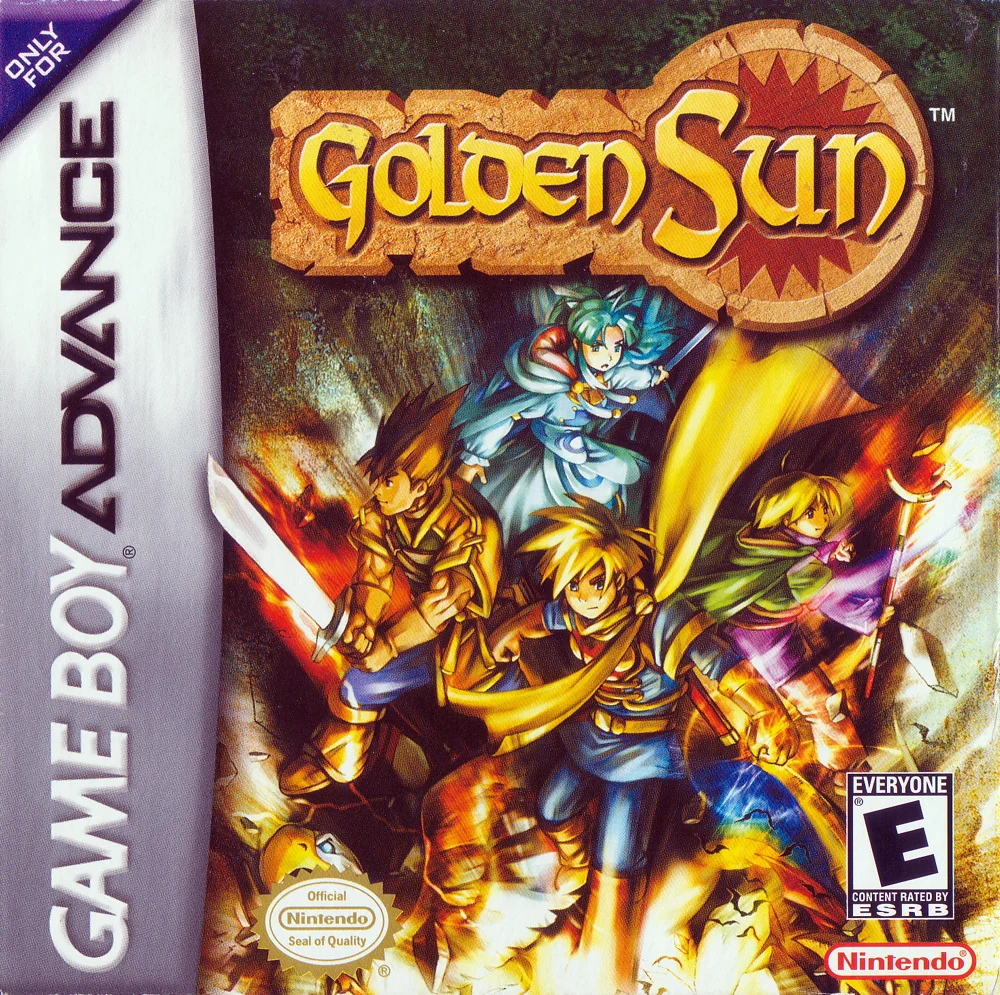
Find a copy
Golden Sun Game Boy Advance
We may earn a commission if you buy through these links, at no extra cost to you. As an Amazon Associate I earn from qualifying purchases.
Opens retailer search results. Check the model, edition, seller, availability and current price before buying.
Before you begin
This walkthrough covers the original Golden Sun for Nintendo Game Boy Advance from Vale through its canonical ending.
It follows every mandatory area in order, including the inland progression after Mercury Lighthouse through Mogall Forest, Xian, Altin, Lamakan, Kalay, Tolbi and Suhalla before the Venus Lighthouse sequence. Fuchin Temple and Fuchin Falls Cave are optional detours that are recommended but not required for the ending.
Optional Djinn, Crossbone Isle, Deadbeard, equipment and transfer preparation are identified separately from required progression.
Lemuria, Jupiter Lighthouse, Mars Lighthouse, summon tablets and other Golden Sun: The Lost Age mechanics are not part of this campaign.
Set yourself up for the run
Maintain an active save and at least one separate backup before dungeons, optional bosses and the final Venus Lighthouse slide.
Heal at a Sanctum and restore HP and PP at an Inn or Psynergy Stone before major encounters.
Keep Djinn Set when you need their class, statistic and Psynergy benefits; use Standby selectively for summons.
Confirm that Mia retains dependable healing before Mercury Lighthouse and the final sequence.
Use the original game's actual field Psynergy as acquired: Move, Lift, Frost, Reveal, Whirlwind, Force, Carry, Cloak, Halt, Catch, Douse, Growth, Ply, Retreat, Gale and Mind Read.
Do not search for Pound, Melt, Teleport, Mars Lighthouse, Jupiter Lighthouse, Lemuria or summon tablets in the original game.
Resupply in the most recent town before long routes, especially before the Karagol Sea, Suhalla Desert and final Venus Lighthouse sequence.
Keep revival items or Revive access for late bosses.
Preserve an ordinary pre-ending save; the Clear Data file is for transfer and is not a normal continuation save.
For transfer, complete the ending and use the Clear Data file's Send, password or compatible cable procedure only after confirming the ordinary save is preserved.
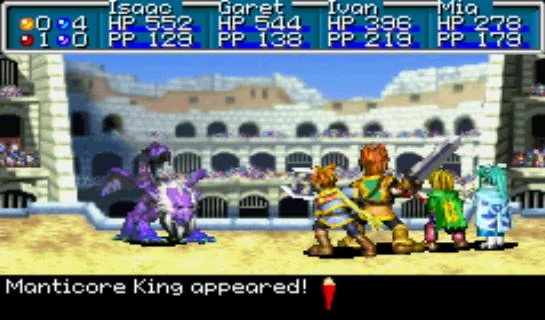
Preparation and Core Mechanics: Djinn, Psynergy, Summons, and Saving
Golden Sun on Game Boy Advance uses Djinn to control battle abilities, character classes, statistics, Psynergy access, and Summons. Set Djinn provide their assigned Adept with stat and class benefits and can be unleashed in battle. Standby Djinn no longer provide those benefits but can be spent on Summons. Djinn used in Summons enter Recovery and return to Set after turns in battle or movement in the field. Before Sol Sanctum, heal at Vale’s Inn, equip affordable upgrades, organize the early Djinn, assign useful Psynergy shortcuts, and preserve a separate backup save. The opening game provides only the field abilities available through current progression. Move is an early practical utility spell; Lift, Frost, Reveal, and other abilities become available later. Melt and Teleport are not field Psynergy in this original GBA release.
Understand Set, Standby, and Recovery Djinn
Open the Djinn menu and inspect the Djinn assigned to each active Adept. A Djinni in Set is attached to that character and supplies its normal statistical benefit. Set Djinn also contribute to the character’s class, which can affect maximum HP and PP, physical statistics, and the Psynergy available to that Adept. A Set Djinni may be unleashed during battle for its individual effect.
A Djinni in Standby remains assigned to an Adept but no longer provides its normal stat or class contribution. It is available for a Summon of the appropriate element. You can also return a Standby Djinni to Set from the Djinn menu when you want to restore its benefits instead of spending it.
A Djinni in Recovery has been consumed by a Summon. It cannot be unleashed, moved between characters, counted toward class formation, or used in another Summon until it recovers. Recovery is temporary, not a loss of the Djinni. The normal cycle is Set, Standby, Recovery, then Set again.
- Keep most Djinn Set during ordinary exploration so the party retains its normal statistics and classes.
- Use Standby deliberately when preparing a Summon or testing a different class arrangement.
- Do not treat a Recovery Djinni as permanently unavailable.
Use a simple early Djinn arrangement
The class system is determined by the elemental Djinn currently Set on each Adept. With only a few Djinn available, a straightforward arrangement is to keep Venus Djinn with Isaac and Mars Djinn with Garet. When Mia and Ivan join the party, keeping Mercury Djinn with Mia and Jupiter Djinn with Ivan provides an easy starting setup that preserves their expected roles.
This arrangement is a recommendation rather than a requirement. Mixed-element classes can be useful, but changing Djinn may replace a character’s current class and alter the Psynergy list. After assigning or removing Djinn, open the Status screen and check the displayed class, statistics, and Psynergy before entering a difficult battle.
If an experiment removes an important healing or support spell, return the Djinn to the previous arrangement. You can also preserve an experiment save before making broad changes. There is no need to optimize classes during the opening minutes; keeping the party’s basic roles intact is more useful than chasing an advanced class before enough Djinn exist to support it.
- Inspect each character’s class after changing Djinn assignments.
- Confirm that the party still has its expected healing and support Psynergy.
- Use matching-element assignments until you are comfortable with mixed classes.
Unleash Djinn and prepare Summons without weakening the party accidentally
A Set Djinni can be selected through the Djinn command during battle and unleashed for its individual effect. Afterward, it moves to Standby. The effect occurs immediately, but the Djinni no longer supplies its Set stat and class benefit until it is Set again or used in another way.
Summons require Standby Djinn of the appropriate element. The Summon menu shows which Summon is available and how many Standby Djinn it consumes. The Djinn used for the Summon enter Recovery afterward, so a large Summon can temporarily remove several class and stat bonuses from the party.
For normal encounters, keep most Djinn Set and rely on regular attacks, Psynergy, and individual Djinn effects. Before a boss, decide whether an opening Summon is worth the temporary loss of class benefits. If you want to use a Summon immediately, place the required Djinn on Standby before the fight. Otherwise, unleash Set Djinn during battle and build toward a Summon over subsequent turns.
Summon recovery is gradual. One recovery step occurs for each relevant turn in battle, and movement in the field also advances recovery. A multi-Djinn Summon therefore does not restore all of its Djinn immediately. Check the Djinn menu after a battle before assuming that every Djinni is ready again.
- Leave some Djinn Set when a battle may last several turns.
- Review the elemental requirement before confirming a Summon.
- Remember that an unleashed Djinni goes to Standby, while a Summoned Djinni goes to Recovery.
- Check the Djinn menu after battles that involved Summons.
Use only the original game’s actual field Psynergy
Open the field command menu and select Psynergy to view the abilities currently available to the party. In the opening Vale and Sol Sanctum portion, Move is the important early utility spell. Use it to push movable objects when the game presents a clear route or puzzle space. If an object does not respond, do not assume that you missed a hidden command; many obstacles are deliberately reserved for later progression.
Later areas provide additional utility such as Lift, Frost, Reveal, and other progression-based abilities. The exact spell list depends on the Adept’s current class and level, so check the Status screen instead of relying on a list remembered from another point in the game. Frost creates temporary ice pillars from suitable water sources. It is not a spell that melts barriers.
Melt is not an original Golden Sun Game Boy Advance field Psynergy. Teleport is also not a field Psynergy in this release. Do not search Vale, Sol Sanctum, or later dungeons for either spell, and do not treat instructions requiring them as part of the original campaign.
- Use Move when an early puzzle clearly requires pushing an object.
- Treat Lift, Frost, Reveal, and other utility spells as progression-gated until acquired.
- Check the current Psynergy list after class changes.
- Do not search for Melt or Teleport in the original GBA game.
Assign L and R shortcuts for frequently used Psynergy
From the field Psynergy menu, highlight the ability you want to use repeatedly and press L or R. Confirm the assignment when prompted. The two shoulder buttons can hold separate field-Psynergy shortcuts, which is useful for Move during early puzzles and for abilities such as Mind Read or Reveal once they become available.
A shortcut only provides quicker access to an ability that the party already possesses. It does not bypass character, class, level, or story requirements. If a shortcut fails after a Djinn reassignment or party change, open the complete Psynergy list and verify that the required Adept still knows the spell.
Use the full Psynergy menu when a puzzle requires a particular character or when the target is difficult to select with a shortcut. Reassign the buttons as the campaign moves from one type of puzzle to another.
- Assign Move to L or R if you expect to use it repeatedly.
- Recheck shortcuts after changing classes or reorganizing the party.
- Use the full menu to confirm the actual owner of a required spell.
Heal, equip, and save before the Sol Sanctum sequence
Explore the accessible parts of Vale and speak with residents before following the story toward Sol Sanctum. Examine reachable objects and collect available items, but do not waste time trying to force blocked paths. The opening areas contain deliberate backtracking points, and many inaccessible objects are waiting for later Psynergy or story progression.
Visit Vale’s Inn before the major transition so Isaac and Garet begin with restored HP and PP. Purchase practical weapon or armor upgrades if they are affordable, but keep enough coins for recovery items and later equipment. Equip newly purchased gear immediately rather than leaving it in a character’s inventory. Retain most Djinn in Set unless you have a specific reason to prepare a Summon.
Save after healing and equipping the party, immediately before entering the story sequence that leads into Sol Sanctum. Keep this file separate from an older Vale save until you have safely reached a later recovery point. If the opening dungeon goes badly, the earlier file gives you a clean opportunity to change equipment, restore resources, or adjust Djinn.
- Explore only the reachable portions of Vale before the story transition.
- Restore HP and PP at Vale’s Inn.
- Buy and equip affordable upgrades while preserving money for recovery.
- Keep most early Djinn Set.
- Create a separate save before entering the Sol Sanctum sequence.
Maintain three ordinary save files
The original GBA game provides three ordinary save files. Use one as the active campaign file, one as a backup before dungeons or major story transitions, and the third for optional exploration or Djinn-class experiments. Save from the field Pause Menu. Do not overwrite the backup after every routine step; retain it until a new safe recovery point has been established.
An Inn restores HP and PP for a fee. A Sanctum is the dependable place to revive defeated Adepts. If a battle goes badly, retreat to the latest accessible town when possible, revive at the Sanctum, restore HP and PP at the Inn, check equipment and Djinn, and save before trying the route again.
Do not assume imported saves, transferred items, or sequel linkage. The first Golden Sun campaign is fully playable as a self-contained file. Transfer data to Golden Sun: The Lost Age is optional and is handled after completing the game; it is not needed for the opening or for the first game’s ending.
- Keep one active file and at least one older backup.
- Do not overwrite every save slot with the same recent position.
- Use the Inn for HP and PP restoration.
- Use the Sanctum to revive defeated Adepts.
- Treat sequel transfer data as optional.
Before you move on
- You can distinguish Set, Standby, and Recovery Djinn.
- You understand that Set Djinn affect statistics and class, while Standby Djinn fuel Summons.
- You have checked the party’s classes and Psynergy after assigning early Djinn.
- You can use Move from the field menu and know that later utility abilities are progression-gated.
- You understand that Frost is not Melt and that Melt and Teleport are not original-game field Psynergy.
- The party is healed, equipped, and saved before beginning the Sol Sanctum sequence.
- At least one backup save remains separate from the active campaign file.
- You are proceeding without assuming imported items or sequel-transfer data.
Vale and the Sol Sanctum Prologue: Triggering the Quest
After the three-year time skip, Isaac, Garet and Jenna reunite in Vale and meet Kraden near his house. Search the accessible village containers for inexpensive supplies, then sneak past the elder guarding the northern route to enter Sol Sanctum. The dungeon teaches jumping puzzles, movable objects, Small Jewel reliefs and the Sun-and-Moon statue mechanism. Complete the elemental-star sequence, escape with Retreat, and return to Vale for the Great Healer’s decision. Choose Yes to accept the quest, receive the Catch Beads and Herb, then leave Vale and meet Flint, the first Venus Djinni, on the southwest road toward Vault.
1. Finish the opening disaster and begin the three-years-later section
During the opening sequence, guide young Isaac through Vale as the Mt. Aleph disaster unfolds. Follow Garet and Jenna toward the evacuation route and allow the scripted battles and scenes to play out. This section is not a normal equipment or exploration segment, so do not spend time looking for Djinn or trying to develop a permanent party.
After the time skip, Isaac is back in Vale and the regular prologue begins. Garet and Jenna are available during this section. Your immediate objective is to find Kraden, who is waiting near his cottage beyond the northern part of the village.
- Complete the Mt. Aleph evacuation sequence.
- Reach the three-years-later section with Isaac, Garet and Jenna.
2. Search accessible Vale containers and make modest purchases
Before visiting Kraden, search the containers in the accessible houses and lower village areas. Useful early pickups include an Antidote, a Smoke Bomb, a shiny Coin and an Herb. Kraden’s home also contains a small coin pickup and an Elixir in an outside container. These items are optional but worthwhile because the party begins with limited money and few recovery options.
The Vale shops do not require a major shopping trip. The starting equipment is adequate for Sol Sanctum, but Wooden Shields and Leather Caps are reasonable defensive purchases for Isaac and Garet if you have spare coins. Keep some money available for healing items and the first substantial equipment stop in Vault. Do not search Vale for the Sleep Bomb; that item is found later in Vault’s item shop.
The containers and blocked areas that require later Psynergy are not part of this visit. In particular, do not attempt to force access to late-game Vale rewards or the Vale Cave before the story grants the necessary abilities.
- Collect the accessible Antidote, Smoke Bomb, Coin and Herb if desired.
- Check Kraden’s house containers for the Elixir and coins.
- Buy only useful early defense or recovery items.
- Do not expect to find a Djinn or Sleep Bomb in Vale at this stage.
3. Find Kraden and sneak to the Sol Sanctum entrance
From the central village area, go north across the bridge, descend the stairs and continue left into the next section. A story scene with the two hostile strangers occurs before you can reach Kraden. Continue up the nearby stairs and speak with Kraden near his cottage. Answer the early questions as the game requests; the conversation advances the expedition rather than testing a hidden requirement.
Return toward Isaac’s house, then take the northern route across the bridge and up the stairs toward the small shrine. An elder patrols this approach and will turn you away if he sees you. Wait near the stairs until he walks behind the right side of the shrine, then hold B and run left past the tree and north before he returns. Follow the path to the Sol Entrance and enter the large doorway.
If the elder catches you, simply wait for his patrol to move away and try the same route again. There is no combat solution or alternate entrance during this part of the story.
- Speak with Kraden at his cottage.
- Return to the shrine-side path after the conversation.
- Wait for the elder to move away, then run behind the tree to the north.
- Enter the Sol Entrance and proceed into Sol Sanctum.
4. Save and clear the first Sol Sanctum jumping rooms
Inside Sol Sanctum, Isaac has Cure, Move and Retreat. Garet can use Move and Flare, while Jenna has Flare. Random battles are light in this opening dungeon, but PP is limited, so use field Psynergy for obstacles and Cure for recovery rather than casting offensive Psynergy in every encounter. Save at the available Sanctum save point before committing to the deeper puzzle route.
The first room is a jumping course over water. From the far-right starting block, jump forward three times, move left twice, go down twice, move left once, then go up three times to reach the northern exit. The next room has another block course. Take the middle route first and open the chest for a Small Jewel.
Return to the block room and take the right-hand route to the Minotaur relief. Examine it, open the item menu and use the Small Jewel on the relief. This opens the western passage. Go back across the room, take the left route and enter the newly accessible doorway.
- Save before the deeper Sanctum puzzles.
- Keep enough PP for Move, Cure and Retreat.
- Collect the first Small Jewel.
- Use it on the right-side Minotaur relief to open the western route.
5. Use the second Small Jewel and reach the Inner Sanctum
In the statue chamber beyond Kraden’s stopping point, look for the statue with a faint outline on the floor. Push it aside with Move to uncover a passage, then climb the stairs. At the upper intersection, take the left branch and follow it to the chest containing the second Small Jewel.
Return to the intersection and take the western route to the room with statues and a water channel. Use Move on the far-left statue to reveal another Minotaur relief, then use the second Small Jewel on it. Cross to the eastern side and move the statue that blocks the doorway so you can enter the opened passage.
Continue through the corridors, taking the western branch for the Herb if you want the extra recovery item, then return to the fork and take the northern route into the Inner Sanctum. Heal before advancing. The Psynergy Stone in the Inner Sanctum can restore PP, making it a useful preparation point before the star sequence.
- Obtain the second Small Jewel.
- Place it in the second Minotaur relief.
- Collect the optional Herb.
- Reach the Inner Sanctum and restore HP and PP before the next puzzle.
6. Solve the Sun-and-Moon statue puzzle in the correct order
Do not begin by placing the statues around the Moon symbol. If you move one of those statues first, Kraden warns that the arrangement is trapped. Go west to the Sun symbol instead. Push the two nearby statues onto their marked floor squares. Their light creates a hole beside the large statue; use Move to pull the large statue into that hole.
Now return to the Moon symbol and place its four surrounding statues on their matching squares. A scene interrupts after the first placement, but the remaining placements can then be completed. Once the arrangement is finished, return down the stairs and inspect the point where the beam of light strikes the western wall. This opens the portal to the elemental-star chamber.
Before collecting the stars, you may remove Jenna’s equipment and give it to another character. Jenna will not remain with the party after the ensuing story scene, so transferring useful equipment prevents it from being unavailable during the next section.
- Solve the Sun arrangement before moving the Moon statues.
- Use Move to pull the large statue into the light-created hole.
- Complete all four Moon placements.
- Open the portal at the western wall.
- Transfer Jenna’s useful equipment if desired.
7. Collect the four elemental stars and escape
Kraden gives Isaac four Mythril Bags and asks him to retrieve the stars. From the portal island, jump northeast onto the stepping stones and follow the route to the yellow statue for the Venus Star. Return toward the portal island, then take the newly available northern stepping stone and continue east to the blue statue for the Mercury Star.
Return to the central island and use the southern stepping stones to reach the purple statue holding the Jupiter Star. Taking it triggers the major story scene with Saturos, Menardi, Felix and Alex. After the scene, return to the central island and follow the northeastern stepping stones. Continue north, then turn west near the top and take the southern branch at the next junction to reach the Mars Star.
The Mars Star triggers the final Sol Sanctum scenes. After the party is separated, Isaac and Garet are returned to the earlier chamber. Cast Retreat with Isaac and leave south through the Sol Entrance. If Retreat is unavailable, follow the opened route back through the dungeon.
- Collect the Venus Star.
- Collect the Mercury Star.
- Collect the Jupiter Star.
- Collect the Mars Star after the confrontation.
- Use Retreat and leave Sol Sanctum through the southern exit.
8. Accept the quest in Vale and meet Flint
Return to Vale and enter the village Sanctum for the aftermath scenes. When the Great Healer asks whether Isaac will take responsibility and undertake the mission, choose Yes. Refusing and then leaving can produce the game-over outcome, so accept the quest to continue the campaign.
Isaac and Garet receive the Catch Beads and an Herb before leaving Vale. The Catch Beads grant the Catch field Psynergy when equipped. If you want an extra recovery item, return to the tree south of Isaac’s house, equip the Catch Beads and use Catch on the hanging object to obtain a Nut. The central Psynergy Stone can also refill PP when you need to prepare before leaving.
Exit Vale and follow the road southwest. Flint appears on the world map along this route. Speak with him and accept his offer to join. Flint is the first Venus Djinni, not an Earth Djinni. Set him to Isaac unless you have a specific class experiment in mind, then continue south toward Vault.
- Choose Yes at the Great Healer’s responsibility question.
- Receive the Catch Beads and Herb.
- Optionally use Catch on the tree south of Isaac’s house to obtain the Nut.
- Find Flint southwest of Vale.
- Accept Flint and set him to Isaac before continuing toward Vault.
Before you move on
- The Mt. Aleph disaster and three-years-later scenes are complete.
- Isaac, Garet and Jenna have met Kraden and entered Sol Sanctum.
- Both Small Jewels have been used on their Minotaur reliefs.
- The Sun-and-Moon statue puzzle has been solved.
- The Venus, Mercury, Jupiter and Mars stars have been collected.
- The elemental-star confrontation and Wise One intervention have occurred.
- Isaac and Garet have returned to Vale and accepted the Great Healer’s mission.
- Catch Beads and the Herb have been received.
- Flint, the Venus Djinni, has joined the party outside Vale.
- The party is on the road toward Vault, the next required town.
Sol Sanctum and Immediate Aftermath: Vault, Early Caves and Recruitment
After leaving Vale, recruit Flint on the road and travel southeast to Vault. Investigate the stolen Shaman's Rod, recruit Ivan, trap the thieves in the inn, recover the stolen goods, and defeat the Bandit and two Thieves. Collect the Bandit's Sword and claim the Water of Life from Vault's mayor before leaving town. Vault Cave is not part of this first visit: its entrance is hidden until Ivan learns Reveal later, and the watchtower bell should be rung before entering if you want the cave's Djinni, Sap, to remain reachable. From Vault, follow the bridges northeast to the Goma Cave entrance. Ivan rejoins when Whirlwind is needed to clear the vines, allowing you to enter Goma Cave proper. Solve the log and stump puzzles, collect the optional Lucky Medal, defeat and recruit the Mars Djinni Forge, then exit east toward Bilibin.
1. Recruit Flint and reach Vault
Once the Sol Sanctum and Vale departure scenes are complete, walk along the road outside Vale. Flint is on the route shortly after leaving town, before the road reaches Vault. Approach the Venus Djinni and accept his tutorial to add him to Isaac's Djinn list. Set Flint to Isaac so you can use his unleash in battle and begin building Venus summon power.
Continue east across the bridge and then south toward Vault. Enter the town after the opening arrival scene. Before starting the thief investigation, heal at the inn and save. Vault is the first town where you can make meaningful equipment upgrades, so check the weapon and armor shops and replace weak starting gear where your coin supply allows. Keep some money for Herbs and other recovery items rather than spending everything on a single weapon.
- Recruit Flint outside Vale.
- Set Flint to Isaac or another Venus Adept.
- Heal and save in Vault.
- Upgrade practical weapons and armor before the thief battle.
2. Recruit Ivan in Vault
Go to the house at the northwest side of Vault, reached by climbing the steps above the town. Speak with Ivan inside. The scene establishes that he can use Mind Read and that the Shaman's Rod belonging to Master Hammet has been stolen. Ivan joins Isaac and Garet temporarily so he can help investigate.
Open the Djinn menu and place Mind Read on a convenient shortcut if you want faster access during the investigation. While exploring Vault, you can collect small supplies such as the Mint in the inn and the Sleep Bomb in the item shop. These are optional, but the Mint can help with temporary stat recovery and the Sleep Bomb is useful if ordinary enemies become troublesome.
- Speak with Ivan in the northwest house.
- Confirm that Ivan has joined the active party.
- Assign Mind Read to a shortcut if desired.
- Collect optional Vault supplies before leaving town.
3. Trap the thieves and enter the inn loft
Go to the upper floor of the inn and approach the suspicious travelers. They run whenever you get close, so do not chase them directly around the room. After the first escape, follow the scene's instructions and help Isaac and Ivan corner one of them. Move around the room to cut off the thief's escape route; once he is trapped, Ivan uses Mind Read and confirms that the travelers are responsible for the theft.
Leave the upper room and exit the inn. Outside, climb the ladder to the roof and enter through the opening. Inside the loft, use Move to shift the wooden box out of the way. Cross the exposed gap and enter the hidden room. Speak to the tied-up woman to trigger the thieves' arrival. This starts the mandatory battle, so heal beforehand and make sure Isaac, Garet, and Ivan have their preferred Djinn set.
- Approach the suspicious travelers upstairs.
- Help corner one thief for Ivan's Mind Read.
- Reach the inn roof from outside.
- Use Move on the box in the loft.
- Speak with the captive woman to begin the battle.
4. Defeat the Bandit and recover the stolen goods
The encounter contains one Bandit and two Thieves. Use area Psynergy where available to damage the group together, but focus ordinary weapon attacks and stronger single-target options on the Bandit first. The Bandit is the most dangerous opponent and can restore health to himself or the group. Ivan's Whirlwind and Ray are useful for group damage, while Garet's Flame and Isaac's Djinn or normal attacks provide steady pressure.
The thieves can use smoke bombs, which may make physical attacks miss. If visibility is obscured, rely more heavily on Psynergy and healing rather than wasting several turns on missed weapon attacks. Isaac's Cure is usually enough for emergency recovery at this point, but use Herbs if a character is close to being knocked out. A defeat is not a progression loss: reload your pre-battle save, buy more Herbs, check equipment, and try again without needing to repeat the entire town investigation if you saved before entering the loft.
After victory, the villagers reclaim the stolen property and Ivan retrieves the Shaman's Rod. The Bandit's Sword is awarded as the battle reward. It is not a shop purchase and may be equipped if its current attack value is useful; its Rapid Smash unleash can also provide occasional burst damage.
- Defeat the Bandit and both Thieves.
- Prioritize the Bandit when the group is recovering health.
- Use Psynergy if a smoke bomb interferes with physical attacks.
- Obtain the Bandit's Sword.
- Confirm that Ivan has recovered the Shaman's Rod.
5. Collect the Water of Life and leave Vault
After the recovery scene, Ivan leaves the active party. Visit the mayor's house at the top of the steps before leaving Vault. Speak with the mayor to receive the Water of Life. This is a valuable revival item at this stage, so keep it rather than selling it unless you are deliberately managing items for money.
Save again after receiving the reward. You may restock Herbs, but do not spend all remaining coins on marginal upgrades because the next required area is Goma Cave and better equipment becomes available in Bilibin. The Djinn visible or hinted at in Vault cannot be collected during this first visit; do not waste time searching for an entrance that the current party cannot reveal.
- Speak with the mayor after the thief battle.
- Receive the Water of Life.
- Save before leaving Vault.
- Do not attempt to collect Vault's hidden Djinn yet.
6. Reach the Goma Cave entrance and reunite with Ivan
Leave Vault and travel east across the first bridge. Continue northward without taking the earlier northbound bridge, then cross the bridge leading east toward the mountain. Enter the cave opening on the mountainside; this passage leads to the Goma Cave entrance.
Inside the entrance area, jump across the water and push the first log or stump aside so you can reach the ladder. Use Move to pull the next wooden obstacle into the gap, creating a crossing. Continue until you find a stump covered by vines. Try to move it. Isaac and Garet cannot clear it, which triggers Ivan's return. Ivan uses Whirlwind to remove the vines and permanently rejoins the party with the Shaman's Rod.
Now use Move on the vine-free stump, cross to the ledge, and cast Whirlwind on the second vine barrier. The opened passage is the entrance to Goma Cave proper. Ivan's Whirlwind is required for this route, so do not leave the area before completing this reunion scene.
- Take the bridge route northeast from Vault.
- Enter the mountainside cave passage.
- Use Move on the logs and stumps at the entrance.
- Trigger Ivan's Whirlwind scene.
- Use Whirlwind to open the Goma Cave entrance.
7. Clear Goma Cave and recruit Forge
Inside Goma Cave, follow the waterway and jump across the first log. Go south, climb the stairs, and enter the next room. Push the wooden log to the far right and then upward so it can serve as a stepping stone from the upper route. Backtrack, cross the water, and follow the connected rooms until you reach the area with another movable log and stump.
Use Move to push the platform log out of the way, cross onto the exposed platform, and push the stump from the ledge. Return to the log and move it back to its earlier position if you want the chest containing the Lucky Medal. The medal is optional and has no role in opening the route or ending the campaign.
Return through the water crossing and use the repositioned log to reach the platform containing the Mars Djinni Forge. Save before approaching Forge. The Djinni battle is optional, but Forge can be recruited only by defeating it before it escapes. Use your strongest reliable attacks, elemental Psynergy, and a Djinni unleash early if needed. If Forge flees, leave the room and return; it can be challenged again. After victory, Forge joins the Djinn list.
From Forge's platform, return to the upper route. Push the final stump out of the way with Move, cross the gap, climb the stairs, and follow the bridge and descending steps to the exit. Leave the cave and travel east on the world map to reach Bilibin.
- Use the logs and stumps to open the upper Goma Cave route.
- Collect the Lucky Medal only if desired.
- Save before challenging Forge.
- Defeat and recruit the Mars Djinni Forge if pursuing the optional Djinn.
- Push the final stump aside and exit toward Bilibin.
8. Mark Vault Cave for a later return
Vault Cave is optional and cannot be completed during this chapter. The hidden entrance in Vault's cemetery requires Ivan's Reveal Psynergy, which he does not learn until later story progression. When Reveal becomes available and the route back to Vault is open, return to town and ring the bell in the northeast watchtower before entering the cemetery route. The bell changes Sap's position so the Venus Djinni can be reached inside Vault Cave.
After ringing the bell, use Reveal in the cemetery to uncover the hidden entrance. Vault Cave contains Sap and a Vambrace, but neither is required for the main campaign. If you are following the story efficiently, leave this branch for the later return trip rather than delaying Goma Cave and Bilibin.
- Do not attempt Vault Cave during the first Vault visit.
- Return only after Ivan learns Reveal.
- Ring Vault's northeast watchtower bell before entering.
- Use Reveal in the cemetery to find the later entrance.
- Treat Sap and the Vambrace as optional rewards.
Before you move on
- Flint is present in the Djinn list.
- Ivan joined in Vault, the thieves were defeated, and the Shaman's Rod was recovered.
- The Bandit's Sword was awarded after the thief battle.
- The mayor gave the party the Water of Life.
- The party left Vault and reached the Goma Cave entrance.
- Ivan permanently rejoined after the Whirlwind scene.
- The party cleared the required Goma Cave route and exited toward Bilibin.
- Forge joined the Djinn list if the optional encounter was completed.
- The Lucky Medal was collected only if desired; it is not required.
- Vault Cave remains flagged as later optional content requiring Reveal and the watchtower-bell preparation.
References for this chapter
Kolima Forest, Bilibin and Early Overworld: Securing Psynergy and the Team
Investigate Bilibin’s tree curse, obtain Gust through the ivy-covered warehouse entrance and open the Bilibin Barricade with Move. Visit cursed Kolima to collect Granite through the rear passage behind the fenced house, then clear Kolima Forest’s log and floodgate puzzles. Enter Tret’s tree, collect Breeze, restore the party at the Psynergy Stone when needed and defeat Tret. Tret cannot cure the villagers after the battle, so Laurel directs the party toward healing water at Mercury Lighthouse. This chapter ends with the route to Imil and Mercury Lighthouse established. Do not obtain or use Hermes’ Water here. The optional Barricade tree rescue, Hard Nut, Lord McCoy reward, Tret’s cure and Kolima Bridge all belong after Mercury Lighthouse.
Step 1: Investigate Bilibin and obtain Gust
Enter Bilibin and speak with the villagers, guards and palace staff to learn about the curse affecting Kolima. Visit Lord McCoy’s palace and complete the conversation that establishes the crisis. Search accessible containers for early supplies, then use the weapon and armor shops before leaving. Prioritize practical upgrades for Isaac, Garet and Ivan, but preserve enough money for Herbs and other recovery items.
Before leaving town, climb the steps north of the inn and follow the upper stockade around the eastern side of Bilibin. Clear the ivy-covered wall with Ivan’s Whirlwind to reveal a cave entrance. Enter the cave, descend to the warehouse side and use Move on the gold statue blocking the passage. Cross the opened route and speak to the Jupiter Djinni Gust. Gust joins without a battle. Set him on Ivan if you want the immediate HP and class benefits, or keep your existing arrangement while testing your preferred early class setup.
- Speak with Lord McCoy and the palace staff.
- Buy useful equipment and healing items in Bilibin.
- Use Whirlwind to reveal the warehouse entrance.
- Use Move inside the warehouse and obtain Gust.
- Save before leaving town.
Step 2: Open the Bilibin Barricade and collect Granite
Leave Bilibin through the southeastern road and enter the Bilibin Barricade. Use Move on the tall crate at the left side of the blocked passage and push it aside to create an opening. Continue through the barricade, cross the bridge and follow the road toward Kolima. The nearby overworld detour for the Turtle Boots is optional and is not needed for story progress.
Enter Kolima if you want the local Djinni and supplies before the forest. Every villager is still transformed into a tree, so normal town services are unavailable. Search containers for minor items, then go to the fenced house in the southeastern part of town. Do not try to reach the Djinni from outside. Walk behind the house and press against the rear wall to find the hidden entrance. Follow the basement passage around, climb the ladder and exit inside the fenced area. Speak to the Venus Djinni Granite and obtain it. Return through the basement and leave the village.
Granite is useful for early defensive setups, especially before the Tret battle. Do not place every Djinn into Standby simply to reach a summon tier; keeping set Djinn available preserves class statistics and reliable Psynergy.
- Move the crate at the Bilibin Barricade.
- Enter cursed Kolima and collect accessible supplies if desired.
- Use the hidden rear entrance beside the fenced house.
- Obtain Granite and review the party’s Djinn assignments.
Step 3: Clear the first Kolima Forest log puzzles
Kolima Forest is northwest of Kolima. Heal and save before entering because the forest enemies are stronger than the surrounding overworld encounters. After the opening story scene, follow the log bridges and push the first vertical log left into the water. Cross it, move around the next obstacles and push the required horizontal and vertical logs to open the northern route. When a log seems to block progress, look for the approach path on the opposite side rather than repeatedly pushing it from the same direction.
In the later forest screens, reposition the logs so the vertical log can be pushed into the water and used as a bridge. The puzzle requires moving one log out of the way, circling around the stumps, then restoring or shifting another log before the crossing becomes available. If the arrangement becomes confusing, leave the screen and return to reset the puzzle rather than wasting time trying random pushes.
Continue into the large pond area. Follow the path to the floodgate switch beside the warning sign and activate it to drain the pond. With the water lowered, move the logs into position. The required exit arrangement uses the upper vertical log and leaves a route that can be crossed after raising the water again. Flip the switch a second time, use the repositioned logs as floating platforms and cross toward the northwest exit.
An optional chest in this area contains the Fur Coat. It requires a separate log arrangement and backtracking, so collect it only if you want the extra defense for Ivan. The Fur Coat is not required to reach Tret.
- Save and heal before entering Kolima Forest.
- Use the log bridges and movable logs to open the northern route.
- Drain the pond with the floodgate switch.
- Separate the optional Fur Coat arrangement from the required exit arrangement.
- Raise the water again and cross the log platforms toward Tret’s area.
Step 4: Enter Tret’s tree and collect Breeze
After the forest route, speak with Laurel and approach Tret. Climb the vine beside him to enter the tree. Follow the upper branches and leaf platforms. A leaf cracks when first stepped on and breaks when stepped on again, dropping the party through the spider web. Use the intact leaves to cross the first web and continue through the branches.
The interior contains a Psynergy Stone and a Healing Ring. Both are optional, but the Psynergy Stone is valuable preparation for the boss. Reaching either item may require falling to a lower room and looping back through the tree, so decide whether the recovery benefit is worth the extra route before committing to the chest paths.
Continue outside onto the branches. Follow the branch route to the right, climb the vine and take the upper path leading toward the Djinni. Speak to Breeze to begin the battle. Defeat the Jupiter Djinni and obtain Breeze. Breeze can use Jupiter Psynergy, including a stronger attack, so heal before interacting with it and keep Isaac’s and Garet’s strongest early attacks available. Afterward, set Breeze on Ivan if you want to improve his Jupiter-oriented class options.
- Cross the cracking leaves carefully.
- Collect the Healing Ring and use the Psynergy Stone if needed.
- Reach the upper branch route inside Tret’s tree.
- Defeat and obtain Breeze.
Step 5: Reach the lower chamber and defeat Tret
Return through the branches and use the interior route that leads back toward the leaf puzzles. Open the nearby Nut chest if desired, then take the lower path and climb through the vines to reach the final leaf arrangement. The correct sequence drops the party through several webs and holes into the basement chamber. Save and heal before approaching Tret’s face.
Tret is weak to fire, making Garet’s fire Psynergy and Mars Djinn useful. Isaac can provide physical damage and emergency Cure support, while Ivan can use Jupiter Psynergy, Impact or healing items. Tret’s Thorn can damage the entire party, and Sleep Star can put one or more party members to sleep. Keep enough HP and recovery capacity to survive a bad turn rather than spending every Djinn on immediate summons.
Use Djinn when their defensive or offensive effects matter, but do not sacrifice the only reliable healing or support option in the party. Summons can shorten the battle, although changing a character’s class temporarily may remove an important spell. If PP or healing items become scarce, retreat to the Psynergy Stone and return instead of forcing the fight.
After Tret is defeated, climb the new vine and exit the tree. Speak with Laurel and use Mind Read if necessary to learn that healing water from Mercury Lighthouse may restore Tret. Tret does not cure Kolima at this point. Use Retreat to leave the forest.
- Restore HP and PP before the boss battle.
- Use fire-based attacks against Tret when practical.
- Keep at least one healing or recovery option available.
- Defeat Tret and leave through the new vine.
- Speak with Laurel about healing water at Mercury Lighthouse.
Step 6: Establish the route to Imil and Mercury Lighthouse
This chapter ends after Tret’s defeat and Laurel’s direction. Hermes’ Water has not been obtained and must not be used on Tret yet. Do not perform the Bilibin Barricade tree rescue, collect the Hard Nut, claim Lord McCoy’s post-cure reward or expect the Kolima Bridge to be open. Those events occur after Mercury Lighthouse and are covered later.
From Kolima Forest, return toward Bilibin and take the northern route toward Imil. Bilibin Cave blocks the snowy passage. The entrance puzzle requires Growth on the sprout, so arrange the Djinn temporarily if necessary to give a character access to Growth, then restore your preferred assignments after crossing. Follow the cave route north and continue through the snow-covered overworld to Imil.
Stop at the Imil handoff rather than completing the town and lighthouse sequence in this chapter. The next chapter covers the Imil story triggers, the Empty Bottle, Mia’s recruitment, Mercury Lighthouse, Sleet, Saturos and the collection of Hermes’ Water. Save before beginning that sequence.
- Tret is defeated but has not been cured.
- Hermes’ Water has not been obtained or used.
- The Barricade tree rescue and Hard Nut remain pending.
- The Kolima Bridge remains closed.
- The route to Imil and Mercury Lighthouse is established.
- Save before beginning the Imil sequence.
Before you move on
- Gust, Granite and Breeze appear in the Djinn list if the recommended local Djinn have been collected.
- The Bilibin Barricade is open.
- Kolima has been visited and Granite has been obtained if pursuing the recommended early Djinn route.
- Kolima Forest’s log and floodgate route has been cleared.
- Tret has been defeated.
- Laurel has indicated that healing water from Mercury Lighthouse is needed.
- Hermes’ Water has not yet been obtained or used.
- Kolima’s villagers remain transformed and the Kolima Bridge is not yet open.
- The optional Barricade tree rescue, Hard Nut and Lord McCoy reward remain available for the later post-Mercury sequence.
- The next destination is Imil, followed by Mercury Lighthouse.
Imil and the Mercury Lighthouse: The First Lighthouse Climb and Major Confrontation
Reach Imil through Bilibin Cave, speak with the girl in the western Sanctum, then revisit the old couple’s house to trigger Mia’s story scene and collect the Empty Bottle. Follow Mia to Mercury Lighthouse, use Move to open the entrance and recruit her after defeating the Lizard Man. Solve the pipe, statue, water-jump and waterfall puzzles, collecting Sleet only if desired. Restore HP and PP at the aerie Psynergy Stone before fighting Saturos. After the battle, use the western elevator to reach the restored fountain and fill the Empty Bottle with Hermes’ Water. Return south through Bilibin Cave. Before entering Kolima Forest, optionally rescue the loose tree at Bilibin Barricade with Move. Then use Hermes’ Water on Tret. His cure restores Kolima’s residents and opens Kolima Bridge, leaving the party ready for the required Mogall Forest route and the optional Fuchin Temple detour.
Reach Imil, trigger Mia’s scene and take the Empty Bottle
Leave Bilibin through the northern route and cross Bilibin Cave. Continue along the snowy road until you reach Imil. The optional Mars Djinn in the Imil-area cave is Fever; Forge belongs to Goma Cave and is not part of this route.
Enter Imil’s western Sanctum and speak with the girl there. This conversation activates the next story event. Then enter the old couple’s house and speak with the people inside. The scene involving the sick man and Mia will occur, and Mia will leave for Mercury Lighthouse after noticing that its beacon has activated.
Before leaving the old couple’s house, open the chest and take the Empty Bottle. It is needed after the lighthouse boss. Rest at the inn and save from the normal menu. Fever is optional and can be collected before leaving if you want the extra Mars Djinn, but it is not required for Mercury Lighthouse.
- Speak with the girl in Imil’s western Sanctum.
- Visit the old couple’s house afterward and trigger the Mia scene.
- Take the Empty Bottle from the house chest.
- Rest and save in Imil.
- Treat Fever as optional and do not search Imil for Forge.
Open Mercury Lighthouse and recruit Mia
Travel northeast from Imil to Mercury Lighthouse. Mia is waiting near the entrance. Use Move on the statue blocking the approach, shifting it aside so Mia can reach the door and open the lighthouse.
Inside, follow the initial passage until a Lizard Man blocks Mia. Defeat it with normal attacks and Psynergy. Continue through the next rooms until you reach the statue beside a gap. Use Move to pull or push the statue into the gap, creating the route forward.
After the following story scene, Mia permanently joins Isaac’s party and Fizz is available with her. Fizz restores HP to one ally when released, so keep it available for emergencies. Check Mia’s equipment and save here if you want a separate file before the main puzzle section.
- Move the statue outside the lighthouse entrance.
- Defeat the mandatory Lizard Man.
- Use Move on the second statue to create the crossing.
- Confirm that Mia and Fizz have joined the party.
- Save after recruitment if desired.
Solve the pipe, switch and first goddess-statue puzzles
Enter the first pipe chamber and roll the loose horizontal pipe so that the water flows through the connected section. Follow the water route around the chamber, then return and move the pipe again when necessary to reach the opposite side and the chest containing a Psynergy Crystal. The crystal restores PP, but you can save it for a later emergency because the aerie provides a complete recovery point.
In the next puzzle room, take the outer route around the pit rather than descending immediately. Push the movable statue onto the circular floor switch, then use the opened slide to reach the lower section. Continue until you reach the first goddess statue and the water-jump platforms.
Stand before the statue’s glowing heart and cast Ply with Mia. The marked platforms over the water become usable. Step across them in the direction of the open route; each jump sequence is limited, so avoid jumping toward an isolated dead end. If you land somewhere unhelpful, return to the previous platform and repeat the sequence rather than trying to cross ordinary water.
- Redirect the first pipe and revisit it when the route requires a second position.
- Collect the Psynergy Crystal.
- Place the movable statue on the floor switch.
- Reach the first goddess statue.
- Cast Ply on the glowing heart.
- Use the activated water-jump platforms.
Complete the upper pipe and statue route
Continue through the water-jump rooms until you reach the larger pipe chamber with a movable blue statue, several water jets and a hole. Use the stairs and side platforms to reach the pipe controls. Roll the vertical pipe to redirect the jet and move the statue, then return to adjust the same pipe as needed. The objective is to shift the statue across the room and drop it through the hole.
After the statue falls, return to the lower level and push it onto the blue floor switch. This opens the corresponding door. In the following statue corridor, push the third statue from the left to reveal the hidden passage and chest route. Not every statue needs to be moved.
Continue through the narrow corridors and waterfall rooms. In the later room, use Move on the lone statue near the broken floor to open the stairway. Follow the newly revealed route toward the long waterfall hallway and the rainbow chamber.
- Use the pipe controls to move the blue statue across the chamber.
- Drop the statue through the hole.
- Push the fallen statue onto its floor switch.
- Move the third statue from the left to reveal the hidden passage.
- Use Move on the later statue beside the broken floor.
- Reach the rainbow chamber.
Collect Sleet and reach the aerie
In the long hallway lined with six waterfalls, enter the fourth waterfall from the right, which is the third from the left. This hidden route leads to Sleet, the optional Mercury Djinn. Defeat Sleet and set it if you want the extra Djinn. Its released effect damages one enemy and lowers that enemy’s attack, making it useful against Saturos, but Sleet is not required.
Return to the waterfall hallway and take the route toward the final goddess statue. In the rainbow room, cast Ply on the statue’s glowing heart. The waterfall reverses, creating the route to the upper aerie.
Use the Psynergy Stone in the aerie to restore HP and PP. Equip your strongest current armor and weapons, set at least one healing or defensive Djinn if possible, and preserve enough PP for Mia to use Ply or Fizz during the battle. Save before crossing the white stepping stones if you want a final ordinary pre-boss save.
- Enter the fourth waterfall from the right if pursuing Sleet.
- Defeat and collect Sleet, or leave it as optional content.
- Cast Ply on the final goddess statue.
- Restore fully at the aerie Psynergy Stone.
- Prepare healing and defensive Djinn.
- Save before the final crossing.
Defeat Saturos at the beacon
Cross the aerie and approach the beacon. The story scene separates Menardi from Saturos and leaves Saturos behind for the battle. He uses strong Mars attacks, physical attacks and area damage, so the fight is more dangerous than the preceding mandatory encounters.
Keep Mia focused on healing with Ply and Fizz. Isaac can use Venus Psynergy, normal attacks or Djinn. Garet can attack or defend, while Ivan can use Jupiter Psynergy and support effects. Mercury attacks and summons are effective, but do not release every Djinn immediately: once Djinn are on standby or recovering, they may no longer provide their normal defensive or healing benefits.
Use Granite, Sleet or another defensive Djinn when the party is threatened by an area attack. Summon only when the party is stable and Mia can still heal on the next turn. If one character falls, stabilize the remaining party first when another area attack is likely; revive after the immediate danger is controlled. The encounter is complete when Saturos is defeated and the following Alex scene finishes.
- Start the battle from the aerie recovery point.
- Keep Mia’s PP available for healing.
- Use defensive Djinn when Saturos’ area damage becomes dangerous.
- Avoid releasing every healing or defensive Djinn at once.
- Confirm that the Alex cutscene has ended before leaving the summit.
Collect Hermes’ Water and return through Bilibin
After control returns to Isaac, go west to the elevator on the left side of the aerie. Ride it down instead of retracing the entire lighthouse. Follow the lower route until you reach the restored fountain outside Mercury Lighthouse.
Stand directly beneath the narrow stream and use the Empty Bottle. It becomes Hermes’ Water. Check the inventory before leaving; this is the item required to cure Tret in Kolima Forest. Heal and save in Imil if necessary. Once the lighthouse beacon is lit, Imil’s shops can provide additional equipment and supplies.
Travel south through Bilibin Cave and return toward Bilibin. At Bilibin Barricade, look for the loose tree in the shallow water. This rescue is optional, but use Move on the tree to pull it toward the bank before continuing. The later reward depends on having performed this rescue, and it does not replace the main route.
- Use the western elevator after the Saturos sequence.
- Reach the restored fountain at the lighthouse base.
- Fill the Empty Bottle with Hermes’ Water.
- Confirm the item in the inventory.
- Heal and save in Imil or Bilibin.
- Optionally rescue the loose tree at Bilibin Barricade with Move.
Cure Tret and open the route east from Kolima
From Bilibin Barricade, continue south to Kolima Forest. Retrace the already cleared forest route to Tret Tree. You do not need to repeat the earlier investigation; the objective is now to reach Tret with Hermes’ Water.
Stand in front of Tret and use Hermes’ Water from the inventory. The cure restores Tret and causes the people transformed into trees to return to normal. Kolima becomes a functioning settlement again, with its residents and services restored.
Leave Kolima after the cutscene and use the newly opened Kolima Bridge to continue east. The next required progression leads through Mogall Forest and onward to Fuchin Temple’s region. Fuchin Temple and Fuchin Falls Cave can be explored as an optional detour, but Mogall Forest is the required route. Heal, restock and save before leaving Kolima.
- Return to Tret after collecting Hermes’ Water.
- Use Hermes’ Water while standing in front of Tret.
- Confirm that Tret and the transformed villagers have been restored.
- Verify that Kolima’s town services are active again.
- Cross the newly opened Kolima Bridge.
- Save and prepare for Mogall Forest; treat Fuchin Temple as optional.
Before you move on
- Mia has permanently joined Isaac’s party.
- Fizz is available and Sleet has been collected if optional Djinn completion is desired.
- Mercury Lighthouse’s puzzle route is complete.
- Saturos has been defeated and the Alex scene has ended.
- The party has descended by the western elevator.
- The Empty Bottle has become Hermes’ Water.
- The optional Bilibin Barricade rescue has been completed if desired.
- Tret has been cured with Hermes’ Water.
- Kolima’s residents and services have been restored.
- Kolima Bridge is open and the party is ready for Mogall Forest.
References for this chapter
- Golden Sun — Official Game Boy Advance Manual
- Golden Sun - Guide and Walkthrough by jesterguy
- Golden Sun - Guide and Walkthrough - Game Boy Advance - By AmericanArsenal
- Golden Sun — Guide and Walkthrough — Game Boy Advance — Mercury Lighthouse and aftermath
- Golden Sun/Mercury Lighthouse — StrategyWiki
- Golden Sun/Kolima Forest — StrategyWiki
- Golden Sun/Imil — StrategyWiki
- Golden Sun — Condensed Walkthrough
- Mercury Lighthouse — Golden Sun Universe
Fuchin Temple through Kalay: The Missing Inland Progression
After Tret is cured and Kolima Bridge reopens, travel south through the inland route toward Kalay. Fuchin Temple and Fuchin Falls Cave are entirely optional for the first game's ending, but the cave contains the Orb of Force, the Zephyr Djinni and useful equipment. Complete that detour now if you want its rewards, or continue directly into Mogall Forest. The required progression begins with crossing Mogall Forest, defeating Killer Ape and equipping the Douse Drop. Continue through Xian, Alpine Crossing, flooded Altin and Hydros Statue to obtain Lift, then visit Lama Temple to learn Reveal. Use Reveal to cross Lamakan Desert and defeat Manticore. In Kalay, complete the palace and inn story triggers, leave town to start the departure sequence, buy the Boat Ticket and save before boarding the scripted Karagol Sea ship.
Reach Fuchin Temple and decide whether to take the optional detour
After completing Mercury Lighthouse, returning Hermes' Water to Kolima and curing Tret, leave Kolima and cross the reopened Kolima Bridge. Follow the southern road toward Fuchin Temple and Mogall Forest. Fuchin Temple and Fuchin Falls Cave are optional content: neither is required to reach the ending, cross Mogall Forest or continue to Kalay.
If you want the optional rewards, enter Fuchin Temple and use Mind Read on Master Nyunpa. Accept his waterfall trial, then speak with the monk near the falls to open Fuchin Falls Cave. Heal at the temple's Psynergy Stone before entering. If you are following only the required story route, you can leave the temple and enter Mogall Forest without completing the trial.
Treat this as a decision point rather than a required objective. The main route from Mogall Forest through Xian, Altin, Lama Temple, Lamakan Desert and Kalay must be completed regardless of whether you clear Fuchin Falls Cave.
- Kolima Bridge is open.
- Fuchin Temple has been visited only if you want its optional rewards.
- The party is healed before entering Fuchin Falls Cave.
- You understand that skipping Fuchin does not block the required route.
Clear optional Fuchin Falls Cave for Force, Zephyr and equipment
In Fuchin Falls Cave, follow the lower log and stepping-stone paths. The Mimic and Game Ticket are optional. Continue through the cave and collect the Dragon's Eye, then place it in the dragon statue to illuminate the dark section and reveal the route onward. The Arctic Blade and other chests are also optional rewards.
Reach the chamber containing the Orb of Force. Collecting it gives the equipped Adept access to Force, so equip the Orb before using the Psynergy. Find Zephyr in the cave, defeat the Djinni and recruit it if you are pursuing the optional Djinn. Force is particularly useful in Mogall Forest because it makes the forest's creature-guidance sequence easier, but Force is not required to cross the forest.
When finished, use Retreat or walk back to Fuchin Temple. You may speak with Nyunpa again, then continue south. Do not place Force, Zephyr, the Dragon's Eye or the cave's equipment on the chapter's required completion list; they are optional first-game rewards, although Force is strongly recommended for convenience.
- The Dragon's Eye has been used on the dragon statue if the cave is being cleared.
- The Orb of Force has been collected if pursuing the optional detour.
- Zephyr has been defeated and recruited if desired.
- The party is ready to proceed whether or not the cave was completed.
Cross Mogall Forest and defeat Killer Ape
Enter Mogall Forest south of Fuchin Temple. If you obtained the Orb of Force, equip it and cast Force on the hollow stump when the green creature hides inside. Follow the creature through the forest's successive areas. Without Force, the forest is still passable: explore the log, rock and stump layouts, use Move to create crossings and take the southbound route rather than treating the missing Psynergy as a dead end.
Search side paths for treasure and the optional Quartz Venus Djinni, but do not let optional exploration prevent you from reaching the southern exit. Keep the party healed because several encounters can occur between recovery points.
Near the forest's end, follow the route to Killer Ape. Save and restore HP before approaching the encounter. Killer Ape is weak to fire, so Isaac and Garet can use their strongest physical or Mars attacks while the party's healer maintains HP. Offensive Djinn and summons are useful, but keep enough PP and Djinn recovery options for the battle's later turns.
Defeat Killer Ape to receive the Douse Drop. Equip the Douse Drop to an Adept; it bestows Douse while equipped. You need Douse for later water and tornado obstacles, so confirm that the Psynergy appears in the field menu before leaving.
- Mogall Forest has been crossed from north to south.
- Killer Ape has been defeated.
- The Douse Drop is in the inventory and equipped to an Adept.
- Quartz has been collected or intentionally skipped.
Pass through Xian and Alpine Crossing
Leave Mogall Forest and travel west to Xian. During the vase scene, wait for the puddle to appear, then cast Frost on it. Climb the resulting ice pillar to reach Mist, the optional Mercury Djinni, and recruit it if desired. Continue through town and resupply if necessary.
The dojo and Master Feh scenes are optional for the main ending. If you have Force, you can use it during the dojo sequence as directed, but this does not replace the required route. Leave Xian by the northern road and continue through Alpine Crossing.
At Alpine Crossing, cast Frost on the puddle and use Growth on the nearby plant. Growth must be available to an Adept; for example, set a Venus Djinni on Garet if that gives him the required Psynergy. Climb the vine and continue over the upper route toward Altin. Corona, the optional Mars Djinni north of Xian, can be collected if you want it, but it is not required.
- The Xian puddle has been frozen if you want Mist.
- Xian has been crossed.
- An Adept has access to Growth at Alpine Crossing.
- The road to Altin is open.
Drain Altin and defeat Hydros Statue
Altin is flooded when you arrive. Speak with the villagers, then enter the mine through the northern route. The Living Statues control the water level. Use Frost on puddles and adjust the mine-cart switches to reach the different mine sections. Defeat the Living Statues encountered along the route and use the changing water levels to reach deeper areas.
Explore for optional equipment and Spritz, the Mercury Djinni, but keep the main objective in view: reach the lowest section and the Hydros Statue. Restore HP and PP before starting the battle. Hydros Statue uses powerful water attacks against multiple party members, so keep Mia focused on recovery when necessary and use defensive Djinn or summons when the group is under pressure.
After Hydros Statue is defeated, open the chest behind it to obtain the Lifting Gem. Equip the Lifting Gem to an Adept so Lift becomes available. Use Lift on the boulder blocking the mine route, then follow the opened path toward the exit. The additional mine chests are optional; the Lifting Gem and the route out are required.
- The Altin mine route has been cleared.
- Hydros Statue has been defeated.
- The Lifting Gem has been collected and equipped.
- Lift is available and the exit route is open.
- Spritz has been collected or intentionally skipped.
Visit Lama Temple and learn Reveal
Leave Altin and enter Lama Temple. Go to Master Hama's building and complete the scene involving Feizhi. Ivan learns Reveal, which exposes hidden objects, doors and routes concealed by illusions. Use Reveal around the temple if you want to check the nearby hidden chest and confirm that the Psynergy is active.
The Hsu rescue at Alpine Crossing is optional for completing Golden Sun. If you want to attempt it, return to the crossing, use Reveal to expose the hidden entrance, then use Lift on the boulder trapping Hsu. If you skip the rescue, you can still continue through Lamakan Desert and reach Kalay.
Before leaving Lama Temple, heal at the Psynergy Stone and check that an Adept can use Reveal. Carry healing items and restore PP before entering the desert, where Reveal is needed repeatedly to locate safe oases and hidden routes.
- Ivan has learned Reveal.
- Hsu has been rescued or intentionally left as optional content.
- The party has enough HP, PP and healing items for Lamakan Desert.
- Reveal is available from the field Psynergy menu.
Cross Lamakan Desert and defeat Manticore
Enter Lamakan Desert from the route west of Lama Temple. Sand raises the party's heat gauge, while rocky ground is safe. Use Reveal on the circular stone formations and other suspicious terrain to expose oases, treasure and hidden paths. Step into revealed oases to lower the heat gauge before crossing additional sand. If the gauge becomes critical, retreat to safe ground and locate the next oasis rather than continuing blindly.
Optional treasure and the Smog Jupiter Djinni can be collected while exploring. For the required route, follow the revealed passages toward the desert's concealed sandfall area. Use Reveal where the terrain suggests an illusion, then continue to the Manticore encounter. Heal before initiating the battle.
Defeat Manticore with the party's strongest reliable attacks and keep recovery available for its damaging attacks. After victory, follow the newly opened route through the connecting passage. Vine, the optional Venus Djinni on the nearby route, can be recruited if desired. Continue west after leaving the desert to reach Kalay.
- Reveal has been used to locate oases and hidden passages.
- The heat gauge was managed with safe ground and oases.
- Manticore has been defeated.
- The route from Lamakan Desert to Kalay is open.
Complete Kalay's triggers and prepare for the scripted ship
In Kalay, visit the palace and speak with Lady Lana to advance the party's story access. Then go to the inn and speak with the tour guide. This inn conversation is the key trigger for the departure sequence. Leave Kalay after speaking with the guide; the tour group scene will begin and the route to the docks will become available.
Kalay Tunnel and Scorch are optional. If you pursue them, use Move on the statue behind the northeastern building and manipulate the nearby statue and water outlet to open the tunnel route. Recruit Scorch if desired, but do not treat it as a prerequisite for boarding the ship.
Buy equipment and healing items in Kalay, then travel southwest to Kalay Docks. Purchase the Boat Ticket from the dock building for 600 coins and show it to the guard at the gangplank. Restore the party, arrange Djinn and save before boarding. The next section is a scripted Karagol Sea crossing to Tolbi; the original game does not provide a free-roaming eastern-sea ship campaign.
- Lady Lana has been visited.
- The tour guide in Kalay's inn has been spoken to.
- Leaving Kalay has triggered the departure sequence.
- Scorch has been collected or intentionally skipped.
- The Boat Ticket has been purchased for 600 coins.
- The party is healed and saved at Kalay Docks.
Before you move on
- Mogall Forest has been crossed and Killer Ape has been defeated.
- The Douse Drop has been obtained and equipped.
- Xian and Alpine Crossing have been cleared.
- Altin Peak has been cleared and Hydros Statue has been defeated.
- The Lifting Gem has been obtained and Lift is available.
- Lama Temple has been visited and Ivan has learned Reveal.
- Lamakan Desert has been crossed and Manticore has been defeated.
- Kalay's palace and inn triggers are complete.
- Leaving Kalay has triggered the departure sequence.
- The Boat Ticket has been purchased for 600 coins.
- The party is healed and saved at Kalay Docks.
- The next objective is the scripted Karagol Sea crossing to Tolbi.
- Fuchin Temple and Fuchin Falls Cave may remain incomplete without blocking the chapter or the first game's ending.
References for this chapter
- Golden Sun — Official Game Boy Advance Manual
- Golden Sun — Guide and Walkthrough, Super_Slash
- Golden Sun — Guide and Walkthrough — Djinn list and Crossbone Isle route
- Golden Sun Quick Walkthrough - Golden Sun Universe
- Douse Drop, Golden Sun Universe
- Golden Sun — Guide and Walkthrough, Gravity81688, GameFAQs/GameSpot
- Golden Sun - Guide and Walkthrough by jesterguy
Karagol Sea, Tolbi and the Colosso Route
Begin at Kalay Docks after completing the inland route and end in Suhalla, ready for the next chapter's desert crossing. Buy the 600-coin boat ticket, save before boarding, recover the Anchor Charm, defeat the fixed Karagol Sea encounters and Kraken, then use a direct-Tolbi rower sequence. In Tolbi, restore the party, complete Altmiller Cave by finding the Mystic Draught and giving it to Babi, and enter the Colosso story sequence. Winning Colosso is not required for Golden Sun's ending, although the tournament result affects rewards and the optional Lunpa route. After Tolbi, leave through Gondowan Passage and travel southeast to Suhalla. Crossbone Isle is an optional ship diversion or later side route; no controllable ship, Lemuria, Trident, Alhafra, Champa, or eastern-sea campaign belongs to this original GBA game.
Start at Kalay Docks and prepare for the scripted crossing
Travel southwest from Kalay to Kalay Docks after the Kalay story scene is complete. Buy the Boat Ticket for 600 coins in the dock building, show it to the sailor at the gangplank, and board. Make an ordinary save on land before entering the ship because the crossing is self-contained: you cannot return to the world map to level, shop, or heal at a town until the voyage is over.
Heal everyone, set the Djinn you intend to use, and give Mia enough Mercury Djinn to use Wish if possible. Carry Herbs, Waters of Life, and other healing items. The ship contains optional supplies, including a Lucky Medal in a below-deck barrel, 23 Coins in a passenger-area barrel, and a Nut in the captain's cabin, but do not delay the story if your inventory is full.
Once aboard, listen to the captain and the passengers. Enter the captain's cabin when directed, then visit the upper passenger room. Return to the captain's cabin for the scene revealing that the Anchor Charm is missing. Read the mind of the blue-bandanna thief to learn that the charm is on top of the mast. Climb the mast to the crow's nest, inspect the object there to obtain the Anchor Charm, and return it to the captain. Visit the oarsmen below deck when prompted; this starts the departure sequence.
- Buy the 600-coin Boat Ticket.
- Save before boarding.
- Set Djinn and prepare Mia's healing.
- Recover the Anchor Charm from the crow's nest and return it to the captain.
Fight the fixed Karagol Sea encounters
After departure, the ship is attacked four times. The first three encounters are fixed groups: three Man o' Wars; a Lizard Fighter with two Rabid Bats; and two Man o' Wars with a Virago. After each battle, select a passenger to replace the injured oarsman. Use normal attacks and efficient Psynergy against the first groups so that Mia and Ivan retain PP for recovery and the final battle.
Heal between encounters with Wish or items rather than allowing several characters to remain at low HP. Keep defensive Djinn available instead of putting every Djinni into Standby immediately. If a character falls during one of the attacks, revive that character before accepting the next rowing prompt. There is no normal town recovery during this section.
- Defeat the three fixed pre-Kraken groups.
- Heal between battles.
- Revive fallen characters before continuing.
- Reserve PP and useful Djinn for Kraken.
Defeat Kraken and choose the direct-Tolbi rowers
The fourth encounter is Kraken. It acts twice per turn, uses water attacks that can strike several characters, and is weak to Mars or fire damage. Enter with the party healed. Keep Mia on Wish or another healing action whenever multiple characters are hurt, while Isaac and Garet use their strongest attacks and Ivan attacks, supports, or attempts Sleep when appropriate. Mars Djinn and fire-based summons are effective, but do not sacrifice all access to healing or defensive Djinn in one opening turn.
After Kraken falls, choose replacements for the remaining rowing prompts. To reach Tolbi directly, use this verified example in selection order: Longhair Warrior, Strongman, Young Man, then Green Guide or Purple Guide. The names describe the passengers, not their positions in the room, so identify each person by appearance and the displayed name before confirming.
An imbalanced selection can divert the ship to Crossbone Isle. That island is optional, and the early visit only exposes part of the dungeon because later Psynergy is needed for deeper areas. If you intentionally take the diversion, speak with the ship's crew after landing and choose to resume the voyage when you are finished. Otherwise, use the direct sequence and continue to Tolbi Docks.
- Use Mars or fire attacks against Kraken.
- Keep Mia healing through the two-attacks-per-turn pattern.
- Choose Longhair Warrior, Strongman, Young Man, then Green or Purple Guide for the direct route.
- Treat Crossbone Isle as optional.
Reach Tolbi and complete Altmiller Cave
After docking, collect any optional dock items, then enter Tolbi. Rest where available, check the equipment shops, and consider the town's optional Lucky Spring and Lucky Wheels activities only after the story route is secure. Visit Babi Palace and follow the scenes involving Iodem and Babi. The required destination is Altmiller Cave, reached from the route near Tolbi.
Altmiller Cave is dark, so cast Reveal when needed. Follow the cave path until the invisible man tells you about the colored lights. In the puzzle room, examine the rock on the far left and then the rock on the far right to activate the five-light display. The five rocks correspond from left to right as Blue, Green, White, Yellow, and Red. Match the flashing color to its corresponding rock twice: the first correct choice makes the colors rotate, and the second correct choice opens the door.
Go through the opened door and take the Mystic Draught from the chest. Return to the invisible man and give him the draught. He is Babi, and the scene afterward invites Isaac to Colosso. Use Retreat to leave quickly, then return to Tolbi. Do not leave the cave before giving Babi the Mystic Draught, or the story will not advance.
- Use Reveal in the dark sections.
- Activate the colored-light puzzle from the far-left and far-right rocks.
- Use the left-to-right color order Blue, Green, White, Yellow, Red.
- Take the Mystic Draught and give it to the invisible man, Babi.
- Return to Tolbi after the scene.
Enter Colosso and decide whether to pursue optional victory rewards
Go up the central road in Tolbi to the Colosso entrance. The party is stripped of equipment for Isaac's obstacle-course competition, and only Isaac fights in the tournament. Before beginning, assign Garet, Mia, and Ivan to the support stations as requested. Move, Growth, and other available Psynergy can remove obstacles or create shortcuts, so check that the appropriate Adept has the required field ability before starting.
During the obstacle courses, prioritize reaching the finish and obtaining useful equipment over opening every chest. The event continues through its story scenes whether Isaac wins or loses the final battle. Winning improves the tournament rewards and leads to the Cloak Ball, which opens the optional Lunpa and Hammet route. It is not required to complete Golden Sun's main ending. If you lose, accept the result and continue unless you specifically want the optional rewards or are preparing a transfer file.
After the Colosso scenes, speak with Babi as required. If Isaac won, collect the tournament rewards and the Cloak Ball from Babi's palace. If you intend to visit Lunpa, do so before continuing south; otherwise, leave Tolbi and proceed directly toward Gondowan Passage.
- Assign the available support Psynergy before starting Colosso.
- Prioritize the finish over optional chests.
- Do not restart merely because you lost; victory is optional for the main ending.
- Obtain the Cloak Ball only if pursuing Lunpa or its optional rewards.
Leave Tolbi through Gondowan Passage and reach Suhalla
Exit Tolbi to the south and follow the road to Gondowan Passage. Iodem's story meeting occurs along this route. Use Lift, Move, and the other field Psynergy already available whenever rocks, pillars, or fallen obstacles block the path. The passage is the required land connection to the southern region; it is not a ship route and does not begin a free-roaming sea campaign.
The Cloak Ball opens an optional detour toward Lunpa and Hammet. Complete that side route only if desired, then return to the main road. Crossbone Isle is also optional and can be postponed until its later access route. Neither side activity is needed to enter Suhalla or to finish the first game's story.
Continue southeast from Gondowan Passage to Suhalla. Enter the town, heal, save, and replenish consumables before leaving. Suhalla has limited equipment services, so replace important gear before arriving if necessary. Confirm that Mia can use Douse before departing; the next chapter begins with the Suhalla Desert crossing. Stop here rather than entering the desert if following this chapter order.
- Leave Tolbi through the southern exit.
- Cross Gondowan Passage using the required field Psynergy.
- Complete Lunpa only as an optional Cloak Ball route.
- Reach Suhalla, heal, save, and restock.
- Confirm that Douse is available before entering the next chapter.
Before you move on
- The party bought a Boat Ticket at Kalay Docks, boarded the scripted ferry, recovered the Anchor Charm, and completed the departure sequence.
- The three fixed pre-Kraken encounters and Kraken have been defeated.
- The party reached Tolbi directly, or completed an optional Crossbone Isle diversion and then continued to Tolbi.
- Altmiller Cave was completed by solving the colored-light puzzle, obtaining the Mystic Draught, and giving it to Babi.
- The Colosso story sequence has been triggered and completed; winning the tournament is optional.
- The party has left Tolbi through Gondowan Passage and reached Suhalla.
- The party has saved, healed, restocked, and is ready to begin the Suhalla Desert chapter with Douse available.
References for this chapter
- Golden Sun — Official Game Boy Advance Manual
- Nintendo UK — Game Boy Advance Games Manuals
- Golden Sun — Guide and Walkthrough — Crossbone Isle and Djinn mechanics
- Golden Sun — Guide and Walkthrough — Djinn list and Crossbone Isle route
- Golden Sun GBA Walkthrough — RetroMaggedon Gaming
- Crossbone Isle — Golden Sun Universe
Suhalla Desert, Suhalla Gate and the First Venus Lighthouse Visit
After the Tolbi and Colosso events, leave through Gondowan Passage and travel to Suhalla. Restock there before entering Suhalla Desert. The small blocking tornadoes must be stopped with Douse, each causing a Tornado Lizard battle before the route opens. Flash, the desert Mars Djinni, is optional. Near the end, the large pursuing tornado can be avoided by running to the exit; fighting Storm Lizard is optional. The pink tornado near Flash is a separate Crossbone Isle route, and Douse there begins the optional Tempest Lizard fight. Continue through Suhalla Gate, collect Dew if desired, and follow the eastern exit to the lower Venus Lighthouse entrance. Use Reveal to obtain the Carry Stone, move the blocking stone with Carry, reveal the hidden passage beside the electrical barrier, and examine the statue twice to set the later route. Then leave for Lalivero, heal, shop and save. End this chapter after the Lalivero handoff, before entering the Babi Lighthouse construction route or Tunnel Ruins.
Leave Tolbi and travel to Suhalla
After the Colosso scenes, heal and save in Tolbi before leaving. Colosso victory is not required for the main ending. If you won the tournament, Babi gives Isaac the Cloak Ball; that permits the optional Lunpa rescue, but it is not needed for Suhalla or Venus Lighthouse progression.
Take the southern exit from Tolbi and meet Iodem at Gondowan Passage. Continue southeast along the marked road to Suhalla. Check the item shop, restore the party at the Sanctum and carry enough healing items for the desert. Suhalla has no required dungeon objective, so leave through the southern exit when prepared.
Do not divert this route toward Lemuria, the eastern sea or sequel areas. The required destination is Suhalla Desert, directly south of town.
- Heal and save in Tolbi.
- Use the southern Tolbi exit and meet Iodem at Gondowan Passage.
- Reach Suhalla by following the southeast road.
- Restock and heal before entering the desert.
- Treat Lunpa as optional content.
Cross the blocking tornadoes in Suhalla Desert
Enter the desert and take the route that advances through the tornadoes. When a small tornado catches Isaac, immediately cast Douse. Each blocking tornado must be dispelled this way, and each one starts a Tornado Lizard battle. Defeat the lizard before continuing; if you allow the tornado to send the party back, re-enter the desert and repeat the approach.
At the first major branch, the eastern detour leads to a chest containing the Virtuous Armlet after another tornado encounter. The western route is the required way forward. At the later three-way split, the left and center routes lead to optional chest battles, while the right route continues. In the next area, the western path has a Cookie, the eastern path has a Lucky Medal, and the center path advances toward the lower desert.
The small tornado encounters are required because they block the normal route. Keep Mia’s healing available and restore PP if the party has spent heavily. Defensive Djinn such as Granite or Flash can help against the lizards, but Flash itself is optional.
- Use Douse on every small tornado blocking the route.
- Defeat the Tornado Lizards that appear.
- Take the right branch at the first three-way split.
- Use the center route in the following area to advance.
- Treat the Virtuous Armlet, Cookie and Lucky Medal as optional rewards.
Collect Flash and distinguish the two late-desert tornadoes
Near the large lower desert area, use Reveal where the visible tracks indicate a hidden crossing. The revealed route leads across a log to the Mars Djinni Flash. Flash must be defeated before joining the party, but recruiting it is optional for the story. Because Djinn can flee, begin with reliable damage or a disabling effect and save beforehand if you want to avoid repeating the encounter.
A pink tornado is visible near this section. Do not confuse it with the pursuing Storm Lizard tornado. Entering the pink tornado carries the party to Crossbone Isle, which is optional. Casting Douse on it starts the optional Tempest Lizard battle instead; neither action is required to reach Venus Lighthouse.
After Flash and any optional detours, continue toward the southern exit. A large tornado begins pursuing the party in the lower desert. Storm Lizard is optional: do not stop to cast Douse on the pursuing tornado. Move quickly along the exit route and leave the desert. If the tornado catches you, the Storm Lizard battle begins; you can still proceed after winning, and the encounter can be postponed by successfully escaping the area.
- Use Reveal to reach Flash.
- Defeat and recruit Flash only if desired.
- Use the pink tornado for optional Crossbone Isle access.
- Do not use Douse on the pink tornado unless you want Tempest Lizard.
- Run to the desert exit to bypass the optional Storm Lizard.
Pass through Suhalla Gate and reach Venus Lighthouse
Follow the road east from the desert to Suhalla Gate. After the scene with the injured guards, continue through the gate. On the first cliff screen, take the slide that reaches the Mint, then climb back up using the vines.
On the next slide screen, use the third slide from the left. This puts Isaac beside the Mercury Djinni Dew. Fight Dew and recruit it if desired; it is optional for the ending. Dew may flee, so use quick damage or a sleep effect if available.
Continue through the vines and the cave route. The cave contains a Psynergy Stone and leads to the lower exit. The ship and Black Orb scene beyond the cave is a story handoff, not a controllable ship sequence. Iodem takes the Black Orb back after it fails to activate the vessel. Return through the cave, follow the eastern path past the injured soldier and leave Suhalla Gate. Venus Lighthouse is immediately ahead on the overworld.
- Reach Suhalla Gate through the eastern desert exit.
- Use the first slide to collect the Mint.
- Use the third slide to reach Dew.
- Collect Dew only if desired.
- Complete the Black Orb scene and leave through the eastern exit.
Obtain the Carry Stone in the lower Venus Lighthouse
Follow the injured soldiers and scholars into the Venus Lighthouse entrance, then enter the interior. In the room with the large tree design on the floor, use Reveal near the upper wall. The hidden doorway and stairs lead to a chest containing the Carry Stone. Take it before attempting the main route; Carry is required for the later connection to the true Venus Lighthouse.
Return to the tree-design room and take the northern route. In the room with two doors, the eastern door leads to the optional Lucky Cap. Backtrack and use the western route for story progress. At the next split, take the upper doorway to reach the block that prevents access to the stairs. Equip the Carry Stone and use Carry to lift the block away from the ledge, opening the passage.
Continue until bands of electricity block the way. Cast Reveal beside the obstruction to expose the hidden staircase. Follow it to the chamber containing the small lighthouse and large statue. Examine the statue once to reveal the first floor pattern, then examine it a second time to set the alternate pattern used by the later route. This activation is required; the optional Lucky Cap is not.
- Use Reveal in the tree-design room.
- Open the chest and obtain the Carry Stone.
- Use Carry on the blocking stone.
- Use Reveal beside the electrical barrier.
- Examine the large statue twice before leaving.
- Treat Lucky Cap as optional.
Leave for Lalivero and hand off to the next chapter
Use Retreat after activating the statue, or walk back through the opened rooms, and leave the Venus Lighthouse entrance through its eastern exit. Follow the road north and then west to Lalivero.
Heal at the inn, save in a separate slot and inspect the weapon and armor shops. Lalivero has the final major shopping stop before the connected endgame route, so replace outdated equipment for the characters you use most and keep recovery items available. Torch, the Mars Djinni found on the town rooftops, is optional and does not affect the main route.
Speak with the local soldiers and residents to advance the Lalivero scenes. When ready, leave through the northern exit toward the Babi Lighthouse construction site. This chapter stops at that handoff. The next chapter covers the construction route and Tunnel Ruins; do not repeat those dungeon instructions here.
- Leave Venus Lighthouse after activating the statue.
- Reach Lalivero by following the northern road and western approach.
- Heal, shop and create a separate save.
- Collect Torch only if desired.
- Leave through Lalivero’s northern exit when ready for the next chapter.
Before you move on
- The party has left Tolbi through Gondowan Passage and reached Suhalla.
- The blocking desert tornadoes have been dispelled with Douse and their Tornado Lizards defeated.
- Flash has been collected only if desired.
- The pink tornado has been identified as the optional Crossbone Isle route.
- Storm Lizard has either been bypassed or defeated.
- The party has crossed Suhalla Gate and collected Dew only if desired.
- The Carry Stone has been obtained in the lower Venus Lighthouse section.
- Carry has been used on the blocking stone.
- The hidden passage beside the electrical barrier has been revealed.
- The large statue has been examined twice.
- The party has healed, shopped and saved in Lalivero and is ready to begin the Babi Lighthouse construction route.
References for this chapter
- Golden Sun - Guide and Walkthrough - Game Boy Advance - By AmericanArsenal
- Golden Sun — Guide and Walkthrough — Djinn list and Crossbone Isle route
- Golden Sun — Guide and Walkthrough — Crossbone Isle and Djinn mechanics
- Golden Sun — Guide and Walkthrough, Super_Slash
- Golden Sun/Suhalla Desert – StrategyWiki
- Golden Sun — Official Game Boy Advance Manual
Babi Lighthouse and Tunnel Ruins: Opening the Final Venus Lighthouse Route
Begin at the Babi Lighthouse construction site after activating the statue in the lower Venus Lighthouse. Work through the unfinished structure, optionally recruit Luff, use Reveal to open the sealed entrance, and descend into the Tunnel Ruins. Solve the Move-based pillar rooms, use Douse followed by Frost to create the raised ice pillar, and arrange the five colored statues to open the passage. The route ends when you reach the true Venus Lighthouse lobby and its Psynergy Stone. This chapter does not cover the final lighthouse climb, the Saturos and Menardi battle, Fusion Dragon, Storm Lizard, Suhalla Desert, or Crossbone Isle.
1. Enter the Babi Lighthouse construction site
Start from Lalivero and travel north to the partially constructed Babi Lighthouse. This is not a completed tower with a normal floor-by-floor climb. The required route uses the exterior construction platforms and the underground ruins beneath the site. Before entering, heal and restore PP in Lalivero. A save outside the construction site is useful because the Tunnel Ruins contain several linked puzzle rooms and limited recovery opportunities.
Move through the opening construction platforms and ladders until you reach the interior entrance area. The workers and soldiers provide the story scene that establishes the obstruction at the large sealed door. Continue downward rather than trying to leave through the upper construction platforms. The party must demonstrate its Psynergy before the workers will allow progress.
- Start from Lalivero after the lower Venus Lighthouse statue has been activated.
- Restore HP and PP before entering.
- Follow the construction platforms down to the underground entrance.
- Do not treat Babi Lighthouse as a completed conventional tower.
2. Optional construction-site rewards and Luff
Several side paths in the construction area contain optional rewards. One early route uses Carry and Move to position a block so that you can reach a chest containing a Lucky Pepper. The item is not required, so skip it if you want to proceed directly to the ruins.
Luff, the optional Jupiter Djinni, is reached by using the exterior platforms and sliding down the correct section after manipulating the nearby block and pillar route. Fight Luff when you reach it, then examine it after the battle to recruit it. Luff is not needed to open the Tunnel Ruins, and missing it does not block the ending. If you are pursuing all 28 Djinn, collect it before descending into the main entrance; otherwise continue without detouring.
The route to Luff and the Lucky Pepper can be revisited later. Do not spend time searching the construction site for a required story item after the main descent has opened.
- Lucky Pepper is optional.
- Luff is an optional Jupiter Djinni.
- Fight and examine Luff if recruiting it.
- Continue to the underground entrance when ready.
3. Open the sealed entrance with Reveal
In the underground chamber, speak with the workers and watch the scene involving the sealed door. Stand near the door and cast Reveal. The Psynergy exposes a hidden switch beside the entrance. Examine the revealed switch to open the door, then proceed through it for the following scene.
The door closes when non-Adepts attempt to pass through, so the workers and accompanying NPCs cannot simply follow the party. After the scene, use Reveal on the same area again and activate the switch once more. This restores the passage for Isaac's group. Follow the opened route and descend the stairs into the Tunnel Ruins.
If the entrance appears blocked, the usual cause is failing to cast Reveal in the doorway area or failing to activate the hidden switch after the story scene. The switch, not a normal visible lever, is the required trigger.
- Cast Reveal beside the sealed door.
- Activate the hidden switch.
- Watch the scene showing that only Adepts can pass.
- Cast Reveal again and reactivate the switch after the scene.
- Descend into the Tunnel Ruins.
4. Cross the first Tunnel Ruins pillar rooms
The first Tunnel Ruins room contains the same goddess-statue and light-circle motif seen in the lower Venus Lighthouse. The previously activated statue determines which of the two broad routes is lit, but both routes eventually lead toward the colored-statue room and the true lighthouse entrance. Proceed south from the opening chamber.
In the first pillar room, go down the stairs and use Move on the pillar at the right. Shift it horizontally as far as the available space allows, then move it downward once. Return to the upper platform, jump onto the repositioned pillar, and cross to the next room.
The following pillar room requires several Move adjustments. Move the left pillar downward, then push it farther down and left before moving it upward into position. Adjust the next pillar downward and then left so that the party can climb back to the upper route. From there, cross the arranged pillars and continue through the ivy-covered passage. The exact path differs depending on the light configuration selected at the lower Venus Lighthouse, but the objective is always to arrange the pillars into a jumpable staircase rather than to push them randomly.
- Leave the opening statue room through the south route.
- Use Move to arrange the first right-hand pillar.
- Use the pillars as stepping platforms.
- Reposition the second set of pillars to reach the upper route.
- Continue through the ivy-covered passage.
5. Solve the Douse and Frost pillar puzzle
Continue through the intervening platform rooms until you reach the section with the empty pillar enclosure. Some routes include ivy that must be removed with Whirlwind before the next pillar can be moved. Arrange the small pedestals so you can cross the room, then proceed toward the water-pillar section.
In the required water puzzle, use Move to pull the empty pillar into the correct enclosure. Position it so that it stands beside the existing lower pillar. Cast Douse on the receptacle to fill it with water, then immediately cast Frost on that water. Frost creates an ice pillar above the lower pillar, producing a taller stepping point.
Climb the nearby stairs and jump across the raised pillar to the opposite ledge. Douse alone does not complete this puzzle: without Frost, the party cannot gain enough height to cross. If the spell seems ineffective, check that the pillar has first been moved into the enclosure and that Douse has filled the correct receptacle.
- Use Move to place the empty pillar in the enclosure.
- Cast Douse on the pillar receptacle.
- Cast Frost on the water.
- Jump across the raised ice pillar.
- Continue toward the colored-statue room.
6. Arrange the five colored statues
After the pillar and ice sections, follow the connecting rooms until you reach five colored statues and five floor squares. Use Mind Read on the statues if you want their clues, then push each statue onto its matching required position. The completed arrangement is: red in the upper-left square, blue in the upper-right square, yellow in the center square, green in the lower-left square, and violet in the lower-right square.
The color positions are spatial instructions, not an elemental party order. If the door remains closed, inspect the room and verify every statue, especially the center yellow statue and the lower-right violet statue. Once all five positions are correct, the door on the far side opens.
This puzzle is required for the route. Optional equipment rooms encountered before or beside it can be skipped if you are conserving time, but do not leave the Tunnel Ruins until the colored-statue door has opened.
- Red: upper-left.
- Blue: upper-right.
- Yellow: center.
- Green: lower-left.
- Violet: lower-right.
- Confirm that the far door opens.
7. Reach the true Venus Lighthouse lobby
Pass through the opened colored-statue door and follow the stairs into the connecting Venus Lighthouse area. This is the true interior entrance, not the lower exterior section visited earlier from the overworld. Continue until you reach the lobby containing the Psynergy Stone.
Use the Psynergy Stone to restore the party before proceeding farther. This is the completion point for this chapter and the safe preparation point for the final Venus Lighthouse climb. Do not begin the upper lighthouse route unless you are ready for the remaining endgame sequence; the next chapter covers those puzzles and the consecutive final battles.
If the route seems to return you to the wrong side of the lighthouse, confirm that you entered through the colored-statue door after solving the Tunnel Ruins puzzle. The statue setting in the lower Venus Lighthouse controls the broader Tunnel Ruins branch, but both configurations connect to the true lobby when their required puzzles are completed.
- Pass through the opened colored-statue door.
- Enter the true Venus Lighthouse interior.
- Reach the lobby Psynergy Stone.
- Restore HP and PP at the stone.
- Save before beginning the final lighthouse chapter.
Before you move on
- The Babi Lighthouse sealed entrance has been opened with Reveal.
- The party has descended into the Tunnel Ruins.
- The required pillar rooms have been crossed with Move.
- The water pillar has been completed with Douse followed by Frost.
- The colored statues are arranged red upper-left, blue upper-right, yellow center, green lower-left, and violet lower-right.
- The passage into the true Venus Lighthouse has opened.
- The party has reached the Venus Lighthouse lobby Psynergy Stone.
- A save exists before starting the final Venus Lighthouse climb.
Final Preparation at Lalivero and the Venus Lighthouse Lobby
Chapter 11 should have ended with the party inside the true Venus Lighthouse lobby, after crossing the Tunnel Ruins and reaching the lobby Psynergy Stone. From there, return to Lalivero using the already-opened route and treat the town as the final resupply point before the upper lighthouse climb. Restore the party, inspect the weapon, armor and item shops, collect useful town pickups, and recruit Torch if you want the complete first-game Djinn set. Lucky Pepper, Luff and other cleanup rewards are optional. Preserve an ordinary adventure save before beginning the final climb, then return to the lobby and use its Psynergy Stone to restore PP. Review equipment, healing and revival items, Djinn assignments and class changes before going farther north. Stop in the lobby with the party ready for Chapter 13. Clear Data is produced after the ending for transfer to Golden Sun: The Lost Age; it does not function as a normal post-ending exploration file.
Confirm the correct starting point
Chapter 11 is complete when the party has crossed the Babi Lighthouse and Tunnel Ruins connection and entered the true Venus Lighthouse lobby. The lobby is the large room at the beginning of the final Venus Lighthouse section, beyond the colored-statue puzzle. Its Psynergy Stone is the important preparation landmark for this chapter.
Do not restart the Carry Stone search, revisit the route-setting statue, solve the Tunnel Ruins puzzles again or treat Babi Lighthouse as unfinished. Those objectives belong to earlier chapters. If the party is already in the lobby, use the established return route to go back to Lalivero for shopping and optional cleanup, then return here before the final climb.
The lobby remains the safest final PP-restoration point. Retreat used inside the main Venus Lighthouse section returns the party to this lobby, so it is also the recovery point for later attempts at the final dungeon route.
- Chapter 11 ended in the true Venus Lighthouse lobby.
- The lobby Psynergy Stone is visible and usable.
- Carry, the statue route and the Tunnel Ruins connection were already completed.
- Do not repeat Babi Lighthouse or Tunnel Ruins puzzles.
Return to Lalivero for final recovery
Use the return route already opened in Chapter 11 to leave the lighthouse area and travel back to Lalivero. Lalivero is the final regular settlement in the original Golden Sun campaign and the last town with shops before the ending sequence.
Visit the inn and restore the entire party before shopping. Then save in an ordinary adventure slot. This is the most useful backup for changing equipment, rearranging Djinn and retrying the final sequence. Keep the file separate from the Clear Data file that will be offered after the ending.
The town's item shop sells Herbs, Nuts, Antidotes, Elixirs and Sacred Feathers, and its artifact menu includes Potion, Psy Crystal and Water of Life. Buy enough recovery supplies for the final dungeon rather than spending every coin on equipment. Give priority to full-HP recovery, PP restoration and revival items if your inventory is low.
Talk to the Lalivero shopkeepers so their final artifact inventories are available. The weapon shop adds the Silver Blade, Swift Sword, Righteous Mace and Crystal Rod. The armor shop adds the Magical Cassock, Jeweled Crown, Mirrored Shield and Spirit Armlet. Compare these with the current equipment and purchase upgrades for the characters you will actually use.
- Return to Lalivero without repeating the earlier lighthouse route.
- Use the inn to restore HP and PP.
- Save in an ordinary adventure slot.
- Buy healing, PP-restoring and revival items.
- Inspect both shops' artifact menus.
Search Lalivero and recruit Torch
Search the town before leaving. The fixed pickups include an Antidote in a barrel at the item shop, a Lucky Medal in the inn, another Lucky Medal in the nearby building, a Psy Crystal near the central statue, a Water of Life on the item-shop roof and a Warrior's Helm reached from the roof-and-wall route. These rewards are useful but none is required to finish the story.
To reach Torch, climb the ladder inside the weapon and armor shop and jump onto Lalivero's yellow perimeter wall. Follow the wall around the buildings until the route reaches the upper area near the inn. Use the vine to climb to Torch. Torch joins without a battle. Torch is optional for the ending, but it is the seventh Mars Djinni in the original game and should be collected if you are pursuing all 28 first-game Djinn or want another Mars Djinni available for class and summon preparation.
The Warrior's Helm is also optional. If the wall route is confusing, enter the southwestern house, climb to its roof and use the perimeter wall as the connecting walkway. Do not mistake these pickups for required story flags.
- Collect the Lalivero pickups you want.
- Recruit Torch from the rooftop route if pursuing optional Djinn completion.
- Take the Warrior's Helm only if it improves your planned equipment.
- Do not treat Torch or the town treasures as required for the ending.
Handle optional cleanup without delaying the finale
Lucky Pepper on the road toward Babi Lighthouse is optional and has no role in opening the final dungeon. Take it only if you want the item or are completing the available treasure pickups.
Luff near the Babi Lighthouse approach is also optional. It is the final Jupiter Djinni available in the original game, but it is not needed to enter Venus Lighthouse, defeat the final bosses or trigger the ending. If you attempt it, make an ordinary save first and be prepared for a Djinni encounter. Skip it if the party is already prepared and you want to begin the final climb immediately.
This is a good point to finish any other accessible first-game cleanup, such as returning for missed Djinn or optional side rewards, but do not confuse optional completion with the campaign route. Crossbone Isle, Deadbeard and the full 28-Djinn collection are not required for the story ending. Mars Lighthouse, Jupiter Lighthouse and sequel locations are not part of this game.
- Decide whether to collect Lucky Pepper.
- Decide whether to fight for Luff.
- Finish only optional content that does not compromise the final save plan.
- Do not delay the ending because of optional Djinn or Crossbone Isle.
Set the final party, equipment and Djinn
Before returning to the lobby, assign the equipment you intend to use in the final battles rather than leaving the strongest items in the inventory. Check each character's weapon, armor, headgear, shield and accessory. Defensive upgrades and PP recovery are generally more valuable than small attack differences when a character is responsible for healing or support.
Review Djinn individually. Set the Djinn needed for the class combinations and statistics you want, and place the rest in standby if you intend to use summons early in a battle. Remember that changing set and standby Djinn can alter classes, statistics and available Psynergy. Check the status screen after making changes so an accidental class change does not remove a needed support spell.
Make sure Mia has enough PP for repeated healing and that the party has a way to recover from a knockout. Carry Antidotes and Elixirs for poison, venom, stun, sleep and delusion effects. Keep several Waters of Life or equivalent revival options if available. Use the inn after all equipment and Djinn changes so the party begins the final route with full HP and PP.
Save again in the ordinary adventure slot after the final preparation. Do not overwrite this backup with the later Clear Data file.
- Equip the final weapons and armor.
- Confirm each character's class after changing Djinn.
- Reserve enough Djinn for the intended summon plan.
- Carry healing, status recovery and revival items.
- Restore HP and PP after all changes.
- Create or preserve the ordinary pre-final save.
Return to the lobby and wait before the final climb
Travel back to the true Venus Lighthouse lobby using the route already completed in Chapter 11. Do not spend this chapter solving the connection again. If the party has entered the main dungeon and needs recovery, use the lobby Psynergy Stone to refill PP completely.
At the lobby, check the inventory one final time and confirm that the desired Djinn are set. This is the correct stopping point before the upper Venus Lighthouse route. The doorway and stairs beyond the lobby lead into the final sequence, so do not proceed until the party, equipment and supplies are ready.
The next chapter begins with the final Venus Lighthouse climb and the consecutive Saturos and Menardi, then Fusion Dragon, encounters. After the ending, the game offers a Clear Data save. Clear Data preserves completion and transfer information for Golden Sun: The Lost Age, but it is not a normal continuation file that returns Isaac's party to Lalivero or the overworld. Keep the ordinary pre-final save until the Clear Data file has been created and any desired transfer password has been recorded.
- Return to the true Venus Lighthouse lobby.
- Use the lobby Psynergy Stone for full PP recovery.
- Confirm final equipment, Djinn, healing and revival supplies.
- Keep the ordinary pre-final save intact.
- Stop at the lobby before beginning the final climb.
- After the ending, save Clear Data separately if transfer is desired.
Before you move on
- Chapter 11 ended at the true Venus Lighthouse lobby.
- Carry, the route-setting statue and the Tunnel Ruins connection were completed in the preceding chapter.
- Lalivero has been visited for final shopping and recovery.
- The desired optional pickups, including Torch, have been collected or deliberately skipped.
- The final weapon, armor and artifact menus have been checked.
- Healing, status recovery, PP restoration and revival items are ready.
- Djinn assignments and resulting classes have been reviewed.
- The party has been fully restored at the inn and then at the lobby Psynergy Stone.
- A separate ordinary pre-final save exists.
- The party is waiting in the Venus Lighthouse lobby before the final climb.
- The player understands that Clear Data is created after the ending and is not normal overworld continuation.
References for this chapter
Optional Djinn Hunting and Side-Dungeons: Crossbone Isle
Yampi Desert Cave, Islet Cave and Treasure Isle are locations from Golden Sun: The Lost Age and do not appear in the original Golden Sun for Game Boy Advance. The correct first-game optional dungeon is Crossbone Isle, reached through the pink tornado hidden in Suhalla Desert. Crossbone Isle is not needed for the story ending, but it contains Bane, the original game’s seventh Venus Djinni, several powerful or cursed equipment pieces and the optional superboss Deadbeard. The full route requires Reveal, Growth, Whirlwind, Move, Frost, Catch, Cloak, Halt and Carry. You can reach the island before obtaining every ability, but Carry is needed for floors seven through nine. Do not confuse the pink tornado’s optional Tempest Lizard with the separate Storm Lizard encounter in Suhalla Desert. No summon tablets are collected in this game.
1. Use the correct optional dungeon for the original GBA game
Do not search the original Golden Sun cartridge for Yampi Desert Cave, Islet Cave or Treasure Isle. Those are optional locations in Golden Sun: The Lost Age, using Felix’s later journey, the Eastern Sea and sequel Psynergy. They are not part of Isaac’s optional content.
For the original North American and European Game Boy Advance release, the relevant side dungeon is Crossbone Isle. It is completely optional for the campaign ending. You can finish the story without Bane, the Crossbone Isle equipment or Deadbeard, but the island is the main first-game challenge for players pursuing all 28 Djinn and the strongest optional rewards.
- Yampi Desert Cave is The Lost Age content.
- Islet Cave is The Lost Age content.
- Treasure Isle is The Lost Age content.
- Crossbone Isle is the correct optional dungeon for original Golden Sun.
2. Reach the pink tornado in Suhalla Desert
Enter Suhalla Desert and progress through the later desert screens until you reach the area near the Storm Lizard route. In the screen with the hidden path, use Reveal near the suspicious gap to expose the concealed route. Cross the revealed log and follow the path to the cave entrance near the Mars Djinni Flash.
Recruit Flash if it is still missing, then continue through the cave. The cave leads to a pink or reddish tornado associated with the Tempest Lizard. Step into the tornado and do not cast Douse. If you wait, it carries the party to the small Crossbone Isle overworld area. From the landing point, travel east toward the mountain entrance to the dungeon.
This tornado is different from the ordinary desert tornadoes and from the separate Storm Lizard event. Casting Douse on the pink tornado begins the optional Tempest Lizard battle instead of transporting the party. The battle is not required to enter Crossbone Isle. If you defeat the Tempest Lizard or leave the area, the transport route can still be used again after returning to the desert.
- Use Reveal to expose the hidden route near the later Suhalla Desert area.
- Reach the cave near Flash.
- Enter the pink tornado without casting Douse.
- Travel east from the island landing area to the mountain entrance.
- Save before beginning the dungeon.
3. Obtain the Psynergy needed for the full route
The first floors can be attempted before every ability is available, but a complete clear requires the utility Psynergy used throughout the game’s late progression. Growth and Whirlwind open the island entrance. Move and Frost handle the early pillar, log and ice puzzles. Catch is needed for the third-floor key puzzle.
Cloak is obtained from the Cloak Ball beside Babi’s bed after the Colosso Finals. Halt is obtained by revisiting Vale after acquiring Lift, moving the rock near Kraden’s house and entering the revealed cave. Carry comes from the Carry Stone in the lower portion of Venus Lighthouse. Carry is the important late requirement for floors seven through nine.
If Carry, Cloak or Halt is missing, do not assume the dungeon is permanently blocked. Clear the floors that are accessible, leave through the island tornado and return after collecting the missing Psynergy.
- Growth and Whirlwind for the entrance.
- Move, Frost and Catch for early and middle puzzles.
- Cloak and Halt for the statue sections and Bane route.
- Carry for floors seven through nine.
- Return later if a required ability is missing.
4. Clear the island entrance and floors one through six
On the island exterior, use Growth on the sprouts and climb the vines. Follow the ledges and slides to reach the mountain entrance. Cast Whirlwind on the vines covering the doorway, then enter the dungeon.
The first floors use Move to reposition pillars and open paths through the rooms. On floor three, use Reveal to expose the red key and Catch to collect blue keys when you want the optional treasure routes. Use the red key to continue downward.
Floor four combines dark passages with statue hazards. Cast Cloak to move through the shadowed sections without being detected. Use Halt on statues when they block a required route. The Storm Gear is an important optional reward on this floor, but it is not needed to continue.
Floor five uses logs and water to create crossings. The Ninja Garb is an optional reward here. On floor six, solve the pillar and ice arrangements with Move and Frost. The Demon Axe is an optional reward, while Bane is the required target if you want all 28 first-game Djinn.
- Open the entrance with Growth and Whirlwind.
- Use Move on the first floors.
- Use Reveal and Catch for the floor-three keys.
- Use Cloak and Halt on floor four.
- Collect Storm Gear, Ninja Garb and Demon Axe only if desired.
- Reach Bane on floor six.
5. Recruit Bane and complete floors seven through nine
Bane moves around the floor-six puzzle area. Use the surrounding blocks and paths to put it in a predictable position, then cast Halt when it is within reach. Interact with the stopped Djinni to begin the battle. After winning, confirm that Bane has joined the Venus Djinn list.
Carry is required below floor six. On floor seven, lift and reposition the box to create the necessary bridge and access route. The Wicked Mace is an optional cursed weapon on this section. Floor eight uses Frost to create an ice pillar, and the Cleric’s Ring is the major reward. The ring lets its wearer use cursed equipment without suffering the normal battle curse effect.
Floor nine is another log-based puzzle. Follow the log route to the exit and collect the Muramasa if you want the optional cursed sword. The Muramasa, Cleric’s Ring and other equipment are not required for the story or for recruiting Bane. If a room setup prevents access to both a chest and the exit, leave and re-enter to reset the puzzle arrangement.
- Defeat and recruit Bane on floor six.
- Use Carry on floor seven.
- Collect the Wicked Mace if desired.
- Use Frost on floor eight.
- Collect the Cleric’s Ring if pursuing optional equipment.
- Complete floor nine and collect Muramasa if desired.
6. Decide whether to challenge Deadbeard
After the ninth floor, the route reaches the Pirate Ship area. Restore the party before climbing the ship’s stairs. Approaching the upper section starts the Deadbeard battle. Deadbeard is optional and is not the game’s story-ending boss, but he is considerably more dangerous than ordinary Crossbone Isle enemies.
Make a separate save before entering the battle area. Restore HP and PP, keep Mia’s healing available and retain access to revival Psynergy or Djinn. Do not put every Djinni into standby at once if doing so removes important class bonuses or healing options. Deadbeard can use heavy physical attacks, strong elemental attacks and abilities that remove positive status changes, so avoid relying on a single buff or one damage plan.
If the party loses, reload the separate save or leave through the island tornado, resupply and return later. After victory, open the reward chest to obtain Demon Mail. The battle can be skipped without affecting Bane, the ending or the ordinary completion route.
- Save separately before climbing toward Deadbeard.
- Restore HP and PP.
- Keep healing and revival options available.
- Defeat Deadbeard only for optional completion.
- Collect Demon Mail after victory.
7. Preserve the correct completion record
The most convenient time to finish Crossbone Isle is after obtaining Carry and before the final Venus Lighthouse climb. This lets you clear every puzzle floor and use any useful equipment during the final story battles. You can also postpone Deadbeard and return from the overworld later.
For first-game optional completion, verify that Bane is registered, the floors below six have been completed and any desired equipment has been collected. If pursuing the optional superboss route, verify that Deadbeard was defeated and Demon Mail is in the inventory.
Do not add Anemos Inner Sanctum, sequel Djinn, summon tablets or The Lost Age dungeons to this checklist. Golden Sun on GBA uses the standard Djinn-based summon sequences; it has no collectible summon tablets. Preserve a normal pre-final save separately if you plan to create Clear Data for transfer or want a backup before the ending.
- Bane is registered as the seventh Venus Djinni.
- Floors seven through nine were completed after obtaining Carry.
- Optional equipment was collected if wanted.
- Deadbeard and Demon Mail were completed if pursuing the superboss route.
- No The Lost Age dungeon or summon tablet is being counted.
- A normal pre-final save is preserved.
Before you move on
- The party reached Crossbone Isle through the pink Suhalla Desert tornado.
- Bane is registered in the Venus Djinn list.
- The full nine-floor puzzle dungeon was completed, with Carry used for the lower floors.
- Storm Gear, Ninja Garb, Demon Axe, Wicked Mace, Cleric’s Ring and Muramasa were collected if optional equipment completion is intended.
- Deadbeard was defeated and Demon Mail collected if pursuing the optional superboss.
- Yampi Desert Cave, Islet Cave, Treasure Isle, summon tablets and Anemos Inner Sanctum were excluded as The Lost Age content.
- A normal backup save exists before the final Venus Lighthouse sequence.
Upper Venus Lighthouse: Final Dungeon Climb and Pre-Finale Preparation
After opening the colored-statue route in the Tunnel Ruins, enter the upper Venus Lighthouse and complete its final sequence of sandfall, light-circuit, pillar, scale and sand-maze puzzles. The Thunder Crown, Dragon Scales and Gaia Blade are valuable optional rewards, but none is required to finish the campaign. The last Psynergy Stone stands immediately before the slide that carries the party to the lighthouse aerie. Restore HP and PP, revive everyone, check equipment and Djinn assignments, then create a separate ordinary save before using the slide. This chapter stops at that pre-finale point; the consecutive Saturos and Menardi, then Fusion Dragon, battles and the Lalivero ending sequence belong to Chapter 10.
Enter the upper Venus Lighthouse and disable the electric barrier
From the eastern exit of the colored-statue room in the Tunnel Ruins, climb the stairs into the upper Venus Lighthouse lobby. A Psynergy Stone is in this first room. It restores PP and remains an important recovery point throughout the climb. The left staircase leads back toward the earlier Venus Lighthouse section and is useful for disabling the electric barrier before you commit to the upper route.
Take the left staircase and use Move on the nearby statue, placing it on the floor switch. This turns off the electric barrier and leaves a possible retreat route. Return to the lobby, then use the central passage to begin the upper-dungeon route. In the western room, push the first gray block left toward the gap. Cast Carry to lift it and drop it onto the lower level, then jump across it and leave through the western door.
The next chamber contains a broad horizontal sandfall. Walk to the upper edge of the sand, then run right while holding Up so the current carries Isaac onto the southeastern ledge rather than dropping him into the lower area. Enter the room southeast of that ledge to open the optional Thunder Crown chest. The crown is cursed equipment, so do not equip it casually; the Cleric’s Ring prevents the curse’s harmful effect. Return to the sandfall room and climb the northern stairs.
- The electric barrier has been disabled with Move.
- The Carry block has been dropped to form the first crossing.
- The main sandfall has been crossed.
- The Thunder Crown has been collected if desired.
Complete the first light circuits and redirect the sandflow
In the room with three small sandfalls, approach the far-right sandfall from its right side and push through it. Follow the stepping stones into the chamber with a Venus statue and a grooved block. Push the block into its matching hole so the light travels through the groove and opens the door.
Step on the floor switch in the next room. This changes the active sand routes. Return through the opened passage, descend as needed and use the newly active sandfall to reach the right-hand route. If the current does not provide the expected crossing, return to the switch; the sand route has not been changed correctly.
Continue until you reach the pillar chamber. Use Move on the pillars to expose the hidden archway. Go through the archway, push the required pillar fully left, then climb back to the upper level and use the repositioned pillar as a stepping point to reach the northern stairs. Follow the connecting passage to the second light-circuit room.
The second circuit has three grooved blocks. First place the lower-right block into the nearby hole one space southeast of it. Push the left block three spaces east and one space north into the upper hole. Finally, push the middle block three spaces south and two spaces west. When both light paths reach their endpoints, the exit opens.
- The first grooved-block circuit is complete.
- The sandflow switch has been activated.
- The hidden pillar passage is open.
- The three-block light circuit has opened its door.
Collect Dragon Scales and solve the scale puzzle
Cross the next sand section by using the nearby block as a stepping point. Move north, cross to the western side and enter the chamber with multiple sandfalls. Push through the first sandfall from the right to reach the chest containing Dragon Scales. This armor is optional, although its elemental defenses make it useful for the endgame. Return to the sandfall chamber and use the western route to reach the stairs.
The next room contains three gray boxes and two floor scales. Use Carry to drop two boxes onto the same scale, as indicated by the white scale platform. The weight raises the opposite scale high enough to serve as a platform, allowing you to jump across to the eastern side.
Continue north to the next box and push it left. Use Carry to drop it onto the lower platform so the route onward is available. Press the switch in the following room to move the sand gate and start another sandflow. Cross the platforms and follow the newly opened current toward the southwestern route.
- Dragon Scales have been collected if desired.
- Two boxes are resting on the same scale.
- The opposite scale has risen high enough to cross.
- The next sand gate has been opened.
Cross the moving-sand maze and collect the Gaia Blade
Follow the new sand route to the chamber where the current moves through several openings. The southeastern chest contains the optional Gaia Blade. Enter the lower gap in the blocks, then the eastern gap, and allow the current to carry Isaac around the upper side of the chest. When the current brings him above the chest, run into the opening beneath it and open the chest.
To leave, repeat the same general route but head north after reaching the upper section instead of entering the chest opening. The maze may take several attempts. Hold the run button while crossing gaps and let the current carry you rather than repeatedly fighting its direction.
The next room contains four grooved pillars and another light circuit. From left to right, place the first pillar in the southeastern hole matching its vertical groove. Put the second pillar into the hole below its original position. Place the third pillar in the hole five spaces south of its starting position. Put the fourth pillar in the hole immediately south of the second pillar’s destination. The exit opens when the circuit is complete.
- The Gaia Blade has been collected if desired.
- The moving-sand maze has been crossed.
- All four grooved pillars are in matching holes.
- The final light-circuit door in this section is open.
Open the final sand route and prepare at the last Psynergy Stone
Press the switch in the room beyond the four-pillar circuit. This opens the third sand gate. Cross the nearby floating platforms and use the northern doorway. Follow the corridor until it returns to the central sand-river area, then cross the newly active northeastern sand route and climb the stairs.
Take the second staircase west into the room containing the final Psynergy Stone and the narrow slide. This is the last reliable recovery point before the finale. Use the stone to refill PP, heal the party with Psynergy, revive fallen characters and confirm that every character has suitable equipment. The Thunder Crown, Dragon Scales and Gaia Blade are optional; missing any of them does not block progression.
Set enough Djinn to preserve normal character statistics and dependable Psynergy. Isaac and Garet should retain strong physical performance, Mia should keep reliable healing access and Ivan should retain useful support or defensive options. Defensive Djinn such as Granite and Flash can help during the coming battles, but avoid placing every Djinni in standby solely for immediate summons. Keep restorative items and status cures available, because the slide leads into the final sequence without a normal town stop.
Create a separate ordinary save in the room with the final Psynergy Stone. Do not use the slide until you are ready to begin the endgame sequence. Falling down it carries the party to the lighthouse aerie and prevents normal retreat. The final boss battles are not covered in this chapter; stop here and continue with Chapter 10.
- The third sand gate has been opened.
- The final Psynergy Stone has been reached.
- HP, PP and fallen characters have been restored.
- Equipment, Djinn and restorative items are prepared.
- A separate ordinary pre-slide save exists.
- The slide has not been used.
Before you move on
- The upper Venus Lighthouse has been entered from the completed Tunnel Ruins route.
- The electric barrier, sandfall switches, light circuits, pillar circuit and scale puzzle have been cleared.
- The optional Thunder Crown, Dragon Scales and Gaia Blade have been collected if desired.
- The final sand route has been opened.
- The party has reached the last Psynergy Stone and recovered fully.
- A separate ordinary save exists before the slide.
- The party is ready to hand off to the final-battle chapter, but the slide and final battles have not yet been used.
References for this chapter
Upper Venus Lighthouse and the Two-Battle Finale
Begin at the final Psynergy Stone in the true Venus Lighthouse. Heal, refill PP, inspect equipment and make a normal save before taking the nearby slide. The slide carries the party to the aerie and starts the consecutive Saturos and Menardi, then Fusion Dragon, encounters. After both battles, the story returns Isaac's party to Lalivero. Leave Faran's house to trigger Iodem's conversation and receive the Black Orb. Enter the guarded building in Lalivero's northwest, follow the dock to its northern end and use the Black Orb to raise Babi's ship. Let the ending scenes and credits finish, then save a Clear Data file in a separate slot if you intend to transfer progress to Golden Sun: The Lost Age. Clear Data is not a normal adventure save, and the original game does not open a playable Jupiter Lighthouse after these events.
1. Prepare at the final Psynergy Stone
This chapter begins in the small room containing the last Psynergy Stone in the true Venus Lighthouse route. Before taking the slide, restore every character's HP, use the Psynergy Stone to refill PP and check that the party is equipped for two consecutive battles. The Stone is the final dependable recovery point before the aerie sequence.
Make a normal save before entering the slide. Keep this file separate from any Clear Data file you create later. The slide is the practical point of no return for the finale: it carries the party to the upper lighthouse area, and there is no ordinary trip back to Lalivero between the first boss fight and Fusion Dragon.
Confirm that Mia has enough PP to heal through both battles, that every active character has suitable armor and weapons, and that you have Revive Psynergy or Water of Life items available. Arrange Djinn for reliable battle classes rather than changing everyone into summon-focused classes without a plan. Defensive Djinn and Djinn that improve survivability are valuable because the party cannot visit a shop or healing point after the slide.
- HP is restored for all four characters.
- The final Psynergy Stone has refilled PP.
- Equipment, Djinn and recovery items have been checked.
- A normal save exists before the slide.
- Optional exploration has been completed or intentionally postponed.
2. Take the slide and defeat Saturos and Menardi
Take the slide beside the Psynergy Stone and follow the short route across the floating platforms to the Venus Lighthouse aerie. Story scenes play there before control returns and the first final battle begins. The battle is against Saturos and Menardi together, not a single boss followed by a separate town visit.
Focus your damage on one target at a time. Splitting attacks between both bosses prolongs the encounter and gives their healing and support actions more opportunities to matter. Use the party's strongest dependable attacks and Psynergy, while preserving enough healing capacity for the second half of the finale. Mercury damage and Mercury summons are useful if your Djinn arrangement supports them, but do not spend every Djinn before you know how the first battle is progressing.
Keep Mia ready to heal whenever multiple characters are injured. Menardi and Saturos can inflict heavy damage, and a character at low HP may be defeated before the next turn. Revive fallen characters when doing so will not leave the party unable to survive the current round. Use defensive Djinn when they prevent a dangerous turn, but avoid setting so many Djinn that your active classes lose the healing or offensive Psynergy you need.
When Saturos and Menardi are defeated, do not assume the game is finished. The Venus beacon sequence follows, and the two bosses combine into Fusion Dragon. There is no recovery screen or town visit between these encounters.
- Damage is concentrated on one boss at a time.
- Mia retains enough PP for emergency healing.
- Useful Djinn and recovery items remain available.
- Saturos and Menardi have been defeated.
3. Defeat Fusion Dragon
Fusion Dragon is the second and final required battle. Treat it as a separate resource check even though it follows immediately after Saturos and Menardi. The dragon can take multiple actions in a round and can combine severe single-target damage with attacks that threaten the whole party. Keep all four characters at safe HP rather than leaving a fragile character alive for one extra attack.
Use Mia's group healing whenever area damage has lowered several characters. Ivan can contribute support, offensive Psynergy or emergency healing if Mia is disabled, while Isaac and Garet can attack, defend or use items according to the situation. Defensive Djinn such as Granite or Flash can blunt dangerous turns, but time them so the party does not lose access to all healing or essential support at once.
This is the point at which you may spend remaining high-level Djinn, summons and consumables freely. There is no later required battle in the original Golden Sun campaign. If Fusion Dragon defeats the party, reload the ordinary save made before the slide, use the Psynergy Stone again, adjust the Djinn setup and retry both battles. You do not need to repeat the earlier Venus Lighthouse puzzles if you preserved that pre-slide save.
After Fusion Dragon falls, allow the following story scenes to play. The party is returned to Lalivero. The game has not yet reached the credits, and the Black Orb sequence is still required.
- The party is healed whenever Fusion Dragon threatens group damage.
- Revival options remain available for emergencies.
- Remaining powerful Djinn and summons are used when they provide a safe advantage.
- Fusion Dragon has been defeated.
4. Receive Iodem's Black Orb in Lalivero
The post-battle scenes return the party to Lalivero, inside Faran's house. Do not save over the pre-final ordinary file if you still want a fallback for optional cleanup or another attempt at the ending sequence. When control returns, leave the house and walk away from it. This triggers Iodem's conversation and awards Isaac the Black Orb.
The Black Orb is the required item for raising the ship hidden at Lalivero. Receiving it is a story trigger, not an optional reward. If Iodem does not appear, make sure you have actually left the house far enough to trigger the scene rather than remaining inside or immediately re-entering it.
After the conversation, move to the northwest part of Lalivero. Find the building with a soldier guarding its entrance and speak to him. He allows the party through to the dock area. This is the final town sequence needed to reach the credits.
- The party has returned to Lalivero.
- The party has left Faran's house after the post-battle scenes.
- Iodem has given Isaac the Black Orb.
- The guarded building in Lalivero's northwest has been opened.
5. Use the Black Orb and watch the ending
Inside the guarded northwest building, follow the walkway and gangplank toward the dock. Continue to the northern end of the dock, where the ship is hidden below the water. Use the Black Orb from the important-item inventory at that location. The ship rises, the final story scenes begin and the credits play.
Do not treat this as the start of a free-roaming ship campaign in the original game. The first Golden Sun ends after this scripted sequence. The ship's purpose here is to conclude the Lalivero ending and establish the continuation into Golden Sun: The Lost Age; the controllable sea journey belongs to the sequel.
Let the complete ending sequence and credits finish. If you quit before the save prompt, the Clear Data file may not be created. Keep the ordinary pre-final save intact until you have confirmed that the ending has played and that your desired save slot has been preserved.
- The dock at the northern end of the guarded area has been reached.
- The Black Orb has been used on the hidden ship.
- The ship has risen.
- The ending scenes and credits have been allowed to finish.
6. Save Clear Data and prepare an optional transfer
After the ending sequence, the game offers the opportunity to save Clear Data. Choose an unused or separate save slot whenever possible. A Clear Data file records the completed adventure for transfer purposes, but it is not a normal file for continuing to explore Lalivero or the overworld. Preserve your ordinary pre-final save if you want to keep playing that file, revisit optional content or retain a convenient backup.
If you want to transfer progress to Golden Sun: The Lost Age, return to the original game's title screen after creating Clear Data and use its Send function. That function allows the selected Clear Data file to produce a password or use a Game Link Cable, depending on the hardware and transfer method available. The password has multiple grades; the more comprehensive option transfers more of the first game's recorded progress, but the game does not require a transfer to complete its own ending.
Completion is confirmed when Saturos and Menardi, Fusion Dragon and the Black Orb ship sequence have all been completed, the credits have appeared and a Clear Data save exists if transfer is desired. There is no first-game Jupiter Lighthouse climb after this point. Jupiter Lighthouse, Lemuria's broader exploration and the sequel's controllable ship campaign belong to Golden Sun: The Lost Age.
- The credits have finished.
- Clear Data has been saved in a separate slot if transfer is desired.
- The ordinary pre-final save has not been overwritten unnecessarily.
- The Send function is available from the title screen if a password or cable transfer is needed.
- No Jupiter Lighthouse objective is expected in the original game.
Before you move on
- The final Venus Lighthouse Psynergy Stone was used.
- A normal save was made before taking the final slide.
- Saturos and Menardi were defeated.
- Fusion Dragon was defeated.
- The party returned to Lalivero.
- Iodem gave Isaac the Black Orb after the party left Faran's house.
- The guarded northwest building was entered.
- The Black Orb was used at the northern end of the dock.
- The hidden ship rose and the ending credits appeared.
- Clear Data was saved separately if transfer to Golden Sun: The Lost Age is planned.
- The original game was not treated as opening Jupiter Lighthouse or normal post-ending exploration.
References for this chapter
- Golden Sun — Official Game Boy Advance Manual
- Golden Sun — Guide and Walkthrough, Super_Slash
- Golden Sun — Guide and Walkthrough, Gravity81688, GameFAQs/GameSpot
- Golden Sun — Ending Walkthrough, Golden Sun Syndicate
- Golden Sun GBA Walkthrough — RetroMaggedon Gaming
- Golden Sun: The Lost Age — Data transfer reference
Immediate Aftermath and Ending: What Happens Next and Clearing the Credits
After Fusion Dragon falls, Golden Sun finishes its story through the Lalivero departure sequence, Babi’s ship and the credits. This chapter is a completion and transfer check, not another playable overworld chapter. A Clear Data file is created after the ending and is used to send completed-game information to Golden Sun: The Lost Age through Password or Cable. It is not a normal continuation file and does not return Isaac’s party to Lalivero for further exploration. Keep an ordinary save from before the final Venus Lighthouse commitment point if you still want to collect missed Djinn, explore Crossbone Isle, defeat Deadbeard or finish optional equipment work. Once Clear Data exists, reveal Send from the title screen or main menu, select the completed file and choose Password or Cable. Gold is the most complete password grade, but it is also lengthy, so record every screen carefully. Do not erase the ordinary save or Clear Data file until optional cleanup and transfer preparation are both finished.
Confirm that the story ending has been reached
The first-game story is complete only after both final encounters have been cleared: Saturos and Menardi, followed immediately by Fusion Dragon. Do not stop after the first battle. The game must continue through the return to Lalivero, the Black Orb sequence involving Iodem and Babi’s ship, the departure scenes and the credits.
You do not need to repeat any of those actions from this chapter. They belong to the final Venus Lighthouse and Lalivero sequence covered earlier in the guide. Use this chapter after the credits to verify the result and prepare a transfer, if desired.
A story-complete run does not require every Djinn, Crossbone Isle, Deadbeard or every optional item. Those are separate first-game goals. The ending is verified by the two final battles, the Lalivero departure sequence and the credits, not by reaching a particular Djinn total.
- Saturos and Menardi were defeated.
- Fusion Dragon was defeated immediately afterward.
- The Lalivero Black Orb and ship-departure sequence occurred.
- The ending scenes and credits played.
Save the Clear Data record without treating it as a normal adventure file
After the ending, follow the save prompt and store the completed result in an available save slot. The slot should be identified as Clear Data rather than as an ordinary location such as Lalivero or Venus Lighthouse. If you want transfer data, verify the slot display before turning the game off.
Clear Data is a completion record for transfer and related menu functions. It is not a post-ending save that places Isaac, Garet, Ivan and Mia back on the first game’s overworld. Loading or selecting it should not be treated as a way to resume ordinary exploration.
Preserve a separate ordinary save made before the final Venus Lighthouse commitment point. Use that file for missed Djinn, optional equipment, Crossbone Isle and Deadbeard. The first game does not open a conventional post-credits overworld chapter, and Babi’s ship is not converted into a free-roaming first-game vehicle.
If the only ordinary file was overwritten, Clear Data can still be used for transfer, but it cannot recreate the earlier exploration state. Optional cleanup then requires another ordinary save or another playthrough.
- The save slot is visibly marked Clear Data.
- Clear Data is not expected to load as a normal Continue file.
- An ordinary pre-final save is preserved for optional cleanup.
- Crossbone Isle and Deadbeard are treated as optional content.
Reveal the Send option
The Send option is hidden until the game has a Clear Data file. The most direct method is performed from the title screen while Press Start is displayed: hold Left on the Directional Pad and R, then press Start while continuing to hold both inputs. The main menu should appear with Send added to the menu choices.
The alternate method starts from the main menu. Hold Left and R, press B, and continue holding Left and R while the menu refreshes. Send should appear at the edge of the menu. Use the title-screen method first if the alternate input does not work.
If Send does not appear, check the save slot before changing the button timing. Confirm that the completed slot is marked Clear Data, that you are holding the R shoulder button rather than L, and that Left and R remain held while pressing Start or B. A normal adventure save is not enough to unlock the option.
Send does not resume the first game. It opens the transfer procedure for choosing a Clear Data file and then selecting Password or Cable.
- A Clear Data file exists before attempting the input.
- Send appears on the main menu.
- The intended Clear Data file is available for selection.
- Left and R are held together during the chosen input method.
Use Password transfer when recording the data manually
Choose Send, select the Clear Data file and choose Password. The game offers Bronze, Silver and Gold grades. Bronze transfers the basic completion information, Silver transfers more character information, and Gold preserves the most supported data, including broader character and inventory information. Gold is the longest option.
After selecting the grade, copy every displayed character in order. Password data is shown across multiple screens, so do not leave the display until all lines have been recorded. Take screenshots or write the lines down carefully if the password will later be entered into The Lost Age.
Treat the password as case-sensitive and preserve symbols exactly as displayed. One incorrect character can invalidate the entry. Keep the Clear Data file until The Lost Age accepts the password, especially when using Gold.
Password transfer is optional for completing Golden Sun. It is only needed if you want to carry the completed record into The Lost Age without using a compatible link cable.
- Password is selected from Send.
- The intended password grade is chosen deliberately.
- Every screen is recorded in order.
- Symbols and letter case are preserved.
- Clear Data remains intact until the receiving game accepts the password.
Use Cable transfer with compatible Game Boy Advance hardware
Choose Cable instead of Password when you have compatible hardware, both cartridges and a Game Link Cable. The original procedure uses two Game Boy Advance systems: Golden Sun on one system and The Lost Age on the other.
Select the Clear Data file in Golden Sun and follow the prompts on both systems. Cable transfer avoids manually copying the long Gold password, but it is still a transfer procedure rather than a way to turn Clear Data into a playable first-game postgame file.
Do not erase the Clear Data file immediately after starting the transfer. Wait until the receiving game reports that the transfer has completed. If the cable procedure fails, retain the Clear Data file and use Password transfer instead.
Whether you use Password or Cable, the transferred information is intended for The Lost Age. Neither method is required to replay Golden Sun’s ending or to verify that the first campaign was completed.
- Two compatible systems and the required cable are available.
- Golden Sun and The Lost Age are in the correct systems.
- The intended Clear Data file is selected.
- The receiving game confirms completion before the source file is erased.
Understand what remains unavailable after the credits
The original GBA game does not provide a conventional post-ending overworld chapter. There is no additional first-game campaign after the credits and no free-roaming ship sequence unlocked by raising Babi’s ship.
Anemos Inner Sanctum, Charon, Iris and Dullahan are not first-game post-ending unlocks. They belong to Golden Sun: The Lost Age and should not be listed as content opened by creating Clear Data in the original game.
Optional first-game content remains tied to an ordinary adventure save. If you want to complete the 28 Djinn collection, clear Crossbone Isle, defeat Deadbeard or collect missed equipment, load the preserved pre-final file rather than Clear Data. Battle Mode and Send are menu functions associated with completion data, not replacements for normal overworld exploration.
- No new post-ending overworld chapter is expected.
- Babi’s ship is not treated as a controllable first-game vehicle.
- Anemos Inner Sanctum and the sequel superbosses are excluded from first-game completion.
- Optional cleanup is performed from an ordinary adventure save.
Final completion and transfer check
For story completion, confirm the two final battles, the Lalivero Black Orb departure sequence and the credits. For transfer-ready completion, confirm those same story events plus a save slot marked Clear Data.
Open Send and verify that the completed file reaches the Password or Cable selection screen. You do not need to finish a transfer merely to complete Golden Sun, but you should record the password or confirm the cable result before deleting anything.
Keep the ordinary pre-final save for first-game cleanup and keep Clear Data for transfer. The two files serve different purposes: one restores normal adventure access before the finale, while the other preserves the completed record for transfer and completion-related menu functions.
The chapter is complete when the story ending is verified, the Clear Data slot is preserved if needed, Send opens successfully and the selected transfer method has either been recorded or confirmed.
- The final Venus Lighthouse battles are complete.
- The Lalivero departure sequence and credits are complete.
- A Clear Data slot exists when transfer is desired.
- Send reaches Password or Cable selection.
- The password is fully recorded or Cable transfer is confirmed.
- An ordinary pre-final save remains for optional first-game content.
- No post-ending overworld chapter or first-game Anemos Inner Sanctum is expected.
Before you move on
- Saturos and Menardi and then Fusion Dragon were defeated.
- The Lalivero Black Orb departure sequence and credits were completed.
- The file slot shows Clear Data when transfer is planned.
- Send appears after the documented Left-and-R input.
- The selected file reaches Password or Cable selection.
- The chosen password is completely recorded or Cable transfer is confirmed.
- An ordinary pre-final save remains for optional cleanup.
- No sequel-only dungeon or normal post-ending overworld chapter is being expected.
Optional Completion: All Djinn, Crossbone Isle and Sequel-Only Content
The original North American and European Game Boy Advance release of Golden Sun contains exactly 28 Djinn: seven Venus, seven Mars, seven Mercury and seven Jupiter. They are optional for the story ending, but collecting all 28 creates the strongest first-game transfer file for Golden Sun: The Lost Age. Crossbone Isle is the major optional dungeon. Its sixth floor contains Bane, the final Venus Djinni, and its deepest area ends with the optional superboss Deadbeard. Defeating Deadbeard lets you open the Demon Mail chest. Golden Sun has 16 standard elemental summon sequences unlocked through Djinn placed on standby; it has no collectible summon tablets. Anemos Inner Sanctum is not enterable in Golden Sun. It is a sequel-only dungeon in The Lost Age requiring transferred data, Teleport and the combined 72-Djinn total. Treasure Isle, Yampi Desert Cave and Islet Cave are also The Lost Age locations, not missing first-game areas.
Track all 28 Djinn by acquisition order
Use the Djinn menu and maintain a written checklist. The original game has 28 total, seven per element. The following acquisition order follows the normal campaign route and is suitable for identifying missed Djinn.
The early route gives you Flint outside Vale, Forge in Goma Cave, Gust in Bilibin, Granite in Kolima, Breeze in Tret Tree, Fever in Imil Falls Cave, Fizz with Mia in Mercury Lighthouse and Sleet inside Mercury Lighthouse. After reaching Fuchin and Mogall, collect Zephyr in Fuchin Falls Cave and Quartz in Mogall Forest.
Continue through Xian and Altin for Mist in Xian, Corona on the island north of Xian and Spritz in the lowest mine of Altin Peak. Smog is in Lamakan Desert. Vine is on the world map northeast of Kalay, and Scorch is in Kalay Tunnel. After obtaining the necessary return route and field abilities, collect Sap in Vault Cave and Kite in Vale Cave.
The Tolbi and Kalay section contains Ember in Tolbi, Hail on the world map northwest of Tolbi near the bridge, Ground at Kalay Docks and Squall in Altmiller Cave. Tonic is in Lunpa Fortress. Later, collect Flash in Suhalla Desert, Dew in Suhalla Gate, Torch in Lalivero and Luff in Babi Lighthouse. Bane is on the sixth floor of Crossbone Isle.
The final elemental totals must be Venus 7/7, Mars 7/7, Mercury 7/7 and Jupiter 7/7. Checking only the overall total can hide a missing Djinni if another list has been misread.
- Flint, Forge, Gust, Granite, Breeze, Fever, Fizz and Sleet.
- Zephyr, Quartz, Mist, Corona, Spritz, Smog, Vine and Scorch.
- Sap, Kite, Ember, Hail, Ground, Squall, Tonic and Flash.
- Dew, Torch, Luff and Bane.
- Djinn menu totals: Venus 7/7, Mars 7/7, Mercury 7/7 and Jupiter 7/7.
Clean up missed Djinn before entering Crossbone Isle
Golden Sun does not contain Teleport Psynergy. Do not plan first-game cleanup around Teleport, and do not search for it in Babi Lighthouse or Venus Lighthouse. Return through the world map, towns and dungeon entrances normally. Retreat is useful for leaving completed dungeons, but it does not replace ordinary travel between regions.
The easiest locations to overlook are the world-map Djinn and return visits: Vine northeast of Kalay, Corona north of Xian, Hail northwest of Tolbi, Ground at Kalay Docks, Sap in Vault Cave and Kite in Vale Cave. Luff is in Babi Lighthouse and requires following the optional upper route rather than simply walking through the required rooms.
For a fought Djinni, save before engaging. If it flees, leave the current screen and return; the encounter can be attempted again. Do not assume a fleeing Djinni has been permanently lost. For cleanup battles, keep healing and revival available. Setting every Djinni to standby can unlock stronger summons but may also damage class access to healing, revival and defensive Psynergy.
Collecting all 28 is optional for Golden Sun's ending. It matters primarily for transfer data and for unlocking the complete first-game summon progression in a properly completed file.
- Do not search Golden Sun for Teleport.
- Revisit world-map and optional dungeon locations before Crossbone Isle.
- Save before each fought Djinni.
- Confirm both the total count and each elemental total.
Reach Crossbone Isle from Suhalla Desert
Crossbone Isle is optional for the campaign but required for Bane and a complete 28-Djinn file. The reliable late-game route begins in Suhalla Desert after obtaining Reveal. Progress through the desert to the final screens and cast Reveal where the hidden footprints appear. Follow the footprints to the pink tornado and enter it. Do not cast Douse on this tornado if you want to reach the island; using Douse changes the encounter instead of transporting the party to Crossbone Isle.
A second route can occur during the passenger-selection event at Kalay Docks. That route is less dependable for completion because the selected passengers determine the result, and early access does not provide every field Psynergy needed for the deeper floors. The Suhalla route is the practical choice for a full clear.
At the island exterior, cast Growth on the plants and climb to the upper ledge. The slides lead to chests or to the cave entrance. Take the route that reaches the whirlwind-covered door, then cast Whirlwind to open it. Crossbone Isle has fixed guardian battles between several puzzle floors, so heal before each guarded entrance and use Retreat if you need to leave safely.
The deeper floors require abilities obtained later in the game. Cloak and Halt are needed for the moving-statue section, while Carry is required for lower puzzles. If the party reaches a blocked room, leave and return after obtaining the missing Psynergy instead of treating the dungeon as impossible.
- Reveal is available.
- The pink tornado is entered without using Douse.
- Growth and Whirlwind are available for the island entrance.
- Cloak and Halt are available before attempting the deeper statue puzzles.
- Carry is available before the lowest floors.
Collect Bane and defeat Deadbeard
Bane is on Crossbone Isle's sixth floor. Complete the room's pillar, ladder and ice-pillar routing until the Djinni is driven toward the lower-right section. Use Halt when Bane is positioned within range, then approach and collect it. Bane is not a story requirement, but it is the seventh Venus Djinni and is necessary for a 28/28 first-game file.
After collecting Bane, continue through the remaining floors if you want the complete dungeon clear. The lower route uses Carry puzzles and contains additional equipment, including cursed items. The Cleric's Ring is especially useful if you intend to use cursed equipment without its normal penalty. Restore HP and PP before the final ship area and create a separate save before approaching Deadbeard.
Deadbeard is an optional superboss, not the final story boss. He can attack twice in a turn and uses powerful physical attacks, multi-target Mars, Mercury and Jupiter Psynergy, Break to remove positive stat changes and self-enhancing Psynergy such as Guard, Ward and Impact. Keep Mia available for group healing, preserve a revival option and use defensive Djinn such as Granite or Flash when incoming damage becomes difficult to manage. Break is useful when Deadbeard raises his defenses or other enhancements.
A summon opening can shorten the battle, but do not place every Djinni on standby if doing so removes your healing or defensive class setup. A safer plan is to preserve at least one reliable healer, one revival method and enough set Djinn for stable classes. If the battle goes badly, reload the pre-battle save and change the Djinn arrangement rather than retracing the entire island.
After Deadbeard falls, open the chest at the northern end of the ship to receive Demon Mail. Then use Retreat or walk back through the exit route. Neither Deadbeard nor Demon Mail is required for Golden Sun's ending, although defeating him can add transfer-related completion value in The Lost Age.
- A separate save exists immediately before Deadbeard.
- Bane has been collected on the sixth floor.
- Healing, revival and defensive Djinn remain available.
- Deadbeard has been defeated if pursuing full optional completion.
- The Demon Mail chest has been opened.
Separate first-game summons from The Lost Age content
The original Golden Sun uses 16 standard elemental summon sequences: four Venus, four Mars, four Mercury and four Jupiter. They become available by placing the required number of that element's Djinn on standby. No summon tablets need to be collected in the first game.
Do not add Moloch, Thor, Daedalus, Charon, Iris or other tablet-based sequel summons to a Golden Sun-only checklist. The first-game completion target is 28 Djinn and access to all 16 standard elemental summon levels, not a number of tablets.
Anemos Inner Sanctum belongs exclusively to Golden Sun: The Lost Age. In that sequel, the party reaches the Anemos Sanctum area in Contigo using Teleport, then opens the inner door after collecting the combined 72 Djinn from both GBA games. Charon is a summon tablet found in the dungeon, and Iris is awarded after defeating Dullahan. These are not obtainable in the original Golden Sun.
Treasure Isle, Yampi Desert Cave and Islet Cave are also The Lost Age locations. They must not be used to fill gaps in a first-game Djinn route. A transfer file can be prepared with all 28 first-game Djinn, but the sequel still contains its own additional Djinn and content requirements.
- All 16 standard first-game summon sequences are available through Djinn standby requirements.
- No summon-tablet count is needed for Golden Sun alone.
- Anemos Inner Sanctum is marked as The Lost Age-only.
- Charon, Iris and Dullahan are excluded from first-game completion.
- Treasure Isle, Yampi Desert Cave and Islet Cave are excluded from the original-game route.
Before you move on
- The Djinn menu shows 28 total: seven Venus, seven Mars, seven Mercury and seven Jupiter.
- The named list includes Bane in Crossbone Isle and Luff in Babi Lighthouse.
- Crossbone Isle has been cleared and Deadbeard defeated if pursuing complete optional first-game content.
- The Demon Mail chest has been opened after Deadbeard's defeat.
- All 16 standard first-game summon sequences are available through Djinn requirements.
- The completed Golden Sun save is preserved for optional transfer to The Lost Age.
- Anemos Inner Sanctum, Charon, Iris, Dullahan, Treasure Isle, Yampi Desert Cave and Islet Cave are correctly identified as The Lost Age content.
References for this chapter
- Golden Sun — Guide and Walkthrough — Djinn list and Crossbone Isle route
- Golden Sun — Guide and Walkthrough — Crossbone Isle and Djinn mechanics
- Golden Sun — Boss Guide, LinkTheValiant
- Crossbone Isle — Golden Sun Universe
- Anemos Inner Sanctum — Golden Sun Universe
- Golden Sun — Official Game Boy Advance Manual
Appendix: Boss Strategy Sheets, Equipment Recommendations and Completion Checklist
Use this appendix to prepare for Golden Sun’s required and optional boss encounters, recover after failed attempts, and verify completion of the original Game Boy Advance campaign. Keep Djinn set during exploration so characters retain their normal class statistics and Psynergy. Defensive Djinn such as Granite and Flash can create openings, but Mia must retain enough healing capacity for extended fights. The required ending consists of clearing the story route through Mercury Lighthouse and Venus Lighthouse, defeating Saturos and Menardi, defeating Fusion Dragon, watching the Lalivero ending sequence and saving the resulting Clear Data file. Deadbeard, Crossbone Isle and collecting all 28 first-game Djinn are optional. Golden Sun has no first-game summon-tablet checklist; its summons are unlocked through Djinn combinations. A Clear Data file enables the hidden Send menu for optional transfer to Golden Sun: The Lost Age.
Prepare the party and Djinn before major bosses
Keep the party’s strongest Djinn set while travelling and before boss approaches. Setting Djinn preserves the character’s normal class progression, statistics and Psynergy. Placing many Djinn on standby may enable stronger summons, but it can also weaken the user’s class and reduce useful abilities. Do not sacrifice a reliable healer merely to reach a higher summon tier.
Isaac and Garet should use the best current weapons, armor, shields and helmets available from the latest town. Prefer a substantial defensive improvement over a minor attack increase. Keep Ivan equipped for speed and Jupiter Psynergy, and give Mia the best available robe, circlet and staff. Restore HP and PP at a Sanctum before entering a boss route. Carry Herbs or Nuts for emergency healing, Psy Crystals for long routes and Waters of Life or equivalent revival items. Preserve a separate save before the Venus Lighthouse summit and before optional Deadbeard attempts.
- Current weapons, armor, shields and headgear are equipped.
- Mia has enough PP to use Wish or Wish Well repeatedly.
- At least one reliable revival method remains.
- A separate pre-final save is available.
Early and midgame boss reference
Killer Ape is best handled as a focused endurance fight. Keep the party healthy, concentrate attacks on the boss and use available elemental Psynergy rather than spending every Djinni immediately. Granite or another defensive Djinni can reduce the danger of the opening turns, after which the party can return to ordinary attacks and healing.
Toadonpa is optional and is vulnerable to status effects as well as fire-based attacks. Use Fire Psynergy, summons or strong physical attacks while Mia heals when necessary. Toadonpa’s Thrash can reduce a character to very low HP, so do not ignore a weakened party member even if the boss appears close to defeat. There is no need to invent a support-enemy phase for this battle; focus on Toadonpa itself.
Kraken is a required route boss and can damage several characters during a long fight. Heal before multiple characters become critical, use the strongest appropriate Psynergy and preserve enough PP for recovery. If the party is running out of PP, retreat to the nearest safe town, restore, upgrade equipment and return. Saturos at Mercury Lighthouse is also required. Use defensive Djinn early, keep Mia healing and avoid entering with the party weakened by unnecessary standby assignments.
- A failed attempt has been diagnosed as damage, healing or PP loss.
- The party returns to town before recovery supplies are exhausted.
- At least one character remains dedicated to healing or emergency support.
Deadbeard and Crossbone Isle are optional
Deadbeard is not required for the canonical ending. Enter Crossbone Isle only when the party has strong late-game equipment, broad Djinn coverage and reliable healing. Save before approaching the ship and keep enough recovery items for the required Venus Lighthouse route. Deadbeard can act repeatedly and uses attacks associated with more than one element, so a single-element resistance plan is unreliable.
Begin with defensive Djinn when the party is threatened, then use controlled offensive Djinn, Psynergy and summons. If Deadbeard raises his statistics, use Break when available to remove those boosts. Keep enough PP and Djinn for healing; an opening summon rush that leaves Mia unable to recover the party is a poor trade. If the battle is lost, retreat, restore completely and revise the setup rather than repeatedly entering with depleted resources. Crossbone Isle, its equipment and Deadbeard’s reward have no effect on the Venus Lighthouse ending.
- The optional dungeon has its own save point or backup save.
- The party can heal without relying entirely on Djinn that must recharge.
- Required final-sequence supplies are not being spent on repeated attempts.
Saturos and Menardi: conserve resources for Fusion Dragon
At Venus Lighthouse, restore HP and PP at the Psynergy Stone before advancing toward the summit. The final slide is the point of no return: after descending it, the party reaches the aerie and proceeds through the story scenes and consecutive final battles without a normal town visit. Save before using the slide and confirm that the party’s classes, equipment and Djinn assignments are ready.
Saturos and Menardi are both vulnerable to Mercury attacks. Saturos can use Potent Cure and defensive Psynergy, while Menardi can heal and strengthen her side, so focus fire rather than spreading damage unnecessarily. Menardi’s Death Size can severely damage or immediately down a character, making her a reasonable first target. If Saturos’s healing is repeatedly extending the fight, defeating him first is also valid. Use Granite and Flash when the opening turns are dangerous, but do not spend every defensive option without considering the Fusion Dragon battle that follows.
Mia should normally preserve her PP for Wish or Wish Well. Isaac, Garet and Ivan can use Djinn, Psynergy and physical attacks while spent Djinn recover. As one opponent nears defeat, stabilize the party instead of ending the battle with everyone critically wounded. There is no recovery screen between this fight and Fusion Dragon.
- The party is healed before the final slide.
- Mia has substantial PP remaining.
- At least one revival method and emergency healing items remain.
- The pre-summit save has not been overwritten.
Fusion Dragon: required final confrontation
Fusion Dragon acts twice per turn and is vulnerable to Mercury attacks. Dragon Driver and Outer Space can inflict severe group damage, and repeated dangerous actions can defeat characters before the next command cycle. Keep HP high enough to survive more than one action instead of waiting until a character is nearly down.
Mia should normally use Wish or Wish Well, revive a fallen character when necessary and attack only when the party is stable. Isaac and Garet can alternate strong attacks, Venus or Mars Djinn and summons. Ivan can provide support Psynergy, use Jupiter attacks or summon when healing is under control. Granite and Flash are useful timing tools, especially before a predicted dangerous turn, but do not assume either one makes the party invulnerable.
If Djinn were used during the first final battle, use ordinary attacks and Psynergy while they reset. Use Psy Crystals, Waters of Life and other consumables freely because this is the end of the campaign. Do not reset after victory; allow the cutscenes to play until the party returns to Lalivero and the Black Orb sequence becomes available.
- Fusion Dragon is defeated.
- The ending scenes play without resetting.
- The party returns to Lalivero for the final story sequence.
Lalivero ending, Clear Data and transfer preparation
After the Fusion Dragon battle and the Lalivero scenes, regain control and leave the house when prompted. Speak with Iodem outside, then go to the northwestern part of Lalivero and pass the soldier blocking the route. Follow the path to the sunken ship, face it and use the Black Orb. This triggers the final ending sequence; the ship is part of the first game’s ending and is not a free-roaming eastern-sea vehicle.
When the game offers the Clear Data save, save it in a clearly identified slot. Clear Data is not a normal continuation save, so retain the separate pre-final adventure save if you want to preserve ordinary exploration. The ending is complete when the required lighthouse route is finished, Saturos and Menardi are defeated, Fusion Dragon is defeated, the ending scenes are viewed and Clear Data is saved.
For optional transfer to The Lost Age, return to the Golden Sun title screen with a Clear Data file present. Hold Left on the D-pad and R, then press B or Start to reveal Send. Choose the Clear Data file, then choose Password or Cable. Bronze, Silver and Gold passwords preserve progressively more information; record the selected password exactly, including capitalization and symbols. Do not erase the Clear Data file until the password has been checked or the cable transfer has completed.
- The Black Orb is used at the Lalivero ship.
- The ending and credits are viewed.
- A Clear Data file is saved.
- The pre-final ordinary save remains available.
- The Send menu appears if transfer is desired.
- The selected transfer password is recorded exactly.
Before you move on
- Mercury Lighthouse and Venus Lighthouse story progression is complete.
- Saturos and Menardi have been defeated.
- Fusion Dragon has been defeated.
- The Lalivero Black Orb sequence has been completed.
- The ending scenes and credits have been viewed.
- A Clear Data file has been saved.
- A separate pre-final ordinary save remains available.
- All 28 Djinn and Deadbeard remain optional goals.
- No summon-tablet collection is required for original Golden Sun.
- The Send menu and transfer password have been recorded if The Lost Age data transfer is wanted.
References for this chapter
Finishing up
Saturos and Menardi and then Fusion Dragon have been defeated at Venus Lighthouse.
The post-battle Lalivero sequence has been completed and the Black Orb has been used on Babi's ship.
The ending scenes and credits have played and a Clear Data file has been saved if transfer is wanted.
The original game's required progression is complete; there is no first-game Jupiter Lighthouse, Mars Lighthouse or Lemuria chapter afterward.
All 28 Djinn and Crossbone Isle/Deadbeard remain optional completion goals rather than requirements for the canonical ending.
Choose your next gameScreenshots & video
Game imagery for reference. Follow the written chapters above for the route and strategies.
Sources & references
Our original guide draws on the references below. Check the edition at the top of this page before following controls or unlock requirements.
- Golden Sun — Official Game Boy Advance Manual
- Golden Sun Guide and Walkthrough, GameFAQs: Psynergy and Controls
- Golden Sun — Guide and Walkthrough — Djinn list and Crossbone Isle route
- Golden Sun/Sol Sanctum — StrategyWiki
- Golden Sun/Vale — StrategyWiki
- Golden Sun GBA Walkthrough — RetroMaggedon Gaming
- Golden Sun FAQ/Walkthrough — Neoseeker
- Golden Sun - Guide and Walkthrough - Game Boy Advance - By BF_Gamer
- Golden Sun — Guide and Walkthrough — Crossbone Isle and Djinn mechanics
- Golden Sun - Guide and Walkthrough by jesterguy
- Golden Sun FAQ/Walkthrough Final - Neoseeker Walkthroughs
- Golden Sun — Guide and Walkthrough, Super_Slash
- Golden Sun — Guide and Walkthrough by Starvenus
- Golden Sun - Guide and Walkthrough - Game Boy Advance - By AmericanArsenal
- Golden Sun — Guide and Walkthrough — Game Boy Advance — Mercury Lighthouse and aftermath
- Golden Sun/Mercury Lighthouse — StrategyWiki
- Golden Sun/Kolima Forest — StrategyWiki
- Golden Sun/Imil — StrategyWiki
- Golden Sun — Condensed Walkthrough
- Mercury Lighthouse — Golden Sun Universe
- Golden Sun Quick Walkthrough - Golden Sun Universe
- Douse Drop, Golden Sun Universe
- Golden Sun — Guide and Walkthrough, Gravity81688, GameFAQs/GameSpot
- Nintendo UK — Game Boy Advance Games Manuals
- Crossbone Isle — Golden Sun Universe
- Golden Sun/Suhalla Desert – StrategyWiki
- Tunnel Ruins - Golden Sun Universe
- Babi Lighthouse - Golden Sun Universe Fandom
- Venus Lighthouse - Golden Sun Universe
- Lalivero - Golden Sun Universe
- Golden Sun: The Lost Age - Password
- Crossbone Isle - Golden Sun Universe
- Golden Sun Crossbone Isle - StrategyWiki
- Crossbone Isle Walkthrough - Golden Sun
- Golden Sun Psynergy Guide - Game Boy Advance
- Golden Sun — Ending Walkthrough, Golden Sun Syndicate
- Golden Sun: The Lost Age — Data transfer reference
- Golden Sun - Send Option FAQ - Game Boy Advance
- Golden Sun: The Lost Age Instruction Manual
- Golden Sun FAQ/Walkthrough v2.0 - Iron Knuckle
- Golden Sun FAQ/Walkthrough - Send Option and Transfer
- Golden Sun — Boss Guide, LinkTheValiant
- Anemos Inner Sanctum — Golden Sun Universe
- Golden Sun/Venus Lighthouse — StrategyWiki
- Golden Sun: Fusion Dragon — Golden Sun Universe
About the game & collecting notes
- Platform
- Game Boy Advance
Step-by-step walkthrough for the original Golden Sun on Nintendo Game Boy Advance, covering the mandatory route from Vale through Sol Sanctum, Vault, Goma Cave, Bilibin, Kolima, Mercury Lighthouse, Mogall Forest, Xian, Altin, Lamakan Desert, Kalay, Tolbi, Colosso, Suhalla Desert, Suhalla Gate, Lalivero, Babi Lighthouse, Tunnel Ruins, the true Venus Lighthouse and the ending sequence. The Fuchin Temple and Fuchin Falls Cave detour is optional for the ending but recommended for Force, Zephyr and its rewards. Optional coverage includes all 28 first-game Djinn, Crossbone Isle, Deadbeard, equipment cleanup and Clear Data transfer preparation. Lemuria, Jupiter Lighthouse, Mars Lighthouse, summon tablets and other The Lost Age content are excluded or clearly labeled sequel-only.
Darryl Polo
Darryl Polo loves tinkering with emulation and revisiting retro games. He enjoys exploring how old favorites play on different setups and sharing what he learns along the way. At Joking Joystick, he writes about the games, hardware, and small discoveries that keep the hobby fun.
Our editorial standardsFound a step that needs another look? Help us improve this guide.