
Final Fantasy (20th Anniversary Edition) — PSP (North America) Complete Campaign Walkthrough
Practical, start-to-finish coverage for Square Enix’s North American PlayStation Portable release of the 20th Anniversary version of the original Final Fantasy. The route follows Cornelia, Pravoka, the Crown and Astos sequence, the Earth Cave and Cavern of Ice, the Airship, Mount Gulg, Sunken Shrine, Flying Fortress, the past Chaos Shrine, and Chaos, with PSP bonus dungeons clearly separated as optional content.

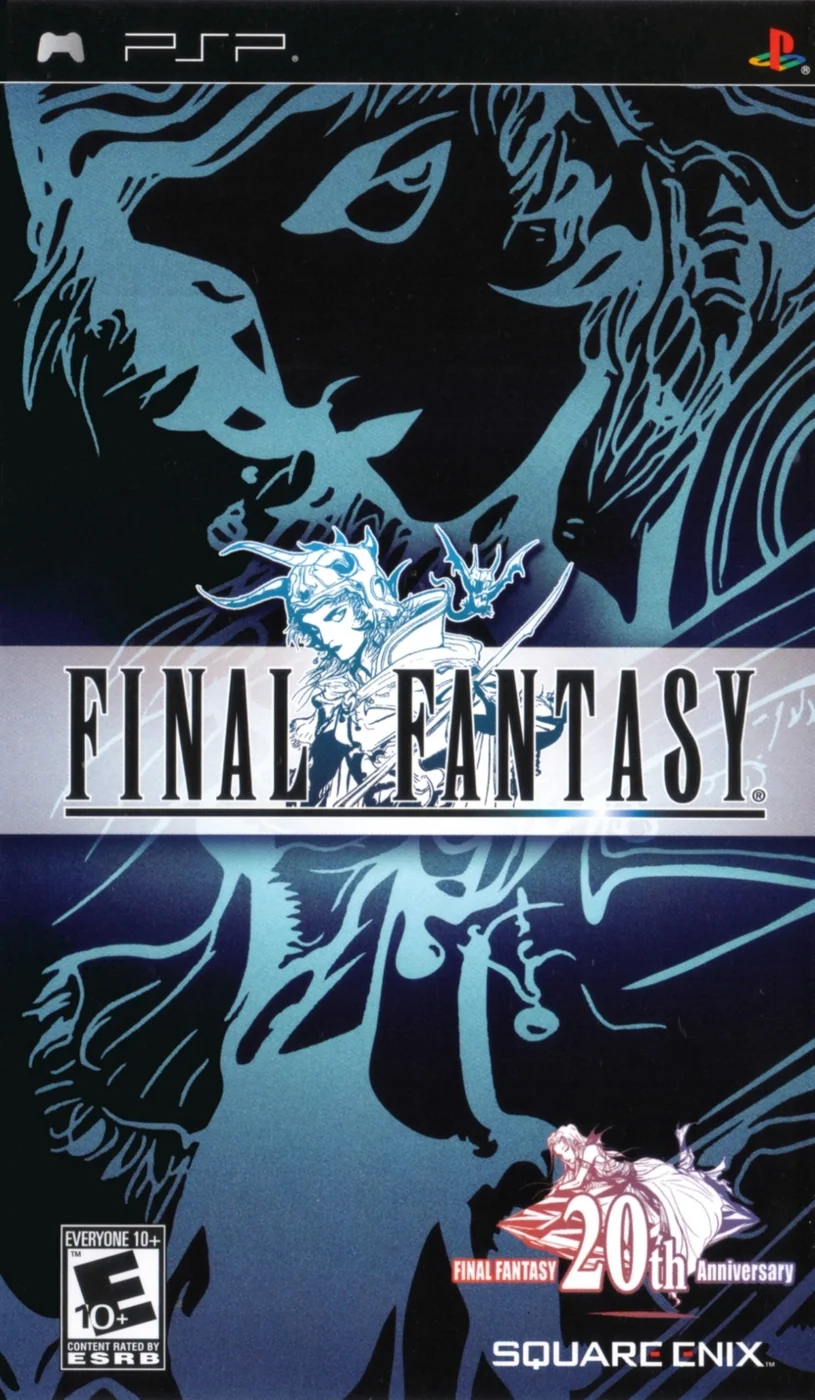
Find a copy
Final Fantasy PSP
We may earn a commission if you buy through these links, at no extra cost to you. As an Amazon Associate I earn from qualifying purchases.
Opens retailer search results. Check the model, edition, seller, availability and current price before buying.
Before you begin
You are playing the North American 20th Anniversary PSP edition of the original Final Fantasy.
This edition updates presentation and audio for PSP while preserving the core campaign: create a four-character party, gather key items, defeat the four elemental Fiends in their required dungeons, restore the crystals, travel through the past Chaos Shrine, and defeat Chaos.
Keep separate in-game saves before major dungeons and bosses, and make external backups when possible.
This walkthrough is written for the PSP release and focuses on concrete required progression.
Each chapter lists objectives, preparation, hazards, recovery steps, and a completion check while separating required progress from optional PSP bonus content.
Use the game's actual Configuration options, including language, dash behavior, cursor behavior, message speed, controls, window color, and Bestiary settings. The PSP's hardware volume controls audio output; do not expect a modern subtitle toggle.
If you want a faster run, follow the required objectives; if you want optional-content completion, use the clearly marked Soul of Chaos and Labyrinth of Time sections.
Set yourself up for the run
Install and test the UMD or official PSP digital package, set the game language to English, Japanese, or Japanese Kana as desired, and confirm save access to Memory Stick Duo or Memory Stick PRO Duo storage.
Use a secondary save slot for backups before major boss fights.
The PSP manual supports up to twenty manual save files per Memory Stick Duo. Use an active progress file, a checkpoint file, and a rollback file as a practical routine rather than treating three files as the system limit.
Open the in-game Configuration menu and review Dash, Cursor, Message Speed, Controls, Window Color, Bestiary, and Language Settings.
Use the documented default controls consistently unless you deliberately remap them: Start opens the field menu, Circle confirms and interacts, Cross cancels and dashes with a direction, Triangle opens the Bestiary, and L/R change pages where available.
Use Select plus Triangle to display the map under the documented default control layout. If controls have been remapped, use the reassigned map command shown by the game.
Decide your party’s classes at the start and plan role coverage: at least one frontline physical attacker, one healer or White Magic user, one Black Magic user or secondary physical attacker, and one support or Red Mage type.
This balance covers early-game dungeon demands.
Stockpile basic consumables at the first few shops: Antidotes, Echo Grass, and Potions or stronger healing items as they become available.
Check shops in each major town after clearing nearby dungeons for upgraded gear and spells.
Familiarize yourself with the PSP's presentation changes and printed manual notes for control mappings.
If you use a PSP emulator, confirm the build is compatible with the official PSP release; real hardware behavior is authoritative.
Keep a small handbook listing major key items you need to carry between towns, such as the Lute, Crown, Nitro Powder, and Levistone.
Mark which items are required to access subsequent dungeons so you do not backtrack without purpose.
If you want optional content, be prepared for additional exploration and stronger encounters; allocate extra playtime and periodic save backups before optional bosses.
PSP Edition Setup and Controls
Identify the North American Final Fantasy PSP release, prepare Memory Stick storage, configure the available game options, learn the default PSP controls, and establish safe active, checkpoint, and rollback saves before entering the Chaos Shrine.
Verify the North American release and prepare the PSP
The North American PSP release is Final Fantasy, product code ULUS-10251. The product code identifies the Final Fantasy 20th Anniversary PSP release; it is not the ULUS-10264 release used by a different PSP title. Community listings may append labels such as System 3.03 or FW3.03 to a UMD image or dump. Treat those labels as compatibility metadata rather than a separate gameplay edition or control scheme.
For a UMD copy, insert the disc with the label facing away from the PSP, close the disc cover, open the Game section of the PSP home menu, select the UMD icon, and launch the game. Do not eject the UMD while it is playing or while the system is reading data. If you are using an official installed copy, launch it from the PSP Game section. The story route and controls in this chapter apply to the North American PSP game itself.
Insert a Memory Stick Duo or Memory Stick PRO Duo before starting a new file. The software manual specifies that 672 KB of free space is required for saving. From the PSP home menu, open Game and Saved Data Utility to confirm that the card is detected. If it is not recognized, shut down the PSP before removing or reinserting it, then check Saved Data Utility again. Do not begin the campaign until the card is writable and the system can display its saved-data contents.
- The game is identified as Final Fantasy for PSP, product code ULUS-10251.
- The UMD or official installed copy launches from the PSP Game section.
- The Memory Stick is detected in Saved Data Utility.
- At least 672 KB of free space is available.
- System 3.03 or FW3.03 labels are being treated as compatibility metadata, not gameplay versions.
Select the language and review Configuration
The first launch displays the language settings screen. The North American PSP release offers English, Japanese, and Japanese Kana. Select the language you want before beginning the campaign. This changes displayed text but does not change the required story route. If the initial language screen no longer appears because configuration data already exists, open Language Settings from the in-game Configuration menu.
Press Start on the field screen to open the field menu, then select Configuration. Review the available settings before creating or loading a party. The Configuration menu includes Dash, Cursor, Message Speed, Controls, Window Color, Bestiary, and Language Settings. Set Message Speed to a readable setting, especially if you are unfamiliar with the spell names and battle commands. Cursor behavior can be adjusted according to whether you want menus to remember their previous position.
Controls allows the button assignments to be changed. Leave the default arrangement in place during the setup test unless a physical button problem requires another layout. If you change the assignments, record the new arrangement before entering the first dungeon. Directions in this chapter assume the documented default North American layout.
There is no separate modern subtitle switch in this release. Dialogue is displayed as text according to the selected language, while Message Speed controls how quickly text advances. PSP hardware volume buttons control sound output outside the game’s text and language settings. The printed software manual is separate from the in-game Configuration menu: the manual explains the controls and systems, while Configuration is where adjustable game settings and Bestiary options are changed.
- English, Japanese, or Japanese Kana is selected.
- Message Speed is readable during dialogue and battles.
- Dash and Cursor behavior have been reviewed.
- Controls has been inspected and left at a known layout.
- Window Color, Bestiary, and Language Settings have been reviewed.
- No nonexistent subtitle toggle is being expected.
- PSP hardware volume controls are understood to be separate from Configuration.
Learn the verified default controls
Use the D-pad or analog stick to move the party and navigate menus. Circle confirms selections and is used to talk to people, search objects, open chests, and interact with field features when the character is facing them. Circle also confirms character, class, spell, item, equipment, and target selections.
Press Start on the field or world map to open the main menu. Use this menu to review Items, Magic, Equipment, Status, Formation, Configuration, and Save. Check current HP and MP, learned magic, gil, equipment, and the party’s location before entering a dungeon or traveling through a dangerous area.
Press Cross to cancel, return to the previous screen, or dash when held together with a direction. Dashing speeds movement through towns and overworld areas, but it does not prevent random encounters. Use it to cross familiar routes quickly, not as a substitute for healing or preparation.
Press Triangle to open the Bestiary from the field screen. Defeated monsters are recorded automatically, and the Bestiary can be used to review entries. Press L or R to switch pages wherever page controls are shown. During battle, holding both L and R is used to attempt a party-wide escape; fleeing is not guaranteed and some encounters may prevent escape.
Press Select and Triangle together from the field screen to display the map. Use the map to check the world view, enlarge the relevant area, and review discovered locations. Test this shortcut before leaving Cornelia so you are not trying to learn it while navigating the Chaos Shrine.
- Circle confirms and interacts with people, objects, menus, and targets.
- Start opens the field menu.
- Cross cancels, returns to the previous screen, and dashes with a direction.
- Triangle opens the Bestiary.
- Select plus Triangle displays the map.
- L and R switch pages where page controls are available.
- Holding L and R during battle attempts a party-wide escape.
Create and test the first save
The game saves through the Save command in the field menu. Press Start, choose Save, select a file with the directional buttons, and press Circle to confirm. The manual allows up to twenty separate save files on one Memory Stick Duo. It also states that deleted saved data cannot be retrieved, so do not delete a file merely to tidy the list.
Use one file as the active progress file. Use a second file as a checkpoint before entering a dungeon, triggering a major story event, or attempting a boss. Use a third file as a rollback file kept at a town or another reliable recovery point. This three-file arrangement is a practical safety routine, not the total save capacity. Preserve older files until the next major objective has been completed and checked.
Start a new game and create the four Warriors of Light. Immediately after entering the world, press Start and visit Items, Equipment, Formation, Configuration, and Save so their locations are familiar. Move outside Cornelia and allow one ordinary battle to begin. Confirm battle commands with Circle, use Cross to return to an earlier command window if needed, and do not hold L and R unless you intend to attempt escape.
After the test battle, return to Cornelia, use the inn if necessary, and make an active save. Save a second copy as the pre-dungeon checkpoint and preserve a third copy at the safe rollback position. Load the test save from the title screen and verify that the party’s location, gil, equipment, experience, HP, and MP are intact. If the load fails, stop overwriting files and return to the last known-good save.
For an especially valuable campaign, connect the PSP to a computer through USB and copy the Final Fantasy savedata folder after returning safely to the PSP home menu. An external copy can help if the Memory Stick develops read errors, but it does not replace separate in-game files. Never remove the Memory Stick while data is being written or loaded.
- A new four-character party has been created.
- A test battle has been completed.
- An active progress file has been saved.
- A separate checkpoint file has been saved.
- A town or completed-objective rollback file has been preserved.
- The test save has been loaded successfully.
- The twenty-file limit and irreversible deletion warning are understood.
Complete the setup before the Chaos Shrine
Before leaving Cornelia, inspect every character through Equipment and Formation. Equip the best immediately available weapon and armor for each class, place a sturdier physical character toward the front of the formation, and keep the party healed. Visit the item shop and carry basic recovery supplies appropriate to your available gil. The first dungeon is close to Cornelia, but returning to town after a defeat is safer than entering with damaged equipment or depleted resources.
Open Configuration once more with Start and confirm the button arrangement. Walk a short distance outside Cornelia, complete one battle, and verify the controls without changing assignments. Press Start to open the field menu, Circle to interact and confirm, Cross to cancel or dash, Triangle to open the Bestiary, and Select plus Triangle to display the map. Save again after returning to town.
The setup chapter is complete when the PSP launches the correct North American release, the Memory Stick accepts and reloads a test save, the desired language is selected, Configuration has been reviewed, and three useful save positions are available. The next gameplay objective is to travel from Cornelia to the Chaos Shrine, defeat Garland, rescue Princess Sarah, and return to Cornelia to advance the opening route.
- The party is healed before leaving Cornelia.
- Equipment and Formation have been checked.
- Basic recovery supplies have been purchased.
- The corrected default controls have been tested in the field and in battle.
- A preserved pre-Chaos Shrine save exists in a separate file.
- The next objective is clear: enter the Chaos Shrine and defeat Garland.
Before you move on
- The North American Final Fantasy PSP release boots successfully.
- The product code is recorded as ULUS-10251.
- The Memory Stick is detected and a test save has been created and reloaded.
- English, Japanese, or the intended Japanese Kana language is selected.
- Dash, Cursor, Message Speed, Controls, Window Color, Bestiary, and Language Settings have been reviewed.
- Start opens the field menu.
- Circle confirms and interacts.
- Cross cancels, returns to the previous screen, and dashes with a direction.
- Triangle opens the Bestiary.
- Select plus Triangle displays the world map.
- L and R switch pages where page controls are available.
- The player understands that up to twenty manual save files can be maintained on the Memory Stick Duo.
- Active, checkpoint, and rollback files have been created as a recommended routine.
- A healed and equipped party has been saved before entering the Chaos Shrine.
- The next objective is clear: travel from Cornelia to the Chaos Shrine and defeat Garland.
Party Creation and Class Strategy
Final Fantasy on PSP asks you to choose four permanent party members from six classes. For a first campaign, Warrior, Monk, White Mage, and Black Mage is a dependable all-purpose team. Warrior supplies defense, Monk provides strong physical damage without expensive weapon upgrades, White Mage handles healing and revival, and Black Mage covers elemental damage. Other combinations work, but your starting choices cannot be replaced or changed later, so decide before naming the characters.
1. Choose four permanent classes
At the opening party-creation screen, select four characters from Warrior, Thief, Monk, Red Mage, White Mage, and Black Mage. The PSP version uses Warrior and Monk; older North American guides may call those same classes Fighter and Black Belt. Each selected character remains in the party for the entire file. There is no recruitment system that lets you dismiss a weak character and bring in a different class later.
The safest first-time party is Warrior, Monk, White Mage, and Black Mage. It has two physical attackers, a dedicated healer, revival access, and broad elemental offense. The Warrior is the most forgiving opening class because of strong armor and weapon access. The Monk costs less to maintain than another weapon-focused fighter, while the two mages cover problems that physical attacks cannot always solve.
A more conventional equipment-focused party is Warrior, Thief, White Mage, and Black Mage. The Thief is less impressive at the start but becomes more useful after the class change. Choose Warrior, Red Mage, White Mage, and Black Mage if you want flexible support and are willing to give up a second dedicated physical attacker.
- Recommended beginner party: Warrior, Monk, White Mage, Black Mage.
- Keep a White Mage if you want the most reliable healing and revival throughout the campaign.
- Remember that party selection cannot be changed after the opening screen.
- Use legacy guide names as follows: Fighter means Warrior, and Black Belt means Monk.
2. Use the Warrior as the defensive anchor
The Warrior is the party’s strongest early defensive class. Give this character the best practical armor, shield, and weapon available in each new town, then place the Warrior among the first characters in the party order. In ordinary battles, attack with the Warrior unless a spell or item is more urgent. This class is especially valuable before the party has accumulated enough spell charges to solve every encounter with magic.
Do not spend all of your early gil on weapons while leaving the Warrior in weak armor. A stronger weapon shortens some fights, but defensive upgrades help the Warrior survive every encounter. When funds are limited, buy equipment that improves survivability first, then purchase important spells and healing supplies.
After the optional class-change quest, the Warrior becomes a Knight. The Knight gains access to more equipment and can use a limited selection of White Magic, including low-level support and healing spells. Knight magic is useful as backup, but it does not replace the White Mage.
- Buy the Warrior’s most useful armor and shield before luxury upgrades for other characters.
- Keep the Warrior near the front of the party order.
- Treat Knight magic as emergency support rather than your main healing plan.
3. Build the Monk around bare-handed combat
The Monk is a physical damage class that relies primarily on levels and unarmed attacks. This makes the Monk economical: you do not need to keep buying a succession of expensive weapons for this character. Equip usable defensive armor when available, but direct the largest weapon budget toward the Warrior or another weapon user.
The Monk may feel less dominant at the very beginning, especially while the party is still gaining levels, but its unarmed damage improves as the campaign continues. Use the Monk to attack ordinary enemies and bosses while the mages preserve spell charges for dangerous groups or recovery.
The Monk cannot use magic before or after promotion. After the class change, the Monk becomes a Master, but it remains a physical-only class. This makes the Monk a strong damage choice, not a substitute for healing, elemental coverage, or status recovery.
- Avoid buying expensive weapon upgrades for the Monk unless testing shows a specific item is useful.
- Keep the Monk equipped with practical armor rather than leaving every slot empty.
- Expect the Monk’s damage to improve with levels instead of immediately after the first shop visit.
- Remember that Master still cannot cast magic.
4. Give the White Mage and Black Mage clear jobs
The White Mage is the party’s most dependable recovery class. Buy useful White Magic when a town offers it, especially healing, revival, status recovery, and defensive spells. During exploration, heal between battles when doing so saves Potions, but do not consume every spell charge before reaching a boss. Protect the White Mage from unnecessary attacks because losing the party’s main healer can turn a manageable battle into a retreat.
The White Mage becomes a White Wizard after class change and gains access to the full White Magic selection, subject to the game’s spell-level and charge restrictions. This is one of the clearest long-term improvements in the party system.
The Black Mage is the dedicated offensive caster. Purchase different elemental spells instead of filling every slot with attacks of one element. Fire, Ice, and Lightning coverage lets the party exploit weaknesses across different regions, while utility or status spells can be more useful than a second similar attack. The Black Mage becomes a Black Wizard and eventually gains access to the strongest Black Magic, but its low durability means it should not be treated as a frontline fighter.
A White Mage and Black Mage together provide the most reliable specialist coverage. If you omit one, make sure another class is deliberately filling that role rather than assuming general-purpose attacks will solve every dungeon.
- Use the White Mage for primary healing, revival, and status recovery.
- Use the Black Mage for elemental weaknesses and groups of vulnerable enemies.
- Preserve enough spell charges for emergencies and boss fights.
- Keep both specialist mages away from the most exposed party positions when possible.
5. Decide whether Red Mage or Thief fits your run
The Red Mage combines physical combat with White and Black Magic. It is useful early because it can attack, provide backup healing, and contribute offensive spells while wearing better equipment than a pure mage. It is a flexible support class, but it does not have the White Mage’s full healing role and cannot use the party-wide Heal spells that make long dungeon trips safer. For a first run, use Red Mage alongside a White Mage rather than treating it as a complete replacement.
After class change, Red Mage becomes Red Wizard and learns a broader selection of White and Black Magic, but it still has restrictions compared with the specialist Wizards. Red Mage is a good choice if you enjoy adapting each turn, not if you want the strongest possible specialist in every category.
The Thief is fast and can eventually become a Ninja, gaining access to useful low-level Black Magic and better equipment options. Its early performance is less dependable than the Warrior’s and it is not a replacement for a healer. A Warrior, Thief, White Mage, and Black Mage team is a sound alternative for players who prefer a faster utility character over the Monk’s straightforward damage.
- Choose Red Mage for flexibility and backup support.
- Keep White Mage in the party if you want dependable long-dungeon recovery.
- Choose Thief for speed and its later Ninja promotion, not for easy early-game damage.
- If using Thief, retain both reliable healing and at least one strong magic-damage option.
6. Test equipment and plan the optional class change
Class selection is permanent, but equipment is freely reassigned. Open the equipment menu, select a character, and check which weapons, armor, shields, helmets, and gloves are usable before confirming a purchase or sale. If a character cannot equip an item, keep it in the inventory until you determine whether another party member can use it. Do not restart merely because you bought an item for the wrong character.
Recheck equipment whenever you reach a new town. Upgrade the Warrior’s defenses first, keep the Monk’s weapon spending low, and make sure both mages have usable defensive gear. If gil is scarce, prioritize survivability, Cure or equivalent recovery magic, and the elemental spells that broaden your options.
The class change is a one-time upgrade, not a system for switching freely between jobs. First clear the Citadel of Trials and take the Rat’s Tail from its treasure area. Then travel to the Cardia Islands, enter Bahamut’s Dragon Cave, and present the Rat’s Tail to Bahamut. The result is Warrior to Knight, Thief to Ninja, Monk to Master, White Mage to White Wizard, Black Mage to Black Wizard, and Red Mage to Red Wizard.
This promotion is optional for the main story, so a player can finish without it. It is nevertheless strongly recommended because it improves equipment access and expands the capabilities of several classes. Before entering the Citadel of Trials, heal at a town, restock recovery items, and save. After promotion, revisit spell shops and equipment menus because newly available options may change how each character should be equipped.
- Use the equipment menu to verify compatibility before selling or discarding gear.
- Do not assume an unusable item is worthless; another class or a later promotion may use it.
- Retrieve the Rat’s Tail from the Citadel of Trials before visiting Bahamut.
- Take the Rat’s Tail to Bahamut in the Cardia Islands to trigger promotion.
- Treat class change as optional story progress but recommended character development.
- After promotion, check spell shops, armor shops, and weapon shops again.
Before you move on
- The four selected classes provide a durable physical attacker, dependable healing or revival, and at least one source of elemental or magical damage.
- The Warrior has the strongest practical defensive equipment currently available, and the Monk is not consuming the party’s limited weapon budget unnecessarily.
- The White Mage has the most useful recovery spells currently available, while the Black Mage has more than one elemental option.
- The equipment menu has been checked for every character after each major town visit.
- The party has saved before the Citadel of Trials if pursuing promotion.
- If promotion is desired, the party has recovered the Rat’s Tail, delivered it to Bahamut in the Cardia Islands, and verified the new Knight, Ninja, Master, White Wizard, Black Wizard, or Red Wizard abilities.
- The party’s final composition still includes a dependable recovery plan before entering the next major dungeon.
References for this chapter
- Final Fantasy — Guide and Walkthrough — PSP — Shady_Knight
- Final Fantasy — Guide and Walkthrough by ANTIverson
- Final Fantasy – Party Creation Guide – PSP – By Schaleh
- Final Fantasy PSP User Manual and Guide
- FF Weekly: December 17th – Final Fantasy Portal Site
- Final Fantasy I Walkthrough – Caves of Narshe
Cornelia — Rescue the Princess (Chaos Shrine and Garland)
Enter Cornelia, receive the king’s request to rescue Princess Sarah, prepare the party and supplies, clear the first visit to the Chaos Shrine, defeat Garland, and return to Cornelia Castle. Speaking with the king and Princess Sarah afterward completes this opening sequence, provides the Lute, and opens the northern bridge toward Pravoka.
1. Enter Cornelia and receive the rescue objective
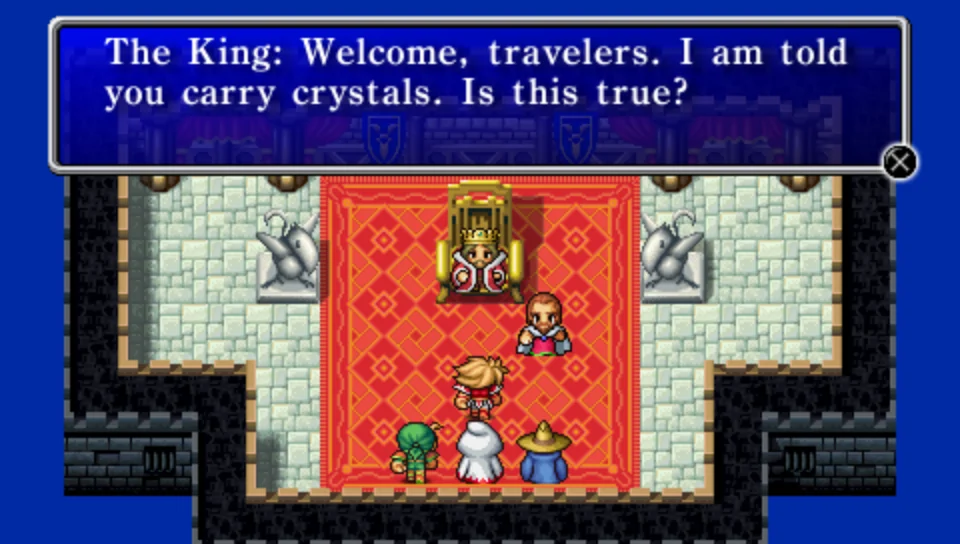
Begin on the world map outside Cornelia. Enter the town, then go through the castle entrance at the north side of the town. On the upper floor, speak with the guard near the king’s chamber. He recognizes the crystals carried by the Warriors of Light and brings the party to the king. Speak with the king to learn that Princess Sarah has been kidnapped by Garland, a former knight of Cornelia, and is being held at the Chaos Shrine.
The king promises to rebuild the northern bridge if Sarah is rescued. No key item is required before leaving Cornelia, so after the conversation return to town and prepare for the first dungeon. The opening objective is now active even if you have not spoken to every town resident.
- Enter Cornelia Castle.
- Speak with the guard outside the king’s chamber.
- Speak with the king and accept the mission to rescue Princess Sarah.
- Confirm that Garland and the Chaos Shrine are the stated destination.
2. Buy early equipment, magic, and recovery items
Visit the weapon and armor shops before leaving. Replace the weakest starting equipment first, especially for the characters who will be taking physical hits. The exact purchases depend on your four starting classes, but a Fighter or Warrior benefits most from an early weapon and armor upgrade, while lightly armored mages should receive any affordable defensive improvement that they can equip.
Buy Potions from the item shop for emergency healing and keep a few Antidotes available. Antidotes are not mandatory for the Garland battle, but poison can occur in early encounters and removing it before returning to town prevents unnecessary HP loss. If your party includes a White Mage, buy Cure. Fire and Thunder are useful purchases for a Black Mage or Red Mage, but do not spend so much on magic that you cannot afford basic equipment and recovery supplies.
Rest at the inn before departing. The church can revive a character who was knocked out during training or an earlier encounter, but it is better to leave with the full party alive and healed.
- Upgrade the most important weapons and armor before buying optional items.
- Carry Potions and several Antidotes if your remaining gil allows.
- Buy Cure for a White Mage or Red Mage.
- Consider Fire or Thunder for a Black Mage or Red Mage.
- Rest at the inn with the whole party alive.
3. Train near Cornelia and travel to the Chaos Shrine
Leave Cornelia through the northern exit and fight a few encounters on the nearby grassland. Training to around level 2 or 3 is a practical preparation point, but the battle is not locked behind a precise level requirement. Return to Cornelia whenever several characters are badly injured, restore the party at the inn, replace important supplies, and save on the world map before making the dungeon attempt.
From Cornelia, follow the western side of the northern route and continue northwest. You will pass the entrance to the optional Earthgift Shrine. Do not enter it for this objective. Continue to the large ruined structure farther north: this is the Chaos Shrine. If the party is already weakened when the shrine comes into view, turn around and recover before entering.
- Gain a few levels near Cornelia rather than grinding deep inside the shrine.
- Save on the world map before entering.
- Travel northwest and pass the optional Earthgift Shrine.
- Enter the Chaos Shrine only with adequate HP and supplies.
4. Clear the accessible Chaos Shrine rooms
The first visit is a compact, single-floor dungeon centered on a large room. From the entrance, first take the southwest path and enter the room there. Open the chest to obtain a Leather Cap, then equip it on the character who gains the most from the extra defense, usually a mage or another character without a better headpiece.
Return toward the entrance and take the northwest route. The room there contains two chests holding a Potion and a Tent. Collect both before fighting Garland. The rooms on the east side are locked and cannot be opened during this visit; they require the Mystic Key obtained later in the main campaign. Do not treat those locked rooms as a missed requirement or spend time searching for an opening mechanism now.
After collecting the three accessible chests, return toward the entrance. The central room directly north from the entrance contains Garland. Keep enough HP and at least one emergency healing option for the battle rather than using every Potion during random encounters.
- Collect the Leather Cap from the southwest room.
- Collect the Potion and Tent from the northwest room.
- Leave the locked eastern rooms for the later Mystic Key sequence.
- Return to the entrance area before beginning the boss battle.
5. Defeat Garland
Enter the central room and speak with Garland to begin the battle. Garland is the first boss and uses straightforward physical attacks. Have the party’s strongest physical attackers select Attack each round. A Black Mage or Red Mage can use Fire or Thunder for additional damage, but neither spell is required to exploit a special weakness; the fight is normally won by maintaining damage while healing when necessary.
Use Cure when a character’s HP becomes unsafe, and use a Potion if the healer is unable to act or if an immediate recovery is more important than conserving spell charges. Keep the party alive rather than concentrating on elaborate status effects. If the battle is lost, there is no need to restart the entire game: reload the save made before entering, return to Cornelia if necessary, heal at the inn, replace spent Potions, and fight a few more encounters near town before trying again.
- Use Attack with the main physical damage dealers.
- Use Fire or Thunder if available, but do not rely on an unverified elemental weakness.
- Heal with Cure or Potions before characters are knocked out.
- If defeated, reload the pre-dungeon save and prepare in Cornelia instead of repeatedly attempting the fight while weakened.
6. Return to Cornelia, obtain the Lute, and cross the bridge
After Garland is defeated, the party is taken back to Cornelia Castle with Princess Sarah. The king explains the next stage of the journey and orders the northern bridge repaired. Speak with Princess Sarah before leaving the castle. Continue the conversation until she gives the party the Lute, which is a required key item for later progression even though it has no immediate combat use.
Leave the castle after the dialogue is complete. A scene shows the bridge being completed. Rest at the inn, revive anyone who was knocked out, and restock Potions or Antidotes if needed. Save on the world map, then travel north to the bridge. Crossing it triggers the opening sequence for the next region and puts the party on the route toward Pravoka. The bridge crossing is the completion point for this chapter; the optional Earthgift Shrine and later locked Chaos Shrine rooms can be postponed.
- Confirm that Garland has been defeated and Sarah has returned to Cornelia Castle.
- Speak with the king after the rescue.
- Speak with Princess Sarah and receive the Lute.
- Leave the castle and allow the bridge scene to occur.
- Heal, restock, save, and cross the northern bridge toward Pravoka.
Before you move on
- Garland has been defeated in the Chaos Shrine.
- Princess Sarah has been returned to Cornelia Castle.
- The king has acknowledged the rescue and the northern bridge has been repaired.
- Princess Sarah has given the party the Lute.
- The party has crossed the northern bridge and is ready to travel toward Pravoka.
References for this chapter
Pravoka, Sea Travel and Early Island Hubs
After crossing Cornelia’s new bridge, travel east to Pravoka, defeat Bikke’s pirates, and take possession of the ship. Use the ship to reach the Elfheim region, visit Elfheim and its castle, then travel overland to Western Keep to receive the Marsh Cave objective. Pravoka’s shops provide the first major equipment and level-two magic upgrades, but save enough gil for supplies and Elfheim’s stronger purchases.
Travel from Cornelia to Pravoka
Leave Cornelia by the eastern bridge and follow the overland route east and then southeast. Continue past the forested stretch until you reach Pravoka, the port town on the eastern side of the starting continent. If the party is badly injured during the journey, retreat to Cornelia rather than risking a defeat just outside town.
Pravoka is the first important shopping stop after the opening sequence. Heal at the inn before beginning the pirate encounter, and make a normal save before speaking to Bikke’s group. The required fight is in the house at the far left of the inn. Talk to the man blocking the entrance to start the battle against nine Pirates.
- Reach Pravoka from Cornelia without entering the ship route yet.
- Heal at the Pravoka inn.
- Save before entering the house at the far left of the inn.
- Speak with Bikke’s pirate group to begin the required battle.
Defeat Bikke’s pirates and claim the ship
The nine Pirates have no listed elemental weakness or resistance, so use ordinary physical attacks as the main damage source. If you have Sleep available, a mage can attempt to disable several Pirates, but this is optional; a normally equipped party should be able to defeat them with focused attacks. Eliminate targets one at a time instead of spreading damage across the group.
After the battle, Captain Bikke gives you his pirate ship. Leave Pravoka and walk south to the nearby white port. Stand at the shoreline to board the ship. The ship is now the required travel method for reaching the southern continent and the Elfheim area.
- Defeat all nine Pirates.
- Receive the ship from Bikke after the battle.
- Leave Pravoka and reach the white port directly south of town.
- Board the ship from the shoreline.
Buy the useful Pravoka upgrades
Pravoka’s weapon shop sells the Broadsword and Battle Axe for 450 gil each, the Scimitar for 160 gil, and the Hammer for 8 gil. Buy a Broadsword or Battle Axe for a compatible frontline fighter if you can afford it. The Scimitar is a cheaper upgrade for compatible lighter weapon users. Do not buy a weapon for a Monk solely because it appears in the shop; compare the character’s actual damage after equipping it.
The armor shop sells Chain Mail for 65 gil, Iron Armor for 640 gil, Leather Armor for 40 gil, Leather Shields for 12 gil, and Leather Gloves for 50 gil. Iron Armor is the major purchase for a compatible Warrior, Knight, or Ninja, while Chain Mail is the practical lower-cost choice for characters who cannot use Iron Armor. Leather Shields and Leather Gloves are inexpensive improvements when the character can equip them.
Pravoka also has level-two White and Black Magic. The available White Magic is Blindna, Invis, NulShock, and Silence. The Black Magic is Blizzard, Dark, Temper, and Slow. Buy only spells that fit the current party and leave enough gil for recovery items and later Elfheim purchases. NulShock is a defensive lightning spell, but it is not required to complete this chapter.
- Prioritize a frontline weapon or armor upgrade over buying every spell.
- Buy Iron Armor only for a class that can equip it and only if it will not empty your funds.
- Consider Temper, Blizzard, Invis, or NulShock according to party composition.
- Keep gil available for Potions, Antidotes, and Elfheim supplies.
Sail to the Elfheim region
From the port south of Pravoka, board the ship and sail west and south. You may encounter sea monsters while traveling, so do not assume the ship is a safe, encounter-free route. If the party is nearly defeated, dock at an available white port and recover instead of continuing across the water.
Dock at the port serving the southern continent. From that port, leave the ship and walk south through the forest. Elfheim is the town in the clearing beyond the forest. The ship does not dock directly at the town, so look for the port first and complete the final approach on foot.
Optional sea travel is not required for the main story. You may explore accessible coastlines for experience and gil, but the only immediate required destination after obtaining the ship is the Elfheim region. The PSP version also contains the optional 15 Puzzle ship minigame; it is not needed for story progression or for reaching Marsh Cave.
- Sail from the port south of Pravoka toward the southern continent.
- Dock at the white port near Elfheim.
- Walk south through the forest to reach Elfheim.
- Return to a port or town if ship encounters consume too many resources.
Restock and inspect Elfheim before visiting the castle
Elfheim is the next required hub. Heal at the inn, then check the item, weapon, armor, and magic shops. Its item shop sells Potions, Antidotes, Echo Grass, Gold Needles, and Tents. Unlike the incorrect version of this route, Tents are not part of the Pravoka item-shop list; buy them here before attempting Marsh Cave.
Elfheim’s equipment and magic are stronger but more expensive. The town sells Iron Armor, Iron Shields, Helmets, and other class-specific upgrades. It also offers level-three and level-four spells. For the immediate Marsh Cave route, prioritize practical survivability and useful level-three magic rather than spending all gil on expensive level-four spells. Keep several Antidotes and Tents for the dungeon sequence.
After shopping, visit Elfheim Castle north of the town. Speak with the castle residents and the people attending the sleeping Elven Prince. This confirms the prince’s curse and points toward Astos, but it does not complete the cure. The Crown objective begins at Western Keep, so do not search Elfheim Castle for the Crown.
- Heal in Elfheim.
- Buy Tents and several Antidotes.
- Replace weak armor if the party can afford the upgrades.
- Visit Elfheim Castle and speak with the prince’s attendants.
- Do not treat the castle visit as completion of the Crown objective.
Reach Western Keep and receive the next objective
Leave Elfheim and travel west around the mountains. Continue north through the large forest, navigating around the rivers until Western Keep comes into view. The route is overland; do not try to reach the keep by ship.
Enter Western Keep and move through the entrance toward the main quarters. Go left and then up to find the lone man inside. Speak with him to learn that he is the king. He explains that Astos stole the Crown and asks you to recover it from Marsh Cave.
The keep contains optional treasure, but the locked room cannot yet be opened. Do not waste time trying to force that door. Once the king gives the Crown objective, return to Elfheim or another safe location, heal, save, and finish preparing for Marsh Cave. The cave lies west and south of the Western Keep route, near the southern end of the landmass. Bring Antidotes and Tents, and consider buying useful Elfheim spells before entering.
- Leave Elfheim and travel west around the mountains.
- Go north through the forest and around the rivers.
- Enter Western Keep and speak with the king in the main quarters.
- Receive the request to recover the Crown from Marsh Cave.
- Ignore the locked treasure room for now.
- Return to Elfheim, heal, restock, and save before the next chapter.
Before you move on
- The nine Pirates in Pravoka have been defeated.
- Bikke has given the party the ship.
- The party has reached Elfheim through the southern-continent port and forest route.
- The party has visited Elfheim Castle and spoken with the prince’s attendants.
- The party has reached Western Keep and spoken with its king.
- The king has requested the Crown from Marsh Cave.
- The party has returned to a safe town, purchased Tents and Antidotes, healed, and saved before entering Marsh Cave.
References for this chapter
Marsh Cave and Western Keep — Crown and Local Quests
The required sequence is Western Keep, Marsh Cave, Western Keep again, Astos, Matoya’s Cave, and the Elven Castle. First learn that the Crown is in Marsh Cave, retrieve it from the Piscodemons on B3, and return it to the apparent king in Western Keep. The king is Astos in disguise. Defeating Astos gives you Matoya’s Crystal Eye. Return it to Matoya for the Jolt Tonic, then have the healer in the Elven Castle use the tonic on the sleeping Elf Prince. The prince wakes and gives you the Mystic Key, which opens several optional treasure rooms and enables the next major progression steps.
1. Prepare in Elfheim
Heal at the Elfheim inn before attempting Marsh Cave. This dungeon has a high encounter rate, several dangerous status effects, and enemies that can deal substantial damage for this point in the campaign. Buy a useful supply of Potions and Antidotes. Bring at least one Tent or Cottage so you can recover on the world map after leaving the cave or before entering Western Keep again.
Check every character’s weapon and armor. Put the strongest available armor on the character who normally occupies the front position, and make sure your White Mage or Red Mage has enough spell charges for healing. If your party is being defeated by ordinary monsters near Elfheim, improve equipment or gain a few levels before entering. Marsh Cave is not a good place to begin experimenting with an underpowered party.
Save before departing Elfheim and keep a second save slot available. If the party is wiped out, reload this preparation save, replace used supplies, and make a direct Crown run instead of attempting every treasure room immediately.
- Heal fully in Elfheim.
- Buy Potions and Antidotes.
- Carry a Tent or Cottage.
- Check weapons, armor, and healing spell charges.
- Save before leaving town.
2. Visit the Western Keep
From Elfheim, travel northwest through the available passage around the mountain range. The Western Keep is an abandoned-looking castle northwest of Elfheim. Enter it and explore until you find the king in the main quarters.
Speak with the king. He asks you to recover the Crown from Marsh Cave, which lies south of the keep. The locked treasure rooms cannot be opened yet, so do not spend time searching for a way through their doors. They become relevant only after you obtain the Mystic Key later in this sequence.
Leave the keep and prepare for the cave. If you did not heal or restock in Elfheim, return there before continuing. From the Western Keep, travel south toward the Marsh Cave entrance. The entrance is a dark opening in the wetland area south of the keep.
- Find the king in the Western Keep.
- Accept the Crown objective.
- Do not worry about the locked treasure rooms yet.
- Locate Marsh Cave south of the keep.
3. Navigate Marsh Cave B1 and B2
Marsh Cave has three basement levels. On the first visit, the Crown is the priority; optional treasure can wait. From the entrance on B1, follow the connected passage toward the southern route rather than spending all of your resources clearing every side room. The route eventually leads to a staircase that returns to a different section of B2.
The cave contains enemies that can poison or paralyze the party. Use an Antidote promptly when poison appears instead of allowing the character’s HP to fall while walking between encounters. Poison and paralysis are more dangerous here because the dungeon may force you to cross several rooms before reaching the next staircase.
Do not rely on physical attacks against every monster. Green Slimes are resistant or immune to ordinary weapon attacks in this version, so use offensive magic against them. Physical attacks remain useful against many other enemies, but spend area or elemental magic when a group is resistant to weapons or is likely to inflict disabling statuses.
If several characters are badly injured, retreat to Elfheim rather than gambling on the next encounter. There is no normal inn inside the cave, and reaching B3 with depleted healing resources is likely to turn the Crown run into a recovery mission.
- Use Antidotes immediately when needed.
- Use magic against Green Slimes.
- Reserve healing MP for dangerous encounters and emergencies.
- Retreat if the party cannot safely reach B3.
4. Reach the Crown on B3
Continue through the southern route of B1 and B2 until you reach the staircase to Marsh Cave B3. B3 is arranged as a compact grid of rooms. The Crown is in the third row of that grid, in the room second from the west side. Enter the room, approach the chest, and prepare for the scripted encounter.
Piscodemons attack when you step in front of the Crown chest. Heal before triggering the fight. Focus on defeating one Piscodemon at a time so that the number of incoming attacks falls quickly. Use your strongest reliable physical attacks against targets that are not resisting them, and use offensive magic when it can damage multiple Piscodemons efficiently. Keep the White Mage or Red Mage ready to heal rather than spending every spell charge on damage.
After the Piscodemons are defeated, open the chest and take the Crown. The other B3 rooms contain optional treasure, but they are not required to complete this chapter. The rooms along the lowest part of the floor are locked until you obtain the Mystic Key. Leave the cave by retracing the route to the entrance.
- Reach B3 through the southern B1/B2 route.
- Find the Crown chest in the third row, second room from the west.
- Defeat the scripted Piscodemons.
- Open the chest and obtain the Crown.
- Leave through the route you used to enter.
5. Return the Crown and fight Astos
Once outside Marsh Cave, return to Elfheim if you need a full recovery. Use a Tent or Cottage on the world map if appropriate, then save before entering the Western Keep. The Crown hand-in immediately starts the Astos battle, so this is the safest point to restore HP and spell charges.
Re-enter the Western Keep and speak with the king in the main quarters. When you present the Crown, he reveals himself as Astos and attacks. Astos has strong physical attacks and can cast dangerous magic, including Death, which can instantly defeat a character. Keep the party’s HP high, but remember that full HP does not protect a character from instant-death magic.
Use your strongest consistent attacks and preserve enough healing power to recover after Astos’s damage. If you have access to useful attack or support spells such as Haste, Temper, Protect, or an effective elemental attack, use them according to your party’s available spell charges. Do not spend all healing MP before the battle simply to speed through ordinary encounters.
After Astos is defeated, take the Crystal Eye he leaves behind. This is the required reward for the Western Keep sequence. The optional treasure rooms remain inaccessible until the Mystic Key is obtained.
- Recover and save before entering Western Keep.
- Give the Crown to the king.
- Defeat Astos while protecting your primary healer.
- Obtain the Crystal Eye.
6. Take the Crystal Eye to Matoya
Leave Western Keep and travel to Matoya’s Cave. The quickest route uses the ship: return to the ship, sail toward the Cornelia area, pass beneath the bridge, and use the nearby dock. Matoya’s Cave is north of that dock. If you prefer, you can also use the overland route through the Cornelia region.
Enter the cave and speak with Matoya. The Crystal Eye is returned automatically through the conversation, and Matoya gives you the Jolt Tonic. Do not continue searching the cave for another progression item; the Jolt Tonic is the item required for the sleeping prince.
After receiving the tonic, return to the Elven Castle in Elfheim. Enter the prince’s room and speak with the healer attending him. The healer uses the Jolt Tonic on the prince. You do not need to use the tonic manually from the item menu.
- Travel to Matoya’s Cave after defeating Astos.
- Give Matoya the Crystal Eye.
- Receive the Jolt Tonic.
- Return to the Elven Castle in Elfheim.
- Speak with the healer in the prince’s room.
7. Receive the Mystic Key and plan the follow-up
The Elf Prince wakes after the healer uses the Jolt Tonic and gives the party the Mystic Key. This confirms that the required Crown, Astos, and Matoya sequence is complete.
The Mystic Key opens previously sealed doors. The Western Keep treasure rooms contain a Falchion, Power Staff, and Steel Gloves, but collecting them is optional for the main campaign. Marsh Cave also has optional locked-room treasure, including equipment and supplies. You can return for these rewards after healing and improving your party; they are not needed to trigger the prince’s awakening.
Do not mistake the Crown chest or the unlocked progression for full Marsh Cave completion. The Crown is the required objective on the first visit. The locked rooms are a later treasure sweep, while the Mystic Key is the actual progression reward from completing the Matoya and Elf Prince steps.
- Confirm the prince has awakened.
- Receive the Mystic Key.
- Optionally revisit Western Keep and Marsh Cave for locked treasure.
- Continue to the next chapter only after the Mystic Key is in the inventory.
Before you move on
- The Crown has been taken from the Piscodemon-guarded chest on Marsh Cave B3.
- Astos has been defeated in the Western Keep.
- The Crystal Eye is no longer in the party’s inventory because it was returned to Matoya.
- Matoya gave the party the Jolt Tonic.
- The healer in the Elven Castle used the Jolt Tonic and the Elf Prince awakened.
- The Mystic Key is in the inventory, confirming completion of this chapter’s required sequence.
Matoya’s Cave, Elfheim and Sleep/Revival Tasks
After defeating Astos in the Western Keep, take the Crystal Eye to Matoya’s Cave and receive the Jolt Tonic. Deliver the tonic to the healer beside the sleeping Elf Prince in Elfheim Castle to obtain the Mystic Key. Use that key to open the locked treasury in Castle Cornelia, take Nitro Powder, and deliver it to Nerrick in Mount Duergar. The opened canal allows the ship to reach Melmond. From there, complete the required Earth Cave chain in the correct order: defeat the Vampire and take the Star Ruby, give the Star Ruby to Titan in Titan’s Cave, continue through to Sarda’s Cave, obtain the Earth Rod from Sarda, return to the Cavern of Earth, use the Earth Rod at the stone plate, and defeat Lich. Only after this Earth Crystal objective should you proceed to Crescent Lake and the Canoe route.
1. Leave the Western Keep with the Crystal Eye
After retrieving the Crown from the Marsh Cave, the ruler in the Western Keep is revealed to be Astos. Defeat Astos in the throne room. When the battle ends, collect the Crystal Eye from the reward chest or item result. This is the required item for the next visit to Matoya’s Cave.
Heal and restock before leaving the region. You can use Elfheim or Cornelia for an inn and recovery supplies. The Crystal Eye should be present in the Key Items portion of the inventory before you continue. You do not need to return to the Marsh Cave for another Crown; that part of the sequence is complete.
- Astos has been defeated.
- The Crystal Eye has been obtained.
- The party is healed and carrying recovery supplies.
2. Return to Matoya’s Cave
Board the ship and sail back toward the Cornelia side of the map. Use the water route beneath the bridge near Cornelia, then continue north to the nearby landing point. From the landing area, walk to Matoya’s Cave and enter.
Speak with Matoya while the Crystal Eye is in the inventory. The exchange restores her sight, and she gives the party the Jolt Tonic. There is no dungeon fight or puzzle during this visit. If Matoya gives no new item, confirm that Astos was defeated and that the Crystal Eye was collected after the battle.
- The ship has passed beneath the Cornelia bridge.
- Matoya has received the Crystal Eye.
- The Jolt Tonic has been obtained.
3. Wake the Elf Prince
Return to Elfheim and enter Elfheim Castle. Rest at the inn first if necessary, then go to the room containing the sleeping Elf Prince.
Speak with the healer standing beside the prince. The healer uses the Jolt Tonic to break the spell. Speaking to the sleeping prince alone does not complete the required exchange, so interact with the attendant beside the bed. Continue the conversation until the prince wakes and the reward is delivered.
- The party has returned to Elfheim Castle.
- The Jolt Tonic is still in the inventory.
- The healer beside the prince has been addressed.
- The Elf Prince has awakened.
4. Receive the Mystic Key
Once the prince wakes, the party receives the Mystic Key. This key opens sealed doors in several early locations. Many rooms contain optional equipment, gil, or consumables, but one locked room is required immediately: the treasury in Castle Cornelia containing Nitro Powder.
The Mystic Key is a permanent progression item. If you want to collect optional rooms now, Elfheim Castle and Castle Cornelia are convenient stops. You can also postpone the Western Keep and Marsh Cave rooms until the party is stronger without blocking the main campaign.
- The Mystic Key has been awarded.
- The key is visible in the Key Items inventory or opens a previously sealed door.
5. Take Nitro Powder from Castle Cornelia
Return to Castle Cornelia and follow the outer route around the castle grounds to the locked treasury area. Use the Mystic Key on the sealed door and collect Nitro Powder from inside.
Other chests in the area are optional. Nitro Powder is the item required for the next event, so verify that it is in the inventory before leaving. If the room will not open, confirm that the Elf Prince was awakened and that the Mystic Key was actually received.
- The locked Castle Cornelia treasury has been reached.
- The Mystic Key has opened the treasury door.
- Nitro Powder has been collected.
6. Open the canal at Mount Duergar
Sail to the port near Mount Duergar and enter the dwarves’ cave. Locate Nerrick and speak with him while Nitro Powder is in the inventory. Nerrick uses the powder to blast through the rock blocking the canal.
Wait for the scene to finish, then return to the ship and sail through the newly opened channel. This connects the inner sea to the western ocean and makes Melmond reachable. Save after the canal opens so a defeat in the next dungeon does not force you to repeat the Mystic Key sequence.
- Nerrick has been found in Mount Duergar.
- Nitro Powder has been delivered to Nerrick.
- The canal has opened.
- The ship can reach Melmond.
7. Complete the Earth Cave item chain and defeat Lich
After reaching Melmond, heal at the inn, update equipment if you can afford it, and speak with townspeople to identify the Cavern of Earth, also called the Earth Cave. Enter the dungeon and travel to the Vampire’s chamber. Defeat the Vampire, then take the Star Ruby from the treasure chest beside the battle area. The Star Ruby is not obtained in Titan’s Cave; it comes from this chest after the Vampire is defeated.
Leave the Cavern of Earth with the Star Ruby and travel to Titan’s Cave, also called the Giant’s Cave, on the western side of the continent. Speak with Titan and give him the Star Ruby. Titan moves aside and allows passage through the cave. You may collect the nearby treasure before exiting, but those chests are optional.
After passing through Titan’s Cave, travel to Sarda’s Cave. Enter the cave and speak with Sarda. He gives the party the Earth Rod and explains that it must be used deeper inside the Cavern of Earth. The Earth Rod is the required item for reaching the Earth Fiend.
Return to the Cavern of Earth. Retrace the route to the area beyond the Vampire’s chamber and enter the passage leading to the stone plate. Interact with the plate and use the Earth Rod. The obstruction clears and the stairs to the lower floors become available. Descend through the newly opened route and continue until you reach Lich. Defeat Lich to restore the Earth Crystal.
This entire chain must be finished before beginning the Canoe and Cavern of Ice progression. After Lich falls, travel to Crescent Lake and speak with the Circle of Sages to receive the Canoe. The Canoe then enables the route toward the Cavern of Ice and the Levistone.
- Melmond has been reached through the opened canal.
- The Vampire has been defeated in the Cavern of Earth.
- The Star Ruby has been taken from the chest beside the Vampire’s chamber.
- Titan has received the Star Ruby and allowed passage through Titan’s Cave.
- Sarda’s Cave has been reached.
- Sarda has given the party the Earth Rod.
- The Earth Rod has been used at the stone plate in the Cavern of Earth.
- Lich has been defeated and the Earth Crystal has been restored.
- The Canoe has been received from the Circle of Sages before starting the Cavern of Ice route.
8. Optional Mystic Key cleanup and recovery
The Mystic Key opens additional rooms in Elfheim Castle, Castle Cornelia, the Western Keep, the Marsh Cave, and other early locations. Their equipment and gil can help, but none of these optional chests replaces the required sequence of Jolt Tonic, Mystic Key, Nitro Powder, canal opening, Star Ruby, Earth Rod, and Lich.
If the party is wiped after the canal opens, reload the save made after Nerrick’s scene. Restock in Melmond or another accessible town, then resume with the Cavern of Earth. If the party is defeated after taking the Star Ruby, reload a save before the Vampire or repeat the short Earth Cave visit. Once Titan has accepted the Star Ruby and Sarda has given the Earth Rod, the remaining objective is to return to the stone plate and descend to Lich.
- Optional Mystic Key treasure has been separated from required progression.
- A save exists after the canal-opening scene.
- The next required target is Lich, not the Cavern of Ice or Mount Gulg.
Before you move on
- Astos has been defeated and the Crystal Eye has been obtained.
- Matoya has received the Crystal Eye and given the Jolt Tonic.
- The Elf Prince is awake and the Mystic Key has been received.
- Nitro Powder has been taken from Castle Cornelia.
- Nerrick has received Nitro Powder and the canal has opened.
- Melmond is reachable by ship.
- The Vampire has been defeated and the Star Ruby has been taken from the nearby chest.
- Titan has accepted the Star Ruby and the party has passed through Titan’s Cave.
- Sarda has given the party the Earth Rod.
- The Earth Rod has opened the stone plate route in the Cavern of Earth.
- Lich has been defeated and the Earth Crystal has been restored.
- The party has received the Canoe from the Circle of Sages before proceeding to the Cavern of Ice.
References for this chapter
- Final Fantasy — Guide and Walkthrough by ANTIverson
- Final Fantasy — Guide and Walkthrough — PSP — By brian_sulpher
- Final Fantasy — Guide and Walkthrough — PSP — Shady_Knight
- Final Fantasy – Guide and Walkthrough – Game Clear Data and Soul of Chaos notes
- Final Fantasy — Guide and Walkthrough by Dark_Vortex
- Nintendo Final Fantasy Player’s Guide reference, Earth Cave and Titan sequence
Cavern of Ice and Levistone Route (Early Dungeon Progression)
Complete the Earth Cave and defeat Lich before attempting the Cavern of Ice. After restoring the Earth Crystal, receive the Canoe from the Circle of Sages in Crescent Lake. Use the Canoe to reach the Cavern of Ice, collect the Levistone, defeat the Evil Eye guarding it, and activate the Airship in the Ryukahn Desert. The Airship opens the route to the Citadel of Trials and other northern areas; Mount Gulg remains the next major fiend objective in the normal campaign order.
Complete the Earth prerequisite before entering the ice cave
Do not begin this chapter immediately after the opening areas or before the Earth sequence is complete. First clear the required lower section of the Cavern of Earth and defeat Lich, the Earth Fiend. To reach him, obtain the Star Ruby from the Cavern of Earth, give it to the giant in the nearby Giant's Cave, pass through to Sage's Cave, and speak with Sarda to receive the Earth Rod. Return to the Cavern of Earth, use the Earth Rod at the sealed stone plate near the Vampire's former room, descend to the lowest level and defeat Lich.
After the battle, step onto the teleporter and confirm that the Earth Crystal has been restored. This is the progression flag required for the next step. If the Earth Crystal is still dark, the Canoe will not be available from the Circle of Sages.
Travel to Crescent Lake after leaving the Earth Cave. Heal, save and restock before continuing. The Circle of Sages is reached through the opening in the upper-right part of town, beyond the shops and across the short bridge. Speak with the sages until the one who rewards the party for defeating Lich gives you the Canoe. The Canoe is a key item for crossing the shallow rivers around the northern mountain regions.
- Defeat Lich in the lowest level of the Cavern of Earth.
- Restore the Earth Crystal after the battle.
- Reach the Circle of Sages in Crescent Lake.
- Receive the Canoe before attempting the Cavern of Ice.
Prepare in Crescent Lake and reach the cavern
Use the inn and save in Crescent Lake before departing. Carry Potions or stronger healing items, Phoenix Downs, Antidotes and Gold Needles if available. Bring a Tent, Sleeping Bag or Cottage for recovery outside the dungeon. There is no dependable inn or permanent healing point inside the Cavern of Ice, so begin with full HP and enough MP for the return trip.
Return to your ship at the southern dock near Crescent Lake and sail to the northern dock in the same general region. Disembark there and launch the Canoe into the river. Follow the river west, take the northern opening, then continue through the winding waterways toward the isolated cave in the mountain area. The cave entrance is reached by river; attempting to walk around the mountains wastes time and exposes the party to additional encounters.
Save before entering. The Cavern of Ice contains damaging ice-crystal floor tiles and several difficult enemy formations, including White Dragons, Ice Gigas and Mindflayers. Fire magic is useful against many ice-aligned enemies, but retain enough charges for emergency damage and healing support.
- Heal and save in Crescent Lake.
- Carry healing, revival and status-recovery items.
- Sail to the northern dock.
- Use the Canoe and follow the river route to the cave entrance.
Cross the upper floors and collect the first optional treasures
On the first floor, move east through the corridor, then south and onward to the first staircase. The next area is broad and allows more than one approach to the exit; follow the passage toward the southwest staircase.
After descending, reach the room on the far side of the floor and avoid the cracked tiles at first. Open the two chests there to collect the Clothes and Flame Sword. These are optional for the Levistone objective, but the Flame Sword is a useful weapon if your Warrior or Red Mage can equip it.
Once you have taken the desired treasure, step on one of the cracked floor tiles. The cracks are intentional one-way drops into the lower section. Do not treat them as traps that end the run; they are required to reach the Levistone route.
Ice-crystal tiles damage the party each time they are crossed. Keep the route across them as short as possible, heal before opening dangerous treasure rooms, and flee from poor random formations rather than spending all of your MP on ordinary battles.
- Reach the room containing Clothes and the Flame Sword.
- Collect the optional equipment before using the crack.
- Minimize steps across damaging ice tiles.
- Preserve MP and healing items for the lower section.
Search the lower section and decide which treasure to take
After falling through the crack, leave the room and enter the main lower passage. The room to the west contains the Ice Armor and Mythril Gloves, but opening these chests triggers a battle with White Dragons. Their Ice Storm attack can deal severe damage, so heal first and be prepared to use Fire magic or strong physical attacks. Both items are optional for obtaining the Levistone and may be skipped if the party is already weakened.
Continue through the lower passages toward the rooms containing the Ether and 10,000 gil. Another southeastern room contains the Ice Shield, Sleeping Bag and 9,500 gil. Avoid the crack in that room until you have collected anything you want. The gil, consumables and equipment are optional; the Levistone is the only required item in this dungeon.
There is no need to clear every treasure room before proceeding. If a White Dragon battle leaves the party low on HP or MP, retreat only if necessary and return with better supplies. Otherwise, prioritize reaching the Levistone and leave the remaining chests for a later visit.
- Heal before opening the Ice Armor and Mythril Gloves chests.
- Treat the White Dragon battle as optional rather than required.
- Collect the Ether, 10,000 gil, Ice Shield, Sleeping Bag and 9,500 gil only if resources allow.
- Use the southeastern crack after completing the desired treasure search.
Defeat the Evil Eye and take the Levistone
The crack drops the party into the area containing the large diamond-shaped object. Restore HP before approaching it. Touching the object starts the Evil Eye battle; the Levistone is obtained only after the encounter is won.
In the PSP edition, Evil Eye has 162 HP, 30 defense and no listed elemental weakness. Its low HP makes a direct attack plan reliable: have the strongest physical attackers strike immediately, use dependable offensive magic if needed, and keep the healer ready to recover damage. Do not spend several turns on elaborate buffs for this short battle.
After Evil Eye is defeated, interact with the diamond to receive the Levistone. Check the key-item inventory if you want to verify the pickup before leaving. The Evil Eye encounter and Levistone are the required completion points; the surrounding gil and equipment are not.
- Restore HP before touching the diamond.
- Defeat Evil Eye with immediate physical attacks or reliable damage magic.
- Take the Levistone after the battle.
- Verify that the Levistone is in the key-item inventory.
Escape, raise the Airship and prepare for Mount Gulg
After taking the Levistone, step on the cracked floor again. This returns the party to the lower route. Follow the passage back toward the upper section. When you reach the first-floor area again, do not return to the southeastern treasure room and drop through the same route. Instead, take the northern path to the staircase in the northeast and use it to exit the dungeon.
Return to the Canoe and then to the ship. Sail back toward Crescent Lake and use the river route south of town to reach the peninsula containing the Ryukahn Desert. Enter the desert and walk toward its central sandy area. The Levistone activates automatically when the party reaches the correct location, causing the Airship to rise from the sand.
Save after the Airship appears. The Airship has no random encounters while flying and can land only on suitable light-green grassland, not forests, mountains, buildings, water or darker terrain. The next major campaign objective is Mount Gulg, where Marilith guards the Fire Crystal. Before entering it, use the Airship's mobility to visit the Citadel of Trials or restock in Crescent Lake if needed.
- Use the second crack after obtaining the Levistone.
- Return through the northern staircase rather than the earlier southeastern drop.
- Reach the central area of the Ryukahn Desert.
- Raise the Airship with the Levistone.
- Save and prepare for Mount Gulg and Marilith.
Before you move on
- Lich has been defeated and the Earth Crystal has been restored.
- The Canoe has been received from the Circle of Sages in Crescent Lake.
- The Evil Eye has been defeated.
- The Levistone is in the party's key-item inventory.
- The party has exited the Cavern of Ice alive.
- The Levistone has activated the Airship in the Ryukahn Desert.
- The game has been saved after obtaining the Airship.
- Mount Gulg and Marilith are identified as the next major required objective.
Progressing the World Map — Boats, Routes and Mid-Game Hubs
This chapter begins after the Levistone has been recovered from the Cavern of Ice and used in the Ryukahn Desert to raise the Airship. Use Crescent Lake as the preparation base for Mt. Gulg, defeat Marilith, then visit Gaia, the Caravan, and Onrac to obtain Oxyale and open the submarine route to the Sunken Shrine. Keep enough gil for the Fairy’s Bottle and do not mistake optional Airship destinations for required progress.
1. Confirm the Airship and prepare for the next objective
Leave the Ryukahn Desert after using the Levistone and confirm that the Airship is available on the world map. The Airship greatly shortens travel, but it does not replace the Boat or Canoe: the Boat remains useful for sea routes, and the Canoe is still required for rivers and shallow inland waterways. The Airship also needs a suitable landing area, so expect to land outside some towns and complete the final approach on foot.
The next required dungeon is Mt. Gulg. Before leaving the desert, make a save after the Airship becomes available. This gives you a clean recovery point if the volcanic dungeon consumes more healing and spell charges than expected. The Airship opens optional destinations at this stage, but exploring them is not necessary for the main campaign and can expose an underprepared party to much stronger encounters.
- Use the Levistone in the Ryukahn Desert before beginning this chapter.
- Confirm that the Airship can be selected on the world map.
- Save after the Airship sequence is complete.
- Treat Mt. Gulg as the next required major objective.
2. Use Crescent Lake as the Mt. Gulg supply base
Return to Crescent Lake before entering Mt. Gulg. Heal at the inn or restore the party by other reliable means, then inspect the weapon, armor, item, and magic shops. Equip every useful upgrade immediately; do not leave a purchased weapon or armor piece sitting in the inventory. Prioritize armor for characters who are taking repeated physical damage, followed by dependable weapons for your main attackers.
Check the available magic for healing, revival, elemental protection, and reliable damage. Buy spells only for classes that can actually learn them, and avoid spending all of your gil on luxury purchases. The Fairy’s Bottle later costs a substantial amount, and the required price differs between some walkthrough references and release variants. The practical requirement is to reserve enough money for it rather than spending your entire supply in Crescent Lake.
Carry a useful stock of healing items, revival items, and status recovery items. If ordinary battles around Crescent Lake are already forcing you to use most of your spell charges, restock or gain a few levels before entering Mt. Gulg. Make a separate pre-dungeon save so you can return to Crescent Lake without losing progress.
- Heal completely in Crescent Lake.
- Equip current weapons and armor.
- Buy usable healing, revival, and status-recovery items.
- Reserve substantial gil for the Fairy’s Bottle.
- Save before entering Mt. Gulg.
3. Enter Mt. Gulg and defeat Marilith
Mt. Gulg is the required Fire Fiend dungeon and lies in the volcanic region reached from the Crescent Lake area. From Crescent Lake, follow the accessible river route with the Canoe toward the volcano, or use the Airship to reach the surrounding region and then walk to the entrance. The Airship makes the approach easier, but it cannot land inside the dungeon.
Mt. Gulg is a long dungeon with fire-themed enemies and numerous side rooms. Keep dependable ice-based damage available when it is effective, but do not waste your strongest spells on every ordinary encounter. Use the dungeon’s treasure rooms when they are close to your route and your party has enough resources. If healing supplies become dangerously low, prioritize the route toward the lower floors and boss rather than attempting every optional chest on the first visit.
Before the final approach, heal the party and confirm that your primary attacker, healer, and revival options are ready. Marilith is the required boss at the end of Mt. Gulg. Concentrate your strongest consistent physical and non-fire damage on her, while the healer keeps the front line alive. Avoid relying on fire magic against a fire-aligned boss unless your own testing shows it is effective in the current version. If the party is defeated, reload the Crescent Lake-area save, improve equipment or levels, and return with more healing resources.
After Marilith is defeated, leave Mt. Gulg and return to Crescent Lake or another safe town. Restore HP and spell charges, then save. The victory over Marilith is the required progression; remaining Mt. Gulg treasure is optional and can be collected during a later visit if your first run focused on reaching the boss.
- Reach Mt. Gulg after raising the Airship.
- Use ice-based damage where it is effective against fire-region enemies.
- Keep enough healing and revival resources for the lower floors.
- Defeat Marilith.
- Return to a town, restore the party, and save.
4. Visit Gaia for equipment and the Fairy’s lead
After defeating Marilith, travel to Gaia. The town is enclosed by mountains, so land the Airship in a usable area outside the settlement and walk to the entrance. Gaia is one of the important mid-game hubs because it offers stronger equipment and magic than the earlier towns, along with the information needed to locate the captured fairy.
Inspect armor first if the party is suffering from physical damage, then replace outdated weapons where the improvement is affordable and usable. Review both magic shops for spells that strengthen healing, elemental defense, escape options, or boss damage. Do not buy every expensive spell automatically; retain enough gil for the Fairy’s Bottle and for recovery supplies before the Sunken Shrine.
Speak with the townspeople, especially those discussing the fairy and Oxyale. The fairy is not obtained directly from Gaia at this stage. The information points to the Caravan in the desert. Rest and save before leaving so you do not lose the equipment and money-management progress made in town.
- Reach Gaia by landing outside the mountain-enclosed town.
- Inspect Gaia’s armor and weapon shops.
- Buy only spells usable by the current party.
- Speak with the townspeople about the fairy and Oxyale.
- Save before traveling to the Caravan.
5. Locate the Caravan and buy the Fairy’s Bottle
The Caravan is a small desert camp rather than a conventional town. Use the Airship to reach the desert region on the western side of the southern continent, then land in a suitable patch near the desert and search on foot. Walk the desert methodically if the camp is not immediately visible; it is easy to fly past because the Caravan does not resemble a large settlement on the world map.
Enter the Caravan and purchase the Fairy’s Bottle. This is a required key item, and the purchase uses a large amount of gil. If you are short, sell obsolete equipment and excess treasure, but do not sell gear currently assigned to a character. If more money is needed, fight in an area where the party wins consistently instead of pushing into a high-level region merely for faster rewards.
After buying the bottle, return to Gaia. Depending on the exact point at which the bottle is used, the fairy is released when you enter town or when you select the key item from the menu. Follow her to Gaia’s upper pool, located in the elevated part of town, and speak with her there. She provides Oxyale, which is the required item for accessing the submerged route from Onrac. Confirm that Oxyale is present in the key-item inventory before leaving Gaia.
- Find the small Caravan camp in the desert.
- Purchase the Fairy’s Bottle.
- Return to Gaia with the bottle.
- Follow the fairy to the upper pool.
- Receive Oxyale and save.
6. Use Oxyale to open Onrac’s submarine route
Travel to Onrac after obtaining Oxyale. Onrac is on the eastern side of the southern continent and is surrounded by difficult terrain, so land the Airship where possible and walk the remaining distance. Use the town as the next shopping and recovery hub. Replace equipment that is still clearly behind the party’s current level, but keep enough gil for healing items and useful magic.
Go to the lower part of Onrac near the dock and the submerged vessel. Speak with the woman at the dock; after the Oxyale sequence, she reveals her connection to the mermaids and allows access to the submarine. The submarine is the required route into the Sunken Shrine. If the NPC does not open the route, verify that the Fairy’s Bottle was taken to Gaia and that Oxyale was actually received before returning to Onrac.
Before entering the Sunken Shrine, restore HP and spell charges and create a fresh dungeon save. The Sunken Shrine is not optional: it contains the Water Fiend sequence and the Rosetta Stone needed later for the Lufenian language. Melmond should remain in your route plan after the shrine, because the Rosetta Stone must be taken to the scholar there before the later Lufenia and Flying Fortress progression. Do not spend this chapter’s preparation time clearing optional Airship destinations unless the party is already well equipped.
- Reach Onrac after obtaining Oxyale.
- Inspect Onrac’s shops and replace clearly outdated gear.
- Speak with the dock NPC near the submarine.
- Confirm that the submarine route is available.
- Restore the party and save before entering the Sunken Shrine.
- Keep Melmond planned for the later Rosetta Stone handoff.
Before you move on
- The Levistone has been used in the Ryukahn Desert and the Airship is available.
- Crescent Lake has been used for healing, equipment, magic, and dungeon preparation.
- Mt. Gulg has been cleared and Marilith has been defeated.
- The party has visited Gaia and upgraded practical equipment where necessary.
- The Fairy’s Bottle has been purchased from the Caravan.
- The fairy has been released in Gaia and has provided Oxyale.
- Onrac’s submarine route is open.
- A fresh save exists before entering the Sunken Shrine.
- Melmond remains on the planned route for the later Rosetta Stone translation sequence.
References for this chapter
Required Fiend Dungeons and Main-Route Order
The PSP 20th Anniversary Edition’s required crystal dungeons are the Cavern of Earth, Mount Gulg, the Sunken Shrine and the Flying Fortress. Their guardians are Lich, Marilith, Kraken and Tiamat. These are the four required fiend locations for the main campaign; they are not the same as the optional Soul of Chaos dungeons. Follow the route in this chapter as a continuity check rather than repeating objectives already completed in earlier chapters.
1. Confirm the required order
Complete the Cavern of Earth and defeat Lich before beginning the route covered here. After Lich is defeated and the Earth Crystal is restored, return to Crescent Lake and speak with the Circle of Sages to receive the Canoe. Do not make a second trip through the Cavern of Earth as part of this chapter.
The main-route order is Cavern of Earth and Lich; Crescent Lake and the Canoe; Cavern of Ice and the Levistone; Ryukahn Desert and the Airship; Mount Gulg and Marilith; the Oxyale and Onrac sequence; Sunken Shrine and Kraken; Melmond and Lufenia; then Mirage Tower, Flying Fortress and Tiamat. Optional treasure can be collected along the way, but it does not replace any of these objectives.
- Lich has been defeated.
- The Earth Crystal has been restored.
- The Canoe has been obtained at Crescent Lake.
- The next required dungeon is the Cavern of Ice, not another visit to the Cavern of Earth.
2. Clear the Cavern of Ice and raise the Airship
Use the Canoe from the river system near Crescent Lake and follow the navigable route to the Cavern of Ice. The cave contains damaging ice-crystal floor tiles, undead enemies, Ice Gigas and other encounters that can consume healing resources. Save and restore the party before entering, and do not spend all of your spell charges clearing optional treasure rooms.
Follow the cave’s descending route until you reach the cracked-floor area connected to the Levistone chamber. Heal before examining the Levistone because the Evil Eye battle begins at the objective. The Evil Eye has low durability compared with later bosses but can use lethal status or instant-death effects, so use your strongest dependable attacks immediately rather than trying to prolong the fight.
After defeating the Evil Eye, take the Levistone. Drop through the nearby cracked floor and use the route back toward the first floor; from the area near the boss route, take the staircase that leads outside instead of returning through the original dead end. Sail back to the ship, then use the Canoe and river route to reach the sandy Ryukahn Desert south of Crescent Lake. Walk into the desert’s central area to trigger the Levistone event and raise the Airship.
- Reach the Cavern of Ice with the Canoe.
- Preserve healing resources across the ice-crystal floors.
- Defeat the Evil Eye and collect the Levistone.
- Use the Levistone in Ryukahn Desert to obtain the Airship.
3. Defeat Marilith in Mount Gulg
Restock at Crescent Lake after obtaining the Airship, then travel to Mount Gulg. The dungeon contains lava terrain and several branching treasure routes. Secure the required path first; return for optional chests only if the party still has enough HP, MP and recovery items.
Fire-element encounters are common, so do not rely exclusively on fire spells. Physical attacks and other available elemental spells provide a more dependable mix. Account for damage from lava tiles as well as battle damage, and keep the healer ready before crossing a long hazardous section.
Proceed to the lower section and heal before entering Marilith’s chamber. Use the party’s most reliable damage, maintain defensive support when available, and recover characters before they reach critical HP. After Marilith is defeated, touch the Fire Crystal to restore it, leave Mount Gulg and save after returning to a town.
- Restock before entering Mount Gulg.
- Use mixed physical and magical damage.
- Avoid exhausting MP on optional treasure routes.
- Defeat Marilith and restore the Fire Crystal.
4. Obtain Oxyale and the Warp Cube
Travel to the Caravan in the desert near Gaia and purchase the Bottled Faerie. The purchase requires a large amount of gil, so gather funds before making the trip. Return to Gaia and visit the Faerie to receive Oxyale. This is the required item for the underwater route from Onrac.
Visit Waterfall Cavern and reach the robot in the treasure area to obtain the Warp Cube. The Warp Cube is not needed to enter the Sunken Shrine, but it is required later to travel from the top of Mirage Tower to the Flying Fortress. Keep it in the inventory until that sequence is complete.
These two items solve different progression gates: Oxyale opens the underwater route, while the Warp Cube opens the late-game transfer to Tiamat’s dungeon. If Onrac’s submarine route does not activate, verify Oxyale. If Mirage Tower cannot transfer the party, verify the Warp Cube.
- Buy the Bottled Faerie from the Caravan.
- Receive Oxyale from the Faerie in Gaia.
- Obtain the Warp Cube from the robot in Waterfall Cavern.
- Do not confuse Oxyale with the Rosetta Stone or Warp Cube.
5. Enter the Sunken Shrine and defeat Kraken
Take Oxyale to Onrac and use the submarine route to enter the Sunken Shrine. The upper section contains the Rosetta Stone and valuable equipment, while the lower route leads toward Kraken. Search the upper floors first if the party is strong enough, because the Rosetta Stone is an important later requirement and the upper treasure is not automatically collected during the boss route.
Once the Rosetta Stone is secured, follow the stairs toward the lower floors and the Water Crystal chamber. Water enemies are suitable targets for lightning-based attacks, and Kraken is vulnerable to lightning in this edition. Preserve your reliable lightning damage for the boss approach instead of spending every charge on ordinary encounters.
Heal before touching the Water Crystal and beginning the Kraken battle. Maintain steady recovery, use lightning when available, and revive only when the party can safely protect the character being restored. After Kraken is defeated, touch the Water Crystal, leave the dungeon and save in Onrac or another town.
- Use Oxyale to activate the Onrac submarine route.
- Recover the Rosetta Stone from the upper Sunken Shrine section.
- Preserve lightning damage for Kraken.
- Defeat Kraken and restore the Water Crystal.
6. Translate the Rosetta Stone and obtain the Chime
Bring the Rosetta Stone to Dr. Unne in Melmond. He translates it and teaches the party the Lufenian language. This step occurs after the Sunken Shrine; the Rosetta Stone is not the item that opens the submarine route.
Travel to Lufenia after the translation. Speak with the townspeople and reach the resident at the eastern end of town to receive the Chime. The Chime is required to enter Mirage Tower. If the tower does not respond, return to Lufenia and confirm that the item was actually received.
Before entering Mirage Tower, restore HP and spell charges, update equipment and save. Mirage Tower leads directly into the Flying Fortress route, so prepare as though the two locations are one late-game expedition. The Warp Cube must already be in the inventory.
- Deliver the Rosetta Stone to Dr. Unne in Melmond.
- Learn the Lufenian language.
- Obtain the Chime in Lufenia.
- Confirm that the Warp Cube is available before entering Mirage Tower.
7. Cross Mirage Tower and the Flying Fortress
Enter Mirage Tower with the Chime and follow the required upward route. Optional equipment is available inside, but avoid exhausting the party before reaching the transfer point. At the top, defeat the required Blue Dragon encounter, then use the Warp Cube at the ancient device to reach the Flying Fortress.
The Flying Fortress is a large multi-floor dungeon with many treasure branches. On the first attempt, prioritize the route to Tiamat and collect defensive equipment when the detour is safe. Use physical attacks against manageable groups to preserve MP, but do not hesitate to spend resources against enemies that can cause instant death, petrification or severe status effects.
Continue through the fortress until Tiamat’s chamber. Maintain defensive support and steady healing rather than depending on an uncertain status effect. Use the party’s most reliable physical and non-elemental options, and reserve enough MP for emergency healing. After Tiamat falls, touch the Wind Crystal, leave the dungeon and save in town before proceeding to the final Chaos Shrine sequence.
- Use the Chime to enter Mirage Tower.
- Defeat the Blue Dragon encounter at the upper transfer area.
- Use the Warp Cube to reach the Flying Fortress.
- Defeat Tiamat and restore the Wind Crystal.
8. Separate required dungeons from Soul of Chaos content
The four required crystal dungeons are the Cavern of Earth, Mount Gulg, the Sunken Shrine and the Flying Fortress. Their required bosses are Lich, Marilith, Kraken and Tiamat. Once all four crystals are restored, the main campaign continues to the final Chaos Shrine sequence.
Earthgift Shrine, Hellfire Chasm, Lifespring Grotto and Whisperwind Cove are separate optional Soul of Chaos dungeons added to this edition’s bonus content. They contain additional enemies, treasure and optional bosses, but none is required to reach the ending. Leave them for post-game or for a separate completionist route unless the party is already prepared for long, resource-heavy dungeon runs.
- Required: Cavern of Earth and Lich.
- Required: Mount Gulg and Marilith.
- Required: Sunken Shrine and Kraken.
- Required: Flying Fortress and Tiamat.
- Optional: Earthgift Shrine, Hellfire Chasm, Lifespring Grotto and Whisperwind Cove.
Before you move on
- Lich was defeated earlier and the Earth Crystal was restored.
- The Canoe was obtained at Crescent Lake.
- The Cavern of Ice was cleared, the Evil Eye was defeated and the Levistone raised the Airship.
- Marilith was defeated in Mount Gulg and the Fire Crystal was restored.
- Oxyale was obtained and used to enter the Sunken Shrine from Onrac.
- The Rosetta Stone was recovered and delivered to Dr. Unne.
- Kraken was defeated and the Water Crystal was restored.
- Lufenian was learned and the Chime was obtained in Lufenia.
- The Warp Cube was collected from Waterfall Cavern and used at Mirage Tower.
- Tiamat was defeated and the Wind Crystal was restored.
- The four required fiends are defeated, and the final Chaos Shrine is the next required main-story destination.
References for this chapter
- Final Fantasy — Guide and Walkthrough by Dark_Vortex
- Final Fantasy — Guide and Walkthrough — PSP — GhostOfLegault
- Final Fantasy — Guide and Walkthrough — PSP — By Dark_Vortex
- Final Fantasy — Guide and Walkthrough — PSP — By Action
- Final Fantasy – Guide and Walkthrough – PSP
- Mirage Tower — Final Fantasy Wiki
Mid-Game Equipment and Spell Upgrades
After clearing the Earth and Fire shrine sequence, make an equipment and magic circuit through Crescent Lake, Gaia and Onrac. Later, after delivering the Rosetta Stone in Melmond and reaching Lufenia, buy Full-Life and Flare if your White Wizard and Black Wizard can use them. Prioritize current armor, healing, elemental coverage and protection against death effects rather than purchasing every spell or luxury weapon.
1. Resupply in Crescent Lake after Mount Gulg
Return to Crescent Lake after defeating Marilith in Mount Gulg. Rest at the inn, restore spell charges and replace depleted healing items before beginning the next part of the journey. Crescent Lake is an important magic stop because its level-six shops sell Protera, Invisira, Stona, Exit, Thundaga, Quake, Death and Stun.
Buy Protera if your White Wizard, Red Wizard or Knight can use it. Raising the party’s physical defense is more consistently useful than buying a spell that only works against a narrow enemy type. Exit is also valuable for dungeon recovery because it lets an eligible caster leave a dungeon instead of walking back through cleared floors. Stona is worth buying before areas containing enemies that can turn characters to stone.
For offensive magic, Thundaga is the most generally useful Crescent Lake purchase for a Black Wizard or Red Wizard because it damages all enemies. Quake and Death are situational and should not take priority over healing, defensive magic or the equipment required for the next region. A party without a Black Wizard can skip Thundaga and keep the gil for armor and accessories.
Do not treat Crescent Lake as the final shopping stop. Use it to restore the party and purchase the spells that solve immediate dungeon problems, then reserve the remaining gil for Gaia’s expensive armor, accessories and higher-level magic.
- Rest and restore spell charges in Crescent Lake.
- Buy Protera if an eligible caster does not already have it.
- Buy Stona before stone-producing encounters become common.
- Consider Thundaga for a Black Wizard or Red Wizard.
- Keep enough gil for Gaia’s equipment and level-seven or level-eight magic.
2. Make Gaia the primary equipment and high-level magic stop
Reach Gaia with the airship and inspect the weapon, armor, item and magic shops. Gaia is the most important general shopping hub in this part of the game, but its prices are high. Replace obsolete armor first, especially on the character who receives the most physical attacks. A new defensive piece that raises survivability is normally a better purchase than a small weapon-damage increase.
Check the armor shop for Protect Rings. In the PSP edition, Protect Rings resist death effects and can be used by any job. They are strong purchases for characters who lack equivalent protection, but do not bankrupt the party for them. Several additional Protect Rings and other defensive equipment can be found later, so buy them when affordable rather than delaying all other upgrades. If someone is still wearing clearly outdated armor, correct that weakness first.
For a Warrior or Knight, prioritize the best compatible body armor, shield and helmet. A Monk or Master generally does not need the same armor spending as a heavily armored frontline character. A Thief or Ninja should receive practical defensive upgrades without taking equipment that the Knight needs more urgently. Mages should improve armor and accessories before buying expensive weapons; keeping a caster alive preserves both healing and offensive spell access.
The Gaia level-seven White Magic shop sells Curaja and Diaja. Curaja fully restores one ally’s HP and is the most important direct-healing purchase for a White Wizard. Diaja is mainly valuable against undead enemies and is less urgent if gil is limited. The Gaia level-seven Black Magic shop sells Blizzaga and Break. Blizzaga gives a Black Wizard or Red Wizard another elemental area attack, while Break is a single-target stone or death-style option with limited reliability against resistant enemies.
After the party has changed classes, check Gaia’s level-eight shops. The White Magic shop sells Dispel, Holy and NulAll. NulAll cuts enemy spell damage to the whole party and is the strongest general defensive purchase in this group. Dispel removes enemy magical protection, and Holy supplies the White Wizard with an offensive option. The Black Magic shop sells Kill, Stop and related high-level choices, but these are more situational than reliable elemental damage. Buy them only after the party has the healing and protection it needs.
- Replace outdated armor before buying luxury weapons.
- Buy Protect Rings when the party can afford them without sacrificing essential armor.
- Purchase Curaja for an eligible White Wizard.
- Consider Blizzaga for dependable area damage.
- After class change, consider NulAll before less reliable status magic.
- Use remaining gil for equipment rather than filling every spell slot automatically.
3. Use Onrac for party healing, death protection and supplies
Visit Onrac after obtaining the Oxyale and before entering the Sunken Shrine. Onrac is not a major weapon or armor destination, so do not travel there expecting a complete physical equipment upgrade. Its value is in support magic and supplies.
The Onrac White Magic shop sells Healaga and NulDeath. Healaga restores a large amount of HP to the entire party and is useful when ordinary group healing no longer keeps pace with dungeon damage. NulDeath improves resistance to enemy death magic and is particularly worthwhile before dangerous late-game areas. It is not a replacement for the Ribbon or other status protection, but it can prevent some fatal spell results.
The Onrac Black Magic shop sells Saber. Saber improves the caster’s attack and accuracy, but it is useful mainly if the Black Wizard will actually make physical attacks or use equipment-based attacks. It is not a substitute for an elemental spell or Flare. If your Black Wizard spends battles casting magic, spend the same gil on healing, NulDeath or Blizzaga instead.
Before entering the Sunken Shrine, refill Hi-Potions, Antidotes and other cures that your party has been using. Restore spell charges at the inn and save before leaving town. Because the Sunken Shrine can consume resources through repeated encounters, do not enter with only enough items for the boss fight; reserve supplies for the approach as well as Kraken.
- Buy Healaga if party-wide recovery is weak.
- Buy NulDeath before death-magic-heavy areas when affordable.
- Buy Saber only if the caster will use physical or equipment-based attacks.
- Refill healing and status-curing items before the Sunken Shrine.
- Save and enter the dungeon with full HP and spell charges.
4. Unlock Lufenia and purchase the two ultimate spells
Do not plan the Lufenia shopping trip immediately after reaching Onrac. First complete the Rosetta Stone sequence in the Sunken Shrine, then take the stone to Dr. Unne in Melmond. Dr. Unne teaches the party the Lufenian language. After that, use the airship to reach Lufenia, landing near the forest and walking into town.
The level-eight magic shops are outside Lufenia rather than in the normal town shopping area. Leave through the northeast side and follow the light-colored ground near the town wall to reach them. The White Magic shop sells Full-Life for 40,000 gil, and the Black Magic shop sells Flare for 40,000 gil. Full-Life is restricted to the White Wizard; Flare is restricted to the Black Wizard. A Red Wizard cannot purchase either spell as a substitute for those classes.
If you can afford only one spell, Full-Life is usually the better recovery purchase because it revives one character at full HP. It costs a large amount of MP, so reserve it for a major battle or a failed recovery late in a dungeon. Keep ordinary Life spells and revival items available for routine deaths.
Flare is non-elemental and gives the Black Wizard damage that does not depend on fire, ice or lightning resistance. Use lower-cost elemental spells against ordinary enemies and save Flare for bosses, resistant monsters or dangerous encounters in the final dungeon. If your party lacks the relevant Wizard class, do not grind solely to buy a spell that nobody can learn.
- Deliver the Rosetta Stone to Dr. Unne in Melmond.
- Reach Lufenia after learning the language.
- Save 40,000 gil for Full-Life and another 40,000 for Flare if both classes are present.
- Buy Full-Life for the White Wizard before treating it as a routine spell.
- Buy Flare for the Black Wizard and conserve it for resistant targets.
5. Build a practical spell and equipment loadout
Before the next required dungeon, every party should have at least one dependable single-target heal, one method of restoring several allies, a revival method and protection against the most common status or death effects in the upcoming area. The exact combination depends on party composition, but the White Wizard should not spend every available slot on offensive magic while lacking Curaja, Healaga or Full-Life.
Keep elemental coverage on the Black Wizard, but do not rely on one element. Blizzaga, Thundaga and other elemental spells are efficient against ordinary groups when they connect. Flare is the fallback for targets that resist the party’s elemental choices. Physical characters should handle weaker encounters whenever possible so high-level spell charges remain available for bosses and long dungeon sections.
Re-equip the party immediately after every purchase or chest discovery. Confirm that the intended wearer can use the item and that a newly found weapon has not replaced a more valuable defensive accessory. If the party repeatedly reaches a boss with empty charges, return to town, improve armor or accessories, and reduce spell use against ordinary enemies instead of grinding without changing the loadout.
- Maintain single-target healing and group healing.
- Keep at least one dependable revival method.
- Carry both elemental and non-elemental damage options when possible.
- Check class compatibility after every equipment purchase.
- Conserve high-level charges for bosses and extended dungeon routes.
6. Final readiness check before the late-game route
Complete the shopping circuit by selling obsolete equipment, restoring HP and spell charges, and replenishing healing and status-curing items. Do not enter the late-game route with a large amount of unused gil while a character still lacks current armor or the White Wizard lacks a reliable recovery spell.
The party is ready to continue when the frontline character has current armor and a usable shield, the casters have their important healing and protection spells, and the group can answer physical, elemental and death-magic threats. If funds are limited, use this order: replace dangerously outdated armor, buy Curaja or Healaga as appropriate, acquire a Protect Ring if affordable, then purchase extra offensive or situational spells.
Save outside the next dungeon and begin with full HP, full spell charges and a stocked item inventory. Keep a backup save before entering a major shrine or final-dungeon sequence so a failed resource plan can be corrected without repeating a large section of travel.
- Current practical armor is equipped on every party member.
- The White Wizard has Curaja or another strong single-target heal.
- The party has group healing and a revival option.
- Protection against death effects is available where affordable.
- The Black Wizard has elemental coverage and, if purchased, Flare.
- Healing items, status cures, HP and spell charges are restored.
- A backup save exists before the next major dungeon.
Before you move on
- Crescent Lake has been used to restore the party and obtain any needed level-six magic.
- Gaia equipment has been checked, obsolete armor has been replaced and Protect Rings have been considered within the available budget.
- The party has visited Onrac and purchased the support magic appropriate to its classes, especially Healaga or NulDeath where useful.
- The Rosetta Stone has been delivered to Dr. Unne, allowing the party to proceed to Lufenia.
- If the party contains the required classes and has enough gil, Full-Life and Flare have been purchased from the Lufenia shops.
- The next required dungeon can be entered with current armor, recovery magic, status cures, stocked healing items and a backup save.
Optional Content and Treasure Hunting
The PSP 20th Anniversary Edition contains four Soul of Chaos dungeons and the PSP-exclusive Labyrinth of Time. None is required to reach or defeat Chaos, but these areas contain powerful equipment, extra bosses, rare encounters, and the hardest optional fights in the game. The Soul of Chaos dungeons open one at a time as the four elemental Fiends fall. The Labyrinth of Time becomes available only after all four Fiends are defeated. Complete the main campaign first if you want the straightforward ending route; otherwise, use the optional dungeons as a source of equipment and experience before entering the final Chaos Shrine sequence.
Open and visit the four Soul of Chaos dungeons
Earthgift Shrine opens after you defeat Lich in the Earth Cave. On the world map, look in the small desert between Cornelia and the Chaos Shrine for the cave entrance. It has five floors, and its four optional guardians are encountered on the final floor. Only one guardian is available on each trip, so clearing every guardian requires repeated runs. Because this is the shortest bonus dungeon, it is the best first optional stop, but its early treasure is not generally worth delaying the main story for.
Hellfire Chasm opens after Marilith is defeated. Find it among the small islands near the Dragon Caves; the entrance is on the southern end of the Dragon Caves island near the marshes. It has ten floors, with optional bosses on the fifth and tenth floors. This is a reasonable second bonus dungeon, especially if you want stat-boosting items or another Ribbon, but do not mistake the entrance opening for a recommendation to clear every floor immediately.
Lifespring Grotto opens after Kraken is defeated. From the canal leading out of Mount Duergar, continue toward the large pool and enter the nearby whirlpool. This dungeon has twenty floors, with bosses at several depths and its most dangerous encounters on the final floor. It is a late-game challenge. Enter only after the party has dependable healing, revival, strong weapons, and enough resources to survive multiple difficult battles.
Whisperwind Cove opens after Tiamat is defeated. Take the canoe through the interconnected rivers near Crescent Lake and follow the waterways to a dead-end cave. This dungeon has forty floors and a more linear progression than the other bonus areas, but it is still long and contains some of the best optional equipment. Save it for a developed endgame party or for post-story completion work.
- Defeat the associated Fiend before attempting to enter each dungeon.
- Save outside before every run and carry healing, revival, and status-curing supplies.
- Use an exit route or return portal whenever one is available instead of treating every run as an all-or-nothing attempt.
- Leave and return later if random battles consume most of your healing or spell resources.
Understand the randomized floors and prioritize useful rewards
Soul of Chaos layouts are not fixed. The game selects from multiple floor configurations when you enter, and the available chest groups can change with that configuration. A chest that appears on one run may be absent on another, so do not reset simply because a familiar room or expected item is missing. The four dungeons have fixed overall lengths and boss locations, but their ordinary floors and treasure selections are variable.
Earthgift Shrine is useful for its short route and optional bosses. Its rewards include equipment such as the Black Cowl, Kenpogi, and Elven Cloak, but it is not necessary to farm the dungeon early. Hellfire Chasm is the first bonus area where stat-boosting rewards and stronger equipment become more significant. Lifespring Grotto can provide high-value equipment such as the Genji Shield, Crystal Shield, and Crystal Ring through its randomized treasure tables, while Whisperwind Cove can contain Genji and Crystal equipment in later chest configurations.
Treat these items as bonus improvements, not prerequisites. If a desired item does not appear, finish the run or leave when possible and try again later. Repeatedly restarting early can consume more time than simply progressing through the story and returning with stronger equipment.
- Prioritize survivability and reliable healing before rare equipment farming.
- Search every floor you reach, but do not assume a specific chest will appear on every run.
- Use the shorter Earthgift Shrine as an optional warm-up and reserve Lifespring Grotto and Whisperwind Cove for the late game.
- Remember that a dungeon’s boss route is more reliable than its ordinary treasure route.
Collect optional treasures in the main story areas
The Masamune is an optional weapon found in the final area of the Chaos Shrine. Search the side rooms before entering the final boss room. It is one of the strongest weapons available and can substantially improve the damage of the character who equips it, but it is not required to complete the campaign. If you leave it behind, return to the Chaos Shrine before committing to the final battle and collect it then.
WarMECH is an optional rare encounter in the Flying Fortress. It is not required for progression, and its appearance is not guaranteed on a normal visit. If you want the encounter, save before searching the relevant bridge area, keep the party healed, and be prepared for a difficult fight. If WarMECH does not appear, continue the dungeon or reload only if the encounter is part of your personal bestiary or completion goal. Do not spend a long session hunting it during a first campaign unless you specifically want that challenge.
Normal story-dungeon chests are generally worth collecting when convenient, but they should not be confused with the randomized Soul of Chaos treasure tables. The Masamune is a notable one-time story-area pickup; many Soul of Chaos rewards can be pursued again on later runs.
- Search the final Chaos Shrine area for Masamune before fighting Chaos.
- Treat WarMECH as an optional rare encounter, not a required boss.
- Keep a separate save before rare-encounter hunting if you do not want to risk your main progress.
Unlock and prepare for the Labyrinth of Time
The Labyrinth of Time becomes available after Lich, Marilith, Kraken, and Tiamat have all been defeated. Go to Cornelia and speak with the hooded figure near the fountain. Then return to the Chaos Shrine and follow the figure to the rear of the area. Examine the spot where the figure opens a door to reveal the entrance.
Save before entering. The Labyrinth has no normal saving inside, cannot be exited with Exit or Teleport, and a party wipe causes a game over rather than returning the party safely to the world map. You can still retreat from the entrance room before stepping through the portal into the first challenge, so use that opportunity to heal, equip the intended weapons and armor, restore spell charges, and stock recovery items.
The dungeon is a sequence of timed challenges selected from a larger pool, so the exact floor order is not fixed. Before each challenge, you can sacrifice abilities such as Magic, Items, or Flee to gain additional time. Solving a challenge before the timer expires creates a blue seal and unlocks that challenge in the Time Chamber. Solving it after the timer expires creates a red seal and still allows progress, but does not unlock that challenge for replay there.
After several challenges, you reach Chronodia. The seal pattern determines which of the eight Chronodia versions you face, and different versions provide different rewards. You can repeat the Labyrinth, so failing to obtain a desired version does not permanently ruin the file. After the first successful clear and Chronodia defeat, save the game; the Time Chamber then becomes available from the main menu for replaying challenges that were opened with blue seals.
- Save immediately before entering the Labyrinth.
- Do not enter with low HP, low spell charges, incomplete equipment, or an untested party setup.
- Record whether each challenge was solved before or after the timer expired if you are pursuing specific Chronodia versions.
- Save after the first Chronodia victory to unlock the Time Chamber.
Recover after skipping or failing optional content
If you skip Masamune, return to the final area of the Chaos Shrine before the final battle and search the side rooms. If WarMECH does not appear, the encounter has not been permanently lost; preserve the save and revisit the Flying Fortress if you still want it.
If a Soul of Chaos chest is absent, do not assume the reward is gone forever. The floor configuration and chest group may change on another entry. The dungeons remain available after they open, and their optional bosses can be challenged again. This makes them suitable for later equipment farming once the party is stronger.
If the party is defeated in the Labyrinth, the current run is lost and the game over returns you to your last save. Reload the pre-entry save, restore the party, alter equipment or spell assignments, and try again. The Labyrinth itself remains unlocked. If you abandon a run before entering the first portal, simply prepare again in the Chaos Shrine and re-enter when ready.
For a speed-focused completion, skip all four Soul of Chaos dungeons, WarMECH hunting, and repeated Labyrinth runs. For optional-content completion, clear Earthgift Shrine, Hellfire Chasm, Lifespring Grotto, and Whisperwind Cove, defeat their available guardians, clear the Labyrinth, defeat Chronodia, and save afterward.
- Use a pre-entry save when attempting the Labyrinth.
- Return to the main story if optional battles are draining more resources than they provide.
- Revisit repeatable bonus dungeons for missing equipment rather than treating ordinary treasure as permanently missable.
- Keep a completed campaign save before beginning repeated superboss or treasure-hunting attempts.
Before you move on
- Masamune has been collected from the final area of the Chaos Shrine, or the player has deliberately skipped it.
- Earthgift Shrine, Hellfire Chasm, Lifespring Grotto, and Whisperwind Cove have been cleared if optional Soul of Chaos completion is intended.
- The Labyrinth of Time has been unlocked after all four Fiends were defeated, Chronodia has been defeated, and the game has been saved afterward.
- The Time Chamber is visible from the main menu, confirming the first Labyrinth clear and Chronodia victory were recorded.
- A separate save or backup exists before repeated optional-boss attempts and before the final campaign sequence.
Late-Game Preparation — MP, Items, Party Roles and Final Gear
After defeating the four fiends, prepare for the past Chaos Shrine by restoring your party, buying the best practical spells and consumables, completing the Adamantite trade if available, and preserving a backup save. The main campaign does not require the PSP edition’s Soul of Chaos dungeons, Labyrinth of Time, or rare Warmech encounter. Use those areas only if you deliberately want optional rewards or extra training.
Use Crescent Lake for immediate restocking
Crescent Lake is a practical first stop after the Flying Fortress or the fourth fiend. Rest at the inn, save, and visit the item shop for Potions, Hi-Potions, Ethers, Phoenix Downs, and Tents. The town also provides useful level 6 magic and Mythril equipment if you have not already bought it. Do not assume that every late-game spell or accessory is sold here; the strongest standard purchases are found elsewhere.
Buy enough revival and healing items to recover from an unlucky dungeon battle, but do not treat a particular inventory count as mandatory. Your required supply depends on party composition, level, and how often you use healing magic. Phoenix Downs are especially important because a knockout outside battle can otherwise force a return to town. Carry Ethers for emergency MP recovery, and use a Tent or Cottage before entering a dungeon rather than saving every consumable indefinitely.
- Rest and save at Crescent Lake.
- Replace missing Phoenix Downs, Hi-Potions, Ethers, and Tents.
- Review level 6 magic before spending gil on minor equipment.
- Keep a separate save before making final purchases.
Visit Gaia for the late standard purchases
Gaia is the better late-game shopping destination. Its item shop sells Hi-Potions, Ethers, Phoenix Downs, Tents, and Cottages. Its magic shops include level 7 spells, and its armor shop offers the Protect Ring and Ruby Armlet. Buy the level 7 spells that fit your party before entering the final sequence, especially your best available healing or support magic and any useful high-level attack spell your casters can use.
If funds are limited, prioritize survivability over a small weapon-damage increase. A Protect Ring is a concrete defensive purchase available in Gaia and is a sensible choice for a character who is frequently exposed to physical damage. A Ruby Armlet can also be useful when you need a light, broadly usable armor upgrade. These purchases are recommendations, not progression requirements; Chaos can be defeated without buying every late-game item.
- Check Gaia’s level 7 magic shops.
- Buy Cottages if you expect several dungeon attempts.
- Consider a Protect Ring before minor weapon upgrades.
- Leave enough gil for revival and MP-restoring supplies.
Review equipment manually and preserve the Monk’s role
Open each character’s equipment screen and confirm every weapon, shield, helmet, armor, and accessory slot. The PSP version provides an Optimize function, but inspect the result rather than accepting it without checking. A Monk or Master should be evaluated separately from a Knight or Ninja because that class’s damage and defense improve through its own class mechanics; do not assume that equipping a weapon is automatically better.
Give your strongest usable weapon to the character who will perform most physical attacks. If your party includes a Knight and you have already obtained Excalibur, equip it to that Knight. Put the most useful defensive accessories on the characters who must stay alive to cast healing or revival magic. If you already possess a Ribbon from optional content or a dungeon chest, assign it where its status protection is most valuable, but do not enter the optional dungeons solely to obtain one.
- Inspect every equipment slot.
- Check the Optimize result manually.
- Keep the Monk or Master’s weapon choice deliberate.
- Equip Excalibur if Adamantite was traded for it and your party has a Knight.
Complete the Adamantite and Excalibur trade
If you collected Adamantite in the Flying Fortress, travel to Mount Duergar before beginning the final attempt. Enter the dwarven cave, go to the smithy in the northern part of the cave, and speak to Smyth. Give him the Adamantite to receive Excalibur. This is a substantial upgrade for a compatible Knight and is worth doing before the final dungeon because it requires only a short detour.
Excalibur is not needed to unlock the Chaos Shrine’s final route, so a party without a Knight is not blocked by failing to make the trade. The Adamantite is not a consumable battle item; once it has been exchanged, confirm that Excalibur is equipped before leaving Mount Duergar.
- Confirm Adamantite is in the inventory if you intend to make the trade.
- Speak to Smyth in Mount Duergar.
- Equip Excalibur to a compatible Knight.
- Save after the equipment change.
Set roles for a long dungeon sequence
Use the formation that places your durable physical characters ahead of your casters. Keep the primary attacker focused on reliable physical damage. The White Mage or other healer should preserve the strongest available healing and revival magic for emergencies, while a Black Mage, Red Mage, or other secondary caster should carry a mixture of offensive and support spells instead of filling every slot with attacks.
The PSP release does not provide modern quick-use item presets or a shortcut bar. In battle, select Item through the ordinary command menu, then choose the required item and target. Before leaving town, review the item list so Phoenix Downs, Hi-Potions, Ethers, and status cures are easy to identify. Restore HP and MP at the inn, then use a Tent or Cottage immediately before entering a dungeon if you are traveling from an area without a convenient recovery point.
- Place durable characters ahead of casters.
- Confirm the healer has usable healing and revival magic.
- Give the secondary caster at least one support option.
- Remember that item use is menu-based, not preset-based.
Farm only what you actually need
For a short preparation session, fight ordinary encounters around the Floating Fortress or the late-game world map while traveling between towns. This provides experience and gil without committing you to a bonus dungeon. Stop once you can replace essential supplies and your party can survive normal encounters without repeated retreats. There is no required level threshold for entering the final dungeon, and grinding beyond what your party needs is optional.
The rare encounter on the bridge before Tiamat is called Warmech in the North American PSP release. It is not a required preparation test. If it appears unexpectedly, prioritize survival: use your strongest defensive and offensive support, heal after its area attack, and revive fallen characters only when the party can safely continue. If the encounter is too dangerous, retreating or losing the battle is not a reason to abandon the main campaign. Do not repeatedly hunt Warmech merely to improve your final-dungeon readiness.
- Use ordinary late-game encounters for a brief gil and experience reserve.
- Stop farming when essential supplies are affordable.
- Treat Warmech as a rare optional encounter.
- Save before deliberately testing the bridge encounter.
Keep PSP bonus dungeons out of the required route
The PSP 20th Anniversary Edition adds Soul of Chaos dungeons and the Labyrinth of Time. These areas provide optional fights and equipment, but they are not required to reach or defeat Chaos. The Labyrinth of Time becomes available after the four fiends are defeated and is especially poor preparation for a first final-dungeon attempt because its rules restrict ordinary escape options and saving inside the dungeon. Enter it only with a separate save and a deliberate optional-content goal.
Do not spend your final supply reserve on optional bosses. If you enter a bonus dungeon and use most of your Ethers, Phoenix Downs, or Cottages, return to Gaia or Crescent Lake and restock before continuing the main route. Optional gear can make the final battle easier, but it is not a prerequisite for completion.
- Do not enter Soul of Chaos or Labyrinth of Time by accident.
- Keep a separate save before optional-dungeon attempts.
- Restock completely after optional content.
- Proceed to the main final dungeon without optional rewards if desired.
Make two final saves and enter the Chaos Shrine
Create a dedicated final-preparation save after shopping, equipment changes, and the Adamantite trade. Keep a second save from before optional encounters or major spending. Before entering the Chaos Shrine, verify full HP and MP, formation, equipped weapons and armor, spell availability, and the number of revival items remaining.
The final route begins at the Chaos Shrine where Garland was defeated. Examine the dark crystal to open the passage to the Chaos Shrine of the past. The dungeon contains strong encounters and the four fiends before the final confrontation, so conserve expensive items against routine battles and use recovery opportunities when the dungeon provides them. Do not enter immediately after a Warmech attempt or optional dungeon run with depleted resources.
- Save in two separate slots.
- Confirm full HP and MP.
- Confirm the healer and secondary caster are equipped and ready.
- Confirm Excalibur is equipped if applicable.
- Replace supplies consumed during farming or optional content.
- Enter the past Chaos Shrine only after the final check.
Before you move on
- A final-preparation save and a separate backup save exist.
- The party has current armor, weapons, and accessories appropriate to each class.
- The healer has full MP or spell charges and usable healing and revival magic.
- The inventory contains enough Phoenix Downs, Hi-Potions, Ethers, and Tents or Cottages for the player’s intended approach.
- The party can defeat ordinary Floating Fortress or late-game world-map encounters without repeated retreats.
- Adamantite has been traded to Smyth and Excalibur equipped if the party includes a compatible Knight.
- Any optional Warmech, Soul of Chaos, or Labyrinth of Time content has been treated as optional.
- The party is ready to enter the past Chaos Shrine without relying on optional equipment or bonus-dungeon rewards.
References for this chapter
- Final Fantasy — Guide and Walkthrough by A_I_e_x
- Final Fantasy — Guide and Walkthrough by ANTIverson
- Final Fantasy — Guide and Walkthrough by Dark_Vortex
- Final Fantasy – Labyrinth of Time Guide – PSP
- Final Fantasy — Labyrinth of Time Guide — PSP — By KaonNemesis
- Final Fantasy PSP User Manual and Guide
Final Dungeon(s) — Entry, Key Puzzles and First Bosses
After the four elemental fiends have been defeated and the crystals restored, return to the Chaos Shrine north of Cornelia. The PSP 20th Anniversary Edition sends the party through the past Temple of Chaos, where the route includes the scripted Death Eye encounter, four rematch fiends, several optional treasure rooms, and the final approach to Chaos. Soul of Chaos dungeons are separate optional content and are not required for this main-campaign dungeon.
1. Prepare at Cornelia and preserve the recovery save
Finish any shopping, equipment changes, or optional exploration before entering. Return to Cornelia, restore the party at the inn, and save in a separate slot. Keep an earlier preparation save untouched. The Temple of Chaos contains no normal inn, so a failed attempt can otherwise force a lengthy repeat from the beginning.
Equip the party for survival rather than maximum damage alone. Give the frontline characters their strongest armor and shields, place the best weapons on the characters who will receive Haste or Temper, and ensure the White Mage or other healer has dependable healing and defensive spells. Carry Phoenix Downs and healing items for situations where a character is incapacitated or the healer cannot safely spend a turn casting.
The final dungeon contains strong random encounters, including dragons, elementals, Death Knights, and other late-game enemies. You do not need to fight every group. Run from low-value encounters when the party is already damaged or when preserving MP matters more than gaining experience.
- Restore HP and MP at Cornelia.
- Save in a second slot before entering.
- Keep the pre-dungeon save untouched.
- Equip the strongest available weapons, armor, and shields.
- Carry healing items and Phoenix Downs.
2. Enter the past Temple of Chaos
Travel to the Chaos Shrine north of Cornelia and enter. On the first floor, walk north to the room containing the black crystal. Examine the crystal after the four elemental crystals have been restored. The party will be transported 2,000 years into the past, beginning the true Temple of Chaos route.
A time-warp exit remains behind the party at the entrance to the past dungeon. Use it if you must abandon the attempt, but remember that leaving means returning to Cornelia for healing and then repeating the route. On the first floor of the past Temple, follow the outer path to the staircase in the southeast corner.
On the next floor, move east to the staircase. The route then leads through the upper floors toward a room containing two chests with an Ether and a Dry Ether. Take these supplies if the party can safely reach them, then continue through the nearby stair route. Do not confuse this early treasure room with a permanent healing point; the items are one-time pickups and do not replace a town recovery.
- Examine the black crystal in the restored Chaos Shrine.
- Enter the 2,000-year-past Temple of Chaos.
- Remember the time-warp exit behind the entrance.
- Use the southeast and east stair routes to reach the upper section.
- Take the Ether and Dry Ether if the party is in good condition.
3. Defeat Death Eye and open the sealed route
Continue through the upper floors until the route reaches a room with a crystal and the stone slab. Entering the room triggers the scripted Death Eye battle. Treat this as a required encounter rather than a random fight: heal beforehand if possible, and use reliable physical attacks or appropriate magic instead of spending rare spells unnecessarily.
After Death Eye is defeated, open both nearby chests if the party remains healthy. One contains an Elixir and the other a Dry Ether. Then examine the stone slab in the center of the room. The party uses the Lute automatically, the slab disappears, and a stairway opens into the lower section. You do not need to select the Lute manually from the item menu.
Return through the route indicated by the new stairway. The path takes you back across the upper floors and down toward the basement levels. From this point, the dungeon becomes a sequence of elemental-themed sections. Heal with spells and items between required fights, but do not assume that a post-battle recovery point exists.
- Prepare for the scripted Death Eye fight.
- Collect the Elixir and Dry Ether if practical.
- Examine the stone slab after Death Eye.
- Let the game use the Lute automatically.
- Follow the newly opened stairway into the basement route.
4. Defeat the Lich and Marilith rematches
The first rematch is Lich. Follow the lower route until the party reaches the Earth-themed section and the boss chamber. Lich can use Flare, so keep the healer ready to restore substantial HP after a damaging turn. Lich remains vulnerable to Dia-based holy damage in this PSP release, and strong physical attacks are also dependable. If you are using a buff-oriented party, Haste and Temper on a reliable attacker are more useful than spending several turns on weak elemental spells.
After Lich falls, continue to the next floor. The route offers optional chests containing a Protect Ring, Sasuke's Blade, Protect Cloak, and Megalixir. These rewards are not required to open the path, so take them only when the party can afford the extra walking and encounters. The Megalixir is especially valuable for the final approach; avoid consuming it casually during the early rematches.
Marilith waits beyond the next required stair route. She can use Death and has no dependable elemental weakness in this rematch. Use strong physical attacks, protect the party against her fire damage when possible, and keep revival items available in case the healer is incapacitated. There is no multi-target phase transition to interrupt; each rematch is a separate single-enemy battle.
- Use Dia and strong physical attacks against Lich.
- Expect Flare from Lich.
- Collect the Protect Ring, Sasuke's Blade, Protect Cloak, and Megalixir only if resources permit.
- Do not rely on an elemental weakness against Marilith.
- Protect against fire damage and keep revival items ready.
5. Defeat Kraken and Tiamat
After Marilith, descend to the next floor and make for the southeast corner. Kraken guards the hallway leading to the next staircase. Kraken is not weak to Thunder in the PSP version, and Ink can blind the party. Use physical attacks strengthened by Haste, Temper, or similar buffs, while the healer restores HP and uses a blindness remedy when necessary. If the party is blinded, continue with magic or item actions rather than wasting several turns on inaccurate physical attacks.
Once Kraken is defeated, descend to the Tiamat floor. The route begins near the upper-left side of this area. Move through the rooms toward the southern and eastern paths. The Masamune is in an optional treasure room along this route. It is a major weapon upgrade for a character who can equip it, but retrieving it requires backtracking and exposes the party to more encounters. If your supplies are already poor, skip it and return later only if you are pursuing optional treasure.
Return to the route near the entrance side of the floor and take the eastern path toward Tiamat. Heal before entering her chamber. Tiamat has no reliable weakness to exploit, so use defensive magic first, then Haste and Temper your main physical attackers. Use Flare only if MP remains after accounting for healing. Her damage can become dangerous when defensive preparation is skipped.
- Travel to the southeast corner for Kraken.
- Do not assume Thunder will exploit Kraken.
- Treat Ink as a blindness threat.
- Decide whether the Masamune is worth the optional detour.
- Heal before Tiamat.
- Use broad defense, Haste, Temper, and reliable physical damage against Tiamat.
6. Reach the final floor and prepare for Chaos
After Tiamat is defeated, continue through the room beyond her and take the stairs to the final floor. This floor has no random encounters according to the established walkthrough route. Move south around the large central room, enter the room at the south end, and walk north toward Chaos.
Use the final floor to restore HP and MP with spells and items. If you collected the Megalixir and the party is badly depleted, this is the most appropriate place to use it. Preserve at least one dependable recovery plan for Chaos: a healer with strong healing magic, revival items, or both. Chaos can deal heavy elemental damage, kill a character in one attack, and restore his HP during the battle, so entering with nearly empty MP is unsafe.
There is no requirement to clear Soul of Chaos content before this encounter. Those four bonus dungeons and their crossover bosses are optional PSP-era additions. They may provide powerful equipment, but the main campaign route is completeable without them.
- Defeat all four rematch fiends before proceeding.
- Take the stairs beyond Tiamat to the final floor.
- Restore HP and MP before speaking to Chaos.
- Use the Megalixir only if the party needs a full recovery.
- Keep the untouched pre-dungeon save available.
- Do not delay the main campaign for Soul of Chaos dungeons unless pursuing optional content.
7. Recovery plan after a failed attempt
If the party is wiped before reaching Chaos, reload the untouched pre-dungeon save and change the preparation rather than repeating the same approach. Reduce optional treasure detours, flee from resource-draining encounters, and reserve high-level healing magic for the rematches. If one caster is repeatedly disabled, let another character use healing items while the primary healer recovers or attacks.
If the party fails against Chaos, reload the closest safe save you created before the final confrontation. Begin the battle with elemental protection and physical-defense buffs, then use Haste and Temper on the strongest physical attackers. Keep healing active every round when necessary. Do not spend all Phoenix Downs early; reserve enough recovery for the later portion of the fight, especially because Chaos may restore his HP and prolong the battle.
There is no separate multi-stage boss sequence that requires a special interrupt order in this release. The practical progression is four individual rematch fights followed by Chaos. The key resource test is surviving the dungeon while preserving enough MP, healing, buffs, and revives for the final battle.
- Reload the pre-dungeon save after a full wipe.
- Skip optional chests if they are exhausting supplies.
- Preserve healing MP for the rematches and Chaos.
- Use items if the healer is disabled.
- Keep revives for the latter part of the Chaos battle.
- Change equipment or party roles before making another attempt.
Before you move on
- The party entered the past Temple of Chaos through the restored black crystal.
- Death Eye was defeated and the stone slab was opened by examining it with the Lute available.
- Lich, Marilith, Kraken, and Tiamat were defeated in the past Temple of Chaos.
- The party reached the final floor and restored HP and MP before the final confrontation.
- The pre-dungeon recovery save remains available in a separate slot.
- The required final-dungeon progression is complete and the party is positioned to confront Chaos; the campaign itself is completed only after Chaos is defeated and the ending is viewed.
Confronting the Final Boss and Ending Sequence
The PSP 20th Anniversary Edition ends with one battle against Chaos in the Temple of Chaos, the past version of the Chaos Shrine. The final route requires rematches with Lich, Marilith, Kraken, and Tiamat before Chaos becomes accessible. Chaos has 20,000 HP, 100 defense, 200 magic defense, no listed weakness, and broad resistance to elemental and status effects. The battle has no scripted transformation, separate phases, or additional boss forms. Instead, Chaos selects from powerful attacks and support actions, including Curaja, Haste, Slowra, Dispel, and damaging spells. The reliable plan is to enter with full resources, strengthen the best physical attackers, keep one character focused on recovery, and respond to Chaos’s healing or Dispel without wasting turns on unreliable status effects.
Prepare before entering the past Temple of Chaos
Return to a town before beginning the final approach and create a dedicated save. Keep a second save slot as a rollback in case the final dungeon consumes more resources than expected. Restore all HP and MP, equip the strongest available weapons and armor, and carry a dependable supply of healing items, revival items, and MP recovery.
Enter the Chaos Shrine north of Cornelia and walk to the restored black crystal in the center. Touching it transports the party 2,000 years into the past, where the dungeon is identified as the Temple of Chaos. Do not begin the final route with a nearly empty healer or a damaged frontline. The dungeon contains dangerous encounters and four mandatory fiend rematches, so the party should be ready to spend resources before the final battle rather than attempting to conserve everything at the cost of early knockouts.
Use the strongest equipment available to each character. A character carrying the Masamune should normally be assigned an attacking role, although the best user depends on the party’s class levels and accuracy. Bring enough recovery to survive several area attacks. Full-Life is useful if available, but ordinary revival items can also complete the campaign if they are used promptly and the healer is protected.
- Create a dedicated final-dungeon save and keep a rollback save.
- Restore HP and MP before touching the black crystal.
- Equip current weapons and armor.
- Carry healing, revival, and MP-recovery items.
- Do not enter with the party’s only healer already low on MP.
Clear the four required fiend rematches
The Temple of Chaos route places the required rematches in this order: Lich on B1, Marilith on B2, Kraken on B3, and Tiamat on B4. These are not optional encounters. Defeat each one before continuing toward the final floor. The rematches use the same fiend identities as the earlier shrine bosses but have substantially higher statistics than their original encounters.
After every rematch, restore HP and inspect the party’s MP before moving onward. If a White Wizard or Red Wizard has spent most of the party’s healing charges, use an Ether or another MP-recovery item before the next section. Random encounters in the Temple can include high-damage monsters such as dragons, elementals, Death Knights, and Iron Golems. If the party reaches a staircase with several characters injured, retreat toward the entrance instead of risking a wipe against another encounter.
After Tiamat falls, continue through the required stairs to B5. The final floor is the preparation point for Chaos. Restore HP and MP there, review equipment, and save again if the game’s save command is available in your current position. The final battle begins when you interact with the figure in the last room.
- Defeat Lich on B1.
- Defeat Marilith on B2.
- Defeat Kraken on B3.
- Defeat Tiamat on B4.
- Restore HP and MP before entering the final room.
- Retreat toward the entrance if a random battle leaves the party unable to recover safely.
Begin Chaos’s battle with survival and damage buffs
Chaos has 20,000 HP, 100 defense, 200 magic defense, and no listed weakness. His listed resistances cover the principal elemental categories and many status effects, so do not build the battle around Sleep, Paralysis, Silence, Death, or a single elemental spell. Physical attacks backed by Haste and Temper are usually the most dependable damage plan for a developed frontline.
Cast Protera early if the party is not in immediate danger. Apply Haste and Temper to the strongest physical attacker or attackers. If you have Giants Gloves, the Giant’s Tonic or another useful combat item, use it when the action will not leave the party unable to heal an emergency. A Black Wizard can contribute with strong spells, but high magic defense makes ordinary elemental casting less reliable than properly buffed physical damage.
There is no fixed opening sequence that must be followed every time. If Chaos begins with a damaging spell or physical attack, heal first and delay a nonessential buff. If the opening turns are mild, establish Protera and the most valuable offensive buffs before committing to repeated attacks.
- Cast Protera when immediate healing is not required.
- Use Haste and Temper on the strongest physical attacker.
- Use the Masamune or the best reliable weapon available.
- Treat status effects and ordinary elemental spells as secondary options.
- Prioritize survival over completing a buff sequence.
Recognize Chaos’s dangerous actions
Chaos can use strong physical attacks and area-damage spells such as Blaze, Tsunami, Earthquake, and Cyclone. These attacks can injure several characters at once. Keep the healer ready to use the strongest reliable group healing available, and do not wait for every character to reach critical HP before responding to major area damage.
Curaja is the most important recovery action to recognize. In this PSP version, Chaos can restore 9,999 HP with Curaja. This is not a scripted phase transition and does not occur at a guaranteed turn. When the large heal appears, resume the main damage plan immediately rather than rebuilding minor buffs or attempting status magic. A second Curaja can occur, so conserve enough MP and items to continue the fight instead of assuming one successful damage cycle will finish it.
Chaos can also use Haste, Slowra, and Dispel. If Dispel removes important preparation, restore Protera first if defense is failing, then reapply Haste and Temper to the main attacker. If Slowra affects the party, do not spend several turns correcting every minor status while injured characters remain vulnerable. Heal, revive the healer if necessary, and restore only the buffs that directly improve survival or damage.
The changing actions are the practical battle signs to watch for: a large area spell means immediate group recovery, Curaja means the damage race has been extended, Haste or Slowra changes turn order, and Dispel means key buffs may need to be rebuilt. None of these actions creates a new HP bar or a separate second phase.
- Heal promptly after Blaze, Tsunami, Earthquake, Cyclone, or heavy physical attacks.
- Expect Curaja to restore 9,999 HP without relying on a fixed turn.
- Reapply Protera, Haste, or Temper after Dispel according to the current danger.
- Revive the healer before resuming full offense.
- Do not mistake changing actions for a scripted boss phase.
Recover from a wipe and confirm the campaign ending
If Chaos defeats the party, reload the dedicated final-dungeon save rather than overwriting it. Change the preparation that caused the failure: improve armor, preserve more MP during the rematches, use Protera earlier, concentrate Haste and Temper on one attacker, or carry more revival and healing items. If Chaos repeatedly heals away your progress, reduce low-impact spellcasting and focus the party’s turns on the strongest physical damage while keeping the healer active.
If the party reaches the final room with depleted MP, retreat if the route allows it and restore supplies before trying again. Do not spend every Ether, Elixir, or revival item on the four rematches if doing so leaves no recovery for Chaos. Conversely, do not hoard all recovery items while allowing the healer or primary attacker to remain defeated; prompt recovery is more valuable than preserving items through a lost attempt.
When Chaos is defeated, allow the ending sequence and credits to play. The main campaign is complete after the final battle ends and the ending has been shown. Preserve the clear data and keep the separate pre-final-dungeon save. The PSP edition includes optional post-clear features and extra content, but those extras are not required to establish completion of the main story, and additional gallery material may require further accomplishments or clears.
- Reload the backup save after a defeat.
- Adjust equipment, MP conservation, mitigation, or buff priorities before retrying.
- Defeat Chaos in the final room of the Temple of Chaos B5 route.
- Watch the ending sequence and credits.
- Preserve the clear data and the pre-final-dungeon save.
- Do not use optional menu extras as a requirement for main-campaign completion.
Before you move on
- Lich, Marilith, Kraken, and Tiamat have been defeated in the Temple of Chaos route.
- Chaos is defeated in the final room on the Temple of Chaos B5 route.
- The ending sequence and credits play.
- The clear data is preserved in a separate save slot.
- The pre-final-dungeon save remains available for optional content or a later replay.
Post-Game and Optional Endings
The PSP 20th Anniversary Edition has four Soul of Chaos dungeons and the PSP-exclusive Labyrinth of Time. These are optional bonus activities rather than requirements for defeating Chaos or viewing the normal ending. Plan them from a save made before the final battle: after the ending, the game records clear data and unlocks extras, but it does not restore the party to the world map for free exploration. A complete PSP bonus-content record requires the four Soul of Chaos dungeons, the Labyrinth of Time and Chronodia, plus a preserved clear file with the unlocked extras.
1. Preserve the correct saves before the final battle
Make two separate saves before entering the final sequence in the Chaos Shrine. Keep one untouched as the main-campaign backup and use the other for optional-dungeon work. This distinction matters because defeating Chaos and viewing the ending does not create a normal post-game world state. If the optional dungeons were skipped, reload the pre-Chaos save to access them.
After defeating Chaos, follow the ending through its conclusion and save the clear data when prompted or when the game provides the clear-data option. A cleared file is valuable for the PSP extras, including the Bestiary and Music Player, but it is not a substitute for the pre-final save when you want to walk around the world, enter bonus dungeons or change equipment before another attempt. The game’s clear-data behavior is sometimes described as New Game Plus in older walkthroughs, but it does not carry the finished party’s levels, equipment or inventory into a fresh campaign. Loading that data starts a new adventure with a new party while retaining completion-related records.
- Keep a pre-Chaos save for continued world-map access.
- Keep a separate clear save after viewing the ending.
- Do not overwrite the only pre-Chaos save with optional-dungeon experiments.
- Use a new save for an alternate class combination.
2. Enter the Soul of Chaos dungeons as they unlock
The four Soul of Chaos dungeons are available before the final battle and unlock individually when their associated elemental fiend is defeated. Earthgift Shrine opens after Lich is defeated in the Earth Cave. Hellfire Chasm opens after Marilith is defeated in Mount Gulg. Lifespring Grotto opens after Kraken is defeated in the Sunken Shrine. Whisperwind Cove opens after Tiamat is defeated in the Flying Fortress. Their world-map entrances are separate from the original fiend dungeons, so use the relevant region rather than searching for a new entrance in Cornelia.
You do not need to clear a Soul of Chaos dungeon immediately when it unlocks. A practical order is Earthgift Shrine first, Hellfire Chasm second, Lifespring Grotto third and Whisperwind Cove last. This follows the general difficulty curve, but it is not a story requirement. Return to town, restore the party and save before every expedition. The layouts and chest placements are selected from changing configurations, so do not expect one fixed floor route to work on every visit.
- Earthgift Shrine: defeat Lich first.
- Hellfire Chasm: defeat Marilith first.
- Lifespring Grotto: defeat Kraken first.
- Whisperwind Cove: defeat Tiamat first.
3. Complete all four Soul of Chaos dungeons
For a full bonus-dungeon clear, defeat every guardian assigned to each shrine rather than stopping after the first successful descent. Earthgift Shrine is five floors and places Ahriman, Echidna, the Two-Headed Dragon and Cerberus on the fifth floor; only one of those guardians appears on a given run, so clearing all four requires four successful trips. Hellfire Chasm has ten floors, with Scarmiglione and Cagnazzo on B5 and Barbariccia and Rubicante on B10, normally requiring two runs. Lifespring Grotto reaches B20, with Gilgamesh on B5, Atomos on B10 and Omega and Shinryu on B20. Whisperwind Cove is the deepest shrine and places its four bosses at progressively deeper checkpoints, including Typhon on B10 and Orthros on B20.
The Soul of Chaos dungeons are long expeditions. Exit and Teleport do not function normally inside them, but Emergency Exit items can appear as treasure, and a defeated party is handled differently from a Labyrinth failure. Do not spend every Ether, Phoenix Down or high-value healing item on ordinary encounters. If the current floor configuration is poor or your party lacks enough resources for the next boss, use an available exit option or deliberately retreat when possible, then return with stronger equipment and a replenished stock of items. Chest hunting is optional; defeating all shrine guardians is the meaningful completion goal.
- Defeat all four guardians in Earthgift Shrine.
- Defeat all four bosses in Hellfire Chasm.
- Defeat all four bosses in Lifespring Grotto.
- Defeat all four bosses in Whisperwind Cove.
- Keep a pre-entry save outside each shrine.
4. Unlock the Labyrinth of Time
The Labyrinth of Time becomes available after all four elemental fiends have been defeated. Return to Cornelia and speak to the hooded figure near the fountain. Follow the figure to the rear of the Chaos Shrine. When the figure opens the concealed door, examine the same location again to make the entrance appear. Save outside before entering, and restore the party in the Chaos Shrine first.
The entrance area still allows you to step back into the Chaos Shrine and prepare, but once you enter the portal to the first challenge you are committed to the run. The Labyrinth has 30 possible challenges, although one run contains only a subset and the order is semi-random. Each challenge presents a time limit and may ask you to sacrifice abilities such as Magic, Item or Flee in exchange for more time. Solve the puzzle before the timer expires when possible: a blue seal advances the run and unlocks that challenge for later Time Chamber replay, while solving it after the limit produces a red seal and does not unlock that challenge for replay.
- Defeat Lich, Marilith, Kraken and Tiamat.
- Speak to the hooded figure in Cornelia.
- Follow the figure into the rear of the Chaos Shrine.
- Save before entering the first Labyrinth challenge.
- Preserve Magic, Item and Flee whenever the current puzzle can be solved without sacrificing them.
5. Clear Chronodia and unlock the Time Chamber
The Labyrinth ends with Chronodia, the PSP-exclusive superboss. There are eight possible Chronodia forms, determined by the number and order of blue and red seals opened during the run, and each form has its own equipment reward. Your first successful run does not need to produce every form. The immediate completion requirement is to reach the end, defeat Chronodia once and save afterward.
Saving after the first Chronodia victory unlocks the Time Chamber on the main menu. The Time Chamber lets you replay challenges that were previously opened with blue seals. It does not permanently change the selected save through ordinary battle rewards or chest contents, so do not treat it as a replacement for regular Labyrinth clears. If you are pursuing every PSP bonus, record which challenges have blue seals and which Chronodia forms have been defeated, then continue using the pre-entry backup whenever a full Labyrinth attempt fails. Death inside the Labyrinth causes a game over, and there is no normal save point anywhere inside.
- Reach Chronodia at the end of a Labyrinth run.
- Defeat Chronodia at least once.
- Save after the victory.
- Confirm that Time Chamber appears on the main menu.
- Use blue seals to unlock challenges for replay.
6. Replay with alternate classes without damaging the completed records
The four starting classes are selected when a new party is created, so an alternate class experiment requires a separate new-game file. The cleared campaign, the pre-Chaos optional-content save and the new alternate party should not share one overwrite cycle. Keep the cleared file even if you are satisfied with the normal ending, because it preserves the Bestiary and other completion extras; keep the pre-Chaos file if you still want access to the world map and optional dungeons with the original party.
A practical save layout is one untouched pre-Chaos backup, one working file for Soul of Chaos and Labyrinth attempts, one clear file after Chaos, and one separate file for each alternate party. The PSP version does not transfer the original party’s levels, weapons or armor into a fresh class run. What carries forward is primarily completion information and unlocked menu extras, not the finished adventuring party.
- Keep the original clear file.
- Keep the pre-Chaos optional-content file.
- Use separate saves for alternate class parties.
- Do not assume equipment, levels or inventory transfer to a new campaign.
- Record completed shrine bosses, Labyrinth blue seals and Chronodia forms.
Before you move on
- The pre-Chaos save remains available for continued world-map access.
- Earthgift Shrine has been cleared by defeating Ahriman, Echidna, the Two-Headed Dragon and Cerberus.
- Hellfire Chasm has been cleared by defeating Scarmiglione, Cagnazzo, Barbariccia and Rubicante.
- Lifespring Grotto has been cleared by defeating Gilgamesh, Atomos, Omega and Shinryu.
- Whisperwind Cove has been cleared by defeating its four associated bosses.
- The Labyrinth of Time has been entered after all four elemental fiends were defeated.
- Chronodia has been defeated at least once and the game has been saved afterward.
- Time Chamber is available if the PSP bonus-content goal includes its replay function.
- Chaos has been defeated and the ending viewed on a preserved clear file.
- Any alternate class run uses a separate save and does not overwrite the completed records.
References for this chapter
PSP-Specific Differences, Compatibility Notes and Troubleshooting
The North American PSP release is identified by product code ULUS-10251 and its U.S. packaging, not by a community filename or firmware tag. This 20th Anniversary Edition uses redrawn graphics, enhanced sound, an updated camera view, widescreen presentation, and additional content including the Soul of Chaos dungeons and Labyrinth of Time. Those additions are separate from the required campaign. To finish the main story, restore the four crystals, enter the final dungeon, defeat Chaos, and view the ending. Protect the save data before changing Memory Stick media, troubleshooting hardware, or investigating an unfamiliar installation.
Confirm the North American PSP edition
From the PSP home menu, open Game and select the Final Fantasy UMD icon. A North American physical copy should identify the software with product code ULUS-10251. The U.S. release shipped on June 26, 2007. Check the disc, case, or manual rather than relying only on the title icon or an unofficial filename.
This is the PSP 20th Anniversary presentation of the original Final Fantasy, not the NES release, the PlayStation Origins version, Final Fantasy II, or a later Pixel Remaster. The PSP edition adds redrawn character and environment graphics, enhanced presentation, an updated camera view, and a 16:9 display format. Its Soul of Chaos bonus dungeons and Labyrinth of Time are optional. They are not required to restore the crystals, reach the final dungeon, defeat Chaos, or view the main ending.
If the title does not launch, confirm that the UMD is seated correctly and that the PSP recognizes it from the Game menu. Do not eject the UMD while the game is running. If using an official digital installation, identify it through the PSP title entry and saved-data listing rather than an unofficial archive name. A filename is not reliable evidence of region, revision, or compatibility.
- The game is Final Fantasy for PSP, not Final Fantasy II or another PSP release.
- The physical North American copy matches ULUS-10251 or matching U.S. packaging documentation.
- The game launches from the PSP Game menu and recognizes the UMD or official installation.
- You understand that Soul of Chaos and Labyrinth of Time are optional for the main ending.
Set language, controls, display, and audio
The first launch displays the language-settings screen. Choose English, Japanese, or Japanese Kana. If the game has already been configured, open Configuration and review the available language, message-speed, control, window-color, and Bestiary settings. The game’s language setting is separate from the PSP system-language setting.
Under the documented default control layout, Circle confirms, talks, and searches; Cross cancels, returns to the previous screen, and dashes when used with a directional button; Square displays the menu; Triangle opens the Bestiary; and L or R switches pages where those buttons are shown. During battle, holding L and R together can attempt to flee with the party. The control assignments can be changed in Configuration, so test them in Cornelia before entering the Chaos Shrine.
To display the map from the field screen, press Select and Triangle simultaneously. This is the documented default map shortcut. Do not substitute Cross plus Triangle. If the controls have been remapped, check the Configuration screen and use the currently assigned map command rather than assuming the default buttons remain unchanged. Start opens and closes the field menu; it is not the documented default map command.
Check the game’s sound settings and the PSP’s physical controls separately. If music is missing, inspect the PSP volume level, mute switch, headphones, and speaker output. If the image has borders or differs from another PSP, review the console’s display or video-output settings. These hardware settings do not change the dungeon order, enemy behavior, or story route.
- Choose English, Japanese, or Japanese Kana on the game’s language screen.
- Test Circle, Cross, Square, Start, Triangle, L, and R before leaving Cornelia.
- Test Select plus Triangle for the map while the default controls are active.
- Confirm that Start opens the field menu, Square displays the menu, and Triangle opens the Bestiary.
- Set message speed and verify both the game audio settings and PSP volume controls.
Treat System 3.03 as external compatibility information
A listing that includes System 3.03, FW 3.03, or a similar number should not be treated as a separate Final Fantasy campaign version. The North American manual identifies the software as PSP-format Final Fantasy and gives its U.S. product information; it does not describe System 3.03 as a story mode, patch, route variation, or gameplay revision.
Some archival or community listings attach firmware-related wording to a disc image or compatibility record. That label is outside the documented game content. Do not change party selection, dungeon order, equipment planning, or boss preparation because a filename contains a firmware number.
Keep an actual PSP system update separate from the game itself. The UMD can include PSP system-update data, and the console may display an update icon if an update is needed to start the software. If the PSP presents an official update, fully charge the battery and connect the AC adaptor before starting. Do not remove the UMD, disconnect power, turn off the system, or remove the battery during the update. Afterward, check System Settings and System Information to confirm the system software status.
Do not start an update merely because an unofficial listing mentions System 3.03. Use the PSP’s normal update screen and proceed only when the console itself presents the update requirement.
- Use ULUS-10251 and U.S. packaging to identify the North American release.
- Do not use a community filename as proof of a gameplay revision.
- Keep a PSP system update separate from Final Fantasy’s campaign data.
- Do not interrupt an active official system update.
Use three practical save files within the twenty-file limit
Insert a Memory Stick Duo or Memory Stick PRO Duo before creating the campaign file. The Final Fantasy PSP manual requires 672 KB of available space for saving. It also states that the game supports up to twenty separate save files per Memory Stick Duo. Twenty is the documented capacity; three files are only a practical routine, not the total limit.
Use one active progression file, one checkpoint file, and one rollback file. The active file is the save you normally overwrite after reaching a safe location. The checkpoint file should be made before a fiend shrine, the final dungeon, a major optional dungeon, or another difficult sequence. Keep the rollback file from the last town or other reliable recovery point until the new checkpoint has loaded successfully.
Save through the in-game menu by selecting Save and choosing a file. A total party defeat is a Game Over, so continue from a previous save. Save before entering dangerous areas and after returning safely from them. If the party is defeated, load the checkpoint or rollback file, heal, replace weak equipment, and change the approach before trying again.
For an additional backup, connect the PSP to a computer with USB Connection and copy the Final Fantasy saved-data folder from PSP storage to a dated backup folder. The official PSP documentation confirms that files can be copied between the PSP and a computer over USB, or through a compatible Memory Stick reader. Do not rename internal save files, mix data from different product codes or regions, or delete a questionable save before preserving every available copy. Deleted save data cannot be recovered through the game’s own menu.
- Leave at least 672 KB available before saving.
- Use multiple files from the available set of up to twenty saves.
- Maintain an active file, checkpoint file, and rollback file as a recommended routine.
- Back up the saved-data folder before hardware repair, Memory Stick replacement, or system maintenance.
- Never delete suspected corrupted data before preserving all available backups.
Recover from UMD, language, display, or audio problems
If the Final Fantasy icon does not appear or the PSP reports that it cannot read the UMD, power the system down fully before opening the disc cover. Remove and reseat the disc, confirm that the cover closes correctly, and inspect the UMD for visible cracks, warping, heavy dirt, or other damage. Clean the exterior gently with a soft, dry cloth using straight strokes from the center toward the edge. Do not use solvents, abrasive materials, circular scrubbing, adhesive repairs, or a damaged disc.
Test another known-working UMD. If several games fail, the PSP drive or system is the more likely fault. If only Final Fantasy fails, test the disc in another compatible PSP if available. Back up the Final Fantasy save before repair, Memory Stick replacement, or other maintenance. Never eject the UMD while the software is running.
If the game opens in an unexpected language, change Final Fantasy’s own Language Settings in Configuration instead of changing only the PSP system language. If music is absent but effects remain, check the game’s sound setting, PSP volume, mute switch, headphones, and speakers separately. If the display differs from another PSP, review the console’s display or video-output settings before concluding that the disc is from another region.
If saved-data access fails, stop making new saves. Shut down the PSP normally, check that the Memory Stick is firmly inserted, and verify that the card is recognized from the PSP’s Saved Data Utility. Preserve the complete saved-data folder before formatting, deleting, or replacing the card. Formatting a Memory Stick deletes its stored data and cannot be undone through the PSP.
- Power down before reseating a problem UMD.
- Compare the behavior with another known-working UMD.
- Check game settings and PSP hardware controls separately.
- Back up saves before repairs, updates, or Memory Stick changes.
- Do not eject the UMD while the game is running.
- Preserve suspected damaged save data before formatting or deleting anything.
Before you move on
- The intended North American PSP release is confirmed by ULUS-10251, U.S. UMD labeling, or matching package documentation.
- The language, controls, message speed, display, and sound are tested before the first dungeon.
- Start opens the field menu, Square displays the menu, Triangle opens the Bestiary, and Select plus Triangle displays the map under default controls.
- At least one normal save and one separate fallback save or computer backup exist.
- The player understands that System 3.03 is external compatibility or archival wording, not a campaign requirement.
- The main campaign can be completed without entering Labyrinth of Time or Soul of Chaos.
Finishing up
You have defeated Chaos in the past Chaos Shrine and viewed the ending sequence and credits.
This confirms completion of the main campaign.
The four required Fiends have been defeated, their crystals have been restored, and the final ending has played.
Keep the pre-final-dungeon save if you want to access unfinished optional content, because the cleared file is not a normal free-roaming post-game state.
Optional PSP bonus dungeons, Chronodia, Warmech, treasure, and menu extras are separate goals and are not required for the main campaign.
Choose your next gameScreenshots & video
Game imagery for reference. Follow the written chapters above for the route and strategies.
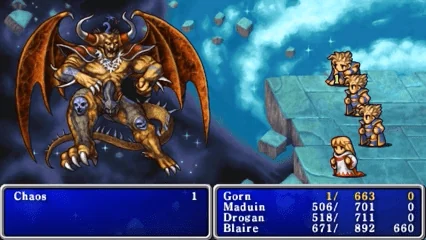
Sources & references
Our original guide draws on the references below. Check the edition at the top of this page before following controls or unlock requirements.
- Final Fantasy PSP User Manual and Guide
- Final Fantasy PSP User Manual PDF
- Final Fantasy PSP UMD and Product Information
- Final Fantasy — Guide and Walkthrough — PSP — Shady_Knight
- Final Fantasy — Guide and Walkthrough by ANTIverson
- Final Fantasy – Party Creation Guide – PSP – By Schaleh
- FF Weekly: December 17th – Final Fantasy Portal Site
- Final Fantasy I Walkthrough – Caves of Narshe
- Final Fantasy – Guide and Walkthrough – PSP
- Final Fantasy – Guide and Walkthrough – Game Clear Data and Soul of Chaos notes
- Final Fantasy — Guide and Walkthrough by Dark_Vortex
- Final Fantasy — Guide and Walkthrough by TakerVersion1
- Final Fantasy — Guide and Walkthrough by A_I_e_x
- Final Fantasy — Guide and Walkthrough — PSP — GhostOfLegault
- Final Fantasy (video game) - release and PSP edition overview
- Final Fantasy PSP Cheats and Unlockables
- Final Fantasy — Guide and Walkthrough — PSP — By Dark_Vortex
- Western Keep — Final Fantasy I Walkthrough
- Final Fantasy — Guide and Walkthrough — PSP — By brian_sulpher
- Nintendo Final Fantasy Player’s Guide reference, Earth Cave and Titan sequence
- Cavern of Ice B2 - Final Fantasy I Walkthrough
- Eyes on Final Fantasy - Walkthrough: Part V
- Walkthrough: Part VIII — Eyes on Final Fantasy
- Final Fantasy — Guide and Walkthrough — PSP — By Action
- Mirage Tower — Final Fantasy Wiki
- Final Fantasy – Spell FAQ – PSP
- Gaia – Final Fantasy Guides
- Final Fantasy – Soul of Chaos Guide – PSP
- Final Fantasy – Labyrinth of Time Guide – PSP
- Final Fantasy Anniversary Edition - Labyrinth of Time - StrategyWiki
- Final Fantasy — Labyrinth of Time Guide — PSP — By KaonNemesis
- Final Fantasy Anniversary Edition Unlockables — StrategyWiki
- Final Fantasy – Soul of Chaos Boss FAQ – PSP
- Final Fantasy I, II confirmed for US PSPs
- PSP Official Online Manual: Connecting a PSP System to a PC
- PSP Official Online Manual: Format Memory Stick
About the game & collecting notes
- Platform
- PSP
Practical, start-to-finish coverage for Square Enix’s North American PlayStation Portable release of the 20th Anniversary version of the original Final Fantasy. The route follows Cornelia, Pravoka, the Crown and Astos sequence, the Earth Cave and Cavern of Ice, the Airship, Mount Gulg, Sunken Shrine, Flying Fortress, the past Chaos Shrine, and Chaos, with PSP bonus dungeons clearly separated as optional content.
Darryl Polo
Darryl Polo loves tinkering with emulation and revisiting retro games. He enjoys exploring how old favorites play on different setups and sharing what he learns along the way. At Joking Joystick, he writes about the games, hardware, and small discoveries that keep the hobby fun.
Our editorial standardsFound a step that needs another look? Help us improve this guide.