
Final Fantasy XIII-2 (PlayStation 3) — Complete Campaign Walkthrough
Practical, step-by-step coverage of Final Fantasy XIII-2 on the original PlayStation 3 release: how to progress every main episode, use the Historia Crux, open gates, handle key bosses, capture and develop monsters, finish the post-game Paradox Endings, collect all 160 base-game Fragments, trigger the base-game secret ending, and complete optional owned DLC such as the Coliseum battles and Requiem of the Goddess episode.

Find a copy
Final Fantasy XIII-2 PlayStation 3
We may earn a commission if you buy through these links, at no extra cost to you. As an Amazon Associate I earn from qualifying purchases.
Opens retailer search results. Check the model, edition, seller, availability and current price before buying.
Before you begin
This guide is written for the original PlayStation 3 edition of Final Fantasy XIII-2.
It walks you from the opening sequences through each required timeline and gate to reach the campaign ending, then covers the post-game tasks for the eight Paradox Endings, all 160 base-game Fragments, and the base-game secret ending.
Follow the campaign chapters in order for a direct first-playthrough route. Because the Historia Crux permits branching, optional areas can be completed later without disrupting the main route.
After the campaign chapters, separate sections cover base-game completion cleanup, optional Coliseum challenge and recruitment content, and the Requiem of the Goddess narrative DLC episode.
Set yourself up for the run
Keep multiple save files.
Make one backup save before major chapter choices and another before the final sequence so you can replay sections for Paradox Endings or missed Fragments.
Familiarize yourself with the Historia Crux menu.
Progression depends on unlocking gates in different timelines and returning to the Crux to route new destinations.
Learn the combat basics and monster capture: battles use real-time command menus and a monster party member system.
Capture and raise monsters early to cover healing and defensive roles you might need later.
Set controls and camera to your preference early; use the prompts shown by your own remapped controller.
Expect side objectives and Wild Artefacts to be necessary for some optional and story routes.
If you plan to complete the base game, budget time for the 160 Fragments, Paradox Endings, and the secret-ending replay.
Treat Coliseum battles and Requiem of the Goddess as separate optional DLC goals; the Coliseum is challenge content, while Requiem is the narrative epilogue.
Controls, Combat Basics and Early Systems
Learn the original PlayStation 3 controls, configure a practical early Paradigm Deck, recruit and deploy monsters, and spend character and monster growth resources without wasting them. These systems are introduced gradually, so use this chapter as a working routine rather than trying to optimize the entire game at the start.
Configure the PlayStation 3 controls and establish a saving routine
The default PlayStation 3 field controls are left stick for movement, right stick for camera movement, X for confirming or interacting, Circle for jumping and canceling, Triangle for opening the main menu, Square for the area map, R1 for checking enemy information, and Start for pausing. L1 opens the Paradigm menu during battle. These are the standard assignments for the original PlayStation 3 release, but controller settings can be changed, so use the command display shown by your own game after remapping.
Open Settings from the title screen or main menu and review the controller and gameplay options before leaving the opening area. Test confirm, cancel, menu, camera, and battle inputs in a safe location. In particular, make sure you can open the Paradigm menu quickly, because changing paradigms is the main way to respond to a sudden attack or a low-health situation.
Save at every save point. Keep two rotating manual saves rather than overwriting one file repeatedly. Use one file for your current progress and the other for the last major checkpoint, such as before entering a new area, starting a boss sequence, or making a choice in a Live Trigger conversation. This is especially useful because the game can contain optional rewards and alternate outcomes that are not always recoverable immediately.
- Verify movement, camera, confirm, cancel, menu, map, and battle inputs.
- Test any remapped controls before entering a difficult fight.
- Maintain two rotating manual saves.
Read the battle screen and use the Active Time Battle system
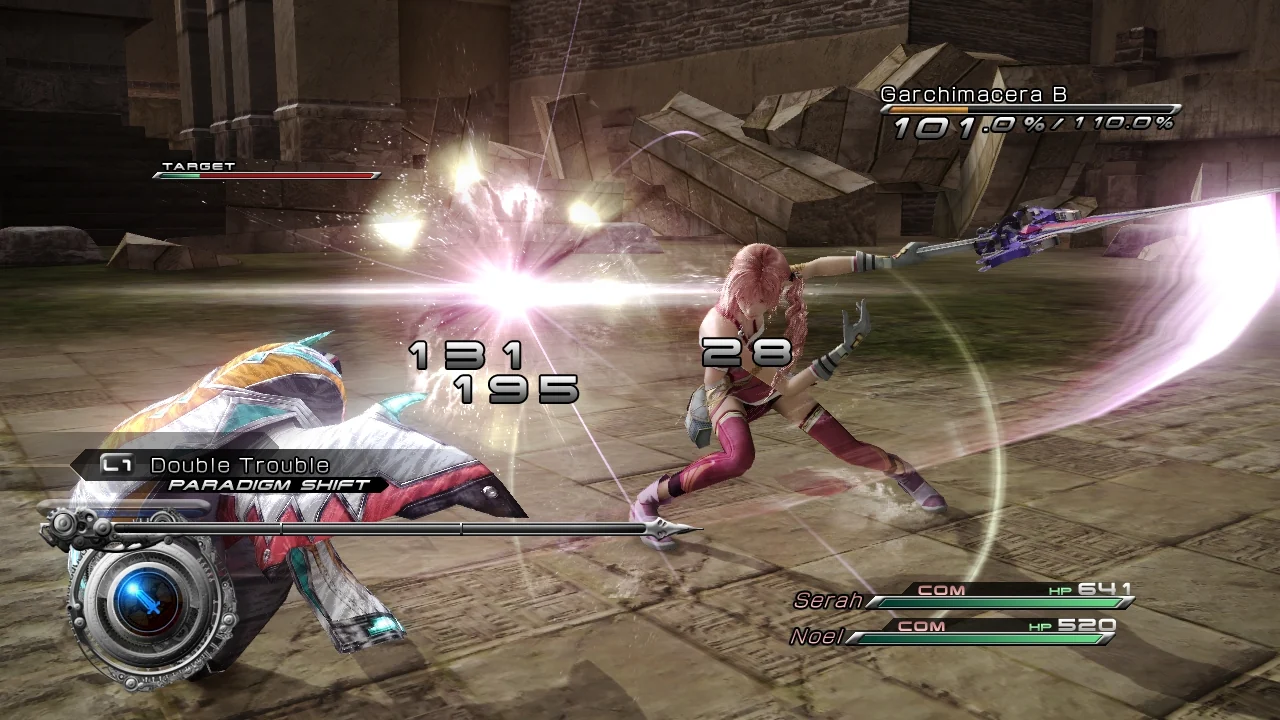
Final Fantasy XIII-2 uses an Active Time Battle system. The ATB gauge fills during combat, and commands are executed when the selected ATB segments are ready. You directly control the current party leader; the other human character and the active monster are controlled by the game's artificial intelligence according to their roles and the current paradigm.
Select an enemy before confirming commands. Check its name, HP, status icons, and Chain Gauge. The Chain Gauge rises when attacks are applied effectively and drops when pressure stops. Ravager actions are generally used to build the gauge, while Commando attacks provide steadier damage and help keep an established chain from falling as quickly. This is a general rule rather than a reason to ignore enemy resistances or special mechanics.
Use Auto-battle when the suggested commands are appropriate, especially against ordinary early enemies. Choose commands manually when you need a specific target, elemental action, healing spell, status effect, or timing. If a command queue has not yet been fully executed, canceling or changing the situation is usually safer than waiting passively while the party takes damage.
Open the Paradigm menu with the configured battle command, normally L1 on PlayStation 3, and switch to another prepared setup. A paradigm shift changes the roles assigned to the party at once. Switching is normally faster and more reliable than trying to issue individual commands to every party member.
- Check the selected target before confirming attacks.
- Use Ravager pressure to build the Chain Gauge and Commando attacks for stable damage.
- Use Auto-battle for routine fights but take manual control when targeting, healing, or timing matters.
- Practice switching paradigms before the first serious boss.
Learn the six roles and build an opening Paradigm Deck
The six roles are Commando, Ravager, Sentinel, Saboteur, Synergist, and Medic. Commando specializes in physical attacks and chain maintenance. Ravager uses elemental attacks and is usually the main chain-building role. Sentinel draws attacks and reduces incoming damage. Saboteur attempts to inflict negative status effects. Synergist applies beneficial effects to allies. Medic restores HP and can eventually revive defeated allies when the required ability is available.
You do not need a separate specialized setup for every early enemy, but you should prepare several different responses. Make one offensive paradigm containing Commando and Ravager roles, one healing paradigm containing a Medic, and one defensive paradigm containing Sentinel when that role is available. A second offensive setup with more Ravager pressure is useful for quickly building a chain. Add Saboteur or Synergist when the characters or an appropriate monster gain access to those roles.
A simple battle pattern is to begin with Ravager pressure, shift to a Commando-focused setup after the enemy is pressured or staggered, and use Medic when either character's HP becomes unsafe. Shift to Sentinel when a boss signals a powerful attack or when the party needs time to recover. If both characters are badly hurt, use a setup with more than one Medic when available rather than waiting for a single healer to catch up.
Paradigms can be reordered in the Party Paradigms menu. Put the setups you use most often near the top so they are easy to select during a fast battle. You can create up to six paradigms, so reserve the available slots for clearly different purposes instead of making six versions of the same damage arrangement.
- Prepare offensive, healing, and defensive paradigms.
- Keep at least one Medic setup and add Sentinel coverage when available.
- Use Ravager to build pressure, Commando for sustained damage, Medic for recovery, and Sentinel for dangerous attacks.
- Arrange the paradigm list so emergency healing and defense are easy to select.
Recruit monsters and assign them correctly
Monsters can become allies when a defeated enemy leaves behind a monster crystal. Crystallization is not guaranteed for every encounter, so continue fighting the species if a desired monster does not join immediately. Some early story battles introduce the system and provide useful starting examples rather than requiring you to build a perfect roster immediately.
After obtaining a monster, open the main menu and choose Party Paradigms, then Paradigm Pack. A Paradigm Pack is a group of three allied monsters that can be used by your paradigms. When you customize a paradigm, select which monster from the pack occupies that paradigm's monster position. Only the monster assigned to the current paradigm is active in battle; capturing a monster without placing it in the pack and assigning it to a paradigm does not make it fight.
Monster roles are fixed. Unlike Serah and Noel, a monster cannot freely switch from Medic to Ravager or from Sentinel to Commando. Choose monsters by the role they already possess. In the early game, Cait Sith is a Medic and is useful for emergency healing. Zwerg Scandroid is an early Ravager option. Keep whichever early Commando, Sentinel, or support monster you successfully obtain, but do not spend rare resources trying to make every capture permanent.
Monster growth uses a separate Crystarium and monster materials rather than the CP used for Serah and Noel. Strengthen the monsters currently assigned to your paradigms. If a monster repeatedly falls before it can contribute, improve its HP and role abilities, replace it with another monster of the same role, or reserve it for a safer paradigm instead of using it everywhere.
- Collect the monster crystals provided by early encounters.
- Create a three-monster Paradigm Pack and assign a specific monster to each useful paradigm.
- Remember that each monster has a fixed role.
- Keep a Medic such as Cait Sith available until character or later monster healing gives you a better replacement.
- Spend monster materials on active allies rather than the entire collection.
Use Feral Link abilities without interrupting survival
Each allied monster has a Feral Link ability. The Feral Link gauge fills while that monster participates in combat. When the gauge is full, activate the ability with the configured Feral Link command, normally Square on PlayStation 3. Some Feral Links require a short sequence of displayed inputs; follow the prompts in order and complete them quickly when possible.
Use a Feral Link when it will help finish an enemy, create a recovery window, or add useful damage without leaving the party exposed. Do not delay a necessary paradigm shift merely to wait for the gauge. The Feral Link is a tool that complements the Paradigm system, not a replacement for healing or defense.
A well-executed Feral Link can improve its result, and using one as the finishing action can help with the chance of obtaining a monster crystal. This does not guarantee recruitment, so treat it as a way to improve an attempt rather than a mandatory capture requirement.
- Watch for the Feral Link gauge after a monster joins battle.
- Follow displayed input prompts in order.
- Use Feral Links for damage, recovery, or a finishing attempt without neglecting healing and defense.
Spend Crystarium resources with an early priority
Open the Crystarium after earning CP and develop Serah and Noel in the roles that support your current paradigms. Early progress is dependable when you strengthen roles you are actively using instead of spreading every purchase across all six roles. Spend available CP before major story encounters rather than carrying a large unspent reserve while fighting with outdated abilities and statistics.
When the Crystarium presents a role bonus or a larger node, choose according to the immediate problem. HP is valuable if a boss is defeating the party before healing can stabilize it. Physical or magical improvements help when the Chain Gauge is being built slowly or the enemy survives too long. The early game does not require a permanent optimization route; later abilities, monsters, and materials will give you opportunities to revise your setup.
For monsters, use the materials shown in the monster Crystarium and prioritize the allies you actually deploy. Confirm that your active monster has received available growth before retrying a difficult battle. If a battle remains hard, first check your paradigm coverage, then upgrade the active monster, then reconsider equipment and manual command timing.
- Spend CP on Serah and Noel before major encounters.
- Prioritize roles already present in your Paradigm Deck.
- Use monster materials on active allies.
- Check both character growth and monster growth before retrying a boss.
Before you move on
- You can move, adjust the camera, open the main menu, inspect equipment, save, and change controller settings without confusion.
- Your Paradigm Deck contains offensive, healing, and defensive responses, with emergency healing easy to select.
- You understand the functions of Commando, Ravager, Sentinel, Medic, Saboteur, and Synergist.
- You have created a Paradigm Pack and assigned at least one useful monster to an active paradigm.
- You understand that monster roles are fixed and can identify the role of each monster before deploying it.
- Serah, Noel, and the monsters you regularly use have received available growth before the next major story encounter.
- You can activate a Feral Link and follow its displayed input sequence when the gauge is full.
References for this chapter
- FINAL FANTASY XIII-2 Official Mini Guide: Controller Commands
- Final Fantasy XIII-2 - Guide and Walkthrough - PlayStation 3 - Krystal109
- Final Fantasy XIII-2 – Guide and Walkthrough – PlayStation 3
- Final Fantasy XIII-2 - Guide and Walkthrough - PlayStation 3 - A_Backdated_Future
- Final Fantasy XIII-2 Walkthrough - GameSpot
- Final Fantasy XIII-2 Official Guide Sample Pages
Historia Crux: Time Travel, Gates and Artefacts
The Historia Crux is Final Fantasy XIII-2’s navigation hub for moving between locations and eras. New destinations appear when you activate Time Gates with named Artefacts or compatible crystal gates with Wild Artefacts. Use the gate matrix to identify unfinished routes, track Fragments and safely replay locations after obtaining Gate Seals. The following procedures apply to the original PlayStation 3 release.
Return to the Historia Crux and read the destination screen
From the field, press Start to open the Pause menu and choose Return to Historia Crux when that command is available. You can also use an unlocked Time Gate in the current area. The return command is not available during every scene or event, so a missing command is not automatically a progression error. Entering the Historia Crux automatically saves your progress. When loading a save, the game first places you in the Historia Crux; select the location you were last visiting to resume the adventure.
On the Crux, use the left stick or directional buttons to highlight a discovered location and press Cross to travel there. Each destination combines an area name with an AF date or an unknown date. Treat every area-and-era combination as a separate location. New Bodhum 003 AF, for example, is not the same destination as another version of New Bodhum, even if the physical setting looks familiar.
Press L1 to toggle the Historia Crux display. The map and gate-matrix views show how discovered locations are connected. Highlight a destination before travelling and inspect its gate icons and Fragment total. The icons indicate how many gates exist for that location; activated gates are displayed in gold, while an unactivated gate represents a route that still needs its required Artefact, Wild Artefact or progression trigger. The same destination information shows how many Fragments are available and how many you have recovered.
- Use Start and Return to Historia Crux when the field command is available.
- Check the area name and AF date before selecting a destination.
- Use the gate matrix to distinguish an unfinished gate from a location with no remaining route.
- Read the available and recovered Fragment totals before leaving a destination.
Open standard gates with named Artefacts
Most mandatory story routes use standard Time Gates that require a particular named Artefact. The Artefact is a Key Item obtained through exploration, a story event, a character interaction, a treasure container or a hidden object. Some hidden Artefacts require Mog’s abilities before they can be collected. After obtaining the correct item, return to the corresponding gate in the field and examine it. The gate then activates and its destination is added to the Historia Crux.
Named Artefacts are specific keys, not a general pool of interchangeable items. If a gate does not respond, check the Key Items section for the exact Artefact name and confirm that you are standing at the correct gate. If the item is missing, continue the current objective, search the marked route and inspect concealed objects with Mog. When the gate activates, return to the Crux and select the newly added location rather than searching for a separate route on the field map.
A standard gate may be visible before it can be used. Its presence does not mean the game expects you to open it immediately. Some gates are placed as future-route markers, and the required Artefact may come from another era or from a later story objective.
- Confirm the exact named Artefact required by the gate.
- Use Mog when an Artefact or treasure object is concealed by a paradox.
- Return to the gate after collecting the item instead of expecting automatic activation.
- If no destination appears, recheck the gate and then return to the Historia Crux.
Use Wild Artefacts at crystal gates
Crystal gates are the blue gate type and accept Wild Artefacts. Wild Artefacts are separate from named story Artefacts and are generally found through optional exploration, hidden objects, side objectives or special activities. A Wild Artefact can be used at any compatible crystal gate, but it is consumed when the gate is opened. Do not treat one Wild Artefact as a reusable master key, and do not assume that it is permanently assigned to one particular gate.
The practical rule is simple: use a Wild Artefact only when examining a blue crystal gate that accepts one. If you are deciding between several optional crystal gates, compare the destinations on the Historia Crux and consider whether one opens a required story branch, a useful side area or a Fragment route. The base game contains ten crystal gates and ten Wild Artefacts, so careless use does not create an infinite reserve. Because the Artefacts are consumed, record which crystal gate you opened if you are following a completion route.
Crystal-gate areas are often optional at the moment they first become visible, but optional does not mean irrelevant. They may contain Fragments, side quests, equipment, enemy encounters or routes needed for later completion. Revisit earlier locations when the story grants new access abilities or when a later objective points you back to a previously inaccessible section.
- Identify a blue crystal gate before attempting to use a Wild Artefact.
- Remember that a Wild Artefact is consumed after opening a crystal gate.
- Choose optional branches deliberately when several crystal gates are available.
- Revisit earlier areas after gaining new exploration abilities.
Separate main-route gates from optional and DLC destinations
The main campaign normally advances through standard gates opened by named Artefacts. Crystal gates commonly lead to optional areas, alternate versions of locations or completion-related content, although some optional-looking routes can become useful or necessary for later objectives. Therefore, classify a destination as currently optional rather than permanently unnecessary.
Downloadable content appears as additional destinations on the Historia Crux and does not replace the core story nodes. The Coliseum and downloadable character episodes require the relevant PlayStation 3 content to be installed. If those extra destinations are absent while the main campaign is functioning normally, verify the installed DLC and the account or region associated with that content before treating the missing nodes as a story-progress problem. Do not use a DLC node as evidence that a standard story gate is missing.
- Use named-Artefact gates to follow the immediate campaign route.
- Use crystal gates for optional, alternate-history or completion branches.
- Check DLC installation when extra Historia Crux destinations are absent.
- Keep DLC access separate from base-game story progression.
Close and reopen a gate with a Gate Seal
Gate Seals allow you to reset a previously opened location. In the Historia Crux, highlight the location with the relevant Gate Seal and press R1 to select the close-gate command. Closing the gate rewinds that location’s history to an earlier state, allowing you to replay its events and make different choices or resolve an earlier situation again. This is the normal method for accessing alternate histories and Paradox-related outcomes.
Closing a gate does not erase your entire campaign. However, related Artefacts may temporarily disappear from the Key Items list because the location has been rewound to before those items were obtained. This is expected behavior. Press R1 again on the closed location to reopen the gate and restore the previous history, or replay the location if you need to recover the related Artefact through gameplay.
Save before closing a gate when testing a choice, alternate outcome or unfamiliar location. In the Historia Crux, Triangle opens the main menu and Square saves your progress, allowing you to create a separate save before experimenting. Use that save as a fallback if you are unsure which version of a timeline you want to preserve.
- Obtain the relevant Gate Seal before trying to reset a location.
- Save in the Historia Crux before closing a gate for the first time.
- Use R1 to close or reopen the highlighted gate.
- Expect related Artefacts to leave the Key Items list temporarily after a reset.
- Reopen the gate or replay the location to restore missing Artefacts.
Before you move on
- You can return to the Historia Crux from the field with Start when the command is available.
- You can select a destination with the left stick or directional buttons and confirm travel with Cross.
- You can identify a named-Artefact gate, a blue crystal gate and an already active gate.
- You understand that Wild Artefacts are consumed and can be used at compatible crystal gates rather than being permanently assigned to one gate.
- You can read the gate icons and available-versus-recovered Fragment totals for a destination.
- You can distinguish core story destinations from optional crystal-gate branches and installed DLC nodes.
- You have created a separate save in the Historia Crux, closed a location with a Gate Seal and reopened it without losing overall campaign progress.
References for this chapter
Prologue and New Bodhum (3 AF): Start and First Routes
Complete the Valhalla prologue, reach New Bodhum 003 AF, defeat Gogmagog twice, obtain the Giant’s Artefact, complete the optional Heart Prism quest if desired, and open the main gate to Bresha Ruins 005 AF. Do not spend time hunting monster crystals during this first visit: monster recruitment is introduced in Bresha Ruins, after which New Bodhum can be revisited for additional monsters and fragments.
1. Complete the Valhalla prologue
The game opens with a sequence in Valhalla rather than New Bodhum. Follow the on-screen instructions through the introductory battles, using Auto-battle if you want to move through the tutorial quickly. The prologue introduces the combat interface, Cinematic Actions, and the conflict involving Lightning, Noel, Caius, and Chaos Bahamut. These encounters are effectively scripted tutorials, so concentrate on following the prompts and completing the displayed actions.
After the final prologue scenes, the story moves to Serah in New Bodhum 003 AF. When the camera and Datalog tutorials finish, leave the NORA House and follow the marked route. The early conversations introduce Live Triggers. Most responses only alter dialogue, but some choices can affect an accessory reward. Do not worry about making an irreversible mistake; the world can be replayed later through the Historia Crux if you want to alter a Live Trigger result.
- Finish the Valhalla tutorial battles.
- Reach New Bodhum 003 AF.
- Leave the NORA House and follow the first waypoint.
- Complete the initial Live Trigger tutorial.
2. Travel from Town Square to the Meteorite Impact Site
From Town Square, speak with Noel when the route prompts you to do so, then continue toward the Meteorite Impact Site. This section introduces the Mog Clock, so approach enemies from the direction shown by the encounter indicator when possible. Fighting from a poor angle can leave Serah exposed while her attack animation begins.
The path is mostly linear. On the way, collect the Potion treasure sphere, the map of New Bodhum, the Librascope, and the Phoenix Down if you want the early supplies. Speak with the characters placed along the route, including Gadot, Yuj, and Maqui, because their conversations are part of the guided route and can provide additional Live Trigger opportunities.
Use Slash & Burn to raise the chain gauge against tougher enemies. Pulsework Soldiers resist ordinary damage until staggered, so continuing to build the chain is more effective than repeatedly changing to a damage-focused formation before the stagger.
- Follow the marked path north from Town Square.
- Learn the Mog Clock system.
- Collect the early map and item spheres if desired.
- Reach the Meteorite Impact Site.
3. Defeat Gogmagog for the first time
Gogmagog is the first required New Bodhum boss. Begin in Slash & Burn to build the chain gauge and push the boss toward stagger. After the stagger, Double Trouble provides stronger immediate damage. If Gogmagog signals the heavy Swipe attack, temporarily use Twin Shields to reduce incoming damage, then return to an offensive paradigm once the threat has passed.
Keep Potions available rather than allowing both characters to remain at dangerously low health. This battle does not require a specialized monster party or late-game equipment. After the victory, you receive the Gogmagog Fragment Alpha and proceed toward the meteorite. Collect the nearby 300 gil and two Gysahl Greens if you have not already done so, then examine the meteorite when the objective directs you to it.
The resulting cutscene returns Serah to the NORA House. This is the point at which the game opens the Crystarium and gives you more freedom to explore New Bodhum.
- Stagger Gogmagog with Slash & Burn.
- Use Twin Shields against Swipe if necessary.
- Obtain Gogmagog Fragment Alpha.
- Collect the 300 gil and two Gysahl Greens when passing the nearby spheres.
- Examine the meteorite and return to the NORA House.
4. Complete the required New Bodhum town events
Spend your available Crystarium points before continuing. Then complete the short set of town objectives. Speak with Lebreau behind the counter, speak with Noel on the beach, and examine the vegetable garden in the southwest portion of town. These interactions advance the route to the next story sequence.
Follow the waypoint to obtain Lightning’s Knife and view the altered events surrounding the fall. Afterward, investigate the cats that attract Mog’s attention and follow the resulting scene. Continue to the children near the beach, chase the boy when he runs away, and complete the Live Trigger conversation at the Winding Way. This sequence awards Snow’s Necklace. Speak with Noel again on the return route if you want the optional conversation, then go back to the NORA House.
Enter Serah’s room and examine the strange mirror when the objective points you there. The following scene awards the Giant’s Artefact. This is the required artefact for the main exit from New Bodhum; it is not obtained from a random drop, the Heart Prism quest, or a Wild Artefact.
- Spend Crystarium points.
- Speak with Lebreau and Noel.
- Examine the vegetable garden.
- Obtain Lightning’s Knife.
- Complete the cat and child events.
- Obtain Snow’s Necklace if completing the local story sequence.
- Examine the mirror in Serah’s room.
- Obtain the Giant’s Artefact.
5. Complete the optional Heart Prism quest before the second boss
After the Giant’s Artefact scene, return outside and speak with Nell, the woman on the beach in the northeast part of town. She starts the Heart Prism side quest. Accept it before leaving for the crater if you want the Fragment during this visit.
Take the newly accessible Tidal Shallows route toward the meteorite. Collect the Iron Bangle and Phoenix Down along the way, then turn back up the hill near the route to find the Medical Kit. Return the Medical Kit to Nell to receive the Heart Prism Fragment and 50 CP. This Fragment is optional for story progression, but it is required for a complete 160-Fragment collection.
If you are following the main story only, you can leave the quest for a later revisit. The Heart Prism is not a prerequisite for the Giant’s Artefact or the Bresha Ruins gate. For a completion-focused run, however, it is efficient to finish the quest now while the Medical Kit route is already open.
- Speak with Nell on the beach.
- Accept the Heart Prism quest.
- Find the Medical Kit on the route through the Tidal Shallows.
- Return the Medical Kit to Nell.
- Claim the Heart Prism Fragment and its CP reward.
6. Defeat Gogmagog for the second time
Before approaching the waypoint at the crater, spend your newly earned CP and equip the Iron Bangle if you collected it. The second Gogmagog battle uses the same basic chain-building approach as the first, but the boss can activate Causality Barrier, reducing both physical and magical damage.
Remain in Slash & Burn while the barrier is active and concentrate on raising the chain gauge. Once Gogmagog staggers, the barrier drops and the boss becomes vulnerable to normal damage. Use Twin Shields when Swipe is telegraphed, then return to Slash & Burn or another available offensive formation. Recover with Potions before health becomes critical rather than trying to finish the fight during a dangerous attack cycle.
Victory awards Gogmagog Fragment Beta and a large CP reward. After the battle, the story enables chocobo riding. The chocobo is useful for safe travel, but you do not need to save the Gysahl Greens for an inaccessible New Bodhum area during this chapter.
- Spend CP before the battle.
- Use Slash & Burn to break through Causality Barrier.
- Use Twin Shields against Swipe when needed.
- Defeat Gogmagog a second time.
- Obtain Gogmagog Fragment Beta.
- Confirm that chocobo riding is now available.
7. Open the Historia Crux route to Bresha Ruins
After the second Gogmagog victory and its following scenes, return to the active gate at the Meteorite Impact Site. Interact with it and use the Giant’s Artefact. The main destination is Bresha Ruins 005 AF.
Do not use a Wild Artefact for this gate. The Giant’s Artefact is the story item that opens the required route. Wild Artefacts are reserved for other Historia Crux destinations and optional branches. Once Bresha Ruins 005 AF appears as an accessible node, this New Bodhum chapter is complete.
Monster recruitment is not available during the initial New Bodhum visit. In Bresha Ruins, the game introduces the monster crystal system and allows you to begin building a monster party. After that system is unlocked, you can return to New Bodhum through the Historia Crux. A later visit adds access to monsters such as Exoray and Tabasco Toad; a Medic such as Cait Sith is also a practical early support choice. These are optional improvements, not requirements for opening Bresha Ruins.
- Interact with the active gate at the Meteorite Impact Site.
- Use the Giant’s Artefact.
- Enter Bresha Ruins 005 AF.
- Begin monster recruitment only after the system is introduced in Bresha Ruins.
- Revisit New Bodhum later for remaining monsters and the Graviton Core Alpha route.
Before you move on
- The Valhalla prologue is complete.
- Gogmagog has been defeated at the Meteorite Impact Site twice.
- Gogmagog Fragment Alpha and Gogmagog Fragment Beta are in the Fragment list.
- The Giant’s Artefact was obtained from the mirror sequence.
- The Heart Prism Fragment has been collected, or Nell’s quest remains available for a later revisit.
- Chocobo riding has been unlocked after the second Gogmagog battle.
- Bresha Ruins 005 AF is visible and accessible on the Historia Crux.
References for this chapter
- Final Fantasy XIII-2 - Guide and Walkthrough - PlayStation 3 - Krystal109
- Final Fantasy XIII-2 Walkthrough: New Bodhum 003 AF
- Final Fantasy XIII-2 New Bodhum 003 AF Fragment Walkthrough
- Final Fantasy XIII-2 New Bodhum 003 AF Monster Guide
- Using the Crystarium – Final Fantasy XIII-2 Guide Sample
- FINAL FANTASY XIII-2 Software Manual
Yaschas Massif and Oerba: Mid-early Progression
After defeating Atlas in Bresha Ruins 005 AF, use the Eclipse Artefact to enter Yaschas Massif 010 AF. Investigate the Oracle Drive, defeat Aloeidai, and follow Hope to receive the Hollow Artefact. Use that artefact to enter Oerba 200 AF, complete its temporal rifts, and defeat Caius Ballad on the schoolhouse roof. The following scene awards the Artefact of Origins, which opens Yaschas Massif 01X AF. In the altered Massif, reveal the Mysterious Artefact with Mog Hunt, convert it into the Illusionary Artefact at the southern gate, and proceed through The Void Beyond. The region also contains optional fragments, a Wild Artefact gate, the Encounters Gate Seal, and the Gorgyra quest.
Enter Yaschas Massif 010 AF
Defeat Atlas in Bresha Ruins 005 AF and continue through the scenes afterward until the Eclipse Artefact is added to your inventory. Return to the Echoes of the Past area and activate the southern gate. Select Yaschas Massif 010 AF from the Historia Crux. The western tunnel gate leads toward Sunleth Waterscape 300 AF, which is another story branch; this chapter follows the Yaschas Massif route.
When you arrive, speak with the researcher and continue through the opening conversation until the area map is obtained. Follow the objective route through the Pass of Padra toward the Paddraean Archaeopolis. Use the minimap to separate the main path from side ledges and treasure areas. Mog Hunt can reveal hidden objects, but most early discoveries are optional and can be collected during a later return visit.
- Atlas has been defeated in Bresha Ruins 005 AF.
- The Eclipse Artefact is in the inventory.
- The Yaschas Massif 010 AF gate has been activated.
- The area map has been obtained.
Cross the Pass of Padra and prepare for Aloeidai
Yaschas Massif contains stronger roaming enemies than the preceding areas, including Feral Behemoths. You do not need to defeat every encounter. Avoid unnecessary battles when the party is already injured, use Chocolina for recovery supplies when available, and spend accumulated Crystogen Points before the boss if your characters or monsters are falling behind.
Prepare several paradigms before approaching the barrier. An offensive paradigm with Commando and Ravager roles is useful for building the chain gauge. Keep a Sentinel monster available for heavy attacks and a Medic monster for emergency healing. A Saboteur or Synergist can improve the battle, but neither is mandatory; use any captured monster that covers the needed role.
Save before speaking with the woman near the barrier on the route through the Pass of Padra. That conversation begins the mandatory Aloeidai encounter. If the party is having difficulty reaching the barrier, retreat to the nearest safe route, heal, and fight only manageable enemies while developing the Crystarium.
- An offensive paradigm is configured.
- A Sentinel monster is available for protection.
- A Medic monster is available for recovery.
- A manual save has been made before the barrier conversation.
Defeat Aloeidai and obtain the Hollow Artefact
Aloeidai is the mandatory boss of Yaschas Massif 010 AF. Begin with Commando and Ravager roles to raise the chain gauge. When Aloeidai applies pressure or prepares a broad attack, change to a defensive paradigm containing Sentinel. Heal promptly rather than allowing both human characters to reach critical health at the same time.
If the first stagger does not finish the fight, use Sentinel to survive the next dangerous sequence, restore the party with Medic, and then return to chain building. A Saboteur can shorten the battle if its debuffs land consistently, but the encounter remains manageable with only offensive, defensive, and healing coverage. If the party is defeated, reload the pre-battle save, spend more Crystogen Points, and replace a fragile monster with a sturdier role substitute.
After Aloeidai is defeated, the Aloeidai Fragment is recorded. Continue through the scenes, speak with the guard, and follow Hope. Speak with him each time he stops instead of wandering away from the objective route. At the base of operations, the following scene awards the Hollow Artefact. The Aloeidai Fragment and Hollow Artefact are separate rewards.
- Aloeidai has been defeated.
- The Aloeidai Fragment is listed in the Fragments menu.
- Hope has been followed to the base of operations.
- The Hollow Artefact is in the inventory.
Clear Oerba 200 AF and defeat Caius Ballad
Return to the Historia Crux and activate Oerba 200 AF with the Hollow Artefact. Follow the objective through the ruined settlement and complete the temporal-rift puzzles. These puzzles require matching the displayed pattern and moving through the nodes in the correct order. If the arrangement is entered incorrectly, restart the puzzle and compare the field pattern again rather than leaving the objective area.
The area also contains optional hidden objects and a Wild Artefact that can be revealed through Mog abilities. Treat this Wild Artefact as a separate resource. It is not the Artefact of Origins and is not required for the main route through Oerba. Keep it unused until you have chosen the Wild Artefact gate you want to open.
After the rift sequence, continue through the ruined village and follow the route to the schoolhouse. Heal, spend available Crystogen Points, and configure an offensive paradigm, a Sentinel-based defensive paradigm, and a healing formation before climbing to the roof. The rooftop encounter is Caius Ballad. Use offensive roles while the party is stable, switch to Sentinel when his attacks become dangerous, and heal before attempting another offensive push. If the fight becomes prolonged, rotate between defense, recovery, and chain building instead of remaining in a weakened offensive formation.
Defeating Caius Ballad is only part of the progression. Continue through the following scene and move to the end of the roof to collect the Artefact of Origins. This mandatory artefact opens the gate to Yaschas Massif 01X AF. Do not mistake the optional Wild Artefact or any local treasure for the item that advances the story.
- Oerba 200 AF has been entered with the Hollow Artefact.
- The temporal-rift sequence has been completed.
- Caius Ballad has been defeated on the schoolhouse roof.
- The following scene has been completed.
- The Artefact of Origins is in the inventory.
Complete the main route in Yaschas Massif 01X AF
Use the Artefact of Origins at the Historia Crux to enter Yaschas Massif 01X AF. Follow the opening conversations in the altered settlement, then go to the Archaeopolis when directed. After the scenes involving Hope and Alyssa, continue through the previously blocked upper walkway.
Use Mog Hunt in the upper Archaeopolis to reveal the Mysterious Artefact. Carry it to the southern gate in the Pass of Padra and examine the gate. The Mysterious Artefact changes into the Illusionary Artefact and activates the route into The Void Beyond. The transformation is required; merely finding the artefact does not open the gate until it is used at the correct location.
The Void Beyond is a short transition area. Collect its map or nearby optional treasure if desired, then continue through the distortion. Afterward, the Historia Crux points toward the next main-story destination, normally Sunleth Waterscape 300 AF. If that destination is not visible, check that you completed the Oerba scene after Caius, obtained the Artefact of Origins, and activated the southern gate in Yaschas Massif 01X AF.
- Yaschas Massif 01X AF has been opened with the Artefact of Origins.
- The Archaeopolis conversations have been completed.
- The Mysterious Artefact has been revealed with Mog Hunt.
- The artefact has been taken to the southern gate.
- The Illusionary Artefact has activated the gate.
- The Void Beyond has been entered.
Return for optional fragments and additional gates
For completion, return to Yaschas Massif 01X AF after the main route is open. The Mirror of Atropos quest requires three crystals gathered around the Pass of Padra. One crystal is revealed with Mog Hunt, another requires Mog Throw, and the third is reached through the lower route near the southern gate. Deliver all three to the requesting NPC to receive the fragment.
The Gorgyra quest begins in the encampment. Accept the request, then travel to the southwest part of the Pass of Padra to fight Gorgyra. Bring dependable healing and a way to remove harmful status effects. If the battle becomes unstable, use Sentinel to survive its pressure, recover with Medic, and resume attacking after the party is healthy. Gorgyra is an optional fragment target, not the mandatory story boss of Yaschas Massif 01X AF.
Two additional 01X AF quests require items found in Yaschas Massif 010 AF. The Tablet of Padra is obtained in the Pass of Padra and is delivered for the Orb of Clotho quest. The Fruit of Fenrir is reached with Mog Throw near the Chocolina area in 010 AF and is delivered for the Sword of Lachesis quest in 01X AF. These quests can be completed after the main route and do not block access to Sunleth Waterscape 300 AF.
The Encounters Gate Seal is a convenience item that allows a later replay of Oerba 200 AF without normal encounters. It is not the Artefact of Origins. A separate crystal gate in Yaschas Massif 01X AF uses a Wild Artefact to open Augusta Tower 300 AF. Check the gate destination before spending the item, because Wild Artefacts are shared resources for several optional and later locations.
- The three crystals have been delivered if pursuing the Mirror of Atropos fragment.
- Gorgyra has been defeated if pursuing the local fragment set.
- The Tablet of Padra quest has been completed if desired.
- The Fruit of Fenrir quest has been completed if desired.
- The Encounters Gate Seal has been distinguished from the story artefacts.
- The Wild Artefact gate has been checked separately from the Illusionary Artefact gate.
Before you move on
- Yaschas Massif 010 AF was entered through the Eclipse Artefact.
- Aloeidai was defeated and the Aloeidai Fragment was recorded.
- The Hollow Artefact was received after following Hope to the base of operations.
- Oerba 200 AF was entered and its temporal-rift sequence was completed.
- Caius Ballad was defeated on the schoolhouse roof.
- The following Oerba scene was completed and the Artefact of Origins was collected.
- Yaschas Massif 01X AF was entered through the Artefact of Origins.
- The Mysterious Artefact was revealed with Mog Hunt and converted into the Illusionary Artefact at the southern gate.
- The gate to The Void Beyond was activated.
- Optional fragments, Gorgyra, the Encounters Gate Seal, and Wild Artefact gates were kept separate from mandatory progression.
- The Historia Crux shows the next main-story destination, with Sunleth Waterscape 300 AF available through the intended route.
References for this chapter
- Final Fantasy XIII-2 Walkthrough - Yaschas Massif 010 AF
- Final Fantasy XIII-2 Walkthrough - Oerba 200 AF
- Final Fantasy XIII-2 Walkthrough - Yaschas Massif 01X AF
- Final Fantasy XIII-2 Artefacts, Gate Seals and Time Gates Guide
- Final Fantasy XIII-2 – Guide and Walkthrough – PlayStation 3
- Final Fantasy XIII-2 – Fragment Guide – PlayStation 3
- Final Fantasy XIII-2 Official Guide Sample Pages
Bresha Ruins and Sunleth Waterscape: Mid-game Locks and Gates
After the Atlas episode is already complete, return to Bresha Ruins 005 AF to confirm the Eclipse Artefact and Reunion Artefact at the monument. Use the Reunion Artefact to open Sunleth Waterscape 300 AF, defeat Royal Ripeness, learn Moogle Throw, and collect the Wild Artefact on the monster ride. Then revisit Bresha for the Holding Cell Key and optional tunnels before completing the later Sunleth objectives that provide the Combat Artefact, Thundering Artefact, and access to the next main-story region.
1. Return to Bresha Ruins 005 AF and open Sunleth Waterscape
This chapter assumes that the Atlas episode in Bresha Ruins 005 AF has already been completed. Do not return here expecting to fight Atlas again. Enter the Lamentable Rest area and inspect the monument where the post-Atlas scenes occurred. Use Moogle Hunt on the hidden objects there to collect or confirm the Eclipse Artefact and Reunion Artefact.
The Eclipse Artefact opens the gate to Yaschas Massif 010 AF. The Reunion Artefact opens the gate in the western tunnel to Sunleth Waterscape 300 AF. If both artefacts are already in your key-item inventory, go directly to the western gate and activate it with the Reunion Artefact. If one is missing, search the monument area for the Moogle Hunt reaction before leaving Bresha.
The two gates provide alternate branches rather than requiring another Atlas victory. Yaschas Massif 010 AF and Sunleth Waterscape 300 AF can be approached in either order, but this chapter follows the Sunleth branch because Moogle Throw is needed for several Bresha side areas and hidden objects.
- Atlas episode was completed before this chapter begins.
- Eclipse Artefact is confirmed in the key-item inventory.
- Reunion Artefact is confirmed in the key-item inventory.
- Reunion Artefact was used at the western Bresha gate.
- Sunleth Waterscape 300 AF is visible in the Historia Crux.
2. Defeat Royal Ripeness in Sunleth Waterscape 300 AF
Follow Serah toward the large Flan at the marked objective. Royal Ripeness is a required boss battle, not a scripted stalemate. It cannot be staggered, so the goal is to survive while steadily reducing its HP. It absorbs Fire and is weak to Wind.
Use a Sentinel monster in a defensive paradigm such as Delta Attack when the party is taking heavy damage. Keep a Medic available through Diversity or another healing setup, and switch to a Ravager-focused paradigm when you need to apply pressure with Wind attacks. Serah is useful as the controlled character because she can repeatedly cast Aero once the weakness is identified.
The battle may be long because the boss cannot be staggered. Do not waste the fight trying to force a stagger or relying on Fire attacks. Use Potions or healing abilities when the party is wounded, and keep Phoenix Downs available in case Royal Ripeness defeats a character. Snow joins as a temporary guest after the battle. Speak with him to receive the Sunleth Waterscape map.
- Royal Ripeness was defeated rather than merely survived.
- Fire attacks were avoided because the boss absorbs Fire.
- Wind attacks were used when available.
- A Sentinel and Medic option were kept ready.
- Snow was spoken to and the Sunleth map was received.
3. Obtain Moogle Throw and collect the ride-route Wild Artefact
After speaking with Snow, follow the route through the forest toward Chocolina and the southwest section. Continue through the marked story route until the scene that grants Moogle Throw. This ability lets Mog retrieve distant treasure spheres and hidden objects; it is also required for the later Bresha Holding Cell route.
Proceed to the monster-ride sequence. During the ride, use the on-screen Moogle Throw command when a target appears. On PlayStation 3, the game displays the relevant prompt, so follow the prompt shown by your current control configuration rather than relying on a remapped-button assumption.
The Wild Artefact is suspended on the eastern side of the ride tunnel. Turn the camera toward that side as the ride progresses and throw Mog when the artefact is within range. Collect it before the ride ends. The nearby Librascope, Mana Chips, and Silver Bangle are useful but optional. If the Wild Artefact is missed, finish the sequence, return to the Historia Crux when possible, and re-enter Sunleth to repeat the ride.
The Wild Artefact is not assigned to one particular future gate. It can be used on a blue crystal gate, so record it as available for optional branches such as Bresha Ruins 300 AF or the Coliseum route when those gates are ready.
- Moogle Throw was acquired.
- The Wild Artefact on the eastern side of the monster ride was collected.
- The ride was completed or can be replayed from the Historia Crux.
- Optional ride treasure was collected only if desired.
4. Revisit Bresha for the Holding Cell Key and optional tunnels
Return to Bresha Ruins 005 AF after learning Moogle Throw. In the Excavation Site, look toward the central excavation area and target the floating treasure sphere that was unreachable earlier. Throw Mog at it to obtain the Holding Cell Key.
Use the key at the locked barrier in the former holding-cell area. Follow the newly opened route into the southwest tunnels. Use Moogle Hunt whenever Mog reacts to a hidden object. The Army Comm Device is concealed in this tunnel network; recover it and return to Morris to complete the Vita Lyrica side quest. Vita Lyrica is optional, but it provides a Fragment and CP.
The tunnels also contain the Butterfly Bow and Unicorn Horn. The Butterfly Bow is a useful early Serah weapon, but neither item is required for the main story. The southwest tunnels contain rare enemy encounters, including potential Ravager and Commando captures. Treat those monsters as upgrades if captured, not as mandatory requirements. Any monster with reliable stagger building, healing, or damage mitigation can fill the same role.
A blue crystal gate in this area leads to Bresha Ruins 300 AF and requires a Wild Artefact. This branch is optional at this stage. The enemies in Bresha Ruins 300 AF are dangerous, so save before entering and postpone it if your current party is struggling. Its side quests can be completed later without blocking the main route.
- Holding Cell Key was obtained with Moogle Throw.
- The former holding-cell barrier was opened.
- Army Comm Device was recovered.
- Vita Lyrica was completed or deliberately deferred.
- Butterfly Bow and optional monster captures were handled according to the player's needs.
- Bresha Ruins 300 AF was opened only if its optional content is wanted.
5. Complete the later Sunleth visit for the Combat Artefact
Return to Sunleth Waterscape 300 AF after the intervening Historia Crux objectives make the later route available. The exact starting point may place you near Chocolina or along the previously explored forest path. Use Moogle Throw on reachable spheres and Moogle Hunt on hidden vines or objects as you retrace the route.
Follow the lower forest route toward Snow and the next Miniflan group. Defeat the group to receive the Combat Artefact. This artefact opens the optional gate to the Coliseum. It does not open the main gate to the Archylte Steppe, so do not treat Coliseum access as the next required story objective.
The Combat Artefact is also a useful point to review your party. Keep a Sentinel monster for damage mitigation, a Medic for recovery, and at least one Ravager or Commando monster for chain building and damage. Crowd-control or area-damage abilities help against groups of Flan and Miniflan, but no named monster is essential.
If the Coliseum gate is visible and the DLC is installed, you may activate it with the Combat Artefact. Coliseum battles are optional and can be postponed until stronger equipment and monsters are available.
- The later Sunleth route was reached.
- The Miniflan group was defeated.
- Combat Artefact was collected.
- The Coliseum gate was recognized as optional DLC content.
- The party was checked for Sentinel, Medic, stagger, and damage coverage.
6. Obtain the Thundering Artefact and open the main route
From the later Sunleth route, travel east from the forest crossroads and follow the path beyond Chocolina. Search the side paths for hidden objects and treasure spheres, then continue to the Miniflan encounter at the end of the route. Defeat this group to obtain the Thundering Artefact.
The Thundering Artefact is separate from both the ride-route Wild Artefact and the Combat Artefact. Keep the three items distinct in your notes and key-item inventory. The Wild Artefact is for blue gates, the Combat Artefact opens the Coliseum branch, and the Thundering Artefact advances the main Sunleth route.
Use Moogle Throw to collect the Extraordinary Egg Fragment on the optional side path before leaving if you are pursuing full base-game Fragment completion. It is not required to open the next story gate. After the fragment check, travel north through the forest and pass the Royal Ripeness area rather than attempting to repeat the earlier boss battle.
Activate the gate at the western side of the Base of the Crystal area with the Thundering Artefact. This opens the route to the Archylte Steppe. Once the gate is active, return to the Historia Crux and confirm that the Archylte Steppe destination is available before proceeding.
- The second Miniflan encounter was completed.
- Thundering Artefact was collected.
- Extraordinary Egg was collected if pursuing Fragment completion.
- The main gate beyond the Royal Ripeness area was reached.
- Archylte Steppe is available in the Historia Crux.
7. Prepare before continuing to the next episodes
Spend available Crystarium resources on Serah, Noel, and the monster roles you actually use. Prioritize a dependable Sentinel, Medic, Ravager, and Commando option instead of leveling every captured monster. A Saboteur or area-damage monster is helpful against groups, but it is not required for progression.
Keep at least one defensive paradigm, one healing paradigm, one chain-building paradigm, and one damage paradigm. A setup combining Commando, Sentinel, and Medic gives the party a stable recovery option, while a Ravager-heavy setup helps build chains against ordinary enemies. Switch paradigms according to the enemy rather than leaving the party in an offensive setup throughout every encounter.
Restock at Chocolina, improve affordable weapons and accessories, and create a separate save after the later Sunleth visit. If a gate does not appear, check the Historia Crux for the correct time period, confirm that the artefact was actually collected, revisit the last story marker, and finish any conversation or objective that appeared after the previous boss.
The required completion point for this chapter is access to the Archylte Steppe. The Coliseum, Bresha Ruins 300 AF, rare monster captures, Vita Lyrica, and the Extraordinary Egg are valuable optional objectives for a full-completion run but do not need to be finished before continuing the main story.
- Serah and Noel have spent their available Crystarium points.
- The monster roster includes healing and defensive options.
- The Paradigm Deck includes defense, healing, stagger building, and damage.
- Chocolina supplies and equipment have been reviewed.
- A separate save exists after Sunleth's main gate is opened.
- Archylte Steppe is confirmed as the next available main-story destination.
Before you move on
- The Atlas episode was already complete when this chapter began.
- Eclipse Artefact and Reunion Artefact were confirmed at the Bresha monument.
- Reunion Artefact opened Sunleth Waterscape 300 AF.
- Royal Ripeness was defeated in Sunleth Waterscape 300 AF.
- Moogle Throw was acquired.
- The Wild Artefact on the monster-ride route was collected.
- Bresha Ruins 005 AF was revisited and the Holding Cell Key was obtained.
- The southwest tunnels, Army Comm Device, and Vita Lyrica were completed or deliberately deferred.
- Combat Artefact was obtained during the later Sunleth visit.
- Thundering Artefact was obtained from the later Miniflan encounter.
- The main Sunleth gate was activated and Archylte Steppe became available in the Historia Crux.
- The party has defensive, healing, stagger-building, and damage paradigms before continuing.
References for this chapter
- Using the Crystarium – Final Fantasy XIII-2 Guide Sample
- Final Fantasy XIII-2 - Guide and Walkthrough - PlayStation 3 - Krystal109
- Final Fantasy XIII-2 Walkthrough - GameSpot
- Final Fantasy XIII-2 Walkthrough: Sunleth Waterscape 300 AF
- Final Fantasy XIII-2 Walkthrough: Bresha Ruins 005 AF Side Notes
- Final Fantasy XIII-2 Artefacts, Gate Seals and Time Gates Guide
Academia and Historia Crux Expansion
Academia’s late-game progression is divided among several Historia Crux entries. Academia 400 AF supplies Graviton Core Delta and a Wild Artefact gate. Academia 4XX AF begins the five-core quest, and the required route then continues through The Void Beyond, A Dying World 700 AF, and New Bodhum 700 AF. When the Artefact of the Ark from New Bodhum 700 AF is placed into the town gate, Academia 500 AF appears on the Historia Crux. Stop there and continue with the final-area route in Chapter 07.
Collect Graviton Core Delta in Academia 400 AF
Enter Academia 400 AF after it becomes available on the Historia Crux. This version of Academia is hostile and has frequent Cie’th encounters, so follow the available route toward Chocolina’s shop rather than trying to complete every fragment and map objective immediately.
From Chocolina’s shop in the northwest section, head north and descend the red escalator. Continue down the apparently reversed escalator route until Mog reacts to a concealed object. Use Moogle Hunt to reveal and collect Graviton Core Delta. The core is a Fragment, so confirm that it appears in the Fragment menu before leaving.
Academia 400 AF also contains a separate gate reached from Chocolina’s shop. Return to the shop, descend the blue escalator, turn around at the lower level, and continue down the next escalator. At the bottom, turn around again and follow the southern route to the crystal gate. A Wild Artefact opens this gate and adds Yaschas Massif 100 AF to the Historia Crux. This gate is separate from the story route that later leaves Academia 4XX AF.
You do not need to finish every Academia 400 AF side quest at this point. The required objectives are Graviton Core Delta and access to a Wild Artefact route if you are using Yaschas Massif 100 AF for the fifth core.
- Collect Graviton Core Delta with Moogle Hunt.
- Confirm the Delta Fragment in the Fragment menu.
- Open the Yaschas Massif 100 AF gate with a Wild Artefact if using the standard five-core route.
- Keep Academia 400 AF’s Wild Artefact gate distinct from the later Academia 4XX AF story gate.
Complete the five-Graviton-Core requirement
Travel to the timelines containing the cores you still need. The game requires five different Graviton Cores, but there are seven available, so you do not have to use one fixed combination. The commonly used route is Alpha in New Bodhum 003 AF, Beta in Bresha Ruins 005 AF, Gamma in Oerba 200 AF, Delta in Academia 400 AF, and Epsilon in Yaschas Massif 100 AF.
In New Bodhum 003 AF, search the raised platform in the central portion of the map. Mog’s Moogle Hunt reveals the concealed treasure containing Graviton Core Alpha. In Bresha Ruins 005 AF, use a chocobo to jump over the broken rail near the staircase and reach the grassy area below; use Moogle Hunt there to reveal Core Beta.
In Oerba 200 AF, travel to the building near Chocolina’s shop. Ride a chocobo onto the roof and use Moogle Hunt to reveal Core Gamma. In Yaschas Massif 100 AF, return to the Behemoth and searchlight area. Search around the large ground fissure, where Mog signals that a hidden item is nearby, then use Moogle Hunt to collect Core Epsilon.
If one of these locations is unavailable or you already collected another core, use the Fragment menu to identify the missing entry and substitute one of the other available cores. Sunleth Waterscape 400 AF and Oerba 400 AF can provide alternate cores, but their Wild Artefact gates and local objectives are optional for the main story.
Monster and Crystarium growth should remain practical rather than specialized during this section. Keep Serah and Noel advancing through their main role paths, and spend monster materials on a small working group that covers damage, stagger building, healing or support, and Sentinel defense. A captured monster is useful because it fills a needed role, not because a particular name is mandatory. Replace it when a stronger equivalent becomes available.
- Register five different Graviton Core Fragments.
- Use the Fragment menu to determine which core is missing before revisiting areas.
- Maintain at least one reliable damage, Ravager, Medic or support, and Sentinel option.
- Do not spend time completing all seven cores unless pursuing full Fragment completion.
Return to Academia 4XX AF and receive the Vagabond Artefact
Travel to Academia 4XX AF, the peaceful future-city version rather than the Cie’th-filled Academia 400 AF. From the arrival area, follow Hope and Alyssa north to Academy headquarters. Pass the information desk and continue through the large doors into the research facility.
Speak with Hope and Alyssa until the Graviton Core request begins. Return to Alyssa with five different Graviton Core Fragments. She accepts the cores and awards the Vagabond Artefact. If the event does not trigger, verify that you are in Academia 4XX AF and that five qualifying core Fragments are registered in the Fragment menu.
After the hand-in scene, speak with Noel as directed. Take the Vagabond Artefact to the eastern gate in Academia 4XX AF. This sends Serah into The Void Beyond. Do not confuse this route with optional Wild Artefact gates in the city. The Vagabond Artefact is the required story key for the next sequence.
Academia 4XX AF is also a good point to review equipment without trying to optimize the final battle yet. Replace outdated weapons and accessories, keep enough healing items for the next story encounters, and retain several usable monster paradigms. Save after receiving the Vagabond Artefact so the core hand-in does not need to be repeated if you make a wrong turn.
- Give five Graviton Cores to Alyssa in Academia 4XX AF.
- Receive the Vagabond Artefact.
- Speak with Noel if the objective does not advance automatically.
- Use the eastern gate to enter The Void Beyond.
- Create a manual save after the hand-in sequence.
Clear The Void Beyond and proceed into A Dying World 700 AF
In The Void Beyond, Serah is separated from Noel. Explore the immediate area before following the objective marker. Speak with each Yeul when the route directs you onward, and collect the story Fragments awarded during these conversations. The section is linear: follow Yeul through the newly opened paths rather than searching for a conventional exit.
The area eventually transitions into A Dying World 700 AF, which represents Noel’s dream. When you regain control, follow the route through the dark wasteland until you find Noel beside the fallen Behemoth. Once Mog becomes available again, use Moogle Hunt to reveal the area map and continue southeast toward the red figures and the objective route.
Follow Noel through the dream sequence until the story returns you to the wasteland. Later, return to the Oracle Drive location. Use Mog to reveal the Oracle Drive if it is hidden, then examine it to trigger the Live Trigger concerning whether Noel has the courage to oppose Caius. Choose the response equivalent to “I can do this.” This awards a Wild Artefact.
The Wild Artefact is not needed to open Academia 500 AF directly. It opens an optional gate in the southern part of A Dying World 700 AF. Use Mog to reveal the bridges linking the two sides of the wasteland, reach the southern gate, and open it if you want Bresha Ruins 100 AF and its available rewards. This detour is useful for optional items and progression resources but is not required for the next main-story location.
- Complete the Yeul conversations and story events in The Void Beyond.
- Finish the required Noel dream sequence in A Dying World 700 AF.
- Reveal and examine the Oracle Drive after returning to the wasteland.
- Choose the affirmative Live Trigger response to receive the Wild Artefact.
- Treat the Bresha Ruins 100 AF gate as optional for this chapter.
Finish New Bodhum 700 AF and unlock Academia 500 AF
Continue from A Dying World 700 AF into New Bodhum 700 AF. When control returns to Serah, use Moogle Hunt at the starting area to reveal the concealed treasure containing the Cartesian Board Fragment and CP. Then examine the spacetime distortion at the dock. The following scene upgrades Mog’s hunting ability, allowing concealed objects marked by Historia Crux symbols to be revealed.
After the scene, head north from the dock toward the town area. Use Mog’s upgraded hunting ability to reveal the Artefact of the Ark near the ruined NORA House. Collect it before returning to the gate. The Supply Sphere Access Code, Hope’s Message, and the New Bodhum 700 AF map are nearby optional items; they can be collected now, but none is required to open Academia 500 AF.
The required gate is at the end of the magically formed pier in the town area. Place the Artefact of the Ark into this gate. The gate activates and adds Academia 500 AF to the Historia Crux. This is the completion point for this chapter. Do not enter or traverse Academia 500 AF here; its platform routes, mandatory battles, and final-story preparation belong to Chapter 07.
Before leaving New Bodhum 700 AF, make a manual save after the Historia Crux updates. This preserves a clean point from which to begin the final-area route while leaving optional fragments and alternate gate work available. Inventory management at this stage should be limited to replacing obsolete equipment, checking that recovery items are available, and keeping a functional set of monster roles. The detailed final-sequence setup comes next.
- Use Moogle Hunt at the New Bodhum 700 AF starting area and obtain the Cartesian Board Fragment.
- Examine the dock distortion and receive Mog’s upgraded hunting ability.
- Reveal and collect the Artefact of the Ark near the ruined NORA House.
- Reach the gate at the end of the formed pier.
- Activate the gate and confirm that Academia 500 AF appears on the Historia Crux.
- Save after Academia 500 AF is unlocked, without entering it.
Before you move on
- Graviton Core Delta is registered from Academia 400 AF.
- Five different Graviton Core Fragments are registered in total.
- Alyssa has accepted the five cores in Academia 4XX AF and awarded the Vagabond Artefact.
- The required route through The Void Beyond and A Dying World 700 AF is complete.
- The Artefact of the Ark has been revealed and collected in New Bodhum 700 AF.
- The gate at the end of the New Bodhum 700 AF pier has been activated.
- Academia 500 AF is visible on the Historia Crux and has not yet been entered.
- A manual save exists after the gate activation, ready for the Academia 500 AF route in Chapter 07.
References for this chapter
Late Game: Route to the Final Confrontation
This chapter begins after Academia 500 AF has already been unlocked. Its purpose is to prepare for and traverse the Academia 500 AF labyrinth, collect the Determination Gate Seal and the optional Final Battle Gate Seal if desired, activate useful Cactuar checkpoints, and reach the final story marker without starting the consecutive final battles. The route uses rotating L-, T- and stairs-shaped platforms controlled by red and blue Chaos Blocks. Falling returns you to the most recently activated Cactuar checkpoint, so activate each checkpoint as soon as you reach it.
1. Prepare before entering Academia 500 AF
Make a separate manual save before selecting Academia 500 AF from the Historia Crux. Keep this file separate from your ordinary rotating save. The area is difficult to navigate, and preserving a pre-entry file lets you leave, improve the party or retry the labyrinth without losing access to the route.
Review the Paradigm Pack before departure. Keep one paradigm for safe chain building, one for direct damage, one with strong healing and at least one Sentinel-centered setup. A practical late-game spread includes a durable Sentinel monster, a dependable Medic monster, and a Commando or Ravager monster capable of sustained damage. A Saboteur or Synergist option is useful, but no single monster lineup is mandatory for reaching the marker.
Spend accumulated Crystarium points, check weapon and accessory upgrades, and stock recovery items. If the party struggles against the enemies in the labyrinth, leave through the Historia Crux and return after improving the characters or monster companions. Anti-Gravity Jump is useful for optional treasure and map completion, but it is not required merely to reach the final story marker.
- A separate pre-entry save is preserved
- The party has chain-building, damage, healing and Sentinel coverage
- Crystarium points and equipment have been reviewed
- Recovery items are available
- Anti-Gravity Jump is treated as optional rather than a main-route requirement
2. Enter Academia 500 AF and collect the first Gate Seal
After the opening scene, move south from the starting platform and take the treasure cube containing the Determination Gate Seal. This seal is optional for the immediate final route, but collecting it now avoids a later return if you are also working toward gate-reversal content.
From the starting area, take the northern path. Move carefully near every edge because a fall resets you to the most recently activated Cactuar checkpoint rather than leaving you where you fell. Continue east across the available platform and collect the Phoenix Down if you want the nearby recovery item.
Return toward the Chocolina platform and activate the Cactuar statue there. This checkpoint is an important recovery point for the opening section. Nearby rotating platforms are controlled by Chaos Blocks: changing a block between its available colors changes the orientation or movement pattern of connected platforms. Do not cross immediately after changing a block. Watch the platform complete its movement, then cross while the landing surface is aligned.
- The Determination Gate Seal has been collected if desired
- The first Cactuar checkpoint near Chocolina is active
- The party has reached the first moving-platform section
- The player understands that Chaos Block changes alter platform routes
3. Cross the opening platform section
From the Chocolina checkpoint, head north and use the moving platforms to reach the eastern platform. Wait for the block to rotate into place before crossing, then continue east to the platform containing the Phoenix Blood. Return to the route and climb the northern stairs. The area contains strong encounters, including Proto-Behemoth groups, so use Sentinel protection when the party is taking heavy physical damage and switch back to damage or chain-building paradigms once the immediate threat is controlled.
Continue to the upper Cactuar statue and activate it. Treat every Cactuar statue as a checkpoint rather than scenery. If you fall during a later jump, deliberately use the checkpoint reset to repeat only the current section instead of retracing the entire maze.
From this checkpoint, backtrack to the earlier branching area, then take the western route and continue north through the rotating platforms. Follow the platforms to the next Cactuar statue and activate it. A nearby route leads to optional treasure such as the Shaman's Mark and the Academia 500 AF map. The map is useful for orientation, but the main objective is to reach the next story platform rather than clear every side platform.
- The upper checkpoint has been activated
- Proto-Behemoth encounters can be handled with Sentinel support
- The western route to the next checkpoint is open
- Optional map and equipment pickups have been distinguished from required progress
4. Reach the central story platform
From the checkpoint area, use the moving block to reach the central platforms. When the block is not aligned, wait rather than attempting a long jump. If a platform moves while you are crossing, allow it to complete its rotation before committing to the next landing.
Use the available stairs and L-shaped platforms to work toward the central story marker. Some routes require changing a Chaos Block, crossing a platform, then falling intentionally to return to the last Cactuar checkpoint before approaching the same section from a different orientation. This is normal for the maze and is safer than trying to force a jump from the wrong side.
The central route eventually leads to the first major story encounter. If you are collecting optional items, do so only after activating the nearby checkpoint. The checkpoint is more valuable than a single treasure because it protects the route from repeated falls and failed platform crossings.
- The central moving-platform section has been crossed
- The nearest available Cactuar checkpoint is active
- Chaos Block changes are being made before, not during, a crossing
- The first major story marker is visible or reachable
5. Continue through the post-battle platform maze
After the first mandatory encounter, the maze changes its platform arrangement and opens additional routes. Follow the newly available stairs and L-shaped platforms, activating every Cactuar statue encountered. The game may automatically activate some statues during story progression, but still confirm the checkpoint by approaching it before moving on.
Use the Chaos Blocks to switch between the red and blue arrangements as required by the current platform position. The color itself is less important than the resulting alignment: watch which block connects to the next platform, wait for the connection, then cross. When a route appears to end, look for a lower platform or a block that must be approached from the opposite side rather than assuming the area is inaccessible.
The Sisters Gate Seal can be collected from a treasure cube during this extended route. It is optional for reaching the final marker and is useful for time-reversal access to New Bodhum 700 AF. Do not abandon the route merely because this seal was skipped; it is not a prerequisite for the final confrontation.
- The post-battle platform arrangement has been navigated
- Additional Cactuar checkpoints are active
- The red and blue Chaos Block routes have been used as needed
- The Sisters Gate Seal is understood to be optional
6. Reach the final platform and collect the Final Battle Gate Seal
Continue across the final sequence of moving platforms and stairs until you reach the platform containing Chocolina and a Cactuar statue. Activate the statue before exploring further. A large red Cactuar statue in this area can warp you back to the start of the labyrinth; use it only if you intentionally want to reset your route or revisit the opening section.
Before activating the final story point, open the nearby treasure cube containing the Final Battle Gate Seal if you want it. This seal is optional for the immediate boss sequence and enables time-reversal access to Academia 500 AF. It is not the final story trigger, so collecting it does not begin the consecutive battles.
Chocolina provides a final opportunity to buy recovery items and manage monster development. Review the Paradigm Pack again, heal the party and confirm that your preparation save still exists in a separate slot. If you need more growth or different equipment, leave through the Historia Crux before touching the final marker.
- The final-platform Cactuar checkpoint is active
- Chocolina is available for final supplies
- The Final Battle Gate Seal has been collected if desired
- The preparation save remains preserved
- The party is healed and the Paradigm Pack is complete
7. Reach the final story marker without activating it
From the final platform, take the northern route across the last block toward the large story marker. Approach only far enough to confirm its location. Do not activate the marker during this chapter: doing so begins the consecutive final encounters and transfers the guide to Chapter 08.
If you fall while approaching the marker, use the final Cactuar checkpoint and repeat the last crossing. Do not use the large red warp statue unless you intend to restart from the beginning of the maze. Once the marker is reached, stop and create or preserve a second manual save if your preferred save arrangement allows it, while retaining the earlier pre-Academia save as a separate backup.
The correct endpoint is standing at the final story marker with the final battle still unstarted. The Historia Crux should remain available from the preparation save, and Chapter 08 should begin from this point with the party already equipped and ready.
- The final story marker has been reached
- The marker has not been activated
- The final Cactuar checkpoint remains available
- A separate preparation save is preserved
- Chapter 08 can begin directly with the consecutive final battles
Before you move on
- Academia 500 AF was already unlocked before this chapter began.
- The Academia 500 AF labyrinth has been traversed to the final platform.
- The final story marker has been reached but not activated.
- A separate preparation save is preserved.
- The party has reliable healing, chain-building, damage and Sentinel options.
- The player is ready to begin Chapter 08 from the final marker.
References for this chapter
- Final Fantasy XIII-2 Walkthrough - GameSpot
- Final Fantasy XIII-2 Walkthrough Final Episode Academia 500 AF - VGFAQ
- P17A: Academia AF500 - Final Fantasy XIII-2 Guide and Walkthrough
- AF500 | Academia (Part 1) - The Last Episode - Walkthrough
- Final Fantasy XIII-2 – Guide and Walkthrough – PlayStation 3, Paradox Ending Details
Final Boss Encounter(s) and Ending: How to Reach the Canon Ending
Follow this chapter only after reaching the final story marker described in Chapter 07. The original PlayStation 3 release then runs through one continuous endgame sequence: Chaos Bahamut, Caius Ballad, a second Caius Ballad encounter, and the final battle against Amber Bahamut, Garnet Bahamut, and Jet Bahamut. Prepare defensive and healing paradigms before activating the final marker, preserve a separate save, complete the required Cinematic Actions, and allow the credits to play. The game then returns you to the Historia Crux for post-game content.
Prepare before the final Academia marker
Return to the Historia Crux before activating the final story marker in Academia 500 AF if you need to improve Serah, Noel, or your active monster party. Spend available Crystogen Points, check equipment, upgrade important monsters, and restock recovery items from Chocolina. No single monster is mandatory, but your deck should provide chain building, damage, healing, defense, and support coverage.
Use at least one Ravager-focused paradigm for raising chain gauges, one Commando-focused paradigm for exploiting stagger windows, a healing paradigm with two Medics when available, and a Sentinel-heavy paradigm for Mega-Flare and the Bahamuts’ flare attacks. A support paradigm with a Synergist and Saboteur is useful for applying party buffs and removing Caius’s enhancements.
Anti-Gravity Jump is not a mandatory battle requirement, but it is a useful preparation for the platform route. It is obtained from the Mystic in Serendipity after the relevant fragment-skill requirement is met. If you already have it, equip it before returning to Academia 500 AF.
Create a manual save in a separate PlayStation 3 save slot before activating the final marker. Manual saving is available from the field Pause Menu. Keep this file intact so you can return to the approach point without relying on the completed post-game state.
- Reach the final Academia 500 AF marker described in Chapter 07.
- Check equipment, Crystarium growth, monster upgrades, and recovery items.
- Prepare Ravager, Commando, Medic, Sentinel, and support coverage.
- Create and preserve a separate pre-finale save.
Cross Academia 500 AF and activate the endgame sequence
Enter Academia 500 AF and follow the route from Chapter 07 toward the final marker. The area uses moving golden platforms and long jumps. Check each cactuar checkpoint you pass; falling into the abyss returns you to the most recently checked checkpoint, reducing the amount of the route you must repeat.
Do not activate the final story marker until your intended Paradigm Deck is equipped and your save is complete. Once the final scene begins, the game takes you through the endgame battles without returning you to normal exploration between every encounter. This is the point at which the chapter’s boss sequence begins.
The opening Chaos Bahamut battle is followed by Caius Ballad. After the first Caius encounter, another Caius battle occurs before the final Bahamut battle. Do not treat the first victory over Caius as the end of the sequence, and do not spend every recovery item immediately after an individual victory.
- Use the cactuar checkpoints during the platform route.
- Confirm the save and Paradigm Deck before activating the final marker.
- Expect four endgame battle stages rather than one isolated final boss.
Defeat Chaos Bahamut
Build Chaos Bahamut’s chain gauge with Ravagers while keeping the party’s health stable. When he uses Metamorphosis and prepares Mega-Flare, switch to a Sentinel-heavy setup. Triple Sentinel, commonly called Tortoise, provides the strongest immediate protection against the attack. Surviving the incoming hit matters more than maintaining a few seconds of offensive pressure.
Mega-Flare can inflict severe damage and Wounds. After it resolves, switch to a Medic setup, restore the party, and remove or repair serious Wounds as necessary. Return to Ravagers to continue building the chain, then use Commandos during the stagger or damage window. If the party is badly weakened, heal before attempting another offensive cycle rather than trying to finish the boss while vulnerable.
- Raise the chain gauge with Ravagers.
- Use Sentinel protection when Mega-Flare is prepared.
- Heal and address Wounds before resuming the attack.
Defeat the first Caius Ballad encounter
Caius opens this encounter with Eye of Bahamut, which can place several harmful effects on one party member. Switch to a healing or support paradigm, keep that character’s HP high, and use Esuna or Dispel-capable actions to remove the effects when possible. Inferno is especially dangerous while the target is weakened.
Caius can use Chain Break to reset his chain gauge. Expect to rebuild the chain after it occurs instead of continuing a failed burst attempt. When Caius uses his self-enhancing ability, remove the enhancements with Dispel or use a defensive paradigm until they expire. A Ravager setup can raise the chain, while Commandos provide the stronger damage once an opening appears.
This encounter may be won without a long stagger if the party’s physical damage is sufficient, but staggering remains a reliable way to create a damage window. Change to healing immediately if the affected character approaches critical HP.
- Watch for Eye of Bahamut and protect the debuffed character.
- Expect Chain Break and rebuild the chain afterward.
- Use Dispel or defensive coverage against Caius’s self-enhancements.
- Do not enter the next encounter with the party badly wounded.
Defeat the second Caius Ballad encounter
The second Caius encounter begins with Heart of Chaos and then uses Eye of Bahamut. Heart of Chaos provides powerful self-enhancement and gives Caius Reraise during this battle. Use Dispel when possible, and keep the party prepared for the fight to continue after Caius’s HP first reaches zero.
This version no longer relies on Chain Break in the same way as the earlier encounter and is easier to stagger. Use Ravagers to raise the chain gauge, apply useful debuffs when they land, and switch to Commandos during the stagger. Maintain a healing paradigm that can recover the character carrying Eye of Bahamut’s effects; Caius’s attacks can quickly defeat that target if HP is allowed to fall.
When Caius reaches zero HP, continue defending and attacking until the victory transition occurs. Reraise is the reason the first apparent defeat does not complete this stage.
- Dispel Heart of Chaos when possible.
- Keep the Eye of Bahamut target at safe HP.
- Use Ravagers to stagger and Commandos to exploit the opening.
- Continue the battle after Caius first reaches zero HP.
Defeat Amber Bahamut, Garnet Bahamut, and Jet Bahamut
The final battle begins with Amber Bahamut and Garnet Bahamut in front while Jet Bahamut controls the encounter from the background. Use an X-style Paradigm configuration so Serah, Noel, and the monster focus on the same target. Start with one outer Bahamut, raise its chain with Ravagers, stagger it, and finish it with Commandos. Repeat for the other outer Bahamut instead of spreading damage across all three.
Defeating Amber and Garnet quickly reduces the danger from the flare attacks and allows Jet Bahamut to become the direct target. Heal fully before the second outer Bahamut falls if possible. Jet may later bring the other Bahamuts back, so be ready to switch targets and remove any revived outer Bahamut promptly.
Jet Bahamut begins his direct phase by applying party-wide debuffs through Break Curse. Switch to a Medic or support paradigm and use Esuna or equivalent recovery actions to clear Poison, Slow, Deshell, and other active effects. Then use Ravagers to build Jet’s chain gauge and Commandos to exploit a stagger.
Watch Jet’s countdown closely. When a flare attack is imminent, heal first if there is time, then switch to a Sentinel-heavy paradigm before the countdown reaches its final stage. Triple Sentinel is the safest response to the flare. After the attack, heal, clear lingering debuffs, and resume the Ravager-to-Commando cycle. If Jet summons or restores an outer Bahamut, reduce the number of active Bahamuts before committing to another full damage phase.
- Use an X-style Paradigm configuration to focus one target.
- Defeat Amber and Garnet before concentrating on Jet.
- Dispel Jet’s Break Curse effects.
- Use Sentinel protection for each flare countdown.
- Be prepared to eliminate revived outer Bahamuts.
Complete the ending and preserve the post-game state
After Jet Bahamut is defeated, complete every required Cinematic Action by following the PlayStation 3 prompts shown on screen. Let the mandatory story scenes play; the battle victory alone is not the completion check.
Allow the credits to play when confirming the standard base-game ending. Once the ending sequence is complete, the game returns you to the Historia Crux or provides the normal continuation into the post-game state. This is the practical confirmation that the main story has been cleared and that remaining fragments, sealed timelines, Paradox Endings, and installed downloadable episodes remain available.
Keep the pre-finale save separate from the post-game save. Use the post-game file for fragment collection, Paradox Scope work, and DLC. The standard ending is separate from the Paradox Endings, the 160-Fragment secret ending, and the Requiem of the Goddess narrative episode.
- Complete all required Cinematic Actions.
- Allow the credits to play.
- Confirm that the game returns to the Historia Crux or post-game continuation.
- Preserve the pre-finale save and maintain a separate post-game save.
- Begin post-game fragment, Paradox Ending, or DLC work only from the continuation state.
Before you move on
- Chaos Bahamut has been defeated.
- The first Caius Ballad encounter has been completed.
- The second Caius Ballad encounter has been completed, including the Reraise phase.
- Amber Bahamut, Garnet Bahamut, and Jet Bahamut have been defeated.
- All required Cinematic Actions and ending scenes have been completed.
- The credits have played.
- The game has returned to the Historia Crux or its normal post-game continuation.
- The original pre-finale save remains in a separate slot.
- The post-game state is available for fragments, Paradox Endings, the secret ending, and installed DLC.
References for this chapter
- Final Fantasy XIII-2 Walkthrough - GameSpot
- Final Fantasy XIII-2 - Guide and Walkthrough - PlayStation 3 - Krystal109
- Final Fantasy XIII-2 - Boss Guide - PlayStation 3 - GameFAQs
- Final Fantasy XIII-2 – Guide and Walkthrough – PlayStation 3
- SQUARE ENIX Support Centre: How do I save data on Xbox360 / PlayStation 3?
- Using the Crystarium – Final Fantasy XIII-2 Guide Sample
After the Credits: Paradox Scope and Paradox Endings
Final Fantasy XIII-2 has eight Paradox Endings in addition to the standard story ending and the secret ending obtained after collecting all 160 base-game Fragments. Paradox Scope is a post-story Fragment Skill obtained from the Mystic in Serendipity, but it is not required for every Paradox Ending. Fate and Freedom uses a Live Trigger choice, while A Giant Mistake and Mog’s Marvelous Flan Plan require gate resets followed by full-power boss victories. Paradox Scope is required for the altered versions of the Caius and Proto fal'Cie encounters, and for the Academia branch that produces The Future Is Hope. After each successful condition, enter the newly available ??? timeline and view its scene so the corresponding transcript Fragment is recorded.
1. Clear the story and unlock Paradox Scope
Complete the main story in Academia 500 AF, defeat the final sequence, and let the ending and credits finish. Once normal Historia Crux exploration is available again, enter Serendipity. Go into the building on the left and speak with the Mystic, also identified in some guides as the Chocobo Girl. She provides the Paradox Scope Fragment Skill after the story has been cleared.
Open the Fragment Skills menu and enable Paradox Scope before the qualifying altered encounter or Live Trigger branch. The skill changes specific replayed events; it does not automatically convert every boss into a paradox version. When it is active for a qualifying battle, the game displays a Paradox Scope notice as the encounter begins. If the ordinary encounter starts, reload and check the skill before entering the fight.
Paradox Scope is required for Vanille’s Truth, Test Subjects, The Future Is Hope, Beneath a Timeless Sky, and Heir to Chaos. Fate and Freedom, A Giant Mistake, and Mog’s Marvelous Flan Plan use different conditions and do not require the skill.
- Academia 500 AF and the main credits are complete.
- The Mystic in Serendipity has granted Paradox Scope.
- The Fragment Skills menu is used to enable or disable the skill before each relevant replay.
2. Preserve saves and use Time Reversal correctly
Time Reversal is performed from the Historia Crux after you obtain the Gate Seal associated with the target location. Select the timeline, use the gate-seal command to close it, and then reopen the timeline to restart that episode from its beginning. This reset is necessary for the altered versions of Bresha Ruins, Sunleth Waterscape, Oerba, Augusta Tower, and Academia.
Keep one normal post-game save. Make another save before each gate reset, especially before replaying Academia 4XX AF. A wrong Live Trigger answer or an incorrectly timed Paradox Scope activation does not permanently damage the file, but a backup avoids repeating long sections.
A successful paradox condition normally unlocks a new ??? node in the Historia Crux. Enter that node and watch the scene. Defeating an altered boss or making the correct choice is not the entire verification step; the transcript Fragment must appear in the Fragment list.
- A normal post-game save is preserved.
- The required Gate Seal is available before attempting Time Reversal.
- Every newly unlocked ??? node is entered after its condition is completed.
3. Fate and Freedom: New Bodhum AF00X
This ending can be obtained before the main story is finished, during the Episode 5 route through the Void Beyond and New Bodhum AF00X. Follow the route through the NORA House and the surrounding dreamlike scenes until Serah reaches the pier and speaks with Lightning.
When the Live Trigger asks whether Serah should abandon her journey and stay with Lightning, choose the affirmative Yes or stay-with-her response. On the default PlayStation 3 control layout this is the Triangle choice; use the displayed prompt if the controller mapping has been changed.
The alternate scene awards Transcript: Fate and Freedom and opens the associated ??? New Bodhum or Hollow Seclusion node. Enter that node and view the scene. Afterward, the game returns you to the point before the Live Trigger. Choose the normal advance response, usually X, when you want to continue the main route toward the later Episode 5 events. This ending does not require Paradox Scope.
- The Episode 5 New Bodhum AF00X pier scene has been reached.
- The affirmative stay-with-Lightning Live Trigger response has been selected.
- The Fate and Freedom transcript and its associated ??? scene have been viewed.
4. A Giant Mistake: Bresha Ruins AF005
After obtaining Paradox Scope, close the Bresha Ruins AF005 gate and replay the episode until Atlas becomes the objective. During the ordinary route, a control device weakens Atlas before the battle. Do not operate that device for this ending.
Approach Atlas and defeat the unweakened version. Paradox Scope is not required. The full-power fight is the condition, so defeating the weakened Atlas produces the ordinary route instead. Use a Sentinel monster to cover heavy attacks, keep a Medic available, and switch to defensive paradigms whenever the party is losing health faster than it can recover. Saboteur support can help create an opening, after which Commando and Ravager damage can finish the fight.
Victory unlocks a ??? Archylte Steppe timeline. Return to the Historia Crux, enter that node, and watch the scene to receive Transcript: A Giant Mistake. If the ordinary weakened battle occurred, close Bresha Ruins AF005 again and repeat the route without activating the Atlas weakening device.
- Bresha Ruins AF005 was reset with its Gate Seal.
- Atlas was fought without using the weakening device.
- The ??? Archylte Steppe scene and A Giant Mistake transcript were viewed.
5. Vanille’s Truth: Oerba AF200
Close and reopen Oerba AF200 with Time Reversal, then enable Paradox Scope before the altered Caius encounter. Replay the route through the upper or northwest rooftop area where the story Caius battle occurs.
The altered fight begins only when the relevant Paradox Scope condition is active. Defeat the stronger Caius using a defensive rotation rather than trying to attack continuously. Keep a Sentinel monster ready for major attacks, use a Medic when either character is wounded, and apply Saboteur effects when the boss allows them. If the normal encounter begins, reload and verify Paradox Scope before entering the battle.
After victory, a ??? Oerba timeline becomes available. Enter it and view the alternate scene to register Transcript: Vanille’s Truth.
- Oerba AF200 was replayed through Time Reversal.
- Paradox Scope was enabled before the altered Caius encounter.
- The ??? Oerba scene and Vanille’s Truth transcript were viewed.
6. Mog’s Marvelous Flan Plan: Sunleth Waterscape AF300
Close and reopen Sunleth Waterscape AF300. Replay the episode until the giant flan becomes the objective and the route normally asks you to find a way to shrink it. Do not complete the shrinking solution.
Return to the giant flan and fight it at full power. Paradox Scope is not required for this ending. Bring a reliable Medic, use Sentinel coverage during dangerous attacks, and alternate Ravager and Commando roles as the chain develops. The full-power victory is the requirement; defeating a weakened or shrunken version completes the ordinary route.
Victory creates a ??? Sunleth Waterscape timeline. Enter it from the Historia Crux and watch the alternate scene. The transcript appears in guides under variants such as Mog’s Marvelous Flan Plan or Mischievous Mog’s Marvelous Plan with Flan; verify the in-game Fragment entry rather than relying only on the shortened name.
- Sunleth Waterscape AF300 was reset.
- The giant flan was fought before using the shrinking method.
- The ??? Sunleth Waterscape scene and transcript were viewed.
7. Test Subjects: Augusta Tower AF200
Close Augusta Tower AF200 and enable Paradox Scope before replaying the route to the upper boss encounter. Follow the tower’s elevator controls and required story interactions until Proto fal'Cie Adam is reached.
The altered Proto fal'Cie Adam battle has more health than the ordinary version. Keep a Sentinel monster for heavy physical and magical attacks, use a Synergist to establish defensive buffs, and bring a Medic for recovery. Defeat the left and right Manipulators when necessary before concentrating on Proto fal'Cie Adam. Dispel dangerous enhancements when possible and attack during safe openings.
After defeating the altered boss, return to the Historia Crux and enter the resulting ??? Augusta Tower node. Watch its scene to register Transcript: Test Subjects.
- Augusta Tower AF200 was reset with Time Reversal.
- Paradox Scope was active before Proto fal'Cie Adam’s altered encounter began.
- The ??? Augusta Tower scene and Test Subjects transcript were viewed.
8. The Future Is Hope: Academia AF4XX
Close and reopen Academia AF4XX, then enable Paradox Scope before beginning the replay. Follow the Academy Headquarters route, speak with Hope and Alyssa, and deliver the five required Graviton Cores. Do not skip the scenes surrounding the delivery, because the decisive Live Trigger can be missed if the sequence is advanced without viewing it.
When Alyssa offers the Artefact, refuse it. The exact on-screen answer should be followed if controls have been remapped. Refusing the Artefact while the Paradox Scope condition is active produces The Future Is Hope and awards its transcript Fragment.
If the choice does not appear, reset Academia AF4XX again. Deliver all five Graviton Cores, keep Paradox Scope active, and allow the entire conversation to play before selecting the refusal response. This ending is triggered by the branch choice, not by winning an altered boss battle.
- Academia AF4XX was reset.
- All five Graviton Cores were delivered to Alyssa.
- The Artefact was refused and The Future Is Hope was viewed.
9. Beneath a Timeless Sky: Serah’s altered Caius battle
Close and reopen Academia AF4XX and replay the Graviton Core sequence. To reach this ending, accept the Artefact that advances the route through the stabilized gate into Episode 5. Continue through the Void Beyond until Serah is alone and reaches the Caius encounter with her monster companion.
Activate Paradox Scope before this Caius battle begins. The skill does not need to be active for every earlier scene, but it must be active when the qualifying battle starts. This is the Serah-side Caius fight, not the later Noel encounter in A Dying World.
Use Sentinel protection, maintain healing, apply debuffs when possible, and switch to damage paradigms during safe windows. The altered fight is demanding because Caius attacks rapidly and can restore or remove progress. Victory opens a ??? New Bodhum timeline. Enter it and view the scene to register Transcript: Beneath a Timeless Sky.
- Academia AF4XX was replayed through the Artefact route into Episode 5.
- Paradox Scope was enabled before Serah’s Caius battle began.
- The ??? New Bodhum scene and Beneath a Timeless Sky transcript were viewed.
10. Heir to Chaos: Noel’s altered Caius battle
Close and reopen Academia AF4XX again. Begin this replay with Paradox Scope disabled so the route can proceed normally through Academia, the Void Beyond, and New Bodhum. At the New Bodhum AF00X pier Live Trigger, choose the normal advance response rather than the affirmative stay-with-Lightning choice used for Fate and Freedom.
Continue into A Dying World AF700. Activate Paradox Scope before Noel’s Caius encounter begins. This is the second altered Caius route and must not be confused with Serah’s Beneath a Timeless Sky battle.
Defeat the altered encounter using careful defensive and healing rotations, removing dangerous buffs when possible and switching to damage during openings. A successful victory opens a ??? Dying World timeline. Enter it and view the scene to receive Transcript: Heir to Chaos.
- The New Bodhum AF00X Live Trigger was answered with the normal advance choice.
- A Dying World AF700 was reached.
- Paradox Scope was active for Noel’s altered Caius encounter and the ??? transcript scene was viewed.
11. Verify all eight Paradox Endings and the trophy requirement
The eight Paradox Ending transcripts are Fate and Freedom, A Giant Mistake, Vanille’s Truth, Mog’s Marvelous Flan Plan, Test Subjects, The Future Is Hope, Beneath a Timeless Sky, and Heir to Chaos. Check the Fragment list rather than relying only on a boss victory or a newly opened node.
The PlayStation 3 Anomalous trophy requires viewing every Paradox Ending, including the separate secret ending. The eight transcript entries therefore do not complete the trophy by themselves. The secret ending requires all 160 base-game Fragments and a replay of the final sequence with the required Fragment Skill active.
Keep the post-game save with access to Academia 500 AF. After the 160th Fragment is collected, close and reopen Academia 500 AF if necessary, enable Paradox Scope, defeat the final sequence again, and allow the post-credit scene to play. Treat this secret ending as separate from DLC episodes such as Requiem of the Goddess.
- All eight named Paradox Ending transcript Fragments are present.
- Every associated ??? timeline has been entered and its scene has been viewed.
- A save preserves access to the ordinary post-game route.
- After collecting all 160 Fragments, the Academia 500 AF final sequence is replayed with Paradox Scope active and the post-credit secret scene is viewed.
Before you move on
- The main story and credits have been completed.
- Paradox Scope is unlocked in Serendipity and appears as an enabled Fragment Skill when needed.
- The Fragment list contains Fate and Freedom, A Giant Mistake, Vanille’s Truth, Mog’s Marvelous Flan Plan, Test Subjects, The Future Is Hope, Beneath a Timeless Sky, and Heir to Chaos.
- Every associated ??? timeline has been entered and its ending scene viewed.
- A separate save preserves the ordinary post-game route before further gate resets.
- All 160 base-game Fragments have been collected.
- Academia 500 AF has been replayed with Paradox Scope active, the final sequence has been defeated again, and the post-credit secret ending has been viewed.
- DLC episodes remain separate completion goals and are not substituted for the base-game secret ending.
References for this chapter
- Final Fantasy XIII-2 – Guide and Walkthrough – PlayStation 3, Paradox Ending Details
- Final Fantasy XIII-2 – Guide and Walkthrough – PlayStation 3
- Final Fantasy XIII-2 Walkthrough – Paradox Endings, FFExodus
- AF00X New Bodhum – Episode 5 Walkthrough, Gamer Guides
- Transcript: Fate and Freedom, Final Fantasy XIII-2 Fragment Guide
- Final Fantasy XIII-2 Walkthrough - GameSpot
Fragment Collection: Strategy to Find All 160
The original PlayStation 3 release contains 160 base-game Fragments. The most reliable way to collect them is to combine the in-game Fragment list with a location-by-location Historia Crux sweep. Complete ordinary quests and map rewards first, then clean up Wild Artefact branches, Serendipity, Bestiary requirements, temporal rifts, and post-game fragments. Protect a completed save before replaying the final sequence for the secret ending.
1. Begin with the Fragment menu and a protected save
After clearing the main story, make a manual save in a separate slot before beginning the full collection sweep. Open the Fragment menu and use its location categories as the authoritative progress check. Do not rely only on trophies, Fragment Skills, or the number of Historia Crux nodes visible on the map; those indicators do not identify every individual missing Fragment.
For an efficient route, work broadly from early areas toward late areas: New Bodhum, Bresha Ruins, Yaschas Massif, Oerba, Sunleth Waterscape, Augusta Tower, Academia, the Archylte Steppe, Serendipity, and the special or unknown-year locations. At each stop, check every year available for that location before moving on. Several locations share similar layouts but have different NPCs, treasure objects, enemies, or quests depending on the year.
Keep a separate written checklist only as a backup to the in-game list. Record the location and year shown for every missing entry, then return to the Historia Crux instead of wandering through every map again.
- Create a protected save before starting the cleanup.
- Use the Fragment menu to identify missing entries by location.
- Check every available year of a location before leaving it permanently.
2. Clear story, quest, and exploration Fragments before farming
Finish every available local quest in a timeline before moving to rare-enemy or casino cleanup. Bresha Ruins, Yaschas Massif, Oerba, Academia, and the Archylte Steppe contain several quest rewards that are easy to miss after the main episode has ended. Some quests require an item, enemy, weather condition, or map state from another year, so a location that appears complete after its boss may still have unfinished Fragment entries.
Search for treasure containers that are out of phase and reveal them with Moogle Hunt. Use Moogle Throw where the map presents unreachable ledges, gaps, or distant objects that become valid targets after the ability is available. These abilities are especially important for square containers used in side quests.
If an NPC does not offer a new quest, check the active quest limit. The game does not allow more than two active quests in the same time and place. Finish one of the existing quests, then return to the NPC. This commonly explains why a quest-giver in Bresha Ruins or Yaschas Massif appears inactive.
Also revisit earlier areas after unlocking new Historia Crux nodes or Mog abilities. A newly reachable object may award a Fragment even though the original story objective for that map was completed long before.
- Complete available NPC quests before targeting rare monsters.
- Use Moogle Hunt on suspicious empty spaces and hidden containers.
- Use Moogle Throw wherever an unreachable object is a valid target.
- If a quest-giver is inactive, finish one of the two active quests in that time and place.
3. Open every Wild Artefact branch and sweep the special locations
A 160-Fragment collection requires more than the linear story route. Open the Wild Artefact gates as they become available and revisit the Historia Crux until all ten Wild Artefacts have been used. Each extra branch can contain its own maps, quests, enemies, or rewards, and leaving a Wild Artefact gate unopened can make the Fragment list appear inexplicably incomplete.
After opening the branches, check the special and unknown-year locations separately. New Bodhum’s unknown-year maps, the Dying World, Vile Peaks, the Archylte Steppe, and Serendipity contain post-story or alternate-history entries that are not completed simply by finishing the main route. Pay attention to Fragment entries whose location includes an unknown year; they are still tracked by the Fragment menu and must be collected.
For the Archylte Steppe, revisit quest-givers after changing the available weather conditions and after completing earlier Steppe requests. Several enemies and objectives are tied to the Steppe’s conditions. Do not assume that one visit or one weather setting completes the area.
- Use all ten Wild Artefacts and enter every resulting gate.
- Check unknown-year locations after the main story.
- Revisit the Archylte Steppe under each relevant weather condition.
- Complete later requests from Steppe quest-givers rather than stopping after the first reward.
4. Solve temporal rifts and confirm the reward
Temporal rifts are a major source of missed Fragments. When the Fragment menu identifies a rift-related entry, return to the specified location and year rather than replaying every rift at random. The game uses several puzzle types, including crystal-grid and clock-style arrangements, and some locations contain more than one rift-related objective.
Before beginning a lengthy puzzle, note the current state and make sure you understand whether the visible puzzle is the complete objective or only the first stage. Avoid leaving immediately after a successful sub-puzzle if the area has not displayed the Fragment reward. The useful completion signal is the in-game Fragment discovery notification and the newly filled entry in the Fragment menu.
If a puzzle has been reset or its arrangement is difficult to follow, leave only after confirming that no Fragment was awarded. Then consult the exact location and year in a PS3 fragment guide and target that puzzle directly. This is more efficient than repeatedly clearing already-completed rifts.
- Record the location and year before entering a rift.
- Confirm the Fragment discovery notification appears.
- Check the Fragment menu after completing a multi-stage rift.
- Use a location checklist to identify one missing puzzle instead of replaying every rift.
5. Complete the Bestiary requirement for Academic Rank: Monster Professor
One of the 160 Fragments is Academic Rank: Monster Professor in Academia 4XX AF. To obtain it, register every required base-game monster in the Bestiary by fighting and defeating each one at least once, then speak with Dr. M in the Academy headquarters. You do not need every Libra detail, every Bestiary check mark, every monster crystal, or the downloadable-content monsters for this Fragment.
Compare the Bestiary against a complete PS3 monster list instead of repeatedly defeating common enemies. The entries most likely to cause delays are monsters tied to a specific year, weather state, story sequence, or unusual map position. Some enemies appear only once during a particular route, and some Proto Fal'Cie Adam encounters or forms can register separately. If Dr. M does not award the Fragment, assume that at least one required base-game entry is still missing and compare the list again.
Use relevant Fragment Skills that improve encounter frequency or rare encounters if you already have them. They can reduce waiting, but they do not replace the need to visit the correct year or map condition. Once the Fragment appears in the menu, stop farming Bestiary entries unless you are pursuing a separate completion goal.
- Compare the Bestiary with a complete base-game monster list.
- Check year, weather, story-phase, and one-time encounter restrictions.
- Defeat every required base-game monster at least once.
- Speak with Dr. M in Academia 4XX AF after the list is complete.
- Do not spend time filling every Libra detail or collecting every monster crystal for this Fragment.
6. Finish all five Serendipity Fragments carefully
Serendipity contains five Fragments: Chocochick Down, Priceless Gift, Chaos Crystal, Setzer's Dice, and Lucky Coin. Collect the visible chocobo-racing reward and purchase or complete the other casino-related requirements shown in the Fragment list before attempting the slot-machine requirement.
Lucky Coin requires total slot-machine winnings of 7,777 coins. The total can be accumulated over multiple sessions, so losing one session does not necessarily erase earlier progress. Track your starting and ending coin totals manually, because the game does not provide a convenient progress counter for this requirement.
Before spending a large amount of casino currency, save in a separate slot. If the slot attendant indicates that the machine is in a favorable state, use that machine; otherwise, you can leave and reload the protected attempt rather than waste the entire bankroll. Manual play is safest for the console version. Do not treat current coin balance as proof that the requirement is complete, because the requirement concerns winnings, not coins still held.
When Lucky Coin is awarded, confirm it in the Fragment menu before leaving Serendipity. If the menu does not list it, continue the slot-machine requirement rather than assuming that a large payout or a high current balance was enough.
- Collect Chocochick Down, Priceless Gift, Chaos Crystal, and Setzer's Dice.
- Save before beginning the slot-machine grind.
- Track cumulative winnings toward 7,777 coins.
- Confirm Lucky Coin appears in the Fragment menu.
7. Separate ordinary cleanup from Paradox Ending rewards
Some post-game Fragment entries are tied to alternate histories or Paradox Ending scenarios rather than ordinary pickups. Keep these separate from the normal area sweep. First collect every ordinary map, quest, monster, casino, and puzzle Fragment that the menu identifies. Then make a new protected save before closing gates or replaying the specific timelines required for alternate endings.
Use the Paradox Scope Fragment Skill only when following the separate Paradox Ending instructions. If an ending replay awards a Fragment, wait for the reward and confirm it in the Fragment menu before moving to the next ending. Do not overwrite the save that contains the complete ordinary collection; it is your recovery point if an ending trigger is missed or a gate must be replayed.
The secret ending is a later step. Reaching 160 Fragments is the collection milestone, but the final ending replay also requires the appropriate Fragment Skill state. Treat the 160/160 check and the ending trigger as two separate verification tasks.
- Finish ordinary area cleanup before replaying Paradox Endings.
- Make a protected save before closing or replaying relevant gates.
- Confirm each alternate-ending reward in the Fragment menu.
- Keep the 160-Fragment save separate from experimental ending saves.
8. Verify 160/160 and preserve the completion save
When the Fragment menu reaches 160 of 160, inspect the location categories once more. Confirm that Lucky Coin, Academic Rank: Monster Professor, every unknown-year entry, every Wild Artefact branch reward, and the Paradox-related entries are present. This final inspection catches cases where a player counted fragments from a guide but never received the in-game reward.
Create another manual save in a different slot and leave it untouched. That save preserves the collection for the secret-ending replay, future DLC sessions, or a later attempt at a missed Paradox Ending. Then follow the dedicated ending chapter: activate the required Fragment Skills, replay the specified final sequence, watch through the credits, and verify the additional scene rather than stopping at the battle victory screen.
- The Fragment menu reads 160 of 160.
- Academic Rank: Monster Professor is listed.
- Lucky Coin is listed under Serendipity.
- All Wild Artefact branches and unknown-year locations have been checked.
- A protected 160-Fragment save exists before the final replay.
Before you move on
- The in-game Fragment menu shows 160 of 160 Fragments.
- Academic Rank: Monster Professor has been awarded by Dr. M in Academia 4XX AF.
- All five Serendipity Fragments are present, including Lucky Coin.
- All ten Wild Artefact gates and their associated locations have been checked.
- Temporal-rift, Bestiary, quest, map, unknown-year, and casino entries have been verified.
- A separate protected save preserves the complete collection before the final-ending replay.
References for this chapter
- Final Fantasy XIII-2 – Fragment Guide – PlayStation 3
- Final Fantasy XIII-2 - Guide and Walkthrough - PlayStation 3 - Krystal109
- Final Fantasy XIII-2 – Monster Infusion FAQ – PlayStation 3
- Final Fantasy XIII-2 Fragments Guide
- Final Fantasy XIII-2 Serendipity Post-Game Walkthrough
- Final Fantasy XIII-2 Walkthrough - GameSpot
- Using the Crystarium – Final Fantasy XIII-2 Guide Sample
Secret Ending: Requirements and Trigger
On the original PlayStation 3 release of Final Fantasy XIII-2, the base-game secret ending is unlocked by collecting all 160 Fragments, obtaining and activating the Paradox Scope Fragment Skill, then replaying the final sequence in Academia (500 AF). After Caius and the three Chaos Bahamuts are defeated again, allow the ordinary ending and credits to finish; the additional scene follows. The eight Paradox Endings are separate alternate outcomes, but their Transcript Fragments count toward the 160-Fragment total. They are not an independently verified extra condition once the Fragment menu shows 160/160. Coliseum and Requiem of the Goddess DLC episodes are separate content and do not replace the base-game requirements.
1. Clear the main story and preserve the completed file
Finish the final episode in Academia (500 AF), defeat Caius and the three Chaos Bahamuts, and watch the normal ending sequence through the credits. The first clear unlocks the post-game state and makes the Paradox Scope Fragment Skill available through Serendipity's Mystic. You do not need to start a New Game or erase the completed timeline.
Create a separate manual save after returning to the post-game state. Keep an earlier save before the final sequence if you have one. A protected save is useful because the final replay repeats several battles and cutscenes, and it also lets you return to unfinished Fragment or Paradox Ending work without losing your completion progress.
- Academia (500 AF) is available from the Historia Crux.
- The ordinary ending and credits have been viewed.
- A separate completed-game save has been created.
2. Obtain and activate Paradox Scope
Travel to Serendipity through the Historia Crux. Enter the leftmost building and speak to the Mystic, the chocobo-themed girl in the Mystic's Chamber. After the main story has been cleared, she unlocks the Paradox Scope Fragment Skill. Open the Fragment Skills menu and switch Paradox Scope on.
Acquiring the skill is not the same as activating it. Check the visible status in the Fragment Skills menu before attempting the secret-ending replay. Paradox Scope is also used for several strengthened boss fights that produce Paradox Endings, but those fights are separate from the final secret-ending replay.
- Paradox Scope is listed among the Fragment Skills.
- Paradox Scope is switched On.
- The skill was obtained from the Mystic after the first story clear.
3. Reach 160/160 Fragments
Continue collecting Fragments until the Fragment menu displays 160/160. Fragments are awarded for story progression, side quests, treasure and hidden-object tasks, minigames, monster-related objectives, special battles, Live Trigger outcomes, and Paradox Endings. The Fragment total is the reliable completion check; opening every visible Historia Crux gate or earning many trophies does not prove that all 160 have been collected.
Some entries become available only after the main story, after acquiring a relevant Fragment Skill, after closing and reopening a timeline, or after revisiting a location with a newly available ability. If the count stops below 160, inspect the Fragment menu for incomplete descriptions and revisit timelines with unresolved objectives rather than assuming the missing entry is automatically in Academia.
The eight Paradox Endings are alternate outcomes that award Transcript Fragments. Their triggers include fighting certain bosses at full strength with Paradox Scope active, selecting a different Live Trigger response, or changing a timeline's state through Time Reversal. Complete any missing Paradox Ending whenever its Transcript Fragment is absent from the Fragment list. Because every Fragment must be present for the secret ending, a missing Paradox Ending Fragment can be the reason the total remains below 160.
- The Fragment menu reads 160/160.
- Every Transcript Fragment needed for the 160 total is present.
- No unresolved Fragment entry remains behind a closed-gate replay, post-game task, or inactive Fragment Skill.
4. Prepare for the final replay
Make another manual save after the Fragment total reaches 160/160. Keep the completed-game save and the 160/160 save in separate slots. Before entering Academia (500 AF), open Fragment Skills and confirm that Paradox Scope is On.
The secret-ending replay does not require a special difficulty setting or a particular battle rating. Normal difficulty is sufficient, and lowering the difficulty is acceptable if the final sequence is preventing progress. The unlock is tied to the Fragment total, active Paradox Scope, and completion of the final sequence, not to earning a five-star result.
Prepare a party that can survive repeated boss phases. Keep at least one reliable healing option, a defensive Sentinel-based paradigm, and a way to build or maintain chain gauges. Refill healing items and review equipment before entering the final route. The game does not require a special secret-ending weapon or DLC item.
- A protected save exists after reaching 160/160.
- Paradox Scope is On before entering Academia (500 AF).
- Healing, defensive coverage, and chain-building options are available.
5. Replay Academia (500 AF)
Open Academia (500 AF) from the Historia Crux. If the gate has been closed and reopened, follow the episode's required route again until the final confrontation becomes available. Leave Paradox Scope active while progressing through the replay.
The final sequence includes the battle against Caius followed by the three Chaos Bahamut encounters. Use an aggressive paradigm while the enemies are vulnerable, then shift to a defensive or recovery paradigm when damage spikes or the party's health drops. Do not abandon the sequence after the first victory: all required final battles and the following story scenes must be completed before the ending can trigger.
If you fail, reload the protected save, adjust equipment or paradigms, and try again. If you accidentally entered the sequence with Paradox Scope disabled, reload before the final route and activate it before repeating the battles.
- Academia (500 AF) has been replayed after reaching 160/160.
- Caius has been defeated again.
- All three Chaos Bahamut battles have been cleared.
- Paradox Scope was active for the replay.
6. Watch the ending and verify the secret scene
After the final battles, allow the normal ending scenes and credits to play. The secret scene is added after the ordinary ending flow; it is not selected from a separate Historia Crux gate and it is not one of the eight Paradox Ending transcripts.
If the additional scene does not appear, reload the protected save and check the requirements in order. First confirm that the Fragment menu shows exactly 160/160 on the same save being used for the replay. Next confirm that Paradox Scope is On. Then replay Academia (500 AF), defeat Caius and the three Chaos Bahamuts, and let the credits finish without exiting the sequence early.
The result can be verified by seeing the additional post-credit scene and by retaining the save that displays 160/160 with Paradox Scope enabled. This base-game scene should not be confused with Requiem of the Goddess, which is a separate playable DLC episode.
- The ordinary ending plays after the replay.
- The credits finish.
- The additional post-credit secret scene appears.
- The save still displays 160/160 Fragments.
- Requiem of the Goddess and Coliseum content are treated as separate DLC completion goals.
Before you move on
- The main story has been cleared and the normal credits have been viewed.
- Paradox Scope has been obtained from the Mystic in Serendipity and is switched On.
- The Fragment menu on the active save displays 160/160.
- Any missing Paradox Ending Transcript Fragments have been collected as part of reaching 160/160.
- Academia (500 AF) has been replayed after reaching 160/160.
- Caius and the three Chaos Bahamut battles have been defeated again.
- The ordinary ending and credits have finished.
- The additional base-game post-credit secret scene has appeared.
- Requiem of the Goddess and Coliseum DLC, if owned, have been completed separately and are not being used as proof of the base-game secret ending.
References for this chapter
Monster Building and Crystarium: Post-game Optimization
Build a compact roster of monsters for damage, chain building, healing, defense and support. Develop each creature with the correct Monster Materials, then use infusion carefully to transfer useful abilities. Post-game strength comes from choosing suitable monsters, preserving rare donors, and farming materials through battles you can clear consistently rather than chasing the hardest encounter immediately.
Choose a practical post-game roster
The third combat position is always filled by a monster, so organize the Paradigm Pack around jobs rather than trying to raise every captured creature. Keep at least one dependable Commando for physical damage, one Ravager for chain building, one Sentinel for dangerous attacks and one Medic for recovery. A Synergist or Saboteur can fill the remaining support role when a fight benefits from buffs, debuffs or elemental abilities.
You do not need a perfect monster for ordinary story cleanup. A reasonably developed creature with the correct role and useful abilities is more valuable than an underdeveloped high-end monster. Start with monsters that are easy to replace and whose Crystarium requirements match the materials you can currently obtain. Reserve major infusion projects for post-game battles, Coliseum opponents and other content that actually demands specialized builds.
Most monsters can be recruited again, but there are exceptions, including special or limited monsters. Before infusing a rare creature, confirm that it can be recaptured or keep a separate save. Infusion consumes the donor monster and removes it from your menagerie.
- Keep a Commando, Ravager, Sentinel and Medic available.
- Add Synergist or Saboteur support when a specific fight calls for it.
- Save before infusing any unusual, rare or difficult-to-replace monster.
Develop the monster with the correct materials
Open the main menu, choose Monsters, select the creature, and enter its Crystarium. Monsters do not use the CP system used by Serah and Noel. Instead, their nodes are unlocked with Monster Materials obtained from battles, treasure and shops. Materials have grades, and the required grade rises as the monster advances. Material type also matters: organic and mechanical creatures do not necessarily accept the same materials, so check the available materials in the Crystarium before spending them.
Material choice affects growth bonuses. Power-oriented materials are appropriate when physical damage is the priority; Mana-oriented materials suit magic-focused creatures; Vitality-oriented materials improve durability; and Potent materials provide a more balanced approach. The best distribution depends on the individual monster’s natural statistics and the role you intend to give it. Do not spend rare high-grade materials on a temporary donor or on a monster you plan to replace soon.
For a Commando, favor physical attack and useful offensive development. For a Ravager, favor magic or balanced growth according to the creature’s natural strengths. A Medic normally benefits from magic and enough durability to survive while healing. A Sentinel needs survivability first. For a Synergist or Saboteur, the value of the monster’s available buffs, debuffs and elemental abilities can matter more than raw statistics. Advance the Crystarium far enough to unlock the abilities that make the role reliable before worrying about perfect final numbers.
- Confirm the monster’s accepted material type before farming supplies.
- Use Power for physical specialists, Mana for magic specialists, Vitality for defense and Potent for balanced growth.
- Do not spend scarce high-grade materials on a temporary donor.
- Develop role reliability before pursuing maximum statistics.
Use infusion to transfer abilities
From the Monsters menu, select the monster you want to improve, choose Infusion, and select the donor monster. The donor is consumed when the infusion is confirmed. Passive abilities can generally be transferred between monsters, while role abilities are restricted to monsters of the same role. Role abilities are also affected by the recipient’s individual Crystarium progression, so an infusion preview may not provide every ability you expect.
Check the preview before accepting the transfer. A monster can hold a maximum of ten passive abilities. If you add another passive ability after reaching that limit, an existing non-locked ability may be replaced. Abilities marked as locked or preferential should be treated as protected, but do not assume that every useful ability is automatically safe. Plan the order of infusions instead of filling the passive slots randomly.
Build a donor list before starting. Capture or raise one monster for each desired ability, then infuse those donors into the final recipient in a deliberate sequence. Keep spare donors when an ability is rare or useful on more than one monster. Do not consume a valuable creature merely because its current statistics look impressive; the important question is which abilities the recipient can inherit and whether the resulting passive set supports the intended role.
- Select the recipient first and verify its role and Crystarium progress.
- Review the infusion preview before confirming.
- Plan around the ten-passive-ability limit.
- Protect locked or irreplaceable abilities with a separate save and spare donors.
Build paradigms around Serah and Noel
Monster development is most useful when it covers a weakness in the two human characters. If Serah and Noel are both assigned offensive roles, include a Medic or Sentinel monster so one paradigm switch can stabilize the party. If the humans already provide healing and defense, use a Commando or Ravager to improve damage and chain control.
Equipment should reinforce the human characters’ jobs rather than duplicate every monster function. A strong Medic monster lets Serah or Noel remain on a damage, chain-building or support paradigm while the monster handles recovery. A Sentinel monster can absorb a dangerous attack while the humans heal, buff or prepare a stagger. This is especially useful against Coliseum opponents whose attacks punish an all-out offensive setup.
Create several paradigms using the same core monster: an offensive arrangement, a recovery arrangement and a defensive arrangement. Add a support paradigm when the fight benefits from buffs or debuffs. Practice switching before entering a difficult battle so that changing from offense to Sentinel or Medic is immediate rather than a menu experiment during an enemy attack.
- Pair offensive human roles with a Medic or Sentinel when survival is the issue.
- Use a Commando or Ravager monster when chain control or damage is lacking.
- Prepare offensive, defensive and recovery paradigms before high-level fights.
Recruit and farm efficiently
Ordinary battles are the most dependable way to obtain Monster Materials. Farm in an area where encounters are close together, battles end quickly and you can recover without repeated trips to a shop or save point. Target enemies that drop the grade and type of material your current monster needs instead of fighting the strongest available enemy by default.
Five-star battle ratings can improve the quantity of rewards, so use a fast offensive paradigm against routine enemies when it is safe. A Feral Link ability can also increase the chance of recruiting a monster when used as the finishing action, although it is not a substitute for repeated attempts against creatures with low recruitment chances. If a battle is taking too long, move to an easier group and build materials there first.
Chocolina can supply materials as the game progresses, but purchases cost gil and the required grades become more expensive. Use shops to fill a specific shortage, not as the only source of every material. Keep the monster being developed in the active Paradigm Pack, spend materials after several battles, and return to farming once the next Crystarium requirement is clear.
The Coliseum is best treated as challenge content with specific rewards. Its fights can be much harder than ordinary post-game encounters, so do not use them as a routine leveling method unless you can clear them consistently. First develop a basic damage, healing and defense roster through normal battles; then use Coliseum victories to obtain rewards or test specialized builds.
- Farm enemies that provide the needed material grade and type.
- Use fast paradigms and aim for strong battle ratings when safe.
- Use Feral Link finishers when trying to recruit a desired monster.
- Treat Coliseum victories as targeted challenge rewards, not automatic material farming.
Prepare and revise specialist builds
Before a difficult Coliseum fight, test the intended monster in ordinary battles. Confirm that the Commando can maintain damage, the Ravager can build the chain, the Medic can restore the party under pressure and the Sentinel can survive the attack pattern you expect. Add support only when its buffs or debuffs produce a clear advantage.
After a defeat, identify the actual failure: insufficient damage, slow chain building, missing buffs, inadequate healing, a failed status resistance plan or inability to survive a particular attack. Change one element at a time. Improve the relevant Crystarium nodes, replace one passive ability, change the monster role or alter a single paradigm. Rebuilding the entire roster after every loss makes it difficult to determine what solved the problem.
Keep a pre-infusion save and, if possible, an unmodified copy of the final monster. This allows you to test alternate passive combinations without permanently losing the original build. Once the monster performs reliably, record its role, donor sequence and useful paradigms in your own notes so a later replacement can be developed without repeating trial and error.
- Test every intended paradigm outside the Coliseum first.
- Diagnose the specific cause of failure before changing the build.
- Change one major variable at a time.
- Keep a pre-infusion save for long-term monsters.
Before you move on
- You have dependable Commando, Ravager, Medic and Sentinel options, plus support coverage where needed.
- Each long-term monster has been developed with compatible material grades and types.
- Your intended passive abilities were checked in the infusion preview, and you preserved rare donors or a backup save.
- Your paradigm deck includes offense, chain building, healing, defense and any support role required by the fights you intend to attempt.
- You can obtain the next materials through repeatable battles or targeted shop purchases without relying on an untested high-level encounter.
- Your strongest monsters have been tested in ordinary combat before being used in Coliseum challenges.
References for this chapter
- Final Fantasy XIII-2 - Guide and Walkthrough - PlayStation 3 - A_Backdated_Future
- Final Fantasy XIII-2 – Monster Infusion FAQ – PlayStation 3
- Final Fantasy XIII-2 Walkthrough - GameSpot
- Using the Crystarium – Final Fantasy XIII-2 Guide Sample
- Final Fantasy XIII-2 Walkthrough – Recruitable Monsters Main
Optional Content: Coliseum DLC and High-Level Challenges
Final Fantasy XIII-2 has two related but separate Coliseum elements on the original PlayStation 3 release. The base-game Coliseum, Year Unknown is reached from Bow Isle in Sunleth Waterscape 300 AF and awards the White Hole Gem during the story route. The separate Coliseum -??? AF- destination contains downloadable opponent battles such as Omega, Lightning and Lieutenant Amodar, Gilgamesh, Ultros and Typhon, Jihl Nabaat, and PuPu when their corresponding content is installed. Coliseum content is optional challenge, recruitment, and reward content. It is not an epilogue and is not a substitute for any base-game Fragment, Paradox Ending, Paradox Scope requirement, or secret-ending requirement.
Confirm the PlayStation 3 downloadable content
The original PlayStation 3 game can be completed without the downloadable Coliseum battles. If you want those encounters, confirm that the relevant battle content is installed for the same regional release as the game. The commonly listed Coliseum opponent packs are Omega; Lightning and Lieutenant Amodar; Gilgamesh; Ultros and Typhon; Jihl Nabaat; and PuPu. These are separate from costumes, weapons, and the story episodes involving Snow, Sazh, or Lightning.
A costume or weapon appearing in the game does not prove that an opponent pack is installed. Check the PlayStation 3 download history or game-data records if a purchased battle does not appear. Imported discs and content obtained through a different regional PlayStation Network account can create compatibility problems, so verify the game and add-on region before treating a missing opponent as a progression failure.
- The game is the original PlayStation 3 release.
- The desired opponent content is installed for the matching regional release.
- The installed content is a battle pack rather than only a costume, weapon, or separate story episode.
Reach the base-game Coliseum from Sunleth Waterscape 300 AF
Progress through Sunleth Waterscape 300 AF until you reach Bow Isle and the western gate. Use the Combat Artefact obtained during the episode to activate that gate. It opens the Historia Crux destination named Coliseum, Year Unknown. This is the story location and should not be confused with the later Coliseum -??? AF- node used for downloadable battles.
Enter Coliseum, Year Unknown and move toward the central area. A scene with the Arbiter of Time follows, and the party receives the White Hole Gem Fragment along with its CP reward. This Fragment is part of the base-game collection and is not a downloadable battle reward.
The location also contains optional treasure and map pickups. Use Moogle abilities to reveal or reach them if you want to clear the area, but they are not needed to unlock the downloadable opponents. After obtaining the White Hole Gem, return through the gate to Sunleth Waterscape and continue the main route or revisit the Historia Crux later.
- The Bow Isle gate in Sunleth Waterscape 300 AF has been activated with the Combat Artefact.
- Coliseum, Year Unknown is selectable from the Historia Crux.
- The Arbiter of Time scene has been completed.
- White Hole Gem appears in the Fragment menu.
Locate the downloadable battle destination
After the relevant content is installed, enter the Historia Crux and look for the separate Coliseum -??? AF- destination. The downloadable opponent battles are accessed there; they are not started by repeatedly entering the story version named Coliseum, Year Unknown.
The battle destination may be available before the party is strong enough to win its hardest encounters. The arena’s availability and the practical ability to clear a fight are different matters. If the node is absent, first confirm the DLC installation and regional compatibility, then check the Historia Crux again. If the node is present but an opponent is missing, verify that particular opponent pack rather than replaying Sunleth Waterscape.
You can return to the downloadable Coliseum after other story or post-game progress. This is useful because the stronger opponents are intended for a developed party with upgraded characters, well-developed monsters, and suitable equipment.
- Coliseum -??? AF- appears as a separate Historia Crux destination.
- The desired opponent is listed after entering the downloadable battle area.
- The opponent pack has been checked independently from unrelated DLC.
Prepare a flexible paradigm deck
Build the party around responses rather than a single damage formation. Keep one paradigm with a Sentinel monster for emergency mitigation, one reliable healing formation, one or more formations for raising the chain gauge, and a damage formation for stagger windows. A practical structure uses Sentinel for dangerous attacks, Medic for recovery, Ravager for chain building, Commando for stable damage and chain maintenance, and Saboteur or Synergist when debuffs or buffs are useful against the selected opponent.
Use a durable Sentinel monster that fits your current development rather than treating one named monster as mandatory. Silver Chocobo, Pulse Knight, Bunkerbeast, and other defensive options can serve different purposes depending on levels, abilities, and infusion choices. The essential qualities are survivability, dependable mitigation, and the ability to remain useful while the human characters heal or rebuild the chain.
Start with defensive equipment. Increase the relevant physical or magical resistance, keep enough HP to survive the enemy’s strongest predictable attack, and use status protection when the battle’s mechanics justify it. Once the encounter is stable, exchange defensive accessories for offensive ones one at a time. Do not copy a late-game build onto an underdeveloped party and assume the same strategy will work.
- A Sentinel emergency paradigm can be selected immediately.
- A double-Medic recovery option is available.
- The deck contains chain-building and stagger-damage formations.
- Equipment addresses the opponent’s most dangerous damage type or status effect.
Use controlled battle rotations
Begin an unfamiliar battle defensively and observe the opening pattern. If the opponent applies debuffs, heavy area damage, or a charge-up attack, switch to Sentinel support before the attack lands. Heal immediately afterward, then resume chain building. This is safer than waiting until both characters are near defeat and attempting to recover while the enemy continues attacking.
When the opponent can be staggered, use Ravagers to raise the chain gauge and Commando attacks to keep the gauge from dropping as quickly once stagger begins. During stagger, switch to the strongest available damage formation. Return to Sentinel or healing when the enemy signals a major attack or changes behavior.
For multi-enemy battles such as Lightning and Amodar, decide on a target order before committing to damage. Concentrating on one threat is often safer than spreading damage, especially if one opponent applies status pressure or creates the more dangerous attack pattern. Keep the Sentinel and healing options available instead of filling every paradigm slot with offense.
Do not assume that progress is preserved inside a failed Coliseum attempt. A defeat ends the encounter, so treat the loss as information. Change the opening paradigm, target order, accessory setup, monster role, or timing before retrying. Save before a long challenge session so an unwanted equipment or monster-management change can be reversed.
- The opening attack can be survived consistently.
- The party has a planned response to stagger loss or a phase change.
- Multi-enemy target order is deliberate.
- A failed attempt produces a specific adjustment for the next try.
Collect optional rewards and track base-game completion separately
Downloadable Coliseum victories can provide recruitable monster crystals and battle-specific rewards. Check the Monster Inventory and equipment lists after each victory instead of assuming that a desired crystal or item was obtained. If recruitment is the goal, repeat the encounter when necessary, but do not mistake a difficult victory for proof that the crystal was awarded.
The downloadable monsters can become useful Commando, Ravager, Sentinel, or specialist options, but a newly recruited crystal is not automatically better than a well-developed story monster. Infusion, role abilities, level development, and the rest of the paradigm deck matter more than the opponent’s name alone.
Use the Coliseum for challenge practice, recruitment, and optional rewards after the main party is stable. For AP or general development, favor an encounter that can be cleared reliably and quickly. A high-level battle is a poor farming choice if failed attempts take longer than repeated victories against a lower-risk enemy.
Coliseum content is optional challenge, recruitment, and reward content. It is not an epilogue and it does not replace any base-game Fragment, Paradox Ending, Paradox Scope requirement, or secret-ending step. Keep the Fragment menu, Paradox Ending records, and secret-ending checklist separate from the arena’s opponent list.
- Each desired downloadable opponent has been defeated.
- Desired crystals are visible in the Monster Inventory.
- Optional equipment has been confirmed in the inventory.
- The Fragment menu and Paradox Ending progress are tracked independently.
- No Coliseum victory is being counted as the 160-Fragment secret-ending requirement.
Before you move on
- Coliseum, Year Unknown has been reached from the activated Bow Isle gate in Sunleth Waterscape 300 AF.
- The White Hole Gem Fragment has been obtained from the Arbiter of Time.
- Coliseum -??? AF- appears separately in the Historia Crux if the relevant downloadable content is installed.
- Each owned battle pack appears in the downloadable opponent list and has been cleared if desired.
- Desired monster crystals and equipment have been verified in the Monster Inventory or item lists.
- The party has dependable Sentinel, Medic, chain-building, and stagger-damage paradigms.
- The Fragment menu, Paradox Ending progress, Paradox Scope status, and secret-ending requirements remain tracked independently.
- The player understands that Coliseum content is optional challenge, recruitment, and reward content, not an epilogue and not a substitute for any base-game completion requirement.
References for this chapter
- Final Fantasy XIII-2 Walkthrough - GameSpot
- Final Fantasy XIII-2 – Downloadable Content Guide – PlayStation 3
- Coliseum -Year Unknown- – Final Fantasy XIII-2 Guides
- Final Fantasy XIII-2 – Coliseum Battles DLC Walkthrough
- Opponent: PuPu – Final Fantasy XIII-2 Guides
- Final Fantasy XIII-2 - Guide and Walkthrough - PlayStation 3 - Krystal109
Requiem of the Goddess DLC and Epilogue Integration
Requiem of the Goddess is a separate Lightning scenario for the original PlayStation 3 release of Final Fantasy XIII-2. It takes place in Valhalla during the events surrounding the main game’s ending and shows Lightning’s struggle against Caius, including the events that lead to her crystallization. The episode appears in the Historia Crux when the matching PS3 add-on is installed. It can become available early, but it is best treated as post-story content because it contains major information about the ending. Complete the base-game ending first, then finish the main-game secret-ending requirements before using Requiem as the supplemental epilogue.
Install and verify the matching PS3 add-on
Install Lightning: Requiem of the Goddess for the PlayStation 3 version of Final Fantasy XIII-2. The original PS3 release received the scenario as a PlayStation Store add-on. Costume downloads, weapons, and Coliseum opponents do not confirm that this story episode is installed.
Load a save and open the Historia Crux. Look for the destination named Valhalla - ??? AF-. This is the DLC node for Requiem of the Goddess, not one of the ordinary year-based Valhalla locations. If it is missing, close the game and check that the add-on was installed under the same regional PlayStation Store account or product region as the game. Then reload the save and check the Crux again.
- The game is the original PlayStation 3 release of Final Fantasy XIII-2.
- The Requiem of the Goddess story add-on is installed.
- Valhalla - ??? AF- appears in the Historia Crux.
Enter the scenario after the base-game ending
Select Valhalla - ??? AF- from the Historia Crux to begin the episode. The scenario is played as Lightning alone rather than as Serah, Noel, and a captured monster. It uses a separate progression system with Lightning-specific roles including Paladin, Mage, Shaman, Knight, Conjurer, and Sorcerer.
The node may be available as soon as the Historia Crux is first available, but that is only an access condition, not the recommended story order. Entering it early exposes ending-related information. For a coherent playthrough, defeat the base-game final boss and watch the standard ending before starting Requiem. For the most complete order, finish the base-game Paradox Ending and 160-Fragment secret-ending work first, then play the Lightning episode.
- The selected destination is Valhalla - ??? AF-.
- Lightning is the only active combatant in this scenario.
- The standard base-game ending has already been viewed.
Develop Lightning through the Caius attempts
The episode begins with repeated attempts against Caius Ballad. Lightning is intentionally weak during the first attempts, so an early defeat is part of the scenario’s progression rather than a permanent failure. Each attempt awards CP, allowing Lightning to gain levels, abilities, and additional roles. This progression is separate from Serah’s and Noel’s Crystarium growth and does not use your normal monster party.
The scenario provides a limited supply of recovery items. Potions and the Elixir are not endlessly replenished during the episode, so do not spend them simply to delay an attempt that cannot succeed. At low levels, use Knight to survive Caius’s strongest attacks, then allow the attempt to end if your supplies and health are exhausted. Repeat the battle to gain CP and return with stronger abilities.
Caius rotates between Commando, Ravager, and Healer. During his Commando phase, watch for the finger snap that signals a powerful attack. Change to Knight immediately and use the defensive ability available in that role. After the attack, return to an offensive role rather than staying in Knight long enough for the chain gauge to collapse.
During Ravager, use Mage and Shaman to build and maintain the chain while switching to Paladin or Knight when the incoming damage becomes unsafe. When Caius enters Healer, he can remove your buffs and restore health, but he is less aggressive. Use this period to rebuild the chain and prepare your own support effects. Once Conjurer is available, use its defensive support before a dangerous exchange. Save Army of One and the Feral Link for a stagger, especially when Caius is launched or otherwise vulnerable.
- Lightning has gained enough CP to access the roles needed for a reliable attempt.
- Knight is ready before Caius’s telegraphed heavy attacks.
- Recovery items have been conserved for a realistic winning attempt.
Earn the Caius rating and reach Chaos Bahamut
Defeating Caius is not enough to advance. Caius must be defeated with a five-star battle rating. If the result is lower, repeat the encounter and improve the clear time while avoiding unnecessary damage and item use. Once the five-star Caius result is achieved, the scenario advances automatically to Chaos Bahamut.
Chaos Bahamut is fought with the same Lightning-only role system. Raise the chain gauge with Mage and Shaman, use Paladin to slow chain loss when necessary, and change to Knight before its strongest attacks. Watch for its charge and transition behavior rather than trying to absorb every hit with healing. Defensive role changes are more reliable than waiting until after the attack connects.
Use support abilities before the stagger if they are available. When Chaos Bahamut is staggered, switch to the strongest damage option and use Army of One or the Feral Link at a favorable opportunity. A safe clear is sufficient for the narrative episode; Chaos Bahamut does not need a five-star rating merely for the story to finish.
If Chaos Bahamut defeats Lightning, the scenario sends you back through the episode’s battle sequence, beginning again with Caius. This makes it worthwhile to learn both fights before spending the limited recovery items. Do not assume that reaching Chaos Bahamut creates a permanent checkpoint.
- Caius was defeated with a five-star rating.
- Chaos Bahamut was defeated.
- The episode advanced into its closing scenes rather than ending at the battle result.
Obtain the special Requiem monster crystal
The narrative completion and the special monster reward are separate goals. To obtain the special Requiem monster crystal, achieve the required five-star result in the Chaos Bahamut battle. Since a five-star Caius result is required to reach Chaos Bahamut, a successful reward run will also include the required Caius rating.
Do not rely on an alternate label such as Armor Lightning or Commando Lightning when checking the original PS3 inventory. Confirm the reward by opening the Paradigm Pack or monster list after the scenario and checking for the newly obtained Requiem monster crystal. The reward is a monster usable in the normal Final Fantasy XIII-2 party system; it is separate from Lightning’s role system during the DLC scenario.
If Chaos Bahamut was defeated without five stars, the story episode can still be complete, but the special crystal condition has not been met. Reattempt the scenario after Lightning has gained enough DLC levels and abilities to survive consistently. If the goal is the crystal, optimize for the battle rating rather than simply reducing risk through excessive leveling, because a very strong Lightning can still lose time needed for the highest rating.
- Caius has a five-star result.
- Chaos Bahamut has a five-star result when the special reward is required.
- The special Requiem monster crystal appears in the Paradigm Pack or monster list.
Watch the complete epilogue and preserve the save
After defeating Chaos Bahamut, allow the complete ending sequence and credits to play. The scenario’s closing scenes explain Lightning’s position in Valhalla and the events surrounding her crystallization. Continue through the credits because the DLC has additional closing material after them.
These scenes are supplemental DLC content. They do not replace the base-game Paradox Scope, the Paradox Endings, the 160 Fragments, or the base-game secret post-credit sequence. If the main completion goal includes every base-game ending, handle those requirements through the base-game Historia Crux and final sequence separately.
For the cleanest narrative order, first defeat the main-game final boss and watch the standard ending. Then obtain Paradox Scope, view the required Paradox Endings, collect all 160 base-game Fragments, and replay the final sequence for the base-game secret ending. After that, enter Valhalla - ??? AF- and complete Requiem of the Goddess. This keeps the base-game ending sequence intact before moving to Lightning’s supplemental epilogue.
When the DLC ending and credits are finished, create a separate save. Keep one file containing the completed base-game content and another reflecting the completed DLC scenario and reward. This protects the completion state if you later replay Requiem for a better rating or develop the special monster further.
- Caius and Chaos Bahamut were defeated.
- The complete Requiem ending scenes and credits were viewed.
- The special Requiem monster crystal was confirmed if that reward was required.
- A separate save was created after completing the DLC.
Before you move on
- Valhalla - ??? AF- was entered from the Historia Crux.
- The Caius scenario was completed with a five-star rating.
- Chaos Bahamut was defeated.
- The complete Requiem ending scenes and credits were viewed.
- The special Requiem monster crystal was confirmed in the Paradigm Pack when pursuing the reward.
- The base-game 160-Fragment secret-ending sequence was kept separate from the DLC episode.
- A separate completion save was created after the DLC ending and reward were recorded.
References for this chapter
Troubleshooting Common Progression Blocks
When Final Fantasy XIII-2 appears to stop opening gates or advancing scenes, diagnose the Historia Crux state first. The most common causes are a missing or wrong artefact, a gate deliberately closed with a Gate Seal, an unfinished local objective, or a hidden item that must be revealed with Moogle Hunt. Actual crashes, freezes, and endless loading require a separate diagnostic process. Preserve the working save before testing any suspected problem.
Check the Historia Crux and the exact gate requirement
Return to the Historia Crux before replaying an entire episode. Select the affected location and confirm that you are looking at the correct era and gate. The Historia Crux displays the gates belonging to each location, and activated gates are marked separately from inactive ones. A normal Time Gate requires its corresponding artefact. A crystal gate requires a Wild Artefact. Having a Wild Artefact does not replace a named artefact required by an ordinary gate.
Check the Key Items list for the exact artefact, then compare the gate with a PlayStation 3-specific artefact or walkthrough reference. If the location is present but the route remains unavailable, inspect every gate icon in that node rather than assuming the whole episode is blocked. Some locations contain multiple destinations, and activating one gate does not automatically activate the others.
If the game was loaded from a manual save, remember that Final Fantasy XIII-2 places the player in the Historia Crux first. Enter the last location again to resume from the saved point. Returning to the Historia Crux from the field also performs an automatic save, so make a separate manual save before deliberately changing a timeline.
- Confirm the exact time period and location.
- Identify whether the blocked route is a normal gate or a crystal gate.
- Check Key Items for the named artefact or a Wild Artefact.
- Inspect all gate icons in the Historia Crux node.
- Make a separate save before resetting a timeline.
Recover artefacts after closing a gate
Closing a gate with a Gate Seal is an intentional history reset, not automatically a corrupted-save symptom. The manual states that the location is rewound to how it was before the first visit and that related artefacts disappear from Key Items. This is why an artefact that was previously used or collected may seem to have vanished after a reset.
From the Historia Crux, select the affected location and use the gate controls to reopen the closed gate. Reopening restores the earlier completed timeline. If you need to replay the earlier version instead, enter the reset location and repeat the route that produced the artefact. Hidden artefacts may require Moogle Hunt, and story artefacts may require finishing the nearby scene before they can be collected.
Do not search every other timeline until you have checked the last gate you closed. Write down the gate name and era before using a Gate Seal, especially while pursuing fragments. After the artefact, destination, or local objective returns, save again and verify the Key Items list before moving on.
- Identify the most recently closed gate and its era.
- Reopen the gate from the Historia Crux and check Key Items.
- If necessary, replay the reset version of the location.
- Use Moogle Hunt on suspicious empty spaces and hidden objects.
- Save after the artefact and destination are restored.
Repeat the local objective chain in order
A gate may remain inactive because the current episode has not reached the action that creates or exposes its artefact. Follow the objective marker, speak to the named NPC, inspect the marked object, complete the required battle or delivery, and return to the relevant character. Do not assume that merely entering the area completes the episode. Established PS3 walkthroughs show several examples in which a conversation, monument, battle, or hidden artefact must be handled before the next gate becomes usable.
If the map marker seems to point at an empty area, use Moogle Hunt around nearby walls, platforms, treasure locations, and apparent dead ends. The game uses hidden artefacts and hidden treasure in multiple timelines. Also check upper and lower levels, ramps, side paths, and areas opened after a boss or story conversation. In some episodes, the next objective becomes clear only after speaking to an NPC a second time or attempting to leave the conversation area.
When checking a side quest, distinguish its reward from mandatory progression. A fragment quest may be optional even if it takes place near the main route. Do not reset the timeline merely because an optional fragment is incomplete; first confirm that the missing item or conversation is actually tied to the destination you need.
- Read the current objective text before retracing the route.
- Speak to all NPCs named or positioned near the objective.
- Inspect monuments, quest objects, and nearby hidden spaces.
- Use Moogle Hunt where the map or walkthrough identifies a concealed item.
- Separate optional fragment quests from required gate objectives.
Handle a frozen or missing cutscene without losing progress
If a cutscene freezes, stutters, or never reaches the next loading transition, first stop repeating the same attempt from the same save. Preserve the original save using the PlayStation 3's available save-copy or system-backup options if permitted, and keep the untouched original separate from test saves. Avoid overwriting the last save that loaded normally.
Reload a manual save from before entering the problem area. Approach the trigger by the normal route, and test the scene once. If it fails again, try an earlier save from before the preceding battle or conversation. This helps distinguish a problem associated with one save state or sequence from a broader disc, drive, or console issue. Clean and inspect the disc using normal PS3 care, but do not assume that cleaning will repair a damaged save or event sequence.
Square Enix confirms that PlayStation 3 event sequences can normally be paused with Start and skipped with Select from the Skip Menu, although certain sequences do not offer that option. If Skip is available, test it only after preserving the save and only as a diagnostic or workaround. A skipped scene is not proof that the underlying problem is fixed; confirm that the next objective, conversation, battle, and gate all function afterward.
If the same scene fails on multiple earlier saves, record whether the failure is a freeze, black screen, endless loading, crash, missing dialogue, or an absent trigger. If another original disc or PS3 is available, testing there can help separate media or console-read problems from save-specific problems. Community reports are useful for finding similar symptoms, but they are not guaranteed solutions and may describe another region, platform, or game.
- Preserve the original save before testing.
- Reload from before the affected area or preceding event.
- Use the official Skip function only when it is available.
- Confirm that progression works after any skipped scene.
- Test another save, disc, or PS3 only as a comparison.
- Record the exact failure behavior.
Report a reproducible platform problem with useful details
If normal gate checks, timeline replay, and earlier saves do not resolve the problem, document the failure precisely. Record the location name, era, gate name, current objective, last artefact or Gate Seal used, recent boss or side quest, save point, and the exact action that causes the failure. Include whether the issue occurs before a cutscene, during a loading transition, after a battle, or when returning to the Historia Crux.
Keep the original save and create a separate test copy where possible. Do not repeatedly close and reopen unrelated gates while diagnosing the issue, because changing several timelines can make it harder to identify the original cause. Compare the route against a PS3 guide or artefact reference, not a guide for a later PC release or a different Final Fantasy XIII title.
For route verification, the supplied GameFAQs walkthroughs, GameSpot walkthrough, and artefact reference are useful community resources. Square Enix's support page is the authoritative reference for PlayStation 3 event skipping. Treat forum or social-media fixes as leads to test cautiously, not as official repairs.
- Write down the era, location, gate, objective, and last item used.
- Describe the failure in concrete terms.
- Keep an untouched save and separate test copy.
- Verify the route against an original-PS3 reference.
- Identify whether the issue is reproducible on another save or system.
Before you move on
- The required gate appears as an active destination in the correct Historia Crux node.
- The required artefact or Wild Artefact is present in Key Items or has been consumed to open the intended gate.
- The relevant NPC conversation, battle, hidden-object interaction, fragment reward, or story scene has completed.
- Returning to the Historia Crux and re-entering the location resumes normally.
- A new manual save loads beyond the formerly blocked event without reproducing the failure.
References for this chapter
- FINAL FANTASY XIII-2 Software Manual
- Final Fantasy XIII-2 - Guide and Walkthrough - PlayStation 3 - A_Backdated_Future
- Final Fantasy XIII-2 - Guide and Walkthrough - PlayStation 3 - Krystal109
- Final Fantasy XIII-2 Walkthrough - GameSpot
- Square Enix Support: Is there a way to skip the event sequences in the PlayStation 3 version?
- Final Fantasy XIII-2 Artefacts, Gate Seals and Time Gates Guide
Full Completion Checklist and Post-Game Goals
Finish the base-game story, obtain Paradox Scope, collect all 160 Fragments, view the eight standard Paradox Endings, replay the final sequence for the secret ending, and then complete any owned DLC separately. Use separate saves and an explicit checklist because the standard ending, the eight alternate endings, the secret ending, Coliseum battles, and Requiem of the Goddess are different completion goals.
1. Finish the base-game campaign and preserve the important saves
Complete the final story route in Academia 500 AF, defeat Caius and the three Chaos Bahamut forms, watch the ending and credits, and allow the game to return you to post-game Historia Crux access. This is the standard base-game ending. It is not the secret ending and it does not by itself complete the Paradox Ending or 160-Fragment requirements.
Save in a new slot after returning to normal post-game access. Keep a separate save from before the Academia 500 AF final sequence if you have one. That earlier file is useful for repeating the ending, checking a missed Fragment Skill setting, or preserving an untouched pre-final state.
Open the Historia Crux and inspect the Fragment and gate totals for every location. Use the Fragment menu as the master checklist, then use a PlayStation 3-specific Fragment guide only when the title of an unfinished entry does not reveal its source. A visible treasure count alone is not enough: Fragments can come from side quests, puzzles, Live Triggers, enemy objectives, minigames, gate replays, and Paradox Ending transcripts.
- The Academia 500 AF final battles are complete.
- The standard ending and credits have been viewed.
- A new post-game save exists in a separate slot.
- A pre-final save is preserved if available.
- The Historia Crux and Fragment menu are being used to track unfinished content.
2. Obtain and enable Paradox Scope at the correct times
After clearing the main story, travel to Serendipity and speak with the Mystic, also identified in guides as the Chocobo Girl. She awards the Paradox Scope Fragment Skill after the story clear. Open Fragment Skills and confirm that the skill is available before attempting the post-game altered encounters.
Paradox Scope is required for most of the post-game Paradox Endings, but it is not a universal requirement. Fate and Freedom is obtained during the story without it. A Giant Mistake does not require it: close Bresha Ruins AF005, replay the route, and defeat Atlas without using the control device to weaken him. Mog’s Marvelous Flan Plan also does not require it: close Sunleth Waterscape AF300, defeat Royal Ripeness during the replay, then defeat the fully powered Royal Ripeness in the second encounter after the story sequence.
For the altered Academia and Caius encounters, enable or disable Paradox Scope according to the individual trigger. In particular, Test Subjects and Beneath a Timeless Sky can involve separate Serah and Noel battles with different Scope requirements. Do not assume that leaving the skill on for every fight is correct. Use a temporary save before the relevant sequence and check the required setting before each decisive battle.
The secret ending does require Paradox Scope to be enabled before replaying the final sequence after all 160 Fragments have been collected. Track the eight standard transcripts separately from the secret ending even though the transcripts count among the 160 Fragment rewards.
- The Mystic in Serendipity has been visited after the story clear.
- Paradox Scope appears in Fragment Skills.
- The Scope setting is checked for each individual Paradox Ending.
- The eight standard transcripts and the secret ending are listed separately.
3. Collect all 160 base-game Fragments systematically
Work through the Historia Crux by location. Start with areas whose counters show unfinished Fragments, then consult the Fragment menu to identify the exact missing entry. The 160 Fragments include ordinary exploration rewards, side-quest rewards, Live Trigger results, temporal-rift puzzles, minigame prizes, enemy and bestiary objectives, map-related rewards, special boss rewards, and the transcripts awarded by Paradox Endings.
When only a few entries remain, check the condition-based sources first. Common late discoveries include the Serendipity casino rewards, the Doctor M enemy-report quest in City of Academia AF4XX, special enemy variants, gate-closure replays, and quests unlocked only after later Historia Crux progress. Doctor M’s Monster Professor Fragment requires the complete base-game enemy report; DLC enemies are not substitutes for missing base-game entries.
If the final entry does not appear after a battle or quest, record its exact name from the Fragment menu. Then verify the required location, gate state, NPC conversation, quest status, puzzle or minigame condition, and enemy version. Do not farm random encounters without first confirming that the missing Fragment is tied to an enemy or bestiary objective.
Create a new save immediately after the 160th Fragment is awarded. The in-game Fragment total and the Defragmented trophy provide the completion check; do not rely only on a personal list.
- Every base-game Fragment entry is present.
- The eight Paradox Ending transcripts are included in the total.
- Serendipity rewards and the Academia AF4XX enemy-report reward have been checked.
- The Defragmented trophy has appeared, or the Fragment menu confirms 160 collected.
- A new save was created after the final Fragment.
4. View all eight standard Paradox Endings
Use gate closure, also called Time Reversal, to reset the relevant timeline before attempting an alternate route. Save before each Live Trigger choice or difficult battle. After the ending scene finishes, open the Fragment menu and confirm that the corresponding transcript was awarded before moving on.
Fate and Freedom is viewed in Neo Bodhum Year Unknown by choosing the option to accept this world during the Live Trigger with Lightning. It can be obtained without Paradox Scope.
The Future Is Hope and Beneath a Timeless Sky use the altered City of Academia AF4XX route. Replay the area after closing its gate, complete the Graviton Core sequence with Hope and Alyssa, and make the required Live Trigger choice. Refusing the Artifact leads to The Future Is Hope; accepting it leads into the route for Beneath a Timeless Sky. Follow the required Paradox Scope setting for the altered Caius battles rather than assuming one setting applies to the whole route.
A Giant Mistake uses Bresha Ruins AF005. Close the gate, replay the route, and when the game presents the Atlas weakening sequence, do not use the control device. Fight and defeat Atlas at full strength.
Mog’s Marvelous Flan Plan uses Sunleth Waterscape AF300. Close the gate, defeat Royal Ripeness during the required story replay, then approach the encounter again after free exploration begins and defeat the fully powered version.
Vanille’s Truth uses Oerba AF200. Close the gate, follow the route to the northwest rooftop, and defeat Caius. Test Subjects uses Augusta Tower AF200 and requires the altered Proto fal’Cie Adam sequence. Heir to Chaos is obtained through the altered Caius route involving the relevant Academia, Neo Bodhum Year Unknown, and A Dying World AF700 sequences.
The eight transcript names to verify are Fate and Freedom, The Future Is Hope, A Giant Mistake, Mog’s Marvelous Flan Plan, Vanille’s Truth, Test Subjects, Beneath a Timeless Sky, and Heir to Chaos. If a transcript is missing, reload the save before the trigger, confirm the gate was actually closed, and repeat the route with the correct Scope setting.
- All eight standard transcript names appear in the Fragment menu.
- Fate and Freedom was obtained through its Live Trigger choice.
- A Giant Mistake was obtained by defeating unweakened Atlas.
- Mog’s Marvelous Flan Plan was obtained by defeating fully powered Royal Ripeness after the first encounter.
- The altered Academia and Caius routes were completed with their required Scope settings.
- A temporary save was used before each irreversible choice or difficult battle.
5. Trigger the base-game secret ending
After the Fragment menu shows all 160 entries, travel to Academia 500 AF. Open Fragment Skills before entering the final sequence and turn Paradox Scope on. Time Reversal is not required for this replay.
Proceed through the final area and defeat Caius and the three Chaos Bahamuts again. Complete the ending sequence and watch through the credits. With all 160 Fragments collected and Paradox Scope active for the replay, an additional post-credit scene appears. This is the base-game secret ending and is separate from the standard ending and the eight standard Paradox Endings.
If the ordinary ending appears without the extra scene, return to the post-game save and check the requirements in order: the Fragment menu must show 160 collected, Paradox Scope must have been enabled before entering the final sequence, and the final battles must be completed again. Preserve a save immediately before this replay so an incorrect setting does not force another full collection route.
The Anomalous trophy is the appropriate trophy check for viewing every possible Paradox Ending. Do not treat the trophy as complete after only the eight standard transcripts; the secret ending is also required.
- The Fragment menu shows 160 collected.
- Paradox Scope was enabled before entering Academia 500 AF.
- Caius and the three Chaos Bahamuts were defeated again.
- The additional secret post-credit scene appeared.
- The eight standard endings and the secret ending are both documented.
- The Anomalous trophy has appeared, or the trophy list confirms the complete set.
6. Complete owned Coliseum DLC separately
The Coliseum is optional DLC challenge content. It is not part of the base-game 160-Fragment total, the eight standard Paradox Endings, or the base-game secret-ending trigger. Confirm that the purchased Coliseum content is installed and that its Historia Crux destination or challenge entries are visible before attempting to track completion.
Clear each owned Coliseum challenge that belongs to your personal completion goal. These battles can demand stronger monster development, dependable healing, defensive paradigms, resistance planning, and a way to control or recover from stagger-heavy attacks. Record the challenges independently; a Coliseum victory does not replace a missing Fragment or Paradox transcript.
If the Coliseum node does not appear, quit the game and verify DLC ownership and installation through the PlayStation 3 system menus. Restart the game and inspect the Historia Crux again. Keep the completed base-game save untouched while diagnosing missing DLC content.
- Owned Coliseum DLC is installed and visible.
- Every owned challenge included in the completion goal has been cleared.
- Coliseum victories are recorded separately from base-game completion.
- No Coliseum result is being counted as a substitute for a Fragment or ending.
7. Complete Requiem of the Goddess as a separate epilogue
Requiem of the Goddess is a separate Lightning-focused narrative episode. It is not required for the base-game 160 Fragments, the eight standard Paradox Endings, the secret ending, or the Anomalous trophy. If installed, select its Historia Crux destination and complete the episode and its final battles as a separate objective.
For a clean narrative order, complete the standard ending, all eight standard Paradox Endings, the 160-Fragment collection, and the base-game secret ending first. Then play Requiem of the Goddess. This prevents the DLC episode from being mistaken for the base-game secret scene and keeps the two conclusions documented independently.
Record the DLC only after its narrative ending has played. If you are also pursuing its battle-performance rewards, track those separately from simply clearing the episode. The DLC does not retroactively replace the base-game ending requirements.
- Requiem of the Goddess is installed and visible in the Historia Crux.
- The complete Lightning-focused episode has been cleared.
- Its ending scenes have been viewed.
- Any performance-based DLC goal has been recorded separately.
- The DLC result is not being used as evidence for the base-game secret ending.
8. Archive the completed PlayStation 3 run
After confirming the 160 Fragments and secret ending, create at least two final saves in different slots. Keep one untouched and use the other for future challenge battles, missed trophy cleanup, or additional DLC attempts. Create another final save after completing owned DLC if you want the archive to represent the entire available content.
Use the PlayStation 3 Saved Data Utility to copy the saves to compatible backup storage. Preserve the pre-final save, post-story working save, pre-secret-ending save, and final completion save when possible. These files let you revisit alternate endings without sacrificing the collection file.
Write down the Fragment total, all eight standard transcript names, the secret scene, Defragmented status, Anomalous status, Coliseum challenges completed, and Requiem of the Goddess completion. A final archive is strongest when the saves and the written checklist agree.
- At least two final save slots exist.
- A PlayStation 3 saved-data backup has been made.
- The 160-Fragment total is documented.
- All eight standard Paradox Endings are documented.
- The secret ending is documented.
- Anomalous is verified.
- Coliseum completion is recorded separately.
- Requiem of the Goddess completion is recorded separately.
Before you move on
- The base-game campaign and standard ending are complete.
- Paradox Scope was obtained from the Mystic in Serendipity.
- All 160 base-game Fragments are collected.
- The eight standard Paradox Ending transcripts have been viewed and checked in the Fragment menu.
- The final sequence was replayed with Paradox Scope active and the secret post-credit scene appeared.
- Anomalous has been verified after all possible Paradox Endings were viewed.
- Owned Coliseum challenges were completed if included in the personal goal.
- Requiem of the Goddess was completed if owned.
- At least two final saves and a separate PlayStation 3 backup copy have been preserved.
References for this chapter
- Final Fantasy XIII-2 – Guide and Walkthrough – PlayStation 3
- Final Fantasy XIII-2 – Fragment Guide – PlayStation 3
- Anomalous Trophy in Final Fantasy XIII-2
- Defragmented Trophy in Final Fantasy XIII-2
- Final Fantasy XIII-2 – Guide and Walkthrough – PlayStation 3, Paradox Ending Details
- Final Fantasy XIII-2 Official Guide Sample Pages
- Final Fantasy XIII-2 – Requiem of the Goddess DLC Walkthrough
- Final Fantasy XIII-2 – Coliseum Battles DLC Walkthrough
Finishing up
Have one save showing the main sequence cleared and the credits watched; that confirms basic campaign completion.
Obtain Paradox Scope after finishing the main story and use it for the qualifying Paradox Ending replays.
Collect all 160 base-game Fragments, then replay the final sequence with the required Fragment Skill state and watch the credits to trigger the base-game secret post-credit scene.
View all eight Paradox Ending scenes and confirm their Transcript Fragments in the Fragment menu.
Complete owned DLC separately: clear desired Coliseum challenge battles and finish Requiem of the Goddess if owned.
Preserve separate final saves for the base-game 160-Fragment state, the secret ending, and completed DLC.
Choose your next gameScreenshots & video
Game imagery for reference. Follow the written chapters above for the route and strategies.
Sources & references
Our original guide draws on the references below. Check the edition at the top of this page before following controls or unlock requirements.
- FINAL FANTASY XIII-2 Official Mini Guide: Controller Commands
- Final Fantasy XIII-2 - Guide and Walkthrough - PlayStation 3 - Krystal109
- Final Fantasy XIII-2 – Guide and Walkthrough – PlayStation 3
- Final Fantasy XIII-2 - Guide and Walkthrough - PlayStation 3 - A_Backdated_Future
- Final Fantasy XIII-2 Walkthrough - GameSpot
- Final Fantasy XIII-2 Official Guide Sample Pages
- Final Fantasy XIII-2 – PS3 User Manual
- Final Fantasy XIII-2 Walkthrough: New Bodhum 003 AF
- Final Fantasy XIII-2 New Bodhum 003 AF Fragment Walkthrough
- Final Fantasy XIII-2 New Bodhum 003 AF Monster Guide
- Using the Crystarium – Final Fantasy XIII-2 Guide Sample
- FINAL FANTASY XIII-2 Software Manual
- Final Fantasy XIII-2 Walkthrough - Yaschas Massif 010 AF
- Final Fantasy XIII-2 Walkthrough - Oerba 200 AF
- Final Fantasy XIII-2 Walkthrough - Yaschas Massif 01X AF
- Final Fantasy XIII-2 Artefacts, Gate Seals and Time Gates Guide
- Final Fantasy XIII-2 – Fragment Guide – PlayStation 3
- Final Fantasy XIII-2 Walkthrough: Sunleth Waterscape 300 AF
- Final Fantasy XIII-2 Walkthrough: Bresha Ruins 005 AF Side Notes
- AF4XX | Academia (Part 2) - Episode 4 - Walkthrough | Final Fantasy XIII-2 | Gamer Guides
- New Bodhum -700 AF- - Final Fantasy XIII-2 - Guides
- Final Fantasy XIII-2 Walkthrough Final Episode Academia 500 AF - VGFAQ
- P17A: Academia AF500 - Final Fantasy XIII-2 Guide and Walkthrough
- AF500 | Academia (Part 1) - The Last Episode - Walkthrough
- Final Fantasy XIII-2 – Guide and Walkthrough – PlayStation 3, Paradox Ending Details
- Final Fantasy XIII-2 - Boss Guide - PlayStation 3 - GameFAQs
- SQUARE ENIX Support Centre: How do I save data on Xbox360 / PlayStation 3?
- Final Fantasy XIII-2 Walkthrough – Paradox Endings, FFExodus
- AF00X New Bodhum – Episode 5 Walkthrough, Gamer Guides
- Transcript: Fate and Freedom, Final Fantasy XIII-2 Fragment Guide
- Final Fantasy XIII-2 – Monster Infusion FAQ – PlayStation 3
- Final Fantasy XIII-2 Fragments Guide
- Final Fantasy XIII-2 Serendipity Post-Game Walkthrough
- Secret Ending - Post Game - Walkthrough | Final Fantasy XIII-2
- Final Fantasy XIII-2 Trophy Guide & Road Map
- Final Fantasy XIII-2 Walkthrough – Recruitable Monsters Main
- Final Fantasy XIII-2 – Downloadable Content Guide – PlayStation 3
- Coliseum -Year Unknown- – Final Fantasy XIII-2 Guides
- Final Fantasy XIII-2 – Coliseum Battles DLC Walkthrough
- Opponent: PuPu – Final Fantasy XIII-2 Guides
- PlayStation Store Update – Lightning: Requiem Of The Goddess PS3 Add-on
- Final Fantasy XIII-2 Walkthrough – Downloadable Content – Lightning
- Lightning: Requiem Of The Goddess – DLC Guide
- Guide: How to 5-Star the Battles in Requiem of the Goddess
- Requiem of the Goddess Question – Final Fantasy XIII-2
- Square Enix Support: Is there a way to skip the event sequences in the PlayStation 3 version?
- Anomalous Trophy in Final Fantasy XIII-2
- Defragmented Trophy in Final Fantasy XIII-2
- Final Fantasy XIII-2 – Requiem of the Goddess DLC Walkthrough
About the game & collecting notes
- Platform
- PlayStation 3
Practical, step-by-step coverage of Final Fantasy XIII-2 on the original PlayStation 3 release: how to progress every main episode, use the Historia Crux, open gates, handle key bosses, capture and develop monsters, finish the post-game Paradox Endings, collect all 160 base-game Fragments, trigger the base-game secret ending, and complete optional owned DLC such as the Coliseum battles and Requiem of the Goddess episode.
Darryl Polo
Darryl Polo loves tinkering with emulation and revisiting retro games. He enjoys exploring how old favorites play on different setups and sharing what he learns along the way. At Joking Joystick, he writes about the games, hardware, and small discoveries that keep the hobby fun.
Our editorial standardsFound a step that needs another look? Help us improve this guide.