
Final Fantasy Tactics Advance (GBA, USA/Australia) — Complete Campaign Walkthrough
Follow the complete main campaign of Final Fantasy Tactics Advance on the original Game Boy Advance, from the opening missions through Royal Valley and the ending. Learn how to manage laws, jobs, abilities and your clan, then use the postgame chapter for optional recruitment and mission planning. The main-story route is complete; the optional section is not an exhaustive 300-mission catalog.

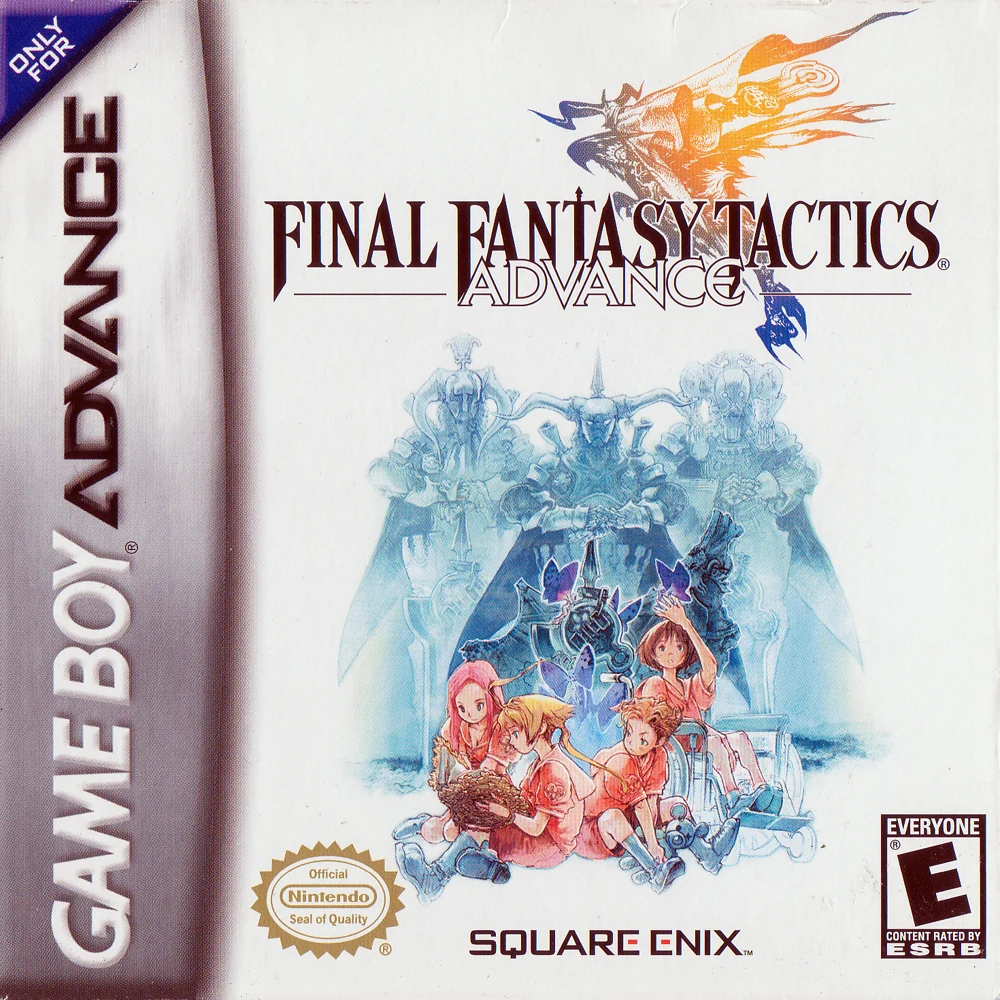
Find a copy
Final Fantasy Tactics Advance Game Boy Advance
We may earn a commission if you buy through these links, at no extra cost to you. As an Amazon Associate I earn from qualifying purchases.
Opens retailer search results. Check the model, edition, seller, availability and current price before buying.
Before you begin
This guide is written for the original Nintendo Game Boy Advance edition of Final Fantasy Tactics Advance.
It assumes the original GBA mechanics and mission names, not Final Fantasy Tactics A2 or another remake or sequel.
Follow the chapters in order.
The story route chapters cover every required numbered mission; the system chapters explain jobs, AP, Judge Points, Laws, clan management and recovery tactics.
Check the active Laws before every engagement.
They change with the calendar and story progression, so build legal alternatives instead of treating Laws as permanent unlocks.
After the ending, use the optional chapter to start postgame exploration and plan further missions.
Completing every numbered mission, recruiting every character and collecting every rare item are separate long-term goals.
Set yourself up for the run
Play on the intended hardware or a reliable GBA build — the walkthrough assumes original GBA mechanics and menu layout from the USA/Australia release; consult the official manual for control references.
Create multiple save files and back them up if your setup allows it; keep one dedicated to experimentation (job changes, law breaks) and one for the main campaign.
Familiarize yourself with basic controls (movement, Wait/Action, item/ability menus) and the World Map interface — these are covered in the manual and in the Jobs/Laws chapters.
Recruit a balanced starter clan: include at least one strong melee (Soldier/Fighter), one White Mage or White Monk for healing, and one ranged or magic damage dealer.
Replace or retrain as required by mission objectives.
Buy and equip basic healing and MP-restoring items before story battles.
Do not rely on loot between successive story fights without checking the shop when you return to town.
Place new map regions thoughtfully: early placements increase available Treasure Hunts and sub-missions.
The Walkthrough explains recommended placements when each story mission grants a new area.
Keep track of active Laws and penalties each mission — Judges will hand out penalties for infractions; consult the Laws chapter to learn safe counters and when to use Anti-law effects.
If you plan to pursue multiplayer clan battles or item trading, prepare a link cable or equivalent local‑multiplayer setup early; these features are optional and do not block the main story but are available on original GBA hardware.
Start and First Steps — Controls, Save Strategy, The Thesis Hunt
Complete the opening scenes and tutorial battle, name the clan, place Sprohm, clear Herb Picking at Giza Plains, place Lutia Pass, and clear Thesis Hunt. Thesis Hunt awards Nubswood and unlocks the Clan command, rival-clan encounters, and the larger Mission List. The starting clan already includes a Nu Mou White Mage, so you can heal from the beginning without waiting for an optional recruit.
Complete the opening and establish a safe save routine
Start a new game and follow the school scenes, including the snowball fight and Marche’s arrival in Ivalice. Continue through the first conversations with Montblanc until the game introduces the World Map and the pub. When the game asks you to name the clan, choose any name you like; the name has no effect on the story or battle systems.
The opening sequence includes the tutorial mission Y-You’re a lizard! Complete it before attempting Herb Picking. Use this fight to learn the basic turn sequence: choose a unit, move it, select an action, and finish with Wait when no further command is useful. Pay attention to attack range, movement range, elevation, and whether a unit will remain within healing range after acting.
On the Game Boy Advance, the Control Pad moves the cursor, A confirms a selection, and B cancels or returns to the previous menu. On the World Map, L displays the Laws, R displays information about the selected region, Start opens the World Map Menu, and Select displays help. In battle preparation, L shows the battlefield and enemy information, R opens unit information and permits equipment or ability changes, Start begins the battle, and Select displays every Law in effect. During battle, B backs out of a command or shows movement information, Start opens the System Menu, and Select displays command help.
Once saving is available, keep one primary save and use another slot for experiments. Make the second save before placing a region, buying mission information, changing several jobs, or entering a battle under an unfamiliar Law. Confirm that the new file loads before overwriting an older file. Story missions cannot simply be replayed from the Mission List after they are cleared, so preserving a pre-mission save is useful if you want to retry a battle or check a different setup.
- Finish the opening scenes and Y-You’re a lizard! tutorial battle.
- Name the clan at the pub.
- Create a primary save and a separate experimental save.
- Use Select for help when a menu function is unclear.
- Confirm that a new save loads before deleting or overwriting the older file.
Place Sprohm and prepare for Herb Picking
After the introduction, the game gives you the Sprohm symbol and explains region placement. Place Sprohm on the available World Map position, then enter the pub in Cyril. Herb Picking is the first numbered story mission. It costs 300 gil and takes place at Giza Plains.
The initial clan is already broad enough for this mission: Marche is a human Soldier, Montblanc is a moogle Black Mage, the Bangaa is a White Monk, one Viera is an Archer, the Nu Mou is a White Mage, and another human is a Soldier. You do not need to recruit a healer before progressing. Open the Party menu and check that the Nu Mou White Mage has a staff and robe equipped. Keep the current weapons and armor equipped unless a shop purchase is clearly stronger and affordable.
Buy only essential supplies and equipment. Reserve enough gil for the 900-gil Thesis Hunt fee after Herb Picking, along with a few Potions. Purchase Herb Picking, save before leaving Cyril, and move to Giza Plains. During deployment, use R to inspect units and L to study the field before pressing Start.
- Place Sprohm on the World Map.
- Confirm that the starting Nu Mou has the White Mage job.
- Equip current weapons, armor, and a usable staff for the White Mage.
- Keep at least 900 gil available for Thesis Hunt, plus basic recovery items.
- Save before entering Giza Plains.
Clear Mission 001, Herb Picking
Herb Picking at Giza Plains uses the objective Defeat all enemies. The opposing group is three Goblins, one Red Cap, and one Sprite. Deploy the full party for the safest first clear, keeping the White Mage behind the front line and close enough to use Cure.
Move the Soldier and White Monk toward the enemies while Montblanc and the Archer attack from safer positions. Do not send a front-line unit so far ahead that it cannot be healed. If the White Mage cannot act safely or a unit needs immediate recovery, use a Potion instead of waiting for Cure.
The Sprite is not the main reason to split the party. Deal with the Goblins and Red Cap while keeping the formation together, then finish any remaining enemy. Check movement and attack ranges before confirming each turn. If the active Law restricts a weapon or action, use a legal substitute rather than accepting a Judge penalty. When all five monsters are defeated, allow the mission-clear sequence to finish. The reward is 600 gil and the Lutia Pass symbol.
- Defeat three Goblins, the Red Cap, and the Sprite.
- Keep the White Mage within support range of the front line.
- Use Cure or Potions before a unit becomes vulnerable to a knockout.
- Allow the mission-clear sequence to finish.
- Receive the Lutia Pass symbol.
Place Lutia Pass and identify Thesis Hunt
Place Lutia Pass on an open World Map position. Placing a new region can make another location shake. A shaking location indicates that an optional Treasure Hunt has appeared there; it is not a mandatory story objective. Do not spend time repeatedly changing placements unless you specifically want to optimize an optional Treasure Hunt reward.
Return to Cyril and inspect the pub. After Herb Picking, the Mission List expands and Thesis Hunt becomes available as Mission 002. Thesis Hunt costs 900 gil, takes place at Lutia Pass, and awards 4,000 gil plus a random item. Optional missions may provide experience, gil, ability points, equipment, or recruits, but do not spend so much that you cannot afford the story mission and recovery items.
Check the Laws before buying the mission. On the World Map, L shows the Laws for the current day. Move the cursor to the destination and check the Law information there as well; the game can show the Laws that will be in effect by the time you travel to that location. Laws are not permanent story unlocks. They cycle with the calendar, so prepare legal alternatives before battle rather than assuming a Law will remain or disappear after a particular story scene.
Save in the experimental slot before buying Thesis Hunt and leaving Cyril. This gives you a clean point from which to change equipment or wait for a more favorable Law cycle if necessary.
- Place Lutia Pass.
- Return to Cyril and inspect the expanded Mission List.
- Identify Thesis Hunt as Mission 002.
- Check both the current Law and the expected Law for Lutia Pass.
- Reserve 900 gil for the mission fee.
- Save before entering the Lutia Pass battle.
Win Mission 002, Thesis Hunt
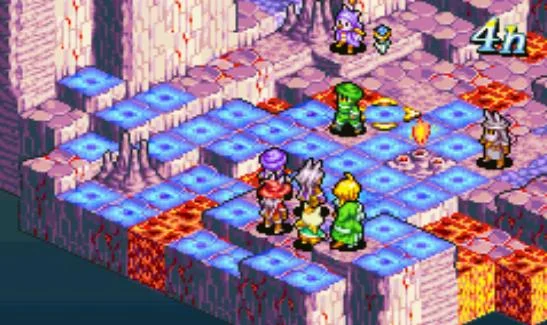
Thesis Hunt takes place at Lutia Pass with the objective Defeat all enemies. The opposing clan contains a White Mage, an Archer, two Soldiers, and two Thieves. The rugged terrain makes elevation and movement range important, so use L during deployment to study routes and enemy positions before starting.
Target the enemy White Mage first if it is reachable without exposing your own healer. Removing it prevents repeated recovery and support actions. Use Montblanc’s Black Magic and the Archer to pressure targets that are awkwardly positioned on higher ground. Keep your own White Mage behind the front line and spend turns healing rather than advancing into danger.
After the enemy White Mage, attack the Archer when it is exposed, then concentrate on the Soldiers and Thieves. Thieves have Counter, so avoid unnecessary adjacent physical attacks when a bow, spell, or other ranged option is available. Do not chase one Thief into an isolated corner; advance as a group and keep damaged units within healing range.
If the active Law bans a preferred weapon or action, change the plan before acting. Use a legal attack, item, or alternate unit instead of intentionally breaking the Law unless the penalty is a deliberate last resort. Defeat the White Mage, Archer, Soldiers, and Thieves, then allow Marche to recover the thesis and the mission-clear scene to play. The reward is 4,000 gil and one random item.
- Defeat the enemy White Mage before it prolongs the battle.
- Use ranged attacks or magic against elevated and difficult targets when practical.
- Avoid unnecessary adjacent physical attacks against Thieves with Counter.
- Keep the White Mage safe and within range of injured allies.
- Defeat all six enemies and wait for the mission-clear scene.
Place Nubswood and activate the Clan command
After Thesis Hunt, place the Nubswood symbol on the World Map. The placement itself does not require a special arrangement for story progression. As before, a shaking location signals an optional Treasure Hunt. Complete one only when the clan is healthy and equipped; it can be postponed without blocking the next story mission.
Return to Cyril and review the new options. The Clan command is now available from the World Map Menu. Open that menu with Start and inspect the roster, active party, mission records, controlled areas, and mission items. The pub also explains rival clans. Rival clans can appear as red figures on the World Map; touching one begins a clan battle, so avoid the encounter if the party is injured, under-equipped, or facing an unfavorable Law.
The next numbered story mission is The Cheetahs at Nubswood. You may complete side missions first for experience, gil, ability points, equipment, and possible recruits, but keep a dependable healer active and preserve enough money for the next story mission. Check the Laws again immediately before starting any battle, because the active Law depends on the game’s calendar and destination rather than being permanently unlocked by story progress.
- Place Nubswood.
- Open the Clan command from the World Map Menu.
- Confirm that rival clans can appear as red figures.
- Verify that The Cheetahs is listed as the next numbered story mission.
- Keep the Nu Mou White Mage or another dependable healer available.
- Inspect the active and upcoming Laws before the next battle.
Before you move on
- The opening scenes and Y-You’re a lizard! tutorial battle are complete.
- The clan has been named.
- Herb Picking at Giza Plains is cleared.
- Lutia Pass has been placed on the World Map.
- Thesis Hunt at Lutia Pass is cleared and the thesis-recovery scene has finished.
- Nubswood has been placed on the World Map.
- The Clan command is visible from the World Map Menu.
- Rival clans can appear as red figures.
- The Mission List contains The Cheetahs and additional optional missions.
- The starting Nu Mou White Mage or another dependable healer is equipped and available for the next story mission.
- The current and destination Laws have been checked before continuing.
References for this chapter
- Final Fantasy Tactics Advance Instruction Manual, North American GBA edition
- Final Fantasy Tactics Advance Walkthrough
- Final Fantasy Tactics Advance Walkthrough, GameFAQs
- Final Fantasy Tactics Advance Guide and Walkthrough, GameFAQs, Lini and Cadoan mission route
- Final Fantasy Tactics Advance - Controls - StrategyWiki
- Thesis Hunt Mission - Final Fantasy Tactics Advance Walkthrough
World Map, Mission List and Placing Regions
The World Map controls travel, region placement, Treasure Hunts and encounters with rival clans. Place every story-awarded region, then return to a town Pub to read rumors and purchase mission information. Keep the next story mission separate from optional battles, Dispatch Missions, Free Missions and Encounter Missions, because only the required story entries advance Marche’s central objective.
Place each story-awarded region
After a story mission awards a new region symbol, the game returns you to the World Map and asks you to place it. Move the cursor to an empty map location, press A, and confirm the placement. The new region then appears in the Area List and becomes available as a destination for later missions.
The opening sequence places Sprohm before Herb Picking. After Herb Picking, place Lutia Pass. After Thesis Hunt, place Nubswood. Later story missions award additional symbols in the same way. For ordinary story progression, any available empty location is acceptable; a normal placement choice does not make the main campaign unwinnable.
- Place the new symbol on an empty map location.
- Confirm that the region appears in the Area List afterward.
- Save before testing a placement intended to produce a particular Treasure Hunt.
Use neighboring placements for Treasure Hunts
Region placement affects Treasure Hunts. When a newly placed region creates the required connection pattern with nearby regions, one or more areas on the map may shake. Move the cursor to a shaking area and press A to investigate it. If the arrangement is valid, the game awards a Treasure Hunt item.
The reward depends on the types and positions of the connected regions. Towns, plains, mountains, forests, caves and deserts do not all produce the same results, so “place every region beside a town” is not a complete Treasure Hunt strategy. For a normal first playthrough, placing a new symbol near existing regions makes possible shaking areas easier to notice. If a specific item matters, make a separate save before experimenting and record the resulting layout.
Treasure Hunts are optional and are not required for normal story progression. Do not delay a required mission solely because the current map arrangement did not produce a shaking area.
- Check the map for shaking areas immediately after placing a region.
- Investigate any shaking area before leaving if you want its optional reward.
- Keep a separate save before changing a layout that is being used for rare-item hunting.
Return to a town and read the Pub rumors
After placing a region, move the clan marker to a settlement such as Cyril or Sprohm and press A. Use the Shop for equipment and supplies, then enter the Pub. Read the available Rumors before reviewing the Mission list. Some rumors are background information, while others are progression flags for particular missions or scenes.
The Pub also shows the missions currently available and handles missions already in progress. If a Dispatch Mission has sent away a unit that you need, review the mission-status options before rebuilding your active party. Canceling a dispatch can forfeit its expected result, so do not do this casually; first check whether the mission is close to completion or uses an important mission item.
- Read new rumors after story battles and region placements.
- Check whether a clan member is away on Dispatch.
- Reserve enough gil for the next mission’s information fee as well as basic equipment.
Buy the next story mission
Choose Mission in the Pub to display the current entries. The required story mission is normally the main progression entry near the top of the list, while other entries are optional or repeatable content. Select an entry to review its price, destination, objective and any mission-item requirement before paying the fee.
At the beginning, the sequence is Herb Picking in Giza Plains, followed by Thesis Hunt in Lutia Pass. After Thesis Hunt, The Cheetahs becomes the next required story mission and takes place in Nubswood. You may complete available optional missions first if you want additional experience, equipment or recruits, but do not mistake those rewards for story advancement.
After accepting a Battle Mission, leave the town and move the clan marker to the named destination on the World Map. Enter that region to begin the tactical battle. If the mission has a time limit, reach the destination before the displayed number of days expires.
- Read the objective and destination before paying for mission information.
- Confirm whether the mission is required, optional or repeatable.
- Review any mission-item requirement before accepting an engagement.
- Travel to the named destination after accepting a Battle Mission.
Distinguish the mission categories
Battle Missions require a normal tactical engagement. Story battles use this format, as do many optional fights that provide gil, experience, AP, equipment or recruits.
Dispatch Missions send one clan member away for a stated period or task. The dispatched unit is unavailable until the mission resolves, and the result is determined by the mission’s requirements and the selected unit’s suitability. Do not dispatch a core healer or damage dealer immediately before a required story battle.
Free Missions concern territory or other non-story objectives. Read the individual description carefully: some are resolved through dispatch conditions, while others lead to a battle or a claim on an area. Controlling territory can also expose the clan to later rival-clan activity.
Encounter Missions involve rival clans. After accepting one, follow the map objective to locate the opposing clan. Rival clans may also appear while you travel, independently of the Pub’s mission list. These fights are optional unless a specific progression condition says otherwise, so do not accept one when the party is injured, poorly equipped or constrained by an unfavorable Law.
- Use Battle Missions when you need direct combat practice and AP.
- Use Dispatch only when the selected unit can be spared.
- Treat Free Missions as separate objectives rather than automatic story steps.
- Prepare the party before accepting an Encounter Mission.
Recheck the list after every progression event
The Mission list is dynamic rather than a permanent catalog. Story progress, region placement, rumors, completed optional missions, clan development, calendar conditions and mission prerequisites can alter which entries appear. Some missions remain available for a long time, while others can disappear or become harder to recover if their timing conditions are ignored.
After every story battle and every newly placed region, return to a Pub, read the rumors, and reopen Mission. Compare the leading progression entry with its destination on the World Map. If the expected mission is missing, do not assume the save is broken. Check the Rumors, Report, mission-item inventory and any prerequisite mission or clan condition listed by your reference notes.
The Report records completed missions and helps distinguish finished content from undiscovered entries. An unknown entry is not necessarily available immediately; many missions are gated until later story progress, a particular rumor, a mission item, a calendar condition or a required clan state is reached.
- Reopen Rumors and Mission after each story battle and region placement.
- Use Report to confirm which missions have been completed.
- Check prerequisites before searching the World Map for a mission that is not yet available.
- Keep the required story entry distinct from optional missions that only provide rewards.
Before you move on
- Sprohm, Lutia Pass, Nubswood and every later story-awarded region have been placed on the World Map.
- You can move to a town, enter the Pub, read Rumors and purchase mission information.
- You can identify the current story-progress entry without confusing it with optional missions.
- You can distinguish Battle, Dispatch, Free and Encounter objectives from their descriptions and map behavior.
- You know to travel to the named destination after accepting a Battle Mission.
- You have checked for shaking map areas after region placement without mistaking Treasure Hunts for required story progress.
- You can use Report, Rumors and the current Pub list to determine whether a mission is completed, available or still gated.
References for this chapter
- Final Fantasy Tactics Advance Instruction Manual, North American GBA edition
- Final Fantasy Tactics Advance Walkthrough
- Final Fantasy Tactics Advance Guide and Walkthrough, GameFAQs, mission and recruitment details
- Final Fantasy Tactics Advance Walkthrough, GameFAQs
- Final Fantasy Tactics Advance Walkthrough, Thonky
Recruitment and Clan Basics — Growing Your Team
After Thesis Hunt unlocks the Clan menu, build a useful roster without wasting gil or dismissing members you may need later. The original GBA game separates ordinary party management from mission administration: use the Clan menu to inspect missions, reports, controlled turf, mission items, Clan level and Clan skills, then use the party and unit menus to select deployable members, change jobs, equip items and assign abilities. Recruitment is handled through several different systems, so check the exact mission type instead of assuming that every reward screen contains a new character.
Open the Clan menu and separate it from party management
After completing mission 002, Thesis Hunt, return to the World Map and press Start to open the main menu. The Clan menu is now available. Use it to review active missions, completed-mission reports, areas controlled by your clan, mission items, Clan level and the eight Clan skills: Combat, Smithing, Appraise, Negotiate, Magic, Craft, Gather and Track.
Use the separate party and unit screens when you need to choose the active battle roster, inspect an individual member, equip weapons or armor, assign mastered abilities, or change jobs. A member can remain in the Clan without being deployed in the next battle. Keep reserves when possible, because a mission may require a particular race, job or number of available units.
- Confirm that the Clan menu appears after Thesis Hunt.
- Review the member list before accepting another mission.
- Use the party/unit screens for deployment, equipment, abilities and jobs.
- Keep reserve members unless you are certain that dismissing one is safe.
Understand the real recruitment routes
Do not treat recruitment as a normal mission reward. Many missions give only gil, equipment, AP, Clan Points or mission items. Some battles or completed missions can result in a character asking to join, but the most controllable early recruitment method is the race-specific Wanted dispatch system.
To create a Wanted opportunity, your Clan must have fewer than six total members, including Marche and Montblanc, and it must still have at least three members. Enter a battle using the reduced roster, then return to a Pub and inspect the Dispatch missions. A race-specific mission such as Human Wanted, Moogle Wanted, Viera Wanted, Nu Mou Wanted or Bangaa Wanted can appear. The available race rotates by month: the established early-game locations are Kingmoon for Humans, Bardmoon for Moogles, Huntmoon for Vieras, Sagemoon for Nu Mou and Madmoon for Bangaa.
Accept the Wanted dispatch only after checking its fee and the unit you will send. The listed dispatch cost is typically 200 to 300 gil. Walk on the World Map until the dispatch clears; the walkthrough reference describes five days for this early recruitment process. When it completes, a member of the named race asks to join. Accept the recruit if the race fills a gap in your roster, or decline it if you are deliberately keeping space for a later recruit. Save before dismissing anyone: a generic member who leaves the Clan cannot simply be restored.
- Keep fewer than six total members before attempting a Wanted mission.
- Have at least three members remaining.
- Fight a battle with the reduced Clan before checking the Pub.
- Check the dispatch fee and send a suitable unit.
- Save before dismissing a member.
Recruit for a role and race combination
Build a functioning group before collecting duplicates. Keep a reliable healing option available, normally a White Mage or a member with Item and suitable consumables. Add physical damage through Marche, a Soldier, Fighter or another frontline job, then add ranged or magical coverage so the party is not forced to approach every enemy directly.
Race determines the jobs a recruit can use. Humes are flexible and can develop through Soldier, Thief, Black Mage, White Mage and other Hume jobs. Moogles provide useful ranged, technological and support paths. Bangaa are suited to durable physical and support jobs, Vieras offer strong magical and ranged development, and Nu Mou specialize in spellcasting and other technical roles. Treat those as development paths rather than promises about a recruit’s starting job.
A Wanted mission is valuable because it gives control over the race that joins, not because every joining character is immediately ready for a difficult battle. Inspect the new member’s race, job, level, equipment access and available abilities before committing expensive gear.
- Keep a healer available for the active roster.
- Add at least one ranged or magical option before difficult maps.
- Choose Wanted races to fill missing roles rather than simply repeating your favorite race.
- Inspect the recruit before buying a complete equipment set.
Test a new recruit cheaply
Place the new member in a low-risk battle before spending heavily. Equip only a serviceable weapon and armor set, then check movement, weapon range, damage, speed and survivability. A healer should restore HP or remove a status when needed, a physical unit should attack from a safe position, and a caster or ranged unit should contribute without exposing itself to unnecessary counterattacks.
Every participating unit receives AP after a completed battle, and AP is applied to abilities currently provided by equipped weapons, armor or other equipment. If the recruit has a useful ability available from current equipment, use the battle to start learning it. Do not leave the member with an unusable weapon or empty ability plan simply because the unit has joined the Clan.
- Use a low-risk battle for the first test.
- Confirm that the intended weapon and armor are equippable.
- Give the recruit useful actions during the battle.
- Check the AP result and ability progress afterward.
Change jobs from the unit menu
Select the member in the unit menu and choose Change Jobs. The game will show the jobs available to that race. Use the information screen before confirming: changing jobs alters the unit’s command set, equipment access, movement, jump and evade values, as well as job-based statistics.
A job change does not erase abilities already mastered. However, the old job’s command set is no longer the unit’s primary command set. For example, a White Mage changed to Black Mage will use Black Magic as the main command set; White Magic remains available only if the unit has mastered it and equips it as the secondary A-Ability set. The same principle lets a physical unit retain Item or another learned command set after moving into a different job.
Recheck equipment after every job change. A weapon or armor item that worked in the old job may be unusable in the new one, and abilities supplied by removed equipment may disappear from the available list until that equipment is restored. Also review reaction, support and movement slots before entering the next mission.
- Review the race’s available jobs before confirming.
- Check movement, jump and evade changes.
- Re-equip the unit after changing jobs.
- Assign a mastered secondary command set if the new job needs the old role.
- Review reaction, support and movement abilities.
Raise Clan level and Clan skills through missions
Mission completion is the main source of Clan Points and Clan skill progress. The Clan level rises when accumulated CP reaches the next threshold; Clan skill points likewise accumulate separately for Combat, Smithing, Appraise, Negotiate, Magic, Craft, Gather and Track. Random clan encounters are useful for battle rewards and AP, but they are not the normal way to raise Clan level.
Inspect the Clan menu after missions to see the progress. Higher Clan skills can provide bonus items at certain thresholds, while Clan level can improve clan benefits such as shop prices. Some missions also require a minimum Clan skill level. You do not need to grind every skill immediately: prioritize missions that advance the story, provide a needed mission item, offer useful equipment or develop a recruitable race.
If a mission appears to require a skill level or mission item you do not yet possess, complete available missions rather than repeatedly checking the same Pub list. Mission availability changes as you place regions and clear prerequisite missions.
- Check CP and Clan skills after completing missions.
- Remember that random encounters are not the normal source of CP.
- Favor missions that combine progress with equipment, mission items or recruitment opportunities.
- Use available missions to satisfy skill and prerequisite requirements.
Protect gil and avoid an irreversible roster mistake
Early money is better spent on equipment for the units you actually deploy, basic healing supplies and the fees for useful dispatch missions. Job changes themselves should not be treated as a major gil expense. Do not outfit every reserve member before you know which jobs and races will remain in the core group.
Before dismissing a generic member, save the game and check whether that member carries a rare learned ability or fills a race requirement. Dismissal is permanent for that individual. If you need a vacancy for a Wanted mission, remove the least valuable non-core member rather than discarding Marche or Montblanc, who cannot be dismissed. Once the roster has a healer, frontline damage and ranged or magical support, develop additional recruits gradually instead of trying to equip everyone at once.
- Spend first on active members, supplies and essential mission fees.
- Save before dismissing a generic member.
- Do not dismiss Marche or Montblanc; they cannot be removed.
- Keep a vacancy only when you have a clear recruitment plan.
- Recheck your core roles before investing in another recruit.
Before you move on
- The Clan menu is available after Thesis Hunt and shows active missions, reports, controlled turf, mission items, Clan level and Clan skills.
- Your roster contains a reliable healing option, a physical attacker and ranged or magical support.
- You know whether your next recruit will come from a Wanted dispatch, a joining offer or another specific mission condition.
- At least one new member has been tested in a low-risk battle and has useful equipment and abilities assigned.
- At least one recruit has been placed in an appropriate race-available job and checked after the change.
- You have saved before any dismissal and have retained enough gil for essential equipment, healing items and useful dispatch fees.
- You are gaining Clan Points and Clan skill progress through completed missions rather than relying on random encounters alone.
References for this chapter
- Final Fantasy Tactics Advance Instruction Manual, North American GBA edition
- Final Fantasy Tactics Advance Guide and Walkthrough, GameFAQs, Lini and Cadoan mission route
- Final Fantasy Tactics Advance Gameplay Guide
- Final Fantasy Tactics Advance - Quest Guide, Mission 241 Lutia Pass
- Final Fantasy Tactics Advance — Job Class Guide
Job System Fundamentals — Learning, AP, JP and Ability Slots
Build each unit around a clear role, equip the correct ability-teaching equipment, and use AP to master abilities permanently. JP is a separate Judge Point resource used by Combo abilities and other JP-based techniques; it is not the currency for ordinary job learning. Changing jobs preserves mastered abilities and AP progress, but changes equipment compatibility, statistics, movement and the unit’s primary command set. The original GBA release does not use a general Job Rank progress screen, so job completion is tracked through learned abilities and unlocked jobs.
Check the unit’s race, job and current learning targets
Open the Party screen and select a unit to review its race, current job, equipment, learned abilities and abilities still being learned. Job availability is race-based, so plan each unit from the jobs that its race can actually use. Humans can develop into physical, magical and ranged roles; Nu Mou are strong candidates for magical jobs; Viera combine ranged, magical and fencing options; Moogles cover thief, animist and gunner routes; Bangaa specialize in warrior, monk and other physical or support jobs.
Choose a role before spending AP. A practical early clan should include dependable healing, a front-line attacker and either ranged or magical damage. A White Mage can keep the group alive, a Soldier, Warrior or White Monk can hold enemies away from fragile units, and an Archer, Black Mage or similar ranged specialist can attack without standing beside the target. Do not move every character through every available job simply because a new job appears.
- Confirm the unit’s race before planning its job route.
- Identify the unit’s main role for the next several missions.
- Review learned abilities and current AP targets on the Party screen.
- Remember that ordinary job progress is not shown as a universal Job Rank level.
Equip the item that teaches the desired ability
Most ordinary abilities are learned from equipment. Select a weapon, armor piece, robe, hat, shield or other item that lists the desired ability, then equip it to a unit whose current race and job can learn that ability. The ability becomes available for use while the teaching item is equipped, and AP is applied to it after eligible battles or dispatch missions.
Keep the teaching item equipped until the ability is mastered. Removing it stops further AP from being applied to that ability, even if the unit has already used the ability in battle. Before selling or trading a rare item, check whether it teaches an ability that a core unit still needs.
A-Abilities provide the unit’s active commands, such as White Magic, Black Magic, Battle Tech or Steal. R-Abilities are reaction abilities, S-Abilities are support abilities, and C-Abilities are Combo abilities. Their equipment sources and AP requirements differ, so use the ability screen rather than assuming every ability is learned from a weapon.
- Equip the exact item that teaches the planned ability.
- Confirm that the ability is available to the current job.
- Keep rare teaching equipment until the intended ability is mastered.
- Check whether the ability is A, R, S or C before planning its equipment and slot.
Earn AP through battles and dispatch missions
After a battle mission or random clan encounter, participating units receive AP. That AP is applied to the unmastered abilities supplied by their equipped equipment. The unit does not need to perform a particular attack, spell or support action to receive normal post-battle AP; the important requirements are having the teaching equipment equipped and participating in the engagement.
Dispatch missions work differently because one selected clan member receives the dispatch result. Use them to concentrate AP on a priority unit, especially when that unit is close to mastering an important ability. Equip the desired teaching item before sending the unit out, and pay attention to any recommended or forbidden job listed by the dispatch mission. A forbidden job can make the dispatch fail regardless of the unit’s strength.
AP requirements vary by ability. Many A-Abilities require 100, 200 or 300 AP, while some powerful abilities require 999 AP. R-, S- and C-Abilities also have their own requirements. The visible ability screen is the authority for the exact amount; do not assume that all abilities in one job cost the same amount.
- Equip the teaching item before starting the mission or dispatch.
- Bring the learner into the active battle party when practical.
- Use dispatch missions when AP needs to be concentrated on one unit.
- Check the ability screen after each mission and replace equipment only after mastery.
Equip mastered abilities in their proper slots
Mastering an ability makes it permanently available to that unit, but it does not automatically activate it after a job change. Return to the Party screen and assign the ability to the correct slot. The current job supplies its primary command set, while a learned A-Ability from another job can normally be selected as the secondary command set.
Reaction, support and Combo abilities each use their own slots. A mastered reaction ability has no effect until it is equipped in the reaction slot, and the same is true of support and Combo abilities. A unit that knows Cure but has neither White Magic nor an appropriate secondary command set equipped cannot cast Cure.
Item is a useful early recovery option because it lets a unit use healing items from the clan inventory. Even after recruiting a White Mage, keeping an Item user in the active party can provide a dependable backup when laws, silence or positioning interfere with spellcasting.
- Assign a secondary command set after mastering abilities from another job.
- Fill reaction, support and Combo slots deliberately.
- Verify that Cure, Item, First Aid or another recovery option is equipped before the next mission.
- Do not confuse knowing an ability with having that ability active.
Change jobs without losing progress
Use Change Job from the Party screen after confirming that the desired job is available to the unit’s race. Changing jobs does not erase mastered abilities or AP already earned. It does change the unit’s primary command set, statistics, movement characteristics, equipment compatibility and currently available job abilities.
Rebuild the equipment setup immediately after changing jobs. A sword, robe, shield or accessory that was usable in the old job may be unavailable in the new one. Recheck the secondary command set and every reaction, support and Combo slot as well; a new job can make an earlier setup unusable or less effective.
For early development, keep one human or Nu Mou working toward reliable White Magic, develop a physical human, Bangaa or Moogle around a durable attack role, and add an Archer or Black Mage when maps make direct melee approaches unsafe. Change jobs to meet a real tactical need, not simply to make the menu look more complete.
- Confirm that the new job is available to the unit’s race.
- Re-equip compatible weapons, armor, robes, shields and accessories.
- Restore the secondary command set and reaction, support and Combo abilities.
- Check range, movement and defensive statistics before the next engagement.
Unlock advanced jobs through mastered A-Abilities
Advanced jobs are unlocked by mastering the required A-Abilities from other jobs. Character level, time spent in a job and total AP alone do not unlock them. Highlight a locked job on the Change Job screen and use the displayed information command to see the remaining prerequisite. Count mastered A-Abilities; R-, S- and C-Abilities do not normally satisfy an A-Ability prerequisite unless the game specifically displays otherwise.
For example, a human Fighter requires two mastered Soldier A-Abilities, while a human Blue Mage requires one White Mage A-Ability and one Black Mage A-Ability. A Viera Elementalist requires one White Mage and one Fencer A-Ability, and a Nu Mou Time Mage requires five Black Mage A-Abilities. These examples show why it is more efficient to give one planned unit the prerequisite abilities instead of scattering them across several characters.
Blue Magic uses a special learning process. The Learning support ability is taught by the Blue Saber. Equip Learning, then allow a monster to successfully use the relevant Blue Magic technique on the learner. The learner does not need to be in the Blue Mage job at the moment the technique lands, but the unit must have Learning equipped and the technique must be one that the unit can learn.
- Read the displayed prerequisite for each locked advanced job.
- Count mastered A-Abilities rather than character levels or total AP.
- Keep prerequisite abilities on the same planned unit when possible.
- For Blue Magic, equip Learning and arrange for the correct monster technique to hit the learner.
Before you move on
- At least one active unit can restore HP through White Magic, Item, First Aid or another dependable recovery option.
- At least one unit can attack from range or use elemental magic when melee positioning is unsafe.
- Each core unit has a visible AP target and the correct teaching equipment equipped.
- You can change a unit’s job, re-equip compatible gear and restore its command and ability slots.
- At least one unit is progressing toward an advanced job through a displayed mastered A-Ability prerequisite.
- You can distinguish AP for equipment-based ability mastery from JP for Judge Point-based Combo techniques.
- You can verify job progress through learned abilities and unlocked jobs rather than searching for a Job Rank screen.
References for this chapter
The Law System and Judges — Read Before You Fight
In the original North American Nintendo Game Boy Advance release of Final Fantasy Tactics Advance, Laws restrict commands, weapon types, elements, status effects, targeting patterns, damage against certain races and other actions. Judges enforce those restrictions in ordinary engagements. Before every battle, inspect the full Law display, prepare legal alternatives and avoid treating one Yellow Card as harmless. Laws change with the World Map day, while story milestones introduce additional and stronger Law sets.
Check the active Laws before deployment
On the World Map, press L to open the law list. The list shows the current laws and the laws scheduled for upcoming days. Moving the cursor or traveling across the map advances the day, so a restriction that is inconvenient now may disappear after several map movements. Press R over a location when you need that location’s information and mission details.
At the battle deployment screen, press Select to display every Law in effect for that engagement. Read the exact wording rather than relying on a category such as magic or weapons. A Fight Law restricts the Fight command, while a Dmg2 Law can forbid all damage against a named race. Target Area and Target All Laws can affect abilities that hit several squares or every unit, even when the selected technique does not look like a conventional spell.
Before pressing Start, inspect every deployed unit. Each unit should have at least one legal way to damage an enemy, heal, support an ally or reposition. If a unit’s normal weapon or command is forbidden, change its equipment or use that unit defensively instead of risking a violation.
- Press L on the World Map to inspect the Law cycle.
- Press R over a location for its area information.
- Press Select during deployment to read the engagement’s complete Law list.
- Give each deployed unit a legal action plan.
Understand Yellow Cards, Red Cards and Boss Medals
For most Laws, the first violation by a unit that does not KO its target produces a Yellow Card. The unit remains on the field, but the violation is recorded and may cause a battle-end penalty. A second violation by that same unit during the same battle produces a Red Card, even if the second violation is against a different Law. The Judge removes that unit from the battlefield and sends it to Sprohm Prison.
A Law-breaking action that KOs its target produces a Red Card immediately instead of waiting for another violation. If Marche receives a Red Card, the result is an immediate Game Over. Do not test a questionable finishing attack with Marche when a Law is active. Some powerful enemies carry a Boss Medal, also called a Hero Medal. These enemies are immune to Red Cards and cannot be removed by forcing them to break Laws, although they may still accumulate Yellow Cards.
At the end of an engagement, the game applies penalties connected with violations. Depending on the Law and card situation, penalties can include gil, items, equipment, Law Cards, mission rewards, monster holdings, AP progress or a permanent stat reduction. If a permanent stat loss or essential equipment penalty appears, reload the save made before the battle and rebuild the party rather than accepting the result.
- The first ordinary violation is normally a Yellow Card.
- A second violation by the same unit in that battle produces a Red Card.
- A Law-breaking KO produces an immediate Red Card.
- Boss Medals prevent Red Cards on certain enemies.
- Never allow Marche to receive a Red Card.
Prepare legal substitutes
If Items are forbidden, use healing or support abilities that do not require the Item command. If Black, White, Red or Blue Magic is restricted, rely on a legal physical attacker, monster ability, bow, gun or another permitted command. If a weapon type is forbidden, change equipment before deployment; the unit can also move into cover, draw an enemy toward a legal attacker or wait safely.
Check status and defensive actions individually. Protect, Shell, Poison, Silence, Stop, Immobilize, Slow, Charm and Confuse may each be covered by a specific Law. Do not assume that a support action is legal merely because it does not deal damage.
Reaction abilities are not bound by Laws. Counter, Bonecrusher and Strikeback can therefore provide useful damage under some weapon or race-damage restrictions. Doublecast is treated as a Red Magic command, so it can cast Summon or Spirit Magic under a Summon or Elementals Law, but it does not bypass a Color Magic Law. Confirm the exact restriction before relying on this interaction.
- Change prohibited equipment before deployment.
- Bring legal damage and recovery options.
- Check status, support and targeting Laws separately.
- Use Move or Wait instead of taking a risky illegal action.
- Consider reaction abilities against weapon or damage restrictions.
Use recommended actions for Judge Points
Every active Law normally lists a recommended action. Performing it awards one Judge Point, whether or not the action defeats an enemy. Use a durable or well-positioned unit for this whenever practical. Do not expose a fragile healer or abandon a winning formation merely to obtain one point.
Judge Points are also awarded for defeating enemies and are used for special commands such as Combo and Totema abilities when those options are available. The recommended action is a bonus opportunity, not a mandatory objective. Healing, protecting Marche and maintaining legal attacks take priority.
- Read the recommended action beside each prohibited action.
- Use a safe unit to perform it when convenient.
- Do not sacrifice positioning for one Judge Point.
- Remember that enemy KOs also award Judge Points.
Use Law Cards and Anti-Law Cards
After Mission 006, Antilaws, Law Cards and Anti-Law Cards become available. Law Cards add restrictions for the current engagement, while ordinary Anti-Law Cards remove a matching active restriction. R1 through R6 Anti-Law Cards remove Laws of the corresponding rank, and Allmighty Anti-Law removes all active Laws when it is usable. Card effects last only for that engagement. Cards can also be obtained through missions and traded at Ezel’s Card Shop.
During one of your units’ turns, press B to leave command selection, press Start and choose Laws or Law Cards. Press A to open your card stock, then select a usable card. White card names are available; black card names cannot be used in the current situation. Confirm the choice and reopen the Law display to verify the result.
The four Bervenia Palace tournament missions have special restrictions. Battle Tourney, Mage Tourney, Swimming Meet and Clan League prohibit Law Card and Anti-Law Card use. Mage Tourney also uses NoClr Magic, which limits attacks to White, Black, Red and Blue Magic. Do not enter these missions expecting your card stock to change the rules.
- Law Cards add restrictions; Anti-Law Cards remove them.
- Use B, Start and the Law Cards menu during a unit’s turn.
- Use rank-matching Anti-Law Cards carefully.
- Do not plan on cards in the four tournament missions.
- Check the Law display after applying a card.
Recover from violations, prison and Jagd battles
If a Yellow Card appears, stop using the illegal action and finish the engagement legally. After the result screen, inspect the penalty. Reload the pre-battle save if important equipment, a permanent stat value or a needed mission reward was lost.
Sprohm Prison offers early release and pardon. Paying for early release returns a unit to the clan, but the Yellow and Red Cards remain on its record. The cards continue to block JP gain until a pardon clears them. A pardon requires payment and waiting through the required sentence. Marche is a special case: while he serves a pardon sentence, the clan must wait rather than continue normal activities.
Jagds are lawless zones. Judges and ordinary Laws do not apply, and Law Cards cannot be used. Any clan member still KO’d when a Jagd engagement ends is lost permanently; Marche’s loss causes a Game Over. Revive every fallen ally before defeating the final enemy. Corrupt Judge missions are different: some have no ordinary Laws, but they do not use the Jagd permanent-loss rule. Cid’s Yellow Clip can remove a Yellow Card in the Corrupt Judge situations where that ability is available, so do not confuse it with a general replacement for pardon.
- Reload after an unacceptable battle-end penalty.
- Early release does not clear cards.
- Use a pardon when you need to restore JP eligibility.
- Revive every KO’d member before winning a Jagd.
- Never allow Marche to remain KO’d in a Jagd.
Before you move on
- You can open the World Map Law list with L.
- You can inspect the selected location with R.
- You can display all engagement Laws with Select during deployment.
- Every deployed unit has a legal offensive, support, healing or repositioning option.
- You know the first-violation, second-violation and illegal-KO card rules.
- You understand how Boss Medals prevent Red Cards.
- You know that Marche receiving a Red Card causes Game Over.
- You can earn Judge Points from recommended actions without sacrificing safe positioning.
- You can distinguish Law Cards, Anti-Law Cards, rank Anti-Laws and Allmighty Anti-Law.
- You know the difference between early release and pardon.
- You can distinguish Jagd permanent-loss rules from Corrupt Judge mission rules.
- You can finish a Jagd with every clan member alive and revived.
References for this chapter
- Final Fantasy Tactics Advance Instruction Booklet, Game Boy Advance
- Final Fantasy Tactics Advance Guide and Walkthrough, GameFAQs, Lini and Cadoan mission route
- Final Fantasy Tactics Advance Gameplay Guide
- Final Fantasy Tactics Advance — Laws FAQ, GameFAQs
- Law system (Tactics Advance)
- Final Fantasy Tactics Advance — Laws, StrategyWiki
Early Story Sequence — The Cheetahs, Desert Peril and Lutia Pass Arc
After Thesis Hunt, clear The Cheetahs in Nubswood, then defeat the monsters in Desert Peril and confront Famfrit in Twisted Flow. Use the optional missions unlocked between these battles to improve equipment, levels and abilities, but do not delay the story for a complete clear of every available mission. The early sequence rewards a balanced clan: keep a White Mage or another dependable healer, bring at least one ranged attacker, and make sure your party can deal both physical and magical damage.
Prepare after Thesis Hunt
After Thesis Hunt, Lutia Pass is already on the World Map, and the next story mission is The Cheetahs. Return to a pub, inspect the Mission list and buy The Cheetahs when your clan is ready. Check the current Law before deploying. A forbidden action is not merely discouraged: using it can lead to a Judge penalty, and repeated violations can imprison Marche or otherwise damage the battle result.
Before leaving town, repair your formation rather than filling every slot with melee units. A White Mage is the safest early healer. Marche or another Soldier or Fighter can hold the front, while an Archer or Black Mage gives you a way to attack across obstacles and from outside reaction range. Buy only equipment that improves your active units or teaches a useful ability; the story missions require gil, so do not empty your purse on every available upgrade.
Save before purchasing the mission and again before entering the battlefield. If the Law blocks your intended weapon or spell category, return to the map and wait for a better Law or rebuild the party around legal actions.
- Have one reliable healing option.
- Bring at least one ranged or indirect attacker.
- Read the active Law before deploying.
- Keep enough gil for the next mission information fee and basic recovery items.
Clear The Cheetahs in Nubswood
Purchase The Cheetahs and travel to Nubswood. The objective is Defeat All Enemies. The enemy group consists of a Fighter, White Monk, Thief, Black Mage and Archer. Ritz and Shara appear as guest allies, but you do not control them, so choose your own units as if they must complete the battle themselves.
The enemy group begins across a small river. Units standing in the river cannot perform actions from that position, so do not leave your healer or mage stranded in the crossing. Move your durable unit toward the bank while keeping the rest of the clan close enough to support it. The White Monk is the first priority because Air Render gives it a dangerous ranged option. After that, remove the Black Mage and Archer if they are attacking safely from the rear. The Thief and Fighter are less urgent once the ranged threats are gone.
Use Ritz and Shara as additional pressure, not as a substitute for your own damage. Shara may immobilize or disable an enemy, but her actions are not guaranteed. Avoid chasing a weakened enemy so far forward that your healer cannot reach the attackers. When the battle ends, the reward allows you to place Eluut Sands on the World Map.
- Defeat the White Monk early.
- Keep the healer off the river tiles when possible.
- Let Ritz and Shara create openings, but do not depend on them for the final attacks.
- Place Eluut Sands after the victory.
Use the Eluut Sands missions before Desert Peril
After The Cheetahs, return to Cyril and inspect the new Mission list. Village Hunt is a useful short battle at Eluut Sands if it is available, because it gives ordinary battle experience and a chance to improve job abilities without committing to a difficult story fight. Watching You and other low-rank missions can also be worthwhile when their Laws permit your normal attacks.
Prioritize missions with simple battle objectives and no rare mission-item requirement. Complete two or three manageable missions if your core units are behind in levels or still lack their basic weapon abilities. Use White Mages to heal whenever the opportunity exists so they gain JP through meaningful actions. Let attackers finish some enemies, but do not prolong a battle dangerously just to gain one more action.
Do not attempt to clear every side mission before advancing. The available list changes as regions are placed and story missions are completed, and many early rewards are quickly replaced by shop upgrades. The goal here is a functional party for Desert Peril, not complete early-game optimization.
- Favor short, low-rank missions with Laws your party can obey.
- Use healing and support actions to build JP safely.
- Upgrade the main party before buying luxury equipment.
- Advance once the clan can survive a sustained battle.
Defeat the monsters in Desert Peril
Buy Desert Peril and travel to Eluut Sands. The mission objective is Defeat All Enemies. The battle contains a Coeurl, two Red Panthers, an Antlion and a Cream. The Coeurl is a strong target, while the Cream has high physical resistance and is healed by Thunder. Use Fire, Blizzard or another non-Thunder magical attack against the Cream; do not waste repeated weapon attacks on it if your mage can handle the target more efficiently.
Deploy a White Mage, a Black Mage or other elemental caster, and at least one strong physical unit. Keep the healer behind the front line and avoid sending one unit deep into the desert alone. Focus attacks on one monster at a time so the enemy cannot recover while your clan is split. If the Coeurl or a Red Panther reaches your back line, retreat the threatened unit toward the healer instead of trading isolated attacks.
After the battle, Desert Peril awards Ulei River as the next region placement. The Mission list also gains optional content, including Mission 241, Lutia Pass. This is not the creation of the Lutia Pass region; Lutia Pass was placed before Thesis Hunt. Mission 241 is an optional Turf Claim battle that becomes available after Desert Peril and can free the area for your clan. Complete it when convenient, especially if you want the associated reward and later access to the area’s optional missions, but it is not required to start Twisted Flow.
- Use non-Thunder magic against Cream.
- Keep the party close enough for healing.
- Focus on one monster at a time.
- Place Ulei River after victory.
- Treat Mission 241, Lutia Pass, as optional Turf Claim content.
Place Ulei River and defeat Famfrit in Twisted Flow
Place Ulei River after Desert Peril, return to a pub and purchase Twisted Flow. Travel to Ulei River. This mission’s objective is Defeat the Boss, and the boss is Famfrit, supported by two Floateyes and two Ahrimans.
Famfrit has Counter and strong defenses, so direct melee attacks are risky. Bring an Archer, a Black Mage, a White Monk with Air Render, a Fighter with an indirect attack such as Greased Bolt if available, or another unit that can damage from outside Counter range. A Dragoon’s Jump can also contribute without standing beside the boss. Do not build the whole party around sword attacks if the current Law forbids swords or fights.
One Ahriman can use Roulette, which may instantly KO a unit, so eliminate that threat if it exposes your party to repeated danger. The victory condition only requires Famfrit’s defeat, but the other enemies can block movement or create a fatal turn. Use ranged attacks to pressure Famfrit while the healer restores the units doing the damage. Spread the party enough to reduce the danger from area attacks, but keep everyone within practical healing range.
When Famfrit falls, the crystal is destroyed and Cadoan becomes available. Entering Cadoan begins the next story phase, including the strengthened Laws and the Antilaws sequence. Save before entering if you want a recovery point for the transition.
- Place Ulei River and buy Twisted Flow from the pub.
- Bring several ranged or indirect attacks.
- Avoid standing beside Famfrit unless the attack is worth the Counter risk.
- Watch for Roulette from the Ahriman enemies.
- Defeat Famfrit, then enter Cadoan to continue the story.
Before you move on
- The Cheetahs is cleared in Nubswood and Eluut Sands has been placed.
- Desert Peril is cleared, Cream has been handled with an appropriate non-Thunder attack, and Ulei River has been placed.
- Mission 241, Lutia Pass is understood as optional Turf Claim content available after Desert Peril; it is completed if the player wants the area freed, but it is not mistaken for a story prerequisite.
- Twisted Flow is purchased at the pub, Famfrit is defeated, and Cadoan becomes available.
- The clan has a healer, at least one ranged or indirect attacker, current equipment and enough gil to continue into the Antilaws sequence.
References for this chapter
- Final Fantasy Tactics Advance Walkthrough
- Final Fantasy Tactics Advance Guide and Walkthrough, GameFAQs, mission and recruitment details
- Final Fantasy Tactics Advance Guide and Walkthrough, GameFAQs, Lini and Cadoan mission route
- Final Fantasy Tactics Advance - Quest Guide, Mission 241 Lutia Pass
- Lutia Pass - Final Fantasy Wiki
- Final Fantasy Tactics Advance Instruction Manual, North American GBA edition
Mid-Game Story Route — Antilaws through Materite Now!
Clear Missions 006 through 019 in order. This route introduces Ezel Berbier and Anti-Law cards, completes the three Totema battles, handles the mandatory Jagd Hunt, follows the Muscadet and Exodus sequence, and ends with Materite Now! at Materiwood. Optional missions may improve equipment, levels, and abilities, but they do not replace any numbered story mission.
Mission 006: Antilaws at Cadoan
After Mission 005, Twisted Flow, place Cadoan on the World Map. Enter Cadoan once to see the introductory scene about Ezel Berbier, then leave and save before returning. The next visit begins Antilaws automatically, so heal, shop, change jobs, and check the active Law first.
The victory condition is to defeat the enemy group while keeping Ezel alive. Ezel is an uncontrolled Nu Mou Illusionist who can put enemies to sleep, but he may also use Fight. You can heal him, so keep a White Mage or Item user within reach and do not let him advance alone. Strong weapon defense, reliable healing, and at least one ranged attacker make this battle safer.
After the fight, Judgemaster Cid attempts to enforce an Advanced Law. Ezel escapes with an Antilaw, then explains his Law Card shop in Cadoan. Law Cards have point values, so trade only surplus cards; preserve useful Antilaws instead of exchanging your entire supply.
- Place Cadoan after Twisted Flow.
- Visit Cadoan once, leave, save, and return to begin Antilaws.
- Keep Ezel alive until the enemy group is defeated.
- Check the Law before using restricted actions.
- Confirm that Ezel’s Law Card shop is available afterward.
Missions 007 and 008: Diamond Rain and Hot Awakening
Place Aisenfield after Antilaws and purchase Diamond Rain. Defeat every enemy. The Ice Flan is vulnerable to Fire, while the Lamia and Icedrakes are the most immediate threats. Focus on one dangerous enemy at a time rather than spreading damage. Use Fire only when the current Law permits it; otherwise use legal physical attacks, Items, or another permitted ability. Place Roda Volcano after the battle.
At Roda Volcano, select Hot Awakening. The objective is to destroy every Ultima Crystal. The crystals cannot move and use Logos, which can Charm a unit and reduce its attack and defense. Keep most of the clan outside their effective range while one durable unit stands next to a chosen crystal. An adjacent unit encourages the crystal to use Fight instead of repeatedly relying on Logos.
Destroy the crystals one at a time and review the turn order after each knockout. Spread the clan so one Charm result or area effect cannot disrupt several units. Once all crystals are gone, the Nu Mou Totema sequence ends and Koringwood becomes available. The North American GBA mission title is Hot Awakening, not The Waking Mountain.
- Place Aisenfield and clear Diamond Rain.
- Place Roda Volcano.
- Destroy every Ultima Crystal in Hot Awakening.
- Place Koringwood after the Totema scene.
Missions 009 through 011: Magic Wood, Emerald Keep, and Pale Company
Place Koringwood and select Magic Wood. You are outnumbered, so advance as a formation with the healer behind the front line. Keep units separated against area spells and identify enemy healers before committing to a long exchange. Immobilize, Disable, Sleep, or similar control effects can buy time when the Law allows them. After victory, place Salikawood.
At Salikawood, clear Emerald Keep. The victory condition is to defeat Babus; the mission ends when he falls, even if other enemies remain. Move durable units toward him and use ranged attacks, magic, or legal status effects to reduce the surrounding threat. The Bishop can use Cure and Dispel, so remove or control it if it is extending the battle, but do not delay a safe attack on Babus. Place Nargai Cave after the mission.
Select Pale Company at Nargai Cave. This is the Adrammelech Totema battle. Dragons accompany the Totema, but defeating Adrammelech ends the engagement. Firestream can strike several units standing on the same line, so approach from different directions and keep the healer behind the attackers. Concentrate your strongest legal attacks on Adrammelech instead of spending turns clearing every dragon.
- Clear Magic Wood before Emerald Keep.
- Defeat Babus in Emerald Keep.
- Place Nargai Cave only after Emerald Keep.
- Defeat Adrammelech in Pale Company.
- Keep units out of the same Firestream line.
Mission 012: Jagd Hunt at Jagd Dorsa
After Pale Company, place Baguba Port and enter it to meet Nono. Save before placing or entering Jagd Dorsa; the engagement begins as soon as you enter. Jagd battles have no Judges or Laws, but a clan member who remains at zero HP when the battle ends is permanently lost.
Bring several dependable revival options, such as Phoenix Down or Life, and monitor the turn order after every knockout. Prioritize the Assassin because of instant-KO attacks, then the Hunter because of random status effects including Doom. The Ninja has strong physical damage, and the Blue Mage can create problems with monster abilities. The Antlion and Toughskin are lower priorities unless they are blocking your formation.
Before the final enemy falls, revive every clan member who is still knocked out. Return to Baguba Port afterward for Nono’s follow-up scene. Jagd Hunt is mandatory story progress, not optional content.
- Meet Nono at Baguba Port.
- Save before entering Jagd Dorsa.
- Bring multiple revival options.
- Prioritize the Assassin, Hunter, Ninja, and Blue Mage.
- Revive every knocked-out clan member before victory.
- Return to Baguba Port after the battle.
Missions 013 and 014: The Bounty and Golden Clock
Purchase The Bounty after Jagd Hunt. The battle is against Clan Ox and ends when all enemies are defeated. Paladin, Fighter, and Black Mage are immediate damage threats; the Paladin may also revive allies. Use the turn order to focus several attacks on one target, and use Sleep or another legal control effect when it prevents a dangerous counterattack. Keep a strong healer available because the Sage can spread poison with an area attack.
After The Bounty, place Jeraw Sands and purchase Golden Clock. Ritz and Shara fight alongside your clan. Both must be alive when the last enemy is defeated, so revive either guest immediately if necessary. The enemy group includes a Gadgeteer, Nu Mou Time Mage, Alchemist, and Juggler. The Gadgeteer’s random effects can disrupt the battle; the Time Mage can use Slow and Stop; the Alchemist’s Aero is dangerous; and the Juggler can inflict Confuse, Berserk, or Frogshape. Silence or defeat the most disruptive enemy first when legal.
After Golden Clock, place Muscadet and enter it to trigger the required cutscene. Leave Muscadet and return as directed to engage Scouring Time.
- Clear The Bounty after Jagd Hunt.
- Place Jeraw Sands.
- Keep Ritz and Shara alive through Golden Clock.
- Trigger the Muscadet cutscene after Golden Clock.
- Do not treat either mission as optional.
Mission 015: Scouring Time and the Exodus encounter
Scouring Time begins through the Muscadet sequence. The opening battle contains a Sage, two Mog Knights, two Templars, a Paladin, and a Gunner. The Paladin can use Drop Weapon, and the Templars have Bonecrusher, so ranged attacks are safer than repeatedly using Fight against them. Control the Gunner if its range is breaking your formation.
The story then moves to Sprohm prison and a separate encounter in which only Marche and Babus are present while Cid enforces the Laws. The objective is to destroy every Exodus Fruit, but Babus is the dangerous opponent and should be defeated first. Protective abilities such as Auto-Life, Auto-Regen, or similar defensive effects are valuable. After Babus falls, destroy the harmless Fruits one by one while obeying the Law.
When both encounters and their scenes are complete, Uladon Bog becomes available. Do not stop after the opening prison battle; the solo Marche-and-Babus encounter is part of the required mission sequence.
- Clear the opening Scouring Time battle.
- Defeat Babus in the separate Exodus encounter.
- Destroy every Exodus Fruit.
- Confirm Uladon Bog becomes available afterward.
Missions 016 through 018: The Big Find, Desert Patrol, and Quiet Sands
Place Uladon Bog and clear The Big Find. The enemy group contains two Thieves, two Bishops, and two Fighters. Defeat the Bishops when Cura is prolonging the fight, then deal with the Thieves before they can use Steal Weapon or Steal Ability. Avoid exposing rare equipment and learned abilities unnecessarily. Watch for reaction abilities such as Strikeback and Bonecrusher before using Fight.
After The Big Find, place Gotor Sands. Any Gotor Sands Exploration mission is optional and does not replace Desert Patrol. Purchase Desert Patrol and defeat the Bishop, Dragoon, Defender, Gladiator, White Monk, and two Soldiers. Remove the Bishop if it is healing, protect important weapons from the Defender’s Drop Weapon, and watch for Soldier Provoke causing Berserk. Place Delia Dunes after victory.
At Delia Dunes, clear Quiet Sands. The first engagement features Llednar, two Templars, and two Titanias. Llednar takes no damage from ordinary attacks. Marche can use Fight to trigger Llednar’s attempted Omega and Cid’s intervention, or the clan can defeat Llednar’s allies while keeping Marche alive. The mission then continues into the Mateus Totema battle.
For Mateus, bring several Phoenix Down or Life users and spread the clan around the poor starting position near the pit. Vampires can knock out several units and return after being defeated. White Monk’s Exorcise, Archer’s Burial, curing effects, or Life can remove them, but concentrate your strongest attacks on Mateus so the battle does not drag on. Quiet Sands is complete only after both engagements and their scenes finish. Materiwood is then placed.
- Clear The Big Find at Uladon Bog.
- Place Gotor Sands and distinguish optional Exploration from Desert Patrol.
- Clear Desert Patrol and place Delia Dunes.
- Resolve the Llednar engagement in Quiet Sands.
- Defeat Mateus and finish the post-battle scenes.
- Confirm Materiwood is placed afterward.
Mission 019: Materite Now! at Materiwood
Place or enter Materiwood after the Quiet Sands scenes and purchase Materite Now!. This mission has one required battle at Materiwood. The victory condition is to defeat all enemies: a Sniper, Red Mage, Elementalist, White Mage, Assassin, and Summoner.
Prioritize the Assassin because of instant-KO and Stop effects, then control the White Mage if it is restoring the group. The Red Mage’s Doublecast can be dangerous, and the Summoner’s spells cover a large area, so keep units separated. The Sniper can damage or destroy equipment, making it sensible to avoid irreplaceable rare gear when comparable equipment is available. Check the active Law before using status control, magic, or Items.
After the battle, Doned takes the Materite and Bervenia Palace appears on the World Map. Materite Now! is complete at this point. Heal, restock revival items, save, and make any desired job or ability changes before entering Bervenia Palace. Entering the palace begins Mission 020, Present Day, which is a separate mission and is not a second encounter within Materite Now!.
- Place Materiwood after the complete Quiet Sands sequence.
- Clear the single Materite Now! battle at Materiwood.
- Prioritize the Assassin and monitor the White Mage.
- Separate units against Summoner area magic.
- Finish the post-battle scene.
- Confirm Bervenia Palace and Present Day are available.
Before you move on
- Mission 006, Antilaws, is cleared with Ezel alive, and Ezel’s Law Card exchange is available in Cadoan.
- Aisenfield, Roda Volcano, Koringwood, Salikawood, and Nargai Cave have been placed in sequence.
- Mission 007, Diamond Rain, is cleared.
- Mission 008, Hot Awakening, is cleared by destroying every Ultima Crystal.
- Mission 009, Magic Wood, is cleared before Emerald Keep.
- Mission 010, Emerald Keep, is cleared by defeating Babus.
- Mission 011, Pale Company, is cleared by defeating Adrammelech.
- Baguba Port has been visited for Nono’s scene and Jagd Dorsa has been entered.
- Mission 012, Jagd Hunt, is cleared with every surviving clan member revived before the battle ends.
- Mission 013, The Bounty, and Mission 014, Golden Clock, are cleared.
- Ritz and Shara are alive when Golden Clock ends.
- The Muscadet cutscene has been triggered before Scouring Time begins.
- Mission 015’s opening battle and separate Exodus encounter are both cleared.
- Uladon Bog has been placed after Scouring Time.
- The Gotor Sands Exploration step has been completed only if the optional Jagd Ahli location is desired.
- Mission 016, The Big Find, is cleared against two Thieves, two Bishops, and two Fighters.
- Mission 017, Desert Patrol, is cleared against a Bishop, Dragoon, Defender, Gladiator, White Monk, and two Soldiers.
- Mission 018, Quiet Sands, is cleared through both the Llednar encounter and the Mateus battle at Delia Dunes. After the complete mission sequence and its scenes finish, Materiwood is placed and Mission 019, Materite Now!, becomes available.
- Mission 019, Materite Now!, is cleared through its required Materiwood battle and post-battle scene, leaving Present Day available at Bervenia Palace.
References for this chapter
- Final Fantasy Tactics Advance Walkthrough, Thonky
- Antilaws Mission — Final Fantasy Tactics Advance Walkthrough — Thonky
- Hot Awakening Mission — Final Fantasy Tactics Advance Walkthrough — Thonky
- Pale Company Mission — Final Fantasy Tactics Advance Walkthrough — Thonky
- Jagd Hunt Mission — Final Fantasy Tactics Advance Walkthrough — Thonky
- Scouring Time Mission — Final Fantasy Tactics Advance Walkthrough — Thonky
- The Big Find Mission — Final Fantasy Tactics Advance Walkthrough — Thonky
- Desert Patrol Mission — Final Fantasy Tactics Advance Walkthrough — Thonky
- Materite Now Mission, Thonky
- Final Fantasy Tactics Advance Instruction Manual, North American GBA edition
- Final Fantasy Tactics Advance Walkthrough, GameFAQs
Treasure Hunts, Side Missions and Optional Rewards
Treasure Hunts, optional missions and mission items provide rare equipment, recruits, abilities and extra gil in the original Game Boy Advance release. None is required to clear the 24 numbered story missions and reach the ending, so use optional content to solve specific needs rather than delaying the story indefinitely. Keep a separate record of World Map placement, mission requirements, mission items, rare equipment and recruit attempts. The Hero Gaol route is order-sensitive: unlock Oasis Frogs after Twisted Flow, complete its Cadoan sequence only after Antilaws, retain the reward, and carry it into a later eligible mission for a chance to recruit Lini.
Plan World Map placement before hunting rare equipment
When you receive a new region symbol, decide whether the save is following the story or deliberately building a Treasure Hunt layout. After a symbol is placed, an area connected to enough neighboring regions may shake on the World Map. Enter the shaking area and choose Treasure Hunt to claim the reward. The reward is determined by the connected surrounding region categories, not simply by the center location’s name or terrain.
Save before placing symbols when pursuing a specific rare item. Region placement cannot be freely rearranged later on the same save, and a layout built for story convenience may not produce the combinations needed for collection goals. Use the terminology from the original GBA tables: Plain may appear as Field in some references, and Marsh may appear as Bog. Confirm that the labels refer to the same terrain category before following a layout.
Treasure Hunts are optional for the main story. If the clan needs levels, JP, healing equipment or a required mission item, complete a useful engagement first rather than repeatedly resetting for a low-value hunt. Return to the World Map after each placement and check connected areas for the shaking indicator.
- Save before deliberate rare-item placement.
- Check connected neighboring terrain categories, not only the center region.
- Use Plain or Field and Marsh or Bog consistently when comparing references.
- Inspect the World Map after placing every new symbol.
- Do not rebuild a story-focused map for an ordinary replaceable reward.
Prioritize the most important Treasure Hunt rewards
The original GBA Treasure Hunt combinations worth planning around include Gastra Bow from three Plains, Galmia Shoes from three Deserts, Mindu Gem from four Deserts or from two Marshes and two Caves, and Genji Armlets from exactly two Marshes and two Jagds. These are especially valuable collection targets because the established walkthrough references identify them as Treasure Hunt-only equipment for this release.
Other notable combinations include Materia Blade from two Towns and two Forests, Tulwar from two Towns and two Plains, Zeus Mace from two Plains and two Mountains, and Excalibur from two Mountains and two Deserts. Materia Blade, Tulwar and Zeus Mace also have hidden-steal routes in story battles, so missing their Treasure Hunt combinations does not automatically end a collection attempt. Sensor or Mog Peek is needed to reveal hidden equipment during those steals.
Galmia Shoes improve movement by ignoring elevation, but they do not teach a job ability. Gastra Bow provides long range, while Genji Armlets improve weapon attack, defense, magic attack and resistance. Prioritize equipment that solves a current role problem, then unique equipment that is difficult to replace. Do not spend the entire campaign chasing every combination when ordinary shop upgrades or mission rewards will keep the clan effective.
- Use three Plains for Gastra Bow.
- Use three Deserts for Galmia Shoes.
- Use four Deserts or two Marshes and two Caves for Mindu Gem.
- Use exactly two Marshes and two Jagds for Genji Armlets.
- Use Sensor or Mog Peek for hidden story-battle equipment.
Check pubs and mission lists after major progress
After each numbered story mission and after important optional victories, visit a pub and inspect the mission list. Optional content includes engagement missions fought by the active clan, dispatch missions that send a unit away, Free-area missions and recruitment missions. The list changes with story progress, region placement, calendar conditions, previous missions and mission items.
Read the displayed requirements before spending gil or accepting a one-time mission. A mission may require an earlier mission, a specific region, a month, a town, a Clan skill, a job level or a mission item. Record unique rewards and recruits before accepting unrelated missions that might consume or alter a needed item.
Use engagements when you want combat practice, JP, experience, stealing opportunities or direct control over a recruit attempt. Use dispatches when you mainly want the reward or recruitment chance without personally fighting the map. Check the active Law before accepting an engagement and adjust jobs, equipment and planned actions accordingly.
- Visit a pub after story progress.
- Read requirements before accepting optional missions.
- Use engagements for JP, experience and stealing.
- Use dispatches for lower-risk reward or recruitment attempts.
- Record whether a unique mission is repeatable.
Complete the Hero Gaol route safely
First clear Mission 005, Twisted Flow. After that, Mission 062, Oasis Frogs, may become available at Cadoan, but do not complete its Cadoan sequence immediately if Mission 006, Antilaws, is still unfinished. Clear Mission 006, Antilaws, first. Then return to Cadoan, accept Oasis Frogs and complete it. This order prevents the Cadoan automatic engagement from blocking the intended Oasis Frogs route.
Oasis Frogs awards the mission item The Hero Gaol. Retain The Hero Gaol in the mission-item inventory. Do not select it before Oasis Frogs awards it, and do not treat Oasis Frogs as a mission that requires the item. After obtaining it, select The Hero Gaol when accepting an eligible engagement or dispatch mission. Lini then has a random chance to offer to join the clan when that mission resolves. Leave an open clan slot before attempting the recruitment.
Do not read or examine The Hero Gaol as part of the immediate Lini attempt. Reading the item is a separate requirement that opens later Hero Gaol-related content, including Twin Swords and related missions. Pursue that chain only after the Lini attempt is handled and only when you are ready to commit the item to its later purpose.
- Clear Mission 005, Twisted Flow.
- Allow Mission 062, Oasis Frogs, to appear at Cadoan.
- Clear Mission 006, Antilaws, before completing the Cadoan Oasis Frogs sequence.
- Complete Oasis Frogs and receive The Hero Gaol.
- Retain The Hero Gaol.
- Leave an open clan slot.
- Carry The Hero Gaol into an eligible engagement or dispatch mission for Lini’s random recruitment chance.
- Do not read The Hero Gaol for the immediate Lini attempt.
Protect mission items and manage optional chains
Mission items are stored separately from ordinary weapons, armor, accessories and consumables. Some unlock missions, some are required to accept missions, some are consumed by mission completion, and some are selected when accepting a mission to create a recruitment chance. Keep unfamiliar mission items until you have checked their requirements and future uses. Do not sell or trade one merely because it has no battle effect.
Before committing an item, write down its source mission, the mission that needs it, whether it is consumed, and whether it only needs to be carried. This distinction is essential for special recruits. The Hero Gaol is carried for Lini’s recruitment chance, while reading it opens its separate mission chain. Other mission items follow their own rules and cannot be substituted between recruits.
Run optional missions in short, purposeful blocks. Complete one or two when the clan needs a healer, job-changing equipment, an ability, levels, JP or a mission item, then return to the story route. For a broader completion file, maintain separate lists for numbered missions, unnumbered missions, repeatable encounters, Treasure Hunts, special recruits, stolen equipment, Clan skills and job mastery.
- Keep mission items separate from ordinary inventory.
- Record whether each item is carried, read, consumed or merely required.
- Check future uses before selling or trading.
- Keep a backup save before committing a unique item.
- Track optional progress separately from the 24-mission story route.
Continue after the ending without confusing completion goals
Clearing Missions 001 through 024 and viewing the ending completes the main story, not every activity in the game. After the ending, revisit pubs, inspect the Clan report and continue optional recruitment, mission-item, Treasure Hunt and rare-equipment goals. The 300 numbered missions are a separate long-term objective and are outside this campaign walkthrough’s mission-by-mission scope.
If an optional mission fails, first check whether it is repeatable, whether it returns after a calendar change or whether its required item remains available. Reorganize jobs and equipment before retrying. Use dispatches for safe progress when direct combat is unnecessary, but use engagements when you need to control stealing, positioning or the exact unit involved in a recruitment chance.
A practical collection record should include the mission number and name, region, requirements, reward, item status and recruit result. This prevents a completed Treasure Hunt from being mistaken for a completed mission and prevents an item needed for later content from being discarded accidentally.
- Complete Missions 001 through 024 for the main ending.
- Track the 300 numbered missions separately.
- Keep separate records for Treasure Hunts, mission items, recruits, stolen equipment, Clan skills and job mastery.
- Check repeatability and item status after an optional failure.
- Keep a safe save before using a unique mission item.
Before you move on
- You can identify a shaking Treasure Hunt area after placing a World Map symbol.
- You know that rewards depend on connected surrounding terrain categories.
- You have recorded the verified combinations for the rare equipment you intend to pursue.
- You used three Plains for Gastra Bow and three Deserts for Galmia Shoes if those are collection targets.
- You used two Marshes and two Jagds for Genji Armlets if pursuing that reward.
- You cleared Mission 005, Twisted Flow.
- You cleared Mission 006, Antilaws before completing the Cadoan sequence for Mission 062, Oasis Frogs.
- You completed Oasis Frogs and received The Hero Gaol.
- You retained The Hero Gaol in the mission-item inventory.
- You left a clan slot open and carried The Hero Gaol into an eligible engagement or dispatch mission for Lini’s random recruitment chance.
- You did not read The Hero Gaol as part of the immediate Lini procedure.
- You separately noted that reading The Hero Gaol opens Twin Swords and related Hero Gaol content.
- You checked whether important mission items are carried, read, consumed or otherwise required before committing them.
- You completed Missions 001 through 024 for the main ending and track the 300 numbered missions separately.
- You maintain separate records for Treasure Hunts, special recruits, stolen equipment, Clan skills and job mastery.
References for this chapter
- Final Fantasy Tactics Advance Instruction Manual, North American GBA edition
- Final Fantasy Tactics Advance Walkthrough
- Final Fantasy Tactics Advance Walkthrough, GameFAQs
- Final Fantasy Tactics Advance Guide and Walkthrough, GameFAQs, mission and recruitment details
- Final Fantasy Tactics Advance Mission Item FAQ, GameFAQs
Clan vs Clan — Rival Clans, Ambushes and Random Encounters
After completing Thesis Hunt, Final Fantasy Tactics Advance unlocks Clan Wars. The Clan command appears on the World Map, and rival clans begin appearing as moving symbols after the related transition through Nubswood and a town or pub. These encounters are optional training battles rather than required story missions. They can provide experience, JP, gil and occasional equipment, but their formations and terrain vary. Inspect the opposing clan, read the current Law, prepare a balanced six-unit party and engage only when your clan is ready.
Unlock Clan Wars and the Clan menu
Complete the story mission Thesis Hunt at Lutia Pass. After the battle, Montblanc explains that your group is ready to participate in Clan Wars, and the Clan command becomes available on the World Map. You are then given the Nubswood symbol to place on the map.
Place Nubswood, then enter a town or pub. The pub conversation explains that rival clans are moving around Ivalice looking for fights. From this point onward, opposing clans can appear on the World Map as moving symbols. Walking into one begins an engagement, which is a separate battle from the story and ordinary pub missions.
You do not need to defeat every clan that appears. Continue with the story, buy mission information, or move to another region if the current encounter is inconvenient. Clan Wars are useful for raising experience and JP, earning gil and testing newly recruited units, but skipping an encounter does not block the main story.
- Thesis Hunt is complete.
- The Clan command is visible on the World Map menu.
- Nubswood has been placed.
- You have entered a town or pub after placing Nubswood and received the rival-clan explanation.
Track a moving rival clan
When an opposing-clan symbol appears, move the cursor over it before committing to the encounter. On the GBA version, press R with the cursor over the symbol when the information command is available. This displays the clan name or encounter information and helps you decide whether to pursue it.
The symbol is not fixed permanently to one location. The instruction booklet states that opposing clans move whenever you travel two route sections. Moving one section advances one in-game day, so a clan may change position while you are traveling between towns. If you cannot intercept it immediately, do not waste time chasing it across the map; rival clans can move away or disappear as the calendar advances.
Some encounters are human-heavy, some emphasize monsters, and others contain a mixture of jobs. The name alone may not reveal every enemy job, so treat the first turn as reconnaissance. Identify the enemy healer, status specialist and strongest damage dealer before committing your whole party to one side of the battlefield.
- Inspect the symbol before entering it.
- Press R over the opposing-clan symbol when the information prompt is available.
- Remember that rival clans move as you travel.
- Do not pursue an encounter at the expense of preparation or a required mission.
Read the Law and build the party
Before deployment, press L on the World Map to check the current Laws. Choose abilities and equipment that let you attack without violating the active Law. A powerful party can become ineffective if its main weapon type, spell category or command is forbidden.
Bring a White Mage or another dependable healing option whenever possible. Rival clans can focus one unit and may contain several attackers, so Cure, Protect or recovery items can prevent a small mistake from becoming a defeat. Keep the healer behind the front line and avoid exposing it to direct attacks on the opening turns.
Include an Archer, Black Mage or another unit with reliable indirect damage. Rival formations may begin on raised terrain or behind obstacles, where melee units lose turns approaching. Ranged attacks also let you pressure enemy support units without immediately entering a reaction-heavy melee.
Fill the remaining positions with sturdy physical attackers and flexible support. Soldiers, Fighters, White Monks or comparable front-line units can occupy nearby enemies while the healer and ranged units work safely. Do not bring six units whose only useful action is a single Law-restricted command.
- The active Law has been checked before deployment.
- At least one unit can heal.
- At least one unit can attack from range or use indirect damage.
- The party has a front line and protected support units.
- Current equipment is installed on the units you intend to deploy.
Eliminate support and control threats first
At the opening of the battle, inspect the enemy formation instead of automatically striking the nearest Soldier. Enemy White Mages can use Cure and Protect to keep the opposing group active, so target them early when they are reachable. Archers, Black Mages and other ranged units are often the safest tools for reaching a healer on elevated ground.
After the healer, prioritize enemies that can disable, immobilize, slow or otherwise control your units. A Juggler, Alchemist, Time Mage or status-focused specialist can be more dangerous than a basic melee attacker if left active. Carry Remedies when the opposing clan is known to use status effects, and keep your healer close enough to respond without standing in the enemy’s attack range.
Spread the party enough to reduce the effect of area spells, but do not scatter so widely that the healer cannot reach anyone. Use terrain to block approaches, place sturdy units between attackers and support characters, and avoid ending several units’ turns within the same obvious area-of-effect pattern.
If a target has a reaction ability that makes ordinary physical attacks unreliable, change methods rather than repeatedly using Fight. Use magic, ranged attacks, special abilities or a different damage type when the target’s reaction is punishing direct contact.
- The enemy healer is disabled early when practical.
- Status and control specialists are not ignored.
- The party is spread against area attacks without losing healing coverage.
- Reaction abilities have been identified before committing melee attackers.
Know when to engage, avoid or withdraw
Engage a roaming clan when your active units are healthy, equipped for the current Law and ready for the opposing formation. These battles are good opportunities to earn JP on a core job, test a new recruit or collect gil before a story mission. Save before a risky engagement if you are experimenting with a new party arrangement.
Avoid the encounter when several important units are injured, when the healer has not learned a usable recovery action, or when the Law blocks the only reliable damage method in your party. Return to a town between consecutive battles when you need supplies, equipment or job changes. Do not assume that two rival clans will have similar terrain or tactics.
If you enter an optional encounter and the battle menu provides a retreat command, use it when the opening position or active Law makes victory unrealistic. A normal roaming clan is not worth sacrificing the development of several core units. If retreat is unavailable, reload a preparation save rather than repeating the same failed deployment. Required story battles should instead be solved by changing equipment, jobs, abilities, Laws or positioning.
- Party health and equipment are checked before engagement.
- The current Law does not invalidate the main strategy.
- You return to town before chaining more battles when supplies or reorganization are needed.
- You retreat only when the optional battle provides that command.
- A failed attempt leads to a changed setup rather than an identical rematch.
Before you move on
- Thesis Hunt is complete and the Clan command is available on the World Map.
- Nubswood has been placed and the pub explanation about roaming rival clans has occurred.
- You can inspect a rival-clan symbol with the R information command when available.
- Your standard party includes dependable healing and at least one ranged or indirect attacker.
- You have won at least one optional Clan War while obeying the active Law.
- You know how to avoid or withdraw from an optional encounter that is poorly timed.
References for this chapter
Advanced Jobs and Ability Combos — Creating Specialty Roles
The original Game Boy Advance version unlocks advanced jobs by mastering specific action abilities, not by reaching job levels or spending JP. Build one or two units at a time, keep ability-teaching equipment equipped until mastery, and choose a primary job for its equipment and statistics before adding a secondary command for utility. Most importantly, Human Fighter and Human Paladin have the same direct prerequisite: two mastered Soldier A-Abilities. Paladin does not require Fighter abilities.
Check the correct job prerequisite
Open the Clan or unit job menu and confirm the unit’s race before planning a route. Humans can become Fighter or Paladin after mastering any two Soldier A-Abilities. The two jobs are separate branches with the same direct requirement. A Human does not need to unlock Fighter first, and mastering Fighter abilities does not count toward Paladin’s requirement.
Humans can also unlock Ninja with two mastered Thief A-Abilities, Hunter with two mastered Archer A-Abilities, Blue Mage with one mastered White Mage A-Ability and one mastered Black Mage A-Ability, and Illusionist with three mastered White Mage plus five mastered Black Mage A-Abilities.
Bangaa unlock Dragoon, Defender, and Gladiator with two mastered Warrior A-Abilities. Two mastered White Monk A-Abilities unlock Bishop and Templar. Nu Mou unlock Time Mage with five mastered Black Mage A-Abilities, Alchemist with two White Mage plus five Black Mage A-Abilities, Morpher with five Beastmaster A-Abilities, Sage with three White Mage plus two Beastmaster A-Abilities, and Illusionist with three White Mage plus five Black Mage A-Abilities.
Viera unlock Red Mage with one mastered Fencer A-Ability, Elementalist with one White Mage plus one Fencer A-Ability, Summoner with two White Mage plus two Elementalist A-Abilities, Sniper with two Archer A-Abilities, and Assassin with two Elementalist plus one Sniper A-Ability. Moogles unlock Mog Knight and Gunner with one mastered Animist A-Ability, and Juggler or Gadgeteer with two mastered Thief A-Abilities.
- Confirm the unit’s race before buying equipment.
- Count mastered A-Abilities only; equipped but unfinished abilities do not satisfy a prerequisite.
- For Fighter or Paladin, master any two Soldier A-Abilities on the Human unit.
- For Paladin, do not spend time mastering Fighter abilities unless you want Fighter skills for a separate build.
Learn abilities through equipment and AP
Abilities are attached to weapons, armor, robes, shields, and accessories. In the equipment or shop screen, inspect an item’s ability information before buying it. Equip the item on a unit that can learn the ability, then earn AP through Engage battles or Dispatch Missions. Once the AP requirement is reached, the ability is mastered permanently and can be equipped later without keeping the teaching item equipped.
Changing jobs does not erase mastered abilities. A Human can spend several battles as a Soldier to learn two action abilities, switch to Fighter or Paladin, and still retain those abilities. If the unit changes equipment before mastery, progress is not normally lost, but learning pauses until the teaching item is equipped again.
AP and JP are separate. AP advances equipment-based abilities and is what the job menu checks for advanced-job prerequisites. JP is gained during battles and is spent on Combo abilities and related clan techniques. Do not describe a job unlock as requiring JP unless the game’s job screen specifically indicates an ability prerequisite instead.
Develop only a few units at once. A practical early project is one Human pursuing Soldier abilities for Fighter or Paladin, another Human pursuing Thief abilities for Ninja, and a Viera pursuing Archer abilities for Sniper. Keep a healer and reliable physical attacker active while other units are temporarily assigned to prerequisite jobs.
- Inspect equipment before purchasing it.
- Keep the teaching item equipped until the ability is mastered.
- Use Dispatch Missions for gradual AP when a unit is not needed in the active party.
- Reserve rare ability-teaching equipment for a unit that can use it.
Choose the primary job before the secondary command
The primary job determines the unit’s available equipment, movement profile, durability, and much of its stat growth. The secondary action command adds learned abilities but does not give the unit the primary job’s equipment access or statistical profile.
A Paladin with Fighter Tech can combine Paladin durability and knight-sword access with Fighter’s ranged or area attacks. A Fighter with Chivalry can gain emergency healing or defensive actions, although it will not become as durable as a true Paladin. A Ninja with White Magic can provide emergency recovery if the Human has already mastered useful White Mage spells, but it remains a mobile physical unit rather than a replacement for a dedicated healer.
A Viera Sniper with Elementalist combines bow range with elemental attacks and status utility. An Assassin with Elementalist or Sniper skills can handle high-value targets and status-sensitive enemies. A Bangaa Defender with White Monk abilities can protect allies while retaining access to recovery or support actions. Before entering a mission, check the active Law and remove any command that depends on a prohibited action.
- Select the primary job for equipment, movement, durability, and main damage type.
- Select the secondary command to solve a specific problem such as healing, range, status control, or area damage.
- Do not expect a secondary command to repair weak equipment access or poor stat growth.
- Review the Law display before committing to a build.
Develop Blue Mage and Morpher projects deliberately
Blue Mage is Human-only and unlocks after one mastered White Mage A-Ability and one mastered Black Mage A-Ability. Blue Magic is learned through the Learning support ability. Equip Learning, then allow an eligible monster to use the desired technique successfully on that unit. The unit must survive the attempt. Some techniques are difficult to obtain without a Nu Mou Beastmaster controlling the monster, because an enemy may not normally use a healing or beneficial technique on your clan.
Learning itself comes from Blue Mage equipment. Once mastered, it can be equipped by a different job, so a Fighter or other Human can learn Blue Magic without being a Blue Mage at the moment the monster uses the technique. This is an optional specialist project and is not needed for the main story.
Morpher is Nu Mou-only and requires five mastered Beastmaster A-Abilities. First use a Hunter with Capture to capture monsters. Captured monsters are stored in the Monster Bank in Cyril. The captured monster provides a soul that can be equipped by a Morpher; without the appropriate soul, changing to Morpher will not provide that monster’s transformation abilities. Develop Capture and the Monster Bank supply before investing heavily in Morpher AP.
- Equip Learning before attempting to acquire Blue Magic.
- Use a controlled or cooperative monster setup when a technique is rarely used naturally.
- Capture monsters with Hunter before attempting Morpher training.
- Confirm the required monster soul is available before changing the Nu Mou into Morpher.
Test each build before committing to a long project
After unlocking an advanced job, learn a few useful abilities before opening another branch. Fighter can prioritize reliable attacks and one ranged option. Paladin can learn a defensive action, a healing action, or a strong knight-sword attack. Ninja benefits from mobility, elemental veil attacks, and eventually Double Sword. Sniper can build accurate ranged damage, while Elementalist and Time Mage provide control or elemental coverage.
Use ordinary Engage missions when you need controlled AP, experience, and a chance to observe the unit. Dispatch Missions are useful for gradual development, but test the finished combination in an actual battle. Check whether the unit can reach targets, obey the current Law, survive counterattacks, and contribute when its preferred action is unavailable.
For a balanced postgame group, retain at least one dependable physical attacker, one ranged or status specialist, one healer, and one unit with time or elemental control. Mastering every job is optional. If a build fails, change the primary job, replace the secondary command, re-equip the unit, or spend the next few battles mastering a more suitable ability rather than repeating the same tactic.
- Confirm the advanced job appears in the Change Class menu.
- Test the unit in a real mission under an active Law.
- Check range, movement, MP, survivability, and equipment access.
- Keep dependable damage and recovery available while experimenting.
Before you move on
- At least one Human has unlocked Fighter or Paladin by mastering two Soldier A-Abilities, with Paladin checked as a direct Soldier branch.
- At least one Human has a separate optional route toward Ninja, Hunter, Blue Mage, or Illusionist if desired.
- At least one Bangaa, Nu Mou, Viera, or Moogle has reached an advanced job through the correct race-specific A-Ability prerequisites.
- Any Blue Mage project has Learning equipped before monster techniques are used for learning attempts.
- Any Morpher project has Capture, Monster Bank preparation, and the necessary monster soul in place.
- The active party has tested its job combinations in a real mission while obeying the current Law and still has reliable damage, recovery, and utility.
References for this chapter
- Final Fantasy Tactics Advance — Ability FAQ, Game Boy Advance
- Final Fantasy Tactics Advance Walkthrough
- Final Fantasy Tactics Advance — Jobs, StrategyWiki
- Final Fantasy Tactics Advance — Blue Mage, StrategyWiki
- Final Fantasy Tactics Advance — Morpher, StrategyWiki
- Final Fantasy Tactics Advance Instruction Manual, North American GBA edition
Magic, Elements and Status — When Spells Win or Lose
Magic is strongest when it solves a specific tactical problem: exploit a confirmed elemental weakness, remove a priority target, control movement, or attack several enemies without catching allies. On the original Game Boy Advance release, spell results depend on the caster, the ability, the target’s defenses and resistances, equipment immunities, and active Laws. Status effects are useful but never guaranteed, so every caster should have a damage option and a way to remain useful when a spell fails or is prohibited.
Inspect the target before casting
Select an enemy and inspect its information before choosing an element or status effect. Do not assume that every monster of the same broad type has the same resistance. When the game identifies a weakness, use that element if the spell can reach the target safely. If no weakness is confirmed, choose a reliable neutral attack or a different element rather than spending several turns testing Fire, Blizzard and Thunder.
Magic is particularly valuable against enemies with strong physical defense, including many Flan-type monsters. It is also useful for finishing an enemy that is protected by terrain or difficult to reach. Against a lightly defended enemy who is already within weapon range, a normal attack may conserve MP and avoid spell charge time. Choose the action that removes the most immediate threat, not automatically the action with the largest listed damage.
- Inspect the enemy before selecting an element or status effect.
- Use a confirmed weakness when the spell can safely reach the target.
- Save MP by using ordinary attacks against weak or nearly defeated enemies.
Choose single-target or area magic deliberately
Use single-target magic to finish a priority enemy, damage a boss, or avoid friendly fire. Enemy healers, Black Mages, Summoners, Archers and fast melee units are usually better single-target priorities than a weaker enemy who can wait. A focused spell is also preferable when only one enemy can be reached before it acts.
Use area magic when two or more enemies can be hit without striking allies and the damage will change the battle. Check the entire affected area before confirming. Do not bunch your clan together just to improve coverage: enemy area attacks and status effects punish the same formation. Remember that a spell with charge time may resolve after a unit moves, dies, becomes immune, or leaves the affected tiles. If the target is mobile, Immobilize it first, use a faster ability, or select a larger area that remains useful if the unit shifts.
- Use single-target spells for priority kills and bosses.
- Use area spells only when multiple enemies are safely covered.
- Recheck the affected tiles and charge-time target before confirming.
Control movement with Slow and Immobilize
Slow is useful against fast enemies such as Assassins, Ninjas and Thieves. Cast it before the target reaches your back line, especially when the enemy has enough movement to bypass your frontline. Slowing a dangerous unit early can give your healer or caster an extra turn to reposition.
Immobilize prevents movement but does not by itself prevent the target from using an action. Use it on a melee enemy that is guarding a narrow approach, on a monster you want to isolate, or on a unit that is outside attack range after being stopped. Disable is different: it prevents the target from using its action abilities, so it is more valuable against a caster or specialist whose main threat comes from its command set. Stop is a stronger form of control when it succeeds, but resistant enemies and equipment immunities can make it unreliable.
These effects can fail. If the same status fails against a resistant target, stop repeating it while the enemy continues taking turns. Switch to damage, Silence, a different status, or a physical attack. A failed status attempt still consumed the caster’s opportunity to act.
- Slow fast enemies before they reach fragile units.
- Use Immobilize to hold melee enemies outside useful attack range.
- Use Disable against enemies whose action abilities are their primary threat.
- Change tactics after a failed status attempt against a resistant target.
Match status effects to enemy roles
Silence is most useful against enemy spellcasters, but it does not stop ordinary weapon attacks and should not be treated as a universal shutdown. Sleep can delay a unit that is not your immediate target, although careless damage may remove the benefit. Poison is more valuable against a durable enemy than against a target that can be defeated directly. When an ability can inflict Stun, use it to interrupt a dangerous turn or temporarily remove a high-value unit from the fight.
Bosses, monsters and specialized enemies may resist or ignore particular statuses. Equipment immunities also matter. If a status repeatedly fails, inspect the target’s information and equipment rather than assuming the caster is underpowered. Status effects are best used to create a safe turn for your clan; they should not replace direct damage when a dangerous enemy can be defeated immediately.
Check the current Laws before using any status ability. A Status Law prohibits status infliction generally. Specific Laws can prohibit Poison, Silence, Slow, Stop and other effects, while Bind prohibits Disable and Immobilize. A prohibited action can cause Judge penalties even if the effect would otherwise succeed.
- Silence enemy casters before they establish a spell rotation.
- Use Poison on high-HP targets that are difficult to finish quickly.
- Check Laws before attempting any prohibited status.
- Use control effects to create a safe attack window, not as a substitute for every direct kill.
Protect casters with equipment and positioning
A Black Mage, Time Mage or other dedicated caster is usually less durable than a frontline unit. Keep the caster behind a Knight, Soldier, monster or terrain barrier, and leave a healer or item user close enough to recover them. Long range does not make a caster safe: Archers, Ninjas and mobile monsters can still reach an exposed unit.
Equip rods, staves and robes that support the role, but do not sacrifice all survivability for a small increase in magical damage. Magic Attack UP, when available to the unit, improves the value of offensive and status magic; defensive equipment or movement support can be better on maps where the caster is likely to be pursued. Give a caster a secondary command set, item access or another useful ability so the unit can contribute when the active Law blocks its main magic.
Before a difficult mission, inspect the Laws and adjust the party before deployment. If Color Magic is forbidden, a Black Mage or Red Mage may lose its main attack options. If Time Magic or a status effect is forbidden, bring physical damage, Items, archery or another permitted command instead of hoping to evade enforcement.
- Keep fragile casters behind a frontline or terrain cover.
- Balance Magic Power with HP, defense and movement.
- Prepare a non-magical or alternate command set for restrictive Laws.
Manage MP and charge time during long battles
Do not spend the caster’s most expensive spell on the first enemy that can be reached. Open with a cheaper attack, a status effect, an item, or a basic action when the target is already near defeat. Reserve enough MP for the enemy’s final group and for emergency support if the caster also carries healing or revival abilities.
Use MP-restoring items or abilities when the clan has them, and let another unit handle minor damage when possible. If MP recovery is limited, alternate major spells with ordinary attacks and avoid casting area magic that will not defeat or disable at least one meaningful target. A caster who ends the first half of the battle empty is often less useful than one who deals moderate damage throughout the map.
Charge time is part of the decision. A slow spell is appropriate against a unit pinned by Immobilize, terrain or a frontline blocker. Against a fast enemy about to act, choose a quicker ability, move to safety, or target a location the enemy cannot leave before the spell resolves. If the target moves or the situation changes, reassess rather than committing another expensive action immediately.
- Reserve MP for the final phase and emergency support.
- Use recovery items or abilities when available instead of exhausting the caster early.
- Use slower spells on pinned targets and faster actions against mobile threats.
- Reassess a delayed spell if the target moves, dies or becomes invalid.
Before you move on
- You can identify when a single-target spell is preferable to an area spell and can inspect the entire affected area before confirming.
- Your clan has a practical answer to enemy casters, fast melee units and physically resistant monsters.
- Before major battles, you check Laws, adjust the caster’s command set, and equip the unit for both magical output and survival.
- You have used confirmed elemental damage and at least one movement-control effect such as Slow or Immobilize.
- You have a backup plan for failed status effects, blocked magic, delayed casts and low MP.
- You can finish a long battle without spending every high-cost spell before the final enemy group.
References for this chapter
- Final Fantasy Tactics Advance Instruction Manual, North American GBA edition
- Final Fantasy Tactics Advance — Mechanics Guide, GameFAQs
- Final Fantasy Tactics Advance Gameplay Guide
- Final Fantasy Tactics Advance Walkthrough
- Final Fantasy Tactics Advance statuses, Final Fantasy Wiki
- Final Fantasy Tactics Advance elements, Final Fantasy Wiki
Boss Patterns, Judges and Recovery — How to Reset a Losing Fight
In the original Game Boy Advance release, most difficult engagements can be recovered by checking the active Laws, protecting Marche, and changing your formation before the enemy gains control of the map. Judges enforce forbidden actions with Yellow and Red Cards, while some bosses carry Boss Medals that prevent normal Red Card removal. Use the following procedure to stabilize boss fights, handle prison penalties, escape permitted optional battles, and retry story missions without repeating the same tactical mistake.
Inspect the Law and mission objective before acting
At the beginning of a battle, do not commit your strongest routine immediately. During one of your units’ turns, press B to back out of the action menu, then press Start to open the System Menu. Use the law-related command to review the restrictions affecting the current engagement. After Law Cards become available, this is also where you can review and use cards when the battle permits them.
Check the world map before entering a mission as well. Move the cursor over an area and press R to view the laws applying there and see the upcoming law rotation. This lets you prepare legal equipment and abilities instead of discovering that your main weapon or healing option is forbidden after deployment.
Read the mission objective before moving anyone. A mission that requires defeating one named enemy should be approached differently from one requiring every enemy, a survival condition, or protection of a guest. Identify at least one legal damage option, one legal recovery option, and one emergency repositioning plan for every essential role.
- Press B, then Start, and inspect the active Laws before committing to an attack.
- Use R on the world map to check the current and upcoming law rotation.
- Read the mission objective and identify legal damage and recovery options.
Know exactly how Yellow Cards and Red Cards work
A successful illegal action that does not KO its target normally gives the acting unit a Yellow Card. The unit remains in the battle, but the card can cause a post-battle penalty. Possible penalties include lost experience or AP, a gil fine, loss of Law Cards, item or equipment penalties, forfeited mission rewards, or a permanent stat reduction.
A second law violation by the same unit during the same battle can produce a Red Card, even when it is not the same Law. Defeating an enemy with an illegal action also produces a Red Card immediately. The Red Card removes the unit from the engagement and sends it to prison. Once a unit receives a card, stop using the forbidden action with that unit.
Cards remain on the unit’s record after bail or ordinary release. A unit with Yellow or Red Cards loses its accumulated JP and cannot earn more until the record is cleared. A pardon costs gil and requires the unit to remain in prison for the required number of battles. If a card penalty causes a permanent stat loss or removes valuable equipment, reload the pre-battle save when possible.
- Stop the offending action immediately after a Yellow Card.
- Treat a second violation in the same battle as a Red Card risk.
- Do not expect bail to clear the record or restore JP earning.
- Reload if a serious permanent penalty affects a core unit or unique equipment.
Protect Marche and do not depend on law-breaking against bosses
Marche receiving a Red Card causes an immediate Game Over. Never use Marche to deliver an illegal finishing blow, and do not leave him in a position where an automatic reaction could violate the active Law. If an enemy is nearly defeated, let a legal unit finish it or use a legal item or ability.
Many important enemies carry a Boss Medal, also called Red Card immunity in some references. These enemies cannot be removed by a Red Card, so deliberately making them violate a Law is not a dependable boss strategy. They may continue acting illegally without suffering the normal removal effect.
Against a boss with a dangerous counterattack, avoid adjacent physical attacks when possible. Switch to archery, guns, legal magic, status control, or another safe damage type. If the boss has strong area damage, spread the clan across separate lanes and avoid placing the healer beside the main attacker.
- Keep Marche away from every illegal finishing action.
- Check for the Boss Medal before considering Judge enforcement as a strategy.
- Change damage type when close-range attacks trigger a dangerous Reaction.
Rescue a bad turn while the battle is still recoverable
If an enemy healer acts before expected, a boss survives a supposedly decisive attack, or several clan members become exposed, stop attacking automatically. Withdraw the most threatened unit, put a durable unit between the enemy and your healer, and use the next legal turn for healing, revival, or status recovery. A unit that is merely injured can still retreat; a unit removed by a Red Card cannot contribute further.
Eliminate enemy healers early when doing so is legal and safe. If reaching the healer would expose the entire back line, disable it with a legal status effect or force it to spend turns moving. Ranged units should target enemy casters and archers from outside their preferred range, while melee units should avoid creating a line where several enemy attacks can reach the same target.
After Ezel’s Law Card system is unlocked, Law Cards and Anti-Law Cards can repair a bad matchup. During a unit’s turn, press B, then Start, open the law-card command, and select an available card. Anti-Law Cards remove restrictions for that engagement; Law Cards add restrictions and can limit enemy options while helping you earn Judge Points. These cards cannot be used in Jagd battles.
- Withdraw endangered units before their next enemy turn.
- Remove or disable enemy healers before committing to a long exchange.
- Use an Anti-Law Card when the active restriction makes the planned formation unusable.
Understand KO recovery and the danger of Jagd areas
In ordinary Judge-supervised battles, a clan member who is KO’d is generally restored after the engagement. Revive that unit during the battle when you need its abilities or positioning, but a temporary KO is not by itself permanent character loss.
Jagd battles are different. Jagd areas have no Judge and no normal Laws. A unit left KO’d when the battle ends is permanently lost from the clan. Before defeating the final required enemy in a Jagd, check every fallen clan member and revive anyone who has not recovered. This includes optional units brought only for support.
Do not apply Jagd assumptions to every special battle. The tournament missions have their own special Laws. The Corrupt Judge missions Immunity Pass, Favoritism and Decision Time have no ordinary Laws, and KO loss does not operate like a Jagd. Their enemy Judges can still issue unusual Yellow Cards, so follow the mission-specific rules and use Cid’s Yellow Clip when available.
- Revive every KO’d clan member before finishing a Jagd battle.
- Do not assume normal post-battle recovery applies in a lawless area.
- Check special mission rules before using a standard Judge or Jagd recovery plan.
Recover correctly after prison or a Yellow Card penalty
After a Red Card, visit Sprohm Prison before sending the affected unit into another mission. Bail releases the unit early but leaves the cards on its record. A pardon clears the Yellow and Red Cards, but it requires gil and a waiting period measured in completed battles. Marche is the exception: while he serves a pardon sentence, the clan must wait rather than continue normal activities.
A detained unit cannot be deployed or managed normally. Replace its role with another clan member, buy a legal weapon or recovery item, and review the next mission’s Laws before accepting it. If a Yellow Card caused the unit to lose JP, do not continue using that unit as though its job plan were unchanged; temporarily assign another unit to the role and rebuild the carded unit after the record is cleared.
If a post-battle penalty permanently reduced a stat or removed valuable equipment, reload the save made before the engagement when possible. Paying bail will not restore the lost item or reverse the permanent stat penalty.
- Visit Sprohm Prison after any Red Card.
- Use bail for immediate access and pardon for clearing the record.
- Replace the detained role and re-equip the clan before the next story mission.
Flee or reset when the position cannot be repaired
Final Fantasy Tactics Advance has a mid-battle Flee command, but the instruction manual warns that not every battle permits fleeing. During an eligible unit’s turn, press B to leave the action menu, press Start to open the System Menu, and choose Flee. This abandons the current engagement and returns you to the world map, so it is useful for permitted random or optional battles that are no longer worth completing. It does not preserve mission progress or satisfy a story objective.
If all usable units are incapacitated, the battle is lost. A normal failed engagement can generally be attempted again, but a story battle that produces a Game Over must be reloaded. Marche’s Red Card is an immediate Game Over regardless of the remaining party.
For a difficult story engagement, save before accepting the mission and keep that save separate from the temporary Save Now slot. Saving during battle erases the previous Save Now data. If the fight has become irrecoverable, use the GBA soft reset—press A, B, Select and Start together—and reload the pre-battle save.
Before retrying, make a specific change. Alter the deployment order, replace one job, equip a different weapon, remove an illegal ability, add a healer or ranged attacker, use an Anti-Law Card, or complete easier missions to gain levels and AP. A retry with the same formation, same Law violation and same approach is repetition, not preparation.
- Use Flee only when the battle allows it and when abandoning the objective is acceptable.
- Keep a normal pre-battle save separate from the temporary Save Now recovery point.
- Change equipment, jobs, abilities, deployment, Law Card use or preparation level before retrying.
Before you move on
- You can open the battle System Menu with B followed by Start and inspect the active Laws.
- You can use R over a world-map area to check the current and upcoming law rotation.
- You can identify a legal attack and recovery option before committing to a boss engagement.
- You can explain the difference between a Yellow Card, a Red Card, prison, bail and pardon.
- You can keep Marche from receiving a Red Card.
- You can use Flee only in a battle that permits it and understand that it abandons the engagement.
- You can reload a separate pre-battle save for a failed story attempt.
- You can revive every clan member left KO’d before completing a Jagd battle.
- After a failed attempt, you have changed the formation, job, equipment, ability selection, Law Card use or preparation level.
Late Game — Materite Now! through Royal Valley
The final original Nintendo Game Boy Advance story route is Missions 019 through 024: Materite Now!, Present Day, Hidden Vein, To Ambervale, Over the Hill and Royal Valley. Materite Now! is the required bridge after Quiet Sands. Present Day contains a normal palace battle followed by a separate five-round survival encounter with Magic Swordsman Llednar. Mission 024 Royal Valley is one numbered mission with three linked battles against Llednar, Queen Remedi and Li-Grim. The game sets its completion flag after Mission 024 and the ending, but the starred completed file restores the World Map to the state before Royal Valley when loaded. Make a separate pre-Royal Valley save if you want to preserve that exact point, and do not expect final-battle levels, equipment or items to remain on the completed file.
Mission 019: Materite Now!
After clearing Mission 018, Quiet Sands, place Materiwood on the World Map and enter it to begin Mission 019, Materite Now! The objective is Defeat all enemies. The opposing clan contains a Sniper, Red Mage, Elementalist, White Mage, Assassin and Summoner. The mission must be cleared before Bervenia Palace becomes the next story destination.
Prioritize the Assassin because Stop and instant-KO abilities can remove a unit before you can respond. Use KO and Stop protection when available. Avoid equipping irreplaceable weapons or armor because the Sniper can destroy equipment with Aim abilities. Keep the clan spread out so the Summoner and Elementalist cannot punish several units at once. The Red Mage has Doublecast; stealing or destroying her weapon is optional, but doing so can prevent her from using that ability if your setup supports it.
Defeat all six enemies. After the Doned scene, Bervenia Palace appears on an island. Return to town, heal, save and reorganize before entering. Entering Bervenia Palace automatically starts Mission 020, Present Day. If available, give Marche an Angel Ring and useful White Mage abilities such as Auto-Life and Curaga. These are helpful preparations, not mandatory requirements.
- Place Materiwood after clearing Quiet Sands.
- Enter Materiwood and begin Mission 019.
- Defeat the Sniper, Red Mage, Elementalist, White Mage, Assassin and Summoner.
- Confirm that Bervenia Palace appears.
- Save, heal and prepare Marche before entering Bervenia Palace.
Mission 020: Present Day and the Llednar survival encounter
Enter Bervenia Palace to begin Mission 020, Present Day. The first battle is a Defeat all enemies fight against one Templar, two Gladiators, one Mog Knight and one Alchemist. The battlefield is small, so use ranged attacks or area attacks carefully and avoid placing fragile units where the Templar and Gladiators can reach them together. Remove the strongest melee threats before they surround your healer.
The Alchemist knows Death while holding the Life Crosier. Stealing that weapon is optional, but it removes that source of Death. Keep Maiden Kiss or another reliable answer to Frogshape available, and disable the Alchemist if it begins acting freely against an injured group.
After the palace battle, Mission 020 continues with a separate encounter against Magic Swordsman Llednar. The objective is Survive, not Defeat Llednar. He cannot be defeated during this encounter. Survive five rounds until Judgemaster Cid arrives and ends the battle. Omega can instantly KO a unit, so spread the clan, use the throne and nearby obstacles to delay him, move wounded units away from his reach and heal whenever a safe turn allows it. Auto-Life and an Angel Ring can help, but neither is required. Do not waste turns trying to win by reducing Llednar’s HP.
When Cid ends the encounter, recover and save. Place Tubola Cave on the World Map. Hidden Vein is the next required story mission, although optional missions may be completed before entering it. The five-round Llednar encounter belongs to Mission 020 and must not be confused with the later Royal Valley boss battle.
- Enter Bervenia Palace to begin Present Day.
- Defeat one Templar, two Gladiators, one Mog Knight and one Alchemist.
- Treat the Llednar encounter as a survival battle.
- Survive five rounds.
- Confirm that Cid ends the encounter.
- Place Tubola Cave after recovering.
Mission 021: Hidden Vein
Enter Tubola Cave to begin Mission 021, Hidden Vein. The objective is Defeat all enemies. The enemy clan contains a Juggler, Sage, Animist, Blue Mage, Mog Knight and White Monk.
Prioritize the White Monk if Revive is prolonging the fight. The Sage’s Giga Flare is extremely powerful, so keep units separated. The Blue Mage can use Roulette, Bad Breath and White Wind; Roulette can KO either side, making the Blue Mage a high-priority threat if it gains repeated turns. The Juggler brings disabling status effects, and Earth Render makes a straight-line formation unsafe.
Check the active Law before relying on Skills or Color Magic. A Skills Law can restrict the Sage, while a Color Magic Law can limit the Blue Mage. Obeying a Law is useful when it protects your plan, but do not cripple your own force simply to avoid a minor penalty. Defeat all six enemies to clear the mission.
After Hidden Vein, place Deti Plains. Do not enter it immediately. Move to a city symbol first. The Doned and Cid scene must play before the story mission becomes available. After the scene, enter Deti Plains to begin Mission 022, To Ambervale.
- Enter Tubola Cave.
- Defeat the Juggler, Sage, Animist, Blue Mage, Mog Knight and White Monk.
- Place Deti Plains.
- Visit a city symbol and allow the Doned and Cid scene to play.
- Enter Deti Plains only after the scene.
Mission 022: To Ambervale
After the Deti Plains trigger scene, enter Deti Plains to begin Mission 022, To Ambervale. The objective is Defeat all enemies. The enemy group consists of a Coeurl, Lilith, Thundrake, Jawbreaker and Big Malboro.
The Coeurl’s Blaster can Petrify a unit from range, making it an early priority. Thundrake deals heavy physical damage, so control or defeat it before it reaches fragile units. Lilith can use Twister, which halves HP, and can inflict Doom, Charm, Poison and Frog. Big Malboro’s Bad Breath can spread several statuses. Bring revival and status recovery, and keep the party separated against area attacks.
Jawbreaker has LV3 Def-less and LV5 Death. These attacks reliably affect units whose levels are divisible by three or five. Check deployed levels before the battle and check again if a unit levels up during the fight. Galmia Shoes are useful on the cliffs but are not required. Ranged attacks, Jump and high-mobility abilities can help units bypass bottlenecks. Defeat all five monsters. After the scene with Cid, Siena Gorge appears on the World Map.
- Trigger To Ambervale through the Deti Plains scene.
- Defeat the Coeurl, Lilith, Thundrake, Jawbreaker and Big Malboro.
- Check levels against LV3 Def-less and LV5 Death.
- Use the cliffs and alternate movement abilities to avoid bottlenecks.
- Confirm that Siena Gorge appears.
Mission 023: Over the Hill
Enter Siena Gorge to begin Mission 023, Over the Hill. The objective is Defeat the Boss, and the required target is Ritz. The enemy group includes Ritz as a Red Mage, Shara as a Sniper, one Elementalist, one Summoner, one Assassin and one Fencer. The battle ends when Ritz is defeated, so the other enemies are optional targets unless they block access or create an immediate danger.
Do not rush onto the narrow bridge. Hold the clan in the wider lower area and let Ritz’s group approach. This gives ranged units and casters room to act and prevents the party from becoming trapped. Keep units separated because Madeen and the Elementalist’s status attacks can punish a tight formation.
The Assassin has Last Breath, which can instantly KO a unit. Shara is dangerous because Sniper abilities can inflict Doom and destroy equipment. Ritz has Doublecast, can put a unit to Sleep before attacking and cannot be Silenced while her Ribbon is equipped. A Color Magic Law can stop her magic if that Law is active. Concentrate your strongest legal attacks on Ritz rather than spending turns stealing equipment unless you deliberately want the optional rewards.
Defeat Ritz to clear Mission 023 and make Ambervale appear. Save before entering Ambervale. Royal Valley is Mission 024 and contains three linked battles without a town break, so heal, check equipment, carry revival and status recovery, and select a party that can handle close combat, instant-KO threats and area magic.
- Enter Siena Gorge.
- Hold position away from the narrow bridge.
- Confirm the roster includes Ritz, Shara, one Elementalist, one Summoner, one Assassin and one Fencer.
- Protect the clan from Last Breath, Doom and Doublecast.
- Defeat Ritz as the required boss target.
- Confirm that Ambervale appears.
- Make a preparation save before entering Ambervale.
Mission 024: Royal Valley, first section
Enter Ambervale to begin Mission 024, Royal Valley. This is one numbered mission with three linked battle sections. You cannot return to town between sections, so bring a dependable healer, several revival options and status recovery before entering. The first section has a Defeat Llednar objective.
Cid’s anti-law removes the invincibility that protected Llednar earlier. Concentrate on Llednar. If supporting enemies prevent your attackers from acting, eliminate the Ninja or Alchemist first. The Ninja’s Double Sword and Veils are dangerous, the Alchemist can use Death, Flare and Frogshape, and the Illusionist’s attacks affect broad areas. The Gunner is less accurate at range because it lacks Concentrate and becomes much less threatening when Blinded.
Llednar can use Omega for an instant KO, Life Render for Doom and Furycircle to damage and push back nearby units. Revive fallen units when safe, but do not spend so long clearing optional enemies that Llednar receives repeated chances to use Omega. Defeat Llednar to end the first section. This is a real boss battle, unlike the protected Llednar survival encounter in Present Day.
- Enter Ambervale only after preparing for three linked battles.
- Allow Cid’s anti-law to remove Llednar’s invincibility.
- Defeat Llednar in the first Royal Valley section.
- Keep healing and revival resources available for the next section.
Mission 024: Royal Valley, second section
The second section begins after the palace scene. Queen Remedi is accompanied by two Dephs, copies of Famfrit and Adrammelech. The objective is Defeat the Boss, making Queen Remedi the required target.
Famfrit can use Breath of God, Demi, Lightspeed and Presence. Adrammelech can use Lightspeed, Firestream and Howl of Rage. Spread the clan against breath attacks and Presence, which can damage and push units back. Demi halves HP, so finish weakened units before they become easy targets.
Remedi relies on physical attacks, but her weapon damage is extremely high. Attack her from range when possible, or approach from a direction that does not expose your healer to an immediate counterattack. Defeat one or both Dephs only if they block access to Remedi or threaten to overwhelm the clan; clearing them is not required. Concentrate enough damage on Queen Remedi to end the section promptly, then use the transition to review HP and statuses. There is no town visit or full resupply between sections.
- Enter the second section with healing and revival available.
- Spread the clan against Breath of God and other area attacks.
- Attack Queen Remedi from range when possible.
- Defeat Queen Remedi; the Dephs are optional targets.
- Prepare immediately for the final section.
Mission 024: Royal Valley, third section
After the conversation with Mewt, Queen Remedi transforms into Li-Grim and summons two Mateus Dephs. Li-Grim is the required target and this is the final battle of the original GBA story. The Mateus Dephs can use Breath of God, Thundaga, Star Cross and Spellbind.
Li-Grim can use Lawshift, Amber Gleam, Magi, Descent, Omega and Alpha. Lawshift can change the active Law, so check the Law display whenever it occurs and stop using commands forbidden by the new Law. Amber Gleam removes beneficial status effects. Omega can instantly KO a unit, Alpha is more destructive, Descent summons a Totema and Magi causes heavy damage.
Use your strongest legal attacks against Li-Grim rather than spending too many turns clearing the Mateus Dephs. Keep the healer out of direct danger, revive quickly when safe and use ranged or high-mobility units to maintain pressure. Defeating Li-Grim ends Mission 024 and triggers the ending sequence.
- Defeat Li-Grim as the required target.
- Watch for Lawshift and obey the current Law.
- Recover from KOs quickly enough to keep several attackers active.
- Ignore the Mateus Dephs when they are not blocking the Li-Grim attack.
- Confirm that Li-Grim is defeated and the ending begins.
Completion check and post-story setup
The main story is complete when Mission 024 is cleared, the ending cutscene plays and the game sets the completion flag. After the ending, save when the game offers the completed file. That file is marked with a star, but loading it does not place you on a post-final-battle World Map. Instead, it restores the World Map to the state before entering Royal Valley. Final-battle experience, JP, equipment, rewards and other changes made during the Royal Valley sequence are not carried into the starred file.
For this reason, make a separate save before entering Ambervale if you want a normal pre-final backup. Use the starred completed file for optional missions, recruitment, Treasure Hunts, equipment work and other post-story goals. If you want to watch the ending again, load that completed file and replay Royal Valley from the restored pre-Royal Valley state; the ending does not play automatically simply because the file has a star.
The completed file does not prove completion of all 300 numbered missions, secret characters, semi-secret characters, Corrupt Judge missions, Treasure Hunts, rare equipment or job-mastery objectives. Track numbered missions separately from unnumbered, repeatable and link-related content. Preserve unusual mission items until you have checked whether they are needed for a later mission, recruitment route or equipment chain.
- Mission 019 Materite Now! is cleared in Materiwood.
- Mission 020 Present Day is cleared, including the separate five-round Llednar survival encounter.
- Tubola Cave is placed and Mission 021 Hidden Vein is cleared.
- Deti Plains is placed and the required city-symbol message scene has played.
- Mission 022 To Ambervale is cleared.
- Siena Gorge is placed and Mission 023 Over the Hill is cleared by defeating Ritz.
- The Over the Hill roster included Ritz, Shara, one Elementalist, one Summoner, one Assassin and one Fencer.
- A separate pre-Royal Valley save exists before entering Ambervale.
- Mission 024 Royal Valley is complete through Llednar, Queen Remedi and Li-Grim.
- The ending cutscene has played and the completion flag has been set.
- The starred completed file is understood to restore the World Map to the pre-Royal Valley state.
- The starred file is available for optional and post-story goals.
- Royal Valley can be replayed from the restored state if the ending needs to be viewed again.
Before you move on
- Mission 019 Materite Now! is cleared in Materiwood.
- Mission 020 Present Day is cleared, including the separate five-round Llednar survival encounter.
- Mission 021 Hidden Vein is cleared after placing Tubola Cave.
- Deti Plains is placed and the required city-symbol scene has played.
- Mission 022 To Ambervale is cleared at Deti Plains.
- Siena Gorge is placed and Mission 023 Over the Hill is cleared by defeating Ritz.
- The Over the Hill enemy roster was Ritz, Shara, one Elementalist, one Summoner, one Assassin and one Fencer.
- Ambervale is entered after a preparation save.
- Mission 024 Royal Valley is cleared through all three sections: Llednar, Queen Remedi and Li-Grim.
- The ending cutscene has played and the completion flag has been set.
- The starred completed file is loaded from the title screen and confirmed to restore the World Map to the state before Royal Valley.
- A separate pre-Royal Valley save is retained if the player wants to preserve the exact staging point.
- Optional missions and recruitment can be pursued from the starred completed file.
- Royal Valley must be replayed from that restored state to view the ending again.
References for this chapter
- Final Fantasy Tactics Advance Instruction Manual, North American GBA edition
- Final Fantasy Tactics Advance Walkthrough, Thonky
- Materite Now Mission, Thonky
- Present Day Mission, Thonky
- Hidden Vein Mission, Thonky
- To Ambervale Mission, Thonky
- Over the Hill Mission, Thonky
- Final Fantasy Tactics Advance Walkthrough: Royal Valley
- Final Fantasy Tactics Advance Walkthrough, GameFAQs
- Final Fantasy Tactics Advance Walkthrough
Final Battles and The Ending — Executing the Closing Strategy
The original GBA main story ends with Mission 024, Royal Valley. Clear Missions 019 through 023 in order, survive the separate Llednar encounter after Present Day, and use Ambervale as the final preparation point. Royal Valley contains three consecutive battles: Llednar, Queen Remedi and Li-Grim. Prepare before leaving Ambervale because there is no ordinary town or shop break between those battles. After the credits, the game records the story-clear flag and the completed file returns to the World Map state from before Royal Valley, allowing post-story activity without preserving ordinary progress made during the final battles.
Complete the six-mission approach to Royal Valley
Clear Mission 019, Materite Now!, at Materiwood. Defeat all enemies, then continue through the resulting scenes until Bervenia Palace appears on the World Map. Visit the pub and purchase or accept Present Day when your clan is prepared, then engage Mission 020 at Bervenia Palace.
Present Day requires defeating all enemies. After that battle, Marche faces Magic Swordsman Llednar in a separate endurance encounter. Llednar cannot be defeated in this scene. The objective is Survive: keep Marche away from Llednar, use recovery when needed and continue until five rounds have elapsed. Cid then arrives and Llednar withdraws.
After the endurance encounter, place Tubola Cave on the World Map. Return to a pub, accept Mission 021, Hidden Vein, and engage at Tubola Cave. Defeat all enemies. Remove the White Monk early because its revival ability can restore defeated opponents. Keep your healer away from the center of the formation and revive fallen clan members whenever the Law system permits.
When Hidden Vein is complete, place Deti Plains. Visit a town or pub to trigger the required scene involving Doned and Cid's message. Only after that scene should you go to Deti Plains for Mission 022, To Ambervale. Defeat all enemies. Spread the clan against the Big Malboro so one Bad Breath does not disable several units at once. Cure disabling statuses quickly and avoid surrounding the monster with fragile characters.
After To Ambervale, place Siena Gorge and engage Mission 023, Over The Hill. This is a Defeat the Boss mission, and Ritz is the boss target. The opposing clan also includes Shara, an Elementalist, a Summoner, an Assassin and a Fencer. Move up the elevated terrain carefully. The Assassin's Last Breath can produce a sudden KO, Madeen punishes clustered units and the Elementalist can inflict status ailments. Ritz is a Red Mage with Doublecast and can use Sleep, but defeating Ritz immediately ends the mission. Clearing the other clan members or attempting steals is optional. Ambervale appears after the battle.
- Clear Mission 019, Materite Now!, at Materiwood.
- Clear Mission 020, Present Day, at Bervenia Palace.
- Survive the separate Llednar encounter for five rounds.
- Place Tubola Cave and clear Mission 021, Hidden Vein.
- Trigger the Doned and Cid scene after Hidden Vein.
- Place Deti Plains and clear Mission 022, To Ambervale.
- Place Siena Gorge and clear Mission 023, Over The Hill.
- Defeat Ritz to finish Over The Hill.
- Confirm that Ambervale has appeared before beginning the final sequence.
Prepare at Ambervale before the required save
Enter Ambervale after Over The Hill. The game presents a required save before the Royal Valley sequence. Use this as your final staging checkpoint. If you still need equipment, job changes, AP, levels, JP, healing items or ordinary optional missions, decline to proceed, return to the World Map and prepare before entering Ambervale again.
Royal Valley does not provide a normal town, shop or equipment screen between its three battles. Bring a dependable healer, at least one revival method and several units capable of reliable physical or non-elemental damage. Curaga, Life, Full-Life, Auto-Life, Angel Rings and strong consumables are useful when available, but no single job composition is mandatory.
Read the active Laws before deployment. If your preferred healing spell, weapon type or attack command is forbidden, equip a legal substitute. Anti-Law Cards can remove a problem Law, but do not rely on one command: retain physical, magical and item-based options. Save an earlier backup separately if possible, because the Ambervale checkpoint is the safest place to retry the final sequence without rebuilding your preparation.
- Enter Ambervale after Mission 023.
- Make the required final-preparation save.
- Equip a reliable healer and revival option.
- Check active Laws and prepare substitutes.
- Keep physical and non-elemental damage available.
- Preserve an earlier backup save when possible.
- Do not begin Royal Valley while routine preparation remains unfinished.
First Royal Valley battle: Llednar
The first battle begins after leaving Ambervale. Marche selects three clan members, while Cid acts as Judgemaster rather than occupying one of the three clan slots. Llednar begins with Fortune protecting him. Cid uses Anti-Law to remove Fortune, after which Llednar becomes vulnerable.
The victory condition is Defeat the Boss. Target Llednar instead of spending turns clearing every supporting enemy. Strong physical attacks are dependable, and non-elemental abilities are useful because Llednar resists elemental attacks. Keep the healer at range and avoid placing several units where one attack or knockback can disrupt the formation.
Llednar can use Omega, Life Render and Furycircle. Omega can cause a sudden KO, Life Render can inflict Doom and Furycircle can push nearby units away. Maintain more than one active attacker and revive important units promptly. Remove a supporting enemy only when it is disabling the healer, blocking access to Llednar or otherwise creating an immediate danger. Defeating Llednar advances directly to the Queen Remedi battle.
- Select Marche and three clan members.
- Allow Cid to remove Fortune.
- Use strong physical or dependable non-elemental attacks.
- Keep the healer away from clustered enemies.
- Revive important units promptly.
- Defeat Llednar to advance.
Second Royal Valley battle: Queen Remedi
After Llednar falls, Babus awakens but remains behind because of his injuries. Marche and Cid enter the palace and confront Remedi. She becomes the Battle Queen and summons Deph copies of Adrammelech and Famfrit. Choose your clan again for this battle.
The victory condition is Defeat the Boss, making Queen Remedi the required target. The Dephs are dangerous, but neither must be defeated if Remedi can be reached safely. Disable or defeat a Deph only when it blocks your route, repeatedly threatens several units or forces the healer to spend every turn recovering the party.
Spread the clan enough to reduce broad attack damage and use legal physical or magical attacks according to the current Law. Keep ordinary healing and revival available, but avoid exhausting rare consumables unless the battle requires them. Defeating Queen Remedi triggers the final transformation without a normal preparation break.
- Choose a fresh party after the Llednar battle.
- Make Queen Remedi the primary target.
- Use legal physical or magical attacks.
- Control a Deph only when it creates an immediate danger.
- Maintain healing and revival coverage.
- Defeat Queen Remedi to begin the final battle.
Final Royal Valley battle: Li-Grim
Remedi transforms into Li-Grim and summons two Mateus Dephs. This is the final battle of the numbered main-story route. The Mateuses can use Star Cross, Thundaga, Breath of God and Spellbind, so keep the healer and primary damage dealer from occupying the same vulnerable cluster.
Li-Grim can use Lawshift, which changes the active Laws during the battle. Recheck the Law display whenever the rules change. An action that was legal earlier can become illegal later, so switch commands or use an Anti-Law Card when appropriate.
Li-Grim's dangerous abilities include Omega, Alpha, Magi and Descent. Descent can summon a Totema and sharply increase the pressure on the party. Amber Gleam can remove beneficial statuses, so Protect, Haste, Regen and similar effects should support your plan but should not be its only foundation.
Focus on Li-Grim and finish her as quickly as the current Laws allow. Defeat a Mateus when it is repeatedly disabling units, blocking access to Li-Grim or forcing the healer to spend every turn recovering the party. Otherwise, keep the Dephs at bay and spend your strongest legal attacks, Totemas and offensive items on Li-Grim. Her defeat completes Mission 024.
- Spread units against Star Cross and other area attacks.
- Recheck the Laws after every Lawshift.
- Expect Amber Gleam to remove beneficial statuses.
- Use major Totemas and rare offensive items if necessary.
- Defeat a Mateus only when it is the immediate threat.
- Defeat Li-Grim.
Watch the ending and verify the story clear
After Li-Grim is defeated, let the ending scenes and credits finish. Do not reset or power off before the game records its clear data. Once the credits are complete, the game records the story-clear flag; the completed save is marked with a star when viewed from the title screen.
Loading that starred file does not resume from the battlefield or from a newly saved post-ending World Map state. Instead, it returns you to the World Map state from before the Royal Valley sequence, using the pre-final-battle progress as the continuing file. Final-battle EXP, AP, items, mission cards, temporary equipment changes and battle positioning are not retained as ordinary post-battle progress. This is why the Ambervale staging save remains important: it is the preparation checkpoint for replaying the ending, while the starred file is the proof that the story has been cleared.
From the starred file's World Map state, check the pubs and Mission List for post-story activity. This main-story completion covers Missions 019 through 024 only. It does not establish completion of every numbered mission, Treasure Hunt, secret or semi-secret recruit, rare item, job ability or Corrupt Judge mission. Track those as separate optional goals.
- Defeat Li-Grim.
- Watch the complete ending and credits.
- Wait for the game to record clear data.
- Confirm the completed file has a star.
- Load the starred file and verify that it returns to the pre-Royal Valley World Map state.
- Check pubs and the Mission List for post-story activity.
- Keep optional missions, recruits, rare equipment and job mastery as separate goals.
Before you move on
- Mission 019, Materite Now!, is cleared at Materiwood.
- Mission 020, Present Day, is cleared at Bervenia Palace.
- The separate Llednar encounter after Present Day is completed by surviving five rounds.
- Mission 021, Hidden Vein, is cleared at Tubola Cave.
- The required Doned and Cid scene after Hidden Vein has been triggered.
- Mission 022, To Ambervale, is cleared at Deti Plains.
- Mission 023, Over The Hill, is cleared at Siena Gorge by defeating Ritz.
- Mission 024, Royal Valley, is entered from Ambervale after the required save.
- Llednar is defeated in the first Royal Valley battle.
- Queen Remedi is defeated in the second Royal Valley battle.
- Li-Grim is defeated in the final Royal Valley battle.
- The complete ending and credits have played.
- The game has recorded clear data and the file shows the completion star.
- Loading the starred file returns to the World Map state from before Royal Valley.
- The final battles' temporary EXP, AP, items, cards and positioning are not being mistaken for retained post-story progress.
- Pubs and the Mission List have been checked for optional post-story content.
- Optional 300-mission, recruitment, Treasure Hunt, rare-item and job-mastery goals are tracked separately rather than treated as part of this main-story completion.
References for this chapter
- Final Fantasy Tactics Advance Instruction Manual, North American GBA edition
- Final Fantasy Tactics Advance Guide and Walkthrough
- Final Fantasy Tactics Advance Walkthrough: Royal Valley
- Final Fantasy Tactics Advance Walkthrough
- Final Fantasy Tactics Advance Gameplay Guide
- What Happens After You Fight Li-Grim - Final Fantasy Tactics Advance Forum
After the Ending: Optional Missions and Recruitment
Finish the original Game Boy Advance story, save the completed file, and use that starred file as the base for optional missions. The clear file returns you to the World Map state from before Royal Valley while preserving the story-clear flag, so it is not a New Game Plus file and does not place you after the final battle. Complete Old Friends, Mission 107, earlier in the campaign when its requirements are met; it is a prerequisite for Ritz's later route. After Royal Valley and the ending, Mortal Snow appears at the Pub. This chapter gives practical starting routes for Ritz, Babus, and Lini, plus safe mission-item and save management. It is not a complete catalog of all 300 numbered missions or every optional recruit.
1. Make and protect the story-clear save
Complete the three Royal Valley battles, view the ending, and follow the game's normal save prompt. A completed file receives a star beside its entry. This star confirms that the main story has been cleared and unlocks postgame mission availability; it does not mean that every numbered or optional mission is complete.
Reload the starred file from the title screen and confirm that your clan, regions, equipment, mission history, and calendar are intact. The file resumes from the World Map state before the Royal Valley sequence rather than leaving Marche in a permanent post-final-battle location. Use this restored map state to visit Pubs, buy missions, dispatch units, and continue optional routes.
Keep the starred file as a master save. Use the other save slot for recruitment attempts, mission-item experiments, and dispatch results. Before starting any special-character route, dismiss or reorganize a replaceable generic unit if necessary so at least one clan slot is free. Do not overwrite the only clear file while testing a recruitment result.
- Complete Mission 024, Royal Valley, and view the ending.
- Confirm that the save entry has a completion star.
- Reload the file and verify that it returns to the pre-Royal Valley World Map state.
- Preserve one untouched master save.
- Create a working save with at least one open clan slot.
2. Complete Old Friends when it appears, then recruit Ritz through Mortal Snow
Old Friends is Mission 107 and is not a postgame-only mission. Its listed availability follows Missions 018 and 048, so check the Pubs after those missions and buy it when it appears. Complete it during the main campaign rather than postponing it automatically until after Royal Valley. Clearing Old Friends is the prerequisite for the later Mortal Snow route.
Old Friends is a battle at a restricted deployment size. Ritz, Shara, and additional members of Ritz's clan assist you, so choose only the extra units allowed by the mission screen. Defeat the Blade Biter first: it is the dangerous target and has strong physical offense. A sturdy frontline unit plus a healer, Black Mage, or another reliable damage dealer is a safe pairing. Check the active Law before committing to your preferred attack type.
After Old Friends is recorded as complete, continue the numbered story route and eventually clear Royal Valley. Once the ending has been viewed and the clear file has been saved, check the Pubs until Mortal Snow appears. Buy Mortal Snow and travel to Lutia Pass. This mission includes Ritz and limits your additional deployment, so bring a compact team with dependable healing and damage rather than planning around a full clan.
The three vampires can return after being defeated, and their spells can damage, poison, or restore their own health. Concentrate attacks on one vampire at a time and finish weakened enemies again if they revive. Holy-element attacks, Raise, Curaga, Archer's Burial, and White Monk Exorcise are useful when permitted by the Law. Do not rely on one response if the active Law bans it; keep ordinary physical attacks and items available.
After victory, Ritz offers to join. Accept her only if you have an open clan slot. She is a special Human, also called Hume in some references, and her default job is Fencer. She can use the Viera job set, but she is not a normal Viera recruit. If you decline her or later dismiss her, watch the Pub during Kingmoon for Ritz's Offer, a dispatch-based fallback recruitment route.
- Clear Missions 018 and 048, then watch the Pubs for Old Friends.
- Complete Mission 107, Old Friends, when it becomes available during the campaign.
- Confirm Old Friends is recorded as cleared before finishing the story.
- Clear Royal Valley and create the starred story-clear save.
- Buy Mortal Snow after the story-clear file exists.
- Complete Mortal Snow at Lutia Pass.
- Use focused attacks and recovery options against the vampires while obeying the active Law.
- Keep a clan slot open and accept Ritz.
- If Ritz was declined or dismissed, check Kingmoon Pubs for Ritz's Offer.
3. Preserve The Hero Gaol for Lini
The Lini route starts with the early Cadoan sequence. Clear Mission 005, Twisted Flow, then clear Mission 006, Antilaws. The second visit to Cadoan triggers the automatic clan engagement associated with Antilaws, so resolve that engagement before treating the Cadoan side-mission route as finished.
After the required Cadoan progression, accept and complete Mission 062, Oasis Frogs, from Cadoan's Pub. Its reward includes The Hero Gaol mission item. Confirm the item in the Mission Items menu and keep it; do not sell, discard, trade, or consume it while pursuing Lini.
For a Lini attempt, carry The Hero Gaol as the mission item on an eligible battle or dispatch mission. Lini's recruitment result is chance-based, so make a working save before the mission resolves if you want to retry. Leave a clan slot open when the result is checked. If Lini does not appear, reload and try another eligible mission or another resolution of the same saved attempt.
Reading The Hero Gaol is not part of the immediate Lini recruitment procedure. The item can be read deliberately to open related Gaol content, including Twin Swords, but the safe Lini route is to retain it and carry it for the recruitment chance. Do not change its state until you have finished the Lini attempt.
- Clear Mission 005, Twisted Flow.
- Clear Mission 006, Antilaws.
- Resolve the automatic Cadoan engagement.
- Complete Mission 062, Oasis Frogs.
- Confirm The Hero Gaol is in Mission Items.
- Carry The Hero Gaol for an eligible mission or dispatch attempt.
- Keep an open clan slot when the result is checked.
- Read The Hero Gaol only when intentionally opening its related mission content.
4. Recruit Babus through Left Behind and With Babus
After the main story is clear, watch the Pub mission list for Left Behind. It is a ten-day dispatch mission, not a normal battle engagement. Select the dispatch unit or units required by the mission screen and let the dispatch resolve. Keep Left Behind separate from A Maiden's Cry; older GBA references consistently warn that resolving both chains together can interfere with the With Babus follow-up.
When Left Behind resolves, go directly to Muscadet. Entering Muscadet triggers the Babus and Doned scene. After the scene, remain in the immediate town sequence and enter a Pub to accept With Babus before advancing other mission chains or spending unnecessary time moving around the World Map.
With Babus takes place at Ambervale. Marche and Babus are required participants, leaving only two additional clan slots for the battle. Bring a healer and a unit that can attack from range or exploit safe positioning. The victory condition is to defeat Queen Remedi, not merely Ahriman or Floateye. The two eye monsters are support enemies, so control them as needed while directing your main damage toward Remedi and following the active Law.
After the battle and conversation, Babus offers to join. Keep a clan slot open before entering the mission so the offer can be accepted immediately. Babus is a special Nu Mou with the unique Runeseeker job and cannot be handled like an ordinary Nu Mou recruit. If he is declined or dismissed, Doned Here is the later fallback mission for another recruitment attempt.
- Load the starred story-clear file.
- Accept Left Behind from a Pub.
- Resolve Left Behind as a dispatch mission using the mission's listed dispatch requirements.
- Do not resolve Left Behind together with A Maiden's Cry.
- Travel directly to Muscadet after Left Behind resolves.
- Enter a Pub and accept With Babus before unnecessary World Map travel.
- Complete With Babus at Ambervale.
- Defeat Queen Remedi.
- Keep a clan slot open and accept Babus.
- Use Doned Here only as a fallback if Babus was declined or dismissed.
5. Track missions and protect mission items
Keep a written record of each optional mission's exact name, number if it has one, type, location, calendar period, current Law, mission-item requirement, dispatch duration, reward, and completion status. The Pub list mixes numbered missions with unnumbered recruitment, dispatch, repeat, engagement, and link content. A missing mission is not automatically a bug; check its prerequisite missions, calendar, location, and mission-item state first.
Treat mission items as progression resources. Before accepting a mission, check whether an item is consumed, merely carried into the mission, or read to unlock another mission. Save before changing a mission-item state. The Hero Gaol is especially important: keep it for Lini attempts, and read it only when you intentionally want to open its related Gaol content.
The original GBA release has 300 numbered missions, but this chapter does not provide an exhaustive 300-mission route and does not claim 100 percent completion. The Corrupt Judge missions are a separate long-term objective unlocked after the numbered mission campaign; they are not required for the Royal Valley ending, the completion star, Ritz, Babus, or Lini.
A safe starting order is: protect the starred clear file; verify that Old Friends was completed earlier; complete Mortal Snow and recruit Ritz; confirm The Hero Gaol is retained if pursuing Lini; complete Left Behind by dispatch; travel to Muscadet; accept With Babus immediately from the Pub; defeat Queen Remedi at Ambervale and recruit Babus; then resume other optional chains one at a time.
- The story-clear file has a star.
- Old Friends was cleared before the main-story ending.
- Mortal Snow was completed at Lutia Pass and Ritz was accepted, or Ritz's Offer remains available.
- The Hero Gaol remains in Mission Items for Lini attempts.
- Left Behind was completed as a dispatch mission.
- The Muscadet cutscene occurred after Left Behind.
- With Babus was accepted immediately after the Muscadet sequence.
- Queen Remedi was defeated and Babus was recruited.
- At least one clan slot remains available for future special recruits.
- Your notes distinguish numbered missions from unnumbered, dispatch, repeatable, recruitment, link, and Corrupt Judge content.
- A protected master save exists before continuing the optional campaign.
Before you move on
- The completed story file has a star.
- Reloading the file returns to the pre-Royal Valley World Map state while preserving the story-clear flag.
- Mission 005, Twisted Flow, is complete.
- Mission 006, Antilaws, is complete.
- The automatic Cadoan engagement was resolved before Mission 062.
- Mission 062, Oasis Frogs, was completed and The Hero Gaol is in Mission Items.
- Old Friends, Mission 107, was completed after its earlier requirements and before waiting for the postgame Ritz route.
- Royal Valley was cleared and the ending was viewed before Mortal Snow was purchased.
- Mortal Snow was completed at Lutia Pass and Ritz was accepted, or Ritz's Offer remains available after a declined or dismissed recruitment.
- Ritz is recorded as a special Human or Hume with the Fencer default job.
- Ritz's access to the Viera job set is understood without recording her as a Viera.
- Left Behind was completed as a dispatch mission.
- The Muscadet cutscene occurred after Left Behind resolved.
- With Babus was accepted immediately from a Pub after the Muscadet sequence.
- With Babus was cleared at Ambervale, Queen Remedi was defeated, and Babus was recruited.
- The Hero Gaol is retained for Lini attempts and was not discarded.
- A Maiden's Cry was kept separate from Left Behind.
- At least one clan slot remains available for future special recruits.
- A written record distinguishes numbered missions from unnumbered, repeatable, dispatch, recruitment, link, and Corrupt Judge content.
- A protected master save exists before continuing the optional campaign.
References for this chapter
- Final Fantasy Tactics Advance Guide and Walkthrough, GameFAQs, mission and recruitment details
- Final Fantasy Tactics Advance Guide and Walkthrough, GameFAQs, Lini and Cadoan mission route
- Final Fantasy Tactics Advance Mission Item FAQ, GameFAQs
- Final Fantasy Tactics Advance Thieves Guild Guide, GameFAQs, optional recruit timing
- Final Fantasy Tactics Advance Gameplay Guide, Neoseeker, Ritz fallback timing
- Final Fantasy Tactics Advance Instruction Manual, North American GBA edition
Optimization, Sample Clan Setups and Troubleshooting
Build a flexible clan instead of one permanent party. On the original Game Boy Advance release, Laws, terrain, enemy reactions, equipment, race-specific job access and each mission’s deployment limit all affect which units are useful. Keep trained reserves, inspect the current Law before deployment, re-equip after job changes and change the part of the formation that caused the failure. After Royal Valley, the clear flag is recorded on the starred file, but the restored file returns to the ordinary World Map at the checkpoint before Royal Valley. Optional missions, numbered missions and recruitment continue from that restored checkpoint; Royal Valley can be replayed later when the ending sequence must be shown again.
Maintain a flexible core roster
Keep more developed units than you can deploy at one time. A useful roster target includes two physical attackers, a dependable healer, a ranged attacker, a Black Mage or Summoner, and reserve units from the available races. This is a roster target rather than a fixed party. Deployment limits vary, and some missions make one role much more valuable than another.
Before accepting a difficult engagement, inspect the current Law and check every selected unit’s weapon, armor, action abilities, reaction ability, support ability and movement ability. A Law that bans the weapon or action your formation relies on is a reason to substitute a reserve, not to enter the battle hoping the restriction will be harmless.
When changing jobs, check the unit’s equipment immediately afterward. Incompatible equipment may be removed or leave the unit without a practical weapon or armor combination. Confirm that the new job has a legal weapon and a usable action set before entering another mission. Equipment teaches abilities through AP; once an ability is mastered, it remains available when the teaching equipment is removed. JP is a separate resource used for Judge-related battle actions such as combos and Totema summons. Do not confuse AP spending with JP spending.
A smaller trained core is easier to equip, but do not discard every reserve. Reserves let you answer weapon Laws, map elevation, enemy races, magic resistance and unusual victory conditions without rebuilding the clan from scratch.
- Keep a reserve healer and reserve damage dealer.
- Inspect the Law before selecting the active party.
- Check equipment immediately after every job change.
- Use the ability screen to confirm which item teaches the next desired ability.
- Distinguish AP for learning abilities from JP for Judge-related battle actions.
Balanced clan setup
Use a balanced formation for ordinary story missions and mixed enemy groups. A practical core is a Soldier or Knight as a front-line anchor, a White Mage, an Archer or Gunner, a Black Mage, and a flexible fifth role when the deployment limit allows it. Choose the fifth role only after checking the Law, terrain and enemy composition.
Give the front-line unit enough defense to survive an exposed turn, but do not send it forward alone. Let the ranged unit attack around obstacles and finish damaged enemies without entering unnecessary reaction range. Keep the healer behind the front line and preserve a route for retreat. Give the Black Mage both a dependable single-target spell and an area option. Area spells are useful against clusters, while single-target attacks are safer when allies are mixed with enemies or when the boss resists the element you prepared.
If the Law bans missile weapons, replace the Archer or Gunner rather than rebuilding the entire clan. A legal caster, physical attacker, item user or alternate ranged unit can fill the damage slot. If the mission allows only a small deployment, retain the healer and the two roles that directly answer the map’s main threat.
- Front line: Soldier, Knight or another durable legal attacker.
- Recovery: White Mage or another unit with healing and revival.
- Ranged pressure: Archer, Gunner or another legal long-range attacker.
- Magic: Black Mage, Summoner or another caster with a legal single-target option.
- Flexible slot: choose it after checking the Law, terrain and deployment limit.
Magic-heavy clan setup
Use a magic-heavy formation against clustered enemies, awkward elevation or targets that are difficult to reach with ordinary weapons. The role plan is a Black Mage, White Mage, Summoner, Red Mage or another hybrid caster, plus one physical or ranged attacker whenever the deployment limit allows it.
Do not make every unit dependent on area spells. A Law may prohibit the relevant action, an area may catch allies, and a boss may resist the element you prepared. Give at least one caster a dependable single-target spell, and keep a physical or ranged unit available for enemies that resist magic or for turns when the casters lack enough MP.
Develop this formation by mastering useful abilities rather than changing jobs constantly. Equip the item that teaches the desired ability, earn AP in missions, and switch only after the ability is mastered or the next job has a clear purpose. Keep defensive equipment on fragile casters; a damage increase is not useful if the unit cannot survive the enemy’s next turn. Spread the casters so one enemy area attack cannot disable the entire formation.
- Carry both single-target and area magic.
- Keep one non-magical damage source.
- Spread casters so one enemy area attack cannot reach all of them.
- Confirm that planned spells and status effects are legal.
- Use defensive equipment when survival is limiting damage output.
Speed-focused story setup
For a faster story route, use a compact group of well-equipped specialists: one durable physical attacker, one fast ranged or mobile unit, one White Mage or item-capable support unit, one high-damage caster or advanced job, and one unit chosen to answer the mission’s Law. If the deployment limit is lower, retain the healer and the two roles that directly counter the map’s enemies.
Prioritize abilities that make turns consistent: healing, revival, movement, reliable attacks and support abilities that help a unit reach its target. Take optional missions when they provide a needed weapon, ability, level or AP opportunity, but do not delay every story mission to master every available job.
Before each story engagement, replace outdated weapons and armor. If several enemy casters appear, prioritize speed and immediate disruption. If the map is narrow or crowded, use ranged attacks and status control instead of sending every melee unit into the same lane. This is a preparation style, not a requirement to skip optional content or gamble on an under-equipped clan.
- Equip the compact group before accepting the mission.
- Use optional missions to solve a specific weakness.
- Prioritize mobility, healing and reliable damage.
- Keep a legal replacement for any specialist affected by the Law.
- Reduce the group only after confirming that recovery remains possible.
Recover from a losing mission
Stop repeating the same attempt after the first clear failure. When the map allows it, return to the World Map, heal, inspect the current Law, visit shops and reorganize the formation. Identify the actual cause: insufficient damage, missing recovery, poor positioning, an illegal weapon or action, an enemy reaction ability, or a unit being too slow to act before danger reaches it.
Change one variable at a time. Re-equip the current jobs, replace a weak weapon, add a legal ranged attack, change a caster’s element, or give a support ability to the unit that acts early. If one unit is defeated before contributing, change that unit’s job or remove it from the active party instead of designing the whole clan around protecting it.
Use sub-missions, visible clan encounters and dispatch missions for a targeted purpose. Earn AP for a particular ability, obtain equipment that teaches the missing action, or raise a replacement unit to a usable level. If a recruit remains ineffective after several changes, replace the recruit. Clan members are resources, not mandatory permanent assignments.
If a battle is lost because of a Law violation, remove the banned action from the active plan, substitute legal equipment or postpone the engagement if it is not urgent. If the problem is an enemy reaction ability, attack from a safer distance, use status control, or select a legal ability that does not trigger the dangerous response. If the problem is a boss resistance, change damage type rather than repeating the same element.
After a failed mission, record one concrete correction before retrying: a weapon to buy, an ability to master, a level to gain, a unit to replace, a position to avoid or a Law-legal command to use. This prevents repeated attempts with no meaningful change.
- Recheck the Law, equipment and abilities before retrying.
- Set one concrete AP, equipment or level target.
- Use sub-missions for targeted preparation.
- Replace a persistently ineffective unit when necessary.
- Change positioning or damage type when enemy reactions or resistances are the real problem.
- Do not spend repeated attempts on an unchanged formation.
Confirm the ending and organize the completion route
Complete Mission 024, Royal Valley, and watch the ending sequence. When the game offers the post-clear save, create a separate starred save rather than overwriting your only preparation file. The starred file records that the main story has been cleared, but it restores the playable state to the ordinary World Map at the checkpoint before Royal Valley. It does not continue from a state immediately after the final battle, and equipment, levels or other changes made during the final sequence should not be treated as permanent postgame gains.
From that restored checkpoint, continue with optional missions, numbered missions and recruitment. This is the normal original-GBA post-clear structure. If you need to display the ending again, Royal Valley may have to be replayed from the restored checkpoint. Keep a second pre-Royal Valley save if you want a reliable fallback before repeating the final sequence.
For a broad completion run, keep separate records for Missions 001 through 300, unnumbered missions, repeatable missions, recruitment missions, Treasure Hunts, mission items, equipment, clan skills, monsters and job abilities. Only the numbered entries count toward the 300 numbered-mission goal. The Corrupt Judge missions are a separate post-completion sequence: Cleanup Time, No Arms Rule, Kissing Rule, Immunity Pass, No Full HP, No Literacy, Favoritism, No Answers, No Jumping and Decision Time.
After all 300 numbered missions are completed, visit Bervenia Palace and trigger the Corrupt Judge storyline. Cleanup Time then becomes available from the pub. Cid becomes recruitable after that mission. The remaining Corrupt Judge missions follow their own sequence, with Decision Time as the special closing mission. Track this content separately from the 300 numbered missions rather than adding it to the numbered total.
Track recruitment separately from mission totals. The five secret characters are Ezel, Babus, Ritz, Shara and Cid. The six semi-secret characters are Lini, Eldena, Cheney, Pallanza, Quinn and Littlevilli. Preserve the required mission items until their recruitment conditions are resolved, reserve clan space before each offer and mark one-time missions separately from repeatable recruitment missions. Missing Professor is one-time, while the Littlevilli mission cycle can be repeated after its prerequisites are met.
For the repeatable ending replay, Memories requires the mission item Stuffed Bear and requires Babus, Ritz, Shara and Cid not to be currently in the clan. Ezel may remain recruited. Accepting Memories temporarily marks Royal Valley as uncompleted, so the ending sequence must be completed again. Memories does not become a permanent numbered mission or a second permanent story state. Record it as a temporary replay separately from both the main story and the 300-mission goal.
- Royal Valley and the first ending have been completed.
- A starred clear save has been created.
- The starred file returns to the pre-Royal Valley World Map checkpoint.
- Optional missions, numbered missions and recruitment are continued from that restored checkpoint.
- A separate pre-Royal Valley save is retained if another ending replay is desired.
- The 300 numbered missions have a separate tracking list.
- The five secret characters and six semi-secret characters have separate recruitment entries.
- Mission items are preserved until their recruitment and mission dependencies are resolved.
- Bervenia Palace and Cleanup Time are completed after all 300 numbered missions.
- The ten Corrupt Judge missions are tracked separately from the numbered mission list.
- Babus, Ritz, Shara and Cid are absent from the clan before attempting Memories; Ezel may remain.
- Memories is treated as a temporary ending replay rather than a permanent postgame chapter.
- Separate records track unnumbered missions, repeatable missions, equipment, hunts, monsters, clan skills and job mastery.
Before you move on
- You can assemble balanced, magic-heavy and speed-focused formations from your available roster.
- Every deployed unit has legal equipment and a usable action set for the current Law.
- The selected formation fits the mission’s deployment limit.
- A failed mission leads to a specific correction involving equipment, job, ability, AP, positioning, damage type or timing.
- Royal Valley and the first ending have been completed, and the starred file returns to the pre-Royal Valley World Map checkpoint.
- Optional missions, numbered missions and recruitment can be continued from the restored checkpoint.
- A separate pre-Royal Valley save exists if you want to replay the ending without risking the clear file.
- The 300 numbered missions are tracked separately from unnumbered and repeatable content.
- The five secret characters and all six semi-secret characters are either recruited or deliberately tracked as outstanding goals.
- After all 300 numbered missions, Bervenia Palace triggers Cleanup Time and the remaining Corrupt Judge sequence can be followed.
- Cleanup Time through Decision Time are tracked separately, with Decision Time understood as a special final mission rather than a normal numbered entry.
- Before Memories, Babus, Ritz, Shara and Cid are not currently in the clan, while Ezel may remain.
- Your completion records separately track unnumbered missions, repeatable missions, mission items, rare equipment, Treasure Hunts, monsters, clan skills and job mastery.
Finishing up
Watch the ending after defeating Li-Grim in Mission 024, Royal Valley.
After the ending, use the game’s completion save behavior and load the file marked with the completion star. The loaded file restores the World Map state from before the Royal Valley sequence while preserving the story-clear flag, so Royal Valley can be replayed when the ending must be viewed again.
Confirm that the starred file loads at the World Map and that the Pub, Clan menu, Mission List and World Map remain available for post-story play.
For broad completion, track all 300 numbered missions separately from unnumbered recruitment, repeatable, link-related and Corrupt Judge missions.
Track AP-based ability mastery, unlocked jobs, learned abilities, rare equipment, Treasure Hunts, mission items, secret recruits and Clan skills as separate objectives.
Do not use a Job Rank screen as the completion test; inspect each unit's learned abilities and job availability instead.
Choose your next gameScreenshots & video
Game imagery for reference. Follow the written chapters above for the route and strategies.
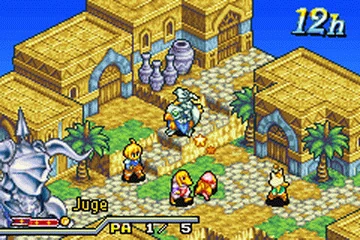

Sources & references
Our original guide draws on the references below. Check the edition at the top of this page before following controls or unlock requirements.
- Final Fantasy Tactics Advance Instruction Manual, North American GBA edition
- Final Fantasy Tactics Advance Walkthrough
- Final Fantasy Tactics Advance Walkthrough, GameFAQs
- Final Fantasy Tactics Advance Guide and Walkthrough, GameFAQs, Lini and Cadoan mission route
- Final Fantasy Tactics Advance - Controls - StrategyWiki
- Thesis Hunt Mission - Final Fantasy Tactics Advance Walkthrough
- Final Fantasy Tactics Advance Guide and Walkthrough, GameFAQs, mission and recruitment details
- Final Fantasy Tactics Advance Walkthrough, Thonky
- Final Fantasy Tactics Advance Gameplay Guide
- Final Fantasy Tactics Advance - Quest Guide, Mission 241 Lutia Pass
- Final Fantasy Tactics Advance — Job Class Guide
- Final Fantasy Tactics Advance — Ability FAQ, Game Boy Advance
- Guide to Dispatch Missions — Final Fantasy Tactics Advance
- Final Fantasy Tactics Advance — Gameplay, StrategyWiki
- Final Fantasy Tactics Advance Instruction Booklet, Game Boy Advance
- Final Fantasy Tactics Advance — Laws FAQ, GameFAQs
- Law system (Tactics Advance)
- Final Fantasy Tactics Advance — Laws, StrategyWiki
- Lutia Pass - Final Fantasy Wiki
- Antilaws Mission — Final Fantasy Tactics Advance Walkthrough — Thonky
- Hot Awakening Mission — Final Fantasy Tactics Advance Walkthrough — Thonky
- Pale Company Mission — Final Fantasy Tactics Advance Walkthrough — Thonky
- Jagd Hunt Mission — Final Fantasy Tactics Advance Walkthrough — Thonky
- Scouring Time Mission — Final Fantasy Tactics Advance Walkthrough — Thonky
- The Big Find Mission — Final Fantasy Tactics Advance Walkthrough — Thonky
- Desert Patrol Mission — Final Fantasy Tactics Advance Walkthrough — Thonky
- Materite Now Mission, Thonky
- Final Fantasy Tactics Advance Mission Item FAQ, GameFAQs
- Final Fantasy Tactics Advance Gameplay Guide, Neoseeker, Ritz fallback timing
- Final Fantasy Tactics Advance — Jobs, StrategyWiki
- Final Fantasy Tactics Advance — Blue Mage, StrategyWiki
- Final Fantasy Tactics Advance — Morpher, StrategyWiki
- Final Fantasy Tactics Advance — Mechanics Guide, GameFAQs
- Final Fantasy Tactics Advance statuses, Final Fantasy Wiki
- Final Fantasy Tactics Advance elements, Final Fantasy Wiki
- Present Day Mission, Thonky
- Hidden Vein Mission, Thonky
- To Ambervale Mission, Thonky
- Over the Hill Mission, Thonky
- Final Fantasy Tactics Advance Walkthrough: Royal Valley
- Final Fantasy Tactics Advance Guide and Walkthrough
- What Happens After You Fight Li-Grim - Final Fantasy Tactics Advance Forum
- Final Fantasy Tactics Advance Thieves Guild Guide, GameFAQs, optional recruit timing
About the game & collecting notes
- Platform
- Game Boy Advance
Follow the complete main campaign of Final Fantasy Tactics Advance on the original Game Boy Advance, from the opening missions through Royal Valley and the ending. Learn how to manage laws, jobs, abilities and your clan, then use the postgame chapter for optional recruitment and mission planning. The main-story route is complete; the optional section is not an exhaustive 300-mission catalog.
Darryl Polo
Darryl Polo loves tinkering with emulation and revisiting retro games. He enjoys exploring how old favorites play on different setups and sharing what he learns along the way. At Joking Joystick, he writes about the games, hardware, and small discoveries that keep the hobby fun.
Our editorial standardsFound a step that needs another look? Help us improve this guide.