
EarthBound (SNES, North America) — Complete Main Campaign Walkthrough
Step-by-step campaign guide for the North American Super Nintendo (SNES) release of EarthBound. This walkthrough leads you through recruiting every required party member, recording the eight Sanctuary melodies into the Sound Stone, reaching the game’s end sequence and defeating Giygas. It focuses on required progress, reliable landmarks, recovery tips, and clear completion checks.

Find a copy
EarthBound Super Nintendo Entertainment System
We may earn a commission if you buy through these links, at no extra cost to you. As an Amazon Associate I earn from qualifying purchases.
Opens retailer search results. Check the model, edition, seller, availability and current price before buying.
Before you begin
You are playing EarthBound on the Super Nintendo (North American release).
This guide walks you from the opening meteor crash through every required story beat to the final confrontation with Giygas.
It assumes you want to finish the main campaign (not a low-level challenge run) and focuses on the reliable route, required items and objectives, and how to recover when things go wrong.
Follow the chapters in order.
Each chapter lists precise subgoals and local landmarks so you can find where to go, which NPCs to talk to, which obstacles block progress, and what to do if a fight or puzzle goes wrong.
Save often, borrow or buy a Town Map early, and keep healing and revival items on hand; the guide flags optional detours and rewards so you won’t miss required progress.
Set yourself up for the run
Set text speed to fast in options to speed scrolling; learn combat and PSI menu navigation so you can act quickly in battles.
Confirm your save method and save state habit: call home at phones/telephones to save, and keep a recent saved file before entering towns or boss fights.
Keep a stock of healing/restorative items (meals, full-heal goods) and revives.
Early shops and mail-order services restock midgame; conserve high-value single-use items for guaranteed tougher fights.
Understand party roles: Ness is your primary PSI user; other characters (Paula, Jeff, Poo) bring unique strengths.
You will need all four by the late-game to complete required encounters.
When you reach the first town, get the Town Map (usually available from the library/reception NPC) to make navigation simpler; if you miss it you can still progress but travel will be harder.
If you intend to use mail-order or special shops later, mark in your head the towns that unlock those services (this guide notes them when required).
Do not sell major story items.
If you are unsure whether an item is plot-related, store it instead of selling it; the manual and in-game descriptions usually hint when an item is special.
Opening — Onett and the Sound Stone
Investigate the meteor, help Pokey find Picky, receive the Sound Stone from Buzz Buzz, obtain the Town Map, defeat Frank and Frankystein, use Mayor Pirkle’s key to reach Giant Step, defeat the Titanic Ant, and record the first Your Sanctuary melody.
Investigate the meteor and find Picky
After Ness wakes in his bedroom, go downstairs and speak with his mother. Follow her instruction to change out of your pajamas, then leave the house. Walk along the road toward the hill behind Ness’s home. Police officers initially block the direct route to the meteor, so approach the officer and continue through the opening conversation until Pokey asks Ness to help find Picky.
Follow Pokey around the meteor area. Picky is near the crash site, and the game will eventually begin the Starman Junior battle. Buzz Buzz assists during this fight, but Ness still needs to survive the battle. Use regular attacks and heal when necessary; do not waste valuable recovery items before the story has delivered the Sound Stone.
After the fight, follow Pokey and Picky back to their house. The house is near Ness’s home, on the route between the meteor hill and Onett. Enter with both boys so the family scene can begin.
- Picky has been found near the meteor.
- Starman Junior has been defeated.
- Pokey and Picky have been escorted home.
Receive the Sound Stone from Buzz Buzz
Inside Pokey’s house, watch the family scene until Buzz Buzz is knocked down. Walk up to Buzz Buzz and speak with him directly. He explains that Ness must visit eight Your Sanctuary locations and record their melodies in the Sound Stone.
Buzz Buzz identifies Giant Step near Onett as the first sanctuary and asks whether Ness understands. Choose Yes. He then offers to repeat the explanation. Choose No. After this exchange, Buzz Buzz gives Ness the Sound Stone. The item is required for recording the sanctuary melodies, so do not leave the house before confirming that the conversation has completed.
Once the scene changes to daytime, return to Ness’s house before entering town. Speak with Ness’s mother to restore the party’s condition, then use the telephone to call Dad and save. This free recovery is preferable to spending several healing items immediately before the Onett battles.
- You chose Yes when Buzz Buzz asked whether you understood the Giant Step instruction.
- You chose No when he offered to repeat the explanation.
- Buzz Buzz has given Ness the Sound Stone.
Borrow the Town Map and prepare in Onett
From Ness’s house, follow the path southeast toward the town. The Onett library is a major landmark on the way from Ness’s neighborhood into the central town area. Enter the library and speak with the receptionist at the front desk. She lends Ness a Town Map at no cost.
The Town Map is accessed from Ness’s normal item menu. Use it to review Onett and the connected roads whenever you lose your bearings. The important landmarks for this section are Ness’s house, the library, the Onett arcade, City Hall, the northern road, and the Traveling Entertainer’s Shack near the Giant Step route.
Visit the Onett Drugstore before challenging Frank. Buy an affordable bat or defensive upgrade if Ness can pay for it, and carry a modest supply of food. Do not spend all available money on expensive single-use recovery items. Ness’s mother remains the safest early recovery option, and Dad’s telephone provides a convenient save point.
- The Town Map has been borrowed from the Onett library receptionist.
- You can open the map from Ness’s item menu.
- Ness has reasonable equipment and several basic healing items.
Defeat the Sharks, Frank, and Frankystein
Go to the arcade in the lower part of Onett. The Sharks are the local gang blocking progress toward Giant Step. Fight through the gang members in and around the arcade, then challenge Frank. Ness’s regular attack is dependable, while PSI Rockin can shorten dangerous encounters if Ness has learned it. Keep enough PP for Lifeup rather than spending every point on minor battles.
Frank is followed by Frankystein, so do not assume the first victory ends the sequence. Continue the battle against the robot, healing Ness whenever his HP becomes unsafe. If Ness is badly injured after the fights, return home before visiting City Hall.
After both enemies are defeated, go to City Hall and speak with Mayor Pirkle. He gives Ness the key to the Traveling Entertainer’s Shack. This key is the practical requirement for opening the path to Giant Step; defeating Frank alone is not enough.
- The Sharks and Frank have been defeated.
- Frankystein has also been defeated.
- Mayor Pirkle has given Ness the Traveling Entertainer’s Shack key.
Open the Giant Step route and cross the cave
Leave City Hall and travel north toward the road that leads out of Onett. Use the key at the Traveling Entertainer’s Shack near the route to Giant Step. The opened path leads into the cave system. If the route is still blocked, confirm that both Frankystein and the mayor conversation are complete, then check the shack rather than repeatedly trying the police road.
Inside the cave, follow the connected rooms and ropes upward. The route includes several narrow passages and enemies that can become dangerous when they attack in groups. Fight enough to keep Ness capable of surviving the approach, but conserve PSI for healing and for the boss. Pick up useful presents when they are directly along the route, but do not turn the cave into a long detour if Ness is already carrying a full inventory.
Before the final ascent, make sure Ness has enough HP and PP for the Titanic Ant. If necessary, retreat to Onett and recover at home. Dad’s telephone can be used at an available save point before the deepest section.
- The Traveling Entertainer’s Shack has been opened with the mayor’s key.
- Ness has entered the Giant Step cave.
- Ness is healed and has PP reserved for Lifeup.
Defeat the Titanic Ant
Continue through the cave until you reach the shining spot at the end of the route. Examine it to begin the Titanic Ant battle. The boss is accompanied by two Black Antoids. The Antoids can use Lifeup to restore the boss, so remove them when they are prolonging the fight or use PSI Rockin when it can damage several targets efficiently.
Use PSI Rockin while it is safe and keep Ness’s HP high with Lifeup or food. The Titanic Ant can use Magnet Alpha to drain PP and Shield Alpha to protect itself. When the boss has a shield active, rely on Ness’s physical attack instead of throwing PSI into the shield. Continue checking Ness’s HP because a strong attack followed by a missed recovery can end the battle quickly.
Do not spend every PP point on the cave enemies before reaching the shining spot. If Ness loses, reload the latest save or return after recovering and improving equipment. The route does not require a different puzzle solution after a defeat.
- The two Black Antoids have been defeated or are no longer sustaining the boss.
- The Titanic Ant has been defeated.
- Ness can pass through the opening behind the former boss position.
Record the Giant Step melody and return to Onett
After the Titanic Ant is defeated, walk through the opening behind it and exit the cave into the Giant Step area. Approach the large footprint. The Sound Stone records the Giant Step melody, and Ness receives the sanctuary recovery effect during the sequence. Defeating the Titanic Ant alone does not complete this objective; Ness must reach the footprint outside the cave.
Return through the cave. The enemies in the Giant Step area flee after the sanctuary guardian has been defeated, making the return trip safer. At the cave exit, an officer directs Ness toward the Onett Police Station. Follow that instruction and return to town rather than trying to head directly south.
The Police Station is the next required Onett objective. The southern road toward Twoson becomes relevant after the police-station sequence, so finish the confrontation there before treating Twoson as accessible. Keep the Town Map and Sound Stone for the next chapter.
- Ness has reached the large footprint at Giant Step.
- The Sound Stone has recorded the Giant Step melody.
- Ness has returned to Onett and has been directed to the Police Station.
- The next objective is the Onett Police Station sequence before continuing toward Twoson.
Before you move on
- Buzz Buzz has given Ness the Sound Stone after the Yes-then-No dialog sequence.
- The Town Map has been borrowed from the Onett library receptionist and can be opened from the item menu.
- The Sharks, Frank, and Frankystein have been defeated.
- Mayor Pirkle has given Ness the Traveling Entertainer’s Shack key.
- Ness has entered Giant Step and defeated the Titanic Ant with its Black Antoid escorts.
- Ness has walked to the large footprint and recorded the Giant Step melody in the Sound Stone.
- Ness has returned to Onett and is ready for the Police Station sequence leading toward Twoson.
Twoson — Recruiting Paula and Happy Happy Village
Use Apple Kid's invention to cross Peaceful Rest Valley, rescue Paula from Happy Happy Village, defeat Mr. Carpainter, immediately clear Lilliput Steps and record its melody, then return to Twoson to reunite Paula with her parents and open the Runaway Five bus route to Threed.
1. Prepare in Twoson and investigate Paula's disappearance
After arriving in Twoson, heal at the Hospital or Hotel and use the Drugstore for ordinary supplies. Polestar Preschool, which is also Paula's home, is near the center of town. Speak with Paula's parents there. You can also visit Everdred in the rear of Burglin Park and talk to him on his roof. Fighting Everdred is optional at this point; whether you defeat him or not, the investigation eventually points Ness toward Peaceful Rest Valley and Paula's disappearance.
Before leaving town, keep at least $200 available for Apple Kid and carry inexpensive food that you are willing to give away. A Ketchup Packet from Burglin Park is a cheap choice if you have no spare food. Consider buying a Copper Bracelet from the Burglin Park merchant if Ness needs more defense. The bicycle is optional and becomes impractical once Ness travels with companions, so healing supplies are a better priority.
Enter Apple Kid's house south of Polestar Preschool and collect the Broken Machine from the trash can if you want the optional Jeff repair later. It is easier to take it now than to arrange a return trip after the next story sequence. Leave at least one inventory space open for key items.
- Paula's parents have been visited at Polestar Preschool.
- Ness has food to give Apple Kid and at least $200.
- Ness has healing items and, if needed, a Copper Bracelet.
- The Broken Machine has been collected if you want the optional later repair.
- At least one inventory slot is free.
2. Sponsor Apple Kid and obtain the Pencil Eraser
Go to Apple Kid's house south of the preschool. Give him a food item when he asks, then agree to provide $200. Afterward, speak with his mouse to receive the Receiver Phone. Keep the phone in Ness's inventory because Apple Kid uses it to contact him.
Travel east from Twoson, pass the bus station, and enter Peaceful Rest Valley through the cave. Continue through the valley until the large metallic pencil statue blocks the northern route. Check the statue if you want, but it cannot be removed yet. Once Ness has displayed the obstacle, turn around and return to Twoson.
Apple Kid will call Ness through the Receiver Phone. Go to Burglin Park and find Apple Kid near the banana seller. Speak with him there to receive the Pencil Eraser. Return to Peaceful Rest Valley and use the Pencil Eraser on the statue. The route beyond the statue is now open.
- Apple Kid has received food and $200.
- The Receiver Phone is in Ness's inventory.
- The pencil statue in Peaceful Rest Valley has been encountered.
- Apple Kid in Burglin Park has given Ness the Pencil Eraser.
- The Pencil Eraser has been used on the statue.
3. Reach Happy Happy Village and collect the Franklin Badge
After erasing the statue, follow the opened path through Peaceful Rest Valley. Cross the bridges and continue east until the cave leading to Happy Happy Village. Avoid unnecessary battles if Ness is low on HP, since some enemies can inflict mushroomization or other status problems. If necessary, return to the Twoson Hospital for treatment before continuing.
In Happy Happy Village, the Hotel is in the southwest and the Drugstore is in the northeast. The Hotel initially charges $50, while the Drugstore provides an ATM, equipment, and supplies. Heal before entering the village's large blue headquarters.
To reach Paula, enter the cave to the left of the Drugstore. Follow it to the cabin where she is imprisoned. Speak with Paula through the bars. She gives Ness the Franklin Badge, but she cannot join until Mr. Carpainter is defeated. When you leave, Pokey sends enemies after Ness. Defeat them, then return to the village.
Keep the Franklin Badge in Ness's inventory. Do not sell, discard, or store it before the Mr. Carpainter battle. It reflects his lightning attacks and is required to survive the encounter.
- Happy Happy Village has been reached through Peaceful Rest Valley.
- Ness has healed and resupplied.
- Paula has given Ness the Franklin Badge.
- The Franklin Badge remains in Ness's inventory.
- The enemies outside Paula's cabin have been defeated.
4. Enter the headquarters and defeat Mr. Carpainter
Enter the large headquarters building in the center of Happy Happy Village. The cultists appear to block the first room, but some move differently from the others. Talk to the moving cultists to make them step aside; several will start battles. Work toward the left side of the room and use the door there, then go upstairs.
Speak with Mr. Carpainter and refuse his offer to join the Happy-Happy cult. The lightning he summons is reflected by the Franklin Badge, beginning the battle. Use PSI Rockin when Ness has enough PP, and use regular attacks while reserving PP for healing. If Mr. Carpainter raises a PSI shield, stop relying on PSI attacks and use physical attacks until the shield is gone. Paralysis can work, but it is not guaranteed.
Cast Lifeup whenever Ness's HP becomes unsafe. If you need to retry, heal at the Hotel before returning to the headquarters. After the battle, Mr. Carpainter gives Ness the Key to the Cabin. Leave the headquarters and return to Paula's cabin through the cave.
- The moving cultists have opened the headquarters route.
- Ness has refused Mr. Carpainter's offer.
- Mr. Carpainter has been defeated.
- The Key to the Cabin is in Ness's inventory.
5. Rescue Paula and prepare for Lilliput Steps
Use the Key to the Cabin on Paula's cell. Paula joins the party immediately; no separate inn stay or additional recruitment conversation is required. She joins at level 1 and is fragile, so protect her from avoidable encounters. Her Teddy Bear absorbs some attacks until it is destroyed.
Return to Happy Happy Village and heal at the Hotel. Once the cult has been stopped, the Hotel can be used for free. Visit the Drugstore to buy Paula a Ribbon rather than a Holmes Hat. Equip any suitable spare armor or other equipment if you have it. Paula's Pray command has random effects, and her offensive PSI becomes increasingly valuable as she gains levels.
Do not return to Twoson yet. The cave east of Happy Happy Village leads to Lilliput Steps, the second Your Sanctuary location. Clear it now, before taking the Runaway Five bus to Threed, so the second melody is recorded in the intended order.
- Paula is following Ness on the overworld.
- Paula's equipment has been checked and upgraded where practical.
- The party has healed in Happy Happy Village.
- The cave east of town has been identified as the Lilliput Steps route.
6. Clear Lilliput Steps and record the second melody
From Happy Happy Village, leave through the eastern side and enter the cave. Paula is very weak at first, so fight nearby enemies cautiously and use the early section to raise her level if necessary. A conservative target is around level 8 before facing the boss. If Paula is repeatedly knocked unconscious, retreat to the village, heal, and try again rather than spending all revival items.
The cave begins with a mostly direct path, then divides. Take the southern branch first to collect the Great Charm. Equip it on Ness if useful; it protects against paralysis and improves speed. Return to the split, take the eastern route, and continue through the cave. You can collect the Croissant on the way if you have space. Follow the path around the water, climb the slope, and continue north. Near the pool, take the path south of the water and collect the PSI Caramel if you want an extra PP recovery item. Continue east to reach Mondo Mole.
At the start of the Mondo Mole battle, try Paralysis. Use PSI Fire when the boss is not protected by a psychic shield, and switch to physical attacks when the shield is active. Keep Ness's HP safe with Lifeup and reserve enough PP for healing. Paula may fall unconscious during this fight; if that happens, Ness can still finish the battle, and the Sanctuary recovery afterward restores the party.
After Mondo Mole is defeated, walk through the doorway beyond the battle area. Approach the small footprints at the Sanctuary site and let the Sound Stone record the Lilliput Steps melody. Wait for the melody sequence and the party recovery to finish before leaving. This is the required verification that the second Sanctuary has been recorded.
- Paula has been raised enough to survive the cave more reliably.
- The Great Charm has been collected if desired.
- Mondo Mole has been defeated.
- The party has passed through the doorway beyond the boss.
- The Sound Stone has recorded the Lilliput Steps melody.
- The Sanctuary recovery sequence has finished.
7. Return to Twoson and unlock the route to Threed
Leave Lilliput Steps through the cave and return west through Happy Happy Village and Peaceful Rest Valley. The bridge that was broken earlier is now repaired, making the return route easier. In Twoson, go to Polestar Preschool and speak with Paula's mother. Try to go upstairs toward Paula's room; Paula's father then returns. Speak with both parents until the reunion scene is complete. Paula's mother gives Ness a Hand-Aid that fully restores one person's HP. Store it with Escargo Express if you do not need it immediately.
After leaving the preschool, a messenger directs Ness to Everdred. If the messenger does not appear, re-enter the preschool and speak with both of Paula's parents again. Go to Burglin Park and speak with Everdred to receive the Wad of Bills. This is a key item worth $10,000 and is not normal spendable money.
Go to the Chaos Theater. Speak with the Runaway Five members outside the theater to receive the Backstage Pass. Enter the theater, use the pass, and follow the girl in the light-colored dress backstage. Speak with the band, leave the dressing room, and watch their performance. After the show, return to the lobby, speak with the ticket girl, then enter the manager's office on the left. Stand near Mr. Poochyfud and use the Wad of Bills from Ness's inventory.
The contract is cleared and the Runaway Five move outside to their bus. Talk to Gorgeous, the man standing outside, then approach the bus door to board. The bus is the required way through the haunted tunnel to Threed at this stage; walking through the tunnel sends the party back to Twoson. Do not board until the Lilliput Steps melody has been recorded and any Twoson errands, especially collecting the Broken Machine, are complete.
- Paula's parents have completed the reunion scene.
- The Hand-Aid has been collected or stored.
- Everdred has given Ness the Wad of Bills.
- The Runaway Five have given Ness the Backstage Pass.
- The Runaway Five performance has been watched.
- The Wad of Bills has been used on Mr. Poochyfud's contract.
- The party has boarded the Runaway Five bus to Threed.
Before you move on
- The Pencil Eraser has been obtained and used on the Peaceful Rest Valley pencil statue.
- Happy Happy Village has been reached.
- Paula has given Ness the Franklin Badge, and the badge was retained through the Mr. Carpainter battle.
- Mr. Carpainter has been defeated and the Key to the Cabin has been used.
- Paula is permanently in the party.
- Mondo Mole has been defeated in the cave east of Happy Happy Village.
- The party has passed beyond Mondo Mole and the Sound Stone has recorded the Lilliput Steps melody.
- Paula's parents have completed their reunion scene at Polestar Preschool.
- Everdred's Wad of Bills has been obtained and used to clear the Runaway Five's theater contract.
- The Runaway Five bus has carried Ness and Paula through the haunted tunnel to Threed.
- The Sound Stone has visibly completed the second melody recording before the party leaves the Twoson region.
References for this chapter
Threed — Clearing the Night Terror and Moving On
After Jeff crashes the Sky Runner into the prison cell, free Ness and Paula, defeat the Boogey Tent, trap Threed’s zombies with Zombie Paper, and cross the graveyard passage to Saturn Valley. Use the waterfall entrance to reach Belch Base, defeat Master Belch with the Jar of Fly Honey, then visit the newly opened northeast cave and defeat Trillionage Sprout. Approach the Milky Well to record its Sanctuary melody before returning through the graveyard passage and taking the bus toward Dusty Dunes Desert.
Free Ness and Paula and prepare Jeff
The Sky Runner crashes into the prison cell in Threed and Jeff joins the party. Open Jeff’s inventory, select the Bad Key Machine, and use it on the cell door. Climb the ladder and leave through the upper exit into the graveyard area.
Return to Threed and use the drug store to buy Jeff better equipment if you can afford it. The soldier behind the pizza place can also provide useful supplies. If you brought the Broken Machine from Apple Kid’s house, keep it in Jeff’s inventory and stay at a hotel later so Jeff can repair it. This repair is optional for the chapter, but it can produce a useful Jeff item.
Heal before starting the town sequence. You do not need to fight Boogey Tent again later: the required Boogey Tent battle occurs only during this initial Threed objective.
- Jeff has joined the party.
- The Bad Key Machine has opened the prison cell.
- The party has healed and Jeff has usable equipment.
- The Jar of Fly Honey has not yet been obtained, so leave room for it in the inventory if possible.
Defeat Boogey Tent and collect the Jar of Fly Honey
Enter the large tent in the center of Threed and speak with the people inside. Then walk to the southern part of town and talk to the dirty child near the sign. He explains that Fly Honey is associated with the evil tent to the south.
Go to the southern tent and approach its entrance to begin the Boogey Tent battle. Paula’s PSI Fire is effective, while Ness can attack, heal, or use PSI Rockin if available. Jeff should use Bottle Rockets if you bought any. Boogey Tent can inflict crying, feeling strange, or temporary immobilization, so restore HP promptly when Ness or Paula is in danger.
When Boogey Tent is defeated, the zombies guarding a nearby trash can scatter. Examine that trash can and take the Jar of Fly Honey. Do not sell, discard, or use it before Master Belch. It is the simplest reliable way to make that later boss battle safe.
- Boogey Tent has been defeated once.
- The Jar of Fly Honey is in the inventory.
- The party is healed before beginning the Zombie Paper sequence.
Trigger Zombie Paper and clear the town route
Walk along Threed’s main street, especially the road that passes the hotel. After the Jar of Fly Honey has been collected, Apple Kid contacts the party through the Receiver Phone and explains his Zombie Paper invention. Continue walking around the main street until the Mach Pizza delivery person arrives and gives you the Zombie Paper.
Enter the central tent in Threed and use Zombie Paper from the inventory while inside. Then stay at the hotel. During the night, the zombies are drawn into the tent and the route through the graveyard becomes available.
If the phone call or delivery does not occur, keep walking along the main street near the hotel rather than repeatedly entering unrelated buildings. After receiving the paper, confirm that it was used inside the tent and spend the night. The graveyard passage will not open merely because Boogey Tent was defeated.
- Apple Kid has called about Zombie Paper.
- The Mach Pizza delivery person has delivered Zombie Paper.
- Zombie Paper has been used inside the central tent.
- The party has stayed at the hotel and the zombies are trapped.
Cross the graveyard passage and defeat Mini Barf
Go to the northwest graveyard. From its northwest corner, move toward the northeast side to find the ladder leading into the secret passage. The passage is mostly linear; continue east through the underground route.
The passage contains No Good Flies, Urban Zombies, Zombie Dogs, and Zombie Possessors. Flash and Fire are useful against several of the undead enemies, and Zombie Possessors should be defeated quickly because they can call additional ghosts. If a small ghost possesses a character, do not spend valuable items trying to cure it immediately; the effect can be handled after the passage.
In the first large room, inspect the casket to obtain a Skip Sandwich DX. In the second large room, inspect the casket for a Silver Bracelet. Both are optional, but the bracelet is a useful defense upgrade. Keep some Bottle Rockets, bombs, and Paula’s PSI available for Mini Barf.
Mini Barf waits near the eastern end of the passage. It is weak to Fire and can exhale stinky breath that makes the party cry. Crying reduces the accuracy of physical attacks, so switch to PSI, bombs, and Bottle Rockets when the party is crying. Jeff can use items to heal Ness or Paula if Ness is busy attacking. After Mini Barf is defeated, climb the ladder to reach the Grapefruit Falls side of the route.
- The graveyard secret passage has been entered.
- The optional Skip Sandwich DX and Silver Bracelet have been collected if desired.
- Mini Barf has been defeated.
- The party has reached the Grapefruit Falls area.
Reach Saturn Valley and enter Belch Base
Continue from Grapefruit Falls to Saturn Valley. Speak with the Mr. Saturn who explains the way to Master Belch’s base. Saturn Valley provides an important recovery hub: use the hotel, hot springs, shop, item storage, and telephone before entering the base.
From Saturn Valley, go back through the short cave and travel north to the waterfall. Walk through the falling water, then move left until you cannot continue and try to walk north. A guard will ask for the password. Do not press buttons or walk away while the password conversation is active. After the wait, the guard allows the party into Belch Base. On later visits, the guard lets you pass without repeating the full wait.
Bring the Jar of Fly Honey into the base. There is a Magic Butterfly room inside, and you can use it to restore HP and PP before the boss. The base also contains optional supplies in trash cans, including a Bomb, an IQ Capsule, a Broken Laser, a Vital Capsule, an HP-Sucker, and a Calorie Stick. Collect them only if you have room and can do so without exhausting the party.
- The Saturn Valley Mr. Saturn has explained the base entrance.
- The waterfall guard has allowed entry.
- The Jar of Fly Honey is still in the inventory.
- The party has a plan for restoring HP and PP inside the base.
Clear Belch Base and defeat Master Belch
From the Belch Base entrance, explore the side rooms if you want the optional items, then follow the main route through the ladders and conveyor-belt area. Foppys may appear in groups and can provide useful experience. Slimy Little Piles are vulnerable to Paralysis, so PSI Paralysis is a practical way to reduce their threat.
Continue west from the conveyor-belt area. Use the Magic Butterfly room to recover before the final approach, then defeat or pass the Slimy Little Pile blocking the route and enter the room beyond it. Talk to Master Belch to start the battle.
Immediately use the Jar of Fly Honey on Master Belch. The honey distracts him and greatly reduces his attacks. Ness can attack or heal, Paula can use her strongest practical PSI, and Jeff should use Bottle Rockets or other high-damage items. If Belch inflicts nausea, use Healing β or a suitable recovery item. Do not attempt to win by ordinary attacks alone if you still have the Jar of Fly Honey available.
After Master Belch is defeated, take the door behind him back to Saturn Valley. Sit in the hot springs to remove the party’s filth and cure status problems. Then speak with the Mr. Saturn beside the coffee table and agree to drink the coffee. The Jar of Fly Honey is no longer needed after this boss, so it may be stored or discarded once you are safely back in Saturn Valley.
- The required Belch Base route is complete.
- Master Belch has been defeated with the Jar of Fly Honey.
- The party has returned to Saturn Valley.
- The hot springs and coffee-table conversation have been completed.
Defeat Trillionage Sprout and record the Milky Well melody
After Master Belch is defeated, the previously blocked area northeast of Saturn Valley opens. Heal at the hotel or hot springs before entering. The cave’s enemies can poison or mushroomize party members, so retreat to the hot springs if a status problem threatens the party.
From the newly accessible area, enter the northeast cave and travel east. When the path exits outdoors, go south, then enter the next cave to the east. A gift box contains a Coin of Slumber. Continue southeast to reach Trillionage Sprout.
Trillionage Sprout is the required guardian for the Milky Well Sanctuary melody. Defeat the Tough Mobile Sprouts first so they cannot continue adding pressure, then concentrate on Trillionage Sprout. Fire-based attacks are effective. Keep a Horn of Life, Secret Herb, or Cup of Lifenoodles available because Trillionage Sprout can Diamondize party members. Diamondization cannot be removed by ordinary healing, and if every party member is Diamondized the battle ends in a Game Over. Save before entering the cave or boss area if possible.
After Trillionage Sprout is defeated, go through the door behind it and walk up to the Milky Well. The Sound Stone records the melody when Ness reaches the Sanctuary location. This melody is required for the full eight-Sanctuary progression, so do not skip the guardian or leave before checking the Milky Well.
- The northeast Saturn Valley cave has been opened after Master Belch’s defeat.
- Trillionage Sprout has been defeated.
- The Milky Well melody has been recorded in the Sound Stone.
- The party has returned safely to Saturn Valley or is ready to retrace the route.
Return to Threed and continue toward Dusty Dunes Desert
Leave Saturn Valley through the Grapefruit Falls route, descend through the graveyard passage, and return to Threed. The passage remains usable because the zombies are trapped in the central tent and the local obstacle has been cleared.
Heal and resupply in Threed if necessary. The next destination is Dusty Dunes Desert and then Fourside. Use the bus stop sign south of the Threed hotel to take the bus east when it is available. You can also proceed through the eastern tunnel on foot, although the bus is the safer and faster choice for normal progression.
The Threed chapter is complete when Jeff has joined, the town route has been cleared, Master Belch has been defeated, the Milky Well melody has been recorded, and the party can leave through the eastern route toward the desert.
- The party has returned from Saturn Valley through the graveyard passage.
- The Milky Well melody is recorded.
- The eastern route toward Dusty Dunes Desert is open.
- The party is healed and ready to begin the desert and Fourside section.
Before you move on
- Jeff has joined the party and the prison-cell escape is complete.
- Boogey Tent has been defeated once and the Jar of Fly Honey has been collected.
- Zombie Paper has been placed inside the central tent and the party has stayed at the hotel.
- Mini Barf has been defeated and the graveyard passage to Grapefruit Falls is open.
- Master Belch has been defeated using the Jar of Fly Honey strategy.
- The Saturn Valley hot springs and coffee-table events have been completed.
- Trillionage Sprout has been defeated in the northeast Saturn Valley cave.
- The Sound Stone has recorded the Milky Well melody.
- The party has returned to Threed and can travel toward Dusty Dunes Desert and Fourside.
References for this chapter
- Nintendo Player’s Guide: EarthBound complete guide
- Jeff Comes to the Rescue in Threed — EarthBound Walkthrough
- Use the Zombie Paper in Threed — EarthBound Walkthrough
- Belch Base — EarthBound Walkthrough
- EarthBound Milky Well — EarthBound Walkthrough
- List of Your Sanctuary Locations — EarthBound Walkthrough
Fourside and the Desert: City Hazards and Buyable Fixes
Cross the Dusty Dunes Desert, clear the gold mine, obtain the Diamond, release the Runaway Five from their second contract, and prepare Ness and Jeff for the Fourside Department Store blackout. After defeating the Department Store Spook, enter Moonside through Jackie’s Café, destroy the Evil Mani-Mani Statue, recover the Trout-Flavored Yogurt Machine, rescue Paula from the Monotoli Building, and leave Fourside with the Runaway Five for the return to Threed.
Finish the Dusty Dunes gold mine and obtain the Diamond
If the Dusty Dunes gold mine is still active, return to the miner’s shack from the eastern desert route. Speak with the miner outside before entering. Inside the mine, defeat all five Guardian Diggers. The first is reached by going north from the entrance, down the ladder, and then left into the northern alcove. The remaining four are spread through the branches beyond the Exit Mouse area. Use the Exit Mouse when you need to leave for healing, but remember that you can carry only one at a time.
Guardian Diggers use Shield α, so Jeff should use Shield Killer if he has it. Ness can use Flash and other strong PSI, while Jeff can use Bottle Rockets after the shield is removed. Once all five Guardian Diggers are defeated, the mine’s music changes and its ordinary enemies disappear. You can then collect any missed gift-box items without further random battles.
Leave the mine and speak with the miner standing between the entrance and his house. Return toward Fourside through the eastern desert route. The miner’s brother arrives in an excavator and gives Ness the Diamond. If he does not appear, return to the mine entrance, speak to the miner again, leave the area, and cross the route toward Fourside once more.
The Contact Lens found in the desert is unrelated to the Diamond. Taking it to the person on the second floor of the Fourside Bakery produces Dirty Socks, an optional battle item. It is not required for the Runaway Five or Monotoli sequences.
- Defeat all five Guardian Diggers.
- Speak with the miner outside after clearing the mine.
- Return toward Fourside and receive the Diamond from the miner’s brother.
- Treat the Contact Lens and Dirty Socks exchange as optional.
Identify Fourside’s recovery and shopping landmarks
Fourside’s hospital, hotel, drug store, phone, and ATM are the safest places to prepare. The Topolla Theater is in the northeast portion of the city, Jackie’s Café is in the northwest, and the Department Store stands near the center-east area. The Monotoli Building is another major landmark, but it does not become the active rescue route immediately after the Department Store Spook.
Visit the northeast junk shop before committing to the next sequence. The Broken Gadget sold there is optional. Jeff can repair it overnight after his IQ reaches 34 or higher, turning it into a stronger weapon. Buying it now is useful only if you intend to keep it until that repair becomes available.
You may also take the bus from the desert-side drug store or walk through the eastern tunnel. The desert route contains optional equipment and the Contact Lens, but none of those items is required once the Diamond has been obtained. Heal, save, and organize inventory in Fourside before entering the theater.
- Locate the hospital, hotel, drug store, phone, and ATM.
- Find the Topolla Theater, Department Store, Jackie’s Café, and Monotoli Building.
- Buy the Broken Gadget only if you want Jeff’s later repair weapon.
- Save before beginning the theater sequence.
Release the Runaway Five at Topolla Theater
Buy a theater ticket and enter Miss Fake’s office. Stand behind her and use the Diamond from Ness’s inventory. This destroys the Runaway Five’s fraudulent contract. The band enters the office and thanks you after the contract is torn up.
Go into the theater and watch the Runaway Five’s final Fourside performance. The performance is the required follow-up event that reopens the Department Store. Venus’s performance afterward is optional and has no effect on the main route.
When the show is finished, leave the theater and confirm that the Department Store is operating again. Do not proceed directly to the Monotoli Building; the next mandatory event begins at the Department Store.
- Use the Diamond on Miss Fake from behind her.
- Watch the Runaway Five’s final performance.
- Confirm that the Department Store has reopened.
Resupply before Paula is kidnapped
Paula will be unavailable during the next sequence, so move any food, Bottle Rockets, revival items, defensive badges, and other supplies you want to use into Ness’s or Jeff’s inventories. You can also call Escargo Express. Do not remove Paula’s weapon or armor merely to create space; those remain with her. If Paula is carrying the Franklin Badge, move it to Ness or Jeff before entering the Department Store.
Enter the reopened Department Store only after you are ready to shop. Once you ride the first elevator upward, finish your shopping before proceeding back toward the exit. The first-floor phone and ATM remain available, but the story blackout is triggered when you attempt to leave after exploring the upper floors.
The arms dealer in the Department Store sells Big Bottle Rockets and may sell the Hyper Beam for Jeff. Buy the Hyper Beam only if it is stronger than Jeff’s current weapon. The toy shop sells Teddy Bears, which can absorb attacks aimed at Ness. Check the armor counters for upgrades for Ness and Jeff.
Avoid using the Trick Yo-Yo as a primary weapon if you have a reliable alternative because its accuracy is poor. Save at least two or three Big Bottle Rockets for the Department Store Spook. Buying a Bottle Rocket supply is more important than filling every inventory slot with minor equipment.
- Move useful supplies out of Paula’s inventory.
- Make the Franklin Badge available to Ness or Jeff.
- Buy Big Bottle Rockets and check Jeff’s weapon options.
- Check Ness’s and Jeff’s armor counters.
- Leave free inventory space before triggering the blackout.
Survive the Department Store blackout
After shopping, try to leave the Department Store. Paula is kidnapped during the blackout, and a loudspeaker directs Ness and Jeff to the office on the upper floor. The party now consists of only Ness and Jeff, so avoid unnecessary encounters and use Big Bottle Rockets when a group is likely to overwhelm you.
The main enemies in this section include Musicas, Mystical Records, and Scalding Coffee Cups. Against mixed groups, defeat Scalding Coffee Cups first, then Mystical Records, then Musicas. Use Ness’s Lifeup freely when damage is accumulating. Spending PSI or a recovery item now is better than reaching the boss with an injured party.
Follow the loudspeaker’s directions to the office on the top floor. Talk to the alien there to begin the Department Store Spook battle. Ness should open with his strongest available PSI Rockin while Jeff uses a Big Bottle Rocket. Continue with Big Bottle Rockets if the boss survives. Ness can use Flash or Sleep as supplementary options, but retain enough PP for Lifeup.
The boss can use PSI Freeze, Brainshock, Lifeup, and Magnet. A Teddy Bear may reduce physical damage, but it will not prevent every threat. If one character falls, use a revival item rather than attempting to finish the fight with only one member unless the boss is nearly defeated.
- Trigger the blackout only after completing your shopping.
- Use Big Bottle Rockets against dangerous upper-floor encounters.
- Follow the loudspeaker to the top-floor office.
- Use PSI Rockin and a Big Bottle Rocket to begin the boss battle.
- Defeat the Department Store Spook and leave the building.
Enter Moonside through Jackie’s Café
After the Department Store Spook is defeated, do not waste time repeatedly checking the Monotoli Building. Go to Jackie’s Café in northwest Fourside. Speak with the woman standing at the right side of the café. She mentions a loud noise outside, so leave the café and approach the crowd.
A dirty child is blocking the path near Everdred. Give him any expendable item to make him move. A cheap item such as a Protractor is suitable. Do not give away the Franklin Badge, unique equipment, a key item, or a supply you intend to use in the next battles.
With the blocker gone, speak with Everdred. He directs you to look behind the café counter. Return inside, walk behind the counter, and inspect the wall. This transports Ness and Jeff to Moonside, the distorted world controlled by the Mani-Mani Statue.
Moonside reverses the meaning of yes and no. Whenever a character asks a yes-or-no question, choose the response opposite to the one you actually want. Ordinary conversations and the area’s warp men are intentionally confusing, so use the visible men in sunglasses and beach shirts to move between sections. If you want a useful early advantage, take the southern warp route to the Protein Drink, then explore the northeast area for the Double Burger.
- Speak with the woman at the right side of Jackie’s Café.
- Give the outside blocker an expendable item.
- Speak with Everdred.
- Inspect the wall behind the café counter.
- Remember that Moonside reverses yes and no.
Complete Moonside’s warp sequence and defeat the Evil Mani-Mani Statue
Your first required destination in Moonside is the Monotoli Building at the southern part of the area. Walk to its right side and speak with the sailor. He wants to meet a man with connected eyebrows and a gold tooth. Until you speak with him, the warp men do not provide the sequence needed to reach the correct rooms.
Use the warp men to visit the southwest section, where a gift box contains a Night Pendant. Equip it to Ness or Jeff before the boss. The pendant protects against Flash, which is especially valuable against the Evil Mani-Mani Statue. Other warp destinations provide a Handbag Strap and a Secret Herb, both optional but useful.
Continue using the warp men until you reach the room with a man resembling Mr. T and a shadow moving nearby. Speak with the shadow first. Then speak with Mr. T and answer his question with No. Because Moonside reverses responses, this advances the sequence and sends you to the hotel. When you leave the hotel, the shadow follows you and becomes invisible.
Return to the sailor beside the Monotoli Building. The sailor now recognizes the invisible man with connected eyebrows and a gold tooth and leaves with him. Go to the front of the Monotoli Building and speak with Mr. Monotoli. He disappears, exposing the statue. Check the statue when you are ready to begin the Evil Mani-Mani battle.
Use Jeff’s Big Bottle Rockets early. Ness can use PSI Rockin, although it may miss, and should heal when necessary. The statue can drain PP with PSI Magnet, remove shields and temporary stat changes with its green light, and use a Flash attack with a chance to instantly knock out a character. Keep the Night Pendant equipped and retain revival items for Ness and Jeff. After the statue is defeated, you return to a storage area behind Jackie’s Café.
- Speak with the sailor beside the Monotoli Building.
- Obtain and equip the Night Pendant if possible.
- Reach the room with the shadow and Mr. T.
- Answer Mr. T with No when required.
- Return to the sailor after the shadow becomes invisible.
- Defeat the Evil Mani-Mani Statue.
Recover the Yogurt Machine and reach the Monotoli Building
Leave the café’s storage area after the statue battle. Apple Kid calls and tells you that he has developed a Trout-Flavored Yogurt Machine. A monkey then appears outside and directs you to meet him at the western end of the Dusty Dunes Desert.
Travel to the hole at the west end of the desert. The Escargo Express deliveryman explains that the Yogurt Machine was misplaced in the desert. Locate the machine in the delivery area and take it back to Fourside. If the monkey or delivery event does not appear, leave the café completely, answer Apple Kid’s call, and follow the western desert route rather than returning immediately to the Monotoli Building.
Back in Fourside, go to the Monotoli Building and speak with Electra, the maid outside. She takes the Yogurt Machine and tells you to visit her on the 48th floor. This is now the actual rescue route for Paula.
Before entering, save at the nearby phone and heal at the hotel or hospital. The 48th floor contains Sentry Robots that attack on contact. Rust Promoters from the northeast junk shop are effective against metallic enemies. Super Bombs from the Department Store arms dealer are also useful. If you still have the Neutralizer or Bag of Dragonite from the Monkey Caves, give them to Jeff or keep them accessible.
- Receive Apple Kid’s call after defeating the statue.
- Meet the monkey at the western Dusty Dunes Desert hole.
- Recover the Yogurt Machine from the delivery area.
- Give the machine to Electra outside the Monotoli Building.
- Save and heal before entering the building.
Cross the Monotoli Building and rescue Paula
Use the elevator to reach the 47th floor. The northern room where Pokey and his father can be found is optional. To continue, use the private elevator on the right side and speak with the elevator attendant to reach the 48th floor.
On the 48th floor, defeat the Sentry Robots quickly. Keep both characters’ HP high because their attacks can remove large amounts of health. Physical attacks work, and PSI Rockin can shorten fights against groups. Rust Promoters are a strong Jeff option against metallic enemies.
From the first 48th-floor room, go left past the bathrooms and enter the first door after them. In the room with four desks, use the north door. In the next room, the northern door contains an optional Sudden Guts Pill; return to the two-desk room and use the left door. In the room without desks, the left northern door contains an optional Vital Capsule. Return and use the upper-right door.
The northern door in the next section leads to Electra’s room, where you can obtain Trout Yogurt that restores a small amount of HP. The left door leads to the Clumsy Robot. Do not use Big Bottle Rockets against this boss; they do not work. Use Super Bombs, Rust Promoters, physical attacks, and the Bag of Dragonite if available. The robot begins with PSI Shield α, so avoid ordinary PSI attacks unless Jeff has removed the shield with Neutralizer. Watch for its missile attack and heal whenever a character’s HP is low enough to risk being knocked out.
After the Clumsy Robot is defeated, the Runaway Five are available in the nearby room. Speak with them, then enter the office through the left door. Mr. Monotoli is inside with Paula. Speak with him and complete the resulting conversation. Paula rejoins Ness and Jeff, and the immediate Fourside rescue objective is complete.
- Use the private elevator to reach the 48th floor.
- Defeat the Sentry Robots and follow the desk-room route.
- Collect the optional Sudden Guts Pill and Vital Capsule if desired.
- Avoid Big Bottle Rockets against the Clumsy Robot.
- Defeat the Clumsy Robot and enter Monotoli’s office.
- Speak with Mr. Monotoli and confirm that Paula has rejoined the party.
Leave Fourside and return to the Runaway Five route
After Paula is rescued, leave the Monotoli Building and return to the Runaway Five. They take Ness, Paula, and Jeff toward Threed, where the next major sequence begins. Do not treat the optional Department Store purchases, Photo Man appearances, desert gift boxes, Contact Lens trade, Venus performance, or Pokey’s room as required progression.
Before boarding the Runaway Five’s transport, check that Paula has her weapon and armor, Ness and Jeff have usable recovery items, and the Franklin Badge has not been left with Escargo Express. Any remaining Fourside shopping can be completed now, but the required city objectives are finished once Paula is reunited and the Runaway Five begin the trip to Threed.
The Fourside chapter is complete when the Diamond has released the Runaway Five, the Department Store Spook and Evil Mani-Mani Statue are defeated, the Yogurt Machine has opened the Monotoli route, the Clumsy Robot is defeated, Paula is back in the party, and the Runaway Five have departed for Threed.
- Paula has rejoined Ness and Jeff.
- The Runaway Five are available after the Monotoli Building battle.
- The party has healed and recovered essential supplies.
- The Runaway Five have begun the return trip to Threed.
Before you move on
- All five Guardian Diggers in the Dusty Dunes gold mine are defeated.
- The Diamond is received on the route back to Fourside.
- Miss Fake’s contract is destroyed and the Runaway Five perform their final Fourside show.
- The Department Store is reopened and the Department Store Spook is defeated.
- Ness and Jeff enter Moonside through the hidden café route.
- The Moonside warp sequence is completed and the Evil Mani-Mani Statue is defeated.
- Apple Kid’s Yogurt Machine is recovered from the western Dusty Dunes Desert and delivered to Electra.
- The Monotoli Building’s 48th-floor Sentry Robots and Clumsy Robot are defeated.
- Mr. Monotoli is confronted and Paula has rejoined the party.
- The Runaway Five have taken the party toward Threed for the next chapter.
References for this chapter
- Nintendo Player’s Guide: EarthBound complete guide
- Fourside and the Desert Gold Mine - EarthBound Walkthrough
- The Department Store of Fourside - EarthBound Walkthrough
- Moonside - EarthBound Walkthrough
- Monotoli Building - EarthBound Walkthrough
- EarthBound - Guide and Walkthrough by goldbman
- EarthBound — Guide and Walkthrough by Kodos86
Winters and Summers — Science, the Runaway Five, and Shortcuts
After the Fourside events, Ness and Paula return to Threed with the Runaway Five. Examining the repaired Sky Runner transfers control to Jeff in Winters. Jeff must leave Snow Wood Boarding School, obtain the Bad Key Machine and Bubble Monkey, cross Tessie Lake, pass through Brick Road and the nearby cave, and reach Dr. Andonuts’s laboratory. The Sky Runner then reunites Jeff with Ness and Paula. After defeating Shrooom and recording Rainy Circle, the party flies to Summers, opens the Stoic Club route, begins the Magic Cake sequence, and hands off to ch10 for Poo’s complete Dalaam and Mu sequence. When ch10 returns the party to Summers, this chapter resumes with the museum, Fourside sewer, Magnet Hill, Pink Cloud, Kraken, and the voyage to Scaraba.
Return to Threed and transfer control to Jeff
After completing the Fourside events and leaving the Monotoli Building, follow the Runaway Five outside. Their van carries Ness and Paula back to Threed. Go to the graveyard and examine the damaged Sky Runner. The story shifts to Jeff at Snow Wood Boarding School in Winters.
Jeff does not join the party at the school. His entire opening sequence must be completed before the Sky Runner returns him to Threed. Tony accompanies him, so follow the school events rather than trying to leave alone.
- Ness and Paula have returned to Threed with the Runaway Five.
- Examining the Sky Runner has transferred control to Jeff.
- Jeff is at Snow Wood Boarding School with Tony.
Leave Snow Wood Boarding School with the Bad Key Machine
As Jeff, try to leave his room. Tony stops him and joins him. Go downstairs and speak with Maxwell. Maxwell gives Jeff a bent locker key. Take it to the locker room and try it on a locker. It will not work, so return to Maxwell. He then gives Jeff the Bad Key Machine.
Use the Bad Key Machine on the locked lockers. Equip Jeff with the useful equipment you find and take the available food and battle supplies. The school also has optional minor items, but Jeff needs at least one free inventory space for the next objective.
Leave the boarding school with Tony. Tony helps Jeff over the fence, allowing him to reach the Winters Drug Store.
- Tony is travelling with Jeff.
- The bent locker key has been returned to Maxwell.
- Jeff has received and used the Bad Key Machine.
- Jeff has left the boarding school.
Recruit Bubble Monkey and cross Tessie Lake
Enter the Drug Store near the boarding school. Speak with the woman beside the counter and buy a pak of bubble gum for one dollar. Then speak with the monkey near the entrance and give it the gum. Bubble Monkey joins Jeff and is required for both Tessie Lake and the later rope.
Travel south through Winters, following the paths toward the Tessie watchers. Before approaching the lake, enter the left tent at the Tessie-watching campsite and spend the night. This rest heals Jeff and triggers the conditions for Tessie to appear. The tent can also repair some broken items Jeff is carrying.
Leave the tent after resting and walk east along the shore to the narrow strip of land projecting into the lake. Step onto the dirt patch at its end. Bubble Monkey uses the gum, Tessie appears, and the creature carries Jeff and Bubble Monkey to the far shore.
- Jeff has bought bubble gum from the Winters Drug Store.
- Bubble Monkey is following Jeff.
- Jeff has rested in the left Tessie-watching tent.
- Tessie has carried Jeff across the lake.
Pass through Brick Road and the adjoining cave
From Tessie’s landing point, follow the path south to Brick Road’s cave. The maze contains optional presents and useful Jeff equipment, including the Broken Iron and Stun Gun. Take them if your inventory allows, but the required goal is to reach the exit. After leaving the maze, speak with Brick Road; he restores Jeff’s HP before the next route.
Continue south to the next cave. Follow the passages and collect recovery items if needed. In the rope area, go up the first rope to inspect the side path, then return to the lower level. At the second rope position, use a pak of bubble gum. Bubble Monkey lowers the rope so Jeff can climb upward.
The shining enemy at the top cannot be fought during this section. Do not attempt to engage it. Move west and leave the cave. Bubble Monkey departs outside, so the two gum uses have fulfilled its required role.
- Jeff has crossed Brick Road’s maze.
- Useful optional equipment has been collected if inventory space permits.
- Bubble Monkey has lowered the rope in the second cave.
- Jeff has exited the cave and reached the Stonehenge area.
Reach Dr. Andonuts and reunite the party in Threed
After leaving the cave, avoid the Cave Boys and travel south past Stonehenge to Dr. Andonuts’s laboratory. Speak with Dr. Andonuts. He explains the Sky Runner and allows Jeff to use the lab’s recovery machine. The lab also contains optional supplies, including a Broken Pipe in an upstairs gift box.
Go to the Sky Runner and enter it. If it does not activate, speak with Dr. Andonuts again, then board the craft. The Sky Runner carries Jeff to Threed and crashes directly into the room where Ness and Paula are being held.
Jeff joins Ness and Paula after the crash. Use the Bad Key Machine on the locked door, climb out of the room, and return to the Threed overworld. The Boogey Tent and zombie-paper objectives belong to the earlier Threed progression and should not be repeated here. The next required destination is Winters.
- Jeff has spoken with Dr. Andonuts.
- Jeff has boarded the Sky Runner.
- The Sky Runner has crashed into the Threed holding room.
- Jeff has joined Ness and Paula.
- The party has escaped the holding room with the Bad Key Machine.
Return to Winters, defeat Shrooom, and record Rainy Circle
The Sky Runner returns the party to Dr. Andonuts’s laboratory in Winters. Speak with him so he can reroute and repair the craft. Before leaving, heal at the laboratory and use the nearby phone if you want to save.
Enter the cave north of Stonehenge. Follow it to Shrooom. The boss can spread mushrooms and inflict poison, so keep HP high and avoid spending all of Paula’s PP before the battle. Paula’s PSI Freeze or PSI Fire, Ness’s reliable offense, and Jeff’s strongest available bottle-rocket item are practical damage options. If a mushroom status effect appears, be cautious with additional PSI because the status can make attacks backfire unpredictably.
After Shrooom is defeated, continue beyond the boss instead of turning around. The Rainy Circle sanctuary is farther along the route. Walk to its focal point and interact with it to record the fourth Your Sanctuary melody. Then return to Dr. Andonuts’s laboratory. The repaired Sky Runner is ready to carry the party to Summers.
- Dr. Andonuts has rerouted the Sky Runner.
- Shrooom has been defeated.
- The Rainy Circle melody has been recorded.
- The party has returned to the laboratory.
Fly to Summers and obtain the Stoic Club reservation
Speak with Dr. Andonuts and use the repaired Sky Runner to fly to Summers. The craft crashes on arrival and is not a continuing transport vehicle. Heal at the hotel or hospital and resupply as needed. Summers’s equipment is expensive, so prioritize recovery items and necessary upgrades without selling unique equipment merely to raise money.
The Stoic Club is near the northeastern side of Summers, but the party is refused at the entrance. Travel to Toto, the port town, and enter the houses there. Speak with the residents until one gives Ness the Stoic Club’s telephone number. Use a telephone or pay phone to call the club and make a reservation.
Return to the Stoic Club and enter. Speak with the people inside, then talk with the woman associated with the Magic Cake business. She leaves to set up her beach cart. Follow the route to the cart southwest of the club and agree to try the Magic Cake. The resulting sequence transfers the story to Dalaam and begins Poo’s training scenario.
- The Sky Runner has crashed in Summers.
- The Stoic Club number has been obtained in Toto.
- A reservation has been made by telephone.
- The Magic Cake sequence has begun.
Handoff to Dalaam and Mu training
Do not complete Poo’s recruitment in this chapter. After the Magic Cake sends the story to Dalaam, stop here and follow ch10, Reference Insert — Dalaam and Poo’s Recruitment.
Chapter 10 gives the complete route through the Place of Emptiness, including the required stillness during the interruption and the Yes answers during the ancestral examination. It then directs you back to Poo’s master, grants Poo his new PSI abilities, and returns him automatically to Summers.
When ch10 ends, Poo is in the party and the main route resumes in Summers. Return to this chapter at the museum step below. Do not repeat the Magic Cake, Dalaam, or Mu sequence.
- The Magic Cake has sent the story to Dalaam.
- Chapter 10 has been completed before continuing below.
- Poo has returned to Summers and joined the party.
Clear the Summers museum and follow the Fourside call
After Poo returns, enter the Summers Cultural Museum and go upstairs. Speak with the museum worker to enter the remodeled room. Fight the two Shattered Man battles inside. PSI Freeze, PSI Rockin, and Jeff’s battle items are useful, but heal between fights if necessary.
After the battles, have Poo examine or interpret the hieroglyphs. Leave the museum and answer the call from Mr. Spoon, the Fourside researcher. Teleport to Fourside and enter the Fourside Museum. Mr. Spoon will not open the sewer route until you obtain Venus’s signature.
Buy a ticket for Venus’s show at the Topolla Theater, enter the theater, and go to Venus’s dressing room. Speak with her to receive her signature on a banana peel. Return to Mr. Spoon and give him the signed banana. He opens the manhole route in the museum.
- The two Shattered Man battles are complete.
- Poo has interpreted the Summers museum hieroglyphs.
- Mr. Spoon has requested Venus’s signature.
- Venus’s signed banana has been delivered to Mr. Spoon.
- The Fourside museum manhole is open.
Defeat Plague Rat of Doom and record Magnet Hill
Enter the opened manhole and follow the sewer ladders. The route winds through several ladder changes; continue through the passages until you reach the Plague Rat of Doom. Keep Ness ready to heal and use Paula’s PSI Freeze or PSI Rockin, along with Jeff’s strongest reliable battle item. Poo can provide support and recovery after his return.
After defeating the Plague Rat of Doom, continue beyond the boss room rather than leaving the sewer immediately. Magnet Hill is at the end of the route. Interact with the sanctuary point to record the fifth melody, then open the nearby chest and take the Carrot Key.
The Carrot Key is required later in Dalaam. Retain it or place it in storage where you can retrieve it before entering Pink Cloud. It is not a disposable optional reward.
- The Plague Rat of Doom has been defeated.
- Magnet Hill’s melody has been recorded.
- The Carrot Key has been collected.
Open Pink Cloud and defeat Thunder and Storm
Leave the Fourside sewer and use Teleport to reach Dalaam. Go to the rabbit statues in the lower-left area of town and use the Carrot Key. The statues disappear and reveal the entrance to the Pink Cloud cave.
Carry the Franklin Badge if it is available, since the cave and boss use electrical attacks. Follow the ropes and holes through the cave. The route descends through the openings until it reaches Thunder and Storm. Heal before approaching the boss.
Use dependable PSI Freeze and PSI Rockin attacks, and use Jeff’s strong bottle-rocket items if you have them. The Franklin Badge can reflect the boss’s electrical attack when worn by an eligible party member. After the battle, continue beyond the boss and interact with the sanctuary point to record the sixth melody, Pink Cloud.
- The Carrot Key has removed the Dalaam rabbit statues.
- The Pink Cloud cave has been traversed.
- Thunder and Storm has been defeated.
- The Pink Cloud melody has been recorded.
Sail from Toto and defeat Kraken
Leave Pink Cloud and return to Dalaam, then use Teleport to return to Summers. Travel east to Toto and go to the dock. Speak with the sailor who now allows the party to sail toward Scaraba after the Stoic Club story has been resolved.
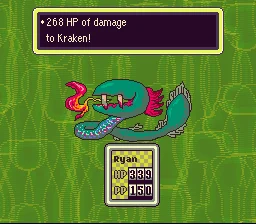
Heal the entire party before boarding. Carry revival items and preserve enough PP for a difficult battle during the crossing. Kraken attacks before the boat reaches Scaraba. Use Ness and Paula for reliable offense, have Poo support with healing or PSI Shield when appropriate, and use Jeff’s strongest available bottle-rocket item. Recover fallen characters promptly rather than allowing the fight to snowball.
Defeating Kraken completes the Summers route and deposits the party in Scaraba. The Scaraba and Pyramid objectives belong to the next chapter.
- The sailor at Toto has accepted the party for the Scaraba voyage.
- The party was fully healed before boarding.
- Kraken has been defeated.
- The party has arrived in Scaraba.
Before you move on
- Jeff has permanently reunited with Ness and Paula.
- Shrooom has been defeated and Rainy Circle has been recorded.
- The Magic Cake sequence has been started and then completed through ch10.
- Poo has returned from Dalaam and joined the party.
- The Summers museum Shattered Man battles and hieroglyph interpretation are complete.
- Venus’s signed banana has been given to Mr. Spoon.
- The Plague Rat of Doom has been defeated.
- Magnet Hill has been recorded and the Carrot Key has been retained.
- Thunder and Storm has been defeated and Pink Cloud has been recorded.
- The Toto voyage has been completed and Kraken has been defeated.
- The party has reached Scaraba, ready for the next chapter.
References for this chapter
Reference Insert — Dalaam and Poo’s Recruitment
Use this insert immediately after the Summers Magic Cake event described in ch05. The Magic Cake transfers control to Prince Poo in Dalaam, where he must complete the Mu training at the Place of Emptiness. After the trial, Poo returns automatically to Summers and joins Ness, Paula, and Jeff. The museum sequence follows immediately after his return, so resume ch05 there rather than treating Dalaam as a separate late-game chapter.
Use the Magic Cake in Summers
Complete the Stoic Club setup in Summers as described in ch05. Arrange access to the club by telephone, enter the Stoic Club, speak with the people inside, and then speak with the woman near the entrance again. Follow her outside when she leaves to set up the Magic Cake cart.
Find the cart southwest of the Stoic Club and accept the Magic Cake. The scene changes to Dalaam, and control passes to Prince Poo. This is the required route to Dalaam in the original North American Super Nintendo release; do not search for a normal overworld path to the kingdom.
- The Stoic Club sequence is complete.
- The Magic Cake cart has been used.
- The scene has changed to Dalaam.
- You are controlling Prince Poo inside the palace.
Leave the palace and prepare for the trial
Poo’s master tells him to undertake his final Mu training at the Place of Emptiness. Before leaving, open the nearby gift boxes. They contain a Brain Food Lunch, a Cup of Lifenoodles, and a Brain Stone. These supplies are optional for completing the trial, but they are useful and should be taken if Poo has room.
A man with a telephone on his head is available in the palace. Speak with him if you want to save before attempting the training. There is no conventional dungeon or required battle during the trial, so grinding is unnecessary.
- Take the Brain Food Lunch.
- Take the Cup of Lifenoodles.
- Take the Brain Stone.
- Save at the palace telephone if desired.
Reach the Place of Emptiness
Leave the palace and travel downhill through Dalaam. You may enter the houses along the route to collect optional food and recovery items. Bottle of Water is especially useful for Poo because it restores more of his PP than it does for most other characters. Brain Food Lunch is also a strong recovery item for him, while the Jar of Delisauce is optional and improves compatible food.
At the bottom of Dalaam, ignore the cave blocked by the black rabbit statues. It is not part of this recruitment trial and cannot be opened during this visit. Continue toward the southeast side of the village, where a Star Master stands at the base of the rope leading to the Place of Emptiness.
Talk to the Star Master. He disappears after the conversation. Climb the rope to the top of the ledge and begin the meditation sequence.
- Leave the palace and walk downhill.
- Collect optional supplies only if you have room.
- Ignore the black rabbit statues and blocked cave.
- Find the Star Master in southeastern Dalaam.
- Climb the rope after the Star Master disappears.
Remain completely still during the interruption
At the top of the Place of Emptiness, begin Poo’s meditation. A girl will appear and tell him to return to the palace. This is part of the trial, not a genuine instruction. Let her finish speaking, then do not press a movement direction or otherwise interrupt the scene.
Wait in place until the surroundings disappear and the ancestral examination begins. If Poo moves during this interruption, the trial fails. Return all the way to the palace, speak with Poo’s master again, and repeat the route to the Place of Emptiness. Do not spend food or PSI items attempting to force the event; the sequence is controlled by dialogue and stillness.
- Meditation has started.
- The girl has finished speaking.
- Poo remains completely still afterward.
- The ancestral examination has begun.
Accept every part of the ancestral examination
The spirit of Poo’s ancient lineage asks whether Poo accepts the loss of his legs, arms, hearing, sight, and finally his mind. Choose Yes for every question. The apparent injuries and the drop in Poo’s HP are scripted effects of the examination. They do not permanently cripple him, and the HP loss does not mean that the trial has gone wrong.
A No answer prevents the training from completing. If you choose No, return to the palace and speak with Poo’s master before trying again. Continue answering Yes until the spirit completes the examination and the messenger appears.
- Answer Yes to the legs question.
- Answer Yes to the arms question.
- Answer Yes to the hearing question.
- Answer Yes to the sight question.
- Answer Yes to the mind question.
- Wait for the messenger to confirm that Mu training is complete.
Return to the palace and let Poo rejoin the party
After the messenger confirms completion, walk back down from the Place of Emptiness and return to the palace. Speak with Poo’s master near the throne. The successful training is acknowledged, and Poo gains several levels. The resulting level gains give him the early Poo abilities associated with this point in the game, including Shield Beta and Teleport Alpha; the event also grants Teleport Beta, which is the important new travel ability from completing Mu training.
Poo then uses Teleport Beta automatically and returns to Summers. When the scene ends, he joins Ness, Paula, and Jeff as the fourth playable party member. If he does not return to Summers, the meditation was interrupted or the palace conversation after the completed trial was missed.
- The messenger confirmed completion.
- Poo’s master acknowledged the completed training.
- Poo gained the levels from the Mu trial.
- Poo has Shield Beta and Teleport Alpha available.
- Poo learned or received Teleport Beta through the completed sequence.
- Poo automatically returned to Summers.
- The active party contains Ness, Paula, Jeff, and Poo.
Resume the Summers route at the museum
Once Poo has joined, continue immediately with the museum sequence in ch05. Do not repeat the Stoic Club, Magic Cake, or Dalaam recruitment steps. The next required objective is the Summers museum investigation: speak with the appropriate museum staff member, examine the hieroglyph material, and follow the existing ch05 directions into the Fourside museum and theater events.
The rabbit-blocked cave in Dalaam is also a later optional or progression-related return, not part of Poo’s recruitment. Leave it alone during this insert unless the surrounding guide explicitly sends you back with the required key. Poo’s later Kings equipment is separate from his recruitment and is not needed for him to join.
- Poo is present with Ness, Paula, and Jeff.
- The guide has returned to Summers.
- The museum sequence from ch05 follows immediately.
- The Stoic Club and Magic Cake instructions are not repeated.
- The blocked Dalaam cave is left for the later route.
Before you move on
- The Magic Cake transferred control to Poo in Dalaam.
- Poo reached the Place of Emptiness through the Star Master’s rope.
- Poo stayed still after the girl’s interruption.
- Poo answered Yes to every ancestral-spirit question.
- The messenger confirmed that Mu training was complete.
- Poo’s master acknowledged the completed trial.
- Poo gained the associated levels and Teleport Beta.
- Poo automatically returned to Summers and joined the party.
- The guide resumed the existing Summers museum route without repeating the recruitment sequence.
Scaraba and the Desert — Sand, Tombs and Saturn Valley Access
Scaraba is the southern desert hub reached after the Kraken battle. The required route is Scaraba, the Sphinx and Pyramid, Southern Scaraba, Dungeon Man, and then Deep Darkness. Saturn Valley is an earlier area and has no second entrance in this desert. Before leaving this chapter, you should have defeated the Guardian General, collected the Hawk Eye, received the Key to the Tower, completed both Dungeon Man visits, and departed in the submarine toward Deep Darkness and Tenda Village.
Prepare in Scaraba before entering the desert
After the Kraken battle, the party arrives at Scaraba. Use the marketplace and nearby facilities as your supply hub. Heal completely before crossing the open desert, save your game, and make room for key items. The desert can cause sunstroke and contains enemies capable of poison, heavy physical damage, and PSI Shield effects, so avoid wandering without a destination.
The merchant near the Pyramid sells Bottles of DXwater. These restore roughly 40 PP to Poo but restore very little to Ness or Paula, making them especially useful before the Pyramid while Poo is still present. Buy them if your PSI reserves are low. If Jeff has Big Bottle Rockets, keep them for the Guardian General rather than spending them on ordinary enemies.
Scaraba’s marketplace also offers useful optional upgrades. The tools vendor can sell equipment such as the Crystal Charm, Paula’s French Fry Pan, Jeff’s Multi-Bottle Rockets, and other tools depending on what the party already owns. These purchases improve survivability but are not required to open the Pyramid. The Piggy Nose is optional; it helps locate hidden Magic Truffles later in Deep Darkness, but it has no role in the Scaraba or Pyramid puzzle.
- Heal and save in Scaraba.
- Buy Bottles of DXwater if Poo needs PP recovery.
- Keep Big Bottle Rockets or other strong Jeff battle items for the Guardian General.
- Treat the Piggy Nose and most marketplace equipment as optional.
Reach the Sphinx and open the Pyramid
Leave Scaraba through the southern desert route and continue toward the Sphinx in front of the Pyramid. Use the town, the merchant, and the oasis landmarks to maintain your direction. The Sphinx switches reproduce the pattern shown by the Hieroglyph Copy in the Summers Museum. If the switches only produce a blank or incomplete response, return to the second floor of the Summers Museum and examine the Hieroglyph display again.
Stand on the top switch first, then activate the switches in this order: top, lower-left, upper-right, upper-left, lower-right, top. The top switch is used at both the beginning and the end. A wrong switch resets the attempt, so restart from the top rather than trying to continue from the mistake. When the sequence is correct, the Pyramid entrance opens.
- Reach the Sphinx southeast of Scaraba.
- Confirm the Hieroglyph instructions if the switch sequence does not respond correctly.
- Press top, lower-left, upper-right, upper-left, lower-right, top.
- Enter the Pyramid after the door opens.
Cross the Pyramid and defeat the Guardian General
Move forward through the Pyramid until reaching the room with the large sarcophagus. The upper-left passage leads to the optional Bag of Dragonite and a dead end. Return to the sarcophagus room and take the right-hand route to continue. Along the way, collect the Speed Capsule and Cup of Lifenoodles if you have room. The Cup is a valuable revival and status-curing item, so keep it rather than selling it.
Continue down the long stairway and inspect the casket at the end to start the Guardian General battle. This boss has very high defense and uses damaging physical attacks, including a stronger charge, as well as an attack that drains PP. There is no need to build the strategy around Fire. Instead, have Jeff use Big Bottle Rockets or another strong battle item. Paula should use her strongest practical PSI Freeze, and Ness should attack or heal with Lifeup as needed. PSI Rockin can contribute damage, while Jeff’s Slime Generator can sometimes immobilize the boss and make it waste turns if you lack strong rockets. Poo can use Freeze or heal while he remains in the party.
The Guardian General is required. If the party is taking repeated heavy hits, prioritize keeping everyone alive over conserving ordinary healing items. The Pyramid has a long route after the boss, so do not leave a character near knockout range simply because the battle appears almost finished.
- Take the right-hand path from the sarcophagus room to progress.
- Collect the Speed Capsule and Cup of Lifenoodles if desired.
- Use Big Bottle Rockets, Freeze, PSI Rockin, and healing against the Guardian General.
- Defeat the Guardian General before attempting to leave the Pyramid.
Activate the switch and collect the Hawk Eye
Enter the room beyond the Guardian General. The casket there contains the optional Rain Pendant. Continue to the raised floor panel and step on it. This reveals a hole beneath the sarcophagus in the earlier central room.
Return to the sarcophagus room and drop through the newly revealed hole. On the lower platform, check the object to obtain the Hawk Eye. The Hawk Eye is required later in Deep Darkness because it reveals the route through the dark swamp. Keep it with Ness, Paula, or Jeff rather than Poo, since Poo leaves the party immediately after the Pyramid sequence. If Poo is carrying it when he departs, Escargo Express stores the item and can deliver it back to the party.
Continue east from the Hawk Eye room. The route contains an optional Diamond Band and may provide a Magic Butterfly recovery opportunity. Follow the final corridor and climb out of the Pyramid into Southern Scaraba.
- Step on the raised floor panel beyond the Guardian General.
- Return to the sarcophagus room and use the revealed hole.
- Collect the Hawk Eye.
- Keep the Hawk Eye with a character who will remain in the party.
- Exit through the eastern Pyramid route.
Allow Poo’s temporary departure and obtain the Key to the Tower
When the party emerges from the Pyramid, the Star Master appears. He restores the party’s HP and PP, then takes Poo away so Poo can learn PSI Starstorm. This is a required story event and does not remove Poo permanently from the game.
After the scene, speak with the native standing near the Pyramid exit, close to the Southern Scaraba oasis area. He gives Ness the Key to the Tower. If you need supplies, continue north to the nearby merchant and equipment stand before heading to Dungeon Man. The merchant can sell powerful late-game options, including Multi Bottle Rockets for Jeff, but they are expensive and optional. Dungeon Man itself contains a phone, a healing bench, and other recovery services, so do not spend every healing item before entering.
- Finish the Star Master scene.
- Confirm that the remaining party has received the scripted HP and PP restoration.
- Talk to the native near the Pyramid exit and receive the Key to the Tower.
- Recover the Hawk Eye through Escargo Express if Poo was carrying it.
Enter Dungeon Man and complete its two-stage route
From the Key-giving native, travel northwest across Southern Scaraba to the human-shaped Dungeon Man tower. Use the Key to the Tower at the entrance. On the first visit, use the phone and healing bench inside if necessary, then work upward through the ropes, ladders, and passages until reaching Brick Road at the top. Speak with Brick Road, then use the normal Return Exit to leave Dungeon Man.
After leaving, travel south through the narrow desert route. Dungeon Man follows the party but becomes stuck between the trees. Walk to the eastern side of this obstruction and speak with the native there. Answer yes when asked about crossing the area. This conversation is required; without it, returning to Dungeon Man will not open the next route.
Return to Dungeon Man and climb to the top again. Speak with Brick Road and take the Goodbye Exit rather than the Return Exit used during the first visit. Follow the newly accessible lower route through the tower. Collect the optional Talisman Ribbon if you have space, then proceed to the submarine on the lower floor and examine it. Jeff repairs it, and the party departs for Deep Darkness.
Dungeon Man is the required transition out of Scaraba. It does not contain a Your Sanctuary location, and it does not lead to a second Saturn Valley entrance.
- Use the Key to the Tower to enter Dungeon Man.
- Reach Brick Road on the first visit and leave through the normal Return Exit.
- Let Dungeon Man become stuck in the southern trees.
- Speak with the native on the eastern side and answer yes.
- Return to Dungeon Man, use the Goodbye Exit, and reach the submarine.
- Examine the submarine to continue to Deep Darkness.
Before you move on
- The Sphinx switches were activated in the order top, lower-left, upper-right, upper-left, lower-right, top.
- The Pyramid was entered and the Guardian General was defeated.
- The floor panel was activated and the Hawk Eye was collected.
- The Star Master restored the party and temporarily took Poo away to learn PSI Starstorm.
- The native near the Southern Scaraba Pyramid exit gave Ness the Key to the Tower.
- Dungeon Man was entered, Brick Road was contacted, and Dungeon Man became stuck in the southern trees.
- The native east of the obstruction was spoken to and the party answered yes.
- The party returned to Dungeon Man, used the Goodbye Exit, found the submarine, and departed for Deep Darkness.
- The player understands that Tenda Village comes later through Deep Darkness and that Saturn Valley is not part of this route.
References for this chapter
Tenda Village — Deep Darkness Recovery and the Stonehenge Lead
Reach Tenda Village at the end of Deep Darkness, use its free recovery services, learn why the tribe cannot open the passage below the boulder, and trigger the phone calls that direct you to Winters. This first visit does not resolve the Tendas’ shyness, open the boulder route, or record the Lumine Hall melody. Those objectives become possible only after the Stonehenge Base sequence has been completed.
Cross Deep Darkness and enter Tenda Village
After the Deep Darkness events and the return of Poo, continue along the route through the swamp until you reach the cave entrance leading to Tenda Village. The swamp is difficult to navigate because much of the route is obscured. Use the Hawk Eye when the screen becomes nearly black; it reveals the terrain well enough to distinguish solid paths from the surrounding darkness. Follow the visible ground and avoid wandering through the swamp, since repeated encounters can drain HP and PSI before the village is reached.
When you enter Tenda Village, do not expect the inhabitants to provide normal conversations. Most of the Tendas are too shy to speak. This is intentional and is not a missing interaction or a bug. The first visit is mainly for recovery, learning the local problem, and triggering the next story route.
- Use the Hawk Eye in the black section of Deep Darkness.
- Follow solid ground to the cave leading into Tenda Village.
- Do not treat the silent Tendas as a progression error.
Use the village recovery services
Walk south from the village entrance and check the trash can in the lower part of the settlement. It contains a Death Ray, which is an optional weapon for Jeff. Take it if Jeff has room and can use the improvement, but do not delay the story if his current weapon is better. The Death Ray is not required to open the village route or advance the plot.
Use the telephone near the entrance to save. A Tenda near the cave entrance in the northern part of the village provides free lodging, making this a useful recovery point after the swamp. The village also has a hot spring. Use it if someone has a status ailment that ordinary resting or PSI cannot remove. These services make Tenda Village the safest place to recover before leaving for the next objective.
The item shop in the village is not operating during this first visit because its attendant is too shy. Do not keep searching for a hidden shopkeeper or attempt to force the shop open. Its availability is tied to the later shyness event.
- Collect the optional Death Ray from the southern trash can if desired.
- Save at the nearby telephone.
- Rest for free with the Tenda near the northern cave entrance.
- Use the hot spring for stubborn status ailments.
- Do not expect the item shop to operate yet.
Learn about the book and the blocked boulder
Go to the chief, who is the Tenda with horns in the village. Speak with him to learn that the tribe needs a book called Overcoming Shyness. This conversation identifies the problem but does not give you the book. The book is not available in Tenda Village during this visit, and the chief cannot yet cure the tribe’s shyness.
Next, explore the southwest portion of the village. You will find a large boulder near two Tendas. The Tenda who is walking nearby is the one who can speak normally. Talk to him to learn that a passage beneath the boulder leads toward an underground area. The Tenda beside the boulder is strong enough to move it, but he is too shy to do so at this point.
The boulder cannot be moved yet. Do not waste time repeatedly talking to the shy Tenda, checking the rock, or searching for an item inside the village that will open the passage. The required book is obtained through a later sequence involving Winters, Stonehenge Base, and the Onett Library.
- Speak with the horned Tenda chief.
- Find the talkative Tenda near the southwest boulder.
- Learn that the boulder blocks the underground route.
- Leave the boulder unresolved during this first visit.
Exit the village to trigger the phone calls
After speaking with the chief and the talkative Tenda near the boulder, leave Tenda Village through the entrance you used from Deep Darkness. The required story calls occur after you exit. If no call occurs, return inside and speak with the chief and the talkative Tenda again, then leave the village once more. The trigger is tied to leaving after the village situation has been introduced.
Apple Kid calls first and explains that he is working at Dr. Andonuts’s laboratory in Winters. The call is interrupted, and the situation changes before Apple Kid can simply hand over the book. Orange Kid then contacts Ness and explains that Apple Kid has information about a book that can help the Tendas. These calls establish the next destination, but they do not complete the Tenda objective.
At this point, use Teleport to travel to Winters. The next chapter should cover the laboratory, the Eraser Eraser, Stonehenge Base, Starman Deluxe, and the later conversation that makes the book available. Do not return to the Onett Library yet expecting to find Overcoming Shyness. Before Stonehenge Base is cleared, the book will not be ready for the Tenda sequence.
- Leave Tenda Village after speaking with the required villagers.
- Receive Apple Kid’s call from outside the village.
- Receive Orange Kid’s follow-up call.
- Teleport to Winters only after both calls and begin the Stonehenge-related objective.
Before you move on
- Ness has entered Tenda Village from Deep Darkness.
- The optional Death Ray has been collected or deliberately skipped.
- The party has saved at the village telephone and used the free rest or hot spring as needed.
- The Tenda chief has mentioned the Overcoming Shyness book.
- The talkative Tenda near the southwest boulder has explained the blocked underground passage.
- Ness has exited the village and received the Apple Kid and Orange Kid calls.
- The player understands that the book, the boulder route, and the Lumine Hall melody remain unresolved until after Stonehenge Base is cleared.
- The next active destination is Winters, beginning the Stonehenge-related sequence.
Return Routes — Rechecking Towns, Mail-order and Final Equipment
Use this chapter only as a preparation checkpoint before the Winters laboratory and Stonehenge Base sequence. The Tenda chief conversation, the boulder-Tenda conversation, and the Apple Kid and Orange Kid phone calls belong to the preceding Tenda Village progression. Do not repeat them here. Instead, confirm that the story has advanced, inspect the party and inventory, replenish useful supplies, decide whether to pursue the optional Sword of Kings, review the Sound Stone without delaying Stonehenge, and make a fresh save. The next chapter begins by traveling to Winters, obtaining the Eraser Eraser, and opening Stonehenge Base.
Confirm that the Tenda Village progression is complete
This checkpoint assumes that the preceding Tenda Village chapter has already covered the chief's explanation of the Overcoming Shyness book, the conversation near the boulder, and the Apple Kid and Orange Kid calls. Do not return to those characters merely to repeat their dialogue. If the calls have not occurred or the story has not advanced, use the earlier Tenda instructions to resolve that missing progression before continuing.
The practical sign that this section is complete is that the route has shifted toward Winters and the Stonehenge problem. The next chapter, not this one, handles the trip to Dr. Andonuts's laboratory, the mouse's delivery of the Eraser Eraser, and the use of that device on the Stonehenge obstruction. Do not obtain or use the Eraser Eraser as part of this preparation checkpoint.
Tenda Village remains a useful recovery location. Use its free rest service, hot spring, and nearby telephone if the party needs healing or a preliminary save. The Death Ray in the village trash can is an optional Jeff weapon and has no bearing on Stonehenge access, so skipping it is not a reason to delay the next chapter.
- The Tenda chief and boulder conversations from the previous chapter are complete.
- The Apple Kid and Orange Kid calls have already occurred, or the story has advanced beyond them.
- The next required sequence is the Winters laboratory followed by Stonehenge Base.
- The Eraser Eraser has not been incorrectly treated as an item that must be obtained in this chapter.
Check the party and clear inventory space
Open the Status and Goods menus and confirm that Ness, Paula, Jeff, and Poo are available. This is the intended party for the Stonehenge Base sequence. If someone is absent, revisit the most recent story location and speak with the principal NPCs there before proceeding; do not assume that shopping or Sanctuary progress will repair a missing party flag.
Review every character's equipped weapon and armor. Replace clearly outdated equipment if you can do so without exhausting your money for recovery items. Keep the Franklin Badge and other unique equipment. If an item has an unclear purpose, store it with Escargo Express rather than selling it.
Leave several Goods spaces open before entering the next chapter. Stonehenge Base has numerous gift boxes, and a crowded inventory can force unwanted discards or prevent useful items from being collected. A practical target is roughly nine or ten open spaces if you intend to collect most of the dungeon treasure.
Jeff should have a dependable weapon or bottle-rocket supply, but do not spend all powerful ammunition on ordinary enemies. Multi Bottle Rockets are useful against dangerous encounters, while revival items and status cures should be preserved for emergencies. Carry at least one reliable revival option and retain important recovery items from Saturn Valley or earlier areas.
- Ness, Paula, Jeff, and Poo are present.
- Weapons and armor have been reviewed and useful upgrades are equipped.
- Unidentified or unique items have been stored or retained rather than sold.
- Several inventory spaces remain open for Stonehenge Base treasure.
- Jeff has a reliable attack option without exhausting the strongest ammunition.
Resupply without turning preparation into a detour
Saturn Valley is an efficient preparation stop because it offers free recovery, a hot spring, and useful supplies such as Horns of Life and Secret Herbs. Use it if the party needs healing or if revival reserves are low. Buy only a practical amount; Stonehenge Base is difficult, but an excessive stockpile is not required.
Check Escargo Express before leaving the preparation area. Retrieve useful recovery items, defensive equipment, or Jeff ammunition that you stored earlier. Conversely, send away bulky items that are not needed for the next sequence. Keep the Eraser Eraser out of this chapter's checklist because it has not yet been obtained.
Scaraba shopping is optional. If a character is still using clearly obsolete equipment, make the most important upgrade first and preserve enough money for healing items. There is no requirement to buy every newly available weapon or piece of armor before Stonehenge.
Do not sell the Death Ray, Sword of Kings, Franklin Badge, or other unusual equipment merely because it is not immediately useful. The Death Ray and Sword of Kings are optional, but their collection value or special use can be lost if equipment is sold carelessly. Storage is safer than selling.
- The party is healed before the next long sequence.
- Revival and status-recovery supplies have been checked.
- Escargo Express has been used to reduce clutter or retrieve useful items.
- The weakest important equipment has been upgraded if affordable.
- Enough money remains for practical recovery items.
Decide whether to pursue the Sword of Kings
The Sword of Kings is an optional weapon for Poo. It can be obtained from Starman Super enemies inside Stonehenge Base, and the chance is extremely low. Starman Supers disappear permanently once Starman Deluxe is defeated, so the decision must be made before the Stonehenge boss encounter.
If you want the sword, make the fresh preparation save described below before entering the next chapter. Keep inventory space open and use the Stonehenge route's Starman Super encounters for farming. Continue until the sword is obtained or you deliberately abandon the attempt. Because the drop is rare, this can consume considerable time and supplies.
Do not defeat Starman Deluxe until the Sword of Kings decision is final. Once the boss is defeated, Stonehenge Base shuts down and the Starman Super opportunity is lost. If you skip the hunt, proceed normally; Poo's sword is not required for any later objective or for completing the game.
- The Sword of Kings is recognized as optional.
- A separate save protects the playthrough before farming begins.
- Inventory space is available if the sword is obtained.
- Starman Deluxe will not be defeated until the farming decision is final.
Review the Sound Stone without delaying Stonehenge
If the Sound Stone is still present in Ness's Goods, use it to review the melodies already recorded. Compare the locations rather than relying on a written counter: Giant Step, Lilliput Steps, Milky Well, Rainy Circle, Magnet Hill, Pink Cloud, Lumine Hall, and Fire Spring are the eight Sanctuary locations.
If one melody appears to be missing, record the suspected location and continue with the main route. Stonehenge Base does not require all eight melodies, and delaying the laboratory sequence to search immediately can create unnecessary backtracking. The missing Sanctuary can normally be revisited later when its guardian and access route are available.
Fire Spring provides the final Sanctuary melody. Completing the full eight-melody sequence leads to the required Magicant transition later in the game. The Sound Stone is not expected to remain as a normal usable item after that transition, so its later disappearance is not evidence of a mistake.
- The Sound Stone has been reviewed if it is still available.
- Any suspected missing melody has been identified by location.
- Stonehenge is not being delayed for a complete Sanctuary list.
- The later Sound Stone disappearance after the full Sanctuary sequence is understood.
Make the fresh pre-Stonehenge save and hand off
Save at a telephone before beginning the Winters and Stonehenge sequence. Tenda Village, Saturn Valley, or another safe telephone location is suitable. Before saving, confirm that the party is healed, current equipment is equipped, recovery supplies are present, and the Goods menu has room for dungeon items.
This save should preserve the option to return for shopping or to attempt the Sword of Kings without sacrificing the main route. It is also the durable preparation point if the Stonehenge dungeon proves costly. Do not overwrite it until the optional sword decision is complete or you are satisfied with the result.
The handoff from this chapter is intentionally simple: travel to Winters and follow ch12. Ch12 covers the laboratory visit, receiving the Eraser Eraser, returning to Stonehenge, removing the eraser-shaped obstruction, navigating the base, and defeating Starman Deluxe. Do not perform any of those actions here.
Do not wait for the Overcoming Shyness book, all eight Sanctuary melodies, or the Tenda boulder to open before proceeding. Those objectives belong to later progression and are not prerequisites for entering Stonehenge Base.
- A fresh save exists before traveling to Winters.
- The party is healed and properly equipped.
- Recovery, revival, and status-cure supplies have been checked.
- The Sword of Kings decision has been made before Starman Deluxe is defeated.
- The next action is to begin ch12 in Winters, not to obtain or use the Eraser Eraser here.
Before you move on
- The earlier Tenda Village conversations and phone calls are complete, or the story has advanced beyond them.
- Ness, Paula, Jeff, and Poo are available.
- Current weapons and armor have been reviewed for all four characters.
- Recovery, revival, and status-cure supplies have been checked.
- Several inventory spaces remain open for the next dungeon.
- The Sword of Kings has been deliberately pursued or skipped before Starman Deluxe is defeated.
- The Sound Stone has been reviewed if available, without delaying Stonehenge.
- The Eraser Eraser has not been obtained or used in this chapter.
- A fresh save has been made before traveling to Winters and entering the sequence covered by ch12.
Stonehenge Base — Entering the Enemy Stronghold
After Apple Kid’s kidnapping call from Tenda Village, return to Winters and visit Dr. Andonuts’s Laboratory. The mouse gives you the Eraser Eraser, which opens the Stonehenge Base. This is a long dungeon containing powerful enemies, several useful presents, the optional Sword of Kings hunt, and the Starman Deluxe boss. Defeating Starman Deluxe permanently removes every enemy from the base, so finish any Sword of Kings attempt before the battle. Afterward, rescue the captives, receive the Saturn Ribbon from Mr. Saturn, and follow Apple Kid’s lead to the Onett Library.
Return to Winters and prepare at Dr. Andonuts’s Laboratory
When Apple Kid calls from Tenda Village and you hear him being taken, teleport to the Snow Wood Boarding House in Winters. Travel south along the route toward Dr. Andonuts’s Laboratory. If you have not already cleared the pencil statue on this route, bring the Pencil Eraser and use it when you reach the obstruction. If the route requires Tessie, cross the lake with the Bubble Monkey, then continue south through the cleared passage.
Enter Dr. Andonuts’s Laboratory and speak with the mouse. It gives you the Eraser Eraser. Check the laboratory’s Instant Revitalizing Device before leaving, then save. The base is lengthy, and the laboratory is the safest nearby recovery point.
Prepare for a difficult dungeon. Keep several empty inventory spaces if you want to collect the presents and attempt the Sword of Kings hunt. Stock normal healing items and, if available, bring Multi Bottle Rockets, Shield Killers, and PP recovery. The Sword of Kings is optional and is not required to complete the game.
- Return to Winters after Apple Kid’s kidnapping call.
- Use the Pencil Eraser on the route if the pencil statue is still present.
- Speak with the mouse in Dr. Andonuts’s Laboratory.
- Receive the Eraser Eraser.
- Heal and save before entering Stonehenge Base.
- Leave several inventory spaces free if collecting treasure or hunting the Sword of Kings.
Open the Stonehenge entrance
From the laboratory, travel north to Stonehenge. Approach the brown circular spot in the middle of the stones from below if you want to trigger the optional Photo opportunity, then step onto the spot to descend into the underground passage.
Walk forward until you reach the iron eraser statue. Open the Goods menu and use the Eraser Eraser on the statue. The statue disappears, and the route into Stonehenge Base opens. This is the only required device interaction in the dungeon; there are no switches, terminals, or multi-step computer puzzles that must be solved to reach the boss.
After using the Eraser Eraser, you can send it to Escargo Express if you want to free an inventory slot. Do not leave before confirming that the statue has vanished.
- Enter Stonehenge through the central brown spot.
- Descend to the eraser statue.
- Use the Eraser Eraser from the Goods menu.
- Confirm that the statue has disappeared.
Cross the first corridors and collect the early presents
Continue through the purple corridors. At the first major split, either route eventually rejoins, but the lower path is the straightforward way forward. In the following rooms, open the present containing Spicy Jerky, then continue east.
In the next area, take the northeastern branch to find the Guts Capsule. Return to the main route and proceed south. At the next intersection, go north to collect the Cup of Lifenoodles, then return and follow the path toward the more technological, factory-like section.
The area contains Starmen, Mook Seniors, and Atomic Power Robots. Keep the party’s HP comfortably above danger range before approaching enemies. Mook Seniors can use damaging PSI and status effects. Atomic Power Robots can explode when defeated, so do not leave one as the final target unless you are prepared for the blast. Use PSI or Jeff’s Rust Promoter where appropriate, and avoid spending rare full-recovery items on routine fights.
- Collect the Spicy Jerky if desired.
- Take the northeastern branch for the Guts Capsule.
- Collect the Cup of Lifenoodles before continuing.
- Treat Mook Seniors and Atomic Power Robots as high-risk encounters.
Decide whether to hunt the Sword of Kings
In the factory-like section, Starman Supers can appear. They have a 1/128 chance to drop the Sword of Kings, Poo’s only effective weapon. The sword is entirely optional, but this is the only place and time to obtain it. Once Starman Deluxe is defeated, every enemy in Stonehenge Base disappears permanently.
If you want the sword, fight Starman Supers before approaching the boss. Keep free inventory space, especially for Jeff’s item capacity, and save before beginning a farming attempt. When a Starman Super appears on the field, approach carefully so you have a chance of starting with an advantage. Do not continue to the boss until you have finished the hunt or decided to abandon it.
If you are not collecting the sword, do not delay the story for this rare drop. Poo can complete the entire game without it.
- Decide whether the optional Sword of Kings is worth pursuing.
- Complete the hunt before defeating Starman Deluxe.
- Keep inventory space available for the drop.
- Skip the hunt safely if you prefer to continue the main route.
Cross the factory section and gather the remaining useful items
From the factory entrance, walk east to the present containing the Broken Harmonica. Jeff can eventually repair it into the Baddest Beam if his IQ is high enough, although it is optional if he already has strong equipment. Descend the ladder and continue east to the present containing the PSI Caramel.
Continue through the room with the Exit Mouse. Take one if you want a quick way out after the boss, then leave through the next exit. In the darker flashing-floor area, go down to collect the Broken Trumpet. Backtrack to the previous branch, follow the route around to the Pixie’s Bracelet, then continue toward the Speed Capsule. The Pixie’s Bracelet is useful Jeff equipment; the Broken Trumpet and Speed Capsule are optional.
After collecting what you want, proceed through the doors on the right. Restore HP and PP before entering the room containing Starman Deluxe. If you skipped a present, you can return for it after the boss because the enemies will be gone.
- Collect the Broken Harmonica if useful for Jeff’s later repair.
- Take the PSI Caramel and Exit Mouse if desired.
- Collect the Broken Trumpet.
- Collect the Pixie’s Bracelet for Jeff if you want the upgrade.
- Take the Speed Capsule if desired.
- Heal before entering the boss room.
Defeat Starman Deluxe
Starman Deluxe has 1,400 HP and begins the battle with PSI Shield β, which reflects offensive PSI. Do not open with PSI Rockin, Freeze, Fire, Starstorm, or another offensive PSI attack while the shield is active. Use Jeff’s Shield Killer or an appropriate Thunder attack to remove the shield. Neutralizer can remove shields, but it also removes beneficial shields and is a poor first choice if you plan to protect the party from Starstorm.
Starman Deluxe can restore its PSI shield during the battle. Whenever the shield returns, stop using offensive PSI until it has been removed again. Jeff’s Multi Bottle Rocket is one of the most efficient ways to shorten the fight because it does not depend on offensive PSI being safe. Physical attacks are also reliable while the shield is active.
The boss can use PSI Starstorm α, which deals heavy damage to the entire party. Have Paula cast PSI Shield Σ or PSI Shield Ω early if she knows it. Keep Ness ready to use Lifeup and reserve revival items for emergencies. If Jeff has a Multi Bottle Rocket, use it early rather than saving it for ordinary encounters. If the battle begins to consume the party’s last recovery resources, reload the pre-dungeon save and retry with a defensive opening.
- Do not use offensive PSI while PSI Shield β is active.
- Use Shield Killer or Thunder to remove the shield.
- Use PSI Shield Σ or PSI Shield Ω to reduce Starstorm damage when available.
- Use Multi Bottle Rockets for efficient damage.
- Heal before HP becomes critical.
- Remove the shield again if Starman Deluxe restores it.
Rescue the captives and leave the cleared base
After Starman Deluxe falls, Stonehenge Base shuts down permanently. All random enemies disappear, including the Starman Supers needed for the Sword of Kings. Return to the previous room and speak with Apple Kid and the other rescued characters.
Talk to Mr. Saturn after the battle to receive the Saturn Ribbon, an optional piece of Paula equipment. Speak with Apple Kid to learn that the Overcoming Shyness book has been returned to the Onett Library. The book is the next required progression item, but the Saturn Ribbon is not required for the main route.
Use an Exit Mouse if you have one. If not, return through the now-safe dungeon to the Exit Mouse room, take one, and use it. Because the enemies are gone, walking back is safe. Once outside, save and teleport to Onett. Go to the library and search the first-floor bookshelves for the Overcoming Shyness book, then continue to Tenda Village.
- Defeat Starman Deluxe.
- Confirm that random enemies have disappeared from Stonehenge Base.
- Speak with the rescued Apple Kid.
- Speak with Mr. Saturn and receive the Saturn Ribbon.
- Leave with an Exit Mouse or walk back through the safe base.
- Save after leaving.
- Go to the Onett Library for the Overcoming Shyness book.
Before you move on
- The Eraser Eraser has been used on the iron statue inside Stonehenge Base.
- Starman Deluxe has been defeated.
- All Stonehenge Base enemies have disappeared permanently.
- Apple Kid has explained that the Overcoming Shyness book is in the Onett Library.
- Mr. Saturn has given the Saturn Ribbon.
- You have exited the base and saved.
- You are ready to teleport to Onett and retrieve the Overcoming Shyness book.
- If pursuing the Sword of Kings, the attempt was completed before the boss battle.
The Lost Underworld and the Phase Distorter Route
After Stonehenge Base is cleared, retrieve Overcoming Shyness from the Onett Library, deliver it to the Tenda chief, and open the passage beneath Tenda Village. Cross Lumine Hall to defeat Electro Specter and record the seventh Sanctuary melody, then pass through the Lost Underworld, use Tendakraut at the underground Tenda gate, and reach Fire Spring. Defeat Carbon Dog and Diamond Dog, record the eighth melody, and allow the resulting sequence to carry Ness toward Magicant.
Retrieve Overcoming Shyness from the Onett Library
This chapter begins after the Stonehenge Base operation is complete and Apple Kid has told you that Overcoming Shyness was returned to the Onett Library. Leave the base and use Teleport to reach Onett. If Teleport is unavailable, return through the Winters route and travel normally; the library is in the northern part of Onett.
Enter the library and speak with the masked person in the lobby if you need the location confirmed. Go through the right-hand door in the first room, then examine the bookshelf on the left side of the room. Ness will obtain the book Overcoming Shyness. Take it immediately to Tenda Village in Deep Darkness rather than trying to enter the lower areas first.
Teleport to Tenda Village and enter the cave. The Tenda chief is in the central lower part of the village. Give him Overcoming Shyness. He reads it to the tribe, after which the previously silent Tendas begin speaking. Speak with the chief again to receive Tendakraut. The chief may also provide a Bag of Dragonite after the follow-up conversation; that item is optional, but useful against difficult late-game encounters.
- Apple Kid has confirmed that Overcoming Shyness is in the Onett Library.
- Overcoming Shyness is in the party inventory.
- The Tenda chief has read the book.
- Tendakraut has been received.
Open the passage beneath Tenda Village
After the book event, heal at the free recovery point in Tenda Village and save at the telephone near the entrance. The strong Tenda who moves the boulder is in the lower-left portion of the village, beside the large rock. Speak with him after the chief has read the book. He lifts the rock and exposes a hole.
Enter the hole. The first small chamber contains a talking rock. Speak with it, then continue through the passage. This route leads to Lumine Hall, not directly to the dinosaur-filled Lost Underworld. Keep Tendakraut in the inventory until you reach the second Tenda settlement below; it is required at that later gate.
If the strong Tenda will not move the rock, leave and re-enter the village, speak with the chief again, and confirm that the book event has finished. The passage does not open merely because you have visited the library; the chief must receive and read the book.
- The strong Tenda has removed the boulder.
- The hole beneath the boulder is open.
- The talking rock in the first chamber has been examined.
- Tendakraut remains in the inventory for the underground gate.
Cross Lumine Hall and reach Electro Specter
Lumine Hall is a ladder-and-hole dungeon. From the entrance, follow the upper passages around the rock formations, then use the ladders to reach the lower routes and return upward on the next ladder. The path eventually leads to the shining spot guarded by Electro Specter. The dungeon includes useful gift boxes, but the required objective is the boss and the melody beyond it; do not spend limited healing supplies simply to collect every optional item.
Fobbys and other enemies can drain HP or inflict dangerous PSI effects. Avoid groups when possible, and use the party’s visible overworld positioning to approach isolated enemies rather than entering several battles in succession. Ness should preserve enough PP for Lifeup and Paula or Poo should retain offensive PSI for the boss. The talking rock near the entrance is also a useful reference point if you need to retrace the route.
Before touching the shining spot, heal the party and confirm that Ness has the Sound Stone. A Franklin Badge can reflect some electrical attacks, while Jeff’s Neutralizer or a Shield Killer can remove Electro Specter’s PSI Shield. Do not rely on ordinary offensive PSI while its reflective shield is active, because the shield can turn attacks back on the party.
- The party is healed before the shining spot is activated.
- At least one reliable revival method is available.
- Jeff has Neutralizer or a Shield Killer if you plan to remove the shield directly.
- The Sound Stone is in Ness’s inventory.
Defeat Electro Specter and record the seventh melody
Activate the shining spot to begin the Electro Specter battle. The boss has a PSI Shield and uses electrical attacks, HP absorption, Shield Killer, and Neutralizer. Have Jeff use Neutralizer or a Shield Killer when appropriate. If you do not have either item available, use physical attacks while avoiding reflected PSI, and use PSI Freeze or PSI Flash only when the shield is no longer protecting the boss.
Ness should prioritize Lifeup and can attack between healing turns. Paula and Poo should use their strongest practical Freeze attacks, while Jeff should use a Multi Bottle Rocket only if you are comfortable spending one here; saving most of them for Diamond Dog is safer. Keep the party spread across healing duties rather than allowing one unconscious character to remain unattended, because the boss can recover HP with Hungry HP-Sucker.
After Electro Specter is defeated, continue past the battle site and enter the shining spot. The Sound Stone records the seventh melody, Lumine Hall. Then use the hole in the area beyond the shining spot. The following drop leads into the Lost Underworld. If the melody does not record, Ness has not reached the correct shining focus; walk farther into the spot rather than leaving the dungeon.
- Electro Specter is defeated.
- The seventh melody, Lumine Hall, has been recorded.
- The party has entered the hole beyond the sanctuary site.
- The route into the Lost Underworld is open.
Cross the Lost Underworld and enter the underground Tenda village
The Lost Underworld is a broad area with very small party sprites and powerful dinosaur enemies. Move along the major paths instead of trying to clear every enemy. Earthquakes and geysers interrupt movement, but the geysers are valuable recovery points: blue geysers restore HP and PP, while red geysers cure status ailments. Use them instead of spending Horns of Life, Secret Herbs, or other scarce items after ordinary battles.
From the entrance, travel toward the northeastern part of the map to find the Sea Pendant gift box if you want the optional defensive upgrade. Then head west and work south toward the fenced Tenda settlement. The settlement is the obvious gated village inside the Lost Underworld. Approach the gate while Tendakraut is still in the inventory. The Tendas smell it, take it from the party, and allow entry. Do not expect Tendakraut to remain afterward.
Inside the village, use the hotel or speak with the talking rock for recovery, then visit the shop if your equipment is outdated. Speak with the large talking rock in the village before leaving. It gives information about the Sanctuary locations and is the trigger that establishes the Fire Spring route. If the Fire Spring entrance does not become usable, return to this rock and speak with it again.
- The Lost Underworld has been entered through Lumine Hall.
- The blue and red geyser functions are understood and available for recovery.
- Tendakraut has been surrendered at the underground Tenda gate.
- The underground Tenda village has been entered.
- The talking rock has been spoken to and the Fire Spring route is active.
Reach Fire Spring and prepare for the final Sanctuary guardian
Leave the underground Tenda village and travel west, then south, following the route described by the talking rock. A gift box containing the Cloak of Kings can be found on the way; it is optional equipment for Poo. Continue toward the southwestern part of the Lost Underworld. A blue geyser is near the Fire Spring approach, and a telephone or bird save point is located beside the cave entrance.
Heal fully at the blue geyser and save before entering. Fire Spring contains fire-oriented enemies and PSI users, so PSI Freeze is generally the most dependable offensive option against ordinary enemies. Avoid testing powerful items on random encounters. If a group blocks a narrow passage, retreat toward the previous screen and approach again rather than wasting rare recovery items.
Before the boss, equip useful elemental protection when available. A Sea Pendant or Star Pendant is especially helpful for Ness after this sequence, although neither is required to obtain the melody. Keep Ness’s HP and PP high, preserve revival items, and carry at least one strong healing option for each likely surviving party member. If you have Multi Bottle Rockets, plan to reserve them for Diamond Dog rather than spending them on Carbon Dog.
- The Fire Spring entrance in the southwestern Lost Underworld has been reached.
- The party has healed at the nearby blue geyser.
- The nearby telephone or bird save point has been used.
- Revival items and PP recovery remain available.
- Multi Bottle Rockets have been reserved for Diamond Dog if possible.
Defeat Carbon Dog and Diamond Dog
At the top of Fire Spring, activate the shining spot to fight Carbon Dog. Carbon Dog is strong against fire and uses powerful fire attacks, so Paula and Poo should favor PSI Freeze. PSI Flash may work, but it is less dependable as the main plan. Ness should heal, use PSI Rockin when appropriate, or attack if the party is stable. Jeff should avoid spending your entire Multi Bottle Rocket supply on this first form, because the transformation immediately begins the more dangerous Diamond Dog phase.
When Carbon Dog is defeated, it transforms into Diamond Dog without giving the party a normal recovery break. Diamond Dog begins with a shield that reduces or reflects physical attacks. Have Jeff use Neutralizer or Shield Killer before ordering physical attacks or Bottle Rockets. Once the shield is down, use PSI Freeze, PSI Rockin, Starstorm, and carefully timed physical attacks. Check for the shield again during the fight; Diamond Dog can restore it, and attacking into it can damage your own party.
Diamond Dog can inflict Diamondization and can use strong PSI attacks. Ness should keep Lifeup available, and the party should revive diamondized or unconscious members whenever the battle situation allows. If a Multi Bottle Rocket is used, first confirm that the shield is down and be ready for the shield to return on a later turn. Continue healing rather than trying to end the battle at the expense of the entire party.
- Carbon Dog has been defeated.
- Diamond Dog’s shield has been removed before physical attacks are used.
- Diamond Dog has been defeated.
- All surviving characters are healed or revived before leaving the boss area.
Record the eighth melody and verify the transition
After the two-form boss battle, move beyond the battle location to the Fire Spring shining focus. Defeating Carbon Dog and Diamond Dog is not by itself enough to record the melody. Ness must physically reach the Sanctuary focus and allow the Sound Stone event to play.
Fire Spring is the eighth Sanctuary location in the normal route. When its melody is recorded after the other seven are already stored, the completed Sanctuary sequence begins and Ness is taken into the Magicant transition. The Sound Stone does not need to remain as a normal usable item afterward; the correct completion evidence is the melody sequence and the transition, not possession of Tendakraut or the Sound Stone.
If the transition does not begin after recording Fire Spring, one of the previous seven melodies is missing. Retrace the Sanctuary locations using the Sound Stone’s recorded-melody feedback and visit any missing focus. The required locations are Giant Step, Lilliput Steps, Milky Well, Rainy Circle, Magnet Hill, Pink Cloud, Lumine Hall, and Fire Spring.
- Ness has reached the Fire Spring Sanctuary focus.
- The eighth melody, Fire Spring, has been recorded.
- The complete Sanctuary sequence or Magicant transition has begun.
- Tendakraut is not expected to remain after the underground Tenda gate.
Before you move on
- Overcoming Shyness was retrieved from the Onett Library.
- The book was delivered to the Tenda chief.
- The strong Tenda opened the passage beneath the upper Tenda Village.
- Electro Specter was defeated and the Lumine Hall melody was recorded as the seventh melody.
- The Lost Underworld was entered through the Lumine Hall route.
- Tendakraut was surrendered at the underground Tenda gate and is no longer in the inventory.
- The underground Tenda talking rock was consulted.
- Fire Spring was reached through the southwestern Lost Underworld route.
- Carbon Dog and Diamond Dog were defeated in their continuous boss sequence.
- Ness reached the Fire Spring Sanctuary focus and recorded the eighth melody.
- The complete Sanctuary sequence or transition into Magicant began, confirming that the required eight melodies are present.
References for this chapter
- Nintendo Player’s Guide: EarthBound complete guide
- Lumine Hall - EarthBound Walkthrough
- Lost Underworld - EarthBound Walkthrough
- Fire Spring — EarthBound Walkthrough, Thonky
- Stonehenge Base - EarthBound Walkthrough
- EarthBound Walkthrough: Lumine Hall
- EarthBound Walkthrough: Lost Underworld
- Stonehenge — EarthBound Walkthrough
- EarthBound/Lumine Hall - StrategyWiki
- EarthBound/Lost Underworld Strategy Guide
- EarthBound/Fire Spring Strategy Guide
Magicant and the Inner World — Ness’s Dream Sequences
After Ness records the eighth and final Your Sanctuary melody at Fire Spring, the Sound Stone plays the completed melody and sends him into Magicant, the inner world created from his memories and power. Ness explores alone, uses the recovery and storage services available there, crosses the red monster area and Sea of Eden, and defeats Ness’s Nightmare at the Mani-Mani statue. The victory permanently ends Magicant, grants Ness the power gathered from the eight Sanctuaries, and unlocks Teleport β. Ness then returns automatically to Saturn Valley, where Dr. Andonuts explains that Phase Distorter II requires Zexonyte. The next chapter begins with the occupied-Onett meteorite objective. Stonehenge Base was already completed earlier and is not part of this chapter’s route.
Record the eighth melody and enter Magicant
Defeat Carbon Dog and its transformed second phase, Diamond Dog, in Fire Spring. After the battle, walk to the Your Sanctuary focal point and interact with it. If the other seven melodies have already been recorded, the eighth melody is added to the Sound Stone and the complete melody sequence plays automatically.
This transition is required. Magicant is not an optional dream area, and Ness enters it alone while Paula, Jeff, and Poo remain outside. Make a save before approaching the Fire Spring Sanctuary if you want a reliable retry point for the guardian or the Magicant boss.
The Sound Stone does not remain in Ness’s inventory after the Sanctuary sequence. Its disappearance is normal and does not indicate a missed item or an unrecorded ninth melody. Fire Spring is the eighth and final Sanctuary location in the original North American SNES release.
Before starting the transition, equip Ness with the strongest protection against Flash that you have. A Sea Pendant is the preferred choice; a Night Pendant or Star Pendant is also useful. If none of those is available, buy an Earth Pendant from the Magicant shop after arriving. The pendant is especially valuable against Ness’s Nightmare’s Flash-based attacks.
- Defeat Carbon Dog and Diamond Dog.
- Record the eighth melody at the Fire Spring Sanctuary.
- Save before the Sanctuary transition if desired.
- Equip Ness’s best available Flash protection.
- Do not expect the Sound Stone to remain after Magicant begins.
Use Magicant’s recovery, storage, and shopping services
When control returns in Magicant, go east from the starting area. Ness’s mother can restore his HP and PP, and Tracy can access Escargo Express storage. Use both services before entering the red monster area. Store weak equipment and unnecessary items so Ness has space for presents and useful recovery supplies.
Go south to the Magicant shop. It sells Magic Puddings and Earth Pendants. Magic Pudding restores PP and is worth purchasing or storing if Ness lacks other PP recovery items. The Earth Pendant provides elemental protection but is weaker than the Sea Pendant, Night Pendant, or Star Pendant.
West of the shop is a building with a telephone and ATM. Continue west toward the snowmen and open the gift box on the west side of that area to receive a PSI Caramel. North of the snowmen is the Flying Men house. Speaking to one of the Flying Men lets Ness recruit that character as an automatic battle ally.
A Flying Man cannot be controlled or healed. If one is defeated, a grave appears outside the house and another Flying Man may be recruited. The supply is limited, so recruiting one is optional and should not be treated as a required party replacement. Ness can complete Magicant without one.
- Restore Ness’s HP and PP with his mother.
- Use Tracy to store unnecessary items.
- Buy or store Magic Pudding if Ness needs PP recovery.
- Purchase an Earth Pendant only if stronger protection is unavailable.
- Collect the PSI Caramel if Ness has inventory space.
- Recruit a Flying Man only if you want an optional automatic ally.
Cross the red monster area and collect the route items
Enter the red monster area east of the Flying Men house. This area contains dangerous enemy combinations, but it is not necessary to grind every encounter. If Ness is already near level 99, avoid unnecessary battles because the Sanctuary power sequence provides a large experience and stat benefit only when additional leveling can still occur.
Loaded Dice can call additional enemies, including Uncontrollable Spheres. If an Uncontrollable Sphere appears, put it to sleep when practical and keep Ness’s HP high enough to survive a severe hit. Care Free Bombs can throw Bombs or Super Bombs, while Electro Swooshes use electrical attacks. The Franklin Badge helps against electrical attacks, but do not spend recovery items simply to clear every encounter.
From the entrance, travel east to the gift box containing a Bag of Dragonite. Return to the previous route and take the north branch at the first split. At the next split, continue north to find the Goddess Band. Return to the earlier junction, take the east branch, and follow the winding path past the Magicant Bat and Magic Tart gift boxes.
A Ness figure near the beginning of the area can provide a Baseball Cap. The cap is optional and offers little benefit compared with Ness’s stronger equipment, so store, drop, or sell it if inventory space is needed. Continue to the end of the route and inspect the metal tentacle. It transports Ness to the Sea of Eden.
- Run from costly encounters when preserving HP and PP is more valuable than experience.
- Collect the Bag of Dragonite.
- Collect the Goddess Band if Ness has room.
- Collect the Magicant Bat and Magic Tart.
- Inspect the metal tentacle at the end of the route.
Cross the Sea of Eden
After the metal tentacle transports Ness, travel east through the Sea of Eden. When the route permits, turn northwest. Krakens occupy this section and can inflict heavy damage, but physical attacks are a practical way to conserve Ness’s PP for healing and the boss encounter.
The Krakens do not respawn after being defeated. If Ness takes serious damage, use recovery items before continuing. Magicant’s mother is available earlier in the area, but after moving into the Sea of Eden there is no reason to risk the boss while carrying severe damage.
Continue toward the northwest portion of the Sea of Eden. The Mani-Mani statue marks the approach to Ness’s Nightmare. Before examining it, restore Ness to full HP and confirm that he has the strongest Flash protection available. Use a Sea Pendant if you have one; otherwise use a Night Pendant or Star Pendant. The Earth Pendant from the Magicant shop is the fallback option.
- Travel east and then northwest through the Sea of Eden.
- Use physical attacks against Krakens to conserve PP.
- Heal Ness before approaching the statue.
- Equip the strongest available pendant before the boss.
Defeat Ness’s Nightmare
Ness’s Nightmare begins with PSI Shield α. This shield blocks Ness’s offensive PSI without reflecting it, so do not waste PSI Rockin or other offensive PSI during this opening state. If you brought a Bag of Dragonite, Bomb, or Super Bomb and can spare it, use one while the shield is active. Otherwise, rely on physical attacks until the shield is gone.
Ness’s Nightmare can use Shield β, which reflects physical attacks. When Shield β is active, stop using ordinary physical attacks and switch to offensive PSI if the opening PSI Shield has already disappeared. If neither physical attacks nor PSI is safe at a particular moment, heal or use an item instead of damaging yourself through the shield.
The boss can use PSI Rockin, Flash-based attacks, and healing. Keep Ness’s HP high and use Lifeup immediately after a powerful attack. The rolling HP counter may give Ness time to heal after apparently mortal damage, but it is not a substitute for prompt recovery. Reserve enough PP for Lifeup rather than spending all of it on damage. Sleep has a chance to work, but it is not reliable enough to serve as the main plan.
If Ness is defeated, reload the save made before the Fire Spring transition or before approaching the final Sanctuary focal point. Refill HP and PP, verify the pendant, and retrieve recovery or PP-restoring items from storage before trying again. Once Ness’s Nightmare is defeated, Magicant ends permanently and cannot be revisited in the normal game.
- Begin the battle with full HP and Flash protection.
- Use physical attacks or expendable offensive items against PSI Shield α.
- Do not spend offensive PSI while PSI Shield α is active.
- Stop physical attacks when Shield β reflects them.
- Reserve PP for Lifeup.
- Heal immediately after major damage.
- Reload the pre-Magicant save if the attempt fails.
Complete Magicant and hand off to the next route
Defeating Ness’s Nightmare triggers the required inner-world conclusion. Ness receives the power gathered from the eight Your Sanctuary locations, producing a major permanent progression benefit and a large experience-driven improvement when he is below the level cap. Magicant then disappears as part of the transition.
Ness also unlocks Teleport β after Magicant. This version of Teleport uses a different movement pattern from Teleport α and is useful for reaching previously visited locations during the remaining campaign. The party is not reunited inside Magicant; Ness is automatically returned to Saturn Valley after the cutscene.
At Saturn Valley, speak with Dr. Andonuts and inspect the Phase Distorter II when the game directs you to it. He explains that the machine needs Zexonyte before it can operate. This is the stopping point for this chapter.
The next chapter begins by retrieving the Meteorite Piece from the occupied Onett meteorite and then completing the Phase Distorter II sequence. Do not repeat Stonehenge Base here: that stronghold was already completed earlier as a prerequisite for the endgame route.
- Defeat Ness’s Nightmare.
- Receive the power gathered from the eight Sanctuaries.
- Confirm that Magicant ends permanently.
- Confirm that the Sound Stone disappears normally.
- Return automatically to Saturn Valley.
- Speak with Dr. Andonuts about Phase Distorter II.
- End this chapter when Dr. Andonuts explains that Zexonyte is required.
- Begin the next chapter with the occupied-Onett meteorite and Phase Distorter II objectives.
Before you move on
- The eighth and final Your Sanctuary melody was recorded at Fire Spring.
- The complete eight-melody sequence played and Magicant began automatically.
- Ness used Magicant’s recovery, storage, and shopping services as needed.
- Ness crossed the red monster area and reached the Sea of Eden through the metal tentacle.
- Ness’s Nightmare was defeated at the Mani-Mani statue.
- Ness received the power gathered from the eight Sanctuaries.
- Magicant ended permanently.
- The Sound Stone disappeared normally.
- Ness unlocked Teleport β.
- Ness returned automatically to Saturn Valley.
- Dr. Andonuts explained that Phase Distorter II requires Zexonyte.
- The next objective is the occupied-Onett meteorite and the Meteorite Piece route.
- Stonehenge Base remains an earlier completed prerequisite, not a post-Magicant objective.
References for this chapter
- Nintendo Player’s Guide: EarthBound complete guide
- Magicant — EarthBound Walkthrough, Thonky
- Ness’s Nightmare — EarthBound Walkthrough, Thonky
- Fire Spring — EarthBound Walkthrough, Thonky
- List of Your Sanctuary Locations — EarthBound Walkthrough
- List of PSI — EarthBound Walkthrough, Thonky
- Get Zexonyte from the Onett Meteorite — EarthBound Walkthrough, Thonky
Phase Distorter and Sea of Eden — Final Approach
After completing Magicant and defeating Ness’s Nightmare, return to Saturn Valley and help Dr. Andonuts finish Phase Distorter II. This requires the Meteorite Piece from the occupied version of Onett. The machine transports the four heroes to an isolated section of the Lost Underworld, where Poo learns PSI Starstorm Ω and the party obtains a Horn of Life. A second machine then transfers their minds into robots and sends them to the Cave of the Past. Repair the party at the machine, decide whether to create a final-route retry save, and cross the cave to Giygas’s entrance.
Continuity warning: preserve the ordinary-world save first
Before entering Phase Distorter II, make a separate save in the normal world and keep it untouched. This is the durable archive for optional exploration, unfinished errands, equipment shopping, photo opportunities, and replay access. Entering Phase Distorter II is the practical point of no return for ordinary overworld gameplay.
The Phase Distorter in the Cave of the Past can repair the party and call Ness’s father, but saving there does not create a cleared file or return you to the present. It is useful only as a retry point for the final route. If you lose after saving in the Cave of the Past, reloading that file places you back in the endgame route rather than restoring access to Saturn Valley, Onett, or the rest of the world. Keep the pre-Phase-Distorter II save even if you also create a Cave of the Past save.
- A normal-world save exists before Phase Distorter II is entered.
- Optional content, shopping, equipment changes, and errands are finished or deliberately postponed.
- You understand that a Cave of the Past save is for final-route retries only.
Retrieve the Meteorite Piece from occupied Onett
After Ness returns from Magicant, teleport to Saturn Valley and speak with Dr. Andonuts. His Phase Distorter needs material from a meteorite. Confirm that you have seen a meteorite when the game asks, then teleport to Onett.
Onett is under enemy control. Most buildings are unavailable, but Ness’s house remains a useful recovery point. Enter the house and talk to Ness’s mother if the party needs to heal before crossing the town. From the house, follow the familiar route up the hill toward the original meteor crash site. The enemies are much stronger than the early-game creatures, so avoid unnecessary battles and keep the party’s HP high.
At the crash site, check the meteorite to take the Meteorite Piece. You do not need to clear Onett or defeat every enemy. Once the item is obtained, teleport back to Saturn Valley. If a party member is diamondized by an Evil Eye, cure that condition before continuing; do not rely on reaching the next town while leaving a serious status ailment untreated.
- The party has returned from Magicant.
- The Meteorite Piece has been taken from the meteorite north of Ness’s house.
- The party has returned to Saturn Valley.
Repair Phase Distorter II and complete final preparations
Use the Meteorite Piece from the inventory while standing near Dr. Andonuts. The meteorite material is converted into Zexonyte, which lets him complete Phase Distorter II. After the conversation, rest overnight in Saturn Valley. The free Saturn Valley lodging is the normal place to use; the machine is ready the following morning.
Use this interval for final preparation. Restock revival items, HP recovery, and PP recovery. Check Escargo Express storage and retrieve supplies you were saving for the finale. Leave open inventory space, including at least one free space in Ness’s inventory and another party member’s inventory, because the late route contains useful items.
Flash protection is especially valuable. Equip Paula with the best available pendant that protects against Flash, such as the Sea Pendant, Night Pendant, or Star Pendant. A Franklin Badge should remain available for Paula if you want the safest arrangement against reflected projectile attacks later. Multi Bottle Rockets, Brain Food Lunches, Magic Truffles, Horns of Life, and other premium supplies are useful but optional; do not treat any one shopping list as a progression requirement.
When ready, save again in the normal world if you want the latest version of your durable archive. Then talk to Dr. Andonuts, answer his confirmation questions, and enter Phase Distorter II. From this point, ordinary travel back to the present is unavailable.
- The Meteorite Piece has been used on Dr. Andonuts.
- The party has rested after the repair.
- Final equipment, recovery items, and storage have been checked.
- A durable normal-world save has been preserved.
- The party has entered Phase Distorter II.
Cross the isolated Lost Underworld area
Phase Distorter II deposits the party in an isolated section of the Lost Underworld. Step out of the machine and move east. The Star Master approaches Poo and teaches him PSI Starstorm Ω. Allow the event to finish before moving on; this is Poo’s strongest Starstorm spell and a permanent upgrade for the final route.
Continue east to find a Mr. Saturn beside the wreckage of the prototype Phase Distorter that Pokey stole. Check the broken machine to obtain a Horn of Life. The Horn is not required to trigger the next scene, but it is one of the most valuable revival supplies available for the final route, so retain it.
Move north and inspect the metal tentacle if desired; it is a landmark rather than a required interaction. Return west along the cliff, then travel south. A new Phase Distorter will appear in the southern portion of the area.
Talk to Apple Kid, then speak with Dr. Andonuts. When Dr. Andonuts walks away, follow him and speak with him again. He explains that living bodies cannot survive the required time transfer. Accept each confirmation prompt. The party is then converted into robotic bodies. When Dr. Andonuts asks Ness to activate Phase Distorter III, answer Yes and enter the machine.
- Poo has learned PSI Starstorm Ω.
- The Horn of Life has been taken from the wrecked prototype.
- Apple Kid and Dr. Andonuts have been spoken to in the required sequence.
- The party has accepted the robotic transformation.
- Phase Distorter III has been activated.
Repair the party in the Cave of the Past
The robotic party arrives in the Cave of the Past, the final dungeon leading to Giygas. The transformation and arrival are automatic; there is no inventory command that restores the characters to their living bodies during this section.
Check the Phase Distorter immediately. Its Repair function restores the party’s HP and PP and is the most important recovery resource in the cave. Use it again whenever the party returns to the machine and needs a complete recovery. This is also the location of the final practical save decision.
The Communicate function calls Ness’s father and allows you to save. Do not confuse this with a durable cleared save. Saving here is appropriate if you want to retry the Cave of the Past and the final battle without repeating the Onett and Saturn Valley sequence, but the file remains trapped in the final route until the game is completed. Your ordinary-world save from before Phase Distorter II is the file to preserve for optional content and future overworld access.
The Cave of the Past is short but dangerous. It is not necessary to grind every enemy. Use the machine’s Repair function before setting out, conserve revival items for emergencies, and return to the machine rather than spending rare supplies merely to recover from routine damage.
- The party has arrived in the Cave of the Past as robots.
- Repair has restored the party’s HP and PP.
- The difference between the normal-world archive and the Cave of the Past retry save is understood.
- The party is ready to cross the final dungeon.
Cross the Cave of the Past
From the Phase Distorter, travel southwest. The path is mostly direct, but the enemies are among the strongest in the game. The main threats include Ghosts of Starman, Final Starmen, Nuclear Reactor Robots, Ultimate Octobots, Bionic Krakens, Squatter Demons, and Wild ’n Wooly Shamblers. Avoid encounters when the route permits, but do not continue while the party is badly damaged.
Give Final Starmen priority. They begin with PSI Shield β, so Paula’s PSI attacks can be reflected until Jeff uses Neutralizer to remove the shield. They can also use PSI Starstorm Ω and may revive fallen enemies. Nuclear Reactor Robots are metallic and weak to Freeze. When other enemies are gone, Poo can use Mirror on an isolated Nuclear Reactor Robot to create an opportunity for recovery, but do not depend on that tactic while multiple enemies remain.
Use the Magic Butterflies placed along the route to recover PP when they can be reached safely. Large metallic orbs transport the party to the next area when touched. A gift box along the route contains Ness’s Legendary Bat. It is optional for completion, but it is a major weapon upgrade and should be collected if Ness has inventory space.
After the second metallic orb, go north to the cave entrance. Enter it and walk north across the machine-like path. The route ends at the eerie entrance to Giygas’s lair. Stop before entering if you need to review supplies or reload the normal-world archive; there are no shops or ordinary overworld services beyond this point.
- The party has crossed the opening section of the Cave of the Past.
- Final Starmen are being handled with Neutralizer before PSI attacks.
- Available Magic Butterflies and the Phase Distorter have been used for recovery.
- The Legendary Bat has been collected if desired.
- The northern cave and Giygas’s entrance have been reached.
Before you move on
- The eight Sanctuary melodies and the Magicant sequence are complete.
- The Meteorite Piece has been retrieved from occupied Onett and used by Dr. Andonuts.
- The party has rested after Phase Distorter II is repaired.
- The durable pre-Phase-Distorter normal-world save has been preserved.
- Poo has learned PSI Starstorm Ω.
- The Horn of Life has been collected from the wrecked prototype Phase Distorter.
- Apple Kid and Dr. Andonuts have completed the Phase Distorter III sequence.
- Ness, Paula, Jeff, and Poo have been converted into robots.
- The Cave of the Past Phase Distorter has repaired the party.
- The player has decided whether to create a final-route retry save with Communicate.
- The party has crossed the Cave of the Past and reached the entrance to Giygas’s lair.
The Final Confrontation — Giygas: setup and tactics
The final battle in the North American Super Nintendo release of EarthBound has three practical stages. First, ignore Giygas and defeat Heavily Armed Pokey while the Devil’s Machine reflects attacks directed at Giygas. Second, damage Giygas directly after Pokey shuts down the machine. Third, stop attacking and use Paula’s Pray command until the scripted sequence is completed. Prepare a save before the Cave of the Past, preserve Ness’s healing PP, and keep Paula alive because her Pray command is the only required way to finish the last stage.
1. Prepare before entering the Cave of the Past
Make a separate save before the final approach and heal everyone before using the Phase Distorter route to the Cave of the Past. The characters will be placed in robot bodies for the time-travel sequence, so treat the entrance as the point of no convenient resupply. Enter with Ness, Paula, Jeff, and Poo alive and with their strongest practical equipment already assigned.
Give Paula a pendant that protects against Flash if you have one, with a Star Pendant or Sea Pendant being especially useful. A Night Pendant is also valuable for protection against Flash, particularly if you choose to equip it on Poo. The fight can still be won without ideal pendants, so do not abandon a good save merely because one item is missing.
Keep Ness’s PP available for Lifeup and status recovery. Jeff should carry the Heavy Bazooka and any strong bottle-rocket ammunition you have retained. Carry full-heal and revival items where possible, but do not fill every inventory slot with ordinary offensive items. Paula’s survival matters more than maximizing her damage output.
- A separate save exists before entering the Cave of the Past.
- Ness, Paula, Jeff, and Poo are alive and healed.
- Paula has the best available Flash-protection pendant.
- Ness has enough PP for repeated Lifeup use.
- Jeff has the Heavy Bazooka and useful ammunition.
2. Defeat Heavily Armed Pokey without attacking Giygas
The first battle shows Giygas protected by the Devil’s Machine alongside Heavily Armed Pokey. Do not target Giygas with physical attacks, PSI, or attacks that strike all enemies. Damage aimed at Giygas is reflected back at the party, and ordinary damage cannot defeat him during this stage. Select Heavily Armed Pokey as the target for every offensive action.
At the start, Paula should generally cast PSI Shield Sigma on the party. Giygas uses PSI Rockin Alpha and PSI Rockin Beta during this stage, and Sigma can reduce the damage. Do not use PSI Shield Omega to reflect those attacks: reflected PSI can create an unfavorable exchange because Giygas can reflect it back again.
Use PSI Freeze on Pokey when Paula or Poo can spare the PP. Jeff’s Heavy Bazooka is a strong single-target choice. Multi Bottle Rockets can help, but they are less efficient against Pokey than the Heavy Bazooka and Freeze. Ness can use Paralysis on Pokey if desired, although it is not guaranteed to work, and should otherwise heal with Lifeup or use a reliable physical attack against Pokey.
Avoid group attacks. If a queued action becomes invalid when Pokey leaves, that is harmless compared with risking Giygas-targeted damage. Keep watching HP rather than waiting for a character to reach critical condition before healing.
- Every damaging action is aimed at Heavily Armed Pokey.
- Paula uses PSI Shield Sigma rather than PSI Shield Omega.
- Jeff uses the Heavy Bazooka when practical.
- Ness preserves PP for Lifeup and does not waste turns attacking Giygas.
- Pokey is defeated and shuts down the Devil’s Machine.
3. Attack Giygas after the machine is disabled
When Pokey turns off the Devil’s Machine, the battle changes to its second stage and Giygas becomes vulnerable to ordinary attacks. Begin using the party’s strongest dependable single-target attacks. Ness can use his strongest physical attack when the party is stable, but he should immediately return to healing whenever an ally is in danger.
Paula can use a strong single-target PSI attack such as Freeze if she has enough PP, while Poo can attack with his strongest practical PSI or physical option. Jeff should use the Heavy Bazooka or another effective weapon item that remains in his inventory. Do not spend every resource immediately; the objective is to survive until the scripted transition, not to win through one particular damage type.
Giygas’s attacks in this stage are difficult to read from the battle text and can include heavy damage, thunder-like attacks, and Flash-like status disruption. Heal after each dangerous round. If Paula is incapacitated, revive her promptly. The next stage cannot be completed without her Pray command.
- The battle display has changed after Pokey shuts down the machine.
- The party now targets Giygas directly.
- Ness retains enough PP or items to heal through the next transition.
- Paula is alive or is revived immediately if incapacitated.
4. Recognize the final stage and stop attacking
After enough damage and additional dialogue, Giygas enters the final stage. At this point, normal attacks are not the solution. Select Pray with Paula. The battle requires nine successful prayers in total; the responses change as people connected to the journey answer Paula’s call, and the final prayer completes the defeat sequence.
Use Pray again on each turn unless Paula must first be revived or restored. If Paula falls, revive her with Ness or a revival item before continuing. Ness should concentrate on Lifeup, healing status problems, and reviving allies. Jeff can defend or use healing items, and Poo can defend, heal, or use a safe supportive action. Their damage is no longer the priority.
Do not stop because an early prayer appears to have little effect. Continue the sequence until the required prayers have been completed. The battle’s strange visual changes and dialogue are scripted events, not signs that the game has malfunctioned.
- Paula selects Pray during the final stage.
- Paula is revived immediately if she is defeated.
- The party uses healing and defensive actions instead of normal attacks.
- The prayer sequence continues through all nine required prayers.
5. Recover from a failed attempt
If the first stage defeats the party, reload the pre-Cave-of-the-Past save and change the opening routine rather than repeating the same actions. Cast PSI Shield Sigma early, focus every attack on Pokey, and use the Heavy Bazooka and PSI Freeze instead of spending turns on low-damage attacks. Keep Ness healing whenever a character is at risk of being knocked out.
If the second stage drains your resources, enter with more PP-restoring items and preserve Ness’s PP during the Pokey stage. If Flash-like effects repeatedly disable the party, improve pendant protection before trying again. If the final stage fails, the usual causes are attacking instead of praying, allowing Paula to remain unconscious, or entering the stage with no practical revival or healing option.
The battle ends when the final prayer resolves and the ending sequence begins. Do not reset when Giygas changes appearance or the dialogue becomes unusual. Those transitions are part of the intended conclusion.
- A failed attempt is retried from a pre-final-route save.
- The first-stage plan is adjusted instead of wasting attacks on Giygas.
- Paula remains available for all required prayers.
- The ending begins after the final prayer resolves.
Before you move on
- Heavily Armed Pokey has been defeated and the Devil’s Machine has been shut down.
- Giygas’s vulnerable second stage has been survived.
- Paula has used Pray nine times in the final stage, with necessary revival or recovery turns handled as needed.
- The final battle has ended and the ending scenes have begun.
- The epilogue has been viewed before making the final cleared-file save.
Aftermath — Epilogue and Returning Home
After Paula’s ninth successful Pray resolves the final phase of the Giygas battle, Ness, Paula, Jeff, and Poo return to their bodies in Saturn Valley. Poo returns to Dalaam, Jeff stays with Dr. Andonuts in Winters, and Paula asks Ness to escort her home. Before that escort, the world can be explored temporarily for changed dialogue and optional errands. When ready, take Paula to Polestar Preschool in Twoson, then return with Ness to his house in Onett. Ness’s mother starts the photo album and credits, and Picky delivers Pokey’s letter afterward. The original North American Super Nintendo release does not create a normal cleared save after the credits, so preserve an ordinary save from before the final Phase Distorter route if you want to replay the ending or revisit the overworld without repeating the finale.
Finish the Saturn Valley farewell sequence
When Paula’s ninth successful Pray reaches the final battle, the scripted ending sequence begins. The party’s robot bodies are destroyed, their spirits return to their owners, and Ness, Paula, Jeff, and Poo awaken in Saturn Valley. Follow the automatic conversations until you regain control; there is no new dungeon or mandatory battle to begin here.
Poo says goodbye and returns to Dalaam. Jeff also leaves the active party, explaining that he will remain with Dr. Andonuts in Winters to continue their work. These departures are required parts of the ending and do not mean that either character was recruited incorrectly.
After Poo departs, three gift boxes are available in Saturn Valley. They contain letters for Jeff, Paula, and Ness: Tony’s letter for Jeff, a letter from the children at Polestar Preschool for Paula, and a letter from Ness’s mother. Open them if you want the additional closure scenes and dialogue. The letters are optional and do not unlock a path, item, boss, or ending flag.
Paula asks whether Ness will escort her home. Either answer leads to the same result: Paula remains with Ness for the temporary return journey. Once control is restored, decide whether to explore before taking her to Twoson.
- Ness and Paula have returned to their bodies in Saturn Valley.
- Poo has departed for Dalaam.
- Jeff has departed to remain with Dr. Andonuts in Winters.
- The three Saturn Valley letters have been collected if the optional dialogue is wanted.
- Paula is accompanying Ness.
Protect the ordinary save that preserves the adventure
The original North American SNES release does not provide a normal completed-game save after the credits. Do not assume that manually saving during the ending or after the credits will create a permanent cleared file. The ending sequence is not followed by ordinary overworld access from a new completed save.
The safest archive is an ordinary save made before the final Phase Distorter route. Preserve that file before entering the final sequence. It lets you return to the pre-finale world, prepare differently, replay the Cave of the Past and Giygas, or reach the temporary post-Giygas exploration period again.
If the only available save is inside the final route, you can still finish the game, but you will need to repeat that route to see the ending exploration again. On original hardware, the game is expected to reach its ending screen rather than return you to a permanent postgame file. Treat the pre-final-route save as the durable completion backup.
- An ordinary save from before the final Phase Distorter route has been preserved.
- You are not expecting a cleared save to appear after the credits.
- You understand that replaying the ending may require repeating the final route.
Explore the changed world before taking Paula home
While Paula is still in the party, you may use PSI Teleport to revisit earlier locations and talk to people whose dialogue changes after Giygas’s defeat. This exploration is optional. There is no additional Sanctuary melody, required dungeon, or second final boss during this period.
Useful optional stops include Onett, Twoson, Threed, Fourside, Summers, Winters, Scaraba, Dalaam, Tenda Village, and Saturn Valley. Some characters comment on the party’s victory, while others provide small farewell scenes. These visits are closure content, not prerequisites for the standard ending.
The Overcoming Shyness book sequence is optional after the main route. If you completed the Tenda book events and the book is available to be returned, revisit the appropriate Tenda and Onett library locations and follow the characters’ dialogue. Returning the book affects optional dialogue only; it is not required for Paula’s farewell, the photo album, the credits, or Pokey’s letter. Do not delay the ending because you believe this favor is mandatory.
Finish any optional exploration, item management, or dialogue visits before entering the Polestar Preschool. The preschool farewell and the subsequent home sequence move the game toward its final presentation.
- All desired changed dialogue has been viewed.
- Any optional Tenda or library favor has been completed if desired.
- Optional Photo Man or other closure visits are finished if wanted.
- You are ready to begin the homecoming sequence.
Escort Paula to Polestar Preschool in Twoson
Travel to Twoson when you are finished exploring. PSI Teleport is the quickest route if available. Enter Polestar Preschool with Paula still accompanying Ness. The building is Paula’s home and is marked with the POLestar sign.
Proceed through the preschool and speak with Paula’s family. The farewell scene confirms that Paula has returned safely. Paula thanks Ness, says goodbye, and leaves the active party. Her departure is the required conclusion of the recruitment and escort sequence.
You do not need to return to Happy Happy Village, repeat the rescue, or find another party member after Paula leaves. When the scene ends, Ness is alone. The next required destination is Ness’s house in Onett.
- Paula was escorted to Polestar Preschool in Twoson.
- Paula’s farewell scene completed.
- Paula left the party normally.
- Ness is alone and ready to return to Onett.
Return to Ness’s house and begin the photo album
Travel to Onett and enter Ness’s house. Speak with Ness’s mother when you are ready to finish the playable ending section. She asks Ness to come home and share the story of his journey through the photo album.
Do not start this conversation until all optional exploration is finished. Once Ness agrees to view the album, the game proceeds through the photographs and credits instead of returning you to normal overworld exploration.
No additional required conversation in Fourside, Twoson, Saturn Valley, or another town is needed after Paula’s farewell. The required order is Polestar Preschool first, then Ness’s house in Onett.
- Paula has already left at Polestar Preschool.
- Optional exploration is complete.
- Ness is inside his house in Onett.
- Ness has agreed to view the photo album.
Watch the credits and confirm Pokey’s letter
Allow the photo album and staff credits to finish if you want to see the complete ending presentation. Do not reset during the sequence if you are waiting for the final post-credit scene.
After the credits, Picky arrives at Ness’s house and delivers a letter from Pokey. This is the final required story event in the original North American release. The letter does not open a new quest, post-credit dungeon, second final boss, or playable continuation.
When the final end screen appears, turn the game off or reset as appropriate for the hardware or emulator. To continue exploring the world or attempt the finale again, reload the ordinary save preserved before the final Phase Distorter route. The game’s ending and the Picky scene are the completion record; there is no separate cleared save slot created afterward.
- The photo album finished.
- The credits finished.
- Picky delivered Pokey’s letter.
- The final end screen appeared.
- The pre-final-route ordinary save remains available for replay or continued exploration.
Before you move on
- Giygas was defeated after Paula successfully used Pray nine times.
- The party returned to their bodies in Saturn Valley.
- Poo departed for Dalaam.
- Jeff departed to remain with Dr. Andonuts in Winters.
- The Saturn Valley letters were collected if wanted.
- Desired optional post-Giygas exploration was completed before the homecoming sequence.
- Paula was escorted to Polestar Preschool in Twoson.
- Paula left the party normally.
- Ness returned to his house in Onett and agreed to view the photo album with his mother.
- The photo album and credits finished.
- Picky delivered Pokey’s letter.
- The final end screen appeared.
- An ordinary save from before the final Phase Distorter route was preserved for replay or another ending attempt.
- You understand that the original North American SNES release does not create a standard cleared save after the credits.
Optional: Sidequests, Collectibles and Mini-goals
EarthBound’s optional content is most valuable when it improves equipment, supplies or Jeff’s reusable weapons without delaying the main route. The best time to handle these activities is during the normal journey, especially before Stonehenge Base is cleared and before the final Phase Distorter sequence. The Monkey Caves, Dungeon Man, Jeff’s broken-item repairs, Tenda barter rewards and selected rare drops are all optional to the ending. Keep a durable save before Stonehenge Base if you want to preserve the Sword of Kings opportunity or return later for optional exploration.
Finish the Monkey Caves when the desert route is open
After the Fourside events direct you back toward the Dusty Dunes Desert and Talah Rama, prepare at the Drugstore before entering the cave. Buy a Picnic Lunch and a Skip Sandwich, and make sure the Pencil Eraser is in the party inventory. The Pencil Eraser is required for the pencil statue near the end of the cave. If it is stored with Escargo Express, retrieve it before entering.
The Monkey Caves are a trading maze. Monkeys block several doors and request food or other objects; follow the available trade routes rather than trying to force every branch at once. Give the first Pizza to the female monkey when the route presents that request before spending the second Pizza elsewhere. The cave supplies most of the later trade objects, including the Ruler, Burger and King Banana. Some branches are optional and lead to items such as the Flame Pendant, Bag of Dragonite, Neutralizer and Broken Tube.
At the final pencil statue, use the Pencil Eraser and enter Talah Rama’s room. Speak with Talah Rama to receive the Yogurt Dispenser, then open the nearby presents for the Brain Food Lunch and Cup of Lifenoodles. Speak with the other monkey in the room before leaving. That conversation leads to the outdoor teleport lesson after you exit, so do not treat the room as complete until both Talah Rama and the waiting monkey have been addressed.
- Buy a Picnic Lunch and Skip Sandwich before entering.
- Carry the Pencil Eraser to remove the final pencil statue.
- Give the first Pizza to the requested female monkey before using the second Pizza.
- Keep the Flame Pendant if you want extra fire protection for Jeff.
- Keep the Broken Tube if you intend to pursue Jeff’s Hungry HP-Sucker repair.
- Collect the Yogurt Dispenser, Brain Food Lunch and Cup of Lifenoodles before leaving.
Explore Dungeon Man for supplies and the Talisman Ribbon
Dungeon Man is optional for completion, but its interior contains free recovery points, a telephone, an ATM and several useful presents. Enter through the tower after obtaining the Key to the Tower in the Scaraba-area desert. Use the bench or hospital when needed instead of spending rare healing items simply to clear ordinary rooms. The dungeon includes enemies that can inflict unusual status problems, so leave and recover if the party begins accumulating serious conditions.
Search the side paths before following Brick Road’s route downward. The dungeon contains several consumables and a Talisman Ribbon. The Talisman Ribbon is a permanent defensive accessory and is the most notable optional treasure in the structure. Inventory space matters because Dungeon Man contains many presents; store low-priority items before entering if you want to collect broadly.
When the route eventually leads to the submarine, use the Instant Revitalizing Device before continuing. Dungeon Man then accompanies the party until the route reaches the Deep Darkness staging area. This is useful optional exploration, but the dungeon does not replace the required southern progression or the later Tenda and Stonehenge objectives.
- Obtain the Key to the Tower before entering.
- Use the free bench, hospital and telephone services.
- Search the side rooms for presents and collect the Talisman Ribbon.
- Keep enough inventory space for the optional presents you want.
- Use the Instant Revitalizing Device before the submarine sequence.
Treat the Tenda barter shop as optional after required progression
By this point, the required Tenda progression should already be complete: the Overcoming Shyness book was retrieved from the Onett Library, delivered to the Tenda chief, and used to remove the boulder so the Lumine Hall and Lost Underworld route opened. Do not repeat those actions as a separate objective in this chapter. The remaining Tenda activities are optional rewards and preparation services.
After the village is no longer blocked by shyness, visit the surface Tenda item shop in the northwest portion of the village. It does not use ordinary money. The shop accepts Horns of Life, and each exchange gives the next item in its sequence. Seven Horns of Life are required to complete the sequence and receive the Hall of Fame Bat. This bat is a permanent Ness weapon upgrade, but it is not necessary for the ending. Buy Horns of Life from Mr. Saturn merchants in Saturn Valley if you decide the exchange is worth the cost.
Use the surface village’s free resting place, hot spring and telephone before leaving. The surface barter shop is separate from the Tenda shop in the Lost Underworld. The Lost Underworld shop sells late-game equipment directly, including the Ultimate Bat, Holy Fry Pan and Shiny Coin. Do not carry Horns of Life to the underground shop expecting the surface exchange list; they are different services in different settlements.
- Confirm that the required book, chief, boulder and Lost Underworld events are already complete.
- Decide whether seven Horns of Life are worth spending on the Hall of Fame Bat.
- Use the surface Tenda free-rest, hot-spring and telephone services.
- Keep the surface barter shop separate from the Lost Underworld equipment shop.
- Visit the Lost Underworld shop later if you want direct late-game equipment upgrades.
Keep broken items for Jeff’s repair system
Do not sell broken items merely because they occupy inventory space. Once Jeff is in the party, a broken item can be repaired when it is in Jeff’s personal inventory, his IQ is high enough and the party sleeps at a hotel, bed or another qualifying rest point. The repair is not guaranteed on every rest, so repeat the rest sequence if the item remains unchanged.
The Broken Gadget from the Fourside junk shop becomes the Double Beam at IQ 34. The Broken Tube from the Monkey Caves becomes the Hungry HP-Sucker at IQ 36. The Broken Cannon from Scaraba becomes the Spectrum Beam at IQ 32. The Broken Trumpet from Stonehenge Base becomes the Defense Shower at IQ 40, and the Broken Harmonica from Stonehenge Base becomes the Baddest Beam at IQ 55.
The Broken Bazooka from the Fourside Sewers is the most practical optional repair. At IQ 45, Jeff can repair it into the reusable Heavy Bazooka. Keep the item in Jeff’s inventory, then rest until the repair occurs. The Heavy Bazooka is useful throughout the late game, but it is not a prerequisite for Giygas. The Broken Antenna from Uncontrollable Spheres in Lumine Hall requires IQ 65 and becomes the Gaia Beam; this is a completionist upgrade rather than a required objective.
- Store broken items with Escargo Express instead of selling them.
- Put the item being repaired in Jeff’s inventory.
- Check Jeff’s IQ before spending time on a repair.
- Rest at a hotel, bed or qualifying rest location after meeting the IQ requirement.
- Prioritize the Heavy Bazooka if you want one optional upgrade with lasting combat value.
Choose carefully before farming rare drops
Rare enemy drops are optional and should not be mistaken for progression requirements. The most important timing decision concerns the Sword of Kings. Starman Super enemies in Stonehenge Base have a one-in-128 chance of dropping it, and Poo cannot obtain another conventional weapon of equivalent importance elsewhere. After Starman Deluxe is defeated, Stonehenge Base shuts down and its enemies disappear, so the normal Sword of Kings opportunity ends on that file.
If you want the Sword of Kings, save before the Stonehenge Base boss, then farm Starman Super encounters in the warehouse portion before fighting Starman Deluxe. Keep at least one free inventory slot so the drop can be received. The grind can be lengthy; stop whenever the time cost outweighs the benefit. The sword is helpful but not required for the final route or ending.
Other one-in-128 goals include the Broken Antenna from Uncontrollable Spheres in Lumine Hall, the Magic Fry Pan from Chomposaur, the Star Pendant from Major Psychic Psycho, the Goddess Ribbon from Ghost of Starman and the Gutsy Bat from Bionic Kraken. These items can improve equipment, but none is needed to record the Sanctuary melodies, enter the Cave of the Past or defeat Giygas. Keep a separate farming save rather than risking the only ordinary pre-finale save.
- Make the Sword of Kings decision before defeating Starman Deluxe.
- Save before an extended rare-drop attempt.
- Keep an empty inventory slot during Sword of Kings farming.
- Treat every one-in-128 drop as optional.
- Do not delay the final route solely for a rare accessory or weapon.
Spend money on practical late-game preparation
Optional money is better spent on recovery, status cures, Bottle Rockets and defensive equipment than on novelty items. Check the Scaraba, Summers and Lost Underworld shops after major story transitions because late-game equipment can replace older gear and reduce the need for grinding.
The Lost Underworld Tenda shop is the most relevant optional late-game vendor. Its direct purchases include the Ultimate Bat, Holy Fry Pan and Shiny Coin, along with useful recovery supplies. These are normal purchases and are separate from the surface Tenda shop’s Horn-of-Life barter sequence. Buy only after confirming the intended character can equip the item and after leaving enough money for recovery supplies.
If inventory space becomes a problem, store unique accessories, repairable items and rare drops rather than selling them. Items with unusual names, broken-item descriptions or no normal buy location should remain in storage until their purpose is confirmed.
- Prioritize revival items, status cures and useful offensive items.
- Check the Lost Underworld Tenda shop before the final approach.
- Confirm equipment compatibility before buying expensive upgrades.
- Store unique or repairable items instead of selling them casually.
Schedule optional content around the permanent save point
For the smoothest main-story completion, finish the Monkey Caves, Dungeon Man exploration, desired Jeff repairs and practical Tenda purchases before entering the final route. These activities can be completed without extreme grinding and are easier to manage while ordinary travel and shops remain available.
Stonehenge Base is the key timing checkpoint. Farm the Sword of Kings before Starman Deluxe if you want it. Once the boss is defeated, the base becomes safe to revisit but no longer provides its normal enemy encounters, so the sword opportunity is gone. The same pre-boss save can preserve the option to skip the grind and continue immediately.
Keep one ordinary save before Stonehenge Base or before the final Phase Distorter sequence. The original North American SNES release does not create a conventional cleared save after the ending. Post-victory scenes and the return-home sequence are part of the completion goal, but they are not an unlimited free-roaming postgame. Preserve the pre-finale file if you want to continue optional collection without risking your completion route.
- Complete practical optional content before the final approach.
- Make the Sword of Kings decision before Starman Deluxe.
- Keep a separate pre-finale save for farming and experimentation.
- Prioritize permanent upgrades over novelty rewards.
- Treat post-Giygas exploration as temporary ending content, not a full postgame campaign.
Before you move on
- The Monkey Caves were completed, Talah Rama was visited and the Yogurt Dispenser was received.
- The desired Monkey Cave optional items, including the Flame Pendant or Broken Tube, were retained or stored.
- Dungeon Man was explored enough to collect the Talisman Ribbon and desired supplies.
- The required Tenda book, chief, boulder and Lost Underworld events are already complete and were not repeated as optional objectives.
- You decided whether to spend seven Horns of Life on the surface Tenda shop’s Hall of Fame Bat.
- Jeff’s broken items were stored, and any desired repair was attempted with the correct IQ and rest conditions.
- You decided whether to farm the Sword of Kings before defeating Starman Deluxe.
- A separate pre-finale save exists if you want to preserve rare-drop opportunities.
- You are ready to continue toward the ending even without any rare enemy drop.
References for this chapter
- Monkey Caves - EarthBound Walkthrough
- Dungeon Man - EarthBound Walkthrough
- Tenda Village - EarthBound Walkthrough
- Lumine Hall - EarthBound Walkthrough
- Lost Underworld - EarthBound Walkthrough
- Jeff's Repairs List - EarthBound Walkthrough
- Stonehenge Base - EarthBound Walkthrough
- Nintendo Player’s Guide: EarthBound complete guide
Troubleshooting and Recovery — What to do when you’re stuck
In the North American Super Nintendo release of EarthBound, apparent progression failures are usually caused by a missed conversation, an item being held by the wrong character or stored with Escargo Express, or a Sanctuary guardian being defeated without Ness touching the shining spot afterward. Preserve the newest save while investigating. Most story flags can be repaired by returning to the responsible building, NPC, or dungeon rather than immediately restarting.
Identify the last confirmed story event
Begin with the last event you can verify: a boss victory, a party member joining, a key item arriving, a new route opening, or a cutscene playing. Use the Town Map in the Goods menu to locate the connected town, cave, laboratory, or facility. The Hint Man may provide general direction, but he is not a complete progression tracker.
Return to the building where the objective began and speak with the assigning NPC again. If the conversation repeats exactly, check the next required location rather than repeatedly resting at an inn. Science-related blocks commonly involve Apple Kid, Dr. Andonuts, or Apple Kid’s mouse. A hotel stay does not replace those conversations.
- Identify the last visible state change.
- Use the Town Map to find the associated area.
- Revisit the NPC who assigned the task or supplied the item.
- Check the relevant facility before reloading a save.
Recover Paula’s recruitment sequence
Travel from Twoson through Peaceful Rest Valley to Happy Happy Village. Enter the cave beside the Drug Store and follow it to the isolated cabin. Speak to Paula through the bars. She gives Ness the Franklin Badge, which is needed for the confrontation with Mr. Carpainter.
Enter Happy Happy Headquarters, work through the cultist-filled rooms, and defeat Mr. Carpainter. The Franklin Badge reflects his electrical attack, so make sure it is present in a character’s accessible Goods inventory. After the battle, receive the Key to the Cabin, return to the isolated cabin, and use the key on Paula’s cell. Her joining scene must play before she is a permanent playable party member.
If Paula remains absent, do not search the Polestar Preschool. Confirm that Carpainter was defeated, that the Key to the Cabin was obtained, and that the cell door was opened. If the key is not visible, check every active party inventory and Escargo Express before considering a reload.
- Paula gave Ness the Franklin Badge.
- Mr. Carpainter was defeated in Happy Happy Headquarters.
- The Key to the Cabin was received.
- Paula’s cell was unlocked and her joining scene played.
Recover Jeff and the Stonehenge route
If Jeff has not joined, return to Winters and visit the Snow Wood Boarding House after the required Apple Kid events. Follow the scene that sends Jeff out of the boarding house, then travel through the Winters route toward Dr. Andonuts’s laboratory. Jeff becomes a normal party member only after this sequence is completed.
When the later Stonehenge Base route is blocked, reach Dr. Andonuts’s laboratory and speak with Apple Kid’s mouse. The mouse supplies the Eraser Eraser. Return to Stonehenge, enter the cave beneath the stone formation, and use the Eraser Eraser on the Iron Eraser statue at the entrance. The Pencil Eraser is a different item and cannot remove this statue.
After entering Stonehenge Base, defeat Starman Deluxe to release the prisoners and advance the plot. The Sword of Kings, dropped rarely by Starman Super, is optional. It is Poo’s unique weapon, but it is not needed to recruit Jeff, clear Stonehenge Base, or finish the game. If the dungeon is overwhelming, leave before the boss, heal at the laboratory’s revitalizing device, save, and return with a stocked inventory.
- Jeff left the Snow Wood Boarding House after the required event.
- Jeff completed the Winters laboratory sequence and joined Ness.
- Apple Kid’s mouse supplied the Eraser Eraser.
- The Iron Eraser statue disappeared.
- Starman Deluxe was defeated.
Recover Poo’s recruitment sequence
Return to Dalaam and speak with Poo’s mentor at the palace. Follow the instruction to visit the Place of Emptiness in the southeastern part of Dalaam. Speak with the Star Master at the base of the rope and climb to the training position.
When a messenger tells Poo to return, do not move him from the training spot. The interruption is part of the test. During the spiritual trial, answer Yes to the questions. Poo’s HP falling to zero is scripted and does not permanently kill him.
After the training concludes, return to the palace and speak with Poo’s mentor. Poo receives his training benefits, learns Teleport β, and returns to Ness. If no scene occurs, repeat the route from the palace mentor. There is no separate Summers NPC required for Poo’s recruitment.
- Poo’s mentor sent him to the Place of Emptiness.
- Poo remained at the training position during the interruption.
- The trial questions were completed with Yes responses.
- Poo returned to Ness and joined the party.
Find a missing Sanctuary melody
The eight Your Sanctuary locations are Giant Step, Lilliput Steps, Milky Well, Rainy Circle, Magnet Hill, Pink Cloud, Lumine Hall, and Fire Spring. The correct guardian mapping is: Giant Step — Titanic Ant; Lilliput Steps — Mondo Mole; Milky Well — Trillionage Sprout; Rainy Circle — Shrooom; Magnet Hill — Plague Rat of Doom; Pink Cloud — Thunder and Storm; Lumine Hall — Electro Specter; Fire Spring — Carbon Dog followed by Diamond Dog.
Use the Sound Stone from the Goods menu to hear the melodies currently recorded. It does not provide a numbered written checklist, so compare the playback against the location list. A melody is recorded only after Ness defeats the guardian and touches the shining spot behind it. Reaching the cave, defeating ordinary enemies, or approaching the Sanctuary entrance is not enough.
Retrace locations in order when possible. Giant Step is in Onett; Lilliput Steps is near Happy Happy Village; Milky Well is in the northeast cave of Saturn Valley after Belch Base; Rainy Circle is in Winters; Magnet Hill is reached through the Fourside museum sewer; Pink Cloud is in the southern mountain route; Lumine Hall is beneath the boulder southwest of Tenda Village; and Fire Spring is in the Lost Underworld. If Fire Spring has not yet been completed, a missing earlier melody is the likely cause of a failed Magicant transition.
At Fire Spring, defeat Carbon Dog and then Diamond Dog, enter the Sanctuary behind the battle, and allow the final melody sequence to complete. The Sound Stone is consumed or disappears during the transition to Magicant, so after that point confirm completion by the Magicant sequence rather than by trying to play the item.
- Before Fire Spring, the Sound Stone plays the seven earlier recorded melodies.
- Each completed guardian was followed by Ness touching the shining spot.
- The guardian names match the correct locations listed above.
- Fire Spring included both Carbon Dog and Diamond Dog.
- Magicant began after the eighth melody sequence.
Repair inventory and item-use mistakes
Check the Goods menu for Ness, Paula, Jeff, and Poo, then inspect Escargo Express storage. A key item may be held by another character or stored away. Use the item description and the intended recipient as the guide; many key items cannot be used successfully from the menu alone.
For the Fourside museum route, take the Signed Banana to the museum curator after obtaining Venus’s autograph. The Contact Lens belongs to the man on the second floor of the Fourside Bakery. The Eraser Eraser is used on the Iron Eraser statue at Stonehenge Base. Tendakraut is obtained from the Tenda chief after the Overcoming Shyness book is returned; carry it to the entrance of the Tenda settlement in the Lost Underworld so the Tenda can open the way.
Do not sell or discard unique key items while troubleshooting. If an item was discarded or an irreversible one-time exchange was made, reload the newest save from before that action. Ordinary food, equipment, and battle items are usually replaceable; plot items often are not.
- Check all four active inventories.
- Check Escargo Express storage.
- Give key items to the named recipient instead of repeatedly selecting Use.
- Keep the newest save intact until item recovery is confirmed.
- Reload after an irreversible item mistake only when no later recovery exists.
Know when to reload and preserve a backup
Reload when a unique key item was discarded, a one-time trade was completed incorrectly, or a save was made after an irreversible mistake. For a missing recruit, melody, or dungeon entrance, retrace the responsible NPC and location first. A repeated conversation is evidence that the flag may already be complete; look for the next location rather than assuming the game is broken.
Before Stonehenge Base, Lumine Hall, Fire Spring, or the Phase Distorter sequence, preserve a separate save when the hardware or emulator provides multiple save files. Keep the earlier file untouched while testing the later one. If the recovery succeeds, confirm a visible change: a party member joins, an item is handed over, a statue disappears, a new passage opens, a melody records, or a cutscene begins.
Do not delete the most recent save during troubleshooting. If only one cartridge save is available, write down the current location and inventory state before making risky changes, and save again only after confirming that the intended progression flag has advanced.
- A backup exists before a major dungeon or endgame sequence.
- The responsible NPC, item, and location were checked in order.
- The original troubleshooting save remains preserved.
- A visible state change confirms successful recovery.
Before you move on
- Paula, Jeff, and Poo have completed their joining scenes and appear as playable party members.
- Before Fire Spring, the Sound Stone has recorded the seven earlier Sanctuary melodies.
- Fire Spring’s Carbon Dog and Diamond Dog sequence was completed and the eighth melody was recorded.
- The Fire Spring melody sequence transitioned Ness into Magicant; the Sound Stone’s later disappearance is expected.
- Apple Kid’s mouse supplied the Eraser Eraser and the Iron Eraser statue was removed.
- Stonehenge Base was cleared and the imprisoned characters were released.
- A backup save remains available before the current troubleshooting or endgame point.
References for this chapter
- Nintendo Player’s Guide: EarthBound complete guide
- EarthBound Walkthrough — StrategyWiki
- EarthBound Happy Happy Village — StrategyWiki
- EarthBound Lilliput Steps — StrategyWiki
- Dalaam — EarthBound Walkthrough
- Stonehenge — EarthBound Walkthrough
- Lumine Hall - EarthBound Walkthrough
- List of Your Sanctuary Locations — EarthBound Walkthrough
- EarthBound Magnet Hill — StrategyWiki
- EarthBound Pink Cloud — StrategyWiki
- EarthBound Milky Well — EarthBound Walkthrough
- EarthBound Key Items — StrategyWiki
Completion Checklist and Next Steps
For the original North American Super Nintendo release of EarthBound, completion requires permanently recruiting Paula, Jeff, and Poo; recording all eight Your Sanctuary melodies; completing Magicant and Ness’s Nightmare; finishing the final Phase Distorter route; defeating Giygas; returning Paula to Polestar Preschool; viewing the photo album and credits; and allowing Picky to deliver Pokey’s letter. Stonehenge Base and the Tenda Village route belong earlier in the campaign. Preserve an ordinary save before entering Phase Distorter II, because the original release does not create a normal cleared save after the ending.
1. Confirm the required party and earlier prerequisites
Before committing to the finale, confirm that Ness, Paula, Jeff, and Poo have all joined permanently. Paula must have been rescued during the Happy Happy Village sequence, Jeff must have joined through the Winters and Stonehenge events, and Poo must have completed Mu Training in Dalaam. Temporary helpers and characters who accompany the party only during a scene do not count as permanent party members.
Stonehenge Base belongs earlier in the campaign. Its completion establishes the endgame research sequence and frees Apple Kid, but you do not return there after Magicant. The Tenda Village and Lumine Hall route must also be complete. In particular, obtaining the Overcoming Shyness book and delivering it to the Tenda chief is required progression: the chief reads it to the village, the Tenda become able to speak normally, and the strong Tenda can then remove the boulder blocking Lumine Hall. The boulder passage ultimately leads to Lumine Hall, the Lost Underworld, Fire Spring, and the eighth Sanctuary melody.
- Ness, Paula, Jeff, and Poo have permanently joined.
- Stonehenge Base was completed before the final route.
- The Overcoming Shyness book was obtained from the Onett Library and delivered to the Tenda chief.
- The boulder passage to Lumine Hall was opened.
- Tenda Village, Lumine Hall, the Lost Underworld, and Fire Spring are complete.
2. Verify all eight Sanctuary melodies
The eight required Your Sanctuary locations are Giant Step, Lilliput Steps, Milky Well, Rainy Circle, Magnet Hill, Pink Cloud, Lumine Hall, and Fire Spring. The Sound Stone records each melody after Ness reaches the sanctuary focal point following the relevant local guardian encounter.
The associated guardians are Titanic Ant at Giant Step, Mondo Mole at Lilliput Steps, Trillionage Sprout at Milky Well, Shrooom! at Rainy Circle, Plague Rat of Doom at Magnet Hill, Thunder and Storm at Pink Cloud, Electro Specter at Lumine Hall, and the Carbon Dog and Diamond Dog sequence at Fire Spring. Guardian General is a Pyramid enemy and is not the Rainy Circle guardian.
Before entering the final Fire Spring sequence, use the Sound Stone from the Goods menu to review the melodies already recorded. After the Fire Spring guardian sequence, walk to the sanctuary focal point so Ness records the final melody. Once all eight are recorded, the game transfers Ness into Magicant. Complete Magicant and defeat Ness’s Nightmare. When Ness wakes, the Sound Stone is gone. That disappearance is normal progression, not a missing-item problem.
- Giant Step, Lilliput Steps, Milky Well, Rainy Circle, Magnet Hill, Pink Cloud, Lumine Hall, and Fire Spring are accounted for.
- The Fire Spring guardian sequence is complete.
- Magicant and Ness’s Nightmare are complete.
- The Sound Stone’s disappearance after the Sanctuary and Magicant sequence is understood as normal.
3. Preserve the durable ordinary save before Phase Distorter II
After Magicant, Ness wakes at Fire Spring and the party returns to Saturn Valley. Speak with Dr. Andonuts and Apple Kid, then follow the instructions to obtain the missing meteorite material from Onett. Before entering Phase Distorter II, make an ordinary in-game save in a protected slot. This is the durable archive for optional exploration, unfinished photographs, rare drops, equipment collection, shopping, or another attempt at the ending.
Finish optional preparation before leaving. Restore HP and PP, check Escargo Express, carry revival and status-recovery items, and leave inventory space for important pickups. Give Paula a strong defensive accessory if available; the final route contains dangerous PSI and Flash effects. The late Mr. Saturn services and other final preparation resources can help, but they do not replace the pre-Phase-Distorter-II archive. The Cave of the Past has no normal route back to the wider world, so a save made there is a final-route retry file rather than a campaign archive.
- A normal save exists before entering Phase Distorter II.
- The save is separate from any final-route retry save.
- HP, PP, revival items, status recovery, equipment, and inventory space have been checked.
- Optional shopping and collection goals are either finished or deliberately postponed.
4. Complete the corrected post-Magicant route
After the return to Saturn Valley, speak with Dr. Andonuts and follow the story instructions to obtain the Meteorite Piece. Teleport to Onett, travel toward Ness’s house and the meteorite crash site, and inspect the meteorite to collect the piece. Onett’s late-game enemies can be dangerous, so recover at Ness’s house if necessary and avoid unnecessary battles.
Teleport back to Saturn Valley and give the Meteorite Piece to Dr. Andonuts. Rest and speak with him again when the Phase Distorter is ready. Confirm that you are prepared before entering Phase Distorter II.
Phase Distorter II transports the party to the strange cave in the Lost Underworld. From the machine, go east to meet the Star Master, who teaches Poo PSI Starstorm Omega. Continue east to the broken Phase Distorter and inspect it to obtain the Horn of Life. Then go north, around the cliff route, and south to the location where Phase Distorter III appears. Talk to Apple Kid, then Dr. Andonuts. Follow Dr. Andonuts when he moves away, speak with him again, and answer yes to the activation questions. Phase Distorter III then transports the party to the Cave of the Past.
Stonehenge Base is not part of this post-Magicant route. Its correct position is earlier, before the Overcoming Shyness book is delivered to the Tenda chief and before the Lost Underworld and Fire Spring sequence. The corrected endgame order is Fire Spring, Magicant, Ness’s Nightmare, Saturn Valley, Onett’s meteorite, Meteorite Piece, Phase Distorter II, Lost Underworld staging area, Phase Distorter III, Cave of the Past, and Giygas.
- The Meteorite Piece was collected from the Onett meteorite.
- The Meteorite Piece was delivered to Dr. Andonuts in Saturn Valley.
- Phase Distorter II was entered from Saturn Valley.
- Poo learned PSI Starstorm Omega in the Lost Underworld staging area.
- Phase Distorter III was activated.
- The party reached the Cave of the Past.
5. Cross the Cave of the Past and defeat Giygas
Once Phase Distorter III arrives in the Cave of the Past, do not save over your durable campaign archive. The cave is a one-way final route. Move southwest from the machine and follow the cave path toward the metal orbs, which transport the party between sections. Use Magic Butterflies when available and conserve PP for dangerous encounters.
Final Starmen begin with PSI Shield Beta and can use PSI Starstorm Omega or revive defeated enemies. Have Jeff Neutralize their shields before relying on PSI attacks, and prioritize them before they can prolong the fight. Nuclear Reactor Robots are also dangerous; deal with surrounding enemies first and use Freeze or other effective attacks as appropriate. A Legendary Bat can be found in a gift box along the route, but it is optional and should not distract from reaching the final chamber.
Continue north after the second metal orb and enter the northern cave. Walk north across the machine to reach Giygas and Pokey. The final confrontation contains ordinary combat phases followed by a scripted phase. Use normal attacks, PSI, and Jeff’s strongest reliable tools while preserving recovery resources for the transition.
When Paula’s Pray command becomes the required solution, select Pray repeatedly. Continue through the scripted prayer sequence even when an individual prayer appears ineffective. Giygas is not defeated by discovering a conventional elemental weakness; the battle ends when the prayer sequence reaches its conclusion.
- The durable pre-Phase-Distorter-II save remains protected.
- The Cave of the Past was crossed without treating the Legendary Bat as mandatory.
- Giygas and Pokey were reached.
- Paula’s Pray command was used repeatedly during the decisive scripted phase.
- Giygas was defeated.
6. Complete the required ending sequence
After Giygas is defeated, follow the ending prompts and return Paula to Twoson. Enter Polestar Preschool and speak with Paula and her family until she leaves the traveling party. This farewell is required; defeating Giygas alone is not the final completion point.
Return to Onett and go to Ness’s house. Speak with Ness’s mother and allow the photo-album sequence to play. Watch the credits through their conclusion. Picky then wakes Ness and delivers Pokey’s letter. The letter delivery is the final required campaign event.
- Paula was returned to Polestar Preschool in Twoson.
- Paula reunited with her family and left the party.
- Ness returned to his mother’s house in Onett.
- The photo album was viewed.
- The credits were watched through their conclusion.
- Picky delivered Pokey’s letter.
7. Separate required progression from optional aftermath
The Overcoming Shyness book has two separate uses that must not be confused. The first is required earlier: after Stonehenge Base, obtain the book from the Onett Library and deliver it to the Tenda chief. That event opens the boulder passage and makes the Lumine Hall route possible. The second is optional and occurs after Giygas: recover the book from the Tenda chief and return it to the Onett Library. That post-Giygas errand is a favor and collection objective, not a prerequisite for the final route.
Tony’s letter, extra photographs, changed dialogue in familiar towns, party-member gifts, rare drops, optional equipment, and additional post-Giygas conversations are also optional. Complete them before Phase Distorter II if you want them preserved in the same ordinary save, or reload that save after viewing the ending.
The post-Giygas world is temporary in the original North American SNES release. The game does not provide a normal cleared save that returns Ness to free exploration after the credits. Reload the preserved pre-Phase-Distorter-II save for optional activities or another final attempt. A Cave of the Past save is useful for retrying the final sequence, but it does not preserve access to the wider campaign.
- The required pre-Giygas Overcoming Shyness delivery was completed.
- The optional post-Giygas book return is distinguished from the required delivery.
- Tony’s letter, photographs, changed-town dialogue, and other aftermath activities are marked optional.
- The pre-Phase-Distorter-II ordinary save remains protected.
- No normal cleared save is expected after the credits.
Before you move on
- Ness, Paula, Jeff, and Poo have all joined permanently.
- Stonehenge Base was completed earlier as a prerequisite.
- The Overcoming Shyness book was delivered to the Tenda chief before Lumine Hall.
- The boulder passage to Lumine Hall was opened.
- The eight Sanctuary locations completed are Giant Step, Lilliput Steps, Milky Well, Rainy Circle, Magnet Hill, Pink Cloud, Lumine Hall, and Fire Spring.
- Fire Spring, Magicant, and Ness’s Nightmare were completed.
- The Sound Stone disappeared during normal progression after the Sanctuary and Magicant sequence.
- The Meteorite Piece was collected from Onett and delivered to Dr. Andonuts in Saturn Valley.
- An ordinary save from before Phase Distorter II was preserved as the durable archive.
- Phase Distorter II, the Lost Underworld staging area, Phase Distorter III, and the Cave of the Past were completed.
- Giygas was defeated by continuing Paula’s Pray command.
- Paula was returned to Polestar Preschool in Twoson.
- Ness returned to his mother’s house in Onett.
- The photo album and credits were viewed.
- Picky delivered Pokey’s letter.
- The optional post-Giygas return of Overcoming Shyness to the Onett Library is distinguished from the required earlier delivery.
- Any Cave of the Past save is understood as a final-route retry save only.
- Optional post-Giygas dialogue and rewards are distinguished from required campaign completion.
Finishing up
Paula, Jeff, and Poo have completed their recruitment scenes.
All eight Sanctuary melodies were recorded, culminating in the Fire Spring melody and the Magicant sequence; the Sound Stone is not expected to remain in the inventory afterward.
The party completed the Phase Distorter and Cave of the Past route and defeated Giygas.
The unsaved post-battle epilogue was completed: Paula was escorted home, the photo album and credits were viewed, and Picky delivered Pokey's letter.
Choose your next gameScreenshots & video
Game imagery for reference. Follow the written chapters above for the route and strategies.
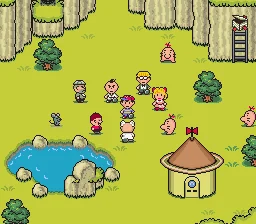
Sources & references
Our original guide draws on the references below. Check the edition at the top of this page before following controls or unlock requirements.
- Nintendo Player’s Guide: EarthBound complete guide
- EarthBound — Guide and Walkthrough — Super Nintendo — by kylohk
- EarthBound — Guide and Walkthrough by Sean_Kelson
- Help Pokey Find Picky — EarthBound Walkthrough
- Giant Step — EarthBound Walkthrough
- Happy Happy Village — EarthBound Walkthrough
- Lilliput Steps — EarthBound Walkthrough
- Return to Twoson with Paula — EarthBound Walkthrough
- Peaceful Rest Valley — EarthBound Walkthrough
- Jeff Comes to the Rescue in Threed — EarthBound Walkthrough
- Use the Zombie Paper in Threed — EarthBound Walkthrough
- Belch Base — EarthBound Walkthrough
- EarthBound Milky Well — EarthBound Walkthrough
- List of Your Sanctuary Locations — EarthBound Walkthrough
- Fourside and the Desert Gold Mine - EarthBound Walkthrough
- The Department Store of Fourside - EarthBound Walkthrough
- Moonside - EarthBound Walkthrough
- Monotoli Building - EarthBound Walkthrough
- EarthBound - Guide and Walkthrough by goldbman
- EarthBound — Guide and Walkthrough by Kodos86
- Winters — EarthBound Walkthrough
- Winters — EarthBound Walkthrough
- Summers — EarthBound Walkthrough
- Pink Cloud — EarthBound Walkthrough
- EarthBound Walkthrough, Part 19: Magnet Hill and Pink Cloud
- EarthBound Player’s Guide, Nintendo of America scan
- Dalaam - EarthBound Walkthrough, Thonky
- Dalaam — EarthBound Walkthrough
- EarthBound - PSI Spell List - Super Nintendo - GameFAQs
- EarthBound Walkthrough — Scaraba
- Dungeon Man - EarthBound Walkthrough
- EarthBound — Guide and Walkthrough by mbrocket, Scaraba and Pyramid section
- EarthBound — Guide and Walkthrough by mbrocket
- Tenda Village - EarthBound Walkthrough
- EarthBound/Tenda Village - StrategyWiki
- EarthBound - Walkthrough by aechris, Super Nintendo
- Stonehenge Base - EarthBound Walkthrough
- EarthBound — Guide and Walkthrough by SixthStSandman
- Lumine Hall - EarthBound Walkthrough
- Lost Underworld - EarthBound Walkthrough
- Fire Spring — EarthBound Walkthrough, Thonky
- EarthBound Walkthrough: Lumine Hall
- EarthBound Walkthrough: Lost Underworld
- Stonehenge — EarthBound Walkthrough
- EarthBound/Lumine Hall - StrategyWiki
- EarthBound/Lost Underworld Strategy Guide
- EarthBound/Fire Spring Strategy Guide
- Magicant — EarthBound Walkthrough, Thonky
- Ness’s Nightmare — EarthBound Walkthrough, Thonky
- List of PSI — EarthBound Walkthrough, Thonky
- Get Zexonyte from the Onett Meteorite — EarthBound Walkthrough, Thonky
- Fix the Phase Distorter II - EarthBound Walkthrough
- Cave of the Past - EarthBound Walkthrough
- Cave of the Past — EBG EarthBound Walkthrough
- EarthBound — Guide and Walkthrough, Super Nintendo
- EarthBound — Boss Guide by PKuliniewicz
- Giygas Final Boss Strategy — EarthBound Walkthrough
- EarthBound Walkthrough — World of Nintendo FAQ
- Monkey Caves - EarthBound Walkthrough
- Jeff's Repairs List - EarthBound Walkthrough
- EarthBound Walkthrough — StrategyWiki
- EarthBound Happy Happy Village — StrategyWiki
- EarthBound Lilliput Steps — StrategyWiki
- EarthBound Magnet Hill — StrategyWiki
- EarthBound Pink Cloud — StrategyWiki
- EarthBound Key Items — StrategyWiki
- EarthBound: Shyness book - EarthBound Wiki
About the game & collecting notes
- Platform
- Super Nintendo Entertainment System
Step-by-step campaign guide for the North American Super Nintendo (SNES) release of EarthBound. This walkthrough leads you through recruiting every required party member, recording the eight Sanctuary melodies into the Sound Stone, reaching the game’s end sequence and defeating Giygas. It focuses on required progress, reliable landmarks, recovery tips, and clear completion checks.
Darryl Polo
Darryl Polo loves tinkering with emulation and revisiting retro games. He enjoys exploring how old favorites play on different setups and sharing what he learns along the way. At Joking Joystick, he writes about the games, hardware, and small discoveries that keep the hobby fun.
Our editorial standardsFound a step that needs another look? Help us improve this guide.