
Donkey Kong Country (Super Nintendo Entertainment System, USA) — Complete Campaign Walkthrough
Step-by-step campaign walkthrough for the original 1994 SNES release of Donkey Kong Country (USA). Covers every main level and boss through the Gang-Plank Galleon finale, essential controls and mechanics, animal buddies and token areas, finding bonus exits and KONG letters, and a 101% completion checklist to fully finish the original SNES campaign.

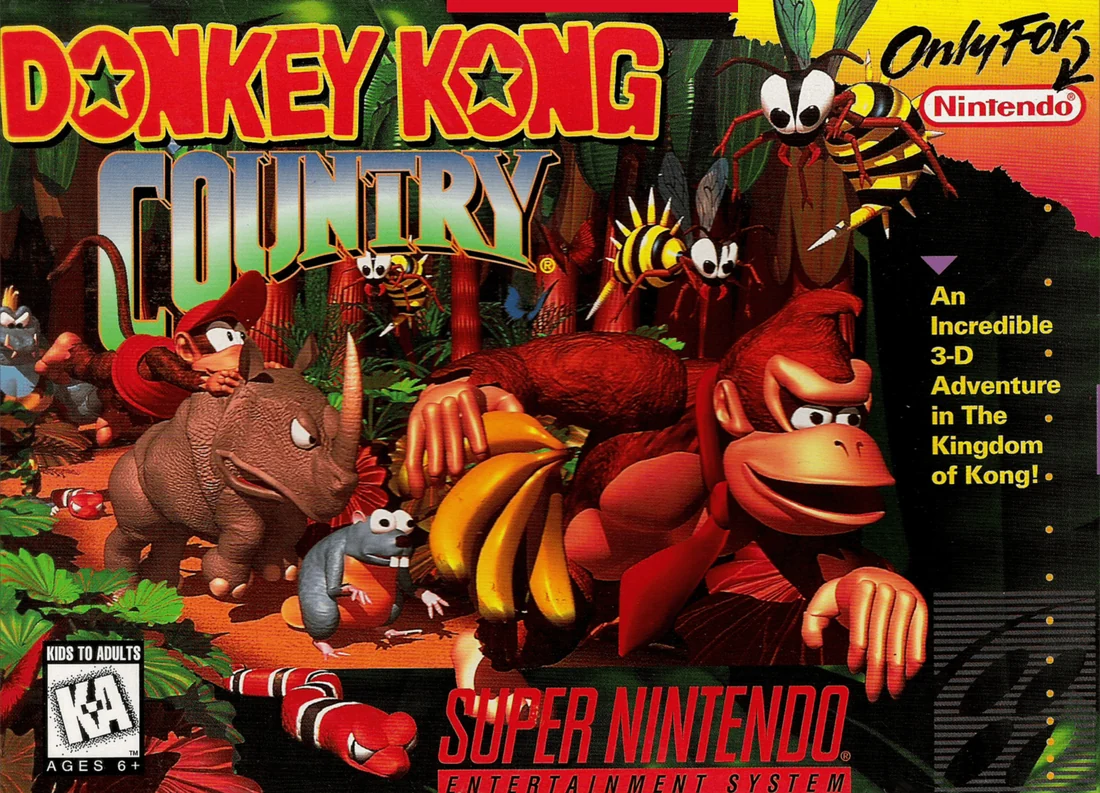
Find a copy
Donkey Kong Country Super Nintendo Entertainment System
We may earn a commission if you buy through these links, at no extra cost to you. As an Amazon Associate I earn from qualifying purchases.
Opens retailer search results. Check the model, edition, seller, availability and current price before buying.
Before you begin
This walkthrough is written for the original Super Nintendo (USA) edition of Donkey Kong Country (1994).
Follow the steps here on the cartridge or an accurate SNES re-release; the guide does not assume changes made in later ports or remasters.
Read the Preparation notes first so you know the essential controls, what to prioritize, and how the game tracks progress.
Each world is broken into its component levels plus the world boss.
Chapters explain where to go, how to survive common hazards, which bonus exits or animal/token areas to search for, clear boss tactics, and how to recover from mistakes.
Follow chapters in order for a standard campaign run; use the dedicated bonus and 101% chapters when you want to fully clear every bonus room and collectible.
Set yourself up for the run
Confirm that the game is the original North American SNES release of Donkey Kong Country.
Learn the original controls: Control Pad for movement, B for jumping and swimming, Y for running, rolling, attacking and handling barrels, A for switching between Donkey Kong and Diddy Kong during ordinary one-player play or dismounting an Animal Buddy, and Start for pausing. Start followed by Select exits a previously completed or otherwise eligible level when the game permits it; Select is not the ordinary one-player Kong-switch button. X has no ordinary stage action.
Practice running jumps, roll or cartwheel jumps, barrel handling, barrel cannons, warp barrels, ropes, vines, minecarts and underwater movement.
Animal buddies come from level-specific crates. Rambi, Enguarde, Winky and Expresso are rideable; Squawks provides light in Torchlight Trouble and is not a rideable buddy.
Animal Tokens are optional collectibles. Three matching golden tokens trigger a temporary timed Animal Token Bonus; they do not permanently unlock an animal for later stages.
Clear ordinary level exits first when lives are low. Bonus rooms, letters, bananas, balloons and Animal Tokens can be revisited later.
For 101%, track ordinary level completion, every counted bonus-room entrance and the final King K. Rool victory. Track letters and Animal Tokens separately as optional goals.
Use Candy Kong to save map progress and Continue Barrels as in-level restart points.
Core mechanics, controls, and movement tactics
The North American Super Nintendo release uses B for jumping and swimming upward, Y for running and attacks, and A for switching between Donkey Kong and Diddy Kong during ordinary on-foot play. A also dismounts a ridden Animal Buddy. Select is not an ordinary one-player Kong-switch command in this control scheme. From a paused, previously completed or otherwise eligible level, press Start followed by Select to leave when the game permits it. Learn these distinctions before practicing momentum, roll or cartwheel jumps, barrel handling, ropes, barrel cannons, minecarts, and underwater movement.
Memorize the original SNES controls
Move with Left and Right on the Control Pad. Press B to jump on land and to swim upward underwater. Hold Y while moving to run. Running builds speed, extends jump distance, and is essential for clearing wide gaps. Press Y while moving to perform Donkey Kong’s roll or Diddy Kong’s cartwheel. Hold Y beside a barrel to pick it up; release Y to throw it.
While both Kongs are available and on foot, press A to switch between Donkey Kong and Diddy Kong. This is the ordinary one-player Kong-switch command for the control scheme used here. Do not rely on Select as a normal in-level switching button. A has a different context-sensitive function when an Animal Buddy is being ridden: it dismounts the animal.
Press Start to pause. To leave a previously completed or otherwise eligible level, use Start to pause and then press Select. The game may require a brief pause-state delay before accepting Select. This is not a universal abandon-stage command: boss stages, Animal Bonus Rooms, and other special situations may refuse the command. X has no normal action during an ordinary stage in the original SNES release.
Press Down to crouch. With Donkey Kong, combine Down and Y to perform his hand slap. The slap can defeat nearby enemies and reveal certain hidden objects or weak-floor openings. On ropes and vines, use Up and Down to climb, hold Y to climb faster, and press B to jump away.
- B: jump on land and swim upward underwater.
- Y: run, roll or cartwheel, pick up and throw barrels, and climb faster on ropes and vines.
- A: switch Kongs during ordinary on-foot play or dismount a ridden Animal Buddy.
- Start: pause the game.
- Start followed by Select: leave a previously completed or otherwise eligible level when permitted.
- Down: crouch; Down plus Y performs Donkey Kong’s hand slap.
- X has no normal stage action in the original SNES release.
Choose the right Kong and protect the team
Donkey Kong is stronger. His jump attack defeats enemies that Diddy may not defeat in one hit, and his hand slap is useful against nearby enemies and certain weak floors. Diddy Kong is smaller, quicker, and more agile. His cartwheel is useful in tight passages and demanding jumps. Press A before a difficult section rather than waiting until the lead Kong is hit.
When both Kongs are present, an enemy hit makes the Kong you control run away and leaves you controlling the other Kong. A second hit costs a life. If you find a DK Barrel after losing one Kong, break it to restore the missing partner. Keeping both Kongs gives you a spare hit, but do not mistake a Star Barrel for a partner-restoration item. The Star Barrel only records the restart point for the main stage after a life is lost.
For a long gap, hold Y while running and press B near the edge. Preserve forward momentum as the jump begins. A roll jump or cartwheel jump is performed by rolling or cartwheeling off a ledge and pressing B during the fall. These jumps can reach distant ledges and collectibles, but practice them over safe ground before attempting them above a pit. Pressing B too late will not recover the jump.
- Use Donkey Kong for powerful enemy attacks and hand slaps.
- Use Diddy Kong for speed, smaller spaces, and demanding jumps.
- Press A to switch Kongs during ordinary on-foot play.
- Restore a missing Kong with a DK Barrel when possible.
- Keep forward momentum for running jumps and roll or cartwheel jumps.
Pick up, throw, and place barrels correctly
Hold Y beside a barrel to pick it up. Release Y to throw it. While carrying a barrel, hold Down and release Y to place it gently on the ground. Gentle placement is useful when a barrel must remain intact beside a wall, when positioning it near a bonus entrance, or when setting down a TNT Barrel before its explosion.
Donkey Kong carries a barrel above his head, which protects him from some attacks from above. Diddy carries a barrel in front of his body, which can provide useful forward protection. A regular barrel is a disposable projectile and can break suitable bonus-area entrances. Steel Kegs continue rolling after striking a wall, while TNT Barrels explode on impact or after being placed.
A DK Barrel restores a missing partner. A Star Barrel records the restart point for the main stage. A Continue Barrel does not guarantee a checkpoint inside every bonus room, so do not enter a dangerous bonus route assuming that failure will return you to that room. Some bonus rooms are single-attempt challenges.
- Release Y normally to throw a barrel.
- Hold Down while releasing Y to place a barrel gently.
- Use regular barrels against enemies or breakable bonus entrances.
- Use Steel Kegs for rolling attacks and TNT Barrels for explosive targets.
- Do not confuse a DK Barrel with a Star Barrel or Continue Barrel.
Read barrel cannons and hidden warp barrels
Jump into a regular Barrel Cannon, then press B or Y to launch. Many cannons rotate automatically, so watch the movement pattern and fire when the opening points toward the next cannon or platform. Do not assume the Control Pad freely aims every cannon. The critical skill is recognizing the cannon’s rotation and choosing the launch moment.
Blast Barrels, also called Auto-Fire Barrel Cannons, launch as soon as you enter them. If one is moving, time your jump so that its automatic launch will carry you toward the next safe landing. Because there is no pause for aiming, identify the destination before committing.
Hidden warp barrels are separate from ordinary cannon sequences and may send you to another point in a level or provide a shortcut. Treat a warp as optional unless you know its destination. A shortcut can bypass a Continue Barrel, a useful DK Barrel, or a collectible route. When lives are low, secure the normal stage path before experimenting with an unverified warp.
- Regular Barrel Cannon: enter it and press B or Y at the correct angle.
- Blast Barrel: launches automatically on entry.
- Watch rotating or moving cannons instead of trying to force an unverified direction.
- Use hidden warp barrels deliberately because they may bypass useful resources.
Survive minecarts and moving hazards
Minecarts move automatically along rails. Your main control is jumping: press B to clear low obstacles, enemies, gaps, and changes in track height. Watch the rail ahead rather than the cart itself. A missed jump can cost the attempt immediately, so prioritize the next landing over bananas, letters, and other optional items.
Do not jump simply because the track dips. Jumping too early can make the cart land in a gap or collide with the next obstacle. When a rail rises toward an enemy or broken section, use a short, deliberate jump. In repeated sequences, watch one cycle before trying to collect anything.
Some minecart sections require a jump to a higher section of track. Wait until the cart is near the edge of the current rail before jumping. An early jump may not carry far enough. After losing a life, use the restart point to practice the obstacle sequence rather than changing timing randomly.
- Prioritize the rail and next landing over collectibles.
- Use short, deliberate jumps for immediate obstacles.
- Expect a missed minecart jump to cost a life or restart the section.
- Practice the sequence before attempting optional letters or bananas.
Control ropes, vines, and underwater movement
Jump toward a rope or vine to grab it automatically. Use Up and Down to climb, hold Y to climb faster, and press B to jump away. Before leaving the rope, look for the next platform, enemy, or Zinger. A fast climb is useful only when the landing is safe; slowing down gives you more time to read moving hazards.
Underwater movement differs from land movement. Press B to swim upward, release it to descend, and press Down to sink faster. The Kongs cannot alter their normal swimming speed with Y. Diddy’s smaller body can be helpful in tight or enemy-filled passages, while Donkey Kong may be preferable when an enemy can be defeated more safely by his stronger attack.
The original SNES game has no drowning timer or air meter. You do not need to surface for oxygen. Instead, avoid enemy contact, leave room to rise or sink around obstacles, and use short B taps so you do not drift into a ceiling enemy or bottom hazard. There is no need to rush merely because a swimming section is long.
- Jump toward ropes and vines to grab them automatically.
- Hold Y to climb faster and press B to leave.
- Use short B taps underwater; Down sinks faster.
- Remember that the original SNES game has no drowning timer or air meter.
- Choose the Kong that gives you the safest spacing for the current underwater obstacle.
Use Enguarde without losing control
Break Enguarde’s Animal Crate to mount automatically. Steer him with the Control Pad. Press B or Y to make him jab with his sword-nose and gain a short burst of speed. Enguarde can attack many enemies in front of him, but he is not invulnerable, so do not charge blindly into a crowded passage.
Point Enguarde toward incoming enemies and leave room to turn before entering a narrow passage. A short jab is safer than repeatedly charging through an unknown area. If a passage contains dense fish or Croctopus movement, slow down and use Enguarde’s nose as a forward weapon while watching the space above and below.
When riding an Animal Buddy, press A to dismount. This is different from on-foot play, where A switches between Donkey Kong and Diddy Kong. Dismount only when the exit platform or required passage is safe; leaving Enguarde beside a hazard can expose the Kong immediately.
Squawks is different from the rideable buddies. He is not ridden. In the original SNES game, Squawks appears in Torchlight Trouble and provides illumination rather than functioning as a controllable animal mount.
- Break an Enguarde crate to mount him.
- Use the Control Pad to steer.
- Press B or Y to jab and burst forward.
- Press A to dismount when riding Enguarde.
- Use A to switch Kongs when the Kongs are on foot.
- Do not treat Enguarde and Squawks as interchangeable animal mechanics.
Before you move on
- From the opening of Jungle Hijinxs, demonstrate walking, running with Y, jumping with B, rolling or cartwheeling, crouching, and switching between the Kongs with A.
- Pause with Start, wait briefly if necessary, and use Select to leave a completed or otherwise eligible level when the game permits it. Do not expect this to work in every special stage or boss situation.
- Pick up, throw, and gently place a barrel. Identify a DK Barrel, Star Barrel, TNT Barrel, and at least one regular or automatic Barrel Cannon during normal play.
- Complete one rope or vine transfer by climbing with Y and leaving with B toward a safe landing.
- Clear an underwater section without losing a life by using short B taps and Down to control height; do not search for an air meter because none exists in the original SNES edition.
- Safely use Enguarde’s Control Pad steering, sword-nose jab, and A-button dismount. Remember that A switches Kongs on foot, while A dismounts a ridden Animal Buddy.
- Complete a minecart or rotating-cannon sequence by prioritizing the next landing over bananas, letters, or other optional collectibles.
References for this chapter
- Super NES Instruction Manuals: Donkey Kong Country
- Donkey Kong Country — Instruction Booklet, Super Nintendo Entertainment System
- Donkey Kong Country: Guide and Walkthrough, Super Nintendo, by DWA
- Donkey Kong Country — Guide and Walkthrough for Super Nintendo, WWalker
- Donkey Kong Country: Guide and Walkthrough, Super Nintendo, by Brian Sulpher
Collectibles, tokens and how the game tracks progress
In the original North American Super Nintendo release, bananas, K-O-N-G letters, Extra Life Balloons and animal tokens help maintain your life supply, but they are not required to open the world map, clear the campaign or defeat King K. Rool. The 101% total comes from completing the 33 main levels, entering the 67 hidden bonus areas and defeating King K. Rool. Treat optional collectibles as survival tools during the first campaign, then revisit stages for a deliberate cleanup run.
1. Use bananas as a steady source of extra lives
Collecting 100 individual bananas awards one extra life. A Banana Bunch is worth 10 bananas, so ten bunches produce the same reward. The count is useful during ordinary level runs, but it is not a permanent stockpile: once the life is awarded, the counter begins building toward the next group again.
Banana trails often mark a route, a landing point or an item hidden just beyond the visible path, but they are not instructions that must always be followed. If a banana line leads through a dangerous jump, prioritize keeping both Kongs alive and reaching the level’s continue barrel or exit. You can replay a familiar early stage later when you need safer life farming.
- Remember that 100 bananas equal one extra life.
- Count Banana Bunches as ten bananas each.
- Do not sacrifice a Kong merely to preserve a banana total.
- Use safe, familiar stages to rebuild lives before difficult areas.
2. Collect K-O-N-G letters for a one-run life bonus
Each main level contains one K, one O, one N and one G. The letters may be placed in the normal route or inside a bonus area. Collecting all four letters during one attempt awards an extra life. The reward is immediate and does not create a permanent letter record for the stage in the original SNES version.
Letters are optional for progression. Missing one does not lock a route, prevent a boss fight or reduce the game’s 101% total. Take a letter when the jump is controlled and the surrounding hazard is understood. If the letter is positioned over a pit, beside a fast enemy or inside a difficult barrel sequence, finish the stage first and return from the world map for a focused attempt.
- Track K, O, N and G by level if you want a complete personal collection.
- Do not assume a missed letter can be collected after reaching the goal during the same attempt.
- Use Donkey Kong for situations where his heavier enemy attack is helpful and Diddy Kong where speed or tighter movement is more valuable.
- Remember that a complete K-O-N-G set awards a life but does not add a 101% point.
3. Treat Extra Life Balloons as immediate rewards
Extra Life Balloons provide lives according to their color: a red balloon gives one life, a green balloon gives two and a blue balloon gives three. Balloons can appear on the normal route or inside bonus areas. Some move away quickly, so prepare your jump before touching the balloon rather than chasing it after it begins drifting.
Balloons are not required collectibles and are not part of the 101% total. Their value is practical: a difficult minecart, ice or factory stage is much less costly when you have several spare lives. If a balloon is suspended above a pit and your approach is unstable, let it go and preserve the current Kong.
- Red equals one life, green equals two and blue equals three.
- Set up moving-balloon jumps before making contact.
- Do not confuse a missed balloon with a missing completion objective.
- Use balloon rewards to prepare for difficult later stages.
4. Understand animal tokens as a bonus-game trigger
The original SNES game has four animal-token types: Rambi, Expresso, Winky and Enguarde. Collecting three tokens of the same type during a level immediately transports the Kongs to that animal’s bonus game. You control the represented animal there and collect the smaller tokens that appear before the timer expires; the resulting score is converted into extra lives.
This is not a permanent animal-unlock system. Three Rambi tokens do not place Rambi in the next stage, and tokens do not create an animal inventory that survives for later runs. Animal Friends encountered in ordinary levels come from Animal Crates or other level-specific placements. The golden tokens are a separate opportunity to enter an animal bonus game.
Mixed animal tokens do not combine. If you collect one Rambi token, one Winky token and one Enguarde token, you have not advanced toward any bonus game. Deliberately collect matching types only when you want the animal bonus or the extra lives it can provide.
- Identify the animal shown on every token before collecting it.
- Three matching tokens trigger that animal’s bonus game immediately.
- Do not expect animal tokens to unlock an animal for subsequent levels or lives.
- Do not combine different token types toward one trigger.
5. Separate the normal level exit from bonus entrances
The ordinary end-of-level target is the route that marks the stage complete and advances campaign progress. Hidden bonus entrances are separate discoveries. They can be concealed behind breakable walls, reached with barrels, placed below or above the apparent route, or accessed through a special platforming detour.
Entering a bonus area is what matters for the hidden-area completion tally. The room may award bananas, a life, a K-O-N-G letter or an animal token, but those rewards are separate from the fact that the bonus area has been found. A bonus entrance is not a replacement for clearing the level’s normal route: if you enter a secret before finishing the stage, replay the stage and reach the ordinary exit afterward.
Some bonus rooms return you to the main level, while others end that attempt after their reward or challenge. Do not assume that leaving a bonus room automatically places you at the world map or completes the main stage.
- Mark the normal exit and every hidden bonus entrance separately.
- Enter a bonus area, then confirm that the main level is also cleared.
- Record bonus discoveries by level instead of relying on memory.
- Treat bonus rewards as optional unless you are using them to build lives.
6. Finish the campaign before attempting a 101% cleanup
For the story route, clear the required main levels in order, defeat the world bosses and defeat King K. Rool at the end of Gang-Plank Galleon. Bananas, K-O-N-G letters, balloons and animal tokens are not required for this objective.
The original SNES maximum is 101%. The total is built from the 33 main levels, the 67 hidden bonus areas and the final King K. Rool completion point. K-O-N-G letters and animal tokens are not additional percentage requirements. A level’s exclamation mark is useful evidence that its bonus areas have been found, but the safest final confirmation is the file’s 101% display combined with a personal count of the hidden areas.
Do not restart the campaign every time you miss a letter or token. Complete the main route first. Then revisit stages that lack a confirmed bonus-area record and search specifically for entrances. Once the 101% objective is complete, use separate notes if you still want every letter, balloon and animal-token reward.
- Clear all required main levels and bosses for the story ending.
- For 101%, confirm all 33 main levels, all 67 bonus areas and King K. Rool.
- Use map indicators as a guide, but verify the final file percentage.
- Keep optional item collection separate from the percentage checklist.
7. Use a two-pass collection order to limit backtracking
During the first pass, take obvious bananas, balloons and K-O-N-G letters when the route is safe. Enter a bonus area when its entrance is visible and the required movement is reliable, but do not spend many lives repeating an unexplored hazard solely for an optional reward.
After the campaign, make a level-by-level list with columns for normal exit, bonus areas entered, K-O-N-G letters and animal tokens. Revisit stages without a confirmed bonus-area completion first, because those discoveries determine the 101% target. Search for missed letters and tokens afterward.
If your life stock becomes low, replay a short, familiar stage and collect bananas, balloons and safe rewards before returning to the difficult level. This preserves progress without turning every cleanup attempt into a full blind run.
- Use one row for every main level.
- Track bonus areas separately from letters and animal tokens.
- Finish the main path before spending lives on high-risk optional routes.
- Farm lives in familiar stages when necessary.
Before you move on
- Story clear: every required main level is complete, every world boss is defeated and King K. Rool is defeated at Gang-Plank Galleon.
- 101% clear: the file displays 101%, supported by a checklist confirming the 33 main levels, 67 hidden bonus areas and final boss completion.
- Optional personal collection: review each level separately for K-O-N-G letters, Extra Life Balloons and animal tokens; these are not required for the original SNES percentage total.
World 1 — Kongo Jungle: Jungle Hijinxs through Very Gnawty's Lair
Kongo Jungle is the opening world in the original North American SNES release of Donkey Kong Country. Its required route is Jungle Hijinxs, Ropey Rampage, Reptile Rumble, Coral Capers, Barrel Cannon Canyon and Very Gnawty's Lair. The five regular stages introduce the main hazards used throughout the game: ropes, Armys, Zingers, tires, underwater enemies, animal crates and barrel cannons. Bonus Areas and K-O-N-G letters are optional for the campaign, but entering every Bonus Area is required for the world’s complete bonus record.
1. Clear Jungle Hijinxs and learn the first animal route
Enter Donkey Kong's cabin at the beginning and jump on the tire inside to collect the Red Balloon. Return outside, defeat the early Gnawtys and Kritters, then collect K above the first elevated enemy. Continue right past the Continue Barrel and collect O. The checkpoint is useful, so avoid taking an optional detour until you are comfortable with the opening section.
Proceed to the Rambi crate. After mounting Rambi, run right through the Gnawtys and break the first weak wall in his path. This opens Bonus Area 1. The room contains a straightforward banana route and a Red Balloon at the end. After exiting, continue through the main stage and collect N three Gnawtys beyond the Rambi crate.
When you reach the final treetop section, collect G. From the tree near G, drop toward the lower-right wall. Rambi can break this wall directly; alternatively, land on the weak spot above the entrance and use the barrel that appears. This opens Bonus Area 2, the animal-token matching room. Entering it is enough to register the Bonus Area, even if you do not win the animal token. Finish by moving right to the exit.
The Expresso token opportunity is near the early Necky section, but it is optional. Rambi is the important required animal for the first bonus route. If Rambi is lost, finish the stage normally and return later for the bonus rather than risking a life on an improvised jump.
- Collect K above the first early elevated enemy.
- Collect O just beyond the Continue Barrel.
- Find the Rambi crate and use Rambi to open Bonus Area 1.
- Collect N three Gnawtys past the Rambi crate.
- Collect G in the final treetops and use the nearby wall to enter Bonus Area 2.
2. Cross Ropey Rampage's ropes and Armys
Ropey Rampage begins in rain and introduces Army enemies and TNT barrels. Use Donkey Kong when possible because Army is more safely handled with Donkey's stronger jump attack; Diddy can also defeat Army with the appropriate attack, but do not attempt a casual stomp from the wrong angle. Climb the first rope and collect K near the elevated opening.
Continue over the treetops and collect O on the normal route. Immediately after O, look for the gap in front of the first tree occupied by a Kritter. Drop straight down into the Barrel Cannon. It fires you into the wall and opens Bonus Area 1, a vertical-rope room whose route leads to N. Leaving this bonus route places you beyond the nearby Continue Barrel, so use it on a dedicated completion attempt if you want the checkpoint for the remainder of the stage.
After the bonus or the normal route, continue across the swinging ropes. Wait for the Zingers to move before transferring from one rope to the next; holding forward continuously is more dangerous than making short, deliberate jumps. Optional animal-token routes include a Rambi token in a tree after the third rope and a Winky token reached by using the tire and weak ground near the first Zinger.
Near the end, cross the final Zinger groups and inspect the last gap after the final Kritter. A barely visible Bonus Barrel opens Bonus Area 2. Then climb to the trees by the exit and collect G. Army may be near the exit roof, so approach the tree slowly and jump only after the enemy has moved away.
- Collect K near the first rope.
- Collect O on the normal route.
- Drop immediately after O to enter Bonus Area 1.
- Collect N in that bonus or on the alternate normal route.
- Find Bonus Area 2 in the last gap after the final Zinger group.
- Collect G in the trees at the exit.
3. Use barrels and tires in Reptile Rumble
At the beginning, defeat the first snake and secure a barrel. Move right past the jumping Kritters, then carry the barrel back to the wall beside K. Throw or place it against the wall to open Bonus Area 1. K is positioned at this bonus entrance, so collect it while opening the route. The bonus room is a simple banana-and-balloon challenge.
Return to the main route and use the tires to climb the raised platforms. O is above a tire between Yellow Zingers. Approach from below, wait for a safe opening and bounce straight upward rather than drifting into either Zinger. Later, N is guarded by an Orange Zinger. A barrel can remove the enemy, but a careful bounce over the Zinger can also reach the letter without fighting it.
The second Bonus Area uses the level's second tire. Roll or carry the tire to the tall mound near the second DK Barrel, then bounce high enough to enter the Auto-Fire Barrel above and to the left. After the Continue Barrel and immediately after N, find the third DK Barrel. Defeat the two Slippas in the nearby crevice, pick up a barrel and break the right wall to open Bonus Area 3.
Continue over the tire path and jumping Kritters to G and the exit. The Enguarde token is reached by bouncing from a Blue Kritter. It is optional, and losing the setup is not a reason to abandon the main route.
- Open Bonus Area 1 with a barrel at the wall beside K.
- Collect O above the tire between Yellow Zingers.
- Collect N beside the Orange Zinger.
- Use the second tire to enter Bonus Area 2.
- Use a barrel at the crevice after the Continue Barrel to enter Bonus Area 3.
- Collect G on the final tire-and-Kritter route.
4. Swim through Coral Capers
Coral Capers has no Bonus Areas in the original SNES layout. Concentrate on the four letters and safe movement around Chomps, Croctopuses and Clambo. Underwater movement has momentum, so use brief directional taps near enemies instead of holding a direction through a crowded passage.
Swim upward through the first vertical shaft and collect K before the first Croctopus. Follow the passages toward the Continue Barrel, then search the high central niche for O. A Chomps Jr. guards the area, so enter from the side and retreat through the opening rather than trying to pass directly through the enemy.
After obtaining an Enguarde crate, use the swordfish to make fish-heavy passages safer, but do not charge blindly into Croctopus patrols. A second Enguarde crate appears after the Continue Barrel in the lower-right portion of a Croctopus's area. N is at the top of the later vertical shaft where the two Chomps patrol. At the end, wait for the final Croctopus to move around the coral formations, then take G from the center of its route and swim to the exit.
The Expresso token is in a secret alcove at the first Chomps section. Swim right into the hidden opening, go upward inside it and leave carefully; the returning path can place you directly beside another Chomps.
- Collect K in the first vertical shaft.
- Collect O in the high niche above the Continue Barrel.
- Collect N at the top of the later Chomps shaft.
- Collect G inside the final Croctopus's patrol area.
- Do not search for a Bonus Area; this stage has none in the original SNES layout.
5. Time Barrel Cannon Canyon's launch sequence
Barrel Cannon Canyon is the most timing-focused Kongo Jungle stage. At the entrance, climb to the roof and use the upper Blast Barrel for a shortcut that collects K. If you choose the normal route, enter the first Normal Barrel Cannon and let it launch you through the opening sequence. Make small corrections only when necessary; oversteering is the usual cause of missing the next barrel.
Continue through the moving-barrel section and collect O during the cannon route. A Winky token can be reached with a Roll Jump or Cartwheel Jump over the small gap beyond the first Kritter. The Rambi token is on the alternate treetop shortcut that also leads toward the Continue Barrel and O.
Shortly after O on the normal route, you land in a Barrel Cannon aimed at a cliff wall. Watch the Blast Barrel moving up and down. When it rises enough, fire through the wall without colliding with the Auto-Fire Barrel to enter Bonus Area 1. Later, after the Continue Barrel, defeat the second Brown Kritter and break the right wall below the third Brown Kritter with a DK Barrel or TNT barrel. This opens Bonus Area 2. Defeat nearby Kritters first so they cannot destroy the barrel before it reaches the wall.
The later cannon sequence contains N near the cannon protected by two Brown Kritters. Wait for the moving Blast Barrel to give you a clear landing. The final treetop section contains G. Use a Kritter, the shortcut route or the top of the exit structure to reach it. If a launch goes wrong, prioritize landing safely; missing a letter is preferable to losing the life.
- Collect K from the opening cannon route or roof shortcut.
- Collect O during the central cannon sequence.
- Enter Bonus Area 1 shortly after O through the moving Blast Barrel and cliff wall.
- Enter Bonus Area 2 at the breakable wall after the Continue Barrel.
- Collect N in the later Brown Kritter cannon section.
- Collect G in the final treetops.
6. Defeat Very Gnawty's Lair
Very Gnawty's Lair is a single-screen fight. The boss must be hit five times by jumping on his head. Begin near the center and let Very Gnawty approach with his regular hops. Jump onto him only while he is actively hopping toward you; do not attack during the pause when he opens his mouth and laughs.
After each successful hit, retreat and reset your position. Very Gnawty becomes faster and jumps farther as the fight continues, so leave enough space to react. The safest pattern is to wait for the next ordinary hop, jump over or onto the boss as appropriate, then move away before the following approach. If you miss a jump, do not chase him across the arena. Re-center and wait for another readable hop.
After the fifth head jump, the boss is defeated and the Monkey Mines route opens on the world map. A missed attempt costs a life, but the completed regular stages remain cleared. Re-enter the stage after replenishing lives if necessary rather than spending several reckless attempts in succession.
- Hit Very Gnawty five times.
- Attack only during his regular hopping movement.
- Avoid the laughing pause after each hit.
- Confirm that Monkey Mines is accessible on the world map.
Before you move on
- Jungle Hijinxs, Ropey Rampage, Reptile Rumble, Coral Capers and Barrel Cannon Canyon show as completed on the Kongo Jungle map.
- Very Gnawty's Lair has been cleared and Monkey Mines is available.
- For optional completion, record the discovered Bonus Areas separately: two in Jungle Hijinxs, two in Ropey Rampage, three in Reptile Rumble, none in Coral Capers and two in Barrel Cannon Canyon.
- Confirm the exclamation mark appears beside each regular level after all of that level's Bonus Areas have been entered.
- K-O-N-G letters and animal tokens may be tracked for extra lives and personal completion, but neither is required to unlock Monkey Mines or finish this world.
World 2 — Monkey Mines: minecarts, switches and Necky's Nuts
Monkey Mines follows Kongo Jungle and contains five ordinary stages followed by the boss stage Necky's Nuts: Winky's Walkway, Mine Cart Carnage, Bouncy Bonanza, Stop & Go Station, Millstone Mayhem, and Necky's Nuts. Complete each ordinary exit to advance across the map. Bonus rooms, K-O-N-G letters, animal tokens, animal crates and warp barrels are optional for the normal campaign. For the original North American SNES release, Monkey Mines contains eight counted bonus rooms: one in Winky's Walkway, none in Mine Cart Carnage, two in Bouncy Bonanza, two in Stop & Go Station and three in Millstone Mayhem.
Prepare for Monkey Mines
Keep both Kongs whenever possible. Diddy is useful for quick movement and cartwheel attacks, while Donkey is preferable when you need to deal with tougher ordinary enemies or carry barrels through a dangerous section. If one Kong is lost, take a safe DK Barrel when it is directly on the route, but do not spend lives chasing an optional collectible.
The ordinary exit advances the world map. Entering a bonus room does not finish the stage, so leave the bonus area and continue to the normal exit. For a first campaign clear, complete each stage safely, then replay stages for missing bonus rooms, letters, animal items or warp routes.
- Clear the five ordinary stages in map order.
- Track bonus-room entries separately from letters, animal items and warps.
- Prioritize reaching the ordinary exit if lives are running low.
Clear Winky's Walkway
Use the first Necky as a stepping stone to reach the K, then continue across the scaffolds until you find the Winky crate. Winky jumps higher than either Kong and can defeat Zingers by landing on them from below, but he can still be lost to enemies or pits.
Shortly after the Continue Barrel, look for a bird flying below a barrel. Jump into the barrel with Winky. Without Winky, bounce on the bird to reach it. This is the stage's only counted bonus room and contains the N. Leave through the eastern side, then continue right from the return point.
The Expresso Token near the later Necky and the high G are optional. Winky or an enemy bounce can help reach the G. The warp route is also optional and does not affect the bonus tally.
- Enter one counted bonus room.
- Collect the N inside the bonus if desired.
- Record the Expresso Token and warp separately.
- Reach the ordinary exit after leaving the bonus room.
Handle Mine Cart Carnage
Mine Cart Carnage is a continuous ride. The cart moves automatically, so watch the rail ahead and begin jumps before gaps, tipped carts and opposing carts reach you. Short, deliberate jumps are safer than holding a jump too long; landing beyond the next safe section can be as dangerous as failing to jump.
The K-O-N-G letters and Enguarde Token are optional. After the Continue Barrel, opposing carts and damaged track sections become less forgiving, so ignore bananas and letters when they compromise a landing. The opening warp can skip much of the stage, but it is separate from the bonus tally.
There are no counted bonus rooms in Mine Cart Carnage. If the ride causes repeated deaths, replay it while ignoring every collectible and learn one rail sequence at a time.
- Count zero bonus rooms.
- Treat the Enguarde Token and warp as optional.
- Watch the next rail section rather than the cart alone.
- Finish through the ordinary exit before attempting collection runs.
Clear Bouncy Bonanza
Bouncy Bonanza uses tires, Zingers and vertical gaps. Keep a tire centered before bouncing, and make steering adjustments after the bounce begins. If you roll a tire, keep it away from pits until the intended platform or launcher barrel is visible.
For the first counted bonus, pick up the barrel near the beginning and carry it past the Zingers. Drop below the bees and throw the barrel into the wall on the right. Enter the opening and complete or leave the matching-barrel bonus. The room counts as soon as you enter it.
Continue through the stage and collect the O if it is safe. Push the tire through the narrow passage and use it to reach the Continue Barrel. When the floating platform rises, push the tire onto it, bounce upward and hug the right wall to pass through the hidden route. Crawl through the narrow passage to collect the N, then return to the main route.
The Winky crate is later in the ordinary route, after the hidden N passage. Enter the wall opening and break the Animal Crate to obtain Winky, then leave through the eastern side. This is not a counted bonus room. Winky is useful for the subsequent tire and Zinger sections, but the crate is optional.
Near the end, after the G, push the tire to the right. When the floating ledge arrives, push the tire onto it and bounce into the launcher barrel above. This is the second and final counted bonus room in Bouncy Bonanza. It contains a tire-bouncing banana challenge. Afterward, continue to the moving platform and ordinary exit. The Rambi Token near the beginning is optional and should be tracked separately.
- Count exactly two counted bonus rooms.
- Use the barrel against the wall near the beginning for the first room.
- Use the tire and floating ledge near the end, after the G, for the second room.
- Treat the hidden N passage as part of the main stage route, not as a counted bonus room.
- Track the Winky crate and Rambi Token separately.
- Reach the ordinary exit after the final bonus room.
Control Stop & Go Station
Rock Krocs move during the Go state and stop during the Stop state. Use each Stop-and-Go barrel to create a safe window, then move between stable ledges instead of trying to rush the entire passage. Before crossing, identify the next barrel and the Rock Kroc positions.
After the Continue Barrel, pick up the nearby barrel and carry it right. Activate the Stop-and-Go barrel as needed, then throw the carried barrel into the lower part of the wall farther right. This opens the first counted bonus room.
After leaving it, continue until you see three vertical bananas and a tire. Push the tire left beneath the bananas, then bounce from it into the hidden launcher barrel. This is the second counted bonus room and contains the Winky Token route. The Expresso Token and opening warp are optional. Continue through the final platforms to the ordinary exit.
- Count two counted bonus rooms.
- Use the carried barrel for the first room after the Continue Barrel.
- Push the tire left beneath the three vertical bananas for the second room.
- Track the Winky Token, Expresso Token and warp separately.
- Use Stop-and-Go barrels before crossing Rock Kroc passages.
Finish Millstone Mayhem
Let each moving millstone pass and pause in the next safe pocket instead of trying to outrun the entire stage. At the beginning, use the tire to bounce onto the ledge above the entrance and enter the launcher barrel. This is the first counted bonus room and contains the K letter.
Later, drop from the edge of the first platform into the launcher barrel. Land on the dark patch to make a tire appear, push it to the right and bounce from it above the millstone into the next launcher barrel. This is the second counted bonus room.
Farther on, find the TNT Barrel below a millstone. If possible, keep both Kongs: Donkey can defeat the nearby Krushas, while Diddy can carry the TNT Barrel more easily. Carry the TNT Barrel into the small area below the millstone and throw it at the right wall. This opens the third counted bonus room.
A Winky crate appears in the later vertical section and is optional. If a tire falls into a pit, continue to the next safe section or restart deliberately rather than attempting a blind recovery.
- Count three counted bonus rooms.
- Use the early tire and launcher route for the first.
- Use the recessed launcher, tire and millstone route for the second.
- Use the TNT Barrel for the third.
- Record the Winky crate separately.
- Reach the ordinary exit after the final millstone section.
Defeat Master Necky in Necky's Nuts
Master Necky attacks from the side of the arena and spits one nut across the floor. Wait for the nut, jump over it and use the central tire to bounce onto Master Necky's beak. Each successful landing deals one hit, and five hits defeat the boss.
Do not jump from the tire before the nut has passed. If a bounce is mistimed, land safely and wait for the next projectile instead of forcing another attack. After each hit, watch whether Master Necky moves higher or lower and adjust your jump accordingly.
Animal buddies from earlier stages do not enter this standard boss arena. If you lose, replay a completed Monkey Mines stage for extra lives or repeat the boss while practicing only the nut timing and tire bounce. After the fifth successful hit, confirm that the boss marker clears and that the route to Vine Valley opens.
- Enter with both Kongs when possible.
- Jump over each nut before attacking from the tire.
- Land five successful hits on Master Necky's beak.
- Confirm that Vine Valley is available on the world map.
Before you move on
- Winky's Walkway, Mine Cart Carnage, Bouncy Bonanza, Stop & Go Station and Millstone Mayhem are cleared on the Monkey Mines map.
- The verified Monkey Mines bonus tally is Winky's Walkway 1, Mine Cart Carnage 0, Bouncy Bonanza 2, Stop & Go Station 2 and Millstone Mayhem 3.
- All eight Monkey Mines bonus rooms have been entered if pursuing 101 percent.
- Necky's Nuts has been defeated with five successful hits and its boss marker is cleared.
- K-O-N-G letters, animal tokens, animal crates and warp routes are recorded separately as optional progress.
- Vine Valley is available from the world map.
World 3 — Vine Valley: vertical platforms, enemies and Queen B.
Vine Valley is World 3 in the original North American Super Nintendo release. Its required sequence is Vulture Culture, Tree Top Town, Forest Frenzy, Temple Tempest, Orang-utan Gang, Clam City and the boss stage Bumble B. Rumble. The six ordinary stages advance the campaign; their hidden bonus rooms are optional for the story route but required for a 101% file. The Vine Valley bonus totals are three in Vulture Culture, two in Tree Top Town, two in Forest Frenzy, two in Temple Tempest, five in Orang-utan Gang and none in Clam City. K-O-N-G letters, animal tokens and Animal Crates are separate optional objectives.
1. Clear Vulture Culture
Vulture Culture is a sequence of Neckys, Mini-Neckys, tires, Zingers and barrel cannons. Use the vultures as temporary stepping stones only after watching their flight paths, and enter each barrel cannon when the next target is clear. Donkey Kong is useful for the hidden route that appears near the beginning, but either Kong can complete the ordinary path.
For the first bonus, defeat or pass the first coconut-throwing Necky and return to the ledge with the tire. Push the tire beneath the vertical line of three bananas, then bounce from it to the concealed barrel above. Enter the bonus room and return to the main stage.
For the second bonus, use the barrel-cannon sequence with the two vertically moving Neckys. Bounce from the vultures and pass the Mini-Necky, then strike the weak area or wall below it to expose a barrel. Carry that barrel into the nearby wall to open the bonus entrance.
Near the end, climb the two-step rise below the last coconut-throwing Necky. After dealing with the Necky, drop onto the weak patch below to uncover a barrel. Carry it to the short wall beneath the ledge and break the entrance open. Finish through the red-arrow exit after registering all three bonuses if you are pursuing 101%.
- Enter three Vulture Culture bonus rooms.
- Use the early tire beneath the vertical banana line for the first bonus.
- Expose and carry the barrel from the vertically moving Necky section for the second bonus.
- Uncover the final barrel beneath the last coconut-throwing Necky for the third bonus.
- Reach the ordinary exit.
2. Cross Tree Top Town
Tree Top Town is built around automatic and moving Barrel Cannons. At the opening, use the first Gnawty as a step and jump into the concealed cannon above the starting area. The cannon carries you into the first bonus room.
During the later cannon sequence, watch for a lone banana near the bottom of the screen. When the moving cannon is centered over that banana, fire toward it. You will be redirected through an off-screen automatic cannon into the second bonus room. If you miss, use the next cannon or retry the level rather than making an uncontrolled jump.
For the main route, fire only when the next cannon is aligned with your current barrel. In the more complicated vertical sequence, look one barrel ahead and make small timing adjustments. Missing normally places you in another cannon or on a lower platform, but a missed transfer can still cost a life. Reach the final tire and red-arrow exit after the two bonus entrances have been registered.
- Enter both Tree Top Town bonus rooms.
- Use the opening Gnawty to reach the first cannon.
- Fire at the lone low banana for the second bonus.
- Complete the ordinary exit.
3. Navigate Forest Frenzy
Forest Frenzy uses moving ropes, Zingers and narrow vertical passages. Before grabbing a rope, identify the next platform and the enemy that guards it. Adjust your height with short movements instead of holding a direction throughout the entire rope ride.
Near the end, a group of Neckys flies around the lowest part of the screen. Climb down the rope, avoid the first low Necky and drop when the next one approaches so that you land in the barely visible bonus barrel below. This is the first bonus entrance; dropping without seeing the barrel usually means losing the life.
For the second bonus, continue to the last stepped hill and uncover the barrel from the weak patch. Carry it across the hill while defeating the Kritters one at a time. Keep the barrel intact, then use it against the left wall at the bottom of the steps to open the bonus entrance. Afterward, continue through the rope and Zinger section to the ordinary exit.
- Enter two Forest Frenzy bonus rooms.
- Drop into the concealed barrel beneath the final rope section.
- Carry the barrel from the final weak patch across the Kritter steps.
- Break the left wall at the bottom of the steps.
- Reach the ordinary exit.
4. Handle Temple Tempest
Temple Tempest introduces pursuing millstones. When one begins moving after you, run toward the next stable section instead of stopping beside it. If the millstone disappears off-screen and its sound stops, you can safely backtrack to its starting point; do not assume it continues moving forever.
For the first bonus, take the first DK Barrel across the opening gap. Jump over the Gnawtys and use the barrel to break the right wall on the far side. Donkey Kong is the safer choice because his barrel-carrying reach makes the approach easier.
For the second bonus, follow the first millstone after the Continue Barrel. When the banana trail points straight down from the rope section, drop along that route into the concealed bonus barrel. Enter it before continuing. The Expresso Crate found in the first bonus is an optional reward and is not required to clear the stage.
The letters and Rambi Tokens can be collected during the same run, but prioritize escaping the millstones. Use the ordinary red-arrow exit after the bonus count is complete.
- Enter both Temple Tempest bonus rooms.
- Carry the first DK Barrel across the opening gap and break the right wall.
- Follow the downward banana arrow from the rope section for the second bonus.
- Reach the ordinary exit.
5. Complete Orang-utan Gang’s five bonuses
Orang-utan Gang contains five counted bonuses and several long gaps. Manky Kongs throw barrels from fixed positions, so watch their rhythm before crossing. Expresso can glide over gaps, but he does not defeat ordinary enemies by touching them; dismount before crowded enemy groups when necessary.
First obtain Expresso and return to the opening area. From the higher ledge near the first pair of Klaptraps, glide left beneath the trees to the hidden ledge and enter the first bonus. After exiting, use the nearby tire and weak patch to collect the optional Enguarde Token if desired.
For the second bonus, use Expresso near the letter N. Glide right and below the trees, then land on the lower hidden ledge rather than following the obvious upper route. At the cliff, use the barrel against the wall to reveal the entrance.
For the third bonus, leave Expresso before the final Manky section. Take the barrel near the last part of the stage, drop into the small crevice when the barrel-throwing rhythm allows it and break the left wall.
For the fourth, recover or carry another barrel past the crevice used for the third bonus. Break the wall on the right side of the larger cliff. For the fifth, defeat the final Manky Kong, take the barrel he was guarding and use it against the wall immediately before the red-arrow finish. If the barrel is lost, finish the stage and replay it rather than forcing a dangerous recovery.
- Enter five Orang-utan Gang bonus rooms.
- Use Expresso to reach the hidden opening-area ledge.
- Glide beneath the trees near N for the second bonus.
- Use the crevice barrel for the third bonus.
- Break the right-side cliff wall for the fourth bonus.
- Use the final Manky section barrel before the exit for the fifth bonus.
6. Survive Clam City
Clam City is an underwater stage with Clambos, Chomps, Chomps Jrs., Bitesizes and Croctopuses. Clambos fire pearls along predictable lines, so move above or below the firing lane before approaching them. Do not wait directly beside a Clambo. Enguarde is optional but makes many fish encounters safer; his attack does not stop Clambo pearls.
The K is in the hidden Enguarde alcove up and left from the first vertical shaft. Swim past the first Clambo, then feel along the left wall to enter the concealed passage. The O is in a small niche with Bitesizes, the N is near the upper-left of the large Chomp chamber and the G is near the final Clambo. The Winky Token is near an earlier Clambo.
Clam City has no counted bonus rooms in the original SNES version. Its hidden Enguarde alcove is part of the stage layout, not a bonus entrance. Reach the ordinary exit to clear it.
- Enter no bonus rooms; Clam City’s counted total is zero.
- Search the first vertical shaft’s upper-left wall for the Enguarde alcove.
- Stay outside Clambo pearl lanes.
- Reach the ordinary exit.
7. Defeat Queen B. in Bumble B. Rumble
Bumble B. Rumble begins with Vine Barrels available in the arena. Queen B. is vulnerable while yellow. Pick up a Vine Barrel, face Queen B. and throw the barrel directly at her body while she is yellow. A successful hit turns her red and makes her invulnerable.
During the red phase, Queen B. performs repeated vertical lunges across the arena. Keep moving, pass beneath her when she rises and avoid trying to jump through her body. The red phase ends when she turns yellow again. At that point, get another Vine Barrel and throw it at her during the next vulnerable phase.
Repeat the yellow-phase throw and red-phase evasion cycle for five successful barrel hits. The lunges become more aggressive as the fight continues, so preserve floor space and avoid throwing a barrel prematurely. Donkey Kong’s larger body makes jumping throws easier, while Diddy should throw when Queen B. flies low enough to reach.
If a Kong is lost, the remaining Kong can continue the fight. After the fifth successful thrown-barrel hit, Queen B. is defeated and the path to Gorilla Glacier opens on the world map.
- Pick up a Vine Barrel.
- Throw it at yellow Queen B.; do not rely on holding the barrel in her path.
- Evade the red invulnerable lunges until she turns yellow.
- Repeat for five successful barrel hits.
- Confirm that Gorilla Glacier opens on the world map.
Before you move on
- Vulture Culture shows its completed-level exclamation mark after all three counted bonuses have been entered and the ordinary exit has been cleared.
- Tree Top Town shows its completed-level exclamation mark after both counted bonuses have been entered and the ordinary exit has been cleared.
- Forest Frenzy shows its completed-level exclamation mark after both counted bonuses have been entered and the ordinary exit has been cleared.
- Temple Tempest shows its completed-level exclamation mark after both counted bonuses have been entered and the ordinary exit has been cleared.
- Orang-utan Gang shows its completed-level exclamation mark after all five counted bonuses have been entered and the ordinary exit has been cleared.
- Clam City is complete after its ordinary exit because it has no counted bonus rooms.
- All six ordinary Vine Valley stages are cleared through their main exits.
- Bumble B. Rumble is cleared after five successful thrown Vine Barrel hits against yellow Queen B.
- The route to Gorilla Glacier opens on the world map.
- Track K-O-N-G letters, Animal Tokens and Animal Crates separately as optional collection goals.
References for this chapter
- Donkey Kong Country — Instruction Booklet, Super Nintendo Entertainment System
- Donkey Kong Country: Guide and Walkthrough, Super Nintendo, by DWA
- Donkey Kong Country — Guide and Walkthrough, Super Nintendo, by nm14
- Donkey Kong Country — Guide and Walkthrough, Super Nintendo, GameFAQs
- DKC Atlas: Donkey Kong Country Level Maps
- Donkey Kong Country Map Selection — Labeled Maps
World 4 — Gorilla Glacier: slippery surfaces and torch-lit caverns
Gorilla Glacier is World 4 in the original North American SNES release. Clear the stages in this order: Snow Barrel Blast, Slipslide Ride, Ice Age Alley, Croctopus Chase, Torchlight Trouble and Rope Bridge Rumble. The boss stage is Really Gnawty's Rampage. The world combines low-friction ice, icy ropes, barrel-cannon alignment, an underwater Croctopus pursuit, darkness and collapsing rope bridges. Finish the normal exits first if lives are low, then replay the stages for their bonus rooms and optional collectibles.
1. Prepare for Gorilla Glacier's movement
Keep both Donkey Kong and Diddy Kong whenever a safe DK Barrel is available. Donkey Kong is useful for taking out tougher ground enemies and has a slightly higher normal jump. Diddy Kong is faster and is usually easier to control during barrel launches, rope transfers and long gap jumps.
Ice and the icy ropes preserve momentum. Releasing the direction does not stop a Kong immediately. Approach edges with short direction taps, begin jumps earlier than on ordinary ground, and avoid holding a direction through a landing unless you deliberately want to slide. Treat each landing as preparation for the next jump rather than as a place to stop.
- Keep both Kongs before attempting optional routes.
- Start jumps early on ice and icy ropes.
- Choose survival and the exit over collectibles when lives are low.
2. Clear Snow Barrel Blast
Snow Barrel Blast begins with icy ground, Gnawtys, Neckys and a series of barrel cannons. Use short steering corrections while moving between barrels. Do not hold a direction throughout an entire launch; the next barrel or platform may require only a small adjustment. In the snowstorm, judge the next landing by the platform's position and shape instead of reacting to distant background details.
The first bonus room is above the starting igloo. Jump onto the igloo and use the nearby Necky as a stepping stone to reach the barrel above. The second is after the Continue Barrel: use Donkey Kong to defeat the blue Krusha to the left, then drop through the gap aligned with the single banana to reach the automatic barrel below. The third is in the later rotating barrel-cannon section. When the cannon is near the first red Zinger, fire straight down onto the hidden platforms, cross them and enter the automatic barrel.
These bonus rooms are optional for opening the world. If a cannon sequence is costing lives, continue along the main route and return after the stage is complete. Activate the Continue Barrel before attempting the later bonus entrance.
- Reach the Continue Barrel before taking repeated bonus-room attempts.
- Use Donkey Kong for the Krusha route after the checkpoint.
- Fire downward from the later rotating cannon to find the third bonus.
3. Use the ropes in Slipslide Ride
Slipslide Ride takes place in a crystal cavern where the icy ropes carry the Kongs in different directions. Blue ropes carry the Kong upward; red or purple ropes carry the Kong downward. Center yourself before transferring to another rope, and wait until the target ledge is clearly aligned. Do not jump early from a descending rope when the destination is still below the screen edge.
The first bonus entrance is near the beginning. Bounce from the first jumping Kritter onto the rope visible above the opening area. Ride upward, jump left to collect the barrel and carry it into the left wall. The second is after the K letter. Take the first red rope downward, jump to the small ledge between the two red Zingers, take the barrel there, then pass through the gap and drop left. Carry the barrel into the left wall.
The third bonus follows the O letter. Cross the four ropes to the right without leaving the fourth too soon. Ride the fourth rope upward until the Kong is above the left Zinger, jump left onto the third rope and ride it upward into the automatic barrel. These routes require controlled transfers; finish the normal exit first if the ropes are costing lives.
- Remember which ropes rise and which descend before transferring.
- Use the visible barrel to open the first two bonus entrances.
- After collecting O, use the fourth rope to reach the third rope and its barrel.
4. Navigate Ice Age Alley
Ice Age Alley mixes icy slopes, swinging ropes, Neckys and barrel-cannon sequences. When carrying a barrel, identify the wall or enemy it must reach before moving. Throwing it blindly can remove the tool needed for the next route. On a slope, use a brief reverse tap to reduce unwanted sliding before jumping.
The first bonus entrance uses the first swinging rope. Jump right from the rope, bounce on the Necky and land on the small platform. From there, bounce across the two Neckys to reach the automatic barrel. The second bonus is shortly before the N, after the steep slopes. The route requires Expresso: use the Expresso crate near the start of the level, keep the animal through the stage, then fly right from the high platform near the N to a small platform with an automatic barrel.
The letter routes and bonus routes can overlap with dangerous landings. If Expresso is lost, do not force the second bonus attempt; the main exit remains available without her. Slow down after every rope transfer so a successful landing does not become an uncontrolled slide into the next pit.
- Find the Expresso crate near the start by moving left from the opening area.
- Use the first swinging rope and two Neckys for the first bonus.
- Keep Expresso until the high platform before N if pursuing the second bonus.
5. Survive Croctopus Chase
Croctopus Chase is an underwater pursuit stage and has no bonus rooms in the original SNES version. Its optional rewards are hidden items, not bonus exits. Take Enguarde when the crate is safely available; his forward attack and speed make the fish-filled passages easier to manage.
Move forward through each chase section and read the Croctopus's route before entering a narrow passage. After passing a blue Croctopus, do not immediately backtrack to its former position, because it can return and strike from behind. When a Croctopus begins following, continue toward the next opening instead of reversing direction repeatedly.
After the halfway point, a hidden route contains Enguarde and a red balloon. Another hidden passage near the barrel sequence contains the O letter; after entering the lower area, hug the right wall to pass through it and then swim toward the letter. These items are optional. Losing Enguarde does not prevent completion, so prioritize the exit over a risky recovery attempt.
- Treat Croctopus Chase as a main-path underwater stage with no bonus rooms.
- Do not backtrack into the previous position of a pursuing Croctopus.
- Use the hidden wall routes only when the passage is clear.
6. Carry Squawks through Torchlight Trouble
Torchlight Trouble is dark from the start. Jump onto the crate at the opening to release Squawks, whose light reveals the immediate route. Keep Squawks with you and move in short bursts. Stop on safe ground whenever the next platform or Mincer is outside the illuminated area; blind jumps are more dangerous than waiting for the screen to reveal the timing.
The first bonus entrance is after the Continue Barrel. Crawl through the low tunnel, pick up the barrel on the ledge, drop left and walk right into the wall to break it open. The second is near the end. Pick up the final barrel, clear the last Mincer, land safely and throw the barrel into the left wall.
Mincers follow fixed paths, so watch one complete movement cycle before crossing a narrow opening. If Squawks is lost, avoid rushing through unseen hazards. Use the next safe area to reorient, or accept a restart from the Continue Barrel rather than spending several lives on blind attempts.
- Release Squawks at the start by jumping on the crate.
- Use a barrel through the wall after the Continue Barrel for the first bonus.
- Throw the final barrel into the left wall after clearing the last Mincer for the second bonus.
7. Cross Rope Bridge Rumble
Rope Bridge Rumble returns to treetop platforms and rope bridges. Some bridges collapse as soon as they are crossed, so maintain forward momentum and jump toward solid platforms before the current bridge disappears. Do not stop to collect a banana if doing so leaves the Kong on a collapsing section with no visible landing.
The first bonus entrance is in the second pit from the start. The rim of an automatic barrel is visible below; drop into the pit and steer into the barrel rather than treating the fall as an unavoidable death. The second is after the G, on the second moving tire. A single banana is high above the tire. Bounce from the tire into the hidden barrel above that banana.
The first bonus contains Winky, while the second awards an animal token if the three barrels are matched correctly. These rewards are optional and do not unlock the boss route. For the main exit, focus on the timing of the moving tires and the collapsing bridges. If a jump is missed, replay from the Continue Barrel and practice only the section after the checkpoint.
- Drop into the visible barrel in the second pit for the first bonus.
- Use the second moving tire after G to reach the hidden barrel above.
- Keep moving across collapsing bridges and aim for solid platforms.
8. Defeat Really Gnawty's Rampage
Really Gnawty's Rampage uses a simple arena and requires five successful head hits. At the beginning, Really Gnawty makes readable, relatively small jumps across the platform. Wait for him to approach during one of these normal jumps, then jump on his head and move away from his landing path.
After each hit, Really Gnawty becomes faster and performs higher or farther jumps. The number of larger jumps increases with the number of hits already delivered; after those larger jumps, he returns to the shorter approach pattern. Do not chase him across the arena. Hold a central or slightly offset position, watch the direction of the next jump, and pass underneath or move away when he makes a long leap.
A missed jump is recoverable. Land, avoid touching the boss, and wait for the next readable normal approach instead of trying to force a second hit immediately. Donkey Kong's slightly higher jump can make the stomp more forgiving, while Diddy Kong can reposition more quickly after a miss. Repeat the approach-and-stomp pattern until the fifth hit. Victory opens the route to Kremkroc Industries.
- Fight from a central position instead of chasing the boss.
- Stomp Really Gnawty during a readable normal approach.
- Avoid the higher and farther jumps after each successful hit.
- Repeat the pattern for five successful head hits.
Before you move on
- Snow Barrel Blast, Slipslide Ride, Ice Age Alley, Croctopus Chase, Torchlight Trouble and Rope Bridge Rumble are cleared on the Gorilla Glacier map.
- Really Gnawty's Rampage is defeated and the route to Kremkroc Industries is open.
- For main-campaign progress, all six regular stage exits and the boss stage are complete. K-O-N-G letters, animal tokens and bonus rooms are optional for reaching the final world.
- For 101% progress, enter all bonus rooms in Gorilla Glacier: three in Snow Barrel Blast, three in Slipslide Ride, two in Ice Age Alley, none in Croctopus Chase, two in Torchlight Trouble and two in Rope Bridge Rumble.
- Do not use K-O-N-G letters or animal tokens as the 101% completion test; the original SNES percentage is advanced by completed stages and discovered bonus rooms.
- After finishing a bonus room, verify that its entrance has been counted before moving on. If the total remains short, replay the listed levels and check the hidden barrel and wall routes rather than repeating ordinary exits.
References for this chapter
- Donkey Kong Country Instruction Booklet, Super Nintendo
- Donkey Kong Country — Nintendo SNES Classic Manual
- DKC Atlas: Donkey Kong Country Level Maps
- Donkey Kong Country — Guide and Walkthrough, Super Nintendo, GameFAQs
- Donkey Kong Country — Guide and Walkthrough, Super Nintendo, GameFAQs
- Donkey Kong Country: Guide and Walkthrough, Super Nintendo, by DWA
World 5 — Kremkroc Industries, Inc.: conveyor hazards and Dumb Drum
Kremkroc Industries, Inc. is World 5 in the original North American Super Nintendo release. The map order is Oil Drum Alley, Trick Track Trek, Elevator Antics, Poison Pond, Mine Cart Madness, Blackout Basement and Boss Dumb Drum. The world mixes burning oil drums, moving track platforms, rope-and-elevator climbs, underwater Mincers, mine-cart transfers and a factory whose lights repeatedly fail. Clear the ordinary exits first if lives are low, then replay the stages for bonus rooms and other optional collectibles. Entering all 67 bonus rooms across the game is required for 101 percent, while K-O-N-G letters, bananas and animal tokens are not required for that percentage.
Follow the original SNES map order
Enter the Kremkroc stages in this exact sequence: 5-1 Oil Drum Alley, 5-2 Trick Track Trek, 5-3 Elevator Antics, 5-4 Poison Pond, 5-5 Mine Cart Madness, 5-6 Blackout Basement and Boss Dumb Drum. Elevator Antics comes before Poison Pond in this release, and Mine Cart Madness comes before Blackout Basement.
Keep both Kongs whenever possible. Diddy is usually easier to maneuver around moving platforms, ropes and mine carts, while Donkey is more forgiving against heavy enemies such as Klumps and Krushas. If you lose one Kong, prioritize a DK Barrel or a safe recovery route over optional collectibles. Candy Kong can save map progress, but she does not create a checkpoint inside a boss fight or bonus room.
- Use the six-stage order shown on the original SNES map.
- Reach each ordinary exit before spending lives on difficult bonus attempts.
- Replay stages after the boss route is open if you are pursuing 101 percent.
Clear Oil Drum Alley and its four bonus rooms
At the beginning, defeat the Gnawty on the raised platform and use the nearby rope to return toward the start. Jump onto the dark floor section to reveal a TNT barrel. Carry it to the right and use it on the oil drum in the floor, then drop into the opening and enter the first bonus room.
After the early K, climb the stepped platforms occupied by Gnawtys. At the top, drop onto the weak floor to reveal another TNT barrel and throw it into the wall on the left. This opens the second bonus. Inside, make the three barrel results match single bananas. A barrel appears when the puzzle is completed; pick it up with Diddy and jump into the right wall while holding it to reveal the secret third bonus. Do not simply walk into the wall, because the bonus-clear animation can eject you before the hidden entrance is reached.
The fourth bonus is farther into the stage, before the Manky Kong section. Drop into the pit containing Rambi and take him through the lower route. When you reach the oil drum that normally leads toward the upper path, stay underneath it and charge the right-hand wall with Rambi. The hidden entrance opens there.
For the ordinary exit, watch the oil flames instead of treating the drums as fixed obstacles. Wait for a flame to retract, cross to the next safe ledge and use tires or platforms as pauses. Losing Rambi does not block the main exit, so abandon the optional route if the animal is endangered and survival is more important.
- Use the opening TNT barrel on the first oil drum.
- Find the second bonus on the Gnawty steps.
- Use the barrel earned inside that bonus to reach the secret third bonus.
- Take Rambi through the lower route and break the wall beneath the later oil drum.
- Cross the final oil-drum sequence by observing each flame cycle.
Ride the moving platform in Trick Track Trek
Trick Track Trek uses a moving elevator-like platform running along a fixed track. Stay toward the rear when enemies drop onto the platform so you have room to react. Bounce on Neckys only when the platform is aligned with them, and avoid jumping blindly while nuts are falling from above.
At the end of the first track section, use a roll jump from the platform toward the hidden barrel beneath the upper walkway to enter the first bonus. Later, after the section with the second Zinger, jump onto the platform containing Gnawtys and continue right to find the second bonus route. Near the end, pass the Manky Kong and search the concealed lower route around the final walkway for the third bonus.
The stage is easier if you treat each platform stop as a timing reset. If a jump is missed, aim for a lower tire or ledge rather than steering toward the next enemy in midair. Secure the Continue Barrel before taking unnecessary risks with the later bonus entrance.
- Stay toward the rear of the moving platform when enemies approach.
- Use the roll jump beneath the first walkway for the first bonus.
- Search the later Gnawty platform route for the second bonus.
- Check the concealed route near the final Manky Kong for the third bonus.
Climb Elevator Antics before entering Poison Pond
Elevator Antics is stage 5-3. At the start, use a roll jump or cartwheel jump from the ledge to grab the first rope. Climb upward and enter the doorway on the right for the first bonus.
Continue until three ropes span a gap, each watched by a Yellow Zinger. Use the first rope, move to the second when its Zinger is low, then climb high enough to avoid contact. Transfer to the third rope when its Zinger moves down, jump to the ceiling route and travel right to the hidden barrel for the second bonus. This bonus contains the O and an Expresso token, but neither is required to finish the stage.
Near the end, ride the last downward-moving elevator all the way down instead of jumping off early. Enter the doorway on the right for the third bonus. During the ordinary route, wait for another elevator cycle whenever a jump would put you against a Zinger or a wall. The platforms repeat their movement, so patience is safer than forcing a departure.
- Take the opening rope into the first bonus.
- Use the three-Zinger rope sequence to reach the second bonus.
- Ride the final elevator down for the third bonus.
- Treat the O, Expresso token and other bonus rewards as optional.
Swim Poison Pond as stage 5-4
Poison Pond follows Elevator Antics in the original SNES map. It has no bonus rooms, so concentrate on reaching the exit. Immediately search the concealed area just left of the entrance for an Enguarde crate. Enguarde's attack makes fish encounters safer, although the animal is not required.
Mincers are the main hazard. Watch a Mincer complete a movement cycle before entering its path, then swim through the opening rather than trying to squeeze around its front edge. In narrow passages, use short directional taps and stay away from the moving center of circular groups. Squidges travel diagonally, while Bitesizes and Chomps Jr. punish long, uncontrolled swims.
If you lose Enguarde, continue with small corrections and let enemies pass before advancing. The K-O-N-G letters and bananas are optional. There is no Poison Pond bonus entrance to search for, so do not waste lives testing ordinary walls or detours.
- Search left of the entrance for Enguarde.
- Read each Mincer cycle before moving.
- Use short swimming corrections in narrow tunnels.
- Treat Poison Pond as a main-route stage with no bonus rooms.
Transfer safely in Mine Cart Madness
Mine Cart Madness is stage 5-5. The cart route repeatedly requires you to leave one cart, bounce from an enemy or tire, and land in another cart. Do not jump as soon as the next cart appears; wait until your current cart is close enough that the landing is over the target rather than beneath it.
Early in the stage, collect the K and use the rope section afterward to reach a hidden launcher barrel. Follow the banana trail and jump upward at its break to enter the first bonus. After the Continue Barrel, let the cart descend into the transfer area before jumping to the next cart. The N is obtained during this sequence. Shortly afterward, use the tire at the top of the rising track to reach the second bonus.
Near the end, reach the exit walkway, turn around and roll from its edge onto the tire behind you. Bounce across the tires to reach the third bonus, then return to the walkway and continue right. If you miss a transfer, aim for the next visible tire or rope; early jumps are the usual cause of falling short.
- Wait for the next cart to come close before transferring.
- Use the rope and broken banana trail to find the first bonus.
- Collect the N during the later cart transfer.
- Use the tire near the rising track for the second bonus.
- Turn back from the final walkway for the third bonus.
Use memory and safe pauses in Blackout Basement
Blackout Basement is stage 5-6, immediately before Dumb Drum. The lights repeatedly turn off, and the original SNES stage does not supply Squawks as a lantern. During each lit interval, identify the next platform, enemy and landing point. When the screen goes dark, stop on a known safe surface instead of attempting a blind jump.
After the Continue Barrel, reach the series of downward arrow platforms. Stay on the final platform as it descends toward the lone banana below; this takes you into the first bonus. After returning, a Steel Keg becomes available. Carry it to the next area, throw it against the wall and jump onto it as it rebounds. Ride the keg until it breaks open the second bonus entrance. Complete this route before collecting the nearby G if you want to preserve the keg setup.
For the main route, use bananas and previously memorized ledges as landmarks during blackouts. Let Klaptraps and Kritters approach a known position before attacking. If you fall, repeat the lit section deliberately rather than rushing because the blackout timing has not changed.
- Use each lit interval to memorize the next landing.
- Stay on the final arrow platform to enter the first bonus.
- Use the rebounding Steel Keg to open the second bonus.
- Do not expect Squawks to illuminate this original SNES stage.
Defeat Dumb Drum using the original SNES sequence
Dumb Drum cannot be attacked directly at the beginning. Its initial drop targets the position where you were standing, so move aside before it descends. It then releases two Green Kritters. Defeat them, survive two more drum drops and prepare for two Slippas. After the Slippas are defeated, Dumb Drum drops three times and releases two Klaptraps. Four drops follow the Klaptraps, then two Klumps appear. After the Klumps, survive five drops and defeat the final pair of Armys.
Donkey is especially useful against the Klumps. If only Diddy remains, use cartwheels and controlled attacks rather than trying to jump directly through both enemies. Armys are safest when attacked from above; without Donkey, Diddy may need two stomps on each Army. Keep moving after every attack so Dumb Drum does not land on your last position.
Once the Army pair is defeated, Dumb Drum makes one final descent and explodes on impact. That final fall does not damage the Kongs. Do not search for TNT barrels or use the later-port TNT strategy: the original SNES boss is completed by defeating the released enemy pairs.
- Move away from your standing position before each drum descent.
- Defeat the pairs in this order: Green Kritters, Slippas, Klaptraps, Klumps, then Armys.
- Use Donkey against Klumps when possible.
- Finish the Army pair and allow the final harmless descent to trigger the explosion.
- Confirm that the map opens the route to Chimp Caverns.
Before you move on
- Oil Drum Alley, Trick Track Trek, Elevator Antics, Poison Pond, Mine Cart Madness and Blackout Basement are cleared in that order.
- All four Oil Drum Alley bonus rooms, all three Trick Track Trek bonus rooms, all three Elevator Antics bonus rooms, both Blackout Basement bonus rooms and all three Mine Cart Madness bonus rooms have been entered if pursuing full bonus completion.
- Poison Pond is marked complete after its ordinary exit; there is no bonus-room requirement for that stage.
- Dumb Drum is defeated by clearing the Green Kritter, Slippa, Klaptrap, Klump and Army pairs, and the route to Chimp Caverns is open.
- K-O-N-G letters, animal tokens, bananas and balloons are tracked separately from bonus-room completion.
- The Kremkroc level names show their completion marker after every counted bonus in each stage has been entered.
References for this chapter
- Donkey Kong Country — Instruction Booklet, Super Nintendo Entertainment System
- Donkey Kong Country — Guide and Walkthrough, Super Nintendo, by DWA
- Donkey Kong Country — Guide and Walkthrough by idiotboy00
- Donkey Kong Country — Guide and Walkthrough by KrocTheDoc
- Donkey Kong Country — Guide and Walkthrough, Super Nintendo, by CStassen
- DKC Atlas: Donkey Kong Country Level Maps
World 6 — Chimp Caverns: crushers, mincers and Necky Senior
Chimp Caverns is the sixth and final ordinary world in the original North American Super Nintendo release. Clear Tanked Up Trouble, Manic Mincers, Misty Mine, Loopy Lights and Platform Perils, then defeat the single boss in Necky's Revenge: Master Necky Snr. The five ordinary stages contain nine counted bonus rooms in total: one in Tanked Up Trouble, two in Manic Mincers, two in Misty Mine, two in Loopy Lights and two in Platform Perils. The Mincer-filled cave in Manic Mincers is an optional ordinary-route detour. It contains the G letter but does not count as a bonus-room percentage point. Animal buddies, K-O-N-G letters, bananas and Animal Tokens are optional for ordinary campaign completion.
1. Prepare for Chimp Caverns
Chimp Caverns follows Kremkroc Industries, Inc. The stage order is Tanked Up Trouble, Manic Mincers, Misty Mine, Loopy Lights, Platform Perils and Necky's Revenge. Necky's Revenge is the world boss stage, not another ordinary cavern level.
For a first clear, prioritize reaching each ordinary exit. The hidden rooms can be collected on later attempts from the world map, and the bonus challenges do not need to be completed for their percentage to count; entering the counted room is the essential requirement. Separate survival runs from cleanup runs when lives are low.
If you need lives, replay a completed stage with a safe opening. Collecting 100 bananas grants an extra life, and collecting K-O-N-G in one level attempt grants another. A life balloon is also worth taking when it can be reached safely. Candy Kong records map progress, but neither Candy Kong nor an ordinary halfway barrel provides a checkpoint inside Necky's Revenge.
For 101% tracking, write down nine Chimp Caverns bonuses: one in Tanked Up Trouble, two in Manic Mincers, two in Misty Mine, two in Loopy Lights and two in Platform Perils.
- Enter the world with both Kongs when possible.
- Clear the five ordinary stages before attempting risky cleanup routes.
- Track nine counted bonuses using the distribution 1, 2, 2, 2 and 2.
- Do not count the Mincer-filled cave in Manic Mincers as a bonus room.
2. Tanked Up Trouble: keep the platform fueled
Tanked Up Trouble places the Kongs on a moving mine platform whose fuel meter controls how long it remains active. Fuel canisters have red dots; more dots mean a larger fuel refill. Collect the canisters with short, controlled jumps and return to the platform immediately. If the meter empties during the ordinary route, the platform stops and drops, costing the attempt.
The counted bonus is near the beginning. After landing on the first moving platform, jump over the first fuel canister and stay aboard. When the platform runs out of fuel, it drops into a launcher barrel instead of sending you directly to a normal death. The launcher sequence moves across three barrels. Watch the red balloon and enter the barrel where it stops to collect it.
For a survival attempt, take the first fuel canister and continue normally. Avoid making a long jump simply to grab a distant refill; losing the platform is worse than leaving a banana or fuel item behind. The halfway barrel helps with the ordinary stage, but dying after it still means repeating the fuel section from that point.
After the ordinary exit, Manic Mincers becomes available. The launcher-barrel room counts toward 101% as soon as you enter it, whether or not you finish the internal challenge.
- Collect fuel before the meter empties on the main route.
- Stay near the center of the platform when approaching a canister.
- Enter the single counted bonus by allowing the early platform to drop into the launcher barrels.
- Reach the ordinary exit to unlock Manic Mincers.
3. Manic Mincers: two counted bonuses and an optional cave detour
Mincers cannot be defeated by ordinary jumps. They move in fixed circular, vertical, horizontal or stationary patterns, so pause before each crossing and watch the nearest hazard complete a cycle. Cross from one safe ledge to the next instead of attempting a blind leap through several moving blades.
Early in the stage, proceed past the first Gnawties and the initial Mincer gaps until you reach the area with the first Krusha. After passing the two circling Mincers, use the nearby barrel against the Krusha if necessary. Drop into the pit, defeat the Krusha with Donkey Kong or retrieve the barrel from the left, then break the right-hand wall. This opens the first counted bonus. Bounce on the Klaptraps inside to receive a red life balloon.
Continue along the main route. Rambi is available in an Animal Crate, but he is optional and can be damaged by Mincers. When the level reaches the large cliff sequence with Gnawties and moving Mincers, an opening in the wall leads to a Mincer-filled cave containing the G letter. Treat this as an optional ordinary-route and collectible detour, not as a counted bonus room. If you are concentrating on reaching the exit, use the normal route instead.
After the cave detour or the corresponding main-route section, take the TNT barrel near the next Gnawty group. Carry it past the enemies, drop into the low area and break the first suitable wall on the right, beneath the tire. This opens the second counted bonus, a barrel-selection challenge involving a red balloon. Watch the balloon and strike the barrel where it stopped.
After leaving the second bonus, continue right through the remaining Mincer and Gnawty sections to the ordinary exit. Manic Mincers contributes two counted bonus rooms to the original SNES 101% total. The G-letter cave, Rambi, the Winky-style token references sometimes shown in mixed-version guides, and other optional collectibles do not replace either counted room.
- Use the barrel or Rambi to open the Krusha-area wall bonus.
- Treat the Mincer-filled G-letter cave as an optional ordinary detour only.
- Carry the TNT barrel to the later right-hand wall beneath the tire.
- Enter both counted Manic Mincers bonuses.
- Reach the ordinary exit before moving to Misty Mine.
4. Misty Mine: use ropes and TNT barrels methodically
Misty Mine is filled with oil drums that release enemies. Advance in short sections and identify the enemy pattern from each drum before jumping. TNT barrels can destroy certain drums and open routes, but carrying one through a crowded section is often more dangerous than taking the enemies slowly.
After the halfway barrel, follow the rope across the large gap. When the rope stops, slide down toward the right-hand wall rather than landing on the obvious lower path. A small ledge and entrance are hidden there. Enter the first counted bonus and follow the banana trails while changing between the upper and lower rope paths to collect K-O-N-G. The Expresso crate at the end is optional.
Later, find the TNT barrel near the Klaptrap-producing drum. Carry it past the enemies and drop into the low area on the right. Stand beside the right wall and set or throw the TNT barrel into it to open the second counted bonus. Inside, stop the moving barrels and match them to collect a matching Animal Token if desired. The token reward is optional and does not affect the bonus count.
If a Kong is lost in the mist, slow down at the next oil drum. Wait for its enemy to move into a predictable position, then use the next DK Barrel if one is available. Do not sprint into the darkness immediately after recovering a partner.
- Use the rope after the halfway barrel to reach the first bonus entrance.
- Follow the alternating rope paths for the K-O-N-G letters if desired.
- Break the later right wall with the TNT barrel for bonus two.
- Count two Misty Mine bonuses.
5. Loopy Lights: control visibility before moving
Loopy Lights alternates between illuminated and dark sections. Hit Light Barrels and On/Off switches before committing to a jump. Jumping Klaptraps imitate the Kongs' jumping rhythm, so use deliberate, high jumps or defeat them with a safe barrel rather than hopping repeatedly in place.
Near the beginning, activate the nearby light and drop into the first marked gap. A hidden launcher barrel sends you to the first counted bonus. Turn on the light and fire through the barrel course to collect the available items before taking the exit.
After the halfway barrel, progress through the light switches and moving platforms until you reach a Necky guarding a light barrel. Defeat the Necky without destroying the ordinary barrel you need. Carry that barrel down the steps, cross the gap, and use it against the right-hand wall in the low pit. This opens the second counted bonus. Turn on the light inside, climb the ledges and collect the available items before exiting.
If the room becomes dark, stop rather than making a long blind jump. Restore the light with the next switch or Light Barrel, then resume from a known platform. The ordinary exit remains the priority if a bonus attempt has already cost a Kong.
- Drop into the first marked gap for bonus one.
- Preserve the barrel near the Necky and carry it to the later right wall.
- Enter both counted Loopy Lights bonuses.
- Use switches before crossing unfamiliar dark sections.
6. Platform Perils: wait for alignment
Platform Perils is the final ordinary stage. It uses arrow platforms, moving elevators, tires, barrels and Krushas. At the beginning, deal with the first Krusha using the nearby barrel, then board the first platform moving to the right. Drop from its left side onto the hidden platform moving left and ride that platform into the launcher barrel at the lower-left. This opens the first counted bonus, where the four barrels must be stopped in K-O-N-G order.
On the main route, let each arrow platform reach a useful height before jumping. A platform moving toward you is not necessarily ready for a landing; many transfers require it to rise or descend into alignment. Use barrels against Krushas and preserve a second Kong for the later platform chain.
Near the end, stay with the final arrow-platform sequence rather than taking the obvious walkway immediately. Let the platform descend, then use a roll-jump to the platform and barrel in the gap. This opens the second counted bonus, where you select the barrel containing the moving Enguarde Token. The token reward is optional, but entering the room counts toward 101%.
If lives are low, finish Platform Perils through the ordinary exit and replay it from the map for the two bonuses. This prevents one failed bonus attempt from repeatedly costing progress on the difficult platform sections.
- Use the hidden left-moving platform at the start to reach bonus one.
- Stop the barrels in K-O-N-G order in the first bonus.
- Remain on the final arrow-platform route to reach bonus two.
- Enter both counted Platform Perils bonuses.
- Reach the ordinary exit to open Necky's Revenge.
7. Defeat Master Necky Snr. in Necky's Revenge
Necky's Revenge contains one boss encounter: Master Necky Snr. The arena has a center tire and no animal buddy, bonus room or midway checkpoint. The fight is not a two-Necky sequence. You must land five total head hits.
Use the center tire as the launch point. Master Necky Snr. spits a nut volley and then exposes himself to attack. Avoid the incoming nut, bounce from the tire and land on the boss's head. After each successful hit, the next volley contains more nuts, reducing the safe space and making patience more important.
For the early attacks, stay near the tire and watch the projectile spacing. For later volleys, move across the floor when necessary and jump over the nuts rather than remaining on the tire while several projectiles spread across the arena. Once the volley has passed, return to the tire and wait for the next vulnerable cycle.
A missed jump is not a reason to chase the boss immediately. Recover on the floor, avoid the next nut pattern and use the following cycle. If the life is lost, replay a completed safe stage for bananas, a balloon or K-O-N-G letters before trying again. Defeating Master Necky Snr. opens the route to Gang-Plank Galleon.
- Use the center tire to reach the boss.
- Dodge the first nut volley and land the first head hit.
- Expect additional nuts after each successful hit.
- Land five total head hits.
- Defeat the single boss to complete Chimp Caverns.
Before you move on
- Tanked Up Trouble, Manic Mincers, Misty Mine, Loopy Lights and Platform Perils have been cleared through their ordinary exits.
- Necky's Revenge is completed and the world map opens the route to Gang-Plank Galleon.
- For 101% tracking, all nine counted Chimp Caverns bonuses have been entered: one in Tanked Up Trouble, two in Manic Mincers, two in Misty Mine, two in Loopy Lights and two in Platform Perils.
- The Mincer-filled cave in Manic Mincers has not been counted as a bonus room. The G letter there is optional.
- Any missed counted room can be collected by replaying its stage from the world map.
- Each ordinary level should display its completion mark after all counted bonus entrances in that level have been found.
- Master Necky Snr. has been defeated with five total head hits; there is no second Necky phase or ten-hit requirement.
References for this chapter
- Donkey Kong Country — Instruction Booklet, Super Nintendo Entertainment System
- Donkey Kong Country — Guide and Walkthrough, Super Nintendo, GameFAQs
- Donkey Kong Country — Guide and Walkthrough by idiotboy00
- Donkey Kong Country — Guide and Walkthrough by KrocTheDoc
- Donkey Kong Country — Bonus Item FAQ by Brother_Reed
- Donkey Kong Country/Platform Perils — StrategyWiki
- Chimp Caverns — Donkey Kong Wiki
Final area — Gang-Plank Galleon: the final boss and King K. Rool
Gang-Plank Galleon is the final single boss stage in the original North American Super Nintendo release of Donkey Kong Country. It is not a ship world with several ordinary levels or an interior platforming route. After completing the six regular worlds and their bosses, enter the ship from the overworld map and move across the deck until King K. Rool appears. The complete battle requires ten successful head hits. Four crown opportunities occur before the cannonball phases, three more follow one-, two- and three-sweep cannonball attacks, and the final three occur after the deliberately false KREDITS sequence. The campaign is not complete when the first credits appear; continue until the tenth hit and the genuine ending begins.
1. Prepare before entering Gang-Plank Galleon
Complete Necky's Revenge in Chimp Caverns and return to the overworld map. Gang-Plank Galleon is the final destination in the original SNES campaign. Enter the ship and move right across the deck. There is no ordinary level route to clear before the boss, no interior section to search and no bonus-room objective inside this stage.
Keep several lives available if you are still learning the fight. If necessary, replay a familiar completed level to collect bananas and reachable extra lives before returning to the ship. Candy Kong's save function preserves map progress, but it does not create a checkpoint inside King K. Rool's battle.
Enter with both Kongs when possible. Losing one Kong gives you a smaller margin for error, but the second Kong is only a buffer against damage; it does not change the boss pattern. No animal buddy, Animal Crate, bonus room or midway checkpoint is required in Gang-Plank Galleon.
Organize the fight into three sections: four opening crown opportunities, three cannonball phases and three post-credit jumping patterns. Every attack follows the same basic rule: avoid K. Rool's body or projectile, wait for him to throw the crown, jump over the crown, then land on his exposed head.
- Complete Necky's Revenge.
- Keep enough lives for several attempts.
- Enter with both Kongs when possible.
- Remember that the battle requires ten total head hits.
- Do not search for an animal buddy, bonus room or midway checkpoint.
2. Land the first four crown hits
Run right at the beginning until King K. Rool appears. He immediately throws his crown across the deck. Jump over the crown and land on K. Rool's head for hit 1. Do not jump into him while the crown is still on his head; the crown itself can hurt the Kong.
After hit 1, K. Rool charges across the deck. Move toward the center and jump over the charge. He stops at the opposite side, throws the crown again, and exposes himself after the crown passes. Jump over the crown and stomp him for hit 2.
After hit 2, K. Rool makes two charges. Stay near the center so you can see both approaches. Jump over the first charge, then the second. When he stops and throws the crown, clear it and land hit 3.
After hit 3, he makes three consecutive charges. The third is faster, so do not wait at an edge and do not try to attack during the charge sequence. Jump over all three charges, wait for the crown throw, jump over it and stomp his head for hit 4.
The opening section therefore contains four head hits, not three. The crown throw is the attack cue each time: avoid the body first, then avoid the crown, then attack.
- Hit 1 follows the opening crown throw.
- Hit 2 follows one charge and a crown throw.
- Hit 3 follows two charges and a crown throw.
- Hit 4 follows three charges and a crown throw.
- Stay near the center when preparing for multiple charges.
3. Survive the cannonball phases for hits five through seven
After hit 4, K. Rool bounces across the deck and lands heavily on the opposite side. That heavy landing begins the cannonball section. Cannonballs fall in a line, bounce once on the deck and leave the screen. They cannot be destroyed, so move through the opening after a ball bounces rather than waiting underneath the falling line.
For hit 5, the cannonballs travel in one sweep from left to right. Watch the first ball land and bounce, then move through the gap before the next ball reaches your position. When the sweep ends, K. Rool throws his crown. Jump over it and stomp his head for hit 5.
For hit 6, the cannonballs make two sweeps: right to left, then left to right. Do not approach K. Rool after the first sweep. Continue moving through the gaps until both directions are complete. Only then wait for the crown throw, clear it and land hit 6.
For hit 7, the cannonballs make three sweeps: left to right, right to left, then left to right. Count all three passes. Keep moving through the safe spaces created after each bounce, then wait for the crown. Jump over the crown and land hit 7.
The cannonball count is tied to the number of hits already landed: one sweep for hit 5, two sweeps for hit 6 and three sweeps for hit 7. Do not use a fixed timer; read the projectile spacing and the direction of each sweep.
- Hit 5 follows one left-to-right cannonball sweep.
- Hit 6 follows two sweeps: right to left, then left to right.
- Hit 7 follows three sweeps: left to right, right to left, then left to right.
- Move through openings after cannonballs bounce.
- Wait for the crown before every cannonball-phase stomp.
4. Continue after the false KREDITS
After hit 7, K. Rool falls and the game displays the deliberately false KREDITS sequence. This is not the end of the campaign. Do not release the controls or reset the game. K. Rool rises again, and three more head hits remain.
For hit 8, stand near the position where you landed the previous stomp and let K. Rool jump over you. Follow his movement without trying to meet him in the air. When he lands and throws the crown, jump over the crown and stomp his head for hit 8.
For hit 9, K. Rool makes another jumping pattern. Let the first jump pass, then move toward the center and run beneath the returning jump when there is room. He lands and throws the crown again. Avoid it and land hit 9.
For hit 10, he makes the final and lowest sequence of three jumps. The jumps become shorter, so the landing positions change and the available space becomes less forgiving. Let each jump pass, move beneath him when safe, and keep enough room to react. At the end he throws the crown at high speed. Jump over it and land the tenth and final head hit.
Do not treat the post-credit section as three identical repetitions. The jumps shorten as the sequence advances. React to K. Rool's height and position instead of relying on a memorized delay.
- Ignore the false KREDITS after hit 7.
- Hit 8 follows the first post-credit jumping pattern.
- Hit 9 follows the second, shorter jumping pattern.
- Hit 10 follows the final three-jump pattern.
- Avoid the last fast crown before the tenth stomp.
5. Recover after a failed attempt
If the crown strikes the active Kong, move away before attempting another jump. The projectile can remain dangerous while it travels across the deck, and immediately trying to counterattack can cause a second mistake. Re-establish a position where the next charge or projectile is visible.
If K. Rool defeats you, the battle restarts from the opening crown throw. Use the first attempts to learn the four opening patterns: zero charges before hit 1, one charge before hit 2, two charges before hit 3 and three charges before hit 4. Then practice surviving one, two and three cannonball sweeps.
When lives are low, leave the final stage and replay a completed level that you can clear consistently. Collect safe bananas and reachable extra lives, save at Candy Kong if desired, and return with enough attempts to learn one battle section at a time.
Protect the remaining Kong rather than trading damage for a risky stomp. If your spacing is poor after a charge or jump, wait for the next readable attack cycle. There is no need to force a hit before the crown is thrown.
- Move away after taking damage.
- Restart from the opening crown sequence after a failed attempt.
- Farm lives in a reliable completed stage when necessary.
- Practice the opening, cannonball and post-credit sections separately.
- Choose survival over a poorly positioned stomp.
6. Confirm genuine campaign completion
A normal story clear requires ten successful head hits: four opening crown hits, three cannonball-phase hits and three post-credit jumping hits. The first four occur during the charge patterns. Hits 5, 6 and 7 follow the one-, two- and three-sweep cannonball phases. Hits 8, 9 and 10 occur after the false KREDITS.
The false KREDITS are not the completion check. Continue playing after they appear, survive the three post-credit attack windows and land the final crown-and-head attack. K. Rool then falls for good and the genuine victory sequence begins.
Once the real victory scenes and final credits begin, the original SNES main campaign is complete. This story clear does not by itself confirm 101% completion. Bonus-room progress is a separate goal that can be pursued by replaying ordinary stages.
If pursuing 101%, track bonus-room visits separately from the boss victory. K-O-N-G letters, bananas, balloons and Animal Tokens are optional personal-completion records and are not required to defeat King K. Rool.
- Land four opening crown hits.
- Land hit 5 after one cannonball sweep.
- Land hit 6 after two cannonball sweeps.
- Land hit 7 after three cannonball sweeps.
- Continue playing after the false KREDITS.
- Land post-credit hits 8, 9 and 10.
- See K. Rool fall for good and wait for the genuine victory sequence.
- Record bonus-room progress separately if pursuing 101%.
Before you move on
- Complete Necky's Revenge and enter Gang-Plank Galleon from the overworld map.
- Defeat K. Rool with the opening crown opportunities for hits 1 through 4.
- Survive the one-, two- and three-sweep cannonball phases and land hits 5 through 7.
- Continue playing after the false KREDITS.
- Survive the three post-credit jumping attack windows.
- Land hits 8, 9 and 10 for ten total head hits.
- See K. Rool fall for good and wait for the genuine victory sequence and real credits.
- Track bonus-room progress separately if pursuing 101%.
Animal buddies and token areas: how to unlock and use them
The original North American Super Nintendo version has five animal friends: Rambi, Enguarde, Winky, Expresso and Squawks. Rambi, Enguarde, Winky and Expresso are rideable animals found in level-specific Animal Crates. Squawks is different: he appears only in the SNES version of Torchlight Trouble, carries a flashlight and cannot be ridden. Golden Animal Tokens are optional collectibles. Collecting three matching tokens immediately starts one temporary Animal Token Bonus; it does not unlock that animal for later levels or create a permanent companion.
Find and mount an Animal Buddy
Look for a wooden Animal Crate marked with the animal's symbol. Jump onto the crate to break it, then jump onto the released animal to mount it. Press A to dismount the buddy. When both Kongs are available, A can also switch the active Kong after dismounting. Animal Crates are tied to particular levels, so an animal found in one stage is not a permanent map or save-file unlock.
Rambi the rhinoceros charges with Y and jumps with B. His charge defeats many ordinary ground enemies and can break certain weak walls, making him useful for secret entrances and dangerous enemy lines. Check the landing area before charging because a blind rush into a pit can lose both Rambi and the current Kong.
Enguarde the swordfish is available only in water. Use the directional buttons to swim, and press Y or B for his forward burst and stabbing attack. He is especially useful against groups of Chomps, Chomps Jrs., Bitesizes and Croctopuses, but do not assume every underwater passage requires him.
Winky the frog jumps with B and reaches higher platforms than either Kong. Use him to clear elevated Zingers, reach high ledges and collect items placed above normal jump height. Expresso the ostrich runs quickly with Y, jumps with B and can extend or control his airborne movement by pressing B again while descending. He is best for long horizontal gaps and routes that require reaching distant platforms.
Squawks is not rideable. In the original SNES release, his only normal-level appearance is Torchlight Trouble in Gorilla Glacier, where the Squawks Crate is near the beginning. After the crate is opened, Squawks follows behind the Kongs and carries a flashlight that reveals the dark cavern. He does not appear as a lantern source in Blackout Basement, and there is no golden Squawks Token or Squawks Token Bonus.
- Rambi: Y to charge, B to jump, A to dismount.
- Enguarde: directional buttons to swim, Y or B for the forward attack.
- Winky: B for his high jump.
- Expresso: Y to run, B to jump and manage his glide.
- Squawks: flashlight companion in Torchlight Trouble only.
Collect golden Animal Tokens
The four golden Animal Token types are Rambi, Enguarde, Winky and Expresso. Walk into a token to collect it. These tokens are optional and do not open worlds, unlock required stages or provide access to King K. Rool. They are separate from level exits and from the bonus rooms that count toward the game's maximum completion percentage.
Tokens may appear on the normal route, in an animal-assisted detour, inside a bonus room or behind a weak wall. If you are exploring for them, inspect suspicious walls while Rambi is available, check high ledges with Winky or Expresso and search underwater alcoves with Enguarde. Some stages contain more than one type of token, so note the animal symbol rather than assuming every token belongs to the buddy currently in the level.
Do not confuse an Animal Crate with a golden token. A crate provides a buddy for the current stage. A token contributes toward the next matching-token trigger but does not summon that animal, refill a lost buddy or place a companion on the world map.
- Only Rambi, Enguarde, Winky and Expresso have golden Animal Tokens.
- Animal Tokens are optional for ordinary campaign completion.
- Animal Crates and golden tokens have different purposes.
- Record token locations separately from required exits and counted bonus rooms.
Trigger the temporary Animal Token Bonus
Collecting three matching golden tokens triggers one Animal Token Bonus immediately. Three Rambi Tokens start the Rambi bonus; three Enguarde Tokens start the Enguarde bonus; the same rule applies to Winky and Expresso. The bonus room changes the Kongs into the matching animal for a timed mini-game. It is not a selection screen and does not unlock the animal for subsequent levels.
The bonus uses a countdown and places small animal tokens around the room. Collect as many as possible before time expires. Every 100 small tokens awards an extra life. Each animal bonus also contains one large matching token. Touching it changes nearby small tokens into an x2 formation and gives a short period during which their value is doubled. The large token is a temporary scoring aid, not a permanent upgrade.
Use a safe route on the first attempt instead of taking a risky jump solely for the large token. When the timer ends, the game tallies the small tokens and returns the Kongs to the level connected with the third matching golden token. The animal used in the bonus does not remain available as a rideable buddy after the mini-game.
- Three matching golden tokens trigger one corresponding Animal Token Bonus.
- The bonus is temporary and timed.
- Every 100 small tokens gives an extra life.
- The large token creates a brief x2 scoring opportunity.
- No Animal Token permanently unlocks an animal.
Choose the correct buddy for the obstacle
Use Rambi for breakable walls, long lines of ground enemies and routes where a charge clears space. Before charging, identify the stopping point and the next safe platform. If the wall does not break, stop rather than repeatedly attacking it near a pit. Dismount with A when the Kong must enter a narrow passage or when the animal is no longer useful.
Use Enguarde in crowded water. His attack lets you remove many fish instead of waiting for every enemy to move away. If the level has no Enguarde Crate, swim in short controlled movements, stop before enemy patrols and use vertical space to let hazards pass. Enguarde cannot leave the water, so do not try to carry him into a land section.
Use Winky where height is the main problem. Bounce over or onto enemies only when the next landing is visible; his high jump can also carry him into a Zinger if you hold the jump without checking the route. Use Expresso for broad gaps and distant ledges. Start a glide from stable ground, then adjust the descent with B and release the animal with A only after confirming where the Kong will land.
Use Squawks only for the Torchlight Trouble lantern section. Move carefully through the visible area, identify the next platform or enemy before advancing and avoid treating him like a mount. If Squawks is lost, the level remains playable, but the dark section becomes much harder to read. The original SNES Blackout Basement has flickering visibility but does not provide Squawks as a lantern source.
- Rambi handles weak walls and ground enemies.
- Enguarde handles underwater enemy groups.
- Winky handles high ledges and elevated threats.
- Expresso handles long gaps and distant platforms.
- Squawks illuminates Torchlight Trouble only.
Plan deaths, retries and completion runs
Animal buddies are obtained from crates during individual level attempts. Losing a buddy does not create a permanent replacement on the map. If another crate exists later in the stage, reach it on a subsequent attempt; otherwise, finish the section with the Kongs or replay the level.
Treat Animal Tokens as a temporary trigger system rather than as a permanent inventory or animal-unlock system. A partial set of one or two tokens should not affect your main campaign plan. If you are replaying after a reset, reload or interrupted session, recollect the relevant tokens when necessary instead of building a route around an assumed stored companion.
For a first completion, prioritize the main exit and keep a buddy only when its ability is needed or substantially reduces risk. For a later cleanup run, replay individual levels for missed Animal Crates, golden tokens, letters and bonus rooms. Animal Tokens and Token Bonuses are not the same as counted bonus-room entrances and are not required for the normal ending or the game's maximum completion percentage.
- Animal buddies come from level-specific crates.
- Token Bonuses are one-time temporary mini-games.
- No animal remains permanently selectable after collecting three tokens.
- Separate campaign progress, counted bonus rooms and optional animal-token collection.
Before you move on
- You can identify Rambi, Enguarde, Winky, Expresso and Squawks.
- You know that Squawks appears in the original SNES release only in Torchlight Trouble and carries a flashlight rather than being ridden.
- You understand that three matching golden tokens trigger one temporary Animal Token Bonus and never permanently unlock or store an animal.
- You can explain the practical use of Rambi, Enguarde, Winky and Expresso.
- You know that Animal Crates provide level-specific buddies, while golden tokens start optional bonus games.
- You have kept Animal Token collection separate from required exits, counted bonus-room entrances and the normal campaign ending.
- For a cleanup run, you replay individual stages for missed crates and tokens instead of expecting a permanent animal-selection screen.
Bonus rooms, hidden exits and the 101% completion method
On the original North American SNES release, the maximum save-file total is 101%. The total is built from the 33 ordinary levels, the 67 counted bonus rooms hidden inside those levels, and the final percentage for defeating King K. Rool. K-O-N-G letters, bananas, animal tokens and extra lives are useful rewards, but they are not separate requirements for the 101% total. The most reliable progress indicator is the exclamation mark added to a level name on the world map after every bonus room in that level has been found.
Finish the ordinary route before beginning cleanup
Clear the six worlds in normal order and defeat each boss so every required path is open. The ordinary campaign has 33 non-boss levels. A level contributes its ordinary percentage when you reach its goal barrel, while each counted bonus room contributes another percentage when you enter it.
You can hunt bonuses during the first clear, but a safer method is to finish the route first and then revisit only levels whose names do not have an exclamation mark. This prevents a missed bonus from being confused with an uncleared level.
- Reach the normal goal barrel in every required level.
- Defeat the six world bosses and King K. Rool.
- After returning to the map, check level names for missing exclamation marks.
Use the map marker as the per-level completion check
On the original SNES map, a level name followed by an exclamation mark means that all counted bonus rooms in that level have been entered. A level can be completed normally and still lack the marker because one or more bonus entrances remain undiscovered.
The marker does not mean that every banana, K-O-N-G letter, animal token or prize has been collected. Track those separately if you want a broader personal checklist. For 101%, the practical loop is: enter the level, find every bonus entrance, leave or finish the level, then confirm the exclamation mark on the map.
- Level name has an exclamation mark.
- No regular level on the world maps lacks its marker.
- Boss stages are recorded as defeated separately; do not expect them to use the same bonus marker.
Recognize the three main kinds of hidden entrance
Most bonus entrances use one of three methods. First, carry or throw a barrel into a suspicious wall. Second, drop into a concealed barrel or cannon below the visible route. Third, use a tire, rope, animal buddy or barrel cannon to reach an apparently inaccessible opening. Marked walls are not always obvious, so preserve a barrel when the layout gives you one and inspect both the upper and lower routes before taking the normal exit.
The bonus room itself may contain a banana collection course, a barrel-cannon sequence, a letter or balloon matching game, an animal-token match, or a short route with a hidden prize. You receive percentage credit by entering the room; you do not need to win the room's challenge. If a failed challenge returns you to the main level, the entrance still counts, provided the room was actually entered.
- Search above and below the expected route.
- Test suspicious walls with a suitable barrel.
- Enter every discovered room even if the reward is not worth the risk.
- Do not confuse an animal crate or ordinary prize barrel with a bonus entrance.
Prioritize the easily missed SNES bonus routes
In Jungle Hijinxs, use Rambi to break the wall after obtaining him, then inspect the tree and wall area after the first bonus returns you to the level. Ropey Rampage has one bonus immediately after the O and another reached by dropping from the route near the arrow sign. In Reptile Rumble, carry the early barrel through the first enemies, inspect the raised DK Barrel area, and preserve the steel-rimmed barrel near the N for the wall entrance.
In Monkey Mines, Winky's Walkway has a visible high entrance that can be reached with Winky or by bouncing from the nearby Necky. Bouncy Bonanza has both a wall entrance near the early bees and a tire-assisted barrel near the exit. Millstone Mayhem hides entrances above the opening route and behind a TNT-barrel wall.
In Gorilla Glacier, check the igloo-side opening at the start of Snow Barrel Blast, turn back after the halfway barrel, and inspect the barrel route before the N. Slipslide Ride uses an icy-rope detour and a barrel wall, while Rope Bridge Rumble hides one entrance below a cliff and another above the tire sequence near the end.
In Kremkroc Industries, Oil Drum Alley is the highest-priority cleanup level. It contains four counted rooms. One is reached with a TNT Barrel near the early black platform, another uses a TNT Barrel against a wall, and a later room is reached from the barrel behind a Manky Kong. The second room contains the particularly easy-to-miss nested bonus: match three single bananas, receive a barrel instead of the expected prize, then jump with the barrel into the right wall and enter immediately. Do not simply throw the barrel and allow the room to end before entering the second chamber.
In Chimp Caverns, Tanked Up Trouble requires deliberately allowing the first fuel platform to run out while standing in its center. Manic Mincers contains a barrel wall after the halfway point and another bonus reached from the room immediately before it. Misty Mine has a rope-and-wall entrance and a later TNT-barrel wall. Loopy Lights hides one bonus at the first gap and another behind a wall after the halfway barrel. Platform Perils has one route below the first arrow platform and a final route below the last arrow platform; both require controlled drops rather than following the visible exit.
- Prioritize Oil Drum Alley's nested bonus.
- Recheck levels with tires, ropes, cliffs and disappearing platforms.
- Treat a visible goal route as unconfirmed until the map marker appears.
Keep a world-by-world tally
Create one row for each of the 33 ordinary levels with these columns: normal goal reached, bonus entrances found, exclamation mark confirmed, K-O-N-G letters, animal-token areas and useful prizes. The first three columns determine 101%; the remaining columns are optional records.
Do not rely on a guide's serial numbering for bonus rooms because different walkthroughs can number or group rooms differently. Use the level name and a short location note instead, such as “Oil Drum Alley: early TNT room; match room; nested barrel room; Manky wall room.” This prevents a numbering discrepancy from making you think a bonus is missing.
- One row per ordinary level.
- Record locations rather than only room numbers.
- Keep optional collectibles separate from required percentage progress.
- Confirm each row with the map's exclamation mark.
Handle dangerous bonus rooms in separate runs
Do not attempt to collect every letter, token and prize while discovering a bonus. On the first run, make entering the room the objective. If the entrance requires a barrel, reach it with both Kongs whenever possible and avoid spending the barrel on an unnecessary enemy. On a later run, return for the K-O-N-G letters or prize if you still want them.
In barrel-cannon rooms, watch the complete movement pattern before firing. In matching rooms, concentrate on the target item and accept the loss of the prize if the timing becomes uncertain. In tire and rope rooms, use short, deliberate jumps and identify the exit before collecting the last reward. A bonus has no mid-room checkpoint, so a failed collection attempt can cost the life you were trying to preserve.
- Discovery run: enter the room and survive if practical.
- Collection run: attempt letters, tokens or prizes separately.
- Keep a spare life or balloon before attempting Oil Drum Alley, minecart and Platform Perils secrets.
Verify the finished 101% file
When every ordinary level name has an exclamation mark, revisit the final approach and defeat King K. Rool at Gang-Plank Galleon. The final boss supplies the last percentage, so a file with every level marker but no King K. Rool victory is not complete.
The concrete 101% check is a save file displaying 101%. If the total is lower, first inspect the world maps for a regular level without an exclamation mark. Missing K-O-N-G letters, bananas or animal tokens are not the first troubleshooting target because they do not determine this total. For expanded completion, keep separate records for all four letters in each level, every animal-token area and any desired bonus prizes.
- Every ordinary level name has an exclamation mark.
- All six world bosses are defeated.
- King K. Rool is defeated.
- The save file displays 101%.
- Optional letters, tokens and prizes are tracked separately.
Before you move on
- All 33 ordinary levels have been cleared.
- Every ordinary level name on the world maps ends with an exclamation mark.
- All seven boss encounters, including King K. Rool, are defeated.
- The save file displays 101%.
- Optional K-O-N-G letters, animal-token areas and desired prizes are recorded separately if pursuing full collectible completion.
Boss tactics and recovery plans
The original Super Nintendo version of Donkey Kong Country uses readable boss patterns rather than fixed button sequences. Before entering a boss stage, preserve both Kongs when possible, save cleared map progress at Candy Kong, and rebuild lives through familiar completed stages. Bananas, K-O-N-G letters, Extra Life Balloons and Animal Token bonus games can all help, but animal buddies remain ordinary-level resources and do not enter standard boss arenas. The final King K. Rool fight requires 10 total head hits across three distinct sections, with false KREDITS appearing before the last three hits.
Prepare before entering a boss stage
If your life count is low, replay a completed stage whose hazards you already understand. Collecting 100 bananas awards an extra life, and collecting all four K-O-N-G letters during one level attempt awards another. Extra Life Balloons also add lives when collected. These rewards are optional for story progress, but they are useful preparation for a difficult boss.
Collecting three matching golden Animal Tokens immediately starts that animal’s temporary Token Bonus game. Enter the bonus when the route is already safe enough to justify the attempt, then collect as many life rewards as practical. Do not treat this as a permanent animal unlock. Rambi, Enguarde, Winky and Expresso come from Animal Crates in ordinary stages, while Squawks is used as a lantern carrier in Torchlight Trouble.
Try to reach the boss entrance with both Donkey Kong and Diddy Kong. If one Kong is missing, open a DK Barrel before the stage goal when one is available, or replay a safe completed level to restore the pair. At a Candy Kong location on the map, enter the save barrel after making progress. Candy Kong preserves map progress; she does not create a checkpoint inside a boss arena or restore a failed attempt.
- Save newly cleared map progress at Candy Kong.
- Enter difficult bosses with both Kongs when practical.
- Use safe banana groups, K-O-N-G letters and Extra Life Balloons to rebuild lives.
- Use an available Animal Token bonus only when its route is not costing more lives than it restores.
- Do not expect an animal buddy to accompany the Kongs into a standard boss fight.
Very Gnawty in Very Gnawty’s Lair
Very Gnawty takes five head stomps. He crosses the arena in bouncing hops and becomes faster after successful hits. Keep enough room behind the Kongs to retreat, watch the height and direction of his next hop, and jump onto his head only when the landing is clear.
After a successful stomp, do not jump again automatically. Read the next approach first. If a stomp misses, move away and wait for another predictable hop instead of trying to force a second attack from a bad position. Losing one Kong does not alter the pattern, but the remaining Kong must be protected because the arena has no boss checkpoint.
- Land five head stomps.
- Expect faster movement after successful hits.
- Use the full arena to create retreat space.
- After a missed stomp, evade first and wait for another safe approach.
Master Necky in Necky’s Nuts
Master Necky is attacked with the central tire. He throws a large nut across the arena, so first position yourself to let the projectile pass safely. Once the opening is clear, bounce from the tire and land on his beak. Five successful beak hits defeat him.
Treat the tire as both an attack tool and a recovery point. If a nut or a poor landing leaves you out of position, spend that cycle avoiding the attack and return to the tire. Do not attempt a low, improvised jump from the floor when the next bounce is unsafe.
- Use the central tire to reach Master Necky’s beak.
- Avoid the nut before committing to a bounce.
- Land five beak hits.
- Use an unsafe cycle to reposition rather than forcing an attack.
Queen B. in Bumble B. Rumble
Queen B. is defeated by throwing Vine Barrels at her while she is yellow. Pick up a Vine Barrel, line up the throw and release it toward her flight path. A successful hit damages her and causes her to turn red. Repeat this process for five total hits.
The red phase is invulnerable. Do not throw a barrel while Queen B. is red and do not try to force contact with her. Move away from her swoops, keep track of the arena and wait until she turns yellow again. Then locate the next Vine Barrel, pick it up and throw it during the next vulnerable phase.
If a throw misses, do not chase Queen B. with the empty barrel or rush into her path. Let the current attack pattern finish, recover another Vine Barrel and make the next throw from a stable position. The reliable original-SNES method is five yellow-phase Vine Barrel throws, with the red phases spent on evasion.
- Pick up a Vine Barrel during the vulnerable cycle.
- Throw it at yellow Queen B.
- Avoid attacking while she is red and invulnerable.
- Repeat the yellow-phase throw for five total hits.
- If a throw misses, retreat and wait for another barrel opportunity.
Really Gnawty in Really Gnawty Rampage
Really Gnawty takes five head stomps, but his movement becomes faster and his jumps become higher after each successful hit. Let a high leap pass over the Kongs when possible. When he lands and begins a lower approach, jump from a controlled position rather than chasing him across the arena.
The ground is slippery, so leave room to brake before the next jump. A missed stomp should lead to an evasive slide or retreat, not an immediate second attack. Watch the next arc and attack only when the landing zone is clear.
- Land five head stomps.
- Expect faster movement and higher jumps after hits.
- Allow high jumps to pass over you when necessary.
- Control sliding distance before each attack.
Dumb Drum in Boss Dumb Drum
Dumb Drum cannot be damaged directly. It descends from above and releases enemy pairs that must be defeated. In the original SNES encounter, the groups are two Kritters, two Slippas, two Klaptraps, two Klumps and two Armys.
Move away whenever the drum drops. After each pair appears, defeat both enemies while preserving open floor space for the next descent. Do not leave an enemy alive while watching the drum; the remaining enemy can collide with a Kong during the next slam.
Donkey Kong is helpful against sturdier ground enemies, especially Klumps, but switching is optional. Continue clearing the pairs and avoiding the drum until the final Army pair is defeated and the last sequence ends. Dumb Drum then explodes.
- Avoid every downward slam.
- Defeat the released enemy pairs in order.
- Clear both members of each pair before the next drop.
- Keep open floor space for movement.
- Do not try to stomp or directly attack the drum.
Master Necky Snr. in Necky’s Revenge
Master Necky Snr. uses the tire-and-beak pattern from Necky’s Nuts. Return to the central tire, wait for a safe opening in the nut volley and bounce onto his beak. Five successful beak hits defeat him.
The volleys become longer as the encounter progresses. If the tire or landing position is compromised, spend the current cycle avoiding projectiles and re-establishing control. Attacking before the volley ends usually leaves the Kong exposed in the center of the arena.
- Use the central tire to reach the beak.
- Wait for the current nut volley to finish.
- Expect longer volleys after successful hits.
- Land five beak hits.
King K. Rool in Gang-Plank Galleon
King K. Rool requires 10 total head hits in the original SNES battle. The fight is easiest to track as four pre-cannonball crown-and-charge hits, three cannonball-phase hits and three post-KREDITS jumping hits.
During the opening section, King K. Rool throws his crown and then charges across the deck. Jump over the crown, use the opening to stomp his exposed head, and immediately prepare for the charge. Do not run toward him without preserving enough deck space for the next attack. Repeat this crown-and-charge pattern until you have landed four hits.
The fight then changes to cannonballs falling and bouncing across the ship. Watch the first bounce to identify the safe route instead of crossing blindly. Move through the gaps as the balls rebound, then attack when the boss presents the opening. Land three hits during this cannonball section, using the bounce pattern to judge when the deck is safe.
The first credits display is false. King K. Rool rises and resumes the battle. During the final section, he uses jumping attacks and continues to throw his crown. His later jumps are lower than the early ones, so do not reuse the opening jump timing without watching his arc. Let him bound over the Kongs, avoid the crown and stomp his exposed head when the opening appears. Land three more hits after the KREDITS sequence.
The fight is complete only after all 10 hits have been delivered: four before the cannonball section, three during the cannonball section and three after the false KREDITS. The genuine ending follows the final post-KREDITS hit.
- Land four crown-and-charge hits before the cannonball section.
- Use cannonball bounces to identify safe openings.
- Land three hits during the cannonball section.
- Treat the first KREDITS display as a false ending.
- Adapt to the lower jumps in the final section.
- Land three post-KREDITS jumping hits.
- Confirm 10 total head hits before considering the game complete.
Recovery plan after repeated failures
After losing to a boss, replay a completed stage with predictable hazards and concentrated banana groups. Aim for 100 bananas, collect a full K-O-N-G set if the route is familiar, and take Extra Life Balloons when they do not require a dangerous detour. If three matching Animal Tokens are ready, enter the Token Bonus and collect its life rewards. Abandon a recovery route if it repeatedly costs more lives than it restores.
Practice the specific failure point instead of replaying the whole campaign without a plan. For the Gnawty fights, concentrate on surviving the faster movement after each stomp. For Master Necky and Master Necky Snr., practice waiting through the complete nut volley and returning to the tire. For Queen B., practice throwing Vine Barrels only during the yellow phase and surviving the red swoops. For Dumb Drum, practice clearing one enemy pair while preserving space for the next slam. For King K. Rool, practice the crown jump, the cannonball gaps and the lower post-KREDITS jumps as separate skills.
Save at Candy Kong before a long recovery session whenever possible. The save preserves cleared map progress, but it is not a boss checkpoint. If one attack repeatedly ends attempts, set a smaller goal: survive one complete cycle, then add the next attack window after the first becomes reliable. Re-enter the boss only after restoring a practical life reserve and identifying the exact pattern that caused the previous failure.
- Save cleared map progress before rebuilding lives.
- Farm lives in a completed stage with familiar hazards.
- Use an available Animal Token bonus when it is safe.
- Practice the attack pattern causing the failure.
- Re-enter the boss after restoring a practical life reserve.
Before you move on
- Very Gnawty, Master Necky, Queen B., Really Gnawty, Dumb Drum and Master Necky Snr. are defeated on the map.
- Queen B. was defeated with five Vine Barrel throws during her yellow vulnerable phases, with her red phases avoided between hits.
- King K. Rool’s opening section contains four successful head hits.
- King K. Rool’s cannonball section contains three successful head hits.
- King K. Rool’s post-KREDITS jumping section contains three successful head hits.
- All 10 King K. Rool head hits have been delivered before the genuine ending begins.
- Any recovery lives were obtained through bananas, K-O-N-G letters, Extra Life Balloons or Animal Token bonus games.
- Candy Kong was used to save cleared map progress, not treated as a boss checkpoint.
References for this chapter
- Donkey Kong Country — Instruction Booklet, Super Nintendo Entertainment System
- Donkey Kong Country — Guide and Walkthrough, Super Nintendo, GameFAQs
- Donkey Kong Country — Guide and Walkthrough, Super Nintendo, GameFAQs
- Donkey Kong Country: Guide and Walkthrough, Super Nintendo, by DWA
- Donkey Kong Country — Speed Guide, Super Nintendo, by Telago
- Donkey Kong Country — Boss Guide, Super Nintendo, by itsnotmyfault
- Queen B. — Donkey Kong Wiki
Troubleshooting common failure points and recommended practice drills
The original Super Nintendo version is easiest to learn by isolating one hazard, repeating it from its normal approach, and only then returning to the full level. Use Continue Barrels as section markers, but do not confuse them with permanent saves. The drills below cover the game's most common failure points without depending on remake mechanics or emulator-only conveniences.
Choose one target and establish the correct restart point
Begin a session with one level and one obstacle. A useful target is clearing the opening sequence of Mine Cart Carnage three times, reaching the difficult rope section in Slipslide Ride, or entering a specific bonus room without losing a life. Do not combine several new techniques in the same attempt; if the target changes after every death, it becomes difficult to identify whether timing, positioning or route choice caused the failure.
When a level contains a Continue Barrel, use it as the beginning of a practice section. Losing a life after breaking that barrel returns the Kongs to that checkpoint, but it does not permanently save the game. To preserve the completed world route on the original cartridge, visit Candy Kong's save barrel on the map. A checkpoint is therefore a useful practice loop, while Candy's location is the place to store progress between sessions.
- Select one level and one obstacle.
- Start from the obstacle's normal approach whenever possible.
- Record whether the mistake was early timing, late timing, poor positioning or an incorrect route.
- Use Candy Kong for permanent cartridge progress and Continue Barrels for in-level recovery.
Mine-cart anticipation drill
Mine Cart Carnage is an especially useful timing exercise because the cart moves at a fixed pace and the player must read the track ahead. Watch for the next rail section, broken track or replacement cart before reaching the edge. Press Jump near the edge of the current track rather than jumping immediately after landing. An early jump often leaves the cart short of the next rail, while a late jump sends it into the gap.
Practice the opening jump until it succeeds three times consecutively. Then restart and add only the next jump. If a replacement cart appears below or ahead, aim for survival first rather than trying to collect every nearby item. A missed collectible is recoverable; a missed cart sequence costs the attempt.
The original SNES Mine Cart Carnage layout has no bonus rooms. Do not spend practice time searching for a bonus entrance there. Its optional warp route can shorten the level, but learn the normal cart route first if the goal is reliable completion rather than speed. Apply the same method separately to Mine Cart Madness later in the game, because its track sequence is not identical.
- Look at the next rail before pressing Jump.
- Clear one jump three times in a row.
- Practice the normal route before learning the warp or speed route.
- Treat a replacement cart as a recovery opportunity, not a collectible detour.
Barrel-cannon alignment drill
In Barrel Cannon Canyon and other cannon-heavy stages, identify the next landing target before entering an automatic barrel. Use stable visual landmarks such as a banana trail, a Zinger, a wall opening or a change in background scenery. These cues are more reliable during a normal run than counting frames, especially if the display or controller introduces slight timing differences.
For a manually aimed barrel, hold the direction only long enough to bring the barrel toward the intended firing line. Release before firing if continued input would rotate past the target. For an automatic cannon sequence, concentrate on recognizing the order of the barrels and the first safe platform after the launch. If one shot repeatedly fails, practice that shot from a nearby save state or emulator state, then add the preceding cannon so the transition is also learned.
After five successful isolated launches, complete the same launch three times from the preceding platform without reloading. This prevents the practice position from hiding the alignment needed to enter the cannon at normal speed.
- Name the landing platform before firing.
- Use scenery and enemy placement as timing landmarks.
- Practice the problem cannon in isolation, then include the preceding cannon.
- Confirm the sequence without reloading.
Ice, slippery ropes and momentum drill
Snow Barrel Blast, Slipslide Ride and Ice Age Alley require earlier braking than ordinary ground. Releasing the direction does not stop the Kong instantly, so use short taps near ledges instead of a long hold. Approach a jump with room to slide after landing. On Slipslide Ride, remember that the ropes themselves alter movement: some ropes carry the Kong upward while others cause downward sliding. Do not treat every rope as a stationary ladder.
On a wide icy platform, run a short distance, release the direction, brake with brief taps and turn before the edge. Repeat the loop without jumping until the stopping distance is predictable. Then add a jump across the same platform. If a barrel or tire is involved, decide the intended landing point before picking it up; carrying an object through a slippery approach removes reaction time.
Use the Kong you intend to use in the full attempt. Diddy is generally preferable when quick movement and smaller positioning are helpful, while Donkey can be preferable when his attack or larger body makes an enemy or object interaction safer. The important practice rule is consistency: changing characters after every failure changes the movement feel as well as the tactic.
- Learn braking before practicing long jumps.
- Use short direction taps near ledges and rope transitions.
- Practice slippery ropes as movement hazards, not ordinary ladders.
- Keep the same Kong for a complete practice set.
Bonus-room, tire and machinery recovery drill
Bonus rooms are optional for the story clear but important for a complete percentage. On a first attempt, identify the room's exit and safe landing surfaces before chasing every banana or letter. If a room uses barrel cannons, repeat the cannon drill. If it uses tires, practice the bounce height and horizontal correction separately. A failed bonus attempt is a poor place to improvise because many rooms offer no internal checkpoint.
Oil Drum Alley should be practiced as an object-and-enemy level, not as a conveyor stage. Learn where burning oil drums create temporary platforms or block progress, and rehearse the timing for jumping after a drum's flame changes. For the hidden bonus routes, learn the required barrel or TNT-barrel setup independently from the main path, then combine the setup with the approach once the landing is reliable.
Blackout Basement should likewise be practiced as a visibility and platforming level. The lights periodically disappear, so use the illuminated intervals to memorize enemy positions, tire locations, arrow-platform movement and the Continue Barrel area. Do not wait for a supposed lantern in this stage; the darkness is solved by route memory, cautious movement and recognition of fixed landmarks. Its moving platforms and tire sections deserve separate drills rather than a generic conveyor technique.
- Learn the bonus-room exit before collecting every reward.
- Practice oil-drum timing separately from the main route.
- Memorize Blackout Basement during the light flashes.
- Use tires, arrow platforms and fixed landmarks as recovery cues.
Using emulation and save states responsibly
A save state can isolate a mine-cart jump, cannon launch or slippery landing and is useful for learning the visual cue. Make several successful attempts from the same position, then move the state farther back or replay from the level's Continue Barrel. The final test should be three successful clears without reloading so the timing works from a real approach.
Do not use rapid reloads as a replacement for execution. On original hardware, a death consumes a life and the Continue Barrel provides the practical restart point; Candy Kong saves the completed map progress. On emulation, input lag, frame pacing and display settings can alter the feel, so use the same configuration for practice and full runs. If a save state is used to study a pattern, translate the result into a normal attempt before counting the obstacle as mastered.
Switch from isolated drills to full-level attempts after the target is consistent and several lives remain. Return to the smaller drill after two or three consecutive deaths at the same obstacle. A good micro-goal is one mine-cart sequence, one cannon alignment, one ice landing or one bonus entrance per life.
- Use save states to study timing, not to skip execution.
- Practice from progressively earlier positions.
- Complete the target without reloading before returning to full runs.
- Match emulator settings to the intended playthrough.
Before you move on
- Clear the selected mine-cart, cannon, ice or machinery sequence three consecutive times from its normal approach.
- Complete one full level containing the practiced obstacle without restarting after every mistake.
- For a bonus-room goal, enter the room, collect the intended reward or letter and reach its exit reliably on separate attempts.
- For a Blackout Basement goal, reach the next checkpoint or exit using the light flashes and memorized landmarks rather than relying on a save state.
- If working toward 101%, mark a bonus entrance only after it has been reached and exited reliably; the main-level clear remains the priority when lives are limited.
- Before moving to another world, confirm that the same practice method works after losing one Kong and after restarting from the level's Continue Barrel.
References for this chapter
- Donkey Kong Country Instruction Booklet, Super Nintendo
- Donkey Kong Country — Instruction Booklet, Super Nintendo Entertainment System
- DKC Atlas: Donkey Kong Country Level Maps
- Donkey Kong Country: Guide and Walkthrough, Super Nintendo, by DWA
- Donkey Kong Country: Guide and Walkthrough, Super Nintendo, by Brian Sulpher
Final checklist, post-game and optional runs
Complete the original North American Super Nintendo release by clearing all 33 ordinary stages, defeating the six world bosses and defeating King K. Rool in Gang-Plank Galleon. The maximum file total is 101%: 33 points for ordinary stages, 67 points for entering the counted bonus rooms and 1 point for defeating King K. Rool. K-O-N-G letters, bananas, Animal Tokens and extra lives are useful optional goals, but they are not additional requirements for the original SNES 101% total.
Confirm the story clear
The normal campaign is finished after every ordinary stage on the six world maps has been cleared, the six world bosses have been defeated and King K. Rool has been beaten in Gang-Plank Galleon. The required boss fights are Very Gnawty, Master Necky, Queen B., Really Gnawty, Dumb Drum and Master Necky Snr., followed by King K. Rool.
Gang-Plank Galleon is the final boss stage in this original SNES campaign. It is not a separate ship-approach world or a second platforming area that must be cleared before the fight. Enter it only after the route to the final stage is open, then concentrate on the boss battle and its changing attack pattern.
- All 33 ordinary stages have been cleared.
- Very Gnawty, Master Necky, Queen B., Really Gnawty, Dumb Drum and Master Necky Snr. have been defeated.
- King K. Rool has been defeated in Gang-Plank Galleon.
- The ending and credits have been viewed if you want to preserve the complete finale experience.
Save before the final attempt
Before entering Gang-Plank Galleon, visit Candy Kong’s Save Point and save the file. Candy’s save barrel records the progress already made on the island, including completed stages and bonus-room discoveries. This is a sensible final safeguard if the first attempt against King K. Rool fails or if you are using original cartridge hardware with limited save slots.
Do not treat Candy Kong as a checkpoint inside the final battle. She does not place a midway save in Gang-Plank Galleon, and the fight must be restarted after a lost life. Prepare by entering with both Kongs whenever possible, but do not delay the final attempt merely to collect optional letters, bananas or Animal Tokens.
- The file has been saved at Candy Kong before the final boss attempt.
- You understand that a lost final-boss attempt requires restarting the battle.
- Optional collecting has not been confused with required story progress.
Use the exact 101% calculation
For the original SNES release, the maximum completion total is 101%. The calculation is 33 ordinary-stage points, 67 bonus-room points and 1 point for defeating King K. Rool. A bonus room counts when you enter it; you do not need to win its internal challenge, collect every banana inside, take its Animal Token or leave with the displayed prize for that room to contribute its point.
The six world bosses are necessary to open the campaign route, but they are not six additional percentage points. Likewise, the final boss contributes one point rather than a separate point for every phase of the battle.
- 33 ordinary stages are complete.
- All 67 counted bonus rooms have been entered at least once.
- King K. Rool has been defeated.
- The resulting file total reaches 101%.
Audit the level-map indicators
After clearing the story, inspect the ordinary levels on the world maps. When a level name has an exclamation mark after it, all counted bonus rooms in that level have been entered. This is the practical in-game method for locating missed bonus rooms. A level without the mark still has at least one counted bonus entrance that has not been registered.
Work through the maps in order: Kongo Jungle, Monkey Mines, Vine Valley, Gorilla Glacier, Kremkroc Industries, Inc. and Chimp Caverns. Replay only the ordinary levels without exclamation marks. World bosses do not need to be replayed for this audit, and a level that already has its mark does not need another bonus search unless you are pursuing a separate collectible or challenge.
- Every ordinary level in Kongo Jungle has an exclamation mark.
- Every ordinary level in Monkey Mines and Vine Valley has an exclamation mark.
- Every ordinary level in Gorilla Glacier has an exclamation mark.
- Every ordinary level in Kremkroc Industries, Inc. and Chimp Caverns has an exclamation mark.
- No unmarked ordinary level remains before the final verification.
Recover missed bonus rooms methodically
Search one unmarked stage at a time rather than replaying the whole campaign. Examine suspicious blank walls, isolated barrels, dead ends, alternate upper and lower routes, hidden tires, platforms below the visible path and places where a barrel can be carried into a wall. Also check routes that appear to drop into a pit: some contain a hidden platform or automatic Barrel Cannon, while others are genuine hazards and require a controlled roll jump or another setup.
Some bonus rooms are reached through another bonus room or require a reward barrel to be used before leaving. If an entrance is difficult, enter the room first and then return to the map to check the level name. The room does not need to be completed successfully for the percentage point, so abandoning a failed puzzle is acceptable if the entry has already registered.
When you finish checking a replayed level, use the map’s exclamation mark as the record rather than relying on memory. If the mark is still absent, search for another entrance in that same stage.
- Each unmarked level is investigated independently.
- Hidden-wall, barrel, tire, cannon and alternate-route entrances have been checked.
- Bonus rooms that lead to further secrets are not dismissed after the first room is found.
- The map indicator is checked after each search.
Verify the saved result after King K. Rool
Once every ordinary level shows its exclamation mark, save at Candy Kong before the final fight if you have not already done so. Defeat King K. Rool, then return to the file-selection screen or another available saved-file display and inspect the recorded percentage. The 101% total and its completion star are confirmation that the required bonus-room audit and final boss result have been recorded; the star is not a separate task.
If the file stops below 101%, first compare the percentage with your map audit. A missing exclamation mark identifies an incomplete level search. If every ordinary level is marked but the total is still short, verify that the file was saved after the relevant progress and that King K. Rool was defeated on that same file.
- Every ordinary level shows its exclamation mark.
- King K. Rool has been defeated on the audited file.
- The saved-file display shows 101%.
- The completion star appears beside the 101% file when the game records it.
Track optional completion separately
K-O-N-G letters, Animal Tokens, bananas and balloons are not part of the original SNES 101% calculation. Record them in separate columns if you want a fuller personal completion target. Letters are useful for extra lives, bananas support life recovery, and Animal Tokens open temporary Animal Token Bonus games, but none of these should be used to diagnose a missing percentage point.
Do not add GBA or Game Boy Color requirements such as photographs, extra modes, altered collectibles or port-specific objectives. This checklist applies only to the original North American SNES release.
- K-O-N-G letters are tracked separately.
- Animal Tokens are tracked separately.
- Banana, balloon and extra-life goals are optional.
- No later-port collectibles or modes have been added.
Choose a post-game challenge
After reaching 101%, replay the game for a no-death campaign, a speed-focused clear, a complete K-O-N-G-letter sweep or a full Animal Token record. These are self-defined replay goals, not additional story chapters or official SNES percentage points.
For speed practice, first learn a reliable route through every stage, then remove bonus detours and unnecessary pauses. For a low-death attempt, keep both Kongs available, favor consistent jumps over risky shortcuts and save whenever you pass Candy Kong. For a completionist record, finish the official 101% audit first, then work through letters and animal objectives world by world.
- Story goal: 33 ordinary stages, six world bosses and King K. Rool defeated.
- 101% goal: 67 counted bonus rooms entered, all ordinary levels marked and the file displaying 101%.
- Personal completion goal: 101% plus separately recorded letters, tokens or life targets.
- Challenge goal: the rules and result are recorded independently of the official percentage.
Before you move on
- Story completion is confirmed by clearing all 33 ordinary stages, defeating the six world bosses and defeating King K. Rool.
- The original SNES 101% target is confirmed by entering all 67 counted bonus rooms, having every ordinary level display an exclamation mark and seeing 101% on the saved file.
- K-O-N-G letters, Animal Tokens, bananas, balloons and personal challenge runs are optional records kept separately from the official percentage.
- Save at Candy Kong before the final battle, then use the post-boss saved-file display and completion star as confirmation that the final result has been recorded.
Finishing up
The story campaign is complete after all ordinary levels are cleared, the six world bosses are defeated, King K. Rool is defeated in Gang-Plank Galleon and the genuine ending begins.
The six world bosses are Very Gnawty, Master Necky, Queen B., Really Gnawty, Dumb Drum and Master Necky Snr.
For 101%, verify all 33 ordinary levels, all 67 counted bonus rooms and King K. Rool. The level-name exclamation marks and the saved-file percentage are the practical checks.
K-O-N-G letters, bananas, Extra Life Balloons and Animal Tokens are optional rewards and are not additional 101% requirements in the original SNES release.
If you want broader personal completion, keep separate records for letters, Animal Tokens and desired life rewards.
If a boss or bonus room causes repeated failures, save at Candy Kong, rebuild lives in a familiar completed level and retry the specific hazard.
Choose your next gameScreenshots & video
Game imagery for reference. Follow the written chapters above for the route and strategies.
Sources & references
Our original guide draws on the references below. Check the edition at the top of this page before following controls or unlock requirements.
- Super NES Instruction Manuals: Donkey Kong Country
- Donkey Kong Country — Instruction Booklet, Super Nintendo Entertainment System
- Donkey Kong Country: Guide and Walkthrough, Super Nintendo, by DWA
- Donkey Kong Country — Guide and Walkthrough for Super Nintendo, WWalker
- Donkey Kong Country: Guide and Walkthrough, Super Nintendo, by Brian Sulpher
- Donkey Kong Country — Guide and Walkthrough, Super Nintendo, GameFAQs
- Donkey Kong Country — Guide and Walkthrough, Super Nintendo, by nm14
- Donkey Kong Country Instruction Booklet, Super Nintendo
- Donkey Kong Country — Guide and Walkthrough, Super Nintendo, GameFAQs
- Donkey Kong Country — Guide and Walkthrough by KrocTheDoc
- Donkey Kong Country/Bouncy Bonanza — StrategyWiki
- DKC Atlas: Donkey Kong Country Level Maps
- Donkey Kong Country Map Selection — Labeled Maps
- Donkey Kong Country — Nintendo SNES Classic Manual
- Donkey Kong Country — Guide and Walkthrough, Super Nintendo, by DWA
- Donkey Kong Country — Guide and Walkthrough by idiotboy00
- Donkey Kong Country — Guide and Walkthrough, Super Nintendo, by CStassen
- Donkey Kong Country — Bonus Item FAQ by Brother_Reed
- Donkey Kong Country/Platform Perils — StrategyWiki
- Chimp Caverns — Donkey Kong Wiki
- Donkey Kong Country — Official SNES Instruction Manual
- Torchlight Trouble — Super Mario Wiki
- Donkey Kong Country — Speed Guide, Super Nintendo, by Telago
- Donkey Kong Country — Boss Guide, Super Nintendo, by itsnotmyfault
- Queen B. — Donkey Kong Wiki
About the game & collecting notes
- Platform
- Super Nintendo Entertainment System
Step-by-step campaign walkthrough for the original 1994 SNES release of Donkey Kong Country (USA). Covers every main level and boss through the Gang-Plank Galleon finale, essential controls and mechanics, animal buddies and token areas, finding bonus exits and KONG letters, and a 101% completion checklist to fully finish the original SNES campaign.
Darryl Polo
Darryl Polo loves tinkering with emulation and revisiting retro games. He enjoys exploring how old favorites play on different setups and sharing what he learns along the way. At Joking Joystick, he writes about the games, hardware, and small discoveries that keep the hobby fun.
Our editorial standardsFound a step that needs another look? Help us improve this guide.