
Donkey Kong Country 3: Dixie Kong's Double Trouble! — SNES (USA) Complete Walkthrough
Step-by-step coverage for the original Super Nintendo (USA) release of Donkey Kong Country 3. This guide walks you through every main-world route to the true final ending (Baron K. Roolenstein aboard the Knautilus), details boss strategies, explains the overworld requirements (Krematoa cogs → Knautilus), and shows how to finish the game and chase full completion.

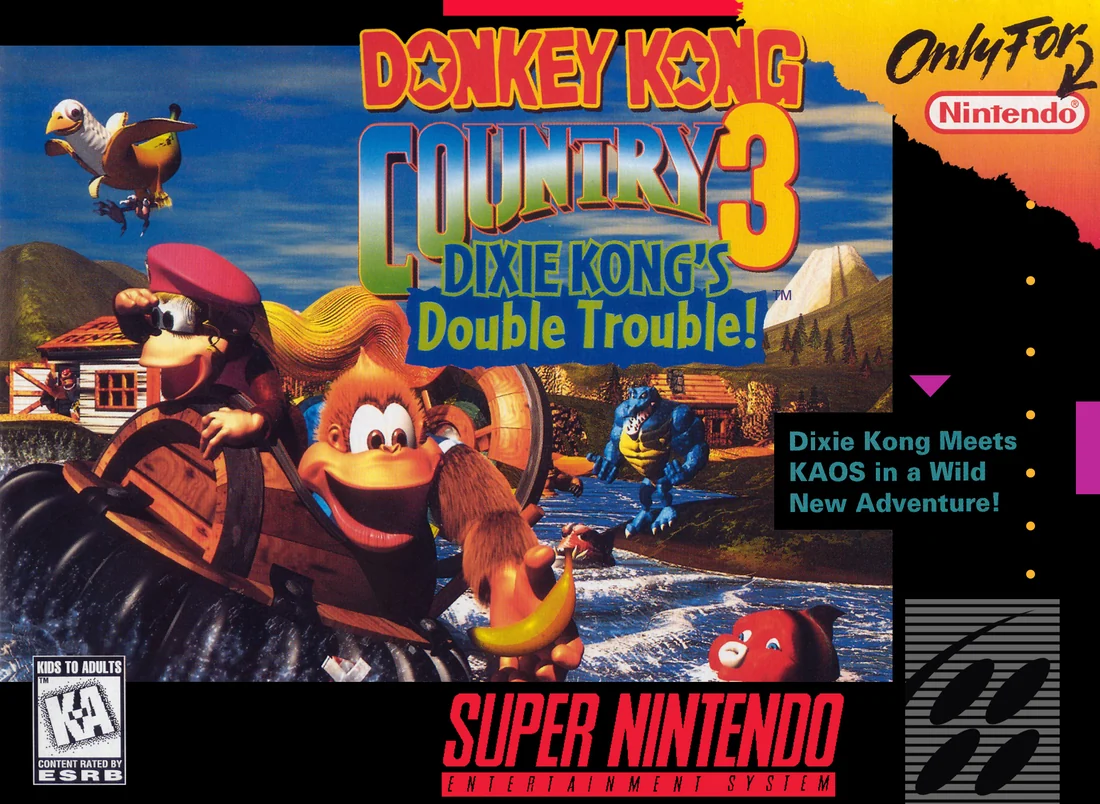
Find a copy
Donkey Kong Country 3: Dixie Kong's Double Trouble! Super Nintendo Entertainment System
We may earn a commission if you buy through these links, at no extra cost to you. As an Amazon Associate I earn from qualifying purchases.
Opens retailer search results. Check the model, edition, seller, availability and current price before buying.
Before you begin
You control Dixie Kong and Kiddy Kong on a search for Donkey Kong and Diddy Kong across the Northern Kremisphere.
Progress is handled on an overworld map: clear levels to open routes, defeat bosses to obtain progression items, and use vehicles and Brothers Bear services to reach optional areas.
This walkthrough covers the original North American Super Nintendo release.
After Kremwood Forest and the Hovercraft, Cotton-Top Cove and Mekanos can be completed in either order; the later chapters are arranged for convenience, not to impose a mandatory order.
It explains the required route through Kastle KAOS, the Bonus Coin payments needed to open Krematoa, the five cogs needed to raise the Knautilus, and the separate Banana Bird requirements for the full Queen ending.
Follow the campaign chapters while checking the overworld for newly opened branches, then use the cleanup chapters for Bonus Coins, DK Coins, Banana Birds and other optional objectives.
Set yourself up for the run
Familiarize yourself with the original SNES tag-team controls: Select switches the active Kong when both are available. Press A to team up or split up; while teamed, use the Control Pad to position the throw and press Y to throw the other Kong.
Know each character’s strengths: Dixie’s Helicopter Spin gives her strong aerial correction and slows her descent, while Kiddy’s weight, roll and water skip help with heavy-impact movement and selected obstacles.
Use the original SNES control layout: B jumps and fires characters from barrels; Y runs, attacks, picks up or throws barrels, and throws the other Kong after team-up; A teams up or splits up, spins Squitter’s web platform, charges Enguarde, and draws or fires Ellie’s water when the manual’s Down-plus-A or A input is used; L draws water with Ellie and R fires stored water; Select switches between Dixie and Kiddy; Start pauses the game.
After Kremwood Forest, the overworld allows Cotton-Top Cove and Mekanos to be tackled in either order. Use the chapter order as a convenient route, not as a mandatory SNES progression order.
Keep a working save at Wrinkly’s Save Cave before attempting risky areas or bosses.
Free and use animal buddies when encountered — they change how some levels are navigated and may be required for certain Bonus Areas or rewards.
If you enter a Bonus Area with an animal, check whether its ability is required for the room and preserve it until the relevant entrance or reward is secured.
Aim to clear each level’s Bonus Areas as practical, but do not sacrifice required campaign progress for a difficult optional attempt.
Bonus Areas award Bonus Coins, which are needed later for Boomer’s Krematoa payments.
Keep an eye on the overworld: some routes require specific level clears, trades, vehicle upgrades, or Brothers Bear events.
The North American release has a Rocket Rush K-O-N-G-letter difference; treat K-O-N-G letters as optional extra-life collectibles rather than progression requirements.
Conserve lives and use Wrinkly’s Save Caves regularly.
Many bosses are pattern-based. Practice the safe opening and retreat after each successful attack instead of repeating an unsafe approach.
Start-up, Controls and Overworld: How the Game Tracks Progress
Begin a 1P GAME on the original North American SNES release, learn the correct Dixie, Kiddy, team, barrel, animal, and Ellie controls, and use Wrinkly’s Save Cave and the overworld flags to track progress. The main campaign ends with the Baron K. Roolenstein battle aboard the Knautilus, while the full 103% route and Banana Bird Queen sequence require additional collectibles and cleanup.
Start a 1P GAME and establish permanent saves
At the title screen, choose a save slot, enter a file name of up to five characters, and select 1P GAME. This is the normal solo mode in which one player controls both Dixie Kong and Kiddy Kong. The 2P CONTEST and 2P TEAM modes are separate multiplayer options and are not needed for the campaign route.
Wrinkly’s Save Cave appears in every main world. Enter it and use the save option after defeating a boss, receiving a vehicle upgrade, completing an important Brothers Bear trade, or finishing a difficult cleanup session. The cave records the campaign state and the progress information displayed for the file.
A Star Barrel is only a midway checkpoint inside the current level. It does not permanently save the file. If you are repeatedly attempting a dangerous Bonus Area, save at Wrinkly’s first. That way, a failed sequence of attempts does not leave your overall progress unprotected. Lives, K-O-N-G letters, and the Star Barrel checkpoint are useful during a stage, but none replaces a permanent save.
- Select 1P GAME for the solo campaign.
- Use Wrinkly’s Save Cave for permanent saves.
- Treat Star Barrels as level checkpoints only.
- Save after bosses, vehicle upgrades, major trades, and difficult cleanup.
- Save before repeated attempts at risky Bonus Areas.
Learn the SNES controls and the two Kongs’ roles
Use the Control Pad to move, climb, swim, steer vehicles, and select options. Press B to jump, enter a level or room, fire a character from a barrel, or disembark from a vehicle on the overworld. Press Start to pause.
Hold Y while moving to run. Y also picks up a barrel; release Y to throw it. When one Kong is carrying the other, release Y to throw the teamed Kong. Press Up while releasing Y to give the throw its upward direction. A teams the Kongs together when both are available, and pressing A again splits them apart. Select switches the active Kong when both are present; it does not team, split, or throw the partner.
Dixie is the more forgiving jumper. Her ponytail attack is useful on the ground, and holding Y after jumping activates the Helicopter Spin, which slows her descent and improves horizontal control. It is not unlimited flight. Kiddy is heavier and has stronger ground movement. His rolling attack and roll jump are useful for breaking obstacles, defeating enemies, and reaching routes that benefit from weight or momentum.
Use Dixie for long jumps and midair corrections. Use Kiddy when a heavy roll, a strong ground attack, or a team throw is the safer solution. If one Kong is lost, locate a DK Barrel to restore the partner before attempting a section that needs both characters.
- B jumps, enters stages and rooms, and disembarks from vehicles.
- Y runs, attacks, picks up and throws barrels, and throws the teamed Kong.
- A teams up or splits up.
- Select switches the active Kong.
- Hold Y in the air with Dixie for the Helicopter Spin.
- Use Kiddy’s roll and roll jump for heavy-impact movement.
- Find a DK Barrel after losing a partner.
Recognize stage objects, animals, and Ellie’s exact SNES mapping
A Star Barrel marks the midpoint of a stage. A DK Barrel restores the missing Kong. A Bonus Barrel begins a timed Bonus Area, and completing the displayed objective awards a Bonus Coin. TNT Barrels destroy selected obstacles or enemies, while Steel Barrels can be carried and thrown. Preserve Steel Barrels when a Koin enemy is guarding a DK Coin, because the correct rebound setup is often required.
Animal Barrels transform the active Kong into an animal helper. Enguarde handles underwater movement and attacks. Squitter creates web platforms, Squawks flies through air sections, Ellie manipulates water and fires water, and Parry reaches elevated objects. An animal may be required for a particular route or bonus entrance, but not every Bonus Area requires one.
For the original SNES version, Ellie’s controls are consistent throughout the guide: press L to draw water into her trunk, and press R to fire the stored water. A also draws water while Down is held on the Control Pad. When A is tapped or held without Down, Ellie fires water. Use the stored-water option when a puzzle requires a deliberate shot, and use the A firing input when rapid shots are safer.
A No Animal Sign ends an animal section. Collect anything that depends on the animal before crossing it. If an animal is lost before a suspected secret, finish the stage safely or return on another attempt rather than spending every life trying to improvise a recovery.
- Use Star Barrels as checkpoints, not saves.
- Use DK Barrels to restore the missing Kong.
- Complete Bonus Areas to receive Bonus Coins.
- Preserve Steel Barrels for Koin encounters and blocked routes.
- Ellie: L draws water, R fires stored water, and A draws with Down held or fires when tapped or held.
- Collect animal-dependent items before a No Animal Sign.
Read the overworld flags and separate the collectibles
An uncleared stage displays a black flag with a white K. After completing a stage, the flag color records which Kong reached the goal: pink means Dixie finished it, while blue means Kiddy finished it. A drooping or partially raised flag means that at least one Bonus Coin remains in that stage. A fully raised flag means the stage’s Bonus Areas have all been completed. A yellow or gold pennant attached to the flag indicates that the stage’s DK Coin has been collected.
These records are independent. A stage can have a pink or blue completion flag while still missing Bonus Coins, or it can have all Bonus Coins while still missing its DK Coin. Check both the flag’s height and the pennant when cleaning up a world. Boss stages do not use the ordinary level-flag tracking in the same way as regular stages.
Bonus Coins come from Bonus Areas and are needed to pay Boomer. Bear Coins are currency for the Brothers Bear. DK Coins are the large stage collectibles, normally guarded by Koin enemies or awarded by special encounters. Krematoa cogs are separate items earned by completing Krematoa stages. Do not spend one category as if it were another.
K-O-N-G letters are optional extra-life collectibles. Collecting K, O, N, and G during one attempt awards a life, but the letters do not open routes and are not part of the normal 103% requirement. The North American Rocket Rush release has a documented missing G-letter difference, so do not treat that absence as an incomplete required collectible.
- Black K flag: the stage is uncleared.
- Pink flag: Dixie reached the goal.
- Blue flag: Kiddy reached the goal.
- Partially raised flag: at least one Bonus Coin remains.
- Fully raised flag: all Bonus Coins in the stage are collected.
- Yellow or gold pennant: the stage’s DK Coin is collected.
- K-O-N-G letters: optional extra-life collectibles.
Use Funky and Brothers Bear before forcing a blocked route
Funky’s Rentals supplies vehicles that open different water and overworld routes. The starting Motor Boat cannot cross every line of rocks. When a boss reward or trade supplies the next vehicle component, return to Funky rather than repeatedly attempting to force the old boat through a blocked passage.
After defeating Arich in Kremwood Forest, return to Funky with the obtained Patch so he can build the Hovercraft. The Hovercraft crosses the rocks that block the northern route. Once that route is open, Cotton-Top Cove and Mekanos are selectable in either order. You do not have to treat Cotton-Top Cove as a mandatory fourth step before Mekanos; choose either world, then complete the other when ready.
The Brothers Bear provide trades, services, clues, and progression events. Their Bear Coins are separate from Bonus Coins and DK Coins. After a boss victory, vehicle upgrade, or item trade, inspect the nearby map again. A new branch may depend on the vehicle, a Bear trade, a payment, or a hidden side path rather than on simply clearing the next visible level.
If the expected route is closed, check Funky, the nearby Brothers Bear, and newly accessible shoreline or rock passages before replaying unrelated stages.
- Return to Funky after receiving a vehicle-related boss reward or item.
- Use the Hovercraft to cross the rocks north of the early worlds.
- After Kremwood Forest, enter Cotton-Top Cove or Mekanos in either order.
- Keep Bear Coins separate from Bonus Coins and DK Coins.
- Inspect the map after bosses, upgrades, and Brothers Bear trades.
Reveal Krematoa and pay Boomer with Bonus Coins
Krematoa is the hidden world surrounded by rocks on the overworld. Reveal it by using the Hovercraft or Turbo Ski to circle the rock formation. The Turbo Ski is an alternative vehicle route, not a mandatory replacement for the Hovercraft. If the area does not appear, circle the complete formation rather than searching for a normal stage entrance.
After Krematoa appears, enter Boomer’s Bomb Shelter. Boomer accepts Bonus Coins to destroy the rocks blocking the stage entrances. Bear Coins cannot be substituted, and cogs are not payments. The first four Krematoa stages require the available access payments; the final Rocket Rush entrance requires the final 25-Coin payment.
Krematoa contains Stampede Sprint, Criss Kross Cliffs, Tyrant Twin Tussle, Swoopy Salvo, and Rocket Rush. The first four stages contain the Krematoa Bonus Areas. Rocket Rush has no Bonus Areas, so do not search it for a missing Bonus Coin. Each completed Krematoa stage awards one cog at its goal.
Complete all five stages, then return to Boomer with all five cogs. The cogs are earned through stage completion rather than purchased. Boomer uses them to activate the machinery and raise the Knautilus. Revealing Krematoa or opening some entrances is not enough.
- Reveal Krematoa with the Hovercraft or Turbo Ski.
- Pay Boomer with Bonus Coins.
- Remember that Rocket Rush requires the final 25-Coin payment.
- Complete all five Krematoa stages.
- Collect one cog from each stage.
- Return all five cogs to Boomer before entering the Knautilus.
Keep the Knautilus ending separate from the Banana Bird Queen event
The battle against Baron K. Roolenstein aboard the Knautilus is the true final boss milestone of the main campaign. It is separate from the earlier Kastle KAOS encounter. Defeating the boss confirms that the ordinary story route is complete, but it does not alone prove that the file has reached 103%.
For the full North American SNES completion route, collect all Bonus Coins, all 41 DK Coins, and all 15 Banana Birds, and finish the vehicle and Brothers Bear progression needed to access the final locations. The Knautilus victory and the Banana Bird Queen sequence are separate completion milestones.
After the full Banana Bird route is ready, enter Wrinkly’s Save Cave to trigger the Queen sequence. Do not expect this event merely from defeating Baron K. Roolenstein, and do not confuse the Queen sequence with the Knautilus fight.
Use two final checks. For the main campaign, verify that Baron K. Roolenstein has been defeated aboard the submarine. For the full route, verify every Bonus Coin, all 41 DK Coins, all 15 Banana Birds, the necessary vehicle and trade progression, and the Wrinkly’s Save Cave event that begins the Banana Bird Queen sequence.
- Defeat Baron K. Roolenstein aboard the Knautilus for the main campaign milestone.
- Collect every Bonus Coin for the full route.
- Collect all 41 DK Coins.
- Rescue all 15 Banana Birds.
- Complete the required Brothers Bear and vehicle progression.
- Enter Wrinkly’s Save Cave when the full Banana Bird route is ready.
- Confirm the separate Banana Bird Queen event.
Before you move on
- You can start a 1P GAME and control both Dixie and Kiddy.
- You know that A teams up or splits up.
- You know that Select switches the active Kong.
- You know that Y throws the teamed Kong.
- You can jump, run, attack, pick up and throw barrels, perform Dixie’s Helicopter Spin, and use Kiddy’s roll jump.
- You know Ellie’s SNES controls: L draws water, R fires stored water, and A draws with Down held or fires when tapped or held.
- You can identify Star Barrels, DK Barrels, Bonus Barrels, TNT Barrels, Steel Barrels, and Animal Barrels.
- You can interpret black, pink, blue, partially raised, fully raised, and pennant-marked stage flags.
- You have located Wrinkly’s Save Cave and know when to use it.
- You know that the Hovercraft opens the northern route after Kremwood Forest and that Cotton-Top Cove and Mekanos are selectable in either order.
- You know why Funky’s vehicles and Brothers Bear trades can alter overworld access.
- You can reveal Krematoa with the Hovercraft or Turbo Ski.
- You understand that Boomer accepts Bonus Coins rather than Bear Coins.
- You know that each completed Krematoa stage supplies one cog and that all five must be delivered to Boomer.
- You distinguish the Knautilus victory from the later Banana Bird Queen event.
- For full completion, you will verify all Bonus Coins, all 41 DK Coins, all 15 Banana Birds, required trades, vehicle progression, and the Wrinkly’s Save Cave Queen sequence.
- You will not mistake optional K-O-N-G letters for required 103% collectibles.
References for this chapter
- Super NES Instruction Manuals: Donkey Kong Country 3: Dixie Kong’s Double Trouble
- Donkey Kong Country 3: Dixie Kong’s Double Trouble! Nintendo SNES Instruction Manual
- Donkey Kong Country 3: Dixie Kong’s Double Trouble! – Bonus Level/Banana Bird Guide – Super Nintendo
- Donkey Kong Country 3: Dixie Kong’s Double Trouble! — Super Mario Wiki
- Donkey Kong Country 3: Dixie Kong’s Double Trouble! - Q&A for Super Nintendo
World 1 — Lake Orangatanga: Lakeside Limbo to Belcha's Barn
Lake Orangatanga is the opening world of the original North American SNES campaign. Clear Lakeside Limbo, Doorstop Dash, Tidal Trouble, Skidda's Row, and Murky Mill, then defeat Belcha's Barn to open the route toward Kremwood Forest. Each ordinary stage contains two Bonus Areas that award Bonus Coins. Those coins are optional for basic campaign progress but are required later if you want to open every Krematoa stage. DK Coins and K-O-N-G letters are separate collectibles.
Prepare at Lake Orangatanga
The opening map gives you the Motorboat and access to the Lake Orangatanga stages. When both Kongs are present, press Select to switch between Dixie and Kiddy. Hold Y while moving to run, press B to jump, and release Y while holding a barrel to throw it. Dixie can use her airborne Helicopter Spin by jumping and holding Y, while Kiddy can perform a Barrel Roll by holding Y and moving left or right. Kiddy can also Water Skip: start a Barrel Roll, aim toward the water, and press B just before entering it.
The team-up controls are important for the hidden routes in this world. Press A to start or end the team-up. After one Kong is carrying the other, use the Control Pad to position the throw and press Y to launch the carried Kong. Upward throws are used to reach high platforms, while horizontal throws can break weak floors or strike enemies. Do not describe A itself as the lift or throw button.
Dixie is the safer choice for long gaps, climbing, and controlled descents. Kiddy is useful for stronger throws, breaking weak floors, rolling through hazards, and Water Skips. If you lose one Kong, look for a DK Barrel, but do not assume one is available immediately in every dangerous section. Wrinkly's Save Cave is marked on the overworld by a black, flickering circle. Save before risky Bonus Area attempts or after defeating Belcha.
- Save at Wrinkly's Save Cave before serious attempts.
- Use A to team up, the Control Pad to aim, and Y to throw the carried Kong.
- Keep Dixie for difficult aerial movement and Kiddy for heavy throws or Water Skips.
- Treat Bonus Coins, DK Coins, and K-O-N-G letters as separate objectives.
Lakeside Limbo: boardwalks, Koin, and Ellie
Move right across the opening boardwalk and defeat the first group of Sneeks before climbing to the upper boardwalk. The K letter is on the normal route. Continue through Koin's area to collect O, then proceed to N. After Ellie's crate, a Booty Bird carries G; defeat it to take the letter.
For Bonus Area 1, defeat the Kobble near the early dock and use a Body Slam to break the weak dock section directly above the Bonus Barrel. In the Bonus Area, collect all 50 Stars before the timer expires, then take the Bonus Coin. For Bonus Area 2, defeat the first Kobble after the Continue Barrel, enter the water behind his dock, and swim right underneath the boardwalk. Collect 15 Green Bananas before they disappear.
Ellie's crate appears after the second Bonus Area. Ellie is useful for carrying, sucking up, and throwing barrels, but she is not required to finish this ordinary stage. For the DK Coin, take the Steel Barrel in Koin's area, throw it up and over Koin so it rebounds from the wall, and let it strike Koin from behind.
- Collect K, O, N, and the Booty Bird's G on the route.
- Use a Body Slam, not the A button alone, to break the weak dock above Bonus Area 1.
- Enter Bonus Area 2 from the water beneath the boardwalk.
- Use a rebounding Steel Barrel to defeat Koin.
Doorstop Dash: operate the pull handles quickly
This mill stage is controlled by pull handles. Each handle opens a metal door for a limited time, so move directly toward the new passage instead of stopping to fight every enemy. K is below the first pull handle, O is above the first trapdoor, and N and G are on the regular route.
For Bonus Area 1, go left of the first rope. Team up, use the Control Pad to position the throw, and press Y to throw the carried Kong up to the pull handle. The opened route leads to the Bonus Barrel. Inside, collect 60 Stars in 30 seconds, then return to the right side of the central door for the Bonus Coin. Kiddy is especially useful because his larger body collects more Stars during each pass.
For Bonus Area 2, climb to the top of the first rope guarded by Buzzes. Do not follow the curved banana trail left. Watch the Buzz patrol, reach the pull handle when the timing is safe, and run beneath the Buzz through the temporary opening. Dixie can cross the Bonus Area more easily with Helicopter Spins; Kiddy must rely on carefully timed jumps.
Near the large pitfall at the end, hug the left wall or follow the bananas to land in a hidden chamber. Pull the handle, take the Steel Barrel, and throw it left through the opened doorway to hit Koin from behind.
- Grab each handle and run immediately for its door.
- Search left of the first rope for Bonus Area 1.
- Use Buzz patrol timing to reach Bonus Area 2.
- Check the chamber beside the final pit if collecting the DK Coin.
Tidal Trouble: control the turbulent water
Tidal Trouble's current makes swimming difficult, but the original SNES stage does not use an oxygen meter. Make short steering corrections and use the docks as stable points between water sections. Avoid Green Kocos, Knockas, Buzzes, and walls rather than searching for air pockets.
Collect K early on the water route. After breaking the second Knocka, take O and continue left through the water to find the Enguarde Barrel. Enter Bonus Area 1 immediately after transforming into Enguarde. Super Dash through the room to spear the Lurchin while its shell is open, collect the 30 Stars, and make another dash for the Bonus Coin.
For Bonus Area 2, use the two Knik-Knaks as steps to reach the high dock containing a Knocka and a Booty Bird. Defeat the bird to obtain N, then use Kiddy’s Water Skip, or a very precise Dixie Helicopter Spin, to reach the Bonus Barrel. The room requires defeating four Knik-Knaks and dropping into the water at the end to collect the Bonus Coin. G is farther right, after the final Green Buzz and Green Koco.
For the DK Coin, team-throw Dixie onto the starting shack, take the Steel Barrel from the roof, return to the dock, and bounce the barrel off the wall behind Koin. Throw at a controlled height so the barrel does not roll away.
- Use the docks to reset your position between current-driven passages.
- Find Enguarde before attempting Bonus Area 1.
- Use Kiddy’s Water Skip to reach the high-dock Bonus Barrel.
- Do not waste time looking for an air timer that the SNES stage does not have.
Skidda's Row: brake early on the snow
The snow is slippery, so release the direction button before a hazard rather than trying to stop beside it. K is just beyond the first Skidda rooftop, O is on the route or appears after Bonus Area 1, N is between crevasses, and G requires a controlled later jump.
Bonus Area 1 is after the second Krimp. Stomp the Krimp and jump into the visible Bonus Barrel. Defeat four Skiddas before ten seconds expire. Bonus Area 2 is reached at the first house with two Skiddas on its roof. With both Kongs, team up and throw Dixie into the Skiddas from below; otherwise approach from the left slope and defeat or avoid them before entering the Bonus Barrel. Reach the Bonus Coin within 15 seconds without sliding into the crevasses.
Dixie is generally safer for long snowy jumps because of her Helicopter Spin. Kiddy’s Barrel Roll is effective when there is enough room to recover. For the DK Coin, throw the Steel Barrel into the snowbank behind Koin without throwing it too high.
- Begin braking before crevasses and enemies.
- Check the first house roof for Bonus Area 2.
- Use Dixie for difficult gap corrections.
- Return later if repeated sliding deaths make a Bonus Area attempt inefficient.
Murky Mill: protect Ellie from Sneeks
Murky Mill requires Ellie for most of the normal route. Bright yellow lights frighten her when Sneeks are present, so use barrels to defeat the Sneeks before moving Ellie through the lit sections. If Ellie runs away, clear the immediate enemy threat first, then recover her instead of chasing toward a pit.
K is below the first swaying light. Use a Re-Koil to reach O, collect N on the obvious route, and use the last Re-Koils to reach G. Bonus Area 1 is below the trapdoor blocked by the first Green Buzz after the regenerating Steel Barrel. Defeat the Buzz, drop through the trapdoor, and use the regenerating barrel to destroy four Green Buzzes. The Bonus Coin appears after the enemies are eliminated.
Bonus Area 2 follows the section where Ellie sucks up a barrel and defeats a Sneek. Run off the edge, use the Auto-Fire Barrel, and land on the floor to the left near the deep shaft guarded by two Green Buzzes. Use the Steel Barrel and Ellie’s suction to clear the shaft, then pass the pairs of Green Buzzes and take the Bonus Coin.
For the DK Coin, after the Star Barrel, take the regenerating Steel Barrel to Koin's hiding place. Have Ellie jump and throw the barrel up and over the wall so it falls onto Koin from behind.
- Keep a barrel ready before moving Ellie under a yellow light.
- Search beneath the first Green Buzz for Bonus Area 1.
- Use Ellie’s suction and the Auto-Fire Barrel setup for Bonus Area 2.
- Use Ellie to throw the Steel Barrel over Koin’s wall.
Belcha's Barn: stun and return the Yellow Knik-Knaks
Belcha cannot damage the Kongs simply by contact. The boss spits barrels from its mouth and moves forward after each one, gradually pushing the Kongs toward the pit behind them. Break a barrel, then stomp the Yellow Knik-Knak inside once to stun it. Pick up the stunned insect and throw it into Belcha’s open mouth. A second stomp destroys the Knik-Knak, so do not stomp it twice before picking it up.
Kiddy is usually easier for this fight because his throw is straighter and stronger, but either Kong can win. Stand far enough from the rear edge to leave room for the next barrel. Line up the stunned Knik-Knak with Belcha’s mouth before throwing. Each successful throw makes Belcha recoil; repeat until the boss is pushed backward into the pit.
If one Kong is hit, continue with the survivor and prioritize breaking the next barrel safely. There is no need to force a partner recovery inside the arena. If Belcha advances too far and the remaining floor becomes unsafe, restart and aim to process each barrel more quickly. After the victory, return to the overworld, save at Wrinkly’s Save Cave, and proceed toward Kremwood Forest.
- Break a boss barrel and stomp its Yellow Knik-Knak once.
- Throw the stunned Knik-Knak into Belcha’s mouth.
- Keep enough floor behind you for the next barrel.
- Save after Belcha is defeated.
Before you move on
- Lakeside Limbo, Doorstop Dash, Tidal Trouble, Skidda's Row, and Murky Mill are all completed at their Goal Flags.
- Belcha's Barn is defeated and the route toward Kremwood Forest is open.
- For optional world completion, each ordinary stage has both Bonus Coins collected.
- If collecting optional items, verify the K-O-N-G letters and DK Coin in each stage separately.
- The file has been saved at Wrinkly's Save Cave after the boss.
References for this chapter
World 2 — Kremwood Forest: Rivers, Mills and Arich's Ambush
On the original North American Super Nintendo release, Kremwood Forest proceeds through Barrel Shield Bust-Up, Riverside Race, Squeals on Wheels, Springin' Spiders, Bobbing Barrel Brawl, and Arich's Ambush. The Game Boy Advance remake changes the placement of some stages, so follow the SNES order below. Normal exits are enough to reach Arich, while Bonus Coins, DK Coins, K-O-N-G letters, Brash's record, and the secret cave are optional cleanup objectives. The five regular stages each contain two Bonus Areas and one DK Coin.
Prepare for Kremwood Forest
After defeating Belcha in Belcha's Barn, move into Kremwood Forest from the Northern Kremisphere map. Save at Wrinkly's Save Cave before beginning if you want a secure restart point. Keep both Kongs together whenever possible: Kiddy is important for Team Throws, heavy barrel handling, and water-skipping, while Dixie is safer for long jumps because Helicopter Spin can correct a missed landing.
A normal stage exit does not require its Bonus Coins or DK Coin. If you are pursuing full completion, record each item separately. K-O-N-G letters provide extra lives and are optional; they are not substitutes for Bonus Coins or DK Coins. Animal helpers are also optional for normal progression, but Squawks, Parry, and Ellie provide access to specific bonus routes or rewards.
- Save before entering the first forest stage.
- Keep both Kongs alive before attempting Team Throw routes.
- Track Bonus Coins, DK Coins, and K-O-N-G letters separately.
Barrel Shield Bust-Up
Climb through the hollow trees using ropes, branches, and platforms. Minkeys throw acorns across the climbing routes. Barrel Shields block those projectiles, so move behind the shield and let it travel with you instead of trying to rush past the Minkeys. When the shield is out of position, wait on a safe section of rope or platform until it covers the next crossing.
The first Bonus Area is reached before the Star Barrel. Carry the first TNT Barrel to the left side of the tree and throw it into the wall. Enter the opening and jump into the Bonus Barrel outside. Inside, climb the rope while avoiding the Minkeys, then leave the top of the tree and drop onto the Bonus Coin. Dixie is the easier Kong for the final descent, but Kiddy can complete it with more careful positioning.
After the Star Barrel, continue through the later Minkey groups. Immediately after the letter N, use Kiddy for an upward Team Throw into the branches above the DK Barrel. Climb into the left tree trunk, take the Steel Barrel, and defeat Koin by throwing the barrel over him so it rebounds from the wall behind him. This is the stage's DK Coin route.
For the second Bonus Area, survive the later Minkey section and use the final TNT Barrel to open the left wall. Follow the short branch route upward, collect the DK Barrel if you need to restore your partner, then switch to Dixie. Helicopter Spin through the openings in the tree trunks and continue beyond the Goal Flag to the Bonus Barrel. The Bonus Area requires collecting 15 green bananas while avoiding acorns. The letter G is obtained by bouncing from the lone Pink Nid near the later vertical route.
- Use Barrel Shields as moving cover from Minkey acorns.
- Use the first TNT Barrel to reach Bonus Area 1 before the Star Barrel.
- Team Throw above the DK Barrel after N to reach Koin.
- Use the final TNT Barrel and Dixie's Helicopter Spin for Bonus Area 2.
Riverside Race
A timer runs throughout this stage, and a swarm of red killer bees follows the Kongs. Keep moving on land; the bees cannot reach you while you are swimming. Kiddy is useful in the open sections because Water Skip lets him cross water quickly and reach high ledges. Avoid pausing beside underwater Kocos.
Brash's record is 1:15. Beating it is optional and is not required for the normal exit or for access to the next regular stage. If you want the secret cave, make a dedicated speed attempt, beat the record, and then return to Brash. His reaction opens the route to the cave. Do not combine the record attempt with a first attempt at the Bonus Areas or DK Coin.
The first Bonus Barrel is high above the second water pool. Defeat the nearby Sneek, use Kiddy to Water Skip up the slope, and jump into the Bonus Barrel. Collect 15 bananas in the water while avoiding the Green Koco.
The second Bonus Area is reached near the letter N. After collecting N, drop to the lower water route, take the Invincibility Barrel, and use its effect to bounce across the trio of Red Buzzes to the high ground and Bonus Barrel. This Bonus Area is different from the first: roll or Spin into four Re-Koils before the timer expires. The DK Coin is beyond the Goal Flag. After the bees disappear, use Kiddy to run left and Water Skip up to Koin's ledge, then throw the Steel Barrel over Koin so it rebounds into his back.
- Use water to escape the pursuing bees.
- Treat Brash's 1:15 record as optional.
- Collect 15 bananas in Bonus Area 1.
- Use the Invincibility Barrel for Bonus Area 2 and defeat four Re-Koils.
Squeals on Wheels
This mill stage has a special exit rule. The exit is near the beginning, but its door remains closed until every required Sneek on a dynamo wheel has been defeated. Use the supplied Steel Kegs or Steel Barrels to knock Sneeks from their wheels. Each defeated Sneek turns part of the nearby progress meter green. Continue upward through the mill, clear every wheel encounter, then drop back through the trapdoors and return to the exit door.
The first Bonus Area is reached after the letter O and before the Star Barrel. Use the regenerating Steel Barrel to defeat the Sneek on the wheel, then jump from the empty wheel into the upper-left passage. The Bonus task is collecting 20 stars while using the two wheels as platforms.
After the Star Barrel, defeat the next wheel Sneeks and progress until the later pair of dynamo wheels. Clear the wheels, continue far enough to reach the later DK Barrel, then backtrack to the empty wheels. Put Kiddy on the lower wheel and Team Throw Dixie up and right to the upper route. Enter the second Bonus Barrel and collect 15 green bananas before the timer expires.
Parry's Animal Crate appears late in the stage. Keep Parry alive, use the bird to follow the overhead banana line, and let Parry defeat the Booty Bird carrying the letter G. Carry Parry through the No Animal Sign to receive the Blue Balloon. The DK Coin route is near the section guarded by two Green Buzzes: clear the Sneeks on the wheel, use the upper-right Team Throw, and defeat Koin with the nearby Steel Barrel.
- Defeat every wheel Sneek so the exit meter turns green.
- Use the twin wheels to enter Bonus Area 1.
- Backtrack from the later DK Barrel for Bonus Area 2.
- Protect Parry if you want the letter G and Blue Balloon.
Springin' Spiders
Instead of ropes, this stage uses Nids as spring platforms. Stand on each Nid and steer the bounce toward the next branch. Do not hold a direction continuously without watching the Nid's movement, or the Kong may overshoot the landing. Dixie is better for recovering from a marginal jump, while Kiddy is needed for the later Team Throw route.
After the letter K, deliberately drop between the branches to find the Animal Barrel containing Squawks. Fly upward through the hollow tree and use coconuts to defeat the Green Buzz blocking the route to the first Bonus Barrel. In the Bonus Area, Squawks must collect 15 green bananas within the time limit while avoiding the Red Buzzes. Squawks can also reach the letter O before the No Animal Sign.
After the letter G, drop into the small gap in the side of the tree to enter the second Bonus Barrel. Use the Nids and upper branches to collect 30 stars. The letter G itself is near the final Swoopy section.
For the DK Coin, keep both Kongs and put Kiddy in front before mounting the third Pink Nid after the Continue Barrel. Team Throw Dixie up and left onto the small shelf, switch to Dixie, and throw the Steel Barrel left through the opening so it strikes Koin from behind. Then use the TNT Barrel to open the tree and resume the main route.
- Use Nids as controlled springboards.
- Find Squawks after K and use him for Bonus Area 1.
- Drop through the gap after G for Bonus Area 2.
- Keep both Kongs for the Koin route after the Continue Barrel.
Bobbing Barrel Brawl
The stage begins with an Animal Barrel and must be played as Ellie. Ellie can draw water into her trunk and fire it as a projectile. She cannot swim, so use floating barrels as temporary platforms and never enter Nibbla-infested water without a way back out.
Near the beginning, defeat the Booty Bird above the first Red Buzz. Its TNT Barrel destroys the Red Buzz and reveals the route to the letter K. Continue using Ellie’s water attack against Booty Birds and Buzzes. The letter O is on the main route near the Star Barrel, and N is above a floating-barrel crossing later in the stage.
For Bonus Area 1, use Ellie's water shot to defeat the Booty Bird above the Red Buzz guarding the Bonus Barrel. The dropped TNT Barrel clears the obstruction. Inside, throw barrels upward so they settle on the water as two stepping platforms, then cross to the Bonus Coin before the timer expires.
For Bonus Area 2, enter the water below the trail of bananas after N. Ellie cannot sink far enough to reach the Bonus Barrel directly. Continue until two yellow Knik-Knaks rise over the water, then use them as moving steps and drop into the barrel. Collect 10 stars while jumping from Steel Barrels and avoiding the Nibbla.
The DK Coin is before the Star Barrel. Use Ellie's suction to pull the Steel Keg toward her, then throw it over Koin without striking the Red Buzzes. The keg must rebound from the wall into Koin's back.
- Remain Ellie until the No Animal Sign.
- Use floating barrels to cross Nibbla pools.
- Use the Booty Bird's TNT Barrel for Bonus Area 1.
- Use the yellow Knik-Knaks to reach Bonus Area 2.
Defeat Arich's Ambush
Arich takes four hits. The first barrel rests on Arich's back. Wait until he is low enough to approach safely, jump onto his back, take the barrel, and throw it into his jaw when he descends. Touching the bottoms of his legs hurts the Kongs, but landing on top of them is safe and lets the Kong bounce away.
After the first hit, replacement barrels appear on the upper-right branch. Reach that branch by riding Arich's back, but do not remain there. Arich rises and spits venom balls while a Kong is on the branch. Grab the barrel and leave before the projectiles destroy it.
After the second hit, Arich releases three venom balls toward the arena. Wait until the pattern clears before carrying the next barrel. After the third hit, he releases five venom balls that bounce through the arena and leave the top of the screen. Again, let the projectiles clear before collecting or transporting the barrel. Arich's bouncing becomes faster after each hit, so retreat and reset your position rather than forcing an immediate attack.
When Arich descends, throw the barrel into his jaw for the fourth and final hit. If only one Kong enters the boss level, the other appears from a DK Barrel at the start. Arich drops a Patch when defeated. Take the Patch to Funky's Rentals to receive the Hovercraft, which opens access to Cotton-Top Cove and Mekanos.
- Hit Arich's jaw four times.
- Ride Arich's back to reach replacement barrels.
- Wait out the three-ball and five-ball venom patterns.
- Deliver the Patch to Funky for the Hovercraft.
Before you move on
- The Kremwood Forest map shows Barrel Shield Bust-Up, Riverside Race, Squeals on Wheels, Springin' Spiders, and Bobbing Barrel Brawl completed.
- Arich's Ambush is cleared and Arich has dropped the Patch.
- The Patch has been delivered to Funky's Rentals and the Hovercraft is available.
- For optional cleanup, each of the five regular stages has both Bonus Coins and its DK Coin, with missed K-O-N-G letters revisited separately.
References for this chapter
- Donkey Kong Country 3: Dixie Kong’s Double Trouble! Nintendo SNES Instruction Manual
- Donkey Kong Country 3: Dixie Kong's Double Trouble! — Guide and Walkthrough — Super Nintendo — DWA
- Barrel Shield Bust-Up — Super Mario Wiki
- Riverside Race — Super Mario Wiki
- Squeals on Wheels — Super Mario Wiki
- Springin' Spiders — Super Mario Wiki
- Bobbing Barrel Brawl — Super Mario Wiki
- Arich's Ambush — Super Mario Wiki
World 3 — Cotton-Top Cove: Barrels, Rockets and Squirt's Showdown
Cotton-Top Cove contains five regular stages followed by Squirt's Showdown. After Arich is defeated and Funky Kong provides the Hovercraft, the map does not force one single next-world order: Cotton-Top Cove and Mekanos can both be pursued. If you choose Cotton-Top Cove, clear Bazza's Blockade, Rocket Barrel Ride, Kreeping Klasps, Tracker Barrel Trek and Fish Food Frenzy, then enter Squirt's Showdown. The stage route below follows the in-game order and includes the two Bonus Areas in every regular stage.
1. Choose Cotton-Top Cove from the Hovercraft map
Once the Hovercraft is available, sail to Cotton-Top Cove if you want to follow this chapter. Mekanos is also available at this point, so do not assume that Cotton-Top Cove is the only newly opened destination or that it must be completed before Mekanos. The chapter's internal order remains Bazza's Blockade, Rocket Barrel Ride, Kreeping Klasps, Tracker Barrel Trek and Fish Food Frenzy, followed by Squirt's Showdown.
For ordinary campaign progress, reaching each Goal Flag is sufficient. Bonus Coins, DK Coins and K-O-N-G letters are separate objectives. If you are collecting the two Bonus Coins in each stage, save before entering a difficult course and use the map to replay only the stage that still lacks a bonus. A failed attempt costs a life, but it does not remove previously secured stage progress.
- Confirm that the Hovercraft is available before sailing to Cotton-Top Cove.
- Remember that Mekanos may also be completed before or after Cotton-Top Cove.
- Clear the five regular stages before attempting Squirt's Showdown.
2. Clear Bazza's Blockade
This underwater stage is built around lines of Bazzas moving across the screen. Avoid swimming directly into a line. Move above or below it, pause in the open water and wait for the next line to pass before continuing. The K is above the first long Bazza line, and the O lies on the normal route.
At the first U-shaped passage below the curved banana trail, wait for an opening between the Bazzas, dive into the lower recess and swim right into the first Bonus Barrel. This is a Find a Coin room. Keep moving through the alternating Bazza lines while staying clear of the Lurchins, then take the Bonus Coin at the far side.
Near the first pair of Red Kocos, sink below the lower fish to find the Enguarde Barrel. Charge through the next Red Koco to collect N. Afterward, return left through the narrow upper passage and use Enguarde to clear the Bazzas blocking the second Bonus Barrel. This room is a Bash the Baddies challenge: destroy the Red Kocos as they emerge from the tubes, preferably clearing one horizontal row at a time. The Bonus Coin appears near the top after the required enemies are defeated.
Continue to the No Enguarde sign to receive G. After the Goal Flag, return or proceed to the area containing Koin and use the Steel Barrel to defeat him for the DK Coin. For the main route, the Goal Flag and the No Enguarde sign are the important landmarks.
- Use the open water above or below each Bazza line.
- Find Enguarde below the first Red Kocos to collect N.
- Backtrack with Enguarde for the second Bonus Barrel.
- Check the area beyond the Goal Flag for Koin.
3. Navigate Rocket Barrel Ride
Rocket Barrel Ride uses Booster Barrels over a waterfall. Make short directional corrections rather than holding a direction continuously. Watch for Green Buzzes and Knik-Knaks before launching, because a long correction can send the barrel directly into an obstacle. Collect K early in the barrel route. To obtain O, launch from the Booster Barrel so the Kongs pass over the Green Buzz and continue through the next barrel. The Parry crate appears later beside an Auto-Fire Barrel; use Parry's high jump to reach N above it. G is on the route after the second Bonus Area.
After collecting O, return to the earlier Booster Barrel. Launch over the Green Buzz and use the three Knik-Knaks as stepping stones to reach the hidden first Bonus Barrel. The room is Collect 20 Stars. Some stars blend into the waterfall background, so follow the Booster Barrel sequence carefully instead of rushing.
Later, pass the No Parry sign. At the waterfall ahead, jump over the Booster Barrel behind the falls and land on the low ledge to the left. Enter the second Bonus Barrel from there. This room is Collect 60 Stars in 35 seconds. Let the star trails guide you when the barrels are hard to see, and make each launch only after collecting the nearby group.
The DK Coin is near the end. Throw the Steel Barrel left, enter the Auto-Fire Barrel above, and land on Koin's left side so the rolling barrel strikes him from behind.
- Use small steering corrections around the waterfall hazards.
- Return to the earlier Booster Barrel after collecting O.
- Use the low ledge behind the waterfall after the No Parry sign for Bonus Area 2.
- Use the Auto-Fire Barrel setup to defeat Koin.
4. Cross Kreeping Klasps
Kreeping Klasps is a rope course above water. Klasps patrol the ropes and remove a Kong on contact, while Nibbla waits below. Let a Klasp pass before changing ropes or dropping to a lower line. The K is above the first rope line, O is obtained by dropping when a Klasp moves away, N is on the main route and G requires jumping over a Klasp.
For the first Bonus Barrel, watch the first pair of Green Buzzes overhead. When they move away, jump upward twice quickly to reach the hidden opening. The room is Grab 15 Bananas on twin ropes. Stay on the ropes and avoid dropping into the water, where Nibbla can end the attempt.
After the checkpoint, look below the next platform. Climb down the rope to find an Auto-Fire Barrel, then enter it for the second Bonus Area. The room requires jumping over four Klasps to reach the Bonus Coin. Dixie makes the entrance safer because her Helicopter Spin can drift toward the barrel, but a careful drop can also work without her.
The DK Coin is on the route near the end. Take the Steel Barrel from the shack and use it against Koin. Do not rush rope changes when a Klasp is returning from the opposite side.
- Wait for Klasps to clear before changing ropes.
- Use the twin ropes carefully in the first bonus room.
- After the checkpoint, search below the next platform for the Auto-Fire Barrel.
- Bring the Steel Barrel to Koin near the end.
5. Use Tracker Barrels in Tracker Barrel Trek
Tracker Barrel Trek follows a waterfall route. A Tracker Barrel follows the Kongs' position, so use it to line up with Arrow Barrels and to cross gaps rather than trying to make uncontrolled jumps. The K is collected during the first Tracker Barrel sequence. O is reached while avoiding a Green Buzz near the waterfall, N follows the pair of Re-koils and G is on the continuing route.
After the first Green Buzz, use the upward Arrow Barrel to reach the upper platform. Switch to Dixie if possible and Helicopter Spin right from that platform to enter the first Bonus Barrel. The room is Collect 70 Stars in 25 seconds. Treat the stars as groups and clear each group before moving to the next barrel.
Continue until you find the Ellie Barrel. After transforming, proceed behind the waterfall on the right to reach the second Bonus Barrel. The room is a Bash the Baddies challenge using Ellie and Tracker Barrels to destroy the enemies. Line up Ellie before firing so the spray reaches the target without pushing her into danger.
For the DK Coin, use the barrel provided near the No Entry sign to defeat Koin. From the waterfall area, throw the Steel Barrel upward and left, then stand on Koin's shield and wait for the barrel to strike him from behind. This is easier if Ellie is kept alive until the coin section.
- Use Tracker Barrels to align with Arrow Barrels.
- Use the upper platform after the first Green Buzz for Bonus Area 1.
- Keep Ellie through the waterfall route for Bonus Area 2 and the DK Coin.
- Throw the Steel Barrel upward and left before waiting on Koin.
6. Manage Nibbla in Fish Food Frenzy
Fish Food Frenzy is an underwater course where Nibbla follows the Kongs. Feed him Kocos to keep him calm. Lurchins are dangerous food, so do not let Nibbla eat them casually; his mood changes as he becomes hungry or consumes unsafe targets. Keep a Green Koco nearby before entering a narrow passage.
The first Bonus Barrel is at the first T-junction. Take the right-hand route into the barrel. The room is Grab 15 Bananas, and the safest approach is to keep Nibbla close while collecting the bananas without forcing him into a Lurchin.
The second Bonus Barrel is near the end of the stage. Take the route that crosses three moving sea urchins in a row and pass above the third one to reach the barrel. In the Bonus Area, have Nibbla eat the required Kocos before time expires, then take the Bonus Coin near the upper part of the room.
The K-O-N-G letters are optional. If you are collecting them, prioritize keeping Nibbla calm over taking a dangerous line for a letter. After the second bonus, continue to the Goal Flag. The DK Coin is obtained after the goal area by using Team Up to reach the upper-left platform and dealing with Koin.
- Keep Kocos available before narrow Lurchin passages.
- Use the first T-junction for Bonus Area 1.
- Cross above the third moving sea urchin for Bonus Area 2.
- Use Team Up near the goal to reach the DK Coin.
7. Defeat Squirt's Showdown
The boss stage begins with Ellie. Fill Ellie's trunk at the waterfall before Squirt begins the rotating water attack. The spray sweeps around the arena and can push Ellie off the platforms, so keep moving around the upper and lower ledges instead of standing at an exposed edge. When the water stops, Squirt's two eyes appear.
During each vulnerable opening, spray both eyes twice. Refill immediately when the trunk is empty, then fire only from a stable platform. After the eyes close, Squirt resumes the rotating water attack; the later rotations become more demanding, so take the safest route around the platform ring rather than trying to cross through the spray.
Repeat the complete sequence until Squirt has been blinded three times. The fight is finished after the third successful sequence, and Squirt awards a ski. This is a required progression reward for Funky Kong's later vehicle work, not a new playable animal ability. Move carefully after the victory and collect the reward without falling from the arena.
- Begin as Ellie and fill the trunk before the first sweep.
- Spray each eye twice during every vulnerable opening.
- Survive three complete eye-attack cycles.
- Collect the ski after Squirt is defeated.
Before you move on
- Bazza's Blockade, Rocket Barrel Ride, Kreeping Klasps, Tracker Barrel Trek and Fish Food Frenzy all show as completed on the Cotton-Top Cove map.
- Squirt's Showdown is cleared and the ski has been collected.
- For optional stage completion, each regular Cotton-Top Cove stage has both Bonus Coins collected.
- For broader completion, return for any missed DK Coins or K-O-N-G letters after the boss.
- The overworld map provides access to the next available stages, including the route toward Mekanos or the next progression area depending on the current map state.
World 4 — Mekanos: Industrial Hazards and KAOS Karnage
Mekanos contains Fire-Ball Frenzy, Demolition Drain-Pipe, Ripsaw Rage, Blazing Bazukas and Low-G Labyrinth. Complete the five stages to open Kaos Karnage. This chapter covers the original North American Super Nintendo release, not the Game Boy Advance remake. Mekanos and Cotton-Top Cove are alternate branches after Kremwood Forest, so either world may be completed first.
Enter Mekanos and prepare for the industrial stages
Use the Northern Kremisphere map to enter Mekanos after Kremwood Forest is available. Visit Wrinkly's Save Cave before repeating a difficult Bonus Area or boss attempt. Keep both Dixie and Kiddy whenever possible: Dixie's Helicopter Spin is useful for long corrections and broad gaps, while Kiddy is valuable for Team-Up throws and some heavy-barrel setups.
The Star Barrel is the stage checkpoint. If one Kong is lost, use a later DK Barrel before attempting a collectible route that requires Team-Up throwing. Bonus Coins and DK Coins are optional for Mekanos progression, but both matter when pursuing the complete file.
- Open Mekanos after Kremwood Forest becomes available.
- Remember that Cotton-Top Cove may be cleared before or after Mekanos.
- Save before repeated Bonus Area attempts.
- Restore the missing Kong before collectible routes that require Team-Up.
Clear Fire-Ball Frenzy
Cross the lava sections from stable platforms and let Karbine fireballs pass before committing to the next jump. Do not jump immediately after a Karbine fires if the bouncing fireball is still occupying the landing area. The first Bonus Barrel is reached with Dixie's Helicopter Spin across the lava near the platform sequence after the Star Barrel; use Squitter inside to complete Bash the Baddies.
The second Bonus Barrel is near the later lone banana and Karbine. Use a Team-Up throw to reach the upper passage, then complete the banana challenge while watching the fireball rhythm. For the DK Coin, take the Steel Barrel near the letter N to Koin. Use the wall behind Koin for the rebound rather than trying to hit him directly. Clear the nearby Karbine pattern first so the throw is not interrupted.
- Cross lava only from stable platforms.
- Wait for bouncing fireballs to clear the landing area.
- Use Dixie's Helicopter Spin for the first Bonus Barrel route.
- Use a Team-Up throw for the high second Bonus Barrel.
- Use the Steel Barrel and the wall behind Koin for the DK Coin.
Ride the toboggan in Demolition Drain-Pipe
The stage begins with the Kongs riding a toboggan through drain pipes. Jumping makes the toboggan attach to the overhead rail; use short jumps and small directional corrections rather than holding a direction continuously. Learn which openings require the upper rail and which require the lower floor before attempting the Bonus Areas.
For Bonus Area 1, continue until the first group of four Buzzes. The last Buzz has a single banana above it. Stay on the lower route, bounce from the Buzzes and jump into that banana; it changes into the hidden Bonus Barrel. The Bonus challenge is Bash the Baddies: remain on the toboggan and crush every Knik-Knak. Missing one prevents the Bonus Coin from appearing, so complete the ordinary stage first if you need to learn the rail timing. The bonus exit returns you to the main course near the entry route, after which continue right toward the Star Barrel.
For Bonus Area 2, proceed beyond the Star Barrel and watch for a Knik-Knak positioned between drain openings. Jump over or bounce from the Knik-Knak, then deliberately drop into the following opening marked by a lone banana. That banana conceals the second Bonus Barrel. The Collect 20 Stars challenge sends the toboggan along a long rail. Drop from the rail when necessary to collect the stars above the Buzzes, then continue to the exit and resume the main course.
The DK Coin is at the end of the toboggan route, just before the Level Flag. After the final rail section, avoid dropping into the pit and move left to the Steel Barrel beside the goal area. Koin is in the small corner to the left. Carry the Steel Barrel to the right side of Koin, then throw it into the wall behind him so it rebounds into his exposed back. If the barrel or Koin falls into the pit, finish or abandon the attempt and replay the stage; there is no need to risk the goal route repeatedly without the correct setup.
- Use jumps to switch between the floor and overhead rail.
- At the first group of four Buzzes, use the lower route and the banana above the final Buzz to enter Bonus Area 1.
- Crush every Knik-Knak in Bonus Area 1.
- After the Star Barrel, drop through the marked opening after the Knik-Knak to enter Bonus Area 2.
- Collect all 20 stars in the second bonus challenge.
- At the end, take the Steel Barrel beside the goal area and bank it off the wall behind Koin.
- Verify both Bonus Coins and the DK Coin separately.
Stay ahead of the saw in Ripsaw Rage
Ripsaw Rage climbs through a series of hollow trees while a large saw rises from below. Keep moving upward and use the outer branches when the saw occupies the central route. The letter O appears in the early tree section; immediately afterward, continue upward on the exterior branches until you see a barrel above the O. Pick up that barrel and throw it at the Green Buzz blocking the first Bonus Barrel. Enter Find the Coin and climb the branches while avoiding the saw. The Bonus Coin is at the top.
After leaving the first bonus room, resume the upward climb and pass the Star Barrel. Continue through the tree sections until shortly after the letter N, where the route provides a Steel Barrel near another Green Buzz. Pick up the Steel Barrel and throw it at that Buzz to open the second Bonus Barrel. Enter Grab 15 Bananas. The Kongs are invincible in this room, but the saw pushes across the branches, so move with it rather than fighting its direction. Collect all 15 green bananas to make the Bonus Coin appear, then take the exit back to the main climb.
For the DK Coin, continue toward the end after the letter G. Look for the lone banana below the normal route and jump down to it before the rising saw catches you. This leads into a Blast Barrel that launches the Kongs to an Invincibility Barrel. Take the invincibility and ride the saw upward to reach the Steel Barrel. Carry the Steel Barrel to the platform above Koin. From that upper platform, throw the barrel so it strikes Koin from behind. The elevated position keeps Koin's shield facing upward while the rebounding barrel reaches his back. After collecting the DK Coin, follow the nearby branches and continue upward to the letter G and Level Flag.
Do not treat the two bonus routes as vague side searches: the first is directly above the letter O and requires the nearby barrel against a Buzz; the second is shortly after N and requires the Steel Barrel against another Buzz. If the saw catches you during either setup, use the Star Barrel to repeat the section rather than restarting the entire stage.
- After the letter O, find the barrel above the main climb and throw it at the Green Buzz blocking Bonus Area 1.
- Complete Find the Coin while climbing ahead of the saw.
- After the letter N, use the nearby Steel Barrel against the Green Buzz to enter Bonus Area 2.
- Collect all 15 green bananas while the saw moves across the bonus branches.
- Below the letter G, jump to the lone banana and enter the Blast Barrel.
- Use the Invincibility Barrel to ride the saw to the Steel Barrel.
- Stand on the platform above Koin and throw the Steel Barrel into his back.
- Verify two Bonus Coins and the DK Coin.
Read the barrel types in Blazing Bazukas
Bazukas fire different ammunition, including Normal Barrels, Steel Barrels and TNT Barrels. Identify the current ammunition before entering a firing lane. TNT Barrels damage the Kongs on contact, while Normal and Steel Barrels can be used as platforms or weapons. Switch Barrels change the ammunition type fired by nearby Bazukas, so activate one only when you are ready to use the next shot.
Keep Squitter through the open factory section and use web platforms to reach higher ledges and safer crossings. The first Bonus Barrel is above this Squitter route. The second is farther ahead near the later Bazuka sequence after the letter N. Both Bonus Areas award Bonus Coins. For the DK Coin, use the Squitter route above the letter O to reach the Switch Barrel, then return with a Steel Barrel and defeat Koin from behind.
- Identify each Bazuka's ammunition before crossing.
- Use Switch Barrels deliberately.
- Keep Squitter until the No Squitter sign.
- Check above the Squitter route and near the later Bazuka after N for Bonus Barrels.
- Use a Steel Barrel to defeat Koin.
Cross Low-G Labyrinth with Quawks
Low-G Labyrinth changes jump height and fall speed. Begin jumps earlier than normal and release directional input before a narrow landing. After the Star Barrel, enter the Animal Barrel to become Quawks. In the original SNES version, Quawks is the purple barrel-carrying bird: he can pick up and carry Normal, Steel and TNT Barrels but cannot fire eggs.
The first Bonus Barrel is above the earlier formation of three Green Buzzes, before the Quawks Animal Barrel. Reach it with a Team-Up throw or return to the section as Quawks and fly above the formation. Complete Collect 80 Stars, then return to the main route. After the letter N, take the three-way fork and use the upper route to obtain a barrel. Carry it to the lower-left route and destroy the Green Buzz blocking the way to the second Bonus Barrel. Inside, Quawks changes to green Squawks, who defeats the Green Buzzes with eggs during Bash the Baddies.
After the second No Animal sign, Quawks becomes a Steel Barrel. Carry it to Koin, stand on Koin's shield and throw the barrel into the wall so it rebounds into him. Continue through the final Buzz section to the goal.
- Start low-gravity jumps early.
- Use Quawks for the barrel-carrying main route.
- Reach the first Bonus Barrel above the earlier three-Green-Buzz formation.
- Collect all 80 stars in the first bonus challenge.
- After N, use the upper fork to obtain a barrel, then take the lower-left route to Bonus Area 2.
- Use green Squawks' eggs inside the second bonus room.
- Use the Steel Barrel created by the No Animal sign to defeat Koin.
Defeat KAOS in Kaos Karnage
Use the entrance DK Barrel to restore the missing Kong before the fight. It is a recovery barrel, not an attack item. KAOS first flies around the arena using exhaust flames. Run beneath him only when the flames are inactive, and avoid being trapped at a wall when he lowers near the floor.
When KAOS stops and extends his rotating blades, jump onto a blade and use it as a platform to reach his helmet. Boxing gloves appear during one blade sequence, so wait for the glove to pass before committing to the jump. Three successful helmet hits trigger the next phase, where the helmet detaches and the replacement head remains on the body.
During the later phase, the detached helmet uses laser attacks while the body repeats its movement and blade pattern. Watch for the visor's firing cue, jump over the laser, then wait for the next blade sequence to attack the exposed head. Three more head hits finish the original SNES battle, for six total hits. The fight does not use a DK Barrel or thrown attack barrel.
After the final hit, wait for KAOS's departure and the cutscene before leaving the stage. Mekanos is complete when the route toward K3 opens, but the campaign continues through K3, Razor Ridge, Kaos Kore, Kastle KAOS and the later Krematoa and Knautilus sequence.
- Restore the missing Kong with the entrance DK Barrel.
- Avoid active exhaust flames and wall traps.
- Use the rotating blades to reach KAOS's helmet or exposed head.
- Wait out boxing gloves instead of forcing a jump.
- Avoid the detached helmet's laser attacks.
- Land three helmet hits before the head detaches and three afterward.
- Confirm the departure sequence and the opening of the K3 route.
Before you move on
- The Mekanos map shows Fire-Ball Frenzy, Demolition Drain-Pipe, Ripsaw Rage, Blazing Bazukas and Low-G Labyrinth cleared.
- Demolition Drain-Pipe Bonus Area 1 was entered from the banana above the final Buzz in the first four-Buzz group and its Knik-Knaks were crushed.
- Demolition Drain-Pipe Bonus Area 2 was entered through the marked opening after the Knik-Knak beyond the Star Barrel and all 20 stars were collected.
- Demolition Drain-Pipe's end-of-stage Koin was defeated with the Steel Barrel banked off the wall behind him.
- Ripsaw Rage Bonus Area 1 was entered above the letter O and its Bonus Coin was collected before the saw reached the top.
- Ripsaw Rage Bonus Area 2 was entered shortly after N with the Steel Barrel and its 15 green bananas were collected.
- Ripsaw Rage's DK Coin was collected by using the Blast Barrel, Invincibility Barrel, rising saw and Steel Barrel below the letter G.
- Blazing Bazukas and Low-G Labyrinth each have both Bonus Areas completed if pursuing the Bonus Coins.
- Low-G Labyrinth was completed using Quawks on the SNES main route, with green Squawks used only inside the second Bonus Area.
- KAOS was hit six times, the surrender or departure sequence played and the K3 route opened.
- Mekanos completion was recorded separately from full campaign completion and the 103% route.
References for this chapter
- Donkey Kong Country 3: Dixie Kong’s Double Trouble! – Guide and Walkthrough – Super Nintendo
- Demolition Drain-Pipe — Super Mario Wiki
- Ripsaw Rage — Super Mario Wiki
- Low-G Labyrinth — Super Mario Wiki
- KAOS — Super Mario Wiki
- KAOS Karnage — Super Mario Wiki
- Donkey Kong Country 3: Dixie Kong’s Double Trouble! Nintendo SNES Instruction Manual
World 5 — K3: Toboggans, Krack-Shot Kroc and Bleak’s House
K3 is the fifth regular world in the original North American SNES release of Donkey Kong Country 3: Dixie Kong’s Double Trouble! Its required route is Krevice Kreepers, Tearaway Toboggan, Barrel Drop Bounce, Krack-Shot Kroc and Lemguin Lunge, followed by Bleak’s House. Clear each stage to open the next one, then defeat Bleak to open Razor Ridge. Bonus Areas, DK Coins and K-O-N-G letters are optional for ordinary story progress, but Bonus Coins and DK Coins matter if you are pursuing the game’s fuller completion total.
Enter K3 and follow the stage order
Reach K3 through the overworld route opened after Mekanos. The regular stages appear in this order: Krevice Kreepers, Tearaway Toboggan, Barrel Drop Bounce, Krack-Shot Kroc and Lemguin Lunge. Bleak’s House becomes available after Lemguin Lunge is cleared.
For a first clear, prioritize reaching each Continue Barrel and completing the normal route. Return afterward for Bonus Areas, DK Coins and letters if a difficult hazard is costing repeated lives. The stage icons on the overworld show which levels have been completed, but they do not replace a personal checklist for optional collectibles.
- Clear the five regular K3 stages in map order.
- Use Continue Barrels as recovery points before attempting difficult optional routes.
- Return to stages later for Bonus Coins, DK Coins and K-O-N-G letters.
Climb the ropes in Krevice Kreepers
Krevice Kreepers is a vertical cliff stage built around horizontal ropes. Klasps cling to many of these ropes and follow your movement, so do not remain on the same rope with one. Draw a Klasp toward one side, then move in the opposite direction and jump to the next rope or platform while it is displaced. This is safer than trying to outrun it along the rope.
The first Bonus Area is reached near the early long rope with a Klasp. Lure the Klasp away, move back along the route and enter the Auto-Fire Barrel at the left. Collect 30 stars in 25 seconds while avoiding the Klasp; Dixie’s Helicopter Spin makes this room easier. The second Bonus Area is in the crevice near the letter N. Put Kiddy in front, use Team-Up to throw Dixie to the upper-right route, pass the Knocka and enter the Bonus Barrel. Climb the ropes and reach the Bonus Coin within 20 seconds.
The K letter is near the early Klasp ropes. The O appears farther up the vertical-rope section, where you must move quickly past another Klasp. After the Star Barrel, ignore the Arrow Barrel long enough to enter the crevice containing N. Near the end, lure the final Klasp away before dropping to G. The DK Coin is after O near a Steel Barrel and Koin. A safe method is to position Kiddy beneath Koin and throw the Steel Barrel upward so it strikes him from behind; if using a rolling throw, make the barrel rebound while you move around Koin’s shield.
- Use Klasp movement against it rather than waiting on its rope.
- Enter both Bonus Areas if collecting all K3 Bonus Coins.
- Check the crevice near the Arrow Barrel for N.
- Lure the final Klasp away before collecting G.
Control the sled in Tearaway Toboggan
Tearaway Toboggan is a fast SNES sled stage. Make brief steering corrections instead of holding a direction continuously. Jump before houses, pits and Buzzes rather than waiting until the sled is already at the obstacle. When a Buzz is part of the route, use it as a controlled bounce or height boost, but avoid late corrections that send the toboggan into the next hazard.
The first Bonus Area is near the start. When the opening Barrel Cannon points diagonally down and to the right, fire into the Bonus Barrel. Throw your partner into three Knik-Knaks before time expires; a DK Barrel inside the room can restore the missing Kong. The second Bonus Area is after G. Pass the three Green Buzzes and enter the Bonus Barrel through the narrow safe gap. Collect all 50 stars along the trail; missing one prevents the Bonus Coin from appearing.
The letters follow the main sled route. K is on a cabin roof, O is between crevasses, N is at the first of the grouped Skiddas, and G is just before the second Bonus Area. After the Goal Flag, continue with the Steel Barrel to reach Koin. Defeat him with a rear strike or a rebound rather than throwing directly into his shield.
- Use short steering inputs on the sled.
- Jump early over pits and cabin obstacles.
- Do not miss any star in the 50-star Bonus Area.
- Continue beyond the Goal Flag for the optional Koin encounter.
Use the falling barrels in Barrel Drop Bounce
Barrel Drop Bounce climbs a waterfall using falling barrels as temporary platforms. Keep moving between barrels instead of waiting for a perfect alignment. After K, use Dixie’s Helicopter Spin to reach separated platforms and follow the banana trails toward the upper routes.
The first Bonus Area is above the falling-barrel section near K. Climb to the upper ledge and jump into the Bonus Barrel, then collect 15 Green Bananas between the barrel stacks without dropping too low. The second Bonus Area is reached around N by jumping right from the ledge and using Dixie’s Helicopter Spin to reach the barrel beside the waterfall. Climb to the Bonus Coin within 20 seconds.
Parry appears later in the stage. Keep the bird alive through the No Parry Sign if you want the green Extra Life Balloon. G is obtained by taking a Steel Barrel past the Goal Flag and using it on the Booty Bird. The DK Coin requires careful Steel Barrel positioning near Koin: either roll the barrel while moving around Koin or bounce it from the nearby ledge so it reaches his unprotected back.
- Move continuously across the falling barrels.
- Use Dixie for the separated Helicopter Spin routes.
- Protect Parry until the No Parry Sign for the optional balloon.
- Search beyond the Goal Flag for G and the DK Coin route.
Cross Krack-Shot Kroc with Squitter
An Animal Barrel near the start provides Squitter. Use his web platforms to cross the bubbling cauldrons and climb the factory sections. Build only the platforms needed for the next jump so you do not clutter the route. Krack-Shot Kroc’s crosshairs track Squitter until the No Kroc Sign. When the sight turns red, move behind one of the large foreground shields; the shield blocks the incoming fireball.
The first Bonus Area is at an upper fork after meeting Kroc. Take the upper-left route with Squitter and use web platforms to reach the Bonus Barrel. Collect 15 Bananas over the cauldron before time expires. The second Bonus Area is above the Red Buzz route after the Star Barrel. Inside, you control Kroc’s gun rather than Squitter. Move the crosshairs with the Control Pad, shoot the Re-Koils and Green Buzzes, then fire at the Bonus Coin when it appears.
K is near the early web-platform route, O is above a bubbling pot, and N is above another cauldron near a Red Buzz. G is behind the wall to the left after the later Bonus Area and before the stage exit. After the No Kroc and No Squitter Signs, carry the supplied Steel Barrel to Koin and use a wall rebound to strike him from behind.
- Use shields whenever Kroc’s sight turns red.
- Take the upper-left fork for the first Bonus Area.
- Treat the second Bonus Area as a target-shooting challenge.
- Collect G behind the wall before finishing the stage.
Avoid the Lemguins in Lemguin Lunge
Lemguin Lunge is a snowy stage where Lemguins repeatedly slide from holes. Side contact is dangerous, but the enemies can be bounced on from above. Use short jumps over groups, and bounce between Lemguins only when the route requires it. The slippery ground makes long slides risky, so keep your movement controlled.
The first Bonus Area is above the opening Red Buzz. Kiddy must team up and throw Dixie into the Bonus Barrel without touching the Buzz. Inside, bounce from Lemguin to Lemguin and reach the Bonus Coin within 15 seconds. The second Bonus Area is below a small house after G. Go over the house, wait for a gap in the Lemguin traffic and run left between the enemies into the Bonus Barrel. Collect 30 stars while using the Lemguins as stepping stones when necessary.
K is above the first pit after the opening Skidda. O is on the roof of the first small house. N is on the slope just after the Star Barrel, and G is above the final Skidda section. Shortly after O, a Steel Keg sits near Koin. Throw it against the wall on the left, then quickly move around so it rolls into Koin’s back.
- Jump over Lemguins or bounce on them from above.
- Use Kiddy’s Team-Up throw for the first Bonus Barrel.
- Check the first house roof for O.
- Use the wall rebound to defeat Koin.
- Enter the second Bonus Area beneath the house after G.
Defeat Bleak in the original SNES boss battle
Bleak’s House uses a distance-based snowball battle. You cannot freely switch partners during the fight, so begin with Dixie if possible; her smaller body and mobility make the projectile patterns easier to avoid. Press B to throw a snowball. The blue marker on the left indicates the throwing range: press Up to target the farther trench and Down to target the nearer trench. A snowball aimed at the wrong distance misses even if the horizontal alignment is correct.
Bleak’s glowing tie is the target. During the opening section, dodge his ordinary snowballs and land two accurate hits, changing the blue range marker whenever he changes trenches. Do not throw continuously; wait until the marker matches Bleak’s position and use one deliberate shot.
After the two ordinary hits, Bleak moves into the giant-snowball phase. His tie is hidden while the large projectiles cross the arena. Avoid the pattern, then wait for Bleak to pause and laugh. That laugh is the confirmed opening: match the close range and hit the glowing tie once.
Bleak then returns to a subsequent small-snowball phase, throwing faster small volleys and changing position. Survive the pattern, adjust the blue marker and land one more tie hit when the target is exposed. This is the fourth successful hit overall.
The final phase uses Bleak’s largest and most elaborate hat volley. The exact number of individual snowballs in the pattern is not needed for the strategy and should not be treated as a fixed seven-volley sequence. Concentrate on staying alive until the volley ends and Bleak exposes the tie again. Match the range and land the fifth hit. After that opening, make the final accurate throw for the sixth and last hit. Bleak breaks apart and awards the stage’s Bonus Coin.
If you lose one Kong, continue with the survivor rather than restarting immediately. There is no advantage to aggressive throws during an active projectile pattern. Dodge first, identify the trench, wait for the laugh or post-volley opening, then throw.
- Start with Dixie when possible.
- Use the blue marker to match Bleak’s near or far trench.
- Land two hits during the ordinary snowball section.
- Land one hit after the giant-snowball phase.
- Land one hit after the following small-snowball phase.
- Survive the largest final hat volley and land the last two confirmed tie hits.
- Collect the Bonus Coin after Bleak is defeated.
Before you move on
- Krevice Kreepers, Tearaway Toboggan, Barrel Drop Bounce, Krack-Shot Kroc and Lemguin Lunge are cleared on the K3 overworld.
- Bleak’s House has been defeated and the Bonus Coin has appeared.
- Razor Ridge is open on the overworld.
- For optional K3 completion, both Bonus Areas, the DK Coin and all four K-O-N-G letters have been collected in each desired stage.
References for this chapter
- Donkey Kong Country 3: Dixie Kong’s Double Trouble! Nintendo SNES Instruction Manual
- K3 — Donkey Kong Wiki
- Krevice Kreepers — Donkey Kong Wiki
- Lemguin Lunge — Super Mario Wiki
- Donkey Kong Country 3: Dixie Kong’s Double Trouble! – Guide and Walkthrough – Super Nintendo
- Donkey Kong Country 3: Dixie Kong’s Double Trouble! Walkthrough — Neoseeker
- Tearaway Toboggan — Super Mario Wiki
- Barrel Drop Bounce — Super Mario Wiki
- Krack-Shot Kroc — Super Mario Wiki
- Bleak’s House — Super Mario Wiki
World 6 — Razor Ridge: Cliffs, Floodlit Fish and Barbos's Barrier
Razor Ridge contains five regular stages followed by Barbos's Barrier. The required route is Buzzer Barrage, Kong-Fused Cliffs, Floodlit Fish, Pot Hole Panic and Ropey Rumpus. This SNES world alternates between Purple Squawks, burning ropes, dark Enguarde navigation, several animal transformations and dense Buzzer formations. Bonus Areas and DK Coins are optional for opening Kaos Kore, but they are required for a full collectible clear. The directions below apply to the original North American Super Nintendo release, not the GBA remake.
Enter Razor Ridge and follow the required route
Save at Wrinkly's Save Cave before beginning if the cave is available. From the Razor Ridge map, clear the stages in this order: Buzzer Barrage, Kong-Fused Cliffs, Floodlit Fish, Pot Hole Panic and Ropey Rumpus. Barbos's Barrier becomes available after Ropey Rumpus is completed, and defeating Barbos opens Konveyor Rope Klash in Kaos Kore.
Razor Ridge does not require Kiddy for ordinary stage completion, although Kiddy is useful for team throws and stable landings. Dixie is usually safer in vertical sections because her Helicopter Spin corrects long jumps. For a full clear, use the stage flags on the overworld to identify levels that still lack Bonus Areas, then revisit them after the main route is open.
- Save before entering Razor Ridge.
- Clear the five regular stages in map order.
- Treat K-O-N-G letters as optional extra-life collectibles.
- Return later for missed Bonus Areas and DK Coins.
Clear Buzzer Barrage with Purple Squawks
Break the DK Barrel near the opening if necessary so both Kongs are available, then enter the Purple Squawks Barrel. Purple Squawks is the barrel-carrying variant used in the North American SNES version. He remains the active animal helper through the main flight sections, so do not approach this level as if it used the green egg-shooting Squawks from later stages.
Use the carried barrels to remove Green Buzzes that block the passages. The K is obtained at the second Booty Bird; use an earlier barrel or the barrel beneath it. Farther on, place the Steel Barrel in front of the third Booty Bird to knock it away, then fly underneath the two Red Buzzes above the bird's former position to collect the O. Avoid the spinning Kopters rather than trying to defeat them.
The first Bonus Area is in the first upper passage. At the far right, a Red Buzz moves above a Green Buzz. Drop a barrel onto the Green Buzz, then immediately swoop down into the Bonus Barrel before the Red Buzz closes the route. Inside, use the regenerating barrel to destroy seven Buzzes and reveal the Bonus Coin.
Continue until you reach Koin's section. Fly upward between the Kopters to reach the Steel Barrel, use it to clear the two Green Buzzes blocking the exit, then let the barrel regenerate. Drop it to Koin's left and fly over Koin so the ricochet strikes him from behind. This earns the optional DK Coin.
Near the end, pass the No Squawks sign. The final Bonus Area is above the last Kopter in a tall, narrow shaft. Bounce on the Kopter's helmet to gain height without touching its blades. Inside, collect 40 Stars by repeatedly using the Kopter as a safe platform. The N and G are along the main route, with the G partly obscured by the upper Green Buzz in a stacked formation; use a barrel to expose it if needed.
- Use Purple Squawks, not Green Squawks, in Buzzer Barrage.
- Use the second and third Booty Birds as the landmarks for K and O.
- Enter the first Bonus Area from the Red Buzz and Green Buzz formation in the upper passage.
- Defeat Koin with the Steel Barrel ricochet.
- Use the last Kopter after the No Squawks sign to reach the second Bonus Area.
Climb Kong-Fused Cliffs before the ropes burn away
Kong-Fused Cliffs is an upward-scrolling rope stage. The ropes burn continuously, so keep climbing and use the Arrow Barrels to move across gaps. Avoid touching the fuse itself. The K is reached by blasting up and left from the first Arrow Barrel. Later, follow the Banana trail to the N and land in the invisible Arrow Barrel that returns you to the climbing route. The G is reached through the Auto-Fire Barrel sequence after several Kopters.
The first Bonus Area is on the second rope. With Kiddy, look for a lone Banana on a slope after a moving Green Buzz and jump repeatedly up the slope to the Bonus Barrel. With Dixie, dodge the two swirling Buzzes, collect the O, and Helicopter Spin right to the wedged Bonus Barrel. The room is a Find the Coin challenge: use the Arrow Barrels to cross the rope while avoiding the flame and Green Buzzes, then take the Bonus Coin at the top.
The second Bonus Area is later, after a trio of Green Buzzes moving back and forth. Helicopter Spin right from the rope to reveal the hidden Bonus Barrel. Climb through the Bonus Area by shifting from side to side around the Kopters, then take the Bonus Coin at the top.
For the optional DK Coin, ride the final burning rope to its end and jump onto the high cliff on the left. Take the Steel Barrel and throw it left so it strikes Koin. Finish the climb and reach the goal.
- Keep climbing while the fuse is active.
- Use the second-rope Banana or Dixie's glide as the first Bonus Area landmark.
- Search right after the trio of moving Green Buzzes for the second Bonus Area.
- Use the Steel Barrel on the high left cliff to defeat Koin.
Use the Gleamin' Breams in Floodlit Fish
Floodlit Fish is an underwater stage completed as Enguarde. Enter the Enguarde Barrel and use the Gleamin' Breams to illuminate the surrounding darkness temporarily. When a Gleamin' Bream is struck, use the brief light window to identify the next wall, Lurchin pattern or opening before moving forward. Closed Lurchins are hazards; do not spear them until their shells open.
The K is held by a Bounty Bass down and left after the Enguarde Barrel. For the O, spear the first Red Koco, swim left and then down. After several fast-moving Lurchin pairs, follow the lone Banana to the right and down for the N.
The first Bonus Area is down the first shaft with rapidly moving Lurchins. Spear the three Red Kocos below; the third guards the entrance, so swim right after defeating it. Inside, collect 90 Stars in the darkness within the time limit. Use controlled Super Dashes across the room instead of charging blindly.
The second Bonus Area is at the four-way junction later in the stage. Two fast Lurchins guard the lower entrance. Remove them only when their shells open, then swim down into the Bonus Barrel. Follow the 40-Star route inside to produce the Bonus Coin. The G is awarded after exiting this Bonus Area.
For the optional DK Coin, continue to the area above the Goal Flag. Use the Auto-Fire Barrel to reach the Steel Barrel, then make the right-handed bank shot into Koin. Finish the stage at the goal.
- Use Enguarde for the entire stage.
- Treat Gleamin' Bream light as temporary route information.
- Enter the first Bonus Area after the third Red Koco.
- Enter the second Bonus Area below the fast Lurchins at the four-way junction.
- Use the Auto-Fire Barrel and Steel Barrel for the Koin shot above the goal.
Handle every animal transition in Pot Hole Panic
Pot Hole Panic uses Green Squawks, Enguarde, Ellie and Squitter in sequence. In the Green Squawks section, shoot the Booty Bird carrying the K. Kuchukas cannot be defeated here, so pass through their bomb patterns and avoid lingering beneath a falling bomb. The O is collected on the route before the water section.
After becoming Enguarde, move carefully through the Lurchins and Kocos. Follow the course until Ellie becomes available. In Ellie's water section, swim left and jump from Ellie to collect the N and enter the first Bonus Area. Use Ellie inside to collect 20 Stars before time expires.
Continue to the Squitter section and build web platforms across the Red Buzz to reach the G. Near the final Kuchuka, keep Squitter and do not touch the No Squitter sign immediately. Build webs upward and to the right of the falling bombs to reach the second Bonus Barrel. Inside, collect 15 Bananas while avoiding the bomb impacts. If a Banana is placed in a dangerous position, wait for the bomb cycle rather than taking damage to collect it.
After the second Bonus Area, pass the No Squitter sign. Near the goal, use a team throw to reach the Steel Barrel above Koin. Throw it so it rebounds into Koin's back, then finish the stage.
- Use Green Squawks, Enguarde, Ellie and Squitter in their intended sections.
- Dodge Kuchuka bombs instead of attempting to defeat the Kuchukas.
- Use Ellie to reach the N and the first Bonus Area.
- Keep Squitter until the final No Squitter sign.
- Use the Steel Barrel to defeat Koin near the goal.
Finish Ropey Rumpus with Parry alive
Take the first TNT Barrel near the opening vertical climb. Grab it and jump as far right as possible so it drops into the lower section and opens the route to the first Bonus Area. Inside, wait for openings in the rotating Buzz pairs; staying near the center of each rotating pair gives you a safer opportunity to pass and reach the Bonus Coin.
Continue through the rope sections and collect the O below the Buzz formation after the Green Buzz moves upward. The optional DK Coin is below a trio of stationary Green Buzzes, with pairs of Bananas between them, shortly after the second Red Buzz beyond the Continue Barrel. Drop down to Koin, defeat him with the available Steel Barrel, then use the Arrow Barrel to return to the rope route.
The Parry Crate is unavoidable later in the stage. Keep Parry alive through the final climb and collect the G shortly before the No Parry sign. Touching the No Parry sign opens the second Bonus Area. Inside, avoid the two swirling Green Buzzes and collect 15 Bananas. Dixie is safer here because her Helicopter Spin provides more control, but survival is more important than speed.
If Parry is hit before the No Parry sign, the second Bonus Area cannot be opened on that attempt. Finish the stage or deliberately retry it from the map, then escort Parry again.
- Use the first TNT Barrel to open the first Bonus Area.
- Wait for gaps in the rotating Buzz formations.
- Find Koin below the trio of stationary Green Buzzes.
- Keep Parry alive through the G and No Parry sign.
- Retry the stage if Parry is lost before the second Bonus Area.
Defeat Barbos's Barrier as Enguarde
Enter the Enguarde Barrel at the start of Barbos's Barrier. Enguarde is the only playable character during the boss fight; Dixie and Kiddy do not participate after the transformation. The boss's weak point is its face, which is protected by two Pink Lurchins that cannot be opened normally.
In the first chamber, Barbos summons Green Lurchins. Spear them while they are safe to hit so they rebound from the walls and strike the Pink Lurchin shields. Destroy both shields, then wait for Barbos's face to open and spear it. Do not attack the face while the shields remain active.
Barbos drops into a lower chamber for the second phase. The Pink Lurchin shields return, and Barbos launches blue homing missile shells. Let a missile follow you until it flashes yellow, then position yourself so its launch line points at one of the Pink Lurchins. Swim away before it fires. Use one missile against each shield, then spear Barbos's exposed face for the second successful hit.
In the final chamber, Barbos rises and traps Enguarde below it. Spine volleys are fired from the bottom of the shell. The first sequence contains four volleys. After the first hit, the next sequence increases to five volleys; after the second hit, it increases to six. Move along one side of the chamber and pass through the gaps rather than crossing the entire arena. When a sequence ends, spear Barbos's face. Three successful hits in this final phase defeat the boss.
There is no Kong fallback if Enguarde is hit. If a missile or spine pattern places you badly, swim away and wait for the next cycle. Attack only after the shields are removed or the volley sequence has ended. Defeating Barbos awards the stage's Bonus Coin and opens Konveyor Rope Klash in Kaos Kore.
- Use Green Lurchins to destroy the Pink shields in phase one.
- Aim flashing missile shells at the Pink shields in phase two.
- Survive four, then five, then six spine volleys in the final phase.
- Spear Barbos's face only during the openings.
- Confirm that Konveyor Rope Klash is available on the Kaos Kore map.
Before you move on
- Buzzer Barrage, Kong-Fused Cliffs, Floodlit Fish, Pot Hole Panic and Ropey Rumpus are completed on the Razor Ridge map.
- Barbos's Barrier is defeated and Konveyor Rope Klash is accessible in Kaos Kore.
- For Bonus Coin completion, both Bonus Areas in each regular Razor Ridge stage have been cleared and the Barbos reward has been recorded.
- For DK Coin completion, the Koin encounter in each of the five regular stages has been cleared.
- K-O-N-G letters may be collected as optional extra-life items and are not required for the SNES completion percentage.
- Use the map flags and saved-progress totals to identify any remaining Bonus Areas or DK Coins before moving on.
References for this chapter
- Donkey Kong Country 3: Dixie Kong’s Double Trouble! – Guide and Walkthrough – Super Nintendo
- Donkey Kong Country 3: Dixie Kong’s Double Trouble! – Bonus Level/Banana Bird Guide – Super Nintendo
- Donkey Kong Country 3: Dixie Kong’s Double Trouble! Nintendo SNES Instruction Manual
- Donkey Kong Country 3 — Map-Based Walkthrough — Yasu's Game Guide
World 7 — Kaos Kore and Kastle KAOS
Kaos Kore is the final standard-world region of the original North American SNES campaign. Clear Konveyor Rope Klash, Creepy Caverns, Lightning Lookout, Koindozer Klamber and Poisonous Pipeline, then enter Kastle Kaos. The boss sequence begins with KAOS and continues immediately with Baron K. Roolenstein. The Kastle Kaos Baron fight requires nine successful barrel hits: two in Phase One, two in Phase Two, two in Phase Three and three in Phase Four. Defeating him completes the standard campaign and starts the rescue sequence, but it does not complete the extended Krematoa and Knautilus route.
1. Prepare the Kaos Kore route
Enter Kaos Kore after defeating Barbos's Barrier in Razor Ridge. The five ordinary stages are Konveyor Rope Klash, Creepy Caverns, Lightning Lookout, Koindozer Klamber and Poisonous Pipeline. Kastle Kaos becomes available after the required stage exits are opened; Bonus Areas, DK Coins and K-O-N-G letters are separate objectives.
Save at Wrinkly's Save Cave before beginning the region. For ordinary progression, finish a difficult stage before spending repeated lives on a secret. You can return from the map to clean up missed Bonus Areas and DK Coins later.
Keep both Kongs whenever possible. Dixie's Helicopter Spin is useful for long horizontal jumps, vertical recovery and reaching high Bonus Barrels. Kiddy is useful for heavy throws, larger collision coverage and some barrel setups. Losing one Kong does not permanently block the region, but several secret routes are much safer with both available.
- Save before entering the first Kaos Kore stage.
- Clear the five stages in map order or revisit them later from the overworld.
- Track each stage's two Bonus Areas and one DK Coin separately from the normal exit.
2. Konveyor Rope Klash
The moving ropes carry the Kongs rapidly in different directions. Use short directional taps rather than holding a direction continuously. Jump early when Buzzes or Bristles approach, and land near the rope's center so the conveyor does not carry you directly into the next hazard.
The first Bonus Area is below a rope shortly after the second Knocka. Throw the Knocka into the approaching Buzz, then drop from the rope into the Bonus Barrel. Collect the 30 Stars while riding the conveyor rope; some Stars are obscured by foreground leaves.
The second Bonus Area is at the first pair of swirling Buzzes after a pair of Knockas. Look for a lone Banana hidden in the leaves above the rope. Jump from the west side of the Buzz section into that Banana to reveal the Bonus Barrel. Inside, collect 15 Bananas while two ropes move in opposite directions. Correct your momentum before dropping into the gap.
For the DK Coin, take the Steel Barrel just before the Goal Flag and throw it right. Jump onto the Konveyor Rope above Koin while the rolling barrel reaches him. Do not drop down to Koin first; the barrel must strike him while you remain above.
- Bonus Area 1: below the rope after the second Knocka; collect 30 Stars.
- Bonus Area 2: hidden Banana above the first swirling-Buzz section; collect 15 Bananas.
- DK Coin: throw the Steel Barrel right, then jump onto the rope above Koin.
3. Creepy Caverns
Boo Barrels appear and disappear while changing their firing directions. Wait for a Boo Barrel to point along the route you need, then enter it quickly. Do not fire blindly into a Buzz, a pit or a blocked shaft. After the Continue Barrel, reach Squitter by defeating the Green Buzz below the Arrow Barrel and using the Arrow Barrel to reach the animal crate.
The first Bonus Area is below and between the second pair of Red Buzzes. Use the Boo Barrel to reach the Auto-Fire Barrel, follow the curved Banana line, then return to the left side of the shaft. Throw your partner into the hidden Bonus Barrel. Collect all 50 Stars by firing when the Boo Barrel points upward; Kiddy can collect more Stars while waiting for the barrel to realign.
The second Bonus Area begins near a downward-pointing Boo Barrel and a lone Banana high in the air. Defeat the nearby Krumple with Squitter, then build platform webs up the left wall. Place downward-angled webs while the Boo Barrels are absent and cross to the Bonus Barrel without being trapped by the three Boo Barrels.
The DK Coin requires precise timing. Throw the Steel Barrel up and right so it clears the Red Buzz while you enter the Boo Barrel route. Quickly jump onto Koin's shield as the Steel Barrel rolls toward him.
- Bonus Area 1: use the Boo Barrel and Auto-Fire Barrel route; collect 50 Stars.
- Bonus Area 2: use Squitter's webs to reach the hidden Bonus Barrel; avoid three Boo Barrels.
- DK Coin: time the Steel Barrel throw and land on Koin's shield before the barrel reaches him.
4. Lightning Lookout
A small distant lightning bolt warns where the damaging bolt will strike. Use that warning to move the attack away from the path you intend to take. If the warning appears at your current position, backtrack briefly, then move forward before the larger bolt lands. Water does not protect the Kongs, so leave a waterhole before the attack bolt arrives.
The first Bonus Area is reached through the waterhole above the letter O. Redirect the lightning, enter the water and defeat every Knik-Knak by jumping out of the water directly in front of each enemy.
The second Bonus Area is above three Barrel platforms. Reach it with a Kiddy Roll Jump or Dixie's Helicopter Spin. Collect all 15 Bananas without being struck by lightning. Kiddy can gather the Bananas easily but is also a larger target.
For the DK Coin, let lightning destroy the first Booty Bird and use its barrel to defeat the second Booty Bird beneath the Red Buzz. Take the resulting Steel Barrel to Koin and strike him without allowing the next lightning cycle to hit you.
- Bonus Area 1: use the waterhole above O and defeat every Knik-Knak.
- Bonus Area 2: reach the barrel platforms above the water and collect 15 Bananas.
- DK Coin: use the Booty Bird barrel chain to obtain the Steel Barrel for Koin.
5. Koindozer Klamber
Koindozers charge toward the Kongs, so provoke them only when you have room to retreat. The letter K is obtained by luring the first Koindozer right along the Banana trail before diving for it. O is hidden in leaves above the middle of the first rope. N is in leaves above a Krimp and can be reached by throwing either Kong. G is on the main route.
The first Bonus Area is above the first Bazuka. Land on Bazuka, jump to the rope on the right and jump up-left to the Bonus Barrel above him. Collect 30 Stars while three Koindozers move through the room, checking the upper leaves for hidden Stars.
The second Bonus Area is high in the treetops after the first Bazuka section. Reach it with a Team Throw from a Koindozer or by bouncing from the nearby Re-Koil. Inside, bounce from one Koindozer to the next and collect 15 Bananas. Dixie's Helicopter Spin gives some recovery if a landing is slightly short.
The DK Coin uses Bazuka's barrel-switch setup. Use Bazuka's barrels as platforms to reach the rope, hit the Switch Barrel while jumping and Helicopter Spin back left. Stand on the far side of Koin and let Bazuka's converted Steel Barrels defeat him.
- Bonus Area 1: above the first Bazuka; collect 30 Stars.
- Bonus Area 2: treetop Bonus Barrel reached with a Team Throw or Re-Koil; collect 15 Bananas.
- DK Coin: activate the Switch Barrel and let Bazuka's Steel Barrels hit Koin.
6. Poisonous Pipeline
The purple fluid reverses Left and Right while the Kongs are swimming in it. Use small taps and judge movement by the Kongs' position on screen rather than by your normal directional habits. The letter K is above the second Lurchin, O is collected during the downward swim, N is above the No Enguarde sign and G appears after the second Bonus Area.
The first Bonus Area is reached after the first moving pair of Lurchins. Continue left through the Kocos until you reach a stationary Lurchin pair. Wait for the Red Koco to move right, swim between the spiny enemies and enter the Bonus Barrel. Enguarde appears inside. Jab every Koco despite the reversed controls.
The second Bonus Area is reached by passing the Red Koco pair between two Lurchins and continuing left past five more Lurchins. Enter the Bonus Barrel at the end of the detour and follow the 30-Star trail carefully. Slow corrections are safer near the walls.
After collecting G, leave the fluid and take the Steel Barrel on the dry route. Carry it right to Koin. Dixie must jump while throwing so the Steel Barrel clears Koin's shield.
- Bonus Area 1: reach the stationary Lurchin pair and defeat every Koco with Enguarde.
- Bonus Area 2: take the left detour past the additional Lurchins and collect 30 Stars.
- DK Coin: carry the Steel Barrel right and jump while throwing it at Koin.
7. Defeat KAOS
KAOS's saw blades are inactive in this SNES encounter. The active danger is the exhaust flame beneath the machine. Wait until the jets stop venting, run underneath, take the barrel from the opposite side and throw it upward into KAOS's head.
After the first hit, the replacement head throws explosive projectiles. Keep moving, wait for another safe exhaust pause and repeat the same barrel attack. Two successful barrel hits disable KAOS. The curtain then rises and reveals Baron K. Roolenstein.
If a partner was lost during the approach, use the DK Barrel that appears before committing to the Baron fight.
- Cross underneath KAOS only while the exhaust flames are inactive.
- Strike each KAOS head with an upward barrel throw.
- Confirm that the curtain rises and reveals Baron K. Roolenstein.
8. Defeat Baron K. Roolenstein: nine-hit Kastle Kaos sequence
Every successful attack must hit the rear helicopter pack, not the visible propeller. Pull the short ceiling handles to make the attack barrels appear. Wait for the Baron to turn away, then throw the barrel into the back of the pack. The fight has four phases and requires nine successful hits total.
Phase One requires two rear-pack hits. The Baron flies over the floor; duck beneath him when he passes overhead. Pull the short handle, collect the barrel and wait for his back to face you. After each of the first two hits, he spins and bounces unpredictably. Stop attacking during this recovery animation and concentrate on avoiding contact until he settles.
Phase Two requires two more rear-pack hits, bringing the total to four. The floor becomes electrified. Pull the shortest handle before the electricity reaches your platform, then move to the small platform on the right. Dixie is useful for reaching the handle with Helicopter Spin, while Kiddy is easier to use for the barrel throw. Wait for the safe opening, strike the rear pack and retreat. Each hit sends the Baron down toward the dynamos, so do not follow him aggressively.
Phase Three requires two hits, bringing the total to six. The stationary platform shifts left and a moving platform helps you reach the single handle that produces the barrel on the left. Duck under the Baron, pull the handle, then crouch on the moving platform as it carries you past him. Jump back to the stationary platform, wait for his rear pack to face you and throw. Repeat the route for the second hit. Do not jump into the Baron while trying to return to the platform.
Phase Four requires the final three hits, bringing the total to nine. Platforms and short handles are available on both sides while the electrical pattern cycles on and off. Wait for the Baron to move away and for the dynamos to complete their active pulse. Cross to the opposite platform, pull the handle and take the barrel before the next electrical discharge. Throw only when the rear pack is exposed. The final three successful rear-pack hits end the Kastle Kaos battle.
A Steel Barrel can absorb the horizontal electrical beam during the later phase if placed in its path, but do not rush to pick it up while it is glowing. Wait until the charge has passed and the barrel is safe. If a throw misses, do not chase the Baron through an active electrical cycle. Reposition, wait for the next handle opening and resume the phase's hit count. If one Kong is lost, continue with the remaining Kong and prioritize survival; the required hit total does not change.
- Phase One: two rear-pack hits, total two.
- Phase Two: two rear-pack hits, total four.
- Phase Three: two rear-pack hits, total six.
- Phase Four: three rear-pack hits, total nine.
- Do not aim at the propeller; every hit must strike the helicopter pack.
- Wait through electrical pulses and recovery animations instead of forcing a throw.
9. Continue after Kastle Kaos
Defeating Baron K. Roolenstein in Kastle Kaos completes the standard Northern Kremisphere campaign and triggers the Donkey Kong and Diddy Kong rescue sequence. This is a major completion milestone, but it is not the true final battle for the extended route.
For the full requested completion, return to the overworld and reveal Krematoa with the Hovercraft or Turbo Ski. Pay Boomer's required Bonus Coins to open the five Krematoa stages, complete each stage to obtain its cog, deliver all five cogs to Boomer and enter the surfaced Knautilus. The later Knautilus encounter is a separate Baron K. Roolenstein fight and must be defeated for the true final ending route.
- The rescue sequence plays after the Kastle Kaos victory.
- Do not treat Kastle Kaos as the final extended-game objective.
- Continue to Krematoa and the Knautilus if pursuing the true ending and full completion.
Before you move on
- Konveyor Rope Klash is cleared, with both Bonus Areas and its Steel Barrel DK Coin completed if pursuing the 103% route.
- Creepy Caverns is cleared, with both Bonus Areas, the Squitter route and its Steel Barrel DK Coin completed if pursuing the 103% route.
- Lightning Lookout is cleared, with the Knik-Knak Bonus Area, the 15-Banana Bonus Area and its Booty Bird-to-Steel-Barrel DK Coin completed.
- Koindozer Klamber is cleared, with both treetop Bonus Areas and the Bazuka/Switch Barrel DK Coin completed.
- Poisonous Pipeline is cleared, with both Bonus Areas, the Enguarde Koco challenge and its Steel Barrel DK Coin completed.
- All ten Kaos Kore Bonus Areas and all five Kaos Kore stage DK Coins are confirmed before leaving the region.
- KAOS has been hit twice and disabled.
- Baron K. Roolenstein's Kastle Kaos hit count is verified as two hits in Phase One, two in Phase Two, two in Phase Three and three in Phase Four, for nine successful rear-pack hits.
- The Donkey Kong and Diddy Kong rescue sequence plays for the standard campaign clear.
- For the extended completion goal, Krematoa is revealed, its five cogs are delivered to Boomer, the Knautilus is entered and the separate Knautilus battle is completed.
World 8 — Krematoa: Cogs, Boomer and Unlocking the Knautilus
Reveal Krematoa with Funky’s Hovercraft or Turbo Ski, pay Boomer to open its five stages, collect one Cog from each stage, and return all five Cogs to Boomer. The five stages contain eleven Bonus Areas in total: three in Stampede Sprint, two in Criss Kross Cliffs, three in Tyrant Twin Tussle, and three in Swoopy Salvo. Rocket Rush has no Bonus Areas. Completing the stages and installing all five Cogs raises the Knautilus, which leads to the separate true final battle with Baron K. Roolenstein.
Reveal Krematoa and open the stages
Take Funky’s Hovercraft or Turbo Ski to the four large rocks east of Mekanos. The Hovercraft is sufficient; the Turbo Ski is only an alternative. Circle the rocks on the overworld until the volcano rises from the sea and Krematoa appears.
Enter Krematoa and visit Boomer’s Bomb Shelter. Boomer removes the rock blocking one stage whenever you pay him Bonus Coins. The first four payments cost 15 Bonus Coins each. The final payment costs 25 Bonus Coins and opens Rocket Rush, for a total cost of 85 Bonus Coins.
Bonus Coins are the coins earned by completing Bonus Areas. They are different from Bear Coins, DK Coins, and Krematoa Cogs. Cogs are not spent to open stages: one Cog is awarded for completing each of Krematoa’s five normal stages and is later delivered to Boomer.
The first four Krematoa stages contain eleven Bonus Areas and therefore eleven Bonus Coins altogether. Stampede Sprint has three, Criss Kross Cliffs has two, Tyrant Twin Tussle has three, and Swoopy Salvo has three. Rocket Rush has no Bonus Areas. If you cannot afford the next payment, leave Krematoa and revisit stages with incomplete Bonus Areas before returning to Boomer.
Save at Wrinkly’s Save Cave before attempting the harder rooms, especially the Parry room in Stampede Sprint and the upper Swoopy Salvo entrances.
- Reach the four rocks east of Mekanos with the Hovercraft or Turbo Ski.
- Circle the rocks until Krematoa rises.
- Visit Boomer’s Bomb Shelter.
- Pay 15 Bonus Coins for each of the first four stages.
- Reserve 25 Bonus Coins for Rocket Rush.
- Track Bonus Coins separately from Bear Coins, DK Coins, and Cogs.
Stampede Sprint: three Bonus Areas and the first Cog
Pay 15 Bonus Coins to open Stampede Sprint. The stage begins with two Bonus Barrels suspended near the opening route. Team-throw a Kong upward into the second Bonus Barrel to enter Bonus Area 1. This is the Green Squawks room. Guide Green Squawks through the Red Buzzes and collect 15 green bananas before the timer expires. The Green Squawks crate is inside this room.
Return to the main route and use the first Bonus Barrel to the left of the Green Squawks entrance. This is Bonus Area 2, the Squitter room. Use Squitter’s web platforms to collect 15 bananas within the room’s time limit. Avoid dropping into the gap while placing webs; make short platforms and move deliberately rather than firing webs continuously.
Continue through the sprint until you reach Ellie. The Ellie barrel cannot be missed. Later, collect Parry from his crate and keep him alive through the fast ground section. Parry flies above the Kongs, so avoid jumping into him or allowing him to collide with hazards.
Carry Parry to the No Parry sign near the end of the stage. Reaching this sign with Parry opens Bonus Area 3. Inside, control Parry through the Red Buzz hazard and collect 15 bananas. If Parry is destroyed before reaching the sign, the third room cannot be entered on that attempt; restart the stage if you are collecting every Bonus Coin.
Finish the stage to receive the first Cog. The Cog comes from completing Stampede Sprint, not from any Bonus Area.
- Enter Bonus Area 1 by using the second opening Bonus Barrel.
- Collect 15 bananas with Green Squawks.
- Enter Bonus Area 2 through the first nearby Bonus Barrel.
- Collect 15 bananas with Squitter.
- Pick up Ellie and then Parry.
- Carry Parry to the No Parry sign.
- Complete Bonus Area 3 with Parry.
- Finish Stampede Sprint and receive the first Cog.
Criss Kross Cliffs: Switch Barrels, Bazuka, and the second Cog
Pay 15 Bonus Coins to open Criss Kross Cliffs. Bazuka fires Steel Barrels vertically from below, and the main route requires bouncing upward on those barrels. Watch the firing rhythm before leaving a ledge; jumping too early can place you directly in the path of the next barrel.
The first Bonus Area is near the beginning, immediately beyond the pair of Red Buzzes around the rising barrel route. Reach the ledge to the left of the Bonus Barrel. Dixie can use a carefully timed Helicopter Spin between the rising Steel Barrels to glide over the Buzzes; Kiddy needs a precisely timed Roll Jump. The room is a Grab 15 Bananas challenge while Bazuka fires TNT Barrels vertically. Collect all 15 green bananas to receive the Bonus Coin.
As you climb, use the Switch Barrels to change the rising Steel Barrels into TNT Barrels when a Red Buzz blocks the route. After the Buzz is destroyed, use another Switch Barrel to restore Steel Barrels. Some sections temporarily force you to cross while TNT Barrels are firing, so move between safe ledges instead of trying to jump continuously.
After the Star Barrel, continue upward past the letter G and the Koin area. On the open ground to the right, move all the way east and use Team Up to throw one Kong into the second Bonus Barrel above. This is Bonus Area 2. The room is a Bash the Baddies challenge: use Bazuka’s rising Steel Barrels as platforms and defeat the five Knik-Knaks before time expires.
Reach the goal after the upper rope and barrel sections to receive the second Cog. The Switch Barrels are also important for the normal route and are not only a Bonus Area tool.
- Pay 15 Bonus Coins.
- Bounce on Bazuka’s Steel Barrels to climb.
- Use Switch Barrels to turn Steel Barrels into TNT Barrels against Red Buzzes.
- Restore Steel Barrels when the route requires upward bouncing.
- Enter the first Bonus Area beyond the opening Red Buzzes.
- Collect 15 bananas while dodging TNT Barrels.
- Use Team Up on the open ground after G and Koin to enter Bonus Area 2.
- Defeat five Knik-Knaks with Bazuka’s Steel Barrels.
- Finish the stage and receive the second Cog.
Tyrant Twin Tussle: Squitter, Kuff ’n’ Klout, and the third Cog
Pay 15 Bonus Coins to open Tyrant Twin Tussle. The early cave route contains Kuff ’n’ Klout pairs. Jump over the running enemies and use the upper gaps to avoid the jumping ones. Do not stay underneath a Kuff ’n’ Klout when it changes direction.
After the first Krimp, use Team Up to throw Dixie into the upper alcove marked by a lone Banana. The Animal Barrel there transforms the Kongs into Squitter. Keep Squitter through the first half; his web attacks can defeat Kuff ’n’ Klout and his web platforms provide access to the first Bonus Area and the DK Coin route.
Bonus Area 1 is just before the No Squitter sign. Reach the Bonus Barrel either by using Squitter’s web platforms or by Team Throwing Dixie upward. Inside, use Squitter’s web attacks to defeat the Kuff ’n’ Klout, then collect 40 Stars. This room awards the first Bonus Coin.
Bonus Area 2 is before the letter N. Step on the twin Krimps, then throw Dixie into the vertical shaft to the left of N. A rotating barrel cannon sends her into the upper route. Use the TNT Barrel there to remove one Kuff ’n’ Klout and make the other charge away. Follow the bananas toward the two Red Buzzes and throw Dixie over the first Buzz into the Bonus Barrel. Inside, use the upper nooks to avoid the charging twins and collect the Bonus Coin. Use Dixie rather than Kiddy here because the narrower character is easier to maneuver around the enemies.
Bonus Area 3 is reached by jumping to the lone Banana immediately to the right of the goal flag. The room requires collecting 15 green bananas while avoiding the Kuff ’n’ Klout. Keep moving and do not linger beneath the central landing area.
Complete the stage for the third Cog. The No Squitter sign is before the Star Barrel, but losing Squitter does not prevent normal stage completion.
- Pay 15 Bonus Coins.
- Find the Squitter barrel above the first Krimp.
- Use Squitter to defeat Kuff ’n’ Klout near the first Bonus Area.
- Enter Bonus Area 1 before the No Squitter sign and collect 40 Stars.
- Use the twin Krimps and vertical shaft before N to reach Bonus Area 2.
- Survive the Kuff ’n’ Klout room and collect its Bonus Coin.
- Jump to the lone Banana right of the goal flag for Bonus Area 3.
- Collect 15 bananas in the goal-side room.
- Finish the stage and receive the third Cog.
Swoopy Salvo: three tree-trunk Bonus Areas and the fourth Cog
Pay 15 Bonus Coins to open Swoopy Salvo. The stage’s main route alternates between Squawks flight and Kong sections. Fire eggs before entering tight passages, and make small corrections rather than holding a direction for too long.
After collecting the letter K, defeat the Green Buzz blocking the tree-trunk doorway with an egg. Fly through the opening and descend inside the right tree trunk to enter Bonus Area 1. The Kongs must jump from Swoopy to Swoopy. When a Swoopy is struck from below, it can stick to the tree and become a temporary foothold. Use the chain carefully to reach the Bonus Coin.
The second entrance is at the third Green Buzz. Fly straight upward into the upper circuit where Swoopys enter from the left. Look for the lone Banana between two rapidly moving Red Buzzes. Touching that banana opens the Bonus Area entrance. Approach from above or below after a Swoopy has moved away; do not rush directly between both Buzzes unless you have a safe angle.
Inside Bonus Area 2, dodge the single Swoopy moving in a figure-eight pattern and collect 15 green bananas before time expires. Keep Squawks near the center of the room until a banana appears in a safe lane, then move through it and immediately correct your position.
For Bonus Area 3, continue past the pair of harmless Swoopys until a chain of harmful Swoopys enters from the left. Use them as temporary steps to reach the final Bonus Barrel. Team Throws are useful for the last height. Collect 20 Stars within the time limit to obtain the Bonus Coin.
After leaving the Bonus Area 2 route, the No Animal sign changes Squawks into a Steel Barrel. This is useful for the Koin encounter but is not part of the Bonus Area sequence. Reach the goal to receive the fourth Cog.
- Pay 15 Bonus Coins.
- After K, defeat the Green Buzz and descend inside the right tree trunk for Bonus Area 1.
- Jump from Swoopy to Swoopy and collect the Bonus Coin.
- At the third Green Buzz, fly upward to the upper Swoopy circuit.
- Touch the lone Banana between the Red Buzzes to enter Bonus Area 2.
- Collect 15 bananas while avoiding the figure-eight Swoopy.
- Use the harmful Swoopy chain after the harmless pair to reach Bonus Area 3.
- Collect 20 Stars with Team Throws if needed.
- Finish the stage and receive the fourth Cog.
Rocket Rush: final payment and fifth Cog
Return to Boomer after the first four stages and pay the final 25 Bonus Coins to open Rocket Rush. This stage has no Bonus Areas, so Rocket Rush cannot supply a missing Bonus Coin.
Enter the Rocket Barrel and use the original SNES control behavior: horizontal steering is reversed, so pressing Left moves the rocket right and pressing Right moves it left. Use brief taps. Long holds make the rocket scrape walls or lose height too quickly.
Collect Fuel Drums whenever the path is safe and avoid unnecessary wall contact. Follow the banana trails through the descent, pass the Star Barrel between the major sections, and reach the Ignition Barrel at the bottom. The Ignition Barrel launches the rocket into the upward section.
The second half climbs through the route at greater speed. Continue using small reversed steering inputs, collect fuel when doing so does not force a dangerous detour, and correct early rather than waiting until the rocket is beside a wall.
The North American SNES release has a documented Rocket Rush letter discrepancy involving the G in some cartridges. This affects only the optional K-O-N-G extra-life collection. It does not affect the stage clear, the fifth Cog, or access to the Knautilus.
Reach the goal to receive the fifth Cog.
- Pay the final 25 Bonus Coins.
- Remember the reversed horizontal Rocket Barrel controls.
- Collect Fuel Drums without taking unnecessary risks.
- Pass the Star Barrel between the two main sections.
- Use the Ignition Barrel at the bottom.
- Reach the goal and receive the fifth Cog.
Deliver all five Cogs and enter the Knautilus
Return to Boomer’s Bomb Shelter after completing Rocket Rush. The Cog order is Stampede Sprint first, Criss Kross Cliffs second, Tyrant Twin Tussle third, Swoopy Salvo fourth, and Rocket Rush fifth.
Opening all five stages is not enough. Clearing all eleven Bonus Areas is not enough. The Knautilus appears only after all five stages have been completed and all five Cogs have been delivered to Boomer’s machine.
Confirm that Boomer has installed the complete Cog set. The Knautilus then rises from the central water in Krematoa. Leave the shelter and move to the surfaced submarine on the overworld map.
Enter the Knautilus to begin the separate Baron K. Roolenstein battle. This is the true final encounter and is distinct from the earlier Kastle KAOS boss sequence.
- Complete Stampede Sprint, Criss Kross Cliffs, Tyrant Twin Tussle, Swoopy Salvo, and Rocket Rush.
- Confirm that one Cog was awarded by each stage.
- Return to Boomer’s Bomb Shelter.
- Confirm that all five Cogs are installed.
- Verify that the Knautilus has surfaced in Krematoa.
- Enter the Knautilus to begin the true final boss encounter.
Before you move on
- Krematoa has risen after circling the four rocks east of Mekanos.
- Stampede Sprint has been completed and its Cog obtained.
- Criss Kross Cliffs has been completed and its Cog obtained.
- Tyrant Twin Tussle has been completed and its Cog obtained.
- Swoopy Salvo has been completed and its Cog obtained.
- Rocket Rush has been completed and its Cog obtained.
- All eleven Krematoa Bonus Areas have been cleared if pursuing every Krematoa Bonus Coin.
- Boomer has installed all five Cogs.
- The Knautilus is visible in Krematoa’s central water.
- Entering the Knautilus begins the Baron K. Roolenstein battle.
References for this chapter
Knautilus — Baron K. Roolenstein (True Final Fight)
The Knautilus is the true final boss stage in the original North American Super Nintendo release of Donkey Kong Country 3: Dixie Kong’s Double Trouble! It becomes available after Krematoa is revealed, all five Krematoa stages are completed, and their five cogs are returned to Boomer. Baron K. Roolenstein requires ten successful Steel Barrel hits. Every damaging throw must strike the propeller or rotor of his helicopter pack. Defeating him awards the final DK Coin and completes the true final-boss route. The Banana Bird Queen sequence is a separate milestone requiring all 15 Banana Birds and a later visit to Wrinkly’s Save Cave.
Raise the Knautilus and prepare for the battle
Reach Krematoa with the Hovercraft or Turbo Ski, then visit Boomer’s Bomb Shelter. Pay the Bonus Coins needed to open the five Krematoa stages: Stampede Sprint, Criss Kross Cliffs, Tyrant Twin Tussle, Swoopy Salvo and Rocket Rush. Finish all five stages and return to Boomer with one cog from each stage.
After Boomer’s machine activates, the Knautilus rises from the central lake. Enter it from the overworld to begin the final boss stage. Save at Wrinkly’s Save Cave before entering if you want the safest retry point.
The arena supplies Steel Barrels during the fight. There is no separate stock of recovery barrels to preserve, so treat every barrel as an attack tool and concentrate on avoiding damage. Dixie’s Helicopter Spin is useful for reaching handles and raised platforms, while Kiddy is generally easier to use when carrying and throwing a Steel Barrel, but either Kong can complete the battle.
The only valid target is the rear propeller or rotor of Baron K. Roolenstein’s helicopter pack. Do not jump on him or throw at his body from the front. Wait until he turns away or is aligned with the overhead vent, then make the throw.
- Krematoa is revealed.
- Stampede Sprint, Criss Kross Cliffs, Tyrant Twin Tussle, Swoopy Salvo and Rocket Rush are complete.
- All five cogs have been returned to Boomer.
- The Knautilus has risen from the lake.
- Both Kongs are available before entering.
Hit one: use the overhead vent
The battle opens with Baron in the background. Fireballs travel across the arena while the upper electrical trap prevents safe jumping. Stay on the floor and avoid the fireballs until the electricity and cannon sequence stops.
When the upper trap shuts down and the overhead ventilation shaft opens, collect the Steel Barrel and throw it upward through the vent. Baron must be near the center of the background so the barrel falls onto the helicopter pack’s propeller. This is the first hit.
If the timing is wrong, do not chase the barrel into an active hazard. Wait for the next safe cycle. The key is to throw only after Baron is nearly beneath the vent and the electrical trap has stopped.
- Avoid the opening fireballs.
- Do not jump into the active upper electrical line.
- Wait for the vent to open.
- Throw the Steel Barrel through the vent onto the propeller or rotor.
- Confirm one successful hit.
Hits two through five: foreground and background sections
After the first hit, Baron flies into the foreground and moves from side to side. When he approaches a corner, jump onto one of the circular dynamos only while it is inactive. From that raised position, wait for Baron to turn his back, then throw a Steel Barrel into the rear of his helicopter pack. Repeat this twice for hits two and three.
Leave a dynamo as soon as it becomes active. Do not remain on a glowing platform and do not try to force a throw while the electrical machinery is running. If Baron passes without presenting a safe angle, let him complete the movement cycle and prepare for the next pass.
Baron then retreats to the background. The cannon and upper electrical trap resume their opening pattern. Avoid the fireballs again, wait for the vent to open, and throw another Steel Barrel through it when Baron is aligned below. Repeat the vent attack twice for hits four and five.
The first five hits therefore follow this order: one vent hit, two foreground pack hits, then two background vent hits. The target remains the helicopter propeller or rotor throughout; the change is Baron’s position and the route used to reach him.
- Land two hits while Baron moves through the foreground.
- Use inactive dynamos as temporary platforms.
- Leave a dynamo when it glows.
- Return to the background section after Baron retreats.
- Land two more vent hits.
- Confirm five total hits.
Hit six: the first moving-floor cycle
After the fifth hit, Baron restarts the cannon and electrical hazards while the conveyor belt begins moving left and right. The belt makes footing and barrel alignment less reliable, but the attack is still another vent throw.
Use small directional corrections instead of holding a direction. Keep away from the lower electrical dynamos and wait for the upper trap to stop. When a Steel Barrel appears, throw it through the overhead vent while Baron is aligned beneath it. This is hit six.
Do not chase Baron across the moving floor. Let the belt carry you only as much as necessary, preserve a safe position, and commit to the throw during the brief opening.
- Recognize the conveyor as the sixth-hit phase.
- Use short movements on the moving floor.
- Avoid the lower electrical dynamos and fireballs.
- Land one more Steel Barrel hit through the vent.
- Confirm six total hits.
Hits seven through ten: block the electric beam, then manage the returning conveyor
After hit six, Baron moves above the Kongs and the lower electrical machines produce a traveling electric beam across the floor. The beam can approach from either side, so watch its direction instead of memorizing a fixed corner.
When a Steel Barrel appears, set it on the floor between the Kong and the approaching beam. Stand behind the barrel as the beam passes. The barrel absorbs the charge and becomes surrounded by electricity for a short time. Do not pick it up while it is glowing.
Once the beam has passed and the machines shut down briefly, pick up the Steel Barrel, move onto an inactive dynamo or other safe platform, and throw at the back of Baron’s helicopter pack. This is hit seven. Repeat the beam-blocking setup and land hit eight. The machinery’s safe window is short, so move directly once the charge ends.
After the second hit in this phase, the conveyor belt returns. The final two attacks still use the same electric-beam protection method, but movement is harder because the floor is moving again. Place the barrel to absorb the beam, wait until it stops glowing, then retrieve it and use a safe platform to throw at the rotor. Land hit nine, repeat the cycle, and land hit ten.
The complete ten-hit order is one opening vent hit, two foreground rotor hits, two background vent hits, one moving-floor vent hit, and four final rotor hits. The conveyor returns after the second hit of the final electrical phase, meaning it affects hits nine and ten.
- Watch the beam’s direction during every electrical cycle.
- Place the Steel Barrel between the Kong and the beam.
- Stay behind the barrel while the charge passes.
- Land hits seven and eight before the conveyor returns.
- Use the same protection method during the returning conveyor cycles.
- Land hits nine and ten on the helicopter propeller or rotor.
- Confirm ten successful hits.
Confirm victory and handle the separate Queen ending
The tenth successful Steel Barrel hit defeats Baron K. Roolenstein. His defeat sequence plays in the background, the final DK Coin is awarded, and the Kongs leave the Knautilus. This confirms completion of the game’s true final-boss route.
Defeating Baron does not automatically complete the Banana Bird Queen objective. For that separate ending milestone, rescue all 15 Banana Birds and then visit Wrinkly’s Save Cave. Keep the two goals separate when checking the save file: the Knautilus battle is the final boss requirement, while the Queen sequence depends on the Banana Birds and the later visit to Wrinkly.
If a Kong is lost during the fight, continue with the survivor and use the next Steel Barrel opportunity. If both Kongs are lost, retry from the save point and change the timing of the failed phase. The most common causes of failure are throwing while Baron is facing forward, standing on a glowing dynamo, picking up the electrified barrel too early, and allowing the conveyor to carry the Kong into a hazard.
- The tenth hit lands on the helicopter propeller or rotor.
- Baron’s defeat sequence finishes.
- The final DK Coin is awarded.
- The Kongs leave the Knautilus.
- All 15 Banana Birds are separately rescued for the Queen ending.
- Wrinkly’s Save Cave is visited after the rescues.
Before you move on
- Krematoa was revealed with the Hovercraft or Turbo Ski.
- All five Krematoa stages were completed.
- One cog from each stage was returned to Boomer.
- The Knautilus rose from the central lake and was entered.
- Baron K. Roolenstein was hit ten times with Steel Barrels.
- The ten-hit order was completed: one opening vent hit, two foreground hits, two background vent hits, one conveyor vent hit, and four final rotor hits.
- The tenth hit occurred during the last moving-floor portion.
- The final DK Coin was awarded.
- The defeat sequence finished and the Kongs left the submarine.
- For the separate Banana Bird Queen ending, all 15 Banana Birds were rescued and Wrinkly’s Save Cave was visited afterward.
References for this chapter
Collectibles, Bonus Rooms and K-O-N-G Letters
The original North American Super Nintendo version reaches a maximum of 103 percent without cheats. To achieve it, complete the campaign, collect all 85 Bonus Coins, collect all 41 DK Coins, and rescue all 15 Banana Birds. K-O-N-G letters, ordinary bananas, balloons, and other extra-life pickups are optional and do not contribute to the standard percentage. Track Bonus Coins, DK Coins, Banana Birds, and Krematoa cogs separately because each has a different purpose and different map or save-file indicator.
Separate the required collectible categories
Bonus Coins come from Bonus Areas and are used to pay Boomer in Krematoa. The North American SNES release contains 85 Bonus Coins in total: 74 outside Krematoa and 11 within its first four stages. Boomer charges 15 Bonus Coins to open each of the first four Krematoa entrances, then 25 more for Rocket Rush. Those payments use the full 85-coin total. The five Krematoa cogs are not Bonus Coins and are not part of that total; each cog is obtained by completing one Krematoa stage and must later be delivered to Boomer.
DK Coins are separate rewards, normally guarded by one Koin in every regular stage. Koin faces away from the Kongs and uses his shield to block ordinary attacks. The dependable method is to use a Steel Keg or other throwable object, bounce it off a wall, and hit Koin from behind. There are 41 DK Coins in the original SNES game. The special final coin is awarded after the Knautilus sequence rather than by a normal stage Koin.
Banana Birds are a third category. Rescue all 15 through Banana Bird caves and the required Brothers Bear and map-side events. Once every bird has been rescued, enter Wrinkly’s Save Cave to trigger the Banana Bird Queen sequence. This is a separate milestone from defeating Baron K. Roolenstein in the Knautilus.
K-O-N-G letters are optional extra-life collectibles. Collecting K, O, N, and G during one level run awards a life, but the letters do not increase the 103 percent total. The same is true of ordinary bananas, banana bunches, life balloons, and incidental extra-life rewards.
- Record Bonus Coins and DK Coins on different checklists.
- Work toward 85 Bonus Coins, 41 DK Coins, and 15 Banana Birds.
- Record each of the five Krematoa cogs separately.
- Treat K-O-N-G letters and ordinary life pickups as optional.
Use the North American SNES map indicators
After a level is completed, its map flag shows which Kong reached the goal. A pink flag means Dixie reached the goal. A blue flag means Kiddy reached the goal. Do not substitute purple or green for these colors in the original North American SNES release.
The flag’s condition also records Bonus Area progress. A lowered or drooping main flag means that at least one Bonus Coin associated with that level is still missing. A fully raised or unfurled flag means the level’s Bonus Areas have all been found and their Bonus Coins collected. The level name also receives an exclamation mark when all of its Bonus Areas have been cleared; use that mark as a direct confirmation rather than relying on flag color.
A small yellow pennant beneath the main flag records the DK Coin. If the yellow pennant is present, that level’s Koin has been defeated and its DK Coin collected. This indicator is independent of Bonus Coin progress. A stage can therefore have a complete Bonus flag but no yellow pennant, or a yellow pennant while a Bonus Area is still missing.
These indicators apply to ordinary stages. Do not expect boss stages or special Krematoa progression to display every reward through the same ordinary level-flag system. For those rewards, check the overall coin count, the stage results, and Boomer’s cog machine.
- Pink flag: Dixie reached the goal.
- Blue flag: Kiddy reached the goal.
- Raised or unfurled main flag: all Bonus Areas in that level are complete.
- Exclamation mark after the level name: all Bonus Areas have been found and cleared.
- Small yellow pennant: the level’s DK Coin is collected.
Search Bonus Areas methodically
Do not assume every stage has the same Bonus Area distribution. Most ordinary stages have two Bonus Areas, but Krematoa is different: its first four stages contain eleven Bonus Coins in total, and Rocket Rush contains no Bonus Areas. If Rocket Rush is missing from your Bonus Coin count, search another Krematoa stage or an earlier level instead of replaying Rocket Rush for a nonexistent Bonus barrel.
On each level run, inspect routes above and below the main path. Check cracked floors, unusual wall gaps, waterfalls, rope sections, vertical shafts, temporary platforms, side branches, and dead ends containing barrels or Steel Kegs. Some entrances require Dixie’s helicopter spin, a team throw, a particular Kong, or an animal buddy. If a route seems designed around Parry, Squawks, Squitter, Ellie, or another helper, keep that helper alive until the suspicious section is fully explored.
When a Bonus Area opens, read its objective before moving. The challenge may require collecting stars or bananas, defeating enemies, reaching a target, or crossing a timed route. The Bonus Coin is awarded only after the objective is completed and the coin is collected. Finishing the room without touching the coin does not finish that collectible. A failed attempt costs the current run but does not remove previously collected coins; return from the map and try again.
- Search both sides of the main route and inspect vertical spaces.
- Check cracked floors, wall gaps, waterfalls, ropes, and temporary platforms.
- Preserve an animal buddy when the surrounding route suggests it is needed.
- Complete the Bonus objective and collect the coin before leaving.
- Do not search Rocket Rush for a Bonus Area.
Audit a completed stage before moving on
After collecting a Bonus Coin, finish the level and return to the map. Confirm that the main flag is fully raised or unfurled and that an exclamation mark appears beside the stage name. If either confirmation is missing, another Bonus Area remains in that level.
Check the small yellow pennant separately. If the stage has the Bonus completion indicators but lacks the yellow pennant, return to find Koin rather than searching for another Bonus barrel. Conversely, a yellow pennant does not prove that every Bonus Area is complete.
Keep a written list of stages whose indicators are incomplete. The map tells you what category is missing, but it does not replace a stage-by-stage checklist when you are pursuing all 85 Bonus Coins and all 41 DK Coins.
- Finish the stage after taking the Bonus Coin.
- Confirm the main flag is fully raised or unfurled.
- Confirm the exclamation mark appears beside the stage name.
- Check the yellow pennant independently for the DK Coin.
Handle Krematoa and Rocket Rush correctly
Pay Boomer 15 Bonus Coins for each of the first four Krematoa stages. Search those stages for their eleven Bonus Coins and complete each stage to receive one cog. Rocket Rush is opened with the final 25-coin payment. It has no Bonus Areas, but it still contains a required DK Coin near the end. The Steel Keg needed to defeat Koin is positioned shortly before the goal, so carry it carefully, set up the rebound, and verify the yellow pennant afterward.
The North American SNES version has a known Rocket Rush letter omission: the G of K-O-N-G is absent from the level in the American release. This affects only the optional extra-life sequence. It does not reduce the 103 percent maximum and does not indicate a missing Bonus Coin or DK Coin. The K, O, and N remain optional as well.
- Pay Boomer 15 coins for each of the first four entrances.
- Collect the eleven Krematoa Bonus Coins in those four stages.
- Complete all five stages and deliver all five cogs to Boomer.
- Pay the final 25 coins to open Rocket Rush.
- Defeat Rocket Rush’s Koin and collect its DK Coin.
- Do not search Rocket Rush for a Bonus Area or a required G letter.
Complete the final cleanup
Finish every Bonus Area first and continue until the Bonus Coin total is 85. Use the exclamation marks and fully raised flags to identify levels with complete Bonus progress. Then audit the yellow pennant beneath every ordinary level flag and continue until the DK Coin total reaches 41.
After all five Krematoa cogs have been delivered to Boomer, enter the surfaced Knautilus and defeat Baron K. Roolenstein. This completes the true main campaign and awards the special final DK Coin. Defeating KAOS earlier is not enough, and neither is merely opening Krematoa.
Once all 41 DK Coins have been collected, visit Funky’s Rentals to receive the Gyrocopter. Use it to reach the isolated Banana Bird locations that are inaccessible with the earlier vehicles. Complete the remaining Banana Bird caves and required trades until the save file records all 15 birds.
Finally, enter Wrinkly’s Save Cave after the fifteenth rescue. The Banana Birds carry Dixie and Kiddy to the Banana Bird Queen and play the full Queen ending. The standard North American SNES completion check is 103 percent with the campaign complete, all 85 Bonus Coins, all 41 DK Coins, and all 15 Banana Birds. The five cogs are required to reach the Knautilus but remain a separate progression item; K-O-N-G letters remain optional.
- All ordinary stages have fully raised or unfurled main flags.
- Every applicable ordinary stage has an exclamation mark.
- Every ordinary stage has its small yellow DK pennant.
- The Bonus Coin total is 85.
- All five Krematoa cogs have been delivered to Boomer.
- The Knautilus battle is complete.
- The DK Coin total is 41.
- Funky has supplied the Gyrocopter.
- All 15 Banana Birds have been rescued.
- Wrinkly’s Save Cave has been entered afterward.
- The Banana Bird Queen ending has played.
Before you move on
- The campaign is complete through the Knautilus and Baron K. Roolenstein.
- The file shows 85 Bonus Coins.
- The file shows 41 DK Coins.
- All five Krematoa cogs have been delivered to Boomer.
- All 15 Banana Birds have been rescued.
- Wrinkly’s Save Cave has been entered after the final rescue.
- The Banana Bird Queen ending sequence has played.
- Ordinary stages show pink or blue flags according to the Kong used, fully raised or unfurled flags, exclamation marks, and yellow DK pennants as appropriate.
- Rocket Rush is excluded from the Bonus Area audit, and its missing North American G is accepted as an optional regional difference.
- K-O-N-G letters and ordinary extra-life pickups remain optional.
References for this chapter
- Donkey Kong Country 3: Dixie Kong's Double Trouble! FAQ — Super Nintendo — KChua
- Donkey Kong Country 3: Dixie Kong's Double Trouble! North American Instruction Manual
- Donkey Kong Country 3: Dixie Kong’s Double Trouble! – Guide and Walkthrough – Super Nintendo
- Bonus Stage – Donkey Kong Wiki
- Cog – Super Mario Wiki
- KONG Letters – Super Mario Wiki
- Rocket Rush – Super Mario Wiki
Animal Buddies, How to Free and Use Them
Animal Friends are temporary tools for movement, combat and secret access in the original North American Super NES release. Animal Barrels transform the active Kong into the pictured animal, while Animal Crates release a companion that remains above or beside Dixie and Kiddy. X dismounts from a rideable Animal Friend. Y performs the normal attack or barrel action for most animals, A handles jumping or charging where applicable, B makes Squawks flap, L draws water with Ellie, R fires Ellie’s stored water, and A, L or R can operate Squitter’s web platforms. Finish animal-dependent routes before crossing a No Animal Sign, because the sign ends that animal section and may create a reward or transition.
Identify the animal source and protect the route
An Animal Barrel changes the active Kong into Ellie, Enguarde, Squawks or Squitter. An Animal Crate releases a companion without changing Dixie or Kiddy; Parry is the main example. Before moving forward, inspect the nearby upper and lower route for a Bonus Barrel, DK Coin, K-O-N-G letter, No Animal Sign or replacement barrel. Many secrets are positioned so that the animal must be kept until the last possible moment.
Press X to dismount from a rideable Animal Friend when the section allows it. X is the original SNES dismount input. Do not press it simply to make a jump easier: leaving Ellie, Enguarde, Squawks or Squitter can remove the ability needed for the next secret. Parry and the Fish Food Frenzy Nibbla are companions, so they are not dismounted with X.
A No Animal Sign ends the current animal section. Passing the sign can turn the animal into a barrel, reveal an item or award a Bonus Barrel, depending on the level. Treat the sign as a checkpoint for the animal objective, not as a harmless decoration. If an animal is lost before a required secret, finish or exit the level and replay it from the map rather than trying to replace its ability with an ordinary Kong.
- Distinguish an Animal Barrel from an Animal Crate.
- Use X to dismount a rideable animal on the SNES version.
- Search around the animal route before crossing a No Animal Sign.
- Replay the level if a required animal-dependent secret is missed.
Ellie: barrels, water and Sneeks
Ellie lifts, draws in and throws barrels with Y. Hold Y near a barrel to pull it toward her trunk; release Y to throw it. Hold Up while releasing Y to throw upward, or hold Down while releasing Y to set the barrel down. Barrels can destroy enemies, block hazards or open a route that ordinary Kong attacks cannot handle.
At a river, lake or waterfall, hold Down and press A, or press L, to draw water into Ellie’s trunk. Press A or R to fire the stored water; hold the firing input for repeated shots. Use Up while firing to angle the stream upward. Water is limited, so refill before a long enemy sequence and avoid wasting shots on enemies that can be bypassed safely.
Ellie is frightened by Sneeks that enter her view. In Murky Mill and other Ellie sections, keep a barrel available or refill at the next water source before entering a cramped passage. If a Sneek appears, attack it quickly with a barrel or water rather than trying to pass it at close range while Ellie is facing the enemy.
Squirt’s Showdown is the clearest required use of Ellie’s water. Enter with a full supply when possible. Fire at Squirt’s exposed eye, then repeat when the other eye opens. During the sweeping water attack, jump over the stream and reposition instead of firing while trapped against a wall. Ordinary Kong attacks do not damage Squirt.
- Use Y to pull in, pick up and throw barrels.
- Use Down plus A or L to collect water.
- Use A or R to fire water.
- Aim upward with Up while firing.
- Keep Ellie away from visible Sneeks.
- Use Ellie’s water against Squirt’s exposed eyes.
Enguarde: underwater attack and the dark-water route
Enguarde swims with the Control Pad. Press Y for the normal bill stab. Hold A to charge his Super Dash and release A to lunge forward. Use normal stabs in narrow passages and near walls; reserve the Super Dash for open water because its committed movement can carry Enguarde into Lurchins, Kocos or a dead end.
Floodlit Fish requires Enguarde to manage the dark-water route. Attack the yellow Gleamin’ Breams to illuminate the surrounding area, then move from one lit section to the next while watching for Lurchins and Kocos. The light does not remove the hazards, so identify the next safe turn before the darkness returns.
Enguarde is required for Barbos’s Barrier. In the first phase, stab the Green Lurchins so they rebound into Barbos’s protective ring. When the shields disappear, stab Barbos’s exposed face. In the next phase, guide the flashing homing shells into the pink shields, then attack when the face is exposed. In the final chamber, swim between the vertical spike volleys and strike Barbos whenever the face opens. If Enguarde is lost, the Kongs cannot reproduce his underwater attack; replay the level for the boss or any missed secret.
- Press Y for Enguarde’s normal stab.
- Hold and release A for the Super Dash.
- Use short stabs near walls and Lurchins.
- Strike Gleamin’ Breams in Floodlit Fish.
- Use reflected hazards to remove Barbos’s shields.
- Preserve Enguarde through the entire Barbos encounter.
Green Squawks and Purple Squawks or Quawks
Green Squawks flies with B and fires eggs with Y. Steer with the Control Pad, use short flaps near ceilings and Buzzes, and inspect both the upper and lower route for hidden Bonus Barrels. Green Squawks is used in Swoopy Salvo’s main flight section and in the second Bonus Area of Low-G Labyrinth, where eggs destroy the Green Buzzes blocking the Bonus Coin.
The purple parrot is commonly called Purple Squawks in walkthroughs and is identified in the manual as Squawk’s relative, Quawks. He flaps with B, steers with the Control Pad and carries barrels with Y; release Y to drop or throw the barrel. He does not use Green Squawks’s egg attack. Place the carried barrel above or beside the target, then release it when the drop or ricochet will connect.
Buzzer Barrage uses Purple Squawks. Carry the supplied barrels through the cavern and drop them on Buzzes or other targets, using the walls and slopes to control the barrel’s path. Low-G Labyrinth begins with Purple Squawks. The low gravity makes movement floaty, so use small corrections and avoid oversteering into the upper hazards. At the first No Squawks Sign, the bird changes back and the Kongs continue; the second Bonus Area supplies Green Squawks for its egg-clearing objective.
Pot Hole Panic begins with Green Squawks, not Purple Squawks. Fire eggs at the early Booty Birds, then follow the level’s animal transitions to Enguarde, Ellie and Squitter. Swoopy Salvo also uses Green Squawks at the beginning, after which the No Animal Sign returns control to the Kongs. Rocket Rush contains no animal-buddy section and has no Bonus Areas.
- Use Green Squawks for egg attacks.
- Use Purple Squawks or Quawks for barrel carrying.
- Keep Purple Squawks in Buzzer Barrage until the barrel route is complete.
- Use Purple Squawks in the main Low-G Labyrinth route.
- Use Green Squawks in Swoopy Salvo and Low-G Labyrinth’s second Bonus Area.
- Use Green Squawks, not Purple Squawks, in Pot Hole Panic.
- Do not search Rocket Rush for an Animal Friend.
Squitter: attack webs and platform webs
Squitter fires damaging attack webs with Y. To create a platform web, press A, L or R once to start the platform and the same input again to stop it. Use Up or Down while initiating the platform to aim its direction. Make short platforms slightly ahead of Squitter, step onto them, then create the next platform. Long bridges are harder to control and leave more time for Buzzes or projectiles to reach you.
Squitter is used in Blazing Bazukas, where web platforms provide a safe route around the factory hazards and allow access to the DK Coin setup. Krack-Shot Kroc also provides Squitter access before its Bonus Area changes the player into Krack-Shot Kroc. In Pot Hole Panic, the final Squitter section is needed for the upper route and the second Bonus Area. Do not cross the No Squitter Sign until the web-dependent work is complete.
In Krematoa, Tyrant Twin Tussle supplies Squitter for its web-platform and attack-web route. Stampede Sprint includes a Squitter Crate in Bonus Area 2, where the spider’s platforms are used to collect the Bonus Coin. If Squitter is lost before a required platform sequence, Dixie’s Helicopter Spin and Kiddy’s Team Throw are not reliable substitutes; replay the level.
- Press Y for attack webs.
- Press A, L or R to start and stop platform webs.
- Aim platform webs with Up or Down while initiating them.
- Build short, controlled platforms.
- Finish the Pot Hole Panic and Krematoa web routes before the No Squitter Sign.
- Replay the stage if Squitter is lost before a required secret.
Parry and Nibbla: companions rather than normal transformations
Parry is released from an Animal Crate and flies directly above the Kongs. He is not independently controlled. Your movement and jumps determine his position. Parry can collect high items and defeat Booty Birds, but contact with Buzzes destroys him. In Ropey Rumpus, protect Parry through the rope route and carry him to the No Parry Sign to reveal the second Bonus Area. In Stampede Sprint, the same objective produces its Parry Bonus Area; avoid unnecessary jumps near overhead Buzzes.
Stampede Sprint has additional animal routes. Ellie is supplied in the main path, Parry appears later, Green Squawks is found in Bonus Area 1 and Squitter is found in Bonus Area 2. Complete each Bonus Area with the animal supplied there rather than assuming one animal can be carried between all three rooms.
Nibbla appears as a special companion in Fish Food Frenzy. Feed him Kocos and keep him away from Lurchins. His color represents his mood; leaving him unfed or allowing him to eat dangerous prey makes him hostile, and a red Nibbla can bite the lead Kong. Move from one safe Koco to the next and resume feeding immediately after returning from a Bonus Area. Nibbla is not a normal transformation and has no separate player control scheme.
- Guide Parry through movement and jumps; do not look for a control input.
- Protect Parry from Buzzes in Ropey Rumpus and Stampede Sprint.
- Reach the No Parry or No Animal Sign before leaving the Parry route.
- Use the supplied Green Squawks and Squitter in Stampede Sprint’s Bonus Areas.
- Feed Nibbla Kocos and keep him away from Lurchins.
- Replay Fish Food Frenzy if the required Nibbla route is lost.
Before you move on
- You can distinguish Animal Barrels from Animal Crates.
- You can dismount a rideable Animal Friend with X.
- You can use Ellie’s barrel, water collection and water-firing controls on the SNES version.
- You can use Enguarde’s stab and charged Super Dash.
- You have used Green Squawks for egg attacks and Purple Squawks or Quawks for barrel carrying.
- You have completed the animal routes in Buzzer Barrage, Floodlit Fish, Pot Hole Panic, Ropey Rumpus, Stampede Sprint, Swoopy Salvo and Low-G Labyrinth.
- You have used Squitter’s attack webs and platform webs in the required factory and Krematoa routes.
- You have preserved Parry to the No Parry or No Animal Sign when pursuing every Bonus Area.
- You have completed Fish Food Frenzy without allowing Nibbla to become hostile before the required route is secured.
- You have replayed any level where an animal was lost before a required collectible or Bonus Area.
References for this chapter
- Donkey Kong Country 3: Dixie Kong's Double Trouble! North American Instruction Manual
- Super NES Instruction Manuals: Donkey Kong Country 3: Dixie Kong’s Double Trouble
- Donkey Kong Country 3: Dixie Kong’s Double Trouble! – Guide and Walkthrough – Super Nintendo
- Donkey Kong Country 3: Dixie Kong’s Double Trouble! — Super Mario Wiki
Boss Strategies Compendium (Belcha, Arich, Squirt, KAOS, Others)
The original North American SNES version gives every boss a different attack rule. Belcha is defeated with flipped Knik-Knaks, Arich with a barrel thrown into his descending head, Squirt with Ellie's water, Bleak with snowballs, and Barbos with Enguarde and redirected enemies. KAOS appears twice: Kaos Karnage requires six head hits, while the Kastle KAOS rematch takes two upward barrel hits. Baron K. Roolenstein then follows in the castle and requires nine rear-pack hits. The optional Knautilus battle is a separate ten-hit encounter using Steel Barrels and is the true final boss route.
Preparation and boss fundamentals
Save at Wrinkly's Save Cave before entering a boss level whenever possible. A defeat costs a life and may force a repeat attempt, while a completed boss returns you to the overworld. Enter the arena with both Kongs when practical so a missed jump or projectile does not end the attempt immediately.
For ordinary Kong-controlled fights, Dixie is generally the safer lead because Helicopter Spin gives better control during recovery jumps. Kiddy is useful for stable ground movement and strong barrel throws, but neither Kong can directly damage Squirt or Barbos. Those encounters force Ellie and Enguarde respectively.
Boss arenas provide the required weapon or animal buddy. Do not waste time looking for a normal level barrel after the fight begins. If a DK Barrel is present, recover the missing partner during a quiet part of the pattern rather than crossing the arena while the boss is attacking. Survival is more valuable than landing an extra hit immediately.
- Save before entering the boss level.
- Identify the supplied weapon or animal buddy.
- Keep both Kongs available when a DK Barrel is provided.
- Back away and reset your position after a missed attack.
Belcha's Barn
Belcha sends ordinary barrels rolling across the floor. Jump on a barrel to break it and reveal a yellow Knik-Knak. Jump on the Knik-Knak once to flip it onto its back, then pick it up and throw it into Belcha's open mouth.
Each successful throw makes Belcha belch and move backward toward the pit. Re-center after every hit so your Kong retains room to react. The rolling barrels and exposed Knik-Knaks can damage you, and falling into the pit ends the attempt, so do not chase a badly positioned bug across the arena.
Repeat the barrel, flip, pickup, and mouth-throw sequence until Belcha is pushed away and defeated. Jumping on Belcha is not an attack, and an unflipped Knik-Knak is not ready to throw.
- Break a rolling barrel.
- Flip the yellow Knik-Knak once.
- Throw the flipped Knik-Knak into Belcha's mouth.
- Re-center after each hit.
- Keep your Kong away from the pit.
Arich's Ambush
Arich begins with a barrel on his back. Jump onto him when the movement pattern gives you a safe landing, collect the barrel, and return to the lower floor. Hold the barrel while waiting for Arich's head to descend into throwing range.
Throw only when Arich's head is coming down. A premature throw can miss and leave you without the weapon needed for the next opening. The important target is his descending head or face, not a random part of his body.
After a successful hit, avoid the bouncing green projectiles and wait for another usable barrel. Do not rush beneath Arich while he is moving. Dixie offers better aerial correction, while Kiddy can make a dependable grounded throw if you wait for the correct height.
- Collect the barrel from Arich's back or its landing position.
- Return to a stable lower-floor position.
- Wait for Arich's head to descend.
- Throw into the head at the bottom of its movement.
- Avoid the bouncing projectiles before preparing the next hit.
Squirt's Showdown
This fight forces Ellie. Fill Ellie's trunk at the waterfall before attacking; the stored water is the only weapon that damages Squirt. Stand beside the waterfall and use the water-fill input shown by the original SNES controls, then move back onto the platforms.
Squirt sweeps a rotating stream of water around the arena. Keep moving around the platforms in the direction that avoids the approaching stream. Do not remain at an edge, because the sweep can wash Ellie into a dangerous position.
When the stream cycle ends, Squirt exposes his eyes. Spray each eye twice during the opening, then return to the waterfall when Ellie's supply is empty. Repeat the movement, refill, and spray cycle until both eyes have been closed across the required openings. Kong attacks do not work here.
- Control Ellie throughout the fight.
- Fill Ellie's trunk at the waterfall.
- Stay ahead of the rotating water stream.
- Spray each exposed eye twice.
- Refill before the next attack cycle.
- Do not attempt ordinary Kong attacks.
Kaos Karnage
Kaos Karnage is the Mekanos boss. Never run beneath KAOS while the jet flames are active. Move to a safe side of the arena and wait for the rotating blades to emerge. The blades are temporary platforms that let you reach the helmeted head.
The boxing-gloved hands can knock you away without damaging the boss, so make one controlled jump onto the head and retreat. The SNES fight requires three hits against the helmet. KAOS resumes its jet attack after each hit, and the timing becomes less forgiving as the fight continues.
After the helmet comes off, the detached head becomes the target and fires a laser. Watch for the visor to brighten, then jump clear of the beam. When the laser sequence ends and the rotating blades return, use them to reach the exposed head again. Three additional head hits finish the encounter, for six total hits: three against the helmet and three against the exposed head.
- Avoid the active jet flames.
- Use the rotating blades as steps.
- Do not treat the boxing gloves as a target.
- Land three helmet hits.
- Evade the detached head's laser.
- Land three exposed-head hits.
- Confirm six total hits in the SNES version.
Bleak's House
Bleak's fight is a snowball duel. Collect a snowball and adjust its throwing distance with the directional controls. The target is the glowing spot below Bleak's neck, not his general body.
Bleak alternates ordinary snowballs with larger attacks launched from his hat. After the large volley, he pauses and laughs. That pause is the safest opportunity to line up a snowball and strike the glowing target.
Dodge first, then collect or position the next snowball. Later volleys may arrive in faster or grouped patterns, so do not throw simply because a snowball is nearby. Continue hitting the glowing target during the post-volley openings until Bleak is defeated.
- Collect a snowball.
- Adjust its range before throwing.
- Aim at the glowing spot below Bleak's neck.
- Dodge the large snowball patterns.
- Attack during Bleak's laugh.
- Prioritize survival over rushed throws.
Barbos's Barrier
The entire fight uses Enguarde. In the first chamber, Barbos is protected by two purple Lurchins. Stab the ordinary Lurchins so they rebound from the walls and strike the purple shields. Once both shields are gone, stab Barbos's exposed soft center.
In the second chamber, Barbos again has two purple shields, but a homing purple projectile follows Enguarde. Let it track you until it turns yellow and prepares to launch in a straight line. Position yourself so that line points toward one shield, then move away before the projectile fires. Repeat for the second shield and stab Barbos when the center opens.
In the final chamber, Barbos fires spikes in repeated salvos. Stay near one side and swim vertically through the gaps rather than moving directly beneath the boss. When a salvo ends and the soft center is exposed, stab it. Continue this pattern until the final openings are cleared.
- Control Enguarde throughout the encounter.
- Redirect ordinary Lurchins into the first two shields.
- Aim the yellow homing projectile at the second-phase shields.
- Swim through the final spike gaps.
- Stab only when Barbos's center is exposed.
Kastle KAOS: KAOS rematch
The Kastle KAOS fight is different from Kaos Karnage. The rotating blades are not used. Pick up the supplied barrel, wait until KAOS's jet flames stop, cross underneath, and throw the barrel upward into his head.
The first hit removes the current head and reveals a replacement head that launches explosive projectiles. Wait for that attack to finish, then cross beneath KAOS during the next safe engine interval, collect another barrel, and throw it upward. Two barrel hits disable KAOS.
Do not leave after the second hit. KAOS is removed from the room, the curtain rises, and Baron K. Roolenstein begins a separate fight. If you lose after defeating KAOS, the SNES version may require defeating the rematch again on a later attempt.
- Use supplied barrels rather than the blade method.
- Cross underneath only while the flames are inactive.
- Avoid the replacement head's explosives.
- Land two upward barrel hits.
- Prepare for Baron K. Roolenstein immediately afterward.
Kastle KAOS: Baron K. Roolenstein
The castle Baron can be damaged only by striking the rear Propellerpack. The first arrangement provides handles and platforms on both sides. Pull a usable handle to make a barrel appear, collect it, and throw it into the Baron's rear as he passes or turns away. Two successful hits complete the opening arrangement.
Electricity then covers the floor. Use the safe raised platform and wait for the electrical cycle before pulling the correct handle and collecting the barrel. Throw at the rear Propellerpack twice. Do not drop into the active floor merely to reach a barrel.
Next, the platform arrangement changes and a moving platform is needed to reach the handle. Duck beneath the Baron when he passes, ride the moving platform to the handle, collect the barrel, and return to the stationary platform before throwing. Repeat twice.
In the final arrangement, electricity activates in bursts rather than remaining on continuously. Wait for the current to stop, pull the currently raised handle, grab the barrel quickly, and retreat to a platform. Throw at the rear pack three times. The complete castle battle is nine hits: two in the opening arrangement, two over the continuous electrical floor, two during the moving-platform arrangement, and three during the final alternating-electricity arrangement.
If a barrel is destroyed by electricity, do not force the next cycle. Re-establish your position, wait for the current to stop, and use the next handle opportunity.
- Target the rear Propellerpack.
- Land two opening hits.
- Land two hits after the floor becomes electrified.
- Use the moving platform for two hits.
- Land three hits during the final electrical bursts.
- Confirm nine total rear-pack hits.
- Do not count this as the ten-hit Knautilus battle.
Knautilus: Baron K. Roolenstein's true final battle
The Knautilus is reached after the five Krematoa stages are completed and their five cogs are delivered to Boomer. This battle is separate from Kastle KAOS and uses Steel Barrels. The target is the helicopter-pack propeller or rotor.
At the opening, avoid the bouncing fireballs and wait for the overhead ventilation shaft to activate. Throw a Steel Barrel upward through the vent when the Baron is aligned beneath it. Do not waste the barrel by throwing during the inactive part of the cycle.
The Baron then moves to the foreground. Use the safe platforms and inactive dynamos to reach the available Steel Barrel, then throw it at the rear propeller twice. He returns to the background for two more vent attacks. After these two hits, the conveyor section activates; keep correcting your footing and land the next propeller hit when the arena supplies a safe opening.
The final group uses an electrical beam from the dynamos. Position the Steel Barrel so the horizontal beam strikes it. The barrel absorbs the charge, but it is unsafe to pick up while glowing. Wait until the electrical effect ends and the dynamos are inactive, then collect the barrel and throw it at the propeller. Repeat the process four times. The conveyor returns after two hits in this group, so treat the floor as moving rather than stationary.
The fight requires ten successful propeller hits: one opening vent hit, two foreground hits, two return-to-background vent hits, one conveyor-section hit, and four electrical-beam and rotor hits. The tenth hit defeats the Baron and awards the final DK Coin.
- Complete all five Krematoa stages.
- Deliver all five cogs to Boomer.
- Use the overhead vent for the opening and return phases.
- Use inactive dynamos and safe platforms for positioning.
- Let Steel Barrels absorb the horizontal electrical beam.
- Never pick up a glowing barrel.
- Account for the returning conveyor.
- Land ten propeller hits.
- Confirm the final DK Coin after victory.
Recovery and completion check
When an attempt fails, change the immediate goal from attacking to resetting position. At Belcha, preserve floor space near the pit. At Arich, wait for the head to descend. At Kaos Karnage, take one blade opportunity at a time. At Squirt, refill Ellie before starting another water cycle. At Bleak, survive the volley before adjusting the snowball. At Barbos, set up controlled ricochets instead of chasing the boss. In both Baron fights, wait for the rear-pack opening rather than throwing at the front of the machine.
The main boss route is complete after Belcha, Arich, Squirt, Kaos Karnage, Bleak, and Barbos are defeated, followed by the two-hit KAOS rematch and the nine-hit castle Baron fight. The true final route is complete after all five Krematoa cogs are delivered, the Knautilus rises, and Baron K. Roolenstein is defeated with ten Steel Barrel hits. The separate Banana Bird Queen milestone requires all 15 Banana Birds and a later visit to Wrinkly's Save Cave.
- Defeat Belcha, Arich, Squirt, Kaos Karnage, Bleak, and Barbos.
- Clear Kaos Karnage with six hits.
- Clear the Kastle KAOS rematch with two barrel hits.
- Defeat the castle Baron with nine rear-pack hits.
- Deliver all five Krematoa cogs.
- Defeat the Knautilus Baron with ten Steel Barrel hits.
- Confirm the final DK Coin.
- Rescue all 15 Banana Birds and visit Wrinkly's Save Cave for the separate Queen sequence.
Before you move on
- Belcha, Arich, Squirt, Kaos Karnage, Bleak, and Barbos are defeated.
- Kaos Karnage is cleared with six hits: three against the helmet and three against the exposed head.
- Kastle KAOS is cleared with two KAOS barrel hits and nine Baron K. Roolenstein rear-pack hits.
- The castle Baron's nine hits are distributed as two opening, two electrical-floor, two moving-platform, and three final electrical-burst hits.
- All five Krematoa stages are completed and their cogs are delivered to Boomer.
- The Knautilus rises from Krematoa's lake.
- The Knautilus Baron is defeated with ten successful Steel Barrel hits to the helicopter-pack propeller.
- The final DK Coin is awarded after the Knautilus battle.
- The separate Queen milestone is confirmed only after all 15 Banana Birds are rescued and Wrinkly's Save Cave is visited.
References for this chapter
- Donkey Kong Country 3: Dixie Kong's Double Trouble! FAQ — Super Nintendo — KChua
- Donkey Kong Country 3: Dixie Kong's Double Trouble! Guide and Walkthrough — Super Nintendo — T_man_J
- Donkey Kong Country 3: Dixie Kong’s Double Trouble! – Guide and Walkthrough – Super Nintendo
- Donkey Kong Country 3: Dixie Kong's Double Trouble! North American Instruction Manual
- Kastle Kaos — Super Mario Wiki
- KAOS Karnage — Super Mario Wiki
- King K. Rool — Super Mario Wiki
- Donkey Kong Country 3: Dixie Kong's Double Trouble! FAQ/Walkthrough — Neoseeker
Overworld Navigation, Shortcuts and Revisit Routes
Donkey Kong Country 3’s Northern Kremisphere is an explorable map rather than a strictly linear level list. Complete Kremwood Forest first, then use the Hovercraft to choose between Cotton-Top Cove and Mekanos, while returning to earlier areas for Brothers Bear errands, Banana Birds, Bonus Coins and DK Coins. Krematoa becomes available with the Hovercraft or Turbo Ski, and its five cogs must be delivered to Boomer before the Knautilus rises.
Use the flags to identify unfinished levels
The map gives you a reliable cleanup system. An unbeaten level has a black flag with a white K. After completing the goal, the flag becomes pink if Dixie reached the goal or blue if Kiddy did. A small gold pennant beneath the main flag marks that the level’s DK Coin has been collected. If the main flag hangs down instead of flying fully, at least one Bonus Coin remains in that level. A fully raised flag means all of its Bonus Areas have been found and completed.
Use these markers to return directly to problem stages instead of replaying an entire world. Missing a DK Coin does not require another campaign clear: enter the marked level, defeat its Koin, and finish or exit the stage normally so the map records the collection. For Bonus Coins, revisit only stages whose flags still droop. K-O-N-G letters and ordinary extra-life pickups are not represented by these markers and remain optional.
- Look for a black flag before starting a level.
- Use the gold pennant to confirm a DK Coin.
- Use the flag’s raised or drooping position to track Bonus Coins.
- Revisit individual stages rather than replaying complete worlds.
Save often and check the Brothers Bear
Wrinkly’s Save Cave records your progress and is the safest stopping point after a boss, vehicle upgrade, major trade or difficult cleanup route. Saving does not replace the map markers, so use Wrinkly for preservation and the flags for level-by-level tracking.
The Brothers Bear provide both hints and required optional-completion errands. Bazaar’s General Store sells items with Bear Coins. His Shell can be taken to Barnacle in Lake Orangatanga to release a Banana Bird, while his Mirror is used in Barter’s trade. Blunder gives clues about Krematoa, although you do not need to solve the island from his dialogue if you already know the route.
Several errands must be completed in a particular order. Speak with Blizzard at his K3 Basecamp to receive the Present, take it to Blue at Blue’s Beach Hut in Cotton-Top Cove, and receive the Bowling Ball. Bring that Bowling Ball to Bazooka in Mekanos so Big Bessie can launch you to Sky-High Secret. Buy the Mirror from Bazaar before visiting Barter; Barter exchanges it for the Wrench. Give the Wrench to Bjorn in Razor Ridge to repair the chairlift and open Clifftop Cache. Baffle’s Code Room in Kaos Kore then requires the Mirror again, so retrieve it from Barter before solving Baffle’s clue and opening Sewer Stockpile.
- Save at Wrinkly after every boss and major trade.
- Buy Bazaar’s Shell before visiting Barnacle.
- Carry Blizzard’s Present to Blue, then take Blue’s Bowling Ball to Bazooka.
- Trade Bazaar’s Mirror to Barter for the Wrench.
- Recover the Mirror later for Baffle’s Code Room.
Follow the flexible main campaign route
The required early route is Lake Orangatanga followed by Kremwood Forest. After defeating Arich and receiving the Hovercraft patch, Funky builds the Hovercraft, which can pass over the rocks blocking wider portions of the map. At this point, Cotton-Top Cove and Mekanos are alternate choices; neither must be completed before the other. A convenient low-stress order is Cotton-Top Cove first and Mekanos second, but you may reverse that order without breaking progression.
After Squirt is defeated in Cotton-Top Cove, Funky can complete the Turbo Ski using the ski component from that encounter. KAOS later supplies the second ski component, allowing the Turbo Ski to travel up waterfalls. This means the Turbo Ski is not needed to reveal Krematoa if you already have the Hovercraft, but it opens additional map routes and Banana Bird locations.
Once Cotton-Top Cove and Mekanos are finished, continue through K3, Razor Ridge and Kaos Kore. The exact cleanup order is flexible. If an entrance is blocked by water, rocks, a waterfall or a chairlift, identify the missing vehicle or Brothers Bear trade instead of repeatedly attempting the same route.
- Complete Lake Orangatanga and Kremwood Forest first.
- After Arich, collect the Hovercraft from Funky.
- Choose Cotton-Top Cove or Mekanos next; their order is optional.
- Use Squirt’s and KAOS’s ski components to obtain the Turbo Ski.
- Continue to K3, Razor Ridge and Kaos Kore.
Reveal Krematoa with the Hovercraft or Turbo Ski
Take the Hovercraft or Turbo Ski to the four large rocks east of Mekanos. Circle the formation cleanly until the volcanic island of Krematoa rises from the sea. The Hovercraft is sufficient for this event; waiting for the Turbo Ski or Gyrocopter would unnecessarily delay access.
Enter Krematoa and visit Boomer’s Bomb Shelter. Boomer accepts Bonus Coins to remove the rocks blocking the island’s stages. Bonus Coins are the payment currency and are separate from the cogs. Do not confuse them with Bear Coins, which are used by Bazaar and some Brothers Bear interactions, or DK Coins, which are collected from Koins in ordinary levels.
Open as many Krematoa entrances as your Bonus Coin total permits, then return to earlier levels if Boomer still blocks the next stage. The first four Krematoa stages contain Bonus Areas; Rocket Rush has no Bonus Areas. Each of the five Krematoa stages awards one cog when cleared, regardless of whether you have found every optional item in that stage.
- Use the Hovercraft or Turbo Ski at the four rocks east of Mekanos.
- Visit Boomer before attempting blocked Krematoa stages.
- Track Bonus Coins and cogs separately.
- Return to earlier stages if Boomer lacks enough Bonus Coins to open the next entrance.
Use a targeted cleanup order
For efficient 103% cleanup, first inspect every ordinary level marker in Lake Orangatanga and Kremwood Forest, then move through Cotton-Top Cove, Mekanos, K3, Razor Ridge and Kaos Kore. Clear drooping-flag levels for Bonus Coins before spending time on isolated Banana Bird errands. This supplies the currency needed for Boomer while minimizing unnecessary map travel.
Next, complete Brothers Bear routes that depend on later vehicles or trades. Use the Hovercraft for rock-blocked caves, the Turbo Ski for waterfall and speed-restricted locations, and the repaired Razor Ridge chairlift for Clifftop Cache. Wait until the Gyrocopter is available before attempting Hill-Top Hoard, K’s Kache and Belcha’s Burrow; those locations cannot be reached by the earlier ground and water vehicles. The Gyrocopter is awarded by Funky after all 41 North American SNES DK Coins have been collected.
Do not treat the map as proof that every Banana Bird or Bear trade has been completed. The flags track level goals, Bonus Coins and DK Coins, but Brothers Bear errands and Banana Bird caves require separate checks. Keep a written list if pursuing the full 103% route.
- Clear drooping-flag levels before long side errands.
- Use each vehicle only for routes it can actually reach.
- Complete the chairlift and bear-trade prerequisites before searching for their caves.
- Collect all DK Coins before expecting Funky to provide the Gyrocopter.
- Track Banana Birds and Bear errands separately from level flags.
Confirm the Knautilus route
Defeating KAOS and completing Kastle KAOS does not finish the full Krematoa route. After opening and clearing all five Krematoa stages, return to Boomer’s Bomb Shelter and deliver all five cogs to his machine. The machine activates Krematoa and exposes the Knautilus. If the submarine has not appeared, check both requirements: every Krematoa stage must be cleared, and every stage cog must have been delivered to Boomer.
Save at Wrinkly before entering the Knautilus. The submarine is the route to the true final Baron K. Roolenstein encounter, separate from the earlier Kastle KAOS battle. After the fight, return to the overworld for any remaining Bonus Coins, DK Coins, Banana Birds or Bear errands.
- Kastle KAOS is complete.
- Krematoa’s five stages are cleared.
- All five cogs are delivered to Boomer.
- The Knautilus has visibly surfaced.
- Save before entering the submarine.
- Return to the map for targeted postgame cleanup.
Before you move on
- Lake Orangatanga and Kremwood Forest are complete.
- Cotton-Top Cove and Mekanos have both been cleared, in either order, after the Hovercraft became available.
- K3, Razor Ridge and Kaos Kore are complete.
- Krematoa has risen at the four rocks east of Mekanos.
- Boomer has opened all five Krematoa stages with Bonus Coins.
- All five Krematoa stages have been cleared and all five cogs have been delivered to Boomer.
- The Knautilus has surfaced and can be entered.
- For full cleanup, every ordinary level has a fully raised flag, every applicable level has its gold pennant, all Brothers Bear routes have been checked, and Banana Bird progress has been tracked separately.
References for this chapter
- Donkey Kong Country 3: Dixie Kong’s Double Trouble! Nintendo SNES Instruction Manual
- Donkey Kong Country 3: Dixie Kong’s Double Trouble! – Guide and Walkthrough – Super Nintendo
- Donkey Kong Country 3: Dixie Kong’s Double Trouble! — Guide and Walkthrough — Super Nintendo — By VGW_Man
- Level Flag — Super Mario Wiki
- Donkey Kong Country 3: Dixie Kong’s Double Trouble! — Donkey Kong Wiki
Post-Final Cleanup, Common Tough Spots and Recovery
After Kastle KAOS and the Knautilus, complete the remaining Banana Bird rescues, item exchanges, vehicle unlocks, and collectible checks. The North American SNES release has fifteen Banana Birds: thirteen are freed from hidden caves by repeating Simon Says sequences, while Barnacle and Bramble exchange their birds for specific items. After the fifteenth bird is recorded, enter any Wrinkly’s Save Cave to trigger the Banana Bird Queen sequence.
Save and separate the completion milestones
Visit Wrinkly’s Save Cave before beginning cleanup, then save again after defeating Baron K. Roolenstein aboard the Knautilus. Kastle KAOS, the Knautilus, the Banana Bird rescues, and the Banana Bird Queen sequence are separate milestones. Do not assume that defeating KAOS ends the complete SNES route.
For full standard completion, track Bonus Coins, DK Coins, Banana Birds, and Krematoa cogs separately. The commonly used North American SNES targets are 85 Bonus Coins, 41 DK Coins, 15 Banana Birds, and all five Krematoa cogs. K-O-N-G letters, ordinary bananas, and incidental extra-life pickups are optional.
- Save before cleanup.
- Confirm that all five Krematoa cogs were delivered to Boomer.
- Confirm that Baron K. Roolenstein was defeated aboard the Knautilus.
- Track Bonus Coins, DK Coins, and Banana Birds as separate totals.
Rescue Banana Birds 1 through 8
1. Bounty Beach: Use Funky’s Motorboat to reach the small beach directly east of Funky’s Rentals. Approach the concealed cave and press B to open it. Watch the colored-crystal sequence, then reproduce it to free the bird.
2. Smuggler’s Cove: Clear Doorstop Dash first. In Lake Orangatanga, swim beneath the upper bridge associated with Tidal Trouble and continue to the northern beach. Open the concealed cave with B and complete its Simon Says sequence.
3. Arich’s Hoard: Beat Riverside Race in less than 1:15. Afterward, clear Springin’ Spiders, then visit Brash’s Cabin. Brash’s reaction changes the route and exposes the crossing. Complete Bobbing Barrel Brawl, return to the revealed entrance across the river, and complete the Simon Says sequence inside Arich’s Hoard.
4. Kong Cave: Use the Hovercraft to sail northwest of Bazaar’s General Store. Pass Wrinkly’s Save Cave and cross beyond the rocks beside the small waterfall. Land on the beach where the cave is hidden, press B, and complete the sequence. This is the SNES location; do not use the GBA map’s altered landmark description.
5. Bounty Bay: Enter Cotton-Top Cove and go past Blue’s Beach Hut. Swim directly north into the shoreline wall until the hidden entrance opens. Complete the Simon Says sequence.
6. Undercover Cove: After clearing Mekanos and obtaining the Turbo Ski, approach the waterfall north of Kong Cave. Use the Turbo Ski’s speed to climb it and land on the beach at the top. Open Undercover Cove and complete the sequence.
7. Glacial Grotto: Clear Lemguin Lunge in K3. On the overworld, press Up at Lemguin Lunge to reach Blizzard’s Basecamp, then press Left to open the hidden ice cave. Complete the sequence inside.
8. Sky-High Secret: Visit Blizzard’s Basecamp and take his Present to Blue’s Beach Hut. Blue changes it into a Bowling Ball. Carry the Bowling Ball to Bazooka’s Barracks in Mekanos and give it to Bazooka. Enter Big Bessie when prompted; the cannon launches the Kongs to the floating cave. Complete the sequence, then press Left when leaving to return to the map.
- Bounty Beach complete.
- Smuggler’s Cove complete.
- Arich’s Hoard complete after Riverside Race, Springin’ Spiders, Brash’s Cabin, and Bobbing Barrel Brawl.
- Kong Cave complete from the Hovercraft-accessible northwest beach.
- Bounty Bay complete.
- Undercover Cove complete with the Turbo Ski.
- Glacial Grotto complete through Lemguin Lunge and Blizzard’s Basecamp.
- Sky-High Secret complete through the Present, Bowling Ball, and Big Bessie chain.
Complete the Mirror, Wrench, and Baffle chain
9. Clifftop Cache: Buy the Mirror and Shell from Bazaar’s General Store. Take the Mirror to Barter’s Swap Shop and trade it for the Monkey Wrench. In Razor Ridge, use Benny’s Chairlifts to reach Kong-Fused Cliffs, then visit Bjorn’s Chairlifts. Give Bjorn the Wrench to repair the lift. Ride across, run left, and enter Clifftop Cache. Complete the Simon Says sequence. To return, wait at the cliff edge for Bjorn’s chairlift.
10. Sewer Stockpile: After trading the Mirror to Barter, return to Barter and buy the Mirror back. Take it to Baffle’s Code Room in Kaos Kore. Baffle provides the code needed for the nearby grate. Enter the Kaos Kore water and swim in a figure-eight around the two rocks to open the grate. Enter Sewer Stockpile and complete the sequence. The Mirror-to-Baffle step is required; do not treat the figure-eight as a standalone shortcut.
11. Hill-Top Hoard: Collect all 41 DK Coins. Once the full total is secured, Funky provides access to the Gyrocopter. Fly to the high area directly above Razor Ridge, land at the cave entrance, and complete the Simon Says sequence.
12. Belcha’s Burrow: Use the Gyrocopter to fly south of Wrinkly’s Save Cave, slightly left of that position. Probe the large bulging green hill until the entrance appears. Enter Belcha’s Burrow and complete its sequence. Do not search south of Bazaar’s General Store; that is an incorrect landmark for the SNES route.
- Bazaar’s Mirror traded to Barter for the Monkey Wrench.
- Bjorn’s chairlift repaired.
- Clifftop Cache complete.
- Mirror bought back from Barter.
- Baffle’s code obtained.
- Sewer Stockpile complete.
- All 41 DK Coins collected.
- Hill-Top Hoard complete with the Gyrocopter.
- Belcha’s Burrow complete south of Wrinkly’s Save Cave.
Finish the final three bird locations and direct exchanges
13. K’s Kache: Use the Gyrocopter to reach the small island in the lake north of Cotton-Top Cove, beside Banana Bird Heaven. Land on the island, open K’s Kache, and complete the Simon Says sequence.
14. Barnacle’s Island: Buy the Shell from Bazaar’s General Store and take it to Barnacle on his island in Lake Orangatanga. Give Barnacle Bazaar’s Shell. He immediately exchanges it for his Banana Bird; there is no cave sequence at this location.
15. Bramble’s Bungalow: Clear Razor Ridge first. On the overworld, move east along the trail beside Bramble’s Bungalow until you reach the large red flower. Walk over it to collect it, then return to Bramble’s Bungalow and give him the flower. Bramble exchanges it for his Banana Bird. Entering the bungalow before collecting the flower does not complete the exchange.
- K’s Kache complete with the Gyrocopter.
- Bazaar’s Shell delivered to Barnacle.
- Barnacle’s Banana Bird received.
- Razor Ridge cleared.
- Red flower collected from the trail east of Bramble’s Bungalow.
- Flower delivered to Bramble.
- Bramble’s Banana Bird received.
Recover from Simon Says failures
The thirteen cave rescues use a colored-crystal memory sequence. Watch the complete pattern before entering the inputs, and use the button mapping displayed by that cave rather than assuming that another cave uses the same arrangement.
A failed sequence ejects the Kongs and changes the pattern. Re-enter the cave, watch the new sequence, and repeat it carefully. There is no reason to rush the inputs. Once a cave has been completed, its bird remains rescued and the cave does not need to be repeated.
- Watch the full sequence before pressing buttons.
- Use the cave’s displayed color-to-button mapping.
- After failure, re-enter and learn the changed sequence.
- Confirm the bird is recorded before leaving the map area.
Trigger the Banana Bird Queen sequence
After all fifteen birds are recorded, enter any Wrinkly’s Save Cave. Do not visit Wrinkly as the final step before the fifteenth rescue; the Queen event is triggered only after the complete bird collection is present. The Banana Birds then carry Dixie and Kiddy to the imprisoned Banana Bird Queen, beginning the final Banana Bird ending sequence.
If the event does not begin, check the fifteen-entry list below. The most commonly overlooked rewards are Hill-Top Hoard, Belcha’s Burrow, Barnacle’s direct Shell exchange, and Bramble’s flower exchange.
- All fifteen Banana Birds are recorded.
- Both direct exchanges are complete: Barnacle’s Shell and Bramble’s flower.
- Enter Wrinkly’s Save Cave only after the fifteenth bird is recorded.
- The Banana Bird Queen sequence plays.
- The Queen is freed.
Recover lives and handle difficult retries
For low-life recovery, use a familiar stage with a repeatable Extra Life Balloon, a safe K-O-N-G route, or a Bonus Area that can be entered consistently. Save before farming and again afterward. Abandon any farming route that costs more lives than it produces.
When a platforming section feels unpredictable, observe one complete hazard cycle from a safe location. Move during the confirmed gap with short inputs instead of holding a direction through the entire sequence. Dixie is generally safer for aerial correction and controlled descent, while Kiddy is useful for heavy landings, water skips, and weight-based interactions.
For boss practice, spend one attempt observing the full pattern. On the next attempt, attack only during a confirmed opening and retreat immediately. Practice Kastle KAOS and the Knautilus independently because they are separate encounters with different hazards and attack rules.
- Use only a reliable life source.
- Save before and after life farming.
- Observe moving hazards before committing.
- Recover the partner only when the DK Barrel route is safe.
- Prioritize survival after losing one Kong.
- Practice KAOS and the Knautilus as separate fights.
Final fifteen-bird and completion verification
Use this list exactly once per bird. The first thirteen entries are cave rescues; Barnacle’s Island and Bramble’s Bungalow are direct Brothers Bear exchanges. After the fifteenth entry is confirmed, enter Wrinkly’s Save Cave to trigger the Queen sequence.
For the complete standard route, also verify every main level, all five Krematoa stages, all five cogs delivered to Boomer, 85 Bonus Coins, and 41 DK Coins. Rocket Rush has no Bonus Areas. K-O-N-G letters are optional extra-life collectibles and are not required for the standard completion total described here.
- 1. Bounty Beach — open the cave east of Funky’s Rentals with the Motorboat and complete Simon Says.
- 2. Smuggler’s Cove — clear Doorstop Dash, swim beneath the upper bridge in Lake Orangatanga, and complete Simon Says.
- 3. Arich’s Hoard — beat Riverside Race under 1:15, clear Springin’ Spiders, visit Brash, clear Bobbing Barrel Brawl, then complete Simon Says.
- 4. Kong Cave — use the Hovercraft to reach the northwest beach beyond the rocks near Bazaar’s General Store.
- 5. Bounty Bay — swim north from Blue’s Beach Hut in Cotton-Top Cove and complete Simon Says.
- 6. Undercover Cove — use the Turbo Ski to climb the waterfall north of Kong Cave.
- 7. Glacial Grotto — clear Lemguin Lunge, press Up to reach Blizzard’s Basecamp, then press Left.
- 8. Sky-High Secret — deliver Blizzard’s Present to Blue, carry the Bowling Ball to Bazooka, and ride Big Bessie.
- 9. Clifftop Cache — trade Barter’s Mirror for the Monkey Wrench, repair Bjorn’s chairlift, and complete the cave.
- 10. Sewer Stockpile — buy the Mirror back, give it to Baffle, use his code, and swim the figure-eight around the Kaos Kore rocks.
- 11. Hill-Top Hoard — collect all 41 DK Coins, obtain the Gyrocopter, and fly above Razor Ridge.
- 12. Belcha’s Burrow — use the Gyrocopter south of Wrinkly’s Save Cave and probe the bulging green hill.
- 13. K’s Kache — use the Gyrocopter to reach the island north of Cotton-Top Cove beside Banana Bird Heaven.
- 14. Barnacle’s Island — give Barnacle Bazaar’s Shell and receive his Banana Bird.
- 15. Bramble’s Bungalow — after Razor Ridge, collect the flower on the trail east of the bungalow and give it to Bramble.
- All fifteen Banana Birds are recorded.
- Wrinkly’s Save Cave is visited only after all fifteen birds are recorded.
- The Banana Bird Queen sequence plays and the Queen is freed.
- All five Krematoa cogs are delivered to Boomer.
- Baron K. Roolenstein is defeated aboard the Knautilus and the tracked completion totals are satisfied.
Before you move on
- Bounty Beach rescued.
- Smuggler’s Cove rescued.
- Arich’s Hoard rescued after the Riverside Race, Springin’ Spiders, Brash, and Bobbing Barrel Brawl prerequisites.
- Kong Cave rescued from the Hovercraft-accessible northwest beach.
- Bounty Bay rescued.
- Undercover Cove rescued with the Turbo Ski.
- Glacial Grotto rescued through Lemguin Lunge and Blizzard’s Basecamp.
- Sky-High Secret rescued through Blizzard’s Present, Blue’s Bowling Ball, Bazooka, and Big Bessie.
- Clifftop Cache rescued after Barter’s Wrench trade and Bjorn’s chairlift repair.
- Sewer Stockpile rescued after the Mirror is returned to Baffle and his code is used.
- Hill-Top Hoard rescued after collecting all 41 DK Coins and obtaining the Gyrocopter.
- Belcha’s Burrow rescued south of Wrinkly’s Save Cave with the Gyrocopter.
- K’s Kache rescued on the island north of Cotton-Top Cove.
- Barnacle’s Island Banana Bird received by giving Barnacle Bazaar’s Shell.
- Bramble’s Bungalow Banana Bird received by collecting the flower east of the bungalow after Razor Ridge and giving it to Bramble.
- All fifteen Banana Birds are recorded.
- Wrinkly’s Save Cave is entered after the fifteenth rescue.
- The Banana Bird Queen sequence plays and the Queen is freed.
- Every main level and all five Krematoa stages are cleared.
- All five Krematoa cogs are delivered to Boomer, Baron K. Roolenstein is defeated, and the tracked Bonus Coin and DK Coin totals are complete.
References for this chapter
Finishing up
Clear every ordinary level and boss through Kastle KAOS to complete the standard campaign.
Reveal Krematoa with the Hovercraft or Turbo Ski, collect enough Bonus Coins to pay Boomer for its five stage entrances, clear all five Krematoa stages, and deliver their five cogs to Boomer.
Enter the Knautilus and defeat Baron K. Roolenstein aboard the submarine. This completes the true final boss route but is not by itself the full 103% Queen ending.
For the standard 103% route, clear every applicable Bonus Area and collect every Bonus Coin, collect all 41 DK Coins including the Knautilus reward, and rescue all 15 Banana Birds.
After rescuing all 15 Banana Birds, return to any Wrinkly's Save Cave. The Banana Birds then carry Dixie and Kiddy to the Banana Bird Queen, whose sequence provides the full final ending.
K-O-N-G letters, ordinary bananas and extra-life pickups are optional and are not substitutes for Bonus Coins, DK Coins or Banana Birds.
Use map markers and the save summary to verify unfinished Bonus Areas and DK Coins before declaring the file complete.
Choose your next gameScreenshots & video
Game imagery for reference. Follow the written chapters above for the route and strategies.
Sources & references
Our original guide draws on the references below. Check the edition at the top of this page before following controls or unlock requirements.
- Super NES Instruction Manuals: Donkey Kong Country 3: Dixie Kong’s Double Trouble
- Donkey Kong Country 3: Dixie Kong’s Double Trouble! Nintendo SNES Instruction Manual
- Donkey Kong Country 3: Dixie Kong’s Double Trouble! – Bonus Level/Banana Bird Guide – Super Nintendo
- Donkey Kong Country 3: Dixie Kong’s Double Trouble! — Super Mario Wiki
- Donkey Kong Country 3: Dixie Kong’s Double Trouble! - Q&A for Super Nintendo
- Donkey Kong Country 3: Dixie Kong's Double Trouble! — Guide and Walkthrough — Super Nintendo — DWA
- Tidal Trouble — Donkey Kong Wiki
- Doorstop Dash — Donkey Kong Wiki
- The Video Game Atlas — Super NES Maps
- Barrel Shield Bust-Up — Super Mario Wiki
- Riverside Race — Super Mario Wiki
- Squeals on Wheels — Super Mario Wiki
- Springin' Spiders — Super Mario Wiki
- Bobbing Barrel Brawl — Super Mario Wiki
- Arich's Ambush — Super Mario Wiki
- Cotton-Top Cove Walkthrough, Donkey Kong Country 3 SNES — Davenport Games
- Donkey Kong Country 3 — Map-Based Walkthrough — Yasu's Game Guide
- Donkey Kong Country 3: Dixie Kong's Double Trouble! North American Instruction Manual
- Donkey Kong Country 3: Dixie Kong’s Double Trouble! – Guide and Walkthrough – Super Nintendo
- Demolition Drain-Pipe — Super Mario Wiki
- Ripsaw Rage — Super Mario Wiki
- Low-G Labyrinth — Super Mario Wiki
- KAOS — Super Mario Wiki
- KAOS Karnage — Super Mario Wiki
- K3 — Donkey Kong Wiki
- Krevice Kreepers — Donkey Kong Wiki
- Lemguin Lunge — Super Mario Wiki
- Donkey Kong Country 3: Dixie Kong’s Double Trouble! Walkthrough — Neoseeker
- Tearaway Toboggan — Super Mario Wiki
- Barrel Drop Bounce — Super Mario Wiki
- Krack-Shot Kroc — Super Mario Wiki
- Bleak’s House — Super Mario Wiki
- Creepy Caverns — Super Mario Wiki
- Donkey Kong Country 3 SNES Maps — VGMAPS
- Tyrant Twin Tussle — Super Mario Wiki
- Criss Kross Cliffs — Super Mario Wiki
- Swoopy Salvo — Yasu’s Game Guide
- Knautilus — Super Mario Wiki
- Donkey Kong Country 3: Dixie Kong's Double Trouble! FAQ/Walkthrough — Neoseeker
- Donkey Kong Country 3: Dixie Kong's Double Trouble! FAQ — Super Nintendo — KChua
- Bonus Stage – Donkey Kong Wiki
- Cog – Super Mario Wiki
- KONG Letters – Super Mario Wiki
- Rocket Rush – Super Mario Wiki
- Donkey Kong Country 3: Dixie Kong's Double Trouble! Guide and Walkthrough — Super Nintendo — T_man_J
- Kastle Kaos — Super Mario Wiki
- King K. Rool — Super Mario Wiki
- Donkey Kong Country 3: Dixie Kong’s Double Trouble! — Guide and Walkthrough — Super Nintendo — By VGW_Man
- Level Flag — Super Mario Wiki
- Donkey Kong Country 3: Dixie Kong’s Double Trouble! — Donkey Kong Wiki
About the game & collecting notes
- Platform
- Super Nintendo Entertainment System
Step-by-step coverage for the original Super Nintendo (USA) release of Donkey Kong Country 3. This guide walks you through every main-world route to the true final ending (Baron K. Roolenstein aboard the Knautilus), details boss strategies, explains the overworld requirements (Krematoa cogs → Knautilus), and shows how to finish the game and chase full completion.
Darryl Polo
Darryl Polo loves tinkering with emulation and revisiting retro games. He enjoys exploring how old favorites play on different setups and sharing what he learns along the way. At Joking Joystick, he writes about the games, hardware, and small discoveries that keep the hobby fun.
Our editorial standardsFound a step that needs another look? Help us improve this guide.