
Donkey Kong Country 2: Diddy's Kong Quest — SNES (USA, Rev 1) Complete Campaign Walkthrough
Step-by-step walkthrough for the original Super Nintendo Entertainment System USA Rev 1 release. It covers the complete main route from Gangplank Galleon through K. Rool Duel, all required stages and boss or rescue encounters, overworld services, animal abilities, Bonus Areas, Kremkoins, Klubba’s Lost World access, and the full 102% completion route. Optional collectibles and Lost World cleanup are clearly separated from the ordinary ending.

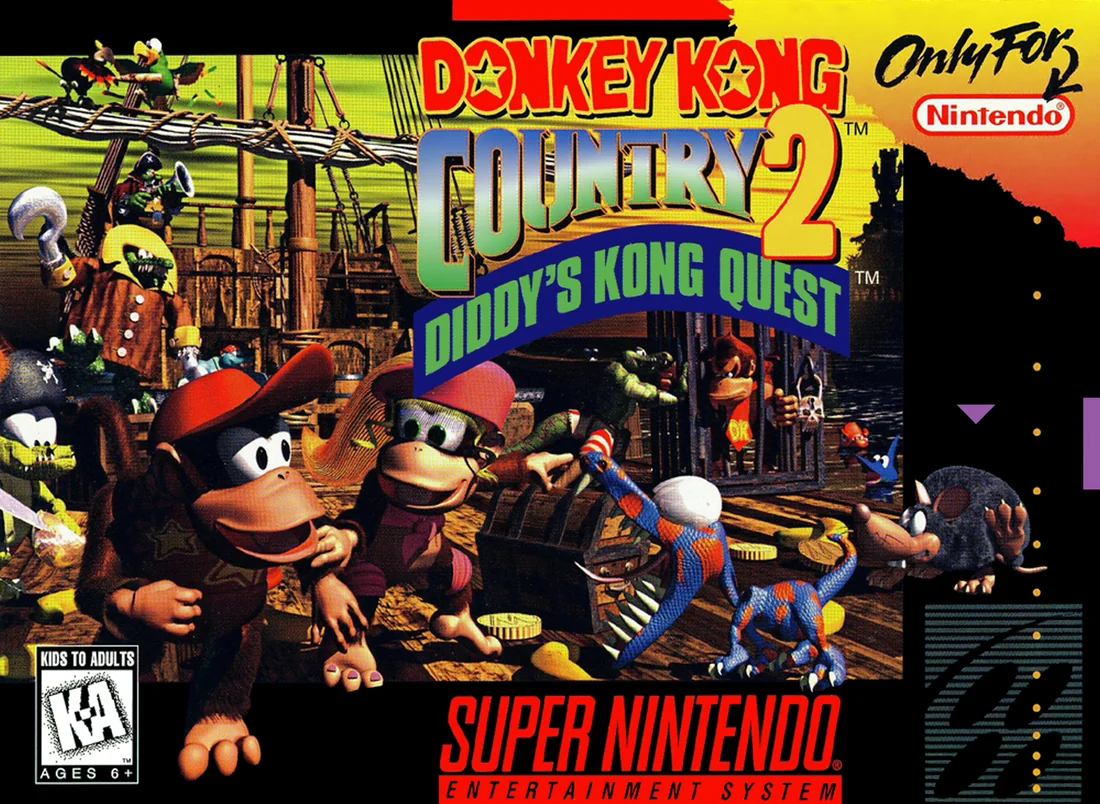
Find a copy
Donkey Kong Country 2: Diddy's Kong Quest Super Nintendo Entertainment System
We may earn a commission if you buy through these links, at no extra cost to you. As an Amazon Associate I earn from qualifying purchases.
Opens retailer search results. Check the model, edition, seller, availability and current price before buying.
Before you begin
You will play as Diddy and Dixie Kong on Crocodile Isle, progressing through the six regular worlds and The Flying Krock before the optional Lost World.
Clear each required regular stage in map order, complete Stronghold Showdown, defeat the five conventional world bosses, and win the final K. Rool Duel to finish the ordinary campaign.
Bonus Areas, Kremkoins, DK Coins, Kong-family visits, and Lost World stages are optional for the ordinary ending but required for the SNES file’s 102% maximum.
This walkthrough assumes the original Super Nintendo Entertainment System USA Rev 1 release and avoids importing mechanics from the Game Boy Advance remake.
Follow the chapters in order, using the level completion markers and collectible icons for a later cleanup pass.
Set yourself up for the run
Controller layout and inputs: confirm Jump, Attack/Throw, and character swap work on your controller/emulator and that Start pauses the game.
Dixie’s hover (spin) is required for some platforming; practice it in Pirate Panic to become comfortable with aerial control.
(See chapter on characters/animals.)
Save and backup: use Kong Kollege or create save states (emulator) for risky attempts.
Kong Kollege initially lets you save free; later it charges Banana Coins.
Save before boss fights and before attempting bonus rooms you haven’t completed.
Understand progression vs optional: required progress = clear stage and defeat world bosses to open later worlds.
Optional but strongly recommended for full completion = collect four KONG letters per level, finish bonus stages to earn Kremkoins, and spend 15 Kremkoins at Klubba to access Lost World stages.
Refer to the Lost World chapter for specifics.
Collect basics: learn how Bonus Barrels (Star Barrels) mark midpoints and how Bonus Areas award stars/Kremkoins.
Practice entering and completing Bonus Areas until you can reliably clear them for the Kremkoin reward.
Familiarize with animal buddies: Rambi, Squawks, Rattly and others appear across worlds and change how you traverse levels.
Learn which levels allow which animals and the safe ways to dismount or use their special abilities.
The dedicated animal chapter lists where each is required or recommended.
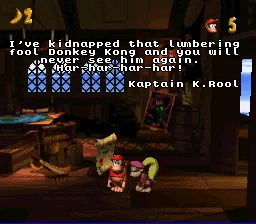
Overworld, Save Points and Fast Travel
The Crocodile Isle map is your progress hub. Kong Kollege saves the file, Funky's Flights II lets you return to previously visited worlds, and Klubba's Kiosks exchange Kremkoins for access to specific Lost World stages. These services use different currencies and follow different first-use rules, so establish them early before committing to difficult backtracking or boss attempts.
Read the map and identify the Kong facilities
After opening a file, Diddy and Dixie begin on the Gangplank Galleon map. The map shows the regular stages and the service locations that support the campaign. Move onto a marked location and press the action button to enter it. A Wrinkly Kong icon identifies Kong Kollege, a Funky Kong icon identifies Funky's Flights II, and a Klubba icon identifies Klubba's Kiosk.
These facilities are separate from normal levels. A level entrance advances the campaign when cleared, while the Kong locations manage saving, travel, advice, or Lost World access. Before leaving a world, scan the map for these icons so you know where to return when you need a save or a missed collectible.
- Identify the Wrinkly, Funky, and Klubba icons available on the current map.
- Treat regular stages, bosses, and service locations as separate map destinations.
- Remember that the map is the place to arrange backtracking; the Biplane Barrel does not replace entering a stage normally.
Save at Kong Kollege
Wrinkly Kong saves your game at Kong Kollege. The first save in each area is free. After that, saving at that area's Kong Kollege costs two Banana Coins. This is a location-based rule rather than a single free save for the entire file: reaching another area with its own Kong Kollege gives you that area's initial free save.
Use the first free save as soon as you reach a new Kong Kollege, then save again after clearing important stages or a boss if you have the required Banana Coins. Keep at least two Banana Coins available when you are working from a previously used Kong Kollege. Banana Coins are the currency for Wrinkly's later saves and for Funky's service; they are not interchangeable with Kremkoins.
The Flying Krock does not provide a Kong Kollege. If you are preparing for the final approach, make your last convenient overworld save before entering that area, then use the game's ordinary Star Barrels and lives to manage attempts inside levels. An overworld save records broader map progress; it is not an extra in-level checkpoint.
- Make the free first save at Kong Kollege in Gangplank Galleon.
- Reserve two Banana Coins before returning to a Kong Kollege you have already used.
- Save after a boss or a substantial collectible sweep instead of relying on an unfinished level attempt.
- Make a final safe save before entering The Flying Krock, since it has no Kong Kollege.
Use Funky's Flights II for backtracking
Funky Kong operates Funky's Flights II in every regular world except the Lost World. His Biplane Barrel provides fast travel between worlds that you have already visited, avoiding the need to replay a completed boss just to return to an earlier map. This is the main way to revisit stages for Bonus Areas, KONG letters, DK Hero Coins, Banana Coins, or extra lives.
The first use from a Funky airport costs two Banana Coins. After that airport has been paid for, flights from it become free. Treat the charge as belonging to the local airport or world: paying at Funky's station in one world does not automatically make every other station free.
Enter the station from the current world map, choose one of the previously reached destinations, and confirm the flight. When you arrive, use that world's map to enter the particular stage or facility you need. Funky moves you between world maps; he does not select a Bonus Area or place you directly at a level's midpoint.
- Use Funky's Flights II after reaching a previous world with unfinished collectibles.
- Carry two Banana Coins when using a local Funky station for the first time.
- After landing, enter the required stage from the destination world's map.
- Do not search the Lost World for Funky's Flights II; the service is absent there in the SNES version.
Locate the five SNES Klubba's Kiosks
The SNES game places Klubba's Kiosk in five regular worlds: Crocodile Cauldron, Krem Quay, Krazy Kremland, Gloomy Gulch, and K. Rool's Keep. There is no Kiosk in Gangplank Galleon or The Flying Krock. On each map, look for Klubba's large face and enter the marked outpost.
Each Kiosk has a fixed Lost World connection in this original SNES design. Crocodile Cauldron opens Jungle Jinx. Krem Quay opens Black Ice Battle. Krazy Kremland opens Klobber Karnage. Gloomy Gulch opens Fiery Furnace. K. Rool's Keep opens Animal Antics.
Do not apply the GBA remake's Kiosk behavior to this release. In the SNES game, paying one Kiosk does not turn every other Kiosk into a universal Lost World entrance; visit the particular regular-world Kiosk connected to the stage you want.
- Crocodile Cauldron: Jungle Jinx.
- Krem Quay: Black Ice Battle.
- Krazy Kremland: Klobber Karnage.
- Gloomy Gulch: Fiery Furnace.
- K. Rool's Keep: Animal Antics.
- Do not expect a Kiosk in Gangplank Galleon or The Flying Krock.
Pay 15 Kremkoins and enter the Golden Barrel
Klubba charges 15 Kremkoins to open one Lost World stage. Kremkoins are earned mainly by completing Bonus Areas, with boss victories also contributing to the total. Banana Coins cannot pay this toll. When you have at least 15 Kremkoins, enter the desired Kiosk, choose the payment option, and Klubba opens the bridge and makes the Golden Barrel available.
After paying a Kiosk, return visits to that paid location lead to the Golden Barrel without another payment. If you leave a Lost World stage before finishing it, return through the same Kiosk. Each of the five regular-world Kiosks requires its own 15-Kremkoin payment, so opening all five requires 75 Kremkoins in total.
The Lost World is optional for the ordinary campaign ending but required for a full completion target. For that goal, complete Bonus Areas as you progress, watch for the level-name completion marker on the map, and reserve Kremkoins rather than spending them carelessly on unrelated services.
- Have 15 Kremkoins before attempting to open a Golden Barrel.
- Confirm the Kiosk's fixed Lost World pairing before paying.
- Return through the same Kiosk if you leave an unfinished Lost World stage.
- Plan for five separate 15-Kremkoin payments if clearing every Lost World stage.
- Use the map's completed-level indicators to identify stages whose Bonus Areas still need attention.
Before you move on
- A file has been saved at Kong Kollege, and you know whether the next save at that location will cost two Banana Coins.
- You have used or located the relevant Funky's Flights II station and understand that it reaches previously visited worlds.
- You can identify all five SNES Klubba's Kiosks and their fixed Lost World destinations.
- You have reserved 15 Kremkoins for the next Golden Barrel if pursuing Lost World content.
- For full Lost World completion, you have a plan to earn and spend 75 Kremkoins across the five Kiosks.
- You have made a final convenient overworld save before entering The Flying Krock.
References for this chapter
- Super NES Instruction Manuals: Donkey Kong Country 2: Diddy’s Kong Quest
- Funky's Flights — Super Mario Wiki
- Klubba's Kiosk — Super Mario Wiki
- Donkey Kong Country 2: Diddy's Kong Quest - Guide and Walkthrough - Super Nintendo - DWA
- Donkey Kong Country 2: Diddy's Kong Quest - Guide and Walkthrough - Super Nintendo - Super_Slash
World 1 — Gangplank Galleon: Pirate Panic to Krow's Nest
Gangplank Galleon contains five regular stages followed by Krow's Nest: Pirate Panic, Mainbrace Mayhem, Gangplank Galley, Lockjaw's Locker and Topsail Trouble. Clear them in that order to open the boss stage. Bonus Areas are optional for ordinary world progression, but each completed Bonus Area awards a Kremkoin, which is useful later at Klubba's Kiosk. The safest general approach is to keep both Kongs together, use Dixie for long horizontal jumps, and treat every Star Barrel as the point from which a failed attempt can be recovered.
Clear Pirate Panic and identify its actual Bonus Areas
Enter Pirate Panic from the Gangplank Galleon map and move right across the ship deck. The opening enemies are Klomps, Neeks and kannonballs. Jump over enemies when their approach is awkward instead of attacking from below. Near the beginning, enter the cabin on the left if you want a red Extra Life Balloon or a safe place to replenish bananas and Banana Coins on repeated visits. This room is not a Kremkoin Bonus Area.
Continue along the normal deck route and collect the KONG letters when the jumps are safe. When the deck breaks downward, drop into the lower route to find the stage's first Bonus entrance. Inside, climb the barrel arrangement from left to right and take the Kremkoin at the upper-right. Return to the level and continue toward the finish.
Later, reach the Rambi section and take the rhino from his Animal Barrel. Follow the left-pointing arrow and use Rambi's charge to break through the indicated wall. The Bonus Area behind it is a Destroy Them All challenge. Charge through the Neeks and Klomps from left to right, avoiding unnecessary contact with enemies that cannot be safely hit from the front. Collect the Kremkoin at the far side, then finish the stage at the goal barrel.
If Rambi is lost, do not assume the wall can be opened by ordinary attacks. Finish the level and replay it later if you want the second Bonus Area or any missed letters.
- Complete Pirate Panic.
- Use the cabin for the optional 1-Up and banana or Banana Coin farming, not as a Kremkoin entrance.
- Check the lower deck Bonus Area and the Rambi wall Bonus Area if collecting Kremkoins.
Climb Mainbrace Mayhem and complete its three Bonus Areas
Mainbrace Mayhem takes place on the ship's rigging. Climb each rope deliberately and watch for Klingers moving along the ropes. Jump on a Klinger from above only when the landing rope is secure. Near the start, follow the right-pointing arrow toward the cargo net. Use Dixie's long jump or helicopter spin to reach the net, cross it, and jump right into the first Bonus Barrel. Climb the rigging in the Bonus Area and take the Kremkoin at the upper-right.
Continue past the Star Barrel. Near the later mast section, pick up the kannonball after dealing with the nearby enemies and carry it left to the kannon. Enter the cannon-launched Bonus Area and defeat all five Klingers. A kannonball, barrel and crate are available, so use whichever projectile gives the safest angle rather than trying to jump onto every enemy. The Kremkoin appears after the enemies are defeated.
After leaving that Bonus Area, climb the next rigging section and move to its upper area. At the top, jump left onto the mast and use a team throw to reach the Bonus Barrel above. This room is a Collect the Stars challenge. Climb and descend the ropes to collect the stars, then take the Kremkoin once the required collection is complete.
Return to the main route and finish at the goal. If a Kong is lost during a rope transfer, look for the DK Barrel near a safe platform before attempting the next climb.
- Reach the first Bonus Barrel from the arrow-marked cargo net.
- Carry the kannonball to the cannon and complete the Klinger challenge.
- Use the upper team throw to enter the third Bonus Area.
- Finish Mainbrace Mayhem.
Cross Gangplank Galley with Rambi and search the two ship-deck bonuses
Gangplank Galley returns to open ship-deck movement and introduces heavier enemy groups, including Krunchas. At the beginning, climb the stack of large barrels and jump into the Bonus Barrel above it. The Bonus Area is a short chest-and-Zinger challenge: throw the chests at the stationary Zinger until the Kremkoin appears.
Continue through the deck and rigging sections. Rambi is available in the stage; mount him when the route is clear, but do not charge into a Kruncha or another enemy that cannot be defeated by a frontal charge. Jump over those enemies or use a barrel. Before narrow gaps, release Rambi if his momentum would carry you into a pit.
Near the later large barrel stack, follow the upward hook route instead of staying on the lowest deck. Jump across the hooks one at a time and reach the Bonus Barrel at the top. In that Bonus Area, continue across the hook sequence until the Kremkoin appears above the far stack of barrels. Return to the main route and finish the stage.
- Enter the opening Bonus Barrel above the stacked barrels.
- Use Rambi only against enemies he can safely defeat.
- Take the upper hook route for the second Gangplank Galley Bonus Area.
- Finish Gangplank Galley.
Swim through Lockjaw's Locker and use Enguarde for the bonus
Lockjaw's Locker is the first underwater stage. Open the Enguarde Animal Crate beneath the first Lockjaw and mount Enguarde. His Superstab lets him defeat or break through threats that are dangerous to the Kongs, so keep him while navigating the main underwater route. Avoid Lockjaws by changing height early rather than trying to pass through them at the last moment.
After the first major underwater section, follow the banana trail upward. It leads to a hidden side room containing an alphabet-shaped banana arrangement and a large crate. Use Enguarde's Superstab against the crate to reveal the Bonus entrance. The Bonus Area is a maze; use the route that goes through the second tunnel upward, first tunnel right, second tunnel upward, second tunnel right, then the first tunnel upward before turning right at the top for the Kremkoin.
Return to the main waterway and continue right. If Enguarde is lost, avoid unnecessary exploration and concentrate on reaching the goal. The stage can be replayed later for the Bonus Area and KONG letters.
- Open the Enguarde crate beneath the first Lockjaw.
- Follow the upward banana trail to the hidden crate.
- Break the crate with Enguarde and complete the maze Bonus Area.
- Finish Lockjaw's Locker.
Climb Topsail Trouble and prepare for Krow
Topsail Trouble is another rigging stage, but Rattly is the important animal companion. Move across the sloped masts and avoid Click-Clacks by waiting for a clear landing rather than jumping through a moving enemy. When the route provides Rattly, use his Superjump to reach high platforms and maintain control on the sloped surfaces.
Shortly after the sloped mast section, use Rattly's Superjump from the indicated platform to reach the first Bonus Barrel above. The Bonus Area requires Rattly to bounce across Flitters and defeat all of them; the Kremkoin appears on the far platform after the targets are cleared.
Later, climb the tall rigging with horizontally moving Flitters. Wait until each Flitter shifts to one side, then climb past it. At the top, jump to the upper-right mast and enter the second Bonus Area. Climb past the moving Flitters, using the rope's full height before making each transfer, and collect the Kremkoin at the top-right.
Finish Topsail Trouble to reveal Krow's Nest. This is the last regular stage in Gangplank Galleon, so the world is not complete after Gangplank Galley alone.
- Use Rattly's Superjump to reach the first Topsail Trouble Bonus Barrel.
- Complete the Flitter defeat challenge.
- Climb past the moving Flitters for the second Bonus Area.
- Finish Topsail Trouble and open Krow's Nest.
Defeat Krow in Krow's Nest
Krow's Nest begins with a vertical mast climb. Take the Star Barrel before the arena and approach the nest with both Kongs if possible. In the first phase, Krow drops an egg that bounces across the arena. Move under its first bounce, then wait until it stops before picking it up. Face Krow and hold the egg as he dives; on the SNES version, crouching can avoid the dive when there is enough floor space. Krow crashes into the egg, allowing the hit. Repeat the same procedure for the second hit.
After two hits, Krow begins the second phase by striking his nest and sending several eggs across the arena. Most eggs leave the area; one remains on the mast or sail. Avoid the moving eggs, wait for the usable egg to stop, and pick it up. Throw it at Krow during his next pass. Repeat the pattern once more for the final hit. Do not chase an egg toward the arena edge, because the next dive or bouncing egg can trap you there.
Krow is defeated after four total egg hits. The boss awards a Kremkoin and opens the route to Crocodile Cauldron. If you lose, the Star Barrel lets you retry the fight without repeating the entire mast climb.
- Reach the arena Star Barrel.
- Land two egg hits in the first phase.
- Avoid the egg shower and land two more hits in the second phase.
- Confirm Krow's Nest is cleared and the Crocodile Cauldron route is open.
Before you move on
- Pirate Panic, Mainbrace Mayhem, Gangplank Galley, Lockjaw's Locker and Topsail Trouble are all cleared on the Gangplank Galleon map.
- Krow's Nest is cleared and Krow's Kremkoin has been collected.
- The optional Bonus Areas have been completed if early Kremkoins are being saved for Klubba's Kiosk.
- Missed KONG letters, DK Hero Coins or Bonus Areas are recorded for later replay through the world map.
References for this chapter
- Donkey Kong Country 2: Diddy's Kong Quest - Guide and Walkthrough - Super Nintendo - DWA
- Donkey Kong Country 2: Diddy's Kong Quest — Guide and Walkthrough by T_Hayes
- Donkey Kong Country 2: Diddy's Kong Quest/Pirate Panic, StrategyWiki
- Donkey Kong Country 2: Diddy's Kong Quest/Mainbrace Mayhem, StrategyWiki
- Donkey Kong Country 2: Diddy's Kong Quest/Gangplank Galley, StrategyWiki
- Krow's Nest, Donkey Kong Wiki
- Krow, Donkey Kong Wiki
World 2 — Crocodile Cauldron (Hot-Head Hop → Kleever's Kiln)
Crocodile Cauldron contains five regular stages followed by Kleever's Kiln. The required route is Hot-Head Hop, Kannon's Klaim, Lava Lagoon, Red-Hot Ride, Squawks's Shaft, and then the boss. Lava is the central hazard, but each stage uses a different solution: Krockheads and Squitter webs, vertical barrel launches, Clapper's temporary cooling, hot-air balloons over steam vents, and finally a mine shaft followed by Squawks's flight. Bonus Areas are optional for ordinary story progress but each completed room awards a Kremkoin, making this world useful preparation for later Klubba payments.
Hot-Head Hop: cross the lava and use Squitter's webs
The opening route uses green Krockheads as temporary platforms and brown Krockheads as springboards. Wait until the next head is positioned for your landing instead of jumping as soon as it appears. A dark chest above the starting tunnel contains a green Extra Life Balloon. Reaching it requires a Team Throw, but it is optional. The nearby Warp Barrel is also optional and sends you to a short shortcut room that returns you close to the End of Level Target; it does not award a Kremkoin.
Continue across the lava and take the Squitter Animal Crate after the Star Barrel. Squitter's webs create temporary platforms, so fire a web, land on it, and then create the next platform only after checking the Zingers and the direction of the next gap. The Video Game Hero Coin is above the Squitter section and can be reached by following the banana formations upward. It is optional and does not affect ordinary stage completion.
Hot-Head Hop has three Bonus Areas. The first is reached by breaking the chest below the letter O, carrying the Kannonball across the Krockheads and Klampons, and placing it in the Kannon. The Bonus Area requires collecting all 60 stars within the room's time limit. The second appears after the letter N; keep Squitter and follow the upward banana formations across the lava to the Bonus Barrel. The third is just before the No Animal Sign, above two Klampons. Reach it with Squitter's webs or a Team Throw. Both later rooms require reaching the Kremkoin before time expires.
After the final lava crossings, the No Animal Sign removes Squitter. Proceed through the last Krockheads and strike the End of Level Target. If the animal is lost earlier, do not restart automatically: the main route remains possible, although the Squitter Bonus Areas will need another attempt.
- Cross the opening Krockheads without rushing their bounce pattern.
- Use Squitter after the Star Barrel for the long lava gaps.
- Use the Kannonball below the letter O for the first Bonus Area.
- Follow the banana formations after N and before the No Animal Sign for the other two Bonus Areas.
Kannon's Klaim: climb the mine shaft through controlled barrel launches
Kannon's Klaim is a vertical stage built around Blast Barrels, Arrow Barrels, wooden platforms, and Kannons that fire either cannonballs or ordinary barrels. Before entering a barrel, identify the direction of the next launch and the position of the Zingers or Mini-Neckies around the exit. Small corrections are safer than holding one direction through an entire barrel chain.
The first Bonus Barrel is at the beginning, beyond the banana arrow pointing right. Dixie can use her Helicopter Spin to cross the gap, while Diddy needs a carefully timed roll jump or a partner-assisted route. The Bonus Area uses Diddy and Dixie Barrels and allows 30 seconds to reach the Kremkoin. After the Star Barrel, find the TNT Barrel and Mini-Necky, then use the Arrow Barrel and a Team Throw from the left edge to enter the second Bonus Barrel. The room uses a chain of Arrow Barrels and gives 25 seconds to reach the Kremkoin.
After the letter N, continue through the Arrow Barrels and use the barrels fired by the Kannon as temporary platforms. Reach the Kannon's platform and enter the third Bonus Barrel. This final room gives only 10 seconds, so move immediately and bounce across the six Flitters toward the Kremkoin. These three Bonus Areas are the stage's normal Kremkoin sources.
Use TNT Barrels against Krunchas rather than attempting a risky jump. The letters are optional extra-life rewards; do not sacrifice a Star Barrel checkpoint or a Kong merely to collect one. The End of Level Target at the top completes the stage. Steerable Barrels do not appear in Crocodile Cauldron, so treat every barrel here as a fixed or directly controlled launch object.
- Read each barrel's launch direction before committing to it.
- Use TNT against Krunchas and move away before the explosion.
- Enter all three Bonus Areas if you need the Kremkoins.
- Use the Star Barrel as the recovery point for the upper shaft.
Lava Lagoon: move between Clapper's cooled-water sections
Lava Lagoon alternates between solid ship-hold platforms and water that is safe only after Clapper cools it. Jump on each Clapper and swim promptly toward the next safe section. When the water begins reverting to lava, leave it for land or reach the next Clapper immediately. Lockjaws, Flotsams, Puftups, and narrow passages make unnecessary fighting dangerous when the cooling effect is nearly gone.
After the Star Barrel, search the wall for the hidden Enguarde Animal Crate. The passage is not on the obvious central route; inspect the wall openings while the water is cooled. Enguarde makes the underwater sections safer and is required for the stage's Bonus Area. Keep him through the later Clapper sequence and pass the No Enguarde Sign. The enclosed route leads to the Bonus Area, where Enguarde must defeat the underwater enemies to reveal the Kremkoin.
The stage's optional letter locations are placed around the water passages, but they are not required for progression. Prioritize reaching each Clapper before the water becomes lethal. Near the end, use the final Clapper and take the exit route after the Enguarde Bonus Area. The Warp Barrel near the beginning is optional and returns the Kongs close to the level exit.
- Strike every Clapper before entering its water section.
- Swim directly toward the next Clapper or solid ledge.
- Find Enguarde after the Star Barrel.
- Keep Enguarde through the No Enguarde Sign to enter the Bonus Area.
Red-Hot Ride: keep the hot-air balloons over the thermals
Hot-air balloons slowly sink whenever they leave a steam vent. Steer each balloon toward the next thermal before it drops too low, and identify the next landing before jumping. The balloon's horizontal movement is controllable, but its rise comes from the vents, so drifting away from a thermal too early can make the next jump impossible.
Rambi appears after the letter K and remains available until the No Animal Sign just before the Star Barrel. Keep him if you want the first Bonus Area. After crossing the large lava pit and reaching solid ground, turn back toward the breakable wall near the two Krunchas and use Rambi's supercharge to enter. Destroy the eight enemies in the Bonus Area within the time limit to receive its Kremkoin.
The second Bonus Barrel is below the ground near the Star Barrel. Reach it with Dixie's Helicopter Spin or by dropping from a hot-air balloon. Its objective is to collect 40 stars within 30 seconds. After the Star Barrel, the letter N and the Video Game Hero Coin are positioned around the next balloon sequence; both are optional. For ordinary completion, keep the balloon centered over the thermals and take each landing rather than attempting a long jump from a sinking balloon.
The Warp Barrel is above the third thermal shortly after the letter K. It is another optional shortcut to the final balloon section. Finish at the End of Level Target to unlock Squawks's Shaft.
- Steer balloons back over thermals before they sink too far.
- Keep Rambi until the No Animal Sign if you want the first Bonus Area.
- Use Dixie's Helicopter Spin or a balloon to reach the Bonus Barrel below the Star Barrel.
- Treat the letter N and Video Game Hero Coin as optional.
Squawks's Shaft: climb the barrels, then clear the mine flight
The stage begins with a chest containing the letter K, followed by a vertical sequence of platforms, Barrel Cannons, Krooks, Klomps, and Zingers. Use each cannon as a separate decision: wait for nearby hazards to pass, enter the barrel, and immediately watch the next exit during the launch. The Star Barrel is the important recovery point before the animal section.
The first Bonus Area is reached from the platform with the second group of three Klomps. Use Dixie's Helicopter Spin or Diddy's cartwheel jump to reach the Barrel Cannon, then enter the Bonus Barrel beyond it. An alternate drop route from the platform above the Krooks can also work. The room contains seven chests and a red Zinger; throw the chests at the Zinger until the chest containing the Kremkoin breaks.
A second Bonus Barrel is left of the Star Barrel and requires a Team Throw into a Blast Barrel. The room is a timed Barrel Cannon route leading to the Kremkoin. After mounting Squawks, fire eggs from a distance at Krooks and Zingers. The third Bonus Barrel is reached late in the flight section by following the upward banana formations after the paired Krooks. Squawks must destroy eight Zingers in the room before the Kremkoin appears.
Squawks's Shaft also has an optional Warp Barrel near the start, reached by dropping beside the Banana Bunch Coin and entering the hidden Blast Barrel. It returns the Kongs close to the exit. Complete the normal route and strike the End of Level Target to open Kleever's Kiln.
- Use the Star Barrel before the Squawks section.
- Search all seven chests methodically in the first Bonus Area.
- Use Squawks's eggs to remove Krooks and Zingers before advancing.
- Follow the upward banana formations for the late Bonus Barrel.
Kleever's Kiln: survive both phases and land six Kannonball hits
The arena has a ledge on each side of a wide lava pit. During the first phase, Kleever rises while held by a fiery arm and throws three separate fireballs. Dodge the fireballs, pick up the Kannonball that appears, and throw it at Kleever. After a successful hit, hooks drop over the lava. Cross to the opposite side using the hooks while watching for additional fireballs, then take the next Kannonball.
Repeat this exchange until Kleever has been hit three times. Kleever then sinks into the lava and returns without the fiery arm. The second phase begins with a faster horizontal charge. Stay near a ledge, watch Kleever's approach, and jump over the blade rather than trying to outrun it on the same platform. After the charge passes, collect the Kannonball and throw it during the opening.
The second phase can include a violent slashing sequence after a hit, so do not rush back toward Kleever. Use the falling hooks to cross the lava safely and wait for a clear landing. Three more Kannonball hits defeat Kleever, for six total. The boss awards a Kremkoin and unlocks Krem Quay. If you lose, retry from the boss entrance; no animal or earlier stage collectible is required for the fight.
- Dodge the three opening fireballs before taking the Kannonball.
- Use the hooks after each first-phase hit.
- Jump over Kleever's second-phase charge.
- Land six total Kannonball hits to clear the boss.
Before you move on
- Hot-Head Hop, Kannon's Klaim, Lava Lagoon, Red-Hot Ride, and Squawks's Shaft are cleared.
- Kleever's Kiln is completed and Kleever has been defeated with six Kannonball hits.
- The Kremkoin from Kleever's Kiln has been awarded and the path to Krem Quay is open.
- The optional Bonus Areas have been completed if their Kremkoins are needed for later Klubba payments.
References for this chapter
- Hot-Head Hop - Super Mario Wiki
- Kannon's Klaim (Donkey Kong Country 2) - Super Mario Wiki
- Lava Lagoon (Donkey Kong Country 2) - Super Mario Wiki
- Red-Hot Ride - Super Mario Wiki
- Squawks's Shaft (Donkey Kong Country 2) - Super Mario Wiki
- Kleever's Kiln - Super Mario Wiki
- Donkey Kong Country 2: Diddy’s Kong Quest — FAQ — GameFAQs
- Donkey Kong Country 2: Diddy’s Kong Quest — Guide and Walkthrough — GameFAQs
World 3 — Krem Quay: Barrel Bayou to Kudgel's Kontest
Krem Quay contains six regular stages: Barrel Bayou, Glimmer's Galleon, Krockhead Klamber, Rattle Battle, Slime Climb and Bramble Blast. The world alternates between swamp, underwater, ship-deck, rigging and bramble sections. Clear the levels in map order, then defeat Kudgel in Kudgel's Kontest. The main route does not require every Bonus Area, but the bonus rooms are the source of Kremkoins needed for Lost World access.
1. Clear Barrel Bayou and use Rambi correctly
Barrel Bayou begins with Rambi. Use him to break through enemies and reach the early swamp sections, but do not assume he remains available for the whole stage. When you reach the no-Rambi sign, Rambi is removed and the DK Coin is awarded. From that point onward, continue on foot using the boardwalks, barrels and team throws.
Kloak is introduced here and can throw barrels, chests or enemies into your path. When he is positioned above the route, wait for his throw rather than jumping blindly through the swamp. One important optional route comes shortly after the no-Rambi sign: stand under Kloak and follow him left after he throws his initial objects. He eventually provides a chest containing a Kannonball. Carry it to the Kannon and complete the Destroy Them All bonus challenge for a Kremkoin.
The second Bonus Barrel is near the end of the stage, after the G letter. Use a team throw to reach it, then complete the Find the Token challenge. If you are only pursuing campaign progress, ignore these detours and reach the goal barrel; if you are collecting everything, return later with both Kongs rather than risking a life on an improvised jump.
- Use Rambi through the opening section and collect the DK Coin at the no-Rambi sign.
- Complete the Kloak-and-Kannon bonus if you want the stage's first Kremkoin.
- Use a team throw after the G letter to reach the second Bonus Barrel.
2. Explore Glimmer's Galleon without confusing light with protection
Glimmer's Galleon is an underwater ship-hold stage. Collect the Glimmer animal barrel near the beginning. Glimmer illuminates the surrounding water, but the light does not defeat Lockjaws, Shuris, Puftups or other aquatic enemies. Swim in short movements, pause before entering narrow passages and keep enough room to retreat from a Lockjaw.
The first Bonus Barrel is reached by returning toward the entrance after collecting Glimmer. Swim upward from the entry area and follow the banana trail to an open door. The second bonus entrance is in the lower part of the hold, below and a few screens left of the G letter. Search the bottom passage instead of staying on the most obvious horizontal route.
The DK Coin is hidden in the upper secret area connected to the first bonus route. From the entrance, collect Glimmer, backtrack upward and enter the room with the open door. Pass through the ceiling into the room marked by a large banana 2, then move through its right-hand wall to reach the coin. This is separate from the bonus challenge, so do not leave immediately after collecting the Kremkoin.
- Collect Glimmer before attempting the dark sections.
- Check the upper open-door route and the lower passage below the G letter for Bonus Barrels.
- Search the hidden upper room for the DK Coin if pursuing completion.
3. Cross Krockhead Klamber by activating the swamp platforms
Krockhead Klamber is the second swamp stage. Its Krockheads appear only briefly, so do not wait on one after landing. Move from one head to the next with a short, deliberate jump and use the Krockhead Barrels to activate additional stepping stones. If a Krockhead is sinking, jump before it disappears rather than trying to extend the landing.
Cattail plants and partially submerged barrel platforms provide safer pauses than the Krockheads themselves. Use them to let the next group appear, then resume moving. Watch for Zingers and Kaboings positioned above the swamp; a high jump that clears the hazard may still carry you beyond the next safe platform.
This stage has one Bonus Area. Check elevated openings around the swamp route and use a team throw when a platform is just beyond normal jumping height. The bonus is optional for reaching Rattle Battle, but completing it adds another Kremkoin to the Lost World fund.
- Activate Krockhead Barrels before committing to long swamp crossings.
- Jump off Krockheads before they retreat into the water.
- Use cattails and barrel platforms as recovery points.
4. Control Rattly through Rattle Battle
Rattle Battle begins on the ship deck and provides Rattly in an Animal Barrel near the start. Keep Rattly for the elevated section because his charged jump is the intended way to clear the high gaps and reach upper platforms. Hold the jump button to charge his special jump, then release when the landing point is lined up. Avoid releasing him before the section with the tall platforms and Zingers.
There are three Bonus Barrels. At the beginning, jump beneath the lone banana to enter a hidden Blast Barrel, then use a team throw to reach the Bonus Barrel on the upper platform. Later, after the second DK Barrel, pass the gap and drop through the opening in the deck; move left underneath the platform to find the second entrance. The third is shortly after the N letter: use the banana arrow and the barrel beneath it to charge Rattly's jump into the high Bonus Barrel.
The vertical bonus challenges reward patient platforming rather than speed. In the barrel-stack room, land on the broadest stack before planning the next jump. In the Zinger room, do not bounce from every enemy unless necessary; the objective is to reach the far side safely.
- Keep Rattly through the elevated ship section.
- Check the hidden Blast Barrel at the beginning, the opening beneath the deck and the banana-arrow barrel after N.
- Use charged jumps only when the landing platform is visible.
5. Escape the rising water in Slime Climb
Slime Climb takes place on the ship's rigging. The water rises as you climb, and a Snapjaw patrols below, so hesitation is dangerous. Move upward continuously and treat every platform or rope as a brief setup for the next jump. Do not wait at the bottom for a perfect cycle once the water has begun rising.
After the Star Barrel, a Kannon sits near an Exclamation Point Barrel. Roll through or otherwise activate the barrel, then drop into the water and follow the banana trail beneath the mast to reach the first Bonus Barrel. The invincibility is essential for this route because it lets you survive the water while following the trail.
The second Bonus Barrel is near the later rigging. Carry the Kannonball found near the end back to the Kannon and complete its challenge. The DK Coin is beneath the sail near the goal; use the Exclamation Point Barrel route to enter the water safely, then swim to the coin before finishing the stage.
- Keep climbing while watching the rising water and Snapjaw.
- Use the Exclamation Point Barrel after the Star Barrel for the underwater bonus route.
- Return a Kannonball to its Kannon and check beneath the final sail for the DK Coin.
6. Navigate Bramble Blast and rescue Squawks
Bramble Blast is the first full bramble stage and uses a maze of Barrel Cannons. Brambles are lethal, so aim each cannon before firing rather than treating the next barrel as automatic. In rotating cannon groups, wait until the barrel points toward the next safe cannon. If the route branches, follow the banana trails and watch for the barrel that leads away from the bramble wall.
The stage contains two Bonus Areas. One is in the lower-left part of the fifth cannon room. The other is reached from the Squawks section near the end. Near the final sequence, use the barrel-and-Flitter route to enter the opening marked by bananas and collect Squawks. Fly carefully through the bramble corridor, keeping the parrot centered and avoiding unnecessary vertical movement.
Squawks also provides the route to the DK Coin. From the area where you obtain him, fly left and upward, then return through the bramble passage as directed by the safe openings. After completing the optional routes, use the final cannon sequence to reach the goal. Missing a cannon is usually fatal, so use the Star Barrel as the reset point and rebuild the route one room at a time.
- Aim every Barrel Cannon before firing.
- Search the lower-left corner of the fifth cannon room for the first Bonus Barrel.
- Use Squawks near the end to reach the second Bonus Area and DK Coin.
7. Defeat Kudgel in Kudgel's Kontest
Kudgel begins by jumping across the arena and landing near the position where you were standing. His landing creates a ground shock that stuns a Kong unless you jump as he comes down. Keep moving between the arena's sides and jump immediately before his landing rather than trying to outrun the shock on the ground.
After the initial jumps, a TNT barrel appears. Pick it up only when Kudgel is safely away, retreat to create space and throw the TNT after he lands. Running into Kudgel with the barrel does not damage him and usually costs a hit. The reliable rhythm is: watch his jump, move to the opposite side, jump over the landing shock, wait for a TNT barrel, then throw it during the next landing window.
Kudgel requires six successful TNT hits. After three hits he becomes more persistent on the screen and his movement speeds up, so keep the arena open and avoid cornering yourself. If a throw misses, do not chase him beneath his jump; wait for the next barrel and repeat the pattern. Defeating him awards a Kremkoin and opens the route to the next world.
- Jump over Kudgel's landing shock.
- Throw TNT barrels after Kudgel lands; do not collide with him while carrying one.
- Land six TNT hits, collect the boss Kremkoin and confirm the next world is open.
Before you move on
- Barrel Bayou, Glimmer's Galleon, Krockhead Klamber, Rattle Battle, Slime Climb and Bramble Blast show as cleared on the Krem Quay map.
- Kudgel's Kontest is defeated, its Kremkoin is collected and the route to the next world is available.
- For optional progress, each level's Bonus Areas have been completed and the DK Coins in Glimmer's Galleon, Slime Climb and Bramble Blast have been collected.
- If preparing for Lost World access, add the Kremkoins from Krem Quay's bonus challenges and Kudgel's defeat to the total before visiting Klubba's Kiosk.
- If a collectible was missed, use the map markers and return later rather than replaying the entire world immediately.
References for this chapter
- Donkey Kong Country 2: Diddy's Kong Quest - Guide and Walkthrough - Super Nintendo - DWA
- Donkey Kong Country 2: Diddy’s Kong Quest — FAQ — GameFAQs
- Donkey Kong Country 2: Diddy’s Kong Quest — Bonus Level and DK Coin Guide by Thrashnet
- Krem Quay — Super Mario Wiki
- Barrel Bayou — Super Mario Wiki
- Krockhead Klamber — Super Mario Wiki
- Bramble Blast — Super Mario Wiki
- Donkey Kong Country 2: Diddy's Kong Quest SNES manual
World 4 — Krazy Kremland: Hornet Hole to King Zing Sting
Krazy Kremland’s required route is Hornet Hole, Target Terror, Bramble Scramble, Rickety Race, Mudhole Marsh, Rambi Rumble, and King Zing Sting. The world alternates between sticky honey, roller-coaster tracks, thorn mazes, swamp platforms, and Rambi’s charge sections. Bonus Areas, KONG letters, and DK Coins are optional for ordinary progress, but the Bonus Areas provide Kremkoins and the DK Coins count toward the SNES completion total.
Hornet Hole: climb the honey and keep Squitter
Honey-covered floors and walls make Hornet Hole different from ordinary platforming. On a wall, jump upward and land higher rather than holding against the surface. At the opening, team-throw one Kong to the hook above, climb the honey, and follow the hooks to the first Bonus Area. Break the chests against the Zingers to release the Kremkoin. After leaving, drop down and enter the doorway on the right for the second Bonus Area; alternate short jumps between the honey patches to reach its Kremkoin.
Continue right past the DK Barrel and climb the main honey shaft. Keep both Kongs together if possible, since team throws are useful for the higher hooks and for recovering from missed jumps. After the early Spiny section, look for Squitter’s Animal Crate above the route. With Squitter, use attack webs to remove Zingers and Spinies before building platform webs toward the next ledge.
After the Continue Barrel, use Squitter to clear the Zinger near the Arrow Barrel, then fire into the shaft. The O is above the first vertical section after the checkpoint; defeat the nearby enemies and build webs upward to reach it. Near the N, defeat the guarding Spiny or Krook before collecting the letter. At the top of this shaft, use the banana stair pattern and platform webs to reach the third Bonus Area. Climb the webs to the Kremkoin, then return to the main path.
The DK Coin is in a lower alcove reached by dropping below a yellow Zinger after the later Spiny section. Defeat the two Zingers in the alcove, collect the coin, and use the Barrel Cannon to return upward. Near the end, use the highest honey patch to time a jump toward the goal target for the G. If Squitter survives to the No Squitter sign, the resulting reward is useful, but losing the animal is preferable to risking the level.
- Use repeated short jumps to climb honey walls.
- Complete three Bonus Areas if collecting every Kremkoin in the world.
- Keep Squitter for the DK Coin route and the later vertical shafts.
- Treat the KONG letters as optional extra-life rewards.
Target Terror: read the gate barrels and protect the cart
Target Terror is a fixed roller-coaster ride. Your control priority is jumping at track gaps, avoiding enemy projectiles, and entering the correct cart when the track separates. Check Barrels open gates; X Barrels close them. Do not hit an X Barrel casually, because the changed gate state can block the cart’s route.
Bounce from the first Flitter for the K and jump across the early gaps. After the first X Barrel, jump from the crest of the next rise to enter Bonus Area 1. Squawks is inside; destroy every Zinger with eggs, then fly to the upper-right passage for the Kremkoin. Rejoin the ride and use the Star Barrel as the reliable restart point for the later cart sequence.
Collect the O and N during the normal ride, prioritizing the next cart over individual bananas. When Klank falls through the lower track near the second shack, follow him. At his final fall, jump into the cart marked by the banana trail to enter Bonus Area 2. Transfer between the carts without dropping to earn its Kremkoin. The G appears after this bonus route. The DK Coin is obtained by jumping upward when entering the second shack, so make that jump before committing to the lower track.
- Check Barrels open gates; X Barrels close them.
- Jump from track crests rather than from the middle of a descent.
- Follow the falling Klank to the second Bonus Area.
- Prioritize a safe cart landing over optional bananas.
Bramble Scramble: use invincibility, Squawks, and Squitter
At the beginning, defeat the first Krook and follow the banana trail through the Barrel Cannon to reach the K. Later, the first Bonus Area is accessed with the Exclamation Barrel: team-throw to it, run through the thorn passage while invincible, and enter the Barrel Cannon. In the bonus, collect the stars while using Squawks to remove Zingers; the Kremkoin appears after the star challenge.
The stage then becomes a controlled Squawks flight. Keep the bird at a steady height, shoot Zingers and Flitters before entering narrow passages, and allow Krooks to throw their hooks before moving through their lanes. The O is on the left after the first Kannon, while the N is high in the large red-Zinger formation later in the flight. The G is awarded near the exit.
At the Continue Barrel, use the intended roll-jump through the false thorn opening to reach Squitter. Build web platforms through the thorn chamber and look for the false wall containing the DK Coin. Continue making webs beneath Squitter while moving through the wall, then retrace the same route. Missing this coin is safer than losing the stage to a blind return jump.
- Use the Exclamation Barrel before crossing the main thorn passage.
- Keep Squawks centered and shoot hazards before entering gaps.
- Use Squitter’s webs as a staircase through the false-wall section.
- The Bonus Area count for Bramble Scramble is one.
Rickety Race: win the race for the DK Coin
At the start, make two upward team throws to reach the upper shack route, then use Dixie’s Helicopter Spin to enter the Bonus Area. Derail five Klanks inside to receive the Kremkoin. Back on the main track, hold left immediately after landing in the cart to reach the hidden Plus Barrel. Its speed boost makes overtaking easier.
Jump from the cart over the hills and land on Klanks to pass them. The K and O are along the normal route. The N requires crushing the second blue Klank in third place, and the G is farther along the course. Finishing the race completes the stage, but reaching first place awards the DK Coin. Do not sacrifice the run trying to collect a letter if the cart is approaching a gap.
- Use the hidden Plus Barrel before the main overtaking sequence.
- Jump from hilltops and land centrally in the cart.
- First place is required for the DK Coin, not for stage completion.
- Rickety Race has one Bonus Area.
Mudhole Marsh: preserve the final Kannon
Cross the opening swamp platforms by waiting for Cat-O’-9-Tails to settle before using it as a spring. Team-throw to the K for the optional letter, then use the hooks, reeds, and Kannon barrels to cross the marsh. The O is inside a chest on the route after the large barrel platform, and the N is obtained by bouncing from a fired Kannon barrel.
The first Bonus Area is above the route near the third Cat-O’-9-Tails. Team-throw into the Bonus Barrel and complete the star challenge for the Kremkoin. Later, carry the Kannonball past Kannon and bring it to the Bonus Kannon. Destroy every target in the second Bonus Area without losing the ammunition to earn its Kremkoin.
For the DK Coin, do not defeat the final Kannon. Use the hook to avoid him, stand to the right of the exit target, and bounce from one of his moving barrels into the target. The G is also near the exit and can be collected with a carefully timed team throw. Mudhole Marsh contains two Bonus Areas.
- Wait for Cat-O’-9-Tails to stop before bouncing on it.
- Carry the Kannonball through the incoming fire.
- Leave the final Kannon alive for the DK Coin route.
- Use the exit target only after positioning for the barrel bounce.
Rambi Rumble: collect the DK Coin before taking Rambi
Follow the opening honey and hook route, defeating Klampons and Kutlasses carefully. The K is below the first Klampon near the pair of hooks, and the O is guarded by the second Kutlass. The N is reached after using the first Zinger as a stepping stone. Before entering Rambi’s chamber, jump to the two invisible hooks above the doorway and cross over to the honey passage. This route leads to the DK Coin; collect it before entering the Animal Barrel, because the normal Rambi route bypasses the coin.
After becoming Rambi, charge through yellow Zingers and use the animal’s supercharge to break the short wall near the later Auto-Fire Barrel. That entrance leads to Bonus Area 2, where Rambi must run over the enemies to reveal the Kremkoin. Bonus Area 1 is reached earlier through the hook-and-honey route after the second Barrel Cannon; climb the honey inside for its Kremkoin.
In the final Rambi section, use yellow Zingers as stepping points and avoid red Zingers and Kannon shots. At the No Rambi sign, time the Barrel Cannon and collect the G from the exit target. Rambi Rumble has two Bonus Areas.
- Collect the DK Coin by using the invisible hooks before entering Rambi’s chamber.
- Use Rambi’s supercharge for the later Bonus Area.
- Do not charge into red Zingers or Kannon fire.
- Leave the animal only at the No Rambi sign.
King Zing Sting: complete the nine-hit Squawks fight
Enter the Animal Barrel to become Squawks. King Zing’s vulnerable point is the red stinger, so approach from behind or below and fire eggs only when the stinger is aligned. Six successful stinger hits are required in the first phase. After the first, third, and fifth hits, King Zing flies erratically. After the second and fourth hits, he releases three waves of eight stingers. Move through open gaps between the projectiles and keep away from the boss while he is red.
After the sixth hit, King Zing shrinks into a red Zinger protected by four rotating yellow Zingers. Shoot all four yellow Zingers quickly; defeated guards can return if the phase takes too long. Once the guards are gone, King Zing becomes yellow again and chases Squawks. Hit him three more times, avoiding his red counterattack after each successful shot. The ninth hit ends the battle and awards the boss Kremkoin.
If a flight line is unsafe, stop firing and use the open center of the chamber to reset your position. Do not hover beside King Zing while he is releasing stingers. Defeating him opens Gloomy Gulch and completes Krazy Kremland’s required route.
- Six stinger hits begin the final phase.
- Defeat all four yellow guards before they regenerate.
- Three additional hits defeat King Zing.
- The boss provides one Kremkoin and opens Gloomy Gulch.
Before you move on
- Hornet Hole, Target Terror, Bramble Scramble, Rickety Race, Mudhole Marsh, and Rambi Rumble are cleared.
- King Zing Sting is defeated and the route to Gloomy Gulch is open.
- All 11 Krazy Kremland Bonus Areas are complete: Hornet Hole has 3, Target Terror 2, Bramble Scramble 1, Rickety Race 1, Mudhole Marsh 2, and Rambi Rumble 2.
- The Kremkoins from those 11 Bonus Areas and from King Zing Sting have been added to the total.
- The DK Coins in the six regular stages are collected if pursuing the SNES completion percentage.
- KONG letters remain optional extra-life rewards and are not required for the displayed completion percentage.
References for this chapter
- Donkey Kong Country 2: Diddy's Kong Quest - Guide and Walkthrough - Super Nintendo - DWA
- Donkey Kong Country 2: Diddy's Kong Quest - Guide and Walkthrough - Super Nintendo - Super_Slash
- Donkey Kong Country 2: Diddy's Kong Quest — Guide and Walkthrough by brian_sulpher
- Donkey Kong Country 2: Diddy’s Kong Quest — Guide and Walkthrough by brian_sulpher
World 5 — Gloomy Gulch: Ghostly Grove to Kreepy Krow
Gloomy Gulch contains five stages before its boss: Ghostly Grove, Haunted Hall, Gusty Glade, Parrot Chute Panic, and Web Woods. The world alternates between disappearing ghost ropes, haunted roller-coaster chases, strong wind, bramble chutes, and Squitter’s web platforms. Bonus Areas are optional for reaching Kreepy Krow, but each completed Bonus Area awards a Kremkoin and contributes to full completion.
1. Clear Ghostly Grove and search both Bonus Areas
Ghostly Grove begins with ghost ropes and platforms that alternate between visible and invisible states. Watch the rope or platform you intend to use before jumping; if it disappears, wait on a secure surface rather than committing to a blind leap. Keep both Kongs available whenever possible, because team throws make several upper routes easier to reach and Dixie’s helicopter spin gives more control over long drops.
Near the second pair of blue Krunchas, pick up a nearby barrel and throw it into the wall beside the single banana. This opens the first Bonus Area. Cross the ropes inside the bonus and collect the Kremkoin on the far side before the timer expires.
Later, after the Star Barrel, look for two ghost ropes leading upward. Move across them and enter the second Bonus Barrel near the upper route. The bonus requires another rope crossing and awards a second Kremkoin. The level also contains a hidden KONG letter: near the end, look for a ring of bananas in open space and move into the center even though the letter itself is invisible. Collecting all four KONG letters in one attempt gives an extra life, but none of these items is required to open the boss route.
Finish at the end target to unlock Haunted Hall. If a ghost rope disappears while you are crossing, jump only when the next rope is visible and use Dixie’s hover to correct horizontal drift.
- Use the barrel beside the second pair of blue Krunchas to enter the first Bonus Area.
- Search the two ghost ropes near the later section for the second Bonus Area.
- Check the banana ring near the end for the invisible KONG letter.
2. Treat Haunted Hall as four separate Kackle chases
Haunted Hall is a roller-coaster stage divided into four chase sections. A countdown begins when the cart passes each entry gate, and a Kackle follows until the cart reaches the next exit gate. The timer is not one uninterrupted clock for the entire level, so concentrate on the current section rather than trying to preserve time from an earlier chase.
Plus Barrels add time to the active countdown, while Minus Barrels remove time. The amount changed is not always identical, so prioritize Plus Barrels when they are on a safe line and avoid Minus Barrels whenever another track is available. Later sections deliberately place Plus and Minus Barrels close together. Approach those groups without holding a direction blindly; identify the useful barrel first, then make the smallest steering adjustment needed to take it.
The Star Barrel appears after the second chase, before the later sections. If you lose a life, use the checkpoint and repeat the track pattern rather than rushing. The Kackle only becomes a physical threat when the timer reaches zero, so a short delay to line up a jump or choose a track is safer than panicking.
Haunted Hall contains three Bonus Areas. The first two are reached from alternate tracks around the first and second chase sections; watch for a separate upper or lower track instead of staying on the obvious main rail. The final Bonus Area is reached from a lower track in the later portion of the stage. These rooms award Kremkoins but are not needed for normal completion. Clear the stage first if the chase is costing lives, then return later for the bonus rooms.
There are four Kackle sections, and each ends at a gate. Do not assume reaching a Plus Barrel means the entire level is safe; continue watching the timer until the cart passes the next gate.
- Identify the entry and exit gate for each Kackle section.
- Take Plus Barrels when safely reachable and avoid Minus Barrels.
- Use the Star Barrel after the second chase as the recovery point.
- Return later for the three alternate-track Bonus Areas if pursuing full completion.
3. Use Rattly and the wind in Gusty Glade
Gusty Glade’s wind changes how far the Kongs travel during jumps. Against the wind, begin jumps earlier and expect less forward distance. With the wind, release movement sooner because the Kongs may drift farther than expected. Use short jumps on narrow ledges and do not try to correct a committed jump with constant forward input.
Rattly is hidden above the entrance. With both Kongs together, use a team throw up and to the left to reach the ledge over the entry door, then move left to the Animal Barrel. Rattly’s high jump reaches platforms that the Kongs cannot, but his jump has a committed arc. Stand beneath the intended landing before bouncing, especially near pits.
The first Gusty Glade Bonus Area is near the No Rattly sign: move left from that sign and jump to the Bonus Barrel. The second is reached by taking the lower chest from a pair of chests near the Continue Barrel. The upper chest contains a Kannonball; carry that ball to the nearby Kannon and fire into the Bonus Area. Both rooms award Kremkoins.
The DK Coin is reached later by using Dixie’s helicopter jump across a steep section after three barrel cannons. It is optional for the campaign but required for a complete collectible file. If Rattly is lost, continue through the ordinary Kong route unless you are specifically attempting an animal-dependent collectible.
- Reach Rattly from the ledge above the entrance.
- Use the Bonus Barrel left of the No Rattly sign.
- Carry the Kannonball from the lower chest to the nearby Kannon.
- Use Dixie’s helicopter jump for the later DK Coin route.
4. Navigate Parrot Chute Panic with controlled steering
Parrot Chute Panic uses Squawks in bramble-lined vertical passages. Make small steering adjustments and prioritize the open route through the brambles over banana trails. When the screen scrolls, wait for a safe gap rather than forcing Squawks through a Zinger or wall of brambles. If you overcorrect, reverse briefly instead of holding a direction for a long distance.
The stage has no KONG letters or Bonus Areas, so the objective is simply to reach the exit. A hidden shortcut is available near a crate: use the crate to break open the nearby wall. This bypasses part of the route but does not skip the entire level.
After the Continue Barrel, use the next Squawks sections as fixed landmarks. If you lose the bird, the recovery route may return you to a lower section; rebuild the route patiently rather than chasing missed bananas. The Star Barrel is the important safety point.
- Use small taps rather than large steering inputs.
- Use a crate to open the nearby wall shortcut when desired.
- Prioritize safe bramble gaps over bananas.
5. Cross Web Woods with Squitter
Web Woods begins with an ordinary Kong section and then transforms the active Kong into Squitter the spider. Squitter fires web shots that become temporary horizontal platforms. This is not a Squawks stage: hold the platform-web control, fire a web toward a usable surface, and jump onto it before building the next platform.
Before entering the Squitter section, use a team throw near the early animal entrance to reach the upper route and collect the available chest reward. Once transformed, stay high when the level offers a choice. The upper line usually gives more room around enemies and is also needed for the KONG letter route.
Shoot short web platforms close to Squitter rather than trying to create a single platform far ahead. Use web shots to defeat ordinary enemies, but do not fire carelessly into Zingers. When crossing large gaps, create one platform, land, then create the next. If a web vanishes, fire another from the current platform instead of making a desperate jump.
Near the later cannon section, pay attention to the cannonball’s path. Let the cannonball break the wall that hides a Bonus Area, then enter and collect the stars for a Kremkoin. A second Bonus Area is reached from the upper route near the end of Squitter’s section; use the high web platforms to reach it. The KONG letter is also on the high route near the early part of the level, so take the upper platforms after the transformation rather than dropping immediately to the lower ground.
The level contains an animal sign near the final section. Leave Squitter only when the route requires it; dismounting over brambles or a pit can waste the attempt. Clear the end target to open Kreepy Krow.
- Transform into Squitter and use web platforms across the large gaps.
- Stay on the high route for the KONG letter and upper Bonus Area.
- Use the cannonball to break the wall hiding the other Bonus Area.
- Do not dismount Squitter over brambles or pits.
6. Defeat Kreepy Krow in three barrel cycles
Kreepy Krow requires three successful barrel hits. At the start of each cycle, stand near the center of the current platform and jump over the ghost Mini-Neckies. After the ghost birds, a living Mini-Necky flies toward the Kongs. Jump on the living bird. A wooden barrel then appears; pick it up and throw it at Kreepy Krow when he makes his horizontal attack pass.
If you miss the living Mini-Necky, no barrel appears. Move to the corner and duck beneath Kreepy Krow’s pass, then wait for the next bird sequence rather than jumping into the boss. Ghost Mini-Neckies cannot produce the attack barrel.
After the first hit, hooks appear on the left. Climb the hooks and rope while avoiding the eggs falling from above, then enter the barrel at the top to reach the next platform. A DK Barrel is available during this transition if the second Kong is missing. The second cycle uses the same living-bird method, but the route transitions to hooks on the right after the hit. After the third cycle, the final platform uses the same method with an additional ghost Mini-Necky before the living bird.
Kreepy Krow is defeated after the third barrel connects and awards a Kremkoin. Wait for the boss-clear transition and return to the Gloomy Gulch map before treating the world as complete.
- Jump over ghost Mini-Neckies and defeat the living bird in each cycle.
- Throw the spawned barrel at Kreepy Krow during his horizontal pass.
- Use the left hooks after the first hit and the right hooks after the second.
- Land three barrel hits and collect the boss Kremkoin.
Before you move on
- The Gloomy Gulch map shows Ghostly Grove, Haunted Hall, Gusty Glade, Parrot Chute Panic, and Web Woods cleared.
- Kreepy Krow has been hit three times and the game has returned to the world map.
- For optional completion, Ghostly Grove’s two Bonus Areas, Haunted Hall’s three, Gusty Glade’s two, and Web Woods’ two have all been completed.
- The Gloomy Gulch KONG letters and DK Coins have been collected if pursuing the full collectible target.
- The Kremkoins from the Bonus Areas and Kreepy Krow have been added to the total for later use at Klubba’s Kiosk.
References for this chapter
- Donkey Kong Country 2: Diddy's Kong Quest - Guide and Walkthrough - Super Nintendo - Super_Slash
- Donkey Kong Country 2: Diddy’s Kong Quest — FAQ — GameFAQs
- Donkey Kong Country 2: Diddy's Kong Quest - Guide and Walkthrough - Super Nintendo - WWalker
- Haunted Hall — Super Mario Wiki
- Web Woods — Super Mario Wiki
- Ghostly Grove — Super Mario Wiki
- Kreepy Krow — Donkey Kong Wiki
World 6 — K. Rool's Keep: Arctic Abyss to Stronghold Showdown
K. Rool's Keep is the sixth world of the original Super Nintendo version. Its required route is Arctic Abyss, Windy Well, Castle Crush, Clapper's Cavern, Chain Link Chamber, Toxic Tower, and Stronghold Showdown. The world tests underwater movement, wind control, ice traction, rising-floor navigation, chain climbing, and animal transformations. Stronghold Showdown is not a boss battle in the SNES release: it is a short, enemy-free rescue scene that awards a Kremkoin and opens the route to The Flying Krock.
Prepare for the Keep and follow the required order
Before entering the Keep, make a save at Kong Kollege if one is available and replenish lives through safe bonus areas if necessary. The normal SNES route is Arctic Abyss, Windy Well, Castle Crush, Clapper's Cavern, Chain Link Chamber, Toxic Tower, then Stronghold Showdown. The last stage is a brief transition rather than a conventional boss level.
Keep both Diddy and Dixie whenever possible. Diddy is useful for quick running jumps and Dixie is safer across long gaps because her helicopter spin can extend a jump. If an optional Bonus Barrel or DK Coin requires a dangerous detour, finish the main route first and return through Funky's Flights later.
- Save before beginning K. Rool's Keep.
- Follow the seven-stage SNES order.
- Treat Bonus Barrels and DK Coins as optional during a first clear.
Clear Arctic Abyss with Enguarde
Arctic Abyss is an underwater ice-cave stage. Swim at a controlled pace and use Enguarde's thrust to defeat ordinary aquatic enemies, but line up before attacking near Lockjaws, Zingers, or narrow walls. The stage contains several vertical passages, so check the full opening before committing to an upward or downward route.
After the Star Barrel, one important optional route begins by dropping down and left, then swimming upward past starfish. Enguarde's charged thrust is needed to cross an opening before the water level changes. Another Bonus Barrel is reached by taking Enguarde upward and using his charge against a wall marked by a lone banana. These detours are not required to finish the stage.
When approaching an exit from the water, position Enguarde under the opening and rise carefully. Avoid surfacing directly beneath an enemy or against a low ceiling. If a life is lost, use the Star Barrel as the starting point for the second half rather than repeating the opening section recklessly.
- Use Enguarde's charge deliberately rather than holding attack continuously.
- Inspect vertical openings before swimming through them.
- Leave the optional wall routes for a later collectible sweep if needed.
Control the wind in Windy Well
Windy Well is a vertical ascent where air currents carry the Kongs upward. Jump into the current, then use short left or right inputs to adjust your position. Do not hold a direction throughout the entire rise; that commonly sends the Kongs into a Zinger or beyond the next platform.
Land near the center of each platform and pause before the next lift. After the letter O, the route includes a long upward passage and a platform with a left-side drop. The main route continues upward, while a lower path beneath a stationary Zinger leads to an optional Bonus Barrel. At the section marked by the No Squawks sign, drop rather than jumping from the platform if you are taking the lower optional route.
Dixie's helicopter spin helps correct a short jump, but it cannot replace careful positioning around moving Zingers. If a collectible is missed, continue to the goal and return later instead of sacrificing a life after reaching the checkpoint.
- Use small directional corrections in the air currents.
- Center each landing before starting the next ascent.
- Remember that the lower drops near the end can lead to optional content.
Ride the rising floor in Castle Crush
Castle Crush uses an automatically ascending floor. Stay ahead of the hazards without rushing beyond the platform's safe area. Early in the level, defeat or bypass the first Kutlass and go left through the passage it guards to find the Rambi Animal Barrel. Rambi can break through enemies and walls that block the intended route.
After the Star Barrel, pass through the left wall near the floating DK Barrel to find the Squawks Animal Barrel. Fly upward through the Zinger passage and follow the upper route. Squawks eventually reaches a No Squawks sign and changes into a TNT Barrel. Carry or throw the TNT Barrel only when you have a clear target; use it against the indicated wall rather than releasing it beside the Kongs.
The rising floor can catch you if you stop too long, but jumping blindly is more dangerous. Watch the next obstruction, preserve any useful barrel until it is needed, and leave room to retreat from TNT explosions. The DK Coin and Bonus Barrels are optional and can be collected during a later replay.
- Find Rambi through the passage left of the early Kutlass if pursuing the optional route.
- Find Squawks after the Star Barrel through the left wall.
- Keep TNT away from the Kongs and throw it only with a safe retreat space.
Freeze the water in Clapper's Cavern
Clapper's Cavern combines icy platforms with pools that the Kongs cannot safely enter on their own. Jump onto Clapper's back to make him freeze the nearby water temporarily, then cross the frozen surface quickly before it returns to its hazardous state. This is the defining mechanic of the stage; it is not a lava section.
Ice causes the Kongs to slide after releasing the direction. Start braking before the edge of a platform by turning early or using a short jump. One practical route is to use the second Clapper, run across the frozen surface, and slide beneath the stationary Zingers. If you miss the timing, retreat to solid ground and wait for another chance rather than jumping from the edge.
The stage also includes an Enguarde section. When the route seems to end near a Banana Coin, use Enguarde's charged thrust against the wall marked by a lone banana to enter an optional room. Another Bonus Barrel is reached by team-throwing to the hook above the entry area. Neither detour is required for the exit.
- Jump on Clapper to freeze water before crossing.
- Brake early on ice and avoid full-speed approaches to gaps.
- Use Enguarde's charge against marked walls only when pursuing bonuses.
Climb Chain Link Chamber methodically
Chain Link Chamber is a long vertical stage built around chains, hooks, Zingers, Krooks, Kutlasses, Kannons, and Mini-Neckys. Unlike Castle Crush and Toxic Tower, it does not force the Kongs upward with a rising floor or liquid. Use that freedom to stop on a safe chain and study the next jump.
When a Krook throws a hook, wait for the hook to travel away or return before jumping past the enemy. Keep a DK Barrel when possible, because losing the lead Kong during a chain transition can make the next section much harder. After the Continue Barrel, two Klumps fire Kannonballs down parallel chains; climb only after watching the firing rhythm and use the single banana on the wall as a landmark for the hidden DK Coin route.
Kutlasses can occupy a landing platform or attack across a narrow lane. Approach from the side that leaves a retreat path. A carried Kannonball is useful for an optional Kannon entrance earlier in the stage, but do not sacrifice a safe position just to preserve it.
- Pause on chains to read enemy movement.
- Use the single banana wall landmark when searching for the DK Coin.
- Keep a retreat route open when approaching Kutlasses or Krooks.
Ascend Toxic Tower with the correct animal rhythm
Toxic Tower is the final full level of the Keep. Toxic waste rises from below, so falling behind removes recovery space. The level requires three animal sections in sequence: Rattly first, Squawks later, and Squitter near the top.
Rattly's charged jump is the key to the opening ascent. Hold the jump input long enough to build height, then land on the next platform before the waste catches up. When the route changes to Squawks, fly upward through the bramble passages while keeping enough height to avoid the rising hazard. Near the end, Squitter creates web platforms through the final bramble section. Build only the webs needed for the next landing so the route remains visible.
There is one Bonus Barrel in the Squitter portion. A hornet beside a wall marks the area; defeat it and walk through the wall to enter the Bonus Area. This is optional. If an animal transformation ends, immediately reset your movement expectations before the next jump, since normal Kong movement is less vertical and less forgiving.
- Use Rattly's charged jump rather than ordinary hops for high platforms.
- Fly carefully with Squawks and avoid dropping toward the waste.
- Use Squitter's web platforms sparingly and prioritize upward progress.
Complete Stronghold Showdown and verify the transition
Stronghold Showdown is a straight, enemy-free interior passage in the original SNES version. Walk through the stage until the Kongs find Donkey Kong bound inside the Keep. Approaching him triggers the rescue scene, awards one Kremkoin automatically, and shows K. Rool taking Donkey Kong away toward The Flying Krock.
There is no damage phase, boss health bar, or attack pattern in this edition. Do not apply the GBA version's Kerozene strategy to the SNES cartridge or the USA Rev 1 release. After the scene, the world map route continues to The Flying Krock and its first stage, Screech's Sprint.
If you are preparing for the final worlds, save before continuing when possible. For full completion, record any missed Bonus Barrels, KONG letters, or DK Coins and revisit their stages later with Funky's Flights rather than repeatedly risking the entire Keep.
- Reach Donkey Kong inside Stronghold Showdown.
- Collect the automatically awarded Kremkoin.
- Confirm that The Flying Krock and Screech's Sprint are available.
- Save before beginning the next world if a save point is available.
Before you move on
- Arctic Abyss, Windy Well, Castle Crush, Clapper's Cavern, Chain Link Chamber, Toxic Tower, and Stronghold Showdown are cleared on the K. Rool's Keep map.
- Stronghold Showdown has triggered the Donkey Kong rescue scene and awarded its Kremkoin.
- The Flying Krock is available as the next destination.
- Any missed Bonus Barrels, KONG letters, or DK Coins have been recorded for later backtracking.
- A save has been made before continuing into The Flying Krock or powering off the system.
References for this chapter
- Donkey Kong Country 2: Diddy’s Kong Quest — FAQ — GameFAQs
- Donkey Kong Country 2: Diddy's Kong Quest — Guide and Walkthrough by T_Hayes
- Donkey Kong Country 2: Diddy’s Kong Quest — Guide and Walkthrough by VinnyVideo
- Toxic Tower — Super Mario Wiki
- Chain Link Chamber — Super Mario Wiki
- Stronghold Showdown — Super Mario Wiki
- Clapper's Cavern — Super Mario Wiki
- Donkey Kong Country 2 SNES level and bonus listings
World 7 — The Flying Krock and Final Boss
The Flying Krock contains one regular level, Screech's Sprint, followed by the nine-hit K. Rool Duel. Clear the bramble approach, win the Squawks race against Screech, then counter each phase of Kaptain K. Rool's blunderbuss attack. The Lost World remains separate from this main-campaign finish.
1. Prepare for The Flying Krock
Stronghold Showdown leads into The Flying Krock, but it is not a conventional boss stage. After its scene ends, Screech's Sprint becomes available as World 7-1. If you are low on lives, use earlier worlds and their bonus rooms to replenish them before attempting the final level. If both Kongs are available, keeping them together is useful because the stage's Bonus Area requires a team throw and the boss provides a DK Barrel after its third and sixth hits.
The original SNES level has a Star Barrel before the Squawks section. Reaching it is the main recovery objective during a first attempt. You may ignore KONG letters, the DK Coin, and the Bonus Area until you know the route; none is required to open K. Rool Duel. If you want the Bonus Area, keep both Kongs alive through the first half.
- Confirm Screech's Sprint is available after Stronghold Showdown.
- Carry spare lives if the bramble race is unfamiliar.
- Keep both Kongs alive if you intend to enter the Bonus Area.
2. Cross the bramble approach
Move right from the start and use roll-jumps to clear the early gaps and Cat O' 9 Tails. When Kloak throws a TNT Barrel, pick it up before it changes into a Kaboom and throw it at a Klinger or another obstruction. On the vine section, climb while watching the Klingers' positions rather than trying to rush directly through them. The safest route is usually to use the upper portions of the vines, then descend after the enemies have moved away.
Continue past the vertically moving Zingers and the pair of Cat O' 9 Tails, then climb the next vine while Mini-Neckies swoop from above. At the top, jump left across the platforms over the brambles. Do not linger under enemies that can knock you upward: contact with the brambles is usually fatal, so take each jump from a deliberate position instead of attacking blindly.
- Use the TNT Barrel against a nearby obstruction before it becomes a Kaboom.
- Climb around Klingers instead of contacting them on the vines.
- Watch Mini-Neckies while climbing the final vine before the checkpoint.
3. Enter the Bonus Area only if you are ready
After passing the Mini-Neckies, jump across the next gap and perform a team throw to reach the high wooden platform containing a kannonball. Carry the kannonball to the right and throw it into the nearby Kannon. This opens the stage's only Bonus Area. Inside, follow the banana trails downward and use Dixie’s Helicopter Twirl for the long falls; switch to Diddy for the roll-jump sections. Reach the Kremkoin before the timer expires, then return to the main route.
This room is optional for the main campaign. If you lose a Kong before reaching the team-throw platform, skip it and continue. The important progression item is the Star Barrel below the Bonus Area route. Enter it before the Animal Barrel so a failed race does not force a complete replay of the bramble approach.
- Team throw onto the high platform only when both Kongs are present.
- Carry the kannonball into the Kannon to enter the Bonus Area.
- Prioritize the Kremkoin over extra bananas inside the timed room.
4. Reach the Star Barrel and start the race
After returning from the Bonus Area, move left and descend toward the Star Barrel. Break it, then enter the Animal Barrel to become Squawks. Fly left to Screech's starting line. The race begins after the start signal, and losing to Screech costs a life, so do not treat this section as a leisurely collectible sweep.
The race route is helped by banana trails. At the opening, fly through the normal path and shoot eggs at Zingers that block the corridor. An SNES shortcut is available shortly after the start: descend through the lower-left opening between the brambles to reach an invisible Barrel Cannon that launches Squawks forward and upward. This can give you a useful lead, but it is optional; use the visible banana route if you are not comfortable finding the opening.
- Break the Star Barrel before entering the Animal Barrel.
- Shoot blocking yellow Zingers with eggs.
- Use the lower-left invisible Barrel Cannon only if you can enter it safely.
5. Navigate the Squawks race
Follow the banana trail through the first vertical climb, then turn right and work through the narrow openings. When the route points downward, descend and follow the maze through the brambles before turning east again. Yellow Zingers can be destroyed with eggs; red Zingers cannot, so steer around them rather than wasting time firing at them.
The race contains optional detours for the KONG letters and DK Coin. The DK Coin is in an upper-right passage reached after a section with yellow Zingers, but taking that detour can cost the lead. Continue through the zigzag route, use small height corrections instead of large swings, and enter the final vertical passage. At the upper branch, take the route toward the finish. If you are collecting letters, the K, O, N, and G are placed along detours and can be collected on later practice attempts.
- Destroy yellow Zingers and avoid red Zingers.
- Follow banana trails through the central bramble maze.
- Ignore the DK Coin and letters on a first clear if they endanger the race.
6. Finish Screech's Sprint
Near the end, Squawks must pass through narrow alternating rises and falls, then deal with another red-Zinger formation. Make short vertical corrections and line up with the open side of each gap before advancing. Cross the banana finish line ahead of Screech. Continue right through the No Animal Sign to turn back into Diddy and Dixie, then hit the End of Level Target.
If Screech wins, the life is lost and the Star Barrel lets you retry the race section. Repeat the same route rather than experimenting with optional detours. The original SNES version also contains a race-bypass glitch involving flying over Screech, but it is unnecessary for a normal completion and should not be treated as the reliable route.
- Cross the finish line before Screech.
- Pass the No Animal Sign and hit the End of Level Target.
- Use the Star Barrel to retry the race after failure.
7. Begin K. Rool Duel with the correct counter
K. Rool Duel requires nine successful hits. At the start, he fires a normal cannonball. Pick it up, avoid his charge, and wait until his blunderbuss visibly begins sucking air. Throw the cannonball into the gun during that suction animation. A premature throw wastes the counter opportunity; the cannonball must enter the weapon to damage him.
After each successful counter, the cannonball is fired back across the arena. Jump over it, then prepare for the next pattern. If both Kongs are available, Dixie is generally more forgiving because her Helicopter Twirl helps with positioning, but either Kong can complete the fight.
- Pick up the normal cannonball at the start.
- Wait for the blunderbuss suction before throwing.
- Jump over the returned cannonball after every hit.
8. Survive hits two through six
For hit two, K. Rool launches a spiked cannonball and charges twice. Avoid both charges; when the spikes retract, pick up that cannonball and throw it during the next suction. For hit three, two spiked cannonballs appear and K. Rool charges three times. One cannonball becomes safe at random, so watch for the retracted spikes before picking one up.
After the third hit, K. Rool falls and Donkey Kong is lowered briefly before the fight resumes. A DK Barrel appears near Donkey Kong; break it if you need the partner Kong, but do not cross the arena recklessly while hazards remain. Hit four uses a stationary barrage of spiked cannonballs. Hit five uses bouncing spiked cannonballs, which can be avoided with a mixture of jumps and walking underneath them. Hit six uses swirling spiked cannonballs with expanding paths. Once the barrage ends, break the provided barrel, take its cannonball, and wait for suction before throwing.
- Never touch a cannonball while its spikes are extended.
- Watch which cannonball becomes safe during hit three.
- Use the DK Barrel only when recovering the second Kong is worth the risk.
9. Complete hits seven through nine
For hit seven, K. Rool sends blue clouds across the arena. Jump over them; contact freezes the active Kong, although rapid button presses can break the freeze. He then makes a series of charges, including a partly invisible and a fully invisible charge. Watch the movement and dust along the floor, jump over each charge, then use the cannonball supplied after the pattern during the next suction.
For hit eight, avoid the red clouds, which slow movement, followed by the spiked cannonballs. The slowdown makes late jumps difficult, so stay ready to jump as soon as the clouds pass. For hit nine, avoid the purple clouds; they reverse left and right if they touch you. Afterward, K. Rool begins teleporting around the chamber and trying to suck the Kong into his gun. There is no immediate cannonball for this part. Keep moving away from each appearance and survive several suction attempts. Only after this sequence does a cannonball appear in the arena. Pick it up, throw it into the blunderbuss during suction, and jump over the final returned shot.
- Jump over blue clouds and break free quickly if frozen.
- Avoid red clouds before the hit-eight cannonball becomes available.
- Keep moving during the hit-nine teleport sequence until the final cannonball appears.
- Avoid purple clouds so the controls remain normal.
10. Confirm the main-campaign completion
After the ninth counter, the ending sequence releases Donkey Kong and Kaptain K. Rool is defeated. Let the ending and credits sequence proceed if you are confirming the campaign completion. When control returns to the map, verify that K. Rool Duel is marked as cleared and that the level is no longer an available uncleared destination.
For a safe finish, travel to Kong Kollege and save after the victory. This chapter's goal is the main campaign ending; Lost World stages, Kremkoins, Bonus Areas, KONG letters, and DK Coins remain optional unless you are pursuing the game's fullest completion target. If the boss is defeated but the game is powered off before saving, the victory may not be preserved as part of the current file state.
- Defeat K. Rool with nine successful cannonball counters.
- View the rescue ending.
- Confirm K. Rool Duel is cleared on the map.
- Save at Kong Kollege before shutting down or closing the emulator.
Before you move on
- Stronghold Showdown has led to The Flying Krock.
- Screech's Sprint is cleared by winning the Squawks race against Screech.
- K. Rool Duel is accessible and K. Rool has taken nine successful cannonball counters.
- Donkey Kong is released and the rescue ending has been viewed.
- The K. Rool Duel destination is shown as cleared on the map.
- A post-victory save has been made at Kong Kollege.
- Lost World stages have not been counted as required for the main-campaign objective.
References for this chapter
Character and Animal Mechanics (Diddy, Dixie, and Buddies)
Diddy and Dixie share the same basic movement, but their attack and jump options make them better suited to different situations. Diddy is the faster choice for committed running jumps and cartwheel attacks. Dixie is the safer choice for long gaps because her Helicopter Spin slows her descent and lets her steer in the air. Neither Kong is universally superior, so switch characters when the next obstacle favors speed, reach, or a particular barrel cannon. Animal buddies are stage-specific tools rather than permanent party members. Preserve each one through the section designed for its ability, and dismount only when the landing area is safe.
Use Diddy for speed, attack momentum, and barrel handling
Hold Y while moving to run. Diddy’s cartwheel is performed with Y and is useful against ordinary ground enemies. If he cartwheels off the edge of a platform and jumps during the movement, he can cover a longer distance than with a standing jump. Use this when a gap is short enough to reward momentum but too long for a normal jump.
Diddy also carries a barrel in front of himself, which can shield him from some frontal contact while he moves. Press Y to pick up a barrel and release it to throw it. Press Down while releasing Y to put the barrel down instead. This is useful when you need to reposition a barrel without breaking it, especially near a Bonus Barrel, a barrel cannon, or an enemy that must be struck from a particular angle.
When both Kongs are present, A teams them up and splits them apart. Select changes the active Kong. Keep both alive whenever possible: losing the active Kong does not end the level if the partner remains, but losing the partner removes a valuable recovery option and can make Kong-specific barrel cannons inaccessible.
- Hold Y while moving for Diddy’s run.
- Use a cartwheel jump when momentum gives a safer crossing than a standing jump.
- Carry barrels as shields, and use Down while releasing Y to place one instead of throwing it.
- Switch to the Kong shown on a Diddy or Dixie Barrel Cannon before landing in it.
Use Dixie’s Helicopter Spin for controlled descent
Hold Y after Dixie leaves the ground to start the Helicopter Spin. She descends slowly while the Control Pad steers her horizontally. This is the best tool for extending a jump to a lower ledge, correcting a landing that is slightly short, or crossing a long open gap where Diddy would need a more exact running jump.
The Helicopter Spin does not reduce damage from spikes, Zingers, brambles, or other hazards. It only changes Dixie’s movement through the air. Start the spin after clearing the takeoff edge, then steer toward the center of the destination platform. Release the input or stop correcting once the landing is lined up; continuing to drift can carry Dixie beyond a narrow ledge.
Dixie can also spin on the ground to attack. Use that attack against enemies that can be safely reached from the floor, but do not confuse it with invulnerability. In hive, bramble, and vertical sections, use the Helicopter Spin to align with openings rather than trying to pass directly through an enemy. If the partner is missing, prioritize the next DK Barrel before attempting a difficult optional letter or bonus entrance.
- Start the Helicopter Spin only after Dixie is airborne.
- Aim for the middle of a platform instead of its outer edge.
- Treat spikes, brambles, Zingers, and pits as lethal during the spin.
- Use the move for distance and correction, not as a substitute for hazard avoidance.
Understand Animal Barrels, Animal Crates, and No Animal signs
On the original SNES version, an Animal Barrel transforms the Kongs into the animal pictured on its face. The five main transformation animals are Rambi, Enguarde, Squawks, Rattly, and Squitter. An Animal Crate instead releases the pictured buddy for the Kongs to ride or use. These are different objects, so do not assume that opening a crate has the same effect as entering a barrel.
The transformation or animal section normally ends at that animal’s No Animal sign. The animal cannot pass the sign; reaching it returns control to the Kongs and commonly leaves a reward. If you find an animal near a difficult obstacle, assume the obstacle was built around that ability and avoid abandoning the buddy early.
Press X to jump off an animal friend. Dismount only when the destination is clearly safe. Jumping off above spikes, a pit, deep water, or a moving hazard can lose the Kongs and the animal at the same time. If an animal is required to reach a Bonus Barrel, continue until you see a safe platform or the intended release point. If the animal is lost, use a nearby Animal Crate if the level provides one; otherwise restart from the Star Barrel rather than forcing a route that depends on the missing ability.
- Distinguish Animal Barrels from Animal Crates.
- Watch for the animal’s No Animal sign before planning the next section.
- Use X to dismount only over a safe landing area.
- Do not assume an animal found early in a stage remains available to the exit.
Rambi and Rattly: charging and high jumps
Rambi attacks with his horn and can break through suitable enemies and certain weak walls. Hold Y to charge. Use the charge against sturdy ground enemies such as Krunchas when the path beyond them is clear. Do not charge blindly into red Zingers, spikes, or a pit; Rambi’s strength does not make him safe against every obstacle. In levels that provide a Rambi route to a Bonus Barrel, inspect suspicious walls and follow arrows or banana trails that indicate a chargeable entrance.
Rattly’s springy tail gives him much greater vertical reach than either Kong. Hold the jump button to prepare his high jump, then release to launch. Set the jump up before entering the danger zone, and use the intended platform or enemy as the landing target. Rattly can bounce across gaps by using enemies positioned above spikes, but a charged jump is difficult to correct once it has begun. If the destination is off-screen, wait until the camera reveals enough of the route before committing.
- Charge Rambi only when the space ahead is known to be safe.
- Use Rambi to defeat heavy ground enemies and expose suitable hidden routes.
- Charge Rattly’s jump before the hazard, not after entering it.
- Treat enemy-bounce routes over spikes as planned jumps, not emergency recoveries.
Squawks and Squitter: flying and web-platform control
Squawks flies when B is pressed and attacks by spitting eggs with Y. Make short vertical corrections rather than holding upward continuously. In narrow Zinger corridors, clear the next enemy before moving deeper into the passage. If a collectible sits beside the route, secure the open path first and return only if the screen position remains safe. Wind can push Squawks horizontally, so leave room to correct before approaching a wall or Zinger.
Squitter fires ordinary webs with Y and creates web platforms with A, L, or R according to the original SNES control layout. Use webs as temporary steps: place the next platform below or beside the intended ledge, jump from it promptly, and avoid building the route so far ahead that the next surface cannot be reached. In bramble sections, keep Squitter moving in small increments and use web shots to remove enemies before they force a hurried jump. Animal Antics is the clearest full-game test of this technique because Squitter must use web platforms across spike and bramble sections.
- Use Squawks’s eggs to clear Zingers before entering tight spaces.
- Make small height adjustments while flying.
- Place Squitter’s web platforms close enough to reach with one controlled jump.
- Use web shots to create room before committing to a platform sequence.
Enguarde, Glimmer, and Clapper: underwater support
Enguarde is the underwater transformation animal. He swims without requiring repeated jump inputs and uses Y for a forward dash that stabs enemies. Begin slowing before tight turns, because charging directly into a corner or enemy group can remove the room needed to recover. Keep Enguarde for underwater barriers, hostile groups, and passages that the Kongs cannot safely cross alone. Dismount only where the Kongs can stand or swim without immediately entering a hazard.
Glimmer is an anglerfish who provides light in a dark underwater stage; he is not an Animal Barrel transformation. Follow the illuminated route, and do not treat Glimmer as a combat animal. Clapper is a seal used as an environmental helper. Jump on him to change the temperature or state of nearby water as intended by the stage. He is also not a transformation animal, so do not search for a dismount command after using him.
When an animal-specific Bonus Area appears, complete its challenge before leaving. Bonus Areas award Kremkoins, and animal abilities are often the safest or only practical way to defeat the required enemies or reach the token. If a failed attempt costs the animal, restart from the Star Barrel when possible and repeat the section deliberately rather than sacrificing lives on uncontrolled jumps.
- Use Enguarde’s dash to clear aquatic enemies, but brake before tight turns.
- Follow Glimmer’s light without treating him as a playable transformation.
- Jump on Clapper to activate his water-changing effect, then continue when the route is safe.
- Complete animal-based Bonus Areas before abandoning the required buddy.
Before you move on
- You can use Diddy’s run, cartwheel jump, barrel carry, and barrel throw without confusing them with Dixie’s movement.
- You can use Dixie’s Helicopter Spin to extend and correct jumps while still avoiding hazards normally.
- You can identify the five transformation animals: Rambi, Enguarde, Squawks, Rattly, and Squitter.
- You can explain the separate roles of Glimmer and Clapper as environmental helpers.
- You can preserve an animal until its No Animal sign or intended release point and can recover by restarting from a Star Barrel when a required animal is lost.
- You can use Rambi’s charge, Rattly’s high jump, Squawks’s eggs and flight, Squitter’s web platforms, and Enguarde’s underwater dash in their intended sections.
- You have completed any animal-dependent Bonus Areas encountered during the campaign and retained their Kremkoins for Klubba’s Lost World access.
References for this chapter
- Donkey Kong Country 2: Diddy's Kong Quest SNES manual
- Super NES Instruction Manuals: Donkey Kong Country 2: Diddy’s Kong Quest
- Donkey Kong Country 2: Diddy's Kong Quest - Guide and Walkthrough - Super Nintendo - DWA
- Donkey Kong Country 2: Diddy’s Kong Quest — Guide and Walkthrough by VinnyVideo
- Animal Antics — Donkey Kong Country 2: Diddy’s Kong Quest
Bonus Areas, Star Barrels and Kremkoins (How to Earn and Spend Them)
In the original North American Super Nintendo release of Donkey Kong Country 2: Diddy’s Kong Quest, Kremkoins come from two sources. Ordinary Bonus Areas provide 68 Kremkoins in total, while seven one-time progression encounters provide the remaining seven: the five conventional world bosses, Stronghold Showdown, and the K. Rool Duel. This produces the complete total of 75 Kremkoins. Each of Klubba’s five Kiosks requires a separate payment of 15 Kremkoins to open its Golden Barrel and reach one Lost World stage.
Recognize Star Barrels, Bonus Barrels and hidden entrances
A Star Barrel is a regular level checkpoint. Touching it changes the point where Diddy and Dixie restart after losing a life, but it does not begin a Bonus Area and it does not award a Kremkoin. Activate it before a difficult vehicle, animal, timed or vertical section whenever possible. If a later attempt fails, restarting from the Star Barrel is safer than repeating the entire level.
Bonus Areas are usually entered through Bonus Barrels, but many entrances are placed away from the obvious route. Search above isolated ledges, behind suspicious walls, below platforms, at dead ends and near cannon arrangements. Some entrances require a throwable barrel, a team-up throw, a specific animal buddy or a cannonball. A hidden doorway may look like an ordinary wall, so inspect places where the level seems to offer an unnecessary detour.
Keep both Kongs together when exploring likely secret routes. A team-up throw or team-up jump may be required, and losing one Kong can make an otherwise accessible entrance unreachable. If an entrance requires an animal, preserve that animal until nearby walls, ceilings and dead ends have been checked. If the animal is lost, finish or intentionally leave the level and replay it after finding another animal crate.
- Touch each Star Barrel before a dangerous section.
- Search alternate routes instead of following only the main path.
- Check hidden walls, cannonball routes and animal-dependent paths.
- Keep both Kongs when a team-up move may be needed.
Complete the Bonus Area and collect the Kremkoin
Entering a Bonus Area is not enough. The Kremkoin appears only after completing that room’s stated objective. Depending on the room, the task may involve collecting stars, defeating every enemy, finding the token in a chest or reaching the end of a barrel sequence. Follow the displayed objective rather than assuming that reaching the far side is sufficient.
When the Kremkoin appears, move into it and collect it before the Bonus Area timer expires. Seeing the coin or completing the route without touching it does not secure the reward. After collecting it, the game returns you to the regular level. You can then continue toward the Exit Target or deliberately lose a life if you need to retry another route from the Star Barrel.
A failed Bonus Area is not permanently lost. Its entrance remains available when the level is replayed. If the Star Barrel is before the entrance, use that checkpoint to make repeated attempts less costly. For a difficult animal or barrel challenge, learn the route first and prioritize survival over bananas and extra enemies.
- Read the objective shown when the Bonus Area begins.
- Complete the stated challenge, not merely the entrance sequence.
- Physically collect the Kremkoin after it appears.
- Replay the level if the room is failed.
Use level markers to locate unfinished Bonus Areas
After every Bonus Area in an ordinary level has been completed and its Kremkoin collected, an exclamation mark appears beside that level’s name on the map. A level without the mark still has unfinished Bonus content or a reward that was not collected. Boss stages are an exception to this marker system because their completion is recorded differently.
Check the markers after clearing each world instead of relying on memory. If a completed level lacks its exclamation mark, replay it specifically for secret entrances rather than simply rushing to the Exit Target. Search late-stage areas, concealed walls, animal routes and places where a cannonball or throwable barrel can be carried farther than the main route suggests.
The marker confirms the Bonus Area work for that level, but it does not by itself confirm that the level’s DK Coin has been collected. For a full 102 percent file, also check the separate DK Coin indicator on the map.
- Treat an exclamation mark as confirmation that the level’s Bonus Areas are complete.
- Revisit ordinary levels without the marker.
- Search late-stage, concealed and animal-dependent entrances first.
- Check DK Coin indicators separately.
Track the seven progression Kremkoins
The 75-Kremkoin total is not supplied entirely by ordinary Bonus Areas. The 68 ordinary Bonus Areas provide 68 Kremkoins, and seven one-time progression encounters provide one each. The five conventional world bosses are Krow, Kleever, Kudgel, King Zing and Kreepy Krow. Stronghold Showdown also grants one Kremkoin in the SNES version when the Kongs reach Donkey Kong, even though the stage has no conventional boss battle. The K. Rool Duel grants the seventh progression Kremkoin after Kaptain K. Rool is defeated.
Do not treat Stronghold Showdown as the GBA version’s Kerozene fight. On SNES, the Kongs find Donkey Kong, receive the Kremkoin, and then watch him get carried away to The Flying Krock. Likewise, do not omit the K. Rool Duel from the final accounting: its reward is required when tracking all 75 Kremkoins.
If the total seems short, revisit ordinary levels that lack exclamation marks first. Repeating a defeated boss does not provide an unlimited supply, while an unfinished Bonus Area remains a reliable source. Lost World Bonus Areas are different: each rewards a DK Coin, not a Kremkoin, so they cannot be used to finance later Klubba payments.
- Count 68 Kremkoins from ordinary Bonus Areas.
- Count one Kremkoin from each of the five conventional bosses.
- Count one Kremkoin from Stronghold Showdown.
- Count one Kremkoin from the K. Rool Duel.
- Do not count Lost World Bonus Areas as Kremkoin sources.
Pay Klubba’s five separate tolls
Klubba’s Kiosks appear in the regular worlds after Gangplank Galleon. At each kiosk, pay 15 Kremkoins to open its Golden Barrel. Each Golden Barrel leads to one specific Lost World stage, so one payment does not unlock the entire Lost World. The five payments require 75 Kremkoins altogether.
A practical route is to complete ordinary Bonus Areas as you encounter them, use the exclamation marks for cleanup, and pay each kiosk once the required 15 coins are available. Record which kiosks have been opened so you do not confuse an available Golden Barrel with an unpaid route.
After a kiosk has been paid, its Golden Barrel remains available without another 15-Kremkoin fee. Lost World stages are optional for the ordinary ending but mandatory for the expanded completion route. Their Bonus Areas improve the DK Coin total, and clearing all five stages allows access to Krocodile Kore.
- Bring 15 Kremkoins to each intended kiosk.
- Treat every Golden Barrel as a separate unlock.
- Record each kiosk after paying it.
- Do not expect Lost World Bonus Areas to replenish Kremkoins.
Use Banana Coins for Swanky and Funky
Banana Coins and Kremkoins are separate currencies. Swanky’s Bonus Bonanza uses Banana Coins and can provide Extra Life Balloons through its quiz, making it useful before a difficult coaster, animal, timed or vertical stage. Swanky’s rewards do not count toward Kremkoin progress and do not open Klubba’s Golden Barrels.
In the SNES release, Funky’s Flights II uses the Biplane Barrel to return to previously reached worlds. The first use of each Funky’s Flights II location costs two Banana Coins; later flights from that same location are free. This is a travel service, not a replacement for level completion, so the destination’s levels must still be replayed to find and finish missing Bonus Areas.
Use Funky’s Flights II to target worlds containing level names without exclamation marks. Fly there, replay the unfinished stages, complete the Bonus Areas and collect their Kremkoins. The SNES version does not use the GBA remake’s Gyrocopter mission system, so do not import those mechanics into this route.
- Use Banana Coins at Swanky’s Bonus Bonanza.
- Use Kremkoins only for Klubba’s Lost World tolls.
- Pay two Banana Coins the first time each Funky’s Flights II location is used.
- Use later flights from that same location for free.
- Use map markers to choose cleanup destinations.
Before you move on
- Every ordinary level intended for full completion has an exclamation mark beside its name.
- The 68 ordinary Bonus Area Kremkoins are accounted for.
- Krow, Kleever, Kudgel, King Zing and Kreepy Krow have each provided their one progression Kremkoin.
- Stronghold Showdown has been completed and its Kremkoin collected.
- The K. Rool Duel has been defeated and its Kremkoin collected.
- All five separate 15-Kremkoin Klubba payments have been made for the full Lost World route.
- All five Lost World Bonus Areas have been completed for their DK Coins.
- Funky’s Flights II has been used to revisit ordinary worlds with unfinished level markers when necessary.
- Swanky’s Bonus Bonanza has been treated as an optional Extra Life Balloon source using Banana Coins.
- The complete total of 75 Kremkoins is accounted for before checking the 102 percent completion target.
References for this chapter
- Kremkoin — Super Mario Wiki
- Stronghold Showdown — Super Mario Wiki
- Stronghold Showdown — Donkey Kong Wiki
- Funky’s Flights II — Donkey Kong Wiki
- Donkey Kong Country 2: Diddy’s Kong Quest — FAQ — GameFAQs
- Donkey Kong Country 2: Diddy’s Kong Quest — Guide and Walkthrough — GameFAQs
- Donkey Kong Country 2: Diddy's Kong Quest - Guide and Walkthrough - Super Nintendo - DWA
Lost World — Unlocking and Recommended Order
The Lost World is optional for reaching the ordinary ending after the K. Rool Duel, but it is required for the complete Super Nintendo campaign. Five Klubba’s Kiosks provide access to five separate stages. Each visit costs 15 Kremkoins and opens one fixed Golden Barrel route. After Jungle Jinx, Black Ice Battle, Klobber Karnage, Fiery Furnace, and Animal Antics are cleared, the central crocodile entrance opens. Entering it leads to Krocodile Kore, where Kaptain K. Rool can be defeated by throwing one correctly timed Kannonball into his blunderbuss. The Lost World provides six DK Coins in total: one from each stage’s Bonus Area and one for defeating Kaptain K. Rool in Krocodile Kore.
1. Gather Kremkoins and identify the five kiosks
Kremkoins come from completed Bonus Areas and progression rewards during the main campaign. Save them for Klubba if you intend to clear the Lost World. Each kiosk toll is 15 Kremkoins, and there are five Lost World stages, so opening every route requires 75 Kremkoins in total. Kremkoins are not the same collectible as DK Coins: Kremkoins pay Klubba, while DK Coins are the large collectible coins used for completion tracking.
Klubba’s Kiosks are found in Crocodile Cauldron, Krem Quay, Krazy Kremland, Gloomy Gulch, and K. Rool’s Keep. There is no kiosk in Gangplank Galleon or The Flying Krock. The destinations are fixed: Crocodile Cauldron opens Jungle Jinx; Krem Quay opens Black Ice Battle; Krazy Kremland opens Klobber Karnage; Gloomy Gulch opens Fiery Furnace; and K. Rool’s Keep opens Animal Antics.
If you have already passed a kiosk, use Funky’s Flights to return to that world. Paying one kiosk does not unlock the other four, so track each payment and stage separately. For the full completion target, all 75 Kremkoins are eventually spent on the five routes. The Lost World Bonus Areas do not refund Kremkoins; they award DK Coins instead.
- Have at least 15 Kremkoins before approaching a kiosk.
- Record which kiosk has been paid and which Lost World stage it opens.
- Reserve enough Kremkoins for the remaining kiosks if pursuing 102% completion.
2. Pay Klubba and enter the Golden Barrel
Stand at the desired kiosk and pay Klubba 15 Kremkoins. The payment opens that kiosk’s Golden Barrel route; it does not unlock every Lost World stage at once. Enter the Golden Barrel to travel to the fixed stage associated with that kiosk.
Clear the stage before returning to the main map. Completing one stage does not open Krocodile Kore. The central crocodile head remains closed until Jungle Jinx, Black Ice Battle, Klobber Karnage, Fiery Furnace, and Animal Antics have all been completed.
Each Lost World stage has one Bonus Area. Its reward is a DK Coin in the SNES release, not a Kremkoin. The Bonus Area is optional for simply reaching the goal, so finish the main route first if the entrance is costing lives. Once you know the stage, replay it and use the Star Barrel as your starting point for a safer Bonus Area attempt.
- Pay 15 Kremkoins at the selected kiosk.
- Enter the linked Golden Barrel and clear its stage.
- Return later for the stage’s Bonus Area and DK Coin if necessary.
3. Recommended opening route: Jungle Jinx, then Black Ice Battle
Jungle Jinx is a practical first choice because its main challenge is consistent tire timing rather than animal transformations. Use the rolling tires as moving jump platforms across the spike sections. Let each tire approach before jumping, and aim for the next solid landing area instead of trying to chain the longest possible jumps. Dixie’s Helicopter Spin can correct a long jump, but keep enough control for recovery if the tire moves away from you.
The Jungle Jinx Bonus Barrel is reached near the Star Barrel. After the checkpoint, go back across the spike section, use Dixie’s glide or a carefully timed roll jump to pass the Flitter, and drop toward the hidden ledge and Bonus Barrel. The Bonus Area requires defeating the Flitters within its time limit and awards the stage’s DK Coin. If the entrance costs a life while you are learning the tire route, finish the stage and return from the Star Barrel.
Black Ice Battle is a sensible second stage once delayed landings are comfortable. Ice makes braking unreliable, so release the run button before ledges and use short hops for adjustments. After the letter N, drop through the shaft while holding right to reach the passage with the Klobber and chest. Defeat or bypass the Klobber, use the chest to reveal a Kannonball, then carry it through the passage. Throw it at the later Zingers to open the route to the Bonus Barrel. Do not rush across the ice; stable footing is more valuable than nearby bananas.
- Treat Jungle Jinx tires as timed platforms and wait for safe approaches.
- Use the Star Barrel before attempting the Jungle Jinx Bonus Area again.
- Brake early on Black Ice Battle’s slippery surfaces.
- Use the revealed Kannonball to clear the later Zinger passage.
4. Continue with Klobber Karnage and Fiery Furnace
Klobber Karnage is built around barrel cannons and temporary Exclamation Barrels. Check the direction of each cannon before firing, because a mistimed launch can send you directly into a hazard. During the later section, use the Exclamation Barrel effect to pass Zingers without jumping into them. Near the end, use the Diddy Barrel and aim toward the isolated route that leads to the Bonus Barrel. The Bonus Area awards the stage’s DK Coin.
Fiery Furnace introduces Steerable Barrels over lava. The Control Pad moves the barrel while its timer runs, but the barrel launches automatically when the timer expires. Start steering before the next Zinger formation reaches you. Use the banana trail as a route guide, but do not wait until the final seconds to line up the launch. When the route requires a Flitter, enter that section with the barrel aimed toward the intended bounce rather than trying to correct at the last instant.
The Fiery Furnace Bonus Barrel appears after the letter G. Follow the barrel route to the elevated island, team up if necessary, and throw one Kong upward into the barrel cannon along the upper route. Ride the cannons toward the Bonus Barrel. Learn the lava section first if necessary; because the Bonus Barrel is late in the stage, separating route practice from DK Coin attempts saves lives.
- Confirm a barrel cannon’s destination before firing in Klobber Karnage.
- Use Exclamation Barrels to pass Zinger formations safely.
- Steer Fiery Furnace’s barrel early and remember that its timer launches it automatically.
- Use a team throw for the elevated Fiery Furnace route.
5. Leave Animal Antics for last and manage every animal transition
Animal Antics is usually the most demanding Lost World stage because it changes animal buddy repeatedly. The SNES sequence is Rambi, Enguarde, Squitter, Squawks, and Rattly. Treat every transition as a new control problem rather than carrying the previous animal’s movement habits into the next section.
In the Rambi section, use short controlled charges and do not accelerate toward a hazard unless the landing area is visible. Enguarde’s underwater section requires deliberate height changes around enemies. In the Squitter bramble section, build webs from stable positions and use them to make controlled platforms. Squawks is especially dangerous because the wind changes direction; make small altitude corrections instead of large zigzags. Begin Rattly’s jumps from level ground so the super jump is predictable.
The Animal Antics Bonus Barrel is in the Squitter section. When you reach the Blast Barrel, do not enter it immediately. Build web platforms above the barrel, travel over the rock to the right, and drop into the hidden Bonus Barrel on the other side. The Bonus Area awards the stage’s DK Coin. If a section repeatedly costs lives, ignore letters and optional items until the main route is familiar, then replay from the Star Barrel.
- Expect the animal order Rambi, Enguarde, Squitter, Squawks, and Rattly.
- Use stable ground before starting Rattly’s high jump.
- Make small corrections during the windy Squawks section.
- Search above and to the right of the Squitter Blast Barrel for the Bonus Barrel.
6. Enter Krocodile Kore and defeat Kaptain K. Rool
After all five regular Lost World stages are cleared, the central crocodile head opens. Enter Krocodile Kore for the optional final battle and the final Lost World completion reward. The fight begins immediately, so arrive with extra lives if possible and do not risk a collectible attempt immediately before the boss unless you are prepared to repeat the route.
Kaptain K. Rool begins with long sequences of spiked Kannonballs and colored gas clouds. In the SNES version, the blue gas can freeze the Kongs temporarily, so avoid contact and concentrate on open landing space. Use small jumps, ducks, and controlled movement rather than running continuously. Keep moving toward open space when K. Rool fires a dense pattern, and avoid jumping without a clear landing.
At the end of the attack sequence, K. Rool fires a wooden barrel containing one regular Kannonball. Bounce on the barrel to break it, pick up the Kannonball, and wait for the blunderbuss to begin its suction. Throw the Kannonball into the weapon during that suction window. One successful hit defeats Kaptain K. Rool in the SNES Krocodile Kore battle. If the throw is missed, the evasion sequence repeats, so carry the Kannonball safely and do not rush the shot. Defeating him awards the sixth Lost World DK Coin.
- Clear Jungle Jinx, Black Ice Battle, Klobber Karnage, Fiery Furnace, and Animal Antics.
- Confirm that the central Lost World crocodile entrance has opened.
- Break the final barrel and throw the Kannonball into K. Rool’s blunderbuss during suction.
- Verify that Krocodile Kore has awarded its DK Coin after Kaptain K. Rool is defeated.
Before you move on
- Jungle Jinx, Black Ice Battle, Klobber Karnage, Fiery Furnace, and Animal Antics are all cleared.
- The central Lost World crocodile entrance has opened and Krocodile Kore has been completed.
- Kaptain K. Rool has been defeated in Krocodile Kore and its DK Coin has been awarded.
- All five 15-Kremkoin kiosk payments have been made, using 75 Kremkoins in total.
- All Bonus Areas in the main campaign and Lost World have been completed.
- All 40 SNES DK Coins have been collected: 34 from regular stages, five from Lost World Bonus Areas, and one from Krocodile Kore.
- The main-world stages, the four Kong family locations, and the broader 102% requirements have been completed.
- The save file displays 102% after the final required progress has been registered.
References for this chapter
- Donkey Kong Country 2: Diddy's Kong Quest — Super Mario Wiki
- Krocodile Kore - Donkey Kong Country 2
- Krocodile Kore — Donkey Kong Wiki
- Donkey Kong Country 2: Diddy's Kong Quest - Guide and Walkthrough - Super Nintendo - DWA
- Donkey Kong Country 2: Diddy’s Kong Quest — Bonus Level and DK Coin Guide by Thrashnet
- Donkey Kong Country 2: Diddy’s Kong Quest — Guide and Walkthrough by VinnyVideo
Boss Strategies Reference (All Major Bosses)
This chapter covers the five conventional world bosses, the required Stronghold Showdown rescue sequence, the nine-hit K. Rool Duel on The Flying Krock, and the optional one-hit Kaptain K. Rool encounter in Krocodile Kore. Seven progression Kremkoins are awarded during the main route: one each for Krow, Kleever, Kudgel, King Zing, Kreepy Krow, Stronghold Showdown, and the K. Rool Duel. Bonus Areas provide additional Kremkoins, while DK Coins remain separate collectibles and are never spent at Klubba's Kiosk.
Krow — Krow's Nest
Krow requires four hits. At the start, wait for him to take an egg from the nest and drop it. Let the egg bounce once, then jump on it to stop it. Pick it up and throw it at Krow as he flies across the arena. Repeat for the second hit.
Krow then rams the nest, causing several eggs to fall. Most disappear or fall away, but one continues bouncing across the platform. Stop that egg with a jump, pick it up, and throw it at Krow. Repeat the same process for the fourth and final hit.
If the usable egg rolls toward an awkward edge, do not chase it into a hazard. Keep moving around the arena and wait for the next egg cycle. A team throw at the nest can reveal optional Banana Coins, but those coins are not needed for the fight. After the fourth hit, collect the Kremkoin before leaving the stage.
- Stop a bouncing egg with a jump.
- Throw the eggs only after picking them up safely.
- Land four hits and collect the Kremkoin.
Kleever — Kleever's Kiln
Kleever can only be damaged with kannonballs. The fight begins with fireballs crossing the platform. Jump over them, then pick up the kannonball when the lane is clear. Throw it at Kleever during an opening; ordinary jumps, rolls, and direct contact do not damage the boss.
Each successful hit sends Kleever into a chase across the lava. Use the hooks to cross to the opposite side instead of attempting to run across the lava. A replacement kannonball becomes available on that side. Wait for a safe fireball gap, throw the ball, and immediately prepare for the next hook crossing.
Kleever requires six kannonball hits. Later charges are faster, so prioritize clearing the fireball pattern and reaching the hooks safely rather than forcing a throw. When Kleever emerges from the lava and begins a direct charge, jump over the sword and continue the established cycle. The sixth hit ends the fight and awards a Kremkoin.
- Use kannonballs rather than contact attacks.
- Cross the lava with the hooks after each successful hit.
- Land six hits and collect the Kremkoin.
Kudgel — Kudgel's Kontest
Kudgel attacks by jumping high and creating a ground shockwave when he lands. Keep moving horizontally and listen for his descent. Jump shortly before he touches down so the jump clears both his body and the shockwave. Do not stand beneath his landing point waiting for the TNT Barrel.
After three jumps, Kudgel pounds the ground and causes a TNT Barrel to appear. He then jumps again. Pick up the TNT Barrel and carry it while avoiding the landing. When Kudgel touches down and pauses, throw the barrel at him, then retreat far enough to avoid the explosion.
The pattern repeats for six total TNT hits. After three hits, Kudgel's jumps become quicker and his landings are harder to read. Stay farther from him and begin the evasive jump earlier. Surviving the shockwave is more important than reaching the TNT Barrel on its first possible cycle. Six TNT hits defeat Kudgel and produce a Kremkoin.
- Jump over Kudgel's body and landing shockwave.
- Wait for the TNT Barrel created after his ground pound.
- Throw the TNT Barrel during Kudgel's pause and retreat.
- Land six hits and collect the Kremkoin.
King Zing — King Zing Sting
The fight begins after entering the Squawks Barrel and moving right. King Zing's vulnerable point is the red stinger. If he approaches, fly beneath him and fire upward at the stinger. If he is moving away, turn and fire at the exposed stinger from behind. Avoid pressing too close to the hive walls, where Squawks has less room to maneuver.
King Zing becomes faster as he takes hits. During his red phase, spikes emerge from his body or are launched through the chamber. Stop attacking and use the open space between the spikes to survive. When he returns to his normal form, resume targeting the stinger. Six stinger hits begin the second half of the battle.
King Zing shrinks and summons four smaller Zingers as protection. Destroy all four with Squawks's eggs. Work quickly because defeated guards can return if the phase lasts too long. Once the guards are gone, King Zing returns to a vulnerable yellow form. Three additional stinger hits finish the battle, for nine successful hits in total. Squawks changes into the Kremkoin when the fight is complete.
- Aim Squawks's eggs at the red stinger.
- Survive the spike patterns instead of forcing attacks.
- Destroy all four protecting Zingers promptly.
- Land three final stinger hits after the protection phase.
Kreepy Krow — Kreepy Krow
Kreepy Krow is fought in three rising sections. Begin near the middle of the current platform and jump over the ghost Mini-Neckies. One enemy in each group is a normal Mini-Necky. Stomp that normal enemy to make an attack barrel appear.
Pick up the barrel and wait for Kreepy Krow to dash across the section. Throw the barrel into him during the dash. If the normal Mini-Necky is missed, no barrel appears. Move to a corner and duck beneath Krow's pass rather than attempting a risky jump, then wait for the next enemy group.
After the first hit, hooks appear on the left. Climb them, use the rope while avoiding falling eggs, and enter the barrel at the top to reach the second section. A DK Barrel on the ascent can restore the second Kong. After the second hit, hooks appear on the right. Climb to the final section and repeat the same Mini-Necky and barrel method. Three barrel hits defeat Kreepy Krow and award a Kremkoin.
- Identify and stomp the normal Mini-Necky in each section.
- Throw the spawned barrel only while Kreepy Krow crosses the platform.
- Use the hooks, rope, and upper barrel to reach all three sections.
- Land three hits and collect the Kremkoin.
Stronghold Showdown — Required Rescue Sequence
Stronghold Showdown is not a conventional boss fight in the original SNES release. Enter it from K. Rool's Keep and move through the short stronghold sequence until Donkey Kong is found tied up. The scene then shows Kaptain K. Rool taking him away. There is no Kerozene battle in this version; that combat encounter belongs to the Game Boy Advance remake.
The stage is still required for the main campaign. Completing the sequence awards a Kremkoin and opens access to The Flying Krock. Treat it as a rescue objective rather than a combat encounter. Do not apply GBA Kerozene instructions to the SNES stage.
- Complete the original SNES rescue sequence.
- Do not expect or fight Kerozene.
- Confirm that The Flying Krock becomes available afterward.
- Collect the Kremkoin awarded during the sequence.
Kaptain K. Rool — K. Rool Duel
The K. Rool Duel on The Flying Krock is the main-campaign finale and requires nine cannonball hits. At the start, Kaptain K. Rool fires a cannonball and then charges across the arena. Jump over him, collect the usable cannonball, and wait for his blunderbuss suction attack. Throw the cannonball into the blunderbuss during the suction window. He fires it back, so jump over the returning shot and prepare for the next cycle.
After the opening phase, K. Rool fires spiked cannonballs. Avoid the spikes and his charges until a usable cannonball appears. In later phases he uses bouncing spiked shots and slow, circling cannonballs. Jump over low projectiles, duck beneath high ones when necessary, and do not grab a cannonball while the surrounding hazards are still active. When K. Rool fires a barrel, jump on it to reveal the cannonball, then save it for the next suction attack.
The fight continues after apparent defeats. A DK Barrel appears during a transition, allowing the second Kong to be restored. Later attacks include blue projectiles that place a Kong in stasis, red projectiles that slow movement, and purple projectiles that reverse controls. If blue stasis takes effect, tap buttons to escape more quickly. During invisible charges, watch the dust trail along the floor and jump over the moving disturbance. When controls are reversed, deliberately press the opposite direction from your instinctive input.
Do not throw cannonballs randomly. The reliable damage window is the suction attack, and the correct projectile is the usable cannonball rather than a spiked shot. After the ninth successful hit, Donkey Kong breaks free and the ending sequence begins. The ninth hit also awards the seventh progression Kremkoin. This reward must be counted alongside the five conventional boss Kremkoins and the Stronghold Showdown Kremkoin.
- Save at Kong Kollege before the final approach when practical.
- Use cannonballs against the blunderbuss during the suction attack.
- Read projectile height and use the dust trail during invisible charges.
- Recover the second Kong from the DK Barrel when needed.
- Land nine hits, collect the Kremkoin, and allow the ending sequence to play.
Retry Planning and Kremkoin Management
Preserve both Kongs during every approach whenever possible. A second Kong gives a mistake buffer and makes difficult jumps or animal-based encounters less costly. If a boss repeatedly consumes lives, stop replaying the approach immediately. Use Funky's Flights II to return to an earlier world and replay a safe stage containing a reliable Extra Life Balloon, bonus entrance, or banana route.
The seven progression rewards are Kremkoins from Krow, Kleever, Kudgel, King Zing, Kreepy Krow, Stronghold Showdown, and the K. Rool Duel. Completed Bonus Areas provide additional Kremkoins. These are separate from DK Coins, which count toward completion and cannot be spent at Klubba's Kiosk.
Klubba charges 15 Kremkoins for each Golden Barrel entrance to the Lost World. Plan the payments before spending the reserve. For ordinary campaign completion, defeat the five world bosses, complete Stronghold Showdown, and win the nine-hit K. Rool Duel. For full completion, use Bonus Area Kremkoins together with the seven progression rewards to open all five Lost World entrances, then clear Krocodile Kore.
Krocodile Kore is a separate one-hit Kaptain K. Rool encounter. Avoid the purple effects and cannonball patterns until the usable cannonball appears. Strike the barrel to reveal it, then throw the cannonball into K. Rool's blunderbuss when the opening is available. The hit awards the Lost World DK Coin, not another progression Kremkoin.
- Farm lives in safe earlier stages instead of repeatedly sacrificing attempts at a boss.
- Keep Kremkoins distinct from DK Coins.
- Reserve 15 Kremkoins for each planned Klubba payment.
- Save before the final approach and before attempting difficult Lost World stages.
Before you move on
- Krow, Kleever, Kudgel, King Zing, and Kreepy Krow have been defeated.
- Stronghold Showdown has been completed as the original SNES rescue sequence, with its Kremkoin collected.
- Kaptain K. Rool has been defeated in the nine-hit K. Rool Duel on The Flying Krock.
- The seventh progression Kremkoin from the K. Rool Duel has been collected.
- The ending sequence has played and Donkey Kong has been freed.
- A safe save was made at Kong Kollege before the final approach when practical.
- For full completion, all five Klubba Golden Barrel entrances have been opened with 15 Kremkoins each.
- All five Lost World stages and Krocodile Kore have been cleared.
- The DK Coin from Krocodile Kore has been collected; it is not confused with a Kremkoin.
- The save file is checked separately for the overall 102% target and the required DK Coin and Bonus Area progress.
Secrets, Cheats, and Known Glitches
The original Super Nintendo version of Donkey Kong Country 2: Diddy’s Kong Quest includes a built-in Music Test, a Cheat Mode with two documented codes, and a recently publicized pause-screen sequence that exits a level. The Pirate Panic Kremkoin trick is an optional shortcut, while the Castle Crush glitch is dangerous because it can crash the game and corrupt SRAM. Use the safe codes for practice or extra lives, and avoid manipulating Castle Crush on any completion save.
Open Music Test and Cheat Mode
At the game-select screen, move the highlight to Two Player Contest. Press Down five times to reveal Music Test. With Music Test highlighted, press Down five more times to reveal Cheat Mode. These are hidden menu entries in the Super Nintendo game and do not require an external device.
Music Test is safe to use and only provides access to the soundtrack. Cheat Mode accepts button sequences from the menu. If a sequence fails, return to the menu and enter it again carefully rather than assuming that the code has partially activated.
- Highlight Two Player Contest on the game-select screen.
- Press Down five times to reveal Music Test.
- Press Down five more times to reveal Cheat Mode.
Use the two documented SNES cheats
For 50 extra lives, enter Y, A, Select, A, Down, Left, A, Down in Cheat Mode. This is the useful option for learning difficult stages or recovering from repeated boss attempts. It does not save the file by itself, so still use Kong Kollege when you want the current progress written to the cartridge battery save.
The second code is B, A, Right, Right, A, Left, A, X. It is commonly called BARRALAX and activates the hard mode that removes DK Barrels from stages. It does not mean that every object shaped like a barrel disappears: level-specific barrels, such as projectile, animal, and bonus-entry objects, should not be treated as universally removed unless the stage itself demonstrates that behavior.
BARRALAX is best reserved for a challenge run. Without DK Barrels, losing the active Kong cannot normally be repaired by finding a partner barrel later in the stage. The code also makes unfamiliar bonus routes and recovery sections less forgiving. For a first campaign or a collectible-focused file, use the 50-lives code instead, or do not activate a cheat at all.
- Enter Y, A, Select, A, Down, Left, A, Down for 50 lives.
- Enter B, A, Right, Right, A, Left, A, X for BARRALAX hard mode.
- Do not confuse the Cheat Mode codes with the separate pause-screen exit sequence.
- Save normally at Kong Kollege after confirming that the file still loads correctly.
Exit a stage from the pause screen
The SNES game has a pause-screen sequence that returns the Kongs to the world map without requiring the current stage to be finished. Pause the game, then enter these four directional and button combinations in order: Right plus Y, Left plus A, Up plus B, Down plus X. Treat each pair as a simultaneous input rather than as two rapid, separate button presses.
This is useful when practicing a route, checking whether a stage contains a missed entrance, or abandoning a bad attempt without deliberately running into an enemy. On an original controller, press the indicated direction and face button together. On an emulator, simultaneous-input settings or hotkeys may interfere, so use the mapped SNES controls if the sequence does not register.
The sequence exits the stage; it is not a level-clear command. Do not expect it to award the stage’s completion, KONG letters, Bonus Area rewards, DK Coin, or Kremkoin. After returning to the map, re-enter the level and complete it normally when you need its progress recorded.
- Pause while inside a normal stage.
- Enter Right plus Y, Left plus A, Up plus B, Down plus X, in that order.
- Confirm that the map appears.
- Re-enter and clear the stage normally if you need completion or collectibles.
Perform the optional Pirate Panic Kremkoin trick
Enter Pirate Panic and go to Kaptain K. Rool’s cabin near the start. Inside are the note and the Red Balloon. On the first visit, do not touch the note or collect the balloon. Leave the cabin and move right without touching either of the first two bananas on the ground outside the entrance.
Continue to the Banana Bunch above the barrel stack near the first Klomp, collect it, and return to the cabin. Again avoid the two bananas outside. Enter the cabin, jump over the note, and collect the Red Balloon. Do not touch the note while taking the balloon. Then leave the cabin once more, avoid the two bananas again, and collect the same Banana Bunch near the Klomp.
Return to the cabin for the final time, still avoiding the two bananas outside. A Kremkoin should now appear above the note. Touch it to receive the large 75-Kremkoin reward. If the coin does not appear, the sequence was broken by touching one of the bananas, taking the balloon on the wrong visit, touching the note, or missing the required Banana Bunch. Exit the stage and restart the procedure from the beginning rather than trying to repair the sequence midway.
This shortcut can provide enough currency to pay many Klubba tolls early, but it is not necessary for ordinary progress. Completing Bonus Areas and defeating bosses is the safer intended method of earning Kremkoins. If the goal is a clean completion file, use the trick only deliberately and keep a normal-save backup before experimenting.
- Enter Kaptain K. Rool’s cabin without touching the note or Red Balloon.
- Avoid both bananas outside the cabin during every trip.
- Collect the Banana Bunch near the first Klomp before the second cabin visit.
- Jump over the note to collect the Red Balloon.
- Collect the Banana Bunch a second time, then return to the cabin.
- Touch the newly appearing Kremkoin to receive 75 Kremkoins.
Avoid the Castle Crush memory-corruption glitch
Castle Crush contains a serious SNES glitch involving Diddy Kong, the first DK Barrel, and the nearby Rambi Animal Barrel. Community documentation describes holding the first DK Barrel against a wall, dropping and quickly picking it up again, and then throwing the resulting invisible or glitched barrel. The exact outcome varies with position, timing, controller input, character arrangement, and version or region details.
The harmless-looking first effects can include an enemy or other nearby object appearing in the wrong place. If the glitched object interacts with the Rambi Barrel, however, the game can produce broken graphics, arbitrary behavior, a lockup, or a crash. Because the game may execute invalid data, SRAM can become corrupted. That can cause lost saves, a damaged-looking file, or abnormal startup behavior until the affected save memory is cleared.
Do not attempt this on a physical cartridge that contains a valuable completion file. The glitch cannot permanently destroy the SNES hardware or physically brick the cartridge, but that does not make it safe: losing a 101 or 102 percent file is a realistic enough risk to avoid the experiment entirely. If using an emulator, make a separate battery-save backup before testing and never overwrite the only working copy.
If the objective is simply to leave Castle Crush, use the pause-screen exit sequence or accept a normal death. If the objective is to practice the stage, use the 50-lives code or emulator save states instead of reproducing the barrel setup.
- Do not reproduce the Castle Crush barrel manipulation on a physical completion cartridge.
- Back up the emulator’s battery save before testing any glitch.
- Remember that a crash or SRAM corruption can occur even if the first barrel behavior looks harmless.
- Use ordinary deaths, the pause exit sequence, or extra lives for safe recovery.
Prefer safe farming and verify the save
For extra lives, replay a reliable early stage or use the 50-lives code. For Kremkoins, clear Bonus Areas normally and defeat the bosses that award them. Those methods preserve the intended progression and avoid depending on a glitch whose behavior may differ between original revisions, later ports, and emulator configurations.
After using a cheat, trick, or emulator state, return to the world map and check that the expected stages and routes are still present. Visit Kong Kollege and save only after confirming that the file loads, the map behaves normally, and no stage has become unwinnable. If the game crashes in or after Castle Crush, do not save over the only backup; close the session and restore the last known-good battery save or emulator backup.
A practical chapter completion check is simple: Music Test and Cheat Mode appear at the expected menu positions; the pause sequence returns you to the map; the Pirate Panic trick produces the stated Kremkoin reward only after the full banana-and-cabin sequence; and the save file remains loadable after ordinary Castle Crush play. Cheats and the Kremkoin trick are optional tools, while preserving the save is the priority.
- Use Bonus Areas for normal Kremkoin income whenever possible.
- Use the 50-lives code or safe replay routes for practice.
- Check the map before saving after any unusual input.
- Keep a separate backup before testing community-discovered tricks.
- Confirm that the file loads normally before powering off the SNES or closing the emulator.
Before you move on
- Music Test appears after five Down inputs from Two Player Contest.
- Cheat Mode appears after five additional Down inputs from Music Test.
- The 50-lives code and BARRALAX code are entered from Cheat Mode, not during gameplay.
- The pause-screen sequence returns the Kongs to the map without marking the abandoned stage complete.
- The Pirate Panic sequence produces the 75-Kremkoin reward only after the note, balloon, banana, and Banana Bunch conditions are followed in order.
- The Castle Crush stage remains playable and the save file remains loadable after normal play.
- Any Kremkoins used for Klubba were obtained through ordinary Bonus Areas and bosses, or through a deliberately chosen and backed-up Pirate Panic trick.
102% Completion Checklist and Final Wrap-up
The original North American Super Nintendo Entertainment System version of Donkey Kong Country 2: Diddy's Kong Quest has a maximum save-file completion total of 102%. Reach it by clearing every regular stage and conventional boss, completing every Bonus Area, collecting the normal supply of 75 Kremkoins and spending them at Klubba's five kiosks, collecting all 40 SNES DK Coins, visiting Cranky, Funky, Swanky, and Wrinkly, clearing all five Lost World stages, and defeating Kaptain K. Rool in Krocodile Kore. KONG letters are optional extra-life rewards and do not count toward the percentage.
Finish the regular campaign
Clear every regular level shown on Crocodile Isle, including Stronghold Showdown, and defeat the conventional bosses on the normal route. The boss stages are Krow's Nest, Kleever's Kiln, Kudgel's Kontest, King Zing Sting, Kreepy Krow, and K. Rool Duel on The Flying Krock.
Stronghold Showdown is a regular stage in K. Rool's Keep, not an additional conventional boss fight. Complete it as part of the level checklist, but do not look for a separate boss marker there.
Defeating Kaptain K. Rool in K. Rool Duel completes the ordinary campaign and produces the normal ending. It does not complete the 102% route by itself. Leave the file available for cleanup and return to the world maps after the ending if necessary.
- Every regular stage is cleared.
- Stronghold Showdown is cleared.
- Krow, Kleever, Kudgel, King Zing, Kreepy Krow, and Kaptain K. Rool in K. Rool Duel are defeated.
- The normal campaign ending has been reached.
Complete every Bonus Area and account for the 75 Kremkoins
Revisit every regular level and complete any Bonus Area that was missed. Merely entering a Bonus Area is not enough: finish its challenge and collect the Kremkoin that appears at the end. A level receives its completion marker on the map after all of its Bonus Areas have been completed and their Kremkoins collected.
Use each level's terrain and available tools to find missing entrances. Common access methods include hidden Bonus Barrels, breakable walls, throwable objects, animal abilities, cannonballs, and passages revealed after taking a specific animal. A stage can be beaten while still lacking its completion marker, so check the map rather than relying on whether the level has already been cleared.
The SNES game contains 75 Kremkoins in the normal completion route. Use them at Klubba's Kiosks to open the five Lost World stages. Do not treat the Pirate Panic Kremkoin exploit as a normal completion method if you want a clean, reliable file.
- Every regular level has its completion marker.
- Every regular Bonus Area has been completed and its Kremkoin collected.
- All 75 Kremkoins have been earned through normal progression and Bonus Area completion.
- No unfinished regular-world Bonus Area remains.
Collect all 40 SNES DK Coins
Collect the DK Coin hidden in each regular level, then collect the five DK Coins awarded in the Lost World Bonus Areas and the final DK Coin awarded for defeating Kaptain K. Rool in Krocodile Kore. These groups together make the complete total of 40 SNES DK Coins: 34 on the regular route, five in Lost World Bonus Areas, and one from the Lost World finale.
Do not use the later GBA terminology Hero Coin or Video Game Hero Coin for this release. On the SNES version, the collectible is a DK Coin, and all 40 are required for the maximum completion total.
The five Lost World stages are Jungle Jinx, Black Ice Battle, Klobber Karnage, Fiery Furnace, and Animal Antics. Each contains a Bonus Area whose reward is a DK Coin rather than a normal Kremkoin. Opening a Lost World stage and reaching its exit is therefore not enough: locate and complete its Bonus Area as well.
The Krocodile Kore reward is separate from those five stage rewards. If all five Lost World stage coins are present but the total is still one short, defeat Kaptain K. Rool in Krocodile Kore and confirm that the final DK Coin has been awarded.
- Every regular-route stage DK Coin has been collected.
- Jungle Jinx, Black Ice Battle, Klobber Karnage, Fiery Furnace, and Animal Antics each have their Lost World Bonus-Area DK Coin.
- Kaptain K. Rool's Krocodile Kore reward has been collected.
- All 40 SNES DK Coins are collected.
- No DK Coin is being confused with a KONG letter.
Pay Klubba and clear the five Lost World stages
Klubba's Kiosks are the access points for the Lost World. Each of the five regular-world kiosks requires 15 Kremkoins for its Golden Barrel, so the complete route uses all 75 Kremkoins in five separate payments. Paying at one kiosk does not unlock the other four.
The linked Lost World stages are Jungle Jinx from Crocodile Cauldron, Black Ice Battle from Krem Quay, Klobber Karnage from Krazy Kremland, Fiery Furnace from Gloomy Gulch, and Animal Antics from K. Rool's Keep. Pay at a kiosk, enter its Golden Barrel, and clear the linked stage before moving to the next access point.
A practical order is Jungle Jinx, Black Ice Battle, Klobber Karnage, Fiery Furnace, and Animal Antics. This is only a recommendation. If a difficult stage causes repeated failures, leave it open and return after completing easier cleanup tasks and becoming comfortable with its animal and vehicle sections.
Clearing all five Lost World stages opens the route to Krocodile Kore. These stages are optional for the ordinary ending but mandatory for 102%.
- All five Klubba payments of 15 Kremkoins have been made.
- Jungle Jinx is cleared.
- Black Ice Battle is cleared.
- Klobber Karnage is cleared.
- Fiery Furnace is cleared.
- Animal Antics is cleared.
- The five Lost World Bonus-Area DK Coins are collected.
Defeat Kaptain K. Rool in Krocodile Kore
After all five Lost World stages are cleared, enter Krocodile Kore from the Lost World area. This is the second and true final battle with Kaptain K. Rool, separate from K. Rool Duel on The Flying Krock.
Complete the Krocodile Kore fight to finish the Lost World route and receive the fortieth DK Coin. Defeating K. Rool only in the regular campaign does not satisfy this requirement. If Krocodile Kore is still closed, recheck the exits of all five Lost World stages.
The Krocodile Kore battle is the final gameplay requirement, but the file can still be below 102% if a Kong-family visit, Bonus Area, regular-route DK Coin, Lost World DK Coin, or the final Krocodile Kore DK Coin is missing.
- The Lost World entrance to Krocodile Kore is open.
- Kaptain K. Rool is defeated in Krocodile Kore.
- The Krocodile Kore DK Coin has been awarded.
- The second K. Rool battle is not being confused with K. Rool Duel.
Visit all four Kong family members
Visit Cranky Kong, Funky Kong, Swanky Kong, and Wrinkly Kong at least once. Enter each character's location and speak to the character; do not assume that using one Kong's service registers visits to the others.
The relevant services include Cranky's hints, Funky's Flights II, Swanky's Bonus Bonanza, and Wrinkly's Kong Kollege. Count Funky after entering his location and Wrinkly after entering Kong Kollege and speaking to her.
If the final percentage is one point short after all gameplay cleanup, revisit each of the four locations and speak to every character again. A repeat visit is harmless and safer than relying on memory.
- Cranky Kong has been visited.
- Funky Kong has been visited.
- Swanky Kong has been visited.
- Wrinkly Kong has been visited.
Save and verify the displayed percentage
Use Kong Kollege for the final save after completing cleanup. Wait for the save operation to finish before resetting the console or closing the emulator.
Check the file's displayed percentage after saving. The maximum for this original SNES edition is 102%, not 101%. If the file is lower, inspect the map in this order: regular levels without completion markers, levels without DK Coin markers, uncleared Lost World stages, the five Lost World Bonus Areas, Krocodile Kore, the final Krocodile Kore DK Coin, and the four Kong-family visits.
KONG letters are not part of the 102% checklist. Collecting K-O-N-G in a level awards an extra life, but missing a KONG letter does not explain a percentage shortfall. Banana Coins are also not percentage collectibles; they are used for Kong-family services and other costs.
When the file displays 102%, save again at Kong Kollege and wait until the save completes. If using an emulator, preserve a backup of the battery-backed save file separately from temporary save states.
- The save file displays 102%.
- Every regular level has its Bonus Area completion marker.
- All 34 regular-route DK Coins are collected.
- All five Lost World Bonus-Area DK Coins are collected.
- The Krocodile Kore DK Coin is collected.
- All five Lost World stages and Krocodile Kore are complete.
- All four Kong family members have been visited.
- A final Kong Kollege save has completed successfully.
Before you move on
- Every regular stage is cleared, including Stronghold Showdown.
- Krow, Kleever, Kudgel, King Zing, Kreepy Krow, and Kaptain K. Rool in K. Rool Duel are defeated.
- All regular Bonus Areas are completed and all 75 Kremkoins have been earned through normal completion events.
- All five Klubba payments of 15 Kremkoins have been made.
- Jungle Jinx, Black Ice Battle, Klobber Karnage, Fiery Furnace, and Animal Antics are cleared.
- All 34 regular-route DK Coins are collected.
- The five Lost World Bonus-Area DK Coins are collected.
- The sixth Lost World-related DK Coin is collected from Krocodile Kore.
- All 40 SNES DK Coins are collected.
- Kaptain K. Rool is defeated in Krocodile Kore.
- Cranky, Funky, Swanky, and Wrinkly have each been visited.
- KONG letters are treated as optional extra-life rewards rather than percentage requirements.
- The final saved file displays 102%.
References for this chapter
- Donkey Kong Country 2: Diddy's Kong Quest - Guide and Walkthrough - Super Nintendo - Super_Slash
- Donkey Kong Country 2: Diddy's Kong Quest - Guide and Walkthrough - Super Nintendo - WWalker
- Donkey Kong Country 2: Diddy's Kong Quest - Guide and Walkthrough - Super Nintendo - DWA
- Completion - Super Mario Wiki
- Krocodile Kore - Donkey Kong Country 2
- Donkey Kong Country 2: Diddy's Kong Quest SNES manual
Finishing up
Defeat Krow, Kleever, Kudgel, King Zing, Kreepy Krow, and Kaptain K. Rool in the K. Rool Duel; complete Stronghold Showdown as the required rescue stage.
Confirm every required regular stage and the K. Rool Duel are cleared on the overworld map.
For the ordinary ending, stop after the K. Rool Duel rescue sequence. For full SNES completion, complete every Bonus Area, collect all DK Coins, visit all four required Kong family members, clear all five Lost World stages, and defeat Kaptain K. Rool in Krocodile Kore.
After the final intended objective, verify the save displays 102% and save at Kong Kollege before powering off or closing the emulator.
Choose your next gameScreenshots & video
Game imagery for reference. Follow the written chapters above for the route and strategies.
Sources & references
Our original guide draws on the references below. Check the edition at the top of this page before following controls or unlock requirements.
- Super NES Instruction Manuals: Donkey Kong Country 2: Diddy’s Kong Quest
- Funky's Flights — Super Mario Wiki
- Klubba's Kiosk — Super Mario Wiki
- Donkey Kong Country 2: Diddy's Kong Quest - Guide and Walkthrough - Super Nintendo - DWA
- Donkey Kong Country 2: Diddy's Kong Quest - Guide and Walkthrough - Super Nintendo - Super_Slash
- Donkey Kong Country 2: Diddy's Kong Quest — Guide and Walkthrough by T_Hayes
- Donkey Kong Country 2: Diddy's Kong Quest/Pirate Panic, StrategyWiki
- Donkey Kong Country 2: Diddy's Kong Quest/Mainbrace Mayhem, StrategyWiki
- Donkey Kong Country 2: Diddy's Kong Quest/Gangplank Galley, StrategyWiki
- Krow's Nest, Donkey Kong Wiki
- Krow, Donkey Kong Wiki
- Hot-Head Hop - Super Mario Wiki
- Kannon's Klaim (Donkey Kong Country 2) - Super Mario Wiki
- Lava Lagoon (Donkey Kong Country 2) - Super Mario Wiki
- Red-Hot Ride - Super Mario Wiki
- Squawks's Shaft (Donkey Kong Country 2) - Super Mario Wiki
- Kleever's Kiln - Super Mario Wiki
- Donkey Kong Country 2: Diddy’s Kong Quest — FAQ — GameFAQs
- Donkey Kong Country 2: Diddy’s Kong Quest — Guide and Walkthrough — GameFAQs
- Donkey Kong Country 2: Diddy’s Kong Quest — Bonus Level and DK Coin Guide by Thrashnet
- Krem Quay — Super Mario Wiki
- Barrel Bayou — Super Mario Wiki
- Krockhead Klamber — Super Mario Wiki
- Bramble Blast — Super Mario Wiki
- Donkey Kong Country 2: Diddy's Kong Quest SNES manual
- Donkey Kong Country 2: Diddy's Kong Quest — Guide and Walkthrough by brian_sulpher
- Donkey Kong Country 2: Diddy’s Kong Quest — Guide and Walkthrough by brian_sulpher
- Donkey Kong Country 2: Diddy's Kong Quest - Guide and Walkthrough - Super Nintendo - WWalker
- Haunted Hall — Super Mario Wiki
- Web Woods — Super Mario Wiki
- Ghostly Grove — Super Mario Wiki
- Kreepy Krow — Donkey Kong Wiki
- Donkey Kong Country 2: Diddy’s Kong Quest — Guide and Walkthrough by VinnyVideo
- Toxic Tower — Super Mario Wiki
- Chain Link Chamber — Super Mario Wiki
- Stronghold Showdown — Super Mario Wiki
- Clapper's Cavern — Super Mario Wiki
- Donkey Kong Country 2 SNES level and bonus listings
- Screech's Sprint — Super Mario Wiki
- Animal Antics — Donkey Kong Country 2: Diddy’s Kong Quest
- Kremkoin — Super Mario Wiki
- Stronghold Showdown — Donkey Kong Wiki
- Funky’s Flights II — Donkey Kong Wiki
- Donkey Kong Country 2: Diddy's Kong Quest — Super Mario Wiki
- Krocodile Kore - Donkey Kong Country 2
- Krocodile Kore — Donkey Kong Wiki
- Donkey Kong Country 2 — Guide and Walkthrough by DarkWolf89
- Donkey Kong Country 2: Diddy’s Kong Quest Cheats, Codes, and Secrets for Super Nintendo
- List of Donkey Kong Country 2: Diddy’s Kong Quest glitches
- Castle Crush Glitch
- The 75 Kremkoin Trick in Donkey Kong Country 2
- Kremkoin Trick and Locations - Donkey Kong Country 2
- Completion - Super Mario Wiki
About the game & collecting notes
- Platform
- Super Nintendo Entertainment System
Step-by-step walkthrough for the original Super Nintendo Entertainment System USA Rev 1 release. It covers the complete main route from Gangplank Galleon through K. Rool Duel, all required stages and boss or rescue encounters, overworld services, animal abilities, Bonus Areas, Kremkoins, Klubba’s Lost World access, and the full 102% completion route. Optional collectibles and Lost World cleanup are clearly separated from the ordinary ending.
Darryl Polo
Darryl Polo loves tinkering with emulation and revisiting retro games. He enjoys exploring how old favorites play on different setups and sharing what he learns along the way. At Joking Joystick, he writes about the games, hardware, and small discoveries that keep the hobby fun.
Our editorial standardsFound a step that needs another look? Help us improve this guide.