
DARK SOULS: REMASTERED (PlayStation 4) — Complete Campaign Walkthrough
Step-by-step route through the PS4 edition of DARK SOULS: REMASTERED that takes you from the opening Undead Asylum through Lordran’s major zones to the Kiln of the First Flame. Includes assembly of the Lordvessel objectives, boss strategies, key shortcuts, recovery options, and optional coverage for the Artorias of the Abyss DLC and NG+ transition.

Find a copy
Dark Souls Remastered PlayStation 4
We may earn a commission if you buy through these links, at no extra cost to you. As an Amazon Associate I earn from qualifying purchases.
Opens retailer search results. Check the model, edition, seller, availability and current price before buying.
Before you begin
You are starting DARK SOULS: REMASTERED on PlayStation 4 — an interconnected, punishing action-RPG where exploration, shortcuts and incremental upgrades matter as much as single fights.
This walkthrough gives a practical, route-focused path through Lordran: which areas to clear first, which bosses and items unlock progress, where to open shortcuts, and which detours are optional but strongly recommended.
Follow the chapters in order on your first playthrough.
Each chapter lists concrete objectives, the core things you must obtain or defeat, recovery options if you die or lose progress, and optional side goals (including the Artorias of the Abyss DLC).
I assume default PS4 controls and the Remastered edition’s item/area layout; use the Preparation checklist before you begin.
Set yourself up for the run
Confirm you are playing DARK SOULS: REMASTERED on PlayStation 4. This guide follows the 2018 Remastered edition, which includes Artorias of the Abyss.
Choose a beginner-friendly starting class if desired. Knight offers strong early defenses; Pyromancer begins with useful firecasting, but every class can complete the campaign.
Decide whether you want to play online. Online play enables possible co-op and invasions, subject to network conditions and the area’s boss status.
Adjust brightness and camera sensitivity only as needed; test lock-on, rolling and camera control against early Hollows.
Learn stamina management, two-handed attacks, blocking, rolling, parrying and healing safely with the Estus Flask.
Use Fire Keeper Souls only with a Fire Keeper to reinforce Estus. Bonfire kindling is a separate action that increases the number of flasks restored at that bonfire.
Use bonfires to rest, refill Estus, level up, repair through the appropriate service, attune spells and later warp when the Lordvessel permits it.
If you plan to co-op, set a consistent multiplayer password and remember that human form is required to summon.
Keep one dependable main weapon, a shield or parrying tool, a ranged option if convenient, and status cures for Curse, Poison and Toxic.
Carry Homeward Bones for safe retreats. Fragrant Branches of Yore are not part of Dark Souls Remastered and are not needed.
Track NPC dialogue and quest conditions. Speak with characters after major milestones because some move, become hostile or become unavailable after specific events.
Before entering Gwyn’s arena, finish any DLC, NPC, covenant, optional-boss, tail-cut, spell and boss-soul transmutation goals intended for the current cycle.
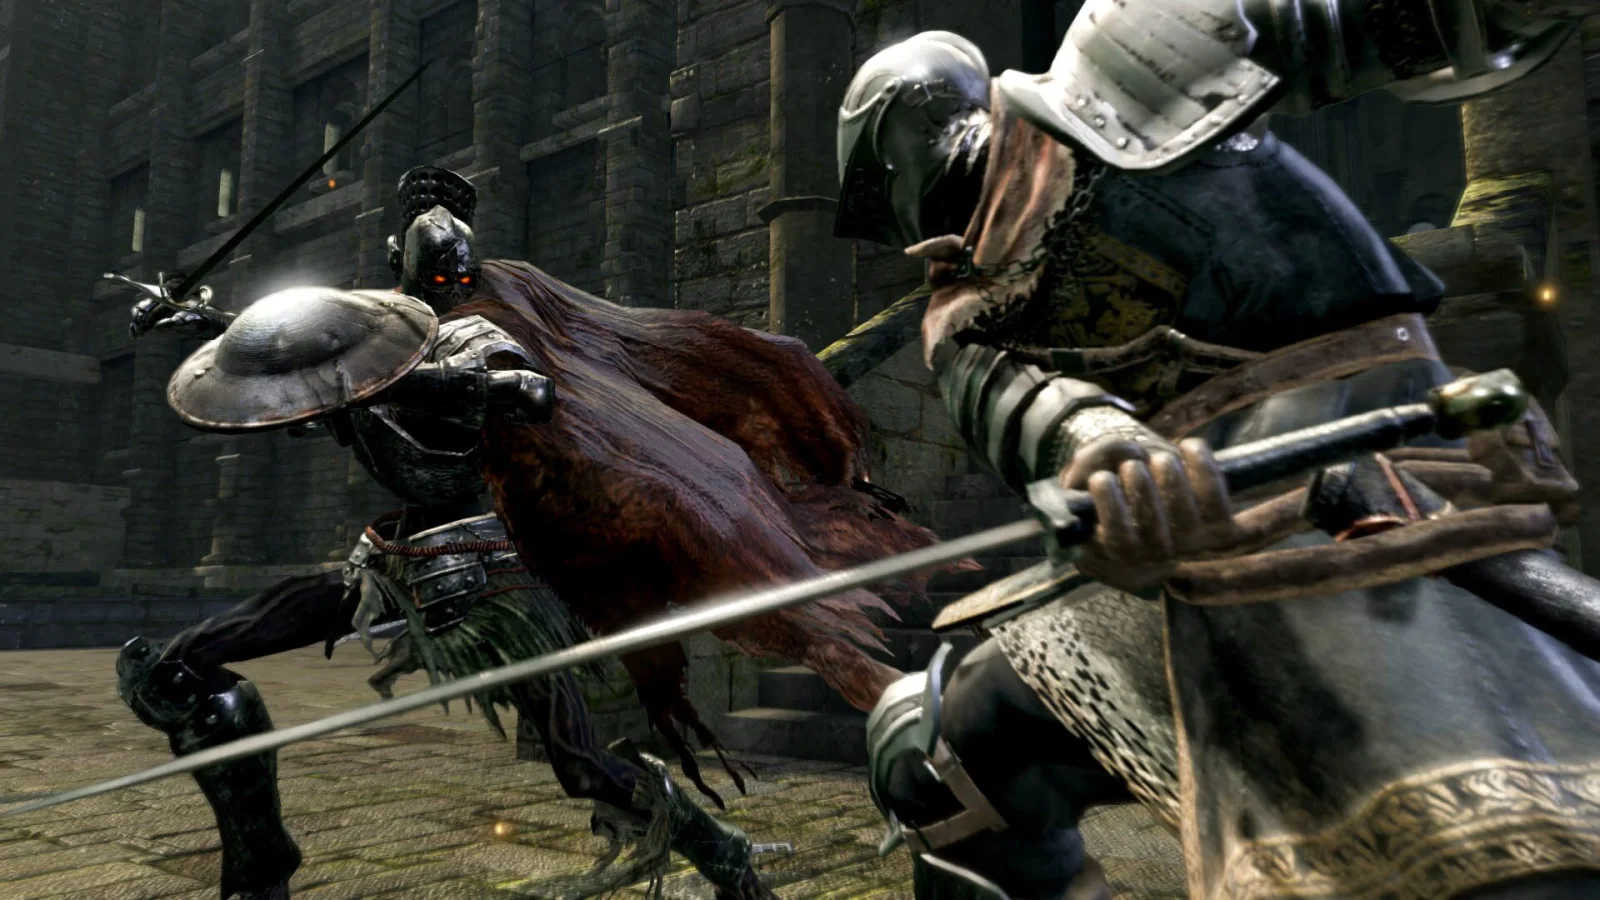
Opening: Undead Asylum and your first bonfire
Escape the Northern Undead Asylum, light its first bonfire, collect the shield and your class equipment, receive the Estus Flask from Oscar of Astora, and defeat the Asylum Demon from the upper ledge. On the normal route, Oscar gives the Estus Flask and Undead Asylum F2 East Key, while the defeated demon gives the Big Pilgrim’s Key. If you kill the demon during the first encounter, the key sequence changes, but Oscar still handles the required progression when you reach him. Use the shortcut to reset at the bonfire, then leave through the crow’s nest for Firelink Shrine.
Escape the cell and light the first bonfire
At the beginning of the Northern Undead Asylum, wait for the corpse above your cell to fall through the opening. Loot it to obtain the Dungeon Cell Key, unlock the cell, and follow the corridor. The first Hollows are safe opportunities to practice light attacks, strong attacks, blocking, rolling, target lock-on, and stamina management. You do not need to defeat every enemy; clear only those that obstruct your route or provide useful practice.
Continue into the courtyard and light the bonfire. This is the Asylum’s first checkpoint. Resting restores your health and Estus charges, but ordinary enemies return. If you die before reaching another bonfire, you reappear here, so use it before attempting the demon or making a long equipment run.
- Dungeon Cell Key collected
- First Asylum bonfire lit
- Basic attacks, guarding, rolling, and lock-on tested
Run past the first Asylum Demon encounter
Enter the large fog gate and move far enough into the room to trigger the Asylum Demon. For the standard campaign route, do not try to defeat it with your initial equipment. Immediately move toward the opening on the left side of the arena, pass through the doorway, and run up the corridor. The demon remains behind while you obtain better equipment and healing.
Continue upward until you reach the section with the archer. You can defeat the archer or move past it, then enter the side room and loot the corpse for a shield. Equip it in your left-hand slot if you want to practice guarding. A shield does not make you invulnerable: blocking consumes stamina, and lowering the shield between attacks lets stamina recover faster.
- First demon encounter bypassed
- Archer-room shield obtained
- Upper Asylum route reached
Meet Oscar and receive the normal-route keys
Follow the upper corridor toward the stairs where a Hollow kicks a large boulder down the passage. Move out of its path. The boulder breaks through a wall and reveals Oscar of Astora. Speak with Oscar and continue through his dialogue. On the normal route, he gives you the Estus Flask and the Undead Asylum F2 East Key.
Assign the Estus Flask to an active item slot. Estus is your primary healing supply and refills whenever you rest at a bonfire. Drink it only after creating distance, moving around a corner, or forcing an enemy into a recovery animation; beginning the drinking animation beside an enemy often results in another hit.
The Undead Asylum F2 East Key opens the locked upper-floor door nearby. If you defeated the Asylum Demon during the first encounter before meeting Oscar, the key sequence changes: Oscar supplies the escape progression when you reach him rather than relying on the demon’s normal post-fight key drop. This unusual route is unnecessary for a first campaign.
- Oscar’s dialogue completed
- Estus Flask received
- Undead Asylum F2 East Key received on the normal route
- Estus placed in an active item slot
Open the route back to the bonfire
Use the Undead Asylum F2 East Key on the locked door in the upper section. Proceed through the corridor and rooms until you reach the stairs leading down toward the original demon arena. Your chosen class already supplied its starting weapon, armor, and other class equipment during character creation; there is no need to find your class weapon on a corpse. Equip a weapon whose attribute requirements you meet, and use the shield from the archer room if it suits your build.
At the bottom of the stairs, open the door locked from the far side. This creates a short loop back to the first bonfire. Rest there before attempting the boss. The shortcut lets you refill Estus and retry the encounter without repeating the entire upper route. Clear only enemies that interfere with the run, especially the archer or Hollows positioned directly on the path.
- F2 East door opened
- Starting weapon equipped
- Shortcut to the first bonfire opened
- Estus refilled before the boss attempt
Defeat the Asylum Demon from above
Return to the demon arena through the opened route. Enter from the upper ledge and drop onto the demon for a plunging attack. This gives you a strong opening hit and demonstrates a technique used throughout the campaign. After landing, keep the demon in view and circle at a safe distance rather than standing directly in front of it.
The demon’s broad horizontal swings are easiest to avoid by rolling through them or away from the weapon’s arc. When it raises its weapon for an overhead slam, move clear and wait for the recovery animation before attacking. If it jumps or begins a large body-slam motion, prioritize distance over damage. Heal only after you have created space. Continue using short attack strings, then retreat before your stamina is empty.
If Black Firebombs were selected as the starting gift, they can make this fight substantially shorter, but they are not required. Defeating the demon after the normal Oscar sequence awards the Big Pilgrim’s Key and the souls for the encounter. Killing it during the initial encounter is an optional challenge and may award the Demon’s Great Hammer, but it is not needed for progression.
- Plunging attack performed or another safe opening created
- Asylum Demon defeated
- Big Pilgrim’s Key obtained on the normal route
- Estus restored before leaving
Leave the Asylum and arrive at Firelink Shrine
Use the Big Pilgrim’s Key on the large exit door beyond the boss arena. Follow the exterior path to the crow’s nest and interact with it. A cutscene carries you from the Asylum to Firelink Shrine, the main early-game hub.
Souls are both experience and spending currency. Carried souls are left at your bloodstain when you die and can be recovered once by touching it. If you die again before reaching that bloodstain, the stored souls are lost. Soul items kept in your inventory are not dropped on death, so use those items only when you are ready to spend them.
At Firelink Shrine, rest at the bonfire and use the leveling option once it is available. Spend carried souls before entering an unfamiliar area rather than carrying a large balance through repeated attempts. Leveling Vitality or Endurance is a dependable early defensive choice, but match later investment to the weapon or spell build you intend to use.
- Big Pilgrim’s Key used on the exit door
- Firelink Shrine reached
- Soul and bloodstain rules understood
- Initial souls spent or safely retained as inventory Soul items
Before you move on
- The character has reached Firelink Shrine after leaving the Northern Undead Asylum.
- The Estus Flask, a usable starting weapon, a shield, and the required escape key progression have been obtained.
- The first Asylum bonfire was activated, and the Asylum Demon was defeated from the upper approach or by another successful method.
- The shortcut loop to the first bonfire was opened before the normal boss attempt.
- The player understands that bonfires restore Estus and that carried souls can be recovered once from a bloodstain after death.
References for this chapter
Firelink Shrine and early hub setup
Use Firelink Shrine as your first safe hub, spend souls before dangerous expeditions, and learn the difference between Estus reinforcement and bonfire kindling. The Firelink bonfire is already kindled and normally restores ten Estus charges, while other early bonfires usually restore five until kindled. Speak with Crestfallen Warrior, Petrus, and Anastacia, leave the NPCs alive, and return after major events because new characters arrive. The standard campaign route leads through the aqueduct to Undead Burg, then to Undead Parish and Andre of Astora. Collect the Fire Keeper Soul in the Parish and give it to Anastacia to improve Estus. Reinforce one main weapon to approximately +2 or +3 when affordable, while keeping enough souls for levels and supplies.
Make Firelink Shrine your first hub
When the crow leaves you at Firelink Shrine, rest at the bonfire before setting out. This establishes the shrine as your respawn point, restores your health and Estus, and lets you spend souls on character levels. Select the level-up option at the bonfire whenever you have enough souls for a useful attribute increase. Souls are both experience and currency, so avoid carrying a large balance into an unfamiliar route when you could safely return and spend it.
The Firelink Shrine bonfire is already kindled at the start of the game because Anastacia of Astora tends it. Resting there normally restores ten Estus Flask charges, not five. This is separate from Estus reinforcement: kindling changes how many charges a bonfire gives you, while giving a Fire Keeper Soul to a Fire Keeper increases the amount of health restored by each flask. Further kindling can increase the charge supply at eligible bonfires, but it does not replace Estus reinforcement.
From the bonfire, identify three important exits. The aqueduct opening leads to Undead Burg and is the normal early route. The elevator near Anastacia descends to New Londo Ruins, while the graveyard path leads toward the Catacombs. Do not treat the latter two routes as the immediate campaign path. New Londo contains ghosts and later progression requirements, and the graveyard leads into skeleton-filled areas that are dangerous for a new character.
If you die, your souls and accumulated soft Humanity remain at a bloodstain where you fell. Return to that location to recover them, but do not force a dangerous fight merely to reclaim a large amount. If the recovery route is unsafe, spend future earnings more carefully and continue from the nearest bonfire.
- Rest at the Firelink Shrine bonfire.
- Use the bonfire to level up when you can afford a useful attribute increase.
- Confirm that Firelink restores ten Estus charges at the beginning.
- Identify the aqueduct, graveyard, and New Londo routes.
- Use the aqueduct as the normal route toward Undead Burg.
Exhaust the early Firelink dialogue
The Crestfallen Warrior sits beside the bonfire. Speak with him repeatedly until he begins repeating himself. He explains the early objective involving the two Bells of Awakening: one is in the Undead Church above Undead Parish, and the other is below Blighttown. His dialogue changes after major progress, so speak with him again when you return after important bosses or area transitions.
Petrus of Thorolund stands near the ruins and the route toward the New Londo elevator. Exhaust his dialogue and decide whether to join the Way of White covenant. Joining is optional for the main campaign. Petrus can later provide miracle-related services, but he is also connected to Rhea of Thorolund’s storyline. Leave him alive and do not attack him for early loot.
Anastacia of Astora is in the locked cell below the Firelink bonfire. She does not provide normal spoken dialogue at the beginning, but interacting with her allows you to reinforce Estus when you have a Fire Keeper Soul. Keep her alive. If Knight Lautrec of Carim is freed from the Undead Parish, return to Firelink after later early-game progress and check her cell, because Lautrec’s quest can eventually cause her death and disable the Firelink bonfire.
Several useful NPCs are absent when you first arrive. Griggs of Vinheim appears after you rescue him from Lower Undead Burg. Laurentius of the Great Swamp appears after his rescue in the Depths. Rhea, Vince, and Nico arrive after the Capra Demon sequence. Whenever one of these events occurs, return to Firelink, speak with the newcomers, and exhaust their dialogue before pushing into the next major area.
- Exhaust Crestfallen Warrior’s current dialogue.
- Speak with Petrus and decide whether to join the Way of White.
- Interact with Anastacia and leave her unharmed.
- Return after the Capra Demon, Depths, and major bell events.
- Speak with later NPC arrivals before advancing their questlines.
Use Fire Keeper Souls and protect Anastacia’s unique soul
A standard Fire Keeper Soul is not ordinary currency. Giving one to a living Fire Keeper reinforces your Estus Flask, improving the healing received from every charge. Do not consume the item for souls or Humanity during a first campaign unless you deliberately accept losing that reinforcement.
After reaching Undead Parish, enter the church and take the Fire Keeper Soul guarded inside. Return to the Parish bonfire, use the nearby elevator down to Firelink Shrine, and give that soul to Anastacia. This raises the healing strength of your Estus early in the campaign. The Parish soul is safe to use for reinforcement; it is not the special soul required to restore Anastacia if she later dies.
If Anastacia is murdered during Lautrec’s quest, the Firelink bonfire becomes unavailable. Investigate her cell to obtain the Black Eye Orb, then use it in Anor Londo when the invasion prompt appears. Defeat Lautrec there and recover Anastacia’s specific Fire Keeper Soul. Bring that soul back to her cell and choose the option to restore her. Do not spend that particular soul on ordinary Estus reinforcement, because doing so prevents the Firelink bonfire from being restored during the current cycle.
- Keep ordinary Fire Keeper Souls for Estus reinforcement.
- Give the Undead Parish Fire Keeper Soul to Anastacia.
- Do not confuse an ordinary Fire Keeper Soul with Anastacia’s unique recovered soul.
- If Lautrec’s event occurs, recover Anastacia’s soul in Anor Londo before using it.
Find the early merchants and Andre of Astora
The Undead Male Merchant is on the early Undead Burg route and sells basic equipment, ammunition, and supplies. The Undead Female Merchant is deeper in Lower Undead Burg, reached after opening the route from the Burg. Buy only what supports your current plan; do not spend every soul on miscellaneous equipment before upgrading a weapon.
Rickert of Vinheim is accessible immediately by taking the elevator from Firelink toward New Londo and following the upper route to his cell. He can repair equipment and perform specialized services, but he is not the convenient early blacksmith for a standard physical weapon. Meet him if you need his services, then return to the main route.
From Firelink, enter the aqueduct and follow Undead Burg upward. Continue into Undead Parish, rest at the Parish bonfire, and enter the church area. Andre of Astora is below that structure, reached by the stairs near the Parish bonfire. Speak with him to unlock standard weapon reinforcement, repairs, and his shop.
Andre sells Titanite Shards for the normal early upgrade path. Choose one primary weapon whose moveset and attribute requirements suit your character, then raise it to approximately +2 or +3 as soon as the shards and souls are affordable. The exact cost depends on the weapon and upgrade level. Andre also sells the Weapon Smithbox, Armor Smithbox, and Repairbox. These are useful but optional: a Weapon Smithbox allows eligible reinforcement at bonfires, while Andre remains necessary for services that the smithbox cannot perform.
- Locate the Undead Burg and Lower Undead Burg merchants.
- Optionally visit Rickert in New Londo.
- Reach Andre below the Undead Parish bonfire.
- Buy Titanite Shards and reinforce one preferred weapon to approximately +2 or +3.
- Reserve enough souls for leveling, repairs, and essential supplies.
Before you move on
- You have rested at Firelink Shrine and used its bonfire to level up or confirmed that you are saving souls for a specific level.
- You know that the Firelink bonfire is initially kindled and restores ten Estus charges.
- You can identify the aqueduct route to Undead Burg, the graveyard route to the Catacombs, and the elevator route to New Londo.
- You have spoken with Crestfallen Warrior, Petrus, and Anastacia’s cell interaction, leaving the early NPCs alive.
- You understand that Fire Keeper Souls reinforce Estus healing, while bonfire kindling controls the number of charges restored.
- You have reached Andre of Astora in Undead Parish and reinforced your preferred main weapon to approximately +2 or +3 when affordable.
- You know that Griggs, Laurentius, and Rhea’s group arrive later after specific rescues or bosses.
- You can return from Undead Parish to Firelink using the church elevator and know that Undead Burg is the next normal route.
References for this chapter
- DARK SOULS: REMASTERED — PlayStation 4 product page
- Firelink Shrine — Dark Souls Wiki
- Anastacia of Astora — Dark Souls Wiki
- Petrus of Thorolund — Dark Souls Wiki
- Andre of Astora — Dark Souls Wiki
- Dark Souls Remastered: Undead Parish Part 2 — GamesRadar+
- Undead Parish — Dark Souls Remastered Walkthrough and Guide
- Estus Flask — Dark Souls Wiki
Undead Burg and Undead Parish — first Bell of Awakening
Travel from Firelink Shrine through Undead Burg, defeat the Taurus Demon, reach Undead Parish, activate its bonfire and Firelink elevator, then climb the church to defeat the Bell Gargoyles and ring the first Bell of Awakening. Meet Andre of Astora for repairs and weapon upgrades, collect the Basement Key near the church gate, and use that key on the locked door near Solaire’s position on the Hellkite Dragon bridge. This opens Lower Undead Burg, the next required campaign route. The Taurus Demon does not drop the Watchtower Basement Key; that optional key is obtained later in Darkroot Garden after Moonlight Butterfly.
1. Prepare at Firelink Shrine and enter Undead Burg
From Firelink Shrine, take the stairway leading up through the aqueduct toward Undead Burg. Spend excess souls before making the attempt if you are carrying enough to lose a level or several purchases. Early levels, healing supplies and a reinforced weapon are more useful than carrying a large unspent soul total while learning the route.
Use a shield to handle individual Hollows, but do not hold it up continuously. Blocking drains stamina, and the Burg’s narrow streets make it easy to be surrounded. Fight one enemy at a time, recover stamina between attacks and keep your equipment load low enough for a normal roll. If you already have Titanite Shards, save them for Andre unless your starting weapon is unsuitable for your build.
- Enter Undead Burg from the Firelink aqueduct.
- Spend or secure souls before attempting the Taurus Demon.
- Use equipment that meets your attributes and allows a normal roll.
2. Reach and light the Undead Burg bonfire
Work upward through the Burg’s narrow streets, checking corners and doorways before advancing. Hollows are positioned above the route, and firebomb throwers can attack while you are fighting enemies below. Climb to the upper platforms and remove the ranged attackers before continuing through the lower street.
The Undead Burg bonfire is in a small room along the main route. Light it and rest there. This creates the correct retry point for the remaining Burg enemies and the Taurus Demon. The boss route is short, so conserve Estus instead of using every charge on ordinary Hollows.
Continue through the wooden platforms and upper streets. Shield-bearing soldiers are vulnerable after their attacks, but repeated strikes against their guard can exhaust your stamina. Move toward the tower entrance until you reach the ladder and the Taurus Demon fog gate.
- Light and rest at the Undead Burg bonfire.
- Clear or avoid the firebomb throwers before pushing onward.
- Reach the Taurus Demon fog gate with healing remaining.
3. Defeat the Taurus Demon and cross toward the Parish
Before entering the arena, climb the ladder beside the tower and kill the two Undead Soldiers on the roof. Leaving them alive can interrupt the fight when you use the tower for a plunging attack. Enter the fog gate, immediately climb the ladder and perform a plunging attack when the demon is positioned below you.
After the plunge, retreat to create space. Repeat the ladder attack only when the demon is not directly beneath the ladder and you have time to climb safely. You can also fight at ground level by circling toward the demon’s rear and rolling away from its overhead strike, leap and wide swings. Do not remain beneath it after attacking, because its stomp can catch a character who stays too close.
Firebombs and other ranged attacks are valid alternatives if you maintain enough distance to react. Once the Taurus Demon is defeated, cross the bridge beyond the arena and speak with Solaire of Astora in the sunlit area.
The Taurus Demon does not drop the Watchtower Basement Key. That is a separate optional key found later on a corpse at the top of the tower beyond the Moonlight Butterfly boss arena in Darkroot Garden. The Watchtower Basement Key opens the Undead Burg watchtower route toward Darkroot Basin and Havel’s area; it is not required to leave the Taurus Demon arena or enter Lower Undead Burg.
- Defeat the Taurus Demon.
- Speak with Solaire of Astora beyond the boss bridge.
- Do not expect the Taurus Demon to provide the Watchtower Basement Key.
- Keep the later Watchtower Basement Key separate from the Parish Basement Key and the Capra Demon’s Key to the Depths.
4. Reach the Parish bonfire and meet Andre
Continue beyond Solaire toward Undead Parish. You will pass through the route watched by the Hellkite Dragon and approach the Parish entrance. At the Parish entrance, separate the armored boar from nearby soldiers where possible. You may kill the boar carefully, attack it from a safer angle or move through after reducing the surrounding threat.
Enter the church grounds and use the side route to find the Parish bonfire. Light and rest there before exploring the church. Andre of Astora is in the workshop below the church. Speak with him for repairs, weapon reinforcement and access to the early upgrade path. Reinforce your primary weapon if you have the required Titanite Shards and souls; even a modest upgrade improves the Parish enemies and Bell Gargoyles encounter.
Inside the church, find the elevator platform near the side of the building. Step onto it and activate the lift. It connects Undead Parish directly with the upper Firelink Shrine ruins. Ride it to Firelink and return once so you know both ends of the shortcut. This is the principal recovery route for future attempts and avoids repeating the full Burg journey.
- Light the Undead Parish bonfire.
- Speak with Andre and reinforce or repair your main weapon.
- Activate the elevator between the Parish church and Firelink Shrine.
5. Collect the Basement Key and clear the church approach
Return toward the church’s front and deal with the Balder Knights methodically. Their shields make impatient attacks ineffective, so circle until they commit to a swing, then strike during recovery. Do not allow several knights to surround you. The Channeler on the church’s upper level can fire magic and strengthen nearby enemies, so kill it before making repeated attempts at the boss.
The Basement Key is on a corpse near the church’s front gate. Reach it by descending the steps beside the closed portcullis. Take this key before leaving the Parish. It opens the locked door near Solaire’s position on the Hellkite Dragon bridge and provides access to Lower Undead Burg.
This Basement Key is not the Watchtower Basement Key. The Watchtower Basement Key is obtained later in Darkroot Garden after defeating Moonlight Butterfly and reaching the corpse at the top of the tower beyond the boss arena. It is also unrelated to the Key to the Depths, which is obtained from the Capra Demon and opens the Depths entrance.
From the church interior, climb through the room above the main floor and continue up the ladders to the roof. If you are human, summon signs may be available outside the Bell Gargoyles fog gate. Solaire can be summoned there, and Lautrec may also be available if you rescued him and spoke with him at Firelink Shrine. Summoning is optional, but an ally can divide the bosses’ attention.
- Take the Basement Key near the Parish church gate.
- Remove the Channeler before repeated Gargoyle attempts.
- Reach the Bell Gargoyles fog gate with a repaired weapon.
- Remember that the Capra Demon, not the Taurus Demon, provides the Key to the Depths.
6. Defeat the Bell Gargoyles and ring the first bell
The fight begins with one Bell Gargoyle. Stay near its side or rear and attack after it finishes a swing. Preserve enough stamina to roll away rather than spending the entire bar on attacks. When the second gargoyle enters, it adds fire breath and makes the roof more dangerous.
Keep moving through the open part of the roof so the gargoyles cannot trap you against the parapet or a wall. If the first gargoyle is close to defeat, continue prioritizing it, but do not trade hits while both bosses are facing you. Fire breath is easiest to avoid by moving away diagonally or getting behind the gargoyle rather than rolling repeatedly straight backward. A summoned ally can occupy one boss while you finish the other.
After both gargoyles are defeated, climb the ladder in the bell tower and pull the lever beneath the bell. The bell ringing confirms completion of this chapter’s main objective. Descend carefully and speak with Oswald of Carim if you want access to his services; this interaction is optional.
To continue the campaign, return to the Hellkite Dragon bridge. Use the elevator to Firelink, then take the upper route back toward the Taurus Demon area, or retrace the Parish route if necessary. Near the area where Solaire was standing, use the Basement Key on the locked door. Descend through Lower Undead Burg. The next required progression is through Lower Undead Burg, the Capra Demon and the Depths route, not through Sen’s Fortress.
- Defeat both Bell Gargoyles.
- Pull the bell lever at the top of the tower.
- Return to the Hellkite Dragon bridge and open the Basement Key door.
- Enter Lower Undead Burg as the next campaign route.
Before you move on
- The Taurus Demon is defeated.
- Solaire of Astora has been encountered beyond the Taurus Demon arena.
- The Undead Parish bonfire has been lit and Andre of Astora is available for repairs and weapon reinforcement.
- The elevator inside the Parish church has been activated and can carry you to Firelink Shrine.
- The Basement Key has been collected near the Undead Parish church gate.
- Both Bell Gargoyles are defeated and the bell lever at the top of the tower has been pulled.
- The locked door on the Hellkite Dragon bridge can be opened, giving access to Lower Undead Burg.
- The Watchtower Basement Key has not been incorrectly attributed to the Taurus Demon; it remains an optional Darkroot Garden item obtained after Moonlight Butterfly.
References for this chapter
- DARK SOULS: REMASTERED — PlayStation 4 product page
- Chapter 3: Bell Gargoyles — Dark Souls Remastered Walkthrough and Guide
- Chapter 9: Moonlight Butterfly — Dark Souls Remastered Walkthrough and Guide
- Watchtower Basement Key — Dark Souls Wiki
- Dark Souls Walkthrough — GameSpot
- Undead Parish — Dark Souls Remastered Walkthrough and Guide
Lower Areas: The Depths and the routes to Blighttown
Continue from Undead Parish by collecting the Basement Key near the Parish gate, crossing the Hellkite Dragon bridge, and opening the door beside Solaire to enter Lower Undead Burg. Rescue Griggs if desired, visit the Undead Female Merchant, unlock the Firelink aqueduct shortcut, and defeat the Capra Demon. Take the Key to the Depths into the sewer, unlock its bonfire with the Sewer Chamber Key, rescue Laurentius, collect the Large Ember, and defeat the Gaping Dragon. Use the Blighttown Key on the large doors beside Domhnall of Zena, descend through upper Blighttown, and activate the swamp bonfire. Purple Moss cures Poison; Blooming Purple Moss cures Toxic. The Master Key can bypass parts of this route, but the Depths remains valuable for its ember, NPCs, items, and boss rewards.
Continue from Undead Parish and collect the Basement Key
From the Undead Parish bonfire, return toward the church and pass through the area where the Fang Boar was fought. Continue beyond the gate at the rear of the Parish grounds and collect the Basement Key from the corpse near the gate. This key is the required normal-route access to Lower Undead Burg; it is not the same item as the Key to the Depths obtained later from the Capra Demon.
Return to the Hellkite Dragon bridge. Use the door beside the bridge, near the route where Solaire of Astora can be found, to enter Lower Undead Burg. If the dragon is still active, do not stop in the middle of the bridge. Use the bridge’s side route, wait for the dragon’s fire to clear, or sprint between safe positions before interacting with the door.
If you are using the Master Key, alternate routes can reach lower areas earlier, but the Basement Key route is the intended progression for this chapter and keeps the Lower Undead Burg and Depths objectives in order.
- Collect the Basement Key near the rear gate of Undead Parish.
- Return to the Hellkite Dragon bridge and open the Lower Undead Burg door beside Solaire.
- Do not confuse the Basement Key with the later Key to the Depths.
Explore Lower Undead Burg before the Capra Demon
Lower Undead Burg is a narrow district occupied by thieves, Undead Attack Dogs, and ambushes from side passages. Move slowly and keep a shield raised when turning corners. The thieves can build Bleed quickly with repeated attacks, so avoid fighting several in the open. Lure one enemy into a wider section before committing to the attack.
Look for Griggs of Vinheim behind a locked house door. You can rescue him if you have the Residence Key or Master Key and meet the door’s requirements. His rescue is optional for reaching the Depths, but it gives access to a later sorcery merchant at Firelink Shrine if your character uses intelligence-based magic.
Continue through the alleys until you reach the Undead Female Merchant’s room. Speak with her before leaving. She sells useful status-removal items and other supplies for the next areas, including moss that helps with Poison and Toxic. Her shop is an important preparation point, especially if you are short on recovery items.
- Move carefully through the thieves and dogs.
- Rescue Griggs if you want his later Firelink Shrine services.
- Locate and speak with the Undead Female Merchant.
Open the Lower Burg shortcuts and defeat the Capra Demon
Before entering the Capra Demon fog gate, open the route that connects Lower Undead Burg back toward the Firelink Shrine aqueduct. The door is reached from the merchant-side passages and removes much of the runback from Firelink. Also check the nearby side paths for useful items before starting the boss attempt.
The Capra Demon begins in a cramped arena with two Undead Attack Dogs. Enter ready to move immediately. Roll or run toward the stairs, create space from the dogs, and eliminate them before treating the demon as a normal one-on-one fight. The stairs and upper ledge can give you a brief position from which to attack or heal, but do not remain there if the demon reaches you.
Once the dogs are dead, keep the Capra Demon near the open portion of the arena. Watch for its paired machete swings, forward pressure, and jumping attack. Attack after its recovery animations, then disengage before becoming trapped against the wall. If repeated attempts fail, use the shortcut, spend unneeded souls, repair equipment, and return rather than clearing every side passage again.
Defeating the Capra Demon awards the Key to the Depths. This key, not the Basement Key, opens the next main area.
- Open the Lower Burg-to-Firelink aqueduct shortcut.
- Kill both Undead Attack Dogs early in the Capra Demon fight.
- Defeat the Capra Demon and obtain the Key to the Depths.
Enter the Depths and activate its bonfire
Use the Key to the Depths on the locked door in Lower Undead Burg near the Capra Demon route. Descend into the sewer and fight the early Hollows and Undead Attack Dogs carefully; the corridors are narrow enough for a dog to interrupt a heal or push you into another enemy.
The Depths has one bonfire, behind a locked door. Explore the upper sewer passages until you find the Sewer Chamber Key near the barred section of the lower route. Use it to open the bonfire room and rest. The Master Key also opens this door, but activating the bonfire is worthwhile even if you entered through an alternate route.
While exploring, identify the passage back toward the Lower Burg entrance and the lower sewer route. Establishing these landmarks is more useful than trying to memorize every tunnel. If you die, return to the bonfire first and then use the shortest open route toward your bloodstain.
- Use the Key to the Depths to enter the sewer.
- Find the Sewer Chamber Key, or use the Master Key, to open the Depths bonfire.
- Rest before attempting the lower sewer and boss approach.
Rescue Laurentius and collect the Large Ember
From the bonfire, proceed toward the butcher’s preparation area. Laurentius of the Great Swamp is trapped inside a large barrel in a nearby side area. Roll into the barrel or strike it carefully from the outside; do not attack Laurentius directly. Speak with him after freeing him. He later appears at Firelink Shrine and can provide pyromancy services.
Return to the butcher’s work area and look behind the table for the drop into the lower sewer section. The chest there contains the Large Ember. The ember is optional for immediate access to Blighttown, but it is important for standard weapon progression because Andre of Astora can use it to extend normal weapon upgrades beyond the early tier.
Open the door linking the lower route back toward the bonfire. This shortcut makes attempts against the Gaping Dragon much less costly. Before entering the boss fog, check your weapon durability, spend souls you do not want to risk, and carry healing and status-removal items.
- Free Laurentius without hitting him.
- Collect the Large Ember behind the butcher’s preparation area.
- Open the lower-route shortcut back toward the Depths bonfire.
Clear the Basilisk tunnels and kill the Channeler
Continue through the giant rat passages and slime-filled corridors. Rats can surround you quickly, so fight from a doorway or narrow approach rather than in the center of a room. Slimes are slow but durable; overhead attacks, fire damage, and patient single strikes are safer than repeatedly attacking while standing underneath them.
The Basilisk tunnels contain the main Curse hazard. Their gray cloud rapidly fills the Curse meter. Leave the cloud as soon as it appears and avoid fighting several Basilisks in the confined passages. A filled meter kills you and leaves the Curse status active, reducing your maximum health until it is removed. Carry or obtain a Purging Stone if possible before exploring this section.
A Channeler overlooks the approach to the Gaping Dragon. Kill it before entering the fog. It fires projectiles and can strengthen the boss, making the encounter more dangerous. The Channeler does not respawn, so removing it improves every later attempt.
- Separate rats and slimes instead of fighting groups in open areas.
- Leave Basilisk curse clouds immediately.
- Kill the Channeler overlooking the Gaping Dragon route.
Defeat the Gaping Dragon
Begin the fight at a distance and let the Gaping Dragon crawl toward you. When it charges, move laterally rather than backing straight away. After the charge, it takes time to recover and rise; this is your safest opening for attacks. Strike the head or rear briefly, then retreat before the body slam, tail sweep, or next charge.
Do not remain beneath the dragon after an opening closes. The camera and hitboxes make the follow-up difficult to read, and the body slam can punish a player who continues attacking. If you are playing online and are in Human Form, summon signs may be available near the approach, depending on the relevant NPC and multiplayer conditions.
If you want the Dragon King Greataxe, sever the dragon’s tail before killing it. Use attacks that can reach the tail and avoid spending the entire encounter directly under the body. This weapon is optional and is not needed to continue.
The Gaping Dragon awards the Blighttown Key along with its other rewards. If you die, use the Depths shortcut, confirm that the Channeler remains dead, and repeat the same charge-and-recovery strategy instead of fully clearing every room.
- Defeat the Gaping Dragon.
- Sever its tail first if you want the Dragon King Greataxe.
- Collect the Blighttown Key.
Open the standard Blighttown entrance
Return to the lower Depths area where Domhnall of Zena sits near the large barred doors. Use the Blighttown Key on those doors. This is the standard entrance from the Depths and leads into upper Blighttown’s wooden platforms and ladders.
The upper settlement is vertical, with enemies positioned above, below, and behind you. Move from one ladder or platform to the next without rolling near open edges. Prioritize enemies that can knock you from the scaffolding, and check the next landing before climbing or dropping.
Blighttown’s dart shooters inflict Toxic rather than ordinary Poison. Toxic drains health much faster. Blooming Purple Moss Clumps cure Toxic, while Purple Moss Clumps cure ordinary Poison from the swamp and other enemies. Green Blossoms improve stamina recovery but do not cure either status. Poison-resistant armor is helpful but not mandatory if you carry enough moss and avoid unnecessary exposure.
- Use the Blighttown Key on the large doors beside Domhnall.
- Descend the wooden platforms without rolling near edges.
- Carry Purple Moss for Poison and Blooming Purple Moss for Toxic.
Reach and activate the Blighttown swamp bonfire
Continue downward until the scaffolding reaches the poison swamp. Follow solid ground and wooden walkways toward the tunnel near the waterwheel. Wading in the swamp builds Poison, so move directly between safe sections instead of wandering. Cure the status when the meter becomes dangerous, then continue toward the tunnel.
Inside the tunnel, locate and light the Blighttown swamp bonfire. Rest there immediately. This bonfire is the practical starting point for the next chapter, where you cross the swamp and reach Quelaag’s Domain. If you used the Master Key or another alternate route to enter lower Blighttown, you may already have reached this bonfire, but the Depths remains worthwhile for the Large Ember, Laurentius, Channeler, Gaping Dragon, and associated rewards.
Once the bonfire is active, the chapter is complete. Spend or bank your souls before making the swamp crossing, and use a Homeward Bone if you have finished collecting items but do not want to risk the return trip.
- Reach and rest at the Blighttown swamp bonfire.
- Identify the waterwheel tunnel and the route toward Quelaag’s Domain.
- Keep status cures and healing available for the swamp crossing.
Before you move on
- The Basement Key has been collected and used on the Hellkite bridge door.
- Lower Undead Burg has been explored, with Griggs rescued if desired and the Undead Female Merchant located.
- The Lower Burg-to-Firelink shortcut is open.
- The Capra Demon is defeated and the Key to the Depths is in your inventory or has been used.
- The Depths bonfire is unlocked and the shortcut toward the lower sewer and Gaping Dragon approach is open.
- Laurentius has been rescued if you want his later Firelink Shrine services.
- The Large Ember has been collected if your build uses standard weapon upgrades.
- The Channeler overlooking the Gaping Dragon route is dead.
- The Gaping Dragon is defeated and the Blighttown Key has been obtained.
- The large Blighttown doors beside Domhnall of Zena are open.
- The Blighttown swamp bonfire has been lit and activated.
References for this chapter
Quelaag’s Domain and the second Bell of Awakening
From the bottom of Blighttown, cross the poison swamp to Quelaag’s Domain, defeat Chaos Witch Quelaag, ring the second Bell of Awakening, and open the route to Sen’s Fortress. Use the swamp bonfire to shorten retries, avoid unnecessary fights near the entrance, and leave the Egg Carriers alone unless you have a reason to attack them. During the boss fight, stay near the spider’s side, punish safe openings, and retreat immediately from the close-range fire explosion. After victory, collect Quelaag’s Soul and the Twin Humanities, continue through the arena’s far exit, pull the bell lever, and inspect the optional hidden chamber containing Quelaag’s Sister, Eingyi, and a bonfire. Return to Firelink Shrine by the route you came through or with a Homeward Bone; bonfire warping is not yet available. With both Bells rung, Sen’s Fortress is open and Kingseeker Frampt appears at Firelink Shrine.
Rest and prepare at the Blighttown swamp bonfire
Before making the final trip to Quelaag’s Domain, rest at the bonfire in the lower Blighttown swamp. Repair your weapon, spend or bank excess souls if you do not want to risk them, and make sure your Estus supply is adequate. If you are poisoned, cure it before entering the boss approach. Purple Moss Clumps are useful for the swamp, but they are not a substitute for avoiding unnecessary exposure.
Use your best normally upgraded physical weapon. Quelaag has strong fire resistance, so fire-based damage is a poor primary choice. Fire-resistant armor or a fire-resistant shield can reduce mistakes, but keep equipment load low enough for the roll and movement speed you normally rely on. Do not delay the attempt waiting for a perfect resistance set; a sound weapon and controlled movement matter more.
- Rest at the lower Blighttown bonfire.
- Repair and upgrade your main weapon if possible.
- Cure poison before entering the boss approach.
- Keep a reliable roll and carry healing and poison-curing items.
Cross the swamp and enter the web-covered mound
From the bonfire, move across the swamp toward the large web-covered mound. A practical approach is to keep toward the right side as you face the entrance, then run directly for the cave while avoiding groups of leeches and the Infested Barbarians when possible. The swamp slows movement, so unnecessary fights can leave you poisoned or surrounded before the boss even begins.
Enter the cave and continue through the web-covered passage. The Egg Carriers in this section are generally passive if you do not attack them. Leave them alone and follow the tunnel to the fog gate. If you die to Quelaag, recover your bloodstain first, then make the shortest possible return rather than clearing every enemy in the swamp again.
- Reach the large web-covered cave entrance.
- Avoid unnecessary swamp fights.
- Leave the Egg Carriers unharmed unless you deliberately want to fight them.
- Locate the fog gate at the end of the tunnel.
Use Maneater Mildred or online help if needed
If Maneater Mildred invaded you in the lower Blighttown swamp and you defeated her, her summon sign can appear outside Quelaag’s fog gate while you are in human form. Reverse hollowing at a bonfire, then check the ground near the fog gate. Mildred can draw attacks away from you, but she is not a guaranteed tank and may stand in lava or fail to avoid the boss’s explosion.
You can also summon online players if signs are available and your PS4 account has the required online access. Summoning increases the boss’s health, so use a phantom to create attack opportunities rather than allowing the fight to become a prolonged exchange. If no sign appears, the boss remains fully manageable alone.
- Be in human form before checking for summon signs.
- Confirm that Maneater Mildred was defeated earlier if you expect her sign.
- Use online summons only if your network access permits them.
- Do not enter the fight with an untested weapon or unfamiliar loadout.
Defeat Chaos Witch Quelaag
Quelaag’s spider body controls most of the arena. Fight near one side of the spider rather than directly in front of its head, where the lava attacks are easiest to hit you. Let her complete a sword swing or thrust, then land a short attack sequence and move away. Blocking can save you from one mistake, but repeated fire attacks drain stamina quickly; rolling and repositioning are safer when you have room.
When the human upper body bends down and the spider curls inward, Quelaag is preparing the close-range fire explosion. Stop attacking immediately and retreat until the blast has ended. This is the most important attack to recognize. The spider can also spray lava across the floor. Treat each lava pool as a temporary barrier, circle toward clear ground, and wait for an opening instead of rolling through the damage to force an attack.
If Quelaag begins a long-distance leap, watch the landing and the lava that follows. Keep enough distance to react, but do not run aimlessly around the arena; excessive distance can make her leap and cover your escape route. Magic, lightning, ranged attacks, and pyromancy that does not rely on fire can help, but a physical weapon with consistent damage is enough. After the killing blow, collect the Soul of Quelaag and Twin Humanities.
- Stay near the spider’s side instead of directly in front.
- Retreat as soon as the close-range explosion is telegraphed.
- Avoid standing in lava or attacking through it.
- Collect the Soul of Quelaag and Twin Humanities after victory.
Ring the second Bell of Awakening
After the boss arena, use the exit on the opposite side rather than returning through the entrance. Follow the passage and climb into the bell tower. Pull the lever beside the bell to ring the second Bell of Awakening. A cutscene shows the large gate to Sen’s Fortress opening near the Undead Parish.
The bell is the required progression event. Defeating Quelaag without pulling the lever does not complete this objective, so confirm that the bell animation and opening-gate cutscene have played before leaving the area.
- Leave through the far side of Quelaag’s arena.
- Reach the bell tower.
- Pull the lever beside the second Bell of Awakening.
- Confirm that the Sen’s Fortress gate-opening cutscene occurs.
Inspect the optional hidden chamber
From the bell area, descend the nearby stairs or carefully drop through the opening. In the lower chamber, strike the illusory wall near the route toward the Demon Ruins. The hidden passage leads to a bonfire and the chamber of Quelaag’s Sister and Eingyi.
Do not attack either NPC if you want access to the Chaos Servant covenant and its related interactions. Speak with them if you want to join the covenant or use the bonfire as a closer checkpoint for later exploration. This chamber is optional for reaching Sen’s Fortress, but the bonfire is valuable and Quelaag’s Sister can reinforce Estus Flasks if you have a Fire Keeper Soul available.
- Descend below the bell tower.
- Strike the illusory wall to reveal the hidden passage.
- Light the Daughter of Chaos bonfire if desired.
- Speak to Quelaag’s Sister and Eingyi without attacking them.
Return to Firelink Shrine and begin the next chapter
Return to Firelink Shrine by retracing the route through Blighttown and the upper areas, or use a Homeward Bone from a safe location. You cannot warp between bonfires yet, because the Lordvessel has not been obtained. Once back at Firelink, Kingseeker Frampt should be present after both Bells have been rung; speak with him and exhaust his dialogue if you want his explanation of the next objective.
The main route is through the Undead Parish toward Sen’s Fortress. Confirm that the sealed entrance beyond the Parish area is open, repair your weapon, and spend your souls before entering. The Demon Ruins route below Quelaag’s Domain is optional at this stage and is not required to proceed to Anor Londo.
- Both Bells of Awakening have been rung.
- Sen’s Fortress is open.
- Kingseeker Frampt is present at Firelink Shrine.
- Your weapon is repaired before entering Sen’s Fortress.
Before you move on
- Chaos Witch Quelaag is defeated.
- The Soul of Quelaag and Twin Humanities have been collected.
- The second Bell of Awakening has been rung and the gate-opening cutscene has played.
- The hidden chamber below the bell tower has been inspected without killing Quelaag’s Sister or Eingyi if those NPCs are wanted.
- At Firelink Shrine, Kingseeker Frampt is present and Sen’s Fortress is open.
- The character is repaired, supplied, and ready to enter Sen’s Fortress.
Sen’s Fortress — traps and the approach to Anor Londo
Sen’s Fortress opens after both Bells of Awakening are rung. Advance slowly through the pendulum bridges, pressure plates, serpent-men and boulder machinery. The critical route leads to the hidden rooftop bonfire, the Cage Key and the Iron Golem arena. Use the cage elevator to shorten retries, kill the firebomb-throwing giant to remove the rooftop bombardment, and summon Black Iron Tarkus if you are human. Defeating the Iron Golem activates the golden transport point that carries you to Anor Londo.
1. Prepare at the entrance
Enter Sen’s Fortress through the large gate beside the Undead Parish bonfire after both Bells of Awakening have been rung. Spend or bank a large soul total before entering, repair your equipment, and bring a weapon that has received the upgrades available to your build. A shield is useful against the fortress’s narrow-corridor enemies, but do not rely on blocking every attack from the serpent-men.
The first corridor contains a floor pressure plate that fires arrows from the wall. You can step on it deliberately and move aside, allowing the volley to hit nearby serpent-men, but do not stand in the firing lane while trying this. Treat every visible pressure plate as an active trap until you know which direction its projectile travels.
- Enter only after repairing your main weapon.
- Keep enough healing for the first bonfire run.
- Use pressure plates against enemies only when you have room to retreat.
2. Cross the pendulum bridges
The first major chamber contains swinging blades over narrow walkways. Watch the pendulums for a complete cycle before crossing. Move decisively across each bridge rather than stopping in the center. If you are hit, prioritize recovering on solid ground instead of trying to continue while staggered.
Serpent Mages fire lightning from ledges and can be more dangerous than the blades. Use the walls and bridge entrances as cover, lure one serpent-man at a time, and kill ranged enemies before spending time on optional corpses or lower platforms. Falling to the lower areas is not required for the main route and can leave you surrounded by Titanite Demons.
- Observe the pendulum rhythm before stepping onto a bridge.
- Clear nearby serpent mages before searching for loot.
- Do not chase lower-platform items during the first ascent.
3. Reach the boulder machinery and optional Logan cell
Continue through the upper passages until you reach the room where the boulder machine directs rolling iron spheres. Stand beside the path rather than in front of the launcher, and wait for a boulder to pass before moving. The lever changes the direction of the machine; use it only after checking which corridor the next boulder will enter.
A boulder can break the damaged wall near the serpent-man leaning beside it. Behind that wall is Big Hat Logan’s cell. Logan is optional for reaching Anor Londo, but freeing him preserves his later Firelink Shrine appearance and sorcery services. Open his hanging cage with the Cage Key or the Master Key. If you do not yet have the Cage Key, continue upward and return after finding it.
- Stay beside the boulder lane, not directly in its path.
- Adjust the machine only when the next boulder’s route is safe.
- Free Big Hat Logan if you want his later NPC and sorcery progression.
4. Collect the Cage Key and activate the hidden bonfire
Follow the route beyond the boulder machinery toward the upper exterior section. In the lower part of the tower containing the Crestfallen Merchant, defeat the Serpent Mage and take the Cage Key. This key opens Logan’s cage if you lack the Master Key and also opens the cage elevator near the boss approach.
Continue upward until the fortress opens onto rooftops where a giant throws firebombs. Move through the bombardment instead of fighting in the impact zones. In the first rooftop section, look for the broken portion of the outer wall and drop carefully to the small ledge below. The bonfire is there. Rest before attempting the final ascent.
Climb to the giant’s tower when ready and kill the firebomb-throwing giant. This stops the bombardment for the remainder of the current visit and makes the rooftop route safer. Keep away from the outer ledges while fighting; the giant’s attacks and ordinary knockback can throw you off the fortress.
- Take the Cage Key from the tower guarded by a Serpent Mage.
- Drop through the broken rooftop wall to light the hidden bonfire.
- Kill the firebomb giant if you want safer boss preparation and item collection.
5. Open the cage shortcut and find Black Iron Tarkus
From the rooftop bonfire, follow the upper route toward the Iron Golem fog gate. Near the approach, you will find two hanging cages. Use the Cage Key or Master Key on one of them and ride it down. This cage elevator connects the upper fortress to the lower entrance section, greatly shortening future attempts. Step off when the elevator reaches its destination; do not remain on the platform beyond its normal stop because the vertical shaft contains a ceiling hazard.
Return to the upper area and stand facing the Iron Golem fog gate. Before entering, cross the short walkway to the tower on the right. If you are in human form and have not placed your own summon sign, Black Iron Tarkus’s white summon sign appears inside that tower. Summon him, then go directly through the fog so he does not wander into unrelated fortress enemies.
- Unlock and ride the cage elevator before the boss attempt.
- Rest at the rooftop bonfire and refill Estus.
- Use human form to summon Black Iron Tarkus from the tower to the right of the fog gate.
6. Defeat the Iron Golem
The Iron Golem’s safest position is usually beside or behind its legs, while avoiding the exact space beneath its body. Stay close enough that its ranged axe shockwave is less likely to be used, circle away from horizontal swings, and roll clear of stomps, vertical strikes and the grab. The grab is especially dangerous near the arena’s edge because it can throw you from the platform.
Attack after a completed swing or stomp, then stop before your recovery leaves you exposed. Repeated attacks against one leg can stagger the Golem. If it begins to wobble, continue attacking only if you remain on the broad central walkway; a stagger near an edge can turn the fight into an accidental fall for either combatant. Tarkus can draw its attention and deal substantial damage, but still keep the Golem away from the drop-offs.
If you die, use the cage shortcut and the rooftop bonfire rather than clearing the entire fortress again. Re-summon Tarkus after returning in human form. The Golem must be defeated; there is no alternate bypass that advances the Anor Londo transition.
- Fight near the central walkway, not against the outer edge.
- Attack the legs after the Golem finishes a committed strike.
- If you fall, use the cage elevator and rooftop bonfire for the next attempt.
7. Take the transport to Anor Londo
After the Iron Golem dies, collect its dropped rewards and move to the golden transport point at the far end of the arena. Examine it to begin the cutscene in which bat-winged demons carry you to Anor Londo. This transport point is the intended progression route and becomes the return point for traveling between Anor Londo and Sen’s Fortress.
When you arrive, proceed through the landing area and light the Anor Londo bonfire before exploring the city. Sen’s Fortress is complete for campaign purposes once the Iron Golem is defeated, the transport sequence has delivered you to Anor Londo, and the first Anor Londo bonfire is active. Missed loot, Logan’s rescue and the Cage Key shortcut can still be handled by returning through the transport area.
- Defeat the Iron Golem rather than merely reaching its arena.
- Use the golden transport point after the boss fight.
- Light the first Anor Londo bonfire before beginning the next chapter.
Before you move on
- The Cage Key has been collected, or you have deliberately chosen to rely on the Master Key and skip it.
- The hidden rooftop bonfire is lit.
- The cage elevator has been opened, or you have confirmed its location and intentionally postponed it.
- Big Hat Logan has been freed if you want his later Firelink Shrine services.
- The Iron Golem is defeated and the golden transport point has carried you to Anor Londo.
- The first Anor Londo bonfire is lit, confirming that Sen’s Fortress no longer blocks the campaign route.
Anor Londo: Solaire, Ornstein & Smough, and the royal city
After the Iron Golem, examine the ring of light to reach Anor Londo. Secure the first bonfire, cross the rotating elevator route and cathedral rafters, then survive the Silver Knight archer approach. The residence bonfire gives you a closer checkpoint before Ornstein and Smough. Along the way, speak with Solaire, Siegmeyer, the Darkmoon Knightess and the Giant Blacksmith. Human players can summon Solaire near the cathedral entrance. Defeat the duo, choose the second-phase survivor according to the boss soul you want, then speak with Princess Gwynevere to receive the Lordvessel. Before leaving, use the upper bonfire, inspect optional rooms and decide whether to join the Princess’s Guard. Do not attack Gwynevere unless you deliberately want dark Anor Londo and its altered NPC and covenant conditions.
1. Reach Anor Londo and establish the first checkpoint
After defeating the Iron Golem in Sen’s Fortress, examine the glowing ring at the far side of the arena. Batwing Demons carry you to Anor Londo. Go down the steps and follow the path to the bonfire beside the Darkmoon Knightess. Rest here before exploring; this is the main checkpoint for the opening section.
Speak with the Darkmoon Knightess and Solaire before leaving. The Knightess tends this bonfire and can reinforce your Estus Flask. Solaire is also available for conversation here. Repair your equipment and spend souls before attempting the exposed walkways. The nearby Giant Sentinels are slow but have wide attacks, so draw one at a time or run past them only after learning the route.
- Rest at the first Anor Londo bonfire.
- Speak with the Darkmoon Knightess and Solaire.
- Repair equipment and prepare healing before crossing the upper routes.
2. Cross the rotating platform, rafters and cathedral interior
From the first bonfire, enter the building with the Batwing Demons and use the large rotating elevator mechanism. Its position changes which bridge and stair routes are available. Take the route upward, then climb onto the cathedral rafters. Walk slowly across the beams and use a shield, bow or other ranged option against Painting Guardians when possible; their knives can cause bleeding and a fall is usually fatal.
Drop from the rafters into the cathedral interior and continue until you reach the lever that lowers the central elevator column. Operate it, then clear or bypass the gargoyle and Painting Guardians. Do not interact with the giant painting unless you intentionally want to enter the optional Painted World of Ariamis and have the required key item. The cathedral route eventually leads outside toward the Silver Knight archer approach.
- Operate the rotating elevator and the cathedral lever.
- Cross the rafters without rushing near the edges.
- Avoid the giant painting unless you are deliberately starting the Painted World.
3. Reach the residence bonfire and open useful shortcuts
From the cathedral route, pass the Sentinels and Batwing Demons, then descend the exterior buttress toward the Silver Knight archers. The archers fire from narrow ledges and can knock you off the path. Move quickly around the final corner, roll through incoming arrows and close on the right-hand archer so you can force a melee attack. Fight near solid ground rather than backing toward the drop. The second archer can then be ignored or defeated from a safer position.
After entering the building beyond the archers, check the first room on the left for the residence bonfire. Rest here; it is the most useful checkpoint for the boss approach. Explore the adjoining residence only when you are ready. An illusory wall in a fireplace leads to a lower room containing a mimic and Havel-related equipment, while the upper rooms contain Silver Knights and optional loot.
- Defeat or bypass the Silver Knight archers.
- Light and rest at the residence bonfire.
- Open the residence routes before attempting Ornstein and Smough.
4. Complete Siegmeyer’s Anor Londo event
From the residence bonfire, go past the spiral staircase into the long hallway and find the route leading to the rooftop. Take the left-hand doorway down to Siegmeyer of Catarina. Speak with him until his dialogue is exhausted. He is waiting for help with the Silver Knights in the adjacent room.
Enter that room and defeat the three Silver Knights. Return to Siegmeyer and speak with him again to advance the event and receive his reward. This interaction is optional for campaign progression, but it is important if you are following his quest. Open the nearby shortcut door before leaving so later returns do not require another full trip through the residence.
- Speak with Siegmeyer before fighting the three Silver Knights.
- Clear the adjacent room and return to him afterward.
- Open the shortcut door near his position.
5. Visit the Giant Blacksmith and prepare for the boss
Return to the large hall near the cathedral entrance and take the route along the upper steps to the Giant Blacksmith. Speak with him and repair your weapon before the boss. He can reinforce equipment, sell useful titanite and create certain special weapons from boss souls. If you are saving a boss soul for a specific weapon, do not consume it at a normal soul-use prompt.
Before entering the fog, decide which boss you want to defeat first. The boss killed second determines the soul you receive for the encounter. Killing Ornstein first leaves a powered-up Smough; killing Smough first leaves a powered-up Ornstein. The survivor returns to full health and gains enhanced attacks, so this is both a combat decision and a reward decision.
- Repair and reinforce your equipment at the Giant Blacksmith.
- Preserve boss souls if you want a special weapon later.
- Choose the intended second-phase survivor before entering the arena.
6. Summon help and defeat Ornstein and Smough
If you want Solaire’s assistance, reverse Hollowing at a bonfire and look for his golden summon sign on the steps near the cathedral entrance. It is on the approach to the fog door, on the right-hand side when entering the great hall from the main entrance. Clear nearby enemies before using it. Other player signs may appear in human form when online matchmaking provides them, but their availability is not guaranteed.
Keep both bosses in view and use the cathedral pillars to interrupt charges and create healing space. The pillars do not make you completely safe, so do not heal while either boss is directly beside you. Smough is slower and has long hammer swings, charges and a lightning-enhanced butt slam after powering up. Ornstein is faster, can close distance with a long-reaching charge and uses lightning attacks in his powered-up phase. Attack only after one boss finishes an animation, then retreat before the other can reach you.
If a summon is present, use the distraction to separate the pair rather than attacking randomly. Do not chase a nearly defeated boss into the other boss’s range. Once the first boss dies, immediately reset your position and learn the survivor’s new reach before committing to attacks.
- Reverse Hollowing if you intend to summon.
- Use pillars for separation, not as an absolute shield.
- Confirm which boss was defeated second and collect the correct soul reward.
7. Claim the Lordvessel and finish the chapter
After the duo is defeated, collect the rewards and use either elevator at the sides of the arena. At the upper level, light and rest at the bonfire in the Chamber of the Princess. Continue through the double doors and speak with Princess Gwynevere. Kneel or continue the conversation when prompted to receive the Lordvessel. Speaking with her again also offers the Princess’s Guard covenant.
The Lordvessel is required for the main campaign’s next progression stage and later permits warping between selected bonfires once it has been placed. You do not need to attack Gwynevere. If you strike the illusion, Anor Londo becomes dark, the local enemy layout changes and the Darkmoon Knightess becomes hostile; this is an optional route and can affect Darkmoon-related plans.
Before leaving Anor Londo, confirm that you have spoken with Solaire, the Darkmoon Knightess, Siegmeyer and the Giant Blacksmith. Keep the residence and Chamber of the Princess bonfires available. Your next main objective is to return to Firelink Shrine and place the Lordvessel through the appropriate progression NPC or ritual route.
- Defeat Ornstein and Smough.
- Rest at the Chamber of the Princess bonfire.
- Speak with Gwynevere and receive the Lordvessel.
- Check optional NPC and covenant interactions before departing.
Before you move on
- Ornstein and Smough are defeated and the boss rewards have been collected.
- You have rested at the Chamber of the Princess bonfire.
- Princess Gwynevere has given you the Lordvessel.
- The Giant Blacksmith remains available for repairs, upgrades and special weapon creation.
- You have checked Solaire, the Darkmoon Knightess and Siegmeyer before returning to the main campaign.
Darkroot Basin and optional detours (including Great Hollow/Ash Lake)
Darkroot Garden and Darkroot Basin are optional areas that provide the Moonlight Butterfly, Divine Ember, Watchtower Basement Key, Grass Crest Shield, Hydra rewards, Dusk of Oolacile, and Great Grey Wolf Sif. The Crest of Artorias gives the most direct entrance from Andre’s parish, while the Basin can also be reached from the Undead Burg and Valley of Drakes. The Great Hollow and Ash Lake are entirely optional and are entered through two illusory walls in the lowest Blighttown swamp. Dusk’s rescue is optional for the main campaign but required if you intend to unlock the Artorias of the Abyss DLC. Sif is optional here; defeat Sif only if you want the Covenant of Artorias ring, Soul of Sif rewards, or related optional content.
1. Enter Darkroot Garden and secure its bonfire
From Andre’s bonfire in the Undead Parish, pass the Titanite Demon and approach the large sealed door. Purchase the Crest of Artorias from Andre to open it. This is the most direct organized route into Darkroot Garden. The Garden can also be reached from Darkroot Basin, but that route is less convenient if you have not yet explored the lower area.
After opening the door, continue into the forest and light the bonfire near the Forest Hunter covenant area. The forest contains Stone Knights, Ents, Frog-Rays, and hostile Forest Hunter NPCs if you are not protected by the covenant. Do not assume the Crest door makes those NPCs friendly. Pull enemies into open ground, avoid waking multiple Stone Knights at once, and keep enough stamina to escape their delayed attacks.
- Darkroot Garden bonfire lit.
- Crest of Artorias used or an alternate Basin route confirmed.
- Weapon repaired and upgraded for the current stage.
2. Defeat the Moonlight Butterfly
From the Garden bonfire, follow the flower-lined path toward the tower. You can fight the Stone Knights or move past them carefully. Enter the tower and climb to the fog gate. The Moonlight Butterfly stays airborne for most of the battle. Melee characters should block or roll through its magic projectiles and wait for it to land on the bridge. Attack during that landing window, then create distance before the next projectile pattern. Sorceries, miracles, pyromancy, bows, and thrown items can damage it while it is flying.
After the fight, climb through the tower and collect the Divine Ember and Watchtower Basement Key. The ember supports the divine weapon upgrade path, while the key opens the basement beneath the Undead Burg tower, where Havel the Rock can be encountered. Keep the Moonlight Butterfly’s soul if you may want its special weapon transmutation; consuming it is permanent.
- Moonlight Butterfly defeated.
- Divine Ember collected.
- Watchtower Basement Key collected.
- Moonlight Butterfly soul retained if pursuing unique weapons.
3. Explore Darkroot Basin and defeat the Hydra
Return toward the Garden entrance and take the descending path into Darkroot Basin. The Basin connects the Garden, the lower Undead Burg side, and the Valley of Drakes. Search the slope near the waterfall for the Grass Crest Shield. Its stamina recovery is useful for most builds, but collecting it is optional.
At the lake, approach the Hydra from the shoreline and stay away from the concealed drop beneath the water. The Hydra begins with ranged water attacks. Advance carefully until it switches to head strikes, then stand near the edge and attack a head after it lunges. Do not chase heads into deep water. Cut them down one at a time while keeping the camera aimed toward the next attack. The Rusted Iron Ring makes movement in the water easier but is not required if you fight from the shore.
The Hydra drops a Dragon Scale and the Dusk Crown Ring. These rewards are optional, and the Hydra itself can be skipped if you are only following the main campaign.
- Grass Crest Shield collected if wanted.
- Hydra defeated without crossing the unsafe drop.
- Dragon Scale and Dusk Crown Ring collected if desired.
4. Rescue Dusk of Oolacile
After killing the Hydra, leave the lake area and rest at a bonfire or reload the area. Return to the cave at the back of the lake. A Golden Crystal Golem appears there. Kill it to free Dusk of Oolacile, then interact with her summon sign near the shoreline and accept her service. Her summon sign and shop are optional for ordinary progression.
Dusk sells sorceries and provides access to her equipment, including the Crown of Dusk. Her rescue is required for the Artorias of the Abyss access sequence in this edition, so complete it before attempting to enter the DLC. The later DLC entrance also requires progression through the Duke’s Archives to obtain the necessary pendant item; rescuing Dusk alone does not open the portal immediately.
- Golden Crystal Golem defeated after the Hydra.
- Dusk of Oolacile rescued.
- Dusk summoned and service accepted if pursuing her shop or the DLC.
5. Decide whether to fight Great Grey Wolf Sif
To reach Sif, return to the Darkroot Garden bonfire and use the Crest of Artorias gate. Follow the forest route past the covenant area and cross the bridge toward the large gravestone. Approaching the sword at the gravestone starts the fight. Sif uses broad sword sweeps, lunges, and jumping attacks. Staying close to the body can make several swings pass overhead, but watch the sword’s movement and roll through the follow-through rather than backing blindly into the arena edge.
Heal only after creating space or after Sif finishes a long attack. Defeating Sif grants the Soul of Sif and the Covenant of Artorias ring. The ring is required to enter the Abyss and fight the Four Kings in New Londo. Sif is not required to access the Artorias of the Abyss DLC, although optional DLC events can acknowledge whether Sif was encountered earlier.
- Sif defeated if you need the Covenant of Artorias ring.
- Soul of Sif preserved if pursuing special weapon transmutations.
- Covenant of Artorias equipped before entering the Four Kings arena.
6. Descend through the Great Hollow only if prepared
The Great Hollow entrance is in the lowest part of the Blighttown swamp, in the direction opposite Quelaag’s Domain. Look for a large tree and strike the first illusory wall. Strike the concealed wall beyond it as well to reveal the descent. This area is completely optional and contains Crystal Lizards, upgrade materials, and the route to Ash Lake.
Repair your weapon, carry plenty of healing, and avoid entering while holding souls you cannot afford to lose. The branches are narrow, the camera can hide landings, and Basilisks can inflict Curse. Move slowly, look for the next solid branch before dropping, and do not make blind jumps. There is no convenient midway bonfire in the descent, so postpone this trip if you are not prepared to complete it.
- Weapon repaired before entering.
- Healing and Curse resistance prepared.
- You are prepared to finish the descent instead of relying on a quick retreat.
7. Explore Ash Lake and choose your return method
At the bottom of the Great Hollow, follow the passage into Ash Lake and light the bonfire on the shore immediately. The area contains a Hydra, Man-Eater Shells, Dragon Scale rewards, the Great Magic Barrier miracle, and the Stone Dragon covenant. The first Hydra can be skipped if you only want to reach the bonfire and covenant, but it can be fought from the shoreline using the same head-luring method as the Darkroot Basin Hydra.
Ash Lake is a dead end. Before the Lordvessel has enabled bonfire warping, you must climb back through the Great Hollow to leave. After bonfire warping is unlocked, the lit Ash Lake bonfire provides a much safer return option. Complete only the rewards you want, because the climb is hazardous and the area has no main-campaign requirement.
- Ash Lake bonfire lit before exploring the shore.
- Great Magic Barrier, Dragon Scales, and covenant interaction collected only if wanted.
- Return route confirmed before spending resources in the area.
Before you move on
- Moonlight Butterfly defeated and the Divine Ember recovered.
- Watchtower Basement Key collected if you want the Havel encounter.
- Hydra defeated if pursuing its rewards, with Dusk rescued afterward if you intend to access the DLC.
- Sif defeated and the Covenant of Artorias obtained if you plan to fight the Four Kings.
- If pursuing the optional detour, the Great Hollow was descended, the Ash Lake bonfire was lit, and the desired miracle, Dragon Scales, Hydra rewards, or covenant interaction was completed.
References for this chapter
- DARK SOULS: REMASTERED — PlayStation 4 product page
- Darkroot Garden — Dark Souls Wiki
- Darkroot Basin — Dark Souls Wiki
- Sif, the Great Grey Wolf — Dark Souls Wiki
- Dark Souls Remastered full walkthrough: Great Hollow and Ash Lake
- Dark Souls Remastered Guide and Walkthrough — Darkroot Basin
- DARK SOULS: REMASTERED official series page
Lordvessel placement, serpent routes and late-game access
After defeating Ornstein and Smough, speak with Princess Gwynevere in Anor Londo to receive the Lordvessel. It enables bonfire warping, but the sealed late-game routes remain closed until the vessel is placed at the Firelink Altar. Decide now whether this playthrough needs Darkstalker Kaathe and the Darkwraith covenant. Standard-route players should use Kingseeker Frampt and place the Lordvessel during this chapter. Kaathe-route players must leave the vessel unplaced; ch10 owns the Sif, New Londo Ruins and Four Kings sequence, followed by speaking with Kaathe and placing the vessel through that route. Placement is not the same as filling the vessel. The four required rewards are Gravelord Nito’s Lord Soul, the Bed of Chaos’s Lord Soul, Seath the Scaleless’s Bequeathed Lord Soul Shard and the Four Kings’ Bequeathed Lord Soul Shard. They are collected from later boss victories and must all be offered before the Kiln of the First Flame opens.
Receive the Lordvessel in Anor Londo
After defeating Dragon Slayer Ornstein and Executioner Smough, leave the boss arena through the large doorway and enter the chamber beyond. Speak with Princess Gwynevere to receive the Lordvessel. Do not attack her if you want the normal campaign route and her reward.
The Lordvessel immediately allows fast travel between eligible bonfires. This does not mean that it has been placed at the Firelink Altar, and it does not remove the golden fog barriers blocking the main Lord Soul areas. Return to Firelink Shrine and decide which serpent route this playthrough will use before committing to placement.
Speaking with Kingseeker Frampt before obtaining the Lordvessel is not, by itself, the decisive route lockout. The important restriction is whether the Lordvessel has been placed before the Four Kings are defeated. If you want Kaathe and the Darkwraith covenant, leave the vessel unplaced and do not use Frampt to place it.
- Ornstein and Smough are defeated.
- Princess Gwynevere has given you the Lordvessel.
- Bonfire warping is available.
- The vessel remains unplaced if you intend to follow the Kaathe branch.
Standard route: place the Lordvessel through Frampt
Choose this route if you do not need the Darkwraith covenant this cycle or if you want to continue directly into the sealed Lord Soul areas. At Firelink Shrine, speak with Kingseeker Frampt and accept his offer to take you to the Firelink Altar.
At the altar, approach the large receptacle and interact with it to place the Lordvessel. The game does not require you to provide any Lord Souls at this moment. Placement is only the access step; the four required rewards are obtained from later bosses and offered afterward.
Once the vessel is placed, the golden fog barriers blocking the Duke’s Archives, Tomb of the Giants and the deeper route into Lost Izalith are removed. You can now continue through those areas in the order used by the later campaign chapters. The Four Kings are not made available by this placement; their New Londo route is handled separately in ch10.
- Frampt transported you to the Firelink Altar.
- The Lordvessel was placed in the receptacle.
- The Duke’s Archives barrier is gone.
- The Tomb of the Giants barrier is gone.
- The deeper Lost Izalith route is open.
Kaathe route: leave the vessel unplaced and defer the branch to ch10
Choose this route only if you want to meet Darkstalker Kaathe and pursue the Darkwraith covenant during this cycle. Do not place the Lordvessel through Frampt, do not use the altar directly, and do not complete the standard placement step in this chapter.
End ch13 after confirming that the Lordvessel is still in your inventory and the golden fog barriers are still present. Chapter 10 owns the remaining branch: it covers obtaining the Covenant of Artorias from Great Grey Wolf Sif, preparing and draining New Londo Ruins, reaching the Abyss and defeating the Four Kings.
After the Four Kings are defeated, ch10 handles speaking with Kaathe at the Abyss bonfire, completing any desired Darkwraith covenant actions, accepting Kaathe’s transport to the Firelink Altar and placing the Lordvessel through that route. Do not repeat those Four Kings or Kaathe instructions here; use ch10 when you reach that branch.
If you are not pursuing the Darkwraith covenant, do not postpone placement unnecessarily. Return to the standard Frampt step and open the late-game routes now.
- The Darkwraith covenant is specifically wanted this cycle.
- The Lordvessel remains unplaced at the end of ch13.
- The Four Kings sequence is deferred to ch10.
- You have not used Frampt or the altar to place the vessel.
Track the four rewards required to open the Kiln
Placing the Lordvessel does not fill it and does not open the Kiln of the First Flame. Continue through the late-game areas and retain the progression rewards until they can be offered at the Firelink Altar.
The required offerings are Gravelord Nito’s Lord Soul, the Bed of Chaos’s Lord Soul, Seath the Scaleless’s Bequeathed Lord Soul Shard and the Four Kings’ Bequeathed Lord Soul Shard. The Four Kings reward comes from New Londo’s Abyss; the other three are obtained in the late-game areas opened after Lordvessel placement.
Do not consume, discard or trade these four progression rewards before they are offered. Ordinary boss souls used for weapon, spell or miracle transmutation are separate from the Lordvessel offerings. Once all four required rewards have been accepted, the Kiln of the First Flame becomes available for the final campaign sequence.
- The four required rewards are recorded for later collection.
- You understand that obtaining the Lordvessel, placing it and filling it are separate objectives.
- You will offer all four required rewards before attempting the Kiln.
Before you move on
- Ornstein and Smough were defeated and the Lordvessel was obtained from Princess Gwynevere.
- You decided whether this cycle uses the standard Frampt route or the Kaathe and Darkwraith route.
- For the standard route: Frampt transported you to the Firelink Altar and the Lordvessel was placed during ch13.
- For the Kaathe route: the Lordvessel remains deliberately unplaced at the end of ch13, and the Sif, New Londo, Four Kings, Kaathe and placement sequence is deferred to ch10.
- You recorded the four required rewards: Nito’s Lord Soul, the Bed of Chaos’s Lord Soul, Seath’s Bequeathed Lord Soul Shard and the Four Kings’ Bequeathed Lord Soul Shard.
- You understand that all four rewards must later be offered before the Kiln of the First Flame opens.
New Londo Ruins and the corrosive water threat
New Londo is reached by the elevator beneath Firelink Shrine. The route has two progression branches. If you are following the standard Frampt route from Chapter 13, the Lordvessel should already be placed at the Firelink Altar; proceed through New Londo to claim the Four Kings’ Lord Soul Shard. If you are pursuing Kaathe and the Darkwraith covenant, do not speak to Frampt and do not place the Lordvessel yet. Complete this chapter first, then speak with Kaathe in the Abyss and use his route to place the Lordvessel before continuing to Chapter 11. Use Transient Curses against the ghosts, obtain the Key to the Seal from Ingward, drain the city, defeat Great Grey Wolf Sif for the Covenant of Artorias, and defeat the Four Kings in the Abyss. New Londo has no bonfire, so Firelink Shrine remains your main recovery point.
1. Choose the correct Lordvessel route before entering New Londo
Check your progression before taking the elevator beneath Firelink Shrine. If you spoke to Kingseeker Frampt and followed his route in Chapter 13, the Lordvessel should already be placed at the Firelink Altar. You can still complete New Londo and defeat the Four Kings, but Darkstalker Kaathe and the Darkwraith covenant route will normally be unavailable for this playthrough.
If you want Kaathe and the Darkwraith covenant, do not speak to Frampt after obtaining the Lordvessel and do not place it at the Firelink Altar. Enter New Londo, obtain the Key to the Seal, drain the ruins, defeat Sif and the Four Kings, then speak with Kaathe in the Abyss. Kaathe can then take you to the Firelink Altar so you can place the Lordvessel before continuing to Chapter 11.
- Frampt route: confirm that the Lordvessel has already been placed.
- Kaathe route: do not speak to Frampt and do not place the Lordvessel before defeating the Four Kings.
- Carry healing, repair your weapon, and prepare for a route with no local bonfire.
2. Enter the flooded ruins and handle the ghosts
Take the elevator at the bottom of Firelink Shrine into New Londo Ruins. The upper section is flooded and inhabited by ghosts that can pass through walls, floors, and ceilings. Normal attacks cannot damage them. Use a Transient Curse before entering the ghost-filled sections. The curse allows your attacks to connect with ghosts for its duration, so carry several rather than relying on a single item.
Transient Curses can be found in the ruins and purchased from Ingward after you reach him. Move across the wooden walkways and through the ruined buildings carefully. Ghosts can emerge from surfaces beside you, and several encounters take place on narrow bridges where a panic roll can send you into the water. Fight only what blocks the route, then continue toward the upper ruined building where Ingward is located.
Rickert of Vinheim is imprisoned near the entrance. Speak with him if you want access to his services, but he is optional and is not required for the Four Kings route.
- Use Transient Curses or a confirmed cursed weapon against ghosts.
- Keep a safe platform behind you when the curse timer is running low.
- Do not spend resources clearing every ghost if you can safely pass the encounter.
3. Find Ingward and obtain the Key to the Seal
Continue upward through the ghost-filled buildings until you reach the large ruined structure with a ladder leading to its roof. Ingward is standing above the building in red robes. Speak with him and exhaust his dialogue. With the Lordvessel in your inventory, he gives you the Key to the Seal, which opens the flood-control door.
If you are low on Transient Curses, buy more from Ingward before leaving. He also provides curse-related services, so keeping him alive is preferable. Killing him is an alternative way to obtain the key, but it is unnecessary for normal progression and removes his services.
The key is the required progression item for draining New Londo. Do not waste time searching the lower city while the floodwater remains in place; the main route to the Four Kings is inaccessible until the seal is opened.
- Confirm that Key to the Seal is in your inventory.
- Purchase additional Transient Curses if necessary.
- Leave Ingward alive unless you deliberately want the alternate key method.
4. Open the seal and drain the lower city
Return from Ingward’s roof toward the sealed doorway in the upper ruins. Use the Key to the Seal, follow the passage, and activate the flood-control mechanism. The water drains from the lower city, exposing streets, buildings, Darkwraiths, Masses of Souls, and the route toward the Four Kings.
There is no bonfire in New Londo after the water is drained. Firelink Shrine remains your main place to level, heal, repair equipment, and refill Estus. Before pushing deeper, open the doors, ladders, and connecting routes that make future attempts shorter.
Locate the connection toward the Valley of Drakes. This route gives you an alternative approach from the Firelink and Blighttown sides and can reduce the need to repeat the entire ghost section after a failed boss attempt. The connection is useful for travel, but it does not replace the need to prepare the Abyss route.
- Confirm that the lower streets are exposed.
- Open the Valley of Drakes connection and any nearby doors or ladders.
- Identify your preferred return route before challenging the boss.
5. Cross the lower ruins without wasting attempts
The drained city contains Darkwraiths, Masses of Souls, ghosts, and hazardous drops. Darkwraiths can chain melee attacks, use lunges, and perform grabs, so lure them into open ground one at a time. Avoid fighting beside ledges or in narrow doorways. Their Titanite Chunk drops are optional; do not turn every boss attempt into a farming run unless you specifically need the upgrade materials.
Follow the exposed streets toward the large stone building and the boss approach. Once you know the route, running past selected enemies is reasonable. Open the useful doors and ladders first, then use the shortened path on later attempts. Return to Firelink to repair your weapon and refill Estus before the final run.
New Londo’s lack of a bonfire means deaths can be costly in time, but the area is designed around learning a repeat route. Do not assume that every enemy must be defeated each time.
- Lure Darkwraiths away from ledges before fighting them.
- Open the shortcuts that you intend to use for repeated attempts.
- Repair your weapon and refill Estus at Firelink before the boss run.
6. Obtain the Covenant of Artorias before entering the Abyss
Before passing through the Four Kings fog gate, defeat Great Grey Wolf Sif in Darkroot Garden if you have not already done so. Sif drops the Covenant of Artorias. This ring is mandatory for surviving the descent into the Abyss, where the Four Kings are fought.
Equip the Covenant of Artorias before entering the fog and keep it equipped while you are in the Abyss. Removing it during the fight causes you to die. You may change your weapon, armor, or other ring, but do not remove the Covenant of Artorias until you have used the exit from the Abyss and returned to normal terrain.
If you are human, summon signs may be available near the approach. Cooperation is optional, but a phantom can help divide attention during the damage race.
- Defeat Sif and obtain the Covenant of Artorias.
- Equip the ring before the Abyss descent.
- Do not remove it until you have exited the Abyss.
7. Defeat the Four Kings with sustained damage
Enter the fog and drop into the Abyss while wearing the Covenant of Artorias. The Four Kings do not appear as four bosses at once. One King appears first, and additional Kings enter as the fight continues. The encounter uses a shared health pool, but allowing several Kings to remain active makes their attacks overlap and greatly increases the danger.
Close distance with the active King immediately and use your strongest practical weapon. The priority is to finish each target quickly rather than maintain a slow defensive fight. Watch for sweeping sword attacks, thrusts, projectiles, the grab, and the area explosion. At close range, some sword attacks can miss, but retreat or roll away when the King begins the grab or explosive attack.
After a King is defeated, locate the next one and move toward it instead of waiting in the center. If more than one is active, keep the nearest King between you and the others when possible. Heal only after creating enough space to avoid being interrupted. If repeated attempts fail, improve weapon damage, adjust stamina use, or summon help; excessive blocking and passive play give additional Kings time to appear.
- Bring a fully upgraded or otherwise high-damage weapon appropriate to your build.
- Prioritize damage, stamina management, and rapid target selection.
- Keep the Covenant of Artorias equipped throughout the entire fight.
8. Collect the Lord Soul and finish the correct covenant branch
When the final King is defeated, collect the Bequeathed Lord Soul Shard. Use the exit in the Abyss to return to the normal world. The Covenant of Artorias is no longer required after you have left the Abyss.
If you are following the Frampt route, return to Firelink Shrine and continue with the Lord Soul areas already made accessible by the Lordvessel. If you are following the Kaathe route, remain in the Abyss and speak with Darkstalker Kaathe. Agree to his route and join the Darkwraith covenant if desired. Kaathe can then transport you to the Firelink Altar; place the Lordvessel there before continuing to Chapter 11.
Do not leave the Kaathe branch unfinished if you want its covenant or progression. Once the Lordvessel has been placed through the standard Frampt route, the Kaathe route is normally lost for that playthrough. After placement, proceed to Chapter 11 for Duke’s Archives and the remaining Lord Soul areas.
- Confirm that the Bequeathed Lord Soul Shard is in your inventory.
- Frampt route: return to Firelink after the victory and continue the campaign.
- Kaathe route: speak with Kaathe in the Abyss, then place the Lordvessel at the Firelink Altar before Chapter 11.
- Record whether you joined the Darkwraith covenant before leaving the branch.
Before you move on
- The New Londo floodgates have been opened and the lower city is accessible.
- The Valley of Drakes connection and useful local doors or ladders have been opened.
- Great Grey Wolf Sif has been defeated and the Covenant of Artorias is available.
- The Covenant of Artorias was equipped for the Abyss descent and remained equipped during the Four Kings fight.
- The Four Kings are defeated and the Bequeathed Lord Soul Shard is in your inventory.
- Frampt-route players have confirmed that the Lordvessel was already placed before this chapter.
- Kaathe-route players have spoken with Kaathe after the victory and placed the Lordvessel at the Firelink Altar before proceeding to Chapter 11.
References for this chapter
- DARK SOULS: REMASTERED — PlayStation 4 product page
- DARK SOULS: REMASTERED — Official Bandai Namco site
- New Londo Ruins — Dark Souls Wiki
- New Londo Ruins — Dark Souls Remastered Walkthrough & Guide
- Chapter 12: The Four Kings — Dark Souls Trilogy Walkthrough & Guide
- Dark Souls Remastered Walkthrough — Return to Firelink Shrine and Placing the Lordvessel
- Dark Souls: New Londo Ruins — GamesRadar+
Catacombs and Tomb of the Giants — light, bonfires, and skeletons
After placing the Lordvessel, enter the Catacombs from the graveyard behind Firelink Shrine. Hunt down the Necromancers that revive nearby skeletons, operate the rotating bridges, activate the area bonfires, and defeat Pinwheel to obtain the Rite of Kindling. Continue directly into the Tomb of the Giants with a Skull Lantern, Cast Light, or Sunlight Maggot equipped. Follow the glowing markers, use the ledges and bonfires as landmarks, and control the Giant Skeletons, archers, Skeleton Beasts, and Bone Towers instead of sprinting through the darkness. If you want the Gravelord Servant covenant, join it before killing Nito by using an Eye of Death at the coffin near the Catacombs Titanite Demon. From the deeper Tomb bonfire, pass the now-open golden fog gate and defeat Gravelord Nito. His Lord Soul is one of the four offerings needed to unlock the Kiln of the First Flame.
Enter the Catacombs and eliminate the Necromancers
From Firelink Shrine, descend through the graveyard and enter the Catacombs. Skeletons may stand back up while their associated Necromancer remains alive, so prioritize finding the caster rather than repeatedly clearing the same group. Necromancers do not respawn after they are killed. Once a Necromancer is gone, the skeletons in that section can be defeated normally.
Use an upgraded weapon and carry a bow, crossbow, spell, or another ranged option for pulling enemies from narrow ledges. Fight on stable ground whenever possible. Skeleton attacks can stagger you toward pits, and the Catacombs punish careless movement more than slow progress.
- Enter the Catacombs through the graveyard behind Firelink Shrine.
- Locate and kill Necromancers before committing to prolonged skeleton fights.
- Keep a ranged option available for enemies on ledges or beyond doorways.
Operate the bridges and secure the Catacombs bonfires
Follow the main descent and operate the rotating bridge levers from solid ground. A lever may rotate the bridge away from your current position, so wait for the platform to settle before crossing. Pull skeletons onto stable ground instead of fighting them on the bridge.
Search side passages for remaining Necromancers before moving onward. Activate the Catacombs bonfires you encounter. One bonfire is hidden behind an illusory wall near a dead-end area; strike suspicious walls when the layout appears to stop short of a useful room. Patches appears near one of the rotating bridge sections. Exhaust his dialogue if you want to preserve his later optional interactions, and do not attack him unless you deliberately want that outcome.
- Stand clear of rotating platforms while using their levers.
- Activate the hidden and lower Catacombs bonfires you reach.
- Do not keep farming revived skeletons while a Necromancer remains alive.
Find Vamos and cross the Bonewheel chamber
Continue downward until you reach Vamos, the Skeleton Blacksmith. Speak with him if you want access to his fire-related weapon services, then prepare for the Bonewheel Skeleton chamber. Bonewheels move quickly, deal heavy damage, and can stun-lock a character against a wall.
Enter from a position that leaves open space behind you. Let one Bonewheel approach, block or sidestep its roll, and attack after it passes. Ranged attacks can pull individual wheels from the group. If you die, clear the chamber methodically rather than sprinting through it while trying to recover your souls.
- Locate Vamos before attempting the Bonewheel chamber.
- Pull Bonewheels individually when the room allows it.
- Avoid backing against walls or corners while several Bonewheels are active.
Defeat Pinwheel and obtain the Rite of Kindling
Follow the lower route to Pinwheel’s fog gate. Pinwheel launches slow fire projectiles and can create copies of itself. Keep moving, close distance when safe, and attack instead of waiting in the middle of the arena. The copies can surround you, but Pinwheel has comparatively low health and should fall quickly to an upgraded weapon or strong spells.
After the victory, collect the Rite of Kindling. It allows bonfires to be kindled beyond the ordinary ten-Estus limit, up to the higher capacity allowed by the Rite. Pinwheel also provides one random mask from the Mask of the Child, Mask of the Father, or Mask of the Mother. The mask is optional and is not required for progression. Use the ladder behind the arena to continue toward the Tomb of the Giants.
- Defeat Pinwheel.
- Collect the Rite of Kindling.
- Treat the random mask as an optional reward.
Enter the Tomb of the Giants with illumination ready
Equip a Skull Lantern, cast Cast Light, or wear the Sunlight Maggot before proceeding. The Skull Lantern occupies the left-hand slot and must be raised to illuminate the area, so lower it when you need to guard or perform another left-hand action. If you lack one, an obtainable Skull Lantern is associated with the Tomb’s Patches pit route.
Follow the glowing markers and move from ledge to ledge. Giant Skeletons can knock you into unseen drops, so fight from wider ground and pull enemies one at a time. After the opening descents, locate Patches and the ladder toward the first Tomb bonfire. Rest there before taking optional detours or continuing deeper.
- Equip a Skull Lantern, Cast Light, or Sunlight Maggot.
- Use the glowing markers as route landmarks.
- Activate the first Tomb of the Giants bonfire.
Decide whether to take Patches’s optional pit
Speak with Patches near the first Tomb bonfire. His trap drops you into a pit containing Reah of Thorolund and her companions, along with useful items including a Skull Lantern. Take this detour only if you want those items or related NPC interactions. Defeat the hostile enemies carefully, collect what you need, and climb back out.
If you want the Gravelord Servant covenant, arrange it before killing Nito. In the Catacombs, near the Titanite Demon and a room of coffins, obtain at least one Eye of Death and interact with the protruding coffin. After waiting in it, you are transported to Nito’s covenant chamber. Pray at the sarcophagus to join. This covenant is optional and has no effect on the required route to Nito.
- Use Patches’s pit for optional items or the Skull Lantern if needed.
- Join Gravelord Servant before killing Nito if you want the covenant this cycle.
- Carry at least one Eye of Death when using the Catacombs coffin.
Reach the deeper Tomb bonfire
Continue through the Tomb’s ledges and tunnels after the Patches area. Expect Giant Skeletons, archers, Skeleton Beasts, and Bone Towers. Use walls to reduce the number of attack angles, kill archers when they are directly supporting a dangerous fight, and avoid allowing Skeleton Beasts to surround you. Do not fight every enemy if a safe route past them is available.
Find and activate the deeper Tomb bonfire before approaching Nito. This bonfire is the main retry point for the boss route. If you are carrying a large number of souls, consider spending them or securing them before making repeated attempts through the dark corridors.
- Use walls and corners to limit enemy approaches.
- Avoid unnecessary fights that consume Estus before the boss.
- Activate the deeper Tomb bonfire.
Pass the open golden fog gate and defeat Gravelord Nito
Because this chapter follows the Lordvessel-placement stage, the golden fog gate beyond the Tomb route is open. From the deeper bonfire, follow the path through the remaining enemies to Nito’s fog door. Kill only enemies that block your route; every unnecessary fight increases the chance of entering the arena without enough healing.
At the start of the fight, remain near the entrance side of the cavern instead of running deep into the arena. Nito uses sweeping sword attacks, a close-range burst, and a Gravelord ground attack that can strike from below. Keep stamina available for an emergency roll and heal after creating distance. Focus on Nito rather than clearing every skeleton. If ordinary skeletons interfere, remove only the ones threatening your position; a Divine weapon can prevent ordinary skeletons from reviving, but it is not mandatory.
When Nito falls, collect his Lord Soul. It is one of the four specific Lordvessel offerings required before the Kiln of the First Flame opens. Confirm the reward, then use the nearby bonfire or a Homeward Bone to leave rather than making an unnecessary return trip through the entire Tomb.
- Pass the open golden fog gate after Lordvessel placement.
- Keep Nito near the entrance side of the arena.
- Collect Gravelord Nito’s Lord Soul after the victory.
Before you move on
- Pinwheel is defeated and the Rite of Kindling is in your inventory.
- You activated the Catacombs bonfires needed for your return route and activated the first and deeper Tomb of the Giants bonfires.
- You entered the Tomb with a reliable light source and reached the deeper bonfire without treating the area as a blind sprint.
- If desired, you joined Gravelord Servant before killing Nito and had an Eye of Death available for the coffin.
- You passed the open golden fog gate and defeated Gravelord Nito.
- Gravelord Nito’s Lord Soul is in your inventory or has been safely retained for the Lordvessel offerings.
References for this chapter
Duke’s Archives and the Crystal Cave — Seath and the Soul of a Lord
The Lordvessel must already be placed at the Firelink Altar before this chapter can be completed. Once it is placed, enter the golden fog route from Anor Londo and work through the Duke’s Archives. The first encounter with Seath the Scaleless is scripted and cannot be won; allow it to end so the game sends you to the Archive Tower prison. Escape with the prison keys, reopen the archive route, collect optional items if wanted, and follow the falling snow across the Crystal Cave’s invisible paths. Destroy the Primordial Crystal in Seath’s arena before attacking him. His Bequeathed Lord Soul Shard is required to open the Kiln of the First Flame after the other Lord Soul areas are complete.
Confirm the Lordvessel prerequisite and reach the Archives
Do not attempt this route before placing the Lordvessel at the Firelink Altar. The Duke’s Archives and its golden fog entrance remain sealed until that placement has occurred. If you have only received the Lordvessel from Gwynevere but have not yet delivered it to the altar, return to Firelink Shrine and complete that step first.
From the first Anor Londo bonfire, take the route toward the large golden fog entrance. Ride the rotating elevator down, pass the armored Crystal Soldier and the first archive defenses, then enter the library. Activate the bonfire inside the Archives before fighting through the upper floors. Crystal Soldiers can deal heavy physical damage, while Channelers can strengthen enemies and attack through open sightlines. Use bookcases and pillars for cover, pull enemies one at a time, and spend excess souls before approaching Seath’s first room.
- The Lordvessel is placed at the Firelink Altar.
- The golden fog route from Anor Londo is open.
- The first Duke’s Archives bonfire has been activated.
- Souls are spent or protected before the scripted Seath encounter.
Trigger the first Seath encounter and escape the prison
Continue upward through the library and pass the Crystal General to reach Seath. The Primordial Crystal protects him during this encounter, so the fight cannot be won. Allow Seath to kill you. If you want to preserve your current souls and Humanity, equip a Ring of Sacrifice or Rare Ring of Sacrifice before entering the room. The death is part of the intended progression and places you in the Archive Tower prison.
Rest at the prison bonfire, then descend through the tower. Kill or bypass the Serpent Soldiers until you obtain the Archive Tower Cell Key. This key opens the initial cell route and is separate from the keys used later. Continue through the prison rather than trying to use a Homeward Bone to return to the previous Archives bonfire; the prison bonfire remains your return point during this sequence.
Near the lower section, locate the gramophone and the surrounding prison route. The Archive Tower Giant Door Key is in a chest behind the gramophone, guarded by Serpent Soldiers and a Serpent Mage. Take the key, return to the upper landing, and use it on the large doors above the ladder. That exit reconnects the prison to the main archive route.
- Do not waste time attacking Seath in the first room.
- Obtain the Archive Tower Cell Key.
- Obtain the Archive Tower Giant Door Key behind the gramophone.
- Use the Giant Door Key to leave the prison tower.
Reopen the library route and handle optional items
After leaving the prison, return through the archive chambers until you reach the library’s balcony bonfire. The central rotating staircase connects the different floors. Operate it when a landing is out of reach, then use the resulting route to reduce the distance between the bonfire, the archive rooms, and the prison exit.
Behind the removable bookcases near the route to the Crystal Cave is a treasure room. Search the chests carefully. The Crystal Ember is optional and belongs to the Giant Blacksmith in Anor Londo; it enables the Crystal weapon path from a sufficiently upgraded normal weapon. The same area contains the Archive Tower Giant Cell Key. This key is not the prison exit key. It opens Big Hat Logan’s giant cell in the lower prison tower.
If you want Logan’s complete sequence, return to the prison, defeat or bypass the Pisacas, and use the Giant Cell Key on his cell. Speak to Logan, then find him later in the archive library. His advanced sorceries are optional. The Fire Keeper Soul on the body inside the giant cell is also optional, but it can be given to a Fire Keeper to reinforce the Estus Flask. If Logan is not freed before Seath dies, the game can move him to his later archive location automatically; the prison Fire Keeper Soul still requires returning to the cell.
- Operate the rotating staircase to establish the archive shortcut.
- Collect the Crystal Ember only if the Crystal upgrade path is useful.
- Use the Archive Tower Giant Cell Key if Logan’s quest or the Fire Keeper Soul is wanted.
- Do not confuse the three Archive Tower keys.
Cross the crystal courtyard and navigate the invisible paths
From the reopened archive route, descend toward the outdoor crystal courtyard. Crystal Golems can be fought for souls and upgrade materials, but clearing every one is unnecessary. Follow the crystal slope toward the large drop and the entrance to the Crystal Cave. Bring Prism Stones, arrows, or another safe way to test the ground if you are unfamiliar with the route.
The Crystal Cave has four invisible paths. Falling snow reveals their surfaces. Three paths are needed to reach Seath, while the fourth provides a return route after the boss. Walk rather than sprint. On the first path, cross toward the corpse holding Humanity. Continue over the visible crystal formations, then use the next snow-marked path near the Moonlight Butterfly. Follow the crystals until the route drops onto the third invisible path near the final cavern.
The Giant Crystal Golems and the optional Blue Titanite Slab route are not required. In the final cavern, kill or bypass the Man-Eater Shells before entering Seath’s arena. During the initial visit there is no normal fog barrier between the clam cavern and the arena, so surviving shells can follow you into the boss fight.
- Use falling snow to identify invisible surfaces.
- Test uncertain sections with Prism Stones or arrows.
- Treat the optional golem, lizard, and slab routes as separate from the main path.
- Clear or evade the Man-Eater Shells before approaching Seath.
Break the Primordial Crystal and defeat Seath
Enter the arena and move toward the large Primordial Crystal behind Seath. Until it is destroyed, Seath is effectively invulnerable. Strike the crystal, then immediately move away from the expanding crystal formations and reposition near Seath’s side. Do not remain directly in front of him while the arena fills with dangerous crystal growths.
Seath’s breath and crystal attacks cover sections of the floor and build Curse. Curse resistance can give you more margin for error, but positioning and movement are the main defenses. Avoid standing in the crystal fields, retreat when Seath begins a wide area attack, and return for short attacks after the formation passes. If Curse is inflicted, use a Purging Stone or visit a qualified healer before continuing, because Curse reduces maximum health and can make later attempts much harder.
For a normal victory, attack Seath’s side or rear and avoid long attack strings. The Moonlight Greatsword is optional and requires cutting the middle portion of his tail during the real fight. The outer tentacles do not produce the weapon. Attempt the tail cut only if you can maintain control of your position; defeating Seath does not require it.
- Destroy the Primordial Crystal before trying to deal normal damage.
- Watch Curse buildup and avoid standing in crystal formations.
- Attack from the side or rear after the crystal breaks.
- Cut the middle tail only if the Moonlight Greatsword is desired.
Collect the Lord Soul and finish the Archives
Seath’s defeat awards the Bequeathed Lord Soul Shard. Confirm that it is present in your inventory before leaving. This shard is one of the four required Lord Soul rewards for opening the Kiln of the First Flame; the other required rewards come from the Four Kings, Gravelord Nito, and the Bed of Chaos.
Return to the first Seath room after the boss dies. A chest there contains the Large Magic Ember, which is optional and can be given to Rickert of Vinheim to extend the Magic weapon upgrade path. If Logan’s quest is active, check his library location and complete any desired purchases or later interactions. These rewards are not required for campaign progression.
When finished, warp from the Archives balcony bonfire or the Crystal Cave bonfire to your next Lord Soul area. If you need to return through the cave without warping, use the fourth invisible path as the escape route. The chapter is complete when Seath is dead, the Lord Soul Shard is secured, and the character can continue toward the remaining late-game areas.
- Seath the Scaleless is dead.
- The Bequeathed Lord Soul Shard is in the inventory.
- The Large Magic Ember has been collected if the Magic upgrade path is wanted.
- Optional Logan, Fire Keeper Soul, and Crystal Ember objectives are complete if desired.
- The character can warp or safely leave the Archives and proceed to another Lord Soul area.
Before you move on
- The Lordvessel was placed before entering the Duke’s Archives.
- Seath the Scaleless has been defeated in the Crystal Cave.
- The Bequeathed Lord Soul Shard is visible in the inventory.
- The Archive Tower Giant Door Key was used to escape the prison.
- The Crystal Ember and Large Magic Ember were collected if the chosen build requires them.
- Big Hat Logan and the prison Fire Keeper Soul were handled if those optional goals were desired.
- The character can warp away from the Archives and continue toward the Four Kings, Gravelord Nito, or the Bed of Chaos.
References for this chapter
- DARK SOULS REMASTERED — Official Bandai Namco product page
- The Duke’s Archives — Dark Souls Wiki
- Crystal Cave — Dark Souls Wiki
- Seath the Scaleless — Dark Souls Wiki
- Archive Tower Giant Door Key — Dark Souls Wiki
- Archive Tower Giant Cell Key — Dark Souls Wiki
- Big Hat Logan — Dark Souls Wiki
- Crystal Ember — Dark Souls Wiki
- Large Magic Ember — Dark Souls Wiki
- Dark Souls Wiki — Lordvessel
Demon Ruins and Lost Izalith — lava, chaos, and the Lord Soul path
After placing the Lordvessel, return to the Demon Ruins beneath Quelaag’s Domain. Defeat Ceaseless Discharge if necessary, then proceed through the deeper ruins to Demon Firesage and Centipede Demon on the standard route. Centipede Demon awards the Orange Charred Ring, which reduces lava damage enough to cross into Lost Izalith. Activate the bonfires along the route, including the hidden bonfire behind an illusory wall near the Bed of Chaos approach. A Chaos Servant rank of +2, normally reached by offering 30 Humanity to Quelaag’s Sister, opens the Demon Ruins shortcut to Lost Izalith and can bypass the two Demon Ruins bosses. Bed of Chaos is a staged encounter: destroy one side, repeat on the other, then cross the exposed center path and strike the core. Side progress remains after death. Victory awards the Lord Soul from the Bed of Chaos, one of the four Lord Soul offerings required before the Kiln of the First Flame opens.
1. Unlock the lower Demon Ruins route
Enter the Demon Ruins through the passage beyond Quelaag’s Domain. If the upper lava is still covering the route, defeat Ceaseless Discharge first. His defeat drains the lava and exposes the path through the upper ruins. The deeper yellow fog gates remain sealed until the Lordvessel has been placed at the Firelink Altar, so return to that objective before trying to force the standard route.
Use the bonfire near the Chaos Servant covenant as your first checkpoint. Proceed through the large demon chambers by drawing enemies away from groups. Capra Demons, Taurus Demons, and other large enemies can overwhelm a character who fights in the center of the room, but several can be bypassed once the route is familiar. Clear only what you need for a safe return trip, then recover any unspent souls before advancing.
- Defeat Ceaseless Discharge if the upper lava still blocks the route.
- Place the Lordvessel before attempting to pass the deeper yellow fog gates.
- Activate the bonfire near the Chaos Servant covenant.
2. Defeat Demon Firesage
Continue through the opened ruins to the Demon Firesage fog gate. Rest at the nearby lower Demon Ruins bonfire before attempting the fight, and clear enemies near the approach if you intend to summon. Demon Firesage combines broad club swings with a jumping explosion and ground-based area attacks. Stay beside the boss rather than directly in front, punish the end of its ordinary swings, and retreat when it raises its weapon for an explosive attack.
The arena pillars can interrupt the boss’s movement, but backing into them can also leave you trapped. Keep enough space to roll around the boss and do not trade hits during the area attacks. After victory, follow the route downward and activate the bonfire before the Centipede Demon approach. This checkpoint is separate from the Lost Izalith bonfires, so do not assume that lighting one has secured the next area.
- Rest at the lower Demon Ruins bonfire before the fight.
- Punish recovery windows instead of trading through explosive attacks.
- Activate the checkpoint before the Centipede Demon route.
3. Defeat Centipede Demon and obtain lava protection
From the lower Demon Ruins bonfire, descend to the Centipede Demon fog gate. Solaire’s summon sign may be available near the approach if the relevant quest conditions are satisfied and your character is human. At the beginning of the fight, move toward a solid platform. The initial arena gives you little room, and being pushed into lava is usually more dangerous than the boss’s direct damage.
Centipede Demon uses a grab, sweeping limbs, jumping attacks, and fire bursts. Attack briefly after a swing or leap, then reposition before the boss can surround you. Avoid fighting with your back to the lava. Defeating the boss awards the Orange Charred Ring. Equip it before crossing the lava basin. It greatly reduces lava damage, but magma still drains health, so cross between solid islands and do not treat the ring as complete immunity.
- Rest before entering the Centipede Demon fog gate.
- Move toward solid ground at the start of the fight.
- Equip the Orange Charred Ring after the victory.
4. Cross into Lost Izalith and activate its bonfires
Leave the Centipede Demon arena and cross the lava basin with the Orange Charred Ring equipped. Move from one solid island or ruined structure to the next, healing before entering exposed magma. Bounding Demons can knock you from safe ground with their lunges, so bypass them unless you are deliberately collecting a nearby item.
Follow the roots and ruined structures toward Lost Izalith. Activate the bonfire on the route as soon as you find it, then search the lower wall of the dark rectangular tower for an illusory wall concealing another bonfire. The hidden bonfire is the most practical normal checkpoint for Bed of Chaos attempts. Before entering the fog, explore any optional branch you intend to complete, because leaving after the boss is defeated is normally done by warping from a bonfire.
- Keep the Orange Charred Ring equipped while crossing the lava.
- Use solid ground to recover rather than lingering in magma.
- Find and activate the hidden bonfire behind the illusory wall.
5. Open the Chaos Servant shortcut if available
If you joined the Chaos Servant covenant and reached rank +2, open the sealed shortcut door in the Demon Ruins. Reaching that rank normally requires offering a total of 30 Humanity to Quelaag’s Sister. The shortcut connects the Demon Ruins to Lost Izalith and can make Demon Firesage and Centipede Demon optional, which is useful when preparing repeated Bed of Chaos attempts.
The shortcut is optional and is not required to complete the chapter. Make sure you are still eligible to open it before relying on it; leaving the covenant can reduce your effective rank. If the door is unavailable, use the standard route and the activated bonfires. In Lost Izalith, bypass unnecessary Bounding Demons, Chaos Eaters, and statues rather than turning every approach into a full-area fight.
- Confirm Chaos Servant rank +2 before relying on the shortcut.
- Offer 30 Humanity in total under the normal covenant progression.
- Use the shortcut for retries only if it is open and available.
6. Defeat Bed of Chaos and claim its Lord Soul
Reach the Bed of Chaos fog gate from the hidden Lost Izalith bonfire or the Chaos Servant shortcut. At the start of the fight, move toward one side and destroy the glowing weak point there. Retreat before the sweeping branches or collapsing floor kills you. Repeat the process on the opposite side. Each destroyed side remains destroyed after death, so successful attempts permanently advance the encounter even when the character dies before reaching the center.
Once both sides are gone, enter the arena again and follow the exposed central route. The floor is narrow, and the boss can still sweep you into the pit. Wait for a safe opening, move forward, and strike the insect-like core at the end. Bed of Chaos does not use a conventional health-bar exchange; movement, timing, and short attempts are safer than trying to force repeated attacks.
After victory, collect the Lord Soul from the Bed of Chaos and activate the nearby bonfire. This is the Lord Soul associated with the Witch of Izalith, not a Bequeathed Lord Soul Shard. It is one of the four required Lord Soul offerings: the other three come from Gravelord Nito, Seath the Scaleless, and the Four Kings, with the latter two being Bequeathed Lord Soul Shards. The Kiln becomes available only after all four have been offered to the Lordvessel.
- Destroy both glowing side weak points before attempting the center.
- Expect side progress to remain after death, but recover lost souls separately.
- Reach the central core and strike it after both sides are destroyed.
- Confirm that the Lord Soul from the Bed of Chaos is present among the key items.
- Count it as one of the four Lord Soul offerings required for the Kiln.
Before you move on
- Ceaseless Discharge is defeated if required to drain the upper lava.
- Demon Firesage and Centipede Demon are defeated on the standard route, or the Chaos Servant shortcut has been opened and used to bypass them.
- The Orange Charred Ring is in the inventory and was used for the normal lava crossing.
- The lower Demon Ruins bonfire and at least one Lost Izalith bonfire have been activated.
- Bed of Chaos is defeated and the Lord Soul from the Bed of Chaos is visible among the key items.
- The Bed of Chaos Lord Soul is ready to be counted with Gravelord Nito’s Lord Soul and the Bequeathed Lord Soul Shards from Seath and the Four Kings before entering the Kiln of the First Flame.
Artorias of the Abyss DLC — entry and optional ending content
Artorias of the Abyss is included in Dark Souls: Remastered on PS4. The DLC is optional, but complete it before Gwyn if you want its boss souls, weapons, spells, rings and other rewards during the current playthrough; defeating Gwyn advances the character toward NG+. Begin by defeating the Hydra in Darkroot Basin and rescuing Dusk of Oolacile from the Golden Crystal Golem behind the lake. After obtaining the Lordvessel in Anor Londo, place it at the Firelink Altar. Then reach the Duke’s Archives, defeat the correct Crystal Golem to obtain the Broken Pendant, and use the disturbance at the Hydra’s former arena to enter Oolacile. The required DLC bosses are Sanctuary Guardian, Knight Artorias and Manus, Father of the Abyss. Black Dragon Kalameet is optional: trigger his appearance, ask Hawkeye Gough to shoot him down, then fight him in the lower canyon. Rescue the small Sif during the Chasm descent if you want Sif’s summon sign inside Manus’s arena. Preserve the Souls of Artorias and Manus until you decide which exchanges suit your build. After finishing the DLC, return to Lordran and continue the main campaign before entering the Kiln.
1. Defeat the Hydra and rescue Dusk of Oolacile
Reach the Hydra’s lake in Darkroot Basin and defeat the Hydra. Fight from the shoreline or shallow water, keep the camera aimed toward the heads, and move sideways when it fires water projectiles. When a head lunges toward land, attack during its recovery, then retreat before another head strikes. Do not chase a head into deep water; the drop-off can kill you immediately.
After the Hydra dies, reload the area by resting at a bonfire or leaving and returning. Walk around the back of the lake, where a Golden Crystal Golem appears. Defeat it to free Dusk of Oolacile, then speak with her until her dialogue is exhausted. Her summon sign and merchant services are optional; rescuing her is the condition needed for the Broken Pendant sequence.
- Hydra defeated in Darkroot Basin.
- Golden Crystal Golem behind the lake defeated.
- Dusk of Oolacile rescued and spoken to.
2. Obtain the Broken Pendant and enter the past
Continue through the main campaign to Anor Londo, defeat Ornstein and Smough, and obtain the Lordvessel. Before attempting to collect the Broken Pendant, place the Lordvessel at the Firelink Altar. Speak with Kingseeker Frampt and accept his transport to the altar for the standard route, or use the appropriate Kaathe route if you deliberately pursued the Darkwraith path. Merely possessing the Lordvessel is not enough: the vessel must actually be placed before the Archives Crystal Golem can provide the pendant.
With Dusk rescued and the Lordvessel placed, enter Duke’s Archives from Anor Londo. Progress through the opening archive section until the first Crystal Golem area near the library entrance. Defeat the Crystal Golem there to receive the Broken Pendant. If the golem was killed before the correct conditions were active, reload the area and return; it respawns and can drop the item once the prerequisites are satisfied.
Return to Darkroot Basin and go to the lake where the Hydra was defeated. At the rear of the lake, examine the black disturbance in the air and accept the prompt to enter it. You arrive in Oolacile Sanctuary. Light and rest at the bonfire before leaving, because this is the DLC’s first reliable checkpoint and return point.
- Lordvessel obtained in Anor Londo.
- Lordvessel placed at the Firelink Altar.
- Duke’s Archives reached after placement.
- Broken Pendant obtained from the Archives Crystal Golem.
- Black disturbance examined and Oolacile Sanctuary entered.
3. Clear Sanctuary Garden and defeat Sanctuary Guardian
From Oolacile Sanctuary, follow the short path into Sanctuary Garden. Sanctuary Guardian uses fast charges, lightning projectiles, a tail lightning attack and a leaping strike. Keep enough distance to see the charge begin, but do not retreat endlessly into the arena wall. Roll diagonally or toward the side of incoming lightning instead of moving straight backward.
Use the recovery after a missed charge, completed tail attack or landing leap as your main opening. Avoid attacking directly in front of the guardian after a single hit; its recovery is short and it can immediately begin another attack. Ranged characters should fire after an attack has finished rather than while the guardian is closing distance. Defeating Sanctuary Guardian awards its soul and opens the route into the Royal Wood.
- Sanctuary Guardian defeated.
- Guardian Soul collected or intentionally retained for later use.
- Royal Wood route opened.
4. Cross the Royal Wood and defeat Knight Artorias
Follow the Royal Wood’s main route toward the large stone coliseum. Use the bonfire along the route as your reset point, and speak with Marvelous Chester if you want his optional merchandise. Continue across the bridge and through the forest until the coliseum entrance comes into view; Knight Artorias waits inside.
Fight Artorias at a range where his sword swings remain visible without allowing him to corner you. Roll through his long combinations and punish only after the final swing, a missed lunge or a completed leap. When he retreats and begins charging dark energy, attack to stagger him if your weapon can interrupt the charge safely. Otherwise retreat to the far side of the arena and prepare for his empowered attacks. Do not spend all stamina attacking his shield or armor; reserve enough for the next roll.
After victory, collect the Soul of Artorias. Lord’s Blade Ciaran appears near the arena. Giving her the soul provides the Gold Tracer and Dark Silver Tracer. Keeping the soul allows the Abyss Greatsword to be created at the Giant Blacksmith from a suitable upgraded greatsword or ultra greatsword. Decide before consuming or exchanging the soul.
- Knight Artorias defeated.
- Soul of Artorias preserved until the intended reward is chosen.
- Ciaran’s optional encounter handled.
5. Descend through Oolacile Township and defeat Manus
Continue from the Royal Wood into Oolacile Township. Find the Crest Key in the township and use it to open Hawkeye Gough’s tower. Gough does not need to shoot Kalameet before you fight Manus. Follow the Township route downward, activate shortcuts and bonfires, and enter the Chasm of the Abyss.
During the Chasm descent, follow the path associated with Alvina and watch for the point where she disappears. Search that area for an illusory wall, then pass through and defeat the Humanity enemies to reach the small Sif. Interact with Sif before entering Manus’s fight if you want the altered sequence and Sif’s summon sign. This rescue is optional and is not required to defeat Manus.
Reach the deepest bonfire and enter Manus’s arena. Stay close enough to read his physical arm attacks, roll through the end of his combinations and heal only after a combo has finished. When the dark-magic barrage forms around you, use the Silver Pendant as the projectiles converge to block the attack. Sif’s summon sign, if unlocked, is inside the arena near the starting location rather than outside the fog gate.
Defeating Manus awards the Soul of Manus and Humanity. Do not consume the soul automatically: it can be used for the Manus Catalyst or exchanged through the appropriate special trade for Pursuers. Choose the reward before spending it.
- Crest Key obtained and Gough’s tower opened.
- Small Sif rescued before Manus if the optional summon is wanted.
- Manus defeated.
- Soul of Manus preserved or exchanged deliberately.
6. Trigger and defeat optional Black Dragon Kalameet
To make Kalameet fightable, travel through the lower canyon beyond Oolacile Township and approach far enough for the dragon to appear and attack. This first encounter is not the full boss battle. Return to Hawkeye Gough’s tower, exhaust his dialogue and agree when he offers to help. Gough then shoots Kalameet down, allowing the dragon to be fought on the lower battlefield.
Use the Township shortcuts to return to the dragon’s arena. Kalameet uses fire breath, dark breath, charges, wing attacks and aerial repositioning. Watch the head and shoulders rather than standing directly in front of the mouth. Move sideways when ordinary fire begins, but retreat from dark flame that remains on the ground. Attack after a breath ends or a charge clearly misses, then disengage before the dragon turns.
The Obsidian Greatsword requires severing Kalameet’s tail during the grounded battle. This is optional and difficult; defeating the dragon without the tail cut still completes the DLC. A normal victory awards the Calamity Ring. Afterward, speak with Gough and revisit Elizabeth in Oolacile Sanctuary for their post-boss dialogue.
- Kalameet’s first canyon appearance triggered.
- Hawkeye Gough asked to shoot Kalameet down.
- Kalameet defeated.
- Obsidian Greatsword obtained if the tail was severed; Calamity Ring collected.
- Elizabeth and Gough revisited if their optional dialogue is wanted.
Before you move on
- Dusk was rescued, the Lordvessel was obtained and placed at the Firelink Altar, the Broken Pendant was obtained from the Duke’s Archives Crystal Golem, and the Darkroot Basin disturbance was used to enter Oolacile.
- Sanctuary Guardian and Knight Artorias were defeated.
- Manus, Father of the Abyss, was defeated; the small Sif was rescued if the optional summon was desired.
- Kalameet was triggered, grounded by Hawkeye Gough and defeated if the optional boss was pursued.
- The Souls of Artorias and Manus were preserved or exchanged according to the intended build.
- The player returned to Lordran and confirmed that the main campaign remains available before Gwyn.
- If current-cycle DLC rewards were wanted, the DLC was completed before entering the Kiln and defeating Gwyn.
References for this chapter
- PlayStation Store — DARK SOULS: REMASTERED PS4 product page
- Dark Souls Wiki — Broken Pendant
- Dark Souls Wiki — Firelink Altar
- Dark Souls Remastered Walkthrough — Manus, Father of the Abyss
- Dark Souls Remastered Walkthrough — Chasm of the Abyss
- Dark Souls Remastered Walkthrough — Return to Firelink Shrine and Placing the Lordvessel
Preparing for the Kiln: last-minute clean-up and NPC closure
Before entering the Kiln of the First Flame, finish the current-cycle quests, covenant rewards, DLC, optional bosses, equipment upgrades and boss-soul crafting that you do not want to repeat. The Kiln opens only after the Lordvessel accepts four specific progression rewards: Gravelord Nito’s Lord Soul, the Bed of Chaos’s Lord Soul, Seath the Scaleless’s Bequeathed Lord Soul Shard and the Four Kings’ Bequeathed Lord Soul Shard. These are separate from ordinary boss souls used for boss weapons, spells, miracles and pyromancies. Opening the Kiln does not start New Game Plus. The irreversible transition occurs only after Gwyn is defeated, an ending is selected and the ending sequence finishes. Treat this chapter as the final preparation checkpoint: once the Kiln is open, complete all desired cleanup before entering Gwyn’s fog gate.
1. Confirm the Lordvessel route and required offerings
Return to the Firelink Altar through Kingseeker Frampt or Darkstalker Kaathe after obtaining the Lordvessel. If it has not yet been placed, decide which serpent route you want first. Defeating the Four Kings before placing the Lordvessel allows Kaathe to appear in the Abyss and can preserve the Darkwraith covenant route. Using Frampt to place the Lordvessel first is the standard route, but it normally prevents Kaathe from appearing for that recruitment during the current cycle.
Check the altar and confirm that it has accepted the four required progression rewards: Gravelord Nito’s Lord Soul, the Bed of Chaos’s Lord Soul, Seath the Scaleless’s Bequeathed Lord Soul Shard and the Four Kings’ Bequeathed Lord Soul Shard. Nito and the Bed of Chaos provide Lord Souls; Seath and the Four Kings provide Bequeathed Lord Soul Shards. The Kiln requires this specific set rather than four arbitrary boss souls.
Keep these offerings separate from ordinary boss souls. Other bosses provide souls that may be used at the appropriate blacksmith or trainer for boss weapons, spells, miracles or pyromancies. Before consuming one for ordinary souls, check whether it has a reward you still want. The four Lordvessel offerings are progression items for opening the Kiln, not substitutes for ordinary boss-soul crafting.
Once all four rewards have been accepted, the sealed entrance to the Kiln opens. This does not teleport you to Gwyn, erase unfinished quests or begin New Game Plus. You can leave the altar, warp to eligible bonfires and finish other content before entering the final fog gate.
- The Lordvessel is placed at the Firelink Altar.
- Nito’s Lord Soul has been offered.
- The Bed of Chaos’s Lord Soul has been offered.
- Seath’s Bequeathed Lord Soul Shard has been offered.
- The Four Kings’ Bequeathed Lord Soul Shard has been offered.
- Desired ordinary boss-soul crafts are complete before relevant ordinary souls are consumed.
- The Kiln is open, but Gwyn has not yet been defeated.
2. Finish NPC quests and preserve desired outcomes
Visit NPCs whose dialogue, rewards or final locations matter to you. Check Solaire of Astora, Siegmeyer and Sieglinde of Catarina, Rhea of Thorolund, Big Hat Logan, merchants and covenant leaders. Characters can leave Firelink Shrine after story events, so search their later locations and exhaust dialogue until it repeats. Gwyn’s defeat ends the current cycle after the ending sequence; you cannot return to the pre-Gwyn world to repair unfinished NPC quests.
If you want Solaire available for Gwyn, prevent his Lost Izalith quest failure. Reach rank +2 in the Chaos Servant covenant to open the shortcut from the Demon Ruins into Lost Izalith. Before Solaire reaches the area through the normal route, use the shortcut and kill the unique red-eyed Chaos Bug. It drops the Sunlight Maggot. Afterward, locate Solaire in the shortcut area and speak with him. His summon sign can then become available near Gwyn, provided you are human and the usual summoning conditions are met.
Solaire’s survival is optional for campaign completion. You do not need him to defeat Gwyn or finish the game. Apply the same planning principle to Siegmeyer, Sieglinde, Rhea and Logan: complete the sequence and collect the desired reward now, or record the missed step for a later cycle rather than assuming it can be repaired after the credits.
- Desired NPC dialogue and rewards are complete.
- Solaire’s Chaos Bug condition is complete if his Gwyn summon is wanted.
- Siegmeyer, Sieglinde, Rhea and Logan have been checked at their current locations.
- No NPC has been killed unless that result is intentional.
- Missed quest steps are recorded for NG+.
3. Complete covenant and ending preparations
Finish covenant ranks, purchases and rewards that matter to this character before entering Gwyn’s arena. For the Darkwraith covenant, obtain the Covenant of Artorias from Great Grey Wolf Sif, defeat the Four Kings before placing the Lordvessel through Frampt, and speak with Kaathe in the Abyss afterward. This route is optional and is not required for either ending.
Do not confuse serpent route or covenant membership with the ending choice. After Gwyn is defeated, the character stands in the arena beside the First Flame. Touch the arena bonfire to link the fire, or leave the arena without touching it to receive the Dark Lord ending. Placing the Lordvessel does not select an ending, and joining the Darkwraiths does not automatically produce the Dark Lord ending.
If you intend to summon, reverse hollowing at a bonfire before entering the final approach, keep online play enabled and check near Gwyn’s fog gate for summon signs. You must be human to summon. Solaire’s sign also depends on his quest state and on Gwyn remaining alive.
- Desired covenant ranks and rewards are complete.
- The Frampt or Kaathe route is settled.
- The intended ending is understood before entering Gwyn’s arena.
- Humanity and online settings are ready if co-op is planned.
4. Repair, reinforce and organize the final loadout
Visit a blacksmith before entering the Kiln. Repair the main weapon, backup weapon, shield, armor and casting equipment. Upgrade weapons as far as your materials and build justify, and carry a backup weapon if the primary has poor durability or an inconvenient damage type. Check equipment burden so the final loadout gives you the roll speed you intend to use.
Use Fire Keeper Souls at an appropriate Fire Keeper if you want stronger Estus healing, and kindle the bonfire you expect to use if you want that specific bonfire to provide more flask uses. Estus reinforcement improves each flask’s healing; kindling changes how many flasks a bonfire supplies. They are separate systems.
The Kiln bonfire is a checkpoint and resting point, not a blacksmith. Repair and reinforce before the final approach. Attune the spells, miracles or pyromancies intended for Gwyn and equip the correct catalyst, talisman or Pyromancy Flame. Buy or organize healing, resins, ammunition and other consumables that fit your build.
- All final equipment is repaired.
- Primary and backup weapons are upgraded.
- Estus reinforcement is complete if wanted.
- The intended bonfire is kindled if more flask uses are needed.
- Spells and casting tools are equipped.
- Final consumables are ready.
5. Finish optional content before entering Gwyn’s arena
Complete optional content that you do not want to repeat in New Game Plus. This can include the Painted World of Ariamis, Darkroot Garden and Basin, the Great Hollow, Ash Lake, optional bosses, covenant rewards, rare weapon upgrades, tail cuts, merchant purchases and remaining DLC. Dark Souls Remastered on PS4 includes Artorias of the Abyss, so complete its access sequence and bosses now if you want those rewards in the current cycle.
Spend excess souls on levels, repairs, ammunition and consumables, and recover bloodstains when practical. The Kiln’s Black Knights respawn after an area reset, making the route useful for practice and some final material gathering. The Kiln bonfire still cannot perform weapon reinforcement or repairs.
Enter Gwyn’s fog gate only after the cleanup list is complete. If something is unfinished, leave it deliberately deferred and record it for NG+. Once Gwyn is defeated, choose the desired ending in the arena and allow the ending sequence to finish; that is when the character advances into New Game Plus rather than returning to the pre-Gwyn world.
- Optional areas and Artorias of the Abyss are complete or deliberately postponed.
- Ordinary boss-soul crafts are finished before relevant ordinary souls are consumed.
- The four Lordvessel progression rewards have been offered separately and the Kiln is open.
- Merchant purchases, covenant rewards, tail cuts and weapon goals are complete or intentionally deferred.
- Final weapon, backup equipment, armor, Estus, spells, catalysts and consumables are ready.
- Current-cycle cleanup is complete or deliberately deferred.
- Gwyn has not yet been defeated; the character is ready to enter the final fog gate.
Before you move on
- The Lordvessel is placed at the Firelink Altar.
- The altar has accepted Nito’s Lord Soul, the Bed of Chaos’s Lord Soul, Seath’s Bequeathed Lord Soul Shard and the Four Kings’ Bequeathed Lord Soul Shard.
- The four progression rewards are recorded separately from ordinary boss souls used for weapons, spells, miracles and pyromancies.
- Desired ordinary boss-soul crafts were completed before relevant ordinary souls were consumed.
- NPC quests, covenant steps, optional bosses, DLC content and equipment goals are complete or deliberately deferred.
- The final weapon, backup equipment, armor, Estus, spells, catalysts and consumables are prepared.
- The Kiln of the First Flame is open and Gwyn has not yet been defeated.
- The player is ready to enter Gwyn’s fog gate, with the ending choice and any desired summon plan understood.
Kiln of the First Flame — Gwyn, Lord of Cinder
Enter the Kiln only after the Lordvessel has accepted all four required offerings: Gravelord Nito’s Lord Soul, the Bed of Chaos’s Lord Soul, Seath the Scaleless’s Bequeathed Lord Soul Shard, and the Four Kings’ Bequeathed Lord Soul Shard. Warp from the Lordvessel or Firelink Altar to the Kiln bonfire, repair and reinforce your equipment beforehand, then cross the ash route guarded by five Black Knights. They respawn after area resets, so either defeat them carefully or learn a controlled run to the fog gate. Gwyn attacks immediately with fast sword strings, a leap, lunge, kick, grab, and overhead strikes. Parrying ordinary attacks is the quickest method, while shields, spacing, the arena’s rocks, and controlled counterattacks provide safer alternatives. After Gwyn dies, collect his soul and choose the ending immediately: light the central bonfire to link the fire, or leave the arena without lighting it for the Age of Dark ending. If you die after Gwyn has been defeated but before choosing, you respawn at the Kiln bonfire with Gwyn still dead and can return directly to the arena. The ending and credits then transition the character into New Game Plus, so finish DLC, quests, upgrades, and optional objectives first.
Verify the four offerings and prepare before entering
The Kiln opens only after the Lordvessel has received all four required offerings. Confirm that the altar accepted Gravelord Nito’s Lord Soul, the Bed of Chaos’s Lord Soul, Seath the Scaleless’s Bequeathed Lord Soul Shard, and the Four Kings’ Bequeathed Lord Soul Shard. These exact rewards unlock the sealed route; checking only that four items were offered can hide a missing progression reward.
Use the warp option at the Lordvessel or Firelink Altar to travel to the Kiln of the First Flame. Rest at the bonfire near the beginning of the area to restore Estus and establish the checkpoint. Repair and reinforce your weapon and armor at a blacksmith before entering. The Kiln bonfire is not a blacksmith and does not provide normal reinforcement services, although a Repairbox lets you repair equipment from a bonfire menu.
Equip the weapon, shield or parrying tool, rings, armor, spells, and consumables intended for the final fight. Reverse Hollowing only if you intend to summon. Human form is required for summoning online phantoms or an available NPC. Solaire’s sign is conditional rather than automatic: his quest must have reached the outcome that leaves him available for this fight.
- Confirm that all four named Lordvessel offerings were accepted.
- Rest at the Kiln bonfire and restore Estus.
- Reinforce and repair equipment before crossing the route.
- Become human only if you plan to summon.
Cross the ash route and handle the five Black Knights
The Kiln approach contains five Black Knights. Two stand along the opening descent. Farther on, another guards the narrow interlocking beams. Continue down toward the greataxe knight, then pass the final halberd knight before the fog gate. The drops and narrow walkways are the main danger, so avoid fighting with your back to an edge.
Pull one knight at a time. Parrying and backstabbing are effective, but a shield block followed by one controlled counterattack is also dependable if you preserve stamina. Ranged attacks can separate a knight from nearby threats. On the beams, wait for a safe position before attacking; a missed roll or a shield impact near the edge can end the attempt immediately.
These five Black Knights respawn after the area resets, including after death. Clear them deliberately if you need practice, Titanite, or their weapon drops. If your only goal is Gwyn, practice the route and then run past them once you can create enough distance. Make sure no knight is directly behind you before entering the fog, because a pursuer can continue attacking during the approach.
- Identify the two Black Knights on the opening slope.
- Cross the narrow beams without fighting beside a drop.
- Pass the greataxe and halberd knights on the lower route.
- Expect the five Kiln knights to return after an area reset.
Recognize Gwyn’s opening and attack patterns
Gwyn applies pressure as soon as you enter the fog. Keep stamina available and do not begin with a slow heal, long spell, or weapon buff while standing in front of him. He often closes with a leap or overhead strike. Roll away from the impact, block if your stamina permits, or prepare to parry if you have already practiced the timing.
His main attacks include rapid sword strings, a forward lunge, a leap or overhead blow, a kick, and a grab that ends in a powerful fire attack. The kick is not parryable and can remove substantial stamina through a shield. The grab is also not a safe parry target; roll away or move behind him when the animation begins. Treat both attacks as reasons to disengage rather than forcing damage.
If you block the start of a sword string, monitor stamina instead of holding the shield indefinitely. A guard break can leave you trapped in the remainder of the combo. Gwyn does not gain a separate later lightning-flurry phase. The encounter remains based on his close-range sword attacks and the openings created when he finishes them.
- Enter with enough stamina for another dodge or block.
- Expect immediate pressure and a fast closing attack.
- Do not attempt to parry the kick or grab.
- Do not wait for a nonexistent later lightning phase.
Use parries, spacing, or the arena safely
Parrying is the fastest strategy once the timing is familiar. Gwyn’s ordinary sword attacks, leap, and lunge can be parried, while the kick and grab cannot. A practical setup is to stand just outside his preferred range and wait for the forward lunge. Parry as the attack reaches you, perform the riposte, then retreat before he resumes pressure. If your timing is unreliable, stop gambling on repeated parries; one mistake can end the attempt.
For a non-parry approach, raise a high-stability shield only for an incoming attack, then lower it to recover stamina. Block one or two hits, circle away from the next swing, and answer with one attack. Heavy weapons can stagger Gwyn, but stop attacking when stamina is low. Use the rhythm of defend, wait for the combo to end, strike once or twice, and reset your position.
The arena’s rocks and pillars can interrupt Gwyn’s path and create a short healing or casting window. They are not permanent cover because Gwyn can move around them. First create separation, then place an obstacle between you and Gwyn, heal quickly, and reposition. Ranged spells, pyromancies, and buffs are safest after he completes an attack or becomes temporarily obstructed.
- Use Gwyn’s lunge as a parry opportunity only if you know the timing.
- With a shield, counter once or twice after his attack ends.
- Use rocks and pillars for brief separation, not permanent cover.
- Prioritize stamina and survival over extended attack strings.
Defeat Gwyn and choose the ending
When Gwyn’s health reaches zero, collect the Soul of Gwyn, Lord of Cinder. The game does not provide a normal free-roam cleanup period after the final sequence. Finish the Artorias of the Abyss DLC, NPC quests, covenant goals, optional bosses, rare weapon preparations, spell and miracle purchases, and ordinary boss-soul transmutations before this fight if you want them completed in the current cycle.
The ending choice occurs in Gwyn’s arena. Light the central bonfire to choose the fire-linking ending. To choose the Age of Dark ending, do not touch the bonfire; leave the arena through the exit instead. There is no separate dialogue menu. The choice is made immediately after the boss encounter.
If Gwyn has been defeated but you die before selecting an ending, the character respawns at the Kiln bonfire with Gwyn still dead. Return through the ash route to the arena and make the ending choice; you do not need to defeat Gwyn again or repeat the entire Kiln route as a new boss attempt. The defeated state persists for this final sequence.
After selecting an ending, allow the ending sequence and credits to play. The character then transitions into New Game Plus. Character equipment, levels, and much of the inventory carry forward, while the world’s bosses, enemies, keys, and progression states reset. Once the transition occurs, missed current-cycle objectives must be handled in a later cycle.
- Collect the Soul of Gwyn, Lord of Cinder.
- Light the arena bonfire for the fire-linking ending, or leave without lighting it for the Age of Dark ending.
- If you die before choosing, return from the Kiln bonfire; Gwyn remains defeated.
- Watch the ending sequence and credits.
- Confirm that the character has transitioned toward New Game Plus.
Before you move on
- The Lordvessel accepted Gravelord Nito’s Lord Soul.
- The Lordvessel accepted the Bed of Chaos’s Lord Soul.
- The Lordvessel accepted Seath the Scaleless’s Bequeathed Lord Soul Shard.
- The Lordvessel accepted the Four Kings’ Bequeathed Lord Soul Shard.
- The Kiln opened and Gwyn, Lord of Cinder, was defeated.
- The Soul of Gwyn, Lord of Cinder is present in the inventory.
- The intended ending was selected by lighting the arena bonfire or leaving without lighting it.
- If death occurred before the choice, the character returned to the Kiln bonfire and Gwyn remained defeated.
- The ending sequence and credits played.
- The character transitioned toward New Game Plus, confirming completion of the main campaign.
References for this chapter
- DARK SOULS: REMASTERED — PlayStation 4 product page
- Gwyn, Lord of Cinder — Dark Souls Wiki
- Kiln of the First Flame — Dark Souls Wiki
- Dark Souls Remastered — Kiln of the First Flame Walkthrough
- Dark Souls Remastered — Boss Guide
- What happens if you die after killing Gwyn? — Dark Souls GameFAQs Discussion
Post-boss cleanup: endings, NPC results and NG+ preparation
Gwyn has already been defeated, the ending sequence has played and the character has entered the next game cycle. This chapter is for documenting what happened, identifying objectives that were missed, and organizing a focused NG+ route. The completed world cannot be revisited after the ending, so unfinished NPC outcomes, DLC encounters, optional bosses, tail cuts, covenant rewards and boss-soul crafts must be treated as later-cycle goals. Your level, equipment, spells, most inventory, boss souls, upgrade materials, souls and Estus reinforcement carry forward. World progression resets, and most key items, embers, smithing boxes, the Lordvessel, the Covenant of Artorias and the Orange Charred Ring must be reacquired. Kindled bonfires retain their status, but warp access must be rebuilt after recovering the Lordvessel. Record the ending, covenant status, NPC results and trophy progress before starting a deliberate NG+ route.
Confirm the completed-cycle result
The current cycle is over: Gwyn was defeated, one of the two ending sequences was triggered, the credits were shown and the character was transferred into NG+. There is no post-credits version of the completed Lordran in which you can return to a finished area and collect a missed reward. Treat every unfinished objective from the previous cycle as a future-run task rather than something still available behind you.
Record which ending occurred. Lighting the bonfire produced the ending in which the character links the fire; leaving the arena without lighting it produced the Dark Lord ending. If you did not write it down, check the trophy list and your own save notes, but do not assume the primordial serpent you followed determined the final ending. The ending choice was made after Gwyn, and both choices lead into the next cycle.
- Confirm that Gwyn was defeated.
- Record whether the fire was linked or abandoned.
- Check the relevant ending trophy in the PS4 trophy list.
- Mark the previous cycle as complete rather than available for free exploration.
Create a missed-objective record
Make separate lists for missed main-game content, Artorias of the Abyss content, NPC rewards, covenant rewards, optional bosses, tail weapons, spells, miracles, pyromancies and boss-soul creations. Include the exact character or item you missed and the earliest point in NG+ when it becomes available again. DLC objectives are not recoverable from the completed cycle; you must progress through NG+ far enough to reopen the DLC route and repeat its access requirements.
For NPCs, record the outcome you actually received rather than assuming the quest will resume. Note whether Solaire, Siegmeyer, Sieglinde, Lautrec, Rhea, Logan, Griggs, Quelana, Dusk, Shiva and other relevant characters survived, died, moved, became hostile or awarded their intended items. A new cycle restores the world’s NPC progression, but it does not repair a missed reward retroactively.
- List unfinished DLC bosses and rewards.
- List missed optional bosses and tail cuts.
- Record every NPC outcome that matters to your goals.
- Separate missed covenant items from ordinary purchases.
- Write down the earliest NG+ area needed for each task.
Audit boss souls and rare weapon progress
Check every boss soul still in your inventory before using it. Boss souls can make weapons, spells or miracles, and a soul spent as ordinary currency cannot be recovered in the current cycle. The Soul of Gwyn is the important post-boss exception: it remains with your carried inventory when NG+ begins. It is used for the Sunlight Spear miracle by a Warrior of Sunlight at the required covenant rank, so reserve it if that miracle is part of your collection plan. That transmutation must occur in NG+ or a later cycle, not in the finished cycle after the ending has already taken place.
If you are pursuing the Knight’s Honor trophy, maintain a source list for every required rare weapon. Three different creations use the Soul of Sif, so the complete set requires three Sif souls across successive cycles. Also record which boss died second in the Ornstein and Smough battle: the second boss determines which of their souls and related rewards you received. Plan the opposite kill order in a later cycle if you need the other result.
- Reserve the Soul of Gwyn if Sunlight Spear is wanted.
- Do not consume remaining boss souls before checking their recipes.
- Record how many Sif souls and creations are complete.
- Record whether Ornstein or Smough died second.
- Track every missing rare weapon by source and cycle.
Document covenant and bonfire progress
Write down your active covenant, covenant rank, offerings, rewards and any covenant-specific miracles or equipment already obtained. Your current covenant and rank carry into NG+, but the new world still requires you to find leaders again and repeat progression conditions for objectives that depend on the reset world. Do not assume a failed or abandoned NPC covenant path has been repaired simply because the cycle changed.
Kindled bonfires retain their kindling status, and your Estus Flask reinforcement level carries forward. The Rite of Kindling itself is removed as a key item. Record which bonfires were heavily kindled and which locations you relied on, because the bonfire state remains useful even while area progression, NPC placement and warp access are rebuilt.
- Record active covenant and rank.
- Record covenant offerings and unclaimed rewards.
- Note miracles, weapons and equipment tied to covenant progress.
- Record heavily kindled bonfires.
- Confirm your Estus reinforcement level.
Verify what entered NG+ with the character
Your character level, equipped and stored weapons, armor, rings, spells, upgrade materials, consumables, boss souls, ordinary souls and most other non-key inventory remain available. Repair and organize the equipment you want to use, then place the next-cycle loadout in an easily accessible order. Your acquired spells and covenant rewards are not erased merely because their original areas reset.
The new cycle removes most story and progression keys. Expect to reacquire the Lordvessel, embers, the Rite of Kindling, the Weapon Smithbox, Armor Smithbox, Repairbox, the Covenant of Artorias and the Orange Charred Ring. The Master Key and Bottomless Box are notable exceptions to the normal key-item reset. Area bosses, NPC states, opened routes and story progression begin again. Because the Lordvessel is lost, warp destinations must be rebuilt after you obtain it again.
- Confirm level and equipment are present.
- Confirm boss souls and upgrade materials remain.
- Confirm spells, miracles and pyromancies remain learned.
- Expect most key items and embers to be gone.
- Plan to recover the Lordvessel before relying on warping.
Build a focused NG+ route
Choose one primary objective for the next cycle instead of trying to pursue every missed task at once. Good targets include the opposite ending, the Soul of Gwyn transmutation, a missed NPC reward, a covenant miracle, an alternate Ornstein or Smough soul, a Sif-soul weapon, a tail weapon or the Artorias of the Abyss DLC. Group secondary tasks by area so the route does not require a separate return trip for one forgotten item.
Begin by restoring the route to Firelink Shrine, then prioritize the keys, embers and NPC conditions required for the selected goal. Keep a running checklist as each boss, quest reward and weapon is completed. NG+ raises enemy durability and damage, but the carried equipment and character level provide a strong starting advantage. Avoid spending the entire carried soul reserve casually before reaching a reliable leveling point; use it deliberately for levels, upgrades and supplies.
- Choose one main NG+ objective.
- Add secondary objectives by area.
- Reacquire the early progression keys and embers needed by the route.
- Reserve carried boss souls for planned crafts.
- Update the checklist after each completed reward or quest.
Before you move on
- The ending shown after Gwyn is recorded as either fire linked or Dark Lord.
- The PS4 trophy list and personal notes record the ending and relevant trophy progress.
- Missed DLC, NPC, covenant, optional-boss, tail-cut, spell and rare-weapon objectives are listed for later cycles.
- The Soul of Gwyn is retained and its planned Sunlight Spear use is recorded if relevant.
- Boss-soul transmutations still needed are listed without claiming they can be completed in the finished cycle.
- Character level, equipment, spells, boss souls, upgrade materials, consumables and ordinary inventory are confirmed present in NG+.
- Active covenant and rank, covenant rewards and bonfire kindling status are recorded.
- The reset of bosses, NPC states, routes and most key items is confirmed.
- A focused NG+ route is written with a primary objective and area-based secondary tasks.
References for this chapter
- DARK SOULS REMASTERED — FromSoftware web manual
- New Game Plus — Dark Souls Wiki
- New Game Plus — Dark Souls Wiki, Fandom mirror
- Ending — Dark Souls Wiki
- Sunlight Spear — Dark Souls Wiki
- Warrior of Sunlight — Dark Souls Wiki
- Boss Soul Items — Dark Souls Wiki
- Rare Weapons — Dark Souls Wiki
- Dragon Slayer Ornstein and Executioner Smough — Dark Souls Wiki
Completion checklist, NG+ strategy and optional 100% tasks
Use this chapter after completing the campaign to verify the ending, organize remaining optional goals and plan efficient NG+ and NG++ runs. The four Lordvessel rewards are split between two Lord Souls and two Bequeathed Lord Soul Shards: Gravelord Nito provides a Lord Soul, the Bed of Chaos provides a Lord Soul, Seath the Scaleless provides a Bequeathed Lord Soul Shard and the Four Kings provide a Bequeathed Lord Soul Shard. The campaign is complete when all four were offered, the Kiln opened, Gwyn was defeated and one ending was completed. Remaining goals belong on separate lists for DLC, optional bosses, NPCs, covenants, spells, miracles, pyromancies, rare weapons and general collection. Plan at least three Sif victories for the full Knight’s Honor weapon set, and assign each future cycle a specific ending, boss-soul craft or collection objective. NG+ preserves your character and most equipment, but resets story progression and removes most keys, embers and several progression items.
1. Verify that the completed campaign is recorded correctly
Check your completed character against the four Lordvessel rewards rather than relying only on a boss checklist. Gravelord Nito must have supplied a Lord Soul, the Bed of Chaos must have supplied a Lord Soul, Seath the Scaleless must have supplied a Bequeathed Lord Soul Shard and the Four Kings must have supplied a Bequeathed Lord Soul Shard. The two Lord Souls and two Shards are the four distinct offerings used to open the Kiln; they are not interchangeable descriptions for one reward type.
The campaign completion record should also show that the four offerings were accepted, the Kiln of the First Flame became available, Gwyn, Lord of Cinder was defeated and one ending was completed. Record whether you linked the fire or left the arena without doing so, because that determines which ending was awarded. Do not treat the ending as a temporary checkpoint: the character has already advanced into the next cycle after the credits.
If you are checking a trophy run, keep the campaign record separate from optional completion. Defeating Gwyn and completing an ending does not prove that every spell, covenant reward, rare weapon, DLC boss or NPC sequence has been completed.
- Nito’s Lord Soul was offered.
- The Bed of Chaos’s Lord Soul was offered.
- Seath’s Bequeathed Lord Soul Shard was offered.
- The Four Kings’ Bequeathed Lord Soul Shard was offered.
- The Kiln opened and Gwyn was defeated.
- One ending was completed and recorded.
2. Mark Artorias of the Abyss and optional content status
The PlayStation 4 Remastered edition includes Artorias of the Abyss. Track the DLC separately from the base-game campaign. A complete DLC record includes Dusk’s rescue sequence, the Broken Pendant, entry through the Darkroot Basin portal, the Sanctuary Guardian, Knight Artorias and Manus, Father of the Abyss. Manus and Father of the Abyss are two names for the same boss, so they count as one encounter rather than two separate bosses.
Track Black Dragon Kalameet as an additional DLC objective. Hawkeye Gough must be involved before the dragon can be fought normally. If Kalameet remains undefeated, record that as a specific future-cycle target rather than writing the DLC as generally incomplete.
Use another list for optional base-game bosses and rewards such as Sif, Crossbreed Priscilla, Dark Sun Gwyndolin, the Moonlight Butterfly, NPC invasions and covenant-related encounters. This prevents optional content from being confused with the four Lordvessel requirements or with the PlayStation trophy categories.
- The DLC portal was entered.
- Sanctuary Guardian was defeated if DLC completion is wanted.
- Knight Artorias was defeated if DLC completion is wanted.
- Manus, Father of the Abyss was defeated if DLC completion is wanted.
- Kalameet was defeated after Gough made the encounter accessible.
- Remaining optional bosses and NPC outcomes are listed individually.
3. Inventory boss souls before spending them
Review every boss soul still in storage and assign it to a weapon, spell or miracle before consuming it. Boss-soul weapons are forged by the Giant Blacksmith in Anor Londo and require the appropriate weapon type at the required upgrade level. Record both the soul and the prepared base weapon so a future cycle does not end with the correct soul but no valid weapon to ascend.
Reserve the Soul of Sif as a three-cycle project. The Soul of Sif produces the Greatsword of Artorias, the cursed Greatsword of Artorias and the Greatshield of Artorias. All three must be held by the same character for Knight’s Honor, so plan three Sif victories unless the missing weapons are obtained through legitimate trading. Do not consume a Sif soul for currency while this trophy remains unfinished.
Track the alternate Ornstein and Smough results separately. The soul received depends on which boss dies first, meaning one playthrough does not provide both soul outcomes. Write down the desired kill order for the next run and prepare the required upgraded weapon bases before visiting the Giant Blacksmith.
The four Lordvessel rewards should not be treated as ordinary crafting stock. Nito’s Lord Soul, the Bed of Chaos’s Lord Soul, Seath’s Bequeathed Lord Soul Shard and the Four Kings’ Bequeathed Lord Soul Shard are progression rewards first. Keep ordinary boss souls separate from those four completed offerings.
- Every unspent boss soul has an assigned use.
- Three Soul of Sif victories are planned for the Artorias weapons.
- The desired Ornstein and Smough kill orders are recorded.
- Required base weapons and upgrade levels are listed.
- No completed Lordvessel reward is being counted as ordinary crafting material.
4. Separate trophy requirements from broader 100% goals
Maintain four independent trophy lists: sorceries, miracles, pyromancies and rare weapons. Wisdom of a Sage, Prayer of a Maiden, Bond of a Pyromancy and Knight’s Honor each use a different collection category. For every missing entry, record whether it comes from a merchant, covenant rank, boss soul, tail cut, enemy drop, treasure pickup or weapon upgrade path.
Knight’s Honor requires the relevant rare weapons to be present on the same character. Include boss-soul weapons, tail weapons, special drops, unique shields and other qualifying rare equipment, but do not assume that every ring, armor set, titanite slab or DLC item belongs to this trophy. Keep those broader items on a separate optional collection list.
Covenant rewards should have their own checklist showing the required offering item, rank and character or covenant condition. Collect the reward before abandoning the covenant or attacking its leader. If a reward can be obtained through another method, record that alternate method explicitly instead of assuming a merchant will replace it.
- Missing sorceries are listed by source.
- Missing miracles are listed by source.
- Missing pyromancies are listed by source.
- Every missing rare weapon has a known acquisition route.
- Covenant rewards are tracked separately from trophy categories.
- Optional rings, armor, slabs and DLC equipment are not being mistaken for mandatory trophy items.
5. Prepare the character before the next cycle
Before starting another cycle, repair and reinforce the equipment you intend to use. Spend materials and souls on current upgrades, prepare ammunition and build-specific consumables, and place important equipment in an organized inventory. Embers do not carry into NG+, so complete any upgrade work that depends on a current-cycle ember before beginning the next journey.
Your level, attributes, souls, ordinary weapons, armor, rings and most non-key inventory carry forward. Story progress does not. Most keys and progression tools are removed, including the Lordvessel, embers, the Rite of Kindling, the Covenant of Artorias, the Orange Charred Ring and blacksmith utility boxes. The Master Key and Bottomless Box are exceptions among commonly used key or storage items.
Kindled bonfires retain their kindling levels, but the Rite of Kindling itself must be recovered before newly kindling bonfires beyond the normal limit. The Lordvessel and its warp access must also be reacquired, and previously unlocked warp destinations must be revisited before they are available again. Treat the next opening as a route-recovery task, not as a continuation of the finished world state.
Do not sell a reliable weapon merely because the early NG+ areas are manageable. Later enemies and bosses become substantially more dangerous, so preserve a dependable main weapon, backup option, shield or defensive tool and healing plan.
- Desired equipment is repaired and upgraded.
- Important ember-dependent upgrades are finished.
- Consumables, ammunition and humanity are stocked.
- Kindled bonfires are recorded.
- Lost keys, embers, the Lordvessel and special rings are listed.
- A dependable NG+ weapon and defensive setup is ready.
6. Give NG+ and NG++ specific objectives
Assign one primary objective to each future cycle. Suitable objectives include obtaining the opposite ending, collecting the alternate Ornstein or Smough soul, defeating Sif for another weapon craft, completing a covenant reward, recovering a missed NPC item or finishing a spell category. A written objective prevents an unnecessary full clear of every optional area.
For a Knight’s Honor route, use one cycle to obtain the first Sif weapon, the next to obtain the second and NG++ to obtain the third after reaching Sif again. Keep all resulting weapons in the same character’s inventory until the trophy registers. Also note any missed tail cut or rare enemy drop before starting, because those may require a separate route through an earlier area.
If the trophy categories are already complete, continue only for the remaining optional targets: rings, armor, slabs, DLC equipment, covenant ranks, boss challenges or NPC outcomes. If an NPC sequence was missed, record its required starting condition and the cycle in which it will be attempted. Do not assume that credits create a post-game version of the completed world where missed sequence events can be repaired.
- The next cycle has one written primary objective.
- The opposite ending is assigned to a specific future run if needed.
- The three Sif weapon crafts are assigned across cycles.
- Alternate Ornstein and Smough soul outcomes are assigned to a kill order.
- Missed NPC, covenant, tail-cut and rare-drop objectives have route notes.
- NG++ is reserved only for goals that genuinely require a third cycle.
Before you move on
- Campaign status is recorded: Nito and the Bed of Chaos supplied Lord Souls, Seath and the Four Kings supplied Bequeathed Lord Soul Shards, all four were offered, the Kiln opened, Gwyn was defeated and one ending was completed.
- DLC status is recorded separately for Dusk, the Broken Pendant, Sanctuary Guardian, Knight Artorias, Manus, Father of the Abyss and Kalameet.
- Every missing sorcery, miracle, pyromancy and rare weapon has an identified source and requirement.
- The three Soul of Sif weapon crafts are assigned across a concrete NG+ and NG++ plan.
- The desired alternate Ornstein and Smough soul outcome has a recorded kill order.
- Important current-cycle upgrades are complete and the next cycle’s lost keys, embers, Lordvessel, Rite of Kindling and special rings are documented.
- The next playthrough has one specific objective rather than an unfocused promise to complete everything.
- Any broader 100% goals, including covenants, rings, armor, slabs, DLC equipment and NPC outcomes, are listed separately from the campaign completion record.
References for this chapter
- DARK SOULS: REMASTERED — PlayStation 4 product page
- Dark Souls: Remastered Trophy Guide & Road Map — PlayStationTrophies.org
- New Game Plus — Dark Souls Wiki
- New Game Plus — Dark Souls Wiki, Fandom mirror
- Knight's Honor — Dark Souls Wiki, Fandom mirror
- Knight's Honor Achievement Guide — Steam Community
Finishing up
Defeated Gwyn, Lord of Cinder, selected an ending, and seen the ending sequence and credits.
Placed the Lordvessel and offered the Lord Soul from Gravelord Nito, the Lord Soul from the Bed of Chaos, the Bequeathed Lord Soul Shard from Seath the Scaleless, and the Bequeathed Lord Soul Shard from the Four Kings, then cleared the Kiln of the First Flame.
Optional: completed Artorias of the Abyss, including its desired bosses and rewards, before Gwyn.
Completed any current-cycle NPC, covenant, optional-boss, tail-weapon, spell and boss-soul transmutation goals before entering Gwyn’s arena.
Recorded unfinished objectives for NG+ or a later cycle, since the completed cycle does not return to free exploration after Gwyn.
Choose your next gameScreenshots & video
Game imagery for reference. Follow the written chapters above for the route and strategies.
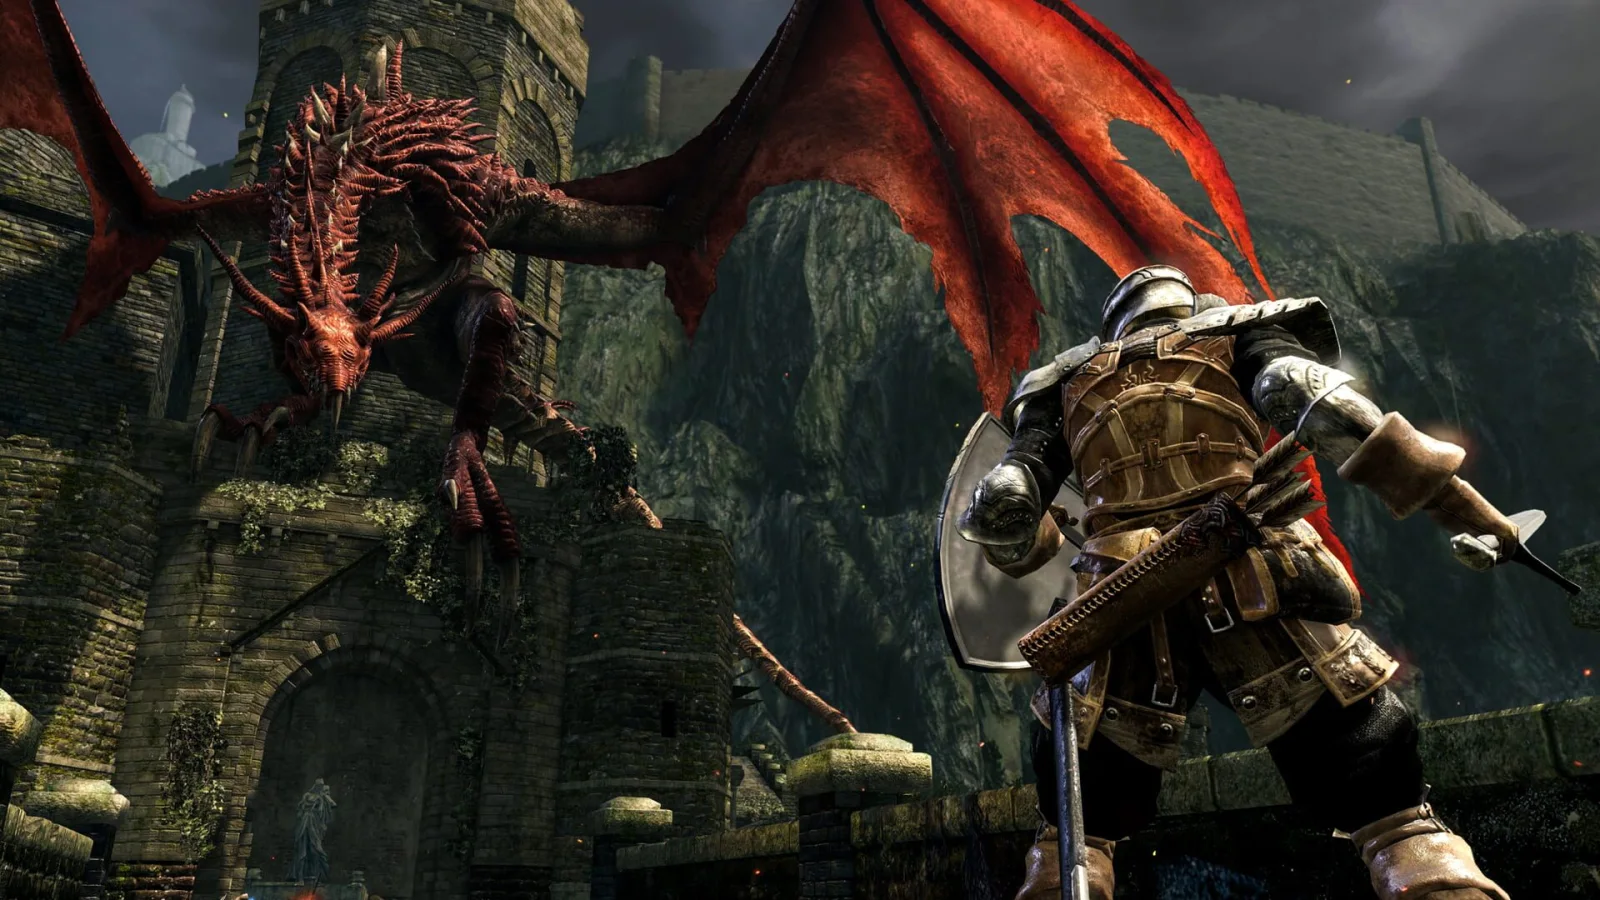
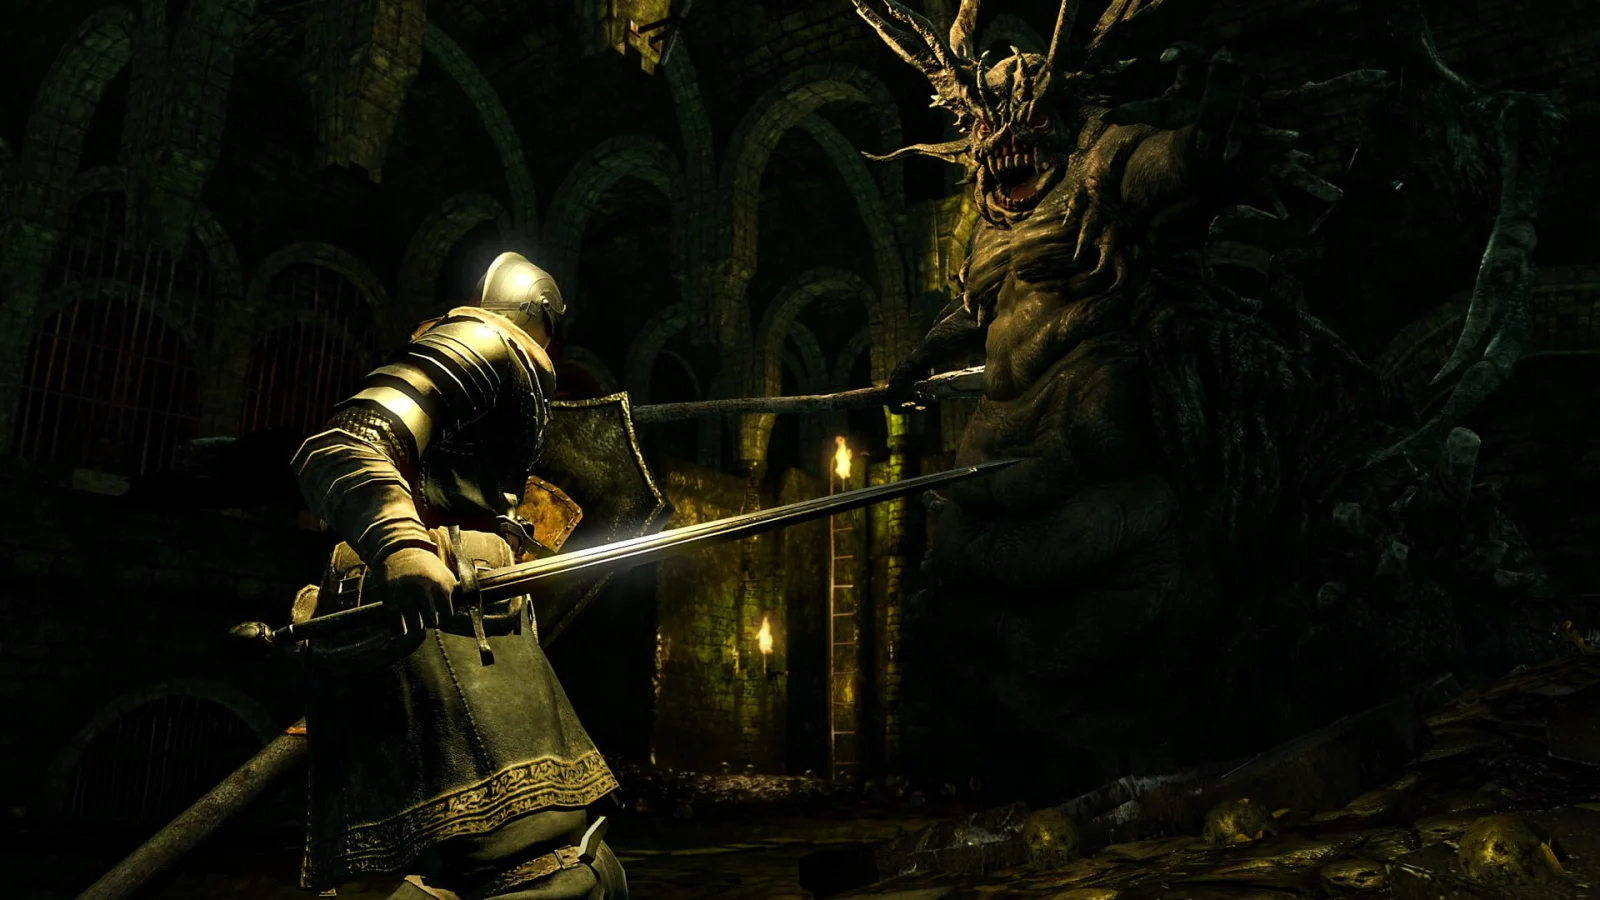
Sources & references
Our original guide draws on the references below. Check the edition at the top of this page before following controls or unlock requirements.
- DARK SOULS REMASTERED — FromSoftware web manual
- DARK SOULS REMASTERED - Web Manual, Basic Game Information
- Chapter 1: Asylum Demon - Dark Souls Remastered Walkthrough and Guide
- Northern Undead Asylum – Dark Souls: Remastered: Items, Secrets and Enemies
- Northern Undead Asylum
- DARK SOULS: REMASTERED — PlayStation 4 product page
- Firelink Shrine — Dark Souls Wiki
- Anastacia of Astora — Dark Souls Wiki
- Petrus of Thorolund — Dark Souls Wiki
- Andre of Astora — Dark Souls Wiki
- Dark Souls Remastered: Undead Parish Part 2 — GamesRadar+
- Undead Parish — Dark Souls Remastered Walkthrough and Guide
- Estus Flask — Dark Souls Wiki
- Chapter 3: Bell Gargoyles — Dark Souls Remastered Walkthrough and Guide
- Chapter 9: Moonlight Butterfly — Dark Souls Remastered Walkthrough and Guide
- Watchtower Basement Key — Dark Souls Wiki
- Dark Souls Walkthrough — GameSpot
- Lower Undead Burg - Dark Souls Remastered Walkthrough & Guide
- Lower Undead Burg - Dark Souls Remastered full walkthrough guide
- Depths - Dark Souls Wiki
- Chapter 5: Gaping Dragon - Dark Souls Remastered Walkthrough & Guide
- Undead Burg - Dark Souls Wiki
- Quelaag’s Domain – Dark Souls Wiki
- Dark Souls: Remastered full walkthrough – Quelaag’s Domain
- Dark Souls Trilogy Walkthrough – Blighttown and Quelaag’s Domain
- Dark Souls Remastered Guide and Walkthrough – PlayStation 4
- Chapter 7: Iron Golem - Dark Souls Remastered Walkthrough & Guide
- Dark Souls: Sen’s Fortress Part 2 walkthrough
- Sen’s Fortress area guide
- Cage Key - Dark Souls Wiki
- Big Hat Logan — Dark Souls Wiki
- Dark Souls: Sen’s Fortress guide
- Chapter 8: Ornstein & Smough — Dark Souls Remastered Walkthrough & Guide
- Dark Souls: Anor Londo Part 2 — Dark Souls Remastered full walkthrough guide
- Anor Londo — DARK SOULS: REMASTERED: Items, Secrets & Enemies
- Darkroot Garden — Dark Souls Wiki
- Darkroot Basin — Dark Souls Wiki
- Sif, the Great Grey Wolf — Dark Souls Wiki
- Dark Souls Remastered full walkthrough: Great Hollow and Ash Lake
- Dark Souls Remastered Guide and Walkthrough — Darkroot Basin
- DARK SOULS: REMASTERED official series page
- Darkstalker Kaathe — Dark Souls Wiki
- The Abyss — DARK SOULS: REMASTERED: Items & Enemies
- Dark Souls: New Londo Ruins — GamesRadar+
- Chapter 12: The Four Kings — Dark Souls Trilogy Walkthrough & Guide
- DARK SOULS: REMASTERED — Official Bandai Namco site
- New Londo Ruins — Dark Souls Wiki
- New Londo Ruins — Dark Souls Remastered Walkthrough & Guide
- Dark Souls Remastered Walkthrough — Return to Firelink Shrine and Placing the Lordvessel
- The Catacombs - Dark Souls Remastered Walkthrough & Guide
- Dark Souls: The Catacombs - Dark Souls Remastered full walkthrough guide
- Dark Souls: Tomb of the Giants Part 1 - Dark Souls Remastered full walkthrough guide
- Gravelord Servant
- Eye of Death
- DARK SOULS REMASTERED — Official Bandai Namco product page
- The Duke’s Archives — Dark Souls Wiki
- Crystal Cave — Dark Souls Wiki
- Seath the Scaleless — Dark Souls Wiki
- Archive Tower Giant Door Key — Dark Souls Wiki
- Archive Tower Giant Cell Key — Dark Souls Wiki
- Crystal Ember — Dark Souls Wiki
- Large Magic Ember — Dark Souls Wiki
- Dark Souls Wiki — Lordvessel
- Demon Ruins — Dark Souls Wiki
- Lost Izalith — Dark Souls Wiki
- The Bed of Chaos — Dark Souls Wiki
- Chapter 17: Bed of Chaos — Dark Souls Remastered Walkthrough and Guide
- Chaos Servant — Dark Souls Wiki
- PlayStation Store — DARK SOULS: REMASTERED PS4 product page
- Dark Souls Wiki — Broken Pendant
- Dark Souls Wiki — Firelink Altar
- Dark Souls Remastered Walkthrough — Manus, Father of the Abyss
- Dark Souls Remastered Walkthrough — Chasm of the Abyss
- Dark Souls Wiki — Solaire of Astora
- New Game Plus — Dark Souls Wiki
- Gwyn, Lord of Cinder — Dark Souls Wiki
- Kiln of the First Flame — Dark Souls Wiki
- Dark Souls Remastered — Kiln of the First Flame Walkthrough
- Dark Souls Remastered — Boss Guide
- What happens if you die after killing Gwyn? — Dark Souls GameFAQs Discussion
- New Game Plus — Dark Souls Wiki, Fandom mirror
- Ending — Dark Souls Wiki
- Sunlight Spear — Dark Souls Wiki
- Warrior of Sunlight — Dark Souls Wiki
- Boss Soul Items — Dark Souls Wiki
- Rare Weapons — Dark Souls Wiki
- Dragon Slayer Ornstein and Executioner Smough — Dark Souls Wiki
- Dark Souls: Remastered Trophy Guide & Road Map — PlayStationTrophies.org
- Knight's Honor — Dark Souls Wiki, Fandom mirror
- Knight's Honor Achievement Guide — Steam Community
About the game & collecting notes
- Platform
- PlayStation 4
Step-by-step route through the PS4 edition of DARK SOULS: REMASTERED that takes you from the opening Undead Asylum through Lordran’s major zones to the Kiln of the First Flame. Includes assembly of the Lordvessel objectives, boss strategies, key shortcuts, recovery options, and optional coverage for the Artorias of the Abyss DLC and NG+ transition.
Darryl Polo
Darryl Polo loves tinkering with emulation and revisiting retro games. He enjoys exploring how old favorites play on different setups and sharing what he learns along the way. At Joking Joystick, he writes about the games, hardware, and small discoveries that keep the hobby fun.
Our editorial standardsFound a step that needs another look? Help us improve this guide.