
Dark Souls III: The Fire Fades Edition — Complete Campaign Walkthrough (PS4)
Step-by-step campaign walkthrough for Dark Souls III: The Fire Fades Edition on PS4, covering the full base campaign and both DLCs (Ashes of Ariandel and The Ringed City). This guide leads you from character creation through every required boss and path to the game's endings and the DLC finales, with practical objectives, missable checks and completion criteria.


Find a copy
Dark Souls III: The Fire Fades Edition PlayStation 4
We may earn a commission if you buy through these links, at no extra cost to you. As an Amazon Associate I earn from qualifying purchases.
Opens retailer search results. Check the model, edition, seller, availability and current price before buying.
Before you begin
This guide is written for the PS4 release of Dark Souls III: The Fire Fades Edition — the all-in-one retail edition that bundles the base game with both DLC expansions.
It walks you through the campaign route that gets you through the main areas and required bosses, plus the two DLCs and their final encounters.
Expect deliberate pacing: Dark Souls III is designed to test patience and observation as much as combat skill.
Follow chapters in order on your first playthrough.
Each chapter lists concrete objectives and a short list of critical subgoals.
Use the preparation checklist to set up a starting build and quality-of-life rules.
If you prefer specific boss strategies, use the chapter for that boss; if you die, the recovery notes in each chapter explain how to reset and resume progress without losing forward momentum.
Set yourself up for the run
Choose a primary build before you begin: melee, strength, dexterity, faith, pyromancy or sorcery.
Stick to one core weapon and matching stats in the early game; spreading stats too thin makes the midgame harder.
Learn bonfire and Ember mechanics: rest at bonfires to set checkpoints and fast-travel, use Andre to allocate Estus charges, and use Ashen Estus for spells and weapon arts.
Keep a supply of Titanite Shards and reinforce one dependable weapon early.
Talk to NPCs and exhaust dialogue before major progression points; many NPC questlines are time-sensitive and affect endings, summons and equipment availability.
Confirm that both DLCs are installed or included on the Fire Fades Edition disc. Ashes of Ariandel is entered by reaching the Cleansing Chapel and speaking with Slave Knight Gael or interacting with the painting fragment; defeating the Deacons is not required for entry. The Ringed City is entered through its late-game transport bonfires.
Familiarize yourself with Firelink Shrine: the Fire Keeper handles leveling, Andre handles reinforcement and Estus allocation, the Shrine Handmaid expands her stock through ashes, and Ludleth handles boss-soul transposition after receiving the Transposing Kiln.
Use early souls to reinforce a core weapon and raise Vigor to survive boss openings.
Enable online features only if you want optional co-op or invasions; multiplayer is not required for campaign progression.
Manage consumables such as Firebombs, Green Blossoms and Homeward Bones, but preserve souls for levels, reinforcement and essential utility purchases.
Use bonfires and opened shortcuts as checkpoints. After defeating a difficult boss, spend or secure souls before beginning the next long area.
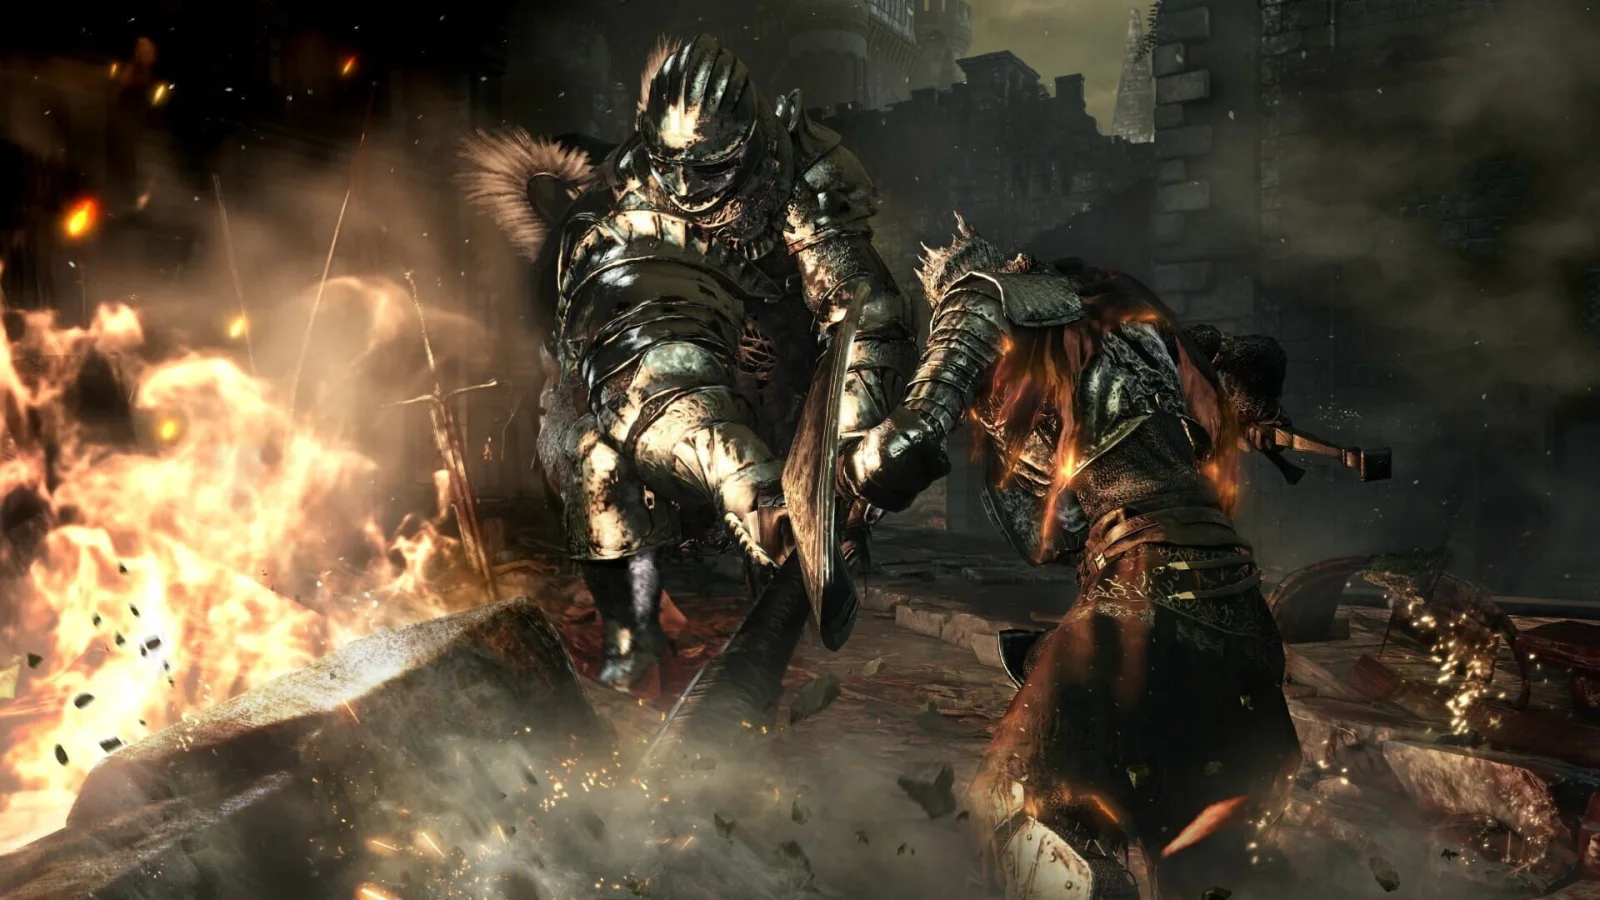
Getting Started: Character Creation and First Decisions
Choose a starting class that matches the weapon or spell style you intend to use, then keep your first levels focused instead of trying to raise every damage stat. Knight is the simplest general melee start for a first PS4 playthrough; Mercenary suits Dexterity weapons, Warrior favors Strength, and Sorcerer, Pyromancer, and Cleric provide clear spell-focused openings. Burial Gifts help with the early game but do not define the entire build. Select one dependable weapon, reinforce it before buying luxury supplies, and raise survivability alongside the minimum attributes needed to use your chosen equipment.
Choose a class by your intended damage stat
Choose Knight if you want a dependable melee foundation. It starts with the Long Sword, a strong physical-defense Knight Shield, sturdy armor, and a balanced spread that supports early Strength, Dexterity, Vigor, and Endurance investment. This is the most forgiving option for learning spacing, stamina management, blocking, and rolling.
Choose Warrior for a Strength-focused character using weapons such as axes, or Mercenary for a Dexterity route. Mercenary begins with the Sellsword Twinblades and high Dexterity, making it a direct choice for fast dual-blade attacks. These classes are starting packages rather than permanent roles, but the opening attributes and equipment affect how easily the first areas can be cleared.
Choose Sorcerer for Intelligence-based sorceries, Pyromancer for a combined Intelligence and Faith route, or Cleric for Faith and miracles. Sorcerer begins with a staff and Soul Arrow spells, Pyromancer begins with a Pyromancy Flame and Fireball, and Cleric begins with a sacred chime and Heal and Force. A magic class still benefits from early Vigor and Endurance instead of putting every level into casting stats.
- Knight: safest general melee opening.
- Warrior: Strength-oriented weapons and high starting Vigor.
- Mercenary: Dexterity and Sellsword Twinblades.
- Sorcerer, Pyromancer, or Cleric: spell-focused openings.
Select a Burial Gift for the opening hours
The Life Ring is the safest general-purpose choice for a new character because it raises maximum HP while equipped. It is not a consumable, so it remains useful until you replace it with another ring. This is especially helpful for classes that begin with less Vigor, although a Knight can use it effectively as well.
Choose the Fire Gem if you want to create an early fire-infused weapon and are willing to treat that infusion as an opening-game tool rather than a permanent build decision. Fire infusion adds fire damage but removes the normal Strength and Dexterity scaling from the weapon, so it is most convenient when your offensive attributes are still low. It also prevents the weapon from receiving ordinary weapon buffs.
Hidden Blessing can restore FP and is most relevant to a spellcaster, while Divine Blessing provides emergency healing and cures status ailments. Sovereignless Soul gives souls immediately, but spending the resulting levels does not provide the same long-term value as a permanent ring. Ember is not a Burial Gift; it is a separate consumable that increases maximum HP and enables online summoning and invasions when the character is embered.
Do not select the Old Wolf Curved Sword as a supposed gift. It is not available during character creation. It is obtained later through the Watchdogs of Farron covenant and therefore should not influence your starting-gift choice.
- General first run: Life Ring.
- Early fire weapon or low physical-stat opening: Fire Gem.
- Caster: Hidden Blessing can provide emergency FP recovery.
- Do not confuse Ember with a starting Burial Gift.
- Do not treat the Old Wolf Curved Sword as starting equipment.
Test one main weapon before spending rare materials
Use the Cemetery of Ash and the opening portion of High Wall of Lothric to test weapon reach, attack speed, stamina cost, rolling attacks, charged heavy attacks, and the weapon skill. Once one ordinary weapon feels reliable, make it your primary reinforcement target. A weapon you understand at +2 or +3 is normally more useful than several unreinforced alternatives.
Spend early souls on leveling and reinforcement before buying large quantities of arrows, resins, knives, or other consumables. Andre can reinforce standard weapons with Titanite Shards once he is available in Firelink Shrine. Keep a second weapon only when it has a clear job, such as ranged enemy-pulling, strike damage, or a different reach profile.
Check the weapon's required Strength and Dexterity before committing levels. If you are below a requirement, the weapon will not perform normally. Two-handing a weapon changes its effective Strength requirement, but it does not remove Dexterity, Intelligence, or Faith requirements.
- Choose one primary weapon after testing its moveset.
- Reach the early +2 or +3 reinforcement milestone before luxury purchases.
- Check attribute requirements before leveling around a weapon.
- Keep a backup weapon only for a defined tactical role.
Match the infusion to the build
Use Heavy when Strength is your main physical damage stat, Sharp when Dexterity is your main physical damage stat, and Refined when you intend to raise Strength and Dexterity together. Compare the resulting attack rating at Andre rather than infusing automatically, because the best choice depends on the weapon and your current attributes.
Raw can be useful temporarily when your weapon requirements are met but your Strength and Dexterity are still low. Raw removes normal attribute scaling in exchange for stronger base physical damage, so reassess it after your main offensive stat begins to rise. Fire is also an early option, but fire resistance varies among enemies and Fire-infused weapons do not retain ordinary physical scaling.
Advanced infusions require the appropriate Coal before Andre can offer them. Do not worry if Heavy, Sharp, Refined, or other desired options are unavailable during the first trip to Firelink Shrine. Infusion is reversible for most standard weapons, so an early decision does not permanently ruin the character.
- Heavy: Strength focus.
- Sharp: Dexterity focus.
- Refined: balanced Strength and Dexterity.
- Raw: possible temporary low-stat option.
- Fire: useful early, but not a universal long-term choice.
- Acquire the required Coal before expecting every infusion option.
Spend the first 10 to 20 levels with a narrow plan
Raise Vigor early enough that ordinary mistakes do not end every encounter. Increase Endurance when you need more stamina for an additional attack, dodge, sprint, or block. Meet the minimum requirements for your chosen weapon, then put most remaining points into its main scaling stat instead of distributing levels across Strength, Dexterity, Intelligence, Faith, and Luck at the same time.
A caster should add Attunement when additional FP or spell slots are needed, then invest in Intelligence for sorceries, Faith for miracles, or both Intelligence and Faith for pyromancy. Even a dedicated caster should not neglect Vigor, because many early enemies can defeat a low-health character before spell range becomes useful.
Raise Vitality only when equipment load requires it or when a specific armor setup is part of the plan. Staying below the game's heavy-load threshold is more important than wearing every piece of high-defense equipment immediately. A focused opening build produces larger practical gains than a spread-out character with several underdeveloped damage types.
- Prioritize Vigor and Endurance alongside weapon requirements.
- Raise one main physical or spell damage route before unrelated attributes.
- Add Attunement when your spell or FP plan requires it.
- Use Vitality for equipment-load needs rather than as an automatic early stat.
Before you move on
- Your character has a defined plan: one primary weapon type and one main physical or spell damage route.
- Your chosen weapon meets its requirements and has reached at least the early +2 or +3 reinforcement milestone when Andre is available.
- Your early levels have meaningfully improved Vigor, Endurance, Attunement, or the chosen scaling stat instead of being scattered across unrelated attributes.
- You know whether your current infusion is temporary or intended to support the build through the next major areas.
- You selected a valid Burial Gift and understand whether it is permanent equipment, a consumable, or an early-game material.
- You are ready to leave the opening areas with a focused character rather than a build divided across several unrelated damage types.
References for this chapter
Cemetery of Ash and Firelink Shrine: First Boss and Hub Setup
Clear the Cemetery of Ash, defeat Iudex Gundyr, and establish Firelink Shrine as the first permanent hub. The route teaches basic combat, introduces the two Estus types, and provides optional early rewards such as the Ravenous Crystal Lizard and Sword Master encounter. After the boss, activate the shrine bonfire, meet the Fire Keeper and Andre, check the Shrine Handmaid’s stock, and speak with Ludleth. The Transposing Kiln is not available yet: obtain it later from the optional Curse-Rotted Greatwood and bring it back to Ludleth before exchanging boss souls.
Follow the Cemetery of Ash route and activate its bonfires
Begin at the Cemetery of Ash bonfire and follow the visible graveyard path. Deal with Hollows individually whenever possible. The early enemies are weak, but several stand close enough to wake together, so avoid attacking into a group unless you have room to retreat. Continue through the ruined passage and uphill toward the open area with the next bonfire. Light and rest there before entering the nearby courtyard.
The Cemetery also contains an Ashen Estus Flask. It restores FP for weapon skills and spellcasting instead of restoring HP. If your character does not use FP regularly, speak with Andre after reaching Firelink Shrine and allot your Estus charges toward the normal Estus Flask. You can change the balance later, so do not restart a character merely because the opening allocation is inconvenient.
- Light and rest at the Cemetery of Ash bonfire.
- Collect the Ashen Estus Flask if you have not already done so.
- Use the bonfire before attempting the boss or an optional detour.
Decide whether to fight the optional early enemies
A large Ravenous Crystal Lizard appears on an optional path before the boss. It rolls aggressively and can pin a new character against the walls, but it is not required for progression. If you attack it, stay near its side or rear and leave the area rather than trading damage when your stamina or healing is low.
The Sword Master is another optional fight near the route leading toward Firelink Shrine. He uses fast curved-sword attacks and is considerably more dangerous than ordinary Cemetery enemies. You can leave him alive and return later. If you fight him now, draw him away from the doorway, keep space for rolls, and punish only after his attack sequence ends. His reward is optional; preserving Estus for Iudex Gundyr is the safer first-run choice.
- Treat the Crystal Lizard and Sword Master as optional.
- Do not spend all healing charges for an optional reward.
- Return to the Cemetery bonfire to reset enemies before the boss.
Defeat Iudex Gundyr
Enter the fog-covered courtyard and pull the Coiled Sword from the kneeling figure. Iudex Gundyr’s halberd has broad horizontal reach, so circle around him instead of retreating directly backward. Stay close enough to roll through his swings, then attack during the recovery after a completed strike. Use short attack strings and preserve stamina for the next dodge.
After taking substantial damage, Gundyr transforms as black growth erupts from his body. Back away during the transformation, then watch the enlarged limbs and head for sweeping attacks. Rolling through the attack is generally safer than trying to outrun it. Moving toward his rear can reduce the number of attacks aimed directly at you, but do not remain underneath him if the camera loses the boss. If you die, travel from the Cemetery bonfire and sprint past ordinary enemies to make another attempt.
- Pull out the Coiled Sword and defeat Iudex Gundyr.
- Light the Iudex Gundyr bonfire after the fight.
- Use the boss bonfire as the recovery point for further Cemetery exploration.
Travel from the boss arena to Firelink Shrine
Leave the arena through the opened doors. A corpse near the graveyard path holds a Broken Straight Sword, which is optional and generally weaker than a character’s starting weapon. Continue along the path and collect the Homeward Bone from the small side alcove if you want an early return item.
Follow the main route toward the shrine. An outer path contains an Ember near a large enemy, but collect it only if the fight is manageable. Enter Firelink Shrine at the end of the path. The shrine is safe, and its central bonfire becomes the main travel and preparation point for the opening areas.
- Open the doors beyond Iudex Gundyr’s arena.
- Collect the Broken Straight Sword and Homeward Bone only if desired.
- Enter Firelink Shrine and approach the unlit central bonfire.
Activate Firelink Shrine and meet the essential NPCs
Place the Coiled Sword in the central bonfire. This activates Firelink Shrine’s bonfire and enables fast travel between discovered bonfires. Speak with the Fire Keeper beside the bonfire; she handles leveling and becomes the character’s regular source of stat increases. Spend early souls primarily on Vigor, Endurance, and the requirements for one main weapon rather than spreading levels across unrelated damage attributes.
Find Andre of Astora through the passage near the shrine’s central room. He reinforces weapons with Titanite, manages Estus Flask allocation, and later handles further blacksmith services as you provide the required materials. Speak with the Shrine Handmaid near the entrance to inspect her current inventory. Her stock expands when she receives Umbral Ashes found later, so several useful items will not be available immediately.
- Place the Coiled Sword in the Firelink Shrine bonfire.
- Speak with the Fire Keeper and confirm that leveling is available.
- Speak with Andre and check weapon reinforcement and Estus allocation.
- Check the Shrine Handmaid’s current inventory.
Locate Ludleth and preserve boss souls for later decisions
Climb the stairs behind the central bonfire to the thrones. Ludleth of Courland sits on one of them. Speak with him now so you know his location, but boss-soul transposition is not available yet. The required Transposing Kiln is obtained later by defeating the optional Curse-Rotted Greatwood in the Undead Settlement.
When you acquire the kiln, return to Firelink Shrine and give it to Ludleth. He can then exchange eligible boss souls for unique weapons, spells, or rings. Until you decide that you do not want a boss-soul reward, avoid consuming Iudex Gundyr’s soul for ordinary souls. The boss itself is complete regardless of whether you pursue transposition.
- Locate Ludleth on the throne level.
- Keep Iudex Gundyr’s boss soul if you may want its later transposed reward.
- Plan to retrieve the Transposing Kiln from the Curse-Rotted Greatwood.
Before you move on
- Iudex Gundyr has been defeated and the Iudex Gundyr bonfire is lit.
- The Coiled Sword has been placed in Firelink Shrine, activating the hub bonfire.
- The Fire Keeper, Andre, the Shrine Handmaid, and Ludleth have been located and spoken to.
- Estus allocation has been adjusted if the character does not need Ashen Estus for spells or weapon skills.
- The main weapon has been reinforced if the required Titanite and souls are available.
- Iudex Gundyr’s boss soul has been preserved if a later transposed reward is desired.
- The player understands that the Transposing Kiln must be recovered from the Curse-Rotted Greatwood before boss-soul exchanges begin.
References for this chapter
- FromSoftware — Dark Souls III: The Fire Fades Edition release information
- FromSoftware FAQ: Dark Souls III The Fire Fades Edition and DLC Access
- Dark Souls III Wiki — Cemetery of Ash
- Dark Souls III Wiki — Firelink Shrine Bonfire
- Gamer Guides — Cemetery of Ash and Firelink Shrine walkthrough
- SuperCheats — Cemetery of Ash walkthrough
High Wall of Lothric, Vordt and the Dancer Route
Clear the High Wall of Lothric by activating both bonfires, opening the elevator shortcut, rescuing Greirat if desired, and reaching Emma’s cathedral. Speak with Emma to receive the Small Lothric Banner, then defeat Vordt of the Boreal Valley and raise the banner beyond his arena to reach the Undead Settlement. The Dancer is not part of the normal immediate route. She becomes available after the required Lord of Cinder progression, although killing Emma early can trigger the encounter prematurely. Defeat the Dancer later, place the Basin of Vows at the altar, and climb into Lothric Castle.
1. Establish the High Wall bonfires and choose the safe route
Travel from Firelink Shrine to High Wall of Lothric and light the arrival bonfire. From the small tower, move onto the battlements and search the upper route for the Tower on the Wall bonfire. This bonfire is optional for progression but strongly recommended because it gives you a reliable checkpoint for the upper section and access to several useful items.
From the tower, descend carefully through the interior. Hollows on rooftops can transform into Pus of Man creatures when their bodies rupture. Fire damage is effective against these enemies, but you can also retreat into the tower and fight from the stairs if the transformation catches you unprepared. Use doors, ladders, and narrow walkways to prevent groups from surrounding you. Approach one enemy at a time and punish the recovery after its attack rather than repeatedly attacking into a shield or large weapon.
- Light the High Wall of Lothric bonfire.
- Light the Tower on the Wall bonfire if possible.
- Visit Andre when you have enough materials and souls for an early weapon reinforcement.
2. Cross the wyvern section and open the main elevator shortcut
From the Tower on the Wall, work downward through the rooftops and the building occupied by hollows. A wyvern covers part of the wall with fire. Watch the flames, then move through the safe gaps and into the nearby structures instead of trying to fight in the open. The fire can also damage enemies positioned beneath it, so use the environment when you need to thin a group.
Continue toward the lower courtyard, where Lothric Knights patrol near the route to Emma. Their shield attacks and delayed sword swings punish frantic hits. Pull them separately with a cautious step or ranged attack. If you reach the courtyard from the side, enter the building and activate the lift. This elevator connects the lower section to the High Wall bonfire area and greatly shortens every later run to Vordt. Ride it once in both directions so you know the shortcut is active.
- Pass the wyvern section without fighting in the open fire lanes.
- Defeat or bypass the Lothric Knights one at a time.
- Activate the elevator linking the lower courtyard with the High Wall bonfire.
3. Rescue Greirat and reach Emma’s cathedral
An optional locked cell on the lower High Wall contains Greirat of the Undead Settlement. The Cell Key is found in the High Wall buildings, so explore the rooms and side passages before committing to the boss route. Free Greirat and speak with him at Firelink Shrine if you want his later services and item requests. This does not affect access to Vordt, so you can postpone the rescue if the area is proving dangerous.
For the required route, return through the shortcut toward the cathedral at the far end of the lower wall. Deal with the sword and spear knights separately; the red-eyed knight nearby is an optional stronger opponent and can be left alone. Enter the cathedral and speak with Emma, High Priestess of Lothric. Exhaust her dialogue to receive the Small Lothric Banner. Speaking with her again also allows you to join the Way of Blue covenant, though the covenant is not required for campaign progression.
- Obtain the Cell Key and rescue Greirat if pursuing his quest.
- Speak with Emma inside the cathedral.
- Receive the Small Lothric Banner before entering Vordt’s approach.
4. Defeat Vordt of the Boreal Valley
From Emma’s cathedral, take the stairs toward the large gate and the arena. Open the shortcut route near the boss approach so the elevator is available for future attempts. Before entering the fog, spend your souls if you are carrying enough to lose and make sure your equipment load still permits a normal roll.
Vordt is safest when fought from his rear legs or flank. His forward mace swings cover the space in front of him, while staying close behind him often causes attacks to miss. Strike after a completed swing, then stop before your stamina is empty. Avoid remaining in the frost cloud produced by his breath; move to his side or behind him and attack only after the breath ends.
At about half health, Vordt begins chaining charges across the arena. Sprint diagonally away from the charge line or roll through the attack as it reaches you, but do not roll repeatedly until your stamina is gone. After the charge sequence, he may pause for another frost breath, creating a dependable opportunity to move behind him. If you die, use the elevator and run past enemies rather than spending Estus on the approach.
- Fight from Vordt’s rear or flank instead of standing in front of him.
- Survive the repeated charge sequence with stamina available for the recovery.
- Defeat Vordt and collect the Soul of Boreal Valley Vordt.
5. Raise the banner and continue to the Undead Settlement
After Vordt is defeated, leave the arena through the large doorway and follow the broken wall toward the overlook. Interact at the edge when prompted and raise the Small Lothric Banner. Batwing Demons carry you to the Undead Settlement. This is the normal continuation of the campaign; Vordt does not open Lothric Castle directly.
At Firelink Shrine, decide whether to consume or reserve Vordt’s soul. Boss souls can be transposed later, so do not spend one automatically if you are interested in a boss weapon or spell. Continue through the Undead Settlement and the later regions on the normal route. The Dancer is a later gate rather than the next required fight.
- Raise the Small Lothric Banner beyond Vordt’s arena.
- Arrive in the Undead Settlement.
- Reserve Vordt’s soul until you have checked the transposition options.
6. Return for the Dancer and open Lothric Castle
The normal Dancer encounter becomes available after the required Lord of Cinder progression brings you back to Emma’s cathedral. Speak with Emma and obtain the Basin of Vows. Approach the altar behind her chair to trigger the encounter if it has not already begun. Killing Emma early can also start the fight, but that is an optional challenge and is not recommended for a first campaign because your weapon, health, and healing supply will usually be underdeveloped.
The Dancer’s attacks have wide arcs and long combinations. Stay near her side when you can read the movement, attack once or twice after a completed sequence, and preserve stamina for the next dodge. Do not rely on holding your shield through the entire fight. In the second phase, create distance when she begins extended spinning attacks rather than trying to interrupt every rotation. Use the arena pillars as temporary cover when healing, but do not become trapped against them.
After defeating the Dancer, place the Basin of Vows on the statue at the rear of the arena. The ladder rises, opening the route into Lothric Castle. Light the Dancer bonfire, climb upward, and proceed through the castle only after repairing equipment and spending souls.
- Return to Emma after the relevant Lord of Cinder progression.
- Obtain and use the Basin of Vows to trigger the normal Dancer route.
- Defeat the Dancer, place the Basin, and climb into Lothric Castle.
Before you move on
- Vordt of the Boreal Valley is defeated and the Soul of Boreal Valley Vordt has been collected or reserved.
- The Small Lothric Banner was obtained from Emma and raised beyond Vordt’s arena.
- The Undead Settlement is accessible, and the High Wall elevator shortcut is active.
- For the later progression gate, Emma has provided the Basin of Vows, the Dancer has been defeated, the Basin has been placed, and the ladder into Lothric Castle is open.
References for this chapter
- FromSoftware — Dark Souls III: The Fire Fades Edition release information
- High Wall of Lothric - Neoseeker Dark Souls III Walkthrough
- High Wall of Lothric - Gamer Guides
- Dancer of the Boreal Valley - Neoseeker Dark Souls III Walkthrough
- Bandai Namco / FromSoftware — Dark Souls III The Fire Fades Edition PS4 Starter Guide
Undead Settlement and the Curse-Rotted Greatwood
The Undead Settlement is the mandatory route after Vordt that leads onward to the Road of Sacrifices. Its NPC rescues, covenant recruitment, item collection and the Curse-Rotted Greatwood are optional or quest-dependent, but the region itself is not a skippable branch. Recruit Yoel at the Foot of the High Wall if pursuing the Usurpation of Fire, and use Draw Out True Strength five times before the Abyss Watchers are defeated. The settlement also contains an Estus Shard, an Undead Bone Shard, Irina, Siegward’s Fire Demon encounter, the giant’s white-birch routes and the early Mound-Makers recruitment. Defeating the optional Curse-Rotted Greatwood awards the Transposing Kiln, which allows Ludleth to exchange boss souls for weapons, spells and rings. Complete time-sensitive NPC and covenant events before killing the Greatwood if you want their early versions.
Enter the mandatory settlement route and recruit Yoel if needed
From the Foot of the High Wall bonfire, cross the bridge and continue toward the large settlement gate. The Undead Settlement is the normal campaign route after Vordt; do not treat the area itself as optional. Open the gate, light the Undead Settlement bonfire and follow the streets, houses and wooden platforms toward the Cliff Underside and Dilapidated Bridge areas. The Road of Sacrifices can be reached from this region without defeating the Curse-Rotted Greatwood.
Before moving deep into the settlement, return toward the broken bridge near the Foot of the High Wall and inspect the group of dead pilgrims. Yoel of Londor is the surviving pilgrim. Speak with him and accept his service to move him to Firelink Shrine. Recruiting Yoel is optional unless you want his dialogue or the Usurpation of Fire route.
For Usurpation of Fire, speak with Yoel at Firelink Shrine and choose Draw Out True Strength whenever the option appears. Use the service five times to obtain five Dark Sigils. The opportunities depend on accumulating hollowing through deaths, so return to Yoel when another free level becomes available. Complete all five before defeating the Abyss Watchers; after that progression, Yoel dies and this part of the route can no longer be started normally. Do not ask the Fire Keeper to heal the Dark Sigils while pursuing this ending.
- Open the main settlement gate and light the Undead Settlement bonfire.
- Speak with Yoel at the broken pilgrim bridge if pursuing his quest.
- Move Yoel to Firelink Shrine.
- Use Draw Out True Strength five times before defeating the Abyss Watchers if pursuing Usurpation of Fire.
Open the settlement shortcuts and return Loretta’s Bone
Advance through the settlement’s burning-tree square, houses and raised walkways. Workers, evangelists, firebomb throwers, thralls and saw-wielding hollows often attack from groups or hidden ledges. Pull enemies into open ground and avoid fighting several evangelists beside the burning tree. Open doors and ladders as you progress so the bonfires and shortcuts reduce the distance to later attempts.
Search the upper route for the hanging corpse carrying Loretta’s Bone. Strike the rope or body so the item falls, then collect it. If Greirat has been released from his cell on the High Wall, return the bone to him at Firelink Shrine and exhaust his dialogue. This advances his personal quest but is not required for reaching the Road of Sacrifices.
The settlement contains many optional embers, rings, Titanite Shards and consumables. Collect them when safe, but keep the main route in view: proceed through the settlement toward the Cliff Underside bonfire, the elevator tower and the paths beyond the graveyard.
- Open nearby doors, ladders and shortcuts.
- Collect Loretta’s Bone from the hanging corpse.
- Return Loretta’s Bone to Greirat if his Firelink quest is active.
- Light the Cliff Underside bonfire.
Collect the settlement upgrades and meet Siegward
Near the large burning tree, search the bodies around the settlement workers for an Estus Shard. Return to Firelink Shrine and give it to Andre to increase the number of Estus charges. In the graveyard and white-birch area, collect the Undead Bone Shard if you are comfortable navigating the giant’s arrows. Burn it at the Firelink Shrine bonfire to improve the amount restored by each Estus use.
At the elevator tower, speak with Siegward of Catarina before riding. The lift has an upper and lower destination. Step onto the platform and use the upper route to reach Siegward’s position, then take the lower route toward the open area where the Fire Demon waits. Speak with Siegward again before attacking the demon so his encounter proceeds correctly.
The elevator and surrounding rooftops connect several optional item paths. Search them for upgrade materials and rings if desired, but do not assume every detour is needed for campaign progress.
- Give the Estus Shard to Andre.
- Burn the Undead Bone Shard at the Firelink Shrine bonfire.
- Speak with Siegward at the elevator.
- Use the elevator’s upper and lower destinations.
Defeat the Fire Demon and decide how to handle the giant
The Fire Demon encounter is optional. Fight beside Siegward if you want to advance his quest. Stay near the demon’s side or rear rather than directly in front of its club. Punish the recovery after an overhead smash or broad swing, then disengage before the next attack. Siegward can draw attention, but he is not invulnerable, so finish the fight rather than waiting for him to carry it.
After the demon dies, speak with Siegward until his dialogue is exhausted. This awards the Siegbrau and the Toast and Sleep gestures. If the encounter is skipped, the main campaign route remains available, but Siegward’s quest state will not advance through this event.
The giant can be reached through the tower and overlooks the white-birch and graveyard paths. Speak with him and choose the friendly response if you want his arrows to stop targeting you. This makes later exploration safer, but befriending him is optional. Collect Young White Branches and nearby items only after finding cover from the arrow volleys.
- Defeat the Fire Demon if following Siegward’s quest.
- Exhaust Siegward’s post-fight dialogue.
- Speak with the giant and choose the friendly response if desired.
- Use cover while collecting white-birch and graveyard items.
Rescue Irina and unlock the graveyard sewer
Find the Mortician’s Ashes and the Undead Bone Shard in the graveyard routes. Give the ashes to the Shrine Handmaid at Firelink Shrine and purchase the Grave Key. Return to the sewer entrance near the Dilapidated Bridge bonfire, unlock the door, pass the rats and follow the passage to Irina’s cell.
Speak with Irina and accept her service. Eygon of Carim is outside the cell; speak with him as well. Irina’s rescue is optional for campaign completion, but she becomes a miracle trainer and her quest can be affected by which tomes you give her.
If you want Irina to remain on her safer miracle-training route, do not give her the Londor Braille Divine Tome or Deep Braille Divine Tome. Give those darker tomes to Karla later instead. This is a quest preference, not a requirement for opening the Road of Sacrifices.
- Find the Mortician’s Ashes.
- Buy the Grave Key from the Shrine Handmaid.
- Unlock Irina’s cell and speak with her.
- Speak with Eygon outside the cell.
- Give dark miracle tomes to Karla instead of Irina if preserving her safer quest state.
Recruit the Mound-Makers before killing the Greatwood
The early Mound-Makers recruitment is optional and should be completed before the Curse-Rotted Greatwood dies. From the settlement rooftops, follow the route toward the hostile thralls and locate the Hollow Manservant carrying a cage on his back. Approach from behind and interact with the cage. Do not attack him. The interaction transports you to the Pit of Hollows.
Speak with Holy Knight Hodrick in the pit and join the Mound-Makers covenant. This is the simplest recruitment method. If the Greatwood has already been defeated, a later Sirris-related route can still provide the covenant, but it has additional quest conditions and can be lost through incompatible actions. Reserve the early cage route if you want the least complicated result.
- Find the cage-bearing Hollow Manservant before the Greatwood dies.
- Interact with the cage from behind without attacking.
- Speak with Holy Knight Hodrick in the Pit of Hollows.
- Join the Mound-Makers if you want the covenant.
Defeat the optional Curse-Rotted Greatwood
The Curse-Rotted Greatwood is beyond the settlement workers, stone arch and graveyard route. It is not required to reach the Road of Sacrifices, but it is required for the Transposing Kiln and its boss soul. Before entering, clear nearby enemies and confirm any time-sensitive NPC or covenant events are complete.
In the first phase, attack the pale pustules on the Greatwood’s limbs and lower body. Trunk attacks are inefficient. Circle around the boss, destroy one or two exposed pustules, then retreat when it shifts, slams or releases a damaging attack. After enough pustules are destroyed, the floor collapses and the second phase begins.
In the second phase, the Greatwood exposes a large pale arm beneath its body. Continue targeting pustules while watching the arm’s grabs and sweeping attacks. Do not stand beneath the boss longer than necessary. Attack after the arm completes a swing or after the Greatwood recovers from a slam, then move away from the damaging fluid that spreads across the floor.
Defeating the boss awards the Soul of the Rotted Greatwood and the Transposing Kiln. Return to Firelink Shrine and give the kiln to Ludleth. Check the available transpositions before consuming the boss soul, because consuming it removes its current-cycle exchange options. If you die, recover the bloodstain outside the fog gate, restock Estus and use the opened settlement shortcuts for the next attempt.
- Finish optional NPC and covenant events before the boss if desired.
- Destroy exposed pustules instead of focusing on the trunk.
- Avoid the second-phase arm, slams and damaging floor fluid.
- Defeat the Curse-Rotted Greatwood if you want the Transposing Kiln.
- Give the Transposing Kiln to Ludleth and review boss-soul exchanges.
Before you move on
- The Undead Settlement has been traversed and the route toward the Road of Sacrifices is open.
- Yoel has been recruited and moved to Firelink Shrine if his quest is desired.
- Five Draw Out True Strength interactions have been completed before defeating the Abyss Watchers if pursuing Usurpation of Fire.
- The Estus Shard has been given to Andre.
- The Undead Bone Shard has been burned at Firelink Shrine.
- Loretta’s Bone has been returned to Greirat if his quest is active.
- Irina has been freed and Eygon has been spoken to if pursuing their quest.
- Siegward’s Fire Demon encounter is complete if following his quest.
- The Mound-Makers covenant has been obtained through the cage route, or the later Sirris route has been deliberately reserved.
- The Curse-Rotted Greatwood is defeated if the Transposing Kiln is wanted.
- The Transposing Kiln has been delivered to Ludleth, and the Greatwood soul has not been consumed before checking its transpositions.
References for this chapter
- FromSoftware — Dark Souls III: The Fire Fades Edition release information
- Undead Settlement - Dark Souls III Walkthrough and Guide
- Mound-makers - Dark Souls 3 Walkthrough and Guide
- Undead Settlement - Darksouls3
- Chapter 3: Curse-rotted Greatwood - Dark Souls III Walkthrough & Guide
- Undead Settlement - Dark Souls III Walkthrough & Guide
Road of Sacrifices and Crystal Sage
The Road of Sacrifices branches after Halfway Fortress. The western side of the marsh leads through the Crucifixion Woods and ruined keep to the Crystal Sage, while the eastern route leads into Farron Keep. Activate the area bonfires, speak with Anri and Horace, and recruit Orbeck if you have at least 10 Intelligence. Use the Crucifixion Woods bonfire for the shortest practical return to the boss. The Crystal Sage is vulnerable to fast pressure: close the distance immediately, attack after each teleport, and use pillars to block sorceries. In the second phase, the true Sage casts purple magic while the copies cast blue magic. Defeat the real Sage, light the new bonfire, and follow the exit toward the Cathedral of the Deep.
Enter the Road of Sacrifices and light the first bonfires
From the Undead Settlement, use the lift in the tower where you first encounter Siegward of Catarina. Ride it to the lower level, leave through the door, and follow the passage past the Boreal Outrider Knight. The Road of Sacrifices bonfire is beyond this route. Rest there before continuing.
The opening path contains ambushes, shielded enemies, and attackers that can hide among the trees and ruins. Advance with your shield or weapon ready, but avoid holding guard until your stamina is empty. Pull enemies individually with a thrown knife, bow shot, or a short step into their detection range, then retreat to open ground before fighting.
- Light the Road of Sacrifices bonfire.
- Spend souls before entering the marsh if you are close to an upgrade or level.
- Keep a physical-damage weapon available for the Crystal Sage.
Reach Halfway Fortress and handle the branch point
Continue along the path until you cross the stone bridge and descend toward Halfway Fortress. Light the bonfire and exhaust Anri of Astora’s dialogue. Speak with Horace the Hushed as well; speaking to him gives access to the Blue Sentinels covenant. These conversations matter for later NPC progression, even if you do not intend to use the covenant.
From Halfway Fortress, the swamp and surrounding paths divide the area. Farron Keep lies along the route toward the deep marsh, while the Crystal Sage is reached through the ruined structures on the opposite side. You can return to Firelink Shrine now to level up, reinforce your weapon, and spend any upgrade materials found in the area.
- Light the Halfway Fortress bonfire.
- Speak with Anri until dialogue repeats.
- Speak with Horace and receive the Blue Sentinels option if desired.
Cross the marsh and activate Crucifixion Woods
Enter the shallow marsh and use trees, raised ground, and ruined walls to separate the Ghru and other enemies. Do not charge into the largest group. Step into an enemy’s range, retreat toward dry ground, and finish that target before drawing another. The water slows movement and makes healing dangerous, so fight on firm ground whenever possible.
The giant crabs and several item branches are optional. If you want to explore them, draw one crab away from the other and keep the smaller enemies cleared first. Otherwise, move around the edge of the marsh and locate the Crucifixion Woods bonfire. This is the most useful bonfire for repeated Crystal Sage attempts because it is close to the ruined keep route.
- Light the Crucifixion Woods bonfire.
- Collect nearby Titanite and Estus upgrades only after the surrounding enemies are under control.
- Leave the giant crabs for later if they are costing too much healing.
Clear the ruined keep and recruit Orbeck
From Crucifixion Woods, enter the large ruined building and advance through the lower rooms. Lycanthropes, casters, and melee enemies can overlap their attacks, so use the walls and doorways to create one-on-one fights. A ranged pull is safer than sprinting through the center of the structure.
Before continuing to the boss, take the upper route to the room overlooking the approach. Orbeck of Vinheim is seated there. You need at least 10 Intelligence to recruit him. Speak with him, choose to learn sorceries, and agree to his terms; he then moves to Firelink Shrine. Give him at least one sorcery scroll soon after recruitment rather than leaving his inventory empty while continuing to defeat bosses. If you do not meet the Intelligence requirement, you can leave him for a later visit, but do not forget him if you want his sorcery shop and quest rewards.
The area also contains the Braille Divine Tome of Carim in a lower side path. Give it to Irina only if you intend to use her miracle inventory and have considered the consequences of the other tomes in her quest.
- Recruit Orbeck if Intelligence is at least 10.
- Give Orbeck a scroll soon after he reaches Firelink Shrine.
- Use the building’s walls and doorways to split caster and melee groups.
Prepare the Crystal Sage approach
After visiting Orbeck, return to the lower room beneath his study and continue through the keep. The route winds through additional enemies before reaching the boss approach. Use Crucifixion Woods rather than Halfway Fortress for the runback, and sprint past isolated enemies only after you know where the fog entrance is.
Favor your strongest properly scaled physical weapon. Fire damage can also help, but do not replace a reliable upgraded weapon with an unscaled elemental option. Magic-resistant armor or a magic-resistance ring is useful, though movement and damage are more important than trying to block every spell. If Eygon of Carim’s summon sign is available from your Irina progression, it appears in the small room near the boss approach. Summoning him can draw attention away from the copies in the second phase.
- Use Crucifixion Woods as the Crystal Sage runback bonfire.
- Keep enough Estus for the boss instead of spending every charge in the keep.
- Check the small room near the fog entrance for Eygon’s summon sign if his quest state permits it.
Defeat the Crystal Sage
At the start, sprint toward the Sage instead of waiting in the center of the arena. The boss attacks with tracking sorceries and crystal projectiles, but the distance is safest when you are close enough to punish its casting recovery. Attack after a spell cast or staff movement, then disengage before your stamina is empty. If the Sage teleports, immediately scan the arena and run to the new position rather than allowing it to keep firing from range. Stone pillars provide cover while you recover stamina or avoid overlapping projectiles.
When the Sage reaches its second phase, several copies appear. The real Sage uses purple magic; the false copies use blue magic. Track the purple attacks and rush their source. If you cannot identify the colors clearly, strike each copy once: false images disappear quickly, while the true boss takes normal damage. Do not remain in the middle of the arena while searching, because the copies can combine their shots into a dangerous barrage. Kill a nearby copy if it is blocking your route or firing at close range, then resume the chase immediately.
The boss is fragile compared with many later encounters, so prolonged caution is usually more dangerous than controlled aggression. Once the Crystal Sage falls, collect the Soul of a Crystal Sage and light the Crystal Sage bonfire.
- Close distance immediately at the start of the fight.
- Identify the real boss by its purple magic in the second phase.
- Use pillars to break simultaneous spell lines.
- Collect the Soul of a Crystal Sage and light the boss bonfire.
Leave the arena and choose the next route
Follow the path out of the Crystal Sage arena. The route continues toward the Cathedral of the Deep, with only a small number of enemies on the way. Light the Cathedral bonfire when you reach it, then decide whether to continue into the Cathedral or return to Farron Keep and handle that branch first. Both regions remain available after the Sage dies.
Before consuming the boss soul, check Ludleth’s transposition options at Firelink Shrine. The Soul of a Crystal Sage can be exchanged for unique equipment or sorcery-related rewards, so do not consume it automatically if you are interested in boss transposition.
- The Crystal Sage bonfire is active.
- The route toward the Cathedral of the Deep is open.
- The Farron Keep branch remains available from the marsh.
- The Soul of a Crystal Sage is stored or held until transposition choices are checked.
Before you move on
- The Road of Sacrifices, Halfway Fortress, and Crucifixion Woods bonfires are active.
- Anri and Horace have been spoken to at Halfway Fortress.
- Orbeck has been recruited, or the character intentionally lacks the Intelligence requirement.
- The Crystal Sage is defeated, the Crystal Sage bonfire is lit, and the boss soul is retained or transposed knowingly.
- The path toward the Cathedral of the Deep is open, and the route back to Farron Keep remains available.
Cathedral of the Deep and Deacons of the Deep
From the Crystal Sage route, cross the graveyard and enter the Cathedral of the Deep. Light the Cleansing Chapel bonfire, then open the two shortcuts that connect the chapel to the cathedral interior and the graveyard-side entrance. Explore the optional well, Patches and Rosaria routes only if their NPC quests or rewards matter to your run. Defeat the Deacons of the Deep by pursuing the red-aura target rather than clearing the entire crowd. The boss awards the Small Doll, which is required later to pass the magical barrier into Irithyll of the Boreal Valley. It is not required to enter Ashes of Ariandel. With the DLC installed, reaching Cleansing Chapel is enough to begin Ashes of Ariandel by interacting with Slave Knight Gael or the nearby painting interaction; this guide places that visit after the Deacons for route continuity, not because the boss is a prerequisite. Return to Firelink Shrine afterward to advance Anri’s dialogue and check any ending-related quest steps.
1. Reach Cleansing Chapel and establish the regional checkpoint
From the Crystal Sage bonfire, take the passage beyond the arena and follow the path into the graveyard. Several corpses rise as you approach them, and Grave Wardens can attack from among the bodies. Move slowly enough to identify the enemies before collecting items, then clear each cluster rather than sprinting through the entire cemetery.
Continue past the graveyard toward the large cathedral structure. The first important bonfire for this region is Cleansing Chapel; there is not a separate early Cathedral of the Deep bonfire that needs to be lit before it. Enter the chapel, light the bonfire and use it as your main recovery point while opening the area’s shortcuts.
The chapel has multiple exits and locked routes that become useful later. Before pushing deep into the cathedral, spend souls if you are carrying an unsafe amount and make sure your main weapon is repaired and reinforced as far as your available materials allow.
- Cross the graveyard beyond the Crystal Sage route.
- Light the Cleansing Chapel bonfire.
- Use Cleansing Chapel as the main checkpoint for the area.
- Repair equipment and spend souls before deeper exploration.
2. Enter the cathedral and open the first chapel shortcut
Leave Cleansing Chapel through the exterior route and work across the walkways and rooftops toward the cathedral. Dogs, Evangelists, Grave Wardens, ranged attackers and Hollow Slaves can overlap here, so pull enemies back to a wider section before fighting. Avoid committing to a duel on a narrow roof if another enemy can attack from behind.
Enter the cathedral through the elevated entrance and continue through the interior rooms. Watch for Deacons using fireballs and for slimes attached to ceilings. After passing through the room containing several Deacons, locate the elevator and ride it down.
At the bottom, open the gate and the nearby large wooden door. This creates the first major return route from the cathedral interior to the Cleansing Chapel area. Confirm the shortcut by returning to the chapel, then rest before continuing. If you die later, this route removes much of the initial rooftop approach.
- Cross the cathedral rooftops.
- Enter the cathedral through the elevated entrance.
- Ride the interior elevator downward.
- Open the gate and the door leading back toward Cleansing Chapel.
3. Open the second shortcut and reach the boss approach
From the newly opened chapel route, return to the cathedral interior and continue through the lower halls. The area contains Giant Slaves, Cathedral Knights, Hollow Slaves, poison-breath statues and sludge-covered ground. The giants are not required for reaching the Deacons. Bypass them if you are low on healing or carrying souls you cannot afford to lose.
Continue through the interior until you reach the route leading toward the upper cathedral entrance. Find the elevator that rises toward the cathedral’s large front doors. Ride it upward and open those doors from the inside. This creates the second major shortcut: from Cleansing Chapel, you can now leave by the exterior route, cross the graveyard and enter the cathedral through the opened main doors.
After opening the doors, follow the cathedral interior toward the raised altar and the Deacons’ fog gate. Cathedral Knights and groups of Deacons guard this approach. Pull the knights away from the casters when possible, and do not spend all your Estus on optional enemies immediately before the boss.
- Pass the lower cathedral halls.
- Bypass or defeat the Giant Slaves as appropriate.
- Ride the elevator to the large cathedral entrance.
- Open the cathedral’s main doors from the inside.
- Reach the Deacons’ fog gate with healing available.
4. Handle optional NPC routes without confusing them with required progress
The well outside Cleansing Chapel can be checked if you are following Siegward of Catarina’s quest. Its events are optional for reaching the Deacons. Patches can also appear through an optional cathedral event involving the bridge and a disguised figure; that route can affect dialogue, gestures and equipment, but it is not required for the boss.
Rosaria’s Bed Chamber is another optional detour reached through the cathedral rafters. It offers covenant access and other rewards, but the rafters involve narrow beams and dangerous drops. Postpone this route if you are carrying a large number of souls or only want to advance the campaign.
If your immediate objective is the Small Doll and main-route progression, finish the shortcuts and proceed to the boss. Return afterward for NPC quests, covenant content and missed items.
- Check Siegward’s well if his quest is active.
- Visit Patches if his optional cathedral event matters to your run.
- Visit Rosaria’s Bed Chamber only if you want its covenant or rewards.
- Do not mistake optional NPC routes for Deacons prerequisites.
5. Defeat the Deacons of the Deep
The Deacons share one health bar. Most enemies in the arena are ordinary targets, but one Deacon carries a red aura. That enemy is the active target that reduces the shared health bar. Move through the crowd, locate the red-aura Deacon and attack it until the aura transfers to another member of the group.
Use short attack strings and keep circling toward the outside of the crowd. Wide horizontal attacks can clear space, while quick weapons make it easier to reach the active target before the group surrounds you. Fireballs and dark attacks come from some of the Deacons, so do not stand still after finishing a combo.
As the shared health bar drops, the boss develops more dangerous attacks and can create a dark mass that causes heavy damage and curse buildup. Interrupt the active target when possible, then move away from the mass and reset your position. You do not need to kill every Deacon in the room. Continue changing targets until the shared health bar is empty.
If you die, use the Cleansing Chapel route and the two shortcuts rather than repeating the full opening approach. Embering before the attempt allows access to nearby summon signs, but the fight can be completed alone by maintaining movement and focusing on the red aura.
- Identify and attack the red-aura Deacon.
- Keep moving around the edge of the crowd.
- Create distance before healing.
- Avoid the dark mass and curse buildup.
- Defeat the shared health bar.
6. Claim the Small Doll and update Firelink Shrine NPCs
The Deacons award the Small Doll. Keep it in your inventory because it is used later at the magical barrier blocking the normal route into Irithyll of the Boreal Valley. It is a key item rather than a consumable, and defeating the Deacons is the source of the item needed for that main-game barrier.
Return to Firelink Shrine after the boss. If you previously met Anri of Astora and Horace the Hushed at the Halfway Fortress, speak with Anri and exhaust the available dialogue about the next destination. Speak with Horace as well if he still has new dialogue.
This Firelink conversation advances Anri’s quest, but it does not by itself guarantee the Usurpation of Fire ending. That ending also depends on earlier Londor steps involving Yoel and Yuria, including the required free-leveling progression. If those steps were not completed, continue the normal route without assuming the ending remains available.
- Collect the Small Doll after defeating the Deacons.
- Return to Firelink Shrine.
- Exhaust Anri’s available dialogue about Irithyll.
- Speak with Horace if new dialogue is available.
- Confirm earlier Yoel and Yuria requirements separately if pursuing Usurpation of Fire.
7. Enter Ashes of Ariandel when desired
With Ashes of Ariandel installed, reaching Cleansing Chapel is sufficient to begin the DLC. Slave Knight Gael appears beside the chapel bonfire area, next to the painting. Speak with him and use the available travel interaction; depending on the interaction prompt or localization, the game may present the action through Gael or the nearby painting fragment.
The Deacons do not need to be defeated first, and the Small Doll is not an Ashes of Ariandel entry requirement. This guide places the Gael visit after the Deacons because it keeps the chapter’s route order together: first establish the chapel, complete the cathedral objective, collect the Small Doll and then decide whether to enter the DLC.
You may enter Ashes of Ariandel immediately or postpone it and continue through the main game toward Irithyll. If Gael or the interaction prompt is absent, rest at the bonfire or reload the area, then verify that the DLC is installed and available on the PS4 system. The Fire Fades Edition contains both Ashes of Ariandel and The Ringed City, but this chapter’s DLC entry point is specifically the Cleansing Chapel interaction.
- Confirm the Small Doll is in the inventory.
- Use the Small Doll later at the Irithyll barrier.
- Return to Cleansing Chapel after the cathedral and Firelink checks.
- Interact with Slave Knight Gael or the nearby painting interaction to enter Ashes of Ariandel if desired.
- Remember that defeating the Deacons was the chosen route order, not a DLC requirement.
Before you move on
- The Deacons of the Deep are defeated.
- The Small Doll is in the inventory.
- The Cleansing Chapel bonfire is lit.
- The cathedral-interior elevator and return door to Cleansing Chapel are open.
- The large cathedral entrance and its elevator route are open.
- Anri’s available post-Deacons Firelink dialogue has been exhausted.
- The Small Doll can be used at the Irithyll barrier.
- If pursuing Usurpation of Fire, the earlier Yoel and Yuria prerequisites have also been completed.
- If starting Ashes of Ariandel, Slave Knight Gael or the nearby painting interaction at Cleansing Chapel has produced the travel prompt.
- If postponing the DLC, the player has confirmed that Deacons completion was optional for entry and can continue toward Irithyll.
References for this chapter
- FromSoftware FAQ: Dark Souls III The Fire Fades Edition and DLC Access
- FromSoftware — Dark Souls III: The Fire Fades Edition release information
- Chapter 5: Deacons of the Deep — Dark Souls III Walkthrough and Guide
- Cathedral of the Deep — Dark Souls III Walkthrough and Guide
- Cathedral of the Deep — Dark Souls III Guide
- Darksouls3 Wikidot — Painted World of Ariandel
Farron Keep and the Abyss Watchers (Lords of Cinder)
Farron Keep is a poisonous swamp whose required route is controlled by three signal flames. From the Farron Keep bonfire, use the islands, stone ramps, towers, and ruined buildings as landmarks. Extinguish all three flames, then use the opened route to reach the Farron Keep Perimeter bonfire and the Abyss Watchers. The first boss phase is a shifting group fight: one Watcher uses the main health bar, additional Watchers join temporarily, and a red-eyed Watcher attacks both the player and the others. The second phase is a single flaming Watcher with delayed fire trails. The area also contains Sage’s Coal, Dreamchaser’s Ashes, the Watchdogs of Farron covenant, titanite, and optional equipment.
1. Prepare at the Farron Keep bonfire
Enter Farron Keep from the Road of Sacrifices and activate the Farron Keep bonfire inside the ruined structure. Poison buildup begins when you wade through the swamp. Carry Purple Moss Clumps if you have them, but do not stop in the open water just to cure a small amount of buildup. Reach an island or dry ground first, then heal or cure poison when enemy pressure allows.
Spend your souls before making the flame run. A reinforced main weapon and enough Vigor to survive a Ghru combo matter more than collecting every item immediately. Keep at least enough stamina for one defensive roll after attacking. If your build uses a shield, do not hold it up continuously in deep water; poison, stamina loss, and enemy attacks can combine quickly.
- Activate the Farron Keep bonfire.
- Carry Purple Moss Clumps or another poison-management option.
- Spend souls and reinforce your main weapon before the swamp route.
2. Reach the first flame and collect the nearby coal
Leave the bonfire and work around the nearby islands and ruined structures rather than crossing the deepest water in a straight line. Use the visible burning structures as navigation points. Move toward the stone ramp and overturned building, then continue through the Ghru-held paths toward the first flame altar.
The first flame is beside a small altar near an archway. Approach it only after pulling nearby Ghru away from the stairs. Extinguish the flame, then retreat through the arch if several enemies are converging. Continue through the surrounding swamp and keep the first altar behind you as a reference point.
A Darkwraith patrols one of the routes near the trees. You can fight it for the reward, but it is optional. Darkwraith attacks have long reach and a dangerous grab; dodge sideways when its hands produce the bright grab effect instead of trading blows. The Sage’s Coal is found beyond this section. Give it to Andre later if you want access to additional infusion options.
- Extinguish the first flame at the altar by the archway.
- Collect the Sage’s Coal only if the Darkwraith route is safe for your character.
- Use islands and ramps to avoid fighting multiple Ghru in deep water.
3. Find the second flame and open the route toward the perimeter
From the first altar, cross toward the next island and climb the stairs near the burning structure. Watch for Mad Ghru, whose jumping attacks can cover more distance than their stance suggests. Attack once or twice, then roll away rather than trying to finish them with a long string.
Extinguish the second flame at the top of the stairs. A bridge beyond it contains several Ghru, including a conjurator that can use Poison Mist. Pull the spear-wielding enemies back with a ranged attack or rush the conjurator before it creates a cloud. Once the bridge is clear, continue to the bonfire area near the large stone doors and activate the Farron Keep Perimeter bonfire.
The Perimeter bonfire is the important recovery point for the boss. If the swamp has drained your Estus or poison cures, rest here before attempting the arena. The large doors and the sound of the Watchers identify the correct direction from this checkpoint.
- Extinguish the second flame.
- Defeat or bypass the conjurator on the bridge.
- Activate the Farron Keep Perimeter bonfire.
4. Extinguish the third flame and decide how much optional loot to take
Return to the Farron Keep bonfire if necessary and leave through the side that leads toward the deeper water and rocky wall. Follow the rocks and stairs to the final flame. An Elder Ghru may be nearby; do not fight several Elder Ghru in the open swamp. Lure one toward an archway, use ranged attacks, or leave the enemies alone while you reach the stairs.
Extinguish the third flame. With all three flames out, the sealed doors on the route to the Abyss Watchers open. You can now go directly back to the Farron Keep Perimeter bonfire and enter the boss arena, or make an optional sweep for upgrades.
The most useful optional progression items include titanite, the Greatsword, the Sage’s Scroll, and the Dreamchaser’s Ashes. The ashes are reached through a concealed wall near the tower and lead to the Watchdogs of Farron covenant area. None of these rewards is required to defeat the Abyss Watchers, so do not risk a large soul stockpile for them if the boss is your immediate goal.
- Extinguish the third flame near the rocky wall and stairs.
- Confirm that the sealed route has opened.
- Collect Dreamchaser’s Ashes or optional weapons only if you can safely return to a bonfire.
5. Control the first Abyss Watchers phase
Enter the arena and identify the first Watcher whose health contributes to the main boss bar. Additional Watchers rise during the phase. Some attack the player, while a red-eyed Watcher attacks both the player and the other Watchers. The red-eyed enemy is not a friendly summon, so keep watching its position, but allow it to distract the main Watcher when possible.
Stay near the edge of the fight without trapping yourself against the wall. Let the Watchers create space between one another, then punish the one connected to the main health bar with one or two attacks. If two enemies turn toward you, disengage immediately. The goal is not to defeat every separate health bar; it is to reduce the main Watcher’s bar while the group is divided.
Responsive weapons can often interrupt a Watcher after a missed lunge or recovery animation. Slower weapons should use single heavy hits or backstabs only when the opening is clear. Avoid attacking through overlapping sword swings. The Watchers are primarily a melee threat here; the swamp’s poison is the environmental hazard, not a special boss mechanic that requires poison resistance.
- Track the Watcher linked to the main health bar.
- Use the red-eyed Watcher’s aggression to create openings.
- Retreat whenever multiple Watchers face you at once.
6. Defeat the flaming second phase
When the main health bar is depleted, the fight transitions to a solo second phase. The Watcher’s sword gains fire effects, and several attacks leave a delayed flame trail on the ground. Keep the boss near the center of the arena so the walls do not restrict your rolls.
Roll diagonally through the sword swings instead of retreating directly backward. Wait for a completed combo, then take one or two attacks and reset your position. The leaping attack and long sweeping strings are punishable only after they finish; attacking during their opening motion often leads to a trade or a delayed flame hit.
Fire resistance can reduce the punishment for mistakes, but timing is more important than specialized equipment. If you are embered and a summon sign is available, summoning is reasonable when repeated attempts are exhausting your Estus or your damage is too low. Summons are optional, and the fight can be completed solo by keeping the boss centered and refusing greedy follow-ups.
- Keep the boss away from the arena walls.
- Roll through the fire-enhanced swings and delayed trails.
- Punish completed attacks rather than the start of a long combo.
7. Confirm the victory and continue to the Catacombs
Defeating the Abyss Watchers awards the Cinders of a Lord and the Soul of the Blood of the Wolf. Light the boss bonfire before leaving. The Cinders are a required progression item for the throne at Firelink Shrine, while the boss soul is optional to consume and can be saved for transposition.
Return to Firelink Shrine and speak with Hawkwood after the victory if you are following his dialogue. Check Andre for the Sage’s Coal infusion options and visit the Shrine Handmaid if you collected ashes or equipment. The route beyond the boss leads into the Catacombs of Carthus, which is the next main campaign region.
The Farron Keep section is complete for campaign progression when all three flames have been extinguished, the Abyss Watchers have been defeated, and the boss bonfire is lit. Optional covenant rewards, titanite, spells, rings, and equipment can be collected before or after continuing.
- Light the Abyss Watchers bonfire.
- Obtain the Cinders of a Lord and Soul of the Blood of the Wolf.
- Speak with Hawkwood at Firelink Shrine after the victory.
- Confirm that the route to the Catacombs of Carthus is available.
Before you move on
- All three Farron Keep flames have been extinguished.
- The Farron Keep Perimeter bonfire has been activated.
- The Abyss Watchers’ first and flaming second phases have been defeated.
- The Cinders of a Lord and Soul of the Blood of the Wolf are in the inventory or storage.
- The Abyss Watchers boss bonfire is lit.
- Hawkwood has been spoken to at Firelink Shrine after the victory if his quest dialogue is being followed.
- The path into the Catacombs of Carthus is available.
References for this chapter
Catacombs, Smouldering Lake and Optional Bosses
After defeating the Abyss Watchers and Deacons of the Deep, complete Anri and Horace’s Firelink Shrine dialogue before entering the Catacombs of Carthus. Speak with Anri in both Catacombs locations. For the Usurpation of Fire route, do not reveal Horace’s location beside the rope bridge; find and defeat Horace in Smouldering Lake, then return to Anri and choose the response that does not disclose his location. The surviving-Anri route is an optional alternative and is labeled separately. High Lord Wolnir is required because his defeat opens the route to Irithyll. Smouldering Lake, the Carthus Sandworm and Old Demon King are optional, but they provide useful rewards, including an Undead Bone Shard and Lightning Stake. Break the rope bridge to create the lake entrance, use rock formations against the ballista, and attack Wolnir’s glowing bracelets rather than his body.
1. Finish the Firelink Shrine conversations
Before entering the Catacombs, return to Firelink Shrine after defeating the Deacons of the Deep. Find Anri of Astora and Horace the Hushed near the thrones and exhaust both characters’ dialogue. This establishes their Catacombs appearances and prevents confusion if one of them is not immediately visible later.
If you are pursuing the Usurpation of Fire ending, confirm that Yoel’s five free level-ups and Yuria’s appearance were completed earlier. Those requirements belong to the Londor questline and cannot be repaired by simply finishing the Catacombs. When ready, leave through the passage beyond the Abyss Watchers’ arena and light the Catacombs of Carthus bonfire.
- Defeat the Deacons of the Deep.
- Exhaust Anri’s Firelink Shrine dialogue.
- Exhaust Horace’s Firelink Shrine dialogue.
- Light the Catacombs of Carthus bonfire.
2. Speak with Anri near the first skeleton ball
From the Catacombs bonfire, follow the main route until you approach the long staircase patrolled by the first rolling skeleton ball. Before committing to the staircase, search the side corridor near the upper approach. Anri is waiting there and is looking for Horace. Speak with Anri until the dialogue repeats.
The curved-sword skeletons can close distance quickly, so draw them into a wider section before fighting. On narrow stairs, it is safer to let the skeleton ball pass and then move through rather than duel beside the ledge. Skeletons may reassemble after being knocked down; strike the loose bones again or continue onward if they are not blocking your route.
- Find Anri in the side corridor near the first skeleton-ball staircase.
- Exhaust Anri’s dialogue.
- Avoid fighting on the narrow staircase when the skeleton ball is approaching.
3. Cross the Catacombs and speak with Anri beside the bridge
Continue through the Catacombs, watching for pressure plates that trigger volleys of fire bolts. Check the floor before entering unfamiliar rooms, and use doorways to separate melee skeletons from archers and bomb throwers. The rolling skeleton balls can destroy enemies, but do not cross their path until they have passed.
Proceed until you reach the suspended rope bridge leading toward High Lord Wolnir. Before crossing it, take the raised side path near the bridge and follow it to Anri’s second Catacombs location. Speak with Anri and exhaust the dialogue. For the Usurpation of Fire route, do not reveal Horace’s location here. Choose the response that leaves his whereabouts undisclosed, then leave Anri in this area while you deal with Horace.
- Avoid the pressure-plate fire traps.
- Reach the suspended rope bridge before Wolnir’s arena.
- Find Anri on the raised path beside the bridge.
- For Usurpation of Fire, do not reveal Horace’s location.
4. Break the bridge and defeat Horace
Return to the rope bridge after speaking with Anri. Attack the bridge supports until the bridge collapses. The remaining structure becomes a ladder. Descend and light the Abandoned Tomb bonfire, then continue toward Smouldering Lake through the lower route.
At the lake entrance, turn toward the right-hand shoreline and look for a small tunnel. Horace is hostile at the end because he has hollowed. Defeat him before making any report to Anri. Use the tunnel walls to limit his movement, avoid backing into a corner, and heal only after creating space.
After Horace is dead, return to Anri’s position beside the rope bridge. For the Usurpation of Fire route, speak with Anri again and select the response that does not disclose Horace’s location. This conservative sequence preserves the intended route without relying on the alternate post-kill disclosure branch. Do not kill the Londor pilgrim concealed near the Church of Yorshka bonfire later in Irithyll.
- Break the rope bridge and descend the ladder.
- Light the Abandoned Tomb bonfire.
- Find Horace in the Smouldering Lake tunnel.
- Defeat Horace before reporting his location.
- Return to Anri and choose the non-disclosure response.
- For Usurpation of Fire, leave the Church of Yorshka pilgrim alive.
5. Optional surviving-Anri route
If you are not pursuing the Usurpation of Fire ending and want Anri to survive, the safe order is still to defeat Horace first. Afterward, return to Anri beside the bridge and choose the dialogue option that tells Anri what happened at Smouldering Lake. This is optional and is not required to open Irithyll.
Do not report Horace’s location while he is alive. If Anri travels to the lake before Horace is defeated, the quest can end with Anri dead. The guide’s recommended route is therefore to keep the location undisclosed, kill Horace, and only then choose whether to report his fate for the surviving-Anri branch.
- Use this branch only if you are not preserving the Usurpation route.
- Defeat Horace before giving Anri any location information.
- Report Horace’s fate only after he is dead.
6. Explore Smouldering Lake and handle the ballista
The ballista fires repeatedly across the lake. Move from one rock formation to another instead of crossing the open water in a straight line. The bolts can stagger you and interrupt healing, so recover behind cover. You may later climb through the Demon Ruins to reach the ballista mechanism and disable it, but disabling it is not required for campaign progress.
Search the shoreline and Demon Ruins for upgrade materials, but treat lava as a severe hazard. Enter it only with suitable fire protection, enough healing and a visible route back to solid ground. If you are only completing the Horace step, you can warp back after the encounter rather than fully clearing the area.
- Light the Abandoned Tomb bonfire.
- Use rock formations as cover from the ballista.
- Disable the ballista or continue avoiding its firing lanes.
- Do not enter lava without protection and an escape route.
7. Defeat the Carthus Sandworm and explore the Demon Ruins
The Carthus Sandworm is near the route leading to Old Demon King. The ballista provides a safer method: position yourself behind a rock outcrop and keep the Sandworm between you and the firing line. The bolts will damage it while the rock limits the danger from many charges and lightning attacks. Move only when the Sandworm threatens to force you out of cover.
The Sandworm drops an Undead Bone Shard and Lightning Stake. Collect both after the fight, then light the Demon Ruins bonfire. In the ruins, pull demons, rats, clerics and slimes through doorways rather than entering multiple rooms at once. Look above entrances because slimes can fall from ceilings.
Old Demon King is optional. Fire resistance helps against his attacks, but fire-only damage is a poor primary plan because the boss resists fire. Use physical or dark damage when available. Punish the recovery after a completed hammer swing, fire breath or ground eruption. When the boss kneels or begins the large late-fight explosion, retreat immediately and wait for the blast to end.
- Use rock cover against the Carthus Sandworm.
- Collect the Undead Bone Shard.
- Collect Lightning Stake.
- Light the Demon Ruins bonfire.
- Use non-fire damage against Old Demon King when possible.
- Retreat from the boss’s kneeling explosion.
8. Defeat High Lord Wolnir
Return to the rope bridge after completing the Anri and Horace steps. Cross the bridge, approach the goblet and enter High Lord Wolnir’s arena. Wolnir’s three glowing bracelets are the main targets. Stay near one arm, attack the bracelet during openings and reposition whenever Wolnir drags himself forward or shifts his body.
Avoid the dark mist around Wolnir’s lower body, which can kill quickly. Move away from arm sweeps and do not remain underneath him while trying to force a final hit. Wolnir can summon a sword and additional skeletons; if the arena becomes crowded, create distance and wait for a safer bracelet opening. Breaking all three bracelets defeats him.
Collect the Soul of High Lord Wolnir and use the boss bonfire. The passage beyond the arena leads to Irithyll of the Boreal Valley. Unlike Smouldering Lake and Old Demon King, Wolnir is required for the normal campaign route.
- Enter Wolnir’s arena through the rope-bridge route.
- Break all three glowing bracelets.
- Avoid the dark mist and arm sweeps.
- Collect the Soul of High Lord Wolnir.
- Confirm that the route to Irithyll is open.
9. Final check before Irithyll
Before advancing, confirm that Anri’s Firelink Shrine dialogue and both Catacombs conversations are complete. Confirm that Horace was defeated before any location report. If you are following the Usurpation of Fire route, Anri’s location was left undisclosed after Horace’s death and the Church of Yorshka pilgrim remains alive. If you chose the surviving-Anri route, the report was made only after Horace’s defeat.
Smouldering Lake, the Carthus Sandworm and Old Demon King can be postponed without blocking the campaign. Return later if you want their rewards. Spend accumulated souls and reinforce your main weapon with available Large Titanite Shards before entering Irithyll.
- Complete Anri’s Firelink Shrine dialogue.
- Complete both Catacombs conversations with Anri.
- Defeat Horace before reporting his location.
- Secure the intended Anri quest branch.
- Defeat High Lord Wolnir.
- Confirm that Irithyll is accessible.
- Reinforce the primary weapon with available Large Titanite Shards.
Before you move on
- The Deacons of the Deep are defeated.
- Anri and Horace’s post-Deacons Firelink Shrine dialogue is complete.
- Anri has been spoken to at both Catacombs locations.
- Horace has been defeated in the Smouldering Lake tunnel before any location report.
- The Usurpation route uses the non-disclosure response after Horace’s death, or the separate surviving-Anri route has been deliberately selected.
- High Lord Wolnir is defeated and the route to Irithyll is open.
- The Abandoned Tomb or Demon Ruins bonfire is lit if Smouldering Lake was explored.
- The Carthus Sandworm is defeated if its Undead Bone Shard and Lightning Stake are wanted.
- Old Demon King is defeated or deliberately postponed.
- The primary weapon is reinforced with available Large Titanite Shards.
References for this chapter
- FromSoftware FAQ: Dark Souls III The Fire Fades Edition and DLC Access
- FromSoftware — Dark Souls III: The Fire Fades Edition release information
- Dark Souls III Guide and Walkthrough for PlayStation 4, GameFAQs
- Catacombs of Carthus walkthrough, HonKit
- Neoseeker — Anri of Astora and Horace the Hushed quest guide
- Anri and Horace questline guide, Prima Games
Irithyll of the Boreal Valley and Pontiff Sulyvahn
After High Lord Wolnir, cross the frozen bridge into Irithyll of the Boreal Valley and light the Central Irithyll, Church of Yorshka, and Distant Manor bonfires. The required route continues from the church through the cemetery, sewer, kitchen, and silver-knight hall to Pontiff Sulyvahn. Irithyll also contains optional covenant and NPC objectives, including a critical Anri decision. For the Usurpation of Fire ending, speak with Anri at the Church of Yorshka and leave the disguised Londor pilgrim alive. After Pontiff, speak with Yuria, collect the Sword of Avowal from the pilgrim near Anor Londo, and complete the Rite of Avowal in the hidden Darkmoon Tomb. For the ordinary Anri route, kill the pilgrim instead. Open the shortcut before challenging Pontiff, then manage his extended fire-and-magic sword strings and phase-two phantom. Defeating him opens the route toward Anor Londo and Aldrich.
Cross the bridge and establish Central Irithyll
From the High Lord Wolnir boss exit, descend to the long bridge leading into Irithyll. Sulyvahn’s Beast attacks while you cross. You can defeat it now for the Pontiff’s Right Eye, or sprint to the far end and enter the city; the beast does not block progression. If you fight it, draw it onto the wider stone near the bridge entrance instead of battling beside the drop-offs. Stay near its rear legs when possible, but disengage when it begins a long charge, sweeping bite, or forward lunge.
After the beast is dead or bypassed, continue through the gate and light the Central Irithyll bonfire. The first streets contain Pontiff Knights, fire witches, and smaller enemies positioned to overlap their attack ranges. Pull enemies backward with a cautious approach or a ranged item, finish one target, and reset your position. The knights punish repeated blocking and greedy attacks, so let their attack sequence end before counterattacking.
- Reach and light the Central Irithyll bonfire.
- Defeat Sulyvahn’s Beast for its optional reward or leave it for a later return.
- Enter the city with enough healing to survive the first streets.
Reach the Church of Yorshka and resolve Anri’s quest decision
Follow the main street upward and around the buildings until you reach the Church of Yorshka. Light the bonfire immediately. This is the safest checkpoint for the route to Pontiff and the place where Anri of Astora may be found. Speak with Anri and exhaust the dialogue before leaving. If Anri is not present, revisit the earlier Catacombs objectives and NPC conversations before assuming the quest has advanced.
The church contains a Londor pilgrim disguised as one of the statues in a corner. This character is the assassin preparing Anri’s death. If you want the ordinary Anri quest, kill the disguised pilgrim after speaking with Anri. Anri will survive and can later be summoned for the Pontiff fight and the Aldrich sequence, depending on the rest of the quest. If you want the Usurpation of Fire ending, do not attack or kill the pilgrim. Leaving the pilgrim alive causes Anri to be taken to the Darkmoon Tomb instead. Killing the pilgrim or otherwise removing this setup prevents the Usurpation ending on that cycle.
If you are following the Usurpation route, Yoel must previously have granted five free levels, Yuria must be present at Firelink Shrine, and you must retain the resulting Dark Sigils. These requirements are separate from simply speaking with Anri. Do not cure the Dark Sigils or allow the Londor questline to fail before the ceremony. Anri’s church conversation is required, but the pilgrim’s survival is the decision that selects the marriage route.
- Light the Church of Yorshka bonfire.
- Speak with Anri and exhaust the dialogue.
- For the ordinary Anri route, kill the disguised pilgrim.
- For Usurpation of Fire, leave the disguised pilgrim alive and preserve the Londor questline.
Handle Company Captain Yorshka and optional covenant content
Company Captain Yorshka is in the Prison Tower above the Anor Londo side of Irithyll. Reach the rotating elevator near the later part of the area, ride it upward, and step onto the invisible bridge leading to her tower. Walk rather than sprinting across the bridge so you can correct your position before the landing. Falling is fatal, and this detour is not required for Pontiff Sulyvahn.
Yorshka accepts the player into the Blades of the Darkmoon only after the Darkmoon Loyalty gesture has been learned from Sirris. Simply possessing another gesture does not substitute for it. If you are not pursuing the covenant, speak with Yorshka if desired, then return to the Church of Yorshka and continue through the cemetery route.
- Reach Yorshka’s tower only if you want the covenant or its rewards.
- Learn Darkmoon Loyalty from Sirris before attempting to join the Blades of the Darkmoon.
- Return to the Church of Yorshka for the required route.
Pass through the sewer and reach Distant Manor
From the Church of Yorshka, descend through the cemetery and enter the darkened building. Continue down to the water and follow the passage toward the sewer. Large spider-like creatures occupy this section. Fight them one at a time, avoid being cornered against the walls, and use the exits to reset if two begin attacking together. The path eventually reaches the Distant Manor bonfire. Light it before proceeding.
Distant Manor is a junction, not the direct entrance to Pontiff’s arena. The lower dungeon route leads toward Irithyll Dungeon and the Profaned Capital, which belong to the later Yhorm sequence. For Pontiff, return from Distant Manor through the sewer and lakeside route, then continue toward the kitchen and the large hall guarded by silver knights. This keeps the boss route separate from the dungeon progression.
- Light the Distant Manor bonfire.
- Leave Irithyll Dungeon for its later progression unless you have a specific optional objective.
- Return through the sewer and continue toward the kitchen and silver-knight hall.
Open the Pontiff shortcut before entering the fog
From the Distant Manor route, pass through the lakeside area and kitchen, then enter the hall with silver knights. Advance cautiously and use corners to separate enemies. Continue toward the upper terrace near the cathedral and locate the gate that connects the boss approach back to the Church of Yorshka side. Open this shortcut before attempting the boss. It greatly reduces the distance of later attempts.
Use the final approach to spend your souls, restore your Estus, and equip a weapon or buff suited to your build. Pontiff deals both fire and magic damage, so avoid relying entirely on a shield that cannot withstand repeated elemental pressure. A light or medium load makes his delayed swings easier to evade. Summon signs may be available depending on your quest state and online settings, but the boss can be defeated without them.
- Open the gate connecting the boss approach to the Church of Yorshka side.
- Restore healing and spend unneeded souls before entering the fog.
- Keep enough stamina for repeated rolls instead of exhausting it on long attack strings.
Defeat Pontiff Sulyvahn
Pontiff Sulyvahn uses a flaming greatsword and a magic greatsword. Stay relatively close during the first phase so his attacks remain readable, and roll through committed swings instead of retreating in a straight line. His combinations can continue longer than expected and may end with a thrust, overhead strike, or delayed follow-up. Wait for the sequence to finish, then take one or two attacks and disengage. Do not heal at medium distance immediately after a single swing; his forward thrusts and closing attacks can reach you before the flask finishes.
At approximately half health, Pontiff kneels and summons a dark phantom that imitates his attacks. The phantom provides an earlier visual cue for paired sequences, but the real boss follows after a delay. You may damage the phantom during its arrival and temporarily defeat it, creating breathing room. It can be summoned again, so do not spend the entire fight chasing it while ignoring Pontiff. If your weapon can remove it quickly, do so when both enemies are separated. Otherwise, circle the arena and attack only after the copied sequence ends.
Fast weapons can punish short recoveries, while heavy weapons should be used only after a full combo or with an attack that provides suitable poise. When the boss raises both swords or creates dark energy around himself, prepare to roll away from the area attack rather than trading. After the kill, collect the Soul of Pontiff Sulyvahn and light the bonfire beyond the arena.
- Survive the first phase by punishing complete attack strings.
- During phase two, choose between quickly weakening the phantom and maintaining pressure on Pontiff.
- Defeat Pontiff Sulyvahn, collect his soul, and light the post-boss bonfire.
Complete the Darkmoon Tomb ceremony if pursuing Usurpation of Fire
After defeating Pontiff, return to Firelink Shrine and speak with Yuria of Londor. Exhaust her dialogue about the wedding. Then travel back to Irithyll and take the route beyond Pontiff toward Anor Londo. Near the rotating platform and the Anor Londo approach, enter the circular room before the lever that controls the platform. Strike the illusory wall to reveal the hidden passage to the Darkmoon Tomb.
If the church pilgrim was left alive and the Londor requirements were completed, the pilgrim will be waiting near the tomb entrance or stairs. Speak with the pilgrim to receive the Sword of Avowal, then enter the chamber and approach Anri. Use the Sword of Avowal on Anri to perform the Rite of Avowal. The ceremony grants three additional Dark Sigils, bringing the total to eight when the five Dark Sigils from Yoel’s free levels were retained. This completes the essential marriage step for the Usurpation of Fire ending.
If the pilgrim is absent, the ceremony cannot be completed as intended. Check Yuria’s dialogue and confirm that the earlier church pilgrim was not killed; if the pilgrim was killed, Anri’s ordinary route has replaced the Usurpation route for that cycle. Do not mistake the ordinary Anri path for the ceremony route. Missing the Rite of Avowal or killing the pilgrim prevents the Usurpation ending.
- Speak with Yuria after Pontiff and exhaust her wedding dialogue.
- Find the hidden Darkmoon Tomb through the illusory wall near the Anor Londo rotating-platform route.
- Obtain the Sword of Avowal from the surviving pilgrim.
- Perform the Rite of Avowal with Anri and confirm the additional Dark Sigils.
Leave Irithyll through the Anor Londo route
After the victory, open the doors beyond the cathedral and continue toward Anor Londo. Search the upper terrace and nearby ledges only after the boss is secure; those rewards are optional. If you are managing NPC quests, return to Firelink Shrine and check relevant characters before advancing further. Otherwise, use the new boss bonfire and proceed through the opened route.
Pontiff’s defeat is the chapter completion point. The next required progression leads toward Aldrich, Devourer of Gods. Irithyll Dungeon and the Profaned Capital remain separate progression content connected to Yhorm the Giant.
- Confirm the Pontiff boss bonfire is active.
- Open and use the route beyond the cathedral toward Anor Londo.
- Keep Irithyll Dungeon separate from the immediate Anor Londo progression route.
Before you move on
- Central Irithyll, Church of Yorshka, and Distant Manor bonfires are lit.
- The Church-side shortcut to the Pontiff approach is open.
- Anri has been spoken to at the Church of Yorshka.
- For the ordinary Anri route, the disguised pilgrim has been killed and Anri’s quest has been preserved.
- For Usurpation of Fire, the disguised pilgrim remains alive, Yuria’s dialogue has been exhausted, the Sword of Avowal has been obtained, and the Rite of Avowal has been completed in the Darkmoon Tomb.
- Pontiff Sulyvahn is defeated, his soul is obtained, and the post-boss bonfire is active.
- The route beyond the cathedral is open toward Anor Londo.
References for this chapter
- FromSoftware — Dark Souls III: The Fire Fades Edition release information
- FromSoftware FAQ: Dark Souls III The Fire Fades Edition and DLC Access
- Bandai Namco — Dark Souls III official site
- Bandai Namco / FromSoftware — Dark Souls III The Fire Fades Edition PS4 Starter Guide
- DS Map — Pontiff Sulyvahn location and approach
- Neoseeker — Anri of Astora and Horace the Hushed quest guide
- Neoseeker — Yoel and Yuria of Londor Questline
- Neoseeker — Irithyll of the Boreal Valley Part 2
- Neoseeker — Pontiff Sulyvahn boss guide
- Dark Souls Wiki — Ending Requirements and Anri Sequence
Profaned Capital, Yhorm the Giant and the Storm Ruler
Reach the Profaned Capital through the lowest level of Irithyll Dungeon, activate its bonfire, cross the ruined city and enter Yhorm the Giant’s arena. The required weapon is the Storm Ruler, found beside Yhorm’s throne. Equip it, charge its weapon skill until the storm effect appears, then release the attack to inflict the intended massive damage. Yhorm’s swings are slow but cover a wide area, and his attacks gain fire damage after he reaches roughly half health. Siegward of Catarina may join automatically if his quest has been advanced through the dungeon; his help is optional. Defeating Yhorm awards Cinders of a Lord and the Soul of Yhorm the Giant. Return to Firelink Shrine to transpose the soul or preserve it for later.
1. Reach the Profaned Capital bonfire
At the lowest level of Irithyll Dungeon, pass through the large door at the back and continue through the cavern. Cross the stone bridge, dealing with the Stone Gargoyle or running past it if you need to preserve health. Enter the tower at the far end, descend through it and use the ladder that leads to the Profaned Capital bonfire. Rest there before exploring the city. This bonfire is the main checkpoint for both the area and the Yhorm attempt.
The area around the entrance contains Jailer Handmaids, gargoyles and ranged fire attacks. Pull enemies toward the bonfire platform or the ladder instead of fighting in the open bridge approach. If you are carrying a large number of souls, spend them before pushing onward; the route contains several ambushes and poisonous or toxic hazards if you explore its side paths.
- Activate the Profaned Capital bonfire.
- Spend or secure unspent souls before crossing the city.
- Keep enough Estus for the approach and the boss attempt.
2. Cross the ruined city and reach the boss route
From the bonfire, cross the large bridge below. Handmaids attack from range, while gargoyles can close the distance quickly. Move from one piece of cover to the next and use walls or broken masonry to block incoming fireballs. Once across, enter the ruined structure and clear the enemies around the fork rather than running blindly into the central room.
At the fork, the right-hand route leads through more Handmaids and gargoyles toward the boss approach. The left-hand room contains optional loot, including an Ember and Greatshield of Glory according to the established walkthrough route. You may collect it now or return after Yhorm is defeated; neither item is required for progression. Be particularly cautious around the two nearby chests, which are mimics in this area.
- Use cover against the Handmaids’ ranged attacks.
- Clear the bridge and fork in small groups.
- Treat the side-room rewards as optional and preserve healing for Yhorm.
3. Check whether Siegward is ready to help
If Siegward of Catarina’s quest has been advanced through his dungeon imprisonment and the required preceding encounters, entering Yhorm’s fog gate triggers a scene in which Siegward joins the fight. He is an NPC who appears automatically, not a summon sign that must be activated. He uses a Storm Ruler of his own and can distract Yhorm while you prepare your weapon. If he does not appear, the fight is still fully completable; the Storm Ruler in the arena is always available.
If Siegward is present, do not stand next to him and trade blows with Yhorm. Use his distraction to reach the throne, equip your Storm Ruler and create enough distance to charge the weapon skill. Siegward can die during the battle, so begin attacking rather than leaving him to fight alone.
- Treat Siegward as optional assistance.
- If he is absent, continue with the same Storm Ruler plan.
- Use his distraction to prepare rather than attempting ordinary melee immediately.
4. Collect and equip the Storm Ruler
Enter Yhorm’s arena and run around the boss toward the throne at the far end. The Storm Ruler is on the ground beside the throne. Pick it up and equip it in an active weapon slot. It does not need reinforcement for this encounter. The sword’s special weapon skill is the intended solution to Yhorm’s unusually high resistance to ordinary attacks.
On the PS4 control layout, use L2 to enter the weapon-skill stance and continue holding the skill input until the storm effect visibly gathers around the weapon. When it is fully charged, press R1 while using the skill to release the storm projectile. Do not release the attack before the charge completes, because the ordinary sword attack will not produce the powerful projectile described here. If Yhorm is approaching, move away first; opening the equipment menu while he is attacking is unsafe.
- Pick up the Storm Ruler beside the throne.
- Equip it instead of leaving it only in the inventory.
- Charge until the storm effect appears before releasing with R1.
5. Defeat Yhorm with repeated charged attacks
After charging, wait for Yhorm to finish a swing or allow Siegward to draw his attention, then release the storm projectile into Yhorm. The attack deals massive damage and is the reliable first-playthrough method. After the projectile, retreat toward the outer part of the arena and repeat the process. Keep the arena’s central space and pillars available for movement instead of backing directly into a wall.
Yhorm’s horizontal machete sweeps have broad reach, so roll away from the swing rather than trying to stand at his feet and trade damage. When he raises the machete overhead, move out of the impact area and punish only after the attack has ended. At approximately half health he enters his embered phase; his attacks gain fire damage and his leap or close-range pressure becomes more dangerous. Continue using the Storm Ruler rather than switching to your normal weapon.
Heal only after creating distance. If you are caught near Yhorm’s legs, roll through or away from the next attack and do not attempt to charge while his machete is already descending. With the Storm Ruler, the fight should require only a small number of successful releases compared with ordinary melee.
- Charge during Yhorm’s recovery or while he is distracted.
- Roll away from sweeps and overhead impacts.
- Continue the same strategy after his embered phase begins.
6. Recover from a failed attempt
If you die, the Storm Ruler remains obtainable in the boss arena on the next attempt. Return from the Profaned Capital bonfire, pass the bridge route again or sprint past nonessential enemies, and collect the weapon before trying to fight. If you lost a large soul reserve, decide whether to retrieve it first; do not let recovery pressure force you into fighting Yhorm without the weapon.
Yhorm can be defeated with ordinary attacks, but that method is much slower and riskier. Without the Storm Ruler, attack the machete arm or head after his committed swings, then retreat before the next sweep. This is an emergency alternative, not the recommended method for this chapter. The boss’s fire damage in the second phase makes prolonged close-range trading especially dangerous.
- Retrieve the Storm Ruler after a failed attempt.
- Do not confuse ordinary sword hits with the charged weapon skill.
- Use the alternate melee method only if the intended weapon strategy is unavailable.
7. Collect the rewards and finish the chapter
Defeating Yhorm grants Cinders of a Lord and the Soul of Yhorm the Giant. These are the required progression rewards for this Lord of Cinder. If Siegward participated, exhaust his dialogue in the boss room before leaving. Afterward, reload or return to the arena as needed to collect his associated rewards, including the Pierce Shield, a second Storm Ruler and the Catarina armor pieces when his quest conditions were fulfilled.
Warp to Firelink Shrine and speak with Ludleth of Courland if you want to transpose the Soul of Yhorm the Giant. Its two established transposition choices are Yhorm’s Great Machete and Yhorm’s Greatshield. If you prefer the souls, consume it instead, but do so only after deciding that you do not need either boss weapon. The Cinders of a Lord cannot be replaced by consuming the boss soul.
- Confirm that Yhorm’s Cinders of a Lord are in your inventory.
- Check the Soul of Yhorm with Ludleth before consuming it.
- Collect Siegward’s post-battle items if his quest was active.
- Rest at a bonfire and prepare for the next Lord of Cinder route.
Before you move on
- Yhorm the Giant is defeated.
- Cinders of a Lord and Soul of Yhorm the Giant are present in the inventory or the soul has been intentionally consumed or transposed.
- The Profaned Capital bonfire remains available for fast travel.
- The Storm Ruler was collected from beside Yhorm’s throne.
- Siegward’s dialogue and post-battle items were checked if he appeared.
- The route is ready to continue toward the remaining Lords of Cinder.
Anor Londo and Lothric Castle: Aldrich, Dancer, Dragonslayer Armour and the Twin Princes
After Pontiff Sulyvahn, cross the upper Irithyll route and operate the rotating tower to reach Anor Londo. Follow the cathedral route to Aldrich, Devourer of Gods, and claim his Cinders of a Lord. Once the Abyss Watchers, Yhorm the Giant and Aldrich are defeated, return to Emma at the High Wall of Lothric. The Small Lothric Banner should already be in your inventory from your earlier visit; it was used to reach the Undead Settlement. Emma now gives the Basin of Vows and the normal Dancer of the Boreal Valley encounter begins. Defeat the Dancer, enter Lothric Castle, defeat Dragonslayer Armour, cross the Grand Archives and defeat Lorian and Lothric. The Twin Princes fight ends only when Lothric dies.
1. Leave Pontiff Sulyvahn and reach the rotating tower
From the Pontiff Sulyvahn bonfire, leave through the doorway opposite the boss entrance. The immediate area contains several routes, including an upper path toward Anor Londo, a Giants courtyard and an optional lower route to the Water Reserve. For the required progression, take the route that climbs through the upper exterior area rather than dropping into the water or committing to the Giants first.
Continue past the Irithyll enemies and Silver Knights, using the wider landings to separate opponents before fighting. Watch for greatbow fire on the upper approach and avoid standing near ledges while a knight is still active. Follow the path to the tower mechanism. Pull the lower lever to bring the rotating structure into position, then use the upper mechanism so the bridge connects to Anor Londo. Light the Anor Londo bonfire before climbing the main stairs.
The Giants courtyard, Sulyvahn’s Beasts in the Water Reserve and the nearby covenant content are optional. They can be cleared now for rewards, but none is required to reach Aldrich. If you explore the optional lower route, return to the rotating tower before continuing.
- Pontiff Sulyvahn is defeated.
- The rotating tower has been positioned to form the route into Anor Londo.
- The Anor Londo bonfire is lit.
2. Cross Anor Londo and reach Aldrich’s fog gate
From the Anor Londo bonfire, climb the long staircase and fight the Silver Knights individually. Keep fights on the broad center of the stairs whenever possible. Shield bashes, lunges and greatsword swings can push you toward the drop, so do not chase a retreating knight onto a narrow edge if another enemy is still nearby.
At the top, enter the cathedral complex and proceed through the main interior. The side rooms contain optional items and can be searched before the boss, but the required route continues through the large hall toward the fog gate. Open any nearby doors or lifts you encounter so the return trip is shorter after a failed attempt.
A Deep Accursed appears in the approach to the upper cathedral area. You can fight it for its reward or run past it, but do not let curse buildup accumulate while you are also dealing with the surrounding enemies. Once the cathedral route is open, enter Aldrich’s fog gate.
- The Silver Knight staircase is crossed safely.
- The main cathedral hall and Aldrich’s fog gate are located.
- At least one nearby shortcut or lift is activated if available.
3. Defeat Aldrich, Devourer of Gods
Aldrich combines ranged magic, homing projectiles, a large bow volley, a sweeping scythe and teleportation. Stay mobile around the outer portion of the arena, but change direction rather than running in a predictable straight line. When Aldrich submerges, stop attacking and create space until the teleport finishes. Immediately locate the new position so he cannot chain several ranged attacks before you reach him.
The main damage window is beside the visible body after a melee attack or while Aldrich is recovering from a movement. Focus attacks on the exposed body rather than the long trailing mass. Do not remain directly behind him for too long; his tail and rear attacks can catch players who become greedy.
When Aldrich creates the large bow, sprint laterally across the arena until the arrows pass. Rolling repeatedly in one direction is less reliable than maintaining movement and using a roll only when an arrow is about to connect. In the second phase, the floor flames persist longer and his attacks become more dangerous. Take short attack windows, preserve stamina for an escape and heal only after a sequence has ended.
Victory awards Aldrich’s Cinders of a Lord and activates the Aldrich, Devourer of Gods bonfire inside the cathedral. Light it immediately, then return to Firelink Shrine and place the Cinders on the appropriate throne if you are handling throne placement as you go.
- Aldrich’s bow volley is avoided by sustained lateral movement.
- Aldrich, Devourer of Gods, is defeated.
- The Aldrich, Devourer of Gods bonfire is lit.
- Aldrich’s Cinders of a Lord are obtained.
4. Return to Emma and begin the normal Dancer encounter
Before returning to High Wall of Lothric, make sure the Abyss Watchers, Yhorm the Giant and Aldrich have all been defeated. These are the three required Lords of Cinder for the normal story sequence. Warp to the Vordt of the Boreal Valley bonfire, ride the lift and enter Emma’s chapel.
The Small Lothric Banner is not obtained at this point. Emma gave it to you during the earlier High Wall visit, before Vordt, and you used it after Vordt to reach the Undead Settlement. If you missed it, check Emma’s room before proceeding; it is the banner that enables that earlier transition.
Now speak with Emma and exhaust her dialogue. After the three Lords of Cinder are defeated, she gives the Basin of Vows and the normal Dancer of the Boreal Valley encounter begins. Collect the Basin from the chapel area if it is not already in your inventory. If you killed the Dancer early, this sequence will not occur in its normal form, and the route beyond the chapel may already be open.
- The Abyss Watchers, Yhorm and Aldrich are defeated.
- The Small Lothric Banner was obtained during the earlier High Wall sequence and used to reach the Undead Settlement.
- Emma is revisited after the three required Lords of Cinder victories.
- The Basin of Vows is obtained and the normal Dancer encounter begins, unless the Dancer was killed early.
5. Defeat the Dancer and enter Lothric Castle
Stay near the Dancer’s rear or side and punish the recovery after her attacks. Her delayed swings are designed to catch early rolls, so wait for the strike to begin before rolling. Use one or two attacks at a time and preserve stamina for the next evasive move. Her grab and thrust are especially dangerous when you attack from the front.
When she draws the second blade, her combinations become longer and her spinning attacks cover much of the arena. Run away from the extended spin instead of trying to block or trade through it. Re-engage only after the sequence ends. If the camera loses the boss during a spin, prioritize creating distance over immediately reacquiring a lock-on.
After victory, light the Dancer of the Boreal Valley bonfire and climb the ladder behind the arena. Follow the upper passage and use the Basin of Vows at the statue if required to open the way into Lothric Castle. Light the Lothric Castle bonfire before pushing through the castle.
- The Dancer’s delayed attacks are punished after their active swings.
- The second-phase spin is avoided without trading damage.
- The Dancer bonfire and Lothric Castle route are open.
6. Cross Lothric Castle and defeat Dragonslayer Armour
From the Dancer’s route, continue through Lothric Castle. The area combines Lothric Knights, winged enemies, fire-breathing wyverns and narrow exterior walkways. You do not need to kill every opponent. Wait for wyvern fire to clear before crossing bridges, and use doors, stair corners and courtyard walls to split knights from supporting enemies.
Follow the castle route toward the Dragon Barracks and the large bridge leading to the boss. Dragonslayer Armour is most dangerous when the fight drifts toward an edge, so keep the encounter near the center. His shield bash can stagger you, while his advancing sword attacks and overhead strikes punish panic healing. Attack after a completed combination or a missed heavy swing.
The Pilgrim Butterflies provide ranged support during the battle. Keep moving when their projectiles appear, but continue watching the Armour so that evasive movement does not carry you into his next attack. Defeating Dragonslayer Armour opens the route to the Grand Archives.
- The Lothric Castle bonfire is lit.
- The wyvern bridges and knight patrols are crossed without being trapped near an edge.
- Dragonslayer Armour is defeated.
- The Grand Archives entrance is accessible.
7. Enter the Grand Archives and unlock the route to the princes
At the entrance outside the Grand Archives, collect the Grand Archives Key and the nearby Gotthard Twinswords, then open the doors and light the Grand Archives bonfire. A Crystal Sage appears near the initial stairs. Defeat it or move past it carefully, because its spells and teleportation can interfere with the first ascent.
Archive Scholars, thralls, crystal enemies, gargoyles and Lothric Knights occupy the upper rooms. When you see bookshelves covered with curse hands, use one of the wax basins before crossing the affected area. Wax prevents the hands from rapidly building curse. Reapply it when the effect wears off.
Progress upward through the archive stairs, ladders, trapdoors and exterior windows. Kick down ladders and activate lifts whenever you find them; these shortcuts reduce the distance from the bonfire after a death. On the rooftops, either fight the gargoyles methodically or run between safe sections, then re-enter the upper archive and continue toward the highest exterior approach.
The final approach contains barricades, hostile knights and narrow platforms. Do not spend all your healing before entering the fog gate. The Twin Princes are at the top of the Grand Archives.
- The Grand Archives Key is collected.
- The Grand Archives bonfire is lit.
- Wax is used before crossing curse-hand bookshelf areas.
- Useful ladders and lifts are activated before the boss attempt.
- The Twin Princes fog gate is reached.
8. Defeat Lorian and Lothric and confirm chapter completion
Lorian begins alone and can teleport beside you, behind you or above you for a plunging attack. Keep the camera under control and wait for him to finish materializing before attacking. Punish the recovery after his sword combinations. When he sends a long wave of flame across the floor, move laterally or roll through it with sufficient distance for the follow-up strike.
In the second phase, Lothric revives Lorian and rides on his back. Continue damaging Lorian when Lothric cannot be reached, but use knockdowns as opportunities to target the younger prince. Damage to Lorian alone does not finish the battle; Lothric revives him unless Lothric’s health is depleted.
When Lorian falls during the mounted phase, move toward the brothers during the revival animation and strike Lothric if your weapon can reach him. Withdraw before the magical burst and follow-up projectiles complete. Continue this pattern until Lothric dies. His death ends the encounter and awards the Cinders of a Lord for Lothric, Younger Prince.
Light the Twin Princes bonfire and return to Firelink Shrine. Place the Cinders obtained in this chapter on the appropriate throne. If Aldrich’s Cinders and the other required Cinders are already placed, the throne sequence is complete and the route to the final approach is prepared.
- Lorian’s teleport attacks and floor flame are avoided without exhausting stamina.
- Lothric is targeted during the mounted phase.
- Lothric dies, ending the Twin Princes encounter.
- The Twin Princes bonfire is lit.
- The Cinders obtained in this chapter are placed at Firelink Shrine.
Before you move on
- Aldrich, Devourer of Gods, is defeated.
- Aldrich’s bonfire is lit and his Cinders of a Lord are obtained.
- The Small Lothric Banner was obtained during the earlier High Wall sequence and used to reach the Undead Settlement.
- The Basin of Vows is obtained from Emma after the three required Lords of Cinder are defeated.
- The Dancer is defeated, either through the normal sequence or the optional early route.
- The Dancer bonfire and Lothric Castle route are accessible.
- Dragonslayer Armour is defeated.
- The Grand Archives Key and Grand Archives bonfire are obtained.
- The Twin Princes are defeated with Lothric’s death ending the encounter.
- The Twin Princes bonfire is lit.
- The Cinders obtained in this chapter are placed at Firelink Shrine.
- The campaign is ready for the final approach to the Kiln of the First Flame, subject to any remaining required throne placements.
References for this chapter
- FromSoftware — Dark Souls III: The Fire Fades Edition release information
- Dark Souls III PlayStation 4 Online Manual
- Anor Londo - Dark Souls III: The Ringed City Walkthrough and Guide for PS4
- Grand Archives - Dark Souls III: The Ringed City Walkthrough and Guide for PS4
- Grand Archives - Dark Souls 3 Walkthrough and Guide
- Emma, High Priestess of Lothric Castle
Final Approach and Soul of Cinder
After the Abyss Watchers, Yhorm the Giant, Aldrich, and the Twin Princes have been defeated, confirm that all four Cinders of a Lord are available at Firelink Shrine. Place each set of Cinders on its matching throne, then use the shrine bonfire to enter the Flameless Shrine and travel to the Kiln of the First Flame. Prepare your final equipment and consumables at the Kiln bonfire before entering the arena. Soul of Cinder changes combat styles during the first phase and becomes more aggressive in the second, so adapt your spacing and punish only clear recovery windows. Victory grants the Soul of the Lords and leaves the ending interaction available. Do not begin Journey 2 until the DLC and any desired optional content are complete. The Ringed City can be entered from its separate bonfire near the Kiln, without first selecting an ending.
Confirm that the final progression requirements are complete
Before leaving Firelink Shrine, verify that the Abyss Watchers, Yhorm the Giant, Aldrich, and the Twin Princes have all been defeated. The required progression items are their Cinders of a Lord, not the boss souls obtained from their remembrance rewards. If one of these four bosses is missing, the final ritual cannot be completed.
The Grand Archives Key is not part of this chapter’s route. It appears at the Grand Archives entrance after the three Lords of Cinder tied to the Abyss Watchers, Yhorm, and Aldrich have fallen. Dragonslayer Armour must separately be defeated to open the Grand Archives doors, and the Twin Princes must then be defeated to obtain the fourth Cinders. These earlier objectives should already be complete before proceeding here.
- The Abyss Watchers’ Cinders are available.
- Yhorm’s Cinders are available.
- Aldrich’s Cinders are available.
- The Twin Princes’ Cinders are available.
Place the four Cinders on the Firelink thrones
Return to the thrones arranged around Ludleth in Firelink Shrine. Interact with the empty throne associated with each defeated Lord and place that Lord’s Cinders there. The four required sets are the Cinders of the Abyss Watchers, Yhorm the Giant, Aldrich, and the Twin Princes.
Do not use ordinary boss souls for this step. Boss souls remain available for transposition or consumption, while the Cinders are the distinct progression items that activate the final route. Before starting the ritual, complete any Firelink purchases, upgrades, or boss-soul transpositions you want to handle on this cycle.
- The Abyss Watchers’ Cinders are on their throne.
- Yhorm’s Cinders are on their throne.
- Aldrich’s Cinders are on their throne.
- The Twin Princes’ Cinders are on their throne.
Use Firelink Shrine to reach the Flameless Shrine
After all four thrones are filled, interact with the Firelink Shrine bonfire and follow the prompt to proceed. The Fire Keeper performs the required ritual, and you are transported to the Flameless Shrine, the darkened version of Firelink Shrine used for the final approach.
Light the bonfire outside the shrine. This bonfire is the transition point to the Kiln of the First Flame. If you are returned to normal bonfire menus after an interruption, select the option that proceeds to the First Flame rather than treating the Flameless Shrine as a normal exploration area.
- The four thrones are filled.
- The Fire Keeper’s ritual has occurred.
- The Flameless Shrine bonfire is lit.
Prepare at the Kiln of the First Flame
Use the Flameless Shrine bonfire to travel to the Kiln of the First Flame. Light the Kiln bonfire as soon as you arrive. This creates a reliable return point for failed attempts and also gives access to the nearby route into The Ringed City if that DLC is installed.
Repair your weapon, spend or bank souls you do not want to lose, and set your Estus allocation for a boss fight. Embering is optional: it increases maximum health and permits available summon signs, but it is not required to enter the arena. Bring a reliable damage option that does not depend entirely on fire, since Soul of Cinder is resistant to some forms of damage and changes behavior between styles.
The separate Ringed City access bonfire is near the Kiln bonfire, before the route to the Soul of Cinder arena. It can be used once the Kiln has been reached; defeating Soul of Cinder or selecting an ending is not required for this access method. The other entry point is in the area beyond Sister Friede’s arena after Ashes of Ariandel is complete.
- The Kiln of the First Flame bonfire is lit.
- Your weapon is repaired.
- Your Estus allocation is appropriate for the fight.
- The Ringed City bonfire has been noted or used if you are beginning that DLC now.
Defeat Soul of Cinder
Soul of Cinder uses several weapon styles during the first phase. With the straight sword, stay at a manageable distance and punish the end of committed combinations. With the curved sword, avoid chasing through fire-enhanced attacks. When the boss switches to the staff, close in during spell recovery, but be ready to retreat from area magic. During spear or greatlance attacks, sidestep long thrusts and avoid standing in the path of lightning strikes.
Do not try to attack after every movement. The safest damage comes after a completed combo, a missed thrust, a spell recovery, or a landing from a committed attack. Keep enough stamina for the next dodge, especially when the boss changes weapons without returning to a neutral stance. Heal only after creating distance or after a sequence has clearly ended.
The second phase begins after the first health bar is depleted. The boss becomes more aggressive and uses powerful lightning attacks along with extended sword combinations. Roll through the complete sequence instead of attempting to trade between every swing. Stay close enough to read the attack but not so close that the camera obscures the weapon. When Soul of Cinder falls, collect the Soul of the Lords.
- Soul of Cinder is defeated.
- The Soul of the Lords is collected.
- The final bonfire remains available for travel.
Leave the ending choice available
Victory does not force an ending immediately. The ending interaction becomes available, but you can leave the area and return to Firelink Shrine or continue into either DLC before committing to the final conclusion. This is the correct stopping point for the base-campaign chapter.
Do not select the ending interaction or begin Journey 2 if you still intend to defeat Sister Friede, Slave Knight Gael, Nameless King, Darkeater Midir, or another optional boss on the current character. Complete those objectives first, then return to the appropriate ending setup described in the endings chapter.
- The base campaign is complete.
- The ending interaction is available but has not been used prematurely.
- Journey 2 has not been started if DLC or optional content remains.
Before you move on
- The Cinders of the Abyss Watchers, Yhorm, Aldrich, and the Twin Princes are confirmed.
- All four Cinders are placed on their matching Firelink Shrine thrones.
- The Flameless Shrine bonfire is active.
- The Kiln of the First Flame bonfire is active.
- Soul of Cinder is defeated.
- The Soul of the Lords is obtained.
- The ending interaction remains available for the endings chapter.
- The Ringed City access bonfire is available near the Kiln if the DLC is installed.
- Journey 2 has not begun while remaining DLC or optional objectives are still planned.
Ashes of Ariandel DLC — Entering the Painted World
In Dark Souls III: The Fire Fades Edition on PS4, Ashes of Ariandel becomes available after you reach the Cleansing Chapel with the DLC installed. Speak with Slave Knight Gael beside the Cleansing Chapel bonfire, then use the painting interaction at his position to travel to the Snowfield. Defeating the Deacons of the Deep is not required for DLC access; this walkthrough visits the Cathedral route first only because it fits the broader campaign order. The Small Doll is also unrelated to Ashes entry and is needed later for the barrier into Irithyll of the Boreal Valley. Progress through Snowfield, Rope Bridge Cave and the Corvian Settlement, defeat Sir Vilhelm to obtain the Contraption Key, and reach the Snowy Mountain Pass and Ariandel Chapel routes. Activate the mechanism in the chapel basement to open the passage behind the altar. The Champion’s Gravetender and Gravetender Greatwolf are optional. The required conclusion is the three-phase battle against Sister Friede, Father Ariandel and Blackflame Friede.
Enter the Painted World from the Cleansing Chapel
Reach the Cleansing Chapel bonfire in the Cathedral of the Deep while Ashes of Ariandel is installed. The Deacons of the Deep do not need to be defeated first. If you have already defeated them, that is simply a campaign-order choice; it does not change the DLC access requirement.
Look beside the Cleansing Chapel bonfire for Slave Knight Gael. Speak with him, then use the painting fragment interaction at his position when the prompt appears. This transports you to the Snowfield bonfire in the Painted World of Ariandel. If the NPC or access prompt is not visible despite the DLC being installed, reload the area and check the bonfire surroundings again.
The Small Doll is awarded through the Cathedral route and is used later to pass the barrier into Irithyll of the Boreal Valley. Do not treat it as an Ashes of Ariandel key item or delay the DLC because you have not obtained it.
- Reached the Cleansing Chapel bonfire.
- Confirmed that Ashes of Ariandel is installed.
- Spoke with Slave Knight Gael and used the painting interaction.
- Entered the Snowfield.
- Kept the Small Doll distinction clear: it is for Irithyll, not DLC entry.
Cross the Snowfield and reach Rope Bridge Cave
Light the Snowfield bonfire immediately. Follow the snowy slope through the Farron Followers and wolf packs. Parts of the snow collapse as you cross them, dropping you onto the lower route. Use the cliffs and ruins to split enemies instead of fighting every target in the open. The large wolf can pursue you for a considerable distance, so either defeat it in a clear area or continue toward the stone structures and return once the route is safer.
Continue through the ruined section until you reach Rope Bridge Cave. Light that bonfire before crossing farther. The rope bridge leads toward Ariandel Chapel, but the main settlement route begins by descending the ladder beside the bridge on the cave side. Leave the bridge intact if you want to follow the main route first; cutting it opens the optional descent to the Depths of the Painting.
- Lit the Snowfield bonfire.
- Passed the wolf and Farron Follower patrols.
- Found and lit the Rope Bridge Cave bonfire.
- Left the rope bridge intact if prioritizing the main route.
Descend into the Corvian Settlement
Use the ladder beside the rope bridge, then follow the ledges and drops into the Corvian Settlement. Light the settlement bonfire as soon as you reach it. The village is vertical, with Corvians attacking from roofs, windows and narrow walkways. Open doors, ladders and gates as you advance so a failed attempt does not require repeating every drop.
Corvian Knights are the main danger. Bait their first lunge, avoid trading in tight spaces and attack during recovery. If several villagers surround you, retreat to a wider section rather than trying to defeat the group beside a knight. Explore for equipment and upgrade materials after establishing a safe return route.
- Used the ladder beside the rope bridge.
- Reached the Corvian Settlement.
- Lit the Corvian Settlement bonfire.
- Opened nearby routes to make repeat attempts safer.
Defeat Sir Vilhelm and obtain the Contraption Key
Advance through the settlement by climbing the rooftops and upper paths until you reach the building near the chapel-side route. Enter the building to trigger Sir Vilhelm’s encounter. He uses the Onyx Blade, with long-reaching swings and a dangerous weapon skill. Keep space around yourself, avoid being pinned against walls and punish the end of his committed attacks rather than trading through the weapon skill.
Defeating Sir Vilhelm awards the Contraption Key and the Onyx Blade. Use the key on the mechanism inside the building to lower the staircase. Climb to the attic and speak with the Painter if you want her optional dialogue. Continue through the upper route and unlock the way toward the Snowy Mountain Pass. Light that bonfire when you reach it.
- Defeated Sir Vilhelm.
- Collected the Contraption Key.
- Obtained the Onyx Blade if desired.
- Used the key to lower the staircase.
- Reached the Painter’s attic and lit the Snowy Mountain Pass bonfire.
Reach Ariandel Chapel and open the hidden boss route
From the Snowy Mountain Pass, follow the exterior route through the Millwood and follower sections. Activate the available shortcuts as you go, including the routes created by knocking down rotten trees. Continue through the cave and giant-fly area until you reach the Ariandel Chapel bonfire. Speak with Sister Friede there if you have not already done so; she gives the Chillbite Ring during her dialogue sequence.
Return through the connected route toward the chapel basement. The basement contains Giant Flies and other hazards, so clear enough enemies to operate safely. Find the large rotating mechanism at the bottom level and activate it. This moves the chapel structure and opens the passage behind the altar. Return to the chapel bonfire, enter the opened passage and descend toward Father Ariandel to begin the required boss encounter.
- Reached and lit the Ariandel Chapel bonfire.
- Spoke with Sister Friede.
- Used the route from Snowy Mountain Pass to the chapel basement.
- Activated the rotating mechanism.
- Opened the passage behind the chapel altar.
Optional: Explore the Depths of the Painting
If you want the optional boss and its rewards, return to the rope bridge and attack its supports until it collapses. Use the exposed branches to climb down carefully. The drops are dangerous, so aim for broad branches and pause on each stable landing. Continue to the lower icy area and light the Depths of the Painting bonfire before approaching the open ground.
Champion’s Gravetender begins the optional encounter, followed by the Gravetender Greatwolf. Focus on the Champion while tracking the wolf’s position. When the Greatwolf charges or leaps, create space and punish its recovery instead of pursuing it across the arena. This boss is not required for the chapel mechanism, the Sister Friede route or Ashes of Ariandel completion.
- Collapsed the rope bridge if pursuing the optional area.
- Reached and lit the Depths of the Painting bonfire.
- Defeated Champion’s Gravetender and the Gravetender Greatwolf if desired.
- Collected Champion’s Bones and the optional boss rewards if desired.
Prepare for Sister Friede
Rest at Ariandel Chapel, restore your Estus and equip your upgraded main weapon. Frost resistance can reduce the danger from repeated frost buildup, but it does not replace learning the attacks or maintaining enough health and stamina. A weapon that can stagger Friede or produce reliable punish damage is useful, but do not sacrifice survivability for a small increase in damage.
If you are Embered, check outside the boss entrance for Slave Knight Gael’s summon sign. His assistance begins during the later part of the encounter rather than the opening phase. The fight is fully possible without him, so do not delay the attempt if the sign is unavailable.
- Restored Estus.
- Equipped a familiar upgraded weapon.
- Prepared for frost buildup.
- Checked for Gael’s summon sign if using assistance.
Defeat the three phases of Sister Friede
Phase one is Sister Friede alone. Watch for her scythe strings, frost trails and disappearing attacks. When she vanishes, follow the movement of snow and listen for her position. Finding her during this sequence can create a backstab opportunity, but waiting for a safer reappearance is acceptable. Take one or two attacks after a completed combo, then disengage before she begins another sequence.
Phase two adds Father Ariandel while Friede supports him. The pair share the phase’s health bar, so Ariandel is the practical primary target. Attack from his side or rear after his bowl swings, fire attacks and slams, then retreat before the follow-up. When Friede begins healing Ariandel, interrupt her immediately with a quick attack, ranged option or other reliable action. If Gael is present, use his distraction to damage Ariandel while keeping Friede visible.
Phase three begins as Blackflame Friede. Her attacks become faster and combine physical, frost and dark damage. Roll through advancing attacks when possible rather than panic-rolling away from every swing. Her jumping attacks and completed long strings provide safer punish windows. Heal only after creating clear distance, and do not chase her across the arena after she disengages. Defeating this phase completes the required Ashes of Ariandel boss progression.
- Defeated Sister Friede in phase one.
- Defeated Father Ariandel during phase two.
- Interrupted Friede’s healing when possible.
- Defeated Blackflame Friede in phase three.
- Collected the Soul of Sister Friede and the victory rewards.
Confirm completion and continue to The Ringed City
After the fight, light the Sister Friede bonfire in the arena. Return to Firelink Shrine if you want to store or transpose the Soul of Sister Friede; do not consume it accidentally if you are saving it for a transposition reward. Visit the Painter in the Corvian Settlement if you want the optional follow-up dialogue and reward sequence.
Because The Fire Fades Edition includes The Ringed City, a bonfire for the Dreg Heap becomes available after Blackflame Friede is defeated. The Ringed City can also be entered through a separate bonfire near the Kiln of the First Flame. Either route reaches the same DLC destination. Completing Ashes first is a sensible narrative order, but Ashes is not required to access The Ringed City.
- Lit the Sister Friede bonfire.
- Stored or transposed the boss soul as intended.
- Visited the Painter if following the optional DLC story.
- Confirmed that Blackflame Friede was defeated.
- Confirmed that the Dreg Heap access bonfire is available.
Before you move on
- The character reached the Cleansing Chapel with Ashes of Ariandel installed.
- Slave Knight Gael was spoken to and the painting interaction was used.
- The Deacons were not treated as a DLC access prerequisite.
- The Small Doll was correctly identified as the Irithyll barrier item.
- Snowfield, Rope Bridge Cave, Corvian Settlement, Snowy Mountain Pass and Ariandel Chapel were reached.
- Sir Vilhelm was defeated and the Contraption Key was obtained.
- The chapel basement mechanism was activated and the passage behind the altar was opened.
- Sister Friede, Father Ariandel and Blackflame Friede were defeated.
- The Sister Friede bonfire was lit and the boss soul was collected.
- Champion’s Gravetender and the Gravetender Greatwolf were defeated if optional boss completion is desired.
- The Painter was visited afterward if pursuing the optional DLC story.
- The Dreg Heap access bonfire appeared after Blackflame Friede’s defeat.
References for this chapter
The Ringed City DLC — Dreg Heap to The Ringed City
The Ringed City is late-game content in The Fire Fades Edition. Enter The Dreg Heap through the bonfire behind the starting position at the Sister Friede arena after defeating Friede, or through the bonfire near the Kiln of the First Flame after opening the base-game endgame route. The required path is Dreg Heap, Earthen Peak Ruins, the Demon in Pain and Demon from Below, the Demon Prince, Ringed City Streets, the Church of Filianore, Halflight, and finally Slave Knight Gael. Darkeater Midir is an optional boss and can be completed before or after Gael. Use cover against the Dreg Heap angels, light every bonfire, and do not spend all healing or damage resources before the Demon Prince and Gael encounters.
Unlock The Dreg Heap and prepare for late-game difficulty
The Fire Fades Edition includes The Ringed City, but the DLC’s transport bonfire appears only after its access condition is met. The first route is to defeat Sister Friede in Ashes of Ariandel, then travel to the Sister Friede bonfire and turn around. A second bonfire behind the arena transports you to The Dreg Heap. The alternate base-game route becomes available after you have defeated the four Lords of Cinder, placed their Cinders on the thrones in Firelink Shrine, and opened the path to the Kiln of the First Flame. At the Kiln bonfire, turn around and use the nearby transport bonfire; Soul of Cinder does not need to be defeated first.
This is endgame content. Enter with a fully developed weapon, a reliable healing setup, and enough health and stamina to survive heavy hits. Keep a ranged attack, bow, crossbow, spell, or throwable available for enemies that attack from ledges or remain protected by the angels. Spend souls before using the transport bonfire so a failed attempt does not cost an avoidable level or reinforcement.
- Defeat Sister Friede, or unlock the Kiln of the First Flame route through the four Lords of Cinder.
- Confirm that the transport bonfire to The Dreg Heap is present.
- Carry a fully reinforced primary weapon, healing supplies, and a ranged option.
Cross The Dreg Heap and disable the angels when possible
Light The Dreg Heap bonfire immediately after arriving. Advance through the ruined buildings by using intact roofs, branches, ledges, and visible platforms as route markers. The area uses controlled drops and collapsing floors, so move toward the next solid structure instead of retreating across a surface that has already failed. When a large herald or other tough enemy blocks a drop, look for a higher branch or roof from which you can perform a plunging attack rather than fighting it in the open.
Angels patrol the exposed sections and repeatedly fire damaging beams. Break line of sight behind walls, roof fragments, and large debris. Each angel is linked to a hidden summoner; reaching and killing that summoner permanently removes the corresponding angel from the area. You can run past some angels, but disabling them makes exploration and later corpse retrieval much safer. The Dreg Heap and Earthen Peak Ruins contain separate bonfires, so do not continue through a dangerous section with a large soul stockpile when you can return to spend it.
- Light The Dreg Heap bonfire.
- Use solid cover whenever an angel begins firing.
- Look for each angel’s summoner before committing to optional loot routes.
- Light the Earthen Peak Ruins bonfire before entering the demon arena.
Cross Earthen Peak Ruins and defeat the Demon Prince
From the Earthen Peak Ruins bonfire, move through the broken windmill structures and use branches and roofs to avoid the two angels. The final approach crosses an exposed area and a poisonous swamp. You can take the safer upper route, drop onto isolated enemies, and return to the bonfire if you need to recover. Summon signs for Lapp and Slave Knight Gael may be available near the boss approach, but summons are optional and can increase the bosses’ health.
The first phase contains the Demon in Pain and the Demon from Below. Keep both visible and attack the demon that has committed to a recovery animation. Their active states change during the fight, and their fire or toxic attacks make standing underneath them for too long dangerous. Short attack strings followed by a retreat are safer than attempting a long combo. After both demons are defeated, the Demon Prince rises from the last demon killed. Stay close enough to punish its recovery, but retreat when it takes flight, creates a large fire attack, releases meteors, or fires the long laser that leaves dangerous ground effects. The Demon Prince’s exact powered attacks depend on which demon was defeated last, so watch the animation rather than assuming one fixed pattern.
After victory, light the bonfire beyond the arena and enter the nearby ruins to collect the Small Envoy Banner. Follow the route past the bonfire to the cliff and use the banner at the marked location. It transports you to the Ringed City proper.
- Defeat the Demon in Pain and Demon from Below.
- Defeat the Demon Prince.
- Light the post-boss bonfire.
- Collect and use the Small Envoy Banner.
Reach the Ringed City Streets and open the main shortcuts
After arriving in the Ringed City, light the first bonfire and proceed through the streets toward the Shared Grave. Ringed Knights have strong defenses, wide attacks, and dangerous weapon skills. Pull one enemy away from the others before fighting, especially on stairs or near a ledge. Check rooftops and side passages before entering a doorway because ambushes can come from above or behind.
Continue through the city until you reach the Shared Grave bonfire. From there, the route toward the Church of Filianore passes through another hazardous section and eventually crosses the bridge watched by Darkeater Midir. Light the Shared Grave bonfire before attempting the bridge. If you are completing Lapp’s optional quest, exhaust his dialogue whenever you find him and revisit the relevant bonfires after major area changes; his quest is not required for DLC progression.
Cross the bridge after preparing fire defense and damage options. Midir lands on the bridge and attacks, but this is not his full boss encounter. Deal enough damage to make him fall from the bridge. The route to Filianore remains open after this encounter, and the fall unlocks access to Midir’s optional arena later.
- Light Ringed City Streets, Shared Grave, and Ringed Inner Wall bonfires when reached.
- Pull Ringed Knights away from groups.
- Damage Midir until he falls from the bridge if you intend to fight him.
- Do not mistake the bridge encounter for Midir’s final boss fight.
Defeat Halflight and activate Filianore’s transition
From the Ringed Inner Wall route, continue through the city to Filianore’s Church. Halflight, Spear of the Church guards the church and is a required boss on the path to Gael. Offline, the fight uses the game’s controlled defender; online play can instead produce a player-controlled Spear of the Church. Prioritize the active defender, avoid standing in the path of summoned projectiles, and interrupt healing only when you can do so without trading a heavy hit. Keep moving around the arena rather than being cornered against its walls.
After Halflight is defeated, use the lift and proceed to Filianore. Interact with the embraced egg beside her to trigger the area transition, then light the Filianore’s Rest bonfire. The surrounding landscape changes, and the route down the ash-covered slope leads to the final approach. Halflight is therefore part of the required DLC completion route; Darkeater Midir is the optional boss in this section.
- Defeat Halflight, Spear of the Church.
- Use the lift after the fight.
- Interact with Filianore’s embraced egg.
- Light the Filianore’s Rest bonfire.
Optional objective: reach and defeat Darkeater Midir
If you knocked Midir from the bridge, return to the Ringed Inner Wall bonfire and use the newly opened shortcut lift. During the descent, leave the lift through the hidden opening in the wall. Follow the concealed passage and its illusory walls to the ladder and drop that lead to Midir’s arena. If the entrance is blocked, return to the bridge and complete the first Midir encounter before trying again.
Fight Midir from in front of his head whenever possible. Head hits deal better damage than attacking the legs or body and keep the camera more manageable. Watch for the forward fire breath, sweeping beam patterns, charge, claw strings, and airborne attacks. Do not remain beneath him when he begins a fire or beam pattern. Retreat, reset your position, and attack after the pattern ends. Midir is optional and does not block Halflight or Gael, so leave this fight for later if it is consuming your healing, buffs, or repair resources.
- Knock Midir from the bridge.
- Open the Ringed Inner Wall shortcut.
- Use the hidden lift opening to reach the arena.
- Defeat Midir only if pursuing optional DLC completion.
Defeat Slave Knight Gael and finish The Ringed City
From Filianore’s Rest, descend through the ash-covered landscape toward the thrones of the Pygmy Lords. Continue to the large open arena where Slave Knight Gael waits. The arena gives you room to reposition, so avoid fighting with your back against an edge. In the first phase, Gael closes distance with lunges, leaps, crossbow attacks, and long sword strings. Roll through the final part of an approach and answer with one or two attacks; chasing every retreat usually leaves you in range of his next leap or weapon skill.
The later phases add faster strings, wider swings, cape hitboxes, and ranged projectiles. Stay at medium range, watch Gael’s body rather than the cape alone, and heal only after a completed sequence or when the arena gives you clear separation. A shield can save a mistake, but holding it through extended strings drains stamina quickly. If you die, return from Filianore’s Rest and repeat the short descent; there is no need to replay the city route.
Defeating Gael awards his soul and the Blood of the Dark Soul. Light the arena bonfire and collect the item. The Blood of the Dark Soul can be taken to the Painter in Ariandel for an optional conclusion, but delivering it is not required for The Ringed City’s campaign completion.
- Defeat Slave Knight Gael.
- Light the Gael arena bonfire.
- Collect the Blood of the Dark Soul.
- Optional: return to Ariandel and deliver the item to the Painter.
Before you move on
- Demon in Pain and Demon from Below defeated.
- Demon Prince defeated and the Small Envoy Banner used.
- Halflight, Spear of the Church defeated.
- Darkeater Midir defeated if pursuing optional endgame bosses.
- Slave Knight Gael defeated, his arena bonfire lit, and the Blood of the Dark Soul collected.
References for this chapter
- FromSoftware FAQ: Dark Souls III The Fire Fades Edition and DLC Access
- The Dreg Heap — Dark Souls III Walkthrough
- The Ringed City — Dark Souls III Walkthrough
- Darkeater Midir — Dark Souls Wiki
- Dark Souls 3: The Ringed City - How to Access the Ringed City DLC
- Darkeater Midir Location & How to Get There — DS Map
Optional and Post-Game: Nameless King, Darkeater Midir and Completion Optionalities
Archdragon Peak is optional base-game content reached after defeating Oceiros, obtaining the Path of the Dragon gesture and using it at the dragon-statue overlook in Irithyll Dungeon. Its boss route contains Ancient Wyvern and the Nameless King. In The Ringed City, Darkeater Midir and Shira’s quest are optional, while Halflight, Spear of the Church, must be defeated before the route to Slave Knight Gael can be completed. This chapter also explains the ordinary ending, End of Fire and Usurpation of Fire. For Usurpation, obtain five Dark Sigils from Yoel before progressing into the Catacombs, preserve Anri’s quest, leave the Londor pilgrim alive at the Church of Yorshka, complete the Rite of Avowal and retain eight Dark Sigils. Giving the Fire Keeper Soul only unlocks Heal Dark Sigil and Request Dissolution; it does not itself cure the sigils or end the Usurpation route. Finish desired bosses, NPC events, covenant rewards and boss-soul transpositions before beginning New Game+.
Reach Archdragon Peak through Oceiros’s hidden route
Defeat Oceiros, the Consumed King, in the Consumed King’s Garden. After the boss arena, follow the passage beyond the room and take the Path of the Dragon gesture from the corpse. No covenant is required. The gesture is the access requirement for Archdragon Peak.
Return to Irithyll Dungeon and locate the outdoor overlook with the seated dragon-like figures. Stand on the empty mat beside them and perform Path of the Dragon. Remain in the pose until the transition transports you to Archdragon Peak, then light the first bonfire. The gesture sends you to the area; it does not activate the Nameless King encounter.
Follow the man-serpent route toward the Dragon-Kin Mausoleum and Great Belfry. Ancient Wyvern blocks the normal route onward. Enter its arena, move past the dragon through the ruins, climb the scaffolding and reach the elevated position above its head. When the wyvern passes below, perform the plunging attack. This is the intended fast resolution; fighting it conventionally from ground level is unnecessary and much more dangerous.
Ancient Wyvern is optional to the overall campaign but is part of Archdragon Peak’s boss route. After the teleport, return through the opened path, collect any desired upgrade materials and equipment, and continue toward the Great Belfry.
- Defeat Oceiros, the Consumed King.
- Take the Path of the Dragon gesture beyond Oceiros’s arena.
- Use the gesture at the dragon-statue overlook in Irithyll Dungeon.
- Reach Archdragon Peak and light its bonfires.
- Defeat Ancient Wyvern if pursuing Archdragon Peak completion.
Ring the Great Belfry bell and defeat the Nameless King
At the Great Belfry, pull the large bell lever. The weather changes and the route across the cloud bridge opens. The encounter begins with the King of the Storm and continues against the Nameless King on foot. The boss is optional and is activated by ringing the bell.
During the mounted phase, keep the stormdrake’s head in view. The head is the dependable target; attacking the body produces poor camera angles and fewer safe openings. Wait for a completed fire breath, grounded lunge or landing, strike the head, then reposition. Do not remain underneath during airborne attacks, and do not chase recklessly after the drake takes flight.
When the stormdrake falls, the Nameless King begins the second phase. His spear attacks include delayed swings, thrusts, lightning attacks and sudden forward advances. Roll diagonally through attacks instead of repeatedly retreating. Heal after a completed combination, a missed thrust or enough distance to prevent an immediate punish. His timing differs sharply from the first phase, so reset your rhythm after the transition.
Keep the Nameless King’s soul until you have checked Ludleth’s transposition options. It can be exchanged for one of his unique rewards, so consuming it immediately can prevent the reward you wanted during that cycle.
- Pull the Great Belfry bell lever.
- Defeat the King of the Storm.
- Defeat the Nameless King if pursuing optional base-game completion.
- Check Ludleth’s transposition options before consuming the boss soul.
Reach and defeat optional Darkeater Midir
In The Ringed City, continue beyond the Shared Grave until Darkeater Midir blocks the bridge. Attack him there until he falls from the bridge. This is only the preliminary encounter and does not award his soul. If he leaves without falling, rest or reload the area and return to the bridge.
After the fall, travel to the Ringed Inner Wall. Use the large elevator and watch for the side opening during its descent. Leave the lift through that opening, follow the passage and drop into Midir’s underground arena. Restock Estus before entering.
Fight from in front of Midir’s head whenever possible. This position gives clearer warnings for his claw swipes, fire breath, dark beam and forward charges than standing beneath his body or behind his tail. Strike after his head finishes an attack, then back away before the next pattern. Do not treat the bridge encounter as completion; the underground fight is the actual boss battle.
Darkeater Midir is not required for Halflight or Slave Knight Gael. His soul, covenant progress and associated rewards are optional.
- Knock Midir from the bridge beyond the Shared Grave.
- Reach the underground arena through the Ringed Inner Wall elevator route.
- Defeat Darkeater Midir if pursuing optional DLC completion.
- Collect the Soul of Darkeater Midir.
- Do not mistake the bridge encounter for the completed boss fight.
Complete Shira’s optional quest and distinguish it from the main route
Find Shira, Knight of Filianore, in her chamber near the Ringed Inner Wall area and speak with her. She asks you to put Midir to rest. Accepting the request is optional and does not unlock the route to Halflight or Gael.
After defeating Darkeater Midir in the underground arena, continue through the Ringed City toward Filianore’s Rest. Shira’s later event occurs as an invasion near this area. Defeat her to obtain her quest rewards and equipment. There is no required hand-in at her original chamber after Midir dies.
The Spears of the Church covenant and its rank rewards are separate optional goals. Halflight is the boss associated with this covenant, but covenant rank is not needed to continue the story. If you are following only the campaign, you may skip Shira and Midir and continue toward the Church of Filianore.
- Speak with Shira near the Ringed Inner Wall if pursuing her quest.
- Defeat Darkeater Midir.
- Reach Filianore’s Rest and resolve Shira’s invasion.
- Collect Shira’s rewards if desired.
- Treat Spears of the Church covenant ranks as optional.
Defeat required Halflight before Slave Knight Gael
Continue the main Ringed City route toward the Church of Filianore and defeat Halflight, Spear of the Church. This encounter is required progression to the DLC’s final area. Depending on connection and matchmaking conditions, the defender may be another player or the offline Halflight version.
After Halflight falls, enter the church and interact with Filianore’s protected resting place. Follow the resulting transition to Filianore’s Rest, then continue to the arena where Slave Knight Gael waits.
Defeat Gael to complete the main Ringed City campaign. For edition-wide campaign completion, the required late-game set is Soul of Cinder, Sister Friede, Halflight and Slave Knight Gael. Ancient Wyvern, Nameless King, Darkeater Midir, Shira and covenant ranks are additional objectives rather than requirements for the base ending or Gael’s route.
- Reach the Church of Filianore.
- Defeat Halflight, Spear of the Church.
- Interact with Filianore’s resting place.
- Reach Slave Knight Gael’s arena.
- Defeat Slave Knight Gael.
Prepare the ordinary ending or End of Fire
For the ordinary ending, defeat Soul of Cinder and interact directly with the bonfire in the arena. No special NPC questline is required. If you have given the Eyes of a Fire Keeper to the Fire Keeper but still want to link the flame, use the bonfire rather than her summon sign.
For End of Fire, reach the Untended Graves, obtain the Eyes of a Fire Keeper and give them to the Fire Keeper in Firelink Shrine. Giving her the Eyes prepares the alternate final interaction but does not select it immediately. After Soul of Cinder is defeated, use the Fire Keeper summon sign beside the final bonfire.
The Fire Keeper Soul is a different item from the Eyes of a Fire Keeper. Giving the Fire Keeper the Fire Keeper Soul unlocks the Heal Dark Sigil and Request Dissolution options; it does not provide general healing, automatically remove Dark Sigils or by itself break the Usurpation of Fire route. The Usurpation route is broken when you use Heal Dark Sigil or another permanent cure that removes the sigils.
Complete optional bosses, NPC events, covenant business and desired boss-soul transpositions before choosing the ending. Do not attack the Fire Keeper during the End of Fire interaction if you want that ending to resolve normally.
- For the ordinary ending, interact directly with the final bonfire after Soul of Cinder.
- For End of Fire, give the Eyes of a Fire Keeper to the Fire Keeper.
- After Soul of Cinder, use the Fire Keeper summon sign for End of Fire.
- Remember that giving the Fire Keeper Soul only unlocks Heal Dark Sigil and Request Dissolution.
- Do not use Heal Dark Sigil or another permanent cure that removes Dark Sigils if pursuing Usurpation of Fire.
Complete the exact Usurpation of Fire sequence
Recruit Yoel of Londor near the Foot of the High Wall and bring him to Firelink Shrine. Use Draw Out True Strength five times, receiving five Dark Sigils. Complete all five draws before entering the Catacombs of Carthus and, for the safest route, before defeating or advancing beyond the Abyss Watchers sequence. If Yoel dies before the five draws are complete, Usurpation is lost for that cycle. Confirm that Yuria of Londor appears at Firelink Shrine and exhaust her dialogue.
Defeat the Deacons of the Deep. Return to Firelink Shrine and speak with Anri, exhausting the available dialogue before entering the Catacombs. Continue through the already-cleared Abyss Watchers route and enter the Catacombs only after this checkpoint.
Meet Anri near the beginning of the Catacombs and again near the suspended bridge before High Lord Wolnir. After Anri’s second Catacombs conversation, do not reveal Horace’s location. Go to Smouldering Lake, find Horace in the cave below the rope bridge and kill him. Return to Anri’s Catacombs location without disclosing where Horace was. This keeps Anri from following the branch that leads to Anri’s death.
At the Church of Yorshka, exhaust Anri’s dialogue and leave the disguised Londor pilgrim among the statues alive. Do not attack the pilgrim. Killing this pilgrim prevents the Londor marriage route even if the earlier steps were completed.
Defeat Pontiff Sulyvahn, return to Firelink Shrine and exhaust Yuria’s dialogue. Travel to the hidden Darkmoon Tomb near the Anor Londo route. Speak with the Londor pilgrim there to receive the Sword of Avowal, enter the tomb and interact with Anri to complete the Rite of Avowal. This grants the final three Dark Sigils, bringing the total to eight.
Do not use Heal Dark Sigil through the Fire Keeper. Giving her the Fire Keeper Soul alone is not the problem: that action merely unlocks Heal Dark Sigil and Request Dissolution. Do not select Heal Dark Sigil, Request Dissolution or another permanent cure that removes the Dark Sigils. After defeating Soul of Cinder, interact directly with the First Flame bonfire to trigger Usurpation of Fire. The final bonfire interaction is required; using the Fire Keeper summon sign produces End of Fire instead.
- Five Dark Sigils were obtained from Yoel before entering the Catacombs.
- Yuria appeared at Firelink Shrine.
- Deacons of the Deep were defeated.
- After the Deacons, Anri’s Firelink dialogue was exhausted before entering the Catacombs.
- Anri’s Catacombs conversations were completed.
- Horace was killed in Smouldering Lake after Anri’s second Catacombs conversation.
- Horace’s location was not disclosed to Anri.
- The Church of Yorshka pilgrim was left alive.
- Pontiff Sulyvahn was defeated and Yuria’s dialogue was exhausted.
- The hidden Darkmoon Tomb was reached.
- The Rite of Avowal was completed.
- Eight total Dark Sigils were retained.
- The Fire Keeper Soul, if given, was not mistaken for a cure and Heal Dark Sigil was not used.
- The First Flame bonfire was used after Soul of Cinder.
Finish cleanup before beginning New Game+
Before resetting the world, return to Firelink Shrine. Check Ludleth for every desired boss-soul transposition, Andre for final reinforcement and the Shrine Handmaid for newly unlocked stock. Do not consume a boss soul until you have confirmed that you do not want its weapon, spell or ring.
For complete campaign progress in The Fire Fades Edition, confirm that Soul of Cinder, Sister Friede, Halflight and Slave Knight Gael are defeated. Add Ancient Wyvern and Nameless King for Archdragon Peak. Add Darkeater Midir, Shira’s invasion, covenant offerings and optional loot only if they are part of your personal completion target.
After the ending, the game offers to begin the next journey immediately. Decline if you still need to explore, finish NPC business or complete DLC objectives. You can begin New Game+ later by sitting at the Firelink Shrine bonfire. Character level, weapons, armor, rings, consumables, upgrade progress, gestures and most ordinary inventory carry forward, while area progress, defeated bosses, NPC states and key progression items reset. Key items must be reacquired in the new cycle.
- Soul of Cinder, Sister Friede, Halflight and Slave Knight Gael were defeated.
- Ancient Wyvern and Nameless King were defeated if optional base-game completion was desired.
- Midir and Shira were completed if optional Ringed City content was desired.
- Desired covenant offerings and rewards were completed.
- Desired boss-soul transpositions were checked.
- The intended ending was selected.
- New Game+ was delayed until current-journey cleanup was complete.
Before you move on
- Archdragon Peak was reached through Oceiros’s Path of the Dragon gesture.
- Ancient Wyvern and Nameless King were defeated if optional base-game completion was desired.
- Midir was knocked from the bridge and defeated in the underground arena if optional DLC completion was desired.
- Shira’s invasion near Filianore’s Rest was completed if her quest was desired.
- Halflight, Spear of the Church, was defeated.
- Slave Knight Gael was defeated.
- For Usurpation of Fire, five Dark Sigils came from Yoel before entering the Catacombs.
- After the Deacons, Anri’s Firelink dialogue was exhausted before entering the Catacombs.
- After Anri’s second Catacombs conversation, Horace was killed without revealing his location to Anri.
- Yuria appeared, Anri survived, the Church of Yorshka pilgrim lived and the Rite of Avowal was completed.
- Eight Dark Sigils were retained and not healed.
- If the Fire Keeper Soul was given, only the newly unlocked options were left unused; giving the soul itself was not treated as a cure.
- The intended ending was selected after Soul of Cinder.
- Soul of Cinder and Sister Friede were defeated before New Game+, with Halflight and Gael added for complete DLC progression.
- Desired boss souls, covenant rewards, NPC rewards and optional bosses were completed before beginning the next journey.
References for this chapter
- FromSoftware — Dark Souls III: The Fire Fades Edition release information
- Archdragon Peak - Dark Souls III Walkthrough and Guide
- Ancient Wyvern - Dark Souls III Walkthrough and Guide
- Dark Souls Wiki — Ending Requirements and Anri Sequence
- Neoseeker — Yoel and Yuria of Londor Questline
- Archdragon Peak - Dark Souls III Guide and Walkthrough for PlayStation 4
- Dark Souls III: The Ringed City
Wrap-up: Endings, NG+ and Checklist for 100% Campaign Completion
Finish the complete PS4 edition by defeating Soul of Cinder, Sister Friede and Slave Knight Gael, then choose an ending before starting Journey 2. To Link the First Flame needs no special quest. The End of Fire requires the Eyes of a Fire Keeper, delivery of the Eyes and use of the Fire Keeper’s summon sign after Soul of Cinder. The Usurpation of Fire requires five Draw Out True Strength level-ups from Yoel, Yuria’s quest, the Anri and Horace sequence, the surviving Londor pilgrim, the Rite of Avowal and eight preserved Dark Sigils. Giving the Fire Keeper Soul unlocks the Heal Dark Sigil and Request Dissolution options; giving it to her alone does not break Usurpation, but using Heal Dark Sigil or another permanent cure that removes the Dark Sigils does. Decline the immediate Journey 2 prompt if cleanup remains, then begin New Game Plus later from the Firelink Shrine bonfire.
1. Confirm the complete-edition objectives
Before selecting an ending, verify the three major completion objectives for Dark Souls III: The Fire Fades Edition on PS4. Defeat Soul of Cinder in the Kiln of the First Flame for the base campaign, Sister Friede in the Painted World of Ariandel for Ashes of Ariandel, and Slave Knight Gael at the end of The Ringed City. The Fire Fades Edition combines the original game with both DLC chapters, but defeating Soul of Cinder does not automatically defeat either expansion boss.
You can complete the DLC before or after Soul of Cinder. If Ashes of Ariandel or The Ringed City remains unfinished, travel from Firelink Shrine or an unlocked area bonfire before starting Journey 2. The Ringed City is available through the bonfire near the Kiln of the First Flame and through the later access route in Ashes of Ariandel after Sister Friede’s encounter.
Do not accept Journey 2 while current-cycle work remains. Starting the next journey resets bosses, doors, shortcuts, area progression and NPC quest states, although much of your character equipment and inventory carries over.
- Soul of Cinder defeated.
- Sister Friede defeated.
- Slave Knight Gael defeated.
- Remaining DLC exploration reviewed.
- Desired ending route confirmed.
2. Finish Firelink Shrine upgrades and boss-soul exchanges
Return to Firelink Shrine before the final boss and speak with Ludleth. If you obtained the Transposing Kiln from the Curse-Rotted Greatwood and delivered it to him, review the available boss-soul exchanges before consuming any boss soul. A boss soul exchanged for ordinary souls cannot be recovered during the current cycle, and each boss soul normally offers a choice rather than unlimited copies of its rewards.
Give Estus Shards to Andre and burn Undead Bone Shards at the Firelink Shrine bonfire. Estus Shards increase the number of flask charges, while Undead Bone Shards improve the amount restored by each charge. Dark Souls III does not use bonfire kindling, so there is no separate kindling step to perform.
Spend or secure loose souls, reinforce your main weapons, repair equipment and purchase remaining consumables, spells, rings or ammunition. Speak with the Fire Keeper, Ludleth, Andre, Yuria if she is present and any NPCs whose rewards or dialogue you still want. This is the safest point to complete transpositions and final Firelink purchases before the world resets.
- Transposing Kiln delivered to Ludleth.
- Desired boss-soul exchanges completed.
- Estus Shards given to Andre.
- Undead Bone Shards burned.
- Equipment repaired and final purchases reviewed.
3. Prepare To Link the First Flame or The End of Fire
To Link the First Flame requires no special NPC quest. Defeat Soul of Cinder and interact with the final bonfire to select the standard ending if no special ending interaction is used.
For The End of Fire, travel to the Untended Graves and enter the dark version of Firelink Shrine. Search behind the Fire Keeper’s normal position for the hidden passage and collect the Eyes of a Fire Keeper. Return to the normal Firelink Shrine, give the Eyes to the Fire Keeper and exhaust her new dialogue.
After defeating Soul of Cinder, do not touch the final bonfire first. Look beside it for the Fire Keeper’s summon sign and use that sign. The summon interaction selects The End of Fire. If the sign is absent, return to Firelink and confirm that the Eyes were collected, delivered and followed by the Fire Keeper’s dialogue.
- Eyes of a Fire Keeper collected.
- Eyes given to the Fire Keeper.
- Fire Keeper dialogue exhausted.
- Fire Keeper summon sign used after Soul of Cinder.
- Final bonfire used directly only for the standard ending or Usurpation.
4. Complete the Usurpation of Fire sequence
Rescue Yoel of Londor in the Undead Settlement and bring him to Firelink Shrine. Use Draw Out True Strength five times, accepting each level-up after the required deaths, to obtain five Dark Sigils. Complete all five while Yoel’s route is active, before progressing far enough for the opportunity to close. After Yoel dies, Yuria of Londor should appear at Firelink Shrine.
After defeating the Deacons of the Deep, return to Firelink and exhaust Anri of Astora’s dialogue. In the Catacombs of Carthus, speak with Anri at the first location near the rolling skeleton-ball trap and answer No when asked about Horace. Find Horace in Smouldering Lake and defeat him. Return to the Catacombs and speak with Anri again near the bridge leading toward High Lord Wolnir. Do not reveal Horace’s location to Anri.
Continue to the Church of Yorshka in Irithyll and speak with Anri. Leave the concealed Londor pilgrim alive among the statues; do not attack or kill the pilgrim. Return to Firelink and speak with Yuria until the marriage is prepared. Travel to the hidden Darkmoon Tomb, speak with the pilgrim outside the ceremony room to receive the Sword of Avowal, then enter and complete the Rite of Avowal with Anri. This supplies three more Dark Sigils, bringing the total to eight.
Giving the Fire Keeper Soul to the Fire Keeper unlocks the Heal Dark Sigil and Request Dissolution options. Merely giving her the item does not break the Usurpation route. However, do not select Heal Dark Sigil or use another permanent cure that removes the Dark Sigils. Purging Stones and Request Dissolution can alter hollowing without replacing the required quest steps, but preserve all eight Dark Sigils for the ending. After Soul of Cinder, interact with the final bonfire and do not summon the Fire Keeper.
- Five Draw Out True Strength level-ups completed.
- Five early Dark Sigils obtained.
- Yuria present at Firelink Shrine.
- Anri spoken to after the Deacons.
- Anri spoken to at both Catacombs locations.
- Horace defeated before his location is revealed.
- Anri spoken to at the Church of Yorshka.
- Londor pilgrim left alive.
- Rite of Avowal completed in the Darkmoon Tomb.
- Eight Dark Sigils preserved.
- Heal Dark Sigil and other permanent cures avoided.
- Final bonfire used after Soul of Cinder without summoning the Fire Keeper.
5. Select the ending after Soul of Cinder
For To Link the First Flame, defeat Soul of Cinder and interact with the final bonfire when no special ending route has been completed.
For The End of Fire, defeat Soul of Cinder and use the Fire Keeper’s summon sign beside the final bonfire. Do not touch the bonfire first.
For The Usurpation of Fire, defeat Soul of Cinder and interact with the final bonfire after completing the Yoel, Yuria, Anri, Horace, pilgrim and Rite of Avowal requirements. Do not summon the Fire Keeper for this route.
- Soul of Cinder defeated.
- Correct final interaction selected.
- Fire Keeper summoned only for The End of Fire.
- Usurpation route completed before using the final bonfire.
6. Complete current-cycle cleanup before Journey 2
After the ending sequence and credits, the game offers to begin Journey 2. Decline if any current-cycle work remains. You return to the existing cycle and can continue from Firelink Shrine, revisit unlocked areas and finish optional content. The DLC does not need to be completed before Soul of Cinder, so clear Ashes of Ariandel or The Ringed City now if either remains.
Review optional bosses and areas such as Nameless King and Archdragon Peak, Darkeater Midir, Champion Gundyr, Old Demon King and the Untended Graves. Check covenant rewards, merchant inventories, spells, rings, weapons, armor, upgrade materials and NPC rewards. Revisit Ludleth if you still need to choose between boss-soul transpositions.
The current cycle is also the last opportunity to collect world-specific keys, ashes, coals, scrolls and tomes before the reset. Do not assume an unfinished NPC quest will continue automatically after Journey 2; the world and its quest flags begin again.
- Optional bosses and late areas reviewed.
- DLC exploration completed as desired.
- Covenant and merchant rewards checked.
- NPC rewards collected.
- Remaining boss-soul exchanges reviewed.
- World-specific progression items collected.
7. Start New Game Plus from the Firelink Shrine bonfire
When cleanup is complete, rest at the Firelink Shrine bonfire and choose the option to begin Journey 2. Your character level, weapons, armor, rings, spells and much of your ordinary inventory carry forward, but the world resets. Bosses return, routes must be reopened and NPC questlines begin again.
Before confirming, repair and reinforce equipment, spend loose souls, organize your loadout and finish desired transpositions. World-specific progression items such as keys, ashes, coals, scrolls and tomes must be reacquired in the new cycle. Ending-related quest progress does not carry over as completed progress.
Journey 2 is optional immediately after the credits. Declining the first prompt leaves the completed cycle available, and the same option can later be selected at the Firelink Shrine bonfire when you are ready.
- Current-cycle cleanup complete.
- No desired boss-soul exchange remains.
- Equipment repaired and upgraded.
- Loose souls spent or secured.
- World-specific items checked.
- Journey 2 started from the Firelink Shrine bonfire only when ready.
Before you move on
- Soul of Cinder, Sister Friede and Slave Knight Gael are defeated.
- The intended ending was verified before Soul of Cinder.
- For To Link the First Flame, the final bonfire was used without the Fire Keeper summon sign.
- For The End of Fire, the Eyes were obtained and delivered, the Fire Keeper’s dialogue was completed, and she was summoned after Soul of Cinder.
- For The Usurpation of Fire, five Yoel level-ups were completed, Yuria appeared, Anri’s required conversations were completed, Horace was safely resolved, the pilgrim survived, the Rite of Avowal was completed, eight Dark Sigils were preserved and the final bonfire was used.
- Giving the Fire Keeper Soul was correctly understood to unlock Heal Dark Sigil and Request Dissolution. The soul was not confused with the Eyes, and Heal Dark Sigil was not used for the Usurpation route.
- Desired boss-soul transpositions, NPC rewards, Estus improvements, optional bosses, covenant rewards and DLC cleanup were completed before Journey 2.
- New Game Plus was started from the Firelink Shrine bonfire only after current-cycle cleanup.
References for this chapter
- FromSoftware — Dark Souls III: The Fire Fades Edition release information
- Darksouls3 Wikidot — Game Mechanics: General and New Game Plus
- Dark Souls Wiki — Ending Requirements and Anri Sequence
- Dark Souls Wiki — Hollowing and Dark Sigils
- Neoseeker — Yoel and Yuria of Londor Questline
- Powerpyx — Usurpation of Fire Ending Guide
Finishing up
Defeated Soul of Cinder (base game final boss) and reached the Kiln of the First Flame arena.
Cleared Ashes of Ariandel by defeating Sister Friede and returned to the main game (if you choose the DLC mid-run).
Cleared The Ringed City by defeating Slave Knight Gael (final DLC boss) and obtained the Blood of the Dark Soul / endgame reward tied to the DLC.
Exhausted any NPC questlines you needed for alternate endings and confirmed the ending you wanted (the guide explains when choices lock out others).
Collected or confirmed any essential upgrade materials you needed for your build (weapon ascensions, infusion choices and rings that materially affect late-game survivability).
Choose your next gameScreenshots & video
Game imagery for reference. Follow the written chapters above for the route and strategies.
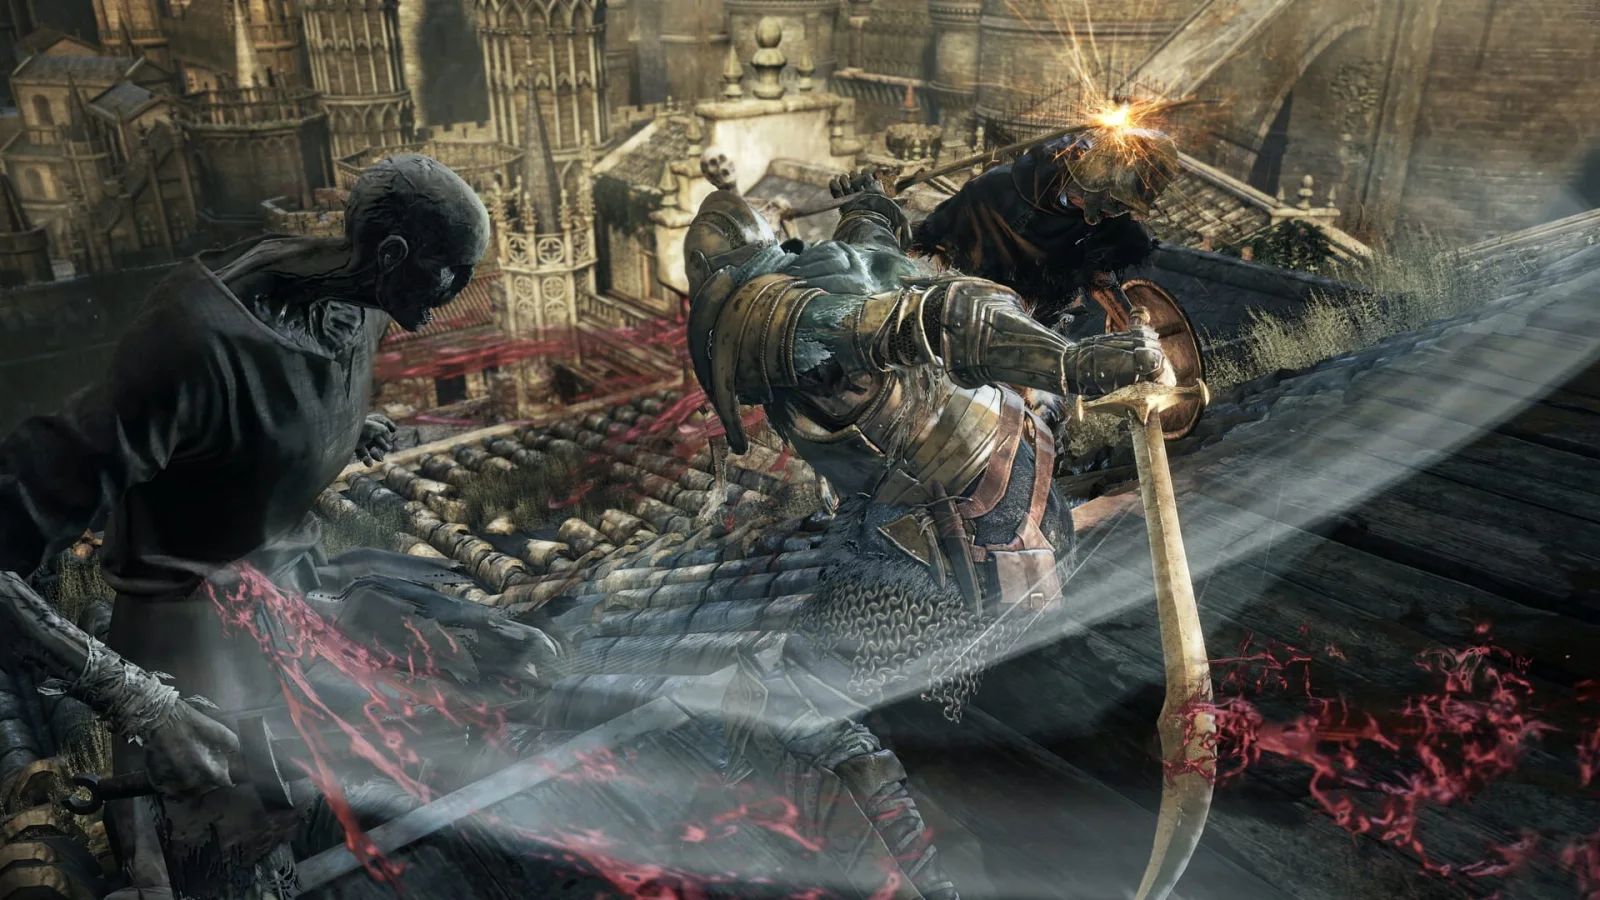
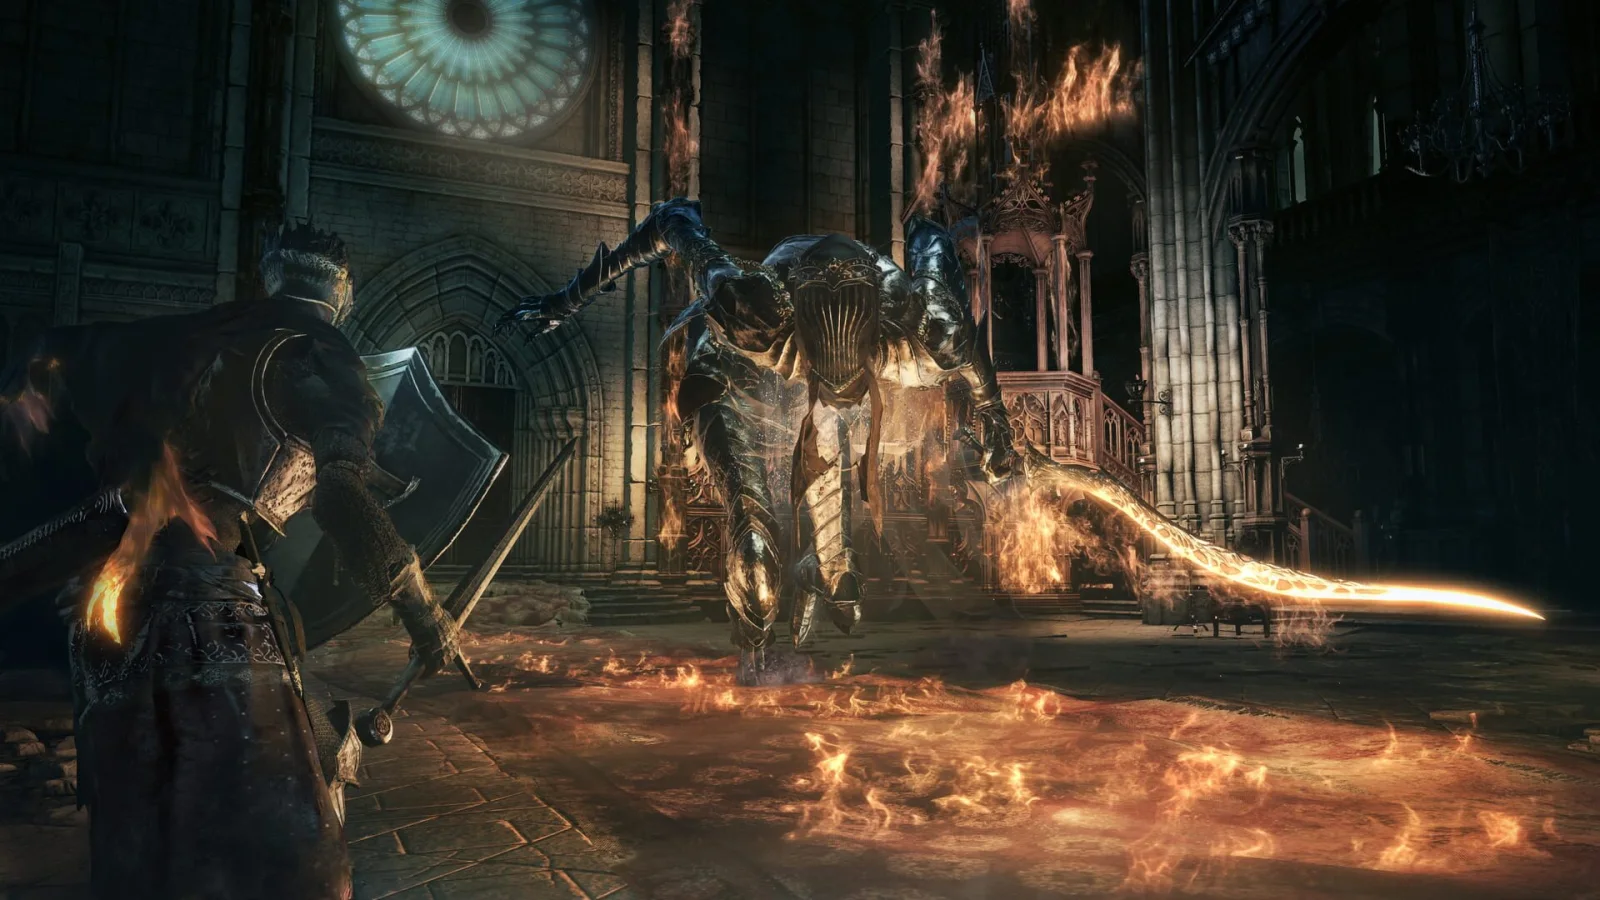
Sources & references
Our original guide draws on the references below. Check the edition at the top of this page before following controls or unlock requirements.
- FromSoftware — Dark Souls III: The Fire Fades Edition release information
- FromSoftware FAQ: Dark Souls III The Fire Fades Edition and DLC Access
- Dark Souls III PlayStation 4 Online Manual
- Dark Souls III PS4 Web Manual
- Dark Souls III PS4 Guide: Character Classes, Attributes, and Burial Gifts
- Dark Souls III Wiki — Cemetery of Ash
- Dark Souls III Wiki — Firelink Shrine Bonfire
- Gamer Guides — Cemetery of Ash and Firelink Shrine walkthrough
- SuperCheats — Cemetery of Ash walkthrough
- High Wall of Lothric - Neoseeker Dark Souls III Walkthrough
- High Wall of Lothric - Gamer Guides
- Dancer of the Boreal Valley - Neoseeker Dark Souls III Walkthrough
- Bandai Namco / FromSoftware — Dark Souls III The Fire Fades Edition PS4 Starter Guide
- Undead Settlement - Dark Souls III Walkthrough and Guide
- Mound-makers - Dark Souls 3 Walkthrough and Guide
- Undead Settlement - Darksouls3
- Chapter 3: Curse-rotted Greatwood - Dark Souls III Walkthrough & Guide
- Undead Settlement - Dark Souls III Walkthrough & Guide
- Chapter 4: Crystal Sage - Dark Souls III Walkthrough & Guide, PS4
- Boss: Crystal Sage - Dark Souls III Guide
- Dark Souls III Walkthrough: Route Order, Missables, Points of No Return
- Crystal Sage
- Road of Sacrifices - Dark Souls III Walkthrough
- Chapter 5: Deacons of the Deep — Dark Souls III Walkthrough and Guide
- Cathedral of the Deep — Dark Souls III Walkthrough and Guide
- Cathedral of the Deep — Dark Souls III Guide
- Darksouls3 Wikidot — Painted World of Ariandel
- FromSoftware — DARK SOULS III THE FIRE FADES EDITION product detail
- Dark Souls Wiki — Abyss Watchers
- Gamer Guides — Farron Keep walkthrough
- GameFAQs — Dark Souls III Walkthrough and Guide, Farron Keep
- Dark Souls III Guide and Walkthrough for PlayStation 4, GameFAQs
- Catacombs of Carthus walkthrough, HonKit
- Neoseeker — Anri of Astora and Horace the Hushed quest guide
- Anri and Horace questline guide, Prima Games
- Bandai Namco — Dark Souls III official site
- DS Map — Pontiff Sulyvahn location and approach
- Neoseeker — Yoel and Yuria of Londor Questline
- Neoseeker — Irithyll of the Boreal Valley Part 2
- Neoseeker — Pontiff Sulyvahn boss guide
- Dark Souls Wiki — Ending Requirements and Anri Sequence
- Profaned Capital - Dark Souls III
- Chapter 10: Yhorm the Giant - Dark Souls III Walkthrough & Guide
- Yhorm the Giant - Dark Souls III Wiki
- Profaned Capital — Dark Souls III Guide
- After defeating Yhorm the Giant - Siegward of Catarina
- Anor Londo - Dark Souls III: The Ringed City Walkthrough and Guide for PS4
- Grand Archives - Dark Souls III: The Ringed City Walkthrough and Guide for PS4
- Grand Archives - Dark Souls 3 Walkthrough and Guide
- Emma, High Priestess of Lothric Castle
- Kiln of the First Flame — Dark Souls III Wiki
- Darksouls3 Wikidot — Keys
- Dark Souls III Guide/Walkthrough — Kiln of the First Flame
- Guide for Dark Souls III — Kiln of the First Flame
- How to Access Dark Souls 3’s The Ringed City DLC
- Colony Guide — Dark Souls 3: Painted World of Ariandel Walkthrough
- GameFAQs — Dark Souls III Missable Guide, Chapter 18: Sister Friede
- The Dreg Heap — Dark Souls III Walkthrough
- The Ringed City — Dark Souls III Walkthrough
- Darkeater Midir — Dark Souls Wiki
- Dark Souls 3: The Ringed City - How to Access the Ringed City DLC
- Darkeater Midir Location & How to Get There — DS Map
- Archdragon Peak - Dark Souls III Walkthrough and Guide
- Ancient Wyvern - Dark Souls III Walkthrough and Guide
- Archdragon Peak - Dark Souls III Guide and Walkthrough for PlayStation 4
- Dark Souls III: The Ringed City
- Darksouls3 Wikidot — Game Mechanics: General and New Game Plus
- Dark Souls Wiki — Hollowing and Dark Sigils
- Powerpyx — Usurpation of Fire Ending Guide
About the game & collecting notes
- Platform
- PlayStation 4
Step-by-step campaign walkthrough for Dark Souls III: The Fire Fades Edition on PS4, covering the full base campaign and both DLCs (Ashes of Ariandel and The Ringed City). This guide leads you from character creation through every required boss and path to the game's endings and the DLC finales, with practical objectives, missable checks and completion criteria.
Darryl Polo
Darryl Polo writes about emulation and retro games. What changes when an old favorite moves to another setup? That question connects his interest in tinkering with the games that made the hardware worth keeping.
Our editorial standardsFound a step that needs another look? Help us improve this guide.