
Dark Souls II: Scholar of the First Sin (PS4) — Complete Campaign Walkthrough
A practical, step-by-step campaign walkthrough for Dark Souls II: Scholar of the First Sin on PlayStation 4. Covers Things Betwixt and Majula, all four Great Soul routes through The Duke’s Dear Freja, The Lost Sinner, The Rotten and the Old Iron King, the complete Drangleic Castle-to-Throne route, Aldia’s optional finale, the Ancient Dragon and Giant Lord prerequisites, and all three Lost Crowns DLC episodes.

Find a copy
Dark Souls II: Scholar of the First Sin PlayStation 4
We may earn a commission if you buy through these links, at no extra cost to you. As an Amazon Associate I earn from qualifying purchases.
Opens retailer search results. Check the model, edition, seller, availability and current price before buying.
Before you begin
You will play as the Bearer of the Curse and use Majula as your hub while exploring interconnected areas, defeating milestone bosses, collecting Great Souls and key items, and lighting primal bonfires to open the route to the Throne of Want.
This guide prioritizes safe routes, consistent checks for essential keys and NPC triggers, clear boss strategies, and how Scholar of the First Sin’s changes (enemy placements, additional NPC content, an optional Aldia final encounter) affect progression on PS4.
Follow each chapter in order for a steady, low-risk run, but expect optional detours: many areas are skippable early or later revisited for items.
When the guide asks you to ‘confirm’ an item, bonfire, or NPC state, do that check before moving on — missing a small dialogue or key can prevent optional content (notably the Aldia boss) from appearing.
Set yourself up for the run
Choose a starting class that matches your intended build. Knight or Warrior are flexible physical starts; Cleric, Sorcerer and Explorer are better selected when you already understand the build you want.
Healing Wares is a reliable beginner gift because it supplies Lifegems, Radiant Lifegems, an Old Radiant Lifegem and Poison Moss. Petrified Something is a valid alternative, but its trade result is random. Avoid Bonfire Ascetic on a first campaign.
On the default PS4 layout, R1 and R2 attack with the right-hand weapon, L1 guards with the left-hand equipment, Circle rolls or backsteps, Square uses the selected item, Triangle changes one- or two-handed stance, R3 locks on, and the D-pad changes equipped items, weapons or spells.
Prioritize Vigor and Endurance early, meet the minimum requirements for your chosen weapon, and raise Adaptability gradually if you want more responsive rolls and item use.
Choose one standard-Titanite weapon for the early campaign. A normal weapon uses six Titanite Shards through +3 and six Large Titanite Shards through +6; special weapons use different materials.
Keep Lifegems, Estus, poison cures, Homeward Bones and a ranged option available. Use resins only when they suit the enemy and your weapon.
Online co-op and PvP are optional. Do not make campaign progression depend on online services.
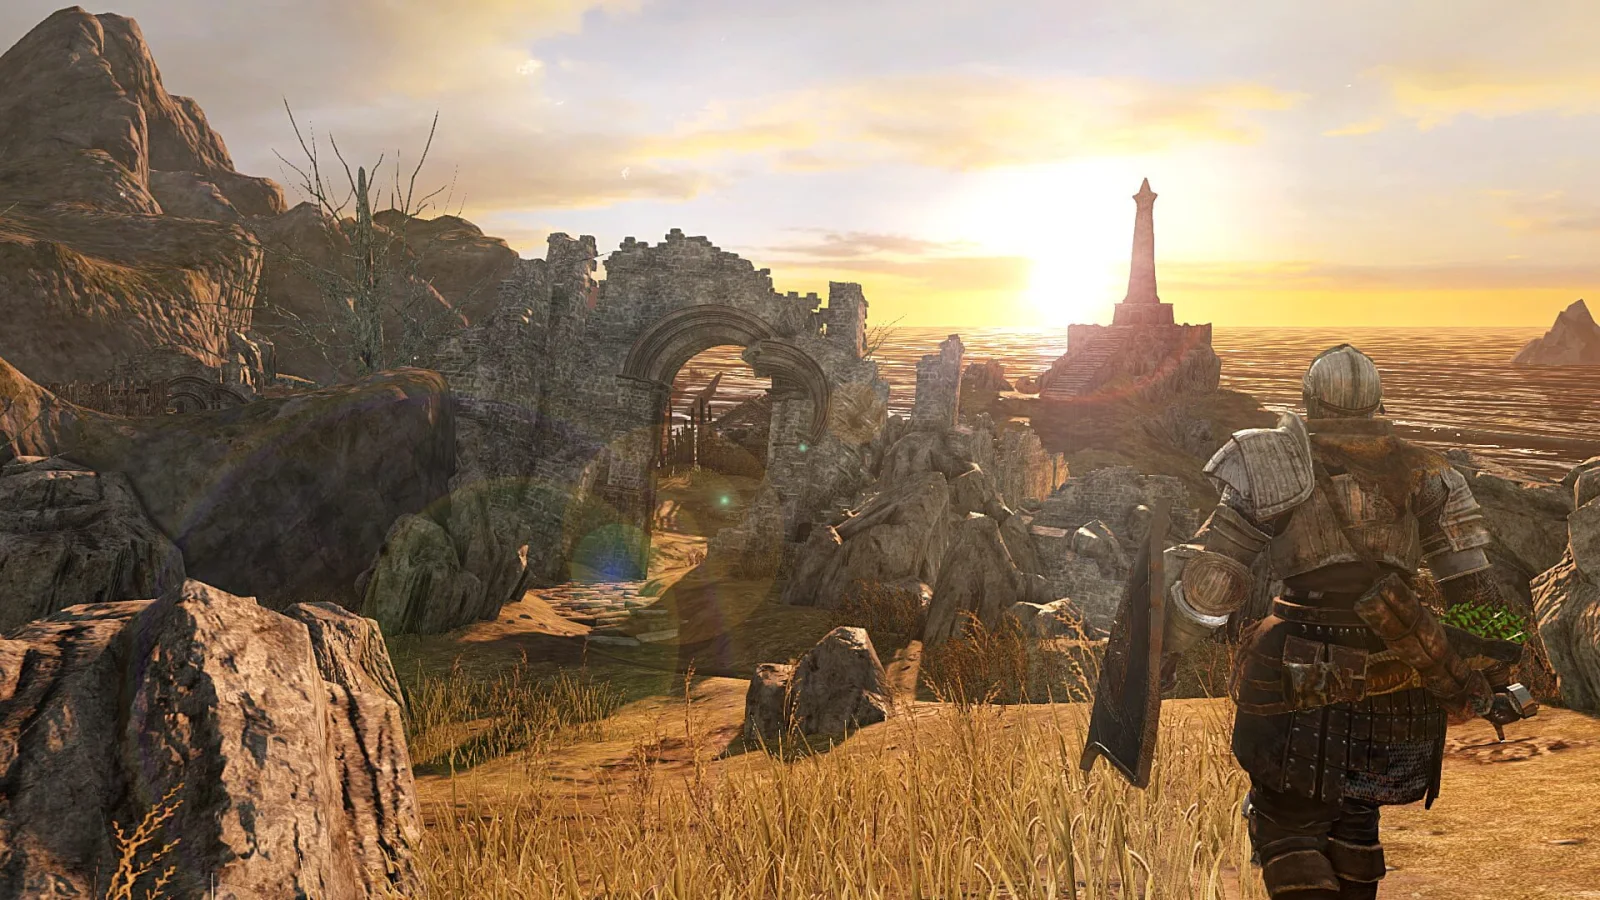
Things Betwixt and Character Setup (first 30 minutes)
Complete the required route through Things Betwixt, learn the combat controls without spending souls recklessly, and reach Majula ready for the first real area. Knight is the most forgiving general-purpose class for a first physical build, while Warrior is a sound alternative. Healing Wares is the safest beginner gift because it supplies extra Lifegems, stronger Lifegems and Poison Moss. In Majula, speak with the Emerald Herald until her opening dialogue is exhausted, receive the Estus Flask, and use her leveling service. Plan to develop one standard weapon toward +6 rather than spreading early titanite across several weapons.
Choose a flexible class and a useful beginner gift
For a first PlayStation 4 Scholar of the First Sin campaign, Knight is a reliable starting class if you want physical weapons, a shield and durable early armor. Warrior is another reasonable choice for a straightforward Strength-and-Dexterity character. Choose Cleric, Sorcerer or Explorer only if you already have a specific build in mind. Your starting class determines initial statistics and equipment, but it does not permanently lock your character into one role.
Healing Wares is the most dependable gift for a new player. It provides ten Lifegems, three Radiant Lifegems, one Old Radiant Lifegem and five Poison Moss. Lifegems restore health gradually, so create distance before using them rather than trying to heal in the middle of a group. Poison Moss becomes useful once poison appears in later areas. Petrified Something is a valid alternative if you specifically want a random trade at the Things Betwixt nest, but its result is uncertain. Avoid Bonfire Ascetic on a first campaign: burning one raises the local bonfire intensity and makes nearby enemies and encounters more dangerous.
- Choose Knight or Warrior for a general physical starting setup.
- Choose Healing Wares unless you have a specific reason to want another gift.
- Do not commit every early level to one damage statistic.
Learn the PS4 combat controls before leaving the tutorial
Rest at the bonfire in the opening hut, then leave through the main route. On the default PS4 layout, the left stick moves, the right stick controls the camera, R1 performs a quick right-hand attack, R2 performs a strong right-hand attack, L1 guards with a shield, Circle rolls or backsteps, Square uses the selected item, Triangle changes between one-handed and two-handed weapon stance, and R3 locks onto a nearby enemy. The D-pad changes equipped items, weapons or spells.
Practice locking onto one enemy, attacking once or twice, then backing away while your stamina recovers. A depleted stamina bar prevents immediate attacks, rolls and defensive actions. Blocking also consumes stamina, and holding a shield slows stamina recovery, so lower the shield between enemy attacks when it is safe. Two-handing a weapon can improve offensive pressure and changes its moveset, but it removes the protection of a shield. Use it when you understand the enemy’s range; use one-handed attacks and a shield while learning an unfamiliar opponent.
A light attack is the dependable option for testing reach and punishing a short recovery. A heavy attack is slower and should be reserved for a clear opening. If an enemy turns away or exposes its back, a rear critical attack is possible, but do not chase a backstab so aggressively that you walk into another enemy. The tutorial is a good place to learn spacing, not a reason to spend all your healing items.
- Confirm the attack, guard, roll, lock-on and item buttons before entering the fog rooms.
- Keep enough stamina for a retreat after every attack sequence.
- Use two hands deliberately instead of leaving the shield behind by accident.
Take the required path through Things Betwixt
From the first bonfire, follow the lit and most obvious route through the wooded passage. The fog doors along this section lead to tutorial rooms that demonstrate movement, attacks, guarding, rolling, plunging attacks and critical attacks. They are useful but not all are mandatory. Enter them one at a time, defeat the isolated enemies, and avoid opening a second route while an earlier enemy is still following you.
After the tutorial section, continue along the main path toward the stone passage and the coastal exit. You will eventually reach the route leading to Majula. The shallow beach area with the two Ogres, the coffin and the nearby optional pickups is not part of the required journey. Leave it for later unless you already understand grab attacks and are comfortable fighting large enemies. If you die there, you gain nothing necessary for reaching the hub.
Scholar of the First Sin adds an optional Pursuer encounter in Things Betwixt, but it is not the first objective and does not block Majula. It is tied to the deeper optional section beyond the early access obstacle and is best attempted after your character has better equipment, more health and a weapon you have tested. Do not mistake that encounter for the required tutorial route or allow it to consume your early soul reserve.
- Clear the tutorial fog rooms at your own pace, one room at a time.
- Follow the main wooded route toward the coastal exit and Majula.
- Ignore the Ogre beach and the Scholar-only Pursuer until a later return visit.
- Rest at the Things Betwixt bonfire before continuing if you have collected several souls.
Reach Majula and activate the Emerald Herald
Continue from the Things Betwixt exit along the cliffside path until the terrain opens into Majula. Rest at the central bonfire immediately. The Emerald Herald stands near the overlook above the settlement. Speak with her until her available opening dialogue is exhausted. She gives you the Estus Flask and becomes the character who allows you to spend souls on levels. If you leave after only one short conversation, you may not have activated every opening service.
Open the equipment menu and check that your weapon, shield and healing items are assigned correctly. Confirm that your armor load is not so heavy that your roll becomes unusably slow, and inspect weapon durability after the tutorial fights. Resting at a bonfire restores durability, health and Estus, but most ordinary enemies also return. Keep Lifegems on the item belt for emergencies, while treating Estus as your faster primary heal.
Walk around Majula without attacking anyone. Locate Blacksmith Lenigrast outside his locked workshop, Maughlin the Armourer in his house, and the other visible residents. Lenigrast cannot provide normal blacksmith services until you obtain his key from Merchant Hag Melentia in the Forest of Fallen Giants. Recording the workshop now prevents confusion when you return with the key. Do not strike peaceful NPCs: killing or provoking them can remove services and dialogue from the remainder of the run.
- Rest at the Majula bonfire.
- Exhaust the Emerald Herald’s opening conversation and receive the Estus Flask.
- Check weapon, shield, healing-item and armor-load settings.
- Locate Lenigrast’s locked workshop and leave Majula’s peaceful residents unharmed.
Set early attributes and plan one standard weapon for +6
For a general physical character, spend early levels on survivability and stamina rather than immediately maximizing Strength or Dexterity. Vigor gives more room for mistakes, while Endurance supports attacking, blocking and retreating. Adaptability increases Agility, which affects the responsiveness of rolls and item use; raise it gradually if your evasive timing feels unusually unforgiving. Strength or Dexterity should first be raised to meet the requirements of the weapon you actually intend to use.
Choose one standard-titanite weapon with a moveset you understand and make it your early upgrade project. A normal weapon requires six Titanite Shards in total to reach +3, then six Large Titanite Shards in total to reach +6. This is why upgrading several weapons at once can leave every weapon weak. Special weapons that use Twinkling Titanite or other materials follow different upgrade paths, so do not apply the +6 plan to them.
You do not need to buy every weapon, armor piece or consumable during the first few minutes. Keep a soul reserve for leveling and later purchases, collect standard Titanite Shards from the opening areas, and return to Lenigrast after obtaining his key from Melentia. Upgrade the weapon only after testing its reach, recovery and stamina cost. A familiar +3 or +4 weapon is generally more useful than an unfamiliar weapon with attractive damage numbers.
- Raise Vigor and Endurance before excessive damage-stat investment.
- Adjust Adaptability only as needed for your preferred Agility and roll feel.
- Select one standard weapon for the early route.
- Reserve six Titanite Shards for +1 through +3 and six Large Titanite Shards for +4 through +6.
- Plan to unlock Lenigrast’s workshop with Melentia’s key in the Forest of Fallen Giants.
Before you move on
- You have exited Things Betwixt and rested at the Majula bonfire.
- The Emerald Herald has given you the Estus Flask and offers leveling when you speak with her.
- Your PS4 equipment layout is checked: weapon, shield, roll, lock-on and healing item are understood.
- You have identified Lenigrast’s locked workshop and know that Melentia later supplies its key.
- You have chosen a primary standard weapon and understand the six-shard plus six-large-shard route toward +6.
- You have not spent souls on an unnecessary early challenge or harmed Majula’s service NPCs.
References for this chapter
- Dark Souls II: Scholar of the First Sin PlayStation 4 Instruction Manual
- Dark Souls II Game Basics Manual
- Things Betwixt — Dark Souls II Wiki
- Starting Gifts — Dark Souls II Wiki
- Emerald Herald — Dark Souls II Wiki
- Estus Flask — Dark Souls II Wiki
- Upgrade Materials — Dark Souls II Wiki
- Guide for Dark Souls II: Scholar of the First Sin — Things Betwixt
Majula — Hub routine, merchants and early NPCs
Use Majula as your permanent base before committing to the Forest of Fallen Giants or Heide’s Tower of Flame. Speak with the Emerald Herald beneath the tree by the cliff until her dialogue repeats; she gives your first Estus Flask and unlocks leveling. Retrieve the Estus Flask Shard from the small well beside the mansion, then return it to the Herald. Meet Saulden at the monument, locate Lenigrast’s locked workshop, and search the nearby corpses for early supplies. Your first essential merchant objective is reaching Merchant Hag Melentia in the Forest, exhausting her dialogue, and buying Lenigrast’s Key. Later, obtain Cale’s House Key in the Forest to open the Majula mansion and claim another shard. Track NPC names, dialogue completion, locations and services, but do not mistake this general recordkeeping for an Aldia requirement: Aldia’s actual triggers occur much later at specific locations.
1. Activate leveling and receive your first Estus Flask
From the Majula bonfire, follow the cliffside path toward the sea. The Emerald Herald, also called Shanalotte, stands beneath a tree. Speak to her repeatedly until her dialogue begins repeating. She gives you the Estus Flask and unlocks the Level Up option. Leveling is performed through her dialogue, not at the bonfire. Return to her whenever you have enough souls to improve your character.
For a first campaign, raise Vigor and Endurance along with the minimum Strength, Dexterity, Intelligence or Faith requirements for the weapon and spells you actually plan to use. Do not put every early level into one damage stat. A reinforced weapon, more health and a larger stamina pool are generally more useful than narrowly increasing one attribute. Adaptability raises Agility, which affects roll and item-use responsiveness, but increase it gradually rather than sacrificing early survivability.
- Receive the Estus Flask from the Emerald Herald.
- Confirm that Level Up is available in her dialogue menu.
- Continue speaking until her current dialogue repeats.
2. Retrieve the first Majula Estus Flask Shard
Find the small stone well beside the large mansion. This is not the enormous central pit. A large rock rests on the well’s edge, attached to a rope and counterweight. Attack the rock once. A corpse rises from the well; loot it to obtain an Estus Flask Shard. Take the shard to the Emerald Herald and select the option to reinforce the Estus Flask. Each shard increases the number of Estus uses, while Sublime Bone Dust is a separate item burned at the Majula bonfire to improve the amount healed per use.
Search the nearby corpses before departing. The body beside Lenigrast’s workshop provides Lifegems and a small soul item, and another Lifegem can be found near the tents around the outer edge of the settlement. Lifegems heal gradually, so use them while you are safe or between encounters; reserve Estus for urgent recovery during combat.
- Attack the rock on the small well beside the mansion.
- Loot the corpse and obtain the Estus Flask Shard.
- Give the shard to the Emerald Herald.
- Collect the nearby Lifegems and soul items.
3. Meet Saulden and establish your Majula return routine
Climb toward the large monument overlooking the settlement and speak with Saulden, the Crestfallen Warrior. Exhaust his current dialogue. He offers access to the Way of Blue covenant, but joining is optional and does not affect the main campaign route. His most useful early function is serving as a visible NPC checkpoint: after major progression milestones, return to Majula and speak with him again to check for new dialogue or changes.
Before each departure, rest at the Far Fire bonfire, spend souls that you are unwilling to risk, check weapon durability and carry Lifegems. If you die while exploring, prioritize recovering your bloodstain before attempting optional pickups. Majula is a safe reset point, so return whenever you obtain an Estus Flask Shard, need repairs or have enough souls for a meaningful level.
- Speak with Saulden until his current dialogue repeats.
- Decide whether to join the Way of Blue; it is optional.
- Rest at the Majula bonfire before entering the next area.
- Keep a note of NPC names, locations and services.
4. Unlock Lenigrast’s workshop and plan your first weapon upgrade
Blacksmith Lenigrast sits outside the small workshop near the Majula bonfire. You can speak with him immediately, but the workshop remains locked until you obtain Lenigrast’s Key. Merchant Hag Melentia sells the key for 1,000 souls. She is first encountered beside the Cardinal Tower bonfire in the Forest of Fallen Giants. Exhaust her dialogue there; after The Last Giant is defeated, she moves to Majula and continues selling the key if you did not buy it in the Forest.
After buying the key, return to Majula and unlock Lenigrast’s door. Rest at the bonfire or otherwise reload the area, then speak with Lenigrast inside. His reinforcement and repair services are now available, and a chest in the workshop contains a Short Bow. Use ordinary Titanite Shards on one dependable weapon after testing its moveset and stat requirements. Do not spread scarce early materials across several weapons you may abandon.
- Meet Merchant Hag Melentia in the Forest of Fallen Giants.
- Exhaust Melentia’s dialogue and defeat The Last Giant so she relocates if needed.
- Buy Lenigrast’s Key for 1,000 souls.
- Unlock the workshop and reload Majula.
- Confirm that reinforcement and repair services are available.
5. Obtain Cale’s House Key and open the mansion
Cale the Cartographer is reached from the Cardinal Tower bonfire in the Forest of Fallen Giants. Descend the ladder, take the route through the doorway and up the fallen tree, cross to the roof and scaffolding, then enter the cave. Wait for the rolling boulder to pass, climb the slope and speak with Cale. Continue talking until he gives you the House Key, then exhaust the remaining dialogue so he can move on later.
Return to Majula and use the House Key on the large mansion. Search the upper rooms and descend into the basement. A skeleton is present in the lower section; defeat it before collecting the Estus Flask Shard from the skeletal remains farther inside. Give that shard to the Emerald Herald. Clearing the basement also matters for Cale’s later relocation, so do not leave the mansion’s lower area unexplored.
- Find Cale in the Forest cave near Cardinal Tower.
- Receive the House Key and exhaust Cale’s current dialogue.
- Unlock the Majula mansion.
- Clear the mansion basement.
- Collect the basement Estus Flask Shard and give it to the Herald.
6. Record NPC states without confusing them with Aldia’s prerequisites
Use a simple note listing each important NPC, the area where you met them, whether their dialogue is exhausted, whether they moved to Majula and what service or item they provide. This prevents missed merchants and quest rewards. Revisit Majula after defeating major bosses or changing areas, because merchants and NPCs can update their stock or location after progression.
The Scholar edition’s Aldia encounter is separate from ordinary Majula dialogue. Aldia first appears after a Primal Bonfire milestone, then appears in the Undead Crypt and Dragon Shrine. To make his optional final battle available, exhaust Aldia’s dialogue at those encounters and defeat Vendrick before defeating Nashandra. Therefore, speaking to Saulden, Lenigrast, Melentia or Cale now is good quest-management practice, but it does not replace the later Aldia conversations. When Aldia eventually appears, continue speaking until his dialogue repeats and record each location in your notes.
For the first departure, use the tunnel from Majula toward the Forest of Fallen Giants. Heide’s Tower of Flame is also accessible through the circular passage, but its large knights make it a less forgiving opening route for a lightly equipped character. The Forest provides the early merchant, Cale, upgrade materials and progression keys needed for the next chapters.
- Record which Majula NPCs you have spoken to and what each one offers.
- Understand that ordinary NPC dialogue is not an Aldia trigger.
- Choose the Forest of Fallen Giants as the default first destination.
- Keep enough souls for repairs, a level and Lenigrast’s Key.
Before you move on
- The Emerald Herald has given you an Estus Flask and Level Up is available.
- The Majula well corpse has been retrieved and its Estus Flask Shard has been given to the Herald.
- Saulden’s current dialogue has been exhausted.
- You know that Melentia is the source of Lenigrast’s Key and that the key costs 1,000 souls.
- Lenigrast’s workshop has been unlocked, reloaded and checked for reinforcement services.
- Cale has given you the House Key, the mansion is open and its basement shard has been collected.
- You have recorded current NPC locations and understand that Aldia’s separate prerequisites occur later.
- You are equipped and supplied for the Forest of Fallen Giants.
References for this chapter
- Majula — Dark Souls II Wiki
- Estus Flask Shard — Dark Souls II Wiki
- Merchant Hag Melentia — Dark Souls II Wiki
- Cale the Cartographer — Dark Souls II Wiki
- Blacksmith Lenigrast — Dark Souls II Wiki
- Aldia, Scholar of the First Sin — Dark Souls II Wiki
- Dark Souls II: Scholar of the First Sin PlayStation 4 Instruction Manual
Forest of Fallen Giants — Last Giant and Pursuer routes
Make Cardinal Tower your base while clearing the Forest of Fallen Giants. Defeat the Last Giant to obtain the Soldier’s Key, then use that key to open the forest’s locked soldier doors, reach Soldier’s Rest, and access the Pursuer’s main arena. Scholar of the First Sin changes this zone with extra Ironclads, darker rooms, additional enemies and new summon options, so clear ambush points instead of sprinting through them. The Pursuer can appear in an optional rooftop encounter near Cardinal Tower; if you do not defeat him there, use the Soldier’s Key to reach the large arena with ballistae. After defeating him, use the nest beyond the arena to travel to the Lost Bastille. The King’s Gate and The Place Unbeknownst belong to a much later memory route and should be ignored until you have the King’s Ring.
Reach Cardinal Tower and establish the forest route
From Majula, enter the tunnel leading to the Forest of Fallen Giants. Follow the first path through the Hollow Infantry, climb the ladders, and continue through the ruined fortifications. The first sections contain archers, shielded soldiers and explosive firebomb enemies, so draw opponents back onto broad platforms rather than fighting on ladders or stairs.
Continue upward until you reach the Cardinal Tower bonfire. Light it and use it as your main checkpoint. Merchant Hag Melentia is found in this general section before she relocates to Majula. Exhaust her dialogue. If she has moved to Majula, buy Lenigrast’s Key from her there; this is the key for opening Lenigrast’s workshop, not the Soldier’s Key needed for the forest doors.
Scholar adds an Ironclad to the platform where the early Pursuer encounter occurs and changes several nearby enemy placements. Treat the roof and the areas above the bonfire as hostile even if you remember the original release.
- Light the Cardinal Tower bonfire.
- Check your weapon durability and healing before pushing deeper.
- Keep Lenigrast’s Key and the Soldier’s Key clearly distinguished.
Reach and defeat the Last Giant
From Cardinal Tower, descend through the lower fortifications and follow the route through the courtyard, wooden platforms and interior passage. Continue downward past the large tree and the soldiers guarding the approach. The Last Giant’s fog gate is at the bottom of this early route, beyond the two shield-bearing soldiers.
Sellsword Luet can be summoned outside the Last Giant’s fog gate in Scholar when his sign is available. He is optional, but his heavy armor can draw the Giant’s attention while you reposition. Enter the fight with enough stamina to retreat after every attack rather than spending the entire bar on damage.
- Locate the Last Giant fog gate.
- Summon Sellsword Luet only if you want the additional support.
- Leave enough stamina for a retreat after each attack.
Use safe positioning against the Last Giant
Stay beside or just behind one of the Last Giant’s legs. Attack in short bursts, then move away whenever he raises a foot or begins a broad arm sweep. The stomp has a wide impact area and can catch a roll made too late. Do not stand directly beneath him after attacking; move toward the rear leg or out to his side before the next animation begins.
When the Giant tears off an arm, his attacks become broader and his reach improves. The same basic plan remains effective: circle around the rear leg, land one or two attacks, then disengage. Heal after a missed stomp, during a long recovery animation, or after creating distance. Once defeated, collect the Soul of the Last Giant and confirm that the Soldier’s Key is in your inventory.
- Attack one leg instead of changing sides constantly.
- Avoid trading hits during the stomp and arm-sweep animations.
- Collect the Soldier’s Key before exploring the locked routes.
Open the Soldier’s Key doors and light Soldier’s Rest
Return to Cardinal Tower and inspect the locked doors around the lower and upper routes. The Soldier’s Key opens the door leading toward Soldier’s Rest, the door that provides access to the Pursuer route, and additional forest doors including the route toward the Flame Salamander pit. Use the key on the Soldier’s Rest door first if you want a safer exploration order.
The basement passage toward Soldier’s Rest is especially dangerous in Scholar because it is dark and contains multiple skeletons. Pull them backward through the doorway so they cannot surround you. Ruined Aflis may be available as a Scholar shade in this passage; his sign is optional and his presence can help with later combat, but do not run ahead and leave him fighting alone.
Light the Soldier’s Rest bonfire if you are exploring this side route. The Flame Salamander area beyond another Soldier’s Key door is optional and has severe fire damage. It is not required to reach the Lost Bastille, so postpone it unless you have ranged attacks, fire resistance or a specific item target.
- Open the Soldier’s Rest door with the Soldier’s Key.
- Light the Soldier’s Rest bonfire if you enter the side area.
- Treat the salamander pit as optional, not as the main progression route.
Choose the correct Pursuer route
The Pursuer has an optional early encounter on the raised platform near Cardinal Tower. In Scholar, an Ironclad occupies this platform, so clear the area carefully before approaching the trigger point. If the Pursuer appears, the platform gives you limited room and no reliable ballista setup; retreating is acceptable if the fight becomes unsafe. Defeating him there awards his boss rewards and prevents the normal arena fight from being necessary.
If the rooftop encounter is skipped or the Pursuer leaves, use the Soldier’s Key on the locked door in the upper forest route. Climb through the fortified passage until you reach the large open arena containing ballistae. This is the intended full encounter and provides much more room for circling and healing than the approach corridors. Do not begin the fight in a narrow hallway.
- Clear the Scholar Ironclad before attempting the optional rooftop encounter.
- Use the Soldier’s Key door if the early Pursuer fight was skipped.
- Reach the open ballista arena before committing to the boss fight.
Defeat the Pursuer and travel to the Lost Bastille
Keep the Pursuer at medium range and avoid attacking during his three-hit sword combination. Roll through the lunging thrust rather than backing away from it, then take only one or two attacks before resetting your position. Watch for the blue curse-infused attacks and keep the boss away from the arena edge so you do not lose room to maneuver.
The ballistae can inflict heavy damage, but they are not required. If you use them, line the Pursuer up with a ballista and activate it only when you have a clear opening; standing at the weapon while the boss is active can leave you exposed. A shield with good physical protection can help against mistakes, but stamina management and rolling through attacks remain the safer plan.
After the Pursuer dies in the main arena, cross to the far side and interact with the bird’s nest. The nest carries you to the Tower Apart bonfire in the Lost Bastille. Light that bonfire before moving through the Bastille. You can later return to the Forest through fast travel if you missed Soldier’s Rest or optional loot.
- Defeat the Pursuer in either the rooftop encounter or the main arena.
- Use the nest beyond the main arena to reach the Lost Bastille.
- Light the Tower Apart bonfire after arrival.
Leave the late-game King’s Gate route for later
The King’s Gate near Cardinal Tower is not part of the early Forest clear. It opens only after you obtain the King’s Ring much later in the campaign. Beyond it lies the Giant memory route, including The Place Unbeknownst and the late-game objectives associated with the memories. Scholar adds extra enemies around this approach, but there is no early Scholar boss that must be defeated to unlock it.
When you return with the King’s Ring, equip it and open the King’s Gate. Follow the memory route only after your late-game preparation is complete. For this chapter, reaching the Lost Bastille through the Pursuer’s nest is the correct completion goal.
- Do not spend time trying to open the King’s Gate early.
- Return after obtaining the King’s Ring during the late-game campaign.
- Treat The Place Unbeknownst as a later memory-route bonfire, not an early shortcut.
Before you move on
- The Last Giant is defeated.
- The Soldier’s Key is visible in your inventory.
- Cardinal Tower is lit, and Soldier’s Rest is lit if you chose to explore that side route.
- The Pursuer is defeated either on the optional rooftop platform or in the main ballista arena.
- The bird’s nest beyond the main Pursuer arena has been used to reach the Lost Bastille.
- The Tower Apart bonfire in the Lost Bastille has been activated.
- The King’s Gate has been left for the later King’s Ring and Giant memory sequence.
References for this chapter
Heide’s Tower of Flame and Cathedral of Blue — Dragons and knights
From Majula, take the underground passage beside the large circular monument and pull the chain in the gated room to enter Heide’s Tower of Flame. The area is optional after the Forest of Fallen Giants, but Dragonrider is the practical route to No-man’s Wharf. Scholar of the First Sin changes Heide substantially: additional Heide Knights patrol the area, a Guardian Dragon replaces the enemy beside the Cathedral bridge, and several item locations differ from the original release. Activate the two levers before entering Dragonrider’s arena to extend the platforms and remove most of the dangerous gaps. After defeating Dragonrider, light the Tower of Flame bonfire, speak to Licia of Lindeldt until her dialogue is exhausted, and continue toward No-man’s Wharf. The Cathedral of Blue and Old Dragonslayer are optional. The Ring of Binding is on the Dragonrider route in Scholar, while Sublime Bone Dust is in a chest on the passage toward No-man’s Wharf.
Enter Heide’s Tower and light Heide’s Ruin
Leave Majula through the underground tunnel beside the large circular monument. Follow the passage to the gated room, pull the chain beside the torch, and continue through the tunnels into Heide’s Tower of Flame. As soon as you enter, turn right down the short side path to light the Heide’s Ruin bonfire.
The first Old Knights are slow but have broad horizontal swings. Fight them in the open, wait for the end of a combo, and answer with one or two attacks rather than emptying your stamina. Keep your camera on nearby enemies before committing to a swing; Scholar places additional Heide Knights around the area, including several that can attack from the sides of the main routes.
If you are in human form, NPC summon signs may be available later. Masterless Glencour can assist with both Heide bosses. Devotee Scarlett is not automatically available here: her small sign appears only after she has first been summoned in Earthen Peak or Undead Crypt.
- Light the Heide’s Ruin bonfire.
- Keep fights in open ground whenever possible.
- Do not assume every Heide Knight is passive or positioned as in the original release.
Prepare the Dragonrider arena and collect the Ring of Binding
From Heide’s Ruin, follow the main route toward the circular room. The right-hand branch leads to Dragonrider. Before entering the boss fog, activate the two levers in the area. The first is revealed after defeating the Heide Knight guarding that section. The second appears in the circular room after the Old Knights there have been defeated. Pulling both levers extends the arena platforms and makes the fight much safer than entering with the gaps still open.
Continue toward the Dragonrider fog gate. In the PS4 Scholar arrangement, a Heide Knight blocks a metal chest directly across from the fog entrance. Defeat that knight and open the chest for the Ring of Binding. The ring reduces the maximum-health penalty from Hollowing, so it is one of the most useful early defensive items even if you plan to restore Humanity regularly.
Masterless Glencour’s sign is just to the right of the Dragonrider fog. Devotee Scarlett’s sign can be on the walkway near the route toward the Cathedral only if her earlier summon requirement has been met. Summons are optional, but they are useful for drawing the boss’s attention away from the arena edge.
- Pull both levers before entering Dragonrider’s fog gate.
- Take the Ring of Binding from the metal chest before the boss.
- Check for Masterless Glencour and, if eligible, Devotee Scarlett.
Defeat Dragonrider and unlock the route to No-man’s Wharf
Dragonrider relies mainly on halberd swings, a thrust, and a jumping attack. Keep the fight near the center of the expanded platform. Stand at medium range, bait a swing or thrust, roll around the attack, land one or two hits, and retreat before your stamina is depleted. Do not backpedal toward the edge while locked on; reposition toward the middle after every exchange.
A shield can absorb a physical hit if it has enough stability, but holding it continuously leaves too little stamina for a roll. Ranged attacks are effective when Dragonrider is recovering from a missed swing. Poison is also possible, although it is not necessary for a normal victory. If using a summon, wait until Dragonrider is committed to the phantom before attacking from the side.
After the fight, use the newly accessible stairs above the arena and light the Tower of Flame bonfire. Speak to Licia of Lindeldt until she repeats herself. She later moves to the mechanism in Majula and can open the route to Huntsman’s Copse for 2,000 souls. From the Tower of Flame bonfire, take the passage and spiral stairs toward No-man’s Wharf.
- Defeat Dragonrider.
- Light the Tower of Flame bonfire.
- Exhaust Licia’s dialogue before leaving Heide.
Follow the Scholar route toward No-man’s Wharf and collect Sublime Bone Dust
From the Tower of Flame bonfire, take the passage leading away from the boss tower and descend the spiral stairs. Continue through the connecting tunnel toward No-man’s Wharf. In Scholar, the Sublime Bone Dust is in a metal chest in this passage, in a side alcove after the route turns and descends. A Royal Knight guards the chest, so draw it into the wider section rather than fighting beside the doorway.
Return to Majula when convenient and burn the Sublime Bone Dust at the Far Fire to improve Estus healing. The chest is optional for progression, but it is a worthwhile early upgrade and is easy to miss if you rely on an original-release item list.
The No-man’s Wharf route is the main reason to defeat Dragonrider at this stage. You can proceed there immediately or return to Heide’s central area to attempt the Cathedral route first.
- Open the Scholar-specific chest containing Sublime Bone Dust.
- Defeat or bypass the Royal Knight without fighting in the narrow doorway.
- Use the Far Fire in Majula to burn the dust if you want the healing improvement now.
Handle the Guardian Dragon and lower the Cathedral bridge
To reach the Cathedral of Blue, return to the central Heide area and take the opposite branch from the Dragonrider route. In Scholar, the enemy beside the drawbridge mechanism is replaced by a Guardian Dragon. Clear the nearby Heide Knights before engaging it; otherwise they can join the fight while you are avoiding fire.
The safest melee position is near the rear legs, but do not stay underneath indefinitely. When the dragon lifts a leg, step or roll away from the stomp, then return for a short attack window. If it flies or moves to the far side, create distance immediately because its long fire breath covers the approach. When it faces you at close range, watch for a bite or short fire attack and roll sideways rather than retreating in a straight line.
Ranged attacks can shorten the dangerous approach, especially while the dragon is recovering from a breath. Poison is optional and should not replace clearing the surrounding knights. Defeating the Guardian Dragon gives access to the mechanism; pull the lever to lower the bridge. The encounter also provides the Watchdragon Parma and dragon-related materials, but these rewards are optional.
- Separate the Heide Knights from the Guardian Dragon.
- Avoid the stomp and long-range fire breath.
- Defeat the Guardian Dragon and pull the bridge lever.
Cross the bridge and defeat Old Dragonslayer
Cross the lowered bridge and expect two hostile Heide Knights on the Cathedral approach in Scholar. Pull them back across the bridge or into the wider section one at a time. Do not fight both beside the stairs. Check your weapon durability and healing before entering the fog.
Old Dragonslayer uses fast lance thrusts, sweeping attacks, lunges, and dark-magic attacks. Circle toward his left side at close or medium range, but do not remain directly behind him. When he misses a thrust or completes a sweep, answer with one or two attacks and reset. A shield can handle a physical strike if stamina remains, but roll away from the dark shockwave and the spread of homing dark projectiles rather than trying to block them.
Magic and lightning damage are effective options, and poison can work if applied during a safe recovery. Ranged characters should not attempt to maintain a large gap indefinitely because Old Dragonslayer closes distance quickly. Fire after a missed lunge or while he is committed to a summon. Masterless Glencour can be summoned near the fight; Devotee Scarlett can also be available if her earlier condition was fulfilled.
After victory, collect the Old Dragonslayer Soul and Old Leo Ring, then enter the Cathedral of Blue and light the bonfire below. Speak with Targray to inspect the Blue Sentinels covenant. Joining is optional and requires a Token of Fidelity.
- Defeat the two hostile Heide Knights without allowing them to surround you.
- Defeat Old Dragonslayer.
- Light the Cathedral of Blue bonfire and speak with Targray if desired.
Before you move on
- Heide’s Ruin and Tower of Flame bonfires are lit.
- The two Dragonrider-area levers have been pulled, and Dragonrider is defeated.
- The Ring of Binding has been collected from the Scholar-specific chest before Dragonrider.
- Licia’s dialogue at the Tower of Flame bonfire has been exhausted.
- The Sublime Bone Dust chest on the route toward No-man’s Wharf has been opened if the optional upgrade was taken.
- For the optional Cathedral route, the Guardian Dragon is defeated, the bridge is lowered, Old Dragonslayer is defeated, the Cathedral of Blue bonfire is lit, and Targray is available.
References for this chapter
No-man’s Wharf and the Flexile Sentry
From Majula, defeat Dragonrider in Heide’s Tower of Flame, then use the underground passage beyond the Tower of Flame bonfire to reach No-man’s Wharf. The area combines narrow wooden walkways, dogs, archers, Varangian soldiers, explosive oil hazards and Scholar-specific Dark Stalkers that fear torchlight. Advance one group at a time, light sconces when safe, speak with Lucatiel in her Scholar location, ring the ship bell and open the dock shortcut before entering the ship. The Flexile Sentry has clubs on one side and swords on the other; use the central mast to control spacing and punish the end of its attacks. After victory, loot the ship, operate its mechanism and ride to the Lost Bastille.
Enter No-man’s Wharf and secure the bonfire
From Majula, travel through Heide’s Tower of Flame and defeat the Dragonrider if you have not already done so. From the Tower of Flame bonfire, descend the spiral stairs and follow the underground route through the old knight passage. Continue through the lift and flooded tunnel until you reach the No-man’s Wharf bonfire. This is the only bonfire in the area, so rest before entering the settlement.
Bring a weapon you can use reliably in confined spaces, a shield if you are comfortable blocking, and a bow, crossbow or spell for pulling enemies. A torch is useful but not mandatory. Several enemies are coated in oil or positioned near oil containers; avoid casually using fire near them because an incoming fire attack can ignite the oil. Do not sprint along the first walkway. An archer fires from ahead while a dog and melee enemies attack from nearby platforms. Pull enemies back toward the bonfire-side path and deal with them separately.
- Rest at the No-man’s Wharf bonfire.
- Carry a ranged pulling option if possible.
- Clear the first dog and archer before crossing the opening platforms.
Find Lucatiel and use light against the Dark Stalkers
After the first groups, climb the initial stairs and immediately look to the left for a building. In Scholar of the First Sin, Lucatiel of Mirrah is inside this building, upstairs against the wall. Speak with her until her dialogue repeats. This advances her quest and makes her summon sign available for the Flexile Sentry if the other summoning conditions are met.
Dark Stalkers are the long-limbed creatures hiding in the darker buildings. They retreat from a lit torch, which lets you separate them from other enemies or drive them away from a doorway. Light the nearby sconces after clearing the immediate area, then switch back to your weapon before fighting. Do not chase a retreating creature into an uncleared room. Archers on upper platforms should be eliminated before you commit to melee fights below; use beams, doorways and walls as cover while healing.
- Exhaust Lucatiel’s dialogue in the upstairs building.
- Use a torch to frighten Dark Stalkers and expose their positions.
- Deal with archers before engaging large melee groups.
Advance across the docks and open the Scholar shortcut
Continue through the wooden buildings and platforms, checking balconies and doorways before climbing. Dogs can stagger you during a fight with a Varangian soldier, so kill them first or pull the soldier away. In the upper settlement, you can meet Carhillion of the Fold on a platform near the dock route. He requires sufficient Intelligence before he will provide his full services; speaking with him is optional, but he can later move to Majula.
Proceed until you reach the dockside section beyond the buildings. In Scholar of the First Sin, look for the weakened wooden bridge across the lower docks and kick it down. This creates a permanent shortcut from the entrance-side platforms toward the ship approach. There is also a separate iron-gate shortcut opened by a switch inside the building near the tavern. The dock bridge is the important shortcut for repeated Flexile Sentry attempts, so make sure it is open before boarding.
A Pharros’ Lockstone can activate a device that illuminates much of the Wharf and helps control the Dark Stalkers, but it is optional and not required to reach the boss.
- Speak with Carhillion if your Intelligence allows it.
- Kick down the Scholar dock bridge.
- Optionally open the iron gate near the tavern.
- Do not spend a Pharros’ Lockstone unless you want the extra lighting.
Ring the bell and prepare for the ship
From the upper dock route, enter the building with the lever and pull it to summon the ship. The bell mechanism is above the settlement and must be activated before the ship appears. Once the ship has docked, clear the nearby archers and melee enemies rather than running directly through them; surviving enemies can follow you onto the approach and interrupt a summon or attack while you enter the fog gate.
If you are human, check the dock near the ship for Lucatiel’s summon sign after speaking with her. Bradley of the Old Guard is another optional Scholar-only summon. His sign is near the first Hollow Infantry enemy who fires flaming arrows on the approach into the Wharf, so it may be behind you rather than beside the ship. A summon is not required, but a phantom can draw the Sentry’s attention and create safer healing windows. If a summon dies during the boss fight and you need Lucatiel for her quest, deliberately leave the fight and try again; her survival requirement matters for later quest progress.
- Ring the bell so the ship arrives.
- Check the ship approach for Lucatiel’s sign.
- Look near the first flaming-arrow infantryman for Bradley’s sign.
- Use the dock shortcut if you need another attempt.
Defeat the Flexile Sentry and travel to the Lost Bastille
The Flexile Sentry is one boss with two distinct weapon sides. One side uses paired clubs; these attacks are slower and easier to read, although they can inflict heavy damage and bleeding. The other side uses paired swords with faster swings and broader reach. The boss turns its body as it attacks, so do not assume that standing beside one leg is permanently safe.
Use the mast in the center of the ship as a spacing tool. Circle so the mast interrupts the boss’s approach, then punish after the end of a club or sword sequence. Keep enough room behind you to roll; being trapped against the ship’s rail is more dangerous than fighting near the center. When the sword side faces you, prioritize evasion and take only short attacks. When the club side finishes a slow swing, you usually have a better opening for one or two attacks. Ranged attacks and fire damage can supplement normal damage, but do not stand still trying to trade projectiles. The arena gradually becomes more difficult to move through as water rises, so avoid unnecessarily extending the fight.
After the Sentry dies, collect the Flexile Sentry Soul. Continue through the ship and open the chest for a Pyromancy Flame and Fireball, then examine the mechanism at the rear of the ship. The ship carries you to the Lost Bastille. On arrival, follow the short lift route upward and light the bonfire before continuing into the prison complex.
- Keep the mast between you and the boss when spacing becomes difficult.
- Treat the sword side as the faster and wider-reaching side.
- Punish completed club swings without overcommitting.
- Loot the ship’s Pyromancy Flame and Fireball chest.
- Operate the ship and light the Lost Bastille bonfire after arrival.
Before you move on
- The No-man’s Wharf bonfire has been lit.
- Lucatiel’s dialogue has been exhausted in the upstairs building, if her quest is being followed.
- The ship bell has been activated and the ship is docked.
- The Scholar dock bridge has been kicked down.
- The Flexile Sentry has been defeated and the Flexile Sentry Soul is in the inventory or storage.
- The ship chest has been opened for the Pyromancy Flame and Fireball.
- The ship mechanism has been examined and the character has arrived in the Lost Bastille.
- The Lost Bastille bonfire has been lit.
References for this chapter
- Dark Souls II: Scholar of the First Sin — FromSoftware product page
- Dark Souls II: Scholar of the First Sin coming to PS3 and PS4 in April 2015 — PlayStation.Blog
- No-man’s Wharf — Dark Souls II Wiki
- Flexile Sentry — Dark Souls II Wiki
- Lucatiel of Mirrah - Dark Souls II Wiki
- Guide for Dark Souls II: Scholar of the First Sin — No-Man’s Wharf
- Dark Souls II: Scholar of the First Sin Walkthrough — PlayStation 4 — GameFAQs
The Lost Bastille and Ruin Sentinels
Scholar of the First Sin has two Lost Bastille entrances. The Forest of Fallen Giants crow’s nest takes you to The Tower Apart, while the No-man’s Wharf ship arrives at Exile Holding Cells. From The Tower Apart, collect the Scholar-only Dull Ember, the Antiquated Key and the Fragrant Branch of Yore, then choose between the direct Ruin Sentinels route and the Antiquated Key shortcut to Straid’s tower and Sinner’s Rise. Defeating the Sentinels gives access to Servants’ Quarters, Belfry Luna and the normal Bastille route. After the fight, collect the Bastille Key outside Servants’ Quarters, open McDuff’s locked workshop if necessary, and unlock the torch rooms and cells around The Lost Sinner’s arena.
Enter through The Tower Apart or Exile Holding Cells
If you defeated The Pursuer in the Forest of Fallen Giants, interact with the bird’s nest beyond his arena. The nest carries you directly to The Tower Apart bonfire in the upper Lost Bastille. Rest there before exploring. In Scholar of the First Sin, the nearby metal chests contain the Dull Ember and two Human Effigies. The Dull Ember is the important progression item: take it to Steady Hand McDuff to unlock his infusion and reinforcement services.
A second chest in the outdoor route near the Silver Serpent Ring contains a Fragrant Branch of Yore in this edition, and The Pursuer can invade in that area. Fight him only after clearing the nearby dogs and invisible Hollow. In the tower room reached from the courtyard, speak with Lucatiel of Mirrah and exhaust her dialogue if you are following her quest.
If you arrived by defeating the Flexile Sentry in No-man’s Wharf, you begin instead at the Exile Holding Cells bonfire. That route joins the same Bastille complex from the prison side. You can later reach the Tower Apart section, but you do not need to revisit No-man’s Wharf before continuing.
- Light The Tower Apart or Exile Holding Cells, depending on your entrance.
- Collect the Scholar-only Dull Ember near The Tower Apart.
- Collect the Fragrant Branch of Yore in the outdoor chest near the Silver Serpent Ring.
- Speak with Lucatiel until her dialogue is exhausted.
Open McDuff’s Workshop and prepare the Bastille loop
From the Tower Apart side, follow the courtyard route past the dogs and Undead Jailers. A locked gate beside the dogs leads to McDuff’s Workshop. If you already have the Bastille Key, you can open it directly; otherwise, push the explosive barrel down the upper stairs until it reaches the weak wall, then ignite it with fire damage. Stand clear before the explosion.
Light McDuff’s Workshop bonfire and give McDuff the Dull Ember if you want his infusion services now. The workshop is also a useful reset point because the route between it, The Tower Apart and the Ruin Sentinels contains several jailers and dogs. Pull enemies back into doorways instead of fighting in the open courtyard, and kill dogs before engaging the slower jailers.
The Antiquated Key is in a Scholar-added chest in the room near Lucatiel and the dogs. It is not the same item as the Bastille Key. Keep it if you want to bypass the Ruin Sentinels temporarily; it opens the route through the first courtyard toward a cage elevator, Straid of Olaphis and Sinner’s Rise.
- Light McDuff’s Workshop bonfire.
- Give McDuff the Dull Ember if you want infusion services.
- Collect the Antiquated Key from the Scholar-added chest near Lucatiel.
- Do not confuse the Antiquated Key with the Bastille Key.
Choose the direct Sentinels route or the Antiquated Key shortcut
For the direct route, return toward the Tower Apart side and follow the upper Bastille buildings through the Royal Swordsmen and Undead Jailers. A petrified hollow blocks the black-door passage to the Ruin Sentinels in Scholar of the First Sin. Use a Fragrant Branch of Yore on the statue, then clear the adjoining cells and corridor before opening the boss approach. The enemies in this section include explosive Rupturing Hollows, so use ranged attacks where available or strike once and retreat before they detonate.
Pilgrim Bellclaire’s summon sign appears in an open cell on the right side of the hallway before the fog gate. Felicia the Brave is another Scholar-only summon and can be found in the approach area after the gate has been opened. Summoning increases boss health, but Bellclaire’s sorcery and either summon’s ability to draw attention can make the three-on-one encounter more manageable.
To postpone the boss, use the Antiquated Key on the locked door in the first courtyard route. Follow the opened passage to the cage elevator, ride up to Straid’s tower, free Straid of Olaphis with a Fragrant Branch of Yore if you have not done so, and continue across the bridge toward Sinner’s Rise. This shortcut does not open Servants’ Quarters or Belfry Luna, so return later if you want those areas.
- Use a Fragrant Branch of Yore on the petrified hollow for the direct route.
- Check the pre-fog cells for Pilgrim Bellclaire.
- Look for Felicia the Brave if you want the additional Scholar summon.
- Use the Antiquated Key only if you intend to postpone the Sentinels.
Defeat Yahim on the starting platform
After entering the fog, you land on a raised platform with Yahim. Alessia and Ricce remain on the lower floor until you leave the platform or Yahim is defeated. Keep Yahim on the platform and circle him rather than immediately dropping down. His shield swings, horizontal attacks and jumping attack have recoveries you can punish with one or two hits. Do not spend all of your stamina attacking; reserve enough to roll away from his follow-up.
The platform is narrow, so avoid backing toward the edge. A shield with good physical stability can help, but lowering it between attacks is important for stamina recovery. If you use Bellclaire, hold Yahim’s attention near one side of the platform while she casts from behind you. When Yahim is nearly dead, finish him rather than dropping down early.
When Yahim dies, or if you fall, the other Sentinels become active. If one jumps onto the platform before Yahim is finished, keep circling and use the space at the far side rather than trying to trade with both. Once Yahim is dead, drop to the main floor on your own terms. This prevents the fight from becoming a three-way melee immediately.
- Keep Yahim on the starting platform whenever possible.
- Use one or two attacks during his recovery, then restore stamina.
- Finish Yahim before voluntarily dropping to the main floor.
- Do not let the platform edge trap you.
Separate Alessia and Ricce on the lower floor
On the lower floor, the objective is to avoid fighting Alessia and Ricce together for longer than necessary. Move around the room’s outer edge and wait for one Sentinel to commit to a leap, shield attack or broad swing. Attack the Sentinel that is recovering, then retreat before the second one reaches you. Their large weapons have long reach, and panic rolls can carry you into the other boss.
If you summoned an NPC, use the summon as a distraction rather than standing beside it and drawing both Sentinels into the same target. Keep one Sentinel between you and the other whenever possible. Ranged attacks are useful immediately after a leap or spinning attack, but do not fire if you have no stamina left to evade the second Sentinel.
Strike damage is generally effective, but a properly upgraded weapon matters more than a particular weapon type. Poison and bleed are not dependable as the main plan because the Sentinels are resistant to those effects. If both bosses converge, stop attacking and run a full circuit of the arena until one separates. After the last Sentinel falls, collect the Ruin Sentinel Soul and search the room’s hidden doors for optional loot before leaving.
- Fight one lower-floor Sentinel at a time.
- Attack only after a leap, broad swing or shield attack has finished.
- Keep an escape route open and avoid being cornered against the walls.
- Collect the Ruin Sentinel Soul after the final kill.
Light Servants’ Quarters and collect the Bastille Key
After defeating the Ruin Sentinels, leave the arena through the natural doorway and follow the cell corridor. Search the hidden doors if you want optional loot, but do not confuse them with the main route. Continue through the corridor until you reach Servants’ Quarters and light its bonfire.
The Bastille Key is found outside Servants’ Quarters on the ledge reached after progressing through the post-boss route. Pick it up before returning to other Bastille sections. Use it to open the locked door beside the dogs and reach McDuff’s Workshop if you used the explosive-wall route earlier, and use it to open the locked cells and gates in Sinner’s Rise.
When you eventually reach The Lost Sinner’s arena, the Bastille Key opens the two side rooms beside the fog gate. Light the oil with a torch in those rooms before the boss fight; this removes the arena’s severe darkness. The key is helpful but not required to enter the boss arena, so do not turn back from Sinner’s Rise solely because you have not collected it yet.
From Servants’ Quarters, the lower ladder leads to a Pharros’ Contraption and the optional Belfry Luna route. The main Bastille progression continues through the upper exit toward Straid’s tower and the bridge to Sinner’s Rise.
- Light Servants’ Quarters bonfire.
- Collect the Bastille Key from the exterior ledge after the boss.
- Open McDuff’s locked workshop door if you did not use the explosive barrel.
- Use the Bastille Key to open the Sinner’s Rise cells and Lost Sinner torch rooms.
- Decide whether to enter optional Belfry Luna.
Before you move on
- The Tower Apart or Exile Holding Cells bonfire is lit, and McDuff’s Workshop is accessible.
- The Dull Ember is in McDuff’s possession if you want infusion services.
- The Antiquated Key is collected if you want the shortcut that postpones the Ruin Sentinels.
- The Ruin Sentinels are defeated if you are taking the direct route, and their soul remains available for use or trading.
- Servants’ Quarters bonfire is lit and the Bastille Key is collected from the exterior ledge.
- Straid’s tower and the bridge to Sinner’s Rise are accessible, either through the Antiquated Key shortcut or after clearing the Sentinels.
- You can reach Sinner’s Rise and open the Lost Sinner arena’s side rooms for torch lighting.
References for this chapter
Sinner’s Rise and The Lost Sinner — mid-game pivot
Reach Sinner’s Rise through the Lost Bastille, activate its bonfire, and descend through the flooded prison to The Lost Sinner. The boss fog gate does not require the Bastille Key, but that key opens the two rooms beside the arena so you can light the oil braziers and greatly improve visibility and lock-on distance. In Scholar of the First Sin, Sellsword Luet can be summoned from a jail cell near the watery approach. The two Prisoned Sinners join only at Bonfire Intensity 2 or higher, including NG+. Defeat The Lost Sinner, collect the boss reward, loot the chest beyond the arena, and light the Primal Bonfire before choosing your next Great Soul route.
Reach Sinner’s Rise and activate its bonfire
Enter Sinner’s Rise from the Lost Bastille by crossing the bridge from the Bastille tower and opening the mist-covered entrance. At the top of Sinner’s Rise, climb to the bonfire and activate it before descending. This gives you a nearby retry point and prevents the flooded approach from becoming a long run after each defeat. The area route is linear: descend through the prison structure, pass the cells, and continue toward the lower flooded section.
The enemies around the descent can attack from cells and side angles. Clear the immediate area before opening doors, and avoid sprinting through the water while several prisoners are still active. If you are carrying a large number of souls, return to Majula and spend them before attempting the boss. The Sinner’s Rise bonfire is the correct starting point for repeated attempts.
- Activate the Sinner’s Rise bonfire at the top of the area.
- Repair your weapon and spend excess souls before the attempt.
- Carry a torch or Flame Butterfly if you intend to light the arena.
Get the Bastille Key and open the arena side rooms
The Bastille Key is not needed to pass through The Lost Sinner’s fog gate. In the PS4 Scholar edition, the key is found in the Lost Bastille near the Servants’ Quarters bonfire: leave the bonfire area, enter the narrow passage, and break through the debris blocking the ledge with the corpse. Pick up the key before returning to Sinner’s Rise if you want the illuminated-arena setup. This location is different from the original release’s commonly repeated Belfry Gargoyles route.
From the Sinner’s Rise bonfire, descend through the prison and follow the flooded passage to the stairs outside the boss entrance. The two locked doors beside the stairs are opened with the Bastille Key. Enter each room, light its oil brazier with your torch, and then return to the fog gate. Lighting both sides makes The Lost Sinner easier to track and improves the practical lock-on distance. The preparation is optional but strongly recommended, especially for a first attempt.
- Obtain the Scholar-version Bastille Key near Servants’ Quarters if you want the lighting setup.
- Open both locked rooms beside the boss entrance.
- Light both oil braziers, then switch back to your normal weapon setup.
Find the Scholar summon before entering
Sellsword Luet’s sign appears in a jail cell along the watery hallway near The Lost Sinner. He is available in Scholar of the First Sin and is built to absorb attention rather than deal heavy damage, using two greatshields and high durability. Summon him if you need space to heal or are still learning the boss’s timing. The additional health granted to the boss by summoning is the tradeoff, so a confident solo character may prefer to fight alone.
If you summon Luet, enter the fog only after confirming that he has followed you through the area transition. Keep your weapon repaired and bring a full healing supply. Physical defense is the most generally useful protection for the boss’s sword attacks; do not sacrifice a responsive roll merely to gain heavier armor. A shield can save you from one emergency hit, but holding it up continuously will drain stamina and leave you vulnerable.
- Decide whether to summon Sellsword Luet in the watery hallway.
- Keep enough stamina for an emergency roll after every attack.
- Enter with a repaired weapon and a full or nearly full healing supply.
Control the arena and punish completed attacks
The Lost Sinner is aggressive and uses fast sword swings, lunges, jumping attacks, and close-range follow-ups. Begin at medium distance, circle around the center of the room, and avoid backing straight into a wall. Wait for a complete swing string, a missed lunge, or the recovery after a jump before attacking. Use one or two hits with a fast weapon, or one deliberate hit with a slower weapon, then disengage. Your goal is to preserve stamina for the next roll rather than win the exchange with a long combo.
The pillars and arena edges are useful for briefly changing the boss’s approach angle, but they are not dependable cover from every attack. Recenter whenever the fight moves into a corner. If the room is unlit, lock-on can become unreliable and the boss is harder to track; if you opened the side rooms, the two braziers remove much of that problem. If lock-on breaks as she crosses the arena, release it, turn manually, and lock on again once you have a clear angle.
Roll through a committed attack when possible instead of repeatedly retreating. Retreating too far can provoke another lunge and may leave you with no room behind you. Do not stand directly behind her for extended periods: the sword’s wide recovery swings can still catch a player who assumes the rear is completely safe. Ranged attacks can draw her toward the center, but avoid slow casts or long item animations while she is facing you.
- Attack after a completed swing, missed lunge, or jump landing.
- Use short punishments and preserve stamina for defense.
- Recenter the fight when the boss reaches a wall or corner.
Handle Prisoned Sinners at higher Bonfire Intensity
On Scholar of the First Sin, two Prisoned Sinners join The Lost Sinner fight when the bonfire intensity is 2 or higher, including a natural NG+ cycle. They are not an automatic feature of every first-playthrough attempt. If they appear, stop chasing the main boss and identify both reinforcements immediately. With Luet present, let him hold the main boss while you remove one Prisoned Sinner, then the other. Without a summon, keep circling and attack only the enemy separated from the others; do not commit to a long exchange in the middle of all three.
Use the arena perimeter to prevent simultaneous contact, but do not trap yourself against a wall. A shield is useful for surviving one unexpected strike, while rolling and repositioning are safer than trying to block a full group assault. Status effects can supplement your normal damage if they are already part of your build, but bleed or poison should not be your only plan. Once the reinforcements are dead, return to the same medium-range rhythm used against the main boss.
- Confirm whether the fight is at Bonfire Intensity 2 or higher before expecting reinforcements.
- Separate and defeat the Prisoned Sinners instead of tunnel-visioning The Lost Sinner.
- Return to the center and finish the main boss with short punishments.
Claim the reward and activate the Primal Bonfire
After The Lost Sinner dies, collect the Soul of the Lost Sinner and continue through the opening beyond the arena. A chest on the route contains a Fragrant Branch of Yore and an Elizabeth Mushroom. Light the Primal Bonfire after collecting the nearby rewards. It returns you to Majula and records the area’s completion for fast travel.
Do not consume the boss soul immediately if you may want to trade it for a unique weapon or spell. Once back in Majula, continue through another Great Soul route such as Huntsman’s Copse and Harvest Valley, the Shaded Woods route, or the Iron Keep route. Defeating The Lost Sinner is one of the four main Great Soul victories, but it does not by itself determine which later route you must take.
- Collect the Soul of the Lost Sinner.
- Loot the chest beyond the arena if you want the Fragrant Branch of Yore and Elizabeth Mushroom.
- Light the Primal Bonfire and confirm that Majula is available through fast travel.
Before you move on
- The Lost Sinner is defeated.
- The Soul of the Lost Sinner has been collected or deliberately left available for later trading.
- The chest beyond the arena has been checked if its contents are wanted.
- The Primal Bonfire behind the arena is lit.
- Sinner’s Rise is available from the travel menu, and the campaign can continue from Majula toward another Great Soul route.
References for this chapter
Huntsman’s Copse and Harvest Valley — mid-game environment hazards
Speak with Licia at Majula’s rotunda, pay 2,000 souls, and enter Huntsman’s Copse. Light the area bonfires, collect the Scholar-specific Undead Lockaway Key near Merciless Roenna, free Creighton, and defeat the Skeleton Lords to lower the bridge into Harvest Valley. Cross the poison areas from dry ground, defeat Covetous Demon, and enter Earthen Peak. Burn the windmill beside Central Earthen Peak to drain the main poison pools before fighting Mytha, then take the elevator into Iron Keep. The Iron Key is found in Iron Keep and opens the Forest of Fallen Giants door to the Flame Salamander cavern; in Scholar, that detour contains the separate Heavy Iron Key for Brume Tower. Smelter Demon is optional. Defeat Old Iron King, light the Iron Keep Primal Bonfire, and leave the area ready for the main campaign or the later Crown of the Old Iron King DLC.
Open Huntsman’s Copse and secure the first bonfires
Return to the rotunda at the far end of Majula and speak with Licia of Lindeldt. If she is still at Heide’s Tower of Flame, defeat the Dragonrider and exhaust her dialogue there first. At the rotunda, choose the option to move the path and pay 2,000 souls. The rotating mechanism opens the route to Huntsman’s Copse.
Enter the Copse and light the Undead Refuge bonfire. Felkin the Outcast stands nearby and sells hexes; speak with him if you need those services. Poison Moths attack from above, so look up before crossing narrow bridges and use arrows, bolts, spells, or quick melee attacks to remove them. Poison Moss and other cures are useful, but the safest defense is to leave poison clouds and pools instead of trading hits inside them.
Continue through the cave and over the rock bridges to Bridge Approach. Light that bonfire before exploring the raised paths. Pull the bridge lever, cross toward the domed building, and follow the route to the locked hut containing the Undead Lockaway bonfire.
- Move Licia’s path from the Majula rotunda and pay 2,000 souls.
- Light Undead Refuge and Bridge Approach.
- Carry poison cures and a ranged option.
- Speak with Felkin if you want access to his hex inventory.
Find the Scholar Undead Lockaway Key and free Creighton
From the locked hut containing the Undead Lockaway bonfire, cross the small bridge. Turn right, then take the first left up the short hill. In the PS4 Scholar arrangement, Merciless Roenna invades near a tree and the Undead Lockaway Key is on the ground beneath that tree. Defeat Roenna before collecting it, or grab the key and retreat toward the bridge if you do not want to risk the fight.
Use the key on the nearby prison hut and light the Undead Lockaway bonfire. Speak with Creighton the Wanderer until his dialogue repeats. Rest at the bonfire to reload the area; in Scholar, Creighton can then provide a summon sign for the Skeleton Lords. His summon sign is found in the skeleton-filled cave beyond the lever-operated gate, approached from the side nearest the Skeleton Lords.
The route contains poison moths, Hollow Rogues, torturers, and ambushes around the bridges. Pull enemies back onto open ground rather than fighting beside ledges or beneath a moth cloud. If you die while carrying the key, return to the same tree; the invasion and pickup location do not change.
- Collect the Undead Lockaway Key beneath the tree near Merciless Roenna.
- Open the Undead Lockaway hut and light its bonfire.
- Exhaust Creighton’s dialogue if you want his Skeleton Lords summon.
- Reload the area before searching for his summon sign.
Optional Undead Purgatory detour
The path to Undead Purgatory branches from the Copse and is not required for Harvest Valley. The required boss for the main route is the Skeleton Lords, so skip this branch if you want to continue quickly.
If you enter Undead Purgatory, use the stone pillars as cover from the Executioner’s Chariot. The Black Hollow Mages keep the skeletons active, so kill them before committing to the chariot. Alluring Skulls can pull ordinary skeletons away from you. When the chariot passes the far end, operate the lever to close the gate and force the horse into a direct fight.
Executioner’s Chariot provides optional rewards and covenant access but does not lower the bridge into Harvest Valley. Return to the Huntsman’s Copse route and continue toward the Skeleton Lords.
- Treat Executioner’s Chariot as optional.
- Kill the Black Hollow Mages first if taking the detour.
- Use the lever to stop the chariot’s circuit.
Defeat the Skeleton Lords and enter Harvest Valley
Proceed through the Copse to the Skeleton Lords fog gate. The arena contains three main lords: a halberd user, a reaper, and a staff user. Each lord creates a separate group when killed. Defeat one lord, then clear its summoned skeletons before damaging the next lord. This prevents several groups from surrounding you at once.
The staff lord produces two Bonewheel Skeletons in Scholar of the First Sin. Keep moving around the arena and avoid attacking a Bonewheel while another skeleton is behind you. Broad horizontal attacks are useful against groups. Alluring Skulls and Yearn can distract ordinary skeletons, but they do not control the three main lords. Creighton’s Scholar summon is useful if his sign is available, though the boss remains manageable without him.
After the boss dies, leave through the far side of the arena. Pull the lever beyond the arena to lower the bridge into Harvest Valley. This is the required connection; Executioner’s Chariot does not replace it.
- Defeat all three Skeleton Lords.
- Clear each summoned group before attacking the next lord.
- Watch for the two Scholar Bonewheels.
- Pull the bridge lever after the fight.
Cross Harvest Valley and defeat Covetous Demon
Cross the lowered bridge and follow the path toward the Poison Pool bonfire. The bonfire is inside a cave beyond a shallow poison area. Sprint across the pool, light the bonfire, and wait for the poison meter to stop rising before crossing again. Stone Trader Chloanne stands near this route; exhaust her dialogue if you want her to relocate to Majula after a reload.
From Poison Pool, follow the dry ledges toward The Mines bonfire. Keep Desert Sorceresses and Undead Laborers away from poison pots and narrow ledges. In the Scholar arrangement, Desert Sorceresses occupy the prominent Poison Pool encounter rather than the original Mounted Overseers. Draw them onto dry ground and kill the casters before entering the depression.
At The Mines, use the bonfire, then follow the route through the upper work areas. The Covetous Demon fog gate is beyond the poison-mist section. The hanging Undead Laborer jars can be shot down with suitable arrows or bolts; the boss may pause to eat a fallen laborer, creating an opening, although damage is reduced during the eating animation. Stay near its side, avoid the forward bite, and punish its slow recovery attacks. If it swallows you, your equipment is removed temporarily, so re-equip immediately after escaping.
- Light Poison Pool and The Mines.
- Speak with Chloanne if you want her merchant relocation.
- Fight Desert Sorceresses from dry ground.
- Defeat Covetous Demon and light Lower Earthen Peak.
Cross Earthen Peak and drain Mytha’s poison
After Covetous Demon, light Lower Earthen Peak and continue into the tower. Use the catwalks and ladders to reach Central Earthen Peak. Manikins can rush from side rooms, while Desert Sorceresses cover the approach with fire projectiles. Pull one enemy at a time and do not sprint through breakable poison jars unless you know the route.
At Central Earthen Peak, look for the windmill outside the bonfire area. Light a torch and interact with the wooden mechanism to burn it. This stops the pump and drains the major poison pools in Earthen Peak, including the central poison in Mytha’s arena. The surrounding poison hazards and smaller poison pots remain, so continue watching your footing. If you die to Mytha, the windmill stays burned; return through the bonfire route without repeating the procedure.
Continue upward to the Upper Earthen Peak bonfire, found behind an illusory wall, and use it as the recovery point for the boss. Mytha fights with a long-reaching spear, sweeping attacks, a spinning move, and a ranged head throw. Stay near her side or behind her when possible, roll through the spear attacks rather than away from the arena’s edges, and punish after the spin or head throw. Do not stand in the remaining poison while healing. Jester Thomas, Devotee Scarlett, and Bashful Ray can be available as Scholar summons, but summoning increases boss health.
- Light Lower and Central Earthen Peak.
- Burn the windmill with a torch before entering Mytha’s arena.
- Find Upper Earthen Peak behind the illusory wall.
- Defeat Mytha without standing in the remaining poison.
Enter Iron Keep and manage its fire hazards
After Mytha dies, take the elevator at the back of the arena. At the bottom, enter Iron Keep and light the Threshold Bridge bonfire before crossing the bridge. The area is filled with Alonne Knights, Ironclad Soldiers, flame-spitting bull heads, and lava drops. Do not run past the first group until you have learned which knights can follow you across the bridge.
Open the doors and side routes one at a time. Alonne Knights punish panic rolls, so bait a single knight into open ground and keep enough stamina for a second roll. Ironclad Soldiers can be staggered by heavy attacks, but their rolling attack can knock you into lava. Fire resistance helps against the bull heads and lava, but it does not make the molten surfaces safe to cross.
Magerold of Lanafir is in Iron Keep and can provide merchant services. Lucatiel’s summon sign and the Scholar summon Manhunter O’Harrah may be available for the area’s bosses depending on your NPC progress. Before the Old Iron King, prioritize a repaired weapon, a shield or roll setup you can use consistently, and enough healing to survive the long route.
- Light Threshold Bridge.
- Pull Alonne Knights into one-on-one fights.
- Treat every lava surface as lethal.
- Repair your weapon before attempting either boss.
Optional Smelter Demon and the Iron Keep bonfires
From Threshold Bridge, cross into the main fortress. The Smelter Demon fog gate is ahead on the primary route and leads to the Ironhearth Hall bonfire if you defeat him. Smelter Demon coats himself in fire during the fight, so fire resistance and careful stamina control are more valuable than greed. Attack after his overhead strikes and retreat when the arena-wide heat damage begins. This boss is optional for reaching the Old Iron King; if the runback or damage-over-time effect is costing too many attempts, leave him for later.
If you skip Smelter Demon, continue through the fortress using the side route toward Eygil’s Idol. If you defeat him, leave the arena through the exit and light Ironhearth Hall before continuing. From there, cross the narrow steel bridge, pass the lava platforms, and climb through the rooms with bull-head traps and Ironclad Soldiers.
At Eygil’s Idol, light the bonfire and pull the lever above it. This shuts off the nearby flame traps and makes the Iron Key accessible. Return toward the entrance section, where a corpse is positioned beneath a bull-head fire trap, and collect the Iron Key after the flames are disabled. The key is not a DLC key and is not used in Iron Keep itself.
- Decide whether to fight optional Smelter Demon.
- Light Ironhearth Hall if Smelter Demon is defeated.
- Reach and light Eygil’s Idol.
- Pull the flame-control lever and collect the Iron Key safely.
Use the Iron Key correctly and defeat Old Iron King
The Iron Key opens the locked door in the Forest of Fallen Giants, beside the elevator route to the Last Giant. In Scholar, that door leads to the Flame Salamander cavern. You do not need to make this detour to finish Iron Keep, but it is the required route to the Heavy Iron Key. Return there when convenient, descend through the unlocked door, defeat or bypass the Flame Salamanders carefully, and collect the Heavy Iron Key from the rear of the cavern. The Heavy Iron Key opens the Brume Tower entrance behind the Old Iron King’s Primal Bonfire and belongs to the later Crown of the Old Iron King chapter.
From Eygil’s Idol, use the newly opened routes and continue through the final flame-trap rooms to the Old Iron King fog gate. Manhunter O’Harrah’s Scholar sign can be available in the final flame-spitting bull-head room. Before entering, remove nearby enemies so a failed attempt does not become a long gauntlet.
The Old Iron King uses a huge fist, sweeping arm attacks, a forward slam, fire breath, and a lava projectile. Fight from the broad stone platform near the entrance rather than standing at the edge. Bait a fist slam, strike once or twice, then retreat. When he leans back for fire breath or a lava projectile, move laterally and keep the camera centered on his upper body. Do not attack during a long animation if doing so leaves you beside the drop. The boss can fall or disappear from the platform if positioned carelessly, so prioritize safe spacing over maximum damage.
- Remember that Iron Key and Heavy Iron Key are separate items.
- Use Iron Key at Forest of Fallen Giants if you want the Flame Salamander and DLC route.
- Reach the Old Iron King fog gate from Eygil’s Idol.
- Defeat Old Iron King and avoid the platform edges during his large attacks.
Light the Primal Bonfire and confirm chapter completion
After Old Iron King dies, enter the chamber behind the arena and light the Iron Keep Primal Bonfire. This bonfire returns you to Majula but does not function like a normal healing and repair bonfire, so use a regular bonfire before spending souls or replacing equipment.
The Old Iron King is one of the four required Great Soul bosses. His defeat and the Primal Bonfire are the completion point for this chapter. The Smelter Demon, Executioner’s Chariot, Harvest Valley Pharros reward, and DLC-key detour are optional for the main campaign.
If you are continuing immediately, travel from Majula to the next uncompleted Great Soul branch. If you are preparing for the Old Iron King DLC, verify that you have the Heavy Iron Key and later return to the door behind this Primal Bonfire to enter Brume Tower.
- Old Iron King is defeated.
- Iron Keep Primal Bonfire is lit.
- The Iron Key is stored for the Forest of Fallen Giants detour.
- The Heavy Iron Key is collected if the Brume Tower DLC route is being prepared.
- At least one regular bonfire remains available for healing, repairs, and leveling.
Before you move on
- Licia’s path is open from the Majula rotunda.
- Undead Refuge, Bridge Approach, and Undead Lockaway are lit.
- The Scholar Undead Lockaway Key was collected and Creighton was freed if his dialogue or summon is wanted.
- The Skeleton Lords are defeated and the bridge into Harvest Valley is lowered.
- Poison Pool, The Mines, Lower Earthen Peak, Central Earthen Peak, and Upper Earthen Peak are available as recovery points.
- The Earthen Peak windmill is burned before or after Mytha’s defeat.
- Covetous Demon and Mytha are defeated.
- Threshold Bridge and Eygil’s Idol are lit; Ironhearth Hall is also lit if Smelter Demon was defeated.
- The Iron Key is collected from the Iron Keep fire trap.
- Old Iron King is defeated and the Iron Keep Primal Bonfire is lit.
- If preparing the later DLC, the Iron Key has been used in Forest of Fallen Giants and the Heavy Iron Key has been collected from the Flame Salamander cavern.
References for this chapter
- Huntsman’s Copse — Dark Souls II Wiki
- Undead Lockaway Key — Dark Souls II Wiki
- Skeleton Lords — Dark Souls II Wiki
- Harvest Valley — Dark Souls II Wiki
- Earthen Peak — Dark Souls II Wiki
- Covetous Demon — Dark Souls II Wiki
- Iron Keep — Dark Souls II Wiki
- Iron Key — Dark Souls II Wiki
- Heavy Iron Key — Dark Souls II Wiki
- Old Iron King — Dark Souls II Wiki
- Harvest Valley and Earthen Peak walkthrough — QuackSouls
- Earthen Peak walkthrough — TrueAchievements
- Iron Keep walkthrough — TrueAchievements
- Dark Souls II: Scholar of the First Sin PlayStation 4 Instruction Manual
Shaded Woods, The Gutter and Black Gulch — darkness and traps
Free Rosabeth of Melfia with a Fragrant Branch of Yore to open the Shaded Woods. Activate the Shaded Woods and Ruined Fork Road bonfires, then use the right-hand doorway at the fork to enter the mist forest and collect the optional Clear Bluestone Ring +1. Return to Majula and descend the pit by ladder or controlled drops, lighting sconces in The Gutter to mark your route. Activate Upper Gutter and Central Gutter, then follow the lower scaffolding into Black Gulch. Light Black Gulch Mouth, unlock the Scholar-specific Hidden Chamber bonfire with another Branch, and clear the poison-statue route toward The Rotten. The two Elite Giants beneath Black Gulch are optional but provide the Forgotten Key, which opens important doors in the Gutter and Majula’s pit and grants access to Darkdiver Grandahl.
1. Free Rosabeth and enter the Shaded Woods
From Majula, take the uphill path toward the petrified woman blocking the stone doorway. Use a Fragrant Branch of Yore on Rosabeth of Melfia, then speak with her until her available dialogue is exhausted. Give her spare clothing if she requests it; doing so is required to move her out of the way and also allows her to relocate to Majula later. Enter the newly opened passage and light the first Shaded Woods bonfire.
Before leaving the area, check your equipment and carry a ranged option if possible. The Scholar edition places Forest Guardians in the mist section, and many of them are difficult to track until they begin moving or attacking. Do not sprint into the mist with several enemies behind you; retreat to ground you have already cleared and fight there.
- Rosabeth has been freed from petrification.
- The Shaded Woods bonfire has been lit.
- You have at least one ranged option or a plan for dealing with invisible Forest Guardians.
2. Activate Ruined Fork Road and take the correct forest route
Follow the main route from the Shaded Woods bonfire to Ruined Fork Road and rest there. The left-hand path leads toward the Shrine of Winter, which is normally sealed until later progression. For the mist forest, use the right-hand doorway from the bonfire room. The remaining route is the branch toward the Huntsman’s Copse side of the game, so do not use it if your immediate goal is the Shaded Woods mist section.
Enter the mist slowly. Stay near the outer edge of the route, keep your camera moving, and avoid cutting across the center unless you are searching for a specific item. Forest Guardians can attack from close range with little warning. If two or more become active, backtrack toward the doorway instead of rolling deeper into unknown terrain.
- Ruined Fork Road has been activated.
- You used the right-hand doorway for the mist forest.
- The Shrine of Winter path has not been mistaken for the current route.
3. Search the mist forest for Clear Bluestone Ring +1
From the right-hand doorway, angle forward into the fog and look for the Curse Jars and the distinctive moaning tree. Continue toward the metal chest beside that tree. The chest contains Clear Bluestone Ring +1, an optional reward that improves spell-casting speed. Check the area around the chest before opening it, because the mist can conceal a Forest Guardian nearby.
After collecting the ring, continue through the mist until the route opens toward the Shaded Ruins and the Scorpioness Najka side of the area. You do not need to defeat Najka for this chapter’s underground route. If the mist becomes too difficult to read, return to the doorway rather than spending healing items while lost. Torches can help you recognize your position, but they do not reveal every enemy.
- Clear Bluestone Ring +1 has been collected if desired.
- You have identified the exit toward Shaded Ruins.
- You can return to Ruined Fork Road without crossing the whole forest again.
4. Descend Majula’s pit into The Gutter
Return to Majula and descend through the large pit. If Gilligan has reached Majula, use his ladder service for the safest route. Otherwise, buy the Silvercat Ring from Sweet Shalquoir and make controlled drops from one visible platform to the next. Aim each landing before you jump; a direct plunge into darkness is likely to kill you even with fall protection.
Reach Grave of Saints if you pass through that area, then continue downward into The Gutter. The Gutter is built around wooden platforms, ladders, broken bridges and short drops. Stop on every stable platform before turning the camera, and do not move backward while fighting near an unmarked edge. A torch is strongly recommended for reading the platforms, but it is not mandatory.
- You have a controlled route through Majula’s pit.
- Grave of Saints has been activated if reached.
- You are carrying a torch or another reliable way to judge ledges.
5. Mark the Gutter route and activate its bonfires
When you first enter The Gutter, turn right to find the Upper Gutter bonfire. Light it before exploring. From there, descend through the wooden structures toward the broad central area and find the Central Gutter bonfire. Use ladders and platforms rather than jumping across gaps you cannot clearly see.
Poison-spitting statues are the main hazard. Destroy them from the side, with arrows, or with quick attacks before fighting nearby hollows. Light sconces at major junctions so you can recognize the route on a return trip. Lighting sconces is useful navigation, not a requirement for normal progression; do not waste time trying to illuminate every platform unless you specifically want the related Scholar encounter.
From the Central Gutter area, take the descending scaffolding and ladders near the large jars. Follow this lower route until the level changes to Black Gulch. If you lose the route, return to Central Gutter and look for the descent rather than dropping from an unrelated platform.
- Upper Gutter is lit.
- Central Gutter is lit.
- The poison statues on your chosen route have been destroyed.
- You know which scaffolding descends from Central Gutter toward Black Gulch.
6. Enter Black Gulch and secure both bonfires
Black Gulch begins with a narrow ledge lined by poison-spitting statues and oil-like puddles. Shortly after entering, check the left wall for a small cave containing the Black Gulch Mouth bonfire. Light it before clearing the rest of the area. This is the first Black Gulch checkpoint and is easy to miss if you keep running along the main ledge.
Advance from statue cluster to statue cluster. Use arrows or bolts to remove statues from a distance, or strike them quickly while standing outside the puddles. When a Razorback Nightcrawler erupts from a puddle, retreat to solid ground and attack after its body settles. Do not heal while standing beside a puddle or directly in front of an active statue.
Near the fog-gate approach, stay along the cliff edge and look for the petrified Undead Traveler blocking a small side chamber. In Scholar of the First Sin, use a Fragrant Branch of Yore on this figure to enter the Hidden Chamber and light the second Black Gulch bonfire. This checkpoint is the best starting point for The Rotten attempts.
- Black Gulch Mouth has been lit.
- The poison statues near the route are cleared.
- Hidden Chamber has been opened with a Fragrant Branch of Yore.
- Both Black Gulch bonfires are available.
7. Collect the Forgotten Key and prepare the Rotten route
From the Black Gulch bonfire route, look over the cliff edge for a lower series of platforms. Drop carefully until you reach the cave containing two Elite Giants. Defeat both giants to receive the Forgotten Key and a Soul of a Giant. This detour is optional for reaching The Rotten, but the key opens the locked door near the lower Gutter area and additional doors connected with the pit in Majula. It also enables access to Darkdiver Grandahl’s Black Gulch location.
Return to Hidden Chamber before attempting the boss if you died during the detour. From there, the route to The Rotten is short. Equip poison resistance if available, bring healing and poison cures, and keep the center of the arena in mind when entering the fog. The arena’s surrounding fire pits punish blind backward rolls, so dodge laterally or toward open central space rather than retreating without checking your position.
The Rotten is vulnerable to ordinary physical damage and can be interrupted by strong attacks, but avoid standing directly in front of its cleaver for extended trades. Watch the hands and torso, attack during recovery windows, then reset your position before the next swing. Summons can divide its attention, although the fire pits and wide attacks still require each player to manage spacing.
- The Forgotten Key is in your inventory if you completed the optional giant detour.
- You have returned to Hidden Chamber after exploring the lower cave.
- Poison cures, healing and suitable resistance gear are ready.
- The Rotten fog gate is reachable from a repeatable bonfire route.
Before you move on
- Rosabeth has been freed and the Shaded Woods route is open.
- The Shaded Woods and Ruined Fork Road bonfires are lit.
- Clear Bluestone Ring +1 has been collected if desired.
- Upper Gutter and Central Gutter have been activated.
- Black Gulch Mouth and Hidden Chamber have both been lit.
- The Forgotten Key has been collected if you completed the optional Elite Giant detour.
- The Rotten fog gate can be reached from Hidden Chamber with a cleared, repeatable route.
References for this chapter
- Dark Souls II: Scholar of the First Sin — FromSoftware product page
- Shaded Woods — Dark Souls II Wiki
- Shaded Woods and Shaded Ruins — Dark Souls II Wiki
- The Gutter — Dark Souls II Wiki.gg
- Black Gulch - Dark Souls II Wiki
- Forgotten Key — Dark Souls II Wiki.gg
- Dark Souls II: Scholar of the First Sin — GameFAQs walkthrough
The Rotten and Black Gulch boss tactics
Black Gulch is a short poison-filled route beneath The Gutter that ends at The Rotten, one of the four Old Ones. In Scholar of the First Sin, the safest checkpoint is the Hidden Chamber bonfire, reached by following the cliff edge and using a Fragrant Branch of Yore on a petrified Undead Traveler. Clear poison statues from range where possible, carry poison cures, and keep the fight away from the burning pits in the boss arena. The Rotten’s attacks are heavily telegraphed, but the grab and dark-area explosion punish greedy attacks. Dodge one attack, land a brief punish, then reset your position. Lucatiel of Mirrah can be summoned beside the Hidden Chamber bonfire after you speak with her in Black Gulch. Bashful Ray is also available in Scholar near the Razorback Nightcrawlers. The boss awards the Soul of the Rotten and unlocks a Primal Bonfire; the separate Old Dead One Soul requires Bonfire Intensity 2 or higher.
Enter Black Gulch and light Black Gulch Mouth
Reach Black Gulch by descending through The Gutter. Follow the ladders and wooden platforms until the path opens into the long ledge lined with poison-spitting statues. The first bonfire, Black Gulch Mouth, is inside a small cave on the left shortly after entering the area. Light it before clearing the corridor.
The statues can stagger you as well as build poison. Use a bow, crossbow, spell or thrown weapon to destroy them from outside their firing range. If you prefer melee, approach one statue at a time with your shield raised, strike, then retreat before the next group activates. Poison Moss is useful for removing poison, while Lifegems can handle minor damage between encounters. Resting at a bonfire does not normally restore destroyed statues, but dying, warping or using a Homeward Bone will restore the route.
- Light Black Gulch Mouth.
- Carry at least one poison-curing item.
- Bring a ranged attack or a method for safely destroying statues.
- Avoid spending most of your Estus before reaching the second bonfire.
Find the Scholar-specific Hidden Chamber bonfire
Leave Black Gulch Mouth and follow the cliff edge on the left. Before the first dense tar-pool section, look for a lower ledge that is easy to miss in the darkness. Drop down carefully and follow the ledge to the petrified Undead Traveler. In the PS4 Scholar of the First Sin edition, use a Fragrant Branch of Yore on this figure to open the way.
The Hidden Chamber bonfire is directly beyond the unpetrified traveler. Rest there before attempting the boss. This checkpoint is close to The Rotten’s fog gate and prevents repeated trips through the poison-statue corridor. Do not confuse this route with the lower ledges that lead toward the Elite Giants and Darkdiver Grandahl; those are optional branches.
- Drop to the lower ledge before the main tar-pool section.
- Use a Fragrant Branch of Yore on the petrified Undead Traveler.
- Light and rest at Hidden Chamber.
Speak with Lucatiel and choose summons
Lucatiel of Mirrah is on a lower ledge near the Hidden Chamber route. Speak with her until her dialogue is exhausted. Afterward, her summon sign appears beside the Hidden Chamber bonfire. Clear nearby statues before summoning so she does not take unnecessary damage on the way to the fog gate.
Scholar of the First Sin also adds the NPC summon Bashful Ray. His sign is found in the Black Gulch route between the Razorback Nightcrawlers, rather than beside the Hidden Chamber bonfire. Lone Hunter Schmidt’s sign can be found near the large skeleton close to the boss fog. You do not need every summon; one companion is usually enough to create healing and attack openings while keeping the arena manageable.
If you are completing Lucatiel’s quest, summon her only after speaking with her in Black Gulch and keep her alive through the encounter. A successful summon is optional for normal campaign completion.
- Exhaust Lucatiel’s Black Gulch dialogue.
- Use her sign beside Hidden Chamber if desired.
- Clear nearby statues before summoning.
- Keep Lucatiel alive if pursuing her quest reward.
Prepare for the arena hazards
The Rotten’s arena contains several burning pits. Treat them as lethal terrain: being knocked into one can rapidly drain health and leave you unable to recover. Enter with the camera centered on the boss and move toward the open central ground rather than rolling along the outer edge.
Fire resistance can reduce mistakes caused by accidental contact, but positioning is more important than a specific armor set. A fire-resistant ring, Flash Sweat or fire-resistant equipment is useful if available. Dark resistance can help against the boss’s later area attack, but do not sacrifice all physical defense or stamina recovery merely to increase one resistance.
Use a weapon you can control reliably. Strong or heavy attacks can deal useful posture damage during recovery windows, but do not commit to long attack strings. A thrusting or strike weapon is suitable if it is already upgraded, though changing to an inferior weapon for damage-type reasons is not necessary.
- Keep the fight on the central ground.
- Equip fire resistance if it does not compromise survivability.
- Have enough stamina for an attack followed by an emergency roll.
- Repair your weapon before entering the fog.
Read the melee attacks and punish briefly
Stay in front of The Rotten at close or medium distance. His cleaver swings, overhead attacks and broad arm sweeps are easier to read when you are not directly behind him. Roll away from vertical strikes and roll through horizontal swings when you have enough stamina to escape the follow-up. After the attack finishes, land one or two hits and immediately reset.
The grab is the most dangerous close-range attack. When the attacking hand draws back, stop attacking and move away from the hand. Roll backward or diagonally away, then wait until the animation has fully ended before approaching. Do not rely on blocking the grab; it must be avoided.
A shield can help against ordinary attacks, but holding it through repeated swings drains stamina and can leave you vulnerable. Two-hand your weapon during confirmed openings for stronger damage and posture pressure, then return to a safer stance when the boss begins another attack cycle.
- Avoid the grab instead of trying to trade through it.
- Punish with one or two attacks, not a full combo.
- Keep stamina available for a defensive roll.
- Do not stand behind the boss near the arena edge.
Escape the dark-area explosion and late attacks
When The Rotten gathers dark energy and begins the area explosion, stop attacking and create distance. Sprint or roll away from the boss while keeping your path on safe ground. The blast can catch players who remain close or continue attacking during the windup. Wait for the effect to finish before returning to melee range.
Later in the fight, some attacks cover more space or create additional pressure around the boss. The same response remains reliable: identify the animation, evade first, then punish only after the hitbox and lingering effect have ended. Ranged characters can fire during a long recovery animation, but only from safe ground and without standing in a burning pit.
If a summon dies, do not immediately rush to compensate for lost damage. Re-center The Rotten in the open area, let the boss finish its current attack sequence and resume the evade-punish-reset rhythm. The fight becomes more dangerous when the player chases the last portion of the health bar.
- Back away from every dark-energy explosion.
- Wait for lingering effects to end before attacking.
- Keep the boss away from burning pits.
- Do not rush the final hits.
Collect the correct rewards and light the Primal Bonfire
After The Rotten dies in a normal first playthrough, collect the Soul of the Rotten. This is the boss soul used for the appropriate soul transposition options; it is not the Old Dead One Soul. The Old Dead One Soul is obtained from The Rotten at Bonfire Intensity 2 or higher, such as after using a Bonfire Ascetic at Hidden Chamber or in a later New Game cycle.
Enter the chamber beyond the arena and light the Primal Bonfire. This completes the Black Gulch Great Soul branch and provides a fast-travel point back through the primal-bonfire network. The boss is required for normal progression unless the Shrine of Winter is opened through the alternate Great Soul requirement.
The lower Black Gulch branches remain optional. The Elite Giants can be reached through a lower route and can provide Souls of a Giant and the Forgotten Key. The Forgotten Key opens several sealed locations, including the route to Darkdiver Grandahl and the door that leads to the Dragon Talon for the Crown of the Sunken King DLC. These rewards are useful, but none is required to defeat The Rotten.
- The Rotten is defeated.
- The Soul of the Rotten is in your inventory.
- The Primal Bonfire beyond the arena is lit.
- Optional: defeat the Elite Giants and collect the Forgotten Key.
- Optional: preserve Souls of a Giant for the Vendrick encounter.
Before you move on
- Black Gulch Mouth and Hidden Chamber have been lit.
- The Rotten’s defeat has been recorded and the Soul of the Rotten has been collected.
- The Primal Bonfire beyond The Rotten’s arena has been lit.
- The Black Gulch Great Soul branch is complete for campaign progression.
- Optional: the Elite Giants have been defeated and the Forgotten Key has been collected.
- Optional: Lucatiel survived the fight if her questline is being pursued.
Doors of Pharros and optional mid-game detours
This branch begins after Rosabeth of Melfia is freed and leads through Shaded Woods, Scorpioness Najka, Doors of Pharros and Brightstone Cove Tseldora. Najka, The Prowling Magus and Congregation, and The Duke’s Dear Freja are the required encounters on this route; Freja provides the fourth Great Soul and the fourth Primal Bonfire. Doors of Pharros itself is mostly optional, including the Rat King covenant, Royal Rat Authority, Santier’s Spear and most Pharros mechanisms. In Scholar of the First Sin, torches frighten the parasite spiders in Freja’s arena, and additional summon signs can appear. The three DLC keys are separate objectives: Dragon Talon for Shulva, Heavy Iron Key for Brume Tower, and Frozen Flower for Frozen Eleum Loyce.
Free Rosabeth and reach the Shaded Woods route
From Majula, follow the path toward the Shaded Woods. Rosabeth of Melfia is petrified beside the passage leading into the area. Use a Fragrant Branch of Yore to free her, then speak with her and move her to Majula. Her original position must be cleared before the path can be used normally.
Continue to the Ruined Fork Road bonfire. The left branch leads toward the Shrine of Winter, while the route for this chapter begins through the misty doorway on the right. The mist obscures enemies and landmarks, so move slowly and keep a shield, bow or spell ready rather than sprinting through the fog.
- Rosabeth of Melfia is unpetrified.
- Rosabeth has been spoken to after being freed.
- Ruined Fork Road is lit.
Cross the mist and light Shaded Ruins
At Ruined Fork Road, take the right-hand mist route. Hug the right wall and follow the inclines, chests and stone structures until the path rises toward a building. Enter the building and continue up the slope to find the Shaded Ruins bonfire.
The area contains Forest Guardians, Lion Clan enemies and ambushes hidden by the fog. Do not attack every silhouette immediately. Use the wall and the visible stone structures to keep enemies from surrounding you. If a petrified Lion Clan Warrior blocks a useful side room, return later with another Fragrant Branch rather than spending your only branch without a clear objective.
- Shaded Ruins bonfire is lit.
- You have a usable ranged pull or enough healing for the fog route.
- You have noted any petrified side paths for a later return.
Follow Shaded Ruins to Scorpioness Najka
Leave the Shaded Ruins bonfire and follow the open path toward the broken towers. The route to the boss passes through the Forest Guardian area and leads between two damaged towers. Clear the guardians before approaching the fog gate so they cannot follow you into the arena. In Scholar of the First Sin, Bradley of the Old Guard can be available as a summon after the nearby guardians are dealt with; Manscorpion Tark requires his dialogue and Ring of Whispers conditions.
Scorpioness Najka attacks with her pincers, tail stabs and burrowing movement. Stay near one side of her body rather than directly in front of her, punish the recovery after a missed thrust, and leave enough stamina for the tail attack or a retreat. When she burrows, move away from the disturbed ground and wait for her to reappear instead of attacking blindly. A shield can help with the first hit, but repeated blocking will leave you vulnerable to the follow-up.
- The approach to Najka is cleared enough for a safe retry.
- Any intended summon sign is visible before entering the fog.
- Scorpioness Najka is defeated.
Enter Doors of Pharros and light both bonfires
After Najka is defeated, use the passage at the far side of her arena. It leads directly into Doors of Pharros. The area can also be entered from the Brightstone Cove side, but no Doors of Pharros boss is required to reach Brightstone Cove.
The first cavern contains Mongrel Rats, Gyrm warriors and Rusted Mastodons. Pull the rats before engaging the larger enemies, and fight near open ground so the mastodons cannot pin you against the water or walls. Continue through the lower cavern to find a small opening containing Gyrm’s Respite.
From Gyrm’s Respite, take the route through the larger cavern and up the ladder. Follow the Gyrm warriors and stairs toward the upper doorway to find Ordeal’s End. Speak with Lonesome Gavlan until his dialogue is exhausted; this is his final location. Light both bonfires before attempting the optional boss or spending Lockstones.
- Gyrm’s Respite is lit.
- Ordeal’s End is lit.
- Lonesome Gavlan’s dialogue is exhausted.
Handle optional Doors of Pharros content deliberately
Most Pharros contraptions are optional. They may open minor treasure rooms, enemy chambers, traps or water mechanisms, so do not activate every face-shaped device simply because it is nearby. Record the mechanisms you use and stand to one side when opening doors in case an enemy is positioned immediately beyond them.
The large door associated with Santier’s Spear requires three connected Pharros activations. Opening it reveals a Rusted Mastodon and a chest containing Santier’s Spear. This weapon is optional and is not needed for the Tseldora route. The Rat King covenant is also optional. Royal Rat Authority is reached from the Ordeal’s End side and must be fought without conventional co-op summons. Several Mongrel Rats enter first and can inflict Toxic, so kill them immediately with sweeping attacks, ranged attacks or area spells before concentrating on the Authority.
If the opening swarm overwhelms you, retreat through the fog, rest at Ordeal’s End and return with Toxic-curing items and a stronger weapon. Defeating Royal Rat Authority has no effect on access to Brightstone Cove or the fourth Great Soul.
- Santier’s Spear has been taken only if wanted.
- Royal Rat Authority is defeated or deliberately postponed.
- Remaining Lockstones are reserved for identified rewards or shortcuts.
- Rat King covenant progress is treated as optional.
Take the upper exit into Brightstone Cove Tseldora
From the upper part of Doors of Pharros, continue past the Gyrm enemies and follow the path through the exit. You arrive near the Royal Army Campsite in Brightstone Cove Tseldora. No boss in Doors of Pharros is required for this connection.
Light the Royal Army Campsite bonfire immediately. From it, move forward toward the cliff face and bear left along the route. Undead peasants can push boulders down the path, so watch the slope before crossing and avoid standing in the center of the track. Continue through the camp and surrounding structures while dealing with peasants, spiders and ranged enemies one group at a time.
The first major fog gate leads to The Prowling Magus and Congregation. This encounter is required for the normal route. Kill the weaker congregation members quickly, then finish the remaining casters while keeping enough stamina to avoid the Magus’s projectiles. After the fight, leave the arena and enter the nearby cave to find Chapel Threshold.
- Royal Army Campsite bonfire is lit.
- The boulder path has been crossed safely.
- The Prowling Magus and Congregation are defeated.
- Chapel Threshold bonfire is lit.
Cross Chapel Threshold and prepare the Freja approach
From Chapel Threshold, descend the stairs into the spider-infested structures. Scholar’s parasite spiders fear fire, so carry a torch or use another reliable fire source while clearing them. The torch is especially useful for preventing the spiders from immediately swarming you, but it does not replace careful positioning against the larger enemies and Hollow Mages.
Continue through the settlement, wooden platforms and cave passages. Watch for ambushes from parasite spiders and ranged attacks from Hollow Mages. The route eventually reaches Lower Brightstone Cove, where Weaponsmith Ornifex can be found if she was previously freed. Her presence is optional for campaign progress, but she can trade certain boss souls if her quest has been completed.
Before the final approach, check for summon signs. Ashen Knight Boyd can appear near the fog gate, while Bashful Ray and Manhunter O’Harrah have Scholar-specific locations in the surrounding area when their conditions are met. Summons can draw spider aggro away from you, but they also increase the boss’s health.
- A torch or dependable fire option is equipped.
- Weaponsmith Ornifex has been visited if her services are wanted.
- Desired summon signs have been checked before entering Freja’s arena.
Defeat The Duke’s Dear Freja and light the fourth Primal Bonfire
Freja can be damaged only at one of her two heads. Keep moving around the outer edge of the arena and attack the head that is facing you, then retreat before the other head or the spider legs can trap you. Do not stand in the center for extended periods, and avoid wide attacks that waste stamina while the vulnerable head is out of reach.
Use the torch to discourage the parasite spiders during the fight, then focus on one head at a time. When Freja turns or raises her body, stop attacking and reposition rather than trying to trade hits. A shield may block a single strike, but rolling around the arena is generally safer than absorbing repeated leg attacks. If you die, return from Chapel Threshold and clear only the enemies necessary to reach the fog; do not spend healing on every spider if the torch lets you pass safely.
After Freja falls, enter the cave directly ahead and to the left to find the Lower Brightstone Cove bonfire. Continue through the boss room and interact with the Ancient Dragon corpse when you later possess the Ashen Mist Heart. For the present objective, collect Freja’s soul and light the Primal Bonfire beyond the boss room. This is the fourth Great Soul route and completes the required branch for Shrine of Winter access, subject to the game’s alternate soul-memory condition.
- The Duke’s Dear Freja is defeated.
- Freja’s soul has been collected or intentionally saved for a later trade.
- The fourth Primal Bonfire is lit.
- Lower Brightstone Cove is available for future returns.
Keep DLC keys separate from the main route
The three Lost Crowns entrances are optional and do not replace the four Great Soul branches. In Scholar of the First Sin on PS4, the entrance items must be collected in the world. The Dragon Talon is reached through the locked door in the Majula pit after obtaining the Forgotten Key from the Elite Giants in Black Gulch. It opens the Shulva entrance near The Rotten’s Primal Bonfire.
The Iron Key from Iron Keep opens the Forest of Fallen Giants salamander area. The Heavy Iron Key found there opens the Brume Tower entrance after the Old Iron King. The Frozen Flower is found in Drangleic Castle and opens the Frozen Eleum Loyce entrance at the Shrine of Winter. None of these keys is required for Doors of Pharros or Brightstone Cove Tseldora.
- Dragon Talon is reserved for Shulva.
- Heavy Iron Key is distinguished from the Iron Key and reserved for Brume Tower.
- Frozen Flower is reserved for Frozen Eleum Loyce.
- DLC progress is kept separate from the fourth Great Soul objective.
Before you move on
- Rosabeth of Melfia was freed and relocated to Majula.
- Shaded Ruins and Scorpioness Najka have been completed.
- Gyrm’s Respite and Ordeal’s End are lit.
- Lonesome Gavlan’s final dialogue has been exhausted.
- Santier’s Spear has been collected if desired.
- Royal Rat Authority is defeated or deliberately postponed.
- Royal Army Campsite and Chapel Threshold are lit.
- The Prowling Magus and Congregation are defeated.
- The Duke’s Dear Freja is defeated and her soul is secured.
- The fourth Primal Bonfire is lit.
- The player understands that Freja’s branch, not Doors of Pharros, supplies the fourth Great Soul.
- Any desired DLC key is correctly identified without confusing Dragon Talon, Heavy Iron Key, Frozen Flower or Iron Key.
References for this chapter
- Shaded Woods and Shaded Ruins — Dark Souls II Wiki
- Doors of Pharros — Dark Souls II Wiki
- Brightstone Cove Tseldora — Dark Souls II Wiki
- Scorpioness Najka — Dark Souls II Wiki
- Royal Rat Authority — Dark Souls II Wiki
- The Duke’s Dear Freja — Dark Souls II Wiki
- Bonfires — Dark Souls II Wiki
- Fragrant Branch of Yore — Dark Souls II Wiki
- Keys — Dark Souls II Wiki
- Dark Souls II: Scholar of the First Sin PlayStation 4 Instruction Manual
Drangleic Castle — Vendrick, Memory Route and King’s Gate Approach
After defeating The Lost Sinner, The Rotten, Old Iron King and The Duke’s Dear Freja, cross the Shrine of Winter to Drangleic Castle. Work through the statue-door gauntlet, defeat the Twin Dragonriders and Looking Glass Knight, then cross the Shrine of Amana into the Undead Crypt. Defeat Velstadt and collect the King’s Ring from the chamber where Vendrick wanders. The ring opens the sealed royal gates, including the route toward the Throne of Want. Continue through Aldia’s Keep, defeat the Guardian Dragon, cross Dragon Aerie and speak with the Ancient Dragon at Dragon Shrine to receive the Ashen Mist Heart. Return to Forest of Fallen Giants, enter Memory of Jeigh and defeat the Giant Lord to obtain Giant’s Kinship. Giant’s Kinship does not operate a physical bridge; defeating the Giant Lord is the event that makes Nashandra available after Throne Watcher and Defender. For Aldia, exhaust his dialogue after the fourth primal bonfire, in the Undead Crypt and at Dragon Shrine, then defeat Vendrick before Nashandra.
Enter Drangleic Castle and light the first bonfire
From the Ruined Fork Road bonfire in Shaded Woods, take the path leading to the Shrine of Winter. With the four Great Soul bosses defeated, the shrine opens normally. Cross it and follow the road to Drangleic Castle.
At the castle entrance, Royal Swordsmen stand near inactive stone statues. Kill enemies close to the statues so the statues absorb their souls. Both entrance mechanisms must activate before the main doors open. In Scholar, the approach has additional enemies and altered placements, so pull one Royal Swordsman away from the group instead of fighting in the center of the courtyard.
Once inside, descend the ladder and light the King’s Gate bonfire. This is the safest reset point for the opening rooms. Equip a weapon suitable for narrow corridors and keep a ranged option ready for archers and stationary enemies.
- Shrine of Winter opened through the four Great Soul route.
- Both castle entrance mechanisms activated.
- King’s Gate bonfire lit.
Clear the statue-door gauntlet and reach the upper castle
Leave the bonfire and enter the large room to the right. The doors in this room are opened by defeating nearby enemies; some contain Stone Soldiers or Ruin Sentinels. Do not activate the entire room at once. Stand near the entrance, draw one enemy, retreat and repeat until the route is safe.
Use the side passages to reach the lower castle areas and light the Under Castle Drangleic bonfire if you want a closer checkpoint. The Scholar arrangement includes additional threats in and around this section, so check corners before opening chests or stepping into a new doorway.
Return to the main foyer and climb toward the royal interior. Royal Swordsmen, Syan Soldiers and archers can overlap their attacks on the stairs. Clear the closest ranged enemy first, then advance through each doorway rather than sprinting past the group.
- The main statue-door route is open.
- Under Castle Drangleic bonfire lit if desired.
- Upper route toward the Dragonriders located.
Defeat the Twin Dragonriders and reach the Looking Glass Knight
Continue through the castle until you reach the Twin Dragonriders. One Dragonrider begins on an elevated platform while the other fights on the floor. If your build can reach the platform safely, defeat the elevated boss first. Otherwise, keep both visible and avoid being trapped between their attacks.
After the fight, continue through the royal passage and light the Central Castle Drangleic bonfire. This checkpoint is reached after the Twin Dragonriders, not at the castle entrance.
Proceed through the large hall and activate the golem by defeating enemies near it. The absorbed souls power the elevator. Ride it upward and follow the passage to the Looking Glass Knight. Fight near the open center of the arena, punish the end of his attacks and create space whenever the mirror shield begins producing a phantom. Kill summoned phantoms quickly if they threaten to surround you.
- Twin Dragonriders defeated.
- Central Castle Drangleic bonfire lit.
- Golem elevator activated.
- Looking Glass Knight defeated.
Cross Shrine of Amana and defeat the Demon of Song
After the Looking Glass Knight, take the elevator down into Shrine of Amana and light the Tower of Prayer bonfire. The route is built around narrow solid paths over deep water. Move slowly and use a bow, crossbow or spell to remove Amana Aberrations and spellcasters before crossing exposed sections.
Stay on visible ground. Deep water greatly limits movement and can hide enemies, while the casters’ projectiles can stagger you from a distance. If you fall or lose the route, return to the last solid platform instead of attempting to fight while standing in deep water.
Continue through the ruins to the Demon of Song. Wait for its defensive shell to open, then attack the exposed body and retreat before the next lunge or slam. After victory, follow the passage toward the elevator and enter the Undead Crypt.
- Tower of Prayer bonfire lit.
- Shrine of Amana crossed without skipping the main route.
- Demon of Song defeated.
- Undead Crypt reached.
Cross the Undead Crypt and collect the King’s Ring
Enter the Undead Crypt and keep your torch extinguished near Grave Warden Agdayne and his followers. Lighting the nearby main light source turns the group hostile and can add red phantoms to the route. Continue through the crypt, clearing bell-ringing enemies before they can summon additional threats.
Follow the main corridor to Velstadt’s fog gate. Velstadt uses slow, heavy swings and dark-enhanced attacks in the later part of the fight. Stay behind him when possible, punish the recovery after his large attacks and avoid committing to long attack strings when he raises his weapon.
Beyond the arena is the chamber where Vendrick walks in a loop. Vendrick is optional for ordinary campaign completion, so do not attack him accidentally. Walk to the remains at the back of the room and collect the King’s Ring. The ring opens King’s Gates when equipped, including the gate at Drangleic Castle and the gates leading to the later progression areas.
- Velstadt defeated.
- King’s Ring collected from Vendrick’s chamber.
- Vendrick left alive if you are postponing the optional boss fight.
Complete Aldia’s Keep and obtain the Ashen Mist Heart
Travel to the Ruined Fork Road bonfire in Shaded Woods and take the sealed royal gate leading to Aldia’s Keep. Equip the King’s Ring before approaching the gate. Inside the keep, inspect suspicious chests carefully; at least one is a mimic, and several rooms contain traps or enemies that activate when you enter the central floor.
Proceed through the keep to the Guardian Dragon. Stay near its side or rear legs, move away when it takes flight and avoid standing directly in front of its fire breath. Defeat it to open the route to Dragon Aerie.
Cross Dragon Aerie by moving from platform to platform and watching for dragon attacks before committing to a jump or ladder. Continue to Dragon Shrine. The Dragon Knights can be fought individually by controlling your distance and avoiding the center of multiple enemies. Reach the Shrine Entrance bonfire and speak with the Ancient Dragon at the end of the shrine. Exhaust the conversation to receive the Ashen Mist Heart. The Ancient Dragon does not need to be defeated for this progression item.
- King’s Ring used to enter Aldia’s Keep.
- Guardian Dragon defeated.
- Dragon Aerie crossed.
- Ancient Dragon spoken to.
- Ashen Mist Heart obtained.
Return to Forest of Fallen Giants and defeat the Giant Lord
Return to the Cardinal Tower bonfire in Forest of Fallen Giants. From the bonfire, take the route down toward the sealed royal gate and equip the King’s Ring before approaching it. The gate leads to the giant-memory route.
Use the Ashen Mist Heart on the giant remains inside the memory entrance. Choose Memory of Jeigh, the memory reached near the earlier Pursuer area. Memory of Vammar and Memory of Orro are optional, although their Giant Souls are useful if you intend to fight Vendrick.
In Memory of Jeigh, advance through the battlefield and enter the Giant Lord’s arena. Stay near the Giant Lord’s ankles, circle away from stomps and attack after the foot comes down. Watch for the giant’s sweeping sword attacks and the battlefield projectiles; do not remain directly in front of the boss. After victory, collect the Giant’s Kinship. The important progression event is defeating the Giant Lord, not activating a bridge with the item. The defeat flag makes Nashandra available after Throne Watcher and Defender, while the Kinship is the associated reward and inventory marker.
- Ashen Mist Heart used to enter the memories.
- Memory of Jeigh entered.
- Giant Lord defeated.
- Giant’s Kinship collected.
- Optional Giant Souls retained if Vendrick remains alive.
Prepare the Throne of Want route and Aldia encounter
Return to the King’s Gate bonfire in Drangleic Castle and equip the King’s Ring. Use the sealed gate immediately outside the bonfire room. The King’s Ring opens this gate. Do not describe Giant’s Kinship as opening a physical bridge; it does not function as a bridge activator.
Proceed through the royal passage to the Throne of Want. Before entering the boss fog, repair equipment, refill Estus and spend excess souls. Defeat Throne Watcher and Throne Defender. If the Giant Lord has already been defeated and the Ashen Mist Heart has been obtained, Nashandra becomes available after the duo. The trigger is tied to the Giant Lord progression event; possessing a legitimately obtained Giant’s Kinship is the practical completion check.
For the optional Aldia fight, exhaust Aldia’s dialogue after lighting the fourth primal bonfire, during the first Undead Crypt encounter and at the Dragon Shrine. Then defeat Vendrick before defeating Nashandra. After Nashandra dies, Aldia appears as the optional final boss if those conditions were completed. If the dialogue or Vendrick requirement was missed, finish Nashandra normally; the missing conditions cannot be repaired without replaying the end sequence under the appropriate conditions.
- King’s Ring opened the royal gate.
- Giant Lord was defeated after obtaining the Ashen Mist Heart.
- Throne Watcher and Throne Defender defeated.
- Vendrick defeated before Nashandra if Aldia is required.
- Aldia dialogue exhausted at all three locations if pursuing the optional final boss.
Before you move on
- The Twin Dragonriders and Looking Glass Knight are defeated.
- The Demon of Song and Velstadt are defeated.
- The King’s Ring is in the inventory.
- Aldia’s Keep, Guardian Dragon, Dragon Aerie and Dragon Shrine have been crossed.
- The Ancient Dragon granted the Ashen Mist Heart.
- Memory of Jeigh was entered and the Giant Lord was defeated.
- Giant’s Kinship was received after defeating the Giant Lord.
- The King’s Ring opens the royal gate outside the King’s Gate bonfire.
- For Aldia: dialogue was exhausted after the fourth primal bonfire, in the Undead Crypt and at Dragon Shrine, and Vendrick was defeated before Nashandra.
References for this chapter
Throne of Want — Throne Watcher and Defender, then Nashandra
Use the King’s Ring to open the royal gate in Drangleic Castle and reach the Throne of Want. Defeat Throne Watcher and Throne Defender as a coordinated pair: lower both health bars, keep them separated, and interrupt the survivor before it revives the fallen boss. Defeating the Giant Lord in Memory of Jeigh awards Giant’s Kinship, the progression item that allows Nashandra to appear after the duo; it does not operate a physical bridge. For Aldia, meet Aldia at the final Primal Bonfire, in the Undead Crypt, and at the Dragon Shrine, then defeat Vendrick before Nashandra. Nashandra uses curse-inducing orbs, dark beams, scythe attacks, and a close-range dark burst. Destroy or avoid the orbs, bait safe attacks, and keep enough stamina for repeated evasions. After the duo is defeated, dying to Nashandra does not restore the duo, so later attempts begin at Nashandra’s fight.
Open the royal gate and prepare the route
Travel to the King’s Gate bonfire in Drangleic Castle and equip the King’s Ring. Leave the bonfire room, pass the Stone Soldiers, and approach the large sealed gate. The ring opens this royal gate. Continue through King’s Passage toward the Throne of Want, then rest, repair your equipment, spend souls you do not want to risk, and prepare your preferred healing items.
The King’s Ring is the prerequisite for entering this route. It does not itself make Nashandra appear. Nashandra becomes available after the Throne Watcher and Throne Defender fight only when the Giant Lord has been defeated and Giant’s Kinship has been obtained. If you defeat the duo before obtaining Giant’s Kinship, the fight is recorded as complete; return after defeating the Giant Lord to continue the endgame sequence.
- King’s Ring is in the inventory and equipped.
- The royal gate has opened.
- Weapon durability, healing, and soul spending have been checked.
- Giant’s Kinship has been obtained if Nashandra should follow immediately.
Complete the Aldia requirements before the final sequence
Aldia is optional in Scholar of the First Sin. To prepare his encounter, exhaust his dialogue at the last of the four Primal Bonfires you activate after defeating the Great Soul bosses. The four locations are Sinner’s Rise, Black Gulch, Iron Keep, and Brightstone Cove Tseldora; Aldia first appears at whichever of these four bonfires was lit last.
Continue through Shrine of Amana and enter the Undead Crypt using the elevator after defeating the Demon of Song. Aldia appears as you enter the crypt for the first time from that elevator. Exhaust his dialogue there. Later, reach Dragon Shrine and light the Shrine Entrance bonfire. Aldia appears again; exhaust this conversation as well.
Defeat Vendrick in the Undead Crypt before killing Nashandra. The order matters for Aldia’s final appearance. Bradley of the Old Guard’s summon sign near the Throne fog is a useful Scholar-specific confirmation that the Aldia conditions are ready, but the sign is not a replacement for the three conversations or Vendrick’s defeat.
- Aldia was encountered at the final Primal Bonfire.
- Aldia was encountered upon entering the Undead Crypt.
- Aldia was encountered at the Dragon Shrine bonfire.
- Vendrick was defeated before Nashandra.
- Bradley’s sign is present if you want an additional readiness check.
Select summons without overcrowding the fight
A maximum of three summons can participate in the Throne Watcher and Defender fight. Benhart of Jugo’s sign is to the left of the fog when his quest progress allows it. Head of Vengarl’s sign is to the right after his requirements have been completed. Bradley of the Old Guard is a Scholar-only summon found to the left when Aldia is ready.
Scholar also provides small-sign options such as Bashful Ray and Pilgrim Bellclaire, but these signs require clearing a longer route and are less convenient than the signs near the fog. Summons increase boss health, so use only the help your build needs. Wait until every chosen phantom has entered before committing to the fight.
- Chosen summons have crossed the fog.
- No unnecessary summon has been added for a build that can separate the bosses alone.
- There is enough healing for both the duo and the possible Nashandra fight.
Separate the duo and lower both health bars
Throne Watcher is the faster and more mobile fighter. Throne Defender is more deliberate and initially relies on a shield. Move around the open arena until one boss separates from the other, then attack the exposed target with one or two hits. Retreat before the second boss closes the distance.
Do not immediately kill one boss while the other has nearly full health. Lower both health bars to a controlled range, keep both bosses visible, and avoid backing toward the arena edge. If they converge, stop attacking and reposition until one turns away. A shield can help stabilize the opening, but stamina must be reserved for emergency rolls and repositioning.
- The bosses are separated before attacking.
- Both health bars have been reduced without either boss dying prematurely.
- The player remains away from the arena edge.
- Stamina is available after every attack.
Handle the half-health changes and stop revival
At approximately half health, the bosses enhance their weapons. The Watcher gains a magic buff and the Defender gains a lightning buff. The Defender’s later state also changes its behavior by putting away the shield and using its sword more aggressively. Treat this transition as a reason to shorten your attack windows, not as an opportunity for a long combo.
When one boss is nearly defeated, stop damaging the other. Finish the weakened boss only when the survivor is far enough away or committed to an attack. After the first death, immediately watch the remaining boss. It can approach the fallen partner and revive it. Attack the survivor during the revival attempt, using a ranged attack only if you can maintain clear positioning.
If the revival succeeds, return to the two-boss plan. Lower both health bars again and prepare another controlled finishing attempt. Do not chase a revival into the second boss’s attack range.
- Both weapon buffs have been recognized.
- The first death is planned rather than accidental.
- The survivor is attacked during its revival attempt whenever safe.
- The revival has failed or the second boss has also been brought near defeat.
Finish Throne Watcher and Throne Defender
Once one boss is dead and the survivor can no longer revive it, fight the remaining boss as a normal one-on-one encounter. Stay near its flank, punish the end of its completed attacks, and leave enough stamina for at least two evasive actions. If a summon survives, let it draw attention while you attack from the side rather than standing directly behind the boss.
Collect the Throne Watcher Soul and Throne Defender Soul after victory. If Giant’s Kinship is already in the inventory, Nashandra follows through the next fog. If she does not appear, do not assume the King’s Ring is missing: check whether the Giant Lord was defeated and Giant’s Kinship was obtained. Leave, complete Memory of Jeigh if necessary, and return to the Throne of Want.
- Both duo bosses are defeated.
- Both boss souls have been collected.
- Giant’s Kinship is in the inventory if Nashandra is intended to appear immediately.
Control Nashandra’s curse orbs and dark attacks
Nashandra begins by creating dark curse-inducing orbs. Their proximity drains health and builds curse, so destroy the closest orb or move to a clear section of the arena. Some weapons and casting tools do not destroy the orbs reliably; test your equipped weapon before depending on this method. You can also pull Nashandra away from the hazards and fight in the open space near the entrance.
At range, Nashandra commonly uses a long dark beam. Run laterally or around the attack rather than standing still and trying to absorb its full duration. Her scythe attacks are easier to avoid by rolling through the swing toward her side, then answering with one or two hits. When she creates a close-range dark burst, stop attacking and move outside its radius before re-engaging.
- The nearest curse orbs are destroyed or avoided.
- The player does not become trapped between the orbs and the arena edge.
- The dark beam is avoided by lateral movement.
- Only short attack windows are used after scythe swings or missed spells.
Defeat Nashandra and verify completion
Keep the fight controlled with one or two attacks at a time. A physical weapon upgraded for the current stage is sufficient; prioritize reliable damage and stamina management over a specific element. Keep healing available for curse damage and do not spend the entire stamina bar during a punish, because Nashandra can follow with a beam, scythe swing, or dark burst.
When Nashandra reaches zero health, the main ending sequence begins. If you die during this battle, the Throne Watcher and Throne Defender remain defeated, so the next attempt starts with Nashandra. If all Aldia requirements were completed, Aldia appears after Nashandra as the optional final encounter. If he does not appear, recheck the three Aldia conversations and confirm that Vendrick was defeated before Nashandra.
- Nashandra is defeated.
- The ending scene begins.
- Aldia appears afterward if the optional requirements were completed.
- The credits or ending sequence has been allowed to start.
Before you move on
- The Throne Watcher and Throne Defender are defeated.
- The Throne Watcher Soul and Throne Defender Soul are in the inventory.
- Giant’s Kinship was obtained from the Giant Lord if Nashandra was required immediately after the duo.
- Nashandra is defeated and the main ending sequence has started.
- For Aldia, Aldia was encountered at the final Primal Bonfire, in the Undead Crypt, and at the Dragon Shrine; Vendrick was defeated before Nashandra; and Aldia appeared afterward.
- If pursuing Benhart’s quest, remember that Nashandra counts as the relevant Throne of Want victory, while the Throne Watcher and Defender encounter does not by itself satisfy that requirement.
References for this chapter
- Throne Watcher & Defender — Dark Souls II Wiki
- Throne of Want — Dark Souls II Wiki
- Aldia, Scholar of the First Sin — Dark Souls II Wiki
- Giant’s Kinship — Dark Souls II Wiki
- NPC Summons — Dark Souls II Wiki
- Nashandra — Dark Souls II Wiki
- Dark Souls II: Scholar of the First Sin PlayStation 4 Instruction Manual
Aldia, Scholar of the First Sin — optional final encounter
In the PS4 edition of Dark Souls II: Scholar of the First Sin, Aldia becomes an optional final boss only if you complete three encounters with him, defeat King Vendrick, and then defeat Nashandra. The first encounter occurs at the last of the four primal bonfires you light, regardless of which Great Soul branch you completed last. The second is at the Undead Crypt Entrance bonfire, and the third is at the Shrine Entrance bonfire in Dragon Shrine. Exhaust every conversation before moving on. The dialogue choices are not a reliable progression test; the required checks are the three completed encounters and Vendrick dying before Nashandra. To preserve the fight, finish the Aldia route, kill Vendrick, then enter the Throne of Want and defeat Throne Watcher and Throne Defender followed by Nashandra. Aldia then appears immediately. His fight revolves around a damaging flame aura, teleport blasts, tracking fire orbs, fireballs and advancing roots. Attack during his brief unprotected windows, especially after teleporting or while charging Forbidden Sun. Aldia drops no conventional boss soul or item, but defeating him enables the final throne choice.
Finish the four primal-bonfire branches
Before Aldia can appear, defeat The Lost Sinner in Sinner’s Rise, The Old Iron King in Iron Keep, The Rotten in Black Gulch and The Duke’s Dear Freja in Brightstone Cove Tseldora. After each victory, enter the nearby Primal Bonfire chamber and light the bonfire. These are the four Great Soul branches required for the normal campaign route.
Aldia first appears at the last of those four primal bonfires that you light. The location depends on your route order, so do not assume that he must appear in Black Gulch or at Freja’s bonfire. If you have already lit all four and did not notice him, revisit the four Primal Bonfire rooms and check for the fiery manifestation. If you used the Shrine of Winter shortcut, you may still need to complete the missing branches before relying on this encounter as your progression checkpoint.
- The Lost Sinner, Old Iron King, The Rotten and The Duke’s Dear Freja are defeated.
- All four primal bonfires are lit.
- Aldia has appeared at the last primal bonfire lit.
Exhaust Aldia’s first conversation
Approach Aldia at the last primal bonfire and speak to him repeatedly. Continue interacting until the conversation stops advancing. The game presents questions with Yes or No choices. The dependable requirement is to complete the encounter and all available dialogue; do not leave the room after only one exchange.
If you are unsure whether the first encounter registered, return to the primal-bonfire chamber before progressing through the late game. Aldia’s appearance at the next locations is the practical confirmation that the earlier encounter was completed. Record the step as complete before entering Drangleic Castle’s final areas.
- Aldia’s first appearance was found at the last primal bonfire.
- Every available line of dialogue was exhausted.
- You have not defeated Nashandra.
Meet Aldia at the Undead Crypt Entrance
Progress through Drangleic Castle, Shrine of Amana and the early Undead Crypt route. When you reach the Undead Crypt Entrance bonfire, approach the large fiery form near the bonfire area and interact with Aldia. Speak with him until no new dialogue appears.
This is a separate encounter from the primal-bonfire appearance. If Aldia is missing, return to the last primal-bonfire chamber and confirm that the conversation was exhausted, then revisit the Undead Crypt Entrance bonfire. Do not defeat Nashandra while investigating a missing encounter, because defeating her without the completed Aldia sequence can end the journey without the optional boss.
- The Undead Crypt Entrance bonfire has been reached.
- Aldia appeared there.
- The entire Undead Crypt conversation was exhausted.
Complete the Dragon Shrine encounter
Continue through the Undead Crypt, defeat Velstadt if you have not already done so, collect the King’s Ring from the chamber beyond and use the royal route through Aldia’s Keep. Complete the Aldia’s Keep and Dragon Aerie route, including the Guardian Dragon and the passage into Dragon Shrine.
At the Shrine Entrance bonfire in Dragon Shrine, Aldia appears again. Speak with him until the dialogue stops advancing. This is the third required encounter. The Dragon Shrine route itself is also part of the final campaign path: you must reach the Ancient Dragon and obtain the Ashen Mist Heart before entering the Giant memories and completing the Giant Lord progression.
Aldia’s three encounter locations are therefore: the last primal bonfire, Undead Crypt Entrance and Dragon Shrine’s Shrine Entrance. The first location varies with the order in which you light the four primal bonfires; the latter two do not.
- The King’s Ring route through Undead Crypt and Aldia’s Keep is complete.
- The Dragon Aerie and Dragon Shrine route has been completed far enough to obtain the Ashen Mist Heart.
- Aldia’s third conversation at Shrine Entrance has been exhausted.
- All three Aldia encounters are complete.
Defeat King Vendrick before Nashandra
Return to the Undead Crypt and enter the large chamber where King Vendrick walks in a slow circuit. He is optional for the ordinary ending but mandatory for the Aldia encounter. Defeat him before fighting Nashandra. Do not treat Giant’s Kinship as a substitute for this requirement; Giant’s Kinship comes from the Giant Lord sequence and helps open the final progression, while Vendrick’s death is the separate Aldia condition.
Bring Souls of a Giant if possible. Each Soul of a Giant in your inventory substantially reduces Vendrick’s defenses, with the hidden giants in Black Gulch, the Ancient Giant Soul from the Ancient Dragon and the Giant memories providing the relevant sources. You do not need to collect every possible soul to satisfy the Aldia trigger, but fighting Vendrick with more than one usually makes the battle far more manageable.
Stay close to one of Vendrick’s legs and circle behind him. His broad sword swings and overhead strikes are easier to avoid from the rear quarter than from directly in front. Attack once or twice, then stop to preserve stamina for his turn and reposition. If he begins to rotate toward you, move around the same leg rather than retreating across the room. Leave and gather more Giant Souls if your damage is too low to make the fight safe.
- King Vendrick is defeated.
- Vendrick died before Nashandra.
- The three Aldia conversations were completed before the Nashandra fight.
- The Giant Lord route and Giant’s Kinship are also complete if you are following the full campaign completion route.
Enter the Throne of Want only after the checks are complete
Before entering the final boss fog, verify this order: all four primal bonfires lit; Aldia encountered at the last primal bonfire, Undead Crypt Entrance and Dragon Shrine Shrine Entrance; Aldia’s Keep and Dragon Shrine route completed; and King Vendrick defeated. Bradley of the Old Guard may have an NPC summon sign near the Throne encounters when the Aldia sequence is active in Scholar of the First Sin. His sign is optional and is only a secondary confirmation, not a replacement for the required encounters.
Enter the Throne of Want and defeat Throne Watcher and Throne Defender. After the duo falls, continue to Nashandra. The duo must be defeated again if you die during the later sequence, but a completed victory over them remains completed for that attempt. Defeat Nashandra with Vendrick already dead and the Aldia encounters registered.
If the requirements are satisfied, Aldia appears immediately after Nashandra instead of the ending proceeding directly. If the ending begins without Aldia, the most likely causes are an incomplete conversation, a missed third location, or Vendrick being defeated after Nashandra.
- Bradley’s sign is optional and is not being used as the only proof.
- Throne Watcher and Throne Defender are defeated.
- Nashandra is defeated after Vendrick.
- Aldia appears in the Throne of Want.
Survive Aldia’s flame phases
Aldia is largely stationary but teleports around the arena. While the fiery aura surrounds him, close-range damage is reduced and touching him exposes you to severe fire damage. Keep medium distance and wait for the aura to disappear instead of forcing a full melee combo. A long weapon can sometimes reach him safely, but short weapons should be used only during clear openings.
After teleporting, Aldia releases a damaging area burst around his new position. Move away from the arrival point, wait for the blast to finish and then close in for a short attack string if the aura is absent. He can launch four tracking fire orbs from above his head. Roll through their paths or run laterally; avoid standing still and do not assume that one dodge will evade every orb.
During Forbidden Sun, Aldia charges a large fireball and the surrounding flame aura fades. This is one of the clearest punish windows. Deliver a limited number of attacks, then disengage and roll or move laterally as the projectile is released. Do not spend the entire stamina bar during the charge, because Aldia can follow with another spell immediately.
Aldia’s root attacks deal physical damage and travel along the ground. When roots begin advancing, move sideways from their line and keep away from the warning patches where eruptions are about to occur. A shield with strong physical and fire protection can help, but repeated blocking can drain stamina quickly. Fire defense is valuable because many of Aldia’s attacks are fire-based, while lightning or physical damage is generally more dependable than fire damage.
At roughly half health, Aldia intensifies the flames and chains attacks more aggressively. The pattern does not require a new strategy: keep your distance during the aura, preserve stamina, evade the projectiles and roots, and punish only during teleport recovery or Forbidden Sun’s charge. If you die, return through the normal Throne route and repeat the duo, Nashandra and Aldia sequence.
- You avoid attacking into Aldia’s active flame aura unless your weapon has safe reach.
- You move away from every teleport arrival blast.
- You evade the tracking fire orbs without exhausting stamina.
- You punish the Forbidden Sun charge briefly, then disengage.
- You move laterally away from advancing roots and eruption warnings.
- Aldia’s health reaches zero.
Complete the final route and choose an ending
After Aldia is defeated, the game presents the final throne decision. Taking the throne produces the throne ending; leaving through the exit produces the alternate ending associated with Aldia’s route. Aldia does not provide a conventional boss soul or equipment reward, so do not wait for a normal item pickup as proof of victory.
The campaign completion route for this chapter is complete when the four primal bonfires are lit, the Aldia’s Keep and Dragon Shrine route has been finished through the Ashen Mist Heart, Giant Lord and Giant’s Kinship progression is complete, Vendrick and Nashandra are defeated in the required order, Aldia is defeated, and the credits have finished. The Lost Crowns DLCs are separate optional campaigns and are not required to trigger Aldia.
After the credits, the character can continue in the completed world state rather than being forced immediately into New Game Plus. Use that opportunity to finish DLC areas, collect missed rewards or prepare equipment before choosing a new journey.
- All four primal bonfires are lit.
- Aldia’s Keep and Dragon Shrine were completed through the Ashen Mist Heart.
- Giant Lord and Giant’s Kinship progression are complete.
- Vendrick was defeated before Nashandra.
- Nashandra and Aldia were both defeated.
- A throne ending was selected and the credits completed.
Before you move on
- The four primal bonfires are lit: The Lost Sinner, Old Iron King, The Rotten and The Duke’s Dear Freja.
- Aldia was encountered and his dialogue exhausted at the last primal bonfire lit.
- Aldia was encountered and exhausted at Undead Crypt Entrance.
- Aldia was encountered and exhausted at Dragon Shrine’s Shrine Entrance.
- Aldia’s Keep and Dragon Shrine were completed through the Ashen Mist Heart.
- Giant Lord was defeated and Giant’s Kinship was obtained.
- King Vendrick was defeated before Nashandra.
- Throne Watcher and Throne Defender, Nashandra and Aldia were defeated.
- The player selected either taking the throne or leaving the throne room.
- The credits completed.
References for this chapter
- Aldia, Scholar of the First Sin — Dark Souls II Wiki
- Aldia, Scholar of the First Sin — DarkSouls II Wiki
- Aldia, Scholar of the First Sin — Dark Souls Wiki
- Nashandra & Aldia walkthrough
- FromSoftware FAQ — Dark Souls II Scholar of the First Sin version differences
- Dark Souls II: Scholar of the First Sin PlayStation 4 Instruction Manual
Crown of the Sunken King — entrance, area flow and Sinh
In the PS4 Scholar of the First Sin edition, defeat The Rotten, collect the Forgotten Key from the hidden giants beneath Black Gulch, and use it on the locked door in Majula’s pit to obtain the Dragon Talon. Use the talon at the DLC door beyond The Rotten’s route to enter Shulva, Sanctum City. Activate the city’s mechanisms to descend through Dragon’s Sanctum, collect the Dragon Stone and use it at the Lair of the Imperfect to raise the bridge toward the lower sanctum. Elana, the Squalid Queen, is the required boss before Dragon’s Rest and Sinh. The Eternal Sanctum Key opens a separate upper route and the optional Cave of the Dead; it is not required for the main path to Sinh. Prepare a repair plan because Sinh rapidly damages weapon durability, and carry a reliable Toxic cure. After Sinh dies, collect the Soul of Sinh, the glowing Crown of the Sunken King on the arena floor, and Yorgh’s Ring from the boss room.
Get the Dragon Talon in the Scholar-specific route
First defeat The Rotten in Black Gulch. Do not expect the Dragon Talon to be sitting beside the Primal Bonfire in Scholar of the First Sin. The DLC key is obtained through a separate chain: the Forgotten Key comes from the large hidden giants in the lowest section beneath Black Gulch.
Return to Majula and descend into the pit. Use the ladders and platforms to reach the locked doorway partway down the shaft. Open it with the Forgotten Key and loot the Dragon Talon inside. If Gilligan has provided the long ladder, it makes this descent easier, but the important requirement is the Forgotten Key, not a particular ladder purchase.
Travel back to the Black Gulch area and follow the passage connected to The Rotten’s boss route. Use the Dragon Talon on the ancient door to enter Shulva, Sanctum City. Light the Sanctum Walk bonfire before exploring. The PS4 Scholar edition includes the Lost Crowns content and its altered enemy placement, so this route applies to the requested edition rather than the original release’s automatic-DLC-key arrangement.
- The Rotten defeated.
- Forgotten Key obtained from the hidden giants below Black Gulch.
- Dragon Talon collected from the locked room in Majula’s pit.
- Dragon Talon used at the Black Gulch DLC entrance.
- Sanctum Walk bonfire lit.
Cross Shulva, Sanctum City
Shulva is controlled by tall mechanisms with circular targets. Strike a target with a weapon, arrow, spell or thrown projectile to move platforms, raise or lower towers, and extend bridges. Before making a drop or long jump, inspect the surrounding structures for a mechanism that creates a safer route.
Advance from Sanctum Walk across the elevated city. Sanctum Soldiers, archers and poison-spitting statues frequently guard the mechanisms, so pull enemies onto broad platforms before fighting. Destroy statues that cover a required crossing, but do not waste time clearing every statue if you can pass without entering its poison stream.
Continue downward through the mechanism-controlled platforms and rotating structures. Reach the Tower of Prayer bonfire and rest there. From Tower of Prayer, take the narrow bridge route toward Dragon’s Sanctum. Sinh’s early flyover and breath attack are environmental hazards, not the boss encounter; wait for the attack to end before crossing the exposed bridge. Scholar can place additional threats, including a Forlorn invasion, so keep moving while operating distant mechanisms.
- Tower of Prayer bonfire lit.
- Required bridges and platforms activated.
- Poison statues on mandatory crossings destroyed or safely bypassed.
- Bridge into Dragon’s Sanctum reached.
Find the Dragon Stone and Eternal Sanctum Key
Enter Dragon’s Sanctum cautiously. Pressure plates, spike floors, moving platforms and Sanctum Soldiers are often arranged as a single trap sequence. Use a ranged option to activate distant buttons before stepping into a room, and check the floor for pressure plates before collecting visible items.
Reach the Hidden Sanctum Chamber bonfire. In the mechanism-heavy section near it, activate the bridge and wall controls, then enter the room containing the Dragon Stone. The stone is in a metal chest revealed by operating the nearby mechanism; it is not obtained from a boss or from the Eternal Sanctum Key route.
Continue through the upper sanctum until you reach the room guarded by Sanctum Knights. Loot the corpse there for the Eternal Sanctum Key. This key opens the locked door near the earlier Dragon’s Sanctum entrance. That door leads to the upper Priestess’ Chamber route and the optional Cave of the Dead; it is not needed to reach Elana or Sinh on the principal route.
Return to the Lair of the Imperfect and place the Dragon Stone on the altar. This raises the bridge leading to the lower section of Dragon’s Sanctum. Cross the newly raised bridge, continue through the lower route, and light the Sanctum Interior bonfire. The stone’s purpose is specifically to create this bridge; it is not a general-purpose key for the other sanctum devices.
- Hidden Sanctum Chamber bonfire reached.
- Dragon Stone collected from the mechanism-revealed chest.
- Dragon Stone placed at the Lair of the Imperfect altar.
- Eternal Sanctum Key collected.
- Sanctum Interior bonfire lit.
Defeat Elana, the Squalid Queen
Follow the lower Dragon’s Sanctum route to Elana’s fog gate. Repair your weapon and refill healing before entering. Dark resistance can help against her spells, but the main danger is allowing her summons to divide your attention while she continues attacking from range.
Elana combines dark magic, sweeping melee attacks and summoning. When skeletons appear, create space and remove them quickly if they are blocking your movement. If she summons a Velstadt-like heavy enemy, avoid fighting it directly beside Elana. Circle the arena, keep the summon in view, and punish Elana only when she is committed to a spell or recovery animation.
Do not spend the entire fight chasing Elana after each teleport. Hold a central position, wait for her to approach or finish casting, then land a short attack sequence and retreat before the summons surround you. Excessive passive play lets more enemies accumulate, but overcommitting to long combos is equally dangerous. Defeating Elana opens the route to Dragon’s Rest and the Sanctum Nadir bonfire.
- Elana, the Squalid Queen, defeated.
- Sanctum Nadir bonfire lit.
- Summons prevented from surrounding the player.
- Main weapon repaired before Sinh.
Prepare for Sinh at Dragon’s Rest
From Sanctum Nadir, proceed into Dragon’s Rest and light the bonfire. Depending on your online state and progression, summon signs for Transcendent Edde and Abbess Feeva may be available. Summons add boss health, so use them when the extra survivability outweighs the increased endurance requirement.
Sinh’s body causes unusually severe durability loss when struck. Bring Repair Powder, the Repair sorcery, a second weapon, or a weapon with enough remaining durability to survive the encounter. Check the equipment screen at the bonfire immediately before entering rather than relying on memory.
Carry Poison Moss or another dependable Toxic cure. Sinh’s breath attacks can build Toxic and leave dangerous residue in the arena. Fire-resistant equipment is useful, but preserving stamina for sprints is more important than wearing the heaviest possible armor. A bow or spell helps punish airborne passes, although most consistent damage comes from short close-range openings after Sinh lands.
- Dragon’s Rest bonfire lit.
- Repair item, spell or backup weapon prepared.
- Toxic cure equipped.
- Healing and ranged options ready.
Defeat Sinh, the Slumbering Dragon
Sinh begins asleep. Approach from the side and take one controlled opening attack, then immediately prepare for his charge or neck swipe. Fight near mid-range so forward breath, claw swipes and turning attacks remain readable. After avoiding an attack, close for a few hits and leave before the next turn catches you under the dragon’s body.
For a forward fire stream, sprint laterally instead of holding a shield against the full attack. For a wide horizontal breath sweep, move toward the safe side and close in as the attack finishes. When Sinh rears and breathes beneath himself, move toward the rear or tail area without standing directly under his feet, then attack after the flames disappear.
When Sinh takes flight, unlock the camera if it pulls your view beneath him. Sprint away from the projected line of the pass and avoid the landing zone. Do not stand in the green residue left by Toxic-producing attacks. Cure Toxic only after creating real separation or while Sinh is committed to a long airborne animation.
Target the head or neck when practical, but do not chase the tail through every turn. Tail spins and claw swipes punish players who remain greedy. Watch weapon durability constantly; switch weapons or use Repair Powder during a flight or long breath animation rather than waiting for the weapon to break. Continue with short punishments after each landing, preserving enough stamina to escape. Sinh is the final boss of the Sunken King DLC and awards the Soul of Sinh when defeated.
- Forward and sweeping breath attacks avoided through movement.
- Airborne passes and landing zones avoided.
- Toxic cured before returning to melee range.
- Weapon durability monitored throughout the fight.
- Sinh defeated.
Collect the crown and decide whether to enter the optional area
After Sinh dies, search the Dragon’s Rest arena instead of leaving immediately. The Soul of Sinh is awarded for the boss victory, while the Crown of the Sunken King is a separate glowing pickup on the ground. Collect it to mark the DLC’s main objective as complete.
Yorgh’s Ring is found on a corpse in the boss room. Search the arena perimeter before returning to the bonfire. The ring is optional and does not affect access to the crown or the other DLC episodes.
The Cave of the Dead is an optional side area reached through the Eternal Sanctum Key route. It contains the Graverobber, Varg and Cerah encounter and additional rewards, but it is not required for Elana, Sinh or the Crown of the Sunken King. Skip it if the campaign route is the priority; return through the unlocked upper sanctum door if you want the optional encounter.
- Soul of Sinh obtained.
- Crown of the Sunken King collected from the glowing arena pickup.
- Yorgh’s Ring collected if desired.
- Cave of the Dead completed or deliberately skipped.
Before you move on
- The Forgotten Key was obtained from the hidden giants below Black Gulch.
- The Dragon Talon was collected from the locked chamber in Majula’s pit.
- The Dragon Talon was used at the Black Gulch DLC entrance.
- Sanctum Walk and Tower of Prayer were reached.
- The Dragon Stone was collected and placed at the Lair of the Imperfect.
- The Eternal Sanctum Key was collected, or its optional route was deliberately skipped.
- Elana, the Squalid Queen, was defeated.
- Sinh, the Slumbering Dragon, was defeated in Dragon’s Rest.
- The Soul of Sinh and Crown of the Sunken King are in the inventory.
- Yorgh’s Ring was collected if the optional arena reward is wanted.
- The Cave of the Dead was completed or deliberately skipped.
References for this chapter
- Dark Souls II: Scholar of the First Sin PlayStation 4 Instruction Manual
- Key Items — Dark Souls II Wiki
- Dragon Stone — Dark Souls II Wiki
- Dragon’s Sanctum — Dark Souls II Wiki
- Sinh, the Slumbering Dragon — Dark Souls II Wiki
- Dragon’s Rest — Dark Souls II Wiki
- Crown of the Sunken King — Dark Souls II Wiki
- Act VII — Crown of the Sunken King walkthrough
Crown of the Old Iron King — Brume Tower, Fume Knight and optional bosses
In Dark Souls II: Scholar of the First Sin on PS4, obtain the Iron Key in Iron Keep, then use it to enter the Flame Salamander area beneath the Forest of Fallen Giants. The Heavy Iron Key is on a corpse in that cavern. After defeating the Old Iron King, use the Heavy Iron Key at the door behind his Primal Bonfire and cross the chain into Brume Tower. Restore the tower’s machinery with the Scorching Iron Scepter, collect the Tower Key, and descend to Fume Knight at the Lowermost Floor. Destroy the four Ashen Idols around his arena when possible because they heal him. Fume Knight is the required boss for claiming the Crown of the Old Iron King. Blue Smelter Demon in the Iron Passage and Sir Alonne in the Memory of the Old Iron King are optional. Sir Alonne requires the Ashen Mist Heart, the Crown and Fume Knight’s defeat.
1. Collect the Iron Key in Iron Keep, then return to the Forest of Fallen Giants
The DLC key sequence is different in Scholar of the First Sin from the original release. First travel through Iron Keep to the Threshold Bridge bonfire. In the area with the first fire-breathing bull-head trap, search beneath that trap for the corpse holding the Iron Key. You do not need to defeat the Old Iron King before collecting this key.
Return to the Forest of Fallen Giants and travel from the Cardinal Tower bonfire toward the Last Giant route. Use the Iron Key on the locked door beside the approach to the Last Giant’s arena. This opens the way into the Flame Salamander cavern. The fall and the salamanders can kill an unprepared character, so enter with healing items and enough health to survive the drop. Defeat the salamanders one at a time or move carefully along the edge of the cavern.
At the rear-right side of the cavern, loot the corpse holding the Heavy Iron Key and the Rebel’s Greatshield. The Heavy Iron Key is the item that opens the Brume Tower entrance after the Old Iron King. It is not found in Iron Keep in the PS4 Scholar edition.
- Iron Key collected beneath the fire-breathing bull head in Iron Keep.
- Iron Key used on the locked door beside the Last Giant route.
- Heavy Iron Key collected from the Flame Salamander cavern.
2. Defeat the Old Iron King and enter Brume Tower
Continue through Iron Keep and defeat the Old Iron King if you have not already done so. Rest at the Primal Bonfire in the boss area, then leave through the nearby passage. Use the Heavy Iron Key on the locked door behind the Primal Bonfire. Cross the long chain to reach Brume Tower.
Light the Throne Floor bonfire immediately after crossing. Brume Tower contains narrow platforms, ambushes, ranged fire attacks, Ashen Warriors, Possessed Armor and Iron Warriors. Physical defense, poise and careful spacing are more useful here than relying only on fire resistance. Keep a ranged option available for enemies positioned across gaps or beside hazards.
Smelter Wedges destroy Ashen Idols. The first wedges are found in the opening part of the tower, and another group of four is available near the Foyer after the machinery is activated. Do not spend every wedge on the first idols you encounter. The four idols surrounding the Fume Knight arena are the priority because active idols heal him during the fight.
- Old Iron King defeated.
- Heavy Iron Key used at the door behind the Old Iron King’s Primal Bonfire.
- Throne Floor bonfire lit.
- Several Smelter Wedges reserved for the Fume Knight arena.
3. Reach the Foyer and restore the tower machinery
From the Throne Floor, follow the interior route through the Ashen Warriors and Possessed Armor. Continue downward and across the connected structures until you reach the Foyer bonfire. Several paths initially appear incomplete because Brume Tower’s elevators are not fully active.
From the Foyer, cross the long chain into the adjacent tower. Descend through the rooms containing Ashen Crawlers and Fume Sorcerers. At the bottom, locate the mechanism surrounded by Ashen Crawlers and take the Scorching Iron Scepter. Clear the room before looting if possible; the crawlers can surround you quickly and restrict movement.
Return to the mechanism beside the Foyer bonfire and install the Scorching Iron Scepter. This restores power to Brume Tower and activates the elevator network. Do not treat the Foyer as the final preparation point until the scepter has been installed, because several routes and bonfires remain inaccessible beforehand.
- Foyer bonfire lit.
- Scorching Iron Scepter recovered from the adjacent tower.
- Scorching Iron Scepter installed at the mechanism near the Foyer bonfire.
- Brume Tower elevators activated.
4. Collect the Tower Key and reach the Lowermost Floor
After activating the machinery, take the elevator route from the Foyer toward the outdoor ash-covered platform. Follow the path into the large exterior area where Iron Warriors emerge from the ash. Clear them individually when possible; fighting multiple Iron Warriors beside a drop is more dangerous than the enemies’ attacks themselves.
Near the rusted chains on the edge of the platform, loot the corpse holding the Tower Key. The Tower Key opens several Brume Tower doors, including the route toward the optional Iron Passage and later sections of the tower. Its location is only reachable after the Scorching Iron Scepter has activated the machinery.
For the required route, continue through the elevator and collapsing-floor sections toward the lower levels. Watch for floor sections that give way and do not attack while standing near an edge. Continue until you reach the Lowermost Floor bonfire, which is close to the Fume Knight fog gate. Rest there before attempting the boss and use the nearby summon signs only if you accept the increased boss health and durability.
- Tower Key collected from the ash-covered outdoor platform.
- Lowermost Floor bonfire reached.
- Fume Knight fog gate located.
5. Destroy the arena idols and defeat Fume Knight
Before entering, use Smelter Wedges on the four Ashen Idols around the arena whenever possible. Each destroyed idol removes its healing effect. If an idol remains active, keep Fume Knight away from it; allowing him to fight beside an active idol can restore a substantial amount of health and turn a controlled attempt into a war of attrition.
Fume Knight begins with a curved sword and the large Fume Ultra Greatsword. In the opening phase, remain close enough to read his swings but do not attack during the middle of a combo. Evade through or around the completed sequence, then take one or two attacks before resetting your position. Avoid being pushed against the arena wall, where the curved sword and greatsword combination can catch successive rolls.
When he changes to the two-handed greatsword stance, his attacks become slower and cover more ground. His sweeping strikes and fire projectiles require deliberate rolls rather than panic movement. Circle at a safe distance, watch the projectile timing, and punish only after a finished swing or recovery. Preserve enough stamina for an immediate defensive roll after every attack. A shield can block one mistake, but repeated blocking will usually leave you unable to escape the next combination.
Steelheart Ellie and Carhillion of the Fold can provide distraction if their summon requirements are met, but summoned phantoms increase the boss’s health. For many characters, fighting alone is more manageable because Fume Knight remains predictable and the battle does not become unnecessarily long.
- Four arena Ashen Idols destroyed or kept away from the fight.
- Fume Knight defeated.
- Soul of the Fume Knight recovered.
- The arena has been cleared before moving to the crown room.
6. Claim the crown and handle the optional bosses
After Fume Knight is defeated, leave the arena and enter the newly accessible throne room. Interact with the throne to collect the Crown of the Old Iron King. The crown is not obtained from Fume Knight’s body, and neither Blue Smelter Demon nor Sir Alonne is required to claim it.
Blue Smelter Demon is reached through the optional Iron Passage. Use the Tower Key to open the relevant gate near the elevator routes, then follow the passage to the Iron Hallway Entrance bonfire. The route contains timed barriers, spellcasters and groups of heavy enemies. The upper and lower paths present different combinations of hazards; clear ranged enemies before dropping into a lower section whenever possible. Blue Smelter Demon is optional and does not control crown access.
Sir Alonne is reached through the Memory of the Old Iron King. You need the Ashen Mist Heart from the Ancient Dragon, the Crown of the Old Iron King and Fume Knight’s defeat. From the Smelter Throne bonfire area, interact with the armor set that becomes available for the memory. Proceed through the memory to Sir Alonne’s arena. His attacks emphasize fast sword strings, a direct rushing thrust and narrow punish windows, so use short attack sequences and avoid healing during his active pressure.
Defeating Sir Alonne is optional for campaign completion and for obtaining the crown. It does provide the final Soul of Nadalia fragment and is relevant to full DLC cleanup or achievement-oriented completion.
- Crown of the Old Iron King collected from the throne room.
- Optional: Blue Smelter Demon defeated in the Iron Passage.
- Ashen Mist Heart obtained before entering the Old Iron King memory.
- Optional: Sir Alonne defeated in the Memory of the Old Iron King.
Before you move on
- The Iron Key was collected from beneath the first fire-breathing bull head in Iron Keep.
- The Iron Key was used to enter the Flame Salamander cavern in the Forest of Fallen Giants.
- The Heavy Iron Key was collected from the corpse at the rear-right side of the cavern.
- The Old Iron King was defeated and the Brume Tower door behind his Primal Bonfire was opened.
- The Throne Floor and Foyer bonfires were lit.
- The Scorching Iron Scepter was installed beside the Foyer bonfire.
- The Tower Key was collected from the ash-covered outdoor platform.
- Fume Knight was defeated at the Lowermost Floor.
- The Crown of the Old Iron King was collected from the throne room.
- Optional: Blue Smelter Demon was defeated in the Iron Passage.
- Optional: Sir Alonne was defeated in the Memory of the Old Iron King.
References for this chapter
- Heavy Iron Key — Dark Souls II Wiki
- Scorching Iron Scepter — Dark Souls II Wiki
- Brume Tower — Dark Souls II Wiki
- Smelter Wedge — Dark Souls II Wiki
- Tower Key — Dark Souls II Wiki
- Fume Knight — Dark Souls II Wiki
- Crown of the Old Iron King — Dark Souls II Wiki
- Memory of the Old Iron King — Dark Souls II Wiki
- Iron Passage — Dark Souls II Wiki
- Ashen Mist Heart — Dark Souls II Wiki
Crown of the Ivory King — Frozen Eleum Loyce and the Burnt Ivory King
Use the Frozen Flower at the Shrine of Winter to enter Frozen Eleum Loyce. Follow the blizzard-shrouded city to the Eye of the Priestess, then defeat Aava, the King's Pet. Speak with Alsanna in the Grand Cathedral to stop the blizzard and thaw the city. The thawed routes contain the Garrison Ward Key, three additional Loyce Knights, shortcuts and optional treasure. The knights are not mandatory, but they greatly improve the Old Chaos battle by sealing the portals that produce Charred Loyce Knights. Enter the Old Chaos from the Grand Cathedral, survive the opening wave, defeat the Burnt Ivory King and pick up the Crown of the Ivory King from the arena floor. Frigid Outskirts and Lud and Zallen are optional and are not required for the crown.
1. Enter Frozen Eleum Loyce and establish the first route
Travel to the Shrine of Winter with the Frozen Flower in your inventory. Interact with the shrine's altar to enter Frozen Eleum Loyce, then light the Outer Wall bonfire immediately. The initial blizzard conceals enemies, frozen objects and some routes. The area does not use a general freezing meter, so cold resistance is not a required countermeasure; visibility, ambushes and stamina management are the main concerns.
Use a ranged weapon, spell or throwable whenever possible. Ice Golems, Retainers, Spellswords, dogs and hidden Forest Guardians can attack together in narrow streets. Pull enemies into open ground instead of fighting beside ledges or frozen groups. Keep enough stamina for a retreat, because several encounters begin after you cross a bridge or pass through a doorway. Avoid blind drops unless the route clearly requires one, and light every bonfire you find before making a long backtrack.
- Have the Frozen Flower before using the Shrine of Winter.
- Light the Outer Wall bonfire.
- Carry a ranged option and enough healing for several enemy groups.
2. Obtain the Eye of the Priestess and defeat Aava
From Outer Wall, follow the main city route through the fountain area and the buildings beyond it. Continue through the tower and rampart paths until you reach the Abandoned Dwelling bonfire. The exact route contains lifts, doors and exposed bridges, so clear casters before crossing and use ranged attacks against enemies on higher platforms.
From Abandoned Dwelling, leave the bonfire area and take the route toward the ramparts. Continue through the passages with Ice Golems and Rampart Golems. At the fork near the Garrison Ward route, continue toward the tower and climb to the upper altar. Examine the bones at the top to receive the Eye of the Priestess. The Eye reveals Aava, the King's Pet, the invisible Wall Watchmen and the invisible Forest Guardians found in Scholar of the First Sin.
Return through the misty approach to the Inner Wall route, then proceed to the arena outside the Grand Cathedral. Aava is unreliable to fight before obtaining the Eye because the boss is invisible. After the Eye is secured, stay near Aava's flank rather than directly in front. When Aava finishes a claw combination, punish with one or two attacks and retreat. Roll through the pounce instead of backing away in a straight line, and move laterally when Aava launches ice projectiles. Fire defense can help against the boss's attacks, but spacing and stamina are more important than heavy armor.
Steelheart Ellie can be summoned near the approach if her sign is available. A summon increases the boss's health, so use one only if the extra target and healing opportunity outweigh the additional durability.
- Collect the Eye of the Priestess from the upper altar.
- Light the Inner Wall route before committing to Aava.
- Defeat Aava and enter the Grand Cathedral.
3. Speak with Alsanna and thaw the city
At the Grand Cathedral, rest at the bonfire and speak with Alsanna, Silent Oracle, several times. Choose to help her. The blizzard then stops, thawing frozen enemies, doors, chests and passages throughout Frozen Eleum Loyce. Rest at the bonfire before exploring because previously inactive enemies become live threats and several routes are now populated.
Return through the city and revisit the areas that were blocked by ice. At the four-sconce door, light all four sconces to open the passage. The thawed section contains optional equipment including the Soul Vessel, Sorcerer's Twinblade and Bone Fist. Do not rush past the room's enemies: the passage includes two Flexile Sentries, and fighting both at once is avoidable if you pull the first enemy away before dropping toward the second.
Search the bodies in the thawed room after dealing with both Flexile Sentries to obtain the Garrison Ward Key. Return to the Abandoned Dwelling route, use the key on the locked gate and light the Expulsion Chamber bonfire. The coffin at this bonfire leads to Frigid Outskirts, but that area is optional.
- Exhaust Alsanna's dialogue and agree to help her.
- Light the four sconces at the thawed city door.
- Defeat or bypass both Flexile Sentries and collect the Garrison Ward Key.
- Open the Garrison Ward gate and light the Expulsion Chamber bonfire.
4. Optional route: Frigid Outskirts and Lud and Zallen
Use the coffin at the Expulsion Chamber bonfire to enter Frigid Outskirts. The route is optional and does not provide the Crown of the Ivory King. The area alternates between clearer visibility and heavy snowstorms, while Ice Stallions attack from the distance and can reappear during the crossing. Move from one ruined shelter to the next rather than sprinting continuously across the open field. If a stallion appears, fight it in a position where another enemy cannot approach from behind.
One ruined structure contains a Pharros mechanism that creates a healing pool. Use the pool before continuing if your health or summoned allies are damaged. Follow the ruined buildings around the area until you reach the ice bridge and the crater arena. Lud enters first; after Lud is defeated, Zallen joins the fight. Focus on surviving the transition and do not continue attacking if the second boss's desperation effect begins while your health is low.
Defeat Lud and Zallen only for their souls and optional completion. If the goal is the Ivory Crown, return to the Expulsion Chamber and continue with the thawed-city routes.
- Treat Frigid Outskirts as optional.
- Use ruined shelters and the healing pool as safe points.
- Defeat Lud and Zallen only if you want their optional rewards.
5. Rescue the three additional Loyce Knights
There is already one Loyce Knight in the Old Chaos when the final battle begins. Three more can be rescued in the thawed city, giving you four possible Loyce Knight allies. They are strongly recommended because they seal the portals that summon Charred Loyce Knights during the opening phase.
For the first additional knight, return through Outer Wall and take the lower route beyond the broken bridge. Ride the lift down, deal with the snow hedgehogs and enter the lower garrison. Follow the route through the cave and unlock the shortcut at the intersection. Outside, pull enemies away from the inactive Facsimile Giants before killing them; nearby deaths can cause a giant to activate. Ride the lift upward, then strike the large snowball at the top of the slope so it rolls into the three golems guarding the bridge. Enter the tower and approach the Loyce Knight to send it to the Grand Cathedral.
For the second knight, return to the rampart routes near the Expulsion Chamber. Follow the thawed stairs and platforms past the ranged attackers, ladders and snow dogs. Open the shortcut doors as you advance. At the end of the lower route, ride the lift and enter the door guarded by the path's enemies. Approach the knight inside; it will teleport to the cathedral.
For the third knight, travel from the Inner Wall bonfire through the previously frozen hallway. Deal with the mages and the three golems near the chest, then continue down the newly opened passage and enter the knight's room. Approach the knight, then use the stairs behind it to open the shortcut back toward the upper route. The knight will join the others at the cathedral.
The Facsimile Giants are the main route hazard. Do not kill Ice Rats or snow hedgehogs beside an inactive giant unless you are ready to fight it. Pull the enemy into a corridor first, then finish it away from the giant.
- Rescue the lower-garrison knight after using the snowball against the three golems.
- Rescue the knight reached through the thawed rampart and lower-route passages.
- Rescue the knight in the thawed Inner Wall hallway.
- Open shortcuts before attempting the final boss.
6. Enter the Old Chaos and defeat the Burnt Ivory King
Return to the Grand Cathedral and use the doorway below Alsanna to enter the Old Chaos. The default Loyce Knight joins the fight automatically. Additional NPC summon signs may appear near the cathedral bonfire, but summons increase enemy health, so use them only if you can keep the opening wave controlled.
The battle begins with Charred Loyce Knights and Charred Loyce Mages emerging from fiery portals. Keep every enemy in view and prioritize the mages when they are active because their fire attacks can punish you while you are fighting a knight. Let the Loyce Knights engage enemies whenever possible. The rescued knights eventually sacrifice themselves to seal portals; this is expected and makes the opening phase manageable. Do not chase a fleeing Charred Knight into a distant corner if another portal remains active.
When the opening phase ends, the Burnt Ivory King enters. His first phase uses physical sword attacks, lunges and combinations. Stay close enough to bait a lunge, roll diagonally through it and counter once or twice. After he imbues the sword, his attacks gain magical damage and longer threat ranges. If the king pauses and begins to glow, move away immediately: a circular ground-spike attack erupts around him. Do not heal beside him during this tell.
Use magic defense if available, but do not sacrifice all mobility for resistance. Circle toward the weapon side, wait for the end of a two- or three-hit sequence, then punish without emptying your stamina bar. Defeat the king to receive the Soul of the Ivory King. After the victory, examine the sparkle on the arena floor to collect the Crown of the Ivory King, then use the pillar of light to return to the Grand Cathedral.
- Use the Loyce Knights to seal portals during the opening wave.
- Prioritize Charred Loyce Mages when they are active.
- Roll through the king's lunge and retreat when he begins the glowing ground-spike attack.
- Collect the Crown of the Ivory King from the arena floor after the boss dies.
7. Optional Loyce Souls and final completion check
Speak with Alsanna after returning from the Old Chaos. The crown does not require Frigid Outskirts, Lud and Zallen or a maximum Loyce Soul total. Charred Loyce Knights can provide Loyce Souls and equipment, and further rewards from Alsanna require collecting enough souls. These rewards are optional and should not be confused with the crown objective.
For DLC completion, confirm that the Frozen Flower was used, the Eye of the Priestess was collected, Aava was defeated, Alsanna's blizzard was stopped, and the Burnt Ivory King was defeated. The decisive inventory check is that the Crown of the Ivory King is present. If the three additional Loyce Knights were rescued, all four knight allies can participate in the opening of the Old Chaos battle; rescuing them is recommended but not required to make the DLC finishable.
- The Crown of the Ivory King is in the inventory.
- Aava, the King's Pet, is defeated.
- The Burnt Ivory King is defeated.
- Alsanna has been spoken to after the final battle.
- Optional: Lud and Zallen are defeated and Alsanna's Loyce Soul rewards are claimed.
Before you move on
- Frozen Flower used at the Shrine of Winter.
- Eye of the Priestess collected.
- Aava, the King's Pet defeated.
- Alsanna's dialogue exhausted and the blizzard stopped.
- Garrison Ward Key collected if the optional routes and knight rescues are desired.
- Burnt Ivory King defeated in the Old Chaos.
- Crown of the Ivory King picked up from the arena floor.
- Optional: Frigid Outskirts crossed and Lud and Zallen defeated.
- Optional: Loyce Soul rewards claimed from Alsanna.
References for this chapter
- Act IX - Crown of the Ivory King - Dark Souls II: Scholar of the First Sin Walkthrough & Guide
- Dark Souls 2: Crown of the Ivory King Guide and Walkthrough - Find all Knights of Eleum Loyce
- Crown of the Ivory King - DarkSouls II Wiki
- The Old Chaos - DarkSouls II Wiki
- Eye of the Priestess - Dark Souls II Wiki
- Garrison Ward Key - Dark Souls II Wiki
- Loyce Knight - Dark Souls II Wiki
Endgame: NG+, covenants, completion checklist and quick farming
After the final ending, Dark Souls II: Scholar of the First Sin returns you to Majula instead of forcing an immediate New Game Plus. Use this period to trade boss souls, finish NPC and covenant objectives, upgrade equipment, complete the three Lost Crowns episodes, and confirm Aldia if you want the optional final encounter. Journey 2 resets world progression and removes keys, Fragrant Branches of Yore, and the King’s Ring, while your character level, equipment, souls, most inventory, and covenant progress remain. Bonfire Ascetics permanently raise the linked area’s Bonfire Intensity and that higher intensity carries into NG+, so use them only for deliberate farming or rematches.
1. Complete first-cycle objectives before choosing Journey 2
After the ending, you remain in the completed world. Rest at the Far Fire in Majula and do not select the Journey 2 option until your preparation is finished. You can still visit merchants, return to every unlocked area, fight surviving optional bosses, enter the DLC episodes, and resolve unfinished NPC quests.
Spend excess souls on levels, consumables, repair supplies, arrows or spells, and upgrade materials. Reinforce your main weapon and at least one backup or ranged tool. Check your casting implements, shield, armor, rings, healing items, and status cures rather than assuming the next cycle will provide convenient replacements immediately.
Finish any missable objective you specifically want from Benhart of Jugo, Vengarl, Navlaan, Pate, Creighton, Lucatiel, or other NPCs. NPC positions and quest states reset in NG+, but rewards already obtained remain with your character. Complete the three Lost Crowns episodes now if they are part of your campaign goal; they do not need to be repeated merely because you begin Journey 2.
- Return to Majula and inspect the Far Fire menu without selecting Journey 2 yet.
- Upgrade the weapons, casting tools, and defensive equipment you intend to use.
- Resolve remaining NPC quests and collect their intended rewards.
- Finish Crown of the Sunken King, Crown of the Old Iron King, and Crown of the Ivory King if required.
2. Check every boss soul before consuming or trading it
Straid of Olaphis in the Lost Bastille and Weaponsmith Ornifex in Brightstone Cove Tseldora exchange different groups of boss souls. Visit both traders before consuming a unique soul for ordinary currency. Some exchanges also require a separate soul payment, so keep a reserve of normal souls.
The four special NG+ Great Soul rewards are particularly important for collectors and spell users. Defeating Lost Sinner, The Duke’s Dear Freja, The Rotten, and Old Iron King at Bonfire Intensity 2 or higher produces Old Witch Soul, Old Paledrake Soul, Old Dead One Soul, and Old King Soul respectively. These can be obtained naturally in Journey 2 or by using an Ascetic at the correct boss-linked bonfire. They are used for additional high-level trades, including Flame Weapon, Crystal Soul Spear, Numbness, and Blinding Bolt, so do not consume them casually.
You do not need to preserve every boss soul forever. Once you have checked Straid’s and Ornifex’s menus and decided which weapons or spells matter to your build, trade duplicates or unwanted souls. Keep a written list if you are pursuing all boss-weapon or spell rewards across multiple journeys.
- Check Straid’s complete exchange inventory.
- Visit Ornifex and review her available weapons and spells.
- Preserve the four Old Souls if you want the additional NG+ trades.
- Do not treat the Soul of Velstadt as one of the four Great Soul NG+ replacements.
3. Review covenant progress and rewards
Covenant rank and accumulated covenant progress carry into the next journey, so record your current rank before changing allegiance. Abandoning a covenant does not erase the rank already earned, although the world activities and NPC availability associated with that covenant reset when the next cycle begins.
Buy or claim any reward currently available from the covenant you are pursuing. Bell Keepers and Rat King progress can be earned through their area activities, while Blue Sentinels and Brotherhood of Blood ranks depend mainly on multiplayer participation. Pilgrims of Dark requires clearing the three Dark Chasms and defeating their final challenge; do not assume that ordinary boss completion advances it.
If online activity is unavailable, do not hold up the entire playthrough for a rank that requires repeated invasions or duels. Covenant rewards are useful for completion goals, but they are not required to make a normal PvE build ready for Journey 2. The Company of Champions is a difficulty covenant, not a farming shortcut, and should not be used accidentally while preparing equipment.
- Record current covenant membership and rank.
- Purchase all covenant rewards you intend to use.
- Separate online-only objectives from ordinary campaign completion.
- Leave difficulty-increasing covenants before starting a normal NG+ route if desired.
4. Stock upgrade materials using controlled routes
Buy ordinary materials from the appropriate merchants before farming. Steady Hand McDuff is the main early source for standard weapon reinforcement, while Stone Trader Chloanne expands her stock as the campaign advances. Her Titanite Chunk supply becomes available after clearing the Undead Crypt, and it becomes unlimited after Nashandra is defeated. This makes a final pre-NG+ shopping trip worthwhile.
For renewable late-game material runs, Dragon Aerie is the clearest route for Twinkling Titanite and other rare drops. Start at the Dragon Aerie bonfire, defeat or bypass the guardian dragons, then collect the Crystal Lizards along the path toward the shrine. Crystal Lizards are one-time kills until the next cycle or an appropriate Ascetic, so do not expect them to respawn after an ordinary rest.
For Titanite Slabs, reliable drops can come from Stone Soldiers in Drangleic Castle and Iron Warriors in Brume Tower. These are chance-based and may be slower than using already-collected fixed items. If you use an Ascetic to repeat a material route, first confirm which bonfire governs the desired chest, enemies, and boss.
A Bonfire Ascetic permanently increases the linked area by one Bonfire Intensity, respawns most enemies and area items, and can restore the area boss. The increased intensity remains when you enter Journey 2, meaning an area raised once during the first journey begins the next cycle one level higher than neighboring regions. Never burn one at a bonfire merely to refresh a single pickup unless you accept the stronger enemies and boss.
- Buy available standard Titanite before resetting the world.
- Use Chloanne’s late-game stock for Chunks when available.
- Farm Dragon Aerie Crystal Lizards for Twinkling Titanite and rare upgrade drops.
- Record every bonfire raised with an Ascetic before beginning Journey 2.
5. Confirm Aldia before finishing the cycle
Aldia’s optional final encounter is available in Scholar of the First Sin only after the required dialogue sequence and Vendrick condition are satisfied. First meet Aldia at a Primal Bonfire after defeating the associated area boss and lighting that bonfire. Exhaust his dialogue, then meet him in the Undead Crypt after the elevator from Shrine of Amana and exhaust the new dialogue there. Finally, meet him at the entrance bonfire in Dragon Shrine and speak with him until his dialogue is exhausted.
Vendrick must be defeated before Nashandra. Bradley of the Old Guard’s summon sign near the Throne of Want is a useful confirmation that the Aldia sequence is active, but summoning Bradley is not itself the trigger. If Aldia is available, he appears after Nashandra is defeated and begins the additional final encounter.
If Aldia does not appear, check the order rather than immediately starting NG+. Confirm that Vendrick is dead, revisit the Undead Crypt and Dragon Shrine locations, and exhaust every available Aldia dialogue. A Bonfire Ascetic at the King’s Gate bonfire can recreate the Throne encounters at higher local intensity, but it does not make the preparation risk-free. Aldia does not award a conventional boss soul, so the reason to complete the fight is the additional encounter and ending sequence.
- Aldia was encountered at a Primal Bonfire.
- Aldia’s Undead Crypt dialogue was exhausted.
- Aldia’s Dragon Shrine dialogue was exhausted.
- Vendrick was defeated before Nashandra.
- Bradley’s sign is visible if you are using it as a confirmation.
6. Start Journey 2 only after the loadout is ready
When the checklist is complete, rest at the Far Fire in Majula and select Begin Journey 2. Your soul level, attributes, equipped gear, storage, souls, most consumables, spells, rings, and upgrade progress carry over. World progression resets, so doors, area bosses, NPC positions, and most key-based access must be handled again.
In Scholar of the First Sin, keys, Fragrant Branches of Yore, and the King’s Ring do not carry over. Do not spend the final minutes of the first cycle assuming those progression items will remain available. Use branches you still need, record any NPCs or doors they affected, and be prepared to obtain the King’s Ring again before late-game gates can be opened.
Journey 2 increases the general world difficulty and adds altered encounters and rewards in several areas. Equip a dependable melee weapon, a ranged option, status cures, repair supplies, and rings suited to your build before confirming. The game does not require you to begin NG+ immediately after Nashandra or Aldia, so postponing the reset is the safest way to preserve access to unfinished first-cycle content.
The campaign completion check is satisfied when Nashandra is defeated, Aldia is also defeated if desired, the three DLC finales are complete if included, all intended boss souls have been checked with Straid and Ornifex, missable NPC rewards are resolved, and your equipment and material stock are ready for the next route.
- Nashandra is defeated.
- Aldia is defeated if the optional Scholar encounter is required.
- All three DLC crowns and final bosses are complete if included.
- Boss souls have been reviewed with Straid and Ornifex.
- Upgrade materials, healing items, status cures, and core equipment are prepared.
- Keys, branches, and the King’s Ring are understood to reset before Journey 2.
- Select Journey 2 at the Far Fire only after all remaining first-cycle tasks are complete.
Before you move on
- Nashandra has been defeated and the main ending has played.
- Aldia has appeared and been defeated if the optional final encounter is required.
- The three Lost Crowns DLC bosses and crown rewards are complete if included in the goal.
- Boss souls have been checked for Straid and Ornifex trades.
- Desired covenant rewards and NPC quest rewards have been collected.
- Upgrade materials and core equipment are prepared.
- The Far Fire is used to begin Journey 2 only after the preparation checklist is complete.
References for this chapter
- Aldia, Scholar of the First Sin — Dark Souls II Wiki
- NG Cycles — Dark Souls II Wiki
- Bonfire Ascetic — Dark Souls II Wiki
- Covenants — Dark Souls II Wiki
- Stone Trader Chloanne — Dark Souls II Wiki
- Guide for Dark Souls II: Scholar of the First Sin — New Game Plus and Beyond
- Guide for Dark Souls II: Scholar of the First Sin — Farming Locations
- Dark Souls II: Scholar of the First Sin PlayStation 4 Instruction Manual
Finishing up
Primary completion check: defeat Nashandra at the Throne of Want and allow the ending sequence to begin.
Optional final-boss check: meet Aldia at the final primal-bonfire encounter, in the Undead Crypt and at the Dragon Shrine; defeat Vendrick before Nashandra; then defeat Aldia after Nashandra.
Main-route check: the guide has covered all four Great Soul bosses—The Lost Sinner, The Duke’s Dear Freja, The Rotten and the Old Iron King—and the subsequent Drangleic Castle, Shrine of Amana, Undead Crypt, Aldia’s Keep, Dragon Aerie, Dragon Shrine and Giant Lord routes.
DLC completion check: defeat Sinh and collect the Crown of the Sunken King; defeat Fume Knight and collect the Crown of the Old Iron King; defeat the Burnt Ivory King and collect the Crown of the Ivory King. Elana, Blue Smelter Demon, Sir Alonne, Lud and Zallen, and the Cave of the Dead are optional unless separately included in the player’s goal.
Key-item check: obtain the King’s Ring, Ashen Mist Heart, Giant Lord’s Giant’s Kinship, and the DLC entrance keys required for the selected episodes.
Optional checklist: complete desired NPC, summon and covenant objectives and review boss souls with Straid and Ornifex before Journey 2.
Choose your next gameScreenshots & video
Game imagery for reference. Follow the written chapters above for the route and strategies.
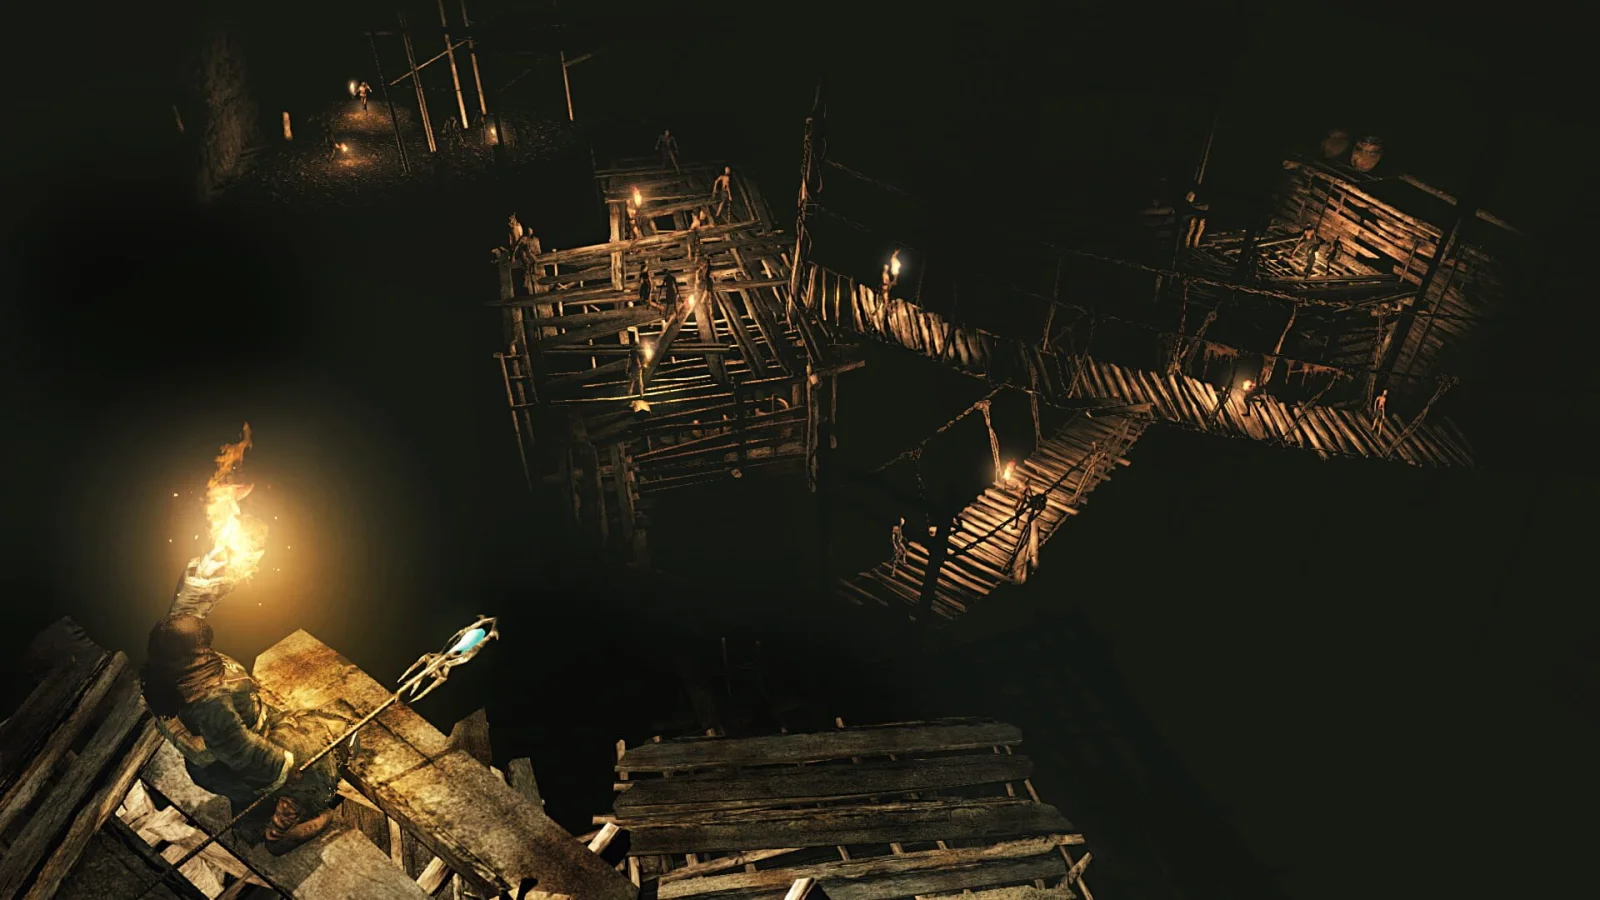
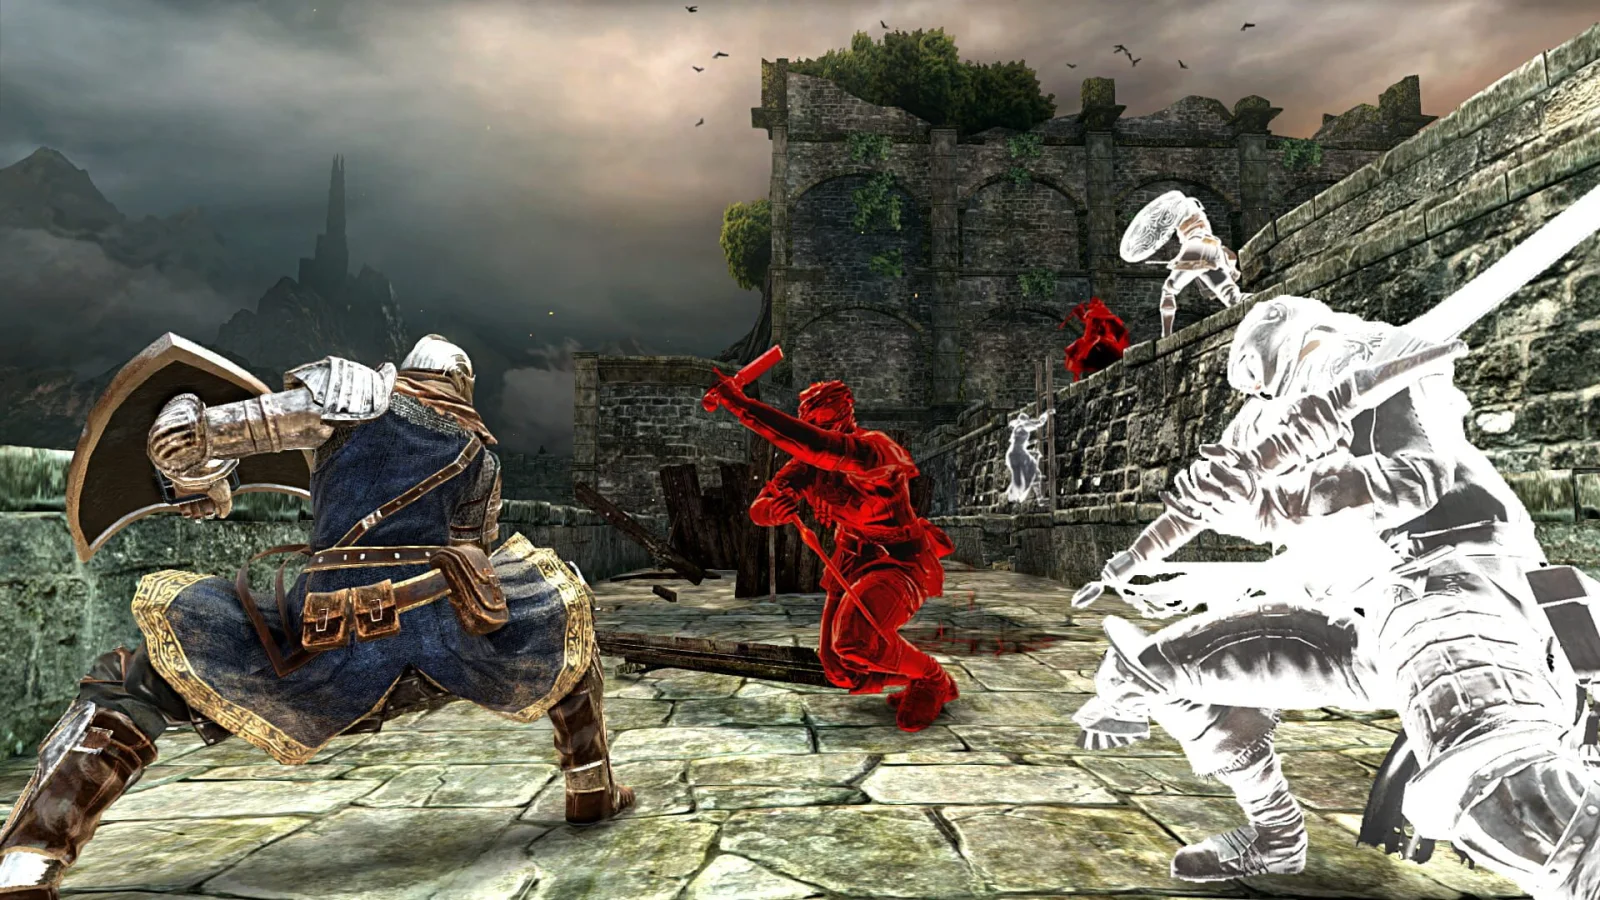
Sources & references
Our original guide draws on the references below. Check the edition at the top of this page before following controls or unlock requirements.
- Dark Souls II: Scholar of the First Sin PlayStation 4 Instruction Manual
- Dark Souls II Game Basics Manual
- Things Betwixt — Dark Souls II Wiki
- Starting Gifts — Dark Souls II Wiki
- Emerald Herald — Dark Souls II Wiki
- Estus Flask — Dark Souls II Wiki
- Upgrade Materials — Dark Souls II Wiki
- Guide for Dark Souls II: Scholar of the First Sin — Things Betwixt
- Majula — Dark Souls II Wiki
- Estus Flask Shard — Dark Souls II Wiki
- Merchant Hag Melentia — Dark Souls II Wiki
- Cale the Cartographer — Dark Souls II Wiki
- Blacksmith Lenigrast — Dark Souls II Wiki
- Aldia, Scholar of the First Sin — Dark Souls II Wiki
- Scholar of the First Sin — Dark Souls II Wiki
- Guide for Dark Souls II: Scholar of the First Sin — Forest of Fallen Giants
- Dark Souls II: Scholar of the First Sin Walkthrough & Guide — PlayStation 4 — Forest route
- Soldier Key — Dark Souls II Wiki
- Key Items — Dark Souls II Wiki
- Heide’s Tower of Flame — Dark Souls II Wiki
- Ring of Binding — Dark Souls II Wiki
- Sublime Bone Dust — Dark Souls II Wiki
- Dark Souls II: Scholar of the First Sin — GameFAQs walkthrough
- Devotee Scarlett — DarkSouls II Wiki
- Dragonrider — Dark Souls II Wiki
- Dark Souls II: Scholar of the First Sin — FromSoftware product page
- Dark Souls II: Scholar of the First Sin coming to PS3 and PS4 in April 2015 — PlayStation.Blog
- No-man’s Wharf — Dark Souls II Wiki
- Flexile Sentry — Dark Souls II Wiki
- Lucatiel of Mirrah - Dark Souls II Wiki
- Guide for Dark Souls II: Scholar of the First Sin — No-Man’s Wharf
- Dark Souls II: Scholar of the First Sin Walkthrough — PlayStation 4 — GameFAQs
- The Lost Bastille — Dark Souls II Wiki
- Ruin Sentinels — Dark Souls II Wiki
- NPC Summons — Dark Souls II Wiki
- Dark Souls II: Scholar of the First Sin — Walkthrough — PlayStation 4 — GameFAQs
- Lost Bastille Walkthrough — TrueAchievements
- The Lost Sinner — Dark Souls II Wiki
- Sinner’s Rise — Dark Souls II Wiki
- Bastille Key — Dark Souls II Wiki
- Sellsword Luet — Dark Souls II Wiki
- Dark Souls II: Scholar of the First Sin Platinum Walkthrough — Gami
- Huntsman’s Copse — Dark Souls II Wiki
- Undead Lockaway Key — Dark Souls II Wiki
- Skeleton Lords — Dark Souls II Wiki
- Harvest Valley — Dark Souls II Wiki
- Earthen Peak — Dark Souls II Wiki
- Covetous Demon — Dark Souls II Wiki
- Iron Keep — Dark Souls II Wiki
- Iron Key — Dark Souls II Wiki
- Heavy Iron Key — Dark Souls II Wiki
- Old Iron King — Dark Souls II Wiki
- Harvest Valley and Earthen Peak walkthrough — QuackSouls
- Earthen Peak walkthrough — TrueAchievements
- Iron Keep walkthrough — TrueAchievements
- Shaded Woods — Dark Souls II Wiki
- Shaded Woods and Shaded Ruins — Dark Souls II Wiki
- The Gutter — Dark Souls II Wiki.gg
- Black Gulch - Dark Souls II Wiki
- Forgotten Key — Dark Souls II Wiki.gg
- The Rotten - Dark Souls II Wiki
- The Rotten - DarkSouls II Wiki
- Black Gulch - DarkSouls II Wiki
- Old Dead One Soul - Dark Souls II Wiki
- Soul of the Rotten - Dark Souls II Wiki
- Doors of Pharros — Dark Souls II Wiki
- Brightstone Cove Tseldora — Dark Souls II Wiki
- Scorpioness Najka — Dark Souls II Wiki
- Royal Rat Authority — Dark Souls II Wiki
- The Duke’s Dear Freja — Dark Souls II Wiki
- Bonfires — Dark Souls II Wiki
- Fragrant Branch of Yore — Dark Souls II Wiki
- Keys — Dark Souls II Wiki
- Drangleic Castle — Dark Souls II Wiki
- King’s Ring — Dark Souls II Wiki
- Shrine of Amana — Dark Souls II Wiki
- Ashen Mist Heart — Dark Souls II Wiki
- Giant’s Kinship — Dark Souls II Wiki
- Nashandra — Dark Souls II Wiki
- Bosses — Dark Souls II Wiki
- Throne Watcher & Defender — Dark Souls II Wiki
- Throne of Want — Dark Souls II Wiki
- Nashandra — Dark Souls II Wiki
- Aldia, Scholar of the First Sin — DarkSouls II Wiki
- Aldia, Scholar of the First Sin — Dark Souls Wiki
- Nashandra & Aldia walkthrough
- FromSoftware FAQ — Dark Souls II Scholar of the First Sin version differences
- Dragon Stone — Dark Souls II Wiki
- Dragon’s Sanctum — Dark Souls II Wiki
- Sinh, the Slumbering Dragon — Dark Souls II Wiki
- Dragon’s Rest — Dark Souls II Wiki
- Crown of the Sunken King — Dark Souls II Wiki
- Act VII — Crown of the Sunken King walkthrough
- Scorching Iron Scepter — Dark Souls II Wiki
- Brume Tower — Dark Souls II Wiki
- Smelter Wedge — Dark Souls II Wiki
- Tower Key — Dark Souls II Wiki
- Fume Knight — Dark Souls II Wiki
- Crown of the Old Iron King — Dark Souls II Wiki
- Memory of the Old Iron King — Dark Souls II Wiki
- Iron Passage — Dark Souls II Wiki
- Ashen Mist Heart — Dark Souls II Wiki
- Act IX - Crown of the Ivory King - Dark Souls II: Scholar of the First Sin Walkthrough & Guide
- Dark Souls 2: Crown of the Ivory King Guide and Walkthrough - Find all Knights of Eleum Loyce
- Crown of the Ivory King - DarkSouls II Wiki
- The Old Chaos - DarkSouls II Wiki
- Eye of the Priestess - Dark Souls II Wiki
- Garrison Ward Key - Dark Souls II Wiki
- Loyce Knight - Dark Souls II Wiki
- NG Cycles — Dark Souls II Wiki
- Bonfire Ascetic — Dark Souls II Wiki
- Covenants — Dark Souls II Wiki
- Stone Trader Chloanne — Dark Souls II Wiki
- Guide for Dark Souls II: Scholar of the First Sin — New Game Plus and Beyond
- Guide for Dark Souls II: Scholar of the First Sin — Farming Locations
About the game & collecting notes
- Platform
- PlayStation 4
A practical, step-by-step campaign walkthrough for Dark Souls II: Scholar of the First Sin on PlayStation 4. Covers Things Betwixt and Majula, all four Great Soul routes through The Duke’s Dear Freja, The Lost Sinner, The Rotten and the Old Iron King, the complete Drangleic Castle-to-Throne route, Aldia’s optional finale, the Ancient Dragon and Giant Lord prerequisites, and all three Lost Crowns DLC episodes.
Darryl Polo
Darryl Polo writes about emulation and retro games. What changes when an old favorite moves to another setup? That question connects his interest in tinkering with the games that made the hardware worth keeping.
Our editorial standardsFound a step that needs another look? Help us improve this guide.