
Crash Bandicoot: Warped — Original PlayStation (USA) Complete Campaign Walkthrough
Practical, route-focused walkthrough for the original North American PlayStation release of Crash Bandicoot: Warped. It covers the five Warp Rooms, the 25 crystal stages, the four chamber bosses, the final Neo Cortex encounter, colored gems, Secret Warp Room stages, relic progression, the alternate ending threshold, and the separate maximum 105% route.

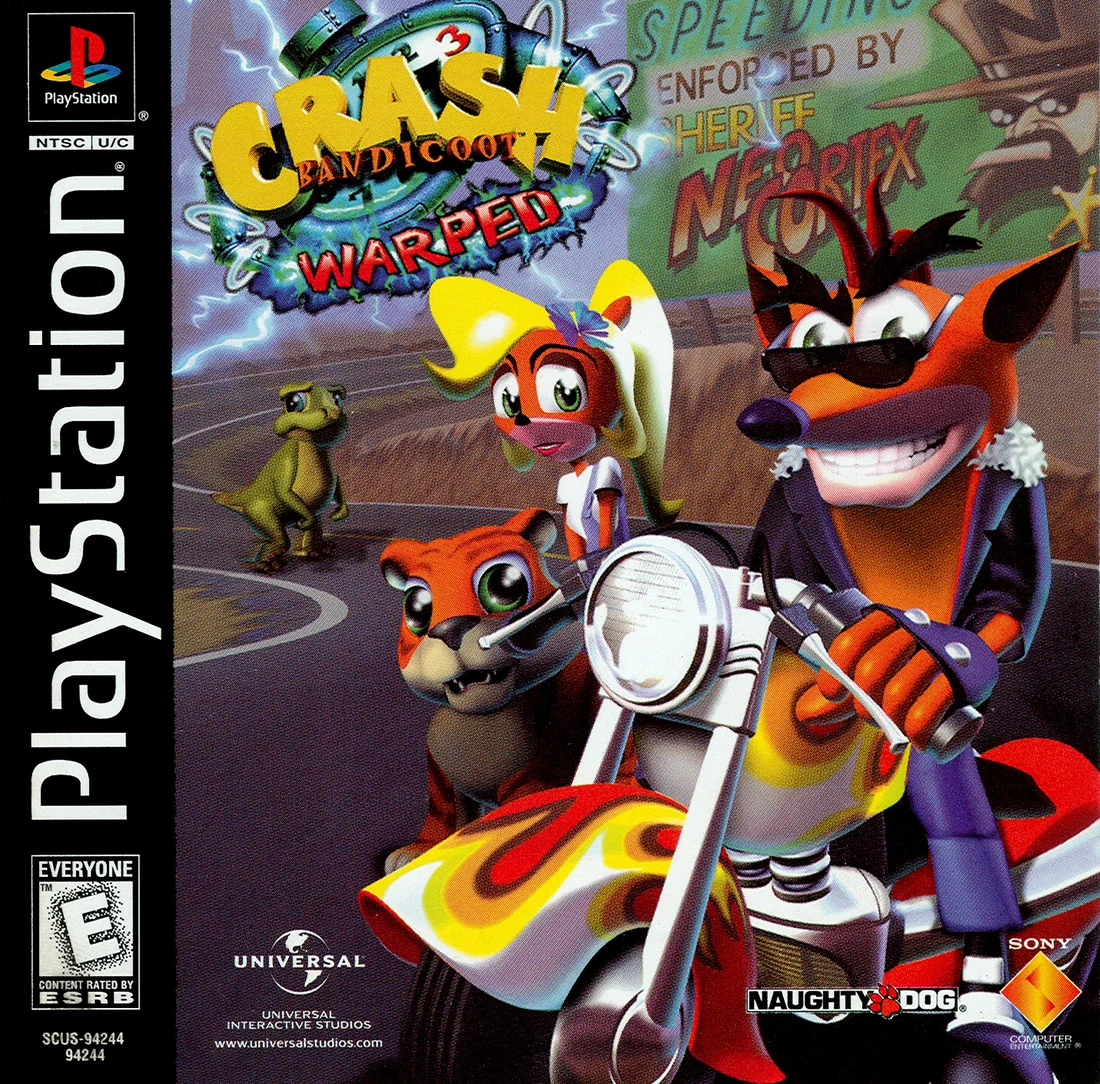
Find a copy
Crash Bandicoot: Warped Sony PlayStation
We may earn a commission if you buy through these links, at no extra cost to you. As an Amazon Associate I earn from qualifying purchases.
Opens retailer search results. Check the model, edition, seller, availability and current price before buying.
Before you begin
You are playing the original North American PlayStation edition of Crash Bandicoot: Warped, also known as Crash Bandicoot 3.
The campaign uses five Warp Rooms containing five crystal stages each. The first four rooms end with Tiny Tiger, Dingodile, N. Tropy and N. Gin; the fifth room leads directly to the final Neo Cortex route after its five crystals.
Follow the main campaign through the 25 crystals first, then use the later chapters for colored gems, Secret Warp Room stages, relics, the alternate ending and maximum completion.
This guide keeps its progression, controls and completion requirements specific to the original NTSC-U PlayStation release rather than the N. Sane Trilogy.
Set yourself up for the run
The main campaign requires 25 crystals and four chamber bosses: Tiny Tiger, Dingodile, N. Tropy and N. Gin. After the fifth chamber's five crystals, the final central Neo Cortex route becomes available; there is no separate fifth-chamber boss.
Treat the ordinary ending, the alternate ending and maximum 105% completion as separate milestones. The guide identifies the original-release thresholds for each instead of describing every gem and relic as necessary for the first ending.
Save at the Warp Room Load/Save monitor after major progress, because checkpoints do not replace a memory-card save.
Essential Setup and Controls
Set up the original North American PlayStation release of Crash Bandicoot: Warped, confirm its controls, and establish a reliable manual-save routine before entering the first time portal. These directions apply to the 1998 NTSC-U PlayStation version, not the later N. Sane Trilogy remaster.
Confirm the correct PlayStation version and hardware setup
Use the North American PlayStation release titled Crash Bandicoot: Warped. The game is compatible with the standard PlayStation controller and the DualShock, but its original control layout is not the same as the later N. Sane Trilogy defaults. On original hardware, insert the memory card before starting the game and keep using the same card and slot for the campaign.
If you are using an emulator, choose a PlayStation controller profile and map the D-pad or left analog stick to movement. Run the game at normal speed and check that released buttons stop registering immediately. Input delay or a drifting stick is especially troublesome when judging platform edges, slide jumps, underwater movement, and vehicle steering.
- Confirm that the disc or image is the North American PlayStation release.
- Insert the memory card before launching the game.
- Test movement in all directions before entering a level.
- If emulating, verify that buttons do not remain held after release and that the game is running at full speed.
Learn the original control layout
Use the D-pad or the DualShock's left analog stick to move Crash. Press X to jump; holding X gives a higher jump than a quick press. Press Square to spin. Press Circle while standing to crouch, or hold Circle while moving to slide. R1 provides the alternate crouch and slide input used by the original game. Start pauses the game, and Triangle opens the inventory or status panel.
The slide is also the starting point for the slide jump: while running, hold Circle or R1 to slide, then press X during the slide. The manual also lists the body slam and high jump as combinations, but do not use either accidentally near TNT, Nitro, or a narrow platform. For ordinary first clears, jump, spin, crouch, and slide are the essential actions to practise.
Vehicle, swimming, hanging, and animal stages use variations of the same controller. When Crash is hanging, X releases him, Square spins, and Circle or R1 pulls his legs up. In swimming sections, the controls differ from normal platforming, so learn the on-screen or manual prompts rather than assuming a normal jump or slide will work.
- D-pad or left analog stick moves Crash.
- X jumps; holding X jumps higher.
- Square performs the spin attack.
- Circle or R1 crouches and slides.
- Triangle opens the status panel.
- Start pauses the game.
- Practise a running slide followed by X before attempting a slide-jump route.
Use the status panel to check progress
Press Triangle during a level to inspect the current inventory and status information. The panel can show your lives, Wumpa fruit, box progress, and the level objectives that have been recorded. Use it after returning to the Warp Room to confirm that a completed level has registered its crystal, gem, or relic rather than relying only on memory.
A crystal, gem, and relic are separate objectives. Finishing a normal route for the first time does not automatically award every optional item. For a first campaign pass, concentrate on reaching the normal exit and collecting the crystal. Return later for gem routes and time trials after you have learned the level and obtained the abilities needed for its alternate path.
- Open the status panel before a difficult attempt to check lives and current progress.
- Confirm that a crystal or other objective is recorded after completing a run.
- Do not treat entering a portal, reaching a bonus area, or breaking many crates as completion of the level.
Save manually in the Warp Room
Crash Bandicoot: Warped on the original PlayStation does not use modern automatic saving. To save, return to the Warp Room and walk to the screen marked Load/Save. Press X to activate it, enter the saved-game name with the directional buttons or left analog stick, confirm each choice with X, and select Done when the game presents that option. Wait for the save process to finish before resetting or switching off the console.
To continue a previous adventure, activate the same Load/Save screen and choose the load option, then select the saved game you want to continue. Make a deliberate save after completing important progress, such as clearing a chamber, defeating a boss, or finishing a major gem or relic session. A checkpoint reached inside a level is not a memory-card save and should never be treated as a substitute for returning to the Warp Room.
- Return to the Warp Room before saving.
- Activate the Load/Save screen with X.
- Complete the name and confirmation process rather than powering off immediately.
- Load the correct saved game from the Load/Save screen when continuing later.
- Save again after major progress instead of relying on a checkpoint.
Understand checkpoints and deaths
Checkpoint crates apply only to the current level attempt. After breaking one, losing a life normally returns Crash to the most recently activated checkpoint. If you have not reached a checkpoint, the restart point is earlier in the level, usually the beginning or a previous restart position. Use checkpoints as practice markers: after a death, repeat the section with the same movement plan, then slow down before the obstacle that caused the failure.
A lost life does not erase a properly saved campaign, but progress made since the last manual save can be lost if the console is turned off. If you run out of lives, use the game-over result to return to the Warp Room or restart as offered by the game, then reload or save as appropriate. Do not assume that a checkpoint preserves newly collected crystals, gems, relics, or lives after a full reset.
- Break a checkpoint crate whenever it is safe to do so.
- After dying, identify the last checkpoint and repeat the failed section deliberately.
- Return to the Warp Room and save after completing the level.
- If a game over interrupts a difficult attempt, reload the latest manual save rather than assuming the checkpoint remains active.
Use Aku Aku protection correctly
Breaking an Aku Aku crate gives Crash one mask of protection. One mask normally absorbs one ordinary damaging hit; after that hit, the mask is gone. Collecting a second mask increases the protection to two ordinary hits. Collecting a third mask activates temporary invulnerability, with Aku Aku covering Crash's face while the effect lasts.
Masks are a buffer, not a guarantee against every hazard. Treat pits, falls, and stage-specific instant-death situations as lethal even when carrying Aku Aku unless the game clearly demonstrates otherwise. Preserve a mask for an unfamiliar enemy or obstacle, and do not spend a two-mask buffer carelessly on a hazard that can be avoided by waiting or jumping. If you reach a checkpoint with protection intact, use that advantage to learn the next section rather than rushing.
- One mask normally absorbs one ordinary damaging hit.
- Two masks provide two-hit protection.
- Three masks activate temporary invulnerability for a limited period.
- Do not rely on Aku Aku against pits or other instant-death hazards.
- Use masks to learn unfamiliar sections, not as a replacement for careful movement.
Before you move on
- Crash can move with the D-pad or left analog stick, jump with X, spin with Square, crouch and slide with Circle or R1, open the status panel with Triangle, and pause with Start.
- You can perform a running slide and follow it with X for a slide jump without confusing the input with a body slam.
- You have opened the status panel and can identify lives and level-progress information.
- You have reached the Warp Room Load/Save screen, created or updated a save, and confirmed that the saved game can be loaded.
- You understand that checkpoints affect restart position during a level but do not replace a manual memory-card save.
- You understand that one Aku Aku mask normally absorbs one ordinary hit, two masks provide two-hit protection, and three masks activate temporary invulnerability.
Time-Twisting Machine (Hub) — Progression and Rules
The Time-Twisting Machine is the central hub in the original North American PlayStation release of Crash Bandicoot: Warped. The main campaign uses five Warp Rooms, each containing five crystal stages. The first four rooms also contain a boss portal that appears after their five crystals are collected. Their bosses are, in order, Tiny Tiger, Dingodile, N. Tropy and N. Gin. Warp Room 5 is different: its five stages provide the final five crystals, and collecting them opens the central route to Neo Cortex. There is no fifth chamber boss. Keep crystals, gems and relics separate in the Status Panel, because each tracks a different type of progress.
Begin with the five regular portals in Warp Room 1
At the start of a new file, Warp Room 1 is the available main room. Its five regular portals lead to Toad Village, Under Pressure, Orient Express, Bone Yard and Makin’ Waves. Enter each stage and follow the ordinary route to its crystal. The crystal is the required campaign objective on a first clear; a complete box total, colored-gem route or relic can be handled later.
A practical first pass is to clear the stages in portal order. This introduces ordinary platforming, underwater movement, animal riding and vehicle sections without forcing you to combine several objectives at once. If you lose a life, re-enter the same portal and continue working toward the crystal. Do not abandon a stage merely because its optional gem route or time trial is difficult.
- Confirm that Warp Room 1 is open.
- Clear Toad Village, Under Pressure, Orient Express, Bone Yard and Makin’ Waves.
- Record the crystal from each ordinary stage route.
Understand the five-crystal rule and the four chamber bosses
Each of the first four Warp Rooms has five crystal stages followed by a boss portal. The boss portal appears only after all five crystals in that room have been collected. Warp Room 1 opens Tiny Tiger; Warp Room 2 opens Dingodile; Warp Room 3 opens N. Tropy; and Warp Room 4 opens N. Gin.
Defeat the available boss before expecting the next main room to open. The correct order is Tiny Tiger, Dingodile, N. Tropy and N. Gin. Each victory advances the hub and grants a new ability, so later optional routes and difficult time trials are best attempted after the relevant boss rewards have been earned.
- Collect five crystals before searching for a boss portal.
- Fight Tiny Tiger after Warp Room 1.
- Fight Dingodile after Warp Room 2.
- Fight N. Tropy after Warp Room 3.
- Fight N. Gin after Warp Room 4.
Treat Warp Room 5 as the final crystal room, not another boss chamber
After N. Gin is defeated, Warp Room 5 becomes available. Its five portals are Gone Tomorrow, Orange Asphalt, Flaming Passion, Mad Bombers and Bug Lite. Clear the ordinary crystal route in all five stages. These are the final five main-room crystals, bringing the campaign total to 25.
Warp Room 5 does not reveal a separate chamber boss after its fifth crystal. Instead, the five collected crystals open the central route to the final Neo Cortex encounter. If you are looking for a fifth boss face or a sixth chamber portal, you are checking the wrong progression rule. Once the fifth Warp Room is complete, return to the hub center and use the newly available final route.
- Unlock Warp Room 5 by defeating N. Gin.
- Collect crystals in Gone Tomorrow, Orange Asphalt, Flaming Passion, Mad Bombers and Bug Lite.
- Confirm a total of 25 main crystals.
- Enter the central Neo Cortex route rather than searching for a fifth chamber boss.
Use the Status Panel to separate campaign and optional progress
Pause and inspect the Status Panel after each room. Crystals represent the main campaign stages. Gems represent box rewards, colored-gem paths and other hidden-route rewards. Relics represent Time Trial results. A stage may show its crystal while still lacking one or more gems or a relic, so an incomplete stage entry does not necessarily mean that the main route is blocked.
For a normal campaign run, check the crystal total and boss progression first. For a completion run, use the panel to identify exactly which gem or relic is missing before replaying a stage. This prevents treating a clear gem, colored gem or relic as a replacement for a required crystal.
- Check the crystal total after every group of stages.
- Review gems and relics as separate categories.
- Use the panel to select optional cleanup targets.
Open the Secret Warp Room through relic milestones
Time Trials become available after a stage’s crystal has been collected. Re-enter the completed stage and touch the floating stopwatch near the beginning to start the trial. Numbered yellow time crates pause the timer for the value shown on the crate. Sapphire, Gold and Platinum are the three relic grades, with Gold and Platinum requiring faster runs.
The first five relics open access to the Secret Warp Room through the central hub platform. Further relic milestones open additional secret-room stages. This access is independent of the crystal gates: collecting 25 crystals does not, by itself, open every secret stage, and collecting relics does not replace the five crystals needed for a chamber boss or the final Cortex route.
The secret area is optional for the ordinary first ending but important for extended completion. Some hidden stages and alternate entrances contribute gems and relics that are tracked separately from the 25 main crystals. When a relic milestone is reached, return to the hub center and check whether a new secret-room portal is active.
- Collect a stage crystal before attempting its Time Trial.
- Earn at least five relics to open the Secret Warp Room.
- Return to the hub after each relic milestone.
- Keep secret-stage progress separate from main-room crystal progress.
Plan the campaign and cleanup passes separately
For a newcomer, the safest order is to collect the five crystals in each available main room, defeat its boss when the portal appears, then continue to the next room. After defeating N. Gin, clear Warp Room 5 and use the central route to face Neo Cortex. This completes the main campaign path without requiring every gem or relic.
After the first ending, revisit completed stages for gems, colored-gem routes, secret exits and relics. Some optional objectives are easier after receiving later abilities, and time trials are more manageable once you know the stage layout. For the full original-release completion route, continue until the Status Panel records the main crystals, the required gem total and all 30 relics at Gold or Platinum level; the final completion reward then raises the file to 105%. The exact displayed gem count can change as the two hidden stages are discovered, so use the Status Panel rather than relying on an assumed count before those stages are revealed.
- Complete 25 crystals and the four chamber bosses.
- Defeat Neo Cortex through the central route opened by Warp Room 5.
- Revisit stages for gems and relics after the campaign.
- Reach 30 Gold-or-better relics for the final completion reward.
- Verify the final percentage on the Status Panel.
Before you move on
- Warp Room 1 has five crystals and its Tiny Tiger portal has been completed.
- Warp Room 2 has five crystals and its Dingodile portal has been completed.
- Warp Room 3 has five crystals and its N. Tropy portal has been completed.
- Warp Room 4 has five crystals and its N. Gin portal has been completed.
- Warp Room 5 records Gone Tomorrow, Orange Asphalt, Flaming Passion, Mad Bombers and Bug Lite as crystal clears.
- The Status Panel records 25 main crystals and the central route to Neo Cortex is available.
- The Secret Warp Room opens after five relics, with additional portals becoming available at later relic milestones.
- For maximum original-release completion, the Status Panel records all 30 relics at Gold or Platinum level, the full discovered gem total and the final completion reward, producing 105%.
References for this chapter
- Crash Bandicoot: Warped — Original North American PlayStation manual
- Crash Bandicoot: Warped — FAQ, PlayStation, Nemesis
- Crash Bandicoot: Warped — Time Trial Guide, PlayStation
- Crash Bandicoot: Warped — Guide and Walkthrough by NickWhiz1
- Crash Bandicoot 3: Warped — level list and Warp Room structure
- Crash Bandicoot: Warped — game data and progression overview
Chamber 1 Route — Clear Five Crystals Safely
Warp Room 1 contains Toad Village, Under Pressure, Orient Express, Bone Yard, and Makin’ Waves. Your required objective is to finish each stage’s normal route and collect its crystal. Once all five crystals are registered, Tiny Tiger becomes available. Do not delay the campaign by trying to break every box on the first attempt. Clear the stages safely first, then return for box gems, relics, and the later Red Gem route in Bone Yard.
Begin with Toad Village
Enter Toad Village first. It is the simplest stage in this chamber and gives you a safe introduction to the original PlayStation version’s ordinary platforming. Follow the main medieval path toward the exit, dealing with frogs and knights only when they block your route. Knights are safest to attack after their swords are no longer covering their bodies; otherwise, jump over them and continue.
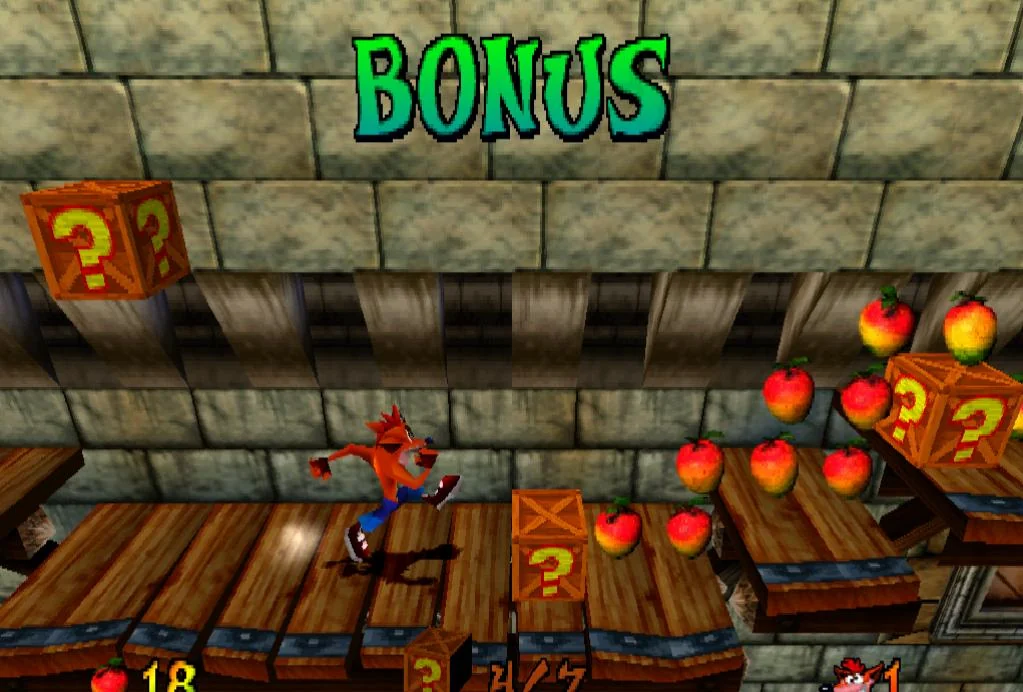
The crystal is on the ordinary route, so do not search for a secret exit during this first clear. The bonus platform after the first bridge is optional. Its crates matter for the clear gem, but not for the crystal or chamber progression. If you miss boxes or lose a life, finish the level instead of restarting immediately. A completed crystal run gives you useful knowledge for the later gem attempt.
- Follow the normal route to the crystal.
- Treat the bonus platform and complete box destruction as optional on this run.
- Leave the stage after the crystal is awarded, even if several crates remain.
Take Under Pressure at a controlled pace
Play Under Pressure next if you want to learn the chamber’s underwater hazards early. Crash uses an underwater scooter with torpedoes. Move deliberately around sharks, puffer fish, dynamite hazards, and electrical obstacles. Do not rush through a narrow passage simply because the route ahead is visible; stop, observe the hazard cycle, and then advance through the opening.
The torpedoes are important for destroying red coral and exposing boxes. That matters for the box gem, but it is not required for the crystal. During the first clear, preserve the vehicle and prioritize reaching the exit. If you die, resume from the latest checkpoint crate when one has been activated. If the relevant section has not been checkpointed, expect to replay more of the stage and use that attempt to memorize the hazard sequence.
- Keep the underwater scooter whenever the route requires its torpedoes.
- Avoid red coral and isolated crates unless you can reach them without jeopardizing the run.
- Use checkpoint crates when available, then retry from the resulting restart point after a death.
Clear Orient Express with Coco and Pura
Orient Express switches control to Coco riding Pura the tiger. Use measured movement rather than holding the direction continuously. Pura’s speed can carry Coco into enemies or obstacles, while jumps must be lined up before ramps and elevated crate groups. Watch for bricklayers, swooping dragons, huts, and gaps in the course.
The crystal is along the ordinary route. Some ramps lead toward boxes on raised surfaces, while other choices can place you below or above a group of crates. For a first clear, choose the route that keeps Coco moving safely toward the finish. The stage’s 51 boxes are relevant to the clear gem, not to the crystal requirement. If a box is missed, continue unless you are specifically making a gem attempt.
- Use short steering adjustments and jump before reaching hazards.
- Stay on the route that continues toward the finish rather than detouring for every crate.
- Complete the course and confirm that the crystal has been added in the hub.
Use Bone Yard to learn chase sections
Enter Bone Yard after the first three stages. This is the chamber’s main standard platforming challenge, with prehistoric enemies, dangerous ground, and dinosaur chase sequences. During ordinary platforming, keep your jumps conservative and avoid attacking near pits or Nitro crates. In the original PlayStation release, touching a Nitro crate detonates it immediately, so do not spin into a Nitro group while trying to clear a nearby enemy.
When the dinosaur begins chasing Crash, commit to forward movement and concentrate on the next safe landing rather than stopping to collect boxes. The dinosaur can destroy boxes during chase sections, which helps a later box-gem attempt, but the first objective remains the crystal. Bone Yard does have a colored-gem route, so the earlier draft’s implication that Chamber 1 contains no such route would be misleading: the Red Gem path appears after the first chase, but it requires the Red Gem from Deep Trouble in a later warp room. Ignore that route for now and return after obtaining the Red Gem.
- Keep away from Nitro crates.
- During dinosaur chases, prioritize survival and forward movement.
- Take the normal route for the crystal; postpone the Red Gem path until Deep Trouble has supplied the Red Gem.
Finish the chamber with Makin’ Waves
Makin’ Waves is a jet-ski stage and is best saved until you have already adjusted to the chamber’s other control styles. Steer with small corrections, approach ramps centrally, and leave space to recover after landing. Watch for bombs, sharks, anchors, cannon fire, and boats. Avoid hugging the edge of the course when a hazard is approaching, because an edge correction can leave no room to recover.
The crystal follows the normal course. The stage’s boxes are placed along the main route, but full box collection is a separate objective. If you miss a crate, keep going and finish the stage. Revisit it later for the clear gem or time trial after you are comfortable with the jet-ski handling.
- Practise steering and jump alignment instead of attempting a fast run.
- Stay on the main route unless you are deliberately pursuing a later optional objective.
- Reach the finish and collect the fifth Chamber 1 crystal.
Verify progression and prepare for Tiny Tiger
Return to the Time-Twisting Machine after completing the five levels. Confirm that Toad Village, Under Pressure, Orient Express, Bone Yard, and Makin’ Waves each display a collected crystal. The boss entrance should then be available in the chamber. Gems and relics are not required to unlock Tiny Tiger; do not spend lives on optional completion work before the boss unless you specifically want the practice.
If your life count is low, replay a familiar early stage and collect reachable Wumpa fruit and life crates along a route you can complete reliably. Toad Village is the safest practice choice. After a death in any level, use the latest checkpoint when available and treat the next attempt as route practice. If a death occurs before a checkpoint, replay the opening carefully rather than taking unnecessary risks to recover lost boxes.
- All five Chamber 1 levels show their crystals in the hub.
- The Tiny Tiger entrance is available.
- You have enough lives to learn the boss fight without needing to abandon the chamber for farming.
Before you move on
- Toad Village, Under Pressure, Orient Express, Bone Yard, and Makin’ Waves each show a collected crystal in the Time-Twisting Machine.
- The Tiny Tiger boss entrance is unlocked after the five Chamber 1 crystals are registered.
- You have postponed Bone Yard’s Red Gem route until obtaining the Red Gem in Deep Trouble.
- You can reliably reach the end of each Chamber 1 level without needing to collect every crate or relic.
Chamber 1 Boss and Recovery Strategy
Collect the five Chamber 1 crystals, enter the Tiny Tiger boss portal, and defeat him by surviving his jumping attacks, striking when his trident is stuck, and then managing the lion waves. Tiny requires three successful hits. Defeating him awards Super Body Slam and opens the next chamber.
1. Verify that Tiny Tiger is available
Return to the first chamber of the Time-Twisting Machine after collecting the crystals from Toad Village, Under Pressure, Orient Express, Bone Yard, and Makin’ Waves. These are the five ordinary levels in Chamber 1. The boss entrance becomes available only after all five Chamber 1 crystals have been collected; partial progress is not enough.
The boss entrance is the separate portal or level point in the chamber, not another ordinary crystal stage. Enter it when you are ready for the fight. Crash is transported to a coliseum arena where Tiny Tiger attacks with a trident and later releases lions into the arena. You do not need to collect the five crystals again if you lose the fight, so a defeat does not erase the chamber requirement.
- All five Chamber 1 crystals are recorded in the inventory or Status Panel.
- The Tiny Tiger boss entrance is visible in the first chamber.
- You have at least one spare life before entering the arena.
2. Prepare for the attempt
Tiny’s fight is primarily an evasion test. The arena gives you room to run, so begin by keeping Crash moving in a broad circle rather than waiting in the middle. Do not rush toward Tiny at the start of a sequence. His jumping attacks are dangerous because his landing position, not just his visible body, can damage Crash.
If you have an Aku Aku mask, preserve it for the fight when practical. One mask protects Crash from one ordinary damaging hit, while additional masks improve the protection level. It is still possible to be defeated by a bad position or a hazardous sequence, so treat Aku Aku as a buffer rather than permission to stand still.
The most useful preparation is an extra life and a clear plan: evade Tiny while he is jumping, wait for the trident opening, land one safe attack, and immediately return to movement. Tiny has three hit points, so there is no benefit in forcing multiple attacks during one opening.
- Begin with room to run in both directions.
- Keep moving instead of waiting beneath Tiny.
- Carry Aku Aku protection when it is safely available.
- Plan to land one attack per vulnerability window.
3. Handle Tiny’s first attack cycle
Tiny jumps around the arena and tries to land on or stab Crash. Run away from the landing area and pay attention to the shadow or the point where Tiny is about to come down. The shadow is a more useful warning than trying to judge his distance from the edge of the screen.
After the attack sequence, Tiny’s trident becomes stuck in the floor. This is the opening to attack. Move in only after the weapon is visibly planted, use one spin attack, and retreat as soon as the hit registers. Do not remain beside Tiny looking for another hit. If you approach while he is still airborne or before the trident is stuck, Crash can be struck before the attack connects.
After the first successful hit, Tiny withdraws and the arena introduces a lion hazard. Do not chase him during this transition. The goal is to survive the hazard phase and wait for the next opportunity to repeat the same process.
- Use Tiny’s shadow and landing area to avoid his jumps.
- Approach only after the trident is stuck in the floor.
- Spin Tiny once, then retreat.
- Do not attempt an attack during the jump or transition.
4. Survive the lion waves
Lions enter through the arena openings and move toward Crash in direct charges. Keep moving so that you are not caught between several approaches. Jump over a lion or use a spin when the timing is comfortable, but do not stop in the middle of the arena to fight every animal. Avoiding the wave is usually safer than trying to clear the entire group.
If a lion approaches from one side, move toward open space or jump over it rather than backing into another incoming lane. The crowd of lions eventually clears, after which Tiny returns to the fight. Use the end of the wave as a reset point: move back toward the outside of the arena, check Crash’s position, and prepare for Tiny’s next jumping sequence.
The later exchanges place more pressure on your movement, but the objective does not change. Evade Tiny, wait for the stuck-trident opening, land one spin, and then survive the following lion phase. Repeat until the third hit is confirmed. A slow victory is safer than trying to shorten the fight by attacking early.
- Keep moving while the lions are active.
- Jump or spin through an immediate lion threat when necessary.
- Avoid standing in the centre of multiple incoming lanes.
- Wait for the lion phase to end before preparing for Tiny’s next attack cycle.
5. Recover after a defeat
If Tiny defeats Crash, return to the Time-Twisting Machine and enter the boss portal again when ready. The five Chamber 1 crystals remain collected, so there is no need to replay Toad Village, Under Pressure, Orient Express, Bone Yard, and Makin’ Waves merely to reopen the fight.
When your life count is low, leave the arena and replay an early Chamber 1 level that you can clear reliably. Choose a straightforward platforming stage rather than repeatedly risking a vehicle section or an unfamiliar bonus route. Collect safe lives and Wumpa fruit, finish the level, and return to the hub before attempting Tiny again.
Use each retry to diagnose one failure point. If Crash is being hit during Tiny’s leap, begin running earlier and follow the landing shadow. If the problem is the trident opening, wait longer before approaching. If lions are causing the deaths, stop trying to attack the group and concentrate on crossing into open space. Tiny gives repeated opportunities, so consistent survival matters more than speed.
- Leave the boss arena instead of spending the last life on another blind attempt.
- Replay a familiar early crystal level to rebuild lives.
- Return to the hub before re-entering the boss.
- Identify whether the failure occurred during a jump, trident opening, or lion wave.
6. Confirm the reward and continue
After three successful attacks, Tiny Tiger is defeated. The game awards Super Body Slam, the first special power obtained from a Chamber boss in Warped. On the original USA PlayStation manual, the move is performed by jumping and pressing the body-slam button combination shown for the power. It creates a stronger body slam with a wider effect and can break certain otherwise inaccessible crates.
Super Body Slam is useful for later routes and optional gem or crate access, but do not treat it as a requirement to replay the entire first chamber. Allow the reward sequence to finish, then use the return portal to go back to the Time-Twisting Machine. The next chamber is now open for the main campaign.
Before leaving, verify that Tiny’s fight has ended rather than assuming the reward appeared after a partial hit. The practical completion point for this chapter is Crash’s return to the hub with Super Body Slam awarded and the next chamber accessible.
- Tiny Tiger has been hit three times.
- The Super Body Slam power has been awarded.
- Crash has returned to the Time-Twisting Machine.
- The next chamber is available.
Before you move on
- The five Chamber 1 crystal levels are complete.
- The Tiny Tiger boss portal is active and has been cleared.
- Tiny Tiger has been struck three times.
- Super Body Slam is shown as awarded after the fight.
- Crash has returned to the hub and the next chamber can be entered.
References for this chapter
Chamber 2 Route — New Hazards and Vehicle Sections
After defeating Tiny, enter Warp Room 2 and clear Gee Wiz, Hang’em High, Hog Ride, Tomb Time and Midnight Run. The ordinary goal in each level is to reach its crystal. Vehicle stages should be learned at a controlled pace before attempting relics or complete-box gem runs. When all five Warp Room 2 crystals are registered, the sixth level button opens Dingodile’s boss fight.
Enter Warp Room 2 and establish the first-clear plan
After defeating Tiny in the first warp room, return to the Time Twister and enter the second room, commonly presented as the Taj Ma Hall area. Its five ordinary levels are Gee Wiz, Hang’em High, Hog Ride, Tomb Time and Midnight Run. You may attempt them in different orders, but Gee Wiz followed by Hang’em High gives a newcomer two conventional platforming stages before the motorcycle and Pura sections.
On this pass, prioritize the crystal rather than every box. Break crates when doing so is safe, but do not turn the first completion attempt into a gem or relic run. Learn the route, note where a vehicle section changes the controls, and use later replays for optional objectives. The game’s relic guide lists the five levels as levels 6 through 10 and distinguishes their separate relic attempts from normal crystal clears.
- Enter the second warp room after defeating Tiny.
- Plan to collect one crystal from each of the five ordinary levels.
- Treat the first run as route practice, not as a relic attempt.
Clear Gee Wiz with deliberate platforming
Gee Wiz is a standard platforming level with medieval scenery and wizard hazards. Let an enemy attack or environmental cycle finish before crossing a narrow platform. When a jump has a limited landing area, line Crash up first and avoid spinning unless the target is safely within reach.
Break ordinary crates whenever the route is secure, but do not leap into a group of crates without checking whether one is Nitro. Nitro crates explode as soon as Crash makes physical contact with them. TNT crates are different: activating one begins a delayed fuse, giving Crash time to leave the blast area. A green Nitro switch can detonate Nitro crates remotely, but it does not make touching an individual Nitro crate safe.
Use checkpoints as practice markers when they are available. If you die, repeat only the section that caused the failure instead of rushing the entire stage. The crystal route is the only required objective for opening the boss button.
- Wait for wizard attacks before crossing exposed platforms.
- Identify TNT and Nitro before touching a crate.
- Use the crystal route as the completion target.
Use Hang’em High to learn suspended platforms
Hang’em High emphasizes suspended platforms, bouncy carpets and gaps where a missed landing can drop Crash into a death hazard. Keep Crash near the center of moving or rotating platforms, and wait for a favorable cycle rather than jumping from an unstable edge. On the first clear, safe landings matter more than breaking every box.
The ordinary level contains the clear-gem objective of breaking all boxes, but that is separate from the crystal. Do not assume that every colored-gem opportunity belongs to this normal entrance. In particular, the yellow gem is obtained through the separate Hang’em High entry in the Secret Warp Room, which requires the appropriate relic total; it is not reached by simply replaying the ordinary level 7 button. Leave that route for the optional completion pass.
- Center Crash before jumping from rotating or moving platforms.
- Finish the normal crystal route before attempting the clear gem.
- Do not confuse the ordinary level 7 entrance with the later yellow-gem route.
Learn Hog Ride’s motorcycle controls before racing
Hog Ride uses the motorcycle rather than normal Crash movement. On the original PlayStation controls, X accelerates and Square brakes. Use small steering corrections and release X before a sharp turn or crowded traffic section. The green arrow pads provide additional speed, so approach them aligned with the road instead of trying to correct direction while crossing one.
For the crystal run, do not hold the accelerator through every corner. Release it before a tight turn, brake when traffic blocks the lane, and accelerate again once the road opens. The safest first run is about learning where vehicles and hazards appear. Once the route is familiar, replay the stage for its box-based gem and then for relic practice. Relic attempts require a different rhythm: a direct line, controlled cornering and deliberate use of speed pads rather than improvised steering.
- Use X to accelerate and Square to brake.
- Release acceleration before sharp turns.
- Learn the traffic pattern before attempting a fast relic run.
Take Tomb Time in separate platforming sections
Tomb Time returns to ordinary platforming but combines narrow ledges, traps, snakes and dangerous crate arrangements. Look above and below Crash before committing to a jump, especially where the camera hides the next landing. Waiting for a trap cycle is safer than trying to force a jump through an active hazard.
Treat Nitro as a forbidden surface. TNT can be activated deliberately, but leave the area before its fuse expires. If a green Nitro switch is present, use it from a safe position rather than trying to spin through the Nitro field. Tomb Time also has optional gem routes associated with colored-gem access and advanced movement. Finish the crystal route first; return later when you are intentionally pursuing those objectives.
- Scan the next landing before jumping across temple hazards.
- Never treat Nitro like a delayed TNT crate.
- Separate the crystal clear from colored-gem attempts.
Finish Midnight Run by controlling Pura’s speed
Midnight Run uses Pura, who moves forward automatically. X jumps, while Circle or R1 increases speed. For the first crystal attempt, use the faster pace only when the path is open. A slower approach gives more time to read barriers, enemies and lane changes. Begin jumps early enough to clear an obstacle rather than steering at the last instant.
The complete-box gem requires a much more practiced route and may require using the speed burst to reach boxes. Do not combine that goal with your first crystal clear. First memorize obstacle placement and the safest lane through each section. After you can finish consistently, replay the stage for the box objective, then begin relic practice with speed held more aggressively.
- Use X to jump during Pura’s section.
- Use Circle or R1 for the speed increase.
- Learn obstacle placement before attempting the gem or relic.
Confirm all five crystals and open the boss
Return to Warp Room 2 after collecting the crystals from Gee Wiz, Hang’em High, Hog Ride, Tomb Time and Midnight Run. Check the Status Panel rather than relying only on having reached a level’s exit. Each of the five level entries must show its crystal as collected.
Once all five crystals are registered, the sixth level button appears in the warp room. This is the boss entrance for Dingodile; it is not another ordinary Chamber 2 stage. Gems and relics are optional for this story-progress gate, so you can proceed immediately or remain in the room to practice vehicle stages first.
If the boss button does not appear, replay the level whose crystal is missing and complete its crystal objective. Do not begin an optional relic session while a required crystal is still unconfirmed.
- Gee Wiz shows a collected crystal.
- Hang’em High shows a collected crystal.
- Hog Ride shows a collected crystal.
- Tomb Time shows a collected crystal.
- Midnight Run shows a collected crystal.
- The sixth boss button for Dingodile is visible.
Before you move on
- All five Warp Room 2 crystal entries are marked collected in the Status Panel.
- The sixth level button leading to Dingodile’s boss fight is visible.
- You can complete Hog Ride while using X for acceleration and Square for braking.
- You can complete Midnight Run while using X to jump and Circle or R1 for Pura’s speed increase.
- Optional gem and relic attempts have been left for dedicated replay sessions.
- The separate Hang’em High yellow-gem route has been reserved for the relic-gated Secret Warp Room rather than treated as part of the ordinary crystal route.
References for this chapter
- Crash Bandicoot: Warped — Original North American PlayStation manual
- Crash Bandicoot: Warped — Guide and Walkthrough, PlayStation
- Crash Bandicoot: Warped — Gem and Time Trial Guide, PlayStation, josher1212
- Crash Bandicoot: Warped — NTSC-U PSX DataCenter entry
- Crash Bandicoot: Warped — Publisher manual download
Chamber 2 Boss — Beating Dingodile
Dingodile becomes available after you collect the five Warp Room 2 crystals from Gee Wiz, Hang'em High, Hog Ride, Tomb Time and Midnight Run. The original North American PlayStation fight takes place in a circular arena surrounded by a crystal barrier. Dingodile attacks with falling fireballs and a flame ray that gradually opens the barrier. Enter only after a safe gap appears, spin him once, and immediately retreat to the arena rim before his flamethrower explodes. Repeat the pattern three times. Victory awards Crash the Double Jump ability and opens Warp Room 3.
Collect the correct five crystals
Before entering the boss arena, complete the crystal objective in all five Warp Room 2 stages: Gee Wiz, Hang'em High, Hog Ride, Tomb Time and Midnight Run. Each stage contributes one required crystal. Gems, relics, bonus-stage box totals and secret exits are separate objectives and do not substitute for a missing crystal.
Dino Might! is not part of this chamber's requirement. It is the first regular stage of Warp Room 3, which becomes available after Dingodile is defeated. Do not use Dino Might! as a diagnostic for a locked Dingodile entrance; instead, check the five Warp Room 2 level displays and replay whichever required stage has not registered its crystal.
Return to the Time Twisting Machine after collecting the fifth crystal. The Dingodile boss entrance should now be active in the central area of Warp Room 2. Enter it when you are ready. Losing the fight does not remove any crystals, so a failed attempt does not force you to replay the five stages.
- Gee Wiz crystal collected.
- Hang'em High crystal collected.
- Hog Ride crystal collected.
- Tomb Time crystal collected.
- Midnight Run crystal collected.
- Dingodile's entrance is active in Warp Room 2.
Learn the arena and first attack cycle
Dingodile fights inside a circular arena, so you can run around him rather than being confined to a straight platforming lane. At the beginning of the encounter, crystals surround him and block a direct approach. A short introductory sequence drops crystals into place; these initial falling crystals are not the damaging attack you need to avoid.
For the first active attack, Dingodile fires fireballs upward while rotating around the arena. Watch the shadows on the floor, because they show where the fireballs will land. Keep moving around the outer part of the arena and steer into the gaps between the shadows. Do not try to cross the barrier or attack while the fireballs are still landing.
After the fireball pattern ends, Dingodile uses his flame ray against the crystal barrier. The ray melts sections of the crystals and eventually creates a passage. Wait until the opening is wide enough for a clean approach. Moving too early can leave Crash trapped between the barrier and Dingodile.
- Use the floor shadows to read fireball landing points.
- Keep moving around the outside of the circular arena.
- Wait for the flame ray to melt a usable opening.
- Do not attack during the fireball portion.
Take one hit and escape the explosion
When the barrier has opened, move through the gap and hit Dingodile with a spin attack. One successful attack removes one point from his three-point health total. A belly flop can also damage him, but the spin is the straightforward choice for a first clear because it lets you continue moving immediately.
Your attack does not end the danger. After Dingodile is struck, his flamethrower explodes after a short delay, giving you only a few seconds to reach the outside rim. Turn away from him as soon as the hit connects and run along the arena's edge. The explosion can damage Crash even though the boss has already lost a health point.
Use this complete pattern rather than attempting multiple attacks: dodge the fireballs, wait for the flame ray to open the barrier, cross in, spin once, and retreat. If the opening is narrow or your approach is poorly aligned, abandon that attempt and wait for the next cycle instead of forcing the hit.
- One spin counts as one successful hit.
- Run to the rim immediately after connecting.
- Stay clear until the flamethrower explosion has finished.
- Do not attempt a second attack during the same opening.
Handle the second cycle
After the first hit, a new crystal barrier forms. Dingodile repeats the fireball-and-flame sequence, but the fireball portion is longer: he performs the rotating fireball attack twice before using the flame ray. Continue circling the arena and use the shadows to select a safe gap for each set of impacts.
Once both fireball sequences are over, wait for the flame ray to melt another passage. Enter only when the route is open, spin Dingodile once, and immediately retreat to the rim again. Treat the second hit exactly like the first; the main change is that you must survive the additional fireball sequence before the opening appears.
If you are hit during this cycle, do not try to recover by rushing across the barrier. The barrier and the boss can leave very little room for correction. Survive the remaining attack if possible, then use the next complete opening for your strike.
- Expect two fireball sequences before the second opening.
- Keep the same circular movement pattern.
- Take only one hit during the opening.
- Escape before the flamethrower detonates.
Survive the final cycle
The third cycle is the most demanding because the fireballs fall in pairs. The gaps between their shadows are narrower, so make small movement adjustments instead of sprinting across the arena. Watch the floor and move toward a clear space before the paired impacts reach Crash.
After the paired fireballs finish, Dingodile uses the flame ray again. Wait for the barrier to open, cross to him and land the third hit. Immediately run back toward the outside edge. The fight is not complete merely because the third hit connected; being caught in the final explosion can still make you restart the encounter.
Once the explosion has ended and the victory sequence begins, the battle is over. You do not need to deliver another attack or remain near Dingodile.
- Read the paired fireball shadows carefully.
- Make controlled corrections rather than crossing the entire arena.
- Land the third hit only after the final barrier opening.
- Survive the final explosion and wait for the victory sequence.
Recover after a failed attempt
If Dingodile defeats you, return to Warp Room 2 and enter the boss arena again. The five crystals remain collected, so the boss stays unlocked. Review the point of failure before retrying: fireball impact, a premature crossing, a missed opening, or failure to retreat after a hit.
If you need additional lives, replay a short early level that you can clear reliably. Collect visible fruit and life crates and finish the level normally. There is no need to use a vehicle stage or an unverified exploit. The goal is to enter the boss fight with enough attempts to learn the three cycles without changing the original PlayStation mechanics.
An Aku Aku mask is useful protection, but it does not replace the retreat after a successful hit. The flamethrower explosion should still be treated as a mandatory hazard even when you have a mask.
- Identify the specific cause of the death.
- Re-enter the unlocked boss without replaying the chamber.
- Farm lives only in a familiar, reliable level if necessary.
- Continue retreating after successful hits, even with Aku Aku protection.
Confirm the reward and continue to Warp Room 3
Dingodile is defeated after three successful hits. Complete the victory sequence, then return to the Time Twisting Machine. Crash receives Double Jump, allowing a second jump in midair. This ability is required for later platforming routes and helps with subsequent gems and relics, although it is not needed to enter the Dingodile fight.
Warp Room 3 opens after the victory. Its first stage is Dino Might!, which is why that level must not appear in the Warp Room 2 prerequisite list. Continue with the main campaign if your goal is the ordinary ending; return later for Chamber 2 gems, relics and other optional completion objectives.
- Dingodile has taken three successful hits.
- The final explosion and victory sequence have completed.
- Double Jump has been awarded.
- Warp Room 3 is accessible.
- Dino Might! is recorded as a Warp Room 3 stage, not a Dingodile prerequisite.
Before you move on
- The five registered Warp Room 2 crystals are from Gee Wiz, Hang'em High, Hog Ride, Tomb Time and Midnight Run.
- Dingodile has been hit three times.
- Crash has escaped the explosion after the third hit.
- The victory sequence has completed.
- Double Jump is available.
- Warp Room 3, beginning with Dino Might!, is accessible.
Chamber 3 Route — Intermediate Platforming and Hidden Exits
Chamber 3 contains Dino Might!, Deep Trouble, High Time, Road Crash, and Double Header. Clear the ordinary route in each stage to collect five crystals and open the N. Tropy boss portal. Treat colored gems, secret exits, and complete-crate runs as separate objectives. Several optional routes require returning after you have gained the correct colored gem or after you have learned the stage well enough to preserve a clean attempt.
1. Clear Dino Might! on the normal route
Enter Dino Might! for its crystal first. The stage mixes prehistoric platforming with sections in which a baby dinosaur carries or follows Crash. On the initial attempt, prioritize the normal route and survival. Let moving enemies and environmental hazards settle before jumping, and use the dinosaur section to learn the obstacle pattern rather than trying to force a fast run. If you lose a life, use the next checkpoint to repeat only the current section and avoid changing routes without a reason.
The Yellow Gem path is optional and cannot be completed until you already possess the Yellow Gem. In the original PlayStation release, that gem is obtained through the secret Warp Room route to Hang ’Em High after earning ten relics. Once you have the Yellow Gem, return to Dino Might! and enter the matching yellow gem path. The route eventually gives access to the second pterodactyl, which carries Crash to the secret level Eggipus Rex. Do not mistake this branch for the required crystal route; if your immediate goal is Chamber 3 story progress, stay on the ordinary path and take the crystal.
- Complete the ordinary Dino Might! route and collect its crystal.
- Do not search for the yellow route until the Yellow Gem has been obtained.
- For optional cleanup, record whether the Yellow Gem path and Eggipus Rex have been completed.
2. Finish Deep Trouble, then return for the Red Gem
Deep Trouble is an underwater stage. Move carefully around enemies and hazards, and use the underwater vehicle’s attack when it gives you a safer way to clear obstacles. The first run should be a crystal run: learn the layout, use checkpoints to divide the stage into manageable sections, and continue to the normal exit rather than stopping to solve every optional box route.
The Red Gem requires a return visit. Near the later part of the stage, activate the green exclamation crate. This changes the previously invisible box section so that you can backtrack through it and follow the alternate route. The Red Gem is collected at the end of that route; merely activating the exclamation crate and finishing through the normal exit is not enough. When attempting the route, avoid treating Nitro crates as ordinary boxes. In the original release, touching Nitro is fatal, so use the exclamation crate from a safe position and keep clear while the surrounding hazards resolve.
- First visit: reach the normal exit and collect the crystal.
- Return visit: activate the green ! crate, backtrack to the revealed box route, and complete the Red Gem path.
- Never spin or jump into Nitro crates.
3. Use High Time for a controlled Death Route attempt
High Time is a platforming stage with ledges, enemy placements, and jumps that punish hurried movement. For the first clear, study the distance and height of each jump, line up Crash before committing, and use Aku Aku protection to survive a contact hazard when a safe landing is more important than preserving the mask. Reach the ordinary exit and collect the crystal before treating the Death Route as a separate challenge.
The Purple Gem is obtained through High Time’s Death Route. The Death Route entrance is available only if Crash reaches it without dying during that attempt. If you die before reaching the entrance, restart the stage and make another clean attempt; continuing from the checkpoint does not restore eligibility for that run. Once the Death Route platform is reached, complete the branch carefully and collect the Purple Gem before returning to the main route. If the route is still unfamiliar, finish the crystal run first and come back with a planned, no-death attempt.
- Complete one ordinary crystal run while learning the level.
- Reach the Death Route entrance without dying on the qualifying attempt.
- Finish the Death Route and collect the Purple Gem only when pursuing optional completion.
4. Treat Road Crash as a separate motorcycle objective
Road Crash changes the controls and pacing from platforming to motorcycle racing. On the first visit, concentrate on reaching the finish safely. Steer early around traffic, avoid sharp last-second corrections, and approach ramps with enough alignment to land on the road. Do not sacrifice the crystal by attempting a risky crate line or an unfamiliar shortcut.
Road Crash contains a secret exit to Hot Coco. During a later exploratory run, continue through the course until you see the roadside sign bearing an alien face, then collide with that sign to trigger the secret transition. This is not part of the normal finish, so ignore it when the only objective is the Chamber 3 crystal. Hot Coco is a separate secret level and should be tracked independently for completion and relic progress.
- Complete the motorcycle course normally for the required crystal.
- Use a later visit to locate the alien-face sign and enter Hot Coco.
- Do not count the secret exit as the ordinary Road Crash finish.
5. Complete Double Header without forcing optional crate runs
Double Header returns to standard platforming and places bulky enemies near jumps and narrow approaches. Watch their movement before attacking, and avoid spinning blindly when a short reposition or a jump is safer. Use the checkpoint crates to learn enemy spacing and platform placement rather than repeatedly attempting the whole stage from the start.
The required objective is the crystal at the normal exit. Double Header does not provide one of Chamber 3’s colored-gem routes. Its optional gem objective is the clear gem associated with completing the required crate total, so attempt that only after you know the route and can safely deal with enemies and Nitro. Nitro crates are instant-kill hazards in this original edition; an exclamation crate may detonate Nitro when used, but stand clear and do not treat the crates as objects that can be pushed or spun away.
- Reach the ordinary exit and collect the fifth Chamber 3 crystal.
- Attempt the clear gem separately after learning the complete crate route.
- Treat every Nitro crate as lethal until it has been safely detonated.
6. Confirm the chamber and record unfinished branches
Return to the Time Twisting Machine after clearing all five stages. The Chamber 3 portal for N. Tropy becomes available when the crystals from Dino Might!, Deep Trouble, High Time, Road Crash, and Double Header are registered. Colored gems and secret levels are not required to open this boss portal, so do not delay story progression because one optional route remains unfinished.
For a later completion pass, check your notes against four distinct objectives: the Red Gem route in Deep Trouble, the Purple Gem Death Route in High Time, the Yellow Gem route in Dino Might! after obtaining the Yellow Gem, and the alien-sign entrance to Hot Coco in Road Crash. Also check Eggipus Rex through the later Dino Might! return. A hidden exit can move you away from the normal level path, so verify the reward before quitting or restarting.
- The hub shows five Chamber 3 crystals, one from each required stage.
- The N. Tropy boss portal is open.
- Optional notes identify Deep Trouble’s Red Gem, High Time’s Purple Gem, Dino Might!’s Yellow Gem path and Eggipus Rex entrance, and Road Crash’s Hot Coco entrance.
Before you move on
- Dino Might!, Deep Trouble, High Time, Road Crash, and Double Header each show a collected crystal in the Chamber 3 hub.
- Returning to the hub opens the N. Tropy boss portal after all five crystals are registered.
- For optional cleanup, the Red Gem is collected through Deep Trouble’s activated backtrack route, the Purple Gem through High Time’s Death Route, the Yellow Gem path is completed in Dino Might! after obtaining the Yellow Gem, Hot Coco is entered from Road Crash’s alien sign, and Eggipus Rex is reached from Dino Might!’s later yellow-route branch.
References for this chapter
Chamber 3 Boss — Approach and Tips
Collect the five Warp Room 3 crystals to unlock N. Tropy. The fight requires three successful crossings over temporary platforms, with each cycle adding missiles and magnetic blasts. Defeat him to earn the Continuous Spin, called Death Tornado Spin in the original manual, and unlock Warp Room 4.
Collect the five Chamber 3 crystals
Warp Room 3 contains Dino Might!, Deep Trouble, High Time, Road Crash and Double Header. Complete these five stages in any order and claim the crystal at the end of each one. Gems, relics and complete box counts are optional for this unlock; the boss requires the five level crystals only.
The crystal stages use different styles of play. Dino Might! includes a dinosaur chase, Deep Trouble uses underwater movement, High Time is a medieval platforming stage, Road Crash is a motorcycle race and Double Header is a standard platforming level with large enemies. On a first pass, prioritize reaching each crystal safely instead of trying to clear every box or start a time trial.
After the fifth crystal is collected, return to the Warp Room 3 hub. N. Tropy’s boss entrance is now available. If you lose, return to the hub and re-enter the boss stage; the five crystals remain collected.
- Dino Might! crystal collected.
- Deep Trouble crystal collected.
- High Time crystal collected.
- Road Crash crystal collected.
- Double Header crystal collected.
- N. Tropy’s boss entrance is visible in Warp Room 3.
Prepare for the arena
The fight takes place across small platforms above a fatal drop. N. Tropy attacks from the opposite side, then creates stepping platforms that allow Crash to reach him. The safe rhythm is evade the current attack, wait for the stepping platforms, cross with controlled jumps, spin N. Tropy once and immediately stabilize on his platform or return to a safe position.
Aku Aku can absorb a damaging hit, but it cannot protect Crash from falling. Do not treat a mask as permission to rush across a missing or disappearing platform. Keep Crash near the middle of each landing and make small directional corrections rather than holding toward N. Tropy throughout the crossing.
If repeated failures leave you short on lives, leave the boss stage and replay a familiar early level for extra lives. A reliable clear is more useful than an unfamiliar farming route. You can also practice the Double Jump before returning, since it is especially useful during the later missile patterns.
- Several spare lives are available.
- You understand that a fall cannot be blocked by Aku Aku.
- Double Jump is available from the earlier Dingodile victory.
- You are prepared to wait for each platform route instead of forcing a jump.
First hit: one missile and three blasts
At the beginning, N. Tropy creates a platform in front of Crash and fires one homing missile. Stay mobile on the starting platform and jump over the missile when it reaches you. Do not jump repeatedly before the missile is close, because unnecessary movement can leave Crash near an edge.
N. Tropy then fires three magnetic blasts. Watch the height and direction of each blast and jump or reposition only as needed. Once all three blasts have finished, wait for the stepping platforms to appear. Cross one at a time, landing near the center of each platform.
When you reach N. Tropy’s platform, spin him once while he is exposed. Do not remain beside him after the hit. Move back to a stable position and prepare for the next cycle.
- The homing missile is avoided.
- All three magnetic blasts are cleared.
- The stepping platforms appear before the crossing begins.
- The first spin attack connects.
Second hit: two missiles and four blasts
After the first hit, N. Tropy moves to the opposite side and creates a smaller platform route. He fires two missiles in this cycle. Jump the first missile, then use Double Jump to clear or correct your position for the second. Keep enough room on the platform to land safely; jumping too early can carry Crash off an edge.
N. Tropy follows with four magnetic blasts. Treat these as a separate sequence rather than trying to advance immediately. Dodge the blasts, then wait for the next set of stepping platforms. Cross with measured jumps and avoid holding the direction toward N. Tropy for the entire route.
Spin N. Tropy once when you reach his platform. If the platform route disappears before you arrive, do not attempt a blind jump. Survive the reset and try the sequence again with a more central starting position.
- Both missiles are avoided.
- Double Jump is used for the second missile or a necessary correction.
- All four magnetic blasts are cleared.
- The second spin attack connects.
Final hit: three missiles and five blasts
For the final cycle, N. Tropy creates an even smaller platform and fires three missiles. The documented sequence is to jump the first missile, use Double Jump for the second and duck the third. Ducking can be performed with the crouch button; remain aware of the platform edge while holding the crouch position.
He then fires five magnetic blasts. Clear the entire blast sequence before attempting the crossing. The platforms are narrow, so line up each jump individually and avoid attacking or changing direction during a landing.
When the stepping platforms appear, cross carefully and reach N. Tropy’s platform. Spin him once during the opening. This is the third successful hit and ends the encounter. If you miss the opening, retreat or stabilize instead of attempting another attack while Crash is still landing.
- The first missile is jumped.
- Double Jump clears or corrects around the second missile.
- The third missile is ducked.
- All five magnetic blasts are avoided.
- The final spin attack connects.
- N. Tropy is defeated.
Claim the new ability and continue
Victory awards the Continuous Spin, identified as Death Tornado Spin in the original PlayStation manual. Tap the spin button repeatedly to keep Crash spinning longer than a normal spin. The move is useful for extended attacks and for the slide-jump-spin movement used in some later routes, but it is not a replacement for Double Jump.
Return to the Time-Twisting Machine after the victory. Warp Room 4 is now accessible, and its required stages are Sphynxinator, Bye Bye Blimps, Tell No Tales, Future Frenzy and Tomb Wader. N. Gin becomes available only after those five Warp Room 4 crystals, so do not expect the N. Tropy victory to open the final Cortex route directly.
Earlier stages remain available for optional gems, box completion and relics. If a colored-gem route is still inaccessible, record the level and return during the cleanup pass with the required colored gem or later ability. The N. Tropy victory itself completes the boss requirement but does not award a colored gem.
- Continuous Spin or Death Tornado Spin is available in the move set.
- Warp Room 4 can be entered from the hub.
- You know that N. Gin requires five Warp Room 4 crystals.
- Any inaccessible gem route is marked for later cleanup.
Before you move on
- All five Warp Room 3 crystals are displayed in the status panel or hub progress display.
- N. Tropy’s entrance became available after the fifth crystal.
- N. Tropy was hit successfully three times.
- Continuous Spin or Death Tornado Spin is available after the victory.
- Warp Room 4 is accessible from the Time-Twisting Machine.
- The player has not mistakenly counted gems or relics as requirements for this boss.
Chamber 4 Route — Advanced Platforming and Gem Routing
Warp Room 4 contains Sphynxinator, Bye Bye Blimps, Tell No Tales, Future Frenzy and Tomb Wader. Clear the normal route in all five levels to collect the chamber’s five crystals. Those crystals unlock N. Gin, the fourth boss; they do not send Crash directly to Neo Cortex. The Blue Gem route in Tomb Wader and the alternate Future Frenzy entrance are optional completion objectives that should be handled on later visits.
Enter Warp Room 4 and collect the five required crystals
A practical first-clear order is Sphynxinator, Bye Bye Blimps, Tell No Tales, Future Frenzy and Tomb Wader. This order introduces the chamber’s Egyptian platforming, flying stage, jet-ski hazards and futuristic platforming in a manageable sequence. On each first visit, concentrate on reaching the crystal and learning the route. Do not repeatedly risk lives trying to break every box until you know where the checkpoints and dangerous transitions are.
The required progression objective is one crystal from each of the five levels. Gems and relics are tracked separately, so an incomplete box count does not prevent the crystal from being recorded. After all five crystals are collected, return to the Warp Room and use the newly available boss entrance to challenge N. Gin. Warp Room 5 opens only after that boss is defeated.
- Clear Sphynxinator, Bye Bye Blimps, Tell No Tales, Future Frenzy and Tomb Wader normally.
- Confirm that five Warp Room 4 crystals are recorded.
- Do not treat the Blue Gem or Future Frenzy alternate entrance as replacements for a crystal.
- Prepare to enter N. Gin’s boss arena after the fifth crystal.
Clear Sphynxinator and plan its two gem objectives
On the first Sphynxinator run, check behind Crash at the starting point before moving forward. The opening area contains four boxes that are easy to overlook. Continue through the normal route, stopping before narrow ledges, pits, enemies and slippery surfaces so each jump begins from a stable position. The crystal can be collected without completing the level’s optional box work.
The ordinary clear gem requires breaking every box in the level, including the boxes behind the starting position and the boxes in the bonus area. If you miss even one, finish the run and revisit the level rather than assuming the missing box can be reached from the goal area.
Sphynxinator’s other clear gem is reached through its Blue Gem path. The Blue Gem is obtained in Tomb Wader, so this route is unavailable on an initial visit unless Tomb Wader has already been completed under the required death-route conditions. After acquiring the Blue Gem, return to Sphynxinator and use the blue gem platform. The path contains slick oil-covered surfaces, enemies and difficult jumps; short, deliberate movements are safer than rushing.
- First visit: take the standard route and collect the crystal.
- For the box gem, inspect the area behind the start and complete the bonus section.
- Return after earning the Blue Gem to attempt Sphynxinator’s second clear gem.
Handle Bye Bye Blimps and Tell No Tales as vehicle stages
Bye Bye Blimps is Coco’s flying stage. Make small steering corrections and leave room around the craft for incoming hazards. Holding a direction for too long can push Coco into an obstacle or off the intended line. On the first attempt, prioritize survival and the crystal rather than destroying every target as quickly as possible. Learn the hazard pattern before attempting a relic.
Tell No Tales uses a jet ski. It is not an underwater swimming stage. The route combines waterway turns with hostile creatures, cannon fire, boats and airborne hazards. Approach ramps and corners with space to correct your line, and avoid riding directly against the edge of the course. If a box is positioned beside a hazard, learn the safe approach first and return for a complete-box attempt later.
Treat both vehicle stages as separate practice and time-trial problems. A safe crystal run establishes the route; a later gem or relic run can then focus on speed and box placement without also trying to discover the stage.
- Use light steering corrections in Bye Bye Blimps.
- Learn the waterway before attempting a complete-box run in Tell No Tales.
- Separate the first crystal run from relic practice.
Complete the normal Future Frenzy route before using its alternate entrance
Enter Future Frenzy through its ordinary Warp Room 4 portal and collect the level’s crystal. The route includes futuristic platforming, laser hazards, enemies and side-scrolling sections. Use checkpoints to divide the stage into manageable sections. On a first visit, reaching the crystal safely is more important than forcing a complete-box run.
The original PlayStation version also has an alternate Future Frenzy entrance in the Secret Warp Room. It requires 20 relics and is not a hidden side path inside the ordinary level-19 route. If the Secret Warp Room entrance is not yet available, leave this objective pending rather than repeatedly searching the standard stage.
The alternate entrance is used for additional completion work. It provides a separate section and allows the remaining Future Frenzy gem and box objectives to be completed. After finishing the alternate section, return through the normal level route and backtrack as needed to collect the boxes that were inaccessible or missed from the first entrance. A relic cannot be started from the alternate entrance; use the normal level entrance for the time trial.
- Collect Future Frenzy’s crystal through the normal entrance.
- Earn 20 relics before attempting its alternate Secret Warp Room entrance.
- Use the alternate entrance for the extra gem and box objectives, not for the crystal.
- Start Future Frenzy relic attempts from the normal entrance.
Use Tomb Wader to obtain the Blue Gem
Complete Tomb Wader’s ordinary route for the fifth Warp Room 4 crystal. Learn the transitions between water, oil-covered surfaces and platforming sections before attempting the colored-gem route. Slippery surfaces reduce stopping control, so line up jumps early and avoid making last-second corrections near pits.
The Blue Gem is on Tomb Wader’s death route. The skull-and-crossbones platform appears only when the attempt has satisfied the level’s no-death requirement. If Crash dies before reaching that platform, finish or abandon the run and begin another attempt; the death route will not become available during that failed attempt. Once the skull route is open, follow it carefully and complete the path to claim the Blue Gem.
After collecting the Blue Gem, leave Tomb Wader and return to Sphynxinator. Do not try to combine the Blue Gem route, every box, the crystal and a relic into one first attempt. Separate objectives make it easier to identify whether a missed reward came from a death-route failure, a missing box or an incomplete colored-gem path.
- Collect Tomb Wader’s normal-route crystal.
- Reach the skull platform without dying during that attempt.
- Complete the death route and record the Blue Gem.
- Return to Sphynxinator for its Blue Gem path.
Organize the cleanup pass and prepare for N. Gin
Keep a progress list for every Warp Room 4 level: crystal complete, normal box gem complete, colored-gem or alternate-route objective complete and relic pending. This prevents an unavailable route from being mistaken for a missed save or broken status display. The Blue Gem path in Sphynxinator remains pending until Tomb Wader is finished, while the alternate Future Frenzy objectives remain pending until 20 relics have opened the Secret Warp Room entrance.
Crash’s slide is useful for low passages and controlled approaches. The body slam breaks reinforced objects that a normal spin cannot destroy, but use it only where the landing is safe. Do not body-slam beside a pit or on a narrow platform if the recovery position is uncertain.
Once all five crystals are recorded, leave the chamber’s level portals and enter the N. Gin boss portal. N. Gin is the fourth boss, after Tiny Tiger, Dingodile and N. Tropy. Defeating him awards the Fruit Bazooka and opens Warp Room 5. The next step is the dedicated N. Gin encounter described in Chapter 9, not the final Neo Cortex fight.
- Use the Status Panel to confirm all five chamber crystals.
- Revisit Sphynxinator after obtaining the Blue Gem.
- Open Future Frenzy’s alternate entrance only after reaching 20 relics.
- Enter N. Gin after the five crystals are complete.
- After defeating N. Gin, proceed to Warp Room 5.
Before you move on
- The Status Panel records crystals from Sphynxinator, Bye Bye Blimps, Tell No Tales, Future Frenzy and Tomb Wader.
- The N. Gin boss entrance is available in Warp Room 4.
- The Blue Gem from Tomb Wader is recorded if optional gem collection is being pursued.
- Sphynxinator’s Blue Gem path has been completed if pursuing full gem completion.
- The Secret Warp Room has been opened with the required relic progress before attempting Future Frenzy’s alternate entrance.
- Future Frenzy’s alternate section has been completed and its remaining boxes have been collected if pursuing maximum completion.
- The player understands that the next required encounter is N. Gin, followed by Warp Room 5 after victory.
References for this chapter
- Crash Bandicoot: Warped — Original North American PlayStation manual
- Crash Bandicoot: Warped — Publisher manual download
- Crash Bandicoot: Warped — Guide and Walkthrough by NickWhiz1
- Crash Bandicoot: Warped — Gem and Time Trial Guide, PlayStation, josher1212
- Crash Bandicoot: Warped — Guide and Walkthrough, PlayStation
- Crash Bandicoot: Warped — FAQ and Colored Gem Locations, PlayStation, ThE_bLImP
- Crash Bandicoot: Warped — Boss Guide, PlayStation, GameFAQs
Chamber 4 Boss — N. Gin
After collecting the five Warp Room 4 crystals, enter the fourth boss portal to fight N. Gin. This original North American PlayStation encounter is controlled as Coco in a spaceship rather than as Crash on foot. The battle has two distinct phases: first, disable five vulnerable parts of N. Gin’s large mech; then destroy seven weapon targets on his larger battle craft. Defeating him awards the Fruit Bazooka and opens Warp Room 5.
Unlock N. Gin’s arena
Complete Sphynxinator, Bye Bye Blimps, Tell No Tales, Future Frenzy and Tomb Wader in Warp Room 4. You only need to finish each level and collect its crystal to open the boss entrance; gems and relics are optional for this progression step.
Return to the Time Twisting Machine after collecting the fifth crystal. Select the newly available boss entrance and begin the fight. N. Tropy was the previous boss in the normal sequence; N. Gin is the fourth boss and must be defeated before the five Warp Room 5 stages become available.
- The five Warp Room 4 crystals are recorded.
- The completed levels are Sphynxinator, Bye Bye Blimps, Tell No Tales, Future Frenzy and Tomb Wader.
- The fourth boss portal is active.
- You are using the original PlayStation controls rather than remaster-specific control advice.
Prepare for the spaceship battle
The encounter switches to Coco’s spaceship. Use the directional controls to steer, keep the ship moving in broad arcs, and use the fire control continuously when a target is vulnerable. The original manual maps the Fruit Bazooka to L2 plus Circle after it is earned, but that reward is not available during this fight.
Do not approach this as a normal Crash boss. There is no platform to cross and no opportunity to spin N. Gin directly. Your job is to aim at the mech’s weapon systems, fire during their active windows, and move away when a weapon begins its attack. Staying in motion is safer than hovering in one place while concentrating on a target.
- You can steer Coco’s ship without losing control of the arena.
- You know the fire button for your controller setup.
- You are prepared to switch targets whenever a weapon begins firing.
- You understand that N. Gin’s exposed weapon parts, not his whole body, are the targets.
Phase one: disable the modified mech
N. Gin’s first machine has five vulnerable sections: the missile launcher on each shoulder, the machine gun on each arm, and the yellow generator or orb in the center of the body. Weapon sections can be damaged when they open or become active. Keep firing at the target while it is exposed, then move away as its attack begins.
A practical order is to concentrate on the two arm machine guns first. Removing them reduces the sustained gunfire and gives you more room to work. Switch to a shoulder missile launcher when it opens, destroy it, then deal with the other shoulder launcher. Continue firing at the central yellow generator whenever it is exposed. The exact order is flexible, but eliminating the active firearms early makes the rest of the phase easier to read.
When a shoulder launcher fires, watch the missiles rather than staring only at the reticle. Shoot down missiles that enter your path when possible, and steer around any that cannot be destroyed in time. If one of the arm guns lifts and begins its firing sequence, move toward a screen corner or another clear part of the arena while continuing to fire when the target remains exposed.
The central generator is the exception to the usual weapon-opening rule: it can be attacked when its opening is available even while the other systems are cycling. Keep returning to it between attacks instead of waiting passively. Phase one ends after all five sections have been destroyed, not after a single hit to N. Gin’s body.
- Both arm machine guns are destroyed or no longer active.
- Both shoulder missile launchers are destroyed.
- The central yellow generator has been hit until it is destroyed.
- You are moving away from machine-gun fire and steering around incoming missiles.
- The transition to the second machine has begun.
Phase two: destroy the larger battle craft
N. Gin retreats into a larger craft, and Pura attaches to Coco’s spaceship to increase its firepower. The craft has seven targets: a bottom weapon that launches a large yellow energy block, a weapon on each side that fires undestroyable energy orbs, and four missile launchers along the upper section.
Prioritize the bottom weapon first. Its projectile causes heavy damage but can be destroyed, and the bottom target remains vulnerable more consistently than the other sections. Keep firing at it while steering clear of the yellow energy block. Once the bottom weapon is gone, the most dangerous attack has been removed.
Next, work on the left and right side weapons. Their energy orbs cannot be destroyed, so steer around the projectiles instead of wasting time shooting them. Fire at a side target during its active opening, then shift to the other side when the first closes. If an orb crosses your intended path, move around it and wait for a better line rather than flying directly through it.
Finish with the four upper missile launchers. Fire at whichever launcher is open, then shift to a neighboring launcher as it closes. You do not have to destroy them in a rigid sequence, but spreading your fire across the active upper targets keeps the phase moving. Shoot or dodge missiles that approach the ship, and keep changing position while the launchers cycle.
After the bottom weapon, both side weapons and all four upper launchers have been destroyed, N. Gin’s craft breaks apart and the battle ends. The defeat sequence confirms the result; there is no additional foot combat afterward.
- Pura has joined Coco’s spaceship and the stronger firing phase is active.
- The bottom weapon and its heavy yellow projectile are destroyed.
- The two side weapons are destroyed; their undestroyable orbs were avoided rather than chased.
- All four upper missile launchers are destroyed.
- N. Gin’s battle craft has been defeated.
Recovery after failure and post-boss progress
If Coco is destroyed, return to the Time Twisting Machine and select the N. Gin entrance again. The five Warp Room 4 crystals remain collected, so you do not need to replay the chamber stages to reopen the fight. Use the next attempt to correct the phase that caused the failure: improve missile avoidance in phase one, remove the bottom weapon sooner in phase two, or keep moving while waiting for target openings.
If you need extra lives before retrying, replay a familiar earlier level that you can clear reliably. Do not spend time collecting optional gems or relics during this preparation unless you are already completing those objectives. The boss battle itself is the immediate progression goal.
After victory, return to the hub and verify that Warp Room 5 is accessible. The five final chamber stages are Gone Tomorrow, Orange Asphalt, Flaming Passion, Mad Bombers and Bug Lite. N. Gin awards the Fruit Bazooka, which can be used later for attacking enemies, activating distant objects and helping with optional cleanup. It does not replace the requirement to complete the five Warp Room 5 crystal stages.
- The boss can be re-entered after a failed attempt without recollecting the five crystals.
- Warp Room 5 is open after victory.
- The Fruit Bazooka has been awarded.
- The next required stages are Gone Tomorrow, Orange Asphalt, Flaming Passion, Mad Bombers and Bug Lite.
- The chapter objective is complete before beginning optional gem or relic cleanup.
Before you move on
- Sphynxinator, Bye Bye Blimps, Tell No Tales, Future Frenzy and Tomb Wader are complete.
- The original N. Gin fight has been cleared in both phases.
- The modified mech’s five weapon sections were destroyed.
- The larger battle craft’s bottom weapon, two side weapons and four upper missile launchers were destroyed.
- The Fruit Bazooka is present after the victory sequence.
- Warp Room 5 is accessible from the Time Twisting Machine.
Chamber 5 Route — Final Crystal Cluster
Warp Room 5 contains the final five required crystal stages: Gone Tomorrow, Orange Asphalt, Flaming Passion, Mad Bombers and Bug Lite. Clear each stage for its crystal; gems, relics and colored-gem routes are optional during the story pass. When all five crystals from this chamber are recorded, the campaign total reaches 25 and the central route to the final Neo Cortex encounter opens. Warp Room 5 has no separate chamber boss.
Enter Warp Room 5 and separate story progress from cleanup
After defeating N. Gin, return to the Time-Twisting Machine and enter Warp Room 5. Its five portals are Gone Tomorrow, Orange Asphalt, Flaming Passion, Mad Bombers and Bug Lite. Each stage awards one required crystal on its ordinary completion route.
A practical order is Flaming Passion, Gone Tomorrow, Orange Asphalt, Mad Bombers and Bug Lite. Flaming Passion can provide the Green Gem needed for Gone Tomorrow’s optional route, so clearing it first avoids an unnecessary return trip. If you are concentrating only on finishing the campaign, any order is valid. Treat every first visit as a crystal run; missed boxes, gems and relics can be attempted later.
- Save at the hub before beginning the chamber.
- Complete each stage’s ordinary route before attempting difficult cleanup objectives.
- Record missed gems and relics for later return attempts.
Clear Flaming Passion and obtain the Green Gem if pursuing cleanup
Flaming Passion is an on-foot Arabian-themed level with fire traps, sword-wielding enemies, explosive crates and a death route. For the required crystal, follow the normal path and prioritize safe landings over speed. Watch for burning floor sections and enemies that punish a rushed approach. The crystal is on the regular route, so the Green Gem is not required to finish the stage.
The Green Gem is reached through the skull-marked death route after the fiery upward-climb section. The route is available only if Crash reaches its entrance without having died earlier in that level attempt. If you die before reaching it, restart the stage and make another clean approach. Use the death route when you are ready to complete its hazards; otherwise, finish the normal crystal run and return later.
- Reach the normal exit and register the crystal.
- Attempt the skull-marked route only during a no-death approach.
- Collect the Green Gem before beginning Gone Tomorrow’s optional gem routes.
Use the Green Gem route in Gone Tomorrow
Gone Tomorrow is a futuristic platforming level with electrical barriers, spinning hazards, mechanical enemies and a side-scrolling section. On the first attempt, move carefully through the normal route and use safe platforms rather than trying to maintain relic speed. The ordinary route provides the required crystal and does not require the Green Gem.
The Green Gem is required to enter Gone Tomorrow’s alternate route. That route is itself a separate challenge and awards one Clear Gem when completed. Enter it on a later attempt after obtaining the Green Gem from Flaming Passion, then follow the route carefully through its hazards and return to the main level.
The second Clear Gem is tied to the full box total. To obtain it, use the Green Gem route to make previously inaccessible boxes available, while leaving route-dependent boxes intact until the alternate path has been completed. On the box attempt, break every required crate in the stage, including those revealed or reached through the Green Gem route. Do not treat the two gems as identical rewards: one comes from completing the Green Gem challenge route, while the other comes from the complete box total using that route.
- Clear the ordinary route for the crystal.
- Return after obtaining the Green Gem to complete the alternate challenge route.
- Make a separate full-box attempt for the second Clear Gem.
- Leave route-dependent boxes intact until their purpose is clear.
Complete Orange Asphalt in separate race and box attempts
Orange Asphalt is a motorcycle race. To earn its crystal, finish the race objective by taking first place. Learn the course before attempting the Clear Gem: traffic, ramps, turns and gaps are easier to manage when you are not also trying to collect every box.
The Clear Gem requires breaking the stage’s full box total. Make a separate run after learning the course, and slow down or adjust your line when necessary to collect a missed box. A later section requires a controlled wheelie and ramp approach to reach a box across a gap, so practice that section before committing to a complete box run. Relics are another separate objective; for those attempts, maintain speed and avoid crashes that force a restart.
- Finish first place and register the crystal.
- Return for the full box route after learning the track.
- Practice the late wheelie-and-ramp section before the box or relic attempt.
Finish Mad Bombers by managing the plane and enemy traffic
Mad Bombers is a plane stage built around destroying airborne targets while avoiding hostile aircraft. During the crystal run, learn the plane’s turning response and keep enough open space to line up shots. Do not chase an enemy into another aircraft or hazard; break off, reposition and attack again from a safer angle.
The stage’s Clear Gem requires a dedicated box-collection attempt. Boxes are suspended around the flight path, so use deliberate passes rather than assuming that a fast completion route will collect them automatically. Health-restoring targets can help recover from damage, but survival is more important than forcing an awkward shot. Return later for the box gem and relic.
- Complete the normal plane objective and record the crystal.
- Use a separate attempt for the box gem.
- Reposition before firing when enemy traffic closes in.
Clear Bug Lite and postpone its all-colored-gems route
Bug Lite is a dark, tomb-themed platforming stage illuminated by a firefly. Stay close enough to keep the route visible, but stop on safe ground when the next platform or hazard is unclear. Nitro crates, darts, moving platforms and drops become especially dangerous when visibility is poor. The ordinary path contains the required crystal and its normal box-completion Clear Gem.
Bug Lite also contains a second Clear Gem route that requires all five colored gems. This route is optional for the campaign and should be left until the colored-gem collection is complete. On the later cleanup pass, enter the colored-gem route and treat it as a separate challenge rather than combining it with an unfamiliar crystal run. The firefly remains essential: rushing beyond its useful light makes recoveries much harder.
- Complete the ordinary route and record the crystal.
- Stay within useful range of the firefly.
- Do not attempt the alternate route until all five colored gems are collected.
Confirm 25 crystals and enter the final Neo Cortex route
After all five Warp Room 5 stages show their crystals, return to the chamber hub and check the Status Panel. If the first four chambers are complete, the total should now be 25. Warp Room 5 does not unlock another chamber boss; collecting its final five crystals opens the central route leading to Neo Cortex, the game’s final boss encounter.
Before entering that route, replay a short, reliable earlier level if you need extra lives or a practice run. You may also postpone gem and relic cleanup until after completing the story. The Green Gem, Gone Tomorrow’s alternate gems, Bug Lite’s all-colored-gems route, box gems and relics are optional for opening the Neo Cortex route and must not be confused with the five crystal requirements.
- Gone Tomorrow, Orange Asphalt, Flaming Passion, Mad Bombers and Bug Lite each show a collected crystal.
- The campaign total has reached 25 crystals if the first four chambers were already complete.
- The central route to Neo Cortex is open.
- The Green Gem is recorded if Gone Tomorrow’s alternate route is planned.
- Missed Clear Gems, colored gems and relics remain separate cleanup objectives.
- Do not look for a separate Warp Room 5 boss portal.
Before you move on
- The Status Panel shows crystals for Gone Tomorrow, Orange Asphalt, Flaming Passion, Mad Bombers and Bug Lite.
- The campaign total has reached 25 crystals if the first four chambers were already complete.
- The central route to Neo Cortex is available.
- The Green Gem is recorded if Gone Tomorrow’s alternate route is planned.
- Gone Tomorrow’s two Clear Gem objectives are kept distinct: alternate-route completion and full box collection.
- Optional Clear Gems, colored gems and relics remain separate cleanup objectives.
References for this chapter
- Crash Bandicoot: Warped — Original North American PlayStation manual
- Crash Bandicoot: Warped — Guide and Walkthrough by NickWhiz1
- Crash Bandicoot: Warped — Gem and Time Trial Guide, PlayStation, josher1212
- Crash Bandicoot: Warped — FAQ and Colored Gem Locations, PlayStation, ThE_bLImP
- Gone Tomorrow — Crash Bandicoot Wiki
Final Boss Encounters and Endings
Crash Bandicoot: Warped on the original North American PlayStation has four chamber bosses: Tiny Tiger, Dingodile, N. Tropy, and N. Gin. After the five Warp Room 5 crystals are collected, the central route to Neo Cortex opens; Warp Room 5 has no separate chamber boss. The completion sequence is separate from the ordinary campaign: first collect 42 gems and 28 relics for the earlier alternate-ending threshold and complete the Cortex rematch. Then complete Hot Coco and Eggipus Rex, which add one gem and one relic each and raise the totals to 44 gems and 30 relics. Earn Gold or Platinum on all 30 relics to make the final 45th gem appear near Coco, then collect it and complete the 105% Neo Cortex rematch. In the original NTSC-U release, the hidden-stage relic-time glitch changes the target times loaded for Hot Coco and Eggipus Rex, but it does not change the fixed count of 30 relics or the completion requirement.
Finish Warp Room 5 and open Neo Cortex's route
Clear Gone Tomorrow, Orange Asphalt, Flaming Passion, Mad Bombers, and Bug Lite, collecting the crystal in each stage. These five crystals bring the campaign total to 25. Warp Room 5 does not contain a sixth boss portal or a separate chamber boss.
The four chamber bosses are Tiny Tiger after Warp Room 1, Dingodile after Warp Room 2, N. Tropy after Warp Room 3, and N. Gin after Warp Room 4. Once all 25 crystal icons are filled, return to the central Time-Twisting Machine and use the newly available Cortex route.
If the route does not appear, replay the five Warp Room 5 stages and inspect the Status Panel. A missing crystal icon means that stage's required crystal was not actually collected. Do not search for Cytrax: that confrontation is not part of the original North American PlayStation release.
- Gone Tomorrow crystal collected.
- Orange Asphalt crystal collected.
- Flaming Passion crystal collected.
- Mad Bombers crystal collected.
- Bug Lite crystal collected.
- Status Panel shows 25 crystals.
- Tiny Tiger, Dingodile, N. Tropy, and N. Gin are defeated.
- Central Neo Cortex route is available.
Prepare for the first Cortex battle
Save before entering the Cortex route and keep several lives available. If you are repeatedly losing at the arena, replay a short familiar stage to collect Wumpa fruit, Aku Aku masks, and extra-life crates, then return to the hub. This preparation is optional and does not replace the 25-crystal requirement.
The fight takes place on a circular arena surrounding a central hole. The hole is both the main hazard and the way to damage Cortex. Stay near the outside portion of the arena without trapping yourself against the edge. Leave room to change direction when the masks move across your path.
One Aku Aku mask absorbs one ordinary damaging hit. Two masks provide two-hit protection, while three masks provide temporary invulnerability against ordinary hazards. A mask does not make falling into the central hole safe, so maintain control of Crash's position throughout the encounter.
- A save exists with 25 crystals.
- Several lives are available.
- The central hole has been identified as the attack target and a major hazard.
- At least one mask is available if practical.
Defeat Neo Cortex with three knockbacks
Cortex cannot be harmed while his shield is active. During each cycle, concentrate on survival first. Avoid Cortex's shots and the moving Aku Aku and Uka Uka hazards rather than trying to attack immediately.
When Cortex begins dropping mines, look for a safe gap instead of crossing the mine field blindly. After the mine sequence, Cortex lowers his shield. Move through the safest opening, make contact with Cortex, and then spin him toward the central hole. A spin against his active shield does not count as a hit.
After the first knockback, the masks change their movement pattern and Cortex continues firing. Keep circling, avoid the masks and mines, and wait for the next shield drop. Do not stand in the center while trying to line up an attack; the open hole is fatal.
The third cycle uses the most dangerous mask movement. Back away when the masks converge or create a blast hazard, then resume circling once the opening is clear. When Cortex's shield drops again, knock him into the hole for the third time. The battle ends after three successful knockbacks. The same basic method applies to later rematches, although the changing mask formations make positioning more demanding.
- Cortex is attacked only while his shield is down.
- Mine fields are crossed through visible openings.
- Cortex is knocked into the central hole three times.
- Neo Cortex is defeated once.
Complete the ordinary campaign ending
The first Cortex victory completes the ordinary campaign. Its required progression is 25 crystals, the four chamber bosses, and one Neo Cortex victory. Gems, relics, secret stages, and Gold or Platinum grades are not required for this first ending.
Allow the ending sequence to finish before resetting or powering off. After returning to gameplay, Crash's later cleanup options include the Running Shoes or Crash Dash ability, which makes repeated relic attempts easier. These rewards do not alter the ordinary campaign requirement.
- 25 crystals are recorded.
- All four chamber bosses are defeated.
- Neo Cortex has been defeated once.
- The ordinary ending has played.
- Post-game movement upgrades are available for cleanup.
Reach the earlier alternate-ending threshold
Collect 42 gems and 28 relics. This is the earlier original-release threshold for the alternate-ending route. Count the gems and relics shown in the Status Panel rather than assuming that every available secret-stage reward is already included.
The 42-gem and 28-relic threshold is separate from maximum completion. Do not add Hot Coco, Eggipus Rex, or the final relic-reward gem to this first checkpoint. Relics may be Sapphire, Gold, or Platinum for this threshold; Gold and Platinum become important later when qualifying for the final gem.
When the Status Panel confirms 42 gems and 28 relics, return to the central machine and complete the available Cortex rematch. Use the same three-knockback method: survive each hazard cycle, wait for the shield to drop, then spin Cortex into the hole. Completing this rematch produces the earlier alternate ending.
- 42 gems are recorded.
- 28 relics are recorded.
- The Status Panel confirms both totals.
- The Cortex rematch is completed.
- The alternate ending has played.
Add Hot Coco and Eggipus Rex
Enter Hot Coco from Road Crash by striking the alien sign on the roadside. Complete the stage to obtain its gem and earn its relic through the time trial. Enter Eggipus Rex from Dino Might by using the Yellow Gem Route and allowing the second Pterodactyl in the dinosaur chase to carry Crash away. Complete Eggipus Rex for its gem and relic.
Each hidden stage adds exactly one gem and one relic. After both stages are completed, the totals change from 42 gems and 28 relics to 44 gems and 30 relics.
On the original NTSC-U release, Hot Coco and Eggipus Rex can load the relic target times belonging to the stages used to enter them. This hidden-stage relic-time glitch affects the target-time display and can make those relics easier than their intended values. It does not remove either stage from the fixed 30-relic count, and it does not change the requirement to earn one relic from each hidden stage.
- Hot Coco is entered from Road Crash.
- Hot Coco gem collected.
- Hot Coco relic collected.
- Eggipus Rex is entered from Dino Might.
- Eggipus Rex gem collected.
- Eggipus Rex relic collected.
- Status Panel shows 44 gems and 30 relics.
Earn the final gem and complete 105 percent
Improve all 30 relics to Gold or Platinum. Platinum is not required on every stage; each relic qualifies once its recorded grade is Gold or Platinum. Check every relic slot, including Hot Coco and Eggipus Rex, because the requirement concerns all 30 relics rather than only the regular Warp Room stages.
After all 30 relics qualify, return to the central Time-Twisting Machine and approach Coco near her laptop. The final completion gem appears there. Collecting it raises the total from 44 gems to 45 and enables the maximum completion route.
The final sequence is therefore: 42 gems and 28 relics for the earlier alternate-ending threshold; Hot Coco and Eggipus Rex add one gem and one relic each, producing 44 gems and 30 relics; Gold or Platinum on all 30 relics awards the final 45th gem; then complete the 105% Neo Cortex rematch. Use the established three-knockback strategy and verify the Status Panel afterward.
- All 30 relics are Gold or Platinum.
- The final gem appears near Coco.
- The final gem is collected.
- Status Panel shows 45 gems.
- Status Panel shows 30 qualifying relics.
- The 105% Cortex rematch is completed.
- Status Panel shows 105% completion.
Before you move on
- Main campaign complete: 25 crystals collected, Tiny Tiger, Dingodile, N. Tropy, and N. Gin defeated, Neo Cortex defeated once, and the ordinary ending viewed.
- Earlier alternate-ending threshold complete: 42 gems and 28 relics recorded, followed by the available Cortex rematch and alternate ending.
- Maximum route complete in the required order: Hot Coco and Eggipus Rex each add one gem and one relic, changing the totals to 44 gems and 30 relics; all 30 relics are Gold or Platinum; the final 45th gem appears near Coco and is collected; the 105% Neo Cortex rematch is completed; the Status Panel shows 45 gems, 30 qualifying relics, and 105%.
References for this chapter
- Crash Bandicoot: Warped — Original North American PlayStation manual
- Crash Bandicoot: Warped — Guide and Walkthrough by NickWhiz1
- Crash Bandicoot: Warped — FAQ, PlayStation, Nemesis
- Crash Bandicoot: Warped — Boss Guide
- Crash Bandicoot: Warped — Extra Item Glitch FAQ and Completion Totals
- Crash Bandicoot: Warped — Developer Times FAQ, PlayStation
Colored Gems — Where They Fit In and How to Plan Routes
In the original North American PlayStation release, Crash Bandicoot: Warped has five Colored Gems: Red, Purple, Blue, Green and Yellow. They are separate from Clear Gems earned by breaking boxes or completing alternate sections. Colored Gems are not required for the ordinary 25-Crystal campaign, but they open additional routes needed for the higher completion thresholds. The safest plan is to clear the main Crystal route first, collect the five colors, revisit the matching stages for their extra Clear Gems, and then schedule Relic attempts around the remaining cleanup.
1. Complete the Crystal route before detailed gem cleanup
Enter each of the 25 regular stages and take the normal route to the Crystal on the first clear. If a colored platform is missing, do not treat that as a failed run: the platform is an optional branch and does not prevent you from reaching the stage’s Crystal. Finish the level normally and return after the required Colored Gem has been collected.
This order keeps the campaign manageable. During first clears, note skull-and-crossbones platforms, colored platform outlines, inaccessible crate groups and unusual dead ends. Do not spend lives attempting a route that is currently locked. Relics can be earned after a stage has been cleared, but difficult time trials are more reliable once you know the level layout and have the movement abilities needed for efficient runs.
- Collect all 25 Crystals before beginning a complete gem audit.
- Record every skull platform and colored platform outline you encounter.
- Leave inaccessible box groups for a later cleanup pass.
2. Collect the five Colored Gems
Red Gem: enter Deep Trouble and follow the ordinary underwater route to the end. Activate the green ! crate, then backtrack to the earlier area where the route divides beneath the electric hazards. The changed crate arrangement opens the passage to the Red Gem. This is a secret-route objective rather than a Death Route, so do not search for a skull platform in this stage.
Purple Gem: enter High Time and reach its skull-and-crossbones platform without losing a life before arriving there. The platform activates the Death Route. Complete the side section to claim the Purple Gem. If Crash dies before reaching the platform, leave and restart the stage so the route becomes available again.
Blue Gem: enter Tomb Wader and reach its skull platform without dying earlier in the attempt. Complete the Death Route to obtain the Blue Gem. The Blue Gem later opens the separate colored route in Sphynxinator.
Green Gem: enter Flaming Passion and reach its skull platform without a prior death. Complete the Death Route to collect the Green Gem. Its matching route is in Gone Tomorrow.
Yellow Gem: first earn enough Relics to access the Secret Warp Room route connected to Hang’em High. The Yellow Gem is obtained by completing the alternate Hang’em High route; the route requires the higher Relic milestone rather than a Death Route in the ordinary stage.
- Red Gem collected from Deep Trouble.
- Purple Gem collected from High Time’s Death Route.
- Blue Gem collected from Tomb Wader’s Death Route.
- Green Gem collected from Flaming Passion’s Death Route.
- Yellow Gem collected from the alternate Hang’em High route in the Secret Warp Room.
3. Revisit the matching stages for colored routes
After collecting a Colored Gem, revisit the stage that displays its matching platform. The Red Gem opens the additional route in Bone Yard. The Purple Gem opens the additional route in Tomb Time. The Blue Gem opens the additional route in Sphynxinator. The Green Gem opens the additional route in Gone Tomorrow. The Yellow Gem opens the additional route in Dino Might!. These branches contain extra crates or collectible objectives and can award an additional Clear Gem for the stage.
Bug Lite is different from the single-color routes. Its alternate route is the all-Colored-Gems route and requires Red, Purple, Blue, Green and Yellow Gems together. Do not enter it expecting one Blue Gem to be sufficient. Once the complete set is recorded, take the available multicolored route and work through its linked sections. The route includes poison darts, floor arrows, Nitro crates, falling blocks, moving platforms and mummy enemies. Reaching the end is not enough by itself: complete the route’s collectible objective so Bug Lite’s separate Clear Gem is recorded.
- Use Red in Bone Yard.
- Use Purple in Tomb Time.
- Use Blue in Sphynxinator.
- Use Green in Gone Tomorrow.
- Use Yellow in Dino Might!.
- Attempt Bug Lite’s alternate route only after all five Colored Gems are collected.
4. Keep Death Routes separate from other secret entrances
A skull-and-crossbones platform identifies a Death Route. It is available only when Crash reaches it without losing a life during that stage attempt. Checkpoints do not preserve the route if Crash dies before reaching the skull platform. If the platform appears only as an outline, exit the stage and start another attempt.
Deep Trouble does not use a Death Route for its Red Gem. Activate the ! crate at the end of the normal underwater route and backtrack to the newly opened passage. The Yellow Gem also uses a different method: enter the Secret Warp Room’s alternate Hang’em High route after reaching the required Relic milestone. Keeping these methods distinct prevents wasted attempts in the wrong stages.
- Restart High Time, Tomb Wader or Flaming Passion after dying before the skull platform.
- Use the ! crate and backtracking method in Deep Trouble.
- Use the Secret Warp Room’s alternate Hang’em High entrance for the Yellow Gem.
5. Finish Clear Gem objectives after collecting the colors
Return to Bone Yard, Tomb Time, Sphynxinator, Gone Tomorrow and Dino Might! after their matching Colored Gems are available. Break the ordinary-area crates and take the colored branch when necessary. Some stages require careful route management because boxes on the normal path must still be broken after Crash returns from the alternate section. If the Clear Gem does not appear, replay the stage and audit both the main route and the colored branch.
Treat Bug Lite as its own cleanup assignment. Enter its all-Colored-Gems route only after Red, Purple, Blue, Green and Yellow are all available. Complete every linked section and collect the separate Clear Gem associated with that route. Do not assume that completing Bug Lite’s ordinary route also completes its multicolored objective.
- Record the additional Clear Gem from Bone Yard’s Red route.
- Record the additional Clear Gem from Tomb Time’s Purple route.
- Record the additional Clear Gem from Sphynxinator’s Blue route.
- Record the additional Clear Gem from Gone Tomorrow’s Green route.
- Record the additional Clear Gem from Dino Might!’s Yellow route.
- Record Bug Lite’s separate Clear Gem from the all-Colored-Gems route.
6. Use the Status Panel to audit progress
Use the Time Twister’s level information and Status Panel to distinguish Crystals, Colored Gems, Clear Gems and Relics. A stage may show that its Colored Gem is collected while still lacking its ordinary box-clear gem or its extra colored-route gem. Reaching a branch, touching a platform or finishing with most boxes broken is not proof that the associated objective has been registered.
The five Colored Gems are only part of the complete gem total. They do not equal the 42-Gem alternate-ending threshold. Keep the Colored Gem count, total Gem count and Relic count as separate checks. For maximum completion, the save must reach 45 Gems and 30 Relics with every Relic at Gold or Platinum level.
- Confirm all five Colored Gems are recorded separately.
- Confirm the five single-color Clear Gem routes are complete.
- Confirm Bug Lite’s all-Colored-Gems Clear Gem is recorded.
- Check the total Gem count separately from the Colored Gem count.
- Check both Relic quantity and Relic quality before the final completion attempt.
7. Schedule Relics around the gem pass
Earn the early Relic milestone when you want access to the Secret Warp Room, then reach the higher milestone needed for the alternate Hang’em High route and Yellow Gem. Do not combine a first attempt at a Death Route or difficult colored branch with a serious time trial. Learn the hazards first, complete the collectible objective safely, then replay the stage with the stopwatch.
A Sapphire Relic can satisfy the initial Secret Warp Room access requirement, but higher completion checks depend on the total number and quality of the Relics. Before the final audit, improve any Relic below Gold if you are pursuing maximum completion. Deaths reset a time-trial attempt, so begin platinum or gold attempts only after the route and hazard order are familiar.
- Earn the initial Relic milestone for Secret Warp Room access.
- Earn the higher Relic milestone for the alternate Hang’em High route.
- Learn each colored route before attempting its Relic.
- Improve any sub-Gold Relic required for the 30-Relic maximum-completion check.
Before you move on
- The Status Panel records the Red Gem from Deep Trouble, Purple Gem from High Time, Blue Gem from Tomb Wader, Green Gem from Flaming Passion and Yellow Gem from the alternate Hang’em High route.
- The additional Clear Gem objectives in Bone Yard, Tomb Time, Sphynxinator, Gone Tomorrow and Dino Might! are recorded.
- Bug Lite’s all-Colored-Gems route has been completed and its separate Clear Gem is recorded.
- All 25 Crystals are recorded before checking an ending threshold.
- For the alternate ending, the save has 42 Gems, 28 Relics and all 25 Crystals.
- For maximum completion, the save has 45 Gems and 30 Relics, with every Relic at Gold or Platinum level.
References for this chapter
- Crash Bandicoot: Warped — Original North American PlayStation manual
- Crash Bandicoot: Warped — Guide and Walkthrough by NickWhiz1
- Crash Bandicoot: Warped — FAQ and Colored Gem Locations, PlayStation, ThE_bLImP
- Crash Bandicoot: Warped — Gem and Time Trial Guide, PlayStation, josher1212
- Gem Path — Crash Bandicoot Wiki
Relics and Time Trials — How to earn and prioritise them
Relics are earned by replaying a stage after its crystal has been collected. Touch the golden stopwatch near the entrance to start a Time Trial, then race to the goal while breaking numbered yellow time crates to freeze the clock. Sapphire is the entry-level relic, Gold is required for the final completion gem, and Platinum is an optional faster grade. Relics are not required for the first Neo Cortex fight, but they unlock the Secret Warp Room and are part of the game's completion route. On the original North American PlayStation release, Hot Coco and Eggipus Rex have a known relic-target glitch: each hidden stage loads timing data from the stage used to enter it. This affects the time displayed or required, but not the fact that each stage awards one relic or the fixed maximum of 30 relics.
Unlock and start a Time Trial
Complete a stage and collect its crystal before attempting its relic. On a later visit, a floating golden stopwatch appears near the beginning of the stage. Touch it only when you are ready, because doing so immediately activates Time Trial mode and starts the clock.
The objective is to reach the exit as quickly as possible. You do not need to break ordinary crates, collect Wumpa fruit or pursue a box gem during the same run. The important objects are the yellow time crates marked 1, 2 or 3. Breaking one freezes the timer for the number of seconds shown on the crate, allowing Crash to keep moving while the clock is stopped.
A failed Time Trial does not cost a life in the original PlayStation release. If a jump goes wrong or the route becomes too slow, allow the attempt to end or restart it and try again. A death ends that run, but it does not turn relic practice into a life-farming exercise.
- Collect the stage crystal first.
- Touch the golden stopwatch when prepared.
- Ignore ordinary crate completion during a relic attempt.
- Break useful numbered yellow time crates.
- Restart freely after a failed attempt.
Learn the route before chasing a grade
First complete a normal run without the stopwatch. Learn the direct route, moving-platform cycles, enemy placements, camera changes and hazards that can conceal a jump. For Crash's platforming stages, practise running, sliding, slide-jumping and maintaining forward movement instead of stopping at every obstacle.
Vehicle and animal stages need separate practice. Motorcycle, jet-ski, tiger and plane levels depend on steering, turning, jumping or shooting rather than the normal running speed. The Speed Shoes help on foot, but they do not replace learning the handling of these sections.
Do not take every time crate automatically. A nearby 3 crate on the natural route is usually worthwhile, but a long detour for a 1 crate may lose more time than it saves. Prioritise crates that can be broken without reversing or making a risky turn, particularly in motorcycle and water stages.
Missing one crate does not necessarily ruin a run. Continue if the route remains clean and the target is still realistic. Restart after a death, major collision or missed shortcut that makes the required time unreachable.
- Run the stage normally before timing it.
- Map hazards and movement sequences.
- Prioritise time crates on the direct route.
- Avoid dangerous detours for small time freezes.
- Restart when a major mistake makes the target unrealistic.
Progress from Sapphire to Gold and Platinum
Sapphire is the sensible first target on an unfamiliar stage. It confirms that you can reach the goal while learning the layout. Gold demands a faster and cleaner run, usually with better use of the yellow time crates. Platinum is the most demanding grade and should be attempted only after the route is repeatable.
The target times belong to a particular game release and level. Do not import PAL, Japanese or Crash Bandicoot N. Sane Trilogy figures into an NTSC-U PlayStation run. The original North American game uses its own timing data, and the hidden stages are affected by their own release-specific issue.
For the 105% route, Gold or Platinum is sufficient on every one of the 30 relic stages. Platinum relics are an optional mastery goal; they are not required for the final completion gem. If a stage has Sapphire, improve it to Gold before spending excessive time pursuing Platinum.
- Use Sapphire to learn difficult stages.
- Upgrade dependable routes to Gold.
- Attempt Platinum after the route is consistent.
- Use timing information for the NTSC-U original.
- Remember that Gold or Platinum satisfies the final relic-grade requirement.
Use the Secret Warp Room efficiently
After earning five relics, return to the central load/save area of the Time Twisting Machine. A platform appears in the centre. Jump onto it to enter the Secret Warp Room, also called Warp Room 6. Further entries open at ten, fifteen, twenty and twenty-five relics.
The stages become available in this order: Ski Crazed at five relics, the alternate Hang 'Em High route at ten, Area 51? at fifteen, the alternate Future Frenzy route at twenty and Rings of Power at twenty-five. These are additional objectives, not replacements for the five ordinary crystal stages in each main Warp Room.
Earn the first five relics from short, familiar stages to open Ski Crazed, then mix easy main-room relics with the newly available secret-room stages. Recheck the centre platform after each five-relic milestone. Do not assume that the alternate Hang 'Em High or Future Frenzy entries are reached through their ordinary level doors; they are selected through the Secret Warp Room.
Hot Coco and Eggipus Rex are separate hidden stages. In Road Crash, hit the alien road sign to enter Hot Coco. In Dino Might!, take the Yellow Gem route, reach the dinosaur chase and let the second Pterodactyl carry Crash away. For Eggipus Rex, Crash must not be protected by Aku Aku when the Pterodactyl grabs him.
- Earn five relics to reveal the centre platform.
- Check the Secret Warp Room at each five-relic milestone.
- Enter the alternate Hang 'Em High and Future Frenzy routes from Warp Room 6.
- Find Hot Coco through the alien sign in Road Crash.
- Find Eggipus Rex through the Yellow Gem route in Dino Might!.
Finish the story before serious relic cleanup
A practical completion order is to collect all 25 crystals, defeat Tiny Tiger, Dingodile, N. Tropy and N. Gin, then defeat Neo Cortex once. Relics are optional for reaching the first Cortex fight. You can earn five early relics if you want Secret Warp Room access, but there is no need to master every time trial before completing the campaign.
After the first Cortex victory, Crash obtains the Speed Shoes. Hold R2 while moving to activate the faster running ability. This is especially useful for on-foot Gold attempts and for improving routes that contain long straight sections. It does not make motorcycle, jet-ski, tiger or plane handling easier.
For a difficult Platinum attempt, make one untimed rehearsal, then repeat the route with the stopwatch active. Treat each failure as a specific problem: a late jump, missed time crate, poor turn, collision or unnecessary pause. Fix that point before changing the entire route.
- Complete the 25-crystal campaign first.
- Use early relics as Secret Warp Room access keys if helpful.
- Defeat Cortex once to obtain the Speed Shoes.
- Practise vehicle and animal stages separately.
- Build Gold results before concentrating on Platinum.
Apply the original completion thresholds correctly
The ordinary ending requires the 25 campaign crystals and one Neo Cortex victory. The original NTSC-U game's true-ending threshold is separate: 25 crystals, 42 gems and 28 relics. Hot Coco and Eggipus Rex are not required for that initial 100% threshold when they have not been entered, and their hidden-stage timing issue does not change the threshold.
For maximum completion, collect all 45 gems and all 30 relics. The 30 relics consist of the 28 regular relics plus one relic from Hot Coco and one from Eggipus Rex. Every relic must be Gold or Platinum. Once this condition is met, collect the extra completion gem from the central hub near Coco's laptop, then return to the final route and defeat Neo Cortex again.
On the NTSC-U original, Hot Coco loads the relic targets associated with Road Crash, while Eggipus Rex loads the targets associated with Dino Might!. This is a timing-data glitch in the original release. It can make the hidden-stage targets appear unusually generous or otherwise different from their intended stage values, but it does not create extra relic slots, remove either hidden-stage relic from the 30-relic maximum, or alter the Gold-or-better requirement for the final completion gem.
Use the Status Panel as the final authority for your file. Confirm the two hidden stages individually rather than assuming that entering them awarded their relics. A stage can have its gem collected while its relic remains unfinished, or the reverse.
- Use 25 crystals for ordinary story completion.
- Use 42 gems and 28 relics for the original true-ending threshold.
- Count Hot Coco and Eggipus Rex as two of the fixed 30 relics for maximum completion.
- Earn Gold or Platinum on all 30 relic stages.
- Collect the extra completion gem after satisfying the relic condition.
- Defeat Neo Cortex again after the final gem appears.
Before you move on
- Every crystal-completed stage shows a golden stopwatch on replay.
- At least five relics have been earned and the central Secret Warp Room platform is available.
- Ski Crazed, the alternate Hang 'Em High route, Area 51?, the alternate Future Frenzy route and Rings of Power have been checked at their relic milestones.
- Hot Coco has been entered from Road Crash and its gem and relic are recorded if pursuing maximum completion.
- Eggipus Rex has been entered from Dino Might! and its gem and relic are recorded if pursuing maximum completion.
- The 25-crystal, 42-gem and 28-relic threshold is complete for the original true ending.
- The final maximum route shows all 45 gems and all 30 relics.
- Every relic is Gold or Platinum.
- The extra completion gem has been collected before the second Neo Cortex fight.
- The post-game percentage and reward display confirm the completed file.
References for this chapter
- Crash Bandicoot: Warped — Original North American PlayStation manual
- Crash Bandicoot: Warped — Time Trial Guide for PlayStation
- Crash Bandicoot: Warped — Time Trial Guide, Warp Room 6 and Secret Levels
- Crash Bandicoot: Warped — Guide and Walkthrough, PlayStation
- Crash Bandicoot: Warped — Extra Item Glitch FAQ and Completion Totals
- Crash Bandicoot: Warped — Original completion totals and threshold reference
Secret Warp Room and Alternate Exits — Unlocks and Uses
The original North American PlayStation release adds a sixth, secret Warp Room after Crash earns five relics. Warp Room 6 contains five entrances that unlock at five-relic milestones. Its alternate Hang'em High entrance is the source of the Yellow Gem, while the alternate Future Frenzy entrance provides an additional gem route. Hot Coco and Eggipus Rex are separate hidden stages entered from Road Crash and Dino Might!. These routes are optional for the ordinary 25-crystal campaign, but they matter when completing the original release's expanded gem and relic totals.
Unlock Warp Room 6
Earn five relics from time trials in the regular levels. Sapphire, Gold and Platinum relics all count toward the first unlock, so you do not need Gold or Platinum relics merely to open the room. After the fifth relic is recorded, return to the central area of the Time Twister and look near the Load/Save monitor. A platform appears in the middle of the hub. Jump onto it to enter Warp Room 6, also called the Secret Warp Room.
Warp Room 6 is not a sixth ordinary campaign chamber and has no boss. It is a separate level-select area beneath the main hub. Its entrances use relic totals rather than crystal totals, so do not wait for another boss or for all 25 crystals before checking it. Save after earning important relics or gems, especially if you are playing on original hardware, because unsaved progress can be lost if the console is powered off.
- Earn five relics of any tier.
- Return to the central hub near the Load/Save monitor.
- Jump onto the newly appeared center platform.
- Confirm that Warp Room 6 is accessible.
Understand the five Warp Room 6 entrances
The five Warp Room 6 entrances appear in stages. Ski Crazed opens at five relics. The alternate Hang'em High entrance, listed as Level 27, opens at ten relics. Area 51? opens at fifteen relics. The alternate Future Frenzy entrance, listed as Level 29, opens at twenty relics. Rings of Power opens at twenty-five relics.
Ski Crazed, Area 51? and Rings of Power are standalone secret-room stages. The Hang'em High and Future Frenzy entries are alternate sections associated with their ordinary levels. They do not replace the standard Hang'em High or Future Frenzy portals, and they do not supply replacement crystals for the main campaign. Use the ordinary level portals when you still need a normal crystal, standard box gem or regular relic.
If an entrance is not visible, earn another relic in a level you can complete reliably, then return to Warp Room 6. The total is cumulative; you do not need to earn the relics in a particular chamber or with a particular medal tier.
- Five relics: Ski Crazed.
- Ten relics: alternate Hang'em High, Level 27.
- Fifteen relics: Area 51?.
- Twenty relics: alternate Future Frenzy, Level 29.
- Twenty-five relics: Rings of Power.
Collect the Yellow Gem in Warp Room 6's alternate Hang'em High
Earn ten relics, enter Warp Room 6 from the center platform, and select the Hang'em High entrance there. This is Level 27, the alternate Hang'em High route. Select it from Warp Room 6 rather than from the standard Level 7 portal. It is not the normal Hang'em High stage, and it is not a regular Death Route that appears because Crash reached a skull-and-crossbones platform without dying.
The alternate entrance is a short obstacle course built around difficult jumps, awnings, carpets and Nitro crates. Follow the route carefully and do not touch Nitro. In the original PlayStation release, touching a Nitro crate causes an immediate death, so treat every Nitro section as a controlled jump sequence rather than trying to spin through it. The route ends with the Yellow Gem.
You do not have to activate the ordinary Hang'em High skull platform first. The ten-relic entrance in Warp Room 6 is the intended access method for this Yellow Gem route. After collecting the gem, the route returns Crash near the end of the ordinary level path, but the ordinary Level 7 entrance remains available for the crystal, normal box gem and regular time trial. Keep those objectives separate when checking the Status Panel.
- Have at least ten relics.
- Enter Warp Room 6 from the center platform.
- Select Level 27, the alternate Hang'em High entrance.
- Cross the Nitro hazard route without contact.
- Collect the Yellow Gem at the end.
Use alternate Future Frenzy for its additional gem
At twenty relics, enter Future Frenzy from Warp Room 6 rather than selecting the standard Level 19 portal. The alternate entrance places Crash in an additional section that awards one of the level's extra gem objectives. Finish the alternate section and collect its gem before assuming Future Frenzy is complete.
The ordinary Future Frenzy entrance is still required for its crystal and regular stage objectives. If the Status Panel continues to show a missing box gem, revisit the standard entrance and check the main route, bonus area and any necessary backtracking. The alternate entrance adds content; it does not replace the regular level.
- Have at least twenty relics.
- Select the alternate Future Frenzy entrance in Warp Room 6.
- Complete the alternate section and collect its gem.
- Revisit ordinary Future Frenzy for any remaining items.
Enter Hot Coco from Road Crash
Select Level 14, Road Crash, from Warp Room 3. During the motorcycle section, watch for the road sign showing an alien face. It is on the left side of the road. Deliberately steer into that sign instead of simply driving past it. The collision transports Crash to Hot Coco, a hidden jet-ski stage.
Hot Coco contains a Clear Gem for breaking all 70 boxes. The course is nonlinear, so use a first run to learn its branches rather than trying to clear every box at maximum speed immediately. The yellow buoys on the right provide a useful starting route. Continue around the course, activate the green exclamation switch when you reach it to remove the relevant Nitro obstruction, then return through the remaining branches and finish after confirming that every box has been counted.
For the relic, enter Hot Coco through the same alien sign in Road Crash and start the time trial at the level entrance. In the NTSC-U original, Hot Coco uses the Road Crash relic thresholds rather than the hidden stage's shorter regional values. Do not import PAL or N. Sane Trilogy targets into this USA release.
- Enter Road Crash, Level 14.
- Find the alien road sign on the left.
- Hit the sign to enter Hot Coco.
- Activate the green exclamation switch.
- Break all 70 boxes for the Clear Gem.
- Replay the stage for its relic if pursuing maximum completion.
Enter Eggipus Rex from Dino Might!
First collect the Yellow Gem from Level 27 in Warp Room 6. Then enter Level 11, Dino Might!, and follow its Yellow Gem path. During the dinosaur chase, three Pterodactyls appear in sequence. Allow the second Pterodactyl to grab Crash. This transfers him to Eggipus Rex.
Do not carry Aku Aku into this transfer attempt. In the original release, an active Aku Aku can prevent the required capture. Once inside Eggipus Rex, remain mounted on Baby T. and avoid steam jets, gaps and flying hazards until reaching the finish. Completing the stage awards its Clear Gem. Re-enter through the same Dino Might! route when you are ready to attempt its relic.
The NTSC-U original also uses the parent-level timing data for Eggipus Rex. Its displayed relic thresholds are tied to Dino Might!, not the shorter values associated with corrected regional versions. This is a release difference, so use USA original-release information for this guide.
- Collect the Yellow Gem first.
- Enter Dino Might! and take its Yellow Gem path.
- Allow the second Pterodactyl to carry Crash.
- Complete Eggipus Rex for its Clear Gem.
- Replay it for its relic if pursuing maximum completion.
Plan the completion route
For the original alternate ending, complete the 25-crystal campaign and reach the original 42-gem and 28-relic threshold. The game initially treats Hot Coco and Eggipus Rex as outside that base total, so their two gems and two relics are not required for that first threshold. The exact display can change as the hidden stages are discovered, which explains why the Status Panel may initially show the lower totals and later show additional available items.
For maximum completion, include both Hot Coco and Eggipus Rex. Their rewards raise the collection from the base pool to 44 gems and 30 relics. Earn Gold or Platinum on all 30 relics; Platinum is not required for the 105% result, but Gold or better is. The final completion gem then appears in the Time Twister near Coco's laptop. Collect it and defeat Neo Cortex again to finish the maximum route.
Use the Status Panel as the final authority for your save. Do not count a Warp Room 6 entrance as a crystal stage, and do not assume that entering a hidden route automatically completes the parent level's standard objectives.
- Complete all 25 crystals and defeat Cortex once.
- Reach 42 gems and 28 relics for the original alternate-ending threshold.
- Open the five Warp Room 6 entrances through 25 relics.
- Complete Hot Coco and Eggipus Rex for the expanded collection.
- Record 45 gems and 30 Gold-or-Platinum relics.
- Collect the final completion gem and defeat Cortex again.
Before you move on
- The center platform near the Load/Save monitor opens Warp Room 6 after five relics.
- Ski Crazed, Level 27 alternate Hang'em High, Area 51?, alternate Future Frenzy and Rings of Power appear at their five-relic milestones.
- The Yellow Gem has been collected from Warp Room 6's Level 27 Hang'em High route.
- Hot Coco has been entered through the alien sign in Road Crash and completed for its gem and relic if pursuing maximum completion.
- Eggipus Rex has been entered through Dino Might!'s Yellow Gem path and completed for its gem and relic if pursuing maximum completion.
- The save reaches the base 25-crystal, 42-gem and 28-relic threshold for the original alternate ending.
- For maximum completion, the save records 45 gems and 30 Gold-or-Platinum relics, followed by the final Neo Cortex rematch.
References for this chapter
- Crash Bandicoot: Warped — Original North American PlayStation manual
- Crash Bandicoot: Warped — Guide and Walkthrough, PlayStation
- Crash Bandicoot: Warped — Guide and Walkthrough by NickWhiz1
- Crash Bandicoot: Warped — Time Trial Guide, Warp Room 6 and Secret Levels
- Crash Bandicoot: Warped — Extra Item Glitch FAQ and Completion Totals
- Hot Coco — Crash Bandicoot Wiki
- Hang'em High — Crash Bandicoot Wiki
- Crash Bandicoot: Warped — Original completion totals and threshold reference
Post-game: Life Farming, Practice Runs and Troubleshooting
Use short, familiar stages to build confidence and collect available lives, then keep ordinary clears, gem routes and relic attempts as separate objectives. Save through the original game’s Load/Save screen, verify controller input before difficult attempts, and use the Status Panel to distinguish missing crystals, gems and relics. For the original North American PlayStation release, 42 gems and 28 relics are the campaign-completion threshold for the expanded ending; the two hidden stages and the final Gold Relic gem are needed for the full 105% target.
Build a life reserve without relying on refresh behavior
Replay Orient Express from Warp Room 1 when you need a short, familiar practice run. Ride Pura carefully, collect extra-life boxes and reachable Wumpa fruit, and finish the stage normally. The purpose is consistency: do not turn a life-farming run into an experimental clear-gem or relic attempt. If Orient Express is not producing a useful reward on a particular replay, switch to another short stage whose route you can complete safely rather than assuming that a load or reload will restore a specific item.
Save progress through the Load/Save screen in the Time Twisting Machine after completing meaningful work. Confirm that the crystal, gem or relic status is present before beginning another difficult attempt. Use the normal memory-card save as the authoritative record of progress. Emulator save states may be useful for isolated practice, but they should not replace the game’s own save when checking completion.
A small reserve is enough for a boss or ordinary platforming retry. Build a larger reserve before repeated vehicle stages, death routes or difficult box gems. There is no need to pursue a maximum life total; a route that gives dependable practice and available lives is more useful than a risky route chosen for a larger theoretical reward.
- Replay Orient Express or another short, reliable stage.
- Collect only lives and fruit that can be taken safely.
- Finish the level instead of abandoning the run repeatedly.
- Save through the game’s Load/Save screen after progress.
- Use another dependable stage if a particular reward is absent.
Separate reconnaissance, gems and relics
Treat the first attempt at a difficult level as reconnaissance. Learn the camera changes, moving platforms, vehicle transitions, bonus entrances, death-route entrances and checkpoint locations. On a later attempt, pursue the crystal or normal exit without taking optional risks that could consume lives before you understand the route.
Use a separate run for a clear gem or colored-gem path. Colored gems open alternate routes in previously completed stages, while clear gems may require breaking every counted box or finishing a special route. If a route contains a death path, reach its entrance only after you are confident that the approach is safe. Missing a box or taking the wrong branch is a reason to finish safely or restart the objective, not to keep spending lives on a compromised run.
For relic practice, enter a stage after its crystal is available and touch the floating stopwatch near the start. Time crates freeze the clock by the value displayed on them. Begin by learning a complete route and earning any achievable relic tier, then improve the same route toward Gold or Platinum. Do not combine a first exploration of a stage with a serious relic attempt.
- Complete a safe reconnaissance run first.
- Record the checkpoint before the difficult section.
- Practise gem routes without activating the stopwatch.
- Use Time Trial mode for dedicated speed attempts.
- Return to normal play for crystals and box-gem objectives.
Prepare for bosses and vehicle sections
Before a boss attempt, test movement in a familiar stage. Confirm that jumping, spinning, sliding, directional movement and pausing respond normally. Collect an Aku Aku mask when it is safely available, but treat protection as a buffer for one mistake rather than permission to rush. Three Aku Aku masks grant temporary invincibility, but a fall or other instant-death hazard can still end an attempt.
Motorcycle, jet-ski, plane and Pura sections require separate practice because their movement is not identical to standard Crash platforming. Practise steering, braking, turns and jump timing in ordinary runs before attempting a relic or complete-box objective. For a difficult boss or vehicle stage, identify the exact failure point: a projectile pattern, a turn, a platform transition or a camera change. Then repeat that specific skill in a short practice loop instead of immediately replaying every earlier section at full speed.
If repeated failures reduce your life reserve, leave the difficult stage and return to a reliable early level. Rebuild the reserve, save normally, and come back with a specific objective. This is more efficient than entering the same attempt while frustrated or changing several techniques at once.
- Test movement before entering a boss.
- Carry Aku Aku when obtaining it is safe.
- Practise each vehicle type separately.
- Identify one failure point before retrying.
- Rebuild lives in a familiar stage when necessary.
Troubleshoot original PlayStation or emulator input
On original PlayStation hardware, test movement and the Status Panel in the hub before beginning a difficult stage. If Crash continues moving after the D-pad is released, spins without a clean Square press, or responds late to a face button, reseat the controller and try a known-good PlayStation-compatible pad. Drift and delayed input are particularly misleading in Pura, motorcycle and jet-ski stages.
For the original PlayStation layout, X jumps, Square spins, Circle crouches or slides, Triangle displays the inventory or Status Panel, and Start pauses. Verify the mapping against an original PlayStation controller profile rather than a remaster preset. On an emulator, use stable timing, avoid unnecessary latency, and keep the same controller configuration between attempts.
After changing a setting, test a familiar jump, spin and directional movement in a stage you know. If the same action fails everywhere, correct the controller, mapping or latency first. If only one camera angle feels difficult, slow down and judge Crash’s landing position instead of immediately assuming the level geometry is defective. Save-state tools can isolate practice sections, but confirm genuine progress through the normal memory-card save and Status Panel.
- Test movement and the Status Panel in the hub.
- Check for D-pad drift and delayed button input.
- Verify the original PlayStation control layout.
- Keep emulator timing and mapping consistent.
- Retest a familiar jump after every configuration change.
Recover from a stuck position or misleading route
If Crash is pressed against scenery, a barrier or a level edge, try the movement the section appears to require: jump away, spin, slide or approach from the direction indicated by nearby platforms. Some apparently empty routes activate through an ! box, a vehicle approach, a later ability or a colored-gem path. Do not treat every dead end as a secret exit.
If Crash genuinely cannot move, pause and leave through the normal game menu rather than forcing inputs indefinitely. Reload the latest confirmed memory-card save, return to the hub and inspect the level indicators before trying again. On original hardware, do not remove the memory card while the game is saving. On an emulator, verify that the memory-card image is mounted and writable before relying on it.
Keep separate notes for crystals, ordinary clear gems, colored gems, secret-stage objectives and relic tiers. This prevents a failed Time Trial from being mistaken for a missing crystal and makes it easier to identify the exact level associated with an incomplete Status Panel entry.
- Try the intended jump, spin, slide or vehicle approach.
- Quit normally if movement is genuinely locked.
- Reload the latest confirmed normal save.
- Inspect the hub indicator before replaying the level.
- Confirm that the emulator memory card is writable.
Verify ordinary, expanded and maximum completion
For ordinary campaign completion, confirm all 25 crystals, defeat Tiny Tiger, Dingodile, N. Tropy and N. Gin, then defeat Neo Cortex. Warp Room 5 contains the final five crystal stages and does not add a fifth chamber boss.
For the original-release expanded ending, work toward 42 gems and 28 relics with the 25 crystals. This is the initial completion threshold tracked before the two hidden stages are added to the visible totals. The hidden stages are Hot Coco and Eggipus Rex: reach Hot Coco by striking the alien road sign in Road Crash, and reach Eggipus Rex through the Yellow Gem path in Dino Might! by allowing the second pterodactyl to carry Crash away. Their items are not required for the initial 42-gem, 28-relic threshold, but they are required for the complete 45-gem and 30-relic total.
For maximum completion, collect all 45 gems and all 30 relics at Gold or Platinum level. The final completion gem is awarded after the Gold-or-better relic requirement is met and the required interaction near Coco and the Load/Save area is completed. Confirm that the Status Panel reaches 105%, save the file normally, and then replay Neo Cortex for the final completion sequence. Platinum is not required for the maximum percentage if every relic is Gold or better.
If an item is missing, use the level indicators rather than restarting the campaign. Check both hidden stages, the colored-gem routes and every relic tier. The campaign, gem collection and relic collection are tracked separately, so an incomplete optional objective does not erase the 25-crystal route.
- 25 of 25 crystals are recorded.
- Tiny Tiger, Dingodile, N. Tropy and N. Gin are defeated.
- Neo Cortex has been defeated for ordinary campaign completion.
- The expanded-ending threshold reaches 42 gems and 28 relics.
- Hot Coco and Eggipus Rex are completed for maximum totals.
- All 45 gems are recorded.
- All 30 relics are Gold or Platinum.
- The Status Panel displays 105% before the final Cortex replay.
Before you move on
- The main campaign is complete at 25 crystals, four defeated chamber bosses and one defeated Neo Cortex.
- The expanded-ending threshold is complete at 42 gems and 28 relics with the 25 crystals.
- Hot Coco and Eggipus Rex are completed for the full secret-stage totals.
- Maximum completion reaches 45 gems and 30 Gold-or-Platinum relics.
- The final completion gem has been obtained and the Status Panel displays 105%.
- A final Neo Cortex replay has been completed after the 105% check.
- A troubleshooting session is complete when a familiar jump, spin and directional movement work consistently without drift or noticeable input delay.
References for this chapter
- Crash Bandicoot: Warped — Original North American PlayStation manual
- Crash Bandicoot: Warped — Guide and Walkthrough by NickWhiz1
- Crash Bandicoot: Warped — Time Trial Guide, Warp Room 6 and Secret Levels
- Crash Bandicoot: Warped — PlayStation secrets and unlockables
- Crash Bandicoot: Warped — Original completion totals and threshold reference
Finishing up
Main campaign cleared: all 25 crystals are collected, Tiny Tiger, Dingodile, N. Tropy and N. Gin are defeated, and Neo Cortex has been defeated once.
Alternate ending: the original-release alternate-ending gem and relic threshold is complete and Neo Cortex has been defeated again.
Maximum completion: all 45 gems are collected, all 30 relics are Gold or Platinum, the two hidden stages are completed, the final completion gem is obtained, and the status display reaches 105%.
Choose your next gameScreenshots & video
Game imagery for reference. Follow the written chapters above for the route and strategies.
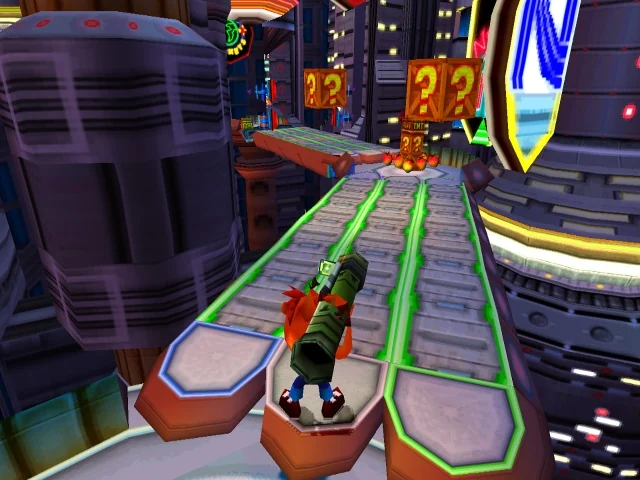
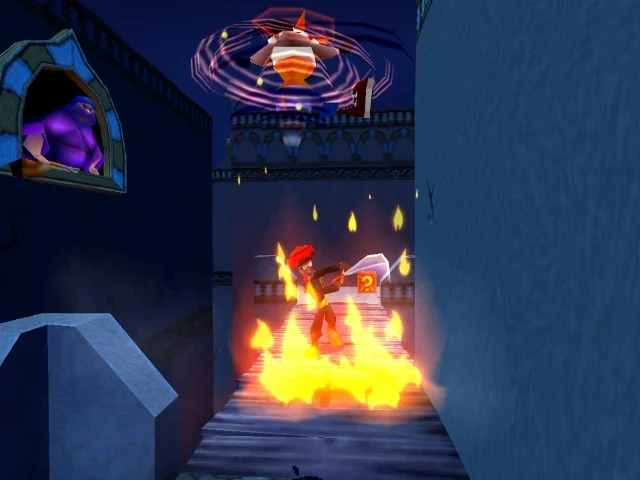
Sources & references
Our original guide draws on the references below. Check the edition at the top of this page before following controls or unlock requirements.
- Crash Bandicoot: Warped — Original North American PlayStation manual
- Crash Bandicoot: Warped — NTSC-U PSX DataCenter entry
- Crash Bandicoot: Warped — Guide and Walkthrough by NickWhiz1
- Crash Bandicoot: Warped — gameplay and checkpoint manual section
- Crash Bandicoot: Warped — FAQ, PlayStation, Nemesis
- Crash Bandicoot: Warped — Time Trial Guide, PlayStation
- Crash Bandicoot 3: Warped — level list and Warp Room structure
- Crash Bandicoot: Warped — game data and progression overview
- Crash Bandicoot: Warped — Original PlayStation Manual
- Crash Bandicoot: Warped — Guide and Walkthrough, PlayStation
- Crash Bandicoot: Warped — Gem and Time Trial Guide, PlayStation, josher1212
- Crash Bandicoot: Warped Warp Room 1 Guide
- Crash Bandicoot: Warped — Boss Guide, PlayStation, GameFAQs
- Crash Bandicoot: Warped — Publisher manual download
- Crash Bandicoot: Warped — FAQ and Colored Gem Locations, PlayStation, ThE_bLImP
- Crash Bandicoot: Warped PSX Cheats and Secret-Level References
- Crash Bandicoot: Warped — Boss Guide
- Gone Tomorrow — Crash Bandicoot Wiki
- Crash Bandicoot: Warped — Extra Item Glitch FAQ and Completion Totals
- Crash Bandicoot: Warped — Developer Times FAQ, PlayStation
- Gem Path — Crash Bandicoot Wiki
- Crash Bandicoot: Warped — Time Trial Guide for PlayStation
- Crash Bandicoot: Warped — Time Trial Guide, Warp Room 6 and Secret Levels
- Crash Bandicoot: Warped — Original completion totals and threshold reference
- Hot Coco — Crash Bandicoot Wiki
- Hang'em High — Crash Bandicoot Wiki
- Crash Bandicoot: Warped — PlayStation secrets and unlockables
About the game & collecting notes
- Platform
- Sony PlayStation
Practical, route-focused walkthrough for the original North American PlayStation release of Crash Bandicoot: Warped. It covers the five Warp Rooms, the 25 crystal stages, the four chamber bosses, the final Neo Cortex encounter, colored gems, Secret Warp Room stages, relic progression, the alternate ending threshold, and the separate maximum 105% route.
Darryl Polo
Darryl Polo loves tinkering with emulation and revisiting retro games. He enjoys exploring how old favorites play on different setups and sharing what he learns along the way. At Joking Joystick, he writes about the games, hardware, and small discoveries that keep the hobby fun.
Our editorial standardsFound a step that needs another look? Help us improve this guide.