
Crash Bandicoot 2: Cortex Strikes Back (PlayStation, USA) — Complete Campaign Walkthrough
Step-by-step walkthrough for the original 1997 North American PlayStation release. Covers controls, the five correctly ordered main Warp Rooms, all five bosses, the Secret Warp Room and hidden entrances, the final Cortex chase, and optional 42-gem completion. The original release has no time-trial or relic system, so those later-version features are excluded.

Find a copy
Crash Bandicoot 2: Cortex Strikes Back Sony PlayStation
We may earn a commission if you buy through these links, at no extra cost to you. As an Amazon Associate I earn from qualifying purchases.
Opens retailer search results. Check the model, edition, seller, availability and current price before buying.
Before you begin
This walkthrough targets the original North American PlayStation release of Crash Bandicoot 2: Cortex Strikes Back.
Follow the chapters through the five main Warp Rooms in their actual order: Warp Room 1, Warp Room 2, Warp Room 3, Warp Room 4 and Warp Room 5.
The ordinary campaign requires the crystal from each of the 25 main levels, the five warp-room boss victories, and the final Cortex chase.
Optional chapters cover the five hidden entrances, Secret Warp Room content, all 42 gems and the alternate ending.
The original 1997 PlayStation release does not contain the time-trial and relic system added in later versions.
Set yourself up for the run
Verify that the game is the original PlayStation release rather than Crash Bandicoot N. Sane Trilogy or another later version.
Save at the Warp Room save point when possible, especially before death-route and secret-entrance attempts.
Learn the original movement inputs: jump, spin, crouch, slide, slide-jump, body slam and high jump.
Treat the first pass through each level as a crystal run, then return for colored gems, death routes, secret entrances and box gems.
Do not prepare a relic or time-trial checklist for this edition; those systems are not present in the 1997 PlayStation release.
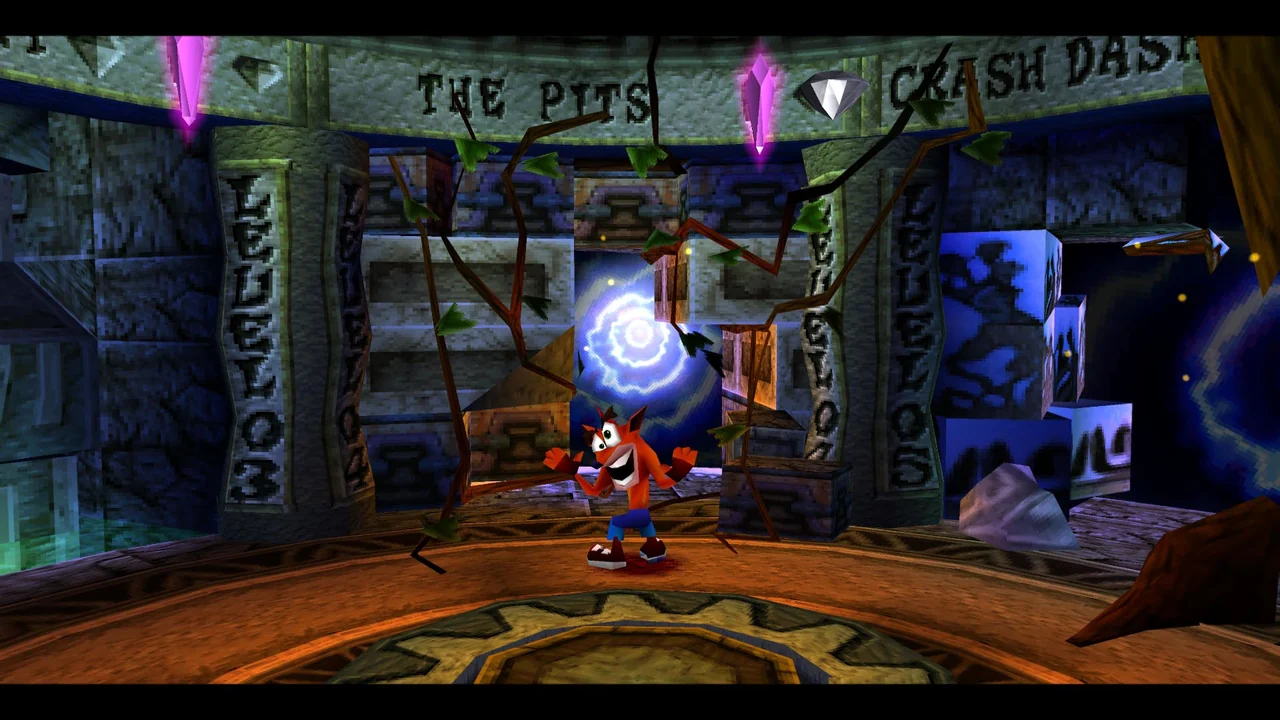
Controls, Moves and Player Basics
Learn the original North American PlayStation controls for Crash Bandicoot 2: Cortex Strikes Back, including the movement combinations needed for difficult platforming. This chapter applies to the 1997 original PlayStation release, not the N. Sane Trilogy. It also explains Aku Aku protection, checkpoints, lives, Warp Room progress indicators and the correct original-edition boss-rematch command.
Learn the original PlayStation inputs
Use the D-pad to move Crash. Press X to jump; holding X produces a higher jump. Press Square to spin. Press Circle or R1 while standing to crouch, and press Start to pause. Triangle opens the in-level inventory and status display, including current Wumpa fruit and remaining lives.
Circle and R1 perform the same crouch or slide function. While Crash is running, press Circle or R1 to slide. While crouched, hold Circle or R1 with a direction to crawl through low passages. The control reference treats the D-pad as the movement input, so use small directional corrections when lining up narrow platforms or jumps.
The standard control layout is: D-pad for movement; X for jump; Square for spin; Circle or R1 for crouch, slide and crawl; Triangle for inventory or status; and Start for pause. The PlayStation manual also lists the special combinations for body slam and high jump.
- D-pad: move Crash
- X: jump; hold X for a higher jump
- Square: spin attack
- Circle or R1 while standing: crouch
- Circle or R1 while running: slide
- Circle or R1 plus a direction while crouched: crawl
- Triangle: review inventory and status
- Start: pause
Use slide, body slam and high jump combinations
To perform a slide, run forward and press Circle or R1. A slide gives Crash a low profile and can pass beneath some hazards. To perform a slide-jump, begin the slide and press X immediately afterward. This carries Crash farther than a normal jump and is useful for wide gaps, low ledges and selected bonus-stage routes. Do not use it automatically near a small landing platform; a normal jump gives more time to correct Crash’s position.
To perform a body slam, press X and then Circle or R1 while Crash is airborne. Crash drops vertically and can break reinforced crates or activate objects below him. Do not confuse this with the high jump. The body slam begins with the jump input, while the high jump begins with the crouch or slide input.
To perform a high jump, press Circle or R1 and then X while Crash is standing or crouched. Add a direction during the high jump to produce a long jump. The timing is quick, so practice the sequence in a safe early section before relying on it near pits, Nitro crates or gem routes.
Square remains Crash’s ordinary spin attack. It defeats many standard enemies and breaks ordinary crates, but it does not make Crash invulnerable. Never spin into Nitro crates, spikes, pits or machinery unless the level specifically requires a safe interaction.
- Run, press Circle or R1, then press X for a slide-jump.
- Press X, then Circle or R1 in the air for a body slam.
- Press Circle or R1, then X for a high jump.
- Add a direction during the high jump for a long jump.
- Use Square for ordinary enemies and crates, not as general protection.
Build reliable movement habits
Choose the movement technique according to the landing area. Use a normal jump when the destination is narrow or when you need time to adjust Crash’s position. Use a slide-jump when the route clearly requires extra horizontal reach. Begin the slide with enough room to jump; starting too close to an edge can leave Crash without enough time to launch.
Before entering a forward-facing jump, line Crash up with the center of the route. During the jump, use brief D-pad corrections instead of holding a direction continuously. This is especially important on moving platforms, thin ledges and routes where the camera makes depth difficult to judge.
When Crash lands on a bounce crate or another surface that permits repeated jumps, press X again as Crash reaches the landing point. Do not make blind follow-up jumps when the next platform is off-screen. First identify the next safe surface, then use the jump timing required by that section.
Practice body slams and high jumps in early levels before attempting difficult gem paths. Extra lives are useful for deliberate practice, but repeatedly spending lives on random inputs is inefficient. If the same jump kills Crash several times, stop and identify whether the problem is distance, timing, alignment or the wrong move.
- Use a normal jump when landing precision matters most.
- Use a slide-jump only when its extra reach is needed.
- Make small directional corrections during airborne movement.
- Identify the next platform before chaining another jump.
- Practice special moves before attempting difficult gem routes.
Understand Aku Aku masks and checkpoints
Breaking an Aku Aku crate gives Crash one protective mask. One mask absorbs one ordinary enemy attack or damaging contact. Collecting a second mask gives Crash protection against another ordinary hit. Collecting a third mask grants temporary invulnerability against minor dangers. The protection is not a solution to every hazard: pits, deep falls, Nitro crates and other clearly lethal hazards can still kill Crash.
A C checkpoint crate records a return point. If Crash loses a life after activating a checkpoint, he returns to the latest checkpoint reached in that level. Activate every checkpoint before attempting a difficult later sequence, then use the next attempt to learn the hazard pattern rather than rushing directly into it.
If Crash has no Aku Aku protection, ordinary damaging contact costs a life. Losing a life returns Crash to the latest checkpoint, but progress through a bonus stage is not preserved if Crash dies there. If all available lives are lost, the game reaches Game Over and the player must continue from the game’s available recovery point with the new life allotment shown by the original release. Treat this as recovery, not as a substitute for learning the section.
- One mask absorbs one ordinary damaging hit.
- Two masks provide two ordinary hits of protection.
- Three masks grant temporary protection from minor dangers.
- Pits and comparable lethal falls remain dangerous.
- Activate C checkpoints before difficult sequences.
- Use Aku Aku protection to reduce mistakes, not to ignore hazard timing.
Check level progress from the Warp Room
The crystal is the required campaign item in an ordinary level. Collecting it marks that level as cleared for normal progression, but the level remains available for return trips. Clear gems, colored gems, bonus routes and hidden paths are separate objectives and may require another visit.
Before entering a portal, inspect the crystal and gem indicators around that level’s Warp Room entrance. These indicators show which rewards have been recorded and which remain outstanding. A clear gem commonly comes from breaking every required box or completing a special route. Colored gems are obtained through specific challenges and can activate alternate gem paths elsewhere.
Triangle is for the current in-level inventory and status display. It is not the complete Warp Room reward record. Use the portal indicators to check crystal and gem completion, then use Triangle during a level to check lives and Wumpa fruit. Start pauses the game and provides the available pause options.
- Confirm the crystal indicator before treating a level as campaign-cleared.
- Inspect the portal indicators for missing clear or colored gems.
- Use Triangle for current in-level status.
- Use the Warp Room entrance indicators for reward tracking.
- Return to cleared levels later for targeted gem attempts.
Replay defeated bosses with the original shortcut
After a Warp Room boss has been defeated, stand on the central platform between the level portals. Hold L1, R1, L2, R2 and Triangle together. While Crash is ascending on the central platform, press Up. This is the original PlayStation boss-rematch command. It allows the defeated boss to be replayed without clearing the five ordinary levels again.
The timing matters: begin holding all five buttons while standing on the central platform, then press Up during the platform’s ascent when Crash is pointing upward. If the rematch does not activate, return to the center of the platform, ensure every shoulder button and Triangle is held, and press Up again during the ascent. Do not use the command inside an ordinary level. Triangle inside a level only opens the status display.
This shortcut applies after the relevant boss has already been defeated. It is useful for practicing attack cycles, dodges and recovery timing without spending lives replaying the preceding Warp Room levels.
- Defeat the boss before attempting a rematch.
- Stand on the central platform.
- Hold L1, R1, L2, R2 and Triangle.
- Press Up while Crash ascends on the platform.
- Do not omit the shoulder buttons.
- Use Triangle inside a level only for the inventory and status display.
Before you move on
- You can identify the original PlayStation inputs for movement, jump, spin, crouch, slide, crawl, body slam, high jump, inventory and pause.
- You can perform a running slide-jump and distinguish it from a body slam and a high jump.
- You understand the one-mask, two-mask and three-mask Aku Aku states.
- You know that pits and other lethal falls are not made safe by ordinary Aku Aku protection.
- You can activate a C checkpoint and use it to resume after losing a life.
- You can inspect a Warp Room portal to determine whether a level’s crystal or gems remain uncollected.
- You can replay a defeated boss by standing on the central platform, holding L1, R1, L2, R2 and Triangle, and pressing Up while Crash ascends.
References for this chapter
Game Systems: Warp Rooms, Crystals, Gems and Bonus Stages
Crash Bandicoot 2: Cortex Strikes Back on the original North American PlayStation release is organized into five main Warp Rooms and a sixth Secret Warp Room. The campaign requires 25 crystals: one in each of the five standard levels on each main floor. Collecting all five crystals in a main Warp Room opens that room’s boss encounter, and defeating the boss gives access to the next main floor. Gems are separate completion items. The original North American release contains 37 clear gems and 5 colored gems, for 42 gems total. Bonus Paths and hidden portals are not needed for an ordinary crystal-and-boss clear, but they are essential for many gems and for reaching the Secret Warp Room.
Use crystals to advance through the five main Warp Rooms
Begin in the first Warp Room and enter any of its five level portals by walking Crash onto the portal. The five levels can generally be attempted in any order. Inside each standard level, take the purple crystal placed along the main route, then continue to the normal exit pad. Reaching the exit without collecting that level’s crystal does not count toward opening the boss.
After all five crystals on the current floor have been collected, return to the center of the Warp Room and use the elevator platform to reach the boss encounter. Defeat that boss to open the next main Warp Room. Repeat this process through all five floors. The campaign requirement is therefore 25 crystals, five bosses, and the final Cortex encounter; gems are not required to unlock the next ordinary boss.
The elevator also lets you return to previously completed rooms. Use it whenever you have earned a colored gem, discovered a Secret Warp Room destination, or want to clean up a missing clear gem. Do not assume that a level is fully complete merely because its crystal has been collected.
- Collect one crystal in every standard level.
- Return to the center elevator after collecting all five crystals on a floor.
- Defeat the floor boss before expecting the next main Warp Room to open.
- Use the elevator to revisit older floors instead of replaying the entire campaign.
Read the original portal display correctly
The original PlayStation game records level progress on the Warp Room display beside each level’s picture. The display identifies the items associated with that level, including its crystal and any gems already collected. This is the correct way to check the original game; do not rely on the completion panels, icons, or interface behavior from Crash Bandicoot N. Sane Trilogy.
Treat the crystal and gems as separate records. A level can show that its crystal has been collected while still missing one or more clear or colored gems. That is normal during a first campaign run. Write down missing items by Warp Room and level if you are pursuing all 42 gems.
A useful order is to finish the crystal route first, then return for gem cleanup after gaining colored gems. Several clear-gem routes contain boxes or platforms that cannot be reached until a matching colored gem has been collected elsewhere.
- Check the item display beside each level picture.
- Record crystals, clear gems, and colored gems separately.
- Do not mistake a crystal-only level completion for full completion.
- Return after acquiring colored gems when a route is inaccessible.
Distinguish clear gems from colored gems
Clear gems are the transparent gems associated with box totals or special route objectives. Many are earned by breaking every relevant box in a level, including boxes on alternate routes and, where the level’s box total includes them, boxes in its Bonus Path. Other clear gems are awarded for completing a death route, a secret section, or another specifically marked challenge. If the level has two clear-gem positions, the second one may require a death route or colored-gem path rather than a second ordinary box sweep.
Do not leave a level simply because every obvious crate on the main path is broken. Inspect bonus areas, skull-and-crossbones death routes, gem paths, backtracking sections, and side routes. Nitro crates count toward box objectives when the level requires them; activate a green exclamation box when the level provides one to detonate its Nitro crates safely.
There are five colored gems: blue, red, green, yellow, and purple. They are earned through special tasks rather than ordinary box totals. Once collected, a colored gem activates matching colored platforms in other levels. Those platforms lead to additional boxes and routes, and some are necessary for clear gems. For example, the blue gem comes from completing Turtle Woods without breaking boxes, while the red gem is reached through the secret Snow Go route accessed from Air Crash.
- Use clear-gem status for box and special-route objectives.
- Use colored-gem status for five special unlocks.
- Check death routes and colored-gem paths before concluding that boxes are missing.
- Return to earlier levels after earning a new colored gem.
Use Bonus Paths without confusing them with normal exits
Bonus Paths are entered from platforms marked with a question mark. Jump onto the platform to enter a separate section containing crates, Wumpa Fruit, and often extra lives. Follow the route carefully, using arrow crates, bounce crates, and exclamation boxes as required. The exit returns Crash to the main level.
A death in a Bonus Path does not cost one of the lives already collected. Crash is returned to the level at the point where the Bonus Path was entered, and the items gathered in that failed Bonus Path attempt are lost. This makes Bonus Paths useful for learning their crate sequences, but you must complete the route successfully if you need its boxes or rewards.
For a clear-gem attempt, do not automatically skip a Bonus Path. Check the level’s box objective and total, because some original Crash 2 levels include Bonus Path boxes in the required total. If you are only collecting the crystal, you may leave the Bonus Path for later, but record that decision so a missing clear gem is not mistaken for a glitch.
- Look for question-mark platforms on the main route.
- Complete the Bonus Path when its boxes are part of the level objective.
- Treat a failed Bonus Path as a reset of that side section, not a campaign loss.
- Return to the entry point and repeat the route if you need its boxes.
Reach the Secret Warp Room through the five hidden portals
The sixth Warp Room is not opened by collecting the 25 ordinary crystals. It is reached through five hidden portals concealed in normal levels. Each portal sends Crash to a particular destination, so record the source level and destination when you find one.
The five original-game connections are Air Crash to Snow Go, Bear Down to Air Crash, Un-Bearable to Totally Bear, Hangin’ Out to Totally Fly, and Diggin’ It to Road to Ruin. These are secret entrances, not ordinary level exits. Follow the unusual platform or side route instead of taking the normal exit when you are deliberately searching for one.
The first important example is Air Crash. Near the early checkpoint and jet-ski section, use the floating boxes over the water to reach the otherwise unusual platform. Touching that platform transports Crash to the Secret Warp Room, where Snow Go becomes available through its secret entrance. Other hidden portals use similarly deliberate actions, such as entering a concealed side route or reaching a platform that is not part of the obvious forward path.
When pursuing the Secret Warp Room, make a separate attempt from the ordinary crystal run if necessary. The hidden portal may occur before or after the crystal route, and taking the normal exit can end the level before you have reached it. Once a secret destination is unlocked, use the corresponding Secret Warp Room portal to revisit it.
- Do not expect the Secret Warp Room to appear after a normal boss victory.
- Search for five hidden portals in Air Crash, Bear Down, Un-Bearable, Hangin’ Out, and Diggin’ It.
- Record each source level and its Secret Warp Room destination.
- Use the Secret Warp Room to reach special level entrances and colored-gem routes.
Before you move on
- All 25 standard-level crystals are recorded.
- Each main Warp Room has had all five crystals collected and its boss defeated.
- The final Cortex encounter is available after the five main Warp Room bosses and the remaining campaign requirements are complete.
- The original North American gem target is tracked as 37 clear gems plus 5 colored gems, for 42 total.
- Bonus Paths, death routes, colored-gem paths, and alternate entrances have been checked for missing gem objectives.
- All five hidden portals have been found if Secret Warp Room completion is being pursued.
- The Secret Warp Room has been entered through a hidden portal rather than assumed to be unlocked automatically.
References for this chapter
- Crash Bandicoot 2: Cortex Strikes Back – FAQ, WebWhizTommy, GameFAQs
- Crash Bandicoot 2: Cortex Strikes Back - FAQ - PlayStation - By JRJ_Jedi
- Crash Bandicoot 2: Cortex Strikes Back — FAQ/Walkthrough v1.00 by Neoseeker
- Crash Bandicoot 2: Cortex Strikes Back/Secrets - StrategyWiki
- Crash Bandicoot 2: Cortex Strikes Back - Guide and Walkthrough - PlayStation - By toby_lover
- Crash Bandicoot 2: Cortex Strikes Back
Warp Room 1: First Five Levels — safe routes and crystal collection
Warp Room 1 contains Turtle Woods, Snow Go, Hang Eight, The Pits and Crash Dash. Finish the ordinary route in each level to collect five crystals and open Ripper Roo’s boss portal. Treat the first pass as campaign progress: learn the hazards, activate checkpoints and collect each crystal safely. Clear Gems and colored gems are separate objectives. Turtle Woods contains the Blue Gem, Hang Eight has two Clear Gems, and Snow Go’s Red Gem is normally reached later through the secret Snow Go route opened from Air Crash in Warp Room 2.
Turtle Woods: collect the crystal before attempting the Blue Gem
Follow the main path through the mud, gaps and small enemies. Jump over pits rather than attacking close to their edges. Turtles are safest when avoided; if you defeat one, do so while Crash has solid ground behind him. Activate every Check Point box before the longer jump sequences, then continue to the crystal at the end of the stage.
Do not force a box-perfect attempt on your first visit. The ordinary Clear Gem requires every breakable box, including the boxes in the bonus area and the hidden side section. When you see the unusual face marking on the ground, use a body slam to enter that side route. The later bird section requires careful jumps and slide-jumps, so learn its layout before trying to collect everything.
- Reach the end and collect the Turtle Woods crystal.
- Activate Check Point boxes before difficult platform sections.
- Record the face-marked floor as the entrance to the hidden box route.
Turtle Woods: obtain the Blue Gem without breaking a crate
Return to Turtle Woods for the Blue Gem after learning the level. Finish the entire stage without breaking any crate. This includes ordinary crates, Check Point boxes, Aku Aku boxes, life crates and other breakable boxes. You may use bouncy or striped boxes as platforms, but do not spin or body-slam them. When a stack blocks the route, jump on the safe bounce surface and use it to clear the obstruction.
If any breakable crate is destroyed, abandon that attempt and restart from the Warp Room. A death does not restore the no-crate condition. Complete the route and collect the Blue Gem at the exit. This gem later opens the alternate colored-gem path in Hang Eight.
- Break zero crates during the complete run.
- Restart if a breakable box is destroyed.
- Collect the Blue Gem at the exit.
Snow Go: survive the ice and complete the ordinary bonus stage
Snow Go adds slippery ground, penguins, seals, Nitro crates and crushing obstacles. Use short, deliberate jumps on the ice and avoid last-second direction changes. Jump over seals, pass the crushing sections promptly and keep a safe distance from Nitro crates. The Red Gem visible above the normal route is not required for the crystal. On the original PlayStation release, use the later secret Snow Go route opened from Air Crash rather than risking an unreliable early attempt.
The ordinary bonus entrance is reached during the normal level. In the bonus, cross the ice and collect its boxes, using crouch-jumps for high boxes. After leaving the bonus, use the nearby exclamation box to make outlined boxes solid when the route brings you back to it. For the Clear Gem, return through the section after activating the required exclamation box and collect every remaining box before taking the exit.
- Collect the Snow Go crystal on the ordinary route.
- Do not confuse the ordinary bonus with the secret route to the Red Gem.
- Use the exclamation box to activate outlined boxes during the Clear Gem attempt.
Hang Eight: collect the crystal, then use the Blue Gem and timed routes
Cross the opening platforms over the water and wait for moving platforms to rise before jumping. After the first Check Point, board the jet ski and steer around mines and whirlpools with broad, early corrections. Avoid hugging hazard edges. Reach the later Check Point, deal with the plant enemies on land and continue to the crystal.
After collecting the Turtle Woods Blue Gem, replay Hang Eight for its colored-gem route. Follow the alternate path, activate the required exclamation boxes and backtrack when the newly solid boxes or platforms open access to the gem route. Take extra care on the jet ski: use the boost only when the water ahead is open and do not make sharp corrections beside mines.
Hang Eight’s timed Clear Gem is a separate objective. On a replay, the timer begins when Crash reaches the first Check Point, before the first jet-ski section. From that trigger, reach the level exit before the timer reaches zero. The timed attempt is lost if Crash dies; return to the Warp Room or restart the level and try again. Do not detour into the bonus area unless you have already confirmed that doing so will not cost the required time.
- Collect the Hang Eight crystal on the ordinary route.
- Use the Turtle Woods Blue Gem before attempting the colored-gem path.
- On the timed Clear Gem attempt, trigger the timer by reaching the first Check Point.
- Reach the exit before the timer expires, without dying during that attempt.
The Pits: collect the crystal, then follow the box route in order
For the first completion, follow the main path through the birds, turtles and ground pits, activating checkpoints and prioritizing survival. Keep Crash centered before each jump and attack enemies only after landing on stable ground. Continue to the crystal and leave the level; the Clear Gem can be attempted separately once the route is familiar.
For the Clear Gem, use the fork deliberately. Take the right branch first and hit the required exclamation boxes. Return to the fork, take the left branch and follow it to the crystal area, collecting the boxes there. Then return to the fork and take the right branch again to finish the remaining route. Enter and complete the bonus stage, and inspect the stone structure and side sections for boxes before exiting. The gem is awarded only when the entire level box total has been completed.
- Collect the The Pits crystal on a safe campaign run.
- For the Clear Gem, take the right branch, then the left branch, then the right branch again.
- Complete the bonus stage and collect its boxes before exiting.
Crash Dash: outrun the boulder and open the first boss portal
Crash Dash is a forward chase. Once the boulder begins following Crash, keep moving and jump over pits and obstacles instead of stopping to fight. Use the visible route, activate Check Point boxes and avoid trying to collect dangerous boxes beside pits or electric hazards on the first pass. Return later for the Clear Gem after learning where the safe jumps are.
When Turtle Woods, Snow Go, Hang Eight, The Pits and Crash Dash each show a crystal in the Warp Room, return to the hub and enter the Ripper Roo portal. If you lose to Ripper Roo, select the boss portal again from the Warp Room; the five levels do not need to be replayed.
- Collect the Crash Dash crystal.
- Confirm all five Warp Room 1 levels show crystals.
- Enter the Ripper Roo portal to continue the campaign.
Before you move on
- Turtle Woods, Snow Go, Hang Eight, The Pits and Crash Dash each show a collected crystal in Warp Room 1.
- The Ripper Roo boss portal is open.
- The Turtle Woods Blue Gem is collected if optional colored-gem progress is being pursued.
- Hang Eight’s Blue Gem route is recorded for a return after obtaining the Turtle Woods Blue Gem.
- The Snow Go Red Gem is marked for later access through the Air Crash secret route.
- The Hang Eight timed Clear Gem procedure is understood: reach the first Check Point to start the timer, then reach the exit before zero without dying during that attempt.
- The ordinary bonus stages have been completed or deliberately postponed without confusing them with the secret Warp Room route.
References for this chapter
- Crash Bandicoot 2: Cortex Strikes Back - Guide and Walkthrough - PlayStation - By toby_lover
- Crash Bandicoot 2: Cortex Strikes Back – Guide and Walkthrough – PlayStation – by AVexer
- Crash Bandicoot 2 FAQ - SmazQ, Crash Mania PDF
- Crash Bandicoot 2: Cortex Strikes Back/Hang Eight – StrategyWiki
- Crash Bandicoot 2 Cortex Strikes Back: Gem Locations Guide
Warp Room 1 Boss — Ripper Roo
Collect the five Warp Room 1 crystals, then use the center platform to enter Ripper Roo’s arena. The fight is won by surviving three TNT-and-Nitro hazard cycles and spinning Ripper Roo after each Nitro sequence leaves him stunned. Clear gems, colored gems, bonus stages and full box counts are not required to open this boss. After victory, the original PlayStation release also allows a boss rematch from the center platform with a specific button combination.
Unlock Ripper Roo’s arena
Complete Turtle Woods, Snow Go, Hang Eight, The Pits and Crash Dash, collecting the crystal at the end of each level. The five crystals are the required progression items for the first boss. You do not need the clear gems, colored gems, bonus-stage boxes or every ordinary box before entering the fight.
Return to Warp Room 1 and stand on the circular platform in the middle of the room. Press Up to ride the platform to Ripper Roo’s arena. This is the original PlayStation arrangement; do not substitute the boss-portal behavior from Crash Bandicoot: N. Sane Trilogy.
- Turtle Woods crystal collected
- Snow Go crystal collected
- Hang Eight crystal collected
- The Pits crystal collected
- Crash Dash crystal collected
- The center platform is available in Warp Room 1
Understand the hazard cycle
Ripper Roo hops around the square arena and creates a TNT pattern first, followed by a Nitro pattern. TNT boxes are red and detonate after their fuse has been activated. Nitro boxes are green and explode immediately when Crash touches them. Treat both types as lethal hazards; Crash cannot safely spin through them.
Ripper Roo is not the target while he is bouncing around the arena. Let the hazard sequence play out. When the Nitro arrangement explodes and Roo is left flashing or unconscious, move in and use Crash’s spin attack once. Retreat as soon as the hit connects, because the next placement cycle begins afterward. Three successful stun-window hits defeat him.
- Do not attack while Roo is still bouncing
- Keep away from green Nitro boxes
- Stay outside the TNT blast areas
- Wait for the Nitro sequence to finish
- Spin Roo only while he is visibly stunned
- Plan for three successful hits
Survive the first cycle
For the first TNT arrangement, remain toward the lower-left portion of the square while keeping enough distance from the boxes to avoid their blasts. Do not hug a box or commit to a long crossing. Watch where Roo places the explosives and adjust in small movements if the safe space changes.
When Roo begins placing Nitro, shift toward the lower-right open area if that route remains clear. The goal is to stand in a section that is not occupied by green boxes when the sequence finishes. Once the Nitro boxes explode and Roo is flashing or unconscious, cross to him and spin once. Immediately move away before the next cycle begins.
- Use the lower-left area as the starting reference for TNT
- Reposition if the box layout closes the route
- Move toward clear space during the Nitro phase
- Land the first spin only after Roo is stunned
- Retreat after the hit
Handle the second cycle
The second pattern follows the same TNT-then-Nitro order, but its safe position is not identical to the first. During the TNT placement, stay near the lower-center area or another open section away from the active boxes. Leave yourself room to change direction when the final TNT boxes appear.
For the Nitro phase, move toward the lower-right side again if it is open, but verify the route before crossing. Do not step across a Nitro box to reach Roo. Wait for the last explosion, confirm that he is stunned, then spin him for the second hit and withdraw.
- Reassess the arena instead of repeating the first route blindly
- Keep a direction-change route open during TNT placement
- Do not cross active Nitro boxes
- Wait for the final Nitro explosion
- Complete the second spin and retreat
Finish the third cycle
The final arrangement can force more repositioning. Move away from the first TNT boxes, then alter your position as Roo places the remaining boxes. Avoid trying to preserve one corner for the entire phase; the useful space shifts as the pattern fills the floor.
When the final Nitro phase begins, stand near the open section of the bottom row, several spaces away from the first Nitro box Roo places. Keep Crash still or make only short adjustments while the boxes are active. After the Nitro sequence explodes and Roo is visibly stunned, spin him for the third time. The victory sequence begins after the successful hit.
- Treat the third pattern as a changing layout
- Move between open areas as the TNT appears
- Avoid every active Nitro box
- Wait for Roo’s stunned state
- Complete the third spin
Recover after a failed attempt
If Crash loses a life during the boss fight, use the center platform in Warp Room 1 to return to the arena. You do not need to replay Turtle Woods, Snow Go, Hang Eight, The Pits and Crash Dash merely because the boss attempt failed. Re-enter the fight and resume practice with the TNT-to-Nitro transitions.
If the TNT explosions are causing the deaths, increase your distance from the active group and wait for the placement to finish before moving. If Nitro is the problem, stop making long crossings and remain in the open section until every relevant green box has exploded. Survival is more important than reaching Roo quickly; the vulnerability window lasts long enough for a controlled approach.
- Return to Warp Room 1 after a failed attempt
- Use the center platform to re-enter the boss
- Do not replay completed levels solely because of a boss death
- Create more distance from TNT when necessary
- Wait out the Nitro pattern before approaching
Rematch Ripper Roo in the original PlayStation release
After Ripper Roo has been defeated, return to Warp Room 1 and stand on the center platform. Hold L1, R1, L2, R2 and Triangle simultaneously, then press Up while the central platform rises. The command sends Crash back to a previously defeated boss instead of simply transporting him to the next warp room.
Use this rematch to practice a particular transition, such as surviving the second TNT layout or positioning for the final Nitro opening. The rematch command works only after the relevant boss has already been defeated. Do not replace the full command with Triangle alone or with Up plus Triangle alone; those abbreviated instructions are not the verified command for this original-edition guide.
- Ripper Roo has already been defeated
- Return to Warp Room 1
- Stand on the center platform
- Hold L1, R1, L2, R2 and Triangle
- Press Up while the platform rises
- Confirm that the boss rematch begins
Before you move on
- The crystals from Turtle Woods, Snow Go, Hang Eight, The Pits and Crash Dash are recorded.
- Ripper Roo has been stunned and hit three times.
- The victory sequence has played and access to Warp Room 2 is available.
- A later rematch can be started from Warp Room 1 by holding L1, R1, L2, R2 and Triangle, then pressing Up while the center platform rises.
- No clear gem, colored gem, bonus-stage completion or full box count was incorrectly treated as a requirement for boss access.
References for this chapter
- Crash Bandicoot 2: Cortex Strikes Back - FAQ - PlayStation - By JRJ_Jedi
- Crash Bandicoot 2: Cortex Strikes Back — Boss Guide, PlayStation, by Lagunathemoron
- Crash Bandicoot 2: Cortex Strikes Back — FAQ/Walkthrough v1.00 by Neoseeker
- Crash Bandicoot 2: Cortex Strikes Back PSX Cheats — Neoseeker
- Crash Bandicoot 2: Cortex Strikes Back — NTSC-U PlayStation database entry
- Crash Bandicoot 2: Cortex Strikes Back/Secrets - StrategyWiki
- Crash Bandicoot 2: Cortex Strikes Back — Boss replay instructions
Warp Room 2: Mid-game platforming and jet-ski / vehicle sections
Warp Room 2 contains Snow Biz, Air Crash, Bear It, Crash Crush and The Eel Deal. Collect each level’s crystal to open the Komodo Brothers encounter. Treat the first visit to each level as a safe crystal run, then return for colored-gem paths, death routes, secret warps and complete box collections. Air Crash contains the main secret-warp entrance for this room, while Bear It is only a normal level in the original PlayStation release.
Clear Snow Biz and mark the red-gem return trip
Enter Snow Biz and make the first attempt a crystal run. The ice reduces traction, so use short jumps and avoid long, committed leaps near pits, seals, porcupines and Nitro crates. Nitro crates are lethal on contact; do not try to spin them. When a Nitro switch is present, reach it without touching the crates and use it to clear the hazard safely.
Follow the ordinary route to the exit and activate every checkpoint. The red-gem route is an optional return objective, not a requirement for the Snow Biz crystal. In the original release, the red gem is obtained in the secret version of Snow Go, which is reached through Air Crash. After collecting that gem, return to Snow Biz and use the red-gem platform to reach its alternate section. Make a separate clear-gem attempt if the route’s boxes make the survival run too risky.
- Collect the Snow Biz crystal.
- Do not confuse Snow Biz’s red-gem route with the location where the red gem is obtained.
- Return after unlocking the red gem through Air Crash’s secret route.
Learn Air Crash’s jet-board section before attempting its secrets
Air Crash begins with standard platforming and then introduces the jet-board. Before mounting it, break safe boxes, locate the checkpoint and identify the direction of the next ramp or floating-crate line. Steer with small adjustments. The board carries momentum, so a long held direction can turn a correct approach into a missed landing.
Use the boost only when it helps clear a long gap, reach a ramp or line up with a distant group of boxes. It does not replace steering. For the first clear, stay on the route and collect the crystal even if you miss optional boxes. Once the board section is familiar, return for the separate secret and death-route objectives.
The secret entrance is reached near the first checkpoint, in the water beside the jet-board area. Jump across the floating boxes and land on the raised platform to be transported to the secret version of Snow Go. That route contains the red gem. This is separate from Air Crash’s death route.
The death route is reached by taking the skull-and-crossbones platform when the required no-death condition is still active. In practice, reach the platform without dying after the relevant checkpoint or start of the attempt. The death route contains boxes needed for Air Crash’s complete box gem. If you die before reaching the skull platform, repeat the approach rather than expecting the platform to remain available on that attempt. Plan one run for the crystal, one for the secret Snow Go entrance and one or more careful runs for the death-route and box requirements.
- Collect the Air Crash crystal.
- Practice steering and boosting before attempting complete box collection.
- Use the floating boxes near the first checkpoint to reach the secret Snow Go entrance.
- Keep the secret entrance and the skull-platform death route as separate objectives.
- Preserve the no-death condition required to make the death route appear.
Complete Bear It as a normal Polar level
Bear It places Crash on Polar, who moves forward automatically while you steer from side to side. Keep Polar near the center before ramps, gaps and narrow channels, then make gradual corrections. Avoid large last-second movements, especially when fish, mines or water gaps are visible ahead.
Use jumps when a ramp or obstacle requires them, not merely because a ramp is present. The safest first objective is the crystal. If a box requires an awkward line, continue to the next checkpoint and return later for a clear-gem attempt.
Bear It has no secret-warp connection in this chapter’s route plan. It is a normal Warp Room 2 level. The related secret entrance involving Polar is in Bear Down, a Warp Room 3 level, and should be handled when that warp room is covered. Do not search Bear It for a portal that belongs to another level.
- Collect the Bear It crystal.
- Use small lateral corrections near ramps and gaps.
- Treat Bear It as a normal level; do not assign Bear Down’s secret entrance to it.
- Return later for difficult box arrangements.
Survive Crash Crush’s boulder chase
Crash Crush is an escape sequence with a boulder pursuing Crash. The boulder cannot be defeated, so maintain forward momentum and choose each landing before jumping. Use slide-jumps where extra horizontal distance is clearly needed, but do not slide-jump blindly around corners or over pits.
Activate checkpoints immediately. On retries, focus on the section beyond the most recent checkpoint instead of taking unnecessary risks in the opening. Collect optional boxes only when the boulder is safely behind Crash and the next landing has enough recovery space.
The normal route does not require a colored gem. Reach the exit and collect the crystal first. Return later for any missed boxes rather than treating every difficult arrangement as evidence of a hidden gem path.
- Collect the Crash Crush crystal.
- Learn the platform sequence before attempting a box-focused run.
- Use checkpoints to reduce repeated exposure to the opening chase.
- Do not invent a colored-gem route for the ordinary crystal path.
Finish The Eel Deal and collect the green gem
Follow The Eel Deal’s sewer route cautiously. Enemies and Nitro crates can appear immediately around corners, so wait until the camera reveals the corridor before charging forward. Activate checkpoints and complete the ordinary route for the crystal if you are making a first survival attempt.
At the early fork, take the right-hand branch containing the Nitro crates. Continue through the Nitro-filled room to the apparent dead end, then jump through the back wall. It is a false wall and leads to the green gem. This colored gem is available from The Eel Deal itself and does not require a previously collected green gem.
After collecting the green gem, retrace the route carefully or use the level’s available recovery method if you are deliberately optimizing a completion attempt. For the clear gem, inspect side corridors and exclamation-box sequences separately; some boxes are easier to collect after the hazard arrangement has been understood. Do not let the green-gem detour replace the ordinary crystal objective.
When all five Warp Room 2 crystals are collected, return to the center of the warp room and use the central elevator to begin the Komodo Brothers encounter. The gems and secret routes may be completed before or after that boss fight.
- Collect The Eel Deal crystal.
- At the first fork, take the Nitro-lined right branch.
- Jump through the false wall at the end of the Nitro room to obtain the green gem.
- Record any missed boxes for a later clear-gem attempt.
- Use the central elevator after all five Warp Room 2 crystals to challenge the Komodo Brothers.
Before you move on
- Snow Biz, Air Crash, Bear It, Crash Crush and The Eel Deal each show their crystal as collected.
- The Air Crash secret entrance to Snow Go has been identified and used if the red gem is being pursued.
- Air Crash’s skull-platform death route has been distinguished from its secret Snow Go entrance.
- The green gem has been collected from The Eel Deal’s Nitro-lined false-wall branch.
- Bear It has been recorded as a normal Warp Room 2 level, with no secret-warp connection assigned to it.
- The central elevator is available after all five Warp Room 2 crystals, allowing access to the Komodo Brothers.
- Any missed boxes, death routes or gem paths are recorded by level for later completion attempts.
References for this chapter
- Crash Bandicoot 2: Cortex Strikes Back - Guide and Walkthrough - PlayStation - By toby_lover
- Crash Bandicoot 2: Cortex Strikes Back – Guide and Walkthrough – PlayStation – by AVexer
- Crash Bandicoot 2 FAQ - SmazQ, Crash Mania PDF
- Air Crash - Bandipedia
- The Eel Deal - Bandipedia
- Crash Bandicoot 2: Cortex Strikes Back/The Eel Deal - StrategyWiki
Warp Room 2 Boss
After collecting the five crystals in Snow Biz, Air Crash, Bear It, Crash Crush and The Eel Deal, use the central platform in Warp Room 2 to fight the Komodo Brothers. The original PlayStation battle has three attack openings. Each successful opening requires Crash to spin the dizzy Komodo Joe into Komodo Moe. Joe’s spinning movement is the main hazard at first; after the first collision, Moe adds sword attacks, and the final cycle combines the swords with Joe’s spinning route.
Collect the five Warp Room 2 crystals
Complete Snow Biz, Air Crash, Bear It, Crash Crush and The Eel Deal, taking the crystal at the end of every level. The order does not matter for opening the boss, but all five crystals must be recorded before the central platform leads to the encounter.
Return to Warp Room 2 after the fifth crystal and walk onto the central platform. Ride it upward to enter the Komodo Brothers arena. This is the original PlayStation arrangement; do not look for the separate boss doorway used in the N. Sane Trilogy. The crystals remain collected if you lose the fight, so a failed attempt does not force you to replay the five levels.
- Snow Biz crystal collected.
- Air Crash crystal collected.
- Bear It crystal collected.
- Crash Crush crystal collected.
- The Eel Deal crystal collected.
- Crash is standing on the Warp Room 2 central platform.
Learn the first attack cycle
Komodo Joe is the slimmer brother who is spun around the arena by Komodo Moe. At the beginning of the cycle, keep Crash away from both brothers and watch Joe’s circular path. Do not try to attack while Joe is moving. Touching either brother at the wrong time can cost a life, so keep to the open space and make small directional adjustments rather than crossing the arena unnecessarily.
When Joe stops spinning, he becomes dizzy and remains vulnerable for a short opening. Move toward him and press Square to spin. Crash’s spin sends Joe across the arena and into Moe. This collision is the required first hit. Jumping on Joe is not the intended original-edition method; use the spin attack while he is visibly stunned.
If Joe stops far from Crash, wait for a safe approach instead of rushing through the brothers. The opening is generous enough to reward patience, and surviving the cycle is more important than reaching Joe immediately.
- Avoid Joe while he is spinning.
- Wait for Joe to stop and become dizzy.
- Press Square to spin the stunned Joe.
- Confirm that Joe collides with Moe for the first hit.
Avoid Moe’s swords and land the second hit
After the first collision, Moe begins throwing swords around the arena. Keep moving and, when practical, stay behind Moe rather than directly in front of him. The swords travel across the room, so do not stand still at the arena edge where a retreat can be blocked. Watch the sword route before changing sides.
When the sword pattern ends, Moe spins Joe again. Return your attention to Joe, but continue checking Moe’s position. Avoid the rotating Joe until he stops and becomes dizzy. Then approach and spin Joe into Moe for the second hit.
Do not attack Moe directly. The fight is built around redirecting Joe. If you miss the opening, retreat, let the brothers reset, and wait for the next cycle rather than attempting a contact attack.
- Stay mobile during Moe’s sword pattern.
- Prefer the space behind Moe when avoiding the swords.
- Wait for the second dizzy opening.
- Spin Joe into Moe for the second hit.
Survive the final combined cycle
After the second collision, Moe continues throwing swords while Joe spins around the room. This is the most dangerous part of the battle because watching only Joe can lead Crash into a sword. Keep moving, track both hazards, and change direction whenever a sword closes the route you were using.
Do not approach Joe the instant his spin ends if a sword is still crossing the area near him. Wait until the path is clear, then spin the dizzy Joe into Moe one final time. The third collision defeats the Komodo Brothers and begins the victory sequence.
The final hit uses the same Square-button spin as the first two. No colored gem, special move or relic is required. Aku Aku protection can absorb a mistake, but it is not necessary to unlock the fight or progress to the next Warp Room.
- Track Joe and Moe simultaneously during the last cycle.
- Avoid approaching through an active sword path.
- Spin Joe into Moe for the third collision.
- Allow the victory sequence to finish.
Recover after failure and save progress
A normal death in the boss arena does not place Crash at an ordinary level checkpoint. The fight must be restarted from the Warp Room, so walk back to the Warp Room 2 central platform and ride it upward again. The five crystals remain recorded, allowing an immediate retry.
Before attempting the fight again, use the Save/Load wall in the Warp Room if you want the current crystal progress preserved on the memory card. Saving does not create a checkpoint inside the boss arena and does not change the Komodo Brothers’ attack pattern.
If a Game Over occurs, continue or reload from the game’s available save options, then return to Warp Room 2. Check that the five crystal icons are still recorded before entering the boss again. Do not treat a level checkpoint from Snow Biz or another stage as a boss checkpoint; those checkpoints apply only inside their own levels.
- Re-enter through the central platform after a single failed attempt.
- Save at the Warp Room 2 Save/Load wall when needed.
- After a Game Over, confirm the five crystals before retrying.
- Do not expect a checkpoint inside the boss arena.
Optional original-edition rematch
After the Komodo Brothers have been defeated, the fight can be replayed from the Warp Room. Stand on the central platform and begin its ascent. Hold L1, R1, L2, R2 and Triangle together, then press Up while Crash is pointing upward during the platform’s rise. The complete shoulder-button combination is required for this original PlayStation rematch command.
The rematch is optional practice and does not unlock Warp Room 3 or affect the campaign ending. If the input is made before the boss has been defeated, it will not serve as a normal progression shortcut. After victory, the game’s standard transition makes Warp Room 3 available.
- The Komodo Brothers have already been defeated.
- Crash is on the central platform during its ascent.
- Hold L1, R1, L2, R2 and Triangle together.
- Press Up while Crash points upward.
- Use the rematch only for optional practice.
Before you move on
- All five Warp Room 2 crystals are recorded: Snow Biz, Air Crash, Bear It, Crash Crush and The Eel Deal.
- The Komodo Brothers have been hit three times by spinning dizzy Komodo Joe into Komodo Moe.
- The victory sequence has played and Warp Room 3 is available.
- No colored gem, relic, time trial or special collectible was required for this boss.
- For optional practice, the full rematch command works after victory: hold L1, R1, L2, R2 and Triangle, then press Up while the central platform rises and Crash points upward.
References for this chapter
- Crash Bandicoot 2: Cortex Strikes Back – Instruction Manual transcription
- Crash Bandicoot 2: Cortex Strikes Back - FAQ - PlayStation - By JRJ_Jedi
- Crash Bandicoot 2: Cortex Strikes Back - Guide and Walkthrough - PlayStation - By toby_lover
- Komodo Brothers (Boss Fights)
- Crash Bandicoot 2: Cortex Strikes Back – PlayStation boss rematch information
Warp Room 3: Plant Food, Sewer or Later, Bear Down, Road to Ruin and Un-Bearable
Warp Room 3 contains Plant Food, Sewer or Later, Bear Down, Road to Ruin and Un-Bearable. Collect the crystal in all five regular levels to open the Tiny Tiger encounter. Plant Food contains the Yellow Gem, which later activates the alternate route in Sewer or Later. Bear Down and Un-Bearable contain secret entrances leading to the Secret Warp Room, while Diggin’ It belongs to Warp Room 4 and later opens Road to Ruin’s hidden box section.
1. Clear the five Warp Room 3 levels
The regular entrances in this room are Plant Food, Sewer or Later, Bear Down, Road to Ruin and Un-Bearable. Hangin’ Out and Diggin’ It are not part of Warp Room 3; both appear in Warp Room 4. You can play these five stages in any order, but a practical first-clear sequence is Plant Food, Sewer or Later, Bear Down, Road to Ruin and Un-Bearable.
On each first attempt, prioritize reaching the normal exit and collecting the crystal. Clear gems, death routes and secret entrances are safer to handle during dedicated replay attempts. This is especially important in Road to Ruin, where the skull-and-crossbones route appears only during an attempt in which Crash has not died. Mark each crystal as soon as it is collected so you know which regular stage needs to be replayed if Tiny Tiger is not available.
- Collect the Plant Food crystal.
- Collect the Sewer or Later crystal.
- Collect the Bear Down crystal.
- Collect the Road to Ruin crystal.
- Collect the Un-Bearable crystal.
2. Plant Food: collect the crystal and Yellow Gem
Plant Food alternates between ordinary platforming and jet-ski sections. Learn the opening route first and use the first checkpoint as your reference point. Immediately after activating the first checkpoint, the Yellow Gem timer appears. The timed objective is active from that point onward, so do not assume you can wait until a later checkpoint before beginning the attempt.
For the Yellow Gem, replay Plant Food after learning the route. Move quickly from the first checkpoint to the end of the level before the timer expires. Do not stop to break optional boxes during this attempt. Practice the turns, dock positions, jet-ski launches and hungry-plant placements separately, then commit to the route during the timed run. Use small steering corrections rather than broad movements, particularly when approaching ramps and narrow platforms.
If Crash dies after the timer has been activated and respawns at a checkpoint, the timed attempt does not simply restart. Restart Plant Food from the Warp Room for another Yellow Gem attempt. If the timed route becomes unsafe, prioritize surviving to the crystal and return for the Yellow Gem later.
The normal clear gem requires breaking every box on the regular route, including boxes in the bonus stage and boxes revealed by the nearby exclamation switch. After the second checkpoint, check the side route before taking the next jet-ski section; the right-hand route contains plants and boxes that are easy to miss. During box runs, use the detonator for Nitro crates and check suspended boxes above the jet-ski ramps.
- Learn the normal route before attempting the timed run.
- Activate the first checkpoint and begin the Yellow Gem attempt from there.
- Reach the end before the timer expires.
- Restart the level from the Warp Room if a death ends the timed attempt.
- Collect the crystal on a normal or timed completion.
- Return later for the regular clear gem if the first run focused on speed.
- Use the Yellow Gem later to open Sewer or Later’s alternate route.
3. Sewer or Later: complete the normal route, then use the Yellow Gem
Sewer or Later contains electrified water, rotating fans, flamethrower enemies and sewer-cleaning enemies. Wait for flame hazards to finish their firing cycle before advancing. Where a sewer cleaner blocks a fan, spin it into the fan blades to clear the passage. Cross electrified water only by using the safe platforms, and avoid blind jumps where the next landing is hidden by the camera.
Complete the ordinary route first and collect the crystal. At the later route changes, look for exclamation switches that reveal boxes or make otherwise inaccessible boxes appear. For a clear-gem attempt, inspect the spaces above Nitro crates and behind route changes before continuing. Never touch Nitro crates merely to test whether they are safe.
After obtaining the Yellow Gem in Plant Food, replay Sewer or Later and stand on the Yellow Gem platform in the earlier sewer section. This opens the alternate route. The path crosses dangerous electrified-water sections and contains a clear gem of its own. Keep Crash on the platforms, wait for the moving hazards and use controlled slide-jumps when the route requires extra distance. The Yellow Gem path does not replace the level’s crystal objective; finish the level after collecting the gem-route reward.
- Collect the Sewer or Later crystal on the ordinary route.
- Use exclamation switches to reveal boxes during a clear-gem attempt.
- Obtain the Yellow Gem in Plant Food first.
- Stand on the Yellow Gem platform in Sewer or Later.
- Complete the alternate route and collect its clear gem if pursuing extended completion.
4. Bear Down: collect the crystal and open Air Crash’s hidden section
Bear Down is a Polar-riding stage. Make steering adjustments before turns instead of waiting until Polar is already beside an obstacle. Use speed when a long jump is required, but avoid unnecessary side movement during narrow approaches. On the first pass, concentrate on surviving to the crystal and learning the placement of boxes around the moving platforms and water gaps.
Near the end, Polar throws Crash onto a snowy landing area. Do not immediately take the normal exit. Turn around and look behind the landing point. Jump across the floating ice platforms over the water and reach the snowy platform in the center of the lake. This activates the hidden entrance to the Secret Warp Room and opens the alternate Air Crash section.
The hidden Air Crash section contains boxes that cannot be collected during Air Crash’s ordinary opening route. It is therefore needed for Air Crash’s full box completion, but not for the Bear Down crystal or for opening Tiny Tiger. The original PlayStation version uses the hidden portal and Secret Warp Room rather than adding a permanent sixth regular entrance to Warp Room 3.
- Collect the Bear Down crystal.
- After Polar throws Crash, turn around instead of taking the normal exit.
- Cross the floating ice platforms.
- Reach the snowy center platform to activate the Secret Warp Room entrance.
- Use the alternate Air Crash section when completing Air Crash’s box gem.
5. Road to Ruin: separate the death route from Diggin’ It’s later entrance
Road to Ruin is a forward platforming stage with falling platforms, fire-spitting statues, barrels and moving platforms. For a first completion, focus on reaching the crystal and exit. Use short, deliberate jumps on the hexagonal platforms and wait for fire hazards to finish their cycles before moving. When a moving platform is approaching, let it come close rather than making a blind jump toward it.
The skull-and-crossbones platform appears only if Crash has not died during that attempt. Reach it without losing a life, then complete the dangerous alternate route to obtain Road to Ruin’s death-route clear gem. If Crash dies before the skull platform appears, restarting from a checkpoint does not restore the route for that attempt. Finish or leave the level, then begin Road to Ruin again from the Warp Room.
Road to Ruin’s other clear gem requires boxes in a hidden section reached later through Diggin’ It. Diggin’ It is a Warp Room 4 level, not a Warp Room 3 level. Near the end of Diggin’ It, use a body slam on the bomb-spitting plant positioned on the small isolated platform. The hidden entrance sends Crash to the additional Road to Ruin section, where the missing boxes can be collected. This entrance is separate from Road to Ruin’s no-death skull route.
- Collect the Road to Ruin crystal.
- Reach the skull-and-crossbones platform without dying during that attempt.
- Complete the death route for its clear gem.
- After Warp Room 4 opens, use Diggin’ It’s plant entrance to reach Road to Ruin’s hidden box section.
- Do not confuse the Diggin’ It entrance with the no-death death route.
6. Un-Bearable: collect the crystal and unlock Totally Bear
Un-Bearable is another Polar chase stage. Stay near the center of the route when possible and steer before obstacles reach Polar. Avoid unnecessary side movement during the faster sections. Complete a survival run first so you know the final gap and the point at which the large Polar is thrown away.
After the large Polar falls into the final pit and Crash is thrown off, do not enter the normal exit. Turn around and return to the gap where the bear fell. Use a slide-jump to cross the opening, then continue backward until you find the small Polar bear. Touch the small bear to activate the Secret Warp Room entrance and unlock Totally Bear.
Begin the slide before jumping so Crash carries enough distance across the gap. If the landing fails, use the nearby checkpoint or restart the level rather than forcing the route after a poor approach. Totally Bear is optional for opening Tiny Tiger, but its boxes count toward extended gem completion.
- Collect the Un-Bearable crystal.
- After the large Polar falls, turn around instead of entering the exit.
- Slide-jump across the final gap.
- Reach and touch the small Polar bear.
- Use the resulting entrance to access Totally Bear.
7. Open Tiny Tiger and keep Warp Room 4 secrets separate
Once the five regular Warp Room 3 crystals are collected, ride the central platform to begin the Tiny Tiger encounter. The Yellow Gem, the Road to Ruin death route and the Secret Warp Room levels are not required for this boss entrance. Defeating Tiny Tiger is the required progression step that opens Warp Room 4.
The optional entrances remain useful for completion. Bear Down opens the hidden Air Crash section, and Un-Bearable opens Totally Bear. Later, in Warp Room 4, Hangin’ Out opens Totally Fly and Diggin’ It opens the hidden Road to Ruin section. Keep these relationships separate: Hangin’ Out and Diggin’ It are not substitutes for Plant Food or Sewer or Later, and Diggin’ It should never be listed as a Warp Room 3 stage.
Before challenging Tiny Tiger, confirm that crystals are displayed for Plant Food, Sewer or Later, Bear Down, Road to Ruin and Un-Bearable. If one is missing, replay only the corresponding regular level. After Tiny Tiger is defeated, proceed to Warp Room 4, where Diggin’ It can eventually finish Road to Ruin’s box-gem requirements.
- All five Warp Room 3 crystals are collected.
- Tiny Tiger is available from the central Warp Room platform.
- Plant Food’s Yellow Gem has been obtained if extended completion is intended.
- Bear Down’s Air Crash entrance is understood.
- Un-Bearable’s Totally Bear entrance is understood.
- Diggin’ It is reserved for Warp Room 4 and the hidden Road to Ruin section.
Before you move on
- Plant Food, Sewer or Later, Bear Down, Road to Ruin and Un-Bearable each show a collected crystal.
- The Plant Food Yellow Gem attempt began at the first checkpoint and reached the end before the timer expired.
- The Plant Food run was restarted from the Warp Room if a death ended the timed attempt.
- The Yellow Gem route in Sewer or Later has been opened and completed if its clear gem is being collected.
- The Bear Down secret entrance has opened the hidden Air Crash section.
- The Un-Bearable secret entrance has opened Totally Bear.
- The Road to Ruin skull route has been completed without a prior death during that attempt if its clear gem is being collected.
- Diggin’ It is correctly identified as a Warp Room 4 level that later opens Road to Ruin’s hidden box section.
- The central Warp Room platform opens Tiny Tiger after the five correct Warp Room 3 crystals are collected.
References for this chapter
- Crash Bandicoot 2: Cortex Strikes Back - FAQ - PlayStation - By JRJ_Jedi
- Crash Bandicoot 2: Cortex Strikes Back - Guide and Walkthrough - PlayStation - By toby_lover
- Crash Bandicoot 2: Cortex Strikes Back/Plant Food — StrategyWiki
- Crash Bandicoot 2: Cortex Strikes Back/Secrets - StrategyWiki
- Crash Bandicoot 2 FAQ - SmazQ, Crash Mania PDF
Warp Room 3 Boss — Tiny Tiger
After collecting the crystals from Plant Food, Sewer or Later, Bear Down, Road to Ruin and Un-Bearable, use Warp Room 3’s central platform to enter the Tiny Tiger fight. Tiny cannot be damaged directly. Win by moving across the suspended platforms, causing him to follow Crash onto platforms that flash red, then escaping before those platforms collapse. Repeat this process until Tiny falls three times.
Open the Tiny Tiger arena
Return to Warp Room 3 after collecting the five required crystals: Plant Food, Sewer or Later, Bear Down, Road to Ruin and Un-Bearable. Clear gems, colored gems and secret levels are not required to enter this boss fight.
Stand on the central platform in Warp Room 3 and press Up to ride to the arena. The fight takes place above a bottomless drop on a suspended grid of platforms. Crash has no weapon or direct attack that can hurt Tiny, so the battle is entirely about movement, spacing and timing.
- The five Warp Room 3 level crystals are collected.
- Crash is standing on the central Warp Room 3 platform.
- The Tiny Tiger arena has loaded.
Understand Tiny’s attack pattern
Tiny continually pursues Crash by jumping from platform to platform. He is not vulnerable to a spin, a jump attack, a slide or a body slam. Avoid him rather than trying to make contact. Crash loses a life by touching Tiny or falling into the pit.
Move with short, deliberate jumps and keep a possible landing platform in view. Do not remain stationary while Tiny closes the distance. Long slide-jumps are usually unnecessary and can carry Crash beyond the platform he intended to reach.
Aku Aku can protect Crash from contact with Tiny, but it cannot prevent a death caused by falling into the void. If you have a mask, use it as insurance against a collision, not as a reason to take a blind jump.
- Tiny is treated as an obstacle, not a target.
- Crash keeps a safe destination available before jumping.
- Aku Aku is not relied upon to protect against a pitfall.
Lure Tiny onto a collapsing platform
Watch the platforms while moving around the arena. When one begins flashing red, it is about to collapse. Guide Tiny toward that platform by continuing across the grid, then leave the flashing platform yourself before it drops.
Crash does not need to touch Tiny or land on the same platform. The objective is to make Tiny occupy the red-flashing platform when it disappears. The safest approach is to use a nearby surviving platform as your destination and allow Tiny’s pursuit to carry him onto the collapsing one.
Leave early enough to make a controlled jump. Waiting until the final instant can leave Crash with no safe landing, especially near the outside edge of the arena.
- A red-flashing platform is identified as the danger platform.
- Crash escapes to a surviving platform before the collapse.
- Tiny falls once.
Repeat the setup after the arena resets
After Tiny falls, the platforms return and the encounter begins another cycle. Do not assume the previous surviving route will remain safe. Resume moving as soon as the platforms reset, watch Tiny’s position and look for the next red-flashing platform.
Change direction before Tiny reaches the platform you intended to use. If he is already close, a short jump to a neighboring platform is safer than trying to pass through him or crossing the entire arena with a long slide-jump.
The second fall is caused in the same way as the first: make Tiny follow Crash onto a platform that is about to drop, then move Crash to safety.
- The arena has reset after Tiny’s first fall.
- Crash reaches a safe platform before the next collapse.
- Tiny falls a second time.
Complete the third cycle
Repeat the movement pattern for the final fall. The available safe space can feel more limited as the cycle develops, so prioritize survival over speed. Watch both Crash’s platform and Tiny’s position instead of focusing only on the next red warning.
When the third collapsing platform removes Tiny, stay on a surviving platform. Do not immediately make a celebratory jump, because Crash can still fall before the victory transition completes. The fight is won when Tiny has fallen three times and Crash remains alive.
- Tiny falls three times.
- Crash survives the final platform collapse.
- The victory transition returns Crash to Warp Room 3 and opens the route to Warp Room 4.
Recover after a failed attempt
If Crash touches Tiny or falls into the void, the boss attempt restarts from the beginning. Tiny’s previous falls do not carry over, so use the next attempt to correct the specific error: leave warning platforms sooner, choose shorter jumps or stop using a route that brings Crash too close to Tiny.
You do not need to replay Plant Food, Sewer or Later, Bear Down, Road to Ruin or Un-Bearable after a failed boss attempt. The level crystals remain collected as campaign progress. Return to the central platform in Warp Room 3 and enter the arena again.
If a Game Over interrupts the attempt, continue from the saved game and verify that Warp Room 3 still shows the completed level progress before returning to the boss platform.
- The failed attempt is treated as a complete boss restart.
- The five Warp Room 3 crystals remain collected.
- Crash can return to Tiny through the Warp Room 3 central platform.
Replay Tiny Tiger for practice
The original PlayStation release allows a previously defeated boss to be replayed from its warp room. Stand on the central platform in Warp Room 3 and hold L1, R1, L2, R2 and Triangle simultaneously. While the platform is rising, press Up. Keep the shoulder buttons and Triangle held during the upward ride until the boss arena loads.
This command works for bosses that have already been defeated; it is not a way to enter Tiny’s arena before completing the required Warp Room 3 boss progression. A successful replay does not award another crystal or alter the campaign route, but it lets you practice Tiny’s later platform cycles without clearing the five regular levels again.
- Tiny Tiger has already been defeated once.
- Crash is standing on the Warp Room 3 central platform.
- L1, R1, L2 and R2 are held together with Triangle.
- Up is pressed while the central platform rises.
- The Tiny Tiger arena loads without replaying the five regular levels.
Before you move on
- The crystals from Plant Food, Sewer or Later, Bear Down, Road to Ruin and Un-Bearable were collected before entering the fight.
- Tiny Tiger has fallen three times.
- Crash has survived the final collapse and returned to Warp Room 3.
- The central platform now provides access to Warp Room 4.
- After victory, the boss can be replayed from Warp Room 3 by holding L1, R1, L2, R2 and Triangle, then pressing Up while the platform rises.
References for this chapter
- Crash Bandicoot 2: Cortex Strikes Back - Guide and Walkthrough - PlayStation - By toby_lover
- Crash Bandicoot 2: Cortex Strikes Back — Boss Guide, PlayStation, by Lagunathemoron
- Crash Bandicoot 2: Cortex Strikes Back — NTSC-U PlayStation database entry
- Crash Bandicoot 2: Cortex Strikes Back Cheats and Hints for PlayStation
- Crash Bandicoot 2: Cortex Strikes Back – Boss Rematch Reference
Warp Room 4: Hangin’ Out, Diggin’ It, Cold Hard Crash, Ruination and Bee-Having
Warp Room 4 contains five regular levels: Hangin’ Out, Diggin’ It, Cold Hard Crash, Ruination and Bee-Having. Each of these five levels contains a crystal, and all five crystals are required before N. Gin becomes available. The room also contains the Purple Gem in Bee-Having and two secret exits. Hangin’ Out’s hidden route leads to Totally Fly, while Diggin’ It’s hidden plant route leads to Road to Ruin through the Secret Warp Room. The secret stages and gem paths are optional for the normal ending but are needed for extended completion.
Clear Hangin’ Out, then return for Totally Fly
Start with Hangin’ Out and make the ordinary crystal route your first objective. The opening sewer sections combine flamethrowers, fast-moving cleaners, electrified water and narrow grating. Wait for the flamethrower to shut off before crossing, and let the fast enemy pass before entering the tunnel. On the grating, move in short controlled bursts instead of running blindly across the entire section. Checkpoints divide the level into manageable attempts, so prioritize reaching the next checkpoint safely over breaking every box immediately.
After the later water drop, continue far enough to activate the checkpoint and collect the crystal on the normal route. If you are pursuing the clear gem, return through the level after learning the hazards and complete the Bonus section carefully. Its Nitro-lined box arrangement requires slide-jumping to the springy iron boxes, then using the raised boxes and TNT crates without touching Nitro. Once the ordinary route is complete, return to the later water section and move toward the camera instead of continuing forward. Drop through the additional hole, cross the dangerous grating and follow the passage to the unmarked teleport. This opens Totally Fly in the Secret Warp Room. The hidden exit is optional and does not replace Hangin’ Out’s crystal.
- Collect Hangin’ Out’s crystal on the normal route.
- Use the checkpoints to separate the flamethrower, grating and electrified-water sections.
- Complete the Bonus section separately if pursuing the clear gem.
- After the later water drop, move backward toward the camera and enter the hidden hole.
- Confirm that Totally Fly is available in the Secret Warp Room.
Use Diggin’ It’s plant route to unlock Road to Ruin
Diggin’ It introduces bomb-spitting plants, moving stone faces, mines, electric fences and beehives that release pursuing bees. A plant lowers itself when Crash approaches; use that opening to belly-flop it, taking care not to touch the spikes around its base. Electric fences are safest when crossed immediately after they switch off. When a bee begins chasing Crash, run until it breaks pursuit or spin it when it closes in. The reddish ground later in the level allows Crash to dig underground, which avoids many bees and seed bombs and also permits attacks from below.
Reach the first checkpoint and Bonus entrance before attempting the skull route. At the fork after the Bonus section, the skull-and-crossbones platform appears only if Crash has not died during that attempt. Take it for the Death Route, which contains boxes needed for one clear gem. If Crash dies before reaching the platform, leave the level and restart it; the checkpoint will not restore the Death Route in the original PlayStation release.
For the alternate clear-gem route, continue through the level and use the underground red-ground section to collect the crystal and boxes. At the later fork, pass the first plant on the round island but do not destroy it yet. Belly-flop the second plant and continue through the remaining bee and box sections. After reaching the end, return to the first plant on the round island and belly-flop it while it is lowered. This activates the secret teleport to Road to Ruin in the Secret Warp Room. Road to Ruin is separate from Ruination and is not one of the five ordinary Warp Room 4 pads.
- Use belly-flops against the bomb-spitting plants when they lower.
- Reach the skull platform without dying if attempting the Death Route.
- Restart the entire level if death removes the skull platform.
- Collect the crystal and track the Death Route boxes separately from the normal route.
- Leave the first plant on the round island intact until returning from the main route.
- Belly-flop that plant to unlock Road to Ruin.
Complete Cold Hard Crash with deliberate Death Route runs
Cold Hard Crash combines slippery ground with smashing logs, green crushing columns, icicles, porcupines, Nitro crates and rolling wheels. On ice, release directional input before landing and make small corrections instead of holding a full direction through every jump. In the early crushing sections, slide beneath the green column and stop in the safe space before the icicles. Approach TNT and icicles cautiously so the explosion clears the route without catching Crash.
The level’s skull-and-crossbones platform appears after the checkpoint in the upper route and is available only if Crash has reached it without dying. Take the Death Route for its gem and boxes. The route contains an outline box that appears after hitting an exclamation box near the far end; activate the exclamation box before the icy path drops Crash back toward the regular course. Continue slowly across the ice, checking behind the cave wall for boxes and avoiding the Nitro crates, logs and crushing columns.
Cold Hard Crash is best handled as multiple planned attempts. First learn the crystal route. On a separate attempt, reach the skull platform alive and collect the Death Route gem. For the clear gem, complete the Death Route boxes, then restart or deliberately use a death to return to the level’s regular route and collect the boxes that the alternate path bypassed. The original route can require backtracking through the level, so do not assume that finishing the Death Route alone accounts for every box. The Bonus section also contains a high hidden box above the striped crates; use the higher striped box and hold the jump button to reach it.
- Learn the ice and crushing-column timing before attempting a gem run.
- Reach the skull platform without dying.
- Activate the exclamation box in the Death Route before the route drops back.
- Search behind the cave wall and above the striped boxes for hidden crates.
- Use separate Death Route and full-box attempts if necessary.
- Return through the regular route to collect boxes skipped by the Death Route.
Take Ruination’s Green Gem route after collecting the Green Gem
Ruination is the fourth ordinary Warp Room 4 level and has its own crystal. Its alternate route requires the Green Gem from The Eel Deal in Warp Room 2. Without that gem, clear the normal route and return later. The level begins with narrow paths, stacked boxes and a hidden Nitro behind an early box grouping, so do not spin through every stack without checking for a concealed explosive crate.
After the early checkpoint, cross the small platforms while avoiding barrels and the fire-breathing statues. Activate the exclamation box that changes the nearby crates into Nitro only when you are ready to navigate around them. Continue along the narrow path to the Green Gem platform. The route contains moving platforms, fire hazards and a barrel-throwing enemy. Take short jumps, wait for the rotating or moving platforms to align, and use Aku Aku protection for the longest sequence if available.
The Green Gem path leads to extra boxes and the clear-gem route. Collect the clear gem after defeating the barrel-throwing enemy, then return to the Green Gem platform and continue through the normal route. The Bonus section requires deliberate use of steel boxes, TNT and striped crates; activate TNT before climbing onto steel boxes, and use the lowered steel crate to reach the upper rows. Continue to the crystal and final checkpoint, then avoid the remaining barrels on the way to the exit.
- Select Ruination from its normal Warp Room 4 pad.
- Bring the Green Gem from The Eel Deal for the alternate route.
- Watch for the hidden Nitro in the opening box stack.
- Cross the statue bridge and barrel sections with controlled jumps.
- Collect the crystal on the ordinary route.
- Return for the Green Gem route and clear gem when ready.
Finish Bee-Having and collect the Purple Gem
Bee-Having is the fifth ordinary Warp Room 4 level. It contains the final crystal for the room, a clear gem and the Purple Gem. The stage combines mallet enemies, bomb-spitting plants, electrified fences, Nitro crates, underground digging and large bee swarms. Crash can dig into the reddish ground to avoid many bees and seed bombs, but mallet enemies can still strike him while he is underground, so surface before passing directly beneath one.
At the opening, move behind the first plant and belly-flop it after it lowers. Slide under the first electric fence, then run through the bee section and return underground as soon as the route permits. When a row of Nitro crates blocks the underground passage, surface, jump over the row and immediately dig again. Hidden boxes may sit behind Nitro stacks, so approach from a safe angle rather than spinning near the crates.
The Purple Gem route begins after an underground section where a stairway of special Nitro crates rests on metal crates. These particular crates are arranged as a climbable staircase; do not treat every Nitro formation in the level as safe. Climb the staircase and enter the alternate section. Clear the enemies near the low square platform, use the mushroom bounce to gain height, then jump from the iron box to the next platform to collect the Purple Gem. Afterward, continue through the gunner, armored enemy, bullet hazards and remaining bee swarms. The normal route eventually provides the crystal, Bonus section and clear gem. Use the green arrows to accelerate through the final electric-fence sequence and activate the Green exclamation box before leaving.
- Collect Bee-Having’s crystal on the normal route.
- Use underground digging to avoid bees and seed bombs, but surface near mallet enemies.
- Identify the special Nitro staircase above the metal crates.
- Climb it carefully and collect the Purple Gem.
- Finish the Bonus section and activate the final Green exclamation box for the clear-gem route.
- Complete the level so the crystal and gems are recorded.
Confirm all five Warp Room 4 crystals before N. Gin
For normal campaign progress, verify crystals from all five Warp Room 4 levels: Hangin’ Out, Diggin’ It, Cold Hard Crash, Ruination and Bee-Having. No one of these five levels can be skipped if you intend to open the room’s boss encounter. The secret exits and colored-gem routes are optional for the normal ending, but they are needed for extended gem completion.
For the expanded route, revisit Hangin’ Out for Totally Fly, Diggin’ It for Road to Ruin, Cold Hard Crash for its Death Route and full-box objectives, Ruination after obtaining the Green Gem, and Bee-Having for the Purple Gem. Track Road to Ruin and Totally Fly as Secret Warp Room stages rather than treating them as additional regular Warp Room 4 levels. Once the five ordinary crystals are displayed, use the central platform to enter N. Gin’s encounter.
- Hangin’ Out shows its crystal.
- Diggin’ It shows its crystal.
- Cold Hard Crash shows its crystal.
- Ruination shows its crystal.
- Bee-Having shows its crystal.
- Totally Fly is unlocked from Hangin’ Out if pursuing secret-stage completion.
- Road to Ruin is unlocked from Diggin’ It if pursuing secret-stage completion.
- The Green Gem route in Ruination is complete if extended gem collection is intended.
- The Purple Gem is collected from Bee-Having if extended gem collection is intended.
- Warp Room 4 has no unfinished ordinary crystal route before entering N. Gin.
Before you move on
- All five ordinary Warp Room 4 levels show collected crystals: Hangin’ Out, Diggin’ It, Cold Hard Crash, Ruination and Bee-Having.
- Totally Fly is unlocked from Hangin’ Out if secret-stage completion is intended.
- Road to Ruin is unlocked by belly-flopping the designated plant in Diggin’ It.
- Diggin’ It’s Death Route and alternate-route boxes are recorded if pursuing all clear gems.
- Cold Hard Crash’s Death Route gem and full-box gem objectives are recorded if pursuing all gems.
- Ruination’s Green Gem route and clear-gem objective are complete if pursuing extended completion.
- Bee-Having’s Purple Gem is collected from the special Nitro staircase.
- The Warp Room 4 display shows all five crystals before entering N. Gin.
References for this chapter
Warp Room 4 Boss — N. Gin
N. Gin is the fourth boss of the original North American PlayStation release of Crash Bandicoot 2: Cortex Strikes Back. The fight becomes available after Crash collects the crystals from Hangin’ Out, Diggin’ It, Cold Hard Crash, Ruination, and Bee-Having. Crash fights from three small platforms and cannot use his normal spin, slide, body slam, or jump attacks against the machine. Instead, Square or Circle throws an unlimited supply of Wumpa fruit. Defeat the machine in order: destroy the two arm-mounted laser blasters, destroy the two shoulder missile launchers, then damage the green central target while moving between platforms.
Open the N. Gin boss fight
Collect the crystals from all five regular Warp Room 4 levels: Hangin’ Out, Diggin’ It, Cold Hard Crash, Ruination, and Bee-Having. Clear gems, colored gems, bonus stages, and secret exits are not required to open this boss encounter. The crystal from each regular level is the required progression item.
Return to the center of Warp Room 4 after the fifth crystal has been recorded. Stand on the central platform and use it to rise toward the boss encounter. In the original PlayStation game, this transition is part of the Warp Room structure rather than the permanent boss-door arrangement used by later remakes.
The arena places Crash on a small group of platforms facing N. Gin’s machine. There is no jetpack section in this battle. Before attacking, identify the platforms available to you and leave room for a jump whenever a weapon begins firing.
- The five Warp Room 4 crystals are collected.
- The central Warp Room 4 platform is available.
- Crash enters the arena without a jetpack.
Use Wumpa fruit projectiles
In the boss arena, press Square or Circle to throw Wumpa fruit. These buttons replace Crash’s normal attack for the duration of the fight. The fruit travels horizontally, so position Crash on the same general height as the exposed part of the machine before firing.
Crash cannot damage the machine by spinning, sliding, body-slamming, or jumping into it. Aim only at the sections that open and flash. Armored or closed sections do not need to be attacked, and throwing fruit while the target is closed only increases the time Crash spends exposed to the next attack.
Keep moving between attacks, but do not jump without first identifying a safe landing platform. The arena is small, and falling between platforms ends the attempt. Controlled bursts of fruit are safer than standing still and firing continuously.
- Square or Circle throws Wumpa fruit.
- Open or flashing machine sections are targeted.
- Crash keeps a safe landing platform in view.
Destroy the arm-mounted laser blasters
N. Gin begins by opening the laser blasters on the machine’s arms. Throw Wumpa fruit at an arm whenever its vulnerable section opens. Continue until both arm weapons have been destroyed; the fight then advances to the shoulder-launcher phase.
The arm weapons fire red laser beams across the arena. Watch the beam’s height and direction. Jump over a low beam or move underneath a higher beam when there is enough room. Avoid standing directly in front of an arm while it is opening, because the weapon can fire before you have finished lining up a shot.
Survival is more important than forcing damage. If a beam is already sweeping toward Crash, move to safety first, then resume firing during the next opening. The boss does not require Crash to hit every opening immediately.
- Both arm-mounted laser blasters are attacked when open.
- Red laser beams are avoided by jumping or moving underneath them.
- Both laser blasters are destroyed before the missile phase.
Destroy the shoulder missile launchers
After the laser blasters are gone, aim at the missile launchers mounted on N. Gin’s shoulders. Their vulnerable sections open during the second phase. Continue throwing Wumpa fruit while keeping Crash near a platform with enough space to jump or sidestep.
The falling missiles indicate their landing positions with shadows on the platforms. Watch those shadows and move away before impact. Do not make a large jump unless necessary; a short relocation usually leaves Crash in a better position to attack the launcher when it opens again.
When one shoulder launcher remains, the missile pattern becomes more direct and may send a missile across the platform. Jump over a traveling missile or move to the other side of the current platform. Keep attacking the remaining launcher until both shoulders are destroyed. The central target should not be treated as the active objective until this phase is complete.
- Wumpa fruit is aimed at the open shoulder launchers.
- Missile shadows are used to identify falling missile locations.
- Both shoulder missile launchers are destroyed.
Break the green central target
Once the arms and shoulders have been destroyed, N. Gin exposes the green target in the center of the machine. This is the final vulnerable section. Throw Wumpa fruit at the green opening whenever it becomes available.
The machine now charges and fires a large green beam at the platform Crash is occupying. The targeted platform becomes unavailable temporarily, so do not remain there while the weapon is charging. Move to another intact platform as soon as the attack is clearly being prepared.
Before firing, identify the next platform you will use. Throw a few fruits at the exposed target, then move away before the beam reaches Crash. After landing, turn back toward N. Gin and repeat the short attack-and-relocate cycle. Continue until the central target breaks and the defeat sequence begins.
- The green central target is the final objective.
- Crash moves away from a platform being targeted by the green beam.
- The central target is destroyed and N. Gin is defeated.
Recover from failure and replay N. Gin
A hit from a laser, missile, or platform-loss attack ends the current boss attempt. Crash does not need to replay Hangin’ Out, Diggin’ It, Cold Hard Crash, Ruination, or Bee-Having. Return to Warp Room 4 and use the central platform to begin the boss transition again.
On a retry, learn the attack rhythm before concentrating on damage. During the first phase, observe the laser height and move under or over it. During the missile phase, react to the shadows rather than running blindly. During the final phase, preserve one nearby platform for the escape from the green beam.
After N. Gin has been defeated, the original PlayStation version permits the boss to be replayed from the central platform. Stand on the central platform in the appropriate Warp Room, hold L1, R1, L2, R2, and Triangle, then press Up while the central platform rises and Crash points upward. The command must include all four shoulder buttons and Triangle; pressing Up with Triangle alone is not sufficient. Only bosses already defeated can be selected this way.
- A failed attempt returns Crash to the Warp Room without replaying the five levels.
- The retry prioritizes laser height, missile shadows, and platform escape timing.
- After victory, L1, R1, L2, R2, and Triangle are held while Up is pressed during the central platform’s upward movement.
- N. Gin is available for replay only after he has already been defeated.
Before you move on
- Hangin’ Out, Diggin’ It, Cold Hard Crash, Ruination, and Bee-Having each show their crystal collected.
- Both laser blasters have been destroyed.
- Both shoulder missile launchers have been destroyed.
- The green central target has been destroyed.
- N. Gin is defeated and Warp Room 5 becomes available.
- For practice, the defeated boss can be selected by holding L1, R1, L2, R2, and Triangle, then pressing Up while Crash rises on the central platform.
References for this chapter
- Crash Bandicoot 2: Cortex Strikes Back - FAQ - PlayStation - By JRJ_Jedi
- Crash Bandicoot 2: Cortex Strikes Back - Guide and Walkthrough - PlayStation - By toby_lover
- Crash Bandicoot 2: Cortex Strikes Back — Boss — Dr. N. Gin — StrategyWiki
- Revisit defeated bosses — Crash Bandicoot 2 guide
- Crash Bandicoot 2: Cortex Strikes Back — Boss replay instructions
- Crash Bandicoot 2: Cortex Strikes Back — NTSC-U PlayStation database entry
Warp Room 5: Late-game platforming and puzzle paths
Warp Room 5 contains Piston It Away, Rock It, Night Fight, Pack Attack and Spaced Out. Collect the crystal in each level to complete the required campaign progression. The optional clear gems demand separate route planning: Piston It Away and Night Fight have death routes, Rock It and Pack Attack are jetpack box runs, and Spaced Out has a second clear gem on a multicolor path that requires all five colored gems.
1. Clear Piston It Away, then treat its two gems as separate objectives
Piston It Away is built around crushing pistons, shrink-ray generators, electrified hazards, narrow platforms and tentacle-like enemies. For the required crystal, advance from checkpoint to checkpoint and wait for a complete piston opening instead of crossing during a partial cycle. Slide into the orange robot enemies when there is room, and use the springy boxes to reach higher crates before breaking them. Near the generator sections, watch for arrow platforms and the blue energy shots that shrink Crash. If a generator leaves you unable to make a return jump, preserve the nearby small machine because you may need it as a stepping stone later.
The death-route clear gem is the simpler optional objective. Reach the skull-and-crossbones platform without losing a life during that attempt, then enter the route and finish it. The route contains its own hazards, including shrinking generators, shielded enemies, electrified gaps and small robots whose wire cycles must be timed. Collect the clear gem and complete the route. If you are learning the level, do this as a dedicated death-route run rather than trying to collect every box at the same time.
The full-box clear gem is more complicated in the original PlayStation release because the regular route and skull-route boxes are not arranged for a guaranteed effortless one-pass collection. Begin a dedicated box attempt by reaching the skull platform without dying, but do not immediately ride it. Continue along the ordinary route, breaking every accessible crate and entering the bonus stage. In the bonus, hit the green exclamation box before returning for any formerly outlined crates, then finish the bonus without detonating Nitro boxes accidentally.
After the bonus, continue toward the level exit and clear the remaining regular-route crates. Keep track of small machines below generators: killing one can remove the jump assistance needed for the return trip. Do not leave the level immediately. Return toward the skull platform and assess whether the remaining route can be crossed safely. If the return is blocked by a missed machine, an awkward generator, or the original version’s route-state behavior, deliberately lose a life or restart the level and make a separate route attempt. The reliable goal is not to force both sets of boxes into one run, but to preserve or reset the route until every ordinary, bonus and death-route crate has been destroyed.
On the successful full-box attempt, enter the skull route, break its remaining crates and finish through its exit. The clear gem is awarded only when the complete level box total has been satisfied, including crates in the bonus and alternate route. If the gem does not appear, replay while marking the ordinary route, bonus, generator sections and skull route separately; do not assume a missing crate was counted merely because the route was completed.
- Collect the Piston It Away crystal on the ordinary route.
- Make a separate death-route attempt if necessary and reach the skull platform without losing a life.
- For the box gem, clear the regular route and bonus-stage crates before committing to the skull route.
- Preserve small machines near generators when they are needed for backtracking.
- Use a deliberate death or restart if the original route state prevents a safe combined collection.
- Confirm that the level awards both clear gems before moving on.
2. Learn the inverted jetpack movement in Rock It
Rock It replaces ordinary running and jumping with a jetpack tunnel. In the original PlayStation control scheme, X moves Crash forward, Circle turns him around, Up moves him downward and Down moves him upward. Square performs the spin attack. Begin with short directional taps so you can correct Crash’s height before entering a laser lane, flame section or electrical cable. Holding a direction for too long commonly sends Crash into the ceiling or floor.
Use the early section to establish the inverted movement before attempting an all-box run. Watch the timing of lasers, flames and detached electrical cables, then enter each opening rather than chasing a box through an active hazard. If you pass a box, Circle allows you to turn around and approach it from a safer direction. The crystal is near the end of the main route.
Rock It has no bonus area or death route. Its clear gem requires every box, including Nitro boxes that must be handled with the level’s green exclamation trigger. Finish a safe crystal run first if the jetpack controls are unfamiliar, then replay specifically for the box gem.
- Confirm the inverted Up and Down movement before entering the hazard sections.
- Use small height corrections instead of holding a direction continuously.
- Destroy every box and use the green exclamation trigger for Nitro boxes.
- Do not search for a bonus or death route in Rock It.
3. Use the fireflies as checkpoints in Night Fight
Night Fight is mostly dark, and the fireflies provide temporary light around Crash. Grab each firefly before entering an unlit stretch and move quickly toward the next one. Do not run blindly after losing the light: pits, mines and enemies are difficult to judge without illumination. At the fork, the ordinary route is on the right; the left branch is the skull-route path and is available only if Crash has not lost a life during that attempt.
For the death-route gem, reach the skull platform, complete the route and collect the gem before finishing the level. For the box gem, handle this as a carefully planned all-box run. In the bonus area, pass around the second firefly first and break the two Bouncy Boxes before collecting that light. At the later fork, inspect the left branch for its two crates before taking the firefly and returning to the main route. Keep the firefly until the next light source is safely reachable.
- Reach the skull platform without losing a life for the death-route gem.
- Keep a firefly until the next light source is within safe reach.
- Break the two Bouncy Boxes before taking the second bonus-area firefly.
- Backtrack for the two crates at the later fork during the all-box attempt.
4. Treat Pack Attack as a harder jetpack run
Pack Attack uses the same inverted jetpack controls as Rock It but adds more frequent flame bursts, lasers, electrical hazards and moving obstacles. Make small vertical adjustments before each hazard instead of making large corrections inside the obstacle. Check both the upper and lower parts of every doorway because boxes may be positioned away from Crash’s central flight line.
The crystal is near the end of the main tunnel. There is no bonus area, death route or secret route in Pack Attack. Its clear gem is awarded for breaking every box, including hidden crates near the edges of the screen and crates revealed around the fire-extinguishing enemies. Use the green exclamation trigger before leaving the level. When a missed box cannot be recovered safely, finish the level and make a dedicated all-box attempt.
- Collect the crystal near the end of the tunnel.
- Search both the upper and lower portions of every doorway.
- Check behind cylinders and beyond the visible screen edge for crates.
- Use the green exclamation trigger before leaving the level.
- Do not look for a bonus or death route in Pack Attack.
5. Finish Spaced Out, then return for its second gem
Spaced Out is the final regular level in Warp Room 5. Its ordinary route combines narrow ledges, fire, Nitro crates, electrical enemies and long jumps. Line Crash up before each large jump and commit cleanly; late corrections over a pit are unreliable. Slide beneath low barriers and use jump-spins only when the landing area is clear. Collect the crystal on the ordinary route to complete required Warp Room 5 progression.
The first clear gem is the box gem. Break every box on the main route and in the bonus area, using the green exclamation trigger to destroy Nitro boxes. The second clear gem is at the end of the multicolor gem path. It requires all five colored gems: Blue from Turtle Woods, Red from the secret route in Snow Go, Green from the hidden route in The Eel Deal, Yellow from the timed Plant Food challenge and Purple from the false-Nitro staircase in Bee-Having.
Return to Spaced Out after all five colored gems have been collected. Take the colored gem platforms in sequence and continue through the additional platforming route to reach the second clear gem. If the multicolor path does not appear, leave the level and complete the missing colored-gem challenge elsewhere first.
- Collect the fifth Warp Room 5 crystal.
- Complete the bonus area during the all-box attempt.
- Collect Blue, Red, Green, Yellow and Purple before attempting the multicolor path.
- Finish the multicolor route and collect Spaced Out’s second clear gem.
Before you move on
- The five Warp Room 5 crystals are displayed as collected: Piston It Away, Rock It, Night Fight, Pack Attack and Spaced Out.
- Piston It Away shows both its death-route gem and full-box gem.
- Rock It and Pack Attack each show their box gem after all crates are destroyed.
- Night Fight shows its death-route gem and box gem.
- Spaced Out shows its box gem and multicolor-path gem after the five colored gems have been collected.
- If a gem is missing, check the level status in the Warp Room and replay that level with a targeted crystal, death-route or all-box objective.
- After the five Warp Room 5 crystals are collected, use the central Warp Room platform to proceed to the Cortex encounter; no additional Warp Room 5 boss is required.
References for this chapter
- Crash Bandicoot 2: Cortex Strikes Back - FAQ - PlayStation - By JRJ_Jedi
- Crash Bandicoot 2: Cortex Strikes Back - Guide and Walkthrough - PlayStation - By toby_lover
- Crash Bandicoot 2: Cortex Strikes Back/Piston It Away - StrategyWiki
- Piston It Away - Bandipedia
- Multicolor Gem Path - Bandipedia
- Colored Gem - Bandipedia
Warp Room 5 Completion and Final Cortex Access
Warp Room 5 is the final regular hub in the original North American PlayStation release of Crash Bandicoot 2: Cortex Strikes Back. Complete Piston It Away, Rock It, Night Fight, Pack Attack and Spaced Out, collecting each level’s crystal. Once the five crystals are registered, the central platform rises to the final encounter with Dr. Neo Cortex. Cortex is the fifth and final boss of the campaign; there is no separate Warp Room 5 boss before him. Clear gems, colored gems and Secret Warp Room stages are optional for the normal ending but required for the extended completion route and alternate ending.
Collect the five Warp Room 5 crystals
Enter the five portals in Warp Room 5 and finish each level by reaching its end and collecting the crystal. The required levels are Piston It Away, Rock It, Night Fight, Pack Attack and Spaced Out. You may complete them in any order available from the hub, so begin with the stage whose movement style you find most manageable. The order does not change the final-boss access requirement: all five crystals must be collected.
Treat the first visit to each stage as a crystal run rather than a full-completion attempt. Piston It Away contains demanding piston-platform sequences and an optional death route. Rock It and Pack Attack use jetpack movement, so prioritize controlled positioning over rushing. Night Fight contains dark sections where recognizing the safe route matters more than clearing every box. Spaced Out is the last regular stage and includes optional gem paths that should be postponed unless you already have the required colored gems.
Use checkpoints to divide each level into practice sections. If you die after collecting a checkpoint, repeat the immediate obstacle sequence carefully instead of trying to recover lost speed. Do not enter a death route unless Crash still has Aku Aku protection or you are confident with the route; dying on a death route usually sends you back to the last checkpoint and does not invalidate the crystal, but it can cost the opportunity to complete that route on the current attempt.
After returning to the hub, verify that the crystal marker for the completed level is displayed. Reaching the end without collecting the crystal does not count. You do not need to collect every box, complete every bonus stage or use a colored-gem platform to activate the final platform. The five Warp Room 5 crystals are the campaign requirement.
- Piston It Away crystal collected.
- Rock It crystal collected.
- Night Fight crystal collected.
- Pack Attack crystal collected.
- Spaced Out crystal collected.
- The five crystal markers are visible in the Warp Room.
- No separate Warp Room 5 boss portal is expected.
Activate the central platform
After all five Warp Room 5 crystals are registered, move to the central platform in the hub and step onto it. The platform rises and begins the final Cortex sequence. This is the correct transition from the last regular warp room to the campaign’s final boss.
The earlier warp rooms end with Ripper Roo, the Komodo Brothers, Tiny Tiger and N. Gin. Cortex follows those four encounters as the fifth and final boss. Do not search for another fifth-room boss after Spaced Out, and do not expect an additional crystal stage to appear before the platform becomes active.
The final encounter is a chase rather than a conventional stationary arena. Crash uses the jetpack-style movement seen in the flying levels while pursuing Cortex through a hazardous route. The objective is to close the distance and hit Cortex with a spin attack three times. The complete obstacle-by-obstacle method belongs in the final-boss chapter; here, the essential access condition is simply the collection of all 25 campaign crystals.
A failed attempt does not erase the five crystals or require replaying the Warp Room 5 levels. Return to the hub and use the central platform again when the game allows another attempt. If the platform does not activate, re-enter the level portals and confirm that every crystal was actually collected rather than merely reaching the level exit.
- All five Warp Room 5 crystals are registered.
- Crash has stepped onto the central platform.
- The platform rises into the Cortex sequence.
- No separate fifth-room boss is required before Cortex.
Separate normal completion from extended completion
For the normal campaign ending, defeat Cortex and allow the ending sequence to play. Clear gems, colored gems, secret exits and Secret Warp Room stages are not required to activate the final encounter. The original 1997 PlayStation release also has no later-version time-trial or relic system, so Sapphire, Gold and Platinum relics are not requirements for this chapter or for final-boss access.
The extended route requires returning to earlier levels and collecting the game’s 37 clear gems and five colored gems. Colored gems open alternate routes in other levels, while clear gems are awarded for box completion, special paths and other level-specific tasks. Several of those tasks involve secret exits or areas reached through the Secret Warp Room, so systematic cleanup is easier after the campaign route is secure.
You may collect the optional gems before or after defeating Cortex. Be aware that the ordinary ending is not the same as the alternate ending: defeating Cortex with the campaign completed is enough for the normal result, while the improved ending requires the full gem collection. Track each level separately so a missing gem is not mistaken for a failure to unlock the final platform.
- Cortex defeated for normal campaign completion.
- The ordinary ending sequence has played.
- No relics or time trials were needed.
- The 37 clear gems and five colored gems are tracked separately for extended completion.
Use the original PlayStation rematch command
After Cortex has been defeated, the original PlayStation release allows a defeated boss to be replayed from the central platform. For the Cortex rematch, stand on the platform and hold L1, R1, L2, R2 and Triangle together. While the central platform rises, press Up. Keep the required buttons held through the platform’s ascent until the rematch begins.
Do not use the shortened Up-plus-Triangle instruction. The full shoulder-button combination is required for the original PlayStation boss-rematch command. Rematching is optional and is useful for practice or another victory; it is not required for the normal ending, the alternate ending or Secret Warp Room access.
- Crash is standing on the central platform after the first Cortex victory.
- L1, R1, L2, R2 and Triangle are held together.
- Up is pressed while the platform rises.
- The Cortex rematch begins before the command is released.
Before you move on
- Piston It Away, Rock It, Night Fight, Pack Attack and Spaced Out each show a collected crystal.
- The central platform rises after all five Warp Room 5 crystals are registered.
- Cortex has been defeated, confirming completion of the fifth and final boss fight.
- The normal ending sequence has played.
- For extended completion, all 37 clear gems and five colored gems are collected, including gems reached through secret routes.
- If a rematch is desired, L1, R1, L2, R2 and Triangle are held while Up is pressed during the central platform’s ascent.
References for this chapter
- Crash Bandicoot 2: Cortex Strikes Back — Guide and Walkthrough, PlayStation, by Wayalla
- Crash Bandicoot 2: Cortex Strikes Back - Guide and Walkthrough - PlayStation - By toby_lover
- Crash Bandicoot 2: Cortex Strikes Back – Guide and Walkthrough – PlayStation – by AVexer
- Crash Bandicoot 2: Cortex Strikes Back/Gameplay – StrategyWiki
- Crash Bandicoot 2 FAQ - SmazQ, Crash Mania PDF
- Crash Bandicoot 2: Cortex Strikes Back – Boss Rematch Reference
Secret Warp Room and Hidden Levels
The original PlayStation release has a sixth, Secret Warp Room reached through five hidden entrances in regular levels. The entrances lead to a second Snow Go route, a second Air Crash route, a second Road to Ruin route, Totally Bear, and Totally Fly. The Secret Warp Room contains no additional crystals, but its levels and hidden sections provide the Red Gem, Clear Gems, and boxes needed for complete gem collection and the alternate ending.
Enter the Secret Warp Room through Air Crash
Enter Air Crash from Warp Room 2 and continue to the first checkpoint, just before the first jet-ski ride. Do not board the jet ski. Beside the water is a line of floating boxes. Jump across them, using Crash’s shadow to judge each landing, and reach the small platform on the far side. Touching the platform transports Crash to the Secret Warp Room.
Snow Go is the only destination available on this first visit. In the original PlayStation release, the Secret Warp Room is not normally selected from the main hub after being discovered. To return later, re-enter it through one of the hidden entrances in Air Crash, Bear Down, Un-Bearable, Hangin’ Out, or Diggin’ It. Any discovered entrance can be used to reach the room; the entrance level determines which destination becomes available.
- Air Crash has been entered from Warp Room 2.
- The first checkpoint and first jet-ski area have been reached.
- Crash has crossed the floating boxes without boarding the jet ski.
- Snow Go is available in the Secret Warp Room.
Clear the hidden Snow Go section and collect the Red Gem
Select Snow Go in the Secret Warp Room. This is the hidden second route of Snow Go, not a separate ordinary Warp Room level. Move carefully over the ice. Wait for the porcupine’s spikes to retract before spinning it, and avoid Nitro crates rather than trying to destroy them. Use Aku Aku masks as protection during the narrow jumps, but do not rush the slippery platforms.
Continue through the iron-crate and arrow-crate sections, hit the exclamation box when you reach it, and proceed past the penguins and swinging log. Near the end, follow the Wumpa fruit trail and drop into the lower passage. Complete the remaining route and collect the Red Gem at the end.
If Crash has three Aku Aku masks and is still invulnerable, let the invulnerability end before dropping into the final gem passage. In the original game, entering the pickup while invulnerable can prevent the Red Gem from being awarded. The Red Gem opens the colored-gem route in Snow Biz, which contains boxes required for Snow Biz’s Clear Gem.
- The hidden Snow Go route has been completed.
- The Red Gem has been collected.
- Snow Biz can be revisited through its red-gem route.
Use Bear Down to unlock the hidden Air Crash route
Enter Bear Down in Warp Room 3 and ride Polar through the level until the final throw. After Crash lands, do not leave through the exit. Turn around and jump across the small floating ice platforms in the water. They sink after use, so commit to each jump and keep moving toward the large snowy island in the middle of the lake. Landing on that island activates the Secret Warp Room entrance and unlocks the second Air Crash destination.
Select Air Crash from the Secret Warp Room and board the jet ski. This hidden section contains boxes omitted from the initial route. Destroy the boxes while steering through the river, then hit the Green exclamation box. Follow the route until it returns Crash to the ordinary Air Crash area.
After returning, continue through the normal section and break the remaining boxes. Do not take the skull-and-crossbones death route during this box attempt; it carries Crash toward the end and bypasses boxes needed for the box Clear Gem. Finish the level after all boxes have been destroyed.
- Bear Down has been completed far enough for Polar to throw Crash.
- The snowy island entrance has been activated.
- The hidden Air Crash section has been cleared.
- The hidden and ordinary Air Crash routes have been combined for the box Clear Gem.
Enter Diggin’ It from Warp Room 4 and unlock Road to Ruin
Diggin’ It is the second level in Warp Room 4, not Warp Room 3. Enter it from the Warp Room 4 hub and continue toward the later part of the level. Look for the isolated bomb-seed-spitting plant standing on a small round platform over a pit. Approach from a safe position and use a body slam while the plant is vulnerable. Spinning it or touching it normally does not activate the secret entrance. The body slam transports Crash to the Secret Warp Room and unlocks the second Road to Ruin destination.
Enter Road to Ruin through its Secret Warp Room destination. At the large cluster of boxes, do not spin through the group. Jump over the boxes instead, because TNT crates are hidden among them and can be triggered by a spin. Continue with controlled slide-jumps over the Nitro crates and hit the exclamation box so the iron-crate route becomes usable.
Follow the hidden path back into the normal Road to Ruin area. The Clear Gem for the complete box total requires the boxes from this hidden entrance and the boxes on the ordinary route. Road to Ruin also has a separate Clear Gem obtained through its death route, so opening the Diggin’ It entrance does not by itself finish every Road to Ruin gem objective.
- Diggin’ It has been entered from Warp Room 4.
- The isolated seed-spitting plant has been defeated with a body slam.
- The Road to Ruin secret entrance is available.
- The hidden TNT-and-Nitro section has been crossed without destroying the box attempt.
- The ordinary Road to Ruin route has also been completed for the relevant box Clear Gem.
Use Un-Bearable to unlock Totally Bear
Enter Un-Bearable in Warp Room 3 and complete the chase until the large polar bear falls through the final broken bridge. Do not exit immediately. Turn around and return to the gap. Use a slide-jump to cross back over it, then continue toward the small bear on the far side. Touching the small bear transports Crash to the Secret Warp Room and unlocks Totally Bear.
Totally Bear is a dark bear-riding stage. The route gives less warning before gaps and obstacles, so favor controlled movement over constant speed. At a wide water gap beneath a stack of boxes, hold Circle or Square to accelerate, then press X for the longer jump. A normal jump may not clear the gap. Replay the stage for its Clear Gem after learning the route, then make a dedicated box-collection attempt.
- The Un-Bearable chase has been completed.
- Crash has crossed back over the broken-bridge gap.
- Totally Bear has been unlocked and completed.
- Every Totally Bear box has been destroyed if its Clear Gem is required.
Use Hangin’ Out to unlock Totally Fly
Enter Hangin’ Out in Warp Room 4 and continue until after the last checkpoint, in the later water-and-platform section. Turn around instead of following the forward route. Wade back through the water and drop through the hole leading to the grated platform section. Cross the grate, using Circle or R1 to pull Crash’s legs up as the spiky moving hazards approach, then drop through the next opening. Continue along the hidden route until the warp carries Crash to the Secret Warp Room.
Select Totally Fly. This dark jet-pack stage uses lightning flies to provide brief periods of visibility. Move steadily and avoid overcorrecting near ceilings, mines, and narrow passages. After collecting a lightning fly, use its light to identify the next landing area before moving forward.
For the Clear Gem, destroy every box. In the section containing steel boxes, destroy the nearby steel boxes before taking the next lightning fly; grabbing it too early can move the light away before the boxes are safely cleared. Complete the bonus section when reached, then finish the level after checking that no steel or ordinary boxes remain.
- The last Hangin’ Out checkpoint has been reached.
- Crash has backtracked through the water, grate, and second hole.
- Totally Fly has been unlocked.
- Totally Fly has been completed with every box destroyed if its Clear Gem is required.
Before you move on
- All five hidden entrances have been activated: Air Crash, Bear Down, Un-Bearable, Hangin’ Out, and Diggin’ It in Warp Room 4.
- Snow Go’s hidden section is complete and the Red Gem is collected.
- The hidden Air Crash section is complete and its boxes have been combined with the ordinary route for the Clear Gem.
- The hidden Road to Ruin section is complete and its boxes have been combined with the ordinary route for the relevant Clear Gem.
- Totally Bear is complete, with its Clear Gem collected if pursuing full gem completion.
- Totally Fly is complete, with its Clear Gem collected if pursuing full gem completion.
- The Secret Warp Room can be reached again through at least one activated hidden entrance.
- The remaining ordinary-level Clear Gems and colored gems have been collected if the alternate ending is the goal; the secret-room routes alone are not sufficient.
- After all 42 gems are collected, defeat Cortex to view the alternate ending scene.
References for this chapter
- Crash Bandicoot 2: Cortex Strikes Back - Guide and Walkthrough - PlayStation - By toby_lover
- Crash Bandicoot 2: Cortex Strikes Back - FAQ - PlayStation - By JRJ_Jedi
- Crash Bandicoot 2 FAQ - SmazQ, Crash Mania PDF
- Crash Bandicoot 2: Cortex Strikes Back/Diggin’ It - StrategyWiki
- Crash Bandicoot 2: Cortex Strikes Back/Secrets - StrategyWiki
Cortex Chase and Final Boss: entry, patterns and victory
The original North American PlayStation release ends with a jetpack chase against Dr. Neo Cortex. Collecting the 25 regular-level crystals opens the final encounter in Warp Room 5. Crash must catch Cortex and spin into him three times before Cortex reaches the portal. Clear gems and colored gems are optional for the normal ending, but all 42 gems must be collected before the final battle for the alternate ending.
Open the final Cortex encounter
Complete the five regular levels in each main Warp Room and collect their crystals. The final group is Piston It Away, Rock It, Night Fight, Pack Attack and Spaced Out in Warp Room 5. These five crystals bring the campaign total to 25.
Return to Warp Room 5 and stand on the central platform. Once all 25 crystals are recorded, the hologram for Dr. Neo Cortex appears and the platform carries Crash to the final encounter. The original PlayStation campaign does not require relics, time trials, secret-level completion or any colored gem to open this fight.
If the Cortex destination does not activate, return to the regular levels and check that every crystal has actually been collected. Gems do not substitute for missing crystals.
- All 25 regular crystals are recorded.
- Piston It Away, Rock It, Night Fight, Pack Attack and Spaced Out are complete.
- The Cortex hologram appears in Warp Room 5.
- No relic or time-trial requirement applies to the original release.
Learn the jetpack controls before chasing Cortex
Crash automatically uses the jetpack in this encounter. Hold X to move forward. Circle makes Crash reverse or face backward, which is useful for correcting a missed approach but should not be pressed casually during the main pursuit. Square performs Crash’s spin attack and is the attack used against Cortex and for clearing obstacles.
The original jetpack controls use inverted vertical movement. Pressing Up moves Crash downward, while pressing Down moves him upward. Left and Right move Crash horizontally in the expected directions. This inversion is also used in the jetpack levels, so players who have practiced Rock It or Pack Attack should already recognize it.
At the beginning of the fight, spend a moment making small vertical adjustments away from Cortex. Keep X held whenever the route is open, and use short directional taps rather than large movements. Broad corrections are more likely to place Crash directly into an asteroid or mine.
- X moves Crash forward.
- Circle reverses Crash or makes him face backward.
- Square performs the spin attack.
- Up moves Crash down and Down moves Crash up.
- Left and Right move Crash horizontally.
Cross the obstacle tunnel
Cortex flies ahead through a long tunnel containing asteroids, mines and other floating hazards. These obstacles do not directly remove a life when struck, but they slow Crash and cost the distance needed to catch Cortex. Several collisions in succession can allow Cortex to reach the portal before Crash gets another attack opportunity.
Use the clearest opening instead of trying to destroy everything. Move above, below or around an obstacle when there is room. If an object blocks the entire route or a correction would be more dangerous than a collision, press Square to spin it away. Resume forward movement immediately afterward.
Do not hold Square continuously. Spinning slows Crash and makes it harder to close the gap. The safest pattern is forward flight, small steering corrections, then a short spin only when an obstacle or Cortex is directly in range.
- Prioritize forward progress over destroying every obstacle.
- Steer around hazards whenever possible.
- Spin only when an obstacle blocks the route or Cortex is within striking distance.
- Avoid continuous spinning because it reduces pursuit speed.
Land the first and second hits
Cortex is slightly slower than Crash, so the distance closes if Crash keeps moving forward cleanly. Wait until Crash is close and nearly lined up behind him. Then press Square to spin into Cortex. A spin from too far away usually misses and wastes the approach.
After the first successful hit, Cortex is propelled farther forward. The pursuit does not end; Crash must repeat the tunnel approach. Immediately hold X again, steer around the next hazards and close the new gap. Use the same procedure for the second hit.
A successful hit is confirmed when Cortex is knocked forward and the chase distance resets. Do not expect a stationary arena or a new weapon phase. This is a race repeated around the same basic objective: catch Cortex, align behind him and make one clean spin contact.
- Close the distance before attacking.
- Spin into Cortex from behind at close range.
- Resume forward flight after the first hit.
- Repeat the approach for the second hit.
- Do not waste time with distant or repeated blind spins.
Complete the third-hit pursuit
After the second impact, Cortex is launched forward once more. Continue holding X through open sections, avoid the next obstacles and use Square only when necessary. When Crash reaches Cortex, line up behind him and make the third successful spin.
The third hit defeats Cortex immediately. If Cortex reaches the portal first, the attempt ends and Crash loses a life. A missed attack does not require a special recovery maneuver: continue forward, rebuild the distance and wait for the next close approach.
Once the third hit connects, stop trying to attack and allow the defeat sequence and ending scenes to play. There is no additional stationary Cortex phase after the chase.
- Catch Cortex after the second reset.
- Land the third close-range spin.
- Prevent Cortex from reaching the portal.
- Allow the victory sequence to finish.
Recover from failure
If Crash hits an asteroid or mine, keep moving forward and take the next clear line. Do not repeatedly reverse with Circle; turning around creates more lost distance. One collision can be recoverable, but several collisions may leave Cortex too far ahead.
If Crash misses Cortex, do not spin continuously in an attempt to catch him. Hold X, steer through the tunnel and approach again from behind. The fight is decided by three confirmed hits, not by the number of spins attempted.
If Cortex reaches the portal or Crash loses the life, return to Warp Room 5 and stand on the central platform again after the attempt ends. There is no boss checkpoint to restore. Re-entering the fight is the normal recovery method.
- Resume forward movement after a collision.
- Rebuild the gap after a missed spin.
- Return to Warp Room 5 if the attempt ends.
- Practice the inverted vertical controls before attempting speedier approaches.
View the normal ending
Defeating Cortex after collecting the 25 crystals completes the normal campaign route. Gems are not required for access to the fight or for this ending. If clear gems or colored gems remain, the completed save can be used to revisit regular levels, secret exits and the secret Warp Room.
The original 1997 PlayStation release does not use relics or time-trial grades. Do not delay the normal ending while searching for Sapphire, Gold or Platinum relics; those goals belong to later versions and are not part of this edition’s Cortex requirement.
- All 25 crystals are collected.
- Cortex is hit three times.
- The normal ending plays.
- Unfinished gem work remains available from the completed save.
Earn the alternate ending
The alternate ending requires the complete set of 42 gems: 37 clear gems and five colored gems. The colored gems alone are not enough. Relics and time trials are not included in this original-release requirement.
For the direct alternate-ending route, collect every clear gem and every colored gem before entering Cortex from Warp Room 5. Then defeat Cortex using the same three-hit chase. After the normal defeat sequence, Dr. Nitrus Brio provides the additional ending sequence in which the complete gem collection is used against the Cortex Vortex.
If the normal ending has already played, continue collecting the missing gems from the saved game. To make the ending condition unambiguous, confirm that the save contains all 42 gems before beginning the final Cortex attempt.
- All 37 clear gems are recorded.
- All five colored gems are recorded.
- The save contains 42 gems before entering Cortex.
- Cortex is defeated after the complete gem total is present.
- The Brio sequence and destruction of the Cortex Vortex confirm the alternate ending.
Before you move on
- Warp Room 5 is open.
- Piston It Away, Rock It, Night Fight, Pack Attack and Spaced Out have yielded their crystals.
- The save contains all 25 regular crystals.
- The Cortex encounter is entered from Warp Room 5’s central platform.
- Cortex is struck three times before reaching the portal.
- The normal ending is viewed for main-campaign completion.
- For the alternate ending, all 37 clear gems and five colored gems are recorded before entering Cortex.
- The Dr. Nitrus Brio sequence plays and the Cortex Vortex is destroyed.
- Any remaining optional goals are pursued from the completed save.
References for this chapter
- Crash Bandicoot 2: Cortex Strikes Back — Guide and Walkthrough, PlayStation, by Wayalla
- Crash Bandicoot 2: Cortex Strikes Back — Boss: Dr. Neo Cortex, StrategyWiki
- Crash Bandicoot 2: Cortex Strikes Back - Guide and Walkthrough - PlayStation - By toby_lover
- Crash Bandicoot 2: Cortex Strikes Back — Boss Guide, PlayStation, by Lagunathemoron
Original PlayStation Completion Limits: No Time Trials or Relics
Crash Bandicoot 2: Cortex Strikes Back on the original North American PlayStation release from 1997 does not contain a Time Trial mode or a Relic system. There are no stopwatch pickups, target times, Sapphire Relics, Gold Relics or Platinum Relics to earn. Those features belong to later Crash releases, including Crash Bandicoot N. Sane Trilogy, and should not be added to a completion checklist for the original disc. Replay stages for crystals, clear gems, colored gems, secret entrances, bonus routes and movement practice instead.
1. Confirm that you are using the original PlayStation game
The applicable edition is the original PlayStation version of Crash Bandicoot 2: Cortex Strikes Back, released in 1997. Its progression is based on warp rooms, crystals, gems, bonus stages, secret entrances and boss battles. The game does not change into a separate race mode after you complete a level.
When you return to a finished level, enter it normally from its warp-room platform. You will not find a stopwatch at the entrance, a relic selection prompt or a target-time screen. Finishing quickly may be useful as personal practice, but the game does not save that result as an official record.
- Confirm the title is Crash Bandicoot 2: Cortex Strikes Back for the original PlayStation.
- Do not search completed levels for stopwatch pickups.
- Do not expect a relic inventory or medal results on the original save.
2. Keep later-version time-trial instructions out of this playthrough
A guide for Crash Bandicoot N. Sane Trilogy may tell you to enter a completed level, touch a clock and race toward a displayed target. It may also describe Sapphire, Gold and Platinum results. Those instructions do not apply to the 1997 North American PlayStation software, even when the level names are identical.
Do not use later-version relic tables for Turtle Woods, Snow Go, Hang Eight, The Pits, Crash Dash or any other stage. The original release has no in-game system that records those times, awards those grades or requires them for an ending.
- Ignore stopwatch procedures from remake guides.
- Ignore Sapphire, Gold and Platinum target times.
- Do not look for a time-trial power-up or a relic reward after defeating Cortex.
3. Replay levels for genuine original-edition objectives
Use normal replays to collect a crystal you missed, finish a clear-gem box route, reach a colored-gem path, enter a bonus stage or recover a secret exit. Some clear gems require every box, while others involve a death route, a special route or a colored gem obtained elsewhere. A level can therefore be completed normally while still requiring a later replay for full progress.
When attempting a gem, decide whether the run is for survival, boxes or a special route before committing to a risky shortcut. Checkpoints help you practice the later portion of a stage, but they do not create timed splits or preserve a formal race result. If you die during a box-collection attempt, review whether the missed route was before or after the checkpoint before trying again.
- Replay stages for missed crystals and gems.
- Use colored gems to open routes in earlier levels when required.
- Treat personal best times as outside-the-game notes only.
4. Use movement practice without confusing it with an in-game record
You can still practice faster movement through a completed stage. First learn a safe route, then improve jumps, slides, spin attacks, platform timing and vehicle control. Preserve Aku Aku protection before a difficult hazard sequence when possible, because a fast attempt that loses a life is less useful than a reliable route you can repeat.
Do not sacrifice a required box or secret path merely to finish sooner. A clear-gem attempt is successful only when its required conditions are met and Crash reaches the stage exit. The game does not award a medal for a clean run, and it does not mark a personal speed improvement in the save data.
- Learn the survival route before optimizing it.
- Separate box-collection attempts from movement-practice attempts when necessary.
- Do not describe a personal replay time as an official relic or time-trial result.
5. Replace relic goals with the correct completion targets
For the normal campaign, collect the 25 crystals in the regular levels, defeat Ripper Roo, the Komodo Brothers, Tiny Tiger and N. Gin, then complete the final Cortex encounter. Cortex is the final campaign battle, not a separate relic unlock or a later time-trial challenge.
For the original-edition full-completion route, track all 42 gems, including the five colored gems, and discover the five secret warp-room entrances. The secret warp room provides additional routes and collectible progress; it is not a time-trial hub. The alternate ending is tied to collecting the game’s crystals and gems and then completing the Cortex encounter, not to earning relic grades.
- Mark all 25 regular-level crystals.
- Defeat the four warp-room bosses.
- Defeat Cortex.
- Track clear gems and colored gems separately.
- Record the five secret warp-room entrances if pursuing full percentage completion.
6. Perform the final original-edition completion check
A completed original PlayStation file should be judged by its campaign, crystal, gem, secret-entrance and Cortex progress. It should not be judged by a relic inventory, target-time list or Sapphire, Gold or Platinum results. If a guide asks you to earn those items, stop and verify that it is not describing N. Sane Trilogy or another later release.
Before calling the original game complete, check the warp-room platforms and your saved progress. Confirm the 25 crystals, the four warp-room boss victories and the final Cortex victory for campaign completion. For the fuller objective, confirm all 42 gems and all five secret warp entrances as well. Replaying a stage for safer movement or a faster personal route is valid practice, but it remains a self-imposed goal rather than a feature recorded by the game.
- Confirm the campaign is complete through the 25 crystals, four warp-room bosses and Cortex.
- Confirm 42 gems and five secret warp entrances for the full original-edition completion route.
- Confirm that no relic grades or target times are being counted.
- If the software displays clocks, relic medals or remake-specific completion features, verify the game edition before continuing.
Before you move on
- Normal campaign completion: collect all 25 regular-level crystals, defeat Ripper Roo, the Komodo Brothers, Tiny Tiger and N. Gin, then defeat Cortex.
- Full original-edition completion route: collect all 42 gems, discover all five secret warp-room entrances and defeat Cortex.
- The original PlayStation save should not contain stopwatch records, target times, Sapphire Relics, Gold Relics or Platinum Relics.
- A fast replay is only personal practice and has no official time-trial status in this release.
- Do not add relics, trophies or remake-only speed abilities to the original PlayStation checklist.
100% Completion: gems, clear-gem methods and a finishing checklist
The original North American PlayStation release contains 42 gems: 37 clear gems and five colored gems. The normal campaign requires the 25 regular-level crystals, victories over Ripper Roo, the Komodo Brothers, Tiny Tiger, N. Gin and Cortex, and the normal ending sequence. Full gem completion requires every clear gem and the Blue, Red, Green, Yellow and Purple gems. Collect all 42 gems before defeating Cortex to obtain the alternate ending. The 1997 original release has no time trials, relics or Sapphire, Gold or Platinum medal requirements.
1. Track the correct completion targets
Record progress by level rather than relying on memory. The normal campaign is complete when all 25 regular-level crystals have been collected, the five bosses have been defeated and Cortex has been beaten. The full gem target is 42: 37 clear gems plus five colored gems.
A clear gem commonly comes from breaking every box, but some are awarded for completing a Death Route, a colored-gem path, a hidden level or an alternate entrance. Several levels contain two clear gems. Treat every gem marker on the level panel as a separate objective.
The original PlayStation game uses the level panels and Warp Room to show collected crystals and gems. Check the panel after each cleanup run and mark the exact level and objective still missing. This avoids repeating completed levels or mistaking a colored gem for a clear gem. The five colored gems unlock platforms and routes; they do not replace the clear gems found on those routes.
- 25 main crystals collected.
- 37 clear gems collected.
- Blue, Red, Green, Yellow and Purple collected.
- Ripper Roo, the Komodo Brothers, Tiny Tiger, N. Gin and Cortex defeated.
- No relic, medal or time-trial requirement added to the original-edition checklist.
2. Collect the five colored gems
Blue Gem: enter Turtle Woods and complete the level without breaking any box. Do not destroy ordinary crates, Question Mark crates, checkpoint crates or Aku Aku crates. Reach the end with the no-box condition intact and collect the Blue Gem. If you break a box, leave through a deliberate death or exit and restart the level from the Warp Room. The Blue Gem opens the extra route in Hang Eight and is also part of the colored-gem sequence in Spaced Out.
Red Gem: enter Air Crash and, at the first checkpoint, do not board the jet ski. Instead, jump across the floating boxes in the water and reach the isolated platform. This sends Crash to the hidden Snow Go section in the Secret Warp Room. Follow that section to the end and collect the Red Gem. This is the original-game route for the Red Gem; it is not obtained from the ordinary Snow Go entrance.
Green Gem: in The Eel Deal, take the right-hand branch at the major fork and enter the Nitro-filled room. Move to the back wall and pass through the false wall. Follow the concealed passage to the Green Gem. It opens the colored route in Ruination and contributes to the final colored-gem route in Spaced Out.
Yellow Gem: in Plant Food, break the first checkpoint crate to start the timed challenge. The timer begins at the first checkpoint, not the second. Continue through the remaining route quickly and reach the Yellow Gem before time expires. Practice the route if needed, then restart the level and make a complete attempt from the beginning. The Yellow Gem opens the alternate path in Sewer or Later.
Purple Gem: in Bee-Having, reach the section where Nitro crates form a staircase. Treat the apparent staircase as a hidden route: jump across the Nitro crates and climb to the concealed path. Finish that route to collect the Purple Gem. It is also required for the multicolored route in Spaced Out.
- Blue: Turtle Woods completed without breaking boxes.
- Red: hidden Snow Go section entered through Air Crash.
- Green: false wall in The Eel Deal found.
- Yellow: Plant Food timer started at the first checkpoint and completed before time expires.
- Purple: hidden Nitro-staircase route in Bee-Having completed.
3. Revisit the colored-gem paths
Return to Hang Eight with the Blue Gem and follow the Blue Gem platform through its extra boxes. Enter Snow Biz with the Red Gem and complete the Red Gem route. Use the Yellow Gem in Sewer or Later to reach its alternate path and break the boxes there. Use the Green Gem in Ruination and clear the route that it opens.
Spaced Out contains the final multicolored route. Enter the colored platform sequence and follow it with the required colored gems. Break the boxes on that route to obtain Spaced Out’s second clear gem. The ordinary Spaced Out box gem and the colored-route gem are separate objectives.
These routes do not award additional colored gems. The five colored gems are collected only in Turtle Woods, the hidden Snow Go section, The Eel Deal, Plant Food and Bee-Having. The routes they unlock award clear-gem progress.
- Hang Eight Blue Gem path complete.
- Snow Biz Red Gem path complete.
- Sewer or Later Yellow Gem path complete.
- Ruination Green Gem path complete.
- Spaced Out multicolored path complete.
- Both Spaced Out clear-gem objectives confirmed.
4. Complete Death Routes and two-gem levels
A skull-and-crossbones platform marks a Death Route. Reach it without dying during that attempt, then complete the route and collect its gem or boxes. If Crash dies before touching the platform, restart the level rather than assuming that a checkpoint restart preserves access.
Air Crash has a Death Route gem and a separate box gem. The box gem requires the hidden Air Crash entrance reached from Bear Down. Road to Ruin also has a Death Route gem and a box gem that requires its hidden entrance from Diggin’ It.
Diggin’ It has a Death Route and a hidden Road to Ruin entrance. Cold Hard Crash requires special route management in the original PlayStation release. Reach the Death Route and break its boxes, then activate the ! box at the far end. Use the lift to return toward the main route instead of dropping straight through and skipping the normal-path boxes. If the Death Route gem is still needed, collect the gem, then deliberately lose a life before activating the later checkpoint so Crash respawns at the Death Route checkpoint. Re-enter the route if necessary, collect the route boxes, and then take the lift back to the normal path. Break the remaining normal-route boxes and finish the level. The stage’s box gem cannot be treated as a simple one-way Death Route run.
Piston It Away also requires deliberate order. First clear the ordinary route and break its normal-path boxes. Do not take the Death Route too early if doing the box gem in one cleanup attempt. After reaching the end or the relevant checkpoint, return to the Death Route platform through the available route-management method; if the checkpoint layout prevents a safe return, use a deliberate death and restart from the earlier checkpoint. Then enter the Death Route, break its boxes and collect the Death Route gem before finishing. The original game does not always provide a convenient direct backtrack from the final stretch, so preserve the correct checkpoint and do not assume that a modern remake’s route behavior applies.
Night Fight has a Death Route gem and a separate box objective. Check the side paths and preserve the firefly illumination while collecting the boxes. Inspect the level panel after each attempt so you know whether the missing objective is the route gem or the full-box gem.
- Air Crash Death Route completed.
- Air Crash hidden-entrance box route completed.
- Road to Ruin Death Route and hidden-entrance box route completed.
- Diggin’ It Death Route and box objectives completed.
- Cold Hard Crash Death Route, ! box, lift return and normal-path box sequence completed.
- Both Piston It Away clear gems collected with the route order managed correctly.
- Both Night Fight clear gems collected.
5. Use all five Secret Warp Room entrances
Air Crash leads to the hidden Snow Go section. At the first checkpoint, jump over the jet ski and use the floating boxes to reach the isolated platform on the far side. Complete the hidden section and collect the Red Gem.
Bear Down leads to the hidden Air Crash section. At the end, after Polar throws Crash toward the exit, turn around and use the dissolving platforms to reach the central island. Enter the hidden Air Crash route, break its boxes and continue into the regular level as needed for the full box count.
Un-Bearable leads to Totally Bear. At the end, after the large bear falls into the gap, do not exit. Slide-jump back across the gap and touch the small bear to enter Totally Bear. Break every box in the hidden level for its clear gem.
Hangin’ Out leads to Totally Fly. After the later checkpoint and water section, turn around at the appropriate overhead-view drop, descend through the alternate opening and cross the mesh route while avoiding the moving hazards. Follow the hidden warp to Totally Fly and break every box there.
Diggin’ It leads to the hidden Road to Ruin section. Near the end, find the isolated plant on its own platform and belly-flop it when it is vulnerable. The portal sends Crash to the alternate Road to Ruin entrance. Break the boxes there, activate the ! box and continue into the regular route to complete the associated box gem.
These five portals are secret entrances and hidden routes, not extra boss stages. Snow Go, Air Crash and Road to Ruin supplement regular-level gem objectives, while Totally Bear and Totally Fly have their own clear-gem objectives.
- Air Crash to hidden Snow Go.
- Bear Down to hidden Air Crash.
- Un-Bearable to Totally Bear.
- Hangin’ Out to Totally Fly.
- Diggin’ It to hidden Road to Ruin.
6. Verify the file before Cortex
The normal ending does not require all 42 gems. It requires the 25 crystals, the five boss victories and Cortex. For the alternate ending, complete the gem cleanup before entering the final Cortex encounter. Check every regular Warp Room and the Secret Warp Room, confirming all 37 clear-gem indicators and all five colored gems.
A reliable cleanup order is to collect the colored gems first, then clear Hang Eight, Snow Biz, Sewer or Later, Ruination and Spaced Out. Next complete the Death Routes and hidden-entry box routes, followed by Totally Bear and Totally Fly. Save after the final successful gem run and verify that the file displays 42 gems before starting Cortex.
If the total is short, recheck Air Crash, Road to Ruin, Diggin’ It, Cold Hard Crash, Piston It Away, Night Fight and Spaced Out. These stages contain multiple clear-gem objectives or route conditions that are easy to overlook. The original level panels are the final authority for identifying which individual objective remains.
- 42 total gems displayed.
- 37 clear gems displayed.
- All five colored gems displayed.
- All five Secret Warp Room entrances used.
- Hidden Snow Go, Air Crash and Road to Ruin sections cleared.
- Totally Bear and Totally Fly cleared.
- Cortex not yet defeated if the alternate ending is still the goal.
7. Final original-edition completion check
Save after the final gem objective and again after defeating Cortex. Reload the file if necessary and inspect both the ordinary Warp Rooms and the Secret Warp Room. The complete target is 25 main crystals, five boss victories, 37 clear gems, five colored gems, all five Secret Warp Room sections cleared and Cortex defeated after the full 42-gem total is present.
The alternate ending is confirmed by the sequence in which N. Brio uses the collected gems to power a weapon that destroys the Cortex Vortex. If that scene does not appear, confirm that the 42-gem total was already present before the final Cortex victory and that no clear-gem marker remains on a regular or hidden level.
The original 1997 PlayStation release does not use the relic system introduced in later Crash games and remakes. Stopwatch pickups, target times and Sapphire, Gold or Platinum medals therefore do not belong on this completion checklist.
- 25/25 main crystals collected.
- Five main bosses defeated.
- 37/37 clear gems collected.
- 5/5 colored gems collected.
- 42/42 total gems displayed.
- All five Secret Warp Room entrances used.
- Totally Bear and Totally Fly cleared.
- Cortex defeated after all 42 gems were collected.
- Alternate ending scene appears.
- No relic or medal requirement applied.
Before you move on
- The file displays 42 total gems: 37 clear and five colored.
- Blue, Red, Green, Yellow and Purple are collected.
- The Plant Food Yellow Gem was earned from the timed run beginning at the first checkpoint.
- Hang Eight, Snow Biz, Sewer or Later, Ruination and Spaced Out colored-gem paths are complete.
- Air Crash, Road to Ruin, Diggin’ It, Cold Hard Crash, Piston It Away and Night Fight have all required clear-gem objectives complete.
- Cold Hard Crash’s ! box and lift-based route management were completed correctly.
- Piston It Away’s normal boxes were secured before the Death Route cleanup, with checkpoint or deliberate-death management used as needed.
- The five Secret Warp Room entrances have been used.
- The hidden Snow Go, hidden Air Crash, hidden Road to Ruin, Totally Bear and Totally Fly sections are cleared.
- All 25 main crystals are collected.
- Ripper Roo, the Komodo Brothers, Tiny Tiger, N. Gin and Cortex are defeated.
- Cortex is defeated after the 42-gem total is complete.
- The alternate ending scene appears.
- No time trials, relics or medal grades are required for the 1997 North American PlayStation release.
References for this chapter
- Crash Bandicoot 2: Cortex Strikes Back - FAQ - PlayStation - By JRJ_Jedi
- Crash Bandicoot 2: Cortex Strikes Back - Guide and Walkthrough - PlayStation - By toby_lover
- Crash Bandicoot 2: Cortex Strikes Back/Secrets - StrategyWiki
- Crash Bandicoot 2 Cortex Strikes Back: Gem Locations Guide
- Crash Bandicoot 2 FAQ - SmazQ, Crash Mania PDF
- Missing 20 Boxes on Cold Hard Crash? - GameFAQs Answers
- Death Route - Bandipedia
- Crash Bandicoot 2: Cortex Strikes Back - Review for PlayStation
Finishing up
The normal campaign is complete when all 25 main-level crystals are collected, Ripper Roo, the Komodo Brothers, Tiny Tiger, N. Gin and Cortex are defeated, and the standard ending has played.
For the alternate ending, collect all 37 clear gems and all five colored gems before entering the final Cortex battle, then defeat Cortex and view the additional ending scene.
The five Secret Warp Room entrances and hidden sections are optional for the ordinary ending but are needed for the full gem route.
Time trials, Sapphire/Gold/Platinum relics and relic grades are not completion requirements in the original PlayStation release.
Choose your next gameScreenshots & video
Game imagery for reference. Follow the written chapters above for the route and strategies.
Sources & references
Our original guide draws on the references below. Check the edition at the top of this page before following controls or unlock requirements.
- Time Trials - Activision Support
- Crash Bandicoot 2: Cortex Strikes Back - FAQ - PlayStation - By JRJ_Jedi
- Crash Bandicoot 2: Cortex Strikes Back — Controls
- Crash Bandicoot 2: Cortex Strikes Back/Gameplay – StrategyWiki
- Crash Bandicoot 2: Cortex Strikes Back — Boss replay command
- Crash Bandicoot 2: Cortex Strikes Back – FAQ, WebWhizTommy, GameFAQs
- Crash Bandicoot 2: Cortex Strikes Back — FAQ/Walkthrough v1.00 by Neoseeker
- Crash Bandicoot 2: Cortex Strikes Back/Secrets - StrategyWiki
- Crash Bandicoot 2: Cortex Strikes Back - Guide and Walkthrough - PlayStation - By toby_lover
- Crash Bandicoot 2: Cortex Strikes Back
- Crash Bandicoot 2: Cortex Strikes Back – Guide and Walkthrough – PlayStation – by AVexer
- Crash Bandicoot 2 FAQ - SmazQ, Crash Mania PDF
- Crash Bandicoot 2: Cortex Strikes Back/Hang Eight – StrategyWiki
- Crash Bandicoot 2 Cortex Strikes Back: Gem Locations Guide
- Crash Bandicoot 2: Cortex Strikes Back — Boss Guide, PlayStation, by Lagunathemoron
- Crash Bandicoot 2: Cortex Strikes Back PSX Cheats — Neoseeker
- Crash Bandicoot 2: Cortex Strikes Back — NTSC-U PlayStation database entry
- Crash Bandicoot 2: Cortex Strikes Back — Boss replay instructions
- Air Crash - Bandipedia
- The Eel Deal - Bandipedia
- Crash Bandicoot 2: Cortex Strikes Back/The Eel Deal - StrategyWiki
- Crash Bandicoot 2: Cortex Strikes Back – Instruction Manual transcription
- Komodo Brothers (Boss Fights)
- Crash Bandicoot 2: Cortex Strikes Back – PlayStation boss rematch information
- Crash Bandicoot 2: Cortex Strikes Back/Plant Food — StrategyWiki
- Crash Bandicoot 2: Cortex Strikes Back Cheats and Hints for PlayStation
- Crash Bandicoot 2: Cortex Strikes Back – Boss Rematch Reference
- Here’s Where To Find All The Secret Level Exits In Crash Bandicoot 2
- Crash Bandicoot 2: Cortex Strikes Back/Diggin’ It - StrategyWiki
- Crash Bandicoot 2: Cortex Strikes Back — Boss — Dr. N. Gin — StrategyWiki
- Revisit defeated bosses — Crash Bandicoot 2 guide
- Crash Bandicoot 2: Cortex Strikes Back/Piston It Away - StrategyWiki
- Piston It Away - Bandipedia
- Multicolor Gem Path - Bandipedia
- Colored Gem - Bandipedia
- Crash Bandicoot 2: Cortex Strikes Back — Guide and Walkthrough, PlayStation, by Wayalla
- Crash Bandicoot 2: Cortex Strikes Back — Boss: Dr. Neo Cortex, StrategyWiki
- 100% Completion | Bandipedia
- Missing 20 Boxes on Cold Hard Crash? - GameFAQs Answers
- Death Route - Bandipedia
- Crash Bandicoot 2: Cortex Strikes Back - Review for PlayStation
About the game & collecting notes
- Platform
- Sony PlayStation
Step-by-step walkthrough for the original 1997 North American PlayStation release. Covers controls, the five correctly ordered main Warp Rooms, all five bosses, the Secret Warp Room and hidden entrances, the final Cortex chase, and optional 42-gem completion. The original release has no time-trial or relic system, so those later-version features are excluded.
Darryl Polo
Darryl Polo loves tinkering with emulation and revisiting retro games. He enjoys exploring how old favorites play on different setups and sharing what he learns along the way. At Joking Joystick, he writes about the games, hardware, and small discoveries that keep the hobby fun.
Our editorial standardsFound a step that needs another look? Help us improve this guide.