Contra — Nintendo Entertainment System (USA) Complete Campaign Walkthrough
Step-by-step walkthrough to clear the original NES (USA) release of Contra. Covers weapons and pickups, co‑op tactics, every level (The Jungle through Alien's Lair), boss strategies, how to use continues and the Konami Code, and concrete checks to confirm you reached the official ending.


Find a copy
Contra Nintendo Entertainment System
We may earn a commission if you buy through these links, at no extra cost to you. As an Amazon Associate I earn from qualifying purchases.
Opens retailer search results. Check the model, edition, seller, availability and current price before buying.
Before you begin
This guide is written to get you from power‑up pickup to final boss without guesswork.
Play using the NES (USA) cartridge or an accurate ROM/virtual console of the NES North American release; the guide follows the NES (USA) stage order, item behavior and boss designs.
Work stage by stage: learn which powerups to prioritise, how to survive base rooms and vertical sections, and how co‑op changes enemy patterns and respawn risks.
Follow the weapon and boss notes before each level so you know what to hunt for and what to avoid.
Set yourself up for the run
Familiarize yourself with basic controls: move, jump, fire and crouch.
You can aim in eight directions, including diagonals. Practice firing while jumping and while crouched to clear enemies above or below you.
If you want an easier run, enter the Konami Code at the title screen: Up, Up, Down, Down, Left, Right, Left, Right, B, A, Start. This starts the selected player with 30 lives.
The code is part of the NES USA release and remains active when using a continue.
Decide between single-player and two-player play. Co-op adds another commando but also changes enemy pressure and screen management.
If new to Contra, start single-player to learn enemy placements, then add a partner.
The standard rifle is always available. The main weapon pickups are Machine Gun, Laser, Fire Ball, and Spread; Rapid Fire and Barrier are auxiliary power-ups, while the unlettered Falcon clears enemies on screen.
Expect one-hit deaths from enemy contact, projectiles and pits.
The normal game begins with three lives, and the game awards an extra life for each stage successfully completed. Up to three continues are available after game over.
If you play on an emulator or modern re-release, use save states for practice but treat them as practice tools, not substitutes for learning patterns.
Use cover and crouch where possible in base rooms.
Many base rooms include power cores or wall targets that must be destroyed to progress. Identify them quickly and prioritize the required targets while managing turret fire.
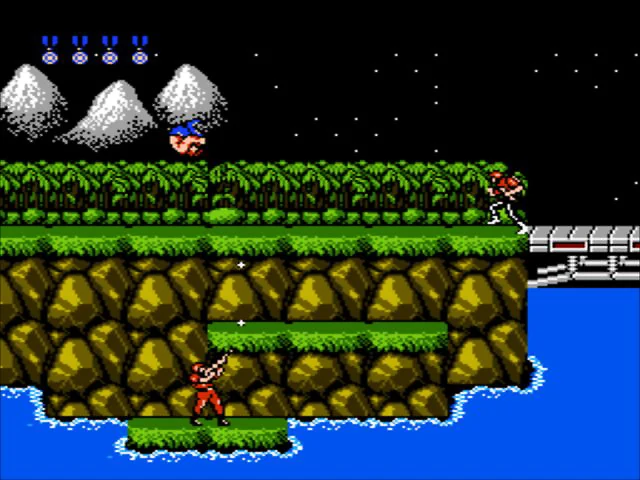
Chapter 1 — Quick Start: Controls, HUD and Core Mechanics
Contra for the North American NES is an eight-stage run built around eight-directional aiming, committed jumps and one-hit deaths. Learn the controller, read the status information, and treat every weapon pickup as temporary because a death returns the next life to the standard rifle. A normal game begins with three lives, each completed stage awards one extra life, and the game offers up to three continues after game over.
1. Start the correct NES campaign and read the status information
At the title screen, press Select to switch between one-player and two-player play, then press Start to begin. This chapter applies to the North American NES release of Contra. Its campaign uses eight stages: Jungle, Base 1, Waterfall, Base 2, Snow Field, Energy Zone, Hangar and Alien’s Lair. Do not substitute arcade or Japanese Famicom presentation for the USA cartridge.
The game does not use a normal health meter. A hit from an enemy, bullet, explosive object or bottomless pit normally costs one life immediately. The safest rule is to treat every enemy contact and every projectile as fatal unless a Barrier pickup is currently active. The stage-introduction and intermission displays identify your progress, while the gameplay screen gives you the action view and the information needed to manage movement, firing and remaining lives.
The score is displayed between defense zones and at the end of the game, but it is not a replacement for the life counter. For this chapter, rely on the documented life rules: the normal game begins with three lives, and successfully overcoming a stage awards one extra life. Do not plan a run around undocumented or disputed score-based life awards.
- Confirm that you are playing the North American NES Contra release.
- Recognize that the campaign has eight stages, beginning with Jungle and ending with Alien’s Lair.
- Treat ordinary enemy contact, most projectiles and bottomless pits as immediately lethal.
- Use the stage and life information to track progress rather than assuming the score is another life source.
2. Move, crouch, aim and jump with the NES controller
The Control Pad moves the commando and selects the direction of fire. Press B to shoot and A to jump. Pressing Up with B fires upward while standing, and pressing a diagonal direction with B lets you shoot diagonally. You can aim left, right, upward or diagonally while moving, jumping or changing position. Hold the desired firing direction as you approach a threat instead of waiting until you are already inside its attack range.
Press Down to crouch. From the crouched position, B fires horizontally while lowering the character’s profile. This can let you avoid some straight-line bullets and can give you a safer firing position against certain turrets. Crouching is not invulnerability: attacks from another height, enemies that touch you and hazards occupying the platform can still kill you. Stand only when you need to change your firing angle or move out of danger.
Contra cannot fire straight downward from the ground. Jump first, then press Down and B while airborne to shoot below yourself. This is useful for enemies beneath a ledge or on a lower platform, but check the landing area before using it. When crouched above a thin platform, pressing A can make the character drop through to a lower level if the position allows it. That is a controlled platform drop, not a universal downward-jump command; on solid ground it will not create a drop.
Jumps are committed full-height leaps rather than short hops or double jumps. Use them to cross pits, avoid bullets, change firing height and reach higher platforms. On narrow ground, prioritize landing safely over maintaining forward speed. Keep firing during the jump when an enemy is above or below your normal line so the change in height does not leave you defenseless.
- Use B with a Control Pad direction to aim before entering an enemy’s firing lane.
- Crouch against suitable horizontal fire, but continue watching for attacks from other heights.
- Jump before attempting to shoot straight downward.
- Use Down plus A only when a lower platform and a safe landing are clearly available.
- Treat every jump as a committed movement with a planned landing.
3. Manage lives, stage rewards and continues
A normal game begins with three lives. Losing the active character consumes one life and returns you to the current stage section. When the supply is exhausted, the game-over screen offers CONTINUE or END. Move the selection with the Control Pad and press Start to confirm. The NES release provides up to three continues, allowing a failed run to be restarted several times instead of immediately returning to Stage 1.
A continue preserves campaign position by retrying the stage you had reached. It does not preserve the weapon held during the failed attempt, and it does not restore the life that was lost. If you use a continue after running out of lives in Stage 5, for example, you return to Stage 5 rather than restarting the entire campaign, but you must rebuild your firepower from the standard rifle.
The instruction manual states that successfully overcoming each stage grants one extra life. Treat this as the reliable stage-clear reward. Do not count on score thresholds for additional lives when planning a standard run, because that claim is not needed to complete the campaign and should not be presented as a confirmed USA NES rule here.
The Konami Code is optional. At the opening title screen, enter Up, Up, Down, Down, Left, Right, Left, Right, B, A, then press Start for one player. For two players, select the two-player option before confirming Start. The North American NES version begins the selected player with 30 lives when the code is entered correctly. The code does not provide immunity, remove pits or preserve weapons, and the continue system still matters after those lives are gone.
- Begin a standard run with three lives.
- Expect one extra life after each successfully cleared stage.
- Use CONTINUE to retry the reached stage after game over.
- Remember that the NES campaign provides up to three continues.
- Do not rely on score thresholds as part of the confirmed life rules for this guide.
- Enter the Konami Code before starting if you want the 30-life option.
4. Understand weapon loss and the HUD’s practical meaning
The standard rifle is available at the start and has unlimited ammunition. Weapon capsules and stationary weapon targets can provide stronger weapons or temporary upgrades, including Machine Gun, Laser, Flamethrower, Spread, Rapid Fire and Barrier. The Falcon pickup is a separate screen-clearing item rather than a normal gun.
Weapon power is tied to the current life. When the commando dies, the next life returns with the standard rifle even if the previous life carried Spread, Machine Gun or another upgrade. A continue likewise restarts the attempt without the weapon held during the failed run. Deaths before bosses are therefore especially costly: you may need to repeat the approach and reacquire a weapon before trying the fight again.
After respawning, do not sprint blindly toward a missed capsule. First identify the safest available pickup and the enemies protecting it. The rifle’s unlimited ammunition means you can keep firing while repositioning, and surviving with the rifle is better than sacrificing another life for a risky upgrade. If you recover a strong weapon, slow down slightly near ambushes so that a single careless hit does not erase the advantage.
- Verify your current weapon after every death.
- Treat stronger weapons as temporary advantages tied to the current life.
- Use unlimited rifle ammunition while retreating or setting up a jump.
- Do not sacrifice a new life solely to recover a difficult pickup.
- Remember that a continue restores stage access, not the lost weapon.
5. Use a repeatable defensive rhythm
The dependable rhythm is observe, fire, dodge and advance. Keep the next platform edge visible, eliminate soldiers before crossing into their range and pause when a new turret or ambush appears. Use diagonal shots against enemies on different elevations, crouch when the attack line allows it and jump only after confirming where you will land.
When a bullet is already close, dodge first. Damage output is irrelevant if the incoming shot is about to end the life. Once the projectile passes, resume firing and move toward the next safe position. In base stages, destroy the required glowing targets before crossing the opened barrier; rushing through while turrets or soldiers remain active creates avoidable crossfire.
If a section defeats you, change the timing on the next attempt instead of repeating the same jump immediately. Identify whether the failure came from a missed enemy, an early leap, a projectile arriving from another height or an unsafe platform drop. A continue is most valuable when it lets you apply that specific adjustment to the stage you reached.
- Clear the nearest visible threat before crossing the next platform edge.
- Dodge first when a projectile is already close.
- Use crouching and diagonal fire to reduce exposure without assuming either is invulnerable.
- After dying, identify the exact hazard and alter the next attempt.
- Use a continue to practice the stage reached rather than treating it as a full restart.
Before you move on
- You can select one-player or two-player mode at the title screen.
- You can fire left, right, upward and diagonally.
- You can crouch, jump and shoot downward after jumping.
- You know that Down plus A can drop through a permitted thin platform.
- You know that the standard game begins with three lives.
- You know that clearing a stage awards one extra life.
- You know that the NES campaign provides up to three continues after game over.
- You can distinguish a life loss from a continue.
- You know that a continue retries the reached stage but does not preserve the current weapon.
- You can enter the verified Up, Up, Down, Down, Left, Right, Left, Right, B, A, Start sequence for the 30-life option.
- You are ready to begin Stage 1 while treating enemies, projectiles and pits as lethal hazards.
Chapter 2 — Weapons and Power-ups: What to Pick and When
Contra on the North American NES uses unlimited-ammunition weapons and temporary auxiliary power-ups. The standard rifle is always available, but dying removes the upgraded weapon you were carrying and returns you to the rifle. The main weapon choices are Machine Gun, Laser, Fire Ball, and Spread. Spread gives the broadest coverage, Machine Gun is useful for sustained forward fire, Laser is strongest along a predictable firing line, and Fire Ball sends a slow spiraling projectile around awkward angles. Rapid Fire is a separate firing-speed enhancement for compatible current weapons; it does not create Machine Gun’s hold-to-fire behavior, and Laser should not be treated as benefiting from it. Barrier gives temporary protection from enemy attacks and contact, but not from pits or water. The unmarked Falcon is a one-use screen-clearing pickup found once in Stage 5. No weapon is mandatory for completing the campaign, but protecting Spread or Machine Gun makes later sections more manageable.
Recognize and trigger item sources
Most open-area power-ups come from flying item capsules. Shoot a capsule while it travels across the screen, then move into the revealed Falcon-shaped symbol to collect it. Fire early enough to leave yourself a safe route to the item. If the capsule leaves the screen before you destroy it, that opportunity is lost. Never jump blindly after a capsule over a pit or water; the pickup is optional, while survival is required.
Base stages also contain stationary weapon sensors and destructible fixtures. Shoot the marked object to reveal its item, then collect the exposed symbol after checking the surrounding turret fire and enemy movement. Some base-stage enemies can also release weapon items. Treat every pickup as an opportunity rather than a progression requirement. If collecting it forces you into enemy fire, continue forward with the weapon you already have.
- Shoot flying capsules before they leave the screen.
- Destroy reachable weapon sensors and fixtures.
- Check pits, water, turrets, and enemy fire before collecting a revealed item.
Use the standard rifle as a recovery weapon
The standard rifle is your starting weapon and has unlimited ammunition. Tap B repeatedly to fire it quickly. It is adequate against isolated soldiers and stationary targets, but it provides less coverage than Spread when enemies occupy several heights or approach from both sides. Use the Control Pad to aim in the available directions, including diagonals, instead of forcing every target into a level firing line.
The rifle is also your recovery weapon after a death. The NES release does not preserve your upgraded weapon when you lose a life. You return with the standard rifle, so advance cautiously until you reach another safe capsule or sensor. Use crouching, diagonal aim, and short jumps to rebuild your position. Do not charge directly back into the spot that killed you. The campaign can be completed with the rifle, although later alien sections leave less room for error without a broader attack.
- Tap B repeatedly with the standard rifle.
- Use diagonal aim against enemies above or below your platform.
- After dying, rebuild firepower from a safe position instead of rushing forward.
Choose Machine Gun for sustained forward fire
The Machine Gun is marked M. Holding B produces a continuing stream of forward shots, which makes it dependable through horizontal stretches, against stationary gunmen and turrets, and against large targets that remain in one firing lane. Hold B while advancing and use directional aiming to keep the stream on the target.
Machine Gun is not automatically better than Spread. Its coverage is comparatively narrow, so enemies above or below you can survive while you fire straight ahead. Keep M when the next section rewards stable forward pressure, especially in a corridor or against a target that stays level with you. Switch to Spread only when the route to the S pickup is safe.
Rapid Fire is a separate item from Machine Gun. It can enhance the firing speed of compatible current weapons, but it does not supply Machine Gun’s hold-to-fire behavior. If you lose M, you also lose any firing-speed enhancement you were carrying and return to the standard rifle.
- Hold B with Machine Gun to maintain its automatic stream.
- Favor M in straight corridors and against concentrated targets.
- Remember that Rapid Fire and Machine Gun are separate power-ups with different functions.
Prefer Spread for crowds and mixed-height threats
The Spread weapon is marked S. Each shot sends bullets across several lanes, allowing one firing position to cover ground-level, elevated, and approaching enemies. This makes it a strong general-purpose choice in open stages, on mixed-height platforms, and against targets with more than one vulnerable area. Keep moving while firing, and aim diagonally when the target is not directly in front of you.
Spread is less convenient in enclosed base rooms when walls or narrow openings block most of the fan. If one orb or weak point is exposed through a small firing lane, Machine Gun may be easier to control. Do not replace a useful weapon merely because an S capsule appears; first check whether collecting it requires abandoning cover. Spread reduces aiming demands, but it does not remove the need to watch pits and projectiles.
A Rapid Fire pickup may improve the firing speed of a compatible current weapon, but do not build a strategy around an exact weapon-by-weapon interaction that is not necessary for completion. The important practical rule is to collect it safely when it complements the weapon you are carrying, while treating Spread itself as the broad-coverage upgrade.
- Prioritize S before crowded open-stage approaches when it is safely reachable.
- Continue choosing the firing direction instead of relying on the fan alone.
- In base rooms, compare the available firing lane before replacing M or another suitable weapon.
- Collect Rapid Fire for a compatible weapon only when the route is safe.
Keep Laser for aligned, high-value targets
The Laser is marked L. It fires a narrow beam along the selected direction and is useful when you can hold a stable position with the target directly in the beam. Its narrow path becomes a liability when soldiers enter from several heights or when you must keep moving across uneven platforms.
Laser is most comfortable when a boss or large target exposes one predictable weak point. Stand where the beam can remain on that target, hold the firing line, and avoid unnecessary movement. If the next section is a broad crowd-control fight, do not assume the higher single-target power makes L the safest choice. Spread’s wider coverage or Machine Gun’s sustained stream may prevent more enemies from reaching you.
Do not describe Rapid Fire as benefiting Laser. If you are carrying L, judge the pickup by its immediate safety and by whether you are willing to change weapons later. Never risk a life to collect R merely because it is nearby.
- Use L when the target stays in one predictable line.
- Avoid carrying Laser into a multi-height crowd fight unless it is your safest available weapon.
- Do not expect Rapid Fire to improve Laser.
Take Fire Ball when its spiral coverage helps
The Fire Ball weapon is marked F. It launches a slow fireball that travels forward in a spiraling pattern, allowing the shot to reach targets around awkward platform geometry. This can help against enemies that are not conveniently aligned with a normal horizontal shot.
The slow projectile is also the weapon’s main weakness. Fast soldiers can reach you before the shot arrives, and Fire Ball is less comfortable when enemies appear simultaneously from several directions. Take F when its spiral solves the immediate layout, particularly around staggered platforms, but do not treat it as a permanent upgrade over Spread or Machine Gun. The campaign does not require collecting every gun.
Rapid Fire is a separate firing-speed enhancement for compatible current weapons. Do not rely on it to change Fire Ball’s projectile path or make the projectile travel like a rifle bullet. Continue moving away from fast enemies while the spiraling shots travel toward their targets.
- Use Fire Ball when a slow spiraling projectile can reach around platform geometry.
- Keep moving while the projectile travels toward the target.
- Remember that Rapid Fire does not change Fire Ball’s basic spiral behavior.
Understand Rapid Fire and Barrier
Rapid Fire is marked R. It is an auxiliary upgrade rather than a replacement weapon. When compatible with the weapon you are carrying, it increases firing speed, but it does not create Machine Gun’s hold-to-fire behavior. Treat it as a way to improve an existing firing pattern, not as a substitute for choosing M, L, F, or S. Because the exact benefit is not required to complete any stage, prioritize a safe route and a reliable weapon over a risky R pickup.
Barrier is marked B and provides temporary protection from enemy attacks and contact. Use it to cross enemy fire, survive a crowded approach, or reach a dangerous position. Barrier does not make pits or water safe; a fall remains lethal. If the screen is already clear, preserve the protection for the next forced passage instead of spending it immediately. Barrier is temporary, so continue moving toward solid ground or a cleared corridor rather than standing in a hazard because enemy contact is harmless for the moment.
- Treat R as a separate firing-speed enhancement, not as Machine Gun.
- Do not describe R as improving Laser.
- Use Barrier against enemy pressure while continuing to treat pits and water as lethal.
Collect the special Falcon in Stage 5
The unmarked Falcon is the Mass Destruction power-up. It is not a gun and does not remain equipped. When collected, it clears the enemies currently on-screen. The pickup appears once in Stage 5, Snow Field, at a fixed water section where three capsules travel from left to right at different heights.
The high capsule contains Rapid Fire, the middle capsule contains the Falcon screen-clear item, and the low capsule contains Spread. Position yourself before the capsules arrive, shoot the capsule you want, and collect the revealed symbol without falling into the water. The middle Falcon can remove enemies that are currently crowding the screen, but do not sacrifice a life to reach it. If the upper or middle route is unsafe, surviving with the lower Spread pickup is the better decision.
The Falcon activates when collected and is not a permanent weapon. It is not required for campaign completion. Save the opportunity for a dense approach if you can safely collect it, but prioritize reaching solid ground over obtaining a particular capsule.
- Watch for the three capsules over the water in Stage 5.
- Remember high equals Rapid Fire, middle equals Falcon, and low equals Spread.
- Treat Falcon as a one-use screen clear, not as a permanent weapon.
Apply a simple pickup priority by situation
For a crowded horizontal screen, choose Spread when it is safely reachable. For a straight corridor, turret line, or boss weak point, Machine Gun is usually easier to maintain. Keep Laser when the target is large, aligned, and exposed for sustained beam contact. Use Fire Ball when its spiral reaches enemies that ordinary shots cannot easily cover. Take Rapid Fire when it is compatible with your current weapon and can be collected without exposing yourself to an avoidable death. Use Barrier for a dangerous enemy crossing or approach rather than an empty screen.
These are priorities, not permanent rules. A safe position is more valuable than a theoretically stronger weapon, and every weapon and auxiliary upgrade is lost when you die. The required objective is simply to advance through the stages and destroy Red Falcon. Collecting every capsule, sensor item, or optional enemy drop is not required.
- Choose the weapon that matches the next firing lane rather than a universal favorite.
- Treat Rapid Fire as a separate firing-speed enhancement for compatible weapons.
- Protect a good weapon by slowing down at pits, turrets, and ambush points.
- Separate required progression from optional item collection.
Before you move on
- You can identify the standard rifle, Machine Gun, Laser, Fire Ball, Spread, Rapid Fire, Barrier, and the unmarked Mass Destruction Falcon.
- You can explain why Machine Gun suits sustained forward fire, Spread suits broad coverage, Laser suits aligned targets, and Fire Ball suits awkward curved attack paths.
- You know how to shoot a flying capsule, destroy a stationary weapon sensor, and collect the Falcon symbol that appears.
- You know that dying removes the current weapon and auxiliary firing-speed upgrade and restores the standard rifle.
- You recognize the Stage 5 three-capsule water section and know that the high item is Rapid Fire, the middle item is Falcon, and the low item is Spread.
- You understand that Rapid Fire is a separate firing-speed enhancement for compatible current weapons and does not create Machine Gun’s hold-to-fire behavior.
- You understand that Rapid Fire should not be described as benefiting Laser.
- You understand that Machine Gun, Laser, Fire Ball, and Spread are optional weapon choices rather than mandatory campaign requirements.
- You understand that Falcon activates on collection and clears enemies currently on-screen.
- You understand that safe positioning is more important than collecting every item, while a suitable weapon improves survival in later stages.
Chapter 3 — Level 1: The Jungle — Fast openings and the first boss
The NES USA Jungle is a side-scrolling opening stage built around one-hit hazards, collapsing bridges, low turrets, hidden soldiers and the first fortress entrance. Stay on the upper route when possible, collect the early Machine Gun without stopping in enemy fire, and use short jumps to cross both mechanical bridges. The strongest practical pickup is the later Spread Gun, but it is optional; the stage and fortress can be completed with the standard rifle or another weapon. Rapid Fire is a separate firing-speed enhancement for compatible weapons. Do not treat it as the source of the Machine Gun’s automatic behavior, and do not rely on it to improve the Laser. At the fortress, clear the upper soldier and shell-firing turrets before crouching on the low grass platform and destroying the glowing red sensor at the bottom.
Leave the opening ledge and secure the first weapon
You start on the high grassy ledge at the far left with the standard rifle. Begin firing before walking into the first group of soldiers. Keep the fire button active while advancing; ammunition is unlimited, so there is no benefit to conserving shots.
A stationary soldier is positioned on the lower route beside the water and fires upward. Jump while moving near him, then hold Down with B to shoot downward and remove him before dropping. A stationary pill-box weapon sensor is beside this area. Shoot the sensor until it opens, then collect the M Falcon to equip the Machine Gun.
The upper route is safer than deliberately entering the water, but the opening water is survivable in this NES stage. If you fall, do not panic or waste a life trying to jump back up. Move right through the water and rejoin the route at the next grassy platform. You cannot jump while submerged, so concentrate on reaching the next solid platform.
- Start firing before moving into the first soldiers.
- Destroy the lower stationary soldier with downward fire.
- Shoot the nearby sensor and collect the M Machine Gun if the route is safe.
- If you enter the water, continue right toward the next grassy platform.
Take or skip the early Rapid Fire capsule
Shortly after the first Machine Gun sensor, a flying weapon capsule travels across the screen. Shoot the capsule to reveal the R Falcon and collect it if you can do so without walking into a bullet or soldier.
Rapid Fire is a separate firing-speed enhancement for compatible weapons. It does not make the Machine Gun automatic; the Machine Gun’s held-B continuous fire is its own property. Do not assume that Rapid Fire improves every weapon in this exact NES implementation, and do not present it as improving the Laser. The useful decision is simple: take R when it is safe, but never sacrifice a life for it.
If you miss the capsule or die afterward, continue with the weapon currently available. A death removes the collected weapon and returns you to the standard rifle, so surviving the bridge section is more important than preserving an optional modifier.
- Shoot the moving capsule after the first Machine Gun sensor.
- Treat R as a separate firing-speed enhancement, not as automatic fire for M.
- Do not count on R to improve the Laser.
- Skip the capsule if collecting it would expose you to an immediate hit.
Cross the two collapsing bridges
The first mechanical bridge begins breaking apart when you enter it. In the NES version, the bridge explosions themselves do not directly damage you; the danger is falling through the missing sections or being hit by enemies while trying to cross. Use short, repeated jumps from one intact section to the next rather than walking across the bridge.
Keep firing during every jump. Aim diagonally or downward when a soldier is below your route, and make each landing deliberate. A long uncontrolled jump is harder to correct than several short jumps. The second collapsing bridge uses the same basic timing, so repeat the process immediately after the first.
If you fall into the water, keep moving right. The lower path is slower but survivable, and it eventually rejoins the upper route. After losing a life, do not rush the bridge simply because you have seen it before. Recreate the same short-jump rhythm from the checkpoint.
- Use repeated short jumps across the first bridge.
- Keep firing while crossing both bridges.
- Do not confuse bridge explosions with direct damage in the NES version.
- If you fall, follow the water route to the next grassy platform.
Clear the post-bridge enemies and collect Spread
Immediately after the second bridge, watch for a stationary soldier and a soldier who hides among the bushes. Clear both before moving into the next ledges. A flying capsule in this section reveals the S Falcon, the Spread Gun. This is the most forgiving weapon for the remainder of the stage because its shots cover several angles, but it is not required.
If you remained on the upper route, shoot the capsule while continuing to move, then collect the Spread from a safe landing position. If you fell into the water, the routes rejoin farther right. Use the grassy platform to climb back into the main path, then shoot the stationary sensor below; it reveals another Spread pickup that rises and lands on the lower-right platform. Walk off the platform edge rather than making a risky leap if that is the route available to you.
A large machine or low directional gun appears on the next ledges. Crouch while firing when its shots pass above you. Check each landing area before jumping, because soldiers can appear from bushes or foreground positions as you enter.
- Destroy the soldier immediately after the bridge.
- Watch for the hidden bush soldier.
- Identify S as Spread, not a separate Shotgun weapon.
- Use the lower-route sensor for the later Spread opportunity if you missed the moving capsule.
Choose the later capsules and prepare for the fortress
Continue right across the raised and lowered grassy ledges. The stage provides additional capsule opportunities, including a Fire Ball, a Laser and another Rapid Fire pickup. Choose the item that is safest to reach and that does not replace a weapon you prefer. Spread is normally the easiest weapon to carry into the fortress, while the standard rifle remains usable if you lose everything.
When two capsules appear together later in the ledge section, the lower pickup is the Laser and the upper pickup is Rapid Fire. Do not switch from Spread to Laser merely because the Laser is available. The Laser has a narrow firing line and is less forgiving when enemies enter from different elevations. Likewise, do not chase R across an uncleared platform.
Destroy or bypass the turrets according to their firing angles. A turret that can only cover forward or diagonal directions can often be avoided by changing elevation, but eliminate it when doing so is safer than passing. Before the final approach, clear the ground-level enemies and the small robots beneath the last pit. The fortress begins once the screen scrolls to the large structure.
- Evaluate Fire Ball, Laser and Rapid Fire pickups without taking reckless jumps.
- Remember that the later pair is Laser below and Rapid Fire above.
- Keep Spread if you already have it and it is safe to do so.
- Clear the final ledges and ground enemies before entering the fortress.
Defeat the Jungle fortress
The fortress entrance has an upper soldier, two shell-firing turrets mounted above the lower target, and a glowing red sensor or power core near the bottom. The bottom sensor is the required objective. The other targets are dangerous distractions, so remove them first whenever possible.
Jump onto the highest grass platform and immediately shoot the soldier stationed at the top. Once he is gone, move to the left side of the second-highest grass platform and crouch-fire toward the two shell-firing turrets. This position keeps you outside much of their firing range while still letting your shots reach them. With Spread, you can attack from farther away; with the rifle or Machine Gun, move only when a shell threatens your position.
After both turrets are destroyed, descend to the lowest grass platform and crouch while firing at the glowing bottom sensor. If your weapon’s line does not connect, use a brief jump or diagonal shot, then return to the platform before the next projectile arrives. The sensor does not need a health bar; continue firing until it visibly breaks and the fortress burns out.
If you die during the fortress fight, repeat the order: upper soldier, two shell turrets, bottom sensor. If you respawn with the standard rifle, use the same safe positions rather than rushing directly toward the core. Destroying the bottom sensor advances the game into Base 1.
- Destroy the soldier on the highest platform.
- Destroy both shell-firing turrets.
- Reach the lowest grass platform and attack the glowing bottom sensor.
- Confirm that the fortress burns out and the game enters Base 1.
Before you move on
- The first lower soldier and nearby weapon sensor have been identified.
- The early M Falcon has been correctly described as the Machine Gun.
- The early R Falcon has been described only as a separate firing-speed enhancement for compatible weapons.
- The guide does not claim that R makes the Machine Gun automatic or improves the Laser.
- Both collapsing bridges have been crossed or the lower water recovery route has been followed.
- The S Falcon has been identified as Spread.
- The later Fire Ball, Laser and Rapid Fire opportunities have been described without making any of them mandatory.
- The fortress approach has been cleared.
- The upper soldier has been destroyed.
- Both shell-firing turrets have been destroyed.
- The glowing bottom sensor or power core has been destroyed.
- The game has advanced from the Jungle into Base 1.
Chapter 4 — Level 2: Base 1 — Room by room clearance
Base 1 is the NES version’s second stage and uses an enclosed fortress layout rather than ordinary side-scrolling. You must clear five regular rooms by destroying the required orb or core on the far wall. Electric barriers keep you away from the wall until the target is destroyed, while turrets, soldiers, grenadiers and rolling hazards create pressure. The sixth room is the boss chamber. It contains four required glowing targets arranged as two outer targets and two central targets, plus two optional side guns that fire spread patterns. Destroying the guns makes the room safer, but Ocular Fire appears as soon as all four required targets are destroyed, whether or not either gun remains active.
Understand the room objective before moving forward
Each regular room begins with your character facing a far wall. An electric barrier prevents you from approaching that wall until its required orb or core has been destroyed. The barrier is not the objective. Pressing forward into it briefly stuns you and prevents shooting, leaving you vulnerable to enemy fire.
Stay behind the barrier and fire at the visible target. Crouch whenever the target can be hit from the crouched position, because many ordinary bullets pass overhead. Stand only when the target is too high for crouched fire, and rise for the shortest exposure possible. Soldiers are not progression targets, but eliminate them when they approach your position or begin throwing grenades.
After the orb or core explodes, the barrier drops and the wall opens. Do not rush through if a turret is still firing across the opening. Cross during a safe interval, or destroy the turret that controls the route. Base 1 has five regular rooms followed by one boss room.
- Shoot the required orb or core, not the electric barrier.
- Use crouching to reduce exposure to ordinary bullets.
- Do not press forward until the target and barrier are cleared.
- Check the opening for remaining turret fire before crossing.
Room 1: destroy the central orb
Room 1 contains one orb in the center of the far wall. Stand near the center of your side and fire continuously at it. Soldier pressure is light, and centered positioning makes their ordinary shots easier to avoid.
A reddish-brown soldier can provide an R power-up when defeated. The weapon is optional. If collecting it would draw you into enemy fire, ignore the soldier and finish the orb. If a soldier reaches you, jump over it and return to the center rather than chasing it toward the barrier.
Once the central orb is destroyed, wait for the barrier and wall to clear before moving into Room 2.
- Aim at the single central orb until it is destroyed.
- Treat the R power-up as optional.
- Advance only after the barrier and wall have opened.
Room 2: remove the right turret, then shoot the left orb
The required orb is on the left side of the far wall, while a turret occupies the right side. Destroy the turret first if its shots are crossing your firing lane. Crouch to let many turret shots pass overhead, then stand or jump briefly to place shots on the turret when necessary.
After the turret is gone, return your aim to the left-side orb. If you leave the turret active, stay low and watch its firing rhythm. Stand only long enough to hit the orb, then duck again when a shot approaches. The orb is the only required progression target in this room.
A soldier may provide an M power-up, but do not move into danger for it. When the orb is destroyed and the barrier disappears, cross into Room 3.
- Deal with the right turret if it controls your position.
- Destroy the left-side orb.
- Ignore the optional M power-up if the route is unsafe.
- Cross after the wall opens.
Room 3: crouch on the low orb and react to grenades
The Room 3 orb is low in the center of the far wall. Crouch in the center of your side and fire directly at it. The lower firing position is usually safer than trying to clear both side turrets first.
Grenadiers advance, pause and throw explosives toward your position. Crouching does not protect you from a grenade. Stand and move away from its landing point, or jump over the danger if the route is clear. After the grenade passes, return to the crouched firing position.
The side turrets are optional. Destroy only the gun whose fire repeatedly forces you away from the orb. In two-player play, one player can maintain fire on the low orb while the other watches for grenades and handles the most threatening turret.
- Crouch and fire at the low central orb.
- Move or jump when a grenade is thrown.
- Do not treat both side turrets as mandatory.
- Use the opened wall to reach Room 4.
Room 4: handle the turret and rolling hazards
Room 4 has a central orb, an upper turret and floor-level slots that release rolling hazards. A rolling hazard kills on contact, but it can be destroyed with concentrated fire. With a strong weapon, shoot it before it reaches you. With the default rifle, keep firing or make a deliberate lateral jump over it with a clear landing area.
Do not jump straight up and land on the same hazard. Crouch when the upper turret fires across your position, then stand only as needed to hit the orb. You do not have to destroy the turret if its angle can be managed safely. If it repeatedly intersects your firing position, destroy it during a short exposure window.
Keep the orb as your main objective. Once it breaks, confirm that the barrier has disappeared before crossing into Room 5.
- Shoot or deliberately avoid each rolling hazard.
- Use crouching against the upper turret’s fire.
- Destroy the central orb.
- Check your landing area before jumping.
Room 5: break the large central core
The fifth regular room contains a large central core, cannons on the sides and above, and heavier soldier activity. Reduce the cannons that create crossfire across your firing lane, then concentrate on the large central target. The upper gun can remain active if crouching keeps its shots away from you, but destroy it if it repeatedly forces you out of position.
Grenadiers may appear while you work on the core. Leave your crouch and move away from a grenade instead of trying to keep firing through it. Do not stand directly in the newly opened doorway while a cannon is still covering it. Cross during a safe interval or finish the cannon first.
A soldier in this room can provide an F power-up. It is optional; preserving your position is more important than collecting it. Destroying the large core opens the route to the boss chamber.
- Reduce cannons that create dangerous crossfire.
- Move away from grenades rather than relying on crouching.
- Destroy the large central core.
- Enter the boss room without lingering in the doorway.
Boss room: destroy four required targets, then defeat Ocular Fire
The Base 1 boss room contains four required glowing targets arranged as two outer targets and two central targets. It also has two side guns that fire three-way spread shots. The guns are optional targets: destroying them is strongly recommended because their spread fire reduces the room available for safe movement, but they do not have to be destroyed for the boss phase to begin.
Start from one side and work on the accessible outer target while watching the nearby gun. When the outer target is destroyed, use the opening to attack the side gun if its spread fire is threatening your position. Move across the room during a safe interval and repeat on the opposite side. After the two outer targets are gone, destroy the two central targets. The exact priority can be adjusted if one gun is already making your side unsafe, but all four glowing targets must be destroyed.
Do not waste time killing every soldier. Eliminate only enemies that threaten your firing position or escape route. Keep crouching where possible, use short exposure windows and avoid standing beneath active spread fire. If a gun remains alive when the fourth target is destroyed, Ocular Fire still appears; the surviving gun continues to be a hazard until defeated or until the fight ends.
When all four required targets have been destroyed, Ocular Fire appears in the upper display area. The eye moves across its enclosure and launches blue fire rings downward. Keep firing upward continuously. Spread is useful because it can damage the eye while also intercepting some projectiles, but Machine Gun or the default rifle can work if you maintain pressure and make small lateral movements.
Stay near the center when the projectile pattern permits it. Move only far enough to avoid a ring that is reaching your position, then return toward a central firing lane. Do not jump into a projectile while trying to preserve your aim. The rings can be destroyed with gunfire, so shoot continuously rather than waiting for a completely safe opening.
In two-player play, one player should maintain pressure on Ocular Fire while the other watches the projectile paths and deals with any remaining side gun. Avoid standing in the same escape lane. Once Ocular Fire is destroyed, walk through the opened exit and confirm the transition to the Waterfall stage.
- Destroy the two outer glowing targets.
- Destroy the two central glowing targets.
- Treat the two side guns as optional but highly useful safety targets.
- Begin the Ocular Fire phase after all four required targets are gone.
- Fire upward while dodging or shooting the descending rings.
- Confirm the transition to Waterfall.
Before you move on
- Five regular Base 1 rooms have been cleared by destroying their required orbs or cores.
- The large central core in Room 5 has been destroyed and the boss chamber entered.
- The two outer and two central glowing boss targets have been destroyed.
- The two side guns have been destroyed, or deliberately left active while the required targets were completed.
- Ocular Fire, the floating eye-like boss, has been destroyed.
- The game has transitioned to the Waterfall stage.
Chapter 5 — Level 3: Waterfall — Climb, falling rocks and the alien boss
Waterfall is the NES USA Contra campaign’s only vertically scrolling stage. Start at the bottom and climb to the summit by jumping between ledges, moving rock platforms and narrow landings. Falling rocks, moving flames, enemy contact and most projectiles are instant-death hazards, so clear each landing before committing to the next jump. Fire Ball and Laser appear early, followed by Barrier and Rapid Fire near the bridge, then Spread and Machine Gun in the upper climb. Spread is a useful choice for the ambushes and the boss, but no weapon is required. At the summit, defeat the alien head by firing at it when the mouth opens. Its two tentacles or arms have vulnerable exposed ends and release red bubbles; reducing them first makes the mouth phase easier, but destroying them is not required to complete the stage.
1. Begin the vertical climb
Move upward from ledge to ledge. Waterfall does not use the normal left-to-right route, and the screen scrolls upward as you gain height. Wait until the next landing is visible before jumping, especially when a soldier or gun emplacement occupies it.
Use each solid ledge as a firing position. Shoot upward or diagonally before jumping, and remove enemies that can be reached from below. A short pause is safer than jumping into an occupied platform because enemy contact is lethal.
In two-player mode, keep both characters in the same vertical section. If one player climbs while the other stays behind, the scrolling screen can push the lower player off the bottom. Advance together rather than racing upward.
- Climb toward the summit instead of searching for a side exit.
- Wait for the next landing to become visible.
- Fire from ledges before jumping.
- Keep both players together during vertical scrolling.
2. Cross the falling-rock section
After the opening ledges, rocks begin dropping from openings in the cliff. A falling rock kills on contact. Watch the openings above the platform you want to reach and delay the jump if a rock is already descending through that route.
Move toward the side of a ledge when a rock lines up with you. Do not jump directly beneath an active opening until the rock has passed. Short, deliberate jumps are safer than full-height leaps made without checking the path.
The first weapon sensor contains Fire Ball. It is optional, so collect it only when the landing is safe. Do not lose a life merely to replace a weapon you can already use effectively.
- Treat falling rocks as instant-death hazards.
- Wait for a clear opening before jumping.
- Move laterally when a rock approaches your position.
- Collect Fire Ball only from a safe landing.
3. Choose an early weapon
A Laser sensor appears not far beyond the Fire Ball opportunity. Fire Ball and Laser are both optional. Take the one you can use reliably, or keep your current weapon if reaching the sensor would expose you to a dangerous jump.
A stationary soldier waits on an upper-right platform. Shoot him before jumping into the next section. Another soldier is hidden in the waterfall and can ambush you as you rise. Keep moving after triggering him, or attack from below or from the side.
Continue upward and destroy the visible gun emplacement before advancing toward the bridge. Attacking from below or from the side is safer than jumping directly into its firing lane.
- Treat Fire Ball and Laser as optional choices.
- Shoot the stationary soldier before jumping up.
- Expect an ambush from the waterfall.
- Destroy the gun emplacement before crossing onward.
4. Cross the bridge and collect the auxiliary power-ups
The bridge section contains moving flames. Touching them is fatal. Stand on a safe part of the bridge and shoot the two capsules as they rise rather than jumping through the flames to chase them.
The left capsule contains Barrier and the right capsule contains Rapid Fire. Barrier gives temporary protection from enemy attacks, but it does not protect against falling, a missed jump, moving flames or a bad landing. If you collect it, use the protection to pass the nearby enemy-fire section while still treating every platform edge as dangerous.
Rapid Fire is a separate firing-speed enhancement for a compatible current weapon. The Laser is excluded from this effect. Take Rapid Fire when the shot is safe, but do not risk a life for it; the stage remains clearable without either auxiliary pickup.
- Shoot the left capsule for Barrier when the angle is safe.
- Shoot the right capsule for Rapid Fire when possible.
- Use Barrier against enemy fire, not against falls or flames.
- Do not expect Rapid Fire to improve Laser.
- Skip either capsule if collecting it requires an unsafe jump.
5. Use the moving rock platforms
Destroy the nearby gun emplacement before attempting the moving-platform crossing. The rock platforms travel at roughly the pace of your jump, so chasing one usually does not help. Wait until a platform reaches a useful position, then make one committed jump.
Stand away from the extreme edge while waiting. Small corrections can send you into the waterfall, and a platform may not be positioned where it appears to be when you start moving. After landing, immediately check the next ledge for soldiers or a turret.
Use the next moving rock to reach the higher ledges. Clear visible enemies from every landing before making another jump. Running soldiers are especially dangerous because contact kills even when they have not fired.
- Destroy the nearby gun before crossing.
- Wait for a moving rock instead of chasing it.
- Stand away from the edge while timing the jump.
- Clear each landing before continuing.
6. Take Spread if the route is safe
A Spread sensor appears in the upper part of the climb. Take it if you have lost your current weapon or can collect it without exposing yourself to a bad landing. Spread is convenient against waterfall ambushes, running soldiers and the boss, but it is not mandatory.
Several soldiers are hidden in or near the waterfall during the upper climb. Do not remain still above a waterfall opening, because a soldier can fire upward as you pass. Continue firing while moving and avoid standing directly over an upward-firing emplacement.
A Machine Gun sensor appears near the upper-left area and is also optional. It can restore a useful weapon after a death, but there is no need to exchange a safer weapon solely because the sensor is present. Continue across the final moving-platform section and climb until the summit arena fills the screen.
- Take Spread if you need it and the landing is safe.
- Do not linger over waterfall openings.
- Watch for upward-firing emplacements.
- Treat Machine Gun as optional.
- Continue climbing until the summit arena appears.
7. Defeat the Waterfall boss
The boss is a large alien head with two moving tentacles or arms. The exposed ends of the tentacles are vulnerable and release red bubbles as they attack. The mouth opens separately and fires a three-bubble spread, including a bubble traveling down the center line. The head and mouth are the required target. The tentacles can be destroyed, but they do not have to be eliminated to win.
When the fight begins, move toward one side rather than remaining directly beneath the center. Concentrate fire on one exposed tentacle end when it comes within a workable angle, then attack the second if doing so is safe. Removing the tentacles reduces the number of red bubbles on screen and makes the mouth phase more manageable.
After reducing or destroying the tentacles, stand slightly off center and fire upward or diagonally when the mouth opens. Avoid the center line of the three-bubble spread, then return your aim to the head during the next opening. Keep moving only enough to avoid bubbles; unnecessary jumps can put you under a tentacle or off the safe firing position.
With Spread, the tentacle ends and mouth are easier to hit without constant repositioning. Fire Ball can also cover the target effectively. Laser remains usable, but the fight requires more careful alignment. Rapid Fire does not improve Laser, so do not collect or retain it expecting a faster beam.
If you enter with the standard rifle or lose your weapon during the climb, do not rush back into the arena on the replacement life. Use the safest available pickup on the retry, clear the upper ledges deliberately and attack during the mouth openings. The stage ends when the alien head is destroyed; destroying the tentacles alone does not complete Waterfall.
- Move off the center line when the fight begins.
- Aim at the exposed ends of the tentacles or arms.
- Reduce the tentacle threat when doing so is safe.
- Attack the head when the mouth opens.
- Stand slightly off center against the three-bubble spread.
- Do not expect Rapid Fire to improve Laser.
- Confirm that Level 4, Base 2 loads after the boss is destroyed.
Before you move on
- The character has climbed from the bottom of Waterfall to the summit arena.
- The alien head has been destroyed by firing at it during its mouth openings.
- The tentacle threat has been reduced or bypassed and the boss encounter is complete.
- The game leaves Waterfall and loads Level 4, Base 2.
- In two-player mode, the screen advances to Base 2 even if one player was lost during the climb.
Chapter 6 — Level 4: Base 2 — Multi-room hazards and the orb sequence
Base 2 is the fourth stage of the NES North American Contra campaign. It is a rear-view enemy-base stage with eight ordinary rooms followed by a boss room. Each room has one or more required power cores. Some cores are hidden beneath glowing protective armor, which must be destroyed before the exposed core can be damaged. The route opens only after the required targets in the current room are destroyed. Electric barriers stun you rather than killing you immediately, but rollers, bullets, grenades, soldiers and direct contact remain fatal. Spread is the safest weapon for this stage, while Machine Gun is also dependable; neither is mandatory. Advance carefully, keep checking the floor for rolling cylinders and use crouching whenever the room layout allows it. In the boss room, destroy the central core first, then remove the spread-fire turret before clearing the remaining two cores. Phantom Image Core appears only after all defensive targets are gone.
Enter Base 2 and establish a safe firing position
Carry Spread into Base 2 if you still have it. Its wide shot can damage a core while also clearing soldiers and rollers near your position. Machine Gun is a strong alternative because continuous fire quickly breaks armor and cores. Laser is usable, but losing its narrow firing line makes crowded rooms less forgiving. No weapon is required for completion.
Base 2 is a room-by-room stage rather than a side-scrolling sprint. At the start of each room, identify the required cores, the turret positions and the floor hazards. Move only enough to obtain a clear firing angle. Crouch beneath suitable gunfire, stand when a target is too high to hit and use short jumps for rollers or grenades. Do not touch electric barriers deliberately: they stun you and can leave you exposed to the next attack.
In two-player mode, one player can keep firing at the required target while the other watches for soldiers and rolling cylinders. Both players should avoid standing in the same lane when a roller is approaching.
- Keep the strongest available weapon.
- Watch the lower edge of the screen for rolling cylinders.
- Wait for the barrier and wall to clear before entering the next room.
Room 1: break the armor, destroy both turrets and finish the central core
Room 1 contains a central power core covered by a protective glowing armor patch. The core cannot be damaged until the covering has been shot away. A turret sits on each side of the protected core, and soldiers can enter and roll dangerous metal cylinders toward you.
Start by firing at the protective covering over the central core. Keep low when the side turrets fire, then stand or jump only when necessary to keep your shots on the armor. If a roller comes across the floor, shoot it with Spread or Machine Gun, or jump over it when there is enough space. Do not let the exposed core become your only concern while a cylinder is entering your lane.
Once the armor breaks, destroy both side turrets before finishing the central core whenever the room is becoming crowded. Their removal greatly reduces crossfire and makes the last part safer. Then return your fire to the exposed central core. The room opens only after the required central core is destroyed; the protective covering and both turrets are part of the practical clearance sequence for a safe passage.
- Shoot away the central core’s protective armor.
- Manage the rolling cylinders and enemy soldiers.
- Destroy the left and right side turrets.
- Destroy the exposed central core to open Room 2.
Room 2: crouch across the four lower cores
Room 2 contains four unshielded cores arranged along the bottom of the wall. Crouch and fire across the row, moving from one core to the next. This position avoids much of the overhead gunfire, but it does not protect you from grenades, rollers or soldiers that reach your position.
Keep your aim on the current core until it is destroyed, then shift to the next one. If a roller approaches, stop attacking long enough to shoot it or jump over it. Grenades require a larger reposition, so do not remain crouched if one is about to land beside you. All four cores must be destroyed before the wall clears.
- Crouch to hit the low targets.
- Destroy all four cores.
- Move when a roller or grenade threatens your position.
Rooms 3 and 4: paired cores with different heights
Room 3 has two central cores covered by protective armor, with a turret mounted above them. Fire at the armor until both coverings are gone, then continue firing at the exposed cores. The upper turret is not the required progression target, but destroying it first or during the armor-breaking sequence reduces incoming fire. Keep checking the floor for rolling cylinders.
Room 4 uses a similar paired-core arrangement, but the targets are lower and exposed immediately. Crouch and fire at the two cores rather than relying on repeated jumps. The lower turret and soldiers can interrupt your firing position, so move briefly when necessary and then return to the cores. A red soldier in this section can provide a Barrier pickup. Collect it only if doing so is safe, and preserve it for a crowded later encounter rather than wasting it on an empty room.
- Room 3: destroy both armor coverings, then both cores.
- Room 4: crouch-fire at the lower paired cores.
- Remove turrets when their fire prevents a safe attack.
- Avoid rollers and grenades while maintaining your firing angle.
Rooms 5 and 6: central turret, rolling mines and the single core
Room 5 places a turret between two side cores. Destroy the left and right cores while watching the central turret. If its shots make the firing lane unsafe, eliminate the turret first; otherwise keep pressure on the cores and move only to avoid incoming hazards. Soldiers can roll metal cylinders through the room, so do not stand still for long periods.
Room 6 contains one central core and several floor ports that produce rolling cylinders. Begin firing at the core, then deal with each roller that enters your lane. Shoot a cylinder when possible, crouch if it passes above you or jump when that gives you more room. Resume fire on the central core after every hazard. Continue this cycle until the core is destroyed and the next room opens.
- Room 5: destroy both side cores while managing the central turret.
- Room 6: attack the single central core.
- Shoot or avoid every rolling cylinder before it reaches you.
Rooms 7 and 8: elevated target and the large final core
Room 7 places its core high above the normal firing line and has a turret at standing height. Destroying the turret first is strongly recommended because its bullets make the jump-fire sequence much harder. Then jump and fire upward at the elevated core. Land, check the floor for a roller or soldier and repeat rather than committing to a blind rhythm.
Room 8 is the last ordinary room. A large central core is surrounded by three turrets, with soldiers, grenades and rolling cylinders adding pressure. Remove the turrets that restrict your movement if you need room, then concentrate on the large core. Crouch beneath ordinary bullets, but stand or jump when a grenade or roller requires it. The large core takes longer to destroy, so keep returning to it after each defensive movement. Its destruction opens the boss room.
- Room 7: clear the standing-height turret if possible, then jump-fire at the elevated core.
- Room 8: manage the three surrounding turrets and attack the large central core.
- Destroy the large core to enter the boss room.
Boss room: clear the defensive targets in the correct order
The boss room begins with three glowing cores and a spread-fire turret above the central core. Red soldiers arrive in shooting waves, while blue soldiers make jumping attacks. These defenders continue to create pressure until the defensive targets are cleared, so use short movements rather than running randomly across the room.
Begin with the central core, the target directly beneath the spread-fire turret. Fire at it while crouching or standing as its height requires, and move only when soldiers or projectiles force you out of position. Once the central core is destroyed, immediately destroy the spread-fire turret. The turret must be gone before the defensive phase can end; leaving it active while clearing the other cores allows the soldier waves to continue into the boss encounter.
After the turret is destroyed, clear the remaining two glowing cores. You may attack either side first, choosing the side with the safer firing lane. Shoot red soldiers before their bullets limit your movement, and destroy or jump over blue soldiers before they make contact. If you have Barrier, this is an appropriate place to use it when the room becomes crowded, but it does not protect against careless positioning after it expires.
When the central core, spread-fire turret and both remaining cores are destroyed, Phantom Image Core appears. The encounter displays four phantom images when the two joined forms separate. The boss can be damaged only while the forms are joined and briefly vulnerable. During the split phase, concentrate on survival. Small homing bubbles travel toward your position; shoot them when they enter your firing lane or move around them without jumping into another hazard.
With Spread, stand near the middle and fire upward as soon as the forms rejoin. With another weapon, choose one side and reposition carefully when the boss reforms. Do not waste shots or movement trying to damage separated images. Repeat the joined-phase attacks until Phantom Image Core is destroyed. The room then clears and the game advances to Level 5, Snow Field.
- Destroy the central glowing core first.
- Destroy the spread-fire turret before the defensive phase can end.
- Destroy the remaining two glowing cores.
- Survive the red shooting and blue jumping soldier waves.
- Attack Phantom Image Core only while its joined forms are vulnerable.
- Dodge or destroy the homing bubbles.
- Defeat Phantom Image Core and advance to Snow Field.
Before you move on
- All eight ordinary Base 2 rooms have been cleared.
- Room 1’s protective covering was removed and its central core was destroyed.
- The four lower cores in Room 2 were destroyed.
- The paired targets in Rooms 3 and 4 were destroyed, with Room 3 armor removed first.
- The two Room 5 side cores, the Room 6 single core, the Room 7 elevated core and the Room 8 large core were destroyed.
- In the boss room, the central core was destroyed first, followed by the spread-fire turret and the remaining two cores.
- The red and blue defensive soldier waves have ended.
- Phantom Image Core appeared and was damaged during its joined vulnerable phases.
- Phantom Image Core was destroyed and the game advanced to Level 5, Snow Field.
Chapter 7 — Level 5: Snow Field — The Falcon pickup and wide-open fights
Stage 5, Snow Field, is a horizontal outdoor level in the North American NES version of Contra. The route combines pipe-bomb hazards, mounted Gunners, weapon capsules, water gaps, two armored vehicles and a final anti-gravity shuttle. Preserve a strong weapon whenever possible. The fixed three-capsule group near the middle of the stage contains Rapid Fire at the top, Falcon in the middle and Spread at the bottom. Falcon is optional and clears enemies currently on screen as soon as it is collected. Spread is usually the safest choice for the armored vehicles and shuttle. After the shuttle is destroyed, the game advances to Stage 6, Energy Zone.
1. Advance through the opening trees and mounted Gunners
Move right while firing, but slow down when the first trees and mounted Gunners appear. Pipe bombs are launched from the trees and create a dangerous blast where they land. Do not remain fixed in one position while watching a Gunner. Move away from the landing point, let the blast pass, then resume advancing while firing.
Crouch to reduce exposure to a Gunner’s shots when you have a clear line of fire. Regular soldiers can run in from the sides while you are focused on the mounted enemy, so keep shooting as you reposition. Avoid jumping unless you need to dodge a shot or grenade; a blind jump can land on a charging soldier.
A second mounted Gunner appears near the end of the first tree section. Destroy each Gunner before pushing into the next ledge or tree section whenever possible. The safest rhythm is to advance after a pipe-bomb blast, clear the soldiers that entered during the pause, then move again before another explosion restricts your position.
- Destroy the opening mounted Gunners before advancing past their firing lanes.
- Move after pipe-bomb blasts instead of standing still in the trees’ danger zone.
- Keep firing while repositioning so regular soldiers cannot approach unseen.
2. Collect Machine Gun and use the ledges
Continue right until you reach the weapon box or sensor containing Machine Gun. Shoot it, then collect the M capsule if you are using the standard rifle or have just lost a stronger weapon. Machine Gun fires a continuous stream while the fire button is held; Rapid Fire is not required to make it automatic.
Use the ledges beyond the sensor to attack the next mounted Gunners from a safer height. Crouch when a Gunner is level with you and wait for a firing opening before dropping down. A Rapid Fire capsule appears later in this section, before the fixed group of three flying capsules. Collect it when the route is safe, especially if you are carrying the standard rifle or Spread.
Keep watching for soldiers entering from behind. The white Snow Field background can make enemy bullets difficult to see, so avoid standing still after a Gunner has been defeated.
- Shoot the weapon box or sensor and collect Machine Gun when it improves your current loadout.
- Remember that Machine Gun fires continuously while the fire button is held.
- Use ledges and crouching to reduce exposure to the mounted Gunners.
- Treat Rapid Fire as a separate upgrade, not as a substitute for Machine Gun.
3. Cross the second tree section and pass the Fire Ball pickup
Proceed through the next group of trees in short bursts. Pipe bombs can appear while soldiers enter from the sides, so advance after each blast, clear the soldiers, and avoid lingering beneath the trees. Do not sprint into unexplored ground while an explosion is still active.
The next weapon box or sensor contains Fire Ball. Fire Ball is optional. If you already have Spread or Machine Gun, keep the dependable weapon unless you specifically want Fire Ball’s circular projectile pattern. If you have only the standard rifle, Fire Ball can help cover targets from different angles, but collect it only when doing so does not expose you to a pipe-bomb blast or Gunner shot.
After the Fire Ball pickup, prepare for the three flying capsules. Do not chase a capsule into an unsafe jump. The items pass through the area at different heights, and surviving with a reliable weapon is more valuable than losing a life while trying to reach a preferred pickup.
- Advance between pipe-bomb blasts and clear soldiers before moving farther right.
- Treat Fire Ball as optional when Spread or Machine Gun is already equipped.
- Approach the flying capsules with enough room to choose a safe jump.
4. Choose correctly among the three flying capsules
The three capsules travel from left to right at different heights. In the NES USA Snow Field stage, the top capsule contains Rapid Fire, the middle capsule contains Falcon and the bottom capsule contains Spread. This arrangement is fixed.
Choose the bottom Spread capsule when you need the strongest general-purpose weapon for the rest of the stage. Spread covers several angles and is especially useful against the armored vehicles and the shuttle. Choose the top Rapid Fire capsule when you are using the standard rifle or Spread and want faster firing. Rapid Fire increases the firing rate of the current weapon; it does not turn Machine Gun into a new firing mode because Machine Gun already fires continuously while the button is held.
The middle Falcon capsule is optional. Collecting it immediately clears enemies currently visible on the screen. It is not stored for later, and it does not remove hazards or enemies that have not yet appeared. Use it when the screen is crowded or when it will make the approach to the water safer. Do not sacrifice a life to reach Falcon if you can instead secure Spread safely.
- Top capsule: Rapid Fire.
- Middle capsule: Falcon screen clear.
- Bottom capsule: Spread.
- Prioritize a safe Spread pickup over Falcon when the route is dangerous.
- Remember that Falcon activates immediately when collected.
5. Cross the water and reach the armored vehicles
Jump across the water gaps while firing forward. A Sniper waits near the far side, so continue shooting as you land instead of stopping immediately. A Scuba Soldier attacks around the water route; shoot it when you have a safe angle, or keep moving so you do not remain beside its firing lane.
After the final gap, continue firing as you land because regular soldiers can enter immediately. When the pipe-covered ground begins, prepare for the first armored vehicle. If you still have Spread or Machine Gun, avoid unnecessary risks before the vehicle encounter. Losing a weapon does not make the stage impossible, but it makes the vehicle fights more demanding.
- Fire during the water jumps and immediately after landing.
- Destroy or bypass the Sniper without stopping in the open.
- Do not linger beside the Scuba Soldier’s firing lane.
- Reach the first armored vehicle with the strongest weapon available.
6. Destroy both armored vehicles
When the first armored vehicle enters and the screen stops scrolling, retreat toward the far-left side of the screen. Turn to face right, crouch and fire continuously. Tap right only enough to face the vehicle if necessary. From this distant position, its shots are easier to avoid and you have more time to keep damaging it before it reaches you.
Spread is the most comfortable weapon for this fight because several shots can connect at once. Machine Gun is also effective if you maintain the stream of fire. Do not stand directly in front of the vehicle at close range, and do not try to jump over it. Keep firing until it is destroyed before advancing.
A mounted Gunner appears after the first vehicle. Clear it, then continue to the second armored vehicle and repeat the same method: create distance, face right, crouch and hold fire. Both armored vehicles must be defeated before you treat this section as complete. If you lose a life, recover on the next attempt by returning to the distant firing position rather than rushing forward.
- Retreat before each armored vehicle begins its firing sequence.
- Crouch and fire continuously from a distant position.
- Destroy the first armored vehicle before advancing.
- Clear the mounted Gunner between the two vehicle encounters.
- Destroy the second armored vehicle before continuing right.
7. Clear the final approach and defeat the anti-gravity shuttle
After the second vehicle, clear the next mounted Gunner and move through the later tree and pipe sections carefully. Pipe bombs continue to appear, and another Gunner stands near the final approach. Move past each explosion before settling into a crouched firing position. If another weapon pickup is available, collect it only when the surrounding hazards are under control.
At the closed door, the Stage 5 boss appears as an anti-gravity shuttle. Position yourself beneath, or slightly to either side of, its center and fire upward while it is visible. Spread is especially effective because it can damage the shuttle while also covering the smaller objects it releases.
During the shuttle’s bomb-dropping phase, fire upward through the center. Your shots can destroy falling bombs while also damaging the shuttle. Move aside if a bomb is descending too close to your position. When the shuttle opens or withdraws and releases smaller flying craft, shoot them or jump over them as they approach. In two-player mode, one player can keep firing at the shuttle while the other handles the released craft, but both players must watch the falling bombs.
When the shuttle returns, resume firing at its center. Repeat the cycle until it is destroyed. If you have Spread, the shuttle may be defeated during its first appearance; otherwise, expect to survive one or more additional cycles. Do not focus so completely on the boss that a small craft reaches you from the side.
- Clear the final Gunners and pipe-bomb approach.
- Attack the shuttle’s central body while it is visible.
- Shoot or evade the falling bombs.
- Destroy or jump over the smaller craft released by the shuttle.
- Repeat the attack cycle until the shuttle is destroyed.
- Confirm the transition to Stage 6, Energy Zone.
Before you move on
- The opening tree sections and mounted Gunners have been cleared.
- The Machine Gun weapon box or sensor was handled without confusing Machine Gun with Rapid Fire.
- The Fire Ball pickup was identified with the correct weapon name.
- The three-capsule group was handled with the correct order: top Rapid Fire, middle Falcon and bottom Spread.
- The water gaps, Sniper and Scuba Soldier section were cleared.
- The first armored vehicle was destroyed.
- The mounted Gunner between the vehicle encounters was cleared.
- The second armored vehicle was destroyed before the route continued.
- The later Gunners and final pipe-covered approach were cleared.
- The anti-gravity shuttle was destroyed by attacking its center while avoiding its falling bombs and smaller released craft.
- The exit opened and the game transitioned to Stage 6, Energy Zone.
- Falcon was treated as an optional immediate screen-clearing pickup rather than a required permanent weapon.
Chapter 8 — Level 6: Energy Zone — Step hazards and precision shooting
Energy Zone is Stage 6 of the North American NES version of Contra. Advance slowly through its stepped platforms, gunner positions and reactive flame vents. The safest method is to clear enemies from a different platform whenever possible, trigger flames before committing to a crossing, and inspect each landing area before dropping. The stage offers an early Machine Gun, a later Laser opportunity and an optional Barrier detour, but none is required. At the end, defeat the armored giant by keeping up sustained fire, jumping over it when it closes in, and clearing the small spinning discs that travel along the ground. The stage-clear transition leads directly to Stage 7, Hangar.
1. Clear the opening steps and collect the Machine Gun if safe
Move right from the starting point and keep firing diagonally upward at the soldiers dropping from the step-like ledges. Eliminate them before walking underneath their landing points. A nearby weapon sensor contains the Machine Gun. Take it when the approach is clear, but do not spend a life forcing the pickup; Energy Zone and its boss remain possible with the standard rifle.
Continue right and kill the gunner positioned on the upper ledge. Before dropping, aim down and remove the gunner on the lowest floor. Another gunner appears when you reach the break in the middle ledge. Fire from a different height whenever possible instead of standing directly in a gunner's line of fire.
Soldiers can enter from behind while you are dealing with a gunner. Turn around and clear them before advancing. Energy Zone rewards short, controlled movements more than a fast run. Stop at each ledge, remove the immediate threat, and only then make the next drop or jump.
- Shoot the descending soldiers before moving beneath their ledges.
- Take the early Machine Gun only when the sensor can be reached without exposing yourself to unnecessary fire.
- Clear the upper, lower and middle-ledge gunners before attempting the first major flame crossing.
2. Trigger the first flame and choose the safer route
Continue right until you reach the large gap with a pipe above it. The pipe flame reacts when you try to pass. Approach far enough to make it extend, then jump across as it retreats toward the pipe. Do not commit to the jump before triggering the flame, because its timing and position will not yet be clear.
A nearby sensor offers a Laser, but it is optional. Preserve your life and current weapon rather than taking a dangerous detour. After the gap, remove the gunners before entering the next group of flame hazards.
When a flame projects horizontally from a wall, inch forward to activate it, then crouch if the flame passes above your character. Advance only as it retracts. Not every flame requires a jump: low horizontal bursts can often be passed while crouching, while a gap-spanning or nearly full-height burst requires a timed jump.
When more than one platform is available, use the level that gives you the clearest shot at the next gunner and the safest landing. Do not change routes merely to chase an optional weapon.
- Trigger reactive flames before attempting to cross them.
- Crouch beneath suitable low flames instead of jumping automatically.
- Use the platform with the clearest firing angle and safest destination.
3. Cross the layered flame section
The next section combines ledges, stationary gunners and overlapping flame vents. Move in short stages: approach a hazard, let it extend and retract, then advance to the next safe platform. Stationary gunners can often be destroyed diagonally from another height, avoiding a dangerous jump into their firing line.
At the long flame crossing, use the lower floor and wait for the flame to retract. Jump immediately through the opening and land beyond it. This crossing needs a jump because the flame occupies too much of the route for simply crouching beneath it. Keep firing during the jump so a soldier on the landing platform cannot attack freely.
In the upper section, destroy the distant gunner before advancing. Approach the next upper flame until it activates, wait for it to pull back, and then cross. If a lower-route sensor is surrounded by active flames or enemy fire, leave it alone. Optional equipment is never worth trading away a reliable weapon and a life.
- Move between flame cycles rather than rushing through overlapping hazards.
- Shoot gunners from another platform whenever a safe angle is available.
- Do not drop toward an item sensor while flames or bullets cover the landing area.
4. Make the final drops and prepare for the boss
After the upper crossing, another wall flame requires a crouch-and-wait response. Move close enough to trigger it, duck while it is extended, and advance as it retracts. Before every drop, inspect the destination and the space above it. Crouching does not make a platform transition safe if the character briefly stands during the drop.
Clear the gunners on the lower floor, move to the middle ledge and eliminate the next gunner. Reach the upper ledge, then return to the lower route at the intended edge. Do not fall blindly from the top ledge: the flame ahead reaches nearly to the bottom. Use the lower approach, wait for the flame to retreat, cross, and continue right to the smooth boss floor.
A lower detour can provide Barrier, but Barrier is optional. Machine Gun is sufficient for the boss, and Spread is useful if you carried it from an earlier stage. Enter the arena with room behind you so you can retreat while firing.
- Check the destination before every platform drop.
- Use the lower approach for the flame that reaches almost to the floor.
- Treat Barrier as optional and enter the boss arena with a dependable weapon and room to move.
5. Defeat the Energy Zone armored giant
The Energy Zone boss is a large armored giant that moves across the arena. It typically walks toward one side, turns and comes back, then throws small spinning discs that travel along the ground. Its color changes as it takes damage, providing a visible indication that the fight is progressing. Keep your attention on both the giant and the floor in front of you.
Start near the far left and fire continuously toward the giant whenever it is visible. Continue firing while it approaches and keep shooting after each landing. When the giant closes in, jump over its body. Do not attempt to run underneath it, slip beside it on the ground or remain in its path. A clean jump over the giant is safer than trying to outrun its movement.
When the giant throws the spinning discs, jump over the discs as they slide along the ground. The first two can often be cleared by one well-timed jump, but be ready to jump again if another disc follows. Watch the floor instead of concentrating only on the boss sprite; the discs are low and can reach you while you are repositioning.
After clearing the discs, resume continuous fire. If the giant jumps, prioritize a safe landing and immediately continue shooting. Spread shortens the battle, but Machine Gun and the standard rifle are adequate if you maintain the jump-over pattern and avoid standing in the giant's path.
Repeat the cycle: fire while the giant is moving, jump over it when it reaches you, clear every ground-traveling disc, and resume fire after landing. The giant changes color through its damage states and eventually explodes. Its defeat completes Energy Zone. After the stage-clear transition, the game advances directly to Stage 7, Hangar.
- Keep firing while the armored giant approaches and after every landing.
- Jump over the giant when it closes in; do not run underneath or beside it.
- Jump over the small spinning discs as they travel along the ground.
- Watch the giant's color changes as damage accumulates.
- Continue the movement-and-fire cycle until the armored giant explodes.
- Confirm the stage-clear transition and the move to Stage 7, Hangar.
Before you move on
- The Energy Zone armored giant has changed color as damage was dealt.
- The giant's ground-traveling spinning discs and movement stop when it is defeated.
- The armored giant explodes and the Energy Zone stage-clear transition appears.
- The game advances to Stage 7, Hangar.
- No specific weapon, including Machine Gun, Laser, Spread or Barrier, was required to complete the stage.
Chapter 9 — Level 7: Hangar — Ceiling Claws, Spike Walls and the Alien Lair Lock
The Hangar is a horizontal hazard stage built around descending ceiling claws, mine carts, rising spike walls, fixed spike barriers, stationary gunners and soldiers entering from behind. Most contacts are instant deaths, so advance in short sections and wait for hazards to open a path. The upper route is generally the safer choice because it reduces the number of claws and mine-cart hazards you must handle, although both routes are completable. The stage offers Fire Ball, Rapid Fire, Barrier, Machine Gun, Laser and an optional Spread opportunity. The later paired capsules contain Laser and Rapid Fire; Spread comes from an optional lower-route sensor if you need it, or can be carried into the stage from earlier. The required objective at the end is destroying the cross-shaped security lock above the Alien's Lair doorway. The nearby mortar turrets and soldiers are hazards, not a mandatory clear.
1. Enter the Hangar and learn the claw pattern
Move right from the starting platform until the first route choice. Jump to the upper ledge when the landing is safe. The lower path is possible, but it normally exposes you to more claws and additional pressure. Do not treat the split as a race. Reach the first claw group, stop, and watch the timing before committing to the next opening.
The ceiling claws descend in a fixed pattern. A lowered claw can kill you on contact, so wait until the nearest arm retracts and move through the opening. Use short bursts of movement instead of holding Right continuously. If you die here, memorize one safe gap at a time rather than switching routes and improvising.
After the first claw group, a flying weapon capsule crosses the area. Shooting it reveals Fire Ball. The pickup is optional. Fire Ball can help against enemies at different heights, but do not step into an active claw merely to collect it. If you entered with Spread, keeping Spread is usually the safer long-term choice. The Hangar can be completed with any weapon.
- Take the upper route when the jump is safe.
- Wait for each claw to retract instead of jumping over a lowered arm.
- Treat the first Fire Ball capsule as optional.
2. Cross the second claw section and collect Rapid Fire safely
Continue to the next route split and again favor the higher path when it gives you a clear landing. A stationary gunner occupies one of the upper platforms. Shoot him before standing beside him, then pause for the next claw opening. Keep your character near the safe side of the platform while firing so a descending arm cannot catch you.
A later flying capsule provides Rapid Fire. Rapid Fire increases the firing rate of the weapon currently equipped; it does not replace that weapon with Machine Gun or Spread. Collect it when the capsule and claw cycle give you a safe approach. If you already have a reliable gun, surviving the section matters more than forcing the pickup.
Mine carts begin appearing around this part of the stage. A cart can be ridden from its top, but contact from the side or underside is fatal. Do not wait beside a cart at floor level. Either pass behind it, jump onto its upper surface when required, or allow it to leave the screen before advancing.
- Eliminate the upper-route gunner before moving beside him.
- Collect Rapid Fire only when the claw opening is safe.
- Never touch a mine cart from the side or underside.
3. Destroy the rising and fixed spike walls
After the Rapid Fire opportunity, move onto the next platform and advance only until the first spike barrier rises from the floor. Stop and shoot it down before walking forward. More rising walls follow, so keep your character in a position where the next barrier can be targeted without stepping into it. A full sprint makes these walls harder to react to.
The following platforms contain fixed spike walls. They must also be destroyed before you continue; jumping or crouching does not make contact safe. Fire from a stable position, then check the space beyond the wall before moving. If a claw starts descending while you are attacking, stop pressing Right and retreat into the nearest safe gap.
At the next split, use the upper route when possible. The high path gives you more room to read the claw timing and avoids some of the cart trouble below. Keep firing through the openings, but do not advance simply because the weapon is still firing. Survival and a clear landing matter more than continuous forward movement.
- Shoot down each rising wall before passing it.
- Destroy fixed spike walls instead of trying to jump through them.
- Use the gaps between claws as temporary firing positions.
4. Use the cart route to reach Barrier
A Barrier capsule is positioned above raised platforms. The platforms cannot be reached reliably from the floor, so preserve the nearby cart and use its upper surface as a stepping point. Jump onto the cart, then jump from the cart to the raised platforms and shoot the capsule. Barrier is optional, but it can let you cross a long hazard section without being stopped by ordinary enemy contact or gunfire.
Barrier does not make pits safe, and it does not remove the need to land on platforms. Do not deliberately collide with carts just because Barrier is active. If the capsule is badly positioned or your current weapon is more important for survival, continue without it rather than losing a life.
After the Barrier area, another cart crossing may be needed to reach the next ledge. Keep the useful cart intact until you have crossed. A stationary soldier waits near the route; shoot him from the ledge before stepping into the next claw section.
- Use the cart's top to reach the raised Barrier platforms.
- Remember that Barrier does not protect against pits.
- Do not destroy a cart needed to reach the next ledge.
5. Handle the Machine Gun, Laser and Rapid Fire opportunities
A flying capsule near the later Hangar route contains Machine Gun. It is optional. Take it if you lost your weapon or need a dependable rapid-firing gun, but do not replace a surviving Spread weapon unnecessarily. If you die, the lost weapon is not preserved, so a risky pickup can cost more than it provides.
Continue through the upper ledges and gap section, clearing spike walls before dropping to the next safe platform. The lower alternative generally contains more claw timing and cart hazards, so do not drop early unless the upper landing has become unsafe. Watch for soldiers entering from behind while you are concentrating on the walls ahead.
Later, a paired capsule opportunity provides Laser and Rapid Fire. The Laser is optional and replaces the weapon you are carrying; Rapid Fire improves the firing rate of that current weapon. Choose according to your position and weapon. Do not treat this pair as a required sequence, and do not walk into a claw or spike wall merely to collect either item.
If you need Spread, use the optional sensor on the lower route when it is safe to reach. Spread may also be carried into the Hangar from an earlier stage. A player already holding Spread should normally keep it rather than taking a risky replacement.
- Treat Machine Gun as optional.
- Recognize the later paired capsules as Laser and Rapid Fire.
- Use the lower-route Spread sensor only if reaching it is safe and useful.
- Do not risk a life for a weapon you do not need.
6. Clear the entrance approach and destroy the security lock
After the later spike groups, the entrance approach places stationary gunners and soldiers near the Alien's Lair doorway. Soldiers can enter from behind while you are firing forward, so check both sides of the screen. Use Spread, Fire Ball, Machine Gun, Laser or Rapid Fire to create a firing lane, but do not stop to eliminate every enemy if the route forward is open.
The final encounter has two ground-mounted triple-mortar turrets below the doorway, continuing soldier pressure and a cross-shaped security lock above the entrance. The mortars lob projectiles into the play area and can interfere with your firing position. Destroy a turret if it blocks the lane, but remember that the lock is the required target. You do not need to clear every mortar and soldier before finishing the stage.
Move to the right-side firing position when the immediate ground hazards allow it and aim diagonally upward at the cross-shaped lock. Keep firing while watching the mortar shots. In two-player mode, one player can concentrate on the lock while the other suppresses soldiers and turrets. In one-player mode, clear only enough space to keep the firing position usable, then return to the lock.
The entrance encounter ends when the cross-shaped lock is destroyed. The game then transitions to Level 8, Alien's Lair. If you die before the transition, re-enter carefully with the default rifle or whatever weapon you recover, rebuild a safe firing lane and attack the lock again rather than trying to rush through the full screen.
- Watch for soldiers entering from behind.
- Recognize the two triple-mortar turrets as hazards, not mandatory destruction targets.
- Aim at the cross-shaped lock above the doorway.
- Confirm the transition to Level 8, Alien's Lair.
Before you move on
- The opening claw section has been crossed, preferably using the upper route.
- The Fire Ball and first Rapid Fire opportunities have been passed or collected safely.
- The rising and fixed spike-wall groups have been cleared.
- The raised Barrier section and required cart crossing have been completed, whether or not Barrier was collected.
- The Machine Gun opportunity has been passed or collected safely.
- The later Laser and Rapid Fire capsule pair has been passed or collected safely.
- The optional lower-route Spread sensor has been used if needed, or Spread has been carried in from an earlier stage.
- The final claw and spike-wall sections have been cleared while rear-spawning soldiers were managed.
- The entrance approach has been reached with the cross-shaped security lock visible above the doorway.
- The lock has been destroyed while the mortar turrets and soldiers were handled only as necessary.
- The game has transitioned to Level 8, Alien's Lair.
Chapter 10 — Level 8: Alien's Lair and the Red Falcon
Alien's Lair is the final NES stage. The route is short, but its alien mouths, homing Spores and fast Crawlers punish rushed movement. Collect the opening Machine Gun or Barrier when possible, defeat the Larva, clear each mouth group before crossing the next gap, and take the optional Spread capsule if the approach is safe. The final encounter is against the Alien Heart, not Red Falcon as a separate on-screen body. Destroying the heart triggers the North American NES ending, which confirms that Red Falcon has been destroyed and displays the CONGRATULATIONS message.
1. Collect the opening weapon capsules
Move right from the starting point and jump onto the upper ledge. Two capsules soon travel across the screen from left to right. The upper capsule contains the Machine Gun, marked M. The lower capsule contains the Barrier, marked B. Shoot the capsules while they pass and collect whichever pickup you can reach safely. If your position allows it, you can collect both, but neither pickup is worth a death caused by a reckless jump.
Machine Gun is useful for the entire stage because holding the fire button produces a continuous stream of shots. Barrier grants temporary invulnerability against ordinary damage, but it does not protect you from falling into pits or other fatal environmental hazards. If you take Barrier, use its protection to move aggressively through the opening Floaters, but still jump the gaps normally.
Continue along the upper route when practical. Small shrimp-like Floaters begin entering from the right. Keep firing while moving, and jump over any Floater that reaches your position instead of stopping in an unsafe location.
- Reach the upper ledge at the start.
- Shoot the M and B capsules as they pass.
- Choose Machine Gun, Barrier, or both if the collection is safe.
- Remember that Barrier does not prevent pit deaths.
- Advance toward the Larva encounter.
2. Defeat the Larva
The first major obstruction is a large alien Larva behind an egg-like barrier. The Larva releases Floaters, but the barrier and Larva are the objectives that must be destroyed before the route opens.
Stand close to the wall beneath the Larva and fire diagonally upward. This angle reaches the target while giving you a consistent position from which to handle the Floaters. Keep shooting rather than chasing every Floater across the screen. When one approaches, fire at it if possible or jump over it and return to the wall.
If you collected Barrier, use its temporary protection to maintain pressure on the Larva. Do not advance merely because a Floater has moved away; wait until the Larva and its obstruction have been destroyed. Once the wall and alien target disappear, move right into the mouth section.
- Treat the Larva and its egg barrier as the required targets.
- Fire diagonally upward from the wall beneath the Larva.
- Shoot or jump over Floaters without retreating into the lower hazard.
- Wait for the obstruction to disappear before advancing.
3. Clear the first alien mouths and Spores
The next section contains alien mouths attached to the ceiling and floor. They release small white Spores. Spores may move slowly at first and then home toward your position, so leaving several mouths active can fill the screen with threats during a jump.
Stop at each mouth group instead of running underneath everything. Destroy the nearest mouth or pair of mouths, then shoot the Spores that are already moving toward you. Once the immediate area is clear, cross to the next ledge. Use the edge of a platform to fire upward at ceiling mouths before dropping below them whenever the layout allows.
After the first four mouths, jump to the small platform in the middle of the gap. This platform is the approach to the later Spread capsule. Keep firing during the jump and do not commit to the next drop while multiple Spores are converging on your landing area.
- Stop before each mouth group.
- Destroy nearby mouths before attempting difficult jumps.
- Shoot homing Spores before they surround your landing position.
- Use ledges to attack ceiling mouths from relative safety.
4. Collect the optional Spread capsule
A capsule travels through the middle-platform section from the left. Shoot it so it lands on the route ahead; it contains the Spread weapon, marked S. Spread is particularly useful here because its projectiles cover multiple heights and reduce the time needed to expose yourself to mouths and Crawlers.
The capsule is optional. If a Spore is already beside you, the platform is crowded, or collecting the weapon would require an unsafe detour, continue with Machine Gun, Barrier, or the default rifle. Missing Spread does not block progression or make the final encounter impossible.
With Spread, continue using controlled stops. The wide shot helps clear targets above and below you, but it does not make active mouth groups harmless. Fire at the mouths first, then remove any Spores that have already been emitted before crossing the next opening.
- Look for the S capsule after the first four mouths.
- Collect it only if the platform and landing area are safe.
- Do not spend a life on this optional pickup.
- Use Spread to cover multiple firing heights.
5. Cross the remaining mouth section
Continue right across the ledges and lower openings. Destroy floor mouths before dropping beside them when possible. If a drop is unavoidable, fire at the immediate landing area before committing, then keep moving once the landing is secure.
More mouths appear at different heights, so repeat the same pattern: stop, shoot the nearest targets, clear incoming Spores, then advance. Do not allow several mouth groups to remain active while you cross a long gap. Their Spores can overlap and remove every safe landing option.
Fast Crawlers begin appearing near the end of the route. Shoot them as soon as they enter from the right. Jump over one only when the landing area is clear, because another can arrive while you are airborne. Destroy the final mouth before entering the open arena whenever practical; leaving it active adds an avoidable threat to the boss approach.
- Clear mouths from ledges before dropping when possible.
- Respond immediately to Crawlers.
- Avoid crossing long gaps with several mouths still active.
- Destroy the final mouth before the arena if you can.
6. Destroy the lower pods around the Alien Heart
The final arena contains the Alien Heart surrounded by four egg pods: two above it and two below it. The pods release Crawlers. The Alien Heart itself does not directly attack, so the immediate danger comes from the creatures emerging from the pods and moving along the floor or ceiling.
Begin on the left side and crouch while firing at the two lower pods. This is the safest general priority because removing the lower pods reduces the ground-level pressure and gives you a better position for the heart. Spread makes this faster, but Machine Gun and the default rifle can also destroy the pods with sustained fire.
You do not need to destroy every pod. The upper pods can remain active if eliminating them would expose you to unnecessary danger. Watch above your character as well as along the floor: Crawlers from the upper pods may travel across the ceiling or drop toward the ground. Shoot them when they threaten your position, then return your aim to the lower pods.
- Identify the four pods around the heart.
- Crouch on the left and target the two lower pods first.
- Watch for Crawlers on both the floor and ceiling.
- Destroy upper pods only when doing so is safe and useful.
7. Destroy the Alien Heart and confirm the ending
After the two lower pods are gone, move close to the Alien Heart and fire diagonally upward. The heart does not cause direct contact damage, and this close position lets your shots connect consistently. Keep firing while making only the small movements needed to avoid Crawlers.
If a Crawler emerges from an upper pod, shoot it or avoid it briefly, then return to the heart. Spread provides the best coverage, Machine Gun supplies reliable continuous damage, and the default rifle still works if you preserve a safe firing position. Do not retreat across the arena unless a Crawler forces you to; the longer the fight lasts, the more opportunities the remaining pods have to create hazards.
Continue attacking until the Alien Heart explodes. This is the playable completion of the final fight. The North American NES ending then begins and identifies Red Falcon as destroyed, followed by the CONGRATULATIONS presentation. Let the sequence play before resetting or returning to the title screen. The harder repeat loop after the ending is not required for the campaign completion goal.
- Stand close to the heart after reducing the lower-pod threat.
- Fire diagonally upward into the Alien Heart.
- Handle Crawlers without abandoning the firing position unnecessarily.
- Confirm the heart explodes.
- Confirm that the CONGRATULATIONS ending sequence begins and identifies Red Falcon as destroyed.
Before you move on
- The opening Larva and its egg barrier have been destroyed.
- The alien-mouth route and final approach have been cleared.
- The lower pods around the Alien Heart have been destroyed or their threat has been reduced enough to attack safely.
- The Alien Heart has exploded.
- The North American NES ending displays CONGRATULATIONS.
- The ending confirms that Red Falcon has been destroyed before the game returns to its post-completion sequence.
Chapter 11 — Boss Patterns and Multi-phase Fights: Practical Responses
NES Contra bosses do not display health bars, and their vulnerability rules differ from room to room. Some encounters require fixed cores or wall targets, some expose a body part only during an attack, and Base 2 changes into a separate Phantom Image Core encounter after its lower targets and spread-fire turret have been cleared. The safest general method is to identify the required target, preserve an escape lane, remove threats that control that lane, and keep firing whenever the target is vulnerable. In Base 2, use the central-core-then-turret order before clearing the remaining cores so the defensive waves do not continue into the Phantom Image Core phase. In two-player mode, divide weak-point and support duties instead of standing together and sharing the same danger.
1. Identify what actually ends the fight
At the entrance to a boss room, do not assume that the largest object on screen is immediately vulnerable. First identify the required target. Base 1 has four required wall targets followed by Ocular Fire. The Waterfall boss is ultimately defeated by damaging its mouth or head when the mouth opens; its flailing arms are useful targets only if you need to reduce incoming fire. Moving bosses such as the Snow Field craft must be tracked and shot directly rather than approached like a wall target.
Base 2 requires a specific opening sequence. Destroy the central lower core first, then destroy the spread-fire turret behind it. After that, clear the two remaining lower cores. The red shooting defenders and white jumping defenders continue appearing while the defensive targets remain active, so do not leave the turret until after the final cores. Once the turret and all three lower cores are gone, Phantom Image Core appears in the upper part of the room.
The NES version does not display a health bar. Judge progress by a target disappearing, a component being destroyed, a visible phase change, or the boss leaving the screen. Do not stop after destroying the first visible target if the room still contains another required phase.
- Name the required target before committing to a risky position.
- Separate required targets from optional parts such as the Waterfall boss arms.
- In Base 2, destroy the central lower core first, then the spread-fire turret, then the two remaining lower cores.
- Confirm that the boss has vanished or changed to its next required phase before moving on.
2. Establish a safe firing lane before attacking
Use the first moments to locate a strip of floor or a platform from which you can fire without being trapped against the screen edge. Keep enough room to jump over a projectile or retreat from a soldier. A centered position is useful when a boss moves horizontally, but it is not automatically safe: shift when a projectile lines up with you or when a support enemy enters your escape route.
Against Base 1 and the first part of Base 2, crouch when turret shots travel at your height, then stand briefly to fire at the exposed target. In Base 2, begin with the central lower core. Once it is destroyed, immediately turn your attention to the spread-fire turret and remove it before attacking the remaining two cores. This order reduces the pressure from the repeating defensive waves before the final cores are cleared.
Against the Waterfall alien, remain on the available platform and fire at the mouth when it opens rather than jumping continuously beneath the head. Against the Snow Field craft, move under its new position and fire upward, then deal with smaller craft or ground threats before they reach your feet.
- Leave room on at least one side for an emergency jump or retreat.
- Use crouching against low horizontal fire when it is safe to stop moving.
- Begin the Base 2 boss sequence with the central lower core.
- Destroy the spread-fire turret before clearing the remaining Base 2 cores.
3. Reduce screen clutter without abandoning the objective
Turrets, soldiers, rolling cylinders, bubbles and small ships can remove the space needed to dodge. Destroy a threat when it covers your only escape route or is about to cross your position. Otherwise, keep shooting the required target. The goal is not to empty the arena; it is to keep one reliable route open while damage continues.
In Base 1, keep firing at the required wall targets and duck or reposition around turret fire. In Base 2, do not treat all four defensive targets as interchangeable. Shoot the central lower core first, then destroy the spread-fire turret as soon as the central target is gone. Only after the turret is destroyed should you clear the two remaining lower cores. Red shooting defenders and white jumping defenders may still enter the arena, but removing the turret before the final cores prevents those defensive waves from carrying into the Phantom Image Core phase.
Clear a red shooter or white jumper when it enters your lane, but do not chase it onto a dangerous background platform. Once Phantom Image Core appears, destroy bubbles that are about to collide with you, then return your aim to the joined boss forms whenever they become vulnerable.
- Remove threats that cover your escape route first.
- In Base 2, follow the central core, turret, remaining cores order.
- Do not leave the spread-fire turret active while finishing the final lower cores.
- Continue damaging the current required target whenever it is exposed.
- Avoid pursuing a minor enemy into a worse position.
4. Recognize the Base 2 Phantom Image Core pattern
The Base 2 boss area begins with three lower glowing cores, a spread-fire turret behind the central core, and enemy defenders entering from the sides. Start by destroying the central lower core. Immediately attack and destroy the spread-fire turret. Then move to the left or right side and destroy one remaining lower core before crossing to destroy the last one. Keeping the turret active while finishing the final cores allows the defensive waves to continue and makes the transition into the next phase unnecessarily dangerous.
After the turret and all three lower cores are gone, Phantom Image Core appears as two boss forms that divide into phantom images and later reunite. The boss can be damaged during the joined form, not while the images are separated. The forms release small homing bubbles that can be shot. During the split, prioritize survival and destroy only bubbles that threaten contact or block your movement. When the images reunite, resume concentrated fire immediately. Focus on one joined form when possible, then finish the other after the first is destroyed. Repeat this evade-and-fire rhythm until both forms have been defeated and the stage advances.
- Destroy the central lower core first.
- Destroy the spread-fire turret immediately after the central core.
- Clear the two remaining lower cores after the turret is gone.
- Do not waste shots on separated phantom images.
- Fire at the reunited boss forms while clearing bubbles that threaten contact.
5. Use diagonal fire and purposeful jumps
Hold a diagonal direction while firing when a weak point is above or below your normal line. Crouch for low targets and use a jump to clear a specific projectile, reach a raised firing height or change sides of the arena. A jump should have a reason. Repeated unplanned jumping can carry you into a boss, a bubble, a soldier or the edge of a platform.
With Spread, keep the boss within the fan of shots and avoid wandering away from the target. With Machine Gun, hold the firing button while maintaining a stable line. With the default rifle, prioritize a safe position and continuous accurate shots rather than trying to force a quick kill. The Laser can damage a target strongly along its line, but its narrow shot makes positioning more important.
During the Phantom Image Core split, movement matters more than firing because the separated images cannot be damaged. Jump over a bubble only when it reaches your lane, or shoot it before it accelerates toward you. Return to a stable floor position before the forms reunite so your next firing window is not wasted.
- Use diagonal fire to reach offset targets without walking directly under them.
- Jump over a specific hazard and return to a stable firing position.
- Do not trade a safe firing lane for unnecessary movement.
- Save concentrated fire for the reunited Phantom Image Core forms.
6. Divide jobs in two-player mode
Assign one player to the required target and the other to support, but change those jobs as the arena changes. During the Base 2 opening, both players should help destroy the central core, then the turret, then the two remaining cores. The support player should handle soldiers and protect the attacker's lane while the target player maintains fire on the current objective. Neither player should ignore a red shooter or white jumper that is about to force both characters into the same escape route.
Keep the characters separated horizontally when the arena allows it. Do not stand on the same line if a single projectile can hit both players. During Phantom Image Core's split phase, both players should prioritize survival and bubble control rather than firing at invulnerable images. When the forms reunite, one player resumes weak-point fire while the other keeps the immediate lane clear.
If one player dies, the survivor should clear the immediate threat and give the returning player room to establish a position before resuming full pressure. Do not have both characters rush toward the same target from the same side.
- Choose a target player and a support player before firing together.
- Complete the Base 2 central core, turret and remaining-core sequence without forcing an unsafe crossing.
- Keep both characters out of the same narrow escape lane.
- Change roles when the boss enters the split or reunited phase.
- Give a returning player space before both players resume the attack.
7. Recover after a death or failed phase
After respawning, assume that the lost weapon has made the next attempt weaker. Re-enter from a deliberate position instead of sprinting toward the place where the previous character died. Clear the nearest soldier or turret that blocks the first safe lane, then watch one attack cycle before committing to a jump or close-range attack.
If a Base 2 attempt fails, restore the intended order rather than improvising around the turret. Fire on the central lower core first, destroy the spread-fire turret immediately afterward, and then clear the two remaining cores. This stops the defensive waves from continuing into Phantom Image Core. If the central core is difficult to reach, use crouching and short exposure windows instead of abandoning the sequence. If the turret controls the floor, keep moving between the lower lanes while firing, but do not leave it active while finishing the last cores.
Against Phantom Image Core, do not fire blindly during the split. Survive that phase, shoot only threatening bubbles, and save concentrated shots for the reunited forms. Against the Waterfall boss, do not spend lives trying to destroy the optional arms if the mouth remains a reachable target. In co-op, let a returning player move away from the respawn point before both players cross the arena.
- Rebuild a safe firing position before attacking again.
- Expect to use the default rifle after losing a powered weapon.
- For Base 2, restart with the central core, then turret, then remaining cores.
- Do not allow the defensive waves to continue into the Phantom Image Core phase.
- Change the failed entry pattern instead of repeating the same rush.
Before you move on
- The current boss's required target is destroyed and the game visibly removes the boss, advances to its next defined phase or begins the stage-clear transition.
- For Base 2, the central lower core is destroyed first, the spread-fire turret is destroyed next, the two remaining lower cores are cleared afterward, Phantom Image Core appears, and its reunited vulnerable forms are defeated before the next stage begins.
- For a Waterfall attempt, the mouth or head has been destroyed; destroying the arms alone does not count as completion.
- In two-player mode, one player can maintain weak-point fire while the other protects the firing lane without both characters occupying the same escape route.
- After a failed attempt, the next entry begins from a deliberate firing position with the Base 2 target order restored or another concrete hazard plan established.
Chapter 12 — Advanced Runs, Challenge Modes and Final Checklist
Use this chapter to turn a first clear of Contra on the North American NES release into a repeatable campaign. Practice the eight stages in connected groups, separate ordinary completion from stricter challenge goals, and verify the complete ending sequence. Campaign gameplay is complete when you destroy the Alien Heart in Stage 8. The ending that follows identifies Red Falcon as destroyed, then shows the escape and closing credits.
1. Practice the campaign in connected blocks
Divide the campaign into four practice blocks: The Jungle into Base 1, Waterfall into Base 2, Snow Field into Energy Zone, and Hangar into Alien’s Lair. This keeps practice focused while preserving the transitions that matter in a full attempt. Do not practice only isolated bosses. Learn how to reach each boss with a usable weapon and enough remaining lives to recover from a mistake.
For each block, first rehearse ordinary traversal. Identify the first dangerous screen, the safest position from which to fire, and the point where advancing activates another enemy group. Then practice the boss or final approach separately. Repeat the transition until you can enter the set piece without depending on a lucky weapon pickup.
Keep the edition consistent. This chapter applies to the North American NES version of Contra, not the Japanese Famicom release or the European Probotector version. The regional versions differ in presentation and some content, so do not use the Famicom ending message or PAL presentation when judging a USA run.
- Practice all four connected stage blocks.
- Learn the first dangerous screen in every stage.
- Practice each boss entry separately from ordinary traversal.
- Use the same North American NES edition for practice and verification.
2. Build a safe clear before adding restrictions
Begin with the standard game rules. Allow lives and continues while learning the route, and concentrate on removing repeatable deaths. Contra becomes more consistent when you clear the immediate firing lane before moving forward instead of treating speed as the only priority. A short pause, crouched shot or controlled jump is usually safer than forcing progress through a crowded screen.
Once you can finish the campaign with continues available, attempt a no-continue clear. These are separate accomplishments: a run may lose several lives and still be no-continue if no Game Over continue is selected. Record lives lost and continues used independently.
Record Konami Code use separately as well. Starting with extra lives changes the rules of the attempt, but it is not the same as selecting a continue after Game Over. When comparing attempts, note the code, player count, lives lost and continues used.
When the same hazard kills you repeatedly, change the approach rather than repeating it. Try crouching under fire, delaying a jump, clearing an enemy before crossing a gap, or entering with a different weapon. Make the route dependable before attempting a no-death challenge.
- Complete one ordinary campaign clear.
- Complete a clear without selecting a continue after Game Over.
- Track deaths and continues as separate totals.
- Record whether the Konami Code was used.
3. Chain the late-game stages
Practice Snow Field directly into Energy Zone. Snow Field gives you room to thin enemy groups, while Energy Zone punishes careless climbing. Clear soldiers and stationary shooters from the ledge above before committing to the next step. Do not drop into a pocket containing several enemies when you can remove them from a safer height.
Preserve a strong weapon when collecting it is safe, but do not lose a life attempting to maintain a particular gun. Spread and Fire Ball can make crowded sections easier, yet the route remains completable with other weapons if you keep moving and shoot deliberately. Treat Barrier as a recovery tool for a genuinely dangerous section, not as permission to rush every routine wave.
Next, practice Hangar into Alien’s Lair without resetting. Hangar combines pits, ceiling claws, mine carts and spike hazards, so the important skill is controlled movement through narrow openings. In Alien’s Lair, clear flying enemies, alien mouths and fast projectiles before moving into the next exposed area. If the screen becomes crowded, retreat only enough to create a firing lane; uncontrolled backtracking can reactivate hazards behind you.
- Clear Snow Field and Energy Zone in one session.
- Clear Hangar and Alien’s Lair in one session.
- Practice entering Alien’s Lair with a multi-shot weapon when safely available.
- Practice rebuilding your weapon after a death before the final encounter.
4. Rehearse the Alien Heart encounter
The final required gameplay encounter is the Alien Heart in Stage 8. The heart itself does not attack directly. Four surrounding pods release the small crawling aliens that pressure your position: two pods are above the heart and two are below it. You may destroy any or all of the pods; destroying every pod is not required to finish the game.
At the start of the room, crouch on the left side and fire at the two lower pods. Spread or Fire Ball makes this easier, but do not sacrifice a life trying to preserve a specific gun. Watch the crawling aliens while firing because one reaching your lane can interrupt the attempt immediately.
After the lower pods are destroyed, move close to the heart and fire diagonally upward. The heart cannot directly damage you, but aliens from the remaining pods still can. Watch the ceiling and floor, shoot or avoid each alien, then return to the diagonal firing position. The upper pods are optional targets; removing the lower two is the practical priority because it reduces the pressure near your starting firing position.
If you die in the room, rebuild calmly from the respawn point. Do not sprint into the arena while the surrounding aliens are active. Re-enter, clear the immediate threat, remove the lower pods and resume diagonal fire. Destroying the Alien Heart completes the final gameplay objective. The ending then establishes the larger result by stating that the vile Red Falcon has been destroyed.
- Reach the Alien Heart in Stage 8.
- Destroy the two lower pods while controlling the crawling aliens.
- Treat upper-pod destruction as optional.
- Destroy the Alien Heart and remain in the game for the escape sequence.
- Confirm that the ending message identifies Red Falcon as destroyed.
5. Use emulator features only for rehearsal
Save states are useful for learning a difficult jump, boss entry, weapon pickup or final approach. Make a state before the hazard, repeat the section and treat the result as rehearsal. Label states by stage and location so a practice result cannot be confused with a continuous campaign attempt.
For a no-death, no-continue or records-style run, begin from the title screen and do not load a state after the attempt starts. Native hardware is the simplest standard, but uninterrupted emulator play can also be used if the challenge rules allow it. Loading a state interrupts the claimed run and should be disclosed or excluded.
Do not use a state to skip the ending. A legitimate completion check requires allowing the helicopter escape, island explosion, CONGRATULATIONS message, credits and Presented by Konami screen to appear naturally.
- Keep save states separate from serious attempts.
- Do not load a state during a claimed continuous run.
- Start the serious attempt from a fresh title-screen launch.
- Allow the complete ending presentation to play.
6. Verify the NES USA completion target
For the North American NES version, ordinary campaign completion requires clearing all eight stages and destroying the Alien Heart at the end of Stage 8. The Alien Heart is the final on-screen target in the gameplay sequence; it is not a separate visual form that must be confused with the Red Falcon name used in the ending text.
After the heart is destroyed, watch the helicopter escape from the exploding island. The game then displays the CONGRATULATIONS message stating that Red Falcon has been destroyed, followed by the credits and the Presented by Konami closing screen. Let the sequence finish before resetting or switching off the system.
Do not require the Japanese Famicom hidden message. That regional version has additional ending material that is not part of the North American NES completion target. Likewise, do not substitute the PAL Probotector presentation when verifying a USA run.
After the ending, the game returns to Stage 1 for a harder replay. This second pass is optional challenge content. It is not a missing ninth stage and does not need to be completed to claim the first NES USA ending.
- All eight stages are cleared.
- The Stage 8 Alien Heart is destroyed.
- The helicopter escape and island-explosion sequence appears.
- The CONGRATULATIONS message identifies the destroyed Red Falcon.
- The credits and Presented by Konami screen appear.
- The Famicom hidden message is not treated as required.
- The harder replay is treated as optional.
7. Document stricter challenge attempts
After your first clear, record the player count, lives lost, continues selected, Konami Code use and the stages that caused the most deaths. Then choose one restriction for the next attempt. A practical progression is ordinary completion, no continue, no death, and finally a repeat of the selected restriction without the Konami Code.
Define two-player rules before starting. Decide whether a shared continue counts against the attempt and whether either player losing a life invalidates a no-death claim. Two-player play changes enemy pressure, recovery opportunities and screen crowding, so record it separately from a one-player result.
Only record the final result after the Presented by Konami screen appears. A run that ends immediately after the Alien Heart explodes has completed the gameplay portion, but it has not yet completed the full ending verification.
- Record the edition and player count.
- Record lives lost and continues used.
- Record Konami Code use separately.
- State whether save states were used only during rehearsal.
- Verify the result after Presented by Konami appears.
Before you move on
- The North American NES version of Contra was used.
- All eight stages were completed.
- The Alien Heart was destroyed in Stage 8.
- The ending identified Red Falcon as destroyed without treating that name as a separate final gameplay target.
- The helicopter escape and island-explosion sequence appeared.
- The CONGRATULATIONS message appeared.
- The credits and Presented by Konami screen appeared.
- For a no-continue claim, no Game Over continue was selected during the successful attempt.
- For a no-death claim, no life was lost during the claimed attempt.
- Any emulator save states were used only for rehearsal and were not loaded during the claimed run.
- The later harder replay was recognized as optional rather than unfinished progress.
Finishing up
You have completed the campaign when you defeat the Alien Heart in Alien's Lair and the victory sequence begins. The ending identifies Red Falcon as destroyed.
Verify that you reached Alien's Lair, Stage 8, defeated the final Alien Heart, saw the helicopter escape and island-explosion sequence, saw the CONGRATULATIONS message stating that Red Falcon was destroyed and the universe was saved, and allowed the credits to finish at the Presented by Konami screen.
If you used the Konami Code, confirm that the normal NES USA victory sequence still appears. The code changes the available life supply, not the campaign ending.
Confirm that all eight stages were cleared in order: Jungle, Base 1, Waterfall, Base 2, Snow Field, Energy Zone, Hangar and Alien's Lair.
For a low-continue or no-death challenge, track deaths and continues externally during the attempt. Ordinary completion requires the ending sequence through Presented by Konami, but it does not require a particular continue count or a no-death result.
Choose your next gameScreenshots & video
Game imagery for reference. Follow the written chapters above for the route and strategies.
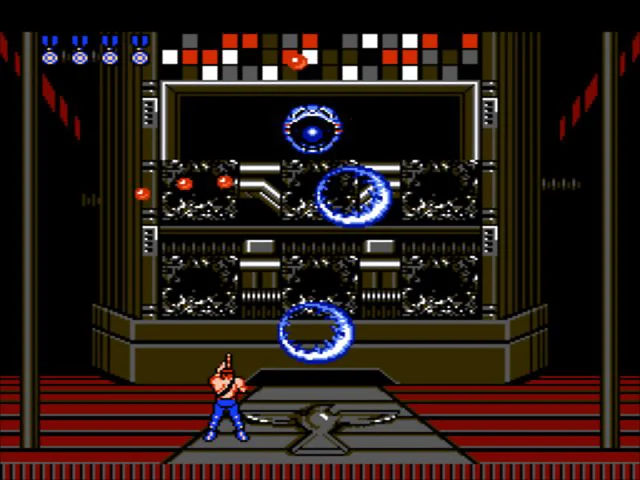
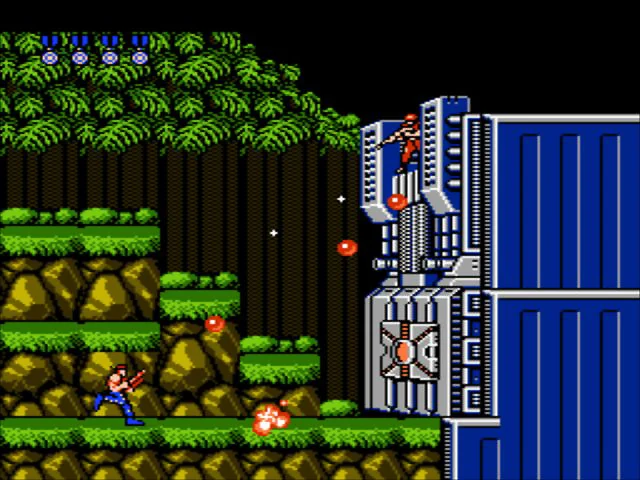
Sources & references
Our original guide draws on the references below. Check the edition at the top of this page before following controls or unlock requirements.
- Contra NES Instruction Manual
- Contra — Guide and Walkthrough — NES — By AzulFria
- Contra — Guide and Walkthrough by LSomers, NES
- Contra — Guide and Walkthrough — NES — By robg37
- Contra Control Flow — Annotated USA NES ROM Disassembly
- Contra — Guide and Walkthrough — NES — By NMorgan
- Contra (NES) — Stage 5 — StrategyWiki
- NES Contra US Annotated Disassembly
- Contra (NES)/Stage 1 — StrategyWiki
- Contra — Guide and Walkthrough — NES — By Ramagamma
- Contra NES Instruction Manual transcript
- Contra — Boss Guide — NES — By Pegboy
- Contra (NES)/Stage 3 — StrategyWiki
- Contra (NES)/Stage 4 — StrategyWiki
- Contra (NES)/Stage 6 — StrategyWiki
- Contra — Guide and Walkthrough by Pseudonym, NES
- Contra Stage 6 — Contra Wiki
- Contra — Stage 6 Nintendo NES Map
- Contra Walkthrough Area 7: Hangar
- Contra — Labeled Maps — Nintendo NES
- Contra (NES)/Stage 8 — StrategyWiki
- Contra (NES)/Enemies — StrategyWiki
- The Contra HQ — NES Ending
About the game & collecting notes
- Platform
- Nintendo Entertainment System
Step-by-step walkthrough to clear the original NES (USA) release of Contra. Covers weapons and pickups, co‑op tactics, every level (The Jungle through Alien's Lair), boss strategies, how to use continues and the Konami Code, and concrete checks to confirm you reached the official ending.
Darryl Polo
Darryl Polo loves tinkering with emulation and revisiting retro games. He enjoys exploring how old favorites play on different setups and sharing what he learns along the way. At Joking Joystick, he writes about the games, hardware, and small discoveries that keep the hobby fun.
Our editorial standardsFound a step that needs another look? Help us improve this guide.