
Chrono Trigger (Super Nintendo Entertainment System, USA) — Complete Campaign Walkthrough
Step-by-step campaign walkthrough for the original 1995 North American SNES release of Chrono Trigger. Covers every required main-story objective from the Millennial Fair through Prehistory, the Tyranno Lair, Zeal, Mountain of Woe, the Ocean Palace, the Black Omen, and the final Lavos confrontation, with practical party and Tech advice, optional side-quests, the original SNES New Game+ requirement, and verified routes to the standard SNES endings.

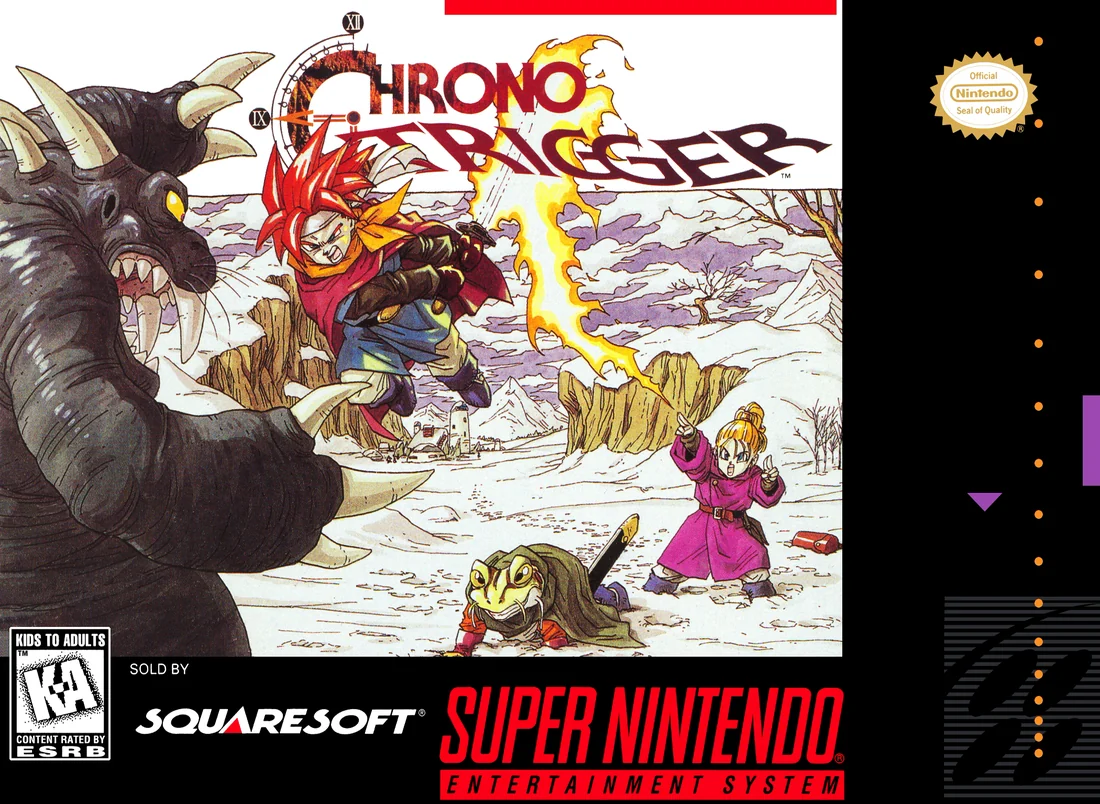
Find a copy
Chrono Trigger Super Nintendo Entertainment System
We may earn a commission if you buy through these links, at no extra cost to you. As an Amazon Associate I earn from qualifying purchases.
Opens retailer search results. Check the model, edition, seller, availability and current price before buying.
Before you begin
You will play the original Super Nintendo Entertainment System (USA) edition of Chrono Trigger.
This walkthrough leads you from the Millennial Fair opening sequence through the final confrontation with Lavos, explaining when and how to progress the plot, which optional objectives are required for story outcomes, and what to save for or leave to New Game+.
Follow the chapter order when you want a linear step-through; skip ahead to specific chapters if you already passed a milestone.
I assume you have a working SNES cartridge, a verified SNES rom image that matches the original release, or an official re-release of the same SNES content.
Chapters focus on concrete in-game decisions: where to go next, which party members to bring for specific encounters, how to complete side-quests that gate story beats, safe ways to recover from setbacks, and an explicit checklist to confirm you reached the SNES campaign ending and unlocked New Game+.
Set yourself up for the run
Save often and keep multiple save slots.
Use at least one slot for a pre-boss backup and one for milestone saves (before major choices or optional dungeons).
Plan for moderate grinding around early dungeons: recommended baseline levels are roughly 10–15 for Mid-Early-game dungeons, 25–40 for late-game bosses depending on your playstyle.
Exact level targets vary with party composition; raise levels if you struggle with a boss’s required damage/tech windows.
Familiarize yourself with Tech combinations and dual/triple Tech triggers.
Many key battles are easier when you use linked Techs (for example, combinations involving Crono, Marle, Lucca, Frog, Robo, Ayla and Magus).
Collect and equip stronger weapons and armors as you find them — equipment upgrades reduce retry time more than small level increases.
Some important equipment is tied to optional events later in the story; don’t assume every upgrade is available immediately.
Plan your party swaps before major story fights.
Some story events force recruitment order or give unique dialogue/shortcuts depending on who is in your active party at certain moments.
Keep a second party you use purely for side-quests where character abilities (steal, charm, techs) matter.
Expect to visit multiple eras (Prehistory, Antiquity / Middle Ages, 1000 A.D., 600 A.D., 2300 A.D., 12,000 B.C., and 1999 A.D.).
Always check local NPCs for new information after major story beats; towns change and reveal new paths.
If your goal after the first clear is to collect alternate endings, prepare to perform a full clear of the Black Omen and to use the New Game+ feature (the original SNES unlocks New Game+ after completing the main campaign).
Millennial Fair — The Opening and the Telepod Incident
Start in Truce in 1000 A.D., prepare Crono, explore the Millennial Fair, meet Marle, and trigger Lucca’s Telepod accident. Optional fair actions affect the later Guardia trial, so this route records the safest choices without requiring a perfect result. The chapter ends when Crono follows Marle through the Gate and reaches Truce Canyon in 600 A.D.
Leave Crono’s house and collect early supplies
Crono begins upstairs in his house in Truce. Go downstairs and speak with his mother. After the conversation, speak with her again to receive Crono’s 200 G allowance. You may name Lucca during the opening conversation; her default name is Lucca.
Open the main menu with X and review Crono’s equipment, items, Tech list, party order, and Config settings. On the SNES controller, A confirms or interacts, B cancels and makes the party dash when held, X opens the menu, and Y changes party order or performs the field function available in the current situation. Saving is available on the world map and at save points, not from every location in the menu.
Before going north to the fair, you can visit the Mayor’s Manor, the large building south of Crono’s house. Open the chest downstairs for a Tonic. Upstairs, speak with the mayor twice to receive money, then open the chest behind him for additional money. This stop is optional, but it gives you enough extra funds to make the fair’s equipment choices more practical. You can also explore the early overworld, but there is no need to grind before meeting Marle.
- Receive the 200 G from Crono’s mother.
- Review the menu and Config screen.
- Optionally collect the Tonic and money in the Mayor’s Manor.
- Do not spend time grinding before reaching the fair.
Enter Leene Square and meet Marle
Travel north from Truce to Leene Square, where the Millennial Fair is taking place. The first fair area contains minigames, vendors, and the route toward the Telepod demonstration. Silver Points earned from minigames are not the same as Gold; they can be exchanged for money at the exchange tent in the second fair area, but farming them is optional.
Go north into the next fair area and approach the girl in white near Leene’s Bell. Crono and the girl collide, causing her pendant to fall. After Crono stands up, speak to the girl before picking up the pendant. Then retrieve the pendant and return it to her. Accept her request to walk with Crono and keep the default name Marle unless you have another preference.
For the safest later trial result, complete the following optional actions before continuing. In the western part of the fair, speak to the cat once and lead it across the square to the girl searching for it. Leave the pink parcel near the old man untouched because it is his lunch. Do not attempt to sell Marle’s pendant to Melchior when he offers the opportunity. These actions do not block the campaign if missed, but they alter later testimony and are worth doing on a first playthrough.
- Speak to Marle before picking up her pendant.
- Return the pendant and accept Marle into the party.
- Return the lost cat to its owner if you want the safest trial outcome.
- Leave the old man’s lunch alone.
- Do not sell Marle’s pendant to Melchior.
Buy or obtain useful fair equipment
The fair vendors sell optional early equipment. Melchior’s weapon stall offers the Iron Blade for 350 G. The equipment tent offers the Karate Gi and Bronze Helmet, while the item tent sells Tonics, Heals, Revives, and Shelters. These purchases are not required to trigger the Telepod event, and some funds may be better spent on Tonics if you did not visit the Mayor’s Manor.
If you have enough money, the Iron Blade is the most direct improvement to Crono’s offense. A Bronze Helmet or Karate Gi can also help, but do not assume you must buy every item. The game provides equipment and supplies soon after the Gate event. Equip anything you purchase through the menu before entering battles.
Once Marle joins, she is the recommended partner for the opening fair battles because she provides healing through Aura. Crono should handle ordinary attacks while Marle uses Aura when either character is hurt. You can also place Marle in the lead through the party-order menu, but no special formation is required.
- Buy the Iron Blade only if you can comfortably afford its 350 G price.
- Consider the Bronze Helmet, Karate Gi, or a small supply of Tonics.
- Equip the purchases before leaving the fair’s vendor area.
- Use Crono and Marle together for the optional practice fights.
Practice combat and learn the first Techs
After Marle joins, you can use the fair’s Gato battle as safe practice. Gato is in the second fair area, near the western side. Speak to him to begin the fight. This battle teaches the active-time battle flow and lets you practice selecting Attack, Tech, and Item commands while enemies continue to act according to the battle gauge.
Fight Gato normally with Crono and Marle. Crono’s early Tech is Cyclone once learned, and Marle’s first Tech is Aura. Use Cyclone when enemies are grouped closely and Aura when healing is needed. You do not need to repeatedly defeat Gato, and you should not treat a specific level as mandatory. If the opening battles feel difficult, fight Gato or other fair enemies until the characters have learned their first Techs, then continue.
Leave the fight through the normal area transition when ready. Silver Points from fair activities may be exchanged for Gold at the purple exchange tent, but the story does not require winning minigames or reaching a particular Silver Point total.
- Use Gato to practice the SNES battle interface if desired.
- Confirm that Crono and Marle have access to their first Techs before the next chapter if you want the easiest opening.
- Use Aura for recovery and Cyclone against clustered enemies.
- Do not grind for a fixed level requirement.
Reach Lucca’s Telepod demonstration
When you are ready to advance, return to the central fair area and speak with a person near the fountain. This activates the announcement that Lucca’s invention is ready. Then travel north through the fair toward the demonstration platform.
Before reaching the machine, Marle stops Crono and asks to buy candy. Leave the controls alone while she makes her purchase. Moving Crono during this scene changes later trial testimony, so wait until Marle finishes and begins walking again.
Enter the demonstration area and listen to Taban, Lucca’s father. Lucca asks Crono to test the Telepod. You may step onto the left platform and be transported safely to the other side. This test is optional for progression; after the demonstration, speak with Marle when she is ready to try the machine. The scene can proceed even if you do not personally use the Telepod first.
- Activate the announcement near the fountain.
- Wait without moving while Marle buys candy.
- Reach Taban and Lucca at the Telepod.
- Optionally test the Telepod with Crono before Marle.
Trigger the Gate and save after the transition
When Marle steps onto the Telepod, her pendant reacts with the machine and opens a blue Gate. Marle disappears. Walk to the pendant left on the platform and interact with it. Crono then follows Marle through the Gate while Lucca remains behind to investigate the malfunction.
Crono arrives in Truce Canyon in 600 A.D. The canyon is a short required path rather than a place to search for a secret route. Move forward through the area, defeat or avoid the early enemies, climb the ladders, and continue toward the exit. A chest along the route contains a Tonic, and another contains a Power Glove. Equip the Power Glove on Crono when you obtain it if you want the early attack increase.
There is no need to find a save point inside Truce Canyon. Once you reach the 600 A.D. world map, save normally from the menu. You can also enter Truce and save at the inn after resting. The next objective is to travel toward Guardia Forest and Guardia Castle while searching for Marle.
- Marle has vanished through the Gate.
- Crono has picked up the pendant and followed her.
- Crono has reached Truce Canyon in 600 A.D.
- Collect and equip the Power Glove if desired.
- Save on the 600 A.D. world map or at the Truce inn.
- Proceed next toward Guardia Forest and Guardia Castle.
Before you move on
- Crono has received his allowance and reviewed the main menu.
- Marle has joined the party after Crono returns her pendant.
- The optional cat, lunch, pendant-sale, and candy choices have been handled according to the safe trial route, if desired.
- Crono and Marle have practiced battle commands and can use their early Techs, or the player has chosen to continue without extra practice.
- Lucca’s Telepod demonstration has occurred.
- Marle has disappeared through the Gate and Crono has followed her to Truce Canyon in 600 A.D.
- Crono has reached the 600 A.D. world map and created a normal save.
- The next destination is Guardia Forest, followed by Guardia Castle.
Guardia Castle, The Trial, and the Gate to the End of Time
Escape Guardia Prison with Lucca and Marle, defeat the Dragon Tank, and follow the first mandatory route into 2300 A.D. In the ruined Future, travel through Bangor Dome, Trann Dome, Lab 16, Arris Dome, and Site 32. Recover the Seed, obtain the Bike Key, cross Site 32, and reach Proto Dome, where you find the damaged Robo. Stop there; the Factory, Robo’s repair, and the End of Time belong to chapter 3.
Return to Guardia Castle and face the trial
After the events at the Millennial Fair and Marle’s disappearance, leave Leene Square and enter Guardia Forest. Follow the forest path to the northern exit, then enter Guardia Castle with Marle. The castle scene automatically advances the story: the Chancellor accuses Crono of kidnapping the princess, the guards remove him, and the trial begins.
The trial’s verdict and dialogue are affected by your earlier behavior at the Fair and by your answers. A favorable verdict is not required for progression, so do not worry if you receive a guilty result. The practical choices associated with the more favorable trial include returning the girl’s cat, leaving the old man’s lunch alone, refusing to sell Marle’s pendant, and speaking with Marle before taking it. During the trial, answer that Marle approached Crono first and that Crono was not interested in her fortune.
After the verdict, Crono is taken to Guardia Prison. There is no alternate story route that avoids this sequence. Continue through the sentencing and prison scenes until control returns to Crono.
- Enter Guardia Castle with Marle.
- Complete the accusation and trial scenes.
- Continue to Guardia Prison regardless of the verdict.
- Keep a save from before the trial if you want to see a different verdict later.
Escape Guardia Prison and defeat the Dragon Tank
Crono begins the prison section alone. Explore the cells and corridors, defeating guards or slipping behind them when possible. You can escape from the cell immediately or wait through the execution setup; both approaches lead toward the same prison escape. Search accessible rooms for restorative items, and use any save point before the Dragon Tank if you want a convenient retry.
Lucca joins Crono during the escape. Follow the route through the prison until you reach the bridge outside. The Dragon Tank blocks the way. It consists of a head, body, and wheel section, and the head can repair the other parts, so make it the first target. Crono’s Cyclone can hit multiple sections, while Lucca’s Fire gives you a useful option against the machine parts. Regular attacks also work if you heal consistently.
Use Tonics or Mid Tonics before either character reaches critical health. If the battle goes badly, reload the prison save or retreat to the nearest safe point before trying again. Once the Dragon Tank is destroyed, cross the bridge and follow the forced escape route through the prison. The guards pursue Crono and Lucca, Marle is reunited with the group, and the party flees through Guardia Forest.
- Escape the prison with Lucca.
- Reach the bridge outside the prison.
- Target the Dragon Tank’s head first.
- Defeat the Dragon Tank and follow the automatic escape route.
- Enter the Gate in Guardia Forest when the escape reaches it.
Enter the ruined Future through Bangor Dome
The Gate reached during the escape sends the party to Bangor Dome in 2300 A.D. This is the required first stop in the Future. Inspect the sealed door inside the dome if you want to register its location, but it cannot be opened during this visit and is not needed for the route ahead.
Leave Bangor Dome and follow the overworld path to Trann Dome. Speak with the survivors to learn about the ruined world, then use the shop if you need stronger equipment or supplies. Equip the best weapons and armor currently available. The Enertron in the dome restores HP and MP, making it a useful recovery point before entering the ruins.
From Trann Dome, follow the overworld route toward Lab 16. The Future enemies are tougher than the early Guardia encounters, but you do not need to fight every group. Use Crono’s physical attacks, Lucca’s Fire, and dual techniques when several enemies stand close together. If your HP or items are running low, return to Trann Dome, recover at the Enertron, and resume the route.
- Use the Guardia Forest Gate and arrive at Bangor Dome in 2300 A.D.
- Visit Trann Dome and speak with its survivors.
- Upgrade equipment and recover at the Enertron if needed.
- Travel onward to Lab 16.
Cross Lab 16 and reach Arris Dome
Enter Lab 16 and work through the ruined corridors toward the eastern exit. Rats move through parts of the area; avoid touching them because they can steal an item. The enemies here reward careful positioning more than reckless rushing, so separate groups when possible and use Lucca’s Fire or Crono’s Cyclone when it can hit multiple targets.
Several chests and side rooms contain useful equipment and recovery items. Take them if the route is safe, but the main objective is to cross the lab and reach the overworld. If you find a sealed or suspicious chest, inspect it only when prepared for the encounter or trap associated with it. You can always prioritize reaching Arris Dome over clearing every side room.
After leaving Lab 16, continue across the Future overworld to Arris Dome. Speak with Doan and the residents near the entrance. Doan explains that the dome’s food stores may contain something useful and directs the party toward the lower sections. The required path is inside Arris Dome, not the nearby Sewer Access.
- Cross Lab 16 without allowing rats to make contact.
- Collect useful equipment when convenient.
- Reach Arris Dome.
- Speak with Doan and learn the objective involving the food stores.
Complete Arris Dome’s Seed sequence
Follow the interior route downward into Arris Dome’s lower area. The path eventually leads through the large chamber and into the storage section. A Guardian and two Bits block the route. The Bits can restore or support the Guardian, so use area attacks such as Crono and Lucca’s Fire Whirl when both characters can reach multiple targets. Once the Bits are removed, finish the Guardian with physical attacks and Fire.
Continue into the storage room after the fight. The food has spoiled, but the party finds a dead man holding a Seed. Examine the scene and read the note that points toward the rat. The rat is not decorative: chase and catch it in the lower dome area. When caught, it reveals the information needed to open the concealed route.
Return to the appropriate computer terminal and use the SNES control combination indicated by the rat: hold L and R, then press A. This activates the hidden platform or passage leading to the sealed section. If the combination does nothing, make sure both shoulder buttons are held at the same time before pressing A; tapping them separately will not work.
Use the newly opened route to reach the information terminal. The computer reveals that the world was destroyed in 1999 A.D. and identifies the next Gate as being in Proto Dome to the east. This discovery is required for the route even though the game does not force you to read every optional terminal.
Return to Doan after completing the lower-dome sequence and give him the Seed. Doan gives the party the Bike Key. This is the required item for the next crossing. Save and recover in Arris Dome before leaving. The Sewer Access, reached from the Future overworld near the domes, is optional and can be skipped without preventing progress.
- Enter the lower sections of Arris Dome.
- Defeat the Guardian and its Bits.
- Recover the Seed from the storage area.
- Catch the rat and learn the concealed-route instruction.
- Use L, R, and A at the relevant terminal to open the passage.
- Read the information terminal about 1999 A.D. and the Gate at Proto Dome.
- Give the Seed to Doan and receive the Bike Key.
- Treat Sewer Access as optional.
Cross Site 32 and reach Proto Dome
Leave Arris Dome and travel to Site 32, the ruined highway area north of the domes. The Bike Key activates the jetbike near the entrance. When you examine it, Johnny appears and offers the race across the highway. You may race Johnny or take the walking route through the ruins; both methods lead to the far side and allow the story to continue.
If you race, steer carefully and use the jetbike’s movement to stay near Johnny rather than repeatedly falling behind. If you prefer not to use the minigame, choose the walking route and fight or avoid the enemies along the highway. The walking route is a valid fallback and does not require winning the race.
After crossing Site 32, leave the area and follow the Future overworld route to Proto Dome, the structure to the southeast. Enter the dome and continue toward the far side. At the end of the route, examine the inactive robot beside the sealed passage. This is Robo in his damaged state. The party identifies him, but he cannot be repaired or recruited until the Factory sequence covered in chapter 3.
Stop the chapter once Robo has been found. Do not enter the Factory or begin the repair sequence here; those events are the opening objective of the next chapter.
- Use the Bike Key at Site 32.
- Either race Johnny or cross the ruins on foot.
- Reach the far side of Site 32.
- Enter Proto Dome.
- Find and identify the damaged Robo.
- Stop before entering the Factory or repairing Robo.
Before you move on
- Crono has been tried in Guardia Castle and escaped Guardia Prison with Lucca and Marle.
- The Dragon Tank has been defeated.
- The party has used the Guardia Forest Gate and arrived at Bangor Dome in 2300 A.D.
- The party has visited Trann Dome and crossed Lab 16.
- The Arris Dome Guardian has been defeated.
- The Seed has been recovered, the 1999 A.D. information has been viewed, and the Bike Key has been received from Doan.
- The party has crossed Site 32 by racing Johnny or walking through the ruins.
- The party has entered Proto Dome and identified the damaged Robo.
- Do not continue into the Factory in this chapter; begin chapter 3 with Robo’s repair and the power-restoration sequence.
References for this chapter
- Chrono Trigger Walkthrough - Gamer Corner Guides
- Chrono Trigger Walkthrough, Part 9: Site 32 and Proto Dome, 2300 AD - ArrPeeGeeZ
- Chrono Trigger — Guide and Walkthrough by Dev, Super Nintendo
- Chrono Trigger - Guide and Walkthrough - Super Nintendo - Black Omen and New Game+ route
- Chrono Trigger - Super Nintendo instruction manual
Proto Dome, Repairing Robo, and the Future (2300 A.D.)
Repair the inactive robot in Proto Dome, recruit Robo, restore power through the Factory, defeat the six R-Series robots, and use the reopened Gate to reach the End of Time. This is a mandatory early Future sequence. The Epoch is not found or awarded here; it becomes available later through the main story.
Repair Robo in Proto Dome
From the Proto Dome entrance, travel through the ruined facility toward the rear rooms. The dome contains robot enemies, but you do not need to fight every encounter. An Enertron is available inside, so use it to restore the party before examining the damaged humanoid robot in the back of the building.
Examine the inactive robot to begin Lucca’s repair scene. The robot identifies himself as R-66Y, and the game lets you choose his displayed name. Robo is the default name used in this guide. After the repair, Robo explains that the rear Gate cannot be used because the dome has no power.
Robo tells the party that the nearby Factory must be used to restore the power system. One of the two girls must remain in Proto Dome to operate the sealed door when the party returns. This is a temporary party arrangement, not a permanent character decision.
- Reach the damaged robot in the rear of Proto Dome.
- Complete Lucca’s repair scene.
- Name the robot.
- Use the Proto Dome Enertron before entering the Factory if HP or MP is low.
Choose the temporary Factory party
Crono and Robo must enter the Factory together. Leave either Marle or Lucca in Proto Dome, then take the other human character with you. Marle is a convenient choice because Aura supplies reliable single-target healing. Lucca is also effective because her Fire Techs and later equipment give the party additional offensive options.
The choice does not permanently remove either character from the party. If you want to change the arrangement before beginning the Factory run, speak to the character who remained in Proto Dome and follow the available dialogue to reverse the assignment. Equip the active characters with their strongest available weapons and armor, then save before leaving the dome.
Robo is important for opening Factory security systems, but he will not be available during the R-Series battle later in the dungeon. Plan to heal before that encounter rather than assuming Robo will remain a fourth fighter.
- Keep Crono and Robo in the active party.
- Leave Marle or Lucca in Proto Dome.
- Take the other human character into the Factory.
- Save and heal before leaving.
Enter the Factory and use Robo’s access
Leave Proto Dome and travel north on the 2300 A.D. map to the Factory. Examine the large computer at the entrance while Robo is active. Robo overrides the security system, opening the way, but an Acid attacks immediately afterward.
Acid has strong physical defense compared with the ordinary enemies in this area. Use Crono’s Slash or another Tech rather than relying entirely on standard attacks. After the battle, take the route into the Factory’s connected conveyor and elevator rooms.
The Factory contains several useful optional upgrades, including the Robin Bow, Thunder Blade, Titanium Vest, Hammer Arm, and Plasma Gun. Collect them when they are on your route or when the party can safely backtrack, but none of these individual items is required to complete the sequence. The weapon for Crono is the Thunder Blade; do not confuse it with a weapon called Bolt Sword in this SNES section.
- Use Robo to override the entrance security.
- Defeat the Acid at the entrance.
- Enter the conveyor and elevator sections.
- Collect practical equipment upgrades when convenient.
Reach the crane controls and move both barrels
Follow the Factory’s right-side route through the conveyor machinery. Moving robots can be avoided in some sections by watching their approach and stepping around them. If an encounter catches you, defeat it and continue; being caught does not permanently damage the route.
Continue upward through the machinery until you reach the room with a computer that displays the crane instructions. The crane requires two separate codes. At the crane control terminal, enter X, A for the first barrel. After the crane finishes, activate the terminal again and enter B, B for the second barrel. These are two distinct inputs, not one four-button sequence.
When both barrels have been moved, return through the newly cleared route. The crane work opens access to the next Factory areas and to optional equipment, including the Thunder Blade. Search the nearby rooms for chests if the party can handle the encounters, then continue toward the computer that reveals the Factory’s security password.
- Find the crane instruction computer.
- Enter X, A at the crane terminal.
- Activate the terminal again and enter B, B.
- Confirm that both barrels have moved.
- Continue through the cleared route.
Learn the security password and reach the generator
Proceed through the Factory until you find the computer that provides the security password. The required SNES button sequence is X, A, B, Y. This is separate from the two crane codes. Enter it at the appropriate security terminal on the laboratory side of the Factory.
Use the elevators, ladders, and catwalks to reach the lower laboratory area. Robo is needed to access or operate several computers along the route. Defeat the Acid, Alkaline, Deverminator, and other machine encounters that block the path, or avoid encounters where the layout permits.
Open the route to the lower section, then examine the generator controls. The resulting scene restores the power system and triggers the Factory’s security response. Before entering the room where Robo is confronted, use a nearby save point if available and heal the party. Robo will be removed from the battle by the story scene, so he cannot help against the R-Series.
- Read the Factory security password.
- Enter X, A, B, Y at the security terminal.
- Reach the lower laboratory and generator route.
- Heal before the R-Series scene.
- Remember that Robo will be unavailable for the boss battle.
Defeat the six R-Series robots
The R-Series consists of six blue robots arranged in two rows. Crono and the human character chosen for the Factory must fight without Robo. The battle is mandatory and cannot be bypassed if you want to complete the Proto Dome sequence.
The robots are weak to Lightning. Crono’s Lightning is useful against individual targets, while Cyclone can strike multiple robots when aimed at the middle robot in a row. Use Cyclone when the enemies remain grouped, then finish weakened or isolated robots with single-target attacks.
If Marle is present, use Aura whenever the party begins to fall behind on HP. If Lucca is present, use her Techs selectively and rely on items when necessary so that the party does not run out of MP before the battle ends. Concentrate on reducing the number of active robots instead of spreading weak ordinary attacks across every target.
If the party loses, reload the Factory save or return to the nearest recovery point before retrying. Conserve MP during the earlier conveyor and laboratory sections, and heal immediately before the scene that removes Robo.
- Enter the fight with Crono and one human ally.
- Use Lightning against the R-Series.
- Aim Cyclone at a middle robot when you want to hit a row.
- Use Aura or recovery items before HP becomes critical.
- Defeat all six robots.
Return to Proto Dome and enter the End of Time Gate
After the R-Series battle, the story carries the party back toward Proto Dome with Robo damaged. The character left behind has operated the sealed door, allowing the party to reach the rear of the dome.
Lucca repairs Robo during the following scene. This completes the required recruitment sequence and makes Robo a permanent available party member. The story proceeds regardless of whether Marle or Lucca was left behind; the choice only affects who accompanied Crono and Robo through the Factory.
Enter the newly opened rear room and step into the Gate. It transports the party to the End of Time. Recover and save there before continuing into the next chapter.
Do not search the Factory or Proto Dome for the Epoch. This section does not award it. The required result is Robo’s recruitment, restoration of the Proto Dome route, and arrival at the End of Time. The Epoch appears later after additional main-story progress.
- Return to Proto Dome after defeating the R-Series.
- Complete Robo’s repair scene.
- Confirm that Robo is available in the party roster.
- Enter the Gate in the rear room.
- Reach the End of Time and save.
Before you move on
- Robo has been repaired and named.
- Crono and Robo entered the Factory together.
- The crane moved one barrel with X, A and the other with B, B.
- The Factory security route was opened with X, A, B, Y.
- The generator was activated.
- The six R-Series robots were defeated while Robo was unavailable.
- Robo was repaired again after the battle.
- The Gate in the rear of Proto Dome transported the party to the End of Time.
- The Epoch was not expected or obtained during this chapter.
References for this chapter
- Chrono Trigger - Guide and Walkthrough - Super Nintendo - New Game+ requirements and ending conditions
- Chrono Trigger - Guide and Walkthrough - Super Nintendo - Black Omen and New Game+ route
- Chrono Trigger — Guide and Walkthrough — Super Nintendo — By Super_Slash
- Factory - Chrono Trigger - Guides
- Chrono Trigger - Super Nintendo instruction manual
Prehistory (65,000,000 B.C.) — Dactyl’s Nest and Recruiting Ayla
Prehistory is completed in two visits. The first visit begins through the End of Time Gate and covers Mystic Mountains, Ioka Village, Ayla’s soup contest, the stolen Gate Key, Forest Maze, Reptite Lair, and Nizbel. After recovering the Gate Key, leave Prehistory and continue the main story through the Masamune and Magus sequence. The party then returns to 65,000,000 B.C. at Ayla’s hut, where the Laruba Ruins, Dactyl Nest, Tyranno Lair, Nizbel II, Azala, Black Tyrano, and the Gate to 12,000 B.C. complete this chapter. The Hunting Range and Ioka trading are optional preparation.
1. Make the first trip to Prehistory
At the End of Time, use the Gate that leads to Mystic Mountains in 65,000,000 B.C. Fight through the Reptites in the mountain area. Ayla appears during the battle and defeats several enemies; finish the remaining enemies, then follow her through the mountain screens to the prehistoric overworld.
Continue toward Ioka Village, the settlement of huts beyond the mountains. The Berserker Ring in an optional chest along the route is useful but not required. Heal before entering the village if the mountain battles left the party weakened.
- Use the End of Time Gate to Mystic Mountains.
- Finish the battle after Ayla intervenes.
- Follow Ayla to the 65,000,000 B.C. overworld.
- Reach Ioka Village.
2. Meet Ayla and win the soup contest
Explore Ioka Village and identify the trading hut, recovery area, and Ayla’s hut. The village’s Sweet Water restores HP and MP, so use it if necessary. Trading prehistoric materials for equipment is optional; do not farm the Hunting Range unless you want stronger equipment or supplies.
Enter Ayla’s hut and continue through the gathering at the Meeting Grounds. Talk to Ayla until she challenges Crono to the soup-drinking contest. In the North American SNES release, repeatedly press the action button to make Crono drink. If the first attempt is lost, try again until Crono wins.
Ayla awards the Dreamstone after the contest. This item is required later for the Masamune repair, so do not leave the event before confirming that the Dreamstone has been received. After the celebration, the party wakes and discovers that the Gate Key is missing.
- Visit Ayla’s hut and the Meeting Grounds.
- Win Ayla’s soup contest.
- Obtain the Dreamstone.
- Continue until the stolen Gate Key is reported.
3. Wake Ayla and follow the Gate Key trail
Return to Ayla’s hut and wake her. The following scenes establish that Kino took the Gate Key and that the Reptites stole it from him. Ayla joins the party for the pursuit. Crono, Ayla, and Marle are a safe general-purpose group because Marle supplies Cure and Crono and Ayla provide reliable damage. Lucca or Robo can replace Marle if you prefer more offensive power or Robo’s healing.
Leave Ioka Village and travel south toward the Forest Maze. Inside the maze, locate Kino and watch the scene explaining what happened to the Gate Key. After Kino leaves, follow the Reptite footprints through the forest. The footprints, clearings, and vine-covered paths identify the required route; side chests are optional.
- Wake Ayla in her hut.
- Confirm that Ayla joins the pursuit.
- Find Kino in the Forest Maze.
- Follow the Reptite footprints.
4. Clear the Reptite Lair and defeat Nizbel
The Forest Maze leads into the Reptite Lair. Follow the main path through the lair until Azala confronts the party and sends Nizbel into battle. Nizbel’s defense is extremely high until Crono uses Lightning. Cast Lightning to shock him, attack while his defense is lowered, and keep the party healthy for the electrical discharge that follows.
After Nizbel releases the stored energy, heal immediately and use Lightning again when his defense returns. Ordinary attacks raise or preserve his resistance, so repeated physical attacks without another Lightning shock are inefficient. Volt Bite is useful when Crono and Ayla are together. Attempting to Charm the Third Eye is optional.
When Nizbel is defeated, Azala returns the Gate Key and the party is sent back to Ioka Village. This completes the first Prehistory visit, but it does not yet begin the Laruba or Dactyl sequence.
- Reach Azala’s chamber in the Reptite Lair.
- Use Lightning to reduce Nizbel’s defense.
- Heal after the stored electrical discharge.
- Defeat Nizbel.
- Confirm that Azala returns the Gate Key.
5. Leave Prehistory and complete the intervening main-story route
After Nizbel, use the recovered Gate Key to leave Prehistory and continue the main campaign. Complete the Masamune storyline, repair the sword with Melchior using the Dreamstone, recruit Frog, travel through the Magic Cave, and defeat Magus.
Do not search for the Dactyl Nest immediately after Nizbel. The Laruba Ruins event and the Dactyl Nest summit become available during the later return to Prehistory after the Magus battle. If you arrive in the prehistoric overworld before that return event, the required Dactyl sequence will not yet be active.
- Leave Prehistory after recovering the Gate Key.
- Complete the Masamune and Frog progression.
- Defeat Magus.
- Return to Prehistory when the story places the party in Ayla’s hut.
6. Return to Ayla’s hut and visit the Laruba Ruins
After Magus is defeated, the party returns to 65,000,000 B.C. and wakes in Ayla’s hut. Leave Ioka Village and travel northwest through the burned forest to the Laruba Ruins. This is the correct time to visit the ruins.
Enter the ruins and go to the northern area. Ayla speaks with the surviving elder about the Reptites, Kino, and the need to reach the Tyranno Lair. Ayla leaves after the conversation. Exit the ruins and follow the overworld route toward the Dactyl Nest. The Laruba conversation is the story trigger for the Dactyl sequence.
- Wake in Ayla’s hut after the Magus sequence.
- Reach the Laruba Ruins northwest of Ioka Village.
- Complete Ayla’s conversation with the elder.
- Leave the ruins and head toward the Dactyl Nest.
7. Climb the Dactyl Nest and unlock flight
Enter the Dactyl Nest and climb the outdoor mountain route. Fight or avoid encounters according to the party’s condition, but restore HP and MP before the summit. The path uses ladders, ledges, and open mountain screens; continue upward until the party reaches Ayla and the Dactyls.
Complete the summit scene. The Dactyls become overworld transportation rather than a permanent party member or inventory item. Choose a third party member for the Tyranno Lair. Marle or Robo makes recovery safer, while Lucca provides useful magic and Ayla supplies strong physical damage.
- Enter the Dactyl Nest after the Laruba event.
- Reach the summit.
- Complete the Dactyl scene.
- Confirm that Dactyl travel is available.
- Choose the third party member.
8. Optional preparation in the Hunting Range and Ioka trading
The Hunting Range north of Ioka Village is optional. Its encounters provide prehistoric materials that can be exchanged at the Ioka trading hut for weapons, armor, accessories, and supplies. These rewards can make the Tyranno Lair easier, but none is required for the story.
Use the Hunting Range if the party is struggling or if you want optional equipment. The rainy-area Nu encounter can provide extra materials, but there is no need to obtain every trading reward. Save before entering the Tyranno Lair because it contains several battles and no shop.
- Visit the Hunting Range only if preparation is needed.
- Trade materials for equipment if useful.
- Restore HP and MP before the Tyranno Lair.
- Save before entering the lair.
9. Enter Tyranno Lair and rescue the captives
Fly to the Tyranno Lair, the structure on the raised platform in the lava field. Land on the platform and enter. At the opening fork, use the right-hand skull entrance, which is open. Descend the stairs and defeat the Reptites in the lower rooms.
Use the switch beside the first barred cell to free the captive villagers. Continue through the lair and descend to Kino’s cell. Speak to Kino. When control returns, return to his cell and take the Mid Ether from the egg-like chest if desired. Follow Kino back toward the entrance; he opens the second skull route.
Proceed through the newly opened skull. In the switch room, use the floor switch and take the right-hand route. In the next room, the left chest contains a Full Tonic. The other chest is a trap that drops the party into a lower area; it is safe to ignore.
- Enter through the open skull.
- Free the captive villagers with the cell switch.
- Speak with Kino.
- Take the optional Mid Ether.
- Follow Kino to the entrance.
- Use the second skull route.
- Ignore the trapped chest if desired.
10. Cross the tile rooms and defeat Nizbel II
Continue through the lair until reaching the room with shifting floor tiles. The room contains optional chests and routes, but the objective is to reach the stairs leading upward. Use the switches and side rooms to open the skull passage and the central balcony door.
Use the save point before the northern exit. Nizbel II waits beyond it. The battle uses the same central idea as the first Nizbel fight: Lightning lowers his defense, while physical attacks raise it again. Shock him with Crono’s Lightning, attack during the lowered-defense period, heal when he releases stored electrical energy, and repeat. Nizbel II acts faster, so do not let the party remain at low HP while waiting for the next opening.
Volt Bite is effective when Crono and Ayla are together. If the party is having trouble, use Marle or Robo for healing and prioritize survival over conserving MP.
- Use the switches to open the central route.
- Reach the tile room and upper balcony.
- Open the skull passage and central door.
- Use the save point before Nizbel II.
- Defeat Nizbel II with repeated Lightning shocks.
- Heal after the stored electrical discharge.
11. Reach Azala and defeat Black Tyrano
After Nizbel II, restore the party and use the upper save point before the final approach. Open the skull route and continue to the room where Azala waits. Take the optional nearby chests if desired, then cross the bridge to the final arena.
Azala should be defeated first. Magic attacks are more reliable against her than ordinary physical attacks. Once Azala is gone, Black Tyrano lowers its defense and begins storing power while a countdown runs. This is the damage window: use Volt Bite and the party’s strongest reliable Techs while keeping HP high.
When the countdown reaches zero, Black Tyrano uses a powerful fire attack against the whole party and its defense rises again. Heal immediately afterward and wait for the next defense-lowering countdown. Ruby Vests are useful because they reduce fire damage, but they are recommended equipment rather than an absolute requirement. Avoid wasting MP on heavy attacks while Black Tyrano’s defense is raised.
- Save before the final arena.
- Defeat Azala first.
- Attack Black Tyrano during its defense-lowering countdown.
- Heal before and after the fire attack.
- Repeat the defense-window cycle until Black Tyrano falls.
12. Enter the Lair Ruins and reach 12,000 B.C.
After the battle, the story shows Lavos descending on the prehistoric world. Kino arrives with the Dactyls and carries the party away. When control returns, save and heal. The Tyranno Lair has been destroyed, and the impact site is now the Lair Ruins.
Enter the Lair Ruins and examine the Gate inside. This Gate is the required transition to 12,000 B.C. After arriving, exit the cave and follow the route to the Skyway. Step onto the Skyway platform to reach the land above the clouds and begin the Zeal sequence.
The chapter is complete only after the Lair Ruins Gate has been entered and the party has visibly arrived in 12,000 B.C.; obtaining Dactyl travel alone is not the endpoint.
- Survive the Lavos impact sequence.
- Enter the Lair Ruins.
- Examine the Gate inside the ruins.
- Arrive in 12,000 B.C.
- Reach the Skyway route above the clouds.
Before you move on
- Ayla has been recruited and is available as a playable character.
- The Dreamstone was obtained from Ayla’s soup contest.
- Nizbel was defeated and Azala returned the Gate Key.
- The party left Prehistory and completed the intervening Masamune and Magus progression.
- The Laruba Ruins event with Ayla and the elder was completed after returning to Prehistory.
- The Dactyl Nest summit event was completed.
- Dactyl travel is available across the prehistoric overworld.
- The Tyranno Lair captives were freed.
- Kino was rescued.
- Nizbel II was defeated.
- Azala was defeated.
- Black Tyrano was defeated.
- The Lair Ruins Gate was entered.
- The party arrived in 12,000 B.C. and reached the Skyway route.
References for this chapter
- Chrono Trigger - Guide and Walkthrough - Super Nintendo - Black Omen and New Game+ route
- Chrono Trigger - Guide and Walkthrough - Super Nintendo - By Mynock
- Chrono Trigger - Guide and Walkthrough - Super Nintendo - By _ATadeo_
- Chrono Trigger/Unnatural Selection? — StrategyWiki
- Tyrano Lair - Chrono Trigger - Guides
- Chrono Trigger - Super Nintendo instruction manual
The Middle Ages (600 A.D.) — Magus, Frog and the Masamune
After the first visit to 12,000 B.C., charge Marle’s Pendant in Zeal Palace and survive Dalton’s Golem sequence. The party is then returned to 65,000,000 B.C.; use the End of Time to resume the 600 A.D. Masamune storyline. Recover the broken sword and hilt, obtain Dreamstone, have Melchior restore the Masamune, recruit Frog, cross the Magic Cave, and defeat Slash, Flea, Ozzie, and Magus. This chapter ends with the party back in 65,000,000 B.C., ready to return through the End of Time to the unfinished Zeal route in 12,000 B.C. Magus’s later recruitment at North Cape is optional and is not part of the mandatory 600 A.D. battle.
Reach Zeal and investigate the first 12,000 B.C. visit
After the prehistoric events, enter the Gate in the crater where Lavos struck. You arrive in a snowy cave in 12,000 B.C. Leave the cave and use the nearby Skyway to reach the floating land above. Travel east to Enhasa, then leave and cross the northern land bridge to the next Skyway. This takes you to the larger floating island containing Kajar and Zeal Palace.
Visit Enhasa and use its recovery point if you need to restore the party. Kajar’s shops and optional Nu interactions can wait. Enter Zeal Palace through the route above the floating island. Save outside the palace before continuing, because the upcoming sequence prevents you from freely leaving until it is resolved.
Inside Zeal Palace, take the upper-right exit into the bedchambers and enter the room on the right to witness Janus and Schala’s conversation. Return to the main hall and try the middle northern doorway. Marle’s Pendant cannot open it yet, so return to the main hall.
Take the upper-left route and interact with the Nu blocking the passage. Continue to the Mammon Machine and examine the red glow at its base. This charges Marle’s Pendant. Return to the middle northern doorway and use the charged Pendant on the sealed door.
- Leave the snowy cave in 12,000 B.C.
- Reach Enhasa and the larger floating island.
- Visit the bedchamber scene with Janus and Schala.
- Reach the Mammon Machine through the upper-left route.
- Charge Marle’s Pendant and open the sealed door.
Resolve Dalton’s Golem encounter and return to the past
Continue through the opened passage and watch the scenes involving Dalton, Schala, and the Prophet. Dalton summons a Golem before the party is captured. The fight can be won or lost without stopping the story. Winning provides the normal battle rewards; accepting defeat still advances the mandatory capture and escape sequence.
If you attempt the battle, avoid repeatedly using elemental attacks without a plan, because the Golem responds to the elements used against it. Physical attacks produce a different response. Keep Revives ready and use defensive equipment that reduces elemental damage when available, but do not spend rare items merely to force a victory.
After the sequence, the party is sent through a Gate and returns to 65,000,000 B.C. This is not the point to search Zeal for a route to 600 A.D. Leave the prehistoric area through its Gate, reach the End of Time, and use the 600 A.D. pillar.
- Watch Dalton summon the Golem.
- Either defeat the Golem or allow the battle to end in defeat.
- Confirm that the story continues either way.
- Confirm that the party returns to 65,000,000 B.C.
- Use the End of Time to reach 600 A.D.
Recover the broken Masamune blade in Denadoro Mountains
In 600 A.D., enter the Cursed Woods and use the concealed entrance near the northern end to reach Frog’s hideout. Speak with Frog to establish that the broken Masamune is the reason he refuses to confront Magus. Leave the woods and travel to Denadoro Mountains, east of Dorino.
Save before climbing. Lucca is especially useful because Fire can weaken the hammer-wielding Ogan enemies. Follow the mountain paths upward, taking the ladders and ledges toward the summit cave. At the top, speak to the child near the sword and choose the dialogue that confirms you came for the Masamune.
Masa and Mune initiate a two-stage battle. Defeat the first form, then continue into the fused form. Heal between attacks and use reliable single-target Techs rather than exhausting all MP on ordinary enemies. After both forms are defeated, the sword spirits return to the blade and the party receives the broken Masamune. The scene removes the party from the mountain, so you do not need to repeat the climb.
- Speak with Frog before pursuing the sword.
- Enter Denadoro Mountains east of Dorino.
- Reach the summit cave.
- Defeat both stages of the Masa and Mune encounter.
- Receive the broken Masamune blade.
Obtain Tata’s Hero Medal and Frog’s broken hilt
Travel south to Porre and enter Tata’s house. Speak with Tata to learn that the Hero Medal came from Frog, then take the medal. Return to the Cursed Woods and enter Frog’s concealed room through the shaking bush.
Show the Hero Medal to Frog. He refuses to take it and moves aside. Examine the sparkling object where he was standing to obtain the broken hilt, which includes another piece of the Masamune. The sword’s inscription points to Melchior.
If Frog does not respond to the medal, make sure Tata’s conversation was completed and the Hero Medal is in the inventory. Both the broken blade from Denadoro Mountains and the broken hilt from Frog’s room are needed before the repair sequence can proceed.
- Speak with Tata in Porre.
- Take the Hero Medal.
- Show the medal to Frog.
- Examine the sparkling object after Frog moves aside.
- Confirm that both Masamune pieces are in the inventory.
Take the Masamune to Melchior and obtain the repaired sword
Leave the Cursed Woods and travel through Truce Canyon to its Gate. Use the Gate to reach the End of Time, then take the pillar leading to Medina Village in 1000 A.D. In Medina, go to Melchior’s hut and speak with him. Present the broken Masamune pieces.
Melchior explains that Dreamstone is required. Dreamstone comes from the prehistoric story events covered earlier. If the Dreamstone objective has not been completed, return to 65,000,000 B.C. and finish the required Ayla sequence before returning to Melchior.
If Melchior does not appear or does not begin the repair conversation, return to 600 A.D., speak with Frog again in the Cursed Woods, and then revisit Melchior’s hut. Do not assume that missing Melchior means the Dreamstone is missing; the Frog conversation can be the unresolved trigger.
Once Dreamstone is available and the Masamune sequence has been triggered, follow Melchior downstairs and allow the repair scene to finish. The restored Masamune is returned to the party, although it is Frog’s weapon and is used in the next scene.
- Use Truce Canyon’s Gate to reach the End of Time.
- Take the pillar to Medina Village in 1000 A.D.
- Speak with Melchior in his hut.
- Provide Dreamstone after the request.
- Receive the restored Masamune.
Recruit Frog and open the Magic Cave
Return through the End of Time to 600 A.D. and visit Frog in the Cursed Woods. Give him the restored Masamune. The Cyrus flashback follows, and Frog joins the party permanently.
Take Frog to the End of Time and speak with Spekkio so Frog can learn magic. This is strongly recommended before Magus’s Castle because Frog then has access to healing and Water-element techniques, but Spekkio’s lesson is not required for recruitment or for opening the Magic Cave.
Return to 600 A.D. and travel to the mountain east of Fiona’s Villa, near the Dorino area. Frog must be in the active party. Examine the sealed mountain entrance and watch Frog use the Masamune to open it. The resulting scene leads directly into the Magic Cave.
Use magic against the Gremlins and normal attacks against enemies that resist or reduce magical damage. Follow the path to the northern exit and examine the dead soldier near the end for the warning about the enemy in Magus’s Castle. Leave the cave and save outside before entering the castle.
- Give the repaired Masamune to Frog.
- Confirm that Frog has joined permanently.
- Teach Frog magic at the End of Time.
- Put Frog in the active party.
- Open and cross the Magic Cave.
Clear Slash and Flea’s routes in Magus’s Castle
Enter Magus’s Castle and return to the central entrance whenever the path requires it. The western and eastern wings must both be completed before the deeper castle route becomes available.
Take the western route first if you want the most direct sequence. Continue through the halls and approach the figures near the throne. They transform into enemies, followed by the Slash encounter. Slash is fought in two stages. Defeat both stages, then collect the Slasher he leaves behind. Use the genuine save point that appears after the battle and restore with a Shelter.
Return to the entrance and take the eastern route. The children guarding a chest become enemies when challenged. Continue through the hall and defeat the enemies that appear. The Flea sequence includes a deceptive opponent before the real Flea battle. Heal between encounters and use magic or dependable Techs rather than relying on a single damage type.
After both Slash and Flea have been defeated, return to the central entrance and step on the false save point. This activates Ozzie’s next section. The point is a trigger, not a safe checkpoint.
- Complete the western castle route.
- Defeat both stages of Slash.
- Collect the Slasher if desired.
- Complete the eastern route.
- Defeat the real Flea.
- Return to the central entrance and activate the false save point.
Follow Ozzie’s traps and reach the real pre-Magus save point
The next section contains conveyor belts, falling blades, rolling enemies, trap floors, and fake save points. Move carefully across the moving hazards; running is useful when crossing areas where stationary timing is difficult.
When Ozzie hides behind barriers, do not waste turns attacking him directly. Move the target cursor to the nearby chains or levers and activate them. Each chain creates another opening, and the final opening causes Ozzie to fall away.
The trap-floor room drops the party to a lower level containing enemies and several objects that resemble save points. One is a real save point, one transports the party, and others become enemies. Use the actual save point when you find it, restore with a Shelter, and save before continuing. The route through the floor traps can be completed by following the outer edges and moving carefully across the safe sections.
Continue upward through the remaining rooms. At the later Ozzie encounter, target the chains behind him rather than Ozzie himself. When he falls, two save-point objects appear. The right one is the genuine save point; use it and restore before taking the left one, which transports the party toward Magus.
- Cross the conveyor and falling-blade rooms.
- Use the chains or switches during Ozzie’s barrier sequence.
- Navigate the trap-floor section.
- Identify and use the real save point.
- Defeat Ozzie by activating the chains behind him.
- Save at the right-hand post-Ozzie save point.
Defeat Magus in Magus’s Castle
A practical party is Crono, Frog, and Robo, although Crono, Frog, and Lucca also work well. Frog should have the Masamune equipped, and the Hero Medal is a useful accessory for him. Robo provides Heal Beam, while Lucca supplies Fire and Crono supplies Lightning. Marle is a valid alternative if you want stronger direct healing and Haste.
At the beginning of the battle, Magus uses a shifting elemental barrier. A normal physical attack forces a barrier change, after which the battle text identifies the element that can damage him. Use only the matching element while that barrier is active; unrelated magic is absorbed. Frog’s normal Masamune attack is especially useful because it lowers Magus’s magic defense without functioning like an ordinary barrier-changing attack.
If the active element is unavailable to your party, use a physical attack to force another change, then heal before the next offensive turn. Magus’s barrier changes can trigger a powerful area spell, so keep the party’s HP high and do not spend every character’s turn attacking. During the phase in which Magus drops the barrier and prepares a powerful spell, use your strongest reliable Techs while keeping a character ready to heal.
Defeat Magus in the castle. The battle is mandatory; unlike the later North Cape choice, there is no recruitment option here. After the victory scenes, Lavos is summoned and a Gate pulls the party away. The party wakes in Ayla’s hut in 65,000,000 B.C. This forced return confirms that the 600 A.D. Magus sequence is complete.
- Reach Magus from the genuine pre-boss save point.
- Track the element named by each barrier change.
- Use matching elemental attacks only when effective.
- Use physical attacks to cycle away from an unusable element.
- Keep healing available for Magus’s area attacks.
- Defeat Magus in Magus’s Castle.
- Confirm the party returns to 65,000,000 B.C. after the Gate sequence.
Prepare for the next required Zeal route and handle North Cape later
After Magus’s defeat, the immediate story location is 65,000,000 B.C. Leave the prehistoric area and use the Gate to reach the End of Time. The next required destination is 12,000 B.C., where the party continues the Zeal storyline through the Terra Cave and Mountain of Woe. Do not treat Magus’s defeat as access to the Ocean Palace; that progression occurs later.
Magus’s recruitment decision happens much later, after the Ocean Palace disaster and recovery of the Epoch. At North Cape in 12,000 B.C., speak with Magus and choose whether to fight him. Choosing not to fight allows him to join the party. Choosing to fight makes him unavailable for that playthrough and produces a permanent battle.
Magus is optional for the main campaign and is not required for the primary ending. If you want to compare both outcomes, save before approaching him at North Cape. Keep this decision separate from the mandatory Magus battle just completed in 600 A.D.
- Confirm Magus was defeated in Magus’s Castle.
- Confirm the party is back in 65,000,000 B.C.
- Reach the End of Time through the prehistoric Gate.
- Identify 12,000 B.C. as the next required destination.
- Postpone the optional Magus recruitment decision until North Cape.
- Save before choosing whether to fight or spare Magus.
Before you move on
- The first 12,000 B.C. visit is complete through the charged Pendant and Dalton’s Golem sequence.
- The party has returned to 65,000,000 B.C. after the Zeal Palace escape.
- The broken Masamune blade has been recovered from Denadoro Mountains.
- Tata’s Hero Medal has been obtained.
- Frog’s broken hilt has been revealed in the Cursed Woods.
- Melchior has restored the Masamune with Dreamstone.
- Frog has joined the party permanently.
- The Magic Cave has been opened with Frog and the Masamune.
- Slash has been defeated in both stages.
- Flea has been defeated.
- Ozzie’s chain sequence has been completed.
- Magus has been defeated in Magus’s Castle.
- The post-battle Gate sequence has returned the party to 65,000,000 B.C.
- The party has reached the End of Time and is ready to take the 12,000 B.C. Gate for the Terra Cave and Mountain of Woe progression.
- Magus’s later North Cape recruitment decision remains optional and has not been confused with the mandatory castle battle.
References for this chapter
- The Magic Kingdom — Chrono Trigger Walkthrough
- Chrono Trigger — Guide and Walkthrough — Super Nintendo — By Super_Slash
- The Masamune! — Chrono Trigger Walkthrough
- Magus’s Castle — Chrono Trigger Walkthrough
- Chrono Trigger/Magus’s Castle — StrategyWiki
- Chrono Trigger - Super Nintendo instruction manual
Ocean Palace, Queen Zeal and the Black Omen
Complete the required 12,000 B.C. sequence through Terra Cave, Algetty, the Beast’s Nest, and the Mountain of Woe. Rescue Melchior by defeating Giga Gaia, receive the Ruby Knife, defeat Dalton in Zeal Palace, and enter the Ocean Palace. Finish the Ocean Palace scenes, including the Ruby Knife, Mammon Machine, and scripted Lavos defeat, then recover the Epoch. For the dependable original-SNES campaign route, enter the Black Omen from an eligible era, defeat Queen Zeal and the Mammon Machine, defeat the Lavos shell, and use the internal Gate and save point as the final preparation checkpoint before the inner Lavos battle. The Black Omen is not required merely to challenge Lavos; the End of Time bucket and direct Epoch route remain available for alternate-ending attempts.
Arrive in 12,000 B.C. and reach the Mountain of Woe
After the party leaves Prehistory through the Gate, move through the snowy 12,000 B.C. region and enter Terra Cave. Follow the cave route to Algetty, the Earthbound settlement. Advance the scenes involving Melchior, Schala, Janus, and the Prophet, then rest at the inn and save before continuing.
Leave Algetty by the upper route and follow the path toward the Beast’s Nest. Continue downward until reaching the lower section, where the Mud Imp is accompanied by two beasts. Defeat them, step onto the cleared platform, and climb the chain to the floating Mountain of Woe. The Ocean Palace is not yet available as the next practical destination; complete the mountain sequence first.
- Arrive in 12,000 B.C. after the Prehistory sequence.
- Travel through Terra Cave to Algetty.
- Rest and save before the lower Beast’s Nest.
- Defeat the Mud Imp and its beast allies.
- Climb the chain to the Mountain of Woe.
Cross the Mountain of Woe and rescue Melchior
Follow the connected chains and narrow platforms upward through the Mountain of Woe. Side platforms contain equipment and restorative items, but the required route is mostly linear. Rubbles are optional encounters. They are difficult to hit with ordinary attacks and may flee, so leave them alone if an attempt is consuming too many resources. Defeating some can provide useful experience and Tech Points.
Use the save point in the upper part of the mountain and restore the party before the summit. A Shelter is useful. At the summit, inspect the imprisoned figure to begin the rescue scene and fight Giga Gaia.
Control the hands when they become dangerous, but do not assume that destroying them is the only valid solution. Group attacks can damage both hands, while reliable single-target damage can focus on the body. Keep recovery available because the hands use strong elemental attacks. After Giga Gaia is defeated, Melchior is freed and the mountain collapses.
Follow the resulting scenes back to Algetty. Save before leaving the area. The rescue of Melchior and the defeat of Giga Gaia are required story progress, while Rubbles and side-platform treasures are optional.
- Follow the chains to the mountain summit.
- Treat Rubbles as optional preparation.
- Use the upper save point and a Shelter before the summit.
- Defeat Giga Gaia by managing the hands and damaging the body.
- Complete Melchior’s rescue and the mountain-collapse scenes.
- Save in or near Algetty before continuing.
Receive the Ruby Knife and defeat Dalton in Zeal Palace
After the Mountain of Woe collapses, follow the scenes in Algetty and Terra Cave. Speak with Melchior and receive the Ruby Knife. Leave the cave and use the available Skyways and connected routes to return to the floating Zeal Palace.
Enter Zeal Palace and proceed to the throne room. Dalton is the required boss before the Ocean Palace. His Iron Orb attack reduces a target’s current HP substantially, so restore injured characters promptly and keep a healer ready. Use dependable Techs rather than relying only on ordinary attacks.
When Dalton is defeated, he leaves a Gate in the throne room. Examine it to descend to the Ocean Palace. Save before entering. Equip current weapons and armor and bring restorative supplies, including Mid Tonics, Full Tonics, Ethers or Mid Ethers, Revives, and Shelters. Crono, Lucca, and Frog provide useful elemental coverage and healing, while Robo is a sound alternative when additional recovery is preferred.
- Receive the Ruby Knife from Melchior.
- Return to Zeal Palace through the available routes.
- Save before Dalton’s battle.
- Defeat Dalton in the throne room.
- Use the Gate Dalton leaves behind to enter the Ocean Palace.
- Prepare equipment and restorative supplies.
Enter the Ocean Palace and reach the Mammon Machine
The Gate leads directly to the Ocean Palace. Move south to the nearby save point, then continue through the palace until the Mune scene and the Mammon Machine sequence begin. After control returns, continue through the dungeon.
Use elemental Techs selectively against the palace’s enemy groups. Lightning is useful against appropriate mechanical enemies, while Fire, Ice, or Water can help against enemies aligned with other elements. Conserve MP during ordinary encounters because the palace contains several required battles and bosses.
Operate the visible floor switches to open the necessary passages. Collect side-room equipment when the detour does not leave the party depleted. Before the long elevator section, use a save point and Shelter to restore HP and MP.
Continue through the lower palace and activate the required switches to form the bridge. Save and use a Shelter before the Golem Twins. Their defenses and counters punish careless repeated attacks, so use controlled Techs, keep a healer active, and revive fallen characters promptly. Defeating the Golem Twins is required to reach the final Ocean Palace scenes.
- Save after entering the Ocean Palace.
- Use elemental attacks selectively.
- Operate the floor switches and bridge mechanism.
- Save and use a Shelter before the Golem Twins.
- Defeat the Golem Twins.
Use the Ruby Knife and survive the Ocean Palace disaster
Continue north through the final palace section, pass the Nu, and approach the Mammon Machine. The Ruby Knife is used in the story scene and changes into the Masamune. Lavos then appears, and the party enters a battle that is scripted to end in defeat during a normal first playthrough.
Do not spend rare restorative items trying to force a normal first-playthrough victory in this encounter. Allow the scene to continue after the defeat. Winning this battle is an advanced New Game+ objective rather than a requirement for the ordinary campaign route.
Follow the aftermath in the Last Village and complete the Blackbird sequence. Dalton takes the Epoch, and the party must recover it before normal air travel is restored. Once the party regains free movement, save. The Ocean Palace cannot be revisited on the same file after the disaster, so collect any optional equipment or Charm opportunities you want before activating the final Mammon Machine sequence.
- Approach the Mammon Machine after saving.
- Use the Ruby Knife during the story scene.
- Allow the normal Ocean Palace Lavos encounter to proceed as a scripted defeat.
- Complete the Last Village and Blackbird scenes.
- Recover the Epoch.
- Save once free travel returns.
Enter and clear the Black Omen
After recovering the Epoch, fly beneath the Black Omen and board it from 12,000 B.C., 600 A.D., or 1000 A.D. For the recommended first clear, enter from 1000 A.D. This leaves the Black Omen available in earlier eras for later runs and additional rewards. The actual dungeon cannot be entered from 2300 A.D.; that visit only produces an exterior scene and does not open the fortress.
Save before boarding. Bring a party with reliable damage, full-party healing, status protection, and enough MP recovery. Crono, Frog, and Marle are a safe first-clear group; Crono, Frog, and Robo provide durable damage and recovery. Ayla is useful for optional Charm attempts but is not required for progression.
The dungeon is mostly linear. Defeat the opening Laser Guards and Mega Mutant, then continue through the enemy rooms and use the available save points. Goons can reduce characters’ HP sharply, and several enemies can inflict status ailments. Use physical attacks or suitable alternate elements when an enemy absorbs your preferred element. The supply Nu can restore resources; the other Nu can return the party to the entrance, so use it only when deliberately retreating.
Defeat Giga Mutant and Terra Mutant while healing immediately after Life Shaver reduces a character to 1 HP. Continue to the Lavos Spawn and attack its mouth rather than its shell. Striking the shell can trigger a dangerous counterattack. After defeating this Lavos Spawn, continue north to the final Panel room.
There are two Panel encounters that are easy to confuse. Earlier in the Black Omen, four Panels appear before Terra Mutant and create a save point. Later, after the Lavos Spawn near the summit, the final room contains five Panels. Defeat all five final Panels; the resulting save point is the last normal save point before the consecutive Queen Zeal and Mammon Machine sequence. Use it and a Shelter before continuing.
Proceed through the room containing the party copies and face Queen Zeal. Heal immediately when Hallation reduces the party to 1 HP. After Queen Zeal’s first defeat, the Mammon Machine battle follows without a normal field break, so enter the first fight with the party already restored. Defeat the Mammon Machine, then continue to Queen Zeal’s transformed battle. Concentrate damage on her face unless you are deliberately using Ayla to Charm the hands. Keep full-party healing ready for Hallation and avoid wasting turns attacking a hand unless you have a specific reason.
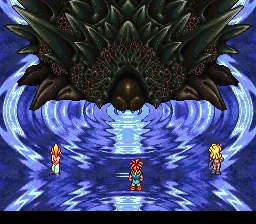
After transformed Queen Zeal is defeated, the Black Omen is destroyed and the party faces the Lavos shell. Defeat the shell, enter Lavos, and reach the Gate and save point inside. This is the final preparation checkpoint for the recommended full-campaign route. Use the Gate to return to the End of Time, restock supplies, change the party, review equipment and Techs, and create a separate pre-Lavos save. The Gate and save point are associated with entering Lavos through the Black Omen route; a direct Epoch crash route bypasses this checkpoint.
- Board the Black Omen from 1000 A.D. for the recommended first clear.
- Save before entering and prepare healing, status protection, and MP recovery.
- Defeat Mega Mutant, Giga Mutant, and Terra Mutant.
- Defeat the Lavos Spawn by attacking its mouth rather than its shell.
- Defeat the earlier four-Panel group before Terra Mutant if following the full dungeon route.
- Defeat the five final Panels after the summit Lavos Spawn.
- Use the resulting final save point and a Shelter.
- Defeat Queen Zeal’s first form.
- Defeat the Mammon Machine.
- Defeat transformed Queen Zeal.
- Defeat the Lavos shell.
- Enter Lavos and reach the internal Gate and save point.
- Return to the End of Time and create a separate final-preparation save.
Before you move on
- The party arrived in 12,000 B.C. and completed the Terra Cave and Beast’s Nest route.
- The Mountain of Woe was crossed and Melchior was rescued.
- Giga Gaia was defeated and the Mountain of Woe collapsed.
- The Ruby Knife was received from Melchior.
- Dalton was defeated in Zeal Palace.
- The Ocean Palace was entered through the Zeal Palace Gate.
- The Golem Twins were defeated.
- The Ruby Knife and Mammon Machine scenes were completed.
- The scripted Ocean Palace Lavos defeat was completed.
- The Epoch was recovered after the Blackbird sequence.
- The Black Omen was entered from 12,000 B.C., 600 A.D., or 1000 A.D.
- Mega Mutant, Giga Mutant, Terra Mutant, and the summit Lavos Spawn were defeated.
- The five final Panels were defeated and their resulting save point was used.
- Queen Zeal’s first form, the Mammon Machine, and transformed Queen Zeal were defeated.
- The Lavos shell was defeated.
- The party entered Lavos and reached the internal Gate and save point.
- The party returned to the End of Time and created a separate final-preparation save.
References for this chapter
- The Guru on Mt. Woe - Chrono Trigger Walkthrough
- What Lies Beyond? - Chrono Trigger Walkthrough
- Lavos Beckons - Chrono Trigger Walkthrough
- The Black Omen - Chrono Trigger Walkthrough
- The Final Battle - Chrono Trigger Walkthrough
- Chrono Trigger — Guide and Walkthrough — Super Nintendo — By Super_Slash
- Chrono Trigger Walkthrough — The Black Omen
- Black Omen Walkthrough: All 20 Chests | Chrono Trigger
The End of Time Hub — Gaspar, Spekkio and Tech Mastery
The End of Time is Chrono Trigger’s central travel hub, recovery point, magic-training room, and late-game planning area. Use its Gates to revisit eras already connected to the story, speak with Gaspar after major events, teach eligible characters their elemental magic through Spekkio, and maintain a separate save before difficult late-game routes. The hub provides safe access to connected destinations, but it does not replace unfinished story events or unlock areas before the campaign makes them available.
Establish the End of Time as your home base
When the party first arrives after the Proto Dome sequence, walk forward and speak with the old man beneath the lamp. He explains why the party reached this place and identifies the practical travel limit: a Gate can carry only three people at once. Choose an active party of three before using a Gate, then check that those characters have their current weapons, armor, and Techs equipped.
Save at the save point near the center of the area. The save point does not automatically restore the party. To heal, examine the shining point beside it. This restores HP and MP without consuming Tonics or Ethers. A Shelter can also be used at a save point or on the world map, but the End of Time’s healing point is the most convenient recovery method while you are here.
The pillars of light are Gates. Each available pillar leads to a destination that the story has already connected to the End of Time, including places such as Truce Canyon, Medina, and the Proto Dome. If an era or location is not represented by a pillar, do not search the hub for a secret route; continue the current campaign objective until the game creates that connection.
A separate shining point at the northern side of the area leads directly toward 1999 A.D. and the Day of Lavos. It is available for an early final-battle attempt once the party can use the End of Time, but it is not a normal travel checkpoint and does not depend on clearing the Black Omen. Use it only when you deliberately want to fight Lavos early or test an alternate-ending route.
- Speak with the old man, Gaspar.
- Save at the central save point.
- Use the nearby shining point to restore HP and MP.
- Select a three-character active party before entering a Gate.
- Treat the northern bucket as a direct Lavos route, not as a normal era-transfer shortcut.
Complete Spekkio’s magic lesson
Enter the room behind Gaspar and speak with Spekkio, the Master of War. He asks the party to walk around the room clockwise three times. Start near the entrance, follow the outside wall, pass each corner, and complete three full circuits without cutting across the middle. If Spekkio does not acknowledge the attempt, repeat the route while staying close to the walls.
Speak with Spekkio again after the three laps. Crono receives Lightning magic, Marle receives Water magic, and Lucca receives Fire magic. This lesson is important because it gives the first three characters access to their basic elemental spell lines. Later spells are learned through normal Tech-point progression rather than through another general lesson from Spekkio.
Frog can learn Water magic as well, but he must be in the active party when you speak with Spekkio after he has joined. Return to the End of Time with Frog selected if you want him to have that spell before the Magic Cave and Magus’s Castle. Robo and Ayla do not learn conventional magic from Spekkio. Robo relies on his own Techs and elemental effects, while Ayla is primarily a physical attacker. If Magus has joined, he already possesses his own magic and does not need this lesson.
Spekkio can also be challenged after the magic lesson. His appearance and strength depend on the lead character’s level, so the encounter changes as the campaign progresses. The fight is optional. If the current form is too strong, leave and return later; losing does not end the campaign. Rewards are tied to defeating the available form and are not necessary for story completion.
- Enter Spekkio’s room after the first conversation with Gaspar.
- Walk clockwise around the outside wall for three complete laps.
- Speak with Spekkio again to teach the initial party members magic.
- Return with Frog in the active party if you want him to learn Water.
- Do not expect Robo or Ayla to receive a conventional Magic command.
- Challenge Spekkio only when the current form is manageable.
Use Gates and the Epoch without bypassing progression
The End of Time is a routing center, not a sequence-skipping device. A Gate can return you to a destination already connected to your journey, but it does not complete a dungeon, repair a key item, recruit a character, or open an unvisited era. When Gaspar or the current story objective directs you to a particular period, use the appropriate Gate and continue from the last unfinished location.
After the Epoch becomes available, use it for broader world-map travel and for reaching distant areas that are difficult to access through the fixed Gates. Its location matters: if you leave the Epoch in another era, it remains there until you return to that era and move it again. Do not assume that the vehicle will always be waiting at the End of Time.
Before departing, check the active party and equipment. This is a convenient place to put Frog into the group for his magic lesson, add Marle or Lucca when healing and elemental coverage are useful, or use Robo when support and physical durability are more valuable. Save after making a party change so a failed dungeon attempt does not require repeating the setup.
- Use each Gate only for a destination already connected to the campaign.
- Use the Epoch after the story makes it available.
- Remember that the Epoch remains where you last left it.
- Review party members, equipment, and Techs before leaving.
Return to Gaspar after the Ocean Palace aftermath
Gaspar’s dialogue changes as the story advances. Speak with him after major events instead of assuming that his first conversation contains every late-game instruction. Early visits explain the End of Time and provide general guidance, but Gaspar does not hand over the Chrono Trigger during the opening portion of the campaign.
After the Ocean Palace aftermath, continue until the late-game travel state is available and you can return to the End of Time. Speak with Gaspar about what happened to Crono. Then walk toward the exit. Gaspar calls the party back; speak with him again and he gives the Chrono Trigger, called C. Trigger in the North American Super NES inventory. This is the required handoff for the Death Peak resurrection route.
Meeting Magus at North Cape is a separate decision and is not required before Gaspar gives you the Chrono Trigger. Magus may be recruited or fought depending on your choices, but do not delay the Chrono Trigger conversation while trying to force a particular Magus outcome. If Gaspar does not call the party back, confirm that the Ocean Palace aftermath has occurred, that the relevant late-game travel method is available, and that you spoke with him before attempting to leave.
After Crono has been restored, return to Gaspar again. He gives broad directions toward the major optional character quests. These quests are not all required merely to challenge Lavos, but they provide strong equipment, character development, and the most complete first-playthrough route. Treat Gaspar’s list as an organized preparation checklist rather than as a new mandatory dungeon sequence.
- Return to the End of Time after the Ocean Palace aftermath and once late-game travel is available.
- Speak with Gaspar about Crono.
- Attempt to leave so Gaspar calls the party back.
- Speak with him again to receive the Chrono Trigger.
- Do not treat Magus’s North Cape decision as a prerequisite for this handoff.
- Return after Crono’s resurrection for Gaspar’s optional-quest guidance.
Create a reliable pre-Lavos checkpoint
Before beginning the final assault, return to the End of Time, restore HP and MP at the shining healing point, and create a dedicated save. Use a separate save slot so you can preserve the completed campaign state while attempting alternate endings or retrying the final route.
For the standard full-campaign route, confirm that the Ocean Palace storyline is complete, the Epoch is available, and Crono has been revived if you want the normal full-party ending sequence. Clearing the Black Omen before fighting Lavos is the recommended route for this guide’s complete SNES campaign and provides the major late-game dungeon, equipment, experience, and preparation opportunities. The bucket and the Epoch can also lead directly to Lavos for alternate-ending attempts, but neither route substitutes for clearing the Black Omen.
Recruiting Robo, Frog, and Ayla, repairing the Masamune, and completing the major character quests make the final push safer, though not every optional quest is mandatory for victory. Prepare more than one viable party. Crono, Marle, and Lucca provide elemental coverage and reliable healing. Crono, Frog, and Robo offer healing, support, and strong physical options. Crono, Lucca, and Robo provide powerful offensive Tech combinations while retaining useful recovery tools. If Magus joined, he can replace another attacker, but he is not required for the standard ending.
Inspect every active character’s weapon, armor, and accessory separately. Confirm that at least one character can restore HP reliably, that the party has sufficient MP recovery for a long dungeon, and that Revives and healing items are available. Full Ethers and stronger restorative items are recommended rather than mandatory. If the Black Omen remains unfinished, return to the appropriate era and complete it instead of expecting the End of Time to create a final-battle checkpoint.
- Restore HP and MP at the End of Time.
- Create a separate pre-Lavos save.
- Confirm the Ocean Palace aftermath and Epoch access.
- Revive Crono if pursuing the normal full-party campaign.
- Clear the Black Omen for the guide’s standard complete-campaign route.
- Check weapons, armor, accessories, healing Techs, Revives, and MP recovery.
- Choose a final party based on learned Techs and available equipment rather than a single universal lineup.
Before you move on
- The party can restore HP and MP at the End of Time’s shining healing point.
- Crono, Marle, and Lucca have received their elemental magic from Spekkio.
- Frog has received Water magic if he is being used for the campaign.
- After the Ocean Palace aftermath, Gaspar has provided the Chrono Trigger when the party speaks with him and attempts to leave.
- The Epoch is available and its current location is understood.
- A separate pre-Lavos save exists.
- The selected final party has reliable healing, appropriate equipment, learned Techs, Revives, and MP recovery.
- The Black Omen is cleared if following the guide’s standard full-campaign route before the final Lavos victory.
Mid-Game Side-Quests That Gate Story Progression
On the original North American Super Nintendo release, only a small number of character and item sequences function as true story gates. Robo’s first recruitment in 2300 A.D. is mandatory, and the Masamune sequence is required to open the route through the Magic Cave and Magus’s Castle. After Crono is revived and the Fated Hour begins, the major character quests are optional for reaching Lavos, but they provide the strongest equipment, permanent upgrades, and useful preparation for a full first-playthrough route. Complete the required story work first, then use the Epoch to handle the optional quests before clearing the Black Omen.
1. Identify the actual story gates
Robo’s initial recruitment is part of the mandatory 2300 A.D. route. After finding Robo in Proto Dome, travel through the Factory, defeat the factory defenses, and complete the sequence that restores Robo’s cooperation. Robo must join the party before the game can continue through the later 2300 A.D. story and open the route toward the End of Time and subsequent eras. Do not confuse this event with Geno Dome, which is a later optional dungeon about Robo’s origin.
The Masamune sequence is also required. In 600 A.D., obtain the broken blade and the Hero’s Badge through the Tata and Frog storyline. During the associated trip to 65,000,000 B.C., follow Ayla to Ioka Village and participate in the nighttime gathering. Speak with Ayla after the party conversations and win her soup-drinking contest. The red stone she gives you is the Dreamstone required for the Masamune.
Take Dreamstone to Melchior in 12,000 B.C. He repairs the broken Masamune. Return to 600 A.D., bring the restored sword to Frog, and follow Frog to the sealed route near the Magic Cave. Frog opens the way, allowing the party to proceed toward Magus’s Castle. If the passage remains sealed, verify that Dreamstone was delivered to Melchior and that the repaired Masamune was returned to Frog.
The Hunting Range and the Ioka trading hut are optional preparation. They can provide trading materials, healing supplies, and useful equipment, but neither replaces the required Ayla gathering and soup contest that awards Dreamstone.
- Robo recruited during the mandatory Factory sequence.
- Broken Masamune and Hero’s Badge obtained.
- Dreamstone won from Ayla at the Ioka Village gathering.
- Dreamstone delivered to Melchior in 12,000 B.C.
- Restored Masamune returned to Frog in 600 A.D.
- Frog opened the route toward the Magic Cave and Magus’s Castle.
2. Reach the Fated Hour before starting the optional circuit
Complete the main story through the Ocean Palace and the events that follow Crono’s disappearance. Obtain the Chrono Trigger from Gaspar and complete the revival sequence at Death Peak. Once Crono is restored, the party returns to the End of Time and the Fated Hour begins.
Speak with Gaspar to receive hints about the major optional quests. These include the Sun Stone, Cyrus’s Ghost and the Northern Ruins, the Sunken Desert and Fiona’s Forest, the Rainbow Shell, Geno Dome, and Ozzie’s Fort. They are optional invitations rather than mandatory story gates.
Before leaving the End of Time, save on a separate file. This preserves a clean pre-quest state and gives you a fallback if you want to change the quest order, test a different party, or proceed directly toward the final dungeon. The Epoch is now the convenient way to revisit the relevant eras.
- Crono has been revived.
- The Fated Hour is active.
- Gaspar has provided the optional-quest hints.
- The Epoch is available for late-game travel.
- A separate pre-quest save has been created.
3. Complete the Sun Stone quest for strong late-game equipment
Begin at Sun Palace in 2300 A.D., located on an isolated island. Enter the palace and defeat the Son of Sun. The encounter is built around the rotating flames: use physical attacks to test the flames and continue attacking the one that damages the boss. Fire-resistant equipment makes mistakes safer, so equip Red Mail, Red Vest, or Ruby Armor when available.
Collect the Moon Stone after the battle and place it in the Sun Keep in 65,000,000 B.C. Leave it there, then visit the corresponding Sun Keep in later eras to follow the stone’s movement. In 1,000 A.D., investigate the household in Porre, purchase Jerky at the Snail Stop, and give it to the woman in the relevant 600 A.D. household rather than selling it.
Return to 1,000 A.D. and collect the recovered Moon Stone from the Porre household. Place it back in the Sun Keep, then revisit the Sun Keep in 2300 A.D. with Lucca in the active party. Take the charged Sun Stone to Lucca’s house in 1,000 A.D. Lucca and Taban use it to create the Wondershot and Sun Shades.
This quest is optional, but its rewards are excellent preparation for the Black Omen and Lavos. The Sun Palace battle also encourages the use of elemental protection that remains useful in later fights.
- Son of Sun defeated in Sun Palace.
- Moon Stone placed in the 65,000,000 B.C. Sun Keep.
- Moon Stone’s theft investigated in 1,000 A.D.
- Jerky given to the correct 600 A.D. household.
- Charged Sun Stone recovered in 2300 A.D.
- Sun Stone delivered to Lucca’s house with Lucca present.
4. Restore the Northern Ruins and complete Cyrus’s ghost quest
Travel to Choras in 600 A.D. and inspect the Northern Ruins. Speak with the carpenter in the local tavern. Then visit the carpenter’s household in 1,000 A.D. and obtain the tools from his wife. Return to 600 A.D. and give the tools to the carpenter so he can begin repairing the ruins.
Enter the Northern Ruins after each repair stage and defeat the monsters blocking the accessible rooms. Return to the carpenter when another section requires repair and pay the requested fee. Continue this cycle until the ruins are fully accessible.
The ruins contain paired sealed chests in 600 A.D. and 1,000 A.D. If you want the improved versions of their contents, inspect the 600 A.D. chest first and decline to take the item. Open the corresponding chest in 1,000 A.D., then return to 600 A.D. and collect the original item. Taking the 600 A.D. contents first prevents the later chest from receiving its improved result.
With Frog in the active party, continue through the repaired ruins and reach Cyrus’s grave. Defeat Cyrus’s ghost and complete the scene. This greatly strengthens the Masamune, but it is not required to open the Magic Cave or finish the main campaign.
- Tools obtained from the carpenter’s wife in 1,000 A.D.
- Tools delivered to the carpenter in 600 A.D.
- Northern Ruins repair stages completed.
- Paired sealed chests handled in the correct era order if upgrades are wanted.
- Cyrus’s ghost defeated with Frog present.
- Masamune upgrade obtained.
5. Clear the Sunken Desert and restore Fiona’s Forest
Go to Fiona’s Villa in 600 A.D. and speak with Fiona and Marco. Enter the nearby Sunken Desert and defeat the desert boss. Several enemies in the area resist ordinary physical attacks, so use the party’s stronger magic and carry enough healing items for the dungeon and boss fight.
After the desert is cleared, return to Fiona’s Villa and leave Robo there. Travel to 1,000 A.D. and enter the restored forest. The time gate inside leads to Lucca’s childhood scene. Follow the button instructions displayed during the machine sequence to stop the accident involving Lucca’s mother.
Completing the scene awards the GreenDream accessory. If you fail the machine sequence and want the reward, reload a save from before entering the time gate and try again. The desert, forest restoration, and GreenDream are optional for reaching Lavos, but they are among the most useful first-playthrough preparations because they provide equipment, items, and a valuable emergency-revival accessory.
- Sunken Desert cleared in 600 A.D.
- Robo left at Fiona’s Villa.
- Restored forest visited in 1,000 A.D.
- Lucca’s childhood sequence completed.
- GreenDream obtained.
6. Finish Toma’s Rainbow Shell route
In 600 A.D., speak with Toma in the Choras tavern and obtain Toma’s Pop. Travel to the West Cape in 1,000 A.D. and examine Toma’s grave while carrying the item. Toma’s ghost reveals the location of the Giant’s Claw.
Return to 600 A.D. and fly to the island near Choras. Enter the Giant’s Claw and follow the route through the prehistoric ruins. Defeat the Rust Tyrano and recover the Rainbow Shell.
The quest is not complete when the shell is found. Bring it to Guardia Castle in 1,000 A.D. and follow the royal investigation. Bring Marle in the active party so the intended royal scenes can occur, then proceed through the courtroom sequence and expose the Chancellor’s plot.
The Rainbow Shell route is optional and does not unlock the Black Omen. It supplies powerful equipment and advances the Guardia family storyline, making it a good quest to complete before the final dungeon.
- Toma’s Pop obtained in 600 A.D.
- Toma’s grave visited in 1,000 A.D.
- Giant’s Claw completed in 600 A.D.
- Rust Tyrano defeated.
- Rainbow Shell recovered.
- Guardia Castle investigation completed with Marle available.
7. Complete Geno Dome and Ozzie’s Fort if desired
Geno Dome is located on an isolated island in 2300 A.D. Place Robo in the lead position before entering. His interaction with the entrance computer opens the dungeon route. Follow the charging-pod, conveyor, elevator, and robot-control sections until you reach Atropos and the Mother Brain encounter.
Save before the Atropos fight and equip Robo with his strongest available weapon, armor, and accessory. Atropos is fought by Robo alone, so use Robo’s healing option when needed and rely on his physical Techs. Continue through the dome after the fight and defeat Mother Brain. Geno Dome is optional, but it provides Robo’s strongest SNES-era weapon and a permanent improvement to his abilities.
Ozzie’s Fort is an optional 600 A.D. dungeon connected to the Mystic storyline. Enter it when the location is available, defeat its bosses, and search the fort for its equipment and scenes. If Magus was recruited after the 600 A.D. Magus battle, he can be brought for his related dialogue, but Magus is not required for the primary campaign ending.
A practical first-playthrough order is Sun Stone, Northern Ruins, Geno Dome, Rainbow Shell, Ozzie’s Fort, and Sunken Desert. This is a convenience order rather than a requirement; choose a different order if your party strength or equipment makes another route safer.
- Geno Dome entered with Robo leading.
- Atropos defeated.
- Mother Brain defeated if completing Robo’s optional quest.
- Robo’s Geno Dome rewards collected.
- Ozzie’s Fort completed if its scenes and equipment are wanted.
- Magus recruitment choice preserved for the intended ending route.
8. Clear the Black Omen before the full SNES completion run
After completing the optional quests, save before entering the Black Omen. The fortress can be approached from an eligible late-game era. Do not enter from 2300 A.D. if you intend to clear the full dungeon route; use the Epoch to reach the Black Omen in an era where its complete progression is available.
The Black Omen is not required merely to challenge Lavos. The party can reach Lavos directly through the bucket at the End of Time or by taking the Epoch to 1999 A.D. It is required for this chapter’s full-campaign route and for the original SNES New Game+ unlock condition used by this guide.
Clear the fortress, defeat its major encounters, and defeat Queen Zeal. Save again before proceeding into the final Lavos sequence. After Lavos is defeated, allow the ending and credits to finish. Preserve the completed file when the game offers the opportunity, then return to the title screen and verify that New Game+ is available.
- Black Omen entered from an eligible era.
- Black Omen route completed.
- Queen Zeal defeated.
- Lavos defeated after the Black Omen clear.
- Completed data preserved.
- New Game+ confirmed on the SNES title screen.
9. Recover when a required sequence was missed
The Fated Hour quests are generally recoverable after Crono’s revival. Use the Epoch to revisit Sun Palace, the Sun Keep, Choras, the Northern Ruins, Fiona’s Villa, the Giant’s Claw, Guardia Castle, Geno Dome, or Ozzie’s Fort. Gaspar’s hints can identify the available quest themes, but his dialogue is not a complete checklist.
If progress is blocked before the Fated Hour, return to the last mandatory story location instead of searching the optional areas. If the Magic Cave remains sealed, recheck the Dreamstone path: win the stone from Ayla at the Ioka gathering, deliver it to Melchior in 12,000 B.C., then take the repaired Masamune back to Frog in 600 A.D. If Robo is absent, revisit Proto Dome and complete the Factory sequence.
If you defeat Lavos by a direct route before clearing the Black Omen, reload the separate pre-final save and clear the Omen first. Without that save, the victory can still produce an ending, but it does not meet this chapter’s full-route requirement. Keep a pre-Black-Omen save and a pre-Lavos save on separate files so alternate-ending experiments do not erase the main completion route.
- Optional quests revisited with the Epoch when necessary.
- Masamune prerequisites rechecked if the Magic Cave is sealed.
- Proto Dome and Factory rechecked if Robo is missing.
- Pre-final save reloaded after an unwanted direct Lavos victory.
- Separate Black Omen and pre-Lavos saves preserved.
Before you move on
- Robo was recruited during the mandatory 2300 A.D. Factory route.
- Dreamstone was won from Ayla at the Ioka Village gathering.
- Melchior restored the Masamune in 12,000 B.C.
- Frog received the restored Masamune and opened the route to the Magic Cave.
- Crono was revived and the Fated Hour began.
- The Epoch is available for late-game travel.
- The desired optional quests were completed or deliberately postponed for New Game+.
- The Black Omen was cleared through its complete SNES route.
- Lavos was defeated after the Black Omen clear.
- A completed save was preserved and New Game+ appears on the SNES title screen.
References for this chapter
- Chrono Trigger — Guide and Walkthrough — Super Nintendo — By Super_Slash
- Chrono Trigger - Guide and Walkthrough - Super Nintendo - New Game+ requirements and ending conditions
- Chrono Trigger - Guide and Walkthrough - Super Nintendo - By DC
- The Fated Hour - Chrono Trigger Walkthrough
- Do you have to beat the black omen to unlock new game+? - Chrono Trigger Q&A for Super Nintendo
- Chrono Trigger — Super Nintendo instruction manual
Late Game — Ocean Palace Aftermath and Preparing for Lavos
After the Ocean Palace disaster, obtain the Chrono Trigger from Gaspar, revive Crono if desired, finish useful late-game preparation, and clear the Black Omen from 1000 A.D. The Black Omen route ends with Queen Zeal, the Lavos shell, and an internal Gate and save point before the inner Lavos battle. Direct bucket and Epoch approaches remain available for alternate-ending attempts, but they should be kept separate from the recommended full-campaign route.
1. Collect the Chrono Trigger and open the late-game route
After the Ocean Palace sequence and the Blackbird escape, go to the End of Time and speak with Gaspar, the old man beside the lamp. He gives you the Chrono Trigger and explains that a clone is needed if you want to restore Crono.
The Epoch now has its wings, allowing free flight through the accessible eras. The Black Omen is also present above the world. You can challenge Lavos immediately with the bucket beside Spekkio or by flying the Epoch to 1999 A.D., but those are direct ending routes rather than the recommended first-playthrough route.
For the full campaign, restore Crono, complete any useful optional preparation, and then enter the Black Omen. The Black Omen is also the route used to obtain the normal late-game New Game+ clear, so do not make a direct bucket or Epoch approach your only first clear if unlocking New Game+ is part of your goal.
- Gaspar has given you the Chrono Trigger.
- The Epoch has its wings.
- You have saved before beginning late-game preparation.
- You understand that the Black Omen route and direct Lavos routes serve different purposes.
2. Revive Crono at Death Peak
Travel to Keeper’s Dome in 2300 A.D. Enter the sealed room and speak with the Nu beside the door. The Nu explains that the Chrono Trigger requires a clone identical to the person being restored.
Return to the Millennial Fair in 1000 A.D. and enter Norstein Bekkler’s tent. Complete the imitation game to obtain Crono’s clone. Then visit Crono’s house and speak with his mother to collect the clone if it has not already been placed in your inventory.
Bring the clone back to Keeper’s Dome and speak with the Nu again. The Nu activates the program that prepares Death Peak and sends Poyozo figures there. Leave the dome and travel to Death Peak in 2300 A.D.
Climb Death Peak. During the exposed sections, use the small tree as shelter when the wind blows, then continue after the gust passes. Follow the Poyozo directions, push and climb the Lavos Spawn shell where required, and continue to the summit. The Chrono Trigger and clone are used automatically during the restoration scene.
Crono’s restoration is optional for reaching the Black Omen and defeating Lavos, but it is recommended for the fullest standard first-playthrough route. Save after the restoration so a failed late-game attempt does not require repeating Death Peak.
- The Crono clone has been obtained.
- The clone has been delivered to Keeper’s Dome.
- Death Peak has been opened by the Nu’s program.
- Crono has been restored if you are following the full campaign route.
- A save exists after the restoration scene.
3. Complete useful optional preparation
The Northern Ruins in 600 A.D. are optional but useful for Frog. Investigate the ruins, defeat the enemies inside, and follow the restoration sequence until the area is repaired. This completes Frog’s Cyrus-related storyline and provides improved equipment, but it is not required to enter the Black Omen.
The Sunken Desert becomes available after the Epoch receives its wings. In 12,000 B.C., make sure Fiona’s sapling has been preserved. Then visit Fiona’s Villa in 600 A.D., enter the desert, defeat the enemies, and allow Robo to remain behind for the forest-restoration sequence. Return after the time change to see the restored forest and receive the GreenDream.
For the Sun Stone quest, follow the Sun Keep through its relevant eras, expose the Moon Stone to sunlight until it is fully charged, and return the finished Sun Stone to Lucca’s house in 1000 A.D. with Lucca present. This produces useful rewards, including Lucca’s Wondershot and the Sun Shades.
The Rainbow Shell quest is another optional preparation route. Investigate the Giant’s Claw in 600 A.D., recover the Rainbow Shell, and resolve the associated Guardia Castle events in 1000 A.D. The rewards improve survivability, but none of these optional quests is required for the Black Omen.
- The Masamune repair and other required story progression are complete.
- Robo was repaired and recruited during the Factory sequence.
- Fiona’s Forest restoration is complete if you want its optional reward.
- The Northern Ruins, Sun Stone, and Rainbow Shell quests are complete or deliberately deferred.
4. Prepare characters, equipment, and supplies
Equip every character who may be used in the Black Omen. The dungeon contains difficult enemies, status effects, several bosses, and long stretches between major recovery points. Bring Mid Tonics or stronger healing items, Mid Ethers or stronger MP recovery, Heals, Revives, and Shelters.
Crono, Marle, and Lucca provide dependable healing, revival, and elemental damage. Crono, Frog, and Robo give you strong physical attacks with access to healing Techs. Ayla is valuable if you intend to use Charm on Black Omen enemies. Magus has powerful individual magic, but he cannot participate in the normal dual- and triple-Tech chains with the other characters.
Do not grind toward a fixed level number. Instead, confirm that the intended party has reliable healing, revival, and damage options, then upgrade weapons and armor whenever better equipment is available. Status protection is particularly helpful because Black Omen enemies can inflict abnormal conditions.
Use ordinary attacks against manageable enemies and reserve MP for bosses. Shelters restore the party at save points, and the Black Omen contains recovery services and an exit route to the Epoch, so there is no reason to spend most of the party’s MP on routine encounters.
- The intended party has current weapons and armor.
- At least one party-wide healing option is available.
- Revives, healing items, MP recovery, and Shelters are stocked.
- A second viable party is equipped.
- You saved before boarding the Black Omen.
5. Enter the Black Omen from 1000 A.D.
Fly the Epoch to 1000 A.D. Move underneath the Black Omen until its name appears, then press the action button to board it. Entering from 1000 A.D. preserves the option to visit its versions in 600 A.D. and 12,000 B.C. before clearing it.
The Black Omen can be entered in 1000 A.D., 600 A.D., or 12,000 B.C. It cannot be entered normally in 2300 A.D., and it is not available in 65,000,000 B.C. Clearing the dungeon in an earlier era removes it from the later eras, so 1000 A.D. is the practical first choice if you want the option of revisiting it.
Save before boarding. If you need to leave from the beginning, examine the sparkling point on the exterior deck to return to the Epoch.
- You entered from 1000 A.D. if you want the later versions preserved.
- You saved before boarding.
- You know that a clear removes the Black Omen from later eras.
- You have decided whether optional repeat clears are worthwhile.
6. Advance through the dungeon and manage MP
From the exterior deck, use the sparkling point to return to the Epoch if you need to restock. Otherwise, proceed north through the Laser Guards and enter the fortress. The route is mostly linear, with optional chests and enemy encounters along the way.
When fighting Goons, do not use Lightning or Shadow attacks because they absorb those elements. Physical attacks or other effective damage are safer. Boss Orbs and Side Kicks can interfere with Tech use, so defeat vulnerable Side Kicks quickly when possible. Walking instead of running can help avoid certain encounters.
Later in the dungeon, a pair of Nus provides useful services. One Nu offers restorative supplies, while the other can return you to the entrance if you choose the wake-up option. Use these services before committing to the last section.
After the Giga Mutant area, continue through the elevators and corridors. Defeat the required Panels and use the available save points. In the earlier Panel room, defeat four Panels; doing so creates an earlier save point. This is not the final checkpoint, so continue north after healing and saving.
- You know how to return to the Epoch from the entrance.
- You are avoiding Lightning and Shadow against Goon enemies.
- You have located the Nu recovery and supply services.
- The earlier four-Panel encounter has been cleared if you want its save point.
- You are prepared to continue toward the later five-Panel room.
7. Defeat the five final Panels and create the Queen Zeal checkpoint
After the later Lavos Spawn encounter, go north into the next room. This room contains five Panels. Defeat all five Panels to open the door and make the final save point appear.
This five-Panel room is separate from the earlier four-Panel room. The earlier four Panels create an earlier save point during the dungeon, while defeating the five Panels here creates the final save point immediately before the Queen Zeal sequence. Use the new save point before proceeding.
Heal the party, restore MP with a Shelter, adjust equipment, and save. If you want to change party members, leave through the available route before committing to the Queen Zeal sequence. This is the last practical preparation point before the consecutive endgame encounters.
- The later room’s five Panels have been defeated.
- The final save point has appeared immediately afterward.
- The party is healed and MP has been restored.
- Equipment and party composition have been checked.
- You saved at the final pre-Queen Zeal checkpoint.
8. Defeat Queen Zeal, the Mammon Machine, and the Lavos shell
Continue north from the final save point. The game sends you through Queen Zeal, the Mammon Machine, and another Queen Zeal battle. The first Queen Zeal victory does not end the dungeon, and there is no ordinary return to the world map between the final encounters, so enter the sequence with full HP and sufficient MP.
Use party-wide healing after Hallation reduces the group’s HP. Keep revival items ready, and do not assume that the first Zeal battle is the only difficult fight. A balanced party with reliable healing is safer than a group built entirely around damage.
After the final Queen Zeal battle, Lavos appears. On the Black Omen route, defeat the Lavos shell and its copied boss sequence before reaching the inner area. The shell fight is not the same as the inner Lavos battle covered in chapter 10.
After the shell sequence, enter the opening in Lavos. You will find a Gate leading to the End of Time and a save point. This is the chapter endpoint. Use the Gate if you need to change party members, visit Spekkio, restock, or finish an optional quest. Return through the bucket or Epoch route when ready, then load the save inside Lavos to begin the inner battle.
- The first Queen Zeal encounter is complete.
- The Mammon Machine sequence is complete.
- The final Queen Zeal encounter is complete.
- The Black Omen Lavos-shell sequence is complete.
- The Gate and save point inside Lavos have been reached.
- You saved before entering the inner Lavos battle.
9. Keep direct Lavos approaches separate
The bucket beside Spekkio at the End of Time sends the party directly to the Day of Lavos. Use it only after saving if you are intentionally pursuing an alternate ending or are ready for the final battle immediately.
The Epoch can be flown to 1999 A.D. and crashed into Lavos. This bypasses the Black Omen and its Lavos-shell sequence, and the Epoch is destroyed by the crash. Use a separate save if you want to preserve the ship and continue exploring after the attempt.
For the recommended first campaign, complete the Black Omen, defeat its Lavos shell, and save inside Lavos. Reserve the bucket and Epoch routes for alternate-ending attempts or New Game+ runs. The inner Lavos forms and final victory are covered in chapter 10.
- The chosen Lavos route was deliberate.
- A separate save exists before using the bucket or Epoch crash.
- The Epoch crash route is understood to bypass the Black Omen shell.
- The Black Omen has been cleared if New Game+ is a goal.
- You are positioned at the internal save point for chapter 10.
Before you move on
- The Ocean Palace aftermath is complete and the Epoch has its wings.
- Gaspar has provided the Chrono Trigger.
- Crono is restored if you want the fullest standard first-playthrough route.
- The Masamune repair and all other required story progression are complete.
- Robo was repaired and recruited during the mandatory Factory sequence.
- Optional preparation quests are complete or deliberately deferred.
- The Black Omen has been cleared from 1000 A.D.
- The earlier four-Panel save point has been distinguished from the later final five-Panel checkpoint.
- All five Panels in the final room have been defeated and the save point immediately before Queen Zeal has appeared.
- Queen Zeal, the Mammon Machine, the final Zeal battle, and the Black Omen Lavos-shell sequence are complete.
- The Gate and save point inside Lavos have been reached.
- A final preparation save exists before entering the inner Lavos battle.
References for this chapter
- The Black Omen - Chrono Trigger Walkthrough
- Chrono Trigger Walkthrough — The Black Omen
- Chrono Trigger — Guide and Walkthrough — Super Nintendo — By Super_Slash
- Chrono Trigger — Guide and Walkthrough — Super Nintendo — By Meowthnum1
- Chrono Trigger Walkthrough, Part 27: Reviving Crono at Death Peak, 2300 A.D.
- Chrono Trigger - Guide and Walkthrough - Super Nintendo - By vinheim
Facing Lavos — Boss Structure, Stage Strategies and Recovery
The original North American SNES release gives you several routes to Lavos. The Black Omen route provides the full late-game approach, while the End of Time bucket reaches the final battle directly and the Epoch can crash into Lavos from 1999 A.D. to bypass the copied-boss opening. The final encounter has three major sections: the outer shell and its copied bosses, the inner Lavos body with two arms, and the true Core formation. In the last formation, the Left Bit heals the central body and absorbs magic, the center body is a dangerous decoy, and the Right Bit is the Active Life target that must be destroyed to win. Keep separate saves because defeating Lavos at different story milestones changes the ending, and losing a normal Lavos battle produces the SNES bad ending rather than simply returning you to the fight.
Create final saves and prepare the party
Keep one save before entering the Black Omen and another at the latest safe point you can reach before the final battle. If you are testing alternate endings with the End of Time bucket or the Epoch, preserve a separate save before using the vehicle or bucket. This prevents an ending attempt from replacing your normal campaign position.
The Black Omen route is the dependable full-campaign route. The End of Time bucket sends you directly to Lavos, while the Epoch can reach 1999 A.D. and crash into Lavos. The Epoch crash skips the copied-boss opening, making it useful for alternate-ending attempts and faster retries. The bucket and ordinary Epoch approaches present the opening differently, so choose the route before committing to the battle.
There is no mandatory final party. Crono provides strong physical attacks and Luminaire. Marle supplies Cure, Haste, and Ice support. Lucca offers Flare and powerful area magic. Frog combines healing and physical damage. Robo provides Heal Beam and durable physical attacks. Ayla is a strong physical attacker, especially with Triple Kick. Magus has excellent magic, including Dark Matter, but does not provide party healing. A newcomer should bring at least one reliable healer and enough physical damage to handle magic-resistant targets such as the Left Bit.
Equip the strongest weapons, armor, and helmets available to the active party. Carry Full Tonics, Revives, and MP recovery items. Save MegaElixirs for the inner body and Core unless a copied boss or the shell itself forces you to use one.
- Save before the Black Omen or final approach in a separate slot.
- Equip the strongest available gear.
- Bring healing, revival, and MP recovery items.
- Confirm that the chosen party can deal both physical and magical damage.
- Preserve another save for ending experiments.
Choose the route into Lavos
The normal outer-shell route contains a sequence of copied bosses from earlier in the adventure. The sequence includes imitations of the Dragon Tank, Guardian, Heckran, Zombor, Masa and Mune, Nizbel, Magus, Azala and the Black Tyrano, and Giga Gaia. The battles are fixed rather than random. Use the tactics you learned against the original versions, but manage resources across the entire sequence instead of spending every powerful Tech immediately.
There are recovery opportunities between portions of the shell sequence. Heal after each copied battle when necessary, but use ordinary attacks and efficient Techs whenever they are sufficient. If a particular copied boss drains too much MP, reload the save before the final approach and conserve resources earlier rather than entering the inner forms depleted.
Crashing the Epoch into Lavos from 1999 A.D. bypasses the copied-boss sequence and brings the party into the shell directly. This is a legitimate SNES route, not a port-only feature. Use it when shortening an alternate-ending attempt, but use the bucket or the full Black Omen route when you want to preserve a particular final approach or presentation.
After the outer shell is defeated, use the save point and nearby time gate inside Lavos. Restore HP and MP, change the active party, and save before proceeding. This is the most useful retry checkpoint in the final sequence.
- Use the full copied-boss route for a first clear if you want the complete approach.
- Use the Epoch crash to bypass the copied bosses when intentionally testing endings.
- Heal between copied bosses rather than allowing the party to remain damaged.
- Save and restore at the interior save point before the inner forms.
Defeat the outer shell and copied bosses
The first section begins with Lavos's outer shell and continues through the copied-boss sequence if you entered by the bucket or the normal Epoch approach. The copied bosses use recognizable versions of their earlier battle patterns, so respond to their known weaknesses instead of treating the entire section as one new boss.
Do not spend Luminaire, Flare, Dark Matter, or your rarest recovery items automatically at the start. Strong physical attacks and lower-cost Techs are usually enough for routine portions. Heal whenever a copied boss leaves a character in danger, and revive fallen characters before moving into the next section.
If you are using the Epoch crash, the party enters the shell without fighting the copied opening sequence. The shell still must be cleared before the inner Lavos forms. Once the shell is defeated, take advantage of the save point and gate before moving forward. If the next attempt fails, reload this interior save rather than repeating the entire approach.
- Recognize and reuse the original tactics for copied bosses.
- Conserve high-cost Techs and rare restorative items.
- Heal before entering the next copied battle.
- Use the interior save point after the shell section.
- Do not confuse the copied shell sequence with the true Core battle.
Destroy both arms before attacking the inner head
The next form is a large Lavos body with a head and two arms. The head has very high defense while either arm remains active, so attacking the head immediately is inefficient. Concentrate on the arms first, in either order. The required condition is that both arms are gone before you commit to finishing the head.
Area Techs such as Luminaire, Flare, and Dark Matter can damage multiple parts, but focused attacks may conserve MP when one arm is already close to defeat. Crono, Frog, Ayla, and Robo can use physical attacks or physical Techs to reduce MP expenditure. Keep HP high because the form can inflict heavy damage and status effects.
After both arms are destroyed, the head becomes vulnerable. Switch to the strongest dependable attacks and combination Techs. Continue healing through its area attacks, and cure disabling status effects when they prevent a healer or primary attacker from acting. Status-protective equipment helps, but it does not replace watching HP.
If attacks against the head are producing negligible damage, stop targeting it and check whether an arm remains alive. The inner body is defeated only after both arms have been removed and the vulnerable head has been finished.
- Destroy both arms before focusing on the head.
- Use physical attacks when they conserve MP without sacrificing damage.
- Heal through the inner body's area attacks.
- Remove disabling status effects when they interfere with recovery.
- Attack the head only after its defense has dropped.
Defeat the true Core formation
The final formation has three parts arranged from left to right: the Left Bit, the center body, and the Right Bit. The center body looks like the obvious target, but it is not the required victory target. The Right Bit is the Active Life target and must be destroyed to end the battle.
Start with the Left Bit. It constantly heals the central Lavos body and absorbs magic, so use physical attacks or physical Techs against it. Do not waste elemental spells on the Left Bit. Defeating it quickly also prevents repeated healing and removes its ability to interfere with the party's status protection.
The Right Bit begins with extremely high defense and cannot be damaged effectively until another formation part has been destroyed. The Right Bit lowers its defense after either the Left Bit or the center body is destroyed. This is the attack window. Once the message indicates that Lavos's defense has been shut off or lowered, immediately use your strongest attacks against the Right Bit. Single-target physical attacks, powerful spells, and effective dual or triple Techs can all be used during this opening.
The center body is a dangerous attacker and can be defeated instead of the Left Bit to trigger the Right Bit's lowered-defense state. This is a valid alternative, but it is generally safer to remove the Left Bit first because the Left Bit heals the center body, absorbs magic, and can remove status immunities. If the center body is destroyed while the Left Bit remains, expect counterattacks and continue watching HP closely.
The Right Bit uses Active Life to revive fallen parts. It can revive the Left Bit, the center body, or both. Active Life does not necessarily restore the Right Bit's defense immediately, so continue attacking the Right Bit during the defense-lowered window. Once the message announces that its defense has been restored, repeat the cycle: remove the Left Bit or center body, wait for the defense drop, and attack the Right Bit.
When the formation returns, do not assume progress has been lost. Repeat the pattern. Remove the Left Bit with physical damage, or remove the center body if you deliberately chose that route, then concentrate on the Right Bit while its defense is lowered. When the Right Bit is destroyed, the other parts disappear and the battle is won.
- Begin with the Left Bit whenever possible.
- Use physical damage because the Left Bit absorbs magic.
- Remember that the Left Bit heals the center body.
- The Right Bit is the Active Life target and required victory target.
- The Right Bit lowers its defense after either the Left Bit or center body is destroyed.
- Attack the Right Bit immediately during the lowered-defense window.
- Repeat the cycle if Active Life revives fallen parts.
Recover from defeat and preserve ending options
A defeat in a normal Lavos battle does not simply return you to the previous room. In the original SNES game, losing a Lavos battle normally produces the bad ending, sometimes called the Apocalypse ending. Reload your pre-battle save if you want to continue the campaign or preserve a planned standard ending. The scripted Ocean Palace confrontation is a special exception: losing there continues the story rather than functioning as the ordinary bad-ending route.
If the copied-boss sequence consumes too many resources, reload the save before entering the final approach and use lower-cost attacks earlier. If the inner body is the problem, stop attacking the head until both arms are gone. If the Core is the problem, destroy the Left Bit with physical attacks, heal after major attacks, and focus on the Right Bit only when its defense is lowered.
The Ocean Palace scene where Lavos defeats the party is not the final battle. After Crono's death, continue the story, obtain the Chrono Trigger from Gaspar, and complete the Death Peak sequence if you want the Crono-present standard ending. Defeating Lavos after reviving Crono leads to Beyond Time and its variations. Defeating Lavos after the Black Omen appears but before reviving Crono leads to Reunion and its variations.
Recruiting Magus also changes later ending scenes. If you want the party-member variation, recruit him at North Cape instead of choosing the alternative confrontation. The route into Lavos matters as well: the bucket, ordinary Epoch approach, and Epoch crash can alter the presentation even when the story milestone is otherwise the same.
To obtain the SNES bad ending deliberately, allow the party to be defeated by Lavos during an ordinary Lavos battle, such as a bucket or final-approach attempt, then watch the resulting ending. Do not use this method if your goal is to preserve a completed campaign file. To obtain a standard victory ending, reload before the battle, win the Core fight, and ensure that the party is at the desired story milestone. The early victory-ending categories are also produced by defeating Lavos at their corresponding milestones, such as immediately after receiving the Hero Medal, recovering the Gate Key, repairing the Masamune, defeating Magus, or defeating Azala.
After a successful final victory, let the ending sequence finish and save the completed game when the game provides the completion save flow. Preserve that file before beginning New Game+ or testing another ending.
- Reload after an unwanted defeat; the normal result is the bad ending, not a standard retry screen.
- Remember that the Ocean Palace story defeat is a special exception.
- Revive Crono before the final victory for the Crono-present route.
- Recruit or defeat Magus according to the ending variation you want.
- Use separate saves for bucket, Epoch, and Epoch-crash tests.
- Save the completed campaign before beginning New Game+.
Before you move on
- The copied-boss sequence has been cleared if the bucket or ordinary Epoch approach was used.
- The outer shell has been defeated.
- Both arms of the inner Lavos body have been destroyed before the head is finished.
- The inner head has been defeated after its defense dropped.
- The Left Bit has been removed with physical damage or the center body has been deliberately used to trigger the defense cycle.
- The Right Bit has been attacked during a defense-lowered window.
- Any Active Life revival cycle has been repeated correctly if necessary.
- The Right Bit has been destroyed and the ending sequence has begun.
- The intended Crono and Magus conditions are in place for the chosen ending.
- The completed game has been saved before beginning New Game+ or another ending attempt.
References for this chapter
- Chrono Trigger/The Final Battle - StrategyWiki
- Chrono Trigger - Guide and Walkthrough - Super Nintendo - New Game+ requirements and ending conditions
- Chrono Trigger - Guide and Walkthrough - Super Nintendo - Black Omen and New Game+ route
- Chrono Trigger — Guide and Walkthrough by Dev, Super Nintendo
- Chrono Trigger — Ending Guide — Super Nintendo — GameFAQs
- Chrono Trigger Endings — Thonky
- Chrono Trigger — Super Nintendo instruction manual
Standard SNES Endings — How Endings Are Determined and a Practical Route List
In the North American SNES version of Chrono Trigger, the ending is determined by the story milestone recorded when Lavos is defeated. The cartridge has twelve standard victory-ending categories, plus a defeat-only bad ending. Most early endings require New Game Plus because a normally equipped first-playthrough party is not expected to defeat Lavos before the late game. The practical method is to protect the first campaign save, make milestone saves during New Game Plus, and use the End of Time bucket, the right-hand Telepod, or the Epoch to reach Lavos from the desired point in the story.
Protect the campaign file and create ending-hunt saves
The ending is selected when Lavos is defeated, not from a menu afterward. For the first playthrough, complete the campaign normally and preserve the save made before the final approach. The recommended full-campaign result is obtained after completing the late-game preparations and reviving Crono at Death Peak. Clearing the Black Omen first is the dependable preparation route, although Black Omen completion is not required merely to challenge Lavos or obtain every late-game ending variation.
Do not overwrite the completed campaign file before confirming New Game Plus. After the ending finishes, return to the title screen and verify that New Game Plus is available. Start it from the protected clear file, then use a separate working slot for ending attempts. Useful saves include one before the Ocean Palace sequence, one before the Death Peak revival, and one after Crono has been revived. A save before the North Cape decision is useful for comparing the Magus and Frog-related presentation differences.
The End of Time bucket is the normal shortcut to Lavos after the party reaches the End of Time. In New Game Plus, the right-hand Telepod at the Millennial Fair provides an immediate Lavos route. After obtaining the Epoch, flying to 1999 A.D. provides another direct route. These are access methods, not separate ending categories.
- Protect the ordinary campaign save before starting New Game Plus.
- Confirm that New Game Plus appears on the title screen after the qualifying victory.
- Keep separate working saves for early, middle, and late story milestones.
- Save before and after the Death Peak revival if you want to compare Beyond Time and Reunion.
- Treat the Telepod, bucket, and Epoch as routes to Lavos rather than additional endings.
Beyond Time and Reunion: the principal late-game results
Beyond Time is the principal completed-campaign result. Revive Crono at Death Peak, finish the remaining preparation, and defeat Lavos. The ending can show different scenes depending on completed optional events, party status, and the route used to enter the final battle, but those changes are variations of the late-game result rather than additional standard SNES categories.
Reunion is obtained by defeating Lavos while Crono remains dead. Keep a save before using the Chrono Trigger at Death Peak. From one copy, complete the revival and defeat Lavos for Beyond Time. From the other, leave Crono unrecovered and proceed to Lavos for Reunion. The battle can be reached through the bucket, Epoch, or another valid route; the defining condition is Crono’s status when victory occurs.
Magus recruitment, Epoch use, optional character events, and other scene changes can alter portions of the ending presentation. Do not count those differences separately. The SNES list counts the standard ending categories, not every variation in the final scenes.
- Revive Crono before victory for Beyond Time.
- Leave Crono dead before victory for Reunion.
- Keep separate saves before the Death Peak decision.
- Count Epoch, Magus, and optional-event differences as variations, not extra endings.
The earliest New Game Plus endings
The Dream Project is the earliest practical New Game Plus ending. Start New Game Plus, return to the Millennial Fair, and use the right-hand Telepod before progressing through the opening sequence. Depending on the opening dialogue and party state, the battle may begin with Crono and Marle or with Crono alone. Carried-over equipment and levels make this route possible, but Lavos remains dangerous. The same category can be reached by winning the first Ocean Palace Lavos confrontation, although that route is much less forgiving.
The Successor of Guardia is obtained by using the right-hand Telepod after returning from the opening trip to 600 A.D., before continuing into the normal route toward the End of Time. Make the attempt from a fresh New Game Plus working save so that a failed battle does not destroy the file used for later endings.
Good Night is obtained after first reaching the End of Time and before the story has advanced to the later Middle Ages milestones. Use the bucket to challenge Lavos as soon as the relevant End of Time access is available. Reload the source save afterward if you are using that file to continue toward another ending.
- Use the right-hand Telepod immediately after beginning New Game Plus for The Dream Project.
- Use the right-hand Telepod after the opening 600 A.D. return, before continuing the normal progression, for The Successor of Guardia.
- After reaching the End of Time, use the bucket before advancing farther into the Middle Ages story for Good Night.
- Reload the source save after each ending attempt.
The 600 A.D. and early-prehistory milestones
Legendary Hero is the earliest ordinary-story checkpoint. Progress through the 600 A.D. events until Tata has been established as the supposed Legendary Hero, but defeat Lavos before taking the Hero Medal from Tata. Save before collecting the medal if you want a reliable retry point.
The Unknown Past begins after obtaining Tata’s Hero Medal and ends when the Gate Key is stolen in Prehistory. Defeat Lavos after taking the medal and before the prehistoric theft occurs. This is the corrected boundary: the Gate Key theft has not yet happened when The Unknown Past is obtained. In a normal story route, this means using the bucket or another available Lavos route after the Tata sequence but before advancing through the prehistoric events that lead to the Gate Key theft.
People of the Times is the next window. Recover the stolen Gate Key in 65,000,000 B.C., then defeat Lavos before giving the repaired Masamune to Frog. A practical save is made after returning with the Gate Key and before the Masamune storyline advances. Do not substitute merely reaching Prehistory or recruiting Ayla for this checkpoint; the recovered Gate Key is the important milestone.
The Oath begins after the Masamune has been repaired and given to Frog, with Frog recruited into the active story, but before opening the Magic Cave. Defeat Lavos during this interval. If the Magic Cave has already been opened, reload the earlier Masamune save or use a New Game Plus attempt.
- After Tata is identified as the hero and before receiving the Hero Medal: Legendary Hero.
- After receiving the Hero Medal and before the Gate Key is stolen in Prehistory: The Unknown Past.
- After recovering the Gate Key and before giving the repaired Masamune to Frog: People of the Times.
- After giving Frog the repaired Masamune and before opening the Magic Cave: The Oath.
The Magus, Azala, and pre-Ocean Palace windows
Dino Age begins after defeating Magus and before confronting Azala at the Tyranno Lair. Once Magus has been defeated, return to the relevant prehistoric route and use the bucket or another Lavos access method before starting the Azala sequence. Do not wait until after the Tyranno Lair confrontation, because the story has then advanced into the next ending window.
What the Prophet Seeks begins after defeating Azala and before the Ocean Palace Lavos sequence. Preserve a save after the Azala and Black Tyrano events if you want to attempt this ending without repeating the entire prehistoric section. The route to Lavos can use the End of Time bucket or, once available, the Epoch.
A Slide Show, also called Memory Lane in some later naming conventions, begins after Schala opens the sealed door and before Marle’s Pendant is charged at the Mammon Machine. Do not charge the Pendant before making this attempt. This is a narrow late-pre-Ocean-Palace window, so keep a separate save immediately after Schala opens the door.
The Dream Project also has the special first-Ocean-Palace route: win the scripted Ocean Palace Lavos confrontation instead of using the early Telepod route. This is a valid way to see the category but is generally harder than using the right-hand Telepod in New Game Plus.
- After defeating Magus and before confronting Azala: Dino Age.
- After defeating Azala and before the Ocean Palace Lavos sequence: What the Prophet Seeks.
- After Schala opens the sealed door and before charging Marle’s Pendant: A Slide Show or Memory Lane.
- Winning the first Ocean Palace Lavos battle is another route to The Dream Project.
The twelve standard SNES victory categories
The twelve standard victory categories in the original SNES scope are Beyond Time, Reunion, The Dream Project, The Successor of Guardia, Good Night, Legendary Hero, The Unknown Past, People of the Times, The Oath, Dino Age, What the Prophet Seeks, and A Slide Show.
Beyond Time and Reunion are late-game results distinguished primarily by whether Crono has been revived before victory. The other categories come from defeating Lavos at earlier story milestones or through the special New Game Plus Telepod route. Epoch entry, Magus recruitment, optional quests, party composition, and related scene changes modify presentation but do not create additional standard categories.
The original SNES cartridge does not contain Dream’s Epilogue or the later bonus-dungeon content. Those belong to later versions and should not be added to the twelve-category SNES list.
- Count twelve standard SNES victory categories.
- Keep Beyond Time and Reunion separate from their scene variations.
- Do not count Epoch or Magus presentation differences as extra categories.
- Exclude Dream’s Epilogue and later-port bonus content.
The bad ending and a safe repeatable routine
Losing to Lavos produces the defeat-only bad ending, commonly associated with the future remaining unchanged. It is not one of the twelve victory categories. If you want to view it, use a disposable save and reload the pre-battle file afterward. For ordinary retries, change the party, equipment, restorative items, and Tech usage rather than abandoning the ending attempt.
A convenient New Game Plus hunting order is The Dream Project, The Successor of Guardia, Good Night, Legendary Hero, The Unknown Past, People of the Times, The Oath, Dino Age, What the Prophet Seeks, and A Slide Show. Beyond Time and Reunion are best handled from protected late-game saves. This order is only a convenience; the important practice is preserving each source save before the ending battle.
After each victory, let the ending finish and return to the title screen. Reload the appropriate source file rather than saving over the completed campaign or the New Game Plus file that contains the carried-over equipment. New Game Plus preserves character levels, learned Techs, and much of the equipment and inventory, while money and story progression do not carry over in the same way. You must repeat the opening and acquire the story milestones needed for each ending window.
- Keep the defeat-only bad ending separate from the twelve victory endings.
- Confirm New Game Plus before beginning the ending collection.
- Use a fresh working save for every ending attempt.
- Reload the relevant milestone save after viewing an ending.
- Do not overwrite the completed campaign or the New Game Plus source file.
Before you move on
- The first full campaign ends with Lavos defeated after Crono is revived, producing Beyond Time or a valid late-game variation.
- The completed campaign remains protected and New Game Plus is selectable from the title screen.
- A separate save exists before Death Peak or the final approach for comparing Beyond Time and Reunion.
- The ending hunt uses the twelve standard SNES victory categories and excludes later-port content.
- The Unknown Past save is after receiving Tata’s Hero Medal but before the Gate Key is stolen.
- The People of the Times save is after recovering the Gate Key but before giving the repaired Masamune to Frog.
- The Oath save is after giving Frog the repaired Masamune but before opening the Magic Cave.
- The Dino Age save is after defeating Magus but before confronting Azala.
- Any Epoch, Magus, party-status, or optional-quest differences are tested as variations from separate saves.
References for this chapter
Unlocking New Game+ and Using It to Collect Other Endings
In the original North American Super Nintendo release, New Game+ becomes available after you complete the Black Omen, defeat Lavos through that route, watch the ending, and reset to the title or file-selection screen. The game does not create a post-Lavos world in which you can continue playing. Instead, preserve an ordinary in-game save made before the final battle. After the clear, that save remains associated with the completed campaign for New Game+ purposes, but loading it returns you to the exact location and story state where you saved before confronting Lavos. New Game+ then starts the story over while carrying over combat progress such as levels, learned Techs, ordinary inventory, and much of your equipment. Story flags, money, recruitments, vehicles, and progression key items reset. The additional Gate in the right-hand Telepod at the Millennial Fair provides a fast route to Lavos for alternate-ending attempts.
1. Complete the Black Omen before the clear
For the original SNES version, finish the Black Omen and defeat its required bosses before defeating Lavos if you want the dependable New Game+ unlock. The Black Omen is the floating fortress raised by Queen Zeal. Enter it after it becomes available, complete the dungeon, defeat Queen Zeal, and continue into the Lavos battle that follows.
This requirement applies to the New Game+ feature, not to every possible ending. The game lets you reach Lavos through other methods, including the bucket at the End of Time, the Epoch at the Day of Lavos, and the additional Gate that appears in the right-hand Telepod after New Game+ is unlocked. Those routes are useful for ending collection, but for a first clear intended to unlock New Game+, use the Black Omen route.
Before entering the final Lavos sequence, make a normal in-game save at a save point. Do not depend only on an emulator save state or a temporary hardware state. The ordinary save is the source file New Game+ will copy, and it is also the file you will reload if you want to continue the original campaign from before the final battle.
You do not need to complete every optional character quest before defeating Lavos. The Black Omen must be completed, but the other late-game side quests are not required merely to activate New Game+.
- Complete the Black Omen.
- Defeat Lavos after completing the Black Omen.
- Make an ordinary in-game save before the final battle.
- Keep the source save in a separate slot from any experimental files.
2. Understand the clear save and reset process
After defeating Lavos, let the ending play through to its final screen. The SNES release does not turn your campaign into a post-game free-roam file. There is no new location after the ending from which to resume the story. When you later load the ordinary save used for the final attempt, the party returns to the location, equipment, inventory, and story position recorded at the last pre-final save point.
The clear is associated with the completed campaign, allowing the file to be used as the source for New Game+. This means the correct source is an ordinary save made before Lavos, not a special post-Lavos save and not a file created after the credits. If your last normal save is outside the Black Omen or immediately before the final battle, that is the file you should select when creating the new run.
Once the ending has finished, reset the SNES and return to the title or file-selection screen. New Game+ should appear beside the ordinary New Game option. Select New Game+, then choose the completed campaign save whose combat data you want to copy. Save the new run to a different destination slot. Do not overwrite the only copy of your original campaign until you have confirmed that the new file starts correctly.
- Watch the ending through its final screen.
- Reset to the title or file-selection screen.
- Confirm that New Game+ is listed.
- Select the ordinary source save from before the final battle.
- Use a separate destination slot for the new run.
- Remember that loading the source file returns you to its last pre-Lavos save point.
3. Know what transfers and what resets
New Game+ preserves the combat progress represented by the selected source file. Character levels and learned Techs carry over, along with ordinary consumable inventory and much of the party’s weapons, armor, helmets, and accessories. This makes early battles much easier and removes the need to repeat normal level grinding before attempting an alternate Lavos ending.
Money does not carry over. Story progression resets completely, so you must replay the Millennial Fair opening, send Marle to 600 A.D., recover the Gate Key, visit the End of Time, recruit the party again, and obtain the Epoch through the normal story. Gates and vehicles are not available until their story events occur.
Progression key items must be obtained again. Treat the Masamune, the Gate Key, the Epoch-related items, the Pendant upgrades, and similar story objects as unavailable until the new run reaches their required scenes. Story-linked equipment may also be excluded or unavailable until the related character or event returns. Do not sell useful early equipment simply because you expect every item to transfer.
Characters retain their transferred levels when they become available, but level does not bypass recruitment scenes. Crono is still the only active character at the beginning, Marle still joins through the Telepod incident, and later characters still require their normal story introductions. Reopen the equipment menu whenever a character joins and assign the strongest transferred gear that is currently usable.
- Expect levels and learned Techs to remain.
- Expect many ordinary items and combat equipment to remain.
- Expect money to reset to zero or the new run’s starting amount.
- Expect story flags, recruitments, vehicles, Gates, and progression key items to reset.
- Re-equip characters when they rejoin the party.
4. Reach the additional Telepod Gate
Replay the opening until Lucca’s Telepod demonstration is ready at Leene Square. In New Game+, a sparkling point appears on the right-hand Telepod. Examine that sparkling point to open a Gate directly to Lavos. This is distinct from the Telepod used in the normal opening sequence, which sends Marle to 600 A.D.
The story state when you use this Gate determines the early-ending variation. If you enter it before Marle has joined the opening sequence, Crono fights alone. If you allow Marle to join and then use the sparkling right-hand Telepod, Crono and Marle enter together. The two-character attempt is the safer first test because Marle provides healing through Aura and can use restorative items while Crono attacks.
Before examining the sparkling point, equip the available characters and carry restorative items. Preserved levels and equipment make the battle practical, but Lavos remains a full final encounter with multiple forms. If the solo version is unreliable, reload the opening save, allow Marle to join, and use the Gate with both characters.
Defeating Lavos through this early Gate immediately produces an alternate ending based on the opening story state. After viewing it, reset and begin another New Game+ attempt or reload a preserved milestone save if you are working through a longer ending route.
- Reach Lucca’s Telepod demonstration in New Game+.
- Find the sparkling point on the right-hand Telepod.
- Decide whether Crono will fight alone or with Marle.
- Equip the active party and carry recovery items.
- Defeat Lavos and record the ending produced by that story state.
5. Use New Game+ for later ending windows
New Game+ is a replay with carried-over combat power, not a chapter-select menu. You still begin at the Millennial Fair and must repeat the story until the desired Lavos access point is available. The right-hand Telepod is the fastest route for many tests because it remains available at the Fair once New Game+ has been started.
For later endings, save at ordinary save points after major story milestones and keep each planned route in a separate slot. Examples of useful milestones include reaching the End of Time, completing the early Middle Ages sequence, obtaining the Hero’s Badge, recovering the Gate Key in Prehistory, repairing the Masamune, defeating Magus, and advancing through the Zeal storyline. The ending is determined by when and how Lavos is defeated, so record the last completed event rather than using a vague label such as “mid-game.”
Some ending windows can be reached in a normal campaign without New Game+, but the party may be too weak to defeat Lavos at that point. New Game+ solves the combat problem by preserving levels and equipment while leaving the story flags at the selected point. Keep the original completed campaign untouched and use separate slots for milestone saves.
If you lose to Lavos, reload the save before entering the Telepod Gate or the relevant access route. Change equipment, bring more restorative items, or use the two-character route instead of the solo route. A defeat does not consume the ending opportunity; it only returns you to the save made before the attempt.
- Save after each meaningful story milestone.
- Record the last event completed before each Lavos attempt.
- Use separate slots for different ending routes.
- Keep the original campaign and its pre-final save intact.
- Reload after a defeat and adjust equipment or party composition.
6. Prepare efficiently before starting the first New Game+
Before finishing the first campaign, organize useful consumables and equipment on the save you intend to copy. Because money resets, carried-over items are more immediately useful than a large gold total. You may spend surplus money on supplies before the final clear, but this is preparation rather than a requirement.
A safe first New Game+ test is the right-hand Telepod after Marle has joined. This gives you two characters and lets you confirm that the clear data and transferred combat progress are working. Once that battle is comfortable, start another run and use the Gate earlier for the solo Crono variation.
Newly recruited characters keep their transferred combat progress when they become available, but they still learn or regain access to story-controlled Tech progression through the new campaign. Visit the End of Time when the story opens it, use its save point as a checkpoint, and take advantage of the available party and Tech management there.
For a broad SNES ending collection plan, first secure the early right-Telepod endings, then create milestone saves as you replay toward the major story flags. You do not need to repeat the Black Omen for every alternate-ending attempt once New Game+ is unlocked. The Black Omen requirement is for establishing the SNES New Game+ feature; later attempts can use the fastest Lavos access available at the desired story point.
- Organize useful gear and consumables before the first clear.
- Do not rely on carried-over money.
- Start with the two-character right-Telepod attempt if the solo battle is unsafe.
- Use End of Time save points as replay checkpoints.
- Use milestone saves to reduce repeated story sections.
- Do not repeat the Black Omen unless you want its battles, treasures, or experience.
Before you move on
- The Black Omen was completed during the source campaign.
- Lavos was defeated after the Black Omen clear.
- An ordinary in-game save exists from before the final battle.
- The ending was watched through its final screen and the system was reset.
- New Game+ appears on the title or file-selection screen.
- The new run begins at the Millennial Fair with the selected save’s combat data transferred.
- The sparkling Gate is present on the right-hand Telepod during Lucca’s demonstration.
- At least one alternate-ending attempt has been completed and its preceding story milestone is recorded.
- The original campaign save remains available and still returns to its last pre-Lavos save point when loaded.
References for this chapter
- Chrono Trigger - Guide and Walkthrough - Super Nintendo - New Game+ requirements and ending conditions
- The Black Omen - Chrono Trigger Walkthrough
- Chrono Trigger — Endings
- Chrono Trigger/The Black Omen - StrategyWiki
- Chrono Trigger - Guide and Walkthrough - Super Nintendo - Black Omen and New Game+ route
Optional Completion Goals — 100% Story Flags vs Just the Campaign
The original North American SNES release has a focused group of optional quests rather than the later-port bonus dungeons. A satisfying first completion should include the main recruitments, the repaired Masamune, Crono’s revival if you want the standard full-party campaign, the major Fated Hour quests, the Black Omen, and Lavos. A stricter completion route adds Ozzie’s Fort, sealed-chest upgrades, hidden tabs, optional equipment, character scenes, and both the useful and narrative rewards from the late-game quests. Because the Rainbow Shell forging sequence makes you choose between Prism Helms and a PrismDress, a single SNES run cannot collect every version of every reward.
Choose a completion target before starting the late-game quests
For the minimum satisfying SNES run, recruit Robo, Frog, and Ayla; complete the story repairs to the Masamune; finish the Ocean Palace aftermath; revive Crono at Death Peak if you want him available for the final campaign; defeat Lavos; and confirm New Game+ on the title screen. Magus is optional. If you spare him at North Cape, he joins; if you fight him to the end, he remains absent and the story continues by the alternate route.
For a high-priority optional run, also complete the Sun Stone, Rainbow Shell, Northern Ruins, Fiona’s Forest, Geno Dome, Sunken Desert, and Ozzie’s Fort quests. These are not all required to reach Lavos, but they provide the strongest character equipment, useful accessories, permanent upgrades, and substantial character scenes. Gaspar’s Fated Hour hints identify the main late-game quest group, but they may be completed in several orders.
- Recruit Robo, Frog, and Ayla.
- Decide whether to recruit Magus or leave him defeated.
- Complete Death Peak if you want Crono restored for the standard full-party route.
- Plan separate save slots before reward choices and before long optional dungeons.
Use a practical order for the major optional quests
A dependable order is Fiona’s Forest and the Sunken Desert when their trigger is available, followed by the Sun Stone, Northern Ruins, Rainbow Shell, Ozzie’s Fort, and Geno Dome. The exact order is flexible, but completing the Sun Stone before the Rainbow Shell gives the best combined forging result. Finish the Black Omen after the side quests if you want its encounters and equipment to serve as your final preparation before Lavos.
For Fiona’s Forest, make sure the sapling in 12,000 B.C. was preserved rather than discarded. In 600 A.D., visit Fiona’s villa east of Dorino and enter the Sunken Desert south of the villa. Defeat Retinite, then return to the first desert room and collect the Power Tab that appears after the battle. Leave the desert, put Robo in the active party, and speak with Fiona so Robo volunteers to restore the forest. Travel to 1000 A.D., enter Fiona’s Shrine, and follow the northern path to find Robo and trigger the forest and Lucca scenes. After the scene, speak with Robo to receive the GreenDream accessory.
For the Sun Stone, visit the Sun Keep in 2300 A.D. and follow Gaspar’s clue through the earlier eras until the Moon Stone has absorbed enough sunlight. Return the charged Sun Stone to Lucca’s house. Lucca receives the Wondershot and Taban provides the Sun Shades. Completing this quest before the Rainbow Shell allows Melchior to forge Crono’s Rainbow sword and the PrismSpecs later.
- Preserve the 12,000 B.C. sapling if pursuing Fiona’s Forest.
- Defeat Retinite and collect the post-battle Power Tab.
- Bring Robo to Fiona after the desert battle.
- Complete the Sun Stone before the Rainbow Shell if you want the combined forging rewards.
Complete the Rainbow Shell and Northern Ruins routes
For the Rainbow Shell, speak with Toma in the Choras Cafe after the quest becomes available. Follow the clues to the Giant’s Claw in 600 A.D., travel through the ruined facility, defeat the boss, and recover the Rainbow Shell. Return to Guardia Castle in 1000 A.D. The courtroom sequence exposes the Chancellor’s plot and leads to the Yakra XIII battle. Afterward, visit the castle treasury and speak with Melchior.
Melchior forges either three Prism Helms or one PrismDress. Save before the choice if you want to preserve the file and compare the alternatives. If the Sun Stone quest is complete, Melchior also creates the Rainbow sword and PrismSpecs. The sword and accessory are separate from the armor choice, so completing both quests is the reliable way to obtain that equipment combination.
For the Northern Ruins, enter the ruins in 600 A.D. with Frog available, then speak with the carpenter in Choras and arrange the repairs by dealing with the carpenter’s related work in the present era. Return to the ruins in 600 A.D. as the repairs progress, then revisit the completed ruins in 1000 A.D. Finally, return to the 600 A.D. ruins with Frog and proceed to Cyrus’s grave. This completes Frog’s character quest, upgrades the Masamune, and opens the associated weapon and armor rewards in the two versions of the ruins.
- Recover the Rainbow Shell from the Giant’s Claw.
- Complete the Yakra XIII sequence in Guardia Castle.
- Save before Melchior’s Prism Helm or PrismDress choice.
- Finish the Northern Ruins with Frog and obtain the upgraded Masamune.
Add Ozzie’s Fort and Geno Dome for equipment and character content
Ozzie’s Fort is on the island east of the Black Omen in 600 A.D. Enter the fort and follow Ozzie’s trap-filled route through the battles with Flea and Slash, then the later confrontation with Ozzie’s remaining forces. This optional dungeon provides Magus-focused equipment, including the DoomSickle, Gloom Helm, and Gloom Cape, along with other useful rewards. Magus is the natural party member for its story context, but the dungeon is not part of the required route to Lavos.
For Geno Dome, travel to 2300 A.D. and enter the active dome on the island. Put Robo at the head of the party before entering. Activate the computer, ride the conveyor routes, and solve the power and charge-pod sections until Robo’s past and Atropos XR are reached. Continue through the factory and defeat Mother Brain. The rewards include Robo’s Crisis Arm, the Teraton Arm, the Atropos Ribbon, tabs, and other late-game equipment. Save before entering because the dungeon is long and its conveyor puzzles are easier to redo from a nearby file than from the beginning.
- Complete Ozzie’s Fort if you want Magus’s strongest SNES equipment.
- Place Robo at the front before entering Geno Dome.
- Defeat Atropos XR and Mother Brain.
- Equip the Crisis Arm and consider the Atropos Ribbon before the final dungeons.
Collect sealed-chest upgrades and optional rewards without confusing them with required progress
Sealed chests and sealed doors become accessible after the party obtains the necessary pendant power. When a sealed chest exists in both a later and an earlier era, examine the later-era chest first, decline to take the item, then travel to the earlier era and open it. Return to the later era afterward to claim the upgraded version. This is a general method for improving several armor and weapon rewards; it is not necessary for story completion.
Hidden tabs and optional equipment are worthwhile if you are pursuing a stronger final party, but do not turn every item into a mandatory objective. The Sunken Desert’s post-battle Power Tab, the Geno Dome’s tabs and equipment, the Northern Ruins rewards, and Ozzie’s Fort’s Magus gear are the most useful targets. Keep separate saves before long dungeons and before the Rainbow Shell reward choice.
The Black Omen is the recommended final optional dungeon. It can be entered from eligible late-era locations and contains several major battles, equipment opportunities, and restorative points. Save before entering, carry a full supply of curatives, and treat it as the last large preparation step before Lavos. It is possible to reach Lavos without clearing it, so its absence does not mean the campaign is broken.
- Use the pendant-era method for sealed-chest upgrades.
- Collect the Sunken Desert Power Tab after defeating Retinite.
- Finish the Northern Ruins, Geno Dome, and Ozzie’s Fort if pursuing high-priority gear.
- Save before entering the Black Omen.
- Clear the Black Omen before the final Lavos attempt if you want the thorough completion route.
Keep later-port content out of the SNES checklist
The 1995 North American SNES cartridge does not contain the Lost Sanctum, Dimensional Vortex, or Dream Devourer. Those areas and the additional post-game material belong to later releases, beginning with the Nintendo DS version and ports based on it. Do not follow instructions involving green portals, Lost Sanctum villages, dimensional dungeons, or the later additional final boss.
The PlayStation release added presentation material such as animated scenes, while later versions added further gameplay content. None of those additions is required for the SNES completion target. For the cartridge version, stop the optional-content checklist after the original Fated Hour quests, sealed-item upgrades, Black Omen, Lavos, and the alternate endings available through New Game+.
- Do not count Lost Sanctum toward SNES completion.
- Do not count Dimensional Vortex or Dream Devourer toward SNES completion.
- Ignore later-port arenas, galleries, and added bestiary features.
- Use SNES-specific instructions for equipment, endings, and New Game+.
Before you move on
- Robo, Frog, and Ayla are recruited, and Magus has been either recruited or deliberately left defeated according to the chosen route.
- Crono has been revived at Death Peak if pursuing the standard full-party campaign.
- The Masamune’s main-story repair is complete; the Northern Ruins upgrade is also complete if pursuing the high-priority optional route.
- The Sun Stone, Rainbow Shell, Fiona’s Forest, Sunken Desert, Geno Dome, Northern Ruins, and Ozzie’s Fort goals are complete if pursuing the recommended optional route.
- The Rainbow sword and PrismSpecs were obtained if the Sun Stone and Rainbow Shell quests were both completed; the Prism Helm or PrismDress choice was recorded separately.
- The Black Omen has been cleared if pursuing the thorough final preparation route.
- Lavos has been defeated and New Game+ is available from the completed save.
- No claimed completion objective depends on Lost Sanctum, Dimensional Vortex, Dream Devourer, or another later-port feature.
References for this chapter
- Chrono Trigger - Guide and Walkthrough - Super Nintendo - New Game+ requirements and ending conditions
- Chrono Trigger/Fiona's Forest — StrategyWiki
- The Sunken Desert - Chrono Trigger Walkthrough
- The Rainbow Shell - Chrono Trigger Walkthrough
- Chrono Trigger - Guide and Walkthrough - Super Nintendo - Black Omen and New Game+ route
- All Side Quests & Their Rewards | Chrono Trigger
- Chrono Trigger — Versions and added content
Troubleshooting Common Failure Points and Recovery Strategies
Late-game setbacks in the original North American Super Nintendo release are usually solved by changing target priority, equipment, party roles, and resource use rather than by grinding without a plan. Keep separate saves for the campaign and ending experiments, use the End of Time as a preparation hub, and complete the Black Omen before the intended first clear if you want the dependable original-SNES New Game+ route.
1. Protect the campaign before late-game attempts
Use separate save files for the ordinary campaign and for ending experiments. Keep one save before entering the Black Omen and another at the save point reached after defeating the Lavos shell inside the Black Omen route. That inner save is especially useful because it provides a Gate back to the End of Time. You can leave, change the party, restock, and return when ready.
Do not treat every Lavos entry method as the same progression route. The bucket at the End of Time and the Epoch can send the party directly into a Lavos battle and can produce alternate endings. For the dependable first-clear route on the original SNES release, finish the Black Omen, defeat Queen Zeal and the Black Omen encounters, then continue through the Lavos sequence.
On original hardware, reserve the three cartridge save slots deliberately. A practical arrangement is one campaign file, one late-game retry file, and one file for experimental endings. If an ending attempt begins before you are ready, reload the campaign or retry file rather than overwriting it.
- Save before entering the Black Omen.
- Preserve the save point inside the Lavos shell route.
- Use the completed Black Omen route for the intended first clear.
- Keep a separate file for early-Lavos ending experiments.
2. Recover from Ocean Palace trouble
The Ocean Palace can drain HP and MP through repeated battles before its major story encounters. Before entering, heal completely, carry restorative items, and save in a separate slot. Use area Techs only when a group is dangerous or numerous; ordinary attacks are often enough for weaker encounters. If a character is repeatedly defeated by one attack, change armor or accessories before attempting to gain several more levels.
A reliable group-healing option is valuable. Marle provides broad healing and Haste, Robo can provide Cure Wave after learning it, and Frog offers another durable healing choice. Bring at least one character who can restore the whole party or use items when a long sequence is approaching.
If you are defeated inside the Ocean Palace sequence, reload the save made before entering rather than assuming that the story sequence can be safely abandoned. If you are lost, return to the most recent room with a switch, elevator, or door connection and check nearby mechanisms before walking into more encounters. The palace advances through linked doors, lifts, and switches; repeated wandering usually costs resources without solving the route.
- Save before entering the Ocean Palace sequence.
- Restore HP and MP before long rooms or elevator sections.
- Keep one dependable party-wide healing option.
- Change equipment when one attack repeatedly defeats the same character.
- Reload the pre-entry save after a failed attempt if resources are exhausted.
3. Survive the Black Omen’s enemy waves
The Black Omen is a long dungeon, so conserve MP during routine encounters and use normal attacks when they are safe. Reserve strong area Techs for crowded groups and dangerous formations. Heal before boss rooms rather than waiting until the party is nearly defeated, and use Ethers or Turbo Ethers before a caster reaches an empty MP bar.
Aliens counter physical attacks with a dangerous instant-death response. Use magic or another safe attack method against them instead of repeatedly striking them with ordinary weapons. Watcher encounters can disable Tech and Item commands with Omnilock, so respond with normal attacks while the restriction is active and do not waste turns repeatedly selecting unavailable commands.
Giga Mutant has extremely high physical defense, including against attacks with a physical component. Use magic-only Techs or magic-focused Dual and Triple Techs. Magus is useful here, as are Lucca’s and Marle’s magic combinations. The upper body can drain MP when struck by magic, so monitor your casters and use restorative items before the fight becomes a resource contest. Against Tera Mutant, focus on the upper section with single-target Techs; the lower section is highly defensive and can reduce a character to 1 HP.
If a Black Omen boss defeats you, identify the attack that caused the loss, replace a purely offensive accessory with defensive protection, and change the target order on the next attempt. Leaving through the Gate after the Lavos shell and returning to the End of Time is preferable to continuing with empty MP and no recovery items.
- Use normal attacks against safe routine encounters.
- Use magic rather than physical attacks against Aliens.
- Respond to Omnilock with normal attacks until Techs and Items are available again.
- Use magic-focused damage against Giga Mutant.
- Target Tera Mutant’s upper section first.
- Restock before repeating a failed Black Omen attempt.
4. Adjust tactics during the Lavos sequence
When the party reaches Lavos through the Black Omen, the first inner battle presents Lavos as a head with two arms. The head begins with very high defense, so do not waste your strongest attacks on it immediately. Destroy the arms first. The right arm can restore the body’s HP, making it the first priority; defeating both arms removes the main obstacle to damaging the head. Once the game indicates that the main body is engaged, attack the head with your strongest available Techs while healing after major party-wide attacks.
After the inner Lavos form falls, the party reaches the Lavos Core. A save point and a Gate to the End of Time are available before the final battle. Use them. If the party is low on MP, missing important equipment, or carrying the wrong characters, leave, prepare, and return. This is the safest late-game recovery point.
The Core has a left bit, a center body, and a right bit. The left bit absorbs magic and can remove status protection, so eliminate it with a strong physical attack or physical Tech. Once the left bit or center body is defeated, the right bit lowers its defense while preparing to revive the fallen parts. Use that opening to damage the right bit, which is the actual victory target. The center body is also dangerous, so attack it when necessary to control the battle, but remember that destroying the right bit ends the encounter. If the right bit revives the others, repeat the pattern: remove the left bit, wait for the right bit’s defense to drop, then concentrate damage on the right bit.
- Destroy both arms before concentrating on Lavos’s head.
- Prioritize the right arm because it can restore the body’s HP.
- Use the save point and Gate before the final Core battle.
- Use physical damage against the left bit.
- Attack the right bit during its lowered-defense interval.
- Remember that destroying the right bit ends the Core battle.
5. Use the End of Time and Spekkio before retrying
If a boss continues to defeat the party, leave the dungeon when the route permits and return to the End of Time. Change the active party, check equipment, and confirm that the characters you plan to use have their intended healing, support, and damage Techs. Do not assume that one universal party is required.
Spekkio is useful for checking elemental attacks and practicing commands in a controlled battle. Use the fight to confirm which characters can supply the elemental coverage or healing you want before returning to the dungeon. Gaspar can also provide late-game guidance, but the practical purpose of the End of Time is preparation and safe travel between Gates.
Crono, Marle, and Robo provide a forgiving combination of damage, Haste, and party healing. Crono, Frog, and Robo offer another durable arrangement. Crono, Lucca, and Marle work well for players comfortable with magic management and Dual Techs. These are recommendations rather than requirements; choose the party whose Techs and equipment you can use consistently.
- Return to the End of Time when supplies or party roles are poor.
- Use Spekkio to test elemental attacks and battle commands.
- Confirm healing, support, and combination Techs before a rematch.
- Change party roles before committing to extensive grinding.
6. Recover from an accidental early final battle
Chrono Trigger allows early Lavos challenges after the party gains access to the End of Time and its routes. The bucket can lead directly to the final sequence, and the Epoch can fly into Lavos in 1999 A.D. If this happens before you intend to finish the campaign, reload the save made before entering the route. If no earlier save remains, you can still attempt the battle, but the result may be an alternate ending rather than the standard completed-campaign presentation.
For the intended first clear, finish the major story, complete the preparation you want, enter the Black Omen, defeat its final encounters, and continue through Lavos. After the ending and credits, reset the SNES and check the title or load screen for New Game+. The reliable original-SNES route is to have completed the Black Omen before defeating Lavos; direct bucket or Epoch victories are better treated as ending experiments unless you have confirmed the result on your exact cartridge or revision.
Once New Game+ is available, preserve the completed campaign save and use the new mode for early-ending tests. This avoids sacrificing the ordinary first-playthrough file and lets you retry the opening Lavos windows with carried-over strength and equipment.
- Reload a pre-route save after an accidental early Lavos entry.
- Complete the Black Omen before the intended campaign clear.
- Reset after the ending and confirm that New Game+ appears.
- Use New Game+ for alternate-ending attempts.
- Preserve the completed campaign save before experimenting.
Before you move on
- You can reach the Black Omen’s boss areas with healing items and usable MP remaining.
- You can handle Alien encounters without relying on physical counters.
- You can defeat Giga Mutant with magic-focused attacks.
- You can remove both arms before damaging Lavos’s head substantially.
- You can reach the save point and Gate before the Lavos Core battle.
- You can remove the left bit, exploit the right bit’s lowered defense, and destroy the right bit.
- You completed the Black Omen before defeating Lavos on the intended campaign clear.
- After watching the ending and resetting, New Game+ appears on the original SNES title or load screen.
References for this chapter
- The Black Omen - Chrono Trigger Walkthrough
- The Final Battle - Chrono Trigger Walkthrough
- Chrono Trigger/The Black Omen - StrategyWiki
- Chrono Trigger/The Final Battle - StrategyWiki
- Chrono Trigger - Guide and Walkthrough - Super Nintendo - By TerrisUS
- Chrono Trigger - Super Nintendo instruction manual
Post-Clear Options: What to Do After You Finish the SNES Campaign
After completing the original North American SNES campaign, preserve the normal save made before the final Lavos sequence, let the ending reach The End, then reset or return to the title/file-selection screen and verify New Game+. For this SNES release, the qualifying first clear must follow the Black Omen route: defeat the Black Omen’s final bosses, continue into the Lavos battle, and complete the ending. Direct victories reached through the End of Time bucket, the Epoch, or the Ocean Palace sequence can show alternate victory scenes, but they are not the qualifying route for unlocking New Game+ on the original SNES version. The completed file does not create a post-ending world state; loading the source save returns you to the last place where you used a normal save. Keep that file intact while beginning New Game+ or pursuing the twelve standard SNES victory-ending categories.
Preserve the qualifying pre-Lavos save
Before entering the Black Omen’s final sequence, make a normal in-game save at a save point or on the overworld and keep it in a dedicated slot. This is the source file you can reload if you want to revisit late-game side quests, change the final party, collect equipment, or attempt another ending without replaying the campaign.
For the original SNES release, complete the Black Omen before the qualifying first victory. Defeat Queen Zeal and proceed through the resulting Lavos battles. This route is required for the New Game+ unlock, even though the game also permits other ways to challenge Lavos. The bucket at the End of Time, the Epoch’s 1999 A.D. approach, and the Ocean Palace confrontation are useful for alternate-ending attempts, but do not substitute for the Black Omen route when your goal is to unlock New Game+.
Use a second save slot for any experimental attempt. Never overwrite the only pre-Lavos file after entering a different Lavos route, because an ending does not return the party to a playable post-game map.
- Make a normal save before the final Black Omen and Lavos sequence.
- Complete the Black Omen for the qualifying SNES clear.
- Keep a separate slot for alternate-ending experiments.
- Do not expect the ending to create a free-roaming post-game world.
Complete the ending and verify New Game+
Defeat Lavos after clearing the Black Omen, then allow the ending sequence and credits to continue until the game reaches The End. Do not power off or reset during the final battles, ending scenes, or credits. The original SNES presentation does not use the later-port clear-data workflow described in some modern guides; the practical check is to let the ending reach The End, reset or return to the title/file-selection screen, and look for the New Game+ option.
After the reset, verify that New Game+ appears beside the ordinary New Game option on the file-selection or title screen. If it does not appear, confirm that the clear actually followed the Black Omen route and that the party defeated Lavos after completing that dungeon. Also confirm that you used a normal in-game save before the final sequence rather than relying only on an emulator save state.
Loading the original source file after the clear returns you to the last location where you saved before entering the final sequence. That is expected behavior, not a failed completion. The file remains useful as a late-game checkpoint, while the New Game+ menu provides the separate route for replaying the story with transferred progress.
- Defeat Lavos after completing the Black Omen.
- Let the ending reach The End.
- Reset or return to the title/file-selection screen.
- Verify that New Game+ is displayed.
- Load the source file once to confirm it remains at its last pre-Lavos save position.
Start New Game+ without losing the campaign file
Select New Game+ from the title or file-selection screen and choose the completed campaign save as the transfer source. The story begins again at the Millennial Fair, but the new file retains the character progress and inventory permitted by the SNES version. Save the new run in a different slot so the original campaign checkpoint remains available.
Character levels and learned Techs carry forward, along with most ordinary weapons, armor, accessories, and usable items. Gold does not carry forward. Story-bound key items and progression objects must be reacquired during the new story, so expect to repeat the normal sequence for items such as the Gate Key, Bike Key, Hero Medal, Epoch, and the story-related Masamune progression.
When a character rejoins the party, open the equipment menu and check the current loadout. Do not assume that every returning character is automatically wearing the strongest available equipment. The transferred levels and Techs make the opening areas much easier, but missing story items still block progression until their normal events are completed.
- Choose New Game+, not ordinary New Game.
- Select the completed campaign file as the source.
- Save the new run in a different slot.
- Expect gold to reset.
- Expect story-bound key items to be absent until reacquired.
- Inspect equipment whenever a character rejoins.
Use New Game+ for the earliest alternate ending
The earliest practical alternate-ending attempt is the Developer’s Room ending, often called The Dream Project. Begin New Game+ and advance to Lucca’s first Telepod demonstration at the Millennial Fair. After a qualifying clear, the right-hand Telepod has a special shining point that provides an early route to Lavos. Enter that point rather than using the ordinary Telepod interaction that sends Crono to 600 A.D.
Save before using the special Telepod if you want to preserve an early New Game+ checkpoint. A transferred party with late-game levels, Techs, and equipment should be able to handle this fight far more easily than a first-playthrough party. After defeating Lavos, allow the ending to finish, then return to the preserved campaign file or begin another New Game+ attempt from an appropriate save.
This shortcut is available because the game has already recorded a qualifying completed clear. It is separate from the normal Telepod scene and should not be confused with the first-playthrough route into the Middle Ages.
- Start New Game+ from the qualifying completed file.
- Reach Lucca’s first Telepod demonstration.
- Enter the shining point in the right-hand Telepod.
- Defeat Lavos and let the ending finish.
- Return to the preserved campaign file before another experiment.
Plan the remaining SNES alternate endings with checkpoints
The original SNES release determines its standard victory endings mainly from the point in the story at which Lavos is defeated and from several story conditions. Create separate saves before major milestones rather than trying to preserve every possibility in one slot. The End of Time bucket is the main repeatable access point once it is available, while the Epoch provides a late-game approach. The special right-hand Telepod in New Game+ provides the earliest shortcut.
A practical order is to obtain the earliest New Game+ ending first, then attempt bucket victories during early and middle story milestones. Useful checkpoints include the period before the party reaches 600 A.D., the events involving Tata and the Hero Medal, the recovery of the Gate Key, the Masamune repair sequence, the Magus confrontation, and the events surrounding Azala. The exact ending scene depends on the story state when Lavos is defeated, so record the completed milestone rather than relying only on an ending number.
For the major late-game variation, keep one save after Crono’s death and another after completing the Death Peak revival. Defeating Lavos before reviving Crono produces different final scenes from defeating Lavos after Crono returns. This comparison can be made without replaying the campaign if the pre-revival checkpoint is preserved.
After viewing an ending, reset or return to the title/file-selection screen and load the intended checkpoint. Do not overwrite the source save merely because an ending has been displayed. The defeat sequence shown after losing to Lavos is a game-over presentation, not one of the twelve standard victory endings.
- Keep a separate save before each intended Lavos window.
- Use the special right-hand Telepod for the earliest New Game+ attempt.
- Use the End of Time bucket for early and middle-story tests.
- Track completed milestones such as Tata, the Hero Medal, the Gate Key, the Masamune, Magus, Azala, and Crono’s revival.
- Preserve a pre-revival Crono save if you want to compare late-game ending variations.
- Do not count a Lavos defeat or game-over screen as a completed victory ending unless the ending sequence reaches The End.
Choose a stopping point and keep the SNES scope clear
For a complete first campaign, keep the Black Omen clear, the standard late-game Lavos victory, and the resulting New Game+ unlock together in the same progression record. If you also want the most conventional late-game scenes, complete Crono’s revival before the final Black Omen clear and Lavos victory. Other party and story conditions can alter portions of the ending without preventing the qualifying route.
The original SNES release is generally documented as having twelve standard victory-ending categories. These include the full campaign ending, the Crono-dead variation, the Developer’s Room ending, and earlier-story endings reached by defeating Lavos before selected milestones. Labels can differ between guides, so track the actual story condition and scene rather than relying only on numbering.
Once finished, retain three useful files if possible: the completed campaign source, the pre-Lavos or pre-revival checkpoint, and an active New Game+ checkpoint. In-game save slots are enough for ordinary planning. External cartridge backup or save-dumping hardware is optional and varies by console, cartridge, adapter, and device.
The original SNES cartridge does not contain the later Nintendo DS, mobile, or Steam bonus dungeons and ending-related additions. If you later play one of those versions, use edition-specific instructions rather than applying its post-game objectives to the SNES campaign.
- Complete the Black Omen route and qualifying Lavos victory.
- Confirm New Game+ after the ending reaches The End.
- Keep the completed campaign and pre-Lavos saves separate.
- Track the twelve standard SNES victory-ending categories only.
- Treat hardware save backup as optional.
- Exclude later-port bonus dungeons and endings from the SNES completion checklist.
Before you move on
- The first campaign includes a completed Black Omen route.
- Lavos was defeated after the Black Omen sequence.
- The ending was allowed to continue until The End.
- The system was reset or returned to the title/file-selection screen afterward.
- New Game+ appears on the title or file-selection screen.
- The original source save still loads at its last pre-Lavos location.
- A New Game+ file begins with transferred levels and learned Techs.
- Gold and story-bound progression items are absent until normally reacquired.
- The completed campaign and experimental New Game+ files occupy separate save slots.
References for this chapter
- Chrono Trigger - Guide and Walkthrough - Super Nintendo - New Game+ requirements and ending conditions
- Chrono Trigger - Guide and Walkthrough - Super Nintendo - Black Omen and New Game+ route
- The Black Omen - Chrono Trigger Walkthrough
- Chrono Trigger - How to Unlock New Game Plus
- Chrono Trigger - Super Nintendo instruction manual
Completion Checklist and Final Notes on the SNES Experience
Use this checklist to verify a complete North American SNES campaign, preserve useful pre-final saves, and prepare for alternate endings through New Game+. For the recommended first-playthrough route, enter the Black Omen in 1,000 A.D., clear its required boss sequence, defeat Queen Zeal, continue into the Lavos battle, allow the ending to reach The End, reset the game, and confirm that New Game+ is available. The Black Omen is not required merely to challenge Lavos, but it is the dependable full-campaign route for this chapter’s completion goal. Remember the distinction between its two Panel rooms: an earlier room contains four Panels, while the final room before Queen Zeal contains five Panels and opens the important save point after they are defeated.
Confirm the required story milestones
Before entering the final dungeon, confirm that Robo, Frog, and Ayla have joined the party. Robo is recruited during the 2300 A.D. story route, Frog joins through the Middle Ages and Masamune sequence, and Ayla becomes available through the required Prehistory events. They do not need to be in the active party for the final battle; recruitment is the relevant completion check.
Confirm that the Masamune storyline has reached its restored-sword outcome. This includes recovering the broken sword, bringing it to Melchior for repair, and returning the restored Masamune so Frog’s story can continue. The minimum campaign does not require every optional weapon, sealed-chest reward, Charm item, or character side quest.
Magus remains a route choice in the original SNES game. At the North Cape, you may fight him or allow him to join. Either choice permits the main campaign to continue. His status changes some later scenes and ending variations, but recruiting or defeating him is not required for this checklist.
- Robo is recruited and appears in the character roster.
- Frog is recruited and the Masamune storyline has reached its restored-sword outcome.
- Ayla is recruited in Prehistory.
- Magus’s North Cape outcome has been chosen, without treating either option as mandatory.
Clear the Black Omen in the recommended order
For the full first-playthrough route, use the Epoch to enter the Black Omen in 1,000 A.D. Proceed through the fortress, defeat its required bosses, defeat Queen Zeal, and continue into the Lavos sequence. Save before entering so a failed attempt does not force you to repeat earlier preparation.
If you want to make repeated Black Omen visits for additional rewards, use the order 1,000 A.D., then 600 A.D., then 12,000 B.C. Each later visit begins in an earlier era, before the fortress was destroyed in the timeline. Treat repeat visits as optional reward runs; do not assume that every chest and encounter completely resets.
Do not confuse the two Panel rooms. An earlier room contains four Panels and opens a local save point when those enemies are defeated. Later, after the Lavos Spawn section, enter the next northern room. This final room contains five Panels. Defeat all five, then use the save point that appears. This is the important late-Black-Omen checkpoint immediately before the final sequence leading to Queen Zeal.
The Black Omen is not required merely to reach Lavos. The bucket at the End of Time and the Epoch provide direct routes to the final battle for alternate-ending attempts. It is included here because it gives the dependable full-campaign route and supplies a final preparation checkpoint before Queen Zeal and Lavos.
Use current equipment, dependable healing, and enough restorative supplies for several consecutive battles. A balanced party is preferable to one mandatory formation. Select characters whose healing, damage, and defensive Techs you can use reliably.
- The recommended Black Omen clear begins in 1,000 A.D.
- The earlier four-Panel room has been completed if encountered.
- The final five-Panel room before Queen Zeal has been completed.
- The save point released after the five Panels has been used.
- A normal in-game save exists before entering the Black Omen.
- Healing and MP-restoring supplies are stocked.
Defeat Lavos after the Black Omen
Continue from the Black Omen’s final sequence into the Lavos battle. The encounter has multiple stages, so defeating the outer form does not finish the fight. Keep the party healed, revive defeated characters promptly, and adapt Tech use to the current stage rather than spending every restorative item immediately.
If you lose, reload the save made before the final approach. A save at the five-Panel checkpoint minimizes repetition before Queen Zeal and the remaining battles. A save before entering the Black Omen lets you restart the full route if your supplies or party setup were poor. A direct bucket or Epoch victory remains valid for an alternate-ending attempt, but it does not replace the Black Omen checkpoint for this full-campaign route.
After Lavos is defeated, allow the ending sequence and credits to reach The End before resetting. Keep the pre-final save in a separate slot. It remains useful for retrying Lavos, changing the final party, checking late-game ending variations, or continuing optional preparation without replaying the campaign.
The completed game does not create a post-game world position. Loading the preserved ordinary save returns you to the last saved pre-Lavos location. The completion flag is used to make New Game+ available after returning to the title or file-selection screen.
- Lavos is defeated after the recommended Black Omen route.
- The ending and credits sequence reach The End.
- The pre-final save remains available in a separate slot.
- You understand that loading the ordinary save returns to the pre-Lavos position rather than a post-game world.
Reset and verify New Game+
Once The End is displayed, reset the original SNES game. On the title or file-selection screen, New Game+ should appear after a qualifying Lavos victory. Select New Game+ and choose the completed save data you want to use as the source. Preserve your campaign and pre-final saves before creating a working replay file.
New Game+ begins again at the Millennial Fair while retaining character levels, learned Techs, and much of the equipment and inventory from the completed file. Money does not carry over. Story-dependent objects and progress, including the Masamune and Epoch, must be obtained again through their normal events. Characters still join at their usual story points, and they must be equipped when they become available.
New Game+ is a replay mode rather than a continuation of the completed world. Its major advantage is that the powered-up party can reach early Lavos-ending windows quickly. During Lucca’s Telepod demonstration, the additional shining telepod route becomes available for an early Lavos attempt. The End of Time bucket remains useful for other milestone-based ending attempts.
Keep the original completed campaign and pre-final saves intact. Use a separate working file for ending experiments so an early victory does not replace the campaign checkpoint you want to preserve.
- New Game+ appears after returning to the title or file-selection screen.
- The completed campaign and pre-final saves remain preserved.
- A separate New Game+ working file is created.
- Transferred levels, Techs, equipment, and inventory are understood.
- Money, plot progress, the Masamune, and the Epoch are not treated as ordinary carried-over progress.
Keep SNES endings separate from later-port additions
The original North American SNES release is generally documented as having twelve standard victory-ending categories. Which one appears depends chiefly on when Lavos is defeated and on late-game conditions such as whether Crono has been revived, whether Magus was recruited or defeated, and whether the Epoch was used for the final approach. The loss sequence is separate from those standard victory endings.
For a first full playthrough, target the late-game conclusion after the campaign milestones and Black Omen clear are complete. This provides the ordinary story-completion ending and leaves a reliable save for later ending attempts. For alternate endings, keep a late-game pre-final save and use New Game+ for earlier story windows.
The Black Omen route, the End of Time bucket, and the Epoch can produce different ending conditions. Consult an SNES-specific ending table when pursuing them, because modern guides may include additional material or use a different ending count. Do not assume that a DS, mobile, or Windows guide’s ending browser, bonus dungeon, extra ending, or interface behavior exists on the 1995 cartridge.
Later releases include additions outside this checklist. The PlayStation version adds presentation material, while the DS and later versions add bonus areas and further ending-related content. Those features are not required for completing the original SNES campaign.
- The first playthrough targets the standard late-game conclusion.
- Alternate endings are attempted from separate saves or a separate New Game+ file.
- The twelve standard SNES victory endings are kept distinct from the separate loss sequence.
- DS, mobile, Windows, and other port-exclusive content is excluded from SNES completion.
Preserve the original experience and choose the next goal
The minimum complete SNES campaign is satisfied when Robo, Frog, and Ayla are recruited, the Masamune storyline is complete, the Black Omen is cleared through the final five-Panel room, the save point released after those five Panels has been used, Queen Zeal is defeated, Lavos is defeated afterward, the ending reaches The End, and New Game+ appears after reset. Maximum levels, every Charm reward, every sealed-chest upgrade, every optional character quest, and every alternate ending are separate completion goals.
Maintain three useful save categories: a permanent campaign checkpoint, a pre-final save, and a current working save. The permanent checkpoint protects the finished route. The pre-final save allows Lavos retries and late-game variations. The working save is for optional exploration or New Game+ experiments.
If you want external save preservation, consult hardware-specific retro-gaming guidance for the exact cartridge, console, adapter, and backup device. Save-battery replacement and save-dumping procedures vary by hardware, so avoid generic instructions when preserving an irreplaceable original cartridge save is the objective.
After confirming New Game+, choose one next goal deliberately: preserve the completed campaign, begin a powered-up replay, or pursue alternate endings. You can revisit optional areas and use different party members on later runs, but keep later-port bonus dungeons and added ending material outside this original SNES route. Take time to enjoy the soundtrack and pacing; the campaign does not require rushing once your pre-final checkpoint is secure.
- Robo, Frog, and Ayla are recruited.
- The Masamune repair storyline is complete.
- The earlier four-Panel room has been cleared if encountered.
- The final five-Panel room before Queen Zeal has been cleared.
- The save point released after the five Panels has been reached and used.
- Queen Zeal and Lavos have been defeated.
- The ending and credits sequence have reached The End.
- A permanent completed-game save and a pre-final save are retained.
- New Game+ is visible after reset.
- The next goal is chosen: preserve the clear, start New Game+, or pursue alternate endings.
Before you move on
- Robo, Frog, and Ayla are recruited.
- The Masamune repair storyline is complete.
- The Black Omen has been cleared on the recommended 1,000 A.D. route.
- The earlier four-Panel room has been cleared if encountered.
- The final five-Panel room before Queen Zeal has been defeated.
- The save point released after the five Panels has been reached and used before Queen Zeal.
- Queen Zeal and Lavos have been defeated.
- The ending and credits sequence have reached The End.
- The original pre-final save is preserved separately.
- After reset, New Game+ is visible on the title or file-selection screen.
- The player understands that the original SNES release has twelve standard victory-ending categories, with the loss sequence counted separately.
References for this chapter
- The Black Omen - Chrono Trigger Walkthrough
- Chrono Trigger/The Black Omen - StrategyWiki
- Chrono Trigger - Guide and Walkthrough - Super Nintendo - By vinheim
- Chrono Trigger - Guide and Walkthrough - Super Nintendo - By Mynock
- Endings - Chrono Trigger Guides - Caves of Narshe
- Chrono Trigger Cheats, Codes, and Secrets for Super Nintendo
Finishing up
Defeat Lavos after clearing the Black Omen route and watch the complete SNES ending and credits.
Allow the ending to reach The End, then reset or return to the title/file-selection screen and verify that New Game+ is available.
Understand that loading the ordinary source save returns the party to the last pre-Lavos save location rather than a post-game world state.
Keep the pre-final ordinary save in a separate slot before experimenting with alternate endings or New Game+.
Record which SNES ending was obtained and use New Game+ for additional ending windows.
Choose your next gameScreenshots & video
Game imagery for reference. Follow the written chapters above for the route and strategies.
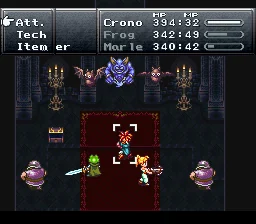
Sources & references
Our original guide draws on the references below. Check the edition at the top of this page before following controls or unlock requirements.
- Chrono Trigger - Guide and Walkthrough - Super Nintendo - Black Omen and New Game+ route
- The Millennial Fair - Chrono Trigger Walkthrough
- The Millennial Fair — Chrono Trigger Walkthrough
- The Millennial Fair — StrategyWiki
- Chrono Trigger - Super Nintendo instruction manual
- Chrono Trigger Walkthrough - Gamer Corner Guides
- Chrono Trigger Walkthrough, Part 9: Site 32 and Proto Dome, 2300 AD - ArrPeeGeeZ
- Chrono Trigger — Guide and Walkthrough by Dev, Super Nintendo
- Chrono Trigger - Guide and Walkthrough - Super Nintendo - New Game+ requirements and ending conditions
- Chrono Trigger — Guide and Walkthrough — Super Nintendo — By Super_Slash
- Factory - Chrono Trigger - Guides
- Chrono Trigger - Guide and Walkthrough - Super Nintendo - By Mynock
- Chrono Trigger - Guide and Walkthrough - Super Nintendo - By _ATadeo_
- Chrono Trigger/Unnatural Selection? — StrategyWiki
- Tyrano Lair - Chrono Trigger - Guides
- The Magic Kingdom — Chrono Trigger Walkthrough
- The Masamune! — Chrono Trigger Walkthrough
- Magus’s Castle — Chrono Trigger Walkthrough
- Chrono Trigger/Magus’s Castle — StrategyWiki
- The Guru on Mt. Woe - Chrono Trigger Walkthrough
- What Lies Beyond? - Chrono Trigger Walkthrough
- Lavos Beckons - Chrono Trigger Walkthrough
- The Black Omen - Chrono Trigger Walkthrough
- The Final Battle - Chrono Trigger Walkthrough
- Chrono Trigger Walkthrough — The Black Omen
- Black Omen Walkthrough: All 20 Chests | Chrono Trigger
- Chrono Trigger - Guide and Walkthrough - Super Nintendo - By TerrisUS
- The End of Time — Chrono Trigger Walkthrough
- Chrono Trigger/The Black Omen - StrategyWiki
- Chrono Trigger - Guide and Walkthrough - Super Nintendo - By DC
- The Fated Hour - Chrono Trigger Walkthrough
- Do you have to beat the black omen to unlock new game+? - Chrono Trigger Q&A for Super Nintendo
- Chrono Trigger — Super Nintendo instruction manual
- Chrono Trigger — Guide and Walkthrough — Super Nintendo — By Meowthnum1
- Chrono Trigger Walkthrough, Part 27: Reviving Crono at Death Peak, 2300 A.D.
- Chrono Trigger - Guide and Walkthrough - Super Nintendo - By vinheim
- Chrono Trigger/The Final Battle - StrategyWiki
- Chrono Trigger — Ending Guide — Super Nintendo — GameFAQs
- Chrono Trigger Endings — Thonky
- Chrono Trigger Cheats, Codes, and Secrets for Super Nintendo
- Chrono Trigger — Endings
- Chrono Trigger/Fiona's Forest — StrategyWiki
- The Sunken Desert - Chrono Trigger Walkthrough
- The Rainbow Shell - Chrono Trigger Walkthrough
- All Side Quests & Their Rewards | Chrono Trigger
- Chrono Trigger — Versions and added content
- Chrono Trigger - How to Unlock New Game Plus
- Endings - Chrono Trigger Guides - Caves of Narshe
About the game & collecting notes
- Platform
- Super Nintendo Entertainment System
Step-by-step campaign walkthrough for the original 1995 North American SNES release of Chrono Trigger. Covers every required main-story objective from the Millennial Fair through Prehistory, the Tyranno Lair, Zeal, Mountain of Woe, the Ocean Palace, the Black Omen, and the final Lavos confrontation, with practical party and Tech advice, optional side-quests, the original SNES New Game+ requirement, and verified routes to the standard SNES endings.
Darryl Polo
Darryl Polo loves tinkering with emulation and revisiting retro games. He enjoys exploring how old favorites play on different setups and sharing what he learns along the way. At Joking Joystick, he writes about the games, hardware, and small discoveries that keep the hobby fun.
Our editorial standardsFound a step that needs another look? Help us improve this guide.