Castlevania (NES, USA Rev A) — Complete Main Campaign Walkthrough
Practical, stage-by-stage directions to beat Konami's original Castlevania on the Nintendo Entertainment System in the North American USA Rev A edition. Covers the game's six levels and eighteen numbered stages, exact route choices, item and heart management, reliable boss counters for the five regular bosses and Dracula's two forms, recovery after failure, and the checklist that proves the main campaign is finished.

Find a copy
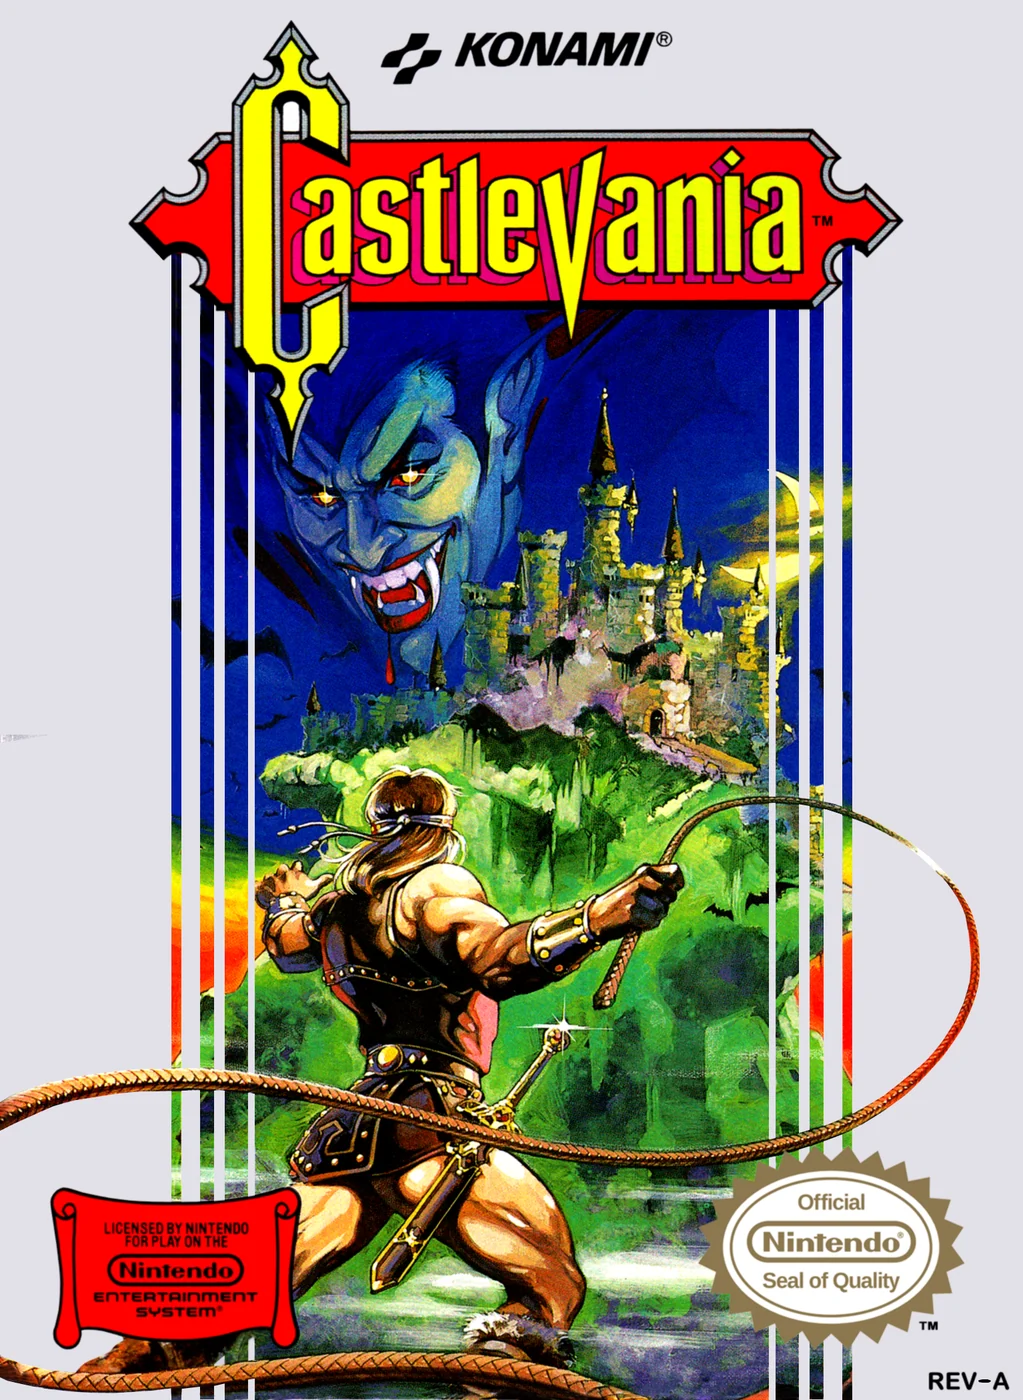
Castlevania Nintendo Entertainment System
We may earn a commission if you buy through these links, at no extra cost to you. As an Amazon Associate I earn from qualifying purchases.
Opens retailer search results. Check the model, edition, seller, availability and current price before buying.
Before you begin
You are Simon Belmont.
The goal is simple: push through six levels divided into eighteen numbered stages of Dracula's castle, defeat each level boss, and finally defeat Dracula at the top.
This guide keeps instructions concrete: where to go, what items to pick, how to spend hearts, and how to approach each boss so you can reliably finish the original North American NES release.
Follow the route and item priorities here if you want consistent, low-frustration runs.
The manual's control scheme and key items, including whip upgrades, shot multipliers and large hearts, determine how you tackle enemies and bosses; this guide uses those mechanics to minimize guesswork and unnecessary deaths.
Set yourself up for the run
Master the basic controls from the NES manual: B to whip/use sub-weapon, A to jump, Up+B to throw sub-weapons while on a staircase, and START to pause or continue after death.
Know how to climb and descend stairs without accidentally attacking.
(See manual control section.)
Understand hearts and sub-weapons: small hearts restore 1 heart unit, large hearts grant 5.
Special weapons consume hearts; the Watch (stopwatch) costs five hearts per use according to the official manual.
Treat hearts as limited fuel — spend them where they give the biggest advantage (bosses and high-risk segments).
Aim to collect the Morning Star whip upgrade (it increases whip length) and any Double/Triple Shot items before late-game fights.
Prioritize whip upgrades and multi-shot items when they appear in reachable candles.
Build a recommended late-game loadout: a reliable long-range sub-weapon (boomerang/cross) plus Holy Water or Axe for crowd control, and keep 5–10 hearts saved for either a Watch use (situations where freezing enemies is decisive) or multiple Holy Water throws during boss windows.
Use candles, money bags and breakable blocks early to farm small hearts and finds.
If you die, the continue options will let you resume from the beginning of the last level reached — plan to conserve lives and hearts so you reach Stage 6 with reasonable resources.
Learn how enemy damage scales: enemies in later stages deal more damage per hit.
Play cautiously in Stages 5–6 and avoid unnecessary contact with enemies and pitfalls.
If playing with an NES controller that has worn buttons, confirm button reliability before starting; tight timing for whip and jump inputs is critical for the platforming and boss windows.
Quick Start — Controls, HUD and Items
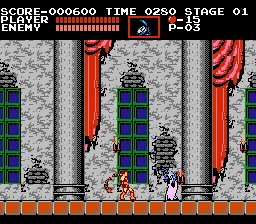
Learn the original North American NES controls, understand the gameplay display, and identify the pickups that control Simon’s health, whip strength, and sub-weapon supply. These instructions apply to the original Castlevania NES release represented by the USA Rev A edition label.
1. Start a game and learn the basic controls
Press START on the title screen to begin. Use the Control Pad to move Simon, crouch, and climb or descend stairs. Press A to jump. Press B to swing the whip. Press Up and B together to use the equipped sub-weapon. If you press B without Up, Simon performs a normal whip attack instead.
START pauses the game and resumes it when pressed again. SELECT is used for menu navigation on the title and game-over screens. It is not an inventory button during ordinary stage play, so there is no mid-stage equipment menu to open. After a game over, SELECT can move between CONTINUE and END; START confirms the choice.
- A jumps.
- B swings the whip.
- Up plus B uses the equipped sub-weapon.
- START begins, pauses, and resumes play.
- SELECT navigates the title and game-over choices.
2. Practice the sub-weapon command on ground and stairs
The Up direction is part of the sub-weapon input. Press Up and B together when Simon is standing on level ground or while he is aligned with a staircase. On stairs, the command can be awkward because Up also moves Simon upward, so use a deliberate, simultaneous input rather than repeatedly tapping B.
You must already have a sub-weapon equipped and enough hearts to use it. If Simon only swings the whip, check that Up was pressed with B. If nothing happens, check the heart counter and confirm that a weapon icon is currently displayed. Stairs are useful for positioning, but Simon’s movement and jumping options are more limited there than on flat ground, so slow down before entering a crowded staircase section.
- Confirm a sub-weapon is equipped before testing the command.
- Press Up and B together instead of B alone.
- Remember that the command works on ground as well as stairs.
- Check the heart count if the weapon does not activate.
3. Read the gameplay display correctly
The gameplay display separates Simon’s health from his ammunition and remaining attempts. Your health is shown in its own meter. The boss health display appears during boss encounters. Lives remaining shows how many lives are available, and the heart count shows the ammunition used by sub-weapons. The equipped weapon display identifies the current special weapon.
The stage timer is a real failure condition. Simon loses a life if time runs out, if his health is depleted, or if he falls into a hole. Hearts do not restore health. They are collected so Simon can use sub-weapons, making them valuable even when the health meter is full.
- Monitor health separately from hearts.
- Watch lives remaining after dangerous mistakes.
- Check the equipped weapon before spending hearts.
- Keep moving when the timer is becoming low.
- Remember that falling, depleted health, and time loss can cost a life.
4. Understand hearts and the main recovery items
A Small Heart adds one heart to the heart count. A Large Heart adds five. Each sub-weapon use consumes one or more hearts, but the exact cost depends on the weapon. The Watch is the specifically documented exception to casual low-cost use: every activation costs five hearts. Do not treat the heart counter as a health meter.
A Magic Crystal fully restores Simon’s health. A Pork Chop restores only part of the health meter. An Invulnerability Potion protects Simon from damage for a few seconds. These recovery and protection items do not replace hearts, so a full health bar does not mean Simon can freely throw sub-weapons.
- Small Heart: one heart.
- Large Heart: five hearts.
- Magic Crystal: full health restoration.
- Pork Chop: partial health restoration.
- Invulnerability Potion: brief invulnerability.
- Watch: five hearts per use.
5. Build and protect the whip
The first Morning Star pickup turns the Leather Whip into the Chain Whip. A later Morning Star increases the whip’s length. The longer weapon lets Simon attack from safer spacing, so use the extra reach to keep enemies outside contact range rather than stepping closer to them.
The whip upgrade is a current-life advantage. Losing a life removes the upgrade, so do not assume a later life will begin with the same whip strength. When a Morning Star appears, check the surrounding enemies and hazards before moving into its pickup position. Collecting an item safely is more important than jumping blindly toward it.
- First Morning Star: changes the whip into the Chain Whip.
- Another Morning Star: increases whip length.
- Use the longer reach to preserve distance.
- Expect the upgrade to be lost after a life is lost.
6. Preserve Double Shot and Triple Shot power
Double Shot and Triple Shot increase the number of consecutive attacks Simon can make with the current sub-weapon. They do not create a new weapon. Their value depends on what Simon is carrying, so avoid replacing a useful weapon without a reason.
Treat the shot multiplier and the equipped weapon as one loadout. A powered-up Holy Water can control a grounded enemy, while a powered-up Boomerang can provide repeated long-range coverage. If you collect another weapon, verify what is now equipped before throwing again, because changing weapons can remove the benefit of the multiplier in the original NES game.
- Double Shot increases consecutive attacks to two.
- Triple Shot increases consecutive attacks to three.
- The multiplier works with the current sub-weapon.
- Check the new weapon after every weapon pickup.
Before you move on
- You can start and pause the game with START, jump with A, whip with B, and use a sub-weapon with Up plus B.
- You can perform the sub-weapon input on both level ground and stairs.
- You can distinguish Simon’s health, lives, hearts, equipped weapon, timer, and boss health display.
- You can explain the functions of Small Hearts, Large Hearts, Morning Stars, Double Shot, Triple Shot, Magic Crystals, Pork Chops, and Invulnerability Potions.
- You can reach the first staircase with a usable sub-weapon, a correctly understood heart count, and no confusion between health recovery and ammunition.
Movement and Whip Fundamentals
Castlevania on the NES rewards deliberate positioning rather than constant movement. Simon’s jump follows a committed arc, his normal game has no midair steering, and the original stair system does not let him jump onto or off a staircase. Control each encounter by establishing distance, attacking at the end of the whip, and reaching safe landings before committing to another movement.
Learn Simon’s movement rhythm
Use Left and Right to walk, Down to crouch, and Up or Down beside a staircase to climb or descend. Press A to jump. The jump carries Simon along a fixed arc, so he cannot correct his horizontal position freely after takeoff. Set Simon’s position before pressing A, especially near pits, enemies, and platform edges.
Press B to swing the whip. A standing attack reaches straight ahead, while crouching before the attack lowers Simon’s body and whip position. The attack does not make Simon invulnerable, so pressing B while walking directly into an enemy can still result in contact damage during the attack or its recovery.
- Stop before unfamiliar enemy formations instead of walking into them.
- Face the direction from which the next enemy will approach.
- Choose Simon’s takeoff position before jumping rather than trying to steer after launch.
Attack from maximum whip range
The safest basic pattern is to let an enemy approach the end of the whip, strike once, and then retreat or wait for the next opening. Do not keep walking forward after a hit. Simon’s reach is limited and predictable, so the goal is to make the enemy enter the whip’s range while Simon remains outside its contact range.
This method works especially well against walking enemies such as zombies and skeletons. Stand just outside their reach, press B as they approach, and step back if the first strike does not defeat them. Against low threats or low-moving projectiles, crouch before pressing B. Against a target that is too close, retreat first instead of trying to force another whip swing.
- Use the end of the whip whenever the enemy’s movement allows it.
- Retreat after a hit if the enemy survives or continues advancing.
- Use crouching attacks only after positioning Simon safely; crouching is not protection from contact damage.
Use jump-whips without midair correction
A jump-whip is useful against bats, birds, and enemies placed near a platform edge, but Simon must begin the jump from a controlled position. Face the target, leave enough room for Simon’s fixed forward arc, and press B during the jump so the whip crosses the enemy before Simon’s body does.
Do not jump directly underneath an airborne enemy unless its movement is predictable. A safer approach is to wait outside the enemy’s contact path, then jump through the space with the whip already timed for the target. Confirm the landing area before jumping; defeating an enemy is not useful if Simon lands on another enemy or beyond a safe platform.
- Begin jump attacks from stable ground and outside contact range.
- Time the whip so it intersects the target before Simon reaches it.
- Do not expect to reverse direction or fine-tune the landing during the jump.
Treat staircases as committed routes
Press Up or Down beside a staircase to climb or descend. In the original NES version, Simon cannot jump from a staircase as though it were flat ground, and a normal jump does not let him land on a staircase. Reach the upper or lower landing before deciding whether to jump, crouch, or continue walking.
Staircases can help regulate enemy timing, but Simon is still vulnerable while climbing and moves more slowly than on level ground. Check the landing before committing to the climb. If an enemy or projectile is waiting at the top, pause on the staircase only long enough to create a timing window, then attack from the landing or retreat if the route is unsafe.
- Check the destination landing before starting up or down.
- Do not press A on a staircase expecting a normal stair jump.
- Use stairs to control timing, not as a place to stand indefinitely under enemy fire.
Use sub-weapons with Up plus B
To use the equipped sub-weapon, press Up and B together. This input applies when Simon is on flat ground and when he is positioned beside or on a staircase; B alone performs the regular whip attack. Hearts are consumed whenever a sub-weapon is used, so throw one only when it removes a dangerous enemy, controls a group, or creates a safe opening.
The weapon’s trajectory depends on the equipped item. An Axe travels upward and is useful against airborne or elevated targets. Holy Water lands on the ground and can hold enemies in its flame. The Cross travels forward and returns, allowing it to pass through a target more than once. Use the appropriate weapon rather than spending hearts automatically whenever an enemy appears.
- Confirm which sub-weapon Simon is carrying before entering a dangerous room.
- Press Up plus B instead of B alone when using the sub-weapon.
- Keep a heart reserve for the next enemy group, staircase, or boss approach.
Control platform edges and landings
Stop before every drop and identify the destination platform before pressing A. If an enemy is waiting on the far side, attack from the near edge when possible, wait for its movement, or use a sub-weapon. A jump should be the final part of the solution, not the first reaction.
When an enemy retreats toward a gap, do not chase it automatically. Simon’s committed jump and fixed air path make rushed pursuits dangerous. Clear the approach, confirm the landing, and then jump with the whip timed for any enemy that occupies the destination.
- Stop at platform edges and verify the landing.
- Prefer a grounded whip or sub-weapon when the destination is occupied.
- Do not follow enemies toward a drop without a deliberate escape route.
Before you move on
- You can defeat a walking enemy by stopping at whip range, striking as it approaches, and retreating without taking contact damage.
- You can perform a jump-whip from stable ground, hit an airborne or elevated enemy, and land on a confirmed safe platform.
- You can recognize that staircases are entered and exited by walking, not by jumping onto or off them.
- You can use Up plus B to activate a sub-weapon and distinguish that input from B’s regular whip attack.
- You can approach a platform edge, inspect the landing, and choose between a grounded whip, a jump-whip, or a sub-weapon without relying on continuous forward movement.
Managing Hearts and Sub-Weapons
Hearts are ammunition for Simon’s sub-weapons. The whip costs nothing, while the ordinary attack weapons use one heart per throw and the Watch uses five. Select a weapon according to the next hazard, protect a useful powered-up loadout, and keep enough hearts to use that weapon when a boss or dangerous room demands it.
1. Check your hearts before committing to a weapon
The heart counter is your sub-weapon ammunition. A Small Heart adds one heart and a Large Heart adds five. Whip candles and collect hearts whenever it is safe, even if you are not planning to attack immediately. A full reserve gives you more options when a room becomes crowded or a boss opening appears.
The Axe, Dagger, Holy Water, and Boomerang normally cost one heart per use. The Watch costs five hearts each time. The whip is free, so use it against isolated enemies that are already within safe range. Spend hearts when a sub-weapon can attack from a safer distance, cover an enemy above you, control a narrow platform, or create a reliable boss opening.
Do not enter a boss room with an empty heart counter if you can safely collect more on the approach. You are not required to use a sub-weapon against every enemy. Wasting ammunition on harmless targets can leave you unable to use the weapon that would make the next encounter manageable.
- Collect Small Hearts and Large Hearts from candles and defeated enemies.
- Use the whip against simple targets when it is safe.
- Keep a reserve for the next dangerous room or boss.
2. Match the sub-weapon to the hazard
The Boomerang travels straight ahead, returns toward Simon, and can hit enemies on both its outgoing and returning paths. Throw it before an enemy reaches contact range so both paths have room to work. Do not confuse the Boomerang with the Cross pickup. The Cross is a separate item that destroys enemies currently visible on the screen when collected.
Holy Water lands on the floor, creates flames, and can repeatedly interrupt grounded enemies. It is especially useful against enemies that walk toward Simon and against bosses affected by its hit-stun. Throw it at an enemy’s feet before contact, then whip or throw another bottle while the flame remains active. It is less useful against enemies that stay well above the floor or cannot be reached by the bottle’s landing point.
The Axe travels in an upward arc and has high attack power, making it useful against airborne or elevated targets. The Dagger travels quickly in a straight line but has lower attack power. Keep it when a fast, flat projectile is useful and no stronger weapon is safely available. The Watch temporarily freezes eligible enemies, but its five-heart price makes it an emergency tool rather than a routine attack.
- Choose Boomerang for distance, returning hits, and mixed enemy groups.
- Choose Holy Water for grounded enemies and repeatable stun opportunities.
- Choose Axe for airborne or elevated targets.
- Choose Dagger for a fast, straight projectile when no better option is available.
- Use Watch only to solve a specific timing or crowding problem.
3. Protect a weapon and its multiplier
Simon carries one sub-weapon at a time. Picking up another sub-weapon replaces the current one. In the North American NES release, changing weapons also removes the Double Shot or Triple Shot multiplier you were carrying, so a new candle item is not automatically an upgrade.
Before breaking a weapon candle, consider the next room and boss. Powered-up Holy Water is valuable when grounded enemies or a stun-sensitive boss is ahead. Powered-up Boomerang is safer when enemies approach from several directions or when you need repeated coverage across the screen. Axe is preferable when the route repeatedly places enemies above you.
If the room gives you space, identify the candle before walking into its drop. You can also avoid striking an unwanted candle while fighting nearby. If a replacement is poor for the next section, walk past it and keep the weapon you have.
- Do not replace powered-up Holy Water or Boomerang without a clear reason.
- Remember that changing weapons removes the current shot multiplier.
- Use distance whipping when you need to break or inspect candles safely.
4. Build Double Shot and Triple Shot deliberately
Double Shot and Triple Shot are power-up items for the equipped sub-weapon. They let Simon throw the same weapon two or three times consecutively, increasing the number of active attacks or projectiles the weapon can produce. They do not give Simon a second type of sub-weapon, and they do not remove the heart cost of throwing.
The upgrade is especially useful with Holy Water because successive bottles can maintain a grounded enemy’s stun and flame coverage. It is also strong with the Boomerang, where multiple projectiles can cover the outgoing and returning paths. Axe benefits when several airborne targets overlap. Dagger gains more frequent projectiles, but its low damage and lack of crowd control still make it a weaker general choice.
Shot multipliers can appear after enough successful sub-weapon use against enemies or candles, and they can also be found in hidden blocks or fixed item locations. When you have a weapon you intend to keep, use it on suitable targets during safe portions of the stage. Do not spend hearts recklessly merely to force progress; rebuild the multiplier while clearing threats that already justify the throw.
A sub-weapon change removes the multiplier in this release. Losing a life also means you should expect to rebuild your weapon and shot level on the next attempt rather than relying on the previous loadout.
- Build the multiplier on the weapon intended for the next boss.
- Use powered-up Holy Water for control and powered-up Boomerang for coverage.
- Remember that Double Shot and Triple Shot do not make sub-weapons free.
- After a death or weapon change, rebuild the shot multiplier.
5. Spend the Watch only for a defined emergency
The Watch temporarily freezes enemies on the current screen for a short time. It does not pause the stage timer, and environmental hazards continue operating while the effect is active. Use it when a crowded screen, staircase, flying-enemy pattern, or narrow passage creates a timing problem that ordinary movement and whipping cannot safely solve.
Before pressing Up+B, confirm that five hearts will be deducted without leaving you unable to use the weapon needed next. One well-timed Watch use can create a safe crossing or freeze a dangerous group. Several casual uses can consume the reserve needed for Holy Water, Boomerang, or Axe during the boss approach.
The Watch has limited usefulness against bosses, so do not build your entire strategy around it unless you have verified that the specific encounter is affected. If a later candle offers a more useful weapon, decide according to the next hazard. Keeping the Watch is reasonable when the upcoming screen is dominated by moving enemies and hazards; replacing it is usually better when the next encounter requires sustained damage or ground control.
- Use Watch only when freezing enemies solves a specific immediate danger.
- Count five hearts for every activation.
- Remember that the stage timer and environmental hazards continue during the freeze.
- Do not rely on Watch against bosses without confirming that the encounter is affected.
- Keep enough hearts for the next weapon and boss encounter.
Before you move on
- You can identify when Boomerang, Holy Water, Axe, Dagger, or Watch is the safest choice for the next hazard.
- You understand that Small Hearts add one, Large Hearts add five, ordinary sub-weapons generally cost one per use, and Watch costs five.
- You can preserve a powered-up weapon by avoiding unwanted sub-weapon candles.
- You know that Double Shot and Triple Shot improve the equipped sub-weapon’s consecutive attack capacity and are lost when you change weapons in this release.
- You can rebuild shot multipliers by using the chosen sub-weapon against appropriate enemies and candles without exhausting the entire heart reserve.
- You understand that Watch freezes enemies temporarily but does not pause the stage timer or environmental hazards.
- You can explain why Watch is an expensive emergency option rather than a standard boss strategy.
Stage 1 — Outer Gates and Entrance (Level 1)
Stage 1 has three connected sections before the Giant Bat. Use the opening torch line to obtain both whip upgrades, clear the foyer carefully, cross the lower Fish Man area without being knocked into pits, and take the Axe and Double Shot before the boss whenever they are available. Optional hidden items can improve score or recovery, but none is required for progression.
1. Take both whip upgrades outside the castle
When Simon appears outside the castle, move right and whip every burning torch. The first torch gives a large heart, the next two provide the two early whip upgrades, and the following torch contains the Dagger. Collecting both upgrades changes the Leather Whip into the Chain Whip and then the Morning Star, giving you the longest available whip for the stage. The Dagger is optional but useful against enemies on a straight horizontal line.
Do not rush through this short opening. There are no enemies here, so it is the safest place to learn the whip's reach and collect hearts. To use the Dagger or any other sub-weapon, hold Up and press B. Enter the doorway after the torch line is finished. An optional flashing money bag can be revealed near the doorway by jumping over the threshold area, but missing it does not affect progress.
- Whip every outdoor torch.
- Collect both whip upgrades if they appear.
- Take the Dagger only if you want a straight-flying sub-weapon.
- Enter the castle through the doorway.
2. Clear the foyer and first staircase
Inside, move right through the zombie corridor. Stop frequently and whip zombies from maximum range instead of walking into a group. Break every candle as you advance; the drops include small hearts, large hearts, and money bags. Hearts are ammunition for sub-weapons, so collect them even when you intend to rely mainly on the whip.
When you reach the first staircase, defeat the Black Panther before climbing. Stairs are rigid in this game: Simon cannot jump while standing on them, and a hit on a staircase causes damage without the usual knockback. Climb only after the immediate enemy is gone. At the upper section, deal with the additional Panthers from the edge of the platforms. Crouching and whipping can hit a Panther as it approaches along the same level.
- Advance behind standing whip attacks.
- Break the foyer candles.
- Kill the first Black Panther before climbing.
- Do not attempt to jump from the staircase.
3. Cross the first upper passage and take the lower route
Continue right across the raised platforms and candle lines. A Panther can leap down from above, so stop at platform edges and let it enter whip range rather than jumping toward it. A hidden money bag can be revealed by striking the final block of an upper platform, but it is an optional score item.
Proceed through the door at the far right. In the next section, Vampire Bats fly across the screen while a block formation prevents direct passage. Whip the lower blocks beneath the obstruction to reveal Roast Beef if you need health. Then return left, collect the nearby candles, and descend the staircase into the lower passage.
The lower passage contains Fish Men that jump from the water and throw fireballs. This is the first genuinely dangerous part of the stage because a hit can knock Simon into a pit. Keep Simon near the center of each platform, attack Fish Men as they rise, and avoid standing at the extreme edge while a fireball is approaching.
- Handle Panthers from platform edges.
- Break the lower blocks if health is needed.
- Descend into the Fish Man passage deliberately.
- Prioritize safe footing over candle drops near pits.
4. Navigate the Fish Man platforms and return upward
Move right across the lower platforms, jumping only when the landing surface is clear. Whip Fish Men as soon as they appear and watch for fireballs before committing to the next jump. The candle route provides hearts and, later, a Watch; the Watch costs five hearts per use, so do not take or spend it as part of the required route if your current sub-weapon is more useful.
Near the far right, destroy the indicated upper block and stand or kneel on the lower platform briefly to reveal an optional flashing money bag above. This reward is not needed. Continue right, climb the staircase, and pass through the next door. If Simon is low on health, prioritize the large-heart candle over the score item and avoid risky attempts at the hidden bag.
- Watch for Fish Men before every jump.
- Keep away from platform edges during fireball attacks.
- Treat the Watch as optional and expensive.
- Climb the staircase at the far right and enter the next door.
5. Prepare in the final approach room
The final section before the boss resembles the foyer: zombies approach from both directions while candles line the route. Move right in short advances, whip the nearest zombie, then break the next candle. An invulnerability potion is available in this section and can be used to pass a dangerous group safely, but it is optional.
Near the staircase leading to the boss, take the Axe from its candle if it appears. The Axe travels in an upward arc and is the most dependable Stage 1 weapon against the airborne Giant Bat. Continue right while collecting hearts. Near the boss entrance, strike the block at the right side of the staircase to reveal the Double Shot. This lets Simon throw two sub-weapons in succession and is especially valuable with the Axe.
Do not spend all your hearts on ordinary zombies. Enter the boss room with the Morning Star, the Axe if available, and enough hearts for several throws. The final large-heart candle can replenish the reserve before the fight.
- Clear zombies instead of running through them.
- Use the invulnerability potion only when it prevents substantial damage.
- Take the Axe before the boss when available.
- Break the block near the staircase for Double Shot.
6. Defeat the Giant Bat
The Giant Bat, also called the Phantom Bat or Vampire Bat in different walkthroughs, moves across the upper part of the room and periodically dives toward Simon. Stand on the ground with enough space to see its approach. Throw the Axe as the boss crosses above you; with Double Shot, continue throwing while staying mobile. The Axe's upward arc covers the boss more reliably than a straight Dagger throw.
When the bat dives, do not chase underneath it. Move away from the dive and let it return across the room. If it passes low and within reach, use a standing whip or jump-whip only when Simon will land safely. If the bat hovers directly above Simon, move sideways rather than attacking straight upward, since contact can cause heavy damage.
The Giant Bat can occasionally launch a fireball from a distance. Keep moving enough to avoid being aligned with the projectile, but do not make large uncontrolled jumps near the room's edges. A patient cycle of Axe throws, short repositioning, and grounded whip strikes is safer than pursuing the boss.
- Keep the bat in front of Simon.
- Use the Axe and Double Shot from the ground when possible.
- Avoid standing directly below a descending bat.
- After the final hit, pass through the exit to begin Stage 2.
Before you move on
- The Giant Bat has been defeated in the final Stage 1 room.
- Simon has exited through the boss-room doorway and the game has advanced to Stage 2.
- The Stage 1 clear does not require the hidden money bags, Roast Beef, invisibility potion, Watch, or Double Shot, although the Axe and Double Shot make the boss safer.
Stage 2 — Deeper Castle Rooms and Queen Medusa
Stage 2 is a route through Black Knights, Medusa Heads, moving ledges, spike crushers, Dragon Skull Cannons, and several dangerous gaps. The safest plan is to keep moving, use the Boomerang or another long-range weapon when available, and treat hidden score items as optional. The stage ends with Queen Medusa; defeating her and collecting the Magic Crystal restores Simon’s health and advances the game to Stage 3.
1. Secure the Boomerang and reveal the crown
Move right from the start and destroy the first candle. It contains the Boomerang, so take it if you do not already have a weapon you strongly prefer. The Boomerang travels forward and returns, giving it useful coverage against enemies that approach from either direction. Continue up the stairs and destroy the wall at the far-right end of the upper passage. Stand in the opening, then return to the lower floor to collect the crown that appears. The crown is an optional 2,000-point reward; skip it if the route exposes you to damage.
Defeat the Black Knight and bat, then climb to the next room. Black Knights require multiple hits, so attack from the edge of whip range and retreat rather than walking into their contact range. Keep moving whenever the bat enters the screen.
- Take the Boomerang from the first candle if useful.
- Reveal the crown from the upper-right wall only if it is safe to collect.
- Defeat the first Black Knight before entering the next room.
2. Collect the hidden Double Shot
The next room contains a Black Knight trapped in a recess. Jump over the recess instead of fighting him at close range. After landing, stop and face back toward the wall you crossed. Whip the upper-left block of that wall to reveal the hidden Double Shot. Pick it up before continuing. The Double Shot increases the number of consecutive sub-weapons you can have active, making the Boomerang or another retained weapon more effective.
Proceed left and defeat the next Black Knight with the Boomerang or whip. At the moving ledge, wait until its position gives you a straightforward jump, then ride or jump across. Do not stop on the ledge to fight every Medusa Head; the ledge is safer when used as a transport point.
- Jump over the recessed Black Knight.
- Turn back and whip the upper-left block to reveal the Double Shot.
- Cross the moving ledge after clearing the landing area.
3. Survive the first Medusa Head platform section
The next room introduces Medusa Heads. They travel along curved paths and can knock Simon into pits, so do not jump automatically whenever one appears. Watch its path, whip it if it enters range, and make each jump only after the immediate flight line is clear.
When you reach the platform before the Black Knight, stand on the brick for several seconds to make a treasure chest appear behind Simon. The chest is optional and worth points. Afterward, defeat the Black Knight and climb the stairs. On the following platform section, jump across the gaps while watching for Medusa Heads. The candles are optional; ignore them if reaching for one would force a blind jump. When you reach the Black Knight, the immediate Medusa pressure eases. Defeat him before continuing.
- Prioritize safe landings over candles and score items.
- Wait for the optional treasure chest only when the surrounding area is clear.
- Whip Medusa Heads before they can collide with Simon during a jump.
4. Use the upper route and moving ledges
From the platform above the ground, jump upward and whip the highest platform to reveal a hidden Pork Chop. Take it only if Simon needs the health; otherwise continue left. Use the moving ledges to cross the gaps. Medusa Heads return near the final ledge, so land before turning around to fight or collect anything.
Enter the next room and immediately drop down one block. Whip the row of blocks near the starting area to reveal another hidden Pork Chop. This room contains spike crushers. A crusher hit is fatal, so wait until each piston rises and walk beneath it during the opening. Do not rush because a Medusa Head or ghost is nearby; the crusher timing is the priority.
- Collect the first hidden Pork Chop only when needed.
- Cross the moving ledges with a clean landing.
- Reveal the second Pork Chop if useful.
- Treat every spike-crusher contact as a fatal hazard.
5. Clear the cannons and the final Medusa hallway
Continue left through the crusher room, watching for the ghost approaching from behind, then deal with the bat. Near the bottom of the stairs are two blocks; whip the left block to reveal another Double Shot. This pickup is optional if you still have the earlier multiplier, but it is valuable if the first one was lost.
Climb the stairs and approach the Dragon Skull Cannons. Against the first cannon, remain on the lower ledge where its fireballs pass overhead and whip it from safety. For the second cannon, stand on the left portion of its ledge and repeatedly whip; the whip can also destroy incoming fireballs. The Boomerang or Dagger can attack while you reposition. The Watch can freeze the cannon, but each use costs five hearts, so reserve it for a genuine emergency.
Climb the final staircase and move left through the hallway. Medusa Heads repeatedly enter from the left. Whip candles for hearts when safe, but keep enough room behind Simon to retreat. The fourth pillar from the right conceals a Cross. Taking it is optional, but its pickup effect destroys the Medusa Heads currently on-screen. Continue left to the boss entrance.
- Whip the left block near the stairs for the second Double Shot.
- Pass beneath the first cannon’s fireballs from the lower ledge.
- Use the Watch sparingly because it costs five hearts per use.
- Take the hidden Cross only when it does not expose Simon to a collision.
6. Defeat Queen Medusa and collect the Magic Crystal
Queen Medusa swoops horizontally toward Simon and releases serpents when she is close to the ground. Stay near the center rather than allowing yourself to be pinned against a wall. When she approaches at whip height, strike and then move away. Whip the serpents as they crawl forward; leaving them alive can restrict the space needed for the next dodge.
The Boomerang is a reliable choice because it can hit on the outgoing path and again on the return. Fire Bomb, if retained, can also be effective when Queen Medusa is near the floor. Holy Water is useful for controlling the ground and the serpents, though it is not mandatory. The Watch can freeze the boss temporarily, but its five-heart cost makes repeated use inefficient.
Do not chase Queen Medusa across the room. Let her enter whip range, attack during her pause, and reset your position. If Simon is pushed toward an edge, prioritize moving away from the edge before attacking. After the boss disappears, collect the Magic Crystal. It fully restores health and ends the stage.
- Remain near the center of the boss room.
- Destroy serpents before they restrict Simon’s movement.
- Use Boomerang, Fire Bomb, Holy Water, or the whip according to the weapon you retained.
- Collect the Magic Crystal immediately after Queen Medusa is defeated.
Before you move on
- Simon has passed the Black Knight, Medusa Head, moving-ledge, crusher, and Dragon Skull Cannon sections.
- Queen Medusa has been defeated in the final room.
- The Magic Crystal has been collected after the boss disappears.
- The game transitions to Stage 3, confirming that Stage 2 is complete.
Stage 3 — Outdoor Wicked Child Route and the Mummy Men
Stage 3 is the outdoor Wicked Child section, not an underground crypt. Move right through the castle rooftops and elevated platforms while dealing with Fleamen, Skeletons, Ravens, Medusa Heads and Bone Pillars. The main danger is not enemy durability but knockback near pits and awkward jumps made while Ravens or Medusa Heads are active. Advance methodically, keep a dependable sub-weapon if possible, and do not spend all your hearts before the final arena. The stage ends with the Mummy Men. Defeat both, then collect the Magic Crystal to restore health and advance to Stage 4.
1. Move right through the opening Fleaman section
Begin by moving right through the opening rooftop area and breaking candles as you advance. Collect hearts when they are safely in your path, but do not stop in an exposed position merely to pick up a score item. The first Fleamen jump unpredictably from their platforms, so let them come toward Simon instead of jumping directly into them.
When a Fleaman lands near Simon, duck and whip if it is at low height, or strike immediately after it touches down. This is safer than trying to clear several Fleamen with a hurried jump. If one is above Simon on a raised block, move beneath it and wait for its jump before attacking.
Skeletons begin appearing after the opening platform section. Watch their movement before committing to the next jump. A Skeleton that reaches Simon during a leap can cause knockback, so defeat it from the edge of a platform or pass only after it has moved away from the landing area.
- Move right from the stage entrance.
- Let Fleamen jump into whip range instead of rushing beneath them.
- Kill or safely bypass Skeletons before making narrow jumps.
2. Cross the first platform and stair sequences
Continue right across the raised platforms and stairs. The stage repeatedly places enemies near edges, so stop at the edge of a platform and identify the next landing area before jumping. If a Skeleton is walking toward the destination, wait for it to move or defeat it first.
Use stairs as controlled positions against approaching enemies. Simon can whip from a stair and can use a sub-weapon while positioned correctly on one, but jumping onto a stair is not the same as walking onto it. Approach the stair and use the direction input to climb or descend rather than assuming a normal jump will land securely.
Ravens become the major hazard in the next outdoor sections. They swoop toward Simon and can knock him into a pit even when Simon would otherwise survive the hit. Stop before a gap, allow a Raven to enter attack range, then whip it while it is descending. Do not jump across a gap while a Raven is still approaching from the far side.
- Inspect each landing area before jumping.
- Use stairs deliberately instead of jumping onto them blindly.
- Destroy Ravens before crossing nearby gaps.
3. Handle Ravens and Bone Pillars without rushing
In the longer rooftop passages, Ravens appear around staircases and separated platforms. Fight them from stable ground whenever possible. If a Raven flies past Simon, do not immediately chase it toward the next gap; wait for its return pattern and attack when it comes back into range.
Bone Pillars guard parts of the route and fire projectiles across the platform. Stand at a distance and whip the incoming fireballs when they threaten Simon. This can clear the immediate lane while you continue attacking the pillar. Holy Water, the Axe or the Boomerang can help when a Bone Pillar is positioned awkwardly, but use the weapon that preserves your safest route rather than replacing a powered-up sub-weapon casually.
When a Bone Pillar and Raven share the same approach, deal with the Raven first if it can knock Simon into a pit. Then advance far enough to attack the pillar without standing where its projectiles will intersect Simon's jump.
- Treat Ravens as the priority near pits.
- Whip Bone Pillar projectiles when they block the route.
- Avoid replacing a powered-up sub-weapon for an unnecessary pickup.
4. Pass the Medusa Head sections
The Medusa Head sections are easier when Simon keeps moving. Their looping flight paths punish hesitation, especially near the edges of platforms. Walk or jump through the open space, and whip only when a head occupies the next safe position. Do not stop in the center of a narrow passage to attack every Medusa Head.
At stairs and elevated platforms, time Simon's movement so a Medusa Head passes before he commits to the next jump. If several heads approach at different heights, stay on the ground when possible; jumping can place Simon directly into a second head's path.
Continue breaking candles when Simon is secure. Hearts are valuable because they let you use Holy Water/Fire Bomb, the Boomerang or another sub-weapon during the later Bone Pillar and Mummy Men encounters. Preserve any Double Shot or Triple Shot upgrade rather than collecting a replacement weapon without a clear reason.
- Keep moving through Medusa Head corridors.
- Avoid jumping into a second Medusa Head at a different height.
- Save hearts and protect Double Shot or Triple Shot upgrades.
5. Reach the final approach to the Mummy Men
After the Medusa Head and Bone Pillar sections, continue right through the final outdoor platforms and stairs. The last approach combines enemy movement with pit danger, so clear the immediate Raven or Skeleton before stepping onto the next narrow platform. If an enemy is not blocking progress, passing it is often safer than fighting beside a drop.
Take any safe heart or health pickup on the route, but do not pause beneath an active enemy merely to collect an optional reward. If Simon reaches the boss doorway with a full or nearly full health bar and several hearts, that is more valuable than a risky score item.
Before entering the arena, decide whether to keep the current weapon. Holy Water/Fire Bomb is useful because it can control a Mummy Man when placed at the correct approach point. The Boomerang is also useful at range. The whip remains adequate if the sub-weapon has been lost, provided Simon stays patient and avoids standing between both bosses.
- Clear enemies that block the next platform or staircase.
- Prioritize health and survival over optional score items.
- Enter the boss room with several hearts if possible.
6. Prepare the Mummy Men arena
The Mummy Men fight begins after Simon advances far enough into the room. If the arena contains accessible heart candles, collect them before moving far enough right to trigger the battle. A hidden Pork Chop may also be available in the arena's lower-left area; use it only when Simon needs the health and can break the block without walking into an active Mummy Man.
Once the fight starts, keep both Mummy Men visible. They walk across the room and throw cloth-like projectiles that travel in a wave. The projectiles can be avoided with spacing, jumped when their height allows, or destroyed with attacks. The dangerous position is between the two Mummy Men, where Simon can be hit from either side.
Holy Water/Fire Bomb is the safest general-purpose choice because a correctly placed bottle can hold a Mummy Man in place long enough for additional whip strikes. Throw it as a Mummy Man approaches rather than from across the room. The Boomerang can attack at range and return through the arena. With only the whip, stand near one side, strike when a Mummy Man enters range, and retreat before the second boss closes in.
- Collect safe heart candles before triggering the fight.
- Use the hidden Pork Chop only when Simon can reach it safely.
- Keep both Mummy Men on screen and avoid standing between them.
- Place Holy Water/Fire Bomb at an approaching Mummy Man rather than wasting throws at long range.
7. Defeat both Mummy Men and advance
Attack the Mummy Man that approaches first, then keep moving so the second one does not trap Simon against a wall. When the two bosses overlap or approach from the same side, use Holy Water/Fire Bomb, the Boomerang or repeated whip strikes to deal damage during the brief opening. Do not chase a retreating Mummy Man across the middle of the room while a cloth projectile is already crossing the arena.
If Simon takes damage, return to a side of the room and re-establish spacing rather than continuing to attack recklessly. The bosses are more manageable when Simon controls one side of the arena. Short, deliberate attacks are safer than spending every heart immediately.
After both Mummy Men are defeated, collect the Magic Crystal that appears. It restores Simon's health and completes the stage transition. The next level is Stage 4, which contains the underground and moving-platform sections and eventually the Frankenstein and Igor encounter. Do not confuse those hazards with Stage 3's outdoor route.
- Defeat both Mummy Men.
- Collect the Magic Crystal after the fight.
- Confirm that the game advances to Stage 4.
Before you move on
- Simon has progressed right through the outdoor Wicked Child section.
- The Fleaman, Skeleton, Raven, Medusa Head and Bone Pillar hazards have been passed or defeated.
- Both Mummy Men are defeated in the final arena.
- Simon collects the Magic Crystal and receives the health restoration.
- The game advances to Stage 4, confirming completion of Stage 3.
Stage 4 — The Tower and Mid-Game Bosses (Level 4)
Level 4 begins in the underground catacombs, crosses a series of water gaps and moving platforms, then rises into an outdoor area where Eagles drop Hunchbacks. After that section, Simon enters corridors guarded by Bone Dragons and reaches the Frankenstein and Igor boss fight. Preserve a useful sub-weapon whenever possible, especially the Fire Bomb, also called Holy Water in many walkthroughs, because it can repeatedly stun enemies and create safe attack windows.
1. Enter the catacombs and prepare your equipment
Simon begins Level 4 by dropping into the underground area. After landing, move right and defeat the opening Bat before committing to the moving-platform route. Do not rush onto the first platform while the Bat is still near Simon; a hit during the jump can send you into the water or leave you badly positioned for the Fishmen.
Break candles when Simon is standing securely on solid ground. The early item pattern can vary in value depending on what you already carry, so do not risk a life trying to reproduce an exact candle order for the Morning Star. If Simon already has the longer whip, treat additional whip-upgrade attempts as optional and prioritize survival.
The important preparation pickup appears later in the underground section. The upper-right candle on the raised route can provide the Fire Bomb, commonly referred to as Holy Water. Take it if available and keep it for the Bone Dragons and Frankenstein fight. The Stopwatch can also appear during this part of the level, but it is optional and is generally less valuable here than a reliable damaging sub-weapon.
- Defeat or bypass the opening Bat before boarding the first moving platform.
- Break candles only when Simon is stable.
- Do not rely on an unverified fixed candle order for the Morning Star.
- Prioritize the Fire Bomb/Holy Water weapon when it appears in the upper-right route.
2. Cross the water and moving platforms
Board the first horizontal platform when it is close enough to the destination that Simon will not need a desperate midair correction. Fishmen leap from the water while the platform moves. Stand near the platform’s safe interior, face the approaching Fishmen, and whip them before they reach Simon. Avoid walking toward the platform edge while attacking.
After the first crossing, continue over the smaller platforms and break candles only after Simon has settled. The route then uses more moving platforms beneath low rock overhangs. Crouch while riding beneath these ceilings. Standing at the wrong moment can cause Simon to collide with the overhead rock or lose his footing.
When a moving platform reaches a ledge, wait for it to align before jumping. The dependable rhythm is to board, crouch beneath the overhang, attack only enemies that threaten the platform, and jump from the side nearest the destination. Candles over open water are optional. A large heart or other pickup is not worth a fall if the jump is uncertain.
Bats and Fishmen can attack during these crossings. Whip enemies that approach Simon’s landing area, but do not swing while walking off the platform. If a Fishman rises beside Simon on a narrow platform, attack immediately instead of trying to jump over it.
- Board platforms near the destination rather than jumping from their farthest point.
- Crouch under low rock ceilings.
- Clear Fishmen and Bats that threaten the landing point.
- Skip risky candles over open water.
3. Climb into the Eagle and Hunchback section
After the final underground crossings, climb the stairs into the open area. Eagles fly across the screen and drop Hunchbacks. The Hunchbacks are the immediate threat: watch the point where one will land and whip it as it touches down. You do not need to chase the Eagles across the screen.
Continue right at a controlled pace. If a Hunchback lands behind Simon, turn around and defeat it before moving on. Jumping forward without checking behind can put Simon between a Hunchback and an Eagle attack. The Fire Bomb/Holy Water weapon can control a landing spot, but preserve enough uses for the Bone Dragons and boss whenever possible.
At the first Bone Dragon, stand at the farthest distance where the whip can reach the skull. Repeatedly attack from that position rather than walking into the dragon’s body. When it launches a fireball, remain facing the dragon and whip the projectile if it enters the whip’s path. This is safer than backing away blindly into the next hazard.
- Watch the Hunchbacks’ landing points instead of pursuing Eagles.
- Turn around when a Hunchback lands behind Simon.
- Use maximum whip range against the first Bone Dragon.
- Destroy incoming fireballs when they enter whip range.
4. Pass the Bone Dragons and recover before the boss
The indoor section contains more Bone Dragons in tighter corridors. Approach each skull from the side and attack before moving into contact range. The Fire Bomb/Holy Water weapon is particularly useful because its ground flame can stun a Bone Dragon, allowing Simon to follow with repeated whip attacks. If the dragon’s height makes the bottle awkward to place, use the whip from a safe distance instead.
A breakable block near one of the Bone Dragon encounters can contain Pork Chop. Take it if Simon needs health and the area is safe, but do not stand beside a dragon while trying to collect it. The food is optional; surviving the approach is more important than obtaining every pickup.
For the final Bone Dragon before the boss, crouch and whip from the farthest practical position. Keep facing the skull and destroy fireballs when possible. Once the corridor is clear, enter the boss door with the Fire Bomb/Holy Water weapon equipped if you still have it. Do not spend the last hearts on incidental enemies unless the attack creates a clear route forward.
- Use Fire Bomb/Holy Water to stun Bone Dragons when the placement is safe.
- Take Pork Chop only when Simon can collect it without trading damage.
- Attack the final dragon from maximum practical range.
- Enter the boss room with a useful sub-weapon whenever possible.
5. Defeat Frankenstein’s Monster and Igor
The boss encounter contains Frankenstein’s Monster and Igor. Frankenstein is the target whose health must be depleted. Igor cannot be killed; Simon can only stun him temporarily. Igor hops around the room and throws fireballs, while Frankenstein advances across the floor and can trap Simon against a wall or ledge.
At the beginning, move toward the lower-right ledge if the approach is clear. This position can provide an early attack opportunity and gives Simon a platform from which to jump over either enemy. Do not remain on the ledge if both enemies close in; move back to open floor before Simon is cornered.
The Fire Bomb/Holy Water weapon is the strongest practical option when carried into this fight. Throw it at Frankenstein as he approaches, then keep attacking during the stun. With a Double or Triple Shot, repeated bottles can maintain pressure and may defeat Frankenstein before Igor becomes difficult to manage. Without a multiplier, use individual throws to create openings rather than emptying the heart supply immediately.
The Boomerang and Dagger allow Simon to attack from farther away. Throw them through Frankenstein, then retreat toward the side with the most room. The Axe can also damage from a distance and may interfere with Igor’s movement, although its arc requires more careful positioning. If Simon has no suitable sub-weapon, use the whip when Frankenstein enters range, briefly stun Igor when he threatens to corner Simon, and jump over an enemy only when the floor is blocked.
Keep both enemies from occupying the same side of Simon. Change sides through the open floor or by using the ledges, and watch Igor’s fireballs while attacking Frankenstein. Trading hits is dangerous because Frankenstein’s contact damage and Igor’s projectiles can overlap.
- Attack Frankenstein; Igor can only be stunned.
- Use the lower-right ledge for an early attack opportunity when safe.
- Prefer Fire Bomb/Holy Water stun pressure if available.
- Keep an escape route open across the room.
- Avoid letting both enemies trap Simon against one wall or ledge.
6. Collect the red orb and confirm the clear
When Frankenstein’s health is depleted, the encounter ends and the red orb appears. Move into it promptly. The orb restores Simon’s health and completes the boss transition; lingering in the room wastes time while the stage timer continues.
The Level 4 clear is confirmed when Simon has collected the red orb and the game advances to Level 5. If Simon dies during the boss fight, the next attempt begins without assuming the same sub-weapon or heart supply, so rebuild the route carefully and prioritize the Fire Bomb/Holy Water or another weapon that gives reliable control.
- Frankenstein’s health is empty.
- The red orb has been collected before time expires.
- The game advances to Level 5.
Before you move on
- Simon has crossed the underground water and moving-platform sections.
- Simon has passed the Eagle-and-Hunchback outdoor area.
- The Bone Dragon corridors have been cleared or safely passed.
- Simon has reached and defeated Frankenstein’s Monster while controlling Igor with temporary stuns and positioning.
- The red orb has been collected and the game advances to Level 5.
Stage 5 — Grand Halls and Heavier Hits (Level 5)
Level 5 contains Stages 13, 14 and 15. Stage 13 opens with Hunchbacks, then moves through White Skeletons, stairs, Red Skeletons and more Hunchbacks before the exit. Stage 14 introduces Axe Armors and continues with Red Skeletons through several stair rooms. Stage 15 begins with Dragon Skull Cannons and Red Skeletons, then ends with the dangerous Axe Armor and Medusa Head hallway before Death. Preserve Holy Water, the Cross, Fire Bombs or the Boomerang when possible, and collect Death’s Magic Crystal immediately after the fight to restore health and advance to Level 6.
Stage 13: defeat the opening Hunchbacks
Move only a short distance at the start of Stage 13 and let the two Hunchbacks approach. They jump toward Simon, so stay ready to whip at close range rather than charging into them. A sub-weapon makes this opening safer, especially Holy Water or the Fire Bomb. If one moves off-screen to the left, it can disappear; do not turn the opening into a risky chase.
After the first Hunchbacks are gone, break the nearby candle with the large heart if you need hearts, then continue right. The next candles contain small hearts or whip upgrades. A White Skeleton approaches on the lower route, while another White Skeleton attacks from above. Move close enough to defeat the lower Skeleton quickly and watch for bones descending from the upper platform. Do not jump blindly beneath the upper Skeleton.
The candle before the stairs contains the Fire Bomb. Take it if your current weapon is expendable and keep it for the Hunchbacks and Axe Armors ahead. Just beyond the stairs is another Hunchback. Set the Fire Bomb at its feet or attack it from whip range, then climb while watching the Skeleton near the stair route.
- Identify the opening enemies as Hunchbacks.
- Let the Hunchbacks approach before attacking.
- Use Holy Water or Fire Bombs to control Hunchbacks when available.
- Defeat the lower White Skeleton before committing to the next jump.
- Watch for bones from the upper White Skeleton.
- Keep the Fire Bomb if it does not replace a better weapon.
Stage 13: White Skeletons, stairs and the hidden one-up
After climbing, clear the Skeleton near the upper route and move left through the candle line. The next screen places another White Skeleton above and one to the right. Defeat the right-hand Skeleton promptly, then advance while watching the upper Skeleton's bone throws. The nearby large-heart candle is worth taking when your health is low, but do not stop beneath an active bone trajectory.
Continue to the stairs and climb carefully. The candles on the upper route provide small hearts. When you reach the stairs at the left side, walk past them and press against the wall for several seconds. A hidden one-up appears below. Descend immediately and collect it if the area is clear. This life is optional; abandon it rather than taking a hit from a returning Red Skeleton or a poorly timed bone.
After collecting the one-up, use the lower candles for hearts and money. A breakable block in the upper-right portion of this section contains a Double Shot. It is useful with Holy Water or the Fire Bomb, but do not replace a weapon that you specifically need for the later rooms. Check the drop before walking into it.
- Defeat the White Skeletons before climbing into their bone paths.
- Walk past the upper stairs and touch the wall to reveal the optional one-up.
- Descend quickly to collect the one-up.
- Skip the one-up if the descent is unsafe.
- Check the upper-right block for the optional Double Shot.
- Do not replace a preferred sub-weapon accidentally.
Stage 13: bypass Red Skeletons and collect the Pork Chop
The next section introduces Red Skeletons. They collapse when struck but rise again, so they are delays rather than permanent kills. Strike one only when it blocks a stair, narrow landing or doorway. Otherwise, jump over it and continue right before it reforms. Repeatedly attacking a fallen Red Skeleton wastes time and can leave Simon exposed to the next Hunchback.
Two Hunchbacks occupy the route after the first Red Skeletons. Use Holy Water or Fire Bombs on the floor so a Hunchback walks into the flames, then move through while it is held. If you lack a useful sub-weapon, let the Hunchback jump past and turn around for a whip strike after it lands. Continue right past the next Red Skeleton and defeat the final Hunchback only when it blocks the route.
After the final Hunchback, whip the upper-left block behind it to reveal the optional Pork Chop. Take it if Simon needs health and the surrounding area is safe. The remaining candles provide hearts or money, and no further enemy group blocks the door. Enter Stage 14 with Holy Water, Fire Bomb or the Cross whenever possible.
- Treat Red Skeletons as temporary obstacles.
- Bypass Red Skeletons whenever the route is open.
- Use floor-based sub-weapons against Hunchbacks.
- Whip the upper-left block after the final Hunchback for the optional Pork Chop.
- Take the Pork Chop only when it can be reached safely.
- Keep a reliable weapon for Stage 14.
Stage 14: Axe Armors and returning axes
Stage 14 introduces Axe Armors. Their axes travel outward and then return, so jumping over the first pass does not finish the hazard. Watch the return path before climbing or descending beside an Axe Armor. A standing whip can destroy an axe when it reaches Simon, which is often safer than trying to duck or jump through the projectile.
Use Holy Water or Fire Bomb at an Axe Armor's feet whenever possible. The flames can hold the enemy in place while Simon attacks or walks past. The opening also includes a Hunchback; deal with it first if it is threatening the landing area, then concentrate on the Axe Armor. If the Axe Armor backs off-screen, let it disappear instead of pursuing it.
Do not take the Axe from a candle if doing so would replace Holy Water or the Fire Bomb. The Axe can be useful against later enemies, but the retained Fire Bomb is generally more forgiving against Axe Armors and the final hallway. If no preferred weapon remains, attack from just outside the armor's contact range and destroy incoming axes with the whip.
The middle rooms contain stair transitions, candles and Red Skeletons. Move through the Red Skeletons rather than trying to keep them defeated. On the lower route, another Axe Armor appears with a Red Skeleton behind it; defeat the armor quickly or lure it away so the Red Skeleton does not trap Simon against the stairs. Optional money bags and shot multipliers are not worth damage when health is low.
- Track both the outward and returning paths of every Axe Armor axe.
- Destroy incoming axes with the standing whip when necessary.
- Use Holy Water or Fire Bomb beneath Axe Armors.
- Avoid replacing a preferred weapon with the optional Axe.
- Bypass Red Skeletons instead of waiting for permanent defeat.
- Prioritize safe movement over optional score items.
Stage 14: final stair rooms and preparation for Stage 15
Continue through the upper and lower stair rooms, clearing only the Axe Armors that block movement. Several Red Skeletons patrol the route. Knock one down once, then pass immediately; if it is not blocking the next landing, jump over it. Keep enough hearts for sub-weapon throws in Stage 15 rather than spending them on every candle or money bag.
Some upper blocks contain Double Shot or Triple Shot upgrades depending on the current shot level. Take a multiplier when it is safely reachable, especially if you are keeping Holy Water, Fire Bomb or the Cross. Avoid jumping into a new weapon without checking its identity, because an unwanted pickup can remove the weapon needed for Death.
Before the Stage 15 door, collect the nearby hearts if they are safe. Entering the next stage with a powered-up weapon and a reserve of hearts is more important than collecting every optional item in Stage 14.
- Defeat only the Axe Armors that block progress.
- Pass Red Skeletons immediately after knocking them down.
- Take a shot multiplier only when the route is safe.
- Avoid unwanted weapon replacements.
- Save hearts for Stage 15 and Death.
Stage 15: Dragon Skull Cannons and Red Skeletons
Stage 15 begins with a Dragon Skull Cannon, not a Bone Pillar. Its fireballs are the immediate hazard. Stand at a range where Simon can whip the incoming shots, then keep striking the cannon. The first section's fireballs travel across Simon's level, so do not rush directly into the cannon while a shot is already crossing the floor. A whip can remove the fireballs as well as damage the cannon.
The opening candles provide hearts, including a large-heart pickup, and a Boomerang appears later on the lower route. Keep the Fire Bomb or Holy Water if you still have one; the Boomerang is a fallback rather than an automatic replacement. A Red Skeleton patrols the lower area. Ignore it if the route is open and concentrate on removing the Dragon Skull Cannon.
Climb the stairs only after the lower cannon is safe. A Red Skeleton patrols the upper route while another Dragon Skull Cannon fires from the next position. Let the Red Skeleton move toward the far side, then attack the cannon from the lower ledge when possible. From that position, its fireballs can pass over Simon instead of forcing a close-range exchange. Climb after the cannon is destroyed, then clear or bypass the Red Skeletons while collecting the small-heart candles.
Before climbing into the next section, check the far-right wall for the optional Pork Chop. Take it if health is missing and the Red Skeletons are not positioned to interrupt the pickup. This is the last safe recovery opportunity before the hardest hallway, so use it without standing in an active enemy path.
- Identify the opening hazards as Dragon Skull Cannons.
- Whip the cannon's fireballs when they enter range.
- Defeat the lower cannon before climbing.
- Use the lower ledge to attack the upper cannon safely.
- Bypass Red Skeletons when they do not block progress.
- Check the far-right wall for the optional Pork Chop.
- Keep Holy Water or Fire Bomb if possible.
Stage 15: Axe Armor and Medusa Head hallway
After the Dragon Skull Cannon section, climb into the long hallway leading left. Two Axe Armors occupy the route while Medusa Heads move through the air. Prioritize the Axe Armors because their contact and returning axes can force Simon into a Medusa Head. Do not stop to collect every candle while both enemy types are active.
Holy Water or Fire Bomb is the safest weapon here. Throw it so the bottle lands at an Axe Armor's feet, then walk through while the flames hold it. With the Cross or Boomerang, keep throwing while advancing and use the whip to destroy axes that reach Simon. If a Medusa Head approaches during a jump, finish the landing before attacking; a rushed jump can carry Simon into the armor or a projectile.
The candle near the stairs contains a large heart, but Medusa Heads can approach from the right while Simon is collecting it. Take it only if the area has cleared. The other candles are mostly small hearts or money bags. At the far-left platform, prepare for the boss entrance instead of continuing to farm the hallway.
- Prioritize both Axe Armors over optional candles.
- Use Holy Water or Fire Bomb at the Axe Armors' feet.
- Keep moving while watching Medusa Head trajectories.
- Use the Cross or Boomerang if the preferred weapon was lost.
- Take the large-heart candle only after the approach is clear.
- Reach the far-left platform to enter Death's room.
Defeat Death and collect the Magic Crystal
Death creates scythes that move toward Simon and can remain dangerous while he crosses the room. Enter with as much health and as many hearts as possible. Holy Water is the most reliable choice: throw it onto the platform where Death appears, then continue throwing as the effect expires. With good positioning, the flames can hold him in place long enough for repeated whip and sub-weapon damage.
If Holy Water is unavailable, use the Cross or Boomerang while moving laterally. Throw toward Death, then retreat toward the opposite side when scythes begin to converge. Whip scythes that threaten Simon's landing position, and do not let the fight push you into a wall. A Double or Triple Shot makes projectile control easier, but survival is more important than maintaining a perfect attack rhythm.
The four candles in the boss room provide small hearts. Use them only when the immediate scythe pattern is safe. Do not spend every heart on desperate throws; wait for Death to enter a controllable position, then resume attacking. If Simon dies, the next attempt can rebuild hearts and shot power from the Stage 15 candles before returning to the boss room.
When Death's health bar is empty, wait for the Magic Crystal to appear and collect it. The Crystal restores Simon's health and completes Level 5. Level 6 begins after the pickup, so do not leave the room without taking it.
- Enter Death's room with a reserve of hearts.
- Use Holy Water to control Death whenever possible.
- Use the Cross or Boomerang while moving laterally if Holy Water was lost.
- Destroy scythes that threaten the next landing.
- Collect safe boss-room hearts only when the scythe pattern allows it.
- Empty Death's health bar.
- Collect the Magic Crystal immediately.
- Confirm that Level 6 begins after the health restoration.
Before you move on
- Stages 13, 14 and 15 have been cleared.
- The Stage 15 Dragon Skull Cannon and Red Skeleton section has been passed.
- The Axe Armor and Medusa Head hallway has been crossed.
- Death's health bar has been emptied.
- The Magic Crystal dropped after Death has been collected.
- Level 6 begins after Simon's health is restored.
Stage 6 — Top of the Castle and Dracula's Room
Death is the boss at the end of Level 5. Collect the Magic Crystal he leaves behind to completely restore Simon's health and begin Level 6. The final level has a Phantom Bat bridge, a Clock Tower climb, and the approach to Dracula's room. The bottom of the staircase leading to Dracula's room is a hard checkpoint in the original North American NES release. Reach it before entering the final hallway, then prepare your hearts and sub-weapon, defeat both forms of Dracula, and confirm completion through the castle-collapse scene and credits.
Defeat Death and collect the Magic Crystal
Death is the Level 5 boss, not the Level 6 boss. Keep moving while watching the small scythes he creates. They travel toward Simon and return if they miss, so destroy scythes that threaten your landing or approach from a reachable angle instead of standing still and waiting for Death to reappear.
Fire Bomb is the strongest control option if you still have it, especially with a Double or Triple Shot. The Cross and Boomerang also help cover space while Simon moves. Without a useful sub-weapon, concentrate on survival, whip Death when he materializes within range, and remove scythes that would trap you.
After Death is defeated, walk into the Magic Crystal immediately. It completely restores Simon's health and ends Level 5. This full recovery is the intended preparation for the final level. Do not leave the room before collecting it.
- Treat Death as the Level 5 boss.
- Keep moving against the returning scythes.
- Use Fire Bomb, Cross, or Boomerang when available.
- Collect the Magic Crystal after the fight.
- Confirm the health refill before Level 6 begins.
Cross the Phantom Bat bridge
Level 6 opens on a bridge with gaps and Phantom Bats. These are regular enemies here rather than a boss. Do not try to defeat every bat. Whip one if it blocks your immediate path, then pass underneath high bats and make deliberate jumps over bats that fly low across the platforms.
A bat that stops moving is preparing to charge. Move toward a position where contact will not knock Simon into a gap, then pass underneath or jump over it when the route opens. On the lower platforms, land near the safe edge and immediately prepare for the next jump instead of stopping to finish an enemy.
The goal is to reach the Clock Tower with as much health as possible. A hit near a gap can cause knockback and cost a life, so avoid unnecessary attacks on narrow ledges.
- Time jumps around the gaps.
- Pass underneath high Phantom Bats when possible.
- Jump over low bats with committed movement.
- Avoid lingering on narrow platforms.
- Reach the Clock Tower without wasting recovery resources.
Climb through the Clock Tower
Inside the Clock Tower, defeat the first skeleton when it reaches Simon's platform, then continue through the stair and gear rooms. Whip candles when safe, but do not stop on a moving gear or exposed ledge merely to collect an optional item. Stairs are useful defensive positions because Simon cannot be knocked backward in the usual way while standing on them.
Eagles carrying Fleamen are the main hazard. Before jumping, wait until the destination platform is clear. Whip an Eagle or Fleaman when it enters range, and do not begin a jump while a Fleaman is about to land where Simon must touch down. In crowded rooms, letting enemies move past is safer than forcing a jump through them.
A Pork Chop is hidden in the gear section and provides optional partial recovery. Take it only if the route is clear. The Stopwatch can help in the Eagle and Fleaman sections, but the official manual identifies a five-heart cost per use. Spend it only when freezing the enemies will prevent likely damage or make a staircase safe.
In the last enemy room, wait until the lower platform is clear of Fleamen. Drop down, move to the staircase, and climb upward. Continue through the upper rooms until you reach the long staircase leading to Dracula's approach.
- Clear landing areas before jumping.
- Use stairs to reduce knockback risk.
- Treat the Pork Chop as optional.
- Spend the Stopwatch only when its cost is justified.
- Climb to the final staircase.
Activate the final checkpoint and prepare
When Simon reaches the bottom of the staircase leading to Dracula's room, the game records a hard respawn point. If Simon loses an ordinary life after reaching this location, he returns to this staircase rather than replaying the entire Clock Tower. The checkpoint does not preserve the previous state: health, hearts, sub-weapon, and Double or Triple Shot status are not carried over as guaranteed resources after the death.
This checkpoint is different from simply pausing or entering the room. If a Game Over occurs, choose CONTINUE to resume the final level under the game's continue rules. Do not expect the defeated-life inventory or health to remain intact. The checkpoint makes repeated attempts practical, but it does not create a stocked Dracula attempt.
Climb the staircase and enter the hallway. Whip the candles for hearts and useful items, then return down the staircase and come back up to regenerate the candles. Repeat only while the timer allows. Build a substantial heart reserve, retain the long chain whip if possible, and avoid replacing a sub-weapon you intend to use.
The first candle in the hallway contains a Boomerang. In Dracula's room, the far-left candle contains the Fire Bomb. Pick up the Fire Bomb before committing to the battle if you want its second-form control. Entering the room starts the final fight after a short delay.
- Reach the bottom of the final staircase to activate the checkpoint.
- Understand that the checkpoint does not preserve resources.
- Use CONTINUE after Game Over rather than expecting the old inventory.
- Farm hallway candles only while time remains.
- Keep the long whip and collect the Fire Bomb before the fight.
Defeat Dracula's first form
Dracula teleports around the room in his cloaked humanoid form. Only his head can be damaged. Stand far enough away to react, then use a standing jump and whip the head as he finishes materializing. If he remains in range, a second whip while Simon lands may connect, but do not trade a hit for an extra attack.
When Dracula opens his cloak, he releases three fireballs based on Simon's position. Do not jump immediately. Let the spread develop, then jump over low fireballs or move beneath a higher one when the route is clear. An early jump can place Simon directly in the upper part of the spread.
The Cross or Boomerang can provide useful coverage, but the whip is reliable and does not require a special stun setup. Holy Water does not provide the dependable stun control associated with the second form, so focus on head hits, fireball avoidance, and repositioning after each teleport.
- Attack Dracula's head only.
- Wait for him to finish materializing.
- Delay the jump against the fireball spread.
- Use Cross or Boomerang for additional coverage when available.
- Do not rely on Holy Water to stun the first form.
Control and defeat the second form
After the first form's health is emptied, Dracula changes into a large monster. The head remains the damage target. He moves through high and low jumps and can produce fireballs, so keep open floor behind Simon and avoid backing into a wall or corner.
Use the Fire Bomb from the far-left candle in Dracula's room. Throw it so the flame catches the monster as he lands or crosses the floor. The flame holds him in place briefly, giving Simon time to jump-whip the head. With a Double or Triple Shot, throw another Fire Bomb before the previous control window ends, then continue alternating Fire Bombs and jumping whip attacks.
A low jump cannot safely be crossed by simply walking underneath. If the jump is unclear, retreat and wait. If the Fire Bomb is unavailable, use the Cross or Boomerang after a landing and attack from the safest distance available, though the fight is less controlled. Continue striking the head until the second form is defeated.
- Keep open floor behind Simon.
- Use Fire Bomb to control the second form when possible.
- Jump-whip the head during the flame window.
- Retreat instead of walking under an uncertain low jump.
- Use Cross or Boomerang after landings if Fire Bomb is unavailable.
Before you move on
- Death has been defeated at the end of Level 5.
- The Magic Crystal has been collected and Simon's health has been restored.
- The Phantom Bat bridge has been crossed.
- The Clock Tower has been climbed.
- The final staircase checkpoint has been reached.
- Both forms of Dracula have been defeated by damaging their heads.
- The castle-collapse sequence appears.
- The credits appear, confirming completion of the original six-level campaign.
- If the harder second quest begins afterward, the first campaign is already complete.
Boss Tactics — Giant Bat, Medusa, Mummies, Frankenstein, Death and Dracula
The original North American NES Castlevania has five regular boss encounters before the final Dracula battle: the Giant Bat, Queen Medusa, the Mummies, Frankenstein's Monster with Igor, and Death. Dracula is a separate final encounter with two forms. Holy Water is the most dependable control weapon against several grounded bosses, while the Axe covers elevated targets and scythes, and the Cross or Boomerang gives useful long-range pressure. The Watch costs five hearts per use and is helpful against the Giant Bat or Queen Medusa, but it has no useful effect against the Mummies, Frankenstein, Death, or Death's scythes. Each regular boss leaves a Magic Crystal, shown as a red recovery orb, that restores Simon's health and advances the game. Dracula provides no equivalent recovery item; defeating both forms and reaching the castle-collapse sequence and credits confirms completion.
Giant Bat — hold position and punish its approaches
Enter the room and stay near the left side of the lower stairs rather than chasing the Giant Bat. It moves unpredictably, then makes low swoops across the room. Let it come into range. When it passes low, duck or step out of its path and attack as it crosses Simon's position. Avoid following it beneath the stairs, where a mistimed jump can turn a safe dodge into contact damage.
The Axe is the clearest choice because its arc reaches the bat while it is above Simon. Throw as the bat approaches, then return to the stairs or open floor. The Cross, also called the Boomerang in many guides, is another strong option because it travels across the room and returns. A Double Shot increases pressure, but do not spend every heart if your reserve is small.
The Watch can freeze the Giant Bat and create a safe whip window, but each use costs five hearts. Use it only if the bat is closing on Simon or if you have enough hearts to preserve the rest of the run. If no useful sub-weapon is available, wait for a low pass and use a jump-whip. After the bat is defeated, walk into the Magic Crystal immediately. It fully restores health and is the required pickup to advance.
- Stay near the left stair area and let the bat approach.
- Use the Axe for high flight paths or the Cross for sustained range.
- Use the Watch only when its five-heart cost is justified.
- Collect the Magic Crystal after victory.
Queen Medusa — control the floor and clear snakes
Once the boss room has finished scrolling, move to the right side and keep enough room to retreat. Queen Medusa rises from the central statue, travels horizontally, and releases small Medusa enemies as she comes down toward the floor. Whip those snakes as soon as they land. Allowing several to remain on the floor makes Medusa's next pass much harder to dodge.
Holy Water is the preferred weapon. Throw it onto the floor as Medusa approaches or descends. The flame can hold her in place, allowing one or two whip strikes before another bottle is placed. Maintain the pattern rather than standing directly beneath her. The Watch is also effective here and can freeze her for repeated whip attacks, but the five-heart cost makes it a reserve option rather than an automatic choice.
The Cross or Boomerang works from the right side if Holy Water is unavailable. It does not control her as reliably, so prioritize survival and use crouching or jump-whips when necessary. Do not confuse Queen Medusa with the Medusa Heads encountered in the approach. Once her health is depleted, collect the Magic Crystal before leaving the room.
- Move to the right after the room settles.
- Whip snakes before they accumulate on the floor.
- Prefer Holy Water; use the Watch only when the heart cost is acceptable.
- Collect the Magic Crystal after the fight.
The Mummies — keep both enemies in front of Simon
The Mummies move back and forth around raised blocks, with a Pork Chop hidden in one of the lower blocks. The main danger is allowing one mummy to pass behind Simon while the other approaches from the front. Use the blocks to keep both enemies on one side. If the spacing collapses, retreat upward instead of jumping through a mummy.
Holy Water is the safest method. Stand on the raised block and throw bottles when the pair enters range. The flames can repeatedly hold them in place. If you have the Cross or Boomerang, crouch on the block and fire from a distance; a Double or Triple Shot makes this much safer. Do not pick up the Pork Chop until the health recovery is worth the exposure, because striking its block can change the room's positioning.
Without a suitable sub-weapon, crouch and whip from the raised block. Turn to influence the mummies' direction and retreat to the higher blocks when either one gets too close. The Watch has no useful effect in this encounter, so do not spend five hearts attempting to freeze them. Defeat both Mummies, then collect the Magic Crystal.
- Keep both Mummies on the same side of Simon.
- Use the raised blocks for distance and height.
- Prefer Holy Water or the Cross; rely on the whip if necessary.
- Do not waste the Watch here.
- Collect the Magic Crystal after both Mummies are defeated.
Frankenstein's Monster and Igor — damage Frankenstein while managing fireballs
Frankenstein's Monster is the required target. Igor cannot be defeated as the objective, so do not chase him around the arena. Igor hops between positions and fires projectiles while Frankenstein moves across the room. Stay near an open platform edge so Simon can jump over either enemy if the lane closes.
Holy Water is highly effective. Throw it at Frankenstein's feet as soon as he enters range, then place another bottle before the flame expires. With a Double or Triple Shot, repeated flames can keep Frankenstein controlled while Igor remains less active. The Cross or Boomerang is a safer fallback when Simon needs to attack from farther away. The Axe can reach both enemies and may destroy fireballs, but its arc requires more careful timing.
If forced to use the whip, attack Frankenstein whenever he is within range and use short crouching or standing strikes to interrupt Igor when necessary. Do not retreat blindly into a corner. Keep one escape route open, jump over the closest threat, and resume attacking Frankenstein. When Frankenstein's health is depleted, collect the Magic Crystal to refill health and advance.
- Attack Frankenstein; Igor is not the required defeat target.
- Use Holy Water to interrupt Frankenstein whenever possible.
- Keep an open lane for jumping over Igor and his fireballs.
- Use the Cross, Axe, or whip if Holy Water is unavailable.
- Collect the Magic Crystal after victory.
Death — control the scythes and preserve lateral space
Death's scythes are the immediate threat. They appear, pause briefly, and then track Simon, so do not stand still after attacking. Destroy scythes when they enter a clear whip or sub-weapon path, then retreat far enough to avoid the remaining projectiles. Corners can provide temporary relief, but do not stay there because Death can float into the same space.
Holy Water is the most reliable weapon if you carried it from the approach. Stand near the right edge of the center platform and throw toward the platform where Death appears. Repeated bottles can keep him stunned, preventing or delaying the scythe pattern. A Double or Triple Shot makes this method much more consistent. If the stun breaks, stop attacking briefly and restore safe spacing before throwing again.
The Axe is a strong alternative because its arc reaches Death and scythes at different heights. The Cross or Boomerang provides distance but requires Simon to jump or reposition to intercept scythes. The Watch has no useful effect against Death or his scythes, so reserve those hearts for another purpose. After Death is defeated, collect the Magic Crystal immediately; it fully restores health before the final level.
- Keep moving while watching the scythes.
- Use Holy Water from the center platform when possible.
- Use the Axe or Cross if Holy Water is unavailable.
- Do not spend the Watch on Death or his scythes.
- Collect the Magic Crystal after victory.
Dracula's first form — strike the head with the whip or Cross
Before entering the fight, take the available sub-weapon and build a heart reserve from the candles near the top of the stairs. The left-side candle in Dracula's chamber contains Holy Water, but it is not a reliable damage or stun tool against Dracula's first form. If you want to use Holy Water during the second form, leave that candle intact until the first form is defeated.
Dracula's first form is vulnerable only in the head. He rises, opens his cloak, releases three fireballs, and teleports around the chamber. If he appears close enough, jump over the fireballs and whip the head during the opening. If he appears far away, prioritize destroying or avoiding the fireballs instead of forcing a risky approach. The Cross or Boomerang can attack from farther away, but the whip is dependable, especially with the Morning Star.
Keep moving while Dracula is off-screen or preparing another teleport. He can reappear close to Simon, so standing still invites contact damage. Do not throw Holy Water expecting the first form to freeze or take normal damage from it. When the first form is defeated, Dracula transitions directly into his second form. There is no Magic Crystal between the forms; use the transition to collect the chamber's Holy Water if you need it.
- Target Dracula's head only.
- Use the whip or Cross for first-form damage.
- Do not rely on Holy Water against the first form.
- Jump over the three-fireball spread and keep moving during teleports.
- Collect the chamber's Holy Water before the second form if needed.
Dracula's second form — use Holy Water to create head-attack openings
The second form is larger, jumps toward Simon, and can release another three-fireball spread. Keep to open ground and let Dracula approach rather than standing directly beneath him. When he makes a low approach, jump over him if the trajectory allows it, then move away immediately after the landing. His head remains the vulnerable target.
Holy Water is the preferred control weapon in this phase. Throw it onto the floor as Dracula lands or approaches. When it connects, the flame can hold him in place long enough for repeated whip strikes to the head. Place another bottle as the previous flame expires, but do not remain underneath him when the interruption ends.
If Holy Water is unavailable, the Cross or Boomerang remains usable, although it provides less control. The whip can also finish the fight if Simon has enough health and hearts to wait for safe openings. If Dracula pushes Simon toward a corner, stop attacking, survive the next jump or fireball pattern, and return to open ground. The Watch is unnecessary here. After both forms are defeated, wait through the castle-collapse sequence and credits.
- Continue targeting the head.
- Use Holy Water to interrupt the second form, then whip repeatedly.
- Back away when the flame ends and avoid standing beneath Dracula.
- Use the Cross, Boomerang, or whip if Holy Water is unavailable.
- Wait for the castle-collapse ending and credits after Dracula falls.
Before you move on
- The five regular boss encounters have been defeated in order: Giant Bat, Queen Medusa, the Mummies, Frankenstein's Monster with Igor, and Death.
- The Magic Crystal, or red recovery orb, has been collected after each regular boss to restore health and advance.
- Both forms of Dracula have been defeated by striking their heads.
- The castle-collapse ending and credits appear after Dracula's defeat.
- No final Magic Crystal or red orb is required after Dracula.
Recovery, Continues and Life Management
Castlevania’s recovery system is built around stage restarts rather than saved rooms. Losing one life sends Simon back to the beginning of the current stage, while losing all available lives brings up the Game Over screen. Choosing CONTINUE returns him to the beginning of the last level reached, allowing you to keep your progress through the castle without restarting from Stage 1. Use each restart to rebuild hearts, choose a suitable sub-weapon, and change the approach that caused the previous death.
1. Understand what causes a life loss
Simon loses a life when his health is depleted, when he falls into a pit or water hazard, or when the stage timer reaches zero. Some environmental hazards, such as crushing traps, can also kill him immediately. The game does not return you to the room where the death occurred.
After a life loss, expect to replay the current stage from its beginning or checkpoint. The boss arena, enemy damage, and exact position from the failed attempt are not preserved. Treat the next life as a fresh attempt through that stage rather than as a direct retry of the final room.
This distinction matters because rushing back to the death point with the same habits usually produces the same result. Identify whether the failure came from a missed jump, an enemy pattern, poor heart management, or entering the boss room already damaged.
- Expect to replay the current stage after an ordinary death.
- Do not expect to resume beside the boss or at the room where Simon fell.
- Identify the specific hazard that caused the life loss before repeating the route.
2. Use CONTINUE correctly after Game Over
When all available lives are gone, the Game Over screen presents CONTINUE and END. Move the selection to CONTINUE with SELECT and press START to resume. Choosing END abandons the run and returns to the title screen.
CONTINUE restarts the game at the beginning of the last level reached, not at the exact room where Simon died. In Castlevania’s original NES structure, this preserves access to the latest completed level checkpoint while requiring you to clear that level again. If the run has reached a later part of the castle, continuing is normally preferable to returning to Stage 1.
Specialist NES references describe the continue system as unlimited, with a new stock of lives for each restart. The exact life display can vary by how the game counts the starting life and remaining lives, so the practical rule is simply to use CONTINUE and expect another full attempt from the last reached level’s beginning.
- At Game Over, select CONTINUE rather than END.
- Press START to confirm the choice.
- Expect to replay the last reached level from its beginning.
- Use the restart to apply a revised route or boss plan.
3. Rebuild hearts before spending sub-weapons
Hearts are ammunition for Simon’s secondary weapons, so rebuilding them is the first recovery task. Whip candles along the opening route of the restarted stage, prioritizing safe groups that can be collected without standing near a pit or enemy spawn. Small Hearts add one heart, while Large Hearts add five.
Do not throw a sub-weapon at every minor enemy simply because you have just restarted. Use the whip against isolated zombies, bats, and other targets that can be handled from range. Save hearts for enemy formations, difficult platforming sections, and the boss approach.
A recovery route should leave you with enough hearts for the weapon you intend to use later. Holy Water is valuable for controlling grounded enemies, the Axe reaches elevated targets, and the Boomerang can provide repeated long-range coverage. The Watch freezes enemies but costs five hearts per use, so it should not be your default way to clear a stage.
- Whip safe candle groups near the start of the restarted stage.
- Collect Large Hearts when the route is safe.
- Use the whip on low-risk enemies to preserve sub-weapon ammunition.
- Reserve hearts for the next major hazard and the boss.
4. Reclaim a useful sub-weapon carefully
If the restart leaves you with an unsuitable weapon, watch the early candles and known item locations for a replacement. Do not pick up an item automatically: walking into a sub-weapon pickup replaces the weapon currently equipped.
Choose the weapon according to the stage rather than trying to collect every item. Holy Water is especially useful against enemies that must be stopped on the ground. The Axe helps against enemies positioned above Simon, while the Boomerang is useful when a target needs to be struck repeatedly at distance. The Dagger travels straight and quickly but generally provides less damage or control.
If you already have a weapon that is working, keep it unless the replacement solves a clear problem. Accidentally replacing a strong loadout can make the boss approach harder than the room that dropped the item.
- Identify the item before touching the candle drop.
- Avoid overwriting a useful weapon without a specific reason.
- Keep the weapon that best addresses the next difficult enemy group.
5. Collect the boss reward immediately
After a stage boss is defeated, a Magic Crystal appears. It is the red orb-like reward commonly associated with the end of each level, and collecting it fully restores Simon’s health before the game advances.
Move to the Magic Crystal promptly. Do not wander around the arena, delay until the timer is nearly empty, or risk falling while trying to reposition. This full refill is the most reliable recovery point in the game and lets you enter the following stage without carrying damage from the previous boss.
If a boss attempt fails, use the next life to reach the arena with more health and a better heart reserve. The goal is not merely to arrive quickly; it is to arrive with enough resources to survive the boss pattern and collect the Magic Crystal afterward.
- Defeat the stage boss.
- Move into the Magic Crystal as soon as it appears.
- Confirm that Simon’s health has been restored before advancing.
- Treat the next stage as a new section with a full health meter.
6. Decide whether to continue or change the plan
Continue after Game Over when you have reached a later level and understand enough of the route to improve. Replaying from that level’s beginning is usually more efficient than abandoning the run and repeating the entire castle.
Change the plan before spending another life. If a narrow platform costs you a life, wait for the enemy cycle and clear the immediate threat before jumping. If a room consumes most of your health, use the whip from maximum range or take a slower route through the enemy formation. If the boss is the problem, arrive with a powered whip, a deliberate sub-weapon, and a reserve of hearts.
Do not pursue money bags or risky bonus opportunities when they expose Simon to a fatal fall. Score matters for optional extra-life goals, but surviving the stage is more important during a completion run.
- Use CONTINUE to preserve access to the last reached level.
- Change the failed tactic before repeating the stage.
- Prioritize survival over score pickups in dangerous rooms.
- Reach the next boss with health and hearts reserved for the fight.
Before you move on
- You can distinguish an ordinary life loss from a Game Over continue.
- You can select CONTINUE with SELECT and START and resume from the last level reached.
- After restarting, you can rebuild hearts from safe candles without wasting most of the supply.
- You can choose and retain a deliberate sub-weapon for the stage’s hazards.
- After defeating a boss, you collect the Magic Crystal and enter the next stage with restored health.
Optional Completion Goals — 1CC, High Score and Clean Runs
After learning the six-level route, Castlevania offers several worthwhile optional challenges. A one-credit clear focuses on reaching the ending without selecting Continue after a Game Over. A minimal-continue run allows a predetermined number of recoveries. A high-score run emphasizes safe enemy kills, candles and money bags without sacrificing lives. A clean run combines reliable survival with a personal rule, such as preserving a planned sub-weapon or refusing risky bonus items. These goals use the same first quest as the normal clear; the difference is how carefully you manage risk, resources and practice.
Choose the challenge before starting
Define the goal before pressing Start. A one-credit clear is complete when Dracula is defeated and the ending is reached without selecting Continue after a Game Over. It does not require a perfect score, a damage-free campaign or every optional item. The practical objective is to complete each level with enough health, hearts and equipment to make the following section manageable.
For a minimal-continue attempt, write down the maximum number of continues you will permit. The NES manual confirms that Continue restarts the game from the beginning of the last level reached, not from the exact room where the life was lost. For a high-score attempt, treat points as optional: money bags and additional enemy kills are useful only while Simon remains safely positioned.
- Choose 1CC, minimal-continue, high-score or clean run before Stage 1.
- Prioritize reaching the next boss alive over optional points.
- Use ordinary clears as practice instead of forcing a score route before the movement is consistent.
Build a dependable equipment plan
Take a Morning Star whenever it can be collected without exposing Simon to unnecessary damage. The longer whip makes ordinary enemies, candles and boss openings safer. Once you have a sub-weapon that suits the route, keep it unless a replacement clearly improves the next section. Holy Water is valuable for controlling grounded enemies and can repeatedly interrupt vulnerable targets. The Cross is useful when enemies approach from both sides or when its returning projectile can strike again. The Axe covers enemies above Simon, while the Dagger provides a fast, flat attack for long horizontal lanes.
Double Shot and Triple Shot increase the number of consecutive sub-weapon attacks available. Their value depends on the weapon being carried. Preserve a multiplier after obtaining it by avoiding an unwanted sub-weapon pickup, but do not sacrifice a life merely to protect it. An immediate weapon change can be correct if the new weapon makes the next room or boss substantially safer.
- Keep the strongest whip upgrade you can safely reach.
- Choose a weapon you can use without stepping into contact range.
- After collecting Double Shot or Triple Shot, avoid replacing the equipped sub-weapon accidentally.
Use Level 1 to learn, not to gamble
The opening level is the best place to learn candle positions, heart drops, enemy timing and the behavior of the first rooms. Destroy candles while Simon is stationary or while the surrounding route is clear. Collect small and large hearts when doing so will not interfere with a jump or incoming enemy. Money bags increase the score, but they are never worth taking a hit or missing a platform.
For a normal clear, move onward after each safe pattern. For a score-focused attempt, the opening zombie room can be used to practice repeated Holy Water kills and controlled enemy timing. This is optional and should be attempted only after the room is consistent. Farming points is not necessary for a 1CC, and staying too long can make the player careless with the stage timer or health.
- Learn the first-level candle route during normal attempts.
- Farm only when the selected challenge justifies the extra time.
- Leave a money bag or candle untouched if collecting it disrupts Simon’s footing.
Protect lives in the middle levels
Levels 3 and 4 combine pits, moving platforms, ravens, skeletons and enemies that enter from multiple directions. Stop at a platform edge and let an enemy approach whip range instead of advancing into contact range. On unstable platforms, defeat the immediate threat before attempting the next jump. Missing an optional candle is always preferable to losing a life.
Use Holy Water to make grounded groups predictable and use the Cross when repeated approaches make its return path useful. The Axe is effective against elevated enemies, but changing weapons only for a small scoring opportunity can remove a safer tool. Once Simon has taken damage, shift from score collection to route completion, especially as the campaign approaches the later levels, where mistakes are more punishing and recovery opportunities matter more.
- Pause at platform edges and enemy spawn points.
- Do not cross a hazard merely to gain points from an optional target.
- After taking damage, abandon nonessential pickups and reach the next door or boss safely.
Treat Levels 5 and 6 as survival stages
The final two levels should not be used for extended score farming unless the attempt is specifically built around that purpose. Collect hearts and useful candles that lie directly on the route, but skip money bags that require a risky jump, a delayed dodge or a fight in a bad position. Preserve the weapon and multiplier that carried you through the earlier levels.
Before Death, retain enough hearts for deliberate sub-weapon attacks and avoid replacing a reliable weapon with an untested pickup. During the Death fight, maintain pressure while watching the returning scythes; do not spend every heart on minor enemies during the approach. After defeating Death, collect the Magic Crystal promptly. It fully restores health and prepares the run for Level 6 and Dracula.
- Stop optional farming when the final levels begin demanding health or precise footing.
- Preserve a dependable sub-weapon and any multiplier attached to it.
- Collect the Magic Crystal after Death before continuing.
Define and verify a clean high-score run
A clean score route gives every action a purpose. Destroy candles when Simon is safe, kill enemies that block progress or can be defeated without contact, and collect money bags only when the route remains stable. Record candle positions and reliable enemy patterns during practice, then make the same decisions on every attempt. Consistency is more valuable than an occasional risky pickup followed by a death.
Decide what clean means before Stage 1. It might mean reaching the ending without losing a life to an optional item, preserving the planned sub-weapon, collecting every safe money bag, or completing the game without a continue. Do not change the definition after a successful run. The official manual identifies money bags as score items, while established scoring references also document score bonuses for multiple enemies defeated by one sub-weapon and extra-life thresholds. Use those mechanics only when they fit the route rather than treating them as mandatory.
- Use a repeatable candle, enemy and bonus-item route.
- Create a safe fallback whenever an optional pickup is missed.
- End score farming immediately when health, footing or weapon control becomes uncertain.
Before you move on
- The 1CC goal is complete when Dracula is defeated, the ending is reached and no Continue was selected after Game Over.
- The minimal-continue goal is complete when the ending is reached within the predetermined continue allowance recorded before the attempt.
- The high-score goal is complete when the ending is reached with the planned score route followed and no life sacrificed for an optional item.
- A clean-run goal is complete when the ending is reached while meeting the rules established before Stage 1, such as preserving the planned weapon or collecting only safe bonus items.
- For practice, a useful preparation checkpoint is reaching Death with an upgraded whip, a controllable sub-weapon, an intact multiplier when available and enough hearts for repeated attacks.
Final Run — Entering Dracula's Chamber and Finishing the Game
After Death’s Magic Crystal begins Level 6, cross the Phantom Bat bridge, climb through the Clock Tower and reach the staircase below Dracula’s room. Use the nearby candle room to rebuild hearts and sub-weapon ammunition, then enter Dracula’s room and collect the Holy Water from the left-side candle before the fight. Defeat Dracula’s humanoid form with head-targeted whip attacks or a suitable long-range weapon while avoiding the three fireballs. Use Holy Water primarily to control the larger second form, then attack its face. The castle-collapse sequence followed by the credits confirms completion of the first quest in the North American NES release.
1. Reach the final-stage respawn point
Level 6 begins after Death’s Magic Crystal restores Simon’s health. The opening route crosses a bridge populated by Phantom Bats. Keep solid footing as the priority: a hit near an edge can knock Simon into a gap. Do not chase a bat toward a drop. Whip only when Simon remains safely positioned, and jump over low bats when the route is clear. If a Phantom Bat stops moving, prepare for its charge and move to a position where knockback cannot send Simon off the bridge.
Continue into the Clock Tower. Skeletons appear first, followed by Eagles that drop Fleamen onto the platforms. Let an Eagle pass before committing to a platform drop, and deal with a Fleaman after it reaches the ground rather than jumping into its path. In the final enemy room, wait until the lower platform is clear, drop down and climb the staircase. Simon cannot suffer ordinary enemy knockback while he is on stairs, making this safer than forcing a fight on the lower floor.
Reach the bottom of the staircase leading toward Dracula’s room. This is the useful Level 6 respawn point. If Simon loses a life after reaching it, the next life returns him to this area instead of the start of the Clock Tower. The respawn does not preserve the previous health, heart count, whip level or sub-weapon, so each attempt still needs preparation. This is separate from Game Over: selecting CONTINUE after losing all lives restarts the last level from its beginning.
- Cross the Phantom Bat bridge without taking knockback into a pit.
- Wait for Eagles and Fleamen before committing to platform drops.
- Use the staircase to avoid lower-room knockback.
- Reach the bottom of the staircase below Dracula’s room.
2. Farm hearts and confirm your loadout
From the bottom of the staircase, climb into the room immediately before Dracula’s chamber. Whip the candles for hearts and any useful drops, then leave and re-enter the room to make the candles available again. This is a heart and ammunition setup, not a health-restoration method: candle drops do not refill Simon’s health bar. If Simon needs health, rely on a Pork Chop or the Magic Crystal when one is actually available; do not expect repeated room entries to heal damage.
Build a practical heart reserve before entering the boss room. The exact amount depends on the attempt, but enough hearts for several Holy Water throws is more valuable than spending the reserve on minor enemies. Keep the Long Chain if you have it, because its extra reach makes head-level attacks safer. Avoid accidentally replacing the intended sub-weapon while farming.
A Cross or Boomerang is useful for the first form because it gives Simon another way to attack or clear incoming projectiles, but it is not mandatory. The most important preparation is retaining enough hearts for Holy Water during the second form. Check Simon’s equipped weapon before entering Dracula’s room, especially after a life loss or continue, because the previous attempt’s inventory is not restored automatically.
- Use the candle room to rebuild hearts and sub-weapon ammunition.
- Do not treat candle farming as health restoration.
- Retain the Long Chain when available.
- Confirm the intended sub-weapon before entering Dracula’s room.
- Save enough hearts for repeated Holy Water throws.
3. Collect Holy Water before the encounter
Enter Dracula’s room and move to the left side. Whip the candle there to obtain Holy Water, also called the Fire Bomb in many walkthroughs because of its flame effect. The official NES manual identifies the weapon as Holy Water: it explodes on the ground and burns enemies that walk through the flames.
Collect the weapon promptly, then move into a safe position. Dracula appears in the room after the encounter begins, and there is no recovery-item break between his two forms. If the attempt starts without Holy Water, there is no opportunity to collect it between forms; finish or lose the attempt and prepare again on the next life.
Do not plan to use Holy Water as the main answer to Dracula’s humanoid first form. Its important role in this fight is controlling the larger second form. Preserve the heart supply until that phase unless a sub-weapon throw is necessary to survive.
- Enter with enough health to survive the opening exchange.
- Reach the left-side candle before committing to the fight.
- Collect Holy Water before the battle develops.
- Remember that no recovery item appears between Dracula’s forms.
4. Defeat Dracula’s first form
The first form is a cloaked humanoid Dracula who teleports around the room. His head is the vulnerable target. When he materializes, he opens his cloak and releases three fireballs whose paths depend on Simon’s position. Do not jump immediately. Jumping too early can make the fireballs travel higher and intersect Simon’s jump. Wait until their height is clear, then jump over them when there is room.
When Dracula appears within reach, jump and whip his head. A second whip as Simon descends can work if Dracula’s position and the fireballs leave enough space, but do not force the extra attack. After each exchange, move away from Dracula’s landing position and prepare for another teleport. Head-targeted whip attacks are the dependable baseline for this phase.
A Cross or Boomerang can supplement the whip, especially when Dracula appears far away or when Simon needs to clear fireballs from a safer distance. These weapons do not remove the need to watch Dracula’s teleport location. Holy Water should not be treated as a reliable first-form stun or damage strategy. Continue attacking the head during safe openings until the humanoid form is defeated, without relying on an unverified fixed hit count.
- Target Dracula’s head rather than the cloak or body.
- Delay the jump until the fireball height is readable.
- Use the whip during safe head-level openings.
- Use Cross or Boomerang only when the throw does not compromise movement.
- Preserve hearts for the second form.
5. Defeat Dracula’s second form
The larger second form appears immediately after the humanoid form is defeated and restores its own health. Its face is the vulnerable target. It jumps across the room and may release fireballs. Do not remain directly beneath it while it crosses the arena. Retreat or jump according to the height and direction of the movement; do not assume every jump creates enough space to walk underneath safely.
Use Holy Water at the place where Dracula is landing or standing. If he enters the flames, he can be held in place temporarily. During that control window, jump and whip his face. Throw another Holy Water when the flame expires or when Dracula begins moving again. With a Double or Triple Shot, successive throws can maintain the pattern, but do not spend hearts blindly if Simon is in a dangerous position.
If Holy Water is unavailable, use the whip, Cross or Boomerang during clear landing openings. These alternatives are less forgiving because they do not provide the same ground-control effect. Attack once or twice, then retreat rather than trading contact damage for another hit. Continue until the second form’s health is depleted.
- Expect the second form to begin without a health refill for Simon.
- Place Holy Water where Dracula will land or stand.
- Whip the face while the flame holds him.
- Retreat when the control window ends.
- Use other weapons only during clear openings if Holy Water is missing.
6. Confirm the main campaign clear
Defeating the second form ends the required battle. The game then displays the castle-collapse sequence, followed by the ending credits. Allow both sequences to play; they are the in-game confirmation that the first quest is complete.
No final red orb or additional recovery item is required after Dracula. The completion goal is satisfied once both forms are defeated and the castle-collapse and credits sequences appear. Starting the game again afterward leads to the harder second quest, which is an optional post-game challenge rather than part of the first-quest clear.
- Both Dracula forms are defeated.
- The castle-collapse sequence begins.
- The ending credits appear.
- No additional boss or final recovery item is expected.
- The harder second quest is treated as optional.
Before you move on
- Death’s Magic Crystal has begun Level 6 and restored Simon’s health.
- The bottom of the staircase below Dracula’s room has been reached.
- The candle room has been used to rebuild a practical heart reserve.
- Holy Water has been collected from the left-side candle in Dracula’s room before the encounter develops.
- Dracula’s humanoid form has been defeated with head-targeted attacks during safe fireball openings.
- The larger second form has been defeated.
- The castle-collapse sequence has played.
- The ending credits have appeared, confirming the main campaign clear.
After-Game, Loops and What Finishing Means
The original North American Nintendo Entertainment System release of Castlevania is complete when Simon defeats both forms of Count Dracula in the Stage 18 throne room and the game proceeds to the castle-collapse sequence and credits. The first quest does not require a score target, special time, additional item, or final red orb after Dracula. After the ending, the game can begin a harder second quest, but that replay is optional for the main completion goal.
1. Prepare before entering Dracula's room
Make your final preparations in Stage 18 before entering the throne room. The hallway provides a Boomerang in an early candle, while the far-left candle inside Dracula's room contains the Fire Bomb, the North American name for Holy Water. If you plan to use the Fire Bomb against the second form, collect it before the battle begins and preserve enough hearts for repeated throws.
The candles in the final approach can provide hearts. If you need more, clear the hallway candles, descend and return so they regenerate, then repeat the route while the stage timer permits. This is safer than entering the throne room with an empty heart supply. Once you are ready, enter the room and collect the Fire Bomb from the far-left candle before Dracula materializes.
A Cross or Boomerang is also a workable choice for the first form. The important requirement is to enter the room with the weapon you intend to use already equipped, because the two Dracula forms follow one another without an intermission for changing equipment.
- The original NES Castlevania campaign is being played.
- The intended sub-weapon is equipped before Dracula appears.
- The Fire Bomb is collected before the fight if it is part of the plan.
- Enough hearts remain for the planned sub-weapon uses.
2. Defeat Dracula's humanoid first form
Dracula appears in a random position after a brief flash. In this form, his head is the damage target. When he opens his cloak, he launches three fireballs at different heights. Stay mobile and avoid standing where he is about to materialize.
Use the whip to strike his head with a standing jump, or throw the Cross/Boomerang through his head when he appears. A reliable rhythm is to wait for Dracula to materialize, jump toward the head, attack during the jump, then prepare for the fireballs as Simon lands. Do not attack the cloak or body; aim for the head.
Do not spend your Fire Bomb supply during this phase. Save it for the larger form. If Dracula appears in a poor position for an attack, prioritize avoiding the fireballs rather than forcing a hit. The first form is defeated after its health bar is emptied, but the encounter is not finished at that point.
- Dracula's humanoid form is defeated by head attacks.
- The whip or Cross/Boomerang is used for the first phase.
- The Fire Bomb is preserved for the larger form when possible.
- The fireball spread is avoided or cleared without abandoning the fight.
3. Defeat the larger second form
After the first form is defeated, Dracula immediately changes into a much larger demon form and restores his health. His head remains the damage target. He advances with high jumps and fires additional projectiles, leaving shorter attack windows than the first phase.
Throw the Fire Bomb on the floor when the demon moves into its range. A successful placement locks him in place temporarily, allowing you to jump and whip his head. Throw another Fire Bomb when the first effect ends, then repeat the whip attacks while he is held. Keep moving when the effect is not active so you are not trapped beneath his next jump.
If you entered with the Cross or Boomerang instead, continue targeting the head and use the returning projectile to cover space while Dracula moves. This method is less forgiving than the Fire Bomb setup, so avoid wasting hearts on attacks that cannot reach his head. The fight is complete only when the larger form's health is emptied.
- The larger demon form appears immediately after the first form.
- The head is targeted throughout the second phase.
- The Fire Bomb is used to create openings when available.
- The larger form is destroyed rather than merely stunned or temporarily displaced.
4. Confirm the main-game completion
Once the second form is defeated, the game leaves the throne-room battle and shows Dracula's castle collapsing in the distance. The credits follow the collapse. This sequence is the completion proof for the first quest in the original NES release.
Allow the collapse and credits to begin before resetting or powering off. The score, remaining time, number of lives, chosen sub-weapon, and number of candles collected do not change the normal completion condition. The required result is the defeat of both Dracula forms followed by the ending sequence.
- The first Dracula form is defeated.
- The larger second form is defeated.
- The castle-collapse scene appears.
- The credits begin.
5. Do not expect a final red orb
Regular bosses leave a red orb that restores Simon's health and allows progression. The orb after Death is especially valuable because it restores health before the Stage 18 approach, so collect it and use the recovered health to survive the final rooms.
Dracula does not provide another red orb after the second form. The game transitions directly from the final defeat to the castle-collapse sequence and credits. Do not search the throne room for a recovery item after winning.
- The red orb after Death is collected before the final approach when possible.
- No post-Dracula red orb is expected.
- The castle collapse and credits, not an item pickup, confirm completion.
6. Continue into the optional second quest
After the first-quest ending, the game can continue into a harder second quest. This is a replay of the campaign, not a separate story with a new protagonist or different final boss. The objective remains advancing through the castle and defeating Dracula's two forms again.
The second quest increases the danger of familiar stages through altered enemy placements, larger enemy groups, faster threats, and heavier damage from enemy hits. Do not assume that a room is safe because it was manageable during the first quest. Relearn the timing of Medusa Heads, Bats, Fish Men, Eagles, and other hazards before attempting a one-credit run.
The game can preserve the special weapon held at the end of the first quest, giving the second run a possible starting advantage. Treat that advantage as optional support rather than a guarantee of success: hearts, health, lives, and stage timing still require careful management.
- The first-quest ending has been viewed.
- The next run is identified as the harder second quest.
- Any carried special weapon is used deliberately.
- The second quest is treated as optional for the assigned goal.
7. Optional post-game goals
Clearing the second quest is the most direct post-game challenge. A one-credit clear is another optional goal: finish the campaign without selecting Continue. Neither is required for the normal first-quest ending.
For a one-credit attempt, practice the final approach separately, preserve a useful shot multiplier when practical, and avoid risky score pickups that can cost health or a life. Keep the final Dracula plan simple: use whip or Cross/Boomerang head attacks in the first phase, then use the Fire Bomb for controlled openings in the second phase if available.
Do not import rules from Simon's Quest or later Castlevania games. This NES release has no exploration map, day counter, multiple-ending requirement, or extra final boss after the castle collapse.
- The second quest is attempted only if desired.
- A one-credit clear is treated as an optional challenge.
- No Simon's Quest rules are applied.
- The first-quest proof remains Dracula's defeat, castle collapse, and credits.
Before you move on
- Defeat Dracula's humanoid first form in the Stage 18 throne room.
- Defeat the larger second form immediately afterward.
- See the castle-collapse sequence.
- Allow the credits to begin.
- For optional post-game progress, begin or clear the harder second quest, or complete a one-credit run without selecting Continue.
Appendix — Quick Item & Control Reference
Use this appendix during a North American NES run of the original Castlevania. It covers the controller inputs, item effects, weapon economy, and practical fixes for staircases, narrow platforms, Death, and continues.
1. Keep the essential controls straight
Press A to jump. Press Left or Right with A to direct the jump. Use the directional pad to walk, crouch, and climb stairs. Press B to crack the whip. To use the equipped special weapon, hold Up and press B; this is also the required input while Simon is positioned on stairs. Pressing B by itself swings the whip.
Press START to begin the game, pause during play, or resume after pausing. SELECT navigates the title-screen choices. Practice the inputs on an early safe screen: collect a special weapon, press B for the whip, then hold Up and press B to throw the weapon. Remember that the directional pad handles stair movement; Simon does not jump from stairs exactly as he does from flat ground.
- A jumps.
- B attacks with the whip.
- Up+B uses the equipped special weapon.
- The directional pad moves, crouches, and climbs stairs.
- START begins, pauses, and resumes.
- SELECT navigates the title-screen choices.
2. Read the heart count as ammunition
Hearts are ammunition for special weapons, not health. A Small Heart adds one heart to the counter, while a Large Heart adds five. Whip candles and standing torches whenever the route is safe, then avoid spending the supply on enemies that can be defeated reliably with the whip. Preserve ammunition before difficult staircase rooms and boss encounters.
The Watch is the confirmed expensive exception: the official manual states that each use costs five hearts. It stops enemies temporarily, so do not activate it automatically whenever you see a threat. Save it for a crowded staircase, a dangerous group of Medusa Heads, or a passage where freezing an enemy creates a safe route. The manual confirms that special-weapon uses consume one or more hearts, but it does not give a universal identical cost for every weapon; do not assume that all weapons cost the same amount.
- Small Heart adds one heart.
- Large Heart adds five hearts.
- Hearts pay for special-weapon uses.
- The Watch costs five hearts per use.
- Whip candles to rebuild ammunition before spending it.
3. Identify weapon and power-up pickups
The Morning Star changes the whip into a chain and increases its reach. A later Morning Star increases the length again. Take these upgrades when the pickup can be reached safely, because longer reach lets Simon attack from farther away and makes staircase approaches more forgiving.
Double Shot and Triple Shot increase the number of consecutive attacks that can be active with the equipped weapon. They are especially useful with Holy Water, which can maintain a damaging flame on the ground, and with the Boomerang, which can pass through targets and return. Before replacing a useful weapon, check the next section and decide whether the new weapon actually improves the route.
The Magic Crystal fully restores health. It normally appears after defeating a level boss; collect it promptly to refill Simon's health and advance. Pork Chop restores some health and is often hidden in a wall or other concealed location. The Invulnerability Potion makes Simon invulnerable for a few seconds, so use it to cross a hazardous section or survive a forced contact window. The Cross destroys all enemies currently on screen when it is picked up; it is an immediate support effect rather than a normal heart-consuming weapon.
- Morning Star increases whip reach.
- Double Shot and Triple Shot allow more consecutive attacks.
- Magic Crystal fully restores health and advances after a boss.
- Pork Chop restores some health.
- Invulnerability Potion grants brief invulnerability.
- Cross destroys on-screen enemies when collected.
4. Choose the right special weapon
Holy Water explodes when it hits the ground and leaves flames that damage enemies walking through them. Use it to control a doorway, hold a floor position, or interrupt an enemy that must approach from one side. The Boomerang travels outward and returns, making it useful for repeated hits and for dealing with threats that cross Simon's path.
The Axe travels in a slow arc and has high attack power. It is useful against targets above Simon or enemies moving through the upper part of the screen, but its arc requires advance positioning. The Dagger travels quickly in a straight line, has lower attack power, and disappears when it hits an enemy. It is dependable across a gap but gives less control over groups. If you have a preferred weapon, do not pick up a replacement casually; a candle weapon replaces the currently equipped special weapon.
- Holy Water provides ground control and lingering flames.
- Boomerang returns and can hit targets repeatedly.
- Axe has high power and follows an arc.
- Dagger travels straight and quickly but has lower power.
- A replacement weapon changes the equipped special weapon.
5. Troubleshoot stairs and narrow platforms
Stairs change Simon's movement and jumping behavior, so approach them deliberately. Stop near the edge of an enemy's reach, use the whip from maximum practical distance, and make small directional adjustments instead of holding forward blindly. When the special weapon is needed, hold Up and press B; pressing B alone swings the whip.
On narrow platforms, wait for an enemy or projectile to pass before committing to a jump. Whip candles from stable ground, then confirm the next landing before moving. If a bat or Medusa Head enters during a jump, prioritize landing safely over one extra attack. A missed attack can be recovered; a rushed jump into a pit costs a life. Use START to pause and settle the next action, but remember that pausing does not create a checkpoint.
- Use small directional adjustments on stairs.
- Use Up+B for weapon throws while climbing or descending.
- Wait for enemy timing before jumping across narrow platforms.
- Prioritize a safe landing over an extra attack.
- Use START to pause, not to create a checkpoint.
6. Stabilize the Death fight
Enter Death's room with a ranged weapon and enough hearts for repeated throws. The Boomerang is a practical choice because it can damage Death while returning and can also destroy or damage scythes that threaten Simon. Throw in short, deliberate bursts while staying mobile instead of standing still to empty every available heart.
Keep moving laterally and watch the scythes as well as Death's position. If a scythe approaches the intended landing area, change position first and resume attacking after the path is clear. Double Shot or Triple Shot makes sustained pressure easier, but preserving health is more important than forcing an attack during a bad jump. After Death is defeated, collect the Magic Crystal immediately. It restores health and is the boss-clear item needed to advance; do not confuse it with a generic red orb or leave the room before collecting it.
- Carry a ranged weapon into Death's room.
- Use short moving attacks instead of standing still.
- Track the scythes before committing to a jump.
- Use Double Shot or Triple Shot when safely available.
- Collect the Magic Crystal after victory.
7. Recover after a mistake
If Simon loses all lives, select CONTINUE on the Game Over screen and press START. The official manual states that this restarts the game from the beginning of the last level reached. It does not return Simon to the exact room where he died with the same health, heart count, or weapon state. Rebuild resources by whipping safe candles and collecting hearts before spending ammunition.
Use a continue as a planned re-entry rather than treating it as a same-room checkpoint. On the restarted level, regain the strongest practical whip upgrade and a suitable special weapon when the route allows, then conserve hearts for the difficult section that caused the failure. The completion standard for this appendix is met when you can perform the core inputs, identify the important pickups, preserve ammunition, handle stairs and narrow platforms carefully, and resume from the beginning of the last reached level after Game Over.
- CONTINUE restarts from the beginning of the last level reached.
- The exact room, health, hearts, and weapon state are not preserved.
- Farm safe candles before spending scarce ammunition.
- Pause to plan, not to create a checkpoint.
- Rebuild the loadout before repeating the failed section.
Before you move on
- You can perform jump, whip, special-weapon, stair, pause, and menu inputs without hesitation.
- You can identify Small Hearts, Large Hearts, Morning Stars, Double Shot, Triple Shot, Magic Crystals, Pork Chops, the Watch, the Invulnerability Potion, and the Cross.
- You can reach Death with a ranged weapon, use short moving attacks, and collect the Magic Crystal after winning.
- You understand that the North American NES continue returns Simon to the beginning of the last level reached.
- You can distinguish required progression items, such as the post-boss Magic Crystal, from optional support pickups.
Finishing up
Clear all six levels and eighteen numbered stages of Dracula's castle, defeat the five regular bosses in order, defeat both forms of Count Dracula, and reach the castle-collapse sequence and credits. Continues are allowed. No final orb or complete optional-pickup checklist is required after Dracula.
Choose your next gameScreenshots & video
Game imagery for reference. Follow the written chapters above for the route and strategies.
Sources & references
Our original guide draws on the references below. Check the edition at the top of this page before following controls or unlock requirements.
- Castlevania — Official NES Manual, Nintendo
- Castlevania — Guide and Walkthrough by David Wonn
- Castlevania — Guide and Walkthrough, NES
- Castlevania — Guide and Walkthrough by Minarinaga
- Castlevania — Basics Guide, NES
- Castlevania — Guide and Walkthrough, NES, by FFMrebirth
- Double Shot — Castlevania Wiki
- Level 1 — Castlevania Walkthrough & Guide, GameFAQs
- Castlevania — Walkthrough, NES, by DBisciglia
- Castlevania — Guide and Walkthrough by CMoriarty, GameFAQs
- Castlevania — Level 2 Walkthrough and Guide
- Castlevania FAQ/Walkthrough, Neoseeker
- Castlevania — Level 3 Guide and Walkthrough, GameFAQs
- Castlevania — Walkthrough by NebulaQuasar109
- Level 4 — Castlevania Walkthrough & Guide
- Castlevania — Walkthrough by RJHarrison and Bkstunt_31, Level 5
- Castlevania Speedrunning — Level 5: Stages 13–15
- Castlevania — official Nintendo NES instruction manual
- Castlevania — Level 6 Walkthrough
- Castlevania — Boss Guide by Pseudonym
- Castlevania FAQ/Walkthrough, NES
- Castlevania — One Credit High Score, RetroAchievements
- Castlevania/Secrets — StrategyWiki
About the game & collecting notes
- Platform
- Nintendo Entertainment System
Practical, stage-by-stage directions to beat Konami's original Castlevania on the Nintendo Entertainment System in the North American USA Rev A edition. Covers the game's six levels and eighteen numbered stages, exact route choices, item and heart management, reliable boss counters for the five regular bosses and Dracula's two forms, recovery after failure, and the checklist that proves the main campaign is finished.
Darryl Polo
Darryl Polo loves tinkering with emulation and revisiting retro games. He enjoys exploring how old favorites play on different setups and sharing what he learns along the way. At Joking Joystick, he writes about the games, hardware, and small discoveries that keep the hobby fun.
Our editorial standardsFound a step that needs another look? Help us improve this guide.