
Castlevania: Symphony of the Night — Original PlayStation (North America, 1997) Campaign Walkthrough
Step-by-step campaign walkthrough for the original North American PlayStation release of Castlevania: Symphony of the Night. The guide follows Alucard from the Entrance through the normal castle, the Holy Glasses and Richter sequence, the Inverted Castle's five Vlad relic bosses, and the final Shaft and Dracula battles. It also separates optional map completion, familiars, rare equipment and replay goals from required progress.

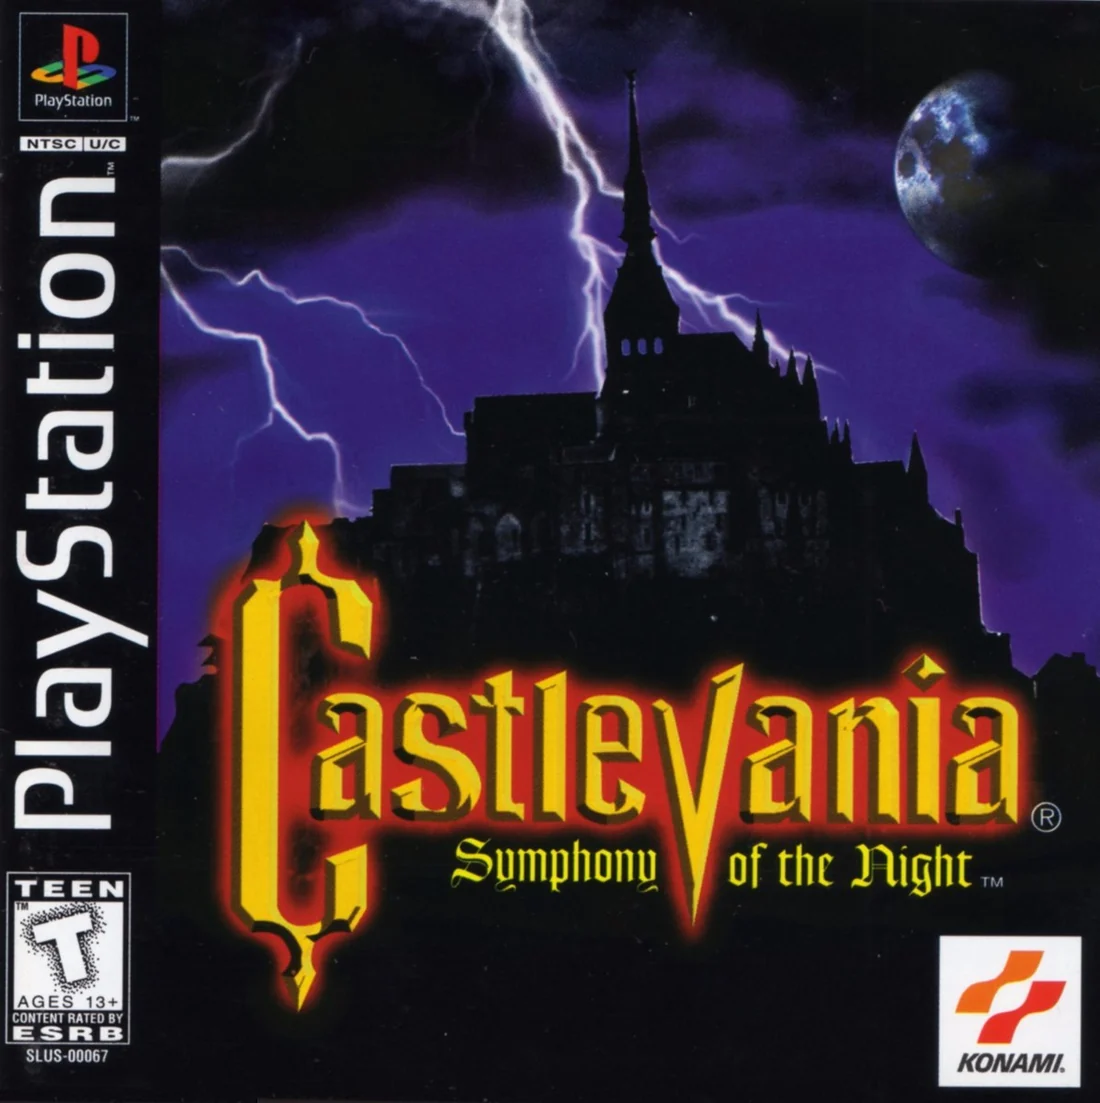
Find a copy
Castlevania: Symphony of the Night Sony PlayStation
We may earn a commission if you buy through these links, at no extra cost to you. As an Amazon Associate I earn from qualifying purchases.
Opens retailer search results. Check the model, edition, seller, availability and current price before buying.
Before you begin
This guide covers the original North American Sony PlayStation release of Castlevania: Symphony of the Night from October 2, 1997.
The required Alucard campaign continues after the first Richter encounter. To reach the true ending, obtain the Holy Glasses, destroy Shaft's control orb during the Richter fight, collect the five Vlad relics in the Inverted Castle, and defeat Shaft and Dracula there.
The route is written for the original PS1 rules, locations, controls, save rooms, familiar list and ending behavior, not for the PSP, PS4, Saturn, Xbox 360 or mobile versions.
Required progression and optional exploration are separated. Full map completion, rare equipment, familiar collection and alternate replay modes are optional unless explicitly marked otherwise.
Set yourself up for the run
Start on a fresh save and keep frequent manual saves.
Use the original PlayStation’s dedicated coffin-style save rooms regularly; portraits, chairs and decorative seating are not save points.
Keep at least two save slots while attempting the true ending when memory-card space permits.
Play deliberately for exploration.
The game is non-linear: many progression doors open only after specific equipment or abilities are found.
Prioritize mobility skills and a weapon that suits your playstyle.
Early-game priority items: any long-reach weapon or fast multi-hit weapon, a shield or armor with good defense, a ranged subweapon you can use comfortably, and a leveled familiar for extra offense or utility.
If you find a familiar early, use it; familiars support combat and exploration but do not replace learning enemy patterns.
Manage HP and hearts conservatively.
Hearts are used by subweapons; stockpile them while exploring so you are not defenseless.
Learn to use the menu: equip the best combinations of head, body and accessory gear, and check spell requirements and familiar levels regularly.
Expect backtracking.
Mark locations on the in-game map that cannot yet be accessed and return after acquiring a new ability or item.
Do not attempt to force a path; look for environmental clues, hidden breakable walls and movement-gated routes.
If you prefer a streamlined playthrough, plan to defeat Richter only after obtaining the Holy Glasses and the other true-ending prerequisites.
For the true ending, clear the Inverted Castle after destroying Shaft’s control orb.
Do not mix mechanics from remasters or the PSP, PS4, Saturn, Xbox 360 or mobile releases into expectations for the original North American PlayStation version.
Consult the version-difference chapter if you switch ports.
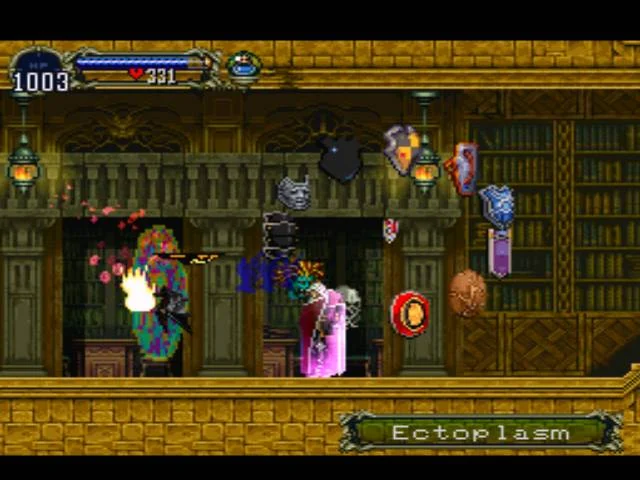
Game Goals, File Management and Early Route
The original North American PlayStation campaign has an apparent ending at Richter and a full Alucard campaign that continues into the Inverted Castle. The early route should focus on reaching the Long Library and purchasing the Jewel of Open without wasting time on rare equipment or inaccessible rooms. Later, collect the Silver Ring and Gold Ring, use them in the Marble Gallery clock room, receive the Holy Glasses from Maria, and use them during the Richter encounter to destroy Shaft’s control orb. The Inverted Castle and Dracula are required for the completed campaign; a pre-Richter backup is useful protection but is not itself a completion requirement.
Know what counts as a complete campaign
Begin by treating the normal castle as the first half of the campaign, not as the entire game. Your immediate route runs from the Entrance through the Alchemy Laboratory, Marble Gallery, Outer Wall and Long Library. After purchasing the Jewel of Open, you can open the blue doors that lead into later normal-castle areas and continue toward the Royal Chapel, Underground Caverns and Castle Keep.
Reaching Richter does not automatically complete the Alucard campaign. If you defeat Richter without exposing Shaft’s control, the game presents an ending and does not open the Inverted Castle. For the full route, obtain the Silver Ring and Gold Ring, use both in the Marble Gallery clock room, speak with Maria below the clock and receive the Holy Glasses. Equip the glasses before the Richter fight and attack the green orb moving around him. Destroying that orb frees Richter and opens the Inverted Castle. The actual campaign completion comes only after clearing that castle and defeating Dracula.
- Reach the Long Library through the normal-castle route.
- Purchase the Jewel of Open from the Master Librarian.
- Do not treat the first Richter ending as completion.
- Later obtain both rings, receive the Holy Glasses from Maria and destroy the control orb.
- Defeat Dracula in the Inverted Castle for the full Alucard campaign.
Use optional backup saves intelligently
Use the original PlayStation memory-card save system deliberately. Keep one main file for normal play and, if you have room on the card, use another slot for an optional backup before a major story checkpoint. The most valuable backup is made after Maria gives you the Holy Glasses and before you enter Richter’s room. If the wrong ending occurs, that file lets you retry the final approach without repeating the entire normal castle.
After the green orb has been destroyed and the Inverted Castle is visibly available, you may create another working save for the second half of the game. Keeping the earlier file is sensible until you are certain the transition worked, but preserving it is file-management advice, not a requirement for a valid completion. A single file can complete the campaign if you prefer to use only one slot.
Do not delete a file marked CLEAR after the ending if you intend to revisit that Alucard campaign. The original PlayStation release has no modern autosave, rewind or automatic recovery system, so deliberate saving matters.
- Use a main file and optional backup slot if your memory card has room.
- Preferably save after receiving the Holy Glasses and before Richter.
- Keep the pre-Richter file until the Inverted Castle is accessible if you want recovery protection.
- Preserve a CLEAR file if you plan to continue exploring or replaying the campaign.
Recognize the original PlayStation save rooms
Symphony of the Night on the original PlayStation does not use save portraits. Dedicated save rooms contain a floating geometric save point. Interact with it and it changes into a coffin surrounding Alucard; complete the save operation from there. These rooms are safe places to restore health and establish the restart point used after death or a game over.
The map identifies explored save rooms, so check it before entering a boss route or a long vertical section. Save after the opening approach, after reaching a new region and whenever you obtain an important movement or story item. If an unfamiliar area begins consuming healing items, retreat to the last known save room instead of continuing until Alucard is nearly dead.
Do not confuse a quiet room, a warp room or a room containing a portrait with a save point. For this original PS1 guide, the reliable save landmark is the dedicated room containing the coffin-style save point.
- Locate the first save room before committing to repeated boss attempts.
- Use dedicated coffin-style save points, not portraits, as your save-room landmarks.
- Check the map for the nearest retreat route before entering unexplored sections.
- Save after major story items and difficult regional advances.
Follow the opening route to the Jewel of Open
Start in the Entrance and move into the Alchemy Laboratory. Explore enough to collect ordinary upgrades, hearts and experience, but do not stop to farm rare drops. The early enemies are mainly an opportunity to learn Alucard’s movement, jumping, crouching, attacks and backdash. Open obvious side rooms when they are on the route, but keep the main objective moving toward the laboratory boss.
Defeat Slogra and Gaibon in the Alchemy Laboratory. After the fight, continue into the Marble Gallery. Follow the connected route toward the Outer Wall, then use the elevator and upper passages to reach the Long Library. This is the intended early progression; you do not need to clear every inaccessible shaft or movement-gated room before visiting the Librarian.
At the Long Library, speak with the Master Librarian and purchase the Jewel of Open. Selling spare gems can provide the money for this purchase, and a Library Card is also a useful optional convenience, but neither rare equipment nor a particular weapon is required for the chapter’s progression. The Jewel of Open lets Alucard open the castle’s blue doors, allowing the route into the Royal Chapel and the later normal-castle branches to continue.
Once the Jewel is obtained, return through the established passages and use the newly accessible blue doors. Do not assume that every unexplored room is currently reachable. Symphony of the Night expects later returns after Alucard gains movement relics, so mark unreachable areas mentally or on the map and continue along the available route rather than repeatedly damaging yourself against an impossible jump.
- Travel from the Entrance to the Alchemy Laboratory.
- Defeat Slogra and Gaibon.
- Continue through the Marble Gallery and Outer Wall.
- Reach the Long Library.
- Purchase the Jewel of Open from the Master Librarian.
- Use blue doors to continue toward the Royal Chapel and later normal-castle areas.
Defer the Clock Tower and preserve the true-ending sequence
Do not make the Clock Tower the next mandatory destination after the Long Library. Its Medusa Heads, moving platforms, gears and vertical hazards are intended for a later return when the normal-castle movement route is more developed. Continue through the blue-door route, obtain the movement relics required for the rest of the castle and progress toward the Castle Keep before treating the Clock Tower as a major objective.
For the true-ending sequence, retain both required rings. The Silver Ring is found during the Royal Chapel route. The Gold Ring is obtained later from the Succubus in the Underground Caverns. When both are available, equip them and return to the large clock room in the Marble Gallery. The lower passage opens, allowing you to reach Maria beneath the clock. After the conversation, Maria gives Alucard the Holy Glasses.
Make a save before returning to Richter. Equip the Holy Glasses before entering the encounter. If the glasses are active, a green orb becomes visible around Richter. Attack the orb rather than Richter. Once it breaks, the scene reveals Shaft’s control and the game opens the Inverted Castle. If Richter is defeated without destroying that orb, the game stops at an ending instead, so an optional pre-Richter backup is especially useful here.
- Do not force the Clock Tower during the initial opening route.
- Continue through the normal castle after purchasing the Jewel of Open.
- Obtain the Silver Ring in the Royal Chapel and the Gold Ring from the Underground Caverns.
- Use both rings in the Marble Gallery clock room.
- Receive the Holy Glasses from Maria.
- Save, equip the glasses, destroy the green control orb and confirm access to the Inverted Castle.
Before you move on
- The normal-castle opening route has been completed through the Entrance, Alchemy Laboratory, Marble Gallery, Outer Wall and Long Library.
- Slogra and Gaibon have been defeated.
- The Jewel of Open has been purchased from the Master Librarian.
- The Silver Ring and Gold Ring have been obtained and retained for the Marble Gallery clock-room sequence.
- Maria has given Alucard the Holy Glasses.
- An optional pre-Richter backup exists if desired; it is not required for completion.
- The green control orb was destroyed during the Richter encounter and the Inverted Castle is accessible.
- The campaign is not considered complete until Shaft and Dracula have been defeated and the Alucard file is marked CLEAR.
References for this chapter
- Castlevania: Symphony of the Night — Guide and Walkthrough — PlayStation — GameFAQs
- Castlevania: Symphony of the Night — Guide and Walkthrough — PlayStation — GameFAQs
- Castlevania: Symphony of the Night — Guide and Walkthrough, PlayStation
- RPGClassics Castlevania: Symphony of the Night walkthrough
- Save Room — Castlevania Wiki
Controls, Menu, Status and Leveling
Learn the original North American PlayStation controls, read Alucard’s status information, manage equipment and resources, save reliably in coffin rooms, and level through normal exploration without turning the campaign into an unnecessary grinding session.
Learn Alucard’s default PlayStation controls
The North American PlayStation release uses Square for the weapon or item in Alucard’s right-hand slot and Circle for the weapon or item in his left-hand slot. Press X to jump. Use Left and Right to move, Down to crouch or descend an elevator, and Up to sit in a chair or operate an elevator upward. Triangle performs a back dash, which is useful for retreating after an attack, crossing a narrow hazard, or escaping an enemy’s contact range.
Press Up together with Square or Circle to use the equipped special weapon. Hearts are ammunition for these weapons, not healing points. Press Start to pause and open the status screen. Press Select to open the castle map. The button assignments can be changed from the System section of the status menu, so treat these as the default controls rather than permanent bindings.
The shoulder buttons become useful after you obtain their associated relics. R1 changes Alucard into bat form, R2 changes him into wolf form, and L1 changes him into mist form. Press X again while airborne after obtaining Leap Stone to perform the double jump. Before the relevant relics are acquired, those commands do not provide their later movement abilities.
- Practice Square, Circle, X, Triangle, and Up plus Square or Circle in a safe early room.
- Use Triangle to create distance instead of trading contact damage with every enemy.
- Remember that transformation and double-jump commands require their associated relics.
- Check the System menu if your controller layout differs from the default.
Read the status screen before changing equipment
The Start screen displays current and maximum HP, MP, and hearts, together with status effects, attack and defense values, level, experience, gold, equipment, spells, relics, familiars, and other progress information. ATT represents the attack value associated with a hand slot, while DEF represents Alucard’s current defensive power.
STR affects physical attack, CON affects physical defense, INT affects magic power, and LCK influences luck-based results such as critical hits and item outcomes. The values shown in the status screen reflect Alucard together with his currently equipped gear, so compare the complete display rather than judging an item only by its name or apparent attack value.
In the Equip section, move through the right-hand, left-hand, head, body, cloak, and accessory slots with the directional buttons. Select a slot, choose an item, and confirm the equipment change. The game does not automatically replace old gear when you find something new. Some weapons require both hands, leaving no room for another hand item such as a shield. Defensive resistances and special effects can make a lower-attack item more useful in a dangerous area.
- Compare new weapons, armor, cloaks, helmets, and accessories as soon as you obtain them.
- Keep a defensive setup available instead of choosing equipment solely for attack power.
- Check resistances and statistic changes before replacing a useful accessory.
- Remember that a two-handed weapon occupies both hand slots.
Manage hearts, MP, and usable items
The heart counter increases when Alucard collects hearts and decreases when he uses special weapons. A heart pickup does not restore HP. Use special weapons for dangerous groups, flying enemies, or bosses when the heart cost is worthwhile, but avoid spending the entire supply on ordinary enemies near a save room. If your heart count is low, break candles and defeat nearby enemies before beginning a difficult encounter.
MP powers spells and shapeshifting. MP replenishes during play, but avoid wasting spells while crossing routine rooms if a boss or hazardous section is nearby. Select spells from the Spells section of the status menu and check their listed MP costs before attempting them. Spells are useful tools, but no single spell is required for the Alucard campaign.
Food, medicine, potions, and other expendable hand items must be equipped before use. Place the item in an available hand slot, then press the corresponding hand button during play. Healing items are most useful before a risky room or boss attempt; collecting one does not activate it automatically. If a hand slot is occupied by a weapon you need, change the equipment before trying to use the item.
- Enter a boss room with enough hearts for the special-weapon attempts you actually intend to make.
- Do not mistake hearts for health recovery.
- Review the Spells section after learning a spell and confirm that enough MP is available.
- Equip food, medicine, or potions before entering an area where recovery may be difficult.
Level naturally and recognize when grinding is worthwhile
Enemies provide experience, and reaching the required total raises Alucard’s level. Normal exploration supplies most early experience, so defeat enemies that block your route and continue forward while ordinary opponents remain manageable. Revisit a nearby room when you need money, a useful drop, hearts, or a short experience boost, but do not repeatedly clear the entire castle simply to increase every statistic as quickly as possible.
Spend extra time leveling when a boss or newly opened region defeats you repeatedly despite a sound approach. Use a short loop near a save room: clear one or two nearby rooms, collect experience and possible hearts, return to the save room, recover, and repeat only while the gains are helping. If the real problem is an obsolete weapon or armor piece, advancing toward the next required relic, equipment chest, or shopping opportunity is usually more effective than grinding several additional levels.
Use the displayed NEXT value to judge how close you are to the next level. Early in the game, a balanced increase in survivability, attack power, and usable equipment is more valuable than specialized luck or magic optimization. Stop grinding when regular enemies are manageable and a progression route remains available.
- Advance when regular enemies die reliably and you can survive occasional mistakes.
- Grind briefly after repeated boss failures if additional HP or damage would directly help.
- Replace outdated equipment before committing to a long grinding session.
- Stop grinding when the current region is comfortable and a progression route remains available.
Use coffin save rooms and the map as part of your routine
Dedicated save rooms contain a floating coffin-like save device. Stand beneath it and press Up to open the save operation, then follow the on-screen prompt to choose the memory-card file and confirm the save. A save room is not a portrait, an autosave point, or a modern quick-save feature. Saving at one also restores Alucard’s HP and MP, making it the correct place to recover before a long detour or repeated boss attempts. Status effects may require separate treatment rather than disappearing simply because you saved.
Maintain more than one file when possible. Use one file as the main campaign record and another for a recent safe position before a boss, equipment test, or major story sequence. A separate pre-Richter file is useful protection if you are pursuing the true ending, but it is optional and does not replace the requirement to complete the campaign on a valid file. Do not overwrite your only file immediately before an encounter you have not yet learned.
The map records explored rooms and identifies important facilities, including save rooms and teleport rooms. The castle map purchased from the Long Library helps reveal the castle’s general structure, while hidden rooms and breakable walls still require exploration. Use Select before long detours to identify known recovery points and teleport connections. Later relics can open routes or rooms inside areas you have already visited, so revisit earlier regions when a new movement ability changes what is reachable.
- Save after obtaining an important relic, reaching a new save room, or completing a difficult boss.
- Stand beneath the coffin device and use the on-screen save prompt; do not rely on an unverified alternate save command.
- Keep an optional backup file before major story encounters and unfamiliar equipment tests.
- Use Select regularly to plan around known save and teleport rooms.
- Remember that the purchased castle map does not automatically reveal every secret room or breakable wall.
Before you move on
- You can use Square and Circle independently, jump with X, back dash with Triangle, open the status screen with Start, and open the map with Select.
- You know that Up plus Square or Circle uses the equipped special weapon and that hearts are its ammunition.
- You can explain the difference between HP, MP, hearts, STR, CON, INT, LCK, ATT, and DEF from the status screen.
- You can equip weapons, armor, cloaks, accessories, and usable items manually.
- You know that spells consume MP and that food, medicine, and potions must be equipped before use.
- You regularly compare hand, head, body, cloak, and accessory equipment instead of leaving early gear equipped indefinitely.
- You can save at a dedicated coffin save room by using the on-screen prompt.
- You save before difficult encounters and advance through normal exploration unless a specific boss or area proves consistently too difficult.
References for this chapter
- Castlevania: Symphony of the Night — Guide and Walkthrough — PlayStation — GameFAQs
- Castlevania: SotN — Guides based on the original PlayStation version
- RPGClassics - Castlevania Symphony of the Night Maps
- Castlevania: Symphony of the Night Controls — StrategyWiki
- Castlevania: Symphony of the Night Instruction Manual
- Castlevania: Symphony of the Night — Guide and Walkthrough, PlayStation
Equipment, Familiars and Souls (Spells)
Keep Alucard’s equipment current, activate familiar Relics instead of merely collecting them, and use spells as selective tools alongside ordinary attacks. The North American original PlayStation release contains five familiars: Bat, Ghost, Demon, Faerie and Sword. Familiar cards are optional for basic completion, but they provide useful damage, healing support, exploration assistance and special utility. Spells consume MP, while subweapons and Item Crashes consume hearts, so prepare both resources separately before difficult fights.
Check equipment after major pickups
Open the status and equipment screens whenever you find a new weapon, shield, armor piece, headgear item or accessory. Compare the displayed attack and defense values, but also read the item description. A weapon with a slightly lower attack value may still be preferable if its attack type, reach or elemental property works better against the enemies in the current region. Do not assume that the newest item is automatically the best one.
During the early campaign, prioritize a dependable melee weapon, armor with a clear defense improvement and accessories that provide useful protection or attributes. Keep unfamiliar accessories until you have checked their descriptions. Some equipment is specialized, and selling it immediately can remove a useful option for a later enemy or boss.
Use the two hand slots deliberately. The right hand normally holds Alucard’s weapon, while the left hand can hold a shield, a second weapon or another usable item. A shield is valuable while learning a new room because blocking or reducing incoming damage is often safer than attempting to defeat every enemy quickly. Test unusual weapon animations in a safe corridor before relying on them in a boss room.
- Compare attack and defense values after major pickups.
- Read unfamiliar item descriptions before selling anything.
- Keep a reliable melee weapon equipped even when using spells or familiars.
- Use the left-hand slot for a shield or secondary item that you can operate confidently.
Collect and activate the five North American PS1 familiars
Familiars are Relics. Finding a familiar card does not activate it automatically. Open the Relics menu, select the card and turn it on; the familiar should then appear beside Alucard. Only the familiar currently active receives experience, so switching repeatedly between cards slows the development of the one you actually want to use.
The five familiars in the North American PlayStation version are Bat, Ghost, Demon, Faerie and Sword. The Bat Card is in the Alchemy Laboratory. The Ghost Card is in Castle Keep. The Demon Card is in the Abandoned Mine route after Cerberus. The Faerie Card is in the Long Library. The Sword Card is in Olrox’s Quarters, in the English-language PlayStation placement rather than the alternate placement used in some later or Japanese releases.
The Bat is a useful offensive choice and becomes more valuable when Alucard uses Bat Form, because the familiar can add attacks while Alucard is airborne. The Ghost provides automatic offensive support and is convenient when you want another source of damage during exploration. The Demon is useful in combat and can interact with certain mechanisms, including switches that Alucard cannot operate directly in the relevant rooms. Treat that function as situational utility rather than as a reason to leave the Demon active for the entire game.
The Faerie is a strong support choice for a first-time player. It can assist with recovery and can provide hints about certain hidden or suspicious areas. The Sword is the most directly aggressive familiar and is also required for the Sword Brothers spell. For normal progression, Faerie favors support, Demon or Sword favors offense, and Bat is useful if you frequently use Bat Form. None of them removes the need to learn enemy patterns.
- Open the Relics menu and turn on the familiar after obtaining its card.
- Leave one familiar active while clearing several rooms so its experience can accumulate.
- Use Faerie for support, Demon or Sword for stronger offensive pressure, or Bat when using Bat Form frequently.
- Remember that the Demon’s switch interaction is limited to specific mechanisms.
Level a familiar through ordinary progress
Familiars gain experience while they are active as Alucard defeats enemies. The practical approach is to choose one familiar and leave it equipped during regular exploration rather than repeatedly changing cards. You do not need to stop the campaign for extensive grinding during a first clear; a familiar that remains active through several regions will improve naturally.
If you want to train one deliberately, use a room with enemies that respawn quickly and a nearby coffin save room, or choose a low-risk route that you can clear and retreat from without repeated contact damage. Do not choose a farming location solely because it is popular in later challenge runs. For a new player, a safe route near a coffin save point is more useful than a faster but dangerous setup. Save before a long training session if the route is far from the nearest coffin save room.
Familiar attacks are automatic and may not connect with every enemy. Continue using Alucard’s weapon, shield and movement normally. The familiar should add pressure while you reposition, not tempt you to stand still and absorb damage. If a familiar appears inactive, pause and confirm that its Relic is enabled rather than assuming the card is broken.
- Keep the selected familiar active during normal room-to-room progress.
- Train near a coffin save room or on a route that is easy to retreat from.
- Continue attacking and dodging instead of waiting for the familiar to finish enemies.
Learn spells and review their MP costs
Alucard’s spells are entered through directional commands followed by an attack button. When a command is entered correctly, the spell is recorded in the Spells section of the menu. The Master Librarian can sell magic scrolls that reveal commands for spells you have not yet learned, but purchasing a scroll is not required if you already know and successfully enter the command. The Spells menu is the dependable place to review learned spells and their MP costs.
Useful early commands include Summon Spirit, which costs 5 MP, and Dark Metamorphosis, which costs 10 MP. Hellfire costs 15 MP, Tetra Spirit costs 20 MP, Sword Brothers costs 30 MP and Soul Steal costs 50 MP. These are MP costs, not hearts or a separate soul currency. Sword Brothers additionally requires the Sword familiar to be active when the command is performed.
Practice commands in an empty room. Directional inputs can fail if Alucard is facing the wrong way, if the sequence is entered too slowly or if the attack button is pressed before the command finishes. Do not test an unfamiliar spell beside a boss. A failed command can leave you exposed, and a successful spell may consume MP that you intended to reserve for recovery or burst damage.
Summon Spirit is a practical low-cost ranged attack. Dark Metamorphosis can restore health under suitable conditions, but it is not a universal emergency heal and should not replace carrying restorative items. Soul Steal is expensive but can affect enemies across the screen and has special utility against some hidden walls. Sword Brothers is a prepared burst option rather than something to depend on when your MP is nearly empty.
- Review the Spells menu after learning a command.
- Use the displayed MP cost when deciding whether to cast.
- Practice commands away from bosses.
- Confirm that the Sword familiar is active before attempting Sword Brothers.
- Keep a melee fallback for situations where MP is insufficient.
Separate MP management from heart management
Spells consume MP. Subweapons and Item Crashes consume hearts. These resources are independent, so a spell-focused plan does not preserve hearts for a Holy Water or Axe strategy, and a subweapon-focused plan does not preserve MP for Soul Steal or Sword Brothers. Before entering a boss room, decide which resource you are actually using and avoid spending it unnecessarily on nearby enemies.
Enter major fights with full or nearly full HP and enough MP for the spell you understand best. If your strategy uses a subweapon, collect hearts on the approach but do not spend them on routine enemies. If you are relying on spells, avoid draining MP simply to speed through weak enemies unless the cast is also protecting you or restoring health.
Cast during a clear vulnerability window: after a charge, during a recovery animation or when several targets are aligned. Keep moving while the spell resolves. Familiars can continue attacking while you reposition, but their damage is inconsistent, so do not stand still waiting for an automatic attack to finish a boss.
If a spell or familiar strategy fails repeatedly, change your positioning and ordinary attack timing before grinding several levels. A familiar is support, not a substitute for learning the boss’s range, contact damage and recovery windows.
- Arrive with HP, MP and hearts matched to the planned strategy.
- Do not spend all hearts before a subweapon-based boss attempt.
- Do not empty MP on minor enemies immediately before a difficult fight.
- Keep a regular melee plan available if the spell command fails or the resource runs out.
Before you move on
- At least one familiar is enabled in the Relics menu and visibly follows Alucard.
- You know the five familiar cards used by the North American PlayStation release and can identify the general region where each is found.
- The Spells menu contains any commands you have learned and shows their usable MP costs.
- Your equipment screen contains a dependable weapon, current defensive equipment and at least one accessory whose purpose you understand.
- Before a boss, you can state whether your plan uses melee attacks, a familiar, a spell or a heart-based subweapon, and you still have a fallback option.
References for this chapter
- Castlevania: Symphony of the Night – FAQ, PlayStation
- Castlevania: Symphony of the Night – Where can I find the familiars?
- Castlevania: Symphony of the Night Familiars
- Castlevania: Symphony of the Night – Relics
- Castlevania: Symphony of the Night – Spells
- Castlevania: Symphony of the Night US spell configuration reference
Entrance, Outer Wall and Early Safe Routes
Follow the opening normal-castle route through the Entrance, Alchemy Laboratory, Marble Gallery, Outer Wall and Long Library. Collect the Cube of Zoe, defeat Slogra and Gaibon, defeat Doppelganger10, activate the Outer Wall elevator and warp room, collect Soul of Wolf, and purchase the Jewel of Open. The lower Outer Wall secret and early equipment are optional. The Clock Tower is only marked for a later return after obtaining the Leap Stone.
Collect the Cube of Zoe and establish the opening checkpoint
After Death removes Alucard’s starting equipment, continue through the Entrance and use the first dedicated coffin-style save room before making a long push. These coffin rooms are the game’s normal save locations. Portraits, decorative objects and warp-room platforms are not substitutes for a save room.
Proceed through the Entrance until you reach the room containing the Cube of Zoe. Collect it before continuing. The Cube of Zoe causes hidden item candles to become visible, allowing you to notice additional hearts, money and consumables during later exploration. It is not a movement relic and does not open the blue door in the Alchemy Laboratory.
After collecting the Cube, continue through the Entrance toward the Alchemy Laboratory. You can inspect side rooms and candles, but do not spend resources trying to clear every optional corner. The immediate route is to reach the laboratory’s upper progression rooms and prepare for the first established boss encounter.
- Use the Entrance coffin save room.
- Collect the Cube of Zoe.
- Keep enough health and hearts for the Alchemy Laboratory route.
- Continue toward the Slogra and Gaibon encounter.
Clear the Alchemy Laboratory and defeat Slogra and Gaibon
Advance through the Alchemy Laboratory using the open vertical route. Save at the laboratory coffin room before the boss approach if you need to restore health. The laboratory’s platforms and narrow passages reward careful movement; eliminate enemies before committing to long jumps, especially when a missed jump would force you to repeat several rooms.
Continue to the upper boss area and defeat Slogra and Gaibon. Treat this encounter as part of the established opening route for this walkthrough, not as an optional detour. Slogra uses fast horizontal charges and spear attacks, while Gaibon moves through the air and fires projectiles. Keep moving so that the two bosses do not trap Alucard between them.
Use the room’s width to separate the bosses whenever possible. Attack the grounded target when it lands or finishes a charge, then reposition before the other boss can close in. A ranged subweapon is useful for Gaibon, but do not spend all of your hearts if the fight is already under control. If you die, reload from the laboratory coffin save room, restore your equipment and try again rather than making an unnecessary long trip from the Entrance.
After both bosses are defeated, use the passage beyond the arena to enter the Marble Gallery. A save room beyond the boss route provides a reliable recovery point for the next section.
- Reach the Slogra and Gaibon arena through the Alchemy Laboratory.
- Defeat both Slogra and Gaibon.
- Use the post-boss coffin save room before continuing if needed.
- Enter the Marble Gallery.
Cross the Marble Gallery toward the Outer Wall
From the Marble Gallery entrance, follow the main route through the early gallery rooms. Use the lower path when the route divides and activate the available coffin save room near the large pit. The Spirit Orb can be collected from a lower section as an optional relic; it is not needed to reach the Outer Wall or Long Library.
Continue toward the large clock room and speak with Maria. This meeting establishes the later route involving the castle’s clock mechanism, but it does not yet provide the Holy Glasses or open the final Richter sequence.
At the later four-way junction, use the lower-right passage. The upper-right route is blocked during this visit, so do not waste time attempting to force the door. Proceed through the long gold-and-stone corridor. Stone Roses can inflict petrification, so keep moving and avoid standing in their attack path. The red exit at the end leads to the Outer Wall.
- Use the Marble Gallery coffin save room near the large pit.
- Collect the Spirit Orb only if desired.
- Speak with Maria in the clock room.
- Take the lower-right branch at the four-way junction.
- Enter the Outer Wall.
Decide whether to take the optional lower Outer Wall secret
When you first enter the Outer Wall, break the nearby container for the Zircon if you want early money. Descend toward the Armor Lord and deal with it carefully. You may fight it, use a safe spell or move past it if your build allows. Do not treat this side trip as required progression.
In the small room beyond the Armor Lord, strike the left wall to reveal a hidden alcove and collect the Pot Roast. Crouch inside the newly opened gap and wait. After a delay, a concealed elevator drops Alucard into the room below.
The lower room contains the Jewel Knuckles and Mirror Cuirass. The Jewel Knuckles are a strong optional early weapon, and the Mirror Cuirass provides useful protection against petrification. Equip them if they improve your current setup, but neither item is required to finish the campaign.
The lower room’s right-side grate cannot yet be crossed because Alucard does not have Form of Mist. Use the concealed elevator again to return to the upper room. The telescope farther below is also optional and has no bearing on the route to the Long Library.
- Check the hidden wall beyond the lower Outer Wall Armor Lord if desired.
- Collect the Pot Roast and wait in the alcove for the hidden elevator.
- Collect the Jewel Knuckles and Mirror Cuirass only if desired.
- Return by the hidden elevator rather than trying to cross the lower grate.
- Treat the telescope as optional.
Defeat Doppelganger10 and activate the Outer Wall elevator
Continue upward through the Outer Wall and use the coffin save room near the boss approach. This checkpoint should be used before entering Doppelganger10’s room, especially if you skipped the optional Mirror Cuirass and Jewel Knuckles.
Doppelganger10 copies Alucard’s basic movement and attacks. Avoid standing at the same distance for long periods because the copy can answer with sword strikes, thrown knives or evasive movement. Bait a jump or landing, strike during the recovery window, then move away before the copy can counterattack.
A long-reaching weapon makes the fight easier because it lets you punish the copy without standing directly beside it. The Stopwatch can also create an opening if you have enough hearts. Do not rely on a single subweapon: if the boss blocks or evades one attack, switch to ordinary spacing and continue exploiting its landing recovery.
Defeat Doppelganger10 and collect the Life Max Up in the route beyond the arena. Continue through the Outer Wall until you reach the elevator controls. Strike the switch to activate the large vertical elevator. Reaching the shaft alone does not activate it.
After activating the mechanism, use the nearby upper coffin save room. This gives you a safe checkpoint before collecting Soul of Wolf and entering the Long Library.
- Save before Doppelganger10.
- Defeat Doppelganger10.
- Collect the Life Max Up after the encounter.
- Strike the Outer Wall elevator switch.
- Use the upper Outer Wall coffin save room.
Collect Soul of Wolf, activate the warp room and enter the Long Library
Return to the elevator shaft and ride it through the newly connected stops. Collect Soul of Wolf from its room on the route. This relic allows Alucard to transform into wolf form; consult the original PlayStation game’s relic and status screens for the assigned command rather than importing a control instruction from a later port.
At the upper Outer Wall, enter the warp room and activate it by stepping onto its platform. The warp room links the Outer Wall with other activated castle warp rooms, including the Entrance. It is not a save room, but activating it greatly shortens recovery trips and makes the next route safer.
Use the elevator and connected Outer Wall passages to reach the Long Library entrance. Move carefully through the library’s stairways and enemy-filled rooms. Dhurons, Flea Men and other enemies can interrupt jumps, so clear a landing area before crossing gaps. Optional equipment such as the Bronze Cuirass can be collected if it improves your defenses, but it is not required.
Continue through the Long Library until you reach the Master Librarian. Purchase the Jewel of Open before leaving. This relic is required to open the blue magical door that leads into the next major section of the normal castle. The castle map and Library Card are useful purchases when affordable, but they are not substitutes for the Jewel of Open.
After buying the Jewel of Open, save in the Long Library coffin room or return through the activated warp route. The next required continuation is back through the Alchemy Laboratory and the blue door toward the Royal Chapel. Do not begin the Clock Tower route yet.
- Collect Soul of Wolf from the activated elevator route.
- Activate the Outer Wall warp room.
- Enter the Long Library.
- Reach the Master Librarian.
- Purchase the Jewel of Open.
- Prepare to return through the Alchemy Laboratory and blue door.
Mark the Clock Tower for a later return
The Clock Tower entrance is at the upper Outer Wall, near the upper save and warp facilities. You may identify the doorway and mark it on the map, but it is not part of this chapter’s immediate objective.
Do not attempt to solve the Clock Tower gear puzzle, collect its movement-dependent equipment or fight Karasuman during this first Outer Wall visit. The route is intended to be completed after Alucard visits Castle Keep and obtains the Leap Stone, which provides the double jump needed for the intervening progression.
Once the Jewel of Open is in your inventory, return through the activated warp route or retrace the Outer Wall and Marble Gallery. Continue to the Alchemy Laboratory, open the blue door, and proceed toward the Royal Chapel. The Clock Tower revisit belongs later, after the Leap Stone and the required movement sequence have been obtained.
- Identify the Clock Tower entrance on the map.
- Leave the gear puzzle and Karasuman for a later visit.
- Do not enter the Clock Tower as an early progression objective.
- Return through the normal route after purchasing the Jewel of Open.
Before you move on
- The Cube of Zoe has been collected in the Entrance.
- Slogra and Gaibon have both been defeated in the Alchemy Laboratory.
- The Marble Gallery has been reached and Maria has been met in the clock room.
- The lower Outer Wall secret has been checked, or its optional contents have been deliberately skipped.
- Doppelganger10 has been defeated.
- The Life Max Up beyond the Doppelganger10 encounter has been collected.
- The Outer Wall elevator switch has been activated.
- The upper Outer Wall coffin save room is available.
- The Outer Wall warp room has been activated.
- Soul of Wolf has been collected.
- The Long Library and Master Librarian have been reached.
- The Jewel of Open has been purchased.
- The Clock Tower entrance has been marked for a later return after the Leap Stone.
- The next intended route is the Alchemy Laboratory blue door toward the Royal Chapel, not the Clock Tower.
References for this chapter
- Castlevania Portal Site: Symphony of the Night history and release information
- Castlevania: Symphony of the Night — Guide and Walkthrough, PlayStation
- GameFAQs — Castlevania: Symphony of the Night Guide and Walkthrough by DJellybean
- Castlevania: Symphony of the Night/Outer Wall — StrategyWiki
- Castlevania: Symphony of the Night/Long Library — StrategyWiki
- RPGClassics Castlevania: Symphony of the Night walkthrough
- Castlevania: Symphony of the Night/Outer Wall — Castlevania Wiki
Throne Rooms and the Royal Chapel — Mid-game Flow
The Royal Chapel is the direct route from the Alchemy Laboratory to Castle Keep. On the first visit, save before the stairway, cross the bell towers, defeat Hippogryph and use the coffin save room beyond the boss before continuing toward the Leap Stone. The spike corridor is deliberately postponed until after Spike Breaker is obtained. On the later return, cross that corridor, meet Maria, and collect the Silver Ring in the room beyond or adjacent to the encounter. Portraits, chairs, stained-glass scenes and chandeliers are landmarks only; they do not save the game.
Save before the Royal Chapel climb
Enter the Royal Chapel from the Alchemy Laboratory and take the first available route to the dedicated coffin save room on the left. Save before attempting the long golden stairway. This room is the proper recovery point for the opening section; background portraits, chairs, stained-glass windows and chandeliers are not save points.
Return to the main chapel room and break the vase on the left if you want the Aquamarine. It is an optional gem that can be sold later and has no role in opening the route to Castle Keep. From the chapel room, begin climbing the long stairway. Keep a dependable ranged subweapon equipped if you already have one, but do not spend all of your hearts on ordinary enemies before reaching the next save room.
- Save at the dedicated coffin room before climbing.
- Treat chapel scenery as visual landmarks, not save points.
- Collect the Aquamarine only if you want an optional sale item.
Climb the long golden stairway safely
The stairway contains Bone Pillars, Corner Guards and rolling skull hazards. When fighting Bone Pillars, attack the upper skull first whenever possible. If it remains active, it can roll down the stairs and strike Alucard while he is dealing with another enemy.
Corner Guards are awkward in the narrow passage because they can push Alucard toward the wall. Let one approach, attack during its recovery, and retreat far enough to create room for its next advance. If your health falls too low, retreat to the coffin room rather than consuming every healing item. Leaving and re-entering the room respawns ordinary enemies, making the stairway a reasonable short experience or drop route, but extended grinding is not required.
- Attack the upper Bone Pillar skull first when practical.
- Keep space behind Alucard when fighting Corner Guards.
- Retreat to the coffin room instead of exhausting healing supplies.
Collect optional equipment before the bell towers
At the upper part of the stairway, use the platforms on the left to reach the Goggles. The Goggles are optional head equipment with an intelligence benefit; take them if the jump is comfortable, but do not risk a death for them.
The nearby moving sword is the Spectral Sword. It can create a dangerous close-range hazard and may release additional sword activity around Alucard. Attack from the edge of its reach, use a ranged subweapon when the room becomes crowded, or pass through without fighting if you are low on health.
A lower-right red door leads toward the Colosseum branch. The Knight Shield is available there as an optional pickup, but this branch does not replace the main Royal Chapel route. Take it only if its defense improves your current equipment, then return to the chapel route.
- Identify the moving sword as Spectral Sword.
- Take the Goggles only if the platform route is safe.
- Treat the Knight Shield as an optional Colosseum detour.
Farm Corner Guards only for an optional weapon
Corner Guards can drop the Cutlass as a common reward and the Damascus Sword as a rarer reward. If you specifically want the Damascus Sword, defeat the Corner Guards on the stairway or nearby rooms, then return to the coffin save room to recover and repeat. The drop is not guaranteed, so set a limit on the number of attempts.
The Damascus Sword is not required for Hippogryph, Castle Keep or the true ending. Continue with any reliable weapon that fits your build if the farming becomes slower or riskier than advancing. Do not farm the Spectral Sword for Damascus Sword; it is a different enemy with different drops.
- Farm Corner Guards only for an optional weapon upgrade.
- Use the coffin room between attempts.
- Do not make the Damascus Sword a progression requirement.
Cross the bell towers and leave the spike corridor alone
From the Spectral Sword area, climb through the right-hand platforms and enter the first bell-tower route. The spike-filled room on the left is inaccessible on the first visit. Mark it on the map and continue upward instead of attempting to force the passage.
At the top of the first tower, collect the Life Max item, Strength Potion and Silver Plate. The Silver Plate is body armor found during this first visit. Continue right through the connecting hallway to the second bell tower, climb to its upper section and collect the Zircon if desired.
Drop down and continue right through the long hallway. The portrait room ahead is a landmark immediately before the Hippogryph encounter, not a save room. Make sure your equipment and healing items are ready before entering.
- Do not enter the spike corridor yet.
- Collect or deliberately skip the Life Max item, Strength Potion and Silver Plate.
- Collect or deliberately skip the Zircon.
- Prepare for Hippogryph without expecting a save in the portrait room.
Defeat Hippogryph and save in the third bell tower
Hippogryph can charge across the floor, rise through the room, release eggs and breathe fire while grounded. Destroy eggs before they hatch when doing so is safe, then attack during the boss's grounded recovery or after a fire-breathing pass. When the boss moves back and prepares the flame attack, step away from its mouth instead of standing directly in front of it.
A ranged subweapon, familiar or spell can help while Hippogryph is airborne, but no particular weapon is mandatory. Favor repeated safe attacks over chasing the boss across the room. If the attempt fails, return from the last coffin save room and conserve hearts for the boss rather than spending them on minor enemies.
After the fight, Maria appears and leaves after her conversation. Continue right through the hallway into the third bell tower. Use the coffin save room there immediately. Then climb to the top of the tower, collect the Potion and Cutlass if useful, and proceed through the red door toward Castle Keep.
- Destroy threatening eggs when practical.
- Move away from the fire-breath line.
- Use the coffin save room after Hippogryph.
- Collect the Potion and Cutlass if useful before entering Castle Keep.
Return later for the Silver Ring
The first visit ends by continuing through Castle Keep. Do not attempt to finish the spike corridor until the later movement route has provided the required transformations and Spike Breaker armor in the Catacombs.
When returning, approach the Royal Chapel through the normal route and climb back to the bell tower. Equip Spike Breaker before entering the previously blocked passage. Follow the spike corridor to its encounter with Maria. Maria is met inside the passage area, but she does not give the Silver Ring.
After the conversation, continue into the room beyond or adjacent to that encounter and collect the Silver Ring there. The Silver Ring is a later progression item used with the Gold Ring in the Marble Gallery clock room. Keep it distinct from the Silver Plate, which is ordinary body armor collected on the first Royal Chapel visit.
- Leave the spike corridor for the Spike Breaker return.
- Meet Maria after crossing into the protected passage.
- Collect the Silver Ring in the room beyond or adjacent to the encounter.
- Do not confuse Silver Ring progression with the earlier Silver Plate pickup.
Before you move on
- The first Royal Chapel coffin save room has been used.
- The Aquamarine has been collected if desired.
- The Goggles and Knight Shield have been checked as optional equipment rather than required objectives.
- The Spectral Sword area has been passed or cleared without exhausting recovery supplies.
- The first bell tower's Life Max item, Strength Potion and Silver Plate have been collected or deliberately skipped.
- The second bell tower's Zircon has been collected or deliberately skipped.
- Hippogryph has been defeated and Maria's post-boss scene has occurred.
- The third-bell-tower coffin save room has been reached and used.
- Alucard has continued through the Potion and Cutlass route toward Castle Keep.
- The spike corridor is marked for a later return requiring Spike Breaker.
- On the later return, Alucard has met Maria in the spike passage and collected the Silver Ring from the nearby room afterward.
- The Silver Plate and Silver Ring remain correctly distinguished in the inventory and route notes.
Approach to the Castle Keep — Preparing for Richter
After defeating Hippogryph, collect Leap Stone in Castle Keep, then use the double jump to reach Olrox’s Quarters and the Colosseum. Obtain Form of Mist there and Soul of Bat in the Long Library. The next required route goes through Olrox’s Quarters, the Underground Caverns, Abandoned Mine and Catacombs for Echo of Bat, Merman Statue, Gold Ring and Spike Breaker. Return to the Royal Chapel for Silver Ring, then use both rings in the Marble Gallery clock room to receive Holy Glasses from Maria. Clock Tower exploration, Fire of Bat, Karasuman, Ghost Card, Power of Mist and Holy Symbol are useful optional objectives, not requirements for the true ending.
Collect Leap Stone in Castle Keep
After defeating Hippogryph in the Royal Chapel, continue into Castle Keep. Explore the connected rooms and climb through the keep until you reach the upper section containing Leap Stone. Collect it and confirm that Alucard can perform the double jump before leaving.
Use the dedicated coffin save room in Castle Keep whenever you need to restore health and magic or secure your progress. If you reach the Castle Keep warp room, activate it so later returns are shorter. The nearby equipment and relic pickups are optional unless they are part of your own build.
Do not continue toward Richter yet. The throne-room route requires Bat form, which is obtained later. Your next required destination is the Marble Gallery clock room, where Leap Stone opens the route into Olrox’s Quarters.
- Enter Castle Keep after Hippogryph.
- Collect Leap Stone.
- Confirm that the double jump works.
- Use a coffin save room or warp room if needed.
- Return to the Marble Gallery clock room.
Reach the Colosseum and obtain Form of Mist
From the large clock room in Marble Gallery, use the double jump to reach the opening that leads into Olrox’s Quarters. Follow the accessible route through the area until you reach the Colosseum. Activate the Olrox’s Quarters warp room if it is available, since it will be useful for later trips.
Continue through the Colosseum until Minotaurus and Werewolf block the route. Avoid allowing both bosses to trap Alucard in the center of the arena. Minotaurus uses broad ground attacks, leaps and axe swings, while Werewolf closes distance quickly and attacks from multiple angles. Strike during their recovery periods, then reposition instead of remaining between them.
After defeating both bosses, continue through the arena and activate the elevator switch. Ride the elevator to the upper section and collect Form of Mist. This relic allows Alucard to pass through the mist-filled grate in the Long Library. The Colosseum bosses are required for this route; do not leave before obtaining Form of Mist.
- Use Leap Stone in the Marble Gallery clock room.
- Enter Olrox’s Quarters and continue to the Colosseum.
- Defeat Minotaurus and Werewolf.
- Activate the Colosseum elevator switch.
- Collect Form of Mist.
Return to the Long Library for Soul of Bat
Return to the Long Library by using the Olrox’s Quarters warp room, a Library Card or the normal castle route. In the library, locate the large stairway leading down toward the Master Librarian. Use Leap Stone to reach the ledge on the left side of the stairway and follow the passage beyond it.
Continue through the Lesser Demon section. The encounter may consume health or resources, so retreat to a dedicated coffin save room if necessary rather than forcing the route with low health. Continue past the encounter until you reach the grate blocking the next passage.
Transform with Form of Mist and pass through the grate. Continue to the room containing Soul of Bat and collect it. Confirm that Bat form is available before leaving. Bat form is needed for later movement checks, including the upper Castle Keep route and the dark Catacombs passage used to reach Spike Breaker.
Fire of Bat and the Clock Tower are not required before this point or for the true-ending route. They can be visited later as optional exploration.
- Reach the upper Long Library ledge with Leap Stone.
- Pass the grate with Form of Mist.
- Collect Soul of Bat.
- Confirm that Bat form is available.
- Leave the library for the required Olrox route.
Optional Clock Tower exploration
The Clock Tower can now be explored because Leap Stone, Form of Mist and Soul of Bat are available. Use the upper Outer Wall route to reach it. This visit is optional for completing the Holy Glasses sequence and reaching the Inverted Castle.
If you explore the Clock Tower, use Bat form to navigate the machinery rooms and look for Fire of Bat. Fire of Bat is an optional transformation upgrade and is not required to obtain Echo of Bat, Spike Breaker, Silver Ring or Holy Glasses.
Karasuman is also optional. If you choose to fight him, keep moving around the arena and attack when he enters range. His ravens and diving attacks are easier to manage when Alucard avoids staying directly beneath him. Defeating Karasuman does not unlock a required movement relic for the Richter route.
The Clock Tower gear puzzle and its equipment rewards are optional as well. Do not delay the required progression for these items unless you specifically want the exploration rewards.
- Treat the Clock Tower as optional.
- Collect Fire of Bat only if desired.
- Defeat Karasuman only if desired.
- Do not add either objective to the required completion chain.
Defeat Olrox and obtain Echo of Bat
Return to Olrox’s Quarters and use the upper route that becomes accessible with Bat form. Activate or use the area’s warp room before entering the boss approach if you have not already done so. Save in a dedicated coffin room when you need recovery before the fight.
Olrox’s first form teleports around the room and summons lesser enemies. Attack when he materializes, then move away before the summoned enemies surround Alucard. After the first form is defeated, Olrox changes into a large green form. Watch for the mouth laser, fireballs and close-range attacks. Leave the laser’s line, avoid standing directly below the boss and attack the head during safe openings.
After both forms are defeated, continue through the post-boss route and collect Echo of Bat. This relic gives Bat form a sonar pulse that reveals the layout of dark passages. Its required use in this chapter is the concealed Catacombs route leading to Spike Breaker.
Olrox is part of the standard progression to the Holy Glasses. Do not skip the fight or attempt the dark Catacombs passage without Echo of Bat.
- Reach Olrox through the upper route in Olrox’s Quarters.
- Defeat both forms of Olrox.
- Collect Echo of Bat after the fight.
- Confirm that the Bat sonar effect is available.
Complete the Underground Caverns and obtain Gold Ring and Merman Statue
Return to Marble Gallery and use the route leading toward the Underground Caverns. Operate the required blue-door switch and enter the deeper cavern passage. Use a dedicated coffin save room before committing to the longer route if your resources are low.
Continue through the Caverns until the Succubus sequence begins. Watch the copies and projected attacks carefully, identify the real target and attack during safe openings. After the sequence ends, continue to the room containing Gold Ring and collect it. Gold Ring is required for the later Marble Gallery clock event.
Continue through the Caverns and use the ferry route to obtain Merman Statue. This relic allows Alucard to summon the Ferryman and is part of the route through the lower cavern area. Continue until Scylla Wyrms and Scylla block the route. Defeat them to open the way toward the Abandoned Mine.
Use platforms, pillars and the arena edges to avoid Scylla’s attacks, then strike during openings. No fixed level, health, magic, heart or equipment threshold is required. If the fight is impractical, retreat to a coffin save room and return after replacing equipment or gaining levels.
Holy Symbol can be collected during the water-route exploration if desired. It protects Alucard while moving through water, but it is not required for Gold Ring, Spike Breaker, Silver Ring, Holy Glasses or the true ending.
- Open the route into the Underground Caverns.
- Complete the Succubus sequence.
- Collect Gold Ring.
- Obtain Merman Statue from the ferry route.
- Defeat the Scylla encounters that block the route.
- Treat Holy Symbol as optional.
Cross the Abandoned Mine and reach Spike Breaker in the Catacombs
Continue from the Underground Caverns into the Abandoned Mine. Use the Mine’s dedicated coffin save room before the deeper route. Cerberus blocks the progression path; attack during its recovery periods and move away from charges and flame attacks rather than standing directly in front of it.
Proceed from the Mine into the Catacombs. Find the dark passage leading to Spike Breaker. Enter Bat form and activate Echo of Bat so the sonar reveals the passage and its hazards. Move carefully through the spikes and avoid unnecessary contact with the walls or floor.
Collect Spike Breaker and equip it before leaving if you are going directly to the Royal Chapel. This armor protects Alucard from the spike corridor required to reach Silver Ring. Ordinary armor does not provide the same protection.
Other Catacombs bosses and rewards can be handled according to your route. The required checkpoint for this chapter is Spike Breaker obtained. Once it is secured, use the Catacombs, Mine or another established travel route to return toward the Royal Chapel.
- Reach the Abandoned Mine.
- Use the Mine coffin save room.
- Defeat Cerberus if it blocks your route.
- Enter the Catacombs.
- Use Bat form and Echo of Bat in the dark passage.
- Collect and equip Spike Breaker.
Return to the Royal Chapel for Silver Ring
Travel back through the normal castle to the Royal Chapel. Before entering the spike corridor in the bell-tower section, equip Spike Breaker. Cross the spikes and use Form of Mist at the grate where the passage requires it.
Continue through the opened route until you reach Maria. The required item is in the area beyond the spike corridor. Collect Silver Ring and keep it available for the Marble Gallery clock-room event.
Save in a dedicated coffin room if the return trip has reduced your health or magic. No fixed resource or level total is required for this step. Holy Symbol is not a substitute for Spike Breaker in the spike corridor and remains optional.
- Return to the Royal Chapel.
- Equip Spike Breaker before crossing the spikes.
- Use Form of Mist at the grate.
- Reach the area beyond the spike corridor.
- Collect Silver Ring.
Use both rings to receive Holy Glasses
Return to the large clock room in Marble Gallery. Equip Gold Ring and Silver Ring at the same time. The clock mechanism then opens the required passage below the room after its sequence completes. If nothing happens, check the equipment slots rather than merely confirming that both rings are in the inventory.
Enter the opened passage and follow it to Maria. Speak with her and receive Holy Glasses. On the original North American PlayStation release, this is the item required to expose the entity controlling Richter.
Equip Holy Glasses before leaving. Their important campaign function is to reveal Shaft’s green control orb during the Richter encounter. They should not be treated as a universal detector for invisible platforms, concealed walls, map icons or every hidden object.
Use a warp room to return to Castle Keep after obtaining the glasses. A separate pre-Richter save is optional protection in case you want to replay the encounter; it is not required for a valid completion.
- Equip Gold Ring and Silver Ring together.
- Wait for the Marble Gallery clock sequence to open the passage.
- Speak with Maria.
- Receive Holy Glasses.
- Equip Holy Glasses before entering Richter’s room.
Prepare for Richter without adding optional objectives to the requirement
Return to Castle Keep and use Bat form to reach the upper route that was inaccessible during the first visit. Follow the route toward Richter’s throne room. Stop at a dedicated coffin save room before the final approach and restore your health and magic.
Choose equipment, a weapon, familiar and subweapon that you can use reliably. The game does not require a specific weapon, armor set, familiar, heart supply, magic total, health total or level. Optional Castle Keep rewards such as Ghost Card and Power of Mist may improve convenience, but neither is required.
Before entering the throne room, verify that Holy Glasses are equipped. During the encounter they reveal the green control orb above or near Richter. Attack the orb rather than defeating Richter first. Destroying the orb is the event that preserves the Alucard campaign and unlocks the Inverted Castle.
This chapter is complete when Alucard reaches the Richter encounter with Leap Stone, Form of Mist, Soul of Bat, Echo of Bat, Gold Ring, Spike Breaker, Silver Ring and Holy Glasses secured. Fire of Bat, Karasuman, Ghost Card, Power of Mist, Holy Symbol and Clock Tower completion are optional.
- Reach the upper Castle Keep route with Bat form.
- Use a coffin save room before the throne-room approach.
- Restore health and magic.
- Equip Holy Glasses.
- Enter Richter’s encounter prepared to attack the green control orb.
Before you move on
- Leap Stone collected and double jump confirmed.
- Form of Mist collected from the Colosseum.
- Soul of Bat collected from the Long Library.
- Olrox defeated and Echo of Bat collected.
- Gold Ring obtained after the Succubus sequence.
- Merman Statue obtained from the Underground Caverns ferry route.
- Scylla route completed and the Abandoned Mine reached.
- Cerberus defeated if it blocks the Mine route.
- Spike Breaker collected from the Catacombs.
- Silver Ring collected after crossing the Royal Chapel spike corridor.
- Gold Ring and Silver Ring equipped in Marble Gallery’s clock room.
- Holy Glasses received from Maria and equipped.
- Upper Castle Keep route reached using Bat form.
- Richter encounter entered with the green control orb visible.
- Fire of Bat, Karasuman, Ghost Card, Power of Mist, Holy Symbol and Clock Tower completion remain optional.
- The chapter is complete when Alucard is ready to destroy the control orb rather than Richter.
References for this chapter
- Castlevania: Symphony of the Night — Guide and Walkthrough — PlayStation — GameFAQs
- Castlevania: Symphony of the Night — Guide and Walkthrough, PlayStation
- Walkthrough - Castlevania: SotN - Guides
- Castle Keep - Castlevania: Symphony of the Night - Guides
- RPGClassics — Castlevania: Symphony of the Night Walkthrough
- StrategyWiki — Castlevania: Symphony of the Night: Master of the Castle
Richter Encounter: How the Fight Affects Endings
The Richter encounter determines whether Alucard reaches the second half of the original North American PlayStation campaign. Defeating Richter without the Holy Glasses produces an early ending and does not open the Inverted Castle. To continue, obtain the Gold Ring and Silver Ring, use both in the Marble Gallery clock room to reach Maria, receive the Holy Glasses, equip them in the head slot, and destroy Shaft’s green control orb during the Richter encounter. Backup saves are useful optional protection, but they are not required for a CLEAR file.
1. Reach the Richter route with both rings obtained
Before entering the throne room at the top of Castle Keep, make sure the Gold Ring and Silver Ring are already in your possession. The Gold Ring comes from the normal-castle Underground Caverns route after the Nightmare sequence. The Silver Ring is reached through the Royal Chapel’s spike corridor after obtaining the equipment and movement capability needed to cross it. These rings are required for opening the route to Maria; they are not interchangeable accessories.
Richter’s room is reached through Castle Keep, in the same throne-room area used during the opening prologue. If you want protection against an accidental early ending, save in the nearby dedicated coffin save room before entering the confrontation. Keeping that file is optional recovery advice, not a completion requirement. Do not delete it until you have confirmed that the Inverted Castle is available.
- Gold Ring obtained.
- Silver Ring obtained.
- Castle Keep route to Richter is open.
- Optional save made before entering the throne room.
2. Open the Marble Gallery clock-room route
Return to the large clock room in the Marble Gallery and equip both the Gold Ring and Silver Ring at the same time. Carrying them is not enough. They must be active equipment when you use the clock-room mechanism. The room then opens the route that leads to Maria beneath the central clock area.
Follow the opened passage and continue until you meet Maria. On the original North American PlayStation release, Maria gives Alucard the Holy Glasses after this ring-based route is completed. If the passage does not activate, open the equipment screen and verify that both rings are equipped simultaneously rather than merely stored in the inventory.
- Gold Ring and Silver Ring are equipped together.
- The Marble Gallery clock-room route opens.
- Maria is reached through the opened route.
- The Holy Glasses are received.
3. Equip the Holy Glasses in the head slot
Open the equipment screen in a safe location and place the Holy Glasses in the head slot. For this original PlayStation version, the glasses are head equipment, not an accessory-slot item. Owning them is not enough for the Richter sequence: they must be equipped when you enter the fight.
Check the head slot immediately before leaving for Castle Keep. If another helmet or head item is equipped, replace it with the Holy Glasses. The glasses do not require a particular weapon, level, amount of hearts, or spell inventory. Keep your preferred offensive and defensive equipment in the remaining slots, then return to the throne room.
- Holy Glasses are equipped in the head slot.
- The glasses are not left only in the inventory.
- The Holy Glasses remain equipped when entering Richter’s room.
- No unrequired weapon, level, heart, or spell threshold is being assumed.
4. Destroy Shaft’s green control orb
Richter uses fast Belmont-style attacks, including whip strikes, jumps, slides, and subweapons. Avoid standing directly in front of him for extended periods. Move around the room, use jumps or ranged attacks to create safe openings, and turn to mist when a full-room attack leaves no practical ground-level escape. Familiars and spells can help, but the fight does not require a particular build.
With the Holy Glasses equipped, a green orb appears above Richter. This is Shaft’s control mechanism and is the actual target for the true route. Aim attacks at the orb rather than trying to empty Richter’s health bar. The orb can be struck while Richter continues moving, so stay mobile and attack during openings. Once the orb is destroyed, Richter is freed and the story proceeds instead of ending with Richter’s defeat.
If Richter is defeated before the orb is destroyed, the encounter follows the early-ending route. A normal victory over Richter is therefore not enough. The required condition is the destruction of the visible green orb during the fight while the Holy Glasses are equipped.
- The green orb is visible above Richter.
- Attacks are directed at the orb rather than Richter’s body.
- The orb is destroyed before the encounter concludes.
- Richter is left free of Shaft’s control.
5. Confirm access to the Inverted Castle
After the orb is destroyed, the story identifies the force controlling Richter and Shaft escapes. Maria removes Richter from the immediate danger, while Alucard continues the campaign. The game then provides access to the Inverted Castle, the second major section of the Alucard route.
The practical confirmation is not simply a victory message or a completed Richter health bar. Confirm that the story continues beyond the ordinary Castle Keep conclusion and that the Inverted Castle route is available. Once this happens, create a new save if desired so the successful checkpoint is easy to recover from. That new save is sensible file management, but it is not a prerequisite for completion.
- Shaft’s control orb was destroyed.
- The story continues beyond the normal Castle Keep conclusion.
- The Inverted Castle becomes accessible.
- An optional post-Richter save is made if desired.
6. Recover from an early Richter ending
If the game proceeds directly to an ending after Richter, the usual cause is that the Holy Glasses were not equipped in the head slot or that Richter was defeated before the orb was destroyed. Reload a suitable save and repeat the sequence: verify both rings, open the Marble Gallery route, receive the glasses from Maria, equip them in the head slot, and then return to Richter.
If no pre-Richter backup exists, the campaign is not automatically impossible. Check the current file and continue from whatever normal-castle progress remains. If the game has already recorded the early ending and no usable earlier save is available, replaying the Alucard campaign may be necessary, but maintaining a backup was never a formal completion requirement. Once the Inverted Castle is confirmed, preserve that successful file before experimenting with optional exploration.
- Reload a suitable pre-Richter save when available.
- Verify that both rings were used to open Maria’s route.
- Verify that the Holy Glasses are equipped in the head slot.
- Destroy the green orb before Richter is defeated.
- Confirm that the Inverted Castle is accessible.
Before you move on
- The Gold Ring and Silver Ring were obtained and equipped together in the Marble Gallery clock room.
- The clock-room route opened and Maria gave Alucard the Holy Glasses.
- The Holy Glasses were equipped in the head slot before entering Richter’s room.
- The green control orb was visible and destroyed during the encounter.
- The story continued beyond the ordinary Castle Keep ending and made the Inverted Castle accessible.
- No backup file was treated as mandatory for the campaign’s completion.
References for this chapter
Inverted Castle: Entry, Recovery Route and First Vlad Relics
The Inverted Castle is the second major half of the Alucard campaign, not a brief bonus area after Richter. It becomes available only when Alucard wears the Holy Glasses during the Richter encounter and destroys Shaft’s green control orb instead of attacking Richter until he is defeated. After the intermission, return to Castle Keep and use the teleporter in the passage immediately to the left of the throne-room area. From there, establish save and teleport recovery routes, then follow the opening path through Reverse Castle Keep, Reverse Clock Tower and Reverse Outer Wall. Darkwing Bat guards the Ring of Vlad, and The Creature guards the Tooth of Vlad. These are two of the five Vlad relics required to open the final Shaft and Dracula route. The remaining relics belong to later branches, while the Forbidden Library is optional for this introductory progression.
Confirm that Richter was freed before entering the second castle
If Richter was defeated without the Holy Glasses revealing Shaft’s control orb, the normal ending sequence begins and the Inverted Castle does not open. If you kept an optional pre-Richter save, reload it, equip the Holy Glasses, and return to the Richter encounter. During the fight, attack the green orb moving around Richter instead of repeatedly striking Richter himself. Destroying the orb breaks Shaft’s control and triggers the story sequence that reveals the second castle.
After the intermission, return to Castle Keep. Do not search behind the throne room for the entry point. The correct teleporter is in the passage immediately to the left of the throne-room area. Stand on it and press Up to enter the Inverted Castle. The same teleporter serves as the return point when you want to go back to the ordinary castle. A Library Card is another way to leave the Inverted Castle, but the Castle Keep teleporter is the direct route between the two castles. Keeping a pre-Richter file is useful recovery protection, but it is not required for a valid completion.
- The Holy Glasses were equipped during the Richter encounter.
- Shaft’s green control orb was destroyed instead of defeating Richter directly.
- The normal Richter ending did not begin.
- The teleporter in the passage immediately left of the Castle Keep throne-room area has been located.
Treat the Inverted Castle as a separate recovery plan
The Inverted Castle is an upside-down version of Dracula’s Castle with its own map, enemies, bosses and teleport connections. Familiar room shapes do not guarantee that the same exits, switches or shortcuts will work in the same way. The important opening landmarks are Reverse Castle Keep, Reverse Clock Tower, Reverse Outer Wall and the Forbidden Library. Mark unexplored rooms and blocked passages on the map rather than repeatedly forcing a route that only looks familiar from the ordinary castle.
Your first priority is recovery. Save before long boss approaches and after collecting a Vlad relic. Locate the dedicated save room in Reverse Outer Wall before committing to the deeper route. A portal is also available in the opening Reverse Outer Wall section; mark it on the map after finding it. Inverted-Castle teleport rooms are not automatically linked to their ordinary-castle counterparts, so do not assume that activating one will place you in the corresponding upright location.
Maximum-life pickups, maximum-heart pickups, equipment and consumables can make the opening safer, but none of the optional supplies in Reverse Castle Keep are mandatory. If a side room costs too much health or exposes you to repeated knockback, mark it and return after obtaining stronger equipment or movement options.
- A dedicated save room has been located before the first long boss route.
- The Reverse Outer Wall portal has been found or marked on the map.
- Unexplored ledges and blocked passages are marked for later visits.
- Optional equipment and maximum upgrades are not being treated as required objectives.
Move from Reverse Castle Keep into Reverse Clock Tower
Explore Reverse Castle Keep cautiously, especially around ceiling-side platforms and long drops. Flying enemies can knock Alucard into hazards, and the inverted layout places usable floors above him instead of below him. Clear enemies before attempting difficult jumps, and retreat through the previous doorway if your health is falling faster than the room is yielding progress.
The opening progression leads from Reverse Castle Keep toward Reverse Clock Tower. Do not spend the entire first section searching for the other three Vlad relics. Their bosses are distributed across later branches of the second castle, and some passages are easier to handle after you have established a reliable recovery route. Follow the accessible connection toward the clock tower, using a save room before the boss approach when you need to recover.
- Reverse Castle Keep has been explored enough to identify the route onward.
- Hazardous ceiling-side rooms are being approached cautiously.
- The route toward Reverse Clock Tower is open.
- The other three Vlad relics are being left for later branches.
Defeat Darkwing Bat in Reverse Clock Tower
Restore your health before entering Darkwing Bat’s room and keep a melee weapon ready. A ranged subweapon, spell or familiar can help when the boss is across the room, but no particular weapon is mandatory.
Darkwing Bat flies around the compact arena and can use its wings to push Alucard toward the wall. When the gust begins, crouch and hold position rather than jumping into the wind. When the bat curls into a drill-like form and travels across the room, jump over it. During ordinary passes, walk or slide beneath the boss when there is room, then attack as it comes within reach. Avoid chasing it into a corner if doing so leaves Alucard trapped against the wall.
Defeat Darkwing Bat and collect the Ring of Vlad. This relic is required for the final campaign route, not an optional reward. Use the return route and save again if the nearby room is available before continuing through the clock tower.
- Health has been restored before the boss room.
- The wing gust is handled by crouching and holding position.
- The drill attack is avoided by jumping over it.
- Darkwing Bat has been defeated.
- The Ring of Vlad has been collected.
Cross the remaining Reverse Clock Tower rooms
Continue through Reverse Clock Tower after collecting the Ring. Bomb Knights, Medusa heads and narrow vertical platforms make this a poor place to spend all your hearts on optional fights. Move deliberately, use room transitions to reset enemy pressure when necessary, and retreat to the known save route if repeated contact damage is wearing you down.
The reversed tower contains a gear mechanism. Work through it to open the route onward, but do not assume that every shortcut from the ordinary Clock Tower is usable in the inverted layout. Optional equipment and enemy drops can wait until the required relic route is secure. Your immediate objective is to reach Reverse Outer Wall, not to clear every tower room.
- The clock-tower gear mechanism has been completed.
- Optional enemy drops have not delayed the route.
- A retreat path to a save room is known.
- The exit toward Reverse Outer Wall has been reached.
Reach Reverse Outer Wall and establish the boss checkpoint
Enter Reverse Outer Wall and use the lower route to find its dedicated save room. This is the most useful checkpoint for the next section. From the area near the Reverse Clock Tower connection, locate the portal as well. The inverted area does not provide the same convenient elevator service as the ordinary Outer Wall, so climb through the rooms manually and use the available platforms and transformations carefully.
As you ascend, you will encounter an exit toward the Forbidden Library. Do not take that branch as the route to The Creature. The required progression continues through Reverse Outer Wall toward the boss approach. The Forbidden Library is a later, optional branch reached after The Creature; its enemies, map rooms and rare equipment drops are not part of the required opening relic route.
Continue through Reverse Outer Wall until you reach the later save room before the boss. Restore health, adjust equipment for the enemies you have been encountering, and enter The Creature’s room only after confirming that this recovery point is available.
- The Reverse Outer Wall save room has been used.
- The portal near the area entrance has been located.
- The Forbidden Library exit has been identified but not mistaken for the boss route.
- The later boss checkpoint has been reached.
- Health and equipment are ready for The Creature.
Defeat The Creature and collect the Tooth of Vlad
The Creature advances by rolling across the room. When it rolls toward Alucard, jump over it rather than trying to trade contact damage. After landing behind the boss, attack during the recovery window. When The Creature stops and swings its hammer, move out of range or jump clear, then resume attacking after the swing ends.
Short attack-and-retreat exchanges are safer than standing directly in front of the boss. Ranged attacks and familiars can contribute while The Creature is moving away, but they are support options rather than requirements. If the attempt fails, return to the Reverse Outer Wall save room, replenish what you safely can, and repeat the approach instead of taking the entire clock-tower route again.
Defeat The Creature and collect the Tooth of Vlad. The Ring of Vlad and Tooth of Vlad are the practical opening pair of relics, but they do not open the final route by themselves.
- The rolling attack was avoided by jumping or moving to safe space.
- Hammer swings were not traded at close range.
- The Creature has been defeated.
- The Tooth of Vlad has been collected.
- The Reverse Outer Wall recovery route remains available.
Use the Forbidden Library as optional follow-up exploration
After The Creature, take the route leading to the Forbidden Library if you want its map rooms, items or enemy drops. The Forbidden Library is the established area name for this inverted-castle branch. It has no required boss for this opening relic route, and its optional equipment should not be farmed before the Ring and Tooth are secure.
Library enemies may offer desirable rare equipment, but those drops can consume substantial time. Continue using the map and return to the save or portal network when you need to regroup. Do not describe the Forbidden Library as Reverse Long Library, do not substitute it for Reverse Outer Wall, and do not place it before The Creature in the required route.
- The area is identified as the Forbidden Library.
- The Forbidden Library is understood as a later optional branch.
- Rare equipment farming has not replaced required progression.
- The map and portal network are being used for recovery.
Prepare for the remaining Vlad relics
Record the Ring of Vlad and Tooth of Vlad in the relic inventory, then begin the later Inverted-Castle branches according to the map. The remaining required relics are Heart of Vlad from Medusa in the Anti-Chapel, Rib of Vlad from Akmodan II in Death Wing’s Lair, and Eye of Vlad from Death in the reverse cavern route. These bosses are separate objectives and should not be presented as immediate extensions of the Reverse Castle Keep route.
When a passage requires a transformation, a high ledge or a concealed route that cannot yet be reached safely, mark it and return later. Once all five Vlad relics have been collected, take them to the ceremonial room above the clock room in Black Marble Gallery. That event opens the final route to Shaft and Dracula. Full map completion, rare equipment and optional inverted-castle exploration are not prerequisites for the true ending.
- Ring of Vlad is collected.
- Tooth of Vlad is collected.
- Heart, Rib and Eye of Vlad remain as later objectives.
- Blocked movement-gated routes are marked for return visits.
- The player understands that all five relics are required before the final Shaft and Dracula route opens.
Before you move on
- Richter was freed by destroying the green control orb with the Holy Glasses equipped.
- The Inverted Castle was entered through the teleporter in the passage immediately to the left of the Castle Keep throne-room area.
- A dedicated Reverse Outer Wall save route has been established.
- Darkwing Bat has been defeated and the Ring of Vlad collected.
- The Creature has been defeated and the Tooth of Vlad collected.
- The Forbidden Library is correctly understood as a later optional branch rather than a required approach to The Creature.
- Heart, Rib and Eye of Vlad remain as later objectives requiring separate bosses and branches.
- The player understands that all five Vlad relics must be collected before the final Shaft and Dracula route opens.
References for this chapter
- Castlevania: Symphony of the Night — Guide and Walkthrough — PlayStation — GameFAQs
- Castlevania: Symphony of the Night/Walkthrough — StrategyWiki
- Walkthrough - Castlevania: SotN - Guides
- Reverse Castle - Castlevania Wiki
- Reverse Keep - Castlevania Wiki
- Castlevania: Symphony of the Night — Guide and Walkthrough, PlayStation
Inverted Castle Route, Vlad Relics and Optional Exploration
The Inverted Castle has one required progression chain and several optional branches. The required chain is to defeat Darkwing Bat, The Creature, Death, Akmodan II and Medusa; collect the Ring, Tooth, Eye, Rib and Heart of Vlad; return to the giant clock in the Black Marble Gallery; and use the opened route to reach Shaft and Dracula. Galamoth, Beelzebub, rare equipment, hidden rooms and approximately 200.6% map completion are optional and should not delay the ending.
1. Establish the required objective and recovery route
After destroying Shaft's control orb during the Richter encounter, Alucard arrives in the Inverted Castle Keep. Save before leaving the starting area. The inverted castle has its own save rooms and teleport connections, and its map is a separate layer from the normal castle. You can return to the normal castle through the appropriate transition point or by using a Library Card, but do not assume that normal-castle shortcuts automatically connect to their inverted equivalents.
Your required checklist is five specific relics: the Ring of Vlad from Darkwing Bat, the Tooth of Vlad from The Creature, the Eye of Vlad from Death, the Rib of Vlad from Akmodan II and the Heart of Vlad from Medusa. The names of the bosses and relics matter. Doppelganger, Galamoth, Beelzebub and the fake Belmont party do not replace any of these five bosses.
- Save in Reverse Keep before beginning the route.
- Track the five Vlad relics separately from ordinary equipment and optional relics.
- Use save rooms and teleport rooms as recovery points between long branches.
2. Defeat Darkwing Bat in the Reverse Clock Tower
From Reverse Keep, take the route toward the Reverse Clock Tower. The tower is the first required boss branch and is recognizable by its vertical gear rooms and clockwork passages. Open the nearby save room before committing to the boss approach, and collect useful pickups only when they are directly on the route.
Darkwing Bat is encountered at the beginning of the Reverse Clock Tower route. The boss stays airborne and attacks by crossing the room and striking with its wings. Keep Alucard mobile, attack during the boss's approach or recovery, and avoid being trapped against the edge of the arena. A ranged weapon, familiar or spell can help when Darkwing Bat remains above normal sword range, but no particular weapon is mandatory.
Defeating Darkwing Bat awards the Ring of Vlad. Continue through the tower toward the Reverse Outer Wall rather than returning to the central gallery immediately. The four-gear machinery remains relevant for movement through the area, but the inverted tower does not require the normal-castle relic sequence to be repeated.
- Darkwing Bat defeated.
- Ring of Vlad collected.
- Reverse Clock Tower save room identified for future recovery.
- Route onward to Reverse Outer Wall opened.
3. Defeat The Creature in the Reverse Outer Wall
Continue left from the Reverse Clock Tower into the Reverse Outer Wall. Save near the start of the area before exploring upward. The elevator does not provide the same straightforward assistance as its normal-castle counterpart, so use Alucard's available movement abilities to climb through the vertical rooms and follow the connected upper passages.
The Creature is the required boss in this region. Its large body and hammer attacks make standing directly in front of it unsafe. Keep moving around its approach, attack after a missed swing, and use jumps or transformations to clear its body when it closes the distance. If the boss corners Alucard, retreat to the opposite side of the room instead of continuing a close-range exchange while trapped.
The Creature awards the Tooth of Vlad. Optional equipment and the Forbidden Library branch can be visited here, but neither is needed for the five-relic route. Continue toward the Black Marble Gallery after securing the relic.
- The Creature defeated.
- Tooth of Vlad collected.
- Optional Forbidden Library exploration left separate from required progress.
- Black Marble Gallery route located.
4. Reach Death through the Reverse Caverns and Cave
From the Reverse Outer Wall, enter the Black Marble Gallery and take the route into the Reverse Caverns. This is the correct practical approach to Death. Do not search the Anti-Chapel or Death Wing's Lair first for this relic; those areas belong to the later branches of the route.
The Reverse Caverns contain water-filled and vertically arranged rooms that may require Bat, Wolf or Mist movement depending on the passage. Follow the connected cavern route toward the area corresponding to the original mine and Cerberus section. Check the map for the save room before entering the boss branch, and use the Wolf form carefully in water passages where the ceiling route is the intended path.
Death uses multiple flying hands and attacks that punish Alucard for remaining directly above or beside the boss without an escape route. Keep moving, attack the exposed target when the hands separate, and retreat across the room when the hands converge. Ranged attacks and familiars are useful because they let Alucard damage the boss while preserving room to maneuver. Death awards the Eye of Vlad.
- Reverse Caverns entered from Black Marble Gallery.
- Death reached through the reverse cavern or mine route.
- Death defeated.
- Eye of Vlad collected.
5. Use the Reverse Entrance and Necromancy Laboratory to reach the later branches
After defeating Death, return through the connected Reverse Caverns and continue toward the Reverse Entrance. From there, follow the route through the Necromancy Laboratory. This section is the practical connector between Death's branch and the Anti-Chapel and Death Wing's Lair branches; it is not an optional detour if you are following the required relic order.
Save whenever you pass a dedicated save room. The laboratory contains dangerous enemies and narrow rooms, so avoid spending all healing items on ordinary encounters. If a room is blocked by a transformation-only opening, mark it for later rather than abandoning the main route. The goal at this stage is to reach the Anti-Chapel connection and then branch into Death Wing's Lair.
Optional areas such as the Floating Catacombs, Beelzebub's route and the Reverse Colosseum can wait. They do not provide the remaining required Vlad relics.
- Reverse Entrance reached after the Death branch.
- Necromancy Laboratory route cleared or passed.
- Anti-Chapel connection identified.
- Optional branches deferred unless deliberately pursuing exploration.
6. Defeat Akmodan II in Death Wing's Lair, then Medusa in the Anti-Chapel
From the Anti-Chapel connection, enter Death Wing's Lair. The lair is the inverted counterpart of the original Olrox's Quarters region and contains Akmodan II, not a second Olrox boss. Use the lair's save room before taking the lower-right route into the boss chamber. The upper and side exits contain useful items and equipment, but they are not required for the relic.
Akmodan II is a large mummy-like enemy whose attacks cover portions of the floor and space around its body. Stay mobile, attack from a safe side, and jump or transform over the boss when it closes in. Holy- or fire-oriented attacks can be useful, but the fight does not require a fixed weapon, level or accessory. Defeating Akmodan II awards the Rib of Vlad.
Return from Death Wing's Lair to the Anti-Chapel. Follow the bell-tower route through the chapel until you reach Medusa. Her petrifying gaze is the main hazard; use the room's vertical space and crouching or positioning to keep the gaze from connecting, then attack during her exposed movements. Do not mistake Medusa for an optional nearby boss. Her defeat awards the Heart of Vlad.
- Death Wing's Lair entered from the Anti-Chapel route.
- Akmodan II defeated.
- Rib of Vlad collected.
- Medusa defeated in the Anti-Chapel.
- Heart of Vlad collected.
7. Return to Black Marble Gallery and open the final route
Once all five required relics are collected, return to the Black Marble Gallery. The relic checklist should now show the Ring, Tooth, Eye, Rib and Heart of Vlad. Enter the giant clock room in the center of the gallery and activate the clock mechanism. The clock strikes thirteen, and the ceiling opens to reveal the route toward the final battles.
This is the required progression trigger. You do not need to defeat Galamoth, Beelzebub, Doppelganger or the fake Belmont party first, and you do not need to reveal every room on the inverted map. Use the nearby save room before entering the final approach, and keep healing items and your preferred offensive equipment ready for Shaft and Dracula.
- Ring, Tooth, Eye, Rib and Heart of Vlad are all present.
- The giant clock in Black Marble Gallery has struck thirteen.
- The ceiling passage to the final section is open.
- A save exists before the Shaft and Dracula sequence.
8. Handle optional bosses, rare equipment and map completion separately
Galamoth is an optional boss in the Floating Catacombs. He is not one of the five Vlad relic bosses. If you defeat him, continue along the route beyond his arena to obtain the Gas Cloud relic; do not describe the relic as a direct boss reward. Gas Cloud improves the offensive usefulness of Alucard's mist form, but it is not required to open the final route or defeat Dracula.
Beelzebub is another optional boss in the Necromancy Laboratory branch. The boss and surrounding rooms can provide map percentage and optional rewards, but Beelzebub does not provide a Vlad relic. Visit this branch after the required route is secure if you are prioritizing the ending.
Rare equipment should be treated as a separate project. The Inverted Long Library contains Schmoos associated with the Crissaegrim drop, but the item is rare and farming it can consume substantial time. Likewise, optional armor and weapon hunts should not interrupt the five-relic progression unless the player specifically wants a stronger build.
Approximately 200.6% combined map completion is an optional exploration target for this PlayStation structure. For a full-map attempt, inspect isolated boss rooms, save rooms, teleport rooms, secret rooms, small vertical chambers and passages that require Bat, Wolf or Mist movement. Compare the map against a verified original-PlayStation map rather than assuming an incomplete percentage is caused by a missing boss.
- Galamoth and the Gas Cloud route marked optional.
- Beelzebub marked optional and not counted as a Vlad relic boss.
- Rare drops pursued only after the required route is secure.
- Both castle maps checked separately for a full-map attempt.
- Approximately 200.6% treated as an exploration goal, not an ending requirement.
Before you move on
- Darkwing Bat, The Creature, Death, Akmodan II and Medusa have all been defeated.
- The Ring, Tooth, Eye, Rib and Heart of Vlad are present.
- The giant clock in Black Marble Gallery has opened the ceiling passage after striking thirteen.
- The final Shaft and Dracula route is accessible.
- Galamoth, Gas Cloud, Beelzebub, rare drops and unexplored rooms are recorded separately as optional objectives.
- For a full-map attempt, both the normal and inverted maps have been checked for isolated rooms, secret chambers, save rooms, teleport rooms, boss arenas and transformation-gated passages.
- After defeating Shaft and Dracula, allow the ending and credits to finish and verify the completed Alucard file as CLEAR before beginning optional cleanup.
References for this chapter
- Castlevania: Symphony of the Night — Guide and Walkthrough, PlayStation
- Castlevania: Symphony of the Night — Guide and Walkthrough — PlayStation — GameFAQs
- Walkthrough - Castlevania: SotN - Guides
- RPGClassics - Castlevania Symphony of the Night Maps
- Castlevania: Symphony of the Night/Death Wing's Lair - StrategyWiki
- StrategyWiki — Castlevania: Symphony of the Night Black Marble Gallery
- Reverse Castle - Castlevania Wiki
Major Bosses: Tactics and Recovery
The original North American PlayStation version rewards controlled movement more than frantic damage trading. Save in a coffin save room before a difficult encounter, restore your resources, check your equipment manually, and watch one attack cycle before committing. Use ranged attacks, familiars and spells to create safe openings, but do not let them replace attention to the boss’s movement. The tactics below cover progression bosses, the Richter sequence, the required Inverted Castle encounters and optional Galamoth.
Prepare in the nearest coffin save room
Use the nearest dedicated coffin save room before a serious boss attempt. Saving there gives you a reliable recovery point and restores Alucard’s condition. The game does not use portrait rooms as save points, and the original PlayStation release does not provide automatic equipment management, rewinds or modern quick-save conveniences.
Open the equipment screen and verify the weapon, armor, accessories and shield manually. A newly collected item is not automatically equipped. Choose gear for the encounter rather than using attack power alone: defensive equipment, elemental protection or a useful special effect can matter more than a small damage increase.
Enter with healing items and enough hearts for the attacks you actually plan to use. Hearts fuel subweapons; they are not a separate stock of ordinary ammunition. If a boss is close to a save room, avoid spending all your hearts on enemies during the approach. Summon a familiar before entering if you intend to use one, then let it provide support while you concentrate on spacing and dodging.
- Save in a dedicated coffin save room.
- Restore HP and MP before entering.
- Check every equipment slot manually.
- Reserve hearts for deliberate subweapon use.
- Treat familiars and spells as support for movement, not replacements for it.
Use a repeatable attack rhythm
At the start of a fight, watch the boss for one complete attack cycle if the arena gives you room. Stand just outside immediate contact range, identify the animation that signals a projectile, charge or jump, and attack after the boss commits to that action. One or two safe strikes followed by repositioning are more reliable than remaining beside the target to force damage.
Keep an escape lane behind Alucard. Do not chase an airborne boss into a corner or run continuously across the arena without checking what is developing behind you. Short jumps, crouching, controlled movement and backdashes are usually safer than crossing the entire room in response to every attack.
Use ranged attacks when the target is elevated or when approaching would cross a hazard. The Axe is useful against high or airborne enemies. A shield can block specific attacks, and Holy Water can help in situations where an enemy remains on the ground, but neither tool is a universal solution. Continue watching the boss while a subweapon or spell is active.
- Observe one recognizable attack cycle.
- Attack after a committed animation or recovery window.
- Keep a retreat route open.
- Use ranged tools for height and distance.
- Do not stare at a spell effect while ignoring the boss.
Handle early progression bosses
Against Slogra and Gaibon in the Alchemy Laboratory, keep both enemies visible. Attack Slogra when he is grounded, then move away before Gaibon changes position or drops into the fight. The Axe can reach Gaibon while he is airborne. After Slogra is defeated, remain mobile against Gaibon’s projectiles and strike when he descends. Crouching and a raised shield can help against attacks that pass above or in front of Alucard, but do not stay still if Gaibon is repositioning.
The Hippogryph in the Royal Chapel is easier when you wait for its landing instead of pursuing it through the air. Attack while it is grounded, destroy an egg if one becomes an active hazard, and move away before the next dive. The Minotaur and Werewolf encounter in the Colosseum is safer when you focus on one target while keeping the other on-screen. Jump over the Minotaur’s uppercut and thrown axe, and be ready for the pair’s combined movement before committing to another attack.
- Keep Slogra and Gaibon visible together.
- Use the Axe against an airborne Gaibon.
- Attack Hippogryph after it lands.
- Destroy dangerous Hippogryph eggs.
- Focus one Colosseum enemy while tracking the other.
Use positioning against Doppelganger, Scylla and Granfaloon
The Doppelganger in the Outer Wall copies Alucard’s general movement and punishes careless close exchanges. Keep the shield ready, attack after the copy finishes a jump or slash, and avoid pursuing it into a corner. If you use Holy Water, treat it as a temporary aid while the copy approaches rather than as a reason to stop moving.
Scylla is fought in a room where the smaller Scylla Wyrms add danger to the main target. Keep the main body in view while clearing or controlling the smaller threats. Holy Water can help cover a grounded area when available, but the reliable objective is to reduce the number of active hazards and strike Scylla only when Alucard can retreat safely. Do not rely on an unverified elemental weakness as the central plan.
Granfaloon is a target-selection fight. Use attacks that remove the outer shell sections or reach the exposed interior, then prioritize the central body once it is available. Falling pieces and moving hazards punish Alucard for standing underneath the collapse. Move away when the arena becomes unsafe, then return for the next opening instead of trying to maintain uninterrupted contact.
- Punish the Doppelganger after its committed movements.
- Keep a retreat route instead of cornering the copy.
- Control Scylla’s smaller threats before forcing close attacks.
- Prioritize Granfaloon’s exposed central body.
- Leave unsafe positions when debris or hazards begin falling.
Manage Death, Karasuman and Beelzebub
Death’s required Inverted Castle encounter is a spacing test. Watch the sickles and energy attacks rather than retreating automatically to the edge of the arena. Move with the pattern, attack during pauses, and use a familiar to add damage while you concentrate on avoiding projectiles. If the room becomes crowded, survival is more valuable than a risky approach.
Karasuman remains vulnerable while hovering, but standing directly below every attack is unsafe. Strike when the boss enters reach, then move as the charging or flock attack begins. The Axe is practical when the target stays above normal melee height. Wait for the boss to return to a readable position rather than jumping blindly through the attack pattern.
Beelzebub’s body is divided into sections, and the falling maggots are poisonous unless your equipment changes their effect. The intended approach is to remove reachable limbs and then attack the torso while avoiding the flies. A high-reaching attack or super jump can let Alucard reach the head and torso more directly, but only use that route when the landing area is clear. Destroy flies that block your movement and do not allow yourself to be trapped between platforms.
- Move with Death’s projectiles instead of fleeing into a corner.
- Attack Karasuman when it enters reach.
- Use ranged attacks when Karasuman remains high.
- Avoid Beelzebub’s poisonous maggots unless protected.
- Prioritize the torso while keeping an escape route from the flies.
Treat Richter as a rescue objective
Richter is not a normal defeat condition when pursuing the full Alucard campaign. Obtain the Holy Glasses from Maria in the central clock-room sequence, equip them before entering the throne-room encounter, and watch for the green orb that becomes visible around Richter. That orb is Shaft’s control device.
Avoid making Richter the target. Attack the revealed orb while moving around Richter’s whip, subweapons and movement attacks. The objective is to destroy the control orb and free Richter. Directly defeating Richter produces an early ending instead of opening the Inverted Castle.
A coffin save room is available before the throne-room approach. An extra save file made before Richter is useful optional protection, especially for a first playthrough, but it is not required for completion. If Richter is defeated directly or the orb objective is missed, reload the optional backup if one exists; otherwise the campaign must be continued from the most recent valid save and the sequence replayed.
- Equip the Holy Glasses before entering Richter’s room.
- Target the green control orb, not Richter.
- Destroy the orb to free Richter.
- Keep a pre-Richter file only as optional protection.
- Do not delete a backup until the Inverted Castle route is confirmed.
Defeat the required Inverted Castle bosses
The Inverted Castle does not require every boss to be defeated. The five relics needed to open the final route are Ring of Vlad from Darkwing Bat, Tooth of Vlad from The Creature, Eye of Vlad from Death, Rib of Vlad from Akmodan II and Heart of Vlad from Medusa. Their order is flexible, so use coffin save rooms and teleporters to choose a route that matches your equipment and movement abilities.
Darkwing Bat is an airborne target. Use a high-reaching weapon or subweapon and avoid chasing it into a dangerous corner. The Creature is more manageable when Alucard stays mobile and attacks during the boss’s recoveries instead of standing in front of its charge. Death’s projectile spacing is described above; the Eye of Vlad is awarded after that encounter.
Akmodan II rewards patience. Keep enough distance to see its movement, attack after its committed actions and avoid getting trapped against the arena boundary. Medusa’s stone gaze is the defining hazard. A shield can block the gaze, and the Mirror Cuirass can prevent petrification while still allowing damage, but neither removes the need to watch her sword range. Approach with the shield raised, then attack during the close-range pattern when her movement is controlled.
- Collect Ring, Tooth, Eye, Rib and Heart of Vlad.
- Do not spend time on optional bosses before the required relics are secured.
- Use ranged attacks against airborne Darkwing Bat.
- Keep moving against The Creature and Akmodan II.
- Use a shield or Mirror Cuirass to manage Medusa’s stone gaze.
Decide whether to fight optional Galamoth
Galamoth is optional and does not provide one of the five Vlad relics. His defeat is useful for optional exploration and the Gas Cloud relic, but it is not needed to open the Shaft and Dracula route. If ordinary attacks barely damage him or his patterns are not yet readable, continue the required route and return later.
The safest conventional position is on the left side of the arena. The raised ledge helps against the ground lightning, the energy balls require retreating farther left, and the horizontal lightning wave can be avoided by jumping from the ledge or crouching on the ground. Do not circle behind Galamoth unnecessarily, because doing so can remove the safe distance from his energy-ball attack.
The Beryl Circlet changes lightning damage into healing, but it does not protect against every hazard. Physical contact, the energy balls and poor positioning remain dangerous. The Shield Rod and Alucard’s Shield combination is a powerful optional technique, not a requirement. Without it, use the left-side position, ranged attacks and a patient attack-and-retreat rhythm.
- Remember that Galamoth is optional.
- Use the left side and ledge to read his attacks.
- Retreat from the energy balls.
- Use the Beryl Circlet only as lightning protection.
- Backtrack for stronger equipment rather than repeating an unreadable fight.
Finish with Shaft and Dracula
After all five Vlad relics are collected, return to the large clock in the Black Marble Gallery. The final passage opens, leading to Shaft and then Dracula. Use the coffin save room immediately before the final sequence, restore HP and MP, and confirm your equipment. A separate save before this route is optional backup, not a requirement.
Shaft’s encounter rewards movement and target tracking. Keep the floating projectiles visible, attack Shaft during openings, and stop chasing him when the surrounding hazards occupy the route. Use a familiar, ranged attack or spell to maintain pressure while Alucard moves. If the arena becomes crowded, prioritize avoiding the orbiting attacks over forcing one more strike.
Dracula’s final encounter should be treated as a sequence of readable attacks rather than a damage race. Stay mobile, avoid standing directly under active hazards, and attack during recovery windows. Use jumps, crouching, controlled retreats and Mist when a specific hazard makes normal movement unsafe. Save healing items for mistakes or late portions of the fight instead of spending everything immediately. No single weapon, familiar, spell or level is mandatory; use the strongest reliable setup available in your file.
- Confirm all five Vlad relics before entering the final route.
- Save and heal in the coffin save room before Shaft.
- Track Shaft’s projectiles while attacking during openings.
- Use movement and Mist to answer Dracula’s hazards.
- Keep healing items for the portions of the fight that cause repeated damage.
Recover after a failed attempt
After death, reload from the most recent coffin save room. Restore your condition, re-equip the intended boss setup and take the shortest safe route back. Do not fight every ordinary enemy on the return trip unless you specifically need hearts, money or experience. Repeated unnecessary encounters create more opportunities to lose resources before the boss.
Retry immediately when the cause of failure is clear, such as missing one jump, standing in one projectile too long or attacking during the wrong animation. Backtrack when the boss removes most of Alucard’s HP with one mistake, your attacks deal very little damage, or the fight requires movement you have not yet obtained. In those cases, gaining equipment, learning the route or returning after another required boss is more productive than repeating the same attempt.
For leveling or familiar growth, choose a room near a coffin save room where enemies can be defeated consistently without consuming healing items. A safe repeatable room is preferable to a dangerous high-experience area. Leave the room, allow enemies to respawn, and return only if the route remains safe; do not treat any exact farming loop as mandatory for the original PlayStation campaign.
- Reload from the latest coffin save room.
- Restore resources and re-equip before returning.
- Retry when the failure has one identifiable cause.
- Backtrack when damage, survivability or movement is inadequate.
- Prefer safe, repeatable farming over dangerous high-reward rooms.
Before you move on
- Richter was freed by destroying Shaft’s revealed control orb rather than by directly defeating Richter.
- The five required relics were collected: Ring of Vlad, Tooth of Vlad, Eye of Vlad, Rib of Vlad and Heart of Vlad.
- The clock-room final route opened in the Inverted Castle.
- Shaft and Dracula were defeated.
- The ending and credits were allowed to finish, and the completed Alucard file is marked CLEAR.
- Any pre-Richter or pre-Inverted-Castle backup remains optional file-management protection, not a condition of completion.
References for this chapter
- Castlevania: Symphony of the Night — Guide and Walkthrough, PlayStation
- Castlevania: Symphony of the Night — Guide and Walkthrough — PlayStation — GameFAQs
- Castlevania: SotN — Guides based on the original PlayStation version
- Castlevania: Symphony of the Night Boss Table - Gamer Corner
- RPGClassics Castlevania: Symphony of the Night walkthrough
Shaft and Dracula: Final Inverted-Castle Sequence
After collecting all five Parts of Vlad, return to the Inverted Castle’s Black Marble Gallery and open the final route above the clock room. Save before entering, prepare a dependable weapon and replenished resources, then defeat Shaft and Dracula. The required completion proof is the true-ending sequence followed by a CLEAR designation on the Alucard file. Backup saves are useful protection but are optional.
Confirm the five Parts of Vlad
Before entering the final route, confirm that all five required relics are in Alucard’s inventory: Ring of Vlad, Heart of Vlad, Tooth of Vlad, Rib of Vlad, and Eye of Vlad. These are guarded by Darkwing Bat, Medusa, The Creature, Akmodan II, and Death respectively.
The relics do not have to be collected in a fixed order. You also do not need to clear every Inverted Castle area, defeat Galamoth, or reach a particular map percentage. Those are optional objectives. Once the fifth relic is secured, return to the central route rather than continuing to explore solely for additional map completion.
- Ring of Vlad is present.
- Heart of Vlad is present.
- Tooth of Vlad is present.
- Rib of Vlad is present.
- Eye of Vlad is present.
Open the final route in the Black Marble Gallery
Travel to the Clock Room in the Inverted Castle’s Black Marble Gallery. The room is the inverted counterpart of the normal-castle clock room where Maria’s sequence occurred. With all five Parts of Vlad collected, the upper route becomes available automatically; you do not insert the relics manually and you do not repeat the Richter encounter.
Before climbing through the opened passage, enter the save room on the right side of the final approach and save. A Heart Refresh is available on the opposite side, but it is not a save point. The route above the clock leads toward Shaft and Dracula, so use the save room before attempting the sequence.
Keeping a separate file from before this route, or from before the Richter encounter, is optional protection against mistakes. It is not required for a valid completion. The original PlayStation game does not offer a normal manual save prompt after the ending, so a backup can be convenient if you intend to preserve a pre-boss state, but the game itself records the completed campaign as CLEAR.
- The upper route is open above the Inverted Black Marble Gallery clock.
- The save room on the right side of the final approach has been used.
- The five relics remain in the inventory.
- Any backup file is understood to be optional.
Prepare before entering the boss route
Equip a weapon that you can use consistently at close range and wear your strongest dependable defensive equipment. No specific weapon, familiar level, Alucard level, or stat total is mandatory for Shaft or Dracula.
Restore HP and MP before leaving the save room. Refill hearts if you plan to use subweapons, and carry restorative items such as food or potions. These are the final required battles, so there is no later story encounter for which resources must be reserved.
Use an offensive familiar if one is already trained, especially if you are comfortable with its behavior. The Sword Familiar can add damage while you concentrate on movement, but familiars are optional and should not encourage you to stand still during an attack pattern. Mist is also useful for avoiding hazards, but only rely on it if you know how to activate and control the transformation reliably.
- A reliable weapon is equipped.
- Defensive equipment is in place.
- HP, MP, hearts, and healing items have been replenished.
- An offensive familiar is active if desired.
- Mist is available if you are comfortable using it.
Defeat Shaft
Continue upward through the opened route to reach Shaft. His main threats are the floating energy balls and the electrical patterns they create. Attack when there is a clear opening, but keep moving enough that the projectiles cannot surround Alucard.
When the energy balls begin moving aggressively around the room, do not remain underneath Shaft trying to finish another attack. Retreat toward open space and use short jumps or Mist to pass through a projectile when necessary. If the balls charge with electricity, move away from the active area or use Mist to avoid the discharge.
A familiar can continue dealing damage while you reposition, and ranged subweapons can supplement your normal attacks. Shaft does not require a special weapon or a particular exploit. The priority is to avoid taking unnecessary hits and to preserve some healing and offensive resources for Dracula, who follows immediately.
- Shaft’s floating projectiles are being watched continuously.
- Crowded patterns are handled with movement or Mist.
- Healing resources are not exhausted before Dracula.
- No mandatory weapon or exploit is being relied upon.
Read Dracula’s first attack cycle
Dracula’s final battle uses a large apparition rather than a throne-room fight. At the beginning, watch for claw swipes and attack only during the recovery window after the claws pull back. Short melee attacks are safer than committing to a long sequence while a claw is already moving toward Alucard.
When energy gathers in the center of the room, Dracula is preparing the crushing central attack. Move away from the threatened area as the attack forms. After this, Dracula shifts into the background and charges a large energy ball. Cross to the opposite side before it reaches Alucard, or use Mist if your position is too poor to escape normally.
Dracula can return with three skull-like projectiles. Keep moving while they approach and avoid stationary attacks until the danger has passed. The reliable rhythm is to recognize the next pattern, evade it, then attack during the recovery window.
- Claw swipes are avoided before committing to melee damage.
- The crushing central attack is escaped before it closes in.
- The large energy ball is avoided by crossing the room or using Mist.
- Skull projectiles are handled while moving.
Handle the repeating hazards
Later in the sequence, Dracula uses a triangle-pattern energy attack that occupies sections of the room. If Mist transformation is available and your timing is practiced, it can carry Alucard through an active hazard. Otherwise, identify the open lane and move before the triangles close around your position.
Do not try to win by attacking continuously. Use the Sword Familiar or another offensive familiar to add damage during openings, then disengage as soon as the next pattern begins. Subweapons and spells can supplement melee attacks, but no single soul, subweapon, or equipment combination is required.
Heal before HP becomes critical rather than waiting for a perfect opening. If Dracula is taking too long to defeat and ordinary Inverted Castle enemies already inflict severe damage, return to the save room after the attempt, improve your equipment, and gain additional experience before trying again. There is no fixed level requirement, but your build should allow you to survive enough mistakes to learn the pattern.
- The triangle-pattern attack is avoided with Mist or an open lane.
- Damage is dealt during recovery windows.
- Healing is used before HP reaches a dangerous level.
- A weak build is improved before repeated attempts become wasteful.
Allow the ending and verify CLEAR
After Shaft is defeated, Dracula appears immediately. Defeating Dracula after opening the Inverted Castle produces the true-ending sequence for the Alucard campaign. Allow the ending scenes and credits to finish rather than resetting the console or leaving the game before the completion state is recorded.
There is no normal post-credits manual save prompt on the original North American PlayStation release. Return to the file-select screen and verify that the completed Alucard file is marked CLEAR. That designation is the required file-based confirmation of success.
A CLEAR file can be retained for optional exploration, including map completion, equipment hunting, and other late-game goals. If you made a pre-Richter or pre-final-route backup, keep it only if you want an additional recovery point; it is not needed to validate the completed campaign.
- Dracula was defeated after the Inverted Castle route was opened.
- The true-ending scenes and credits were allowed to finish.
- The Alucard file is marked CLEAR on the file-select screen.
- Any retained backup is treated as optional rather than a completion requirement.
Before you move on
- Ring of Vlad, Heart of Vlad, Tooth of Vlad, Rib of Vlad, and Eye of Vlad were collected.
- The upper route opened in the Inverted Castle’s Black Marble Gallery Clock Room.
- Shaft and Dracula were defeated in the final Inverted-Castle sequence.
- The true-ending scenes and credits played.
- The completed Alucard file is marked CLEAR on the file-select screen.
- A pre-boss or pre-Richter backup may be retained for convenience, but it is optional and not part of the required completion proof.
References for this chapter
- RPGClassics — Castlevania: Symphony of the Night Walkthrough
- Castlevania: Symphony of the Night — Guide and Walkthrough — PlayStation — GameFAQs
- GameFAQs — Castlevania: Symphony of the Night Guide and Walkthrough by DJellybean
- StrategyWiki — Castlevania: Symphony of the Night Black Marble Gallery
- GameFAQs — Is there a possibility of saving after defeating Dracula?
Recovery from Deaths, Save Recovery and Quick Rebuilds
On the original North American PlayStation release, recovery is built around dedicated save rooms, manual memory-card saves and short return routes. After a death, reload the latest save and assume that unsaved experience, exploration, equipment pickups and consumables must be earned again. Save rooms restore HP and MP when used, but hearts remain separate and must be collected from candles or enemies. The safest rebuild is to restore your equipment, identify the nearest coffin save room, replenish only the resources needed for the next attempt, and repeat the shortest reliable route to the failed objective.
Reload the last secure save and identify what was lost
After Alucard dies, return to the most recently saved game from the File Select screen. The original PlayStation release does not preserve a separate room-by-room death checkpoint. Resume from the last save location and treat anything acquired afterward as unsecured until you reach another dedicated save room and save to the memory card.
Check the equipment screen before leaving. Confirm your weapon, headgear, body armor, accessories, active relics, sub-weapon and familiar. If you changed equipment during the failed attempt, the loaded file reflects the setup from the last save, not necessarily the setup you were using when you died.
Do not confuse the opening encounter with Death with the ordinary death penalty. During the story, Death removes Alucard’s equipped gear as part of the early progression. Later deaths normally return you to the saved state; they do not randomly delete a weapon or armor item from your inventory. If a valuable item was collected after the last save, however, it must be collected again.
- Load the latest memory-card save instead of repeating the game from the beginning.
- Check weapon, armor, headgear and accessories before leaving the room.
- Confirm the intended familiar is active on the relic screen.
- Assume unsaved experience, exploration and pickups are lost.
- Distinguish the scripted early Death event from an ordinary death.
Make the nearest coffin save room the center of the route
Open the castle map and identify the failed objective, the nearest dedicated save room and the rooms connecting them. Save rooms are recognizable by their safe layout and coffin-style save point. Stand at the coffin and press Up to access the save prompt. Saving also restores Alucard’s HP and MP, making the room both a recovery point and a permanent progress checkpoint.
Use the shortest route you already understand. Do not detour through unopened branches for treasure during a recovery run. Enemies that are not blocking a door or narrow passage can usually be bypassed by jumping over them, changing form when appropriate, or using a ranged attack to clear the landing area. Avoid taking unnecessary contact damage simply to earn a few more experience points.
When you have obtained a major item or cleared a difficult approach, return to a save room and record the progress. A save room immediately before a boss is ideal, but it is not necessary to save after every ordinary room. The important rule is that a valuable pickup, familiar improvement or successful boss victory should not remain only in the current unsaved session.
- Locate the nearest coffin save room before attempting the route again.
- Use the map to remove optional branches from the recovery path.
- Save after collecting an important relic, weapon, armor piece or familiar card.
- Begin the boss approach with restored HP and MP.
- Do not mistake a warp room for a save room; use the map symbols and room layout carefully.
Replenish hearts without confusing them with health
Hearts are the ammunition resource for Alucard’s sub-weapons. They are separate from HP, MP and experience. Using a save room restores HP and MP, but it does not refill your heart count. If the next fight depends on axes, holy water, daggers, the cross or another heart-consuming sub-weapon, collect hearts before starting the final approach.
The Outer Wall has a documented optional heart source near one of its save rooms. On the upper route, after the area with Axe Lords, a vertical room with two torches contains a large heart worth five hearts. The adjacent room provides a nearby save point. If this route is already safe for your current equipment, you can collect the heart, leave the room, return after the candle resets, and repeat the collection. This is a convenience loop, not a requirement for completing the game.
Do not cross a hazardous room repeatedly for hearts if the intended sub-weapon is not central to your plan. A small reserve is enough when you expect to use melee attacks, spells or a familiar for most of the fight. Stop the supply run if Medusa Heads, Axe Lords or another enemy is costing more HP than the hearts are worth, then return to the save room and change tactics.
- Choose the sub-weapon before deciding how many hearts to collect.
- Use the Outer Wall five-heart candle only when the route is safe and nearby.
- Remember that hearts do not restore HP.
- Leave the farming room before low HP makes the trip dangerous.
- Return to the save room after collecting the needed reserve.
Use short, safe loops for experience and familiar progress
A useful rebuilding loop has predictable enemies, open space and a save room close enough to restore HP and MP. The Entrance and Outer Wall are practical early areas because their rooms are familiar, their enemies are generally easier to read than late-game threats, and their routes connect to established save points. Clear one or two rooms, retreat through the route you just secured, and repeat only while the enemies remain under control.
Enemies normally return after you leave their room and come back. That makes ordinary rooms suitable for modest experience farming, but there is no need to pursue a fixed level target unless a boss is repeatedly defeating you. If the approach consumes most of your HP, correct the route first. A higher level will not solve damage caused by jumping into a Medusa Head, landing on an enemy or lingering in a narrow corridor.
Keep a familiar active when you want it to gain experience from defeated enemies. Familiar progress is useful over a long campaign, but familiars support Alucard rather than replacing positioning and defensive movement. If a familiar’s attack pattern makes you stand near an enemy longer than necessary, disable it for the dangerous room and prioritize survival. Save after a meaningful familiar improvement so the progress is not left unsecured.
- Choose rooms with predictable attacks and enough space to retreat.
- Farm only until the next objective becomes manageable.
- Keep a familiar active when it helps without distracting from movement.
- Save after worthwhile experience or familiar progress.
- Do not continue farming once the route becomes more dangerous than the reward.
Retreat after valuable progress instead of pressing deeper
Return to a save room after finding a weapon, armor piece, relic, familiar card, Life Max Up, Heart Max Up or other meaningful upgrade. The safest retreat is the route you have already cleared. Use the map to avoid unopened branches, and do not enter a new room merely because it is adjacent to the one containing your reward.
Retreat when a failed boss attempt has consumed the healing items, hearts or MP reserved for the fight. Save-room recovery handles HP and MP, while candles and enemy encounters provide hearts. Healing items should be reserved for a dangerous approach or the boss itself instead of being spent to compensate for repeated avoidable contact damage.
If you have acquired something valuable but have not saved since obtaining it, make saving the next objective. Do not continue toward another major area until the item and the route that secured it are recorded on the memory card. Optional backup files before Richter or before the Inverted Castle can provide extra protection, but they are not required for a valid completion.
- Save after major equipment, relic and progression pickups.
- Use a known route when returning from an unexplored area.
- Restock only the resources needed for the next objective.
- Do not push onward with low HP because the next room is visible.
- Treat backup files as optional protection rather than a completion requirement.
Reset the plan after repeated failures
After two or three failed attempts, stop repeating the same depleted run. Return to the nearest save room, restore HP and MP, equip the most reliable weapon and make one controlled supply trip. Then practice the approach without entering the boss room. The goal is to arrive with minimal damage and with the hearts, MP and healing items reserved for the actual fight.
If the approach still drains your health, identify the exact room responsible. A Medusa Head corridor, a platforming section, a narrow landing zone or a room with enemies positioned above the entrance may be the real obstacle. Practice that room, bypass the enemies when possible, or change the route before spending time on extensive level grinding.
For the next attempt, select one primary plan: melee range, a sub-weapon, a spell, a familiar-assisted strategy or a deliberate combination. Enter with enough resources for that plan, but do not spend everything on the approach. If the boss wins again, note the attack or phase that caused the failure and rebuild specifically for that problem rather than replacing the entire setup.
- Save before beginning a new recovery cycle.
- Reach the boss room without using the resources reserved for the fight.
- Identify the room or attack causing repeated losses.
- Change one part of the plan at a time so the result is clear.
- Save after a successful boss victory before exploring onward.
Before you move on
- You can identify the nearest coffin save room and the shortest reliable route to the failed objective.
- You can explain which progress was secured by the last save and which progress must be repeated.
- You can use a save room to restore HP and MP before another attempt.
- You can replenish hearts through safe candles or enemy encounters without risking an unnecessary death.
- You can restore your equipment, sub-weapon, active familiar and intended route before retrying.
- You have saved after recovering from a death, after collecting important equipment and after defeating the relevant boss.
- You understand that optional backup files protect progress but are not required for the Alucard campaign’s CLEAR result.
References for this chapter
- Castlevania: Symphony of the Night Instruction Manual
- Castlevania: Symphony of the Night — Guide and Walkthrough — PlayStation — GameFAQs
- Castlevania: Symphony of the Night/Outer Wall — Castlevania Wiki
- Castlevania: Symphony of the Night/Outer Wall — StrategyWiki
- Castlevania: Symphony of the Night — Guide and Walkthrough — PlayStation — GameFAQs
- How do I use the Familiars? — Castlevania: Symphony of the Night Q&A for PlayStation — GameFAQs
Optional Goals: 200% Map, Familiars and Rare Armor
The original North American PlayStation version has several worthwhile optional rewards, but none is required for the true ending. The efficient approach is to collect useful fixed items while completing the main movement route, then decide whether to spend additional time on familiar leveling, rare armor, or full map exploration. The five familiar cards are Bat, Faerie, Demon, Ghost, and Sword. The commonly cited 200.6% figure is a combined normal-and-Inverted-Castle exploration target, not a prerequisite for unlocking the Inverted Castle, defeating Dracula, or obtaining a CLEAR file.
1. Collect the five optional familiar cards when their routes are convenient
The North American PlayStation release contains five familiar cards: Bat, Faerie, Demon, Ghost, and Sword. They are optional relics and do not affect the Richter trigger, the five Vlad relics, or the final route. Collect them during ordinary exploration instead of making a separate early detour for all five.
The Bat Card is in the Alchemy Laboratory. From the laboratory’s upper route, use the available movement ability to reach the elevated room containing the card. The Faerie Card is in the Long Library. The Demon Card is in the Abandoned Mine, also called the Abandoned Pit to the Catacomb in some references. Its most practical use is activating a mechanism that Alucard cannot reach himself.
The Ghost Card is in Castle Keep. The Ghost’s ordinary attack is modest, and its Soul Steal behavior does not appear until the familiar reaches level 70 or higher, so do not equip it expecting immediate healing. The Faerie is the most useful general-purpose defensive familiar because it can use healing and status-recovery items, although it may consume items when you would rather save them.
The North American PlayStation Sword Card is in Olrox’s Quarters. After obtaining Bat Form, enter the hallway below the Olrox battle area and look for the unmarked breakable section of ceiling. Destroy that ceiling and fly upward into the hidden room. This is the PS1 English-language location; later versions based on other editions can move familiar content.
- Alchemy Laboratory: collect the Bat Card.
- Long Library: collect the Faerie Card.
- Abandoned Mine: collect the Demon Card.
- Castle Keep: collect the Ghost Card.
- Olrox’s Quarters: use Bat Form to break the hidden ceiling and collect the Sword Card.
2. Finish movement upgrades before farming equipment
Movement relics produce more progress than most early armor upgrades. Complete the normal-castle route far enough to obtain the major traversal abilities, then revisit rooms that were blocked by height, narrow openings, spikes, water, or transformation requirements. This reduces backtracking and makes optional rewards safer to collect.
A practical cleanup sequence is to revisit the Entrance, Alchemy Laboratory, Long Library, Royal Chapel, Olrox’s Quarters, Castle Keep, Underground Caverns, Catacombs, and Abandoned Mine as the relevant abilities become available. Use the map to identify dark squares beside rooms you have already explored. Such gaps commonly indicate a concealed breakable surface, a transformation-only passage, a vertical room that needs double jump or flight, or a one-way route that was not accessible on the first visit.
Do not delay the true-ending route for a complete collection run. If a movement relic opens a nearby optional item, take it while passing through. If the reward requires a long return trip through dangerous rooms, mark the location and continue with the required campaign.
- Revisit vertical rooms after obtaining Leap Stone or Bat Form.
- Use Mist Form where a narrow passage appears to connect two rooms.
- Check suspicious walls, floors, and ceilings with normal attacks.
- Leave distant rare-drop farming until the main route is secure.
3. Prioritize useful fixed equipment in the Inverted Castle
Fixed equipment is more reliable than rare-drop farming during a first true-ending attempt. Replace the starting gear when a new item offers better defense, useful resistances, or a special effect that matches the area. Keep a weapon whose reach and attack timing you can control rather than choosing solely by its displayed attack value.
Dragon Helm is a fixed item in the Reverse Clock Tower. It has a special effect that halves enemy defense, making it a useful offensive choice even though its listed defense is not exceptional. Obtain it while traveling through the Reverse Clock Tower rather than making an isolated farming trip.
Twilight Cloak is a fixed item in the Anti-Chapel. Reaching it requires Spike Breaker, because the cloak lies beyond the spike corridor. If you are following the required Vlad-relic route, collect it when the path is already open; do not return early solely for this cloak.
Alucard Mail is a fixed item in Death Wing’s Lair and provides strong elemental protection. Alucard Shield is a fixed item in the Reverse Caverns. The Shield Rod and Alucard Shield combination is extremely powerful, but neither the combination nor either individual item is mandatory for Shaft or Dracula. A normal weapon, suitable armor, healing items, and a familiar are sufficient for a first clear.
- Take Dragon Helm in Reverse Clock Tower if you pass its room.
- Use Spike Breaker to reach Twilight Cloak in Anti-Chapel.
- Collect Alucard Mail in Death Wing’s Lair when convenient.
- Collect Alucard Shield in the Reverse Caverns if you want the Shield Rod combination.
- Do not postpone Dracula solely for optional equipment.
4. Farm rare armor only after the campaign route is stable
God’s Garb, Walk Armor, and Axe Lord Armor are optional targets with different purposes. God’s Garb is a rare drop from Guardians in the Inverted Castle’s Black Marble Gallery area. Guardians are dangerous and the drop is not needed for the ending, so attempt this only after you can reach the area safely and have a dependable method for defeating them.
Walk Armor is a fixed item in the Catacombs. Its defense increases as more rooms are explored, so it is best treated as a map-exploration reward rather than an immediate combat upgrade. It is useful for a completion-focused file, but it is not a reason to stop the main route.
Axe Lord Armor is found through the Librarian. With Gravity Boots, repeatedly bounce on the Librarian to trigger the item drop opportunity. This is an optional activity and primarily provides the Axe Knight transformation effect; it is not a required defensive upgrade. Stop if the process becomes disruptive to ordinary progression.
Keep your practical equipment equipped while farming. Luck-boosting gear or temporary luck items may improve drop chances, but a safe combat setup is more important than a theoretical increase in luck. Save before a farming session when possible so an unsuccessful attempt does not replace your best progression file.
- Farm God’s Garb only from Guardians in Black Marble Gallery after reaching the area safely.
- Treat Walk Armor as a Catacombs exploration reward.
- Use Gravity Boots and the Librarian for the optional Axe Lord Armor attempt.
- Keep a progression save separate from extended farming when possible.
5. Choose between focused completion and full map exploration
The commonly cited 200.6% target represents the combined normal and Inverted Castle maps. It is optional. A player can obtain the Holy Glasses, destroy Shaft’s control orb, collect the five Vlad relics, defeat Shaft and Dracula, watch the ending, and receive a CLEAR result without reaching 200.6%.
For a focused true-ending file, stop optional exploration once you have a reliable weapon, adequate armor, healing supplies, and the movement abilities needed for the required route. For a full map file, buy the normal Castle Map from the Librarian and compare the in-game map against a verified completed map. The Inverted Castle is counted separately, so a completed normal map does not complete the inverted layout.
Map cleanup requires more than opening obvious doors. Check breakable walls, floors, and ceilings; transformation-only passages; isolated rooms; save rooms; warp rooms; boss rooms; and small chambers hidden above or below larger rooms. The Sword Card ceiling in Olrox’s Quarters is an example of a room that can be missed even when the surrounding area appears complete.
Do not use the final percentage as a story-progress requirement. If the map becomes the goal, maintain a separate exploration file so a missed room or experimental route does not endanger the completed campaign file.
- Use the normal Castle Map when pursuing full exploration.
- Treat the Inverted Castle as a separate map.
- Check isolated boss, save, and warp rooms.
- Search breakable surfaces and transformation-only passages.
- Treat approximately 200.6% as optional rather than required.
6. Defer collection-heavy goals when a first clear is the priority
Familiar-level grinding, every weapon and spell, every armor drop, rare equipment farming, and exact map completion can greatly extend the campaign without improving the required route to Dracula. If this is your first playthrough, collect convenient rewards and leave the rest for a dedicated file.
The original North American PlayStation familiar list is Bat, Faerie, Demon, Ghost, and Sword. Do not add the Japanese or Sega Saturn-only familiar content to this checklist, and do not use later-port locations as though they were guaranteed to match the 1997 North American disc.
After obtaining the true ending, preserve the CLEAR file before beginning map cleanup, rare-drop farming, familiar leveling, or unusual equipment experiments. A separate working file lets you pursue optional goals without risking the completed record.
- Retain the completed true-ending file.
- Use a separate file for rare armor and familiar leveling.
- Use the PS1 North American five-card familiar list.
- Begin full map exploration only as a deliberate optional project.
Before you move on
- For a focused optional-content route, confirm that convenient familiar cards and fixed rewards were collected or deliberately deferred, while the required Vlad relic route remains intact.
- For the familiar objective, verify the five North American PlayStation cards: Bat, Faerie, Demon, Ghost, and Sword.
- For a fixed-equipment route, verify Dragon Helm in Reverse Clock Tower, Twilight Cloak in Anti-Chapel beyond the spike corridor, Alucard Mail in Death Wing’s Lair, and Alucard Shield in the Reverse Caverns if those optional rewards were chosen.
- For a rare-equipment route, identify God’s Garb as a Guardian drop and Axe Lord Armor as a Librarian reward rather than confusing either with fixed treasure.
- For a full-exploration route, inspect the normal and Inverted Castle maps independently, including concealed surfaces, transformation passages, isolated rooms, save rooms, warp rooms, and boss rooms, then verify the final percentage on the file.
- Before collection-heavy experiments, preserve the Alucard file that completed the true ending and received CLEAR.
References for this chapter
- Castlevania: SotN — Guides based on the original PlayStation version
- Bat Card — Gamer Corner Guides
- Faerie Card — Gamer Corner Guides
- Demon Card — Gamer Corner Guides
- Ghost Card — Gamer Corner Guides
- Sword Card — Gamer Corner Guides
- Olrox’s Quarters — Gamer Corner Guides
- Dragon Helm — Gamer Corner Guides
- Twilight Cloak — Gamer Corner Guides
- Anti-Chapel — Gamer Corner Guides
- Alucard Mail — Gamer Corner Guides
- Death Wing’s Lair — Gamer Corner Guides
- Alucard Shield and Reverse Caverns — Gamer Corner Guides
- Walk Armor — Gamer Corner Guides
- Catacombs — Gamer Corner Guides
- God’s Garb — Gamer Corner Guides
- Guardian — Gamer Corner Guides
- Axe Lord Armor — Gamer Corner Guides
- 200.6% Map Completion Discussion — Arqade
PS1 Original vs Later Ports: What Changes and What Doesn’t
This chapter is for the North American PlayStation release of Castlevania: Symphony of the Night from 1997. The route, item descriptions, dialogue references, and edition-specific notes elsewhere in this guide use that release as the baseline. Later versions retain the same broad Alucard campaign, but they can change presentation, optional content, item placement, or technical behavior. Confirm the version before using a map or walkthrough, and do not combine details from different releases into one route.
1. Confirm the release before starting a route
The target edition is the North American PlayStation game released in 1997. A physical U.S. PlayStation disc is the clearest match, while a digital or emulated copy should be identified by its original PlayStation release and region rather than by the modern hardware running it.
Do not treat every PlayStation-branded release as the same game. Castlevania Requiem: Symphony of the Night and Rondo of Blood is a later PlayStation 4 package with upscaling, high-resolution backgrounds, rendering options, trophies, and selectable English and Japanese voices. It is not an unchanged North American PlayStation disc. The PSP release in Castlevania: The Dracula X Chronicles is also a later version that includes Symphony of the Night as part of that package.
Before following exact directions, compare the title, platform, region, and release label with the guide. If the game is labeled Castlevania Requiem, The Dracula X Chronicles, Akumajō Dracula X: Gekka no Yasōkyoku, Sega Saturn, or Xbox 360, stop and verify the relevant section instead of assuming every item and scene is in the same place.
- The game is the North American PlayStation release from 1997.
- The guide is not being applied to the Japanese Sega Saturn version.
- The copy is not the PSP-derived release in The Dracula X Chronicles or Castlevania Requiem.
- The platform and region match the route being followed.
2. Use the original PS1 presentation as a version clue, not as the only proof
The North American PlayStation release has its own English localization and voice presentation. Later releases can use revised dialogue or different voice options, so a line that sounds unfamiliar is not by itself evidence that the player triggered the wrong event. Check the platform and release label before troubleshooting an ending or conversation.
The original release also has presentation details that may not be reproduced in later ports, including its ending and credits treatment. These audiovisual differences are useful for identifying a version, but they are not reliable evidence of whether the player has reached the standard ending or unlocked the Inverted Castle. Confirm progression by checking the actual in-game event: Richter must be confronted while the Holy Glasses reveal Shaft’s controlling orb, and the orb must be destroyed.
Do not use a video’s dialogue, soundtrack, screen layout, or menu appearance as the sole authority for a PS1 question. A video can show the same route on another release while silently differing in optional content, item placement, or presentation.
- Changed dialogue or voices are treated as edition clues, not proof of a failed trigger.
- The Richter sequence is verified by its in-game objective rather than by audio or video comparison.
- A walkthrough’s platform and region are checked before copying exact directions.
- The original PS1 release remains the authority for this guide.
3. Keep Sega Saturn maps and content separate
The Japanese Sega Saturn version is a distinct release with additional areas and content. Its castle layout is not a safe source for exact North American PlayStation directions. A Saturn map can show rooms, connections, items, or optional material that are absent from the U.S. PlayStation game.
The Saturn release also has its own playable Maria content and version-specific behavior. Do not add Saturn-only areas or Maria progression to the Alucard campaign described here. The original North American PlayStation route reaches its true ending without those additions.
If a map shows an unfamiliar area near the Entrance, Underground Cavern, or Inverted Castle, first check whether the map is marked Saturn. Do not assume a missing Saturn room means that your PS1 copy is defective or that an undocumented passage is required. Replace the map with one explicitly based on the PlayStation release.
- The map is labeled for PlayStation rather than Saturn.
- Saturn-only areas are not added to the PS1 route.
- Saturn Maria content is not treated as part of the Alucard campaign.
- Unknown rooms are checked against a PS1 map before being investigated.
4. Treat PSP and PS4 versions as related but not identical
The PSP version included in The Dracula X Chronicles retains the recognizable Alucard campaign, but it is a modified release. Castlevania Requiem uses the later PSP-derived form of Symphony of the Night rather than reproducing the North American PlayStation disc without changes. These releases add or alter presentation and include playable Maria content that is outside the original North American PS1 completion goal.
Some optional familiar and item details differ between the original English-language PlayStation release and the PSP-derived version. One documented example is the Sword Familiar item: its placement differs between the English PlayStation version and the Dracula X Chronicles version. The practical rule is simple: do not use a PSP or Requiem item map to correct a PS1 route. If an item is missing, verify the guide’s edition before searching the entire castle.
The same warning applies to optional familiar content, Maria-related scenes, dialogue, and ending presentation. These changes do not make the PS1 true ending invalid, and they do not make later-port content mandatory. Players on PSP or PS4 should switch to a guide written for that version when collecting optional items or following version-specific scenes.
- PSP and PS4 players use port-specific notes for Maria and optional familiar content.
- PSP item coordinates are not substituted for PS1 coordinates.
- The Sword Familiar location is checked against the correct release.
- Later-port additions are not treated as PS1 requirements.
5. Use Xbox 360 information selectively
The Xbox 360 release is close enough to the original PlayStation route that a broad walkthrough can be useful. A specialist guide based on the original PlayStation version explicitly treats its general walkthrough as applicable to Xbox 360, but that does not establish that every audiovisual detail, technical behavior, bug, menu action, or ending presentation is identical.
For this PS1 chapter, broad advice such as saving before Richter, using the Holy Glasses for the control-orb sequence, and keeping optional backups is transferable. Exact claims about item positions, glitches, display behavior, sound cues, or port-specific fixes require evidence for the specific release. If an Xbox guide conflicts with a PS1 map or original-release walkthrough, keep the PS1 evidence for this campaign.
Do not use a general similarity between releases as permission to merge them. Confirm the edition whenever the disputed fact concerns an item, familiar, map connection, boss interaction, or unlock condition.
- Xbox information is used for broad structure only unless the exact fact is verified.
- PS1 evidence controls disputes in this PS1-focused guide.
- Port-specific glitches and technical fixes are not imported automatically.
- Exact item and unlock claims are checked against a matching edition.
6. Treat unofficial PC projects as separate builds
There is no single standard PC edition that can automatically stand in for the original North American PlayStation release. An unofficial project may reproduce the PlayStation version, use another port as its source, or add widescreen support, randomizers, balance changes, bug fixes, altered controls, or modern save features.
Before using a PC project to fact-check this guide, identify its source release and modifications. A randomizer can move items by design, while a recompilation project may inherit the behavior of the Xbox 360 version rather than the original disc. A modern save system or display option also says nothing about how the PS1 version behaves.
If the project does not clearly identify its source, do not use it to settle a disputed item location, familiar behavior, boss interaction, or ending trigger. Check an original-release walkthrough, a PS1-specific map, or the physical game instead.
- The PC project’s source release is identified.
- Randomizer, rebalance, and quality-of-life changes are disabled when comparing standard routes.
- Modern save and display features are not treated as PS1 evidence.
- Unresolved disputes are checked with a source matching the original release.
7. Apply the safe cross-version rule
The broad campaign objective carries across the major releases: explore as Alucard, acquire movement abilities, obtain the Holy Glasses, free Richter by destroying Shaft’s control orb, enter the Inverted Castle, gather the five required Vlad relics, and defeat Shaft and Dracula. General survival advice such as saving before major encounters and checking equipment is also broadly useful.
Exact details do not automatically carry across. Verify item locations, familiar availability, optional characters, room connections, control mappings, dialogue, sound cues, technical glitches, and ending presentation against the release being played. When two guides disagree, do not combine them into a hybrid route. Select the guide that matches the platform and region, then use a second source for that same edition to resolve the disputed point.
For the North American PS1 campaign, completion is established by the true-ending sequence and the completed Alucard file marked CLEAR. Approximately 200.6% map completion, optional familiars, rare equipment, Maria mode, trophies, and later-port features are outside this chapter’s required scope.
- Broad campaign objectives are separated from version-specific details.
- The Holy Glasses and Richter orb sequence are verified in-game.
- The five Vlad relics, Shaft, and Dracula remain the required final chain.
- A pre-Richter backup is preserved only as optional recovery protection.
- The completed Alucard file is checked for CLEAR after the ending and credits.
Before you move on
- The game is identified as the North American PlayStation release from 1997, or the player has switched to a guide written for the actual release being played.
- No Saturn-only rooms, equipment, Maria content, or map connections have been added to the PS1 route.
- PSP-derived dialogue, voice options, optional content, and documented item-placement differences are recognized as later-version details rather than PS1 requirements.
- Xbox 360 and PC information is used only when the specific fact has been checked for the relevant source release.
- Any disputed item placement, boss behavior, map connection, familiar detail, or ending trigger has been checked against a source for the exact edition.
- After the true-ending sequence, the Alucard file is marked CLEAR. A pre-Richter backup may be retained for replay, but it is not required for a valid completion.
References for this chapter
- Konami Castlevania Portal: Castlevania: The Dracula X Chronicles
- Konami: Castlevania Requiem: Symphony of the Night and Rondo of Blood
- Castlevania: Symphony of the Night — StrategyWiki walkthrough and version notes
- Castlevania: Symphony of the Night — Guide and Walkthrough, PlayStation
- Castlevania: SotN — Guides based on the original PlayStation version
- Castlevania: Symphony of the Night — Sword Familiar version difference
- Castlevania: Symphony of the Night — Sega Saturn version differences
- Castlevania: Symphony of the Night — Dracula X Chronicles version details
Final Checks, True Ending Verification and New Playthrough Rewards
The required Alucard campaign ends only after the Inverted Castle has been opened, all five Vlad relics have been collected, and Shaft and Dracula have been defeated there. After the ending and credits, the original North American PlayStation file is marked CLEAR. Richter replay is a separate optional objective. It requires the cleared Alucard campaign and sufficient map completion, but published references disagree about the exact percentage for the original release, so use the file-select prompt rather than relying on a disputed number.
Verify the true-ending completion chain
Do not treat the first Richter encounter as the end of the full Alucard campaign. Before entering Richter’s room, equip the Holy Glasses obtained from Maria. During the encounter, they reveal the green orb above Richter. Attack and destroy that orb instead of defeating Richter directly. This breaks Shaft’s control and opens the route to the Inverted Castle.
The Inverted Castle is the second half of the campaign, not merely an alternate ending scene. Progress through it and collect the five required Vlad relics: Ring of Vlad, Heart of Vlad, Tooth of Vlad, Rib of Vlad, and Eye of Vlad. Confirm each relic in the inventory as it is obtained.
After all five relics are collected, return to the central Black Marble Gallery route. The blocked final path will open, leading to Shaft and then Dracula. Defeating Dracula in this Inverted-Castle sequence is the decisive completion event for the full Alucard campaign.
- The Holy Glasses were equipped during the Richter encounter.
- The green control orb was destroyed instead of Richter being defeated directly.
- The Inverted Castle opened.
- Ring of Vlad, Heart of Vlad, Tooth of Vlad, Rib of Vlad, and Eye of Vlad were collected.
- Shaft and Dracula were defeated in the Inverted Castle.
Confirm the CLEAR record
After Dracula is defeated, allow the ending and credits to finish. The original PlayStation version does not use a modern post-game autosave or create a separate completed-game slot. The existing Alucard file is updated with a CLEAR designation.
Return to the file-selection screen and inspect the Alucard file used for the completed campaign. It should display CLEAR or an equivalent cleared status. This is the practical completion check for the true-ending route. If the file lacks the CLEAR mark, verify that Dracula was defeated after the Inverted Castle route rather than ending the game at Richter.
The cleared Alucard file remains usable for later exploration. Loading it lets you revisit the castle, continue equipment or map work, and return to the final area. These activities are optional and do not replace the required completion check.
- The ending and credits were allowed to finish.
- The original Alucard file displays CLEAR or equivalent cleared status.
- The file remains loadable.
- The result was not judged from the Richter ending alone.
Protect the completed file
Keep the CLEAR file on the memory card as the primary completion record. The original PlayStation release has no cloud recovery, rewind function, or modern save-history system. If you overwrite the only CLEAR file with an experimental save, the file may still be playable, but you lose the simplest preserved record of the completed campaign.
A pre-Richter save is useful if one is available. It lets you replay the Holy Glasses sequence and recover from accidentally defeating Richter without repeating the normal castle. A separate working file is also useful for map exploration, rare equipment attempts, and equipment testing.
These are optional file-management precautions, not gameplay requirements. A pre-Richter backup is not needed for a valid CLEAR file, and the absence of one does not invalidate completion.
- The CLEAR file is retained.
- A pre-Richter save is preserved if available.
- Optional exploration uses another file when possible.
- The backup file is not treated as mandatory.
Start Richter replay only after the game confirms it
Richter replay is separate from Alucard progression and is not needed for the true ending. On the original North American PlayStation release, the cleared Alucard campaign is required, and the game also checks for sufficient map completion. Community references disagree about the exact percentage threshold, and some reports describe different requirements or version behavior. Do not rely on a disputed number as the completion standard.
After confirming the Alucard file is marked CLEAR, go to the file-selection screen and inspect the prompt or instruction indicating that RICHTER can be entered. Only when that prompt is present should you create a new file and enter RICHTER as the name. Follow the prompt’s capitalization and spelling exactly.
If the prompt is absent, do not assume the CLEAR file is defective and do not overwrite it. Retain the cleared file and continue optional map exploration in both castles. Recheck the file-selection screen after increasing map coverage. This avoids turning conflicting percentage reports into an unnecessary restart.
The new Richter file is independent. Richter does not inherit Alucard’s level, equipment, familiars, spells, money, or inventory. His run uses his own movement and attack abilities and should be kept in a separate slot from the Alucard CLEAR file.
- The Alucard campaign was completed in the Inverted Castle.
- The Alucard file displays CLEAR.
- The file-select screen explicitly indicates that RICHTER can be entered.
- If the prompt is absent, the CLEAR file is retained while map exploration continues.
- RICHTER is created in a separate file slot.
- No Alucard equipment or progression is expected to carry over.
Keep later-port features outside the PS1 checklist
Maria mode is not part of the original North American PlayStation release’s Alucard completion scope. It is associated with later or alternate releases, including the Sega Saturn version and enhanced releases based on the PSP version. Do not use Maria mode as evidence that the 1997 North American PlayStation campaign is complete.
Trophies, achievements, cloud saves, rewind functions, altered voice or text presentation, and port-specific bonuses likewise belong to other platforms or releases. They may be valid objectives elsewhere, but they are outside this PS1 guide’s completion judgment.
Optional Alucard goals include approximately 200.6% combined map completion, rare armor and accessories, all familiars, spell collection, familiar leveling, and rare equipment drops. None is required for the true ending or for the CLEAR designation.
- Maria mode is excluded from the original North American PS1 completion list.
- Trophies and achievements are not used as evidence.
- Approximately 200.6% map completion is optional.
- Rare equipment and familiar collection are optional.
Choose follow-up goals without risking completion
For a separate action-focused challenge, start Richter mode only after the file-select prompt confirms that it is available. For completionist exploration, load the cleared Alucard file and compare both castle maps for unexplored rooms, concealed passages, movement-relic routes, and missed final-area sections. For rare equipment hunting, use a separate working file whenever possible.
Before a long optional session, note the memory-card slot containing CLEAR. If you have a reliable hardware or memory-card backup method, use it before deleting or overwriting saves. Do not erase the CLEAR file merely because a map percentage, rare drop, familiar, or replay objective remains unfinished.
The required completion standard stays fixed: the original North American PlayStation Alucard file must show CLEAR after the Inverted-Castle Dracula victory. Richter replay, map completion, rare rewards, familiars, Maria mode, and later-port features are separate objectives.
- A follow-up goal has been selected.
- The CLEAR slot is identified and protected.
- Optional work uses a separate file when possible.
- The Alucard file still displays CLEAR after experimentation.
Before you move on
- The original PlayStation file-selection screen shows an Alucard file marked CLEAR or equivalent cleared status.
- The file was cleared after Dracula was defeated in the Inverted Castle.
- All five Vlad relics were collected before the final Shaft and Dracula sequence.
- The CLEAR file remains loadable.
- A pre-Richter file is preserved if available, but its absence does not invalidate completion.
- The file-select screen explicitly indicates when RICHTER can be entered.
- If the Richter prompt is absent, the CLEAR file is retained while optional map exploration continues.
- Any Richter file is created separately after the Alucard requirements are satisfied.
- Maria mode and other later-port features are excluded from the PS1 completion judgment.
- Approximately 200.6% map completion and rare-item goals remain optional.
References for this chapter
- Castlevania: Symphony of the Night — 100% Completion FAQ
- RPGClassics: Castlevania Symphony of the Night Cheats and Secrets
- CheatCodes: Castlevania Symphony of the Night PlayStation Walkthrough/FAQ
- Castlevania Wiki: New Game Plus and Clear Files
- Castlevania Wiki: Name Entry Screen
- Castlevania: Symphony of the Night — Version and Port Information
Finishing up
Reaching Richter is only the first major ending checkpoint. Defeating him without destroying the control orb produces an early ending and does not complete the full Alucard campaign.
To continue the true route, obtain the Gold Ring and Silver Ring, use them in the Marble Gallery clock room, receive the Holy Glasses from Maria, equip them before entering Richter's room, and destroy the green orb controlling him.
The game then opens the Inverted Castle. Collect the Ring, Tooth, Eye, Heart and Rib of Vlad from the required inverted-castle bosses, use them to open the final route in the Black Marble Gallery, and defeat Shaft and Dracula.
After the ending and credits, verify that the Alucard file is marked CLEAR. A pre-Richter backup is useful but optional.
Choose your next gameScreenshots & video
Game imagery for reference. Follow the written chapters above for the route and strategies.
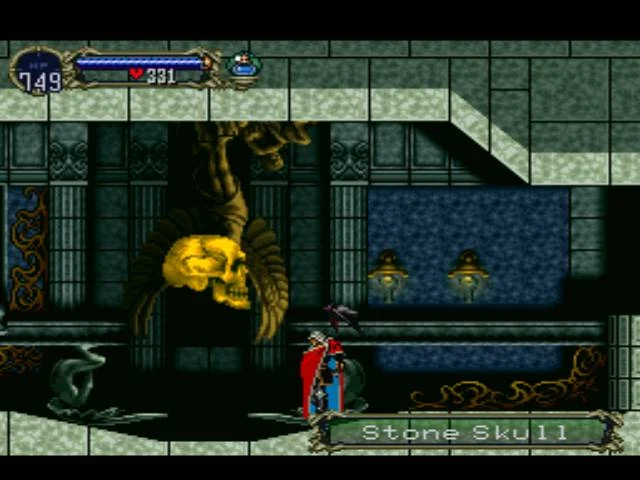
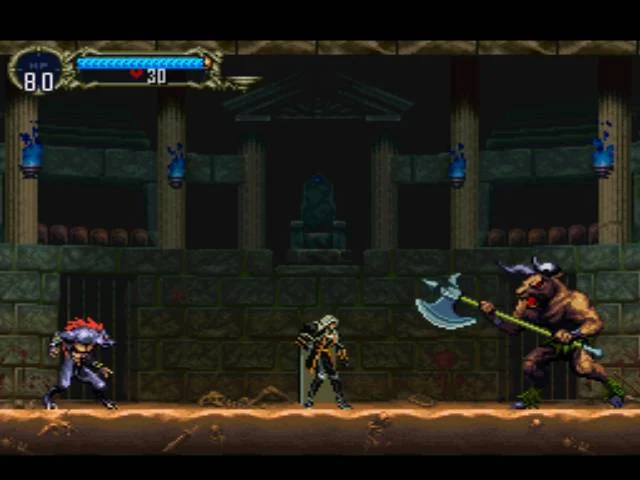
Sources & references
Our original guide draws on the references below. Check the edition at the top of this page before following controls or unlock requirements.
- Castlevania: Symphony of the Night — Guide and Walkthrough — PlayStation — GameFAQs
- Castlevania: Symphony of the Night — Guide and Walkthrough — PlayStation — GameFAQs
- Castlevania: Symphony of the Night — Guide and Walkthrough, PlayStation
- RPGClassics Castlevania: Symphony of the Night walkthrough
- Save Room — Castlevania Wiki
- Castlevania: SotN — Guides based on the original PlayStation version
- RPGClassics - Castlevania Symphony of the Night Maps
- Castlevania: Symphony of the Night Controls — StrategyWiki
- Castlevania: Symphony of the Night Instruction Manual
- Castlevania: Symphony of the Night – FAQ, PlayStation
- Castlevania: Symphony of the Night – Where can I find the familiars?
- Castlevania: Symphony of the Night Familiars
- Castlevania: Symphony of the Night – Relics
- Castlevania: Symphony of the Night – Spells
- Castlevania: Symphony of the Night US spell configuration reference
- Castlevania Portal Site: Symphony of the Night history and release information
- GameFAQs — Castlevania: Symphony of the Night Guide and Walkthrough by DJellybean
- Castlevania: Symphony of the Night/Outer Wall — StrategyWiki
- Castlevania: Symphony of the Night/Long Library — StrategyWiki
- Castlevania: Symphony of the Night/Outer Wall — Castlevania Wiki
- Royal Chapel — Castlevania: Symphony of the Night Guides
- Walkthrough - Castlevania: SotN - Guides
- Castle Keep - Castlevania: Symphony of the Night - Guides
- RPGClassics — Castlevania: Symphony of the Night Walkthrough
- StrategyWiki — Castlevania: Symphony of the Night: Master of the Castle
- Retro Game Walkthroughs - Castlevania: Symphony of the Night (PS1)
- RPGClassics - Castlevania Symphony of the Night Tips
- Video Chums — Castlevania: Symphony of the Night step-by-step guide
- Castlevania Wiki — Holy Glasses
- Castlevania: Symphony of the Night — Version and Port Information
- Castlevania: Symphony of the Night/Walkthrough — StrategyWiki
- Reverse Castle - Castlevania Wiki
- Reverse Keep - Castlevania Wiki
- Castlevania: Symphony of the Night/Death Wing's Lair - StrategyWiki
- StrategyWiki — Castlevania: Symphony of the Night Black Marble Gallery
- Castlevania: Symphony of the Night Boss Table - Gamer Corner
- GameFAQs — Is there a possibility of saving after defeating Dracula?
- How do I use the Familiars? — Castlevania: Symphony of the Night Q&A for PlayStation — GameFAQs
- Bat Card — Gamer Corner Guides
- Faerie Card — Gamer Corner Guides
- Demon Card — Gamer Corner Guides
- Ghost Card — Gamer Corner Guides
- Sword Card — Gamer Corner Guides
- Olrox’s Quarters — Gamer Corner Guides
- Dragon Helm — Gamer Corner Guides
- Twilight Cloak — Gamer Corner Guides
- Anti-Chapel — Gamer Corner Guides
- Alucard Mail — Gamer Corner Guides
- Death Wing’s Lair — Gamer Corner Guides
- Alucard Shield and Reverse Caverns — Gamer Corner Guides
- Walk Armor — Gamer Corner Guides
- Catacombs — Gamer Corner Guides
- God’s Garb — Gamer Corner Guides
- Guardian — Gamer Corner Guides
- Axe Lord Armor — Gamer Corner Guides
- 200.6% Map Completion Discussion — Arqade
- Konami Castlevania Portal: Castlevania: The Dracula X Chronicles
- Konami: Castlevania Requiem: Symphony of the Night and Rondo of Blood
- Castlevania: Symphony of the Night — StrategyWiki walkthrough and version notes
- Castlevania: Symphony of the Night — Sword Familiar version difference
- Castlevania: Symphony of the Night — Sega Saturn version differences
- Castlevania: Symphony of the Night — Dracula X Chronicles version details
- Castlevania: Symphony of the Night — 100% Completion FAQ
- RPGClassics: Castlevania Symphony of the Night Cheats and Secrets
- CheatCodes: Castlevania Symphony of the Night PlayStation Walkthrough/FAQ
- Castlevania Wiki: New Game Plus and Clear Files
- Castlevania Wiki: Name Entry Screen
About the game & collecting notes
- Platform
- Sony PlayStation
Step-by-step campaign walkthrough for the original North American PlayStation release of Castlevania: Symphony of the Night. The guide follows Alucard from the Entrance through the normal castle, the Holy Glasses and Richter sequence, the Inverted Castle's five Vlad relic bosses, and the final Shaft and Dracula battles. It also separates optional map completion, familiars, rare equipment and replay goals from required progress.
Darryl Polo
Darryl Polo loves tinkering with emulation and revisiting retro games. He enjoys exploring how old favorites play on different setups and sharing what he learns along the way. At Joking Joystick, he writes about the games, hardware, and small discoveries that keep the hobby fun.
Our editorial standardsFound a step that needs another look? Help us improve this guide.