
Castlevania: Dawn of Sorrow — Nintendo DS (USA) Complete Campaign Walkthrough
Complete the original North American Nintendo DS campaign in verified progression order: Lost Village and Flying Armor, Wizardry Lab and Balore, Garden of Madness with Magic Seal 2, Dmitrii, Quetzalcoatl, Malphas and the first Dario Bossi fight, Demon Guest House and Puppet Master, then the recommended Subterranean Hell and Rahab branch or the directly accessible Condemned Tower and Gergoth branch, followed by Cursed Clock Tower and Zephyr, Silenced Ruins and Bat Company, the late Demon Guest House and Paranoia route, The Pinnacle and Aguni, the Mina's Talisman Garden event, Mine of Judgment and Death, then The Abyss and Menace. The guide distinguishes required campaign gates from optional traversal branches and separately explains the good-ending unlocks for New Game+, Julius Mode, Boss Rush and Sound Mode.

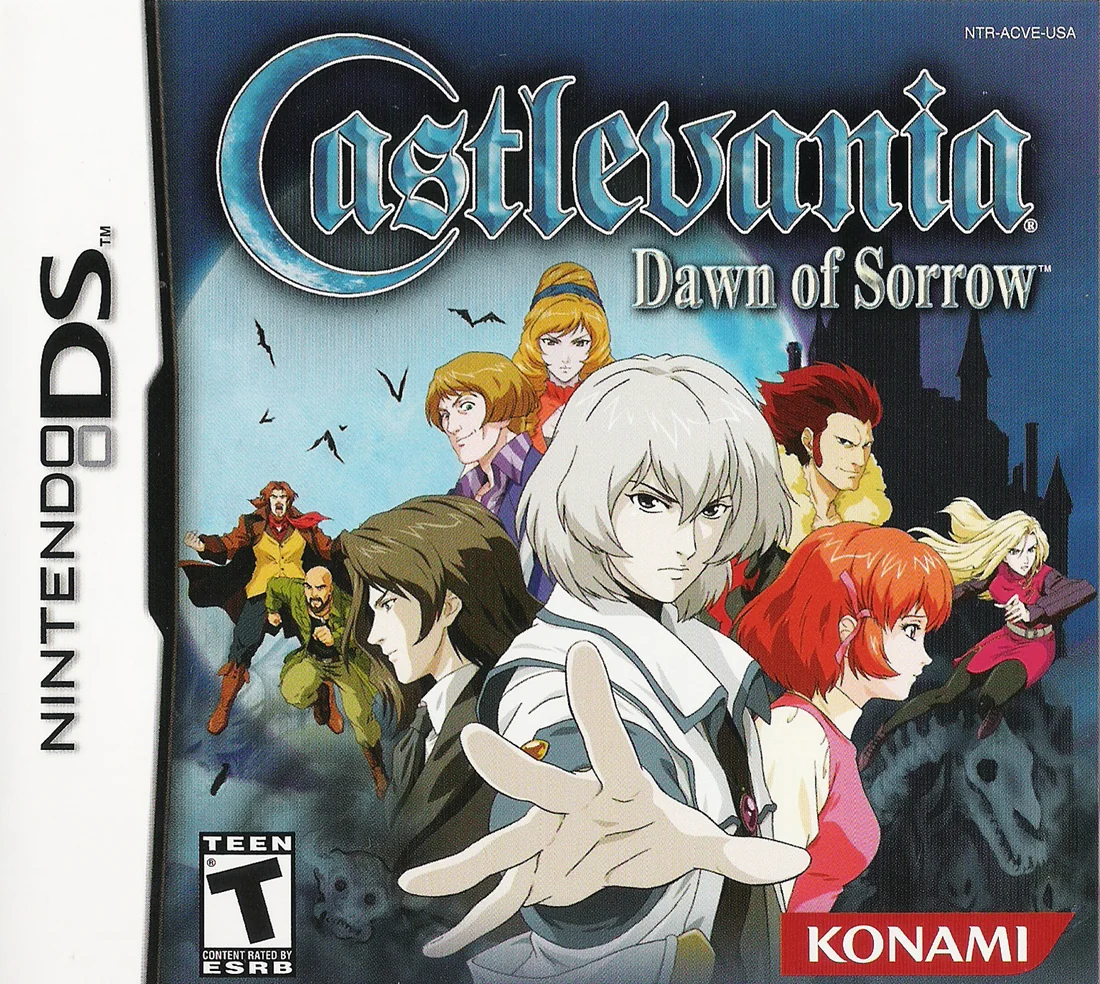
Find a copy
Castlevania: Dawn of Sorrow Nintendo DS
We may earn a commission if you buy through these links, at no extra cost to you. As an Amazon Associate I earn from qualifying purchases.
Opens retailer search results. Check the model, edition, seller, availability and current price before buying.
Before you begin
This walkthrough covers the original North American Nintendo DS release of Castlevania: Dawn of Sorrow.
Follow the required route through the mandatory bosses and progression gates: Flying Armor, Balore, Dmitrii, Quetzalcoatl, Malphas, Dario Bossi, Puppet Master, Gergoth, Zephyr, Bat Company, Paranoia, Aguni, Death, Abaddon and Menace. Rahab is covered as a recommended Subterranean Hell branch that grants underwater movement and useful optional access, but it is not presented as an unavoidable prerequisite for every route through the campaign.
Optional equipment, soul farming, map cleanup, weapon synthesis, New Game+ and Julius Mode are clearly separated from the route needed to reach the canonical Soma ending.
When a soul is required, the guide identifies its exact boss or enemy source, soul category and next destination.
Set yourself up for the run
Use a protected save for the main Soma campaign and a separate slot for experimental synthesis or alternate endings.
Learn the original DS control layout and the four Tactical Soul categories from the manual.
Keep the current traversal Ability enabled and verify the active Bullet, Guardian and Enchant souls before every major route.
Use save rooms to restore HP and MP before bosses; use warp rooms to shorten returns but do not confuse their functions.
Do not spend unique boss souls on weapon synthesis until any soul-collection objective is complete.
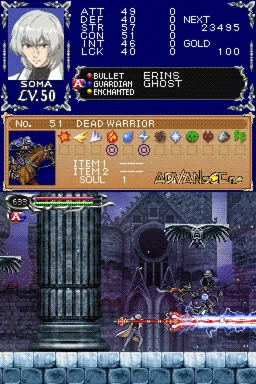
Start and Essentials: first hours, controls and map reading
Begin in the Lost Village with Soma’s knife and the early souls from the opening enemies. Learn the original Nintendo DS controls, collect the Short Sword, escort Yoko to the first save room, receive Magic Seal 1, and defeat Flying Armor. After sealing the boss, equip Flying Armor’s Guardian Soul and hold R after jumping to slow Soma’s descent. Use it to collect the Claymore and reach the outdoor routes, then collect the Spear, Mace, money, second save checkpoint, Cape, and Potion. Visit Yoko’s synthesis room and Hammer’s shop, then activate the water-drain switch that exposes the moat route toward Wizardry Lab. Stop at that exposed route and hand off to chapter 3; Wizardry Lab itself is covered next.
Choose a campaign save slot and learn the original DS controls
At the title screen, choose an unused save slot if you want this campaign kept separate from experiments or a later New Game+ file. During play, press Start to open the Status/Settings menu. Press Select to switch the upper screen between Map View and the Status Window. The map records explored rooms and discovered save and warp locations, while the Status menu contains equipment, souls, abilities, items, enemy information, Library entries, and Magic Seal practice.
Move with the Control Pad. Press Y for Soma’s normal weapon attack. Press A for the equipped weapon’s special attack, which consumes MP. Press B to jump, Down plus B to slide on normal terrain or drop through narrow platforms, and L to dash backward. Press R to activate the equipped Guardian-type Tactical Soul. Press Up plus Y to use the equipped Bullet-type Tactical Soul. X swaps between the A and B equipment sets, but only after the Doppelganger Tactical Soul has been acquired later in the campaign.
The lower touch screen is used for menus, Magic Seals, and other special interactions. A save room contains a statue surrounded by blue lights. Stand near the statue and press Up on the Control Pad to save; the room also restores HP and MP. A warp room is separate. Enter it, press Up, and select a discovered destination on the map with the touch screen. Undiscovered warp destinations cannot be selected, so activate each new warp room when you find one.
- Choose the intended campaign save slot before starting the route.
- Confirm that Y attacks, A performs the MP-consuming weapon special, R activates Guardian Souls, and Up plus Y activates Bullet Souls.
- Open the Status menu and switch between Map View and Status Window with Select.
- Use the first available save statue before attempting Flying Armor.
Clear the opening rooms and collect the Short Sword
Soma begins in the Lost Village with a knife and several opening souls. In the first room, defeat the Skeletons and Bat, then leave through the right exit. In the next room, attack the background lamp. Lamps, candles, chairs, tables, and similar objects can release gold or MP Hearts, making them safe targets for practicing normal attacks and recovering small amounts of MP.
Continue right across the bridge. Defeat the Skeleton and Peeping Eye if they block the route, but do not stop to farm Peeping Eye’s soul. Enter the next room and take the Short Sword from the wooden platform. Equip it from the Equipment menu. It is a reliable early weapon and makes the next encounters easier than the starting knife.
Proceed right through the Warg area. Wargs are useful practice targets and may provide a strong early Bullet Soul, but the drop is not required. If you obtain a Warg Soul, equip it in the Bullet slot and activate it with Up plus Y. Continue past the Axe Armor and Zombies. Stay outside Axe Armor’s throwing range, watch for horizontal or upward axe throws, and attack after each throw has passed.
- Short Sword collected and equipped, unless another weapon is deliberately preferred.
- Background objects have been used for practice and minor resources.
- A Warg, Skeleton, or another available Bullet Soul is equipped if obtained.
- Peeping Eye and other uncommon opening drops have not been treated as required progress.
Escort Yoko, collect the Potion, and save before Flying Armor
Continue right until the scene with Yoko Belnades and Julius Belmont near the castle entrance. After Julius enters the castle, Yoko follows Soma. Escort her back to the room where the Short Sword was found, then drop down from the platform. Pick up the Potion on the ground and enter the save room to the right. Approach the statue and press Up. Saving here restores HP and MP and creates the correct checkpoint before the first boss.
Leave the save room and return to the red boss door outside. Yoko gives Soma Magic Seal 1. You can practice the seal from the Magic Seal entry in the Status menu. During the actual sealing sequence, use the stylus or finger to trace the displayed shape in a single continuous stroke without lifting it from the touch screen. If the seal is entered incorrectly, the boss revives with some HP and must be weakened again.
Do not use the Potion merely to replace a small amount of damage before entering the boss room. The save statue has already restored Soma. Keep the Potion for a dangerous route or a later boss attempt.
- Yoko has been escorted to safety.
- Magic Seal 1 is present in the Status menu.
- The save room below the Short Sword route has been used immediately before Flying Armor.
- At least one Potion remains unless it was genuinely needed.
Defeat Flying Armor and obtain the first traversal-enabling soul
Enter the boss room and use the Short Sword for consistent close-range damage. A Warg or Skeleton Bullet Soul is useful but not mandatory. Flying Armor’s blade patterns are readable. When the blades point outward and leave the screen, jump when they return from both sides. When the blades point downward, move away from the indicated impact area. When the blades spin around the armor, back away instead of trading hits at close range. Attack after each pattern finishes, then retreat before the next approach.
When Flying Armor’s HP reaches zero, the touch screen displays the Magic Seal circle. Trace Magic Seal 1, the V-shaped seal, in one continuous stroke. Do not leave the boss room before completing it. After the boss is sealed, collect the orange recovery orb. Boss recovery orbs restore HP and MP, so taking this one is more valuable than saving a Potion.
Flying Armor’s Soul is a Guardian-type soul. Equip it in the Guardian slot, jump, and hold R while descending to reduce Soma’s falling speed. It is not a permanent Ability Soul and does not grant a double jump. Test it immediately in the room to the left of the boss arena by jumping toward the ledge and holding R during the descent. If the jump fails, return to the floor and try again instead of repeatedly risking damage.
- Flying Armor is defeated and sealed with Magic Seal 1.
- The orange recovery orb has been collected.
- Flying Armor’s Soul is equipped in the Guardian slot.
- The reduced-fall effect has been tested successfully.
Collect the Claymore, Spear, Mace, and the second save checkpoint
From the room left of the Flying Armor arena, jump and activate Flying Armor’s Soul near the peak of the jump. Float left onto the ledge and collect the Claymore. It has greater power than the Short Sword but a slower attack, so use whichever weapon’s timing is more comfortable. Continue left into the outdoor area with platforms and a car at the bottom.
Take the Spear from the upper-left platform if you want a longer-reaching weapon. The path farther left is blocked for now; mark it on the map and do not keep attempting it. Drop to the middle-left section, defeat the Armor Knight guarding the door, and enter. Inside, pass the Ouija Table and collect the Mace. Drop down to the left of the Mace to obtain the money bag, then continue left to the save room. Save here before exploring the lower village routes.
The Ouija Table Soul is optional and has a poor drop rate. Do not spend a long time farming it during this chapter. Its utility is not needed for the opening route, and the save room already restores HP and MP.
- Claymore collected using Flying Armor’s reduced-fall effect.
- Spear collected or the blocked upper-left route marked for later.
- Mace and the nearby money bag collected.
- The second save room has been used after the Mace route.
Visit Yoko and Hammer, then collect safe early equipment
Return outside to the car at the bottom of the platform area. Enter the room to the left of the car to meet Yoko. Her weapon-synthesis service permanently consumes both the selected weapon and the soul used with it. For this chapter, visiting Yoko is useful for orientation, but synthesis is optional. Do not fuse Flying Armor’s Soul, a useful weapon, or any soul you still want for normal progression.
Go outside and travel right from the car to Hammer’s shop. Hammer sells maps, information, weapons, and recovery items. The first castle map is useful for navigation but is not required for progression. Buy it if you can afford it; otherwise continue without it. Do not spend all available gold on minor upgrades, because later weapons and supplies are more valuable.
From the outdoor area, enter the middle-right door. Defeat the Ouija Table, drop down, defeat the Zombie, and collect the second money bag. Continue through the lower-right exit to the area with the Spinning Devil and two cars. Drop to the bottom and travel right through the corridor containing five Zombies. Enter the room with the mirror and collect the Cape. The mirror is not usable yet; leave it alone.
Return to the Spinning Devil area and collect the Potion from the middle-right section if the route is safe. The room above contains an optional money and Corn Soup detour reached by sliding near the right side of the Zombie corridor. Take it only if HP is healthy and the nearest save room remains reachable.
- Yoko’s synthesis service has been identified without sacrificing a useful soul or weapon.
- Hammer’s shop has been located and the first map purchased only if affordable.
- Cape collected from the mirror room.
- Potion collected if the detour did not create unnecessary risk.
- At least one useful Bullet or Guardian Soul remains available for later fights.
Activate the water-drain switch and expose the moat route
From the Spinning Devil area, return to the upper-left portion of the outdoor route. Use Flying Armor to cross the gap and reach the room near the Celia poster. Defeat or bypass the Student Witches and Zombies, then leave through the upper-right exit. Continue along the stone corridor until you reach the gate with water behind it.
Attack the switch beside the gate. This drains the water and opens the passage. The change exposes the moat route beneath the castle entrance. Do not try to swim through the earlier water section; Soma does not have underwater movement yet, and the required progress here is activating the switch rather than crossing a submerged passage.
After the switch activates, identify the newly exposed route and the red-glowing entrance leading onward to Wizardry Lab. If HP or MP is low, return to the nearest save room before continuing. Do not enter Wizardry Lab as part of this chapter; chapter 3 begins from this handoff and covers the laboratory route, its hazards, the save room before Balore, and the boss fight.
- The upper gap has been crossed with Flying Armor’s Guardian effect.
- The Student Witch route and upper-right corridor have been cleared or safely passed.
- The water-drain switch has been activated.
- The moat route beneath the castle entrance is exposed.
- The Wizardry Lab entrance has been identified but not entered.
- The campaign save is recorded before handing off to chapter 3.
Before you move on
- The chosen campaign save slot contains a save after the second early save room or immediately before the Wizardry Lab handoff.
- Short Sword and at least one alternative weapon have been collected.
- Magic Seal 1 has been received and successfully used to seal Flying Armor.
- Flying Armor’s Soul is equipped or confirmed in the Guardian Soul menu and has successfully carried Soma across the first gap.
- The Claymore, Spear, Mace, and Cape have been collected, with optional money, Corn Soup, and Potion detours completed only if safe.
- Yoko and Hammer have been visited, and no irreplaceable weapon or useful soul has been spent on unplanned synthesis.
- The water-drain switch has been activated and the moat route is exposed.
- The Wizardry Lab entrance is identified, but the chapter ends before Soma enters it.
- The map identifies the early save rooms, the Lost Village services, and the next major area.
References for this chapter
- Castlevania: Dawn of Sorrow — North American instruction manual
- Castlevania: Dawn of Sorrow — Guide and Walkthrough, original DS progression, Abaddon and ending route
- Castlevania: Dawn of Sorrow — Guide and Walkthrough — GameFAQs
- Castlevania: Dawn of Sorrow — Guide and Walkthrough — Meowthnum1
- Castlevania: Dawn of Sorrow/The Lost Village — StrategyWiki
Tactical Souls: categories, slots and practical loadouts
Dawn of Sorrow separates usable souls into Bullet, Guardian, Enchant and Ability categories. One Bullet, one Guardian and one Enchant Soul can be equipped in a Tactical Soul set at the same time. Bullet Souls are active attacks, Guardian Souls create sustained or defensive effects, and Enchant Souls provide passive bonuses. Ability Souls are handled separately in the Ability menu and can be toggled there. After you obtain the Doppelganger Ability Soul in the Garden of Madness, the Equipment screen supports A and B sets, which can be exchanged with X during play. Use one set for routine exploration and the other for boss preparation, but verify both sets whenever you change weapons or souls.
Open Equip and identify the three Tactical Soul slots
Press Start and choose Equip to open the equipment and soul setup screen. The Tactical Soul portion contains separate Bullet, Guardian and Enchant positions. You can have one soul selected in each of those three categories at a time; selecting another soul in a category replaces the currently equipped one rather than adding a second active choice.
Bullet Souls are the red category and normally provide direct attacks or other active effects. Use the equipped Bullet Soul with Up plus Y. Check its Use value before relying on it, because Bullet activations spend MP. Guardian Souls are blue. Activate the equipped Guardian Soul with R. Some create a familiar, some provide defense or movement, and their MP behavior depends on the individual soul; use the displayed Time or other cost information as your guide. Enchant Souls are yellow and grant passive bonuses while equipped, such as stat increases, resistances or other utility effects. They do not need a button press for their ordinary passive effect.
- The Equip screen shows one Bullet Soul, one Guardian Soul and one Enchant Soul.
- You know which button activates the current Bullet Soul and which activates the current Guardian Soul.
- You have checked the MP cost or drain shown for the souls you plan to use.
Manage Ability Souls separately
Ability Souls are the silver or white category. They are not placed in a fourth combat slot beside Bullet, Guardian and Enchant. Open the Ability section from the menu to review them and use the game’s toggle command to enable or disable individual abilities. Enabled Ability Souls provide movement or interaction functions without using MP, while disabled ones do nothing until turned on again.
Keep the traversal Ability Soul required by your current route enabled before leaving the menu. For example, the double-jump ability is needed for elevated routes, and Balore’s ability is needed to break certain blocks with the touch screen. If a room or puzzle behaves differently than expected, check the Ability menu first; a required ability may have been toggled off. Do not treat an Ability Soul as an ordinary Tactical Soul and do not plan around putting it into the Bullet, Guardian or Enchant position.
- Ability Souls are being checked in the Ability menu rather than equipped in a Tactical Soul slot.
- The movement or interaction ability required for the current route is enabled.
- You can distinguish an Ability Soul’s permanent utility from a Bullet or Guardian attack.
Build a defensive exploration set
For normal castle travel, choose a Guardian Soul that helps control approaching enemies, creates a familiar, or protects Soma while he is moving through crowded rooms. Activate it only when its effect solves a problem; leaving a Guardian effect active while crossing several rooms can drain MP needed for a boss or emergency Bullet use. A familiar is particularly useful around stairs, flying enemies and doorways where several enemies can attack from different heights.
For the Enchant slot, use The Creature if you have obtained its soul and are willing to farm it. Its effect restores HP gradually, making it useful for reducing attrition between encounters, but it is slow and should not replace a Potion during an active fight. The Creature’s soul is a rare drop, so use your best available defense, resistance or maximum-HP Enchant instead if you do not have it. Keep a practical Bullet Soul equipped for enemies that are unsafe to approach, but use ordinary weapon attacks against weak targets to preserve MP.
This exploration arrangement does not need to be the strongest theoretical setup. Its purpose is to let you clear rooms safely, recover from small mistakes and arrive at save or warp rooms with enough MP remaining to handle an unexpected enemy group.
- The Guardian Soul helps with protection, crowd control or safe positioning.
- The Enchant Soul improves survivability or reduces travel attrition.
- The Bullet Soul is reserved for targets that are awkward, distant or dangerous to fight normally.
- You are not leaving a continuous Guardian effect active when it is no longer useful.
Build an offensive boss set
Before a boss, select a weapon with reliable reach and pair it with a Bullet Soul whose activation does not leave Soma helpless. A direct projectile, single-target strike or controllable summon is usually easier to use repeatedly than an effect with a long animation. Keep enough MP for several deliberate activations instead of spending the entire bar immediately. Ordinary weapon attacks should remain part of the plan, because a boss fight can last longer than one MP sequence.
Use an offensive Enchant Soul when you have one that supports your weapon and attack style. Golem is a straightforward example because its Enchant effect raises STR, improving physical attacks. If the boss emphasizes an element or status effect, a resistance Enchant may be more useful than a small damage increase. An Enchant Soul only grants its effect when it is selected in the active set; merely owning it does nothing.
Choose a Guardian Soul that protects Soma during repositioning or creates a reliable opening. Activate it for the relevant attack pattern rather than assuming it should remain active for the whole fight. Before entering the boss room, refill HP and MP at the nearest save point, confirm the selected Bullet Soul’s cost, and make sure your chosen weapon and Enchant Soul support the same damage approach.
- The weapon and Enchant Soul support the same physical, magical or defensive plan.
- The Bullet Soul has a clear purpose and enough MP is reserved for it.
- The Guardian Soul is being used for protection, positioning or a specific damage window.
- HP and MP have been restored before the boss attempt.
Unlock and test the A/B equipment swap
The Doppelganger Ability Soul is found in the Garden of Madness. Once you have it, open Equip and configure the two equipment sets labeled A and B. Each set can hold its own weapon, armor, accessory and Tactical Soul choices. Enable Doppelganger in the Ability menu, then press X during gameplay to switch between the two sets.
Place the defensive exploration setup in A and the boss setup in B, or reverse those labels if that is easier to remember. On the exploration set, use a survivability-oriented Guardian, a recovery, defense or resistance Enchant, and a low-cost Bullet Soul. On the boss set, use your strongest practical weapon, an offensive or relevant resistance Enchant, your preferred high-damage Bullet Soul and a Guardian reserved for a dangerous pattern or attack opening.
Test the swap in a safe room before approaching a boss. Open Equip after changing major equipment and inspect both sets, because changing A does not automatically copy those choices to B. The same soul may be selected in both sets if you want it available for both purposes. If X does not change the displayed configuration, confirm that Doppelganger is enabled rather than assuming the soul is missing.
- Doppelganger has been acquired in the Garden of Madness.
- Doppelganger is enabled in the Ability menu.
- A and B contain deliberately different exploration and boss configurations.
- Pressing X during gameplay changes the active weapon and soul setup.
Before you move on
- You can open Equip and identify the Bullet, Guardian and Enchant positions.
- You understand that Bullet Souls use Up plus Y, Guardian Souls use R, and Enchant Souls work while equipped.
- You can open the Ability menu and confirm which traversal abilities are enabled.
- You have a defensive exploration setup and an offensive boss setup using the souls currently available.
- After obtaining Doppelganger, X successfully switches between the two intended equipment and soul sets.
References for this chapter
- Castlevania: Dawn of Sorrow — North American instruction manual
- Castlevania: Dawn of Sorrow — Guide and Walkthrough, original DS progression, Abaddon and ending route
- Castlevania: Dawn of Sorrow – Guide and Walkthrough – DS – By Bkstunt_31
- Castlevania: Dawn of Sorrow - Guide and Walkthrough, Ability Soul descriptions
Wizardry Lab and Balore: the first major Ability Soul
Begin at the already-activated water-drain switch in the Lost Village route. Pass through the opened gate, cross the drained moat and enter Wizardry Lab. Activate the Lab’s save and warp rooms before taking the lower route toward the story cutscene and Balore. Use the save room immediately before the boss to refill HP and MP. Balore’s eye laser is avoided by ducking; his fist patterns require moving close, moving away or ducking before jumping. After completing the Magic Seal, use the Balore Ability Soul with the DS stylus to destroy blue ice blocks. Preserve the first ice blocks in the moving-floor room so they remain footholds, ride the platform across and duck beneath the final obstruction. Exit through the upper-right route into Garden of Madness, where the next chapter continues. Dmitrii and Malphas occur later and are not part of this chapter.
1. From the drained moat into Wizardry Lab
Begin this chapter in the room where the water-drain switch has already been activated. Do not repeat the Lost Village sweep or strike the switch again. The gate beside the switch should already be open, and the moat water should be gone.
Pass through the gate and deal with the Spin Devil in the short passage. Continue straight across the exposed moat and enter Wizardry Lab. This is the correct opening handoff for the original Nintendo DS release. Flying Armor and its early traversal soul should already be completed from the preceding chapter, but no additional opening detour is required here.
- The water-drain switch was activated in the previous chapter.
- The gate beside the switch is open.
- The moat is empty.
- The Spin Devil passage has been crossed.
- Wizardry Lab has been entered.
2. Activate the first Wizardry Lab checkpoints
The entrance shaft contains continuously appearing Ghosts. Drop through it carefully until you reach the small landing with openings on both sides. Take the left opening to find the save room, and collect the nearby Mind Up if you can do so safely. Save before continuing.
Return to the landing and take the right-hand route. The next section contains a Bomber Armor, Slimes, Skeletons and a Skull Archer. Move away from Bomber Armor explosions, clear Slimes before they reach Soma and use a slide through crowded Skeleton and Skull Archer positions when necessary. Cross the gap to collect the Blunt Sword if it improves your current equipment, then continue down and open the money chest.
Backtrack to the preceding shaft and use the lower exit. Continue through the Skeleton and Student Witch rooms. When you reach the Manticore section, take the route toward the right side of the map and enter the warp room. Activate it immediately. The warp connects to the Lost Village, giving you a safe way to heal, shop and change equipment before the Balore approach.
- The first Wizardry Lab save room has been activated.
- The Mind Up has been collected if desired.
- The Blunt Sword and money chest have been treated as optional equipment and money.
- The Wizardry Lab warp room has been activated.
- HP, MP and equipment have been checked before continuing.
3. Take the lower route to Balore’s save room
Return from the warp room toward the lower-left section of Wizardry Lab. The route passes Slaughterers and The Creature. Slaughterer fireballs travel in an arc and can be avoided by backing away, jumping or destroying them. The Creature has a dangerous close-range strike, so attack from a platform or from outside its reach instead of trading blows directly.
Continue through the lower corridors until the story cutscene with Celia, Dmitrii and Dario plays. After the scene, proceed through the next room and use the bottom-right exit to reach the save room before Balore. This is the important boss checkpoint; refill HP and MP here before entering the arena.
Keep some MP available for a Bullet Soul or Guardian effect if the fight becomes unsafe. A healing item can provide additional insurance, but the save chair should be your primary recovery point.
- The Celia, Dmitrii and Dario cutscene has played.
- The Slaughterer and Creature rooms have been crossed.
- The save room immediately before Balore has been used.
- HP and MP have been restored before the boss attempt.
4. Defeat Balore by reading his attack patterns
Enter the boss room and approach the ice barrier. Balore’s opening eye beam cuts through the ice and starts the fight. Stay close enough to reach his face during recovery windows, but watch the eye and fists rather than attacking without pause. Weapons with an overhead or broad swing, such as an Axe or Claymore if available, are useful because they can reach the face while Soma remains mobile.
When Balore charges the giant laser from his eye, duck beneath the beam. When one fist rises for a downward slam, move toward Balore’s face; the space near him is safer for this attack. When a fist retracts and rises toward the ceiling, move away toward the right side of the arena before it descends.
When Balore holds a fist in front of his face and throws two horizontal punches, duck at the beginning of the sequence and then jump over the punches. Do not jump too early. After each pattern finishes, attack the face during the recovery window and then return to a position from which the next animation is easy to recognize.
The Manticore Bullet Soul is a useful optional damage tool, but it is not required. Normal weapon attacks are sufficient if Soma avoids standing beneath active fists and does not spend all MP at the start of the fight.
- Duck beneath the eye laser.
- Move toward the face for the downward fist slam.
- Move away from the face for the rising-fist strike.
- Duck, then jump over the two horizontal punches.
- Attack during recovery windows.
- Keep some MP available for an emergency soul use.
5. Complete the Magic Seal and test Balore’s soul
After Balore’s HP is depleted, complete the Magic Seal with the DS stylus. Do not leave the boss room until the seal sequence has finished and the reward has registered. Balore’s reward is an Ability Soul that allows Soma to destroy the blue ice blocks found throughout the castle.
Move to the right after the seal and use the stylus on the ice barrier. Touch the blue blocks directly on the lower screen; this is not a weapon attack and does not use the Bullet or Guardian soul slots. Clear enough ice to pass through, then return to the nearby save room and save again.
The Combat Knife in the nearby ice detour is optional. It attacks quickly but is not required for campaign progress, so collect it only if you want the weapon or additional map coverage.
- Balore has been defeated.
- The Magic Seal has been completed successfully.
- The Balore Ability Soul is registered.
- The first blue ice barrier has been destroyed with the stylus.
- The post-boss save room has been used.
6. Cross the required moving-floor ice puzzle
Return toward the main Wizardry Lab route and enter the room with the moving platform and multiple ice formations. Do not destroy the first set of ice blocks when you enter. Those blocks are used as a foothold to reach the moving platform later.
Break the later ice formations that obstruct the platform’s path, then return to the beginning of the room. Use the preserved first set as a step, board the moving platform and ride it across. The ice arrangement is part of the route; removing every block immediately can eliminate the footing needed to climb onto the platform.
Near the far side, duck while riding to pass beneath the low obstruction. Continue through the exit on the right. The Foie Gras room is an optional detour and is not needed to leave the Lab. If the ice arrangement becomes unusable, leave and re-enter the room to reset the blocks before trying again.
- The first ice set has been left intact.
- The obstructing ice formations have been cleared.
- The moving platform has been reached using the preserved foothold.
- The platform has been ridden across the room.
- Soma has ducked beneath the final obstruction.
- Foie Gras has been treated as optional.
7. Enter Garden of Madness
Pass through the final Wizardry Lab door into Garden of Madness. The first garden rooms contain Une and Skelerang enemies. Clear enemies near landing areas before making long jumps, and watch for Skelerang projectiles when moving between platforms.
Continue upward until you reach the Garden save room and activate it. This establishes the next recovery point for the following chapter. The campaign progress completed here is the drained moat route, Wizardry Lab access, the activated Lab checkpoints, Balore’s defeat, the completed Magic Seal, the Balore Ability Soul and entry into Garden of Madness.
Do not treat Dmitrii or Malphas as pre-Balore encounters. Their story events occur later after the Garden route has opened.
- Wizardry Lab has been exited through the moving-floor route.
- Garden of Madness has been entered.
- The Garden save room has been activated.
- Dmitrii and Malphas remain for their later campaign sequence.
Before you move on
- The chapter began with the water-drain switch already activated.
- The gate beside the switch was open and the moat was drained.
- Wizardry Lab was entered from the exposed moat.
- The first Wizardry Lab save room and warp room were activated.
- The save room immediately before Balore was used.
- Balore was defeated.
- Balore’s Magic Seal was completed successfully.
- The Balore Ability Soul was registered and used to destroy the first blue ice barrier.
- The moving-floor ice route was crossed while preserving the required foothold.
- Soma exited Wizardry Lab and entered Garden of Madness.
- Dmitrii and Malphas were not incorrectly placed before Balore.
References for this chapter
Garden of Madness and Dark Chapel: Dmitrii, Malphas and First Dario Fight
After Balore, use the ice-breaking soul to return to Garden of Madness and collect Magic Seal 2 beside the first Treant. Activate the Garden warp room, open the castle gate through the initial Demon Guest House passage, then use the Dark Chapel save and warp rooms to reach Dmitrii. Feed Dmitrii a harmless Bullet Soul such as Une, defeat the Quetzalcoatl that replaces him, and defeat Malphas with Magic Seal 2. Malphas grants Double Jump. Return to the upper Garden, activate the save room near the two Treants, and defeat Dario Bossi. After Dario escapes, save again and follow the opened route into the first Demon Guest House section, where Arikado gives Soma Mina’s Talisman. This is only the initial Guest House visit; Magic Seal 3, Puppet Master, the upper Guest House, Paranoia and Aguni occur later.
Return to Garden of Madness and secure Magic Seal 2
After defeating Balore, use the ice-destroying soul on the blue ice blocks in Wizardry Lab and retrace the route to Garden of Madness. During the moving-platform section, preserve useful ice blocks as footholds until you are positioned safely. If necessary, use the Wizardry Lab recovery point before entering the Garden.
Climb the opening Garden shaft while dealing with or bypassing Skelerangs. Take the first passage on the left to activate the Garden save room. From there, climb back toward the upper-left route and enter the room with the Treant. Defeat the Treant, then collect Magic Seal 2 from the floor at the far-left side of the room. This is the correct location; it is not in the Dark Chapel bell tower.
Continue upward and activate the Garden warp room through the nearby passage. The Breastplate and other equipment in the large platform rooms are optional. A nearby boss door remains sealed because it requires a later Magic Seal, so do not treat it as current progression.
Use the lower-left exit from the Garden’s large platform area to enter the initial Demon Guest House passage. Move through the short section to the Lost Village side and step on the castle-gate switch. This opens the main castle entrance and makes future travel between the village and castle more convenient. Return through the warp network and prepare for the Dark Chapel route.
- Balore is defeated and the ice-breaking soul is available.
- Garden of Madness’s save room is active.
- The first Treant is defeated.
- Magic Seal 2 is collected beside the Treant.
- The Garden warp room is active.
- The castle-gate switch has been activated.
- The sealed Garden boss door is left for later content.
Cross the Dark Chapel and establish recovery points
Enter the Dark Chapel and activate the save room in the opening section. Proceed through the Ghoul and Witch corridor, then enter the room containing Ghost Dancers and Amalaric Snipers. Activate the warp room in the lower-left portion of this room before continuing. This creates a reliable return path to the Lost Village, shops, weapon services and earlier save rooms.
Continue through the Great Armor, Valkyrie and moving-platform rooms. The upper-left item above the moving platform is not required yet. Take the upper route to the stairway, activate the save room at the top, and use it before entering Dmitrii’s boss door.
The Dark Chapel’s optional equipment and soul drops can wait. A Ghost Dancer Soul may help with later soul collection, and the Tombstone Soul can help with petrification, but neither is required for this chapter’s bosses. Keep at least one healing item available and refill MP before Dmitrii.
- The Dark Chapel save room is active.
- The Dark Chapel warp room is active.
- The upper Dark Chapel save room near Dmitrii is active.
- Optional equipment is not allowed to delay the boss route.
- HP, MP and healing supplies are restored before Dmitrii.
Defeat Dmitrii with a predictable copied Soul
Equip a harmless Bullet Soul before entering Dmitrii’s arena. Une is the safest demonstration because Dmitrii copies the Bullet Soul attack but does not reproduce the original enemy’s movement intelligently. Student Witch, Skeleton or Zombie are also suitable low-risk choices. Do not lead with a Guardian Soul, since a copied sustained effect can make the fight harder to control.
Keep enough distance to avoid Dmitrii’s knife, then strike during his recovery with the copied Soul and a weapon. With Une, jump and drop the attack onto him while staying ready to move away. If he dashes or jumps, reposition rather than trading contact damage. Dmitrii does not require a Magic Seal after his HP is depleted.
Collect Dmitrii’s Soul, return to the nearby save room and save. Re-enter the former boss room afterward. Quetzalcoatl now occupies the room, so do not assume the route is clear simply because Dmitrii has been defeated.
- A harmless Bullet Soul is equipped.
- Dmitrii copies a predictable attack.
- Guardian Soul use is avoided for the opening exchange.
- Dmitrii is defeated without using a Magic Seal.
- Dmitrii’s Soul is collected.
- The nearby save room is used before Quetzalcoatl.
Defeat Quetzalcoatl and Malphas
Quetzalcoatl bounces around the room with a Fleaman riding a dragon. Crouch near the center and attack the head as it passes overhead, while avoiding the room edges where its rebounds are harder to read. Do not spend all MP here; Malphas is immediately ahead.
After Quetzalcoatl falls, move through the connecting room and enter Malphas’s boss door. Malphas spends much of the fight airborne. When black orbs form, move away first and jump over them as they approach. When Malphas faces sideways and releases the crow attack, move behind the boss. When the blue feather pattern spreads horizontally, stay directly underneath rather than jumping into the feathers. Attack during the recovery after each pattern.
When Malphas’s HP is empty, use the stylus to complete Magic Seal 2 on the lower screen. Keep the stylus ready before the fight and draw the displayed pattern carefully. Completing the seal finishes the encounter and awards the Malphas Soul.
- Quetzalcoatl is defeated after Dmitrii.
- MP remains available for Malphas.
- Black orbs, crows and blue feathers are recognized.
- Magic Seal 2 is completed after Malphas’s HP reaches zero.
- The Malphas Soul is collected.
Test Double Jump and return to Dario’s Garden route
Malphas’s Soul is an Ability Soul that grants Double Jump and does not consume MP. Press B to jump, then press B again while airborne. A downward input during the second jump also enables the jump-kick movement, which is useful for some optional crossings.
Return to the save room near Dmitrii before taking detours. Double Jump opens optional rewards such as the Hoop Earring near the Malphas approach, the Power Belt in the Dark Chapel moving-platform room, the Long Sword route and the Elfin Robe in Garden of Madness. These are useful but not required for Dario.
Warp back to Garden of Madness. From the Garden warp room, climb through the upper-right route, cross the rooms with the Catoblepas, Mollusca and Skeleton Ape, and continue toward the section with two Treants. In the room to the right of the two Treants, activate the save room. Then climb the nearby platforms to the top, pass the Rycuda and enter the boss door. This is the first Dario Bossi fight.
- The Malphas Soul is equipped in the Ability slot.
- Double Jump is tested successfully.
- The Dark Chapel recovery route remains available.
- The Garden warp room is used for the return trip.
- The save room near the two Treants is active.
- The first Dario boss door is reached.
Defeat Dario Bossi and enter the first Demon Guest House section
Dario’s fireball travels directly toward Soma. Crouch under it when there is room; jumping over it is also possible when you are positioned far enough away. His ground fire wave travels along the floor, so jump over it and counterattack after it passes.
When Dario raises both hands and laughs, he is preparing the fire pillars. The pillars appear around Soma’s position and can form a trap if you stand still or run blindly into a corner. Move in a controlled direction as the first pillar appears, then continue away from the second while watching for the third pillar between them. Do not let the three flames compress you against Dario or a wall. Dario can also teleport; wait until he becomes vulnerable again instead of attacking during the teleport.
Use a patient pattern: stay near the middle of the arena, avoid one attack, land one or two weapon strikes or a safe Bullet Soul, then reset your position. A long-reaching weapon or Mandragora Soul can punish him without requiring reckless contact. Magic Seal 2 is not used for this fight. After Dario is defeated, a scene plays and he escapes rather than awarding a traversal ability.
Return to the Garden save room and save. Re-enter the former boss room, move through the opened exit, and climb to the upper-left passage. The right passage is locked; take the left level door into the first Demon Guest House section.
Proceed through the opening Guest House corridor. Arikado meets Soma and gives him Mina’s Talisman. Continue left only far enough to activate the nearby Guest House save room, then stop if you are following the chapter order. The deeper Guest House route, Magic Seal 3 and Puppet Master belong to the next chapter. This first visit must not be confused with the later upper Guest House route used for Paranoia.
- Dario’s fireball is avoided by crouching or jumping.
- The ground fire wave is jumped.
- The three fire pillars are avoided without cornering Soma.
- Dario is defeated without using Magic Seal 2.
- The Garden save room is used after the fight.
- The opened exit from Dario’s room is followed.
- The first Demon Guest House section is entered.
- Mina’s Talisman is received from Arikado.
- The nearby Guest House save room is activated.
- Puppet Master, Magic Seal 3, Paranoia and the upper Guest House are left for later.
Before you move on
- Balore was defeated before the Garden return.
- Magic Seal 2 was collected beside the first Garden Treant.
- The Garden and Dark Chapel recovery points are active.
- Dmitrii was defeated after being made to copy a harmless Bullet Soul.
- The post-Dmitrii Quetzalcoatl was defeated.
- Malphas was defeated and Magic Seal 2 was completed.
- The Malphas Soul and Double Jump are in Soma’s collection.
- The save room near the two Garden Treants is active.
- Dario Bossi was defeated in the first Garden encounter.
- The post-Dario exit into the first Demon Guest House section is open.
- Mina’s Talisman was received from Arikado.
- The next chapter begins with the deeper Demon Guest House route, Magic Seal 3 and Puppet Master, not Paranoia or the later upper Guest House.
References for this chapter
- Castlevania: Dawn of Sorrow — Guide and Walkthrough — GameFAQs
- Castlevania: Dawn of Sorrow — Guide and Walkthrough, original DS progression, Abaddon and ending route
- Castlevania: Dawn of Sorrow — Guide and Walkthrough — Meowthnum1
- Castlevania: Dawn of Sorrow – Guide and Walkthrough – DS – By Bkstunt_31
- Castlevania: Dawn of Sorrow Walkthrough, RetroMaggedon Gaming, Garden of Madness and Mine of Judgment
Demon Guest House first visit and Puppet Master
Begin at the Demon Guest House checkpoint established in the previous chapter. Mina’s Talisman is already in Soma’s inventory, and the nearby save room has already been activated; do not repeat Arikado’s scene or search for the talisman again. First activate the Guest House warp room, then enter the movable-room puzzle and arrange only the route needed to reach the upper section. Optional weapons, armor, money, consumables and extra map percentage can wait. From the upper rooms, collect Magic Seal 3 and save immediately before Puppet Master. During the fight, destroy the hand-held puppet before it reaches an Iron Maiden, then complete the seal on the touch screen. Puppet Master awards Substitute Puppet, a Bullet Soul used with Up plus Y. Test it at the marked puppet gap below the boss route, then save again before beginning the longer lower-castle trip. The new connection leads toward Subterranean Hell and also supports the route into Condemned Tower; Rahab is a useful recommended branch, not the only progression option.
Resume from the established Guest House checkpoint
Load the save made during the first Demon Guest House visit. This chapter assumes the previous chapter has already delivered Mina’s Talisman during Arikado’s scene and activated the nearby Guest House save room. Keep the talisman in the inventory for the later canonical ending, but do not equip it now and do not retrace the opening Garden of Madness route.
From the checkpoint, move through the lower portion of the Guest House section toward the warp room. Activate the Guest House warp point before entering the longer puzzle route. This gives you a reliable return path to the Lost Village, Hammer’s shop and the nearby save room if you need healing, equipment or MP recovery.
- Load the existing Guest House checkpoint.
- Confirm that Mina’s Talisman is already in the inventory.
- Do not repeat Arikado’s scene or the initial entrance route.
- Activate the Demon Guest House warp room.
Enter the movable-room puzzle and open the required upper route
Proceed from the checkpoint into the large central section made from movable rooms. Use the room-shifting mechanism to rearrange the connected blocks and create a passable route to the upper continuation. Work from the current blank space and move only the blocks needed to connect the entrance to the upper exit; there is no need to solve every branch during this visit.
The puzzle contains optional equipment, money, consumables and map coverage. Weapons and armor found in side rooms can improve Soma’s build, but none of those rewards is required to reach Puppet Master. If you lose track of the arrangement, return to the switch and rebuild the route toward the upper continuation rather than spending time opening every side chamber.
Do not attempt to bypass the pendulum and platform sections by making blind jumps. Use the available platforms normally and wait for a safe opening before crossing. Falling usually costs more time than clearing the nearby enemies and repeating the platform sequence carefully.
- Enter the central movable-room section.
- Use the blank space and room-shifting mechanism to build the upper route.
- Treat weapons, armor, money and extra map coverage as optional.
- Cross the platform sections without attempting unverified shortcuts.
- Leave the puzzle through the upper continuation.
Reach Magic Seal 3 and prepare for Puppet Master
Continue upward through the upper Guest House rooms. Killer Dolls are dangerous in narrow passages because contact can inflict Curse, so attack from outside their reach or pass them when the room gives you space. Killer Clowns, Buers and other enemies occupy the approach, but you do not need to clear every room completely.
In the large room near the top of the route, take the upper-left passage. The room there contains Magic Seal 3, guarded by a Killer Doll. Collect the seal before entering the boss corridor. The nearby side passage contains optional material and can be skipped if your goal is campaign progress.
Return to the preceding room and use the upper route toward the boss entrance. A save room is positioned immediately before Puppet Master. Save there, refill HP and MP, and choose a weapon or Bullet Soul that can strike targets above Soma or hit several targets quickly. No particular soul is mandatory, but fast attacks make the boss’s puppet interruption easier.
- Reach the upper Guest House rooms.
- Avoid unnecessary contact with Killer Dolls.
- Collect Magic Seal 3 from the upper-left passage.
- Use the save room before the boss.
- Refill HP and MP before entering Puppet Master’s arena.
Defeat Puppet Master by stopping the hand-held puppet
Puppet Master remains near the center of the room and creates smaller puppets that drift through the arena. Destroy them when they obstruct movement, but do not let them distract you from the main attack. The dangerous puppet is the larger one that Puppet Master holds before sending it toward an Iron Maiden.
When Puppet Master produces the hand-held puppet, attack it immediately. Your objective is to destroy that puppet before it reaches one of the Iron Maidens around the room. If it reaches the Maiden, Soma is exchanged with the puppet and takes severe damage. Upward strikes, quick melee weapons and Bullet Souls that can hit repeatedly or cover an area are effective for this interruption.
After the hand-held puppet is destroyed, return to attacking Puppet Master. Repeat the same priority whenever another puppet is summoned. Keep enough room to move around the arena, and clear small puppets if they begin blocking your escape path. When the boss’s HP reaches zero, the lower screen displays Magic Seal 3. Trace the complete pattern carefully; the boss is not fully defeated until the seal is completed.
- Watch for the larger puppet held by Puppet Master.
- Destroy it before it reaches an Iron Maiden.
- Clear smaller puppets when they interfere with movement.
- Reduce Puppet Master’s HP to zero.
- Complete Magic Seal 3 on the touch screen.
Equip Substitute Puppet and test the marked gap
After the seal succeeds, Puppet Master awards Substitute Puppet. In the original North American Nintendo DS release, this is a Bullet Soul. Equip it in the Bullet Soul slot and activate it with Up plus Y. Do not place it in the Guardian or Ability category. Each activation consumes MP.
Substitute Puppet throws a puppet forward. At specific narrow gaps, a matching puppet marker is positioned beside the opening. If the thrown puppet reaches the marked position within its range, Soma swaps places with it and crosses the gap. The soul does not work on ordinary cracks, sealed walls or unmarked openings, and it cannot cross a gap when the throw falls short.
Leave the boss area and return to the nearby save room before testing the new soul. Then descend through the lower Guest House route. At the first marked puppet gap, face the opening, press Up plus Y and confirm that Soma swaps across. If the throw misses, reposition closer to the gap and try again after checking that the marker is present; do not waste MP repeatedly from outside the soul’s effective range.
- Register Puppet Master’s soul.
- Equip Substitute Puppet as a Bullet Soul.
- Activate it with Up plus Y.
- Use it only at a marked puppet gap within throwing range.
- Return to the save room after the boss.
- Successfully cross the first marked gap.
Open the lower route and hand off to the next chapter
After crossing the marked gap, continue through the lower Guest House rooms and use the newly opened connection. The route passes through enemy groups including Liliths, Ghost Dancers and Persephones. Fight only what blocks the corridor if your HP and MP are strong; otherwise retreat to the save room or use the active warp room to restock.
This lower connection provides access toward Subterranean Hell and also supports the route toward Condemned Tower. The recommended next branch is Subterranean Hell and Rahab because Rahab’s underwater movement opens useful exploration, but Rahab is not the sole prerequisite for entering or pursuing Condemned Tower. Do not treat the optional underwater spike route or optional chests as part of this chapter’s completion requirement.
Save after testing Substitute Puppet and before committing to the next area. The chapter is complete once the lower route is open, the soul works at a marked gap and both Subterranean Hell and the Condemned Tower approach can be reached from the post-boss castle network.
- Reach the lower Guest House connection.
- Activate or confirm the useful return point before leaving the area.
- Identify the routes toward Subterranean Hell and Condemned Tower.
- Treat Rahab as the recommended next branch, not a mandatory sole gate.
- Save after testing Substitute Puppet.
Before you move on
- The chapter began from the previously activated Demon Guest House save checkpoint.
- Mina’s Talisman was already in the inventory from the preceding chapter.
- The Demon Guest House warp room is active.
- The movable-room puzzle was crossed through its required upper continuation.
- Optional puzzle rewards were left for later or collected without delaying campaign progress.
- Magic Seal 3 was collected from the upper-left upper-route room.
- The save room before Puppet Master was used.
- Puppet Master was defeated by stopping the hand-held puppet before it reached an Iron Maiden.
- Magic Seal 3 was completed successfully after the boss’s HP reached zero.
- Substitute Puppet is registered and equipped as a Bullet Soul.
- Substitute Puppet was activated with Up plus Y.
- A marked puppet gap was crossed successfully.
- The lower Demon Guest House connection is open.
- The routes toward Subterranean Hell and Condemned Tower are reachable.
- The Guest House save or warp point was used before handing off to the next chapter.
References for this chapter
- Castlevania: Dawn of Sorrow U.S. Instruction Manual
- Castlevania: Dawn of Sorrow Walkthrough, RetroMaggedon Gaming, Garden of Madness and Mine of Judgment
- Castlevania: Dawn of Sorrow — Guide and Walkthrough — Meowthnum1
- Castlevania: Dawn of Sorrow — Guide and Walkthrough, Abaddon Magic Seal 5 confirmation
- Demon Guest House – Castlevania: Dawn of Sorrow Walkthrough and Guide
Subterranean Hell and Rahab: underwater access
After defeating Puppet Master, use Substitute Puppet from the Bullet Soul slot to cross the marked wall gap in the Dark Chapel basement and enter Subterranean Hell. Save immediately after entering, then take the upper-right route from the area’s first save room to Rahab. Soma cannot move freely underwater during this fight, so use the surface and temporary ice platforms only as short attack positions while avoiding falling icicles and Rahab’s leaps. Defeating Rahab grants the Ability soul that allows underwater movement. Save again, equip the Ability soul, and test it before exploring deeper water. Subterranean Hell and Condemned Tower are separate branches available from the Dark Chapel; Rahab is the recommended objective here, not a universal prerequisite for Condemned Tower. Bone Ark and the spike crossing are optional or later exploration and should not replace the Rahab objective.
Return to the Dark Chapel basement and use Substitute Puppet
After defeating Puppet Master, save before leaving the Demon Guest House route. The nearby High Mind Up and other equipment are optional, so do not delay the next progression step to collect every item. Return to the Dark Chapel through a warp room.
From the Dark Chapel warp room, descend through the lower chapel route toward the basement. Follow the passage with falling ceiling spikes and the small marked gap in the wall. This is the lower route into Subterranean Hell; the upper bell-room route leads toward the separate Condemned Tower branch instead.
Open the Tactical Soul menu and equip Substitute Puppet in the Bullet Soul slot. It is not a Guardian Soul and must not be activated with R. Press Up plus Y to throw the puppet. When the puppet passes through the marked gap, activate the soul again as required to exchange Soma’s position with the puppet and reach the far side. The crossing is limited to the marked opening; do not expect Substitute Puppet to pass through arbitrary walls or gaps.
Let the ceiling spikes fall, move into a safe space, and wait for them to rise before continuing. If the puppet lands incorrectly, retreat to a safe position and retry rather than forcing Soma through the trap. Preserve MP for the crossing and do not confuse this utility with the later underwater Ability soul.
- Puppet Master has been defeated.
- Substitute Puppet is available and equipped as a Bullet Soul.
- The lower Dark Chapel basement route has been identified.
- The marked wall gap has been crossed with Up plus Y.
- The falling ceiling spikes have been passed without spending unnecessary recovery items.
Use the first Subterranean Hell save room
After crossing the wall, Soma enters Subterranean Hell. Defeat or carefully bypass the Dead Pirate in the entry room, descend to the next Dead Pirate, and continue toward the right-hand save room. Use the chair before attempting the boss route. This is the essential checkpoint for Rahab because it removes the need to repeat the Dark Chapel crossing after a failed attempt.
From the save room, return to the adjoining route and take the upper-right exit. A Cave Troll occupies the approach to the boss room. Defeat it before it can use its lightning attack, or pass it cautiously if your health is low. Enter the boss door after restoring HP and MP.
Do not attempt to explore every submerged passage yet. Soma cannot travel normally through the deeper water before obtaining Rahab’s Ability soul, and several items and enemy rooms are better handled after the boss. A Dead Pirate Soul, if it drops, is useful but optional and is not required to reach Rahab.
- The first Subterranean Hell save room has been used.
- The upper-right route from the save room is clear.
- The Cave Troll approach is understood.
- HP and MP have been restored before Rahab.
Defeat Rahab from the surface
Rahab’s arena is filled with water, but Soma does not yet have underwater movement. Stay on the available surface footing and use temporary ice platforms only when they give you a safe angle. Rahab can dive through the water, rise vertically, leap across the arena, create ice platforms, and drop icicles during aerial movement.
When Rahab rises and spits ice that forms a platform, attack during the opening instead of treating the platform as permanent ground. Rahab can destroy or invalidate the platform, so move away once the attack window ends. A weapon with useful vertical reach, a ranged Bullet Soul, or a damage effect that continues while Soma moves can reduce the waiting time while Rahab is underwater.
When Rahab leaps across the arena, watch the icicles falling from above and move between their landing positions. Do not run blindly toward the opposite side. When Rahab surfaces or rises near Soma, attack briefly, then return to a safe position. The fight is more consistent when you wait for the boss to enter range rather than spending MP continuously while it is submerged.
If you lose, return to the save room and refill before trying again. Recovery items are better reserved for the boss attempt than for rushing through the approach. No particular Bullet, Guardian, or Enchant Soul is mandatory, but avoid exhausting all MP before Rahab provides an opening.
- Rahab’s dive and surface patterns are recognized.
- Temporary ice platforms are being used as attack opportunities, not permanent footing.
- Falling icicles are avoided by moving between their landing points.
- Rahab has been defeated and sealed with the required Magic Seal.
Equip Rahab and confirm underwater movement
After the victory, Soma obtains Rahab’s Ability soul. Open the Ability menu and activate Rahab before attempting the lower water passages. Rahab is an Ability Soul, not a Bullet or Guardian Soul, so it is not placed in either Tactical Soul slot.
Return to the nearby save room and save immediately. This is the immediate post-boss recovery point. Do not assume that a warp room is directly beside the boss chamber; the Subterranean Hell warp room is reached later while exploring the area. If you need healing, equipment, or purchases, use the route back through the active warp network after securing the save.
Test Rahab in the water outside the boss route. While submerged, repeated Jump presses let Soma move through the water, and he can also walk along the bottom. If Soma still cannot enter or travel through the water, reopen the Ability menu and verify that Rahab is active rather than merely collected.
- Rahab is active in the Ability menu.
- Repeated Jump movement works underwater.
- The post-boss save room has been used.
- The difference between the Ability menu and Tactical Soul slots is understood.
Explore the new water route and defer the spike crossing
With Rahab active, return through the boss area and explore the newly accessible water passages. Move carefully around Needles, Fish Heads, Mermen, Procel, and other enemies positioned at different heights. Use walls, floors, and short movement bursts to avoid being pinned between enemies. A defensive Enchant Soul or a Guardian Soul that attacks while Soma remains mobile is safer than charging through every room.
The deeper section includes a hazardous spike crossing. Treat this as optional or later exploration for this chapter. It is not a substitute for Rahab and is not needed to establish the recommended progression toward Condemned Tower. The crossing can require a specialized setup involving movement and soul interactions, so do not spend all MP experimenting immediately after the boss.
Bone Ark is a useful optional soul associated with later spike-area traversal, but it is not Rahab’s replacement and is not required for the main campaign route described here. Likewise, the High Mind Up and other water-area equipment can be collected during a later sweep. If the spike route becomes unsafe, retreat to the save room, use the warp room once reached, and return with a full resource reserve.
- Rahab opens the previously inaccessible water passages.
- The Subterranean Hell warp room is reached or its location is recorded for later.
- The spike crossing is marked as optional or deferred.
- Bone Ark is treated as optional assistance rather than required progression.
- A safe return to a save room remains available before moving on.
Before you move on
- Puppet Master has opened the marked wall passage from the Dark Chapel basement.
- Soma has entered Subterranean Hell through the lower route.
- The first Subterranean Hell save room has been used.
- Rahab has been reached and defeated.
- The Rahab Ability soul is active and has been tested underwater.
- The post-Rahab save point has been used.
- The Subterranean Hell warp room has been reached or deliberately deferred with its route understood.
- The Bone Ark and spike section are either completed as optional exploration or intentionally left for a later return.
- Soma can leave the area with enough HP and MP to continue toward the next progression branch.
References for this chapter
- Castlevania: Dawn of Sorrow — North American instruction manual
- Castlevania: Dawn of Sorrow — Guide and Walkthrough — GameFAQs
- Castlevania: Dawn of Sorrow Walkthrough, RetroMaggedon Gaming, Garden of Madness and Mine of Judgment
- Castlevania: Dawn of Sorrow — Guide and Walkthrough, original DS progression, Abaddon and ending route
- Subterranean Hell — Castlevania: Dawn of Sorrow Walkthrough and Guide, Neoseeker
Condemned Tower and Gergoth: Tower Key route
After Puppet Master, use the Substitute Puppet Bullet Soul from the upper Dark Chapel to cross the marked puppet gap and activate the switch that opens the Condemned Tower connection. Climb the tower through its enemy-filled shafts and platform rooms, then save in the room beside Gergoth’s arena. During the fight, crouch near Gergoth’s feet when he charges the laser, run away from the inhaling chomp when space allows, clear or leave his poison and petrifying gas, and slide beneath his leap. Complete the Magic Seal after the floor collapses and the battle ends. Gergoth’s defeat removes the tower’s central floors, so use Double Jump with Flying Armor to climb back to the top. Enter the room left of the former boss arena to collect the Tower Key, activate the nearby warp room, then descend to the locked door below and approach it with the key equipped in your inventory. Enter the red level door beyond it to reach Cursed Clock Tower. Rahab and Subterranean Hell are an optional branch and are not required for this route.
1. Prepare Substitute Puppet and open the Condemned Tower route
After defeating Puppet Master, the reward is Substitute Puppet. It is the Puppet Master’s Bullet Soul, not a Guardian or Ability Soul. Equip it in the Bullet Soul slot and activate it with Up plus Y. The soul consumes MP when used and throws a small puppet; when the puppet reaches a marked gap containing a matching doll, Soma switches places with it. Do not press R for this ability, and do not place it in the Guardian or Ability slot.
Use a portal to return to the Dark Chapel. From the warp room, move through the upper section of the chapel toward the bell room. The lower basement branch leads toward Subterranean Hell and Rahab; that route is optional for the Condemned Tower objective. In the bell room, locate the small marked gap in the wall and use Substitute Puppet to cross it. Continue into the large courtyard, descend through the broken sections, and reach the switch at the bottom. Activate the switch to open the door leading back into the Dark Chapel connection. If the switch does not register on the first contact, jump onto it again.
Go through the opened door and continue right into Condemned Tower. Before leaving the chapel, restore HP and MP at a save room or portal. The tower contains long enemy-filled sections before the next save room, so carry healing items and use a reliable melee weapon. Substitute Puppet is needed for this entrance, but you should switch back to your preferred combat Bullet Soul once the marked-gap crossing is complete.
- Substitute Puppet has been obtained from Puppet Master.
- Substitute Puppet is equipped in the Bullet Soul slot.
- The soul is activated with Up plus Y.
- The marked gap in the upper Dark Chapel has been crossed.
- The bottom switch has opened the Condemned Tower connection.
- Rahab has not been treated as a mandatory prerequisite.
2. Climb Condemned Tower to the boss approach
Enter Condemned Tower and move right through the opening rooms. The initial route uses ordinary platforms, Double Jump and the tower’s vertical shafts; Flying Armor is not required for this first ascent. Clear or bypass enemies according to the width of each platform. Disc Armors, Draghignazzos, Great Axe Armors, Fleamen, a Werewolf and other flying enemies can interrupt jumps, so do not leap through a crowded landing area without first removing the most dangerous target.
Continue right through the lower rooms until you reach the room containing the Mind Up and the passage where Julius appears. After the scene, return to the preceding room and climb upward. Continue through the upper-left and upper-right exits as the tower rises. The Silver Stud and Estoc are optional equipment, so collect them only if you can do so without taking unnecessary damage. A door on the left side of one of the upper rooms is inaccessible before Gergoth; remember its position because it becomes part of the return route after the fight.
When a vertical shaft requires a choice between rushing upward and fighting, prioritize the enemies guarding the narrowest platforms. Skeleton Apes can throw barrels from awkward angles, while Great Axe Armors can punish Soma at close range. If you lose a large portion of your HP, retreat to the nearest save room rather than treating the boss door as a one-way commitment. The goal is to reach the save room beside Gergoth with enough healing and MP for several attempts.
- The Mind Up and Julius scene have been passed.
- The inaccessible pre-boss door has been identified for later return.
- The upper tower route has been climbed without spending all recovery items.
- The save room beside Gergoth is within reach.
3. Save and set up for Gergoth
At the top of the climb, enter the save room beside the boss entrance and save before opening Gergoth’s door. This is the main recovery point for the chapter. If an attempt fails, return here, restore HP and MP, and begin again instead of consuming every potion during a long approach.
Use a weapon with dependable damage and enough reach to hit Gergoth’s body or head without standing directly in every attack. A sword, greatsword, axe or another weapon that can reach above Soma is useful, but no single weapon is mandatory. Equip a Bullet Soul that can damage Gergoth from a safe angle and a Guardian Soul only if you can use it without draining the MP needed for recovery. Substitute Puppet is useful for positioning in some encounters, but it is not required as a Guardian effect and should not be assigned to that slot.
Keep healing items for the boss rather than spending them on minor tower damage. A full MP bar is also valuable because a missed soul activation or emergency defensive effect can turn a survivable attack into a defeat. There is no need to follow a fixed level requirement; if Gergoth’s attacks are removing most of Soma’s HP in one hit, improve equipment or gain a few levels before retrying.
- The pre-Gergoth save room has been activated.
- A weapon with useful reach is equipped.
- A damage-dealing Bullet Soul is available.
- Substitute Puppet is not being treated as a Guardian Soul.
- Healing items and MP have been reserved for the boss.
4. Defeat Gergoth and complete the Magic Seal
Gergoth’s laser is the most dangerous attack. He opens his mouth and gathers energy before firing a sweeping beam down toward his legs. Move close to his feet and crouch as the attack begins. The beam passes over Soma in this position, allowing a short counterattack after the sweep finishes. Do not remain in the middle of the arena while the charge is visible.
When Gergoth raises his chest and releases purple or gray gas, clear the cloud with melee attacks if it is in your way or retreat to an unaffected part of the room. The purple gas can poison Soma, while the gray gas can petrify him. When Gergoth inhales and pulls debris toward his mouth, run toward the opposite wall if enough space remains. If he is already close to a wall, move toward his feet and crouch as the bite lands rather than being trapped in the center.
When Gergoth backs into a wall and crouches, prepare for his leap. Slide beneath him as he launches instead of jumping over his body. After he lands, reposition immediately because his follow-up attack can catch Soma if you remain underneath him. Attack in short groups and stop when a new cue begins; holding an attack pattern too long is more dangerous than giving up one hit.
Partway through the fight, Gergoth breaks the floor and both characters fall to the lower arena. You may attack briefly during the descent, but move away before he lands. His head is vulnerable for a short time after impact, so take a few hits and then retreat before he rises. The same attack cues continue in the lower arena, although his pace becomes faster. Reduce his health to zero and complete the Magic Seal on the touch screen when the prompt appears. The victory gives Soma Gergoth’s Soul, which is an attack soul and does not replace Flying Armor or any traversal requirement.
- The laser is avoided by crouching close to Gergoth’s feet.
- Purple and gray gas are cleared or avoided.
- The inhaling chomp is handled by retreating or crouching near the feet when space is limited.
- Gergoth’s leap is avoided by sliding underneath him.
- Soma moves away before Gergoth lands after the floor collapse.
- The Magic Seal is completed after the boss is defeated.
5. Re-climb the damaged tower and collect Tower Key
After the fight, the central floors of Condemned Tower are broken. The return climb is therefore different from the initial ascent. Equip Flying Armor and use it together with Double Jump: jump from a stable ledge, then activate Flying Armor during the jump to slow Soma’s fall and carry him across the gaps. Flying Armor is the tool for the destroyed-floor sections; Double Jump alone is not reliable for the widest breaks.
Climb back through the tower to the upper section. Clear enemies on landing platforms before attempting the next crossing, especially when a Disc Armor or flying enemy can knock Soma into a shaft. If you miss a platform, stop on the next safe ledge and reassess the map rather than repeating the jump while under attack. The post-boss path is a recovery climb, not a place to spend remaining potions on optional rooms.
At the top, enter the room to the left of the former Gergoth arena and collect the Tower Key. The key is required progression. After collecting it, enter the adjacent room and activate the warp point. Save afterward if the nearby chair is available. This warp point is important because it lets you return to the upper tower without repeating the entire damaged-floor climb after entering the next area.
- Flying Armor is equipped for the broken-floor sections.
- Double Jump and Flying Armor are used together across the central shafts.
- The room left of Gergoth’s former arena has been entered.
- The Tower Key is in Soma’s inventory.
- The warp room beside the key has been activated.
6. Unlock Cursed Clock Tower
From the Tower Key room, descend to the room below. Locate the locked blue or iron door in the middle section of the tower. With the Tower Key in Soma’s inventory, walk up to the door and touch or approach it. The game opens the door through proximity; striking it with the weapon is not the required action. If nothing happens, confirm that the key was collected in the room left of the boss arena and that you are standing at the correct locked door below it.
Pass through the opened door and continue left to the red level door. Entering that door transitions Soma from Condemned Tower into Cursed Clock Tower. Activate a save or warp point before beginning the piston, pendulum, gear and spike rooms. Those hazards belong to the next chapter and are not part of the Tower Key retrieval objective.
If the route appears blocked, do not return to Subterranean Hell looking for another key. The main progression check is the post-Gergoth climb, the Tower Key pickup, the adjacent warp activation and the approach to the locked door below the key room. Once the red level door has been entered, Condemned Tower and Gergoth’s Tower Key sequence is complete.
- The locked door below the Tower Key room has been reached.
- The door has opened by approaching it with Tower Key in the inventory.
- The red level door beyond the lock has been entered.
- Cursed Clock Tower is available as the next progression area.
Before you move on
- Substitute Puppet is equipped and has been used as a Bullet Soul with Up plus Y at the upper Dark Chapel gap.
- The Dark Chapel switch has opened the Condemned Tower connection.
- Condemned Tower has been entered through the upper Dark Chapel route.
- The save room beside Gergoth has been activated.
- Gergoth has been defeated and the Magic Seal has been completed.
- The damaged tower has been re-climbed with Double Jump and Flying Armor.
- The Tower Key has been collected in the room left of Gergoth’s former arena.
- The warp room beside the key has been activated.
- The locked door below the key room has opened when approached with Tower Key.
- The red level door beyond the locked door has been entered and Cursed Clock Tower is now available.
References for this chapter
- Castlevania: Dawn of Sorrow — Guide and Walkthrough — GameFAQs
- Castlevania: Dawn of Sorrow Walkthrough, RetroMaggedon Gaming, Garden of Madness and Mine of Judgment
- Castlevania: Dawn of Sorrow — North American instruction manual
- Puppet Master – Castlevania Wiki
- Castlevania: Dawn of Sorrow — Guide and Walkthrough, original DS progression, Abaddon and ending route
Cursed Clock Tower and Zephyr: time-stop Bullet Soul
Begin this chapter after Gergoth has been defeated, the Tower Key has been collected, the locked door has been opened, and Soma has entered Cursed Clock Tower. Cross the tower’s piston, pendulum, blade, gear and spike rooms, activate the available save and warp points, collect Magic Seal 4, and reach the save room before Zephyr. Defeat Zephyr, complete Magic Seal 4, and receive his Bullet-Type Tactical Soul. Equip it in the Bullet slot and activate it with Up plus Y; the soul consumes 80 MP. Return through the established warp route to the lower Subterranean Hell cannon chamber. The cannon has already destroyed one pillar when time freezes. End this chapter with Zephyr equipped and Soma positioned at the cannon, ready to use the soul. The cannon activation and entry into Silenced Ruins belong to the next chapter.
Begin inside Cursed Clock Tower and cross the first hazards
Start at the Cursed Clock Tower entrance opened in the previous chapter. Gergoth, the Tower Key, the locked-door opening and the entrance itself are prerequisites already completed; do not backtrack to repeat them. Continue through the opening corridor after the scene ends and follow the main route through the first spike-lined rooms.
The Clock Tower immediately combines enemies with moving hazards. Deal with Medusa Heads before making long jumps whenever the room allows it, because petrification during a platforming section can send Soma into spikes. Move in short stages through each room rather than trying to cross the entire passage in one jump. Flying Armor can help correct some gaps, but the route still depends on waiting for platforms and machinery to reach safe positions.
When you reach the piston corridor, watch the piston faces and the ceiling spikes together. Let each piston move into a usable position before committing to the next jump. Crouch or remain low when the ceiling leaves little clearance, and recover on a safe piston or ledge before attacking nearby enemies. If damage has accumulated, prioritize reaching the lower Clock Tower save room instead of detouring for optional equipment.
- The chapter begins after entry into Cursed Clock Tower.
- The opening spike rooms have been crossed.
- Medusa Heads are cleared or bypassed before difficult jumps.
- The piston corridor has been crossed without rushing under the ceiling spikes.
Activate the lower save room and climb through the machinery
Follow the lower route after the piston section until you reach the Clock Tower save room. Activate it and restore HP and MP. This is the first dependable recovery point for the area and should be used before attempting the longer upper climb.
From the save room, continue through rotating blades, moving platforms and pendulum rooms. Stay low when a blade’s sweep passes overhead, then advance during the opening rather than jumping into the returning blade. Pendulums are temporary platforms: jump onto the next safe surface, stabilize Soma’s position, and wait for the next swing if the following landing is not clear.
In the vertical rooms, use the large pendulums and fixed ledges to gain height. Imps and other enemies can interrupt a jump, so eliminate them when they block a required landing. Optional rooms containing equipment or the golden 573 mechanism are not needed for Zephyr, Magic Seal 4 or the Subterranean Hell objective. Leave them for a later exploration pass if the hazard timing is costing too much health.
- The lower Clock Tower save room is activated.
- HP and MP are restored before the upper climb.
- The rotating-blade rooms are crossed from safe positions.
- The pendulum and moving-platform sections are traversed without skipping required landings.
- Optional 573 and equipment detours are not treated as campaign requirements.
Reach Magic Seal 4 and the boss save room
Continue through the gear shafts, Medusa Head rooms and upper platforming passages until you reach the room containing Magic Seal 4. Collect the seal before entering Zephyr’s area. It is used after Zephyr’s HP reaches zero, so defeating the boss without successfully completing the seal does not finish the encounter.
After collecting the seal, follow the route toward the upper Clock Tower rooms. Use the available platforms and pendulums deliberately, and clear enemies that can interrupt a jump. Optional rewards such as the Handgun, Army Jacket, Scale Mail, UMA News 3-3 and the Flying Humanoid soul are not prerequisites for the boss or the cannon route.
Activate the save room immediately before Zephyr. Refill HP and MP and keep at least one healing item available. Equip a dependable melee weapon and, if desired, a ranged Bullet Soul for attacks while repositioning. Do not spend all MP before the fight; Zephyr’s soul will later require MP, and a full bar makes the return trip safer.
- Magic Seal 4 has been collected.
- The pre-Zephyr save room has been activated.
- HP and MP are restored.
- A reliable weapon is equipped.
- At least one healing item remains available.
Defeat Zephyr and complete Magic Seal 4
Zephyr is highly mobile and uses knife attacks, charges and a time-stop sequence. Use short melee attacks while he is moving normally, then disengage instead of committing to a long combo. When the visible aura appears, treat it as a warning and stop attacking from close range; the safest response is to create distance and watch the next pattern.
For a horizontal knife, jump over it or retreat if Soma is positioned near a wall. When Zephyr moves through the air and places knives above Soma, identify the gaps before time resumes and move into an open space. Do not remain directly below the knife pattern. If he charges across the floor, jump over the charge and avoid standing beside him when he turns back.
A ranged Bullet Soul can add damage during repositioning, but conserve MP and avoid activating an attack that leaves Soma beside Zephyr as the aura appears. The fight is more reliable when Soma deals a few hits during each opening and then returns to a safe position.
When Zephyr’s HP reaches zero, use the lower screen to complete Magic Seal 4. Follow the displayed seal carefully with the stylus. If the first attempt is missed, continue the sequence until the seal is successfully completed. Zephyr’s Soul is awarded only after the encounter is properly sealed.
- Zephyr’s aura is treated as a warning to disengage.
- Horizontal knives and air-dropped knife patterns are avoided.
- Zephyr’s charge is jumped or evaded safely.
- Zephyr’s HP reaches zero.
- Magic Seal 4 is completed successfully.
- Zephyr’s Soul is obtained.
Equip Zephyr’s Bullet Soul and return to Subterranean Hell
After the battle, activate the warp point near Zephyr’s room and save if necessary. The Clock Tower has a later passage that depends on Bat Company; that route is not needed for the immediate cannon objective, so do not confuse it with the return path.
Open the Tactical Soul menu and place Zephyr’s Soul in the Bullet slot. It is not an Ability-Type Soul and must not be placed in the Ability menu. On the original Nintendo DS release, activate Bullet-Type souls by pressing Up on the Control Pad and Y. Zephyr’s Soul consumes 80 MP per use, so refill before attempting the cannon if the battle or return route reduced Soma’s reserves.
Use the established warp network to reach Subterranean Hell. From the Subterranean Hell warp area, take the lower route toward the cannon chamber. The direct path does not require Rahab for this chapter; Rahab is useful for separate underwater exploration but is not the prerequisite for Zephyr’s cannon sequence.
Proceed through the lower rooms until the cannon chamber is visible. The cannon has already fired once and destroyed the first pillar. Time then freezes, leaving the next cannonball suspended before it can destroy the second pillar. Do not activate Zephyr’s Soul yet if following this chapter boundary. Stop with Zephyr equipped, MP available and Soma standing in the frozen cannon room, ready to press Up plus Y. The actual activation, pillar destruction and Silenced Ruins entrance are handled in the next chapter.
- The warp point near Zephyr has been activated.
- Zephyr’s Soul is equipped in the Bullet slot.
- Zephyr’s Soul is not placed in the Ability menu.
- Up plus Y is ready for Bullet-Soul activation.
- Soma has returned to Subterranean Hell through the established warp route.
- The frozen cannon chamber has been reached.
- The second pillar remains intact and Soma is ready to activate Zephyr’s Soul.
Before you move on
- Gergoth and the Tower Key prerequisite were completed before this chapter began.
- Soma entered Cursed Clock Tower through the previously opened entrance.
- The lower Clock Tower save room and the pre-Zephyr save room were activated.
- Magic Seal 4 was collected.
- Zephyr was defeated and Magic Seal 4 was completed successfully.
- Zephyr’s Soul was obtained and equipped in the Bullet slot.
- Soma returned to lower Subterranean Hell through the established warp route.
- The frozen cannon chamber was reached.
- The second pillar remains intact, and Soma is ready to activate Zephyr’s Soul with Up plus Y.
- Silenced Ruins has not yet been counted as complete; its opening begins in the next chapter.
References for this chapter
- Castlevania: Dawn of Sorrow — North American instruction manual
- Castlevania: Dawn of Sorrow — Guide and Walkthrough — Meowthnum1
- Castlevania: Dawn of Sorrow — Guide and Walkthrough, original DS progression, Abaddon and ending route
- Castlevania: Dawn of Sorrow — Guide and Walkthrough — GameFAQs
- Zephyr - Castlevania Wiki
Silenced Ruins and Bat Company: unlock the Pinnacle route
Begin at the frozen cannon reached after defeating Zephyr in the Cursed Clock Tower. Equip Zephyr as a Bullet Soul and press Up plus Y when the cannon shot stops. The shot then destroys the obstruction and opens Silenced Ruins. Follow the ruins’ main route, leaving the optional Rare Ring puzzle aside if desired. After the Julius and Dario scene, use the nearby save room before entering Bat Company’s arena. Defeat Bat Company, complete the Magic Seal and collect its Guardian Soul. Holding R transforms Soma into a flying bat while MP drains. Use the Silenced Ruins warp room to return to the Cursed Clock Tower, cross the spike passage with Bat Company and continue through the remaining rooms into The Pinnacle. The Mana Prism and Rare Ring are optional; neither is needed for the canonical route.
1. Start at the frozen cannon and resume its shot
Begin this chapter immediately after defeating Zephyr in the Cursed Clock Tower. You should already be standing in the lower Subterranean Hell route at the cannon room where the shot has stopped in midair. Do not retrace the earlier Subterranean Hell route or search for another entrance to Silenced Ruins.
Equip Zephyr in the Bullet Soul slot. Zephyr is not an Ability Soul and does not belong in the Ability menu. When the cannon shot is frozen, press Up plus Y to activate the Bullet Soul. Time resumes in the room, allowing the shot to finish its path and destroy the obstruction or pillar blocking the passage.
If the mechanism does not respond, check that Zephyr is equipped as the active Bullet Soul and that you are using Up plus Y rather than the Guardian command. Once the obstruction is destroyed, move through the newly opened passage into Silenced Ruins.
- Defeat Zephyr before beginning this chapter.
- Stand at the frozen cannon.
- Equip Zephyr as the Bullet Soul.
- Press Up plus Y.
- Confirm that the cannon destroys the obstruction.
- Enter Silenced Ruins.
2. Follow the main route through Silenced Ruins
The opening Silenced Ruins room contains Bats, Ghouls and a Peeping Eye. Move to the right exit. The following room has a broken stairway and several Skeleton variants; take the available route toward the middle-right exit rather than stopping to clear every enemy.
In the next room, defeat or bypass the Gorgon and Ghouls, then continue right. The following room has a Bone Ark near the lower section. Drop through the room, avoid unnecessary damage and use the upper-right exit to continue toward the interior route.
The ruins include an ice-block puzzle involving a bouncing red ball. Solving it can lead to the Rare Ring, but that item is optional and has no role in opening the boss route. Leave the puzzle alone if you want to preserve health and time. The main path remains accessible without completing it.
Use melee attacks for ordinary enemies and save MP for the boss approach. Narrow rooms make it safer to retreat briefly than to spend the entire MP gauge on routine encounters.
- Exit the first room to the right.
- Use the middle-right route through the Skeleton room.
- Pass the Gorgon room and continue right.
- Drop through the Bone Ark room and take the upper-right exit.
- Skip the Rare Ring puzzle unless you want the optional item.
3. Reach the Julius scene and save before Bat Company
Continue through the next connecting rooms until you reach the scene involving Julius and Dario. After the conversation ends, move right. The room immediately to the right is a save room; use it before entering the boss approach.
From the save room, continue through the adjoining corridor. The next enemy room contains Skeletons, Dead Crusaders and Ghouls. The lower path is easier to use because the upper route has a Dead Crusader beneath a low ceiling. Follow the lower path to the right and open the boss door.
The nearby save room is the important retry point for this chapter. If Bat Company defeats you, reload here rather than repeating the cannon activation and the entire Silenced Ruins route. The Silenced Ruins warp room is reached after the boss, so do not confuse it with this pre-boss save room.
- Trigger the Julius and Dario scene.
- Move right to the save room.
- Save before entering the boss corridor.
- Use the lower path in the Dead Crusader room.
- Enter Bat Company’s arena.
4. Defeat Bat Company
Bat Company changes between a large bat, a hand and a ring-firing head form. It can be damaged during its active forms, but avoid attacking while it is changing shape. Keep Soma near a side of the room when you need a predictable response, then move through the opening created by each attack.
When Bat Company forms a hand, attack while it approaches, but do not jump over it too early. The hand can catch Soma during the jump. Wait until it is close, then jump or move past it. If the grab connects, escape immediately because the attack can inflict heavy repeated damage.
During the ring attack, Bat Company positions itself near a corner and launches blue rings across the room. Crouch under rings that pass overhead and strike the lower rings with the weapon if they block your path. Ranged Bullet Souls can help, but keep enough MP for the rest of the fight.
In bat form, attack while the boss approaches, then jump over it or slide beneath it when it reaches Soma’s position. Do not remain in its flight path. A normal weapon is sufficient; optional offensive souls such as Killer Clown or Frozen Shade can shorten the fight but are not required.
After Bat Company’s HP is depleted, complete the Magic Seal successfully. The boss is not fully cleared until the seal is completed and the Bat Company soul is registered.
- Attack only while Bat Company is in an active form.
- Wait for the hand to come close before jumping over it.
- Crouch or slash through the ring pattern.
- Jump over or slide under the bat form.
- Complete the Magic Seal.
- Confirm that Bat Company has been registered.
5. Equip and test Bat Company’s flight
Bat Company is a Guardian Soul. Equip it in the Guardian slot after the battle; do not look for it in the Ability menu. Hold R to transform Soma into a bat. Use the directional controls to move through open air, including upward and downward movement through vertical passages.
The transformation consumes MP while active. Release R as soon as Soma reaches a safe platform or ordinary floor, and check the MP gauge before beginning a long flight. If the form ends unexpectedly, refill MP rather than assuming that the passage requires a different soul.
Test the soul in the nearby rooms by flying through a vertical opening and returning to solid ground. This confirms that the soul is equipped correctly before you attempt the spike route in the Cursed Clock Tower.
- Equip Bat Company as the Guardian Soul.
- Hold R to transform into a bat.
- Use directional controls to fly.
- Release R on solid ground.
- Confirm that MP drains during flight.
- Test the transformation before leaving the area.
6. Activate the Silenced Ruins warp room
From the boss-side area, backtrack through the Silenced Ruins. Use the larger room with the Bone Ark as a landmark: descend to the lower section and take the route to the right. Continue through the corridor with flying enemies until you reach the Silenced Ruins warp room.
Activate the warp room before attempting the next traversal section. It gives you a safe way to return to the Lost Village for supplies and then travel directly to the Cursed Clock Tower. The Mana Prism found during the surrounding exploration is optional and does not affect access to The Pinnacle.
When you are ready, warp to the Cursed Clock Tower. The next required use of Bat Company is in the tower, not inside the Silenced Ruins.
- Backtrack from the boss area.
- Use the lower Bone Ark route as a landmark.
- Activate the Silenced Ruins warp room.
- Treat the Mana Prism as optional.
- Warp to the Cursed Clock Tower.
7. Cross the Cursed Clock Tower spike passage and enter The Pinnacle
From the Cursed Clock Tower warp point, travel right and then down. In the lower room, stand on the floor switch so the wall to the right opens, then move left into the descending spike section. Watch for Medusa Heads while dropping through the rooms and use the safe lower-left areas before continuing.
Continue through the next spike room and move left. The following room contains the long spike passage that requires Bat Company. Equip the Guardian Soul, hold R and fly horizontally across the open gap. Keep Soma centered between the spikes and release R only after reaching the far platform. Start with enough MP to complete the crossing; if the gauge is low, return to a save point or warp room first.
The next room contains another spike arrangement. Drop to the bottom and slide under the low spikes by pressing Down plus B, then move left. Bat Company is not needed for every room after the main gap, so return to normal movement when the passage requires sliding or platforming.
Continue left through the Harpy room and enter The Pinnacle. Use the first accessible save room in The Pinnacle before beginning the later Demon Guest House and Paranoia sequence.
- Warp to the Cursed Clock Tower.
- Activate the wall-opening switch.
- Descend through the Medusa Head and spike rooms.
- Fly across the long spike passage with Bat Company.
- Slide under the later low spikes using Down plus B.
- Pass the Harpy room.
- Enter The Pinnacle and use its save room.
Before you move on
- Zephyr is equipped as the active Bullet Soul at the frozen cannon.
- Up plus Y has resumed the cannon shot.
- The obstruction or pillar has been destroyed and Silenced Ruins is open.
- The main Silenced Ruins route has been followed without treating the Rare Ring as required.
- The save room after the Julius and Dario scene has been used.
- Bat Company has been defeated and its Magic Seal completed.
- Bat Company is registered as a Guardian Soul.
- Flight has been tested and MP drain is understood.
- The Silenced Ruins warp room has been activated.
- The Cursed Clock Tower spike passage has been crossed with Bat Company.
- The Pinnacle has been entered and its save room has been activated.
References for this chapter
- Castlevania: Dawn of Sorrow — Guide and Walkthrough — GameFAQs
- Castlevania: Dawn of Sorrow — Guide and Walkthrough, original DS progression, Abaddon and ending route
- Castlevania: Dawn of Sorrow - Guide and Walkthrough - DS - By Bkstunt_31
- Castlevania: Dawn of Sorrow — North American instruction manual
Late Demon Guest House and Paranoia
After defeating Bat Company in Silenced Ruins, use its flight ability to reach the lower part of The Pinnacle and enter the previously inaccessible upper section of the Demon Guest House. Activate the Ghost Dancer shortcut, cross the chandelier rooms, and find the upper-left route to the three-soul barrier. Open the barrier by using Axe Armor, Killer Clown, and Ukoback souls on their matching wall images. The passage contains a preliminary mini-Paranoia encounter followed by the true Paranoia boss. Only the true fight awards Paranoia’s Bullet Soul. Activate Paranoia with Up plus Y to enter mirrors, then use it at the mirror in Dario Bossi’s Pinnacle arena instead of fighting Dario normally. This reveals Aguni and preserves the canonical route. Puppet Master belongs to the earlier Demon Guest House visit and grants Substitute Puppet, a Bullet Soul activated with Up plus Y; it is not a Guardian Soul. The movable-room puzzle and its equipment remain optional for campaign progression.
Enter the upper Demon Guest House from The Pinnacle
Do not repeat the lower Demon Guest House route used for the first Puppet Master encounter. First defeat Bat Company in Silenced Ruins and obtain its Guardian Soul. Use Bat Company to fly through the spike-blocked route leading to The Pinnacle. From the lower section of The Pinnacle, take the passage that connects back to the upper portion of the Demon Guest House. This upper entrance is the required approach to Paranoia’s area.
Use the nearest save or warp room before starting the climb. The upper house contains cramped rooms and vertical platforming, so a single-target Bullet Soul and a defensive Guardian Soul are safer than effects that fill the room or attract additional enemies. If you still have Puppet Master’s soul, remember that it is a Bullet Soul. Its Substitute Puppet ability is activated with Up plus Y and lets Soma throw a puppet and switch places with it when the puppet lands. It is not activated with R, and it does not occupy the Guardian slot.
- Bat Company has been defeated.
- Bat Company’s Guardian Soul is available for the Pinnacle route.
- The Pinnacle-side entrance to the upper Demon Guest House has been reached.
- Puppet Master is equipped and activated only as a Bullet Soul when needed.
- HP and MP are restored before the climb.
Activate the Ghost Dancer shortcut and cross the chandeliers
Move through the upper Demon Guest House until you reach the room containing Ghost Dancers and a green floor switch. Step on the switch to open the passage connecting this upper section with rooms in the lower portion of the house. This shortcut is useful for recovery and backtracking, but it does not remove the three-soul barrier near Paranoia.
Continue upward through the chandelier rooms. Eliminate enemies on the next landing before making a difficult jump, because taking a hit can knock Soma down several screens. Bat Company makes the vertical route easier, but you can still be pushed off by enemies if you rush. If you fall, use the opened shortcut to return to the climb rather than spending healing items in a dangerous position.
Use the upper save room when you reach it. This checkpoint is the appropriate place to refill before the soul-gated corridor and the two consecutive Paranoia encounters. The movable-room puzzle elsewhere in the Demon Guest House is not required for this route and can be left for optional equipment and map completion.
- Step on the Ghost Dancer-room switch.
- Confirm that the upper and lower Demon Guest House sections are connected by the shortcut.
- Cross the chandelier route and reach the upper recovery point.
- Leave the movable-room puzzle for optional exploration unless you specifically want its rewards.
Find the Mimic and the three-soul barrier
Continue through the upper house toward the upper-left side of the section. A Mimic appears along this route. Approach it with room to retreat, then attack after it reveals itself. Avoid being pinned against nearby enemies or a wall. Defeating the Mimic is not the requirement for opening the Paranoia passage, so do not confuse this encounter with the soul gate.
The required barrier consists of three pink wall sections displaying enemy images. If you have not collected the necessary souls, leave through the shortcut and hunt them down before returning. Axe Armor souls can be obtained from Axe Armor enemies in earlier castle areas, Killer Clown souls are available in the Demon Guest House, and Ukoback souls can be collected in Subterranean Hell. The game does not require these souls to remain equipped after their matching barriers have been opened.
- Reach the upper-left route after the chandelier rooms.
- Defeat or safely pass the Mimic.
- Locate all three pink wall sections.
- Confirm that Axe Armor, Killer Clown, and Ukoback souls are in the soul inventory.
Open the barrier with the matching enemy souls
Stand before each pink wall and equip the soul represented by its image. Use Axe Armor on the Axe Armor wall, Killer Clown on the Killer Clown wall, and Ukoback on the Ukoback wall. Activate the equipped Bullet Soul if the game requires the soul’s effect to be applied directly. The order is not the important part; matching each soul to its image is what removes the barrier.
If a wall does not respond, check the soul category and name in the menu. Substitute Puppet, despite being obtained from Puppet Master, has no role in this barrier. It is a Bullet Soul used with Up plus Y for its teleporting puppet effect. After all three wall sections disappear, move through the opened corridor and return to the save point if your MP or healing supply is low.
- Use Axe Armor on the Axe Armor image.
- Use Killer Clown on the Killer Clown image.
- Use Ukoback on the Ukoback image.
- Verify that all three wall sections have disappeared.
- Restore resources before entering the boss corridor.
Defeat the preliminary Paranoia encounter
The first encounter beyond the opened barrier is a smaller version of Paranoia. Treat it as a separate fight. It does not award Paranoia’s soul, so continue even if no soul appears after the battle.
Watch for the rapid knife dash and the mirror-based laser attack. Jump over the horizontal dash instead of trying to absorb contact damage. When the enemy retreats into a mirror or reappears from one, keep moving along the lower part of the room and avoid committing to a long attack animation until the firing position is clear. This encounter is a useful timing check for the true battle immediately afterward.
After the preliminary enemy is defeated, continue through the next doorway. Do not return to the castle simply because the first fight did not provide a soul; the true Paranoia encounter is further inside.
- Recognize the first enemy as the preliminary mini-Paranoia.
- Jump over the knife dash.
- Avoid the mirror laser by moving away from its firing line.
- Continue through the next door instead of expecting the soul immediately.
Defeat true Paranoia and obtain the Bullet Soul
In the true Paranoia fight, attack during its exposed movement across the room, then disengage when it positions itself directly above Soma. Move away from the vertical drop or body attack and resume attacking after the opening ends. When Paranoia uses the mirrors, track the active mirror and keep moving so that the laser or knife attack does not catch Soma during a long weapon swing.
Do not rely on low-MP Bullet Soul spam if it leaves no resources for recovery. Short weapon attacks, a controlled single-target Bullet Soul, and a Guardian effect that can be activated briefly are safer for a first attempt. If you are defeated, return to the upper save point, refill HP and MP, and adjust the loadout before trying again.
After the true boss is defeated, complete the Magic Seal and collect the reward. The resulting Paranoia soul is a Bullet Soul. Equip it and press Up plus Y when standing before a usable mirror. It is not a Guardian Soul and is not activated with R.
- Defeat the true Paranoia boss.
- Complete the Magic Seal.
- Obtain Paranoia’s Bullet Soul.
- Confirm that Paranoia is assigned to the Bullet slot.
- Save before returning to The Pinnacle.
Use Paranoia at Dario’s mirror to reach Aguni
Return through the upper-house connection to The Pinnacle and go to Dario Bossi’s arena. When the encounter begins, do not attack Dario normally if the goal is the canonical route. Equip Paranoia, stand before the large mirror in the arena, and press Up plus Y. Soma enters the mirror and reaches Aguni, the fire demon responsible for Dario’s power.
Defeat Aguni instead of ending the encounter by fighting Dario directly. Aguni’s attacks leave openings between fire patterns, so keep moving and use brief attack windows rather than remaining beneath him or committing to a long animation while a fire attack is forming. After Aguni falls, continue with the Mina’s Talisman event and the later Mine of Judgment sequence.
Paranoia can also be used at other mirrors for optional items and exploration. Those rewards are not required for the campaign clear, but the mirror in Dario’s arena is required to continue toward the canonical ending.
- Return to Dario’s arena in The Pinnacle.
- Equip Paranoia in the Bullet Soul slot.
- Use Up plus Y at the arena mirror.
- Enter the mirror and defeat Aguni.
- Confirm that the Mina’s Talisman and late-game route are available.
Before you move on
- Bat Company has been defeated and its flight route has opened The Pinnacle connection.
- The Pinnacle-side entrance to the upper Demon Guest House has been used.
- The Ghost Dancer switch has opened the shortcut between the upper and lower house sections.
- The chandelier route and upper recovery point have been reached.
- The Axe Armor, Killer Clown, and Ukoback souls have opened the three matching pink wall sections.
- Both the preliminary mini-Paranoia and the true Paranoia encounter have been defeated.
- The true fight awarded Paranoia’s Bullet Soul.
- Paranoia is activated with Up plus Y and has been used at the mirror in Dario’s arena.
- Aguni has been reached and defeated instead of ending the route by fighting Dario normally.
- Puppet Master remains correctly classified as a Bullet Soul wherever it is discussed.
- Optional movable-room equipment and full map coverage remain separate from campaign progression.
References for this chapter
- Castlevania: Dawn of Sorrow — Guide and Walkthrough — GameFAQs
- Castlevania: Dawn of Sorrow FAQ/Walkthrough - Neoseeker
- Castlevania: Dawn of Sorrow - Guide and Walkthrough - DS - By yetstay - GameFAQs
- Castlevania: Dawn of Sorrow - Guide and Walkthrough - DS - By Itachiroth
- Castlevania: Dawn of Sorrow — North American instruction manual
- Castlevania: Dawn of Sorrow/Controls - StrategyWiki
Pinnacle aftermath, Magic Seal 5 and Mine of Judgment entrance
After defeating Aguni through Paranoia’s mirror route, leave the mirror area and collect Magic Seal 5 in the room to the left. Save before leaving The Pinnacle. Return to the central room in Garden of Madness with Mina’s Talisman equipped and allow the entire scene to finish. This opens the lower Condemned Tower route. Warp there, descend through the opened barrier and enter Mine of Judgment. Activate the first Mine save room, follow the descending route while avoiding poisonous Tanjellies, activate the Mine warp room, and then use the save room immediately before Death. This chapter ends at that checkpoint. Do not repeat the late Demon Guest House, Paranoia or Aguni sequence, and do not enter Death’s arena until the next chapter.
1. Leave the mirror area and collect Magic Seal 5
This chapter begins after Aguni has been defeated through the mirror behind the second Dario encounter. Exit the mirror and let the post-battle conversation finish. Do not warp away immediately: after the scene, move left from the room where the mirror sequence took place and collect Magic Seal 5. It is the final Magic Seal and is obtained after the Aguni event, not during the boss-seal drawing.
Once the seal is in your inventory, return to the nearby Pinnacle save room and save. This checkpoint preserves the completed Aguni route and lets you retry the Garden event without repeating Paranoia or Aguni if you make a mistake.
Use the Pinnacle warp room when you are ready to leave. You do not need to revisit the upper Demon Guest House, the three-soul barrier or either Paranoia encounter. Those objectives belong to the preceding chapter and should already be complete.
- Aguni was defeated through Paranoia’s mirror.
- Magic Seal 5 was collected after leaving the mirror area.
- The game was saved after collecting Magic Seal 5.
- Paranoia and Aguni will not need to be repeated.
2. Return to Garden of Madness with Mina’s Talisman equipped
Warp to Garden of Madness and travel to the central story room that was previously sealed. Before entering, open the equipment screen and place Mina’s Talisman in Soma’s accessory slot. Confirm that it is equipped rather than merely present in the inventory.
Enter the central room and allow the complete scene to play. Do not skip out of the room before the conversation and intervention finish. With Mina’s Talisman equipped, the game follows the canonical route: Soma does not receive the Mina Dies ending, and the route toward the final areas becomes available.
If you enter without Mina’s Talisman and receive the bad ending, reload the save made after collecting Magic Seal 5. Equip the talisman before entering the room again. This is why saving immediately after the Aguni sequence is important.
When the scene is over, do not return to The Pinnacle to repeat the late-game route. Your next destination is the lower section of Condemned Tower.
- Garden of Madness has been reached through a warp point.
- Mina’s Talisman is equipped before entering the central room.
- The complete canonical scene has finished.
- The route to lower Condemned Tower is now open.
3. Descend through Condemned Tower into Mine of Judgment
Warp to Condemned Tower. From the warp-room area, descend through the central shaft toward the bottom of the tower. Continue through the lower rooms until you reach the passage that was blocked before the Mina’s Talisman event.
Enter the newly opened room and let the conversation involving Arikado and Julius finish. Julius breaks the barrier in the floor, revealing the passage into Mine of Judgment. Drop through the opened floor after the scene ends.
If the barrier is still present, do not search for another route. Confirm that Aguni was defeated through the mirror, Magic Seal 5 was collected, Mina’s Talisman was equipped, and the central Garden of Madness scene was completed. The Mine entrance depends on that sequence.
Before dropping into the Mine, consider returning to a shop or save point to refill healing items and MP. The Mine contains a long one-way-feeling descent, poisonous enemies and a boss checkpoint at the far end.
- The lower Condemned Tower route has opened.
- The Arikado and Julius scene has played.
- Julius has broken the floor barrier.
- Mine of Judgment has been entered.
4. Activate the first Mine of Judgment save room
At the Mine entrance, travel left through the connected rooms until the route ends at the first Mine save room. Use it immediately. This is the first major recovery point in the area and should be active before you explore the descending route.
After saving, return toward the entrance-side rooms and continue through the lower and side exits. The Mine route zigzags rather than following a straight vertical drop. Check the available doors at each level and use the passages that carry you deeper into the mine.
Tanjellies crawl through several of the early Mine rooms and can inflict poison on contact. Avoid rushing into wall corners or dropping onto enemies. Strike them from a safe position, jump over them when the room allows it, or use a ranged soul to clear the passage before advancing.
Slogras, Rippers, Giant Slugs, Bugbears, Gaibons and other enemies occupy the route. You do not need to defeat every enemy or farm their souls. Clear only what blocks a doorway or makes a landing unsafe, preserving HP and MP for the later checkpoint and Death encounter.
- The first Mine save room has been activated.
- The Mine route is being followed through its side exits and shafts.
- Tanjellies are being handled without unnecessary poison damage.
- Optional enemy souls and side rooms are being skipped unless needed.
5. Activate the Mine warp room and reach the pre-Death save
Continue through the Mine’s zigzag rooms until you reach a chamber with a Giant Slug near the lower section and a passage leading left. Take the left passage to find the Mine of Judgment warp room and activate it. This gives you a reliable return route to the rest of the castle for supplies.
After activating the warp, return to the preceding route and continue through the lower-right and downward passages. Follow the connected rooms until you reach the save room near the end of the Mine. The route includes additional Tanjellies and vertical shafts, so keep checking the room exits instead of dropping blindly.
Use the final save room before Death as soon as you find it. It is immediately before the boss approach, with an empty room and then the boss entrance beyond it. Refill HP and MP, equip the weapon and souls you intend to use against Death, and confirm that healing items are available.
Do not enter the room on the left after this save point. That doorway begins the Death encounter and is the subject of chapter 12. If you die before activating this checkpoint, reload at the first Mine save room and repeat the descent using the Mine warp room as your resupply route.
- The Mine of Judgment warp room has been activated.
- The final save room before Death has been used.
- HP, MP and healing items are prepared.
- The Death doorway has not yet been entered.
- The player is ready to begin chapter 12 at the pre-Death checkpoint.
Before you move on
- Aguni has been defeated through Paranoia’s mirror.
- Magic Seal 5 has been collected after leaving the mirror area.
- The game has been saved after collecting Magic Seal 5.
- Mina’s Talisman was equipped before entering the central Garden of Madness room.
- The canonical Garden scene has finished.
- The lower Condemned Tower barrier has opened.
- Mine of Judgment has been entered.
- The first Mine save room is active.
- The Mine of Judgment warp room is active.
- The save room immediately before Death is active.
- Death’s room has not yet been entered.
References for this chapter
- Castlevania: Dawn of Sorrow — Guide and Walkthrough, original DS progression, Abaddon and ending route
- Castlevania: Dawn of Sorrow — Guide and Walkthrough — GameFAQs
- Castlevania: Dawn of Sorrow Walkthrough, RetroMaggedon Gaming, Garden of Madness and Mine of Judgment
- Castlevania: Dawn of Sorrow Instruction Manual, Nintendo DS
Death, The Abyss and the Menace checkpoint
Begin at the Mine of Judgment save room immediately before Death. Defeat both forms, then complete Magic Seal 5 on the DS touch screen. Death is not permanently defeated until the seal succeeds and the Death Soul is registered. Save at the Mine checkpoint after the sealed victory, then use the door beyond Death’s arena to enter The Abyss. Activate the first Abyss save room, optionally collect Hippogryph beneath the sand, and follow the route to the save room before Abaddon. Defeat Abaddon, use the recovery point beyond the boss and continue through The Abyss to the final save room immediately before Menace. This chapter does not repeat Aguni, Mina’s Talisman, the central Garden event or the Mine entrance. It ends with the pre-Menace checkpoint active and Soma ready for chapter 13.
1. Start at the Mine of Judgment save room
Begin in the Mine of Judgment save room directly before Death. Sit in the chair to restore HP and MP, then confirm that your preferred weapon, a reliable Bullet Soul and a Guardian Soul are equipped. Keep healing items for the boss attempt and do not spend the entire MP bar clearing the Tanjellies, Rippers and Slogras on the way to the arena.
Leave through the left side of the save room, pass through the connecting rooms and enter the boss room. Death has two consecutive forms, so there is no opportunity to refill HP or MP between them. The battle also ends with a Magic Seal sequence. Before leaving the checkpoint, open the Status menu and practice Magic Seal 5 if its input is not familiar.
- The file is at the Mine of Judgment save room before Death.
- HP and MP are restored.
- A weapon, Bullet Soul, Guardian Soul and healing items are ready.
- Magic Seal 5 has been practiced or its input is familiar.
2. Defeat Death’s first form
The first form advances for a close-range attack consisting of a vertical scythe swing followed by a horizontal swing. Let Death approach, retreat from the first swing and duck or keep moving away from the second. Do not attack through the scythe just because Death appears to be finishing the animation; the weapon can still hit Soma during the recovery frames.
Death can throw the scythe so it breaks into several small sickles. A broad weapon or wide Bullet Soul can clear the sickles nearest Soma, but it is usually safer to move through the largest opening than to destroy every projectile. Keep enough floor space available so the sickles do not pin Soma against a wall.
When Death flashes, three airborne copies appear and fire vertical laser beams. Move into the open space between the copies and wait for the beams to finish. The copies disappear quickly, so avoid spending a large amount of MP during this pattern. Attack during the pauses after the scythe attacks, then return to a position with room to retreat.
A long or wide-reaching weapon works well here. Axe Armor can add safe ranged damage, but do not spend all of its MP before the second form. When the first form is defeated, Death changes immediately into the red form.
- The two-part scythe swing was avoided.
- The thrown scythe and sickles were dodged or cleared.
- The three laser-firing copies were handled by moving between them.
- A useful amount of HP and MP remains for the second form.
3. Defeat Death’s second form
The second form can disappear and reappear beside Soma before swinging the scythe once or twice. When Death vanishes, stop attacking and prepare to move. As he reappears, duck for the first slash and jump or retreat for the second. Avoid jumping too early, because Soma can land directly into the follow-up swing.
During the spinning-scythe attack, either move far enough away that the large scythe cannot reach Soma or stay close and double-jump over it. Small sickles appear in the air during the same sequence. If you retreat, concentrate on avoiding the sickles rather than trying to damage Death; if you stay close, attack only after clearing the immediate path.
The most dangerous pattern begins when Death holds his arms out and fires four energy shots toward the sides of the room. Remember the side from which the first shot travels. After the third shot, the first giant skull enters from that side. Run away from it, then reverse direction for the next skull. Continue alternating sides until all four skulls have passed. Bat Company or another hovering or invulnerable Guardian Soul can help if the timing is unreliable, but preserve enough MP for the rest of the fight.
Use ranged attacks or a continuing Guardian effect after the skull sequence, while keeping the center of the room available for the next movement pattern. When Death’s HP reaches zero, do not assume the boss is finished. The lower screen will display Magic Seal 5.
- The vanish-and-scythe attack was avoided.
- The spinning scythe and airborne sickles were survived.
- All four skulls were dodged by alternating away from their approach sides.
- Death’s HP reached zero and the Magic Seal 5 screen appeared.
4. Complete Magic Seal 5 and secure the Death victory
Magic Seal 5 is mandatory after Death’s second form. Use the stylus or your finger to trace the displayed points in the indicated order without lifting from the touch screen. The seal can be practiced from the Status menu before the fight. A fast, continuous stroke is more reliable than stopping to make each corner perfectly precise; stay close to the displayed route and complete the sequence in one motion.
If the seal fails, Death revives with HP and must be defeated again. Do not save or leave the room assuming the soul was registered. Return to the boss pattern, reduce Death’s HP to zero again and retry the seal. If the first attempt fails because the touch screen is difficult to read, practice Magic Seal 5 from the menu after the failed attempt, then restart from the Mine save room if necessary.
The battle is complete only when the seal succeeds, Death disappears permanently and the Death Soul is registered. After the successful seal, leave the arena and return to the nearby Mine save room. Save immediately. This creates the correct recovery point for The Abyss and prevents a failed later run from forcing another two-form Death battle and another seal attempt.
- Magic Seal 5 was drawn successfully after both Death forms.
- Death did not revive after the seal input.
- The Death Soul is registered in the soul inventory.
- The game was saved at the Mine checkpoint after the sealed victory.
5. Enter The Abyss and activate its first checkpoint
From the Death area, use the door beyond the arena. In the original Nintendo DS release, this doorway functions as the transition into The Abyss. Death’s victory does not require another seal after entering the new area; Magic Seal 5 was completed during the boss sequence, and no additional seal is needed at the Abyss entrance.
When The Abyss loads, move through the entrance passage and use the first Abyss save room on the left side of the route. Activate it before exploring the deeper rooms. The Mine save room and the first Abyss save room are separate checkpoints, so saving after Death does not substitute for establishing this new recovery point.
The opening rooms contain Arc Demons, Flame Demons, Fleamen, Alastors and red floor sections that trigger tall flame pillars. Watch the reddish floor tiles before crossing them, because the flame pillars reach the ceiling and cause heavy damage. Avoid isolated enemies when the room gives you a clear landing, and spend MP only when an enemy blocks a narrow passage or dangerous platform.
- The sealed Death victory was saved.
- The door beyond Death’s arena was used.
- The first Abyss save room was activated.
- Flame-triggering floor tiles were identified and crossed carefully.
6. Optional Hippogryph pickup and the route toward Abaddon
Continue from the first Abyss checkpoint through the rooms with mud, Alastors and other late-game enemies. In the room with quicksand-like flooring, deliberately drop into the sand and search the lower enclosed section. A soul cage there contains Hippogryph. Break the cage and equip Hippogryph in the Ability slot if you want the safer route through the vertical rooms.
Hippogryph lets Soma perform a high jump by pressing Up and L together while standing on the ground. It consumes no MP. Test it before proceeding so you know how far the jump carries Soma. Hippogryph is recommended for recovering from missed ledges and crossing several vertical transitions, but it is optional and is not required to defeat Abaddon or reach Menace.
Mud Demon can be collected in the mud rooms and lets Soma move normally through mud. It is useful for optional exploration and soul collection, but it is not a required prerequisite for Abaddon. Continue through the Abyss rather than stopping to farm it unless you specifically want the ability.
Follow the one-way route through the rooms containing Frozen Shades, Stolas, Final Guards, White Dragons, Succubi, Flame Demons and Malacodas. Use Hippogryph when a normal jump cannot reach the next platform. In the room before Abaddon, take the right-hand exit to the save room and restore HP and MP before opening the sealed boss door.
- Hippogryph was collected from the sand section, or intentionally skipped.
- Hippogryph was equipped and tested if collected.
- Mud Demon was treated as optional.
- The save room before Abaddon was activated.
7. Defeat Abaddon
Abaddon hops toward Soma and commands locust swarms with its baton. Watch the baton gesture before committing to movement. A horizontal line sends locusts across the room in a straight path. Move through the visible gap or stay low and clear the approaching insects with a fast attack.
A U-shaped gesture sends locusts down from above and back toward the ceiling. Double-jump near the center when the opening is clear, or remain near a wall and duck if the swarm leaves the floor open. A sideways U travels from one side of the room and returns to that side; move into the open middle section and do not jump blindly into the returning swarm.
The waterfall-like baton motion creates the most restrictive pattern, with locusts descending from above in a broad curtain. Move toward the side where the swarm is forming and pass through the opening before it closes. Bat Company can help Soma hover through dangerous sections, while Buer can block or destroy locusts if you have developed that Guardian Soul. A mine-like Bullet Soul or a ranged attack can damage Abaddon without requiring Soma to stand still.
Attack between swarm patterns and keep enough space to react to Abaddon’s jumps. After the boss is sealed with Magic Seal 5, the Abaddon Soul is awarded. It is a Bullet Soul that summons locusts and is not a traversal Ability Soul. Use the nearby recovery point after the fight.
- The horizontal locust line was avoided.
- The U-shaped and sideways-U swarms were crossed through their openings.
- The waterfall swarm was survived without a panic jump into the insects.
- Abaddon was defeated and its Bullet Soul was received.
- The recovery point beyond the boss was used.
8. Reach the final save room before Menace
Continue beyond Abaddon through the remaining Abyss rooms. The route includes Black Panthers, Stolas, Iron Golems, Final Guards, Malacodas, Giant Slugs and spike hazards. Fight enemies that block a passage, but avoid unnecessary exchanges with Iron Golem and Final Guard. Identify the next safe platform before crossing a spike section, and use Hippogryph to correct a difficult vertical jump if you collected it.
A portal in the later Abyss route can return Soma to the castle. Use it if you need to refill items, change equipment or recover MP, then return through the Abyss entrance route. Do not begin the final approach with an empty MP bar if your chosen Menace strategy depends on a Guardian or Bullet Soul.
Continue through the final rooms until you reach the save room immediately before Menace. Activate the chair and restore HP and MP. This is the standard retry checkpoint for the final boss, so a defeat there will not require repeating Death, Magic Seal 5, the Mina’s Talisman event, Aguni or Abaddon.
Stop at the pre-Menace save room. The next chapter covers the boss door, Menace’s phases, safe attack positions, recovery after failure and the canonical ending. No further Magic Seal sequence is required in this chapter after the successful seals for Death and Abaddon.
- The post-Abaddon recovery point or portal was identified.
- The final Abyss rooms were crossed without exhausting HP and MP.
- The save room immediately before Menace was activated.
- A usable Bullet Soul and Guardian Soul are ready.
- The file is handed off to chapter 13 at the full-resource Menace checkpoint.
Before you move on
- The run began at the Mine of Judgment save room immediately before Death.
- Death’s first form was defeated.
- Death’s second form was defeated.
- Magic Seal 5 was successfully drawn after Death’s HP reached zero.
- The Death Soul was registered after the successful seal.
- The game was saved at the Mine checkpoint after the sealed Death victory.
- The door beyond Death’s arena was used to enter The Abyss.
- The first Abyss save room was activated.
- Hippogryph was collected from the sand section, or intentionally skipped with the optional route understood.
- The save room before Abaddon was activated.
- Abaddon was defeated and its Bullet Soul was received.
- The post-Abaddon recovery point or portal was identified.
- The final save room immediately before Menace was activated.
- HP, MP, recovery items and the selected combat souls are ready.
- Chapter 13 can begin directly with the Menace fight; no Aguni, Mina’s Talisman, Magic Seal 5, Death or Mine-entry sequence needs to be repeated.
References for this chapter
- Castlevania: Dawn of Sorrow - Guide and Walkthrough - DS - By yetstay - GameFAQs
- Castlevania: Dawn of Sorrow — Guide and Walkthrough, original DS progression, Abaddon and ending route
- Castlevania: Dawn of Sorrow — Guide and Walkthrough — GameFAQs
- Castlevania: Dawn of Sorrow — North American instruction manual
- Magic Seal - Castlevania Wiki
- Abaddon - Castlevania Wiki
Final boss build, phase recognition and defeat strategy
Begin at the final Abyss save room immediately before Menace. The canonical prerequisites are already complete: Aguni was defeated inside Dario’s mirror, Mina’s Talisman was equipped for the Garden of Madness event, and the route through Mine of Judgment and The Abyss is open. Save, restore HP and MP, and use the nearby warp room if you need different equipment or supplies. Menace has two forms. In the first, attack the face in the torso while avoiding poison and spike patterns. In the second, destroy the knee face and then the face in the skull while controlling the flying creatures that can knock Soma from the platforms. Preserve enough MP for the standing form. After both forms are defeated, allow the ending scenes and credits to play. Julius Mode is available as post-clear content after completing an eligible ending; it is not required for the canonical Soma clear.
Start from the final Abyss checkpoint
This chapter begins at the final Abyss save room, immediately before Menace. The earlier route requirements are complete: Aguni was defeated in Dario’s mirror, Mina’s Talisman was equipped before the Garden of Madness story event, and the Mine of Judgment and Abyss route has been cleared. Do not retrace those areas unless you are deliberately correcting an earlier ending choice.
Save before entering the boss room. Use the nearby warp room if you need to return to the castle for healing items, MP recovery, armor, or a different weapon. The boss door is the route forward from this checkpoint, so this is the intended location for repeated attempts.
Choose equipment that you can use consistently. A weapon with a dependable attack arc or reach is more useful than a nominally stronger weapon that forces Soma into Menace’s body. Keep one ranged Bullet Soul available for the standing form, and favor an Enchant that improves survivability if contact damage has been causing failures. Abaddon is a practical option for attacking Menace while also helping remove the flying creatures, but any reliable ranged soul can fill that role.
- Save at the final Abyss save room.
- Confirm that the nearby warp room is usable.
- Restore HP and MP before entering.
- Equip a familiar weapon and a ranged or crowd-control Bullet Soul.
Defeat Menace’s first form
Menace begins in a lowered position. The vulnerable target is the face protruding from the torso. Stand where you can reach that face without remaining underneath a dangerous body section, then use short weapon attacks during safe openings. Do not spend the entire MP bar here; the standing form is more demanding because it adds multiple targets and flying enemies.
Watch for the spike patterns rather than attacking through them. When spikes rise from the lower portions of the arena, move toward the safer central area if the warning is at the sides. When the central area becomes dangerous from above, leave the middle and use a side position. Adjust to the visible hazard instead of committing to a long attack animation.
Menace can also open its mouth and release poison. Move away from the cloud and wait for the attack to end. A few extra hits are not worth being poisoned and then struck by the next hazard. If you use a Bullet Soul, fire it during a clear opening and stop before MP loss leaves you unable to control the second form.
Continue striking the torso face until Menace rises. That change marks the transition to the standing form; there is no separate Magic Seal puzzle to perform during this encounter.
- Attack the face in Menace’s torso.
- Move away from active spike patterns.
- Leave the poison cloud instead of attacking through it.
- Keep a useful amount of MP for the standing form.
- Continue until Menace rises.
Attack the knee without getting trapped
In the standing form, Menace’s body, feet, and legs inflict contact damage. The lower vulnerable target is the face in the knee. Approach from an angle, land a short attack sequence, and retreat before the foot or leg closes your escape route. Ranged attacks are useful because they let Soma damage the knee while moving away.
Menace can walk across the room and corner Soma against a wall. It uses punches at different heights and can stomp when Soma is on a lower level. Watch the boss’s position instead of holding an attack string. If the boss reaches your side while you are on a middle platform, drop or slide beneath the foot when necessary and escape first. Trying to trade hits beside the knee usually produces contact damage followed by a stomp or punch.
Once the knee face is destroyed, shift your attention to the upper platforms and the face inside Menace’s skull. Do not remain below the boss longer than necessary. Climb when the route is open, then wait for a punch or stomp to finish before attacking the upper target.
- Approach the knee diagonally or from outside contact range.
- Evade stomps by changing level or sliding away.
- Do not remain trapped against a wall.
- Destroy the knee face before committing to the upper platforms.
Destroy the skull face and control the flying creatures
The second vulnerable target is the face inside Menace’s skull. It closes after taking damage, so use brief attacks during each opening rather than trying to maintain a continuous combo. Weapon strikes are appropriate when the platform is clear; use the Bullet Soul when it gives you a safer angle or lets you attack while repositioning.
The flying creatures are the immediate threat whenever they enter Soma’s platform. They can knock him into Menace, push him from a platform, or prevent him from escaping a punch. Stop attacking the skull if a creature is close and remove the nearer threat first. Abaddon can damage Menace while helping with crowd control, but do not assume it will destroy every creature before contact. Finish the creature yourself when it reaches Soma’s side.
If multiple creatures appear, prioritize survival over boss damage. Clear the platform, move to a lower level deliberately if the upper route is crowded, and climb again after the danger passes. Avoid jumping blindly through a creature or attempting to force a skull hit while Soma is already being pushed. Repeat short skull attacks and retreats until the upper face is destroyed.
- Attack the skull face only while it is exposed.
- Remove a flying creature before it reaches Soma’s platform.
- Use ranged attacks to control crowded spaces.
- Leave an unsafe platform instead of forcing a hit.
- Destroy the skull face to finish the battle.
Recover after a failed attempt
If Menace defeats Soma, return to the final Abyss save room. The previous bosses, story events, and cleared route remain complete; you do not need to repeat Aguni, the Garden of Madness event, Mine of Judgment, or Abaddon. Restore HP, MP, and consumables before re-entering the boss room.
If the torso form is easy but the standing form is the problem, use normal weapon attacks more often during the first form and reserve MP for the knee, skull, and flying creatures. If Soma dies beside the knee, replace a damage-focused Enchant with a defensive or higher-HP option and shorten each exchange. If the upper platforms cause the failure, prioritize single weapon hits and use MP only when the skull is exposed or a creature needs to be removed quickly.
When Menace corners Soma, escape before attacking. Sliding beneath the foot, dropping to another level, or moving to a clear platform is more important than preserving position. A failed attempt does not erase long-term progress, so use the final save room as the regular reset point rather than restarting from an earlier chapter.
- Return to the final Abyss save room after defeat.
- Restore HP, MP, and consumables.
- Adjust the Enchant according to the phase that caused the failure.
- Reserve MP for the standing form when necessary.
- Escape first whenever Menace corners Soma.
Confirm the canonical clear
Menace is defeated when the torso face in the first form and the knee and skull faces in the standing form have all been destroyed. After the battle, let the dialogue and ending scenes continue. The campaign clear is confirmed by viewing the ending sequence and credits, not merely by reaching the Abyss or defeating Aguni.
After the credits, keep the completed Soma save. If the title screen shows the appropriate clear or completed-game indication, that confirms the file has recorded the ending. The exact post-game menu presentation can vary by save state, so use the viewed credits and retained completed file as the primary checks.
Julius Mode is post-clear content and is not part of the Menace route. Completing an eligible ending makes it available separately; begin it only after confirming that the Soma file is preserved. New Game+, Boss Rush, Sound Mode, map cleanup, soul collection, synthesis, and full Julius Mode progression belong to the post-game chapters.
- Menace’s torso face was destroyed.
- The knee face was destroyed.
- The skull face was destroyed.
- The ending dialogue and credits were viewed.
- The completed Soma file remains available.
- Julius Mode is checked only after the main campaign clear.
Before you move on
- The final attempt began from the Abyss save room immediately before Menace.
- Menace’s torso face, knee face, and skull face were destroyed.
- The ending dialogue and credits were viewed.
- The completed Soma save remains available.
- The Clear indication is present if shown by the save or title screen.
- Julius Mode is available as post-clear content without replacing the completed Soma file.
References for this chapter
- Castlevania: Dawn of Sorrow — Guide and Walkthrough — GameFAQs
- Boss strategies — Castlevania: Dawn of Sorrow Walkthrough & Guide — GameFAQs
- Castlevania: Dawn of Sorrow — Boss Guide, Abaddon strategies
- Castlevania: Dawn of Sorrow — Secrets Guide, endings and unlock conditions
- Castlevania: Dawn of Sorrow instruction manual
After the credits: Julius Mode and New Game+ access (optional)
Finish Dawn of Sorrow with the good ending if you want both post-game options. Defeat Dario’s mirror-world demon, equip Mina’s Talisman before the false-Mina confrontation, defeat Menace, and let the credits finish. The completed Soma file then displays a Clear icon. Selecting that icon starts New Game+ on Normal or Hard and transfers most equipment and many souls, but Soma’s level, story progression and several special or progression-related souls do not carry over. Julius Mode is a separate campaign unlocked by either the good ending or the second bad ending. Julius begins alone; Yoko is recruited at her Weapon Synthesis shop and Alucard is recruited in the Demon Guest House room associated with Mina’s Talisman. They use fixed character abilities instead of Soma’s Tactical Soul and equipment systems. Progress through the castle, recruit both allies, defeat the required bosses, enter the late Abyss route and defeat Dark Lord Soma to clear Julius Mode.
1. Secure the good ending before starting post-game content
For the canonical Soma campaign ending, do not stop at the first ending route. Acquire the Paranoia soul and use it to enter Dario’s mirror-world confrontation. Defeat the demon in that mirror encounter so Dario’s route advances instead of ending in the earlier bad outcome.
Before the later confrontation involving Celia and the Mina doppelganger, open Soma’s equipment screen and confirm that Mina’s Talisman is equipped as the accessory. The Talisman is the condition that lets Soma recognize the deception. Continue through the resulting late-game path, defeat Menace, and allow the ending sequence and credits to finish before changing files.
Save the completed Soma file afterward. The best practice is to keep that file untouched and use another slot for New Game+ or experimental collection work. Julius Mode is also available after the second bad ending, but that route does not provide the Clear icon used to start New Game+.
- Paranoia acquired and used to reach Dario’s mirror-world demon.
- Mina’s Talisman equipped before the false-Mina confrontation.
- Menace defeated.
- Ending sequence and credits viewed.
- Completed Soma file saved in a protected slot.
2. Start New Game+ from the Clear icon
Return to the title screen and choose Game Start, then Select Data. On the file-selection screen, look for the bat-shaped Clear icon above the completed Soma file. Select the Clear icon, not the ordinary file entry. The ordinary entry loads the completed campaign; the Clear icon opens the New Game+ setup.
The game then lets you choose Normal or Hard for the new run. Normal is the useful choice when your goal is to collect missed souls, test weapon synthesis or finish map exploration with a strong inventory. Hard is a separate difficulty challenge and should be chosen only if you want a tougher repeat campaign. The castle’s basic route and story objectives still have to be completed again.
If the game offers to copy the completed file, use the copy option when available. Otherwise, leave an empty save slot before beginning. Do not overwrite the only file that contains the good ending unless you have deliberately accepted losing that permanent reference point.
- Select the Clear icon above the completed file.
- Choose Normal or Hard for the new campaign.
- Preserve the original good-ending file whenever possible.
- Use a separate slot or copied file for New Game+.
3. Know what New Game+ actually resets
New Game+ returns Soma to the beginning of the story. His level and level-based statistics reset, and the castle’s story gates, boss victories and required Ability souls must be handled again. You cannot use the mode as an immediate free-roam state that skips the campaign’s traversal requirements.
Most equipment, forged weapons, accessories and many ordinary Tactical Souls transfer from the completed file. The transfer is not universal: Mina’s Talisman and progression-related, event-related or Ability souls are among the important exceptions reported for this game. Because the exceptions matter to route planning, expect to reacquire movement and event souls instead of assuming that every soul remains active.
Use the carried-over equipment to make the second campaign efficient, but check the Soul and Ability screens after New Game+ begins. If a movement power is missing, follow the story until its original boss or event is reached. Keep the original file available if you are using New Game+ to experiment with weapon synthesis or consume rare souls.
- Expect Soma’s level and statistics to reset.
- Reacquire story-gated Ability and event progress.
- Verify transferred souls in the inventory instead of assuming all are present.
- Use carried-over equipment and forged weapons for collection or testing.
- Keep a separate completed save as a fallback.
4. Open Julius Mode and create its separate campaign
Julius Mode appears on the title screen after either the good ending or the second bad ending. It shares the DS cartridge’s limited save slots with Soma Mode, so leave a slot open before selecting it. Start the mode from the title screen and create a new Julius file rather than trying to load Soma’s completed file through Game Start.
Julius Mode does not use Soma’s equipment, money, consumables, Tactical Souls or equipment menu. Start pauses the action instead of opening Soma’s menu, and Select has no normal Soma inventory function. Lamps and statues provide hearts for sub-weapons, so break them when you need to replenish the resource used by Julius, Yoko and Alucard’s special attacks.
The three characters have fixed movesets. Use Y to attack, Up plus Y to activate the selected sub-weapon or special weapon, R to cycle the available sub-weapons, and X to switch between recruited characters. Character switching is the central Julius Mode tool, not an equipment replacement system.
- Julius Mode is visible on the title screen.
- A free save slot is available.
- Julius Mode has its own file.
- Use hearts and fixed character abilities instead of expecting Soma’s inventory.
5. Recruit Yoko and Alucard in the correct places
Julius begins alone. Progress through the opening area and defeat the early Flying Armor encounter so the castle route is open. When you reach Yoko’s Weapon Synthesis shop location, speak with Yoko there to recruit her. She then becomes available through the character-switch command.
To recruit Alucard, advance through the Garden of Madness and defeat Dario’s required encounter. Continue to the Demon Guest House room where Soma receives Mina’s Talisman in the main campaign. Speak with Alucard in that room. Once the conversation is complete, Alucard becomes the third selectable character.
Do not search for Soma-style items to unlock either ally. These recruitment events are conversations at fixed locations. If a character portrait is not available, continue the main Julius route until the corresponding boss and room event have been completed, then revisit the indicated location.
- Flying Armor route completed.
- Yoko spoken to at the Weapon Synthesis shop.
- Dario’s required Garden of Madness encounter completed.
- Alucard spoken to in the Mina’s Talisman room of the Demon Guest House.
- Both ally portraits appear for character switching.
6. Finish Julius Mode as a separate campaign
After recruiting the allies, use the three movesets to open the castle in the order that best suits your current route. Julius is the straightforward whip fighter, Yoko provides magic attacks, and Alucard supplies a different close-range style together with bat transformation and other fixed abilities. Switch characters when a room favors a particular reach, movement option or attack pattern.
Julius Mode does not require Soma’s seals or Tactical Soul collection. Concentrate on bosses, character recruitment and route access rather than searching every room for equipment or souls. Save whenever you pass a save room, refill hearts from lamps and statues before difficult boss rooms, and spend enough time fighting ordinary enemies to avoid entering late areas severely underleveled.
The mode’s late route leads through the final castle areas and the Abyss. Unlike Soma’s main campaign, the decisive encounter is against Dark Lord Soma. Bring all three recruited characters to the late-game route, use character switching to cover poor matchups, and defeat Soma to complete the alternate campaign. The Julius ending and credits are the completion confirmation for this optional run.
- Julius, Yoko and Alucard are recruited.
- Major route-blocking bosses are defeated.
- The Abyss route is reached.
- Dark Lord Soma is defeated.
- Julius Mode ending and credits are viewed.
Before you move on
- The good-ending Soma file remains saved and displays the Clear icon.
- New Game+ can be launched from that Clear icon on Normal or Hard.
- Julius Mode is selectable from the title screen.
- Yoko has been recruited at the Weapon Synthesis shop.
- Alucard has been recruited in the Demon Guest House Mina’s Talisman room.
- Julius Mode has been completed by defeating Dark Lord Soma and viewing its ending.
References for this chapter
- Castlevania: Dawn of Sorrow — North American instruction manual
- Castlevania: Dawn of Sorrow — Guide and Walkthrough, original DS progression, Abaddon and ending route
- Castlevania: Dawn of Sorrow — Secrets Guide, endings and unlock conditions
- Castlevania: Dawn of Sorrow — Julius Mode FAQ, Neoseeker
- Castlevania: Dawn of Sorrow endings guide
Optional completion: useful enemy souls and weapon strengthening
Yoko Belnades’ shop in The Lost Village can permanently transform selected weapons by consuming a listed Tactical Soul. The source weapon and soul disappear when synthesis is confirmed, so preserve unique boss souls until your soul-collection objective and Chaos Ring goal are complete. The most useful late-game farming targets are regular enemies and difficult encounters rather than a separate group of optional campaign bosses: Final Guard provides a strong defensive Guardian Soul, Mandragora offers a powerful close-range Bullet attack, Erinys provides the Enchant Soul Sense Up, and Malacoda supplies a situational tail-based Bullet attack. Use duplicate ordinary souls for low-risk experiments, keep separate saves before rare transformations, and move boss-soul weapon projects to New Game+ if spending them would damage the collection on your main file.
1. Open Yoko’s shop and inspect the permanent cost
Yoko Belnades operates her shop in The Lost Village after the campaign event that brings her there. Speak with her and choose weapon synthesis. The menu displays the weapon you must provide, the soul required for the transformation and the resulting weapon before you confirm.
In the original North American Nintendo DS release, synthesis is permanent. The source weapon is consumed and replaced by the new weapon, while the required soul is removed from Soma’s inventory. This is not a temporary enhancement and cannot be undone through Yoko’s menu.
Before confirming any rare recipe, write down the soul being spent and check whether it is still needed for your soul percentage, a weapon branch or an active combat setup. Save beforehand, perform the fusion, and test the result in a dangerous area while retaining the earlier save until you are satisfied.
- Escort Yoko to The Lost Village and confirm that her synthesis menu is available.
- Read the full recipe and resulting weapon before accepting.
- Keep a separate save before consuming a unique or difficult-to-farm soul.
2. Complete the soul-collection goal before spending unique souls
If you want the Chaos Ring, make soul completion the first priority. The collection reward requires the available enemy and boss souls to be in your possession; a soul removed for synthesis no longer counts as held on that save. This is especially important for boss souls, because the normal campaign generally gives you only one copy of each boss soul.
Do not spend a unique boss soul merely to increase weapon attack during the first clear. Finish the soul-collection objective, confirm that the Chaos Ring reward has been obtained, and only then begin boss-soul synthesis. If a boss soul was already consumed, New Game+ is the practical recovery route because the boss can be defeated again and its soul reacquired.
For ordinary enemies, keep one copy of any soul whose ability you use. Farm a duplicate before synthesis whenever the soul is useful as a Bullet, Guardian or Enchant effect. This preserves your combat setup while still allowing weapon development.
- Keep every unique boss soul until the collection objective is complete.
- Confirm the Chaos Ring reward before using boss souls in synthesis.
- Use duplicate ordinary enemy souls for early weapon experiments.
3. Build the Joyeuse sword branch
A practical one-handed sword route begins with Fragarach. Combine Fragarach with Mollusca’s Soul to create Hrunting, or combine Fragarach with Treant’s Soul to create Mystletain. Either Hrunting or Mystletain can then be combined with Killer Clown’s Soul to create Joyeuse.
Joyeuse branches into three elemental or status-focused weapons. Combine it with Catoblepas’s Soul for Milican’s Sword, Ukoback’s Soul for Laevatain, or Frozen Shade’s Soul for Ice Brand. These are alternatives, not a mandatory chain: choose the property that covers enemies your current weapon handles poorly.
Farm one required enemy at a time using the shortest safe room loop. Clear the target room, leave far enough to reset the enemy, and return through a portal or save room when HP or MP becomes low. Test the finished weapon against both a resistant enemy and an enemy vulnerable to its property before extending the branch.
- Create Hrunting or Mystletain before hunting Killer Clown’s Soul.
- Choose Milican’s Sword, Laevatain or Ice Brand according to the property you need.
- Test the completed weapon before committing to another branch.
4. Reserve souls for the Burtgang and Valmanway route
The Joyeuse branches Milican’s Sword, Laevatain and Ice Brand can each be fused with Iron Golem’s Soul to create Burtgang. Burtgang can then be fused with Arc Demon’s Soul to create Kaladbolg, followed by Abaddon’s Soul to create Valmanway.
Do not start this route until your collection goal is secure. Iron Golem, Arc Demon and Abaddon are all useful souls, and Abaddon’s soul is a unique boss reward. Consuming one before obtaining the Chaos Ring can force you to postpone the collection goal until New Game+.
The highest displayed attack is not automatically the best practical weapon. Consider swing speed, reach, elemental property and special attack. A faster weapon that keeps Soma safe can outperform a slower weapon with a larger number during prolonged boss or exploration fights.
- Reserve Iron Golem, Arc Demon and Abaddon until soul collection is complete.
- Confirm that the weapon branch begins from one of the three Joyeuse evolutions.
- Compare speed, reach and special attack before spending the final ingredients.
5. Build the Balmung, Final Sword and Claimh Solais route
A separate great-sword route starts with Balmung. Combine Balmung with Final Guard’s Soul to create Final Sword, then combine Final Sword with Alastor’s Soul to create Claimh Solais. Balmung itself requires the earlier great-sword chain and Gergoth’s Soul, so this project has several unique-soul costs before the final weapon exists.
Final Guard’s Soul is a Guardian effect that gives Soma iron-clad defense while active, and Alastor’s Soul provides a sword familiar. Decide whether each familiar is more valuable than the finished weapon for your current objective. If you still rely on Final Guard for exploration or Alastor for combat support, postpone the transformation.
Because this route consumes rare souls and a high-level weapon, make a pre-synthesis save. After creating Claimh Solais, test its range, attack rhythm and damage against several late-game enemies before overwriting the backup.
- Obtain Balmung and verify that the collection goal is already complete.
- Treat Final Guard and Alastor as both weapon ingredients and useful combat souls.
- Keep a pre-synthesis save until Claimh Solais has been tested.
6. Farm useful late-game enemy souls
Final Guard appears in The Pinnacle and The Abyss. Its Guardian Soul grants strong defensive protection, but it consumes MP while active. Farm it when you want a safer room-clearing setup, especially for late areas with armored enemies or heavy contact damage. Approach carefully: Final Guard itself is dangerous, and its sword strikes and projectile attacks punish careless frontal attacks.
Mandragora provides a Bullet Soul that creates a powerful close-range attack. It is useful against large targets and enemies that can be safely approached, but its limited range makes positioning important. Erinys is not a Bullet Soul: it is an Enchant Soul whose Sense Up effect increases experience gained. Farm Erinys when you want faster leveling rather than another direct attack.
Malacoda is a Bullet Soul found in The Abyss and attacks with a tail. Its usefulness is situational because the hit must connect at close range, so treat it as an alternative attack rather than an automatic replacement for Mandragora. Use the route’s nearby recovery points and stop farming when MP or healing supplies become unsafe.
- Farm Final Guard for a defensive Guardian option.
- Farm Mandragora for a close-range Bullet attack if its range suits your build.
- Farm Erinys for Sense Up and Malacoda for a situational tail attack.
- Use short loops near a portal or save room instead of exhausting a long route.
7. Use Boss Rush for testing and follow a safe completion order
After clearing the campaign, Boss Rush is useful for practicing major encounters and testing a completed weapon or soul setup. It should not replace ordinary enemy farming, and normal campaign bosses should not be treated as a renewable source of boss souls on the same save.
For late exploration, pair a dependable weapon with one economical Guardian Soul and one Bullet Soul that you can activate without emptying MP. Final Guard is suited to dangerous rooms when its drain is acceptable; Mandragora or Malacoda can shorten fights when their range matches the target. Erinys belongs in an Enchant slot when experience gain is the priority.
Use this order for optional completion: finish the campaign, preserve and collect the souls needed for the Chaos Ring, farm one defensive and one offensive support soul, perform low-risk synthesis with duplicate ordinary souls, then choose one major weapon branch. If a planned recipe consumes a boss soul, use New Game+ rather than damaging the collection state of the original save.
- Use Boss Rush for practice and equipment testing, not soul farming.
- Build one defensive loadout and one practical Bullet-based loadout.
- Complete soul collection before spending unique boss souls.
- Record every consumed soul and transformed weapon in your save notes.
- Use New Game+ for boss-soul synthesis that would compromise the main collection file.
Before you move on
- Yoko’s synthesis shop is open in The Lost Village.
- Your main save still contains every soul required for your chosen collection objective, or you have deliberately moved synthesis to New Game+.
- The Chaos Ring goal is complete before any unique boss soul is spent.
- You have one dependable defensive soul and one practical offensive Bullet Soul for post-game exploration.
- You have tested any rare weapon transformation in difficult rooms and retained a backup save.
- Your next project is clearly recorded as the Joyeuse branch, the Burtgang and Valmanway route, or the Balmung, Final Sword and Claimh Solais route.
- Your save notes identify every soul consumed and every weapon created.
References for this chapter
- Castlevania: Dawn of Sorrow — Guide and Walkthrough — Meowthnum1
- Castlevania: Dawn of Sorrow — Secrets Guide, endings and unlock conditions
- Castlevania: Dawn of Sorrow — Guide and Walkthrough — Bkstunt_31
- Castlevania: Dawn of Sorrow — Enemy Grinding Guide
- Weapon Synthesis — Castlevania Wiki
- Sword — Castlevania Wiki
- Erinys — Castlevania Wiki
- Final Guard — Castlevania Wiki
- New Game Plus — Castlevania Wiki
Finisher: canonical clear and post-game checklist
Complete the good-ending Soma route by using Paranoia at the second Dario encounter to enter the mirror and defeat Aguni. Afterward, collect Magic Seal 5 in the room to the left of the Aguni encounter, then equip Mina’s Talisman before entering the central Garden of Madness event. Continue through Mine of Judgment, defeat both forms of Death, and complete Magic Seal 5 after Death’s HP reaches zero. Confirm that the Death Soul is registered, save at the Mine checkpoint, and enter The Abyss through the door beyond Death’s arena. Defeat Abaddon, complete Magic Seal 5 again after Abaddon’s HP reaches zero, and confirm that the Abaddon Soul is registered before proceeding. Reach the final save room, defeat Menace, watch the complete good-ending sequence and credits, then check the Soma file for the Clear icon. New Game+, Julius Mode, Boss Rush and Sound Mode are separate post-game features; map percentage, soul collection, synthesis, Hard Mode and full Julius Mode progress are not prerequisites for the main campaign clear.
1. Confirm the route to Aguni and the good ending
Begin at the second Dario encounter in The Pinnacle. Before entering the battle, open the Tactical Soul screen and equip Paranoia in the Bullet Soul slot. Paranoia is a Bullet Soul, not a Guardian or Ability Soul. Stand in front of the large mirror in Dario’s room and activate Paranoia with Up plus Y. Soma enters the mirror and reaches Aguni instead of fighting Dario directly.
Do not defeat Dario normally during this encounter. Killing Dario without using the mirror produces the earlier ending and does not open the route to Menace. Inside the mirror, defeat Aguni, then complete the Magic Seal sequence displayed after the battle. Return to the normal side of the room and leave through the opened route.
After the Aguni scene, go left into the adjacent room and collect Magic Seal 5. This pickup is required for the sealed story door in the central Garden of Madness area. Save before continuing. Magic Seal 5 is collected after Aguni, but it must also be successfully drawn after Death and after Abaddon later in the campaign.
Travel to the central story room in Garden of Madness when the game directs you there. Equip Mina’s Talisman in the accessory slot before entering. With the talisman equipped, the Mina event resolves into the good-ending route and opens the descent toward Mine of Judgment. Without it, the game gives the second bad ending and does not open the canonical final route. Preserve your save before this scene if you want to view an alternate ending later.
- Paranoia is equipped in the Bullet Soul slot.
- Paranoia is activated with Up plus Y at the second Dario mirror.
- Aguni is defeated inside the mirror.
- Magic Seal 5 is collected in the room beyond the Aguni encounter.
- Mina’s Talisman is equipped before entering the central Garden of Madness room.
2. Descend through Mine of Judgment and defeat Death
After the Mina event with the talisman equipped, follow the newly opened route through the lower castle toward Mine of Judgment. Enter the mine and use its save and warp rooms as you encounter them. The area has strong enemies and several long passages, so avoid spending all of your healing items or MP on optional fights before reaching the boss checkpoint.
Continue through Mine of Judgment until you reach the pre-boss save room and the Death arena. Death has two forms. In the first form, watch the scythe’s horizontal and vertical attacks, the thrown scythe that releases smaller sickles, and the airborne copies that fire downward. Back away or duck as appropriate, destroy or avoid the smaller sickles, and strike during recovery windows rather than standing directly in front of the scythe.
The second form is faster and changes Death’s attack patterns. Death can disappear and reappear near Soma, swing the scythe at close range, and send the scythe and sickles around the room. Keep moving, avoid committing to long attack animations, and use a weapon or soul with enough reach to punish openings without standing underneath the boss. If you use a sustained Guardian effect, preserve enough MP for the approach through The Abyss and the Menace attempt.
Defeat both forms of Death and wait for the Magic Seal 5 prompt to appear on the touchscreen. Draw the seal in one continuous stroke, connecting the displayed points in order without lifting the stylus. If the drawing fails, Death revives with some HP; reduce the boss to zero again and retry the seal. The encounter is not complete until the seal succeeds and the Death Soul is registered.
After the successful seal, save at the Mine of Judgment checkpoint and restore HP, MP and consumables. The door beyond Death’s arena leads into The Abyss. Do not treat the first victory over Death as the end of the encounter, because an unsuccessful seal attempt sends you back into the fight.
- Mine of Judgment has been entered through the route opened after the Mina event.
- The Mine save and warp points have been used when available.
- Both forms of Death have been defeated.
- Magic Seal 5 has been drawn successfully after Death’s HP reaches zero.
- The Death Soul has been received and registered.
- The Mine checkpoint has been used after the sealed Death encounter.
- The door beyond Death’s arena has been used to enter The Abyss.
3. Cross The Abyss and defeat Abaddon
The Abyss is the final area before Menace. You do not need to clear every side room, chest or optional soul, but use recovery points and avoid unnecessary combat when HP or MP is low. The area contains vertical rooms, hazardous floors, awkward enemy placement and long stretches where rushing can turn a manageable route into a resource drain.
If you have a flight or transformation soul that makes vertical movement safer, equip it for exploration. Bat Company can help with airborne movement, while defensive souls can reduce the risk from crowded rooms. Do not sacrifice a stable boss loadout merely to collect optional items on the way to Abaddon.
Abaddon appears on the route before Menace and must be defeated. Abaddon directs several locust formations into the room instead of attacking Soma directly. Watch the shape and direction of each swarm rather than attacking continuously. For a U-shaped formation, move to a lower corner and crouch if the pattern permits. For horizontal or sideways formations, use Bat Company or another reliable movement option to pass through the safe space between the swarms. Attack Abaddon during the short openings after a formation has passed.
Do not remain committed to a long attack animation when the swarm pattern changes. Abaddon’s formations can punish Soma while he is locked in place. If the fight consumes too many recovery items, retreat through the available route and return from a save point rather than attempting Menace immediately with depleted resources.
When Abaddon’s HP reaches zero, complete Magic Seal 5 on the touchscreen. The Abaddon encounter is not complete until the seal succeeds. If the drawing fails, Abaddon remains active and must be reduced to zero again before the seal prompt can be retried. Confirm that the Abaddon Soul has been received and registered, then return to the route and continue through the remaining Abyss rooms toward the final save room.
- The Abyss has been entered through the door beyond Death’s arena.
- Optional Abyss rooms have been treated as nonessential.
- Abaddon has been defeated on the route to Menace.
- Magic Seal 5 has been drawn successfully after Abaddon’s HP reaches zero.
- The Abaddon Soul has been received and registered.
- The route through the remaining Abyss rooms has been reopened after the sealed Abaddon encounter.
- HP and MP have been restored before the final boss attempt when possible.
4. Reach the final save room and defeat Menace
Continue through The Abyss until you reach the save room immediately before Menace. Save there, refill HP and MP, and equip a dependable weapon and a loadout that preserves mobility. Keep a practical Bullet Soul for damage or emergency range and a Guardian Soul that does not consume MP so quickly that you enter the fight unable to use other abilities.
Menace is a large multi-section boss. The vulnerable target changes as the battle progresses, so concentrate attacks on the exposed head rather than repeatedly striking protected sections. In the lower portion, approach only when the head is within safe weapon range. When the hands prepare to punch or sweep, move away and wait for the attack to finish before returning.
During the upper portion, use the available platforms and the Hippogryph movement ability when necessary to reach the higher target. Attack the head inside the open skull when it becomes exposed. Use flight primarily to reposition or avoid a hand attack; do not remain in a dangerous height or corner after the opening closes.
Continue damaging the exposed target until Menace is defeated. If you fail, return to the pre-Menace save room, change one part of the loadout at a time, and try again. A stronger defensive Enchant, a weapon with better reach, or a Bullet Soul that can hit from a safer distance is more useful than repeatedly spending all MP on attacks that leave Soma exposed.
After the victory, allow the dialogue, ending sequence and credits to finish. Do not reset the Nintendo DS or overwrite the save before the post-battle sequence has completed. The required result is the good ending reached through Aguni and Mina’s Talisman, not an earlier ending caused by fighting Dario directly or entering the central Garden event without the talisman.
- The pre-Menace save room has been used.
- Menace has been defeated after Abaddon’s successful Magic Seal 5 sequence.
- The complete good-ending dialogue and credits have been viewed.
- The game was allowed to finish the post-battle sequence before the file was checked.
5. Verify the Clear icon and preserve the finished file
After the credits, return to the file-selection screen and inspect the completed Soma file. A good-ending clear file displays a Clear icon. This is the practical confirmation that the canonical Soma campaign has been completed. The icon confirms the campaign result; it does not prove that every map room, soul, weapon or optional reward has been obtained.
Record the completed file slot and preserve it before starting another mode. If this is your only finished file, do not overwrite it casually with New Game+, Julius Mode or a weapon-testing run. Use a second slot when possible so the canonical clear remains available for reference and future challenges.
If the Clear icon is absent, review the route rather than assuming a missing optional item caused the problem. Confirm that Paranoia was used at the second Dario mirror, Aguni was defeated, Magic Seal 5 was collected after Aguni, Mina’s Talisman was equipped for the central Garden event, Death’s two forms were defeated, Magic Seal 5 was successfully drawn after Death, the Death Soul was received, Abaddon was defeated, Magic Seal 5 was successfully drawn after Abaddon, the Abaddon Soul was received, and Menace was defeated. Optional map percentage and soul collection are not required for the Clear icon.
- The completed Soma file displays the Clear icon.
- The completed file slot has been recorded.
- The canonical Soma file has been preserved before another mode is started.
- The successful Magic Seal 5 sequence after Death has been confirmed.
- The successful Magic Seal 5 sequence after Abaddon has been confirmed.
- The Death Soul and Abaddon Soul have been received and registered.
- The absence of optional map or soul completion has not been mistaken for a failed campaign clear.
6. Check post-game modes separately from campaign completion
The Clear file provides access to New Game+. Select the Clear icon to begin a new story run under the available New Game+ options. New Game+ restarts the campaign; it does not leave the defeated castle in a permanent free-roam state. Review the mode’s carryover rules before spending unique souls or overwriting the original clear file.
The good ending unlocks Julius Mode, Boss Rush and Sound Mode. Julius Mode is a separate campaign with Julius and his allies and does not use Soma’s normal Tactical Soul progression. It is not required for the canonical Soma ending. Bad Ending II can also unlock Julius Mode, but viewing that ending is unnecessary if the good ending has already been achieved.
Boss Rush is a separate boss challenge, and Sound Mode is a listening option. Their availability does not prove complete map discovery, full soul collection, every weapon synthesis, Hard Mode completion or a finished Julius Mode run. Track those objectives independently.
- New Game+ is available from the Clear file.
- Julius Mode is available after the good ending.
- Boss Rush is available after the good ending.
- Sound Mode is available after the good ending.
- Optional modes are not being counted as prerequisites for the Soma campaign clear.
7. Perform the optional post-game audit
After preserving the clear file, use the castle’s warp points to revisit movement-gated areas and note any unfinished branches. Relevant original DS areas include Garden of Madness, Demon Guest House, Cursed Clock Tower, Underground Cemetery, Subterranean Hell, The Pinnacle, Mine of Judgment and The Abyss. Check ice-block routes, underwater passages, ledges, transformation openings, one-way doors and suspicious walls.
The Peeping Eye Soul can help identify hidden-room entrances, but hidden rooms and optional chests are not required for the canonical ending. Likewise, optional enemy souls and weapon upgrades should be treated as collection or preparation goals, not evidence that the story route failed.
Keep separate records for map percentage, complete soul collection, weapon synthesis, Yoko’s weapon transformations, Boss Rush rewards, Hard Mode and Julius Mode completion. If you plan to consume a rare soul for synthesis, preserve the clear file or use another save slot first. A completed campaign is confirmed by the correct ending and Clear icon; full completion is a larger, separate project.
Finish this chapter when the Aguni-to-Menace sequence is recorded, the credits have played, the Clear icon is visible and no required story route remains blocked. If a major route is inaccessible before the final battle, review the required boss events and traversal Ability Souls. After the Clear icon appears, any remaining locked rooms are normally optional exploration rather than missing campaign progression.
- Required traversal abilities and major campaign routes are accounted for.
- Map percentage is tracked separately from the Clear status.
- Soul collection and weapon synthesis are tracked separately from the campaign.
- Boss Rush, Hard Mode and Julius Mode goals are recorded separately.
- The completed Soma file and future-mode save slots are documented.
Before you move on
- Paranoia was equipped as a Bullet Soul and activated with Up plus Y at the second Dario mirror.
- Aguni was defeated and Magic Seal 5 was collected afterward.
- Mina’s Talisman was equipped before entering the central Garden of Madness room.
- Death’s two forms were defeated in Mine of Judgment.
- Magic Seal 5 was successfully drawn after Death’s HP reached zero.
- The Death Soul was received and registered.
- The Mine checkpoint was used after the sealed Death encounter.
- The door beyond Death’s arena was used to enter The Abyss.
- Abaddon was defeated on the final route.
- Magic Seal 5 was successfully drawn after Abaddon’s HP reached zero.
- The Abaddon Soul was received and registered.
- The remaining Abyss route was completed after the successful Abaddon seal.
- Menace was defeated.
- The complete canonical ending and credits were viewed.
- The completed Soma file displays the Clear icon.
- New Game+, Julius Mode, Boss Rush and Sound Mode access have been checked or recorded.
- Optional map percentage, soul collection, weapon synthesis, Boss Rush rewards, Hard Mode and Julius Mode completion are tracked separately from the campaign clear.
References for this chapter
- Castlevania: Dawn of Sorrow — North American instruction manual
- Castlevania: Dawn of Sorrow — Guide and Walkthrough, original DS progression, Abaddon and ending route
- Castlevania: Dawn of Sorrow — Secrets Guide, endings and unlock conditions
- Castlevania: Dawn of Sorrow — Boss Guide, Abaddon strategies
- Castlevania: Dawn of Sorrow — Guide and Walkthrough, Abaddon Magic Seal 5 confirmation
- Castlevania: Dawn of Sorrow — official Konami history page
- Castlevania: Dawn of Sorrow endings guide
Finishing up
The canonical Soma route is complete when Dario's first Garden of Madness encounter, Aguni through Paranoia's mirror, Mina's Talisman Garden event, Death and its successful Magic Seal 5 sequence, the Abyss route, Abaddon and its successful Magic Seal 5 sequence, Menace and the ending credits have been cleared and viewed.
The completed file shows the Clear icon, allowing New Game+ on Normal or Hard. The good ending also unlocks Julius Mode, Boss Rush and Sound Mode; Julius Mode is an optional separate campaign.
Full-map exploration, complete soul collection, weapon synthesis and Julius Mode completion are optional post-game goals, not requirements for the canonical Soma ending.
Choose your next gameScreenshots & video
Game imagery for reference. Follow the written chapters above for the route and strategies.
Sources & references
Our original guide draws on the references below. Check the edition at the top of this page before following controls or unlock requirements.
- Castlevania: Dawn of Sorrow — North American instruction manual
- Castlevania: Dawn of Sorrow — Guide and Walkthrough, original DS progression, Abaddon and ending route
- Castlevania: Dawn of Sorrow — Guide and Walkthrough — GameFAQs
- Castlevania: Dawn of Sorrow — Guide and Walkthrough — Meowthnum1
- Castlevania: Dawn of Sorrow/The Lost Village — StrategyWiki
- Castlevania: Dawn of Sorrow – Guide and Walkthrough – DS – By Bkstunt_31
- Castlevania: Dawn of Sorrow - Guide and Walkthrough, Ability Soul descriptions
- Castlevania: Dawn of Sorrow - Guide and Walkthrough - DS - By yetstay - GameFAQs
- The Wizardry Lab — Castlevania: Dawn of Sorrow Walkthrough and Guide
- Castlevania: Dawn of Sorrow Walkthrough, RetroMaggedon Gaming, Garden of Madness and Mine of Judgment
- Castlevania: Dawn of Sorrow U.S. Instruction Manual
- Castlevania: Dawn of Sorrow — Guide and Walkthrough, Abaddon Magic Seal 5 confirmation
- Demon Guest House – Castlevania: Dawn of Sorrow Walkthrough and Guide
- Subterranean Hell — Castlevania: Dawn of Sorrow Walkthrough and Guide, Neoseeker
- Puppet Master – Castlevania Wiki
- Zephyr - Castlevania Wiki
- Castlevania: Dawn of Sorrow - Guide and Walkthrough - DS - By Bkstunt_31
- Castlevania: Dawn of Sorrow FAQ/Walkthrough - Neoseeker
- Castlevania: Dawn of Sorrow - Guide and Walkthrough - DS - By Itachiroth
- Castlevania: Dawn of Sorrow/Controls - StrategyWiki
- Castlevania: Dawn of Sorrow Instruction Manual, Nintendo DS
- Magic Seal - Castlevania Wiki
- Abaddon - Castlevania Wiki
- Boss strategies — Castlevania: Dawn of Sorrow Walkthrough & Guide — GameFAQs
- Castlevania: Dawn of Sorrow — Boss Guide, Abaddon strategies
- Castlevania: Dawn of Sorrow — Secrets Guide, endings and unlock conditions
- Castlevania: Dawn of Sorrow instruction manual
- Castlevania: Dawn of Sorrow — Julius Mode FAQ, Neoseeker
- Castlevania: Dawn of Sorrow endings guide
- Castlevania: Dawn of Sorrow — Guide and Walkthrough — Bkstunt_31
- Castlevania: Dawn of Sorrow — Enemy Grinding Guide
- Weapon Synthesis — Castlevania Wiki
- Sword — Castlevania Wiki
- Erinys — Castlevania Wiki
- Final Guard — Castlevania Wiki
- New Game Plus — Castlevania Wiki
- Castlevania: Dawn of Sorrow — official Konami history page
About the game & collecting notes
- Platform
- Nintendo DS
Complete the original North American Nintendo DS campaign in verified progression order: Lost Village and Flying Armor, Wizardry Lab and Balore, Garden of Madness with Magic Seal 2, Dmitrii, Quetzalcoatl, Malphas and the first Dario Bossi fight, Demon Guest House and Puppet Master, then the recommended Subterranean Hell and Rahab branch or the directly accessible Condemned Tower and Gergoth branch, followed by Cursed Clock Tower and Zephyr, Silenced Ruins and Bat Company, the late Demon Guest House and Paranoia route, The Pinnacle and Aguni, the Mina's Talisman Garden event, Mine of Judgment and Death, then The Abyss and Menace. The guide distinguishes required campaign gates from optional traversal branches and separately explains the good-ending unlocks for New Game+, Julius Mode, Boss Rush and Sound Mode.
Darryl Polo
Darryl Polo loves tinkering with emulation and revisiting retro games. He enjoys exploring how old favorites play on different setups and sharing what he learns along the way. At Joking Joystick, he writes about the games, hardware, and small discoveries that keep the hobby fun.
Our editorial standardsFound a step that needs another look? Help us improve this guide.