
Castlevania: Aria of Sorrow — Complete Campaign Walkthrough (Nintendo Game Boy Advance, USA)
A step-by-step Nintendo Game Boy Advance USA campaign route from Castle Corridor through Chaos. It covers the required area order, Tactical Souls, movement abilities, Death and Skula, the first Underground Reservoir pass, the Underground Cemetery, Legion and Galamoth, Balore and Giant Bat, the optional Forbidden Area detour, the Top Floor route through the Inner Quarters, Graham’s true-ending condition, Julius, the Chaotic Realm and Chaos. Optional Forbidden Area equipment, Ancient Book clue collection, Boss Rush, Julius Mode, soul completion and the Chaos Ring are separated from required progression.

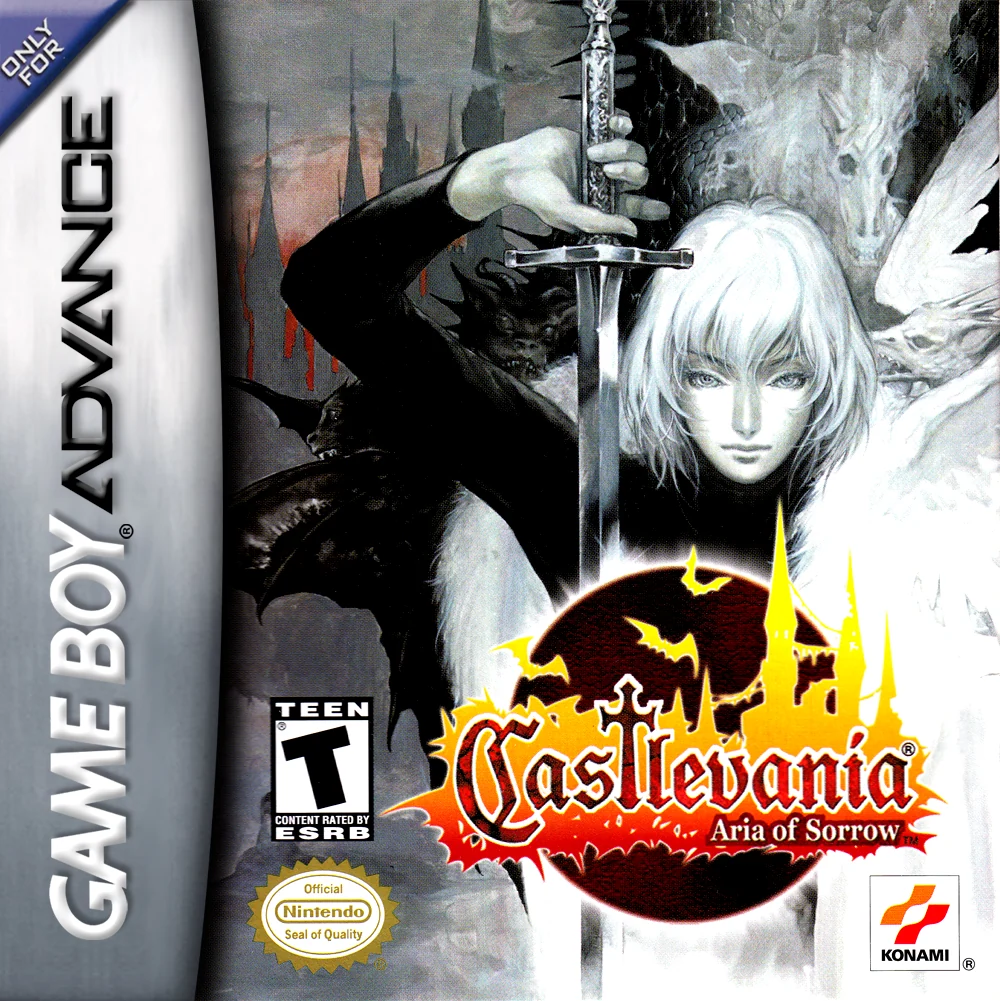
Find a copy
Castlevania: Aria of Sorrow Game Boy Advance
We may earn a commission if you buy through these links, at no extra cost to you. As an Amazon Associate I earn from qualifying purchases.
Opens retailer search results. Check the model, edition, seller, availability and current price before buying.
Before you begin
You are Soma Cruz, trapped inside Dracula's Castle during the 2035 solar eclipse.
Follow the chapters in order. The route begins in Castle Corridor, continues through Chapel, Study, Dance Hall, Inner Quarters, Floating Garden and Clock Tower, then reaches the first Underground Reservoir pass. Continue through the Underground Cemetery and Arena to defeat Legion and Balore and obtain Galamoth and Giant Bat. After that, optionally return to the Underground Reservoir for Ancient Book 3 and optionally pass Chronomage with Galamoth for Ancient Book 2; the required late-game route uses Giant Bat and the Castle Corridor or eastern Inner Quarters connection to reach the Top Floor. The Forbidden Area is an optional waterfall detour for equipment, extra souls and map completion.
To open the true-ending route, equip Flame Demon, Giant Bat and Succubus before Graham's battle and keep them equipped through the encounter, including the defeat of Graham's first form. The Ancient Books provide clues to those souls but are not themselves the activation switch.
After Graham, defeat Julius and Chaos in the Chaotic Realm. That Chaos victory is the campaign completion check used here.
Set yourself up for the run
Familiarize yourself with the control layout: attack, jump, guard/slide (if you have the Ability soul), map, and the buttons that trigger Bullet (red), Guardian (blue) and Enchant (yellow) souls.
The manual clarifies the control bindings and soul activation behavior—read it before deep exploration.
Prioritize acquiring ability souls (permanent moves) that expand navigation: backdash/slide and any jump-enhancing souls.
These open shortcuts and safer routes through later areas.
Collect and keep good weapons with a range of attack styles (short reach, long slash, and thrown/charged).
You’ll be relying on weapon variety as much as souls; keep at least one reliable weapon and one ranged option in your inventory.
Use save rooms liberally.
The castle contains sparse save points between areas; failing a boss or trap is expensive without recent saves.
Balance MP and survivability: Guardian souls drain MP while active and Bullet souls consume MP per use.
Bring or buy MP-restoring items if you intend to rely heavily on summoned souls or transformations.
Track the three Ancient Books: they provide the clues for the best ending and are placed in Study, Inner Quarters (behind Chronomage), and the Underground Reservoir.
Make a note to return to those rooms when you explore them.
If you want the best ending, plan when and where to equip the three specific souls (Flame Demon, Giant Bat and Succubus) and the fight you must modify — the Graham encounter — so you can trigger the extended route.
Chapter 12 explains exact requirements.
Expect to re-enter earlier areas: backtracking is part of the campaign.
When you unlock new ability souls, revisit earlier zones to find previously unreachable rooms and items.
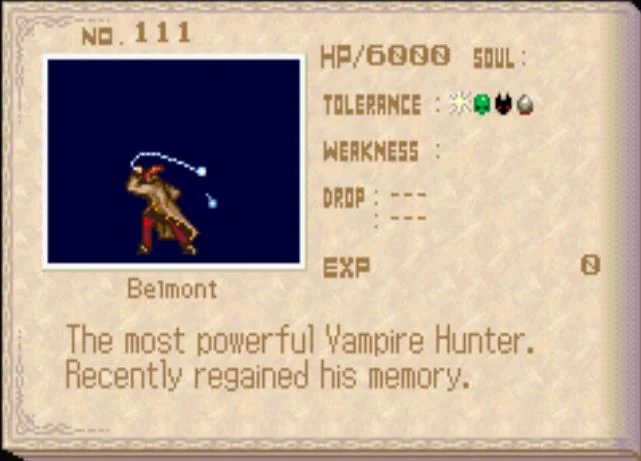
Controls, Menus and the Tactical Soul System
The North American Game Boy Advance release uses four Tactical Soul categories. Red Bullet Souls perform one-shot attacks with Up plus B and spend MP per use. Blue Guardian Souls are activated with R and spend MP while their effects operate; some toggle with a press and others require R to be held. Yellow Enchanted Souls provide passive effects without MP drain. Silver Ability Souls are managed separately in the Ability menu, do not consume MP, and may be automatic or tied to a specific command such as L. Start opens the Status Screen, Select opens the castle map, and save rooms both restore HP and MP and permanently record progress. Outside a save room, the Status Screen’s Sleep option creates a temporary one-use save.
Learn the original GBA movement and combat controls
Use Left and Right on the Control Pad to move Soma. Press Down to crouch. Press A to jump; holding A longer produces a longer jump, so use short presses for precise landings and longer presses for wide gaps. Press B to attack with the currently equipped weapon. The weapon attack is your basic, MP-free option and should remain part of your normal combat routine even after you begin collecting souls.
Press Down plus B to make Soma leap down through thin floors when the room permits it. Press Up to talk to characters, operate certain devices, and interact with some objects. The default manual layout assigns Up plus B to the equipped red Bullet Soul, R to the equipped blue Guardian Soul, L to an Ability Soul only when that particular ability uses the L button, Start to the Status Screen, and Select to the castle map. If you use an emulator, its physical button labels may differ after remapping, but the game’s original functions remain the same unless you deliberately change them in Configuration.
- A jumps and B attacks with the equipped weapon.
- Down plus B drops through thin floors where allowed.
- Start opens the Status Screen.
- Select opens the castle map.
- Up plus B activates the equipped Bullet Soul.
- R activates the equipped Guardian Soul.
Assign the four Tactical Soul categories correctly
Bullet Souls are red. Equip one in the Bullet position and press Up plus B to perform its attack. The manual describes Bullet Souls as single-burst attacks that consume MP when fired. Their effects vary widely: some launch projectiles, some strike around Soma, and some provide a special attack rather than a conventional projectile. Check the soul’s description and MP cost before entering a boss room.
Guardian Souls are blue. Equip one in the Guardian position and use R to start or stop it, or hold R when the soul’s description specifies a held effect. Guardian Souls consume MP while their magical effect is operating. A toggle-type Guardian can remain active after you release R, so press R again when you no longer need it. A held Guardian stops when you release the button. This difference matters when crossing ordinary rooms because leaving a Guardian active can drain the gauge before you reach the next difficult encounter.
Enchanted Souls are yellow. Equip one in the Enchanted position and its effect remains active without a combat command. These souls do not consume MP. They may raise an attribute, alter a status interaction, improve recovery, change shop prices, or provide another persistent benefit. You can equip one Enchanted Soul at a time.
Ability Souls are silver rather than grey or white. They do not use MP and are not handled like the red, blue, and yellow Soul Set positions. When an Ability Soul is acquired, open the Ability section of the Status Screen to turn that ability on or off. Some abilities operate automatically, while others use a particular input. L is the command for abilities that specifically require it; it is not a universal cast button for every Ability Soul. For example, the Grave Keeper ability uses L for a backdash, while other movement abilities function automatically or use their own stated action.
- Equip one Bullet Soul, one Guardian Soul, and one Enchanted Soul at the same time.
- Remember that Bullet Souls spend MP per attack.
- Stop toggle-type Guardian Souls with R when their effect is no longer needed.
- Treat Enchanted Souls as passive and MP-free.
- Manage Ability Souls in the Ability menu rather than assuming they all use L.
Manage MP without weakening ordinary combat
The green MP gauge is consumed by Bullet Soul attacks and by Guardian effects while they operate. Enchanted and Ability Souls do not consume MP. Soma’s MP also replenishes gradually during ordinary play, and candles can restore MP, but the slow recovery is not a reason to leave a Guardian effect running through every harmless room. Use the weapon for enemies you can safely approach and reserve MP for ranged attacks, crowd control, hazardous positioning, or a boss pattern that a particular soul handles well.
Before a boss, enter a nearby save room and restore the gauge. Test an unfamiliar Bullet Soul in a safe room or against a weak enemy so you know its range and cost. For Guardian Souls, determine whether the effect toggles or requires you to hold R. If MP reaches zero, Soma can still attack with his weapon; the danger is losing access to the soul effect when you need it, not losing the ability to fight altogether.
Keep a dependable weapon equipped while experimenting. A newly found weapon is not automatically better: compare damage, reach, attack speed, and how safely it handles airborne or shielded enemies. Change weapons from the Status Screen, but return to the familiar weapon if the new one makes routine rooms harder.
- Check the green MP gauge before a boss door.
- Release or switch off sustained Guardian effects in safe rooms.
- Use weapons when a soul would only duplicate a safe melee attack.
- Test unfamiliar souls before relying on them in a boss fight.
- Keep a weapon with dependable reach available.
Equip souls and review their descriptions
Press Start to open the Status Screen and move to the equipment or Soul Set sections. The Soul Set screen lets you choose the active red Bullet, blue Guardian, and yellow Enchanted Soul. Select a slot, confirm the chosen soul, and read its description before leaving the menu. The description is the reliable way to determine whether a Guardian toggles or must be held and whether an Ability has a special input.
Use the Ability section separately to review acquired silver abilities and turn them on or off. If a movement technique seems unavailable, first confirm that the correct Ability is enabled. Then reread its description and test the indicated command in an open room. Do not press L repeatedly for every Ability Soul; some are automatic and some use a different condition. Ability Souls are utility powers rather than another MP-consuming attack category.
- Use the Soul Set screen for Bullet, Guardian, and Enchanted Souls.
- Use the Ability section for silver Ability Souls.
- Read each soul’s description before assigning it for a boss.
- Confirm whether a Guardian toggles or requires a held button.
- Confirm the input or automatic behavior of each Ability.
Read the map, save correctly, and use Sleep safely
Press Select during exploration to open the castle map. The map records rooms Soma has entered and shows the connected layout once you have obtained the relevant Castle Map items. Visited rooms are distinguished from portions that are only revealed by a map item, so use the display to find unexplored branches. Save rooms have their own marked appearance, and boss entrances are represented by distinct door markers at the edge of the relevant room. After gaining a movement or traversal ability, inspect previously incomplete sections and return to rooms whose ledges, gaps, water, or blocked passages now appear reachable.
A save room is also a recovery room. Stand in front of the statue of Maria and press Up to restore HP and MP and bring up the permanent save prompt. Select Yes to record the game on the cartridge. Merely entering the room is not enough to create a permanent save; interact with the statue and confirm the prompt. Make this a routine before every boss attempt and after obtaining a major ability or important item.
The Status Screen also contains Sleep, which is useful when you must stop outside a save room. Sleep creates temporary save data and preserves Soma’s current room, HP, MP, inventory items, and equipped items. It is not a replacement for a permanent save: the temporary data is erased after it is loaded once, and Sleep is unavailable during certain events, including some stage-boss situations. After using Sleep, load it when you resume and then reach a real save room before relying on the progress as permanent.
- Press Select after entering new rooms and after obtaining a new Ability Soul.
- Use the map to distinguish explored rooms, revealed rooms, save rooms, and boss entrances.
- Stand before Maria’s statue and press Up to save permanently.
- Confirm the save prompt before leaving the room.
- Use Sleep only as a one-use temporary stopping point outside a save room.
Before you move on
- You can open the Status Screen with Start and the map with Select.
- You can equip one red Bullet Soul, one blue Guardian Soul, and one yellow Enchanted Soul simultaneously.
- You can activate a Bullet Soul with Up plus B and a Guardian Soul with R.
- You can explain that Bullet Souls spend MP per use, Guardian Souls spend MP while operating, and Enchanted Souls do not consume MP.
- You can open the Ability section, distinguish automatic abilities from command-based abilities, and avoid treating L as a universal Ability Soul button.
- You can identify a save room on the map, stand before Maria’s statue, press Up, and confirm a permanent save.
- You can use Sleep as a temporary one-use save without confusing it with cartridge-stored progress.
Castle Corridor — First Hours: mapping and survivability
Begin by exploring the Castle Corridor’s entrance and lower passages. Collect the Short Sword, Grave Keeper soul, and early equipment, then use the first save room before taking the skeleton route to Creaking Skull. After the boss, collect Castle Map 1, save again, inspect the nearby breakable wall for an optional Mind Up, and obtain the Flying Armor soul from the lower branch. Flying Armor slows Soma’s descent and is needed to cross the large gap on the upper route toward the Chapel. The early section teaches careful spacing, soul conservation, and backtracking rather than requiring extensive grinding.
1. Explore the entrance and collect the first equipment
From the entrance, move right through the zombie rooms. The upper routes contain items and connections that cannot be fully explored yet, so concentrate on the accessible lower path. In the large room beyond the entrance, collect the Short Sword and equip it if you prefer its reach to the starting weapon. Continue through the lower passage and defeat or bypass the Mermen around the water and platforms.
A glowing Soul Keeper on the available route provides the Grave Keeper soul. Equip it in the Ability slot. Press L to perform its short backdash. This is your first dependable evasive movement and is especially useful against enemies that occupy narrow corridors. It is not a damage soul, so do not expect it to consume MP or attack enemies.
- Short Sword collected or a preferred weapon equipped.
- Grave Keeper obtained and equipped as an Ability soul.
- Entrance and lower Corridor rooms entered and added to the map.
2. Use the first save room before the boss route
Continue through the lower Corridor until you reach the save room on the eastern side of the early passage. Enter the room and save. Save rooms restore HP and MP, making this the correct checkpoint before the skeleton and Axe Armor route. If you have taken substantial damage, do not continue merely because the next rooms are close; return to this room whenever necessary.
The Underground Reservoir entrance is nearby, but the early water route is not part of the required path. Soma can only tread water at this stage, so do not spend time trying to force the submerged route. Use normal attacks against zombies, Mermen, and bats whenever practical. Reserve MP for a ranged Bullet soul or emergency recovery rather than keeping a draining Guardian soul active through every room.
- First save room found and used.
- HP and MP restored before the boss approach.
- Early water branch identified but not treated as currently passable.
3. Take the skeleton and Axe Armor route
From the save room, take the upper-right route into the skeleton rooms. Skeletons are safest when approached with a jump or crouch rather than from directly in front. If a skeleton throws a weapon, either jump over the projectile or close the distance after it has committed to the throw. Keep Grave Keeper equipped so L is available when an enemy corners you.
Continue through the connected passage until you reach the Axe Armor. Its attack has a clear wind-up; wait for the swing, step or jump away, then counterattack while it recovers. The upward branch beyond this section is blocked by Soma’s current mobility, so do not mistake it for the required route. The door beyond the Axe Armor leads to Creaking Skull.
- Skeleton passage cleared.
- Axe Armor passed or defeated.
- Grave Keeper backdash tested in a live encounter.
- Boss entrance reached with a return route to the save room.
4. Prepare for Creaking Skull
Before entering the boss room, make sure your weapon is equipped and that you still have enough HP to survive a mistake. A ranged Bullet soul can help punish the boss while you remain outside its reach, but it is not mandatory. Normal weapon attacks are sufficient if you control the distance. Keep a healing item available if you have one, but do not spend it merely to avoid returning to the save room.
Creaking Skull is the required boss of the Castle Corridor. Its large bone makes the ground attack easy to recognize, while the fire attack is announced by a brief pause before the projectile is released. The arena is simple, so staying calm and watching the boss’s animation is more useful than continuously attacking.
- Weapon and soul slots checked.
- MP preserved for ranged attacks or recovery.
- Healing item available if needed.
5. Defeat Creaking Skull through spacing and reaction
When Creaking Skull raises its large bone, move away or use the Grave Keeper backdash to clear the strike zone. Do not remain directly in front of the boss while waiting for the swing. After the attack finishes, step in and land several weapon hits before retreating again.
When the boss pauses and draws in the fire attack, crouch or jump according to the projectile’s height. If you are already close, jumping over the attack and continuing past the boss is safer than trying to stand still and trade damage. Use a Bullet soul only during safe openings; emptying your MP is unnecessary because the boss has a predictable pattern and can be defeated with the weapon alone.
On victory, collect the recovery orb and leave the room. Creaking Skull’s soul is an optional random reward rather than a requirement for the route forward. If it does not appear, continue normally; you do not need to repeat the fight for progression.
- Creaking Skull defeated.
- Recovery orb collected.
- Optional boss soul ignored or obtained without delaying progress.
- Boss-room exit opened.
6. Collect Castle Map 1 and check the nearby secret room
Proceed to the right after the boss and collect Castle Map 1. Use the nearby save room immediately afterward. The map helps you distinguish explored rooms, save points, and unexplored branches, but it does not reveal every item or breakable wall.
Inspect the nearby lower Corridor rooms before leaving. A breakable wall in the area contains a Mind Up. Strike suspicious walls along the lower route, especially where the room layout leaves an unusual solid section or dead end. The Mind Up is optional, but it is a useful early MP increase and is close to the required route. If you miss it, the area remains accessible for later backtracking.
- Castle Map 1 collected.
- Post-boss save room used.
- Nearby lower rooms checked for the breakable wall.
- Mind Up collected if desired.
7. Obtain Flying Armor and cross the upper gap
From the post-boss area, take the lower branch and continue through the rooms until you reach the Soul Keeper containing Flying Armor. Equip it in the Guardian slot and test it over a long drop. While active, Flying Armor slows Soma’s descent, allowing you to steer farther during a jump. It does not grant free flight, prevent damage from every fall, or let Soma swim through the Reservoir.
Return to the corridor near the boss route and take the upper path. The large gap that was previously impossible can now be crossed by combining a running jump with Flying Armor. Start the jump with enough horizontal speed, activate the soul while descending, and steer toward the far ledge. If you fall, return to the nearby save room and try again rather than spending healing items in the corridor.
Once across, continue east through the upper Corridor. The route toward the Chapel is open; some side rooms contain only early equipment and can be revisited later. Save before entering the Chapel if you have returned to a save point, and keep Grave Keeper available for close-range evasion.
- Flying Armor obtained and tested.
- Large upper-corridor gap crossed.
- Route toward the Chapel opened.
- Progress saved before leaving the Castle Corridor.
Before you move on
- The entrance, lower Corridor, first save room, skeleton passage, boss approach, and post-boss rooms are visible on the map.
- Grave Keeper is available in the Ability slot and the L-button backdash works.
- Creaking Skull has been defeated and the recovery orb has been collected.
- Castle Map 1 has been collected and the post-boss save room has been activated.
- The optional Mind Up room has been checked or marked for later.
- Flying Armor has been collected, the large upper gap has been crossed, and the route toward the Chapel is open.
References for this chapter
- Castlevania: Aria of Sorrow/Castle Corridor — StrategyWiki
- Castlevania: Aria of Sorrow — Guide and Walkthrough by grassmaster
- Castlevania: Aria of Sorrow — Guide and Walkthrough — GameFAQs, Bkstunt_31
- Awakening in Dracula’s Castle — Castle Corridor
- Castlevania: Aria of Sorrow Game Boy Advance instruction manual
The Chapel — vertical hazards, pillars and a tougher boss
Enter the Chapel from the southeastern Castle Corridor route and follow its broken galleries to the lower-right passage. The first Chapel visit does not provide Double Jump; Malphas grants that Ability Soul later in the Study. Flying Armor is a Guardian Soul, not an Ability Soul: equip it in the blue slot and activate it when a long jump or controlled descent is useful, while watching its MP cost. From the first large room, climb to the upper-right stairway, take the upper route for currently reachable items, then return to the decorated hall and descend through the lower-right exit. The first room on the left is a save room. Continue through the lower passage to Manticore. Its ranged fireballs are avoided with jumps or repositioning; its tail twitches before a poisonous sting, so retreat instead of trading contact damage. After the victory, leave through the left-side route to enter the Study. Silk Robe and the ceiling money room are optional. Tallhammer is in the upper-right of the Manticore room, but it requires the later Giant Bat soul. The Chapel does not contain Undine.
Enter the Chapel and follow the initial gallery
Take the southeastern route from the Castle Corridor into the Chapel. In the first room, ignore the broken stair sections and clear the Ghosts as they appear. Continue through the doorway at the far side into the large room filled with platforms.
Use the platforms to reach the stairway at the upper-right corner. Climb into the next section, then take the stairs leading left. Durgas and Bone Pillars can interrupt jumps, so attack them before committing to a landing. Do not assume that Double Jump is available here: it is not obtained until the Study, after Manticore. The normal Chapel route uses existing platforms, ordinary jumps, and the movement benefit of Flying Armor where needed.
Flying Armor must be equipped in the Guardian Soul slot. It is activated with the Guardian control and consumes MP while active; it is not toggled through the Ability slot. Its slower descent and extended movement can help with the Chapel's longer gaps, but do not leave it running while simply walking through safe rooms or fighting ordinary enemies.
- Enter the Chapel from the southeastern Castle Corridor route.
- Reach the large platform room and the upper-right stairway.
- Keep Double Jump off the route plan; it is a later Study reward.
- Use Flying Armor only as a Guardian Soul when its movement effect is useful.
Sweep the upper side route without delaying progress
At the top of the stair route, defeat the Bone Pillars and use the platforms to inspect the accessible ledges. The Chapel contains optional equipment and item rooms, but none is required for Manticore. If a ledge demands a movement ability you do not yet have, mark it on the map and continue instead of repeatedly risking damage.
The upper-right side of the Chapel includes an optional weapon pickup in the early route. Reach it only if the jump is comfortable with your current movement tools. Do not confuse this optional exploration with the route to the boss; after checking the upper section, return to the large decorated room.
Watch the ceiling and corners while exploring. Some Chapel rooms contain breakable sections or alcoves that are easier to identify after nearby enemies are defeated. The optional Silk Robe and the money room near it are best collected after Manticore, because that route opens from the boss room and can be checked safely with the boss defeated.
- Inspect accessible upper ledges without assuming Double Jump.
- Mark blocked or uncertain ledges for later revisits.
- Return to the large decorated room after the upper-route sweep.
Take the lower-right route and use the save room
From the decorated large room, descend through the passage at the lower-right. The first room to the left is the Chapel save room. Use it before continuing; the route beyond contains the boss door, and the save point restores both HP and MP for another attempt.
Leave the save room and take the bottom doorway. The following cavern contains ordinary enemies and Une plants. Do not touch the plants while passing through, and avoid spending large amounts of MP on enemies that can be bypassed or defeated with normal attacks. Enter the boss door at the end of the passage.
Equip a reliable weapon and, if desired, a low-cost Bullet Soul for damage while moving. A continuously active Guardian Soul is optional, not required. Preserving MP gives you more flexibility if the fight lasts longer than expected or if you need Flying Armor to correct a jump during the approach.
- Use the first left-hand room as the Chapel save room.
- Restore HP and MP before entering the lower passage.
- Avoid contact with Une plants.
- Enter the Manticore room from the bottom route.
Defeat Manticore with spacing and reaction
Manticore uses two primary attacks. At range, it opens its mouth and launches a large fireball, sometimes in a short sequence. Jump over the projectile or move to a clear position; do not stand directly in front of the boss waiting for the shot to reach you.
At close range, the tail gives a visible twitch before the poisonous sting. Retreat as soon as the twitch begins. Poison reduces Soma's combat effectiveness, so avoiding the hit is more valuable than squeezing in one extra attack. If you are poisoned, use Anti-Venom if available and stop trading contact damage.
Attack after each pattern ends, then reset to a safe distance. A weapon with good reach is convenient, but no specific weapon is mandatory. Bullet Souls can add damage during movement, while Guardian Souls should be used briefly rather than held continuously. If the attempt fails, return to the save room, restore MP, and repeat the same spacing plan rather than consuming all healing items in one exchange.
- Jump or reposition around the fireball pattern.
- Retreat when the tail twitches.
- Defeat Manticore without relying on a continuously draining Guardian Soul.
- Use the nearby save room to recover after a failed attempt.
Leave for the Study and mark the Tallhammer revisit
After Manticore is defeated, inspect the right side of the boss room if you want the optional post-boss items. The Silk Robe is reached through the upper-right exit, where a Skeleton Knight guards the room. A nearby ceiling section can be broken with an appropriate attack or soul to reach the optional money room.
Return to the boss room and leave through the left-side route. Continue through the enemy rooms and descend as needed until the passage enters the Study. This is the required next destination after the Chapel; the Study is where Malphas grants Double Jump.
Tallhammer is not an immediate Chapel reward. It sits on the upper-right ledge of the Manticore boss room and requires Giant Bat, which is obtained much later after Balore in the Arena. When Giant Bat is available, warp back to the Chapel, re-enter the Manticore room, transform into bat form, and fly to the upper-right ledge while avoiding the room's enemies.
Do not search the Chapel for Undine. Undine is obtained later and serves the water-walking portion of the Underground Reservoir route. Record any unreachable ledges, then continue into the Study.
- Manticore is defeated.
- The left-side exit from the boss area leads toward the Study.
- Optional Silk Robe and ceiling money room are collected or marked.
- Tallhammer is recorded as a Giant Bat revisit objective.
- Double Jump is reserved for the later Malphas encounter in the Study.
- Undine is not expected in the Chapel.
Before you move on
- The Chapel entrance and initial gallery are mapped.
- The upper-right stair route and decorated central room are reached.
- The Chapel save room has been used before the boss attempt.
- The lower-right passage and Manticore door are identified.
- Manticore's fireball and poison-tail patterns have been handled successfully.
- Manticore has been defeated.
- The left-side exit toward the Study is open.
- Tallhammer is either collected during the later Giant Bat revisit or marked for that revisit.
- Double Jump is reserved for Malphas in the Study, and Undine is reserved for its later water-route location.
References for this chapter
The Study — books, the first Ancient Book and key item hunting
Enter the Study from the Chapel and follow its lower library route to the save room and Yoko’s scene. Great Armor blocks the required exit with a shield, but its low thrust and overhead swing expose different attack openings. Defeat it, collect Malphas and equip the Ability soul to gain Double Jump, then use that movement upgrade to open the route toward the Dance Hall. Ancient Book 1 is important for the true-ending clues, but it is not obtainable during the normal first Study visit. Locate its blocked room near the save-room section, mark it on the map and leave it for the later return after Skeleton Blaze grants Slide in the Dance Hall. Optional weapons and equipment can be collected if their routes are already accessible, but none are required for Study completion.
Enter the Study and follow the lower progression route
Enter the Study through the upper exit of the Chapel. The opening library rooms branch around a large vertical section. A branch toward the right contains an optional weapon route, but the required path descends through the connected rooms. Continue downward, then work through the lower passages while checking the map for unexplored side rooms.
Several Study rooms contain circular orb hazards that move around platforms. Treat these as fixed environmental obstacles rather than enemies to defeat. Watch one circuit, wait for a gap and cross with a controlled jump. Flying Armor’s floating jump from the Castle Corridor is sufficient for the normal route to Great Armor; do not wait for Malphas before proceeding.
- Enter from the Chapel side of the Study.
- Take the descending route for required progression.
- Cross the moving orb hazards during safe openings.
Reach the Study save room and inspect the Ancient Book room
Continue through the library rooms until you reach the Study save room. Save before pushing farther toward the boss. From this area, inspect the nearby rooms and identify the one containing Ancient Book 1. The book is separated from the normal route by a low obstruction that Soma cannot pass during this first visit.
Do not treat the blocked room as a missed item or a failed jump. Mark its location on the map and continue. Skeleton Blaze’s Slide, obtained later in the Dance Hall, is the normal return requirement for entering this room from the Study side. Ancient Book 1 belongs to the later return and must not be counted as collected in this chapter.
- Save at the Study save room.
- Locate the blocked Ancient Book 1 room.
- Mark the room for the later Slide return.
- Leave the book inaccessible during this visit.
Trigger Yoko’s scene and choose the boss route
From the save room, continue through the connected passage until the floor drops into the section where Yoko appears. After the scene, the route toward Great Armor continues to the left. A side branch leads to optional Study equipment, including the concealed Whip Sword route.
The Whip Sword passage requires the Grave Keeper Ability soul’s backdash and is not needed for the boss or the Dance Hall. If you already have Backdash and want the weapon, take the detour before entering Great Armor’s room. Otherwise, mark the branch and continue left. Keep your most dependable weapon equipped rather than changing equipment solely because an optional chest is nearby.
- Trigger Yoko’s Study scene.
- Take the left branch toward Great Armor.
- Use Backdash for the optional Whip Sword passage only if already available.
- Keep optional equipment separate from required progress.
Defeat Great Armor by attacking around the shield
Great Armor’s raised shield blocks ordinary attacks from the front. Do not stand in front of the boss and trade repeated weapon swings. Maintain enough distance to see which attack it begins, then punish only after the opening appears.
When Great Armor performs its low sword thrust, crouch beneath the blade and answer with a crouching strike aimed at its lower body. When it raises the sword for an overhead attack, jump and strike the exposed head during the swing. These two openings let you bypass the shield. After one or two hits, retreat and wait for the next attack instead of continuing to swing into the guard.
Bullet souls can add damage when you have a clear opening, but weapon attacks conserve MP and are reliable here. If the attempt leaves you at low health, retreat through the boss door and use the nearby Study save room before trying again. Backdash can help create space after the overhead attack, but it is not required to defeat Great Armor.
- Wait for Great Armor’s attack instead of striking the raised shield.
- Crouch beneath the low thrust and counter low.
- Jump-attack the head during the overhead swing.
- Return to the save room if the fight goes badly.
Collect Malphas and open the Dance Hall route
After Great Armor is defeated, continue into the room beyond the arena. Follow the post-boss scene, then collect Malphas from the glowing reward point. Malphas is an Ability soul that grants Soma a second jump while airborne.
Open the Status Screen and equip Malphas in the Ability slot. Double Jump is the required movement upgrade for the wider gaps on the route toward the Dance Hall. With Malphas equipped, leave the Study through the forward route and begin mapping the connected Dance Hall rooms.
Hammer becomes available as a shopkeeper at the castle entrance after the boss sequence. His shop is useful for supplies and equipment, but visiting it is optional and does not replace the need to equip Malphas.
- Defeat Great Armor.
- Collect Malphas.
- Equip Malphas in the Ability slot.
- Use Double Jump to open the route toward the Dance Hall.
- Optionally visit Hammer at the castle entrance.
Before you move on
- Great Armor has been defeated.
- Malphas has been collected and equipped in the Ability slot.
- The forward route toward the Dance Hall is open and can be crossed with Double Jump.
- The Study save room and Great Armor route are marked on the map.
- The room containing Ancient Book 1 has been located and marked for a later return.
- Ancient Book 1 remains uncollected at the end of this chapter.
- Any optional Study weapon or equipment branches currently reachable have been recorded separately from required progression.
The Dance Hall and The Study’s upper regions — movement and mid-game upgrades
Enter the Dance Hall after obtaining Malphas, the double-jump Ability Soul, from the Study. Activate its save room and teleport room before taking the cellar route to Big Golem. The boss is vulnerable at the legs; retreat from the arm, rock stream, and forward jab rather than attacking its protected arm. After the victory, continue left into the next room and destroy the Soul Keeper to obtain Skeleton Blaze, the slide ability required to enter the Inner Quarters. Use the new slide to collect Cutall and to return to the Study for Ancient Book 1 if that route was previously blocked. Gold Ring and Samurai Armor are optional Dance Hall equipment. High Mind Up and Sherman Ring require later mobility, so mark those rooms for a return instead of treating them as immediate objectives.
Enter the Dance Hall and activate the safe routes
From the Castle Corridor, use Malphas to double-jump to the ledge leading into the Dance Hall. At the first junction, take the upward route and continue to the save room. Save before exploring the lower cellar because the direct route to Big Golem does not pass another save point. From the entrance area, travel left to find the teleport room and activate its crystal. The teleport room is optional for progression, but it gives you a fast return route to Hammer, Mina, and the Study after the boss.
The ballroom is occupied by Ghost Dancers that move in coordinated pairs. Do not rush through the middle of the room while they are crossing your path. Stand near an edge, attack when a pair approaches, and advance only after the immediate space is clear. A weapon with useful reach is safer than a short weapon when enemies are positioned above or below Soma. Use a Bullet Soul for enemies that remain outside weapon range, but save most of your MP for the boss and the return trip.
- Malphas is equipped as the active Ability Soul.
- The Dance Hall save room has been used.
- The teleport room has been activated if a fast return route is desired.
Sweep the upper Dance Hall rooms
From the save-room route, explore the upper corridors before descending into the cellar. In the corridor guarded by a Minotaur, inspect the wall behind it and attack the breakable section to collect Samurai Armor. This armor is optional, but it is a meaningful defensive upgrade for the next areas. The upper route also leads toward the roof rooms, where Catoblepas can be used as a temporary platform to gain height.
Do not destroy every Bone Pillar in the roof room before checking the upper ledges. Leave a usable pillar in place, stand on Catoblepas when necessary, and double-jump from the remaining platform to reach the available side rooms. The Dance Hall roof includes money pickups and a route toward High Mind Up, but the highest section requires Giant Bat and is not part of the immediate progression. Mark that route for a later return rather than wasting time trying to force it now.
- Samurai Armor has been collected or its room has been marked.
- The roof rooms have been mapped as far as Malphas allows.
- The Bone Pillars have not been destroyed in a way that removes the climbing route.
Take the cellar route to Big Golem
Return to the main entrance level and descend through the ballroom and storage rooms. The cellar contains several close-range enemies, including Evil Butchers, Fleamen, and Wooden Golems. Clear one group at a time and avoid jumping repeatedly in confined rooms; airborne enemies can collide with Soma at the top of his jump. The room with two Minotaurs contains a repeatable 500-gil pickup, which is optional but useful for Hammer's shop.
Before entering the boss room, return to the nearby save room if your HP or MP is low. You may use a potion during the boss fight if necessary, but avoid spending healing items merely to cross ordinary rooms. A save-room recovery is more valuable before a failed attempt than after every minor hit. Equip a dependable weapon and a ranged Bullet Soul, or keep a Guardian Soul available for a short defensive or damaging opening rather than holding it continuously.
- The cellar route and its side rooms are mapped.
- The optional 500-gil pickup has been collected if convenient.
- HP and MP are restored before entering Big Golem's arena.
Defeat Big Golem by attacking the legs
Big Golem has 1,200 HP and protects its raised arm, so do not spend the fight striking the arm. Watch which limb is forward. When a leg is presented, move close and attack it with your weapon, then retreat before the next arm motion. If the boss swings while walking, crouch when the attack passes overhead or step away if you are already too close to the body.
When Big Golem raises a hand toward its mouth, it is preparing to spit rocks across the room. Back away and wait for the stream to finish before approaching. When it crouches and extends its arm forward, treat the movement as a jab or push attack and step out of its reach. If the boss drives Soma toward the edge, cross to the opposite side during the recovery instead of attempting to jump over the arm at point-blank range.
A ranged Bullet Soul can continue dealing damage while Soma retreats from the rock stream. Use it in short bursts and return to weapon attacks when the boss exposes a leg. A continuous Guardian Soul is not necessary and can drain MP quickly; turn it off when the opening has passed. After the boss is defeated, continue through the left exit rather than leaving the arena immediately.
- Big Golem has been defeated.
- The boss arena and adjoining left-hand room are visible on the map.
- The Big Golem Guardian Soul has been obtained if the post-battle soul drop has appeared.
Collect Skeleton Blaze and open the Inner Quarters route
In the room beyond Big Golem, destroy the Soul Keeper to obtain Skeleton Blaze. This is a separate Ability Soul, not the direct reward from the boss itself. Open the Status screen, select Skeleton Blaze in the Ability slot, and confirm that it is active. The slide is performed by pressing Down plus A; it lets Soma pass through low crawlspaces that cannot be crossed by a normal jump.
Return to the Dance Hall save-room route and look for the low passage beneath it. Slide through the passage to open the required route into the Inner Quarters. Before leaving, return to the ballroom room containing the low obstruction and slide beneath it to collect Cutall. Cutall is optional, while Skeleton Blaze and the Inner Quarters passage are required for the main campaign.
- Skeleton Blaze has been collected and activated.
- The low passage beneath the Dance Hall save-room route has been crossed.
- Cutall has been collected or its room has been marked for a later visit.
Return to the Study and mark later Dance Hall upgrades
Use the newly acquired slide to revisit the Study's lower junction if Ancient Book 1 was not collected earlier. The book is in the Study, not the Dance Hall, and the slide opens the narrow route to its room. Collect it before moving deeply into the Inner Quarters so its clue is available for the later Graham sequence.
You can also revisit the Dance Hall after obtaining later mobility souls. The hidden room near the Dance Hall and Inner Quarters juncture contains Sherman Ring, but reaching it requires Giant Bat and is optional. High Mind Up likewise belongs to the upper route that requires later mobility. Gold Ring is an optional Dance Hall pickup; Rune Ring is not in this area and should be pursued later in the Underground Reservoir. Equip the best available armor and weapon before entering the Inner Quarters, then use the teleport room or save room to recover.
- Ancient Book 1 has been collected if it was previously inaccessible.
- Gold Ring and Samurai Armor have been obtained or their rooms are marked as optional.
- Sherman Ring, High Mind Up, and Rune Ring are not being treated as immediate Dance Hall requirements.
- The Inner Quarters entrance is open and the next save route is known.
Before you move on
- The Dance Hall map includes the entrance, save room, teleport room, ballroom, cellar route, Big Golem arena, and the room containing the Skeleton Blaze Soul Keeper.
- Big Golem has been defeated and Skeleton Blaze is active in the Ability slot.
- The slide passage beneath the Dance Hall save-room route opens into the Inner Quarters.
- Cutall has been collected or its low passage has been identified for later.
- Ancient Book 1 has been collected from the Study if it was previously blocked.
- Samurai Armor and Gold Ring have been obtained or intentionally skipped, while High Mind Up, Sherman Ring, and Rune Ring are correctly marked as later or optional objectives.
References for this chapter
Inner Quarters — Chronomage, an Ancient Book and platform puzzles
Enter the Inner Quarters from the Dance Hall after obtaining Skeleton Blaze. Clear the opening rooms, use the save room before Headhunter, defeat all three of Headhunter’s forms, then climb the outdoor tower to the upper-right Soul Keeper pedestal for Undine. Undine is an Enchant Soul: equip it in the Enchant slot and leave it active to let Soma walk across water. Use it to cross the fountain and open the route toward Castle Corridor and the Floating Garden. Chronomage is intentionally impassable during this first visit; return after Legion with Galamoth if you want the optional boss fight, Dainslef and Ancient Book 2. Skula, obtained later in the Clock Tower, is separate from Undine and enables underwater movement.
Enter the Inner Quarters from the Dance Hall
After defeating Big Golem in the Dance Hall, continue through the room beyond the boss and destroy the Soul Keeper pedestal to obtain Skeleton Blaze. This is the Ability Soul that gives Soma his floor slide. Equip Skeleton Blaze in the Ability slot before leaving the Dance Hall.
Return to the Dance Hall save room if you need to restore HP and MP. From the long lower route, take the red-door passage and continue until you reach the low opening leading into the Inner Quarters. Slide beneath it rather than trying to jump through. If Soma cannot pass, check that Skeleton Blaze is equipped, not merely collected.
- Skeleton Blaze has been collected and equipped.
- The low passage from the Dance Hall has been crossed.
- The Inner Quarters entrance is recorded on the map.
Clear the opening rooms and optional side chambers
Defeat the Persephone in the first room, then climb upward through the tower. At the upper ledge, use Double Jump to reach the optional High Mind Up. Continue into the room on the right and crouch on the floor while attacking to reveal the hidden drop into a side chamber.
The side chamber contains Student Witches and a High Potion. Attack the right wall there to open the small room containing the Ninja Suit. These are optional rewards. Return to the main route and continue through the rooms guarded by Durgas and Nemeses. Fight on open floor whenever possible so that enemies do not push Soma toward pits or doorways.
- High Mind Up, High Potion and Ninja Suit have been collected or deliberately skipped.
- The route through the Durgas and Nemeses is open.
- Soma is healthy enough for the boss approach.
Use the save room and defer Chronomage
At the upper junction, the left branch leads to Chronomage. Do not treat this as a normal boss fight. During the initial visit, Chronomage stops time and returns Soma to the preceding area, so the room cannot be cleared yet. Mark its location on the map and leave it for the later Galamoth return.
Take the other branch to the Inner Quarters save room and restore HP and MP. From there, continue through the upper rooms toward Headhunter. Saving before the boss is preferable to using healing items while exploring optional branches.
- Chronomage’s room has been identified and deferred.
- The Inner Quarters save room has been used.
- The Headhunter approach has been reached with restored resources.
Defeat Headhunter’s three forms
Headhunter’s first form walks across the arena and attacks with a dagger. Stay outside the swing’s range, strike during the recovery period, then change sides before the boss corners you. Avoid trading hits against a wall; passing through the boss or repositioning across the room is safer.
The second form floats above Soma and uses lightning strikes together with flaming dragon-shaped projectiles. Keep moving across the arena, step away from lightning impact points and jump over fireballs that travel along the floor. Use attacks that can reach the elevated target, but do not spend MP on effects that cannot connect.
The final form is a fast reptilian creature that moves along the floor and ceiling. Its tongue can reach across the room, and it can release poisonous mist. Remain near the center when possible, duck or jump according to the tongue’s height, and move away when the creature travels overhead. Attack when it returns to the floor, then collect the recovery orb after all three forms are defeated.
- The dagger form has been defeated.
- The floating form’s lightning and fireballs have been avoided.
- The reptilian form has been defeated.
- The recovery orb has been collected.
Climb the outdoor tower and collect Undine
Leave Headhunter’s chamber through the right exit and climb the connected outdoor rooms. Valkyries and Disc Armors guard the ascent. When a Disc Armor throws its weapon, account for the returning disc before stepping into the next position.
The left alcove near the rooftop contains Hrunting, an optional poison sword. Continue to the upper-right alcove and destroy the Soul Keeper pedestal there to obtain Undine. Undine is an Enchant Soul, not a Guardian Soul and not an ordinary enemy drop. It works passively when equipped and lets Soma walk across the surface of water.
- The outdoor tower has been reached.
- Hrunting has been collected if desired.
- The upper-right Soul Keeper pedestal has been destroyed.
- Undine has been added to the Enchant Soul inventory.
Equip Undine and open the route toward Floating Garden
Open the soul settings and equip Undine in the Enchant slot. It does not require manual activation for water-walking; keep the soul equipped while crossing the fountain. Return through the tower and take the lower route to the fountain section. Walk across the water surface, then use Double Jump to reach the ledge on the far side.
Continue through the connected rooms until the route reaches the warp-room connection leading back toward Castle Corridor and the flooded entrance to Floating Garden. If Soma sinks, check that Undine is equipped in the Enchant slot. Do not confuse this ability with Skula: Skula is obtained much later, after Death in the Clock Tower, and enables underwater movement rather than surface water-walking.
- Undine is equipped in the Enchant slot.
- The fountain has been crossed by walking across its surface.
- The far ledge has been reached with Double Jump.
- The route toward Castle Corridor and Floating Garden is open.
Record the optional Galamoth and Ancient Book 2 return
Do not attempt to defeat Chronomage during this chapter. After defeating Legion in the Underground Cemetery, obtain Galamoth and return to the blocked room. Galamoth protects Soma from Chronomage’s time-stop effect, allowing the boss to be defeated and the rooms beyond it to be entered.
That later return is optional for campaign completion and is not required for the Giant Bat route to the Top Floor or for reaching Graham. It is useful for fuller map coverage and for optional rewards including Dainslef and Ancient Book 2. Ancient Book 2 is not required to complete the initial Inner Quarters route.
- Chronomage is explicitly deferred until Galamoth is available.
- The later Galamoth return is understood as optional for the main campaign.
- Ancient Book 2 is not being treated as an initial-route requirement.
- Skula remains a later Clock Tower objective, separate from Undine.
Before you move on
- Headhunter has been defeated in all three forms.
- The outdoor tower above the boss chamber has been reached.
- Undine has been collected from the upper-right Soul Keeper pedestal.
- Undine is equipped in the Enchant slot.
- The fountain has been crossed using Undine’s passive surface-water effect and Double Jump.
- The route toward Castle Corridor and Floating Garden is open.
- Chronomage’s location is marked for a possible post-Legion return.
- The initial chapter is complete without requiring Legion, Galamoth, Chronomage or Ancient Book 2.
References for this chapter
Floating Garden — water-walking route to the Clock Tower
After defeating Headhunter in the Inner Quarters, obtain Undine from the outdoor section and equip it as an Enchant Soul. Undine lets Soma stand and walk on water; it is passive and is not a Guardian Soul. Return to the flooded passage in the Castle Corridor, cross the water, and use the available movement route to enter the Floating Garden. In the garden, reach the bottom-right save room, collect Castle Map 3 from the lift section, then return to the main platform route and climb toward the upper-left exit. The Floating Garden has no mandatory boss on this visit. Its required purpose is to connect the Castle Corridor to the Clock Tower, where the next chapter begins.
Equip Undine and return to the flooded Castle Corridor passage
Undine is obtained in the Inner Quarters after the Headhunter sequence. Equip it in the Enchant slot before leaving. Its effect is passive: when Soma reaches a water surface, he can stand and walk across it instead of sinking. It does not use a Guardian-style activation and should not be placed in the Guardian slot.
Return to the Castle Corridor and use the lower passage that previously blocked progress. Walk across the water with Undine equipped. After crossing, follow the available ledges and use Double Jump where necessary to reach the doorway leading to the Floating Garden. Undine is the requirement for the water crossing; Double Jump, Malphas, and Flying Armor do not provide the same water-walking effect.
- Undine is equipped in the Enchant slot.
- Soma can walk across the flooded Castle Corridor passage.
- The route beyond the water has been reached without trying to substitute Flying Armor or Malphas.
Enter the Floating Garden and follow the fountain route
The Floating Garden is a group of elevated rooms connected by platforms and lifts. From the entrance, move right through the garden and watch for Cockatrice, Gorgon, flying enemies, and other creatures that can knock Soma from a platform. Clear an enemy before committing to a narrow landing whenever possible.
Continue until you reach the large fountain and the nearby moving-platform section. Jump onto the platform and ride it upward. The first useful destination is the map room reached by taking the upper route to the right. Do not take unnecessary risks by jumping between platforms while an enemy is occupying the landing area; falling back to the lower floor is safer than forcing a transfer.
- The Floating Garden entrance is recorded on the map.
- The fountain and first lift section have been located.
- Enemies near platform landings have been cleared or safely bypassed.
Collect Castle Map 3
Use the lift route to reach the room containing Castle Map 3. Depending on the platform position, you may need to ride upward, transfer to another platform, and enter the room on the right. Collect the map before moving on. The map is not a separate progression key, but it makes the disconnected-looking garden rooms and later returns much easier to understand.
After taking the map, leave the room and use the platforms to return toward the lower section. Do not assume that the room containing the map is the route to the Clock Tower; the required climb continues from the main garden section.
- Castle Map 3 has been collected.
- The lift route back toward the lower garden has been identified.
- The map room has not been mistaken for the Clock Tower exit.
Reach the bottom-right save room
From the map section, continue through the connected lower rooms until you reach the save room in the bottom-right portion of the Floating Garden. Save and recover there before beginning the longer upward route. This save room is a useful checkpoint even though the area has no mandatory boss on the first visit.
If you passed the save room while taking the map, backtrack through the lower platform rooms rather than climbing immediately. Keep note of the lift positions and the doors that return to the central garden; the area’s room connections can appear disconnected on the map.
- The bottom-right Floating Garden save room has been found and used.
- HP and MP have been restored before the upper climb.
- The route back to the central platform section is understood.
Climb to the upper-left Clock Tower exit
Return to the main garden section and take the platform route that climbs from the lower-left side. Ride the first lift upward, transfer to the higher moving platform, and continue through the upper rooms. When a platform leaves before you can board it, wait for its return instead of attempting an unsafe long jump.
At the upper part of the garden, follow the route to the left. The following connected rooms also continue left; keep moving through them until the area transition changes to the Clock Tower. Some upper rooms contain optional money or equipment, but none is required for this chapter’s objective. Flying enemies are the main platform hazard, so attack them before jumping when they are positioned over a landing.
Stop once the Clock Tower transition appears. Do not begin the gear climb, spike route, tower save-room route, Death fight, or Skula collection here. Those events are covered in the next chapter.
- The upper platform route has been climbed from the central garden section.
- The connected upper rooms have been followed to the left.
- The Clock Tower area transition has appeared.
- Death has not been fought and Skula has not been claimed in this chapter.
Before you move on
- Undine is equipped in the Enchant slot and allows Soma to walk across the flooded Castle Corridor passage.
- The Floating Garden has been entered and its fountain-and-lift section has been crossed.
- Castle Map 3 has been collected.
- The bottom-right garden save room has been used.
- The upper-left route has led to the Clock Tower transition without fighting Death or claiming Skula.
References for this chapter
- Castlevania: Aria of Sorrow/Floating Garden — StrategyWiki
- Castlevania: Aria of Sorrow — Guide and Walkthrough — GameFAQs, Bkstunt_31
- Castlevania: Aria of Sorrow - Guide and Walkthrough - Game Boy Advance - By Grawl
- Castlevania: Aria of Sorrow — Guide and Walkthrough by PsychoPenguin, GameFAQs
- Castlevania: Aria of Sorrow Game Boy Advance instruction manual
Clock Tower — Death and the Skula route
Enter the Clock Tower from the Floating Garden and climb its machinery-filled route through rotating gears, spikes, Medusa Heads, Lightning Dolls and Bomber Armors. Activate the lower save room, pass Yoko’s section, then reach the upper save room before Death. In the first phase, attack Death’s floating scythe while avoiding the smaller sickles and targeted beams. In the second phase, respond to the thrown scythe, charging attacks and the room-spanning scythe sweep. After the battle, collect Death’s soul and the recovery orb, then enter the room to the left and destroy the Soul Keeper to obtain Skula. Skula is an Enchant soul, not a Guardian or Ability soul. Equip it in the Enchant slot, return to the water passage near the lower Clock Tower save room, break the collapsing floor and follow the underwater route toward the Underground Reservoir.
Enter the Clock Tower and reach the lower save room
From the Floating Garden entrance, follow the connected passage into the Clock Tower. Continue through the opening machinery rooms and proceed after Graham moves ahead. The first section descends through rotating gears, spike-lined platforms and rooms containing Medusa Heads, Lightning Dolls and Golems. Keep moving toward the lower-right portion of this section until you reach the first Clock Tower save room. Activate it before attempting the longer climb.
Treat the gears as temporary platforms rather than fixed ground. Wait for a broad section of a gear to line up with the next ledge, then jump toward its center. Do not linger on toothed edges or near spike walls. If an enemy is not blocking the next landing, bypassing it is safer than attacking while standing beside a hazard. Use a ranged Bullet soul against Lightning Dolls or Medusa Heads when necessary, but retain enough MP for Death.
- Enter the Clock Tower from the Floating Garden.
- Descend through the first gear and spike rooms.
- Activate the lower Clock Tower save room.
- Keep a dependable weapon and reserve MP for the boss.
Pass Yoko’s room and climb to the pre-Death save room
Leave the lower save room and travel west through the Clock Tower until you reach the room where Yoko is present. Continue through the Bomber Armor section, then use the larger room beyond it to begin the upper climb. Work upward through the gears, defeating or bypassing the Lightning Doll and Harpy, then continue right past another Bomber Armor.
The upper route continues through rooms containing Medusa Heads, a Valkyrie and a Gremlin. Keep climbing, follow the path as it turns left, and pass the Lightning Doll rooms. You will then reach a Great Armor and a vertical section with Harpies. Continue to the top of this section and enter the save room on the right. Heal and save there before entering Death’s chamber across the passage.
Golden Medusa Heads and spike placements make careless jumps especially costly. When a gear carries Soma toward a wall or spike bed, jump to a fixed ledge early rather than waiting for the platform to complete its rotation. Keep room around Soma instead of fighting in narrow doorways.
- Pass Yoko’s room and the Bomber Armor section.
- Climb through the Medusa Head, Valkyrie and Gremlin rooms.
- Pass the Great Armor and Harpy sections.
- Activate the save room immediately before Death.
Defeat Death’s first form
During the first phase, Death is not the target. Attack the large floating scythe that moves toward Soma. It advances slowly while spinning, so strike it as it approaches and retreat in short steps. Stay away from corners, because being trapped against a wall leaves little room to avoid the smaller sickles that appear around the arena.
Death also creates vertical beams aimed at Soma’s position. Move deliberately when they appear instead of crossing the entire room at once. Short, controlled repositioning keeps the beams from forcing Soma into another hazard. A Bullet soul can damage the scythe from a safer distance, while a Guardian soul can help clear space if several small sickles overlap, but avoid draining all of your MP before the second phase. Continue attacking the scythe until the first form ends.
- Attack the floating scythe rather than Death’s ethereal body.
- Keep away from the corners.
- Use short movements against the vertical beams.
- Avoid the small sickles or clear space with a limited soul use.
Defeat Death’s second form
Death becomes tangible and uses a large double scythe. When he throws it horizontally, duck beneath the projectile if it passes at standing height. When Death charges across the room or closes in for a swipe, jump over him and land with enough space to react. Do not remain beside him after an attack, because the next scythe pattern can begin immediately.
For the wide room-spanning attack, Death sends the scythe upward before it travels around the arena. Watch its position rather than focusing only on Death. Duck when the scythe passes overhead, then jump over it when it returns across the floor. Attack after the hazard has passed instead of chasing Death during the sweep. Once Death is defeated, wait for the scythe to leave before walking forward; it can still damage Soma during the victory transition.
- Duck under the thrown scythe when it passes at standing height.
- Jump over Death’s charge and close-range attack.
- Track the scythe during the full-room sweep.
- Wait for the scythe to disappear after the victory.
Obtain Skula and return toward the Underground Reservoir
After Death is defeated, collect the recovery orb. Death’s soul is awarded from the boss victory. Then enter the room to the left of the boss chamber and destroy the Soul Keeper there. This provides Skula, which allows Soma to walk while underwater. Skula is an Enchant soul in the original Game Boy Advance release, so equip it in the Enchant slot. Do not search for it among Guardian or Ability souls.
Return to the save room immediately before Death and heal. Retrace the upper Clock Tower route toward the lower section until you reach the water-filled room with the wooden collapsing floor. This room is near the Bomber Armor section on the return path. Equip Skula before breaking the floor, then stand on the wooden platform until it collapses and drops Soma into the submerged passage below.
Follow the underwater route west. Needles occupy the early submerged section; defeat them or move past them when there is a safe opening. Continue through the Devil and Harpy rooms, descend through the spike hazards and follow the lower passage toward the Underground Reservoir connection. Skula is passive once equipped, so it does not require Guardian-button activation or continuous MP drain. Do not proceed into the deep water route without checking that Skula is selected in the Enchant slot.
- Collect Death’s soul and the recovery orb.
- Destroy the Soul Keeper in the room left of Death’s chamber.
- Obtain Skula as an Enchant soul.
- Equip Skula in the Enchant slot.
- Return to the pre-Death save room.
- Break the wooden collapsing floor in the Clock Tower water room.
- Follow the underwater passage toward the Underground Reservoir.
Before you move on
- The lower Clock Tower save room has been activated.
- The upper save room immediately before Death has been activated.
- The gear, spike and upper hazard route has been crossed.
- Death’s first-form scythe has been destroyed.
- Death’s tangible second form has been defeated.
- Death’s soul and the recovery orb have been collected.
- The Soul Keeper left of Death’s chamber has provided Skula.
- Skula is equipped in the Enchant slot.
- The wooden collapsing floor in the water room has been broken.
- Soma has begun the underwater route toward the Underground Reservoir.
References for this chapter
- Castlevania: Aria of Sorrow Game Boy Advance instruction manual
- Castlevania: Aria of Sorrow — Soul Collecting FAQ
- Castlevania: Aria of Sorrow - Guide and Walkthrough - Game Boy Advance - By Dev
- Castlevania: Aria of Sorrow — Guide and Walkthrough — GameFAQs, Bkstunt_31
- Castlevania: Aria of Sorrow — Clock Tower — StrategyWiki
Underground Reservoir — first-pass water navigation and the deferred third Ancient Book
After defeating Death in the Clock Tower, collect Skula from the chamber beyond the boss room and equip it before entering the Underground Reservoir. Skula allows Soma to sink and move through submerged passages; it does not provide water-surface movement. On this first Reservoir visit, prioritize the save room, warp room, main submerged route, and connection toward the Underground Cemetery. Inspect optional side paths only when they do not pull you away from the forward route. Ancient Book 3 is in the Reservoir’s elevated upper-right branch, but that route requires Giant Bat, which is obtained later from Balore in the Arena. Mark the branch and continue through the Cemetery and Arena instead of delaying progression. Return for the book after Balore. The waterfall and Forbidden Area route are optional and separate from the first-pass objective. The Reservoir itself has no mandatory boss.
Enter the Reservoir after Death
Defeat Death in the Clock Tower and enter the chamber beyond the boss room. Collect the Skula soul from the Soul Keeper, then open the Soul menu and equip Skula before leaving. Skula is the soul used to sink below the water and move through submerged sections of the castle. It is not a replacement for Undine, which is used for standing and jumping on the water’s surface.
Retrace the Clock Tower route until you reach a warp room. If the warp connecting this area with the rooms near the castle entrance is active, use it to shorten the return trip. From the Castle Corridor, follow the lower interior route to the Underground Reservoir entrance. Enter the Reservoir and locate its nearby save room before making a deep exploration attempt. This is the beginning of the first pass; Ancient Book 3 is intentionally deferred.
- Death has been defeated.
- Skula has been collected from beyond the Clock Tower boss room.
- Skula is equipped before entering submerged passages.
- The Underground Reservoir has been entered.
- The Reservoir save room has been found and used.
Follow the initial submerged route
From the entrance, clear the first rooms and descend into the flooded section. Equip Skula before dropping beneath the surface. Move carefully through the narrow corridors because Fish Heads, Needles, Tritons, Man-Eaters, and other enemies can attack while Soma is changing height. Use a ranged attack or Bullet Soul when an enemy occupies the far side of a confined passage, and avoid chasing enemies into a blind corner.
Follow the main flooded route through the central and western sections. When the passage forces you to change elevation, use the dry ledges and platforms as staging points rather than jumping directly into a crowded room. The Reservoir contains optional weapons and equipment, including Rahab’s Sword, but these pickups are not required for reaching the Underground Cemetery. Collect them only if the route remains safe and you have already identified the way back to the save room.
A water-surface side room contains the Elfin Robe, but reaching it requires Undine rather than Skula. If Undine is not yet available, note the room on the map and continue. Do not treat the robe or any other elevated side pickup as a reason to postpone the Cemetery route.
- The first submerged section has been mapped.
- The central and western flooded branches have been inspected.
- Rahab’s Sword has been collected or marked as optional.
- The Elfin Robe room has been marked for an Undine return if needed.
- A safe route back to the Reservoir save room is known.
Activate the Reservoir warp room
Continue through the Reservoir’s vertical passages and platform rooms. Some rooms use boats or moving platforms to carry Soma between elevations. Wait for the platform or boat to reach a useful position, then jump to the next ledge; do not attempt a blind leap across a flooded gap while enemies are positioned above or below you. Flying Armor may help with certain controlled movement sections, but it does not provide underwater traversal and does not replace Skula.
Search the connected rooms until you find the Reservoir warp room and activate it. This is a required practical checkpoint even though the area has no boss of its own. Once active, the warp prevents a later return from requiring the entire Clock Tower and Castle Corridor route. Record the warp room and nearby save rooms on the map before moving toward the lower exit.
If you are low on health or MP, return to the save room before continuing. The first pass is about establishing dependable navigation, not clearing every elevated or submerged side room.
- The Reservoir warp room has been activated.
- The major central passages have been mapped.
- The nearby save rooms are identified.
- Soma has been healed and saved before leaving for the Cemetery connection.
Reach the Underground Cemetery connection
From the central Reservoir route, continue through the lower passages toward the connected Underground Cemetery area. Follow the doors that lead onward rather than turning back for the high upper-right branch. If a room contains a route you cannot yet reach, mark it on the map and continue; the missing movement ability is obtained later in the campaign.
Ancient Book 3 is not a first-pass requirement. Its Reservoir location is in an elevated upper-right section that cannot be reached normally at this stage. Giant Bat is obtained only after defeating Balore in the Arena, so attempting to finish the book route now either fails or encourages unnecessary backtracking. The correct order is to establish the Reservoir route, enter the Underground Cemetery, defeat Legion, continue to the Arena, defeat Balore, and obtain Giant Bat before returning for the book.
Save before entering the Cemetery. Legion is fought in the connected Cemetery area, not in the Reservoir. Leaving the Reservoir after opening the Cemetery route is therefore correct progress, even though one Reservoir branch remains unexplored.
- The lower route toward the Underground Cemetery is open.
- The Reservoir save and warp rooms are known.
- The Underground Cemetery has not been delayed for Ancient Book 3.
- Ancient Book 3’s upper-right branch is marked for a later Giant Bat return.
- Soma is saved before proceeding into the Cemetery.
Optional waterfall and Forbidden Area branch
The Reservoir also contains a waterfall blocking an optional route into the Forbidden Area. Do not confuse this branch with the required Cemetery connection. Skula alone cannot carry Soma through the waterfall. The documented setup uses Undine together with Curly, Manticore, or Devil.
If you already possess Undine and one of those transformation souls, equip Undine for water-surface movement and place Curly, Manticore, or Devil in the Guardian slot. Stand far enough from the waterfall to give the transformation room to move, face the current, and activate the transformation to rush through. If the attempt fails, retreat and create more distance before trying again rather than spending healing items while repeatedly colliding with the current.
The Forbidden Area is optional for the main campaign. If Undine or the required transformation soul is missing, mark the waterfall and return later. Neither opening this branch nor collecting its equipment is necessary for the first-pass Reservoir completion check.
- The waterfall has been located and marked.
- Undine is available before attempting the crossing.
- Curly, Manticore, or Devil is available for the transformation rush.
- The Forbidden Area branch has been treated as optional.
- The waterfall has not been confused with the Cemetery route.
Leave the Reservoir after the first pass
The first Reservoir pass is complete when Skula has been used to establish the submerged route, the save room and warp room are known, and the lower connection toward the Underground Cemetery is open. You do not need to collect Ancient Book 3 before leaving. You also do not need to clear the waterfall, obtain the Elfin Robe, or collect every optional weapon during this visit.
Proceed through the Underground Cemetery and continue to the Arena. After Balore is defeated, Giant Bat becomes available. Only then should you return to the Reservoir and use the elevated upper-right route to collect Ancient Book 3. That later visit belongs to the post-Balore progression and is not part of this first-pass chapter.
Before departure, use the save room and confirm the Reservoir warp is active. Keep the upper-right unexplored branch clearly marked on the map so the later return is easy to identify. The Reservoir has no mandatory boss; Legion is the next required boss in the connected Underground Cemetery.
- The first-pass submerged route has been explored.
- The Reservoir save room has been used.
- The Reservoir warp room has been activated.
- The Cemetery connection is open.
- The upper-right Ancient Book 3 route is marked but intentionally deferred.
- The player is ready to continue into the Underground Cemetery.
Before you move on
- Death has been defeated in the Clock Tower.
- Skula has been collected from the chamber beyond Death and equipped for the Reservoir route.
- The Underground Reservoir has been entered after returning through the Clock Tower and Castle Corridor.
- The main submerged, central, and lower passages have been explored enough to establish forward navigation.
- The Reservoir save room has been located and used.
- The Reservoir warp room has been activated.
- The route toward the Underground Cemetery is open.
- Ancient Book 3’s upper-right branch has been identified and marked for later.
- The player is proceeding to the Underground Cemetery without waiting for Ancient Book 3.
- The waterfall and Forbidden Area branch have either been left optional or marked for a later return.
- Soma is saved and ready to continue toward Legion and the Arena.
References for this chapter
- Castlevania: Aria of Sorrow - Guide and Walkthrough - Game Boy Advance - By Dev
- Castlevania: Aria of Sorrow — Guide and Walkthrough
- Castlevania: Aria of Sorrow — Guide and Walkthrough by Zenalasca
- Castlevania: Aria of Sorrow - Guide and Walkthrough - Game Boy Advance - By Grawl
- How to get past an impenetrable waterfall? — Castlevania: Aria of Sorrow Q&A
- Castlevania: Aria of Sorrow Game Boy Advance instruction manual
Underground Cemetery and Arena — Legion, Galamoth, Balore and Giant Bat
After defeating Death and collecting Skula, enter the Underground Reservoir and take its lower branch to the Underground Cemetery. Use the save room before Legion, then defeat the boss. Destroy all four outer sections before the core if you want Legion’s separate enemy soul. Afterward, continue through the opened passage to the Soul Keeper and collect Galamoth, the Ability soul that lets Soma pass Chronomage later. Return through the Cemetery and Reservoir, then take the Arena branch. Climb to Balore, use his fists to reach the active eye, and avoid the beam-linked fire wave in the second phase. After Balore falls, collect Giant Bat and equip it as a Guardian soul. Chapter 11 may optionally return to the Underground Reservoir for Ancient Book 3 and optionally pass Chronomage with Galamoth to collect Ancient Book 2. The required late-game route then uses Giant Bat and the Castle Corridor or eastern Inner Quarters connection to reach the Top Floor.
Enter the Underground Cemetery from the Underground Reservoir
Reach the Underground Reservoir after defeating Death in the Clock Tower and collecting Skula. From the Reservoir’s lower section, follow the branch leading to the Underground Cemetery. The Reservoir also connects to the Arena, so use the map to distinguish the downward Cemetery branch from the route that turns toward the Arena.
The Cemetery is a short optional area with limited exploration on the first visit. Clear enemies near landing points before dropping through the vertical passages, then continue until the route reaches the save room before Legion. If you find the upper-right or upper-left item alcoves, treat their contents as optional and return to the main route rather than spending healing items unnecessarily.
Use the save room before entering the boss door. Restore HP and MP, save the game, and confirm that your weapon has enough reach for a large target. A controllable Bullet soul can help, but avoid draining MP on ordinary Cemetery enemies immediately before the fight.
- Skula has been collected from the Clock Tower.
- The Underground Cemetery was entered from the Reservoir.
- The save room before Legion has been used.
Understand Legion’s shell and soul condition
Legion consists of a central core surrounded by four separate outer sections made from bodies. The core and each section have separate damage states. Legion advances slowly while bodies released from damaged sections walk along the floor or platforms. Keep moving between levels and avoid standing directly beneath the boss while bodies are falling.
Defeating the core clears Legion and opens the route beyond the boss. Legion’s enemy soul has an additional condition: all four outer sections must be destroyed before the central core is defeated. If the core dies while any section remains, the boss is cleared but the Legion soul condition is missed. Reload a previous save or make another attempt if collecting every soul matters to your file.
Use a weapon with dependable reach and attack one section at a time. A Bullet soul is useful when it gives safe damage, but preserve MP for mistakes and recovery. Legion’s size makes close attacks possible, yet staying below the body for too long exposes Soma to contact damage, falling bodies and laser fire.
- All four outer sections will be destroyed before the core if Legion’s soul is wanted.
- A reliable weapon is equipped.
- Enough HP, MP and healing remain for the entire fight.
Destroy the four sections, then defeat the core
Begin by attacking the outer sections while watching the laser pattern. Each destroyed section increases the danger in the room. Bodies accumulate on the floor and Legion gains broader beam coverage, so reposition after every short attack sequence instead of standing underneath the boss.
The lower sections are practical early targets because destroying them creates more room to slide or move beneath Legion. When a laser sweeps across the room, move to a safe ledge or change levels rather than trying to continue a ground combo. If a section releases bodies, clear the immediate landing area before returning to the shell.
Do not attack the core until all four sections have disappeared if you want Legion’s soul. Once the core is exposed, continue moving around the chamber and attack during gaps between beam sweeps. The core still produces contact and projectile hazards, so retreat when it closes distance or bounces through the room. Defeat the core to open the post-boss passage.
- All four sections were destroyed before the core when the Legion soul was desired.
- Laser sweeps and released bodies were avoided by changing position.
- The exposed core was defeated.
Follow the post-boss passage and collect Galamoth
After Legion falls, leave through the opened passage instead of immediately returning to the Reservoir. Continue through the rooms beyond the boss and follow the available rightward route. Optional money and equipment pickups can be collected during this detour, but they are not required for the Arena or the main campaign.
Continue until you reach the Soul Keeper pedestal. Break the pedestal and collect Galamoth. Galamoth is an Ability soul obtained after the Legion route, and it is separate from Legion’s enemy soul. Destroying Legion’s four sections affects the Legion-soul condition; it does not replace or grant Galamoth.
Galamoth allows Soma to pass the time-stopping Chronomage in the Inner Quarters on a later return. After collecting it, backtrack through the post-boss rooms and reconnect with the Cemetery exit. Use the map to retrace the route rather than searching for a new passage inside the short Cemetery area.
- The post-boss passage was followed.
- Galamoth was collected from the Soul Keeper pedestal.
- Galamoth is available as an Ability soul for the later Chronomage route.
- The return path toward the Reservoir is open.
Return through the Reservoir and enter the Arena
Retrace the Cemetery route until you reach the Underground Reservoir. The Arena and Cemetery are separate branches connected through the Reservoir, so do not search for a direct passage from Legion’s chamber to Balore. Follow the Reservoir route toward the Arena entrance.
The Arena contains combat rooms, lifts and platform hazards. Clear enemies near doorways and ledges before advancing, especially enemies that can knock Soma into a lower section. Side rooms and challenge rooms may contain useful equipment, money, healing items or additional map area, but they are optional for reaching Balore.
Continue through the Arena’s vertical combat rooms and elevator sections until you reach the lower boss area. Use the Arena warp room if you have already activated it, then locate the save room before Balore. Restore HP and MP and save. Equip a weapon that can reach an elevated target. A ranged Bullet soul may help during the eye openings, but do not spend all MP clearing the approach.
- The Cemetery was exited through the Reservoir.
- The Arena was reached from the Reservoir branch.
- The save room before Balore was used.
- Optional Arena rooms were not mistaken for required progression.
Defeat Balore by reaching the active eye
Balore’s first phase uses two enormous fists while one eye is active. Watch the fists and wait for one to slam into a position Soma can reach. After the impact, jump onto the fist as it rises. It carries Soma toward the active eye, allowing you to attack the glowing target. Jump away before the fist descends or another attack closes the space.
Do not force a jump when a fist lands too far away, and do not waste attacks on the inactive eye. Keep enough floor space available to react to the second fist. Small, controlled attacks are safer than trying to remain on the fist for too long.
After the first eye is defeated, Balore uses the other eye and fires a horizontal beam across the floor. The beam is followed by fire traveling along the ground. Watch the beam, identify the fire’s direction, and jump over the advancing flames. Attack the eye during the opening after the fire passes, then prepare for the next beam. Defeat Balore to open the reward route.
- A fist was allowed to land before Soma jumped onto it.
- Only the active eye was attacked.
- The beam and ground fire were avoided.
- Balore was defeated.
Collect Giant Bat and prepare the late-game route
Leave Balore’s chamber after the fight and enter the reward room. Break the Soul Keeper pedestal and collect Giant Bat. Giant Bat is a Guardian soul, not an Ability soul and not the same type as Galamoth. Equip it in the Guardian slot, activate it in a safe room and confirm that Soma transforms into a flying bat.
Giant Bat grants true flight and opens the high-ceiling route needed to reach the Top Floor. Save after obtaining it and use an available warp room to reduce future travel. Do not leave Giant Bat unequipped when preparing for the late-game approach; it is required for the ceiling route rather than merely a convenient shortcut.
Chapter 11 may optionally begin with a Giant Bat return to the Underground Reservoir to collect Ancient Book 3 from its elevated upper-right route. After that, the player may optionally pass Chronomage with Galamoth in the Inner Quarters and collect Ancient Book 2. Those books provide clues and completion information, but they are not substitutes for the named souls. The required late-game progression uses Giant Bat and the Castle Corridor or eastern Inner Quarters connection to reach the Top Floor. The Forbidden Area remains optional for campaign completion and true-ending access.
- Giant Bat was collected after Balore.
- Giant Bat is equipped in the Guardian slot.
- Soma can transform into a flying bat.
- An Arena save or warp point is available for later travel.
- The optional Ancient Book 3 and Ancient Book 2 returns are understood.
- The player is ready to use Giant Bat and the Castle Corridor or eastern Inner Quarters connection for the Top Floor route.
Before you move on
- The Underground Cemetery was entered from the Underground Reservoir.
- The save room before Legion was used.
- Legion was defeated.
- All four Legion sections were destroyed before the core if the separate Legion soul was desired.
- The opened post-boss passage was followed.
- Galamoth was collected from the Soul Keeper pedestal.
- The return route led back to the Underground Reservoir.
- The Arena was reached from the Reservoir branch.
- Balore was defeated.
- Giant Bat was collected and equipped in the Guardian slot.
- Soma can fly as a bat.
- The optional Ancient Book 3 Reservoir return and Ancient Book 2 Chronomage return are understood.
- The required next route uses Giant Bat and the Castle Corridor or eastern Inner Quarters connection to reach the Top Floor.
References for this chapter
- Castlevania: Aria of Sorrow Game Boy Advance instruction manual
- Castlevania: Aria of Sorrow/Underground Reservoir — StrategyWiki
- Castlevania: Aria of Sorrow/Underground Cemetery — StrategyWiki
- Castlevania: Aria of Sorrow/The Arena — StrategyWiki
- Castlevania: Aria of Sorrow - Guide and Walkthrough - Game Boy Advance - By Dev
- Castlevania: Aria of Sorrow — Complete walkthrough (GBA)
Forbidden Area and Top Floor approach — optional detours, late returns and the throne-room entrance
After Balore, Giant Bat opens the ceiling route into the Top Floor. The Forbidden Area is optional: visit it for map completion, Flame Demon farming and equipment such as Claimh Solais, but do not treat it as required for Graham, the true ending or Top Floor access. After obtaining Galamoth, you may return to Inner Quarters, pass Chronomage and collect Ancient Book 2. Then revisit the Underground Reservoir with Giant Bat for Ancient Book 3. Neither book is required if you already know the three souls needed for the extended Graham route. Reach the Top Floor from Inner Quarters or Castle Corridor, fly through its high ceiling with Giant Bat, activate the warp and save before Graham. Before entering the boss room, equip Flame Demon in Bullet, Giant Bat in Guardian and Succubus in Enchant, then keep all three equipped through the encounter.
Optional: enter the Forbidden Area through the Underground Reservoir waterfall
The Forbidden Area is an optional side area. It is not required for campaign completion, the true ending, Top Floor access, Graham, Julius or the Chaotic Realm. Skip it when following the shortest route. Visit it for map completion, additional equipment, enemy souls or a convenient place to farm Flame Demon.
Use the Underground Reservoir warp room as your landmark, then travel to the waterfall room on the reservoir’s right-side route. Equip Undine in the Enchant slot so Soma can stand and move on water. Equip Curly, Manticore or Devil in the Guardian slot. Activate the transformation soul while standing on the water, then push into the falling water. The rushing transformation breaks through the waterfall and opens the passage behind it.
If Soma stops before crossing, return to the water and leave more room behind him before trying again. Undine supplies the water-surface effect; Curly, Manticore or Devil supplies the forward rush. Neither soul replaces the other.
- The Forbidden Area is being treated as optional.
- Undine is equipped in the Enchant slot.
- Curly, Manticore or Devil is equipped in the Guardian slot.
- The player understands that this detour does not unlock the Top Floor or the true ending.
Optional: search the Forbidden Area for equipment and Flame Demon
The Forbidden Area has no mandatory boss. Mudmen hide in shallow muck pools and can grab Soma when he walks over them. Attack from the edge of a pool when possible. If a Mudman catches Soma, keep attacking until it releases him rather than trying to walk away from the grab.
The area contains optional equipment, including Joyeuse and Claimh Solais. Claimh Solais is a strong late-game weapon, but it is not required for Top Floor access, Graham, the true ending, Julius or Chaos. Do not delay the required route merely to obtain it.
Flame Demon enemies appear in the Forbidden Area and can be farmed if that soul has not dropped elsewhere. Soul drops are random. Defeat the enemies, leave and re-enter the room to reset them, and verify the soul in the Soul Set menu before leaving. Do not assume the soul was acquired just because a Flame Demon was defeated.
- Optional equipment has been collected only if wanted.
- Flame Demon has been confirmed in the Soul Set menu if farmed here.
- No Forbidden Area weapon or reward is being treated as a progression key.
Optional late return: pass Chronomage and collect Ancient Book 2
After defeating Balore and obtaining Giant Bat, use a warp room to return to Inner Quarters. The most direct landmark is the Inner Quarters warp room. Exit it, go right through the connected rooms, go down when the route drops, then continue right through the upper passage until you reach the area where Chronomage previously stopped you.
Equip Galamoth before entering the time-displacement passage. Galamoth cancels Chronomage’s effect and allows Soma to move through the corridor. Defeat Chronomage if you want to clear the area, then continue upward and through the rooms beyond. Galamoth is the ability needed for this passage; do not confuse it with Legion’s separate soul.
The room beyond Chronomage contains an Arc Demon, Dainslef and Ancient Book 2. Collect the book if you want its clue about the souls required for the extended Graham route. The book itself is not the trigger, and reading it is not required if you already know that the relevant souls are Flame Demon, Giant Bat and Succubus. Return to a warp room after the detour.
- Balore has been defeated before attempting this return.
- Galamoth is equipped for the Chronomage passage.
- Chronomage and the rooms beyond it are understood to be optional.
- Ancient Book 2 and Dainslef are collected only if desired.
- Ancient Book 2 is not being treated as a requirement for Top Floor access or Graham.
Optional clue return: collect Ancient Book 3 in the Underground Reservoir
After obtaining Giant Bat, revisit the Underground Reservoir through a warp room. Use Skula for the submerged sections. From the reservoir’s central passages, follow the boat and flooded-room route until you reach the large chamber with an elevated opening and the connected upper-right section.
In the room with the high opening above the water, equip Giant Bat in the Guardian slot and fly vertically through the gap. Continue across the elevated rooms and follow the upper passage until you reach the room containing Ancient Book 3. The route is above the flooded chambers, not along the lowest underwater passage.
Ancient Book 3 is an optional clue concerning the souls used for the extended Graham route. It does not unlock Giant Bat, replace Galamoth, open the Top Floor or substitute for equipping the three required souls. After collecting it, return through the reservoir route or use the warp room.
- The Reservoir return occurs after Giant Bat has been obtained.
- Skula is equipped for underwater movement.
- Giant Bat is used to reach the elevated upper-right route.
- Ancient Book 3 is collected only if the optional clue objective is wanted.
- The book is not treated as a required campaign item.
Reach the Top Floor through the required Giant Bat ceiling route
The Top Floor can be approached from either Castle Corridor or Inner Quarters. A straightforward route is to warp to Inner Quarters, leave the warp room, move right through the connected rooms, go down once, then continue right until the entrance room for the Top Floor appears. The exact number of rooms can be confirmed on the in-game map by looking for the Top Floor area adjoining the upper castle passages.
In the Top Floor entrance room, continue right until you find the high gap in the ceiling. Equip Giant Bat in the Guardian slot and activate it to fly upward. Ordinary jumping and Double Jump cannot clear this passage. Once Soma reaches the upper landing, revert to human form and continue through the Top Floor.
Do not detour through the Forbidden Area merely to reach this section. Giant Bat is the required ability for the ceiling passage, regardless of whether you entered the Top Floor from Castle Corridor or Inner Quarters.
- Balore has been defeated and Giant Bat has been obtained.
- The Top Floor is being approached through Castle Corridor or Inner Quarters.
- Giant Bat has been used to clear the high ceiling passage.
- The Forbidden Area has not been incorrectly treated as mandatory.
Activate the Top Floor warp and prepare for Graham
Continue through the opening Top Floor rooms. The route passes Final Guards, Basilisks, Lubicants, Succubi, Erinys, Stolas and other powerful enemies. Follow the connected upper passages until you reach the Top Floor warp room and activate it. The warp is a useful return point even though it is not required for immediate progression.
Continue through the upper rooms until you find the save room near Graham’s approach. Save there and restore HP and MP before entering the boss route. Optional equipment includes Gungner, Satan’s Ring, Kaladbolg, Mana Prisms and other pickups. None is necessary for the ending route.
Hippogryph is also optional. To collect it, take the side route to the Iron Golem, defeat the golem with a reliable method, break the wall behind it and destroy the pedestal. Skip this detour if you are conserving health, MP or healing items.
- The Top Floor warp has been activated.
- The Top Floor save room has been found and used.
- Optional equipment is separated from required progress.
- Hippogryph is collected only if desired.
Obtain Succubus and lock in the Graham loadout
Succubus enemies appear on the Top Floor and in other areas, including the Arena. If the soul does not drop, leave and re-enter the room to reset the enemies and repeat the fight. Confirm Succubus in the Soul Set menu before continuing.
At the Top Floor save room, restore HP and MP. Equip Flame Demon in the Bullet slot, Giant Bat in the Guardian slot and Succubus in the Enchant slot. Keep all three equipped through the complete Graham encounter as the safe procedure for preserving the extended route. The Ancient Books are clues; the equipment condition is what matters.
The named souls do not need to be activated or used as attacks merely to satisfy the preparation condition. Save immediately before entering Graham’s room. If the short ending appears, reload that pre-Graham save, verify all three slot assignments and repeat the encounter without changing the loadout.
After the extended Graham outcome, leave through the adjacent room to collect the Black Panther soul and Dracula’s Tunic. Return to the Top Floor save room before following the next chapter’s route toward the Floating Garden. The later Kicker Skeleton encounter is required for the route, but the Kicker Skeleton soul itself is optional.
- Succubus has been obtained and confirmed.
- Flame Demon is equipped in Bullet.
- Giant Bat is equipped in Guardian.
- Succubus is equipped in Enchant.
- HP and MP have been restored.
- A save exists immediately before Graham’s room.
- The three named souls will remain equipped through the complete encounter.
- The player is ready to continue after the extended Graham outcome.
Before you move on
- The Forbidden Area was skipped or visited only as an optional detour.
- If visited, the waterfall was crossed with Undine in Enchant and Curly, Manticore or Devil in Guardian.
- Balore has been defeated and Giant Bat has been obtained.
- Chronomage was skipped or passed with Galamoth only for the optional rooms beyond it.
- Ancient Book 2 was collected only if the optional clue objective was desired.
- The Underground Reservoir was revisited after Giant Bat if the optional Book 3 objective was desired.
- Ancient Book 3 was collected from the elevated route if desired.
- The player understands that neither Ancient Book is required for Top Floor access, Graham or the true ending.
- The Top Floor was reached through Castle Corridor or Inner Quarters.
- The Giant Bat ceiling passage was crossed.
- The Top Floor warp room was activated.
- The Top Floor save room was found and used.
- Succubus was obtained and confirmed.
- Hippogryph was collected only if desired.
- Flame Demon, Giant Bat and Succubus are equipped in Bullet, Guardian and Enchant.
- Soma is saved immediately before Graham’s room and ready for the next chapter.
References for this chapter
- Castlevania: Aria of Sorrow - Guide and Walkthrough - Game Boy Advance - By Dev
- Castlevania: Aria of Sorrow — Guide and Walkthrough by Zenalasca
- Breaking into the Forbidden Area — Joyeuse and Claimh Solais
- The Top Floor — Graham Jones and the true-ending souls
- Castlevania: Aria of Sorrow/Top Floor — StrategyWiki
- Castlevania: Aria of Sorrow Game Boy Advance instruction manual
- Castlevania: Aria of Sorrow Maps
The Graham Jones confrontation — how to trigger the true-ending route
Before entering Graham’s throne-room battle, equip Flame Demon in the Bullet slot, Giant Bat in the Guardian slot and Succubus in the Enchant slot. The Ancient Books are clues to these three souls, not mandatory items, and the souls do not need to be activated during the fight. The decisive check occurs when Graham’s first form is defeated: all three named souls must be equipped at that moment. Keeping the same loadout through the second form and the following scene is the safest procedure, but it is not necessary to spend MP or use the souls as attacks. Defeat Graham’s first form, then his demon form, watch for Arikado’s continuation, and move left afterward to collect Black Panther and Dracula’s Tunic. If the short ending appears, reload the save made before Graham and repeat the encounter with the exact three-soul loadout.
Prepare at the save room before Graham’s door
Use the save room immediately before the throne-room approach. Restore HP and MP, arrange your healing items, and save before entering Graham’s room. This gives you a reliable retry point for either a failed battle or the short ending.
Open the Soul Set menu and verify the names individually. Equip Flame Demon as the red Bullet soul, Giant Bat as the blue Guardian soul and Succubus as the yellow Enchant soul. These exact souls matter; do not substitute another bat, demon or yellow soul. Set them before entering the boss room.
The Ancient Books provide clues pointing to Flame Demon, Giant Bat and Succubus. You do not need to collect or reread all three books if you already know the required souls. They are hints rather than equipment, and there is no book-based switch that must be activated.
The important timing is the defeat of Graham’s first form. Flame Demon, Giant Bat and Succubus must all be equipped when that form receives its final hit. Keeping them equipped from the start of the battle through the second form and the following scene avoids accidentally changing the loadout, but the souls do not need to be activated or used for attacks.
- Flame Demon is equipped in the Bullet slot.
- Giant Bat is equipped in the Guardian slot.
- Succubus is equipped in the Enchant slot.
- The game is saved before entering Graham’s room.
- The three named souls will remain equipped when the first form is defeated.
Defeat Graham’s first form without missing the ending check
Graham teleports around the room and attacks when he appears. Stay mobile and watch the location where he materializes rather than committing to one corner. When he appears, strike his exposed body if the attack pattern leaves an opening, then move away before the next projectile pattern begins.
His early attacks include fireballs and straight or staggered fiery projectiles. Jump, duck or move through the gaps according to the height of each projectile. Do not stand directly beneath Graham while waiting for another attack opportunity; a short approach followed by a retreat is safer than trying to maintain uninterrupted damage.
When his health is low, Graham moves to the center and sends fiery projectiles around the room in a circular pattern. This is the critical phase for the ending condition. Confirm that Flame Demon, Giant Bat and Succubus are still equipped before delivering the final hit. If you changed a slot to use another soul, pause the attack, restore the exact three-soul loadout and only then finish the first form.
Weapon attacks are sufficient, so conserve MP if your reserves are low. Activating Flame Demon is optional and is not part of the ending requirement. The game checks the equipped souls at the first-form defeat; it does not require each soul to be cast, used to damage Graham or deliver a particular attack.
- Graham’s teleporting first form is defeated.
- The circular projectile phase is handled without losing the retry opportunity.
- Flame Demon, Giant Bat and Succubus are equipped when the first form receives its final hit.
- No soul activation or special finishing attack is being treated as mandatory.
Handle Graham’s second form
After the first form is defeated under the correct condition, Graham changes into a large demon body in the background. The vulnerable target is the central body. Use a weapon with useful reach or an upward attack if available, but no specific weapon is required for progression.
Two large hands create the close-range hazard. Watch for the warning sparkle before a hand swings inward. Ducking or sliding avoids the horizontal sweep, and moving away from the center gives you more room when both hands threaten the same area. Do not remain beneath a hand after its warning appears simply to gain one more hit.
A moving ring travels above Graham and tracks Soma’s position before firing a laser. Lead the ring toward one side of the room, then move or slide away as the shot is released so the beam lands where Soma was standing. Return to the central body after the laser passes and attack during the next opening.
Keeping Flame Demon, Giant Bat and Succubus equipped throughout this form is the safest procedure because it prevents an accidental loadout change before the ending scene. It is not a separate requirement to activate them, spend MP on them or use them during the second form.
- The central demon body is treated as the target.
- The hands’ sparkle warning and inward sweeps are avoided.
- The tracking ring is led away before its laser fires.
- The three named souls remain equipped as a safe precaution, without treating their use as mandatory.
Confirm the continuation and collect the post-Graham rewards
After Graham is defeated, watch the scene instead of assuming the campaign has ended. The correct route continues with Arikado’s appearance and dialogue rather than stopping at the short ending. Do not change the soul loadout until this continuation has appeared.
When control resumes, leave the post-battle area to the left. Enter the newly accessible room and collect the Black Panther soul and Dracula’s Tunic. Their availability confirms that the extended route is open. Graham’s defeat alone is not the completion check for this chapter; the continuation and reward room must also be reached.
Save after collecting both rewards. The next objective is the return toward the Floating Garden. The opened black-mist door there leads to Julius and then to the transition into the Chaotic Realm. Chaos, not Graham, is the final encounter required for the game’s true-ending route.
- Arikado appears after Graham’s defeat.
- The story continues instead of stopping at the short ending.
- The route to the left of the post-battle area is accessible.
- Black Panther is collected.
- Dracula’s Tunic is collected.
- A new save is made after collecting the rewards.
Recover from the short ending
If the game displays the short ending after Graham, reload the save made before entering his room. You do not need to restart the campaign; the pre-Graham save lets you repeat the boss with the correct condition.
Before entering again, verify the complete names: Flame Demon, Giant Bat and Succubus. Equip Flame Demon in Bullet, Giant Bat in Guardian and Succubus in Enchant. Keep that exact loadout unchanged until Graham’s first form has been defeated. The decisive point is the final hit on that first form, so do not defeat it while even one slot contains a substitute.
After the first form falls, you may technically change souls for the second form, but retaining the three named souls is the safer procedure and avoids confusion. The souls do not need to be activated, used as attacks or selected for the final blow. Defeat the second form, watch for Arikado’s continuation, move left for Black Panther and Dracula’s Tunic, and save again.
If the short ending repeats, verify the slot assignments rather than relying on color alone. In particular, make sure the blue soul is Giant Bat, not another bat-related effect, and that all three named souls were equipped at the instant the first form was defeated.
- The pre-Graham save is reloaded.
- Flame Demon is in Bullet, Giant Bat is in Guardian and Succubus is in Enchant.
- The exact loadout is present when Graham’s first form receives its final hit.
- The souls are not treated as requiring activation or attack use.
- Arikado’s continuation, Black Panther and Dracula’s Tunic are confirmed.
Before you move on
- Graham’s first form is defeated while Flame Demon is equipped in Bullet, Giant Bat in Guardian and Succubus in Enchant.
- The three souls are retained through the remainder of the encounter as a safe procedure, without claiming that their activation or attack use is required.
- Graham’s second form is defeated by attacking the central demon body while avoiding the hands and tracking ring laser.
- Arikado appears after the battle instead of the story stopping at the short ending.
- The route to the left of the post-battle area is accessible.
- Black Panther and Dracula’s Tunic are collected.
- A new save is made after collecting the rewards.
- The route toward the Floating Garden, Julius, the Chaotic Realm and Chaos is available.
References for this chapter
- Castlevania: Aria of Sorrow/Top Floor — StrategyWiki
- Castlevania: Aria of Sorrow - Guide and Walkthrough - Game Boy Advance - By Grawl
- Castlevania: Aria of Sorrow — Guide and Walkthrough — GameFAQs, Bkstunt_31
- Castlevania: Aria of Sorrow — Guide and Walkthrough
- Castlevania: Aria of Sorrow FAQ/Walkthrough — Neoseeker
After Graham — Julius, the return to Floating Garden and the Chaotic Realm door
After defeating Graham with Flame Demon, Giant Bat and Succubus equipped, collect Black Panther and Dracula’s Tunic, then save. Warp to the Castle Corridor and travel east to the Floating Garden rather than retracing the entire Top Floor route. In the Garden, use Giant Bat to cross the elevated passage in the upper-right section. Continue through the Rippers and Altairs, drop through the thin floor, and defeat the Kicker Skeleton below. This enemy is not optional: the guarded route cannot be completed without clearing it, although its Ability Soul is optional. Save in the nearby room, return to the lower passage, and enter the formerly sealed black-mist door. Julius Belmont begins the forced battle. Use a strong non-holy weapon, avoid trading blows during his backdash, and answer his whip, slide, jump-kick and sub-weapon attacks with short punish windows. After Julius falls and the conversation ends, leave the arena and activate the separate warp in the room beyond it. That transition sends Soma to the Chaotic Realm, where the next chapter begins.
Confirm the post-Graham state and prepare for the return trip
Begin from the save made after the extended Graham sequence. The required signs are that Arikado appeared after Graham, Black Panther was collected from the pedestal in the adjoining room, Dracula’s Tunic was picked up, and the file was saved afterward. This chapter does not repeat Graham’s fight or reapply the three-soul condition.
If those rewards are missing, return to the pre-Graham save and verify that Flame Demon, Giant Bat and Succubus were equipped when Graham’s first form was defeated. A normal Graham ending does not open the route covered here.
Restore HP and MP before leaving. Select the weapon and soul setup you want for Julius, but do not waste MP on continuous effects during the return trip. Black Panther is useful for short bursts of movement, yet its drain makes it inefficient to hold active throughout the entire journey. Keep healing items available for the boss attempt.
- The extended post-Graham continuation occurred.
- Black Panther and Dracula’s Tunic are in the inventory.
- The post-Graham save has been used.
- HP, MP and healing supplies are ready.
Warp to the Floating Garden and cross the elevated route
Use the nearest warp room to travel to the Castle Corridor. From there, follow the established eastern connection until you re-enter the Floating Garden. This is the efficient return route after Graham; there is no need to climb back through the Top Floor.
In the Garden, move right through the opening section, then go upward into the large upper-right room. Climb to the highest reachable part of that room and use Giant Bat to fly through the elevated passage. The opening is too high for ordinary jumps, so Giant Bat is required for this route.
Continue through the connected rooms. Defeat or bypass ordinary enemies according to the space available, but do not let flying enemies knock Soma into lower gaps. Proceed until the route reaches the section containing Rippers, Altairs and the thin floor above the Kicker Skeleton area.
- The Castle Corridor warp was used.
- The Floating Garden was re-entered from the castle side.
- The upper-right elevated passage was crossed with Giant Bat.
- The Ripper and Altair section has been reached.
Defeat the Kicker Skeleton guarding the route
Continue right through the Ripper and Altair section, then drop through the thin floor when the route requires it. A Kicker Skeleton waits in the lower room. Defeat it before attempting to continue. This encounter is mandatory because the enemy blocks the passage leading onward; it is not an optional detour.
The Kicker Skeleton attacks by jumping toward Soma. Stand far enough away to see the leap, then strike after it lands or pass behind it when the room gives you space. Avoid trading hits directly beneath it, where the jump and landing can overlap Soma’s attack animation.
The Kicker Skeleton Ability Soul is optional. It can add a kick to Soma’s double jump, and you may repeat the fight if you want the soul for collection or movement utility. Do not remain here waiting for the drop before progressing. Once the enemy has been defeated, leave through the route and enter the save room to the left.
- The Kicker Skeleton was defeated.
- The guarding enemy was treated as mandatory.
- Only the Kicker Skeleton Ability Soul was treated as optional.
- The nearby save room has been used.
Enter the opened black-mist door
Leave the save room and continue right through the Garden Path. Drop through the next thin floor into the lower chamber, then move left through the connecting room. The passage leads to the black-mist door that was sealed during the earlier Floating Garden visit.
The door opens only after the extended Graham route has been completed. No Kicker Skeleton Ability Soul, additional key item or special attack is needed. The Kicker Skeleton itself must still be cleared because it guards the route before this door.
If the barrier remains closed, do not farm the Kicker Skeleton. Return to the post-Graham save and verify that Graham was defeated with Flame Demon, Giant Bat and Succubus equipped and that the extended continuation occurred. Then repeat the return route.
- The Kicker Skeleton route has been cleared.
- The black-mist door is open.
- The room beyond the door has been entered.
- Julius’s encounter begins automatically.
Defeat Julius Belmont
Equip a strong non-holy weapon for the fight. Julius is tolerant of holy damage, so a dependable weapon with another damage type is generally preferable to relying on a holy-aligned sword. No single weapon is mandatory; use the strongest reliable non-holy option available in the original Game Boy Advance release.
Julius uses the Vampire Killer, rapid movement, jump-kicks and slides. Keep enough distance to see his approach. Jump over a standing whip attack or retreat until its reach has passed, then punish during recovery. Do not attack into his backdash, because he is invulnerable during that movement.
When Julius jumps, attack the landing only if Soma has room to retreat afterward. If Julius slides close to the floor, jump over him rather than standing in front of the slide. Avoid chasing him during evasive movement; short attacks followed by immediate repositioning are safer than extended strings.
During the later portion of the battle, Julius adds sub-weapons such as the dagger, axe, holy water and cross. Move away from the projectile pattern first, then resume attacking after the space clears. A ranged Bullet Soul can help when closing distance is unsafe, but conserve MP for emergencies instead of holding a draining Guardian effect for the entire encounter.
If Soma falls, reload the Garden Path save and repeat the route. The Graham soul condition does not need to be performed again, and the Kicker Skeleton Ability Soul is not required for the rematch.
- A strong non-holy weapon is equipped.
- Whip, jump-kick, slide and backdash responses are being used.
- Julius’s later sub-weapons are being avoided.
- Julius Belmont has been defeated.
- The post-battle conversation has finished.
Use the separate warp into the Chaotic Realm
After Julius is defeated and the conversation ends, leave the battle room through the available exit. Do not expect the arena itself to transfer Soma directly to the final area.
Enter the adjoining room beyond the arena. This room contains the separate warp used to continue the story. Stand at the warp point and press Up when control is available. The game then transfers Soma to the Chaotic Realm.
Enter the opening save room there before beginning the gauntlet. Saving immediately gives you a recovery point for the next chapter, which covers the high-level enemies, resource management and Chaos encounter.
If Julius has been defeated but the Chaotic Realm has not appeared, inspect the room beside the arena again and activate the warp rather than searching the Floating Garden for another boss. If the black-mist door was never open, return to the post-Graham save and verify the extended ending route.
- The room beyond Julius’s arena has been entered.
- The separate post-battle warp has been activated.
- The area name Chaotic Realm is displayed.
- The Chaotic Realm entrance save room is accessible.
Before you move on
- The chapter began from the save after the extended Graham continuation.
- Black Panther and Dracula’s Tunic were already collected.
- The Castle Corridor warp was used to return toward the Floating Garden.
- Giant Bat was used to cross the upper Floating Garden passage.
- The Kicker Skeleton guarding the route was defeated.
- The Kicker Skeleton Ability Soul was treated as optional.
- The black-mist door was entered.
- Julius Belmont was defeated with a suitable non-holy weapon.
- The separate warp beyond Julius’s arena transferred Soma to the Chaotic Realm.
- The Chaotic Realm opening save room is accessible.
References for this chapter
- Castlevania: Aria of Sorrow - Guide and Walkthrough - Game Boy Advance - By Dev
- Castlevania: Aria of Sorrow — Guide and Walkthrough
- Castlevania: Aria of Sorrow — Guide and Walkthrough — GameFAQs, Bkstunt_31
- Castlevania: Aria of Sorrow — Complete walkthrough (GBA)
- Castlevania: Aria of Sorrow Game Boy Advance instruction manual
Chaotic Realm — the final gauntlet and Chaos’s forms
After defeating Julius, continue through the transport room into the Chaotic Realm and save in the room immediately to the left. The area has no normal map, but its main route is mostly linear and includes useful recovery items. Conserve HP, healing items and MP recovery for Chaos rather than spending resources on every enemy. A side branch contains the Chaos Ring only after every enemy soul has been collected, so it is optional for campaign completion. Before the boss, save in the room immediately to the right of the final door. Chaos begins by sealing Bullet, Guardian and Enchant Souls inside three colored statues. Destroy the blue statue first as the recommended opening because its charging creature is the most dangerous threat and is difficult to avoid. Red-first remains a workable alternative if restoring Bullet Souls early is more valuable to you. After all three statues are destroyed, Chaos exposes a black central mass protected by four corner eyes. Lower its defense by destroying the eyes, then manage the skeletal dragon, green shot, homing orbs and sequential spike launch while attacking the core. Defeat both forms to trigger the true ending.
Enter the Chaotic Realm and use the first save room
After Julius is defeated, continue into the transport room. The transition carries Soma into the Chaotic Realm. Go left from the entrance and use the save room before beginning the gauntlet. The Chaotic Realm does not have a normal map to complete, so use the room layout and landmarks rather than expecting new map squares to appear.
Equip a dependable weapon before leaving the entrance. Claimh Solais is a strong choice if you have it, but it is not required; any reliable high-damage weapon is suitable. Ordinary enemies can generally be defeated with weapon attacks, so conserve MP and recovery items for the final battle. The Chaos Ring is an optional reward and is unavailable unless every obtainable enemy soul has already been collected.
- Defeat Julius and enter the Chaotic Realm.
- Save in the room immediately left of the entrance.
- Equip a reliable weapon and preserve healing and MP recovery.
Follow the opening tower route
Leave the save room, return to the entrance area and go upward. Ignore the right-hand door and enter the first room on the left. A Metal Golem guards a Mana Prism there; collect it if the MP recovery will help, then return to the vertical room.
Continue upward, ignoring the next right-hand doors, and leave through the upper-left route. Proceed through the long rooms and take the far-left exit into the Giant Skeleton section. Defeat or bypass the enemies according to your resources. Weapon attacks are sufficient for the ordinary enemies in this stretch, and conserving MP is more useful than clearing every room with souls.
- Collect the optional Mana Prism if useful.
- Leave the opening tower through the upper-left route.
- Reach the Giant Skeleton section without overspending MP.
Pass the optional Chaos Ring branch and reach the next save point
Continue from the Giant Skeleton section through the rooms with Erinys and Alastor enemies. The route eventually reaches an area modeled after the Underground Reservoir. A side room on the earlier route is associated with the Chaos Ring, but do not treat it as required. The ring becomes available only after every enemy soul has been collected, so skip the detour during a normal campaign completion run.
Proceed through the main route, descend through the vertical rooms and follow the lower passages. Continue until the route reaches another save room. Use it before taking the submerged section. If your HP or MP is low, retreat to the save room rather than consuming several recovery items against ordinary enemies.
- Treat the Chaos Ring route as optional.
- Follow the main route to the next save room.
- Use the save point before the submerged section.
Cross the submerged and upper gauntlet
Leave the save room and continue downward through the long vertical route. At the bottom, go right and drop into the water. Use Skula to sink and travel through the submerged passage, then climb onto the upper-right ledge and continue onward.
In the next upper section, a small room on the left contains a Final Guard and an optional Super Potion. Take it if you need the reserve, then return to the main path. Continue upward through the Medusa Head room and enter the water room at the upper-left. Swim upward and proceed through the rooms containing Alastor, Iron Golem, Shadow Knight and Stolas.
Descend carefully through the gear-and-spike section. Do not drop blindly through the machinery. Continue through the lower rooms until the route sends you upward again into another water section. Swim to the top and enter the save room on the right. This is the final recovery point before Chaos.
- Use Skula to sink through the submerged route.
- Take the optional Super Potion if needed.
- Move carefully through the gear and spike section.
- Reach the final save room on the right.
Save before Chaos’s arena
Heal and save in the final room on the right. The special door on the left begins the final battle sequence, so check your weapon, HP and item supply before entering. The Chaotic Realm route is complete once you reach this room; the remaining objective is the Chaos fight.
At the beginning of the battle, Chaos seals Soma’s Bullet, Guardian and Enchant Souls. Each category remains unavailable until its corresponding colored statue is destroyed. Start with weapon attacks rather than attempting to activate a sealed Tactical Soul.
- Use the final save room before the boss door.
- Heal before entering the special door.
- Expect Bullet, Guardian and Enchant Souls to be sealed at the start.
Destroy the three colored statues
Destroy the blue statue first as the recommended opening. Its statue periodically becomes a charging creature, and that attack causes heavy damage while giving you little room to react. Double-jump over the charge or move clear of its path, then attack the statue when the creature has passed. Removing the blue statue restores Guardian Souls, but do not spend MP carelessly while the other seals remain active.
Red-first is still a workable alternative if you prefer to restore Bullet Souls immediately. The red statue produces three green crystal projectiles that can be struck with your weapon. Destroying it early gives access to ranged Bullet attacks, which may make the remaining targets easier, but red-first is not the recommended default when the blue charge is causing the greatest immediate danger.
The yellow statue creates a targeting marker that follows Soma and drains MP if it connects. Keep moving so the marker cannot settle on you, then attack the yellow statue during a clear opening. After the first target is destroyed, the remaining order is flexible. The objective is to destroy all three statues; do not waste MP attempting to use a category that is still sealed.
Once the blue, red and yellow statues are gone, Chaos changes to its second form. Use the transition to reposition, but do not assume the battle is finished.
- Target the blue statue first as the recommended plan.
- Jump over or move away from the blue creature’s charge.
- Use red-first only as a viable alternative for early Bullet access.
- Keep moving against the yellow MP-drain marker.
- Destroy all three colored statues.
Lower the second form’s defense
Chaos’s second form places a black central mass in the arena with four eye-like targets around the corners. Destroying the eyes lowers the central mass’s defense, making your weapon attacks more effective. Destroy all four if the arena remains under control; if hazards are converging, remove enough eyes to create an opening and return to the core when safe.
A skeletal dragon circles the arena and damages Soma on contact. It sometimes stops and fires a large green shot that travels or ricochets through the room. Track both the dragon’s body and the projectile instead of focusing exclusively on the core.
Chaos also releases four green homing orbs from the corners. They move toward Soma and inflict heavy damage on contact, but weapon strikes can destroy or repel them. Clear nearby orbs before they overlap with the dragon or the spike pattern. When several hazards converge, stop attacking and create distance first.
- Destroy the corner eyes when practical.
- Avoid the skeletal dragon and its green shot.
- Strike or evade the homing orbs.
- Prioritize positioning when multiple hazards overlap.
Avoid the spike ring and destroy the core
The central mass periodically surrounds itself with spikes and launches them outward in sequence. Watch the order in which the spikes appear. The spikes fire in that same order, so remain on the side where the last spikes appeared, then move beneath the central mass after the earlier spikes have launched. Do not stay still waiting for the entire pattern to finish.
Attack the central mass during the openings created by the destroyed eyes. Use short weapon strings and retreat whenever the dragon or orbs approach. Bullet or Guardian Souls can help after their seals are removed, but weapon attacks remain dependable and preserve MP for emergency recovery.
Continue until the black central mass is destroyed. Defeating only the three statues is not enough. The Chaotic Realm campaign objective is complete when both Chaos forms have been defeated and the ending sequence begins.
- Use the spike appearance order to choose the safer side.
- Move beneath the core during the sequential launch.
- Attack the weakened central mass between hazards.
- Defeat Chaos’s second form completely.
- Watch the ending sequence after the victory.
Before you move on
- Julius has been defeated and the Chaotic Realm has been entered.
- The entrance save room and the later recovery save rooms have been used as needed.
- The final save room immediately right of Chaos’s entrance has been used.
- The blue, red and yellow sealed statues in Chaos’s first form have all been destroyed.
- The corner eyes have been destroyed or sufficiently reduced to expose the central mass.
- Chaos’s second-form central mass has been defeated.
- The ending sequence plays after the complete Chaos victory.
- The Chaos Ring remains optional unless every enemy soul has been collected.
Endings, Boss Rush, and Julius Mode — postgame unlocks and goals
After defeating Chaos in the Chaotic Realm and finishing the true-ending sequence, protect the completed Soma save. That file supports New Game Plus, Soma Boss Rush, and later soul-collection work. New Game Plus resets Soma to level 1 and carries over most equipment and ordinary souls, but progression souls, Ability Souls, and Black Panther must be reacquired. Boss Rush sets Soma to level 40, uses the selected save file’s equipment and souls, and replaces normal inventory with its own supplies. The reward ranges are 5:00 to under 6:00 for Excalibur, 4:00 to under 5:00 for Positron Rifle, and under 4:00 for Valmanway. After the good ending, enter JULIUS on a separate new file to begin Julius Mode; complete that campaign through Graham if you want Julius available in Boss Rush. The optional Chaos Ring requires every obtainable enemy soul and is separate from campaign completion.
Save and protect the completed Soma file
The main campaign is complete when Soma defeats Chaos in the Chaotic Realm and the ending sequence finishes. If the true-ending route was followed, the required Graham preparation used Flame Demon in the Bullet slot, Giant Bat in the Guardian slot, and Succubus in the Enchant slot. Allow the ending to reach the save process before opening another mode or starting a new campaign.
Save the cleared Soma file in a slot that you will not overwrite casually. This file is the source for New Game Plus and remains useful for Soma Boss Rush because the selected clear file supplies the equipment and souls used there. Keep a reliable weapon, armor, accessory, and soul setup on the file rather than treating it as disposable.
Before beginning postgame work, check the soul list, equipment inventory, map percentage, and any remaining objectives. The Chaos Ring is not granted merely for seeing the true ending; it has a separate requirement of collecting every obtainable enemy soul. If you intend to pursue it, preserve the clear file before experimenting with other modes.
- Chaos was defeated in the Chaotic Realm.
- The complete true-ending sequence finished.
- The cleared Soma file was saved in a protected slot.
- The equipment, soul list, map percentage, and remaining goals were checked.
Start New Game Plus and reacquire removed progression souls
Begin New Game Plus from the completed Soma file. The new campaign starts from the opening route with Soma at level 1. Most equipment and many ordinary enemy souls carry over, but the game removes selected progression and movement souls so the castle’s intended route remains relevant.
Plan to reacquire Flying Armor, Undine, Skula, Giant Bat, and Black Panther. Ability Souls are also removed and must be collected again. These losses are normal for the original Game Boy Advance release and do not indicate that the clear file was damaged. Record the missing souls before farming ordinary enemies so you know which items are intentionally absent.
Follow the normal campaign route and collect each removed progression soul when its original boss, enemy, or Soul Keeper becomes accessible. Keep separate notes for progression souls, Ability Souls, and ordinary enemy souls. This prevents repeated farming of a soul that carried over while a movement power needed for a blocked route remains missing.
Choose Normal for an efficient cleanup run unless you specifically want Hard Mode and its separate equipment placements. Check the starting inventory before leaving the opening area, then update the reacquisition list whenever a blocked passage identifies a missing movement ability.
- New Game Plus was started from the preserved cleared Soma file.
- Soma’s level reset to 1.
- Carried-over equipment and ordinary souls were checked.
- Flying Armor, Undine, Skula, Giant Bat, Black Panther, and the removed Ability Souls were placed on a reacquisition list.
- Normal or Hard was selected deliberately.
Run Soma Boss Rush and pursue its weapon rewards
After the good ending unlocks Boss Rush, select the mode and choose the Soma save file whose equipment and souls you want to use. Soma is set to level 40 for the event. The selected file supplies the equipment and usable souls, while ordinary inventory is replaced by the predetermined Boss Rush supplies.
The standard sequence is Creaking Skull, Manticore, Great Armor, Man-Eater, Big Golem, Headhunter, Death, Legion, Balore, and Graham. There is no ordinary castle exploration, shopping, or normal save-room recovery between these encounters, so select a loadout that deals reliable damage without depending on supplies from the chosen file’s normal inventory.
The reward ranges are distinct. A completion time from 5:00 up to, but not including, 6:00 awards Excalibur. A time from 4:00 up to, but not including, 5:00 awards Positron Rifle. Any completion under 4:00 awards Valmanway. These are optional challenge rewards, not requirements for the true ending or ordinary campaign completion.
If a desired weapon does not appear, improve the recorded time and repeat Boss Rush with a suitable save file. Practice boss transitions, minimize menu time, and prefer dependable attacks over a setup that requires rare drops during the run. Protect the cleared Soma file before attempting repeated time trials.
- Soma Boss Rush is available after the good ending.
- The intended Soma save file was selected.
- Soma is level 40 during the event.
- The replacement Boss Rush inventory was understood.
- 5:00 to under 6:00 was recorded for Excalibur.
- 4:00 to under 5:00 was recorded for Positron Rifle.
- Under 4:00 was recorded for Valmanway.
- The Boss Rush weapons were treated as optional rewards.
Start Julius Mode and unlock Julius Boss Rush
After completing the game with the good ending, create a separate file and enter JULIUS as the name. Use a new slot rather than the cleared Soma file. This starts Julius Mode, so the file is an alternate-character campaign and does not serve as the source for Soma’s New Game Plus equipment and souls.
Julius uses his own Vampire Killer, movement techniques, and sub-weapons instead of Soma’s weapon, armor, accessory, and Tactical Soul menus. Follow the castle route and defeat Graham. Julius Mode is a separate campaign and does not continue through Soma’s Chaotic Realm and Chaos encounter.
Save the completed Julius file after its ending. Keep both clear files: the Soma file for New Game Plus, soul collection, and Soma Boss Rush, and the Julius file for the alternate-character challenge. They are separate save purposes and should not be treated as interchangeable.
To use Julius in Boss Rush, choose the completed Julius clear file when selecting the Boss Rush character or source file. Julius Boss Rush is separate from Soma Boss Rush and does not use Soma’s weapons, armor, accessories, souls, or ordinary inventory.
- A separate file was created with the exact name JULIUS.
- The file starts Julius Mode instead of an ordinary Soma campaign.
- The cleared Soma file remains preserved.
- Graham was defeated in Julius Mode and the clear file was saved.
- The Julius clear file was selected if Julius Boss Rush was desired.
Collect every enemy soul and claim the optional Chaos Ring
The Chaos Ring is a full-completion reward separate from the true ending, Boss Rush, Julius Mode, and map completion. The requirement is every obtainable enemy soul in the original GBA game. Track enemy souls separately from Ability Souls and movement powers so that a complete movement list is not mistaken for a complete enemy-soul collection.
Use the preserved Soma file or New Game Plus for cleanup. New Game Plus offers another opportunity to reach missed enemies, although removed progression souls and Ability Souls must be collected again. Pay special attention to conditional souls. Legion’s soul requires destroying all four outer shell sections before defeating the exposed core; defeating the core too early can leave that enemy soul uncollected for the current file.
After the enemy-soul requirement is complete, return to the Chaotic Realm and search the side-room branch where the Chaos Ring appears. In the original GBA version, the ring is found in the upper-left branch of the room identified in soul-collection guides, near the route associated with the Death-area layout. If it is absent, recheck the enemy-soul list and confirm that conditional souls were actually obtained before repeating the final route.
A practical order is to preserve the cleared Soma file, complete desired New Game Plus cleanup, collect the Chaos Ring, finish Julius Mode, and then pursue Boss Rush weapon times. The ring is optional and is not needed to defeat Chaos or unlock the alternate modes.
- Every required enemy soul was collected.
- Removed movement and Ability Souls were reacquired in New Game Plus where necessary.
- Legion’s conditional soul was verified for full soul completion.
- The Chaotic Realm was revisited after the enemy-soul requirement was complete.
- The Chaos Ring was collected if optional full completion was desired.
Before you move on
- Chaos was defeated in the Chaotic Realm and the cleared Soma file was saved.
- New Game Plus can be selected from the preserved cleared Soma file.
- Carried-over equipment and ordinary souls were checked, while removed progression and Ability Souls were scheduled for reacquisition.
- Soma Boss Rush is available and uses the selected file’s equipment and souls at level 40 with replacement inventory.
- The Boss Rush ranges were understood: 5:00 to under 6:00 for Excalibur, 4:00 to under 5:00 for Positron Rifle, and under 4:00 for Valmanway.
- JULIUS starts the alternate Julius campaign in a separate file.
- The Julius campaign was completed through Graham if Julius Boss Rush access is desired.
- Every obtainable enemy soul was collected and the Chaotic Realm was checked for the optional Chaos Ring.
References for this chapter
- Castlevania: Aria of Sorrow — Boss Rush Guide, LiteYear
- Castlevania: Aria of Sorrow — Cheats, Codes, and Secrets for Game Boy Advance
- Castlevania: Aria of Sorrow — Guide and Walkthrough
- Castlevania: Aria of Sorrow — Keeping Souls after beating game?
- Castlevania: Aria of Sorrow — Guide and Walkthrough, Schlave
100% Souls, the Chaos Ring and full completion checklist (optional)
For optional full completion, collect every obtainable Tactical Soul, finish the main castle map, defeat the required and optional encounters, and claim the Chaos Ring in the Chaotic Realm. Track missing souls by enemy name instead of relying only on the percentage display. Legion is the most dangerous entry to miss: destroy all four outer shell sections before defeating the central core, or that battle will not award Legion’s soul. After every obtainable enemy soul is registered, return to the Chaotic Realm and locate the room containing a Lubicant and an Erinys. Take its upper-left exit to reach the Chaos Ring room. Treat map completion, soul completion, the true ending, equipment collection, and synthesis collection as separate goals.
1. Build a soul checklist before farming
Open the enemy and soul information screens and make a written list of every enemy whose soul is still unregistered. The percentage display helps measure progress, but it does not identify the missing enemy. Record souls by enemy name and separate ordinary monsters, boss souls, fixed-location Ability Souls, and enemies found only in the Chaotic Realm.
Work through the list by location. Return to a room containing the target enemy, defeat it, leave through a doorway so the room reloads, and repeat. If a room contains several missing enemies, check each one before moving to another area. Save after a rare soul appears so a later mistake does not erase the result. A soul is complete only when it is visibly registered in the soul information screen.
- Make a written list of missing soul names before beginning a farming circuit.
- Separate enemy souls from fixed-location Ability Souls and boss souls.
- Save after important drops and verify each new entry in the soul screen.
2. Secure Legion’s soul correctly
Treat Legion as a special case during the Underground Cemetery battle. Destroy all four outer shell sections first. Only after every section has been removed should you damage the central core. If the core dies while any shell section remains, that battle will not award Legion’s soul.
If Legion’s soul is missing after the battle, do not count the file as complete. On the original GBA release, the practical recovery options are an earlier save or a later New Game Plus playthrough after obtaining the full ending. New Game Plus lets you fight Legion again, although Ability Souls such as Double Jump and Slide must be reacquired. Check the soul list rather than assuming the boss encounter supplied the entry.
- All four Legion shell sections are destroyed before the core dies.
- Legion’s soul is visibly registered as acquired.
- If the entry is missing, preserve an earlier save or plan a New Game Plus recovery.
3. Farm rare drops efficiently
Use the Soul Eater Ring when it is available from Hammer’s shop. It improves the practical efficiency of soul farming, but it does not replace fighting the correct enemy or guarantee an immediate drop. Defeat the target, leave and re-enter the room, and continue until the soul is actually registered.
Verify enemy names instead of farming by appearance. Similar silhouettes and related variants can have different entries and separate souls. Choose rooms where the target is alone, appears in a group, or stands close to a doorway. These layouts let you defeat the enemy and reload the room quickly. Save after a difficult drop before changing equipment or beginning another long circuit.
- Use the Soul Eater Ring if available, but do not treat it as a completion requirement.
- Confirm the target’s name before starting a long farming session.
- Check the soul entry after the drop rather than relying on memory.
4. Include late-game and Chaotic Realm souls
Review the Top Floor, Forbidden Area, and Chaotic Realm separately from the early castle areas. Reaching Chaos does not prove that the collection is complete: enemies in the Chaotic Realm have souls that also count toward the requirement. Return to the realm after the true-ending route is available and farm any missing entries there.
The requirement is every obtainable enemy soul, not every enemy or character encountered. Some story characters and encounters do not provide Tactical Souls and should not be treated as missing entries. Use the soul information screen and an enemy-by-enemy list as the deciding record.
- Top Floor and Forbidden Area enemies have been checked.
- Chaotic Realm enemy souls have been checked after that area becomes accessible.
- Do not count non-soul-giving characters as missing collection entries.
5. Claim the Chaos Ring
After the collection screen confirms that every obtainable enemy soul is acquired, enter the Chaotic Realm through the post-Graham route in the Floating Garden. Follow the realm until you reach the room containing a Lubicant and an Erinys. These enemies are the route landmark for the ring; do not substitute another similar-looking room.
From the Lubicant-and-Erinys room, take the upper-left exit. The adjoining room contains the Chaos Ring once the complete soul requirement has been fulfilled. Pick it up and confirm it in the accessory inventory. The ring provides effectively unlimited MP for Tactical Soul use, making it especially valuable for farming, exploration, and challenge content.
- Every obtainable enemy soul is registered before searching for the ring.
- The Chaotic Realm room containing a Lubicant and an Erinys is located.
- The upper-left exit is taken and the Chaos Ring is collected from the adjoining room.
6. Complete the map and final checklist
Review the castle map and compare it with a complete original-GBA map. The main castle route is commonly tracked as 14 map sections; the Chaotic Realm is an additional late-game area that must also be visited and cleared for a full campaign record. Revisit rooms blocked by Double Jump, Hippogryph, Undine, Skula, Galamoth, and Giant Bat, as well as breakable walls, hidden rooms, underwater passages, and one-way routes. Use the in-game percentage as a progress measure, but inspect unexplored rooms directly when searching for the last missing squares.
Defeat every main campaign boss, Legion, the Arena encounters, Julius, and Chaos. Collect the three Ancient Books and confirm that Flame Demon, Giant Bat, and Succubus were equipped for Graham so the true-ending route opened. Equipment, weapons, synthesis materials, map completion, soul completion, and the Chaos Ring are separate completion targets; one does not automatically prove the others.
A fully completed optional file has every obtainable soul registered, including Legion and the Chaotic Realm entries; all main map sections explored; the Chaotic Realm cleared; the three Ancient Books collected; the true-ending route completed through Julius and Chaos; and the Chaos Ring obtained. If the ring is absent, first recheck the soul list, then return to the Chaotic Realm’s Lubicant-and-Erinys room and take the upper-left exit.
- All main castle map sections are explored, with no ability-gated gaps remaining.
- The Chaotic Realm has been entered and Chaos has been defeated.
- The three Ancient Books were collected and the Graham soul condition was followed.
- Every obtainable Tactical Soul is registered, including Legion and late-game entries.
- The Chaotic Realm room containing a Lubicant and an Erinys was found, the upper-left exit was taken, and the Chaos Ring was collected.
Before you move on
- The soul information screen shows every obtainable Tactical Soul acquired, including Legion and Chaotic Realm entries.
- All main castle map sections are fully explored, with hidden rooms and ability-gated routes checked.
- The three Ancient Books were collected, Flame Demon, Giant Bat, and Succubus were equipped for the Graham route, and the true ending was completed.
- Every main boss, Legion, Arena encounter, Julius, and Chaos has been defeated.
- The Chaotic Realm room containing a Lubicant and an Erinys was found, the upper-left exit was taken, and the Chaos Ring was collected from the adjoining room.
References for this chapter
- Castlevania: Aria of Sorrow — Soul Collecting FAQ
- Castlevania: Aria of Sorrow — Guide and Walkthrough
- Castlevania: Aria of Sorrow — Guide and Walkthrough
- Castlevania: Aria of Sorrow Map
- Nintendo Game Boy Advance games manuals: Castlevania: Aria of Sorrow
- Castlevania: Aria of Sorrow — route and completion checklist
Finishing up
You have defeated Death and collected Skula, cleared the Underground Reservoir, defeated Legion in the Underground Cemetery and obtained Galamoth, defeated Balore and obtained Giant Bat, reached the Top Floor through the Giant Bat route, and prepared for Graham. Passing Chronomage and collecting Ancient Books 2 and 3 are optional clue and exploration objectives; the Forbidden Area may be skipped or explored as an optional detour.
You have defeated Graham with Flame Demon in Bullet, Giant Bat in Guardian and Succubus in Enchant, then continued through Julius and the Chaotic Realm.
You have defeated Chaos and seen the resulting ending sequence.
The required boss route includes Creaking Skull, Manticore, Great Armor, Big Golem, Headhunter, Death, Legion, Balore, Graham, Julius and Chaos.
Optional completion includes Chronomage, Ancient Book collection, Forbidden Area equipment and extra souls, all enemy souls, the Chaos Ring, Boss Rush rewards and Julius Mode.
Choose your next gameScreenshots & video
Game imagery for reference. Follow the written chapters above for the route and strategies.
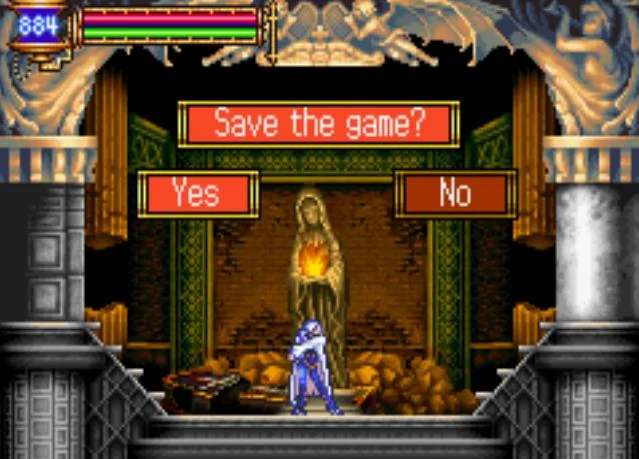
Sources & references
Our original guide draws on the references below. Check the edition at the top of this page before following controls or unlock requirements.
- Castlevania: Aria of Sorrow Game Boy Advance instruction manual
- Castlevania: Aria of Sorrow Controls — StrategyWiki
- Castlevania: Aria of Sorrow Souls, StrategyWiki
- Castlevania: Aria of Sorrow — Guide and Walkthrough — GameFAQs, Bkstunt_31
- Castlevania: Aria of Sorrow Map
- Castlevania: Aria of Sorrow/Castle Corridor — StrategyWiki
- Castlevania: Aria of Sorrow — Guide and Walkthrough by grassmaster
- Awakening in Dracula’s Castle — Castle Corridor
- Castlevania: Aria of Sorrow/Chapel — StrategyWiki
- Castlevania: Aria of Sorrow — Guide and Walkthrough, Schlave
- The Chapel — Graham Jones and the Manticore — Pixel Guides
- Castlevania: Aria of Sorrow/Study — StrategyWiki
- Castlevania: Aria of Sorrow - Guide and Walkthrough - Game Boy Advance - By Grawl
- Study — Castlevania Wiki
- The Study — breaking Great Armor’s guard
- Castlevania: Aria of Sorrow — Guide and Walkthrough by Zenalasca
- Castlevania: Aria of Sorrow/Dance Hall — StrategyWiki
- The Dance Hall — Big Golem and the Skeleton Blaze slide — PixelGuides
- Castlevania: Aria of Sorrow - Guide and Walkthrough - Game Boy Advance - By Dev
- Castlevania: Aria of Sorrow — Guide and Walkthrough
- One Path to Headhunter — Inner Quarters
- Castlevania: Aria of Sorrow/Inner Quarters — StrategyWiki
- Castlevania: Aria of Sorrow/Floating Garden — StrategyWiki
- Castlevania: Aria of Sorrow — Guide and Walkthrough by PsychoPenguin, GameFAQs
- Castlevania: Aria of Sorrow — Soul Collecting FAQ
- Castlevania: Aria of Sorrow — Clock Tower — StrategyWiki
- How to get past an impenetrable waterfall? — Castlevania: Aria of Sorrow Q&A
- Castlevania: Aria of Sorrow/Underground Reservoir — StrategyWiki
- Castlevania: Aria of Sorrow/Underground Cemetery — StrategyWiki
- Castlevania: Aria of Sorrow/The Arena — StrategyWiki
- Castlevania: Aria of Sorrow — Complete walkthrough (GBA)
- Breaking into the Forbidden Area — Joyeuse and Claimh Solais
- The Top Floor — Graham Jones and the true-ending souls
- Castlevania: Aria of Sorrow/Top Floor — StrategyWiki
- Castlevania: Aria of Sorrow Maps
- Castlevania: Aria of Sorrow FAQ/Walkthrough — Neoseeker
- Castlevania: Aria of Sorrow/Chaotic Realm — StrategyWiki
- Castlevania: Aria of Sorrow FAQ/Walkthrough — MegaBelmont
- Castlevania: Aria of Sorrow — Boss Guide — GameFAQs, bluberry
- Castlevania: Aria of Sorrow — Boss Rush Guide, LiteYear
- Castlevania: Aria of Sorrow — Cheats, Codes, and Secrets for Game Boy Advance
- Castlevania: Aria of Sorrow — Guide and Walkthrough
- Castlevania: Aria of Sorrow — Keeping Souls after beating game?
- Nintendo Game Boy Advance games manuals: Castlevania: Aria of Sorrow
- Castlevania: Aria of Sorrow — route and completion checklist
About the game & collecting notes
- Platform
- Game Boy Advance
A step-by-step Nintendo Game Boy Advance USA campaign route from Castle Corridor through Chaos. It covers the required area order, Tactical Souls, movement abilities, Death and Skula, the first Underground Reservoir pass, the Underground Cemetery, Legion and Galamoth, Balore and Giant Bat, the optional Forbidden Area detour, the Top Floor route through the Inner Quarters, Graham’s true-ending condition, Julius, the Chaotic Realm and Chaos. Optional Forbidden Area equipment, Ancient Book clue collection, Boss Rush, Julius Mode, soul completion and the Chaos Ring are separated from required progression.
Darryl Polo
Darryl Polo loves tinkering with emulation and revisiting retro games. He enjoys exploring how old favorites play on different setups and sharing what he learns along the way. At Joking Joystick, he writes about the games, hardware, and small discoveries that keep the hobby fun.
Our editorial standardsFound a step that needs another look? Help us improve this guide.