
Bloodborne Walkthrough for PlayStation 4: Complete Main Campaign, Optional Areas, Bosses, and Endings
A complete PlayStation 4 walkthrough for the original Bloodborne campaign. Follow the safest progression through Yharnam, unlock shortcuts, defeat every required boss, preserve useful NPC quests, collect the items needed for the secret ending, and finish with Gehrman and the Moon Presence. Optional regions, bosses, Chalice Dungeon goals, and endgame checks are separated from the required route.


Find a copy
Bloodborne PlayStation 4
We may earn a commission if you buy through these links, at no extra cost to you. As an Amazon Associate I earn from qualifying purchases.
Opens retailer search results. Check the model, edition, seller, availability and current price before buying.
Before you begin
Bloodborne begins in Central Yharnam, where your immediate objective is not to understand every mystery but to survive long enough to establish a route through the city.
Explore carefully, activate every lamp you reach, open shortcuts whenever possible, and return to the Hunter’s Dream when you need to spend Blood Echoes, improve your weapon, or restock supplies.
The game allows several areas and bosses to be tackled in different orders, but the chapters below use a reliable route that keeps the main story clear while leaving room for optional discoveries.
The ending is determined near the end of the hunt.
If you want the widest version of the finale, collect and consume at least three One Third of Umbilical Cord items before refusing Gehrman’s offer.
Do not enter the final confrontation until you have completed the optional areas and NPC steps you care about, because defeating the final boss immediately starts New Game Plus.
The walkthrough distinguishes required progress from optional bosses, side areas, Chalice Dungeons, weapons, runes, and NPC rewards so you can choose how much of Yharnam to complete.
Set yourself up for the run
Choose a starting origin based on your preferred early statistics rather than trying to optimize a permanent build.
A first-time hunter can safely prioritize Vitality, then add the primary attribute used by the chosen weapon.
Test both forms of your starting trick weapon.
The transformed moveset is not merely a stronger version; it changes reach, speed, crowd control, and stamina use.
Practice switching forms during attacks and use the firearm primarily to interrupt enemies and create visceral attacks.
Return to the Hunter’s Dream often.
Spend Blood Echoes before difficult areas, repair weapons when durability falls, and use the workshop to strengthen one main weapon consistently rather than spreading early materials across several weapons.
Carry Blood Vials and Quicksilver Bullets, but do not spend every Echo on supplies if you still need to level.
The Central Yharnam and later lamp routes provide repeatable opportunities to replenish both resources.
Search for shortcuts before repeatedly attempting a boss.
A gate, elevator, ladder, or side door can turn a long enemy-filled run into a short practice route and also gives you a safer way to recover lost Blood Echoes.
Read item descriptions for key story objects, especially Hunter Badges, Caryll Runes, and One Third of Umbilical Cord items.
The game often communicates prerequisites through item wording and environmental placement rather than direct quest markers.
Talk to NPCs until their dialogue repeats, then revisit them after major bosses or shifts in the night.
Record where you sent survivors, because some NPC rewards and outcomes depend on whether they are directed to the Oedon Chapel or Iosefka’s Clinic.
Explore optional regions before defeating Mergo’s Wet Nurse if you want to complete side quests, obtain the available One Third of Umbilical Cords, or fight the optional main-game bosses.
The final encounter changes the state of the game immediately.
Treat Insight as a resource as well as a story statistic.
It enables certain interactions and summons but can also alter enemy behavior and expose you to additional dangers.
Spend it deliberately when you understand what you are buying.
The Old Hunters expansion is not part of the original base-game campaign covered by the main route.
If your copy includes that expansion, treat it as separate optional content and enter it before the final boss if you want to complete it in the current playthrough.
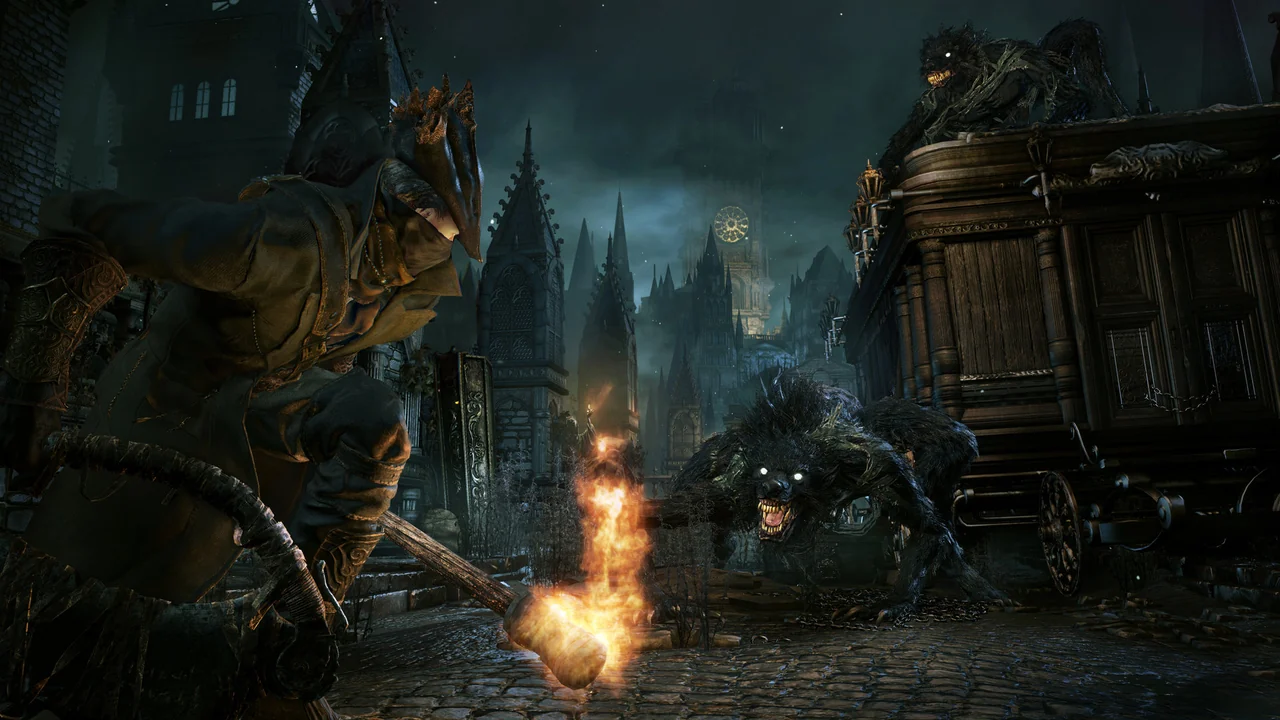
The Hunt Begins: Character Setup, Hunter’s Dream, and Central Yharnam
Begin in Iosefka’s Clinic, make the first trip to the Hunter’s Dream, choose the starting weapons, and establish Central Yharnam as the opening base. This chapter teaches the combat loop, shortcut use, Blood Echo recovery, and the route toward Father Gascoigne. Cleric Beast, the Sewer Well, and the wheelchair hunter are optional and are not required to leave the area.
Leave Iosefka’s Clinic and reach the Hunter’s Dream
After character creation, leave the examination room and enter the larger clinic. The wounded man nearby can be spoken to, but he is not required for progress. Continue through the clinic until you reach the outdoor area with the hostile wolf. Your hunter is unarmed at this point, so fighting the wolf is possible but inefficient. Allowing it to kill you is the intended early route, although reaching the first Central Yharnam lamp by other means also works.
After death, you awaken in the Hunter’s Dream. The messengers provide one trick weapon and one firearm. Use the workshop to inspect the weapon stations and the Yharnam headstones. The headstones return you to discovered lamps, while the workshop later handles repairs, fortification, and blood gem equipment. The Doll is not immediately available for leveling. Gain Insight by discovering a boss, entering a boss arena, or using a Madman’s Knowledge item, then return to the Dream and speak with her.
- Exit the clinic and encounter the first wolf.
- Visit the Hunter’s Dream through death or another valid route.
- Choose one trick weapon and one firearm from the messengers.
- Gain Insight before expecting the Doll to offer leveling.
Choose equipment and practice the combat loop
The Saw Cleaver is a quick, uncomplicated choice for a first run. The Hunter Axe offers more reach and broad attacks, while the Threaded Cane has a longer transformed form and favors a more technical Skill-oriented style. None of these choices prevents later weapon changes, so select the moveset you can control reliably. The Hunter Pistol fires quickly and is useful for timing practice; the Hunter Blunderbuss has a wider spread at close range.
Return through the Yharnam headstone and equip the weapon in the right-hand slot and firearm in the left-hand slot. Press R1 for ordinary attacks, R2 for a strong attack, L1 to transform the weapon, L2 to fire, and Triangle to use a Blood Vial. When an enemy begins an attack, a correctly timed firearm shot can stagger it. Move close and press R1 to perform a visceral attack. If an enemy hits you, the orange portion of the health bar shows the temporary rally window. Strike back before it disappears to recover part of the lost health.
- Equip both starting weapons.
- Test transformed and untransformed attacks.
- Practice a firearm stagger on a slow enemy.
- Use rally attacks instead of healing automatically after every hit.
Light Central Yharnam and speak through the windows
From the clinic headstone, follow the stairs and upper path into Central Yharnam. Continue until you reach the lamp beside the house with Gilbert speaking through a red-lit window. Light the Central Yharnam lamp immediately. Speak with Gilbert and exhaust his dialogue if you want his later reward; his conversation is optional but useful for learning about the surrounding area.
The lamp is the main return point for this district. It connects to the Hunter’s Dream, where you can spend Blood Echoes after the Doll is awake, repair or fortify weapons, and restock supplies from storage. Enemies return after traveling away and back, so use the lamp deliberately. Before carrying a large number of Echoes into an unfamiliar route, return to the Dream and spend them or buy supplies.
- Light the Central Yharnam lamp.
- Speak with Gilbert through the red-lit window.
- Travel to the Hunter’s Dream and return once.
- Confirm that the lamp now serves as the area’s main base.
Break up the burning-mob street
From the lamp, descend toward the street where the townspeople gather around a burning pyre. Do not rush into the center. Approach from the outside edge, attract one or two enemies, and retreat around a corner before the full group reaches you. Pebbles are useful for separating targets. Keep the camera pointed toward the remaining mob so that a second group does not reach you while you are finishing the first enemy.
The brick troll near the large gate is a good early parry target. Wait for its slow attack to begin, fire just before the blow connects, and step forward for the visceral attack. If the shot misses, dodge away and reset instead of emptying your stamina bar with repeated attacks. Clearing the entire street is optional. The important objective is to learn how to divide groups and reach the connecting side routes safely.
- Separate enemies from the burning mob.
- Practice a firearm stagger on a brick troll.
- Keep stamina available for an emergency dodge.
- Avoid fighting the whole street at once.
Explore the sewer route and open its shortcuts
Search the streets around the burning pyre for the descent into the aqueduct and sewer area. The sewer contains rats, crawling enemies, hanging corpses, narrow ledges, and ladders. Move slowly near drops and wooden platforms. The large pig in the lower sewer is optional; if you fight it, approach from behind for a charged attack and visceral follow-up, then retreat if it turns into the narrow passage.
At the sewer crossroads, one route leads upward and eventually returns to the surface while another continues deeper among boats and rats. Explore only as much as you can do safely. The lower route contains useful early items, but the upper route is more important for progression because it leads toward the buildings, the dog cages, and the shortcut network. Cut down hanging corpses when safe to reach the lower platforms and the optional Saw Spear pickup.
Continue upward through the sewer exit and deal with enemies one at a time. In the building near the upper route, the wheelchair hunter can fire at close range. Approach from behind or stagger him with a firearm. He guards supplies, not a required key. From the building, exit through the opposite passage, climb the stairs, and pull the lever that opens the gate back toward the Central Yharnam lamp. This shortcut is the main recovery route for repeated attempts.
- Find the sewer entrance beneath Central Yharnam.
- Open the gate shortcut leading back toward the lamp.
- Treat the lower pig, boats, and Saw Spear as optional exploration.
- Defeat or bypass the first wheelchair hunter.
- Use ladders and ledges carefully around the aqueduct.
Handle werewolves, dogs, and the first side encounters
The werewolves near the dark house attack rapidly and can kill an unprepared hunter in a few hits. Lure them through the doorway one at a time, where their movement is restricted, or sprint past them if you are only opening the route. Fire damage is effective against beasts, but early fire supplies are limited. Do not spend every consumable clearing enemies that you can safely bypass.
The dog cages near the upper route are another ambush risk. Kill the caged dogs before crossing farther if you have enough room to fight, because released dogs can attack from behind. You can also open doors and speak with several residents through windows. These conversations are optional for immediate progression, but some begin quests that can be affected by later choices. Eileen the Crow can also be encountered near the upper sewer exit. Speak with her if you find her, but do not mistake this meeting for a required objective.
- Lure the werewolves through a doorway or bypass them.
- Deal with caged dogs before they can join a later fight.
- Speak with Eileen if encountered.
- Do not treat window conversations as required combat progress.
Reach the Great Bridge and prepare for the next objective
Continue through the upper buildings until you reach the route back toward the Great Bridge. A flaming boulder trap can be triggered on the bridge. When the nearby enemies react, move into a side alcove or behind cover and let the boulder pass before continuing. Carrion Crows and a Huntsman’s Minion guard the far portion of the bridge; separate them with a pebble or by retreating toward the cleared section.
The Great Bridge leads to the optional Cleric Beast encounter. You may attempt it now, but defeating it is not required to reach Father Gascoigne or continue the campaign. Entering the arena grants Insight, which can awaken the Doll if you have not already gained Insight elsewhere. If you defeat Cleric Beast, a lamp appears in the arena and the Sword Hunter Badge unlocks additional shop access. If you postpone the fight, return to the Central Yharnam lamp and use the sewer-side route toward the graveyard and Father Gascoigne instead.
Before advancing, repair and fortify the chosen weapon if you have enough Blood Stone Shards, and carry a reserve of Blood Vials and Quicksilver Bullets. If you die, your Blood Echoes are either lying where you fell or held by an enemy with glowing eyes. Recover them before beginning another risky attempt. If recovery is unsafe, spend new Echoes elsewhere rather than repeatedly adding more to the same danger.
- Reach the Great Bridge without being caught by the fireball trap.
- Open a safe return route through the sewer or upper-building shortcut.
- Repair and fortify the weapon when possible.
- Decide whether to attempt Cleric Beast or proceed toward Father Gascoigne.
- Know how to identify and recover dropped Blood Echoes.
Before you move on
- The Hunter’s Dream has been visited.
- A trick weapon and firearm are equipped.
- The Central Yharnam lamp is lit and can be used as the return point.
- The hunter has practiced firearm staggering, visceral attacks, rally healing, transformed attacks, and stamina management.
- At least one sewer-side route and one upper-building route toward the Great Bridge are understood or opened.
- The shortcut gate near the upper buildings has been opened if the route was explored that far.
- The Sewer Well, first wheelchair hunter, Eileen encounter, and Cleric Beast are clearly understood as optional for the next required objective.
- The hunter can reach either the Cleric Beast arena or the sewer and graveyard route toward Father Gascoigne without starting from the clinic.
Central Yharnam Completion: Cleric Beast, Father Gascoigne, and the Tomb of Oedon
Cleric Beast is an optional boss on the Great Bridge. Father Gascoigne is the required Central Yharnam boss for the normal Cathedral Ward route. Open the residence shortcut before attempting Cleric Beast, use the aqueduct and sewer route to reach the Tomb of Oedon, then take the Oedon Tomb Key through the building beyond the boss arena. The Hunter Chief Emblem is a convenient optional purchase, not the only way into Cathedral Ward.
Open the Central Yharnam shortcuts before attempting the bosses
From the Central Yharnam lamp, take the large doorway and proceed toward the burning mob. Do not try to clear the whole group in the open. Pull individual townspeople toward the side stairs, use corners to break line of sight, and deal with the brick brute separately after the crowd has been reduced. The quickest route to the important shortcut passes through the dark residence near the bridge.
Inside the residence, check behind furniture and around the stair landings for ambushes. The wheelchair hunter can rise when you approach, so attack immediately or circle behind it rather than allowing it to fire at close range. Leave the residence through the upper route and activate the switch outside. This opens the gate linking the Central Yharnam lamp with the bridge approach and is the safest retry route for Cleric Beast.
You can also explore the aqueduct and sewer before either boss. Collect Blood Stone Shards, Blood Vials, Quicksilver Bullets, and the Saw Hunter Badge if you reach the boar tunnel. Return to the Hunter’s Dream to repair and strengthen your weapon whenever you have the required materials.
- The residence shortcut between Central Yharnam and the bridge route is open.
- Your weapon is repaired and strengthened if materials are available.
- Blood Echoes are spent or safely banked before a boss attempt.
Reach the Great Bridge and decide whether to fight Cleric Beast
Use the new shortcut from the Central Yharnam lamp and climb toward the Great Bridge. Near the bridge approach, separate the Huntsman’s Minion and the carrion crows instead of fighting them as one group. Pebbles or a single ranged attack can draw the larger enemy away from the crows. On the bridge, two Scourge Beasts guard the path. Fight them one at a time if possible, or sprint past them if you are conserving healing items and bullets.
The Cleric Beast fog gate is at the far end of the bridge. There is no usable Great Bridge lamp before this fight. The Great Bridge lamp appears only after Cleric Beast is defeated, so use the Central Yharnam shortcut for retries. Simply encountering Cleric Beast grants Insight, which may enable leveling in the Hunter’s Dream if you have not already gained Insight elsewhere.
Cleric Beast is optional. You can leave the Great Bridge route unfinished and still reach Father Gascoigne through the aqueduct and Tomb of Oedon route.
- Do not expect a lamp before the Cleric Beast fight.
- Keep the Central Yharnam shortcut open for the return trip.
- Skip the boss if you want to proceed directly toward Father Gascoigne.
Defeat Cleric Beast on the Great Bridge
Cleric Beast attacks with broad arm sweeps, forward pressure, leaps, and slams. Staying at long range encourages it to close the distance, so work around one side of its body rather than retreating across the bridge. The safest general position is beside or behind a leg, where many frontal swipes cannot connect cleanly.
Focus attacks on one limb at a time. Repeated hits to a limb can create a stagger, giving you time for additional damage or a charged attack. When the boss begins a wide swing, dodge toward its body or around its side instead of rolling straight backward. Preserve enough stamina for the next movement; a short attack string is safer than emptying the stamina bar.
The bridge edges provide visual landmarks but are dangerous if they trap you against the railing. Move back toward the center whenever the boss drives you toward an edge. Use rally healing after a recent hit only when the boss is recovering and you can safely land attacks. Otherwise create space before using a Blood Vial. Fire damage can help, but the fight is primarily decided by positioning and controlled attacks.
After victory, the Great Bridge lamp appears in the arena. Light it immediately, collect the Sword Hunter Badge, and return to the Hunter’s Dream if you need to level, repair, or purchase newly unlocked equipment.
- Cleric Beast is defeated if pursuing the optional boss route.
- The Great Bridge lamp is lit after the victory.
- The Sword Hunter Badge is obtained and can unlock additional purchases.
Use the aqueduct route to reach Father Gascoigne
Return to the Central Yharnam lamp and take the sewer route rather than repeatedly crossing the bridge. Descend past the brick brutes and enter the aqueduct. Move carefully across the wooden platforms and ledges; several drops are survivable, but falling into the lower waterway can force a longer recovery route. Rats, corpses, and large huntsmen are easier to handle when pulled into open ground one at a time.
Continue through the waterway and climb toward the upper sewer section. The large Maneater Boar can be fought from behind for a visceral attack, or bypassed if you are low on healing supplies. Proceed through the graveyard and climb toward the Tomb of Oedon fog gate.
Before entering, speak with the Young Girl through the red-lit window in Central Yharnam if you want the Tiny Music Box. Agree to search for her mother. The item is optional and Father Gascoigne can be defeated without it.
- The aqueduct route is open for repeated attempts.
- The Tiny Music Box is in your inventory if you want to use it.
- Quicksilver Bullets are available if you plan to attempt firearm parries.
Defeat Father Gascoigne’s human phase
Gascoigne begins as an aggressive hunter using a firearm and a transforming weapon. The gravestones divide the arena and can interrupt his direct approach, but they are temporary cover rather than a safe place to remain. Keep circling so that you do not become pinned against the fence or a tomb.
A firearm shot timed just before one of his committed swings can stagger him for a visceral attack. If you are not comfortable parrying, dodge diagonally through his attacks, land one or two strikes, and retreat before your stamina is exhausted. Do not chase every missed swing; Gascoigne can turn quickly and punish a greedy follow-up.
Use the larger gravestones to create a moment for healing or repositioning, then return to open space. His extended combos and jumping attacks cover more ground than they initially appear to, so do not retreat in a straight line for too long. When he pauses after a completed attack string, take a short punish and prepare to move again.
- Keep the arena perimeter available for diagonal dodges.
- Use visceral attacks when firearm timing is reliable.
- Avoid exhausting stamina during an attack sequence.
Handle the beast phase and the Tiny Music Box
When Gascoigne transforms, he becomes faster and his attacks reach around the gravestones more effectively. Fight near the upper stair area or another section with room to circle, and dodge toward his side when he commits to a leap or long swing. Punish the recovery after a missed attack rather than standing in front of him and trading blows.
The Tiny Music Box can stun Gascoigne, but it is not a permanent solution. Repeated use during the human phase can force his transformation, and after it has affected him in beast form he will not continue responding to it normally. Use it only when you have enough space to activate it safely, then move behind him for a charged attack or take a brief damage window. Molotov Cocktails are another optional tool, especially after an Oil Urn, but never throw them so close that you lose the ability to dodge.
After the defeat message appears, collect the Oedon Tomb Key and light the Tomb of Oedon lamp. The Red Jeweled Brooch is on a nearby roof reached by dropping from the lower section of the arena. It is connected to the Young Girl’s side story. You may return it or use it as a blood gem, depending on which outcome and reward you prefer; neither choice is required for the main campaign.
- Father Gascoigne is defeated.
- The Oedon Tomb Key is collected.
- The Tomb of Oedon lamp is lit.
- The Tiny Music Box was treated as an optional assist, not a required item.
Enter Cathedral Ward and establish the next hub
From the Tomb of Oedon lamp, climb the stairs and use the Oedon Tomb Key on the locked gate above. Continue through the building, climb the ladder, and follow the upper passage. Before opening the final door, open the chest for the Blood Gem Workshop Tool. This item allows Blood Gems to be installed at the workshop in the Hunter’s Dream and is an important early upgrade unlock.
Open the door at the top to trigger the transition into Cathedral Ward. Light the Cathedral Ward lamp and speak with the Chapel Dweller nearby. Return to the Hunter’s Dream to level up, repair equipment, and apply a Blood Gem if you have one.
The Hunter Chief Emblem is an alternate convenience route. If you defeated Cleric Beast and obtained the Sword Hunter Badge, the Bath Messengers can sell the emblem for Blood Echoes. Using it opens the large gate near the Cathedral Ward plaza, but purchasing it is not mandatory. A different route becomes available after completing Old Yharnam and defeating Blood-starved Beast: the newly opened side door from Oedon Chapel leads through the Healing Church Workshop and around to the Cathedral Ward side of the gate.
For the next chapter, treat Cathedral Ward as the new hub. Cleric Beast may be skipped, and the Tiny Music Box may be ignored, but Father Gascoigne, the Oedon Tomb Key, and the route into Cathedral Ward are the required progression milestones.
- The Blood Gem Workshop Tool is collected before leaving the route.
- The Cathedral Ward lamp is lit.
- The weapon is repaired and upgraded before beginning the next area.
- You have chosen whether to buy the Hunter Chief Emblem or use the later Old Yharnam route.
Before you move on
- Father Gascoigne is defeated and the Oedon Tomb Key is in the inventory.
- The Tomb of Oedon and Cathedral Ward lamps are active.
- The Blood Gem Workshop Tool has been collected.
- Cleric Beast has either been defeated and its Great Bridge lamp lit, or the boss has deliberately been skipped.
- The residence shortcut is open, and the hunter is ready to continue from Cathedral Ward.
Cathedral Ward and Old Yharnam: Vicar Amelia, Blood-starved Beast, and Early NPC Routing
Use Cathedral Ward as the next hub, choose whether to reach Vicar Amelia through the paid gate or the Old Yharnam route, then clear Old Yharnam for its boss, workshop access, and Chalice reward. Amelia is the story progression boss, while the Blood-starved Beast is optional for the main route but valuable for broad completion. Survivor choices made here affect later rewards and deaths.
Establish Cathedral Ward and secure the hub
From the Cathedral Ward lamp, enter Oedon Chapel and speak with the Oedon Chapel Dweller. He explains that the chapel can shelter people during the Hunt. Activate the lamp before exploring, because this room becomes the return point for Cathedral Ward, Old Yharnam, the Healing Church Workshop, and later survivor checks.
Explore the streets around the chapel without committing to the Grand Cathedral immediately. Church Servants, Church Giants, and Executioners can overwhelm a new hunter when pulled together, so use corners, doorways, and the broad plaza to separate them. Open ladders, gates, and elevators whenever you reach them. A shortcut is more valuable than a few extra Blood Echoes if a route ends in a death.
The central plaza gate is locked from the Cathedral Ward side. You can open it by purchasing the Hunter Chief Emblem from the Bath Messengers in the Hunter’s Dream, or by reaching the opposite side through Old Yharnam and the Healing Church Workshop. The emblem costs 10,000 Blood Echoes, so do not buy it automatically if you want the optional Old Yharnam route and its rewards.
- Light the Cathedral Ward lamp.
- Speak with the Oedon Chapel Dweller.
- Open every nearby shortcut before making a long attempt toward the Grand Cathedral.
- Treat the locked plaza gate as a route choice, not a permanent blockage.
Choose the route toward Vicar Amelia
The direct route uses the Hunter Chief Emblem. Return to the Hunter’s Dream, purchase the emblem from the Bath Messenger, and use it on the locked gate in Cathedral Ward. This opens the plaza and lets you climb the Grand Cathedral stairs without completing Old Yharnam first.
The broader route begins by entering Old Yharnam from the lower Cathedral Ward path. Defeat the Blood-starved Beast in the Church of the Good Chalice, then return to the Cathedral Ward lamp. A side door in Oedon Chapel will now be open. Follow the elevator and workshop route, drop through the tower’s lower sections, and operate the switch on the far side of the Cathedral Ward gate. This opens the same plaza without spending 10,000 Echoes.
Old Yharnam is not required before Vicar Amelia. However, clearing it is useful for a completion-focused run because it gives the Pthumeru Chalice, opens the Healing Church Workshop, supplies early upgrade materials, and creates access to later routes. If you choose the emblem first, Old Yharnam remains available afterward.
- Use either the Hunter Chief Emblem or the Old Yharnam and workshop route.
- Upgrade and repair your main weapon before attempting either boss.
- Bank Blood Echoes before entering the Grand Cathedral or the Church of the Good Chalice.
Defeat Vicar Amelia in the Grand Cathedral
After opening the plaza gate, climb toward the Grand Cathedral and enter the large boss arena. Stay near Amelia’s side or rear legs rather than directly in front of her. Her forward swipes, bites, grabs, and lunges cover the space in front of her body, while her rear quarters give you more time to react.
Target one limb at a time. Repeated attacks against a limb can stagger Amelia and create a visceral opportunity. Do not remain underneath her after a stagger ends; the camera can hide a stomp or sweeping arm. Use short attack strings, then move away before your stamina is empty.
Amelia eventually clasps her hands and begins restoring health. Attack her during the recovery or throw Numbing Mist to prevent the healing from succeeding. Fire Paper, Oil Urns followed by fire damage, and other fire-based tools can shorten the encounter, but they do not replace positioning. Preserve enough stamina to escape after every attack sequence.
When Amelia dies, collect the Gold Pendant and light the Grand Cathedral lamp. Then interact with the glowing skull on the altar. The vision supplies the password needed at the Forbidden Woods gate. Defeating Amelia changes the night state, so complete any time-sensitive conversations or desired evening-state exploration before touching the skull if you are deliberately managing NPC quests.
- Fight from Amelia’s side or rear instead of standing in front of her.
- Interrupt her hand-clasping recovery with damage or Numbing Mist.
- Examine the skull after the fight to obtain the Forbidden Woods password.
- Light the Grand Cathedral lamp before leaving.
Enter Old Yharnam and manage Djura’s gunfire
Old Yharnam is reached through the lower route from Cathedral Ward. The opening streets contain burning barricades, Beast Patients, riflemen, and enemies positioned to draw you into larger groups. Move slowly and use walls, buildings, and corners to break enemy sight lines. Open doors and ladders as soon as possible so a failed attempt does not require clearing the entire town again.
Djura occupies a high tower and fires a Gatling gun when you enter his line of sight. Do not fight in the open while he has a clear view. Move between cover, descend through the streets, and return to exposed areas only after nearby enemies have been separated or defeated. His shots can stagger the hunter and may knock you from elevated paths.
Alfred can be found near the approach to Old Yharnam. Speak with him and agree to cooperate if you want his summon sign for the Blood-starved Beast. That summon is tied to his earlier Cathedral Ward position; after the night transition caused by examining Amelia’s skull, Alfred moves and is no longer available for this particular fight. This does not make him necessary, but it is important if you intend to use him.
- Break Djura’s line of sight before engaging groups.
- Open the Old Yharnam lamp and the route back toward the boss courtyard.
- Speak with Alfred before advancing the night if you want his Blood-starved Beast summon.
- Carry Antidotes before entering the Church of the Good Chalice.
Defeat the Blood-starved Beast
The Blood-starved Beast is in the abandoned Church of the Good Chalice at the end of Old Yharnam. Its attacks build poison, and the danger increases as the fight progresses. Keep Antidotes in an accessible item slot and retreat early when the poison meter becomes threatening. The arena contains an altar and side aisles, but the long central nave gives you the most room to evade.
Stay close to the boss’s side and circle around it rather than repeatedly retreating straight backward. Its lunges and claw strings are easier to avoid when you step around the flank. Attack once or twice after a missed strike, then reposition. In the later phases, the boss becomes faster and its proximity poison makes prolonged contact dangerous, so do not remain in front of it after a combo.
Fire Paper and Molotov Cocktails are effective options. Pungent Blood Cocktails can distract the boss long enough for several attacks, but use them as an opening rather than standing still until the effect ends. If you have no Antidotes left, additional ones can be found in the boss arena near the altar area.
Victory lights the Church of the Good Chalice lamp, awards the Pthumeru Chalice, and opens the side door in Oedon Chapel. Use that door to reach the Healing Church Workshop. Continue through the workshop, use the drop-down route through the tower, and operate the Cathedral Ward gate switch from the far side. This is the permanent shortcut to the Grand Cathedral approach.
- Keep Antidotes available throughout the fight.
- Circle around the boss and avoid extended contact during the poison phases.
- Use fire tools or Pungent Blood Cocktails if the fight becomes prolonged.
- Confirm that the Oedon Chapel side door is open after victory.
- Collect the Pthumeru Chalice before leaving the Church of the Good Chalice.
Route survivors without sacrificing the refuge
The Oedon Chapel Dweller can receive several survivors. The Lonely Old Woman, Arianna, the Bigoted Old Man, and Adella are the principal people to route there. Iosefka’s Clinic is the competing refuge, and choosing one location over the other changes available rewards and later outcomes. Decide deliberately instead of sending every person to the first safe place mentioned.
The Afflicted Beggar can also be directed to the chapel, but this is not a safe choice. If he is sent there, he kills the other refugees in succession, including the chapel dweller. Leave him where he is unless you specifically want that outcome or are following a different quest plan. The Young Girl’s route also has a fatal outcome rather than a successful rescue.
Arianna and Adella can each provide special blood while they remain at the chapel. Avoid repeatedly switching between their blood supplies if you want to preserve both NPCs. Their quest outcomes depend on timing and later world changes, so do not promise that every survivor can be saved in one playthrough.
Return to the chapel after major bosses and area changes. Speak with the dweller, check each survivor’s position, and collect desired rewards before advancing the world into the Blood Moon. Keep a written note of who was sent to the chapel or clinic; the game does not provide a reliable central record.
- Choose the chapel or clinic for each survivor before confirming the dialogue.
- Do not send the Afflicted Beggar to the chapel if you want the other refugees to survive.
- Track Arianna and Adella separately if you want their blood rewards.
- Revisit the chapel after Gascoigne, Amelia, and major area transitions.
Before you move on
- Vicar Amelia is defeated and the skull in the Grand Cathedral has been examined, making the Forbidden Woods password route available.
- The Blood-starved Beast is defeated if following the broad-completion route.
- The Pthumeru Chalice has been collected.
- The Oedon Chapel side door and Healing Church Workshop route are open if Old Yharnam was cleared.
- The Cathedral Ward plaza gate is open through either the Hunter Chief Emblem or the workshop-side switch.
- The desired survivors have been assigned to the chapel or clinic, and the Afflicted Beggar has not been sent to the chapel by accident.
- The hunter has a repaired, upgraded weapon and a supply of Blood Vials and Antidotes before entering the Forbidden Woods.
Hemwick Charnel Lane, Forbidden Woods Entrance, and the Road to the Shadows
Hemwick Charnel Lane is optional for the main campaign, but defeating the Witch of Hemwick grants access to the Rune Workshop Tool. The Forbidden Woods becomes the mandatory route after Vicar Amelia. This chapter gives a practical path through both areas, identifies the important shortcuts, and explains how to handle Hemwick’s ambushes, the forest traps, poison, cannon fire, and snake enemies without losing the route.
1. Choose whether to clear Hemwick Charnel Lane
From the Cathedral Ward lamp, take the exterior route toward the Grand Cathedral. Before reaching the cathedral, follow the road that branches toward the wooded field guarded by riflemen and dogs. This leads to Hemwick Charnel Lane. The area is optional: you can enter the Forbidden Woods without defeating the Witch of Hemwick, so do not treat Hemwick as a main-story prerequisite.
Move along the edge of the field instead of crossing its center. Draw the nearest dog or rifleman toward you, kill it in a clear space, and then advance to the next target. Trees can obscure riflemen, while dogs can close the distance quickly. At the far end of the approach, pass through the gate and activate the Hemwick Charnel Lane lamp. This is the checkpoint for the area and the correct lamp to use before attempting the boss.
- Activate the Hemwick Charnel Lane lamp before exploring deeply.
- Carry Blood Vials, Quicksilver Bullets, and Antidotes for the area’s mixed enemy groups.
- Remember that Hemwick is optional for reaching the main ending.
2. Cross the Hemwick streets and open the return route
Advance from the lamp through the village square and cemetery roads. Hemwick Grave Women often stand near graves, statues, staircases, or corners and may be joined by dogs or Molotov throwers. Stop at each open section and let enemies approach rather than running into the next group. Use tombs, walls, and the corners of buildings to prevent several enemies from surrounding you.
When you reach the double stairway, hold position near the top of the first stairs. Let the nearby dog and Grave Woman come down to you, then deal with the Molotov thrower and remaining enemies separately. On the higher route, watch for narrow ledges and roof sections where a hit can throw you over the edge. Stay against the wall when possible and avoid fighting near drop-offs.
Continue through the stables and rooftops toward Hemwick Crossing. The stables contain ambushes, a firearm enemy, and a wandering enemy that can disappear if ignored. In the crossing, two Executioners patrol near the tower. Pull them apart and use the doorway as a defensive boundary if necessary. Afterward, operate the switch to open the Village Gate. This gives you a much safer return route from the lamp.
- Separate dogs, Grave Women, and Executioners instead of fighting them together.
- Stay away from roof edges and cliff sides during melee.
- Open the Village Gate before attempting the boss approach.
3. Defeat the Witch of Hemwick and obtain the Rune Workshop Tool
After opening the route, continue through the upper paths and enter the Witch’s Abode. The Witch of Hemwick encounter uses two witches. One may be difficult to see at first, and the active witch can relocate after taking damage. Walk slowly around the room, watch for the red glow that indicates the witch’s position or summoning activity, and attack only after identifying a safe opening.
With 15 or more Insight, Mad Ones can appear during the encounter. They are dangerous because their grab can inflict severe stagger or paralysis. Do not automatically chase every summon across the room. Keep the camera moving, avoid being boxed in by pillars, and kill a Mad One only when it blocks your path or is close enough to interrupt your attack. If the room becomes crowded, retreat toward open space rather than attacking while surrounded.
Defeat both witches to finish the encounter. The Witch’s Abode lamp appears after the boss is defeated, not before it. Use that lamp, then return to the boss room and follow the passage beyond it to find the Rune Workshop Tool on a body. Take the tool back to the Hunter’s Dream and use the Memory Altar to equip Caryll Runes. The victory and tool are useful optional rewards, but they do not advance the main story.
- Locate and defeat both witches.
- At 15 or more Insight, watch for Mad Ones and their grab attacks.
- Activate the Witch’s Abode lamp after victory.
- Collect the Rune Workshop Tool from the room beyond the boss arena.
4. Enter the Forbidden Woods after Vicar Amelia
Return to the Grand Cathedral after defeating Vicar Amelia. Inspect the altar to receive the password. Then go back to the Cathedral Ward approach and speak to the figure at the locked password door. The door opens into the Forbidden Woods. Hemwick and the Witch of Hemwick are not required for this step.
The first forest stretch has one important lamp, located near the Small Windmill. Follow the descending route through the initial huts and riflemen until you find it, then activate it immediately. The forest has many side paths, but the small lanterns hanging along the trees mark the main route. If you become lost, return to the last lantern and advance from there rather than cutting randomly through the brush.
Watch for pressure plates that release swinging logs, riflemen positioned above the road, and villagers hiding beside fences or buildings. Move from one landmark to the next: the Small Windmill lamp, the dog cages, the village garrison, the cannon, and the Large Windmill.
- Defeat Vicar Amelia and inspect the altar for the password.
- Open the password door from Cathedral Ward.
- Activate the Forbidden Woods lamp near the Small Windmill.
- Use the hanging lanterns as navigation landmarks.
5. Cross the village and reach the Large Windmill
From the Forbidden Woods lamp, proceed through the first village groups carefully. Riflemen and oil-urn throwers can punish you while you fight dogs, so deal with ranged enemies first whenever possible. Pull enemies back toward the lamp or a cleared section instead of fighting beside the campfires.
The cannon section is safer when crossed from building to building. Wait for the cannon shot, move behind cover, clear each occupied building, and only then approach the cannon emplacement. Buildings can contain riflemen or melee ambushers, so do not assume every doorway is safe. Once you reach the cannon, the immediate ranged threat is removed.
Continue into the Large Windmill. A Snake Parasite patrols the interior. Let it move toward the fireplace, circle behind it, and use a charged attack if you can do so safely. Inside the windmill, the door opposite the elevator leads into the dense forest. The elevator itself must be activated from below, so continue through the forest route first.
- Kill ranged enemies before dogs when the terrain allows.
- Use buildings as cover from the cannon.
- Clear the Large Windmill interior before entering the dense forest.
- Do not assume the windmill elevator is ready until its lower switch has been activated.
6. Navigate the snake forest, poison areas, and shortcuts
After leaving the Large Windmill, cross the bridge and look for the path on the right that climbs toward a cave. The cave contains an elevator that returns to the Small Windmill near the Forbidden Woods lamp. Activate it as soon as you reach it. This is the most important early shortcut because it lets you return to the lamp without repeating the cannon and village sections.
Continue through the dense forest by following the small lanterns. Snake Balls can hide in the brush, while Snake Parasites have long-reaching attacks once the snakes emerge from their heads. Advance slowly enough to hear or see an enemy before it attacks. Pull one enemy into open ground, then retreat if a second group begins to join the fight. Fire damage and attacks that stagger can help, but positioning is more reliable than any single weapon choice.
The lower forest includes poison water, giant Snake Balls, and groups that can overwhelm you if fought in the swamp. Lure enemies onto solid ground before attacking. If you must cross poison, move directly to the next dry surface and use Antidotes when the buildup becomes dangerous rather than waiting until the status effect triggers.
Beyond the snake sections, follow the lantern-marked road toward the ravine and the village rooftops. Near the end of the route, activate the elevator that leads back to the Large Windmill. From the windmill side, open the one-way gate connecting to the Graveyard Path. This creates another useful route toward the Shadows of Yharnam approach. The forest allows optional detours for weapons, runes, armor, and the Cainhurst Summons, but none of those pickups are required to reach the boss.
- Activate the cave elevator that returns to the Small Windmill.
- Separate Snake Parasites and Snake Balls before engaging.
- Fight on dry ground whenever possible.
- Carry Antidotes through the poison sections.
- Activate the later elevator back to the Large Windmill.
- Open the one-way gate connecting to the Graveyard Path.
Before you move on
- Hemwick is complete when the Witch of Hemwick has been defeated, the Witch’s Abode lamp is active, and the Rune Workshop Tool has been collected from the room beyond the boss arena if optional completion is desired.
- The main progression requirement is complete when Vicar Amelia has been defeated, the altar has provided the password, and the password door into the Forbidden Woods has opened.
- The first forest section is secured when the Forbidden Woods lamp near the Small Windmill is active and the player can return to it without crossing the entire opening route.
- The shortcut network is prepared when the cave elevator to the Small Windmill is active, the later elevator to the Large Windmill has been activated, and the Graveyard Path gate has been opened.
- The chapter is ready for the next stage when the player can reach the village, ravine, and Shadows of Yharnam approach without relying on a full run from the original Cathedral Ward entrance.
- Before attempting the Shadows, repair the main weapon, spend Blood Echoes if practical, and carry Blood Vials and Antidotes for the forest approach.
Forbidden Woods and Shadow of Yharnam
Cross the Forbidden Woods by using its shortcuts instead of repeatedly traversing the entire forest. Control the cannon village, snake-infested paths, and swamp route, then defeat the three separate Shadows of Yharnam. After the fight, light the Forbidden Grave lamp and continue through the opened route toward Byrgenwerth.
Enter the Forbidden Woods and light the first lamp
From Cathedral Ward, leave through the passage beside the graveyard where the Church Giants patrol. Speak to the hunter at the locked entrance if you have not already done so, then continue through the gate into the Forbidden Woods. Follow the lanterns and the main downhill path until you reach the Forbidden Woods lamp. This is the area’s ordinary checkpoint; there is no second regular lamp in the forest before the boss.
The opening section contains villagers, riflemen, dogs, traps, and enemies positioned beside fences or gravestones. Advance in short stages rather than sprinting through the trees. When a group is gathered near a shack or bonfire, lure one or two enemies away with a pebble, a thrown knife, or a retreat around a corner. The forest is deliberately difficult to read, so use hanging lanterns, fences, buildings, and the direction of the main path as landmarks.
Search safely for Blood Vials, Antidotes, and upgrade materials, but do not spend all your healing items clearing every side path before learning the route. If you die, first reopen the shortcuts and establish a reliable path to the boss; return later for optional pickups.
- Light the Forbidden Woods lamp.
- Identify the nearby door and route that lead into the deeper forest.
- Treat cages, corpse piles, narrow bends, and dark gaps beside buildings as ambush points.
Cross the village and survive the cannon approach
Continue through the settlement area, where villagers, riflemen, dogs, and snake-headed enemies occupy cramped lanes. The cannon is positioned beyond the village and fires across the approach. Its shot can kill or stagger you while nearby enemies close in, so cross the firing lane quickly and use houses, walls, and raised ground to break the cannon’s line of fire.
The dog cages are dangerous because dogs can rush through the path while villagers attack from behind. Draw the handlers or dogs away from the rest of the group before committing to a fight. Snake-headed enemies have long reach and can stagger you repeatedly. Bait one attack, step outside its range, and punish the recovery instead of trading blows in front of several enemies.
A side route through the village can lead toward the back of Iosefka’s Clinic and other optional pickups, but it is not required for the route to Shadow of Yharnam. For the main path, use the cannon area and the large windmill as your landmarks. Keep walls between yourself and ranged attackers, and retreat toward a cleared space rather than into an unexplored lane.
- Cross the cannon’s firing lane under cover.
- Separate dogs from the villagers guarding the cages.
- Use the village walls and buildings to break ranged attacks.
Open the windmill shortcuts
Enter the large windmill beyond the cannon area. Inside are hostile hunters or villagers, ladders, and a lower route that leads toward the snake-infested forest. Explore the building carefully and activate the elevator found in the windmill. This elevator connects the windmill area with the Forbidden Woods lamp, greatly shortening future attempts.
Leave the windmill and cross the bridge outside. Follow the path near the snake-headed enemy to find the second elevator route. When activated from the lower side, this lift connects the swamp and snake section back to the windmill. Once both elevators are open, you can travel from the lamp through the windmill and descend close to the later forest sections instead of repeating the entire village.
There is also a one-way gate near the later boss approach. From the lower forest, take the uphill route beside the snake enemies rather than immediately following the path down toward the boss. Open this gate from the far side. It creates another useful connection between the main shortcut route and the graveyard approach, although the elevator loop is usually the clearest route for repeated attempts.
- Activate the elevator linking the windmill area to the Forbidden Woods lamp.
- Activate the lower elevator linking the swamp section back to the windmill.
- Open the one-way gate near the boss approach if you find the uphill route beside the snake enemies.
Navigate the snake forest, swamps, and pig route
From the windmill, continue into the second half of the woods. Giant snakes, smaller snake clusters, snake-headed enemies, corpse enemies, and poison hazards occupy the paths. Do not fight a large cluster in the open unless you have already separated it. Use the edge of the terrain, trees, walls, and elevation changes to make enemies approach one at a time.
The route eventually descends toward a watery section with fireflies and large pigs. Poison can build quickly in the deeper water, so stay on firmer ground when possible and keep Antidotes ready. The pigs are dangerous at close range but can often be bypassed after you have opened the shortcuts. If you are carrying Blood Echoes, clear one pig or lure it into a favorable position rather than rushing through several enemies at once.
From the lower swamp and pig area, follow the path that rises toward the graveyard. If you have opened the gate near the boss approach, use it to bypass much of the forest. Otherwise, take the route through the windmill elevator loop, then descend through the swamp and continue toward the boss entrance. The purpose of these shortcuts is to make recovery after a failed boss attempt practical, not to eliminate every enemy.
- Keep Antidotes available for the poison sections.
- Use dry ground and terrain to separate snake enemies.
- Confirm that the gate or elevator loop gives you a repeatable route to the boss fog.
Prepare for Shadow of Yharnam
The boss entrance is at the end of the graveyard route. Before entering, repair your weapon, refill Blood Vials and Quicksilver Bullets, and spend Blood Echoes if losing them would make the next attempt stressful. Fire protection can help against some attacks, but a weapon you can control and enough healing are more important than a specific build.
Shadow of Yharnam is a fight against three separate enemies with separate health bars. One uses a katana and favors aggressive melee attacks. Another carries a candle and sword and can use close-range fire attacks. The third keeps more distance and casts fire projectiles. There is no universally required kill order. Choose a target that fits your weapon and parry skill, but avoid spreading damage so widely that all three reach their stronger attacks together.
The central tombstone can divide the group and block some projectiles, but it is not a permanent shield. Circle around it rather than allowing yourself to become trapped against it. Keep all three opponents in view whenever possible, and preserve stamina for a long dodge or sprint away from an attack arriving off-screen.
- Repair and restock before entering the fog.
- Confirm that you are tracking three separate health bars.
- Choose a target order without losing sight of the other two Shadows.
Defeat the three Shadows in controlled stages
At the start, stay mobile and punish isolated attacks. The katana Shadow can be parried when its swings are readable, while the melee Shadows can be staggered by strong attacks when approached safely. The fire-casting Shadow uses direct and arcing projectiles, so do not stand still while locked onto a melee target. If the caster begins a long animation and you have a clear path, pressure it; otherwise use the tombstone or sprint around the arena to escape.
As individual health bars are reduced, the surviving Shadows gain more dangerous attacks. Fire can appear in vertical pillars or explosive projectiles, and the melee enemies become less forgiving at close range. The safest general plan is to lower one health bar decisively, finish that Shadow, then use the extra space to manage the remaining two. You may weaken multiple targets first, but do not leave several enemies one hit from their stronger phase unless you can finish them quickly.
When a Shadow mutates, watch for the summoning animation that precedes large snake attacks. The summoned snakes can strike across a wide area and may reach you while you are attacking another target. Stop attacking unless you can interrupt the summon immediately, sprint in a broad arc, and resume only after the attack has ended. Once one Shadow remains, stay close enough to punish it when safe; excessive distance gives it more chances to summon snakes or cast.
- Use the central tombstone to divide the group without cornering yourself.
- Parry only attacks whose timing you can read consistently.
- Leave the area when a snake-summoning animation begins.
- Defeat all three individual health bars rather than treating the fight as one shared pool.
Light the Forbidden Grave lamp and continue to Byrgenwerth
After the final Shadow dies, Blood Rapture is automatically awarded and the Forbidden Grave lamp becomes available in the boss area. Light it immediately. This is the next checkpoint and confirms that the boss encounter has been completed.
The route beyond the arena leads toward Byrgenwerth. Leave the graveyard through the open passage and continue along the path until the dense forest gives way to the college grounds. You can stop at the Byrgenwerth entrance and return to the Hunter’s Dream before exploring further if you want to spend Echoes, repair weapons, or finish optional forest pickups.
Defeating Shadow of Yharnam opens the route to Byrgenwerth, but it does not itself trigger the Blood Moon transition. That major world-state change occurs after the next required boss, Rom, the Vacuous Spider. Finish any desired Forbidden Woods exploration now, then enter Byrgenwerth when ready for the next chapter.
- Light the Forbidden Grave lamp.
- Confirm that Blood Rapture has been awarded.
- Reach the Byrgenwerth grounds or identify the entrance beyond the graveyard.
- Return to the Hunter’s Dream before continuing if you need to spend Echoes or repair equipment.
Before you move on
- The Forbidden Woods lamp is lit.
- The windmill elevator and lower forest elevator are active, or the one-way gate near the boss approach has been opened for a reliable return route.
- The cannon village, snake forest, swamp, and graveyard approach have been traversed successfully.
- All three separate Shadows of Yharnam health bars are empty.
- Blood Rapture has been awarded and the Forbidden Grave lamp is lit.
- The path from the boss area toward Byrgenwerth is open.
Byrgenwerth and Rom, the Vacuous Spider
After defeating the Shadow of Yharnam, enter Byrgenwerth and secure its lamp before exploring the abandoned college. Open the shortcut, collect the useful items, decide whether to defeat the hostile scholar, then jump from the Lunarium into Moonside Lake to fight Rom, the Vacuous Spider. Defeating Rom is mandatory and leads to the Blood Moon, but the transition is completed only after you approach the apparition that appears in the lake. Finish time-sensitive NPC rescues and quest steps before triggering that scene.
Enter Byrgenwerth and light the lamp
From the Shadow of Yharnam arena, pass through the opened route and follow the path toward Byrgenwerth. The first serious enemies are Garden of Eyes. Their grabs inflict heavy Frenzy buildup, so keep Sedatives on the quick-item bar if you have them. Fight near the approach path rather than sprinting blindly into the garden; the fog and terrain can hide another enemy until it is already within grab range.
When you reach the Byrgenwerth lamp, activate it immediately. From the lamp, explore the lower paths before entering the college. Drop down carefully, lure Garden of Eyes away from groups, and use trees, walls, and the building itself to break line of sight from the larger enemies. A Brainsucker guards the side path containing the Arcane Lake Caryll Rune. This rune is optional, but the side path also helps you learn the area’s layout before the boss route.
- Activate the Byrgenwerth lamp before entering the building.
- Equip Sedatives if the Garden of Eyes are causing repeated Frenzy buildup.
- Open the shortcut gate around the far side of the terrace.
- Collect the Arcane Lake Caryll Rune if you want the optional reward.
Clear the terrace and enter the college
The terrace around the Lunarium is an ambush zone. Garden of Eyes can drop down near the lake, while a Fluorescent Flower attacks with ranged projectiles from the fog. Do not run directly across the open terrace with every enemy active. Move along the upper edge, let the Garden of Eyes approach one at a time, and use the pillars and walls as cover from the flower’s attacks.
Before going into the building, activate the gate switch on the far side of the terrace. This creates a short return route from the lamp and is the most useful safety improvement in the area. Search the terrace for consumables, including Sedatives, but do not risk a long fight for an item while the ranged enemy still has a clear line of fire.
Enter the college through the accessible doorway. A chest on the lower floor contains a Pearl Slug, and another chest in the seating area contains the Student attire pieces. These rewards are optional. The required route leads upward through the stairs and ladder, but the hostile scholar begins moving toward you as you climb.
- Use cover against the Fluorescent Flower.
- Activate the terrace shortcut before committing to the upper floors.
- Search the lower floor and seating area for optional equipment.
Handle the hostile scholar and obtain the Lunarium Key
The hostile hunter in the college is Yurie, the Last Scholar. Defeating her is optional for reaching Rom, but doing so makes the building safer and awards useful consumables. Her firearm and arcane attacks can punish a direct approach. Fight near the stair area only if you have room to retreat; otherwise, draw her toward the lower floor and use the doorway to reset the distance.
Parries can work, but do not stand in front of her waiting for a shot while an arcane attack is active. A short attack string followed by a retreat is safer than trying to trade blows. If the fight is not going well, leave through the doorway, return to the lamp, and come back after spending your Blood Echoes. You can also bypass her temporarily and collect the key route first.
Climb the ladder to the upper floor and take the Lunarium Key from the workbench. Continue to the top floor if you want the Empty Phantasm Shell, then return to the locked door leading to the Lunarium. The shell and Student attire are optional; the key and Lunarium door are required.
- Defeat Yurie or bypass her without losing your Blood Echoes.
- Collect the Lunarium Key from the upper floor.
- Take the Empty Phantasm Shell if you want the optional arcane item.
Visit Master Willem and prepare for the lake
Use the Lunarium Key to open the upper door and step onto the balcony overlooking the lake. Master Willem sits in a chair at the far end. He does not provide a normal conversation or a required quest. Interacting with him causes him to gesture toward the lake. Killing him is optional, but he drops the Eye Caryll Rune, which increases Discovery. Leave him alive if you prefer; this choice does not block the route to Rom.
The balcony is the final preparation point before the boss. Repair your weapon, spend Blood Echoes, check your Blood Vials and Quicksilver Bullets, and apply a Bolt Paper or bring a lightning-capable weapon if available. Rom and the smaller spiders are vulnerable to lightning, but damage buffs are optional and should never take priority over avoiding a spider swarm.
When ready, jump from the end of the Lunarium into Moonside Lake. Rom is initially passive on the first visit, so the fight does not begin until you attack. After a failed attempt, Rom begins the encounter more aggressively when you return.
- Decide whether to leave Master Willem alive or kill him for the Eye Caryll Rune.
- Repair equipment and spend Blood Echoes before the jump.
- Carry healing items and prepare a lightning option if available.
- Do not jump until you are ready to begin the boss fight.
Defeat Rom’s first phase
Rom begins surrounded by Children of Rom and does not attack during the opening phase. Clear the small spiders before attacking the boss if you want the safest start. Their heads are heavily armored, so circle to the side or rear and strike the body. Approach one spider at a time, use a short attack sequence, then move away before another spider lands a headbutt or web attack.
You may instead rush Rom and attack her body immediately. This is faster but riskier, because the spiders can attack from outside the camera view. If you choose the direct method, keep Rom on one side of the arena and avoid getting trapped between her body and several spiders. Wide horizontal attacks are useful for controlling the smaller enemies, but preserve enough stamina for an emergency dodge.
Once the first group is under control, apply Bolt Paper if you are using it and attack Rom’s side or rear. Do not repeatedly strike the rocky head. Use one or two attacks at a time, then disengage. Rom teleports after taking substantial damage, so leave yourself a full stamina bar when her health is getting low.
- Target the bodies of the small spiders rather than their armored heads.
- Keep Rom and the nearest spiders in view at the same time.
- Attack Rom’s side or rear with short combinations.
- Save stamina for retreating from a sudden spider lunge.
Survive the later phases
After Rom teleports, another group of spiders appears and Rom begins using arcane attacks. You can kill the new spiders for a controlled fight, or ignore most of them and draw Rom away from the group. The safest choice depends on the arena position: remove nearby spiders that block your escape, but do not cross the entire lake to chase an isolated one while Rom is preparing a spell.
At close range, Rom can release a spherical arcane blast. Back away as soon as she raises her head and begins the cast. At medium range, she can create a ring of rising meteors from the lake. Move out of the affected distance rather than rolling repeatedly in place. At long range, she calls falling meteors toward your position. On current patched versions, stopping briefly when the cast begins and then dodging based on the impact pattern is more reliable than committing to a blind sprint. The original unpatched 1.00 behavior differs, so do not rely on a single exact movement instruction if playing that version.
Rom gains a rapid thrashing attack when you remain close during the final phase. After every teleport, reset your position, watch her animation, and attack only during a clear opening. If the spiders surround you, disengage first; healing in the middle of the group usually creates another hit rather than a safe recovery.
- Back away from the close-range arcane blast.
- Leave the medium-range rising-meteor zone before it erupts.
- Watch the meteor pattern instead of assuming one dodge direction always works.
- In the final phase, expect the close-range thrashing attack.
Trigger the Blood Moon transition
Continue using a controlled rhythm: remove only the spiders that threaten your position, strike Rom’s side or rear, and retreat before your stamina is exhausted. Bolt Paper, the Tonitrus, and other lightning options can shorten the fight, but none is required. If you summon an ally, use the distraction to attack Rom’s flank while still watching for the boss’s area attacks.
When Rom dies, collect the reward and confirm the Nightmare Slain message. The fight itself does not complete the world-state transition. A figure appears in the lake; approach the apparition to trigger the scene that advances the night into the Blood Moon. You are then returned to Cathedral Ward with the route into the changed Yahar’gul available.
Before approaching the apparition, finish time-sensitive NPC actions that you care about. In particular, rescue or recruit the survivors you intend to send to Oedon Chapel or Iosefka’s Clinic, complete any pre-transition conversation steps, and collect rewards whose conditions depend on the earlier state of the night. Cainhurst, Nightmare Frontier, Chalice Dungeons, and many optional bosses remain accessible later, while Upper Cathedral Ward is not a pre-Rom obligation because its key is obtained in later Yahar’gul progression.
- Defeat Rom, the Vacuous Spider.
- Confirm the Nightmare Slain message.
- Finish desired NPC rescue and quest steps before approaching the lake apparition.
- Approach the apparition only when you are ready to enter the Blood Moon state.
- Return to the Hunter’s Dream and restock before continuing toward Yahar’gul.
Before you move on
- The Byrgenwerth lamp is active.
- The terrace shortcut gate has been opened.
- The college has been searched for the Lunarium Key, with the optional Student attire and Empty Phantasm Shell collected if desired.
- Yurie has been defeated or bypassed safely.
- Master Willem has been left alive or killed for the Eye Caryll Rune according to the player’s choice.
- Rom, the Vacuous Spider is defeated and the Nightmare Slain message appears.
- Desired pre-Blood-Moon NPC rescues, conversations, and time-sensitive rewards are complete.
- The lake apparition has been approached only after preparation, and the hunter is ready to continue through the newly opened Yahar’gul route.
The Blood Moon: Yahar’gul, the Unseen Village, and The One Reborn
After defeating Rom, the Vacuous Spider, return through the Grand Cathedral route to the Blood Moon version of Yahar’gul. Light both lamps, suppress the bell-ringing women before clearing dangerous groups, collect the optional Upper Cathedral Key, unlock the chapel shortcuts, and defeat The One Reborn. The mummy beyond the boss leads to Lecture Building 2F and the next mandatory region.
Enter the post-Rom version of Yahar’gul
After Rom dies, leave the lake and return to the Grand Cathedral lamp. Go down the stairs outside the cathedral, using the route where the two Cathedral Ward hunters stood earlier. Enter the church at the bottom and pass beneath the Lesser Amygdala hanging over the doorway. The Amygdala can grab you, so move through the entrance without stopping beneath it. This is the post-Rom Yahar’gul, Unseen Village route, not the earlier prison visit.
The earlier Hypogean Gaol visit is separate optional progression. Before Rom, an Abductor could kill you and transport you to the prison beneath Yahar’gul. That route contains its own lamp and exploration opportunities, but it is not the Blood Moon route to The One Reborn. After Rom, the church entrance becomes the reliable way back into the altered village.
Descend through the opening streets and light the Yahar’gul, Unseen Village lamp as soon as you reach it. The hunters and other enemies here are stronger than the earlier inhabitants. Several groups can also be restored or reinforced while a nearby Bell Ringer remains alive, so do not waste healing items trying to clear every enemy before locating the summoner.
- Defeat Rom, the Vacuous Spider.
- Enter through the church below the Grand Cathedral.
- Light the Yahar’gul, Unseen Village lamp.
- Do not confuse this route with the pre-Rom Hypogean Gaol visit.
Find and kill the area Bell Ringers
From the first lamp, move toward the long stairs and the surrounding buildings. When enemies begin returning after death, treat that as a signal to search for the Bell Ringer rather than continuing a prolonged street fight. In the first major building, push upstairs and locate the woman responsible for the nearby group. Kill her first, then clean up the remaining hunters while they are no longer being restored.
Continue through the upper paths and buildings toward the grave-woman and holding-cell sections. Use walls, railings, doorways, and stair corners to split enemies apart. Riflemen and the large Amygdala-like beam hazards can punish you in open ground, so draw enemies back to a covered position instead of fighting in the middle of a plaza.
The Upper Cathedral Key is in the Holding Cell area. From the upper level, follow the railing until you find the gap in the barrier, then drop down into the cell below. Take the key from the corpse wearing Choir Garb. This key is optional for the main story but required for Upper Cathedral Ward. Search the area only as far as you can do safely; the key is the important objective, while Tiny Tonitrus and other loot can wait if the enemies are overwhelming.
- Prioritize area Bell Ringers when enemies keep returning.
- Use cover against rifles, beams, and large groups.
- Drop from the upper Holding Cell level to obtain the Upper Cathedral Key.
- Treat the Upper Cathedral Key as optional story progress, not a requirement for The One Reborn.
Light Yahar’gul Chapel and open the return route
From the village streets, work toward Yahar’gul Chapel. You can bypass or defeat many enemies, but move deliberately through the narrow approaches: hunters may attack from doorways, dogs can rush from behind wagons, and a Bell Ringer may be positioned above or beyond the first group. If the area becomes chaotic, retreat to the lamp rather than spending all your Blood Vials to force a fight.
Enter the chapel and light the Yahar’gul Chapel lamp. Then open the nearby doors that connect the chapel side of the area to the earlier prison and street routes. These doors create a much safer return path after a failed attempt or a trip to the Hunter’s Dream.
Activate the elevator shortcut when you reach its usable side. The lift connects the chapel-side route with the upper Yahar’gul section and bypasses much of the first approach. Do not expect to activate it during the initial pre-Rom prison visit; its useful post-Rom connection becomes available while you explore the altered village. Before leaving the chapel vicinity, deal with the Bell Ringer supporting the nearby streets if enemies continue returning.
- Light the Yahar’gul Chapel lamp.
- Open the chapel’s connecting doors.
- Activate the usable elevator shortcut.
- Use the shortcut to bank Echoes and restock before the boss approach.
Reach Advent Plaza and prepare for the boss
From the chapel, follow the connected streets toward the large open approach to Advent Plaza. The route includes cramped passages, elevated shooters, dogs, Scourge Beasts, and enemies that can punish a blind sprint. Use pillars and statues as cover, lure dogs away from tougher enemies, and retreat to the chapel whenever you lose control of the fight.
A hostile hunter may stand near the road before the boss. Defeating him is optional, but clearing the approach makes later attempts safer. An Old Hunter summon sign can appear near the carriage before the fog gate when the relevant summon conditions are met; summoning is optional and does not replace the need to manage the arena attendants.
Spend or secure your Blood Echoes before entering. Upgrade your weapon if you have gathered Blood Stone Chunks, carry Blood Vials, and consider Bolt Paper for the boss. The most important preparation is not a particular level or build: it is opening the chapel route and understanding that the arena attendants should be killed before attacking the boss.
- Open the chapel return route before committing to the boss road.
- Recover or spend Blood Echoes.
- Check for an optional summon sign near the carriage.
- Carry healing and, if available, Bolt Paper.
Defeat The One Reborn
The One Reborn is surrounded by Bell Ringers in the elevated galleries. At the start of the fight, immediately use either staircase and kill the attendants. If they remain alive while you attack the boss, they can bombard you with homing fireballs. Removing them turns the encounter into a much more controlled close-range fight.
Return to the lower floor and attack the boss from the side rather than standing directly in front of its upper body. Its arms sweep across the arena, its legs can kick hunters lingering beneath it, and its impacts can create dangerous dark spheres. Strike during the recovery after a limb attack, then move away before the next sweep. Do not stay locked into a long attack string simply because one limb is exposed.
Watch for the boss’s area attacks. It can rain gore onto your position and cover the ground with corrosive fluid. When it begins a large body-wide attack or the floor becomes unsafe, retreat toward a clear section of the arena and wait for the effect to end. Healing beside the corpse mass is risky because a separate limb may still hit you.
Several limbs and the large corpse on the front of the body can be damaged for stagger opportunities. When the boss collapses, use the opening for a concentrated attack, then disengage before its recovery. Bolt Paper can improve damage, but positioning and attendant control are more important than an elemental buff. Deplete the central health bar to win and wait for the Nightmare Slain message.
- Kill all visible arena Bell Ringers before focusing the boss.
- Attack from the side and punish recovery windows.
- Retreat from corrosive pools, limb sweeps, and body-wide attacks.
- Confirm the Nightmare Slain message.
Use the mummy and continue the campaign
After the victory, light the Advent Plaza lamp outside the arena. Climb the stairs near the lamp and enter the room containing the seated mummy. Inspect it to be transported to Lecture Building 2F. This is the next mandatory progression route toward the Nightmare of Mensis.
The Lecture Building and Nightmare Frontier are related but distinct destinations. The mummy transport places you on the second floor for the main story route. The Nightmare Frontier is an optional area reached through a different Lecture Building connection and is not a substitute for the post-boss route.
You can return to the Hunter’s Dream from the Advent Plaza lamp before continuing. If you collected the Upper Cathedral Key, now is a good time to decide whether to clear Upper Cathedral Ward before advancing. The One Reborn is a required story boss; defeating it and using the mummy are the progression events that open the next main-game stage.
- Light the Advent Plaza lamp.
- Inspect the seated mummy.
- Arrive at Lecture Building 2F.
- Decide whether to clear Upper Cathedral Ward or other optional content before continuing toward Nightmare of Mensis.
Before you move on
- Rom, the Vacuous Spider, has been defeated.
- The Yahar’gul, Unseen Village lamp is lit.
- The Yahar’gul Chapel lamp is lit and the connecting shortcut doors are open.
- The useful elevator shortcut between the chapel route and upper Yahar’gul is active.
- The Upper Cathedral Key is in the inventory if pursuing optional completion.
- The One Reborn has been defeated and the Nightmare Slain message has appeared.
- The Advent Plaza lamp is lit.
- Inspecting the mummy has transported the hunter to Lecture Building 2F.
Nightmare Frontier and Amygdala
Nightmare Frontier is an optional base-game area reached through the Lecture Building. It is separate from the mandatory Nightmare of Mensis route and is not required for the credits. The area contains poison, Frenzy, hostile hunters, rock-throwing enemies, Winter Lanterns, optional items, and the Amygdala boss. Completing it is worthwhile for broad campaign completion and awards the Ailing Loran Chalice, but Amygdala does not replace The One Reborn or Mergo’s Wet Nurse in the required story order.
Reach the Lecture Building and enter Nightmare Frontier
You can reach the Lecture Building in two ways. The usual early route is to obtain the Tonsil Stone from a red-lantern window NPC in or around the Forbidden Woods, then return to Cathedral Ward. From the Grand Cathedral lamp, take the path outside the cathedral toward the building guarded by a Lesser Amygdala. Stand beneath the Amygdala while the Tonsil Stone is in your inventory and allow it to seize you. Instead of dying, you will be transported to the first floor of the Lecture Building.
The other route becomes available after the post-Rom Yahar’gul progression. From Yahar’gul, reach the Lecture Building’s second floor. The two floors serve different destinations: the first floor has the route to Nightmare Frontier, while the second-floor route leads toward the Nightmare of Mensis. If you arrived on the second floor, use the building’s internal route to reach the lower floor and light its lamp before leaving.
On the first floor, search the lecture rooms for consumables and speak through the appropriate door if you want to interact with Patches. Continue through the large hall and take the exit that leads outside. Follow the path through the doorway at the far end to reach the Nightmare Frontier lamp. Nightmare Frontier is part of the original Bloodborne campaign and is not the Hunter’s Nightmare from The Old Hunters expansion.
- Tonsil Stone obtained, or the Lecture Building reached through Yahar’gul.
- First-floor Lecture Building lamp activated.
- Exit to Nightmare Frontier located.
- Antidotes, Sedatives, Blood Vials, and a repaired weapon prepared.
Establish the opening route and activate the first shortcut
From the Nightmare Frontier lamp, move along the cliffside path and use the green lanterns, bridges, and distinctive rock formations as landmarks. The area is deliberately difficult to read at first, so avoid running after every visible item. Clear only the enemies that block your route, then return for optional pickups after the main path is understood.
The opening section contains beasts, Silverbeasts, and enemies that can throw rocks from elevated positions. Use the terrain to break their line of sight. If a rock-thrower is covering a narrow path, move between impacts rather than standing in the open and trading damage. Near the opening section, a large tombstone projecting over the cliff can be collapsed to create a shortcut back toward the starting area. Activate this route before exploring deeply; it reduces the distance required after a death.
A second and more important shortcut is located close to Amygdala’s approach. It is reached from the swamp-side route by climbing a small rise near a Silverbeast and entering the lift. Ride it to connect the boss-side area with the upper part of the Frontier. Once this elevator is active, a failed Amygdala attempt does not require another full crossing of the poison lake.
- Opening landmarks identified.
- Collapsed tombstone shortcut activated if encountered.
- Elevator near the Amygdala approach activated.
- Blood Echoes spent or a recovery route planned before deeper exploration.
Cross the poison lake and deal with the hunters
The central swamp slows movement and builds Slow Poison. Carry Antidotes and use them when the status begins rather than waiting until the meter is nearly full. Move between dry islands and solid ground quickly. Do not remain in the water to fight several enemies at once, because the movement penalty makes ordinary attacks and evasive rolls unreliable.
Rock-throwing enemies can hit you while you are crossing the lake. Approach from cover, move during the pauses between throws, and kill the thrower only when you can reach it without pulling several other enemies into the fight. Crawling creatures and Silverbeasts are easier to manage on dry ground. Draw them out of the swamp, then attack after their lunges, spit attacks, or recovery animations.
Two hostile hunters patrol parts of the Frontier. Pull one at a time with a pebble, firearm shot, or cautious advance. If both become aggressive, retreat to wider terrain rather than allowing them to pin you beside a cliff or in the poison. Their attacks are dangerous, but the terrain is often the real threat. You can also bypass some encounters once the shortcut is open; defeating every hunter is not required to reach Amygdala.
- Antidotes placed on the quick-use bar.
- Poison lake crossed using dry ground and cover.
- Hostile hunters separated, defeated, or deliberately bypassed.
- No prolonged fight started beside a cliff or in deep poison.
Handle Winter Lanterns and Frenzy
Winter Lanterns build Frenzy while they can perceive you and can inflict heavy damage with their grab. Equip Sedatives before entering their patrol areas. Frenzy resistance can help, but breaking line of sight and controlling the engagement is more dependable than relying on equipment alone.
Use rocks, walls, and bends in the path to approach each Lantern from outside its direct view. Wait for its movement pattern, close the distance quickly, and attack decisively. If the Frenzy meter becomes dangerous, create distance first and then use a Sedative. Do not remain in front of the Lantern trading attacks while the meter continues to rise.
The Frontier contains optional caves and side paths with consumables, Blood Stone materials, runes, and hunter-tool opportunities. The Messenger’s Gift is an optional pickup associated with the area, but it is not needed for Amygdala or the campaign. If your health, Sedatives, or Antidotes are running low, leave the side path and return after activating the boss shortcut.
- Sedatives ready before entering a Lantern patrol area.
- Line of sight broken before each engagement.
- Optional caves explored only after the main return route is secure.
- Frenzy status treated as an immediate retreat-and-recover problem.
Reach Amygdala’s Chamber
Continue from the swamp through the raised paths, ledges, and rock formations toward the large stone approach to Amygdala’s Chamber. The route includes narrow drops and enemies that can knock you from ledges, so walk near edges and avoid panic-rolling around blind corners.
Before entering the fog, confirm that the elevator near the boss approach has been activated. Return to the Frontier lamp, spend accumulated Echoes, repair your weapon, and restock healing items. The elevator makes the boss run short enough that there is no reason to carry a large Echo total into the fight.
Amygdala is optional. Defeating it does not open the mandatory Nightmare of Mensis sequence and does not alter the required order of The One Reborn and Mergo’s Wet Nurse. Its principal progression reward is the Ailing Loran Chalice, which begins an optional Chalice Dungeon branch.
- Amygdala’s Chamber reached.
- Boss-side elevator activated.
- Weapon repaired and Echoes spent or secured.
- Ailing Loran Chalice reward understood as optional dungeon progression.
Defeat Amygdala by baiting recovery animations
Amygdala’s head takes better damage than its limbs, but it is elevated and exposed only during certain attacks. Stay near the middle or rear of the arena rather than directly in front of the boss. Watch the hands and arms, then move in after a slam, sweep, or other attack with a clear recovery animation. Strike the head when it drops within reach, then retreat before the next attack begins.
The boss uses wide arm sweeps, downward slams, a forward-facing arcane beam, projectiles, a close-range spit or burst, and a jumping attack. Move sideways out of the beam’s line instead of running straight beneath the head. When Amygdala jumps, either move away from the landing area or remain carefully beneath the body if your position is controlled; repeated panic rolls usually exhaust stamina and leave you vulnerable when the boss lands.
Damaging the limbs is acceptable when the head cannot be reached, but do not stand under the front arms indefinitely. After losing a substantial portion of its health, Amygdala tears off several arms and gains longer melee reach. This phase rewards the same method: bait an attack, punish the head or a safe limb, then withdraw before the follow-up sweep.
Keep enough stamina for one attack sequence and an escape. Heal after reaching a safe distance, not beside the boss’s front limbs. Arcane resistance may reduce the danger of its ranged attacks, but no particular build or level is required. Continue until the Nightmare Slain message appears, then collect the Ailing Loran Chalice.
- Amygdala’s beam and projectiles avoided by moving out of their lines.
- Head attacked after slams or other recovery animations.
- Arm-removal phase handled with shorter attack windows.
- Stamina reserved for retreating from sweeps and jumps.
- Nightmare Slain message displayed and Ailing Loran Chalice collected.
Before you move on
- The Nightmare Frontier lamp is lit.
- The collapsed tombstone shortcut and boss-side elevator are activated, or their locations are deliberately bypassed after the route is learned.
- The poison lake, hostile-hunter section, and Winter Lantern routes have been cleared or intentionally bypassed.
- Amygdala is defeated and the Ailing Loran Chalice is collected.
- The hunter understands that Nightmare Frontier is optional, while The One Reborn and Mergo’s Wet Nurse remain required story bosses.
- The hunter can leave the area and continue the main campaign toward Nightmare of Mensis without confusing the Frontier with that mandatory route.
Forsaken Cainhurst Castle and Martyr Logarius
Forsaken Cainhurst Castle is an optional base-game area reached with the Cainhurst Summons from Iosefka’s Clinic. You must first defeat the Witch of Hemwick, then use the blue monument at Hemwick Crossing to summon the carriage. The castle contains unique equipment, the Evelyn firearm, Executioner’s Gloves, Cainhurst attire, faction rewards, and the optional boss Martyr Logarius. Defeating Logarius reveals the hidden chamber of Annalise, Queen of the Vilebloods. Cainhurst is not required for the main campaign, Mergo’s Wet Nurse, or any ending.
1. Collect the Cainhurst Summons from Iosefka’s Clinic
Use the Forbidden Woods lamp and follow the route toward the forest settlement. After crossing the bridge, keep to the left side of the path and pass the houses. Behind the settlement, find the poison-filled cave and follow it through the water and ladders. The upper exit leads into the rear of Iosefka’s Clinic, bypassing the locked front entrance from Central Yharnam.
Inside the clinic, continue to the upper operating room and collect the Cainhurst Summons from the bed. The summons is the required access item for the castle. This rear entrance also provides an opportunity to collect other clinic items or resolve clinic-related NPC decisions, but those activities are separate from Cainhurst access. Do not leave the summons behind if you intend to visit the castle during this playthrough.
- Enter Iosefka’s Clinic through the rear Forbidden Woods route.
- Reach the upper operating room.
- Collect the Cainhurst Summons.
- Resolve any clinic decisions you want to make before advancing other NPC quests.
2. Activate the carriage at Hemwick Crossing
The carriage does not appear until the Witch of Hemwick has been defeated. Travel to the Witch’s Abode lamp and return through Hemwick Charnel Lane toward the large clearing known as Hemwick Crossing. Several Executioners patrol this area. The blue-lit monument stands in the clearing; approach it while the Cainhurst Summons is in your inventory and examine it to call the carriage.
Board the carriage when it arrives. You will be transported directly to Forsaken Cainhurst Castle. On arrival, move up the frozen approach and enter through the gate. Light the Forsaken Castle Cainhurst lamp immediately. This is the main area lamp for the castle; there is no separate interior castle lamp to activate later. The next permanent boss-area lamp becomes available only after defeating Martyr Logarius.
- Defeat the Witch of Hemwick.
- Return to the monument at Hemwick Crossing.
- Use the Cainhurst Summons at the monument.
- Light the Forsaken Castle Cainhurst lamp.
3. Cross the castle grounds and enter the main building
The castle grounds contain Bloodlickers, crawling Lost Children of Antiquity, and other enemies that can punish a careless sprint. Move along the approach, draw enemies away from one another, and use the statues and walls to limit the Bloodlickers’ movement. Clear the immediate path before collecting exposed items, especially when an enemy is positioned near a drop or narrow bridge.
Enter the castle through the main doorway and explore the entrance hall carefully. The Reiterpallasch can be collected without triggering the concealed Castle Spirits, but looting the three corpses in the entrance hall causes the spirits to appear. Their attacks are quick and difficult to read in the dim room. If you want the items, loot one corpse at a time, retreat toward the doorway or stairs, and avoid fighting multiple spirits in the center of the hall.
The castle does not provide another ordinary lamp inside the main building. Instead, treat the entrance hall, library, and rooftop routes as connected sections leading back toward the original castle lamp or forward to the Logarius arena. Search the side rooms for Cainhurst armor pieces, Blood Stone Chunks, and consumables. The castle’s equipment is optional, but the Evelyn in Library 1F and the Executioner’s Gloves in the Secluded Reading Room are particularly useful collection targets.
- Loot the Reiterpallasch before disturbing the entrance-hall corpses if you want to delay the spirits.
- Collect the Cainhurst armor pieces if pursuing broad equipment completion.
- Search Library 1F for the Evelyn and Vileblood Register.
- Reach the Secluded Reading Room for the Executioner’s Gloves.
4. Follow the library and rooftop route
From the entrance hall, work upward through the library sections. Servants, spirits, gargoyles, and Lost Children of Antiquity can occupy narrow walkways, so avoid fighting beside ledges. In Library 1F, search around the bookshelves and lower walkways for the Evelyn and the Vileblood Register. Continue upward and use the broken-window route to reach the Secluded Reading Room, where the Executioner’s Gloves and Cainhurst attire can be collected.
The upper route eventually leads outside onto the castle rooftops. Cross the roofs carefully and watch for gargoyles that can stagger you near the edges. Some drops are part of the intended route, but do not attack while standing on a narrow ledge unless the enemy is already isolated. Continue across the connected roof sections, using ladders and lower ledges to reach the final approach. A wide rooftop with several stone spires is the arena for Martyr Logarius.
Before entering the boss area, spend Blood Echoes if you are carrying a risky amount, repair your weapon, and restock healing items. Cainhurst is optional, so there is no campaign penalty for returning later after strengthening your character or weapon.
- Reach the upper library sections.
- Collect the Evelyn if desired.
- Collect the Executioner’s Gloves from the Secluded Reading Room.
- Cross the rooftops and identify the stone spires in Logarius’s arena.
5. Defeat Martyr Logarius
Logarius begins by keeping his distance and using arcane attacks. His ranged options include tracking skulls, lines of projectiles, and explosive attacks that can punish you for standing close during a cast. Move laterally rather than retreating in a straight line, and use the arena’s stone spires to block projectiles. Approach after a spell finishes, land one or two attacks, and withdraw before he begins another casting sequence.
During the opening phase, his committed scythe swings can be parried, but firearm timing is less dependable while he is casting. If parries are not part of your usual play, attack after his spell recoveries instead. Avoid chasing him across the entire roof, because the pursuit can place you in the path of a delayed explosion or tracking projectile.
When Logarius begins his empowered phase, he becomes more aggressive and gains faster melee strings, lunges, and airborne attacks. If you can reach him during the long transformation animation, a charged attack from behind can interrupt the transformation before the full enhancement is established. Otherwise, wait for the end of his attack strings and punish only during clear recovery windows. Do not trade blows simply because he is close; his melee pressure can carry through several evasive attempts.
Logarius can plant a sword-like spell object in the rooftop. Attack that object immediately when it is safe to do so. If it remains active, it produces repeated homing blades that make the rest of the fight much more dangerous. After destroying it, return your attention to Logarius. In the empowered phase, firearm parries and visceral attacks are effective when timed against recognizable melee attacks, but survival and positioning are more important than forcing a parry.
After the boss dies, light the Logarius’ Seat lamp. The Crown of Illusions appears near the throne. Collect it before leaving the rooftop.
- Use the stone spires to block or break line of sight against ranged spells.
- Punish spell recoveries instead of chasing through active projectiles.
- Interrupt the transformation if you can safely reach Logarius from behind.
- Destroy the planted sword spell as soon as possible.
- Light the Logarius’ Seat lamp and collect the Crown of Illusions.
6. Open the Queen’s Chamber
Equip the Crown of Illusions and walk toward the wall behind Logarius’s throne. The crown reveals the illusion and opens the route to the Queen’s Chamber. Follow the stairs upward and light the Vileblood Queen’s Chamber lamp before speaking with Annalise. This lamp provides direct travel back to the hidden chamber.
Annalise offers the option to kneel and swear an oath to the Cainhurst Vilebloods. The oath is optional and does not determine any of Bloodborne’s three campaign endings. Accepting it grants the Corruption Caryll Rune, the Respect gesture, and the Cainhurst Badge, which expands the workshop’s purchasable inventory. Declining the oath does not block campaign completion.
The Unopened Summons is in the Queen’s Chamber. Keep it if you intend to progress Alfred’s optional quest. Giving it to Alfred can lead to a different outcome for Annalise, so do not hand it over until you have decided whether you want the Vileblood faction branch or Alfred’s branch. Both are optional and cannot be completed in exactly the same state during one uninterrupted sequence.
- Equip the Crown of Illusions.
- Reveal the passage behind Logarius’s throne.
- Light the Vileblood Queen’s Chamber lamp.
- Speak with Annalise.
- Accept or decline the Vileblood oath according to the intended NPC route.
- Collect the Unopened Summons before leaving.
Before you move on
- The Forsaken Castle Cainhurst lamp is lit.
- Martyr Logarius is defeated.
- The Logarius’ Seat lamp is lit.
- The Crown of Illusions is in the inventory.
- The Queen’s Chamber has been revealed and its lamp is lit.
- Annalise has been visited and the Vileblood oath has been accepted or declined intentionally.
- The Unopened Summons has been collected if Alfred’s quest or broad NPC completion is planned.
- Optional Cainhurst equipment, including the Evelyn, Executioner’s Gloves, and armor pieces, has been collected if desired.
References for this chapter
- Bloodborne — Official PlayStation Product Page
- Forsaken Cainhurst Castle — Bloodborne Wiki
- Cainhurst Summons — Bloodborne Wiki
- Cainhurst Castle – Bloodborne Walkthrough & Guide
- Martyr Logarius — Bloodborne Wiki
- Bloodborne Guide: Forsaken Cainhurst Castle, Martyr Logarius Boss Fight, Crown of Illusions — Prima Games
Upper Cathedral Ward and Ebrietas
Upper Cathedral Ward is an optional late-game district reached after Rom, the Vacuous Spider, has been defeated. Its entrance requires the Upper Cathedral Key from post-Blood Moon Yahar’gul. The area contains the Celestial Emissary and Ebrietas, Daughter of the Cosmos, with the Great Isz Chalice awarded for defeating Ebrietas. Blue-eyed Celestial enemies, Brainsuckers, Scourge Beasts, frenzy buildup, and dark corridors make the opening section dangerous, but the area has a lamp, one-way doors, a gate shortcut, and an elevator route that greatly reduce the return journey.
1. Take the Upper Cathedral Key from post-Rom Yahar’gul
After defeating Rom, the Vacuous Spider, travel to the Yahar’gul Chapel lamp. The Upper Cathedral Key is in the post-Blood Moon version of Yahar’gul, reached through the upper streets near the Amygdala that fires a damaging beam across the approach.
From the chapel, climb toward the upper route and continue through the streets until you reach the rooftop and broad stairway area connected to the chapel approach. Look for the gap in the railing on the right side. Drop onto the ledge below, then drop again into the holding cell. Search the corpse inside to obtain the Upper Cathedral Key. The key is collected by dropping into the cell from above; it is not reached by opening the cell door from the corridor.
Return to Cathedral Ward and enter the Healing Church Workshop through the elevator route beside the Cathedral Ward lamp. Climb the tower to the locked door at the top and use the Upper Cathedral Key. The Radiant Sword Hunter Badge is associated with the Workshop tower route before this entrance, not a chest beside the Upper Cathedral Ward doorway, so collect it only if you have not already done so.
- Rom, the Vacuous Spider, has been defeated.
- Upper Cathedral Key collected from the holding cell in post-Rom Yahar’gul.
- Locked door at the top of the Healing Church Workshop opened.
2. Activate the Upper Cathedral Ward lamp
After opening the door, climb the stairs and cross the bridge toward the district. Use the Upper Cathedral Ward lamp as soon as you reach it. This is the primary recovery point for the area and should be activated before exploring the building.
The first enemies are small blue Celestial creatures and Church Servants. They can attack in groups and are especially dangerous in the narrow entrance halls. Pull enemies toward the bridge or doorway rather than sprinting deep into the building. If several begin surrounding you, retreat to the lamp side of the area and reset the encounter.
The small Celestial creatures can build frenzy-like pressure through repeated contact, while Brainsuckers can drain Insight and punish a hunter who remains in front of them. Do not let a Brainsucker hold you in place while another enemy attacks. Use short weapon strings, attack after its grab or spell misses, and retreat through a doorway if the corridor becomes crowded.
- Upper Cathedral Ward lamp activated.
- Opening blue Celestial enemies and Church Servants separated or bypassed safely.
- Sedatives, Blood Vials, bullets, and weapon durability checked before deeper exploration.
3. Explore the building and obtain the Orphanage Key
From the lamp, enter the main building and work through the halls toward the large central room. Search cautiously: blue Celestials can rush from side passages, and Scourge Beasts can burst through windows after you collect nearby items. If a beast appears, retreat through the door or into a wider room instead of fighting beside a railing.
Use the side corridors to reach the storage and service sections. One Brainsucker guards the Cosmic Eye Watcher Badge, which is found on a corpse in the base-floor storage area. This badge is optional, but it expands the shop inventory and is useful for a broad completion run.
Continue through the building until you reach the upper section and balcony. A Brainsucker holds the Orphanage Key. Defeat it, or use a long-reaching weapon to attack from a safer doorway if you are struggling with its arcane grab and Insight-draining attacks. The key is not found at the main entrance and is not the same item as the Upper Cathedral Key.
Before leaving the upper level, inspect the standing corpse on the balcony to learn the Make Contact gesture. Then return to the large locked door on the lower level and use the Orphanage Key. Pull the nearby lever to open the gate shortcut back toward the earlier part of the building.
- Cosmic Eye Watcher Badge collected if pursuing optional shop and item completion.
- Make Contact gesture obtained if desired.
- Orphanage Key taken from the Brainsucker in the upper section.
- Gate shortcut opened.
4. Defeat Celestial Emissary
The route beyond the Orphanage Key door leads through the former orphanage and into the boss room. Celestial Emissary begins as a crowd of small Celestial enemies. Only one is tied to the boss health bar. Keep moving around the room, avoid being trapped against the walls, and watch which target is registering damage against the boss bar.
You can thin the crowd first, but do not spend so long attacking minor enemies that the boss surrounds you. A wide weapon transformation or controlled area attack can clear space, while a fast weapon lets you punish the true target and retreat before the group closes in.
When the boss reaches roughly half health, the true Celestial Emissary grows into a giant form. Its melee reach increases, and the remaining small enemies continue to interfere. Circle rather than standing directly in front of it, attack after its swing sequence ends, and preserve enough stamina to escape if the smaller creatures approach from behind.
Near the final portion of the fight, the boss develops a tentacled head and gains arcane attacks. Use the room’s distance and pillars or walls to interrupt the line of fire. Heal only after creating space, because the small Celestials can stagger you while the boss fires. Defeating the true target ends the fight; killing every small creature is not required.
Light the Lumenflower Gardens lamp that appears after victory. The area beyond the boss can then be reached without repeating the entire opening route.
- True Celestial Emissary identified and defeated.
- Lumenflower Gardens lamp activated.
- Small Celestials cleared enough to make the post-boss route safe.
5. Cross the window route and reach Ebrietas
In the Celestial Emissary arena, break the large window behind the boss area. The glass opens onto the Grand Cathedral walkways. Proceed carefully because additional Celestial enemies wait along the route, including enemies with tentacled heads and arcane attacks.
Search the walkway for the A Call Beyond hunter tool if you are pursuing optional equipment, then continue toward the lift. Activate the lift so it becomes a faster return route between the Upper Cathedral section and the altar area. If you have lost many Blood Vials or bullets, return to the lamp before beginning the descent.
The lift leads to the Altar of Despair, where Ebrietas is waiting. The fight is optional for reaching the campaign credits, but defeating her completes the principal Upper Cathedral Ward route and awards the Great Isz Chalice. The altar has enough open space for repositioning, although the raised edges can make camera control awkward.
- Window behind the Celestial Emissary used.
- A Call Beyond collected if desired.
- Lift to the Altar of Despair activated.
- Great Isz Chalice identified as an optional reward rather than a mandatory story item.
6. Defeat Ebrietas, Daughter of the Cosmos
Ebrietas is most dangerous when you remain directly in front of her. Her frontal tentacles sweep across a wide area, and her charge can cross the arena quickly. Approach from the side, attack briefly, and move away before she completes another sequence. Staying near her side or rear can create openings, but do not remain underneath her during a body slam or rear attack.
When Ebrietas draws back and lines up for the charge, dodge laterally at the last safe moment. Rolling straight backward often leaves you in the charge path. If you can reach her head safely, head strikes can produce stronger damage opportunities, but do not stand in front of her for extended periods just to target it.
As the fight continues, Ebrietas adds more blood and arcane pressure. Move diagonally or behind her body when projectiles begin rather than repeatedly rolling straight backward. Her close-range aura and later attacks punish greedy attacks, so stop attacking when the area around her becomes hazardous and wait for a clear recovery window.
Heal after a completed attack animation or after you have created clear distance. If you die, use the Upper Cathedral Ward lamp and the activated lift to shorten the return trip. Defeating Ebrietas displays the Nightmare Slain message and awards the Great Isz Chalice.
- Ebrietas, Daughter of the Cosmos, defeated.
- Nightmare Slain message displayed.
- Great Isz Chalice collected.
- Upper Cathedral Ward lamp and altar lift remain available for cleanup.
Before you move on
- The Upper Cathedral Key was collected from post-Rom Yahar’gul and used at the top of the Healing Church Workshop.
- The Upper Cathedral Ward lamp is lit.
- The Cosmic Eye Watcher Badge and Orphanage Key were collected if optional area completion is being pursued.
- The Orphanage Key door and the gate shortcut were opened.
- Celestial Emissary was defeated and the Lumenflower Gardens lamp was activated.
- The window behind the Celestial Emissary arena was broken, the altar lift was activated, and Ebrietas was defeated.
- The Great Isz Chalice was collected.
References for this chapter
- Upper Cathedral Ward — Bloodborne Wiki
- Cosmic Eye Watcher Badge — Bloodborne Wiki
- Bloodborne: Upper Cathedral Ward, Celestial Emissary and Ebrietas Walkthrough — GameFAQs
- Bloodborne Guide: Upper Cathedral Ward, Orphanage, Celestial Emissary Boss Fight — Prima Games
- Upper Cathedral Ward — Bloodborne WikiDot
Optional Hunter Quests, Survivors, and the One Third of Umbilical Cords
Complete the major NPC questlines, preserve the survivor outcomes you want, and secure enough One Third of Umbilical Cord items for the third ending. These objectives are optional for reaching the credits, but several rewards and encounters are missable. The safest approach is to resolve NPC decisions before the final confrontation with Gehrman and to consume three cords before refusing him if you want to fight the Moon Presence.
1. Complete Eileen the Crow’s hunter quest
If you met Eileen in Central Yharnam, find her outside Oedon Chapel after Cathedral Ward becomes accessible and speak with her until she warns you about the hunter in the Tomb of Oedon. Travel to the Tomb of Oedon and allow Eileen to engage Henryk. Attack Henryk yourself, but watch your positioning carefully: stray hits can damage Eileen, and Henryk can kill her if the fight is left unattended.
After Henryk dies, return to Eileen and exhaust her dialogue. Do not enter the Grand Cathedral for the later encounter until the Blood Moon has appeared after defeating Rom. At that point, return to the Grand Cathedral approach. Eileen should be wounded outside. Speak with her before entering the cathedral, then defeat the Bloody Crow of Cainhurst inside.
The Bloody Crow is an optional hunter fight, but completing it gives Eileen’s intended quest conclusion and access to her reward. If you skipped Eileen’s early conversations, failed to help with Henryk, or entered the Tomb of Oedon without properly starting the quest, her later state can change. In that case, she may become hostile or disappear from the intended route.
- Speak with Eileen in Central Yharnam and outside Oedon Chapel.
- Help her defeat Henryk at the Tomb of Oedon.
- After the Blood Moon, speak with Eileen outside the Grand Cathedral.
- Defeat the Bloody Crow of Cainhurst.
2. Follow Alfred’s route without confusing the two summons
Speak with Alfred near the Cathedral Ward route leading toward Old Yharnam. Agree to cooperate if you want his gesture, dialogue, and Fire Paper reward. His summon signs can help with certain bosses, but summoning him is not required for his quest.
To reach Forsaken Cainhurst Castle, take the Cainhurst Summons from the rear section of Iosefka’s Clinic. Reach that area through the Forbidden Woods entrance, follow the path through the forest and cave, and enter the clinic from behind. The Cainhurst Summons is used at the carriage departure point; it is not the item you give to Alfred.
After defeating Martyr Logarius, equip the Crown of Illusions near the boss arena and reveal the Vileblood Queen’s chamber. Take the Unopened Summons from the room. This is a different item from the Cainhurst Summons. Return to Alfred near the Cathedral Ward entrance and give him the Unopened Summons. He rewards the Wheel Hunter Badge and teaches a gesture. Returning to the queen’s chamber afterward completes the next part of his optional route and provides another gesture.
Joining the Cainhurst Vilebloods or supporting Alfred’s Executioner outcome is optional. These choices affect faction rewards, runes, gestures, and badges, not the main ending.
- Speak with Alfred near Cathedral Ward.
- Take the Cainhurst Summons from the rear of Iosefka’s Clinic.
- Use the Cainhurst Summons to reach Forsaken Cainhurst Castle.
- After Logarius, obtain the Unopened Summons from Annalise’s chamber.
- Give the Unopened Summons to Alfred if pursuing his full quest.
3. Choose a survivor refuge deliberately
When survivors ask for a safe place, recommend Oedon Chapel if you are following a preservation-focused route. Arianna is found in the Cathedral Ward housing district after the area opens. Send her to the chapel if you want to preserve her late-game event. Adella can be rescued from Hypogean Gaol and directed there as well; wearing Church attire helps establish the intended interaction.
The Suspicious Beggar in the Forbidden Woods is dangerous. Sending him to Oedon Chapel can lead to the deaths of other survivors. If you want to avoid that outcome, do not send him to the chapel. His clinic route has different risks, so treat every refuge decision as a tradeoff rather than assuming every NPC can be saved together.
Arianna and Adella can provide special blood items. Repeatedly accepting Arianna’s blood while Adella is present can cause conflict between them and may endanger Arianna. If preserving Arianna’s child event is more important than collecting temporary healing items, decline further blood once the two women are living in the same refuge.
- Send Arianna to Oedon Chapel if preserving her event.
- Rescue Adella from Hypogean Gaol if desired.
- Do not send the Suspicious Beggar to Oedon Chapel on a preservation route.
- Avoid repeatedly accepting Arianna’s blood while Adella is present.
4. Preserve the impostor Iosefka until the Blood Moon
The doctor in Iosefka’s Clinic can accept survivors before the Blood Moon, but the later occupant is an impostor. Leave the impostor alive until after Rom, the Vacuous Spider, has been defeated. Do not attack her during the early clinic visit if you want this cord source.
After Rom and the appearance of the Blood Moon, return to Iosefka’s Clinic through the rear route in the Forbidden Woods. Enter the upper clinic room and defeat the impostor Iosefka. She provides One Third of Umbilical Cord. If she was killed before Rom, this source is lost for the current playthrough.
The clinic also contains the Cainhurst Summons in its rear section. Taking that item does not require killing the impostor, so collect the summons while leaving her alive.
- Leave the impostor Iosefka alive before defeating Rom.
- Return to the clinic after the Blood Moon appears.
- Defeat the impostor in the upper room and collect One Third of Umbilical Cord.
5. Complete Arianna’s cord event
If Arianna was sent to Oedon Chapel and remains alive through the Blood Moon, continue until after defeating Micolash, Host of the Nightmare. Then return to the chapel and check the lower route toward the Tomb of Oedon. Arianna should have left the main chapel area and can be found with her newborn child.
Defeat the Celestial Child and collect One Third of Umbilical Cord. This source is optional, but it is one of the four possible cords and can replace the Iosefka source if the clinic quest was lost. Arianna’s event can fail if she was killed, sent to the clinic, displaced by Adella’s conflict, or otherwise removed before giving birth.
Mergo’s Wet Nurse provides another cord after the mandatory boss fight. The abandoned workshop in the Healing Church Workshop provides a further cord. Because there are four possible sources, losing one does not automatically prevent the third ending, but you must still obtain three total.
- Keep Arianna alive through the Blood Moon.
- Defeat Micolash before checking for Arianna’s child.
- Find the child near the Tomb of Oedon and collect the cord.
- Confirm the abandoned workshop and Wet Nurse cords if using them.
6. Consume the cords before Gehrman
The third ending requires consuming at least three items named One Third of Umbilical Cord before refusing Gehrman. Merely possessing three is not enough. Open the inventory and use three of them before beginning the final confrontation.
The possible sources are the abandoned workshop, the impostor Iosefka after the Blood Moon, Arianna’s child after Micolash, and Mergo’s Wet Nurse. You may use any three. The game does not require a particular NPC combination, and consuming a fourth cord is unnecessary for the ending condition.
After the cords have been consumed, refuse Gehrman and defeat him. The Moon Presence encounter follows only when the cord condition was already satisfied. If you defeat Gehrman without consuming three cords, the third-ending sequence will not begin in that playthrough.
- Have three or more One Third of Umbilical Cord items.
- Use at least three from the inventory before refusing Gehrman.
- Do not rely on possession alone; verify that the items were consumed.
7. Perform the final side-content check
Before entering the final Hunter’s Dream confrontation, resolve any remaining optional content you want from Eileen, Alfred, Cainhurst, Upper Cathedral Ward, survivor quests, and optional hunters. Collect the abandoned workshop cord if you have not already done so. After Mergo’s Wet Nurse, return to the Hunter’s Dream and complete these tasks before speaking to Gehrman’s final prompt.
NPC rewards are separate from mandatory campaign progression. The story can be completed without Eileen’s quest, Alfred’s faction outcome, Arianna, Adella, Iosefka, Cainhurst, or the optional cord sources. These activities instead provide badges, gestures, runes, blood items, weapons, trophies, and access to the third ending.
When ready, confirm that your intended NPC outcomes are complete, your desired optional rewards are collected, your Blood Echoes have been spent, and three cords have been consumed if you want to fight the Moon Presence. The final confrontation is the point at which the current cycle ends, so do not postpone unfinished side content until after the credits.
- Resolve Eileen’s intended outcome or deliberately abandon the quest.
- Complete Alfred’s desired route and faction interaction.
- Finish Cainhurst and any survivor decisions you still want.
- Collect the required cords and consume three for the third ending.
- Spend Blood Echoes and finish optional objectives before approaching Gehrman.
Before you move on
- Eileen’s quest is complete through the Bloody Crow encounter, or the player has deliberately accepted its alternate outcome.
- Alfred’s desired Cathedral Ward, Cainhurst, and Unopened Summons interactions are complete.
- Arianna, Adella, Iosefka, and the Suspicious Beggar have been routed according to the chosen survivor plan.
- The abandoned workshop, Iosefka or Arianna source, and Mergo’s Wet Nurse source have been checked as needed.
- At least three One Third of Umbilical Cord items have been consumed before refusing Gehrman if pursuing the Moon Presence ending.
- All desired optional rewards and side objectives are complete before the final Hunter’s Dream confrontation.
References for this chapter
- Bloodborne arrives exclusively on PS4 this week — PlayStation.Blog
- Bloodborne — Official PlayStation Product Page
- Progression Guide | Bloodborne Wiki
- Eileen the Crow | Bloodborne Wiki
- Alfred, Hunter of Vilebloods | Bloodborne Wiki
- Cainhurst Castle – Bloodborne Walkthrough & Guide
- Third Umbilical Cord
- All Questlines Checklist – Bloodborne
The Lecture Building and Nightmare of Mensis Approach
Use the Lecture Building as a junction between the optional Nightmare Frontier and the mandatory Nightmare of Mensis. The first floor leads to Nightmare Frontier, while the second floor leads to the endgame route after The One Reborn. Clear the building for its useful items, then reach the first Nightmare of Mensis lamp and establish the elevator route toward Mergo’s Loft before continuing to Micolash.
Enter the correct floor of the Lecture Building
There are two entrances, and they lead to different destinations. Before The One Reborn, obtain the Tonsil Stone from a suitable survivor window in the Forbidden Woods or another valid source, then travel to the Amygdala near the Cathedral Ward route leading toward the Grand Cathedral. Allow the Amygdala to seize you. The transport places you on the first floor of the Lecture Building. Light the lamp immediately; it is named Lecture Building.
After defeating The One Reborn, continue through Advent Plaza and inspect the mummy in the room beyond the boss arena. The transport places you on the second floor and unlocks the lamp named Lecture Building 2nd Floor. This is the normal story entrance to Nightmare of Mensis.
The distinction matters throughout the chapter. The first-floor main hallway ends at the door to Nightmare Frontier, an optional area containing Amygdala. The second-floor main hallway ends at the door to Nightmare of Mensis, which is required for the remaining main campaign. Do not use the first-floor door expecting the story route.
- Light Lecture Building on the first floor if you arrived through the Tonsil Stone route.
- Light Lecture Building 2nd Floor after using the mummy beyond The One Reborn.
- Remember: first floor leads to Nightmare Frontier; second floor leads to Nightmare of Mensis.
Clear the first floor and secure the optional items
From the first-floor lamp, the main hallway itself is safe. The door opposite the starting room leads to Patches the Spider and is optional. Continue through the side rooms if you want the building’s rewards before leaving.
Enter Lecture Theater 1 carefully. A Slime Scholar can drop from above as you approach, so step away from the doorway and deal with it before allowing the surrounding students to gather. Student enemies are slow, but their ranged attacks and group numbers make the lecture rooms dangerous if you fight in the center. Use doorways, desks, and the edges of the seating rows to separate them.
Collect the Lecture Theatre Key and use it to open the locked lecture-room door. Lecture Theater 2 contains the Augur of Ebrietas Hunter Tool. It is optional and primarily useful to hunters investing in Arcane, but it is a significant base-game pickup. The Student Uniform and Student Trousers are also available in this section.
When you finish, return to the main hallway. The door at its far end leads directly to Nightmare Frontier. You may enter that area now, but it is not required for the main campaign. If your goal is the mandatory route, do not take this door.
- Obtain the Lecture Theatre Key.
- Collect the Student clothing if pursuing the building’s items.
- Take Augur of Ebrietas from Lecture Theater 2 if it suits your build or completion goal.
- Leave through the main hallway only when you are ready to enter Nightmare Frontier.
Use the second floor for the main story
If you entered on the first floor and want to reach Nightmare of Mensis, use the internal connection through Patches’s area to reach the second floor. The ladder provides the practical link between the floors, so open and remember it before committing to either nightmare.
On the second floor, go along the Lecture Theater 1 balcony and search the side route for the Communion Caryll Rune. A Bloodstone Chunk is also available in this floor’s exploration path. These rewards are optional, but the rune can improve blood-vial capacity and the upgrade material is useful before the endgame.
The second-floor route contains student ambushes, including enemies that drop from above or attack from the side of the corridor. Move through the balcony and adjoining rooms slowly, checking corners before opening the next door. You do not need to clear every student to progress.
At the far end of the second-floor hallway, open the large door to enter Nightmare of Mensis. This is the mandatory continuation after The One Reborn. Do not confuse it with Nightmare Frontier, which is reached from the first floor.
- Open the internal ladder route between the floors if you have not already done so.
- Collect Communion and the Bloodstone Chunk if you want the second-floor rewards.
- Use the far door on the second floor to enter Nightmare of Mensis.
Reach and light the first Nightmare of Mensis lamp
The opening trail of Nightmare of Mensis is initially quiet. Follow the tunnel and look for a Loran Silverbeast standing with its back toward you. Sneak behind it for a charged attack if you want to remove it safely. A Wandering Nightmare is nearby; leave it alone if you are trying to reach the lamp quickly, because fighting it can draw you into the open.
Continue along the trail and turn the corner near its end. At this point the Brain of Mensis gains a line of sight to you. Its gaze steadily drains health and builds Frenzy while you remain exposed. Sprint forward rather than stopping to fight in the open, then use the structure and nearby cover to break its view.
The Nightmare of Mensis lamp is ahead in the covered area. Light it before collecting side items or testing the surrounding enemies. This lamp is the safe reset point for the opening approach and should be your objective on the first visit.
- Sneak past or defeat the Loran Silverbeast.
- Avoid wasting time fighting the nearby Wandering Nightmare during the first approach.
- Run through the Brain of Mensis’s exposed sightline and light the Nightmare of Mensis lamp.
Cross the first Mensis section and activate the return route
After lighting the lamp, continue toward the hill and chapel area. Giant Lost Children patrol the approach and can throw large rocks from above. Keep your camera aimed uphill when moving through the open section, and use walls, ledges, and the chapel structure to interrupt the attackers’ lines of fire. Pull enemies toward cover instead of fighting in the middle of the slope.
Several Nightmare Apostles gather around the chapel and may descend together if you rush into the center. Lure them one at a time with a ranged attack or step back to create space. The same principle applies to the later unarmed and armed attendants: isolate them near corners and avoid allowing several enemies to surround you.
Continue beyond the chapel toward the elevator station. One elevator can be activated to descend toward the path directly in front of the Mergo’s Loft: Base Lamp. Ride it once to establish the connection, then use it as your dependable return route. This is the key practical shortcut in the opening Mensis section; reaching the lamp alone does not complete the preparation.
Search the nearby side paths only after the elevator is active. The area includes additional upgrade materials, runes, and consumables, but none is worth losing a large Blood Echo total over. If the Brain’s gaze fills your Frenzy meter, move behind solid cover and use a Sedative before re-entering the exposed route.
- Use cover against the rock-throwing Giant Lost Children.
- Separate the Nightmare Apostles instead of triggering the whole group.
- Activate the elevator that descends toward Mergo’s Loft: Base Lamp.
- Use Sedatives from cover when Frenzy becomes dangerous.
Prepare for the route to Micolash
Before advancing deeper, return to the Hunter’s Dream if your weapon needs repair or reinforcement. Restock Blood Vials and Quicksilver Bullets, and place Sedatives in an easily accessible quick-item slot. No fixed Sedative count or Insight total is required, but carrying several is practical because later Mensis routes include Brain exposure and Winter Lanterns.
Bank Blood Echoes before attempting the long route beyond the elevator. If you die, the recovery path will include exposed platforms, ranged enemies, attendants, and the possibility of Frenzy. A Bold Hunter’s Mark is also useful when you decide that preserving your current echoes is more important than finishing the exploration run.
Once the Nightmare of Mensis lamp is lit and the elevator toward Mergo’s Loft: Base Lamp is active, continue through the platforms and library route. The next major objective is Micolash, whose encounter is a chase through connected rooms rather than a conventional arena from the start. Follow him through each relocation instead of searching for a separate boss room.
Your preparation is complete when the Lecture Building floors are understood, the optional Frontier entrance has been distinguished from the story entrance, the Nightmare of Mensis lamp is active, the elevator return route is open, and your weapon, healing supplies, echoes, and Sedatives are ready.
- Repair and reinforce your weapon before continuing.
- Bank Blood Echoes before the Micolash approach.
- Prepare Sedatives without assuming a fixed required quantity.
- Confirm that the Nightmare of Mensis elevator route is active.
Before you move on
- The first-floor Lecture Building lamp is active if you entered through the Tonsil Stone route.
- The Lecture Theatre Key and desired first-floor items have been collected, including Augur of Ebrietas if wanted.
- The internal route between the Lecture Building floors is open or otherwise understood.
- The second-floor Lecture Building lamp is active after the One Reborn route.
- The Nightmare of Mensis lamp is lit.
- The elevator toward Mergo’s Loft: Base Lamp has been activated.
- Blood Echoes have been banked, the weapon is repaired, and Sedatives are ready before continuing toward Micolash.
References for this chapter
Micolash, Host of the Nightmare
Micolash is a required story boss in Mergo’s Loft. The encounter is built around two pursuit sections followed by two enclosed combat phases. The first phase takes place in a library room after Micolash is driven into a dead end. The second begins after a longer chase and a drop from an upper balcony. His normal attacks are manageable, but A Call Beyond can cause devastating arcane damage if he is allowed to cast without pressure.
1. Prepare before beginning the pursuit
Use your most reliable upgraded weapon and carry a full supply of Blood Vials and Quicksilver Bullets. Micolash is less durable than many late-game bosses, so ordinary physical attacks are sufficient. You do not need a special weapon, damage type, or build to complete the fight.
Arcane defense can help against A Call Beyond, although it is not a requirement. Bone Marrow Ash can improve firearm damage, and ranged consumables can provide extra damage or pressure from a safer distance. These options are supplemental; a controlled melee strategy works on its own.
Consider spending a large Blood Echo total before entering the fight. The route is a maze, and a death during either chase can make recovering echoes more inconvenient. The Nightmare of Mensis approach also contains enemies that can interfere with the pursuit, so enter with enough healing to survive more than one mistake.
- Equip a weapon you can use comfortably in confined rooms.
- Restock Blood Vials and Quicksilver Bullets.
- Consider Arcane-resistant clothing or a ranged option, but do not treat either as mandatory.
- Spend or secure a large Blood Echo total before the attempt.
2. Start the first chase and reach the library room
From the Mergo’s Loft approach, follow the path into the upper Nightmare of Mensis buildings. Micolash runs away when approached, so do not try to force a conventional fight in the opening corridors. Follow him through the connected rooms and turns until he reaches the first enclosed library area.
Keep the camera under control at every junction. Skeletal puppets occupy parts of the route and can surround you while Micolash continues moving. Kill one if it blocks a doorway or threatens to trap you, but do not stop to clear every enemy in the district. The goal is to maintain the pursuit and keep the route readable.
Micolash eventually reaches a dead-end room. A gate closes behind him, creating the first combat section. Enter carefully and remove nearby skeletal puppets if they are active. They are dangerous mainly because they can attack from behind while Micolash uses his forward tentacle strike, Augur of Ebrietas.
- Follow Micolash instead of attacking during the opening corridors.
- Use doorways and turns as landmarks.
- Kill skeletal puppets that block the route or threaten to surround you.
- Wait for the first gate to close before committing to the phase-one fight.
3. Defeat the first phase with short attacks
Micolash’s first-phase moves are primarily close-range punches and Augur of Ebrietas. Augur is a forward tentacle attack that can stagger the hunter and set up additional damage. Stay near his side rather than standing directly in front of him. When he begins the casting motion, dodge diagonally around his body and answer with a brief attack string.
Do not empty your stamina bar trying to keep him pinned. Two or three attacks followed by a reposition is a dependable rhythm. If he backs toward the room’s edge, maintain enough distance to dodge without being trapped against a wall. Keep track of the skeletal puppets before committing to another attack sequence.
After enough damage, Micolash leaves the room and the barrier opens. This begins the second chase. There is no second boss trigger to find in the first room, so return to the surrounding stairs and passages as soon as the route opens.
- Circle toward Micolash’s side when Augur of Ebrietas begins.
- Use short attack strings and preserve stamina for dodging.
- Check the puppets before pursuing him out of the room.
- Leave through the opened route when the first phase ends.
4. Follow the second chase through the upper maze
The second pursuit covers a larger section with staircases, connected rooms, and mirror-like entrances. Micolash relocates through these routes rather than remaining in a single arena. Follow the doorway or passage he uses and continue climbing through the upper library area.
If he disappears from view, search the nearby stairs and connected rooms rather than returning toward the original entrance. The chase has not reset. The important landmarks are the upper corridors, the central rooms, and the route that eventually places Micolash behind the second gate.
Do not waste time clearing every enemy. Kill a puppet or attendant if it blocks the doorway, interferes with a turn, or prevents a safe retreat. Otherwise, continue the pursuit. Taking too long allows enemies to gather in the corridors and makes it harder to identify the route Micolash has taken.
- Use staircases and mirror-like entrances as route landmarks.
- Search nearby connected rooms if Micolash leaves your view.
- Do not retreat to the beginning of the area when the chase seems to pause.
- Fight only enemies that block or seriously threaten the pursuit.
5. Enter the second room and stop A Call Beyond
When Micolash is trapped behind the second gate, follow the route to the upper balcony and drop through the opening into his room. This is the true second phase. He still uses punches and Augur of Ebrietas, but he can now cast A Call Beyond. The spell creates arcane projectiles above him before sending them outward across the room.
The safest general approach is to stay close enough that he has little time to begin the spell. Circle around him, attack briefly, and reposition when he turns or raises an arm. Do not stand at the far end of the room and trade attacks. Distance gives him time to complete A Call Beyond, and the projectiles can kill the hunter before healing is possible.
If the spell begins forming, close the distance immediately. A firearm can interrupt the cast if it connects during preparation, but the timing is not mandatory for victory. If the projectiles have already launched, dodge toward Micolash as the attack releases instead of rolling directly away. Passing through the attack’s origin can be safer than crossing the full spread of projectiles.
Pillars, doorways, and the room’s edges may provide brief cover, but do not rely on hiding while Micolash repeatedly casts. The objective is to keep pressure on him. Ranged attacks from the balcony can also work for players who can land them consistently, but close-range combat is the more straightforward plan for most hunters.
- Stay close enough to pressure Micolash during the second phase.
- Interrupt A Call Beyond with a firearm if the timing is reliable for you.
- If the spell fires, dodge toward Micolash at the release rather than retreating blindly.
- Keep stamina available for Augur of Ebrietas and emergency dodges.
- Do not trade attacks from the opposite side of the room.
6. Confirm the victory and activate the next checkpoint
When Micolash dies, the Nightmare Slain message confirms that the required encounter is complete. Check your inventory for the Mensis Cage after the battle; it is associated with the boss reward, but it is not necessary to treat the corpse as a special pickup objective before leaving.
A vertical bridge rises after the victory and connects the boss area to the newly available Mergo’s Loft: Middle lamp. Cross the bridge, light the lamp, and use it as the main checkpoint for the next chapter. The route ahead leads toward Mergo’s Loft and the required Mergo’s Wet Nurse encounter.
If you leave without lighting the lamp or die while moving away, return through the Mergo’s Loft route. The raised bridge is no longer the same approach used during the chase, but the post-boss area includes a recovery route through the surrounding passages and elevators. Do not assume the boss must be fought again simply because the original bridge position looks different.
Before continuing, return to the Hunter’s Dream if you need to restock or spend echoes. The next section contains additional late-game enemies, Frenzy hazards, and optional side paths, so the new lamp is the correct place to prepare.
- Confirm the Nightmare Slain message.
- Check that the Mensis Cage is present in the inventory if you are collecting key rewards.
- Cross the raised bridge after the fight.
- Light the Mergo’s Loft: Middle lamp.
- Restock before advancing toward Mergo’s Wet Nurse.
Before you move on
- The Nightmare Slain message appears.
- Micolash’s Mensis Cage reward is confirmed in the inventory if pursuing the chapter’s item check.
- The vertical bridge rises after the fight.
- The Mergo’s Loft: Middle lamp is lit.
- The route toward Mergo’s Loft is open and no further Micolash chase section remains.
- The hunter can return to the Hunter’s Dream and resume the required endgame route from the new checkpoint.
Mergo’s Loft and Mergo’s Wet Nurse
After defeating Micolash, climb Mergo’s Loft, activate its shortcuts, decide whether to complete the optional Brain of Mensis route, and defeat Mergo’s Wet Nurse. The Wet Nurse is required for the main campaign and awards one One Third of Umbilical Cord. The Brain of Mensis, Blood Rock, Choir Bell, and Moon Caryll Rune are optional. Defeating the Wet Nurse changes the Hunter’s Dream and opens the final endgame state, but it does not immediately begin New Game Plus or force the final conversation with Gehrman.
Enter Mergo’s Loft and secure the base shortcuts
From Micolash’s arena, cross the raised bridge and enter Mergo’s Loft. The opening section contains Mergo’s Attendants, spiders, shadows, and narrow routes where enemies can surround you. Advance in short sections, pull enemies back toward doorways, and avoid chasing them onto open bridges. If several enemies begin following, retreat to the previous room instead of trying to fight on the stairs.
Light the Mergo’s Loft: Base lamp as soon as you reach it. Continue through the tower until you find the lift that returns to the lower section. Activate it before pushing farther upward. This elevator is the main recovery shortcut for the opening climb. Pick up the Eye Caryll Rune near the lift if you are collecting area rewards, but it is not required for progression.
The tower’s spiders are easiest to manage near a doorway. Draw one or two down the stairs, retreat behind the threshold, and finish them before the rest arrive. Keep Sedatives available for routes exposed to the Brain of Mensis. Frenzy is not ordinary damage: when the meter fills, the resulting burst can remove most or all of a hunter’s health.
- Light Mergo’s Loft: Base.
- Activate the elevator that returns toward the base section.
- Use doorways to separate spiders and attendants.
- Carry Sedatives before crossing exposed sections.
Reach Mergo’s Loft: Middle
Continue upward from the base section, using corners and walls to break line of sight from the Brain of Mensis. The Brain’s gaze affects enemies as well as the hunter, so you can sometimes let it weaken a group before moving in. Do not remain in the open waiting for enemies to die; use the covered route and move between safe positions.
The tower includes shadows, spiders, large hostile creatures, and Winter Lanterns. Winter Lanterns build Frenzy through their gaze and can kill a hunter with their grab. Bypass them when possible. If a fight is unavoidable, approach from cover, use a firearm parry if you are confident in the timing, and spend a Sedative immediately if the Frenzy meter becomes dangerous.
Near the upper part of the tower, follow the route toward the second lamp and light Mergo’s Loft: Middle. This lamp is the principal checkpoint for both the Wet Nurse route and the Brain of Mensis side route. From here, locate and activate the cage elevators and other lifts before entering the final approach. Sending lifts back to their starting position can also make later attempts shorter.
- Break the Brain’s line of sight before fighting minor enemies.
- Bypass Winter Lanterns unless you need their route or drops.
- Light Mergo’s Loft: Middle.
- Activate the lifts and cage elevators around the middle section.
Complete the optional Brain of Mensis route
The Brain of Mensis is optional and is not needed to reach Mergo’s Wet Nurse. To reach it, begin at Mergo’s Loft: Middle and use the small cage elevator in the side area near the shortcut cages. When the cage passes the broken opening, leave through that opening rather than riding straight to the bottom. Follow the exposed route through the spider-filled area and the Winter Lantern section.
Cross the rafters and narrow platforms carefully. Use walls and pillars to interrupt the Brain’s gaze, and do not fight the spiders in the most exposed sections unless necessary. At the end of the route, pull the lever. A cutscene shows the Brain falling from its suspended position.
After pulling the lever, return to the tower’s lower interior and use the newly available route down to the void. A lift near the Mergo’s Attendant area leads to the chamber where the injured Brain now waits. If you obtained the Make Contact gesture in Upper Cathedral Ward, stand in front of the Brain and perform it. Hold the gesture until the interaction completes and the Moon Caryll Rune is awarded. This reward is optional; attacking the Brain first prevents the gesture reward.
Kill the Brain after collecting the rune to receive Living String, a material used for a Chalice Ritual. The same side route provides a Blood Rock and a Choir Bell pickup. The Blood Rock is reached from the broken-wall or lower-void route near the Brain’s former position, while the Choir Bell is found in the upper rafters near the lever. These rewards are useful for broad base-game completion but are not required for the story.
- Obtain Make Contact before attempting the Brain’s rune reward.
- Use the broken cage opening to reach the lever route.
- Pull the lever and then descend through the newly opened path.
- Perform Make Contact before attacking the Brain.
- Collect Living String, the Blood Rock, and the Choir Bell if pursuing optional completion.
Open the route to the Wet Nurse’s Lunarium
Return to Mergo’s Loft: Middle and take the main tower route rather than the Brain’s side path. Advance through the upper interior, using the active lifts to avoid repeating the lower climb. Watch for shadows and other enemies around stair landings; open spaces near the tower’s top can allow several attackers to reach you at once.
The route eventually reaches the upper exterior and the large lift leading to the Wet Nurse’s Lunarium. Activate any nearby lift or shortcut before entering the boss area. Spend or bank Blood Echoes, repair your weapon, and restock Blood Vials. Fire Paper or Bolt Paper can help, but no consumable replaces safe positioning.
Enter the Lunarium only after confirming that the shortcut from Mergo’s Loft: Middle is active. The boss arena is large, so there is no need to fight with your back against the boundary. Keep the center and outer perimeter available for the dark phase.
- Return to Mergo’s Loft: Middle after optional exploration.
- Activate the upper shortcut before the boss attempt.
- Repair your weapon and spend excess Blood Echoes.
- Enter the Wet Nurse’s Lunarium through the lift route.
Defeat Mergo’s Wet Nurse
Mergo’s Wet Nurse attacks with several overlapping blades, lunges, sweeping arcs, and turning strikes. The safest general position is beside or behind the boss rather than directly in front of the weapon arcs. Circle around the rear quarter, attack after a swing finishes, and leave enough stamina for a dodge. Do not remain underneath the boss for an extended combo, because turning attacks can catch a hunter who keeps attacking without watching the body’s rotation.
When the Wet Nurse turns toward you, stop attacking and evade through or sideways past the incoming blades. A charged attack from behind may create a visceral opening, but only attempt it when the boss is committed to a long recovery animation. Short attacks followed by repositioning are safer than exhausting the entire stamina bar.
During the dark phase, additional shadow projections appear and the arena becomes much more dangerous. Do not stand and trade attacks with the projections. Sprint around the arena’s perimeter in one direction, preferably counterclockwise, while watching for lunges and blade sweeps. The projections eventually disappear. When the arena returns to normal, be ready for an immediate attack from the real Wet Nurse.
After the final blow, the game awards a One Third of Umbilical Cord. The defeat message reads Nightmare Slain; if the boss dies during the dark phase, the message may appear after the phase ends rather than instantly. Confirm the cord in the inventory before leaving the area.
- Stay beside or behind the Wet Nurse when possible.
- Preserve stamina for evasive movement.
- During the dark phase, circle the arena instead of trading attacks.
- Confirm the One Third of Umbilical Cord after victory.
- Confirm that Nightmare Slain has appeared.
Return to the Hunter’s Dream and prepare for the final stretch
After the Wet Nurse is defeated, Mergo’s crying stops and the Hunter’s Dream changes. The workshop becomes visibly altered, and the final route involving Gehrman is now available. This does not automatically begin New Game Plus. Do not approach Gehrman until you have completed the optional areas, NPC decisions, Chalice Dungeon goals, weapon upgrades, and ending preparations you want for this cycle.
This is the final practical opportunity to finish side content before the endgame confrontation. Complete Cainhurst Castle, Nightmare Frontier, Upper Cathedral Ward, optional bosses, survivor and hunter quests, and any remaining One Third of Umbilical Cord preparations. For the third ending, consume at least three One Third of Umbilical Cord items before refusing Gehrman. The Wet Nurse’s cord is one possible item and should be retained until the ending condition is secured.
When all desired objectives are complete, return to the Hunter’s Dream and spend remaining Echoes. The next chapter covers the separate choices involving Gehrman and, when eligible, the Moon Presence.
- Verify the Wet Nurse’s cord is in the inventory.
- Complete desired optional areas and NPC quests.
- Consume at least three cords before refusing Gehrman if pursuing the third ending.
- Spend Echoes and finish preparations before the final Hunter’s Dream confrontation.
Before you move on
- Mergo’s Loft: Base and Mergo’s Loft: Middle lamps are lit.
- The major lifts and cage shortcuts between the base and middle sections are active.
- The optional Brain route is complete if desired: the lever was pulled, Make Contact was performed before attacking the Brain, Living String was collected, and the Blood Rock and Choir Bell were obtained if wanted.
- Mergo’s Wet Nurse is defeated and Nightmare Slain has appeared.
- The One Third of Umbilical Cord from the Wet Nurse is present in the inventory.
- Desired optional bosses, NPC quests, Cainhurst, Upper Cathedral Ward, Nightmare Frontier, and Chalice Dungeon objectives are complete before approaching Gehrman.
- At least three One Third of Umbilical Cord items have been consumed before refusing Gehrman if the Moon Presence ending is intended.
The Hunter’s Dream Endgame: Gehrman, the Three Endings, and Moon Presence
After defeating Mergo’s Wet Nurse, the gate leading deeper into the Hunter’s Dream opens. This begins Bloodborne’s final sequence, but you still have time to complete optional areas, NPC quests, Chalice Dungeons, weapon upgrades, and other current-cycle goals. The required story bosses before this point are Father Gascoigne, Vicar Amelia, Shadow of Yharnam, Rom, the Vacuous Spider, The One Reborn, Micolash, Host of the Nightmare, and Mergo’s Wet Nurse. Your final choice determines whether you submit to Gehrman, fight him without facing Moon Presence, or unlock the Moon Presence battle by consuming at least three One Third of Umbilical Cord items before Gehrman is defeated. Bloodborne transitions into New Game Plus after the ending and credits.
Prepare the Hunter’s Dream before the final choice
Return to the Hunter’s Dream after defeating Mergo’s Wet Nurse. The gate near the workshop is now open, leading to the garden where Gehrman waits beneath the large tree. Walking into this garden does not immediately force an ending; the decisive commitment occurs when you answer Gehrman’s offer. The Wet Nurse defeat also changes the Dream’s appearance, making this the clear endgame state.
Before speaking to Gehrman, complete any optional content you want finished in the current cycle. This is the time to clear Cainhurst Castle, Nightmare Frontier, Upper Cathedral Ward, Darkbeast Paarl, Amygdala, Martyr Logarius, Celestial Emissary, Ebrietas, the Witch of Hemwick, and Cleric Beast if they remain undefeated. Finish NPC decisions, collect desired weapons and badges, attempt Chalice Dungeon objectives, strengthen and repair your weapon, and spend or secure Blood Echoes.
If you want the Moon Presence ending, use at least three One Third of Umbilical Cord items from the inventory before Gehrman is defeated. Using them before speaking to him is the safest procedure. Carrying three cords is not enough. The base game provides more possible cord sources than the minimum required, so losing one source does not necessarily prevent the third ending if three others remain available.
The practical point of no return is completing the final ending sequence, not merely entering the garden. Choosing Submit Your Life ends the current cycle immediately. Choosing Refuse starts the Gehrman fight, and dying returns you to the Hunter’s Dream for another attempt. However, once the final ending and credits have completed, the previous world is no longer available as an unfinished playthrough.
- Complete the required story route through Father Gascoigne, Vicar Amelia, Shadow of Yharnam, Rom, The One Reborn, Micolash, Host of the Nightmare, and Mergo’s Wet Nurse.
- Finish optional areas, NPC decisions, upgrades, and Chalice Dungeon goals intended for this cycle.
- Consume at least three One Third of Umbilical Cord items if pursuing Moon Presence.
- Spend Blood Echoes, repair equipment, and restock Blood Vials and Quicksilver Bullets.
- Create a save backup before speaking to Gehrman if pursuing all three ending trophies.
Choose Submit Your Life for the first ending
Speak to Gehrman in the garden and choose Submit Your Life. No boss fight follows this choice. The Hunter is released from the Hunter’s Dream, the ending cutscene plays, and the credits follow.
This ending does not require One Third of Umbilical Cord items. It is the shortest route through the finale, but it ends the current cycle immediately. Do not choose it while intending to return for optional bosses, missed weapons, NPC rewards, or unfinished dungeon work.
After the credits, Bloodborne begins New Game Plus. Your character level, weapons, upgrades, inventory, and other persistent character progress carry forward, while bosses, NPC states, area pickups, and campaign progression reset. New Game Plus is a new cycle, not a return to the pre-ending version of the world.
- Select Submit Your Life when Gehrman offers the choice.
- Do not select this option if current-cycle optional content remains unfinished.
- Allow the ending and credits to finish before treating the cycle as complete.
Choose Refuse to fight Gehrman
Choose Refuse when Gehrman asks whether you will submit. The garden becomes the boss arena and Gehrman attacks. Dying returns you to the Hunter’s Dream, allowing you to restock, change equipment, spend Echoes, or try again.
Gehrman begins with the Burial Blade in its long, two-handed scythe form. Watch for broad sweeps, delayed follow-ups, jumping cleaves, lunges, and attacks that cover more distance than they initially appear to. Dodge sideways or backward until a sequence ends, then answer with one or two attacks. Do not chase every retreat, because a delayed scythe swing can catch an early counterattack.
Later, he transforms the Burial Blade into its shorter sword form and uses a firearm. His sword strings are faster, and a successful gunshot can stagger the Hunter and lead into a visceral attack. Preserve enough stamina for an emergency dodge. If you are not confident in a parry, evade the full sequence and punish the recovery instead.
Firearm parries are useful but optional. Read committed scythe swings, lunges, and other attacks that leave him exposed, then fire just before contact. A safer general rhythm is to bait an attack, evade the first swing or combination, land a short punish, and reset. Avoid attacking through the end of a combo unless his recovery is clearly visible.
As Gehrman’s health falls, he becomes more aggressive and gains stronger mobility and area attacks. When he begins an empowered motion, stop attacking and create distance. Heal only after escaping immediate range or after a completed animation. If you defeat him without having consumed three cords, the refusal ending proceeds without Moon Presence. If the cord requirement was met before his defeat, Moon Presence appears instead.
- Keep Gehrman in view and preserve stamina for evasive movement.
- Avoid standing directly in front of the Burial Blade for extended periods.
- Expect firearm pressure after the weapon changes form.
- Use parries as optional opportunities rather than forcing every attempt.
- If you die, return from the Hunter’s Dream with replenished supplies.
Unlock the Moon Presence encounter
To unlock Moon Presence, consume at least three One Third of Umbilical Cord items and then choose Refuse. Defeat Gehrman while the three-cord condition is active. Consuming the items before speaking to him avoids any uncertainty, although the decisive requirement is that three have been used before Gehrman is defeated.
Moon Presence appears after Gehrman’s defeat instead of the normal refusal ending continuing directly to its conclusion. If fewer than three cords were consumed before Gehrman falls, Moon Presence does not appear in that sequence. You do not need every available cord source; the requirement is three consumed items.
- Use three One Third of Umbilical Cord items.
- Select Refuse rather than Submit Your Life.
- Defeat Gehrman after meeting the cord requirement.
- Enter the Moon Presence encounter when it begins.
Defeat Moon Presence
Moon Presence is quick despite its size. It uses close-range swipes, lunges, leaps, shockwaves, and attacks that can make parts of the arena unsafe. Stay near a flank when practical, strike once or twice, and reposition. Remaining directly in front of it makes its lunges and frontal attacks harder to read.
Its most important attack is the blood-explosion effect that prevents normal healing and reduces the Hunter to a small amount of health rather than killing outright. When it connects, stop attacking and create space. Heal as soon as healing becomes available. Do not continue a combo at critical health merely because the boss appears vulnerable.
Moon Presence can also create red hazards or blood-like projectiles that restrict portions of the arena. Move away from affected areas rather than fighting through them. Track the creature’s torso and limbs, not only its head, because body movement often provides the warning for lunges and shockwaves.
Use brief attacks after long recovery animations, then disengage before the next sequence. Keep stamina available for the next lunge. If you die here, you can attempt the final route again; defeating Gehrman alone does not complete the third ending until Moon Presence is defeated.
- Heal immediately after the health-reduction attack when healing becomes possible.
- Leave red hazards instead of continuing a combo inside them.
- Use short attacks during recovery windows.
- Keep stamina available for the next lunge or shockwave.
Confirm the ending and current-cycle completion
The selected ending cutscene and credits confirm completion of the current cycle. For the third ending, both Gehrman and Moon Presence must be defeated. After the credits, Bloodborne transitions into New Game Plus rather than restoring the previous world state.
New Game Plus preserves the Hunter’s level, weapons, upgrades, inventory, and other character progress, but resets the campaign world. Bosses return, NPC questlines begin again, and area pickups and progression gates must be handled again. Treat it as a new campaign using the same character, not as a continuation of unfinished optional work.
For all three ending trophies, create a save backup before speaking to Gehrman, complete one ending, then restore the backup and select another route. Without a backup, the normal method is to repeat the campaign in separate cycles. The game does not return you to the unfinished pre-ending world after the credits.
- The selected ending cutscene has played.
- The credits have completed and New Game Plus has begun or been confirmed.
- For the Moon Presence ending, both Gehrman and Moon Presence were defeated.
- Micolash, Host of the Nightmare, was completed before Mergo’s Wet Nurse, along with the other required story bosses.
- All desired optional bosses, NPC quests, upgrades, and exploration were completed before the final ending.
- A save backup was used before the final decision if multiple ending trophies are planned.
Before you move on
- The required story bosses Father Gascoigne, Vicar Amelia, Shadow of Yharnam, Rom, The One Reborn, Micolash, Host of the Nightmare, and Mergo’s Wet Nurse have been defeated.
- The chosen ending cutscene and credits have played.
- The character has transitioned into New Game Plus, confirming that the current cycle is over.
- For the Moon Presence ending, Gehrman and Moon Presence were both defeated.
- Before the final conversation, all desired optional bosses, NPC quests, upgrades, Chalice Dungeon goals, and exploration were completed.
- For multiple ending trophies, a save backup was made before the final choice or additional full playthroughs are planned.
Optional Completion: All Main-Game Bosses, Weapons, Runes, and Chalice Dungeons
Use this chapter before the final Hunter’s Dream confrontation if you want broad base-game completion rather than only the credits. It covers the principal optional bosses, standard Hunter Weapon and Caryll Rune trophy goals, and the fixed Chalice Dungeon route leading to Yharnam, Pthumerian Queen. The Old Hunters expansion is outside this chapter.
1. Finish the principal optional base-game bosses
For the broad optional-boss checklist, defeat Cleric Beast in Central Yharnam, Blood-starved Beast in Old Yharnam, Witch of Hemwick in Hemwick Charnel Lane, Darkbeast Paarl in Hypogean Gaol, Amygdala in the Nightmare Frontier, Martyr Logarius in Forsaken Cainhurst Castle, Celestial Emissary in Upper Cathedral Ward, and Ebrietas, Daughter of the Cosmos, beyond the Celestial Emissary arena.
These encounters are optional for reaching the credits. Cleric Beast is not required if you use the Central Yharnam route to Father Gascoigne and then purchase the Hunter Chief Emblem to open the Cathedral Ward gate. Blood-starved Beast is also optional for the main ending, although defeating it opens useful routes, including the Healing Church Workshop access and the path to the Rune Master trophy. Do not treat either boss as universally required for Vicar Amelia.
A practical order is to clear Cleric Beast and Blood-starved Beast early, then Witch of Hemwick after opening Hemwick from Cathedral Ward. Visit Hypogean Gaol for Darkbeast Paarl when the area becomes accessible, enter the Nightmare Frontier through its proper access route for Amygdala, use the Cainhurst Summons to reach Logarius, and collect the Upper Cathedral Key in Yahar’gul before attempting Celestial Emissary and Ebrietas. This is a convenience order, not a mandatory sequence.
- Cleric Beast defeated.
- Blood-starved Beast defeated.
- Witch of Hemwick defeated.
- Darkbeast Paarl defeated.
- Amygdala defeated.
- Martyr Logarius defeated.
- Celestial Emissary defeated.
- Ebrietas defeated.
2. Track standard weapons, badges, and optional variants separately
A Hunter weapon may be a starting choice, a fixed pickup, a quest or faction reward, or a shop purchase unlocked by a Hunter Badge. After obtaining a badge, return to the Bath Messengers and check the weapon shop. A badge normally unlocks the associated purchase rather than placing the weapon directly into the inventory.
For the base-game Hunter’s Essence trophy, obtain the listed standard Hunter Weapons: Saw Cleaver, Saw Spear, Hunter Axe, Threaded Cane, Blade of Mercy, Kirkhammer, Ludwig’s Holy Blade, Reiterpallasch, Chikage, Rifle Spear, Stake Driver, Tonitrus, Logarius’ Wheel, Beast Claw, Burial Blade, Hunter Pistol, Hunter Blunderbuss, Repeating Pistol, Ludwig’s Rifle, Evelyn, Cannon, Flamesprayer, Rosmarinus, Hunter’s Torch, Torch, and Wooden Shield. Uncanny and Lost versions are alternate Chalice Dungeon variants and are not required as separate additions to this checklist.
Important sources include the Saw Spear in Central Yharnam; Rifle Spear and Stake Driver through the Powder Keg Hunter Badge; Ludwig’s Holy Blade through the Radiant Sword Hunter Badge; Evelyn and Reiterpallasch in Cainhurst; Chikage through the Cainhurst Vileblood badge; Beast Claw in Ailing Loran; and Logarius’ Wheel through Alfred’s Wheel Hunter Badge route. Burial Blade becomes available through the Old Hunter Badge after defeating Gehrman, so it may require a later cycle or a deliberate endgame plan.
Do not assume every weapon can be secured without regard to NPC timing. Eileen, Alfred, Djura, Cainhurst, and Gehrman-related rewards depend on quest states or choices. If a weapon is missing, identify its badge, pickup, or quest source instead of repeatedly checking the shop without the prerequisite.
- Every desired Hunter Badge has been collected.
- The Bath Messengers have been checked after each new badge.
- The listed standard Hunter Weapons are distinguished from Uncanny and Lost variants.
- Cainhurst, Upper Cathedral Ward, Yahar’gul, Forbidden Woods, and Ailing Loran have been searched for weapon rewards.
- Quest- and faction-dependent weapons have been secured before their NPC states change.
3. Check Caryll Rune progress without confusing trophies and full collection
Use the Memory Altar in the Hunter’s Dream after obtaining the Rune Workshop Tool. Caryll Runes come from fixed area pickups, bosses, NPC outcomes, the Insight Bath Messengers, and Chalice Dungeon exploration. The Rune Master trophy does not require collecting every Caryll Rune; it requires acquiring an extremely precious rune.
A reliable early target is Formless Oedon in the Healing Church Workshop area. After Blood-starved Beast opens the relevant Cathedral Ward route, ride the elevator and step through the opening partway up the shaft. Follow the hidden path to the chest containing Formless Oedon. Taking the rune from the chest is sufficient for the trophy.
For broader collection, revisit the Hunter’s Dream, Cainhurst, Upper Cathedral Ward, Nightmare areas, and NPC locations before Mergo’s Wet Nurse. Quest rewards can depend on Eileen, Alfred, Iosefka, Arianna, Adella, and the Oedon Chapel routing decisions. Keep ordinary rune collection separate from trophy completion, and check the Insight Bath Messengers before spending large amounts of Insight on other purchases.
- Rune Workshop Tool obtained.
- Memory Altar tested with at least one rune.
- Formless Oedon or another verified precious Caryll Rune obtained for the Rune Master trophy.
- NPC-dependent rune rewards reviewed before the final story sequence.
- Insight shop checked before spending large amounts of Insight.
4. Start the fixed Chalice Dungeon route
Chalice Dungeons are optional side areas created by performing rituals at the gravestones in the Hunter’s Dream. A fixed dungeon layer normally contains a lamp, side rooms, a lever that opens the boss route, and a boss whose reward may be another Chalice. Root Chalices generate different layouts and are mainly useful for alternate loot, Blood Gems, runes, weapon variants, and glyph searches.
Defeat Blood-starved Beast to obtain the Pthumeru Chalice. Create and complete Pthumeru, then Central Pthumeru, then Lower Pthumeru. These fixed dungeons provide early Chalice progression and supply ritual materials needed for later rites. Search side rooms instead of rushing directly from lamp to boss, because ritual materials and workshop items may be required later.
The Hintertomb branch is not mandatory for the Queen route. Ailing Loran is useful because Amygdala drops its Chalice in the Nightmare Frontier, and its fixed layers provide Bastard of Loran materials for the Defiled ritual. Great Isz is another useful material branch, and Ebrietas provides its Chalice. Depending on available supplies, Great Isz or Lower Loran can provide the additional Red Jelly needed for Great Pthumeru Ihyll.
- Pthumeru Chalice created and completed.
- Central Pthumeru completed.
- Lower Pthumeru completed.
- Ailing Loran entered if Bastard of Loran or other materials are needed.
- Hintertomb treated as optional rather than mandatory for the Queen route.
- Great Isz or Lower Loran used for additional Red Jelly if needed.
5. Complete Defiled and Great Pthumeru Ihyll
After Lower Pthumeru, create the Defiled Chalice when you have its required ritual materials, including Bastard of Loran from Ailing Loran or another verified source. The Defiled rite halves the hunter’s maximum health. This is a dungeon rule, not a permanent character penalty, but it makes traps, fire damage, and boss mistakes especially dangerous. Upgrade your weapon, carry enough Blood Vials, and avoid trading damage in narrow arenas.
The fixed Great Pthumeru Ihyll route requires the Defiled Chalice. Complete the Defiled layers and defeat its final boss to receive the Great Pthumeru Ihyll Chalice. Before performing the Ihyll ritual, verify that you have nine Ritual Blood (5), four Red Jelly, 25 Arcane Haze, and one Living String.
Two of the four required Red Jelly are available in a chest on Lecture Building 1F. The remaining two normally come from the fixed Great Isz or Lower Loran dungeons. Other verified sources or farming routes may also supply them, but do not assume that the two Lecture Building items are enough. Arcane Haze can be produced or gathered through the workshop and Chalice Dungeon system, while Living String comes from the required late-game source associated with the Mensis Brain.
Create Great Pthumeru Ihyll and work through its three layers. Use the lamps and side passages to establish recovery routes, then defeat the Layer 1 and Layer 2 bosses before entering Layer 3. Yharnam, Pthumerian Queen is the Layer 3 boss and the target of the Chalice Dungeon boss trophy. Root Chalices, additional rites, and glyph dungeons are not required to reach her.
- Defiled ritual materials confirmed before beginning.
- Defiled Chalice completed under its reduced-health rule.
- Nine Ritual Blood (5), four Red Jelly, 25 Arcane Haze, and one Living String confirmed for the Great Pthumeru Ihyll ritual.
- Two Lecture Building 1F Red Jelly collected.
- The remaining two Red Jelly obtained from Great Isz, Lower Loran, or another verified source.
- Great Pthumeru Ihyll created.
- Ihyll Layers 1 and 2 completed.
- Yharnam, Pthumerian Queen defeated on Layer 3 if pursuing the Chalice boss trophy.
6. Define the completion target and prepare for New Game Plus
Campaign completion means defeating the required story bosses and receiving one ending. Principal optional-boss completion adds the eight encounters listed at the beginning of this chapter. Trophy completion may additionally require Hunter’s Essence, Rune Master, optional-boss trophies, Chalice trophies, Hunter’s Craft, and other objectives. Full Chalice completion is broader and can include Root Chalices, cursed rites, alternate weapon variants, high-level Blood Gems, and glyph exploration.
Before confronting Gehrman, spend Blood Echoes, buy or retrieve missing weapons, review the Memory Altar, finish NPC quests, collect desired cords and optional rewards, and complete any Chalice layer you still want to visit. Do not rely on returning after the ending: the game automatically begins New Game Plus after the ending sequence.
New Game Plus preserves the hunter’s level, weapons, Blood Gems, storage, and most ordinary inventory. Key items tied to story progression are generally removed and must be collected again, while badges and several workshop-related items are exceptions. Bosses, NPC states, lamps, area progression, and ordinary world pickups reset, and enemies become stronger. Chalice Dungeon progress and created dungeons are handled separately from the main world, so record any unfinished ritual goals before ending the cycle.
Use a manual save backup only if your own platform and account setup supports it. Otherwise, choose the final ending only after the current cycle’s optional bosses, weapons, NPC rewards, runes, cords, and Chalice goals are complete.
- The desired optional bosses are defeated.
- The listed standard Hunter Weapons are obtained for Hunter’s Essence if desired.
- A precious Caryll Rune has been obtained for Rune Master if desired.
- NPC, faction, weapon, rune, and optional-area objectives are complete for the current cycle.
- Pthumeru, Central Pthumeru, Lower Pthumeru, Defiled, and Great Pthumeru Ihyll have been completed for the fixed Queen route.
- Yharnam, Pthumerian Queen is defeated for the Chalice boss trophy goal.
- Blood Echoes have been spent before Gehrman.
- The final ending choice is made only after all current-cycle objectives are complete.
Before you move on
- Cleric Beast, Blood-starved Beast, Witch of Hemwick, Darkbeast Paarl, Amygdala, Martyr Logarius, Celestial Emissary, and Ebrietas are defeated if pursuing the principal optional-boss checklist.
- The standard Hunter’s Essence weapon list has been checked, and Uncanny or Lost variants are not being counted as separate required additions.
- The Hunter’s Dream Memory Altar has been checked, and a precious Caryll Rune has been obtained if pursuing Rune Master.
- Pthumeru, Central Pthumeru, Lower Pthumeru, Defiled, and Great Pthumeru Ihyll have been completed for the fixed Queen route.
- The Great Pthumeru Ihyll ritual requirements were met with nine Ritual Blood (5), four Red Jelly, 25 Arcane Haze, and one Living String.
- Two Red Jelly came from Lecture Building 1F and the remaining two came from Great Isz, Lower Loran, or another verified source.
- Yharnam, Pthumerian Queen is defeated for the Chalice boss trophy goal.
- The current-cycle NPC, faction, weapon, rune, optional-area, and ending objectives are complete before Gehrman.
Finishing up
The required campaign route is Father Gascoigne, Vicar Amelia, Shadow of Yharnam, Rom the Vacuous Spider, The One Reborn, Micolash Host of the Nightmare, and Mergo’s Wet Nurse, followed by the Hunter’s Dream endgame.
For the standard ending, accept Gehrman’s offer.
For the second ending, refuse the offer and defeat Gehrman.
For the third ending, consume at least three One Third of Umbilical Cord items before refusing Gehrman, then defeat Gehrman and Moon Presence.
Before entering the final confrontation, verify that you have completed any optional bosses, NPC quests, weapon purchases, rune collection, Chalice Dungeon goals, and side-area exploration you want on that playthrough.
The final ending sequence begins New Game Plus after the ending and credits finish.
A broad base-game completion run should include Cleric Beast, Blood-starved Beast, Witch of Hemwick, Darkbeast Paarl, Amygdala, Martyr Logarius, Celestial Emissary, Ebrietas, the required story bosses including Micolash, and the fixed Chalice Dungeon route toward Yharnam, Pthumerian Queen.
If you are pursuing all ending trophies in one PlayStation 4 save, create a separate backup before the final choice and before consuming the cords.
Otherwise, plan to see the remaining endings on later New Game Plus cycles.
A completed run is confirmed when the selected ending sequence and credits finish and the game transitions into New Game Plus.
You can then begin the next cycle or keep the finished save as the starting point for another completion goal.
Choose your next gameScreenshots & video
Game imagery for reference. Follow the written chapters above for the route and strategies.
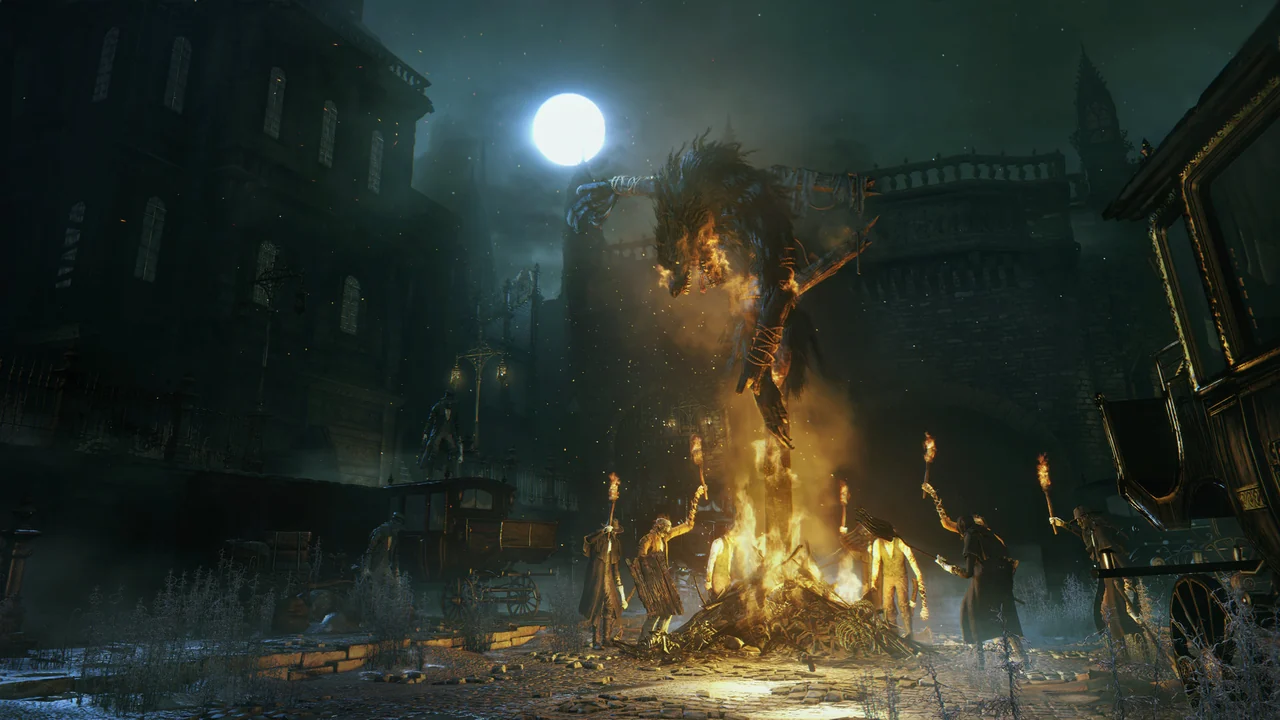
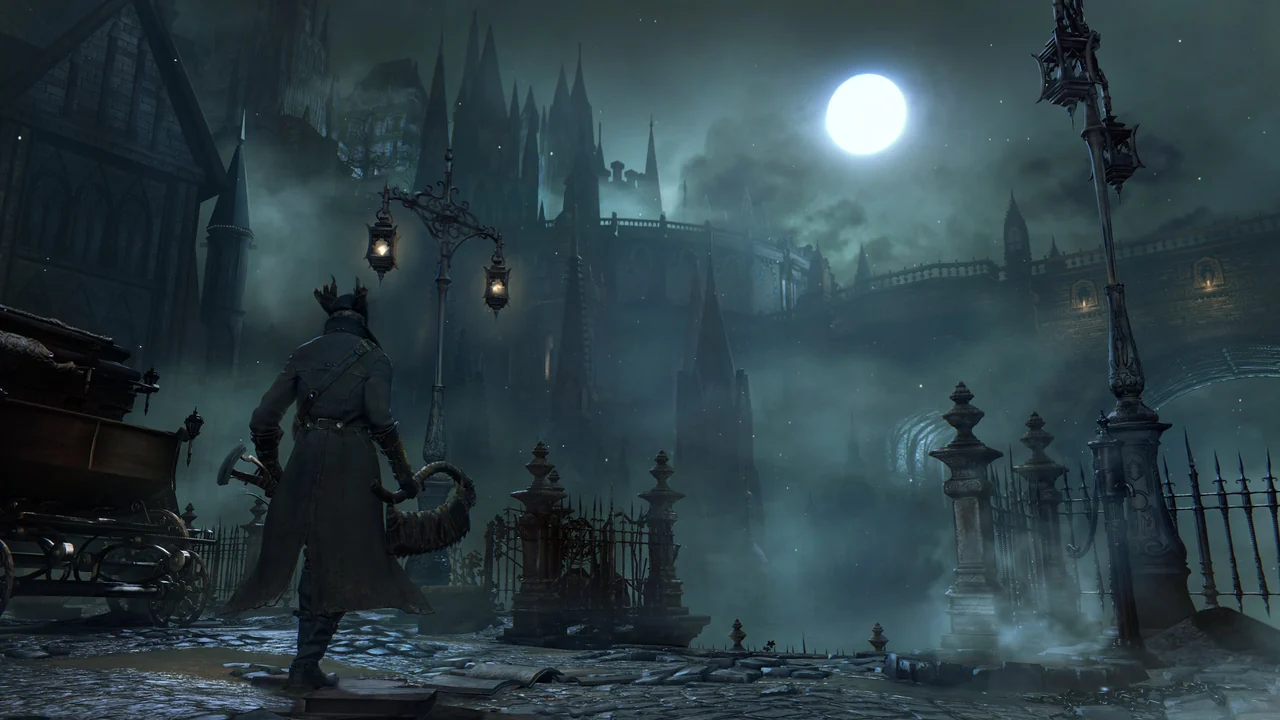
Sources & references
Our original guide draws on the references below. Check the edition at the top of this page before following controls or unlock requirements.
- Bloodborne — Official PlayStation Product Page
- Bloodborne Out Now Only on PS4, Let the Hunt Begin
- Central Yharnam — Bloodborne: Complete Edition Walkthrough & Guide
- Central Yharnam - Bloodborne Wiki
- Central Yharnam Sewers — Bloodborne Walkthrough
- Bloodborne Controls
- Central Yharnam - Bloodborne Walkthrough & Guide
- Cathedral Ward — Bloodborne Walkthrough and Guide
- Bloodborne Guide - Cathedral Ward, Old Yharnam, Blood-starved Beast Boss Fight
- Tiny Music Box - Bloodborne Wiki
- Cathedral Ward — Bloodborne Wiki
- Vicar Amelia — Bloodborne Wiki
- Old Yharnam — Bloodborne Wiki
- Blood-starved Beast — Bloodborne Wiki
- Oedon Chapel Dweller — Bloodborne Wiki
- Bloodborne arrives exclusively on PS4 this week — PlayStation.Blog
- Hemwick Charnel Lane — Bloodborne Wiki
- Forbidden Woods - Bloodborne Wiki
- Forbidden Woods - Bloodborne Walkthrough and Guide
- Shadow of Yharnam - Bloodborne Wiki
- Forbidden Woods Shortcut Discussion - GameFAQs
- Byrgenwerth — Bloodborne Wiki
- Rom, the Vacuous Spider — Bloodborne Wiki
- Byrgenwerth — Bloodborne Walkthrough and Guide, GameFAQs
- Master Willem — Bloodborne Wiki
- Yahar’gul, Unseen Village — Bloodborne Wiki
- Yahargul, Unseen Village Walkthrough — Ludo
- The One Reborn — Bloodborne Wiki
- Yahar’gul Unseen Village — Neoseeker Bloodborne Walkthrough
- Nightmare Frontier - Bloodborne Walkthrough & Guide
- Lecture Building | Bloodborne Wiki
- Nightmare Frontier - Bloodborne Wiki
- Bloodborne Guide - Lecture Building, Nightmare Frontier, Amygdala Boss Fight
- Lecture Building 1F - Nightmare Tombstone Walkthrough
- Forsaken Cainhurst Castle — Bloodborne Wiki
- Cainhurst Summons — Bloodborne Wiki
- Cainhurst Castle – Bloodborne Walkthrough & Guide
- Martyr Logarius — Bloodborne Wiki
- Bloodborne Guide: Forsaken Cainhurst Castle, Martyr Logarius Boss Fight, Crown of Illusions — Prima Games
- Upper Cathedral Ward — Bloodborne Wiki
- Cosmic Eye Watcher Badge — Bloodborne Wiki
- Bloodborne: Upper Cathedral Ward, Celestial Emissary and Ebrietas Walkthrough — GameFAQs
- Bloodborne Guide: Upper Cathedral Ward, Orphanage, Celestial Emissary Boss Fight — Prima Games
- Upper Cathedral Ward — Bloodborne WikiDot
- Progression Guide | Bloodborne Wiki
- Eileen the Crow | Bloodborne Wiki
- Alfred, Hunter of Vilebloods | Bloodborne Wiki
- Third Umbilical Cord
- All Questlines Checklist – Bloodborne
- Nightmare of Mensis
- Bloodborne Walkthrough: Nightmare of Mensis
- Bloodborne - Guide and Walkthrough - PlayStation 4 - By Arkia
- Micolash, Host of the Nightmare — Bloodborne Wiki
- Micolash, Host of the Nightmare — Bloodborne Wiki, Fandom
- Mergo’s Wet Nurse
- Bloodborne: Brain of Mensis
- End-Game — Bloodborne Wiki
- Moon Presence — Bloodborne Wiki
- New Game Plus — Bloodborne Wiki
- Great Pthumeru Ihyll Chalice
- Chalice Dungeons Flow Chart
- Pthumeru Ihyll
- Ailing Loran
- Ritual Materials
- Trophies
- Formless Oedon
- New Game Plus
- Bloodborne Trophy Guide and Road Map
- Chalice Dungeons Walkthrough and Guide
About the game & collecting notes
- Platform
- PlayStation 4
A complete PlayStation 4 walkthrough for the original Bloodborne campaign. Follow the safest progression through Yharnam, unlock shortcuts, defeat every required boss, preserve useful NPC quests, collect the items needed for the secret ending, and finish with Gehrman and the Moon Presence. Optional regions, bosses, Chalice Dungeon goals, and endgame checks are separated from the required route.
Darryl Polo
Darryl Polo loves tinkering with emulation and revisiting retro games. He enjoys exploring how old favorites play on different setups and sharing what he learns along the way. At Joking Joystick, he writes about the games, hardware, and small discoveries that keep the hobby fun.
Our editorial standardsFound a step that needs another look? Help us improve this guide.