
BioShock (PlayStation 3, original 2008 release) — Complete Campaign Walkthrough
Complete the original PlayStation 3 BioShock campaign from the lighthouse through Fontaine’s defeat and the ending sequence. The guide covers the required routes, bosses, plasmid and weapon tactics, Little Sister decisions, late-game preparation, and concrete checks for campaign completion. Optional diaries, research, tonics, weapon upgrades, trophies, and full Power to the People coverage are tracked separately from the main ending goal.


Find a copy
BioShock PlayStation 3
We may earn a commission if you buy through these links, at no extra cost to you. As an Amazon Associate I earn from qualifying purchases.
Opens retailer search results. Check the model, edition, seller, availability and current price before buying.
Before you begin
You begin BioShock as Jack, the sole survivor of a plane crash who enters the underwater city of Rapture via a bathysphere.
This guide gives step-by-step routing through every main area on the PS3 original release — Welcome to Rapture through the Fontaine finale — with practical combat tactics, plasmid/weapon priorities, upgrade advice, and how to handle Little Sisters to reach each ending.
Follow the ordered chapters during your run.
If you want a particular ending, use the Little Sister guidance placed where you meet the first Sisters and again before the final area.
The walkthrough treats required objectives and optional side rewards separately so you can reach the ending cleanly while still picking up important upgrades and Gene Bank/Gatherer’s Garden opportunities.
Set yourself up for the run
Set the difficulty before starting.
Difficulty affects enemy damage and resource pressure; Normal is a reasonable first-run choice, while Hard and Survivor should be treated as dedicated challenge runs.
Check the Vita-Chamber setting in Options. Leaving it enabled provides automatic revival at nearby chambers; disabling it makes manual saves essential.
Create separate manual saves before bosses, Little Sister decisions, major transitions, and the final Fontaine approach.
On the original PS3 controls, L2 fires the equipped plasmid, R2 fires the equipped weapon, L1 changes plasmids, and R1 changes weapons. Hold L1 or R1 to open the corresponding selection radial.
Keep a dependable ranged weapon, a close-range option, and at least one plasmid for interruption or crowd control.
Early ADAM priorities are usually a useful plasmid or slot plus Health or EVE capacity, but do not spend every point before you know your build.
Use Power to the People stations on weapons you actually rely on; each station is a one-use upgrade opportunity.
Use Electro Bolt against security devices and enemies near water, Incinerate against ice and flammable hazards, Telekinesis against explosives and environmental objects, and traps or hacked security to control dangerous encounters.
Hacking cameras, turrets, bots, vending machines, Health Stations, and safes can reduce resource pressure; use an Automatic Hack Tool or destroy a device if a difficult hack is not worth the risk.
Gatherer’s Gardens, Gene Banks, U-Invent machines, vending machines, and Power to the People stations are level landmarks, not universal HUD icons. Learn their locations as you enter each area.
Decide whether you are primarily rescuing or harvesting Little Sisters. Rescue gives less immediate ADAM but supports the favorable route and later rewards; harvesting gives more immediate ADAM and moves the ending toward the darker variations.
Keep a written Rescue/Harvest tally and preserve a manual save before a choice you may want to replay.
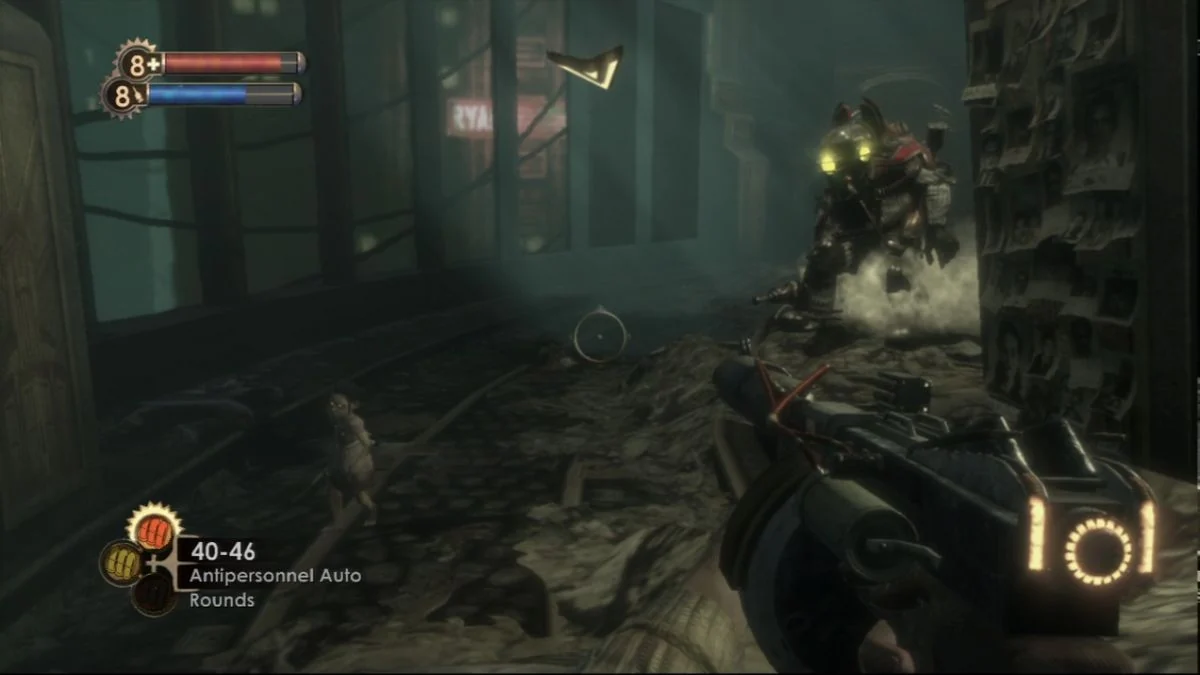
Welcome to Rapture — Lighthouse, Bathysphere, and First Steps
Swim to the lighthouse, descend through the bathysphere, answer Atlas’s radio call, and follow the linear opening route through the Welcome Center. You will collect the Wrench, receive the Electro Bolt plasmid, learn the stun-and-strike technique, obtain the Pistol, and pass through Kashmir Restaurant and the Footlight Theater. The chapter ends when Atlas opens the route into the Medical Pavilion. There is no Little Sister decision, ADAM purchase, or Big Daddy fight required here.
Enter the lighthouse and ride the bathysphere
After the opening crash, swim toward the lighthouse and climb the steps to its entrance. Go inside and descend the staircase to the lower chamber. The bathysphere is the only usable route forward, so enter it and pull the lever to begin the descent into Rapture.
When the bathysphere arrives, pick up the radio mounted beside the exit when Atlas calls. Leave the chamber and follow the walkway. A Vita-Chamber is close to the arrival area; pass it so it becomes your first revival checkpoint. Vita-Chambers require no activation, but noting their locations helps if you die during the opening fights.
- Reached the lighthouse
- Pulled the bathysphere lever
- Answered Atlas’s radio call
- Passed the first Vita-Chamber
Collect the Wrench and defeat the first Splicer
Continue along the walkway and up the stairs. A security bot drives away a Spider Splicer, leaving the Wrench on the floor near the rubble. Pick it up, then use it to break through the debris blocking the passage. Crouch through the opening and stay close to the left wall while the burning couch is pushed down the stairs.
At the top, attack the Thuggish Splicer with the Wrench. Keep your swings controlled rather than pursuing the enemy blindly into another room. Search the body after the fight and check nearby containers for early health supplies, EVE Hypos, and other useful items.
- Collected the Wrench
- Destroyed the rubble
- Defeated the first Thuggish Splicer
- Looted the body and nearby containers
Take Electro Bolt and open the security door
Go up the stairs near the room where you fought the Splicer and approach the Gatherer’s Garden machine. Take the Electro Bolt plasmid from the tray. This machine is providing your first plasmid; you do not have ADAM yet, so there is no purchase to make here.
On the PS3 default controls, L2 fires the equipped plasmid and R2 fires the equipped weapon. Tap L1 to switch plasmids or hold L1 to open the plasmid selection radial. Use Electro Bolt on the damaged electrical panel beside the large security door. The shock restores the mechanism and opens the required route. Electro Bolt consumes EVE, so watch the blue EVE meter before using it repeatedly.
- Acquired Electro Bolt
- Used L2 to fire the plasmid
- Shocked the damaged panel
- Opened the security door
Cross the flooded passage and practice the one-two punch
Move through the opened passage and continue down the flooded route. Atlas will direct you toward another Thuggish Splicer. Fire Electro Bolt to stun the enemy, then switch to the Wrench and attack while the Splicer is immobilized. This stun-and-strike combination is the safest early combat pattern and preserves scarce ammunition.
Search the area for EVE Hypos and health supplies. Continue through the door marked Airlock Active, then climb the stairs and deal with the next Splicers. A second Vita-Chamber is located along this early route. Pass it before continuing to the elevator junction.
- Crossed the flooded passage
- Used Electro Bolt to stun a Splicer
- Finished a stunned Splicer with the Wrench
- Passed the next Vita-Chamber
Ride the elevator and collect the Pistol
At the elevator junction, use the functioning elevator to reach the upper level. A Splicer is positioned near a baby carriage. Defeat the enemy, then search the carriage to obtain your first firearm, the Pistol. Tap R1 to switch weapons or hold R1 to open the weapon selection radial; R2 fires the selected weapon.
Use the Pistol for enemies outside melee range, but conserve ammunition when a lone Thuggish Splicer can be safely handled with Electro Bolt and the Wrench. Aim for the head when firing and search the area for additional rounds before entering the restaurant.
- Used the working elevator
- Defeated the Splicer near the carriage
- Collected the Pistol
- Practiced switching between weapon and plasmid modes
Search Kashmir Restaurant and reach the Footlight Theater
Enter Kashmir Restaurant and descend to the lower floor. The audio diary New Year’s Eve Alone is on a table in this area. It is optional and does not affect progression, but collect it if you want the opening story material. Search the kitchen for supplies and be prepared for a Pistol-carrying Leadhead Splicer.
Return upstairs and enter the Dames restroom. A brief scripted vision occurs there, and the audio diary Hole in Bathroom Wall is near the debris. Follow the clue through the opening into the adjoining restroom and then onto the Footlight Theater walkway. Cross the elevated lighting structure and look down when Atlas warns you. You will see a Big Daddy and Little Sister below. Do not attack them; this is an introduction to the game’s central threat and resource system, not a required encounter.
- Entered Kashmir Restaurant
- Collected New Year’s Eve Alone if desired
- Collected Hole in Bathroom Wall if desired
- Crossed into the Footlight Theater
- Observed the Big Daddy and Little Sister without fighting
Survive the security ambush and enter Medical Pavilion
Continue through the theater route and descend toward the large room near the Neptune’s Bounty path. Break the padlock on the gate when required, then proceed through the adjoining rooms. Splicers may be positioned near pools of water; use Electro Bolt on enemies standing in the water to stun or kill them efficiently, then search the bodies.
When you approach the route toward Neptune’s Bounty, the passage is sealed and a security turret rises as the area locks down. Do not stand in the open near the turret. Use the stairs, walls, and water area for cover while dealing with the incoming Thuggish and Leadhead Splicers. Shock enemies in the puddle when possible, and switch to the Pistol for targets that remain at range.
After the ambush, Atlas opens the route toward the Medical Pavilion. Loot the defeated Splicers if it is safe, then follow the newly opened passage. Continue beneath the large Medical Pavilion sign and pass through the gates to trigger the transition. This is the end of Welcome to Rapture; no crank-operated vault door is required.
- Opened the route beyond the theater
- Survived the turret ambush
- Defeated or bypassed the attacking Splicers
- Followed Atlas’s opened route
- Entered the Medical Pavilion
Before you move on
- The Wrench, Electro Bolt, and Pistol are in your inventory.
- You have passed the early Vita-Chambers and can switch between plasmid and weapon modes on the PS3 controller.
- You have crossed Kashmir Restaurant and the Footlight Theater route, seen the introductory Big Daddy and Little Sister encounter, and survived the security ambush near the Neptune’s Bounty path.
- Atlas has opened the route beneath the Medical Pavilion sign and you have passed through the gates into the Medical Pavilion.
Medical Pavilion — Gatherer’s Gardens, First Upgrades and the Trading Post
Medical Pavilion introduces hacking, security support, environmental plasmid use, and the first major boss. Restore Emergency Access, return through the foyer, explore the central Pavilion, obtain Incinerate! from Eternal Flame, melt the frozen Dental Services entrance, and collect Telekinesis from Dandy Dental. Use Telekinesis to clear the debris blocking Dr. Steinman’s route, then defeat him and recover his key. The Pavilion contains a Circus of Values, security devices, Vita-Chambers, optional tonics, and a Gatherer’s Garden after the first Little Sister encounter. It does not contain a Power-to-the-People station or U-Invent machine; the first weapon-upgrade station is in Neptune’s Bounty, and the first U-Invent is in Arcadia Glens.
1. Enter Emergency Access and restore power
From the Medical Pavilion entrance, turn toward the foyer and search behind the reception desk for supplies and the Released Today audio diary. A Circus of Values vending machine is nearby. Keep some money for ammunition and healing rather than buying every available item immediately.
Enter Emergency Access through the door with the disabled security bot. On the PlayStation 3, interact with the bot to begin the pipe-routing hack. Rotate and move the available pipe pieces until fluid travels from the starting point to the exit. When the hack succeeds, the bot becomes friendly. Let it accompany you into the next room and help against the Splicers.
Continue past the first encounter and collect the Adam’s Changes diary from the desk if you want the area’s optional story material. Go upstairs and activate the Emergency Access control. The route remains blocked, so Atlas directs you toward Dr. Steinman’s key. Follow the opened passage to the electrical override and use it to restore power to the main foyer.
- Hack the first security bot.
- Activate the Emergency Access control and electrical override.
- Confirm the nearby Vita-Chamber before entering the main Pavilion.
2. Return through the foyer and secure the central Pavilion
Restoring power opens a route that releases several Splicers. Retreat toward the foyer instead of fighting in the exposed upper passage. Allow the hacked security bot to draw attention while you use the pistol, wrench, or Electro Bolt to finish enemies. Search the reception area again after the attack because bodies and newly accessible rooms can contain useful ammunition and health items.
Use the stairs at the rear of the foyer to enter the main Medical Pavilion. Check the walls, desks, crates, and alcoves for supplies and optional audio diaries. In the central area, security cameras and turrets cover several approaches. Hit each device with Electro Bolt to disable it temporarily, then complete the hack if the pipe layout is manageable. A hacked device attacks hostile Splicers and is more useful than simply destroying it.
There is a Health Station near the central security devices. Hack it when safe; hacked Health Stations cost less to use and can harm enemies that attempt to use them. Make a manual save before following the route toward Surgery.
- Return to the central Pavilion after restoring power.
- Hack or disable the visible cameras and turrets.
- Use or hack the nearby Health Station and save before advancing.
3. Reach Eternal Flame and obtain Incinerate!
Follow the signs toward Dr. Steinman’s Aesthetic Ideals until a Nitro Splicer blocks the passage with an explosive blast. You cannot clear this debris yet. Return to the central area and take the southwest route to the Eternal Flame Crematorium.
Inside the crematorium, deal with the Splicer near the entrance and hack the security camera in the rear room. An optional furnace interaction produces the Hacker’s Delight gene tonic after the body is cremated. Upstairs, crawl through the small opening into the locked office and collect the Incinerate! plasmid beside the broken Gatherer’s Garden machine.
Equip Incinerate! at a Gene Bank if necessary. Use it on the oil slick outside the office when Splicers gather there. Incinerate! also melts the frozen barriers leading toward Twilight Fields and Dental Services. Do not confuse this plasmid with Telekinesis: Incinerate melts ice, but it cannot move the explosive needed to clear Steinman’s barricade.
- Collect Incinerate! in Eternal Flame.
- Use it on the oil slick and frozen barriers.
- Search the crematorium for optional supplies and Hacker’s Delight.
4. Explore the frozen treatment areas and obtain Telekinesis
Melt the ice blocking the route into Dental Services. The passage leads to the lower concourse, where you can collect the shotgun. Taking the shotgun triggers a Splicer attack, so move to a defensible position and use the weapon at close range. The Useless Experiments diary is near the Dandy Dental entrance.
Kure-All is an optional side route. Stun and hack its rocket turret with Electro Bolt, then search the back rooms for supplies and the Wrench Jockey tonic. Painless Dental contains optional material, a security device, and the Speedy Hacker tonic. These areas are not required, but clearing them before the boss provides useful resources.
Enter Dandy Dental and collect the Telekinesis plasmid near the tennis practice machine. You have limited plasmid slots at this stage, so replace a power you are not using rather than discarding Electro Bolt permanently. Telekinesis is the required tool for the next story obstacle. There is no U-Invent machine in Medical Pavilion; save crafting components because the first U-Invent is encountered later in Arcadia Glens.
- Melt the Dental Services ice with Incinerate!.
- Collect the shotgun and survive the ambush.
- Obtain Telekinesis from Dandy Dental.
5. Clear Steinman’s barricade and reach Surgery Ward
Return to the corridor where the Nitro Splicer previously blocked the route. Equip Telekinesis and wait for the Splicer to throw an explosive. Hold the plasmid button to grab the explosive before it reaches you, then release it toward the debris. The blast clears the passage.
Proceed through the newly opened route and collect the Symmetry diary if desired. Steinman retreats and sends a security bot and turret against you. Use Electro Bolt to disable them, then hack them or destroy them from cover. Collect the Static Discharge tonic in the hallway and search the optional Surgical Savings room for additional supplies.
Before entering the final operating area, reload the shotgun or machine gun, refill health and EVE, and make a manual save. The Pavilion’s main story does not require a Power-to-the-People upgrade because none is located here. The first Power-to-the-People station appears later in Neptune’s Bounty, after the bathysphere descent.
- Use Telekinesis to destroy the debris.
- Disable or hack the security bot and turret.
- Save and replenish supplies before the boss room.
6. Defeat Dr. Steinman and collect his key
In the operating area, Dr. Steinman attacks with a machine gun and moves between cover positions. Stay near cover rather than standing in the center of the room. Shotgun blasts at close or medium range are effective, while Telekinesis can throw explosive objects back at him when suitable objects are available.
Use Electro Bolt to create openings, but do not spend all your EVE at once. Fire during Steinman’s pauses, then retreat behind the room’s solid cover while reloading. If he approaches a Health Station, a hacked station can damage him and deny his recovery. Keep moving if Splicers join the fight or if Steinman tries to flank you.
After Steinman falls, search his body and collect the Emergency Access key. Pick up the Not What She Wanted diary from the operating area if desired, then search nearby rooms for remaining ammunition, medical supplies, and optional loot.
- Defeat Dr. Steinman.
- Collect the Emergency Access key.
- Search the operating area before leaving.
7. Complete the Pavilion and prepare for Neptune’s Bounty
Return through the Surgery Ward and follow the newly opened route. A detour introduces the first Little Sister choice. Defeat the guarding Big Daddy only when prepared, then choose Rescue or Harvest. Rescue gives less immediate ADAM but supports the rescue-based ending path and later rewards; Harvest gives more ADAM immediately but moves the ending toward the darker outcomes.
After the choice, use the nearby Gatherer’s Garden to spend ADAM on a needed Health or EVE capacity upgrade, plasmid, tonic, or slot. Do not spend every point automatically. The Gatherer’s Garden is the relevant upgrade machine in this area; the Pavilion still has no Power-to-the-People station and no U-Invent machine.
Follow the objective back to the central Pavilion and activate Emergency Access with Steinman’s key. The bathysphere route to Neptune’s Bounty opens. Before departing, search remaining side rooms, refill health and EVE, make a manual save, and keep enough ammunition for the next area’s heavier combat and Big Daddy encounters.
- Make your first Little Sister decision.
- Use the Pavilion Gatherer’s Garden if you need an upgrade.
- Open the bathysphere route and save before entering Neptune’s Bounty.
Before you move on
- Dr. Steinman is defeated and the Emergency Access key is in your inventory.
- The first Little Sister decision has been completed and the nearby Gatherer’s Garden is available.
- The bathysphere route to Neptune’s Bounty is open.
- The Medical Pavilion Power-to-the-People station and U-Invent objectives have been correctly treated as later objectives, not missed items in this level.
- A manual save exists before entering Neptune’s Bounty.
Neptune’s Bounty and Smuggler’s Hideout — First Little Sister Encounters and Big Daddy Fights
Neptune’s Bounty expands the Little Sister and Big Daddy system introduced earlier. Follow Atlas to Fontaine Fisheries, meet Peach Wilkins, retrieve the Research Camera from the Wharfmaster’s Office, and photograph three Spider Splicers so Peach will open the way forward. Big Daddies are dangerous optional encounters unless they are escorting a Little Sister you intend to Rescue or Harvest. Prepare each fight with a retreat route, environmental hazards, traps, and a mixture of weapons and plasmids. After completing Peach’s request, recover your confiscated weapons, use the Power to the People station if desired, and melt the ice blocking Smuggler’s Hideout. Open the submarine hatch, survive Ryan’s ambush, and continue through the destroyed-submarine route into Arcadia.
Enter Neptune’s Bounty and prepare before the first major fights
Leave the bathysphere and follow Atlas toward Fontaine Fisheries. Search the opening rooms for ammunition, First Aid Kits, EVE Hypos, money, and audio diaries, but do not commit to a Big Daddy fight while ordinary Splicers or active security devices can flank you. Identify the nearest Vita-Chamber and note a doorway, stairwell, or flooded section that can serve as a retreat route.
Neptune’s Bounty contains flooded floors and raised walkways. Electro Bolt is useful for briefly stunning enemies and for disabling security devices, especially around water, but its EVE cost makes it poor as your only attack. Carry a firearm for sustained damage and keep a close-range option available. If you have Telekinesis, use it to throw explosive objects or return rockets from an RPG turret rather than spending all your ammunition.
- Locate the Neptune’s Bounty Gene Bank or another safe loadout point.
- Identify a nearby Vita-Chamber before provoking a Big Daddy.
- Carry a firearm, a close-range weapon, healing items, and enough EVE for emergency plasmid use.
Reach Fontaine Fisheries and accept Peach Wilkins’s assignment
Proceed through the fisheries route until you reach the secured entrance to Fontaine Fisheries. Knock on the door and speak with Peach Wilkins. A Spider Splicer attacks during the conversation. You do not need to defeat her immediately; keep moving, avoid her blades, and let the security response drive her away. Peach sends a Grenade Launcher through the delivery system, so collect it if you need additional explosive firepower.
Peach will not let you through until you retrieve a Research Camera from the Wharfmaster’s Office. The camera is not in the Lower Wharf. From Peach’s area, return toward the upper walkways and follow the newly available route toward the office. Security cameras and several turrets protect this section. Shock and hack them when practical, or destroy them from cover if the hacking puzzle is unsafe.
- Meet Peach Wilkins at Fontaine Fisheries.
- Survive or evade the initial Spider Splicer attack.
- Collect the Grenade Launcher if you need its ammunition or explosive damage.
Retrieve the Research Camera and photograph three Spider Splicers
Enter the Wharfmaster’s Office and search for the Research Camera. The office is heavily defended, so disable the security devices before crossing open floors. The first useful photograph can be taken through the office window when a Spider Splicer is visible. Equip the camera and wait for a clear shot rather than wasting film on a distant or obstructed target.
You must photograph three Spider Splicers for Peach. After leaving the office, use the camera during the encounters around the underwater corridor, Jet Postal, and Fightin’ McDonagh’s area. One Spider Splicer may retreat quickly when a door opens, so keep the camera ready before entering. If you miss a shot, continue through the nearby rooms and photograph another Spider Splicer instead of repeatedly returning to the office.
Research photographs provide combat bonuses against the photographed enemy type. Prioritize clear action shots when safe, but do not remain exposed merely to improve the score.
- Collect the Research Camera in the Wharfmaster’s Office.
- Photograph three Spider Splicers in total.
- Return to Peach only after the objective confirms that the required research is complete.
Resolve a Big Daddy and Little Sister encounter safely
Big Daddies patrol Neptune’s Bounty, and some are paired with Little Sisters. You are not required to kill every Big Daddy you see. If one is not escorting a Little Sister, leave it alone unless you specifically want the optional loot and combat experience. Before attacking a paired target, clear nearby ordinary Splicers, locate explosive containers or water, and ensure that your retreat path is not blocked.
Rosies use rivets and proximity mines at range. Bouncers close distance quickly and can punish you in narrow corridors. Use cover, move between attacks, and combine weapon damage with traps, explosive objects, Telekinesis, or a hacked turret. Electro Bolt can create a short opening, but do not spend your entire EVE supply on repeated stuns. If the fight goes badly, retreat around a corner, heal, reload, and return rather than trading melee hits in the open.
After the Big Daddy falls, approach the Little Sister and choose Rescue or Harvest. This is not the first meaningful choice of the campaign; the player may already have made that decision in Medical Pavilion. Rescue provides less immediate ADAM and contributes to the rescue-oriented ending path, while Harvest provides more ADAM immediately but contributes toward harsher ending outcomes. Record the choice if you are deliberately managing the ending.
- Clear nearby Splicers before starting the Big Daddy fight.
- Keep a fallback route open and preserve some EVE for emergencies.
- Complete the Rescue or Harvest interaction after the Big Daddy is defeated.
Return to Peach and open the route to Smuggler’s Hideout
After the third successful Spider Splicer photograph, return to Fontaine Fisheries and speak with Peach again. He permits you to enter, but requires you to place your weapons in the pneumatic tube. Before surrendering them, change your plasmids and tonics at the nearby Gene Bank if necessary and collect useful supplies in the surrounding rooms.
Move through the fisheries while dealing with Peach’s ambush and the accompanying Splicers. Use explosive objects, Enrage, or the Grenade Launcher to break up the group, and watch for active cameras and turrets. Once the area is secure, use the pneumatic tube to recover your confiscated weapons. A Power to the People station is available before the exit; spend its single upgrade on a weapon you expect to use for the remainder of the campaign.
Melt the ice blocking the western exit with Incinerate. Continue through the newly opened passage into Smuggler’s Hideout.
- Return to Peach after completing the three photographs.
- Recover your weapons from the pneumatic tube.
- Use or pass the Power to the People station, then melt the ice leading to Smuggler’s Hideout.
Open the submarine route and survive the ambush
In Smuggler’s Hideout, move through the tunnel and disable or hack the early turret before advancing. Search the side areas for ammunition and healing supplies, then continue until the submarine comes into view. Follow the objective to open the submarine hatch, climb over the debris, smash the padlock on the side route, and activate the control panel.
The control-panel sequence triggers an assault by Splicers. Use the room’s barrels and flammable containers, fight from the vicinity of the Health Station when possible, and avoid standing in the center of the passage. A nearby Vita-Chamber reduces the cost of failure, but manual saving before the sequence is still useful.
After the attack, follow the newly opened route. The submarine is destroyed as you approach, and the path beyond leads through the Arcadia doorway. Loot the nearby bodies, pass through the bulkhead, and confirm that the Arcadia area has loaded before ending the chapter.
- Open the submarine hatch and activate the control panel.
- Survive the Splicer ambush after the control-panel sequence.
- Reach the Arcadia doorway after the submarine is destroyed.
Before you move on
- The Research Camera has been collected from the Wharfmaster’s Office.
- Three Spider Splicer photographs have been accepted for Peach Wilkins.
- At least one Big Daddy and Little Sister encounter in Neptune’s Bounty has been resolved through Rescue or Harvest, if you chose to pursue one.
- Peach’s weapon-confiscation sequence has occurred and your weapons have been recovered from the pneumatic tube.
- The Power to the People station has been used or deliberately passed.
- The submarine sequence in Smuggler’s Hideout has occurred, the submarine has been destroyed, and the Arcadia doorway is open.
Arcadia and Farmer’s Market — Greenhouse Combat and Environmental Tricks
After Ryan poisons Arcadia, search Julie Langford’s laboratory, obtain the Farmer’s Market key, and follow the route through Arcadia Glens and Tree Farm. The Lazarus Vector requires three separate ingredients: seven Chlorophyll Solution samples, seven Bee Enzyme Samples, and seven units of Distilled Water. Chlorophyll Solution is mainly collected from defeated Houdini Splicers in Arcadia and Farmer’s Market; the Bee Enzyme Samples are in Silverwing Apiary, and the Distilled Water is in Worley Winery. Use the apiary smoker to search the hives safely, inspect the winery cellar for the remaining water and a Power to the People station, then craft the Lazarus Vector at a U-Invent machine. Return to Arcadia’s Research Laboratory, insert the vector into the misting system, and activate it to restore the forest.
Finish the Arcadia laboratory objective and secure the market route
After Ryan poisons Arcadia, continue through the Research Laboratories until you reach Julie Langford’s office. Search Langford’s body for her audio diary, then inspect the writing on the office window. The code is 9457. Use it on the safe hidden behind the botanical illustration to obtain the Lazarus Vector Formula diary and the Market Key. The formula establishes the three required components: seven Chlorophyll Solution samples, seven Bee Enzyme Samples, and seven units of Distilled Water.
Before leaving the laboratory, check your inventory and objective display. Chlorophyll Solution is commonly dropped by Houdini Splicers, so collect the containers from those enemies as you travel through Arcadia. You do not need to find all seven in one room, but you must have seven total before the Lazarus Vector can be invented. If you are short, continue searching Houdini Splicer bodies in Arcadia and Farmer’s Market rather than assuming the enzyme or water locations will substitute for chlorophyll.
- Search Langford’s office and obtain the Market Key.
- Confirm that the Lazarus Vector requires seven Chlorophyll Solution, seven Bee Enzyme Samples, and seven Distilled Water.
- Collect Chlorophyll Solution from Houdini Splicers whenever it appears.
Cross Tree Farm and enter Farmer’s Market
Leave the laboratory and follow the route through Arcadia Glens and Tree Farm toward the Farmer’s Market bulkhead. Security cameras and Splicers cover several paths, so approach corners carefully. Hack security devices when the circuit is manageable, or disable them before crossing an exposed bridge or staircase. Electro Bolt is useful against cameras and turrets, while Telekinesis can return explosive objects without forcing you into the open.
A Power to the People station is located along the Tree Farm route toward Farmer’s Market. Use it on a weapon that fits your build rather than spending it without a plan. Search the side paths for ammunition, EVE, health supplies, and Houdini Splicer bodies. When you reach Farmer’s Market, enter the main market area and clear or hack the nearby camera and turrets before beginning the ingredient search. The combination-locked market section is optional and is not needed to complete the Lazarus Vector.
- Follow the route from the Research Laboratories through Arcadia Glens and Tree Farm.
- Use the Tree Farm Power to the People station if its upgrade suits your weapons.
- Enter Farmer’s Market and secure the first market room.
Collect seven Bee Enzyme Samples in Silverwing Apiary
From the connected tube area in Farmer’s Market, enter Silverwing Apiary. Locate the smoker control near the hive room and activate it before searching the hives. The smoke temporarily keeps the bees from attacking, giving you time to inspect the containers and collect the Bee Enzyme Samples.
Search the hive containers quickly and keep track of the total in the objective display. You need seven Bee Enzyme Samples. The smoke does not provide permanent protection, and Splicers may enter while you search. If the bees become active before you have seven samples, retreat through the entrance, wait for the danger to pass, and activate the smoker again for another collection run. Do not use Incinerate in a narrow doorway or beside flammable objects if burning debris could cut off your escape route. Electro Bolt, the shotgun, or Telekinesis is safer when you need to preserve a clear retreat.
- Activate the Silverwing Apiary smoker.
- Search the hives and collect seven Bee Enzyme Samples.
- Repeat the smoker cycle if the bees return before the collection is complete.
Search Worley Winery for seven units of Distilled Water
Leave Silverwing Apiary and enter Worley Winery through the connected passage. Deal with the camera, turret, and nearby Splicers before searching the room. Inspect tables, counters, containers, and the open floor for Distilled Water, then descend toward the lower winery. A tripwire is positioned near the stairs; disarm it or step over it without crossing the beam.
Continue through the lower cellar and adjoining areas until you have collected seven units of Distilled Water. The lower winery also contains another Power to the People station. Use it if you have a weapon upgrade that improves your main damage source. Search the cellar thoroughly for the available water and locate the U-Invent machine before leaving. Keep out of exposed water when using electrical attacks, and fight from dry thresholds or raised edges when possible.
- Collect seven units of Distilled Water from Worley Winery.
- Avoid or disarm the winery tripwire.
- Use the lower-winery Power to the People station if appropriate.
- Locate a U-Invent machine in Farmer’s Market.
Verify all three ingredient totals and craft the Lazarus Vector
Before using the U-Invent machine, confirm that the objective display shows all three required totals: seven Chlorophyll Solution, seven Bee Enzyme Samples, and seven Distilled Water. Chlorophyll Solution is the component most likely to be missing because it is gathered from Houdini Splicers rather than from one dedicated room. If the total is below seven, search remaining Houdini Splicers in Farmer’s Market and the Arcadia route before attempting to craft the vector.
Once all three totals are complete, use the U-Invent machine to create the Lazarus Vector. The ingredients are consumed by the invention. Restock ammunition, health supplies, and EVE before returning through the market, since security devices and Splicers may still be active or may reappear along the route.
- Confirm seven Chlorophyll Solution in addition to the seven enzyme and seven water requirements.
- Craft the Lazarus Vector at a U-Invent machine.
- Reload and restock before returning to Arcadia.
Return to the Research Laboratory and activate the misting system
Follow the objective route back through Farmer’s Market, Tree Farm, and Arcadia Glens to the Research Laboratories. Security bots and Splicers may attack during the return. Use doorways and side rooms as fallback positions, hack useful security devices, and avoid stopping in open walkways while an alarm is active.
Return to Langford’s Research Laboratory and interact with the misting system when prompted. Insert the Lazarus Vector, then activate the machine. The game begins the restoration process in stages, and hostile forces may attack while the system operates. Defend the area until the objective advances beyond the Lazarus Vector task. The chapter is complete when the forest restoration sequence has begun and the next story objective appears.
- Return to Arcadia’s Research Laboratory with the completed Lazarus Vector.
- Insert the vector into the misting system.
- Activate the system and wait for the objective to advance.
Before you move on
- The inventory or objective display confirms seven Chlorophyll Solution samples.
- Seven Bee Enzyme Samples have been collected from Silverwing Apiary.
- Seven units of Distilled Water have been collected from Worley Winery.
- The Lazarus Vector has been crafted at a U-Invent machine.
- The vector has been inserted into the misting system in Arcadia’s Research Laboratory.
- The misting system has been activated and the restoration sequence has begun.
- The objective advances beyond the Lazarus Vector task.
References for this chapter
Fort Frolic — Sander Cohen, Spider Splicers and the Artist’s House
Fort Frolic begins when Sander Cohen blocks the bathysphere and sends Spider Splicers against you. Follow his assignment through Fleet Hall, photograph Kyle Fitzpatrick, then hunt Martin Finnegan, Silas Cobb, and Hector Rodriguez in the Poseidon Plaza area. Place all four photographs in Cohen’s Quadtych to receive the Crossbow and unlock the route to Hephaestus. The level contains two Power to the People stations, several optional tonics, security devices, a Big Daddy and Little Sister encounter, and a later projection-room reward. If you want the optional Power to the People station in Cohen’s Mercury Suites apartment, do not kill or attack him when he appears after the Quadtych is completed. You may return to Fleet Hall before departing to collect the newly opened projection-room items.
Enter Fort Frolic and reach Fleet Hall
After arriving by bathysphere, walk toward the next bathysphere station as Atlas directs. The route is interrupted when Sander Cohen submerges the vehicle and sends Spider Splicers into the entrance area. Fight from the edges of the room instead of standing beneath the central approach. Electro Bolt, Incinerate, shotgun blasts, and anti-personnel ammunition are effective, but leave enough ammunition for Fleet Hall and the target hunts.
Enter the Atrium and use the Circus of Values, Gene Bank, Vita-Chamber, or U-Invent facilities if needed. The first Fort Frolic Power to the People station is not in the Atrium itself. It is in Le Marquis d’Epoque, reached by going through the Cocktail Lounge on the lower level. You can visit it before or after Fleet Hall. A code found near a corpse in this area opens a later safe, so record it rather than spending ammunition trying to force access.
Return to the Atrium’s upper level and enter Cohen’s Collection before proceeding to Fleet Hall if you want its optional safes and audio diary. Hack or disable the camera and turret before searching. Then follow the route into Fleet Hall, deal with the camera near the theater approach, and use the elevator to reach the theater seating area.
- Survive the opening Spider Splicer attack.
- Locate the lower-level service areas and the Le Marquis d’Epoque upgrade station.
- Reach Fleet Hall with a loaded firearm and available healing.
Complete the Fleet Hall scene and photograph Kyle Fitzpatrick
In the theater, Cohen stages Kyle Fitzpatrick’s death at the piano. When the scene finishes, step onto the stage and photograph Fitzpatrick’s body for the first Quadtych image. The game identifies this target as Kyle Fitzpatrick; the photograph is required for the main Fort Frolic objective.
Before leaving the theater, search the upper boxes. The Alarm Expert tonic can be reached by jumping from an adjacent box or by using Telekinesis. Check the connecting corridors for security devices and supplies, but avoid breaking display objects unless you are prepared for the alarm they can trigger. Return to the Atrium and place Fitzpatrick’s photograph in one of the empty frames of Cohen’s Quadtych.
Cohen rewards the first completed photograph with the Crossbow. Equip it if it suits your build, but do not spend all your trap or regular bolts immediately. The Crossbow becomes particularly useful against later Splicers and can be upgraded at the stations found throughout the level.
- Photograph Kyle Fitzpatrick on the Fleet Hall stage.
- Collect the Crossbow from the Quadtych reward.
- Search the theater boxes for the optional tonic.
Cross the frozen tunnel and defeat Martin Finnegan
From the Atrium, take the upper route toward the frozen tunnel leading to Poseidon Plaza. Collect the optional audio diary in the ice if desired. When you enter the larger frozen chamber, Martin Finnegan freezes you briefly and then attacks. He is a frost-based Houdini Splicer who teleports and throws ice projectiles.
Keep moving around the chamber and use the open sightlines to track his appearances. Incinerate can melt the frozen Splicers and expose supplies, while ordinary firearms, the Crossbow, and anti-personnel ammunition damage Finnegan reliably. If explosive containers remain intact, use them when he materializes nearby, but do not trap yourself against the frozen bodies or side walls.
After killing Finnegan, loot the Frozen Field tonic from his body and photograph the corpse. Melt nearby ice with Incinerate or the Chemical Thrower if you want the optional ammunition and Automatic Hack Tool. Return to the Atrium and place Finnegan’s photograph in the Quadtych. A Big Daddy and Little Sister may be present near this route; their encounter is optional for level progression, but you must resolve it if you want that Little Sister’s ADAM.
- Defeat Martin Finnegan.
- Collect Frozen Field if desired.
- Photograph Finnegan’s corpse and add the image to the Quadtych.
Open Poseidon Plaza and defeat Silas Cobb
Return through the frozen route and melt the obstruction into Poseidon Plaza. Before pursuing the target, enter Sinclair Spirits on the ground floor and activate the switch behind the bar. This opens the basement route. Deal with the security threat, descend into the basement, and collect the second Fort Frolic Power to the People upgrade station. A safe and additional supplies are nearby.
Continue through the plaza and take the upper route to Rapture Records. Silas Cobb waits inside. Drop to the lower level and be ready for his bomb trap and summoned Spider Splicers. Take cover while the explosive sequence resolves, defeat the reinforcements, then use the vent to return to the upper level and pursue Cobb.
Silas uses incendiary projectiles and can be difficult to approach directly. Telekinesis can return his thrown Molotov cocktails, while the Crossbow or a machine gun lets you maintain distance. Photograph his corpse after the fight. You may return to the Atrium and place the picture immediately, but expect Cohen to send a Splicer attack when the third image is installed. A hacked camera or turret gives you a safer fallback position during this ambush.
- Activate the Sinclair Spirits switch.
- Use the basement Power to the People station if desired.
- Defeat and photograph Silas Cobb.
Find Hector Rodriguez and finish the Quadtych
Enter Eve’s Garden from the plaza and search the stage and dressing-room area. Exploring the room causes Hector Rodriguez to appear. He retreats while throwing explosive firebombs, so avoid chasing him blindly through narrow corridors. Use the upper-level turrets after hacking them, return his projectiles with Telekinesis, or use long-range ammunition and freeze or stun effects to stop his escape.
After Hector is dead, photograph his body and return to the Atrium. Place the fourth photograph in the remaining Quadtych frame. Cohen appears on the staircase, praises the completed work, and opens the display cases. Take Medical Expert 2 from the right-hand case. The other case is Cohen’s Muse Box and is not opened by simply completing the artwork; it requires killing Cohen and using the key from his body.
If you want the later optional reward and the Power to the People station in Cohen’s Mercury Suites apartment, do not attack Cohen, the Quadtych, or the dancers during this scene. Leave him alive and continue to the bathysphere. If you want the separate optional Cohen-kill trophy or Muse Box contents, that choice can be made later in Mercury Suites instead.
- Defeat and photograph Hector Rodriguez.
- Place all four photographs in the Quadtych.
- Collect Medical Expert 2.
- Leave Cohen alive if preserving his later apartment encounter.
Collect optional Fort Frolic rewards and depart
After completing the Quadtych, the previously blocked projection room in Fleet Hall becomes accessible. Return there if you want the Electric Flesh tonic, ammunition, audio diary, and film reel. The return trip is optional and is not required to open the bathysphere route.
Before departing, check the plaza for any Big Daddy and Little Sister encounters you intend to resolve. Rescue or harvest according to your ending plan. You can also revisit the upgrade stations, Circus of Values, Gene Bank, and U-Invent machines, but do not spend ADAM or ammunition merely to clear every side room.
When ready, return to the metro bathysphere station and board the vehicle for Hephaestus. Fort Frolic is complete once the bathysphere departs. The next area begins with heavier security and industrial combat, so leave with a loaded primary weapon and at least one crowd-control plasmid equipped.
- Visit the Fleet Hall projection room if collecting optional rewards.
- Resolve any desired Fort Frolic Little Sister encounter.
- Board the bathysphere to Hephaestus.
Before you move on
- Kyle Fitzpatrick, Martin Finnegan, Silas Cobb, and Hector Rodriguez have all been photographed.
- All four photographs are mounted in Cohen’s Quadtych.
- Medical Expert 2 has been collected from the right-hand display case.
- The Fort Frolic bathysphere to Hephaestus is unlocked and has been boarded.
- The two Fort Frolic Power to the People stations were visited if those upgrades were part of the run.
- Cohen remains alive if the later Mercury Suites apartment encounter and its upgrade station are desired.
- The optional Fleet Hall projection-room rewards were collected if narrative and upgrade completion is part of the goal.
Hephaestus — Industrial Zones and Heavy Machinery
Hephaestus requires you to assemble an EMP Bomb, redirect magma in Geothermal Control, overload the Hephaestus Core, and destroy the magnetic locks blocking Andrew Ryan’s office. Start by following the route through Ryan Industries and the Hephaestus Core, then search the Workshops, Kyburz’s office, nearby Big Daddy corpses, and other industrial rooms for the bomb components. After constructing the bomb, return to Geothermal Control, hack the two machine-gun turrets, turn the Magma Release Valve, and take the elevator down to the core. Place the EMP Bomb on the core, retrace your route, activate the Circuit Breaker outside Ryan’s office, and enter Rapture Central Control. Optional diaries, tonics, vending machines, and upgrade stations are useful but are not required for completion.
1. Enter Hephaestus and reach the first Ryan Industries rooms
Leave the bathysphere and follow the main passage into Hephaestus. The area contains stronger Leadhead and Thuggish Splicers, security cameras, machine-gun turrets, and narrow industrial walkways. Search side rooms for ammunition, First Aid Kits, EVE Hypos, and audio diaries, but keep the objective marker as your route guide rather than clearing every optional room.
Hack cameras and turrets when practical. Electro Bolt can briefly disable a security device so you can begin the hacking sequence, while an Automatic Hack Tool or a security shutdown panel can bypass a difficult hack. A hacked turret is especially useful later, so avoid destroying every device immediately.
- Follow the main route toward Ryan Industries and the Hephaestus Core.
- Disable or hack security devices before entering exposed rooms.
- Keep a manual save before beginning the bomb-assembly sequence.
2. Inspect the Core and begin the EMP Bomb objective
Continue until the route opens into the Hephaestus Core area. Investigate the rooms and corpses around the Core, including the approach to Andrew Ryan’s office. An audio diary explains that the magnetic locks must be overloaded, changing the objective to constructing an EMP Bomb.
The bomb requires three types of components: Nitroglycerin, Ionic Gel, and R-34 Wire Clusters. Do not expect every Quarter-Can of Ionic Gel to be collectible immediately; some become available after the bomb objective is active. The wire clusters come from Big Daddy corpses or Big Daddies you defeat, so search bodies left from earlier Little Sister encounters and deal with additional Big Daddies only if you still need components.
- Trigger the objective to construct the EMP Bomb.
- Collect Nitroglycerin, Ionic Gel, and enough R-34 Wire Clusters.
- Search Big Daddy corpses for the wire components.
3. Gather the bomb components through the Workshops and Kyburz’s office
Follow the objective marker into the Workshops. Search the work areas and the rooms connected to them for glowing bomb components. Nitroglycerin can be obtained from Kyburz’s office by activating the switch associated with his desk; activating it also creates a security threat, so be ready to deal with the turret or other enemies it brings into play.
Collect the available Ionic Gel containers and continue checking the route for R-34 Wire Clusters. If you are short on wire, return to Big Daddy corpses around the Core and other areas you have already passed. You do not need to harvest every Little Sister for this objective; the required wire can come from Big Daddies you have already fought or from additional encounters.
- Obtain the Nitroglycerin charge.
- Collect the available Ionic Gel.
- Reach the required number of R-34 Wire Clusters without spending unnecessary ammunition.
4. Complete the EMP Bomb in the Workshops
Return to the unfinished bomb casing in the Workshops once all three component types are in your inventory. Interact with the casing to install the components and complete the EMP Bomb. The objective then changes to using the bomb against the Hephaestus Core.
Before leaving, refill ammunition and EVE if needed. A Power-to-the-People station may be available in the broader Hephaestus area; use it on a weapon you expect to carry into the late game, but do not delay the main route for an optional upgrade.
- Place all required components into the bomb casing.
- Confirm that the Completed EMP Bomb is in your inventory.
- Restock before returning to Geothermal Control.
5. Redirect the magma in Geothermal Control
Return to the Hephaestus Core and enter Geothermal Control. Two machine-gun turrets cover the Magma Release Valve. Shock and hack them before operating the valve so they can attack the Splicers that arrive during the sequence. If a turret cannot be hacked safely, use a shutdown panel or an Automatic Hack Tool rather than leaving both devices hostile.
Place proximity mines or other traps near likely entrances if you have spare explosives. Start turning the Magma Release Valve. You are not locked into the interaction permanently: release the valve when enemies reach you, eliminate them, and resume turning it. When the magma has been redirected and the water below has cleared, use the elevator to descend.
- Hack or disable both machine-gun turrets.
- Turn the Magma Release Valve until the flow is redirected.
- Use the elevator to reach the lower Geothermal Control route.
6. Reach the Core and plant the EMP Bomb
Follow the lower catwalks through Geothermal Control. Search the corpse near the route for useful supplies, including the Shorten Alarms 2 engineering tonic and an Automatic Hack Tool if they are still present. Watch adjacent platforms and upper walkways for Splicers instead of focusing only on the objective marker.
Activate the Core Lift Control to raise the platform into the central part of the Core. When the lift reaches position, approach the designated ledge and place the EMP Bomb. The bomb overloads the Core and changes the objective to destroying Ryan’s magnetic locks.
- Reach the Core Lift Control.
- Raise the platform into the central Core area.
- Place the EMP Bomb and wait for the overload objective to update.
7. Return to the Circuit Breaker and enter Rapture Central Control
Retrace the route toward the entrance to Ryan Industries. Security bots may appear during the return trip, and any cameras or turrets you left hostile can create crossfire. Use hacked devices, Bot Shutdown panels, doorways, and corners to avoid fighting in the open. If your health is low, retreat to a safer room before continuing rather than pushing through the machinery corridors.
Follow the objective marker to the Circuit Breaker outside Andrew Ryan’s office. Activate it to destroy the magnetic locks. Then pass through the opened bulkhead into Rapture Central Control. The chapter is complete when the new control area has loaded and the objective has moved beyond the Hephaestus Core.
- Return from the overloaded Core to Ryan’s office entrance.
- Activate the Circuit Breaker and destroy the magnetic locks.
- Enter Rapture Central Control.
Before you move on
- The EMP Bomb has been completed with Nitroglycerin, Ionic Gel, and R-34 Wire Clusters.
- The Magma Release Valve has redirected the magma and the lower route to the Core is open.
- The EMP Bomb has been placed on the Hephaestus Core and the Core has overloaded.
- The Circuit Breaker outside Andrew Ryan’s office has destroyed the magnetic locks.
- Rapture Central Control is accessible and loaded.
Rapture Central Control to Olympus Heights — Systems and Shortcuts
Rapture Central Control is a short, missable story area that leads directly into Olympus Heights. Prepare in Hephaestus, collect the three Central Control audio diaries before leaving, use the upper catwalk and maintenance crawlspace to reach Ryan’s office, then complete the self-destruct override and escape through the Little Sisters’ vent. In Olympus Heights, leave Tenenbaum’s safehouse through the sewer, cross the plaza, and enter Mercury Suites. Search Tenenbaum’s apartment first; her investigation reveals that Fontaine has taken the Lot 192 remedy. Find the Fontaine’s Breakup recording for the elevator code 5744, enter Fontaine’s apartment, take Lot 192, and return to the Apollo Square bulkhead. Security cameras, turrets, and Splicers make careful movement more valuable than clearing every optional room.
Prepare in Hephaestus before entering Central Control
Central Control is effectively a one-way story section. Once Jack escapes through the ventilation route, the level is not available for normal backtracking, so use the last accessible Hephaestus facilities before entering. Restock First Aid Kits, EVE Hypos, ammunition, and any supplies you expect to need. Keep one dependable ranged weapon ready and equip a plasmid that can disable or stagger security devices, such as Electro Bolt or Winter Blast.
Make a manual save before crossing the bulkhead. This gives you a clean retry point for the Ryan sequence and preserves the chance to collect the three audio diaries if you miss one. The chapter does not require a particular weapon build, and optional combat should not consume resources you need for the next level.
- Restock health, EVE, and ammunition in Hephaestus.
- Make a manual save before entering Central Control.
- Equip a ranged weapon and a security-disabling plasmid.
Enter Central Control and collect The Vita Chamber
After entering the large Central Control room, search the accessible area before climbing toward Ryan’s office. The audio diary The Vita Chamber is on a table beside a Vita-Chamber unit in the control-room section. Pick it up now rather than relying on a later return, because the level closes behind you after the escape.
Check the room for ammunition, money, and health supplies. A Circus of Values machine is available in this section, so correct any immediate shortage before advancing. Security coverage can be handled by breaking camera line of sight, disabling devices with a plasmid, or using a nearby security-control option when one is accessible. Do not remain exposed while an alarm is active; the resulting Security Bots can drain supplies needed for the rest of the level.
- Collect The Vita Chamber beside the Vita-Chamber unit.
- Search the control room for supplies before advancing.
- Break camera sight lines or disable security before an alarm escalates.
Use the upper catwalk and maintenance crawlspace
The malfunctioning main doors are not the intended route to Ryan’s office. From the control room, climb the stairs to the upper level and continue to the upper catwalk. Find the maintenance crawlspace and enter it. Follow the shaft until you can break through the grating and drop into the adjoining room.
Before entering Ryan’s office, search the room beneath the crawlspace. The audio diaries Mind Control Test and Baby Status are together on the table beneath the wall of photographs and notes. These are the other two Central Control diaries, and they are missable on a normal campaign because there is no standard return trip after Jack leaves the level.
Once the diaries are collected, go through the adjoining door and continue into Ryan’s office. Optional exploration is no longer important here; prioritize the story route and conserve ammunition for the security response that follows.
- Climb to the upper catwalk instead of forcing the locked main doors.
- Enter the maintenance crawlspace and break through the grating.
- Collect Mind Control Test and Baby Status before proceeding.
Complete Ryan’s office sequence and escape
Allow the confrontation in Ryan’s office to play out. After control returns to Jack, inspect the office for optional material if desired, including the Director’s Commentary reel when using a release that contains that collectible. The required progression is to use Ryan’s genetic key at the large self-destruct override console and complete the shutdown sequence.
Security forces may appear after the scene. You do not need to defeat every machine before leaving. Break away from the office, follow the Little Sisters, and enter the ventilation opening they use as an escape route. This long drop transitions Jack into Olympus Heights. There is no useful route back through Central Control, so finish any diary collection before triggering the escape.
- Use Ryan’s genetic key at the self-destruct override console.
- Complete the shutdown sequence.
- Follow the Little Sisters into the ventilation route.
Leave Tenenbaum’s safehouse and reach Mercury Suites
Jack awakens in Tenenbaum’s safehouse in Olympus Heights. Search the room for supplies, then go upstairs and enter the sewer route. Pick up the valve handle in the safehouse and use it where the route requires to open the way to street level.
After reaching the plaza, deal with or bypass the nearby Splicers and security devices. A Big Daddy and Little Sister pair may be present in the plaza, but they are optional to the immediate story objective. Continue toward the Mercury Suites area. Ignore the Apollo Square bulkhead for now; the route remains blocked until the Lot 192 objective is resolved.
Mercury Suites contains apartments, balconies, cameras, turrets, and tripwires. Move along the edges of rooms, inspect corners before crossing open spaces, and use cover against enemies on upper walkways. Hack or avoid security devices when possible instead of starting repeated alarms.
- Take the valve handle in Tenenbaum’s safehouse.
- Use the sewer route to reach street level.
- Pass the Apollo Square bulkhead and continue to Mercury Suites.
Search Tenenbaum’s apartment and learn the elevator code
In Mercury Suites, reach the upper apartment levels and enter Tenenbaum’s apartment through the opening on the third floor. Search the apartment and listen to the relevant instructions. The objective changes when you learn that Fontaine has taken the Lot 192 remedy to his own apartment.
Return to the Mercury Suites route and locate the Fontaine’s Breakup audio diary. It reveals the code for Fontaine’s private elevator: 5744. The elevator keypad cannot be hacked, so enter 5744 manually at the locked elevator on the lower level. If you already know the code, the diary remains optional for progression, but collecting it prevents confusion and preserves the narrative clue.
- Enter Tenenbaum’s apartment through the third-floor opening.
- Confirm that Fontaine has taken the Lot 192 remedy.
- Find Fontaine’s Breakup or use the verified code 5744 at the elevator.
Take Lot 192 and exit to Apollo Square
Ride the elevator to Fontaine’s apartment and prepare for Splicers, a camera, and other security threats inside. Clear or bypass the entrance, then search the apartment. The Lot 192 remedy is in Fontaine’s office area. Taking the first dose reverses the health reduction caused by Fontaine’s conditioning, but the treatment destabilizes Jack’s plasmids. The game can force a different plasmid at inconvenient moments, so rely on firearms and physical movement when your selected plasmid changes unexpectedly.
Collect the remedy and any nearby supplies, then retrace the route to the lower Mercury Suites area. Do not waste time searching for a second cure here; the immediate objective is to leave Olympus Heights. Return to the bulkhead leading to Apollo Square and pass through it. Reaching that transition completes the required progression for this chapter.
- Reach Fontaine’s apartment using the elevator.
- Take Lot 192 from Fontaine’s office area.
- Return to the Olympus Heights bulkhead and enter Apollo Square.
Before you move on
- The Central Control audio diaries have been collected if they are part of the run’s narrative or collectible goal.
- Ryan’s office sequence is complete and the self-destruct override has been activated with Ryan’s genetic key.
- Jack has escaped through the ventilation route and awakened in Tenenbaum’s safehouse.
- Jack has taken the first Lot 192 dose in Fontaine’s apartment.
- Jack has returned to the Olympus Heights bulkhead and entered Apollo Square.
References for this chapter
Apollo Square and Point Prometheus — Tight Combat and Resource Prioritization
Finish Apollo Square after collecting the second Lot 192 dose from Suchong’s laboratory, then take the bathysphere to Point Prometheus. Spend ADAM and restock before leaving, but treat Point Prometheus as the recommended final cleanup area rather than your only remaining chance to gather resources. Fontaine blocks the direct route, so Tenenbaum requires you to imitate a Big Daddy. Collect the Suit Control System, Big Daddy bodysuit, helmet, and boots; gather three pheromone samples in Little Wonders; and install the voicebox modulator in Optimized Eugenics. Return to the atrium, strike the marked vent with the Wrench, and escort the summoned Little Sister to the Proving Grounds entrance. Big Daddy and Little Sister pairs encountered during the search are optional. After the Proving Grounds escort, you can still return to Point Prometheus and use the bathysphere before taking Fontaine’s elevator, so leave any optional cleanup for either this chapter or that final staging window.
Finish Apollo Square and prepare for Point Prometheus
In Artemis Suites, enter Suchong’s laboratory and take the second dose of Lot 192 from his desk. This restores your control over plasmid selection. Search the laboratory and nearby Apollo Square rooms for ammunition, First Aid Kits, EVE Hypos, and invention components before returning toward the metro station.
Use the Gatherer’s Garden near the metro to spend ADAM on Health or EVE upgrades if your bars are limiting survival. Buy plasmid or tonic slots only when they support the build you are already using. Hestia Chambers is optional, but it is a useful preparation detour: the upper floors contain ammunition and supplies, and the fourth floor has a Power to the People station. Before boarding the bathysphere, make sure you have a dependable ranged weapon, a close-range weapon, and a plasmid that can interrupt or disable enemies.
- Collect the second Lot 192 dose in Suchong’s laboratory.
- Restore your preferred plasmid loadout at a Gene Bank if needed.
- Spend surplus ADAM and restock before boarding the bathysphere.
- Make a manual save before leaving Apollo Square.
Enter Point Prometheus and take the Suit Control System
Follow Fontaine through the opening passage. He seals the route ahead, so do not waste ammunition trying to pursue him through the locked section. In the main atrium, search the dead Big Daddy for the Suit Control System, also described in some game references as the Suit Control Device. This is the first required disguise component.
A Power to the People station is close to the corpse. Use it now if you have a weapon upgrade that will remain valuable through Proving Grounds and Fontaine’s Lair. Point Prometheus also has a Gatherer’s Garden, Gene Bank, Vita-Chamber, vending machines, and security systems, making the atrium a useful staging area while you work through the connected facilities.
- Loot the dead Big Daddy in the atrium.
- Take the Suit Control System.
- Use the nearby Power to the People station if appropriate.
- Hack or disable nearby security when doing so is safer than a direct fight.
Collect the pheromones in Little Wonders
From the atrium, enter Little Wonders Educational Facility. Approach through the upper-level route when possible, because turrets cover parts of the lower entrance. Search the upper rooms, the numbered Little Sister rooms, and the Autopsy Ward for three Big Daddy pheromone samples. Some samples are on desks, while another area is reached by dropping from the upper level into a lower room.
Hack or disable turrets before searching the cells. Keep a weapon ready for Splicers that enter from the connecting corridors. The Autopsy Ward also contains useful supplies and an optional tonic. Continue searching until the pheromone requirement is complete; ordinary exploration rewards are optional, but the three samples are required for the disguise.
- Enter Little Wonders Educational Facility.
- Collect three Big Daddy pheromone samples.
- Search the numbered rooms and Autopsy Ward, including lower areas reached from above.
- Hack or bypass the facility’s turrets before looting exposed rooms.
Recover the bodysuit and helmet in Failsafe Armored Escorts
Return to the atrium and enter Failsafe Armored Escorts on the south side. Search the Suit Assembly area for the Big Daddy bodysuit. Then continue to Candidate Induction and take the helmet. Collecting the helmet triggers an ambush, so reload before picking it up and keep a retreat route in mind.
Candidate Conversion contains machine-gun and rocket turrets, a safe, and supplies. Hack the turrets or use security controls when possible rather than allowing them to join every fight. A recording in this facility points to the missing boots’ location. If you find a Big Daddy and Little Sister pair while searching, defeating the Big Daddy and choosing Rescue or Harvest is optional for this chapter’s progression; the required disguise objective does not depend on resolving that pair.
- Collect the Big Daddy bodysuit in Suit Assembly.
- Collect the helmet in Candidate Induction.
- Survive or bypass the ambush after taking the helmet.
- Treat any naturally occurring Big Daddy and Little Sister encounter as optional.
Find the boots in Mendel Memorial Research Library
Leave Failsafe Armored Escorts and return to the atrium. Take the upper route to Mendel Memorial Research Library. The Big Daddy boots are on the library’s second-floor area near the librarian’s desk. A security camera and rocket turret cover parts of the route, so hack them, disable them, or cross using cover.
The boots are a required disguise component, not a collectible that can be skipped. Search the library for ammunition and the Damage Research 2 tonic if you want the optional combat benefit, then return to the atrium.
- Enter Mendel Memorial Research Library.
- Collect the Big Daddy boots from the second-floor library area.
- Deal with or bypass the camera and rocket turret.
- Return to the Point Prometheus atrium.
Install the voicebox modulator in Optimized Eugenics
From the atrium, enter Optimized Eugenics through the northern route. Reach Live Subject Testing and use the Voicebox Modification Machine to change Jack’s voice for the disguise. Alarm Expert 2 is nearby as an optional tonic. Optimized Eugenics also contains a Gene Bank and the final Power to the People station, located in the Eugenics Analysis area.
You can explore the generator and flooded central chamber for optional supplies. A control room can temporarily shut down the power, allowing access to a nearby safe before the electricity returns. Do not spend time clearing every room if your resources are low; the required objective is the voicebox modification, while the safe, research, diaries, and any Big Daddy encounter are optional.
- Use the Voicebox Modification Machine in Live Subject Testing.
- Use the Optimized Eugenics Power to the People station if desired.
- Visit the Gene Bank and adjust your tonic loadout.
- Resolve or bypass the optional Big Daddy and Little Sister encounter.
Complete the disguise and summon the escort Little Sister
Confirm that you have the Suit Control System, bodysuit, helmet, boots, three pheromone samples, and voicebox modification. Return to the Point Prometheus atrium and approach the sealed route where Fontaine escaped. Follow Tenenbaum’s instruction and strike the marked vent with the Wrench. The summoned Little Sister recognizes your completed Big Daddy disguise and opens the route to Proving Grounds.
Reload weapons, heal, and refill EVE before starting the escort. Stay close to the Little Sister as she moves toward the Proving Grounds entrance. She pauses at corpses to gather ADAM, giving Splicers time to attack, so hack nearby cameras and turrets and clear threats around her before moving on. This summoned escort is required; the other Big Daddy and Little Sister pairs in Point Prometheus are not.
Point Prometheus is the recommended final cleanup area before Proving Grounds, but it is not your only remaining chance to prepare. After completing the Proving Grounds escort and receiving the ADAM Harvesting Tool, you can still backtrack to Point Prometheus and use the bathysphere to revisit earlier areas. Do this before taking Fontaine’s elevator, which begins the final no-return sequence.
- Confirm every required disguise component is complete.
- Strike the marked vent with the Wrench.
- Keep the summoned Little Sister protected during the escort.
- Reach the Proving Grounds entrance.
- Remember that Point Prometheus remains revisitable after the escort and ADAM Harvesting Tool, before Fontaine’s elevator.
Before you move on
- The second Lot 192 dose has been collected from Suchong’s laboratory, and Apollo Square has been exited through the bathysphere.
- The Suit Control System has been taken from the dead Big Daddy in the Point Prometheus atrium.
- The Big Daddy bodysuit and helmet have been collected in Failsafe Armored Escorts, and the boots have been collected in Mendel Memorial Research Library.
- Three Big Daddy pheromone samples have been collected in Little Wonders, and the voicebox modulator has been used in Optimized Eugenics.
- Desired Power to the People upgrades, ADAM purchases, research, diaries, and optional Little Sister encounters have been handled or intentionally skipped.
- The full disguise is complete, the marked vent has been struck with the Wrench, and the summoned Little Sister has opened the route to Proving Grounds.
- A manual save exists before the escort or before leaving Point Prometheus if you want to retry the sequence.
- After the escort and receipt of the ADAM Harvesting Tool, any remaining backtracking is completed before taking Fontaine’s elevator.
Proving Grounds and Final Approaches — Last Upgrades and Little Sister Checks
Proving Grounds contains the required final escort before Fontaine, but entering the level is not the permanent point of no return. Follow the scripted Little Sister through the museum, defend her during three ADAM-gathering stops, survive the later rogue Bouncer attack, and collect the ADAM Harvesting Tool when the final door opens. Afterward, use the staging area to adjust your Gene Bank loadout, buy or craft supplies, and create a manual save. You may still return to Point Prometheus and use its bathysphere to revisit accessible areas before taking the elevator. The elevator to Fontaine is the actual final transition: once you ride it, earlier areas are unavailable. Resolve your remaining Little Sister choices, research, shopping, and optional cleanup before that ride.
Prepare before beginning the Proving Grounds escort
Before starting the escort, finish any work you want to do in Point Prometheus. Search Little Wonders, Optimized Eugenics, and other accessible rooms for upgrades, research opportunities, diaries, ammunition, and supplies. If you still need to resolve eligible Little Sister encounters for your chosen ending, do so before committing to the final elevator later in the chapter.
You do not need to finish every optional task before entering Proving Grounds itself. The important distinction is that the level can be completed first, then revisited through Point Prometheus before the final elevator. Nevertheless, entering with a healthy supply of ammunition, First Aid Kits, EVE Hypos, and useful plasmids makes the escort safer.
Visit a Gene Bank and configure a dependable combat set. Keep a ranged weapon with adequate ammunition, a crowd-control plasmid such as Electro Bolt or Winter Blast, and either an explosive weapon option or another high-damage tool. Use Gatherer’s Gardens, vending machines, and U-Invent stations as needed. Create a manual save before beginning the escort so you can retry the sequence without losing preparation progress.
- Complete any desired Point Prometheus cleanup before the escort.
- Resolve any eligible Little Sister choices you want to settle early.
- Equip a ranged weapon and at least one reliable interruption or crowd-control option.
- Stock health, EVE, ammunition, and useful crafted items.
- Create a manual save before entering the escort route.
Summon the scripted Little Sister and enter the museum
At the beginning of Proving Grounds, locate the Little Sister vent and strike it with the wrench to summon the escort. This Little Sister is part of the level’s required progression. She is not one of the normal Little Sisters that can be harvested or rescued, so her presence does not change your ending tally.
Check the nearby service machines and collect supplies before opening the route into the museum. Handle cameras and turrets when you have a safe opportunity: hacking them can provide useful support, but it does not replace watching the escort’s health. Once she begins walking, stay near her and follow her route through the locked Little Sister doors.
- The scripted escort Little Sister has emerged from the vent.
- You have confirmed your loadout and ammunition.
- Nearby security devices are hacked, disabled, or ready to be handled.
- You understand that this escort does not count as a Harvest or Rescue choice.
Defend the first ADAM-gathering stop
Follow the Little Sister into the first museum section. She stops at a corpse and begins gathering ADAM, which triggers an attack by Splicers. Keep her visible and position yourself between her and the main approaches. Use display structures, doorways, and corners as cover, but avoid retreating so far that enemies can reach her unnoticed.
Prioritize enemies attacking or approaching the Little Sister rather than distant targets. A stun plasmid can interrupt a dangerous attacker, while Telekinesis can throw suitable objects back toward groups. Use security devices when available, then finish survivors with the weapon that best preserves your stronger ammunition. After the area is quiet, collect dropped supplies and wait for the escort to move again.
If the escort Little Sister is killed, return to the nearest active Little Sister vent and strike it with the wrench to summon another. Do not treat her death as a failed ending route; it only requires replacing the escort so the level can continue.
- Keep the Little Sister within sight during the gathering sequence.
- Interrupt enemies that are closing on her.
- Use cover without abandoning the gathering area.
- Collect supplies before following her onward.
- Summon a replacement from the nearest vent if she dies.
Protect the second gathering stop and manage the museum approaches
Continue through the next locked door and follow the Little Sister to the second test subject. She gathers ADAM again, bringing another group of enemies into the museum. Watch the balconies, adjoining rooms, and side approaches rather than focusing only on the central hall.
Hack a camera or turret before the attack if you can do so without leaving the escort exposed. Telekinesis is useful for throwing environmental objects, and explosive ammunition can clear clustered enemies, but conserve some high-damage resources for the later heavy encounter. Reload between attacks and use healing items before your health becomes critical.
Do not advance while enemies are still attacking the Little Sister. Wait until the gathering sequence finishes and she resumes walking. Search side rooms only after the immediate defense is secure, since wandering too far can allow an uncovered enemy to damage her.
- Cover elevated walkways and side rooms as well as the main hall.
- Preserve heavy ammunition for the later rogue Bouncer.
- Keep an interruption plasmid ready for enemies that reach the escort.
- Wait for the escort to move before advancing.
Survive the final defense and take the ADAM Harvesting Tool
Follow the Little Sister to the third and final gathering point. The last defense includes ordinary Splicers and, later, a rogue Elite Bouncer. Keep distance from the Bouncer, use cover to avoid its charge, and attack when it is committed to another target. If hacked security devices remain active, let them draw attention while you deal with enemies threatening the Little Sister directly.
After the final gathering, follow the escort through the last door. Search the room and nearby upper-level area for supplies if you wish, then take the ADAM Harvesting Tool from the Little Sister. This tool is required for the Fontaine encounter. The escort’s three gathering actions are mandatory progression, but they are not normal Little Sister decisions and do not award an ending-related Harvest or Rescue result.
- The escort Little Sister completed all three ADAM-gathering stops.
- The rogue Bouncer and remaining attackers are defeated or cleared.
- The final door has opened.
- The ADAM Harvesting Tool is in your inventory.
- The escort has not altered your Little Sister ending tally.
Use the staging area and decide whether to backtrack
After receiving the ADAM Harvesting Tool, use the staging area before the final elevator. Visit the Gene Bank, adjust plasmids and tonics, refill health and EVE, buy ammunition, and use the U-Invent station if your components support useful supplies. Keep a ranged damage option, a crowd-control plasmid, and enough resources for a multi-phase final battle.
This staging area is also the last opportunity to decide whether to backtrack. You can return through Point Prometheus and use the bathysphere to revisit accessible earlier areas, complete remaining research, search for upgrades, resolve eligible Little Sister encounters, or gather additional supplies. The escort and tool do not permanently lock those revisitable areas. Return to the staging area when your cleanup is complete.
Create a separate manual save after the escort and before using the elevator. This save preserves the completed Proving Grounds sequence and lets you retry the final approach without repeating the escort.
- Set the final Gene Bank loadout.
- Refill health and EVE.
- Buy or craft useful ammunition and consumables.
- Backtrack through Point Prometheus if optional cleanup remains.
- Return to the staging area and create a separate manual save.
Confirm the ending plan and ride the final elevator
Review your eligible Little Sister choices before entering the elevator. The escort Sister in Proving Grounds does not count, and the ending is determined by the earlier Harvest and Rescue decisions. If you want the favorable ending, confirm that your previous choices meet the campaign’s favorable threshold. If you want a darker variation, verify that the number of harvested eligible Sisters matches the intended result.
When your cleanup, spending, loadout, and save are complete, take the elevator from the staging area to Fontaine. This elevator is the actual point of no return for revisiting earlier areas. Once it departs, you cannot use the bathysphere to return to Point Prometheus or other campaign levels, so reserve your health, EVE, ammunition, and major consumables for the final sequence. The next chapter covers Fontaine’s fire, ice, electrical, and syringe stages.
- Your earlier eligible Little Sister choices match the intended ending.
- Optional research, upgrades, and shopping are complete or deliberately abandoned.
- You have a ranged damage option and a way to interrupt enemy groups.
- Healing items, EVE, and ammunition are reserved for Fontaine.
- The manual save was created before the elevator ride.
- The elevator has begun the final approach to Fontaine.
Before you move on
- The escort Little Sister completed three ADAM-gathering stops.
- The final door opened and the ADAM Harvesting Tool was collected.
- Any desired Point Prometheus cleanup and revisitable-area backtracking were completed before the final elevator.
- The Gene Bank loadout was adjusted and useful health, EVE, ammunition, and crafted supplies were stocked.
- A separate manual save was created after the escort and before the elevator.
- The intended Little Sister ending tally was confirmed.
- The final elevator was entered, completing the Proving Grounds and final approach.
Fontaine’s Lair — Final Preparation and Arena Entry
Begin this chapter after the Proving Grounds escort is complete and the ADAM Harvesting Tool is already in your inventory. The room before Fontaine’s elevator is the final preparation area: use its Gene Bank, Gatherer’s Garden, U-Invent machine and vending machines to finalize your build, replenish supplies and craft ammunition. Make a manual save before entering the elevator. Once the elevator rises, you enter Fontaine’s circular arena, where Fontaine is attached to an ADAM-injecting machine on a raised platform. This chapter ends at the arena entrance, before the first syringe interaction and before the fire, ice and electrical boss phases described in the next chapter.
Return to the final staging area
After completing the Proving Grounds route, remain in the final museum room and confirm that the ADAM Harvesting Tool is already in your inventory. Do not retrace the escort route or search for another tool. The Little Sister sequence has finished; your objective now is to prepare for the final confrontation and take the elevator at the far end of the area.
Search the room and nearby passages before committing to the elevator. This is the last convenient place to inspect supplies and make build changes before the boss arena. If you still want to collect an audio diary, open a safe or use a nearby machine, do it now rather than expecting to return after the elevator ride.
- The Proving Grounds escort is complete.
- The ADAM Harvesting Tool is already in your inventory.
- You have returned to the final preparation room before the elevator.
Spend remaining ADAM and adjust your Gene Bank loadout
Use the Gatherer’s Garden in the staging area to spend any ADAM you still intend to use. Prioritize upgrades that improve your actual loadout rather than purchasing a new plasmid simply because it is available. Extra health or EVE capacity can help if your reserves are low, while additional slots are useful only if you have a specific plasmid or tonic combination ready.
Next, open the Gene Bank and replace equipment that was valuable during exploration but is less useful in a direct arena fight. Hacking, research and security-focused tonics are optional here; favor survivability, elemental resistance, weapon damage or movement benefits that match your preferred weapons. Equip the combat plasmids and tonics you know how to use instead of changing to an unfamiliar setup immediately before the elevator.
- Remaining ADAM has been spent or deliberately saved.
- The Gene Bank loadout contains your final combat plasmids and tonics.
- Exploration-only equipment has been replaced if it is no longer helping your build.
Reload, craft and purchase supplies
Reload every weapon you expect to carry into Fontaine’s Lair. Use the Circus of Values and El Ammo Bandito machines in the staging area to buy useful ammunition, and use the U-Invent machine to craft supplies if you have the components. Give priority to ammunition for weapons you can use accurately while moving; an underused weapon is not valuable merely because it has a full magazine.
Collect the First Aid Kits and EVE Hypos placed around the room, then check your reserves. Refill before the elevator rather than entering with empty slots. Keep a mixture of direct-damage ammunition and a method for interrupting or controlling enemies. The exact weapon choice is flexible, but relying on a single ammunition type creates a needless risk if you miss shots or run out during the final sequence.
Do not waste all your money and components on experimental crafting. Keep the supplies that best support your established build, and leave the room only when your weapons, healing items and EVE reserves are in usable condition.
- Weapons are reloaded.
- Useful ammunition has been purchased or crafted.
- First Aid Kits and EVE Hypos have been collected and replenished where possible.
- Your loadout includes both reliable damage and an interruption or crowd-control option.
Create the final manual save
Make a manual save while you are still in the staging area, before pressing the elevator button. Name or place it where you can recognize it as the Fontaine preparation save. This gives you a practical retry point if the final sequence goes badly or if you decide to alter your loadout.
Treat this save as the end of free preparation. After entering the elevator, do not assume that a normal Vita-Chamber checkpoint or a useful mid-fight manual-save opportunity will protect your progress. If you want to change plasmids, tonics, ammunition or spending decisions, do so before leaving this room.
- A manual save exists from the final staging area.
- You are satisfied with your weapons, ammunition, health, EVE and Gene Bank setup.
- You understand that the elevator begins the point of no return for final preparation.
Take the elevator to Fontaine’s Lair
When you are ready, go to the elevator at the end of the staging area and activate it. The ride carries Jack from the Proving Grounds to Fontaine’s Lair. A final radio message plays during the ascent, but there is no objective requiring you to stop or leave the elevator.
When the doors open, step into the arena and pause long enough to orient yourself. The room is a broad circular combat space with an outer route around the perimeter, structural cover and a raised platform ahead. Fontaine is attached to the ADAM machine on that platform. The open floor gives you room to move, while the platform and surrounding structures divide the arena into clear approach and retreat lines.
Do not begin the boss procedure in this chapter. Stop after entering the arena and confirming that the final encounter has loaded. The next chapter begins with the required syringe interaction and explains the separate Fontaine forms in their fixed order.
- The elevator has reached Fontaine’s Lair.
- You have entered the circular arena and identified the raised platform and perimeter route.
- You have stopped before the first syringe interaction.
Before you move on
- The Proving Grounds escort was completed before this chapter began.
- The ADAM Harvesting Tool is already in the inventory.
- The final staging area has been searched for supplies.
- The Gene Bank loadout has been adjusted for the final fight.
- Weapons, ammunition, First Aid Kits and EVE Hypos have been prepared.
- A manual save was created before entering the elevator.
- The elevator has carried Jack into Fontaine’s Lair.
- The player has entered the arena but has not yet performed the first syringe interaction.
Fontaine’s Lair — Three Forms and the Final Syringe Sequence
This chapter begins after the elevator has delivered you into Fontaine’s Lair. Fontaine must be drained with the Little Sister’s syringe before the fight and again after each of his three forms. The fixed order is fire, ice and electricity. Fire Fontaine uses ranged fire attacks and charges; ice Fontaine adds security-bot pressure; electrical Fontaine is accompanied by Splicers. Do not waste ammunition on an elemental attack that matches Fontaine’s current form. Keep moving around the open arena, attack during his recovery windows and clear only enemies that block your route. After the electrical form is defeated, return to the ADAM machine and use the syringe a fourth and final time. The Little Sisters then overpower Fontaine and the ending transition begins. A normal mid-fight checkpoint is not available, so failure sends you back to the beginning of the encounter.
1. Begin with Fontaine attached to the ADAM machine
When the arena loads, Fontaine is positioned at the far end, attached to the ADAM machine. Walk up the ramp and approach the machine. Do not begin by trying to damage Fontaine with gunfire. Interact with the Little Sister’s syringe at close range to drain the first ADAM vial. The extraction knocks you away and starts the fire phase. The opening syringe action is mandatory; it is not an optional method of weakening him.
After Fontaine enters the arena, move onto the open floor and keep a broad route around the room. Avoid backing into walls or trapping yourself beside the machine. The open space gives you room to strafe, reload and break away from a charge. Treat this as one continuous encounter: if you die, you should expect to restart the fight rather than resume from a normal Vita-Chamber checkpoint inside the arena.
- Approach Fontaine while he is attached to the ADAM machine.
- Use the syringe to begin the encounter.
- Move into the open arena and preserve room for evasive movement.
2. Defeat Fontaine’s fire form
Fire Fontaine attacks with fire-based ranged attacks and can rush across the arena. Strafe sideways rather than retreating in a straight line, and change direction when he charges. Attack after he finishes a rush or pauses to recover instead of standing in front of him and trading damage. Continue circling so that you can reach ammunition, healing supplies or another part of the room without passing directly through him.
Do not rely on fire ammunition or fire plasmids against this form. Use firearms, explosives, the Chemical Thrower with a non-fire setting, freezing effects or another damage source that does not match his current element. The exact weapon is less important than maintaining damage while preserving enough EVE and ammunition for the later phases. When the fire form’s health is depleted, Fontaine withdraws to the ADAM machine.
- Strafe during fireballs and charges.
- Use non-fire attacks against the fire form.
- Attack during recovery windows and avoid cornering yourself.
- Continue until Fontaine returns to the ADAM machine.
3. Perform the second extraction and survive the security bots
As soon as Fontaine returns to the machine, go back up the ramp and use the syringe again. This is the second syringe use overall and changes Fontaine to his ice form. Do not spend time firing at him while he is attached to the machine; the required progression action is another ADAM extraction.
Security bots join the encounter after this extraction. If you can safely reach the nearby Bot Shutdown panel, use it to reduce the immediate pressure, then hack or convert a disabled bot when doing so will not leave you exposed. Converted bots can distract Fontaine and provide additional damage. If the panel or a hack would trap you beside the machine, keep moving and return to the boss instead of forcing the interaction.
- Use the syringe after the fire form is defeated.
- Expect security bots during the ice phase.
- Disable or convert bots when the route is safe.
- Return to the open arena after the extraction.
4. Defeat Fontaine’s ice form
Ice Fontaine continues to use ranged attacks and rapid charges, but the security bots can make the arena harder to read. Keep circling and use cover briefly while reloading. Do not allow bots or Fontaine to push you against a wall; break away as soon as your escape route narrows. If a converted bot remains active, let it draw attention while you attack from another angle.
Avoid ice ammunition and ice plasmids against the ice form. Use ordinary firearm damage, explosives, non-ice Chemical Thrower ammunition or another available attack type. If you are low on ammunition, prioritize accurate shots during Fontaine’s pauses rather than wasting volleys while he is moving. When this form’s health is depleted, he returns to the machine for the third extraction.
- Keep an escape route open around the arena.
- Use converted security bots as distractions when possible.
- Do not use matching ice attacks as your main damage source.
- Deplete the ice form before attempting the next extraction.
5. Perform the third extraction and handle the Splicers
Run to the ADAM machine after the ice form falls and activate the syringe. This is the third syringe use overall and changes Fontaine to his electrical form. The machine interaction is required; the boss does not progress simply because his previous health bar was depleted.
Splicers appear during the electrical phase. Use Decoy, Enrage, Insect Swarm, Telekinesis or another crowd-control option to prevent them from surrounding you. You do not need to eliminate every summoned enemy immediately. Kill or disable the Splicers that block your path, interrupt attacks or threaten to pin you, then return your attention to Fontaine. Keeping the arena navigable is more valuable than clearing every target before damaging the boss.
- Use the syringe after the ice form ends.
- Expect Splicers during the electrical phase.
- Control only the enemies that threaten your movement or attack windows.
- Keep Fontaine as the primary target.
6. Defeat Fontaine’s electrical form
Electrical Fontaine should be attacked with non-electrical damage. Avoid making Electro Bolt or other electrical attacks your main source of damage during this phase. Use accurate gunfire, explosives or a suitable Chemical Thrower setting, and continue strafing across the arena rather than standing in one place. When Fontaine charges, move laterally and attack after the rush ends.
Use healing items before your health becomes critical, especially if Splicers are forcing you to fight at close range. Save enough EVE for emergency crowd control, but do not conserve recovery resources so aggressively that a preventable hit ends the attempt. Continue attacking until the electrical health bar is depleted and Fontaine returns to the ADAM machine for the last time.
- Use non-electrical attacks against the electrical form.
- Strafe across the arena and avoid being surrounded.
- Spend healing items before a dangerous low-health situation.
- Defeat the electrical form and follow Fontaine back to the machine.
7. Use the final syringe and trigger the ending transition
After the electrical form is defeated, go up the ramp to the ADAM machine and activate the syringe again. This is the fourth and final syringe use: once to start the encounter, then once after the fire, ice and electrical forms. The final extraction is mandatory. Ordinary damage alone does not complete the battle, and the ending does not begin until this interaction is performed.
The Little Sisters then attack Fontaine in a scripted sequence. You do not need to restart combat against another boss form. Remain in the area and allow the sequence to continue into the ending cinematic. This chapter is complete when the scripted attack has begun and the game transitions to the ending sequence.
- Reach the machine after defeating the electrical form.
- Use the syringe for the fourth and final time.
- Allow the Little Sisters’ scripted attack to begin.
- Continue into the ending cinematic.
Before you move on
- Fontaine’s fire form has been defeated.
- The syringe has been used after the fire form.
- Fontaine’s ice form has been defeated.
- The syringe has been used after the ice form.
- Fontaine’s electrical form has been defeated.
- The syringe has been used four times total, including the opening extraction.
- The Little Sisters’ scripted attack has begun.
- The game has transitioned into the ending cinematic.
Endings — Favorable, Disappointed/Sad and Angry Outcomes
BioShock determines its ending from the Little Sister choices recorded during the campaign. Harvesting zero or one eligible Little Sister produces the favorable ending. Harvesting more than one but not every eligible Little Sister produces the darker disappointed or sad variation. Harvesting every eligible Little Sister produces the darkest angry variation. An unresolved Sister counts as neither rescued nor harvested, so leaving Sisters alone prevents the all-harvest condition. Fontaine’s fight, the final syringe interactions and ordinary combat decisions cannot change the tally. Keep a manual save before the last decision you intend to make and another before the final approach so you can replay the ending without repeating the whole campaign.
Record each Little Sister decision
After defeating a Big Daddy, approach the Little Sister and choose either Rescue or Harvest when the prompt appears. Rescue removes the parasite and records a rescue. Harvest kills the Little Sister and records a harvest while granting the larger immediate ADAM reward. The ending calculation uses these completed decisions, not the number of Big Daddies defeated or the amount of ADAM spent afterward.
If you walk away from a defeated Big Daddy without resolving the Little Sister, she remains unresolved. Do not count her as rescued, and do not count her as harvested. This distinction matters for the darkest ending: an untouched or otherwise unresolved Sister means that not every eligible Sister was harvested.
- Track completed Rescue and Harvest choices separately.
- Treat an unresolved Little Sister as neither rescued nor harvested.
- Do not use ADAM totals to predict the ending.
Use the favorable ending threshold
The favorable ending occurs if you harvest zero or one eligible Little Sister. Rescuing every Sister is the simplest way to guarantee this result, but one harvest does not automatically lock you out of it. If you accidentally harvested one Sister, stop harvesting and rescue any additional Sisters you decide to resolve; there is no need to restart solely because of that single harvest.
Leaving other Sisters unresolved also keeps the harvest count at zero or one, but a deliberate rescue route is easier to track and provides the rescue-related rewards during the campaign. The ending is determined when the story concludes, so later spending of ADAM, weapon choices and difficulty selection do not replace the Little Sister tally.
- Zero harvested: favorable ending.
- One harvested: still favorable ending.
- Do not harvest another Sister if you are preserving this outcome.
Identify the disappointed or sad variation
The disappointed or sad darker variation occurs when more than one, but not every eligible, Little Sister has been harvested. This includes a mixed route with both rescues and harvests. It also includes a route in which you harvested more than one Sister but left at least one other eligible Sister unresolved; the absence of a rescue does not turn that route into the angry ending.
The visual structure of the darker conclusion is paired with a more sorrowful or disappointed version of Dr. Tenenbaum’s narration when the all-harvest condition has not been met. Some references describe this result as mixed, sad or neutral-style, but BioShock’s original ending logic should not be labeled with BioShock 2’s later Good, Neutral and Bad framework.
- More than one Sister was harvested.
- At least one eligible Sister was not harvested, whether rescued or left unresolved.
- Use disappointed or sad terminology, not BioShock 2’s neutral-ending rules.
Identify the angry variation
The angry variation requires harvesting every eligible Little Sister available in the campaign. This is stricter than merely harvesting more than one. If even one eligible Sister remains unresolved or was rescued, the route is not the all-harvest route and should produce the disappointed or sad darker variation instead.
For this reason, do not infer the angry ending from the number of harvests alone. A player who harvested several Sisters but ignored another one has not harvested every eligible Sister. Likewise, a player who harvested several and rescued at least one has not completed the all-harvest condition. The decisive test is whether every eligible Sister was harvested.
- Every eligible Little Sister was harvested.
- No eligible Sister was rescued.
- No eligible Sister was left unresolved.
Save before the final decisions
Keep a manual save before the last Little Sister encounter you may want to change. This is the most useful replay point if you are near the threshold between one and more than one harvest, or if you want to change a route that would otherwise end with several harvests but not every Sister harvested. Use a separate slot rather than overwriting your only campaign save.
Keep another manual save before entering the final Fontaine sequence. This preserves your completed Little Sister tally and lets you replay the boss and ending without repeating the final areas. A Vita-Chamber recovery will not undo a Rescue or Harvest choice. If you want a different ending, reload a save from before the relevant decision.
- Keep a pre-decision manual save.
- Keep a separate pre-Fontaine save.
- Do not rely on a Vita-Chamber to reverse a choice.
Finish Fontaine’s sequence
Complete Fontaine’s arena battle and perform every required syringe interaction when the game presents the prompt. The final syringe sequence triggers the Little Sisters’ scripted intervention and begins the ending transition. Fontaine’s health phases, weapon loadout, plasmid choices, difficulty and ordinary enemy kills do not alter the recorded Little Sister outcome.
Do not reload immediately after the first ending image if you are checking the result. Allow the complete ending cinematic and credits to play. The narration and final imagery together identify the favorable, disappointed or angry variation.
- Fontaine has been defeated.
- Every required syringe interaction is complete.
- The ending cinematic and credits have been viewed.
Replay for another ending
To change a favorable ending into a darker one, reload a save before enough additional Sisters were resolved to raise the harvest total above one. To change a disappointed or sad ending into the angry variation, reload a save before the remaining eligible Sisters and harvest every one of them. To change an angry route into a less severe result, reload before at least one eligible Sister was harvested and rescue that Sister or leave her unresolved, provided the resulting harvest total still meets the desired threshold.
Changing only Fontaine’s combat performance cannot change the ending. The required alteration must occur before the Little Sister tally is finalized. Preserve the original route in a separate save if you want to keep both outcomes available.
- Choose the target harvest threshold before replaying.
- Alter a Little Sister decision, not merely the final boss fight.
- Keep separate saves for alternate outcomes.
Confirm campaign completion
The main campaign is complete when Fontaine is defeated, the final syringe sequence has triggered the Little Sisters’ attack, the ending cinematic has played and the credits have been reached. Optional audio diaries, research progress, tonics, weapon upgrades, Power to the People stations, U-Invent crafting and trophies do not block the ending.
Use the following final check: zero or one harvest means favorable; more than one but fewer than all eligible Sisters harvested means disappointed or sad; every eligible Sister harvested means angry. Unresolved Sisters are not rescues, but they also prevent the route from being classified as all-harvest.
- Fontaine is defeated and the final scripted sequence is complete.
- Credits have been viewed.
- The ending matches the actual harvest total and unresolved choices.
- A replay save remains available if another ending is wanted.
Before you move on
- Fontaine has been defeated and the final syringe sequence has triggered the ending transition.
- The complete ending cinematic and credits have been viewed.
- Zero or one harvest is identified as favorable.
- More than one but fewer than all eligible Sisters harvested is identified as disappointed or sad.
- Every eligible Sister harvested is identified as angry.
- Unresolved Sisters have been excluded from both the rescue and harvest totals.
- A manual save before the relevant decision or final approach remains available for replay.
Optional: Collectibles, Audio Diaries and Narrative Completion
Audio diaries, Gene Tonics, Power to the People stations and U-Invent crafting are optional for completing BioShock, but they provide important story context and can make later combat easier. The original PlayStation 3 campaign has 122 audio diaries for the Historian trophy. Five are permanently missable in a normal run: two in Welcome to Rapture and three in Rapture Central Control. Collect those before leaving their respective areas. Other diaries, tonics and weapon upgrades can generally be collected later through the bathysphere network. Point Prometheus cleanup before the Proving Grounds escort is recommended, but it is not the final opportunity. After completing the escort and receiving the ADAM Harvesting Tool, you can return to Point Prometheus, use the bathysphere and revisit earlier levels. The final elevator to Fontaine’s Lair is the important lockout. Keep a checklist, record consumed weapon-upgrade stations and make manual saves before cleanup and before the final elevator.
Secure the five permanently missable audio diaries
In Welcome to Rapture, collect both diaries in Kashmir Restaurant before continuing through the opening route. New Year’s Eve Alone is on a table beneath the Atlas statue in the lower restaurant area. Hole in Bathroom Wall is in the women’s bathroom, on the side reached through the flooded restaurant area. Pick up both entries before leaving this opening level; you cannot return to Welcome to Rapture later through the bathysphere network.
Rapture Central Control contains three more diaries that cannot be recovered after the level is completed. At the beginning of the level, take The Vita Chamber from the desk beside the Vita-Chamber station. Before entering the route toward Andrew Ryan, go up the stairs and enter the crawlspace. Follow it to the room covered with writing and collect Mind Control Test and Baby Status from the desk. Do not proceed through Ryan’s door until all three entries are in your collection.
- Welcome to Rapture: New Year’s Eve Alone
- Welcome to Rapture: Hole in Bathroom Wall
- Rapture Central Control: The Vita Chamber
- Rapture Central Control: Mind Control Test
- Rapture Central Control: Baby Status
Sweep each level before advancing its main objective
Use the audio-diary collection menu as a record, but check individual names rather than relying only on a percentage or total. Search desks, counters, offices, bathrooms, side rooms, corpses, locked areas and rooms opened by hacking. A diary must be picked up; hearing a message through a radio or scripted conversation does not count as collecting that diary.
A practical sweep order is Medical Pavilion, Neptune’s Bounty, Smuggler’s Hideout, Arcadia, Farmer’s Market, Fort Frolic, Hephaestus, Rapture Central Control, Olympus Heights, Apollo Square, Point Prometheus and Proving Grounds. In Arcadia, search the Tea Garden, Waterfall Grottos, Lower Rolling Hills, Tree Farm and Research Laboratories. In Farmer’s Market, check the winery, cellar and freezer areas as well as Silverwing Apiary. Revisit rooms after story events open new routes or remove obstructions.
Most areas remain available through the bathysphere network after you unlock the required routes. If you miss an ordinary diary, finish the current objective, return to a bathysphere and revisit the level instead of restarting immediately. Rapture Central Control and Welcome to Rapture are the exceptions.
- Check diary names by area, not only the overall total.
- Search side rooms before activating a level exit.
- Revisit ordinary missed entries through the bathysphere network.
- Treat Welcome to Rapture and Rapture Central Control as permanently missable areas.
Track all 12 Power to the People stations
Each Power to the People station provides one free weapon upgrade and is consumed after use. The original game contains 12 stations. Their locations are Neptune’s Bounty Freezer; Arcadia Tree Farm; Farmer’s Market Winery Cellar; Fort Frolic Le Marquis D’Epoque; Fort Frolic Sinclair Spirits; Hephaestus Core; Hephaestus Kyburz’s Office; Olympus Heights Mercury Suites; Olympus Heights Cohen’s Apartment; Apollo Square Fontaine’s Center for the Poor; Point Prometheus Atrium; and Point Prometheus Optimized Eugenics.
Spend upgrades on weapons that match your build and record each used station. No special weapon is required for the campaign, and collecting every station is optional. The PS3 Weapon Specialist trophy is tied to fully upgrading one weapon, not merely finding every station.
The Cohen’s Apartment station requires Sander Cohen to remain alive after Fort Frolic. Later, enter his apartment in Olympus Heights and deal with the Houdini Splicers or otherwise trigger the sequence that opens access to his private quarters. If Cohen was killed during the Fort Frolic confrontation, the apartment route and its station can be unavailable in that playthrough.
- Neptune’s Bounty: Freezer
- Arcadia: Tree Farm
- Farmer’s Market: Winery Cellar
- Fort Frolic: Le Marquis D’Epoque
- Fort Frolic: Sinclair Spirits
- Hephaestus: Core
- Hephaestus: Kyburz’s Office
- Olympus Heights: Mercury Suites
- Olympus Heights: Cohen’s Apartment
- Apollo Square: Fontaine’s Center for the Poor
- Point Prometheus: Atrium
- Point Prometheus: Optimized Eugenics
Equip Gene Tonics at Gene Banks
A Gene Tonic does not provide its benefit merely because it is in your inventory. Visit a Gene Bank and place it in an active Physical, Engineering or Combat slot. Armored Shell is a reliable defensive choice, Extra Nutrition improves the value of food and medical items, and Hacker’s Delight is useful for a hacking-focused build. Wrench and weapon-specific tonics are worthwhile only when they match your preferred combat style.
Review your loadout whenever you reach a Gene Bank. Keep at least one defensive or recovery option equipped before Point Prometheus and the final stages. Optional tonic pickups can improve specialized builds, but no particular tonic is required to finish the campaign.
- Visit a Gene Bank after collecting important tonics.
- Confirm each desired tonic is in an active slot.
- Keep a defensive or recovery tonic equipped for late-game combat.
Use U-Invent stations deliberately
U-Invent stations turn collected components into ammunition, hacking tools and other supplies. Craft when your component inventory is close to its carrying limit, but avoid spending rare parts simply to empty space. Armor-piercing ammunition is useful against armored enemies, while additional hacking tools help when turrets, cameras and security bots are slowing your progress.
Before the final elevator, review your ammunition, First Aid Kits, EVE Hypos and hacking tools. Craft supplies that support the weapons and plasmids you actually use. U-Invent crafting is optional, so missing a recipe or component is not a reason to restart a campaign.
- Craft when components approach their inventory limit.
- Reserve rare parts for supplies you will actually use.
- Make a final ammunition, health and EVE check before Fontaine’s Lair.
Clean up safely around Proving Grounds
Finish as much of your collectible sweep as practical in Point Prometheus before beginning the Proving Grounds escort. This reduces backtracking and lets you compare your diary, tonic and weapon-upgrade checklists while the route is still clear.
However, entering Proving Grounds does not immediately prevent cleanup elsewhere. Complete the escort and obtain the ADAM Harvesting Tool. Before taking the elevator to Fontaine’s Lair, return through Point Prometheus to its bathysphere and revisit earlier levels if you still need ordinary diaries, tonics or weapon upgrades. The final elevator to Fontaine’s Lair is the meaningful final lockout for this cleanup opportunity.
Keep a manual save before the cleanup trip and another before taking the final elevator. The first protects a collectible run if you discover a missing entry; the second preserves the completed campaign state for an alternate ending attempt or a final-boss replay.
- Complete the Point Prometheus sweep before or after the Proving Grounds escort.
- After receiving the ADAM Harvesting Tool, use the bathysphere for remaining cleanup if necessary.
- Do not take the Fontaine elevator until the collectible run is ready to end.
- Keep separate manual saves before cleanup and before the final elevator.
Before you move on
- The collection includes all 122 audio diaries if pursuing the Historian trophy.
- The two Welcome to Rapture diaries and all three Rapture Central Control diaries were collected before leaving those areas.
- Every intended Power to the People station has been used and its weapon upgrade recorded.
- Desired Gene Tonics have been placed in active Gene Bank slots.
- U-Invent components have been converted into useful ammunition, hacking tools or other supplies.
- Point Prometheus and any revisited earlier areas have been checked before taking the elevator to Fontaine’s Lair.
- A manual save exists before final cleanup and another exists immediately before the final elevator.
Recovery from Failure — Save Strategy, Vita-Chambers and Replaying Key Segments
Use Vita-Chambers for immediate recovery, but protect campaign decisions and boss preparation with separate manual saves. The PlayStation 3 version allows Vita-Chambers to be disabled in the Options menu; when disabled, death returns you to a saved game instead of reviving you at a chamber. Keep a preserved save before the last Little Sister decision and another in the final Proving Grounds preparation area. Proving Grounds is the last practical staging area before Fontaine: escort the Little Sister, take the ADAM Harvesting Tool, finish shopping and inventing, then save before using the elevator. Fontaine’s arena does not offer a Vita-Chamber or ordinary mid-fight save, so a failed attempt should be restarted from that preparation save.
1. Check the Vita-Chamber setting before relying on revival
Open the pause menu and inspect Options before beginning a difficult section. With Vita-Chambers enabled, death normally revives Jack at a nearby chamber. This is useful for learning a room or retrying a combat encounter, but it is not a replacement for a manual save: the revival may leave you with an unattractive position, reduced supplies or enemies still active nearby.
If Disable Vita-Chamber is enabled, death returns you to the most recent saved game instead. Confirm this setting before a high-difficulty attempt or a no-chamber run. If you leave the option enabled, treat each chamber as an emergency checkpoint rather than assuming it protects your preferred progress state.
- Check the Vita-Chamber option before a serious retry.
- Remember that a Vita-Chamber revival does not create a new manual save.
- If chambers are disabled, save more often and avoid experimental fights without a fallback file.
2. Maintain separate milestone saves
Use multiple manual-save slots instead of overwriting one campaign file. Keep one current progress save, one recent-area save and at least one preserved milestone save. The most valuable milestones for this campaign are before the last unresolved Little Sister decision and in the final preparation area of Proving Grounds, immediately before the elevator to Fontaine.
A third preserved file before a major late-game transition, such as Point Prometheus or Proving Grounds, gives you a way to recover from a poor resource plan without replaying the entire campaign. Save after completing a difficult objective and before spending a large amount of ADAM, rare ammunition or money if you may want to test another build. Wait for the save to finish before quitting or changing areas.
- Keep several separate campaign saves.
- Preserve a file before the final Little Sister choice you intend to alter.
- Preserve a file in Proving Grounds before taking the elevator to Fontaine.
- Do not overwrite the only file that retains your preferred ending path.
3. Recover after a normal death
When Vita-Chambers are enabled, inspect the revived position before committing to another attempt. If Jack appears surrounded, has poor health or has lost too much ammunition, reload the latest manual save instead of repeatedly accepting the same bad recovery. A manual reload is especially useful when the chamber revival leaves a turret, camera or Big Daddy encounter active in an unfavorable location.
Change one tactical factor on the next attempt. Hack a nearby camera or turret before triggering the fight, lure Splicers into a narrow route, use Electro Bolt or another interruption tool to stop a dangerous enemy, or switch to a longer-range weapon. Search bodies and nearby containers before buying replacements, but do not spend every healing item immediately if the room still contains a Health Station or useful supplies.
- Reload when the chamber places you in a losing position.
- Change the route, weapon, plasmid or security setup rather than repeating the same exchange.
- Use nearby hacked security to reduce the number of enemies you must fight directly.
4. Recover from a failed Proving Grounds escort
Proving Grounds is an escort section, not the Fontaine fight itself. Before starting the escort, clear or hack security devices near the route whenever possible and keep the Little Sister close. She stops at bodies to gather ADAM, and enemy waves appear while she works. Defeat attackers before they reach her and use hacked turrets or cameras as additional protection.
If the Little Sister dies during the escort, return to or strike a nearby vent as instructed by the game to summon another Little Sister, then resume the route. Do not treat the death as a campaign-ending failure. After the final escort objective is complete, take the ADAM Harvesting Tool from the Little Sister. This is the item required to drain Fontaine during the boss sequence.
- Protect the Little Sister while she gathers ADAM.
- If she dies, summon a replacement from a nearby vent and continue.
- Do not enter the final elevator until the escort is complete and the ADAM Harvesting Tool is in your inventory.
5. Make the final Fontaine preparation save
After receiving the ADAM Harvesting Tool, use the Proving Grounds staging area to finish preparation. Check the vending machines, U-Invent station, Gene Bank and available health services. Convert spare components into useful ammunition or supplies, buy the healing and EVE items you can afford, and equip the plasmids and tonics you actually intend to use. Keep a reliable ranged weapon ready and retain one crowd-control option for Splicers or security support.
Create a separate manual save before taking the elevator. The elevator leads directly to Fontaine, and the boss arena does not provide a Vita-Chamber or a normal opportunity to create a mid-fight save. If Fontaine defeats you, reload this preparation file rather than relying on a chamber revival or replaying the entire escort.
- Finish shopping and inventing before leaving Proving Grounds.
- Save after receiving the ADAM Harvesting Tool and before entering the elevator.
- Keep healing, EVE and ranged damage available for the complete boss sequence.
- Reload this file after a failed Fontaine attempt.
6. Protect and replay Little Sister decisions
Little Sister choices are permanent campaign decisions once the game saves past them. If you are pursuing a particular ending path, record which Sisters you rescued or harvested and preserve a save before the last choice you may want to change. Continue from a second save after making the decision, leaving the original branch untouched.
To test another ending, reload the pre-choice file, change the relevant Little Sister decision, then continue through the remaining preparation and Fontaine sequence. Replaying Fontaine alone cannot rewrite earlier choices. Likewise, a save made only after the final choice cannot restore the earlier branch.
- Record rescue and harvest choices as you make them.
- Keep the pre-choice file separate from the active campaign file.
- Reload an earlier decision save when testing a different ending.
- Do not overwrite the original branch until you are certain you no longer need it.
7. Recover missed optional content before committing
Before taking the final elevator, use the available transport route to revisit earlier areas if you still need an upgrade, audio diary, Little Sister or research opportunity. The final preparation save is useful for repeating the boss, but it should not be treated as a universal recovery point for every missed objective. If the missing item is in an earlier level, use the earliest save that still gives access to that level or return there before entering Fontaine.
Once the elevator sequence begins, concentrate on completing the boss and ending sequence. Keep the earlier exploration save intact if you want to return for optional content or create an alternate ending branch.
- Finish optional exploration before taking the final elevator when possible.
- Use the earliest accessible save for a missed item.
- Keep a clean pre-Fontaine file for boss retries and alternate endings.
Before you move on
- You know whether Vita-Chambers are enabled or disabled in Options.
- You have a preserved save before the final Little Sister decision you may want to change.
- You have completed the Proving Grounds escort and taken the ADAM Harvesting Tool.
- You have a manual save immediately before the elevator to Fontaine.
- You can restart Fontaine without replaying the escort sequence.
- You can replay an ending branch without overwriting the original campaign file.
- After Fontaine is defeated, the ending sequence begins and can be viewed from the active campaign branch.
Post-Campaign Tasks and Replay Advice
Use a second BioShock campaign on the original PlayStation 3 release for a specific purpose: an alternate ending, a difficulty trophy, research and diary completion, weapon upgrades, or a different combat build. Preserve a manual save before the final Little Sister decisions and another before the endgame approach. The patched PS3 version also supports New Game Plus, which carries your previous weapons, abilities, and inventory into a new campaign; if the mode is missing on an older disc installation, update the game before expecting it. Keep New Game Plus separate from trophy planning, because PS3 trophy guides warn that trophies are disabled in that mode. A dedicated fresh campaign remains the safer choice for Survivor, disabled Vita-Chamber, research, and missable trophy objectives.
1. Update the PS3 version and preserve endgame saves
Before beginning replay work, install the available game update for your BioShock disc or download installation. The patched original PlayStation 3 version received New Game Plus support, and 2K announced the mode for the PS3 version with the Challenge Rooms content on November 19, 2008. If New Game Plus does not appear in the New Game menu after completing the campaign, do not assume the feature is absent from BioShock; check that the game is updated first.
Keep an untouched manual save from before the final Little Sister decisions. A second save before the final lift or endgame transition is useful for repeating the last combat sequence, but it cannot replace a save made before earlier Rescue or Harvest choices. BioShock does not become a free-roaming postgame after Fontaine, so the completed campaign itself is not a substitute for a pre-decision backup.
- Update the PS3 installation before expecting New Game Plus.
- Keep an untouched save before the last Little Sister decisions.
- Keep a second save before the final approach if storage permits.
- Never overwrite the backup while testing another ending.
2. Choose between New Game Plus and a fresh campaign
Use New Game Plus for combat experimentation, build comparison, and general cleanup when the patched mode is available. The mode begins a new campaign with weapons, abilities, and inventory carried over from a previous playthrough, making it useful for testing a different plasmid combination or reaching later weapon-upgrade stations with a prepared loadout.
Do not treat New Game Plus as the default solution for every missed trophy. The PS3 trophy guide used for this chapter warns that trophies are disabled in New Game Plus, so use a fresh campaign for trophy objectives unless your own installed version and trophy documentation explicitly confirm otherwise. A fresh run is also the safer choice for Survivor, Hard without Vita-Chambers, research, diary, and Little Sister trophies.
- Use New Game Plus for builds and cleanup rather than assuming it is a trophy route.
- Start a fresh campaign for a serious Survivor or disabled Vita-Chamber attempt.
- Keep the completed original save even after starting New Game Plus.
3. Set one concrete replay objective
Decide the purpose of the replay before committing to it. An alternate-ending run should use a written Little Sister tally. A trophy run should identify whether it targets difficulty, research, audio diaries, hacking, crafting, weapon modification, or a Little Sister outcome. A narrative-completion run should use an area-by-area diary checklist and search each level before taking an irreversible route forward.
Do not assume that every missed item can be collected after Fontaine. The opening Welcome to Rapture section contains audio diaries that cannot be recovered once you leave, and other progression transitions can also close off earlier areas. For a new collectible campaign, check each level before advancing and record completed research subjects, diaries, and Power to the People stations immediately.
- Write down the exact goal before starting the replay.
- Use a checklist for diaries, research, and weapon upgrades.
- Confirm missable early items before leaving their areas.
4. Run a consistent Rescue or Harvest campaign
For the reliable favorable ending target, Rescue every Little Sister you encounter. Rescuing gives less immediate ADAM than Harvesting, but it provides later rescue rewards and keeps the playthrough on the rescue-focused route. After each Big Daddy encounter, interact with the Little Sister before leaving and record the result so that a late choice does not become confused with the full campaign tally.
For a Harvest-focused replay, decide at the beginning that immediate ADAM is the priority and record every choice. Harvesting gives the larger immediate payment but removes the later rescue reward and changes the ending route. Harvesting all encountered Sisters is the dependable way to target the most hostile ending variation; mixed choices produce another ending variation rather than an independent post-game quest branch. A save before a late Sister interaction lets you test a different final tally, but it only changes choices made after that save.
- Record every Rescue or Harvest choice.
- Keep a save before a late Sister decision when testing endings.
- Do not rely on one final choice to erase earlier decisions.
5. Use the replay to test a different combat build
A weapon-and-stun build can center on Electro Bolt, Incinerate, the shotgun, and the rifle. Use Electro Bolt to interrupt machines or stagger a target, then switch to the weapon and ammunition appropriate for the enemy. Specialized ammunition gives the replay a chance to emphasize deliberate weapon selection instead of relying on one firearm throughout the campaign.
For a control-focused build, pair Telekinesis with Incinerate or Winter Blast. Throw environmental objects into groups, freeze isolated targets for safe follow-up attacks, and preserve EVE for Big Daddies or dense ambushes. A wrench build can work with defensive tonics and careful positioning, but it should not be adopted casually on a high difficulty.
Do not automatically repeat the same Power to the People choices. Each station accepts one weapon upgrade and then closes permanently in that campaign, so choose upgrades around the weapons supporting the new build. The known station route passes through Neptune’s Bounty, Arcadia or Farmer’s Market, Fort Frolic, Hephaestus, Olympus Heights, Apollo Square, and Point Prometheus.
- Change the primary weapon or ammunition emphasis from the first campaign.
- Replace at least one major plasmid family or tonic strategy.
- Record each Power to the People choice immediately.
6. Make PS3 trophy attempts dedicated campaigns
The original PS3 trophy set includes Brass Balls for completing Hard with Vita-Chambers disabled, A Man Chooses for completing Survivor, and I Chose the Impossible for completing Survivor with Vita-Chambers disabled. Treat the last objective as a dedicated campaign. Set the intended difficulty and Vita-Chamber option before serious progress, then verify the setting after loading saves.
For an upgrade-focused campaign, track every Power to the People station as you reach it because an upgrade cannot be undone within that run. For Research PhD, photograph enemy types throughout the campaign, including security devices where required by the trophy criteria, instead of waiting until the final areas. For Historian, follow a diary checklist from the opening section onward, paying special attention to areas that become inaccessible after story transitions.
Use separate saves for difficulty, ending, and collectible goals. This prevents a failed trophy condition or an overwritten Little Sister choice from destroying the fastest route to another objective.
- Use a fresh save for Hard or Survivor completion.
- Disable Vita-Chambers before beginning the relevant trophy attempt.
- Track research subjects and diaries throughout the campaign.
- Verify the trophy notification or PS3 trophy-menu entry before deleting a completion save.
Before you move on
- Complete the specific replay objective selected at the start.
- Watch Fontaine’s ending cutscene and compare it with the recorded Little Sister tally.
- For a trophy run, confirm the relevant trophy notification or PS3 trophy-menu entry.
- For a New Game Plus build test, verify that carried-over weapons, abilities, and inventory are available and that the intended new loadout is used in combat.
- Retain both the completed-run save and the pre-decision backup if another ending or trophy attempt is planned.
References for this chapter
Concrete Completion Checklist — What ‘Finished’ Means for this Walkthrough
The original BioShock campaign on PlayStation 3 is complete when you defeat Frank Fontaine through his fire, ice, and electrical forms, perform every required syringe interaction, watch the Little Sisters finish the confrontation, view the ending cinematic, and reach the credits. Your ending is determined by the number of eligible Little Sisters harvested during the campaign. Harvesting zero or one produces the favorable ending. Harvesting more than one but not every eligible Sister produces the darker disappointed or sad variation. Harvesting every eligible Sister produces the darker angry variation. Audio diaries, research bonuses, Gene Tonics, weapon upgrades, Power to the People stations, hidden supplies, and trophies are optional goals and do not block the campaign ending. Keep separate saves before the final approach and before a relevant Little Sister choice if you want to replay the conclusion or pursue another ending.
1. Preserve saves before the final approach and ending decisions
Before entering Fontaine’s final area, create a manual save in a separate slot. This gives you a reliable starting point for another boss attempt or for checking the ending without replaying the Proving Grounds escort and the preceding approach. The save is a convenience, not a requirement for completion.
If you may want a different ending, keep another manual save from before the last Little Sister decision you intend to change. The ending tally is based on the harvest and rescue choices made during the campaign. Spending ADAM, changing weapons, buying plasmids, equipping Gene Tonics, or defeating Fontaine with a different combat setup does not alter that tally.
Use the final staging area to check your weapons, ammunition, first-aid kits, EVE hypos, and equipped plasmids. You do not need a fully upgraded weapon or a particular plasmid combination to finish the game. Choose the equipment you can use consistently and carry enough healing and ammunition to survive three forms. If your version has Vita-Chambers enabled, they remain part of the normal death-and-respawn system elsewhere, but the Fontaine arena does not provide a normal Vita-Chamber checkpoint for repeating the boss fight.
- A manual save exists before entering Fontaine’s final approach.
- A second save exists before the last relevant Little Sister choice if an alternate ending is planned.
- Your available weapons, ammunition, health, EVE, and combat loadout have been checked.
- You are not treating a fully upgraded weapon or a specific tonic as a completion requirement.
2. Complete Fontaine’s fire, ice, and electrical forms
When the Fontaine arena loads, approach Fontaine while he is attached to the apparatus and use the Little Sister’s syringe. This opening drain starts the fight. Fontaine first takes his fire form. Keep moving around the arena, avoid his fire attacks and charges, and damage him until he retreats to the apparatus.
After the fire form is depleted, approach the apparatus and perform the next syringe interaction. Fontaine then changes to his ice form and summons security bots. Deal with the bots if they are preventing movement or concentrating fire on you; the nearby security controls can help reduce that pressure. Continue damaging Fontaine until he retreats again.
Use the syringe at the apparatus a third time to begin the electrical form. This phase adds Splicer pressure while Fontaine uses electrical attacks and charges. Keep enough room to maneuver, use cover when useful, and spend your strongest remaining ammunition when an opening appears. The exact weapon or plasmid used is flexible; no single counterweapon is mandatory.
When the electrical health bar is empty, the fight is not yet complete. Return to Fontaine and perform the final syringe interaction. This fourth drain triggers the Little Sisters’ attack and ends the playable boss encounter. Ordinary damage alone does not finish the sequence.
- The opening syringe interaction has started the boss fight.
- Fontaine’s fire form has been defeated.
- The second syringe interaction has been completed.
- The ice form and its security-bot pressure have been handled.
- The third syringe interaction has been completed.
- The electrical form and its Splicer pressure have been handled.
- The final syringe interaction has triggered the Little Sisters’ attack.
3. Watch the ending cinematic and reach the credits
After the final syringe interaction, allow the scripted Little Sister sequence to play. Their attack on Fontaine is part of the conclusion, not an optional scene that can be skipped while still counting the boss as fully completed.
Remain in the game through the ending narration and closing cinematic. The favorable route presents Jack rejecting control of Rapture and leaving with the rescued Little Sisters. The darker route presents Jack accepting power and turning Rapture’s forces toward the surface. The two darker variations use the same broad hostile resolution, but Tenenbaum’s delivery changes according to whether the game records a mixed harvest route or an all-harvest route.
For this campaign guide, completion occurs when the ending cinematic has played and the credits have begun. There is no additional playable story chapter required after the credits. If the game returns to a menu afterward, the completed ending still counts.
- The Little Sisters’ final attack has played.
- The ending narration and closing scenes have been shown.
- The credits have begun.
- No further playable story objective is required after the credits.
4. Match the ending to the Little Sister tally
The favorable ending is awarded when you harvest zero or one eligible Little Sister during the campaign. Rescuing every Little Sister is not the only way to receive it; a single harvest still remains within the favorable threshold. If you have harvested one, rescue the remaining Sisters to avoid crossing that threshold.
The disappointed or sad darker variation occurs when you harvest more than one eligible Sister but do not harvest every eligible Sister. This includes a mixed route with both rescues and harvests. The route is darker than the favorable outcome, but it is distinct from the all-harvest variation.
The angry darker variation occurs when you harvest every eligible Little Sister encountered by the campaign. The distinction depends on the complete harvest tally, not merely on whether you rescued fewer Sisters than you harvested.
Do not describe these outcomes as BioShock 2-style Good, Neutral, and Evil endings. The original BioShock uses the favorable ending, a disappointed or sad darker variation, and an angry darker variation. Fontaine’s elemental phase order and the way you win the boss fight do not change the ending tally.
- Favorable ending target: zero or one harvest.
- Disappointed or sad darker target: more than one harvest, but not every eligible Sister harvested.
- Angry darker target: every eligible Sister harvested.
- The ending terminology remains specific to the original BioShock release.
5. Track optional objectives separately from campaign completion
Audio diaries, research bonuses, Gene Tonics, weapon upgrades, Power to the People stations, hidden supplies, and PlayStation 3 trophies are separate completion goals. Missing one of them does not invalidate the campaign ending and does not require another Fontaine attempt.
If you are pursuing optional objectives after finishing the story, protect the save that preserves your completed ending. Keep a separate file for trophy cleanup, collectible hunting, or an alternate ending rather than overwriting the only pre-Fontaine or pre-choice save.
To replay for another ending, load a save from before the Little Sister choice that needs to change. A save made after the ending cannot retroactively alter the harvest tally. A save before the final approach is useful for replaying Fontaine, but it cannot change earlier choices unless it was created before those choices were made.
- Fontaine has been defeated through all three forms.
- The final syringe interaction has completed.
- The ending cinematic and credits have been reached.
- The ending matches the recorded harvest tally.
- Optional collectibles, upgrades, research, and trophies are listed separately.
- A pre-choice or pre-final-approach save remains available for replay.
Before you move on
- Frank Fontaine has been defeated in fire, ice, and electrical forms.
- The opening syringe interaction and the syringe interaction after each retreat have been completed.
- The final syringe interaction has triggered the Little Sisters’ scripted attack.
- The ending cinematic has played and the credits have begun.
- The ending matches the tally: zero or one harvest for the favorable ending, more than one but not all eligible Sisters harvested for the disappointed or sad darker variation, or every eligible Sister harvested for the angry darker variation.
- Optional audio diaries, research, Gene Tonics, weapon upgrades, Power to the People stations, supplies, and trophies are treated as separate goals.
- A manual save remains before the final approach or before a relevant Little Sister decision if replay is planned.
Finishing up
Defeat Fontaine through all of his required forms and complete the final syringe sequence.
Watch the ending cinematic and credits to confirm that the campaign has finished.
Use the Little Sister tally only to identify the favorable ending, the darker disappointed/sad variation, or the darker angry all-harvest variation.
Keep a manual save before the Fontaine approach if you want to retry the boss or replay an ending branch.
Treat audio diaries, research, tonics, weapon upgrades, Power to the People stations, and trophy goals as optional completion categories rather than requirements for the campaign ending.
Choose your next gameScreenshots & video
Game imagery for reference. Follow the written chapters above for the route and strategies.
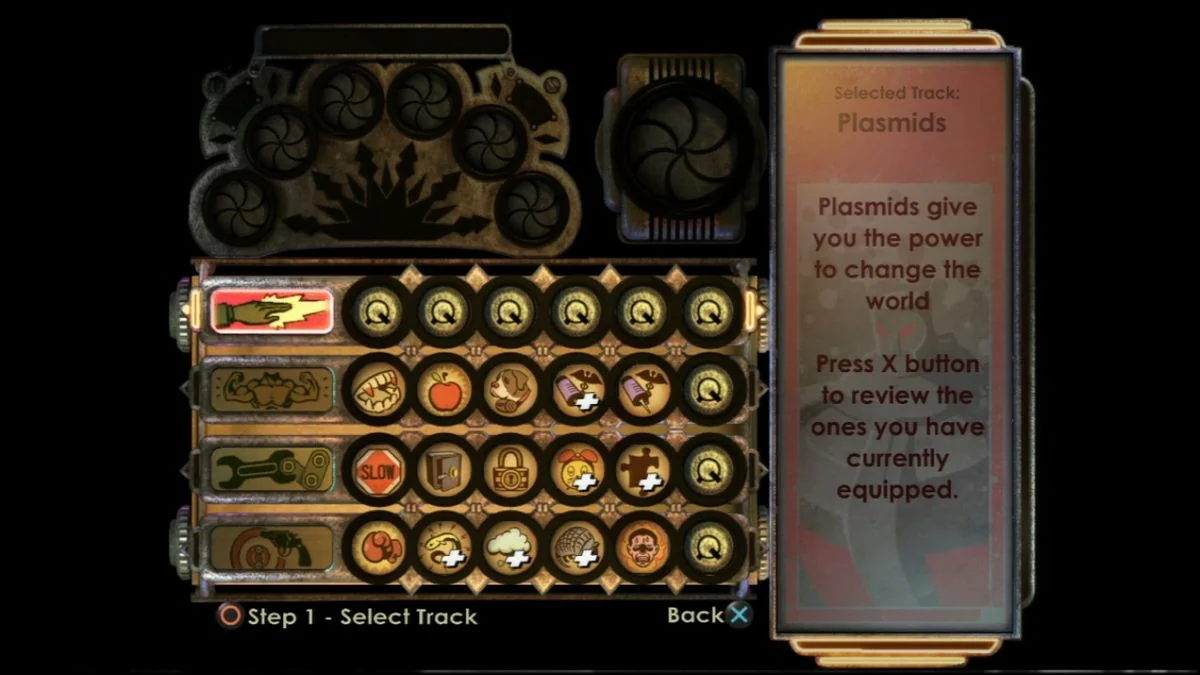
Sources & references
Our original guide draws on the references below. Check the edition at the top of this page before following controls or unlock requirements.
- Welcome Center — BioShock Walkthrough and Guide, GameFAQs
- Welcome to Rapture — BioShock Guide and Walkthrough, SuperCheats
- BioShock Controls — BioShock Wiki
- BioShock/Welcome to Rapture — StrategyWiki
- BioShock PlayStation 3 Owner’s Manual
- BioShock Walkthrough — GameSpot, Fontaine section
- BioShock Guide and Walkthrough — GameFAQs
- Medical Pavilion — BioShock Remastered Walkthrough and Guide
- Neptune’s Bounty Walkthrough — GameBanshee
- BioShock Walkthrough: Neptune’s Bounty — PortForward
- BioShock Walkthrough: Smuggler’s Hideout — PortForward
- Farmer’s Market — BioShock Walkthrough and Guide, GameFAQs
- Arcadia — GameBanshee BioShock Walkthrough
- Farmer’s Market — GameBanshee BioShock Walkthrough
- Farmer’s Market — SuperCheats BioShock Guide
- Fort Frolic — BioShock Walkthrough and Guide
- Fort Frolic — GameBanshee Walkthrough
- Power to the People – StrategyWiki
- BioShock Extended PS3 Manual — 2K Games
- Hephaestus Walkthrough — GameBanshee
- Hephaestus — BioShock Walkthrough, GameFAQs
- Hephaestus — BioShock Guide and Walkthrough, SuperCheats
- Rapture Central Control — BioShock Wiki
- BioShock Walkthrough — Rapture Central Control, GameFAQs/GameSpot
- Olympus Heights — BioShock Walkthrough & Guide, GameFAQs/GameSpot
- Olympus Heights — GameBanshee
- Point Prometheus — BioShock Walkthrough and Guide — GameFAQs
- Point Prometheus Walkthrough — GameBanshee
- BioShock Walkthrough — PortForward
- BioShock Walkthrough — Proving Grounds — GameFAQs
- Proving Grounds — GameBanshee
- Guide for BioShock - Proving Grounds, TrueAchievements
- Proving Grounds — BioShock Wiki
- Fontaine’s Lair Walkthrough — GameBanshee
- Fontaine’s Lair — BioShock: The Collection eGuide
- BioShock FAQ/Walkthrough v1.00 — Neoseeker Walkthroughs
- BioShock Game Script — PlayStation 3 — GameFAQs
- Story Choices — BioShock Wiki
- Multiple Endings in BioShock — University of Nottingham research paper
- BioShock Rapture Historian Audio Diary Guide
- Rapture Central Control Walkthrough
- Historian Achievement in BioShock
- Power to the People
- Guide for BioShock — Proving Grounds — TrueAchievements
- BioShock PS3 DLC Surfaces Tomorrow – PlayStation.Blog
- BioShock PS3 Trophies Confirmed, Detailed – PlayStation.Blog
- More BioShock Trophy Details – PlayStation.Blog
- BioShock Trophy Guide & Road Map – PlayStationTrophies.org
- Fontaine — BioShock Walkthrough and Guide — GameFAQs
About the game & collecting notes
- Platform
- PlayStation 3
Complete the original PlayStation 3 BioShock campaign from the lighthouse through Fontaine’s defeat and the ending sequence. The guide covers the required routes, bosses, plasmid and weapon tactics, Little Sister decisions, late-game preparation, and concrete checks for campaign completion. Optional diaries, research, tonics, weapon upgrades, trophies, and full Power to the People coverage are tracked separately from the main ending goal.
Darryl Polo
Darryl Polo loves tinkering with emulation and revisiting retro games. He enjoys exploring how old favorites play on different setups and sharing what he learns along the way. At Joking Joystick, he writes about the games, hardware, and small discoveries that keep the hobby fun.
Our editorial standardsFound a step that needs another look? Help us improve this guide.