
Apollo Justice: Ace Attorney — Nintendo DS (North America) Complete Campaign Walkthrough
Step-by-step campaign walkthrough for the original North American Nintendo DS release of Apollo Justice: Ace Attorney. Covers the four official cases—Turnabout Trump, Turnabout Corner, Turnabout Serenade, and Turnabout Succession—from the opening courtroom sequence through the final Jurist System resolution. It also explains DS controls, the single-save structure, Perceive, selected 3-D evidence examinations, the MASON System, recovery from trial mistakes, and the differences between the original cartridge and later ports.

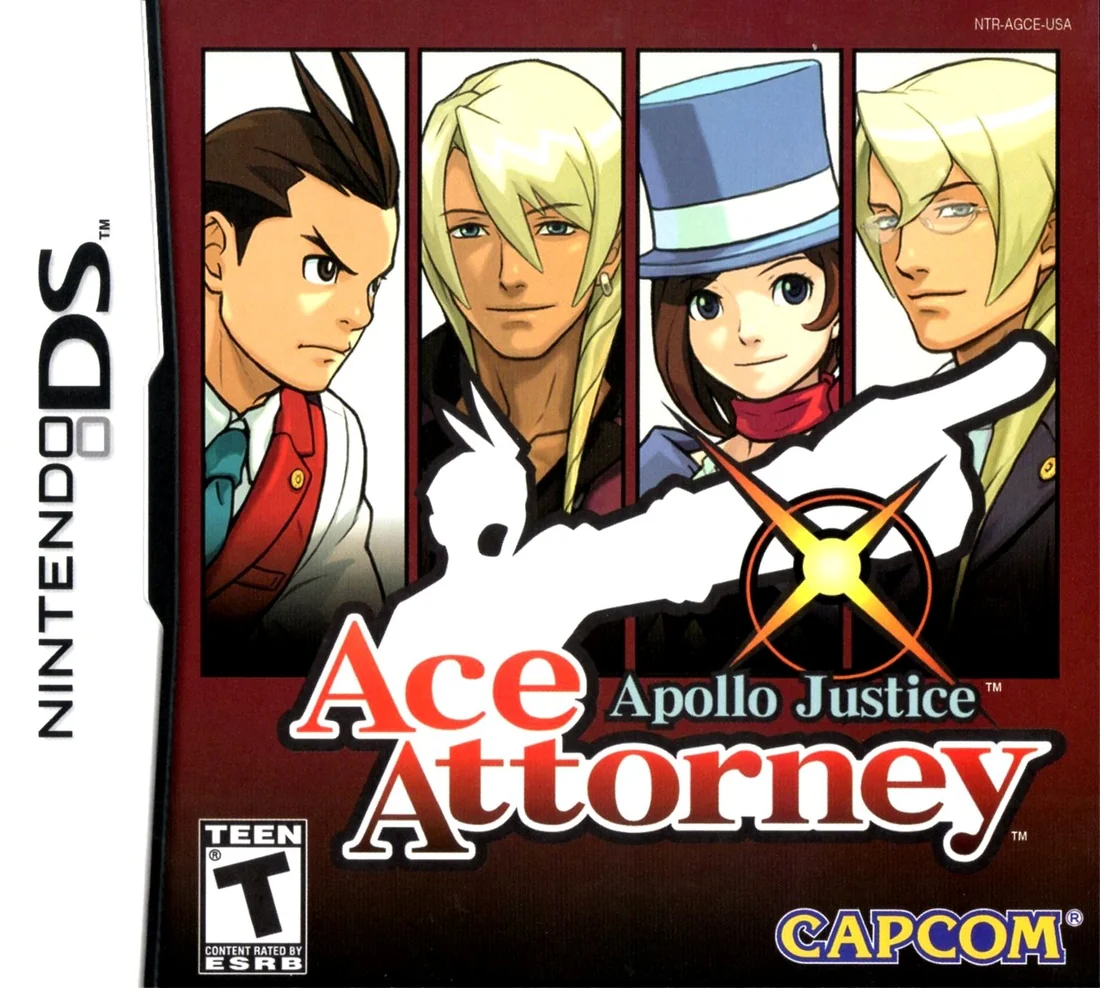
Find a copy
Apollo Justice: Ace Attorney Nintendo DS
We may earn a commission if you buy through these links, at no extra cost to you. As an Amazon Associate I earn from qualifying purchases.
Opens retailer search results. Check the model, edition, seller, availability and current price before buying.
Before you begin
You are about to play Apollo Justice: Ace Attorney on the Nintendo DS.
This guide targets the original North American Nintendo DS release and covers all four official cases through the ending of Turnabout Succession.
The DS cartridge has one active in-game save location, so make deliberate saves before major courtroom sections and do not overwrite a clean recovery point unnecessarily.
Apollo Justice uses investigation commands, Press and Present, Perceive, microphone prompts, and selected 3-D evidence or reconstruction sequences. There is no universal free-roaming Crime Recreation Mode.
Follow the cases in order. Each investigation or courtroom section below lists the required evidence, testimony responses, and recovery point.
The final completion checkpoint is the end of Turnabout Succession: complete the Day 3 courtroom evidence route, select Not Guilty for Vera Misham in the Jurist System decision, and watch the closing scenes and credits.
Set yourself up for the run
Confirm that the game is the original North American Nintendo DS release, not the 3DS, mobile, or Apollo Justice: Ace Attorney Trilogy version.
Use the DS Start-button save screen during normal gameplay. The original cartridge has one active in-game save location rather than multiple named manual slots.
Save before major trial segments and keep the cleanest available pre-trial position until the next section is secure. External save backups or emulator-specific tools are separate from the game’s own save system.
Learn Examine, Move, Talk, Present, Press, the Court Record, and Perceive. The game also contains selected 3-D evidence inspections and reconstruction scenes, not a general Crime Recreation Mode.
Keep the microphone opening clear when a prompted fingerprint, forensic, or courtroom voice action appears, but use button or touch controls whenever the game provides them.
Expect four cases in this order: Turnabout Trump, Turnabout Corner, Turnabout Serenade, and Turnabout Succession.
Reserve extra time for Turnabout Succession, which includes a flashback trial, the MASON System, and the final courtroom sequence.
Getting Started — Cartridge, Saves, Edition Notes
Set up the original North American Nintendo DS release of Apollo Justice: Ace Attorney and establish a safe saving routine before beginning Turnabout Trump. The DS edition uses two physical screens, stylus input, button controls, and occasional microphone functions. Its save system is built around one active in-game save, so the safest normal routine is to preserve a deliberate point before each courtroom segment and reload that point after a failed attempt rather than saving over it.
1. Confirm the release and hardware
The target edition is Apollo Justice: Ace Attorney for Nintendo DS, released in North America on February 19, 2008. This is the original DS-format release, not the later mobile edition, Nintendo 3DS release, or Apollo Justice: Ace Attorney Trilogy. Capcom’s North American announcement gives the February 19, 2008 arrival date, correcting the earlier inventory date of April 12, 2007, which does not represent the North American localized release.
A genuine DS-format session presents two physical screens, with the lower Touch Screen handling most menus, investigation commands, evidence selection, and special interactions. The cartridge can run on compatible DS-family hardware, including Nintendo DS, Nintendo DS Lite, Nintendo DSi, and compatible Nintendo 3DS systems, but the host system does not change the game into a later port. Continue to follow the original DS interface whenever the cartridge is being used.
- The title screen identifies Apollo Justice: Ace Attorney.
- The game is running from the original Nintendo DS-format release.
- Two DS screens are visible, with the lower screen accepting stylus input.
- The microphone opening is unobstructed if a voice or sound prompt appears.
2. Start the game and use the Save Screen
Insert the Game Card while the DS system is turned off, start the system, and select the game from the DS menu. From the title screen, begin a new game if no progress exists, or continue the existing file if you are returning to a campaign already in progress.
During a normal playable investigation or courtroom scene, press START. The original instruction manual identifies START as the command that opens the Save Screen. Follow the on-screen save prompt and confirm the operation. Saving is available during the campaign and records the current point so that you can leave and later resume from that position.
Wait until the save operation has finished before closing the software or powering down the system. Do not interrupt the DS while it is writing the save data. Use the Save Screen during a stable scene rather than trying to save during a transition, automatic dialogue sequence, or other moment when the game is not accepting normal commands.
- Press START during a playable scene.
- Choose the save command on the Save Screen and confirm it.
- Wait for the save operation to finish before turning off the system.
- Resume later by loading the existing campaign rather than selecting New Game.
3. Treat the cartridge as one active save
The original DS release should be treated as having one active in-game save location. It is not a multi-slot system with separate ordinary files for the beginning of a case, the middle of a trial, and the end of an episode. Each new save updates the same campaign position.
Do not begin a new game to create a second branch. Doing so can replace the progress represented by the existing file. If you want a second recovery point, it must be maintained outside the game’s own menus. Depending on your equipment, that may involve a legally supported cartridge save-backup device or a normal emulator save-file copy. A separate cartridge is only a separate copy of the game hardware; it does not duplicate the save stored on the first cartridge. External backup reliability depends on the device or emulator, so treat it as an optional safeguard rather than part of the DS game’s built-in save system.
- Assume there is one active DS save.
- Never use New Game as a method of creating another ordinary file.
- Protect an important position externally only if your hardware or emulator supports a reliable, lawful save backup.
- Remember that every later in-game save replaces the previous position.
4. Create a useful pre-trial recovery point
Before entering a new courtroom segment, complete the mandatory investigation work currently available. Examine the relevant scene, talk through every available required topic, move to each newly opened location, and present or inspect evidence whenever the game directs you to do so. When the investigation has reached the point where court is the next objective, press START and save.
Label the position for yourself with a short note such as “Turnabout Trump, before court” or “Case 2, investigation complete.” The game itself does not provide multiple named branches, so the note helps you remember what the single file contains. Keep that pre-trial position intact until the courtroom segment is safely completed. If you save afterward, the file will move forward and the earlier recovery point will no longer be available through the normal game menus.
- Finish the mandatory investigation tasks before saving.
- Record the case and immediate objective represented by the file.
- Save immediately before the courtroom section when practical.
- Avoid overwriting the pre-trial point until the trial segment is complete.
5. Recover from a bad trial attempt
A single mistake does not always require a restart. If the judge’s patience remains healthy, continue carefully and use the Court Record rather than guessing. If several wrong presentations have reduced the health gauge, or you have selected an incorrect answer and want to avoid repeating the damaged attempt, stop experimenting with random evidence.
Write down the testimony line, question, or answer that caused the problem. Then restart the software without saving over the deliberate pre-trial position. When the game offers the existing campaign, continue from that saved file instead of selecting New Game. You will repeat the section after the save, but the completed investigation work will remain intact.
Do not save merely to exit after a failed courtroom attempt if you intend to retry from before court. Saving at that moment replaces the useful recovery position with the current trial state. Reload first, then use the Court Record and the relevant testimony more deliberately.
- Note the failed testimony line or question.
- Do not save after an attempt you intend to abandon.
- Reload the pre-trial save instead of starting a new game.
- Use the failure note to avoid repeating the same presentation.
6. Test the DS controls and microphone
The original manual supports complete Touch Screen play as well as button controls. The Control Pad moves the cursor and highlights choices. A confirms or advances, B cancels or returns, L presses a witness during cross-examination, and R opens the Court Record or presents evidence in the applicable courtroom context. X selects evidence and confirms a Perceive point when the game calls for it. START opens the Save Screen.
Y toggles microphone input when the microphone icon is displayed. In supported moments, holding Y allows the game to recognize commands such as “Objection!” or “Hold it!” The microphone is an input option, not a reason to assume every courtroom action requires spoken commands. When the game provides a normal on-screen or button-controlled alternative, use that if microphone recognition is unreliable.
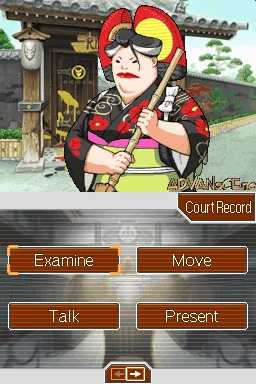
Use the stylus to select investigation commands such as Examine, Move, Talk, and Present; choose testimony statements; open the Court Record; and interact with evidence or special scenes. Test stylus taps on an ordinary menu before starting the campaign. If a later investigation asks for sound or breath through the microphone, keep the opening clear and follow the prompt shown by the game.
- Verify that stylus taps register accurately.
- Test A, B, X, Y, L, R, the Control Pad, and START.
- Confirm that Y activates microphone input when the microphone icon appears.
- Use button or Touch Screen commands when microphone recognition is inconvenient.
7. Keep later editions separate
Later mobile, Nintendo 3DS, and Apollo Justice: Ace Attorney Trilogy releases preserve the same four-case campaign but do not reproduce the original DS experience exactly. Their display layouts, artwork treatment, input methods, audio presentation, and menu arrangements can differ. The Trilogy in particular adds modern presentation and control features that are not part of the original cartridge.
For this DS edition, follow the physical two-screen layout, the DS button mapping, and the Touch Screen prompts. Do not assume that a command, menu arrangement, save convenience, or input option seen in a later release exists on the Nintendo DS cartridge. Likewise, do not treat the presence of the game on newer hardware as proof that you are playing the original edition.
- The session uses the original two-screen DS presentation.
- You are following DS button and Touch Screen prompts.
- You understand that later ports may rearrange menus and controls.
- You are not applying modern port features to the cartridge version.
Before you move on
- The game is confirmed as the North American Nintendo DS release dated February 19, 2008.
- A first save has been created through START on the Save Screen.
- You understand that the cartridge has one active in-game save location.
- A pre-trial routine is established: finish mandatory investigation work, save before court, and avoid overwriting that point during a failed attempt.
- Stylus, button, and microphone behavior have been tested before beginning the campaign.
- You can restart the software and continue from the deliberate save without selecting New Game.
References for this chapter
- Apollo Justice: Ace Attorney — Nintendo DS Instruction Manual
- Capcom News: New Ace Attorney Apollo Justice Keychain
- Apollo Justice: Ace Attorney — Nintendo DS Instruction Manual transcription
- Apollo Justice: Ace Attorney Controls — StrategyWiki
- Apollo Justice: Ace Attorney — Turnabout Corner walkthrough and investigation structure, StrategyWiki
Controls & Core Systems — Touchscreen, Microphone, Perceive, and Selected 3-D Evidence
The original North American Nintendo DS release of Apollo Justice: Ace Attorney can be played almost entirely with the stylus, but its button controls are useful and reliable. Learn the investigation commands first, then separate ordinary courtroom actions from Apollo’s Perceive ability and from the selected evidence inspections that use 3-D models. These systems are connected to specific story moments rather than being interchangeable modes. The game includes eligible 3-D evidence views and a specific courtroom reconstruction in Turnabout Trump; it does not provide a universal free-roaming crime-scene mode.
1. Learn the Nintendo DS controls and touchscreen layout
The lower screen contains the active commands. Tap a command, destination, testimony statement, Court Record category, or evidence item with the stylus. The upper screen normally displays the scene, dialogue, witness, or courtroom action. The game can be completed with touch controls, but the buttons are useful when you want to advance text or select commands without covering the lower screen with the stylus.
The Control Pad moves a cursor, highlights choices, browses the Court Record, and changes the viewing position during supported Perceive sequences. A confirms a choice, advances text, or confirms an examination. B cancels a selection or returns to the previous screen. R opens the Court Record in most situations and leads to evidence selection when Present is active. L presses the currently selected testimony statement in court. Start opens the Save Screen.
X and Y are context-sensitive. X selects evidence or confirms a Perceive point, and it can perform other story-specific actions shown by the interface. Holding Y activates microphone input when the game displays a supported microphone prompt; in evidence views it can also perform the displayed zoom-out function. Always use the on-screen label when a control appears to have a different function in the current scene.
The Court Record contains evidence and profiles. Use the Court Record switch at the top-right of the touchscreen, or the corresponding button command, to change between those categories. Do not assume that every button has the same function in Investigation, Trial, Perceive, and evidence-inspection screens.
- Use the stylus to tap the command currently displayed on the lower screen.
- Use the Control Pad and A to highlight and confirm choices.
- Use B to cancel or return.
- Use R to open or browse the Court Record.
- Use L to Press during testimony.
- Press Start to open the Save Screen.
2. Use the four investigation commands in sequence
Investigation scenes normally provide Examine, Move, Talk, and Present. Examine searches the current location for objects and clues. Move opens the available destination list. Talk reveals the subjects currently available for the person at the location. Present shows an evidence item or profile to that person.
When entering a newly available location, examine the entire visible scene before leaving. Tap likely objects as well as small details near the edges of the screen. Some wide scenes allow the view to shift horizontally with L or the on-screen arrows; this is a scene-view function, not movement through the investigation map. If the view can shift, inspect both sides before deciding that nothing remains.
After examining an important object, speak to the nearby character again. New Talk topics can appear after an examination, a location change, or the presentation of a relevant profile or piece of evidence. If a character refuses to discuss a subject, revisit the available locations and examine the newest objects rather than repeatedly presenting unrelated evidence.
Present is usually used when the story gives you a reason to test a person’s statement, identity, knowledge, or connection to the case. Random presentations may produce optional dialogue, but they are not a substitute for examining the scene and exhausting the available Talk list. If progress stops, return to the latest crime scene, check every visible point, review the Court Record, and revisit locations that became available after the last major discovery.
- Use Examine on the whole visible scene.
- Shift a wide scene when the interface provides a left or right view.
- Use Talk until the available subjects are exhausted.
- Present relevant evidence or profiles when prompted by the investigation.
- Revisit earlier locations after a new clue changes the case.
3. Read testimony before choosing Press or Present
During a cross-examination, the witness’s account is divided into numbered statements. Press questions the selected statement and may add detail, create a new statement, or cause the witness to revise the testimony. Present challenges the selected statement with evidence or a profile from the Court Record.
Read the complete testimony before acting. A suspicious-sounding statement is not always the one that must be contradicted, and some contradictions become clear only after Press changes the testimony. Pressing is generally the safe first step when you need more information. When a statement is revised or added, read the new version carefully before opening the Court Record.
Present only an item that directly addresses the claim on screen. A wrong presentation or incorrect courtroom answer reduces the judge’s patience. If the health gauge is already low, stop experimenting and reload a useful save rather than spending the remaining margin on unrelated evidence. Save before a difficult presentation when the game gives you a convenient opportunity.
The microphone is optional for supported courtroom commands. When the microphone icon appears, hold Y and speak toward the DS microphone using the requested phrase, such as Objection or Hold it. The same command can be activated through the button or touchscreen interface, so voice-recognition failure is not itself a progression lock. Some investigation examinations also use the microphone for a story-specific prompt, such as blowing on fingerprint powder. Follow the prompt shown by that particular sequence rather than assuming microphone input is required throughout the game.
- Read every statement in the current testimony.
- Press when you need the witness to explain or revise a claim.
- Present evidence against the exact statement that it contradicts.
- Use the displayed button or touchscreen command if microphone recognition fails.
- Reload when repeated errors have nearly exhausted the judge’s patience.
4. Activate Perceive only at designated testimony moments
Perceive is Apollo’s special ability for finding a nervous habit when ordinary testimony does not yet reveal a direct contradiction. It is available only during selected cross-examinations and only when the bracelet or Perceive command appears. It is not an investigation command and cannot be used freely while speaking to characters.
When Perceive becomes available, activate it from the touchscreen or with the corresponding displayed control. The witness’s testimony continues while the lower screen provides a closer view that you can scan with the stylus or Control Pad. Watch the entire statement. The relevant tell may be a hand movement, facial change, eye movement, sweat, posture shift, or another conspicuous action.
The correct solution has two parts: the physical tell must occur at the correct body area, and it must occur while the witness reaches the relevant phrase. Perceive does not automatically highlight the lie or mark every unusual motion. Move the focus to the area showing the tell and confirm it with the on-screen command or X when the interface requests confirmation. If the attempt fails, replay the statement and watch for the movement at the precise phrase rather than selecting random points.
A successful Perceive sequence usually produces a new observation, evidence connection, or testimony change. Continue reading the resulting dialogue. Finding the nervous habit is not always the final courtroom response; the game may next ask you to present evidence, answer a question, or address the revised testimony.
- Wait until the bracelet or Perceive command is active.
- Watch the witness while the designated statement is spoken.
- Match the physical movement to the exact phrase that triggers it.
- Focus on the body area showing the tell.
- Follow the new testimony or evidence prompt after a successful Perceive.
5. Inspect eligible 3-D evidence and the specific courtroom reconstruction
Some evidence in the DS release can be examined in a 3-D viewer. Select the item in the Court Record and choose Check when that option is available. The lower screen then provides the inspection controls. Use the stylus controls, and use the Control Pad or the displayed zoom buttons when supported. The exact available actions depend on the evidence item.
Rotate and zoom the object far enough to inspect surfaces that are not visible from the initial angle. Check the front, back, sides, underside, interior, or other highlighted areas when the item permits those views. Important details can include a mark, fingerprint location, damage, writing, a card, or an object’s orientation. When the cursor or Examine command identifies a detail, inspect it before leaving the viewer.
Apollo Justice also presents a specific courtroom reconstruction in Turnabout Trump. Treat that sequence as a focused story examination with a defined objective. Follow the prompts, rotate the displayed object or scene as instructed, and inspect the relevant hidden position or detail. The result is a fact or updated evidence entry used by the current courtroom argument.
These inspections are not a universal Crime Recreation Mode. Most investigation locations are ordinary 2-D scenes, and only selected evidence or story sequences use 3-D examination. Do not search every location for a rotatable model. When a guide or testimony refers to a model, use the Court Record’s Check command or follow the reconstruction interface that the story has explicitly opened.
- Open the Court Record and choose Check only when the evidence offers that option.
- Rotate and zoom the eligible object using the available touchscreen or button controls.
- Inspect hidden sides, undersides, interiors, and highlighted marks when possible.
- Complete the specific Turnabout Trump courtroom reconstruction when it appears.
- Use the fact revealed by the inspection in the testimony or evidence prompt that follows.
Before you move on
- You can use Examine, Move, Talk, and Present in Investigation mode with the stylus or the displayed button controls.
- You know how to shift a supported wide investigation scene and understand that L is not a map-movement command.
- You can read a full testimony, Press for clarification, and Present evidence against the correct statement.
- You can activate Perceive only when the bracelet command is available, observe the witness, and confirm the tell at the matching phrase.
- You can identify eligible evidence in the Court Record, choose Check, rotate or zoom the model, and inspect hidden details.
- You can distinguish ordinary investigation, Perceive, eligible 3-D evidence inspection, and the specific Turnabout Trump courtroom reconstruction.
- You understand that each discovered clue must be connected to the testimony, evidence, or question currently being tested.
References for this chapter
- Apollo Justice: Ace Attorney — Nintendo DS Instruction Manual
- Apollo Justice: Ace Attorney — Nintendo DS Instruction Manual transcription
- Apollo Justice: Ace Attorney - Guide and Walkthrough by Burner
- Apollo Justice: Ace Attorney — Guide and Walkthrough by Xcarvengerx
- Apollo Justice: Ace Attorney Controls — StrategyWiki
Courtroom Basics — Objections, Presenting Evidence, Judge Patience
Courtroom progress in Apollo Justice: Ace Attorney depends on reading each testimony carefully, deciding whether to press for more information or present a direct contradiction, and preserving the Judge’s patience meter. On the original Nintendo DS release, the stylus is the clearest control method, but the D-pad and buttons provide reliable alternatives. The microphone can activate voice commands, yet it is optional: every required courtroom action can be performed through the touch screen and standard controls.
1. Prepare before the cross-examination
Before entering a trial segment, save with the Start button whenever the game permits it. The DS version allows saving during the middle of a chapter, so use that opportunity before a major courtroom sequence or after an investigation has supplied important evidence. If a presentation ends the trial, reloading a recent save is safer than spending the remaining patience meter testing guesses.
Open the Court Record and read the descriptions of newly obtained evidence and profiles. Pay attention to updated descriptions after an item has been examined in three dimensions or used during an investigation. A photograph, report, diagram, or object may become useful only after the game has added a specific detail to its description. The fact that an item belongs to the current case does not make it the correct response to every statement.
During a cross-examination, the testimony is displayed one statement at a time. Use the arrows on the touch screen to move backward and forward through statements. You can review the testimony repeatedly, so do not present evidence simply because a line sounds suspicious. First determine what the witness has actually claimed and which established fact disproves it.
- Save before a major trial segment when the Start save screen is available.
- Review new evidence, profiles, and updated item descriptions.
- Read the complete testimony before committing to a presentation.
2. Choose Press when the testimony needs clarification
Press questions the witness about the highlighted statement. On the DS, touch Press or press L. Pressing commonly reveals an additional fact, causes the witness to expand the statement, or replaces the testimony with a revised version. It is therefore the normal first response when you see an unexplained detail but cannot yet prove that the statement is false.
Pressing is not always mandatory, and it is not always harmless. Some courtroom exchanges warn that unnecessary questioning will be penalized or ask you to choose whether to press further. Follow the explicit prompt instead of automatically pressing again. In other exchanges, pressing creates a new statement that becomes the actual target for Present. If the testimony changes, reread the entire revised sequence before acting.
A useful safe pattern is: press the questionable statement once, read the new information, then decide whether the added statement creates a direct contradiction. If pressing produces no new testimony and the statement is already contradicted by a specific Court Record item, present that item instead.
- Use L or the on-screen Press command to question the highlighted statement.
- Read any added or revised statement before choosing another action.
- Stop pressing when the game warns that further questioning has a cost.
3. Choose Present only when the contradiction is specific
Present is used when a statement conflicts with a particular piece of evidence or profile. Touch Present, or use R to open the Court Record during a cross-examination. Select the relevant item, then confirm through the active on-screen Present command. The exact button prompt can vary with the current screen; do not assume that X is the universal confirmation button for every Court Record menu. On the DS, X is associated with the active Present function in court and with confirming a Perceive point, while A commonly confirms or advances ordinary selections.
The evidence must contradict the highlighted statement itself. An item that merely concerns the same victim, witness, location, or event is not enough. Match the wording of the testimony to the evidence’s confirmed detail. For example, if the witness claims that an object was in a particular position, use a photograph or scene record that establishes a different position. If the game asks you to point out a contradiction in an image, select the exact area requested on the touch screen rather than presenting the photograph without marking the detail.
Some court prompts ask for a profile, a piece of evidence, an answer to a question, or a location within a picture. These are all forms of the same principle: establish the fact the court is asking about, then choose the Court Record entry or screen location that proves it. Do not choose an item merely because it was collected recently.
- R opens the Court Record during a cross-examination.
- Select the evidence that disproves the highlighted statement, not a related item.
- When a picture must be examined, mark the precise contradictory detail.
4. Protect the Judge’s patience meter
The green health-style meter represents the Judge’s patience. Incorrect evidence presentations and wrong courtroom answers reduce it, and the size of the penalty depends on the mistake. If the meter reaches zero, the current trial attempt ends and you must retry from the game’s available restart or save point.
A small penalty does not require an immediate reset, but it should change your approach. Stop making guesses, reread the testimony, inspect the relevant evidence, and consider whether an earlier statement should have been pressed first. The game often expects a particular order: Press to expose a missing detail, allow the witness to revise the account, and then Present the evidence against the revised version.
If you have already lost patience and are no longer certain of the next response, reload the save made before the courtroom sequence. This is especially valuable before a long chain of cross-examinations. Do not waste the remaining meter by cycling through unrelated evidence; there is no benefit to proving that an item is merely irrelevant.
- Treat the patience meter as a limited resource.
- After a penalty, reassess instead of immediately trying another item.
- Reload a pre-trial or pre-segment save when continued guessing is unsafe.
5. Use Perceive only when the bracelet is active
Apollo’s bracelet provides a separate courtroom tool called Perceive. When the bracelet icon is active, select it to focus on the witness during the relevant testimony. The game then presents a closer view in which you must watch for a nervous motion or physical tell connected to a particular statement.
Perceive is not a general-purpose lie detector. It does not automatically mark every suspicious movement, and it is unavailable during statements where the game has not placed a relevant tell. Watch the witness through the entire statement and identify the motion that changes or repeats at the meaningful line. Select the tell only when it occurs in the correct context, then follow the resulting prompt, which may require evidence or another courtroom response.
If the bracelet is inactive, return to Press and Present logic. Do not try to force Perceive against a normal testimony line. The game’s active bracelet prompt is the indication that this investigative courtroom tool is currently required.
- Attempt Perceive only when the bracelet icon is active.
- Watch the complete relevant statement before selecting a nervous motion.
- After identifying the tell, follow the new prompt instead of immediately presenting a random item.
6. Use button controls or the microphone
The original DS release supports microphone recognition for courtroom commands. Hold Y when the microphone prompt is available and say the displayed command, such as “Objection!” or “Hold it!” Voice input activates the corresponding courtroom command; it does not replace the need to decide whether the testimony should be pressed or evidence should be presented.
For normal button play, L presses the witness, R opens the Court Record or activates the courtroom Present function, A confirms or advances ordinary selections, B cancels or returns, and the D-pad moves through menus and Court Record entries. The touch screen remains the most consistent method because some actions are represented by touch-only panels or image-selection prompts. If voice recognition fails, use the touch screen or buttons immediately; no required contradiction depends on successful microphone recognition.
The microphone is also used for certain DS investigation activities elsewhere in the game, but that does not change courtroom strategy. Shouting “Objection!” is an alternate input, not a special advantage and not a substitute for selecting the correct evidence.
- Hold Y only when a microphone command is available.
- Use L for Press and R to access the Court Record during court.
- Switch to touch or button controls if voice recognition is unreliable.
Before you move on
- You can review all testimony statements and move backward or forward through them before acting.
- You can distinguish Press, which develops or changes testimony, from Present, which answers a contradiction with a specific Court Record entry.
- You can open the Court Record with R, select the appropriate evidence, and follow the active Present confirmation prompt without relying on voice input.
- You understand that an incorrect presentation or courtroom answer reduces the Judge’s patience and that reaching zero ends the current attempt.
- You can recognize an active bracelet prompt, identify the relevant nervous motion during Perceive, and continue through the resulting courtroom prompt.
- You know to stop guessing after a penalty, recheck the testimony and evidence, and reload a pre-trial save when necessary.
Case 1 — Turnabout Trump (Opening Courtroom Sequence)
Turnabout Trump opens with a guided courtroom sequence instead of a conventional investigation. The game first presents the murder at the Borscht Bowl Club, then places Apollo Justice in court defending Phoenix Wright. This chapter covers the setup, the initial evidence, the Court Record tutorial, and the point where Phoenix’s first testimony is ready to be cross-examined. Stop there and continue with the ordered testimony solutions in chapter ch05.
1. Watch the opening murder and identify the case setup
Let the opening sequence play without skipping unfamiliar dialogue. It shows a poker game at the Borscht Bowl Club ending with Shadi Smith being struck with a bottle. Phoenix Wright is identified as the defendant, and the prosecution presents the poker game as a possible motive because Phoenix was supposedly losing to Smith.
Apollo Justice is then brought into court with Kristoph Gavin. This is Apollo’s first case as a defense attorney, and Kristoph is introduced as his mentor. Winston Payne handles the prosecution, while the judge explains the basic courtroom situation. Trucy Wright is also connected to the case, but the first playable courtroom exchanges concentrate on Apollo, Kristoph, Phoenix, Payne, and the judge.
The opening is designed to establish Apollo’s role and to make Phoenix’s unusual position immediately clear. Phoenix is not acting as the defense attorney here; Apollo must defend him. Read the introductory conversations because they provide the motivation for Apollo’s involvement and explain why Kristoph has him take the lead.
- Allow the opening murder sequence to finish.
- Confirm that Shadi Smith is the victim.
- Recognize Phoenix Wright as the defendant.
- Enter court with Apollo and Kristoph.
- Read the introductory dialogue before advancing through the tutorial.
2. Do not search for an investigation map
There is no free-roaming investigation phase between the opening crime scene and this first courtroom section. Do not wait for a Borscht Bowl Club location screen, a Move menu, or an examination map to appear. Turnabout Trump supplies its initial facts through the opening scenes, the preliminary courtroom exchanges, testimony, and evidence descriptions.
This structure is specific to the opening portion of the episode. Later sections of Turnabout Trump and the other cases use different sequences, so do not treat the absence of an investigation screen as a general rule for the entire game.
When the court introduces a fact or item, read its description in the Court Record before continuing. The early tutorial assumes that you will inspect evidence as it is added, and later testimony solutions depend on details that are easy to miss if you only memorize the item names.
- Proceed directly from the opening scenes into court.
- Do not search for a separate Borscht Bowl Club investigation location.
- Read each new evidence description before advancing.
- Remember that later portions of the game use different investigation structures.
3. Learn the original DS courtroom interface
When Kristoph explains the Court Record, accept the tutorial if this is your first Ace Attorney game or if you are unfamiliar with the Nintendo DS controls. During testimony, Press asks a witness to expand or clarify a statement. Present opens the Court Record so you can choose evidence or a profile to challenge the current testimony.
On the original Nintendo DS release, the Court Record is available through the touch-screen interface and physical controls. Use whichever method is more comfortable, but check the evidence descriptions rather than relying only on the top-screen courtroom text. The touch screen is also used for selecting testimony statements and navigating evidence examinations.
The opening trial teaches the rhythm used throughout the campaign: listen to the complete testimony, press statements when the game or the testimony gives you a reason to probe further, and present evidence only when the contradiction has been established. Do not start making random presentations merely to see what works. Incorrect choices reduce the judge’s patience and can force a reload.
- Distinguish Press from Present.
- Open the Court Record with the stylus or the physical control described by the game.
- Read the full description of each item.
- Use the tutorial explanations before attempting the first contradiction.
- Avoid random evidence presentations.
4. Inspect the evidence available before Phoenix testifies
During the preliminary exchanges, the prosecution introduces the Deadly Bottle as the apparent murder weapon. Open it in the Court Record and inspect both available sides before the testimony begins. The evidence description and the physical view are separate parts of the tutorial, so do not close the examination after viewing only the first side.
Smith’s Autopsy Report and Crime Photo 1 are also available at this stage. Read both descriptions. The autopsy report establishes the medical finding that will matter when the testimony is challenged later, while the photograph records the immediate crime-scene information that the court will compare against witness statements.
The Attorney’s Badge is present as Apollo’s profile item, but it is not the solution to the opening contradiction. Treat it as part of the Court Record and interface tutorial rather than as evidence to present against Phoenix’s testimony.
- Open Deadly Bottle.
- Inspect the front and back of Deadly Bottle.
- Read Smith’s Autopsy Report.
- Read Crime Photo 1.
- Recognize Attorney’s Badge as Apollo’s profile item, not the opening contradiction evidence.
5. Preserve a recovery point before the first cross-examination
Use the game’s available save command before beginning the first testimony if the save prompt or menu is available. The original DS release uses one active in-game save location rather than a collection of ordinary named save slots. Plan around that limitation: save at a deliberate stopping point, and reload the active save if an incorrect presentation causes a serious loss of judge patience.
A safe point immediately before the first testimony is more useful than repeatedly saving after every line. It lets you retry the tutorial cross-examination without replaying the opening scenes, while still preserving the campaign’s current progress. Do not assume that the DS cartridge can preserve several independent courtroom attempts in separate standard slots.
Do not skip dialogue that you have not already read or saved past. The opening case contains tutorial explanations and evidence introductions that are easy to miss when advancing rapidly. If you accidentally advance through an important explanation, reload the active save before guessing at the testimony route.
- Create or update the active save before the first testimony.
- Do not rely on multiple ordinary named save slots.
- Keep a recovery point before experimenting with Press and Present.
- Reload after a major mistake instead of repeatedly sacrificing judge patience.
- Avoid skipping unread tutorial dialogue.
6. Stop at the handoff to chapter ch05
After the judge calls Phoenix to the stand and the game finishes introducing the first testimony, stop before selecting any testimony statement. The correct handoff point is the courtroom screen showing Phoenix’s first testimony with the cross-examination controls available. Apollo is ready to use Press and Present, and the initial evidence is already in the Court Record.
Do not press any statement, present Deadly Bottle, or follow the later Phoenix and Olga testimony route in this chapter. Those actions begin the ordered courtroom solution covered in chapter ch05. Keeping this boundary intact prevents the same evidence and testimony instructions from appearing twice in the assembled guide.
From this point, chapter ch05 begins with the first Phoenix testimony. It will specify which statements to press, when the revised testimony appears, and when to present the required evidence.
- Phoenix has been called to testify.
- The first testimony is visible on the courtroom screen.
- The Press and Present controls are available.
- The Court Record contains the initial evidence.
- Do not select a testimony statement yet.
- Continue with chapter ch05 for the first cross-examination.
Before you move on
- The opening murder at the Borscht Bowl Club has finished.
- Apollo Justice has entered court as Phoenix Wright’s defense attorney.
- Kristoph Gavin and Winston Payne have been introduced in the courtroom.
- The game has explained the Court Record, Press, and Present commands.
- Deadly Bottle has been added, opened, and inspected from both sides.
- Smith’s Autopsy Report and Crime Photo 1 have been read.
- A deliberate active save has been made before the first testimony, where possible.
- Phoenix Wright has been called to the witness stand.
- Phoenix’s first testimony is visible and ready for cross-examination.
- No testimony statement has been pressed and no evidence has been presented; chapter ch05 begins at this exact position.
References for this chapter
Case 1 — Turnabout Trump: Trial Strategy and Key Contradictions
Continue from the opening courtroom sequence in Turnabout Trump. This chapter covers the remaining trial sections, including Phoenix’s testimony, Olga Orly’s contradictions, Apollo’s first Perceive sequence, Phoenix’s revised account, Kristoph Gavin’s testimony, and the story-specific courtroom reconstruction. Follow the order carefully: several testimony revisions appear only after required presses, and some evidence must be examined in the Court Record before the game will accept it. The reconstruction is a single Turnabout Trump sequence, not a permanent Crime Recreation mode. When it ends, continue through the verdict and closing scenes to unlock Turnabout Corner.
1. Finish Phoenix’s first testimony
Phoenix begins with his account of the poker competition. If Kristoph offers a refresher course, choose it if you want the tutorial; choosing No thanks skips it without blocking progress.
During The Competition, press statements 2, 3, and 4. The order does not matter, but all three must be pressed before Phoenix adds the statement that he never touched the murder weapon. Present Deadly Bottle at that added statement.
The contradiction adds Wright’s Cell Phone and Olga’s Photo to the Court Record. Examine the new evidence if desired, but do not spend judge patience presenting unrelated items. Pressing is generally safe here; incorrect evidence presentations reduce the judge’s patience.
- Choose the refresher course or No thanks.
- Press Phoenix’s statements 2, 3, and 4.
- Present Deadly Bottle at the added statement.
- Confirm that Wright’s Cell Phone and Olga’s Photo have been added.
2. Break Olga Orly’s first account
Olga’s first testimony claims that Phoenix attacked and strangled Shadi Smith. Present Smith’s Autopsy Report at the final statement. Crime Photo 2 is then added to the Court Record.
Present Crime Photo 2 at Olga’s third statement, the one describing the victim holding a hand near the locket. This exposes the contradiction and shifts the court’s attention toward the poker game.
During Serious Competition, press the second statement about the two kinds of chips. When asked whether to press harder, choose Press harder. When asked whether Olga should add the information to her testimony, choose Add to testimony. Present Chip Photo at the revised chip statement, then choose Both were right when the court asks how both accounts can be true.
In The Final Hand, press the third statement and present Chip Photo at the revised version. The court asks you to identify the contradiction in the displayed hands. Select the victim’s hand in the upper-right portion of the display, then choose View victim’s hand.
Victim’s Hand is added to the Court Record. Examine it and rotate the cards until their backs are visible. Inspect the blue-backed card. Choose After the murder when asked when it was switched, then choose Someone else when asked who switched it. The trial proceeds to a recess.
- Present Smith’s Autopsy Report at Olga’s final initial statement.
- Present Crime Photo 2 at Olga’s third statement.
- Press the second Serious Competition statement.
- Choose Press harder, then Add to testimony.
- Present Chip Photo at the revised chip statement.
- Choose Both were right.
- Press the third statement in The Final Hand and present Chip Photo at its revision.
- Select the victim’s hand, inspect the blue-backed card, and choose After the murder and Someone else.
3. Perceive Olga’s nervous tell
After the recess, Olga gives The Best Laid Traps testimony. Press statement 4, where she says Phoenix picked up a bottle and swung it. Choose Press harder when prompted. Apollo’s bracelet then becomes available for the Perceive tutorial.
Activate Perceive on the selected statement and watch Olga’s upper body. Her tell is the movement of her hand toward her neck. Select the tell while that movement occurs. Perceive does not automatically mark the correct body part, so watch the animation rather than tapping at random.
Present Deadly Bottle when asked what caused the impression on Olga’s neck. Olga changes her account to claim that Phoenix was responsible and that she never let him out of her sight. Press the revised statement, choose Flawed, and present Wright’s Cell Phone. The phone contradicts her claim that Phoenix remained beside her continuously.
When the court asks who knew the final cards were blue, present Kristoph Gavin’s profile. Choose Hear the testimony when asked whether Phoenix should testify. This starts Phoenix’s second testimony.
- Press Olga’s fourth statement and choose Press harder.
- Perceive the movement of Olga’s hand toward her neck.
- Present Deadly Bottle.
- Press the revised statement and choose Flawed.
- Present Wright’s Cell Phone.
- Present Kristoph Gavin’s profile.
- Choose Hear the testimony.
4. Correct Phoenix’s chronology and obtain Bloody Ace
During Appetite Before Murder, press Phoenix’s third statement, which concerns the failed trap and Smith attacking Olga. Phoenix adds a revised statement explaining that he discovered the trap and disposed of the card in the bottle.
Before presenting the bottle at that revised statement, open the Court Record and examine Deadly Bottle. In the DS evidence viewer, rotate the bottle until the bottom or lower back is visible and inspect that area. Apollo identifies that the bottle is empty. Return to the revised third statement and present Deadly Bottle. Bloody Ace is added to the Court Record.
After that contradiction has been established, present Crime Photo 1 at statement 5, the statement concerning the blood on Smith’s forehead. This advances the trial. Do not begin with Crime Photo 1, and do not present Deadly Bottle before the revised statement appears.
- Press Phoenix’s third statement in Appetite Before Murder.
- Examine Deadly Bottle in the Court Record.
- Rotate it and inspect the bottom or lower back.
- Present Deadly Bottle at Phoenix’s revised third statement.
- Confirm that Bloody Ace has been added.
- Present Crime Photo 1 at statement 5.
5. Expose Kristoph and complete the reconstruction
Kristoph’s testimony, That Fateful Night, describes what he claims to have seen through the Hydeout’s small window. Press statement 5. Choose Show evidence, then present Bloody Ace. This begins the story-specific courtroom reconstruction.
First select the dark-blue V marker for the victim and present it. Touch and hold the victim’s chair, then rotate it as instructed. Select and present the red K marker for the killer. When asked where the killer would need to stand to strike the victim from the front, select and present the dark area directly in front of the victim’s facing direction.
Touch and hold the cupboard and drag it to the left. Select and present the light-blue 2 marker for the second witness. When asked what explains the upside-down fingerprints on the bottle, present Olga’s Photo.
The game then displays a bottle in the evidence viewer. Rotate it until the bottom is visible and inspect it. This is a separate inspection from the earlier Deadly Bottle check.
After the bottle inspection, the court asks for the final proof. Present Bloody Ace. This is the final reconstruction evidence; do not present Attorney’s Badge at this prompt. Continue through the verdict and closing scenes after the presentation is accepted.
- Press Kristoph’s fifth statement and choose Show evidence.
- Present Bloody Ace to begin the reconstruction.
- Present the V marker and rotate the victim’s chair.
- Present the K marker.
- Present the dark area in front of the victim.
- Move the cupboard left.
- Present the 2 marker.
- Present Olga’s Photo.
- Inspect the bottom of the second bottle.
- Present Bloody Ace after the bottle inspection.
- Continue through the verdict and closing scenes.
Before you move on
- Victim’s Hand has been added and its blue-backed card has been examined.
- Olga’s neck tell has been identified through Perceive.
- Wright’s Cell Phone has been presented against Olga’s revised claim.
- Deadly Bottle has been checked from the bottom or lower back and presented at Phoenix’s revised statement.
- Bloody Ace has been added after the bottle presentation.
- Crime Photo 1 has been presented at Phoenix’s later testimony.
- The reconstruction has been completed in the order V, chair rotation, K, attack area, cupboard, and 2.
- Olga’s Photo has explained the upside-down fingerprints.
- The second bottle’s bottom has been examined.
- Bloody Ace has been presented after the second bottle inspection.
- The verdict and closing scenes have played, and Turnabout Corner is available.
References for this chapter
Case 2 — Turnabout Corner (Investigation)
Turnabout Corner’s investigation takes place over two investigation days separated by the first trial segment. The first day links Phoenix’s hit-and-run, Eldoon’s stolen noodle stand, Trucy’s missing magic prop, and the murder in People Park. The second day identifies the relevant footwear, opens Meraktis Clinic, and gathers the medical evidence needed for the final trial sequence. Exhaust every available Talk topic, re-examine updated evidence, and follow the location order below when progression stops.
1. Start at the Wright Talent Agency and Hickfield Clinic
At the Wright Talent Agency, speak with Trucy and exhaust every available topic. The conversation establishes the hit-and-run, Eldoon’s stolen noodle stand, and Trucy’s missing magic prop. You will then move automatically to Hickfield Clinic.
Speak with Phoenix about every available subject. His account of the accident adds the Map to the Court Record and opens the route to the accident scene. Return to the Wright Talent Agency and speak with Guy Eldoon about himself, Eldoon’s Noodles, the stolen stand, and Trucy’s request. Finish the conversation before moving on; this opens the accident and stand-theft locations.
- Finish all of Trucy’s available topics.
- Speak with Phoenix until the Map is added to the Court Record.
- Exhaust Guy Eldoon’s available topics.
- Confirm that Accident Scene and the stand-theft location are available from Move.
2. Search the Accident Scene and the stand-theft location
Move to the Accident Scene and speak with Plum Kitaki about the Kitakis, last night’s accident, and the splattered paint. Use the Look Around control to shift the view to the right. Examine the trash can and take the Mirror, not the slippers. The Mirror is the item needed to identify Phoenix’s hit-and-run car.
Shift the view back and speak with Plum again. Ask about People Park and the private matter. After the brief scene involving the visiting woman, move to the Scene of the Stand Theft, also shown as Eldoon’s House in later location descriptions.
At Eldoon’s House, speak with Eldoon about the noodles, stolen stand, garage, and Meraktis Clinic. Examine the Bowl on the ground and check it if the game offers an inspection. Shift left and examine the police car. The conversation about Meraktis Clinic supplies the route to its garage.
- Discuss the accident and splattered paint with Plum.
- Take the Mirror from the Accident Scene trash can.
- Ask Plum about People Park and the private matter.
- Examine the Bowl at Eldoon’s House.
- Examine the police car and ask Eldoon about Meraktis Clinic.
3. Identify the hit-and-run car
Move to Meraktis Clinic - Garage and examine the green car. Inspect the tailpipe to obtain Trucy’s Panties, then inspect the pink object near the car to obtain the Cell Phone. Examine the broken side-mirror wiring. When the game asks whether to show evidence, present the Mirror. The evidence is updated to confirm that this is the car involved in Phoenix’s accident.
Travel back through the Wright Talent Agency to Hickfield Clinic and speak with Phoenix again. Exhaust his topics about the investigation’s progress, Meraktis Clinic, and People Park. Return to the Wright Talent Agency. Alita Tiala is now present and provides the defense request that moves the murder investigation forward.
- Obtain Trucy’s Panties from the tailpipe.
- Obtain the Cell Phone near the car.
- Present the Mirror at the missing side mirror.
- Speak with Phoenix after identifying the car.
- Speak with Alita when she appears at the agency.
4. Accept Wocky’s defense and reach People Park
Speak with Alita about her request, Tiala’s story, the murder in the park, and her fiancé. Her Letter of Request is added to the Court Record. Move to Kitaki Mansion and show the letter to the officer. The officer still refuses entry, but Klavier Gavin appears and escorts Apollo and Trucy to People Park.
At People Park, show the Letter of Request to Ema Skye. Once she verifies it, speak with her about the available topic. Examine the noodle stand and the nearby scene objects. The full forensic examination is not available yet, so do not treat the lack of new results as a dead end. Return to Hickfield Clinic and speak with Phoenix when the game directs you there.
- Finish Alita’s available topics.
- Obtain the Letter of Request.
- Show the letter to the officer at Kitaki Mansion.
- Let Klavier escort you to People Park.
- Show the letter to Ema and examine the noodle stand.
5. Retrieve the powder and examine the knife
At Hickfield Clinic, speak with Phoenix. He directs you back to the agency to retrieve an item. Return to the Wright Anything Agency and examine the blue magician’s hat in the center of the room. This gives you White Powder.
Return to People Park and present White Powder to Ema. It becomes Fingerprint Powder, and Ema’s remaining topics become available. Speak with Ema about the case and present Guy Eldoon’s profile when requested. This adds the Noodle Stand and Meraktis’s Autopsy Report to the Court Record.
Examine the red trash can to obtain the Bloomers. Then examine the knife beside the police mannequin or statue. Select the dark mark near the blade, cover the indicated area with powder using the stylus, and blow into the DS microphone only when prompted. Compare the revealed print with Wocky Kitaki’s profile. The Knife is updated, and the first investigation day’s forensic requirement is complete.
- Examine the hat and obtain White Powder.
- Present White Powder to Ema so it becomes Fingerprint Powder.
- Present Guy Eldoon’s profile during Ema’s case discussion.
- Obtain the Bloomers from the red trash can.
- Match the knife print with Wocky Kitaki.
6. End Investigation Day 1
After the knife analysis, travel to the Detention Center through the Wright Anything Agency. The scene with Wocky and Winfred Kitaki ends the first investigation day. Wocky is not yet available for his full interview, so do not assume the game is stuck because additional topics are missing. Save after the transition if you want a recovery point before the first trial segment.
- Reach the Detention Center after the knife analysis.
- Allow the Wocky and Winfred scene to finish.
- Do not expect Wocky’s complete questioning until Investigation Day 2.
7. Begin Investigation Day 2
Day 2 begins at the Wright Anything Agency. Speak with Alita and exhaust her available topics. Move to the Detention Center and question Wesley Stickler about every available subject.
Move to Kitaki Mansion and speak with Plum about Wocky, the case, Alita Tiala, and the relationship between father and son. Examine the trash can beside the People Park gate. This is where you obtain the Slippers; they are not the slippers from the first Accident Scene trash can. Inspect the Slippers in 3-D and examine the unusual leaf-shaped mark on the sole. Re-examine the inside when the game permits it to reveal the toe-print detail.
Move to Eldoon’s House and exhaust Eldoon’s new topics, including his past and his connection to Meraktis Clinic. Shift to the side of the screen that leads toward the clinic and attempt to enter. The resulting scene prevents entry for now. Return to the Detention Center and speak with Wocky. Present either the Pistol or the Knife to unlock his additional topic, then ask about the night of the crime.
- Finish Alita’s Day 2 topics.
- Question Wesley Stickler.
- Obtain the Slippers from the Kitaki Mansion trash can.
- Inspect the Slippers’ sole and inside.
- Speak with Eldoon about his past and Meraktis Clinic.
- Present the Pistol or Knife to Wocky and ask about the night of the crime.
8. Complete footprint analysis and enter Meraktis Clinic
Return to Kitaki Mansion and then People Park. Speak with Ema about the new investigation kit and footprint analysis. Follow the DS prompts: cover the selected footprint with plaster, dry the impression, brush away the excess, and compare the result with a profile. Match the first print with Wocky Kitaki.
Analyze the green print in the same way and match it with Wesley Stickler. Analyze the red print, then ask Ema about the Mystery Print. Choose to show evidence and present the Slippers. Their unusual sole mark identifies them as the mystery footwear, and Ema gives you Detective Skye’s Orders.
Return to Eldoon’s House and use the orders to gain access to Meraktis Clinic proper. Examine the blue footwear near the shoe rack to obtain the Sandals. Inspect them to begin the toe-print dusting sequence. Examine the empty place on the slipper rack and the door with the green sign to enter the office.
Inside, examine the Lamp on the floor and the safe beside the large black chair. When asked what can help with the safe, present Fingerprint Powder. Dust the keypad. The most-used digits are 2, 5, 7, and 9, but the first two digits are already entered on the lock. Press 5 and then 2 to open the safe. Do not enter 7952 as a complete code. Examine the envelope to obtain Wocky’s Chart, then examine the hole to obtain the Bullet.
- Match the first footprint with Wocky Kitaki.
- Match the green footprint with Wesley Stickler.
- Present the Slippers for the Mystery Print.
- Obtain Detective Skye’s Orders.
- Obtain and inspect the Sandals.
- Present Fingerprint Powder at the safe.
- Press 5 and then 2 after the pre-entered digits.
- Obtain Wocky’s Chart and the Bullet.
9. Finish the evidence checks and trigger the next trial
Return to People Park and present the Sandals to Ema. Re-examine the Slippers in 3-D and inspect the inside of the left slipper for the toe print. Complete the dusting sequence and present the Slippers when Ema asks for the comparison. The matching toe-print evidence links the two pieces of footwear.
Visit Hickfield Clinic and speak with Phoenix about the past and forged evidence. Then return to the Detention Center. Speak with Wocky and present Wocky’s Chart and the Sandals when those items unlock additional topics. Exhaust the resulting conversation.
Finally, return to Eldoon’s House and present Wocky’s Chart. Speak with Eldoon about Wocky’s chart and Meraktis’s dilemma. Once those topics are complete, the investigation is finished and the game advances to the next Turnabout Corner courtroom segment.
- Complete the Sandals and Slippers toe-print comparison.
- Speak with Phoenix about the past and forged evidence.
- Show Wocky’s Chart and the Sandals to Wocky.
- Show Wocky’s Chart to Eldoon.
- Finish Eldoon’s topics about Wocky’s chart and Meraktis’s dilemma.
- Confirm that the Day 3 trial begins.
Before you move on
- The Court Record contains the Map, Mirror, Bowl, Cell Phone, Trucy’s Panties, Letter of Request, Fingerprint Powder, Noodle Stand, Meraktis’s Autopsy Report, Bloomers, Knife, Slippers, Sandals, Detective Skye’s Orders, Lamp, Wocky’s Chart, and Bullet.
- The knife fingerprint has been matched with Wocky Kitaki.
- The first footprint has been matched with Wocky Kitaki and the green footprint has been matched with Wesley Stickler.
- The Slippers’ sole mark and inside toe print have been examined.
- Meraktis Clinic has been opened using Detective Skye’s Orders.
- The safe has been opened by pressing 5 and then 2 after the pre-entered digits.
- Wocky’s Chart and the Sandals have been shown to Wocky, and Wocky’s Chart has been shown to Eldoon.
- Eldoon’s topics about Wocky’s chart and Meraktis’s dilemma are complete.
- The game transitions into the next courtroom segment of Turnabout Corner.
References for this chapter
- Apollo Justice: Ace Attorney — Nintendo DS Instruction Manual
- Apollo Justice: Ace Attorney — Turnabout Corner walkthrough and investigation structure, StrategyWiki
- Apollo Justice: Ace Attorney — Spoiler-Free Walkthrough Guide
- Apollo Justice: Ace Attorney - Guide and Walkthrough by Burner
- Apollo Justice: Ace Attorney — Guide and Walkthrough by cyelz
Case 2 — Turnabout Corner (Complete Trial Sequence)
Turnabout Corner has two courtroom sections separated by an investigation. The first section establishes that Wesley Stickler’s account of the shooting cannot be true and exposes his crimes as a witness. The investigation then supplies the medical, ballistic, footwear, and chart evidence needed to challenge Alita Tiala. The final courtroom section reconstructs the shooting at People Park and ends with Wocky Kitaki’s Not Guilty verdict. The People Park diagram is a case-specific courtroom selection, not a universal Crime Recreation mode.
1. Press Wocky’s testimony and obtain the Check-Up Report
The first courtroom section begins with Wocky Kitaki’s Truth. Press statement 3, statement 4, and statement 5 in that order. You do not need to press the other statements for progression, and you should not present evidence during this testimony.
After the third required press, Wocky’s Check-Up Report is added to the Court Record. This report documents the earlier operation and explains why Wocky had a motive to confront Pal Meraktis, but motive alone does not establish that Wocky fired the fatal shot.
The court then calls Wesley Stickler. His account must be tested against the autopsy report, the Pistol, the Knife, and the later scene evidence.
- Press Wocky’s Truth statement 3.
- Press statement 4.
- Press statement 5.
- Confirm that Wocky’s Check-Up Report is added.
- Do not present evidence during Wocky’s Truth.
2. Contradict Stickler’s first two testimonies
Stickler first gives A Night in the Park. The Pistol is added during this testimony. Present Meraktis’s Autopsy Report against statement 5, where Stickler claims that the bullet struck Meraktis in the forehead from the front. The autopsy contradicts that description by placing the entry wound at Meraktis’s right temple.
Stickler revises his account as A Night in the Park 2. Present the Pistol against statement 5, where he says that the killer tossed the pistol aside before fleeing. When the court asks whether the killer could have been wearing gloves, choose No way.
The judge then asks what the killer threw away. Present the Knife. This sequence establishes that Stickler’s description of the discarded weapon does not match the weapon evidence and moves the testimony toward the correct account.
- Present Meraktis’s Autopsy Report against statement 5 of A Night in the Park.
- Present the Pistol against statement 5 of A Night in the Park 2.
- Choose No way when asked whether the killer wore gloves.
- Present the Knife when asked what the killer threw away.
3. Complete From Shot to Call and use Perceive
Stickler next gives From Shot to Call. Press statements 1, 2, 3, and 4. When Apollo is asked whether he should continue despite the danger, choose Yes. The courtroom section then pauses for the events involving Trucy and resumes later.
When From Shot to Call is presented again, press statement 3, the line about using a cell phone. Activate Apollo’s bracelet when it becomes available. Focus on Stickler’s right hand at the corner of his book and watch for the finger movement while he says that he used his cell phone. Trigger Perceive at the moving tell and confirm it.
When Apollo asks what he should request, either Ask for his number or Ask to see his phone can advance the sequence. When asked whether the defense can prove that the phone was dropped on the night of the murder, choose Show evidence and present the Mirror. The broken mirror links Stickler’s phone to the relevant night and forces the next testimony.
- Press all four statements in the first From Shot to Call testimony.
- Choose Yes when Apollo is asked whether he should continue.
- In the repeated testimony, press statement 3.
- Perceive Stickler’s fingers at the corner of his book.
- Choose either available phone-related request.
- Choose Show evidence.
- Present the Mirror.
4. Expose Stickler’s position at People Park
In Stickler’s Truth, press statement 4. When Apollo is asked whether to press him about the killer, victim, or stand, choose The noodle stand. When asked whether the sign is important, choose Very important.
A new statement is added claiming that the stand’s sign read NOODLE. Present the Noodle Stand against that added statement. When asked how Stickler saw the sign, choose ...and he saw it right.
The court displays the ordinary People Park diagram. Select any area in the upper half of the diagram other than the river, then present the selection. Do not restrict yourself to one exact point north of the stand; any valid upper-half location away from the river satisfies this step.
When asked whether to accuse Stickler, choose Accuse of another crime. Present Trucy’s Panties when asked for evidence of his involvement, then present Bloomers when asked why he lied about his location. The evidence exposes his thefts and undermines his credibility, but this section ends with an adjournment rather than Wocky’s verdict.
- Press statement 4 of Stickler’s Truth.
- Choose The noodle stand.
- Choose Very important.
- Present the Noodle Stand against the added NOODLE statement.
- Choose ...and he saw it right.
- Select any area in the upper half of the People Park diagram other than the river.
- Choose Accuse of another crime.
- Present Trucy’s Panties.
- Present Bloomers.
5. Finish the investigation before the final courtroom section
After the adjournment, complete the Day 2 investigation before expecting the final courtroom section. At Kitaki Mansion, examine the trash can to obtain Slippers. At Meraktis Clinic, inspect the office evidence, including the envelope and the hole above it, to obtain Wocky’s Chart and the Bullet.
At People Park, inspect the Slippers and the Sandals in the Court Record. Rotate and zoom them as needed, examine the relevant dark marks, and complete the fingerprint analysis. Present the Slippers to Ema, choose Got one right here, and present the Sandals for comparison. The evidence then updates to Alita’s Sandals.
Return to the Detention Center and present Alita’s Sandals to Wocky, then present Wocky’s Chart. Complete his available conversation. Finally, present Wocky’s Chart to Guy Eldoon and finish the resulting discussion. These investigation steps unlock the final trial route.
- Obtain Slippers from the Kitaki Mansion trash can.
- Obtain Wocky’s Chart and the Bullet at Meraktis Clinic.
- Inspect the relevant marks on the Slippers and Sandals.
- Present Slippers to Ema and compare them with Sandals.
- Confirm the update to Alita’s Sandals.
- Present Alita’s Sandals and Wocky’s Chart to Wocky.
- Present Wocky’s Chart to Eldoon and complete the discussion.
6. Challenge Alita’s first two courtroom accounts
The final courtroom section begins with Wocky’s Plan. Press statement 5. When asked whether someone else could have used the pistol, choose There was another. Present Alita Tiala’s profile, then Wocky’s Chart, and finally Alita’s Sandals.
Alita then gives The Meraktis Clinic. Present Wocky’s Chart against statement 4. The statement changes and Apollo’s bracelet becomes available. Perceive the ring on Alita’s left hand when it moves during the phrase about going to the clinic now. After the Perceive sequence, present Wocky’s Check-Up Report.
A new statement is added. Present the Bullet against that revised statement. This connects Alita’s demand for the medical chart with the bullet recovered from the clinic.
In The Meraktis Clinic 2, press statement 5 and choose Someplace else. On the scene display, select the black area immediately to the right of the victim, inside the cart area, then present it. Choose Well, I’ve got it! when asked whether you can prove someone was in the stand. Present Slippers, followed by Bowl.
- Press statement 5 of Wocky’s Plan.
- Choose There was another.
- Present Alita Tiala’s profile, Wocky’s Chart, and Alita’s Sandals in that order.
- Present Wocky’s Chart against statement 4 of The Meraktis Clinic.
- Perceive the ring on Alita’s left hand.
- Present Wocky’s Check-Up Report.
- Present the Bullet against the revised statement.
- Press statement 5 of The Meraktis Clinic 2.
- Choose Someplace else.
- Select the black area immediately to the right of the victim.
- Choose Well, I’ve got it!
- Present Slippers, then Bowl.
7. Finish Tiala’s Explanation and obtain the verdict
In Tiala’s Explanation, activate Perceive at statement 5. Focus on Alita’s right hand near her neck and scarf, and trigger Perceive when it moves during the line claiming that she only talked to Meraktis.
Present the Lamp, then present the Noodle Stand. When the court asks where Meraktis was dragging the stand, point to the river on the left side of the diagram and present the selection. Choose The car didn’t run when asked to explain what happened that night.
Present Trucy’s Panties when asked why the car would not run. The scene evidence then supports the reconstruction that separates Alita’s actions from Wocky’s presence at the park. When Apollo is asked why Wocky is trying to become a businessman, present Wocky’s Chart.
The court then reaches Wocky’s Not Guilty verdict and the game advances to Turnabout Serenade.
- Perceive Alita’s right hand near her neck at statement 5.
- Present the Lamp.
- Present the Noodle Stand.
- Select the river on the left side of the map.
- Choose The car didn’t run.
- Present Trucy’s Panties.
- Present Wocky’s Chart at the closing prompt.
- Confirm Wocky’s Not Guilty verdict and advance to Turnabout Serenade.
8. Recover safely from mistakes
Wrong evidence or an incorrect answer reduces the judge’s patience. If a mistake leaves too little margin for the rest of the testimony, reload rather than guessing through the remaining prompts. The original Nintendo DS release has one active in-game save location, so use a deliberate save before a courtroom section or investigation transition only when you are comfortable replacing the current recovery point.
For the first courtroom section, the reliable order is Press Wocky’s Truth statements 3, 4, and 5; present the Autopsy Report; present the Pistol; choose No way; present the Knife; press all four From Shot to Call statements and choose Yes; then complete the repeated Perceive sequence, Mirror presentation, Noodle Stand presentation, upper-half People Park selection away from the river, Trucy’s Panties, and Bloomers.
For the final courtroom section, preserve the order of the Alita route: Wocky’s Plan, The Meraktis Clinic, The Meraktis Clinic 2, and Tiala’s Explanation. If the final trial does not unlock, return to the Day 2 investigation locations and recheck Wocky, Ema, Eldoon, Meraktis Clinic, People Park, and Kitaki Mansion for unfinished dialogue, examination, or evidence presentation.
- Reload after a costly judge-patience penalty instead of brute-forcing the rest of the trial.
- Use the corrected Wocky press order: 3, 4, and 5.
- Use any valid upper-half People Park position other than the river.
- Do not treat the adjournment as Wocky’s verdict.
- Recheck investigation dialogue and evidence presentations if the final trial does not begin.
Before you move on
- Wocky’s Check-Up Report is added after pressing Wocky’s Truth statements 3, 4, and 5.
- Meraktis’s Autopsy Report contradicts Stickler’s forehead claim.
- The Pistol is presented against statement 5 of A Night in the Park 2.
- No way is selected when the court asks whether Wocky’s accuser could have worn gloves.
- The Knife is presented when the court asks what the killer threw away.
- The first From Shot to Call testimony is fully pressed and Yes is selected.
- Stickler’s repeated cell-phone testimony is perceived at the finger movement on his book hand.
- Ask for his number or Ask to see his phone is selected, followed by Show evidence and the Mirror.
- The Noodle Stand is presented against the added NOODLE statement.
- The People Park diagram is solved by selecting any upper-half area other than the river.
- Trucy’s Panties and Bloomers are presented after Accuse of another crime.
- The investigation supplies Wocky’s Chart, Bullet, Slippers, and the updated Alita’s Sandals.
- Wocky’s Plan is resolved with statement 5, There was another, Alita Tiala’s profile, Wocky’s Chart, and Alita’s Sandals.
- The Meraktis Clinic testimony uses Wocky’s Chart, Perceive on Alita’s ring, Wocky’s Check-Up Report, and Bullet.
- The Meraktis Clinic 2 testimony uses Someplace else, the black area immediately to the right of the victim, Well, I’ve got it!, Slippers, and Bowl.
- Tiala’s Explanation uses Perceive on the hand near Alita’s neck, Lamp, Noodle Stand, the river-side map area, The car didn’t run, and Trucy’s Panties.
- Wocky’s Chart is presented at the closing prompt.
- Wocky receives the final Not Guilty verdict and the game advances to Turnabout Serenade.
References for this chapter
- Apollo Justice: Ace Attorney — Guide and Walkthrough by Xcarvengerx
- Apollo Justice: Ace Attorney - Guide and Walkthrough by Burner
- Apollo Justice: Ace Attorney - Guide and Walkthrough by DarkstarRipclaw
- Apollo Justice: Ace Attorney — Game Script, DS
- Apollo Justice: Ace Attorney — Nintendo DS Instruction Manual
Case 3 — Turnabout Serenade (Investigation)
Turnabout Serenade has two investigation phases separated by courtroom scenes. The first phase establishes the concert crime, the missing-body mystery, the song clues, and the Mixing Board evidence. The second phase follows the Videotape toward the concert equipment and the Borginian cocoon-smuggling plot. Follow the locations in order, exhaust available conversation topics, examine newly updated evidence, and use the original Nintendo DS evidence names, including Guitar Case.
1. Gather the opening concert and crime-scene evidence
Begin in the Gavinners’ Dressing Room. Examine the postcards on the lower table to add the Postcard to the Court Record. Talk to Klavier about The flaming guitar and Lamiroir’s song. The Lyrics Sheet is added after the second topic; examine it before leaving if you want to review its clues.
Move to the Backstage Hallway and examine the reddish-brown door leading to Lamiroir’s Dressing Room. This adds the Investigation Request. Enter Lamiroir’s Dressing Room, talk about The victim and The crime, then examine the blue brooch near the filing cabinet. The Brooch is added to the Court Record.
Pan to the right side of the room. Examine LeTouse’s body, his left hand, and the Revolver on the floor. The hand adds the Key Ring. Examine the Key Ring and Revolver in the Court Record. Present the Revolver to Ema, then discuss The murder weapon. These steps establish the required opening evidence and unlock the route to The Stage.
- Examine the postcards in the Gavinners’ Dressing Room.
- Talk to Klavier about all available topics.
- Obtain the Lyrics Sheet and Investigation Request.
- Obtain the Brooch, Key Ring, and Revolver.
- Examine the body, blood writing, wall holes, and weapon.
- Present the Revolver to Ema and discuss The murder weapon.
2. Complete the Mixing Board sequence
Move through the Backstage Hallway to The Stage. Talk to Klavier about The case, The Gavinners, and The missed cue. During the Mixing Board sequence, isolate the tracks until you identify the missed performance cue. The required answer is channel 2. Select it when the game asks which part was incorrect; the Mixing Board is then added to the Court Record.
Present the Key Ring to Klavier. Continue with Gavin’s troubles. When asked whether you noticed the connection between the disasters, choose the response indicating that you have noticed, then present the Lyrics Sheet when requested. Complete The song’s prediction topic. This is a story-specific audio evidence sequence, not a permanent Crime Recreation mode.
- Reach The Stage.
- Discuss The case, The Gavinners, and The missed cue.
- Choose channel 2 in the Mixing Board sequence.
- Obtain the Mixing Board.
- Present the Key Ring to Klavier.
- Present the Lyrics Sheet during Gavin’s troubles.
- Finish The song’s prediction topic.
3. Trigger the end of the first investigation
Return to the Gavinners’ Dressing Room and present the Brooch to Lamiroir. Talk through her available topics, including Machi and Mr. LeTouse. Return to the Backstage Hallway; the game then moves Apollo to Lamiroir’s Dressing Room. Discuss The disappearing act with Ema and examine the room again, including the area where the body had been.
Move to The Stage and examine the steel structure behind the piano, the device that raises the performance platform. This examination ends the first investigation phase and begins the first trial section. The first investigation does not resolve the murder by itself; the courtroom adds the autopsy report, crime photograph, Diagram, and further evidence.
- Present the Brooch to Lamiroir.
- Exhaust Lamiroir’s available topics.
- Discuss The disappearing act with Ema.
- Examine the raised-platform structure behind the piano.
- Save before the transition if you want a recovery point.
4. Start the second investigation at Wright Anything Agency
After the first courtroom section, begin at the Wright Anything Agency. Talk to Trucy about Daryan, Agent LeTouse, the Troupe Gramarye, and Trucy’s father. The Videotape is added to the Court Record. Examine it if desired, then present it to Valant when the conversation permits.
Move to the Detention Center and talk to Machi about The trial today, Lamiroir’s testimony, and Machi’s eyesight. Do not leave until the available topics have been exhausted. His eyesight discussion is part of the progression and helps unlock the next Coliseum events.
- Question Trucy about Daryan and LeTouse.
- Discuss the Troupe Gramarye and Trucy’s father.
- Obtain the Videotape.
- Present the Videotape to Valant.
- Question Machi about the current trial and his eyesight.
5. Obtain the Headset, Switch, and Remote Trigger
Travel to Sunshine Coliseum, then the Backstage Hallway. Talk to Lamiroir about her available topics, including The voice, Machi, Mr. LeTouse, and Darkness. Present the Videotape to her. The Headset is added to the Court Record. Examine the Headset in the evidence viewer, then present it to Lamiroir.
Move to The Stage. Talk to Valant about Lamiroir’s illusion, the Troupe Gramarye, and Valant and Zak. Examine the piano to obtain the Switch. Return through the Backstage Hallway to Lamiroir’s Dressing Room and exhaust Ema’s available topics. Present the Switch to Ema and discuss The switch. The Switch updates into the Remote Trigger, while the Forum Diagram and Igniter are added. Examine the updated evidence before continuing.
- Present the Videotape to Lamiroir.
- Obtain, examine, and present the Headset.
- Talk to Valant on The Stage.
- Examine the piano and obtain the Switch.
- Present the Switch to Ema.
- Obtain the Remote Trigger, Forum Diagram, and Igniter.
6. Investigate Daryan, Klavier, and the smuggling evidence
Return to Sunshine Coliseum and question Daryan about all available topics. Then talk to Klavier about Your alibi and Prosecutor Gavin before moving to Gavin’s Office.
In Gavin’s Office, examine the burned guitar and the tray or container near the speaker. Talk about The case, The Guitar’s Serenade, Lamiroir’s guitar, and The strange lump. These steps add the Borginian Newspaper, Prosecutor Gavin’s Guitar, and Replica to the Court Record. Examine the new items, including the burned portion of Prosecutor Gavin’s Guitar and the Replica’s details.
Present the Igniter to Klavier. If the conversation does not advance, re-check both office objects and exhaust every available topic. The evidence now links the concert’s ignition device, Klavier’s guitar, the missing key, and the suspected cocoon operation.
- Question Daryan at Sunshine Coliseum.
- Question Klavier about every available topic.
- Examine the burned guitar and nearby tray in Gavin’s Office.
- Obtain the Borginian Newspaper, Prosecutor Gavin’s Guitar, and Replica.
- Present the Igniter to Klavier.
7. Examine the Guitar Case and continue to Hickfield Clinic
Return to Sunshine Coliseum, pass through the Backstage Hallway, and enter The Stage. Examine the Guitar Case near the entrance beside the ladder. This is the required original Nintendo DS object and triggers the discovery of Lamiroir inside it. Do not substitute a separate contrabass-case instruction or skip this examination.
The game moves Apollo to Hickfield Clinic. Talk to Lamiroir about Attacked! and Assailant. Present the Replica to her, then discuss The Borginian Cocoon and Smuggling. These conversations connect the Replica to the dangerous cocoon trade and explain why LeTouse was investigating the group.
The game then moves automatically to the Detention Center. Present the Replica to Machi and discuss The Cocoon. Machi’s conversation updates the Replica in the Court Record. Examine the updated Replica after the conversation if you want to confirm the new description before court begins.
- Return to The Stage after presenting the Igniter.
- Examine the Guitar Case beside the ladder.
- Continue automatically to Hickfield Clinic.
- Present the Replica to Lamiroir.
- Discuss The Borginian Cocoon and Smuggling.
- Present the Replica to Machi at the Detention Center.
- Complete The Cocoon conversation.
- Confirm that the Replica has updated.
8. Confirm the stopping point before the next trial
Turnabout Serenade does not contain a universal Crime Recreation mode or a general 3-D crime-scene map. Its special investigation interactions are the Mixing Board sequence, ordinary Court Record examinations, and specific story-triggering object inspections such as the piano and Guitar Case.
Before the second investigation ends, the important route should have produced the Videotape, Headset, Remote Trigger, Forum Diagram, Igniter, Borginian Newspaper, Prosecutor Gavin’s Guitar, and Replica. Earlier investigation evidence includes the Postcard, Lyrics Sheet, Investigation Request, Brooch, Revolver, Key Ring, and Mixing Board.
If the game seems stuck, revisit the last active location, exhaust every dialogue topic, and re-examine updated evidence. The essential second-phase chain is Videotape to Valant, Videotape to Lamiroir, Headset examination and presentation, piano examination for Switch, Switch to Ema, Igniter to Klavier, Guitar Case on The Stage, Replica to Lamiroir at Hickfield Clinic, and Replica to Machi at the Detention Center. When Machi’s cocoon conversation finishes and the Replica updates, proceed into the next courtroom section.
- Do not search for a universal Crime Recreation mode.
- Confirm the first-phase crime-scene and concert evidence.
- Confirm the Headset and Remote Trigger chain.
- Confirm the office evidence and Replica.
- Examine the Guitar Case on The Stage.
- Present the Replica to both Lamiroir and Machi.
- Confirm that the Replica updates.
- Proceed when the game advances to court.
Before you move on
- The first investigation ends after examining the steel structure behind the piano on The Stage.
- The first-phase Court Record includes the Lyrics Sheet, Postcard, Investigation Request, Brooch, Revolver, Key Ring, and Mixing Board.
- The second investigation includes the Videotape, Headset, Remote Trigger, Forum Diagram, Igniter, Borginian Newspaper, Prosecutor Gavin’s Guitar, and Replica.
- The Guitar Case on The Stage has been examined.
- The game has moved to Hickfield Clinic and then the Detention Center.
- The Replica has been presented to Lamiroir and Machi.
- Machi’s cocoon conversation is complete.
- The Replica has updated in the Court Record.
- The game advances into the next Turnabout Serenade courtroom section.
- A recovery save is available before continuing into court.
References for this chapter
- Apollo Justice: Ace Attorney - Guide and Walkthrough by DarkstarRipclaw
- Apollo Justice: Ace Attorney — Guide and Walkthrough by BWoodhouse
- Apollo Justice: Ace Attorney — Spoiler-Free Walkthrough Guide
- Apollo Justice: Ace Attorney Episode 3: Turnabout Serenade Day 2 Investigation
- Turnabout Serenade Transcript Part 3
- Apollo Justice: Ace Attorney Speedrun Route
Case 3 — Trial — Smuggling, Motive and Turning the Court
Turnabout Serenade’s later trial sections first clear Machi Tobaye through Lamiroir’s testimony, then expose Daryan Crescend’s role in the murder and the Borginian cocoon-smuggling operation. Follow the testimony in order, use Perceive only at the stated nervous tells, and examine the Mixing Board at the two separate points where the court requests it. The first Mixing Board examination identifies the second-set song segment containing the gunshot. The later examination proves that Machi could play the piano passage with one hand while operating the Igniter with the other. These are individual courtroom examinations in the original Nintendo DS release, not a general Crime Recreation system.
1. Perceive Machi and Lamiroir, then identify whom Lamiroir is protecting
During the Proof of Innocence testimony from Machi and Lamiroir, activate Apollo’s bracelet on the statement explaining that Machi does not understand the lyrics because they are in English. Move the viewing frame to Machi’s eyes behind his glasses. Watch for the movement and use Perceive while the relevant statement is active. The tell is his glance toward Lamiroir.
Present Borginian Newspaper when the court asks for evidence connected with Machi’s knowledge of the lyrics. This produces a revised statement explaining that Lamiroir told Machi the crime followed the song. Activate Perceive again during that revised statement and inspect Lamiroir’s mouth or lips as she reacts. The valid tell is around her lower face, not her eyes or clothing.
When the court asks whom Lamiroir is protecting, present Machi Tobaye’s profile. This advances the trial to Lamiroir’s account of what she heard.
- Perceive Machi’s moving eyes during the English-language lyric explanation.
- Present Borginian Newspaper.
- Perceive Lamiroir’s mouth or lips during the revised explanation.
- Present Machi Tobaye’s profile.
2. Expose the Remote Trigger and Lamiroir’s position
During Lamiroir’s What I Heard testimony, press the second statement concerning what LeTouse and the detective were discussing. Choose the response asking what they were talking about. A new statement about sending a message or pressing a switch is added.
Present Remote Trigger on the revised statement about sending a message to someone. When the court asks how the command could have been heard over the concert, present Headset. When it asks what the switch operated, present Igniter.
When asked how Lamiroir could have heard the voice, choose She was somewhere else. The court then opens a position-selection view. Move to the left side of the scene and select the air-vent area near the small window above the doorway. This is a one-time courtroom selection for the testimony, not a reusable crime-scene model.
- Press Lamiroir’s second statement.
- Choose What were they talking about?
- Present Remote Trigger.
- Present Headset, then Igniter.
- Choose She was somewhere else.
- Select the air-vent area on the left side of the view.
3. Resolve the ceiling testimony and the concert illusion
During the Above the Ceiling testimony, present Video Tape on the statement explaining why Lamiroir was above the ceiling. Watch the recording when prompted; it supplies the movement and timing needed to challenge the prosecution’s interpretation.
During The Big Illusion testimony, press the statement about having to continue singing. When asked how to address the discrepancy, choose Present evidence and present Brooch. A revised statement is added. Press that new statement to finish this courtroom section.
Video Tape and Brooch are separate evidence actions. Do not look for a universal Crime Recreation menu. The recording review and the ventilation-area selection are specific events built into this trial.
- Present Video Tape on the appropriate Above the Ceiling statement.
- Press the relevant statement in The Big Illusion testimony.
- Choose Present evidence.
- Present Brooch.
- Press the newly added statement.
4. Correct the shooting timing with Burnt Fragments and the first Mixing Board examination
After the recess, examine the newly added Burnt Fragments so the evidence is fully available. During Daryan’s Rebuttal, present Burnt Fragments at statement 4, the statement disputing that the gunshot evidence proves the true timing. Daryan revises his testimony with a statement challenging the claim that the shooting took place during the second set.
Present Mixing Board at that revised second-set statement. The game opens the sound examination. Mute every instrument except track 1, then listen through the relevant song sections. The gunshot is heard in the second segment of track 1. Select that second segment and present it.
Do not select the first track-1 segment here. That is the later comparison used in the separate Machi-trigger examination. Keep Burnt Fragments, the revised second-set statement, and this first Mixing Board examination in the stated order. If the presentation is rejected, reload a save from before this courtroom sequence rather than spending judge patience on unrelated guesses.
- Examine Burnt Fragments after they are added.
- Present Burnt Fragments at Daryan’s Rebuttal statement 4.
- Present Mixing Board at the revised second-set statement.
- Mute every instrument except track 1.
- Listen through the relevant track-1 sections.
- Select and present the second segment of track 1 containing the gunshot.
5. Establish Daryan’s connection to the smuggling operation
During Daryan’s Proof of Innocence testimony, present Replica on statement 2, where he denies that his knowledge connects him to LeTouse or the cocoon operation. This redirects the testimony toward the smuggling evidence.
During Cocoon Smuggling, present Newspaper Article on statement 3, the statement concerning the smuggling operation and its consequences. The testimony revises. Present Prosecutor Gavin’s Guitar on the revised statement. This is the original Nintendo DS evidence name; do not substitute Round Sample, Burnt Guitar, or another guitar entry.
When the court asks whether you can show that Machi could have operated the trigger, present Machi Tobaye’s profile. Choose I can prove it. This begins a separate, final Mixing Board examination.
- Present Replica on Proof of Innocence statement 2.
- Present Newspaper Article on Cocoon Smuggling statement 3.
- Present Prosecutor Gavin’s Guitar on the revised Cocoon Smuggling testimony.
- Present Machi Tobaye’s profile.
- Choose I can prove it.
6. Complete the final Mixing Board examination and finish the case
Present Mixing Board when the court asks how Machi could have operated the trigger while playing. This is different from the earlier Daryan sound examination. Follow the on-screen mixer controls, then select the leftmost sound bar directly below the 1 and 2 labels and above the rewind button. This is the required original Nintendo DS input for the one-handed piano passage.
Present the enabled sound selection. The result establishes that Machi played the relevant piano passage with one hand, leaving his other hand available to operate the Igniter. When asked what should happen next, choose Call a witness.
Present Machi Tobaye’s profile as the witness to be called. Continue through the resulting testimony, Daryan’s exposure, the verdict, and the epilogue. Turnabout Serenade is complete when its closing sequence finishes and the game advances to Turnabout Succession.
- Present Mixing Board for the final Machi-trigger examination.
- Select the leftmost sound bar directly below the 1 and 2 labels and above the rewind button.
- Present the enabled sound selection.
- Choose Call a witness.
- Present Machi Tobaye’s profile.
- Continue through the verdict and epilogue until Turnabout Succession begins.
Before you move on
- Machi’s moving eyes have been challenged with Perceive.
- Borginian Newspaper has been presented.
- Lamiroir’s mouth or lips have been perceived during the revised explanation.
- Machi Tobaye’s profile has been presented as the person Lamiroir was protecting.
- Remote Trigger, Headset, and Igniter have been presented in order.
- The air-vent area has been selected after choosing She was somewhere else.
- Video Tape has been presented during Above the Ceiling.
- Brooch has been presented during The Big Illusion, and the revised statement has been pressed.
- Burnt Fragments have been presented at Daryan’s Rebuttal statement 4.
- Mixing Board has been presented at the revised second-set statement.
- All instruments except track 1 have been muted during the first Daryan sound examination.
- The relevant track-1 sections have been heard, and the second segment containing the gunshot has been selected and presented.
- Replica has been presented on Proof of Innocence statement 2.
- Newspaper Article has been presented on Cocoon Smuggling statement 3.
- Prosecutor Gavin’s Guitar has been presented on the revised Cocoon Smuggling testimony.
- Machi Tobaye’s profile has been presented, followed by I can prove it.
- The final Mixing Board examination has used the leftmost sound bar directly below the 1 and 2 labels and above the rewind button.
- Call a witness has been selected and Machi Tobaye’s profile has been presented.
- Daryan’s verdict, the Turnabout Serenade epilogue, and the transition to Turnabout Succession have played.
References for this chapter
Case 4 — Turnabout Succession: Final Investigation and MASON System
Complete Turnabout Succession’s Day 1 investigation, both Day 2 courtroom sections, both seven-years-ago courtroom sections, and the full MASON System route on the original North American Nintendo DS release. This chapter ends when Letter from Misham is obtained and Preparations Complete begins the final trial.
Day 1 Investigation: Wright Anything Agency, Detention Center, and Drew Studio
At the Wright Anything Agency, examine the Magic Show Ticket and inspect its reverse side. Talk to Phoenix and exhaust every available topic. The Gramarye Envelope is added to the Court Record; examine it and inspect the signature on its back.
Move to the Sunshine Coliseum and speak with Valant. Present the Gramarye Envelope when the conversation calls for evidence concerning the Gramarye family. Continue through every available topic, then move to the Detention Center and speak with Vera Misham. Exhaust her conversation and examine Vera’s Card after it enters the Court Record.
Go to Drew Studio. Speak with Ema and examine the room. The three paintings become separate Court Record items: Portrait, Acrylic, and Landscape. Examine the painting hidden behind the drawers to obtain Hidden Painting. Examine the Coffee Mug in the Court Record and rotate it until the pale blue mark on its rim is identified.
Present the Coffee Mug to Ema and complete the poison-detection sequence. Spray the room as instructed, then use the spray on the small picture frame near the books to reveal Tiny Frame. Pan right to the desk and examine the open drawer to obtain Red Envelope. Examine the envelope and inspect its seal on the reverse side.
Present Red Envelope to Ema. Follow the indentation-detection tutorial, moving the scanner across the page until the hidden writing is revealed. Brushel’s Card is added to the Court Record. Examine the card before leaving.
- Magic Show Ticket examined on both sides.
- Phoenix’s available topics completed.
- Gramarye Envelope obtained, examined, and presented to Valant.
- Vera’s conversation completed and Vera’s Card examined.
- Hidden Painting obtained.
- Coffee Mug’s blue rim mark identified.
- Tiny Frame revealed with the detection spray.
- Red Envelope obtained and examined.
- Brushel’s Card added and examined.
Finish Day 1 and unlock the courtroom sections
Return to the Detention Center and interview Spark Brushel. Exhaust every available topic and present Hidden Painting when the conversation requests evidence about Drew’s talent.
Return to Drew Studio and present Hidden Painting to Ema. Discuss the newly available Forger topic. Present Portrait, Acrylic, and Landscape individually, completing the forensic examination for each painting. When all three analyses are finished, the investigation ends and the first Day 2 courtroom section begins.
- Brushel interviewed and Hidden Painting presented.
- Forger topic discussed with Ema.
- Portrait, Acrylic, and Landscape each analyzed.
- Day 2 Trial Former unlocked.
Day 2 Trial Former: Spark Brushel
In The Journalist’s Story, press statement 4. Choose The star’s coffee, then Very important. Press the added statement 4a and present Coffee Mug.
In What Brushel Noticed, press statement 2 and choose Add to testimony. Present Red Envelope at the added statement 2a, then choose It’s impossible when asked about the red-envelope claim.
In The Scent Of A Story, activate Perceive on statement 5. Move the viewfinder to Brushel’s right armpit. Trigger Perceive when the testimony reaches the line about Drew’s talent, then confirm the tell and present Hidden Painting.
In The Interview: A Recap, press statement 4 and choose Just one thing. Present Letter Box at the revised statement. Press statement 3, choose I can prove it, and present Tiny Frame. Present Red Envelope, then use the detection spray on the relevant stamp area near the lower-right portion of the page. Choose Drew Misham when asked to identify the false lead, then present Vera Misham’s profile as the true forger.
Do not present Red Envelope before the revised testimony exists. If a presentation loses judge patience, reload the save made before this trial instead of guessing through later testimony.
- Coffee Mug presented in The Journalist’s Story.
- Red Envelope used in What Brushel Noticed.
- Perceive completed at Brushel’s right armpit.
- Hidden Painting presented in The Scent Of A Story.
- Letter Box and Tiny Frame used in The Interview: A Recap.
- Red Envelope processed with the detection spray.
- Vera Misham’s profile presented.
- Misham’s Autopsy Report added.
Day 2 Trial Latter: The Red Envelope
During The Red Envelope, press statements 1, 2, 4, and 5. A new statement 5a is added. Press statement 5a and present Magic Show Ticket there.
The trial then moves to the seven-years-ago courtroom sequence. MASON is not available yet; continue through the flashback instead of trying to access it early.
- Statements 1, 2, 4, and 5 pressed.
- Added statement 5a pressed.
- Magic Show Ticket presented at statement 5a.
- Seven-years-ago Trial Former begins.
Seven Years Ago Trial Former
Notebook Page, Magnifi’s Chart, and Small Syringe enter the Court Record at the beginning of this section. During The Circumstances, press statement 3 and choose Shot something else. When asked to identify the contradiction, select the hole in the stuffed clown’s head.
Press statements 4 and 5. Stage Pistol is then added and the testimony is revised. Present Stage Pistol at the added statement.
- Notebook Page, Magnifi’s Chart, and Small Syringe obtained.
- Shot something else selected.
- Stuffed-clown head selected.
- Statements 4 and 5 pressed.
- Stage Pistol presented at the revised statement.
Seven Years Ago Trial Latter
Magnifi’s Letter 2 is added before the testimony. During The Night of the Crime, press statement 4, choose The number of pistols, then choose Quite important. Present Stage Pistol at the revised statement.
During Who Shot What, press statement 4 to add IV Report. Choose Very important and press the added statement 4a. Choose There’s a contradiction, present Crime Photo, and select the IV bag in the photograph. Choose He’d seen it before, then present Small Syringe.
Magnifi’s Diary is added. Examine it, choose Show evidence, and present Notebook Page. The flashback concludes and MASON becomes available.
- Magnifi’s Letter 2 obtained.
- The Night of the Crime completed with Stage Pistol.
- IV Report obtained.
- Crime Photo presented and the IV bag selected.
- Small Syringe presented.
- Magnifi’s Diary examined.
- Show evidence selected and Notebook Page presented.
- MASON System unlocked.
MASON System: Past Wright & Co. Law Offices and Defendant Lobby No. 2
Begin MASON at Past Wright & Co. Law Offices. Talk to Trucy about every available subject. When she offers to demonstrate the trick, choose Please, show me! to obtain The Amazing Mr. Hat. Continue the conversation to obtain Trucy’s Locket.
Select Past Defendant Lobby No. 2 and talk with Mike Meekins. Exhaust the available dialogue about Meekins, the magician’s disappearance, and the vanishing trick. When the Psyche-Locks become available, activate the Magatama.
Clear the first lock by presenting Trucy Enigmar’s profile. Clear the second by presenting The Amazing Mr. Hat. Finish the newly available dialogue about the vanishing trick and the trick itself before leaving. Present Borscht Bowl Club becomes available only after this location and its follow-up conversation are complete.
- Past Wright & Co. Law Offices visited first.
- The Amazing Mr. Hat obtained.
- Trucy’s Locket obtained.
- Past Defendant Lobby No. 2 visited.
- Mike Meekins’s available dialogue exhausted.
- First Lobby lock cleared with Trucy Enigmar’s profile.
- Second Lobby lock cleared with The Amazing Mr. Hat.
- Vanishing-trick follow-up dialogue completed.
- Present Borscht Bowl Club unlocked.
MASON System: Present Borscht Bowl Club, Solitary Cell 13, and Past Drew Studio
Select Present Borscht Bowl Club and talk with Zak Gramarye about every available subject. Present Trucy’s Locket when required; this unlocks Present Solitary Cell 13. Transferal of Rights is added during the conversation.
At Present Solitary Cell 13, exhaust the available conversation. The Psyche-Locks cannot yet be solved. Examine the blue hand-like object on the left side of the room to obtain Nail Polish. Examine the yellow envelope once before leaving.
Go to Past Drew Studio. Talk with Drew and present Notebook Page when prompted. Continue the conversation, pan right to the desk, and examine the small picture frame to obtain Commemorative Stamp.
Clear Drew’s forger lock by choosing The forger and presenting Vera Misham’s profile. Continue the dialogue, present Commemorative Stamp when requested, and choose Great magicians, aren’t they? The stamp is updated after the resulting conversation.
During this same Past Drew Studio visit, clear Vera’s client lock. Activate the Magatama, present Nail Polish first, and present Kristoph Gavin’s profile second. Finish the client conversation before leaving. Do not defer this lock until after Past Detention Center.
- Transferal of Rights obtained.
- Trucy’s Locket presented to unlock Solitary Cell 13.
- Nail Polish obtained.
- First Solitary Cell 13 envelope examination completed.
- Commemorative Stamp obtained.
- Drew’s forger lock cleared with Vera Misham’s profile.
- Commemorative Stamp presented and updated.
- Vera’s client lock cleared with Nail Polish followed by Kristoph Gavin’s profile.
- Both Past Drew Studio locks completed during the initial visit.
MASON System: Past Detention Center and Present Drew Studio
Select Past Detention Center and speak with Valant about the fateful trial and blackmail. Activate the Magatama and clear the lock in this order: present Stage Pistol, present Trucy’s Locket, present Commemorative Stamp, choose With a person, and present Thalassa Gramarye’s profile.
After the lock is cleared, discuss Blackmail and the newly available topic The darkness. This completes the Past Detention Center section and allows the present-day Drew Studio sequence to be completed.
Go to Present Drew Studio and speak with Spark Brushel. Present Trucy’s Locket when required, then continue the conversation about Thalassa. Thalassa’s Portrait enters the Court Record.
- Past Detention Center visited after both Past Drew Studio locks are complete.
- Stage Pistol presented.
- Trucy’s Locket presented.
- Commemorative Stamp presented.
- With a person selected.
- Thalassa Gramarye’s profile presented.
- Blackmail and The darkness discussed.
- Present Drew Studio completed.
- Thalassa’s Portrait obtained.
MASON System: Present Borscht Bowl Club and Sunshine Coliseum
Return to Present Borscht Bowl Club and activate Zak’s Psyche-Lock. Present Commemorative Stamp, Apollo Justice’s profile, and Thalassa’s Portrait in that order. Continue through the newly available Gramarye topics until Zak’s Confession enters the Court Record.
Move to Present Sunshine Coliseum. Activate the locked topic and present Transferal of Rights, followed by Zak’s Confession. Complete the resulting conversation about Magnifi and Valant.
- Present Borscht Bowl Club revisited after Present Drew Studio.
- Commemorative Stamp presented first.
- Apollo Justice’s profile presented second.
- Thalassa’s Portrait presented third.
- Zak’s Confession obtained.
- Present Sunshine Coliseum visited afterward.
- Transferal of Rights presented.
- Zak’s Confession presented.
- Present Sunshine Coliseum was cleared with Transferal of Rights and Zak’s Confession.
Final Present Solitary Cell 13 inspection and transition
Return to Present Solitary Cell 13 only after Sunshine Coliseum is complete. Examine the yellow envelope on the center table. Use the detection spray around the stamp area until the hidden evidence is revealed, then inspect the revealed section. Letter from Misham is added to the Court Record.
The MASON System ends when Letter from Misham is obtained. Choose Preparations Complete when the game transitions to the final Day 3 Trial. Do not repeat MASON. The final courtroom, Vera Misham’s Jurist System decision, closing sequence, and credits are covered in the next chapter.
- Final Present Solitary Cell 13 visit made after Sunshine Coliseum.
- Yellow envelope examined again.
- Detection spray used around the envelope’s stamp.
- Revealed area inspected.
- Letter from Misham obtained.
- MASON System closed.
- Preparations Complete selected.
- Final Day 3 Trial begins.
Before you move on
- Day 1 Investigation is complete.
- Day 2 Trial Former is complete.
- Day 2 Trial Latter is complete.
- Seven-years-ago Trial Former is complete.
- Seven-years-ago Trial Latter is complete.
- MASON began at Past Wright & Co. Law Offices.
- Past Defendant Lobby No. 2 was visited, its dialogue was exhausted, and both Psyche-Locks were cleared.
- Present Borscht Bowl Club became available after the Lobby route was completed.
- Present Solitary Cell 13 was unlocked with Trucy’s Locket.
- Nail Polish was obtained before the Past Drew Studio sequence.
- Drew’s forger lock was cleared with Vera Misham’s profile.
- Commemorative Stamp was obtained and updated.
- Vera’s client lock was cleared during the same Past Drew Studio visit with Nail Polish followed by Kristoph Gavin’s profile.
- Valant’s Past Detention Center lock was cleared with Stage Pistol, Trucy’s Locket, Commemorative Stamp, With a person, and Thalassa Gramarye’s profile.
- Present Drew Studio produced Thalassa’s Portrait.
- The later Present Borscht Bowl Club lock was cleared with Commemorative Stamp, Apollo Justice’s profile, and Thalassa’s Portrait.
- Present Sunshine Coliseum was cleared with Transferal of Rights and Zak’s Confession.
- The final Present Solitary Cell 13 envelope inspection produced Letter from Misham.
- Preparations Complete was selected and the final Day 3 Trial began.
References for this chapter
Case 4 — Turnabout Succession: Final Trial and Ending
Begin this chapter after the MASON System has finished, Letter from Misham has been obtained, and Day 3 Trial is available. The final courtroom sequence explains how Vera Misham was poisoned, exposes Kristoph Gavin’s connection to Drew Misham, and ends with the Jurist System decision concerning Vera. The successful campaign completion route is to choose Not Guilty for Vera, confirm the choice, and watch the closing sequence through the credits.
1. Begin Day 3 Trial
This chapter starts after the final MASON System sequence, not during the investigation. Confirm that Letter from Misham is in the Court Record and that the game has advanced to Day 3 Trial. If the trial is unavailable, return to the previous chapter and finish the Solitary Cell 13 sequence rather than trying to repeat courtroom presentations here.
When the game asks whether you are ready to proceed, choose Preparations Complete. The court then asks how Vera could have been poisoned while isolated. Choose Show how. When the evidence prompt appears, present Nail Polish.
The next prompt asks who could have used the nail polish to poison Vera. Present Kristoph Gavin’s profile. This brings Kristoph into the final courtroom sequence and starts his testimony. Save before proceeding if you want a recovery point; the original Nintendo DS release uses one active in-game save location rather than several ordinary named cartridge slots.
- Letter from Misham is in the Court Record.
- Day 3 Trial is available.
- Choose Preparations Complete.
- Choose Show how.
- Present Nail Polish.
- Present Kristoph Gavin’s profile.
2. Perceive Kristoph’s tell
During Kristoph’s testimony, use Apollo’s bracelet on the fifth statement. Advance until the statement refers to being responsible for poisoning Vera’s father as well. This is the designated Perceive point for the final testimony.
Watch Kristoph’s hands carefully. The tell is the scar on his right hand. On the DS screen, the witness is shown facing the player, so his right hand appears on the left side of the image. Select the scar when it becomes visible; the bracelet does not automatically mark the correct location.
If you select the wrong point, repeat the Perceive attempt and wait for the hand movement to occur again. Do not present evidence until the Perceive sequence has been completed. Finding the scar exposes the contradiction in Kristoph’s denial and allows the court to connect the poisonings.
- Use Perceive on Kristoph’s fifth statement.
- Reach the statement concerning responsibility for poisoning Vera’s father too.
- Select the scar on Kristoph’s right hand.
- Finish the Perceive sequence before continuing.
3. Establish the poisoning method
After Kristoph’s testimony, the court asks how Drew Misham was poisoned. Present Commemorative Stamp. This identifies the poisoned object and explains how the poison was connected to Drew’s correspondence and forgery work.
The stamp is not the answer to every later question. Keep track of the purpose of each presentation: Commemorative Stamp establishes the poisoning method, while the next evidence prompt establishes Kristoph’s motive and the earlier forgery.
If you make an incorrect presentation and lose judge patience, reload the last useful save rather than guessing through the remaining prompts. The final sequence is short enough that rebuilding the route is safer than spending the remaining health on trial and error.
- Present Commemorative Stamp when asked how Drew was poisoned.
- Do not use Commemorative Stamp as the answer to the later motive prompt.
- Reload after a damaging mistake if your recovery save is available.
4. Prove Kristoph’s motive
When the court asks what reason Kristoph had for murdering Drew Misham, present either Red Envelope or Notebook Page. Both are accepted at this motive prompt in the original Nintendo DS route.
Red Envelope points to the old forgery transaction and the client’s instructions involving the stamp. Notebook Page connects the same motive to the forged page used in the trial seven years earlier. You do not need to present both at this prompt; use either accepted item.
Do not confuse this with the next question. Commemorative Stamp explains the poison, while Red Envelope or Notebook Page explains why Kristoph had a reason to silence Drew. If the game rejects an unrelated item, return to the motive prompt and choose one of those two pieces of evidence.
- At the motive prompt, present Red Envelope or Notebook Page.
- Understand that either item is accepted.
- Use Commemorative Stamp only for the poisoning-method question.
5. Present Letter from Misham
After the motive is established, the court asks for the evidence connecting Kristoph to Drew’s forgery request. Present Letter from Misham. This is the required final-link presentation and should not be replaced by Red Envelope or Notebook Page.
The letter completes the chain of proof: Commemorative Stamp identifies the poison-bearing object, Red Envelope or Notebook Page establishes the old forgery motive, and Letter from Misham connects that transaction to the client behind it. Let the dialogue and courtroom reactions continue after the evidence animation.
Obtaining Letter from Misham before Day 3 Trial is a progression requirement, but obtaining it is not the completion check for this chapter. You must continue through the Jurist System decision and the post-verdict scenes.
- Present Letter from Misham when the final link is requested.
- Do not substitute Red Envelope or Notebook Page for this presentation.
- Continue after the evidence animation and courtroom reaction.
6. Choose Vera’s Jurist System outcome
After the courtroom revelations, the Jurist System asks for a decision about Vera Misham. Select Not Guilty, then select Confirm. This decision concerns Vera’s outcome; it is not a final verdict menu for Kristoph Gavin.
Choosing Not Guilty produces the successful route in which Vera survives and the closing sequence proceeds. Choosing Guilty leads to the unsuccessful alternative in which the case does not reach the intended resolution. If you want to preserve the decision point, save beforehand when practical, remembering that the DS game has one active save location.
After confirming Not Guilty, continue through every remaining conversation and scene. Do not stop after the choice, Kristoph’s reaction, or the letter presentation. Allow the ending sequence and credits to play without resetting.
- Select Not Guilty for Vera Misham.
- Select Confirm.
- Understand that the choice concerns Vera, not Kristoph’s separate prosecution.
- Continue through all closing scenes and credits.
7. Completion check and recovery
Turnabout Succession is complete when the successful post-verdict closing sequence has played and the credits begin. The required route is: Preparations Complete; Show how; Nail Polish; Kristoph Gavin’s profile; Perceive the scar on Kristoph’s right hand during the fifth statement; Commemorative Stamp; Red Envelope or Notebook Page; Letter from Misham; Not Guilty for Vera; Confirm.
If judge patience reaches zero, reload the most useful earlier save and repeat this order. If Day 3 Trial never appears, the missing step is in the preceding MASON System sequence, especially obtaining Letter from Misham in Solitary Cell 13. Do not restart this chapter by repeating MASON locations.
The final completion state is not merely Kristoph’s exposure and not merely the addition of Letter from Misham. Confirm Vera Misham’s Not Guilty Jurist System result and watch the closing material through the credits.
- The final trial began with Letter from Misham already obtained.
- Kristoph’s scar was identified during the fifth statement.
- Commemorative Stamp was presented for the poisoning method.
- Red Envelope or Notebook Page was presented for the motive.
- Letter from Misham was presented for the final link.
- Not Guilty was selected and confirmed for Vera Misham.
- The successful closing sequence and credits played.
Before you move on
- Day 3 Trial was started after Letter from Misham was obtained.
- Preparations Complete was selected.
- Show how was selected and Nail Polish was presented.
- Kristoph Gavin’s profile was presented.
- Perceive was used on Kristoph’s fifth statement and the scar on his right hand was selected.
- Commemorative Stamp was presented to establish the poisoning method.
- Red Envelope or Notebook Page was presented at the motive prompt.
- Letter from Misham was presented to establish the final link.
- Not Guilty was selected for Vera Misham and Confirm was selected.
- The successful closing sequence played and the credits began.
References for this chapter
Perceive, 3-D Evidence Inspection, and the Turnabout Trump Reconstruction
Apollo Justice: Ace Attorney on Nintendo DS uses three related but separate techniques. Perceive is a scripted courtroom ability used during selected cross-examinations. Certain Court Record items can be rotated and examined from another angle. Turnabout Trump contains one story-specific courtroom reconstruction involving positions, objects, photographs, and the Bloody Ace. None of these features creates a permanent or universal Crime Recreation mode. The dependable method is to identify the testimony claim, use the tool the game has enabled, read any updated testimony or evidence description, and then present the Court Record item that proves the contradiction. The Nintendo DS manual confirms the basic controls: L presses testimony, R presents evidence or opens the Court Record, X selects evidence or confirms a Perceive point, Y handles microphone recognition when enabled, and Start opens the Save Screen.
1. Confirm that Perceive is available
During a designated cross-examination, watch for the Perceive command or Apollo’s bracelet prompt. If the command is absent or unavailable, Perceive cannot be used at that moment. It is not an investigation command and cannot be activated freely against every witness.
The first tutorial occurs with Olga Orly in Turnabout Trump. Later scripted checks include Wesley Stickler’s fingers and book pages, Alita Tiala’s ring, Machi Tobaye’s eyes, Lamiroir’s mouth or lips, and Spark Brushel’s sweat. These are fixed story events, not a general system for scanning every character or every testimony.
On the Nintendo DS, the Control Pad moves the cursor, A confirms and advances, B cancels or returns, L presses testimony or switches screens, R opens the Court Record and presents evidence, X selects evidence or confirms a Perceive target, Y enables microphone recognition when the microphone option is available, and Start opens the Save Screen. Stylus controls are also available. Voice recognition is optional, so use the button controls if the microphone is unreliable.
- Wait for the bracelet or Perceive command to appear.
- Do not attempt Perceive during ordinary investigation scenes.
- Use the stylus or buttons according to preference.
- Use button controls when microphone recognition is inconvenient.
2. Match the nervous tell to the exact testimony phrase
When Perceive begins, move Apollo’s focus to the body part or object associated with the witness’s nervous habit. The correct target is not always the most obvious moving part of the animation. The tell must occur while the relevant testimony phrase is being delivered.
Watch the full phrase before confirming. The selected statement is slowed or segmented, and the tell may occur late in the line. A normal blink, idle pose, or unrelated movement does not count. Confirm only when the motion is synchronized with the testimony.
For Stickler, focus on the fingers or the edge of the book as he fidgets with its pages. For Alita, watch the ring during the designated revised statement. For Machi, focus on his eyes behind the glasses when they dart during the English-language statement. For Lamiroir, focus on her mouth or lips during the revised statement beginning "It was I who explained." Her lips remain unnaturally closed or move differently at that phrase. For Brushel, focus beneath the raised arm where the sweat appears. The Lamiroir check is a mouth-and-lips observation; do not move the cursor to her throat or neck for this sequence.
- Place the focus on the scripted body part or object.
- Watch the complete testimony phrase.
- Confirm only while the tell is synchronized with the phrase.
- For Lamiroir, select the mouth or lips as she begins the revised line "It was I who explained."
- Ignore ordinary idle animation.
3. Read the revised testimony after Perceive
A successful Perceive does not always resolve the contradiction immediately. It may reveal concealed information, add a new statement, or trigger a follow-up question. Read the revised testimony completely before choosing evidence. The contradiction is often in the new wording rather than in the sentence that triggered Perceive.
In the opening Olga sequence, the nervous tell leads to the Deadly Bottle presentation. In Turnabout Serenade, Machi’s eye movement and Lamiroir’s mouth movement expose concealed information in the joint testimony before the case requires further evidence and profile presentations. The tell is the method used to expose hidden information, not necessarily the final answer by itself.
If the observation fails, reposition the focus and replay the phrase. If a presentation is rejected, do not repeatedly guess while spending judge’s patience. Reload a useful save and retry after checking the relevant Court Record entry.
- Read every statement added after a successful Perceive.
- Determine what new fact the tell exposes.
- Present the evidence that proves the revised contradiction.
- Reload instead of brute-forcing rejected presentations.
4. Inspect eligible Court Record evidence
Only selected evidence supports 3-D inspection. When an item provides a Check or examination option, select it and use the stylus to rotate or zoom the object. Check fronts, backs, undersides, interiors, and concealed marks when the item or testimony makes those areas relevant.
Turnabout Trump’s Deadly Bottle is a major example. When the bottle is required at the revised Phoenix testimony, open it from the Court Record and examine the lower back or bottom until the game confirms that the bottle is empty. Only then present the updated Deadly Bottle. A normal presentation without completing that inspection may be rejected. The bottle is a Court Record item whose description or condition is updated by examination, not a general-purpose 3-D crime viewer.
The Victim’s Hand also requires examination of the cards. Rotate the hand or card display and inspect the backs to identify the relevant blue card. These examinations update or clarify evidence. The inspection screen itself is not a separate courtroom item and should never be treated as a universal crime-scene viewer.
- Use 3-D inspection only when the game supplies the examination option.
- Rotate past the starting view.
- Check backs, bottoms, undersides, or interiors when relevant.
- Reopen the Court Record after an update.
- Present the updated evidence, not the inspection interface.
5. Complete the Turnabout Trump courtroom reconstruction
The reconstruction begins after Kristoph Gavin’s testimony reaches the Bloody Ace presentation. Present Bloody Ace when the court first requests it. This starts the diagram sequence; it is not the final presentation of the sequence.
When the diagram appears, point out the dark-blue V marking the victim’s position. Use Point Out on the victim’s swivel chair and rotate it. When asked who is in the wrong position, point out the red K marking the killer’s position. Next point out the dark area directly in front of the victim as the attack position.
When prompted to address the obstruction, select the taller cupboard and use Point Out to move it toward the left side. Then point out the light-blue 2 marking Witness 2’s position. The diagram questions are ordered, so do not select unrelated objects while the game is asking for a particular location.
When the court asks for photographic proof, present Olga’s Photo. The game then prompts another bottle examination. Rotate and inspect the bottle’s bottom or contents as directed. After that second bottle inspection, present Bloody Ace again to finish the reconstruction. Do not present Attorney’s Badge at this final request, and do not attempt to present the reconstruction interface as evidence. The Bloody Ace, Olga’s Photo, and Deadly Bottle sequence is specific to Turnabout Trump.
- Present Bloody Ace to start the reconstruction.
- Point out the victim’s V position.
- Rotate the victim’s chair with Point Out.
- Point out Kristoph’s K position.
- Point out the dark attack area in front of the victim.
- Move the taller cupboard.
- Point out the light-blue 2 position.
- Present Olga’s Photo.
- Complete the second bottle inspection.
- Present Bloody Ace again to finish the sequence.
6. Turn observations into contradictions
The practical courtroom chain is press, activate Perceive if enabled, identify the synchronized tell, read the revised testimony, and present the evidence that proves the new contradiction. Do not present evidence merely because a witness appears nervous; wait for the resulting testimony or question to establish what must be disproved.
For physical evidence, inspect the item first, then return to the testimony that depends on its position, condition, contents, or visibility. If the Court Record description changes, read the updated entry before presenting it. This is especially important for the empty Deadly Bottle and the card-related evidence in Turnabout Trump.
For the reconstruction, follow the spatial prompts exactly. Bloody Ace is the opening item, Olga’s Photo is presented after the Witness 2 position is identified, the bottle is inspected again, and Bloody Ace is presented a second time to close the sequence. The diagram and inspection reveal the proof; they are not standalone evidence entries.
If progression stops, check whether you confirmed the hidden mark or card rather than merely rotating near it. Also verify that you selected the Court Record item named by the current prompt. When judge’s patience has already been reduced, reload rather than experimenting with unrelated evidence.
- Tie each physical observation to a specific testimony claim.
- Inspect evidence before presenting it when the game requires an update.
- Read revised testimony after Perceive.
- Present Court Record evidence rather than a cursor position or interface.
- Follow the reconstruction order without substituting Attorney’s Badge for the final Bloody Ace presentation.
- Reload after a damaging mistake instead of guessing repeatedly.
Before you move on
- You can identify when the bracelet or Perceive command is active.
- You know that Perceive is unavailable during ordinary investigation scenes and unselected testimony.
- You can identify Stickler’s page-fidgeting, Alita’s ring, Machi’s eye movement, Brushel’s sweat, and Lamiroir’s mouth or lip movement during the scripted sequences.
- You can focus on Lamiroir’s mouth or lips when the revised testimony begins "It was I who explained," rather than targeting her throat or neck.
- You can focus on the correct body part and confirm only while the matching phrase is active.
- You can read the revised testimony produced by a successful Perceive.
- You can inspect eligible evidence and rotate it to reveal backs, bottoms, interiors, or concealed marks.
- You can update Deadly Bottle by examining its lower back or bottom before presenting it at the revised Phoenix testimony.
- You can inspect the Victim’s Hand and identify the relevant card by examining the backs.
- You can complete the reconstruction in order: Bloody Ace, victim V, chair rotation, killer K, attack area, cupboard movement, Witness 2 position, Olga’s Photo, second bottle inspection, and Bloody Ace again.
- You understand that the reconstruction and 3-D views reveal or update Court Record evidence rather than functioning as a universal Crime Recreation mode.
- You can use the complete contradiction method: press, Perceive when enabled, read the revised statement, and present the evidence that proves it.
References for this chapter
- Apollo Justice: Ace Attorney — Nintendo DS Instruction Manual
- Apollo Justice: Ace Attorney - Guide and Walkthrough by DarkstarRipclaw
- Apollo Justice: Ace Attorney — Guide and Walkthrough by Xcarvengerx
- Apollo Justice: Ace Attorney - Guide and Walkthrough by Burner
- Apollo Justice: Ace Attorney - Guide and Walkthrough by DarkstarRipclaw, 3DS listing used for cross-checking the same episode sequence
- Olga's Photo - Ace Attorney Wiki
- Deadly Bottle - Ace Attorney Wiki
Optional Content, Replay, and Edition Differences
The original North American Nintendo DS release of Apollo Justice: Ace Attorney contains four required episodes: Turnabout Trump, Turnabout Corner, Turnabout Serenade, and Turnabout Succession. Optional dialogue, extra examination descriptions, replay practice, printed promotional materials, and features added to later releases are not required for the original campaign ending. Completion means finishing the final Turnabout Succession courtroom sequence, choosing Not Guilty for Vera Misham in the Jurist System decision, and allowing the closing sequence and credits to play. That decision concerns Vera’s fate; it is not a final verdict in a separate trial against Kristoph Gavin.
Finish the required campaign in order
Play the four episodes in their normal sequence: Turnabout Trump, Turnabout Corner, Turnabout Serenade, and Turnabout Succession. Turnabout Corner may be referred to informally by guides using Wocky Kitaki, Alita Tiala, or Pal Meraktis, but those are character and case-event references, not alternate official episode titles.
There is no fifth story case required after Turnabout Succession on the original DS release. The final chapter contains several investigation, MASON System, and courtroom segments, so reaching the end of one trial section does not by itself complete the game. Continue until the final Jurist System decision has been made and the closing scenes have finished.
- Clear Turnabout Trump.
- Clear Turnabout Corner.
- Clear Turnabout Serenade.
- Clear Turnabout Succession.
- Finish the Jurist System decision and closing sequence.
Separate required progression from optional dialogue
During an active investigation, speak with every currently available person and inspect newly accessible locations or objects before leaving. Conversations and examinations can unlock the next required topic, location, or testimony. Once the investigation has advanced, however, many repeated conversations, scenic descriptions, and additional examination comments are optional. You do not need to inspect every harmless background object or obtain every alternate line to reach the ending.
The same distinction applies in court. Press a statement when the testimony or the current walkthrough route requires it, or when you want additional context and the judge’s patience allows experimentation. If pressing only produces extra dialogue and does not change the testimony, return to the contradiction that the current statement establishes and present the appropriate evidence. Avoid testing unrelated evidence simply to collect alternate reactions, especially late in a trial when penalties are difficult to recover from.
- Talk to every available witness before moving on.
- Recheck locations after major revelations or new evidence.
- Do not mistake extra descriptions for mandatory evidence.
- Follow the displayed testimony when presenting evidence.
- Preserve judge patience for required contradictions and choices.
Use the original DS save system deliberately
On the Nintendo DS release, press Start during gameplay to open the Save Screen and confirm the save. Saving is available during ordinary investigation and trial progress, although the game may require you to finish a particular prompt or screen before saving. Save before a difficult trial segment, after a significant evidence update, and before a sequence containing a risky answer when the Save Screen is available.
The cartridge has one ordinary active in-game save location. It does not provide multiple named cartridge slots for keeping several independent campaign positions. Saving again replaces the previous ordinary save. When loading, the game provides recovery choices such as continuing from the saved position or restarting from the beginning of the current chapter or section, depending on the point reached. These recovery choices are not separate permanent save files.
If a presentation or answer exhausts the judge’s patience, reload the last useful save rather than repeatedly continuing from the failed position. On real hardware, a separate cartridge or hardware-based backup method is needed if you want to preserve both a completed campaign and a replay position. Emulator save states and exported save-file backups are external conveniences, not features of the original DS menu.
- Press Start and confirm the save before difficult courtroom work.
- Remember that the DS cartridge has one ordinary active save location.
- Use the chapter-start recovery option when the last save is unsafe.
- Back up completed progress externally before beginning a replay if needed.
- Do not assume modern collection-style save slots exist on the cartridge.
Use the DS manual for platform-specific instructions
The printed Nintendo DS instruction manual is the best reference for the original release’s basic touchscreen layout, button functions, microphone icon, and Save Screen. The game can be played through the touchscreen, while the buttons provide shortcuts: A confirms or advances, B cancels or returns, L presses a witness statement, R opens the Court Record and is used to present evidence from it, Start opens the Save Screen, and Y activates microphone input when the microphone prompt is displayed. X is used for evidence selection and for confirming a Perceive point in the appropriate courtroom screen.
Microphone actions are prompt-based. When the game displays the microphone symbol, hold Y and perform the requested voice or breath input. Courtroom commands such as Objection! or Hold it! should be attempted only when the corresponding prompt is active. If recognition fails, check that the DS microphone opening is clear and repeat the displayed instruction. You can use the touchscreen instead of the buttons whenever the interface presents the required command.
Packaging varied by retailer, region, and production run. A manual, preorder item, keychain, booklet, or other promotional insert is not required evidence and does not unlock any story content. Use the manual to clarify controls, not as a checklist of campaign objectives.
- Check the manual’s control diagram if a DS input is unclear.
- Look for the microphone icon before using voice or breath input.
- Use R for the Court Record and L for Press.
- Treat packaging inserts and promotional extras as optional.
Understand the 3DS and mobile differences
The Nintendo 3DS release retains the same four-case adventure but updates the artwork and adds convenience features. Capcom documented a text-skip option, access to the Japanese version from the title menu, and updated presentation. The 3DS edition also changes some forensic interactions, including evidence rotation with the Circle Pad and a button-assisted fingerprint-cleaning method. These are later-release conveniences and should not be substituted for the original DS touchscreen and microphone instructions.
The mobile release uses an interface and presentation designed for smartphones and tablets rather than the original two-screen DS layout. Menus, screen arrangement, and input prompts therefore differ even though the case progression remains broadly shared. Read the active release’s own prompts instead of assuming that a DS microphone or button instruction has an identical mobile equivalent.
- Expect redrawn artwork and changed menus on 3DS.
- Do not use Circle Pad or 3DS button shortcuts on the DS cartridge.
- Expect a redesigned smartphone or tablet interface on mobile.
- Use the current release’s displayed input prompt.
Keep Trilogy features outside the DS completion route
Apollo Justice: Ace Attorney Trilogy is a later collection containing Apollo Justice: Ace Attorney, Dual Destinies, and Spirit of Justice. It adds collection features such as an Art Library, Orchestra Hall, Animation Studio, costumes, and Story Mode, along with bonus material connected to the other games in the collection. These features are not part of the original DS campaign and do not count toward completing the DS release.
Do not search a later collection’s galleries, music rooms, costumes, animation tools, or Story Mode for missing DS evidence. Conversely, do not expect those features, their interface, or their convenience options to appear on the original cartridge.
- Do not count Trilogy galleries or music rooms as DS objectives.
- Do not search later collection extras for missing original evidence.
- Do not expect Story Mode on Nintendo DS.
- Keep collection content separate from the four-case campaign.
Confirm the true ending before replaying
The completion checkpoint comes at the end of Turnabout Succession. After the final courtroom evidence route has exposed the connected truth and the game reaches the Jurist System decision, select Not Guilty for Vera Misham and confirm the choice. This is the successful campaign route. It determines whether Vera is acquitted; it is not a final verdict on Kristoph Gavin.
Continue through the post-decision dialogue, closing scenes, and credits. Do not stop at the evidence conclusion, the courtroom exposure of Kristoph, or a chapter-complete transition. Once the ending has played, there is no additional mandatory case, collectible set, manual item, or bonus mode required for the original DS campaign.
Replay is useful for reviewing testimony, finding optional dialogue, or practicing presentations. Before starting a new campaign on real hardware, protect the completed save if you want to retain it, because the cartridge’s single ordinary save location will be overwritten by new progress.
- All four official episodes are complete.
- The final Turnabout Succession courtroom sequence has ended.
- The Jurist System choice for Vera is Not Guilty.
- The post-decision closing scenes and credits have played.
- No optional item or later-release feature is required for DS completion.
Before you move on
- Turnabout Trump, Turnabout Corner, Turnabout Serenade, and Turnabout Succession have all been cleared.
- The final Turnabout Succession courtroom resolution has concluded.
- The Jurist System decision for Vera Misham is Not Guilty.
- The complete post-decision ending sequence and credits have played.
- No additional mandatory case, collectible, manual item, gallery, or bonus mode remains on the original DS release.
- Any replay was started only after protecting completed save data when retaining it mattered.
References for this chapter
- Apollo Justice: Ace Attorney — Nintendo DS Instruction Manual
- Apollo Justice: Ace Attorney — Guide and Walkthrough by Xcarvengerx
- Apollo Justice: Ace Attorney FAQs, Walkthroughs, and Guides for DS — GameFAQs
- Capcom’s Apollo Justice: Ace Attorney — Capcom News
- Apollo Justice: Ace Attorney is now available digitally for Nintendo 3DS — Capcom News
- Trucy and Apollo’s Excellent Adventure: New Apollo Justice: Ace Attorney Features — Capcom News
- Ace Attorney Apollo Justice Now Available For iOS — Capcom News
- Apollo Justice: Ace Attorney Trilogy Is Out Now — Capcom News
Troubleshooting, Common Failures and Recovery Steps
Apollo Justice: Ace Attorney on the original Nintendo DS is usually recoverable when progress appears blocked. The usual cause is an unfinished Talk topic, an unexamined object, an evidence or profile presentation, a hidden touch-screen interaction, or a courtroom response that must be replayed from a clean recovery point. The DS release uses one active in-game save location, with From save point and From chapter start providing different ways to resume or restart the current section.
1. Record the exact failure before reloading
If the Judge’s penalty gauge reaches zero, the current trial attempt ends, but the campaign is not permanently damaged. Incorrect evidence presentations, wrong multiple-choice answers, failed Perceive responses, and incorrect scene or reconstruction selections can all cost penalty points. Stop guessing as soon as the gauge becomes low.
Before reloading, note the case, day, witness, testimony title, statement number, and action that caused the penalty. Write down whether you pressed, presented evidence, used Perceive, selected an answer, or chose a location on a diagram. The first suspicious statement is not always the contradiction: Press can create revised testimony, and the correct response may be a profile, a later statement, or a story-specific examination.
- Record the witness and testimony section.
- Record the exact statement that caused the penalty.
- Separate Press, Present, Perceive, and answer-selection mistakes.
- Do not brute-force presentations with a nearly empty penalty gauge.
2. Use the DS save and recovery options deliberately
Press START during investigation or trial and confirm the save prompt. Saving returns you to the title screen. Select Continue, then choose From save point to resume at the position of the active manual save, or From chapter start to restart the current section from its built-in starting point. These are recovery choices for one campaign state, not separate named cartridge slots.
Use From save point when the saved position is before the mistake and you know what must change. Use From chapter start when the saved position follows a bad presentation, when the penalty gauge is empty, or when you cannot identify which earlier response caused the problem. Restarting the section may discard recent progress, but it gives you a clean route instead of repeating a failed trial attempt.
Save before an uncertain courtroom sequence, after a major investigation update, and whenever you reach a useful point before testing a contradiction. Overwriting the active save removes the previous rollback position, so do not save immediately after a penalty-heavy mistake unless you deliberately want that state.
- Press START and confirm the save at a safe position.
- Choose Continue, then From save point for the saved location.
- Choose From chapter start when the current save is unsafe or confusing.
- Do not treat either choice as a second ordinary save slot.
3. Clear a stalled investigation in order
At the blocked location, choose Examine and inspect every currently available object. Check furniture, doors, containers, floor areas, machinery, bodies, background objects, and details revealed after moving the view. A required examination can add evidence, update an existing item, or unlock a new conversation without making the progress gate obvious.
Choose Talk for every person present and complete every available topic. A topic can change after an examination, a move to another location, a presentation, or a later story event. If a character has no new topic, visit another available location and return after completing the next lead.
Use Present when the conversation points toward a person, object, relationship, timeline, or medical fact. Investigation presentations do not use the courtroom penalty gauge, but unrelated presentations can waste time and obscure the relevant response. Read the reaction after each supported presentation.
Choose Move and visit every listed destination. New destinations can appear only after a conversation or examination elsewhere. Once a lead is followed, return to the location where progress stopped; the game may require a second visit or a newly available Talk topic.
- Examine the current scene, including any panning arrows.
- Finish every available Talk topic.
- Present evidence or profiles suggested by the conversation.
- Visit every newly available destination.
- Return to the previously blocked location.
- Check the Court Record after every update.
4. Check common DS investigation bottlenecks
In Turnabout Corner, a frequent early blockage occurs at Eldoon’s House. After examining the bowl near the stand, touch the left arrow at the bottom of the touch screen to pan left, then examine the police car. Talk to Guy Eldoon about Meraktis Clinic afterward. Without that hidden view and conversation, the next clinic-related progress may not appear.
Another Turnabout Corner blockage occurs during the later investigation. At Eldoon’s House, pan left again to trigger the officer-related conversation, then move to People Park and complete Ema Skye’s available actions. Later, examine Slippers and Sandals in the Court Record’s 3-D viewer, including the relevant underside or print details, then present the resulting footwear evidence to Ema when prompted.
These examples illustrate the general rule: a location can look complete while a pan arrow, background object, hidden side, or changed Court Record item remains unchecked. If the expected character is absent, do not assume a bug. Revisit the previous scene and inspect the view from both available directions.
- At Eldoon’s House, use the left pan arrow when the walkthrough requires it.
- Examine the police car before expecting the clinic lead.
- Complete Ema’s People Park sequence before attempting the next clinic step.
- Inspect both Slippers and Sandals in the Court Record when footwear evidence is required.
- Revisit locations after a new item or conversation appears.
5. Recheck evidence before returning to court
Open the Court Record whenever evidence or a profile is added. Examine both categories and re-examine items whose descriptions have changed. A date, location, object condition, relationship, or stated cause can matter more than the item’s name. Story progression may depend on an updated description or a detail visible only after rotating, zooming, flipping, or examining an eligible 3-D item.
During cross-examination, match evidence to the exact claim in the selected statement. The newest item is not automatically correct. Press when testimony is incomplete or likely to change; after revised testimony appears, read it again before presenting. Perceive is available only at designated testimony moments. When the bracelet prompt appears, watch the full animation and identify the nervous tell at the correct phrase rather than selecting body parts randomly.
- Read every changed evidence description.
- Review profiles when identity or relationships matter.
- Press before presenting when testimony may still be revised.
- Present evidence that contradicts the selected statement.
- Use Perceive only when the bracelet prompt is active.
6. Recover from skipped dialogue or input failures
If dialogue was advanced too quickly, return to the last person, scene, or evidence update connected to it. Recheck every Talk topic and examine the scene again. If the missed information occurred in court, use the latest clean save or From chapter start rather than submitting random evidence. On the replay, press unfamiliar statements and wait for revised testimony, new evidence, or a new prompt.
For touch-screen actions, use the stylus and repeat the requested gesture carefully. For fingerprint dusting or similar actions, keep the DS microphone opening unobstructed and use controlled, moderate blowing. If voice input is unreliable, use button input whenever the game permits it: L can press a witness, R opens or presents from the Court Record in relevant contexts, and Y activates microphone input when needed.
If a touch or microphone action still fails, preserve the latest usable save, exit the game, restart the DS, and retry. Do not overwrite a clean investigation position with an uncertain trial save.
- Replay the location tied to the skipped conversation.
- Use From chapter start when the missing trigger cannot be identified.
- Retry touch actions with the stylus.
- Keep the microphone unobstructed during microphone prompts.
- Use button controls instead of voice input when available.
- Restart only after preserving a usable save.
7. Confirm the real completion sequence
A stalled investigation is cleared when the game adds evidence, updates an item, opens a destination, supplies a new Talk topic, starts a testimony, or permits the next story transition. A failed trial is recovered when the correct response advances the testimony and the expected story or Court Record update appears without exhausting the penalty gauge.
For the campaign endpoint, do not confuse the final courtroom evidence route with the later Jurist System decision. In Turnabout Succession’s Day 3 Trial, choose Show how, present Nail Polish, present Kristoph Gavin’s profile, use Perceive on the scar on his right hand during the fifth statement, present Commemorative Stamp, present either Red Envelope or Notebook Page at the motive prompt, and present Letter from Misham to establish the link to Drew Misham. This courtroom sequence exposes Kristoph Gavin through cumulative evidence.
After that evidence route is complete, the game presents the Jurist System decision concerning Vera Misham. Select Not Guilty and confirm it. Continue through the closing resolution and credits. Selecting Not Guilty is not a final verdict on Kristoph Gavin; it determines Vera Misham’s outcome and is required for the canonical good ending.
- The blocked investigation produces the expected update or destination.
- The failed trial is replayed from From save point or From chapter start.
- All four official cases are complete.
- Turnabout Succession’s MASON System and Day 3 Trial are complete.
- Kristoph Gavin’s final courtroom exposure has been resolved.
- The Jurist System selects Not Guilty for Vera Misham.
- The closing sequence and credits play.
Before you move on
- The blocked investigation advances after the current scene, dialogue, Court Record, destinations, and return visits are checked.
- A failed trial is recovered through From save point or From chapter start and the relevant section is completed without exhausting the penalty gauge.
- Turnabout Trump, Turnabout Corner, Turnabout Serenade, and Turnabout Succession are complete.
- The MASON System has been completed.
- The Day 3 courtroom evidence route exposes Kristoph Gavin and reaches its final resolution.
- The Jurist System decision selects Not Guilty for Vera Misham.
- The closing sequence and credits play.
References for this chapter
- Apollo Justice: Ace Attorney — Nintendo DS Instruction Manual
- Apollo Justice: Ace Attorney — Guide and Walkthrough by Xcarvengerx
- Apollo Justice: Ace Attorney — Guide and Walkthrough by BWoodhouse
- Apollo Justice: Ace Attorney — Guide and Walkthrough by cyelz
- Apollo Justice: Ace Attorney Controls — StrategyWiki
Finishing up
You have completed the main campaign when Turnabout Succession’s Day 3 courtroom sequence concludes, the Jurist System decision is completed with Not Guilty selected for Vera Misham, and the closing scenes and credits begin.
The final Letter from Misham presentation is a required step, but it is not by itself the completion checkpoint. Continue through the remaining Kristoph courtroom sequence, the Jurist System decision, and the ending.
Verify that all four official cases have been cleared: Turnabout Trump, Turnabout Corner, Turnabout Serenade, and Turnabout Succession.
Optional dialogue and repeated trial attempts are not required for completion. Preserve a completed save through an appropriate external backup method before starting a replay, because the original DS game has one active in-game save location.
Choose your next gameScreenshots & video
Game imagery for reference. Follow the written chapters above for the route and strategies.

Sources & references
Our original guide draws on the references below. Check the edition at the top of this page before following controls or unlock requirements.
- Apollo Justice: Ace Attorney — Nintendo DS Instruction Manual
- Capcom News: New Ace Attorney Apollo Justice Keychain
- Apollo Justice: Ace Attorney — Nintendo DS Instruction Manual transcription
- Apollo Justice: Ace Attorney Controls — StrategyWiki
- Apollo Justice: Ace Attorney — Turnabout Corner walkthrough and investigation structure, StrategyWiki
- Apollo Justice: Ace Attorney - Guide and Walkthrough by Burner
- Apollo Justice: Ace Attorney — Guide and Walkthrough by Xcarvengerx
- Apollo Justice: Ace Attorney — Guide and Walkthrough by BWoodhouse
- Apollo Justice: Ace Attorney/Gameplay, StrategyWiki
- Apollo Justice: Ace Attorney — Episode 1: Turnabout Trump, Day 1 - Trial Former — StrategyWiki
- Apollo Justice: Ace Attorney — Guide and Walkthrough by cyelz
- Apollo Justice: Ace Attorney — Game Script, DS
- Turnabout Trump — Ace Attorney Wiki
- Apollo Justice: Ace Attorney — Spoiler-Free Walkthrough Guide
- Apollo Justice: Ace Attorney - Guide and Walkthrough by DarkstarRipclaw
- Apollo Justice: Ace Attorney Episode 3: Turnabout Serenade Day 2 Investigation
- Turnabout Serenade Transcript Part 3
- Apollo Justice: Ace Attorney Speedrun Route
- Apollo Justice: Ace Attorney/Episode 3: Turnabout Serenade/Day 3 - Trial Latter — StrategyWiki
- Apollo Justice: Ace Attorney — MASON System Investigation
- Turnabout Succession - Transcript - Part 5
- Apollo Justice: Ace Attorney - Guide and Walkthrough by DarkstarRipclaw, 3DS listing used for cross-checking the same episode sequence
- Olga's Photo - Ace Attorney Wiki
- Deadly Bottle - Ace Attorney Wiki
- Apollo Justice: Ace Attorney FAQs, Walkthroughs, and Guides for DS — GameFAQs
- Capcom’s Apollo Justice: Ace Attorney — Capcom News
- Apollo Justice: Ace Attorney is now available digitally for Nintendo 3DS — Capcom News
- Trucy and Apollo’s Excellent Adventure: New Apollo Justice: Ace Attorney Features — Capcom News
- Ace Attorney Apollo Justice Now Available For iOS — Capcom News
- Apollo Justice: Ace Attorney Trilogy Is Out Now — Capcom News
About the game & collecting notes
- Platform
- Nintendo DS
Step-by-step campaign walkthrough for the original North American Nintendo DS release of Apollo Justice: Ace Attorney. Covers the four official cases—Turnabout Trump, Turnabout Corner, Turnabout Serenade, and Turnabout Succession—from the opening courtroom sequence through the final Jurist System resolution. It also explains DS controls, the single-save structure, Perceive, selected 3-D evidence examinations, the MASON System, recovery from trial mistakes, and the differences between the original cartridge and later ports.
Darryl Polo
Darryl Polo loves tinkering with emulation and revisiting retro games. He enjoys exploring how old favorites play on different setups and sharing what he learns along the way. At Joking Joystick, he writes about the games, hardware, and small discoveries that keep the hobby fun.
Our editorial standardsFound a step that needs another look? Help us improve this guide.