
Xenoblade Chronicles 3 – Complete Campaign Walkthrough (Nintendo Switch)
Optional late-game class-cap route for Xenoblade Chronicles 3 on Nintendo Switch. Complete the optional Side Story quests for Eunie, Lanz, Taion and Sena after their Chapter 6 or Chapter 7 prerequisites become available, while treating Side Story: Mio as already completed by the Chapter 6 main route. Side Story: Noah is not a prerequisite for this chapter because it is completed later during the Chapter 7 Origin Ore route in the final-preparation chapter. Raise each relevant inherited class to Rank 10 first, satisfy the exact information, rest-spot and active-Hero requirements shown in the Hero Roster, and confirm the resulting Rank 20 caps. None of these optional routes is required to reach the Origin ending.

Find a copy
Xenoblade Chronicles 3 Nintendo Switch
We may earn a commission if you buy through these links, at no extra cost to you. As an Amazon Associate I earn from qualifying purchases.
Opens retailer search results. Check the model, edition, seller, availability and current price before buying.
Before you begin
This guide takes you through the full main campaign of Xenoblade Chronicles 3 on Nintendo Switch, from the opening Everblight Plains sequences to the Chapter 7 climax and credits.
You will find concrete, ordered objectives for every major story beat, practical combat and class setup advice for Ouroboros fights, preparation checklists for boss thresholds, and recovery steps when things go wrong.
Play along as you go: use the preparation checklist before attempting late‑game bosses, follow the chapter routes to avoid missing mandatory story triggers, and treat the chapter and boss-level recommendations as minimum targets rather than absolute limits — the game expects different party levels depending on difficulty and choices.
Set yourself up for the run
Confirm you are playing the original Xenoblade Chronicles 3 Nintendo Switch release. The Expansion Pass and the separate Switch 2 Edition are outside this guide's base-game campaign scope.
This guide follows the seven-chapter main story through Origin and the ending.
Learn Interlink and Ouroboros mechanics when the story unlocks them; the early Chapter 1 tutorial does not provide free Ouroboros control or Chain Attack practice.
Build the party through equipped classes: keep at least one dependable Defender, one or two reliable Healers, and enough Attacker damage for ordinary encounters and bosses.
Raise the specific inherited classes to Rank 10 before attempting Ascension Quests that require that rank. The six main-character Ascension Quests are useful but, except where the story itself requires them, are optional for reaching the ending.
Craft Gems, update class Arts and Skills, and replace outdated accessories at rest spots or shops before major story sections.
Use rest spots, food, bonus EXP and manual saves for preparation. Chain Attack gauge and Interlink availability are combat resources, not TP-restoration inventory items.
Use the active main-story objective and quest log to follow mandatory progression; optional Hero, Standard and Ascension Quests are clearly separated from the campaign route.
Before Chapter 6 and Origin, complete only the optional Ascension and Hero content that supports the classes and roles you actually intend to use.
Configure camera, control and tactics settings before late-game fights, then test the selected setup in ordinary encounters.
Start & Survival: Everblight Plains and the Opening Pairing
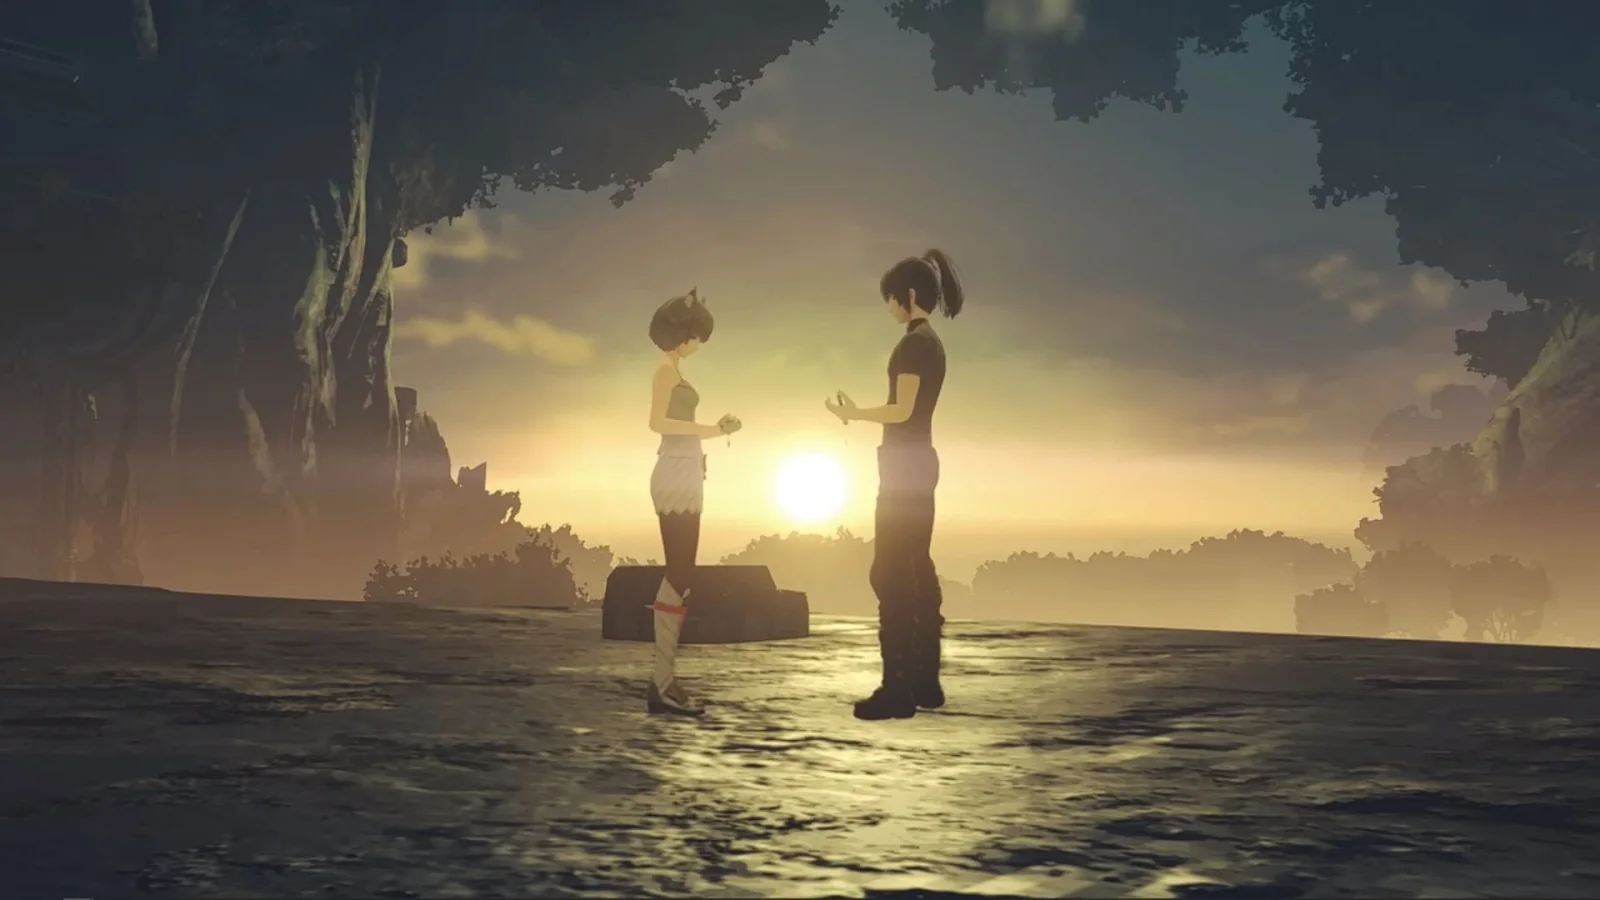
Chapter 1 teaches Xenoblade Chronicles 3’s basic combat loop before opening the wider campaign. Begin in Everblight Plain with Noah, Lanz, and Eunie, complete the introductory battles, and follow the marked route to Colony 9. Learn auto-attacks, Arts, positional bonuses, targeting lines, and the three combat roles. Colony 9 then requires the mandatory Preparing for Battle quest before the party can leave. Continue through Yzana Plains and Alfeto Valley, reaching the mysterious ether source before defeating two Automaton Sentries and then the Agnus Defender, Agnus Attacker, and Agnus Healer formation. The sequence continues with the Mysterious Enemy and Moebius fights, where the first Ouroboros Interlink battle occurs. Afterward, control shifts between Eunie and Mio during the return and escape sections. Complete the Colony 9 Defenders and Gamma Patrol encounters, then follow the final scenes until Chapter 2 begins. Chain Attack TP is not available in this opening section.
1. Complete the opening battles in Everblight Plain
After the introductory scenes, move to the marked location and draw Noah’s weapon when prompted. Characters auto-attack while standing still and within range, so stop moving when you want Noah to continue his normal attacks. Use the Arts shown on the combat palette as they become available, then resume positioning while they recharge.
The opening fights establish the normal combat rhythm: select a target, allow auto-attacks to build Arts, activate an Art, and keep the party in useful positions. Noah is a Swordfighter and Attacker, Lanz is a Heavy Guard and Defender, and Eunie is a Medic Gunner and Healer. You do not assign a separate Role Action to these roles. The character’s current class determines the role and its associated behavior.
When the game explains Cancel Attacks, activate an Art as an auto-attack connects. The timing does not need to be perfect to clear the tutorial, but practicing it improves Art recharge and will matter in later battles.
- Defeat the opening Agnian groups.
- Use Noah’s Arts after their gauges fill.
- Practice one Cancel Attack when the tutorial presents it.
- Keep Lanz between enemies and the more vulnerable party members.
2. Defeat Ulula and follow the route to Colony 9
Continue to the designated location until the Ulula encounter begins. Watch the indicators on Noah’s Arts to identify positional requirements. When an Art benefits from a side or rear position, move around the enemy only when Lanz has its attention; avoid running through the enemy and exposing Eunie.
Let Lanz remain near the frontline so he can maintain enemy attention. Keep Eunie behind the main engagement area, where she can heal without standing in the enemy’s immediate attack range. If Noah moves behind Ulula for a positional Art, return to a safe angle after using it.
After Ulula is defeated, follow the objective marker toward Colony 9. Activate landmarks you pass, including Torchlight Hill and Colony 9 Rear Gate when the route reaches them. Landmarks provide fast travel and recovery access, which is useful if an optional fight goes badly. The Chapter 1 route and landmark function are documented in the Switch walkthrough references.
- Defeat Ulula.
- Use at least one positional Art from the side or rear.
- Follow the objective marker to Colony 9.
- Activate nearby landmarks instead of passing them without interacting.
3. Finish Colony 9’s mandatory preparation
Inside Colony 9, follow the story markers to the bathing tent and complete the bathing scene. Return to the barracks and rest, then pass through the Colony 9 Ferronis to reach Assembly Square. The required preparation sequence is the quest Preparing for Battle.
Speak with Camilla in Assembly Square, purchase the Bronze Temple Guard, and equip it to Noah. Then speak with Roald and inspect his Collectopaedia Card. Leave the settlement along the marked route and gather the requested materials: Chewy Radish x3, Clustrelle x3, and Rich Fish Meat x2.
Register all three material types on Roald’s Collectopaedia Card, then speak with Roald again to finish the objective. The requested items are the required progression task; containers, side quests, and extra gathering are optional. Do not spend large amounts of money or uncommon materials on a complete equipment overhaul because stronger equipment becomes available later.
- Complete the bathing-tent scene.
- Rest in the barracks.
- Reach Assembly Square through the Colony 9 Ferronis.
- Speak with Camilla.
- Buy and equip the Bronze Temple Guard to Noah.
- Register Chewy Radish x3, Clustrelle x3, and Rich Fish Meat x2 with Roald.
- Complete Preparing for Battle.
4. Leave Colony 9 and cross Yzana Plains
After Preparing for Battle is complete, leave Colony 9 through the marked exit and follow the route across Yzana Plains. The game introduces further exploration and combat features during this section. When a soldier husk is placed directly along the objective route, interact with it as instructed; unrelated husks and containers can be collected later.
Use the expanded party to compare the three roles. Attackers such as Noah and Sena benefit from positional attacks, Defenders such as Lanz and Mio should draw or avoid enemy attacks, and Healers such as Eunie and Taion should keep the party alive from a safer position. These are class-defined roles, not abilities that you separately assign from a menu.
Mio, Taion, and Sena join the story group during the journey. Follow the new tutorials, but do not look for Chain Attack TP yet. Chain Attacks are introduced later in the campaign, so there is no Chain Attack gauge or TP objective to complete during this opening route.
- Leave Colony 9 after completing Preparing for Battle.
- Follow the marked route through Yzana Plains.
- Use the six-character story group when it becomes available.
- Avoid optional enemies whose levels are clearly above the party.
- Do not spend time looking for a Chain Attack tutorial in Chapter 1.
5. Reach the mysterious ether source and clear the Alfeto Valley encounters
Continue toward Alfeto Valley through the marked route. Discover Gura Flava Lowlands when the route brings you there, and use the active objective marker if the terrain makes the next path unclear. Optional quests and containers can be left for later unless you deliberately want to complete them before the chapter’s point of no return.
When you reach the mysterious ether source that crash-landed in Alfeto Valley, the required encounter begins with two Automaton Sentries. Defeat both machines before advancing. Keep the party together, let Lanz or Mio hold the frontline, and use Eunie or Taion to maintain healing from behind. The two Automaton Sentries are the first mandatory fights at this location.
After the Automaton Sentries are defeated, the next required battle is the three-member Agnus formation: Agnus Defender, Agnus Attacker, and Agnus Healer. Keep your Defender between the enemy group and the rest of the party. Concentrate on the Agnus Healer first if the formation is recovering damage, then eliminate the Attacker and Defender. Attack from the side or rear when the enemy is occupied by your Defender, but do not abandon the frontline merely to chase a positional bonus.
After the Agnus formation is cleared, remain in the area. The story continues into the Mysterious Enemy fight and then the Moebius battle. Do not fast-travel or treat the Automaton Sentries or Agnus formation as the end of the Alfeto Valley objective. The verified order is Automaton Sentries, Agnus Defender/Attacker/Healer, Mysterious Enemy, and Moebius.
- Reach the mysterious ether source in Alfeto Valley.
- Defeat both Automaton Sentries.
- Defeat the Agnus Defender, Agnus Attacker, and Agnus Healer formation.
- Remain in the area for the Mysterious Enemy encounter.
- Continue into the Moebius battle.
6. Defeat the Mysterious Enemy and use Interlink
The next major fight is against the Mysterious Enemy. Use the established formation: keep a Defender in front, leave Eunie or Taion behind the main impact area, and use Noah’s or Sena’s positional Arts when the enemy’s facing permits. Watch the targeting line so you can tell whether the enemy is attacking the intended Defender or has shifted attention to another party member.
The enemy can enter an enraged state, shown by a burning effect across its health bar. When that happens, avoid reckless movement and prioritize survival. Keep the Healers upright, revive only when the area is safe, and let the Defender maintain enemy attention while the party continues dealing damage.
The story then leads into the Moebius battle and formally introduces Interlink. Follow the on-screen instruction to combine the paired characters and enter the required Ouroboros form. Use the available Ouroboros Arts during the tutorial encounter rather than trying to conserve the transformation. Their cooldown behavior differs from ordinary Arts, and the story battle is designed to teach the form’s basic use.
Finish the Moebius encounter and allow the immediate cutscenes to play. The chapter is not complete yet; the return and escape sequence still has mandatory battles.
- Defeat the Mysterious Enemy sequence.
- Trigger the Moebius encounter.
- Use the required Interlink and Ouroboros form.
- Finish the battle and watch the following story scenes.
- Do not expect Chain Attack TP to be available here.
7. Return toward Colony 9 as Eunie
After the Alfeto Valley battle, control shifts to Eunie for the return journey. Use this section to practice the Healer role. Keep Eunie away from the center of the enemy group, use her healing and support Arts when allies take damage, and move toward a fallen character only when the area is safe.
Only a Healer performs the standard revival action in these early fights. If an ally falls while you control Eunie, approach the downed character, stand close, and hold the revival command when prompted. Attackers and Defenders cannot perform that normal revival action, so switch to a Healer if the game gives you control options and the battlefield is stable.
Follow the route back through Gura Flava Lowlands and Yzana Plains. When Colony 9’s forces confront the party, defeat the three Keves Attackers identified as the Colony 9 Defenders encounter. They are ordinary soldiers rather than a complex boss, but keep your party together and let the Healer recover damage before moving onward. The return route and three Keves Attacker encounter are listed in the Chapter 1 walkthrough sequence.
- Control Eunie during the return sequence.
- Practice healing and a Healer revival if an ally falls.
- Follow the marked route back toward Yzana Plains.
- Defeat the Colony 9 Defenders encounter.
- Continue after the battle instead of exploring freely.
8. Escape as Mio and complete Chapter 1
After the Colony 9 Defenders battle, control shifts to Mio for the escape section. Mio is a Defender, so pay attention to enemy targeting lines and use her defensive Arts to keep attention away from Sena and Taion. The route is restricted by the story, so follow the objective marker and do not detour into high-level enemies.
The escape includes a forced fight against an Agnus Attacker identified as the Gamma Patrol encounter. Keep Mio in front, allow her to draw pressure, and let Taion support the party from behind. If Sena is available as an Attacker, use her Arts when the enemy is focused on Mio rather than moving her into the enemy’s face.
Continue through the marked escape route and let the required conversations and cutscenes play. Chapter 1 ends after the final story scenes establish the party’s new situation. Save once Chapter 2 appears as the active chapter; that is the reliable completion check for this opening section.
- Control Mio during the escape sequence.
- Defeat the Gamma Patrol encounter.
- Follow the marked escape route.
- Complete the final Chapter 1 conversations and cutscenes.
- Confirm that Chapter 2 is active before treating Chapter 1 as complete.
Before you move on
- Ulula has been defeated and the party has reached Colony 9.
- The bathing-tent, barracks, and Colony 9 Ferronis scenes are complete.
- Preparing for Battle has been completed with Camilla and Roald.
- The Bronze Temple Guard is equipped to Noah.
- Roald’s Collectopaedia Card contains Chewy Radish x3, Clustrelle x3, and Rich Fish Meat x2.
- The six-character story group has formed for the Alfeto Valley sequence.
- The mysterious ether source has been reached.
- Both Automaton Sentries have been defeated.
- The Agnus Defender, Agnus Attacker, and Agnus Healer formation has been defeated.
- The Mysterious Enemy and Moebius sequence has been cleared.
- The first required Interlink and Ouroboros battle has been completed.
- The party has returned toward Colony 9 and defeated the Colony 9 Defenders.
- The Mio-controlled escape sequence and Gamma Patrol encounter are complete.
- The final Chapter 1 scenes have played and Chapter 2 is active.
References for this chapter
Chapter 2: Colony 4, Fornis and the Chain Attack Route
Chapter 2 begins after the Chapter 1 departure and moves the party from Luca’s Eyot through southern Aetia and the Fornis Region. Restore the Hillside Ferronis Hulk, cross Eagus Wilderness, complete the required Riku and Manana Standard Quest, learn cooking and gem crafting, and unlock Chain Attacks by defeating Gyanna Aspar. Continue to Colony 4, survive its attack, defeat Silvercoat Ethel and Consul K, then use the newly available Noah-Mio Interlink during the Moebius K battle. Chapter 2 does not unlock all three Ouroboros pairs or Ouroboros Chain Orders; those mechanics arrive later. Optional quests such as Nopon Register and Collapsed Traderpon can be postponed without blocking the Chapter 3 transition.
Leave Luca’s Eyot and reach the Hillside Ferronis Hulk
After the Chapter 1 transition, follow the red main-story route from Luca’s Eyot into Hermit’s Alleyway. Examine the rock blocking the passage and push it aside when prompted. Continue through the passage to Millick Meadows, then follow the objective toward Viliera Hill and the decommissioned Ferronis.
Approaching the Ferronis starts The Hillside Hulk, a required Standard Quest. This is not the Colony 9 tutorial and does not require returning to Colony 9, Yzana Plains or Alfeto Valley. Stay near the quest marker and defeat the five Nestrand Crustips around the machine. Lure them separately if the group begins to overwhelm the party.
- Leave Luca’s Eyot through Hermit’s Alleyway.
- Push aside the blocking rock.
- Reach Millick Meadows and Viliera Hill.
- Trigger The Hillside Hulk.
- Defeat five Nestrand Crustips.
Restore the Hillside Ferronis Hulk and rest
Inspect the Ferronis after the Crustips are defeated, then open the nearby container and check the power compartment. The machine needs an ether cylinder. Follow the objective to the Ether Channels, harvest ether, and return to the Ferronis.
Insert the charged ether cylinder into the power compartment. Once the machine is active, use its Fabricator and open the two available containers. These rewards are useful early equipment and materials, but you do not need to spend rare components on a broad upgrade project yet.
Use the rest area at the Ferronis and choose Rest when the quest asks you to continue. The following scene advances the main route and opens the next tutorial sequence.
- Inspect the Ferronis power compartment.
- Harvest ether from the Ether Channels.
- Insert the ether cylinder.
- Use the Fabricator.
- Open both containers.
- Rest at the Hillside Ferronis Hulk.
Set classes, cross Aetia and enter Fornis
After resting, the game introduces class and Arts management. Open the Characters menu and review the available class assignments and Arts for the six protagonists. Keep at least two Healers and two Defenders active while learning the system; a balanced setup is more useful than repeatedly changing every character.
Speak with ShillShill only if you want the optional Nopon Register Standard Quest. It is not required for the story, and its registration work can be completed later. For the main route, leave the Hillside Hulk area and travel south through Aetia.
The game may direct you toward Bodom Grebels as a combat check. Defeat the marked group, then continue south. Follow the route through the southern Aetia region until the party crosses into Fornis. Ignore high-level enemies near the road rather than forcing fights that are not attached to the objective.
- Review the six characters’ classes and Arts.
- Keep a balanced party with Healers and Defenders.
- Optionally accept Nopon Register without treating it as mandatory.
- Defeat the marked Bodom Grebels if the objective appears.
- Cross from southern Aetia into Fornis.
Cross Eagus Wilderness and complete Riku and Manana
Continue south through Eagus Wilderness. Follow the main marker toward the oasis and allow the camp scene to begin. This starts Riku and Manana, the second Standard Quest required for the Chapter 2 story route.
At the oasis rest area, choose Cook and make Manana’s Battle Soup using the ingredients supplied by the quest. Follow the next objective to help Riku and Manana with their preparations. The quest then leads to the Gyanna Aspar encounter near the oasis.
Defeat Gyanna Aspar, whose level is around 16 in the normal story route. This battle triggers the Chain Attack tutorial. When the Chain Attack gauge is full, activate the Chain Attack command and follow the displayed order-selection instructions. Use the tutorial to understand that party members can be selected in sequence and that the attack ends when the available orders are exhausted.
- Reach the Eagus Wilderness oasis.
- Start Riku and Manana.
- Cook Manana’s Battle Soup.
- Complete the preparations at the oasis.
- Defeat Gyanna Aspar.
- Activate and complete the Chain Attack tutorial.
Return to camp, craft a gem and equip it
After Gyanna Aspar, return to the Lake Rezzento Camp. The story introduces gem crafting there. Open the crafting menu, make one of the available early gems with the supplied materials, and equip it to the character or equipment slot requested by the tutorial.
Do not confuse gem crafting with optional material farming. One tutorial gem is enough to advance. You can craft additional copies later when you have stronger materials and a clearer class plan.
When the tutorial is complete, leave the oasis and continue south through Eagus Wilderness. Save at the rest area before approaching the next marked location, because the route immediately enters a sequence of forced battles and story scenes.
- Return to Lake Rezzento Camp.
- Open the gem-crafting menu.
- Craft one available gem.
- Equip the gem as instructed.
- Leave the oasis and continue south.
Survive the Colony 4 attack and defeat Silvercoat Ethel
Continue toward the designated location in the southern Fornis route. A Colony 4 attack interrupts the journey. Defeat the first group of three Keves Forces, then follow the objective rather than exploring away from the battle area.
The next encounter combines Silvercoat Ethel with three Keves Forces. Defeat the soldiers while keeping one Defender positioned between the attackers and your Healers. Once the soldiers are under control, concentrate on Ethel. Use positional Arts when their conditions are safe, but do not abandon the party’s defensive formation to chase bonus damage.
After the Ethel battle, follow the marked route toward the next confrontation. The game provides a rest opportunity before the Consul sequence; use it to heal, adjust equipment and confirm that a Chain Attack is available if possible.
- Reach the Colony 4 attack location.
- Defeat the first three Keves Forces.
- Defeat Silvercoat Ethel and the accompanying Keves Forces.
- Recover at the available rest point.
- Prepare for the Consul K encounter.
Use Interlink against Consul K and Moebius K
The next story battle begins against Consul K. During this encounter, the game teaches manual Interlink for Noah and Mio. Use the Interlink command when the tutorial prompts you, then control the Noah-Mio Ouroboros form and use its Arts until the form’s heat becomes a concern. Return to the normal party when the form’s duration or the battle situation makes that safer.
Consul K then transforms into Moebius K. This is the major Chapter 2 boss sequence. Keep your Defender drawing attacks, maintain healing coverage and save the Chain Attack if the first phase ends without needing it. When Moebius K summons additional Keves Forces, eliminate the reinforcements if they are pressuring the Healers before returning damage to the boss.
Use Interlink during a dangerous area attack or when the party needs a temporary defensive buffer. If the party is defeated, retry from the battle restart and enter with full health, updated Arts and a balanced class setup. After Moebius K falls, complete the following cutscenes and dialogue without leaving the area.
- Complete the Noah-Mio Interlink tutorial.
- Defeat Consul K.
- Continue into the Moebius K battle.
- Handle summoned Keves Forces before they overwhelm the back line.
- Defeat Moebius K.
- Finish the post-battle scenes.
Complete Colony 4 scenes and hand off to Chapter 3
After the Moebius K sequence, control returns near Colony 4. Follow the active objective into the colony and complete the required conversations and scenes. The party’s visit to Colony 4 concludes the Chapter 2 campaign route and leads directly into the next chapter transition.
You may now explore Colony 4, accept optional activities and return for quests such as Nopon Register or Collapsed Traderpon when their conditions are met. They are not required to finish Chapter 2. Do not expect the other two Ouroboros pair forms or Ouroboros Chain Orders to become available here; those mechanics are introduced later in the main story.
Continue following the active main objective until the chapter-ending scene and Chapter 3 transition are recorded. Once the Chapter 3 title or opening objective appears, this chapter is complete.
- Complete the required Colony 4 scenes.
- Confirm Moebius K is defeated in the quest history or story log.
- Allow the Chapter 2 ending scenes to finish.
- Confirm the Chapter 3 transition or opening objective appears.
- Leave optional Colony 4 quests for later if desired.
Before you move on
- The Hillside Hulk is complete.
- The Hillside Ferronis Hulk has been restored and used as a rest point.
- The party has crossed from southern Aetia into the Fornis Region.
- Riku and Manana is complete.
- Gyanna Aspar has been defeated.
- The Chain Attack tutorial has been completed.
- A tutorial gem has been crafted and equipped.
- The Colony 4 attack has been cleared.
- Silvercoat Ethel has been defeated.
- Consul K and Moebius K have been defeated.
- The required Colony 4 scenes have finished.
- The Chapter 3 transition or opening objective is visible.
- No return to Colony 9, Yzana Plains or Alfeto Valley is required for Chapter 2 completion.
References for this chapter
- Xenoblade Chronicles 3 Nintendo Switch product page
- Xenoblade Chronicles 3 | Main Story Walkthrough Guide | GameWith
- XC3 – Chapter 2 Walkthrough
- Cooking, Chain Attacks and Gem Crafting – Chapter 2
- Boss Fight: Silvercoat Ethel – Chapter 2
- Boss Fight: Consul/Moebius K – Chapter 2
- The Hillside Hulk – Standard Quest
- Riku and Manana – Standard Quest
Ouroboros Forms & Roles: Learning Interlink Mechanics
Begin this chapter after the Chapter 2 ending. The three Kevesi-led Ouroboros forms and ordinary Chain Attacks are already available: Noah, Lanz and Eunie can lead their pairings with Mio, Sena and Taion respectively. Chapter 3 adds the three Agnian-led forms during its late-story progression and then teaches Ouroboros Orders during the Consul J sequence. Use ordinary encounters to practise Fusion Arts, raise Interlink Level to 3, manage the Heat Gauge and manually release before overheating. Keep a dependable Defender and healing plan because an active Interlink removes both members of that pair from their normal class roles. Finish the chapter by defeating Consul J, performing an Ouroboros Order, and returning to the post-battle story position that begins the Chapter 4 handoff.
1. Begin from the Chapter 2 ending state
Start this chapter from the save created after the Chapter 2 finale. Do not return to Colony 9, Yzana Plains or Alfeto Valley, and do not repeat the Chapter 2 Riku and Manana objective. That earlier progression has already supplied ordinary Chain Attacks, while the end-of-Chapter 2 story has supplied the first three Ouroboros forms.
The available Kevesi-led forms are Noah with Mio, Lanz with Sena, and Eunie with Taion. At this point, each pair can Interlink through either active character, but the lead character determines which version of that pair’s Ouroboros moveset you control. The other three, Agnian-led versions become available later in Chapter 3.
Before continuing the story, check the normal party at a rest spot. Keep at least one reliable Defender and enough healing to survive if an Interlink removes a key healer from ordinary combat. A practical learning party uses one Defender, two Healers and the remaining slots for damage, although this is a recommendation rather than a story requirement.
- Load a save made after the Chapter 2 ending.
- Confirm that normal Chain Attacks are available.
- Confirm that the Noah-Mio, Lanz-Sena and Eunie-Taion pairings can Interlink.
- Keep a Defender and dependable healing available.
2. Practise one Ouroboros form in a safe encounter
Choose an ordinary enemy near a landmark or rest spot. Avoid a Unique Monster or a required boss for the first test. Both members of the chosen pair must be active and alive. Select the active character’s Interlink command to merge the pair and enter the corresponding Ouroboros form.
While transformed, the pair uses Ouroboros Arts instead of their normal class Arts. The two characters are not separately performing their normal Attacker, Defender or Healer duties during the Interlink, so avoid merging your only source of healing when the party is already in danger. Use several Ouroboros Arts, then watch the Heat Gauge at the bottom of the battle display.
Release the form manually before the Heat Gauge fills completely. If the gauge reaches its limit, the Ouroboros form ends automatically and enters its recovery period. Manual release is useful because it avoids the full-overheat penalty and lets you keep the pair available for a later emergency or Chain Attack. Repeat the test with a second pairing so you understand that each pair has a separate form and cooldown.
- Use an ordinary enemy for the first test.
- Activate an Interlink with both members of the pair alive.
- Use several Ouroboros Arts.
- Manually release before the Heat Gauge fills.
- Test a second pairing.
3. Raise Interlink Level with Fusion Arts
Return to normal combat and use Fusion Arts. A Fusion Art combines a Combat Art with a Master Art, and successful uses build the active pair’s Interlink Level. Continue fighting a durable ordinary enemy until the level reaches 3 rather than transforming immediately at Level 1.
Once the Interlink indicator reaches Level 3, activate the pair and compare the resulting Ouroboros Arts with the lower-level version. Level 3 is particularly important for Chain Attacks because starting a Chain Attack while actively controlling that Level 3 Ouroboros form makes its Ouroboros Order available immediately after the feature has been unlocked by the story.
Do not keep the form active until it overheats simply to preserve Level 3. The level is built before Interlinking, while the Heat Gauge controls the duration of the current transformation. Release when the practice is complete, then let the pair recover before beginning another test.
- Use Fusion Arts during a normal encounter.
- Raise one pair to Interlink Level 3.
- Activate that pair after reaching Level 3.
- Release before overheating.
4. Follow the Chapter 3 route to the Agnian-form unlock
Continue the Chapter 3 main quest by following the objective marker through the required Fornis and Pentelas story route. Complete the mandatory field objectives and story battles as they appear; optional Hero Quests and exploration can wait unless you need experience or a stronger party.
When the story reaches the late Chapter 3 sequence around the Urayan Tunnels, Lambda Ferronis and Consul J, watch the tutorial prompts carefully. The story battle and its associated events unlock the Agnian-led forms for Mio, Sena and Taion. After the event, the three pairings can be led from either side: Noah or Mio, Lanz or Sena, and Eunie or Taion.
Use a safe encounter after the unlock and test at least one of the newly available Agnian-led forms. The two leads of a pairing do not merely change the character portrait; they provide different Ouroboros movesets and different Chain Attack Order effects. Choose one preferred lead for each pairing before the Consul J battle, but do not spend the entire chapter rebuilding every class.
- Follow the Chapter 3 main marker through the required story route.
- Reach the late Chapter 3 Urayan Tunnels and Lambda Ferronis sequence.
- Complete the story event that unlocks the Agnian-led forms.
- Test at least one newly available Agnian-led form.
5. Practise an ordinary Chain Attack
Chain Attacks were introduced earlier through the Riku and Manana objective in Chapter 2, so they should already be usable here. Build the Chain Attack gauge in a normal encounter, then press the command shown when the gauge is full. Start with a standard Chain Attack before attempting an Ouroboros Order.
Each round presents available Chain Orders with TP values and completion bonuses. Select the order that fits the situation, then choose characters whose TP can reach at least 100 percent. An Attacker is useful early when you want to increase damage, a Healer helps stabilize the party, and a Defender can protect the party or revive a fallen ally when the order completes. The exact sequence depends on the characters and Hero available in your current party.
Use this exercise to learn the order screen rather than chasing a maximum multiplier. Complete one ordinary Chain Attack against a weakened enemy or a story target that is not close to defeating the party. Review which characters remain available for later rounds before committing to each order.
- Fill the Chain Attack gauge in normal combat.
- Complete one ordinary Chain Attack.
- Inspect TP and completion bonuses before selecting each order.
- Use a Healer or Defender order when survival matters more than immediate damage.
6. Unlock and perform an Ouroboros Order during Consul J
The Ouroboros Order tutorial occurs during the late Chapter 3 Consul J sequence. Before entering that encounter, heal at a rest spot, equip familiar classes, and make sure at least one Defender and two healing options are available. Consul J can pressure several characters at once, so do not transform your only reliable healer without checking the rest of the party.
There are two ways to make an Ouroboros Order appear after the story unlock. The first is to complete Chain Orders with both members of the same Ouroboros pair, such as Noah and Mio or Lanz and Sena. The corresponding Ouroboros Order then becomes available for the next Chain Attack round. Selecting that Order resolves the special attack and ends the Chain Attack afterward.
The second method is the deliberate practice method. Before starting the Chain Attack, build a pair to Interlink Level 3, activate that Ouroboros form, and start the Chain Attack while you are controlling it. Its Ouroboros Order is then available immediately. If the Chain Attack began this way, the other Ouroboros Order for that same pair can be selected afterward, allowing the special two-Order sequence before the Chain Attack ends.
Use the Order when Consul J is vulnerable or when the party needs the damage and reactivation benefits. If the first attempt fails, retry with a normal party setup, save the Chain Attack gauge for the boss, and begin the Chain Attack from a Level 3 Interlink rather than relying on two matching character orders.
- Reach the Consul J sequence after the Ouroboros Order tutorial begins.
- Build one pair to Interlink Level 3 before starting a Chain Attack.
- Perform at least one Ouroboros Order.
- Understand that the matching-orders method ends the Chain Attack after the special Order.
- Understand that a Level 3 starting Interlink permits the paired two-Order sequence.
7. Defeat Consul J and hand off to Chapter 4
During the Consul J battle, focus on keeping the front line stable while healers clear the damage caused by his wide attacks. Use your normal class Arts and Fusion Arts to build the Chain Attack gauge, then spend it when the boss has taken enough damage for the Ouroboros Order to finish the phase. If the party starts collapsing, manually release an Interlink after its emergency purpose is served so the pair can return to normal roles and healing.
After the battle and its required scenes, follow the objective marker until the story returns you to the post-battle field position. Do not leave the area assuming Chapter 3 is incomplete because the next chapter does not begin immediately at the boss arena. The handoff is complete when the Chapter 3 ending events have finished and the Chapter 4 main-story objective is available.
At that point, retain the party arrangement that worked against Consul J, but begin preparing for broader class and Hero options in Chapter 4. Optional Chapter 3 Heroes and exploration are not required for this chapter’s completion state.
- Defeat Consul J after the Ouroboros Order tutorial.
- Finish the required post-battle scenes.
- Follow the next objective until the Chapter 4 handoff is active.
- Do not replay Chapter 2 or the earlier Colony 9 route.
Before you move on
- The save is positioned after the Chapter 2 ending, not before it.
- The three Kevesi-led forms are available: Noah-Mio, Lanz-Sena and Eunie-Taion.
- Chain Attacks are available from the earlier Riku and Manana progression.
- Fusion Arts have raised at least one pair to Interlink Level 3.
- A normal Ouroboros form has been activated and manually released before overheating.
- The late Chapter 3 story has unlocked the Agnian-led forms for Mio, Sena and Taion.
- At least one ordinary Chain Attack has been completed.
- The Ouroboros Order tutorial has occurred during the Consul J sequence.
- At least one Ouroboros Order has been performed.
- Consul J has been defeated and the post-battle Chapter 4 handoff is active.
References for this chapter
- Xenoblade Chronicles 3 | Chapter 2 Walkthrough & Boss Guide | GameWith
- Xenoblade Chronicles 3 | Chapter 3 Story Walkthrough | GameWith
- Xenoblade Chronicles 3: Ouroboros & Interlink - Levels & How To Use | GameWith
- Xenoblade 3: Ouroboros - Interlink | Gamepressure
- Chapter 3: Saffronias - Xenoblade Chronicles 3 Walkthrough & Guide | GameFAQs
- Urayan Tunnels - Xenoblade Chronicles 3 Walkthrough | Neoseeker
Region Routes: Great Cotte Falls to Maktha Wildwood
After Chapter 3, Chapter 4 begins at Colony Lambda and sends the party through Great Cotte Falls, Old Cliffside Way and Maktha Wildwood. Defeat Umber Drague, rest at Titan Rock Camp, complete Juniper’s Natural Selection Hero Quest in Colony Tau, then continue through High Maktha Wildwood. The route requires Imminent Illusion, the Stolen Provisions sequence and the Sparkling Pool Camp rest. Finish the chapter’s field battles against Ethel and Cammuravi’s Ferronises and Moebius O and P before entering the Castle section. Chapter 4’s opening story level is approximately 27, but later fights rise into the mid-30s.
1. Leave Colony Lambda and cross Great Cotte Falls
Begin the Chapter 4 main objective at Colony Lambda. Before leaving, check that every active party member has a usable class setup, at least one healer is equipped, and no character is using badly outdated accessories. The story route leads through Great Cotte Falls toward the next objective marker. Activate nearby landmarks and rest spots when they are directly on the route, but do not spend time clearing every container or unique monster.
Continue through the first section of Great Cotte Falls until the party reaches the large open area containing the Umber Drague encounter. The main route uses the falls’ natural slopes and elevated paths; if the marker seems to be above or below you, check the map for the next ledge or descent instead of circling the same platform.
- Start Chapter 4 at Colony Lambda.
- Reach the Umber Drague battle area in Great Cotte Falls.
- Keep the party around the opening Chapter 4 level range, approximately level 27 or higher.
2. Defeat Umber Drague and rest at Titan Rock Camp
Umber Drague is approximately level 30. Clear nearby enemies only if they are close enough to join the fight, then keep the defender positioned in front of the boss while healers remain within range of the party. Watch for the boss’s stronger attacks after its roar or heat-based attack; avoid letting the attacker characters pull the boss away from the defender. A Chain Attack is useful once the boss has lost a substantial amount of health, but do not sacrifice party survival merely to force an early burst.
After the battle, follow the updated objective back through the falls toward Titan Rock Camp. The camp is reached across the water and along the lower route from the battle area. Interact with the camp and choose Rest when prompted. This rest advances the Chapter 4 objective; it is not an optional camp visit. Once the scene ends, leave the camp and return toward the higher Great Cotte Falls route.
- Defeat Umber Drague.
- Reach Titan Rock Camp.
- Choose Rest at Titan Rock Camp so the next objective appears.
3. Descend Old Cliffside Way and complete Natural Selection
After resting, pass through the next Great Cotte Falls section and take the route toward Old Cliffside Way. Follow the objective marker down the cliffside path until the party reaches Maktha Wildwood. Continue through the marked route in High Maktha Wildwood until the automatic Hero Quest Natural Selection begins.
Natural Selection is required for this story route. Defeat the attacking Agnus fighters, then follow the Mystery Agnian trail through the forest. Continue to the quest marker at Colony Tau and investigate the colony rather than leaving the area to pursue unrelated field content. The quest concludes with a battle against three Annon Rhinons, around level 33. Keep the party grouped because the enemies can pressure the back line while the group is spread across the terrain.
Completing Natural Selection recruits Juniper, unlocks the Stalker class and grants the Rope Sliding traversal skill. Afterward, examine the rope mechanism at the marked route and use Rope Sliding to cross the gap. This traversal action is required to continue through the intended High Maktha Wildwood path.
- Reach High Maktha Wildwood through Old Cliffside Way.
- Complete the Natural Selection Hero Quest.
- Defeat the Annon Rhinons at Colony Tau.
- Confirm that Juniper and Rope Sliding are available.
4. Continue through High Maktha Wildwood and complete Imminent Illusion
Use the newly available rope route to continue through High Maktha Wildwood. Follow the yellow objective marker after each scene because the correct path alternates between forest floors, raised roots and rope crossings. Activate the Colony Tau and Maktha Wildwood landmarks that are beside the route so you can return quickly if you later pursue regional quests.
The next mandatory encounter begins Imminent Illusion. Fight the Mysterious Raider, approximately level 34, but do not assume that the objective requires a full defeat. Reduce its health far enough to trigger the story scene; the encounter ends when the event occurs. Once the scene is over, resume following the marker through the forest. Do not detour into Low Maktha Wildwood during this first pass. That lower area is optional for Chapter 4 and contains stronger enemies and unrelated exploration.
- Use Rope Sliding to remain on the main route.
- Trigger Imminent Illusion.
- Reduce the Mysterious Raider’s health until the required scene occurs.
- Continue through High Maktha Wildwood after the encounter.
5. Rest at Sparkling Pool Camp and finish Stolen Provisions
Continue through the upper forest route until the story directs the party to Sparkling Pool Camp. Interact with the camp and choose Rest. After the scene, Stolen Provisions begins. Search the nearby marked area for the enemies responsible for taking the supplies, then defeat the group of three Eregaa Anlood enemies, approximately level 33.
Next, collect three Yellowgrove Kelp Mushrooms in the nearby Yellowgrove area. Use the quest markers and collection prompts rather than wandering into the lower forest. Once all three mushrooms are registered, return to Sparkling Pool Camp. Interact with the camp again when prompted to complete the objective and trigger the next story scene.
If the party is underlevelled, use nearby normal encounters or camp experience before proceeding. Avoid high-level enemies below the intended route; they are not required for Stolen Provisions and can make the return trip unnecessarily difficult.
- Rest at Sparkling Pool Camp.
- Defeat the three Eregaa Anlood enemies.
- Collect three Yellowgrove Kelp Mushrooms.
- Return to Sparkling Pool Camp and complete the sequence.
6. Leave Maktha Wildwood and clear the field battles before the Castle
After the Sparkling Pool Camp scene, follow the main marker through the remaining Maktha Wildwood route toward the Castle. Save before leaving the forest and make sure the party has at least one reliable defender and two sources of healing or strong recovery support. The mandatory battles in this section are around levels 35 and 36, so replace any equipment that is several areas old.
The first major fight is against Ethel’s Ferronis and Cammuravi’s Ferronis. Focus the party’s damage on one target while the defender maintains control of the other, unless the battle’s positioning makes a split safer. Keep healers away from the front line and reserve Ouroboros or Chain Attack resources for the later part of the encounter if the party is stable.
Continue toward the Castle after the Ferronis battle. The next required encounter is Moebius O and P, approximately level 36. Prioritize survival during their area attacks and avoid allowing the party to scatter so that healing and defensive effects reach everyone. Use a Chain Attack when the bosses are sufficiently weakened or when a dangerous phase needs to be ended quickly.
Once Moebius O and P are defeated, follow the objective to reach the Castle. The route then changes into the Castle infiltration and Annihilator sequence covered in the next chapter section.
- Reach the Castle approach after passing through Maktha Wildwood.
- Defeat Ethel’s Ferronis and Cammuravi’s Ferronis.
- Defeat Moebius O and P.
- Reach the Castle and trigger the next story section.
Before you move on
- Umber Drague is defeated and Titan Rock Camp has been used to advance the story.
- The party has reached Colony Tau and completed Natural Selection, recruiting Juniper and unlocking Rope Sliding.
- Imminent Illusion has triggered and ended after the Mysterious Raider’s health was reduced.
- Sparkling Pool Camp has been used, Stolen Provisions is complete, and the three Yellowgrove Kelp Mushrooms were collected.
- Ethel’s Ferronis, Cammuravi’s Ferronis and Moebius O and P have been defeated.
- The party has reached the Castle entrance, ready for the next story section.
References for this chapter
- Xenoblade Chronicles 3 — Nintendo official release announcement
- Chapter 4 (XC3)
- Xenoblade Chronicles 3 Chapter 4 Walkthrough & Boss Guide
- Xenoblade Chronicles 3 Natural Selection Quest Guide
- Chapter 4: Life — Xenoblade Chronicles 3 Walkthrough & Guide
- Exploring Great Cotte Falls, Part 2
- Stolen Provisions — High Maktha Wildwood
Keves Castle Operation: Annihilator, Escape and the Queen of Keves
Complete the Chapter 4 Keves Castle operation from the Syra Hovering Reefs infiltration through the Annihilator Foundations, the escape route and the Queen of Keves encounter. Rest and prepare at Hovering Reef 2 Camp, use the castle switches and lifts to reach the Annihilator, then defeat the Level 42 Moebius D & J. Escape through Middle Drainage, Goods Transport Shaft and Upper Water Supply before fighting the Level 43 Queen of Keves. Her HP cannot be fully depleted: once Ether Protection activates, attacks miss and the story battle ends through the following scenes. This chapter ends with the transition into Chapter 5. Agnus City and Agnus Castle are later Chapter 5 objectives, not part of this operation.
Prepare at Hovering Reef 2 Camp
After the story route reaches the Syra Hovering Reefs, return to the intersection west of Colony 11 and take the southwest cable to Hovering Reef 7. Cross the reefs using the cables and vines until you reach Hovering Reef 2 Camp. Rest there before entering the castle operation. This is the best preparation point for the mandatory sequence, so craft available gems, prepare food, check accessories and save your game.
Take the cable southeast from Hovering Reef 2 to Hovering Reef 1. The main road is guarded, but you can climb the vines to approach from above or take the cable on the left toward the Ether Mine. The Ether Mine route contains Levnises but is less densely packed. Defeat enemies that detect you or move past them when the route is clear, then continue toward the containers in the northwest to enter Keves Castle through the delivery route.
Use a balanced six-character party with dependable healing and at least one Defender. Two Healers are a safe choice for the Level 42–43 battles, and War Medic or another source of reliable debuff recovery is useful. Do not look for TP items: Chain Attack gauge and Interlink access are combat resources, not consumable inventory supplies. Preserve some combat resources for the Queen, but do not avoid necessary fights merely to keep a perfect gauge.
- Rest at Hovering Reef 2 Camp.
- Craft gems, prepare food and check equipment.
- Save before entering Keves Castle.
- Bring dependable healing, a Defender and debuff recovery.
Enter Keves Castle and open the route to the Annihilator
The infiltration begins at Hangar, Lower Level near Storage Area #1. Your first objective is the western ramp. The northern exit has larger Levnises, while the southern exit has smaller troops and Levnises. Use whichever side is safer for your party, and avoid letting multiple patrols join the same battle. Two Guard Blockers protect the western ramp; defeat them and continue through Hangar, Lower: West Gate.
Proceed to Hangar, Upper: Main Gate and Hangar, Upper Level. Activate the switch on the eastern side to move the crates, then open the nearby door to reach Storage Area #3. Enter the rest spot here if you need to recover before continuing.
Cross the bridge west from Storage Area #3 and activate the next switch. Climb the ladder, follow the opened route north, drop across the crates and activate the switch there. Return to the ladder, climb again and continue north to the elevator. Activate it to reach Troop Reserve Section.
From Troop Reserve Section, the right-hand route is generally easier to manage. Follow it to the western end, defeat the Guard Rescuer and Guard Trooper near the ramp, climb the ramp and enter Equipment Storage. Open the door and activate the switch outside. Return to Troop Reserve Section, take the left route and open Standby Room #1. Continue through the opened western door, pass Hull Maintenance Block and approach Annihilator Foundations to trigger the mandatory battle.
- Reach the western ramp from Hangar, Lower Level.
- Activate the switches that move the crates and open the upper route.
- Use the elevator to reach Troop Reserve Section.
- Activate the Equipment Storage switch.
- Approach Annihilator Foundations after opening the route.
Defeat Moebius D & J at Annihilator Foundations
Moebius D & J are a Level 42 interlinked boss. The pair uses several damaging Arts, including Doom Rain, which hits the party and can inflict Blaze; Unstoppable Spear, which targets one character and can also inflict Blaze; and Grim Rush, which can inflict Launch. Chaos Arch and Dread Edge punish characters caught in the boss’s attack path or frontal area.
Keep your Defender positioned so the boss is not constantly turning through the party. Do not trap the boss against a wall if that forces your Healers and Attackers into its frontal attacks. When Dread Edge begins charging, use a Break attempt if available to interrupt it. After the boss becomes Enraged, move the party away from Infernal Call’s Blaze field and use Burst to end the Enrage when possible.
Cleanse Blaze from characters who are already low on health, especially Healers. If the party becomes unstable, use a Chain Attack for recovery and damage rather than saving it for an ideal finishing sequence. Interlink can protect a character during a dangerous attack, but avoid putting every Healer into Interlink at once. If you have built Interlink Level 3, the Ouroboros Talent Arts can shorten this high-health fight, but no specific form is required.
After Moebius D & J fall, allow the Annihilator scenes to play. There is no separate switch or arena objective after the boss. The story automatically begins the escape sequence.
- Defeat the Level 42 Moebius D & J.
- Remove Blaze from endangered characters.
- Interrupt Dread Edge when possible.
- Move the party out of Infernal Call’s Blaze field.
- Allow the Annihilator scenes to finish.
Escape through Middle Drainage and Upper Water Supply
After the Annihilator event, take the path down the left side in front of the party and enter the grate to reach Middle Drainage. Follow the channel until a large turbine blocks the route. The counterweights beside the turbine function as a lift; use them to reach Goods Transport Shaft and the piping above the channel.
Follow the upper route through the tunnel to Upper Water Supply. Continue to the grate at the end and open it. This triggers the Queen of Keves encounter. The escape route is mandatory and does not contain a separate branch that avoids the boss.
There is no shop or TP-item supply stop during this sequence. If the party is badly damaged after Moebius D & J, use any available rest point before opening the final grate. If your preparation was poor, reload the save from before the infiltration and improve healing, debuff recovery or equipment rather than expecting to leave the castle and return later.
- Take the left path after the Annihilator scenes.
- Enter Middle Drainage.
- Use the counterweights beside the turbine.
- Reach Goods Transport Shaft.
- Follow the piping to Upper Water Supply and open the grate.
Survive the Queen of Keves encounter
The Queen of Keves is a Level 43 story boss. Elemental Wind deals damage to one target and can inflict Break. Elemental Earth strikes beneath a target, deals area damage around the impact and inflicts Toxin. Elemental Flare fires three fireballs in succession and can inflict Blaze. Spread the party enough to limit overlapping area damage, but keep Healers close enough to reach fallen allies.
When the Queen becomes Enraged, Mind Blast adds a dangerous frontal attack. It deals damage and can inflict Arts Shackle, preventing affected characters from using Arts temporarily. Keep the party behind or beside the Queen when practical, and prioritize recovering any Healer hit by Arts Shackle. Cure Bullet is particularly useful if War Medic is available, although the effect can also expire naturally.
Use Burst when available to end Enrage, and use Chain Attacks as soon as they are useful for survival or damage. Do not save every Chain Attack for Overkill: the Queen’s health is story-limited and cannot be completely depleted. Interlink can protect a character during a lethal attack, but do not remove every available Healer from normal combat at the same time.
Near the end of the battle, the Queen casts Ether Protection. All attacks will miss while the protection is active. Stop trying to force additional damage and allow the scripted scenes to proceed. The encounter ends shortly afterward through the story sequence.
- Watch for Break from Elemental Wind.
- Remove Toxin and Blaze from characters in danger.
- Keep Healers safe from Mind Blast and Arts Shackle.
- Use Burst or Chain Attack during dangerous Enrage sequences.
- Stop attacking once Ether Protection activates.
Confirm the Chapter 4 handoff
Let the post-battle cutscenes and escape scenes finish. The Queen battle is not won by reducing her HP to zero; Ether Protection is the required story endpoint. When the sequence concludes, Chapter 4 is complete and the game transitions into Chapter 5: Eclipse.
Agnus City and Agnus Castle are not additional objectives in this chapter. Do not return to Keves Castle looking for a missing city trigger. Once control returns or Chapter 5 begins, save normally and check the new main quest marker before fast traveling.
If the handoff does not appear immediately, wait until every cutscene has ended. Reload only after confirming that the final post-battle scene has finished. The completion state is the Chapter 5 transition after the Keves Castle escape.
- Ether Protection has activated.
- The Queen encounter ends through the scripted scenes.
- The post-battle escape scenes finish.
- Chapter 5: Eclipse begins or its main objective becomes available.
- Do not treat Agnus City or Agnus Castle as Chapter 4 objectives.
Before you move on
- Moebius D & J, the Level 42 interlinked boss, are defeated.
- The Annihilator story event has played.
- The party escapes through Middle Drainage, Goods Transport Shaft and Upper Water Supply.
- The Level 43 Queen of Keves reaches Ether Protection and the battle ends through the following scenes.
- The game transitions into Chapter 5: Eclipse.
References for this chapter
- Xenoblade Chronicles 3 — Nintendo Switch product page
- Chapter 4: Life — Xenoblade Chronicles 3 Walkthrough & Guide
- Xenoblade Chronicles 3 Chapter 4 Walkthrough & Boss Guide
- Boss Fight: Moebius D & J — Chapter 4 Walkthrough
- Boss Fight: Queen of Keves — Chapter 4 Walkthrough
- Keves Castle — Xenoblade Chronicles 3 Walkthrough
Midgame: Swordmarch, The Castle Beckons, and Erythian Campaigns
Chapter 5 moves from the City at Swordmarch into the Erythia Sea and ends with the Li Garte Prison Camp escape. Complete the City’s required conversations and Castle Access, then gather prison intelligence on Corne Island and Thurbin Island before discussing it at Vinisog Holm Camp. Prepare at Inlet Camp before starting the infiltration: once the operation begins, Skip Travel is unavailable for a long stretch. Inside the prison, complete the Ghondor encounter and the First, Second, and Third Day of Prison objectives. The escape then requires several guard battles, Gyrinus, two phases against Moebius M, and Moebius N. Keep reliable healing, a functioning defender, and Chain Attacks available for the late sequence.
1. Reach the City and complete Castle Access
After the Chapter 4 transition, enter the Cadensia Region and follow the main objective to the Great Sword’s Base. Continue along the marked route and follow Shania into the City. At the City Entrance, stay with the story route until the required scenes finish, then go to the Lost Numbers Dormitory and speak with the Residential Guard. Choose to rest when prompted.
The following day, travel to the War Room. Use the elevator near Praetorian Hill to reach Monica and receive the Castle Access quest. Complete its required conversations with Samon, Timna, and Miyori. The objective then sends you to fight Planaa Ansel and four Seeth Ansel. Defeat the group, return to Samon, and complete the report conversation. Do not leave the City expecting the next objective until this report is finished.
- Reach the Great Sword’s Base and enter the City.
- Rest at the Lost Numbers Dormitory when instructed.
- Speak with Monica in the War Room.
- Speak with Samon, Timna, and Miyori.
- Defeat Planaa Ansel and the Seeth Ansel group.
- Report back to Samon.
2. Leave the City and begin The Castle Beckons
After Castle Access, return to the Lost Numbers Dormitory and follow the objective to Sentridge Harbor. Use the Boundary to travel into the Erythia Sea. The next main objective leads to Vinisog Holm, where you meet the Lost Numbers soldiers and Kisame at Vinisog Holm Camp.
The Castle Beckons requires two prison-intelligence fragments. Travel to Corne Island and complete its marked investigation, then travel to Thurbin Island and complete its investigation as well. Thurbin Island contains locked gates; collect the nearby South Gate Key, North Gate Key, and Front Gate Key as the objective route requires, then proceed through the island’s marked area. The two investigations can be completed in either order.
- Reach Sentridge Harbor.
- Sail the Boundary to Vinisog Holm.
- Meet Kisame at Vinisog Holm Camp.
- Collect the prison-information fragment on Corne Island.
- Collect the prison-information fragment on Thurbin Island.
3. Finish the prison intelligence objective and prepare at Inlet Camp
After both fragments are collected, return to Vinisog Holm Camp and use the Discuss option for the topic Li Garte Prison Information. This completes The Castle Beckons and starts the prison-infiltration phase. Sail north from Vinisog Holm toward Hykt’s Cove, enter the narrow inlet, and disembark near Inlet Camp.
At Inlet Camp, finish any preparation you want before resting. Upgrade current equipment, set gems and accessories, confirm class assignments, buy food, and make sure the active party has at least one dependable defender and two sources of healing if possible. Create a manual save. Rest at Inlet Camp and accept the prompt to begin the infiltration only when you are ready; Skip Travel is disabled for a substantial portion of the prison sequence, although available quests do not expire.
- Discuss Li Garte Prison Information at Vinisog Holm Camp.
- Reach Hykt’s Cove and Inlet Camp.
- Finish desired equipment, class, food, and side-quest preparation.
- Save manually before resting to begin the infiltration.
4. Enter the prison through Patulia Bay and find Ghondor
After starting the operation, the party appears in Patulia Bay at night. Sail north under the bridge, then disembark by the cliff and enter the narrow passage into Sea-Gnawed Cave. The left branch contains loot and ends without advancing the route; take the right branch to the broken wall and destroy it. Continue through Prison Precipice toward the far-west Vent Entrance, then enter the prison through the ventilation route.
Inside Li Garte Prison Camp, follow the vents and drop down at the route leading to the Food Storage and Central Cell. The party temporarily cannot use Ouroboros. Continue through the marked prison route until Ghondor and her companions engage you. Defeat Aggy and Oggy first to reduce incoming pressure, then defeat Ghondor. This encounter is a required story battle, not an optional confrontation.
- Enter Patulia Bay after beginning the operation.
- Pass through Sea-Gnawed Cave.
- Break through the wall at Prison Precipice.
- Enter through the Vent Entrance.
- Reach the Central Cell area.
- Defeat Aggy, Oggy, and Ghondor.
5. Complete the three prison days
After the Ghondor battle, follow the scenes to the Communal Cell Block and Cell No. 1, then return to the Central Cell as directed. Rest at Cell No. 1 when the objective tells you to begin the next day. For First Day of Prison, collect the specified prison items and report to the Prison Guard, then return to the Central Cell for the next instruction.
For Second Day of Prison, investigate the enraged Basreek Feris. Defeat it once, examine and follow the Feris pawprints, then defeat the Basreek Feris again near the southern gate. Before reporting back to the guards, you may speak with Ruggyscruggy in the cell block to complete Lost Stones; this quest is optional and does not block the story. Finish the report, speak with Ghondor, rest at Cell No. 1, and return to the Central Cell.
For Third Day of Prison, leave the prison area and defeat the three Kaalm Garaffa. The story then restores Ouroboros access and starts the escape.
- Rest at Cell No. 1 when instructed.
- Complete First Day of Prison and report to the guard.
- Defeat the Basreek Feris, follow its pawprints, and defeat it again.
- Optionally complete Lost Stones with Ruggyscruggy.
- Speak with Ghondor and rest before the third day.
- Defeat all three Kaalm Garaffa.
6. Escape the prison and defeat Gyrinus
After Third Day of Prison, defeat the required Agnian guards in the prison yard. The nine guards are arranged in three groups: one nearby and two groups farther west by the lake. Clear each group before moving on so you do not pull multiple encounters together. Ouroboros is available again, so use Interlink when several enemies surround the party or when healing is under pressure.
Rendezvous with Ghondor at Watchtower No. 1, then defeat the next group of twelve Agnian guards. Continue through the west-gate route and defeat the Agnus Vanguard Elite, Agnus Skirmisher, Agnus Medic, and Agnus Scout. Prioritize the Medic when it is safe to do so, while keeping the defender positioned to hold the main threat.
Proceed through Prison Camp, Freight Gate, then head northwest toward the western gate. Gyrinus is the next mandatory miniboss. Restore the party before engaging, keep the defender between Gyrinus and the healers, and use a Chain Attack if the fight becomes unstable; more major battles follow immediately.
- Defeat the nine required Agnian guards.
- Meet Ghondor at Watchtower No. 1.
- Defeat the next twelve Agnian guards.
- Defeat the Agnus Vanguard Elite, Skirmisher, Medic, and Scout.
- Reach the western gate.
- Defeat Gyrinus.
7. Defeat both Moebius M phases and Moebius N
Moebius M is fought twice at level 49. In the first battle, maintain healing and damage her normally. When Eclipse Soul begins, M becomes immobile and the party cannot immediately counter the possession mechanic; keep the party alive and wait for the effect to end rather than wasting attacks on the wrong target.
The second Moebius M battle restores her health and adds the active Eclipse Soul mechanic. When a party member is possessed, Taion’s Mondo indicates the affected character. Target the possessed character as directed and attack until the possession ends; attacks do not damage that ally and help resolve the mechanic. M can also inflict Bind with Dominion Flower, so keep healers ready and avoid letting the defender fall during her area attacks. A Chain Attack is especially useful after the second phase begins or when M enters her dangerous late phase.
Moebius N follows immediately at level 50. This is the final mandatory battle of Chapter 5 and there is no normal exploration break afterward. Enter it with the party healed and retain enough revival and defensive options to survive a long fight. Keep the defender engaged, revive fallen healers promptly, and use Chain Attacks for emergency healing or a controlled damage window. Once N is defeated, follow the objective to escape the castle, speak with the required characters, and inspect the cell when directed. The resulting scenes complete Chapter 5 and transition into Chapter 6.
- Defeat Moebius M in the first phase.
- Survive the first Eclipse Soul sequence.
- Defeat Moebius M in the second phase.
- Break the possession effect when the marked ally is indicated.
- Defeat Moebius N.
- Complete the final escape conversations and cell inspection.
- Confirm the Chapter 6 transition.
Before you move on
- Castle Access is complete and the City report to Samon has been made.
- The Castle Beckons is complete after discussing Li Garte Prison Information at Vinisog Holm Camp.
- Ghondor, Aggy, and Oggy have been defeated in Li Garte Prison Camp.
- First Day of Prison, Second Day of Prison, and Third Day of Prison are complete.
- The Agnian guard groups, the Agnus guard formation, and Gyrinus have been defeated.
- Both Moebius M phases and Moebius N have been defeated.
- The final escape scenes finish and the game transitions into Chapter 6.
References for this chapter
- Xenoblade Chronicles 3 Nintendo Switch product page
- Exploring the City - Chapter 5 Walkthrough | Xenoblade Chronicles 3 | Gamer Guides
- Heading to Li Garte Prison Camp - Chapter 5 - Walkthrough | Xenoblade Chronicles 3 | Gamer Guides
- Xenoblade Chronicles 3 | Chapter 5 Walkthrough & Boss Guide | GameWith
- Chapter 5: Eclipse - Xenoblade Chronicles 3 Walkthrough & Guide | GameFAQs
- Boss Fight: Moebius M - Chapter 5 - Walkthrough | Xenoblade Chronicles 3 | Gamer Guides
Chapter 6 Opening: From the Fog to Captocorn Pass
Chapter 6 begins with Noah lost in fog. Follow the visible light and complete the awakening sequence, then defeat Moebius N and the Queen of Agnus at level 50. After the battles, meet Mio, leave through the West Perimeter Gate, and follow the Cadensia route to Hope’s Rest. Return to Agnus Castle, complete the scenes at the Ascension Grounds, rest at the Station Breakroom, and make Mio’s hairstyle choice. The story then sends you back through the Prison Camp’s Freight Gate and west exit. Follow the road northwest through the Old Road of Rebirth until you enter Upper Aetia and reach Captocorn Peak. Activate Captocorn Pass as soon as you arrive. Stop there; the next chapter section begins with the onward route from this landmark.
1. Follow the light through the opening fog sequence
Chapter 6 starts with the party separated in a fog-filled sequence. Move forward toward the visible light and the voices guiding Noah. The path is intentionally limited, so keep advancing toward the illuminated area rather than searching for a side route. Several story scenes play automatically as you approach the light.
When control returns, follow the active objective markers through the short awakening section. This portion establishes the transition into Chapter 6 and does not require optional exploration. If the objective marker appears to stop moving, turn toward the brightest visible opening and continue forward until the next scene begins.
The party returns to combat immediately afterward. Before engaging the next boss, make sure your active party uses the normal attacker, defender, and healer balance. The story sequence supplies the required combat setup, so there is no need to leave the area for preparation unless your equipment or levels are significantly behind the surrounding enemies.
- Approach the light during the fog sequence.
- Advance through the awakening scenes until the party regains normal control.
- Confirm the active party has dependable healing and a defender before the boss encounter.
2. Defeat Moebius N
Moebius N is the first required Chapter 6 boss and is level 50. Keep the party spread enough to avoid losing multiple characters to the same area attack, while keeping healers close enough to restore the front line. Maintain attention on the boss rather than chasing minor targets away from the main battle area.
Use your defender to hold Moebius N’s attention and position the boss away from the healers. Save a Chain Attack or Interlink use if the battle is going smoothly; the following Queen of Agnus encounter is another mandatory fight in the same story sequence. If the party begins losing control, prioritize reviving healers and stabilizing aggro before attempting a burst.
No special collectible or optional quest is required to clear this encounter. When Moebius N is defeated, allow the following scenes to finish. The next objective continues directly into the Queen of Agnus battle.
- Defeat level-50 Moebius N.
- Keep the defender between the boss and the support characters.
- Revive healers first if the party begins to collapse.
- Wait for the story transition to the next battle.
3. Defeat the Queen of Agnus and meet Mio
The Queen of Agnus is the next mandatory level-50 encounter. Treat this as a separate battle even though it follows Moebius N without a normal exploration break. Heal immediately when the fight begins, re-establish the defender’s aggro, and keep the party positioned so a single attack cannot disable several characters at once.
Use your strongest reliable Arts and Talent Arts after the Queen’s attention is secured. A Chain Attack is appropriate if the boss is near defeat or if the party needs a controlled damage window, but do not start one while the healers are down or the defender has lost aggro. If the fight is lost, reload the latest autosave and repeat the two-battle sequence with the Chain Attack or Interlink reserved for the Queen.
After the Queen is defeated, follow the new objective to the marked location and meet Mio. Continue through the mandatory dialogue until the route to the West Perimeter Gate becomes available. Do not leave the area for unrelated activities before this meeting, because the next route is opened by the story scenes.
- Defeat the level-50 Queen of Agnus.
- Restore the party between the two boss encounters if necessary.
- Meet Mio at the marked location after the battle.
- Continue until the West Perimeter Gate objective appears.
4. Travel through the West Perimeter Gate to Hope’s Rest
From the marked meeting location, follow the objective toward the West Perimeter Gate. Pass through the gate and continue along the Cadensia route. The road bends away from the prison area and eventually leads to Hope’s Rest, a viewpoint overlooking Patulia Bay. Stay on the marked road instead of climbing nearby slopes or attempting to return through the castle interior.
Hope’s Rest is reached by following the path southwest after passing through the gate. When the party arrives, allow the story scenes to play through completely. The location is a required narrative stop, not an optional viewpoint, and the next objective does not advance until the scene sequence finishes.
After the Hope’s Rest scenes, the game sends you back toward Agnus Castle. Fast travel is normally available if you want to shorten the return trip, but following the objective marker on foot also works. Use a rest spot before returning only if you need to restore health or adjust equipment.
- Pass through the West Perimeter Gate.
- Follow the Cadensia road toward Hope’s Rest.
- Reach Hope’s Rest and finish its full scene sequence.
- Return toward Agnus Castle when the objective updates.
5. Complete the Agnus Castle, Ascension Grounds, and Station Breakroom scenes
Return to Agnus Castle and follow the objective into the Ascension Grounds. Move toward the marked central area and continue through the required scenes. If the objective marker is not immediately visible, check the center of the grounds rather than searching the outer castle corridors.
The story then directs you to the Station Breakroom. Enter the breakroom on the east side of the castle area and rest when prompted. This rest is required progression, not an optional recovery action. Mio’s hairstyle choice follows the rest scene. Either option changes her appearance only; it does not change her class access, statistics, or combat abilities.
After the hairstyle scene, return to the Ascension Grounds when the objective sends you there. Speak to the marked person and finish the resulting conversation. The game then prepares the party to leave the castle region and pursue the route toward Captocorn Peak. Do not continue into optional cleanup if you have not completed these scenes, because the Cadensia travel objective appears only after the castle sequence advances.
- Return to Agnus Castle after Hope’s Rest.
- Complete the required Ascension Grounds scenes.
- Rest at the Station Breakroom.
- Choose Mio’s hairstyle.
- Return to the Ascension Grounds and finish the follow-up conversation.
6. Leave Cadensia and reach Captocorn Pass
When the story sends you after the true Queen of Agnus, travel to the Prison Camp’s Freight Gate in the Cadensia Region. From there, take the west exit. Continue northwest along the road instead of turning back toward the castle or following the earlier route to Hope’s Rest.
Follow the road to the Old Road of Rebirth. Continue through the marked transition until the party enters Upper Aetia and reaches Captocorn Peak. The regional transition confirms that you are on the correct route; no optional quest is required to open this passage.
Captocorn Pass is the first landmark to activate after arriving at Captocorn Peak. Walk forward into the snowy approach until the location registers, then use the landmark to save your progress and establish a fast-travel point. Stop at Captocorn Pass. The next section resumes from this landmark and covers the onward Chapter 6 route.
- Fast travel or travel to the Prison Camp’s Freight Gate.
- Leave through the west exit.
- Follow the road northwest to the Old Road of Rebirth.
- Continue into Upper Aetia and Captocorn Peak.
- Activate Captocorn Pass.
- Stop here and hand off to the next chapter section.
Before you move on
- The fog and light sequence is complete.
- Moebius N and the Queen of Agnus have been defeated.
- Mio has been met at the marked location.
- The party has passed through the West Perimeter Gate and completed the Hope’s Rest scenes.
- The party has returned to Agnus Castle, completed the Ascension Grounds scenes, rested at the Station Breakroom, and chosen Mio’s hairstyle.
- The party has left through the Prison Camp’s Freight Gate, followed the Old Road of Rebirth, entered Captocorn Peak, and activated Captocorn Pass.
- The active story position is at Captocorn Pass, ready for the next section.
Chapter 6: Choices — Colony Omega, Cloudkeep and the Chapter 7 Transition
Begin this section at Captocorn Pass in the Upper Aetia Region. Follow the snowy route south and then east along Tsang Road, rest at Tsang Camp, and continue to Colony Omega. The colony assault contains several forced fights, including the Colony Omega Force, the four named opponents Mwamba, Hackt, Glorysong Miyabi and Smoldering Cammuravi, and finally Moebius Y. Completing Side Story: Mio is mandatory for the main story. Its rewards include Miyabi as a Hero, Mio’s Troubadour class, Zephyr Rank 20 and Mio’s second Soul Link slot. After the colony is liberated, travel west to Gava Junction, then northwest along Ladras Way to Ladras Camp. From there, reach the Altar of Reception and enter Cloudkeep through Spoondrift Gate. Climb the linear interior route and prepare for two consecutive boss stages: Moebius J and Moebius D together at level 54, followed by Moebius D & J at level 55. Defeat both stages and let the Cloudkeep scenes play without quitting. Chapter 7 begins immediately after those scenes.
1. Start at Captocorn Pass and begin Side Story: Mio
This route starts when the party arrives at Captocorn Pass in the Upper Aetia Region. Walk forward into Captocorn Peak and continue through the first story scenes. The game automatically starts Side Story: Mio shortly after entering the area; you do not need to find a separate quest giver or manually activate it.
Follow the snowy path south from Captocorn Pass. At the junction, take the route east and southeast along Tsang Road. The western branch is not the required route at this point. Continue along the road until you reach Tsang Camp, where the objective directs you to rest. Use the rest spot before proceeding because the next section contains several consecutive battles.
Side Story: Mio is not optional if you are following the main story. The game uses this quest to resolve the Colony Omega objective and unlock the party rewards needed for the remainder of the chapter. The recommended quest level is about 50, so check equipment, gems, accessories and Arts before leaving Tsang Camp.
- Reach Captocorn Pass in the Upper Aetia Region.
- Walk forward until Side Story: Mio begins.
- Travel south, then east and southeast along Tsang Road.
- Rest at Tsang Camp before continuing.
- Confirm that Side Story: Mio is the active objective.
2. Assault Colony Omega and clear the outer troop formations
Leave Tsang Camp and continue south along the route. At the next opportunity, turn east toward Colony Omega. The approach leads to Colony Omega Camp and then to the colony’s Ferronis. Several groups of mixed Keves and Agnus soldiers block the way.
The first large encounter is the Colony Omega Force. The formation includes Agnus Duoblades, Keves Snipers and other soldiers attacking together. Keep the party close enough for healing fields and area Arts to cover the group, but make sure the Defender is the enemy focus before committing to a Chain Attack. Eliminate exposed attackers first if the formation is spreading damage across your party.
Continue around the approach to the front of the Colony Omega Ferronis. A second mixed troop formation must be defeated before the named opponents appear. These battles are part of the quest and cannot be bypassed by taking a side path. If the outer groups overwhelm the party, retreat to Colony Omega Camp or Tsang Camp, rest, update accessories and return with the same route.
Do not save every Interlink and Chain Attack for a theoretical final phase. The colony sequence is a series of forced encounters, and using one of these tools to stabilize a difficult troop battle can leave the party in better condition for the named opponents.
- Reach Colony Omega through the southern and eastern route from Tsang Camp.
- Defeat the Colony Omega Force.
- Defeat the second mixed troop formation near the Ferronis.
- Restore the party before the named Colony Omega opponents appear.
- Keep a Defender and dependable healing available.
3. Defeat Mwamba, Hackt, Miyabi and Cammuravi
After the outer formations are defeated, advance into the Colony Omega sequence. The named opponents are Mwamba, Hackt, Glorysong Miyabi and Smoldering Cammuravi, each around level 53. They fight as a group, so avoid allowing the encounter to become a spread-out battle across the entire field.
A practical priority is to pressure Glorysong Miyabi or another support target first, then remove Mwamba if he is contributing heavy damage. Hackt functions as a Defender and can usually be left until the more dangerous attackers or support units are under control. Watch the battle interface rather than relying on a fixed order if one opponent is already near defeat or has drawn away from the group.
Use your own Defender to keep the opponents facing away from the Healers. If the party becomes surrounded, Interlink with the character whose Ouroboros form gives you the best immediate survivability, then return to normal combat once the formation is stable. A Chain Attack is appropriate when it can remove one opponent or prevent the group from recovering.
The battle is followed by the Moebius Y encounter, so do not assume that defeating the four opponents ends the quest. Allow the post-battle scenes to finish and keep control until the next fight begins.
- Defeat Mwamba.
- Defeat Hackt.
- Defeat Glorysong Miyabi.
- Defeat Smoldering Cammuravi.
- Use healing, Interlink or Chain Attack before the party is overwhelmed.
- Remain ready for the Moebius Y battle.
4. Defeat Moebius Y and collect the Side Story: Mio rewards
Moebius Y is approximately level 54 and follows the Colony Omega opponents as the final battle of Side Story: Mio. The boss has high resistance to Break and other reactions, so treat Break as an opportunity rather than a guaranteed plan. Its recorded physical defence is higher than its ether defence, making ether-focused damage useful when your party can provide it without sacrificing healing or aggro control.
Keep the Defender between Moebius Y and the rest of the party, and place healing fields where the frontline can remain inside them. Do not allow the fight to become a chase across the arena. If the boss turns toward a Healer, stop attacking briefly and restore control of the target before committing to a Chain Attack.
Use Interlink when the party needs protection from a dangerous attack cycle or when a downed character cannot be revived safely. Chain Attacks are most useful after the party has established aggro and the Healers are not already struggling to keep everyone alive. If you fail, return to Tsang Camp or Colony Omega Camp, rest and adjust the party before repeating the outer battles.
After Moebius Y falls and the final scenes play, Miyabi joins as a Hero. The quest also unlocks the Troubadour Hero Class for Mio, raises the Zephyr class rank cap to 20 and unlocks Mio’s second Soul Link slot. These rewards are granted by completing the quest; no separate recruitment battle is required. You may equip Troubadour immediately if your party needs another Healer, but keep enough Defenders and Attackers active for the next boss sequence.
- Defeat Moebius Y at approximately level 54.
- Use ether damage where practical, without weakening party roles.
- Confirm the final Side Story: Mio scenes have finished.
- Confirm Miyabi is available as a Hero.
- Confirm Troubadour is unlocked for Mio.
- Confirm Zephyr Rank 20 and Mio’s second Soul Link slot are available.
5. Travel from Colony Omega to Ladras Camp
After Side Story: Mio is complete, control returns near Colony Omega. Leave the colony and travel west. Continue slightly north until you reach Gava Junction. From Gava Junction, take the west or northwest route toward Ladras Way; the southern route returns toward the lower Aetia Region and is not the direct Cloudkeep path.
Follow Ladras Way west through the snowy terrain. Ladras Camp is near the western end of the route and is the intended recovery point before Cloudkeep. Rest there, check every active character’s equipment and Arts, and save before approaching the next story landmark.
The area contains optional paths and quests, but they are not required for Chapter 7. In particular, Nocclia Mire is an optional poisonous swamp route. Do not divert into it while following the main story unless you have the Hazard Neutralization field skill from Segiri. The required route to Cloudkeep goes through Ladras Way and does not require crossing the swamp.
Use this preparation stop to establish a balanced formation. The Cloudkeep sequence is easier with a reliable Defender, at least one dedicated Healer and a second source of recovery or support. Bring Arts that can attempt Break or other reactions, but do not build the entire party around reactions because the bosses have substantial resistance.
- Leave Colony Omega after Side Story: Mio.
- Reach Gava Junction.
- Take the northwest route toward Ladras Way.
- Reach Ladras Camp.
- Rest, update equipment and save before Cloudkeep.
- Avoid Nocclia Mire unless Hazard Neutralization is available.
6. Enter Cloudkeep through the Altar of Reception
From Ladras Camp, travel northwest along Ladras Way to the Altar of Reception. Approach the altar to trigger the story scene that creates the bridge to Cloudkeep. Cross the bridge and enter through Spoondrift Gate.
Cloudkeep’s exterior and interior route may look broad, but the required path is largely linear. Climb the large staircase and continue upward through the structure. Follow the objective marker and keep moving toward the highest-level door. Optional containers and side paths can be ignored if you want to preserve time and resources for the boss sequence.
There is no required puzzle or alternate route that blocks progression here. Before approaching the final upper door, restore the party and make sure the active classes, Arts, accessories and gems are correct. The next encounter begins the Cloudkeep boss sequence, and the first stage is followed immediately by another boss stage.
The Cloudkeep bosses are around levels 54 and 55. If the party is substantially below that range, use bonus EXP at a rest spot or complete easier preparation content before entering. You do not need to complete every other primary-character Ascension Quest to unlock Chapter 7; Side Story: Mio is the story-critical Ascension Quest in this section.
- Reach the Altar of Reception from Ladras Camp.
- Trigger the bridge scene.
- Enter Cloudkeep through Spoondrift Gate.
- Climb the main staircase and follow the upper route.
- Restore the party and save before the upper door.
- Enter with a balanced party near the boss level range.
7. Defeat Moebius J and Moebius D together
The first Cloudkeep boss stage contains Moebius J and Moebius D simultaneously, both at approximately level 54. This is one battle with two active bosses, not two separate one-on-one fights. Keep the Defender’s target under control so the two bosses do not repeatedly turn toward the Healers.
Prioritize Moebius J if the party can safely do so. J can summon Moebius Puppets, and the additional enemies can make the battle spiral if they are left alive while D continues attacking. Remove puppets when they begin to occupy the field or threaten a Healer, then return pressure to J. Once J is defeated, finish D while maintaining the normal Defender and Healer formation.
Both bosses have high reaction resistance, so Break, Topple and other effects should be treated as bonus openings rather than the only plan. Use positional Arts when the correct angle is available, but do not abandon the party’s safe formation to chase a positional bonus. If the group is in danger, use Interlink defensively or launch a Chain Attack to remove J before the puppet pressure becomes unmanageable.
There is no full recovery screen separating this encounter from the combined battle. Enter the first stage with the Healers’ Arts ready and avoid spending every survival tool immediately unless the battle is already close to failure.
- Begin the simultaneous Moebius J and Moebius D battle.
- Keep the Defender between the bosses and the Healers.
- Prioritize Moebius J when safe.
- Defeat Moebius Puppets before they overwhelm the field.
- Defeat Moebius J and then Moebius D, or finish the remaining boss after J falls.
- Prepare to continue immediately into the combined battle.
8. Defeat Moebius D & J and trigger Chapter 7
After Moebius J and Moebius D are defeated separately, the encounter continues as Moebius D & J at approximately level 55. The combined boss has a large health pool and can hit the current target with heavy consecutive pressure. Keep the Defender active and place healing fields where the frontline can remain protected.
The combined form has high reaction resistance and is immune to several knockback or control effects, so do not wait for a perfect Break or Topple chain. Maintain steady damage, use Chain Attack when the party is stable and reserve Interlink for a dangerous attack cycle, emergency survival or a decisive damage window. If the boss focuses a non-Defender, stop attacking long enough to restore aggro or revive the fallen character.
Unlike the first stage, the combined form does not use the same Moebius Puppet pressure, so keep the party focused on the boss rather than searching the arena for extra targets. The safest general pattern is to maintain the frontline, heal through area damage, revive promptly and use the Chain Attack when the boss is already controlled.
If the party loses, reload the manual save made before the upper door if available. Recheck accessories and gems, consider moving one attacker into a more supportive class, and use the first-stage Chain Attack earlier so the party reaches the combined form with more healing and revival capacity.
When Moebius D & J falls, do not quit during the following Cloudkeep scenes. Let the dialogue and cutscenes run through the meeting with the true Queen of Agnus and the immediate aftermath. Chapter 7 begins immediately after these Cloudkeep scenes finish. The transition is confirmed when the chapter heading or active objective changes to Chapter 7. Create a fresh manual save once control returns.
- Defeat Moebius D & J at approximately level 55.
- Maintain Defender control and continuous healing.
- Use Chain Attack or Interlink when the party is stable or in danger.
- Allow every post-battle Cloudkeep scene to finish.
- Confirm the true Queen of Agnus scenes have played.
- Confirm Chapter 7 begins immediately afterward.
- Create a new manual save after control returns in Chapter 7.
Before you move on
- Captocorn Pass and Captocorn Peak have been reached.
- Side Story: Mio is complete.
- The Colony Omega Force and the required outer troop formations are defeated.
- Mwamba, Hackt, Glorysong Miyabi and Smoldering Cammuravi are defeated.
- Moebius Y is defeated.
- Miyabi is available as a Hero.
- Troubadour is unlocked for Mio.
- Zephyr Rank 20 and Mio’s second Soul Link slot are available.
- Gava Junction, Ladras Way and Ladras Camp have been traversed.
- The Altar of Reception bridge scene has played.
- Cloudkeep has been entered through Spoondrift Gate.
- Moebius J and Moebius D have been defeated in their simultaneous battle.
- The combined Moebius D & J battle has been defeated.
- The true Queen of Agnus Cloudkeep scenes have finished.
- Chapter 7 begins immediately after those scenes.
- A new manual save exists after control returns in Chapter 7.
References for this chapter
- Xenoblade Chronicles 3 — Chapter 6: Choices Walkthrough and Guide
- Xenoblade Chronicles 3 Side Story: Mio Quest Walkthrough Guide - GameWith
- Xenoblade Chronicles 3 — Hero Quest: Side Story - Mio
- Xenoblade Chronicles 3 — Exploring Captocorn Peak Walkthrough
- Xenoblade Chronicles 3 — Official Nintendo Switch release information
Optional Ascension & Hero Quests: Late-Game Class Caps
Complete this chapter after the Chapter 6 campaign route, with Side Story: Mio already finished, and before c10’s final Origin preparation. Do not require or repeat Side Story: Noah here: it becomes available later in Chapter 7 during The Ultimate Vessel after five Origin Metals have been obtained, and c10 should verify its completion. The optional Side Stories for Eunie, Lanz, Taion and Sena raise Medic Gunner, Heavy Guard, Tactician and Ogre from a Rank 10 cap to Rank 20. Each requires the associated class to have reached Rank 10, plus a specific information topic, rest spot and active-Hero condition. None is required to enter or complete Origin. Use System → Hero Roster to inspect prerequisites, and train only the classes you intend to use.
Check class ranks and separate optional Ascension content from the main story
Open the Characters menu and check the starting classes of Noah, Mio, Eunie, Taion, Lanz and Sena. For each Side Story covered here, the relevant starting class must have reached Rank 10; character level alone is not enough. When the quest is completed, its class cap rises from Rank 10 to Rank 20 for characters who can inherit that class. The quest does not automatically train every character in the class.
Use System → Hero Roster to inspect each Hero’s conditions before travelling. The displayed requirement may involve story progress, a colony or Standard Quest, an information topic, a particular rest spot, an active Hero or Rank 10 in the relevant class. Complete the four optional Side Stories only for classes that support your intended party; none is required for the mandatory route through Origin.
- The relevant starting class is Rank 10 before its Side Story is attempted.
- System → Hero Roster has been checked for hidden or incomplete prerequisites.
- You understand that these four Side Stories are optional campaign content.
Verify Side Story: Mio, but leave Side Story: Noah for Chapter 7
Side Story: Mio is completed during the Chapter 6 main route at Colony Omega. Check the quest log and class menu to confirm that Miyabi is available and Zephyr’s rank limit has been raised beyond 10. If Mio’s quest is not complete, return to the Chapter 6 main objective rather than trying to start it as an optional information quest.
Do not require Side Story: Noah in this chapter. It is a later Chapter 7 story-linked quest during The Ultimate Vessel, after the party has obtained five Origin Metals. It takes the party to Gardin Defense Base and ends with the Consul Crys encounter, raising Swordfighter’s rank limit to 20. Leave this check for c10, where it belongs in the Origin Metal route.
- Side Story: Mio is recorded as complete from the Chapter 6 main route.
- Miyabi is available and Zephyr can advance beyond Rank 10.
- Side Story: Noah is not being treated as a c06 prerequisite.
- Side Story: Noah is scheduled for verification during c10’s Chapter 7 Origin Metal route.
Complete Side Story: Eunie from Fourtune Clovers
Travel to the southeast part of the City in Swordmarch and listen to the children discussing Fourtune Clovers. If the conversation is absent, advance the City-related story and return later. Go to City Camp, set Riku and Manana as the active Heroes, and discuss Fourtune Clovers at the rest spot. The topic and the active-Hero setting are both required to begin Side Story: Eunie.
Follow the quest marker into the Pentelas Region and complete the investigation objectives and required battles. Use at least one Defender and two dependable revival-capable Healers. Keep Break and Topple available for dangerous attacks, and use an Interlink or Chain Attack if the party begins losing healers. After the final encounter, confirm that Medic Gunner’s rank limit has increased to 20. Do not confuse this optional quest with Mio’s mandatory Chapter 6 Side Story.
- Fourtune Clovers was overheard in the City.
- Fourtune Clovers was discussed at City Camp.
- Riku and Manana were active Heroes when the topic was discussed.
- Medic Gunner can advance beyond Rank 10.
Complete Side Story: Lanz from Curious About Training
After Chapter 5 has advanced far enough for The Castle Beckons, the City and the Boundary to be available, travel to Fuller Elevator Landing at Great Sword’s Base in the Cadensia Region. Listen to the soldiers near the landing to obtain Curious About Training, then discuss that topic at a rest spot. If the conversation is missing, advance the City story and check again; this information is easy to overlook because the main route does not require returning to the elevator landing.
Follow the quest to the training ground southwest of City Camp, then continue through Serene Square and the War Room. The route proceeds to Morrack Inlet, Knife’s Edge Pass and Pedesto Valley Floor. Investigate the transport at the marked shelter and defeat the Garvel group before fighting Moebius H. Preserve Break and Topple for the longer enemy attack animations, and use a Chain Attack or Interlink if the party’s Healers are overwhelmed. Completion raises Heavy Guard’s rank limit to 20.
- The Chapter 5 City and Boundary prerequisites are complete.
- Curious About Training was obtained at Fuller Elevator Landing.
- The topic was discussed at a rest spot.
- The Garvel group and Moebius H were defeated.
- Heavy Guard can advance beyond Rank 10.
Complete Side Story: Taion from The Sea
In Chapter 6, listen to the soldiers near Death’s Door Camp at Agnus Castle to obtain The Sea. Travel to Inlet Camp, set Riku and Manana as the active Heroes, and discuss The Sea there. This specific rest spot and Hero combination is required to start the quest. Keep Riku and Manana active while pursuing the objectives; if the quest suspends after changing Heroes, restore them and continue from the current objective.
Follow the route to Colony Lambda and speak with Isurd. Discuss Isurd’s Request at the Lambda Shelter, then continue through the Erythia Sea objectives toward Hermit’s Inlet. Complete the Ferronis investigation and material objectives, then follow the marker through Farlaine Underpass and back toward Hermit’s Inlet.
The final battle is against Moebius V. Prepare protection against Poison and Bind, especially for Healers. Two Healers and at least one Defender make recovery safer. Keep Break and Topple available for Lethal Mist and Accursed Dance; interrupt charged attacks when possible. If a Bind or damage-over-time sequence disables the Healers, use an Interlink or Chain Attack to create recovery time, revive the party and resume control of the boss. Completion raises Tactician’s rank limit to 20.
- The Sea was overheard near Death’s Door Camp.
- The Sea was discussed at Inlet Camp with Riku and Manana active.
- Riku and Manana remained active while the quest was pursued.
- Moebius V was defeated.
- Tactician can advance beyond Rank 10.
Complete Side Story: Sena from Ghondor’s Grumblings
In Chapter 7, first advance the main story until Samon has discussed the vessel capable of entering the Great Sea. Then listen near the maintenance area southwest of Michiba Canteen in the City to obtain Ghondor’s Grumblings. At a rest spot, set Ghondor as the active Hero and discuss the topic. Ghondor must remain active while the quest is pursued; if progress is suspended, restore Ghondor before continuing.
Follow the objectives to Swordmarch and the Material Storage Warehouse. Defeat the marked Feyz Rhoguls and continue through the City scenes and required battles. Use at least one Defender and two Healers or other reliable revival options. Against groups, focus the most dangerous target instead of spreading damage. Save a Chain Attack or Interlink for the boss phase. Completion raises Ogre’s rank limit to 20.
- The Samon vessel conversation is complete.
- Ghondor’s Grumblings was overheard near the City maintenance area.
- The topic was discussed with Ghondor active.
- Ghondor remained active while the quest was pursued.
- Ogre can advance beyond Rank 10.
Confirm the optional work before handing off to c10
Open the quest log and Hero Roster after completing the optional routes. Confirm Side Story: Eunie, Side Story: Lanz, Side Story: Taion and Side Story: Sena, or deliberately leave any postponed quest marked for later cleanup. Confirm Side Story: Mio as a completed Chapter 6 story quest. Do not list Side Story: Noah as complete here unless you have already advanced into its later Chapter 7 objective; c10 must verify it during The Ultimate Vessel and the final Origin Metal search.
Check the class lists for Medic Gunner, Heavy Guard, Tactician and Ogre. Each completed Side Story should show a rank limit above 10. Also record Zephyr as the Chapter 6 check. Swordfighter should be checked later in c10 after Side Story: Noah, not used as a requirement for this chapter. Rank-cap increases apply to characters who can inherit the class, but each character must still equip the class and earn Class Points to learn its Rank 11–20 abilities.
Before moving to final preparation, keep at least one usable Attacker, Defender and Healer configuration. Replace poor accessories, restore Arts and Gems, and use rest spots to spend accumulated Class Points. These quests improve class flexibility but are not required to reach or complete Origin.
- Side Story: Mio is verified as complete from Chapter 6.
- Side Story: Eunie, Side Story: Lanz, Side Story: Taion and Side Story: Sena are complete or deliberately scheduled for cleanup.
- Zephyr displays a rank limit above 10.
- Medic Gunner, Heavy Guard, Tactician and Ogre display rank limits above 10.
- Side Story: Noah is reserved for c10’s Chapter 7 Origin Metal route.
- At least one usable Attacker, Defender and Healer setup is prepared for the final campaign approach.
Before you move on
- Side Story: Mio is recorded as complete from the Chapter 6 main route.
- Side Story: Eunie, Side Story: Lanz, Side Story: Taion and Side Story: Sena are complete, or each postponed quest is recorded for later cleanup.
- Zephyr displays a rank limit above 10.
- Medic Gunner, Heavy Guard, Tactician and Ogre display rank limits above 10.
- Side Story: Noah is not required for c06 and is listed for later c10 verification during The Ultimate Vessel.
- At least one usable Attacker, Defender and Healer setup is prepared for the final campaign approach.
- The Hero Roster shows no overlooked prerequisite for an optional quest the player intends to complete.
References for this chapter
- Class Rank (XC3)
- Side Story: Eunie Ascension Hero Quest Guide - Xenoblade Chronicles 3 - Neoseeker
- Side Story: Lanz Ascension Hero Quest Guide - Xenoblade Chronicles 3 - Neoseeker
- Side Story: Taion Ascension Hero Quest Guide - Xenoblade Chronicles 3 - Neoseeker
- Side Story: Sena Ascension Hero Quest Guide - Xenoblade Chronicles 3 - Neoseeker
- Side Story: Noah Ascension Hero Quest Guide - Xenoblade Chronicles 3 - Neoseeker
- Xenoblade Chronicles 3 | Chapter 7 Walkthrough & Boss Guide | GameWith
- Xenoblade Chronicles 3 Side Story: Mio Quest Walkthrough Guide - GameWith
- Side Story: Lanz | Xenoblade Wiki
- Xenoblade Chronicles 3 Quest Guide: All Quests and how to complete them
Final Act Approach: Everything to Do Before Origin
Chapter 7 provides a final preparation window before the Origin infiltration. First collect the five Origin Ore pieces requested by Samon, then complete Side Story: Noah at Gardin Defense Base to obtain the sixth piece. Return to Sentridge Harbor and speak with Samon to complete The Ultimate Vessel and finish the Bravery. Before sailing, review your active classes, class caps, Master Arts, Skills, Gems, accessories and party roles. Ascension Quests for other Heroes are optional preparation rather than universal requirements, so prioritize only the classes and tools you intend to use. Save at Sentridge Harbor, then pilot the Bravery to the waters north of Farview Cape and accept the prompt to enter Origin. The final dungeon has several consecutive story battles, so do not begin it with an untested formation or unfinished equipment setup.
Collect the first five Origin Ore pieces in the required story route
After the Chapter 7 events at Cloudkeep, return to Samon’s workshop in the City and speak with him to begin The Ultimate Vessel. The quest sends you after six pieces of Origin Ore, but the first five are gathered before Noah’s Side Story begins. Use Skip Travel whenever possible rather than crossing Aionios on foot.
The first piece is at Cloudkeep. Fast-travel to Hall of the Serene and follow the objective. The next is in the northern part of Everblight Plain; Torchlight Hill is a useful landmark, although Battlescar Ferronis Hulk can be closer if it is active. Climb the vine-covered wall in the marked area and inspect the ore location.
Travel to Cape Arcaphor in the Cadensia Region for the third piece. The ore is behind the waterfall near Welkin Falls. A Unique Monster can appear in the surrounding area, but fighting it is not required to collect the objective. The fourth piece is at the base of Zain’s Talon in Elaice Highway. The fifth is in Low Maktha Wildwood, north of Gingin’s Treehouse. Follow the quest marker and avoid unnecessary high-level enemies rather than clearing the whole region.
- The Ultimate Vessel is active.
- Origin Ore has been collected at Cloudkeep.
- Origin Ore has been collected at Everblight Plain and Cape Arcaphor.
- Origin Ore has been collected at Zain’s Talon and Low Maktha Wildwood.
- Samon has directed the party to the final piece at Gardin Defense Base.
Complete Side Story: Noah at Gardin Defense Base
After the fifth piece, travel to Ekdaso Verge near the eastern side of the Keves Castle Region and follow the objective to Fourth Ixia Bridge. Do not try to enter Gardin Defense Base through its obvious front entrance. From the bridge, use the newly available zip-line route: activate the machine south of the bridge, cross to the floating island, then use the second zip-line to reach the rear of the base.
Continue through the marked route until the story returns you to the Keves Castle area. Follow the opened path through Fort O’Virbus, Kismet Crossing and the castle interior. The quest leads to the required Consul Crys encounters. Heal at the available rest point and confirm your party roles before approaching the marked battle, because this sequence is mandatory and also completes Noah’s Ascension Quest.
When Side Story: Noah ends, the Swordfighter class rank cap is raised to 20 and the final Origin Ore is obtained. This is the required story-related class-cap exception in this preparation chapter; the other Hero Ascension Quests are not universal prerequisites for entering Origin.
- The rear entrance to Gardin Defense Base has been used.
- Side Story: Noah is complete.
- The Consul Crys encounters are complete.
- Noah’s Swordfighter class cap has been raised.
- The sixth Origin Ore is secured.
Return to Samon and complete The Ultimate Vessel
Fast-travel to Sentridge Harbor Control and speak with Samon at Dock No. 3. The Bravery is completed during this conversation and The Ultimate Vessel ends. Only after this step is the vessel ready to break through the vortex surrounding Origin.
Do not sail immediately if you still need to alter your party. This is the final convenient point to review optional Hero and Ascension content while the overworld remains accessible. If a Hero’s class is important to your planned build, open the Hero Roster and read its listed conditions before searching for the quest. In general, an inherited Hero class must reach Rank 10 before its Ascension Quest can unlock Rank 20, and hidden quest-chain conditions may also apply.
- All six Origin Ore pieces have been delivered.
- The Bravery is complete.
- The Ultimate Vessel is complete.
- You have confirmed which optional Ascension Quests are actually useful for your chosen classes.
Finalize classes, roles and equipment without inventing a universal build
At a rest spot, set the classes you intend to use for the final dungeon and check every character’s Arts, Master Arts, Skills, Gems and accessories. Xenoblade Chronicles 3 ties the active weapon to the selected class, so do not waste time looking for separate weapon purchases or weapon replacements. Upgrade or replace accessories and Gems when your current effects no longer match the role.
Keep a dependable balance across the six starting characters. A direct ending attempt should have reliable healing and revival through Healer classes, at least one Defender capable of maintaining enemy attention, and enough damage to finish Chain Attacks. If the party repeatedly loses aggro or cannot recover from area attacks, change the formation before attempting Origin rather than relying on a level increase alone.
Set the Ouroboros pairings and Interlink order you already understand. Avoid changing every character to an unfamiliar class immediately before departure. The final story battles alter party availability and temporarily divide the group, so ensure both the Keves group of Noah, Eunie and Lanz and the Agnus group of Mio, Taion and Sena have functional roles before leaving.
- Every active character has a tested class.
- Both story teams have healing, defense and damage coverage.
- Master Arts, Skills and Gems support the selected roles.
- Accessories have been checked for survivability and relevant resistance effects.
- Your preferred Ouroboros pairings and Interlink order are set.
Save before departure and enter Origin from Farview Cape
Use a rest spot to heal, cook or apply any useful pouch effects, then spend Bonus EXP only to correct a level gap or bring a recently changed character into line. There is no separate stock of TP consumables to purchase; Chain Attack performance comes from combat decisions, party roles, Arts, accessories and class setup.
Make a manual save at Sentridge Harbor before departing. When ready, pilot the completed Bravery toward the waters just north of Farview Cape in the Erythia Sea. You can also fast-travel to Doublecrag Gate and sail west. Approach the edge of the sea until the game asks whether you want to sail for Origin, then accept the prompt.
This is the completion point for the preparation chapter: the Bravery is finished, the party is saved and the Origin entry prompt has been accepted. If you are not ready for the consecutive story battles inside, decline to proceed and return to the harbor or another rest point before trying again.
- The party is healed and manually saved.
- No character is using an untested class setup.
- Both Keves and Agnus teams have workable roles.
- The Bravery is piloted to the waters north of Farview Cape.
- The Origin entry prompt has been accepted only after final preparations are complete.
Before you move on
- The Ultimate Vessel and Side Story: Noah are complete.
- All six Origin Ore pieces have been delivered to Samon and the Bravery is finished.
- The active classes, Master Arts, Skills, Gems and accessories have been reviewed.
- Both Noah’s Keves group and Mio’s Agnus group have workable Attacker, Defender and Healer coverage.
- A manual save exists before departure.
- The party has reached the waters north of Farview Cape and accepted the prompt to sail to Origin.
References for this chapter
- Hero Quest: Side Story - Noah - Chapter 7 - Walkthrough | Xenoblade Chronicles 3 | Gamer Guides
- Heading to Origin - Chapter 7 - Walkthrough | Xenoblade Chronicles 3 | Gamer Guides
- Xenoblade Chronicles 3 | Chapter 7 Walkthrough & Boss Guide | GameWith
- Ascension Quest: Reasons to Evolve - Zeon - Hero Quests | Xenoblade Chronicles 3 | Gamer Guides
Origin: Early Rooms & Multi-Stage Encounters
Begin Chapter 7’s Origin Interior route at Force Field Generator Base and finish this section at Upper Storage Tower. Recover at Cabin of the Bravery, defeat the opening guard, cross the amplifier and Ferronis Arsenal machinery rooms, and reach Eternal Prison. Defeat N in both phases, then use the southern terminal to open South Sector Passage. Cross the hangar, activate its elevator shortcut, open the route into Hangar Zone, activate Storage Supply #2 and defeat the Center Defense Team’s three consecutive waves of three Level 68 Kurria Flak. Wait for the following story scene, then continue north through Central Defense to Upper Storage Tower. This chapter ends there. Defense Tower #1, Defense Tower #2, Moebius X and the remaining Origin route belong to c11.
1. Prepare at Force Field Generator Base
After the story sequence that brings the party to Origin, control begins at Force Field Generator Base. Backtrack toward the Bravery to activate Cabin of the Bravery, the nearby rest spot. Use it if the party needs healing, Arts recovery or a party adjustment before entering the interior.
This is a good point to confirm that the active party has at least one reliable Defender and enough healing to support a long dungeon route. Keep revival Arts available and check accessories, Gems and equipment before leaving. Ordinary Origin enemies can usually be bypassed, so do not spend Chain Attacks or Interlinks merely to clear patrols unless a fight becomes dangerous.
Save at the entrance before proceeding. The important resource checks in this section are the two-phase N battle and the later three-wave Kurria Flak sequence, not the regular groups encountered between landmarks.
- Activate Cabin of the Bravery.
- Check healing, revival Arts, classes, accessories and equipment.
- Save before entering the interior route.
2. Clear the opening guard and reach the first amplifier
Follow the path away from the Bravery toward the sealed door. A required enemy group attacks near the entrance. Defeat the group to trigger the scene that opens the route forward; if the enemies spread around the doorway, pull them into the open space and defeat them one at a time rather than fighting with the party trapped against the door.
Enter North Sector Passage and use the elevator to cross to the opposite side. Continue through the passage until the next door opens into Amplifier No. 1. Follow the available path around the room, using the ladders and outer walkway to keep progressing toward the far exit. The route loops around the amplifier rather than crossing directly through its center.
Cross the bridge and continue through North Shell Passage. Follow the bulkhead route into the next amplifier section and proceed to Amplifier Control Room. Activate the rest spot there before continuing. Resting at this point is optional, but it provides a useful recovery point before the machinery rooms and N.
- Defeat the required opening guard.
- Cross North Sector Passage and Amplifier No. 1.
- Reach and activate the Amplifier Control Room rest spot.
3. Cross Amplifier No. 2 and operate Ferronis Arsenal #2
Leave Amplifier Control Room and continue through the next North Shell Passage section until you reach Amplifier No. 2. Follow the route to the upper walkway, climb the ladder and use the zip-line to cross the gap. Continue through the southern door and enter Ferronis Arsenal #1.
Follow the large route through Ferronis Arsenal #1 to its southern exit. Continue into Ferronis Arsenal #2, where rotating platforms block the way forward. Climb to the platform route and ride it toward the western side, then descend to the lower level.
At the lower level, find the mechanism that reverses the platform direction and operate it. Return to the upper platform route and ride the machinery in its new direction to open the southern path. Continue through the southern door into Arsenal Control Room. Activate the rest spot and recover before entering Eternal Prison.
- Cross Amplifier No. 2 and use its zip-line.
- Reach Ferronis Arsenal #2.
- Operate the platform-direction mechanism.
- Activate Arsenal Control Room before N.
4. Reach Eternal Prison and defeat N’s first phase
Leave Arsenal Control Room and travel east into Ferronis Arsenal #3. Follow the route around the room to the eastern exit, then continue through East-West Sector Passage. Use the elevator and follow the southern route toward Eternal Prison.
At the prison entrance, interact with the terminal to open the door and begin the required Level 68 N encounter. Keep a Defender positioned to hold N’s attention while the rest of the party attacks from safer angles. Avoid stacking every character directly beside the Defender, since N’s large attacks can punish a tightly grouped party.
Bleed and other damaging effects can make the first phase costly if healing is delayed. Keep area healing available and revive fallen characters promptly. If the party is healthy, save the strongest Chain Attack or Ouroboros resources for the transition and second phase rather than spending everything at the start.
The first health bar is only the opening phase. Continue until the phase ends and the story transition begins; do not treat the initial reduction as victory.
- Use the Eternal Prison terminal.
- Defeat N’s first Level 68 phase.
- Keep the party alive through the transition scene.
5. Defeat N’s second phase and open South Sector Passage
After the transition, N resumes the battle in a stronger second phase. Continue using the Defender to control his position while Healers stay clear of avoidable area attacks. When a large attack damages the whole party, stop attacking briefly if necessary and restore the party before resuming damage.
Use a Chain Attack when the party needs a controlled damage window or when N’s pressure makes normal combat unstable. An Interlink can provide a temporary safety window, but do not rely on it as the only answer to a downed party. Preserve at least one reliable healing or revival option until the phase is close to defeat.
Defeating both phases triggers the required story scene. After control returns, go to the southern terminal and operate it. This unlocks the doors into South Sector Passage. Do not attempt to continue south until the terminal interaction and its resulting route change are complete.
- Defeat N’s second Level 68 phase.
- Wait for the post-battle story scene.
- Operate the southern terminal to unlock South Sector Passage.
6. Cross South Sector Passage and prepare the hangar route
Ride the elevator south through South Sector Passage and continue to the southern doors. Supply Storage #1 is in the room on the left and functions as an optional rest spot. Use it if N left the party damaged. The route ahead leads through South Shell Passage to the upper level of the hangar.
Descend by the nearby ladder or drop to the lower level. Inspect the nearby terminals to open the required bulkheads, then follow the hangar route around the perimeter. On the western side, operate the terminal that rotates the ladder. Climb the rotated ladder, continue along the upper route and return to the hangar section.
Use the zip-line to reach the lower level. At the south-east corner, operate the switch that activates the nearby elevator. This shortcut is useful if the party fails during the upcoming defense, because it reduces the amount of hangar traversal needed on a retry.
Continue through the hangar and operate the northern switch to open the bulkhead. Proceed west into Hangar Zone. The door farther west leads to Storage Supply #2. Activate this landmark before advancing; it is the final convenient recovery point before the mandatory Kurria Flak waves.
- Use Supply Storage #1 if recovery is needed.
- Open the hangar bulkheads.
- Activate the south-east elevator shortcut.
- Open the northern hangar bulkhead.
- Activate Storage Supply #2.
7. Defeat the three Kurria Flak waves
From Storage Supply #2, continue through Hangar Zone toward Central Defense. The Center Defense Team triggers the required battle sequence. The encounter consists of three consecutive waves, with three Level 68 Kurria Flak in each wave. The next wave begins after the previous group is defeated, so do not assume the fight is over after the first victory.
Keep the Defender near the main group and use area healing when multiple Kurria Flak are attacking at once. Focus one enemy at a time when possible so that the incoming damage decreases steadily. If the party begins to collapse, use a Chain Attack or Interlink during the second or third wave rather than waiting until all healers are down.
After the third wave, wait for the complete story scene. The scene confirms that the Center Defense sequence is finished and restores the next route forward. Do not leave the area after the first or second wave, and do not reload simply because the next group has not appeared immediately; the waves are scripted to continue in sequence.
- Defeat the first wave of three Level 68 Kurria Flak.
- Defeat the second wave of three Level 68 Kurria Flak.
- Defeat the third wave of three Level 68 Kurria Flak.
- Wait for the following story scene.
8. Reach Upper Storage Tower and hand off to the next chapter
When control returns after the Kurria Flak scene, continue west briefly and then follow the corridor north. Regular Kurria Flak groups can be fought or bypassed. If the party is still damaged, avoid pulling multiple patrols together and use the open route to separate them.
Continue until Central Defense. Take the ramp down and deal with the required enemies blocking the approach. Enter the nearby door to reach Upper Storage Tower, which is a rest spot and the endpoint for this chapter section.
Activate Upper Storage Tower, recover the party and save. Stop here for c12. The route beyond this point continues through Central Defense and later Defense Towers; those areas, including the conditional Moebius X encounter at Defense Tower #2 when Side Story: Eunie has been completed, are covered by c11 and should not be treated as unfinished c12 objectives.
- Reach Central Defense after the Kurria Flak scene.
- Enter Upper Storage Tower.
- Recover and save at Upper Storage Tower.
- Hand off the later Defense Tower route to c11.
Before you move on
- Cabin of the Bravery was activated or the party otherwise entered Origin in a prepared state.
- The opening guard was defeated and the amplifier and Ferronis Arsenal route was crossed.
- N was defeated in both Level 68 phases and the post-battle scene played.
- The southern terminal was operated and South Sector Passage was opened.
- The hangar elevator shortcut was activated.
- Storage Supply #2 was activated.
- All three waves of three Level 68 Kurria Flak were defeated.
- The post-wave story scene played.
- The party reached Upper Storage Tower, recovered and saved.
- The player stopped at Upper Storage Tower for the c11 handoff rather than entering the later Defense Tower route.
Origin: Defense Towers, Moebius Y and the Amphitheatre Checkpoint
Resume after the previous Origin chapter has reached the Upper Storage Tower and Central Defense portion of the dungeon. Do not repeat the South Sector Passage, Supply Storage #1, South Shell Passage, hangar, Center Defense Team or earlier Kurria Flak waves. Follow the late-Origin route through Defense Tower #1, Defense Tower #2, Defense Tower #3, Arms Storage Tower, Lower, Defense Tower #4 and Central Sector Passage. Moebius X appears at Defense Tower #2 only if Side Story: Eunie was completed; otherwise continue through that tower without fighting her. Moebius Y at Defense Tower #4 is required. Afterward, ride the elevator to Amphitheatre and make a separate manual save before opening the central door. Crossing that door begins the uninterrupted final sequence, so complete all preparation beforehand.
1. Resume at the Upper Storage Tower and reach Defense Tower #1
Begin from the Upper Storage Tower rest spot or the nearby Central Defense section reached at the end of the preceding Origin route. If you are still before the Central Defense transition, finish that earlier route first; this chapter does not repeat the South Sector Passage, Supply Storage #1, South Shell Passage, hangar, Center Defense Team or the three Kurria Flak waves.
Use the Upper Storage Tower rest spot before moving on if you need to restore HP, change classes, adjust accessories or refill your battle setup. From the Upper Storage Tower area, continue through Central Defense and follow the marked route toward Defense Tower #1. The tower is on the Central Defense loop and is the first required tower in this section.
Pass through Defense Tower #1 and continue onward. Do not turn back toward the hangar or search for another route through the earlier Origin rooms. Defense Tower #1 is a required passage, but it does not contain the conditional Moebius X encounter.
- Resume from the Upper Storage Tower or adjacent Central Defense state.
- Use the Upper Storage Tower rest spot if preparation is needed.
- Pass through Defense Tower #1.
- Do not repeat the earlier Origin entrance, hangar or Kurria Flak route.
2. Check the Side Story: Eunie condition at Defense Tower #2
Continue from Defense Tower #1 around the Central Defense route to Defense Tower #2. Check your quest history before entering if you are unsure whether Side Story: Eunie was completed. The condition is based on completing that Ascension Quest, not merely encountering Consul X during an earlier story event.
If Side Story: Eunie was completed, Moebius X appears at Defense Tower #2. Defeat her before proceeding. Prepare at the nearby rest point if necessary, keep at least one reliable Defender active, and maintain enough healing and revival coverage for a long level-70 encounter. Save Burst, Chain Attack and Interlink options for periods when she enters rage or begins putting sustained pressure on the party. If your front line falls, revive and restore threat control before returning to damage.
If Side Story: Eunie was not completed, Moebius X does not appear in this section. Continue through Defense Tower #2 using the opened route. Do not wait for the boss, search for a hidden trigger or treat the absence of the fight as a progression failure. Moebius X is optional to this Origin route and is not a universal mandatory boss.
After the applicable battle or passage is complete, leave Defense Tower #2 through the western exit and continue toward the west side of Central Defense. Do not return to Defense Tower #1.
- Reach Defense Tower #2 after passing Defense Tower #1.
- Fight Moebius X only if Side Story: Eunie was completed.
- If Side Story: Eunie was not completed, continue through Defense Tower #2 without that encounter.
- Exit west and continue toward Defense Tower #3.
3. Pass Defense Tower #3 and use Arms Storage Tower, Lower
From Defense Tower #2, follow the western side of Central Defense and pass through Defense Tower #3. Continue along the marked route rather than returning to the center of the loop. This is the next required tower in the late-Origin sequence.
After Defense Tower #3, take the route toward Arms Storage Tower, Lower on the south side of Central Defense. The lower tower is not required as a separate objective, but it contains a useful rest point and is the last convenient preparation location before the required Moebius Y battle.
Use Arms Storage Tower, Lower to recover, change classes, review Arts and Skills, and replace equipment if needed. Keep a balanced party with dependable damage, a Defender and sufficient healing. The Upper Storage Tower and Arms Storage Tower, Lower are separate landmarks; the Upper landmark is the earlier recovery point, while the Lower landmark is reached after Defense Tower #3.
- Pass through Defense Tower #3.
- Reach Arms Storage Tower, Lower.
- Use the Lower rest point if recovery or preparation is needed.
- Do not confuse Arms Storage Tower, Lower with the earlier Upper Storage Tower.
4. Defeat the required Moebius Y at Defense Tower #4
Leave Arms Storage Tower, Lower and follow the route back toward the east and north side of Central Defense. The entrance to Defense Tower #4 is near the center of the area. Heal before entering the boss section and confirm that every active character has suitable Arts, Skills, Gems and accessories.
Moebius Y is the required boss at Defense Tower #4 regardless of whether optional character Ascension Quests were completed. The fight is a level-70 encounter with high durability, so do not rely on one attacker or a single surviving healer. Keep the Defender's aggro stable, revive fallen party members promptly and maintain enough healing to withstand the boss's sustained damage and defensive buffs.
Use a Chain Attack or coordinated burst when your party has built sufficient TP and the boss is safely controlled. If the battle becomes unstable, use Interlink defensively to buy time for healing and revival rather than spending every Ouroboros option at the start. Once Moebius Y is defeated, the route to Central Sector Passage opens.
- Reach Defense Tower #4 after Defense Tower #3 and Arms Storage Tower, Lower.
- Heal and review the party before triggering the boss battle.
- Defeat the mandatory Moebius Y encounter.
- Proceed through the opened route to Central Sector Passage.
5. Reach Amphitheatre and make the final-sequence save
After defeating Moebius Y, pass through Central Sector Passage and interact with the elevator at the end. Ride it to the Amphitheatre, then register the landmark when prompted. This completes the route covered by this chapter and places the party immediately before the game's final sequence.
Stop at Amphitheatre before opening the central door. Open the system menu and create a separate manual save in a different slot from your normal campaign save. Confirm that the save was made while the party is still outside the central room. Do not wait until after entering the door; the door is the point of no return for the finale.
Before crossing the door, check active class roles, Arts, Skills, Gems, accessories, Ouroboros pairings, healing coverage, revival options and current party levels. Make any remaining changes now. The final sequence is long and contains several consecutive battles and cutscenes, so do not begin it while intending to leave for ordinary exploration or preparation.
When the separate save is secure and the party is ready, open the central Amphitheatre door and accept the confirmation prompt. The late-Origin route is complete, and the next chapter begins with the uninterrupted final sequence.
- Clear Central Sector Passage.
- Ride the elevator to Amphitheatre.
- Register or confirm the Amphitheatre landmark.
- Create a separate manual save before opening the central door.
- Complete all party and equipment preparation before crossing the door.
- Open the central door only when ready to begin the finale.
Before you move on
- The party has resumed from the Upper Storage Tower or Central Defense state established by the preceding Origin chapter.
- Defense Tower #1 has been passed.
- At Defense Tower #2, Moebius X has been defeated only if Side Story: Eunie was completed; otherwise the party has continued through the tower without that encounter.
- Defense Tower #3 has been passed.
- Arms Storage Tower, Lower has been reached or passed.
- Moebius Y at Defense Tower #4 has been defeated.
- Central Sector Passage has been cleared and its elevator has been used.
- The party is standing at Amphitheatre before the central door.
- A separate manual save exists before opening the Amphitheatre central door.
- Opening the central door begins the uninterrupted final sequence, confirming completion of this late-Origin chapter.
References for this chapter
- Xenoblade Chronicles 3 | Nintendo Switch games | Nintendo UK
- Exploring Origin Interior (Part 2) - Chapter 7 Walkthrough
- Exploring Origin Interior (Part 3) - Chapter 7 Walkthrough
- Chapter 7: Time Moves Again - Xenoblade Chronicles 3 Walkthrough & Guide | GameFAQs
- Origin - Xenoblade Chronicles 3 Walkthrough
- Boss (XC3)
- X - Xenoblade Wiki
Origin: Principal Boss — Patterns, Interruptions and Recovery
The first Origin boss is Z, a level 72 encounter followed immediately by the longer level 75 Z Infinity sequence. Z restricts Interlink use for most of the opening, freezes the arena at 95% health, sets it alight at 90%, and raises a damage-reducing shield near 85%. The shield cannot be handled like a normal damage race: continue surviving until the scripted Ouroboros Chain Attacks free the party. After the shackles are removed, reactions, Chain Attacks, Interlinks and Lucky Seven become much more effective. Cure Bullet or another reliable debuff solution is especially useful because Z combines heavy single-target damage with Resistance Down and random debuffs.
1. Prepare the party for a long debuff-heavy battle
Z is level 72, but this encounter is immediately followed by the level 75 Z Infinity sequence. Entering around level 75 gives the party a useful safety margin, especially if you are not playing on the easiest difficulty. Before approaching the final battle, save manually and check every active character’s class, accessories, gems and arts. Use a stable composition with at least two reliable Healers and at least one Defender able to hold Z’s attention.
Give priority to debuff recovery. Cure Bullet from the War Medic class or Valdi is particularly useful because Z repeatedly applies debuffs, including Resistance Down, random effects and later Ether Defense Down or Toxin in the following sequence. You do not need to build around a single exact class combination, but do not enter with a party that has no dependable way to recover from debuffs or revive fallen allies.
- Enter at approximately level 75 if possible.
- Use at least two dependable Healers and one Defender.
- Equip Cure Bullet or another reliable debuff-recovery option.
- Save before starting the final encounter.
2. Survive the restricted opening and learn Z’s main Arts
At the beginning, Interlink use is unavailable for most of the encounter, and Z takes comparatively little damage. Do not treat this as a normal burst window. Keep the Defender between Z and the rest of the party, remain close enough for area healing, and let your Arts recharge naturally while you push the scripted health thresholds.
Dusk launches a powerful single-target attack and can seriously damage a Defender. Reproach Barbarity also targets one character but applies Resistance Down, making later damage and debuffs more dangerous. Dark Ere the Dawn deals area damage around its target and adds a random debuff. Sovereign Purge is a close-range area attack that causes Knockback, while Grim Inquisition charges before firing a continuous beam in front of Z. Move the controlled character out of the beam rather than standing directly in front of him.
Normal reaction attempts are unreliable during this opening. Use positionals only when they do not pull the controlled character away from the party’s healing area. The goal is to remain stable and reach the next health gate, not to force a fast Chain Attack.
- Do not waste time trying to activate normal Interlinks during the restriction.
- Watch the Defender after Dusk and Reproach Barbarity.
- Cleanse Resistance Down and random debuffs when possible.
- Move out of Grim Inquisition’s frontal beam.
3. Handle the frozen arena at 95% health
When Z reaches approximately 95% health, he freezes the arena and slows movement. This effect makes positional Arts harder to use, but it is not a separate enemy or puzzle. Keep the party compact and continue attacking from the position where the Defender is holding Z. Avoid scattering the group in pursuit of side or rear bonuses, because the slow can leave the controlled character outside healing range.
Continue watching for Dusk and Reproach Barbarity while movement is impaired. If the tank receives Resistance Down, switch briefly to healing or debuff recovery before committing to damage. The frozen phase ends as the fight reaches the next threshold; there is no need to search for an object or leave the arena.
- Stay near the Defender while movement is slowed.
- Prioritize survival over positional damage.
- Do not search for a way to remove the ice effect.
4. Escape the burning arena at 90% health
At approximately 90% health, Z sets the arena alight. The party suffers continual Blaze damage during this phase, and flames concentrated near the arena’s center periodically erupt. This is the most important early damage race: keep attacking, but do not stand inside the central fire when it begins to build toward an eruption.
Move the controlled character just far enough away from the central hazard, then let the Defender re-establish Z’s position. Avoid dragging the entire party across the arena for a minor positional bonus. Preserve healing Arts for the Blaze damage and for Z’s single-target attacks. If a Healer is incapacitated, revive that character before trying to push the next threshold; the fight becomes much harder if the party reaches the shield phase without recovery support.
- Leave the central flames before they erupt.
- Keep the party within healing range while moving.
- Treat continual Blaze damage as a resource-management problem.
- Revive fallen Healers before the next health gate.
5. Break the shield through the scripted Chain Attacks
Near 85% health, Z raises a shield that greatly reduces incoming damage. Continue fighting until the story event triggers; ordinary damage and reaction attempts are not the intended solution. When the forced Ouroboros Chain Attack begins, choose a safe order and use the sequence to damage the shield. If the game allows you to select the order, use the opportunity to restore party stability and avoid entering the next transition with a dying character.
After the first forced sequence, further scripted Chain Attacks occur as the remaining characters break free. The documented sequence proceeds through the Lanz and Eunie Ouroboros attack, then Eunie and Taion, and finally Noah and Mio. These events are largely controlled by the story, so do not worry about saving a voluntary Chain Attack for them. Between scenes, heal whenever normal control returns and keep debuff recovery ready.
- Do not mistake the shield for a permanent damage immunity.
- Use the forced Ouroboros Chain Attack to break the shield.
- Expect additional scripted Chain Attacks involving the other Ouroboros pairs.
- Heal between transitions whenever control is available.
6. Use reactions and burst damage after the shackles are removed
Once the scripted Chain Attack sequence ends, the restriction is lifted. Z becomes much less resistant, reaction combos become more practical, and normal Chain Attacks and Interlinks are available. This is the correct time to spend the resources saved during the opening. Apply Break, Topple, Daze or Launch if your current classes can do so reliably, then begin a Chain Attack while Z is controlled or immediately after a dangerous Art finishes.
A level 3 Interlink, Lucky Seven, or a prepared Chain Attack can remove a large portion of Z’s remaining health. Do not spend every recovery option during the first burst: Z can survive the initial attack and later becomes more aggressive. If Noah has Lucky Seven available, use it during this unrestricted section rather than attempting to force it through the opening restriction.
- Wait until the shackles sequence is complete before using your main burst.
- Use reaction combos only after Z becomes vulnerable again.
- Spend Chain Attacks, level 3 Interlinks and Lucky Seven during this phase.
- Keep at least one emergency healing or revival option available.
7. Survive the enrage and confirm the transition
Later in the unrestricted phase, Z can enrage and chain his Arts more rapidly. Treat this as a survival window rather than chasing positional damage. Keep the Defender anchored, stay within healing range, and watch for Dusk, Resistance Down and Grim Inquisition. A Chain Attack or Interlink can provide a safe damage window and help prevent the party from being overwhelmed by repeated Arts.
If a Healer falls, switch immediately to revival or healing instead of continuing a damage rotation. If the party is defeated, the long Z encounter must be repeated, including its scripted transitions, so change the opening setup before retrying. Consider raising the party level with Rest EXP, improving debuff recovery, or replacing a fragile damage class with a second Defender or Healer.
After Z is defeated, the story moves to Z Infinity, the level 75 final sequence. There is no normal free-roaming break between these encounters, so finish this battle with as much healing and burst capacity as possible. The next battle uses multiple controlled party configurations and has its own four-phase structure.
- Use defensive cooldowns when Z begins chaining Arts.
- Revive Healers before resuming damage.
- Adjust the party if the opening restriction or debuffs caused the defeat.
- Confirm that the story transitions to the level 75 Z Infinity encounter.
Before you move on
- Z’s frozen and burning arena phases have been cleared.
- The shield sequence has ended and the scripted Ouroboros Chain Attacks have freed the party.
- Normal Interlinks and Chain Attacks are available again and Z has become vulnerable to more reliable reaction combos.
- Z is defeated and the story transitions to Z Infinity, the level 75 final encounter.
- The party reaches Z Infinity with surviving Healers, debuff recovery and at least one prepared burst plan.
References for this chapter
- Final Boss: Z - Chapter 7 - Walkthrough | Xenoblade Chronicles 3 | Gamer Guides
- Final Boss: Z Infinity - Chapter 7 - Walkthrough | Xenoblade Chronicles 3 | Gamer Guides
- Chapter 7: Time Moves Again - Xenoblade Chronicles 3 Walkthrough & Guide | GameFAQs
- Xenoblade Chronicles 3 | Main Story Walkthrough Guide | GameWith
- Xenoblade Chronicles 3 | Nintendo Switch games | Nintendo UK
Origin: Final Phase & Denouement
The Origin finale is a continuous sequence containing the opening Z∞ battle, separate X∞ and Y∞ battles, and a final Z∞ fight. There is no normal rest or team-building break between these encounters, and losing can send you back to the start of the final sequence with lengthy scenes to repeat. Keep a reliable Defender and Healer available whenever the game gives you control, use Chain Attacks for recovery as well as damage, and reserve Interlink protection for the most dangerous scripted attacks. During X∞ and Y∞, the party is divided into Keves and Agnus teams, so each side must survive independently until Heroes join. After the final Z∞ defeat, watch the ending and credits, then save when the game prompts you. Load that clear save afterward to confirm the campaign completion and continue with post-game content.
1. Begin the continuous Z∞ sequence with survival builds and recovery tools
After the first battle against Z and its scripted Chain Attack events, the game proceeds directly into the Z∞ sequence. Treat the entire finale as one extended attempt: defeat does not return you to a convenient rest point, and the opening scenes may need to be repeated after a loss. Before entering, make sure the active party includes dependable healing and at least one character able to hold enemy attention. If available, give a controlled character or Hero access to Cure Bullet or another reliable debuff-removal option, because Z∞ can inflict Toxin, Ether Defense Down, Accuracy Down, and Slow Recharge.
Z∞ begins as a level 75 encounter. Attack from the safest available angle and keep the party close enough for area healing without standing in the boss's line attacks or sweeping lasers. Watch for Hand of Origin: Z∞ relocates and sweeps the field with lasers, so move out of their path instead of trying to complete a long positional Art. Gravity Catastrophe reduces accuracy and slows Art recharge, while Grandmaster strengthens Z∞ with Attack Up and Fast Recharge. Continue damaging the boss, but switch attention to reviving a Healer or Defender immediately if either falls.
- Enter with at least one active Healer and one Defender.
- Keep a debuff-removal option available if your setup permits it.
- Move when Z∞ relocates for Hand of Origin instead of remaining in the laser path.
- Do not spend every defensive resource during the opening portion.
2. Handle the Z∞ thresholds and the Origin Punishment transition
As Z∞ loses health, the battlefield becomes more dangerous and the fight advances through scripted thresholds. When the boss uses Origin Punishment, treat the attack as a recovery check rather than a damage opportunity. It strikes the party heavily and can inflict Topple and Daze. The exact health percentage is not a dependable cue across descriptions of the fight, so watch the boss animation, the on-screen attack notification, and the accompanying story transition.
Before Origin Punishment connects, move into a clear area and prepare a Chain Attack or Interlink if the party is already weakened. Chain Attacks can stabilize the fight by allowing recovery while the attack is occurring; Interlink can provide temporary protection if activated in time. Afterward, switch to the controlled Healer or Defender, clear Daze where possible, revive fallen allies, and use area healing before returning to offense. If Astraea creates a large central tornado, keep the party away from it because standing in the field causes continuous damage.
- Recognize Origin Punishment from its named attack notification and story transition.
- Use Chain Attack or Interlink protection if the party cannot survive the hit normally.
- Recover from Topple, Daze, and debuffs before resuming full damage.
- Keep clear of the central Astraea tornado.
3. Survive the X∞ and Y∞ split-party battles
When the first Z∞ sequence ends, the game moves into the X∞ and Y∞ encounters. The party is divided into Keves and Agnus teams: the Keves side fights X∞ first, followed by the Agnus side fighting Y∞. Interlink is disabled during these split-party sections, so Chain Attacks become especially important for both damage and recovery. Do not build a strategy that depends on Ouroboros invulnerability here.
During the X∞ battle, the boss eventually performs a scripted attack that can reduce the controlled party members to 1 HP. This is followed by a story event and recovery, so do not panic or waste the attempt assuming the effect is a normal wipe. Keep attacking until the scene occurs, then stabilize the team. Recruited Heroes join the battle during the sequence, and additional Heroes assist during Y∞. Focus on the active boss and protect the local Healer rather than spreading attacks across unrelated targets. If a split-team member falls, revive that character promptly; a thin roster leaves little margin until the scripted assistance arrives.
The two encounters are mandatory and occur in the order provided by the story. Defeating X∞ does not finish the finale: wait for the transition into Y∞, defeat Y∞, and allow the scene that reunites the party before planning for the final Z∞ battle.
- Use the Keves team against X∞, then the Agnus team against Y∞.
- Do not depend on Interlink during the split-party section.
- Treat the X∞ 1-HP attack as a scripted survival event and continue until the recovery scene.
- Protect each team's Healer and use Chain Attacks for emergency recovery.
- Wait for the party reunion after Y∞ before assuming the finale is complete.
4. Defeat the final Z∞ form and answer Infinite Finale
The last encounter reunites the party against a stronger Z∞ form. Play defensively because this is the point where a failed recovery can force a full restart of the extended Origin finale. Keep the boss targeted, maintain a safe formation, and use Chain Attacks when the party needs healing or when a large damage window opens. Do not spend every Interlink immediately; retain at least one defensive option for the late scripted attacks.
At a later threshold, Z∞ uses Origin Punishment again. Respond as before: move when necessary, survive the hit, free Healers from Daze, revive fallen characters, and restore the party before returning to offense. When Z∞ begins Infinite Finale, the game signals the incoming attack by causing the party's attacks to be evaded. Stop trying to force normal damage through this warning. Enter a Chain Attack to recover while protected, or activate an Interlink with enough duration to cover the attack. If the party is healthy and the boss is near defeat, use the protected window to deliver the finishing burst. Nia and Melia join the battle during the later portion, providing additional support, but their arrival does not remove the need to keep your own Healers alive.
- Save a Chain Attack or Interlink for Infinite Finale.
- When attacks begin missing, prepare for Infinite Finale instead of continuing ordinary Arts.
- Recover the party after Origin Punishment before committing to the final damage push.
- Use the final Chain Attack or protected Interlink window to finish Z∞.
5. Complete the ending and create the clear save
After the final Z∞ health bar is depleted, the combat sequence ends and the game proceeds through mandatory story scenes. Continue through the dialogue, final scenes, credits, and post-credits material. The game does not record the completed campaign merely because the final boss was defeated; wait until the ending sequence reaches the save prompt.
When prompted after the ending, save the completed data. Do not overwrite the file you want to keep unless you have already preserved a backup or separate manual save. Return to the title screen and load the newly saved file. A completed save is marked with a clear icon and places the party back before the final point of no return, allowing continued exploration and post-game quests without replaying the ending. This is the concrete completion state for the base campaign; the game does not leave the party in a freely playable post-credits version of the final battlefield.
- The final Z∞ battle is defeated.
- The ending scenes, credits, and post-credits material finish.
- The game presents the post-ending save prompt and the clear data is saved.
- Loading that file shows the clear icon and returns the party to the pre-final-battle world state.
Before you move on
- Z∞ opening form, X∞, Y∞, and the final reunited-party Z∞ form are defeated.
- Origin Punishment and Infinite Finale have been survived in the final sequence.
- The ending scenes, credits, and post-credits material complete.
- The post-ending clear save is saved when prompted.
- Loading the save shows the clear icon and returns the party to the world before the final point of no return.
References for this chapter
- Xenoblade Chronicles 3 | Chapter 7 Walkthrough & Boss Guide | GameWith
- Final Boss: Z - Chapter 7 - Walkthrough | Xenoblade Chronicles 3 | Gamer Guides
- Final Boss: Z Infinity - Chapter 7 - Walkthrough | Xenoblade Chronicles 3 | Gamer Guides
- Chapter 7: Time Moves Again - Xenoblade Chronicles 3 Walkthrough & Guide | GameFAQs
Aftermath: Credits, Post-Credits Checks and Immediate Post-Game
After defeating the final Origin encounter, finish the closing scenes and credits, then accept the prompt to save completed data. The resulting clear file is marked separately from an ordinary save and loads the world from the point before the final battle. This is the file used for post-game exploration, the two base-game Hero events for Nia and Melia, and New Game Plus. The original Switch base edition does not include Land of Challenge or Challenge Battles; those are Expansion Pass content and are not required to verify the campaign clear.
1. Complete the ending and create the clear file
Defeat the final Origin encounter and continue through the ending scenes without returning to the title screen. Let the closing sequence and credits finish. Defeating the final encounter by itself is not the complete handoff; the game must reach the completed-data save prompt after the ending.
When the save prompt appears, confirm it. This creates the completed or clear file used by the post-game systems. Do not interrupt the software during the save operation. If you want to preserve an untouched pre-final-battle file as well, use a separate save slot before beginning the final approach, but the completed file is the one needed for New Game Plus and the post-game Hero events.
- The final Origin encounter is defeated.
- The ending scenes and credits have finished.
- The completed-data save prompt appears.
- You confirm the completed-data save.
2. Identify and preserve the completed save
Open Load Game and look for the file carrying the game's completion marker. Depending on the interface presentation, it may be described or displayed as a clear marker, completion emblem or similar special symbol. Use that marker to distinguish the completed file from an ordinary save; do not rely only on the file name or location.
Keep at least one completed file available before beginning New Game Plus. Loading this file is the route back to post-game Aionios. New Game Plus uses completed data as its source but starts the story again, so it is not a substitute for the clear file if you still want to explore the existing world.
- A completed or clear marker is visible on one save file.
- The marked file appears in Load Game.
- At least one completed source file is being preserved.
3. Load the clear file and return to Aionios
Load the marked file from the title screen. The game places the party back in the world state before the final battle rather than creating a permanently altered post-ending timeline. This is normal. You can leave the final area and resume ordinary exploration, fast travel, shops, rest spots, sidequests, Hero quests, Ascension quests and optional battles.
If the file loads without a clear marker, you selected an ordinary save rather than the completed data. Return to the title screen and choose the marked file. The post-game Hero events depend on loading the completed file; simply having defeated the boss during an earlier session is not enough if the clear data was never saved.
- The marked file loads successfully.
- The party returns to Aionios before the final battle.
- Fast travel and normal exploration are available.
- Post-game map events can be checked.
4. Recruit Nia in Cloudkeep
With the clear file loaded, travel to the Hall of the Serene in Cloudkeep, in Upper Aetia. Check the map for the new post-game question-mark event and approach it. Completing the event recruits Nia as a Hero and makes the Lifesage class available through the normal Hero-class system.
Nia's recruitment is separate from her later Ascension content. First confirm that Nia has joined the Hero roster. Any requirements for raising Lifesage beyond its initial state belong to later cleanup and are not necessary for the immediate campaign-clear check.
- The completed file is loaded.
- Cloudkeep in Upper Aetia is visited.
- The Hall of the Serene event is triggered.
- Nia appears in the Hero roster.
5. Recruit Melia in Keves Castle
Travel to Keves Castle and enter the Main Castle Gate on the first floor. After the campaign has been cleared and the completed file has been loaded, a new post-game event is available at this location. Approach the event to recruit Melia as a Hero and unlock the Royal Summoner class through the Hero-class system.
Melia's recruitment is also separate from her Ascension quest. Do not delay the recruitment check while trying to satisfy later class-development requirements. Confirm first that Melia has joined the Hero roster; her Ascension content can be completed afterward as optional post-game progression.
- Keves Castle is visited from the completed file.
- The first-floor Main Castle Gate is checked.
- The post-game event is triggered.
- Melia appears in the Hero roster.
6. Confirm New Game Plus without starting it by mistake
Return to the title screen after preserving the completed file. New Game Plus appears as an additional start option once completed data exists. Highlight it only when you are ready to begin another campaign; selecting it does not load post-game Aionios.
When starting New Game Plus, select the completed save as the source. Character growth and much of the eligible inventory progression carry over, but story-gated systems are reacquired during the new run. In particular, systems such as Chain Attacks and Ouroboros Interlink are not simply available from the opening sequence because the source file was cleared.
If you want to continue exploring, choose Load Game and select the clear file instead. If you choose New Game Plus, the game starts the story again from its opening progression.
- New Game Plus is visible on the title screen.
- The completed save is selectable as its source.
- You understand that New Game Plus restarts the campaign.
- The clear file remains available for post-game exploration.
7. Apply the correct edition boundary to challenge content
For the original Switch base edition, Land of Challenge and Challenge Battles are not expected to appear. They are Expansion Pass content, not immediate base-game unlocks and not requirements for confirming that the main campaign is complete.
If the Expansion Pass is installed, check its additional modes separately from the base-game clear. Their presence or absence does not change whether the campaign clear was registered. The relevant base-game checks are the completed save, successful clear-file loading, the post-game Nia and Melia events, and the New Game Plus option.
- Base edition: Land of Challenge is not required or expected.
- Expansion Pass edition: challenge modes can be checked separately.
- The campaign clear does not depend on DLC challenge content.
8. Finish the immediate post-game verification
The immediate post-game process is complete when the ending and credits have finished, completed data has been saved, the marked file loads back into Aionios, and New Game Plus appears on the title screen. Recruiting Nia and Melia verifies the principal base-game post-story Hero events, although their later Ascension quests are separate optional objectives.
Before beginning New Game Plus, retain the completed file if you may want to return to post-game Aionios. You can then pursue remaining Hero quests, Ascension quests, unique monsters, superbosses, collectibles and other cleanup without defeating Origin again.
- The ending scenes and credits have finished.
- A clear or completed marker is visible on the save.
- The marked file loads into the pre-final-battle world state.
- Nia's Hall of the Serene event is available or completed.
- Melia's Main Castle Gate event is available or completed.
- New Game Plus appears on the title screen.
- At least one completed source file is preserved.
Before you move on
- The final Origin encounter is defeated.
- The ending scenes and credits have finished.
- Completed data is saved and carries the game's clear marker.
- The marked file loads back into Aionios before the final battle.
- The Hall of the Serene event for Nia is available or completed.
- The Main Castle Gate event for Melia is available or completed.
- New Game Plus appears on the title screen.
- For the original Switch base edition, Land of Challenge access is not required.
References for this chapter
Optional: Post-Game Bosses and Superboss Preparation
The five Aionios's Strongest superbosses are optional post-game challenges in the original Nintendo Switch release. They are not required for the Chapter 1–7 campaign, the Origin encounter, the ending, or the campaign clear. First listen to the Aionios's Strongest information topic in the City. Then defeat the four open-world superbosses: Level 95 Kilocorn Grandeps, Level 100 Perilwing Ryuho, Level 105 Dreadwyrm Nizoont, and Level 110 Levialord Empireo. After those four victories, discuss Aionios's Strongest at a rest spot to make Level 120 Seraphic Ceratinia appear in The Cavity. Named Graves provide optional rematches. Expansion Pass Challenge Battles and Future Redeemed are separate DLC content and are outside this base-game route.
1. Separate the superboss route from campaign completion
Load the campaign-clear file after completing the Origin sequence and allowing the ending and credits to finish. The Aionios's Strongest encounters are optional post-game challenges, so an unfinished superboss chain does not prevent completion of Chapters 1–7 or registration of the main story clear.
The route has four open-world targets followed by a fifth superboss that is unlocked through an information chain. The initial levels are Kilocorn Grandeps at Level 95, Perilwing Ryuho at Level 100, Dreadwyrm Nizoont at Level 105, Levialord Empireo at Level 110, and Seraphic Ceratinia at Level 120. Do not search The Cavity for Seraphic Ceratinia before completing the unlock steps.
- Load the campaign-clear file.
- Keep Aionios's Strongest separate from the campaign completion checklist.
- Record the four open-world targets and their initial levels.
- Treat Seraphic Ceratinia as a later unlock, not an immediately available encounter.
2. Start the Aionios's Strongest information chain in the City
Travel to the City and look for the conversation near the War Room or nearby street-market area concerning the Great Sword, The Cavity, or Aionios's Strongest. Listen to the conversation until the topic is registered. This City conversation supplies the first information entry.
The City entry does not by itself make Seraphic Ceratinia appear. The next four entries come from defeating Kilocorn Grandeps, Perilwing Ryuho, Dreadwyrm Nizoont, and Levialord Empireo. Only after those four open-world victories should you return to a rest spot and discuss the completed Aionios's Strongest topic.
- Listen to the Aionios's Strongest conversation in the City.
- Confirm that the topic is recorded in the information list.
- Do not expect Seraphic Ceratinia to appear yet.
- Plan to defeat the four open-world superbosses next.
3. Prepare a party for enemies above the normal story level range
Before each attempt, rest, review class ranks, and replace story-level equipment that is no longer adequate. Use a stable party with dependable aggro control, sustained healing, and at least one reliable revival option. Chain Attacks and Interlink abilities can provide finishing windows, but they do not compensate for a party that cannot survive long enough to use them.
Raise the party toward the target's level with bonus experience when needed. Check accuracy and Dexterity before fighting evasive enemies, especially Perilwing Ryuho. Make a manual save before each first attempt. If the party fails, change a specific variable such as accuracy, defensive accessories, healing coverage, aggro control, class roles, or level instead of repeating the same setup.
- Use current weapons, Gems, accessories, Arts, and Skills.
- Bring dependable aggro control and multiple recovery options.
- Review accuracy before Perilwing Ryuho.
- Save manually before each new superboss attempt.
4. Defeat Kilocorn Grandeps at Dumas' Jaw
In the Fornis Region, fast travel to the Saffronia Tree landmark in the Rae-Bel Tableland. Travel northwest toward Dumas' Jaw, where Level 95 Kilocorn Grandeps appears. If it is not present, check the surrounding area and return after changing the local conditions if necessary.
Restore the party and save before approaching the Unique Monster. Keep the Defender's aggro stable while Attackers deal damage and Healers maintain the group. If the party collapses early, disengage when possible, return to a rest spot, and improve the setup before trying again. The victory adds one of the four open-world Aionios's Strongest entries and grants the Soulhacker skill Monarch's Heart.
- Reach Dumas' Jaw from Saffronia Tree.
- Defeat Level 95 Kilocorn Grandeps.
- Confirm the new Aionios's Strongest information entry.
- Confirm Monarch's Heart if Soulhacker rewards are being tracked.
5. Defeat Perilwing Ryuho at Coolley Lake
Travel to Coolley Lake in the Aetia Region. The lake is reached through the higher Aetia route around Melnath's Shoulder and Captocorn Peak. Save before entering the arena, where the initial Perilwing Ryuho encounter is Level 100.
Perilwing Ryuho is immune to Smash in its base-game superboss encounter, so do not make a Launch-to-Smash sequence the required damage plan. Its high Agility also makes accuracy important. Review Dexterity, accuracy effects, and attack reliability before committing to the fight. Defeating it adds the second open-world information entry and grants the Soulhacker skill Eagle Rush.
- Reach Coolley Lake through the Upper Aetia route.
- Defeat Level 100 Perilwing Ryuho.
- Do not depend on Smash to finish this encounter.
- Confirm Eagle Rush and the second open-world entry.
6. Defeat Dreadwyrm Nizoont and check the reward pedestal
In the Pentelas Region, enter Lower Maktha Wildwood and travel through the Cavern of Oblivion. Continue toward the deepest chamber beyond the Forgotten Trick Gate. Level 105 Dreadwyrm Nizoont waits at the end of this route. Save before engaging.
After winning, inspect the pedestal behind the arena before fast travelling away. The pedestal contains the optional Legendary Biter accessory. The victory also grants the Soulhacker skill Hot Soul and adds the third open-world Aionios's Strongest entry.
- Reach the end of Cavern of Oblivion in Lower Maktha Wildwood.
- Defeat Level 105 Dreadwyrm Nizoont.
- Inspect the pedestal for Legendary Biter.
- Confirm Hot Soul and the third open-world entry.
7. Defeat Levialord Empireo in the Aegis Sea
Reach the southeastern Erythia Sea and continue beyond the Boundary into The Aegis Sea. Hargan Port Camp is a useful landmark for this approach. Level 110 Levialord Empireo appears in the water arena, so restore the party and save before entering the encounter.
Use the same recovery-first plan as before. If aggro is lost or multiple characters fall together, retreat and revise the composition rather than repeating an unstable attempt. Defeating Levialord Empireo grants the Soulhacker skill Power Pick-Me-Up and supplies the fourth open-world Aionios's Strongest entry.
- Reach The Aegis Sea beyond the Erythia Sea Boundary.
- Defeat Level 110 Levialord Empireo.
- Confirm Power Pick-Me-Up.
- Verify that all four open-world superboss victories are recorded.
8. Discuss the completed topic and defeat Seraphic Ceratinia
Return to the City after defeating all four open-world superbosses. Confirm that the City information entry and the four victory entries are present. Then rest at any suitable rest spot and discuss Aionios's Strongest. This discussion is the required trigger for the final superboss; the four victories alone do not make Seraphic Ceratinia appear.
Travel to Swordmarch and enter The Cavity. Continue to the upper Great Sword area, where Level 120 Seraphic Ceratinia appears after the discussion. Save before the encounter and use the party's most reliable developed classes. Defeating Seraphic Ceratinia completes the initial five-boss Aionios's Strongest route and grants the Soulhacker art Transient Bond.
- Defeat Kilocorn Grandeps, Perilwing Ryuho, Dreadwyrm Nizoont, and Levialord Empireo.
- Discuss the completed Aionios's Strongest topic at a rest spot.
- Reach Seraphic Ceratinia in The Cavity.
- Defeat Level 120 Seraphic Ceratinia.
- Confirm Transient Bond and the fifth victory.
9. Use Named Graves for rematches and keep DLC separate
Each defeated superboss leaves a Named Grave at its arena. Examine the grave when you want to return to that location and attempt an optional stronger rematch. These rematches are build tests and completionist challenges, not requirements for the initial five-boss route or the main ending. Their levels and difficulty can differ by encounter, so do not assume that every grave uses the same progression.
The Expansion Pass adds separate content such as Challenge Battle modes, additional quests, heroes, outfits, support items, and the Future Redeemed story scenario. Challenge Battles can test late-game builds, but they are not prerequisites for the base-game campaign clear or for Aionios's Strongest.
- Confirm a Named Grave for each defeated superboss.
- Use graves for optional rematches only after the initial clears.
- Track Challenge Battles and Future Redeemed separately.
- Do not add Expansion Pass objectives to the base-game superboss checklist.
Before you move on
- The City Aionios's Strongest information topic was listened to and recorded.
- Kilocorn Grandeps, Perilwing Ryuho, Dreadwyrm Nizoont, and Levialord Empireo were defeated at their initial levels of 95, 100, 105, and 110.
- The completed Aionios's Strongest topic was discussed at a rest spot after the four open-world victories.
- Level 120 Seraphic Ceratinia appeared in The Cavity and was defeated.
- Named Graves are available for the defeated superbosses.
- Legendary Biter was collected if the optional Dreadwyrm reward is being tracked.
- Base-game superboss completion is recorded separately from Expansion Pass Challenge Battles and Future Redeemed.
References for this chapter
New Game Plus & Carryover: How to Restart Without Losing Unlocks
After completing the seven-chapter base-game story and viewing the ending, Xenoblade Chronicles 3 unlocks New Game Plus for the original Nintendo Switch release. Your cleared file remains the place to continue post-game exploration, finish Hero and Ascension Quests, challenge Unique Monsters and complete other cleanup. New Game Plus instead begins the main story again while retaining substantial character development, inventory and unlock progress. Levels, classes, class ranks, Ascension progress, Soulhacker records, equipment-related items, currency, collectibles and applicable Hero progress carry over, but story progress does not. Quests, key items, maps, landmarks, Rest Spots, traversal skills and defeated Unique Monster grave records reset. Chain Attacks, Interlinking and Hero selection are story-gated again. Monica must be recruited through her Hero Quest during the replay, while Ethel’s optional early return depends on the required Rank 20 condition. This chapter covers the Switch base game and excludes Expansion Pass and Nintendo Switch 2 Edition content.
1. Keep the cleared file for post-game work
Complete the final story battle, allow the ending and credits to finish, and save the cleared game data when the game provides the opportunity to continue. Confirm that the file is marked as completed before beginning another run. This cleared file is the one to use for post-game exploration, unfinished Hero Quests, Ascension Quests, Unique Monsters, collection work and other cleanup.
New Game Plus is a replay of the main story, not a continuation from the post-game version of Aionios. Before selecting it, preserve the cleared file in a separate save location or slot if you still need that file for cleanup. Do not treat New Game Plus as a way to keep quest completion or story progress; those parts of the campaign begin again.
- Finish the final battle and view the ending and credits.
- Confirm the file has its completed-game marker.
- Keep a separate cleared file if post-game exploration is unfinished.
2. Check the character progress that carries over
Character levels, unlocked classes, class ranks and class Ascension progress carry over into New Game Plus. You can therefore begin a second run with previously developed class options available as soon as the relevant characters and class systems become usable again. Special Talent Arts obtained before the replay, including Noah’s additional Talent Arts and Mio’s Dominion Flower, also remain part of the retained development.
Soulhacker progress carries over as well. Arts and Skills learned from Unique Monsters remain recorded, along with Soul Tree progress and earned SP. These records do not bypass the story’s opening restrictions. The replay still has to restore the appropriate characters and combat systems before you can use the retained options in battle.
- Review character levels and class ranks on the cleared file.
- Check which classes have been unlocked and which have completed Ascension.
- Review Soulhacker Arts, Skills, Soul Tree progress and SP if alternate builds are part of your plan.
3. Prepare the inventory you want to use
Most ordinary inventory and development resources carry over, including Gold, accessories, crafted Gems, collectibles, Ether Cylinders, Origin Shards, Silver and Gold Nopon Coins, The Art of Flow, clothing and attachments. Equip or record the accessories and Gem combinations you want before beginning if you plan to test a specific role or challenge setup.
The world itself is reset. Maps, discovered geography, landmarks and Rest Spots must be found again. Traversal Skills are unavailable until their normal story or quest unlocks return. Opened containers are refilled, including containers that previously held Legacy of the Seven equipment, and field Origin Shards become available again. Defeated Unique Monsters also return because their named graves are not retained as completed records.
- Choose the equipment, accessories and Gems you want for the opening chapters.
- Expect maps, landmarks and Rest Spots to require rediscovery.
- Do not plan routes around late-game traversal abilities at the start of the replay.
- Expect previously opened containers and field Origin Shards to be available again.
4. Restore the combat systems through the story
New Game Plus does not begin with every combat feature active. Chain Attacks and Interlinking are disabled at the beginning and must be unlocked again through their normal story progression. High levels, strong equipment and retained class development make early battles easier, but they do not remove these narrative gates.
Tutorial notifications are reduced or disabled in New Game Plus, so use the Tips menu if you need to review a mechanic. The opening sequence still determines when each combat system becomes available. Do not assume that a retained class, Talent Art or accessory grants access to Chain Attacks or Ouroboros forms before the relevant story events.
- Do not expect Chain Attacks in the opening battles.
- Do not expect Interlinking before its normal story unlock.
- Use the Tips menu if a tutorial does not replay automatically.
- Treat retained equipment as a combat advantage, not a replacement for story progression.
5. Reacquire Heroes under their normal conditions
Retained Heroes are not freely selectable from the opening scene. Mwamba temporarily occupies the Hero position, and Hero selection remains restricted until the early story restriction ends. After that point, retained Heroes become available when their usual story or recruitment conditions are restored.
Monica must be recruited again by completing her Hero Quest during the New Game Plus run. Do not assume that having recruited her on the original file makes her immediately selectable. Other Heroes likewise follow their normal availability points, even though their related class progress and other retained development can remain in the save.
- Expect Mwamba to occupy the early Hero position.
- Wait until Hero selection returns before trying to use retained Heroes.
- Plan to complete Monica’s Hero Quest again.
- Revisit retained Heroes when their normal story conditions are met.
6. Handle Ethel’s optional return
Ethel has a special New Game Plus condition because her continued availability is optional. If Ethel’s class reached Rank 20 before starting the replay, she can return after the story has progressed beyond Colony 4 and the relevant conditions are satisfied. If that Rank 20 condition was not met, she follows the ordinary temporary departure instead of remaining available through the replay.
Treat Ethel’s class rank as a preparation check before beginning New Game Plus. Her absence after the Colony 4 sequence does not mean the original progress was deleted; it means the optional return condition was not active or the story has not yet reached the point where she can return.
- Check Ethel’s relevant class rank before starting New Game Plus.
- If her class is Rank 20, continue past Colony 4 and meet the story conditions for her return.
- If the condition is not met, expect her normal temporary departure.
7. Give the replay a specific purpose
Choose a clear objective before starting: alternate Ouroboros pairings, missed Hero Quests, unfinished Ascension work, remaining class ranks, a second exploration pass or a controlled challenge. Retained levels and equipment can overpower early encounters, so lower character levels at Rest Spots later in the run if you want battles closer to first-playthrough difficulty.
Keep a dependable Defender and Healer while experimenting with unusual class combinations. Reacquire story systems, vendor access, traversal routes and quest rewards as the campaign opens them. Retained inventory and Hero progress do not make every story-gated feature or post-game reward immediately usable.
- Define the reason for starting New Game Plus before selecting it.
- Keep a stable Defender-and-Healer core while testing alternate builds.
- Restore story systems and complete required Hero Quests again.
- Use level adjustment later if the retained power level removes too much challenge.
Before you move on
- The original cleared file remains available and is marked as completed after the ending and credits.
- New Game Plus is available after the cleared game data has been recorded.
- The replay retains character levels, unlocked classes, class ranks, Ascension progress, Soulhacker Arts and Skills, Soul Tree progress, applicable Hero progress, inventory, equipment-related items, currency and listed collectibles.
- The replay resets story progress, quests, most quest-related and story key items, maps, geography, landmarks, Rest Spots, traversal skills and named Unique Monster grave records.
- Previously opened containers and field Origin Shards can be collected again.
- Chain Attacks and Interlinking return only after their normal story gates.
- Hero selection returns after the early Mwamba restriction ends.
- Monica is recruited again through her Hero Quest.
- Ethel’s optional return is available only when the required Rank 20 condition has been met and the replay reaches the relevant story point.
- The second run has a defined purpose, such as alternate builds, missed Heroes, Ascension progress, exploration rewards or a controlled challenge.
Cleanup & 100% Roadmap: Sidequests, Collectibles and Ascension Closure
This chapter is optional after completing Chapter 1–7 and the Origin ending. Load the completed save to explore from the pre-final-battle state, then separate your goals into six main-character Side Stories, optional Hero Ascension Quests, regional quests and Collectopaedia requests, Unique Monsters and superbosses, and Expansion Pass content. The six main-character routes raise their associated classes to Rank 20, but they are not all required to finish the base campaign: Noah’s Side Story is part of the final story progression, while the other character Side Stories can be completed as optional content when their conditions are met. Use System → Hero Roster to check each class’s exact prerequisites. Nia and Melia have post-game recruitment and Ascension routes. Challenge Battles and Expansion Pass Heroes belong in a separate DLC checklist, not the original base-game completion target.
1. Preserve the completed save and define the cleanup target
After defeating the final Origin encounter and watching the ending, load the save marked as completed. The game places you back before the final battle rather than opening a new free-roam timeline after Origin, but the completed-save flag preserves access to post-game content and is also used for New Game Plus. Keep this file as your cleanup master. If you plan to start New Game Plus, create or retain a separate save first so the completed file remains available.
Before traveling, decide which checklist you are pursuing. Base-campaign completion means the Chapter 1–7 story, Origin and ending. Optional base-game completion can add Hero recruitment, the six main-character Side Stories, Hero Ascension Quests, regional Standard Quests, Collectopaedia requests, Unique Monsters and superbosses. Expansion Pass content is a separate category. Do not make every Rank 20 class, every superboss or every DLC Challenge Battle a requirement for finishing the original campaign.
Open System, then Hero Roster. For each unlocked Hero and class, record the current rank, the named prerequisite quest, the required information discussion, the required active Hero and any colony or story condition. The Roster is the correct place to check a missing Ascension requirement because these conditions differ between classes.
- Keep the completed save separate from New Game Plus.
- Mark campaign completion separately from optional cleanup.
- Use Hero Roster entries rather than assuming every class follows the same trigger.
2. Finish the six main-character Side Story routes
The six party members have Side Story quests that function as their Ascension quests and raise their original classes from Rank 10 to Rank 20. These are not all post-game tasks. Noah’s Side Story is tied to the Chapter 7 main progression and is required for the campaign route. Mio, Eunie, Taion, Lanz and Sena have their own story conditions and can be completed when their information, location and class-rank requirements are available. If you have already finished the story, use the Hero Roster to identify any unfinished route rather than searching every colony blindly.
When a character’s entry requires Rank 10, put that character or another eligible inheritor into the named class and raise it to Rank 10 through battles, quests or stored class points. Then complete the specified information discussion at the correct rest spot with the required Hero active. For example, Eunie’s route uses the Fourtune Clovers information and the City Camp discussion with Riku and Manana active. Taion’s route uses The Sea information and its specified camp discussion. Other routes use their own story locations and prerequisites, so do not transfer one character’s trigger method to another.
After each Side Story, open the class screen and confirm that the associated class cap has increased to Rank 20. If the cap has not changed, the quest has not been completed or the wrong class entry is being checked. These six routes are valuable character and class content, but only the story-required route should be treated as mandatory for the campaign checklist.
- Complete Noah’s Side Story during the story if it is still unfinished.
- Use each character’s Hero Roster entry for the remaining five routes.
- Meet the Rank 10 condition before searching for the trigger.
- Confirm Rank 20 access after every completed Side Story.
3. Complete optional Hero Ascension Quests by region
After the six main-character routes, process ordinary Hero Ascension Quests in regional groups. Fast-travel to the colony, landmark or rest spot named in the Hero Roster, then complete the listed Standard Quest, colony-development, information or class-rank prerequisite. If the marker is absent, return to the Roster and identify the missing condition instead of repeatedly reloading the area. Some triggers require the relevant Hero to be active, and some information discussions work only at one specified camp.
Segiri’s Invisible Bond is one of the longer chains. It requires Side Story: Noah, the Colony 0 quest line, refurbishment of Li Garte Prison Camp to Level 5 and the final Colony 0 prerequisite. With Segiri active, return to the Central Cell Canteen at Li Garte Prison Camp after those conditions are complete. Treat this as an example of a prerequisite chain, not a universal requirement for every Hero.
Ethel and Cammuravi use a special Colony Omega progression rather than a normal single Ascension Quest. Raise Seraph to Rank 10, return to Colony Omega and follow the facility sequence. The available choice determines how Ethel and the related class progression are handled. Check the Roster and active-Hero requirement before entering so the event can proceed.
Group these tasks geographically: finish the named chains in one region, turn in nearby Standard Quests, and then move to the next region. This reduces backtracking and helps reveal follow-up quests that appear after colony development or information discussions.
- Complete prerequisite chains before searching for an Ascension marker.
- Keep the required Hero active when the Roster specifies one.
- Treat Segiri and Colony Omega as special chains with their own conditions.
- Recheck the Roster after each Hero Ascension Quest.
4. Recruit Nia and complete Grasping My Future
Nia is a post-game Hero. Recruit her on the completed save, place her in the active Hero slot and trigger all four memory events before attempting the Ascension Quest. Visit the Saffronia Tree landmark in the Fornis Region, Tower Camp in the Pentelas Region, the Ascension Grounds at Agnus Castle and Memorial Hall in the City. Each location produces a separate scene or information event; visiting only some of them does not start the quest.
After all four scenes have played, rest at a campsite and discuss Nia’s memories. The first discussion can end without starting the quest if the class requirement is missing. Raise Mio, or another eligible inheritor, to Rank 10 in Lifesage, then discuss the memories again. This starts Grasping My Future. Follow the objective to Cavity, complete the required encounter and finish the story sequence.
When the quest ends, open the class screen and verify that Lifesage can reach Rank 20. Nia’s recruitment and Lifesage Ascension are optional for completing the original Chapter 1–7 and Origin campaign, but they belong on a full base-game Hero and class checklist.
- Recruit Nia on the completed save.
- Trigger the Saffronia Tree, Tower Camp, Agnus Castle and Memorial Hall scenes.
- Discuss Nia’s memories at a rest spot.
- Raise Lifesage to Rank 10 and start Grasping My Future.
- Complete the Cavity objective and verify Lifesage Rank 20.
5. Recruit Melia and complete From Atop Her Throne
Melia is also a post-game Hero. Raise Noah’s Royal Summoner class to Rank 10, place Melia in the active Hero slot and travel to the Throne Room on the fourth floor of Keves Castle. This begins From Atop Her Throne and creates three required subquests.
Complete Colony 9’s Backup by following the markers in Colony 9 and the southern area, then return as directed. Complete Friction With Agnus by traveling to Agnus Castle and resolving the marked rebel-force encounter. Complete The City Pep Talk from the City’s War Room, follow the conversation and movement markers, and return to the indicated location. Keep Melia active throughout the chain; progress can be suspended if the required Hero is not active.
After all three subquests are complete, return to the Keves Castle Throne Room. Finish From Atop Her Throne and check Royal Summoner in the class menu. The class should now be able to reach Rank 20. Do not treat maximum colony affinity as a universal prerequisite for this route. Colony development may matter to other quests, but Melia’s documented route is the Rank 10 condition plus the three named subquests and final throne-room return.
- Recruit Melia on the completed save.
- Raise Noah’s Royal Summoner to Rank 10.
- Keep Melia active for the route.
- Complete Colony 9’s Backup, Friction With Agnus and The City Pep Talk.
- Return to the throne room and verify Royal Summoner Rank 20.
6. Sweep regional quests, then schedule difficult optional fights
Once the Ascension routes you want are complete, sweep one region at a time. At every colony and city, check NPCs with quest markers, rest-stop discussions, Standard Quest lists, Collectopaedia Board requests and nearby map markers. Turn in requests during existing travel routes, gather materials while moving between objectives and record unresolved tasks that require weather, a particular Hero, a story state or a special route. Regional cleanup is optional and should not delay the main campaign or be confused with the conditions for the six character Side Stories.
Leave Unique Monsters and superbosses until the party is ready. First raise the classes you actually intend to use, improve gems and accessories, and prepare a formation with dependable healing, revives, enemy control and a way to handle the target’s resistances. Test the party against lower-level Unique Monsters, record each victory and move upward. Use a separate log for defeated monsters so a long cleanup session does not repeat targets unnecessarily.
Keep Expansion Pass objectives outside the original base-game checklist. Nintendo identifies the Expansion Pass as adding support items, quests, modes, outfits and an additional story scenario. Its Challenge Battle content, extra Heroes and related reward tracks are not required to complete the original Switch base edition. If the Expansion Pass is installed, create a second checklist for those additions rather than mixing them with base-game quests or superboss goals.
- Sweep colonies, cities and rest spots by region.
- Complete desired Standard Quests and Collectopaedia requests during travel.
- Log Unique Monsters and superbosses separately from story completion.
- Track unfinished conditions instead of repeatedly searching for absent markers.
- Record Expansion Pass Heroes and Challenge Battles in a separate DLC category.
Before you move on
- The completed save still loads with post-game access and remains separate from any New Game Plus file.
- The Chapter 1–7 campaign and Origin ending are recorded as complete independently of optional cleanup.
- Noah’s Side Story is complete if it was not already completed during the main story.
- The remaining five main-character Side Stories are either complete or deliberately deferred as optional base-game content.
- The Hero Roster has been reviewed and each intended Hero Ascension condition is completed or documented.
- Nia’s recruitment, four memory scenes, rest-stop discussion and Grasping My Future are complete if pursuing full base-game Hero and class completion.
- Melia’s recruitment, Royal Summoner Rank 10 condition, three subquests and From Atop Her Throne are complete if pursuing full base-game Hero and class completion.
- Regional Standard Quests, Collectopaedia requests and colony-development tasks are logged according to the chosen cleanup target.
- Unique Monsters and superbosses are logged and defeated according to the targets chosen for the optional cleanup plan.
- Expansion Pass Heroes, Challenge Battles and their rewards are recorded separately from the original Switch base-game checklist.
References for this chapter
- How To Get All Hero Ascension Quests - Xenoblade Chronicles 3 Walkthrough
- Grasping My Future Ascension Hero Quest Guide - Xenoblade Chronicles 3
- Ascension Quest: From Atop Her Throne - Melia - Hero Quests
- Xenoblade Chronicles 3 Quest Guide: All Quests and how to complete them
- What DLC Is Available? Xenoblade Chronicles 3
Finishing up
The base-game campaign is complete when the final Origin sequence is defeated, the ending and credits finish, and completed data is saved.
Load the clear-marked save to confirm that the party returns to the pre-final-battle world state and that post-game access is available.
New Game Plus appears from the title screen after the clear data has been recorded; it starts a separate replay and is not the same as loading the post-game clear save.
Nia and Melia recruitment, Ascension Quests, superbosses and Challenge Battles are optional post-game content. Challenge Battles require the Expansion Pass and are not required for the original Switch base-game campaign.
Choose your next gameScreenshots & video
Game imagery for reference. Follow the written chapters above for the route and strategies.
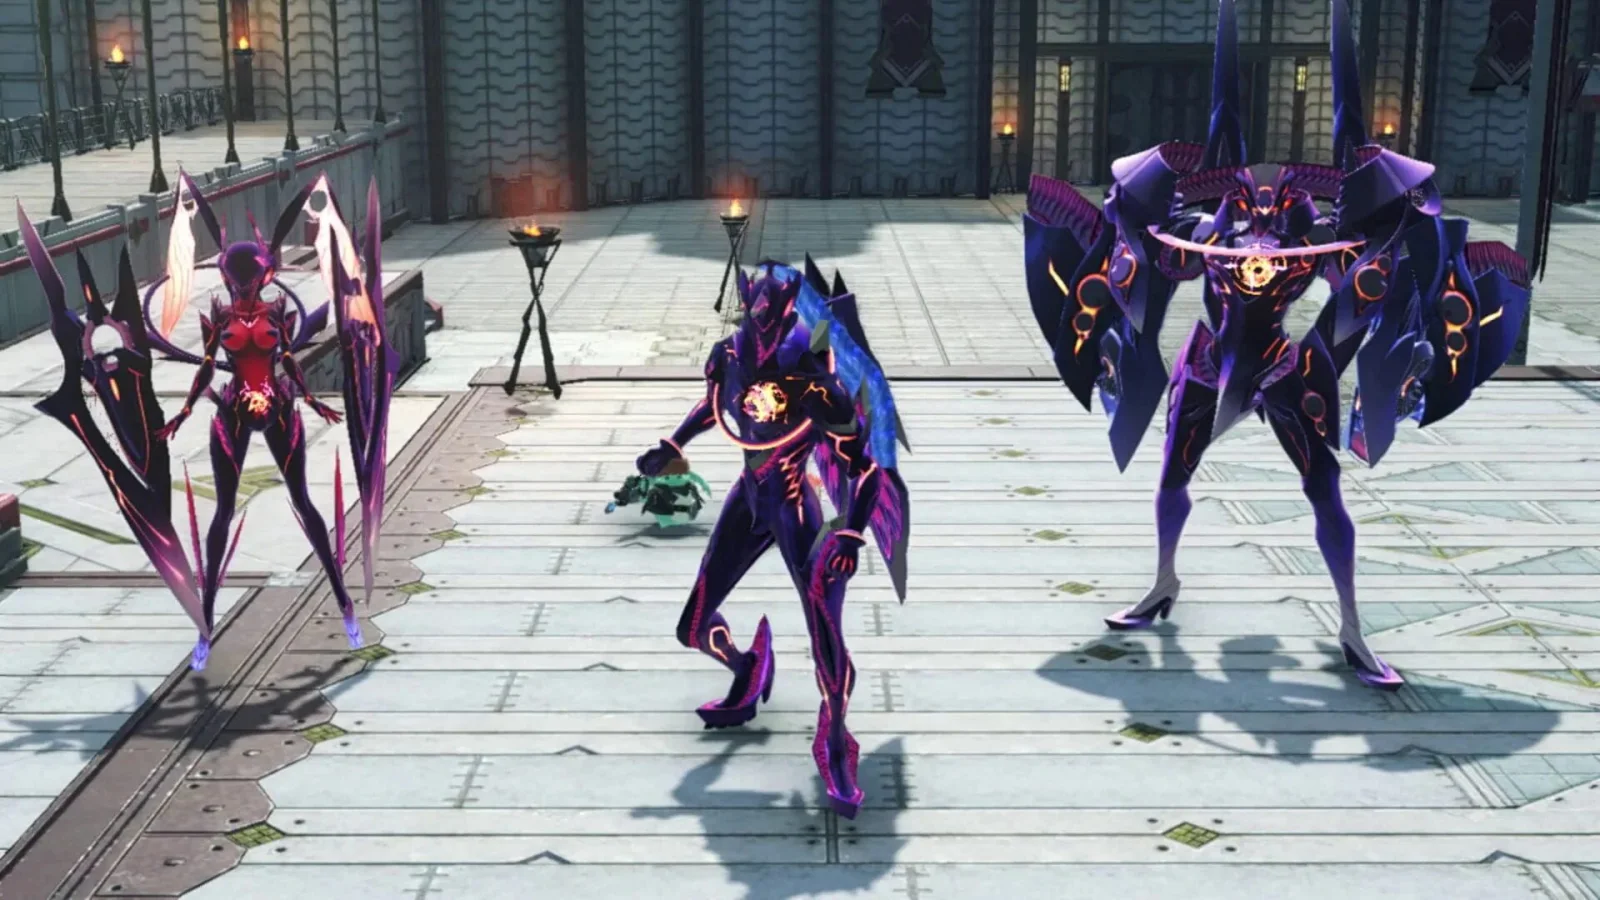
Sources & references
Our original guide draws on the references below. Check the edition at the top of this page before following controls or unlock requirements.
- Xenoblade Chronicles 3 Nintendo Switch product page
- Chapter 1: Ouroboros - Xenoblade Chronicles 3 Walkthrough & Guide
- Xenoblade Chronicles 3 | Chapter 1 Walkthrough & Boss Guide
- Heading to Colony 9 - Chapter 1 - Walkthrough
- Exploring Yzana Plains and Alfeto Valley - Chapter 1 - Walkthrough
- Xenoblade Chronicles 3 | Main Story Walkthrough Guide | GameWith
- XC3 – Chapter 2 Walkthrough
- Cooking, Chain Attacks and Gem Crafting – Chapter 2
- Boss Fight: Silvercoat Ethel – Chapter 2
- Boss Fight: Consul/Moebius K – Chapter 2
- The Hillside Hulk – Standard Quest
- Riku and Manana – Standard Quest
- Xenoblade Chronicles 3 | Chapter 2 Walkthrough & Boss Guide | GameWith
- Xenoblade Chronicles 3 | Chapter 3 Story Walkthrough | GameWith
- Xenoblade Chronicles 3: Ouroboros & Interlink - Levels & How To Use | GameWith
- Xenoblade 3: Ouroboros - Interlink | Gamepressure
- Chapter 3: Saffronias - Xenoblade Chronicles 3 Walkthrough & Guide | GameFAQs
- Urayan Tunnels - Xenoblade Chronicles 3 Walkthrough | Neoseeker
- Xenoblade Chronicles 3 — Nintendo official release announcement
- Chapter 4 (XC3)
- Xenoblade Chronicles 3 Chapter 4 Walkthrough & Boss Guide
- Xenoblade Chronicles 3 Natural Selection Quest Guide
- Chapter 4: Life — Xenoblade Chronicles 3 Walkthrough & Guide
- Exploring Great Cotte Falls, Part 2
- Stolen Provisions — High Maktha Wildwood
- Xenoblade Chronicles 3 — Nintendo Switch product page
- Boss Fight: Moebius D & J — Chapter 4 Walkthrough
- Boss Fight: Queen of Keves — Chapter 4 Walkthrough
- Keves Castle — Xenoblade Chronicles 3 Walkthrough
- Exploring the City - Chapter 5 Walkthrough | Xenoblade Chronicles 3 | Gamer Guides
- Heading to Li Garte Prison Camp - Chapter 5 - Walkthrough | Xenoblade Chronicles 3 | Gamer Guides
- Xenoblade Chronicles 3 | Chapter 5 Walkthrough & Boss Guide | GameWith
- Chapter 5: Eclipse - Xenoblade Chronicles 3 Walkthrough & Guide | GameFAQs
- Boss Fight: Moebius M - Chapter 5 - Walkthrough | Xenoblade Chronicles 3 | Gamer Guides
- Xenoblade Chronicles 3 — Chapter 6: Choices Walkthrough and Guide
- Exploring Agnus Castle - Chapter 6 Walkthrough
- Agnus Castle Barbican Revisited - Xenoblade Chronicles 3 Walkthrough
- Chapter 6 (XC3)
- Xenoblade Chronicles 3 Side Story: Mio Quest Walkthrough Guide - GameWith
- Xenoblade Chronicles 3 — Hero Quest: Side Story - Mio
- Xenoblade Chronicles 3 — Exploring Captocorn Peak Walkthrough
- Xenoblade Chronicles 3 — Official Nintendo Switch release information
- Class Rank (XC3)
- Side Story: Eunie Ascension Hero Quest Guide - Xenoblade Chronicles 3 - Neoseeker
- Side Story: Lanz Ascension Hero Quest Guide - Xenoblade Chronicles 3 - Neoseeker
- Side Story: Taion Ascension Hero Quest Guide - Xenoblade Chronicles 3 - Neoseeker
- Side Story: Sena Ascension Hero Quest Guide - Xenoblade Chronicles 3 - Neoseeker
- Side Story: Noah Ascension Hero Quest Guide - Xenoblade Chronicles 3 - Neoseeker
- Xenoblade Chronicles 3 | Chapter 7 Walkthrough & Boss Guide | GameWith
- Side Story: Lanz | Xenoblade Wiki
- Xenoblade Chronicles 3 Quest Guide: All Quests and how to complete them
- Hero Quest: Side Story - Noah - Chapter 7 - Walkthrough | Xenoblade Chronicles 3 | Gamer Guides
- Heading to Origin - Chapter 7 - Walkthrough | Xenoblade Chronicles 3 | Gamer Guides
- Ascension Quest: Reasons to Evolve - Zeon - Hero Quests | Xenoblade Chronicles 3 | Gamer Guides
- Exploring Origin Interior (Part 2) - Chapter 7 Walkthrough
- Origin - Xenoblade Chronicles 3 Walkthrough
- Chapter 7: Time Moves Again - Xenoblade Chronicles 3 Walkthrough & Guide | GameFAQs
- Xenoblade Chronicles 3 | Nintendo Switch games | Nintendo UK
- Exploring Origin Interior (Part 3) - Chapter 7 Walkthrough
- Boss (XC3)
- X - Xenoblade Wiki
- Final Boss: Z - Chapter 7 - Walkthrough | Xenoblade Chronicles 3 | Gamer Guides
- Final Boss: Z Infinity - Chapter 7 - Walkthrough | Xenoblade Chronicles 3 | Gamer Guides
- Final Boss: Z Infinity - Chapter 7 - Walkthrough | Xenoblade Chronicles 3 | Gamer Guides
- Xenoblade Chronicles 3 | Post Game Contents - What To Do After Beating The Game
- How to Recruit Melia in Xenoblade 3 - Postgame - Walkthrough
- Xenoblade Chronicles 3 Post Game Content & New Game Plus
- Here's how New Game+ works in Xenoblade Chronicles 3
- What DLC Is Available? Xenoblade Chronicles 3
- Xenoblade Chronicles 3: Aionios's Strongest Locations
- Xenoblade Chronicles 3 - Where To Find Aionios' Strongest Super Bosses
- Xenoblade Chronicles 3 | Aionios's Strongest Unique Monsters List
- Xenoblade Chronicles 3 | Unique Monster Lists & Locations
- New Game + (XC3) | Xenoblade Wiki
- Xenoblade Chronicles 3 New Game Plus: What Carries Over
- New Game Plus — Xenoblade Chronicles 3 Guide
- How To Get All Hero Ascension Quests - Xenoblade Chronicles 3 Walkthrough
- Grasping My Future Ascension Hero Quest Guide - Xenoblade Chronicles 3
- Ascension Quest: From Atop Her Throne - Melia - Hero Quests
About the game & collecting notes
- Platform
- Nintendo Switch
Optional late-game class-cap route for Xenoblade Chronicles 3 on Nintendo Switch. Complete the optional Side Story quests for Eunie, Lanz, Taion and Sena after their Chapter 6 or Chapter 7 prerequisites become available, while treating Side Story: Mio as already completed by the Chapter 6 main route. Side Story: Noah is not a prerequisite for this chapter because it is completed later during the Chapter 7 Origin Ore route in the final-preparation chapter. Raise each relevant inherited class to Rank 10 first, satisfy the exact information, rest-spot and active-Hero requirements shown in the Hero Roster, and confirm the resulting Rank 20 caps. None of these optional routes is required to reach the Origin ending.
Darryl Polo
Darryl Polo writes about emulation and retro games. What changes when an old favorite moves to another setup? That question connects his interest in tinkering with the games that made the hardware worth keeping.
Our editorial standardsFound a step that needs another look? Help us improve this guide.