
Xenoblade Chronicles 2 (Nintendo Switch) — Complete Campaign Walkthrough
Step-by-step campaign walkthrough for Xenoblade Chronicles 2 on Nintendo Switch. This guide takes you through the main story from Chapter 1 to the final chapter, explains key battle systems, mandatory story objectives, and postgame/New Game Plus options. Optional DLC (Torna — The Golden Country) and how it fits with the main campaign are covered separately.


Find a copy
Xenoblade Chronicles 2 Nintendo Switch
We may earn a commission if you buy through these links, at no extra cost to you. As an Amazon Associate I earn from qualifying purchases.
Opens retailer search results. Check the model, edition, seller, availability and current price before buying.
Before you begin
You’re about to play through Xenoblade Chronicles 2’s main campaign on Nintendo Switch.
This guide assumes you want to finish the base game’s story (the in-game final chapter) while avoiding common dead-ends, and explains where to go, which objectives are required to progress, how to approach major battles, and how to recover from mistakes without spoiling optional completion goals.
Follow chapters in order.
Optional content such as sidequests, rare-Blade farming and Torna — The Golden Country (the Expansion Pass standalone story) is flagged so you can postpone it until after the main ending.
When I reference story chapters I use the game’s internal progression headings; optional DLC is explained separately and will not be required to reach the main ending.
Set yourself up for the run
Update the game and your system: Install the latest patch and Expansion Pass DLC if you plan to use Torna or the DLC packs.
Nintendo’s official Xenoblade Chronicles 2 product pages and support notes document the Expansion Pass and Torna release details.
Set a comfortable difficulty level and enable autosave.
Learn the battle basics: chain Arts, manage Driver/Blade switching, use Break/Topple combos and Overdrive Protocols.
Combat fundamentals are necessary for boss fights.
Allocate storage for DLC and future patches (Torna and Expansion Pass content require additional space if purchased).
Keep a notepad for treasure-trove locations, affinity/heart-to-hearts and rare Blade recruitment conditions — these are optional but often affect endgame builds.
Decide how much side content you want: the main route can be played with minimal sidequests, but completing select sidequests and building Blade affinity greatly eases later bosses.
Familiarize yourself with party roles (tank, healer, DPS) and Blade driver pairings — adjust your frontline depending on boss resistances and encounter types.
If you own Torna standalone or the Expansion Pass, decide whether to play Torna mid-run (recommended timing is after finishing Chapter 7) or after completing the main game.
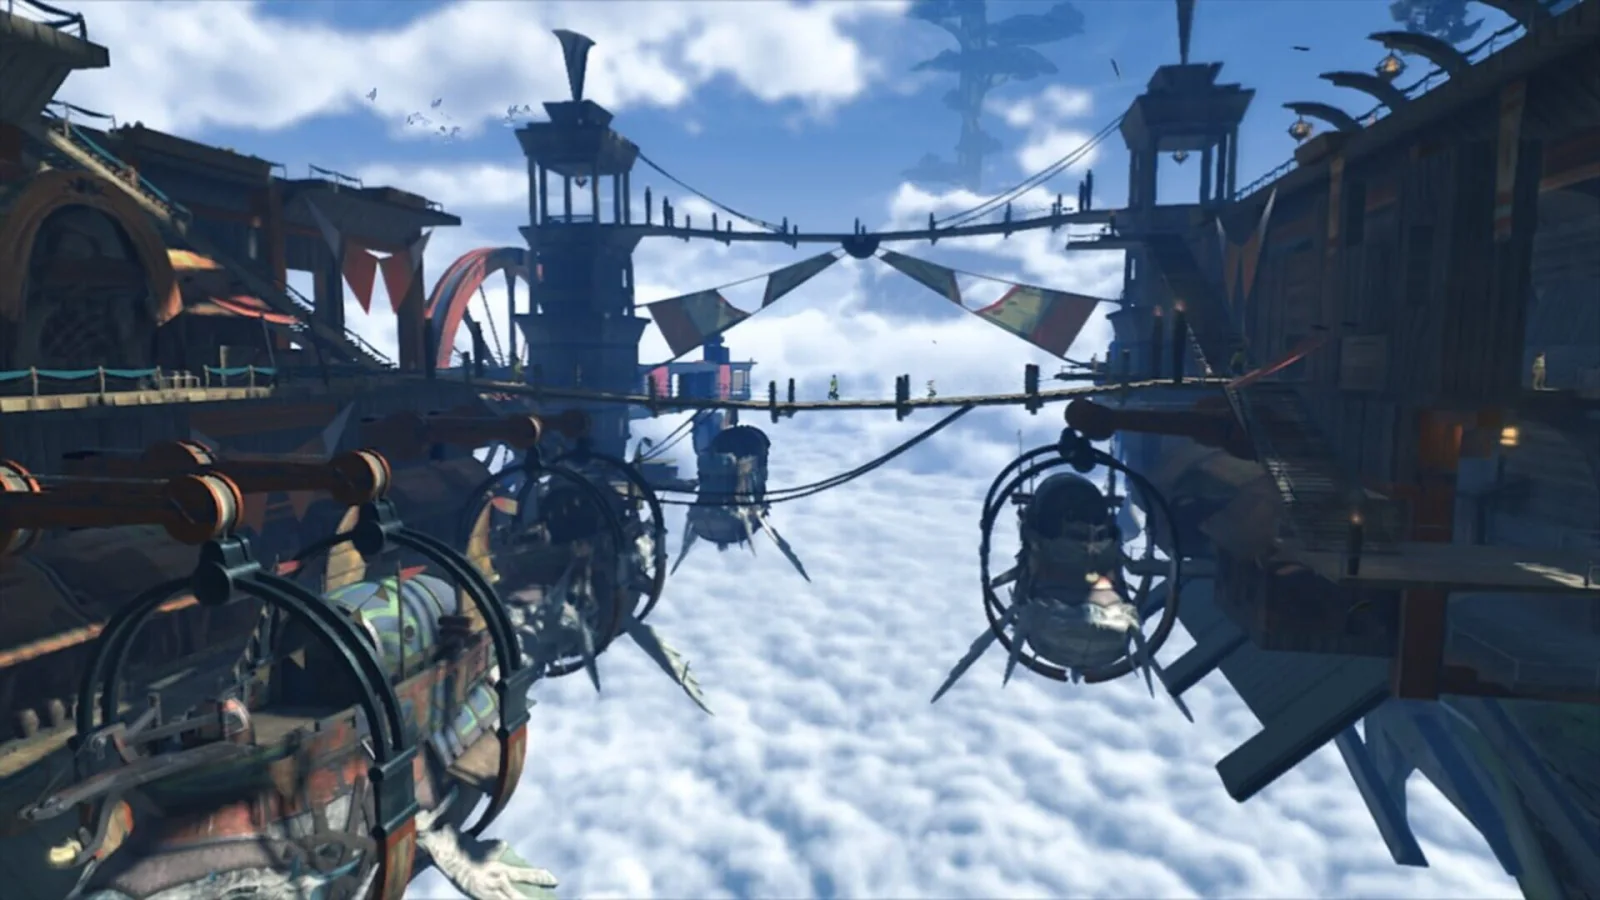
Preparation and Core Systems (Before Chapter 1)
Confirm that you are starting Xenoblade Chronicles 2 on Nintendo Switch rather than Torna or a different edition, update the software, check available storage, and choose a manageable difficulty. Let the opening combat tutorials play and reread available entries from the in-game System menu. Rex begins with Pyra; additional Blade bonding is unlocked during Chapter 2, when the game teaches the Main Menu → Blades → Bond Blade route. Build toward damage, defense, and healing instead of spending every Core Crystal on one Driver. Use the opening scripted battles and low-level enemies to practice Arts, Blade switching, Specials, Driver Combos, Blade Combos, and the Party Gauge. Torna—The Golden Country is a separate optional story and is not required for the base game’s ending.
1. Confirm the original Nintendo Switch game and install updates before starting
Launch Xenoblade Chronicles 2 from the HOME Menu. The original game is the Nintendo Switch campaign released on December 1, 2017. Torna—The Golden Country is a separate story expansion and should not be launched as though it were Chapter 1 of the main campaign. If your console offers a Nintendo Switch 2 Edition or upgrade option, do not apply its feature descriptions to this original-edition guide; the campaign structure is the same, but edition-specific quality-of-life features can differ.
To update the original Switch software, highlight Xenoblade Chronicles 2 on the HOME Menu, press the + or – button, choose Software Update, and then choose Via the Internet. Allow the download and installation to finish before beginning. This is especially useful if you intend to use Expansion Pass functions or later DLC features. Do not delete save data while managing software; if storage is tight, remove only software or other data that you can redownload or replace.
Nintendo lists the base game at approximately 13.2 GB in its current digital listing. Digital Expansion Pass material requires additional storage, so open System Settings → Data Management before downloading DLC. If you use a microSD card, confirm that it is installed and recognized. A physical cartridge still requires storage for updates and downloadable content.
- Launch Xenoblade Chronicles 2, not Torna, for the main campaign.
- Update the game from the HOME Menu before playing.
- Check system or microSD storage before downloading DLC.
- Do not mix Nintendo Switch 2 Edition instructions with the original Switch release.
2. Choose difficulty, inspect controls, and create dependable saves
Start on Normal unless you already understand Xenoblade Chronicles 2’s combat systems. The opening encounters are intentionally limited, so an easy first fight does not mean a higher difficulty will remain comfortable once enemies gain more health, resistances, and group tactics. After loading a save, open the in-game System menu and review Options. The game allows difficulty changes through its options after the relevant version update; choose a setting you can maintain rather than treating the first battle as a test of difficulty.
Review the button prompts shown by the game for targeting, drawing or sheathing weapons, Arts, Specials, Blade switching, the map, and menus. Controller layouts can feel different in handheld mode, with Joy-Con controllers, and with a Pro Controller. Follow the displayed prompts rather than importing a control scheme from another Xenoblade game.
Use the System menu’s Save command whenever you reach a safe location, finish a major tutorial, recruit a Driver, or prepare to enter a story battle. The game has normal automatic saving, but manual saves are the reliable way to preserve a pre-battle state. Keep one manual save separate from your most recent file so a failed experiment with equipment, Core Crystals, or a difficult fight does not remove your fallback.
- Select a first-playthrough difficulty you can change later if necessary.
- Read the control prompts displayed by your own version and controller.
- Make a manual save after the opening tutorials and before major story battles.
- Keep at least one backup manual save instead of relying only on automatic saving.
3. Read the tutorials and learn the basic combat cycle
Do not skip the opening combat explanations. Xenoblade Chronicles 2 teaches its systems through scripted encounters, and later mechanics depend on understanding the earlier ones. When a tutorial appears, allow it to finish. To review available explanations, open the Main Menu with +, enter System, and select the Tutorials entry when it is available. Tutorial entries are added as the campaign introduces new systems, so some subjects will remain locked until later chapters.
A Driver fights through the currently active Blade. Stand within attack range and allow auto-attacks to build Arts. Use the face-button Arts when their cooldowns are ready, then press A when the active Blade’s Special gauge has reached a usable level. Each Blade supplies its own weapon, Arts, element, and Special attacks. Switch between engaged Blades with the corresponding directional-button prompt shown beside the Blade icons. Switching is not merely a defensive escape; it also gives access to different Arts, elements, and combo reactions.
Learn the two combo families separately. Driver Combos use reactions in order: Break, Topple, Launch, and Smash. The reaction must be applied by the correct Driver Art within the visible reaction window. Blade Combos use elemental Specials in a sequence displayed in the upper-right combat interface. You do not need a perfect three-stage Blade Combo in the first fights, but you should recognize the on-screen route and use a compatible Special when a party member begins one.
The Party Gauge is the segmented gauge near the party display. It can revive a fallen ally and, once full, activate a Chain Attack. Do not spend all three segments on a routine revival immediately before a dangerous battle if the party can recover normally. As you gain experience, combine Blade Combos with Driver Combo reactions to create Fusion Combos and use Chain Attacks after preparing the enemy with elemental orbs.
- Reread available tutorials through Main Menu → System → Tutorials.
- Practice auto-attacks, Arts, Specials, and Blade switching.
- Recognize Break → Topple → Launch → Smash as the Driver Combo order.
- Preserve the Party Gauge when a Chain Attack or emergency revival may be needed.
4. Unlock Core Crystal bonding in Chapter 2 and assign Blades deliberately
Rex does not begin the game with a full random Blade roster. His initial story setup centers on Pyra. Continue the required story into Chapter 2 until the game presents the Core Crystal bonding tutorial. At that point, open Main Menu → Blades → Bond Blade, select a Driver, and then select a Core Crystal. The result is randomized, so a Rare or Legendary Core Crystal does not guarantee a particular Blade.
After a Blade awakens, it is not automatically the best choice for every situation. Open Main Menu → Characters → Character Setup → Engage Blades to place it in an active slot. Inspect its role, element, weapon, Driver Arts, Special levels, and Affinity Chart. A Blade with lower visible attack power may still be valuable because it supplies healing, aggro control, Break or Topple access, a missing element, or a useful field skill.
Spread your early options across the Drivers who are actually available rather than bonding every crystal to Rex. You will receive additional party members and more opportunities to configure the team as the story advances. Keep at least one practical defensive option, one healing option, and several offensive or elemental choices in the active roster. Random Core Crystal results are not a reason to restart the campaign; ordinary Blades can still fill important combat and field roles.
- Wait until the Chapter 2 bonding tutorial unlocks the Bond Blade menu.
- Use Main Menu → Blades → Bond Blade to resonate with Core Crystals.
- Use Character Setup → Engage Blades to place awakened Blades in active slots.
- Distribute roles across the available Drivers instead of stacking every Blade on Rex.
5. Practice in safe battles and use Argentum’s Training Ground when available
The opening scripted battles are the first practice area. Fight normally instead of rushing through every encounter. Practice allowing an auto-attack string to begin, canceling into an Art, filling a Special gauge, switching Blades, and following a Blade Combo prompt. When you are unsure of a mechanic, test it against ordinary enemies near a Skip Travel point rather than against a Unique Monster or story boss.
After Argentum becomes available, the local Training Ground provides a controlled place to review combat fundamentals when the activity is unlocked. Speak with the Training Ground attendant, Vorden, and follow the available practice prompts. If the Training Ground activity is not yet offered, do not stop the campaign searching for it; use low-level enemies and the tutorial menu until the story opens more of Argentum’s functions.
Before leaving the preparation phase, purchase only affordable pouch items and basic equipment. Pouch items can improve the rate at which Arts or Specials become available, but buying every early item is unnecessary. Confirm that your active party has a healing method, a way to survive enemy attention, and at least one Blade whose element or reaction can contribute to the current tutorial. Then follow the main-story objective into Chapter 1. Sidequests, rare-Blade collection, Challenge Battle, and Torna can all wait.
- Practice against ordinary enemies before attempting optional elites.
- Use Argentum’s Training Ground with Vorden when it is available.
- Confirm healing, defensive utility, and offensive options before entering Chapter 1.
- Leave optional DLC and extensive Blade farming until the main systems are unlocked.
Before you move on
- Xenoblade Chronicles 2 launches and has been updated from the HOME Menu.
- You have checked available storage before downloading any Expansion Pass content.
- You can identify the active Driver, active Blade, Driver Arts, Blade Specials, Driver Combos, Blade Combos, and the Party Gauge.
- You know that additional Core Crystal bonding begins after the Chapter 2 tutorial and can follow Main Menu → Blades → Bond Blade.
- Your active party has damage, healing, and defensive utility rather than a single repeated role.
- You have made a manual save and can begin Chapter 1 without relying on optional DLC or extensive side content.
References for this chapter
- Nintendo Official Site — Xenoblade Chronicles 2 for Nintendo Switch
- How to Update Xenoblade Chronicles 2 — Nintendo Support
- Is there a Difference Between the Expansion Pass and the standalone version of Torna - The Golden Country? — Nintendo Support
- Xenoblade Chronicles 2 FAQ/Walkthrough — Chapter 08: World Tree
- Tutorials — Xenoblade Chronicles 2 Walkthrough and Guide — GameFAQs
- The Basics — Xenoblade Chronicles 2 Combat Guide — GameFAQs
- Xenoblade Chronicles 2 Battle System and Combat Tips — Prima Games
Chapter 1 — Encounters: Argentum, the Maelstrom, and the Ancient Ship
Chapter 1 takes Rex from the Argentum Trade Guild through the salvage contract, the Maelstrom, and the Ancient Ship. Complete the required Argentum errands, board the Maelstrom, speak with the Torna clients, and report for duty at the crow’s nest. Before leaving the Maelstrom, collect its missable bedroom chest. In the Ancient Ship, follow the marked route to restore power, use party combat and positioning against the Lethal Lysaat King, and defeat Level 4 Megalo Aligo. After the story introduces Pyra, complete the required Level 5 Malos battle using Rex’s Arts, Pyra’s Specials, and the on-screen combat instructions. Chapter 1 ends after the escape sequence; reaching Gormott is the transition into Chapter 2, not part of this chapter’s completion.
1. Defeat the opening King Crustip and complete the first Argentum conversations
After the opening scenes, Rex begins at the salvage site. Lock on to the Level 1 King Crustip and defeat it using your available Arts. Rex attacks automatically when he is within range, while Arts are activated from the face buttons after they charge. Stay close enough for his auto-attacks to continue instead of repeatedly running away from the target.
Return to the marked area in Argentum and speak with Melolo. Continue to Chairman Bana when the objective directs you there. These conversations establish the salvage job and open the preparation sequence. Do not spend time clearing optional enemies or searching the wider Trade Guild yet; the main objectives provide the required route and tutorials in order.
- Defeat the opening King Crustip.
- Speak with Melolo.
- Meet Chairman Bana and activate the preparation objective.
2. Complete the Big Job preparations in Argentum
Follow the objective markers to Shynini’s Accessories and purchase the Abyss Vest, then equip it from the Character menu. Return to Melolo when directed. She sends you to Max, who is in the Argentum Bazaar area. Max presents a choice about sending money home. Sending 90,000G gives Rex additional provisions, but it is not required to proceed; choosing not to send the money also allows the story to continue.
After speaking with Max, talk to Rurui at the marked location. Continue to Fishy Fishy and purchase any available food item. The important requirement is making the purchase, not selecting one particular dish. This step introduces pouch items, which provide temporary effects while equipped. Equip a pouch item if you want to practice the system, but do not spend time optimizing it for this short opening chapter.
When the objective sends Rex to Lemour Inn, speak with the inn attendant and rest. Resting makes bonus experience available for voluntary level increases. You do not need to spend every point immediately. If you want to explore Argentum’s shops or complete an optional errand, do so before boarding, but none of that is required for Chapter 1 completion.
- Buy and equip the Abyss Vest.
- Speak with Max and choose whether to send the 90,000G.
- Talk to Rurui.
- Buy food at Fishy Fishy.
- Rest at Lemour Inn.
3. Board the Maelstrom and finish the ship’s required conversations
Go to the Goldmouth Exit Dock and speak with Spraine to board the Maelstrom. Once aboard, find Nia and Dromarch on the lower interior deck, then speak with Jin upstairs. Continue to the Maelstrom Deck and talk to Malos and Sever. Finally, climb to the crow’s nest and speak with Monell to begin Rex’s lookout duty.
After the lookout sequence, you can move through the ship again. Before reporting downstairs, enter the bedroom at the end of the ship and open the visible treasure chest. This chest contains the Rush Hour accessory and cannot normally be collected after the story moves on from the Maelstrom. It is optional for story completion, but it is the most important missable item in this chapter.
Return downstairs when ready. The game forms the temporary party for the Ancient Ship approach. You control Rex at this stage, while the available allies support him. Their exact selection is not important for completing the chapter.
- Speak with Nia and Dromarch.
- Speak with Jin.
- Speak with Malos and Sever.
- Report to Monell at the crow’s nest.
- Collect the bedroom chest before leaving the Maelstrom.
4. Enter the Ancient Ship and restore its power
Proceed from the Maelstrom to the Ancient Ship. A Lethal King Lysaat attacks near the entrance. Keep Rex behind or beside it when possible; standing directly in front of the enemy makes it easier to be struck when it backs into the party. Use Rex’s Arts as they charge and let allied characters draw some of the enemy’s attention.
Inside the ship, follow the objective route through the decks. You may lure individual enemies away from groups rather than fighting several targets at once. Lock on to an enemy and use the game’s lure instruction when it appears. Watch for broken sections of flooring in Hold #1, since falling through the wrong section can drop Rex to a lower level and force a detour.
Continue through Hold #2 and the Loading Bay to reach the System Control Room. Search the nearby route for the Ether Cylinder, carry it back to the indicated compartment, and activate the central control panel. The restored power opens the route to the chapter’s first major boss. Treasure in the Ancient Ship is optional, but the area is a one-time story visit, so collect visible chests now if you want those rewards.
- Defeat the Lethal King Lysaat at the entrance.
- Reach the System Control Room.
- Find the Ether Cylinder.
- Restore power and activate the central control panel.
5. Defeat Level 4 Megalo Aligo
Pass through the newly opened route to begin the Level 4 Megalo Aligo battle. Attack from the side or rear instead of standing in front of the monster. Rex’s Anchor Shot can create a healing potion when it connects; collect the potion when needed, especially if the party has taken damage during the approach.
Time Arts after Rex’s auto-attack sequence has progressed. The third hit of an auto-attack string is stronger, and using an Art at the right point improves its effectiveness. Keep the party focused on Megalo Aligo and avoid pulling nearby enemies into the fight. If a Break or Topple opportunity appears from the party’s available Arts, use it to interrupt the enemy and create a damage window, but do not wait indefinitely for a combo if normal attacks are already keeping the battle under control.
After Megalo Aligo falls, continue into the chamber below. The story reveals Pyra and moves Rex into the next tutorial sequence.
- Defeat Level 4 Megalo Aligo.
- Use Arts after auto-attacks have charged them.
- Collect healing potions created by Anchor Shot when necessary.
6. Complete the Pyra and Malos sequence to finish Chapter 1
Follow the objective to the girl on the hilltop. The story introduces Pyra, and Rex becomes her Driver. Follow the on-screen instructions for switching to Pyra and charging her Special. Arts charge the Special gauge, and using an Art as an auto-attack connects can charge it more efficiently.
After the story confrontation, Rex returns to the Ancient Ship Deck for the required Level 5 Malos battle. Stay close enough to Pyra for the affinity connection to remain active, use Rex’s Arts whenever they are ready, and trigger Pyra’s Special when the gauge allows it. The battle is designed to teach the relationship between Arts, Specials, and Blade combat rather than demanding a complex endgame Blade Combo.
If Rex’s health drops, use Anchor Shot when available to create recovery and avoid standing directly in front of Malos. Continue using the prompted attacks until the battle ends. The following escape scenes complete Chapter 1. When Rex and the party arrive on Gormott and the game begins the next set of objectives there, Chapter 1 is over and Chapter 2 has started.
- Complete the Pyra introduction and Blade tutorial.
- Defeat Level 5 Malos.
- Advance through the escape scenes until the story transitions to Gormott and Chapter 2.
Before you move on
- The Argentum preparation sequence is complete: the Abyss Vest was purchased, Max and Rurui were handled, food was bought, and Rex rested at Lemour Inn.
- Rex boarded the Maelstrom, met the Torna clients, reported to Monell, and optionally collected the missable Rush Hour chest.
- The Ancient Ship power system was restored and Level 4 Megalo Aligo was defeated.
- Pyra’s Blade tutorial was completed and Level 5 Malos was defeated.
- The escape sequence has ended and the story has transitioned to Gormott, where Chapter 2 begins.
References for this chapter
- Xenoblade Chronicles 2 — Chapter 1: Encounters Walkthrough and Guide
- Xenoblade Chronicles 2 Walkthrough — Chapter 1: Encounters
- Big Job Preparation — Xenoblade Chronicles 2 Walkthrough
- Ancient Ship — Xenoblade Chronicles 2 Walkthrough
- Nintendo Official Site — Xenoblade Chronicles 2 for Nintendo Switch
- What DLC Is Available? Xenoblade Chronicles 2 — Nintendo Support
Chapter 2 — Aptitude: Expanding to New Titans and Affinity Basics
Chapter 2 begins with Rex stranded in Gormott Province. Find Gramps in Wrecc Marshland, rescue Nia from the Wormeater Brog, and cross Gormott to Torigoth. After the arrest sequence, cook Glitterbake in Tora’s House, gather three clues about Nia, collect the parts needed for Poppi, and complete the Tiger! Tiger! tutorial. Then infiltrate the Titan Battleship through its lower root entrance, rescue Nia, obtain the Level 2 Access Key, open the Hangar, and defeat Dughall before the final Mòrag encounter at Torigoth Relay Base. This chapter introduces Core Crystal resonance, Affinity Charts, Trust, Blade switching, Blade Combos, and Poppi’s Poppiswap system. Optional Heart-to-Hearts and extra Affinity nodes can improve your roster, but no optional Blade or DLC content is required to finish the chapter.
1. Find Gramps and rescue Nia in Gormott Province
After the Chapter 1 escape, Rex begins in the Lower Level of Gormott Province. Follow the main-story marker through Wrecc Marshland to find Gramps. The route is mostly a straightforward walk through the marsh; fight enemies close to Rex’s level and avoid large groups or unusually high-level monsters rather than trying to clear the whole area.
Continue toward the next marker and examine the Collection Point when the game directs you to do so. Follow the path to Trailblazers’ Bridge. A fallen tree blocks the route. Use Pyra’s Fire Mastery Field Skill to burn it, then proceed through Old Ghostwood Road.
You will find Nia fighting a Wormeater Brog. Join the battle to recruit Nia and Dromarch. This encounter teaches the first practical Blade Combo sequence: use Pyra’s Fire Special, then request Dromarch’s Water Special when it reaches the required level to complete Steam Bomb. The Party Gauge is also explained here; keep one segment available when possible so you can revive a fallen ally.
- Gramps has rejoined Rex.
- The fallen tree at Trailblazers’ Bridge has been burned.
- Nia and Dromarch have joined the active party.
- You have completed or practiced the introductory Steam Bomb Blade Combo.
2. Cross Gormott and reach Torigoth
From the rescue area, follow the uphill route through the vine-covered trees to Outlook Knoll. At the overlook, the game introduces Blade affinity and Trust. Keep the active Blade near its Driver during combat so the affinity link remains connected, but do not stop the campaign to complete every Affinity Chart node.
From Outlook Knoll, descend toward Restful Waters and continue through Garanti Plain and the Plains of Evening Calm. Gormott contains enemies far above the party’s level, including dangerous aggressive groups and roaming Unique Monsters. Stay on the main road, fight only enemies near your level, and activate landmarks so Skip Travel can return you to safety.
Enter Torigoth through the marked route. Activating Torigoth Arch gives you a useful fast-travel point and introduces the town’s Development system. Before entering the next marked back street, improve Rex’s and Nia’s Core Chips and accessories if you have affordable upgrades, and place a pouch item on each active Driver.
- Outlook Knoll has been reached.
- Torigoth Arch is active as a Skip Travel location.
- Rex and Nia have current Core Chips, accessories, and pouch items.
- You have avoided Territorial Rotbart and other high-level optional enemies.
3. Survive the Torigoth arrest and meet Tora
Follow the story through the market and into Obra Street. The first forced battle is Captain Padraig with two Ardainian Soldiers. Defeat the two soldiers first, then finish Padraig. Collect HP Potions created by Anchor Shot when you need recovery rather than letting them disappear.
The next battle is against Brighid and Captain Padraig. Defeat Padraig first so that his ranged attacks no longer add pressure, then concentrate on Brighid. Brighid blocks often and uses area attacks, so keep Rex moving and use Sword Bash from behind when practical. Let Nia maintain healing, and preserve at least one Party Gauge segment in case she falls.
After the battle, the story brings Rex to Tora’s House. Examine the kitchen and use Pyra’s Cooking Field Skill to cook Glitterbake with the supplied ingredients. This begins The Race to Find Nia and introduces Tora while Nia temporarily leaves the active party.
- Captain Padraig and the two soldiers are defeated.
- Brighid and Padraig are defeated.
- Glitterbake has been cooked in Tora’s House.
- The Race to Find Nia is active in the quest log.
4. Gather Nia’s clues and obtain the artificial Blade parts
A Core Crystal resonance tutorial occurs during this section. When prompted, awaken the available Core Crystal and inspect the new Blade’s role, element, weapon, and Affinity Chart. Common Core Crystals are suitable for building early role coverage; do not spend time resetting for a particular random Blade.
Collect the three required clues. Speak with Turuni near Torigoth Arch and pay for the battleship rumor. Then speak with Moui near the bridge beside the western Salvaging Point. Finally, leave Tora’s House through the main entrance and speak with Lope on the nearby walkway. Return to Tora’s House after all three conversations.
The next objective starts Artificial Blade Parts 1. Speak with Kassa at Margia’s Odds & Ends in the Torigoth market. Obtain three Bion Connectors either by purchasing them or by salvaging near Torigoth. Buying them is reliable but expensive; salvaging with Silver Cylinders is cheaper, although several attempts may be required.
For Artificial Blade Parts 2, leave Torigoth through the main gate and travel to Lascham Island. The Level 9 Juppen Krabble is near the center of the marked island. Avoid the much stronger monsters in the surrounding area, defeat only the required Krabble, then Skip Travel back to Torigoth and report to Cedwyn. Cedwyn provides the Perfect Range Sensor.
- A new Core Crystal has been bonded and inspected.
- Turuni, Moui, and Lope have provided the three clues.
- Three Bion Connectors have been obtained.
- The Juppen Krabble has been defeated and Cedwyn has been spoken to.
- The Perfect Range Sensor is in the quest progression.
5. Awaken Poppi and prepare for the Titan Battleship
Return to Tora’s House with the Bion Connectors and Perfect Range Sensor. The story awakens Poppi, adds Tora and Poppi to the party, and opens the Poppiswap system. Complete the required Tiger! Tiger! tutorial. You do not need to grind the minigame for Chapter 2; use the tutorial parts and continue unless you specifically want to begin improving Poppi early.
Before leaving, equip Tora with a defensive accessory if you have one and check that Rex, Tora, and Poppi have usable Core Chips. Tora and Poppi provide the chapter’s first dedicated tanking option, while Rex supplies damage and Nia will return during the rescue sequence. During combat, switch Blades after spending their Arts so another Blade can continue attacking while the first recovers.
Optional Affinity Chart nodes, Trust gains from pouch items, and Heart-to-Hearts can be pursued when available, but none is required for the main route. Read each Affinity Chart requirement before attempting it; some nodes need a specific action, field skill, item category, or number of battles.
- Tora and Poppi have joined the party.
- The Tiger! Tiger! tutorial has been completed.
- Poppi has usable initial Poppiswap equipment.
- Rex and Tora have more than one usable Blade or combat option where available.
6. Infiltrate the Titan Battleship and rescue Nia
Follow the objective toward Garagorm’s Arch. Near the ship, stay beside the low wall, descend to the lower ledges, follow the climbing points and vines, and run along the large root to trigger the boarding scene. The party enters through the Ballast Disposal Chute.
Move through the Cloud Tank Chamber, climb the ladders, and reach the Port-side Walkway. Defeat or avoid the guards as the route permits, then examine the vent. Pyra and Poppi’s Field Skills open it. Drop through the vent, turn right, and continue around the corridor until Dromarch is found in his cell.
After Dromarch rejoins, backtrack to the Engine Room. Defeat the soldiers and turn the first valve to stop the lower steam flow. Continue around the engine-room route and open the door beneath the metal staircase. The door requires the early Field Skill combination shown by the game; turn the second valve inside to shut off the upper steam flow. Without this step, the steam hazard on the upper catwalk can defeat the party quickly.
Proceed through the upper route into the Living Quarters, Sickbay, and Nia’s holding area. Defeat the Ardainian Sergeant and accompanying soldier, eliminating the regular soldier first if you need to reduce incoming damage. Nia returns to the party and you receive the Level 1 Access Key.
Use the key to inspect the newly accessible cells or armory, then enter the armory and obtain the Level 2 Access Key. Return to the appropriate locked route and activate the Hangar Division Console. Heal and update equipment before entering the Hangar sequence.
- The Titan Battleship was entered through the Ballast Disposal Chute.
- Dromarch has been found and returned to the party.
- Both Engine Room steam valves have been turned.
- The Ardainian Sergeant has been defeated.
- Nia has been rescued.
- The Level 2 Access Key and Hangar access have been obtained.
7. Defeat Dughall and Mòrag, then confirm Chapter 2 completion
In the Hangar, defeat Dughall. Keep Tora and Poppi drawing enemy attention while Rex attacks from a safer angle. Build Specials through Art use and Blade switching, then complete a Blade Combo when the displayed route allows it. If Dughall defeats the party, use the nearby checkpoint, improve Core Chips or accessories, and fight a few nearby enemies for a modest level increase rather than restarting the entire chapter.
After the Hangar encounter, the story leads to the Torigoth Relay Base for the Mòrag battle. This fight is a separate required encounter and is the actual final combat gate of Chapter 2. Focus on Mòrag while controlling the party’s spacing, and avoid allowing the whole group to stand in the same area-of-effect attack. Use Nia’s healing, let Poppi hold attention, and capitalize on Break, Topple, Specials, and Chain Attack opportunities when they are available.
After Mòrag is defeated, watch the following scenes and let the travel transition finish. Chapter 2 is complete when the story advances to the next chapter and the quest log displays Chapter 3’s main objective. Optional Heart-to-Hearts, additional Core Crystal bonding, and Gormott exploration can then be postponed or completed before proceeding.
- Dughall has been defeated in the Hangar.
- Mòrag and Brighid have been defeated at Torigoth Relay Base.
- The post-battle scenes and escape sequence have finished.
- The quest log has advanced to Chapter 3 objectives.
Before you move on
- Tora and Poppi are permanent party members and appear in the party-management menus.
- Nia and Dromarch have been rescued and are available again after the Titan Battleship sequence.
- The three Bion Connectors and Perfect Range Sensor objectives have been completed.
- You have used Core Crystal resonance, inspected active Blade Affinity Charts, and equipped current Core Chips and accessories.
- The Titan Battleship route is complete, including the two steam valves, Level 2 Access Key, and Hangar access.
- Dughall and Mòrag have been defeated, and the story has advanced to the Chapter 3 main objective.
Chapter 3 — Our Own War: Mid-Early Progression and Party Roles
Chapter 3 begins at Traveler’s Resting Tree in Gormott and sends Rex’s group to Umon’s Shipyard. Complete Umon’s Ship, including the wood-gathering objectives, the high-tide Titan search and the return to the shipyard. After the party is swallowed by Uraya, follow the interior route to Garfont Village, where Vandham joins temporarily. Learn Topple, defeat the first Akhos encounter, then travel through Uraya to Fonsa Myma. The chapter ends at the Great Stairway with a two-phase Malos and Akhos fight. Focus Akhos first, survive the forced transition, then use Mythra’s added power to finish both enemies. Vandham leaves during the finale, so build your long-term party around Rex, Nia and Tora rather than treating him as a permanent member.
1. Leave Traveler’s Resting Tree and reach Umon’s Shipyard
Chapter 3 starts at the Traveler’s Resting Tree landmark on Gormott’s Upper Level. Travel north toward the large tree and stone bridge, then pass beneath the bridge and continue through the Nose Gogol area. You can fight through the enemies, but running past isolated groups is safe if you are trying to reach the next landmark. Continue uphill and through the waterfalls until you reach Greatspine Boundary, then follow the valley west to Umon’s Shipyard.
Avoid the strong unique monster in this area unless you are deliberately prepared for it. The main route is along the southern side of the zone and does not require defeating every Tirkin, Driver or flying enemy. Activate Umon’s Shipyard as a landmark before beginning the next objective sequence.
- Start from Traveler’s Resting Tree.
- Cross Greatspine Boundary and activate Umon’s Shipyard.
- Avoid unnecessary unique-monster fights on the way.
2. Complete Umon’s Ship and prepare the departure
Speak with Umon to begin Umon’s Ship. The first objective requires Puzzletree Wood from collection points in Gormott. After obtaining it, travel to Dawnview Grotto in the upper-right portion of Gormott and collect the required Diamond Oak. The grotto is reached by climbing the large roots near Waytree and following the upper path through the cave area. Return to Umon after collecting the wood.
The Titan then escapes. Return to Torigoth and rest at Coedwig Inn using the long-rest option until the tide is high. Travel to Marash Spring during high tide, approach the wayward Titan and complete the interaction, then report back to Umon. Speak with Umon once more when you are ready to leave Gormott. This entire sequence is mandatory; simply arriving at the shipyard does not advance the chapter.
- Collect the required Puzzletree Wood.
- Collect the required Diamond Oak at Dawnview Grotto.
- Change Gormott to high tide at Coedwig Inn.
- Recover the Titan at Marash Spring and report to Umon.
3. Cross Uraya’s interior and survive the first ambushes
After Umon’s ship departs, the party is swallowed by Uraya and begins inside the Titan. Immediately after taking control, check the nearby chest for the Poppi parts manual. Continue deeper into the area while staying on the higher bridges and paths when possible; the lower sections contain more dangerous enemies and can make recovery difficult if several groups join the fight.
At the clearing ambush, defeat Yew and Zuo before concentrating on Vandham. Zuo can draw your party’s attention with taunt, while Vandham is much harder to bring down. Removing the supporting enemies first prevents the healer from being locked into a long recovery cycle. After the fight, continue to Garfont Village. Do not wander into every side path or challenge high-level enemies simply because the map is open.
- Collect the Poppi parts manual if you want additional Poppiswap options.
- Defeat Yew and Zuo before focusing Vandham.
- Reach Garfont Village through the marked story route.
4. Use Vandham as a temporary damage Driver and learn Topple
At Garfont Village, speak with the required characters and then meet Vandham at the back gate. He joins as a temporary guest Driver. He can provide strong damage and an additional frontline presence, but he will not remain with the party after Chapter 3. Keep Nia or another reliable healing option active instead of assuming Vandham covers recovery.
Follow the route out of the village. You will encounter a large obstacle that triggers the next field-skill instruction, then proceed through the cavern and up the rise. The game introduces Topple during this section. Make sure the party has a way to attempt Break and Topple: Nia can provide Break with suitable Arts, while Tora can supply Topple when his relevant Art is equipped. A Driver Combo follows Break, then Topple, then Launch and Smash, although the full sequence is not yet necessary for every fight.
At the lake route, defeat the required large Arachno. The battle awards the Beastly Core Crystal, but it cannot be resonated with immediately. Return to Garfont Village and go to the training grounds when the story directs you there.
- Recruit Vandham at Garfont Village’s back gate.
- Equip practical Break and Topple options.
- Defeat the required Arachno and obtain the Beastly Core Crystal.
- Return to the training grounds.
5. Defeat the first Akhos encounter and travel across Uraya
Akhos interrupts the training sequence. This is an instructional battle for Chain Attacks, so use the opportunity to build the Party Gauge rather than spending it on routine encounters beforehand. Akhos can inflict Shackle Driver, which temporarily prevents Drivers from acting effectively. If you can complete a Blade Combo ending in Earth, use it to seal that ability; otherwise, maintain healing and wait out the effect instead of allowing the party to collapse while trying to force damage.
After the battle, speak with Vandham and begin the journey to Fonsa Myma. Leave through the opened route and cross the bridge. A mandatory encounter with Zeke occurs along the way. Defeat him, then continue along the cliff route. Runner and Skwaror enemies can draw nearby wildlife into the fight, so approach them carefully or run past them while keeping the objective marker in view.
At the tiered ponds, either route eventually leads to the same upper path. Follow the bridges toward the lake, remove the blockage with Pyra and Roc, then pass through the opened gate. Stay on the main road as it curves toward the capital. The side paths are not required for Chapter 3 progression.
- Defeat Akhos at the training grounds.
- Complete the Chain Attack tutorial sequence.
- Defeat Zeke during the route to Fonsa Myma.
- Use Pyra and Roc to clear the lake blockage.
6. Complete the Fonsa Myma story sequence
Enter Fonsa Myma and proceed upward through the market to the theater. The city has shops and an inn, so replace outdated Driver equipment and refill useful pouch items before continuing. Watch the theater sequence, then speak with Cole backstage as directed. Return to the inn and speak with Dellin to rest.
After resting, Pyra is temporarily absent. Return toward the theater and climb toward Sevind Palace Plaza. Turn right and continue up the long staircase. The story triggers the final confrontation partway up, so do not leave the city expecting another separate quest marker. If you want a safer attempt, fill the Party Gauge through ordinary enemies before starting the climb, but do not waste it on unnecessary fights.
- Reach the theater and speak with Cole backstage.
- Rest at the inn with Dellin.
- Climb from the theater toward Sevind Palace Plaza.
- Enter the Great Stairway sequence with current equipment.
7. Defeat Malos and Akhos at the Great Stairway
The final Chapter 3 encounter begins at the Great Stairway after the story scene. The battle starts against Malos and Akhos. Target Akhos first because his Shackle Driver effect can disable your Drivers, while Malos can interfere with targeting and draw attention away from the intended target. Use Break and Topple attempts whenever the Arts are ready, and spend the Party Gauge to revive a fallen ally rather than saving every bar for a Chain Attack.
The first phase ends when the scripted health threshold is reached, so do not treat the opening as a normal battle that must be completed immediately. After the transition, Vandham leaves the battle and Mythra becomes available in place of Pyra. Re-establish your target on Akhos, use Mythra’s Light attacks and Specials to accelerate damage, and complete Blade Combos when the required elements are available. Once Akhos is defeated, finish Malos while maintaining healing and avoiding unnecessary target changes.
After both enemies are defeated, watch the following story sequence. Vandham is no longer a permanent party member, and the game advances to Chapter 4. Save after control returns and confirm that the chapter title or next main objective is available.
- Focus Akhos during the opening phase.
- Survive the forced transition at the health threshold.
- Use Mythra after the second phase begins.
- Defeat both Akhos and Malos.
- View the post-battle scenes and confirm Chapter 4 has started.
Before you move on
- Umon’s Ship has been completed, including Puzzletree Wood, Diamond Oak, the high-tide requirement and the Marash Spring Titan.
- The party has entered Uraya, reached Garfont Village and recruited Vandham as a temporary guest.
- The first Akhos tutorial encounter, the required Arachno fight and the Zeke encounter are complete.
- The party has reached Fonsa Myma, completed the theater and inn sequence, and climbed to the Great Stairway.
- Akhos and Malos have both been defeated in the two-phase Chapter 3 finale.
- Vandham has left the party, Mythra has been introduced, and the game has advanced to Chapter 4.
- A new save exists after the Chapter 3 ending sequence.
References for this chapter
- Chapter 3: Our Own War — Xenoblade Chronicles 2 Walkthrough & Guide
- Chapter 3: Our Own War — Xenoblade Chronicles 2 Walkthrough & Guide
- Xenoblade Chronicles 2 Chapter 3 Walkthrough — GameFAQs
- Xenoblade Chronicles 2 — Nintendo Switch Official Product Page
- Difference Between the Expansion Pass and the Torna: The Golden Country Standalone Version — Nintendo Support
Chapter 4 — Aegis: Story Milestones and Forced Encounters
Chapter 4 begins with Vandham’s Last Wish and the required introduction to Merc Missions, then sends Rex’s group through Argentum and back to Gormott while they recover Roc’s stolen Core Crystal. After the Bolderbore Gate battle and Roc’s recruitment, travel to Mor Ardain and investigate Lila’s artificial-Blade attacks. The route continues through Alba Cavanich, the Old Industrial District, and the Old Factory. The major required fights are Lila, Mòrag with Ardanian soldiers, Zeke, Lila again, Rosa, and finally Mikhail and Patroka. Do not confuse the final Old Factory confrontation with a Temperantia objective. The chapter ends after defeating Mikhail and Patroka. The Tranquility sidequest and other Merc Missions are optional, although Tranquility is a useful source of a healer Blade.
1. Complete Vandham’s Last Wish, then travel through Argentum
After the Chapter 3 ending, go to the Mercenary HQ in Garfont Village and speak with Yew. Accept the required Merc Mission named First Mission from the Merc Group menu, dispatch any eligible Blade, wait for the mission to finish, collect its report, and speak with Yew again. This is the only Merc Mission required to open Chapter 4’s route; later missions are optional unless a separate quest asks for one.
Go to Fonsa Myma Port in Uraya and speak with Chamomo at the indicated dock to travel to Argentum. At Lemour Inn, go upstairs and cross the metal bridge to the Goldmouth Flight Deck. Speak with Murmur, pay the required fare, return to the inn when prompted, and then go back to the Flight Deck to depart. The party is interrupted before reaching Mor Ardain, beginning the search for Roc’s stolen Core Crystal.
- Finish First Mission and report to Yew.
- Use Fonsa Myma Port to reach Argentum.
- Speak with Murmur at the Goldmouth Flight Deck and follow the story prompts.
2. Recover Roc’s Core Crystal and defeat the Gormott bandits
In Torigoth, follow the main objective and speak with every marked witness around the port until the search points you toward Nocclia Timber Site. At the site, speak with Otto. You can inspect the footprints if you meet the displayed Keen Eye and Fortitude requirements, or speak with Otto again to make the footprints visible without relying on that field-skill check. Follow the red footprints or Skip Travel directly to Umon’s Shipyard.
Enter the shipyard to trigger the fight against four Latollo Puffots. Defeat them and recover the stolen item. The investigation then directs you toward the bandits in Upper Level — Right. Travel to Waytree or Dawnview Grotto, follow the route northeast to Bolderbore Gate, and continue through the newly opened path after the story scene. Roc joins the party during this sequence; engage Roc on Rex if you want the Wind Blade and Smash access available for the next battle.
Continue into the nearby cave and defeat Benjamin the Brain, Cartbreaker Grzeg, and Menacing Jo. Focus Benjamin first because his healing can undo your damage. Grzeg is the next priority because his attacks are more threatening, while Jo is safer to leave until last. Use Driver Combos when possible, keep Nia healing, and avoid spending the entire party gauge before the fight is secure.
- Speak with Otto at Nocclia Timber Site.
- Reach Umon’s Shipyard and defeat the four Latollo Puffots.
- Pass through Bolderbore Gate and receive Roc.
- Defeat Benjamin, Grzeg, and Jo.
3. Investigate Lila and complete the first Mor Ardain battles
Return to Argentum and then travel to Mor Ardain. In the Lower Level, reach Alba Cavanich and follow the objective through the settlement. During the pursuit, disable the steam hazard by reaching the valve at the end of the rooftop route, then continue after Lila. Follow the marked path until the first Lila battle begins.
Lila can knock characters back or inflict Blowdown and can temporarily become immune through an Ether Barrier. Keep Nia available for healing, use Anchor Shot to create recovery potions when Rex is under pressure, and continue Blade Combos while waiting for the barrier to end. A Chain Attack is most useful after you have built several elemental orbs rather than at the opening of the battle.
After Lila escapes, Skip Travel to Kedeigh Gate and follow the objective north. Defeat Mòrag and the three Ardanian Soldiers. Survive the opening pressure, let the party settle into its roles, then use Driver Combos and Blade Combos to remove the soldiers and wear down Mòrag. Afterward, Mòrag joins the investigation. Travel to Anangham #2 Dock, speak with Periperi, investigate the shipment at the bottom of the Alba Cavanich elevator, and speak with the junk-shop owner. Complete the required purchases during the conversation so the next objective appears.
Speak with Timell near the steam cloud on the Upper Level, then travel west toward the Black Ash barrels in the Old Industrial District. The objective can be advanced by inspecting the barrels with Nopon Wisdom Lv. 3 or by completing the Merc Mission Materials Stakeout. The Merc Mission is optional only in the sense that the field-skill route can replace it; one of these two routes is needed to continue.
- Defeat the first Lila encounter.
- Defeat Mòrag and three Ardanian Soldiers.
- Speak with Periperi, complete the junk-shop purchases, and speak with Timell.
- Inspect the Black Ash barrels or complete Materials Stakeout.
4. Reach the Old Factory and defeat Zeke and Lila
After reporting the investigation, use the Old Industrial District route toward the factory. The safer route goes through the industrial buildings and requires field skills; the Chansagh Wastes route exposes you to enemies far above the expected level, so avoid fighting and run only if you deliberately choose that path. Activate landmarks as you pass them and retreat with Skip Travel if a group catches you.
Near the factory, the mandatory Zeke battle begins. Keep Nia healing, use Anchor Shot for emergency potions, and attempt Break into Topple while Zeke is still susceptible. Pandoria’s Specials and Zeke’s area attacks can damage multiple characters, so do not cluster unnecessarily or spend the Chain Attack before you have stabilized the fight.
At the factory entrance, open the nearby treasure trove to obtain the ladder key, use it at the control panel, lower the ladder, and enter through the window. The first ventilation shaft requires Superstrength Lv. 2 and Focus Lv. 1. Continue along the catwalk, take the left route at the crossroads, and open the second ventilation shaft with the same requirements. After the scene, defeat the four Jailer Tirkin and fight Lila again. Keep Rex out of unnecessary back attacks because Lila can punish them, and use a Chain Attack after building several orbs.
- Choose the industrial route or safely run the Chansagh Wastes route.
- Defeat Zeke near the factory.
- Obtain the ladder key and enter through the window.
- Pass both Superstrength Lv. 2 and Focus Lv. 1 ventilation checks.
- Defeat the second group of Jailer Tirkin and Lila.
5. Open the factory hangar, defeat Rosa, and finish Chapter 4
After the second Lila battle, Tora temporarily leaves the party. Follow the route toward Bana: defeat the three Tirkin near the panel to obtain the key, activate the console to raise the bridge, cross the upper route, and descend to the factory floor. When the large door closes, drop through the broken floor, step off the conveyor belt, and disable the incinerator controls. Follow the now-safe conveyor route to the ramp and stairs, reach the tower, defeat the Tirkin inside, activate the console, and return through the opened door to the hangar.
Rosa begins with Rex and Nia, so prioritize survival rather than trying to end the first phase quickly. Keep Nia alive, collect HP Potions with Anchor Shot, and use Blade Combos when they do not expose the party to a knockdown. After the story transition, Tora returns with Poppi QT and can resume the tank role. Rosa can Topple and Launch characters, inflict party-wide Blowdown, fire damaging missiles, and become more dangerous when enraged. Use a Blade Combo that seals Blowdown if your available elements permit it, attempt Topple during openings, and save the Chain Attack for a strong damage window.
After Rosa falls, move straight toward the exterior objective. The final Chapter 4 battle is Mikhail and Patroka. Patroka is the immediate damage threat, while Mikhail can taunt, block attacks, and inflict control effects. Let Tora take the initial attention when possible, focus Patroka first, and keep Nia positioned to heal without standing in Patroka’s damaging area. Use Driver Combos and Blade Combos whenever the party is stable, but do not force a combo while a character is being targeted by a launch or area attack. Patroka becomes more dangerous during her enraged phase; once she falls, Mikhail is much easier to finish despite his blocking.
Defeating Mikhail and Patroka ends Chapter 4 after the following scenes. If you fail, restart from the nearby factory landmark, check current shop equipment, improve accessories and Core Chips, and confirm that your healer and tank are equipped before trying again. A short level increase is reasonable, but no optional DLC, rare Blade hunt, or sidequest is required to complete the chapter.
- Raise the factory bridge and disable the incinerator.
- Reach the hangar and complete both phases of the Rosa battle.
- Defeat Patroka first when possible, then defeat Mikhail.
- Watch the post-battle scenes until the next chapter begins.
Before you move on
- The Mikhail and Patroka battle is complete.
- The post-battle scenes have finished and the game advances to the next main-story chapter.
- Chapter 5 — Masters and Slaves, or its opening main-story objective, is available in the quest or map progression.
- Optional Tranquility, later Merc Missions, rare Blade collection, and Expansion Pass content remain separate from Chapter 4 completion.
References for this chapter
- Nintendo Official Site — Xenoblade Chronicles 2 for Nintendo Switch
- What DLC Is Available? Xenoblade Chronicles 2 — Nintendo Support
- How to Access DLC — Nintendo Support
- Chapter 4: Aegis — Xenoblade Chronicles 2 Guide and Walkthrough
- Chapter 4: Aegis — Xenoblade Chronicles 2 Walkthrough and Guide
- Empire of Mor Ardain: Old Factory — Xenoblade Chronicles 2 Walkthrough
Chapter 5 — Masters and Slaves: Leftheria, Indol, and Temperantia
Chapter 5 starts in Leftheria rather than Indol or Mor Ardain. Follow the route through Baldotas Isle, Daram Isle, the Orl Cloudway, Ansel Hatchery, and Fonsett, then leave through Ysheva Harbor after visiting Rex’s home. A required battle against Thunderbolt Zeke occurs at the harbor. Indol is mostly story progression, but you can rest, shop, and complete a short optional quest before leaving for Temperantia. The chapter’s required battles are the Aeshma Core with its Power Cables, Jin, and a second Aeshma Core encounter. The first Aeshma battle is the key mechanic check: the Core constantly regenerates while the Power Cables remain active, so build Specials and a Party Gauge before attacking the cables. Optional sidequests can provide a Rare Core Crystal, useful accessories, or equipment, but none is required for Chapter 5 completion.
1. Cross Leftheria and take the safer route to Fonsett
After the opening scene, speak with Fan la Norne to begin the chapter. Follow the path across the first bridge to Baldotas Isle. At the fork, the straightforward route continues across the island toward Daram Isle. The alternative route through Daridan’s Stack and the Isle of Sleeping Remains contains stronger enemies and is not required, so use the easier path unless you specifically want to explore.
On Daram Isle, follow the outer route to the bridge leading into the cloud-covered passage. Continue until you reach the large sealed-looking doorway, then turn right into the narrow opening and examine the Titan’s reflex center. This opens the route through the Orl Cloudway. Continue through the passage, cross toward Ansel Hatchery, and follow the path onward to Fonsett. You do not need to clear the surrounding enemies; run past groups that are not blocking the route and use Skip Travel if you accidentally become trapped in a fight.
In the original Nintendo Switch version, field skills must be supplied by the Blades equipped to your active party Drivers. If an obstacle displays a requirement, open the Blade setup menu, equip the required skill levels, and examine the obstacle again. Do not assume that an unequipped Blade elsewhere in your collection will satisfy the check.
- Reach Baldotas Isle and choose the easier route through Daram Isle.
- Examine the Titan’s reflex center in the Orl Cloudway.
- Continue through Ansel Hatchery to Fonsett.
- Equip required field-skill Blades before attempting an obstacle.
2. Complete the Fonsett story objectives and leave through Ysheva Harbor
In Fonsett, visit the cemetery at the high point of the village. Then return to the lower part of the settlement and enter Corinne’s house when the objective directs you there. Speaking with the required characters advances the story; exploring the village and talking to party members is optional.
When the story sends you onward, leave Fonsett through the front gate and follow the bridge toward Ysheva Harbor. A level 39 unique Driver is positioned along this route and can attack if approached. Give it a wide berth if you are not prepared for an extra fight. Continue to the harbor to trigger the required Thunderbolt Zeke battle. Keep the party healed because Morag is not available for this encounter.
Zeke uses the same general approach as his earlier battles, but this encounter can be more dangerous because of his powerful UFLS MAX attack. Build Specials while maintaining control of the fight, then use a Blade Combo or Chain Attack when you have elemental orbs prepared. If the battle goes badly, you return near the harbor after defeat, so heal before re-engaging and avoid pulling nearby enemies into the fight.
- Visit the Fonsett cemetery.
- Rest at Corinne’s house when the story requires it.
- Avoid the level 39 unique Driver unless you want the fight.
- Defeat Thunderbolt Zeke at Ysheva Harbor.
3. Follow the required Indol sequence and prepare before Temperantia
After Zeke’s defeat, the party travels to Indol. Follow the objective upward through Poldis Circle and Seoris Plaza to the Indoline Sanctum. Enter the guest quarters and speak with Armalia when instructed to rest, then continue to the Audience Chamber and complete the next required conversations and rest sequence.
Indol’s Chapter 5 section is primarily story progression. You may shop, adjust equipment, and save, but you do not need to complete every available quest before leaving. Check Rex, Nia, Tora, Morag, and Zeke’s equipment, replace weak weapon chips, and make sure at least one active Driver has a reliable healing Blade. Keep several elements available across the party so you can build a Blade Combo during the coming boss fights.
If you want a quick optional reward, Indol’s Teachings is available through Mololo outside the refugee camp on Quattor Street. It eventually rewards a Rare Core Crystal, but it is not required for the chapter. Complete it only if you are already in Indol and want the extra resource; otherwise continue to the main objective.
- Rest at the guest quarters when directed.
- Upgrade weak chips, accessories, and healing options.
- Decide whether to complete Indol’s Teachings.
- Save before departing for Temperantia.
4. Reach the Aeshma Core and disable the Power Cables
After the Indol scenes, go to the port and speak with Timur to travel to Temperantia. Climb the route toward the objective and approach the weapon on the upper plateau. A battle begins against the Aeshma Core and its Power Cables.
Do not focus on damaging the Core at the start. While the Power Cables remain active, the Core rapidly restores its health. Instead, use the opening phase to build Arts, Specials, and the Party Gauge. Arrange your active Blades so that you can produce a Blade Combo with the elements you have available. A complete Combo is useful for creating an elemental orb and preparing a Chain Attack.
When you are ready, target the Power Cables behind the Core. Damage the cables until they are close to half health, then prepare for their counterattack behavior. Finish them with a Chain Attack if possible. If the first Chain Attack does not destroy them, rebuild the Party Gauge and repeat the process. The battle ends when the Power Cables are cut; continuing to attack the regenerating Core before that point wastes time.
If you lose, you return near the upper outcropping. Use the airflow to reach the battlefield again. Watch the edges carefully: a party member who falls and revives at low health can make the rematch much harder, so wait for recovery before re-entering the fight.
- Build Specials and the Party Gauge before attacking the cables.
- Target the Power Cables behind the Core.
- Use a Chain Attack near the cables’ halfway point.
- Return through the airflow after a failed attempt.
5. Defeat Jin and finish the final Aeshma Core battle
After the Power Cables are destroyed, the story forces a battle against Jin. Keep your healer alive and avoid grouping every Driver directly in front of him. Jin can disrupt the active Blade’s affinity and remove stored Special progress, temporarily evade attacks, inflict Blowdown, and launch nearby characters with heavy attacks. Do not waste a Chain Attack during his evasion effect; wait until he becomes vulnerable again.
Use Break and Topple when available, then spend a Chain Attack during a stable damage window. If Jin repeatedly interrupts your setup, switch to a more defensive accessory arrangement or use Morag as the frontline Driver if she is properly equipped. You do not need a special rare Blade or a particular build to win; the important points are healing, avoiding unnecessary frontal damage, and not relying on one stored Special for the entire fight.
Jin’s battle is followed by another Aeshma Core encounter. This time the Power Cables no longer sustain the Core, so target the Core directly. It still uses heavy attacks, can cause Blowdown, and can apply Shackle Blade, which prevents Specials. Build elemental orbs before the Core reaches its strongest state, then use a Chain Attack to finish it before the fight becomes more dangerous. Heal immediately after a heavy Shockwave attack and do not allow your healer to remain disabled by Shackle Blade if you can switch Blades.
- Keep the healer away from the most dangerous frontal attacks.
- Wait out Jin’s evasion effect before committing major damage.
- Defeat Jin with Break, Topple, Blade Combos, and Chain Attacks.
- Target the Core directly in the final battle after the cables are gone.
6. Choose optional sidequests without delaying the campaign
Chapter 5 offers optional quests in Argentum, Gormott, Uraya, Leftheria, and Indol. The most immediately useful short reward is Indol’s Teachings, which provides a Rare Core Crystal. Whereabouts Unknown can eventually provide an Overclocking Bangle and other equipment, but it sends you between Gormott and Mor Ardain and is not required. Treat it as optional preparation rather than part of the story route.
Uncover the Truth offers defensive accessories and a Beta Scope, but it is not a quick Chapter 5 errand. It requires both The Nopon Murals and The Riddle on the Wall, and the shrine portion requires Wind Mastery level 3 and Leaping level 2. Postpone it if those prerequisites are not already complete. Likewise, collection-heavy quests such as At Wits End can wait until you naturally have the required materials.
Use Heart-to-Hearts and easy Affinity Chart nodes when they are conveniently available, but do not chase every blocked chest or collection point. Record the location, equip the necessary field-skill Blades later, and return with Skip Travel. Chapter 5 has no collectible-clear requirement.
- Take Indol’s Teachings if you want an additional Rare Core Crystal.
- Postpone Uncover the Truth unless its prerequisites are already complete.
- Treat Mor Ardain sidequest travel as optional.
- Leave blocked field-skill locations for a later return.
7. Confirm Chapter 5 completion
Chapter 5 is complete only after the sequence involving the Power Cables, Jin, and the second Aeshma Core has finished. The story then advances to Chapter 6: Wounds. Optional quests remaining in the log do not indicate that the chapter is incomplete.
After control returns, save at the next available rest point or Skip Travel location. Keep a manual save before beginning Chapter 6 if you intend to return for Indol, Leftheria, Gormott, or Argentum sidequests. Your party should enter the next chapter with at least one dependable healer, upgraded weapon chips and accessories, and enough elemental variety to complete Blade Combos.
- The second Aeshma Core has been defeated.
- The story advances to Chapter 6: Wounds.
- The next main-story objective appears in the quest log.
- A manual save exists after the Chapter 5 ending sequence.
Before you move on
- The party has traveled from Leftheria through Fonsett and Indol to Temperantia.
- Thunderbolt Zeke, the Power Cables, Jin, and the final Aeshma Core encounter have been defeated.
- The Chapter 6: Wounds main-story objective appears after the final Chapter 5 sequence.
- Optional sidequests remain separate from the completed campaign progression.
- A manual save has been created after Chapter 5 ends.
Chapter 6 — Wounds: Indol, Tantal and the Torna Confrontation
Chapter 6 begins in Indol after the previous chapter’s crisis. Follow the story through the Audience Chamber, investigate Bana’s actions in Goetuis, defeat Giga Rosa aboard the Titan Battleship, and then travel to Tantal. The chapter’s final route crosses Litharia Snowfield, the upper and lower levels of Tantal, and Genbu Drifts before the major Torna confrontations. Keep a healer available, use Mòrag as a durable frontline option, and bring Tora when the story requires him for the Giga Rosa sequence. Poppi customization through Poppiswap can improve Tora but is optional; Tiger! Tiger! is not required for the main route. The most dangerous battles are Giga Rosa, the three-member Torna fight against Akhos, Mikhail and Patroka, and the subsequent scripted battle with Jin. After Jin’s fight and the following scenes, Chapter 6 is complete and Chapter 7 becomes available.
1. Resume in Indol and complete the Emergency Peace Conference sequence
After the opening scenes, you regain control in Indol. Go to the Audience Chamber and approach the throne. Then speak with the Indoline guarding the door to the south. Follow the next story instructions through the courtyard and return to the Audience Chamber when the objective updates. Finally, speak to the Indoline near your chambers in the Sanctum to trigger the departure preparations for Tantal.
Mòrag is temporarily removed from the party during this portion. You do not need to rebuild a long-term party for the short travel and story scenes before she returns. Still, check the menu before leaving Indol so Rex has current core chips and accessories and Nia or another available Blade can provide healing. There is no equipment-repair mechanic to manage; replace outdated core chips and accessories directly through the menu or at shops.
- Approach the throne in the Audience Chamber.
- Speak with the southern Indoline guard.
- Return to the Audience Chamber when directed.
- Speak to the Indoline near your Sanctum chambers.
- Check Rex’s equipment and keep a healer available.
2. Investigate Bana in Goetuis and answer the inn questions
Leave the Sanctum and follow the objective to Goetuis. If the map allows it, Skip Travel to Yannath Main Gate and walk north up the stairs, then return south after the scene. The investigation requires speaking with marked and nearby NPCs until the objective advances. When the game sends you to the inn, answer the questions with the following information: the Ardanian Titan battleship, poison, the main meal at the banquet, and the Tirkin.
After the investigation, Skip Travel to Goetuis Wharf #2 and enter the Titan Battleship. Move north to the mess hall. A short battle against four Tirkin occurs before the next scene. When control returns, place Tora in the active party if he is not already there, and use Bonus EXP at an inn if you want a modest level increase before the mandatory boss.
- Speak with the investigation NPCs until the objective updates.
- Answer all four inn questions correctly.
- Enter the Titan Battleship from Goetuis Wharf #2.
- Reach the mess hall.
- Put Tora in the party before returning to the hangar.
3. Defeat Giga Rosa aboard the Titan Battleship
Giga Rosa is the first major battle of the chapter. Keep the party spread enough that one area attack does not incapacitate everyone, and prioritize survival over forcing a full Driver Combo. Giga Rosa can inflict Blowdown, Topple and Launch, and several of these attacks can affect multiple allies. Maintain a reliable healer and use Blade Switches when the current Blade cannot contribute a useful Special or role.
The key hazard is the Time-Limited Missile that Giga Rosa creates. Do not destroy it casually: its destruction can trigger a powerful explosion that may wipe out weakened allies. Either move the party away from it and continue attacking Giga Rosa, or use a Blade Combo ending in Fire to seal its Self Destruct effect before destroying it. When Giga Rosa reaches roughly half health, it gains a Spike Damage effect. Stop attacking briefly if necessary, allow Nia to restore the party, and then resume with Specials, Blade Combos and a Chain Attack during a safe opening.
After the battle, Mòrag returns and you receive Aegaeon’s Core Crystal. Bond Aegaeon to Mòrag when convenient and give him a current core chip; he is a Water-element Tank Blade intended for Mòrag.
- Keep a healer active throughout the battle.
- Avoid destroying the Time-Limited Missile without sealing Self Destruct or moving away.
- Recover before attacking through the Spike Damage phase.
- Use a Chain Attack during a controlled opening.
- Bond Aegaeon to Mòrag after receiving his Core Crystal.
4. Travel from Goetuis Wharf to Tantal and cross Litharia Snowfield
When ready to leave, speak with the marked NPC at the end of Goetuis Wharf #1. After arriving at Genbu Port, move forward through the hallway into Tantal. Activate the nearby landmark, then follow the main path across Litharia Snowfield. The route leads generally north toward the Three-Vein Crossroads; the lower branch contains optional treasure, while the upper route continues toward the capital.
Tantal’s enemies are around the high-thirties to low-forties, so fight only the groups blocking the route unless you need experience. Snowdol Bunnits can drop Overclocking Bangles, but farming them is optional and should not delay the story. At the Three-Vein Crossroads, continue east toward the capital rather than taking the northern treasure detour. In the capital, activate the main gate landmark and follow the marked street for the next scenes.
- Activate Genbu Port and the first Tantal landmarks.
- Follow the upper route toward Three-Vein Crossroads.
- Continue east to the capital.
- Ignore optional Overclocking Bangle farming unless you specifically want it.
- Use the inn and shops in the capital before proceeding.
5. Enter Theoscaldia Palace and reach the lower level of Tantal
In the capital, follow the story marker southeast, then explore the nearby inn and shops if you need healing items or equipment. Continue to Theoscaldia Palace at the eastern end of Theosoir. Story events temporarily remove Zeke and Pyra/Mythra from the active party. Leave the Hall of Reception by taking the path to the right, defeat the Tantalese Knights in the large room, and trigger the scene that restores Zeke.
Proceed south through the palace to the Hall of Virtue. Take the staircase down on the eastern side, defeat the guards, and continue into Puresnow Passage. The side rooms contain optional treasure; the required route descends from the western end. After the scenes and battles, continue downward until you reach the lower level of Tantal.
Once you arrive at Lumos Pedestal, face away from the staircase and slide down the icy slope. This is the quickest way to begin the lower-level route. Cross Genbu Drifts toward the western side of the map and look for the valley surrounded by ruins, the Great Pillar Passage. Enter it and continue forward for the final story battles.
- Reach Theoscaldia Palace.
- Allow the story to temporarily remove and then restore party members.
- Pass through the Hall of Virtue and Puresnow Passage.
- Reach Lumos Pedestal.
- Slide down to the lower level and enter Great Pillar Passage.
6. Prepare for and win the Torna group battle
Before entering the final approach, save at a landmark if possible and configure the party for sustained combat. Rex, Mòrag and Nia are a dependable arrangement for this sequence because they provide damage, a sturdy frontline and healing. Zeke can work if your equipment and Blade setup are stronger on him, but do not enter without a dedicated healer. Give active Drivers their strongest available core chips and accessories, and ensure at least one Driver can apply Break or Topple.
The group fight is against Akhos, Mikhail and Patroka. Patroka is the immediate damage threat, so focus her first if the party can keep her separated from the others. She can create a damaging fire area around herself and becomes more dangerous as her health falls. Akhos can Shackle Blades and create an object that reduces the time available for Blade Combos; destroy that object promptly if it appears. Mikhail can draw the party’s attention to himself, launch allies around him and temporarily evade attacks, so do not waste a Chain Attack while his evasion is active.
If the party is overwhelmed, prioritize reviving Nia or the character carrying the healing role, then use a Chain Attack to remove Patroka or finish Akhos. Do not chase Mikhail through hazards while the other two enemies remain active. Once Akhos is defeated, Mikhail is substantially easier to finish.
- Save before the Great Pillar Passage confrontation.
- Bring Rex, Mòrag and Nia if their equipment is current.
- Target Patroka first when possible.
- Destroy Akhos’s Blade-Combo-disrupting object.
- Wait out Mikhail’s evasion before committing major attacks.
7. Survive the Jin battle and confirm Chapter 6 completion
After the group battle, the story immediately leads into a separate fight against Jin. He can evade briefly, inflict Blowdown, force Topple in an area, damage a single target heavily, reduce Blade Affinity and use an attack that immediately Smashes one target. Keep the party close enough for revives but avoid clustering around Jin when he uses area control attacks. Continue using Arts and Specials, switch Blades when a current setup is disabled, and prioritize keeping Nia alive.
This encounter is story-controlled and ends after Jin loses approximately three-quarters of his health, so do not spend rare resources assuming you must deplete the full bar. If the battle is lost, reload the nearby checkpoint and change the opening formation or equipment rather than grinding the entire region. After Jin’s battle, watch the following scenes. Chapter 6 ends when those scenes conclude and the Chapter 7 main-story objective becomes available.
- Keep the healer alive during Jin’s area attacks.
- Move away from his Topple and Smash follow-ups when possible.
- Use Specials and Driver Arts consistently rather than waiting for a perfect combo.
- Let the scripted Jin battle end after the required health loss.
- Confirm that Chapter 7’s main-story objective appears.
Before you move on
- Giga Rosa has been defeated aboard the Titan Battleship.
- Aegaeon’s Core Crystal has been received and Mòrag has returned to the party.
- The party has reached Tantal and crossed the required route to Great Pillar Passage.
- Akhos, Mikhail and Patroka have been defeated.
- The scripted Jin battle has ended and its following story scenes have played.
- The main objective advances to Chapter 7: The Fear She Carries.
- Poppi customization, Tiger! Tiger!, optional treasure, Overclocking Bangle farming and sidequests may remain unfinished.
Chapter 7 — The Fear She Carries: Spirit Crucible Elpys and the Story Pivot
Chapter 7 temporarily removes Pyra and Mythra, then sends the party from Tantal to Theoscaldia Palace, back to Fonsett, and through the Village Guardian into Spirit Crucible Elpys. Most Blades in Elpys cannot charge Specials beyond Level 1, so Driver Combos, positioning, Poppi, and Chain Attacks become more important than normal Blade Combo damage. Prepare Field Skills before entering: the direct web barrier requires Fire Mastery 3 and Wind Mastery 2, an alternate route can require Wind Mastery 4, and the Stele of Judgment requires Keen Eye 2 and Ancient Wisdom 3. Defeat the multiplying Phantasms, then travel through Mor Ardain to the Cliffs of Morytha, defeat Malos, and complete the Jin and Malos confrontation. Torna — The Golden Country is optional and can be played after Chapter 7 or after the main game.
1. Complete the opening Chapter 7 scenes and return to Fonsett
After Chapter 7 begins, go to the Royal Audience Chamber in Theoscaldia Palace and speak with the King of Tantal. Finish the required conversation and story scenes there. Do not travel directly to Spirit Crucible Elpys from the map; the game first requires this palace visit.
When the palace objective is complete, Skip Travel to Fonsett Village. Meet Gramps at the Fonsett Arch, then follow the nearby steps toward the Village Guardian. Speak with the Guardian and watch the scene that reveals the entrance to Spirit Crucible Elpys. The staircase below the Guardian becomes the required route into the dungeon.
- Speak with the King of Tantal in Theoscaldia Palace.
- Return to Fonsett Village after the palace scene.
- Meet Gramps at the Fonsett Arch.
- Speak with the Village Guardian and reveal the Elpys entrance.
2. Prepare a party before entering Spirit Crucible Elpys
Pyra and Mythra are unavailable for the Chapter 7 section in Elpys, so do not rely on their weapons, Specials, or Field Skills. Equip Rex with other Blades and check the other Drivers before descending. Keep at least one dependable defensive Driver, one source of healing, and enough weapon types to perform Break and Topple when the opportunity appears.
Check Field Skills in the Blade menu before entering. The direct web barrier on the main route requires Fire Mastery Level 3 and Wind Mastery Level 2. If you approach the alternate web route instead, the check can require Wind Mastery Level 4. The Stele of Judgment later requires Keen Eye Level 2 and Ancient Wisdom Level 3. These checks count suitable Blades assigned to the active party, so equip the required Blades rather than leaving them inactive in the inventory.
Dark Mastery Level 5 together with Ancient Wisdom Level 3 can open an optional shortcut in the dungeon, but it is not a universal requirement for completing Chapter 7. If you do not have it, use the normal route.
- Equip non-Aegis Blades before entering Elpys.
- Prepare Fire Mastery 3 and Wind Mastery 2 for the direct web barrier.
- Prepare Wind Mastery 4 if using the alternate web route.
- Prepare Keen Eye 2 and Ancient Wisdom 3 for the Stele of Judgment.
- Treat Dark Mastery 5 plus Ancient Wisdom 3 as optional shortcut access only.
3. Cross Spirit Crucible Elpys while Blade power is restricted
Enter the revealed staircase and follow the main route through the tunnels. Activate landmarks as you reach them so a defeat does not force you to repeat the entire descent. The early passage is mostly linear; when the route branches around Bone Road, follow the path that continues toward the marked objective rather than clearing every side room.
As the party moves deeper into Elpys, the dungeon suppresses most Blade power. Normal Blades cannot build Specials beyond Level 1, which makes the usual Blade Combo sequence unreliable. Poppi is not affected in the same way, so Tora and Poppi can be especially useful if they are properly equipped. For everyone else, build Driver Arts, use Break and Topple, keep the tank in control of enemy attention, and rely on Chain Attacks when the Party Gauge is full.
Avoid unnecessary Unique Monsters and do not pull multiple groups in narrow tunnels. If an ally falls while enemies are still surrounding the party, retreat to a wider platform before attempting a revival. The dungeon is easier when you bypass fights instead of spending resources on every encounter.
- Activate landmarks during the descent.
- Expect ordinary Blades to stop at Level 1 Specials.
- Use Driver Arts and Driver Combos as the main control tools.
- Use Poppi if available and suitably upgraded.
- Avoid unnecessary fights and Unique Monsters.
4. Clear the web barriers and the Stele of Judgment
At the first required spider-web passage, use the direct route if you have Fire Mastery Level 3 and Wind Mastery Level 2. If that check is not available, inspect the surrounding route for the alternate web approach and satisfy the Wind Mastery Level 4 requirement instead. Do not assume the alternate path has the same Field Skill check as the direct path.
Continue through the lower sections and follow the route toward the Stele of Judgment. Inspect the Stele with Keen Eye Level 2 and Ancient Wisdom Level 3 to open the way forward. If the menu reports that a skill is missing, leave the immediate area, adjust the active party, and return. Common Blades can satisfy useful Field Skill requirements, so do not release a Blade merely because it is not part of your preferred combat team.
The Dark Mastery 5 and Ancient Wisdom 3 route is a shortcut option rather than a mandatory gate. If you lack those skills, continue along the standard path and use the required Stele route.
- Use either the direct Fire 3/Wind 2 web route or the alternate Wind 4 route.
- Open the Stele of Judgment with Keen Eye 2 and Ancient Wisdom 3.
- Do not grind for Dark Mastery 5 unless you specifically want the shortcut.
5. Defeat the multiplying Phantasm encounter
Continue past the Stele of Judgment and the Portal of the Hero until the mandatory Phantasm battle begins. The Phantasms become evasive while multiplying, and a damaged Phantasm can create additional enemies when it reaches roughly half health. The danger is allowing the group to grow faster than your restricted party can defeat it.
Spread damage across several Phantasms rather than finishing one immediately while the others remain at full health. When multiple targets are low, use a Chain Attack and choose area-of-effect Specials where possible. Poppi's unrestricted Special levels are useful, but the encounter is still manageable with ordinary Blades if you use Driver Combos, keep healing under control, and wait out the multiplication animation instead of attacking ineffectively.
If the fight becomes crowded, maintain a single target until it is close to the finish threshold, then rotate to another damaged Phantasm. Avoid spending the Party Gauge on a premature revival unless losing that character would end the battle; a Chain Attack is often the safest way to remove several low-health enemies together.
- Expect Phantasms to multiply near half health.
- Spread damage before committing to a finish.
- Use area-of-effect Specials during a Chain Attack.
- Do not waste attacks while a Phantasm is evasive.
- Keep the Party Gauge available for a decisive Chain Attack or emergency revival.
6. Travel from Leftheria to the Cliffs of Morytha
After the Elpys story sequence, return to the surface and follow the new objective. Use Skip Travel to Mor Ardain, then go to the palace area and proceed to the route that provides passage toward the Cliffs of Morytha. Speak with the required sailor and board the ship when the story prompt appears.
Before entering the Cliffs, update core chips, accessories, and pouch items. The area contains mandatory battles and Field Skill checks, but the game displays the exact requirements at each obstruction. If a check is missing, use the Blade menu to assign suitable Blades before trying again. Follow the marked route through the cliffs, ascend the vines when necessary, and continue toward Balquors Ruins rather than exploring every side path.
- Return to Mor Ardain after the Elpys sequence.
- Use the story-required ship to reach the Cliffs of Morytha.
- Update equipment before entering Balquors Ruins.
- Meet the Field Skill requirements displayed at each Cliffs obstruction.
- Follow the route toward Balquors Ruins.
7. Defeat Malos, finish the Jin and Malos battle, and decide when to play Torna
At Balquors Ruins, prepare for the mandatory Malos battle. Keep the party close enough for healing but avoid clustering vulnerable Drivers if Malos begins using disruptive attacks. His effects can interfere with Blade control and party performance, so prioritize survival over forcing a fast Blade Combo. Use Break and Topple when available, and save the Party Gauge for a Chain Attack or emergency revival.
Continue through the ruins after Malos is defeated. The next major confrontation is against Jin and Malos. Focus damage rather than scattering attacks without a purpose, use Driver Combo openings whenever they appear, and follow the story prompts when the battle transitions. The concluding phase provides a major story advantage involving Rex's enhanced Aegis form; complete the encounter and its following scenes to finish Chapter 7.
Torna — The Golden Country is not required for Chapter 8 or the Xenoblade Chronicles 2 main-game ending. It is a separate story set 500 years before the base game and is available through the Expansion Pass or as a standalone release. Playing it after Chapter 7 is a reasonable narrative choice because Chapter 7 has already established the relevance of Jin, Malos, and the earlier Aegis conflict, but playing Torna after the main campaign is also valid. Keep a separate save if you want to preserve your pre-Chapter 8 position.
- Defeat Malos at Balquors Ruins.
- Complete the Jin and Malos confrontation, including its final story phase.
- Confirm that the next chapter is Chapter 8.
- Start Torna only if desired; it is optional.
- Keep a separate save before leaving Chapter 7 if you plan to play Torna first.
Before you move on
- The King of Tantal has been visited in Theoscaldia Palace.
- Gramps and the Village Guardian have been visited in Fonsett, and the Elpys entrance has opened.
- The party has entered Spirit Crucible Elpys and cleared the required web and Stele of Judgment checks.
- The mandatory Phantasm encounter has been defeated.
- The party has reached the Cliffs of Morytha through the Mor Ardain ship route.
- Malos at Balquors Ruins has been defeated.
- The Jin and Malos confrontation and its final story phase are complete.
- The game has advanced to Chapter 8.
- A separate pre-Chapter 8 save exists if Torna or Chapter 7 optional content will be played first.
References for this chapter
- Chapter 7: The Fear She Carries — Xenoblade Chronicles 2 Walkthrough and Guide
- Chapter 7: The Fear She Carries — Xenoblade Chronicles 2 Walkthrough and Guide
- Spirit Crucible Elpys — Xenoblade Chronicles 2 Walkthrough
- How to Update Xenoblade Chronicles 2 — Nintendo Support
- Is there a Difference Between the Expansion Pass and the Torna: Golden Country standalone version? — Nintendo Support
- Monolith Soft’s Tetsuya Takahashi reveals more on Xenoblade Chronicles 2: Torna — The Golden Country
Chapter 8 — World Tree: Long-Range Objectives and Dungeon Sequences
Chapter 8 begins with Rex alone in the Land of Morytha and follows a fixed route through the ruined city, the Decaying Titan, and the World Tree. Rex becomes the Master Driver for most of the party’s Blades, then must defeat Deadfire Guldo, a group of Darkblood Guldos, and Infernal Guldo before the World Tree ascent begins. At the Megaflote Base, stop for equipment, party, and optional-quest preparation. The World Tree route uses elevators, a water-drain control panel, a Data Processing Room keycode, and a final lift toward the 7th Perimeter Entrance. A major missable-content warning occurs before the scene after the water-drain section: completing that scene permanently locks the Indoline Praetorium, so finish any quests accepted there first. Chapter 8 ends after the fight against five Indoline Loyalists and an Indoline Star, followed by the long story scene. The World Tree then continues through Chapters 9 and 10.
1. Wake in the Land of Morytha and defeat Deadfire Guldo
After the opening scenes, Rex is alone in the Land of Morytha with Mythra. Leave the starting area by going northeast to the objective marker. Follow the ruined route through the Ancient People’s Driftland and continue east when the story directs you. You will be asked to choose which name Rex uses for the Ascended Aegis. This choice changes naming and some presentation, not the route or combat abilities.
Continue east until the Deadfire Guldo encounter begins. Jin temporarily joins Rex for this fight. Use Rex’s Arts and Jin’s strong Driver Combo access to apply Break and then Topple, and finish with a Special or Driver Combo rather than allowing the battle to drag on. Afterward, Rex can engage Blades that were previously assigned to other Drivers, except Poppi. Open the Blade menu and give Rex a practical tank, healer, or utility option if your current setup lacks one. Do not feel obligated to move every Blade immediately; assign enough options to give Rex damage, survival, and reliable reaction coverage.
- Follow the objective marker northeast from the starting area.
- Defeat Deadfire Guldo with Rex and Jin.
- Review Rex’s newly expanded Blade access before continuing.
2. Cross the ruined streets and clear Great Wall Tunnel No. 8
From the Deadfire Guldo area, climb the concrete slope into the toppled building. Follow the building’s edge west, enter it, and move north through the dark interior to the opposite side. The route then leads up another slope and across a catwalk. Enter Great Wall Tunnel No. 8 when the path reaches the large tunnel entrance.
The tunnel triggers a battle against several Darkblood Guldos while Rex and Jin are still the available combatants. Do not split your attention between distant targets. Focus on one Guldo at a time, use Jin’s Driver Combo tools to create openings, and use Mythra’s Specials when Rex needs quick damage or better Art recharge. If Rex lacks dependable healing, engage a healing Blade before entering. The Guldos can change their element, but a consistent Break, Topple, and focused-target plan is more important than trying to exploit every elemental change.
After the fight and following scenes, cross the bridge and continue north, then northeast. Avoid pulling several nearby Guldos together. The route eventually enters Womb Hollow in the Decaying Titan.
- Bring a healing Blade before entering Great Wall Tunnel No. 8.
- Focus on one Darkblood Guldo at a time.
- Avoid unnecessary fights on the bridge and approach to Womb Hollow.
3. Navigate Womb Hollow and defeat Infernal Guldo
In Womb Hollow, head northeast past the enemies to the rising slope. Follow the path south, then northwest to the metal ramp. Continue upward and follow the upper path north. At the northern edge, face east and jump across the ridges until you land on the metal platform beside the doorway. Before moving forward, take control of Rex so the next encounter starts with the intended party setup.
Infernal Guldo is substantially stronger than the surrounding enemies and is designed around a forced transition. The battle begins with Rex and Jin, and the game supplies a full Party Gauge and maxed Affinity Link for the Aegis sequence. Build Blade Combos quickly and use Mythra or the Ascended Aegis to maintain pressure. The first phase ends at roughly two-thirds of the boss’s health.
During the second phase, Jin leaves and the rest of the party returns. Use Mòrag and Nia if they are suitably equipped, keep a healer active, and save your Chain Attack for around half health. Infernal Guldo can inflict Doom on multiple party members below that point and may summon additional enemies later. The safest plan is to build several Blade Combo orbs, begin the Chain Attack near half health, and finish the boss before Doom or reinforcements overwhelm the party. If you fail, return through the nearby route and change equipment or party roles rather than repeatedly attacking with the same setup.
- Control Rex before approaching the Central Pathway story marker.
- Use the supplied Party Gauge and Aegis sequence in the first phase.
- Save a Chain Attack for the second phase near half health.
4. Reach Megaflote Base and prepare before entering the World Tree
After Infernal Guldo, follow the root forward until the Megaflote Base landmark is discovered. This is the natural preparation point for the remainder of the campaign dungeon. Use Skip Travel to visit shops, restock pouch items, update Core Chips and accessories, and spend bonus experience if your active Drivers are falling behind the surrounding enemies.
You can leave the World Tree area at any time, so this is the best place to complete sidequests, Blade quests, or affinity work before committing to the climb. Optional preparation is not required for Chapter 8 completion, but a functioning healer, a defensive Driver, and a repeatable Break-to-Topple plan will make the next sections safer. Rex’s Master Driver access also allows you to place strong Blades from other Drivers on him, while Poppi remains exclusive to Tora.
- Activate Megaflote Base.
- Upgrade current Core Chips, accessories, and pouch items.
- Complete any Indol-related quests before proceeding to the lockout scene later.
5. Enter the World Tree and drain the Central Deck water
Use the elevator at Megaflote Base to enter the World Tree. Activate Benetnash, Elevator #6, then follow the initial corridor to the room with a split path. Either side is acceptable as long as you reach the eastern elevator. Ride it upward and activate Lv. 2, Mizar: Lower Deck. Continue southeast to the next elevator, then activate Mizar, Elevator #8.
From Elevator #8, go north and follow the route east and upward through the long room. Enter the stairwell and climb to Lv. 2, Mizar: Central Deck. Follow the western route, then turn south and continue into the water-filled room. The water blocks the direct route. Leave the room to the west, follow the hallway south, and enter the large room at the southern end. Defeat the Margot Sovereign near the window, then operate the nearby control panel to drain the water.
Return to the drained room and descend the stairs. Enter the large cylindrical structure in the center and climb its internal ladder to reach the next elevator. Treasure in the lower hole is optional and can force a return trip, so skip it if you want to preserve momentum.
- Activate Benetnash, Mizar: Lower Deck, Elevator #8, and Central Deck landmarks.
- Defeat the Margot Sovereign beside the control panel.
- Drain the Central Deck water before using the cylindrical structure.
6. Complete the keycode route and avoid the Indol lockout mistake
Ride the next elevator and follow the route to the Sky Bridge. The forward elevator is blocked. Go north into the room with two columns, climb either column, and enter the northeastern room. Drop to its bottom floor, then use the southwestern ramp to reach the futuristic bookcases in the Data Processing Room. Inspect the northwestern face of the southeastern-most bookcase to obtain the keycode.
Return to the Sky Bridge by Skip Travel or jump down from the Data Processing Room’s southeastern window. Use the machine beside the southeastern elevator: enter the keycode at the right-hand panel, then operate the call button on the left. The elevator will open the route upward. A nearby Unique Monster and optional treasure can be ignored.
Before leaving the next elevator area, stop and check your quest log. The following story scene permanently locks access to the Indoline Praetorium for the rest of the playthrough. Complete every quest accepted in Indol before triggering that scene. Quests accepted elsewhere that send you to Indol are handled differently, and Indol Merc Missions and Dev Point progress transfers to Leftheria, but unfinished quests accepted directly in Indol can be lost.
- Find the keycode in the Data Processing Room bookcase.
- Unlock the southeastern Sky Bridge elevator.
- Finish quests accepted in the Indoline Praetorium before triggering the next story scene.
7. Defeat the Indoline group and confirm Chapter 8 completion
Ride the unlocked elevator and follow the path east to the 7th Perimeter Entrance. Continue north and upward, then leave the platform to the south when the route directs you. Keep following the path upward and north past the landmark until the story battle begins against five Indoline Loyalists and one Indoline Star.
Target the Indoline Star first. Use Blade Combos to control the encounter and start a Chain Attack if the Star survives long enough to threaten the party. Once the Star falls, the Loyalists are much less dangerous. Maintain healing and do not chase enemies into a distant group if the battlefield spreads.
After the battle, a lengthy story scene plays and Chapter 8 ends. The next active chapter is Chapter 9. The World Tree is not cleared at this point: the same broad dungeon complex continues through all of Chapter 9 and Chapter 10. Save after the chapter transition and preserve a separate manual save before continuing if you want a clean Chapter 9 starting point.
- Defeat five Indoline Loyalists and one Indoline Star.
- Watch the complete following story scene.
- Confirm that Chapter 9 is now active and save before continuing.
Before you move on
- Deadfire Guldo, the Darkblood Guldo group, and Infernal Guldo are defeated in the Land of Morytha and Decaying Titan.
- Megaflote Base, Benetnash, Mizar: Lower Deck, Mizar Elevator #8, Central Deck, and Sky Bridge have been used as route landmarks.
- The Central Deck water has been drained and the Sky Bridge elevator has been opened with the Data Processing Room keycode.
- Any quests accepted directly in the Indoline Praetorium have been completed before the lockout scene.
- The five Indoline Loyalists and Indoline Star are defeated, the following lengthy scene has played, and Chapter 9 is active.
- A manual save is preserved before continuing into Chapter 9.
Chapter 9 — Rain: World Tree Route and End-Game Preparation
Chapter 9 is a short World Tree ascent followed by two mandatory battles in immediate succession: Jin, then Amalthus. Follow the marked route through the elevators, 7th Perimeter Skyport and Alioth, avoiding unnecessary enemy groups. The route includes a field-skill gate requiring Electric Mastery 4 and Focus 5; story-given Blades may not cover this requirement, so check your Blade roster before committing to the final approach. Prepare for Jin’s high evasion and Seal Healing, then keep a second battle-ready setup for Amalthus, who can change element, disable Blade switching, heal through Reincarnation and use a dangerous area attack. No Expansion Pass Blade, Torna content, rare-Blade quest or extensive farming is required.
1. Prepare before climbing farther into the World Tree
Chapter 9 begins in the World Tree route after the Chapter 8 events. Follow the active story marker toward the elevators rather than treating the surrounding high-level enemies as mandatory encounters. Use Skip Travel to return to a shop or inn if your equipment is outdated, then resume from the nearest discovered landmark.
Spend stored bonus experience if one of your active Drivers is substantially behind the level of the enemies on the route. Update Driver weapons, Blade weapon chips, accessories and aux cores. Prioritize accuracy on your main damage setup because Jin has strong evasion, and keep at least one dependable healing or recovery option active. A tank is useful, but the exact party composition is flexible as long as you can survive two consecutive bosses.
Check every active Blade’s affinity chart and Arts before leaving. You need a practical Break option, a way to continue a Blade Combo when the on-screen route changes, and enough elemental coverage to reach higher-level Specials. A complete Driver Combo is helpful, but do not sacrifice survivability merely to force a specific Break, Topple, Launch or Smash arrangement.
- Spend bonus experience at an inn if your active party is underleveled.
- Replace outdated weapons, chips, accessories and aux cores.
- Equip accuracy support if attacks frequently miss high-evasion enemies.
- Keep healing, revival and party-gauge options available.
- Save before beginning the final World Tree approach.
2. Follow the elevator route to the 7th Perimeter Skyport
From the opening area, enter the hallway leading to the first elevator and use Mizar, Elevator 5. The next elevator area contains groups whose abilities complement one another: some enemies can Topple, another can draw aggro by summoning support, and another can apply debuffs. Pull enemies away from one another when possible, or simply run past them if the story marker does not require a fight.
Continue through the route until the story carries you toward the 7th Perimeter Skyport. The long catwalk contains powerful enemies, including Blade Blots. Move along the marked path and avoid engaging every group, especially if your party gauge is not full. The party gauge is more valuable for reviving a fallen Driver during the upcoming boss sequence than for recovering from a minor route battle.
After the Skyport events, continue to the upper ledge and the sealed panel. The field-skill check requires Electric Mastery 4 and Focus 5. This is a real progression gate in the original Switch release. Check your Field Skills before approaching the panel. If your story-given Blades do not meet the requirement, bond additional Electric Blades or return to the menu and arrange the required skills before trying to continue. Once the check is satisfied, open the panel and proceed.
- Use Mizar, Elevator 5, then continue toward the 7th Perimeter Skyport.
- Avoid pulling support enemies into fights unnecessarily.
- Preserve the party gauge before the final route.
- Verify Electric Mastery 4 and Focus 5 before the sealed panel.
- Activate landmarks and Skip Travel points as you pass them.
3. Cross the Alioth section and make the final preparation
After the panel, cross the hallway into the Alioth section. The central route can place you near a Mecha that emerges from below, as well as wandering enemies. Swing around either side of the room when possible and enter Alioth, Elevator 3. Continue through the final hallway, but stop before the story marker if you need to change equipment or save.
This is the best time to make a focused final adjustment rather than attempting a complete rebuild. Give your main attacker an accuracy or damage setup, give your healer enough survivability to remain active, and equip resistance or defensive support if a Blade is repeatedly disabled by enemy effects. Do not spend Overdrive Protocols or rare resources simply to improve a temporary Blade; use them only when a transfer or upgrade solves a role your party will keep using.
Optional preparation is available but not required. Vay Taos in this part of the World Tree can drop Beta Scope, an accessory that reduces an enemy’s Break resistance. Farming one for a Driver who supplies Break can make Driver Combos more consistent. High-level enemies and Unique Monsters can also provide stronger equipment or Core Crystals, but Chapter 9 does not require a particular Rare Blade, Expansion Pass Blade or exact level threshold.
- Approach Alioth, Elevator 3, using the safer side route when practical.
- Make a final accuracy, healing and survivability check.
- Farm Beta Scope only if your Break attempts are unreliable.
- Do not treat Rare Blade farming or DLC equipment as mandatory.
- Create a separate save before the boss marker if possible.
4. Defeat Jin, the first mandatory boss
The first boss is Jin, and the battle begins before Amalthus. Jin is highly evasive and uses attacks that can punish careless timing. Empty Moment and related evasion actions can cause attacks to miss and may be followed by heavy counter damage. Stunned Swallow can launch the party, while Skyward Slash can reduce Blade affinity. Zero Zone applies Seal Healing, preventing normal healing for a period of time.
Use accuracy support if your attacks are repeatedly missing, then build Arts patiently instead of spending every Special as soon as it becomes available. Keep the controlled Driver positioned safely and switch Blades when needed to continue Arts recharge and maintain a useful elemental route. If Jin creates an opening, apply Break and continue into Topple or another available Driver reaction before starting a Chain Attack.
Do not activate a Chain Attack merely because the gauge is full. Use it during a reliable vulnerability window, or use a high-level Special or defensive action to survive Seal Healing and launch pressure. If your party loses health during Zero Zone, keep enough party gauge to revive the most important fallen member. Defeat Jin, then prepare immediately for the second fight; the chapter does not end after Jin.
- Use accuracy support against Jin’s evasion.
- Watch for Empty Moment, Stunned Swallow, Skyward Slash and Zero Zone.
- Build a Blade Combo and Driver reaction before committing to a Chain Attack.
- Keep party gauge available for an emergency revival.
- Do not assume Jin is the final Chapter 9 battle.
5. Defeat Amalthus and complete Chapter 9
Amalthus follows Jin immediately. He is a sustained fight with several mechanics that reward patience. Divine Robes grants heavy protection and changes his element, so a Blade that was effective a moment earlier may become a poor choice. Guilty Road can reset aggro, Thousand Tentacles can damage and Break the party, Domination applies Shackle Blade, and God Rage can cause area damage and Launch.
When Amalthus uses Reincarnation, stop attacking and keep the party moving away from the affected area. The attack can restore health based on damage dealt while it is active, so continuing a normal assault can undo your progress. Resume your rotation after the effect ends. Sacred Arrow is a particularly dangerous area attack; avoid it with an appropriate evasion action, a high-level Special or a Chain Attack when your timing permits. If Domination repeatedly prevents Blade switching or Specials, use resistance support or complete an Earth-sealing Blade Combo if your team can do so reliably.
Keep a Chain Attack for a clear damage opportunity, preferably after Amalthus has used Reincarnation and you have rebuilt your party safely. Continue using Break and other Driver reactions when they are available, but do not chase a reaction into a dangerous position. After Amalthus falls, allow the story scenes to play out. The game then advances to Chapter 10.
- Expect Divine Robes to change Amalthus’s element and defensive profile.
- Move away during Reincarnation so the healing does not undo your damage.
- Prepare for Shackle Blade from Domination.
- Avoid Sacred Arrow with evasion, a high-level Special or a Chain Attack.
- Use your strongest burst after Reincarnation has ended.
- Confirm that the story advances to Chapter 10 after the ending scenes.
Before you move on
- The Electric Mastery 4 and Focus 5 panel has been opened.
- Jin has been defeated.
- Amalthus has been defeated immediately afterward.
- The post-battle scenes finish and the game advances to Chapter 10.
- Your pre-boss save remains available if you created one.
- Your party still has a functional healing option, current equipment and at least one usable Blade Combo route for Chapter 10.
References for this chapter
- Chapter Nine: Rain — Xenoblade Chronicles 2 Walkthrough and Guide
- Chapter 9: Rain — Xenoblade Chronicles 2 Bringer of Chaos Walkthrough
- Get up to speed on Xenoblade Chronicles 2’s world and combat! — Nintendo UK
- Xenoblade Chronicles 2 Expansion Pass — Nintendo Official Site
- Is there a Difference Between the Expansion Pass and the standalone version of Torna - The Golden Country? — Nintendo Support
Final Chapter — And Thus, Boy Met Girl: The Final Sequence and Victory
Chapter 10 takes you through Elysium and the First Low Orbit Station before the final battle with Aion. The route is largely linear, but the last station section contains strong enemies and a final control panel that establishes the retry point. Before entering, update equipment, confirm reliable healing, prepare several Blade elements, and make a separate pre-ending save if you want to preserve the ability to replay the finale. Aion is an endurance fight with a dangerous later attack, so build elemental orbs, protect the Party Gauge for revivals, and use a Chain Attack at the correct moment. After the battle, continue through the mandatory story scenes and credits. The base-game ending does not require Torna — The Golden Country, the Expansion Pass, rare-Blade quests, or superbosses.
1. Prepare before entering the final route
After the opening Chapter 10 scenes, use the available Skip Travel points and inspect the entire active party. Replace outdated Core Chips, accessories, and Aux Cores, then check every Driver’s Arts and Blade arrangement. A dependable team should include a source of healing, a Driver or Blade setup that can maintain aggro, and enough elemental variety to create Blade Combos and elemental orbs during the final battle.
Use an inn to spend stored bonus experience if the party is clearly below the level of the surrounding enemies. The final boss is manageable at lower levels with a strong build, but level 70 is a practical minimum recommendation from established walkthrough guidance, while around level 75 gives more room for mistakes. This is a recommendation, not a story requirement.
Equip pouch items that improve survivability or Art and Special recharge. Keep revival capacity available through a full or nearly full Party Gauge, and do not enter the final approach with one fragile healer as your only recovery plan. If you want a file immediately before the finale, make a manual save before committing to the last station route.
- Upgrade the principal party’s Core Chips, accessories, and Aux Cores.
- Bring reliable healing, aggro control, and multiple Blade elements.
- Use an inn for stored experience if the party is underprepared.
- Make a manual pre-ending save if you want to replay the final sequence.
2. Travel through Elysium toward the First Low Orbit Station
Follow the active main-story objective through Elysium. The required route leads through the marked passages and story locations toward the First Low Orbit Station. Optional rooms may contain treasure and useful late-game equipment, but they are not needed for completion. Avoid spending the Party Gauge on unnecessary battles immediately before a required encounter.
When a Field Skill check blocks progress, open the Blade menu and place a Blade with the necessary Field Skill on an active Driver. If the required skill is not available, use Skip Travel to return to a safe area and rearrange the roster before coming back. Field Skill checks are progression requirements, so defeating nearby enemies will not solve them.
Once inside the station, use cleared corridors to recover before opening another security area. Pull enemies individually where possible, especially in rooms containing several Artifice enemies. Use ordinary encounters to recharge Arts and Specials, but retreat if the party has lost healing resources or revival capacity.
- Keep the Chapter 10 objective selected in the quest log.
- Rearrange active Blades when a Field Skill check blocks the route.
- Recover before each new security area.
- Avoid unnecessary fights that consume the Party Gauge.
3. Reach the Aion Hangar Entrance through the station’s lower section
From the Architect’s Room, enter the hallway in the southeast corner and ride the elevator. After the story scene, move south into the wide room containing several Artifice Colossi. These enemies are powerful enough to punish an unfocused party, but they can be avoided: hug the northernmost wall and continue around the curved path instead of fighting every enemy.
Use the stairway along the western wall to reach the upper catwalk. Continue to the northern control panel and operate it to open the large doors. Exit north and ride the elevator to the Aion Hangar Entrance. The stairway doors in the curved room are not required for the main route, so do not spend time opening them unless you specifically want to explore.
The station’s layout makes recovery important. If you need experience, the Artifice Colossi can provide it, but fighting them is optional. If you are already near the recommended level, bypass them and preserve your Party Gauge for Aion.
- Use the northern wall to avoid unnecessary Artifice Colossus battles.
- Take the western stairway to the upper catwalk.
- Operate the northern control panel.
- Ride the elevator to the Aion Hangar Entrance.
4. Use the final checkpoint and make your last battle setup
At the Aion Hangar Entrance, move east to the control panel marked with the main-story indicator. Interacting with this panel saves the game in front of the final door and begins the final-boss sequence. This is the important retry point: if the party is defeated afterward, reload from the title screen to return to the saved position before the final battle.
Before interacting with the panel, check equipment one more time. Give your healing Driver enough survivability to remain active during area attacks, use defensive or aggro-support accessories on the intended tank, and give damage Drivers Arts that recharge consistently. Confirm that your active Blades provide several elements so you can create orbs rather than repeatedly attempting an incomplete Blade Combo.
Do not spend rare consumables simply to clear the final room. The control panel is the last convenient preparation point, so use it only after the party is ready.
- Reach the Aion Hangar Entrance.
- Create or confirm the final control-panel save.
- Check healing, aggro, accessories, Arts, and elemental coverage.
- Keep the Party Gauge available for revivals.
5. Defeat Aion by managing the battle’s dangerous transitions
Take direct control of the Driver whose Blade setup you understand best. During the opening phase, maintain aggro control and use Driver Combos whenever the opportunity is safe. The first phase ends when Aion is reduced to roughly two-thirds health, so do not spend every resource expecting the fight to end immediately.
The next phase begins with a dangerous attack that can defeat Rex. If this happens, do not panic or restart immediately: preserve the Party Gauge and allow a healer to revive him. Continue rotating Blades so Arts remain available, and avoid allowing the entire party to cluster under a large area attack. If another Driver falls, revive promptly unless Aion is moments from defeat.
Build several elemental orbs during the safer portions of the battle. Four or five orbs provide a strong foundation for the finishing sequence, but the exact number depends on your party and damage output. When Aion approaches the later dangerous portion of the fight, watch for the start of Prometheus. If the attack begins, activate a Chain Attack immediately; waiting can result in an unavoidable party wipe. Use the Chain Attack to break orbs and maximize damage. If Pneuma is available through the story-driven sequence, use that power to finish the orb-breaking chain and secure the victory.
If you lose, reload the final-door save. Replace the weakest accessory or Blade, spend stored experience at an inn before returning if necessary, and try again. Torna and Expansion Pass content are not required for this battle.
- Use Driver Combos during safe openings.
- Preserve the Party Gauge for revivals.
- Create elemental orbs before the decisive Chain Attack.
- Answer Prometheus immediately with a Chain Attack.
- Reload the final-door save after a defeat and adjust the weakest part of the build.
6. Finish the ending and verify the cleared state
After Aion is defeated, continue through every mandatory story scene and allow the ending sequence and credits to play. The story is not complete merely because the boss health reaches zero; the post-battle scenes are part of the main campaign conclusion.
After returning to the title screen, verify that the cleared Chapter 10 save is present before deleting or overwriting anything. With the relevant game update installed, a save that has reached the final chapter and cleared the game enables Advanced New Game on the title screen. Advanced New Game resets quests, Heart-to-Hearts, Skip Travel points, and cleared Merc Missions, while carrying over selected progression. Saving after beginning Advanced New Game overwrites the original cleared save, so retain a separate pre-final or cleared backup if you want to continue ordinary postgame content first.
The base ending is complete once Aion is defeated, the mandatory final scenes and credits have played, and the cleared save state is recognized. Torna — The Golden Country, challenge content, rare-Blade quests, and superbosses remain optional.
- Defeat Aion.
- Play through the mandatory post-battle scenes and credits.
- Verify the cleared Chapter 10 save at the title screen.
- Confirm Advanced New Game is available if the game is updated.
- Keep a separate save before beginning Advanced New Game.
Before you move on
- Aion has been defeated.
- The mandatory post-battle scenes and credits have played.
- The title screen recognizes the cleared Chapter 10 save.
- Advanced New Game appears when the applicable update is installed and the game has recorded the clear.
- The base-game ending is complete without Torna — The Golden Country or other Expansion Pass content.
Postgame and New Game Plus — What to Do After the Credits
Xenoblade Chronicles 2 does not turn the cleared campaign into a freely editable postgame world. After the final battle and ending, the game creates clear data that returns you to the point before the final sequence. That file records the clear and unlocks Advanced New Game on the title screen. Use the clear file to continue optional activities such as Blade quests, Unique Monsters, superbosses, Merc Missions, and Expansion Pass Challenge Battles. Do not start Advanced New Game until you are finished with that endgame state, because saving the new run overwrites the clear data used to launch it. Keep the file made before the final point of no return if you want a separate fallback for replaying the ending under its original conditions.
1. Make the pre-final save before entering the last sequence
Before beginning the final approach, make a manual save at the available save point or console outside the final sequence. This is your practical fallback if you want to replay the ending with your original party, equipment, and unfinished quest state. Once the final sequence begins, do not rely on being able to create another ordinary campaign file for the same user; preserve this pre-final state before proceeding.
Complete the final battle and watch or skip through the ending until the game presents its clear-data save prompt. Accept that prompt. The resulting file is marked as cleared and is the file that unlocks Advanced New Game. Loading it returns you to the point immediately before the final battle rather than placing you in a permanently altered free-roam world.
- Save before the final point of no return.
- Accept the clear-data prompt after the ending.
- Keep the pre-final state intact if replaying the original ending matters to you.
2. Verify Advanced New Game from the title screen
Return to the title screen after creating clear data. The menu should now show Advanced New Game. Select it only after you have decided to begin a second campaign. Advanced New Game starts the story again from Chapter 1; it is not a menu for entering a permanent post-ending area.
Read the confirmation carefully. Saving after beginning Advanced New Game overwrites the clear data from which the mode was launched. If you still want to farm superbosses, finish Blade quests, or revisit the final sequence in the original campaign state, cancel the New Game Plus prompt and load the cleared file instead.
- Confirm Advanced New Game appears before starting it.
- Load the clear file for ordinary postgame activities.
- Start Advanced New Game only when you accept the overwrite consequence.
3. Understand what Advanced New Game carries over
Advanced New Game carries over Driver levels, Driver and Blade equipment and growth, awakened Blades, acquired items, gold, town development status, Merc Group level, Event Theater data, and recorded Unique Monster information. This lets you replay the story with a developed combat roster instead of rebuilding every resource from the beginning.
Story progression does not carry over. Quests, Heart-to-Hearts, Skip Travel points, and cleared Merc Missions reset. Drivers and Blades may also be unavailable until the relevant characters rejoin the party or the story unlocks their systems again. Treat the opening chapters as a progression restart with retained assets, not as a fully unlocked world.
Advanced New Game also adds useful second-run systems. Drivers can be levelled down at inns in exchange for Bonus EXP, and Traveling Bards can exchange Bonus EXP for special rewards. These features are optional but give a practical use to excess experience during a retained-progress run.
- Expect levels, equipment, Blades, items, gold, and development to remain.
- Expect quests, Heart-to-Hearts, travel points, and completed Merc Missions to reset.
- Recheck the party and story-gated systems as each Driver rejoins.
4. Use the cleared file for normal postgame completion
Load the clear file if your goal is completion rather than a second story run. Review every Driver’s Blade roster, affinity charts, unfinished Blade quests, Heart-to-Hearts, Merc Missions, and area quests. Complete the activities whose rewards improve the party you intend to use against high-level enemies, but do not treat any of them as required for the base-game ending.
Use inns to convert stored Bonus EXP into levels when you need an immediate power increase. Improve the actual equipment used by your active party: weapon chips, accessories, Aux Cores, pouch items, and Blade affinity progress usually matter more than raising every reserve character equally. Record which Blades have the field skills or combat roles you still need before releasing or reorganizing them.
- Review unfinished quests and Blade affinity charts.
- Advance Merc Missions for useful rewards and affinity progress.
- Spend Bonus EXP only after deciding which Drivers need it.
5. Prepare for Unique Monsters and superbosses
Treat postgame superbosses as optional build tests. Establish a team with a durable frontline, reliable healing or mitigation, and a complete Driver-combo plan. Your party should be able to create Break, Topple, Launch, and Smash when the target allows those reactions, while your Blades provide compatible elements for Blade Combos and Chain Attacks.
Begin with high-level Unique Monsters that are manageable for your build. If a fight defeats you, change one variable at a time: replace an accessory, improve a weapon chip, alter Blade roles, add resistance, or adjust the Chain Attack route. Do not assume that several extra levels will solve a weakness to a specific status effect, spike attack, or failed reaction chain.
- Test the build on progressively stronger Unique Monsters.
- Maintain a workable Driver-combo and Blade-Combo route.
- Adjust equipment and role coverage before committing to heavy grinding.
6. Use Challenge Battle only if you own the Expansion Pass
Challenge Battle Mode is additional Expansion Pass content, not a requirement for the main story or ordinary postgame. Access it through the Expansion Pass option after the relevant content has been installed and updated. Its battles are designed as difficult optional encounters and can reward accessories, Aux Cores, Noponstones, Poppi parts, and special recruitable Blades such as Shulk, Fiora, and Elma through their associated challenges.
If you do not own the Expansion Pass, ignore Challenge Battle references in completion lists. Concentrate on the base game’s Unique Monsters, Blade quests, affinity charts, Merc Missions, equipment upgrades, and remaining regional quests. None of those activities is required to unlock or record the main ending.
- Confirm the Expansion Pass is installed before searching for Challenge Battle content.
- Treat Noponstone rewards and Challenge Blades as optional.
- Use base-game postgame activities if the Expansion Pass is unavailable.
7. Choose between postgame completion and the second campaign
Remain on the clear file if you want to defeat superbosses, complete Blade stories, finish regional quests, collect optional Blades, or replay the final sequence with your original campaign state. Begin Advanced New Game when you want the retained-progress replay, New Game Plus-exclusive Blade opportunities, level-down features, and a fresh run through the story.
Because the original Switch release overwrites the clear data when you save in Advanced New Game, make the decision before committing. A Nintendo Switch save-data backup or a separate user profile may preserve an additional state if available to you, but do not assume that ordinary in-game saving creates independent campaign slots. The safest in-game plan is to finish the cleared file first, then start Advanced New Game only when no further work on that clear state is needed.
- Use the clear file for optional completion and superbosses.
- Start Advanced New Game for a retained-progress story replay.
- Do not overwrite the only clear state until you are ready.
Before you move on
- The post-ending clear-data save has been created and is visibly marked as cleared.
- Advanced New Game appears on the title screen when the clear data is present.
- Loading the clear file returns you to the area before the final sequence with your original campaign progress intact.
- You have either completed the optional postgame targets you wanted or deliberately started Advanced New Game after accepting that its first save overwrites the clear state.
- You can distinguish base-game completion from optional Unique Monsters, superbosses, Blade quests, Merc Missions, and Expansion Pass Challenge Battle content.
Optional: Torna — The Golden Country
Torna — The Golden Country is a separate Xenoblade Chronicles 2 campaign set 500 years before the base game. It is optional and is not required to reach the Xenoblade Chronicles 2 ending. On the original Nintendo Switch release, Expansion Pass owners launch Torna from the Xenoblade Chronicles 2 title screen after updating the game. The standalone Torna release contains the same story and also includes a code for Expansion Pass Packs 1–4, which are usable only with Xenoblade Chronicles 2. You can begin Torna after Chapter 7 for additional context, or wait until after the base-game ending. Keep separate saves. Torna has its own party, equipment, combat emphasis, and Community system; its story progression eventually requires Community Level 2 and then Community Level 4.
1. Confirm your original Nintendo Switch edition and access method
This chapter covers the original Xenoblade Chronicles 2 release for Nintendo Switch, not a later Nintendo Switch 2 edition. If you own Xenoblade Chronicles 2 with the Expansion Pass, update the base game and launch it. The title screen gains a Torna — The Golden Country story option once the required content is installed. Start Torna from that option rather than creating a normal Xenoblade Chronicles 2 save.
If you own the standalone Torna software, launch it as its own game. The standalone release contains the same Torna story as the Expansion Pass. Its included download code is for Expansion Pass Packs 1–4 used in Xenoblade Chronicles 2; it does not turn the standalone Torna application into the base game and does not make the base-game campaign playable.
Do not purchase both the Expansion Pass and standalone Torna just to obtain the story. Nintendo identifies the Torna story as shared between those products. If you have the base game and Expansion Pass, you already have the Torna campaign.
- Confirm that the software is the original Nintendo Switch version.
- Update Xenoblade Chronicles 2 before looking for the Torna option.
- Use the title-screen Torna option when playing through the Expansion Pass.
- Use the separate Torna application when using the standalone release.
- Redeem the standalone release's Packs 1–4 code only if you also own Xenoblade Chronicles 2.
2. Choose a spoiler-safe place in your play order
Torna is optional for the base-game ending. You do not need to start it to unlock Chapter 8, Chapter 10, the final battle, or the Xenoblade Chronicles 2 credits. The commonly recommended mid-game position is after completing Chapter 7 and before continuing into Chapter 8. Keep the Chapter 7 save in a separate slot, then start Torna without overwriting it.
Playing Torna after finishing the main game is also valid and avoids interrupting Rex's campaign. It provides historical context and expands characters and events referred to in Xenoblade Chronicles 2, but its prequel status does not make it a required chapter of the base game.
Torna begins a separate campaign. Base-game Drivers, Blades, levels, accessories, core chips, pouch items, quests, and inventory do not carry into Torna. Likewise, Torna's Community progress and campaign equipment do not modify your Xenoblade Chronicles 2 save.
- Preserve a Chapter 7 save if you want to resume immediately at Chapter 8.
- Use a separate save slot or separate application for Torna.
- Choose post-Chapter 7 or post-ending play based on your spoiler preference, not on a progression requirement.
3. Follow the opening route through Torna, Gormott, and the early settlements
Start the Torna campaign and follow the pink main-objective marker. The early route introduces the Torna group, the Vanguard Switch system, and the campaign's equipment and crafting menus. Read the tutorials when they appear because Torna changes how the front and rear members of the party contribute during combat.
The verified main-story route begins with objectives in the Kingdom of Torna, then moves to Gormott for the objectives Power Unimaginable and Where's the Boy Gone? After those events, the story returns to the Kingdom of Torna for Feeding an Army, Lett Bridge Restoration, and To Cross a Desert. Use the map's quest marker and fast-travel points to move between these locations rather than searching every region manually.
At each settlement, visit the shop and campsite before leaving. Equip improved weapons, core chips, accessories, and pouch items. Campsites are also important because Torna's characters use their own crafting and development options. When a story objective asks for an item or repair, inspect the active quest description and use the nearby settlement or camp menus before travelling elsewhere.
- Keep the active main quest selected so its pink marker is visible.
- Travel through the Kingdom of Torna and Gormott in the order shown by the current objective.
- Check shops, campsites, crafting, and equipment after each major story transition.
- Do not search for base-game Blades or base-game quest items in the Torna campaign.
4. Build Community before the game stops the story
Torna's Community menu tracks the people recruited through conversations and side quests. Unlike optional affinity activities in the base game, Community progress becomes a direct story prerequisite. The campaign requires reaching Community Level 2 at an earlier gate and Community Level 4 at a later gate. If the main marker disappears or the next objective refuses to advance, open the Community menu and read the displayed requirement.
Whenever you enter a settlement, speak with named residents and accept available quests before leaving. Complete the errands, gathering tasks, combat objectives, repairs, and escort activities that add people to the Community. New quests can appear after story events, so revisit the settlements when the party returns to a region.
Do not save all Community work for the final approach. The late Level 4 requirement is deliberately substantial and can require completing most of the available qualifying quests at that stage. Efficient progress comes from accepting every available settlement request during normal travel, then using the Community menu to identify entries that still have an available quest or conversation.
- Reach Community Level 2 when the first story gate requests it.
- Continue recruiting residents after the first gate instead of returning immediately to the main route.
- Reach Community Level 4 before attempting the final story sequence.
- Use the Community menu to find missing contributors instead of guessing which town to visit.
5. Use Torna's battle system instead of copying the base-game rhythm
Torna retains the Driver Combo and Blade Combo foundations but gives more direct control over switching between the front and rear positions. Practise Vanguard Switch in ordinary fights: move a character to the back when the frontline is under pressure, then switch forward when that character's useful art or special is ready. The exact value of a switch depends on the current character, art, enemy position, and party condition.
Build specials while watching for Break and Topple opportunities. When an enemy is vulnerable, use the available reaction, continue the Blade Combo, and spend a Chain Attack when the party gauge and elemental setup make it worthwhile. Against groups, reposition before activating a long special so the party is not surrounded or struck by an area attack.
Before story bosses, replace outdated equipment and review each character's arts, accessories, and affinity development. Torna's crafting and equipment systems are local to this campaign. If a boss defeats you, travel back to the nearest settlement or campsite, improve the weakest defensive or offensive slot, and retry with a different switching order rather than simply repeating the same attack sequence.
- Practise Vanguard Switch before relying on it against bosses.
- Use Break, Topple, Blade Combos, and Chain Attacks during openings.
- Keep the party's front position clear of avoidable area attacks.
- Upgrade Torna equipment through its own shops, campsites, and crafting menus.
6. Finish the final route after Community Level 4
After reaching Community Level 4, resume the main objective and follow the route toward the Tornan capital and the late-game story locations. Continue using fast travel between the current settlement, camps, and the marked destination. The final sequence leads into the Tornan Titan interior and its endgame battles, so treat the last safe settlement or campsite as your preparation point.
Before entering the final area, save, equip the strongest current gear, set useful pouch items, and confirm that every active party member has a role. Carry recovery items and keep enough party gauge available to respond to a difficult phase. During the final battle sequence, watch enemy positioning and switch characters when the current frontline is losing control; use prepared specials and Chain Attacks during clear vulnerability windows rather than opening with them immediately.
If you fail, return through the nearest available travel point, restore the party, and change one weakness at a time: level, equipment, pouch support, art selection, or switch timing. Optional unique monsters and collection tasks are not required for the ending, so postpone them unless they are helping you solve a specific combat problem.
- Community Level 4 is displayed before the final story route begins.
- The party has current weapons, core chips, accessories, and pouch items.
- A separate save exists before entering the final sequence.
- The final story objectives in the Tornan Titan interior are completed in order.
7. Confirm completion and return to the base game
Torna is complete when its final story sequence reaches the ending and credits. Afterward, load the Xenoblade Chronicles 2 save you preserved earlier. If you followed the mid-game order, resume the base game at Chapter 8. If you played Torna after the main ending, return to your postgame base-game file instead.
Do not expect Torna completion to unlock a new base-game chapter or import Torna's party development. Recheck the base game's Drivers, Blades, equipment, pouch items, and active quests before continuing because the two campaigns use separate progression systems and different combat emphasis.
For long-term completion, preserve both the pre-Torna Chapter 7 save and the completed Xenoblade Chronicles 2 save. This allows you to revisit the recommended story order, continue base-game postgame activities, or begin another Torna run without destroying the original campaign state.
- The Torna ending and credits have been reached.
- The original Chapter 7 or completed base-game save remains intact.
- The base game resumes independently at Chapter 8 or postgame.
- Torna Community progress and equipment remain separate from Xenoblade Chronicles 2 progression.
Before you move on
- The Torna campaign reaches its ending and credits.
- Community Level 2 and the later Community Level 4 requirement have been satisfied.
- The final Tornan Titan interior objectives and endgame battles are complete.
- The original Xenoblade Chronicles 2 save remains available independently.
- The player can load the base game at Chapter 8 after a Chapter 7 play order, or at postgame after finishing Xenoblade Chronicles 2 first.
- Expansion Pass and standalone ownership are correctly distinguished, and any standalone DLC code has been redeemed only for Xenoblade Chronicles 2.
References for this chapter
- Is there a Difference Between the Expansion Pass and the standalone version of Torna - The Golden Country? — Nintendo Support
- How to Update Xenoblade Chronicles 2 — Nintendo Support
- Xenoblade Chronicles 2: Torna ~ The Golden Country — Nintendo Official Site
- Main Story Quest (XC2) — Xenoblade Wiki
- Community (TTGC) — Xenoblade Wiki
- Xenoblade Chronicles 2: Torna ~ The Golden Country FAQ/Walkthrough — Neoseeker
- Xenoblade Chronicles 2: Torna — The Golden Country Instruction Manual
Finishing up
You have defeated Aion, completed the mandatory ending scenes, and watched the base-game credits.
A cleared save has been created or confirmed after the ending. Loading that clear data returns you to the pre-final sequence state for optional postgame activities.
Advanced New Game appears on the title screen when the applicable game update is installed and the cleared save is present.
Torna — The Golden Country, Challenge Battle, Blade quests, superbosses, Merc Missions, rare-Blade collection, and other Expansion Pass content remain optional and are not required for the base-game ending.
Choose your next gameScreenshots & video
Game imagery for reference. Follow the written chapters above for the route and strategies.
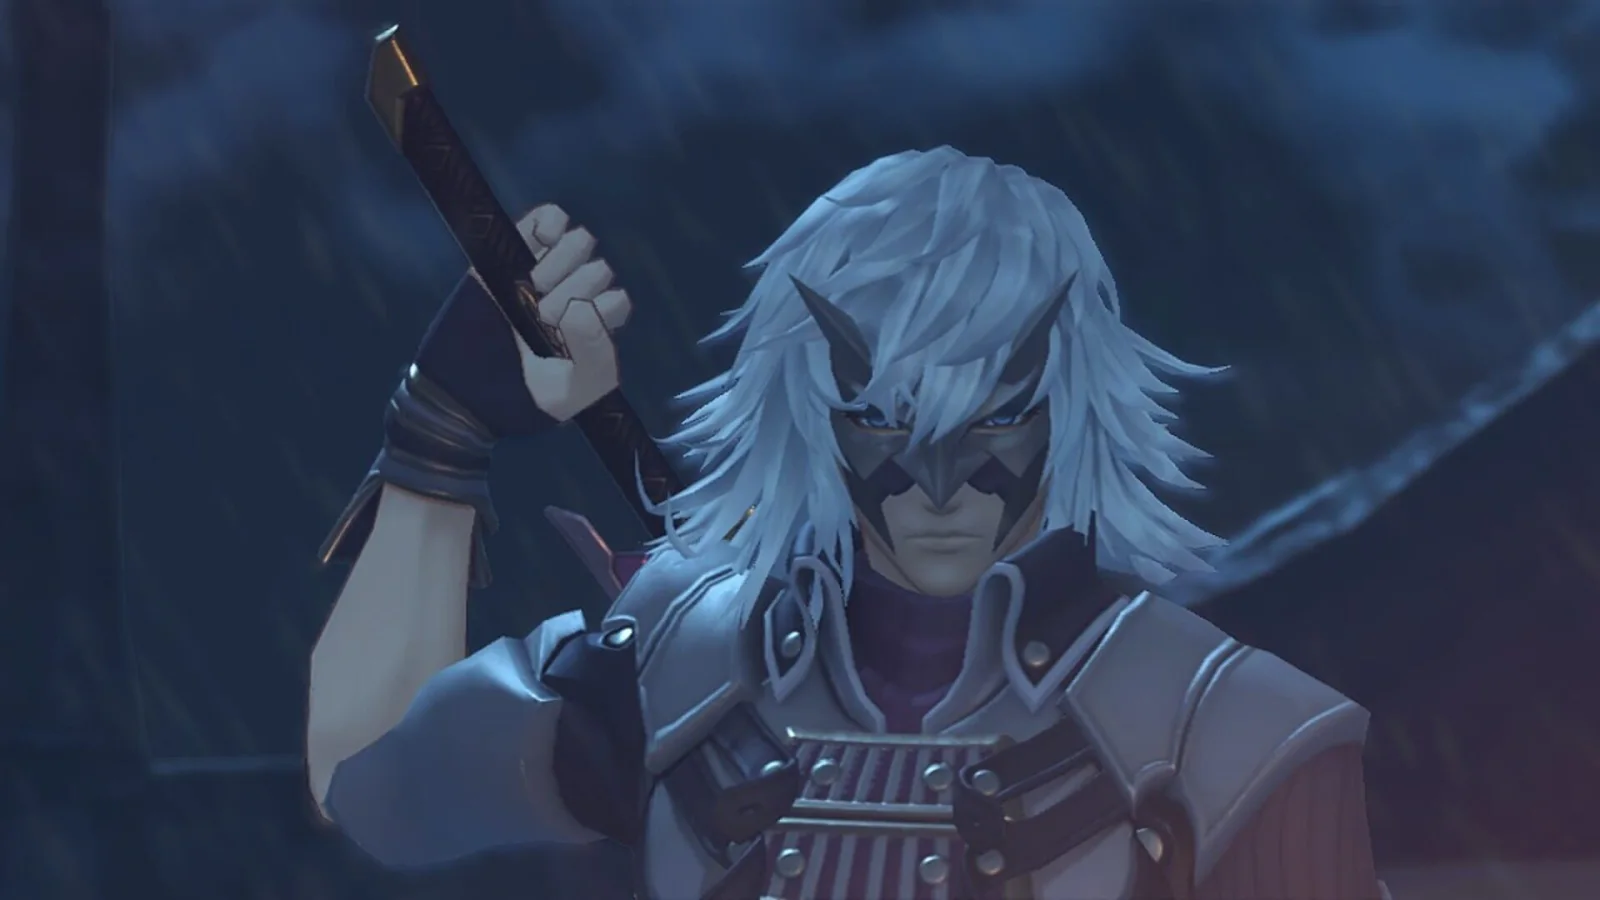
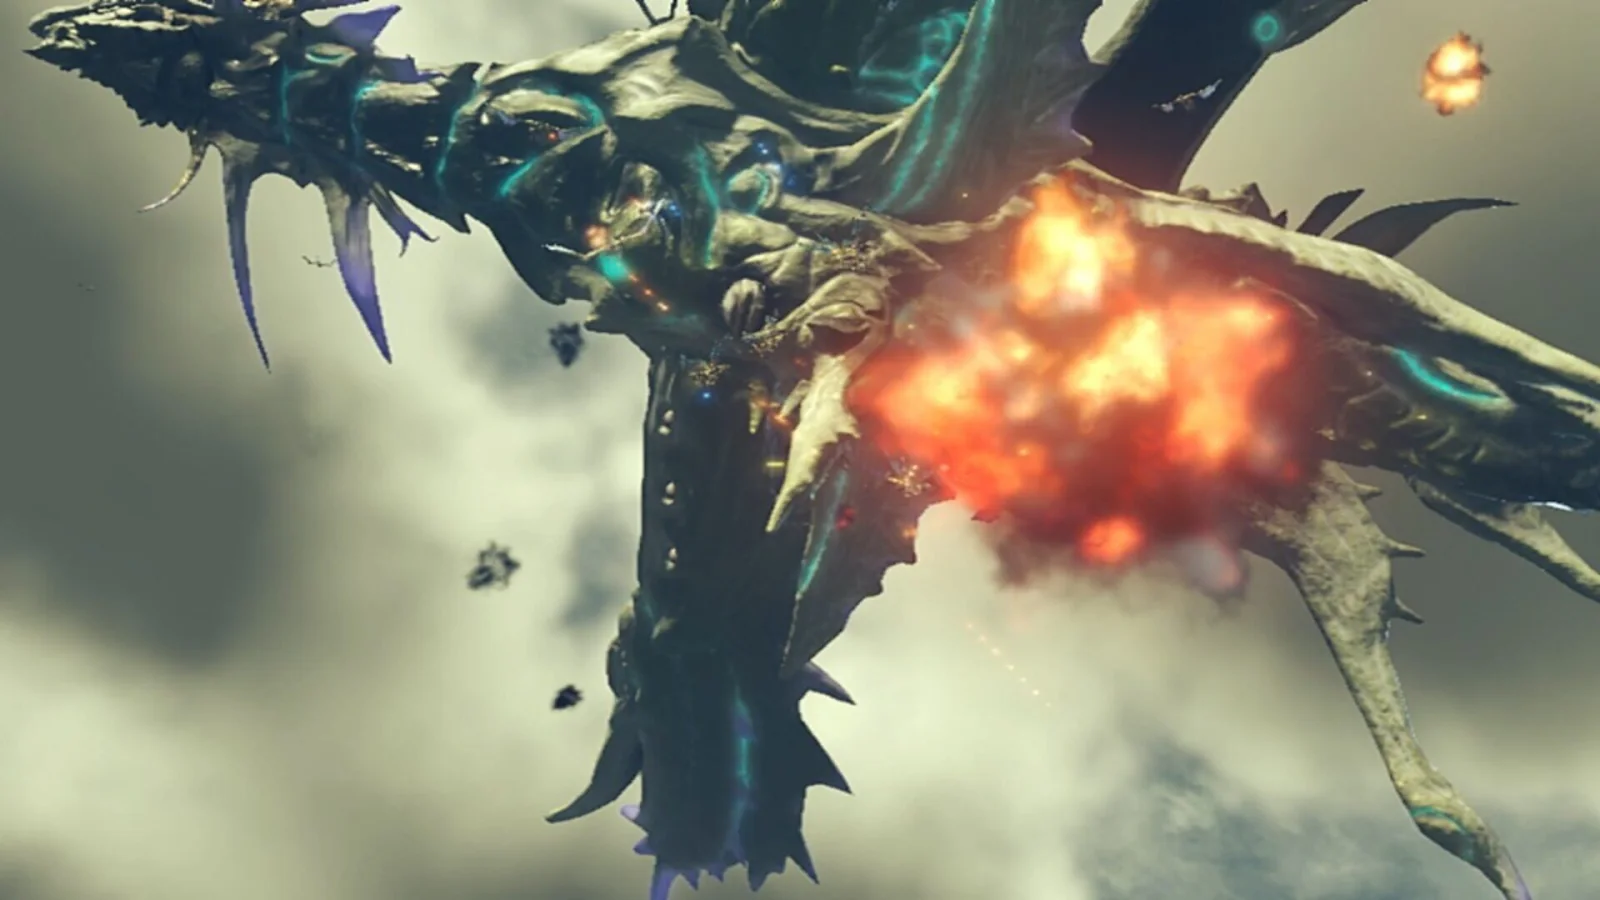
Sources & references
Our original guide draws on the references below. Check the edition at the top of this page before following controls or unlock requirements.
- Nintendo Official Site — Xenoblade Chronicles 2 for Nintendo Switch
- How to Update Xenoblade Chronicles 2 — Nintendo Support
- Is there a Difference Between the Expansion Pass and the standalone version of Torna - The Golden Country? — Nintendo Support
- Xenoblade Chronicles 2 FAQ/Walkthrough — Chapter 08: World Tree
- Tutorials — Xenoblade Chronicles 2 Walkthrough and Guide — GameFAQs
- The Basics — Xenoblade Chronicles 2 Combat Guide — GameFAQs
- Xenoblade Chronicles 2 Battle System and Combat Tips — Prima Games
- Xenoblade Chronicles 2 — Chapter 1: Encounters Walkthrough and Guide
- Xenoblade Chronicles 2 Walkthrough — Chapter 1: Encounters
- Big Job Preparation — Xenoblade Chronicles 2 Walkthrough
- Ancient Ship — Xenoblade Chronicles 2 Walkthrough
- What DLC Is Available? Xenoblade Chronicles 2 — Nintendo Support
- Chapter 2: Aptitude — Xenoblade Chronicles 2 Walkthrough and Guide
- Xenoblade Chronicles 2 Walkthrough — Chapter 2: Aptitude
- Xenoblade Chronicles 2 Walkthrough — Chapter 2: Aptitude
- Xenoblade Chronicles 2 Chapter 2 Walkthrough Guide: Aptitude
- Chapter 3: Our Own War — Xenoblade Chronicles 2 Walkthrough & Guide
- Chapter 3: Our Own War — Xenoblade Chronicles 2 Walkthrough & Guide
- Xenoblade Chronicles 2 Chapter 3 Walkthrough — GameFAQs
- Xenoblade Chronicles 2 — Nintendo Switch Official Product Page
- Difference Between the Expansion Pass and the Torna: The Golden Country Standalone Version — Nintendo Support
- How to Access DLC — Nintendo Support
- Chapter 4: Aegis — Xenoblade Chronicles 2 Guide and Walkthrough
- Chapter 4: Aegis — Xenoblade Chronicles 2 Walkthrough and Guide
- Empire of Mor Ardain: Old Factory — Xenoblade Chronicles 2 Walkthrough
- Chapter Five: Masters and Slaves — Xenoblade Chronicles 2 Walkthrough & Guide
- Xenoblade Chronicles 2 Chapter 5 Side Quests — GameFAQs Walkthrough
- Chapter 6: Wounds — Xenoblade Chronicles 2 Walkthrough & Guide
- How to Update Xenoblade Chronicles 2 — Nintendo Support
- Chapter 7: The Fear She Carries — Xenoblade Chronicles 2 Walkthrough and Guide
- Chapter 7: The Fear She Carries — Xenoblade Chronicles 2 Walkthrough and Guide
- Spirit Crucible Elpys — Xenoblade Chronicles 2 Walkthrough
- Is there a Difference Between the Expansion Pass and the Torna: Golden Country standalone version? — Nintendo Support
- Monolith Soft’s Tetsuya Takahashi reveals more on Xenoblade Chronicles 2: Torna — The Golden Country
- Chapter 8: World Tree — Xenoblade Chronicles 2 Walkthrough & Guide
- Chapter Eight: World Tree — Xenoblade Chronicles 2 Walkthrough & Guide
- Chapter Nine: Rain — Xenoblade Chronicles 2 Walkthrough and Guide
- Chapter 9: Rain — Xenoblade Chronicles 2 Bringer of Chaos Walkthrough
- Get up to speed on Xenoblade Chronicles 2’s world and combat! — Nintendo UK
- Xenoblade Chronicles 2 Expansion Pass — Nintendo Official Site
- Final Chapter: And thus, boy met girl. — Xenoblade Chronicles 2 Walkthrough & Guide
- First Low Orbit Station: Lower Level — Xenoblade Chronicles 2 Walkthrough
- How to Update Xenoblade Chronicles 2 — Nintendo Support
- Xenoblade Chronicles 2 Wiki — Main Story Guide
- Xenoblade Chronicles 2 New Game Plus Guide: Carryovers, Blades, and Settings
- Final Chapter: And thus, boy met girl — Xenoblade Chronicles 2 Walkthrough & Guide
- How to Update Xenoblade Chronicles 2 — Nintendo Support
- Xenoblade Chronicles 2: Torna ~ The Golden Country — Nintendo Official Site
- Main Story Quest (XC2) — Xenoblade Wiki
- Community (TTGC) — Xenoblade Wiki
- Xenoblade Chronicles 2: Torna ~ The Golden Country FAQ/Walkthrough — Neoseeker
- Xenoblade Chronicles 2: Torna — The Golden Country Instruction Manual
About the game & collecting notes
- Platform
- Nintendo Switch
Step-by-step campaign walkthrough for Xenoblade Chronicles 2 on Nintendo Switch. This guide takes you through the main story from Chapter 1 to the final chapter, explains key battle systems, mandatory story objectives, and postgame/New Game Plus options. Optional DLC (Torna — The Golden Country) and how it fits with the main campaign are covered separately.
Darryl Polo
Darryl Polo writes about emulation and retro games. What changes when an old favorite moves to another setup? That question connects his interest in tinkering with the games that made the hardware worth keeping.
Our editorial standardsFound a step that needs another look? Help us improve this guide.