
The Witcher 3: Wild Hunt — Complete Edition (PS5) — Campaign Walkthrough
Complete-edition, PS5-focused walkthrough covering the main campaign from prologue to the true endings, plus both expansions (Hearts of Stone and Blood and Wine), Kaer Morhen, and post-game completion options. Emphasis on route order, quest prerequisites, preparation for key battles and preserving saves for PS5 features and cross-gen save transfer.


Find a copy
The Witcher 3: Wild Hunt — Complete Edition Sony PlayStation 5
We may earn a commission if you buy through these links, at no extra cost to you. As an Amazon Associate I earn from qualifying purchases.
Opens retailer search results. Check the model, edition, seller, availability and current price before buying.
Before you begin
This walkthrough is written for the PS5 Complete Edition of The Witcher 3: Wild Hunt.
It assumes you are using the PS5-native release (next‑gen update / Complete Edition) and will point out PS5-specific steps where they affect saves, performance, or UI.
The plan leads you through the mainline quest sequence required to reach the game’s campaign ending(s), and then through Hearts of Stone and Blood and Wine so you can finish the complete story offered by this edition.
Follow the chapter order for a reliable, paced run: begin in White Orchard and follow the recommended main-quest clusters in Velen, Novigrad and Skellige to keep your quest choices and gear progression sound.
Chapters flag required objectives versus optional side content, show when to pause for leveling or contracts, and explain recovery steps if a boss or quest fails.
Do not skip the Preparation chapter — PS5 save-transfer, install and performance options matter for the Complete Edition experience.
Set yourself up for the run
Confirm which PSN product you own before upgrading: owners of prior-gen copies may need the free next‑gen update or the standalone Complete Edition — use the PlayStation Store game page and CD PROJEKT RED support to verify eligibility and correct SKU.
Backup important saves externally or to cloud before performing cross-gen transfers or converting an old-gen save.
The PS5 Complete Edition supports save transfer but behavior can vary by regional SKU; keep at least one safe copy.
Decide difficulty and playstyle now.
Combat difficulty affects key fights and resource needs; adjust accessibility options and PS5 performance vs fidelity modes in settings before long quest sequences.
Install the full Complete Edition with all updates; next‑gen patches add ray tracing, faster loading, and PS5 features such as 3D audio and DualSense haptics.
Allow time for the initial update and any large day‑one patches.
Familiarize yourself with the game’s main quest icons and quest-log workflow.
Use quest-tracking to mark the exact quest objective you want to pursue next; this guide references quest clusters (e.g., Velen main arc, Novigrad main arc) rather than single-quest step dumps.
Reserve roughly 60+ GB of free space on the PS5 for install and patching (allow extra for downloadable updates and save-cloud).
If you plan to carry a PS4 save to PS5, read CD PROJEKT RED’s support guidance and ensure your save is visible in the cloud or local storage before starting the PS5 session.
Pre-Run: PS5 Installation, Save Transfer, and Settings
Prepare the PS5 Complete Edition before beginning the campaign. Confirm that the PlayStation Store lists the correct PS5 product and that your ownership qualifies for the appropriate upgrade route. Install the complete game and Patch 4.04, preserve existing PS4 saves through cloud, USB, or console transfer, then use CD PROJEKT RED’s cross-progression process to make a selected save available in the dedicated PS5 version. Before starting, choose a graphics mode, configure audio, subtitles, accessibility, and controller feedback, then create and reload a fresh manual save.
1. Confirm the correct PS5 edition and entitlement
On the PS5, open the PlayStation Store and search for The Witcher 3: Wild Hunt. Select the game page, open the options menu, choose View Product, and use the edition selector to find The Witcher 3: Wild Hunt - Complete Edition. Confirm that the listing identifies both PS4 and PS5 versions and includes Hearts of Stone and Blood and Wine. The PS5 Complete Edition also includes the next-generation visual, audio, controller, and accessibility features.
If you own the eligible digital PS4 Game of the Year edition, CD PROJEKT RED’s upgrade instructions direct you to select the Complete Edition and confirm that the purchase price is $0. A PS4 base-game license by itself provides the next-generation base game, not automatically the Complete Edition. If you own the expansions separately, install their PS5 versions as directed by the Store rather than assuming the Complete Edition entitlement will appear.
For a physical PS4 copy, use a PS5 with a disc drive. Keep the disc inserted when installing and playing the upgraded version. A PS4 disc cannot verify ownership on a PS5 Digital Edition. If the free upgrade does not appear, check that the disc’s region code matches the region of your PlayStation account; CD PROJEKT RED identifies a region mismatch as a cause of upgrade problems.
- The Store page identifies the PS5 version.
- The Complete Edition is shown as owned, correctly purchased, or free through an eligible upgrade.
- A physical copy is being used with a PS5 disc drive.
- The disc and account regions match when applicable.
2. Install the PS5 application and update it fully
Start the download from the PlayStation Store or your Game Library and allow the game and its updates to finish before beginning a campaign or troubleshooting a missing save. Both the PS4 and PS5 applications can be present on the console, so check the application label on the home screen before launching. Do not assume that launching The Witcher 3 automatically selects the dedicated PS5 version.
After launching, check the version number beneath the game title on the main menu. CD PROJEKT RED’s current PlayStation support form lists Patch 4.04 as the latest supported version. If the installed version is older, close the game, highlight the application on the PS5 home screen, press Options, and choose Check for Update. Keep the older application and its saves until the transfer has been tested successfully.
The PS5 Store listing confirms that the Complete Edition contains the base game and both expansions. It also identifies PS5 support for DualSense vibration and trigger effects, manual saving, adjustable difficulty, subtitles, and other accessibility features.
- The dedicated PS5 application is installed.
- The game reports Patch 4.04 or the current version shown by CD PROJEKT RED support.
- The full installation and all available updates have completed.
- The PS4 application has not been deleted before save recovery is confirmed.
3. Back up the original PS4 save
Before using cross-progression, create a recent manual save on the PS4 version and preserve it. With PlayStation Plus, use the PS4 system’s Application Saved Data Management menu to upload the save to Online Storage. You may also copy PS4 saved data to compatible USB storage or use the PS5’s console-to-console data-transfer process while signed into the same PlayStation Network account.
These backups are separate from The Witcher 3’s in-game cross-progression. PlayStation Plus or USB storage protects the original PS4 file for recovery, while cross-progression creates a cloud-marked save that the PS5 application can read. Keep the original PS4 save and any backup until the PS5 version has loaded the transferred file and successfully created a new PS5 save.
- A recent manual PS4 save exists.
- The save is protected through Online Storage, USB storage, console transfer, or more than one method.
- The original PS4 data remains available.
4. Transfer the selected save through My Rewards
Update the PS4 version to Patch 4.04, then launch it and open My Rewards from the main menu. Follow the on-screen instructions to connect the game to a CD PROJEKT RED account. Cross-progression becomes available after the connection is established.
Create a new save containing the progress you want to move. The uploaded save receives a cloud icon beside its name. Do not rely on an older save created before connecting the account; make a fresh save after the connection so the transfer process can identify it.
Launch the dedicated PS5 version and open My Rewards. Connect it to the same CD PROJEKT RED account used on PS4. Open Load Game and look for the cloud-marked upload. Load it, move Geralt or complete another harmless action, then create a new PS5 manual save. Reload that PS5 save before deleting or replacing any older files.
If the save is missing, verify the PS4 patch level, the account used in My Rewards, the application version, and the presence of the cloud icon. Do not repeatedly overwrite the original file while troubleshooting.
- The PS4 version is updated to Patch 4.04.
- Both applications use the same CD PROJEKT RED account.
- The selected PS4 save has a cloud icon.
- The file appears under Load Game on PS5.
- A new PS5 manual save has been created and reloaded.
5. Select graphics, audio, accessibility, and controller settings
Open Options before beginning the opening sequence. Choose Performance mode if you prefer the more responsive higher-frame-rate presentation. Choose Ray Tracing mode if you prefer ray-traced global illumination and ambient occlusion at the mode’s lower frame-rate target. The PS5 feature set supports switching between these modes, so you can change the choice later if combat or image quality feels uncomfortable.
For compatible headphones or audio equipment, enable the PS5’s 3D Audio features through the console audio settings. In The Witcher 3’s menus, set master, music, effects, dialogue, and subtitle options to suit your setup. The PS5 edition supports DualSense haptic feedback and adaptive trigger effects, but the PlayStation listing also confirms that the game can be played without vibration or adaptive trigger resistance. Reduce or disable those effects if they interfere with comfort or precision.
Review subtitle size and background, speaker names, color options, camera behavior, control reminders, tutorial reminders, difficulty, and autosave settings. Use manual saves before leaving safe areas and before major decisions. Finally, enter the game, create a manual save, open Load Game, and reload it. This verifies that the installation, storage, and chosen settings are ready before the campaign begins.
- Performance or Ray Tracing mode has been selected deliberately.
- 3D Audio matches the connected headphones or sound system.
- DualSense vibration and adaptive triggers are configured for comfort.
- Subtitles, accessibility, difficulty, tutorials, and autosaves are ready.
- A fresh manual save reloads successfully.
Before you move on
- The PlayStation Store or Game Library shows the PS5 Complete Edition as owned, correctly purchased, or free through an eligible upgrade.
- The installed PS5 application reports Patch 4.04 or the current version identified by CD PROJEKT RED support.
- The Complete Edition’s base game, Hearts of Stone, and Blood and Wine are installed or available through the correct entitlement.
- Any desired PS4 save appears in the PS5 Load Game menu after the My Rewards cross-progression steps.
- A new PS5 manual save has been created and successfully reloaded.
- Graphics, audio, controller, subtitle, accessibility, difficulty, tutorial, and autosave settings are configured before the opening sequence begins.
References for this chapter
- CD PROJEKT RED support: How do I update my game to the next-gen?
- How do I transfer my save file to the next-gen update? - CD PROJEKT RED Support
- Unable to update the game to the next-gen update — The Witcher 3: Wild Hunt | Technical Support — CD PROJEKT RED
- The Witcher 3: Wild Hunt - Complete Edition, PlayStation Store
- The Witcher 3: Wild Hunt PS5 features detailed, PlayStation Blog
- Technical Support — The Witcher 3: Wild Hunt — CD PROJEKT RED
Controls, Inventory and Combat Basics (PS5 tweaks)
Learn the default DualSense layout in a safe area before taking difficult contracts. Square performs fast attacks, Triangle performs strong attacks, Circle dodges, X handles interaction and movement actions, L2 activates Witcher Senses or parries, R2 casts the selected Sign, and R1 uses the selected quick-access item. Hold L1 to open the radial menu for Signs, bombs, potions, oils, crossbow bolts, and pocket items. Use steel against people and animals and silver against monsters, then combine the correct sword with an oil and a suitable Sign. Dodge monsters instead of trying to parry every attack, and practice parrying human weapon swings. Keep armor and swords repaired, sell obsolete loot, and meditate after crafting so prepared potions and bombs can be replenished. The PS5 Complete Edition also supports quick Sign casting, radial-menu item switching, optional automatic oil application, DualSense haptics, and Performance or Ray Tracing display modes.
Learn the default DualSense controls in a safe area
Use Square for a fast attack and Triangle for a strong attack. Circle performs a dodge and also handles climbing, jumping, and surfacing in the appropriate context. X interacts with objects and characters and handles running or sprinting; when the movement context allows it, use X while moving at speed to roll. L2 activates Witcher Senses outside combat and blocks or parries during combat. R2 casts the Sign currently selected in the quick-access menu.
Press R1 to use the currently equipped quick-access item. This can be a bomb, crossbow bolt, pocket item, or another item assigned through the radial interface. Press L1 to open the quick-access menu. The D-pad selects consumable slots with Up and Down, while Left and Right draw or sheath the steel and silver swords. Press the right stick to lock onto a target. The right stick otherwise controls the camera, so do not confuse camera movement with changing the lock-on target.
Checklist: fast attack is Square; strong attack is Triangle; dodge is Circle; parry is L2; Sign is R2; quick item is R1; radial menu is L1; steel sword is D-pad Left; silver sword is D-pad Right. Test each action away from enemies before relying on it in a contract fight.
- Fast attack: Square
- Strong attack: Triangle
- Dodge: Circle
- Block or parry: L2
- Cast selected Sign: R2
- Use selected quick item: R1
- Open quick-access menu: L1
- Lock on: press the right stick
Choose the PS5 control and display options
Open Options and review the Gameplay settings before leaving the starting area. The next-generation version includes an alternative Quick Sign Casting option. When enabled, Signs can be changed and cast without opening the full radial menu. Try it during a low-risk encounter; if it causes accidental casts, return to the standard radial method, which pauses or slows the action while you select a Sign.
The radial menu also supports next-generation quality-of-life options for switching potions and applying oils. Automatic oil application can be enabled if you do not want to select an oil manually before every eligible fight. If you use automatic oils, still check that Geralt has the relevant oil prepared and that the game has identified the enemy correctly.
In the PS5 version, Performance Mode prioritizes a smoother frame rate, while Ray Tracing Mode prioritizes ray-traced lighting at a lower target frame rate. Performance Mode is generally easier for learning dodge and parry timing. DualSense haptics provide feedback for actions such as sword strikes, Sign casts, mounting, and other world interactions. You can reduce or disable controller effects without changing progression or combat rules.
Checklist: test Quick Sign Casting; decide whether to use manual or automatic oils; choose Performance or Ray Tracing mode; keep controller feedback at a level that does not distract from combat.
- Test Quick Sign Casting in a safe encounter
- Decide whether automatic oil application suits your play style
- Use Performance Mode if frame-rate consistency helps your timing
- Adjust haptics and adaptive-trigger effects if they obscure other feedback
Build a repeatable sword-and-defense rhythm
Use the correct sword before attacking. The steel sword is intended for people and ordinary animals, while the silver sword is intended for monsters and other supernatural enemies. The game usually draws the appropriate sword automatically when combat begins, but confirm the weapon if an encounter behaves unexpectedly. Apply the matching oil before the fight when you have the recipe and ingredients available.
Against ordinary enemies, wait for the attack animation, use a short dodge to leave the hit area, and answer with one or two fast attacks. Dodging preserves Geralt’s position near the target, while rolling creates more distance and is useful when an enemy’s attack covers a wide area. Strong attacks are slower and consume stamina, so use them during clear openings rather than holding Triangle continuously.
Parrying is most reliable against human enemies and other opponents with readable weapon swings. Press or hold L2 as the blow arrives to block or counter according to the game’s timing. Large monsters and many special attacks should be avoided rather than parried. Against groups, keep moving around the outside of the formation so enemies cannot surround Geralt. Quen is a dependable defensive Sign: cast it before a dangerous exchange and refresh it after the shield is consumed.
Checklist: use fast attacks as the normal response; reserve strong attacks for openings; dodge broad monster attacks; parry readable human swings; use Quen when entering an uncertain fight; avoid letting several enemies attack from different sides at once.
- Confirm steel or silver before a fight
- Use short dodges to stay close to a target
- Roll when you need to escape a wide attack or crowded group
- Parry human weapon swings instead of every attack type
- Cast Quen before a dangerous exchange
Use Signs, bombs, and quick items with a purpose
The five basic Signs each answer a different problem. Aard can stagger or knock down suitable targets. Igni pressures enemies with fire and can interrupt some actions. Yrden creates a control area and is especially useful when a supernatural enemy benefits from being slowed or exposed. Axii can disrupt certain enemies and is also used for some dialogue options. Quen provides a protective shield. Choose the Sign that matches the enemy’s behavior, then return to swordplay while stamina recovers.
Hold L1 and select the desired Sign, bomb, potion, oil, crossbow bolt, or pocket item from the radial menu. Release L1, then press R2 to cast the selected Sign or R1 to use the selected quick item. The D-pad consumable slots are separate from the radial menu and should hold reliable healing or emergency items before entering a ruin, cave, or major story battle.
For bombs, select the bomb in the radial menu before throwing it. A quick press of R1 performs the quick use associated with the selected item; the exact throw behavior can depend on the item and current context. For oils, use the radial-menu option to select and apply the oil to the displayed sword, or enable automatic oil application if you prefer the game to handle eligible applications in combat. Always confirm which sword is selected before applying an oil manually.
Checklist: assign a healing item to a D-pad slot; keep a preferred bomb available through L1; use Quen when uncertain; use Yrden for enemies affected by its control field; verify the sword before applying an oil.
- Aard for disruption
- Igni for fire pressure
- Yrden for control and supernatural targets
- Axii for disruption and dialogue opportunities
- Quen for protection
- R1 uses the selected quick item
- R2 casts the selected Sign
Maintain equipment, alchemy, and carrying capacity
Weapon and armor durability decreases during use. Repair damaged equipment with the appropriate repair kit from the Inventory or visit a blacksmith for weapons and an armorer for armor. Repair before a contract, cave, or story battle rather than waiting until the equipment is nearly broken. When comparing replacements, check damage or armor values, level requirements, and useful bonuses instead of keeping every item simply because it has a higher displayed number.
Craft potions and bombs when recipes and ingredients become available. Prepared alchemical items are replenished through meditation when Geralt has the required alcohol-based ingredient, so meditation is part of the normal maintenance loop rather than a way to restore health during an active fight. Do not assume meditation makes every consumable free: ingredients still matter when first crafting an item or when supplies are missing.
Gather herbs, monster parts, alcohol, and crafting materials while traveling, but sell excess junk and outdated weapons or armor to free carrying capacity. Keep witcher gear diagrams and rare crafting components. A temporary weapon with better statistics can be useful while waiting for the next witcher-gear upgrade, but do not sell diagrams merely because the current level requirement is too high.
Before major fights, repair both swords, confirm the armor set, assign healing and bombs, check the oil supply, and meditate if your crafted consumables need replenishing. This routine prevents the common mistake of entering a contract with damaged equipment and inaccessible supplies.
- Repair weapons and armor before major fights
- Keep at least one healing option in a usable slot
- Meditate after crafting when replenishment is needed
- Sell junk and obsolete equipment
- Keep witcher gear diagrams and rare crafting materials
- Check oils, bombs, and sword selection before contracts
Before you move on
- You can draw the steel and silver swords, perform fast and strong attacks, dodge, roll, block, parry, cast each available Sign, and use a quick item without checking the controls.
- You know that L1 opens the radial menu, R1 uses the selected quick item, and R2 casts the selected Sign.
- You have tested Quick Sign Casting and standard radial Sign selection and chosen the method that produces fewer mistakes.
- You can identify when to use steel versus silver, apply or automatically select the appropriate oil, and use Quen, Aard, Igni, Yrden, or Axii for their practical roles.
- Your equipped weapons and armor are repaired, your healing item is assigned, your preferred bomb is accessible, and your crafted potions and bombs can be replenished through meditation when the required alcohol is available.
Prologue & White Orchard — The Tutorial and First Choices
White Orchard is the opening training region and the safest place to learn Witcher Senses, Signs, alchemy, sword combat, mounted travel, looting, contracts, and Gwent. Follow Lilac and Gooseberries into the inn, then complete the local secondary quests and exploration before returning to Vesemir after The Beast of White Orchard. The important departure cutoff is beginning The Incident at White Orchard: this sequence moves Geralt to Vizima and can fail several unfinished White Orchard quests, including Missing in Action and On Death’s Bed. The region contains one witcher contract, Devil by the Well, six Places of Power, optional Gwent cards, and a missable Crystal Skull. White Orchard choices do not determine the campaign’s major ending branches, but they affect immediate rewards and whether some early content is completed.
Reach the inn and secure the early quest leads
Follow Vesemir through the opening combat and ride toward the White Orchard inn at Woesong Bridge. During the opening investigation, use Witcher Senses to pick up Yennefer’s Crystal Skull near the campfire where Geralt and Vesemir first stop. This item is an optional conversation object for a later meeting with Yennefer, but it disappears if you leave the prologue without collecting it.
At the inn, ask the travelers about Yennefer, then speak with the scholar, Aldert Geert. Agree to his Gwent tutorial if you want to begin the card game immediately. Winning gives the Zoltan Chivay card; if you lose, the card can still be obtained later. Before leaving, speak with the innkeeper and check her shop if you want to buy cards or supplies. Read the notice board outside to reveal local quests, including Missing in Action and Contract: Devil by the Well.
- Collect the Crystal Skull before completing The Beast of White Orchard.
- Read the notice board outside the inn.
- Play Aldert Geert for the Gwent tutorial if desired.
- Create a manual save before beginning the local secondary quests.
Complete Missing in Action before the departure sequence
Start Missing in Action from the notice titled Brother Missing or by speaking with Dune. Travel to the marked battlefield and use Witcher Senses to examine the Temerian shields, bodies, and other clues. Follow the white-flower shield trail toward the hut and speak with Dune when the search reveals what happened to Bastien.
The final conversation determines how the survivor is treated, but it does not affect the main campaign’s ending. Complete the quest before returning to Vesemir after the griffin hunt. Leaving for Vizima makes this quest inaccessible, so it belongs on the pre-departure checklist rather than being saved for later exploration.
- Begin Missing in Action from the notice board or Dune.
- Search the battlefield for the shield clues and follow the trail.
- Resolve the quest before starting The Incident at White Orchard.
Learn alchemy and complete the local follow-up quests
Speak with Tomira during The Beast of White Orchard when the main quest sends you to investigate the griffin’s victims. Gather the buckthorn required for the hunt from the riverbed, then return to Tomira to advance the objective. If you want the early healing tutorial, complete On Death’s Bed by preparing the potion and giving it to Lena before leaving White Orchard; this quest also becomes unavailable after the departure sequence.
Collect herbs beside roads, fields, and ruins, and loot containers after checking for enemies. Craft Swallow when its formula and ingredients are available. Crafted potions and bombs are replenished through meditation when Geralt has strong alcohol in his inventory. Roach is available from the beginning; a saddle and saddlebags are optional equipment upgrades, not prerequisites for horse travel or fast travel.
- Visit Tomira during the griffin investigation.
- Complete On Death’s Bed if you want the optional quest and its outcome recorded.
- Craft Swallow or another useful preparation when the ingredients are available.
Finish Contract: Devil by the Well
Read the Devil by the Well notice and speak with Odolan, then travel south to the abandoned village of Hovel. Search the houses and well area with Witcher Senses. Examine the clues inside the eastern house, inspect the rope at the well, and enter the water to recover the bracelet. Leave the well, use the bracelet with the remains, and follow the quest objectives to summon the noonwraith.
This is a specter encounter. Yrden creates the opening needed to damage the noonwraith while she is material, and Specter Oil or Moon Dust can improve the fight if available. Keep attacks short, avoid chasing her while she is immaterial, and recast Yrden when the sign expires. Loot the trophy after the battle and return to Odolan for payment and the quest resolution.
- Recover the bracelet from the well.
- Use Yrden during the noonwraith fight.
- Return to Odolan after collecting the trophy.
- Do not postpone the contract beyond the White Orchard departure sequence.
Use Places of Power to build the opening character
White Orchard has six Places of Power. Activating each one grants an ability point the first time it is used and temporarily increases the intensity of its associated Sign. Their locations include areas near the abandoned village, the sawmill and crypt, the northern road, and other guarded or monster-populated parts of the region. Approach each marker carefully, save before entering dangerous areas, and clear or bypass nearby enemies before interacting with the stone.
Spend the ability points after activating the stones. Quen is a dependable first defensive investment, while Igni helps against vulnerable groups and Yrden supports the Devil by the Well encounter. Places of Power do not directly upgrade Signs by themselves; they provide points that you can spend in the character menu, along with a temporary Sign-strength bonus.
- Activate all six White Orchard Places of Power if you are pursuing early skill points or full regional completion.
- Spend the resulting ability points.
- Repair damaged swords and replace weak equipment before the griffin hunt.
Prepare for the griffin and leave only after cleanup
Return to Commander Peter Saar Gwynleve at the Nilfgaardian garrison to advance The Beast of White Orchard. Complete the investigation objectives involving the witnesses, the griffin’s attack site, Tomira, and Mislav, then collect the buckthorn and meet Vesemir at the hunting location. Equip your best steel and silver swords, repair them, place food or Swallow in a quick slot, and prepare Thunderbolt or any suitable oil if available.
During the griffin fight, use the crossbow when it is airborne or out of sword range. Dodge its charges, keep moving around the battlefield, and attack briefly after it lands. Do not remain underneath it during the dive or chase it into an unsafe position. After the griffin dies, return to the White Orchard inn and speak with Vesemir only after completing the quests and exploration you intend to keep. That conversation begins The Incident at White Orchard, followed by the fight and departure to Vizima. Make a final manual save before speaking with Vesemir.
- Complete The Beast of White Orchard and defeat the griffin.
- Finish Missing in Action, On Death’s Bed, and Devil by the Well if desired.
- Complete the Gwent tutorial and buy any White Orchard cards you want before the inn changes.
- Activate desired signposts and Places of Power.
- Save before speaking with Vesemir after the griffin hunt.
- Complete The Incident at White Orchard and continue to Vizima.
Before you move on
- Lilac and Gooseberries, The Beast of White Orchard, and The Incident at White Orchard are complete.
- The griffin has been defeated and Geralt has reached Vizima.
- Missing in Action and Contract: Devil by the Well are resolved before departure.
- On Death’s Bed is complete if you chose to pursue it.
- The Crystal Skull was collected if you want its later optional dialogue.
- The Gwent tutorial was completed and any desired White Orchard cards were purchased before the inn’s departure event.
- The six White Orchard Places of Power you intended to collect have been activated.
- A manual save exists immediately before the final conversation with Vesemir and another after arriving in Vizima.
References for this chapter
- The Witcher 3: Wild Hunt - Complete Edition, PlayStation Store
- The Witcher 3: Wild Hunt — Complete Edition is now in stores! — CD PROJEKT RED
- Lilac and Gooseberries Walkthrough — Game8
- Contract: Devil by the Well Walkthrough — Game8
- Missing in Action Walkthrough — Game8
- The Incident at White Orchard — Witcher Wiki
- Place of Power — Witcher Wiki
- Missing in Action — Prima Games
Velen — The Bloody Baron Cluster and Early Main Quests
Velen’s main investigation follows two connected trails: the Bloody Baron at Crow’s Perch and the search for Ciri in Crookback Bog. Start with The Nilfgaardian Connection and Hendrik’s evidence, then work through Family Matters, Hunting a Witch, Wandering in the Dark, Ladies of the Wood and The Whispering Hillock. The Hillock decision changes the fate of Downwarren, the Crookback Bog orphans, Anna and the Baron, so make a manual save before committing to it. Use nearby contracts and Witcher gear hunts to improve Geralt, but do not attempt to clear every question mark. Once the main Velen investigation and any desired low-level side content are complete, continue to Novigrad.
1. Begin the Velen investigation at the Nilfgaardian camp
Follow The Nilfgaardian Connection to the Nilfgaardian Army Group Center Camp. Speak with the soldiers and follow the quest marker to Heatherton. Use Witcher Senses in the abandoned village, then search Hendrik’s body and room for his notes. The evidence identifies two relevant leads: the Bloody Baron at Crow’s Perch and the witch-related trail leading toward Crookback Bog.
Activate signposts at the camp, Heatherton and any villages encountered along the route. Signposts are required for fast travel, so interact with them as you pass rather than planning a separate sweep later. Ignore distant question marks unless they are close to your current route; they are optional exploration, not prerequisites for the Velen story.
- Complete The Nilfgaardian Connection.
- Search Hendrik’s body and room at Heatherton.
- Activate useful signposts near the investigation route.
2. Start Family Matters at Crow’s Perch
Travel to Crow’s Perch and speak with the Bloody Baron to begin Family Matters. Search the Baron’s rooms with Witcher Senses, examining the bed, furnishings and other highlighted evidence. When the objective moves outside, investigate the stable and surrounding grounds. The clues establish that Anna and Tamara have disappeared and that the Baron is withholding part of the story.
After the confrontation with the botchling, you can choose the ritual that transforms it into a lubberkin or the path that kills it and uses its blood for the pellar’s ritual. Both choices continue the investigation, but the lubberkin route gives Geralt a direct tracking sequence. Follow the resulting clues until the quest sends you toward the fishing village and then Oxenfurt. Tamara’s location in Oxenfurt is part of the investigation, not the end of Family Matters.
- Investigate the Baron’s rooms and stable.
- Resolve the botchling encounter.
- Find Tamara in Oxenfurt when the quest directs you there.
3. Complete Keira Metz’s Velen sequence
When Family Matters directs you to investigate the remaining leads, travel to Keira Metz’s hut and complete Hunting a Witch. Continue immediately into Wandering in the Dark. This sequence supplies the information needed to connect the witch trail to Crookback Bog and unlocks the next major portion of the Velen investigation.
During the cave sequence, keep the active quest selected and use Witcher Senses whenever the objective asks you to find a route or clue. Search side chambers after combat if you want additional loot, but do not leave the ruins until the quest objectives are complete. Afterward, return to the Baron-related quest line when the journal points you toward Ladies of the Wood.
- Complete Hunting a Witch.
- Complete Wandering in the Dark.
- Confirm that Ladies of the Wood is available in the quest log.
4. Investigate Crookback Bog and prepare for the Hillock decision
Follow Ladies of the Wood to Downwarren and Crookback Bog. Track the trail, speak with the villagers and continue through the objectives involving Johnny and the Ladies of the Wood. The quest eventually connects to The Whispering Hillock, which may appear as a separate secondary quest if you discovered the Ancient Oak early or as part of the main investigation.
Make a manual save before completing the Hillock’s final objective. If you choose the ritual route, collect the required components and complete the sequence at the Ancient Oak. If you reject the spirit’s bargain or kill it through the available objective, the resulting fate is different. There is no outcome that preserves every group: the decision affects Downwarren, the orphans, Anna and the Baron’s later fate.
Do not treat a guide’s preferred result as a required campaign solution. Choose the consequence you want, then finish Ladies of the Wood and Ciri’s Story: Fleeing the Bog.
- Reach Downwarren and Crookback Bog through Ladies of the Wood.
- Make a manual save before the final Hillock decision.
- Complete The Whispering Hillock and Ciri’s Story: Fleeing the Bog.
5. Return to Crow’s Perch and close the Baron cluster
After the Crookback Bog investigation, return to Crow’s Perch when the quest marker directs you there. Finish the remaining Family Matters objectives and speak to the Baron or the pellar as required by your chosen route. The scenes and available characters differ according to the Hillock decision, so follow the current journal objective rather than searching for a universal location.
Complete Return to Crookback Bog when it becomes available. This follow-up resolves the Baron’s remaining involvement in the bog and determines the immediate outcome for Anna, the Baron and other connected characters. Some NPCs can leave or become unavailable afterward. If you want to test a different result, reload the manual save made before the Hillock decision; later travel cannot reliably undo these consequences.
- Finish the remaining Family Matters objectives.
- Complete Return to Crookback Bog if it appears.
- Record the outcome before beginning a large amount of optional cleanup.
6. Use practical contracts and gear hunts to strengthen Geralt
Take notice-board contracts near your current route and compare their recommended levels with Geralt’s level. Contract: Shrieker at Crow’s Perch is an early hunt, while Contract: Jenny o’ the Woods begins in Midcopse and is suitable once Geralt is stronger. Read the bestiary entry before each final encounter, prepare the indicated oil or bomb when available, and negotiate the reward before accepting payment.
Contract: Missing Brother is a much higher-level Velen contract, associated with the area southwest of the Border Post. It is not an early upgrade route; leave it for later rather than forcing the fight underleveled. Patrol Gone Missing and other nearby contracts can be useful if their levels match your progress.
Check treasure-hunt notices and diagrams for Griffin School equipment as you travel through Velen. Visit armorers and blacksmiths to compare replacements, repair worn equipment before caves or forts, and sell surplus weapons only after checking whether dismantling them provides a useful crafting component. Do not spend all crowns on ordinary gear that will soon be replaced by quest rewards or diagrams.
- Complete Shrieker and Jenny o’ the Woods when their levels are appropriate.
- Defer Missing Brother until its recommended level is reasonable.
- Repair equipment and pursue affordable Griffin School diagrams.
7. Leave Velen for Novigrad at a controlled transition point
Novigrad can be visited before Velen is fully resolved, and doing so does not normally break the campaign. For the clearest story order, first complete The Nilfgaardian Connection, Family Matters, Hunting a Witch, Wandering in the Dark, Ladies of the Wood, The Whispering Hillock and the available Return to Crookback Bog follow-up. Then finish nearby contracts and secondary quests that are at or below your level.
You do not need to clear every Velen question mark, remote treasure or high-level contract before leaving. When the Baron and Crookback Bog investigation is complete, follow the Novigrad main-quest marker. Keep the pre-Hillock save and, if desired, a second save before the final Baron-family scenes so you can revisit the consequences without replaying the entire region.
- Finish the principal Velen quest cluster.
- Complete only the nearby optional content appropriate to your level.
- Keep manual saves before the Hillock and Baron-family outcomes.
Before you move on
- The Nilfgaardian Connection is complete and Hendrik’s evidence has been examined.
- Family Matters, Hunting a Witch, Wandering in the Dark and Ladies of the Wood are complete.
- The Whispering Hillock decision has been resolved and Ciri’s Story: Fleeing the Bog has finished.
- Return to Crookback Bog has been completed if it was added to the journal.
- Geralt has repaired equipment and completed suitable nearby contracts or gear hunts.
- A manual save remains before the Hillock decision and, preferably, before the final Baron-family scenes.
References for this chapter
- The Witcher 3: Wild Hunt - Complete Edition, PlayStation Store
- The Witcher 3: Wild Hunt — Complete Edition is now in stores! — CD PROJEKT RED
- Family Matters — The Witcher 3: Wild Hunt Walkthrough, Gamer Guides
- Ladies of the Wood — The Witcher 3: Wild Hunt Walkthrough, Gamer Guides
- The Whispering Hillock — The Witcher 3: Wild Hunt Walkthrough, Gamer Guides
- The Witcher 3 contracts, Witcher Wiki
Novigrad — Politics, Witch-Hunts and Main Investigation
Novigrad’s main investigation runs through Triss, Dandelion, Whoreson Junior, Dijkstra and the city’s criminal and political factions. The safest route is to complete the principal quests in parallel, because Get Junior and Count Reuven’s Treasure unlock information for each other. Several secondary quests can fail when you reach specific stages of Get Junior, the later political quests, or the Isle of Mists. Before leaving for Skellige and eventually starting the Isle of Mists, finish the Novigrad character quests you want, secure your intended romance outcome, and make a separate save. Use negotiation where it preserves access to objectives, but do not assume every encounter can be completed peacefully.
1. Start the Novigrad investigation
After entering the city, take the main quest Pyres of Novigrad and follow its objective markers through the southern districts. Speak with the contacts connected to Triss and the King of Beggars. This establishes the route toward Dandelion and opens the next Novigrad main quests.
Complete Novigrad Dreaming at the haunted house. Search the building with Witcher Senses, inspect the relevant clues, then follow the quest’s instructions through the cellar and the curse resolution. When the quest sends you back into the city, update the quest log before travelling so that you do not overlook the next contact.
- Complete Pyres of Novigrad.
- Complete Novigrad Dreaming.
- Create a manual save before beginning the Dandelion investigation.
2. Follow Broken Flowers and open both investigations
Begin Broken Flowers at the Rosemary and Thyme. Visit the women listed in Dandelion’s notebook and question them about his movements. Return to the Rosemary and Thyme whenever the objective requires it; the quest advances through several interviews rather than one continuous destination.
When Broken Flowers points you toward Whoreson Junior, begin Get Junior. The quest leads through the bathhouse and introduces the casino and arena objectives. During the investigation, asking the appropriate questions about Dandelion starts Count Reuven’s Treasure. Treat these as connected quests and switch between them when one quest’s objective naturally supplies information needed by the other.
- Complete the required interviews in Broken Flowers.
- Start Get Junior.
- Start Count Reuven’s Treasure when the investigation presents the opportunity.
3. Protect The Gangs of Novigrad before advancing Get Junior
If you intend to complete The Gangs of Novigrad, speak with Cleaver before meeting Roche’s contact during the later part of Get Junior. The quest can fail when that Get Junior stage is triggered if Cleaver has not been approached first. Accepting Cleaver’s assistance changes how the casino and arena objectives can be handled, so make a save before committing to that route.
The casino and arena each permit more than one approach. You can fight through hostile groups, use dialogue where the game offers it, or follow the criminal route opened through Cleaver. Negotiation is useful for avoiding unnecessary combat, but it is not a universal stealth solution. Keep Quen available for ambushes, use dodge rather than repeatedly blocking fast attacks, and avoid pulling several rooms of enemies at once.
- Speak with Cleaver before reaching Roche’s contact in Get Junior if The Gangs of Novigrad matters to you.
- Save before entering the casino and before entering the arena.
- Complete both Get Junior investigation locations and report back as directed.
4. Complete Count Reuven’s Treasure carefully
Follow Count Reuven’s Treasure through Dijkstra’s bathhouse and the sewer investigation with Triss. Use Witcher Senses on the trail and examine every marked clue before leaving an objective area. The route includes confined fights and dialogue with political consequences, so keep healing items and Quen accessible rather than relying on sword attacks alone.
When the investigation reaches the witch-hunter section, read the available dialogue before choosing threats, cooperation or deception. Some objectives can be approached in different ways, but the information you obtain and the later political relationships are more important than clearing every guard. Finish the quest’s required reporting steps instead of leaving after the sewer portion.
- Complete the bathhouse and sewer investigation.
- Recover and report the required evidence.
- Keep a save before the major interrogation and political decisions.
5. Finish Triss’s Novigrad storyline
Complete A Matter of Life and Death at the Vegelbud estate. Follow the masquerade objectives, keep up with the escape sequence, and check the quest log after the estate section because the next Triss quest is not completed automatically by merely leaving the area.
Start and complete Now or Never when it becomes available if you want Triss present for later events or if you want to settle the romance decision. Follow Triss through the city and sewers, then make a separate save before the final conversation. Do not leave this quest until after the Isle of Mists; that later point can remove unfinished character and ally content.
- Complete A Matter of Life and Death.
- Complete Now or Never before beginning the Isle of Mists.
- Preserve a separate save for the intended Triss outcome.
6. Rescue Dandelion and finish the major city stories
Continue through The Play’s the Thing and A Poet Under Pressure. These quests resolve the central Dandelion investigation and direct Geralt toward the next part of the search for Ciri. Complete Cabaret and Carnal Sins if you want the full Dandelion and Priscilla storyline; do not assume the main quest alone will finish those character arcs.
Before advancing into the late-game chain, review available Novigrad and Oxenfurt quests. An Eye for an Eye, A Dangerous Game, Redania’s Most Wanted, Gangs of Novigrad and character-linked Gwent quests are among the content that should be completed before their individual failure points or before the Isle of Mists. Redania’s Most Wanted also belongs to the broader political sequence, so do not postpone every Redanian quest until the endgame.
- Complete The Play’s the Thing.
- Complete A Poet Under Pressure.
- Complete Cabaret and Carnal Sins if desired.
- Finish the available Novigrad political, ally and Gwent quests that you want in this playthrough.
7. Use the city’s services without wasting resources
Use armorers for armor repairs and armor-related sales, and use blacksmiths for weapon repairs and weapon sales. Check merchants, herbalists and innkeepers for diagrams, ingredients, food and crafting materials, but compare prices before spending crowns on random upgrades. Dismantle junk only when the resulting materials are useful; otherwise selling it can provide more immediate funds.
Prioritize a repaired silver sword, appropriate oils for the monsters in your current quests, healing supplies and equipment that fits your build. You do not need to buy every rune or glyph in Novigrad. Keep rare crafting components and Witcher gear diagrams unless you have verified that they are duplicates or irrelevant to your planned equipment.
- Repair active weapons and armor.
- Sell weapons to blacksmiths and armor to armorers where practical.
- Restock healing items, alchemy ingredients and useful oils.
- Keep rare diagrams and crafting materials.
8. Leave Novigrad only after the cutoff check
When the main story points you toward Skellige, do not immediately start the Isle of Mists later in the campaign. First inspect the full quest log and finish the character quests, romance quest and political missions you want. The Isle of Mists displays a warning because several unfinished quests can fail or become unavailable after that point.
Make two manual saves: one before beginning the Isle of Mists and one after completing the Novigrad preparation quests. Confirm that Triss’s quest is complete, The Gangs of Novigrad has not failed unintentionally, and your intended ally and political quests are resolved. Then repair your gear, restock consumables and continue the main campaign.
- Confirm the desired Novigrad quests are complete rather than merely active.
- Check that The Gangs of Novigrad has not failed unexpectedly.
- Finish Now or Never and the desired political or ally quests.
- Create a pre-Isle-of-Mists backup save.
- Leave with repaired gear and stocked consumables.
Before you move on
- Pyres of Novigrad and Novigrad Dreaming are complete.
- Broken Flowers, Get Junior and Count Reuven’s Treasure are complete.
- The Play’s the Thing and A Poet Under Pressure are complete.
- A Matter of Life and Death and Now or Never are complete, with the intended Triss outcome preserved in a separate save.
- The Gangs of Novigrad, Cabaret, Carnal Sins, An Eye for an Eye, A Dangerous Game, Redania’s Most Wanted and other desired city quests are complete before the Isle of Mists cutoff.
- Weapons and armor are repaired, healing supplies and oils are stocked, and a pre-Isle-of-Mists backup save exists.
References for this chapter
- The Witcher 3: Wild Hunt - Complete Edition, PlayStation Store
- Get Junior — The Witcher 3: Wild Hunt Walkthrough, Neoseeker
- The Witcher 3: Wild Hunt FAQ/Walkthrough, Neoseeker
- The Gangs of Novigrad, Witcher Wiki
- The Isle of Mists quest reference and cutoff list
- Count Reuven’s Treasure — Novigrad Walkthrough, Gamer Guides
- Get Junior — The Witcher 3: Wild Hunt Walkthrough, Gamepressure
Temerian Riverlands & Oxenfurt: Mid-Campaign Consolidation
Use this chapter to finish important Velen, Novigrad, Oxenfurt, romance, ally, and political quests before the main campaign reaches The Isle of Mists. Do not treat every question mark or treasure hunt as urgent: the quests most worth protecting are those involving named companions, romances, political factions, Gwent cards, or future Kaer Morhen support. Complete Keira Metz’s storyline carefully, resolve Triss’s Novigrad sequence, and check the journal for Roche, Ves, Dijkstra, Thaler, and other ally-related objectives. Keep a manual save before irreversible conversations, repair equipment, and group nearby contracts or treasure hunts into signpost-based routes. When the preparation is complete, ordinary exploration may remain, but no important character or political quest should be left unattended before starting The Isle of Mists.
1. Finish the remaining Velen character quests
Return to Crow’s Perch, Midcopse, and the surrounding Velen locations and review the Secondary Quests tab rather than relying only on map markers. Resolve unfinished parts of the Bloody Baron and Tamara arc, including Family Matters and the Baron-related follow-up quests if they are still active. These quests are more important than routine treasure markers because their outcomes determine which characters remain available and how later scenes are presented.
Complete Keira Metz’s sequence in its intended order: An Invitation from Keira, A Towerful of Mice, A Favor for a Friend, and For the Advancement of Learning. At the end of For the Advancement of Learning, make a manual save before the decisive conversation. If you want Keira available as a Kaer Morhen ally, use the dialogue route that keeps her alive and directs her toward Kaer Morhen. If you deliberately choose another outcome, record it in your completion notes because it changes later support and removes some optional scenes.
- Review the Bloody Baron and Tamara quests in the journal.
- Complete Keira Metz’s four-quest sequence.
- Create a manual save before the final Keira conversation.
- Decide whether Keira’s survival and Kaer Morhen recruitment matter to your intended run.
2. Protect Triss-related quests before starting her major sequence
Before beginning A Matter of Life and Death, inspect your Novigrad quest log for the Soldier Statuette and Nobleman Statuette quests. These statuettes are connected to earlier Novigrad content and can become temporarily inaccessible once A Matter of Life and Death begins. If either quest is available and you want the associated scenes, complete it first rather than assuming you can return later.
Then complete A Matter of Life and Death and follow it with Now or Never if you want to preserve Triss’s romance and mage-rescue storyline. Now or Never must be completed before The Isle of Mists; leaving it active until that point causes it to fail. The romance decision occurs during this chain, so save beforehand if you want to compare outcomes without replaying the entire Novigrad section.
- Complete the Soldier Statuette and Nobleman Statuette quests if available.
- Finish A Matter of Life and Death.
- Finish Now or Never before The Isle of Mists.
- Keep a separate save before the major Triss decision.
3. Resolve Dandelion, Priscilla, and companion quests
Complete Cabaret before attempting to close Dandelion’s Novigrad storyline. Carnal Sins follows from that character arc and should also be completed before the campaign moves into its late Act II sequence if you want the full investigation and its consequences. These quests are not required to reach the main ending, but they are named-character quests and are safer to resolve now than to leave among ordinary cleanup objectives.
Review other active quests involving Zoltan, Dandelion, Shani, and Novigrad’s mages. Some are available only after particular main or secondary quests, so follow the current journal objective and do not assume that a missing marker means the quest is permanently lost. Complete any Gwent-related character quest you care about before advancing major Novigrad events, especially if you are pursuing the card-collection trophy or a complete optional-content run.
- Complete Cabaret and Carnal Sins if they are active.
- Review named-character quests involving Dandelion, Zoltan, Shani, and the Novigrad mages.
- Finish missable Gwent opportunities before major quest transitions.
4. Complete political and ally prerequisites while they are available
If An Eye for an Eye, A Deadly Plot, or Redania’s Most Wanted is in the journal, treat those quests as priority political content. Their availability depends on earlier choices and quest progress, so do not expect every playthrough to display the same objectives. Complete the quests that your save provides and retain a manual save before major political conversations.
These quests matter beyond their immediate rewards. They can affect later political developments and the availability of Reason of State. The exact chain varies with earlier decisions, but the safe procedure is consistent: before starting The Isle of Mists, finish every active quest involving Roche, Ves, Dijkstra, Thaler, Triss, or a named mage rescue. Do not abandon those quests merely because their recommended levels are below Geralt’s current level.
- Review the entire Secondary Quests tab for political objectives.
- Complete available Roche, Ves, Dijkstra, Thaler, and mage-related quests you want preserved.
- Save before irreversible political decisions.
- Do not use low recommended level as a reason to abandon an important character quest.
5. Build practical regional routes for gear and money
Use signposts to work in short loops instead of crossing Velen or Novigrad for one marker. A Crow’s Perch and Midcopse loop covers central Velen; an Oxenfurt, Carsten, and Novigrad loop handles most urban objectives. Read notice boards to reveal contracts and points of interest, then select only tasks near Geralt’s level. High-level monster contracts and isolated question marks can wait until stronger equipment is available.
Prioritize Witcher gear diagrams and crafting components that match your build. Visit blacksmiths and armorers when passing through towns, compare their inventories, and repair equipment before contracts or story fights. Keep rare monster parts, meteorite ore, runestones, glyphs, and other components used by diagrams unless you urgently need money. Sell ordinary surplus weapons and armor, but do not dismantle or sell a rare component without checking its crafting uses first.
- Repair weapons and armor before difficult fights.
- Group nearby objectives by signpost and region.
- Prioritize gear diagrams that fit your build.
- Keep rare crafting components and useful runestones or glyphs.
6. Leave routine exploration for a deliberate cleanup pass
After the named-character and political quests are complete, clear nearby contracts and treasure hunts that are close to Geralt’s level. This provides experience, crowns, alchemy ingredients, and practice with oils, bombs, and signs without delaying the campaign. You do not need to clear every Velen question mark before sailing to Skellige, and remote smugglers’ caches are generally a poor reason to interrupt the story.
Before beginning The Isle of Mists, check the quest log one final time. The game warns that some quests will fail or become unavailable, but the warning is not a substitute for reviewing the journal. Create a permanent manual save before committing to the island. At that point, it is acceptable for the remaining objectives to be ordinary contracts, treasure hunts, races, fistfights, or high-level exploration rather than unresolved quests involving companions, romances, political factions, or future allies.
- Finish nearby contracts and treasure hunts that suit Geralt’s level.
- Leave distant or high-level question marks for later.
- Review the Secondary Quests tab before The Isle of Mists.
- Create a permanent pre-Isle-of-Mists save.
- Confirm that no important companion, romance, political, or ally quest remains active.
Before you move on
- The Bloody Baron and Tamara content is resolved or deliberately abandoned.
- Keira Metz’s storyline is complete, and her intended fate is preserved in a manual save.
- A Matter of Life and Death and Now or Never are complete if Triss’s storyline is being pursued.
- Cabaret and Carnal Sins are complete if Dandelion and Priscilla’s Novigrad arc is being preserved.
- Available Roche, Ves, Dijkstra, Thaler, mage-rescue, and other political quests have been reviewed and completed where desired.
- Geralt has repaired equipment, a coherent upgraded gear setup, and enough alchemy supplies for the next major story sequence.
- The final pre-Isle-of-Mists save exists, and the remaining Velen or Oxenfurt objectives are routine exploration rather than unresolved character prerequisites.
References for this chapter
- The Witcher 3: Wild Hunt - Complete Edition, PlayStation Store
- The Isle of Mists quest reference and cutoff list
- A Matter of Life and Death, Witcher Wiki
- Now or Never — Witcher Wiki
- The Witcher 3 secondary quests — Witcher Wiki
- A Deadly Plot and political quest prerequisites — Gamers.Wiki
- Now or Never walkthrough — Gamer Walkthroughs
Skellige: Arrival, Faction Tensions, and Island Hopping
After Destination: Skellige, establish Kaer Trolde as your base and complete The King Is Dead – Long Live the King. For the full succession route and the best ally preparation, finish Possession and The Lord of Undvik before starting King’s Gambit. During King’s Gambit, help either Cerys or Hjalmar; do not leave both siblings to handle the investigation alone, because that prevents Coronation and can leave Brothers in Arms: Skellige unresolved. Complete Coronation, then return during Brothers in Arms: Skellige to recruit Hjalmar and ask Ermion for help. Before King’s Gambit, complete The Cave of Dreams if you want that optional quest, because it becomes unavailable afterward. Use boats only to connect discovered harbors and signposts, and treat remote sea markers, caves, and ruins as optional until their recommended levels are appropriate.
1. Reach Kaer Trolde and prepare the archipelago route
Complete Destination: Skellige to arrive at Kaer Trolde harbor. Follow the objective into the keep and complete The King Is Dead – Long Live the King. This sequence introduces Yennefer’s investigation and opens the main Skellige quest cluster.
After the funeral sequence, use Kaer Trolde harbor and the keep as your supply base. Read the notice board, activate every nearby signpost, repair both swords and your armor, and sell excess weapons before crossing to another island. Buy or craft food, healing items, and the oils relevant to the enemies shown in your quest log. When sailing, use the world map to travel between discovered harbors whenever possible; boats are mainly for reaching isolated coastlines and question marks, not for replacing fast travel.
- Complete The King Is Dead – Long Live the King.
- Read the Kaer Trolde notice board.
- Activate the harbor, keep, and nearby road signposts.
- Repair equipment before taking a boat to another island.
2. Complete Possession and The Lord of Undvik before King’s Gambit
Take Possession from Crach’s request and travel to Svorlag on Spikeroog. Speak with Udalryk and the villagers, follow the investigation to Eiric and the abandoned family home, then use Witcher Senses to find Cerys inside. Continue the quest’s investigation of the hym and follow Cerys’s instructions for whichever resolution you choose. Do not leave the quest half-finished when you intend to unlock the succession chain.
For The Lord of Undvik, speak with the relevant people in the New Port inn if you want the extra information, then sail or fast travel to Undvik. Track Hjalmar’s expedition through the wreckage, abandoned settlements, and the trail leading toward the ice giant. At the giant’s camp, Vigi the Loon is in a cage. If you want to save him, find the key in the nearby chest and reach the cage without stepping on the snow, because the noise wakes the giant and can kill Vigi. Folan can also survive if you keep him with Hjalmar. Finish the ice giant encounter and speak with Hjalmar afterward.
Both Possession and The Lord of Undvik are prerequisites for the full King’s Gambit route. They also contribute to the Skellige ally objective in Brothers in Arms: Skellige. Complete them before advancing to the Isle of Mists; their failure cutoff is much later than the start of the Skellige arc, but postponing them creates unnecessary risk.
- Complete Possession in Svorlag.
- Complete The Lord of Undvik on Undvik.
- Save Vigi by taking the cage key without walking on the snow if you want the bonus ally presence later.
- Keep Folan alive during The Lord of Undvik if possible.
3. Finish missable Skellige content before starting King’s Gambit
If you want optional story content, complete The Cave of Dreams before starting King’s Gambit. The quest takes place in a cave in southwestern Ard Skellig and is associated with Blueboy Lugos. It becomes unavailable once King’s Gambit has begun, so treat it as a pre-succession objective rather than a post-arc cleanup task.
You can also take nearby contracts while the region is open. Contract: Muire D’Yaeblen begins from the Kaer Trolde notice board and leads into an investigation near the harbor. Contract: The Phantom of Eldberg begins from the notice board at Arinbjorn and sends you to the lighthouse and haunted settlement on Faroe. Contract: Skellige’s Most Wanted begins from the Fyresdal area. These quests are optional for the main campaign, but they provide experience, coin, alchemy ingredients, and opportunities to practice fighting wraiths, drowners, sirens, and other island enemies.
- Complete The Cave of Dreams before King’s Gambit if you want it.
- Pick up Muire D’Yaeblen at Kaer Trolde.
- Pick up The Phantom of Eldberg at Arinbjorn.
- Check the Fyresdal notice board for Skellige’s Most Wanted.
4. Resolve King’s Gambit and make the succession advance
After Possession and The Lord of Undvik are complete, return to Kaer Trolde and begin King’s Gambit. Investigate the feast attack and follow the resulting objectives. When the game asks whether to help Cerys or Hjalmar, choose one of them and complete that route. The Cerys route emphasizes examining evidence and exposing the plot. The Hjalmar route sends you after the surviving berserkers and resolves the crisis through a direct hunt.
Do not choose the option that leaves both siblings to investigate alone if you want Coronation and the full Brothers in Arms objective. That outcome can prevent Coronation from starting, leave the succession objective stuck, and remove the siblings’ normal support path. Once King’s Gambit is completed through either sibling’s route, begin and finish Coronation at Gedyneith. The ruler may be Cerys or Hjalmar depending on your choice; either completed route is valid for campaign progression, but the choice changes Skellige’s later political state.
Make a manual save before King’s Gambit and another before choosing Cerys or Hjalmar. This preserves the succession alternatives without replaying the preceding island quests.
- Start King’s Gambit only after Possession and The Lord of Undvik are complete.
- Choose either Cerys or Hjalmar during the investigation.
- Complete Coronation at Gedyneith.
- Keep a manual save before the succession choice.
5. Fight safely on islands, in caves, and at sea
Flying enemies are common near coasts. Keep the crossbow equipped for sirens and ekhidnas: shoot them down, then finish them with the silver sword when they land. Quen gives you a safe opening against mixed groups, while Yrden can help against certain supernatural enemies and confined cave encounters. Use bombs when several enemies cluster, and apply the correct oil before entering a contract target’s arena.
Before entering a remote ruin, cave, or guarded site, compare its recommended level with Geralt’s current level. Skellige includes high-level locations that are not intended to be cleared immediately. Mark them and return later instead of burning durability and consumables on repeated deaths. Search caves with Witcher Senses, inspect ledges and side passages, and check whether a treasure-hunt objective points to a specific diagram before abandoning a site.
Prioritize Witcher gear treasure hunts near your level over random sea markers. The archipelago contains useful diagrams in ruins, caves, forts, and shipwreck areas, but clearing every question mark is optional and does not advance the search for Ciri. Boats can be damaged by collisions and hostile creatures; if a fight starts at sea, use the crossbow from the boat or disembark at a safe beach before engaging.
- Carry the crossbow for sirens and ekhidnas.
- Use Quen or Yrden before entering tight cave fights.
- Apply monster oils before contract encounters.
- Mark over-level ruins and caves for later.
- Use fast travel between discovered harbors whenever practical.
6. Complete Brothers in Arms: Skellige before the Isle of Mists
When Brothers in Arms: Skellige becomes available during the ally-gathering phase, return to Kaer Trolde and speak with the relevant characters. Ermion agrees to help. Crach cannot leave Skellige for the battle, but completing the required quests allows him to provide the Winter’s Blade. Hjalmar can be recruited after the succession is settled through King’s Gambit and Coronation. If Cerys becomes queen, she supports Geralt by sending Hjalmar rather than attending the battle herself.
If you saved Folan and Vigi during The Lord of Undvik, they can accompany Hjalmar as additional fighters. These are bonus results of the Undvik quest, not replacements for completing the succession chain. Confirm each available ally’s dialogue and quest objective before leaving Skellige.
The Skellige chapter is complete when the succession has produced a ruler, Coronation is finished, the Brothers in Arms: Skellige objective is resolved as far as your choices allow, and all desired contracts or treasure hunts are either completed or deliberately marked for later. Make a final save before starting the Isle of Mists, because that transition can fail or lock out several unfinished secondary quests.
- Finish Coronation before attempting the Skellige recruitment objective.
- Recruit Hjalmar during Brothers in Arms: Skellige.
- Ask Ermion for help.
- Confirm the fate of Folan and Vigi if you pursued the full Undvik rescue.
- Create a backup save before starting the Isle of Mists.
Before you move on
- The King Is Dead – Long Live the King is complete.
- Possession and The Lord of Undvik are complete.
- The Cave of Dreams is complete if optional missable content is desired.
- King’s Gambit is complete with either Cerys or Hjalmar chosen.
- Coronation is complete and a ruler of Skellige has been established.
- Desired Skellige contracts and Witcher gear hunts are complete or intentionally reserved for later.
- Brothers in Arms: Skellige has no unresolved succession objective before the Isle of Mists.
- A manual or backup save preserves the preferred succession outcome and ally state.
References for this chapter
- The Witcher 3: Wild Hunt Complete Edition Guide - Prima Games
- King's Gambit | Witcher Wiki
- Brothers In Arms: Skellige | Witcher Wiki
- The Lord of Undvik - The Witcher 3: Wild Hunt Walkthrough
- Possession Walkthrough and Best Choice - The Witcher 3
- The Cave of Dreams Walkthrough - The Witcher 3
- Skellige Isles Witcher Contracts - The Witcher 3: Wild Hunt Walkthrough
- Skellige Witcher Diagrams Walkthrough
Contracts, Gwent, and Resource Economy
Use contracts and short exploration loops to keep Geralt supplied without delaying the main campaign. Read notice boards, accept nearby work, investigate each monster with Witcher Senses, then prepare the matching oil, bomb, sign, repairs, and healing items before entering the lair. Sell ordinary equipment to suitable merchants, dismantle items that provide rare crafting components, and store alternate gear instead of carrying it everywhere. Gwent is optional for the story, but early practice prevents a difficult collection backlog. Buy available cards, challenge named players, and protect quest-linked matches before major story transitions. A practical regional loop is to complete one or two level-appropriate contracts, loot useful sites, visit a craftsman, restock alchemy, and return to the main quest.
Use notice boards to build a sensible contract route
At each settlement, inspect the notice board before leaving. This reveals contracts and other local work, while some contract givers can also be found directly in the world. Accepted contracts appear in the quest log with a recommended level and region. Accept nearby notices together, but activate the contract you are currently following so the objective markers remain clear.
Prioritize contracts close to Geralt’s level and those that overlap with your current destination. White Orchard’s Contract: Devil by the Well is a useful early investigation and combat lesson. In Velen, Contract: Shrieker, Contract: Jenny o’ the Woods, and other level-appropriate jobs provide experience, loot, and practice against different monster behaviors. Do not repeatedly force a high-level contract; leave it in the log and return when Geralt is better equipped.
- Read newly available notice boards.
- Compare the recommended level with Geralt’s level.
- Group contracts by region and travel route.
Investigate first, then prepare for the monster
Follow the investigation steps instead of rushing to the marked combat area. Speak with witnesses, inspect bodies and tracks, and examine objects with Witcher Senses. Once the monster is identified, open the bestiary entry. Its weaknesses usually tell you which weapon oil, bomb, or sign will make the encounter safer.
Before entering the lair, repair the weapons and armor you intend to use. Apply the relevant oil, place useful bombs in a quick slot, and make sure food or healing potions are accessible. Quen is a dependable defensive choice when learning an unfamiliar monster; Yrden, Igni, Aard, or Axii can be more effective when the bestiary identifies a specific vulnerability.
Meditation can restore health on appropriate difficulty settings and replenishes crafted potions and bombs when Geralt has strong alcohol in his inventory. It does not refill weapon oils, so carry enough oil or its ingredients and reapply it when charges run out.
- Complete the investigation and read the bestiary entry.
- Apply the matching oil before the fight.
- Repair equipment and confirm healing and bomb access.
- Remember that meditation does not refill weapon oils.
Negotiate, loot, and spend contract rewards carefully
Many contracts include a payment discussion before or after the hunt. A reasonable counteroffer can increase the reward, but extreme demands may be refused. Treat the extra crowns as useful support rather than a reason to risk losing the contract payment.
After killing the monster, search its body and the surrounding lair before returning to the contractor. Contract loot can include trophies, mutagens, monster parts, crafting components, and quest items separate from the agreed payment. Check the trophy’s passive effect before selling it. If its bonus helps your current play style, keep it equipped; otherwise store or sell it when you are certain it has no remaining purpose.
Spend early contract income on repairs, crafting, diagrams, alchemy ingredients, and essential equipment. Luxury purchases and gambling stakes can wait until Geralt’s core build is stable.
- Loot the monster and its lair before leaving.
- Collect the negotiated payment from the contractor.
- Check trophies and rare components before selling them.
- Prioritize survival and crafting expenses.
Sell and dismantle equipment with a purpose
Do not sell every unwanted item immediately. Dismantle equipment when the resulting components include rare metals, leather, jewelry parts, monster materials, or other resources needed for Witcher gear and later crafting. Ordinary surplus weapons generally belong with blacksmiths, while armor and some related equipment are better handled by armorers. Specialty merchants often offer better prices for the categories they deal in, but their available crowns and inventories differ, so do not make a long detour solely for a small price increase.
Sell common junk and excess food when inventory weight becomes a problem. Keep crafting diagrams, runestones, glyphs, monster ingredients, mutagens, quest items, and materials that appear scarce. Store alternate weapons, armor, trophies, and spare horse equipment in a stash. After several contracts, visit a capable craftsman, repair the gear you actually use, and compare new equipment against your build before dismantling it.
- Dismantle rare-material items instead of selling blindly.
- Use blacksmiths for weapons and armorers for armor when convenient.
- Store alternate equipment in a stash.
- Retain diagrams, runestones, glyphs, quest items, and scarce materials.
Start Gwent early and protect collection opportunities
Gwent is optional: no main-story objective requires you to win matches. If you want the Collect ’Em All quest or the related trophy, begin in White Orchard by playing the scholar at the inn and buying cards offered by innkeepers and other merchants. Buy cards whenever you visit a settlement, then check the deck screen and remove weak cards rather than adding every card you own. A smaller deck with reliable units is easier to use than a bloated deck filled with low-value cards.
Play named opponents, innkeepers, merchants, craftsmen, and other eligible players whenever the option appears. Many first victories award cards, but not every opponent provides a unique card, and generic-player rewards are drawn from regional pools. The Gwent players list and A Miraculous Guide to Gwent can help identify what remains, although the in-game guide is a regional progress aid rather than a complete card-by-card inventory.
For a collection-focused run, make a manual save before the Gwent tournament during A Matter of Life and Death and before entering High Stakes. Win the matches in those quests, because their tournament rewards are among the easiest cards to lose permanently. Also complete Gwent-linked quests such as Old Pals, Big City Players, Playing Thaler, and A Dangerous Game promptly, and buy cards from merchants before a quest or story event can remove them. The exact recovery options depend on the quest and the game’s update state, so do not rely on a later replacement.
- Play the White Orchard scholar and buy available cards.
- Check every major settlement’s innkeepers and merchants.
- Challenge eligible named opponents.
- Save before A Matter of Life and Death’s tournament.
- Save before High Stakes and win the tournament.
- Track active Gwent quests before major story transitions.
Repeat a short contract-and-crafting loop
A useful rhythm is to complete one or two nearby contracts, investigate guarded sites or monster nests encountered along the route, sell or dismantle the haul, repair at a craftsman, restock alchemy, and then resume the main quest. This gives experience and materials without turning the game into an endless grind.
Do not postpone the campaign solely to accumulate crowns. Quest rewards, exploration, Witcher gear diagrams, and dismantling usually provide more useful progression than repeatedly farming low-value enemies. If a contract is far above Geralt’s level, mark it and move on. Return when the recommended level is close rather than risking repeated deaths or spending more on repairs than the contract can repay.
Keep upgrades coherent. A fast-attack or sword-focused build benefits from matching armor bonuses, weapon upgrades, and runestones. A sign-focused build should invest in sign intensity and stamina support rather than buying every unrelated heavy-attack improvement. Change equipment when the replacement improves the whole setup, not merely because one displayed number is higher.
- Complete contracts near Geralt’s current level.
- Sell, dismantle, repair, and restock after each short route.
- Return to the main quest after preparation.
- Spend ability points and upgrade materials around one compatible build.
Before you move on
- Contracts near Geralt’s level have been completed or deliberately postponed, and completed rewards have been collected from their contractors.
- Weapons and armor are repaired, useful monster materials are stored, and dismantled equipment has supplied needed crafting components.
- Alchemy has been restocked, weapon oils have been reapplied manually, and the current loadout supports a consistent sword, sign, or alchemy build.
- Available Gwent cards have been bought from visited merchants, the White Orchard scholar has been challenged, and eligible named players have been played.
- A Matter of Life and Death and High Stakes have been checked before their relevant story transitions if card collection is a goal.
- Active Gwent quests are tracked, and the main campaign remains the priority rather than being replaced by repetitive farming.
References for this chapter
- The Witcher 3: Wild Hunt — Complete Edition, PlayStation Store concept page
- The Witcher 3 contracts, Witcher Wiki
- Collect ’Em All, Witcher Wiki
- Gwent players, Witcher Wiki
- A Matter of Life and Death, Witcher Wiki
- The Witcher 3 Missable Gwent Cards Checklist, Gamers.Wiki
- The Witcher 3 Guide, GamesRadar
Mid-Game Choices: Pursuit of Ciri and Branching Consequences
Ugly Baby begins the Uma operation at Kaer Morhen; it does not begin Battle Preparations. Complete its connected sequence through Disturbance, The Final Trial, To Bait a Forktail..., No Place Like Home, and Va Fail, Elaine. After Uma is restored, the Brothers in Arms recruitment quests become available. Finish those recruitment and time-sensitive companion quests before sailing to the Isle of Mists, whose warning marks a major cutoff. Battle Preparations belongs much later, after the Isle of Mists, the Battle of Kaer Morhen, Bald Mountain, and Final Preparations. It contains the final pre-war tasks and becomes the important cutoff for Reason of State. Track ally recruitment separately from Ciri's ending: five later decisions determine whether Ciri dies, becomes a witcher, or becomes empress, while the Emhyr visit and war result add separate conditions. Use manual saves before the Isle of Mists, political endgame decisions, and the late Ciri choices.
1. Complete the Uma and Kaer Morhen sequence before recruiting allies
Finish Ugly Baby by taking Uma to Kaer Morhen and starting the curse-breaking operation. Ugly Baby continues through Disturbance, The Final Trial, and To Bait a Forktail...; these three tasks can be handled in the order presented by the quest log. Disturbance has Geralt help Yennefer locate the source of the magical interference. The Final Trial sends Geralt and Lambert to the elemental altar. To Bait a Forktail... sends Geralt and Eskel after the forktail. Complete all three, then proceed through No Place Like Home and Va Fail, Elaine to restore Uma and learn that Ciri is on the Isle of Mists.
The Brothers in Arms recruitment stage follows this Kaer Morhen sequence. It comes before the Isle of Mists, not immediately at the start of Ugly Baby and not during the later Battle Preparations quest. When the recruitment objectives appear, create a manual save before speaking to allies. The game will also issue a warning when you prepare to sail to the Isle of Mists; keep a separate save immediately before accepting that journey.
- Uma has been taken to Kaer Morhen.
- Disturbance, The Final Trial, and To Bait a Forktail... are complete.
- No Place Like Home and Va Fail, Elaine are complete.
- Brothers in Arms objectives are available or have been reviewed.
- A manual save exists before the recruitment sweep.
2. Preserve Keira Metz and recruit Letho when available
Complete An Invitation from Keira Metz, A Towerful of Mice, A Favor for a Friend, and For the Advancement of Learning. At the end of For the Advancement of Learning, convince Keira to abandon her dangerous plan and go to Kaer Morhen. Sending her to Radovid or fighting her removes her from the ally roster. Keira's survival also preserves later dialogue and support during the defense.
If Letho survived the imported Witcher 2 state or its corresponding world-state simulation, complete The Fall of the House of Reardon and then Ghosts of the Past. At the end of Ghosts of the Past, invite Letho to Kaer Morhen. Letho is optional and is not present in every playthrough, so do not treat his absence as a failed quest if the save's world state excludes him.
- Keira is alive and bound for Kaer Morhen.
- Letho has been recruited if he exists in the chosen world state.
- Brothers in Arms: Velen has been resolved.
3. Finish Novigrad companion and mage quests before the cutoff
Complete A Matter of Life and Death, then Now or Never, if you want Triss's personal storyline and the Novigrad mage rescue. Now or Never is the critical quest for helping the mages escape and keeping that storyline available; A Matter of Life and Death is important for Triss's romance route and related consequences but is not a substitute for Now or Never. During Brothers in Arms: Novigrad, speak with Triss and request her help.
Complete An Eye for an Eye if you want Vernon Roche and Ves. Keep Ves alive during the mission, then ask Roche for assistance. Speak with Zoltan at the Rosemary and Thyme after handling any desired business connected to him; he can be recruited directly through the Novigrad recruitment stage. Dijkstra is not a normal Kaer Morhen combat recruit, so do not interpret his refusal as a missing prerequisite.
Political quests require separate planning. If you want the Nilfgaard-favorable war state needed for the Empress outcome, complete the required Redania and Temerian political chain and keep Reason of State available for its later window. Do not let the Isle of Mists cutoff arrive while An Eye for an Eye, A Deadly Plot, Redania's Most Wanted, Now or Never, or other desired Novigrad quests remain unfinished.
- A Matter of Life and Death is complete if Triss's romance route is desired.
- Now or Never is complete if the mage rescue is desired.
- An Eye for an Eye is complete and Ves survived if Roche's group is desired.
- Zoltan has been asked to help.
- Political prerequisites have been reviewed before the Isle of Mists.
4. Secure Hjalmar, Ermion, Vigi, and Folan on Skellige
Complete Possession and The Lord of Undvik if you want the Skellige succession and ally content. During The Lord of Undvik, rescue Hjalmar's companions Vigi the Loon and Folan rather than leaving them behind. Their survival allows them to accompany Hjalmar. Hjalmar is the relevant Skellige battlefield recruit; Cerys can become queen, but she does not replace Hjalmar as the combat ally.
Resolve the succession outcome, then speak with the appropriate ruler during Brothers in Arms: Skellige. If Cerys rules, she can arrange Hjalmar's assistance; if Hjalmar rules, speak with him directly. Ask Ermion for help as well. Complete The Last Wish before the Isle of Mists if you want Yennefer's personal storyline or romance route, because the later endgame will not reliably restore a missed relationship decision.
- Possession and The Lord of Undvik are complete if the Skellige route is desired.
- Hjalmar is alive and has been asked to help.
- Vigi and Folan were rescued if their participation is desired.
- Ermion has been asked for assistance.
- The Last Wish is complete if Yennefer's storyline is being pursued.
5. Treat the Isle of Mists warning as the final mid-game review
When the quest directs Geralt to sail to the Isle of Mists, stop at the boat and read the warning. Before accepting the journey, complete every desired Brothers in Arms quest and review named companion, romance, Gwent, succession, and political quests. The cutoff can fail or remove quests including Now or Never, A Matter of Life and Death, A Dangerous Game, An Eye for an Eye, The Lord of Undvik, Possession, The Fall of the House of Reardon, Ghosts of the Past, and the four Brothers in Arms objectives.
Repair swords and armor, refill healing items, and prepare oils and bombs for the monsters encountered during recent quests. Ordinary contracts and unexplored question marks can usually wait, but named-character and political quests should be treated as urgent. If an ally is missing after a prerequisite quest was failed, waiting or fast travel generally will not restore the recruitment; reload the earlier manual save instead.
- A manual save exists directly before the Isle of Mists warning.
- All desired Brothers in Arms quests are complete.
- Time-sensitive companion, romance, Gwent, succession, and political quests have been reviewed.
- Equipment is repaired and healing items, oils, and bombs are stocked.
6. Separate ally recruitment from Ciri's five ending decisions
Recruitment does not decide Ciri's fate. The five late choices occur during Blood on the Battlefield, Final Preparations, and Child of the Elder Blood. For a supportive route, let Ciri blow off steam in the snowball sequence rather than dismissing her grief; if you take her to Emhyr, refuse payment; let her attend the Lodge meeting alone; let her release her anger in Avallac'h's laboratory; and agree to accompany her to Skjall's grave. These choices represent support and trust rather than Geralt controlling her decisions.
The game checks the choices as a group. If Geralt visits Emhyr, Ciri generally needs three positive decisions among the five. If Geralt does not take her to Emhyr, two positive decisions from the remaining four are sufficient for survival. The Empress result has extra conditions: Geralt must visit Emhyr, Ciri must survive, the war must end in Nilfgaard's favor, and the political chain must reach the required outcome. Therefore, track the five Ciri choices separately from the Emhyr visit and Reason of State.
Create a save before Blood on the Battlefield and another before the late decisions in Child of the Elder Blood. Later, after Bald Mountain and the Novigrad endgame quests, Battle Preparations begins. Complete its subquests, including The Sunstone, Veni Vidi Vigo, and Child of the Elder Blood, then resolve Reason of State before telling Avallac'h that everything is ready. This later Battle Preparations cutoff is distinct from the earlier Brothers in Arms recruitment stage and the Isle of Mists cutoff.
- The five Ciri-support decisions are being tracked separately.
- The Emhyr visit and payment choice are recorded.
- The desired war outcome and Reason of State route are planned.
- A save exists before Blood on the Battlefield.
- A second save exists before the late Ciri decisions.
- Reason of State is complete before the final Battle Preparations commitment if the political route is desired.
Before you move on
- Ugly Baby, Disturbance, The Final Trial, To Bait a Forktail..., No Place Like Home, and Va Fail, Elaine are complete.
- Brothers in Arms: Velen, Novigrad, Skellige, and Nilfgaard have been reviewed before sailing to the Isle of Mists.
- Keira, Triss, Roche, Ves, Zoltan, Hjalmar, Ermion, Letho, Vigi, and Folan are accounted for according to the chosen world state and goals.
- The Isle of Mists warning has not been accepted until desired time-sensitive quests are complete.
- A save exists before the Isle of Mists and another before the late Ciri decisions.
- The five Ciri-support choices, Emhyr visit, payment choice, and political outcome are tracked separately.
- Reason of State has been completed before the late Battle Preparations commitment if the Nilfgaard or Empress route is desired.
- Geralt's equipment is repaired and healing supplies, oils, and bombs are stocked.
References for this chapter
- The Witcher 3: Wild Hunt – Complete Edition — CD PROJEKT RED Press Center
- Ugly Baby quest reference
- The Isle of Mists quest reference and cutoff list
- The Witcher 3 main quests reference
- Full Crew ally requirements
- Ciri's Fate walkthrough and ending conditions
- Battle Preparations quest reference
- Brothers in Arms Walkthrough — GameBanshee
- Final Preparations and Reason of State walkthrough
Preparing for Kaer Morhen: Allies, Gear and Strategy
Complete the Uma sequence before beginning ally recruitment. Ugly Baby brings Uma to Kaer Morhen, but the four Brothers in Arms quests do not become available immediately. Finish Ugly Baby’s connected tasks, then No Place Like Home and Va Fail, Elaine. After Avallac’h reveals Ciri’s location, review the Brothers in Arms quests and recruit every available ally before sailing to the Isle of Mists. The main optional roster includes Keira Metz, Triss Merigold, Vernon Roche, Ves, Zoltan Chivay, Hjalmar, Ermion, and Letho when his world-state requirements are satisfied. Folan and Vigi can join Hjalmar if they survive The Lord of Undvik. Cerys, Crach, Dijkstra, Emhyr, and Nilfgaardian troops are not ordinary combat recruits. Repair equipment, replenish alchemy, finish important side quests, and preserve layered manual saves before the Isle of Mists warning.
1. Finish the Uma sequence before recruiting allies
Complete Ugly Baby at Kaer Morhen and follow its connected objectives: Disturbance, The Final Trial, and To Bait a Forktail... These tasks prepare the cure but do not yet open the ally-recruitment checklist. Return to the keep and complete No Place Like Home, the overnight sequence with the witchers.
After No Place Like Home, complete Va Fail, Elaine. Help Yennefer administer the decoctions during the Trial of the Grasses procedure. When the ritual reveals Avallac’h, he gives Geralt the Magic Firefly and explains that Ciri is hiding on the Isle of Mists.
Only after Va Fail, Elaine is complete should you inspect the Main Quests tab for Brothers in Arms: Velen, Brothers in Arms: Novigrad, Brothers in Arms: Skellige, and Brothers in Arms: Nilfgaard. These are the preparation stage for the coming defense. Do not sail to the Isle of Mists merely because its quest has appeared; use this interval to finish recruitment and other vulnerable side quests.
- Ugly Baby and its connected Kaer Morhen objectives are complete.
- No Place Like Home is complete.
- Va Fail, Elaine is complete and Avallac’h has revealed Ciri’s location.
- The four Brothers in Arms quests are visible or their objectives are accounted for.
- A manual save exists before beginning the recruitment circuit.
2. Recruit Keira Metz and Letho in Velen
Keira can join if she survives her storyline and is sent to Kaer Morhen. Complete An Invitation from Keira Metz, A Towerful of Mice, A Favor for a Friend, and For the Advancement of Learning. At the end of For the Advancement of Learning, choose the outcome that sends Keira to Kaer Morhen. Killing her or refusing to send her removes her from the optional roster.
Letho depends on the selected Witcher 2 world state. He must have survived The Witcher 2, either through an imported save or the opening world-state simulation. Complete The Fall of the House of Reardon to start his return, then complete Ghosts of the Past. At the end of that quest, invite Letho to Kaer Morhen. The Reardon quest by itself does not recruit him.
If Letho is absent, check the simulated or imported world state before treating the missing quest as a problem. The PS5 Complete Edition cannot make Letho available if the chosen world state says he died.
- Keira is alive and has been sent to Kaer Morhen.
- For the Advancement of Learning is complete.
- Letho is alive in the selected world state, if desired.
- Ghosts of the Past is complete and Letho has accepted the invitation.
3. Complete the Novigrad recruitment route
A Matter of Life and Death unlocks Now or Never for Triss. Complete the masquerade quest, then start and finish Now or Never before the Isle of Mists cutoff. Complete the mage-rescue operation and resolve the evacuation successfully. A Matter of Life and Death alone is not the complete Triss recruitment route.
Complete An Eye for an Eye to recruit Vernon Roche and Ves. During the ambush, keep Ves alive. Then speak with Roche through Brothers in Arms: Novigrad. Roche brings Ves when the recruitment succeeds.
Complete A Dangerous Game before asking Zoltan to join the defense. The quest contains its own objectives and rewards; recruiting Zoltan immediately through the Brothers in Arms conversation can cause A Dangerous Game to fail. Once the quest is resolved, return to Zoltan and secure his help.
Dijkstra is not a normal combat recruit. His Brothers in Arms interaction can provide assistance or a reward depending on the state of his storyline, but he does not travel to Kaer Morhen as a battlefield fighter. Emhyr also refuses to send Nilfgaardian troops because Geralt will not accept Emhyr’s condition.
- A Matter of Life and Death is complete.
- Now or Never is complete and the mage evacuation has been resolved.
- An Eye for an Eye is complete and Ves survived.
- A Dangerous Game is complete before Zoltan is recruited.
- Dijkstra and Nilfgaard are not counted as ordinary combat allies.
4. Secure Skellige support and optional Undvik allies
Complete Possession, The Lord of Undvik, King’s Gambit, and Coronation. The succession outcome can make either Cerys or Hjalmar ruler, but Hjalmar is the Skellige combat recruit. Speak with Hjalmar during Brothers in Arms: Skellige and ask him to help.
Ermion does not require a separate recruitment quest. Visit him during Brothers in Arms: Skellige and request his assistance. Crach does not travel to Kaer Morhen, although he can support Geralt by giving Winter’s Blade.
Folan and Vigi are optional allies attached to Hjalmar. During The Lord of Undvik, rescue Folan from the trolls and free Vigi before confronting the ice giant. Both must survive. If Hjalmar is recruited afterward, the survivors accompany him to Kaer Morhen. Saving only one preserves only that one optional ally.
Do not leave the Skellige succession chain unresolved if Brothers in Arms: Skellige still lists it as an objective. Complete the relevant investigation and coronation steps before moving to the island rescue.
- Possession is complete.
- The Lord of Undvik is complete.
- Folan and Vigi survived if their optional support is wanted.
- King’s Gambit and Coronation are complete.
- Hjalmar has been invited to Kaer Morhen.
- Ermion has been asked to help.
- Cerys and Crach are not counted as ordinary battlefield recruits.
5. Repair equipment and replenish alchemy
Repair the equipped steel sword, silver sword, armor, and any spare weapon you intend to use. Carry weapon and armor repair kits or keep them in the stash. Repair before the commitment point rather than assuming a merchant will be available during the next sequence.
Meditate to replenish bombs, potions, and decoctions when your alcohol-based alchemy ingredient permits it. Refill the items used by your established build instead of changing to an unfamiliar setup immediately before the Isle of Mists. Keep Quen, a healing item, and a stamina- or sign-supporting item accessible through the combat item slots.
Preserve rare crafting components for Witcher gear and planned upgrades. Do not sell materials merely to create a little coin or inventory space. Treasure hunts and many contracts can wait, but missing narrative side quests may not be recoverable after the cutoff.
- Weapons and armor are repaired.
- Repair kits are carried or stored safely.
- Potions, bombs, oils, and decoctions are replenished.
- Healing and stamina- or sign-supporting items are accessible.
- Rare crafting materials needed for planned gear have not been sold.
6. Save before the Isle of Mists commitment point
Create one manual save before starting the final recruitment circuit, a second after the desired ally objectives are complete, and a third when the game warns you near the Isle of Mists destination. Keep all three files until the main story consequences are settled.
Before sailing, review Now or Never, An Eye for an Eye, A Dangerous Game, The Fall of the House of Reardon, Ghosts of the Past, the Keira quest chain, The Lord of Undvik, the Skellige succession quests, and every Brothers in Arms entry. Also review romance, Gwent, and political side quests if their outcomes matter to you.
Travel to the northern side of Undvik with the Magic Firefly only after recruitment is complete. When the warning appears, stop and make the manual save if you have not already done so. Continuing through the destination begins the Ciri-recovery sequence, and many open non-DLC side quests can fail or become unavailable.
After accepting the commitment and reaching the Isle of Mists, ordinary free travel is restricted until the story advances. If a desired ally is missing afterward, reload the pre-Isle save rather than trying to repair the recruitment state from inside the locked sequence.
- A pre-recruitment manual save exists.
- A completed-recruitment manual save exists.
- A save at the Isle of Mists warning exists.
- No desired Brothers in Arms objective remains unresolved.
- Important ally-dependent and time-sensitive side quests are complete.
Before you move on
- Ugly Baby, No Place Like Home, and Va Fail, Elaine are complete.
- Brothers in Arms: Velen, Novigrad, Skellige, and Nilfgaard have been reviewed and completed as far as the save allows.
- Keira, Triss, Roche, Ves, Zoltan, Hjalmar, Ermion, and Letho when eligible have been handled according to the desired outcome.
- Folan and Vigi survived The Lord of Undvik if their optional support is wanted.
- The Skellige succession chain and required ally prerequisites are complete.
- Weapons and armor are repaired, alchemy is replenished, and useful repair kits and crafting materials are secured.
- Manual saves preserve the pre-recruitment state, completed-recruitment state, and Isle of Mists warning state.
- The player can now begin The Isle of Mists without knowingly sacrificing a desired Kaer Morhen ally or important time-sensitive side quest.
Kaer Morhen Sequence: Defense and Consequences
The Battle of Kaer Morhen begins after The Isle of Mists and the allied preparations at the witchers’ fortress. Make a manual save before selecting the two defense options, repair your equipment, and prepare healing items, Elementa Oil, Yrden, and Dimeritium Bombs. The battle proceeds through three forest portals, a mounted retreat, the outer gate, wall and courtyard defenses, short Ciri sections, and a final portal-defense phase. Prioritize marked objectives over enemies that continuously arrive from gates or portals. Keira Metz saves Lambert automatically if she was recruited; otherwise Geralt must reach Lambert during the rescue sequence. Vesemir’s death and the battle’s main story outcome are scripted, but your recruited allies and preparation choices change the battle’s support, pressure, rewards, and some scenes.
1. Save before the defense choices
When the planning phase begins at Kaer Morhen, create a manual save before selecting the laboratory and workshop options. These choices affect the battle itself, so keep this save if you want to test a different defense without replaying the preceding quests.
The laboratory choice is between Potions’ll be the most useful and Witchers’ traps—that’s the best idea. Potions provides upgraded alchemy rewards, including Superior Swallow and, if you completed Following the Thread, Fortified Raffard’s Decoction. Witchers’ traps places traps around the fortress that damage Wild Hunt troops and reduce pressure during crowded sections. Choose traps if your healing supply is already reliable; choose potions if you need additional recovery options.
The workshop choice is between Patch up the wall and Clear the armory. Patching the wall closes Savolla’s breach and removes one later enemy wave. Clearing the armory gives Geralt the leveled Rose of Shaerrawed silver sword and improves the other witchers’ weapons. For most prepared characters, Patch up the wall is the safer defensive choice, but Clear the armory is reasonable if your silver sword is weak.
- Create a manual save before choosing the laboratory and workshop options.
- Repair swords and armor before beginning the assault.
- Prepare healing items, Elementa Oil, Yrden, and Dimeritium Bombs.
2. Close the three forest portals
After the planning scenes, leave the inner keep to begin the assault. Geralt starts in the forest with Lambert and, if recruited, Letho. Yennefer’s concealment makes you difficult to detect while you are not fighting and are away from the hounds.
There are three marked portals. Move directly toward each one, defeat only the nearby defenders that prevent you from reaching it, then cast Yrden on the portal or throw a Dimeritium Bomb. Closing the portal stops further reinforcements from that location. Do not spend time clearing the entire forest; the objective is to seal the portals and keep moving.
Hounds can break your rhythm and are dangerous when they surround Geralt. Dodge through their attacks, use Quen before crossing exposed ground, and use Igni when you need to create space. The portal objective takes priority over loot and isolated enemies. After the third portal is closed, the battle advances through a scripted transition.
- Seal all three marked forest portals.
- Use Yrden if you want to conserve Dimeritium Bombs.
- Avoid prolonged fights after a portal is already closed.
3. Retreat to the fortress and close the outer gate
During the retreat, follow the route to Kaer Morhen rather than stopping to fight every pursuer. Stay on horseback when the game directs you toward the fortress and watch for incoming fire. Once inside the outer area, follow the objective to the gate mechanism and pull the lever to close the gate.
After the gate is secured, move along the wall and assist the defenders at the marked positions. Enemies may continue to arrive from portals or breaches, so do not chase them away from the objective area. If a gate, lever, or portal is marked, deal with the immediate attackers and interact with the objective as soon as the game allows it.
Quen is useful before climbing into a crowded defense position. Against Wild Hunt warriors, use short attack strings and dodge their counterattacks. Against hounds, Igni and controlled movement are safer than standing still and trading sword blows.
- Reach the fortress without detouring into optional fights.
- Pull the outer-gate lever when prompted.
- Stay near the current wall or gate objective.
4. Complete the Ciri and Lambert rescue sections
Control shifts to Ciri during short sections between Geralt’s defense phases. Follow the objective route and use her mobility to pass groups instead of trying to defeat every enemy. Ciri can call down a damaging fire attack during the relevant section; move away from the impact area before it lands, then continue toward the marked destination and assist the required ally.
When the battle returns to Geralt, Lambert’s situation depends on whether Keira Metz was recruited. If Keira came to Kaer Morhen, she saves Lambert during the staged scene. If Keira is absent, Geralt must reach Lambert and defeat the Wild Hunt soldiers attacking him. Respond to this objective promptly rather than remaining in the previous courtyard. This is the battle’s meaningful ally-survival intervention.
Do not treat Vesemir’s later death as a combat failure. It is part of the main story sequence and cannot be prevented by changing attacks, signs, or defense choices.
- Follow Ciri’s marked route and use her mobility to avoid unnecessary fights.
- If Keira is absent, reach Lambert as soon as the rescue objective appears.
- Do not reload expecting a different combat tactic to save Vesemir.
5. Defend the inner courtyard and close the final portals
After the retreat and intervening Ciri section, Geralt returns to the fortress for the final defense. Wild Hunt portals open around the courtyard. Vesemir provides Dimeritium Bombs for this phase, and additional supplies may be present in nearby crates depending on the current stage. Use Yrden or Dimeritium Bombs to close each marked portal, then defeat the enemies that block the next objective.
Fight near your allies and inside the defended area. The Witchers’ traps from the laboratory choice can damage enemies as they cross the courtyard, but avoid charging blindly through active hazards. If the wall was patched, one later wave is absent; if the armory was cleared, the improved weapons and Rose of Shaerrawed reward may help offset the extra pressure.
When the game directs you to move, retreat, or assist a named ally, do so immediately. Some enemies continue spawning until the staged objective advances, so clearing every warrior is neither necessary nor efficient. Use Quen before entering a group, refresh it after a hit, and close portals before pursuing stragglers.
- Close every marked inner-courtyard portal.
- Use the supplied bombs or Yrden instead of waiting for allies to handle the portals.
- Remain within the active defense area and follow objective markers.
6. Finish the aftermath and preserve the save
The battle ends through a scripted sequence involving Vesemir and Ciri. After the Wild Hunt withdraws, continue through the immediate story scenes until normal control returns. Create a new manual save after the funeral and the next quest transition become available.
Keep the pre-battle save as well as the post-battle save. The earlier file preserves the opportunity to change the laboratory or workshop choice and to replay the Lambert rescue if Keira was not present. The later file preserves your completed Kaer Morhen state for the remaining main campaign.
- Allow the Vesemir and Ciri story sequence to finish.
- Confirm that The Battle of Kaer Morhen is completed in the quest log.
- Create a post-battle manual save and retain the pre-battle save.
Before you move on
- The three forest portals, the outer gate, the wall and courtyard objectives, and the final inner-courtyard portals have been completed.
- The Ciri sections and the Vesemir story sequence have finished, and the next post-battle quest is available.
- Lambert is alive if Keira was recruited or if Geralt reached him during the rescue phase.
- The quest log shows The Battle of Kaer Morhen as completed.
- A post-battle manual save exists, and a separate pre-battle save remains available for alternate preparation choices or rescue outcomes.
References for this chapter
- The Witcher 3: Wild Hunt - Complete Edition, PlayStation Store
- The Battle of Kaer Morhen Walkthrough, Defense Choices and Best Choices — Game8
- The Battle of Kaer Morhen — GameBanshee walkthrough
- The Battle of Kaer Morhen — Neoseeker walkthrough
- The Battle of Kaer Morhen — Gamer Walkthroughs
- The Battle of Kaer Morhen — Guides4Gamers quest stages
Final Pursuit: Isle of Mists and Endgame Decision Points
The Isle of Mists is the base campaign’s major point of no return. Before sailing to the marked approach in northern Skellige, complete the available Brothers in Arms missions and finish important character, romance, political, Gwent, and other time-sensitive quests. After the rescue and Kaer Morhen sequence, Bald Mountain leads into Final Preparations in Novigrad. Resolve Blindingly Obvious, The Great Escape, Payback, Through Time and Space, and every active conditional objective: It Takes Three to Tango if both Triss and Yennefer were romanced, and A Final Kindness if Keira’s storyline makes it available. Final Preparations cannot properly conclude while one of these required objectives remains unresolved. Reason of State must be completed before telling Avallac’h that everything is ready during Battle Preparations. Five Ciri-support decisions influence whether she survives the White Frost; taking her to Emhyr and securing a Nilfgaard victory are separate requirements for the Empress outcome. Keep manual saves before the Isle of Mists, Battle Preparations, Reason of State’s final operation, and the late Ciri decisions.
1. Finish the pre-Isle of Mists checklist
When The Isle of Mists is active, open the quest log and complete the available Brothers in Arms missions before sailing. These missions determine which allies can appear during the defense of Kaer Morhen. Check the entries for Velen, Novigrad, Skellige, and Nilfgaard, then follow the objectives for the characters available in your world state, such as Keira Metz, Vernon Roche, Ves, Zoltan Chivay, Triss Merigold, Yennefer, Ermion, Hjalmar, Cerys, or Letho.
Finish important character quests, romance quests, political investigations, and Gwent quests before approaching the island if you want their outcomes preserved. Witcher contracts, treasure hunts, and ordinary exploration are generally safer to postpone, but the warning near the destination is the final practical checkpoint. Create a manual save before continuing and keep it in a separate slot.
- Complete every available Brothers in Arms quest for the allies you want.
- Finish important character, romance, political, and Gwent quests before the voyage.
- Create and preserve a manual save before approaching the island.
- Do not overwrite the pre-Isle save while testing later choices.
2. Complete The Isle of Mists
Travel to Skellige and use a marked boat to reach the island approach. Sail toward the objective near northern Undvik. When the game displays its point-of-no-return warning, stop and reload if important unfinished work remains. Continuing begins the island sequence and can fail or remove access to many unfinished non-expansion quests.
At the approach, follow the magic firefly through the mist to the hut. The sailors ask Geralt to search for their missing companions. Follow the quest markers to locate Ferenc, Gaspard, and Ivo, dealing with the monsters at each location. Escort Gaspard when required, then return to the hut and complete the reunion with Ciri. The story immediately proceeds toward the Kaer Morhen sequence.
- Use a marked boat to reach the island approach.
- Follow the magic firefly through the mist.
- Find Ferenc, Gaspard, and Ivo.
- Return to the hut and complete the reunion scenes.
3. Complete the Kaer Morhen aftermath and Bald Mountain
Continue through Ugly Baby, No Place Like Home, Va Fail, Elaine, The Battle of Kaer Morhen, and Blood on the Battlefield as they become available. Once the defense begins, the required story route is largely linear. After Blood on the Battlefield, travel with Ciri to Bald Mountain and complete the confrontation there before returning to Novigrad.
The first Ciri-support decision occurs in Blood on the Battlefield. Choose the snowball activity rather than drinking with her. If you take Ciri to Emhyr, refuse the emperor’s payment. These decisions are tracked internally, so record them manually if you are targeting a particular ending.
- Finish the Kaer Morhen defense.
- Complete Blood on the Battlefield.
- Choose the snowball activity with Ciri.
- If visiting Emhyr, refuse his payment.
- Complete Bald Mountain before returning to Novigrad.
4. Resolve every Final Preparations objective
After Bald Mountain, return to Novigrad and continue Final Preparations. Complete Blindingly Obvious, The Great Escape, Payback, and Through Time and Space. Blindingly Obvious handles the meeting with Triss and the political situation. The Great Escape retrieves Margarita Laux-Antille from prison. Payback follows Ciri’s retaliation in Novigrad. Through Time and Space takes Geralt and Avallac’h through the dimensional route to meet Ge’els.
Final Preparations also requires conditional objectives when their conditions are met. If you romanced both Triss and Yennefer, It Takes Three to Tango becomes active after the Lodge meeting; complete the Kingfisher Inn sequence before attempting to close the preparation stage. If A Final Kindness appears because of Keira’s storyline, complete it with Triss rather than leaving it in the quest log. The exact order of these objectives is flexible, but Final Preparations cannot properly conclude while one of the required or active conditional quests remains unresolved. Battle Preparations should advance only after the full set is complete.
Use the quest log rather than assuming the four commonly listed objectives are the entire stage. Keep a save before the last active Final Preparations objective if you still need optional Novigrad content.
- Complete Blindingly Obvious.
- Complete The Great Escape and retrieve Margarita.
- Complete Payback.
- Complete Through Time and Space.
- Complete It Takes Three to Tango if it appears.
- Complete A Final Kindness if it appears.
- Confirm that Final Preparations has concluded before advancing Battle Preparations.
5. Complete Reason of State before the political cutoff
Reason of State depends on earlier political quests and on the outcome of Blindingly Obvious. If it becomes available, create a separate save before beginning its final operation. Complete it before telling Avallac’h that everything is ready during Battle Preparations. Do not postpone it until On Thin Ice.
At the political confrontation, defend Roche, Ves, and Thaler if you want the route that keeps them alive and supports a Nilfgaard-winning outcome. Choosing Dijkstra instead produces a different northern victory outcome. Preserve a save before the final confrontation so you can test the political result without replaying the entire endgame.
Taking Ciri to Emhyr is not enough for the Empress outcome. Ciri must survive, Nilfgaard must win the war, and Geralt must have taken her to the emperor. If Ciri survives but Nilfgaard does not win, the surviving-Ciri witcher outcome follows instead.
- Confirm that Reason of State is unlocked.
- Complete it before telling Avallac’h that everything is ready.
- Keep a save before the final political confrontation.
- Defend Roche, Ves, and Thaler if pursuing the Nilfgaard-winning route.
- Preserve a separate save before the Battle Preparations commitment.
6. Make the remaining Ciri decisions and complete the finale
The remaining Ciri-support decisions occur during Final Preparations and Child of the Elder Blood. Let Ciri attend the Lodge meeting alone. In Avallac’h’s laboratory, allow her to destroy the laboratory rather than telling her to calm down. When she asks to visit Skjall’s grave, go with her. Together with the snowball decision and the conditional Emhyr-payment decision, these are the five tracked moments. At least three supportive results are required for Ciri to survive.
After Battle Preparations, continue through The Sunstone, Child of the Elder Blood, Skjall’s Grave, Veni Vidi Vigo, On Thin Ice, Tedd Deireadh, The Final Age, and Something Ends, Something Begins. Follow the active objective during the final battle because normal exploration is temporarily restricted. Watch the epilogue fully before deciding which earlier save to reload.
- Let Ciri attend the Lodge meeting alone.
- Let Ciri destroy Avallac’h’s laboratory.
- Visit Skjall’s grave with Ciri.
- Complete Battle Preparations and the remaining main quests.
- Watch Something Ends, Something Begins in full.
7. Prepare consumables and preserve alternate routes
Before The Isle of Mists and again before the late endgame, repair Geralt’s steel sword, silver sword, and armor. Refill Swallow and other healing items, replenish bombs and oils, and put a preferred healing item on an accessible quick slot. Quen is useful against sudden heavy attacks, Yrden remains valuable against specters, and short sidesteps are safer than repeatedly rolling away during many endgame encounters.
Use separate save groups: one immediately before the Isle of Mists warning, one before the Battle Preparations conversation that commits the route, one before Reason of State’s final decisions, and one before the late Ciri choices. After watching an ending, reload the relevant earlier save rather than relying on post-story exploration to restore failed quests.
- Repair both swords and armor.
- Refill healing items, potions, bombs, and oils.
- Keep healing items accessible during combat.
- Preserve pre-Isle, pre-Battle Preparations, pre-Reason of State, and late-choice saves.
Before you move on
- The Isle of Mists is complete and Ciri has been reunited with the group.
- The Battle of Kaer Morhen and Blood on the Battlefield are complete.
- Bald Mountain is complete.
- Blindingly Obvious is complete.
- The Great Escape is complete and Margarita has been retrieved.
- Payback is complete and Ciri’s Novigrad retaliation sequence is resolved.
- Through Time and Space is complete and the dimensional journey with Avallac’h has concluded.
- It Takes Three to Tango is complete if it became active.
- A Final Kindness is complete if it became active.
- Final Preparations has concluded without an unresolved required objective.
- Reason of State was completed before the Battle Preparations commitment point, if pursued.
- Battle Preparations and the remaining base-game main quests are complete.
- The epilogue quest Something Ends, Something Begins has played.
- Ciri’s survival, witcher, or Empress outcome is confirmed.
- The desired political outcome is confirmed in the ending scenes.
- Separate saves remain before the Isle of Mists and before the Battle Preparations commitment.
References for this chapter
- The Witcher 3: Wild Hunt – PS4 & PS5 Games — PlayStation
- The Witcher 3: Wild Hunt - Complete Edition, PlayStation Store
- The Witcher 3: Wild Hunt — Complete Edition is now in stores! — CD PROJEKT RED
- Final Preparations — Witcher Wiki
- It Takes Three to Tango — Witcher Wiki
- A Final Kindness — Witcher Wiki
- The Witcher 3 decision checklist — Witcher Wiki
- Final Preparations: Full Quest Walkthrough in The Witcher 3 — ConsolePulse
- Battle Preparations: Full Quest Walkthrough in Witcher 3 — ConsolePulse
- Final Preparations walkthrough — GameBanshee
- The Great Escape walkthrough — GameBanshee
- Reason of State — Witcher Wiki
- Something Ends, Something Begins — Witcher Wiki
Epilogue, Credits and Immediate Post-Game
Finish Tedd Deireadh, The Final Age and the epilogue quest Something Ends, Something Begins, then preserve both the completed result and a pre-finale branch save. After the epilogue, the game returns Geralt to Kaer Morhen so you can continue eligible contracts, exploration, crafting, and expansion content. For a straightforward first completion, play Hearts of Stone before Blood and Wine, then consider New Game+ only after confirming that your regular completed save is backed up. The Complete Edition already includes both expansions and New Game+; no separate expansion purchase is required.
Complete the ending sequence and verify the epilogue
Continue the base campaign through the final act and complete Tedd Deireadh, The Final Age. This is followed by the epilogue quest Something Ends, Something Begins. Do not treat the Wild Hunt’s defeat or the White Frost sequence as the end of the campaign: the epilogue still presents the consequences of earlier decisions, including Ciri’s outcome, political changes, and Geralt’s personal ending scenes. The exact scenes depend on your previous choices, so there is no single universal ending sequence.
Follow the objectives in Something Ends, Something Begins until the quest concludes. When the final scenes have played, allow the credits to start if you want to see the complete presentation, then wait until control returns or load the resulting post-story state. The quest log is the practical confirmation that the main campaign’s final quest has concluded; the game does not provide one universal checklist covering every optional contract, treasure hunt, card collection, and question mark.
- Tedd Deireadh, The Final Age is complete.
- Something Ends, Something Begins is complete in the quest log.
- The final Ciri, political, and personal outcome scenes have played.
- The credits have started or the game has returned control to the post-story world.
Create and protect ending saves
After the epilogue, make a manual save in the returned post-story world. Create a second clearly identifiable save as well. Keep at least one earlier save from before the final irreversible decision cluster, and preferably another from before the last major battle sequence. The earlier save is what lets you test a different ending without replaying the entire campaign. Do not overwrite it with cleanup progress.
For a PS5 version save, use PlayStation Plus cloud storage or the PS5 system backup utility if you need an external backup. PlayStation’s storage guidance distinguishes PS5 saves from PS4 saves: individual PS5 save files cannot be copied to a USB drive in the ordinary PS4-style manner. In-game manual saves remain the simplest way to preserve multiple ending branches, while cloud or full-console backup protects against hardware or storage failure.
- A manual save exists after the epilogue.
- A pre-final-choice save remains untouched.
- A pre-battle save is preserved if you want a shorter replay route.
- Important PS5 saves are uploaded to PlayStation Plus cloud storage or included in a full console backup.
Use the post-story world for eligible cleanup
After the credits, Geralt returns to the world in a continuation state centered at Kaer Morhen. You can use this save to complete eligible contracts, secondary quests, treasure hunts, crafting, exploration, and other unfinished activities. This does not rewind the narrative or reopen content that was failed, permanently closed, or made unavailable by earlier choices. If an NPC or quest is missing, load an earlier save rather than assuming the post-story state will restore it.
Review the Quest tab by category, then inspect the maps of White Orchard, Velen, Novigrad, Oxenfurt, Skellige, and Kaer Morhen for remaining objectives. Check contracts and treasure hunts separately from question marks and merchant inventories. For a completionist run, record unfinished objectives before starting an expansion so you know whether later progress came from the base campaign or DLC content.
- The ending save is separate from the cleanup save.
- Unfinished main, secondary, contract, and treasure quests have been reviewed.
- You have identified content that requires an earlier save rather than post-game exploration.
- Optional cleanup is being tracked by category instead of relying on one completion screen.
Start Hearts of Stone from the completed campaign
For the recommended narrative order, begin Hearts of Stone before Blood and Wine. From the post-story world, travel to the Seven Cats Inn in the Novigrad Outskirts and inspect its notice board. Reading the expansion contract starts Evil's Soft First Touches, the opening Hearts of Stone quest. If the notice is not visible, confirm that the expansion is installed and that you are using the Complete Edition content rather than a separate base-game installation.
Before entering the first expansion objectives, repair your equipped swords and armor, clear inventory space, and restock healing items, bombs, oils, and alchemical supplies. Hearts of Stone can be started before the base campaign is complete, but beginning it after the main ending avoids interrupting the central search for Ciri and gives you a stronger character for its higher-level encounters.
- The post-ending base-game save is preserved.
- The Seven Cats Inn notice board has been checked.
- Evil's Soft First Touches appears in the quest log.
- Weapons, armor, inventory space, and alchemy supplies are ready.
Start Blood and Wine after Hearts of Stone
When Hearts of Stone is finished, return to the mainland and inspect a notice board in Velen or Novigrad for the Toussaint appeal that begins Envoys, Wineboys. Read the notice and follow the quest objectives to unlock travel to Toussaint. Blood and Wine is the larger closing adventure and is best saved until after the base campaign and Hearts of Stone for a clean narrative progression.
Once in Toussaint, keep a separate save before major story decisions and before the expansion finale. The Complete Edition includes Blood and Wine as part of the package, along with Hearts of Stone and the other additional content, so there is no separate purchase step for this edition.
- Hearts of Stone has concluded or is intentionally being postponed.
- Envoys, Wineboys has been started from a notice board.
- Toussaint is accessible through the quest objectives.
- A separate Blood and Wine branch save is maintained before major decisions.
Choose continued play or New Game+
Remain on the completed campaign save if you want to finish expansions, contracts, treasure hunts, Gwent, crafting sets, or map cleanup. Choose New Game+ only when you are ready to begin a new campaign: from the main menu, select New Game+ and choose a completed regular-playthrough save. New Game+ starts the story again with an imported character state; it does not extend the existing world’s quest progress. The Complete Edition includes New Game+ as part of the available content.
Do not select an existing New Game+ save as the source for another New Game+ run. CD PROJEKT RED’s support guidance states that a new New Game+ journey must be started from a normal completed campaign save. Keep the original post-ending save backed up and distinguish it from any new campaign files before beginning.
- You have decided between cleanup, expansions, and New Game+.
- The source save for New Game+ is from a completed regular campaign.
- The original ending save remains available and backed up.
- You understand that New Game+ resets story and world progress.
Before you move on
- Tedd Deireadh, The Final Age and Something Ends, Something Begins are complete.
- The ending scenes have played and a post-epilogue save can be loaded.
- At least one pre-final-choice save remains preserved.
- The post-story world has been checked for intended cleanup activities.
- Hearts of Stone has been started or completed through Evil's Soft First Touches and its later conclusion.
- Blood and Wine has been started or completed through Envoys, Wineboys and its later conclusion.
- Before New Game+, a completed regular campaign save has been selected and backed up.
References for this chapter
- The Witcher 3: Wild Hunt – Complete Edition — PlayStation Store
- Cannot start New Game+ — The Witcher 3: Wild Hunt | CD PROJEKT RED Technical Support
- Something Ends, Something Begins — Witcher Wiki
- Evil's Soft First Touches — GameBanshee
- Envoys, Wineboys — GameBanshee
- How to manage PS5 console storage space — PlayStation Support
Hearts of Stone — Entry, Builds, and the Immortal Opponent
Hearts of Stone is included in The Witcher 3: Wild Hunt — Complete Edition on PS5. Start it from the notice board at the Seven Cats Inn, southeast of Novigrad, which adds Evil’s Soft First Touches. The expansion is intended for a high-level Geralt, with the opening quest generally recommended around level 32. Complete the Toad Prince sequence, then work through Dead Man’s Party, Open Sesame!, Scenes From a Marriage and Whatsoever a Man Soweth…. Dead Man’s Party contains the one-time opportunity to begin A Midnight Clear. Open Sesame! contains the auction-only Viper armor diagrams from Countess Mignole and the Viper venomous steel sword diagram in the Borsodi vault. To pursue the alternate finale, speak with Shani, reach Professor Shakeslock and challenge Gaunter O’Dimm. During O’Dimm’s realm sequence, search the optional path guarded by a specter to obtain the Viper venomous silver sword before solving the reflection riddle. This is separate from Iris, the steel sword given by Olgierd after he is saved. Keep manual saves before the auction, wedding departure and finale.
Start Hearts of Stone and prepare for the Toad Prince
On your standard campaign save, travel to the Seven Cats Inn southeast of Novigrad and read the notice board. Track Evil’s Soft First Touches from the quest log, then follow the objective toward Oxenfurt. The PS5 Complete Edition includes Hearts of Stone and Blood and Wine, so the expansion should be available as installed game content rather than requiring a separate in-game purchase. If the quest does not appear, verify that the Complete Edition content and current game update are installed, then reload a save from outside the inn.
The opening quest is designed for a high-level Geralt, commonly listed around level 32. Repair your silver sword and armor, refill food and potions, and prepare Golden Oriole before entering the sewer boss area. Golden Oriole is especially useful against the Toad Prince because poison damage can become healing. Keep moving around the arena, avoid poison pools, and attack after the creature lands from a leap or finishes a large swing. Quen gives you protection while closing distance, but do not remain in front of the boss long enough to be hit by its tongue or follow-up attack.
Create a manual save before committing to the sewer encounter. If the fight goes badly, reload, drink Golden Oriole before the battle and keep the camera wide enough to see both the boss and the poison patches. You can leave the expansion to gain levels or improve equipment; abandoning the opening attempt does not permanently fail the story. Continue through the prison sequence and Gaunter O’Dimm’s intervention until Olgierd gives Geralt his three tasks.
- Read the Seven Cats notice board and confirm Evil’s Soft First Touches is in the quest log.
- Prepare for a quest intended for a high-level Geralt, around level 32.
- Repair equipment and carry Golden Oriole, healing supplies and a reliable silver sword.
- Create a manual save before the sewer boss.
Complete the three tasks while preserving missable rewards
After Evil’s Soft First Touches, Dead Man’s Party and Open Sesame! are available. They can be completed in either order. Dead Man’s Party sends Geralt to Shani, the von Everec family crypt and a wedding near Brunwich. After the wedding sequence has ended and Vlodimir is no longer using Geralt’s body, remain in the area and speak with Shani if you want A Midnight Clear. Start that quest before leaving the wedding location for good; otherwise its opportunity is lost.
Open Sesame! leads to the Borsodi auction in Oxenfurt. Follow the social objectives and speak with the guests instead of rushing directly through the event. During the auction, talk to Countess Mignole until the trading option appears. She sells the four Viper School armor diagrams: armor, boots, gauntlets and trousers. These diagrams are tied to the auction sequence, so make a manual save before entering it and purchase them before the opportunity closes if you want the complete armor set.
Proceed through the heist and search the vault before leaving. The Viper venomous steel sword diagram is a separate reward from the armor diagrams and is found inside the Borsodi vault near Maximilian Borsodi’s house. It is not the finished silver sword and it is not Iris. Check the containers and loot areas before advancing beyond the vault sequence.
Scenes From a Marriage becomes available after the connected Hearts of Stone objectives have progressed. At the von Everec estate, follow the tracks around the grounds and defeat the Caretaker in the rear garden. Apply Relict Oil, use Quen to absorb a mistake and kill the summoned spirits immediately when they appear. The Caretaker can restore substantial health by reaching those spirits, so prioritize them over continued attacks on the boss. Strike after his charge or ground attack, then roll away from the next area attack.
Inside the manor, inspect the marked objects and complete Iris’s memory scenes. Against the painting wraith, use Specter Oil and watch for the painting that begins glowing. Attack the active painting quickly to interrupt the healing effect. Continue through the memories and choose whether Geralt takes the rose or leaves it with Iris. Either choice completes the main quest, but the scene and reward context differ.
- Complete Dead Man’s Party and Open Sesame! in either order.
- Start A Midnight Clear before leaving the wedding sequence permanently.
- Buy all four Viper armor diagrams from Countess Mignole if desired.
- Loot the Viper venomous steel sword diagram from the Borsodi vault.
- Use Relict Oil and destroy the Caretaker’s summoned spirits quickly.
- Use Specter Oil and interrupt the painting wraith’s healing paintings.
Use the Ofieri merchant and Runewright only if they suit your build
Look for From Ofier’s Distant Shores on the notice boards and quest map. Follow its objectives to recover the required Ofieri materials and return them to the merchant. Completing this content opens additional diagrams and leads to the Runewright at Upper Mill.
The Runewright is optional and does not block the Hearts of Stone story. His Enchanting: Start-up Costs quest unlocks his services in stages and requires a large investment of crowns and materials. Keep your money available until you decide whether runewords and glyphwords fit your build. If you do want the system, complete the staged objectives and return to Upper Mill after each required upgrade; if not, you can leave the merchant content unused without affecting the expansion ending.
Other optional content includes Avid Collector, Rose on a Red Field, Without a Trace, The Royal Air Force, Ofieri quests and Hearts of Stone treasure hunts. Avid Collector is tied to the auction-related opportunity, so investigate the art discussion and purchase the relevant painting if you want that side content. These activities are not required to finish the expansion, but the auction and several reward windows are one-time events.
- Complete From Ofier’s Distant Shores for its merchant and diagram rewards if desired.
- Visit Upper Mill and decide whether to fund the Runewright.
- Reserve crowns and materials before starting Enchanting: Start-up Costs.
- Finish auction-related optional content before closing the auction sequence.
Reach Professor Shakeslock and choose the finale route
Before starting Whatsoever a Man Soweth…, complete any optional quests and gear pickups you care about, then make at least two manual saves. When the finale begins, speak with Shani and follow the optional investigation to the Oxenfurt Academy. Reach Professor Shakeslock and learn how O’Dimm can be challenged. Visiting Shakeslock is the prerequisite for opening the Olgierd-saving route; merely completing the earlier expansion quests is not enough.
If you follow the ordinary conclusion without the Shakeslock detour, O’Dimm claims Olgierd according to the pact. If you challenge O’Dimm, he transports Geralt to a timed realm built around reflections. Sprint through the area, avoid unnecessary exploration and follow the objective toward the mansion. When the route reaches the reflection puzzle, inspect the environment and solve it before the timer expires. The solution depends on identifying the reflection rather than treating the sequence as a conventional combat encounter.
The Viper venomous silver sword is obtained during this O’Dimm-realm route. Before solving the final reflection riddle and leaving the realm, take the optional path guarded by a specter and search the sword-in-stone location. This is a finished sword, not a crafting diagram, and it is the only route-specific Viper silver sword reward. Do not confuse it with the Viper venomous steel sword diagram from the Borsodi vault.
After defeating O’Dimm’s challenge, Olgierd survives and gives Geralt Iris, a separate steel sword reward. Thus, the Olgierd-saving route can provide both Iris and the Viper venomous silver sword if the sword is collected before exiting the realm. If you miss the sword, reload the pre-finale save; continuing after the ending will not recreate the realm automatically. If O’Dimm wins, the Olgierd-saving rewards, including Iris and the Viper venomous silver sword, are unavailable on that branch.
- Finish desired optional content before Whatsoever a Man Soweth….
- Speak with Shani and reach Professor Shakeslock to unlock the challenge route.
- Save before entering O’Dimm’s realm.
- Search the specter-guarded sword-in-stone path for the Viper venomous silver sword.
- Solve the reflection riddle before the timed sequence expires.
- Remember that Iris is Olgierd’s separate steel sword reward.
- Create a post-expansion save after the final scenes.
Before you move on
- Evil’s Soft First Touches, Dead Man’s Party, Open Sesame!, Scenes From a Marriage and Whatsoever a Man Soweth… are marked complete.
- The Toad Prince, Caretaker and painting wraith have been defeated, and Iris’s memory sequence has concluded.
- A Midnight Clear and desired optional quests are complete or deliberately skipped.
- The Viper armor diagrams and Viper venomous steel sword diagram have been collected if desired.
- The Ofieri merchant and Runewright content has been completed or intentionally left unused.
- For the Olgierd-saving route, Professor Shakeslock was visited before the final confrontation.
- The Viper venomous silver sword was collected from the specter-guarded location in O’Dimm’s realm before solving the reflection riddle.
- Iris was received from Olgierd after the successful challenge, confirming that the steel sword and silver sword rewards were distinguished correctly.
- The chosen finale has played and a post-Hearts of Stone manual save exists.
- A pre-finale save remains available if you want to view the alternate O’Dimm outcome.
References for this chapter
- The Witcher 3: Wild Hunt — Complete Edition, PlayStation Store concept page
- The Witcher 3: Wild Hunt – PS4 & PS5 Games — PlayStation
- Whatsoever a Man Soweth... - WitcherDB
- Whatsoever a Man Soweth… Walkthrough — GameBanshee
- Hearts of Stone Walkthrough — GameFAQs
- Viper School Gear — RelicTrek
- The Witcher 3 Hearts of Stone Viper Gear Guide — Gamers.Wiki
- Viper Armor — GosuNoob
Blood and Wine — Toussaint, Late-Game Gear and the Duchy Arc
Begin Blood and Wine by reading Envoys, Wineboys from a Velen notice board and following the contract into Toussaint. Complete The Beast of Toussaint, then use Beauclair as a base for equipment repairs, alchemy, contracts and secondary quests. Before The Night of Long Fangs commits the finale route, make a protected manual save. For the reconciliation outcome, follow Damien, read the complete palace journal, enter the Land of a Thousand Fables, obtain Syanna’s ribbon from the Little Flint Girl, listen to Syanna’s account, complete the final investigation and choose the forgiving dialogue. Dettlaff’s battle has three distinct phases, including a final arena where three pulsating hearts must be destroyed. After the ending, complete Be It Ever So Humble... at Corvo Bianco. Grandmaster gear, mutations, contracts, vineyard renovations and most Toussaint side quests are optional and should be tracked separately from the expansion’s main-story completion.
1. Start Blood and Wine and reach Toussaint
Read a Velen notice board and accept Envoys, Wineboys. Track the quest and travel to the meeting point near the Stonecutters’ Settlement. Help the knights deal with the roadside threat, then follow the investigation and escort sequence until Geralt reaches Toussaint. The PS5 Complete Edition includes Blood and Wine as part of the edition’s expansion content, so no separate legacy release is required for this route.
Once Beauclair is available, activate its signposts and visit the city’s merchants. Repair both swords, replenish food and alchemy ingredients, and make a manual save before major conversations. You do not need to clear every Toussaint question mark before continuing the story. Keep enough money and materials for repairs because the opening investigation quickly leads into several difficult monster encounters.
- Read Envoys, Wineboys from a Velen notice board.
- Reach Toussaint and activate Beauclair signposts.
- Repair equipment and restock food, potions and bombs.
2. Complete The Beast of Toussaint
Follow The Beast of Toussaint and its connected investigation through the duchy. At crime scenes, use Witcher Senses to examine the highlighted bodies, tracks and objects before leaving the search area. If the objective does not update, remain inside the marked investigation zone and look for an unchecked clue rather than travelling to the next quest marker.
The early story includes vampire enemies that can punish an outdated build. Vampire Oil and Black Blood are useful preparations, while Quen provides a safety margin during unfamiliar attacks. Bruxae can vanish and reposition, so avoid committing to long attack strings when they disappear. Dodge out of their attack line, wait for the reappearance, and resume with short fast-attack combinations. After the opening investigation expands your freedom in Toussaint, pause for nearby contracts and secondary quests if Geralt needs experience or better equipment.
- Finish the initial Beast investigation.
- Examine every required clue before leaving each search area.
- Use vampire preparations and controlled attacks against bruxae and similar enemies.
3. Unlock Grandmaster crafting without confusing it with story progress
Find Lazare Lafargue, the Grandmaster armorer in Beauclair, and begin Master Master Master Master!. Ask him about the missing witchers to unlock the Feline, Griffin, Manticore, Ursine and Wolven Grandmaster scavenger hunts. Completing one full diagram hunt and returning the diagrams is enough to resolve the introductory quest; completing all five hunts is only necessary if you want every Grandmaster diagram.
Grandmaster equipment is crafted from diagrams and materials, and many pieces require lower-tier Witcher gear as components. Do not dismantle or sell Witcher equipment until you know which set you intend to build. Choose the school that supports your existing combat or sign build. Grandmaster gear is an optional late-game upgrade and is not required to unlock the Blood and Wine ending.
- Locate Lafargue and start Master Master Master Master!.
- Unlock the school hunts you intend to complete.
- Keep lower-tier Witcher gear and rare monster materials for crafting.
4. Preserve the route choice during The Night of Long Fangs
Continue the main story until The Night of Long Fangs begins and Beauclair is attacked. Geralt can initially investigate Damien or go to Orianna. You can still change direction during the early portion, but the important commitment occurs later. Make a protected manual save before opening the hidden book in the palace playroom or telling Regis to pursue the Unseen Elder.
For the route that allows both sisters to survive, find Damien and proceed to the palace playroom. Read the entire court governess’s journal, not merely the entry that mentions the Land of a Thousand Fables. The complete journal is required for the later conversation options. Examine the room until you find the hidden key, then open the wardrobe and interact with The Land of a Thousand Fables book. Opening that book commits Geralt to the Syanna route. The alternative is to follow Orianna, then continue through Blood Simple and What Lies Unseen toward the Unseen Elder; that route does not provide the same reconciliation sequence.
- Make a manual save before the route commitment.
- Read every entry in the palace journal.
- Open The Land of a Thousand Fables only when you are ready to choose Syanna’s route.
5. Complete Beyond Hill and Dale... and secure the reconciliation requirements
In Beyond Hill and Dale..., follow the road through the fairy-tale world and complete the objectives that lead Syanna through the region. Collect the three magic beans needed to reach the beanstalk sequence. When you meet the Little Flint Girl, obtain Syanna’s ribbon by paying for it or winning it through the available Gwent option. The ribbon protects Syanna when Dettlaff attacks and is required for the reconciliation outcome.
Do not rush out of the fairy-tale world after obtaining the immediate objective. Continue until Syanna explains her history and listen to her full account. The ribbon alone is not enough. The required combination is the complete palace journal, the ribbon, and listening to Syanna’s story. After returning to Beauclair, complete the remaining investigation and proceed into Pomp and Strange Circumstance. During the final conversation with Syanna, choose the empathetic options that question her revenge and ask whether she can forgive Anna Henrietta. Selecting the reconciliation dialogue is what allows the sisters’ relationship to resolve peacefully.
- Collect the three magic beans.
- Obtain Syanna’s ribbon from the Little Flint Girl.
- Listen to Syanna’s complete account in the fairy-tale world.
- Complete the final investigation and choose the forgiving reconciliation dialogue.
6. Prepare for and defeat Dettlaff
Before entering Tesham Mutna, repair the silver sword and armor, replenish healing items, and place Quen, food and any preferred combat potions where they are easy to use. Vampire Oil is appropriate for the fight. Black Blood can be carried as additional vampire protection, but positioning and attack recognition matter more than any single consumable.
Dettlaff’s first phase is a close-range fight. Dodge his slashes, avoid staying directly in front of him, and punish brief openings instead of extending attacks until stamina is empty. In the airborne phase, watch for the bat-wave attack and move laterally when the release cue ends; do not rely on Quen to absorb it. When he dives or lands with a clear recovery window, attack briefly and retreat before the next sequence.
The final phase places Geralt in a blood-filled arena. Dettlaff’s three pulsating hearts are the real objectives. Move between the targets, destroy each heart, and avoid spending too long fighting the blood clones. A clone can be interrupted or defeated when necessary to create space, but defeating clones does not replace destroying the hearts. Once all three are destroyed, the battle proceeds to its conclusion. Reload the branch save if you want to test a different route or ending.
- Enter Tesham Mutna with repaired equipment and replenished supplies.
- Dodge the bat wave laterally rather than trying to absorb it with Quen.
- Destroy all three pulsating hearts in the final phase.
7. Finish the expansion and separate optional completion from the main ending
After the main resolution, continue until Be It Ever So Humble... appears. Travel to Corvo Bianco and enter the estate to trigger the post-ending sequence and final visitor scene. Completing this quest confirms the Blood and Wine story has reached its post-epilogue state. Vineyard renovations, the guest room, laboratory improvements and other property upgrades are useful but are not required for the expansion’s narrative conclusion.
For a complete Toussaint cleanup, review the quest log and map after the epilogue. Track the Grandmaster scavenger hunts, Turn and Face the Strange and its mutation system, major contracts, Wine Wars, Fists of Fury: Toussaint, the Gwent tournament, the knightly tournament and character-focused side quests separately. Finding every Grandmaster diagram is different from crafting every Grandmaster set. Keep both the pre-route save and the post-ending save so alternate conclusions and optional cleanup remain available.
- Complete Be It Ever So Humble... at Corvo Bianco.
- Confirm that the selected Blood and Wine ending and concluding dialogue have played.
- Preserve a pre-route save and a separate post-ending save.
- Review unfinished Grandmaster hunts, contracts, mutations, treasure hunts and secondary quests.
Before you move on
- Envoys, Wineboys and The Beast of Toussaint are complete.
- The selected Blood and Wine route has reached its concluding dialogue.
- For the reconciliation route, the complete journal was read, Syanna’s ribbon was obtained, her account was heard, the final investigation was completed and the forgiving dialogue was selected.
- Dettlaff’s battle and the post-battle resolution are complete.
- Be It Ever So Humble... is complete and the Corvo Bianco visitor scene has played.
- Protected pre-branch and post-ending saves are retained.
- Optional Grandmaster hunts, contracts, mutations, vineyard quests and treasure hunts are checked separately.
References for this chapter
Post-Story Completion: New Game+, Trophies and Clean-Up
Finish the regular campaign and both expansions, then preserve your saves before starting cleanup or New Game+. New Game+ is built into the Complete Edition and is launched from the Main Menu using a completed regular-playthrough save; it is not created from an existing New Game+ save. Skills and many possessions can carry over, but quests, story choices, relationships, discovered locations and world progress start again. For trophy hunting, the decisive preparation happens before The Isle of Mists: protect missable ally, political, Gwent, fistfight, race and contract objectives with manual saves. Afterward, review contracts, treasure hunts, Witcher diagrams, monster nests, question marks, merchants, Gwent cards and trophies as separate checklists, because the game does not provide one universal counter for every optional activity.
1. Preserve the regular completion save
Make a manual save after the main campaign ending, another after Hearts of Stone, and another after Blood and Wine. Keep a separate save before any ending-related choice or expansion branch you may want to replay. The game can return you to a free-exploration state after major conclusions, but that does not replace a deliberately preserved branch save.
On PS5, use manual save slots as your primary archive and upload important files to PlayStation Plus cloud storage if you subscribe. Do not overwrite the only save from before The Isle of Mists, a Gwent tournament, a political decision or a Blood and Wine finale. The Complete Edition includes both expansions, while New Game+ is embedded rather than requiring a separate download.
- Regular campaign ending preserved
- Hearts of Stone conclusion preserved
- Blood and Wine conclusion preserved
- Pre-Isle of Mists save retained
- Important branch saves uploaded or otherwise protected
2. Start New Game+ from the correct source save
From the Main Menu, choose New Game+ and select a completed regular-playthrough save when prompted. The save does not need to include a completed Hearts of Stone or Blood and Wine run; the requirement relevant here is completion of the regular main storyline. If the selected file is already a New Game+ save, the game will not use it to create another New Game+ journey. Select the original regular campaign file instead.
New Game+ begins the story again. Geralt’s selected progression and many possessions can carry over, but the campaign’s quests, relationships, choices, discovered locations and objective state do not. Treat the confirmation screen as the final check: verify the intended source save, difficulty and character build before accepting. Keep the finished regular save untouched so you can return to post-story cleanup.
- Selected a regular completed save
- Confirmed it is not a previous New Game+ save
- Backed up the original file
- Checked the intended difficulty and build
- Accepted only after reviewing the New Game+ confirmation
3. Secure missable trophies before The Isle of Mists
If the PlayStation trophy list matters, make The Isle of Mists your hard checkpoint. Before sailing there, complete or protect the requirements for Full Crew and the related ally quests, political objectives connected to Assassin of Kings and Kingmaker, Keira’s quest chain, and any Gwent, fistfight or horse-racing objectives still in progress. A separate save before entering the Isle of Mists gives you a recovery point if a required character, card or quest disappears.
Card Collector is especially unsafe to postpone. Obtain the White Orchard opportunity, win the cards offered during A Matter of Life and Death, choose the cards rather than coin at the end of A Dangerous Game, and complete the High Stakes tournament with a save before entering it. The Complete Edition trophy guide identifies the base-game card trophy as missable and lists these quest-linked card opportunities.
For Even Odds, reserve suitable Witcher contracts before attempting the trophy. Defeat the required contract monsters without using Signs, potions, mutagens or bombs; the restriction does not require avoiding weapon oils. If a trophy does not trigger, reload the relevant branch save and repeat the qualifying objective with no prohibited effects active. Do not assume New Game+ will repair a missed quest-specific trophy automatically.
- Full Crew conditions checked
- Political and ally quests resolved
- White Orchard Gwent opportunity completed
- A Matter of Life and Death cards won
- A Dangerous Game reward set to cards
- High Stakes saved before entry
- Even Odds contracts reserved
4. Clean the world by category and region
After the story, open the quest log and review unfinished Witcher contracts, treasure hunts and scavenger hunts. Then sweep the world map region by region: White Orchard, Velen, Novigrad, Oxenfurt, Skellige and Toussaint. Clear ordinary monster nests, guarded treasures, abandoned sites, smugglers’ caches and other question-mark activities only after checking the associated quest log, because a map marker is not a complete record of every optional objective.
For equipment completion, visit blacksmiths and armorers and compare your diagrams against the Witcher-set tiers you have crafted. Missing diagrams may come from treasure hunts, merchants, quests or guarded locations rather than a simple question mark. In Toussaint, check the Grandmaster Witcher diagrams and their upgrade chain separately. Crafting every non-Witcher weapon is optional unless your personal completion target specifically includes every craftable item.
Skellige’s sea markers are the longest cleanup route. Use fast travel between unlocked islands, keep repair supplies and food available, and return to merchants and notice boards after major quest arcs. In Toussaint, revisit Corvo Bianco and the duchy’s settlements for unfinished contracts, side quests and merchant activity. Do not treat a clear-looking map as proof that every quest, card or diagram is complete.
- Contracts reviewed by region
- Treasure and scavenger hunts reviewed
- Witcher diagrams compared by tier
- Grandmaster diagrams checked
- Skellige sea markers swept if desired
- Toussaint and Corvo Bianco revisited
5. Preserve alternate outcomes and difficulty runs
Some trophies and story results require different choices or mutually exclusive quest outcomes. Make a permanent save immediately before the relevant quest, complete one branch, wait for the trophy notification and a subsequent save, then reload to test the alternate branch. Keep the original file until the complete trophy set is secure.
For a Death March trophy run, begin on the required difficulty and leave it unchanged through the qualifying campaign completion. A separate lower-difficulty cleanup save is safer for ordinary exploration, Gwent practice and expansion cleanup, but do not confuse that file with the save being used for a difficulty trophy.
- Permanent branch save created
- Trophy notification confirmed
- Alternate branch tested from reload
- Death March file kept separate
- No branch save deleted prematurely
6. Verify completion before archiving
Use separate lists for the regular main story, Kaer Morhen sequence, Hearts of Stone, Blood and Wine, contracts, treasure hunts, Witcher diagrams, Gwent, trophies and map activities. The game does not present one universal completion counter that certifies every category, so completion means that each category in your chosen goal has been checked independently.
Archive the regular completed save, the strongest post-expansion save and any pre-branch files you still need. If you have not started New Game+, leave the regular save untouched and confirm that it appears in the New Game+ selection screen. If you have started New Game+, retain the original regular file separately; it remains the reliable source for another New Game+ attempt and for returning to post-story cleanup.
- Main campaign completed
- Kaer Morhen sequence completed
- Hearts of Stone completed
- Blood and Wine completed
- Desired missable trophies earned or protected
- Cleanup categories checked separately
- Regular save archived
- New Game+ started deliberately or postponed
Before you move on
- A backed-up regular save exists with the main story, Kaer Morhen sequence, Hearts of Stone and Blood and Wine completed.
- The New Game+ menu recognizes the intended regular completed save, or New Game+ has deliberately been postponed.
- Missable trophy objectives are completed or protected by permanent branch saves.
- Contracts, treasure hunts, Witcher diagrams, monster nests, question marks, Gwent and trophy progress have been checked as separate categories.
- At least one pre-branch save remains for every alternate ending or trophy outcome still desired.
- Any remaining optional content is listed explicitly instead of being assumed complete because the map appears clear.
References for this chapter
- Cannot start New Game+ - CD PROJEKT RED Support
- The Witcher 3: Wild Hunt – Complete Edition — PlayStation Store
- The Witcher 3: Wild Hunt – Complete Edition — CD PROJEKT RED Press Center
- The Witcher 3: Wild Hunt Trophy Guide & Road Map — PlayStationTrophies.org
- Card Collector Trophy in The Witcher 3: Wild Hunt - Complete Edition — PlayStationTrophies.org
- Card Collector Trophy Guide — PlayStationTrophies.org
Troubleshooting, Recovery and Save Management
When a quest appears broken in The Witcher 3: Wild Hunt — Complete Edition on PS5, protect the affected save first, then test the least destructive fixes in order. Check the journal for a related quest or unmet objective, leave combat and the immediate area, and reload a save from before the failure. Restart the game and power-cycle the console when the problem persists. For missing Hearts of Stone, Blood and Wine, or other DLC warnings, verify the installed content, restore licenses, and check Console Sharing and Offline Play. The PS5 version has eight manual-save slots, separate from autosaves and checkpoints, so reserve them for decision points and recovery states. If the fault remains, preserve the original save and give CD PROJEKT RED Support the exact quest, objective, edition, patch, location, and symptoms.
1. Confirm that the objective is genuinely blocked
Read the active quest objective exactly as written, then inspect the rest of the journal for another quest involving the same NPC, settlement, building, or story event. The game can activate a related quest that must be completed before the original objective advances. Check the quest marker again after completing that dependency rather than repeatedly interacting with the same object.
If an NPC is missing or will not speak, first finish nearby combat and leave any restricted encounter area. Move far enough away for the scene to reset, then return by a normal route. Check whether the NPC is involved in another active quest or whether the objective requires a particular location or event. Treat fast travel or meditation as diagnostic tests only; neither is a guaranteed repair for a damaged quest state.
- Read the exact active objective.
- Inspect related quests in the journal.
- Leave combat and restricted quest scenes before testing the NPC again.
2. Make a recovery save, then reload in a controlled order
Before experimenting, create a manual save in a slot you can identify as the affected state. Do not overwrite the only save from before the problem. Load the newest valid save once and test the objective without changing several variables at the same time.
If the problem began after entering a building, crossing a quest boundary, starting dialogue, looting an item, or beginning combat, load a save made before that event. Replay the section normally. Speak to the required NPC before looting nearby containers, defeat enemies inside the intended objective area, and follow the marked route instead of entering a later area early. These are controlled tests that may restore a missed trigger, but they should not replace keeping an earlier backup.
- Create a clearly labeled manual save before testing.
- Keep a save from before the suspected failure.
- Replay the trigger normally from an earlier state.
3. Reset the game session and console cache
Close The Witcher 3 completely from the PS5 home screen and relaunch it. Do not rely on Rest Mode alone when testing a persistent problem. If the issue involves a crash, black screen, missing scenery, repeated loading failure, or a quest that remains broken after an earlier reload, power-cycle the console.
For the official quest-progression cache procedure, turn off the PlayStation 5 without entering Rest Mode, wait until the indicator light is fully off, unplug the power cable, wait at least 30 seconds, reconnect it, and start the console. CD PROJEKT RED’s general PlayStation cache article gives a two-minute wait for performance, crash, and black-screen troubleshooting; using the longer two-minute interval is reasonable when the fault is not limited to one quest. This process does not erase games or saved data.
- Close and relaunch the game.
- Power down fully rather than using Rest Mode.
- Use at least 30 seconds for a quest issue, or two minutes for broader performance faults.
4. Repair missing expansion or DLC access
The Complete Edition includes the base game, Hearts of Stone, and Blood and Wine, but a save can still report missing downloadable content if the installation, license, account, or console activation state is wrong. From the PS5 home screen, check that the game and its required content are installed. Do not delete the save while investigating.
If the expansion is installed but is not visible, restore PlayStation licenses. If a loaded save reports that DLC is missing even though it is installed, open Settings, Users and Accounts, Other, Console Sharing and Offline Play, and enable it for the PS5 account that owns the content. Restart the game and try the save again. If the save came from the PS4 version or another platform, use the game’s Cross Progression process with the same CD PROJEKT RED account and create a new uploaded save; a cloud icon should appear beside the uploaded save.
- Confirm the Complete Edition and required content are installed.
- Restore licenses when installed DLC is not visible.
- Enable Console Sharing and Offline Play for missing-DLC errors.
- Use the same CD PROJEKT RED account for Cross Progression.
5. Organize the limited manual-save rotation
The PlayStation support page documents eight manual-save slots, separate from checkpoints and autosaves. Use them as a rotation instead of overwriting every older file. Keep one rolling current save, one pre-decision save, one save before a point-of-no-return quest, one save before each expansion finale, and at least one end-state save. Reuse only the rolling slot until the related story section is safely complete.
Label saves by location or purpose, such as Kaer Morhen preparation, Isle of Mists departure, Hearts of Stone finale, Blood and Wine finale, or final ending. Preserve pre-ending files until all intended outcomes are recorded. If you need more long-term archives than the game’s slots permit, use PlayStation Plus saved-data backup or Cross Progression, but verify that the uploaded save appears before deleting a local copy.
- Use the eight manual slots deliberately.
- Keep pre-decision and pre-finale saves separate.
- Verify cloud or PlayStation Plus backups before deleting local files.
6. Escalate with complete evidence
If the journal check, controlled reload, full restart, cache reset, content verification, and earlier save do not resolve the issue, stop testing on the only copy of the affected state. Preserve both the failing save and the earliest useful backup. Record the exact quest name, objective text, region, nearby landmark, sequence of actions before the failure, game edition, patch shown beneath the title on the main menu, installed expansions, and whether the save was transferred through Cross Progression.
Contact CD PROJEKT RED Support through the PlayStation Witcher 3 support pages. Include screenshots or video when the failure is visual, and explain whether the issue affects one save or every save. Community wikis may identify quest-specific dependencies, but use them as reference only. Do not apply mods, trainers, save editors, or unofficial replacement files to the only backup of a campaign, especially when requesting support.
- Preserve the failing save and an earlier backup.
- Record the quest, objective, edition, patch, location, and symptoms.
- Contact official support before using unofficial repair tools.
Before you move on
- The affected quest advances from a clean reload or an earlier valid save.
- The PS5 is running the installed Complete Edition with the required content available.
- Missing-DLC warnings are resolved through installation, license, or Console Sharing checks.
- Manual saves exist before major decisions, point-of-no-return quests, expansion finales, and desired endings.
- The original failing save and at least one earlier backup remain preserved.
- If the problem persists, an official support request contains the exact quest, objective, edition, patch, location, symptoms, and supporting media.
References for this chapter
- I am unable to complete/progress in a quest — The Witcher 3: Wild Hunt | Technical Support — CD PROJEKT RED
- Clear cache on PlayStation — The Witcher 3: Wild Hunt | Technical Support — CD PROJEKT RED
- Information about saves — The Witcher 3: Wild Hunt | Technical Support — CD PROJEKT RED
- How do I transfer my save file to the next-gen update? - CD PROJEKT RED Support
- Missing DLC error while loading a save — The Witcher 3: Wild Hunt | Technical Support — CD PROJEKT RED
- Expansion/DLC not visible (but downloaded and installed) — The Witcher 3: Wild Hunt | Technical Support — CD PROJEKT RED
- The Witcher 3: Wild Hunt — Complete Edition is now in stores! — CD PROJEKT RED
Optional Completion Runs: Gwent, Hidden Contracts and Master Gear Sets
Handle optional completion as several controlled passes instead of one uninterrupted map sweep. Protect quest-linked Gwent opportunities before finishing their associated story quests, then clear contracts, treasure hunts and points of interest by region. Use the map filters to identify unexplored locations, but verify each marker in the journal because some activities require a quest trigger or a specific interaction. Build Witcher gear through Mastercrafted quality in the base game and Grandmaster quality in Blood and Wine. Keep separate saves before tournaments, major character quests and final reward choices. The Complete Edition on PS5 contains the base game, Hearts of Stone and Blood and Wine, so expansion cleanup can continue in the same overall campaign, but Gwent collection goals and gear goals should be tracked separately.
1. Protect quest-linked Gwent cards before cleanup
If Card Collector or a complete base-game Gwent collection matters, do not begin by clearing every map marker. First check the quest log for Gwent: Playing Innkeeps, Gwent: Old Pals, Gwent: Big City Players, Gwent: Skellige Style, A Matter of Life and Death, A Dangerous Game and High Stakes. These quests contain important opponents, tournament matches or card rewards that can become unavailable when their surrounding story events end.
Before starting A Matter of Life and Death, make a manual save and win every Gwent match offered during the masquerade sequence. Before finishing A Dangerous Game, inspect the final reward choice and take the cards if collection progress is the priority. In High Stakes, save before entering the Passiflora tournament and aim to win every round; losing can remove the tournament cards from that playthrough even though the quest itself may continue.
Play every named Gwent opponent who offers a card, and buy cards from innkeepers and merchants whenever they are available. The in-game Gwent book can indicate how many cards remain to be found in a region, but it is not a complete location-by-location checklist. Use a separate checklist and mark cards as soon as they enter the collection. Do not use a fixed claim about the total number of missable cards, because card availability and recovery behavior have varied across guides and patched versions.
- A manual save exists before A Matter of Life and Death, A Dangerous Game and High Stakes.
- The masquerade matches are won before leaving the quest area.
- The card reward is selected at the end of A Dangerous Game if collection completion is the goal.
- Every available named player and card-selling merchant has been checked.
2. Finish vulnerable secondary quests before map sweeping
Open the quest log before clearing question marks and look for unfinished secondary quests involving Triss, Dijkstra, Zoltan, Roche, Skellige’s rulers, Lambert and other characters who may later move, die or become unavailable. Complete the character quest first when a map activity overlaps its location. This preserves dialogue, rewards, Gwent opponents and ally-related content that a simple exploration sweep can miss.
Use three save layers for optional content: one save before the quest begins, one during the quest before a major reward or tournament, and one after the reward is secured. Keep the pre-quest file until you have checked the inventory, quest log and Gwent collection. If an NPC is missing, reload the earlier file rather than assuming that waiting or fast travel will restore a permanently closed quest.
- Desired character and faction side quests are complete before broad cleanup.
- Tournament and card-linked quest rewards are present in the collection or inventory.
- A pre-decision save remains available for each optional chain with mutually exclusive outcomes.
3. Clear map content region by region
Use this order for a manageable cleanup route: White Orchard, Velen and Novigrad, Skellige, Kaer Morhen, then Toussaint. Read notice boards to reveal nearby activities, open the world map and use its filters to separate undiscovered question marks from completed or irrelevant markers. Travel to each intended marker, identify the activity with Witcher Senses, complete the objective, loot the reward and confirm the journal or map state before moving on.
Prioritize Witcher contracts, treasure hunts, places of power, monster nests and guarded treasures over ordinary bandit camps when time or inventory space is limited. Contracts provide coin, experience, trophies and monster materials. Treasure hunts contribute diagrams and equipment progression. In Skellige, clear sea markers in short groups from a nearby port, then return to sell or dismantle loot; do not fill the boat with low-value items during a single long trip.
A question mark is not always a self-contained combat encounter. Some locations are revealed or completed only after a quest begins, a document is read, a prisoner is released or an object is examined. If a marker remains, check the quest log and use Witcher Senses before treating it as a bug. Do not plan on question marks respawning after completion; treat cleared locations as finished unless the game explicitly creates a new activity.
- Each intended region has been checked with the relevant map filters.
- All desired Witcher contracts and treasure hunts are complete.
- Skellige sea markers have been handled in groups rather than one overloaded voyage.
- Persistent markers have been checked for quest locks and required interactions.
4. Craft Witcher gear through the highest available base-game tier
Use the crafting menu to identify missing Witcher gear diagrams, then track the corresponding Scavenger Hunt quest. The normal progression is basic, enhanced, superior and mastercrafted. Confirm the next diagram and recipe before dismantling an older item, because higher-tier recipes commonly require the previous gear piece as an ingredient as well as additional materials.
For mastercrafted swords, complete the quest that makes Hattori available as a master swordsmith in Novigrad. For mastercrafted armor, use Yoana at Crow’s Perch after the relevant armorer progression. Before crafting, inspect the recipe for meteorite ore, monster parts, leather, ingots and other components. Dismantle only when the resulting component is needed, and compare the dismantling cost with buying or crafting a cheaper substitute.
- The desired school’s diagrams are collected through mastercrafted tier.
- Hattori and Yoana are available for the relevant weapon and armor recipes.
- Required materials have been checked before older gear is dismantled.
- Completed pieces are stored or equipped and not accidentally sold.
5. Finish Grandmaster gear in Toussaint
After reaching the Blood and Wine region, visit Lazare Lafargue in Beauclair and begin Master Master Master Master!. He is the Grandmaster craftsman and directs Geralt toward the Grandmaster Scavenger Hunts. The eligible schools are Griffin, Feline, Ursine, Wolven and Manticore. Viper has no Grandmaster upgrade, so do not search Toussaint for a nonexistent Viper Grandmaster tier.
Grandmaster pieces are endgame equipment with a level requirement of 40. Track one school at a time, follow the quest objectives to each diagram cache and read documents when they point to another location. The sets normally require armor, trousers, boots, gloves and both swords, although the Manticore set follows its own Grandmaster recipe structure. Bring repair kits, healing supplies and a combat-ready loadout because several caches are guarded or placed in hostile ruins.
Return to Lafargue after collecting the diagrams and craft the set. Finish the quest if you want the crafting objective recorded, then store the completed equipment in a labeled inventory position or chest. Grandmaster gear, mutation-related rewards and Toussaint’s high-level contracts make Blood and Wine a practical final gear destination rather than an early cleanup area.
- The intended Grandmaster diagrams are collected.
- The set is crafted by Lazare Lafargue and meets its level requirement.
- Master Master Master Master! is completed if quest completion is part of the goal.
- The final gear set and any unused diagrams are preserved in the post-cleanup save.
6. Preserve the final completion state
Make the final pass using three separate records: the quest log for unfinished optional chains, the map filters for regional exploration and the inventory or crafting screens for cards, diagrams, trophies and unique equipment. Gwent collection is its own objective; completing every contract or clearing every question mark will not prove that all cards were obtained. Likewise, crafting one Grandmaster set does not prove that every school’s diagrams were found.
Finish in Toussaint if you want the strongest practical gear hub, but keep an earlier save from before any still-unresolved base-game tournament or character quest. After the last cleanup batch, save manually, retain an earlier branching save and copy the completed save to available PlayStation storage. This gives you a clean post-story state for trophy cleanup, alternate quest outcomes or New Game+ preparation.
- The Gwent collection has been compared with a complete card checklist.
- Desired contracts, treasure hunts, question marks and unique rewards are recorded as complete.
- Chosen Witcher gear sets are crafted through Mastercrafted or Grandmaster quality.
- A final post-cleanup save and an earlier branching save are both preserved.
Before you move on
- No optional quest remains in the journal unless it was intentionally left for a different outcome.
- Quest-linked Gwent tournaments and card rewards have been secured, and the collection has been compared with a full checklist.
- All intended regional contracts, treasure hunts and map activities have been checked using the relevant map filters.
- The selected Witcher gear sets are crafted through Mastercrafted or Grandmaster tier with the correct craftspeople.
- A final save, a pre-branching save and a backup copy of the completed state are preserved.
References for this chapter
- The Witcher 3: Wild Hunt Next-Gen Update and Complete Edition announcement
- CD PROJEKT RED support: How do I update my game to the next-gen?
- Gwent Guide: The Witcher 3: Wild Hunt — Neoseeker
- The Witcher 3 Missables Checklist — WitcherDB
- Master Master Master Master! — Witcher Wiki
- The Witcher 3: All Grandmaster Witcher Gear Set Locations — PowerPyx
- The Witcher 3: Wild Hunt patch 4.01 changes
Final Checklist and Completion Verification
Verify the main campaign, Kaer Morhen sequence, Hearts of Stone, and Blood and Wine separately instead of relying on one completion indicator. Preserve a save before the late-game ending branch, a completed main-story state, and completed expansion states before beginning New Game+ or deleting older files. The PS5 Complete Edition includes the base game, both expansions, and New Game+, while cross-progression uses CD PROJEKT RED account linkage and newly created cloud saves. Optional quests, contracts, treasure hunts, Gwent, undiscovered locations, and trophies require their own checklist because the game does not provide one universal 100% screen.
Confirm the main campaign and Kaer Morhen sequence
Open the quest log and review the completed main-story entries. Confirm that The Battle of Kaer Morhen is finished, then verify that the late-game sequence continued through the final pursuit, the final confrontation, and the ending quests. Do not treat the end of the Kaer Morhen defense as campaign completion; it is a major turning point, not the conclusion.
Let the ending scenes and epilogue dialogue finish before making your archive save. Then create a manual save with a clear note in your own records, such as Main Story Complete - Ending A. Also retain a separate save from before the late-game ending branch. The completed save is useful for post-story exploration, but the earlier branch save is the safer route for replaying alternate outcomes.
- The Battle of Kaer Morhen is complete.
- The final main-story quests and ending scenes have played.
- A completed-main-story save exists.
- A separate pre-ending branch save is protected.
Verify Hearts of Stone as its own campaign
Switch to the Hearts of Stone section of the quest log and confirm that the expansion's final quest, Whatsoever a Man Soweth..., is complete. Reaching Oxenfurt, meeting Gaunter O'Dimm, or completing the earlier contracts does not finish the expansion. Its conclusion includes the resolution of the contract and the aftermath of the final confrontation.
If you want to preserve both major outcomes, keep a manual save before the late Hearts of Stone decision. The option to challenge O'Dimm and save Olgierd depends on earlier actions, including the optional meeting with Professor Shakeslock, so changing only the final dialogue may not expose every result. Keep the pre-decision save until you have recorded the outcome you want.
- Whatsoever a Man Soweth... is listed as completed.
- The final contract resolution and aftermath are finished.
- A pre-decision Hearts of Stone save is retained if alternate outcomes matter.
- The expansion is not counted complete merely because its opening quests were finished.
Verify Blood and Wine through its epilogue
In Toussaint, review the Blood and Wine quest section and complete the central duchy storyline through its final resolution. Do not stop immediately after the last major battle or confrontation. Continue through the post-story dialogue and personal epilogue until the expansion has clearly delivered its closing scene and normal control has returned.
Make a manual save after the epilogue, then list unfinished Blood and Wine content separately. Contracts, treasure hunts, character quests, tournaments, romances, and other Toussaint activities are optional completion targets and are not proved complete by finishing the main duchy storyline. If you are pursuing a particular Blood and Wine outcome, retain the branch save made before the relevant late-story decisions.
- The Blood and Wine main storyline is complete.
- The Blood and Wine epilogue has played.
- A post-epilogue Toussaint save is stored.
- Unfinished optional Toussaint content is recorded separately.
Preserve and label alternate-ending saves
Keep one save before the late-game sequence where major ending variables are finalized, and use additional manual saves before decisions you specifically intend to test. After viewing one ending, reload the protected branch save instead of overwriting it. Make the alternate choices, complete the resulting objectives, and save the new result under a different label.
Several main-story outcomes depend on earlier decisions and completed or failed character quests. The final conversation alone does not determine every ending variation. In your notes, record the branch save, the important earlier choices, and the resulting ending. This is more reliable than expecting the save list or quest log to identify every narrative variation.
- The main-game branch save is protected from deletion.
- Each desired ending has a distinct save or route note.
- Alternate-ending tests never overwrite the original branch save.
- Earlier relationship and character-quest decisions are recorded where relevant.
Archive saves and prepare for New Game+
Keep the original saves on the console until the backup has been verified. For cross-progression, update the source copy, connect it to the same CD PROJEKT RED account through My Rewards, and create a new save to upload. The cloud icon documented by CD PROJEKT RED appears beside that newly uploaded save; on the PS5 copy, connect the same account and look for the save in Load Game.
For a normal PS4-to-PS5 transfer, use the PlayStation-supported transfer method or the game's documented cross-progression process. Do not assume that every local or USB transfer will display the same cloud icon. Confirm that the intended save is visible in the PS5 Load Game menu before deleting or replacing anything.
The Complete Edition contains New Game+. Start it from the Main Menu after finishing the regular campaign. Select a normal-playthrough save, not an existing New Game+ save; the official support guidance states that a New Game+ file cannot be used to start another New Game+ journey. Preserve the original completion saves even after starting the new run.
- The intended saves are visible from the correct account.
- The cross-progression cloud icon has been verified where applicable.
- A completed main-story save and both expansion saves are identifiable.
- New Game+ is started from a regular-game save, not an existing New Game+ save.
Perform optional cleanup as a separate completion goal
Inspect the quest log and map region by region for unfinished contracts, treasure hunts, character quests, races, fistfights, Gwent objectives, undiscovered locations, monster nests, and expansion activities. Track these categories independently. Completing the main campaign, Hearts of Stone, or Blood and Wine does not automatically prove that every optional activity is done.
Before deleting old files, compare your trophy plan and personal checklist against the saved states. Some quests, Gwent cards, character outcomes, and trophies can be missed or made unavailable by progression. Keep older saves whenever an objective depends on a past decision, and archive the files before beginning a broad cleanup pass.
- The main, Hearts of Stone, and Blood and Wine quest sections are reviewed separately.
- Optional activities are tracked by category rather than inferred from the ending.
- Gwent, trophies, contracts, treasure hunts, and undiscovered locations are checked independently.
- Older saves are retained for missable or mutually exclusive objectives.
Before you move on
- The Battle of Kaer Morhen and the complete main campaign ending are finished.
- A completed main-story save and a protected pre-ending branch save exist.
- Hearts of Stone is complete through Whatsoever a Man Soweth... and its aftermath.
- Blood and Wine is complete through its final resolution and epilogue.
- Cross-progression or transfer backups have been verified from the intended account.
- Optional quests, contracts, treasure hunts, Gwent, trophies, and map activities have been checked independently.
- The selected regular-game save is preserved before starting New Game+.
References for this chapter
- The Witcher 3: Wild Hunt - Complete Edition, PlayStation Store
- The Witcher 3: Wild Hunt PS5 features detailed, PlayStation Blog
- How do I transfer my save file to the next-gen update? - CD PROJEKT RED Support
- Cannot start New Game+ - CD PROJEKT RED Support
- Whatsoever a Man Soweth... - WitcherDB
- Scenes From a Marriage - The Official Witcher Wiki
Finishing up
You reach campaign completion when you finish the main story’s final quest(s) and the associated Kaer Morhen/Isle of Mists sequence appropriate to the route you chose.
Confirm the final in‑game epilogue scenes play and the credits roll.
Complete Hearts of Stone and Blood and Wine mainlines to their endings and verify their epilogues.
Both expansions appear as full-content quests inside the Complete Edition and conclude with their own final scenes.
If you want a single-file proof of full completion, use the in-game quest log and world map to confirm no flagged main quests remain uncompleted and check DLC questlines for any remaining objectives.
Optional: start New Game+ after the Complete Edition main and expansions if you want to carry over gear and face late-game builds; verify your final save before initiating New Game+ so you retain desired items.
Choose your next gameScreenshots & video
Game imagery for reference. Follow the written chapters above for the route and strategies.
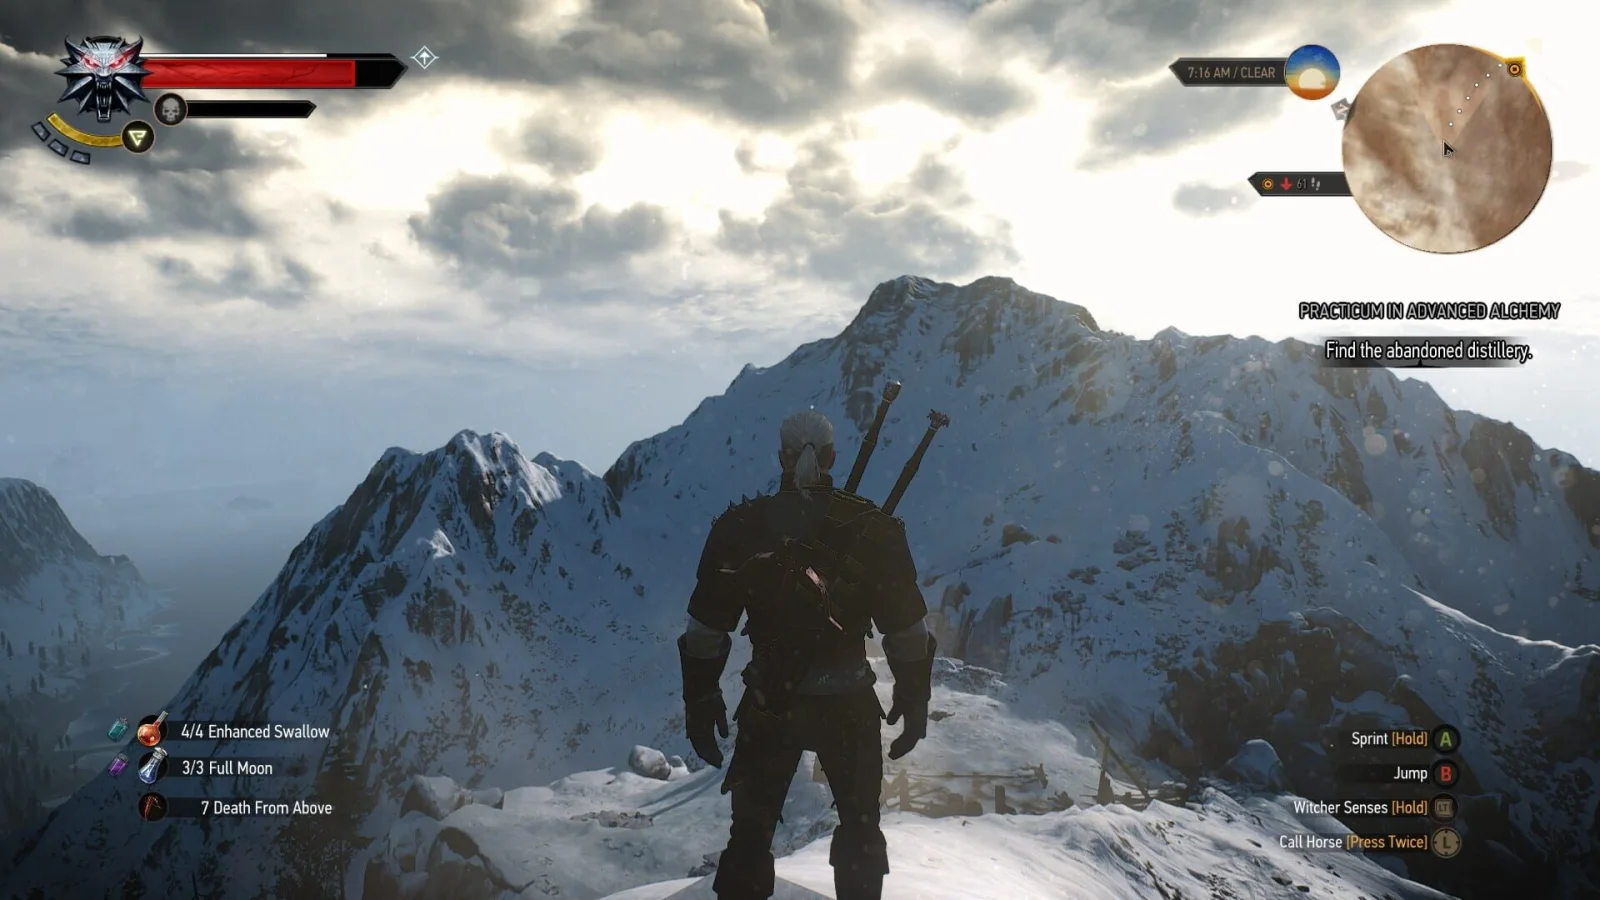
Sources & references
Our original guide draws on the references below. Check the edition at the top of this page before following controls or unlock requirements.
- CD PROJEKT RED support: How do I update my game to the next-gen?
- How do I transfer my save file to the next-gen update? - CD PROJEKT RED Support
- Unable to update the game to the next-gen update — The Witcher 3: Wild Hunt | Technical Support — CD PROJEKT RED
- The Witcher 3: Wild Hunt - Complete Edition, PlayStation Store
- The Witcher 3: Wild Hunt PS5 features detailed, PlayStation Blog
- Technical Support — The Witcher 3: Wild Hunt — CD PROJEKT RED
- The Witcher 3: Wild Hunt Game Manual — PlayStation controls and quick-access functions
- Patch 4.04 — list of changes
- The Witcher 3: Wild Hunt — PlayStation technical support
- The Witcher 3: Wild Hunt — Complete Edition is now in stores! — CD PROJEKT RED
- Lilac and Gooseberries Walkthrough — Game8
- Contract: Devil by the Well Walkthrough — Game8
- Missing in Action Walkthrough — Game8
- The Incident at White Orchard — Witcher Wiki
- Place of Power — Witcher Wiki
- Missing in Action — Prima Games
- Family Matters — The Witcher 3: Wild Hunt Walkthrough, Gamer Guides
- Ladies of the Wood — The Witcher 3: Wild Hunt Walkthrough, Gamer Guides
- The Whispering Hillock — The Witcher 3: Wild Hunt Walkthrough, Gamer Guides
- The Witcher 3 contracts, Witcher Wiki
- Get Junior — The Witcher 3: Wild Hunt Walkthrough, Neoseeker
- The Witcher 3: Wild Hunt FAQ/Walkthrough, Neoseeker
- The Gangs of Novigrad, Witcher Wiki
- The Isle of Mists quest reference and cutoff list
- Count Reuven’s Treasure — Novigrad Walkthrough, Gamer Guides
- Get Junior — The Witcher 3: Wild Hunt Walkthrough, Gamepressure
- A Matter of Life and Death, Witcher Wiki
- Now or Never — Witcher Wiki
- The Witcher 3 secondary quests — Witcher Wiki
- A Deadly Plot and political quest prerequisites — Gamers.Wiki
- Now or Never walkthrough — Gamer Walkthroughs
- The Witcher 3: Wild Hunt Complete Edition Guide - Prima Games
- King's Gambit | Witcher Wiki
- Brothers In Arms: Skellige | Witcher Wiki
- The Lord of Undvik - The Witcher 3: Wild Hunt Walkthrough
- Possession Walkthrough and Best Choice - The Witcher 3
- The Cave of Dreams Walkthrough - The Witcher 3
- Skellige Isles Witcher Contracts - The Witcher 3: Wild Hunt Walkthrough
- Skellige Witcher Diagrams Walkthrough
- The Witcher 3: Wild Hunt — Complete Edition, PlayStation Store concept page
- Collect ’Em All, Witcher Wiki
- Gwent players, Witcher Wiki
- The Witcher 3 Missable Gwent Cards Checklist, Gamers.Wiki
- The Witcher 3 Guide, GamesRadar
- The Witcher 3: Wild Hunt – Complete Edition — CD PROJEKT RED Press Center
- Ugly Baby quest reference
- The Witcher 3 main quests reference
- Full Crew ally requirements
- Ciri's Fate walkthrough and ending conditions
- Battle Preparations quest reference
- Brothers in Arms Walkthrough — GameBanshee
- Final Preparations and Reason of State walkthrough
- Va Fail, Elaine Walkthrough — GameBanshee
- The Isle of Mists Walkthrough — GameBanshee
- The Witcher 3 Quest Flowchart — GitHub
- Brothers In Arms: Novigrad Walkthrough — Game8
- Act II: Uma’s Curse — Gamer Walkthroughs
- The Battle of Kaer Morhen Walkthrough, Defense Choices and Best Choices — Game8
- The Battle of Kaer Morhen — GameBanshee walkthrough
- The Battle of Kaer Morhen — Neoseeker walkthrough
- The Battle of Kaer Morhen — Gamer Walkthroughs
- The Battle of Kaer Morhen — Guides4Gamers quest stages
- The Witcher 3: Wild Hunt – PS4 & PS5 Games — PlayStation
- Final Preparations — Witcher Wiki
- It Takes Three to Tango — Witcher Wiki
- A Final Kindness — Witcher Wiki
- The Witcher 3 decision checklist — Witcher Wiki
- Final Preparations: Full Quest Walkthrough in The Witcher 3 — ConsolePulse
- Battle Preparations: Full Quest Walkthrough in Witcher 3 — ConsolePulse
- Final Preparations walkthrough — GameBanshee
- The Great Escape walkthrough — GameBanshee
- Reason of State — Witcher Wiki
- Something Ends, Something Begins — Witcher Wiki
- The Witcher 3: Wild Hunt – Complete Edition — PlayStation Store
- Cannot start New Game+ — The Witcher 3: Wild Hunt | CD PROJEKT RED Technical Support
- Evil's Soft First Touches — GameBanshee
- Envoys, Wineboys — GameBanshee
- How to manage PS5 console storage space — PlayStation Support
- Whatsoever a Man Soweth... - WitcherDB
- Whatsoever a Man Soweth… Walkthrough — GameBanshee
- Hearts of Stone Walkthrough — GameFAQs
- Viper School Gear — RelicTrek
- The Witcher 3 Hearts of Stone Viper Gear Guide — Gamers.Wiki
- Viper Armor — GosuNoob
- The Night of Long Fangs — Witcher Wiki
- Tesham Mutna — Witcher Wiki
- Sylvia Anna — Witcher Wiki
- Cannot start New Game+ - CD PROJEKT RED Support
- The Witcher 3: Wild Hunt Trophy Guide & Road Map — PlayStationTrophies.org
- Card Collector Trophy in The Witcher 3: Wild Hunt - Complete Edition — PlayStationTrophies.org
- Card Collector Trophy Guide — PlayStationTrophies.org
- I am unable to complete/progress in a quest — The Witcher 3: Wild Hunt | Technical Support — CD PROJEKT RED
- Clear cache on PlayStation — The Witcher 3: Wild Hunt | Technical Support — CD PROJEKT RED
- Information about saves — The Witcher 3: Wild Hunt | Technical Support — CD PROJEKT RED
- Missing DLC error while loading a save — The Witcher 3: Wild Hunt | Technical Support — CD PROJEKT RED
- Expansion/DLC not visible (but downloaded and installed) — The Witcher 3: Wild Hunt | Technical Support — CD PROJEKT RED
- The Witcher 3: Wild Hunt Next-Gen Update and Complete Edition announcement
- Gwent Guide: The Witcher 3: Wild Hunt — Neoseeker
- The Witcher 3 Missables Checklist — WitcherDB
- Master Master Master Master! — Witcher Wiki
- The Witcher 3: All Grandmaster Witcher Gear Set Locations — PowerPyx
- The Witcher 3: Wild Hunt patch 4.01 changes
- Scenes From a Marriage - The Official Witcher Wiki
About the game & collecting notes
- Platform
- Sony PlayStation 5
Complete-edition, PS5-focused walkthrough covering the main campaign from prologue to the true endings, plus both expansions (Hearts of Stone and Blood and Wine), Kaer Morhen, and post-game completion options. Emphasis on route order, quest prerequisites, preparation for key battles and preserving saves for PS5 features and cross-gen save transfer.
Darryl Polo
Darryl Polo loves tinkering with emulation and revisiting retro games. He enjoys exploring how old favorites play on different setups and sharing what he learns along the way. At Joking Joystick, he writes about the games, hardware, and small discoveries that keep the hobby fun.
Our editorial standardsFound a step that needs another look? Help us improve this guide.