
The Legend of Zelda: Oracle of Seasons — Complete Campaign Walkthrough (Game Boy Color, USA)
Step-by-step walkthrough for the original Game Boy Color (USA) release of Oracle of Seasons. This guide covers overworld navigation, every main dungeon through the game's ending (defeat of Onox and freeing Din), seasonal mechanics, essential items, recovery from setbacks, and an optional linked-game overview to reach the true ending.

Find a copy
The Legend of Zelda: Oracle of Seasons Game Boy Color
We may earn a commission if you buy through these links, at no extra cost to you. As an Amazon Associate I earn from qualifying purchases.
Opens retailer search results. Check the model, edition, seller, availability and current price before buying.
Before you begin
You are Link, transported to Holodrum to rescue Din, the Oracle of Seasons.
The Rod of Seasons is obtained after the first dungeon. Once its seasonal powers are unlocked, use tree stumps to change local overworld conditions and open routes.
This walkthrough leads through the eight regular dungeons, the required overworld quests between them, Onox’s Castle, Onox’s defeat, Din’s rescue, and the standalone ending of the original Game Boy Color USA release.
The main campaign ends when Onox and Dark Dragon Onox are defeated, Din is freed, and the ending sequence begins.
The linked Oracle of Ages continuation is optional and is covered separately; it is not required for the standalone Oracle of Seasons ending.
Set yourself up for the run
Learn the Game Boy Color controls, item assignment, sword, shield, map, seeds, and save procedure.
Expect eight regular dungeons followed by Onox’s Castle.
The Rod of Seasons is obtained after the first dungeon; seasonal powers are gained gradually from the Season Spirits and must be used from tree stumps.
Track optional rings, Gasha Seeds, the trading sequence, animal companions, and equipment upgrades separately from required progression.
Keep Bombs, recovery items, and the current dungeon tools available before long overworld routes and boss attempts.
Use the Maku Tree, Temple of Seasons, Gale Seed trees, and major towns as navigation checkpoints.
The standalone campaign ends with Onox and Dark Dragon Onox. The linked Oracle of Ages continuation, Twinrova, Ganon, and the Room of Rites are optional.
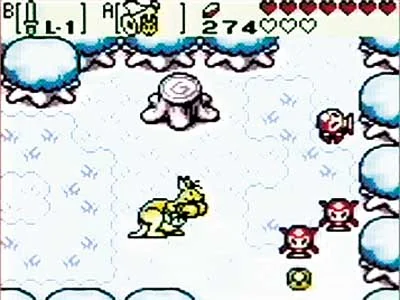
Starting Holodrum: controls, Horon Village and the Maku Tree
After Onox kidnaps Din, take Impa’s message to the Maku Tree in Horon Village. Mayor Ruul provides the Village Key, which opens the route to Hero’s Cave. Work through the cave without a weapon, collect the two Small Keys, and claim the L-1 Wooden Sword. Return to town, buy the L-1 Wooden Shield for 30 rupees, then open the Maku Tree’s gate and wake the tree by striking its sleep bubble. The Maku Tree explains that Holodrum can be restored only by collecting the eight Essences of Nature and gives you the Gnarled Key for Level 1, Gnarled Root Dungeon.
Reach Horon Village and obtain the Village Key
After the opening scene, Link wakes in a forest. Walk south until you reach the traveling troupe and speak with Din, the red-haired dancer. Continue through the scene in which Onox attacks, kidnaps Din, and throws Holodrum’s seasons into disorder. When control returns, speak with Impa. She directs you to the Maku Tree in Horon Village.
Follow Impa south and then west across the bridge into Horon Village. The direct path toward the Maku Tree is blocked, so do not try to force your way through the guarded entrance. From the village entrance, travel toward the northern part of town and enter Mayor Ruul’s house, recognizable by its chimney. Speak with Mayor Ruul to receive the Village Key.
Return to the locked gate near the place where Impa is waiting. Use the Village Key on this eastern village gate. The opened route leads toward the western coast and Hero’s Cave. Impa will point out the cave entrance as you approach it.
- Speak with Din before leaving the opening forest.
- Talk to Impa after Onox attacks.
- Find Mayor Ruul’s house in Horon Village.
- Receive the Village Key.
- Use the key on the locked village gate near Impa.
Use the Game Boy Color controls and map
Move with the Control Pad. A and B are the two item buttons, and Start opens the inventory and equipment screens so you can assign carried items. Because the sword and shield are inventory items in Oracle of Seasons, obtaining one does not mean it is always active; assign each item to a button before relying on it. The sword button attacks, while the shield button is held to defend against attacks from the front.
Press Select to open the World Map. The map shows the entire world, Link’s current location, and destinations. Dungeon and location names are displayed after you have visited those places, so use the map to confirm which areas you have actually reached rather than expecting every landmark to be labeled immediately. The map is useful for checking your position between Horon Village, the coast, Hero’s Cave, and the northern route to Gnarled Root, but it does not replace visual landmarks such as bridges, gates, ledges, and distinctive buildings.
For this opening section, keep the sword on one button and the shield on the other. If you want to gather rupees safely after obtaining the sword, cut grass and defeat nearby enemies instead of entering unexplored areas.
- Use the Control Pad for movement.
- Use A and B for assigned items.
- Open inventory with Start and assign the sword manually.
- Press Select to check the World Map.
- Use visited location names and landmarks to confirm your route.
Clear Hero’s Cave and collect the L-1 Wooden Sword
Enter Hero’s Cave and avoid the Keese and other enemies because Link has no weapon yet. In the first room, leave through the eastern door. In the next room, the doors close. Push the central block to reopen them, then take the northern exit first.
In the following room, push the block upward so you can follow the narrow path without falling. At the pair of blocks near the far side, push the left block downward and the right block to the right. Continue into the room with the enemies and the floor switch. Avoid the enemies, step on the switch, and open the chest that appears to obtain a Small Key.
Return to the earlier block room. Push the blocks as needed to reopen the doors, then take the southern exit this time. In the next room, go to the eastern side and push against the locked door while carrying the Small Key; this opens the passage. Continue north, activate the switch in the next room, and go around to the opened doorway.
Follow the final passage north to the chest containing the L-1 Wooden Sword. Open it and equip the sword immediately. The game warps Link back to the cave entrance after the sword is collected, so there is no need to retrace the entire mini-dungeon. You can now defeat basic enemies and cut grass and bushes.
- Avoid enemies until the sword is obtained.
- Collect the first Small Key from the switch chest.
- Return to the block room and take the southern route.
- Use the key on the locked eastern door.
- Activate the next switch and open the chest with the L-1 Wooden Sword.
- Equip the sword after the automatic return to the entrance.
Gather rupees and buy the Wooden Shield
The shield is purchased in Horon Village rather than found in Hero’s Cave. After leaving the cave, the nearby ledge above the entrance provides an optional shortcut to a hidden chest. Cut the bush on the ledge and jump down through the opening to reach the chest containing 30 rupees. This detour is not required for story progression, but it supplies exactly enough money for the Wooden Shield.
Return to Horon Village and enter the ordinary shop marked with a shield sign. Pick up the L-1 Wooden Shield and speak with the shop clerk to buy it for 30 rupees. If you skipped the hidden chest or spent the money, cut grass and defeat enemies outside town until you have enough. Do not spend these rupees on optional purchases before buying the shield if you want to complete the recommended opening setup.
Open the inventory and assign the shield to the button not occupied by the sword. Hold the shield button while facing an enemy to block frontal projectiles such as Octorok stones. The shield is useful but not required to obtain the Gnarled Key; it is simply the first defensive upgrade available in the normal USA campaign.
- Optionally collect the 30-rupee chest above Hero’s Cave.
- Buy the L-1 Wooden Shield from the Horon Village shop.
- Assign sword and shield to separate item buttons.
- Use the shield while facing projectile enemies.
Open the Maku Tree’s gate and receive the Gnarled Key
From Horon Village, travel to the gate leading to the Maku Tree’s clearing. With the Wooden Sword equipped, swing at the gate to open it. Continue north into the clearing. The Maku Tree is weak and asleep because Holodrum’s seasons have been disrupted.
Stand near the tree and strike the sleep bubble that rises from it. Once the bubble is popped, speak with the Maku Tree. It explains that Din’s rescue and the restoration of Holodrum require the eight Essences of Nature. These Essences are held in the game’s eight regular dungeons, so the tree becomes an important progress checkpoint whenever the story sends you back to Horon Village.
The Maku Tree gives you the Gnarled Key. This is the required key for Level 1, Gnarled Root Dungeon. Leave the clearing and travel east from Horon Village, passing the area near Hero’s Cave. Continue across the bridge and then go north. At the large root blocking the route, use the Gnarled Key on its keyhole to enter the first dungeon.
Do not attempt advanced regions yet. At this point, the Gnarled Key is the only dungeon key required for main-story progress, and later areas will remain blocked until Link obtains the appropriate seasonal powers and dungeon items.
- Open the Maku Tree’s gate with the Wooden Sword.
- Strike the Maku Tree’s sleep bubble.
- Hear the eight-Essence objective.
- Receive the Gnarled Key.
- Travel east past Hero’s Cave, cross the bridge, and go north to Gnarled Root.
- Use the Gnarled Key at the root’s keyhole.
Before you move on
- Link has the L-1 Wooden Sword and L-1 Wooden Shield assigned to separate item buttons.
- The Maku Tree has been awakened and has explained the need to collect the eight Essences of Nature.
- The Gnarled Key is present in Link’s inventory.
- The route to Level 1, Gnarled Root Dungeon is open: travel east past Hero’s Cave, cross the bridge, go north, and use the key at the large root.
- The next required objective is to enter Gnarled Root Dungeon and claim the first Essence of Nature.
References for this chapter
- Oracle of Seasons instruction manual, USA Game Boy Color edition
- Oracle of Seasons Walkthrough: Getting Started in Holodrum
- Meet the Maku Tree — The Legend of Zelda: Oracle of Seasons Guide and Walkthrough
- The Legend of Zelda: Oracle of Seasons/Arrival — StrategyWiki
- The Legend of Zelda: Oracle of Seasons — 100% Item Walkthrough — Game Boy Color
Level 1 — Gnarled Root Dungeon (first Essence)
Use the Gnarled Key from the Maku Tree to open the giant root in North Horon. Gnarled Root Dungeon has no season-changing requirement. Follow its progression through the first Small Key, Dungeon Map, Compass, Bombs, second Small Key, Brother Goriyas mini-boss, Seed Satchel with Ember Seeds, Boss Key, and Aquamentus. The dungeon’s main obstacles are locked doors, mine-cart routing, block puzzles, torches, blade traps, pits, and Floormasters that can return you to the entrance. Defeat Aquamentus by striking its horn while avoiding its three fireballs and charge. Take the Heart Container, then enter the next room to claim Fertile Soil, the first Essence of Nature.
Reach Gnarled Root Dungeon in North Horon
Before leaving Horon Village, confirm that you have the Wooden Sword and the Gnarled Key from the Maku Tree. A Wooden Shield is useful against projectiles, but it is not required to enter or clear this dungeon. Restore your hearts before setting out if possible.
Leave Horon Village through the north exit. From the screen with Impa, travel east, then north. Cut the bushes blocking the next northern passage, continue north, and go west across the bridge. On the far side, walk to the keyhole beside the giant root and use the Gnarled Key. The root rises and reveals the entrance. No Rod of Seasons or seasonal power is needed for this route.
- Wooden Sword obtained
- Gnarled Key received from the Maku Tree
- Hearts restored before entering
- Gnarled Root Dungeon opened in North Horon
Collect the first Small Key and Dungeon Map
From the entrance, go north. The doors close in the next room, which contains four blocks. Push the upper-right block in any direction to reopen the passages. Continue through the east door and defeat all four Blue Stalfos. A Small Key drops onto the blue floor tile; collect it.
Return to the block room and use the key on the locked door in the west wall. Defeat every Blue Stalfos in the following room. A chest appears after the room is cleared; open it to obtain the Dungeon Map. The bushes in and near these early rooms can hide fairies, so use them to recover instead of spending a potion immediately.
- First Small Key collected
- West locked door opened
- Dungeon Map collected
- Early fairy recovery spots noted
Ride the carts and obtain the Compass, Bombs, and second Small Key
Go north from the map room and enter the mine cart. When it stops, clear the enemies in the next area, then push the central block to open the west exit. Move through the blade traps by approaching them and retreating so they return toward their starting positions before you pass.
Solve the block arrangement in the next room to reach the chest containing a Gasha Seed, which is optional. Return east, climb the stairs, and continue right to the Compass chest. Strike the nearby track switch with your sword, then return to the cart and ride the changed route. The cart passes a chest; after it stops, walk west and collect the Bombs.
Go east from the Bombs, climb the stairs, and proceed east before descending. Move carefully past the spinning blade trap to the right side of the room. Step on the floor switch to make a chest appear, then open it for the second Small Key.
- Compass collected
- Track switch changed with the sword
- Bombs collected
- Second Small Key collected
Reach and defeat Brother Goriyas
Backtrack west from the second-key room. After climbing the stairs, continue west until you find cracks in the north wall. Place a bomb at the cracked section and enter the passage. Work through the blade-trap rooms and use the second Small Key on the locked northern door.
In the Brother Goriyas room, two enemies throw boomerangs to one another. Keep moving around the room and avoid standing between a brother and the returning boomerang. Your shield can block a boomerang if your position is bad, but sword attacks are the way to defeat them. Attack when a brother is exposed, then move away before the next throw. Clearing the room opens the route beyond it.
- Cracked north wall opened with a Bomb
- Locked mini-boss door opened
- Brother Goriyas defeated
Take the Seed Satchel and open the Boss Key route
After the mini-boss, leave through the west side. Push the leftmost block upward to reach the stairs, then descend and follow the ladders through the side-view section. Cross the platforms carefully; falling can cost health and force a repeat of part of the route. The chest at the end contains the Seed Satchel loaded with Ember Seeds. Equip the Satchel immediately.
Return upstairs and push the block below the leftmost block to escape the surrounding blocks. Go east and step into the warp point in the mini-boss area. This returns you to the mine-cart room. Use an Ember Seed on each of the two unlit torches beside the sealed west doorway. Enter the opened room, defeat all enemies, and collect the Boss Key from the chest.
- Seed Satchel collected
- Ember Seeds available
- Mini-boss warp used
- Two torches lit
- Boss Key collected
Cross the Floormaster rooms and reach Aquamentus
Leave the Boss Key room, go south, then east. Push the upper-right block to open the route, enter the next room, and light the two torches at its north end with Ember Seeds. The opened doorway leads into the Floormaster maze.
Floormasters can grab Link and return him to the dungeon entrance. Defeat them before advancing whenever possible, and avoid hugging the room edges where their attacks are easier to miss. The chest in the maze contains the optional Discovery Ring, which can later reveal hidden Soft Soil locations. From the maze, use the upper route to reach the boss door and unlock it with the Boss Key. Restore your hearts before entering if a nearby fairy is available.
- Second torch doorway opened
- Floormasters cleared or safely bypassed
- Discovery Ring collected only if desired
- Aquamentus door reached with the Boss Key
Defeat Aquamentus and claim Fertile Soil
Aquamentus can be damaged by striking its horn with the Wooden Sword. Stay toward the upper side of the arena when approaching so you can reach the horn without remaining directly in front of the dragon. Charge the sword for a Spin Attack when you have room; regular slashes also work.
When Aquamentus raises or lights its horn, prepare for the three fireballs. Move into a gap between their paths rather than standing close to the dragon’s face. If Aquamentus charges across the room, move out of its line and let it hit the wall before returning to attack. Do not chase it into a corner; preserve room to dodge the next fireball pattern. Repeat the approach-and-retreat pattern until the horn breaks and Aquamentus is defeated.
Take the Heart Container, which restores your health and adds another heart. Leave through the opened doorway on the right, climb the steps in the next room, and collect Fertile Soil. This is the first Essence of Nature. The game then sends Link outside and the Maku Tree gives the next objective.
- Aquamentus defeated by striking the horn
- Heart Container collected
- Fertile Soil obtained
- Link returned outside and the Maku Tree message appears
Before you move on
- The inventory contains the Seed Satchel with Ember Seeds, and the dungeon map records the cleared route.
- Aquamentus has been defeated and the Heart Container has increased Link’s maximum health.
- Fertile Soil is in the inventory as the first Essence of Nature.
- Link has been returned outside the dungeon and received the Maku Tree’s next instruction.
Temple of Seasons: obtain the Rod of Seasons and Power of Winter
After Gnarled Root Dungeon, return to Horon Village and leave through the eastern exit south of the Maku Tree. Sokra stops Link and points toward the Temple of Seasons. Burn the blocking tree with an Ember Seed, enter the Eastern Suburbs, and follow Rosa while staying out of her direct line of sight. Her final return makes this chase easy to fail, so wait before following her west. Cut the bush where she disappears to reveal the Subrosian portal. In Subrosia, win the L-1 Boomerang at the Dance Hall, then travel to the central Temple of Seasons for the Rod of Seasons. Only the Winter Tower is accessible now. Strike its crystal switch with the Boomerang or a Bomb and meet the Spirit of Winter. Return through the portal to Holodrum. The next chapter explains seasonal travel; Holly, the Shovel, and the approach to Snake’s Remains come later.
Return to Horon Village and open the Eastern Suburbs
Start this chapter after defeating the Gnarled Root Dungeon boss and receiving the first Essence of Nature. Return to Horon Village instead of trying to reach the next dungeon immediately. Check your Seed Satchel and make sure Ember Seeds are available before leaving.
Go to the eastern exit of Horon Village, the route just south of the Maku Tree. Sokra stops Link near the blocked passage and provides the story explanation for the Temple of Seasons. After the conversation, use an Ember Seed on the small tree blocking the exit. Walk east through the opened passage into the Eastern Suburbs.
The Eastern Suburbs are the required route to Rosa. You may encounter ordinary enemies on the way, but there is no need to detour for optional caves or side quests. Continue north through the area, following the route toward the windmill and the eastern screens where Rosa appears.
- Have the first Essence of Nature from Gnarled Root Dungeon.
- Return to Horon Village.
- Speak with Sokra at the eastern exit south of the Maku Tree.
- Use an Ember Seed to burn the blocking tree.
- Enter the Eastern Suburbs.
Follow Rosa without being seen
Continue north through the Eastern Suburbs, then go east when the route requires it. Rosa appears and talks about a temple falling into Subrosia before running away. Follow her north, but do not walk directly in front of her. If she sees Link, she runs away and the chase restarts from her earlier position.
Use the trees as cover. Stay on the opposite side of a tree from Rosa and wait until she moves away or leaves the screen. On the next screen, keep using one tree as your reference point rather than crossing the open area while she is facing Link.
Rosa doubles back on the third screen, so do not follow as soon as she leaves. The final screen is similar: she goes west, leaves the screen, then returns for one last look. Wait until she has gone west again before following. When she reaches the bush patch, she disappears into a bush near the upper-left portion of the area.
Cut through the bushes with the sword. The blue, swirling portal underneath is the first route into Subrosia. Enter it to begin the required Subrosian sequence.
- Follow Rosa north and east without entering her direct line of sight.
- Use trees as cover on each chase screen.
- Wait through Rosa’s third-screen double-back.
- Wait through her final return after she goes west.
- Cut the bush where she disappears and enter the blue portal.
Win the L-1 Boomerang at the Subrosian Dance Hall
From the Subrosian portal, take the left set of stairs down. Follow the accessible route around the lava and continue toward the sign and cave entrance leading to the Subrosian Dance Hall. The Dance Hall is the required source of the L-1 Boomerang for this early visit.
Speak with the red Subrosian and join the dance. The instructor demonstrates a sequence of movements before Link must repeat it. Watch the instructor’s facing and pose instead of trying to memorize only the vocal sounds. Repeat the left, right, and pose actions in the shown order, keeping roughly the same rhythm.
The routine becomes faster and continues through several rounds. A mistake ends that attempt, but you can immediately speak to the dancer and try again. Complete the entire routine without a mistake to receive the L-1 Boomerang. The later Dance Hall prizes are optional and are not needed for this chapter.
- Reach the Subrosian Dance Hall from the first portal.
- Watch the instructor’s movements carefully.
- Complete the full routine without a mistake.
- Receive the L-1 Boomerang.
Travel to the central Temple of Seasons
Leave the Dance Hall and backtrack to the screen containing the blue portal. This time, use the right-hand staircase. Follow the lower Subrosian route through the village and lava-filled passages. Continue east until the route reaches the green-tiled path leading north.
Follow the green path north to the central Temple of Seasons. The surrounding area has several optional Subrosian locations, but they are not required for the main campaign. If you take a wrong turn, return to the portal screen and use the right-hand staircase again; the Temple route begins from that side.
Enter the temple itself and continue north. The interior is a direct passage rather than a dungeon with keys or combat puzzles. Keep going until you reach the raised altar in the central room.
- Return from the Dance Hall to the portal screen.
- Use the right-hand staircase.
- Follow the lower route and then the green-tiled path north.
- Enter the central Temple of Seasons.
Receive the Rod of Seasons
Inside the central temple, continue straight through the interior and stand on the altar. The powers of the Season Spirits combine to give Link the Rod of Seasons.
The Rod is the key progression item, but it does not immediately let Link choose any season. It must first be empowered by the individual spirits in the corner towers. During this visit, the tower obstacles prevent access to the other three towers, so do not present Spring, Summer, or Autumn as available yet.
After receiving the Rod, leave the central temple and prepare to visit the only accessible tower. The L-1 Boomerang from the Dance Hall is the normal tool for its entry puzzle.
- Reach the altar inside the central temple.
- Receive the Rod of Seasons.
- Do not expect the Rod to change seasons yet.
- Leave the central temple for the Winter Tower.
Enter the Winter Tower and obtain the Power of Winter
From the central temple, travel south and east to the tower with the purple top and the Winter symbol. This is the only season tower accessible during the first visit. Ignore the blocked Spring, Summer, and Autumn towers; they belong to later progression.
Enter the Winter Tower and move to the crystal switch across the small lava channel. Throw the L-1 Boomerang across the gap to strike the switch. The switch changes state and creates a bridge. If you did not obtain the Boomerang, a Bomb can also be used to reach the switch, provided the explosion is positioned correctly.
Cross the new bridge and climb through the short tower route. Continue upward through the staircases until you reach the blue statue and altar of the Spirit of Winter. Approach the spirit to empower the Rod of Seasons with the Power of Winter.
The Power of Winter is now permanently available for the rest of the campaign. Link can use the Rod only from suitable tree stumps in Holodrum; waving it from ordinary ground does not change the season. Leave the tower after the blessing and backtrack to the blue Subrosian portal.
- Enter the purple-topped Winter Tower.
- Strike the crystal switch with the Boomerang or a Bomb.
- Cross the bridge and climb to the upper altar.
- Receive the Power of Winter.
- Return to the Subrosian portal.
Return to Holodrum and hand off to seasonal travel
Enter the blue portal to return to Holodrum. A message from the Maku Tree points Link toward the Woods of Winter, but do not continue into Holly’s house or begin the Shovel route in this chapter.
The next chapter covers how to use the Rod from tree stumps, how Winter changes terrain, and how to plan seasonal travel through Holodrum. The later dungeon chapter handles Holly, the Shovel, and the approach to Snake’s Remains.
At this stopping point, the chapter’s required progression is complete. There is no need to obtain another season, enter a later portal, or reveal the next dungeon entrance before moving on.
- Return to Holodrum through the blue Subrosian portal.
- Confirm that the Rod of Seasons has the Power of Winter.
- Stop before the Holly and Shovel sequence.
- Hand off to the seasonal-travel chapter.
Before you move on
- The first Subrosian portal has been revealed and entered.
- The L-1 Boomerang has been received from the Subrosian Dance Hall.
- The Rod of Seasons is in Link’s inventory.
- The Power of Winter has been obtained from the Winter Tower.
- Link has returned to Holodrum through the Subrosian portal.
- The chapter ends before the Holly, Shovel, and Snake’s Remains route begins.
Overworld movement and seasonal travel basics
After receiving the Rod of Seasons in the Temple of Seasons and empowering it at the Winter Tower, Holodrum becomes a route-planning puzzle. The Rod works only from tree stumps, and only seasonal powers granted by the Spirits can be selected. Winter freezes suitable water and creates snowy paths, Spring raises water and grows flowers, Summer dries some waterways and grows vines, and Autumn fills certain gaps with leaves while making Rock Mushrooms liftable. Revisit blocked screens after each new Power of Seasons instead of repeatedly testing a route that still lacks its required item or season. Plant Gasha Seeds in soft soil, activate Gale Seed trees as travel points, visit Vasu to appraise rings, and keep Recovery Hearts and rupees available before long expeditions. The trading sequence is optional for the eight-Essence campaign, so advance it during ordinary travel rather than diverting from required dungeons.
1. Establish the Rod of Seasons route loop
The Rod of Seasons does not change Holodrum’s season from ordinary ground. Stand on a tree stump, assign the Rod to an item button, and use it there. The Rod can select only powers already granted by the Spirits of the Seasons. At this point, the Power of Winter is the available surface power, so do not expect to select Spring, Summer, or Autumn until their corresponding towers have been completed.
When a route is blocked, first locate the nearest tree stump. Change to Winter, inspect the surrounding screens, collect anything newly reachable, and return to the stump if the route closes behind you. Mark inaccessible ledges, water crossings, snow barriers, vines, and Rock Mushrooms for later visits. Seasonal changes affect the current area but do not permanently reshape every route; switching seasons can close a path that was previously open.
- Obtain the Power of Winter before expecting the Rod to change Holodrum’s surface season.
- Use the Rod only while Link is standing on a tree stump.
- Mark obstacles that require Spring, Summer, Autumn, the Shovel, or later dungeon items.
2. Use each season for the correct kind of obstacle
Winter is the first surface power. Suitable water freezes into walkable ice, and snow can create raised paths or block entrances. In the Woods of Winter, use the available stump and test the frozen-water crossing. If snow piles stop the route, mark that screen and continue only along paths that are already open; the snow-blocked route requires Holly’s Shovel, which belongs to the next chapter.
Spring raises water in certain areas and causes flowers or spring plants to appear. Flowers can launch Link to higher ground, while raised water can connect waterways or cover obstacles. Summer dries selected lakes, ponds, and streams and causes climbable vines to grow on particular walls. Autumn fills some holes with leaves, lets Link lift Rock Mushrooms, and changes vegetation on specific screens. These effects are local rather than universal. If a seasonal change does not alter the obstacle in front of Link, look for another stump or a required item instead of repeatedly changing seasons.
- Winter: test frozen water and snowy routes, but leave shovel-blocked piles for later.
- Spring: check raised water and flowers that provide upward movement.
- Summer: check dried waterways and walls with newly grown vines.
- Autumn: check leaf-filled gaps, Rock Mushrooms, and altered vegetation.
3. Make practical overworld loops instead of blind wandering
Use Horon Village as the early supply and organization hub. From town, travel through North Horon and the Woods of Winter, checking each screen for tree stumps, soft soil, caves, and visible items. If you reach a dead end, return to the last stump and test another available season. Do not push deeply into a region that clearly requires a later Power of Seasons or dungeon tool; the overworld is designed to be revisited after Link gains new abilities.
Activate every Gale Seed tree you pass. Gale Seeds allow Link to warp to an activated tree, which makes them useful for returning to Horon Village or reaching a remote region without repeating enemy-filled screens. A practical loop is to begin in town, collect or purchase supplies, check nearby soft soil, travel by Gale Seed to the current objective, and warp back after collecting its reward. Carry Recovery Hearts before crossing unfamiliar territory, and retreat from a dungeon when health is low instead of spending every recovery item before the important rooms begin.
- Activate Gale Seed trees near major regions and dungeon approaches.
- Combine a shop visit, a soft-soil check, and a story objective when the route allows it.
- Use Gale Seeds for return travel when the route is long or dangerous.
4. Begin the trading sequence only when its items appear
The trading sequence is optional and is not required to collect the eight Essences of Nature. Its early steps become available after the first dungeon. With Ember Seeds, light the torch in Dr. Left’s house in southeastern Horon Village to receive the Cuccodex. Take it to Malon’s house near the area where Din’s troupe began the game, and Malon will exchange it for the Lon Lon Egg.
The next exchange occurs during a Maple encounter. Carry the Lon Lon Egg until Maple appears, then collide with her to trade it for the Ghastly Doll. Maple’s appearance is tied to defeating enemies and changing overworld screens, so do not treat her as a character who remains in one permanent location. If the next recipient is inaccessible because the route requires another Power of Seasons or dungeon item, keep the trade item and continue the main campaign. The completed sequence eventually leads to a stronger sword, but that reward is optional for the standalone ending.
- Remember that the trading sequence is optional for the main campaign.
- Use the Cuccodex to obtain the Lon Lon Egg before looking for Maple.
- Keep each replacement item until its next recipient becomes reachable.
5. Plant Gasha Seeds whenever soft soil is reachable
Mayor Ruul gives Link an early Gasha Seed in Horon Village. Plant it in the soft-soil patch outside his residence by selecting the seed while standing on the prepared earth. Once the tree matures, strike the Gasha Nut with the sword to receive a variable reward such as rupees, hearts, a potion, a ring, or a Piece of Heart. The result depends on the planting location and other game factors, so do not assume every tree produces the same item.
A planted seed matures through continued play, including travel and defeating enemies. Keep progressing instead of waiting beside the patch. When you discover another soft-soil location, plant another seed if you have one available. A harvested tree disappears, so replant the patch when possible. Gasha Trees are useful supplementary sources of rupees, recovery, and rings, but do not spend required expedition money on purchased seeds if Link still needs supplies for the next dungeon.
- Collect Mayor Ruul’s seed and plant it outside his residence.
- Mark every soft-soil patch found during ordinary overworld travel.
- Revisit planted trees after dungeon or overworld progress and replant harvested patches.
6. Manage rings, healing, and rupees before leaving town
Visit Vasu’s Jewelers in Horon Village. Vasu gives Link the L-1 Ring Box and the first ring, which appraises as the Friendship Ring. The first appraisal is free. Later rings found in chests, Gasha Nuts, or Maple encounters must be appraised before their effects are known, and later appraisals cost rupees. After appraisal, select the ring from the Ring Box menu if its effect is useful. Rings are optional equipment, so do not delay required story progress to search for a particular one.
Use the Horon Village shop as the dependable early recovery stop. Its early supplies include Recovery Hearts, bombs, and the Wooden Shield; potions become a later option through the trading sequence and Syrup. Keep some rupees available for healing and required purchases rather than spending everything on optional seeds or ring appraisals. Before a long trip, confirm that the sword, shield, Seed Satchel, Rod of Seasons, and current dungeon tool can be assigned without repeatedly opening the inventory in danger.
- Have Vasu appraise new rings before judging their effects.
- Carry Recovery Hearts before unfamiliar routes and dungeon attempts.
- Reserve rupees for healing and required equipment.
- Keep the Rod assigned when exploring areas with nearby tree stumps.
Before you move on
- The Rod of Seasons is obtained, the Power of Winter has empowered it, and Link can change to Winter from a tree stump.
- Link has identified or tested the Winter stump and frozen-water crossing in the Woods of Winter.
- The snow-blocked route is marked for return after obtaining Holly’s Shovel in the next chapter.
- At least one Gale Seed tree outside Horon Village is activated for return travel.
- Mayor Ruul’s Gasha Seed is planted in the soft soil outside his residence, or another reachable soft-soil patch is planted if that seed has already been used.
- Vasu has provided the L-1 Ring Box and appraised the first ring.
- The trading sequence is either started with the Cuccodex, Lon Lon Egg, or Maple exchange when available, or deliberately deferred as optional content.
- Link has Recovery Hearts or other available healing, a usable sword and shield, the Rod assigned, and enough rupees to avoid delaying the next required overworld or dungeon objective.
References for this chapter
- Oracle of Seasons instruction manual, USA Game Boy Color edition
- Oracle of Seasons Walkthrough – Snake's Remains
- Oracle of Seasons Walkthrough — Gnarled Root Dungeon and Horon Village
- The Legend of Zelda: Oracle of Seasons — Trade Quest
- Oracle of Seasons Trading Sequence
- The Legend of Zelda: Oracle of Seasons — Gasha Seeds
Level 2 — Snake's Remains (second Essence)
After obtaining the Spirit of Winter, cross the frozen pond in the Woods of Winter and visit Holly's house to receive the Shovel. Clear the snow and bushes blocking the eastern route to Snake's Remains. Inside, collect the first Small Key, Compass, Power Bracelet, Dungeon Map, two more Small Keys and the Boss Key. The dungeon's required tools are Ember Seeds, Bombs and the Power Bracelet. Facade is vulnerable to Bombs when its face appears. After opening the Boss Key route, defeat the Pols Voices, cross the turnstile and moving platforms, then fight Dodongo by throwing Bombs into its open mouth and lifting the inflated boss onto the central spikes. Claim the Heart Container and the second Essence of Nature, the Gift of Time.
Reach Snake's Remains through the winter route
Leave Subrosia through the same vortex used to enter it. In the Holodrum screen to the right, stand on the tree stump and use the Rod of Seasons to activate winter. Cross the frozen pond, travel two screens north, then two screens east, and use the next stump to activate winter again if the area is not already frozen. Climb the steps and enter the nearby house by dropping through its chimney. Holly gives Link the Shovel.
Leave Holly's house and dig through the snow blocking the route. Travel south three screens, then left to the next tree stump and activate winter. Go left one screen, take the northern path, and shovel away the snow blocking the way east. The Mystery Seeds in this area are optional. Continue north, then left one screen, and cut the bushes covering the entrance to Snake's Remains.
- The Rod of Seasons has the Spirit of Winter.
- The Shovel was obtained from Holly.
- The bushes at the Snake's Remains entrance have been cut.
Collect the first Small Key and Compass
Ignore the unlit torches in the entrance room and go left. Pass the Blue Blade Traps and the Green Zols to reach the chest containing 5 Rupees. Go north from there and defeat all four Ropes. A Small Key drops into the center of the room; collect it and return to the entrance.
Use Ember Seeds on both torches in the entrance room. The northern door opens. Go north, then immediately right through the narrow passage. Defeat the Ropes in this room and push the out-of-place block on the right one tile to the right. A chest appears in the center; open it for the Compass.
Return left and go north through the room with the fireball-spitting torch. Defeat the enemies in the next room to open the east door, but do not spend the Small Key there. The blocks point toward a suspicious section of the west wall. Bomb that wall if you want the optional rupee room, then return and use the Small Key on the locked northern door.
- The first Small Key came from the four Ropes.
- The Compass was collected after completing the block formation.
- The first Small Key was not spent on an optional room.
Get the Power Bracelet and Dungeon Map
The locked room contains two Hardhat Beetles. Strike them with the sword so they are knocked into the pits. When both are gone, the west door opens. In the next room, Moblins stand across a gap. Throw Bombs across the gap to defeat them; the regenerating bushes can provide more Bombs. When both Moblins are defeated, a chest appears. Open it to obtain the Power Bracelet.
Return to the Hardhat Beetle room and knock the Beetles into the pits again if necessary. Go east and use the Power Bracelet to move the pots blocking the chest. Open it to collect the Dungeon Map.
Go down and right from the Map room. Defeat the Red Zols and Ropes, then push the right-side misplaced block to the right to open the east door. In the next room, follow the path around the Giant Blade Traps and open the chest for another Small Key. Continue right past the second blade trap and go down.
- The Power Bracelet was collected.
- The Dungeon Map was collected.
- The second Small Key was taken from the blade-trap room.
Cross the rollers and obtain the timed Small Key
Use the Power Bracelet to push the purple rollers aside. Reach the stairs in the bottom-right corner and go outside onto the ledge above the dungeon. The Gasha Seed chest there is optional. Walk left and use the staircase to re-enter the dungeon's lower section.
Before entering the next room, check your Bomb supply. You need at least six Bombs for the timed chest. If necessary, cut the bushes or pay the Business Scrub hidden beneath the lone bush on the left for a Bomb refill.
Go north into the room with the disappearing chest. Move counter-clockwise around the central diamond, bombing the cracked blocks in the required sequence. Bomb the northern block first, then continue around the inner and outer paths. On the western side, destroy the group of three cracked blocks with two Bombs, then bomb the final block before the chest. Open the chest immediately to collect the third Small Key. If the chest disappears, leave and re-enter to reset the room.
- Both rollers were moved with the Power Bracelet.
- At least six Bombs were available before entering the timed room.
- The third Small Key was collected before the chest disappeared.
Pass the Thwomp section and defeat Facade
Backtrack out of the timed-chest section, return across the outdoor ledge, and re-enter through the staircase. Push through the rollers and go up, then right. Bomb the cracked blocks in the middle of the next room and descend the staircase to the basement.
In the basement, approach the Spiked Thwomp from below and retreat so it falls. Once it lands, walk across its flat head to the ladder. In the next room, move quickly beneath the smaller Thwomps, then climb the ladders on the far side. Do not wait beneath the smaller enemies because they can crush Link.
In the next upper section, push the rollers while avoiding the weakened floor. Move to the pots and clear the path to the locked door at the lower right. Use the third Small Key and enter Facade's room.
Facade can only be damaged while its face is visible. Drop a Bomb directly on the face, then move away from the new floor holes and falling fire. When Beetles appear, defeat them because they may restore Hearts or Bombs. Repeat the Bomb attack until Facade is defeated. The fight normally requires five successful Bomb hits.
- The Spiked Thwomp and smaller Thwomps were crossed safely.
- The third Small Key opened the door to Facade.
- Facade was defeated with Bombs.
Collect the Boss Key and reach Dodongo
Leave Facade's room through the opened east door. Continue east through the next room and use the remaining Small Key on the locked block. Proceed through the enemy room and enter the room where the Boss Key is visible on a raised area. Defeat or avoid the enemies, then go south to the moving-platform section.
Ride the moving green platforms across the gap. Move from the upper platform to the vertical platform, continue to the lower platform, then transfer to the right-hand platform and ride it to solid ground. Climb the stairs and go north to the Boss Key chest.
From the Boss Key, go west through the blade-trap rooms and continue west past the Sparks. Find the horizontal corridor with pots in the lower alcove. Lift the pots and bomb the cracked wall. In the room beyond, defeat all four Pols Voices with Bombs; sword attacks do not defeat them. The bushes can replenish Bombs. The east door opens after all four are destroyed.
Enter the turnstile and let it carry Link south. Cross the moving platforms in the next room, defeat the Ropes on the far side, and move the pots blocking the right side. Hearts may be available in the pots on the left. Enter the boss room when ready.
- The Boss Key was collected from the moving-platform route.
- The locked block after Facade was opened with the remaining Small Key.
- All four Pols Voices were defeated with Bombs.
- The turnstile and final moving-platform room were crossed.
Defeat Dodongo and claim the Gift of Time
Keep Bombs and the Power Bracelet equipped. Dodongo's dangerous attacks are contact damage, fireballs and a charge. Watch its movement: if it speeds up and prepares to charge, move out of its path. If it opens its mouth without charging, throw a Bomb into the opening.
The Bomb makes Dodongo inflate. Quickly approach the inflated boss and lift it with the Power Bracelet, then throw it onto the spikes in the center of the arena. Repeat the Bomb, lift and throw sequence four times. Avoid standing on the central spikes yourself, and keep moving around the outer ring while waiting for Dodongo to open its mouth.
After Dodongo is defeated, collect the Heart Container. Leave through the opened lower-right exit and walk up the altar steps to collect the second Essence of Nature, the Gift of Time. Link is transported out of Snake's Remains after the Essence is obtained.
- Dodongo was thrown onto the central spikes four times.
- The Heart Container was collected.
- The Gift of Time was added as the second Essence of Nature.
Before you move on
- Snake's Remains has been cleared and Link has been transported outside after claiming the dungeon reward.
- The Power Bracelet is present in the inventory.
- The Heart Container from Dodongo's room has been collected.
- The second Essence of Nature, the Gift of Time, is present in the progress display.
References for this chapter
Poison Moth’s Lair aftermath: Sunken City, Spring, and the Dancing Dragon route
Open Spool Swamp with the Floodgate Key, defeat Poison Moth’s Lair’s mini-boss and Mothula, and take the Bright Sun to obtain the third Essence. The dungeon also provides the Roc’s Feather, which enables the next overworld route. Cross the animal-dependent Natzu region to Sunken City, use Dimitri to reach the Master’s Plaque puzzle, and exchange the plaque with the Master Diver for Zora’s Flippers. Dive through the underwater passage to Mt. Cucco, enter Subrosia, recover the stolen Roc’s Feather, and climb the Spring Tower to add the Power of Spring to the Rod of Seasons. In Spring, obtain the Spring Banana and temporarily recruit Moosh, then use him to reach the Dragon Key. Insert the key at Mt. Cucco’s summit, stop the waterfall, and open Dancing Dragon Dungeon. Ricky, Dimitri, or Moosh may be the file’s permanent flute companion; only the terrain of Natzu changes.
1. Open Spool Swamp and reach Poison Moth’s Lair
After clearing Snake’s Remains, follow the Maku Tree’s direction toward Spool Swamp. Travel through the flooded passage to the Floodgate Keeper’s House and speak with the keeper. Pull the lever inside the house, collect the Floodgate Key from the drained pool, and return to the rock with the keyhole. Insert the key to drain the large pool into Spool Swamp.
Use the exposed passage beneath the former pool, cross the underground bridge section, and emerge on the far side of the swamp. Continue to the sleeping Sokra, then jump down and use the nearby tree stump to change the area to Winter. Follow the frozen route through the swamp. The final section depends on the flute obtained earlier: Ricky, Moosh, and Dimitri each open a different Natzu or swamp route. Use the companion whose flute is in your inventory rather than searching for a universal path.
At the end of the animal route, follow the path to the waterfall and the entrance to Poison Moth’s Lair. Stock a few recovery items before entering. The Floodgate Key, not a special dungeon key, is what opens this approach.
- The Floodgate Key was taken from the Floodgate Keeper’s House.
- The Spool Swamp floodgate is open.
- Winter is active on the frozen swamp route.
- Poison Moth’s Lair is accessible.
2. Clear Poison Moth’s Lair and collect the third Essence
From the dungeon entrance, go up and left, then return to the room with the three Spiked Beetles. Flip them with the Shield or Shovel and defeat them with the sword to open the upper passage. Continue through the Mini-Moldorm and Floormaster rooms. Push the vases onto the switch, then use the Power Bracelet to move the rollers and take the Small Key from the chest.
Use that key to reach the upper rooms. Defeat the Mini-Moldorms to reveal Bombs, then bomb the unusual section of the upper wall to open the hidden passage containing the Dungeon Map. Return to the block-and-statue rooms, match the lower statues to the upper arrangement, and continue left. Work through the Peahats, Mini-Moldorms, and Hardhat Beetles until you reach the locked route to the dungeon item.
In the moving-tile room, defeat the Arm-Mimics to make the chest appear. Open it to obtain the Roc’s Feather. Use it to cross the moving platforms and pits, then ride the platforms and trampoline to reach the Compass. Push the trampoline into position, cross the roller-and-spike-floor room with the Roc’s Feather and Power Bracelet, and collect the next Small Key.
Continue through the moving platforms and Thwomp section. In the water room, take the locked route to the Omuai mini-boss. Watch the ripples to identify an Omuai before it surfaces. When one appears, lift it with the Power Bracelet, throw it onto dry ground, and slash it before it returns to the water. Repeat for all three.
After the mini-boss, cross the planks and fall to the lower room. Push the indicated block into the pit, jump across, and take the Boss Key. Use the portal to return near the mini-boss room, then take the alternate upper route to the boss door. Against Mothula, stay on the central platforms and avoid the perimeter fireballs. Cut down the small moths, then strike Mothula when it stops in the center. Keep away from the pits; falling sends Link below and resets the fight after he returns by trampoline.
Take the Heart Container after Mothula falls, descend the revealed stairs, and collect the Bright Sun. This is the third Essence of Nature. Outside, the Maku Tree reports that the next Essence lies behind the waterfall north of Sunken City.
- The Dungeon Map, Roc’s Feather, Compass, and Boss Key were collected.
- Omuai was defeated by lifting each creature from the water.
- Mothula was defeated without exhausting recovery supplies.
- The Bright Sun, the third Essence of Nature, is in the inventory.
3. Cross Natzu and enter Sunken City
Leave the dungeon and return through Spool Swamp to the Natzu approach. The route is file-dependent. With Ricky, activate the bridge switch, climb the ledges, use his tornado punch to clear bushes, and follow the raised path east past Great Moblin’s Keep. With Moosh, use the bridge and float over the holes, then continue east and south around the keep. With Dimitri, ride through the water, follow the waterfall route north, and cross to the dry path beyond the keep.
All three routes lead to Sunken City. Inside the flooded city, use the Roc’s Feather to jump across shallow water and walkable edges. Find the Gale Seed tree on the eastern side and activate it as a travel point. Ingo’s House is a useful landmark near the eastern water route. The city is not solved by ordinary walking alone; the next required items involve Dimitri and the waterfalls.
- The Natzu route matching the file’s permanent flute companion was crossed.
- Sunken City was entered.
- The eastern Gale Seed tree was activated.
- Ingo’s House and the eastern water area were located.
4. Get the Master’s Plaque and exchange it for Zora’s Flippers
If Dimitri is not the permanent companion, return toward Sunken City’s entrance and find the children surrounding him. Speak to the middle child and give the group all of Link’s Bombs. The children leave, allowing Link to ride Dimitri. If Dimitri’s Flute is the permanent companion, simply call him with the flute. This temporary rescue does not change which companion belongs to the file.
Ride Dimitri north through the city’s water and waterfalls. Reach the cave containing the four eye statues. Push the statues so they occupy the four corners around Link, then stand in the center and perform a spin attack. The attack must reach the statues together; when the arrangement is correct, the staircase opens. Cross the gap with the Roc’s Feather and take the Master’s Plaque from the chest.
Return through the waterfall route and enter the Master Diver’s cave. Show the Master Diver the plaque to receive Zora’s Flippers. The Flippers let Link submerge and swim; they replace Dimitri for ordinary underwater travel, although Dimitri may still be needed to reach this first plaque puzzle.
- Dimitri was rescued or called when required.
- The four statues were arranged around the central position.
- The Master’s Plaque was collected.
- The Master Diver exchanged the plaque for Zora’s Flippers.
5. Dive to Mt. Cucco and enter Subrosia
Return to Sunken City and go to the water east of Ingo’s House. Find the diving spot in the reef and submerge with the Zora’s Flippers. Follow the underwater passage and surface at Mt. Cucco. This underwater route is the reliable connection between Sunken City and the mountain; do not treat the Subrosia portal as the immediate destination from town.
At Mt. Cucco, climb the upper path and drop from the appropriate ledge into the Subrosia portal. In Subrosia, two Subrosians steal the Roc’s Feather and leave Fool’s Ore behind. Follow them west through the area and into the strange house. When their movement gives you access to the marked digging spot, dig there to recover the Roc’s Feather. Keep it before proceeding; the Spring Tower route requires its jumping ability.
From the recovery area, travel east across the lava platforms and use the Roc’s Feather to cross the gaps. Climb to the Temple of Seasons’ Spring Tower. The optional Gasha Seed route can be skipped.
- The underwater passage from Sunken City to Mt. Cucco was used.
- The Mt. Cucco Subrosia portal was entered.
- The stolen Roc’s Feather was recovered.
- The Spring Tower entrance was reached.
6. Obtain the Power of Spring
Inside the Spring Tower, cross the lava streams with the Roc’s Feather and follow the stairs upward. Continue to the altar of the Spirit of Spring. The spirit adds the Power of Spring to the Rod of Seasons. This is the only seasonal power required from this visit; Summer, Autumn, and the later Temple of Seasons tower objectives belong to later chapters.
Leave the tower by the same Subrosian route and return through the Mt. Cucco portal. The Rod still changes seasons only at tree stumps. Spring activates blooming buds and flowers, which are needed for the banana route below.
- The Spirit of Spring was reached.
- The Power of Spring was added to the Rod of Seasons.
- The Roc’s Feather remains available.
- The return portal to Mt. Cucco is known.
7. Obtain the Spring Banana and temporarily recruit Moosh
At the base of Mt. Cucco, use the nearby stump to change the area to Spring. Go east to find Moosh looking for Spring Bananas. Cut through the flowers and take the upper route. Use the Power Bracelet to lift the Flying Blue Cucco, then repeatedly press the button assigned to the Power Bracelet so it carries Link to the upper ledge.
Enter the cave on the ledge and use the Roc’s Feather to cross the pits. Follow the platforms to the upper exit and take the Spring Banana from the tree. Return to Moosh and give him the banana. Moosh then allows Link to ride him for the Dragon Key route.
This Moosh encounter is temporary and is not determined by the permanent flute companion. A file with Ricky’s or Dimitri’s Flute still uses Moosh here after delivering the banana. Optional rings and cave rewards can be ignored.
- Spring is active at the Moosh route.
- The Flying Blue Cucco carried Link to the upper ledge.
- The Spring Banana was collected.
- The banana was given to Moosh.
8. Take the Dragon Key and open Dancing Dragon Dungeon
Ride Moosh west toward the Goron Mountain side. Follow the route into the winter-covered section. The path to the Dragon Key crosses a large field of pits, so use Moosh’s hovering ability to fly across the gaps. Reach the chest or item location on the far side and collect the Dragon Key, then return from the pit field with Moosh.
From the mountain route, use the season stumps as needed. The upper approach requires Winter so that the snow path and stairs are present. Enter the cave passage, cross its pits with the Roc’s Feather, and follow the stairs through the interior until you emerge at Mt. Cucco’s summit.
At the summit, lift the Blue Cucco with the Power Bracelet and repeatedly press its assigned button to reach the opposite ledge. Walk east and insert the Dragon Key into the keyhole. The waterfall stops, revealing the route to Level 4. Drop back down, use the nearby stump to change the area to Summer, and climb the vines to the Dancing Dragon Dungeon entrance.
Stop here. The next chapter begins inside Dancing Dragon Dungeon and covers its dungeon item, boss, and fourth Essence.
- The Spring Banana was delivered and Moosh can be ridden.
- The Dragon Key was collected across the Goron Mountain pit field.
- The winter summit route was crossed.
- The Blue Cucco carried Link to the keyhole ledge.
- The Dragon Key stopped the waterfall.
- Summer vines now lead to the open Dancing Dragon Dungeon entrance.
Before you move on
- Poison Moth’s Lair was entered through the opened Spool Swamp floodgate.
- Mothula was defeated and the Bright Sun, the third Essence of Nature, was collected.
- The Roc’s Feather was obtained from Poison Moth’s Lair.
- Sunken City was reached through the animal-dependent Natzu route.
- The Master’s Plaque was collected and exchanged with the Master Diver for Zora’s Flippers.
- The underwater passage east of Ingo’s House was followed to Mt. Cucco.
- The Mt. Cucco Subrosia portal was entered, the stolen Roc’s Feather was recovered, and the Power of Spring was added to the Rod of Seasons.
- The Spring Banana was given to Moosh, who can now be ridden temporarily regardless of the permanent flute companion.
- The Dragon Key was collected, inserted at the mountain summit, and used to stop the waterfall.
- The Dancing Dragon Dungeon entrance is open, with the next chapter beginning inside it.
Dungeons 4–5: Dancing Dragon Dungeon and Unicorn’s Cave
Begin with Dancing Dragon Dungeon already open at Mount Cucco. Clear its mine-cart routes, defeat Agunima, collect the Slingshot, defeat Gohma, and claim the fourth Essence, Soothing Rain. Afterward, travel through Subrosia to the later Temple of Seasons tower and obtain the Power of Autumn. Use Autumn at Eyeglass Lake to remove the mushrooms blocking Unicorn’s Cave. Explore the fifth dungeon, obtain the Magnetic Gloves, defeat Syger and Digdogger, and take Nurturing Warmth. Finish with five Essences and the Ancient Ruins as the next main objective. Optional side quests, rings, Gasha Seeds, and linked-game rewards can wait.
1. Enter and begin Dancing Dragon Dungeon
This chapter starts with the waterfall at Mount Cucco already drained by the Dragon Key and the entrance to Dancing Dragon Dungeon open. Change the season to Summer at the nearby tree stump so vines grow up to the dungeon entrance, then climb inside. Do not return to Poison Moth’s Lair or repeat the Sunken City route; those objectives are already complete.
At the beginning, collect the Bombs from the nearby chest if your supply is low. The dungeon is built around mine carts, switches, cracked walls, pits, and dark rooms. When riding a cart, watch the track switches before entering it. A switch changes the cart’s destination, so leave the cart, adjust the switch when necessary, and ride again rather than assuming every track leads forward.
In the room containing pots and floor switches, use the pots to hold down most of the switches and stand on the remaining one. This opens the way to a Small Key. Continue exploring the connected mine-cart rooms and use keys on doors that lead deeper into the dungeon. The map and compass are useful for distinguishing the central routes from dead-end item rooms, but do not spend keys on a side branch if another locked door clearly continues toward the dungeon’s lower areas.
- Dancing Dragon Dungeon is entered with the dungeon entrance already open.
- The initial Bomb supply and first Small Key have been collected.
- Mine-cart switches are being changed deliberately rather than ignored.
2. Find the Slingshot and prepare for Agunima
Continue through the dungeon until the route leads to rooms with cracked floors, statues, and mine-cart tracks. Some paths require Roc’s Feather to cross gaps, while dark rooms are easier if the Slingshot is equipped with Ember Seeds. If you need more Ember Seeds, the Deku Scrub in the dungeon can replenish that supply for Rupees.
In the statue room, move the purple statue in the required direction and cross the weakening floor quickly. The chest on the raised section contains the Slingshot. Once you have it, use it on distant torches and targets. Ember Seeds are especially useful for lighting torches, while other seed types can be used for ordinary switches when the room permits them.
Return through the mine-cart route after collecting the Slingshot and search the upper and central branches for the remaining Small Keys, the compass, and the Boss Key route. The dungeon’s progression can appear circular because several cart rides reconnect to earlier rooms. Use the map to identify unexplored doors, and remember that a newly opened track may be the intended route rather than an optional shortcut.
Agunima is the dungeon’s mini-boss. He creates copies of himself, but the real Agunima is the one with a shadow. Light the nearby braziers with Ember Seeds so the shadows are visible. Strike the real figure with the sword, then move away from the projectiles and repeat the process. Defeating Agunima opens the surrounding doors and activates a warp point back toward the dungeon entrance, which is useful if you need to restock before continuing.
- The dungeon map and compass are collected or their locations are confirmed.
- The Slingshot is in the inventory.
- Agunima is defeated and the return warp is available.
- Ember Seeds remain available for torches and the mini-boss route.
3. Reach Gohma and claim the fourth Essence
After defeating Agunima, use the newly opened routes and the remaining mine-cart tracks to reach the lower portion of the dungeon. Some rooms contain enemies that do not need to be defeated; avoid unnecessary damage and preserve health for the boss route. Use the Boss Key at the locked door when the route reaches the basement area.
Gohma begins the fight with a claw protecting its eye. Attack the claw with the sword until it is destroyed or forced out of the way. When Gohma raises or extends the claw, be prepared to move sideways or jump away from the grab. Roc’s Feather is useful for avoiding the charge and maintaining space in the arena.
Once the claw no longer protects the eye, equip the Slingshot and fire seeds into Gohma’s exposed eye. Attack during the opening, then retreat before the claw or the boss’s movement can trap Link against a wall. Gohma also produces smaller enemies, so clear them when they interfere with movement rather than chasing them at the expense of a safe boss opening.
When Gohma falls, take the Heart Container and then collect Soothing Rain, the fourth Essence of Nature. The dungeon is now complete. Save after leaving the dungeon if possible, and restock Bombs, seeds, and healing before beginning the Autumn route. A failed boss attempt returns you to the last save or restart point, so the cleared dungeon route should be used to return to the boss instead of replaying optional rooms.
- The Boss Key has been used at Gohma’s door.
- Gohma is defeated using the sword against the claw and the Slingshot against the eye.
- The Heart Container and Soothing Rain are collected.
- Four Essences of Nature are now complete.
4. Obtain the Power of Autumn after Dancing Dragon Dungeon
Leave Mount Cucco and travel to the Subrosia portal on the Eyeglass Lake side of Holodrum. This is the later Temple of Seasons visit; Autumn is not obtained before Dancing Dragon Dungeon in this progression. Enter Subrosia and follow the route toward the next accessible tower. If rocks block the passage, use the Bomb Flower available in Subrosia to clear the obstruction.
Enter the Autumn Tower and climb through its accessible rooms. The tower is not a regular Essence dungeon. Its purpose is to restore another seasonal power to the Rod of Seasons. Reach the spirit’s chamber and receive the Power of Autumn, then leave through the route that returns Link to the Eyeglass Lake region.
The Power of Autumn changes terrain around tree stumps. In autumn, certain mushrooms ripen and can be lifted with the Power Bracelet, while piles of leaves cover some pits and alter routes. The Rod still changes seasons only when Link stands on a tree stump. It does not change the season from ordinary ground, so locate the stump near Eyeglass Lake before attempting to open the dungeon entrance.
- The Autumn Tower has been completed.
- The Power of Autumn has been added to the Rod of Seasons.
- The Eyeglass Lake tree stump can change the area to Autumn.
5. Open and explore Unicorn’s Cave
Travel to Eyeglass Lake and use the nearby stump to set the area to Autumn. Go north and then east toward the blocked cave entrance. The mushrooms at the entrance can now be lifted and removed with the Power Bracelet. Clear them away and enter Unicorn’s Cave, the fifth dungeon.
The early rooms contain enemies, narrow ledges, water currents, and gaps. Collect the map and compass while opening the main-route chests, and use Small Keys on doors that continue toward the central dungeon path. The dungeon’s defining mechanic appears after the Magnetic Gloves are found: Link can attract or repel magnetic balls and pull himself toward magnetic posts.
When using the Magnetic Gloves, check which side of the object Link is standing on before activating them. Attract pulls a magnetic object toward Link, while the opposite polarity pushes it away. The same controls can move Link across gaps by pulling him toward a magnetic post. Release the gloves before Link is dragged into spikes, pits, or a wall that cuts off the intended route.
The dungeon includes magnetic-ball puzzles in which one ball must be moved onto a switch and then repositioned from the opposite side. If a door closes, return to the last magnetic puzzle and check whether the ball is on the correct switch rather than spending a key elsewhere. Continue until the Boss Key is obtained, then return to the boss door.
- The Autumn terrain has opened the entrance to Unicorn’s Cave.
- The dungeon map and compass are collected or their locations are confirmed.
- The Magnetic Gloves are obtained and used to cross magnetic gaps.
- The Boss Key route is open.
6. Defeat Syger and Digdogger
Syger is Unicorn’s Cave’s mini-boss. Keep away from its rolling charge and attack during the pause after it stops. In the magnetic-ball arena, use the Magnetic Gloves to repel the spiked ball into Syger when the ball is positioned for a clean hit. Repeat the collision until Syger is defeated, then use the newly activated warp point if you need to return to the dungeon entrance for healing.
Proceed through the rooms beyond the mini-boss and solve the remaining magnetic-block puzzles. Pull Link across gaps with the gloves, move the magnetic ball onto switches, and use Roc’s Feather where a jump is still required. Open the Boss Key door only after confirming that your health and recovery supplies are adequate.
Digdogger is fought with the Magnetic Gloves rather than ordinary sword attacks alone. The large spiked ball in the arena can be attracted from a pillar and then repelled across the room. Stand on one side of the arena and wait until the ball’s path will cross Digdogger before using Repel. A successful hit breaks the large form into smaller Digdoggers.
Continue using the magnetic ball against the smaller forms whenever possible. Sword attacks can finish the smallest forms, but the ball is safer and can damage them efficiently when the arena gives you a clear line. Avoid standing directly in the rebound path, and keep moving after each impact so Digdogger cannot trap Link against the room’s edge.
After the boss is defeated, collect the Heart Container and then take Nurturing Warmth, the fifth Essence of Nature. Leave the dungeon and save. The next main objective is Ancient Ruins and Dungeon 6, not the Graveyard or Temple Remains regions.
- Syger is defeated and the dungeon warp is available.
- Digdogger is defeated with the magnetic spiked ball.
- The Heart Container and Nurturing Warmth are collected.
- Five Essences of Nature are complete.
- Ancient Ruins and Dungeon 6 are the next main objectives.
Before you move on
- Soothing Rain is in the inventory as the fourth Essence of Nature.
- Nurturing Warmth is in the inventory as the fifth Essence of Nature.
- Dancing Dragon Dungeon and Unicorn’s Cave have both been cleared.
- The Slingshot, Magnetic Gloves, and Power of Autumn are available.
- The Eyeglass Lake route is open and the Unicorn’s Cave entrance is no longer blocked by mushrooms.
- The next main objective is Ancient Ruins and Dungeon 6.
References for this chapter
- Oracle of Seasons instruction manual, USA Game Boy Color edition
- Oracle of Seasons Walkthrough – Dancing Dragon Dungeon, Zelda Dungeon
- Mount Cucco and Dancing Dragon Dungeon, StrategyWiki
- Oracle of Seasons Walkthrough – Unicorn’s Cave, Zelda Dungeon
- Eyeglass Lake, Thonky Oracle of Seasons Guide
- Eyeglass Lake and Unicorn’s Cave, StrategyWiki
Subrosia dungeons and advanced seasonal puzzles (Dungeons 6–7)
After the fifth Essence, complete the Tarm Ruins route to reach Ancient Ruins, then use the Pirate Captain’s bell quest to open the western-coast path to Explorer’s Crypt. Ancient Ruins contains the L-2 Magical Boomerang and ends with the sixth Essence, Blowing Wind. Before Explorer’s Crypt, visit the Pirate Captain in Subrosia, learn the drawer sequence, enter Samasa Desert, recover the Rusty Bell, have the Subrosian Smithy polish it, and return it to the Captain. The coastal stump must be set to Summer so vines grow into the Graveyard. Explorer’s Crypt contains Roc’s Cape, the Poe Sisters miniboss, and Gleeok, whose defeat awards the seventh Essence, Seed of Life. The Iron Shield, Noble Sword, rings, Gasha Seed and heart pieces in these areas are optional.
Reach Tarm Ruins and enter Ancient Ruins
Travel from the central Holodrum routes toward Tarm Ruins. Follow the seasonal overworld path by using the stumps and the Rod of Seasons to handle the terrain in front of you: Winter lets you cross snowdrifts, Autumn removes Rock Mushrooms, Spring provides Blast Blooms for vertical movement, and Summer grows vines. These changes are made at stumps and remain active until you use another stump, so check the current season whenever a familiar route suddenly becomes blocked.
Near the Ancient Ruins entrance, Winter lets you clear the snow piles with the Shovel. Continue past the Blue Darknuts, move the blocking Armos Statue, then change to Spring and use the Blast Bloom to return to the upper ledge. Cross the bridge to the dungeon entrance. The Gasha Seed patch near Tarm Ruins and the Noble Sword route are optional; neither is required for the sixth Essence.
Before entering, carry Bombs and a reasonable supply of Seeds. A Pegasus Tree near the ruins provides a useful warp point. If you want the optional Gasha Seed at the entrance, change to Autumn, remove the Rock Mushrooms and burn the marked tree with an Ember Seed, but do not delay the dungeon for this reward.
- Ancient Ruins entrance reached through Tarm Ruins.
- Winter, Spring and the Shovel used for the required overworld route.
- Bombs and Seeds available.
- Optional Noble Sword and Gasha Seed ignored unless specifically wanted.
Clear Ancient Ruins and obtain the Magical Boomerang
From the Ancient Ruins entrance, go up two screens and step onto the turnstile so Link faces east. Move right through the Rope room, then cross the cracked-floor room with Roc’s Feather. Jump over the Blue Blade Traps, cut the crystals quickly and keep moving because the floor collapses. The chest in this area is optional and contains only Rupees.
In the next Rope room, bomb the center of the lower wall to reveal a passage. The hidden room contains a useful Rupee supply, but it is optional. Return to the entrance area, use the Small Key on the locked block, and use the Magnetic Gloves to move the N-Ball onto the floor button. This opens the west route to the Dungeon Map.
Continue through the turnstile rooms and blue-red switch puzzles until you reach the Compass. In the room with the moving bridge, equip Roc’s Feather and Pegasus Seeds before pressing the floor button. Use the speed boost to cross before the temporary bridge disappears. The dungeon then leads through bombable walls, Armos rooms and several Magical Boomerang switch puzzles.
Reach the chest on the raised ledge to obtain the L-2 Magical Boomerang. It is required, not optional. After taking it, the surrounding Armos activate; two Magical Boomerang hits defeat them. Use the opened route to fall back to the lower floors, then follow the newly available switch paths. Curve the Boomerang around obstacles when necessary, and use it to activate switches that ordinary sword strikes cannot reach.
The dungeon’s final route uses moving platforms, Magnetic Gloves, blue-red switches and a trampoline. After the Vire miniboss, clear the rooms beyond it and push the trampoline into position so Link can reach the upper floor. Use the Magical Boomerang to set the switches correctly, return through the opened staircase and unlock Manhandla’s room with the Boss Key.
- Dungeon Map and Compass collected.
- L-2 Magical Boomerang collected.
- Vire defeated.
- Boss Key obtained.
- Optional Rupee rooms skipped if supplies are already sufficient.
Defeat Manhandla and claim the sixth Essence
Manhandla moves across a room containing solid sections and shifting floor hazards while its four heads fire projectiles. The heads are vulnerable to the Magical Boomerang when their mouths are open. Curve the Boomerang around the boss when possible so the returning flight can strike more than one head. Keep Roc’s Feather equipped so you can jump away as the boss accelerates after each head is destroyed.
Once all four heads are gone, Manhandla’s core changes form and shocks Link if struck with the sword. Continue using the Magical Boomerang until the core is stunned and splits open. When the heart is exposed, immediately slash it with the sword. Collect the Heart Container, go up the staircase that appears, and take the Essence of Nature, Blowing Wind.
Ancient Ruins is complete when Blowing Wind appears in the Essence list. The next required objective is not another season puzzle inside the dungeon; it is the Pirate Captain’s bell quest that opens the western coast and Graveyard route.
- Manhandla defeated with the Magical Boomerang and sword.
- Heart Container collected.
- Blowing Wind collected as Essence 6.
- Save made after leaving Ancient Ruins.
Complete the Pirate Captain’s bell quest
After Ancient Ruins, leave Horon Village toward the Eastern Coast and speak with the pirate at the gate. If the Subrosia portal near Horon Village is active, use it; otherwise travel through the Sunken City route to reach Subrosia. Enter the Pirate House and speak with the Captain. Then talk to the Pirate upstairs on the far right. He demonstrates a drawer sequence: third drawer twice, second drawer once, first drawer twice, and fourth drawer three times.
Return through the portal to the Eastern Coast and speak with the pirate at the gate again. Use the same sequence on the skull heads from left to right: third twice, second once, first twice and fourth three times. The gate sinks into the sand, opening Samasa Desert.
In the desert, enter the visible end of the pirate ship and speak with the Pirate Ghost. Leave the ship, travel right and then north to the oasis, and speak with the Pirate Skull. Carry the skull with the Power Bracelet near the desert’s whirlpools. When his teeth chatter, drop into that quicksand. The cave contains the Rusty Bell.
Take the Rusty Bell back to Subrosia and show it to the Captain. He sends you to the Subrosian Smithy. Give the bell to the Smithy and wait for it to become the Pirate’s Bell. Return to the Captain and hand it over. The pirates then move their ship, opening the western-coast route. This entire sequence is required to reach Explorer’s Crypt.
- Captain spoken to in the Subrosian Pirate House.
- Drawer sequence recorded.
- Samasa Desert opened with the matching skull-gate sequence.
- Rusty Bell recovered from the correct quicksand cave.
- Rusty Bell polished into the Pirate’s Bell.
- Captain given the finished Pirate’s Bell.
Reach Explorer’s Crypt through the Graveyard
After the Pirate ship moves, leave the ship and go up twice to the small coastal hut. Open the chest for Bombs, then bomb the suspicious wall to reach the exterior stump. Change the season to Summer, return through the hut and follow the coastal route toward the lower-left area. Summer vines now grow where the route was previously blocked; climb them to enter the Graveyard.
The Graveyard contains hostile tombstones and ghost enemies. Move north through the Graveyard to the Explorer’s Crypt entrance. Do not confuse the nearby Autumn heart-piece route with the dungeon entrance. Autumn is useful for optional Rock Mushroom access, while Summer is the required season for the vine route from the coast.
The Iron Shield can be forged as an optional upgrade by obtaining Blue Ore and Red Ore in Subrosia, having them combined into Hard Ore, and giving the Hard Ore and your shield to the Subrosian Smithy. It is not necessary for Explorer’s Crypt. The Magical Boomerang from Ancient Ruins is useful, but the dungeon’s required item is Roc’s Cape.
- Pirate ship moved from the western coast.
- Coastal stump set to Summer.
- Vines climbed into the Graveyard.
- Explorer’s Crypt entrance reached.
- Optional Iron Shield skipped or completed without confusing it with required progress.
Navigate Explorer’s Crypt to Roc’s Cape
Inside Explorer’s Crypt, first work through the opening rooms and conveyor-belt routes to obtain the Dungeon Map. Use the Magnetic Gloves to manipulate magnets and enemies, and pay attention to pits because several routes require controlled jumps rather than ordinary walking.
Return east from the map area, drop through the indicated hole and unlock the route on the right. Continue through the ghost and Darknut rooms, using the Magnetic Gloves to pull enemies into pits when direct combat is unsafe. Activate the crystal switch, cross the bridge and use the magnets to reach the trampoline route. Defeat the Stalfos that blocks the northern path.
From the Stalfos room, use the moving platform and Roc’s Feather to cross the spike area. Reach the chest on the upper side of the next room and collect Roc’s Cape. The cape replaces Roc’s Feather and allows Link to hold the jump to cross wider gaps. Use it immediately to leave the item room and open the next part of the dungeon.
Continue through the Cape-controlled gaps, bridges, stairs and Magnetic Glove rooms to obtain the next Small Key. Push the trampoline into position near the water, ride the moving platform, and place the N-magnet over the switch to make the chest appear. Keep track of the holes and stairs; Explorer’s Crypt intentionally sends Link between floors, but the Dungeon Map makes the return route manageable.
- Dungeon Map collected.
- Magnetic Glove routes completed.
- Stalfos blocking the Cape route defeated.
- Roc’s Cape collected.
- At least the next Small Key obtained after the Cape section.
Defeat the Poe Sisters, get the Boss Key and reach Gleeok
Continue through the lower rooms, bridges and moving platforms until you reach the Poe Sisters’ torch room. The sisters attempt to extinguish four torches. If all four go out, Link is returned to the dungeon entrance. Equip a slingshot with Ember Seeds before entering and relight torches when necessary. Stay near the center, watch which sister approaches a torch, and strike her as she comes within sword range.
After both Poe Sisters are defeated, the east door opens. Follow the stair and platform route, then use Magnetic Gloves and Roc’s Cape to reach the room containing another Small Key. Some enemies can be defeated with Scent Seeds by causing them to fall into pits, but this is optional; jumping with Roc’s Cape also works.
Use the key on the northern route and solve the ordered switch room. The statues indicate the switch sequence. Use Pegasus Seeds with Roc’s Cape to reach the switches in the required order. Continue to the red trampoline and the blue-red switch arrangement described by the owl statue. Once the switches are set correctly, the path to the enemy room opens. Defeat every enemy there and collect the Boss Key.
Return through the watery and stair-filled rooms to the boss door. From the Boss Key room, fall through the hole, take the trampoline route, cross the ledges and use the stair maze to reach the left side of the boss floor. Unlock the door and enter Gleeok’s arena.
- Poe Sisters defeated before all four torches extinguish.
- Required Small Keys collected.
- Boss Key obtained from the cleared enemy room.
- Shortest available stair and ledge route to Gleeok followed.
Defeat Gleeok and claim the seventh Essence
Gleeok’s first phase has two heads that spit fire. Use Roc’s Cape to jump over the flames and strike the heads with the sword. Spin attacks can damage a head quickly. Defeat both heads without taking too long between them; if one head is left alone for too long, it can reattach and force you to repeat part of the phase.
In the second phase, Gleeok becomes skeletal and repeatedly jumps to create a ground-shaking impact before charging across the room. Jump with Roc’s Cape just before the impact so Link is not stunned. When the skeleton charges, jump over it and slash after it passes. Repeat the jump, evade and counter pattern until it is defeated. Keep the center and open portions of the arena available rather than allowing yourself to be trapped against the spikes.
Collect the Heart Container after the battle, then leave through the west door and walk to the altar. Take the Seed of Life, the seventh Essence of Nature. The optional Autumn heart piece near the Graveyard can be collected later, but it is not part of the required Essence route.
- Both Gleeok heads defeated before they can reattach.
- Ground-shaking attacks avoided with Roc’s Cape.
- Charging skeleton jumped over and counterattacked.
- Heart Container collected.
- Seed of Life collected as Essence 7.
Before you move on
- Ancient Ruins is cleared and Blowing Wind is listed as Essence 6.
- The Pirate Captain has received the polished Pirate’s Bell and the ship has moved from the western coast.
- The Summer vine route from the coastal hut into the Graveyard is open.
- Explorer’s Crypt is cleared, Gleeok is defeated and Seed of Life is listed as Essence 7.
- The inventory contains the L-2 Magical Boomerang and Roc’s Cape.
- The Maku Tree recognizes seven Essences; the final regular dungeon, Sword and Shield Maze, remains ahead.
References for this chapter
- Oracle of Seasons Walkthrough – Ancient Ruins
- Oracle of Seasons Walkthrough – Explorer’s Crypt
- Ancient Ruins – The Legend of Zelda: Oracle of Seasons Guide and Walkthrough
- Explorer’s Crypt – The Legend of Zelda: Oracle of Seasons Guide and Walkthrough
- The Legend of Zelda: Oracle of Seasons – Guide and Walkthrough by Demajen
- Oracle of Seasons instruction manual, USA Game Boy Color edition
Final regular dungeon (Dungeon 8): claim the eighth Essence
Sword and Shield Maze is the eighth and final regular dungeon in the original North American Game Boy Color release of Oracle of Seasons. Reach it through the Temple Remains after obtaining Roc’s Cape and completing the Subrosian volcano eruption. The dungeon combines icy floors, lava rooms, Magnetic Gloves puzzles, mine carts, side-scrolling jumps, and sliding ice blocks. Bring Roc’s Cape, Magnetic Gloves, Power Bracelet, Magical Boomerang, bombs, and a Slingshot upgraded to the Hyper Slingshot inside the dungeon. Ember Seeds and Mystery Seeds are required for the Frypolar fight, while Pegasus Seeds are useful but optional against Medusa Head. Collect the Compass, Dungeon Map, Hyper Slingshot, Small Keys, and Boss Key, defeat Frypolar and Medusa Head, then claim the eighth Essence of Nature, Changing Seasons. Return to the Maku Tree afterward to receive the Huge Maku Seed, which opens the route to Onox’s Castle.
Open the route to Sword and Shield Maze
Before entering Dungeon 8, make sure you have Roc’s Cape, Magnetic Gloves, Power Bracelet, Magical Boomerang, bombs, and the Slingshot. Carry Ember Seeds and Mystery Seeds for Frypolar. Pegasus Seeds are helpful for the final boss but are not required. The dungeon itself supplies some additional seeds and bombs, but entering with a useful reserve makes the lava and mine-cart sections safer.
Travel to the Temple Remains in northern Holodrum. Use Roc’s Cape to cross the gaps and work through the altered temple until you reach the Subrosian portal near the upper part of the area. In Subrosia, find the Subrosian who is throwing objects into a lava pit and throw a bomb into the pit. The resulting volcanic eruption changes the Temple Remains and floods parts of it with lava.
Return through the portal and follow the newly changed Temple Remains route. The northern Subrosian portal leads to the volcano area. In Subrosia, climb north through the connected paths and enter the volcano-shaped dungeon entrance. If the Temple Remains route still has its old layout or the dungeon entrance is inaccessible, the bomb-in-the-lava-pit eruption has not been completed.
- Roc’s Cape obtained
- Magnetic Gloves and Power Bracelet available
- Magical Boomerang and bombs available
- Ember Seeds and Mystery Seeds carried
- Subrosian volcano eruption completed
- Sword and Shield Maze entered
Collect the opening keys and Compass
From the dungeon entrance, go north and then east. A statue is positioned across a gap. Shoot it with the Slingshot to make the first Small Key fall onto the floor. Take the key, leave west, then use the northwest exit and go north again.
Defeat the Magnites in the next room to open the northern door. In the icy room, defeat the Zols, bomb the cracked blocks, and use the Magnetic Gloves to pull the magnetic ball into the Hardhat Beetle. Push or pull the ball until it strikes the enemy. When the enemies are gone, collect the second Small Key that falls from above.
Go east and pass the Sparks. Continue east to the room with the locked purple block, use a Small Key, and descend the stairs. Follow the narrow passage past the Ropes and Keese, then continue through the Wallmaster room without stopping. Use Roc’s Cape across the rollers, lava, moving platform, and spinning flames. In the room with Fire Keese and large blade traps, step on the switch at the upper-right to open the door. Enter the next room, climb the stairs, and open the chest at the upper-right to obtain the Compass.
- First Small Key collected from the statue
- Second Small Key collected after defeating the Hardhat Beetle
- Locked purple block opened
- Compass collected
Reach the Dungeon Map and extend the bridge
From the Compass room, go back down the stairs and use the locked door on the right. Work through the rotating-device rooms: use the device to face north, climb the short stairs, move left, drop from the ledge, and use the device again so you can exit south into the enemy room.
The owl statue gives the clue that a silent watch may be needed. Do not defeat the enemies before solving the statue puzzle. Leave the room and re-enter it, then stand still without pressing movement or item buttons. After a short delay, the Armos statue awakens. Defeat it, then use the stairs in the lower-left area.
Go east and open the chest for the Dungeon Map. While in this room, use the Magnetic Gloves on the N-polarity ball. Pull it around the purple blocks, move it toward the lava-side track, then change polarity so it travels upward and can be placed on the floor switch. When the ball lands on the switch, the bridge on the right side extends. This bridge is required for the route to the Hyper Slingshot.
- Rotating-device route completed
- Armos awakened by standing still
- Dungeon Map collected
- Magnetic ball placed on its switch
- Bridge extended
Get the Hyper Slingshot and defeat Frypolar
Leave the map room to the west, descend, and use Roc’s Cape across the lava to reach the upper route. Return to the Armos area and awaken and defeat the required statues. Push the purple block away from the chest and open it to obtain the Hyper Slingshot. This fires three seeds at once while consuming one seed from the inventory.
Use the bridge and rotating-device route to reach the chest containing another Small Key. Continue to the room with three statues. Stand on the upper ledge so one Hyper Slingshot shot strikes all three statues simultaneously. The resulting stairs lead to a room with cracked blocks and Darknuts; bomb the blocks, defeat the enemies, and take the Small Key from the chest. Use it to open the route to Frypolar.
Frypolar changes between fire and ice forms. Use Mystery Seeds on the ice blades that rise from the floor to shrink them into throwable ice crystals. When Frypolar is in ice form, strike it with an Ember Seed to force the form change. When it becomes fire form, lift the prepared ice crystal with the Power Bracelet and throw it at Frypolar. Repeat the Mystery Seed, Ember Seed, and crystal-throw sequence until Frypolar is defeated. Use the warp left behind to recover or return to the central dungeon route.
- Hyper Slingshot collected
- Small Key from the rotating-device route collected
- Three-statue route completed
- Frypolar defeated
- Frypolar warp available
Solve the ice rooms and claim the Boss Key
From the Frypolar warp, take the north exit and light all seven torches in the torch room with Ember Seeds. Move quickly because the flames do not remain lit indefinitely. The stairs lead to the three-block ice puzzle.
Push the leftmost ice block down and then right. Push the top block down and then right. Push the rightmost block down, right, up, and right. Finally, push the remaining block right. The blocks must occupy the yellow tiles on the right side; when they are correctly placed, the stairs appear at the top of the room.
Descend the ladder and cross the floating ice platforms with Roc’s Cape. Jump again promptly after landing because Link slides on the ice. Ride the conveyor belts to the upper-left ledge, then use the falling spiked blocks as temporary platforms to reach the ladder.
In the next room, step on the switch at the lower-right to extend the bridge. Continue east, use Roc’s Cape over the blade traps, and reach the upper-right side of the following room. Throw the Magical Boomerang around the obstruction to strike the crystal switch in the lower-middle area. Cross the bridge and exit south.
Defeat the Keese in the next area. The southeast switch opens an optional Ball-and-Chain Trooper room and is not needed for completion. Use bombs or thrown pots against the Pols Voices if necessary. Once the required enemies are defeated, the southwest door opens. Climb the stairs and take the Boss Key from the chest.
- Seven torches lit
- Three-block ice puzzle solved
- Side-scrolling ice section crossed
- Bridge switch activated
- Crystal switch struck
- Boss Key collected
Complete the lava-cooling route and collect the remaining keys
Return to the ice-block area and unlock the west door. Continue through the Spark room and bomb the wall beside the owl statue. In the next room, watch the ghostly Armos statue’s complete route. Then walk over the same tiles in the same order. If you fail, leave and re-enter to receive another route. A Small Key falls when the path is copied correctly.
Pick up an ice crystal from the altar and carry it south. Throw it into the red pit at the lower-right. The crystal cools lava in the basement below. Descend and open the chest on the eastern side for another Small Key. The western chest contains bombs and is optional.
Return to the altar for another ice crystal and enter the mine cart. Use the key block and throw the crystal into the first red pit. Return to the ice room, take another crystal, use the track switch as needed, and ride the altered route to the next pit. The crystal can be set down temporarily without breaking, which is necessary while operating switches and changing mine-cart routes.
Continue through the connected mine-cart rooms. Defeat or avoid the Wizzrobes, Fire Keese, Beamos, and Spiked Beetles while carrying the crystals. Bring a crystal through the final mine-cart route and throw it into the last red pit. This completes the lava cooling and opens the lower passage. Descend, follow the newly accessible route north, and use the final Small Key on the locked block near the northern end. Take the eastern path to the Boss Key door.
- Ghostly Armos route copied
- First basement lava section cooled
- First remaining Small Key collected
- Mine-cart crystal routes completed
- Final lava section cooled
- Last Small Key collected
- Final locked block opened
Defeat Medusa Head and claim Changing Seasons
Before entering the boss room, break the nearby pots to restore hearts if needed. Equip Roc’s Cape and keep the sword available. Medusa Head moves rapidly and can teleport around the room, so do not chase it continuously. Maintain enough open floor to jump over attacks.
When Medusa Head fires ordinary fireballs, keep moving and jump when the spread approaches. If it appears in an upper corner, prepare for a horizontal laser sweep. Jump with Roc’s Cape so the laser passes underneath Link. When Medusa Head appears in the center and releases blue projectiles, jump over the projectiles or float over them with Roc’s Cape; they petrify Link temporarily rather than dealing ordinary damage, leaving him vulnerable if they connect.
Use direct sword attacks during safe openings, especially after Medusa Head completes an attack or returns to the center. A charged Spin Attack is effective during the blue-projectile attack: jump over the projectiles and release the spin as Link lands. Pegasus Seeds fired from the Hyper Slingshot can briefly stun Medusa Head, allowing sword strikes, but this is optional and should not replace the Cape and sword plan.
After enough sword damage, Medusa Head is defeated. Take the Heart Container, leave through the northern exit, and walk to the altar at the tip of the sword-shaped dungeon. Collect the eighth Essence of Nature, Changing Seasons.
- Boss Key door opened
- Medusa Head defeated
- Heart Container collected
- Changing Seasons collected
Return to the Maku Tree and receive the Huge Maku Seed
After taking Changing Seasons, leave the dungeon and return through the nearby Subrosian portal to Holodrum. Use a Gale Seed to warp to Horon Village, then go to the Maku Tree. Speak with the Maku Tree after all eight Essences of Nature are in your possession.
The Maku Tree combines the eight Essences and gives Link the Huge Maku Seed. This is a story item, not ammunition for the Seed Satchel. It is the item that dispels the evil barrier around Onox’s Castle. The eighth Essence by itself does not open the castle route.
Save after receiving the Huge Maku Seed. Restore health and replenish bombs and useful seeds before beginning the castle chapter. Rings, Gasha rewards, optional heart pieces, and other side content can wait; the next required objective is reaching the castle entrance through Northern Peak.
- All eight Essences of Nature collected
- Maku Tree visited after Changing Seasons
- Huge Maku Seed received
- Health and supplies restored
- Save made after receiving the Huge Maku Seed
Before you move on
- Sword and Shield Maze is cleared.
- Medusa Head was defeated and the Heart Container was collected.
- Changing Seasons, the eighth Essence of Nature, is in the inventory.
- The Maku Tree has acknowledged all eight Essences.
- The Huge Maku Seed is present in the inventory.
- A save has been made after receiving the Huge Maku Seed, leaving the file ready for the Onox’s Castle chapter.
References for this chapter
- Sword and Shield Maze - The Legend of Zelda: Oracle of Seasons Guide and Walkthrough
- Oracle of Seasons Walkthrough - Sword and Shield Maze
- Chapter 19: Sword & Shield Maze - Zelda Universe
- The Legend of Zelda: Oracle of Seasons - Guide and Walkthrough - Game Boy Color - By Kirby021591
- Oracle of Seasons instruction manual, USA Game Boy Color edition
Preparing for Onox's Castle
After collecting all eight Essences of Nature, return to the Maku Tree in Horon Village. The restored tree gives Link the Huge Maku Seed, a story item whose power removes the dark barrier at Northern Peak and opens the route to Onox's Castle. Before leaving, refill your hearts, confirm that Bombs and a recovery option are available, and keep the Rod of Seasons easy to select for the battle ahead. Use a Gale Seed to warp to North Horon, then follow the bridge and hollow-log route through Temple Remains. Defeat or pass the Ball-and-Chain Soldier, reach the barrier, and let the Huge Maku Seed trigger the Twinrova scene. When the scene ends, continue north through the opened route until you reach the castle entrance and enter. This chapter stops there; the next chapter begins inside Onox's Castle.
Return to the Maku Tree and receive the Huge Maku Seed
First confirm that the eighth regular dungeon has been completed and that its Essence of Nature was collected. The reward must be in your Essence collection; reaching the boss room or defeating the boss without taking the Essence is not enough. Return to Horon Village, go to the Maku Tree, and speak with the tree after the eighth Essence has been obtained.
The Maku Tree restores its power and gives Link the Huge Maku Seed during the resulting story sequence. This is the required final story item for opening the way to Onox's Castle. The game also shows a scene involving Onox before Link resumes control, so allow the sequence to finish before travelling onward.
The Huge Maku Seed is separate from the Seed Satchel and its ammunition. It is not Ember, Scent, Mystery, or another ordinary seed, and it is not selected, thrown, planted, or consumed through normal item controls. Its effect occurs automatically when Link reaches the dark barrier at Northern Peak. If the barrier does not react, return to the Maku Tree and verify that the post-eighth-Essence conversation and item award occurred.
- The eighth Essence of Nature has been collected.
- The Maku Tree has completed its post-Essence conversation.
- The Huge Maku Seed has been received.
Restock before leaving Horon Village
Begin the final approach with full hearts or as much health as your current supplies allow. Carry Bombs for the final castle route. They are not used to remove the Northern Peak barrier, but they are needed shortly after entering Onox's Castle for the Facade encounter. A Potion or another healing option is strongly useful for a first attempt, although it is not required to open the castle.
Keep the Rod of Seasons easy to select. It is not needed to reach the barrier or enter the castle, but it is required later when Onox uses Din as a shield. Your sword and shield should also be readily available for the castle's combat rooms. The standalone USA campaign does not require a linked-game sword, a special ring, an upgraded shield, or a separate castle key for this approach.
A Gale Seed is recommended for the trip. Use the warp that places Link at the Scent Seed tree in North Horon, east of the area associated with Ricky. This saves time and places you close to the route into Temple Remains. Optional heart pieces, rings, stronger equipment, and extra Gasha rewards can improve survivability, but none is a prerequisite for the barrier event or castle entrance.
- Hearts are full or nearly full.
- Bombs are available.
- A Potion or another recovery option is available if possible.
- A Gale Seed is ready for the North Horon warp.
- The Rod of Seasons, sword, and shield are easy to select.
Follow the North Horon and Temple Remains route
Use a Gale Seed and choose the North Horon destination near the Scent Seed tree. From the landing area, go south one screen, west one screen, and north one screen. Continue west, cross the bridge, and go north two screens. Enter the hollowed log on the left. This is the route through Temple Remains toward Northern Peak, not a Subrosia entrance.
After coming through the hollow log, go north one screen. A Ball-and-Chain Soldier occupies the route ahead. Defeat it if you are comfortable fighting it, or move carefully around its attack range and proceed when the path is clear. Once past that room, go west one screen and then north one screen to reach the dark barrier at Northern Peak.
Do not waste Bombs, Seed Satchel ammunition, or seasonal powers on the barrier. It is opened by the combined power of the eight Essences and the Huge Maku Seed. If the barrier remains closed, the problem is progression-related: return to the Maku Tree and confirm the item award rather than trying random item interactions at the barrier.
- North Horon was selected as the Gale Seed destination.
- The bridge and hollowed log were used to enter the Temple Remains route.
- The Ball-and-Chain Soldier has been defeated or safely passed.
- Link has reached the dark barrier at Northern Peak.
Let the barrier scene finish and enter Onox's Castle
When Link reaches the blocked Northern Peak area with the Huge Maku Seed, the seed activates automatically and the dark magic disappears. A story scene follows in which Twinrova reveals the danger surrounding Din and the Flame of Destruction. There is no button prompt, special season, dungeon key, or additional overworld objective required during this event. Wait until control returns to Link.
After the Twinrova scene and the Maku Tree's brief encouragement, continue north through the newly opened route. Use the castle itself as the landmark: keep moving north until Link reaches the entrance to Onox's Castle, then enter the opening. Do not rely on a fixed screen count, since the visible route and stopping point are the reliable references for this handoff.
Stop once Link has entered the castle. The next chapter begins inside the entrance room and covers the northbound combat route, the optional fairy-room recovery behavior, the Wizzrobe and Darknut-Wallmaster rooms, Facade, the supply room, and Din's crystal. Preserve your Bombs, healing option, and access to the Rod of Seasons for that section.
- The Huge Maku Seed has dispelled the Northern Peak barrier.
- The Twinrova story scene has finished.
- Link has continued north through the opened route to the castle entrance.
- Onox's Castle has been entered.
- Bombs, recovery supplies, and the Rod of Seasons remain available for the next chapter.
Before you move on
- The Maku Tree has given Link the Huge Maku Seed after all eight Essences were collected.
- The dark barrier at Northern Peak has disappeared automatically.
- The Twinrova story scene has completed.
- Link has continued north through the opened route and entered Onox's Castle.
- Bombs and a recovery plan remain available, and the Rod of Seasons can be selected for the upcoming boss sequence.
- The file is positioned inside the castle entrance, ready for the next chapter's room-by-room route.
References for this chapter
- Oracle of Seasons Walkthrough – Onox’s Castle, Zelda Dungeon
- Onox’s Castle – The Legend of Zelda: Oracle of Seasons Guide and Walkthrough
- The Legend of Zelda: Oracle of Seasons – Guide and Walkthrough – Game Boy Color – By Dev
- The Legend of Zelda: Oracle of Seasons – Guide and Walkthrough – GameFAQs
Onox’s Castle: route from the entrance to Din’s crystal
This chapter begins at the entrance to Onox’s Castle, after the barrier has already been removed and the Huge Maku Seed has opened the route. The castle is a compact northbound sequence with no dungeon item or seasonal puzzle. The main route requires clearing a Wizzrobe room, a Darknut and Wallmaster room, and a Facade rematch. Two entrance-side rooms contain fairies, but their flying-tile traps can return Link to the entrance, so use them only when the healing is worth the reset. After Facade, search the pot-filled supply room before continuing to Din’s crystal. Approaching the crystal triggers General Onox and hands the game over to the final-battle chapter. During Onox’s first phase, the Rod of Seasons is required whenever Din’s crystal is used as a shield.
Start at the castle entrance
Begin this chapter in the first room inside Onox’s Castle. The entrance is the bottom room of the castle route, and the required path continues north. Do not leave to repeat the Temple Remains approach or the Maku Tree sequence; those prerequisites are already complete. Your immediate objective is to reach the room containing Din’s crystal, not to search for a key or dungeon item.
Before taking the northern exit, check your health, sword, shield, Bombs, Rod of Seasons, and recovery supply. The castle is arranged as a sequence of combat rooms, so unnecessary damage early in the route makes the later Onox fight harder. If you need emergency healing, the two side rooms connected to the entrance can provide fairies, but they are not a normal checkpoint and should not be treated as a permanent save or recovery room.
- Link is already inside Onox’s Castle.
- The northern route is the main path.
- Sword, shield, Bombs, Rod of Seasons, and recovery supplies are ready.
- The side fairy rooms are understood as optional reset rooms, not permanent checkpoints.
Use the fairy rooms only when necessary
The east and west exits from the entrance lead to rooms containing fairies. Entering too far causes the door to close and activates a flying-tile trap. The tiles cross the room repeatedly, so do not wander around trying to fight the trap. Keep Link’s shield facing the incoming tiles and concentrate on reaching the fairy or surviving until the room sequence ends.
If you have the Magical Boomerang equipped, use it from near the doorway to collect the fairy without committing as deeply into the room. This is the safer option when you only need the healing. If the trap activates, expect the room sequence to return Link to the castle entrance after it is resolved. That reset means you must take the northern route again, so skip the side rooms when your health is already adequate.
- Fairy room entered only for useful healing.
- Flying tiles handled with the shield and minimal movement.
- Magical Boomerang used from the doorway when available.
- Northern exit taken after healing or after deciding to skip the fairies.
Clear the Wizzrobe room completely
The first required room north of the entrance contains several Wizzrobes. Keep moving instead of standing in the middle of the room, and attack whenever a Wizzrobe becomes vulnerable. Their teleporting and ranged attacks make the open edges of the room dangerous, so watch the entire screen rather than focusing on one target.
The northern exit opens only after every Wizzrobe has been defeated. If the route appears to send you back or refuses to advance, sweep the corners and edges for a remaining enemy. Do not leave after defeating only the Wizzrobes you can see near the center; continue checking until the completion sound or normal door behavior confirms that the room is clear.
- All Wizzrobes defeated.
- Room edges checked for a remaining enemy.
- Northern exit confirmed usable before continuing.
Defeat the Darknuts and Wallmasters
The next room combines armored Darknuts with Wallmasters. Darknuts are safest to attack from the side or rear because their front-facing defenses make direct sword swings unreliable. Circle around them on open floor and avoid backing yourself into a wall. If two Darknuts approach together, retreat, let one separate, and attack only when you have room to move afterward.
Wallmasters can interrupt your movement and punish hesitation. Watch for one descending from above and move out from underneath it. Defeat the Wallmasters as well as the Darknuts; the northern exit does not provide a shortcut around an unfinished clear condition. If the room returns you to the previous chamber, re-enter and search for the enemy that survived.
- Darknuts attacked from the side or rear.
- Link kept away from walls and corners.
- Wallmasters defeated without standing beneath their descent.
- Every enemy cleared before using the northern exit.
Beat the Facade rematch
The next chamber contains Facade, previously encountered in Snake’s Remains. Bombs are the essential weapon. Place a Bomb near the center when Facade appears or exposes its vulnerable face, then move away so the blast catches the target without catching Link. Avoid throwing Bombs continuously; a missed placement wastes both time and part of the supply needed for other situations.
Facade creates holes, beetles, and fireball hazards while moving around the room. Use broad movements around the open floor and prioritize avoiding damage over forcing an immediate hit. Wait for another opening if the boss disappears or the previous Bomb failed. After enough successful explosions, Facade is defeated and the route north opens. Collect the fairy it leaves behind if you need the healing, then continue north.
- Bombs used when Facade is exposed.
- Link moved away from each Bomb before detonation.
- Holes, beetles, and fireballs avoided.
- Facade defeated before taking the northern exit.
- Dropped fairy collected if useful.
Search the supply room before the final approach
The room immediately north of Facade is a supply room filled with pots and contains no required enemy fight. Break the pots on both sides and collect the useful health and item drops before continuing. This is the intended preparation stop before the final confrontation, so do not rush through the middle and leave supplies behind.
Use the room to stabilize your health and replenish what the pots provide. Preserve a potion or other limited recovery item when the available drops are sufficient, but do not refuse healing if Link is already in danger of dying. Once you leave by the northern exit, continue toward Din’s prison and prepare for the confrontation rather than expecting another ordinary preparation room.
- Pots on both sides searched.
- Health drops collected.
- Useful item drops collected.
- A limited recovery item preserved when practical.
- Link is ready to continue north.
Approach Din’s crystal and hand off to the boss chapter
Take the northern exit from the supply room and enter the chamber containing Din’s crystal. Walk forward to trigger the scene. General Onox appears and the final battle begins immediately; there is no castle key, seasonal mechanism, or dungeon item to collect first.
During the opening phase, Onox uses heavy attacks and keeps enough distance that careless sword swings can expose Link to his mace, spiked projectile, falling rocks, or whirlwinds. Keep moving around the arena and use safe openings for charged or spin attacks. When Onox pulls Din’s crystal in front of himself, do not strike the crystal with the sword. Equip or use the Rod of Seasons to knock the crystal aside, then return to attacking Onox. The fight continues after the floor collapses and Link faces Dark Dragon Onox; that battle is covered in the next chapter.
- Din’s crystal approach scene triggered.
- General Onox has appeared.
- Rod of Seasons is ready for the crystal-shield phase.
- The chapter ends with the boss encounter handed off to the final-battle chapter.
Before you move on
- Link is inside Onox’s Castle at the beginning of the northbound route.
- The optional fairy-room behavior has been understood and used only when appropriate.
- The Wizzrobe room has been cleared completely.
- The Darknut and Wallmaster room has been cleared completely.
- Facade has been defeated in the castle rematch.
- The pot-filled supply room has been searched.
- Link has approached Din’s crystal and triggered General Onox’s appearance.
References for this chapter
- Onox’s Castle – The Legend of Zelda: Oracle of Seasons Guide and Walkthrough
- The Legend of Zelda: Oracle of Seasons – Guide and Walkthrough – GameFAQs
- Oracle of Seasons Walkthrough – Onox’s Castle, Zelda Dungeon
- The Legend of Zelda: Oracle of Seasons/Onox’s Castle — StrategyWiki
- Chapter 20: Onox’s Castle, Zelda Universe
Final boss — Onox: fight plan and recovery
Onox’s battle begins in a top-down arena. His armor blocks ordinary sword strikes, so charge and release Spin Attacks after avoiding his ball-and-chain swings, falling debris, and whirlwinds. When Din’s crystal appears as a shield, hit the crystal with the Rod of Seasons, then switch back to the sword and attack Onox during the brief opening. After this form is defeated, the floor collapses and Onox reveals his Dark Dragon form in a side-scrolling arena. Use Roc’s Cape to jump onto a claw after it slams down, ride it upward, and leap toward the jewel on his forehead. Avoid the claw sweep and fire attacks, conserve healing for the dragon phase, and reload a pre-castle save if the attempt fails. The campaign is complete when Din is freed and the ending sequence begins.
Prepare at the castle entrance
Before starting the final approach, save at the castle entrance or at your most recent safe opportunity. The original Game Boy Color game does not give you a normal mid-battle checkpoint, so a deliberate save is the safest way to protect your supplies and retry the encounter without relying on an uncertain game-over position.
The required battle tools are the Rod of Seasons and Roc’s Cape. Keep the Rod ready for the crystal-shield portion of Onox’s first form, then make sure Roc’s Cape is available before the dragon battle begins. Your best available sword is helpful because it reduces the time spent exposed, but no specific sword upgrade is required to begin the fight. Carry a Potion if you have one, but treat it as emergency recovery rather than something to spend on minor damage in the castle.
Onox’s Castle also contains side rooms with fairies. These rooms can restore health, but leaving them sends Link back toward the castle entrance, so use them before the final push rather than assuming they function as permanent checkpoints. If you enter one, plan to clear the route again before returning to Onox.
- Save before the final approach.
- Keep the Rod of Seasons available.
- Keep Roc’s Cape available for the dragon form.
- Restore health before entering the final chamber.
- Do not spend your only recovery item on ordinary castle damage.
Normal form: use charged Spin Attacks
Onox’s armor prevents ordinary sword swings from damaging him. Hold the sword button to charge a Spin Attack, then release it when Onox has finished an attack and you can approach from open space. After the strike, retreat immediately instead of standing beside him for follow-up slashes.
The safest pattern is evade, charge, approach, strike, and retreat. Circle through the arena so that Link does not become trapped against a wall or corner. You do not need to attack during every movement cycle; waiting for a clean opening is safer than trading damage with the boss.
Onox can swing or throw his ball and chain, create a quake that causes debris to fall, and send whirlwinds across the arena. Move laterally away from the ball-and-chain impact, keep moving when the ceiling attack begins, and wait for the whirlwinds to pass before closing in. The attack recovery after one of these sequences is your most dependable opportunity to release a Spin Attack.
- Do not rely on normal sword swings.
- Charge the Spin Attack before approaching.
- Strike after an attack sequence ends.
- Retreat after every hit.
- Keep a clear route around the arena.
Din’s crystal: clear the shield safely
After taking enough damage, Onox brings Din’s crystal into the battle and uses it to block your sword attacks. Do not attack the crystal with the sword. Equip the Rod of Seasons and strike the crystal to knock it temporarily away from Onox.
Use the opening immediately. Switch back to the sword, charge or release a Spin Attack, and hit Onox before the crystal returns to its shielding position. Once the opening closes, move away and wait for the next safe chance to use the Rod again. The Rod is not needed for seasonal environmental changes during this encounter; its purpose here is to displace Din’s crystal.
Position Link at a safe distance before striking the crystal when possible. This gives you time to switch items without standing directly beside Onox’s ball and chain. Avoid chasing the crystal around the arena; move it once, damage Onox, and reset the pattern.
- Use the Rod of Seasons on Din’s crystal.
- Never strike the crystal with the sword.
- Attack Onox during the temporary opening.
- Retreat before the crystal returns.
- Repeat until the first form is defeated.
Transition to Onox the Dark Dragon
When the first form is defeated, walk toward Din after the immediate action settles. The floor begins to collapse, and Link is taken into the side-scrolling arena for Onox’s true form. This is not a conventional top-down continuation, so change your positioning and item priorities before trying to attack.
Equip Roc’s Cape for the dragon battle. The vulnerable target is the large jewel on Onox’s forehead, not his body or claws. The claws are temporary platforms that let Link reach the jewel, so concentrate first on reading the hand movement rather than trying to attack from the ground.
- Allow the transition to finish.
- Equip Roc’s Cape.
- Target the forehead jewel.
- Use the claws as platforms rather than attacking them.
Dragon form: ride a slammed claw to the jewel
Watch for Onox to bring a claw down onto the platform. Move away from the impact point, then use Roc’s Cape to jump onto the lowered claw once it is safely within reach. As the claw rises, stay on it and prepare to jump toward the jewel. Slash the jewel with the sword while Link is carried upward or as he leaps from the claw.
A charged Spin Attack can deal damage if you can prepare it without compromising the jump, but reliable positioning is more important than forcing a charge. After striking the jewel, return to the platform and reset near open space. Repeat the claw-to-jewel pattern rather than remaining under the dragon.
If a claw is held upright and begins moving across the arena, it is preparing a sweeping attack rather than offering a safe platform. Run toward the opposite side and wait for the next downward slam. Jumping at the claw during the sweep is likely to place Link in its path.
- Wait for a downward claw slam.
- Jump onto the claw with Roc’s Cape.
- Leap from the raised claw toward the jewel.
- Return to the platform after the hit.
- Avoid claws that are sweeping across the arena.
Avoid the dragon’s fire attacks
Onox’s Dark Dragon form can launch blue flames and rapid red projectiles in addition to the claw slam and horizontal sweep. Keep moving while waiting for the next platform opportunity, but use short, controlled movements so you can still see which claw is active. Frantic jumping can put Link into a projectile or make the next claw opening harder to read.
When fire appears, prioritize survival over an immediate attack. Move clear of the projectile path, then return to the claw pattern once the attack ends. If Link is positioned badly, move to an edge with room to react rather than attempting to force a jump onto a moving hand.
Use your Potion only when another hit would put the attempt at serious risk. The dragon phase is where the remaining health is most valuable, so preserve healing through the first form and spend it late if necessary.
- Keep moving while watching the claws.
- Avoid blue flames and rapid projectiles before attacking.
- Do not jump onto a sweeping claw.
- Save healing for dangerous health levels.
- Repeat the jewel attack until Onox falls.
Retry procedure and completion check
If Link dies, reload the save made before the final approach and restore health before returning to the chamber. If you used a Potion, restock it when possible; if the castle’s fairy rooms are used, remember that leaving them sends Link back through the castle route. On the retry, enter the first form with enough health to make several patient Spin Attack attempts, then preserve as much health as possible for the Dark Dragon.
The fight is complete when the dragon is defeated, Din is freed, and the game begins its ending sequence. After the ending, reloading the completed file preserves the post-Onox world state for remaining activities and password preparation. The unlinked campaign ends with Onox; Twinrova and Ganon belong to the linked continuation involving Oracle of Ages.
- Reload the pre-castle save after a failed attempt.
- Restore health before retrying.
- Confirm the dragon is defeated.
- Confirm Din is freed.
- Wait for the ending sequence before marking the campaign complete.
- Keep the completed file if you intend to use the Linked Game password.
Before you move on
- Onox’s armored normal form is defeated with Spin Attacks.
- Din’s crystal is displaced with the Rod of Seasons and Onox is defeated while exposed.
- Onox reveals his Dark Dragon form.
- The forehead jewel is struck until the dragon is defeated.
- Din is freed and the ending sequence begins.
- Reloading the completed save shows the post-Onox state and preserves the file for remaining activities or Linked Game preparation.
References for this chapter
- Oracle of Seasons Walkthrough – Onox’s Castle, Zelda Dungeon
- Onox’s Castle – The Legend of Zelda: Oracle of Seasons Guide and Walkthrough
- Chapter 20: Onox’s Castle, Zelda Universe
- The Legend of Zelda: Oracle of Seasons – Guide and Walkthrough – GameFAQs
- Oracle of Seasons instruction manual, USA Game Boy Color edition
Aftermath and the main ending: freeing Din and what changes
Defeating General Onox and Dark Dragon Onox completes the standalone Nintendo Game Boy Color campaign. After the final battle, walk to Din’s crystal, watch the restoration scenes and credits, then record the Secret to Labrynna shown afterward. Save the completed file when prompted. Reloading that file returns Link to explorable Holodrum after Onox’s defeat, where Din can be visited in Horon Village and optional standalone activities can be finished. The standalone ending does not include the Twinrova and Ganon finale. That continuation requires starting Oracle of Ages with the Secret to Labrynna. Preserve the completed Seasons file until you have copied the password and made any desired ring or secret transfers.
Free Din and complete the standalone ending
After defeating Dark Dragon Onox, Din remains suspended in her crystal. Walk directly to the crystal instead of resetting, saving elsewhere or trying to leave the arena. Link’s contact breaks the crystal and begins the rescue sequence.
Allow the dialogue and scenes to play without interruption. Din thanks Link, and the game shows Holodrum returning to its normal seasonal order. Din recognizes Link as a hero, while Twinrova appears as part of the closing plot material and explains that Onox’s actions helped light the Flame of Destruction. This is a story lead into the other Oracle game, not an additional boss encounter in the standalone Seasons campaign.
The credits follow the rescue and restoration scenes. The required standalone completion point is reached when Onox and his Dark Dragon form are defeated, Din is freed, the restoration sequence has played and the credits have finished. There is no ninth regular dungeon or additional Seasons boss after this sequence.
- General Onox is defeated.
- Dark Dragon Onox is defeated.
- Link reaches Din’s crystal and Din is freed.
- The restoration scenes and credits have finished.
Record the Secret to Labrynna
After the credits, Oracle of Seasons displays the Secret to Labrynna. This is the completion password for starting a linked Oracle of Ages game. Copy every character exactly, including the position and appearance of symbols. Keep the password outside the game rather than relying on memory.
The Secret to Labrynna is different from the Ring Secret and from the shorter secrets used to transfer individual rewards or upgrades. Do not enter it as an item password during ordinary Seasons play. Its purpose is to begin Oracle of Ages as a continuation of the completed Seasons adventure.
When the game offers the opportunity to save, save the completed Seasons file. Do not overwrite it with an unfinished file before recording the password. If the password was missed, reload the completed save and check Farore’s Memory beside Farore in the Hall of Secrets. On the original Game Boy Color password system, Farore’s Memory records the main linked-game password and later linked secrets after the appropriate completed file has been loaded. If the book is not available, first confirm that the post-credits completed save was made rather than loading an earlier save.
- The Secret to Labrynna has been copied exactly.
- The completed Seasons file has been saved.
- The main completion password is kept separate from the Ring Secret.
Reload the completed Seasons file
Load the file saved after the ending. The game returns Link to explorable Holodrum with Onox defeated and the land restored. You do not need to clear Onox’s Castle again to resume exploration, and the castle is not a new regular dungeon after the ending.
Use this file for any unfinished standalone cleanup. Heart pieces, rings, Gasha Seed planting and harvesting, minigames, upgrades and other ordinary rewards remain available according to the progress already made. These tasks are optional and are not required for the normal ending, so a newcomer should not delay the final assault merely to finish them.
Keep the completed file if you intend to begin Oracle of Ages as a linked game. It is the safest record for recovering the Secret to Labrynna and for obtaining the Ring Secret or other transfer passwords later.
- Reloading returns Link to explorable Holodrum.
- Onox’s Castle does not need to be cleared again.
- Optional standalone activities can be continued.
- The completed save is preserved for linking.
Confirm the restored world and visit Din
After reloading, travel to Horon Village. Din is present there with a member of her troupe. Speak to her if you want a direct confirmation that the post-Onox world state is active. She can ask Link to dance with her again and comments on the troubling events beginning in Labrynna.
The restoration affects the normal seasonal state of Holodrum, but this visit does not begin another dungeon or unlock another standalone boss. It is an epilogue interaction. The developing Labrynna situation explains why the story points toward Oracle of Ages rather than continuing with another Holodrum campaign.
If Din is not present, check that you loaded the file saved after completing the ending rather than an earlier save made before entering Onox’s Castle. The completion file, not the pre-castle file, is the one intended for post-game exploration and password work.
- Din is present in Horon Village.
- The restored Holodrum state is confirmed.
- No additional standalone dungeon is expected.
Keep standalone rewards separate from linked content
Rings already collected remain associated with the Seasons file. To transfer them to Oracle of Ages, visit the Red Snake in Vasu’s Ring Shop and obtain the Ring Secret. Enter that password with the corresponding Red Snake in the other Oracle game. This transfer is separate from the Secret to Labrynna and can be handled after the main ending.
The Twinrova-and-Ganon climax is not hidden somewhere in post-game Holodrum. The standalone Seasons ending stops with Onox defeated, Din rescued, Holodrum restored and the completion password displayed. The Room of Rites, Twinrova and Ganon belong to linked-game progression in Oracle of Ages after the Secret to Labrynna is used.
Other linked secrets can transfer particular upgrades or rewards between files. Keep each password labeled by its recipient and purpose. Farore’s Memory is useful for reviewing recorded linked secrets, but it does not replace the need to start Oracle of Ages with the correct Labrynna password.
- Standalone optional cleanup is distinguished from linked-game content.
- The Ring Secret is obtained from Vasu’s Ring Shop if ring transfer is wanted.
- Twinrova, Ganon and the Room of Rites are reserved for the linked continuation.
Begin the linked Oracle of Ages continuation
When ready, start a new Oracle of Ages file and choose the password or Secrets option rather than an ordinary independent game. Enter the Secret to Labrynna from the completed Seasons file before beginning the new adventure.
The linked Ages file carries continuation information from Seasons and adds linked characters, secrets and story events. During that game, some characters provide passwords intended for people in Holodrum. Return to the Seasons file, give each password to its named recipient, record the response and enter the resulting return secret at Farore in the linked game when instructed.
Original Game Boy Color hardware supports the link system described in the instruction booklet when the required systems, cartridges and cable are available. Password linking is the practical alternative when the games are played separately. Preserve the completed Seasons save until all desired ring transfers and secret exchanges are finished.
- Oracle of Ages is started through its password or Secrets option.
- The Secret to Labrynna is entered before beginning the linked file.
- The completed Seasons save remains preserved during all transfers.
- The extended Twinrova-and-Ganon sequence is pursued only in the linked continuation.
Before you move on
- Onox and Dark Dragon Onox are defeated.
- Din is freed from her crystal.
- Holodrum’s restoration scenes and the credits have finished.
- The Secret to Labrynna has been copied or confirmed through Farore’s Memory.
- Reloading the completed save returns Link to explorable Holodrum with Onox defeated.
- Din can be visited in Horon Village.
- Any desired standalone optional content is complete, or the completed file has been preserved for later cleanup and linking.
References for this chapter
Optional: Linked Game overview and how to reach the true ending
This optional chapter covers the linked Oracle of Ages continuation after completing the original USA Game Boy Color Oracle of Seasons campaign. After Onox is defeated and the Seasons ending finishes, record the Secret to Labrynna and enter it when creating a new Ages file. The password enables linked continuity, extra events, cross-game secrets, and the route to the Room of Rites after Veran. Ages remains a complete second adventure: its dungeons, equipment, and story objectives are not skipped. In the Room of Rites, clear the statue-eye passage, defeat Koume and Kotake, defeat their merged Twinrova form with the correct sword and seed responses, then defeat Ganon. Check on Zelda afterward and record the Hero’s Secret if you want to start another Hero’s Game or preserve the password chain.
1. Finish Oracle of Seasons and record the continuation password
This chapter is not required for the standalone Oracle of Seasons ending. The original North American Game Boy Color campaign is complete after you defeat General Onox and Dark Dragon Onox, rescue Din, and watch the standalone ending. The linked route begins only when you use the password provided afterward to start Oracle of Ages.
Let the ending sequence and credits continue until the game displays the Secret to Labrynna. Record every character exactly as shown before switching off the system, deleting the file, or overwriting the completed Seasons save. This password identifies the next game as a linked Ages adventure rather than a normal standalone file.
Keep the completed Seasons file available. It is still needed if you later want to enter individual secrets, transfer rings, or claim cross-game rewards. The Secret to Labrynna is different from ordinary item secrets, Ring Secrets, and the later Hero’s Secret.
- General Onox and Dark Dragon Onox are defeated.
- Din has been rescued and the standalone ending has been viewed.
- The Secret to Labrynna has been recorded exactly.
- The completed Seasons file remains intact.
2. Start a linked Oracle of Ages file
Insert Oracle of Ages and choose an unused save slot. Select the password or linked-game start option and enter the Secret to Labrynna from Seasons. Confirm the displayed information before accepting the file. A correctly linked Ages file starts with four hearts instead of the usual three and carries selected continuity details from Seasons, including Link’s name, the animal companion choice, and the development state of Bipin and Blossom’s child.
The password does not copy the Seasons inventory into Ages. You must still obtain the Ages sword, dungeon items, songs, heart containers, and other equipment through ordinary Ages progression. The Rod of Seasons, Essences of Nature, Holodrum dungeon progress, and Seasons equipment remain in the original game.
A compatible original Game Link Cable is another way to connect the two cartridges, but the password method is the practical route when using separate systems or when cable compatibility is uncertain. Do not assume a later rerelease offers every original cable feature. For the original Game Boy Color release, the password route is sufficient.
- A new Ages save slot is selected.
- The linked-game or password option is chosen.
- The Secret to Labrynna is entered without transcription errors.
- The file begins with four hearts and linked-game continuity.
3. Use cross-game secrets without confusing their roles
A linked game adds characters, conversations, and events that are absent or altered in an ordinary file. Some characters give Link a secret intended for the other Oracle title. Write each password down, travel to the named character in the other game, and enter it when requested. Some rewards are given immediately; others require a short task before the return password appears.
When a character gives you a return secret, take it to Farore in the Hall of Secrets inside the Maku Tree in the appropriate game. Farore converts the completed exchange into the linked item or upgrade. Do not treat these item secrets as replacements for the main continuation password; they are separate codes with separate destinations.
Rings use a separate transfer process. Speak with the Red Snake at Vasu’s Ring Shop to obtain a Ring Secret, then enter that password with the Red Snake in the other game. Ring transfer does not merge dungeon progress or inventories. It transfers the encoded ring collection and can be used when you want rings from one game available in the other.
- The linked file’s carried-over names and companion choice are noted.
- Individual item secrets are recorded separately from the Secret to Labrynna.
- Return passwords are taken to the requested character or Farore.
- Ring transfer is performed through the Red Snake when wanted.
4. Complete the linked Ages campaign before entering the Room of Rites
Play Oracle of Ages through its regular story. Obtain the Harp of Ages and its songs, complete the required overworld objectives, clear the dungeons, and defeat Veran in the Black Tower. Starting with a linked password does not bypass the second game’s progression.
After Veran is defeated, continue through the linked story scenes instead of resetting immediately. In a linked Ages file, Din and Nayru combine their powers and the Maku Tree opens the way to the Room of Rites, where Twinrova is holding Zelda. The Room of Rites and its final battles are not part of the standalone Ages ending and cannot be reached by merely entering a password without completing Ages.
Before entering the final route, restore your health and make sure your sword, Seed Shooter or Slingshot, and recovery supplies are ready. Optional equipment can make the fights safer, but the required progression is defeating Veran and following the linked post-battle events to the Room of Rites.
- The linked Ages dungeons and required objectives are complete.
- Veran has been defeated.
- The linked post-Veran scenes have been watched.
- The entrance to the Room of Rites is available.
5. Clear the statue passage and defeat Koume and Kotake
From the entrance to the Room of Rites, travel north. In each statue room, wait until the statues’ eyes stop spinning, then leave through the direction none of the statues is facing. Repeat this rule through the passage. After several rooms, you reach a room with eyeless statues; continue north and approach Zelda to trigger the battles.
Koume and Kotake attack together. Reflect Koume’s fireballs with your sword so they strike Kotake, the blue witch. Reflect Kotake’s ice balls so they strike Koume, the red witch. Ordinary sword swings against the witches themselves do not replace this reflection tactic. Keep enough space to line up each projectile and avoid standing directly in the sisters’ path.
After enough reflected attacks, the witches merge into Twinrova. Twinrova alternates between fire, ice, and a brief mixed form. In fire form, the floor contains lava and sword hits can knock Link backward; strike only when you have room to recover. In ice form, the floor is slippery and sword attacks are required. If you own the Snowshoe Ring, it reduces the difficulty of movement on the ice; the Steadfast Ring can help prevent knockback during the fire form.
When Twinrova briefly appears in the mixed red-and-blue state, check the floor before firing. If the floor is lava, equip Mystery Seeds and hit her with the Seed Shooter or Slingshot. If the floor is ice, use Ember Seeds instead. The seed type follows the active floor hazard. Do not use Scent Seeds as the required mixed-form response, and do not fire the wrong seed type for the floor.
- The statue-eye rule is followed through the passage.
- Koume’s fireballs are reflected into Kotake.
- Kotake’s ice balls are reflected into Koume.
- Twinrova’s fire form is fought without being knocked into lava.
- Twinrova’s ice form is fought while managing slippery movement.
- Mystery Seeds are used over lava and Ember Seeds over ice during the mixed form.
6. Defeat Ganon and finish the linked ending
Ganon attacks after Twinrova. Biggoron’s Sword does not damage him, so equip the Noble Sword or Master Sword. With the Noble Sword, charge and release spin attacks to deal damage. The Master Sword can damage Ganon with ordinary sword strikes, although charged attacks remain useful when the arena gives you room.
Ganon can appear with his trident, fire energy projectiles, teleport around the room, leap, and create a shockwave on landing. Keep moving rather than chasing every teleport. When he fires groups of projectiles, use the diagonal gaps between them or move to a safer side of the arena. When he absorbs energy and prepares a leap, jump before he lands to avoid the shockwave, then move away from the large fireball that follows.
During the blue-tinted phase with flashing diamond patterns, movement controls are reversed. Deliberately compensate for the reversal instead of correcting instinctively. Ganon walks toward Link while continuing to attack, so make controlled sword strikes and preserve enough space to retreat when the floor returns to normal.
After Ganon is defeated, go to the southeast side of the room, climb the stairs, and check on Zelda. Watch the remaining ending and credits. The game then displays the Hero’s Secret. Record it if you plan to start another password arrangement or pursue the other linked order.
The Hero’s Secret begins a new Hero’s Game. It does not turn the completed linked file into a freely replayable post-game state and does not preserve that file’s dungeon progress or inventory. The new file begins with four hearts and includes the Victory Ring; a Ring Secret can be used to bring rings from an earlier game session.
- A Noble Sword or Master Sword is equipped for Ganon.
- Ganon’s trident, projectiles, leap shockwave, fireball, teleporting, and reversed controls are handled.
- Ganon is defeated.
- Zelda is checked after the battle.
- The complete linked ending and credits are viewed.
- The Hero’s Secret is recorded if another linked arrangement is planned.
Before you move on
- The standalone Oracle of Seasons campaign was completed independently of this optional chapter.
- The Secret to Labrynna was recorded after completing Seasons.
- A new Oracle of Ages file was started with that password and began as a linked continuation.
- The linked Ages campaign was completed through Veran’s defeat.
- The Room of Rites was entered and its statue-eye passage was cleared.
- Koume and Kotake were defeated by reflecting their projectiles into each other.
- Twinrova was defeated with Mystery Seeds over lava and Ember Seeds over ice during the mixed form.
- Ganon was defeated.
- Zelda was checked after Ganon’s defeat and the complete linked ending was viewed.
- The Hero’s Secret was recorded if another linked or completion-focused file is planned.
Finishing up
All eight Essences of Nature have been collected from the eight regular dungeons.
The Rod of Seasons and every seasonal power required by the route have been obtained.
The Maku Tree has given Link the Huge Maku Seed, and it has removed the Northern Peak barrier.
Onox’s Castle has been entered and cleared.
General Onox and Dark Dragon Onox have been defeated, Din has been freed, and the standalone ending sequence has played.
Choose your next gameScreenshots & video
Game imagery for reference. Follow the written chapters above for the route and strategies.
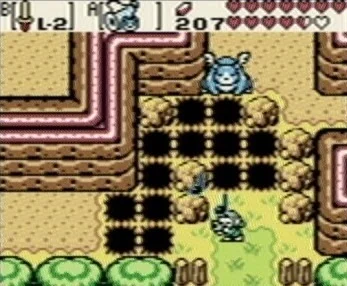
Sources & references
Our original guide draws on the references below. Check the edition at the top of this page before following controls or unlock requirements.
- Oracle of Seasons instruction manual, USA Game Boy Color edition
- Oracle of Seasons Walkthrough: Getting Started in Holodrum
- Meet the Maku Tree — The Legend of Zelda: Oracle of Seasons Guide and Walkthrough
- The Legend of Zelda: Oracle of Seasons/Arrival — StrategyWiki
- The Legend of Zelda: Oracle of Seasons — 100% Item Walkthrough — Game Boy Color
- Oracle of Seasons Walkthrough — Gnarled Root Dungeon and Horon Village
- Chapter 2: Gnarled Root Dungeon
- The Legend of Zelda: Oracle of Seasons/North Horon and Gnarled Root Dungeon
- Gnarled Root Dungeon - The Legend of Zelda: Oracle of Seasons Guide and Walkthrough
- Chapter 3: Tower of Winter
- Oracle of Seasons Walkthrough – Snake's Remains
- The Legend of Zelda: Oracle of Seasons – Guide and Walkthrough by Demajen
- The Legend of Zelda: Oracle of Seasons — Trade Quest
- Oracle of Seasons Trading Sequence
- The Legend of Zelda: Oracle of Seasons — Gasha Seeds
- The Legend of Zelda: Oracle of Seasons — Guide and Walkthrough by Coffee
- Chapter 5: Snake’s Remains
- RPGClassics Oracle of Seasons Dungeon Maps — Snake's Remains
- Oracle of Seasons Walkthrough - Poison Moth’s Lair
- Oracle of Seasons Walkthrough – Dancing Dragon Dungeon, Zelda Dungeon
- The Legend of Zelda: Oracle of Seasons - Item List - Game Boy Color - By TakerVersion1
- Mount Cucco and Dancing Dragon Dungeon, StrategyWiki
- Oracle of Seasons Walkthrough – Unicorn’s Cave, Zelda Dungeon
- Eyeglass Lake, Thonky Oracle of Seasons Guide
- Eyeglass Lake and Unicorn’s Cave, StrategyWiki
- Oracle of Seasons Walkthrough – Ancient Ruins
- Oracle of Seasons Walkthrough – Explorer’s Crypt
- Ancient Ruins – The Legend of Zelda: Oracle of Seasons Guide and Walkthrough
- Explorer’s Crypt – The Legend of Zelda: Oracle of Seasons Guide and Walkthrough
- Sword and Shield Maze - The Legend of Zelda: Oracle of Seasons Guide and Walkthrough
- Oracle of Seasons Walkthrough - Sword and Shield Maze
- Chapter 19: Sword & Shield Maze - Zelda Universe
- The Legend of Zelda: Oracle of Seasons - Guide and Walkthrough - Game Boy Color - By Kirby021591
- Oracle of Seasons Walkthrough – Onox’s Castle, Zelda Dungeon
- Onox’s Castle – The Legend of Zelda: Oracle of Seasons Guide and Walkthrough
- The Legend of Zelda: Oracle of Seasons – Guide and Walkthrough – Game Boy Color – By Dev
- The Legend of Zelda: Oracle of Seasons – Guide and Walkthrough – GameFAQs
- The Legend of Zelda: Oracle of Seasons/Onox’s Castle — StrategyWiki
- Chapter 20: Onox’s Castle, Zelda Universe
- Din (Oracle), Zelda Dungeon Wiki
- Oracle of Seasons Password FAQ - GameFAQs
- Farore’s Memory, Zelda Dungeon Wiki
- Room of Rites - Zelda: Oracle of Ages Walkthrough
- Link Secrets - Zelda Universe
- Linked Game - Zelda Dungeon Wiki
About the game & collecting notes
- Platform
- Game Boy Color
Step-by-step walkthrough for the original Game Boy Color (USA) release of Oracle of Seasons. This guide covers overworld navigation, every main dungeon through the game's ending (defeat of Onox and freeing Din), seasonal mechanics, essential items, recovery from setbacks, and an optional linked-game overview to reach the true ending.
Darryl Polo
Darryl Polo loves tinkering with emulation and revisiting retro games. He enjoys exploring how old favorites play on different setups and sharing what he learns along the way. At Joking Joystick, he writes about the games, hardware, and small discoveries that keep the hobby fun.
Our editorial standardsFound a step that needs another look? Help us improve this guide.