
The Legend of Zelda: Oracle of Ages — Complete Campaign Walkthrough (Game Boy Color, USA)
Step-by-step campaign walkthrough for the original Game Boy Color release of The Legend of Zelda: Oracle of Ages (USA). Covers preparation, overworld navigation, each main dungeon and boss, time-based puzzle techniques, recovery tactics, the Black Tower final sequence and the game's ending, plus post-game linking notes.

Find a copy
The Legend of Zelda: Oracle of Ages Game Boy Color
We may earn a commission if you buy through these links, at no extra cost to you. As an Amazon Associate I earn from qualifying purchases.
Opens retailer search results. Check the model, edition, seller, availability and current price before buying.
Before you begin
You are playing the original Game Boy Color edition of The Legend of Zelda: Oracle of Ages (USA).
This guide assumes a single-file playthrough of Oracle of Ages on the GBC (or a faithful digital re-release that preserves original mechanics).
Oracle of Ages emphasizes time-based puzzle solving: you will shift between present and past repeatedly using the Harp of Ages, and many obstacles are overcome by moving objects, NPCs or terrain between the two eras.
Follow the route chapters in order if you want a smooth main-campaign run.
Each dungeon chapter gives the precise subgoals you must complete there (key items, map/compass, the Essence and the boss).
Overworld chapters explain where to travel, how to use Time Portals, what optional upgrades to pursue before the later towers, and how to recover from common failures (missing keys, low health, or stuck puzzles).
Set yourself up for the run
Start with a fresh save slot and name your file so you can identify it for Link-system transfer later.
Use the game's built-in save before major boss fights and before entering the Black Tower.
Learn and practise the Harp of Ages tune when you obtain the harp: quick, accurate inputs are required to travel reliably between past and present and to trigger time-based puzzle states.
Prioritize acquiring the sword and shield upgrades available early via the trading/side-quest paths; stronger sword/shield values matter in boss fights and the Black Tower.
Familiarize yourself with Time Portals on the overworld map (they connect present and past locations).
Use the present/past toggles to fetch items or reconfigure the environment across eras.
Conserve Rupees and bombs where possible.
Some key doors and optional progression routes require bombs or other limited items.
Buy recovery items (potions, shields) from towns before long dungeon runs.
Keep a physical or mental note of mini-dungeon entrances (Hero's Cave, Great Moblin's Keep, Ambi's Palace); they offer side rewards but are not mandatory for the main ending.
When facing a new dungeon, explore methodically: open chests, find and use the map/compass as early as possible, and collect small keys before attempting boss rooms.
Prepare to backtrack mid-campaign: some late-game areas require returning with a specific Harp power or upgraded item.
Do not permanently discard items you may need to use across eras.
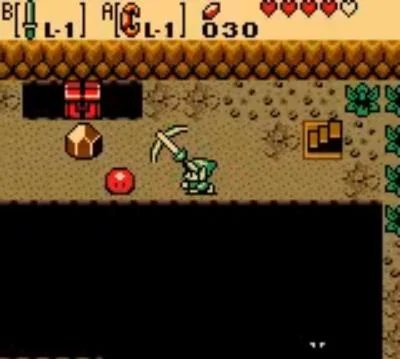
Starting Out: Lynna City, Maku Tree and the Harp of Ages
Complete the opening rescue, reach Lynna City, and meet the Maku Tree in the present. When Veran changes the past, follow Ralph through the temporary Time Portal and enter ancient Lynna. Obtain the Shovel from a worker in Ambi’s Tower, use it to reach the past Maku Road, solve the short block-and-key sequence, and rescue the Maku Tree Sprout from the Moblins. Return through the portal, receive the Seed Satchel from the restored Maku Tree, and proceed through Yoll Graveyard to Spirit’s Grave. After collecting the first Essence of Time, return to the present and enter Nayru’s House. Push the fairy statue aside, descend into the hidden room, and take the Harp of Ages. Nayru teaches the Tune of Echoes, which awakens fixed Time Portals. Use it beside the house and travel to the past, then return, so the two-era movement system is established before continuing.
Help Impa and obtain the Wooden Sword
After the opening scenes, walk north until Link hears a cry for help. Continue north, then go left toward the large rock marked with a Triforce symbol. Push the rock left and go north through the passage it blocked.
Continue north to the gathering where Nayru is performing. Talk to the animals so the bear moves aside, then approach Nayru to trigger the possession scene. When Veran takes control of Nayru, the scene ends with Link and Ralph in the forest. In a standalone North American Game Boy Color game, Impa gives Link the Wooden Sword. In a linked game this opening reward can differ, so these directions assume a new, unlinked USA campaign.
Assign the sword to A or B from the inventory screen. Hold the sword button until Link charges the blade, then release it to practise the spin attack. Normal sword swings are sufficient for the enemies in the opening area.
- The Nayru possession scene is complete.
- The Wooden Sword is in the inventory and assigned to an action button.
- You have tested both a normal sword strike and a charged spin attack.
Reach Lynna City and meet the Maku Tree
From the screen where Veran possessed Nayru, go south three screens. On the third screen, use the sword to cut the bushes on the left. Enter the opening to reach Lynna City. This is the required early entrance; do not spend time trying to force other blocked routes.
The ring shop is north of the city shop. Visit Vasu if you want to begin the ring system: in a new game he gives Link the Ring Box and an unidentified ring, then appraises it as the Friendship Ring. Rings are optional and do not advance this chapter.
Leave the ring shop and go north. Enter the cave to the left of the person standing outside. This is Maku Road. Follow its exits north to the Maku Tree. There are no enemies on this initial present-era section. Speak to the Maku Tree to begin the next story event. She warns that Link needs a special power to defeat Veran, then disappears.
Leave the Maku Tree’s area through the exit on the right. Ralph steps into a circular Time Portal. Walk onto it to travel to the past. This temporary portal is available before Link owns the Harp of Ages, so use it as soon as the story creates it.
- The bushes south of the Nayru scene have been cut.
- You have entered Lynna City through the western opening.
- You have spoken with the Maku Tree in the present.
- You have followed Ralph through the temporary portal into the past.
Get the Shovel in ancient Lynna
In the past, go south and then west to reach the town. The route toward the Maku Tree is blocked by dirt, so Link needs the Shovel before he can continue.
Enter the house to the left of Ambi’s Palace and speak with the man inside to receive a Gasha Seed. Planting it in the soft-soil patch south of the house is optional; it can eventually produce a random Gasha reward, but it is not required for the Harp or the first dungeon.
Go to the southwest corner of the town and enter Ambi’s Tower. Speak to the man blocking the entrance so he moves aside. Inside, follow the accessible route around the construction area until you find a worker beside four holes and a guard. Speak to that worker to receive the Shovel.
Use the Shovel to dig through the dirt on the right side of the tower route, then clear the dirt blocking the southern exit and leave. A Piece of Heart can be uncovered nearby with the Shovel, but it is optional.
- You have entered ancient Lynna.
- The Shovel is in the inventory.
- Any Gasha Seed or Piece of Heart collection has been treated as optional.
Cross the past Maku Road and rescue the Maku Tree Sprout
Return to the northeast corner of ancient Lynna, where the present-era Maku Road entrance was located. A worker and two children are nearby. Dig through the dirt in the upper-left part of the screen to reveal the entrance, then enter the past Maku Road.
The first room contains a block puzzle and a locked door. Push the block upward one tile to open the route. In the next room, defeat the Keese and move the central block to reach the right exit. In the following room, defeat all of the red Gels to open the doors.
In the next puzzle room, push the upper block into the hole. On the right side, move the blocks so Link can reach the switch, then open the chest for the Small Key. Return to the earlier locked-door room and use the key. Continue through the block arrangement, activate the switch, and proceed through the door.
Defeat the two Stalfos in the next room. Push the blocks as needed to reach the exit and climb the stairs. Outside, you find the young Maku Tree Sprout under attack by two Moblins. Defeat both enemies with the sword. Speak to the Sprout afterward; she opens the gate that provides the return route. Go south through that gate and step into the newly appeared Time Portal.
- You have used the Shovel to enter the past Maku Road.
- The Maku Road Small Key has been collected and used on the locked door.
- Both Moblins attacking the Maku Tree Sprout are defeated.
- The return gate and the portal back to the present are available.
Receive the Seed Satchel and clear Spirit’s Grave
Back in the present, go north to the Maku Tree. She has returned and explains that Veran’s actions in the past caused the crisis. She gives Link the Seed Satchel, initially filled with Ember Seeds. Ember Seeds burn small trees and can light certain torches; conserve them while exploring because optional burned obstacles can wait.
The Maku Tree directs Link to Yoll Graveyard. Travel there and complete the required graveyard objective, including obtaining the Graveyard Key, then enter Spirit’s Grave. The dungeon is the first principal dungeon and must be cleared before the Harp of Ages becomes available.
Use the dungeon map and compass if you find them, and collect the dungeon item before attempting routes that are blocked at the entrance. Defeat Spirit’s Grave’s boss and take the Eternal Spirit, the first Essence of Time. Leave the dungeon after the victory and return to the overworld. The Harp cannot be obtained during the opening Maku Tree rescue; it is obtained after this first dungeon.
- The Seed Satchel is in your inventory and contains Ember Seeds.
- Yoll Graveyard’s entrance requirement has been completed.
- Spirit’s Grave has been cleared.
- The first Essence of Time, the Eternal Spirit, has been collected.
Find the Harp of Ages in Nayru’s House
Return to the present and make your way back toward the starting forest and Lynna City. The gate opened by the Maku Tree Sprout provides a shortcut, so use it rather than repeating the entire past Maku Road route. From the Maku Tree’s area, go right to the screen where Link first met Nayru, then go south, east, and north to reach Nayru’s House.
Enter the house and speak with Impa. She is examining the fairy statue and suspects that the house contains a hidden room. Push the statue to the left to uncover the passage, then follow the stairs down into the concealed room. Touch the glowing object to receive the Harp of Ages.
Nayru’s imprint appears and teaches the Tune of Echoes. Equip the Harp from the inventory and use the Tune of Echoes while standing beside the circular portal near the house. The tune awakens the portal. Step into it to travel 400 years into the past, then use the same portal to return to the present. This establishes the normal early-game method: fixed circular portals must be awakened before Link can cross between the two eras.
- You have entered Nayru’s House after completing Spirit’s Grave.
- The fairy statue has been pushed aside and the hidden room has been reached.
- The Harp of Ages is in the inventory.
- The Tune of Echoes has been learned.
- A nearby fixed Time Portal has been awakened and used in both directions.
Before you move on
- Link has entered Lynna City and spoken with the Maku Tree in the present.
- Link has travelled to ancient Lynna, obtained the Shovel, crossed the past Maku Road, and rescued the Maku Tree Sprout.
- The Seed Satchel with Ember Seeds has been received.
- Spirit’s Grave has been cleared and the Eternal Spirit has been collected.
- The Harp of Ages and Tune of Echoes have been obtained.
- At least one fixed Time Portal has been awakened and used to travel to the past and back to the present.
References for this chapter
Overworld Navigation and Time-Portal Basics
Use Lynna City and Lynna Village as the first two hubs of Labrynna. Collect the Ring Box from Vasu, inspect the city shop without treating the Wooden Shield as mandatory, and use Maku Road as the required route to the Maku Tree. After the opening events grant the Harp of Ages and Tune of Echoes, activate a nearby fixed Time Portal and travel between the present and past. Compare the same screens in both eras, speak with NPCs in each settlement, and mark obstacles that require later items. Hero’s Cave is not part of a normal unlinked USA file, so leave it for linked-game content. Finish this chapter when you can return to Lynna City, identify Lynna Village and the Maku Tree area, use the nearby portal in both directions, and recognize which blocked routes are merely waiting for later progress.
Use Lynna City as the present-day hub
After the opening sequence and your first successful time-travel events, return to Lynna City in the present. Walk through the settlement before leaving so you know the positions of the Shop, Vasu Jewelers, the Maku Road approach and the exits toward the surrounding fields. Lynna City is the safest place to reorient yourself when an exploration attempt goes badly.
Enter Vasu Jewelers, the house marked by a ring symbol, and speak with Vasu. In an unlinked game he gives you the L-1 Ring Box and an unidentified ring, then appraises that first ring as the Friendship Ring at no cost. The ring is optional for story progress, but obtaining the box now ensures that later rings can be stored rather than overlooked.
- Visit the Lynna City Shop.
- Visit Vasu Jewelers.
- Receive the L-1 Ring Box and have the first ring appraised.
Inspect the shop and plan your early Rupees
The Lynna City Shop sells the Wooden Shield for 30 Rupees. The shield is useful, but it is not a prerequisite for completing this opening survey, so do not delay required progress while grinding for it. Check the stock, then decide whether to buy it now or return after collecting more Rupees in the overworld.
Cut nearby bushes and grass when you need money, but keep your supplies under control. Do not spend Rupees on every optional purchase before checking whether the next route provides a cheaper or free alternative. The early game does not require a stockpile of bombs or other consumables; buy only what you can reasonably use before the next major objective.
- Know where Stockwell’s shop is located.
- Decide whether to buy the 30-Rupee Wooden Shield now or later.
- Keep some Rupees available for future necessities.
Treat Maku Road as the required opening route
Go to the northeastern side of Lynna City and enter the cave marked as the Maku route. In the unlinked Game Boy Color campaign, Maku Road is the straightforward introductory passage leading to the Maku Tree. It is not an optional dungeon to postpone: follow its open route upward, checking each room entrance and watching for enemies as you advance.
Use this passage to practise basic combat and navigation. The route is intentionally simple, with blocked side passages and warning signs directing you forward. If you take damage, continue only while you can safely reach the exit; otherwise return to Lynna City, recover through normal overworld exploration and re-enter. Do not confuse Maku Road with Hero’s Cave, which is an additional linked-game area and is not required on a standard unlinked file.
- Enter Maku Road from Lynna City.
- Follow the open route to the Maku Tree area.
- Do not search for Hero’s Cave on an unlinked file.
Activate a fixed Time Portal near the Maku Tree
Once you have the Harp of Ages and the Tune of Echoes, return to the Maku Tree area in the present. Find the dormant circular Time Portal near the route between Lynna City and the Maku Tree. Stand on it and play the Tune of Echoes using the Harp of Ages. The portal activates and carries Link to the corresponding location in the past.
Walk around at least one nearby screen in Lynna Village, the past-era settlement corresponding to Lynna City. Compare the buildings, paths, obstacles and NPC positions with the present. Then return to the same portal and travel back. This round trip is the basic time-travel exercise: the Tune of Echoes activates fixed portals, so it does not permit free switching from every location on the map.
- Locate the fixed portal near the Maku Tree area.
- Use the Tune of Echoes to travel to the past.
- Walk through Lynna Village and return to the present.
Compare both eras before abandoning a route
When an overworld path appears blocked, inspect the corresponding location in the other era before deciding that you need a new item. Trees, rocks, shallow water, fences, buildings and ledges can change between Lynna City and Lynna Village. A route that is closed in one era may be open in the other, while some obstacles remain impassable until you obtain a later item.
Speak with residents in both settlements. Their comments can identify changes caused by the passage of time and point toward the next objective, but not every clue represents an immediate task. Mark locked doors, deep water, cracked walls, ledges and other item-gated obstacles on your map, then move on rather than repeatedly attacking or bombing them.
- Test both eras when a path seems blocked.
- Speak with NPCs in Lynna City and Lynna Village.
- Mark obstacles that clearly require later equipment.
Complete the survey before beginning the next major route
Before leaving the Lynna area, confirm that you can reach Lynna City from the Maku Tree area without guesswork. Restock only if necessary, equip the Wooden Shield if you bought one, and save after completing the portal exercise. Your next progress route will lead away from the central settlement, so knowing the return path prevents wasted travel after a failed combat or exploration attempt.
This chapter is complete when you recognize Lynna City as the present hub, Lynna Village as its past counterpart, Maku Road as the required introductory passage, Vasu Jewelers and the Shop as optional support locations, and the nearby fixed Time Portal as your first dependable connection between eras.
- Know the route back to Lynna City.
- Have the Ring Box in your inventory.
- Have travelled through the nearby portal in both directions.
- Have recorded at least one later item-gated obstacle.
Before you move on
- You have visited Lynna City’s Shop and Vasu Jewelers.
- You have received the L-1 Ring Box and appraised the first ring.
- You have entered Maku Road and followed it to the Maku Tree area.
- You have activated the nearby fixed Time Portal with the Tune of Echoes, travelled to Lynna Village and returned.
- You can identify Lynna City, Lynna Village, Maku Road, the Maku Tree area, Vasu Jewelers, the Shop and at least one later item-gated obstacle.
- You understand that Hero’s Cave is linked-game content and is not required for this unlinked USA campaign.
Spirit's Grave (Dungeon 1) — Find the First Essence
Spirit's Grave is the first dungeon in the original North American Game Boy Color version of Oracle of Ages. Reach it through Yoll Graveyard by lighting the two torches in the hidden cave to obtain the Graveyard Key. Inside, the dungeon uses block puzzles, blue-flame torches, small keys and the Power Bracelet rather than time travel. Collect the Map and Compass, defeat the Ghini miniboss to open the route onward, then obtain the Power Bracelet and Boss Key. Pumpkin Head must be damaged by attacking its body, lifting the fallen pumpkin with the bracelet and striking the small ghost underneath. Afterward, collect the Heart Container and take the Eternal Spirit from the altar. The Maku Tree then directs Link toward the Western Woods.
Reach Yoll Graveyard and open the dungeon gate
From Lynna Village, travel east into the Forest of Time. Go north, east and south, then burn the shrub on the right to enter Yoll Graveyard. Burn the next shrub to enter the main graveyard area. Go right, down and left to the area where the children talk about a ghost beneath a grave. Cross the bridge, go right twice, burn the lower shrub and enter the hidden staircase.
In the cave, use Ember Seeds on both torches. When both flames are lit, the Graveyard Key appears on the central skull-marked tiles. Take it and leave the cave. Return left twice, go up across the bridge and go right to the ghost area. Continue north twice to the locked gate. Push against the center of the gate to use the Graveyard Key, then go right once and down three screens. Stay near the middle of the Crow-filled path and enter the building at the end to reach Spirit's Grave.
- Graveyard Key collected.
- Spirit's Grave entered through the northern gate.
- Carry enough Ember Seeds for the graveyard torches and the dungeon's later torch puzzle.
Collect the Dungeon Map and Compass
From the dungeon entrance, go right into the room with three Red Zols. Slash each Red Zol, then continue attacking the Gels produced when it splits. The room does not clear until the split enemies are defeated. Push the lowest red block sideways and leave through the north exit.
In the next room, push the large puzzle block upward until Link can use the steps on the left. Go down to the ledge and open the chest for the Dungeon Map. Drop back down, repeat the red-block route and push the puzzle block upward onto its marked position. Arrange it so its blue side faces upward between the torches. The blue flames open the doors.
Take the northern route first. In the narrow room, push the central block upward and open the chest on the left to obtain the Compass. To the left of this chest, burn the curtain with an Ember Seed. Defeat the Ropes beyond it, step on the floor switch and open the revealed chest for the optional Power Ring L-1. This ring increases sword damage but also makes Link take more damage, so it is not required for completion.
- Dungeon Map collected.
- Compass collected.
- Optional Power Ring L-1 collected if desired.
- Red Zols and their Gels fully defeated.
Obtain the first Small Key and the second Small Key
Leave the ring room through the right side and push the block to open the southern route. Go down, descend the stairs and move right. Push the bottom block to the right, then go north and position the puzzle block between the torches again to reopen the doors. Go through the right-hand door, pass the Stalfos and continue north.
The next room contains a flying Ghini. Defeat it to unlock the doors and make a Small Key appear on the red tile. Take the key and leave through the western door. In the block-filled room, push the center block left and use the newly available locked door to go north.
In the next room, use the Compass tone as confirmation that a chest is present. Move to the right side, push the lower block upward, circle around and open the chest for the second Small Key. Keep the surrounding lanes open so you can leave without trapping yourself behind the movable blocks.
- First Small Key taken from the Ghini room.
- Second Small Key taken from the chest.
- Required route opened with the first key.
Get the third Small Key and defeat Giant Ghini
From the second-key room, return to the block group at the bottom of the next room. Push the leftmost block down, push the right block right and follow the outer edge to the eastern exit. Go north through the door you find there.
In the following puzzle room, push the middle block up, the left block left and the block above Link upward. Step on the switch to reveal a chest. Return to the blocks, push the right block right and the upper block upward, then step on the second switch to reveal a moving platform. Use the stairs if necessary and ride the platform upward to the chest containing the third Small Key.
Leave the room by the route you used to enter. Go left, then north, and follow the passage toward the locked southern door. Use the third key and enter the Giant Ghini room. Slash away the small ghosts when they cling to Link, then attack Giant Ghini with the sword. Keep your distance when it opens its mouth and charges because sword strikes do not reliably push it back. Defeating it creates a teleportation point linking this room with the dungeon entrance.
- Third Small Key collected.
- Giant Ghini defeated.
- Dungeon teleportation point activated.
Collect the Power Bracelet and the Boss Key
From the Giant Ghini area, go west and unlock the southern door. In the next room, push the left and right blocks downward, move the middle block aside and leave through the southern exit. Defeat the Stalfos in the following room, but do not worry about the lower chest yet because it is blocked by pots.
Move around to the right side and exit north. Pass the Stalfos and reach the upper part of the room. Light both torches with Ember Seeds. The stairs appear when the flames are lit. Descend, climb the ladder and open the chest to obtain the Power Bracelet.
Return to the earlier Stalfos room and use the bracelet to lift the pots blocking the lower chest. The chest contains the optional Discovery Ring. From this room, go south. In the next room, do not lift the pot near the switch; push the pot onto the switch to open the door. Enter the following room, lift the pots blocking the upper chest and take the Boss Key.
To reach the boss corridor efficiently, leave the Boss Key room through the east exit and step onto the teleportation point. This returns Link to the Giant Ghini room. Go north twice. A Wallmaster drops from the ceiling in the corridor, so keep moving and watch its shadow. If it catches Link, use the teleportation point to return quickly and try the corridor again.
- Power Bracelet collected and equipped.
- Optional Discovery Ring collected.
- Boss Key collected.
- Wallmaster corridor crossed.
Defeat Pumpkin Head and claim the Eternal Spirit
Use the Boss Key on the locked door at the end of the corridor. Pumpkin Head walks slowly, jumps to crush Link and sometimes spits three energy balls in a spread. Keep moving around the room and avoid standing beneath the jumping body. Strike Pumpkin Head's body with the sword until it disappears and leaves only the pumpkin head.
Use the Power Bracelet to lift the pumpkin. A small ghost appears underneath. Throw the pumpkin away from the ghost or throw it into the ghost for damage, then slash the exposed ghost while it moves back toward the pumpkin. The ghost's damage persists between phases, so repeat the body-and-ghost sequence until the boss is defeated. Keep enough space to avoid being run over when the ghost returns to its pumpkin.
Take the Heart Container that appears in the center of the room. Then leave through the northern exit and walk up the steps to the altar. Touch the Essence to receive the Eternal Spirit, the first Essence of Time. Link is returned to the dungeon entrance, where the Maku Tree identifies the Western Woods as the next destination. There is no separate manual hand-in required.
- Pumpkin Head defeated.
- Heart Container collected.
- Eternal Spirit obtained from the altar.
- Maku Tree has directed Link toward the Western Woods.
Before you move on
- The Dungeon Map, Compass, Power Bracelet and Boss Key are in Link's inventory.
- Pumpkin Head has been defeated and the Heart Container has been collected.
- Link has touched the altar and received the Eternal Spirit.
- The dungeon exit has returned Link to the entrance and the Maku Tree has identified the Western Woods as the next objective.
Wing Dungeon (Dungeon 2) — Master Moving Platforms and Air Puzzles
Enter Wing Dungeon in the Past after obtaining Bombs and a Shield. This dungeon does not require changing eras inside; its main challenges are mine carts, moving platforms, colored floor tiles, statue positioning and gaps that become manageable after collecting Roc’s Feather. Collect the Dungeon Map, Compass, five Small Keys and Boss Key, defeat Swoop, claim Roc’s Feather, then defeat Head Thwomp with Bombs. Take the Heart Container and touch the altar outside the boss room to receive Ancient Wood, the second Essence of Time. The Maku Tree then sends Link toward Crescent Island.
Enter Wing Dungeon and collect the Dungeon Map
Reach the Past version of the Deku Forest after obtaining Bombs. The dungeon entrance is at the corresponding forest location where the structure has crumbled in the Present. Bomb the cracked entrance and go inside. In the first room, read the owl’s advice, equip the Shield and go right. Flip the Spiked Beetles onto their backs with the Shield, then defeat them with your sword. The left door opens after the room is cleared.
In the next room, push the block right three times, down once, left once and up once. Continue pushing it left until it rests on the black tile and opens the upper route. In the following room, push the middle block upward and the block to its right sideways so you can reach the lower-right cracked wall. Bomb it, enter the hidden room and open the chest for the Dungeon Map.
Do not spend a Small Key in these opening rooms. The route to the first key is reached by returning through the rooms you just cleared.
- Bring Bombs and a Shield before entering.
- Bomb the cracked entrance in the Past.
- Collect the Dungeon Map from the bombable-wall room.
- Do not use a Small Key in the opening section.
Collect the first two Small Keys
Return toward the entrance and go through the northwest route. Defeat or avoid the Ropes, then pass the Keese and enter the room with Sparks. Sparks cannot be defeated with your current equipment, so stay clear of them and continue west. Defeat the Pig Warriors and Keese in the next room; a Small Key drops when the room is cleared.
Return to the room where blocks obstruct the southern exit. Push the upper-left and upper-right blocks downward, then push the middle block sideways to open the route. Go back to the Spiked Beetle room, move to its eastern side and unlock the door with the first key. Bomb the cracked wall in the room beyond and go downstairs.
Use the hanging ladders to reach the central stationary platform, then board the moving platform on the right. In the next area, approach the Spiked Thwomp so it drops, then move underneath it while it rises. Use the next moving platform to reach the ladder and defeat the Ropes above. Open the chest for the second Small Key.
- Take the key dropped by the Pig Warrior and Keese room.
- Use the first key on the eastern door of the Spiked Beetle room.
- Use the moving platform and ladder to reach the second key chest.
- Wait for the Spiked Thwomp to rise before crossing beneath it.
Get the Compass and defeat Swoop
Return through the lower platform route to the room with the Ropes and floor holes. Clear the Ropes in the upper-right section, then push the lowest block sideways. Open the revealed chest for the Compass. Leave through the northern route and defeat or bypass the Pig Warriors.
Unlock the door on the left and enter the mine cart. The cart carries Link through the next section automatically; monsters in its path are dealt with by the cart, so concentrate on staying aboard. When the cart stops, avoid the green Zols and exit north to reach Swoop’s room.
Swoop hovers over Link and flaps rapidly before crashing down at Link’s position. Stand on the blue tiles around the room’s edge because those tiles do not break when Swoop lands. Strike Swoop with the sword after each landing, then retreat. Later in the battle, Swoop bounces several steps after landing, so wait until the movement ends before attacking.
If Link falls through a hole, he reaches the floor below. Go east, climb the staircase and go west to return to the arena. Swoop has full health when the room is re-entered, so avoid falling whenever possible.
- Open the Compass chest before going to the mine cart.
- Fight Swoop from the blue perimeter tiles.
- Attack only after Swoop lands and finishes any follow-up bounce.
- Use the east staircase route if you fall below the arena.
Claim Roc’s Feather and continue through the mine carts
After Swoop is defeated, leave through the upper-right door and go downstairs. Avoid the Anti-Fairies and use the southern exit. In the next room, avoid the spear attacks from the Shrouded Stalfos, then go east and defeat the two Stalfos. Read the owl’s clue about the blue wing, climb the central stairs and cross the side-scrolling section.
Make the Thwomp drop, pass under it while it rises and continue right to the chest containing Roc’s Feather. Equip it so Link can jump over gaps and colored floor tiles. The ledge reached by jumping onto the Thwomp contains an optional rupee reward; it is not needed for dungeon completion.
Return to the mine-cart room. Push the block right once, up once, left once and up once to open the track. Ride the cart and use Roc’s Feather to jump over the four colored tiles on the right until they match the arrangement on the left. Jump over the left-side tiles once and the right-side tiles twice. A Small Key drops when the puzzle is solved.
- Take Roc’s Feather from the chest after Swoop.
- Use Roc’s Feather to cross the side-scrolling gaps.
- Treat the rupee ledge as optional.
- Solve the mine-cart color puzzle to obtain the next Small Key.
Solve the pot, statue and Gel puzzles
Use the key block on the upper route, then take the southern exit from the ledge area. Jump over the colored tile to open the gate, return through the northwest route and use the mine cart. The room reached by the cart contains Pig Warriors and a chest with an optional Gasha Seed. Take it if desired, then exit north.
Next, solve the pot-switch room. Remove all pots except the upper-right pot. Push that pot to the tile above the hole on the left, jump around the gap with Roc’s Feather, push the pot right, jump behind it and push it down into line with the floor switch. Jump around once more and push it right to open the eastern door.
In the statue room, the colored tile determines which statue color can be moved. Move the yellow statue to the center after switching the tile to yellow. Switch to blue and arrange the blue statues above, below, left and right of the center. Switch back to red and place the red statues in the four corners. A Small Key appears when the pattern matches.
Use that key on the eastern door. In the Gel room, jump over the center tile to change the floor color and expose the Gels. A Gel matching the floor is invulnerable, so change the color and defeat each one after it becomes vulnerable. When all Gels are defeated, open the chest for the Boss Key.
- Collect the optional Gasha Seed only if wanted.
- Use Roc’s Feather to position the pot without dropping it into the wrong space.
- Match the statue colors around the central statue.
- Defeat every Gel to reveal the Boss Key chest.
Defeat Head Thwomp and receive Ancient Wood
Leave the Boss Key room through the west exit, unlock the northern door and continue past the Keese and Sparks. Unlock the boss door on the right. Before entering, equip Bombs and Roc’s Feather. The owl’s clue explains the weakness: the red face dislikes smoke, and the sword cannot damage Head Thwomp.
Head Thwomp can be damaged only when a Bomb enters the top of its red face. Use the rotating platforms to throw a Bomb sideways or downward, or jump from the upper-left or upper-right ledges and throw as you descend. Wait for the red face instead of throwing at the other colors. Successful hits produce recovery hearts, while incorrect throws are rejected and trigger attacks.
The boss changes its face and uses different attacks. When the green face appears after a throw, stand at the top of either ladder. When the purple face appears, climb down the ladder and wait out the attack. When the blue face appears, stand on the middle ledge beside either ladder. Head Thwomp also ejects Bombs during its attacks, so collect them if your supply becomes low. Repeat the successful red-face Bomb attack until the boss is defeated.
Take the Heart Container, then leave the arena through the right side and go up to the altar. Link receives Ancient Wood, the second Essence of Time. Outside, the Maku Tree explains that the next Essence lies on Crescent Island in the South Sea and directs Link toward the town’s coast.
- Enter the boss room with Bombs and Roc’s Feather equipped.
- Throw Bombs into Head Thwomp only when its face is red.
- Use the ladder and middle-ledge positions to avoid the colored attacks.
- Collect the Heart Container.
- Touch the altar outside the boss room to receive Ancient Wood.
- Follow the Maku Tree’s direction toward Crescent Island.
Before you move on
- The dungeon inventory contains the Dungeon Map, Compass, Roc’s Feather, five Small Keys and the Boss Key.
- Swoop and Head Thwomp are defeated.
- The Heart Container has been collected.
- Link has touched the altar and received Ancient Wood.
- The Maku Tree has identified Crescent Island in the South Sea as the next main-story destination.
Moonlit Grotto (Dungeon 3) — Seed Shooter and Shadow Hag
Moonlit Grotto is the third dungeon in the original Game Boy Color version of Oracle of Ages. It lies on Crescent Island in the present, after the Tokay trading sequence restores Link’s equipment and opens the dungeon route. Unlike several later areas, the dungeon itself has no past-era version and does not use water-level puzzles. Its progression centers on four crystals, rotating platforms, red blocks, bombs and the Seed Shooter. The dungeon map and Compass are optional but useful; the Seed Shooter, Boss Key, Heart Container and Echoing Howl are required for the main campaign. Subterror must be exposed with the Shovel before it can be damaged. Shadow Hag is defeated by firing seeds into a wall so they ricochet into her while Link faces away. After taking the Echoing Howl, follow the Maku Tree’s direction toward the mountains northwest of Lynna City and the next objective in Symmetry City.
1. Reach Moonlit Grotto and prepare the required equipment
Moonlit Grotto is on Crescent Island in the present. Complete the island’s required recovery and trading sequence first: reclaim the Shovel, Sword, Power Bracelet, Bombs, Roc’s Feather, Flippers, Harp of Ages and Seed Satchel as the Tokay sequence makes them available. Use the Harp of Ages at the island’s hidden time portal to return to the present, then follow the upper-right route to the dungeon entrance.
The dungeon is a present-era location. Do not search for a second past layout or attempt to solve its rooms by changing eras. The Harp still has one useful dungeon function: it can defeat Pols Voices. Bring bombs for cracked blocks and Armos Statues, and make sure the Seed Satchel contains ammunition before the boss. Seed replenishing plants appear in later rooms, so do not spend every seed on optional enemies.
- Reach Moonlit Grotto on Crescent Island in the present.
- Have the Shovel available for Subterror.
- Carry bombs and enough seeds for the Seed Shooter and Shadow Hag.
- Do not look for a past-era version of the dungeon.
2. Get the Dungeon Map and activate the first crystals
From the entrance room, go to the upper-left corner and bomb the cracked block. Push the red block beneath it to the left and enter the room to the west. Defeat the two Pols Voices there. You may throw bombs at them, or play the Harp of Ages to defeat them. The chest that appears contains the Dungeon Map. Return to the entrance room, bomb the same upper-left obstruction and push the nearby red block to the right so the northern route opens.
Go north from the entrance and defeat the two Mini-Moldorms to open the door on the right. In the Iron Mask room, attack from behind if you choose to fight, then slash the blue crystal. The crystal changes the dungeon’s connected mechanisms. Continue north and step into the rotating platform; it carries Link toward the right side. Remember that these platforms alternate their destination each time they are used.
- Obtain the Dungeon Map from the Pols Voice room, if desired.
- Break the first blue crystal in the Iron Mask room.
- Use the rotating platform to reach the right-side puzzle room.
3. Solve the red-block room and collect the first small key
In the right-side room, bomb the cracked block beside the green statues. Throw another bomb over the short barrier to destroy the cracked block near the crystal. From the upper-left side, push the red block down, then circle around and throw a bomb over the next barrier to break the remaining cracked block. Push the lower red block upward and slash the crystal.
Push the red block beside the crystal upward. Move the lone green statue right twice, up twice, left once and down once. A small key drops onto the floor. Take it, return to the rotating-platform room, ride the platform and use the locked door in the room below. Continue through the upper route and fall through the large pit to reach the basement level.
- Break the second crystal in the red-block room.
- Move the green statue in the order right, right, up, up, left, down.
- Collect the small key and use it on the locked route leading to the basement.
4. Reach the Compass and the second small key
In the basement, defeat or bypass the enemies and move down. Defeat the Mini-Moldorm behind the green barrier to open the lower doorway. In the next room, defeat the Pols Voices with bombs or the Harp of Ages, then return upward and use the staircase to reach the upper floor on the opposite side of the red blocks. Slash the next blue crystal, return to the basement and defeat the Mini-Moldorm by throwing bombs over the barrier.
Take the lower-left exit and enter the room with the crystal switch and Armos Statue. Throw a bomb so it explodes beside the switch, activating the statue. Defeat the Armos with bombs; the sword will not damage it. The chest contains the Compass. Go upstairs, move left and solve the three-red-block pattern: push the upper middle block up, the upper-left block left and the upper-right block right. A second small key falls from above.
- Break the third blue crystal from the upper-floor staircase.
- Defeat the activated Armos Statue with a bomb.
- Collect the Compass, if desired, and the second small key.
5. Obtain the Seed Shooter and break the fourth crystal
Return to the central wheel room and use the rotating platform until the northern route becomes available. In the room with four Armos Statues, step on the switch to activate them. Defeat all four with bombs. If your bomb supply is low, leave through the west side, cut the regenerating plants for more bombs, then return. Take the small key that appears and use it on the northern locked door.
Defeat the Red Gels and Flying Tiles in the next room. Shielding or repeatedly swinging the Sword handles the tiles. Follow the rooms containing concealed Spiny Beetles, then use the remaining locked door. In the next room, defeat the two Mini-Moldorms and the two Arm Mimics. The chest that appears contains the Seed Shooter.
Return to the adjacent room and use an Ember Seed in the Seed Shooter to light the central torch. This opens the southern route. Continue through the wheel room and aim the Seed Shooter from the left side of the next crystal’s barrier. Fire diagonally to break the fourth and final blue crystal. A chest appears in the nearby room with an optional Gasha Seed, and the rotating platform drops to the basement, opening the remaining route.
- Defeat the four Armos Statues with bombs and take the small key.
- Obtain the Seed Shooter after defeating the Mini-Moldorms and Arm Mimics.
- Light the central torch with an Ember Seed.
- Break the fourth blue crystal with the Seed Shooter.
6. Defeat Subterror and obtain the Boss Key
After the rotating platform has fallen, descend through the pit and use the lower wheel room to reach the room with Iron Masks and two torches. Push the blocks aside and fire Ember Seeds so they ricochet off the walls into both torches. This chest is optional and contains a Gasha Seed. Continue through the wheel room and take the upper route past the Peahats to reach Subterror.
Equip the Shovel and Sword before entering the mini-boss fight. When Subterror burrows underground, use the Shovel over his position to dig him out. Strike him with the Sword while he is exposed, then keep moving because he eventually drills upward to attack. He moves faster as the fight continues. Repeat the Shovel-and-Sword pattern until he is defeated.
Leave the arena to the west and go north. Defeat the Mini-Moldorms, then push the lower-right red block to the left to make another small key fall. Return to the wheel room and take the route to the bridge puzzle. Use the crystal switch and the red rotating bouncer so the seed ricochets into the green lever and changes the bridge positions. Cross both bridges, collect the optional rupees if wanted, then unlock the upper door.
- Use the Shovel to expose Subterror and the Sword to damage him.
- Collect the small key after defeating the Mini-Moldorms above the mini-boss.
- Use the Seed Shooter, crystal switch and red bouncer to change the bridges.
- Open the locked route toward the Boss Key.
7. Open the boss route and defeat Shadow Hag
In the next bridge room, use the crystal switch and red bouncer again to create a path upward. Push the out-of-place red block to the right, return through the wheel room and take the eastern route. In the switch room, step on the floor switch, step off, then step on it again and remain standing on it. Aim the Seed Shooter diagonally up and right so the shot bounces through the rotating red bars and strikes the green lever. The upper door opens.
Go upstairs and take the Boss Key. Drop from the ledge, then travel left, up, left and up to return to the boss-door approach. Because the red block was moved earlier, the route remains open. Unlock the boss door with the Boss Key.
Shadow Hag splits into four shadows that chase Link around the room. Use the Roc’s Feather to jump over the shadows and keep moving. When the shadows regroup, moths appear. They can be ignored or defeated for possible recovery. Shadow Hag then emerges behind Link and charges. Do not turn to face her. Aim the Seed Shooter at the wall in front of Link so the seed rebounds backward into Shadow Hag. Repeat this pattern; the ricocheted shots are the required damage method. If the shadows or moths crowd you, prioritize movement and wait for the next opening.
- Collect the Boss Key from the upper chest.
- Keep the Roc’s Feather and Seed Shooter equipped or readily accessible.
- Avoid the shadow group and do not turn toward Shadow Hag when she appears behind Link.
- Use wall-bounced Seed Shooter shots until Shadow Hag is defeated.
- Take the Heart Container from the boss room.
8. Claim the Echoing Howl and continue the campaign
After taking the Heart Container, leave the boss room through the western exit. Walk up the steps in the altar room and collect the third Essence of Time, the Echoing Howl. The dungeon is complete once the Essence is in Link’s inventory.
The following story sequence directs Link toward the mountains northwest of Lynna City, leading into the Symmetry City objective. Leave Crescent Island using the opened route. Helping Dimitri after the dungeon by giving the Tokay an Ember Seed is optional and can provide a temporary animal companion; it is not required to claim the Essence or advance the main campaign. If you miss the Essence, re-enter the cleared dungeon and follow the boss-room route west to the altar.
- Shadow Hag is defeated.
- The Heart Container has been collected.
- The Echoing Howl is in Link’s inventory.
- The post-dungeon message points toward the mountains northwest of Lynna City.
- The next main objective is the route toward Symmetry City, not a required second dungeon on Crescent Island.
Before you move on
- Moonlit Grotto’s four crystal mechanisms have been activated and the dungeon’s required route is open.
- The Seed Shooter and Boss Key have been collected.
- Subterror and Shadow Hag are defeated.
- The Heart Container has been taken.
- The Echoing Howl has been collected from the altar room.
- The post-dungeon story has directed Link toward the mountains northwest of Lynna City and the Symmetry City sequence.
Skull Dungeon (Dungeon 4) — Key Management and Patience
Skull Dungeon is the fourth dungeon in The Legend of Zelda: Oracle of Ages for Game Boy Color. It opens in present-day Symmetry Village after Patch repairs the Tuni Nut and Link returns it to the village pedestal. The dungeon contains extensive lava, mine carts, moving blade traps, colored floor puzzles and Switch Hook rooms. The Switch Hook is the required dungeon item, Armos Warrior is the mini-boss, and Eyesoar guards the fourth Essence of Time, the Burning Flame. The dungeon itself does not require changing between past and present; its progression is handled with the dungeon’s switches, carts, Seed Shooter, Roc’s Feather and Switch Hook.
1. Enter the dungeon and collect the Compass
Enter the opening in the waterfall at present-day Symmetry Village. From the entrance, go north and then west. Defeat the Stalfos and Shrouded Stalfos in the room to open the western door.
Jump across the lava and use a Scent Seed from the Seed Shooter to remove the Shrouded Stalfos in your way. Go north, avoid the Spark moving around the room, and leave through the southern exit. In the next room, push down the rightmost block surrounding the chest. Open the chest for the Compass, then leave through the south exit.
- Skull Dungeon entered after restoring the Tuni Nut.
- Compass collected.
- Scent Seeds available for Shrouded Stalfos and later dungeon puzzles.
2. Get the first Small Key and open the eastern route
Clear the enemies in the room south of the Compass room. Jump across the lava and manipulate the puzzle block until it reaches the black square with its blue side facing upward. The practical sequence is to push the block down until it is to the right of the black square, then push it right once, down once, left once, up once, and left until it rests on the black square.
A chest appears on the blue tile. Open it to obtain the first Small Key. Exit through the northeast route, drop down and travel east twice through the lava-filled rooms. Follow the narrow path around the lava, jump to the central platforms and push the blocks so the locked doorway on the north side becomes accessible. Use the Small Key there.
- First Small Key collected.
- Locked northern door opened.
- Do not spend the key on another door before reaching the eastern mine-cart route.
3. Ride the mine carts for the Map and two more keys
Defeat the Stalfos in the room beyond the locked door and continue east. Strike the yellow switch, board the mine cart and ride it into the enclosed section. Cross the small lava gap and open the chest for the Dungeon Map. Return to the cart route.
Strike the switch to send the cart toward the room containing a Moldorm and a moving crystal switch. Use Scent Seeds to defeat or weaken the Moldorm, then use the Seed Shooter to activate the crystal switch. The switch reveals a chest containing the second Small Key.
Board the cart again and set the track so it carries you onward rather than back to the previous room. Defeat or bypass the Stalfos and use the second Small Key on the locked door in the northeast. In the Blade Trap room, use a Scent Seed to remove the Shrouded Stalfos, then approach the traps to activate them. Wait until they retreat toward the walls before crossing.
In the next room, pull the wall switch to remove the lava temporarily and move quickly to the northern exit. Defeat the bone-throwing Stalfos, go west, clear the Hardhat Beetles with Gale Seeds, and enter the colored-tile room. Jump over the indicated middle tiles twice to turn them blue, then jump over the center and lower corner tiles once to turn them yellow and open the door.
Proceed through the blade-trap room and push the block onto the black square without allowing it to fall through the cracked floor. In the next room, ride the moving platform and use the Seed Shooter on the crystal switch. Open the revealed chest for the third Small Key.
- Dungeon Map collected.
- Second Small Key collected from the Moldorm and crystal-switch room.
- Third Small Key collected from the moving-platform room.
- Watch mine-cart switches before boarding; the wrong track can send you back.
4. Get the fourth Small Key and reach Armos Warrior
Return to the previous room and use the northwest door. Defeat the Stalfos and Green Zol, then unlock the key block. Jump over the floor tile to open the gate and return to the cart room.
Board the mine cart and defeat the Stalfos positioned along its route. The door at the end opens only after the enemies are cleared; if the cart carries you away first, ride it around and try again. Cross the moving platforms and leave through the south door.
In the next colored-tile room, jump over the two middle tiles twice so they match the required pattern. A chest appears or drops into reach with the fourth Small Key. Return to the prior room, use the key on the key block and board the mine cart.
Defeat or bypass the Gibdos in the room where the cart stops. An Ember Seed can turn a Gibdo into a Stalfos, making it easier to defeat. Leave through the west exit to enter the mini-boss room.
- Fourth Small Key collected.
- Key block opened before boarding the next cart.
- Ember Seeds available if you want to weaken the Gibdos.
5. Defeat Armos Warrior and obtain the Switch Hook
Armos Warrior throws its sword, which then travels around the room. Move so the sword's path intersects the warrior. The thrown sword must strike Armos Warrior three times; after the third hit, its shield breaks.
The warrior then charges directly at Link. Move out of its path and let it bounce off the wall. While it is recovering, attack with the sword. Repeat the charge-and-counterattack pattern until the warrior is defeated. Collect the Fairy if needed, then leave through the south door.
Continue south, cross the bridge and exit east. Bomb the cracked wall. The next room is a large floor-tile puzzle. Starting from the yellow center tile, walk across the tiles in a continuous route so every tile turns red. If the center tile becomes trapped with unvisited tiles remaining, leave and re-enter the room to reset the puzzle.
When all tiles are red, a chest appears containing the Switch Hook. This L-1 tool swaps Link's position with a compatible pot or diamond-shaped stone; it does not pull Link toward the target. Use it on the diamond outside the room to cross the gap.
- Armos Warrior defeated by reflecting its thrown sword.
- Switch Hook collected.
- Tile puzzle reset by leaving and re-entering if the route becomes trapped.
6. Use the Switch Hook to obtain the Boss Key
From the Switch Hook room, swap with the diamond across the gap and go north. Travel east from the mini-boss area, climb the stairs and leave through the northern exit. Use the Switch Hook on the diamond across the path, then go through the southeast exit and pass the Gibdos.
In the lava room, use the Switch Hook to cross. Stand on the floor switch, then hook the diamond onto the switch so the door remains open. Go south and follow the path to the stairs. Descend, defeat or avoid the Gibdos and use the northern exit.
In the next room, do not throw the pot in the northeast corner. Stand below the blocks over the lava and use the Switch Hook to reach the pot on the right. Continue using the pot and diamond as swap targets until you can place the diamond on the switch and keep the route open. Reposition the diamond as necessary to leave the room.
Follow the path to the Moldorm room and descend the stairs. Use the Switch Hook on the pots to cross the room and reach the southern exit. In the next room, jump over the center tile to reveal the hidden gels, then defeat them while they are visible. Cross the blade traps and Peahats to reach the second large floor-tile puzzle.
Solve the second tile puzzle by turning every tile red. Use the numbered route in a detailed map if necessary, because an incorrect turn can trap the yellow center tile. The chest contains the fifth Small Key. Go north, cross the moving platform and use the Switch Hook on the upper diamond, then climb the stairs.
Use the moving platforms and the pots as Switch Hook targets to reach the ladder. Unlock the key block, move the first diamond out of the way and hook across to the second diamond. Leave west, pull the wall switch and move quickly around the room to the northern exit. Pull the next switch down, use the pots to cross, and use Roc's Feather to jump to the upper exit.
Climb the stairs, jump east over the lava and use the Switch Hook to reach the upper-right section. Push a pot against the top wall, swap with the pot to the left and push that pot onto the floor switch. Swap back across the short wall using the pot at the top, then open the chest for the Boss Key.
- Fifth Small Key collected from the second tile puzzle.
- Boss Key collected.
- Do not throw the northeast pot in the Boss Key approach room; reset the room by leaving and returning if necessary.
7. Reach Eyesoar and claim the Burning Flame
From the Boss Key chest, go southeast and jump down from the ledge. Travel south twice, then take the eastern branch. Use the Switch Hook on the diamond-shaped stones and continue east. Descend the stairs and use the Switch Hook with the pots to cross the room. Ride or cross the moving platforms to reach the ladder on the east side, climb up and enter the boss door.
Eyesoar is surrounded by four smaller eyes that orbit the central blue eye. Use the Switch Hook so it connects directly with the central eye. A successful hit swaps Link and the central eye, scatters the surrounding eyes and leaves the boss stunned. Attack the exposed central eye with the sword.
If the orbiting eyes block the hook's path, slash them to make them temporarily disappear or wait for them to spread apart. Reposition rather than chasing the boss into a crowded angle. Repeat the Switch Hook hit and sword attacks until Eyesoar is defeated.
Collect the Heart Container, then go north into the next room and take the Burning Flame. This is the fourth Essence of Time. The immediate post-dungeon direction is the ridge north of Nayru's House, where the next Goron-related objective begins.
- Boss Key used to enter Eyesoar's room.
- Eyesoar defeated by hooking the central eye and striking it with the sword.
- Heart Container collected.
- Burning Flame obtained as the fourth Essence of Time.
Before you move on
- The Switch Hook is in Link's inventory and Armos Warrior has been defeated.
- The Boss Key has been collected and used to open Eyesoar's door.
- Eyesoar is defeated and the Heart Container has been collected.
- The Burning Flame is in Link's inventory as the fourth Essence of Time.
- After leaving the dungeon, the Maku Tree's next guidance points Link toward the ridge north of Nayru's House and the Goron Elder objective.
Crown Dungeon (Dungeon 5) — Cane of Somaria, Crystal Switches and Smog
Reach Crown Dungeon in present-day Rolling Ridge after rescuing the Goron Elder in the past and receiving the Crown Key. The dungeon is a maze of staircases, crystal switches, colored barriers, moving statues and underground passages. Work through the left side first to collect several Small Keys, then obtain the Dungeon Map and Cane of Somaria before opening the right side. The Cane creates a movable block that holds switches, stops linked statues and redirects Smog’s cloud fragments. Defeat Smog by making its separated clouds collide, attack the reunited form, and repeat the process through four rounds. Take the Heart Container and Sacred Soil after the battle; the Maku Tree then points you toward the next objective on Rolling Ridge.
1. Get the Crown Key and enter Crown Dungeon
In past-era Rolling Ridge, bring the Bomb Flower to the Gorons at the mountain entrance. The explosion clears the blocked passage and frees the Goron Elder. Speak to him after the rescue to receive the Crown Key.
Return to the present and go to the area where Great Moblin’s Keep stood. Enter the cave on the right. Equip Roc’s Feather and Pegasus Seeds, use a seed, and make long jumps across the separated solid platforms. Follow the cave route until you exit outside, then go west to the raised structure in the northern wall. Use the Crown Key to open Crown Dungeon.
- Rescue the Goron Elder in the past.
- Receive the Crown Key.
- Cross the present-day cave with Roc’s Feather and Pegasus Seeds.
- Unlock the Crown Dungeon entrance.
2. Clear the lower route and collect the first keys
From the entrance, go to the left staircase and descend into the basement section. Move right through the lower passage until you reach the high ledges. These ledges cannot be climbed normally: create a temporary Cane of Somaria block later in the dungeon, then jump from the block with Roc’s Feather. For now, follow every available staircase and route, defeating or avoiding enemies as needed.
Return to the crystal-switch room and use the Seed Shooter to change the crystal. Walk around the lowered pillars rather than trying to cross them directly. The red and blue pillar positions determine which side of the room is open, so shoot the switch again whenever the opposite color is required.
Proceed to the room containing linked statues. Pushing one statue makes the other move in the same direction. The puzzle cannot be completed until you have the Cane of Somaria, so use the available route to continue rather than attempting to force the statues into position. Search the accessible left-side rooms for Small Keys and open only doors that advance into unexplored sections. Crown Dungeon becomes much easier if you collect the left-side keys before committing to the far-right rooms.
- Use the crystal switch to lower the correct colored pillars.
- Explore the accessible left-side rooms.
- Collect the available Small Keys before opening unnecessary doors.
- Leave the linked-statue puzzle until you have the dungeon item.
3. Find the Dungeon Map and obtain the Cane of Somaria
Continue through the crystal-switch routes and underground passageways until you reach the map section. Use the stairs to move between the main floor and basement, and check both sides of each passage before backtracking. One route leads through an underground passage to a dark room with an invisible floor. Use the Cane only after obtaining it; before then, cross the available platforms and ledges carefully to reach the map area. Open the chest containing the Dungeon Map before moving on if you want the clearest view of the dungeon’s connected staircases.
The Cane of Somaria is behind a locked route near the map side of the dungeon. Follow the path through the staircase and torch room. Shoot Ember Seeds into the torches, then enter the room where a switch displays a statue arrangement. Reproduce the displayed arrangement with the statues. When the pattern is correct, the chest opens and gives you the Cane of Somaria.
The Cane creates one movable block at a time. The previous block disappears when you create another. Use the block on floor switches, beside linked statues, or beside a ledge as a temporary stepping point for Roc’s Feather. Plan where Link will walk after placing it; pushing it into a corner can make a puzzle awkward until the room resets.
- Collect the Dungeon Map.
- Light the required torches with Ember Seeds.
- Match the statue arrangement shown by the puzzle switch.
- Obtain the Cane of Somaria.
- Remember that only one Cane block can exist at a time.
4. Use the Cane to collect the remaining keys and Compass
Return to the earlier statue rooms now that you have the Cane. In the room with three switches, push the statues onto three switches and create a Cane block on the fourth. This opens the chest containing another Small Key.
Continue east and north, then use the staircase and underground passage to reach the next crystal-switch section. Create Cane blocks to cross the gaps and climb to the ladder. Strike the crystal from the required sides so the route through the colored barriers is open. In the next linked-statue room, place one statue on its red tile, create a block to stop it from moving, and push the other statue onto the second tile. The resulting chest contains another Small Key.
Use the remaining keys to reach the eastern portion of the dungeon. You will encounter Smasher, the mini-boss. Let Smasher throw its large ball, avoid the impact, pick the ball up when it lands, and throw it back at Smasher. Repeat this until the mini-boss is defeated and the northern route opens.
Afterward, create a Cane block on the nearby switch to form a bridge. Cross the bridge and use the Switch Hook to reach the chest containing the Compass. The Switch Hook is needed here; the Cane alone does not provide access to the chest.
- Use Cane blocks to complete the four-switch puzzle.
- Solve the second linked-statue puzzle and collect its Small Key.
- Defeat Smasher by throwing its ball back at it.
- Create the bridge with the Cane of Somaria.
- Use the Switch Hook to collect the Compass.
5. Reach the Boss Key and open Smog’s chamber
From the Compass area, descend through the basement passage and return to the upper dungeon routes. Adjust the crystal switch whenever colored barriers block the next staircase. Follow the ledges and locked passages toward the western and northern sections, using Cane blocks to cross gaps and control the dungeon’s moving objects.
Eventually you will reach the large statue puzzle associated with the owl statue’s instruction to bring everything to it. Statues of the same color move together, so place Cane blocks to prevent unwanted movement while positioning the groups. All of the surrounding grey tiles must be covered; the exact color order is not important as long as every required tile is occupied. Completing the arrangement reveals the Boss Key.
Return to the room where you found the Dungeon Map and use the large locked door leading toward the boss route. Before entering, refill your hearts if possible and make sure the Cane of Somaria is equipped or easy to select. The boss fight depends on using it repeatedly, not on a separate dungeon item.
- Use the crystal switches to reopen the upper route.
- Complete the owl statue’s surrounding-statue puzzle.
- Collect the Boss Key.
- Return to the map-side room and unlock the boss door.
- Enter with the Cane of Somaria available.
6. Defeat Smog and claim the fifth Essence
Smog begins by dividing into two or three small cloud fragments. The fragments travel along the walls of the blocks in the arena. Your goal is to make every fragment collide with the others. Place a Cane block in the path of a fragment to redirect it around a different wall or lane. Watch the movement cycle before placing a block so the redirected cloud meets the others instead of passing them.
The fragments release blue projectiles, but the projectiles cannot pass through blocks. Use existing blocks and newly created Cane blocks as cover while setting up the next redirection. You can also strike a cloud with the sword to interrupt it briefly, but sword attacks do not damage Smog while it is divided.
When all fragments collide, Smog reforms into its larger body and becomes vulnerable. Attack it repeatedly with the sword while avoiding its lightning bolts. After the damage window ends, the cloud puzzle begins again. Repeat the reunion-and-attack process four times. If the fragments become difficult to route, use the reset switch in the arena to restart the current arrangement instead of taking unnecessary damage.
When Smog is defeated, go north and collect the Heart Container. Continue into the next chamber to receive the fifth Essence of Time, Sacred Soil. After leaving the dungeon, the Maku Tree indicates that another Essence remains on Rolling Ridge and the next stage of the campaign begins.
- Redirect every small cloud until the fragments collide.
- Use blocks to shield against the blue projectiles.
- Attack Smog only after it reforms.
- Repeat the process through four damage rounds.
- Collect the Heart Container.
- Take Sacred Soil from the Essence chamber.
Before you move on
- The Cane of Somaria is in the inventory and has been used to solve the dungeon’s switch, ledge and linked-statue puzzles.
- The Dungeon Map, Compass, required Small Keys and Boss Key have been collected or used to reach the boss.
- Smasher is defeated and the Compass has been taken from its chest with the Switch Hook.
- Smog is defeated after four reunion-and-attack cycles.
- The Heart Container has been collected.
- Sacred Soil, the fifth Essence of Time, has been taken from the chamber north of the boss room.
- The game has returned Link to the overworld and the Maku Tree has indicated the next objective on Rolling Ridge.
Mermaid's Cave (Dungeon 6) — Swimming Zones and Era-Dependent Currents
Mermaid's Cave must be completed in both eras. First obtain both Mermaid Keys through the Rolling Ridge Goron events, then enter the Past dungeon to move its wall and open the route that changes the Present layout. The Present section contains the dungeon map, three required Small Keys, Vire, the Mermaid Suit and the Boss Key. Once the suit is obtained, return to the Past, dive into the newly accessible deep water, solve the underwater current and Switch Hook rooms, and open the route to Octogon. Defeat Octogon with the Seed Shooter, collect the Heart Container, and take Lonely Peak from the Essence room. The dungeon is complete when Lonely Peak is added as the sixth Essence of Time.
1. Obtain both Mermaid Keys before entering the dungeon
Complete the present-day Goron sequence on Rolling Ridge first. The Old Mermaid's Key comes from the present Goron Bomb Game after you complete the required Goron trading steps and provide Goronade. Keep this key; it opens the present version of Mermaid's Cave later.
Travel to the Past and give Lava Juice to the Goron who knows the Graceful Goron. He gives you the Letter of Introduction. Take the letter to the first-generation Graceful Goron in the Goron Dance Hall and complete the dance challenge to receive the Mermaid Key.
Leave the Dance Hall, swim to the waterfall at Rolling Ridge Base, and enter the cave behind it. Use the Mermaid Key on the Past entrance. The Old Mermaid's Key is for the Present entrance; the two keys are not interchangeable.
- Old Mermaid's Key obtained in the Present.
- Letter of Introduction delivered in the Past.
- Mermaid Key obtained from the Past Goron Dance Hall.
- Past entrance opened behind the Rolling Ridge waterfall.
2. Open the Past dungeon route
Bomb the damaged wall on the right side of the Past entrance room. Defeat the Red Wizzrobe and two Green Wizzrobes to make a chest appear, then take the Gasha Seed if desired. In the next room, ignite the Candleheads with Ember Seeds. When they explode, the upper doorway opens.
Enter the torch room and light the torches in this order: leftmost, rear middle, front middle, then rightmost. To reach the rear-middle torch, stand below the middle pair and bounce an Ember Seed off the right wall. The opened wall reveals deep water that cannot yet be entered, so return toward the entrance.
The Past Dungeon Map is optional and lies in the water to the left of the torch area. From the entrance, go up and left to the room with the central tile and invisible Gels. Defeat the Gels to reveal the Past Compass. Then go up through the Candlehead and Keese room, defeat the two Shrouded Stalfos across the gap, and take the Small Key from the chest.
Use the key on the western locked door. Defeat the Blue Wizzrobe, place a Cane of Somaria block on the right switch, destroy every vase in the upper-left group except the middle vase, and push that vase onto the other switch. In the next room, defeat the enemies, bomb through the cracked blocks, and bomb the hollow section of the north wall just to the right of center. Do not enter the new passage yet; the Mermaid Suit is required beyond it.
- Past torch sequence completed.
- Past Small Key collected.
- Vase-and-Somaria switch puzzle solved.
- Bomb hole opened in the Past north wall.
- Deep water still inaccessible until the Mermaid Suit is obtained.
3. Enter the Present dungeon and defeat Vire
Exit the Past dungeon and use the Tune of Currents outside to reach the Present. Enter the cave at Dry Falls and unlock the door with the Old Mermaid's Key.
The Present Dungeon Map is optional. From the entrance, go upward, then left across the gap with the Switch Hook and open the chest. For the required route, continue to the blue-switch rooms. Use the switch to change the floor arrangement, reach the upper-right route, change it again, and enter the room with the Ropes. Drop a Scent Seed from the Satchel so the Ropes rush toward it and fall into the pits; the chest contains a Small Key.
Return through the floor-switch route and bomb the southern wall between the red blocks. Cross the gap with the Switch Hook, bomb the weak wall, and solve the colored-tile block puzzle. Follow the block's route across the red, yellow and blue tiles to make the chest appear, then take the second Small Key.
Use the rotating platforms to reach the upper rooms. The platforms require repeated loops: step onto one, circle around to approach it again, and use the changed direction to reach the next ledge. Take the third Small Key from the chest on the upper-left route, then continue through the northern locked door to Vire.
Vire flies around the room, fires orbs and periodically charges. Stand ready to slash when he approaches. After taking enough damage, he splits into smaller Vires. Wait for each one to hover before charging, then slash it. Bombs placed in Vire's travel path can also damage him.
- Present Dungeon Map collected or deliberately skipped.
- Three Present Small Keys collected.
- Colored-tile block puzzle completed.
- Vire defeated.
4. Claim the Mermaid Suit
After Vire, enter the room to the right. Throw a bomb over the yellow gate so it destroys the cracked block instead of dropping into the pit. Use the Switch Hook on the diamond stone, climb the steps and open the chest for the Mermaid Suit.
The Mermaid Suit allows Link to swim faster and enter deep water. It also changes underwater control: the direction pressed on the D-pad moves Link while the suit is equipped, while only the item assigned to the A button can be used as an underwater weapon or tool.
Use the nearby warp to return to the dungeon entrance. The Present Compass is optional and can be collected by going through the Candlehead room, crossing the Giant Blade Trap passage, using the Switch Hook on the vases and opening the chest. Do not confuse this optional route with the Boss Key route.
- Mermaid Suit obtained.
- Deep water can now be entered.
- A useful underwater item, such as the Seed Shooter or Switch Hook, is assigned to A.
- Present Compass collected if desired.
5. Return to the Past and obtain the Boss Key route items
Leave the Present dungeon and use a time portal outside to return to the Past. Re-enter Mermaid's Cave through the waterfall. Go right two screens from the entrance, defeat the Candleheads, go north, then go right and dive into the deep water on the far-right side.
Follow the underwater path beneath the purple blocks and descend into the submerged dungeon area. Current-driven floors can push Link toward pits, so use the available upper or lower path rather than fighting the flow directly. In the underwater Rope room, defeat both Ropes to make a Small Key appear. Remember that only the A-button item works underwater.
Return to the Past first-floor switch room. Recreate the earlier Cane of Somaria and vase solution, pass through the bombed north wall, and use the rotating platform route to reach the deep-water section. Dive again and follow the underwater current route toward the Switch Hook room.
Use the Switch Hook to defeat the two Ropes and open the eastern door. Six diamond stones must be placed on the six yellow tiles. Move each stone with the Switch Hook until all tiles are filled, then take the chest's Small Key.
Resurface and use this key on the first-floor locked door. Place a Cane of Somaria block on the switch so the red bars face the blue switch. Fire a Seed Shooter shot against the appropriate red block so it ricochets through the bars and strikes the blue switch. Cross the bridge and enter the boss door.
- Past deep-water route entered with the Mermaid Suit.
- Underwater Rope Small Key collected.
- Six diamond stones placed on the yellow tiles.
- Second underwater Small Key collected.
- Ricochet switch puzzle completed.
- Boss door opened.
6. Defeat Octogon and take Lonely Peak
Octogon circles the central platform and turns toward Link before firing a rock. Stand on or near the platform and fire the Seed Shooter into Octogon's exposed face after it launches the rock. Seeds can also be bounced off the wall behind Octogon to strike its face from an angle.
When Octogon submerges its head, dive into the water and fire upward while keeping Link moving. Octogon follows Link underwater and releases bubbles, so avoid staying still. Surface when necessary to reset the position and recover control.
If Seed Shooter ammunition becomes scarce, the pots on the central platform replenish Scent Seeds when Link dives underwater and returns to the surface. Keep the Seed Shooter assigned to A before diving, because the other equipped item cannot be used underwater.
After enough successful hits, Octogon is defeated. Collect the Heart Container from the central platform, enter the room to the right, climb the steps and take Lonely Peak. The Essence is the sixth Essence of Time.
- Octogon defeated.
- Heart Container collected.
- Lonely Peak collected from the Essence room.
- Lonely Peak appears as the sixth Essence of Time before leaving the dungeon.
Before you move on
- The Mermaid Suit is in Link's inventory and Link can enter deep water.
- The Past underwater route, six-diamond puzzle and ricochet switch puzzle are complete.
- Octogon is defeated and the Heart Container is collected.
- Lonely Peak is collected from the Essence room and counts as the sixth Essence of Time.
Jabu-Jabu's Belly (Dungeon 7) — Long Hook, Water Levels and Plasmarine
Jabu-Jabu's Belly becomes accessible only after the Fairy Queen is restored with Fairy Powder in the past and purifies the Zora Seas. King Zora then permits entry to Jabu-Jabu's Shrine in the present. Inside, do not use the Harp of Ages: this dungeon remains in the present and is controlled by three water-level switches. Explore the dry layout first, collect the Dungeon Map, Compass and Small Keys, then obtain the Long Hook from the Angler Fish area. The Long Hook reaches distant diamonds and pots, crosses gaps and lets you complete the late key route. Use the water-control room as your navigation hub. For Plasmarine, wait for an energy orb, hook the boss as the orb approaches, and make the boss change to the color vulnerable to that orb. Take the Heart Container and the Rolling Sea after the fight.
1. Purify the Zora Seas and enter the dungeon
Before entering Jabu-Jabu's Belly, complete the Zora prerequisite. In the past, obtain Fairy Powder from the back room of the Eyeglass Island Library. Use the Switch Hook to reach the Fairy Queen's cave near the Zora Seas, then sprinkle the Fairy Powder on the transformed Fairy Queen. She will return to normal and cleanse the seas.
Return to the present and speak with King Zora in his palace. Once he recognizes that the seas have been purified, he allows Link to enter Jabu-Jabu's Shrine. Leave the palace, swim to the shrine west of the palace and enter the open mouth. Jabu-Jabu's Belly is the dungeon inside.
Make sure you already have the Cane of Somaria. Several required rooms use it to hold down a switch while Link moves a diamond or pot with the Switch Hook or Long Hook. The dungeon cannot be completed without using this type of block-and-switch puzzle.
- Fairy Powder was used on the Fairy Queen in the past.
- The Zora Seas are clean.
- King Zora has granted access to Jabu-Jabu's Shrine in the present.
- The Cane of Somaria is available.
2. Explore the entrance area and find the water-control room
Jabu-Jabu's Belly is a present-era dungeon. Leave the Harp of Ages unused after entering. The dungeon's changing state comes from a room containing three floor switches: the red-tile switch drains the water, while the two blue switches raise it to different levels. Treat this room as the central navigation point and remember how to return to it.
Begin by exploring the dry routes from the entrance. Defeat enemies blocking corridors, use the Switch Hook on nearby diamonds when necessary, and open the first accessible locked doors. The initial objective is not to reach the boss; it is to expose enough of the dungeon's layout to understand which floors become reachable at each water level.
If a stairway, ledge or passage is submerged, do not assume it is permanently inaccessible. Return to the control room and try another level. Conversely, if water prevents Link from pushing blocks or using the Cane of Somaria in a puzzle room, drain the dungeon before attempting that room again.
- The three-switch water-control room has been located.
- The initial dry routes have been explored.
- You know where to return when a water setting blocks progress.
3. Collect the map, compass and early Small Keys
Continue through the accessible rooms and collect the Dungeon Map as early as possible. The dungeon has multiple floors and repeated routes, so the map is especially useful for identifying rooms that have been visited at the wrong water level. Collect the Compass as well if you want chest indicators while retracing routes.
Open every practical Small Key chest before raising the water farther. Some key rooms require a diamond to be moved onto one switch and a Cane of Somaria block to be placed on another. If the water is too high, the Cane of Somaria may not function in the required position; lower the water and solve the room while the floor is dry.
The dungeon also contains optional treasure, including a ring and Gasha Seeds. These are not required for the seventh Essence. Take them when the current route makes them convenient, but prioritize Small Keys and paths leading back to the water-control room. If you run low on health, exit through the entrance, recover in the overworld and return. Dungeon progress remains recorded.
- Dungeon Map collected.
- Compass collected or its location noted for later.
- All accessible Small Key chests have been opened.
- Required key doors are recorded rather than opened blindly.
4. Defeat Angler Fish and take the Long Hook
Use the water settings to reach the mini-boss route. The Angler Fish moves through the arena and fires projectiles. Keep Link moving around the open portions of the room, avoid standing directly in the fish's path, and attack when it passes close enough for the sword to connect. The fight is safer when you circle rather than chase it into a corner.
After Angler Fish is defeated, follow the opened route to the dungeon-item chest and collect the Long Hook. This is the longer version of the Switch Hook. It can target distant diamonds, pots and other hookable objects that the ordinary Switch Hook cannot reach.
Test the Long Hook immediately on a distant target before leaving the item room. Its extended range is required for later gap crossings and for pulling Link out of blocked areas. It is also the essential weapon for the Plasmarine fight.
- Angler Fish defeated.
- Long Hook collected.
- The Long Hook has been tested on a distant hook target.
5. Raise and lower the water to complete the late key route
Return to the water-control room and use the Long Hook to reach the upper routes that were previously separated by gaps. In one important section, Link must hook a diamond from the lower area, use a pot above to escape, then place the diamond on one switch and a Cane of Somaria block on the other. This reveals a chest containing a required Small Key.
After collecting that key, continue through the newly opened door and reach the upper-floor switch route. Use the control switches to raise the water partway, then follow the connected corridors toward the next locked door. If the water is not at the correct level, the route may appear to end at a gap; change the level and approach the area again from its other entrance.
For the final key sequence, use the Long Hook to cross the large gaps and unlock the key block on the upper floor. Reach the switch that raises the water farther, then return through the newly flooded routes. A later chest on a ledge contains another Small Key. Keep checking the map: Jabu-Jabu's Belly requires several keys, and missing one can leave the boss route apparently incomplete.
If you raised the water and now need to drain it, do not restart the game. From the room north of the entrance, stand on the appropriate switch and use the Long Hook on the nearby diamond to reach the upper side of the control area. From there, move the obstructing block and return to the red-tile switch. Drain the water, then revisit the two-switch room while the floor is dry.
- The Long Hook has opened the distant-target routes.
- The two-switch room has been solved with a diamond and Cane of Somaria block.
- The required late Small Keys are collected.
- The boss-key route is open or its remaining locked door is identified.
6. Find the Boss Key and prepare for Plasmarine
Continue through the upper and lower routes opened by the final water settings. Use the Long Hook on diamonds and pots across gaps, and use the Cane of Somaria whenever a switch must remain pressed while Link moves elsewhere. Some paths require draining the water again before Link can push a block or climb a staircase.
The Boss Key is in a late chest reached through these Long Hook routes. Once it is collected, use the map and the water-control room to retrace the route to the boss door. The exact water level needed for the final approach depends on which side of the dungeon you used to reach the upper floor, so change the level rather than forcing Link through a blocked or submerged passage.
Before entering, refill health and carry a potion if available. The arena does not require normal sword damage, but accidental contact and Plasmarine's electrical attack can quickly remove hearts.
- Boss Key collected.
- The boss door has been reached.
- Health is restored before entering the arena.
- The Long Hook is equipped for immediate use.
7. Defeat Plasmarine with its own energy orbs
Plasmarine changes between red and blue forms and attacks by swimming toward Link, firing an energy orb or becoming electrified. Keep moving around the arena and wait for it to fire an orb rather than approaching for sword attacks.
The orb has the same color as Plasmarine's current form. When the boss fires an orb, use the Long Hook on Plasmarine as the orb approaches. The hook both switches Link and Plasmarine's positions and changes the boss to the opposite color. The incoming orb can then damage Plasmarine because it is now vulnerable to that orb's color.
For example, if Plasmarine is red and fires a red orb, hook Plasmarine so it becomes blue and is struck by the red orb. If it is blue and fires a blue orb, hook it so it becomes red and the blue orb hits it. Do not hook randomly while the boss is electrified; wait for another projectile opportunity. Repeat the color-change-and-orb setup until the boss is defeated.
- Plasmarine's red and blue forms are understood.
- The Long Hook is used as an orb approaches.
- Plasmarine is struck by its own orb after changing color.
- The Heart Container is collected.
8. Take the seventh Essence and confirm dungeon completion
After Plasmarine falls, take the Heart Container and leave the arena through the opened passage. Follow the route to the altar room and collect the seventh Essence of Time, the Rolling Sea.
A story scene follows the collection of the Essence. Link is returned outside Jabu-Jabu, and the Maku Tree reacts to the new progress. A Zora later gives Link a Zora Scale, which is used to enter the Sea of Storms and continue toward the final dungeon sequence.
If you die before taking the Essence, re-enter Jabu-Jabu's Belly and use the map to retrace the boss route. If the water setting seems to have stranded you, return to the control room through the upper or lower connection and use the red-tile switch to drain the dungeon. Missing a key is more likely than a permanent softlock; search unopened chests in previously visited rooms before assuming the route is broken.
- The Heart Container from Plasmarine's arena is taken.
- The Rolling Sea is displayed as the seventh Essence of Time.
- Link has been returned outside Jabu-Jabu.
- The post-dungeon story scene has begun.
Before you move on
- Jabu-Jabu's Belly is cleared.
- The Heart Container has been collected from Plasmarine's arena.
- The seventh Essence of Time, the Rolling Sea, is in Link's collection.
- Link has exited the dungeon and the story transition toward the Sea of Storms has begun.
References for this chapter
Ancient Tomb (Dungeon 8) — Power Glove, Four Slates and Ramrock
Ancient Tomb is the eighth main dungeon in the original North American Game Boy Color release of Oracle of Ages. Reach it only after obtaining the Tokay Eyeball, crossing the Sea of No Return maze and entering the tomb in the past. The dungeon tests the Long Hook, Cane of Somaria, Ember Seeds, rotating platforms, blue-and-red pillar switches, underwater currents, mine carts and the final tile-changing puzzle. Its key reward is the Power Glove, the upgraded lifting item required for Ramrock's fourth phase. Collect the Dungeon Map, Compass, four Slates and Boss Key, then defeat Ramrock in four distinct phases. Take the Heart Container and the Falling Star afterward. The Falling Star completes the eight Essences of Time. When you leave, visit the Maku Tree in the present to receive the next endgame item before entering the Black Tower.
1. Reach the entrance and open the first route
Before entering, make sure you have bombs, Ember Seeds, the Long Hook, Cane of Somaria and Roc's Feather. The Long Hook is the upgraded Switch Hook used throughout the dungeon. If you need recovery, break the pots in the entrance room; two of them contain fairies. The Ancient Tomb itself is in the past, at the end of the Sea of No Return route, and cannot be entered until the Tokay Eyeball has opened the way.
Go north from the entrance. Light both torches and defeat the Ghinis. Push the statue in the upper-left area either up or down, then place a bomb where it stood. Enter the new passage to the west. In the next room, defeat all three Floormasters before attempting the cracked-block route. Bomb the cracked blocks on the left and the row below them to reach the chest on the right. Take the Small Key, then work back through the cracked blocks to the locked door and go south.
- Have the Tokay Eyeball prerequisite completed.
- Carry bombs, Ember Seeds, the Long Hook, Cane of Somaria and Roc's Feather.
- Collect the first Small Key.
- Bomb the wall behind the upper-left statue.
2. Open the altar and collect the early dungeon items
In the altar room, use the Long Hook to move the diamond stone onto the nearby button. Create a Cane of Somaria block on the lower-left button, then stand on the lower-right button. Fire an Ember Seed diagonally upward and to the right so it bounces into the torch. The stone tablet separates and exposes the staircase. Go up the newly formed steps and descend.
On the first basement floor, use the rotating platform to travel west. Defeat the three Ghinis and push the lone blue block to reveal a staircase, but do not descend immediately. Go north and take the Small Key from the chest. Return to the blue block and descend. Open the chest beside the stairs for the Dungeon Map, then return upstairs.
Continue east and use the rotating platform to reach the crystal switch. Strike it so the switch turns red, lowering the blue pillars and raising the red ones. Use that configuration to reach the Compass chest. Return to the switch and turn it blue again, then follow the lowered red pillars toward the next section. Bomb the weak wall, cross the blade-trap corridor with Roc's Feather, and take the next Small Key from the chest.
- Use the three-button altar solution.
- Collect the second Small Key before descending for the Map.
- Take the Dungeon Map and Compass.
- Collect the next Small Key beyond the blade traps.
3. Solve the tile puzzle and obtain the Power Glove
Use the crystal switch whenever the pillar arrangement blocks the route. Hook across the diamond stones, ride the rotating platforms and defeat the Stalfos that guards another Small Key. Continue through the locked door and clear the Ropes while avoiding the Beamos. This leads to the large tile-changing room containing Mini-Moldorms.
Defeat the Mini-Moldorms before walking the puzzle. If they disrupt your movement, leave and re-enter the room. The correct path is a long continuous route: Right 5, Down 2, Left 2, Up 1, Left 2, Down 2, Right 4, Down 1, Left 3; Down 1, Right 2, Down 1, Right 1, Down 1, Left 3, Up 1; Left 1, Up 1, Left 1, Up 3, Left 1, Up 2, Left 1, Down 3, Right 1, Down 1, Left 1; Down 2, Right 2, Down 1, Left 5, Up 1, Right 2, Up 1, Left 1; Up 1, Left 1, Up 1, Right 1, Up 1, Right 1, Left 2, Up 1. The chest that appears contains the Power Glove.
The Power Glove replaces the Power Bracelet and lifts the large blue statues found in this dungeon. After taking it, follow the pillar route to the Blue Stalfos mini-boss. Blue Stalfos launches either a solid orb or a multi-orb projectile. Jump over the multi-orb attack with Roc's Feather. Strike the solid orb back at Blue Stalfos, then slash the small flying form that appears after a successful reflection.
- Defeat the Mini-Moldorms before starting the tile puzzle.
- Complete the tile route and collect the Power Glove.
- Use the Power Glove to lift large blue statues.
- Defeat Blue Stalfos and take the released fairy.
4. Collect the four Slates and Boss Key
After the mini-boss, cross the Wizzrobe and blade-trap rooms. Use the Long Hook on the diamond stones and jump through the narrow blue-block corridor. A chest at the top contains another Small Key. Continue to the altar chest and take Slate 1. Follow the ledges back toward the large statue room, lift the lower-left large blue statue and descend the staircase it reveals.
On the third basement floor, push the two vertical blocks into position so you can use the Long Hook across the gap. Open the chest for the Boss Key, then return to the second basement floor. Use the mine-cart route and clear the phantom-tile room. Continue through the blue-block corridor and step on the button to open the eastern passage.
Defeat the Ball and Chain Trooper in the icy room to open the upper door, then take Slate 2 from the chest. Continue through the Candlehead room and the underwater passage. In the flooded section, use the Long Hook against the Mini-Bari, then swim through the current rooms without being pulled into the holes. Take the upper-right staircase into the underwater cavern, swim through the lower passage and surface at the far side to collect Slate 3.
Return through the cavern and use the nearby button to create the shortcut back to the altar area. Take the lower-left exit, unlock the blue block beside the lever and enter the room with recovery pots. Pull the lava lever fully downward to solidify the crossing temporarily. Move quickly to the lower-right passage, enter the next room and take Slate 4 from the chest. Use the ledges and Long Hook to return toward the altar.
- Collect Slate 1 after the Power Glove route.
- Take the Boss Key from the third basement floor.
- Collect Slate 2 after defeating the Ball and Chain Trooper.
- Collect Slate 3 through the underwater current route.
- Pull the lava lever fully down and collect Slate 4.
5. Open Ramrock's chamber and win the four-phase battle
Return to the Slate altar and place all four Slates in the empty slots. The tablet moves aside and reveals the route downward. Follow the newly opened path, descend the ladder and reach the third basement floor. Go east, slash the gray crystal beside the cracked block, bomb the block and fire an Ember Seed into the torch. Cross the bridge and lift the large blue statue with the Power Glove to reach the boss door.
Ramrock's first phase sends his fists toward Link. Strike the fists with the sword so they rebound into his head. After three successful hits, he changes to the second phase. He moves around the room and closes his claws over bombs. Throw a bomb so Ramrock catches it between the claws; the explosion damages him. Repeat this three times.
In the third phase, Ramrock uses shields, large orbs and eye lasers. The orbs cannot be reflected. Avoid their paths and move across the room to evade the lasers. Equip the Seed Shooter with Scent Seeds and fire at the wall behind Ramrock so the seeds bounce into the back of his head. Continue until this phase ends.
In the final phase, Ramrock's hands become metal balls attached to chains. When he throws one ball, run to the other ball and use the Power Glove to pull it toward the south wall. Release it so it springs back into Ramrock. Pulling the ball down repeatedly before releasing gives the needed distance. Repeat the counter three times to defeat him.
- Place all four Slates before attempting the boss route.
- Use the sword against the first-phase fists.
- Use bombs in the second phase.
- Use Scent Seeds against the third phase.
- Use the Power Glove against the fourth-phase chain balls.
6. Take the eighth Essence and prepare for the Black Tower
After Ramrock falls, take the Heart Container in the center of the room. Go west into the Essence chamber and walk up the steps to claim the Falling Star. This is the eighth and final Essence of Time; the dungeon is complete once the Essence is added to your collection.
Leave the Ancient Tomb and visit the Maku Tree in the present. Her dialogue changes after the Falling Star and directs the next stage of the campaign, providing the item needed for the final approach. The Black Tower is not opened merely by a separate Ancient Tomb switch; the required trigger is completing the eight-Essence sequence and following the Maku Tree's present-era instructions.
Optional cleanup is available before the Black Tower. In the Sea of No Return, use the Power Glove on the large blue statues to find a chest containing the Blue Ring. This ring is not required for the main ending, but it can reduce incoming damage and is useful if the boss route has depleted your healing supplies.
- Collect the Heart Container.
- Take the Falling Star.
- Confirm that all eight Essences are complete.
- Visit the Maku Tree in the present before entering the Black Tower.
- Treat the Blue Ring as optional.
Before you move on
- The Power Glove is in the inventory.
- The Dungeon Map, Compass, Boss Key and four Slates have been collected.
- Ramrock is defeated and the Heart Container has been taken.
- The Falling Star has been claimed from the Essence chamber.
- The Maku Tree in the present acknowledges the completed eight-Essence sequence and gives the next endgame direction.
Black Tower — The Final Dungeon Approach
After defeating Ramrock in the Ancient Tomb, the eighth Essence of Time, the Falling Star, completes your collection. Return to the Maku Tree in the Present to receive the Huge Maku Seed, then use the Harp of Ages to travel to the Past. Enter the Black Tower from the southwest area of Lynna Village and climb its three combat floors. At the summit, the Huge Maku Seed and eight Essences remove the false-door illusion and reveal the route into the Black Tower Turret. Follow the staircase sequence, cross the flame room, pass the Blue Lynels and Ball-and-Chain soldier, and enter the northern door. In the original USA Game Boy Color campaign, this leads directly to Veran. The Room of Rites is not part of the standalone ending; it follows Veran only in a Linked Game started with the Secret to Labrynna password from Oracle of Seasons.
Collect the final Essence and obtain the Huge Maku Seed
Finish the Ancient Tomb and take the Falling Star after defeating Ramrock. This is the eighth and final Essence of Time. The Falling Star is not an item awarded by the Maku Tree; it is collected inside the Ancient Tomb at the end of the dungeon.
Return to the Maku Tree in the Present and speak with her. With all eight Essences delivered, the tree gives you the Huge Maku Seed. Twinrova then appears during the story sequence. This is the required trigger that makes the final Black Tower route available.
Before leaving, refill your hearts and restock whatever supplies you normally use. A Magic Potion, bombs, seeds and a useful ring can make the tower safer, but none of these is the entrance requirement. Optional preparations can be completed now, including collecting the Blue Ring near the Sea of No Return if you have not already done so.
- The Falling Star has been collected from the Ancient Tomb.
- All eight Essences of Time are complete.
- The Maku Tree has given Link the Huge Maku Seed.
- Optional healing and offensive supplies are ready.
Travel to the Past and enter the Black Tower
From the Maku Tree's area in the Present, return to Lynna City and use a Time Portal or the Harp of Ages to reach the Past. Go to the southwest area of Past Lynna Village and enter the Black Tower construction site. The story scene with Ralph, Impa and Nayru establishes the confrontation with Veran.
Continue to the tower entrance after the scene. The tower can technically be entered earlier in the game, but the final route cannot be completed until the eighth Essence is collected and the Maku Tree has supplied the Huge Maku Seed. Remain in the Past while climbing; no time-travel puzzle is required inside the tower's main route.
The Black Tower is not a conventional dungeon with a map, compass or boss key. Its first section is a sequence of enemy rooms. You can defeat enemies for space and possible drops, but moving past them is often safer than clearing every room.
- Link is in the Past.
- The entrance is the Black Tower in the southwest area of Lynna Village.
- The final story scene outside the tower has played.
- The Huge Maku Seed is in the inventory progression.
Climb the first three floors
On the first floor, start by going east from the worker. The northern path is a dead end containing Ropes. Follow the connected rooms around the tower: continue through the room with a hidden Zol, go through the Blue Octorok room, then pass the Ropes and Tektites before descending to the Pig Warrior room. Use the staircase there to reach the second floor.
On the second floor, move north through the Shrouded Stalfos room. Continue east past the Beamos and Gibdos, then go down through the Like Like room and reach the Darknuts guarding the next staircase. Keep your shield equipped where practical and deal with Like Likes promptly so they cannot steal it.
On the third floor, go up from the staircase and continue through the Darknut rooms. Move left through the Wizzrobe room, then continue through the next Darknut and Wizzrobe rooms until you reach the room with three doors. A cutscene plays there. Afterward, enter the revealed correct door to reach the Black Tower Turret. Before receiving the Huge Maku Seed, the tower's door arrangement loops; after the Maku Seed and all eight Essences, the illusion is removed.
- The first-floor staircase has been reached.
- The second-floor staircase has been reached.
- The third-floor enemy route is complete.
- The three-door room cutscene has played.
- The correct door to the Black Tower Turret is available.
Cross the Black Tower Turret staircase maze
The turret begins with a staircase maze spread across two levels. Follow this order: use the stairs in the middle of the left wall; go north and take the next stairs; use the northwest stairs; go south and take the first stairs you pass; go east past the first stairs, then go north and use the stairs at the end of the path; use the stairs to the south; use the stairs in the middle of the north wall; then go south and use the next stairs.
Wizzrobes and Darknuts occupy the maze. You do not need to defeat every enemy, and many return after using stairs. When a Darknut blocks a narrow passage, create room with a bomb or use your defensive equipment rather than trying to trade repeated sword hits in a corner. Keep moving through projectile rooms and do not linger near stair landings.
The next room contains several staircases and moving flames. Wait for a safe opening instead of walking into the flame pattern. Use the staircase just to the left of the southeasternmost staircase. Choosing another staircase sends you away from the correct upper route and forces you to repeat part of the maze.
- The eight staircase transitions have been followed in order.
- The flame room has been crossed safely.
- The staircase just left of the southeasternmost staircase has been used.
Reach the northern door and handle the edition difference
After the flame room, Link reaches a ledge where pots may contain fairies or seeds. Take recovery items if needed, then go north and use the stairs. In the large room above, the northern exit is directly ahead but cannot be reached by walking straight through the enemies. Go south first, then take either the east route or the west route north.
Both side routes pass Blue Lynels and a Ball-and-Chain soldier. Keep moving, use the shield against attacks that can be blocked, and do not spend time clearing enemies that are not stopping your progress. Once past them, enter the door in the middle of the north wall.
A cutscene follows. In the original standalone USA Game Boy Color game, continue north when control returns to begin the Veran sequence. There is no standalone Room of Rites after this point. In a Linked Game of Ages, the game includes an additional story transition and eventually sends Link to the Room of Rites after the Black Tower Veran battle. If the game provides a portal after the first battle, it can be used to return for recovery before re-entering the final area.
- The turret's flame room has been cleared.
- The recovery pots have been checked if necessary.
- The Blue Lynels and Ball-and-Chain soldier have been passed.
- The middle northern door has been entered.
- The standalone or Linked Game transition has been identified correctly.
Recover from defeat and verify Black Tower completion
If Link falls in the tower, return to the Past entrance and repeat the route. The first three floors do not require a key inventory, and the turret staircase order remains fixed. Do not waste time searching for a missing boss key or dungeon map; neither is required for this final approach.
If health becomes low before the turret, leave the tower and recover in Lynna Village or use available fairies and other recovery items. The staircase maze is easier to repeat after you have memorized the eight transitions and the flame-room staircase. If you are playing a standalone game, retain the completed save until the credits finish so you can record the Secret to Labrynna password shown afterward if you intend to begin a linked Oracle of Seasons game.
This chapter is complete when the Maku Tree has supplied the Huge Maku Seed, Link has entered the Black Tower in the Past, the three-floor route and turret maze have been crossed, and the middle northern door has triggered the final confrontation sequence. Defeating Veran and reaching the credits completes the standalone campaign. Only a Linked Game continues from there to the Room of Rites and its additional final bosses.
- A failed attempt can be retried from the Past entrance.
- The fixed staircase route is available for another attempt.
- The northern-door cutscene has triggered.
- The original campaign is ready for the Veran battle, or the Linked Game is ready for its additional finale.
Before you move on
- The Ancient Tomb has been cleared and the Falling Star collected.
- The Maku Tree in the Present has given Link the Huge Maku Seed.
- Link has entered the Black Tower in the Past after the required story scene.
- The three combat floors have been climbed.
- The Huge Maku Seed has removed the false-door illusion at the summit.
- The turret staircase route and flame-room staircase have been completed.
- The northern door has been entered and the Veran confrontation sequence has begun.
- For a standalone USA game, Veran is the final confrontation before the ending and credits.
- For a Linked Game, the post-Veran transition to the Room of Rites is available.
Veran and the Linked-Game Room of Rites — Final Battles and Recovery
Finish the Black Tower in the past, then defeat Veran in the standalone North American Game Boy Color campaign. The first phase requires Mystery Seeds on possessed Queen Ambi, the Long Hook to separate Veran, and Sword attacks. Veran then becomes a winged fairy-like monster while four Dark Links occupy the arena. Charged Spin Attacks provide the safest reliable opening. Her final sequence uses beetle, spider and bee forms: avoid the beetle’s landing attack and strike its exposed body, stun the spider with Bombs before attacking its face, and slash the bee during close passes. After Veran falls, follow the escape sequence, watch the standalone ending and credits, and record the password if you intend to begin a linked Oracle of Seasons game. The Room of Rites, Twinrova and Ganon are not part of a normal Ages file; they occur only when Ages was started as a Linked Game with an Oracle of Seasons password.
Prepare for the Black Tower’s final ascent
Enter the Black Tower in the past only after collecting all eight Essences of Time and obtaining the Huge Maku Seed. The final tower rooms contain frequent combat, but defeating every enemy is unnecessary. When a room provides a clear route around an enemy, run past it and preserve your health for Veran. Check pots, bushes and other breakable objects for hearts or ammunition during the ascent, but do not rely on finding a specific recovery item before the boss.
Continue through the upper tower rooms, including the staircase and flame puzzles, until the route leads to the chamber before Veran. The final approach is not a separate dungeon objective: once the eight Essences and Huge Maku Seed have opened the way, your goal is simply to reach the boss chamber. Before entering, make sure the Seed Shooter is equipped with Mystery Seeds, the Long Hook and Bombs are accessible, and the Sword and Roc’s Feather are available. A Potion is useful but optional. The Harp of Ages is not a solution to any Veran phase, so do not waste time attempting to change eras in the arena.
- Have all eight Essences of Time and the Huge Maku Seed.
- Carry Mystery Seeds, Bombs and the Long Hook.
- Keep the Sword and Roc’s Feather available.
- Restore as much health as possible before entering Veran’s room.
Separate Veran from Queen Ambi
After the story scene with Ralph and Queen Ambi, enter the boss arena and watch Veran’s movement around Ambi. Veran periodically stops to prepare an attack that sends energy orbs around the room. This pause is the opportunity to use the Seed Shooter. Fire a Mystery Seed at the possessed Ambi. The seed drives Veran’s shadow away from Ambi without treating Ambi herself as the target to defeat.
When Veran separates from Ambi, immediately use the Long Hook to pull Veran away from her body. Once Veran is exposed and separated, strike her with the Sword. Do not slash Ambi while Veran still possesses her; that does not advance the battle and can cost health. After the hit, Veran returns to Ambi and the pattern begins again. Repeat Mystery Seed, Long Hook and Sword attacks until the first phase is completed.
Keep moving while waiting for Veran’s pause. The circular projectiles are easier to avoid when Link is not standing directly beside Ambi. A purple spider creature can also appear during this phase; defeat it if it blocks your path or if you need the chance of recovery, then return your attention to Veran. The important requirement is to use Mystery Seeds on the possessed body and the Long Hook on the exposed Veran before attempting Sword damage.
- Wait for Veran’s attack pause around Ambi.
- Shoot the possessed Ambi with a Mystery Seed.
- Use the Long Hook to separate Veran.
- Strike the separated Veran with the Sword and repeat the sequence.
Defeat Fairy Veran and manage the Dark Links
Veran next changes into a fast winged, fairy-like form. Four Dark Links appear in the arena and mirror Link’s movement. They can obstruct a planned attack or push Link into Veran’s projectiles, so clear one when it traps you or blocks an open section. Do not spend the entire phase chasing Dark Links; the main objective is to create enough space to attack Veran safely.
Veran moves rapidly across the room and fires energy attacks. Stay out of her direct flight path, circle through an open part of the arena, and watch for her approach. Charge a Spin Attack, then release it as Veran passes close to Link. A normal Sword slash can work when she comes within range, but the charged Spin Attack gives a stronger and more dependable hit window. Avoid charging in the middle of several Dark Links or while a projectile is approaching. Move first, then charge from a clear position.
Defeated Dark Links may provide recovery hearts. If health is low, remove an obstructing Dark Link when safe and collect any heart that appears, but do not take unnecessary contact damage trying to farm them. The Harp of Ages has no combat role in this phase. Continue using movement and charged Spin Attacks until Fairy Veran is defeated.
- Clear Dark Links only when they obstruct movement or create a safe recovery opportunity.
- Avoid Veran’s flight path and energy attacks.
- Use charged Spin Attacks as she passes within range.
- Collect recovery hearts when doing so is safe.
Counter the beetle, spider and bee forms
Veran’s final sequence cycles through three forms: beetle, spider and bee. Identify the current form before attacking because each one requires a different response. In beetle form, Veran jumps across the arena and creates a dangerous impact when she lands. Use Roc’s Feather to jump over the attack or move decisively beyond the landing area. Wait for the vulnerable portion of the beetle to be exposed, then close in and slash with the Sword. Do not waste attacks against a protected shell or body position.
In spider form, keep enough distance to react to the web and movement attacks. Throw a Bomb at the spider’s face or into its path. The explosion stuns Veran and exposes the face for attack. Approach only after the Bomb has detonated, slash the exposed face with the Sword, and retreat before the next web or body attack. Bomb placement matters more than rapid Sword swings; attacking before the stun leaves Link exposed.
In bee form, keep moving around the arena and watch for the stinger and smaller bee projectiles. Let the bee make a close pass, then slash its body when it enters Sword range. Retreat immediately instead of following underneath it, since the next pass or projectile can punish prolonged contact. Continue applying the correct response to whichever form appears until Veran is defeated.
- Jump over or move away from beetle-form landings, then slash the exposed body.
- Stun spider form with a Bomb before attacking its face.
- Slash bee form during a close pass and retreat afterward.
- Do not attack protected or unstunned forms.
Recover from a failed attempt
If Veran defeats Link, restock before climbing the Black Tower again. The most effective preparation is conserving health during the upper floors: run past enemies that do not block the route, break objects when convenient, and avoid optional combat near the final rooms. Recheck the Seed Shooter’s ammunition and your item assignments before entering the boss chamber. Mystery Seeds, Bombs and the Long Hook are the essential phase-specific tools.
If the Ambi phase causes the most damage, wait for Veran’s attack pause instead of chasing her around the room. Shoot Mystery Seeds only when the possessed body is a clear target, then use the Long Hook immediately after separation. If Fairy Veran is the problem, clear a Dark Link that blocks your route and charge Spin Attacks from an open section rather than standing in Veran’s flight path. If the transformation sequence is the problem, spend one cycle watching the form before attacking: beetle requires landing avoidance, spider requires a Bomb stun, and bee requires a close-pass Sword slash.
Time travel does not solve any boss phase. The arena does not call for the Harp of Ages, so attempting to use it only delays the correct response and can leave Link exposed.
- Restore health and restock before retrying the tower.
- Use Mystery Seed, Long Hook and Sword in that order during the Ambi phase.
- Use charged Spin Attacks against Fairy Veran.
- Watch the current final form before committing to an attack.
Finish the standalone campaign
After the final blow, allow the scripted Black Tower escape sequence to play out. In a normal North American Oracle of Ages file, Veran’s defeat is the end of the standalone campaign. Continue through the story scenes and credits rather than resetting immediately. The game presents a password for continuing into a linked Oracle of Seasons adventure; record it if you want to use the password system later. The password is optional and does not replace the standalone ending.
Do not expect the Room of Rites after completing a normal Ages file. That area belongs to the connected storyline and is reached when Oracle of Ages was started as a Linked Game using a password from Oracle of Seasons. In that version, after the Veran battle and related story progression, Link enters the Room of Rites and must pass the statue-eye rooms by choosing the direction none of the statues faces. The connected route continues to Twinrova and then Ganon. Those encounters are optional connected-game content for the assigned standalone goal, not additional requirements for a normal Ages completion.
- Let the Black Tower escape sequence finish.
- Watch the standalone ending and all credits.
- Record the password if you intend to continue with Oracle of Seasons.
- Treat the Room of Rites, Twinrova and Ganon as Linked-Game content only.
Before you move on
- Veran is removed from Queen Ambi with Mystery Seeds and the Long Hook, then defeated with Sword attacks.
- Fairy Veran and the four Dark Links are overcome.
- Beetle, spider and bee forms are defeated.
- The Black Tower escape sequence begins and completes.
- A normal standalone file reaches the ending and credits and displays the continuation password.
- If playing a Linked Game, the optional continuation reaches the Room of Rites and can proceed to Twinrova and Ganon.
References for this chapter
Post-Game: Optional Rewards, Cleanup and the Link Password
Oracle of Ages does not become a free-roaming post-game chapter after Veran. Once the escape sequence and ending begin, let the credits finish, press a button at the ending prompt, and record the password if you want to begin Oracle of Seasons as a linked continuation. You can then reload the completed Ages file and collect optional rewards, appraise rings, revisit item-gated areas, plant Gasha Seeds and search for remaining Pieces of Heart. Maku Road, Ambi’s Palace and Great Moblin’s Keep are story areas rather than repeatable post-game dungeons. The ordinary game’s larger Ring Box comes from the hidden basement of the Lynna City Secret Shop; the five-ring L-3 Ring Box is linked-game content. Farore’s Memory in the Maku Tree records passwords and secrets already learned, so preserve the completed save instead of deleting it.
1. Finish the ending and preserve the completion password
After defeating Veran, follow the escape sequence and allow the ending to continue. When the ending screen prompts you to press a button, do so and write down the password displayed afterward. On a normal, unlinked Oracle of Ages file, this is the password used to start a continuation in Oracle of Seasons. It is not entered into the existing Ages file; it belongs on a new file in the other Oracle game.
If you are playing the original Game Boy Color release with two systems and two cartridges, the instruction manual also describes starting a continuation with the Game Link option. Otherwise, use the password method when creating the new Seasons file. Do not erase the completed Ages file before recording the password. The completed file remains available for optional cleanup and for reviewing secrets later.
- Complete Veran’s escape and ending sequence.
- Record the password shown after the ending prompt.
- Keep the completed Oracle of Ages save file.
2. Use Farore’s Memory if you need to recover a recorded secret
Return to the Maku Tree and enter the Hall of Secrets once the area is accessible. Farore’s Memory records passwords and secrets learned during the linked-game process. Use it to review a recorded completion secret or another password before entering it in the opposite Oracle game. This is a record of secrets already obtained; it does not turn a regular Ages file into a linked file by itself.
A password from a completed Ages game starts Oracle of Seasons as the continuation. After progressing through that linked Seasons adventure, characters can provide additional secrets that are taken back to Farore in the linked Ages file for corresponding upgrades or rewards. Linked passwords do not copy the entire map, dungeon progress or inventory from one cartridge to the other.
- Visit Farore’s Memory if you misplaced a recorded code.
- Enter the completion password only when creating the opposite game’s continuation file.
- Treat later character passwords as separate secrets with separate rewards.
3. Clear the ordinary Ring Box and ring cleanup
Visit Vasu’s Jewelers in Lynna City and speak with Vasu to appraise any unidentified rings. The normal Ages file begins with the L-1 Ring Box, which stores one appraised ring. To obtain the ordinary L-2 upgrade, travel to Lynna Village in the Past and stand one screen right of the Mermaid Statue. Stand one square above the leftmost dead tree and play the Tune of Ages to shift to the present. Enter the shop there and walk down the stairs into the hidden basement.
The basement sells three optional items: the L-2 Ring Box for 300 Rupees, a Gasha Seed for 300 Rupees and a Piece of Heart for 500 Rupees. Buy the Ring Box if you want to keep several appraised rings available during cleanup. The L-3 Ring Box, which holds five rings, is not an ordinary post-game purchase in Ages; it requires the appropriate linked-game secret.
- Appraise unidentified rings at Vasu’s Jewelers.
- Buy the L-2 Ring Box from the hidden Lynna City shop basement if desired.
- Do not expect the L-3 Ring Box without linked-game progress.
4. Revisit item-gated areas for Pieces of Heart
Use the completed file to revisit locations that opened after obtaining the Shovel, Roc’s Feather, Power Bracelet, Mermaid’s Suit and other late-game equipment. Oracle of Ages has twelve Pieces of Heart, with four pieces combining into one Heart Container. The remaining pieces can be spread across both eras, so check a location again if an earlier visit was blocked by terrain, water or an item requirement.
The Lynna City Secret Shop is one confirmed cleanup stop: after buying its Piece of Heart, the stock changes, so return only if you still need another listed purchase. Other late-game targets include the underwater route near Crescent Island, the Piece of Heart outside the Black Tower in the Past and the random Piece of Heart that Maple can drop. Use a location guide or your own notes to avoid repeatedly checking areas whose reward you already collected.
- Compare your heart total against the twelve available Pieces of Heart.
- Recheck both eras around item-gated caves, ledges and water routes.
- Buy the Secret Shop Piece of Heart if it is still in stock.
5. Plant Gasha Seeds and handle Maple encounters
Plant unused Gasha Seeds in Soft Soil locations and return after the required growth conditions have been met. Open the resulting Gasha Nuts and record what you receive; their contents are random, so do not assume that one particular tree will always produce a specific ring or heart reward. The game’s heart-piece list includes a Piece of Heart obtained from a Gasha Nut, making continued planting useful if that item is missing.
Maple appears during ordinary overworld travel after enough enemies have been defeated. Continue moving through enemy-populated screens while checking for her encounters, then collect any dropped items before she does. A Piece of Heart can be among her possible drops, so Maple is relevant to cleanup but is not a guaranteed or repeatable reward on a fixed schedule.
- Plant remaining Gasha Seeds in Soft Soil.
- Track Gasha rewards instead of assuming a fixed result.
- Continue normal travel if Maple’s Piece of Heart is still missing.
6. Treat the story locations as completed, not as post-game dungeons
Maku Road is the early route leading to the young Maku Tree. Ambi’s Palace is visited during the main Veran storyline. Great Moblin’s Keep is also part of the required progression: defeat the Great Moblin and complete the Goron events so the Bomb Flower can be used to open the route toward Crown Dungeon. These locations may remain accessible for nearby overworld checks, but they do not become repeatable post-game mini-dungeons with new bosses or treasure rooms.
If one of these areas seems incomplete, consult your map and story progress rather than searching for a new entrance. The optional post-game work is overworld cleanup, ring appraisal, Gasha collection and linked-game preparation.
- Do not search Maku Road for a post-game dungeon reward.
- Treat Ambi’s Palace as a completed story location.
- Confirm Great Moblin’s Keep was cleared during the Crown Dungeon route.
7. Start the linked Oracle of Seasons file only when ready
On an unused Oracle of Seasons file, choose the Secrets option and enter the completion password from Oracle of Ages. Verify that the file is marked as a linked continuation before investing time in it. The linked game changes story presentation and enables additional secrets; it does not reproduce every item, dungeon clear or map state from the completed Ages file.
If you complete the linked Seasons adventure, record the new completion secret as well. Return to the linked Ages file afterward and use Farore to process any return secrets that provide upgrades or other rewards. Keep written copies of passwords you intend to use, even if they are also visible in Farore’s Memory.
- Create the continuation on a new Oracle of Seasons file.
- Confirm the linked-file marker before starting the adventure.
- Record later return secrets and enter them at the specified recipient.
Before you move on
- You completed Veran’s escape and watched the ending sequence.
- You recorded the password shown after completing the ordinary Ages file and kept the completed save.
- You checked Farore’s Memory for recorded secrets when necessary.
- You visited Vasu’s Jewelers and obtained the L-2 Ring Box if you wanted the ordinary upgrade.
- You checked the Lynna City Secret Shop, remaining item-gated areas, Gasha Seeds and Maple encounters for unfinished optional rewards.
- If pursuing the connected adventure, a new Oracle of Seasons file accepted the password and was identified as linked.
References for this chapter
Link System and Connected-Game Notes (Oracle of Ages ↔ Oracle of Seasons)
The original Game Boy Color Oracle games can be played as separate campaigns or connected through passwords called Secrets. A normal Oracle of Ages file ends after Veran in the Black Tower and provides the Secret to Holodrum, which starts a Linked Oracle of Seasons file. A normal Oracle of Seasons file provides the Secret to Labrynna, which starts a Linked Oracle of Ages file. The linked second game is a fresh campaign rather than an inventory transfer. It begins with four Heart Containers and special starting equipment, adds story events, and eventually leads to Twinrova and Ganon after the ordinary final boss. Event secrets, Ring Secrets and the Hero's Secret are separate systems with different purposes.
1. Finish a normal Oracle of Ages file and record the Secret to Holodrum
If Oracle of Ages is your first game and you started it with New Game, complete the eight Essences of Time, use the Huge Maku Seed to enter the Black Tower, defeat Veran and continue through the ending and credits. This is the complete standalone Ages campaign. It does not continue to the Room of Rites, and it does not include the Twinrova or Ganon battles.
At the end of the normal Ages ending, the game displays the Secret to Holodrum. Copy the password exactly. This password is generated from that particular save and can preserve linked details such as your animal companion and certain character-development choices. It is not a code that transfers your sword, hearts, rupees, dungeon keys, Essences or ordinary inventory.
Keep the completed Ages cartridge or save file. You can review the relevant secret later in the Hall of Secrets inside the Maku Tree, and the completed file is useful for receiving optional rewards generated by linked-game events.
- Veran has been defeated in the Black Tower.
- The normal Ages ending and credits have played.
- The Secret to Holodrum has been copied exactly.
- The completed Ages save has been preserved.
2. Start a Linked Oracle of Seasons file from the Ages password
Insert Oracle of Seasons, select an unused file and choose Secrets. Enter the Secret to Holodrum from the completed Ages file. On original hardware, the Game Link option can perform the connection directly with two Game Boy Color systems, both cartridges and a compatible Game Link Cable. Do not select a file containing progress you want to keep.
The new Seasons file is a continuation in story terms but a new playthrough in gameplay terms. It does not inherit the eight Ages Essences, dungeon completion, rupees, heart pieces or ordinary equipment. It does begin with four Heart Containers instead of the normal three and with the Wooden Sword already available. The file-selection icon identifies a linked Seasons file by showing Link with the Rod of Seasons.
Play through Seasons normally. The linked file adds characters, conversations and optional rewards, and its ending sequence includes the extended connected-game conclusion after the ordinary Seasons objectives. You may return to the completed Ages file to enter passwords requested by characters in Seasons, but those exchanges are optional and are not needed to finish standalone Ages.
- The Secret to Holodrum was entered on an unused Seasons file.
- The file-selection screen identifies the file as linked.
- The new file starts with four Heart Containers and the Wooden Sword.
- No Ages inventory or dungeon progress was expected to transfer.
3. Start a Linked Oracle of Ages file from Oracle of Seasons
The reverse direction is the route required for the extended ending inside Oracle of Ages. First complete a normal Oracle of Seasons file by defeating Onox and finishing its standalone ending. Seasons then provides the Secret to Labrynna. On an unused Oracle of Ages file, choose Secrets and enter that password. The original Game Boy Color version also supports the Game Link option when the required hardware is available.
This linked Ages file is not the same as a normal standalone Ages file. It begins with four Heart Containers and the Wooden Sword from the preceding linked state; Impa gives Link a Wooden Shield rather than the opening sword. The file-selection icon shows Link holding the Harp of Ages. The dungeon order and core campaign remain an Ages adventure, but additional characters and events appear during the journey.
After collecting the eight Essences of Time, creating the Huge Maku Seed and defeating Veran in the Black Tower, a Linked Ages file continues to the Room of Rites. Follow the new sequence there to fight Twinrova and then Ganon. This is the connected-game finale. A normal Ages file stops after Veran and the ordinary ending instead.
- A normal Seasons file was completed first if the extended Ages route is wanted.
- The Secret to Labrynna was entered on an unused Ages file.
- The linked Ages file shows the Harp of Ages on the file-selection screen.
- The Room of Rites was treated as linked-only content.
- Twinrova and Ganon were attempted only after Veran in a Linked Ages file.
4. Handle event secrets and Ring Secrets separately
During a linked second-game campaign, certain characters give Link short passwords intended for a named person or location in the completed first game. Record both the password and its intended recipient. Return to the appropriate character in the first game's completed file and enter the secret there. The resulting challenge or conversation can award an item or upgrade, and the game may provide a return secret for Farore.
Farore is in the Hall of Secrets inside the Maku Tree. Farore's Memory records secrets that Link has learned, so use it to review passwords when moving between cartridges or save files. It does not make every password interchangeable: an event secret, its return secret and the starting Secret to Holodrum or Labrynna have different purposes.
Rings use a separate system. Appraise the rings at Vasu Jewelers, then speak to the Red Snake to receive a Ring Secret and enter that password at the corresponding snake in the other Oracle game. On original Game Boy Color hardware, the Blue Snake can transfer rings directly through a Game Link Cable with two Game Boy Color systems. Ring transfer is separate from creating a linked story file.
- Each event secret was recorded with its intended recipient.
- Farore's Memory was used when a learned password needed checking.
- Event secrets were not substituted for the starting link password.
- The Ring Secret was obtained separately at Vasu Jewelers.
- Cable transfer was attempted only with compatible original Game Boy Color hardware.
5. Finish the linked campaign and use the Hero's Secret
Complete the linked second game through its extended conclusion. In a Linked Oracle of Ages file, this means defeating Veran, proceeding through the Room of Rites, defeating Twinrova and defeating Ganon. After the final sequence, record the Hero's Secret. It is not the Secret to Holodrum or Secret to Labrynna, and it does not resume the completed file.
Enter the Hero's Secret on an unused file in either Oracle of Ages or Oracle of Seasons if you want a Hero's Game. This creates a fresh campaign with the linked-game benefits rather than copying the previous dungeon state or ordinary inventory. Link begins with an additional starting Heart Container and receives the Victory Ring, whose purpose is to record that Ganon was defeated; it has no combat effect.
A Hero's Game is optional. It is useful for players pursuing the full two-game progression, ring collection and opposite-order routes. It is not required for the standalone Oracle of Ages objective. If your goal is only the original North American Ages campaign, stop after Veran, watch the normal ending and record the Secret to Holodrum only if you intend to continue in Seasons.
- The linked game's extended final sequence was completed if pursued.
- The Hero's Secret was copied before starting another file.
- The Victory Ring was identified as a completion marker rather than a combat upgrade.
- The standalone Ages completion was not confused with the linked-game finale.
Before you move on
- A normal Ages player has defeated Veran, watched the standalone ending and recorded the Secret to Holodrum if Seasons is planned.
- A player creating Linked Ages has first completed Seasons and entered its Secret to Labrynna on an unused Ages file.
- The linked file begins as a fresh campaign with four Heart Containers and the appropriate starting equipment.
- Event secrets were delivered to their named recipients, with Farore used for return secrets and memory storage.
- Ring transfer was handled through a Ring Secret or the original Game Boy Color cable method rather than the story password.
- The linked Ages route, if pursued, was completed through Veran, the Room of Rites, Twinrova and Ganon.
- The Hero's Secret was recorded after the linked finale if a Hero's Game or broader cross-game completion route is wanted.
References for this chapter
- The Legend of Zelda: Oracle of Ages - Manual - GBC
- Linked Game - Zelda Wiki
- Linked Game - Zelda Dungeon Wiki
- The Legend of Zelda: Oracle of Ages: Secrets to and from Holodrum - StrategyWiki
- Beginning the Game - Zelda: Oracle of Ages Walkthrough
- Linked Game Differences - Zelda: Oracle of Ages Walkthrough
- Room of Rites - Zelda: Oracle of Ages Walkthrough
- The Black Tower - Zelda: Oracle of Ages Walkthrough
- Victory Ring - Zelda Dungeon Wiki
Troubleshooting Common Problems and Recovery Tactics
Most apparent dead ends in Oracle of Ages come from checking only one era, missing a reward that appears after clearing a room, or spending a Small Key on the wrong door. When progress stops, compare the current room with its past or present counterpart, inspect every exit, and use the Dungeon Map and Compass to identify unexplored rooms and important unopened chests. Treat Save and Quit as a controlled retreat to the dungeon entrance, not as a return to the exact spot where you last saved. Leave difficult boss attempts when your health or supplies are poor, restock, save, and return by a known route. Time travel can solve a puzzle while also creating a longer return trip, so check Link's destination before activating a portal.
1. Decide whether the obstacle needs another era, an item, or a different route
When a room seems impossible, stop moving blocks and check what the room actually contains. Look for a Time Portal, stairs, a switch, a pushable object, a locked door, or an obstacle that resembles a later dungeon item. Oracle of Ages frequently uses the past and present versions of the same screen for different parts of one solution. A route that is blocked in one era may be open in the other, but a barrier may also be intentional until you obtain an item such as the Seed Shooter, Switch Hook, Cane of Somaria, Mermaid Suit, or another dungeon reward.
Use the Harp's currently available tune only when the game provides the appropriate place or condition for it. If the room has no usable Time Portal, leave through every available exit and check the adjacent rooms for one. Do not spend bombs on a suspected wall simply because the route is not visible; first compare the room in the other era and inspect the dungeon's intended paths. If neither era provides a usable route, mark the obstacle and continue searching for the required item or prerequisite outside the room.
- Check the current room and its counterpart in the other era when a valid portal or tune is available.
- Inspect every exit and at least one adjacent room before deciding that progress is blocked.
- Ask whether the obstacle clearly requires a dungeon item you do not yet possess.
- Do not bomb walls or consume supplies solely because a route is temporarily hidden.
2. Use the Dungeon Map and Compass to organize a search
If you have lost track of the dungeon, open the Dungeon Map and compare completed rooms with blank sections around them. The Compass is useful for prioritizing important unopened chests, including chests that hold keys or other dungeon equipment. This does not replace checking the route itself: a marked chest may be optional, may belong to the other era, or may require an item you have not collected yet.
Search one branch at a time. Start from the entrance or a known junction, follow one accessible route until it ends, then return to the junction before taking the next branch. Keep track of locked doors you have opened and doors that still require keys. If a room contains enemies but no obvious chest, clear the room completely and look again after the reward appears. Several progression rewards are revealed by defeating a specific enemy group or solving the room's condition rather than by opening a chest that was visible on entry.
- Use the Map to identify unexplored rooms and missing branches.
- Use the Compass to prioritize important unopened chests.
- Clear enemy rooms completely, then inspect the whole room for a newly revealed reward.
- Record which locked doors you opened so you do not spend a key twice in your planning.
3. Recover when you appear to be out of Small Keys
Before assuming that a key was wasted, revisit every accessible unopened chest and every room whose enemies have not been cleared. Check ledges, stairs, pots, side passages, and bombable walls only when the dungeon layout or a visible crack supports those routes. Also inspect the corresponding past or present section when the dungeon spans both eras. Mermaid's Cave, for example, has separate past and present routes, keys, and navigation problems, so repeatedly searching one version can make the dungeon appear impossible when the required key is elsewhere.
Compare the locked doors you opened with the route toward the dungeon item, mini-boss, Boss Key, and boss room. A key used on a side chest may be optional, while a key used on a central route may be required. Do not use a remaining Small Key merely because a locked door is nearby. First determine whether that door leads toward unexplored rooms or whether another accessible chest or enemy reward supplies the next key.
- Recheck every unopened chest identified by the Compass.
- Clear unfinished enemy rooms and inspect where their reward appears.
- Search the dungeon's other era when its layout is divided between past and present.
- Do not spend another key until you know which locked door advances the main route.
4. Reset block, tile, and enemy puzzles without wasting supplies
If a movable-block arrangement or floor-tile puzzle has been spoiled, leave the room and re-enter when the room's design allows a reset. This is useful for many ordinary puzzle rooms, but do not assume every persistent object or dungeon mechanism resets in the same way. If enemies are part of the puzzle, clear them first when possible, then leave and return. For a crystal switch, rotating device, water level, current, or other persistent mechanism, follow the dungeon's intended route instead of repeatedly exiting and expecting the whole dungeon state to return to its starting position.
Before changing eras, look at where Link will stand and identify the next safe exit. A switch can open a route while also placing Link on the wrong side of a ledge, block, current, or deep-water section. If a time change leaves you stranded, retrace the last safe route to the portal or use the dungeon's warp point if one is available. Do not keep toggling in place when the destination geometry is clearly unfavorable.
- Leave and re-enter ordinary puzzle rooms when a reset is expected.
- Do not assume every switch, water level, or dungeon mechanism resets on re-entry.
- Check Link's landing position and the next exit before changing eras.
- Use a warp point or retrace a known route when a time change creates forced backtracking.
5. Retreat and restore health before a boss or long dungeon section
When your health is low, leave the dungeon instead of gambling on a boss attempt. Restock at a shop and collect safe recovery items from the route, grass, pots, or enemies. A Fairy Fountain is an especially useful destination: the instruction manual states that a small fairy restores six Hearts and a Great Fairy restores lost Hearts. If you carry a Magic Potion, it automatically restores your life when your life energy reaches zero, so treat it as an emergency reserve rather than relying on it for routine damage.
Save after restocking and before returning to a difficult dungeon branch. If the next section needs bombs, seeds, or another consumable, refill those supplies before entering. A failed boss attempt is information about the attack pattern, not a reason to rush back with the same low-health setup. Return by the safest route you have already confirmed, and use the dungeon entrance or an internal warp to shorten the trip when the game provides one.
- Leave the dungeon before health becomes a liability in trap-heavy rooms.
- Use a Fairy Fountain when one is safely accessible.
- Carry a Magic Potion for emergencies rather than routine healing.
- Restock bombs and seeds when the next route depends on them.
- Save after preparation and before committing to the boss route.
6. Use Save and Quit as a recovery tool, not as a checkpoint teleport
Save and Quit is useful when Link is trapped in an awkward dungeon position, when a route has become inefficient, or when you need to restart from a dungeon entrance. It does not mean that the game will place Link back at the exact tile where you last saved. In dungeon walkthroughs for Oracle of Ages, saving and quitting is commonly used to return to the dungeon entrance so Link can take a different branch or leave the dungeon to change eras.
Use this option only after checking that you have not overlooked an immediately available exit or key route. If you are carrying a newly obtained item or key, confirm that the game has registered the progress before quitting. After restarting, use the Map and your written route notes to return to the unresolved room. This is safer than repeatedly spending health, bombs, or seeds trying to escape a position created by a careless era switch.
- Use Save and Quit to return to the dungeon entrance when the route is inefficient or unsafe.
- Do not expect it to restore Link to the exact last room or tile.
- Confirm that newly obtained progression items or keys have been registered before quitting.
- After restarting, follow a known route back to the unresolved branch.
Before you move on
- You can identify the missing room, chest, key, item, or era route using the Dungeon Map and Compass instead of wandering randomly.
- You know which locked doors are required for the main route and which are optional or currently inaccessible.
- You have a reliable retreat route from the dungeon entrance to a shop, safe recovery area, or Fairy Fountain.
- You can reset an ordinary failed puzzle by leaving and re-entering when appropriate, while recognizing mechanisms that require a deliberate route instead.
- You understand that Save and Quit returns you to the dungeon entrance rather than the exact last tile.
- Before entering a boss room, your health and consumables are adequate and the Boss Key route is complete.
References for this chapter
- The Legend of Zelda: Oracle of Ages - Manual - GBC
- Zelda: Oracle of Ages Walkthrough — Thonky Game Guides
- Mermaid’s Cave - Zelda: Oracle of Ages Walkthrough
- Crown Dungeon — Zelda: Oracle of Ages Walkthrough
- Wing Dungeon — Zelda: Oracle of Ages Walkthrough
- The Legend of Zelda: Oracle of Ages - Guide and Walkthrough - Game Boy Color - By Mmeeva
Appendix: Quick Boss Patterns, Item Uses and Shortcuts
Use this appendix with the original North American Game Boy Color release of Oracle of Ages. Each principal dungeon boss has a specific item-based solution, but several fights also require careful positioning and movement. The Harp of Ages is a progression tool rather than a combat item: its songs determine how Link travels between the past and present. Dungeon items remain useful after their own dungeon, so revisit blocked overworld routes whenever Link gains a new tool. The standalone campaign ends after Veran is defeated in Black Tower. The Room of Rites, Twinrova and Ganon are linked-game content and are not required for a fresh standalone Oracle of Ages completion.
Bosses from Spirit’s Grave through Skull Dungeon
Pumpkin Head is fought in two parts. Attack the body with the sword until it separates or disappears. Equip the Power Bracelet, lift the pumpkin head and throw it away to expose the ghost. Slash the ghost before it reunites with the head, then repeat the cycle. Keep the bracelet available because ordinary sword attacks cannot finish the exposed phase.
Head Thwomp is fought from the moving platforms around the arena. Use Roc’s Feather to remain mobile and release bombs so they land on the boss’s head. The boss rotates through several faces; the red face is the vulnerable result. Watch the falling rocks and fireballs rather than standing still beneath the boss. Reposition on the platforms between bomb throws.
Shadow Hag creates shadow copies and later sends moths through the room. Use Roc’s Feather to jump over dangerous projectiles, clear moths when they obstruct movement, then use the Seed Shooter with Scent Seeds. Fire at a wall so the seed ricochets into the boss when its position is exposed. Keep moving while the shadows or moths are active.
Eyesoar is surrounded by smaller eyes. Defeat enough of the smaller enemies to create an opening, then use the Switch Hook on Eyesoar. The hook scatters the surrounding eyes and exposes the main body briefly; close in and strike with the sword before the formation returns. Repeat this setup instead of chasing the boss around the room.
- Keep the Power Bracelet available for Pumpkin Head’s exposed ghost phase.
- Use Roc’s Feather and bombs against Head Thwomp rather than relying on sword swings from the lower arena.
- Use Scent Seeds for Shadow Hag’s ricochet attack.
- Clear smaller eyes before using the Switch Hook on Eyesoar.
Crown Dungeon, Mermaid’s Cave and Jabu-Jabu’s Belly
Smog is a positioning puzzle rather than a conventional sword fight. Equip the Cane of Somaria and place blocks so the separated cloud pieces travel into one another and merge. Once the large cloud reforms, attack it with the sword. Later rounds change the paths and add hazards, so place each block with the next collision in mind instead of trying to force the clouds together immediately.
Octogon is fought both at the surface and underwater. At the surface, stand on the central platform and use the Seed Shooter when Octogon’s exposed face is available. Avoid its rock attacks and reposition after firing. When Octogon submerges, equip the Mermaid Suit and dive after it. Continue using the Seed Shooter underwater while swimming around the arena; aim at the exposed target rather than the hard shell. Avoid direct contact and the bubbles it releases, since a bubble can force Link back to the surface. Resurface when necessary, return to the central platform and repeat the same surface-to-underwater cycle until Octogon is defeated. The Seed Shooter is the primary attack throughout this battle; do not treat Scent Seeds as the trigger for the underwater phase or replace the dungeon-specific method with ordinary sword attacks.
Plasmarine alternates between blue and red. It fires an orb, then follows Link toward the location where he was standing. After the projectile is released, use the Long Hook on Plasmarine to exchange positions and change its color. The boss must be a different color from the incoming orb, causing the projectile to damage it. If Plasmarine electrifies itself instead of firing, keep away and wait for the next projectile opportunity.
- Use Cane of Somaria to merge Smog’s cloud pieces before attacking.
- Against Octogon, use the Seed Shooter at the surface and underwater.
- Use the Mermaid Suit to pursue Octogon below the water and avoid bubbles and contact damage.
- Use the Long Hook on Plasmarine after its orb is fired, not before.
Ancient Tomb and Veran’s endgame battles
Ramrock has four separate phases. First, strike its incoming fists with the sword so they are reflected back. Second, throw bombs between the fists before they close together. Third, use the Seed Shooter and ricochet seeds from the arena walls around the raised fist-shields. Fourth, equip the Power Glove and pull back one of the flails after Ramrock launches the other; release it so the flail strikes the boss. Change equipment between phases rather than repeatedly using the previous phase’s item.
Possessed Nayru is fought during the sequence in which Veran is removed from Nayru. Use Mystery Seeds from the Seed Shooter to stun the possessed body, then use the Long Hook to pull Veran’s spirit away and attack the spirit with the sword. Do not attack the body indiscriminately; the objective is to separate Veran from Nayru. Repeat the stun, hook and sword sequence until the possession ends.
Veran’s final standalone battle has three forms. In the first, use Mystery Seeds to stun Queen Ambi’s possessed body, pull Veran out with the Long Hook and strike the exposed spirit. In the moth form, stay mobile and attack Veran with the sword as she passes. The Dark Links can be avoided, and striking them may produce recovery items. In the final monster phase, Veran changes among beetle, spider and bee forms. Attack the beetle when its face is exposed, use bombs to interrupt the spider and keep moving until the bee form presents a safe sword opening. During the bee phase, the Seed Shooter can also attack from a distance.
- Carry the Seed Shooter, bombs, sword and Power Glove into Ramrock’s arena.
- Use Mystery Seeds and the Long Hook against Possessed Nayru.
- Use the Long Hook to remove Veran from Ambi’s body before attacking.
- The standalone final battle is Veran in Black Tower, not a Room of Rites fight.
Dungeon items and Harp of Ages reference
The principal dungeon items are obtained in this order: Power Bracelet in Spirit’s Grave, Roc’s Feather in Wing Dungeon, Seed Shooter in Moonlit Grotto, Switch Hook in Skull Dungeon, Cane of Somaria in Crown Dungeon, Mermaid Suit in Mermaid’s Cave, Long Hook in Jabu-Jabu’s Belly and Power Glove in Ancient Tomb. The Long Hook extends the Switch Hook’s reach. The Power Glove is a stronger lifting tool and is required for Ramrock’s final phase and late Ancient Tomb progress.
The Harp of Ages is obtained in Nayru’s House. The Tune of Echoes activates nearby time portals, allowing travel through an energized portal. Tokkey teaches the Tune of Currents after Link plays the Tune of Echoes for him; Currents moves Link from the past to the present and leaves a temporary route back toward the past. After Nayru is rescued, she teaches the Tune of Ages, which permits direct travel between eras when the destination has a valid space for Link. If Link would materialize inside a solid object, the game returns him to the original era. Ordinary dungeon rooms do not permit normal Harp-based time travel, so solve dungeon puzzles with the items available inside them.
Use the dungeon item listed for each boss and retain it for later overworld routes. When an overworld path is blocked, check both eras and revisit it after obtaining the next dungeon item. The Long Hook is not a separate weapon type; it is the upgraded form of the Switch Hook. Use the Tune of Currents for the game’s past-to-present route and the Tune of Ages when direct era travel is available.
- Use the dungeon item listed for the boss and retain it for later overworld routes.
- Do not treat the Long Hook as a separate weapon; it is an extended Switch Hook.
- Use the Tune of Currents for past-to-present travel.
- Learn the Tune of Ages after rescuing Nayru and use it when no fixed portal is available.
Overworld shortcuts and completion checks
The most reliable shortcuts come from equipment and harp songs rather than from an Essence automatically changing every map screen. Roc’s Feather crosses small gaps, the Seed Shooter activates distant or ricochet-based switches, the Switch Hook and Long Hook cross gaps or exchange Link with targets, the Cane of Somaria creates temporary blocks, the Mermaid Suit opens deeper-water routes and the Power Glove removes heavy obstacles. When a path is blocked, revisit it after each new dungeon item and test both eras.
Use the Tune of Echoes at visible time portals, the Tune of Currents when leaving the past for the present and the Tune of Ages when direct era changes are needed. Before entering Black Tower, confirm that all eight Essences have been collected, refill hearts, restock bombs and seeds and save. Follow the tower to its final battle and defeat Veran, then watch the standalone ending and credits.
A linked game changes the completion path. If a completed Oracle of Seasons password or link state is used, the later Room of Rites sequence can include Twinrova and Ganon after the Veran-related ending events. That is optional linked-game content, not a requirement for finishing a fresh standalone North American Oracle of Ages campaign. Preserve the completed save and record any displayed continuation information before starting or overwriting a linked adventure.
- Revisit blocked screens after acquiring each dungeon item.
- Confirm all eight Essences before entering Black Tower.
- View the standalone ending and credits after defeating Veran.
- Treat Room of Rites, Twinrova and Ganon as linked-game progression.
Before you move on
- The boss reference covers Pumpkin Head, Head Thwomp, Shadow Hag, Eyesoar, Smog, Octogon, Plasmarine, Ramrock, Possessed Nayru and Veran.
- The Octogon method uses the Seed Shooter during both surface and underwater phases and does not incorrectly assign Scent Seeds as the phase trigger.
- The item list includes all eight principal dungeon items, including the Long Hook and Power Glove.
- The Harp of Ages section distinguishes the Tune of Echoes, Tune of Currents and Tune of Ages.
- All eight Essences have been collected, Black Tower has been cleared, Veran has been defeated and the standalone ending and credits have been viewed.
- If using the Link feature, the completed save or continuation information has been preserved before beginning the linked-game sequence.
References for this chapter
- The Legend of Zelda: Oracle of Ages - Guide and Walkthrough - Game Boy Color - By Kirby021591
- The Legend of Zelda: Oracle of Ages - Guide and Walkthrough - Game Boy Color - By Mmeeva
- Mermaid’s Cave - Zelda: Oracle of Ages Walkthrough
- The Black Tower - Zelda: Oracle of Ages Walkthrough
- The Legend of Zelda: Oracle of Ages - Manual - GBC
Finishing up
Confirm all eight Essences of Time are collected; obtain the Harp of Ages and required tunes; receive the Huge Maku Seed from the Maku Tree; clear the Black Tower; defeat Veran; and watch the standalone ending and credits. If you are deliberately playing a Linked Game started with a Secret to Labrynna, continue afterward to the Room of Rites, Twinrova and Ganon, then record the resulting continuation information.
Choose your next gameScreenshots & video
Game imagery for reference. Follow the written chapters above for the route and strategies.
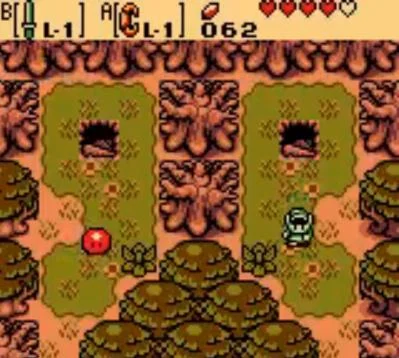
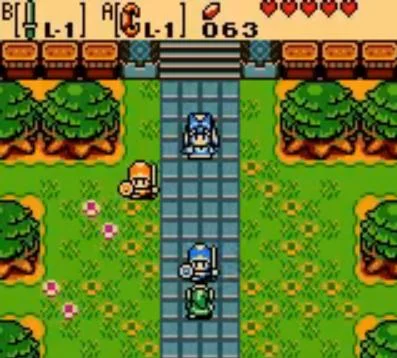
Sources & references
Our original guide draws on the references below. Check the edition at the top of this page before following controls or unlock requirements.
- Beginning the Game - Zelda: Oracle of Ages Walkthrough
- The Legend of Zelda: Oracle of Ages - Guide and Walkthrough - Game Boy Color - By Shdwrlm3
- The Legend of Zelda: Oracle of Ages - Guide and Walkthrough - Game Boy Color - By Kirby021591
- The Legend of Zelda: Oracle of Ages - Manual - GBC
- Maku Road, Zelda Dungeon Wiki
- Meet the Maku Tree, Thonky Game Guides
- Spirit's Grave - Zelda: Oracle of Ages Walkthrough
- Oracle of Ages Walkthrough - Spirit's Grave
- The Legend of Zelda: Oracle of Ages - Guide and Walkthrough - Game Boy Color
- Wing Dungeon — Zelda: Oracle of Ages Walkthrough
- Oracle of Ages Walkthrough - Wing Dungeon
- Wing Dungeon - Zelda: Oracle of Ages Wiki
- Moonlit Grotto - Zelda: Oracle of Ages Walkthrough
- Oracle of Ages Walkthrough – Moonlit Grotto
- Oracle of Ages Walkthrough – Skull Dungeon
- Skull Dungeon – Zelda: Oracle of Ages Walkthrough
- The Legend of Zelda: Oracle of Ages/Symmetry City and Skull Dungeon
- Skull Dungeon – Zelda Wiki
- Crown Dungeon — Zelda: Oracle of Ages Walkthrough
- Oracle of Ages Walkthrough - Crown Dungeon
- The Legend of Zelda: Oracle of Ages - 100% Item Walkthrough - Game Boy Color
- The Legend of Zelda: Oracle of Ages - Guide and Walkthrough - Game Boy Color
- Oracle of Ages Walkthrough - Mermaid's Cave
- Mermaid’s Cave - Zelda: Oracle of Ages Walkthrough
- Jabu-Jabu's Belly - Zelda: Oracle of Ages Walkthrough
- Oracle of Ages Walkthrough - Jabu-Jabu's Belly
- Jabu-Jabu's Belly - Zelda Dungeon Wiki
- Oracle of Ages Walkthrough - Ancient Tomb
- Ancient Tomb - Zelda: Oracle of Ages Walkthrough
- The Black Tower - Zelda: Oracle of Ages Walkthrough
- Oracle of Ages Walkthrough - The Black Tower - Zelda Dungeon
- Veran - Zelda Dungeon Wiki
- The Legend of Zelda: Oracle of Ages - Guide and Walkthrough - Game Boy Color - By ArchO
- Oracle of Ages Heart Pieces
- Oracle of Ages Items
- Ring Box
- Farore's Memory
- Linked Game - Zelda Wiki
- Linked Game - Zelda Wiki
- Linked Game - Zelda Dungeon Wiki
- The Legend of Zelda: Oracle of Ages: Secrets to and from Holodrum - StrategyWiki
- Linked Game Differences - Zelda: Oracle of Ages Walkthrough
- Room of Rites - Zelda: Oracle of Ages Walkthrough
- Victory Ring - Zelda Dungeon Wiki
- Zelda: Oracle of Ages Walkthrough — Thonky Game Guides
- The Legend of Zelda: Oracle of Ages - Guide and Walkthrough - Game Boy Color - By Mmeeva
About the game & collecting notes
- Platform
- Game Boy Color
Step-by-step campaign walkthrough for the original Game Boy Color release of The Legend of Zelda: Oracle of Ages (USA). Covers preparation, overworld navigation, each main dungeon and boss, time-based puzzle techniques, recovery tactics, the Black Tower final sequence and the game's ending, plus post-game linking notes.
Darryl Polo
Darryl Polo loves tinkering with emulation and revisiting retro games. He enjoys exploring how old favorites play on different setups and sharing what he learns along the way. At Joking Joystick, he writes about the games, hardware, and small discoveries that keep the hobby fun.
Our editorial standardsFound a step that needs another look? Help us improve this guide.