
The Legend of Zelda: Link's Awakening DX — Complete Game Boy Color Campaign Walkthrough (USA / Europe Rev B)
Step-by-step campaign walkthrough for The Legend of Zelda: Link’s Awakening DX on Game Boy Color hardware, covering the eight Instrument dungeons, required item progression, the trading sequence and Magnifying Lens route, the Wind Fish’s Egg maze, the normal ending, and optional DX content including the Color Dungeon, the verified 12 Pieces of Heart, 26 Secret Seashells, Camera Shop photographs, and Game Boy Printer support.

Find a copy
The Legend of Zelda: Link's Awakening DX Game Boy Color
We may earn a commission if you buy through these links, at no extra cost to you. As an Amazon Associate I earn from qualifying purchases.
Opens retailer search results. Check the model, edition, seller, availability and current price before buying.
Before you begin
You are on Koholint Island, marooned after a shipwreck and searching for a way to awaken the Wind Fish.
This guide covers the original Game Boy Color edition of Link’s Awakening DX, including the eight-dungeon campaign, item-gated overworld route, trading sequence, Magnifying Lens clue, Wind Fish’s Egg maze, and final boss.
The Magnifying Lens is the intended way to read the maze directions for the current save, but the Egg itself opens from the eight Instruments and the Ballad of the Wind Fish.
DX-only features such as the Color Dungeon, Camera Shop photographs, and Game Boy Printer support are optional and are kept separate from the main ending.
Follow the campaign chapters in order, saving before dungeon entries, major overworld hazards, and the final Egg attempt.
Set yourself up for the run
Learn the two-equipped-item system and practice assigning the sword, shield, and sub-items to A and B.
Use the in-game save command before dungeons, difficult bosses, and long overworld routes; preserve a pre-Egg save for optional cleanup.
Track the eight Instruments and required dungeon items separately from optional rewards.
Start the trading sequence with the Yoshi Doll when convenient. Complete it before the Egg if you want the intended library maze clue, but do not describe it as a literal entrance requirement.
Plan optional DX content separately: Color Dungeon, Secret Seashells, Pieces of Heart, Camera Shop photographs, and Game Boy Printer output. DX does not have a Fairy Bottle collection.
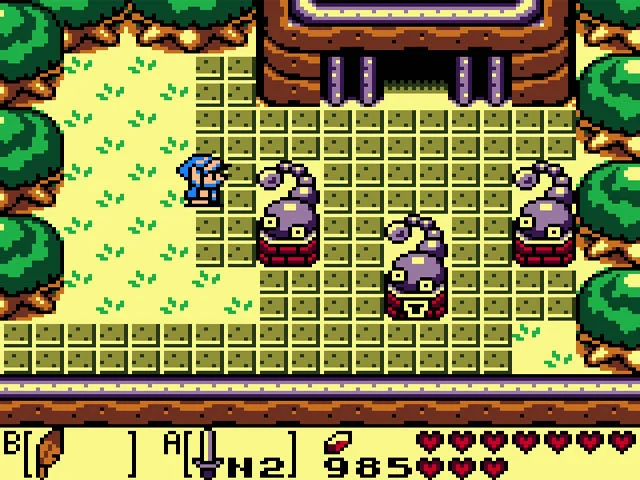
Starting Out: Controls, Saving, and Early Goals
After the shipwreck, Marin brings Link to her house in Mabe Village, where Tarin returns the L-1 Shield. Learn the original Game Boy Color control scheme, including free assignment of weapons and tools to A and B, then use the shield to reach Toronbo Shores and recover the Sword. Mabe Village is your early supply and saving base, with optional rewards in the well and fishing pond. Stop this chapter after obtaining the Sword, returning to town, and saving before beginning the Mysterious Forest route in the next chapter.
Wake in Mabe Village and recover the L-1 Shield
After the opening shipwreck sequence, Link wakes in Marin’s house in Mabe Village. Speak with Marin, then walk over to Tarin. Tarin is Marin’s father and returns the L-1 Shield that was recovered with Link. The shield is not permanently active: it must be assigned to an item button before it can be used.
Press Start to open the subscreen. This is where you review your inventory and assign weapons or tools to the A and B buttons. Highlight an item, then press the button you want to assign it to. The button positions shown during play can be confusing at first: the item displayed on the left is used with B, while the item displayed on the right is used with A. A convenient early setup is Sword on A and Shield on B, but either arrangement is valid.
Test the shield before leaving town. Press its assigned button to raise it, then walk toward an enemy projectile or other harmless attack only if you are comfortable doing so. The shield is needed to push the Sea Urchins blocking the route to the Sword, so do not leave Mabe Village without confirming that you can activate it.
- Speak with Marin after Link wakes up.
- Speak with Tarin and receive the L-1 Shield.
- Open the subscreen with Start.
- Assign the Shield and test its button.
Use the original DX inventory and item-button system
Link’s Awakening DX does not reserve the Sword for a permanent attack button. The Sword, Shield, and later tools all use the two assignable item buttons. Open the subscreen whenever the route requires a different item pair, assign the needed tools, and return to play. This is especially important in the original Game Boy Color release because there are no modern remake-style permanent Shield or Sword controls.
For this opening section, keep the Sword and Shield assigned once the Sword is obtained. Later chapters will explain when to replace one of them with another tool. Holding the assigned Sword button charges a stronger Whirling Blade attack, while pressing the assigned Shield button raises the shield to repel many projectiles.
Use the Control Pad for movement and menu navigation. Select is used for the map once the map screen is available. The library in Mabe Village also contains operation hints, so it is a useful place to review the control style without risking health.
- Know which button activates each assigned item.
- Keep the Sword and Shield available during the trip to Toronbo Shores.
- Remember that changing an assignment can remove the Sword or Shield from its previous button.
Save before leaving town and keep a reliable checkpoint
To open the original DX interrupt-save menu during play, press A, B, Start, and Select simultaneously. Choose Save and Continue if you want to remain in the adventure, or Save and Quit if you are ending the session and returning to the opening demo. The manual also lists Continue Without Saving after a Game Over; avoid that option when you want to preserve newly collected progress.
The cartridge has three save files. If you want a separate backup before a major route, save the current progress in one file and preserve another file rather than overwriting every checkpoint. The game resumes from the entrance to the last building entered, so saving from a safe building or town area is preferable to relying on an emergency retry after a defeat.
Make a manual save after receiving the Shield, then save again after recovering the Sword. Before moving into the Mysterious Forest in the next chapter, create one more checkpoint in or near Mabe Village.
- Practice A+B+Start+Select until the save menu appears reliably.
- Save after receiving the Shield.
- Reserve a separate save file if you want a pre-forest backup.
- Do not choose Continue Without Saving after a Game Over if the recent progress matters.
Travel from Mabe Village to Toronbo Shores
Leave Marin’s house and take the southern route out of Mabe Village. The path descends toward Toronbo Shores, where Link’s Sword was lost during the shipwreck. Without a weapon, avoid unnecessary fights and use the ledges and open spaces to move past enemies. Octoroks can fire projectiles from a distance, making the Shield useful even before the Sword is recovered.
Continue across the beach until Sea Urchins block the way. Assign the Shield to one of the item buttons, hold it up, and walk into the Sea Urchins to push them aside. Do not attack them as if they were ordinary enemies; the intended action here is to use the Shield as a barrier and shove them out of the passage.
Follow the cleared beach route to the Sword lying in the water. An Owl message interrupts immediately before Link can claim it. After the message ends, pick up the Sword. The Sword becomes your main attack and allows Link to cut bushes, defeat ordinary enemies, and begin the forest route.
- Leave Mabe Village by the southern route.
- Reach Toronbo Shores while avoiding unnecessary damage.
- Push the Sea Urchins with the raised Shield.
- Collect the Sword after the Owl message.
Return to Mabe Village and collect only useful early rewards
After obtaining the Sword, return toward Mabe Village and save. The village is the best early staging point because it contains the Town Tool Shop, library, Trendy Game, fishing pond, and telephone booth. These facilities are optional at this stage; the next required objective begins at the Mysterious Forest entrance north of town.
For an optional health upgrade, cut the bushes covering the well in western Mabe Village and drop inside. The Piece of Heart is available once Link has the Sword and is not required for the campaign. Four Pieces of Heart make one additional Heart Container, but missing this one does not block the next objective.
The fishing pond north of Mabe Village is also optional. Fishing costs rupees, and the larger fish provides the early fishing Piece of Heart in the DX route. Do not spend money there if you need it for supplies or the next chapter’s activities. Leave the Trendy Game and the trading sequence for the following chapter so the progression remains in order.
- Return to Mabe Village after collecting the Sword.
- Take the well Piece of Heart if desired.
- Treat the fishing pond Piece of Heart as optional.
- Save before approaching the Mysterious Forest.
- Do not begin the Yoshi Doll, Toadstool, or Tail Key sequence in this chapter.
Before you move on
- Link has received the L-1 Shield from Tarin.
- You can open the subscreen with Start and assign items to A and B.
- You can raise the Shield reliably and know how to change item assignments.
- Link has collected the Sword from Toronbo Shores.
- The optional well or fishing rewards have either been collected or deliberately skipped.
- Link is back in Mabe Village with a manual save ready for the Mysterious Forest route.
- The Yoshi Doll, Toadstool, Magic Powder, raccoon encounter, Tail Key, and Tail Cave have not yet been covered or completed in this chapter.
Mabe Village & Tail Cave (Dungeon 1) — Learn the Basics
This chapter assumes Link already has the Shield and Sword from ch00. Begin with the optional Trendy Game and early trading sequence if you want the intended route toward the Bananas used later at Kanalet Castle. Then return to the Mysterious Forest, collect the Toadstool, have the Witch turn it into Magic Powder, and use the powder on the enchanted raccoon to reveal Tarin and the Tail Key. Open Tail Cave, collect its key items, obtain Roc’s Feather, defeat Rolling Bones and Moldorm, and claim the Full Moon Cello. Afterward, defeat King Moblin, rescue BowWow, and keep him with Link while crossing Goponga Swamp toward Bottle Grotto. The Yoshi Doll and its trades are not literal requirements for Tail Cave or the normal ending.
Begin with the optional Yoshi Doll trading route
This chapter assumes you already recovered the Shield and Sword during ch00. If the Sword is not in your inventory, return to that chapter before continuing. The following trade sequence is optional for the main campaign, but it supplies Bananas for the later Kanalet Castle route and is the intended way to begin the full trading chain.
Enter the Trendy Game in the southeastern part of Mabe Village. Each attempt costs 10 rupees. Move the crane horizontally with B, then use A to position the claw over the Yoshi Doll. The crane’s movement is limited to those two inputs, so line up the claw before committing to the drop. Keep trying until you win the Yoshi Doll.
Take the Yoshi Doll to Mamasha, the mother carrying a baby in the large house north of the village. She gives you the Ribbon. Bring the Ribbon to the small Chain Chomp in the house beside Madam MeowMeow’s larger house. The Chain Chomp trades it for Dog Food. Carry the Dog Food to Sale’s house on Toronbo Shores and trade it for Bananas. Stop here if you only want to prepare the later Kanalet Castle objective; the remaining trades belong in the dedicated trading-sequence chapter.
- Sword prerequisite from ch00 confirmed.
- Optional: Yoshi Doll won from the Trendy Game.
- Optional: Yoshi Doll traded for the Ribbon.
- Optional: Ribbon traded for Dog Food.
- Optional: Dog Food traded for Bananas.
Collect Magic Powder and take the Tail Key
Return to the Mysterious Forest through the northwest side of Mabe Village. Follow the forest route to the cave containing the Toadstool. Push the rocks out of the way, take the Toadstool outside the far side of the cave, then retrace your route out of the forest. The heart piece visible in the forest cannot be collected yet, so do not waste time trying to reach it.
Travel south and east from the forest to the Witch’s Hut. Assign the Toadstool to A or B and use it beside the Witch. She converts it into Magic Powder. Magic Powder can also light torches and damage some enemies, so keep it assigned until the forest objective is complete.
Re-enter the Mysterious Forest and find the raccoon blocking the upper route. From the forest entrance, the raccoon is reached by going west, south twice, west once, and north once. Sprinkle Magic Powder on it. The raccoon is revealed as Tarin, and the forest route is restored. Go north and open the chest for the Tail Key. The Owl then directs you toward Tail Cave.
- Toadstool collected.
- Magic Powder received from the Witch.
- Magic Powder used on the enchanted raccoon.
- Tail Key collected.
Open Tail Cave and gather the dungeon items
Use the Tail Key at the keyhole statue outside Tail Cave. Inside, go west from the entrance and slash the Hardhat Beetles repeatedly so they fall into the pits. Take the Small Key, then continue west. Defeat the Green Zols while avoiding the torches’ fireballs and open the chest for the Compass.
Return to the entrance, go north, and defeat the enemies around the central switch. Step on the switch to make a chest appear, then take the Small Key. Go east and defeat the Stalfos and Keese; the chest that appears contains the Dungeon Map. Continue through the upper route and use the available Small Key when the path requires it.
The DX Stone Beak is optional. If you want it, enter the room with the three Three-of-a-Kind enemies and strike them until all three display the same suit. A chest appears with the Stone Beak, which lets Link read the dungeon’s Owl Statue hints. Skip this side room if you are prioritizing the direct route.
Continue through the Mini-Moldorm room and take the Small Key from the chest after defeating it. In the next room, push the lone block to open the door. Use the Shield against the Spiked Beetles so they flip onto their backs, then slash them. The staircase leads to a side-scrolling passage with Goombas. Cross it, climb the ladder, and follow the upper rooms to the chest containing Roc’s Feather. Equip the Feather so Link can jump over pits and hazards.
- Tail Cave opened with the Tail Key.
- Compass collected.
- Dungeon Map collected.
- Optional: Stone Beak collected.
- Roc’s Feather collected and equipped.
- Spiked Beetles defeated with the Shield.
Find the Nightmare Key and defeat Tail Cave’s bosses
Use Roc’s Feather to backtrack through the rooms leading toward the dungeon’s upper route. Jump the pit, touch the locked block, and continue to the room where the Nightmare Key is obtained. Check the dungeon map and Compass if you lose the route; the Compass marks the boss room and signals when a room contains a Small Key.
Return to the miniboss route and enter Rolling Bones’s room. Rolling Bones sends a spiked bar across the room, then jumps to the opposite side. Jump over the bar with Roc’s Feather and slash Rolling Bones after he lands and becomes vulnerable. Repeat until he is defeated. A Fairy and a warp portal appear afterward.
Use the warp or walk back through the dungeon, then unlock the boss door with the Nightmare Key. Moldorm circles the arena, with its glowing tail as the vulnerable target. Stay away from the ledges, jump over Moldorm with Roc’s Feather when necessary, and slash the tail whenever it comes within reach. If Moldorm knocks Link into the pit, climb back into the arena and continue; the fight resumes rather than resetting completely.
After Moldorm is defeated, collect the Heart Container. Exit through the northern passage and take the Full Moon Cello, the first Instrument of the Sirens. A bombable wall in the dungeon leads to an optional Secret Seashell room, but Bombs are acquired later, so return for it only after Bombs become available.
- Nightmare Key collected.
- Rolling Bones defeated.
- Moldorm defeated by striking its exposed tail.
- Heart Container collected.
- Full Moon Cello collected.
Rescue BowWow and keep him for Goponga Swamp
Return to Mabe Village after clearing Tail Cave. The children report that BowWow has been taken. Go back toward the forest and follow the route to the Moblin Hideout. Defeat the Moblins inside, then face King Moblin.
King Moblin charges across the room. Move out of his path and let him collide with the wall. While he is stunned, attack with the Sword. Repeat the evade-and-strike pattern until he is defeated. In the next room, touch the post to free BowWow.
Do not return BowWow to Madam MeowMeow yet. From the hideout, travel back toward the Tail Key area, then follow the path toward Goponga Swamp. BowWow eats the large flowers blocking the swamp route, opening the way to Bottle Grotto in the swamp’s northeastern section. Once the entrance is accessible, the next chapter can begin. BowWow is required for this access route, but he is not a permanent inventory item and will later be returned after Bottle Grotto.
- King Moblin defeated.
- BowWow rescued from the Moblin Hideout.
- BowWow remains with Link.
- Goponga Swamp flowers cleared sufficiently to reach Bottle Grotto.
Before you move on
- The Sword prerequisite from ch00 is present.
- Optional intended trades were completed as far as desired: Yoshi Doll to Ribbon, Ribbon to Dog Food, and Dog Food to Bananas.
- The Toadstool was converted into Magic Powder.
- The enchanted raccoon was transformed and the Tail Key was collected.
- Tail Cave was opened.
- The Compass, Dungeon Map, Roc’s Feather, and Nightmare Key were collected; the Stone Beak was collected if desired.
- Rolling Bones and Moldorm were defeated.
- The Heart Container and Full Moon Cello were collected.
- King Moblin was defeated and BowWow was rescued.
- BowWow remains with Link while the Goponga Swamp route to Bottle Grotto is opened.
References for this chapter
- Link’s Awakening Walkthrough – Tail Cave – Game Boy Color
- The Legend of Zelda: Link’s Awakening DX - Guide and Walkthrough - Game Boy Color - By CPFace
- The Legend of Zelda: Link’s Awakening DX Instruction Manual
- The Legend of Zelda: Link’s Awakening DX - Guide and Walkthrough - Game Boy Color - By Coffee
Bottle Grotto (Dungeon 2) — Power Bracelet and New Reach
After rescuing BowWow from the Moblin Hideout, take him through Goponga Swamp. He eats the flowers blocking Bottle Grotto’s entrance. Inside, light torches with Magic Powder, solve crystal-switch and block puzzles, defeat Hinox, and collect the dungeon’s Small Keys, Map, Compass, Stone Beak, Power Bracelet, and Nightmare Key. The Power Bracelet lets Link lift pots, rocks, and the Genie’s bottle. Defeat Genie by stunning and throwing the bottle, then strike his exposed form while avoiding fireballs. Collect the Full Heart Container and Conch Horn, the second Instrument of the Sirens. Return BowWow to Madam MeowMeow afterward, then use the bracelet to clear rocks on the route toward Ukuku Prairie. A 20-rupee chest and an optional 50-rupee chest can also be collected in or near the completed dungeon.
Reach Bottle Grotto through Goponga Swamp
Rescue BowWow from the Moblin Hideout before attempting this route. From Mabe Village, take BowWow east toward Goponga Swamp. The flowers blocking the swamp path cannot be removed by Link at this point; approach them with BowWow and he will eat them, opening the way to Bottle Grotto.
Save before entering. Keep the sword, Roc’s Feather, and Magic Powder readily available. BowWow does not accompany Link inside the dungeon, so the swamp entrance is the point where his assistance is required.
- BowWow has been rescued from the Moblin Hideout.
- BowWow has eaten the flowers blocking the Goponga Swamp route.
- A recent save exists before entering Bottle Grotto.
Open the first rooms and collect the first keys
The chest in the entrance room is blocked by pots, so leave it for later. Go north into the dark room and use Magic Powder on both torches in the center. The eastern door opens. Defeat the Stalfos in the next room to make a Small Key fall from above, then collect it.
Return to the torch room and use that key on the locked door to the west. Avoid the sliding Traps, defeat the Keese, and light the torches if visibility is poor. When the room is cleared, the northern door opens. In the next room, move to one side to draw the Hardhat Beetle away, cross the gap with Roc’s Feather, and open the chest for the Stone Beak. Knock the beetle into the gap to open the way onward.
Return to the room where the first key fell. Strike the crystal switch, go south, and reach the crystal behind the raised blocks. Strike it and open the chest for another Small Key. Then use the crystal-switch arrangement to reach the locked room containing the Compass. Defeat the Shy Guy by holding the sword button, walking around so its back faces Link, and releasing the sword for a spin attack.
- The first Small Key has been collected from the Stalfos room.
- The Stone Beak is in the inventory.
- The Compass has been obtained.
- The second Small Key has been collected from the crystal-switch room.
Reach and defeat Hinox
Continue through the crystal-switch rooms and collect the next Small Key from the chest reached by jumping across the gaps. In the room with two Shy Guys, defeat them to make another key fall from the ceiling; route around the room and collect it rather than trying to reach it directly through the blocks.
Use the key on the eastern locked door. Push the two blocks in the next room toward the center so they cover the blue floor tiles and reveal the stairs. In the side-scrolling passage, use Roc’s Feather to clear the spikes and ride the moving platforms to the ladder. The following room is dark, but its northern one-way door leads to Hinox.
Keep away from Hinox’s grab range. Move around the room, strike after his charge leaves him exposed, and retreat immediately because he can throw Link and follow with a bomb. Avoid the cracked floor near the walls, since being thrown onto it causes additional danger. After the fight, collect the fairy if needed and use the warp that appears as a shortcut back to the entrance.
- The remaining pre-bracelet Small Keys have been collected.
- The stairs to the moving-platform section are open.
- Hinox is defeated and the dungeon warp has appeared.
Collect the Map, rupees, and Power Bracelet
From Hinox’s room, take the eastern exit, jump across the gaps, and enter the northeast room. A Vacuum Mouth pulls Link toward its corner. Move carefully to the northwest chest and collect the Dungeon Map. Go north, jump to collect the floating Magic Powder, and open the chest for 20 rupees.
Use the locked western door to enter the room with the two ghosts. Equip Magic Powder and apply it to a torch. Once the room is lit, the ghosts become vulnerable; defeat both with the sword. Their defeat makes the Power Bracelet chest appear.
Equip the Power Bracelet when you need to lift an object. Face a pot, rock, or skull, hold the button assigned to the bracelet, and press the Control Pad away from the object. Press the button again to throw it. The bracelet is also required to stun and lift Genie’s bottle later, so do not leave the dungeon without it.
- The Dungeon Map and 20 rupees have been collected.
- Both ghosts have been defeated in the lit room.
- The Power Bracelet is in the inventory and its lifting action works.
Find the Nightmare Key
In the room east of the bracelet chest, lift the surrounding pots and reach the northeast area. Strike the crystal switch, using a thrown pot if Link cannot reach it directly, then strike it again from the opposite side to expose the chest containing the fifth Small Key.
Use the crystal arrangement to walk across the raised blocks and continue east. In the room containing a Pols Voice, Keese, and Shrouded Stalfos, use the required order: defeat the Pols Voice first by moving the blocks aside and throwing a pot, then defeat the Keese, and finally defeat the Stalfos. A chest appears with the Nightmare Key.
Go north, unlock the eastern door, and defeat the Pols Voices with thrown pots before killing the Red Zol. Take the stairs. Stand on the stone platform to lower it, then carry a pot onto the platform so its extra weight lowers it far enough for Link to climb the ladder. Jump across the final gaps and unlock the Nightmare Door.
- The fifth Small Key has been collected.
- The Pols Voice, Keese, and Stalfos were defeated in that order.
- The Nightmare Key is in the inventory.
- A pot is ready for the weighted-platform section.
Defeat Genie and collect the Conch Horn
Genie begins by throwing flames. Keep moving around the room and wait for him to return to the bottle. Slash the bottle once with the sword to stun it, then use the Power Bracelet to pick it up and throw it against a wall. Repeat the stun-and-throw process until the bottle breaks.
Genie then reappears outside the bottle. He can throw fireballs, split away temporarily, and reappear from one of the separated positions. Do not stand still after his disappearance. A practical safe pattern is to stay near the middle of the south wall while he spins, then walk left or right as he reappears and throws. Strike with the sword when he is vulnerable and use the shield if he flies directly into Link. Continue avoiding the fireballs and attacking during openings until he is defeated.
Collect the Full Heart Container. Leave through the western door and move to the next room to collect the Conch Horn, the second Instrument of the Sirens.
- Genie’s bottle has been broken by repeated wall throws.
- Genie’s exposed form has been defeated.
- The Full Heart Container and Conch Horn have been collected.
Return BowWow and use the new overworld reach
After collecting the Conch Horn, return to Mabe Village and speak with Madam MeowMeow to return BowWow. The Power Bracelet remains with Link, and BowWow is no longer required for normal overworld travel.
Use the bracelet to lift rocks blocking routes east of Mabe Village and toward Ukuku Prairie. This opens the practical route toward the next major objective, Key Cavern, and lets Link inspect previously blocked caves and item locations. Do not confuse the bracelet with the later Level 2 Power Bracelet from Face Shrine; the current bracelet lifts ordinary rocks, pots, and skulls, but not the large elephant statues found much later.
For optional resources, re-enter Bottle Grotto after obtaining the bracelet and lift the pots blocking the entrance chest for 50 rupees. The earlier 20-rupee chest near the Map room is also available during the dungeon clear. Restock hearts and rupees, then save before leaving for the Ukuku Prairie route.
- BowWow has been returned to Madam MeowMeow.
- At least one rock-blocked route toward Ukuku Prairie has been opened.
- The optional 50-rupee chest has been collected if desired.
- A save exists after the dungeon clear.
Before you move on
- The Power Bracelet is in the inventory and successfully lifts pots, rocks, and skulls.
- The Dungeon Map, Compass, Stone Beak, required Small Keys, and Nightmare Key have been collected.
- Hinox and Genie are defeated.
- The Full Heart Container and Conch Horn are collected.
- BowWow has been returned to Madam MeowMeow.
- The optional 20-rupee and 50-rupee chests have been collected if desired.
- A save exists after Bottle Grotto and before continuing toward Ukuku Prairie and Key Cavern.
References for this chapter
- Bottle Grotto - The Legend of Zelda: Link's Awakening Walkthrough
- Link's Awakening Walkthrough - Bottle Grotto - Game Boy Color
- The Legend of Zelda: Link’s Awakening DX - Guide and Walkthrough - Game Boy Color - By Coffee
- Chapter 4: Bottle Grotto
- The Legend of Zelda: Link’s Awakening DX Manual - Game Boy Color
Key Cavern (Dungeon 3) and Mid-Game Route Choices
Complete Kanalet Castle, recover Richard’s five Golden Leaves, dig up the Slime Key, and enter Key Cavern. The dungeon’s required treasure is the Pegasus Boots, which enable dash attacks and long jumps with Roc’s Feather. Defeat the Dodongo Snakes, collect the Nightmare Key, defeat Slime Eye, and take the Sea Lily’s Bell, the third Instrument of the Sirens. The Bow and large Rupee chests are optional. Afterward, use the Boots to knock down the Mabe Village Library book for the DX Color Dungeon clue if desired. The next required objective is Yarna Desert; Angler’s Tunnel comes later and cannot be completed immediately after Key Cavern.
Prepare the Kanalet Castle route
Before traveling to Kanalet Castle, make sure the trading sequence has reached the Bananas. The relevant trade is Dog Food to Sale in Toronbo Shores; Sale gives the Bananas in return. Do not describe this as a Pineapple exchange. The Pineapple is obtained later by giving the Honeycomb to Chef Bear in Animal Village and is not needed for the Kanalet Castle route.
You also need the Shovel for the Slime Key later. From Mabe Village, travel east through Ukuku Prairie to Richard’s Villa. Speak with Richard and accept his request to recover five Golden Leaves from Kanalet Castle. From the castle approach, the main gate is closed, so walk east along the outside of the moat to find Kiki the Monkey.
- Dog Food has been traded to Sale for the Bananas.
- The Shovel is in the inventory.
- Richard has requested the five Golden Leaves.
- Kiki is waiting east of Kanalet Castle.
Give Kiki the Bananas and enter Kanalet Castle
Give the Bananas to Kiki. The monkeys build a bridge across the gap and leave a Stick on it. Pick up the Stick before moving on; it is the next item in the trading sequence, although the trade chain is not required to enter Key Cavern.
Cross the new bridge and go north behind the castle. Clear the obstruction near the concealed staircase, then enter the short side-scrolling passage. Use Roc’s Feather to jump the gaps and avoid or defeat the Goombas. Climb the stairs at the far end to emerge inside Kanalet Castle.
- Kiki has received the Bananas.
- The monkey bridge is complete.
- The Stick has been collected.
- The hidden staircase behind the castle has been used.
Collect the five Golden Leaves
In the castle grounds, defeat the Darknut and continue through the lower area. A crow in a tree guards one Golden Leaf. Throw a nearby rock at it to make it attack, then defeat it with the sword or another thrown rock.
Leave the grounds and confront the bomb-throwing enemy outside the castle. Watch the opening where he appears, jump over the bombs, and strike him when he surfaces. Defeating him provides the second Golden Leaf.
Enter the castle through the lower entrance. Defeat the enemy group in the first interior room to receive another leaf. Continue to the room with the floor switch and step on it; this opens the front gate.
Go upstairs and bomb the marked wall locations. Defeat the Darknut that appears on the left side for the fourth leaf. Leave through the exterior route and enter the other castle doorway to fight the Ball and Chain Soldier. Throw a pot at the closed doorway to open it, then attack after the chain has been thrown. Defeat the soldier to receive the fifth leaf.
- The crow has dropped a Golden Leaf.
- The bomb-throwing enemy has been defeated.
- The first interior enemy group has been cleared.
- The upstairs Darknut has been defeated.
- The Ball and Chain Soldier has been defeated.
- The castle’s front gate is open.
Return the leaves and dig up the Slime Key
Return to Richard’s Villa with all five leaves and speak with Richard. He moves aside and exposes the staircase behind him. Enter the short cave. The left-hand route leads to an optional Secret Seashell; take the right-hand route to reach the field behind the villa.
The field is filled with grass and concealed potholes. Cut or clear the grass carefully and follow the safe route until you reach the Owl Statue. Clear the bush directly in front of the statue, equip the Shovel, and dig in that spot. The Slime Key appears there. If it does not appear, confirm that all five leaves were handed to Richard and that you used the right-hand cave exit.
- All five Golden Leaves have been delivered to Richard.
- Richard has moved aside.
- The right-hand cave route has been used.
- The bush in front of the Owl Statue has been cleared.
- The Slime Key has been dug up.
Unlock and reach Key Cavern
Leave the pothole field and circle around to the statue and keyhole north of Richard’s Villa. Insert the Slime Key to open the gate. This unlocks the dungeon route but does not place Link directly at the entrance.
Return south toward Richard’s Villa, then follow the overworld route east and north. When you reach the water, use Roc’s Feather to jump between the small islands and continue to the Key Cavern entrance. Save before entering if possible.
- The Slime Key has opened the dungeon gate.
- The water-side island jumps have been completed.
- Key Cavern’s entrance is open.
- The game has been saved before entering.
Open Key Cavern’s first branches
At the dungeon entrance, the northern door closes. Lift a pot and throw it at the door to open it. Go north, defeat the enemies, and collect the Small Key that appears. Continue through the Stalfos rooms and descend the staircase into the larger central section.
Use the available Small Keys on accessible locked blocks and doors. Pairodds teleport when approached, so attack quickly or use pots when a sword strike is awkward. Key Cavern contains more Small Keys than the strict minimum route requires; having one left near the end is normal and does not mean the dungeon is broken.
The northern branch includes an optional chest with Rupees. Take it if useful, then return to the lower route and push the block out of the way to reach the Dodongo Snakes.
- The entrance door has been opened with a pot.
- The first Small Key has been collected.
- The central branches are being opened in a workable order.
- The optional Rupee chest has been taken only if desired.
Defeat the Dodongo Snakes and take the Pegasus Boots
Place a bomb directly in front of each Dodongo Snake so it swallows the bomb. Wait for the snake to face the bomb before placing it, because the snakes can turn away. Each snake must swallow three bombs. After both are defeated, a warp point appears and fairies can restore health.
Go east from the mini-boss room. In the block puzzle, push the lower block left and move the middle block to clear the chest. Open it to obtain the Pegasus Boots. Assign the Boots to an item button and hold that button while moving to charge a dash. The dash breaks the crystal barriers and is required for later rooms.
The Bow chest and larger Rupee chests are optional. They are not required for Slime Eye or for completing Key Cavern.
- Both Dodongo Snakes have been defeated.
- The Pegasus Boots are in the inventory.
- The dungeon warp point is available.
- Bombs remain available for any unopened bombable wall.
Collect the Compass, final keys, and Nightmare Key
Use the warp point as needed while opening the remaining routes. In the room with the Bombites, avoid the walking bombs until they begin flashing, then knock them away with the sword before they return. Clear the enemy rooms to reveal the Compass and additional Small Keys.
Bomb the weak west wall near the Compass and clear the hidden room to obtain another key. In the room with the Owl Statue, bomb the indicated wall and use Pegasus Boots with Roc’s Feather to perform the long jump across the gap.
Continue through the staircase route and open the Nightmare Key chest. The Boots are also needed to dash through the large block enemy and to cross the later gaps. If you are short a Small Key, revisit enemy rooms and inspect the remaining locked branches; Key Cavern places keys in several enemy-clear rewards and includes a surplus key when fully explored.
- The Compass has been collected.
- The bombable wall near the Compass has been opened.
- The hidden Bombite room has been cleared.
- The Nightmare Key is in the inventory.
- The required long jumps have been completed.
Defeat Slime Eye and claim the third Instrument
Enter the Nightmare Door with the Pegasus Boots and Roc’s Feather available. Slime Eye begins above Link while slimes fall from the ceiling. Dash into the wall opposite the entrance to knock the boss down.
Strike the eye with the sword until the body stretches apart. When the two halves are separated, dash through the center with the Pegasus Boots to split Slime Eye into two smaller eyes. Attack the eyes while watching their shadows. Each eye jumps upward and crashes down, producing a damaging landing shockwave; use Roc’s Feather to jump over the impact and move away from the landing point.
After both eyes are defeated, collect the Heart Container. Go through the opened northern door and take the Sea Lily’s Bell. This is the third Instrument of the Sirens. The next required route leads to Yarna Desert.
- Slime Eye has been knocked down with a wall dash.
- The boss has been split with a Pegasus Boots dash.
- Both eyes have been defeated.
- The Heart Container has been collected.
- The Sea Lily’s Bell is displayed as the third Instrument.
Use the Pegasus Boots and prepare for Yarna Desert
Return to the overworld and save. If you want to complete the optional DX Color Dungeon, enter the Mabe Village Library and dash into the upper bookcase to knock down the book. Read it for the gravestone directions used by the Color Dungeon entrance. The dungeon is optional and does not provide an Instrument.
For the main campaign, continue toward Yarna Desert. Angler’s Tunnel is not the immediate next destination: it requires the later desert and overworld sequence, including the Angler’s Key. The Flippers are obtained inside Angler’s Tunnel, so do not attempt to use swimming routes before that dungeon.
- The Library book has been knocked down and read if the Color Dungeon is planned.
- The Sea Lily’s Bell is visible in the Instrument list.
- The game has been saved after Key Cavern.
- Yarna Desert is the next main objective.
- Angler’s Tunnel has not been treated as immediately accessible.
Before you move on
- Kiki’s bridge has been built with the Bananas.
- Kanalet Castle has been cleared and all five Golden Leaves have been delivered to Richard.
- The Slime Key was dug up in front of the Owl Statue and used at the dungeon gate.
- The Dodongo Snakes and Slime Eye are defeated.
- The Pegasus Boots are in the inventory and can be equipped to an item button.
- The Heart Container has been collected.
- The Sea Lily’s Bell is displayed as the third Instrument of the Sirens.
- The Mabe Village Library book can be knocked down with the Pegasus Boots and read for the Color Dungeon directions.
- The overworld route toward Yarna Desert is available.
References for this chapter
- Link’s Awakening Walkthrough - Key Cavern - Game Boy Color
- The Legend of Zelda: Link’s Awakening DX – Guide and Walkthrough – Game Boy Color
- The Legend of Zelda: Link’s Awakening DX - Guide and Walkthrough - Game Boy Color - By CPFace
- The Legend of Zelda: Link’s Awakening DX - Complete Guide (With Maps) - Game Boy Color - By GuideWriter1984
- Slime Key Location, Five Golden Leaves and Kanalet Castle Bridge
The Color Dungeon (GBC Exclusive) — Access and Completion
The Color Dungeon is an optional DX dungeon hidden in the southeastern Cemetery. It can be entered after Bottle Grotto and BowWow’s return to Madam MeowMeow, which places the Power Bracelet in Link’s inventory. The Pegasus Boots and the Mabe Village Library book provide the intended gravestone clue, but the book is optional if the sequence is known. Push the bottom-middle grave, which is the right-hand grave in the lower row, down; then push the bottom-left left, top-left up, top-middle right, and top-right up. Magic Powder does not reveal the staircase, but Link must already have Magic Powder before he can progress inside. The DX Color Guards do not sell it. Complete the colored-tile, statue, and Orb Monster puzzles, defeat Giant Buzz Blob, Stone Hinox, and Hardhit Beetle, then choose Red Clothes for attack power or Blue Clothes for defense. The dungeon contains no Instrument and is not required for the normal ending.
1. Prepare the DX route and required items
Use The Legend of Zelda: Link’s Awakening DX on color-capable hardware such as a Game Boy Color, Game Boy Advance, or Game Boy Player. The DX cartridge can run on older monochrome Game Boy hardware, but the Color Dungeon’s presentation and color-based puzzles require a color-capable system.
Complete Bottle Grotto and return BowWow to Madam MeowMeow in Mabe Village. This preceding progress gives Link the Power Bracelet, which is needed to move the Cemetery graves and to lift the stunned Orb Monsters inside the dungeon. The Color Dungeon remains optional and does not affect the eight-Instrument route.
Obtain Magic Powder before entering. The DX Color Guards do not provide a purchase option. If you do not have powder, return to the Mysterious Forest and give the Sleepy Toadstool to Syrup, then collect the Magic Powder. Bring Bombs for Stone Hinox and keep Roc’s Feather equipped or readily available for its ground-shock attack and the dungeon’s jumping hazards.
- Link’s Awakening DX in use
- Color-capable hardware in use
- Bottle Grotto completed
- BowWow returned to Madam MeowMeow
- Power Bracelet obtained
- Magic Powder obtained before entry
- Bombs recommended
- Roc’s Feather available
2. Reveal the Cemetery staircase
After obtaining the Pegasus Boots, visit the Mabe Village Library and dash into the upper bookshelf to knock down the book. Its diagram is an optional clue for the five-grave formation and movement order. You may skip the Library if you already know the solution.
Travel to the southeastern Cemetery and find the formation with three graves across the upper row and two across the lower row. Push the bottom-middle grave down first. This is the right-hand grave in the lower row, not a lower-right grave in a three-position row. Then push the bottom-left grave left, the top-left grave up, the top-middle grave right, and the top-right grave up. The staircase appears beneath the final grave.
Magic Powder has no role in revealing the staircase. Do not spend powder on the graves. The Power Bracelet and the five correct pushes are the practical entrance conditions; the Pegasus Boots and Library book only reveal the clue.
- Optional Library clue obtained or sequence already known
- Southeastern five-grave formation located
- Bottom-middle pushed down
- Bottom-left pushed left
- Top-left pushed up
- Top-middle pushed right
- Top-right pushed up
- Staircase revealed
3. Pass the Color Guards and collect the first dungeon items
Enter the staircase with Magic Powder already in the inventory. Speak to both Color Guards and answer their question by identifying the colors of their clothes. The DX guards do not sell Magic Powder, so leaving to obtain it is required if you entered without any. Once both guards are answered correctly, they move aside and allow progress.
Go north and defeat the enemies that rise from the floor, then go east to the first color-statue room. Strike the statues so that they match the room’s required color and open the chest for the Compass. Continue through the colored floor rooms. These tiles bounce Link when crossed, change color when landed on, and eventually disappear, so cross them deliberately rather than making unnecessary rebounds.
In the Orb Monster room, strike each Orb Monster until it curls into a ball. Lift it with the Power Bracelet and throw it into the floor opening of the matching color. Completing the puzzle opens the chest containing the Stone Beak. Continue south, defeat the enemies to open the route, then go west across the bouncing tiles and open the chest for the first Small Key.
- Both Color Guards answered correctly
- Magic Powder confirmed before proceeding
- Compass obtained
- Stone Beak obtained
- First Small Key obtained
4. Obtain the second key, defeat Giant Buzz Blob, and take the Nightmare Key
Use the one-way route to return toward the earlier colored-floor area, then travel upward to the second color-statue room. Strike the bottom-right statue once, then the upper-left statue twice. When the statues match, collect the Small Key that appears and continue east and north through the locked route.
Giant Buzz Blob is vulnerable only after its electrified form has been changed. Do not attack the legged, electrified form with the sword. Sprinkle Magic Powder on it to turn it into the round form, wait for it to hop and land, then strike it with the sword. Repeat when it becomes electrified again. Keep moving because its electrical attack can travel across the room in several directions.
After the fight, go west to the three-block puzzle. Push the top and bottom blocks left, then push the middle block down. Open the chest for the Nightmare Key. Preserve the remaining route rather than entering the boss room immediately; Stone Hinox and the Map still have to be reached.
- Second Small Key obtained
- Giant Buzz Blob defeated
- Nightmare Key obtained
- Magic Powder conserved if possible
5. Defeat Stone Hinox and obtain the Map
Backtrack through the colored-floor route to the locked door opened by the second Small Key. Enter Stone Hinox’s room and avoid standing on the spikes. Bombs are effective and let you keep distance. Stone Hinox jumps, creates a ground shock, and causes boulders to fall from above. Jump with Roc’s Feather when it rises to avoid being stunned, then attack during the recovery window.
After Stone Hinox is defeated, leave through the west door. In the next room, reach the upper-left corner, lift the pot covering the floor switch, and step on the switch to open the northern route. Defeat the enemies in the following room; when the room is cleared, the Map chest appears.
Go east to the next Orb Monster puzzle. Stun each Orb Monster, lift it with the Power Bracelet, and throw it into the floor opening of the matching color. Completing the puzzle creates the third Small Key.
- Stone Hinox defeated
- Pot lifted from the upper-left switch
- Floor switch activated
- Dungeon Map obtained
- Third Small Key obtained
6. Open the Nightmare’s Door
Return to the colored-floor area and go west to the final statue puzzle. Use the room’s clue and strike the statues in the required sequence so they all become blue. The verified sequence is top, right, left, and bottom. A different starting point can work only if it produces the same completed state; if the puzzle does not open, reset the arrangement and use the listed order.
Proceed through the green Zol room and use the third Small Key on the locked door. Continue through the crystal-switch rooms, striking the switch to raise and lower the colored blocks as needed. Follow the opened path to the upper route and use the Nightmare Key on the Nightmare’s Door.
Before entering, restore hearts and confirm that Bombs, Roc’s Feather, and the sword are assigned or readily accessible. The final boss is Hardhit Beetle; no Instrument is awarded here.
- Final statue puzzle solved
- Third Small Key used
- Crystal switch route completed
- Nightmare’s Door opened
7. Defeat Hardhit Beetle and select the Color Dungeon reward
Hardhit Beetle begins blue and becomes red as it takes damage. Maintain pressure because it gradually returns toward blue if Link stops attacking for too long. It can summon Stalfos and throw spinning blades. Use the Bow and Arrows or Magic Rod if available. Otherwise, use Roc’s Feather to jump over the blades while attacking with the sword.
After the battle, enter the Great Fairy’s room and choose Red Clothes to double attack power or Blue Clothes to double defense. The other special color can be selected later by returning to the dungeon’s end and repeating the route. In the original DX release, choosing a special color normally prevents returning to Green Clothes, so postpone the choice if preserving the standard outfit is important.
The Color Dungeon is complete once the Fairy Queen awards a color. It contains no Instrument and is not required to open the Wind Fish’s Egg or reach the normal ending.
- Hardhit Beetle defeated
- Red Clothes or Blue Clothes selected, or choice intentionally postponed
- Fairy Queen reward received
- Color Dungeon completed
- No Instrument expected from this dungeon
Before you move on
- Bottle Grotto is complete, BowWow has been returned to Madam MeowMeow, and the Power Bracelet is in the inventory.
- Magic Powder was obtained before entering the Color Dungeon; it was not purchased from or supplied by the Color Guards.
- The Cemetery staircase was revealed with bottom-middle down, bottom-left left, top-left up, top-middle right, and top-right up.
- Both Color Guards were answered correctly.
- The Stone Beak, Compass, Map, three Small Keys, and Nightmare Key were collected.
- Giant Buzz Blob and Stone Hinox were defeated.
- The colored Orb Monster puzzles, statue puzzles, switches, and crystal-switch route were completed.
- Hardhit Beetle was defeated and the Fairy Queen awarded Red Clothes or Blue Clothes, unless the reward choice was intentionally postponed.
- The save can return to the main campaign. No Instrument was added because the Color Dungeon is optional.
References for this chapter
Angler's Tunnel (Dungeon 4) — Water and Hookshot Use
Before beginning this chapter’s post-Key Cavern route, make sure you handled the Kanalet Castle monkey event in the correct order: obtain the Bananas, give them to Kiki at the castle, collect the Stick after the monkeys build their bridge, and then complete Key Cavern. Afterward, return to Ukuku Prairie with the Stick and give it to Tarin at the beehive for the Honeycomb. Trade the Honeycomb to Chef Bear for the Pineapple, then give the Pineapple to Papahl in the mountains if you are following the full trading sequence. Bring Marin from Toronbo Shores to Animal Village so she can awaken the Walrus and open Yarna Desert. Defeat Lanmola for the Angler Key, unlock the Tal Tal Heights waterfall, and reach Angler’s Tunnel from the mountain ledge. Inside, collect the dungeon treasures, defeat Cue Ball, learn the save-specific tile order, obtain the Flippers, defeat Angler Fish, and claim the Surf Harp as the fourth Instrument. The Hookshot is not required for this original Game Boy Color DX dungeon.
1. Finish the Kiki event, then complete Key Cavern
The Stick must be obtained before the Honeycomb event. If you have not done this sequence yet, first obtain the Bananas during the trading route and take them to Kiki at the Kanalet Castle bridge. Give Kiki the Bananas. The monkeys build a bridge, and the Stick is left behind when the event ends. Pick up the Stick before entering Key Cavern.
Now complete Key Cavern and obtain the Pegasus Boots. The dungeon itself does not require the Honeycomb, Pineapple, or Marin event, but the Stick remains needed afterward. If Key Cavern is already complete and the Stick is in your inventory, proceed directly to Tarin’s beehive event.
Return to Ukuku Prairie and find Tarin beneath the beehive. Speak with him and give him the Stick. The bees chase Tarin away and leave the Honeycomb. Pick it up before leaving the screen.
Take the Honeycomb to Chef Bear in the southeastern house of Animal Village. Give it to him to receive the Pineapple. The Pineapple advances the intended trading sequence, but it is not a literal requirement for Angler’s Tunnel or the normal ending.
- The Bananas were given to Kiki at Kanalet Castle before Key Cavern was entered.
- The completed monkey bridge left the Stick behind, and the Stick was collected.
- Key Cavern was completed and the Pegasus Boots were obtained.
- Tarin received the Stick and left the Honeycomb behind.
- Chef Bear exchanged the Honeycomb for the Pineapple.
2. Bring Marin to the Walrus
Find Marin at Toronbo Shores, near the beach where Link washed ashore. Speak with her so she follows Link. If she is not there, check Mabe Village first and then return to the shore.
With Marin following, travel through Ukuku Prairie toward Animal Village. The warp portal near Animal Village can shorten the trip, but do not enter a dungeon or otherwise separate Marin from Link before the Walrus event.
At Animal Village, approach the sleeping Walrus near the village’s southwestern side. Marin plays the Ballad of the Wind Fish and wakes him. The Walrus moves aside, opening the route into Yarna Desert.
If the Walrus remains asleep, Link arrived without Marin. Return to Toronbo Shores, make Marin follow again, and escort her to Animal Village.
- Marin was found at Toronbo Shores.
- Marin is following Link during the trip.
- Marin played the Ballad of the Wind Fish for the Walrus.
- The entrance to Yarna Desert is open.
3. Defeat Lanmola and obtain the Angler Key
Enter Yarna Desert through the passage opened by the Walrus. Keep moving through the sand and use the sword to clear Leevers or Pokeys that block the route. Avoid lingering in the quicksand.
Reach the northern quicksand arena to begin the Lanmola battle. Lanmola travels underground, surfaces, leaps across the arena, and dives again. Its head is the vulnerable target. Stand near the edge of the pit and slash when the head passes close enough.
Do not remain in the center of the quicksand. If Link drops into the cave below, continue through the lower passage and recover the Angler Key there if it fell from the boss arena. Confirm that the key is in the inventory before leaving the desert.
The cave beneath the quicksand also contains an optional Piece of Heart behind a bombable wall. It is not needed for the dungeon and can be collected now or later after obtaining the Flippers.
- Lanmola was defeated by striking its head.
- The Angler Key is in the inventory.
- The lower quicksand cave was checked if the key fell there.
- The optional Piece of Heart was collected or deliberately deferred.
4. Unlock the waterfall and reach Angler’s Tunnel
Leave Yarna Desert and follow the Tal Tal Heights route toward the waterfall with the keyhole. Lift the rocks blocking the mountain paths and continue until the Angler Keyhole is visible. Use the Angler Key to open the waterfall.
Opening the keyhole reveals the dungeon area but does not put Link at the entrance. From the keyhole area, go east to activate the Tal Tal Heights warp portal. Then return west along the mountain route, climb the stairs, and enter the caves leading toward Mt. Tamaranch.
Use the Pegasus Boots to dash through the green crystal barriers. On the mountain route, find Papahl after he becomes lost. Give him the Pineapple to receive the Hibiscus. This is trading-sequence progress and is not required to enter the dungeon.
Continue around the mountain, following the upper ledges until a high cliff overlooks the dungeon entrance. Jump from the cliff to land at Angler’s Tunnel. Recover hearts and save before entering.
- The Angler Key opened the Tal Tal Heights waterfall.
- The Tal Tal Heights warp portal was activated.
- Papahl received the Pineapple and gave Link the Hibiscus, if pursuing the trading sequence.
- Link reached the dungeon entrance by jumping from the mountain ledge.
5. Collect the Map, two early keys, Stone Beak, and Compass
From the entrance, go north and defeat the Zol and Spiked Beetles. Raise the shield to flip the Spiked Beetles, then slash them while exposed. Move west for the optional bomb supply, return east, climb the steps, and follow the raised path north and east to the Dungeon Map chest.
From the Map route, return to the large gap. Equip the Pegasus Boots and Roc’s Feather, dash toward the edge, and jump across. In the next room, bomb the cracked block, push the adjacent block into the water, and open the chest for a Small Key. Continue north, bomb the second cracked block, and open the next chest for another Small Key.
Backtrack across the gap and follow the outer route to the Stone Beak chest. Continue through the reopened enemy rooms to the Compass. After the Compass, clear the water-filled room and open the chest for another Small Key.
Use the available keys on the locked doors along the route. When you reach the room with two Red Zols, defeat both. A Small Key falls through the floor. Do not assume it is lost: it will be recovered later from the flooded passage after the Flippers are obtained.
- The Dungeon Map is collected.
- The Stone Beak is collected.
- The Compass is collected.
- The two early Small Keys and the additional accessible key are collected.
- The key dropped by the Red Zols is known to be waiting below.
6. Reach Cue Ball and obtain the Flippers
From the Red Zol area, continue downward and follow the route indicated by the owl statue’s hint about the glinting tile. Cross deep-water gaps with Roc’s Feather where necessary. Ignore the first five-tile room for now; its solution cannot yet be completed.
Take the route around the flooded sections and collect the next Small Key from its chest. Use it to return toward the locked path leading to Cue Ball. Cue Ball rolls around the room and changes direction after striking walls. Its vulnerable area is the side or rear.
Jump over Cue Ball with Roc’s Feather, then turn and slash its exposed side or back. You can also use the Pegasus Boots to circle the room and strike from behind. Avoid meeting it head-on.
After Cue Ball is defeated, go north and pull the Power Bracelet handle fully. The blocks separate only briefly, so run through the opening to the left. In the next room, defeat the Red Zol while avoiding the fireballs and open the chest for the Flippers. They activate automatically in deep water and do not use an assignable item slot.
- The owl statue’s glinting-tile hint was reached.
- Cue Ball was defeated from the side or rear.
- The temporary block passage was opened with the Power Bracelet.
- The Flippers were collected.
7. Learn the tile order and get the Nightmare Key
After obtaining the Flippers, return to the first five-tile room. One tile glints. Step on it, watch where the glint moves, and continue following it until all five positions have been recorded. The sequence is generated for the current save file, so do not use a sequence from another playthrough.
Return to the second five-tile room, where water now allows access to the separated tiles. Step on the five tiles in exactly the order observed in the first room. An incorrect tile resets the puzzle; simply watch the glint again if necessary.
When the staircase appears, descend into the side-scrolling passage. Let each Spiked Thwomp drop, pass while it rises, and use Roc’s Feather to jump from the final Thwomp to the upper platform. Climb the ladder and follow the upper route to the Nightmare Key chest.
The Nightmare Key route contains optional rupee chests. Ignore them if you are only completing the dungeon or if you want to minimize backtracking.
- The five-tile sequence was observed after obtaining the Flippers.
- The same sequence was repeated in the flooded tile room.
- The Spiked Thwomp passage was crossed.
- The Nightmare Key was collected.
8. Recover the fallen key and defeat Angler Fish
Use the Flippers to reach the flooded passage beneath the Red Zol room and collect the Small Key that fell through the floor. This is the final Small Key needed for the main route.
Continue through the northern flooded rooms. Press the floor switch to open the upper route, unlock the required block, and swim through the underwater passage. Use the ladder at the far side, then continue through the enemy rooms toward the boss route.
Use the Nightmare Key on the boss door. Angler Fish swims vertically along the right side of the chamber. Smaller Angler Fry cross the room, and the boss can charge into a wall, causing ceiling tiles to fall.
Swim close to the glowing light on Angler Fish’s feeler and slash rapidly. Move away when the boss charges and avoid the falling tiles. The smaller fish can be destroyed with the sword or avoided. Bombs and arrows are unnecessary for this fight.
After Angler Fish is defeated, collect the Heart Container. Return to the ladder and climb upward, then go north to claim the Surf Harp. The dungeon warp removes Link from the dungeon, and the next story direction points toward Martha’s Bay.
- The Small Key below the Red Zol room was recovered through the flooded passage.
- The switch, locked block, and underwater route were cleared.
- Angler Fish was defeated by striking the glowing feeler.
- The Heart Container was collected.
- The Surf Harp is in the inventory as the fourth Instrument of the Sirens.
- The post-dungeon direction points toward Martha’s Bay.
Before you move on
- Kiki’s bridge event was completed before Key Cavern, and the Stick was collected.
- Key Cavern was completed and the Pegasus Boots were obtained.
- Tarin received the Stick, the Honeycomb was collected, and Chef Bear exchanged it for the Pineapple.
- Marin awakened the Walrus and Yarna Desert became accessible.
- Lanmola was defeated and the Angler Key opened the Tal Tal Heights waterfall.
- The Dungeon Map, Stone Beak, Compass, Flippers, Nightmare Key, and five Small Keys were collected.
- Cue Ball and Angler Fish were defeated.
- The Heart Container after Angler Fish was collected.
- The Surf Harp is in the inventory as the fourth Instrument of the Sirens.
- Link can swim in deep water outside the dungeon, and the next main-story direction points toward Martha’s Bay.
References for this chapter
- Link’s Awakening Walkthrough – Angler’s Tunnel – Game Boy Color
- The Legend of Zelda: Link’s Awakening DX - Complete Guide (With Maps) - Game Boy Color - By GuideWriter1984
- The Legend of Zelda: Link’s Awakening DX – Guide and Walkthrough – Game Boy Color
- Angler’s Tunnel – The Legend of Zelda: Link’s Awakening Walkthrough
Catfish's Maw (Dungeon 5) — Large Puzzles and Reflex Fights
After Angler’s Tunnel, do not enter Catfish’s Maw immediately. First escort the Ghost to its house in Martha’s Bay, then take it to its grave in the Cemetery. The DX Photographer can take an optional picture at the grave after the Ghost is returned. Only then dive through the underwater passage in southwestern Martha’s Bay to reach Catfish’s Maw. Inside, collect the Compass, Stone Beak, Dungeon Map, and Hookshot while pursuing Master Stalfos through four encounters. Use the Hookshot to reach the Nightmare Key and boss route. The optional Gohma battle requires the Bow and Arrows but creates a useful warp point. Defeat Slime Eel with the Hookshot, collect the Heart Container and Wind Marimba, then continue toward the Face Key and Face Shrine. The Fishing Hook, Mermaid’s Necklace, Mermaid’s Scale, and Magnifying Lens are trading-sequence progress, not dungeon-entry requirements.
Return the Ghost before entering Catfish’s Maw
After completing Angler’s Tunnel, the Ghost begins following Link. Do not swim directly to Catfish’s Maw yet. From the Martha’s Bay area, take the Ghost to its house. The house is reached by crossing the large gap with Roc’s Feather and the Pegasus Boots, then continuing left until you find the Ghost’s former home. Enter and let the Ghost inspect the room.
Leave the house and take the Ghost to its grave in the Cemetery. The quickest route is to play Manbo’s Mambo and warp to Manbo’s Pond, then walk left one screen, down three screens, up the steps on the left, and up one screen to the grave. The Ghost will ask you to look beneath a jar in its house; this completes the Ghost event. Catfish’s Maw progression should begin only after this handoff is complete.
In the DX version, stand beside the grave after the Ghost has been returned. The Photographer appears and takes the optional picture titled I Was Very Afraid. This photograph is not required for the dungeon or the ending.
- The Ghost is following Link after Angler’s Tunnel.
- The Ghost has inspected its house in Martha’s Bay.
- The Ghost has been taken to its grave in the Cemetery.
- The optional grave photograph has been taken, if desired.
Enter Catfish’s Maw through the underwater passage
After the Ghost sequence, return to Martha’s Bay and make sure the Flippers are equipped through the inventory. From the bridge area, swim up and left toward the large rock formation surrounding the Catfish entrance. Find the bubbles in the water near the rocks and dive at the underwater opening. Follow the short side-scrolling passage, resurface, and swim into the giant Catfish’s mouth.
The Angler Key is not used at this entrance; it opened Angler’s Tunnel earlier. The Fishing Hook, Mermaid’s Necklace, Mermaid’s Scale, and Magnifying Lens are also not dungeon-entry requirements. If you are completing the trading sequence, exchange the Fishing Hook with the fisherman beneath the bridge for the Necklace, then give the Necklace to the mermaid north of the dungeon to receive the Scale.
- Flippers obtained from Angler’s Tunnel.
- The Ghost event is complete.
- The underwater entrance has been reached from southwestern Martha’s Bay.
- Catfish’s Maw entered through the Catfish’s mouth.
Collect the Compass, first Small Key, and Stone Beak
From the dungeon entrance, go left twice and defeat the enemies blocking the left-hand door. Open the chest in the next room for the Compass. Use the staircase to enter the side-scrolling platform section. The paired chain platforms act like seesaws: stepping on one lowers it while raising its partner. Cross carefully, then repeat the process in the next platform room and climb the ladder at the far side.
In the room beyond, defeat the four Stalfos and slash the crystals as needed. Push the two blocks on the top row together so the four blocks form a square arrangement. A Small Key drops from the ceiling. Return through the underground passage to the Compass room, defeat the Iron Masks blocking the route, and use the key on the locked door above.
Continue left through the trap-lined room and defeat the Iron Masks. In the next room, defeat the remaining Iron Masks while avoiding the circulating Bubble. A chest appears containing the Stone Beak. Collect the nearby bombs before leaving.
- Compass collected.
- The paired chain-platform rooms crossed.
- First Small Key collected from the four-block puzzle.
- Stone Beak collected.
Track Master Stalfos through four encounters
Return right and then up to the room containing three Stalfos. Defeat them to open the upper door, read the Owl Statue’s advice, and enter the first Master Stalfos fight. Master Stalfos protects most of his body with a shield. After he lands from a jump, attack his exposed side. When he collapses into bones, place a bomb beside him. Repeat until he retreats.
The chest in the room to the right is empty because Master Stalfos has stolen its contents. Follow him by manipulating the central block at the five-block crossroads. Push the block upward, leave and re-enter so it resets, then push it into the position that opens the switch route. Step on the switch and enter the second Master Stalfos fight. Use the same side-attack and bomb method.
Reset the crossroads again and take the upper route. Defeat the buried Zols in the next room to open the door to the third encounter. After Master Stalfos retreats again, go left and collect the Dungeon Map. Play Manbo’s Mambo to return to the dungeon entrance, then retrace the left-side route through the underground passage.
In the room with four Stalfos near the entrance, defeat or bypass them and enter the fourth Master Stalfos fight. This encounter awards the Hookshot after you defeat him. Use bombs whenever he collapses; sword attacks alone are not enough for the final encounter.
- The first three Master Stalfos encounters have been completed.
- Dungeon Map collected.
- The fourth Master Stalfos encounter defeated.
- Hookshot obtained.
Use the Hookshot to obtain the Nightmare Key
From the fourth encounter, use the Hookshot to cross the newly accessible gaps and return toward the central rooms. Hookshot to the chest in the upper part of the entrance-side room for rupees, then continue through the Iron Mask and Zol rooms until you reach the chest across the gap. Open it for a Small Key.
At the central crossroads, use the Hookshot on the latch to extend the bridge. The Gohma room is on the locked route to the left, but that fight is optional. For the required route, return through the upper rooms and find the chamber with four torches around deep water. The Owl Statue’s clue points to the center where the torchlight lines intersect. Dive there and follow the underwater passage.
Resurface in the next section, use the Hookshot to extend the bridge, and cross to the chest containing the Nightmare Key. Return through the underwater passage. Follow the central-block route to the Hookshot chest containing another Small Key if your chosen path requires it. Use the Hookshot on the remaining latches and wooden targets to reach the locked block before the boss approach.
- Hookshot used across the major dungeon gaps.
- Torchlight intersection located.
- Underwater passage crossed.
- Nightmare Key collected.
- Required Small Key obtained for the final route.
Optional Gohma warp and required boss approach
The Gohma room is optional. It is reached by using a Small Key on the locked route near the central crossroads. You must have the Bow and Arrows to damage these Gohmas; the Hookshot does not replace them. Each Gohma exposes its eye before firing a projectile. Shoot the open eye, then move away from the fireball or charge. Defeat both Gohmas to create a warp point that makes later attempts against Slime Eel more convenient.
If you skip Gohma, continue through the Hookshot bridge route and return to the lower approach. Use the Small Key on the locked block, then open the Nightmare door with the Nightmare Key. Both routes ultimately lead to Slime Eel.
- Gohma defeated for the optional warp, or intentionally skipped.
- Bow and Arrows used if fighting Gohma.
- Locked block opened with a Small Key.
- Nightmare Key used on the boss door.
Defeat Slime Eel and collect the Wind Marimba
Slime Eel places openings around the walls while its tail sweeps around the central hole. Keep circling the room and avoid standing in the tail’s path. When a genuine head emerges, use the Hookshot to pull it completely out of the wall. The vulnerable body segment, marked by a heart-like symbol, is exposed while the head is extended. Slash that segment with the sword.
Some openings can produce decoy heads or dangerous movement, so do not swing blindly at every hole. After a successful hit, change your movement direction if the tail reverses. Prioritize avoiding the tail over taking an unsafe extra attack. Repeat the Hookshot-and-sword sequence until Slime Eel is defeated.
Collect the Heart Container after the battle. Leave through the upper exit and take the Wind Marimba from the Instrument pedestal. This is the fifth Instrument of the Sirens and the required completion reward for Catfish’s Maw.
- Slime Eel pulled from a wall opening with the Hookshot.
- The exposed vulnerable body segment struck repeatedly.
- Heart Container collected.
- Wind Marimba obtained as the fifth Instrument.
Complete the nearby trading progress and leave for the Face Key
If you have the Mermaid’s Scale and the Hookshot, travel to the Mermaid Statue south of Martha’s Bay. Reach the statue by crossing the inlet with the Hookshot, then place the Scale on it. The statue moves aside and reveals a cave. Proceed north through the cave, dealing with the invisible enemies, and collect the Magnifying Lens.
The Magnifying Lens reveals otherwise hidden characters and allows Link to read the special book in the Mabe Village Library. That book gives the current save’s Wind Fish’s Egg maze directions. The Lens is useful for the intended final route but is not required to enter Catfish’s Maw or to obtain the Wind Marimba.
After confirming the Instrument and Heart Container, pursue the Face Key and then Face Shrine. Save before leaving the dungeon if you have completed a difficult run, and use the Hookshot on overworld gaps and bridges as you continue.
- Wind Marimba is in the Instruments collection.
- Hookshot remains in the inventory.
- Mermaid’s Scale placed at the Mermaid Statue, if completing the trade sequence.
- Magnifying Lens collected, if completing the intended Egg-clue route.
- Face Key and Face Shrine identified as the next main objectives.
Before you move on
- The Ghost has been returned to its grave in the Cemetery.
- Catfish’s Maw’s boss, Slime Eel, is defeated.
- The post-boss Heart Container is collected.
- The Hookshot is present and usable.
- The Wind Marimba is taken from the Instrument pedestal, bringing Link to five Instruments of the Sirens.
- The optional Gohma warp has been created, or Gohma was deliberately skipped.
- The Mermaid’s Scale has been placed at the Mermaid Statue and the Magnifying Lens collected if following the complete trading sequence.
- The next main objective is the Face Key and Face Shrine.
Face Shrine (Dungeon 6) — Puzzle Logic and Map Use
Face Shrine is the sixth main dungeon in The Legend of Zelda: Link’s Awakening DX for Game Boy Color. Enter after obtaining the Face Key from the Armos Knight in the southern shrine near the Ancient Ruins. The dungeon requires the Level-1 Power Bracelet, Hookshot, Pegasus Boots, Roc’s Feather, bombs, arrows, and a shield. Its principal puzzles use crystal switches, liftable elephant statues, horse-head blocks, Wizzrobes, and bomb-eating Dodongo Snakes. The dungeon item is the Level-2 Power Bracelet, followed by the Nightmare Key and the Coral Triangle, the sixth Instrument of the Sirens. Optional rewards in and around Face Shrine are rupees and a Secret Seashell; there is no Face Shrine-area Piece of Heart. The dungeon’s boss Heart Container is a separate permanent health reward. This route applies to the original Game Boy Color DX release, not the Nintendo Switch remake.
Get the Face Key and enter the northern shrine
After Catfish’s Maw, travel to the southern shrine near the Ancient Ruins. Move the statues blocking the approach and enter. Defeat the Armos Knight to receive the Face Key. Keep moving when it jumps, jump over its landing shock, and attack from the side. Arrows are a safe option once you have room, while Spin Attacks work when the boss is exposed.
Leave the southern shrine, then travel to the northern Face Shrine entrance. Follow the water route east and north, using the Hookshot across the necessary gap. Insert the Face Key at the keyhole to raise the entrance. Save and refill before entering. Bombs and arrows are especially useful against Wizzrobes.
- Obtain the Face Key from the southern shrine.
- Bring bombs, arrows, Hookshot, Pegasus Boots, Roc’s Feather, and the Power Bracelet.
- Open the northern Face Shrine entrance and save before proceeding.
Reach the Level-2 Power Bracelet
From the entrance, take the western route and defeat the Wizzrobes with bombs or arrows. Continue through the upper-left rooms until reaching the crystal-switch room. Place a bomb beside the switch, then move toward the upper-right side and wait for the explosion to change the barrier arrangement.
Enter the next room and bomb the wall where the passage ends. Defeat the enemies beyond the opening, then descend the stairs. Cross the side-scrolling passage while avoiding the large bubbles and climb the ladder at the far side. Defeat the enemies in the upper room, go north, and open the chest to obtain the Level-2 Power Bracelet.
Use this bracelet to lift the heavy elephant statues that block later routes. It is the correct dungeon item for Face Shrine and is not obtained in Eagle’s Tower.
- Time the first crystal-switch change with a bomb.
- Bomb the blocked wall beyond the switch room.
- Collect the Level-2 Power Bracelet.
Collect the Map, Stone Beak, Compass, and keys
Use the upgraded bracelet to lift and throw elephant statues. In the central rooms, throw a statue at the blocked door when required. Return to the crystal-switch areas as necessary; Face Shrine is not strictly linear, and the map layout helps identify routes that open only under one barrier arrangement.
Open the chest in the western section for the Dungeon Map. Continue through the upper-right passage to collect the Stone Beak. Return to the nearby pottery door and throw a pot at it to open the way to the Compass. Use the crystal switch to configure the barriers, then defeat the Wizzrobes in the required room to make a Small Key appear.
Use the Map and Compass to separate mandatory rooms from side chambers containing rupees. When a route seems closed, change the crystal state rather than repeatedly attacking the barrier.
- Collect the Dungeon Map, Stone Beak, Compass, and required Small Keys.
- Use pots or elephant statues to open pottery doors.
- Change crystal switches whenever the barrier layout blocks the next staircase or door.
Solve the central puzzles and defeat Smasher
In the room with large statues, throw one at the northern door to open it. Continue to the horse-head puzzle and throw both pieces until they land upright. The door opens only when both horse heads are standing correctly.
Proceed through the lower and eastern routes, changing the crystal-switch state whenever raised barriers block progress. Use the Hookshot across the long gap and spend a Small Key on the locked block. In the falling-tile room, hold the Shield while the tiles strike; defeating the encounter releases the next key.
Reach Smasher through the upper route. When he throws his heavy ball, wait for it to stop, pick it up, and throw it back. Do not stand between Smasher and the ball. After the miniboss is defeated, lift the blocking statue and use the ladders and side-scrolling passage to return to the upper section.
- Land both horse-head pieces upright.
- Cross the long gap with the Hookshot and use the required Small Key.
- Defeat Smasher by returning his heavy ball.
Defeat the Dodongo Snakes and get the Nightmare Key
Continue through the upper rooms and solve the second horse-head puzzle in the same way. In the Pols Voice room, use bombs to defeat the enemies; do not apply the Switch remake’s chess-piece behavior to this Game Boy Color version.
At the Dodongo Snakes, place bombs directly in front of them so they swallow them. Repeat until both snakes are defeated. If bombs are low, check nearby side rooms for refills before attempting the encounter again.
After the miniboss area opens, take the western route and use the Hookshot across the gap. Unlock the block and continue north. When you reach the chest that will not open normally, lift a nearby pot and throw it at the chest. This produces the Nightmare Key.
- Defeat both Dodongo Snakes by feeding them bombs.
- Use the Hookshot after the miniboss route opens.
- Throw a pot at the sealed chest to obtain the Nightmare Key.
Defeat Facade and collect the Coral Triangle
Return through the upper passages, changing the crystal-switch state whenever a barrier prevents access. Clear the Vacuum Mouth room by defeating the hidden green Zols or letting the suction pull them into the pits. Continue through the rooms with Wizzrobes, Beamos, and blocking pieces until the Nightmare door is reached.
Use the Nightmare Key to enter Facade’s room. Facade first throws floor tiles, then pots, and finally creates holes in the floor. Raise the Shield against the tiles, keep moving away from the pots, and avoid the holes as they appear. When the face is exposed, place a bomb against it and retreat. Repeat this attack pattern until the boss is defeated.
Collect the dungeon Heart Container, then enter the following room and take the Coral Triangle. The instrument is added to the Instruments of the Sirens, and Link exits the dungeon for the next story objective.
- Clear the Vacuum Mouth room.
- Reach Facade with the Nightmare Key.
- Bomb Facade’s exposed face, collect the Heart Container, and take the Coral Triangle.
Optional Face Shrine rupees and Secret Seashell
The Face Shrine route includes optional rupee chests, including 50-, 100-, and larger rupee rewards in side rooms. Use the Map to return to these chambers after changing the crystal-switch arrangement. They are not required for the dungeon or for later story progression.
For the Face Shrine-area Secret Seashell, take the side route that climbs the stairs and exits from the dungeon to the Raft Ride area. Open the chest on the isolated land platform outside to receive the Secret Seashell. If the Level-2 Sword has already been obtained from the Seashell Mansion, this chest instead contains rupees. There is no Piece of Heart in or around Face Shrine in the DX arrangement, so do not add one to a collectible checklist for this dungeon.
- Collect the optional rupee chests if desired.
- Exit through the upper side route to reach the Face Shrine-area Secret Seashell chest.
- Do not search Face Shrine for an overworld Piece of Heart; the dungeon Heart Container is the separate health reward.
Before you move on
- The Face Key was used to open the northern Face Shrine.
- The Level-2 Power Bracelet, Dungeon Map, Compass, and Nightmare Key were collected or used.
- Smasher and both Dodongo Snakes were defeated.
- Facade was defeated and the dungeon Heart Container was collected.
- The Coral Triangle appears among the Instruments of the Sirens.
- The optional Face Shrine-area chest was checked for its Secret Seashell or replacement rupees, if desired.
References for this chapter
- Link’s Awakening Walkthrough - Face Shrine - Game Boy Color - Zelda Dungeon
- The Legend of Zelda: Link’s Awakening DX - Complete Guide (With Maps) - Game Boy Color - By GuideWriter1984
- Zelda Link’s Awakening: Face Shrine Map, Compass and Powerful Bracelet
- The Legend of Zelda: Link’s Awakening DX - Guide and Walkthrough - Game Boy Color - By Dev
Eagle's Tower (Dungeon 7) — Vertical Design and Platform Strategy
Eagle's Tower is the seventh dungeon of the Game Boy Color version of Link's Awakening DX. Reach it after learning Frog's Song of Soul, reviving the Flying Rooster and obtaining the Bird Key in Tal Tal Heights. Inside, the major puzzle is a heavy iron ball that must be carried through several routes and thrown into four pillars. The pillars support the upper floors; destroy all four to lower the tower and open the route to Grim Creeper, the Nightmare Key and Evil Eagle. The dungeon also contains the Mirror Shield, which is required for later progress. Use the Roc's Feather for gaps, the Hookshot for long crossings and the Crystal Switch to control raised and lowered blocks. Evil Eagle is fought on the tower roof: slash during low passes, block feathers with the shield, and move toward the Eagle during its wind attack so Link is not blown from the platform.
1. Open the tower and prepare for the dungeon
Before Eagle's Tower, complete the Signpost Maze and pay Mamu 300 rupees to learn Frog's Song of Soul. Lift the Rooster Statue in Mabe Village, enter the passage beneath it and play the song at the Rooster's bones. The revived Flying Rooster follows Link until Eagle's Tower is defeated and can carry him across large gaps when Link grabs it with the Power Bracelet.
Travel to the Hen House area in Tal Tal Heights and enter the cave below it. Push through the blocks, grab the Rooster and fly across the large gap to obtain the Bird Key. Return through the mountain caves to the tower entrance, place the Bird Key in the nearby keyhole rock and climb the revealed staircase. Bring the Roc's Feather, Hookshot, Power Bracelet and a healing supply. Save before entering if your hardware or emulator supports a reliable separate save state or backup.
- Frog's Song of Soul learned.
- Flying Rooster revived.
- Bird Key obtained and used at the tower entrance.
- Roc's Feather, Hookshot and Power Bracelet available.
- Health restored before entry.
2. Get the first key and reach the upper floor
From the entrance, go right through the first rooms. Use the Roc's Feather to jump the spike gaps and avoid the Blade Traps rather than trying to cross while taking contact damage. In the room with two Like Likes, defeat both enemies; the dropped Small Key opens the locked door at the upper-right. Go through it and climb the stairs to the second floor.
In the next room, leave the iron ball temporarily and use the Power Bracelet on the lever at the right. Pull it down, then move left through the opening before the blocks close. If you fail the timing, pull the lever again. Continue left and drop through one of the holes to return to the first floor.
- Small Key collected from the Like Likes.
- Locked upper-right door opened.
- Second floor reached.
- First hole drop completed without losing the route.
3. Collect the Stone Beak and Mirror Shield
On the first floor, clear the enemies and follow the route left and downward to the chest containing the Stone Beak. Backtrack toward the right side, defeat the Anti-Kirby if it blocks the route, and read the owl statue's hint about jumping from the floor above to reach the chest.
Use the Crystal Switch near the spikes to lower the correct blocks. Hit it with the sword or a projectile, then travel left, down and around to the stairs. With the blocks lowered, open the chest on the second floor to obtain the Mirror Shield. Drop through the nearby hole afterward; this places Link on a higher first-floor ledge. Walk upward, collect the Small Key from the chest and return to the room with the horse-head statues. Throw both statues until they land upright to make the Dungeon Map chest appear.
- Stone Beak collected.
- Crystal Switch used to lower the correct blocks.
- Mirror Shield collected.
- Additional Small Key collected.
- Dungeon Map obtained from the horse-head puzzle.
4. Carry the iron ball through the pillar route
Return to the room containing the iron ball. Pick it up with the Power Bracelet and place it beside the blocks on the left. Pull the lever, move quickly through the opened gap and enter the pillar room. Defeat the Zols, then throw the ball into the first pillar from the correct side so it does not fall into a hole. If the ball drops into a hole, it returns to its previous position; retrieve it and continue rather than restarting the dungeon.
Carry the ball to the second pillar and strike it from below. Return upward, push the block aside, cross the spikes and solve the Three-of-a-Kind room if you want the Compass. Continue with the ball to the next section, throw it over the barrier and use the surrounding stairs and holes to approach the third pillar from the opposite side. Carrying the ball across the spikes may cost health, so do it only when the route is clear and take a winged heart if one is available.
After the third pillar, use the Crystal Switch and the lower-floor loop to reach the room with the tile enemies. Drop the ball on a safe floor tile, survive the flying tiles and defeat the Spark with Magic Powder if necessary. Take the ball east and destroy the third accessible support, then use the bombable walls and Hookshot chest crossing to reach the lower route. Drop through the hole, loop right and climb back toward the second floor.
Use the remaining Crystal Switches while standing on the correct blocks so the raised platforms place Link on the needed ledges. Retrieve the iron ball, carry it through the one-way route and cross the Hookshot gap. The final pillar is reached from below; throw the ball into it. The tower then lowers with a visible collapse, joining the upper floors and opening the remainder of the dungeon.
- First pillar destroyed.
- Second pillar destroyed.
- Third pillar destroyed.
- Fourth pillar destroyed.
- Tower-lowering collapse seen.
5. Defeat Grim Creeper and obtain the Nightmare Key
After all four pillars fall, repeat the central stair and Crystal Switch route to reach the newly connected third-floor rooms. Avoid unnecessary fights on narrow platforms, but defeat enemies that can knock Link into holes. Continue upward and right to Grim Creeper's room.
Grim Creeper summons groups of six bats. Watch their formation, position Link so the bats pass across his sword range and slash repeatedly as they charge. Every bat must be destroyed; if one escapes, another group is summoned. Once the bats are cleared, continue into the next room. Push the two blocks together to make the chest appear and collect the Nightmare Key.
- Grim Creeper defeated by clearing each bat wave.
- Nightmare Key collected.
- Enough health remains for the boss approach.
6. Reach the roof
From the Nightmare Key room, go down and left through the side-scrolling Goomba room. Use the Roc's Feather to jump on the Goombas for possible heart recovery, then enter the Nightmare Door. Climb the steps and use the Hookshot on the block across the gap. Follow the opened route down, right and up the stairs, then climb the exterior ladder to the roof.
Before climbing the final staircase, restore as much health as possible. Equip the Mirror Shield or keep it ready. Do not spend bombs or arrows in the earlier rooms unless they are needed for a specific obstacle; Evil Eagle is primarily a sword-and-shield fight.
- Nightmare Door opened.
- Hookshot crossing completed.
- Roof reached.
- Health restored before Evil Eagle.
7. Defeat Evil Eagle and claim the seventh Instrument
Evil Eagle attacks from a side view on the tower roof. During low passes, jump if needed and slash when the Eagle comes within sword range. If it flies level with Link or dives directly across the platform, hold the shield up to block the contact attack; a well-timed sword strike can also punish the pass.
When Evil Eagle perches at a corner and flaps its wings, it creates a strong gust and fires feathers. Hold the shield toward the feathers and move toward the Eagle, not away from it. Jump when necessary to avoid being swept from the roof. Staying near the center gives more room to recover from a missed movement. Repeat the attack and defense cycle until the boss is defeated.
After the battle, collect the Heart Container and climb down into the tower. Drop from the ledge into the newly accessible treasure room, then enter the northern room and step onto the altar to collect the Organ of Evening Calm. The game counts this as the seventh Instrument and transports Link out of the dungeon, advancing the route toward Turtle Rock.
- Evil Eagle defeated.
- Heart Container collected.
- Organ of Evening Calm collected.
- Seven Instruments now appear in the inventory.
Before you move on
- The four iron-ball pillar collapses have occurred and the upper tower floors have lowered.
- Grim Creeper is defeated and the Nightmare Key has been collected.
- The Nightmare Door has been opened and Evil Eagle is defeated.
- The Heart Container and Organ of Evening Calm are collected.
- The inventory shows seven Instruments, including the Organ of Evening Calm.
Turtle Rock (Dungeon 8) — Late-Game Item Mix and Boss Prep
Continuity check: Frog’s Song of Soul, the revived Flying Rooster, and the Bird Key should already be complete from the preceding Eagle’s Tower chapter. Eagle’s Tower is defeated, the Rooster is gone, and Link now follows the Tal Tal Mountain Range route to Turtle Rock. Rescue Marin at the broken bridge, use the Mirror Shield to cross the flame passage, and awaken the turtle guardian with Frog’s Song of Soul. Inside Turtle Rock, collect the map, compass, and Stone Beak, solve the moving-platform routes, defeat Smasher, defeat the Dodongo Snakes from the upper ledge, and activate the crystal switch. Blaino awards the Magic Rod, which melts the dungeon’s ice barriers and is required against Hot Head. The Thunder Drum is the eighth Instrument. The trading sequence and Magnifying Lens are not Turtle Rock requirements, but the Lens remains useful for the Wind Fish’s Egg maze.
Confirm the post-Eagle’s Tower state
This chapter begins after Eagle’s Tower has been completed. Frog’s Song of Soul should already be in the Ocarina, the Flying Rooster should already have been revived and used to obtain the Bird Key, and the Bird Key should already have opened Eagle’s Tower. Do not search for another Bird Key or try to revive the Rooster again: after Eagle’s Tower, the Rooster is gone and does not return for the Turtle Rock route.
Make sure Link has the Hookshot, Mirror Shield, Roc’s Feather, Power Bracelet, Bombs, and Ocarina. A Level-2 Sword is helpful for the guardian outside Turtle Rock and for general combat, but the trading sequence, Magnifying Lens, and any traded item are not prerequisites for entering or completing this dungeon. Save before leaving for the mountain route, and refill hearts or carry Secret Medicine if the previous dungeon left Link weakened.
- Eagle’s Tower and Evil Eagle are defeated.
- The Organ of Evening Calm is in the inventory.
- The Flying Rooster is gone from the route.
- Hookshot, Mirror Shield, Roc’s Feather, Power Bracelet, Bombs, and Ocarina are available.
Rescue Marin and open Turtle Rock
Follow the Tal Tal Mountain Range route from Eagle’s Tower. Near the house associated with the Rooster, use the Hookshot to cross the broken bridge and rescue Marin. After the scene, continue through the mountain caves and ledges. The Hookshot is needed to cross large gaps, and the route uses ordinary cave exits rather than the Flying Rooster.
When you reach the cracked section of mountain wall, place a Bomb to open the cave. Walk upward through the flame corridor while holding the Mirror Shield forward. The shield blocks the fireballs; do not try to rush through without it. Exit the cave and continue around the mountain to the turtle-shaped stone guardian.
Stand in front of the guardian and play Frog’s Song of Soul. It moves its head from side to side and occasionally charges. Circle around the open area, avoid the charge, and slash the head when it approaches. A Level-2 Sword reduces the number of hits needed. When the guardian falls, the entrance to Turtle Rock opens.
- Marin was rescued from the broken bridge.
- The Hookshot was used across the mountain gaps.
- The Mirror Shield was used through the flame corridor.
- The Turtle Rock guardian was awakened with Frog’s Song of Soul and defeated.
Collect the early Turtle Rock items
Enter Turtle Rock and go up to the Vire. Defeat it with the Boomerang when possible, then clear the Ropes and the blue Hinox in the following rooms. Complete the first movable-block floor pattern to open its rupee chest, then continue past the Sparks and Rolling Bones. Defeat the next Vire to obtain a Small Key, and open the Compass chest in the lower route.
Return toward the entrance and cross the lava gap with Roc’s Feather. Push the next movable platform up and left to form a path to the Dungeon Map. In the map room, bomb the cracked north wall, descend the staircase, and cross the side-scrolling fireball passages with Roc’s Feather. After resurfacing, defeat the Ropes and open the Stone Beak chest.
Continue to Smasher. Lift and throw his ball with the Power Bracelet; four successful hits defeat him. In the nearby movable-platform room, follow the floor-covering route to make a Small Key appear. Bomb the indicated cracked walls, but do not waste keys on the optional locked door unless you deliberately want its contents.
- The Compass and Dungeon Map were collected.
- The Stone Beak was collected.
- Smasher was defeated with his own ball.
- The first required Small Key from the floor puzzle was collected.
Reach the upper ledge and defeat the Dodongo Snakes
Use the moving-platform route to reach the rooms with the Gibdos and the two Dodongo Snakes. Keep moving across the cracked floor while defeating the Gibdos with the Boomerang, then collect the Small Key they leave behind. Do not defeat the Dodongo Snakes from the lower floor. Their chest appears on the upper ledge, and defeating them too early allows them to respawn before you can claim the reward.
Continue through the Hookshot and side-scrolling passages until you exit the dungeon on the northwest side of the mountain. Collect the nearby Piece of Heart if it is still available, then activate the warp location and enter the adjacent Turtle Rock entrance. Link returns to the Dodongo Snake room on the upper ledge.
Pick up Bombs and throw them directly into the snakes’ mouths. Each Dodongo Snake must swallow three Bombs. Direct throws are more reliable than leaving Bombs on the floor. Once both snakes are defeated, open the chest for the Small Key. Play Manbo’s Mambo to return to the main entrance if desired.
- The Dodongo Snakes were left alive on the first visit.
- The upper Turtle Rock entrance or nearby warp was activated.
- Each Dodongo Snake swallowed three Bombs.
- The upper-ledge chest was opened for its Small Key.
Activate the crystal switch and defeat Blaino
From the entrance, retrace the moving-platform route to the bombable wall and crystal-switch room. Strike the crystal switch so the blocks change position for the western route. Return through the moving-platform rooms, spend the required Small Keys on the locked blocks, and cross the side-scrolling lava passage with Roc’s Feather.
The route resurfaces near Blaino. Attack him from above or below rather than standing directly in front of him. When he begins the large wind-up punch, move away immediately; that attack can send Link all the way back to the dungeon entrance. A useful method is to hold a sword spin attack, jump over him with Roc’s Feather, and release the spin as Link passes over him.
After Blaino falls, collect the Fairy if needed and climb to the chest above him. The chest contains the Magic Rod. This is the essential Turtle Rock item: it melts the ice barriers in the remaining side-scrolling passages and is the required weapon for Hot Head.
- The crystal switch was struck before taking the Blaino route.
- The required locked blocks were opened.
- Blaino’s large wind-up punch was avoided.
- The Magic Rod was collected.
Melt the ice and claim the Nightmare Key
Return to the moving-platform area and take the staircase leading to the ice passage. Equip the Magic Rod and melt the ice blocks while using Roc’s Feather to jump between platforms. In the second ice section, melt the higher row first, then jump onto the lower row and reach the staircase. Continue through the newly opened rooms to Cue Ball.
Cue Ball must be attacked from behind. Wait for it to charge, jump over it with Roc’s Feather, and slash its exposed rear. Repeat the jump-and-strike pattern until it is defeated. Then solve the final moving-platform puzzle. The completed route leads to the chest containing the Nightmare Key.
Use the Nightmare Key on the boss door. The final approach contains more lava, stairs, and ice barriers. Keep both Roc’s Feather and the Magic Rod available, melt the blocks that obstruct the route, and refill hearts before entering Hot Head’s room. Secret Medicine is optional but provides a useful recovery if the dungeon has consumed much of Link’s health.
- The ice passages were cleared with the Magic Rod.
- Cue Ball was defeated by striking its rear.
- The final moving-platform puzzle was completed.
- The Nightmare Key was collected.
Defeat Hot Head and collect the Thunder Drum
Hot Head rises from the lava and creates diagonal fire splashes when it lands. Watch where it emerges and stand below its landing point so the splashes pass to the sides. Fire the Magic Rod when Hot Head emerges. A successful hit removes its flames and makes it move rapidly around the room; continue firing to land additional hits while avoiding its movement.
After enough Magic Rod shots, Hot Head’s shell breaks and its smaller exposed form continues moving through the lava. Keep using the Magic Rod until the boss is defeated. Collect the Heart Container, then cross the opened route and take the Thunder Drum.
The Thunder Drum is the eighth and final Instrument of the Sirens. Turtle Rock itself does not require the trading sequence or Magnifying Lens. If following the intended reliable route, finish the trading sequence afterward or before the Egg approach so the Magnifying Lens can reveal the current save’s library directions. At the Wind Fish’s Egg entrance, play the Ballad of the Wind Fish outside the Egg before entering the final maze.
- Hot Head was defeated with the Magic Rod.
- The final dungeon Heart Container was collected.
- The Thunder Drum is in the inventory.
- All eight Instruments of the Sirens are collected.
- Link can return to the Wind Fish’s Egg entrance for the Ballad.
Before you move on
- Eagle’s Tower is complete and the Flying Rooster is gone.
- Marin was rescued from the broken bridge.
- The Turtle Rock guardian was defeated with Frog’s Song of Soul.
- The Magic Rod and Nightmare Key are in the inventory.
- Hot Head was defeated and the final dungeon Heart Container was collected.
- The Thunder Drum is in the inventory as the eighth Instrument.
- The player can return to the Wind Fish’s Egg entrance and play the Ballad of the Wind Fish outside the Egg.
- If using the intended clue route, the trading sequence is complete and the Magnifying Lens can reveal the save-specific library directions.
Trading Sequence — Full Route and Practical Tips
The DX trading sequence runs from the Yoshi Doll in Mabe Village to the Magnifying Lens beneath the Mermaid Statue. The order is Yoshi Doll, Ribbon, Dog Food, Bananas, Stick, Honeycomb, Pineapple, Hibiscus, Letter, Broom, Fishing Hook, Necklace, Mermaid’s Scale, and Magnifying Lens. The early trades through the Stick are required to open Kanalet Castle and continue the main route. The later trades are optional for the literal ending, but the Magnifying Lens is the intended way to read the current save’s Wind Fish’s Egg directions in the Mabe Village library. The eight Instruments of the Sirens and the Ballad of the Wind Fish at the Egg entrance—not the trading sequence itself—are the direct final-area requirements. The optional Goriya exchange gives the Boomerang but consumes the item currently assigned to the B button.
1. Win the Yoshi Doll and trade it for the Ribbon
After recovering the Sword, enter the Trendy Game in the southeast part of Mabe Village. Pay the entry fee and position the claw over the Yoshi Doll. Use the horizontal control to line the claw up with the doll, then use the other control to place the claw’s shadow over the doll’s base before releasing it. The Yoshi Doll is the prize needed for this sequence; other Trendy Game prizes are optional.
Take the doll to Mamasha in the large house in northern Mabe Village, near the Dream Shrine. Speak to her and agree to give her the Yoshi Doll. She gives you the Ribbon. This begins the intended full trade route, but neither the Yoshi Doll nor the Ribbon is a literal requirement for entering the final Egg.
- Yoshi Doll obtained from the Trendy Game
- Yoshi Doll given to Mamasha
- Ribbon received
2. Trade the Ribbon for Dog Food, then Dog Food for Bananas
Go to the small doghouse beside Madam MeowMeow’s home in Mabe Village. Speak to CiaoCiao, the smaller Chain Chomp inside, while carrying the Ribbon. Give her the Ribbon to receive Dog Food.
Travel to Toronbo Shores and enter Sale’s house, the building surrounded by banana trees. Give Sale the Dog Food and take the Bananas. Keep them until you reach Kanalet Castle; they are required to start the monkey bridge event.
- Ribbon traded to CiaoCiao
- Dog Food received
- Dog Food traded to Sale
- Bananas received
3. Give the Bananas to Kiki and collect the Stick
After obtaining the Power Bracelet from Bottle Grotto, approach Kanalet Castle. The main gate is closed, but Kiki waits east of the entrance. Give Kiki the Bananas. Kiki and the other monkeys build a bridge across the moat. Cross the new bridge and pick up the Stick left behind.
The Bananas and Stick are the required portion of the trade sequence for entering Kanalet Castle and collecting the Golden Leaves. The later trades are not needed to open the castle or obtain the Instruments.
- Power Bracelet obtained
- Bananas traded to Kiki
- Monkey bridge completed
- Stick collected
4. Trade the Stick, Honeycomb, Pineapple, and Hibiscus
After completing Key Cavern and obtaining its Instrument, return to the beehive in the eastern part of Ukuku Prairie. Tarin is standing there. Speak to him while carrying the Stick. He knocks down the hive, runs away when the bees appear, and leaves the Honeycomb behind for you to collect.
Take the Honeycomb to Chef Bear in the southeast house of Animal Village. Give it to him and receive the Pineapple.
When progressing through the Tal Tal Mountain route toward Angler’s Tunnel, follow the cave route through the crystal obstacles to reach Papahl on a high ledge. The Pegasus Boots are needed to dash through the crystals. Give Papahl the Pineapple and receive the Hibiscus.
Return to Animal Village and enter the northeast house. Speak to Christine, the goat, while carrying the Hibiscus. Give it to her and accept the Letter addressed to Mr. Write.
- Key Cavern completed
- Stick given to Tarin
- Honeycomb collected
- Honeycomb traded to Chef Bear
- Pineapple received
- Pineapple traded to Papahl
- Hibiscus received
- Hibiscus traded to Christine
- Letter received
5. Deliver the Letter and exchange the Broom
Take the Letter to Mr. Write’s house on the border of the Mysterious Forest. Speak to him inside to complete the delivery. He gives you a Broom.
Bring the Broom to Grandma Yahoo. She is normally in the Mabe Village house near Ulrira, but she can move to the Animal Village house beside Christine’s home as the story progresses. If she is not in Mabe Village, check Animal Village. Give her the Broom to receive the Fishing Hook.
- Letter delivered to Mr. Write
- Broom received
- Grandma Yahoo located
- Broom traded to Grandma Yahoo
- Fishing Hook received
6. Finish the sequence in Martha’s Bay
After obtaining the Flippers, go to the island with the Owl Statue in Martha’s Bay, east of Catfish’s Maw. Swim around the island to the wooden bridge and enter the water beneath it. The fisherman is below the bridge. Use Roc’s Feather to jump from the water onto his boat, then give him the Fishing Hook. He gives you a Necklace.
Swim to the Mermaid in the northwest part of the Catfish’s Maw area and return her Necklace. She gives you a Mermaid’s Scale.
To reach the Mermaid Statue, start near the entrance to Animal Village and travel south until the path ends. Turn west and use the Hookshot on the wooden boxes across the small water gap. Continue north to the statue. Place the Scale in it to reveal a staircase. Enter the passage and walk north to collect the Magnifying Lens.
- Flippers obtained
- Fishing Hook traded to the fisherman
- Necklace received
- Necklace returned to the Mermaid
- Mermaid’s Scale received
- Hookshot obtained
- Scale placed in the Mermaid Statue
- Magnifying Lens collected
7. Read the Egg clue and decide whether to trade for the Boomerang
Return to Mabe Village with the Magnifying Lens. Enter the library and examine the dark book in the lower-right area. The Lens makes the small writing readable. The book displays the correct directions through the Wind Fish’s Egg for the current save. Record the directions before entering the Egg, because the route is save-specific.
The Magnifying Lens is the intended and most reliable way to solve the Egg maze, but it is not a literal requirement for opening the Egg. The direct final-area requirements are collecting all eight Instruments of the Sirens and playing the Ballad of the Wind Fish at the Egg’s exterior entrance. The trading sequence is therefore practically important rather than universally mandatory for the normal ending; a player who knows or discovers the maze route can proceed without the Lens.
After obtaining the Lens, you may visit the optional Goriya in a bombable cave at Toronbo Shores, south of the monkey that throws coconuts. The Goriya exchanges the item currently assigned to the B button for the Boomerang. Check the equipped item before accepting. The exchange is not required for the Lens, the Egg, or the normal ending.
- Magnifying Lens used to read the Mabe Village library book
- Save-specific Egg directions recorded
- Trading sequence not mistaken for a literal Egg-opening requirement
- B-button item checked before the Goriya exchange
- Boomerang exchange treated as optional
Before you move on
- The Magnifying Lens is in the inventory, and the Mermaid’s Scale has been exchanged.
- The Mabe Village library book can be read and its directions have been recorded for this save.
- The player understands that the Lens is the intended practical solution to the Egg maze, not a literal condition for opening the Egg.
- All eight Instruments of the Sirens have been collected before the final Egg attempt.
- The optional Goriya exchange has not been mistaken for a required step.
- If the Boomerang was obtained, the player remembers which B-button item was traded and understands that the exchange does not affect the normal ending.
Wind Fish's Egg — Final Maze and True Ending
After Turtle Rock, collect the Thunder Drum to complete the eight Instruments of the Sirens. Learn Marin’s Ballad of the Wind Fish, travel to the summit of Mount Tamaranch, and play the song at the exterior Egg entrance. The eight Instruments and the Ballad are the literal requirements for opening the Egg. The completed trading sequence and Magnifying Lens are practical route aids: the Lens lets you read the save-specific directions in the Mabe Village Library. Inside the Egg, cross the dark opening rooms, fall into the repeating maze, follow the directions from the Library book, and drop through the final pit. Defeat Giant Gel, Agahnim’s Shadow, Moldorm’s Shadow, Ganon’s Shadow, the Nightmare of Lanmola, and Dethl. Use Magic Powder on Giant Gel, reflect Agahnim’s round projectiles, strike Moldorm’s tail, dash into Ganon’s Shadow with the Pegasus Boots and Sword, fire the Magic Rod at the Nightmare of Lanmola, and jump over Dethl’s arms before attacking its open eye. Let the full ending and credits play before returning to the save for optional cleanup.
Complete the Instruments and open the Egg
Finish Turtle Rock and collect the Thunder Drum from the room beyond its Nightmare. This is the eighth and final Instrument of the Sirens. Make sure the Ocarina is in your inventory and that Marin has taught Link the Ballad of the Wind Fish. If you have not learned it, return to Mabe Village and speak with Marin when she is there.
Travel to the Wind Fish’s Egg at the summit of Mount Tamaranch. The mountain route uses the Power Bracelet to lift rocks and Roc’s Feather to cross gaps. From the upper mountain area, follow the accessible path toward the Egg and climb the stairs to its entrance.
Stand outside the Egg and play the Ballad of the Wind Fish on the Ocarina. Do this before entering; the song is not played inside the maze. With all eight Instruments collected, the performance cracks the Egg open. The trading sequence and Magnifying Lens are not checked when the Egg opens.
- Thunder Drum collected.
- All eight Instruments of the Sirens collected.
- Ballad of the Wind Fish learned.
- Ballad played at the exterior Egg entrance.
- Egg entrance opened.
Read the current save’s maze directions
Before committing to the final dungeon, return to Mabe Village and enter the Library. The trading sequence leads to the Magnifying Lens. With the Lens in your inventory, examine the small text in the bottom-right book, Dark Secrets and Mysteries of Koholint. Write down every direction in the order shown.
The directions are generated for the current save, so do not rely on a route copied from another playthrough. The Library book is the intended in-game solution and gives the reliable path through the repeating maze.
Without the Magnifying Lens, the Egg can still be opened once the eight Instruments and Ballad requirements are met, but you lack the intended readable route clue. Complete the trading sequence and return to the Library rather than assuming a universal fixed sequence. This makes the trading chain practically important without making it a literal Egg-opening requirement.
- Trading sequence completed through the Magnifying Lens.
- Dark Secrets and Mysteries of Koholint examined.
- Every maze direction copied in order.
- Directions confirmed for the current save.
Restock and save before entering
Restore Link’s hearts before entering the Egg. On the original Game Boy Color controls, save by pressing A, B, START, and SELECT simultaneously, then confirm the save option. Make a pre-attempt save before beginning the final run.
Carry Magic Powder for Giant Gel, the Magic Rod for the Nightmare of Lanmola, and Roc’s Feather for Dethl. Keep either the Boomerang or Bow and Arrows available for Dethl’s eye. A Potion or Secret Medicine is optional but useful because the Nightmare battles occur in one continuous sequence.
If Link dies, reload the pre-attempt save, restore any supplies you used, and repeat the written Library route. Do not assume that reaching the final pit creates a convenient checkpoint.
- Hearts restored.
- Magic Powder available.
- Magic Rod available.
- Roc’s Feather available.
- Boomerang or Arrows available.
- Pre-attempt save completed.
Cross the repeating maze
Enter the Egg and walk north through the dark rooms. Continue forward until Link falls through a pit and lands in the maze room with multiple exits.
Begin following the Library directions from the maze’s proper starting room. Take one exit per instruction, in order. Do not skip an arrow, add an extra movement, or change direction because several rooms look alike.
If you return to the repeating section or fail to reach the large final pit, stop and restart from the correct maze room while checking each written direction. The successful route ends at a large hole. Fall through it to begin the Nightmare sequence.
- Opening Egg rooms crossed.
- Pit into the repeating maze reached.
- Library directions followed in order.
- Final pit reached.
Defeat Giant Gel, Agahnim’s Shadow, and Moldorm’s Shadow
Giant Gel is the first Nightmare form. It bounces around the room and is not damaged by the Sword. Equip Magic Powder and sprinkle it on the form as it lands within range. Repeat the attack until the form changes, moving away after each hit so the bouncing body does not collide with Link.
Agahnim’s Shadow fires round energy projectiles and X-shaped projectiles. Face the shadow and swing the Sword into the round projectiles to reflect them back. Avoid the X-shaped projectiles; do not rely on the Mirror Shield to protect Link from them. Keep moving and stay clear of the projectile’s later wall-bounce path.
Moldorm’s Shadow is vulnerable at the end of its tail. Strike the tail with the Sword, then immediately reposition because the worm moves quickly after being hit. Fight from open space and avoid allowing Link to become trapped against a wall or corner.
- Giant Gel defeated with Magic Powder.
- Round projectiles reflected into Agahnim’s Shadow.
- X-shaped projectiles avoided.
- Moldorm’s tail struck repeatedly.
Defeat Ganon’s Shadow and the Nightmare of Lanmola
Ganon’s Shadow creates fire bats and then throws its trident. Keep moving while the bats are active, using Roc’s Feather to jump when necessary. After the trident is thrown, jump over it and immediately equip or use the Pegasus Boots with the Sword to dash into Ganon’s Shadow during the opening. Repeat the dash attack until the form is defeated.
The Nightmare of Lanmola follows Ganon’s Shadow. Equip the Magic Rod and fire at the moving form. In the Game Boy Color release, the Magic Rod is the dependable weapon for this phase and can defeat the Nightmare rapidly. Continue moving so contact does not cost unnecessary health.
- Fire bats avoided or jumped over.
- Thrown trident avoided.
- Pegasus Boots and Sword equipped for the attack window.
- Ganon’s Shadow defeated with repeated dash attacks.
- Nightmare of Lanmola defeated with the Magic Rod.
Defeat Dethl and verify the ending
Dethl is the final Nightmare form. Its two spiked arms sweep around the room while the central eye remains closed. Equip Roc’s Feather and jump over each arm as it passes. Do not try to walk beneath the arms or attack while the eye is shut.
When the eye opens, attack it with the Boomerang or Arrows. Prioritize surviving the arm sweeps, then attack only during the eye-opening window. As the battle progresses, the movement becomes faster, so adjust each jump rather than holding a fixed position.
After Dethl is defeated, climb the stairs that appear and allow the entire ending sequence to play. The Wind Fish awakens, Koholint Island disappears, Link is shown at sea, and the credits roll. The special Marin scene for completing the game without dying is optional and is not required for the normal ending. Leave the system running until the credits have finished, then return to the existing save for optional exploration.
- Dethl’s arms cleared with Roc’s Feather.
- Dethl’s open eye struck with the Boomerang or Arrows.
- Dethl defeated.
- Wind Fish awakening shown.
- Koholint’s disappearance shown.
- Credits displayed.
- Save remains available for optional exploration.
Before you move on
- All eight Instruments of the Sirens are collected.
- The Ballad of the Wind Fish was played at the exterior Egg entrance.
- The current save’s Library directions were used to cross the repeating maze.
- Giant Gel, Agahnim’s Shadow, Moldorm’s Shadow, Ganon’s Shadow, the Nightmare of Lanmola, and Dethl were defeated.
- The Wind Fish awakened and Koholint Island disappeared.
- The ending and credits were displayed.
- The save remains available for optional Color Dungeon, Camera Shop, Secret Seashell, Piece of Heart, and other cleanup goals.
References for this chapter
- Wind Fish’s Egg - The Legend of Zelda: Link’s Awakening Walkthrough
- The Legend of Zelda: Link’s Awakening DX - Guide and Walkthrough - Game Boy Color - By Artemis251
- The Legend of Zelda: Link’s Awakening DX - Complete Guide (With Maps) - Game Boy Color - By GuideWriter1984
- Wind Fish’s Egg - Zelda Dungeon Wiki
- The Legend of Zelda: Link’s Awakening DX - Boss Guide - Game Boy Color - By ApolloGod
Overworld Secrets: Seashells, Pieces of Heart, and DX Photographs
The Game Boy Color version of Link’s Awakening DX contains 12 Pieces of Heart, eight dungeon Heart Containers, 26 Secret Seashells, and an optional Camera Shop album containing 12 photographs. Four Pieces of Heart create one additional Heart Container, while each dungeon boss provides a full Heart Container independently. The 12 heart pieces are found in Mabe Village, Koholint Prairie, Mysterious Forest, Ukuku Prairie, Yarna Desert, Tal Tal Heights, Kanalet Castle, Animal Village, the Graveyard, eastern Tal Tal Mountain, and the Turtle Rock exterior route. The small fishing fish gives rupees, not a Piece of Heart. The Seashell Mansion can provide bonus shells at exactly five and ten shells, and the Level-2 Sword is awarded at 20 collected shells. Camera Shop photographs and Game Boy Printer support are optional DX features and are not needed for the normal ending.
1. Track the four collectible categories separately
Keep separate records for the 12 Pieces of Heart, eight dungeon Heart Containers, 26 Secret Seashells, and Camera Shop photographs. Every four Pieces of Heart add one Heart Container, so all 12 provide three extra containers. The eight dungeon bosses provide their own containers and do not count toward the 12-piece total.
None of these collections is required for the normal campaign ending. Do not import the Nintendo Switch remake’s expanded heart-piece list, 50-shell total, Fairy Bottles, figurines, or Chamber Dungeon rewards into this Game Boy Color/DX checklist. Face Shrine has no overworld Piece of Heart; its relevant collectible in the surrounding route is a Secret Seashell.
- Record Pieces of Heart separately from dungeon Heart Containers.
- Record Secret Seashells separately from both heart categories.
- Exclude Nintendo Switch remake-only collectibles.
- Treat photographs and printing as optional.
2. Collect the first six Pieces of Heart
In western Mabe Village, enter the well and follow the short passage to the Piece of Heart. Cut the blocking bushes with the Sword before dropping into the well if necessary.
At the Fishing Pond behind Madam MeowMeow’s house, pay to fish and catch the large fish. That fish holds a Piece of Heart. The small fish provides rupees, so it does not belong on the heart-piece list.
In northwestern Koholint Prairie, go to the area north of the Witch’s House where the Piece of Heart is surrounded by pits. Use Roc’s Feather to jump across the gaps and reach it. This is the Koholint Prairie pit-area piece, not a Mysterious Forest location.
After obtaining the Power Bracelet, return to the Mysterious Forest and enter the hollow-log cave. Lift the skulls blocking the deeper passage and collect the Piece of Heart inside.
In Ukuku Prairie, enter the bombable cave and use the Pegasus Boots to dash through the crystal obstacles. Bomb the cracked wall in the upper section and take the Piece of Heart in the revealed room.
After defeating Lanmola in Yarna Desert, use the newly accessible quicksand route to reach the underground passage. Bomb the northern wall and enter the hidden room for the desert Piece of Heart.
- Mabe Village well.
- Mabe Village Fishing Pond large fish.
- Koholint Prairie pit area north of the Witch’s House.
- Mysterious Forest hollow-log cave after obtaining the Power Bracelet.
- Ukuku Prairie bomb cave.
- Yarna Desert room after Lanmola.
3. Finish the water, village, and mountain route
After clearing Angler’s Tunnel and obtaining the Flippers, swim east from the dungeon entrance to the underwater cave. Dive in the deep-water section to collect the Tal Tal Heights Piece of Heart.
Swim into the moat around Kanalet Castle and circle around the castle perimeter. Dive in the deep water above the pits to find the submerged Piece of Heart outside the dungeon.
At the outskirts of Animal Village, find the bombable wall and open it. Follow the cave route and use the Hookshot to cross the gap to the Piece of Heart.
In the southwest four-grave area of the Graveyard, push the bottom-right gravestone to reveal stairs. Enter the cave, clear the cracked obstruction with a Bomb, and use the Hookshot to cross the gap to the Piece of Heart.
In eastern Tal Tal Mountain, follow the late-game mountain route until you reach the cave entrance hidden beneath a lone bush. Follow the cave to its Piece of Heart.
The final Piece of Heart is reached through the exterior route behind Turtle Rock. After entering the dungeon, follow the route that leads to its back exit and collect the Piece of Heart on the outside ledge before leaving the mountain area.
- Tal Tal Heights underwater cave east of Angler’s Tunnel.
- Kanalet Castle moat.
- Animal Village cave.
- Graveyard four-grave cave using the bottom-right gravestone, Bomb, and Hookshot.
- Eastern Tal Tal Mountain cave.
- Turtle Rock back-exit exterior ledge.
4. Manage Secret Seashells and the Level-2 Sword
The original Game Boy and DX releases contain 26 Secret Seashells. Visit the Seashell Mansion when you have exactly five collected shells to receive an additional shell, then return when you have exactly ten to receive another. These two rewards are Secret Seashells, not Pieces of Heart.
At 20 collected shells, the Seashell Mansion awards the Level-2 Sword. The sword reward does not consume the 20-shell total. Any remaining unclaimed shells are removed after the sword reward, so complete the shell sweep you want before claiming the sword. Missing the exact five- or ten-shell Mansion visits forfeits those bonus shells, but does not prevent obtaining the sword if enough other shells remain.
- The DX total is 26 Secret Seashells.
- Visit the Seashell Mansion with exactly five shells.
- Visit it again with exactly ten shells.
- Claim the Level-2 Sword at 20 shells.
- Record Mansion rewards as shells, not heart pieces.
- Finish the desired shell sweep before taking the sword.
5. Complete the optional DX Camera Shop album
The Camera Shop is east of Goponga Swamp and stores Link’s photographs. The album contains 12 photographs, although the opening event has alternate outcomes, so one save cannot display both first-photo variants. Choose the first-photo result you want before continuing.
While Marin follows Link, visit the Toronbo Shores cliff, fall into the western Mabe Village well, and stand with Marin at the Flying Rooster weather vane. These Marin photographs are time-sensitive and can become unavailable after she stops accompanying Link.
Look through the window of Ulrira’s house for his photograph. After BowWow has been returned to Madam MeowMeow, approach BowWow for his photograph. The Thief photograph requires stealing from the Mabe Village shop and permanently changes Link’s name to THIEF, so avoid it during a normal run unless that result is intentional.
After obtaining the Magnifying Lens, revisit the fisherman beneath the Martha’s Bay bridge and the hidden Zora in northeastern Animal Village. During the Golden Leaves sequence, visit the closed Kanalet Castle gate before opening it, then revisit Richard’s area after delivering the leaves when the photograph event is available.
After returning the Ghost to its grave, revisit the grave for the Ghost photograph. After Eagle’s Tower, when the Flying Rooster is no longer accompanying Link, cross the bridge east of the Hen House for the final photograph. Compatible Game Boy Printer hardware can print stored photographs, but printing is not required.
- Choose one first-photo variant.
- Take all three Marin photographs before she stops following Link.
- Photograph Ulrira and BowWow.
- Treat the Thief photograph as optional and permanent.
- Use the Magnifying Lens for the fisherman and hidden Zora photographs.
- Visit the closed Kanalet Castle gate during the Golden Leaves sequence.
- Revisit the Ghost’s grave after the Ghost sequence.
- Cross the Hen House bridge after Eagle’s Tower without the Flying Rooster.
6. Verify the optional collection
A complete DX collectible record contains all 12 Pieces of Heart, all eight dungeon Heart Containers, the Level-2 Sword, the desired 26-shell total, and the Camera Shop album with one selected first-photo variant. The Koholint Prairie pit-area heart and the Mysterious Forest hollow-log heart must appear as separate entries.
For efficient routing, collect the Mabe Village and Koholint Prairie pieces early when Roc’s Feather is available. Return to the Mysterious Forest after the Power Bracelet. Add the Yarna Desert piece after Lanmola, the water pieces after the Flippers, the Animal Village and Graveyard pieces after Bombs and the Hookshot, the eastern mountain piece during the late mountain route, and the Turtle Rock piece before leaving through its back exit.
- All 12 DX Pieces of Heart are collected.
- The Koholint Prairie pit-area piece is recorded north of the Witch’s House.
- The Mysterious Forest hollow-log piece is recorded separately.
- All eight dungeon Heart Containers are counted separately.
- The small fishing fish is recorded as a rupee reward.
- The five- and ten-shell Mansion rewards are recorded as Secret Seashells.
- The Level-2 Sword is claimed at 20 shells.
- The Camera Shop album is complete to the selected first-photo variant.
- Game Boy Printer use remains optional.
Before you move on
- The save contains these 12 DX Pieces of Heart: Mabe Village well; Mabe Village large fishing-pond fish; Koholint Prairie pit area north of the Witch’s House; Mysterious Forest hollow-log cave; Ukuku Prairie bomb cave; Yarna Desert cave after Lanmola; Tal Tal Heights underwater cave; Kanalet Castle moat; Animal Village cave; Graveyard four-grave cave; eastern Tal Tal Mountain cave; and the Turtle Rock back-exit exterior ledge.
- The Graveyard piece was obtained by pushing the bottom-right gravestone in the southwest four-grave area, then using the Bomb and Hookshot route.
- The Koholint Prairie and Mysterious Forest pieces are recorded as separate locations.
- The eight dungeon Heart Containers are recorded separately.
- The small fishing fish, Trendy Game, Town Tool Shop, Tabahl Wasteland, Richard’s Villa, Pothole Field, and Seashell Mansion are not counted as DX Pieces of Heart.
- The five- and ten-shell Mansion rewards are recorded as Secret Seashells.
- The Level-2 Sword has been claimed at 20 Secret Seashells, with unclaimed shells removed afterward.
- The Camera Shop album is complete to the selected first-photo variant.
- The optional collection remains separate from the eight Instruments, Wind Fish’s Egg, final Nightmare, ending, and credits.
References for this chapter
- Link’s Awakening Heart Pieces (Game Boy)
- Koholint Prairie — Zelda Dungeon Wiki
- The Legend of Zelda: Link’s Awakening DX Items
- Link's Awakening Photographs — Zelda Dungeon Wiki
- Photographs — The Legend of Zelda: Link's Awakening Walkthrough
- Secret Seashells — Zelda Universe
- The Legend of Zelda: Link’s Awakening DX - Complete Guide (With Maps) - Game Boy Color - By GuideWriter1984
Game Boy Color Features: Printer Notes, DX Quirks, and Version Differences
The Legend of Zelda: Link’s Awakening DX is the Game Boy Color edition of the original adventure. It retains the original dungeon order, two-equipped-item system, trading sequence, eight Instruments of the Sirens, and Wind Fish’s Egg finale while adding color presentation, the Photographer album, Game Boy Printer compatibility, and the optional Color Dungeon. The Color Dungeon requires a color-capable system and becomes available after Bottle Grotto, BowWow’s return, and the Power Bracelet. Its Cemetery entrance uses the sequence bottom-middle down, bottom-left left, top-left up, top-middle right, and top-right up; bottom-middle is the right-hand grave in the lower row. The Library book and Pegasus Boots reveal the clue but are not the literal trigger. Bring Magic Powder before entering: the Color Guards only identify their colors and explain that Powder is required to proceed; they do not sell it in the original DX release. The dungeon awards Red Clothes or Blue Clothes and does not provide an Instrument. Do not import Nintendo Switch features such as Fairy Bottles, figurines, Chamber Dungeons, or its expanded collectible structure.
Confirm the DX edition and use color-capable hardware
Use The Legend of Zelda: Link’s Awakening DX for Game Boy Color rather than the earlier monochrome cartridge. DX adds color presentation, the Photographer album, Game Boy Printer support, and the Color Dungeon. The main campaign remains the original eight-Instrument adventure.
The DX cartridge can run on compatible monochrome Game Boy hardware, but the Color Dungeon requires a color-capable system. Its puzzles use colored enemies, statues, switches, floor tiles, and movable objects. The main campaign remains playable without color, while the Color Dungeon’s visual logic is intended for Game Boy Color or other compatible color hardware.
Treat the Color Dungeon as bonus content rather than a ninth Instrument dungeon. Its reward is a choice between Red Clothes and Blue Clothes. It does not add an Instrument, replace a story objective, or serve as a condition for opening the Wind Fish’s Egg.
- Confirm that the cartridge is Link’s Awakening DX.
- Use a color-capable system for the Color Dungeon.
- Keep the Color Dungeon separate from the eight Instrument dungeons.
Meet the practical Color Dungeon prerequisites
Complete Bottle Grotto, return BowWow to Madam MeowMeow, and obtain the Power Bracelet before attempting the Cemetery entrance. The Bracelet lets Link push the gravestones. The trading sequence and Magnifying Lens are not required to reveal this entrance.
After obtaining the Pegasus Boots, visit the Mabe Village Library and dash into the elevated book. Read it for the gravestone clue. The book and Boots provide the hint only; they are not the literal activation conditions if the correct sequence is already known.
Obtain Magic Powder before entering the dungeon. The Color Guards identify their colors and explain that Magic Powder is needed to continue, but they do not sell Powder in the original Game Boy Color DX release. If the pouch is empty, leave the dungeon area and collect Powder before attempting to proceed. The Mysterious Forest Toadstool route is the normal early source, and later capacity upgrades can increase the amount Link carries.
- Complete Bottle Grotto.
- Return BowWow to Madam MeowMeow.
- Obtain the Power Bracelet.
- Read the Library book after obtaining the Pegasus Boots if you want the clue.
- Bring Magic Powder before entering the Color Dungeon.
- Do not rely on the Color Guards as a Powder source.
Reveal the Cemetery staircase
Travel to the southeastern Cemetery screen containing five gravestones. Clear nearby enemies if they interfere with pushing. Arrange the stones in this exact order: push the bottom-middle gravestone down, then the bottom-left gravestone left, the top-left gravestone up, the top-middle gravestone right, and the top-right gravestone up.
For this arrangement, bottom-middle means the right-hand gravestone in the lower row. The staircase appears under the final gravestone when every move is correct. If it does not appear, verify the starting positions and directions rather than searching for another item.
Go down the staircase and speak to the two Color Guards. Identify the colors they are wearing. They then explain the Magic Powder requirement. Since they do not provide or sell Powder in DX, return for more if necessary before continuing.
- Push bottom-middle down.
- Push bottom-left left.
- Push top-left up.
- Push top-middle right.
- Push top-right up.
- Treat bottom-middle as the right-hand grave in the lower row.
- Bring Magic Powder past the guards.
Clear the Color Dungeon
Use the Power Bracelet to lift the color-coded shell enemies after striking them into their ball forms. Throw each one into the matching-colored hole. Incorrect placements reset the affected objects, so watch the hole colors before throwing.
Follow the dungeon’s colored floor and statue puzzles by observing how colors change when Link steps on tiles or strikes statues. Collect the Map, Compass, Stone Beak, and Small Keys as the opened rooms require. These puzzles depend on DX’s color presentation and should not be replaced with instructions from the Nintendo Switch remake.
Defeat Stone Hinox by staying mobile around its jumps, ground-shaking landings, and falling rocks. Use the Roc’s Feather to avoid being stunned by a landing shockwave when needed. Sword strikes work during safe openings, but contact can knock Link backward; bombs are useful if available. Keep away from spikes and do not let the falling rocks pin Link against a wall.
Later, use Magic Powder on Giant Buzz Blob while it is in its electrified standing form. Powder changes it into a vulnerable hopping blob. Strike it with the Sword after it lands, then retreat before it returns to its electrified form. Repeat the Powder-and-Sword cycle until it is defeated. The Nightmare Key becomes available after the required route and puzzle work is complete.
- Throw color-coded shell enemies into matching holes.
- Solve the color-changing tile and statue rooms.
- Collect the Map, Compass, Stone Beak, and required Small Keys.
- Defeat Stone Hinox while avoiding jumps, shockwaves, rocks, and spikes.
- Use Magic Powder on Giant Buzz Blob, then attack with the Sword.
- Collect the Nightmare Key.
Defeat Hardhit Beetle and choose the clothing reward
Use the Nightmare Key to enter Hardhit Beetle’s room. The boss moves around the arena, fires projectiles, and becomes more difficult to approach as its shell takes damage. Stay mobile, avoid its direct path, and attack during openings after its movement or projectile pattern. Strike continuously when safely positioned so the shell does not have time to recover.
After the boss is defeated, the Great Fairy offers Red Clothes or Blue Clothes. Red Clothes increase Link’s attack power, while Blue Clothes reduce the damage he receives. Red Clothes shorten fights; Blue Clothes are the safer choice for exploration and difficult encounters. The choice is optional campaign support, not story progression.
- Enter the boss room with the Nightmare Key.
- Defeat Hardhit Beetle.
- Choose Red Clothes or Blue Clothes.
- Record the clothing reward separately from the Instrument tally.
Use the Photographer album and Game Boy Printer
DX adds the Camera Shop and Photographer events. Visit the Camera Shop to begin the photograph feature, then complete its optional events to add pictures to the album. Photographs do not affect dungeon entry, the trading sequence, the Instruments, the Color Dungeon, or the ending.
Stored album photographs can be printed with compatible Game Boy Printer hardware and the required connection cable. Printing is optional accessory content; it is not required for campaign completion and does not print arbitrary maps or gameplay screens.
If printer hardware is unavailable, continue normally. Follow the hardware and game manual instructions for connection and compatibility.
- Visit the Camera Shop.
- Complete optional Photographer events if collecting the album.
- Use compatible printer hardware only if desired.
- Treat printing as optional DX content.
Keep DX separate from the Nintendo Switch remake
Use the original DX item gates, dungeon order, controls, and campaign structure. Do not substitute the Switch remake’s control layout or puzzle instructions.
Do not add Fairy Bottles, figurines, Chamber Dungeons, or remake-only collectible totals to a DX checklist. The relevant DX side feature is the Photographer album, and the relevant bonus dungeon reward is Red Clothes or Blue Clothes.
A complete DX run may include the Color Dungeon, photographs, Secret Seashells, Pieces of Heart, and Printer support, but none of those optional features replaces the eight-Instrument route or the final Egg sequence.
- Use original DX mechanics and item gates.
- Keep the Color Dungeon separate from the eight Instruments.
- Track the Photographer album instead of remake figurines.
- Exclude Fairy Bottles, Chamber Dungeons, and remake collectible totals.
Before you move on
- The cartridge is confirmed as The Legend of Zelda: Link’s Awakening DX.
- Bottle Grotto is complete and BowWow has been returned to Madam MeowMeow.
- The Power Bracelet is available.
- The gravestone sequence is complete: bottom-middle down, bottom-left left, top-left up, top-middle right, and top-right up.
- The staircase appears before any Color Dungeon combat.
- The Color Guards’ colors have been identified.
- Magic Powder was brought into the dungeon; no claim was made that the guards sell it.
- Stone Hinox has been defeated.
- Giant Buzz Blob has been defeated with Magic Powder and Sword attacks.
- Hardhit Beetle has been defeated and Red Clothes or Blue Clothes has been selected.
- The Color Dungeon is recorded as optional and separate from the eight Instruments.
- The Photographer album and Game Boy Printer are treated as optional DX features.
- Nintendo Switch remake-only systems and collectibles are excluded.
References for this chapter
- The Legend of Zelda: Link’s Awakening DX Manual - Game Boy Color
- Color Dungeon - The Legend of Zelda: Link’s Awakening Walkthrough
- The Legend of Zelda: Link’s Awakening DX - Guide and Walkthrough - Game Boy Color - By CPFace
- The Legend of Zelda: Link’s Awakening DX - Guide and Walkthrough - Game Boy Color - By Coffee
- Color Guard - Zelda Dungeon Wiki
Boss-by-Boss Quick Reference and Recovery Tactics
Prepare each boss with the item that damages it, refill hearts before the final approach, and save at a safe opportunity when practical. The eight Instrument bosses are followed by six Nightmare forms in the Wind Fish’s Egg: Giant Gel, Agahnim’s Shadow, Moldorm’s Shadow, Ganon’s Shadow, the Shadow of Lanmola, and Dethl. If Link dies, confirm the return point and repeat any route or boss progress that was not protected by a save. The Giant Hardhat Beetle belongs only to the optional DX Color Dungeon and is not part of the eight-Instrument campaign.
Prepare before entering a boss room
Save at the nearest safe opportunity before the final approach, then refill hearts before crossing the boss threshold. Carry a potion or other healing item if one is available on your file. Check the equipped sub-item instead of assuming the dungeon’s newest treasure is always the answer: the Sword, Shield, Pegasus Boots, Roc’s Feather, Hookshot, Bombs, Magic Powder, Magic Rod, Arrows, and Boomerang each have specific uses.
Preserve Bombs for Facade, keep Magic Powder available for Giant Gel, and do not waste Magic Rod ammunition or time before Hot Head or the Shadow of Lanmola. If the first attempt shows that the arena is unsafe, leave the dungeon, recover, and return rather than repeatedly entering with only a few hearts.
- Save before the final approach when possible.
- Refill hearts and carry healing if available.
- Equip the item required by the specific boss.
- Preserve limited supplies for the encounter.
Dungeons 1–3: Moldorm, Genie, and Slime Eye
Moldorm in Tail Cave exposes its tail as it crawls around the arena. Keep away from the pits and outer hazards, let the body pass, then strike the tail from behind. Each hit makes Moldorm accelerate briefly, so reset your position instead of chasing it across the room. Contact can knock Link into a hazard, and the boss becomes harder to control as it speeds up.
Genie is protected while moving inside its bottle. Dodge the bottle and fireballs until it pauses, then strike the bottle with the Sword. Use the Power Bracelet to lift and throw the stunned bottle into a wall. Repeat the bottle throws until it breaks. When Genie emerges, keep moving and slash when it comes within reach; after each hit, prepare for its spin and fireball response.
Slime Eye begins on the ceiling. Dash into the wall with the Pegasus Boots to knock it down, then slash the exposed eye. Continue attacking until it separates into two halves with a narrow connection. Use a Pegasus Boots sword dash to split it, then attack the halves one at a time. Watch their shadows and use Roc’s Feather to avoid the falling bodies.
- Moldorm: strike the exposed tail, then retreat from the body and pits.
- Genie: stun, lift, and throw the bottle before attacking Genie.
- Slime Eye: use Pegasus Boots to start and split the battle, then use Roc’s Feather to evade the halves.
Dungeons 4–6: Angler Fish, Slime Eel, and Facade
Angler Fish is fought underwater in a side-scrolling arena. Strike the glowing antenna on its head with the Sword while swimming around the open space. When it charges, retreat or move around it instead of trying to trade contact damage. Falling rocks and smaller fish can interrupt your attack, so prioritize a clear position over constant swings.
Slime Eel repeatedly exposes its head from one of four wall openings while its tail sweeps through the room. Identify the real head by its eyes, use the Hookshot to pull it from the opening, and slash the vulnerable hearts or glowing section immediately. Stay near one side of the room or in a corner when the tail is rotating, then move only when the head appears. A false head produces a damaging decoy, so do not Hookshot every opening automatically.
Facade attacks by sending floor tiles and pots across the room, then creates holes that restrict movement. Circle the perimeter, block tiles with the Shield when useful, and place Bombs on the exposed face. Step away before each detonation and preserve enough Bombs to finish the fight. Sword attacks are not the intended solution.
- Angler Fish: swim around the arena, strike the antenna, and avoid charges and falling debris.
- Slime Eel: Hookshot the real head from the wall, then slash the exposed weak point.
- Facade: use Bombs while moving around the arena and avoiding holes.
Dungeons 7–8: Evil Eagle and Hot Head
Evil Eagle is fought on the exposed top platform of Eagle’s Tower. Use the Hookshot when it flies across the platform to strike its beak, and remain near the center so a missed attack does not leave Link at the edge. During the wind-and-feather attack, raise the Mirror Shield and push toward the boss or the safer center to resist being blown away. If Evil Eagle dives low, the Sword can hit it during the opening, but the Hookshot is the consistent primary weapon. Falling off the platform makes you repeat the climb before resuming the fight.
Hot Head leaps from the lava in Turtle Rock and is vulnerable to the Magic Rod. Stand where you have room to retreat, fire as it emerges, and continue firing while it bounces above the lava. Avoid its fireballs and landing area. If it returns to the lava, it recovers, so use each exposed movement to deal as much damage as possible. If the Magic Rod is not equipped, leave the room and change equipment before trying again.
- Evil Eagle: use the Hookshot on its beak and keep Link away from the platform edge.
- Evil Eagle: raise the Mirror Shield during the wind and feather attack.
- Hot Head: use the Magic Rod continuously while it is above the lava.
Wind Fish’s Egg: the six Nightmare forms
The first form is Giant Gel. Sprinkle Magic Powder on it whenever it appears. Approach after each small hop, use the powder, then back away before its next movement. Agahnim’s Shadow follows; use the Sword to reflect the single flashing projectile back at it. Do not try to reflect groups of small shots, which damage Link, and reposition when the shadow moves around the room.
Moldorm’s Shadow behaves like the earlier Moldorm: circle the room and strike the exposed tail without allowing the body to knock Link into the edge. Ganon’s Shadow can be damaged with a Pegasus Boots sword dash. Wait for its attack opening, dash into it with the Sword, then retreat from the bats and returning trident before setting up another pass.
The Shadow of Lanmola is vulnerable to the Magic Rod as it emerges. Fire when it appears and reposition immediately rather than waiting in its path. Dethl is the final form. Its two arms sweep around the arena while the central eye opens intermittently. Use Roc’s Feather to jump the arms, then hit the eye with Arrows or the Boomerang when it opens. The arms accelerate after successful hits, so prioritize a safe jump over forcing a shot. Continue until Dethl falls and the ending sequence begins.
- Giant Gel: use Magic Powder after each hop.
- Agahnim’s Shadow: reflect single flashing projectiles with the Sword and avoid grouped shots.
- Moldorm’s Shadow: strike the tail while avoiding the edge.
- Ganon’s Shadow: use Pegasus Boots and Sword dashes during attack openings, then retreat from bats and the trident.
- Shadow of Lanmola: use the Magic Rod as it emerges.
- Dethl: jump the arms and hit the eye with Arrows or the Boomerang.
If Link dies or reaches a boss in poor condition
After death, verify where the game has returned Link and whether the dungeon state reflects your latest save. Boss victories and route progress that occurred after the last save may need to be repeated, so do not assume an unsaved victory is protected. Save again after returning to a safe location.
If hearts or supplies are low, leave the dungeon and refill before another attempt. A fairy or potion is more valuable than forcing a one-heart fight. If you reached the boss with the wrong item equipped, retreat and change equipment. For Evil Eagle, falling from the platform means repeating the climb, so practice holding the Mirror Shield during the gust before attempting to deal damage. For Ganon’s Shadow, use the first attempt to learn its attack opening and only dash when you have room to retreat. For Dethl, learn the arm timing before spending every Arrow or Boomerang throw.
- After death, verify the current save position and dungeon state.
- Repeat unsaved route or boss progress as necessary.
- Refill hearts and supplies before a second attempt.
- Change the equipped item before re-entering if preparation was the problem.
Before you move on
- Moldorm, Genie, Slime Eye, Angler Fish, Slime Eel, Facade, Evil Eagle, and Hot Head are defeated.
- The eight Instruments of the Sirens have been collected.
- Giant Gel, Agahnim’s Shadow, Moldorm’s Shadow, Ganon’s Shadow, the Shadow of Lanmola, and Dethl are defeated in the Wind Fish’s Egg.
- The ending begins after Dethl’s defeat and proceeds through the normal ending and credits.
- The Giant Hardhat Beetle is defeated only if optional DX Color Dungeon completion is desired; it is not required for the main ending.
References for this chapter
- The Legend of Zelda: Link’s Awakening DX - Guide and Walkthrough - Game Boy Color - By Dev
- The Legend of Zelda: Link’s Awakening DX - Boss Guide - Game Boy Color - By ApolloGod
- The Legend of Zelda: Link’s Awakening DX - Guide and Walkthrough - Game Boy Color - By Artemis251
- Link’s Awakening Enemies Guide - Game Boy and DX Bestiary
Final Checklist, Ending Verification and Post-Ending Tasks
Confirm all eight Instruments of the Sirens, learn the Ballad of the Wind Fish from Marin, and obtain the Magnifying Lens if you want the intended reliable route through the final maze. Read the current save’s directions in the Mabe Village Library, save outside the Wind Fish’s Egg, heal Link, and carry Secret Medicine if available. At the Egg entrance, play the Ballad, follow the recorded route, defeat all six Nightmare forms, and defeat Dethl. Let the awakening sequence and credits finish before resetting. Preserve the pre-Egg save for optional Color Dungeon, photographs, Heart Pieces, Secret Seashells, the Level-2 Sword, and other cleanup.
1. Confirm the required main-story progress
Before making the final attempt, confirm that the eight Instruments of the Sirens have been collected: the Full Moon Cello, Conch Horn, Sea Lily’s Bell, Surf Harp, Coral Triangle, Organ of Evening Calm, Wind Marimba, and Thunder Drum. Clearing Turtle Rock and receiving the Thunder Drum completes the required dungeon sequence. The eight Instruments are the story requirement for the final approach to the Wind Fish’s Egg.
Make sure Marin has taught Link the Ballad of the Wind Fish. The song must be played at the Egg’s exterior entrance. The trading sequence eventually leads to the Magnifying Lens, which provides the intended clue for the final maze, but the trades and Lens are not literal requirements for opening the Egg or viewing the normal ending.
- All eight Instruments of the Sirens have been collected.
- Turtle Rock is complete and the Thunder Drum has been received.
- Marin has taught Link the Ballad of the Wind Fish.
- The Magnifying Lens has been obtained for the intended maze route.
2. Read the current save’s Egg-maze directions
Go to the Mabe Village Library after obtaining the Magnifying Lens. Examine the dark book titled Dark Secrets and Mysteries of Koholint. The small writing becomes readable with the Lens. Record every direction in the order shown before leaving the library.
The directions are associated with the current save, so do not use a sequence copied from another playthrough. If the clue cannot yet be read, do not guess at a universal replacement route. Continue the trading sequence until you obtain the Magnifying Lens, then return to the library and read the book.
The other notable library book is associated with the optional Color Dungeon clue. Do not confuse it with the dark Egg-maze book.
- The dark Egg-maze book has been read with the Magnifying Lens.
- The complete direction sequence for this save has been written down.
- No route from another save or unrelated guide has been substituted.
3. Prepare and save outside the Egg
Save outside the Wind Fish’s Egg after recording the route. On the original DX control scheme, use the save command shown by the game’s save menu; creating this recovery point is worthwhile because a failed final battle requires repeating the maze. Heal Link before climbing Mount Tamaranch and carry Secret Medicine if you have it.
Equip the Sword and choose a useful sub-item before entering. During the Nightmare battle, Link needs access to Magic Powder, Pegasus Boots, Roc’s Feather, Magic Rod, and either the Boomerang or Arrows. These can be reassigned between phases. The Color Dungeon, Red Clothes or Blue Clothes, Pieces of Heart, Secret Seashells, Level-2 Sword, and Camera Shop photographs are optional and can be completed before or after the ending.
If you want the alternate no-Game-Over ending scene, use this save as the preparation point and avoid receiving a Game Over during the entire adventure.
- A recovery save exists outside the Wind Fish’s Egg.
- Link is healed before the final attempt.
- Secret Medicine is available if desired.
- The required final-battle items are available or can be reassigned.
- Optional DX content has been completed only if you deliberately want it finished before the ending.
4. Open the Egg and cross the final maze
Travel to the Wind Fish’s Egg at the top of Mount Tamaranch with all eight Instruments collected. Stand outside the Egg, select the Ocarina, and play the Ballad of the Wind Fish. The entrance opens after the performance. Do not wait until the interior maze to play the song.
Enter the Egg and proceed through the opening rooms until Link reaches the section of identical-looking passages. Follow the directions copied from the current save’s Library book one room at a time. If you lose your place, reload the pre-Egg save and use the written sequence again instead of improvising.
The correct route leads to the final pit. Drop through it to begin the Nightmare battle.
- The Ballad was played at the exterior Egg entrance.
- The Egg opened before Link entered.
- The current save’s recorded maze sequence was followed.
- The final pit was reached.
5. Defeat the Nightmare forms and Dethl
Giant Gel is vulnerable to Magic Powder. Avoid its bouncing body and sprinkle Powder on it until the form is defeated. Sword attacks do not solve this phase.
Against Agahnim’s Shadow, swing the Sword to reflect the large round energy shots. Avoid the star-shaped projectiles instead of trying to reflect them.
Moldorm’s Shadow exposes its tail as the safe target. Strike the tail with the Sword, then retreat as it speeds up. Stay clear of the body while repositioning.
Ganon’s Shadow summons fire bats and throws a trident. Avoid those attacks, then use the Pegasus Boots with the Sword to dash through the form during an opening. Repeat until it disappears.
The Lanmola form is defeated with the Magic Rod. Keep moving and fire when the form is within range; one successful Magic Rod hit is sufficient in the DX battle.
Dethl swings two long arms around the room. Equip Roc’s Feather and jump over the arms. When the eye opens, hit it with the Boomerang or Arrows, then immediately prepare for the next sweep. The arms accelerate, so remain mobile rather than standing under the body.
If Link dies, reload the pre-Egg save, heal again, and repeat the recorded maze route. A Game Over does not prevent the normal awakening and credits, but it prevents the alternate no-Game-Over Marin scene for that run.
- Giant Gel was defeated with Magic Powder.
- Agahnim’s Shadow and Moldorm’s Shadow were defeated with their appropriate Sword tactics.
- Ganon’s Shadow was defeated while avoiding the bats and trident.
- The Lanmola form was defeated with the Magic Rod.
- Dethl was defeated by jumping over the arms and striking the open eye.
6. Watch the ending and verify completion
After Dethl is defeated, allow the game to continue without resetting. The Wind Fish awakens, Koholint Island disappears, and Link is shown surviving at sea. Let the complete credits sequence play. These scenes and the finished credits are the concrete confirmation that the normal main campaign is complete.
If the entire adventure was completed without receiving a Game Over, DX adds an alternate Marin scene after the normal ending material. This is an optional variation, not a separate required campaign objective.
- The Wind Fish’s awakening is shown.
- Koholint Island’s disappearance is shown.
- Link’s survival at sea is shown.
- The credits have finished.
- The alternate Marin scene is viewed only if the run avoided every Game Over.
7. Resume optional tasks from the preserved save
After the ending and credits finish, reset or power off and reload the save made before entering the Egg. DX does not create a modern post-credits free-roam state; the preserved save returns Link to the earlier position and is therefore the correct file for cleanup.
Use that save to complete the optional Color Dungeon, collect missed Pieces of Heart and Secret Seashells, claim the Level-2 Sword, and finish Camera Shop photograph events. Do not add Switch-remake Fairy Bottles, figurines, Chamber Dungeons, or other remake-only objectives to this DX checklist.
Game Boy Printer output is optional and requires compatible printer hardware, cable, and supplies. Do not erase the cartridge file from the title screen unless you intentionally want to begin a new adventure.
- The awakening sequence and credits were allowed to finish.
- The pre-Egg save remains available.
- Optional DX content is completed if desired.
- Photographs are printed only with compatible Game Boy Printer equipment.
- The cartridge save was not erased accidentally.
Before you move on
- All eight Instruments of the Sirens have been collected.
- The Ballad of the Wind Fish was played at the exterior Wind Fish’s Egg entrance.
- The Egg maze was completed using the directions read from the current save’s Mabe Village Library book.
- All six Nightmare forms were defeated, ending with Dethl.
- The Wind Fish awakening, Koholint Island disappearance, Link’s survival scene, and credits were viewed.
- The Magnifying Lens and Library directions were used as the intended route aid, not treated as literal Egg-opening conditions.
- A pre-Egg save remains available for Color Dungeon, Pieces of Heart, Secret Seashells, Camera Shop photographs, the Level-2 Sword, and other optional tasks.
- The alternate Marin scene was viewed if the entire adventure was completed without a Game Over.
References for this chapter
- The Legend of Zelda: Link’s Awakening DX - Complete Guide (With Maps) - Game Boy Color - By GuideWriter1984
- The Legend of Zelda: Link’s Awakening DX - Guide and Walkthrough - Game Boy Color - By Artemis251
- Wind Fish’s Egg - Zelda Dungeon Wiki
- Link’s Awakening Walkthrough: The Awakening - Game Boy Color - Zelda Dungeon
- The Legend of Zelda: Link’s Awakening DX Manual - Game Boy Color
100% and Bonus Runs: Planning a Completionist Playthrough
Use this checklist for the original Game Boy Color release of The Legend of Zelda: Link’s Awakening DX. Keep the main campaign, 12 overworld Pieces of Heart, eight dungeon Heart Containers, 26 Secret Seashells, Level-2 Sword, Color Dungeon, trading sequence, Camera Shop photographs, and optional Game Boy Printer output as separate goals. Visit Seashell Mansion while holding exactly five shells and again while holding exactly ten to receive both bonus shells. Delay the Level-2 Sword until every shell location is recorded if you want a complete 26-shell sweep. The Color Dungeon is optional DX content, requires color-capable hardware and Magic Powder, and uses the sequence bottom-middle down, bottom-left left, top-left up, top-middle right, and top-right up. The Magnifying Lens reveals the current save’s Wind Fish’s Egg maze directions through the Mabe Village Library, but it is not required to open the Egg or reach the normal ending.
Create separate completion records
Play the original Game Boy Color DX release rather than the 2019 Switch remake. Record campaign progress separately from optional collection goals. The normal ending requires the eight Instruments of the Sirens, the Ballad of the Wind Fish, playing that song at the exterior entrance to the Wind Fish’s Egg, completing the save-specific maze, defeating the Nightmare sequence and Dethl, and viewing the ending and credits.
Maintain separate records for the 12 overworld Pieces of Heart, eight dungeon Heart Containers, 26 Secret Seashells, Level-2 Sword, Color Dungeon reward, Camera Shop album, trading sequence, and optional printer output. The Level-2 Sword is awarded at 20 collected shells. If you want a complete shell record, finish all 26 shell entries before claiming it, because later uncollected shell spots may instead produce rupees after the sword reward is available.
- Eight Instruments collected
- Eight dungeon Heart Containers recorded separately
- 12 overworld Pieces of Heart recorded
- All 26 Secret Seashells recorded before taking the Level-2 Sword
- Level-2 Sword obtained
- Color Dungeon completed
- Camera Shop and trading records maintained
Collect the 12 Pieces of Heart
Mark each Piece of Heart separately from dungeon boss Heart Containers. At the Fishing Pond, target the large fish for the Piece of Heart; the small fish gives rupees. The Turtle Rock entry is reached through the exterior mountain route, not from an ordinary interior dungeon chest.
The complete DX list is: Mabe Village well; Mabe Village Fishing Pond large fish; Koholint Prairie pit area; Mysterious Forest log cave; Ukuku Prairie bomb cave; Yarna Desert cave after defeating Lanmola; the Cemetery four-grave cave; Tal Tal Heights underwater cave east of Angler’s Tunnel; Kanalet Castle moat; Animal Village cave; eastern Tal Tal Mountain Range cave; and the Piece of Heart reached through the Turtle Rock exterior route.
For the Cemetery entry, go to the screen containing four graves and push the bottom-right grave upward to reveal the staircase. Inside, use a Bomb on the cracked wall, then use the Hookshot to cross the gap and reach the Piece of Heart. This is the intended item route; Roc’s Feather is also needed for the final movement around the platforms.
- Mabe Village well
- Mabe Village Fishing Pond large fish
- Koholint Prairie pit area
- Mysterious Forest log cave
- Ukuku Prairie bomb cave
- Yarna Desert cave after Lanmola
- Cemetery four-grave cave: bottom-right grave, Bomb, and Hookshot route
- Tal Tal Heights underwater cave east of Angler’s Tunnel
- Kanalet Castle moat
- Animal Village cave
- Eastern Tal Tal Mountain Range cave
- Turtle Rock exterior route
Manage the five- and ten-shell Mansion rewards
Plan the shell sweep around the two exact-count Seashell Mansion checks. Enter the Mansion while holding exactly five Secret Seashells to receive the first bonus shell. Later, return while holding exactly ten to receive the second. If you enter with more than the required amount, that corresponding exact-count reward is lost on that save, so do not pick up nearby shells casually when approaching either threshold.
The Mansion is in northeastern Ukuku Prairie. After both exact-count rewards are secured, continue the ordinary shell locations. The Level-2 Sword is awarded at the Mansion after reaching 20 shells. Visiting for the sword before documenting every shell location can cause remaining uncollected shell spots to provide rupees instead.
- First Mansion visit made at exactly five shells
- Second Mansion visit made at exactly ten shells
- Both Mansion rewards logged as additional Secret Seashells
- Sword reward delayed until all 26 shell locations are recorded
Collect Secret Seashells 1 through 13
Use the original Game Boy Color DX locations rather than a Switch-remake map. Collect the shell in the Mabe Village bush field after recovering the Sword. Buy the Shovel for the Mabe Village doghouse dig spot, and use Bombs to open the cracked wall in Tail Cave. The Mysterious Forest chest requires the Power Bracelet. At the circular-weeds location south of the Ghost’s grave, cut the bush and dig the cleared square.
Schedule the Seashell Mansion reward at exactly five shells before moving beyond that count. The diamond-shaped grass location north of Key Cavern requires the Shovel. The lone tree west of Tail Cave requires Pegasus Boots. The Ghost’s house pot appears after returning the Ghost to his grave. The Martha’s Bay island shell requires the Flippers.
- 1. Mabe Village bush field east of the village
- 2. Mabe Village doghouse dig spot after buying the Shovel
- 3. Tail Cave bombable-wall chest
- 4. Mysterious Forest Power Bracelet chest
- 5. Ukuku Prairie circular-weeds bush-and-dig spot south of the Ghost’s grave
- 6. Seashell Mansion reward at exactly five shells
- 7. Ukuku Prairie diamond-shaped grass dig spot north of Key Cavern
- 8. Lone tree west of Tail Cave requiring Pegasus Boots
- 9. Ghost’s house pot after returning the Ghost to his grave
- 10. Martha’s Bay island bush
- 11. Seashell Mansion reward at exactly ten shells
- 12. Ukuku Prairie cave route ending at the Owl Statue dig spot
- 13. Ukuku Prairie smooth-stone area rock
Collect Secret Seashells 14 through 26
Continue through the remaining overworld, cave, and dungeon locations. The Richard’s Villa shell is in the cellar after returning all five Golden Leaves. The telephone-booth tree requires Pegasus Boots. The Yarna Desert shell is beneath a stone on the northeastern route. The Key Cavern-area shell is on the island northeast of the dungeon entrance and requires the Flippers.
The Face Shrine shell is reached through the dungeon’s upper-left back exit. Collect the Kanalet Castle-area shell while the Flying Rooster is still available. In Eagle’s Tower, use the route from the second-floor Hinox room to reach the chest. Finish with the Tal Tal Mountain and Ancient Ruins routes, then claim the Level-2 Sword only after all 26 entries are marked.
- 14. Bushes immediately east of Seashell Mansion
- 15. Martha’s Bay southwest land bush near the Mermaid Statue
- 16. Richard’s Villa cave chest after returning the five Golden Leaves
- 17. Ukuku Prairie telephone-booth tree requiring Pegasus Boots
- 18. Martha’s Bay southeast Owl Statue dig spot
- 19. Yarna Desert stone in the northeast route
- 20. Key Cavern-area island bush
- 21. Face Shrine dungeon back-exit chest reached through the upper-left exit
- 22. Kanalet Castle-area shell across the Flying Rooster gap
- 23. Eagle’s Tower chest reached from the second-floor Hinox room
- 24. Tal Tal Mountain shell across the bridge east of the Chicken House
- 25. Tal Tal Mountain eastern cave exit chest
- 26. Ancient Ruins Armos-statue cave chest
- Level-2 Sword claimed only after all 26 entries are recorded
Complete the Color Dungeon and DX side content
The Color Dungeon is optional DX content and contains no Instrument. Use color-capable hardware. Once the Power Bracelet is available, go to the Mabe Village Library and use Pegasus Boots to knock the high book from the shelf for an optional clue. The entrance is in the five-gravestone area at the lower-right side of the Cemetery.
The direct gravestone sequence is bottom-middle down, meaning the right-hand grave in the lower row; bottom-left left; top-left up; top-middle right; and top-right up. The Library clue is optional if the sequence is already known. Before proceeding through the Color Dungeon’s guards and later Giant Buzz Blob encounter, obtain Magic Powder through the normal overworld route, such as taking the Sleepy Toadstool to Syrup or buying powder from the Mabe Village shop. Do not rely on the guards to supply it.
Complete the dungeon and record whether you selected Red Clothes or Blue Clothes. The Color Dungeon reward is separate from the main eight-dungeon Heart Containers and Instruments. Visit the Camera Shop for the optional DX photograph album, and treat Game Boy Printer output as a separate hardware-dependent goal.
- Color Dungeon completed on color-capable hardware
- Gravestone order recorded as bottom-middle down, bottom-left left, top-left up, top-middle right, top-right up
- Magic Powder obtained before proceeding through the dungeon
- Red Clothes or Blue Clothes recorded
- Camera Shop album checked
- Opening-photo variant recorded if pursuing the full album
- Printer output marked separately if compatible hardware is available
Finish the trading sequence and read the Egg clue
For the USA and Europe DX release, the trading sequence runs from the Yoshi Doll through the Ribbon, Dog Food, Bananas, Stick, Honeycomb, Pineapple, Hibiscus, Letter, Broom, Fishing Hook, Necklace, Mermaid’s Scale, and finally the Magnifying Lens. Begin with the Yoshi Doll from the Trendy Game, then trade each item to the next recipient as new areas and routes become available.
After receiving the Magnifying Lens, use it to access the hidden route at the Mermaid Statue and then read the Mabe Village Library book. The book reveals the directions for the current save’s Wind Fish’s Egg maze. This is the intended reliable route, but neither the trading sequence nor the Magnifying Lens is a literal requirement for opening the Egg. The optional Boomerang exchange consumes the item currently assigned to the B button, so check the equipped item before making that trade.
- Yoshi Doll obtained
- Ribbon, Dog Food, Bananas, Stick, Honeycomb, Pineapple, Hibiscus, Letter, Broom, Fishing Hook, Necklace, and Mermaid’s Scale traded in order
- Magnifying Lens obtained
- Current save’s Library Egg clue read
- Boomerang exchange treated as optional and current B-button item checked
Perform the final completion audit
Confirm the eight Instruments and Ballad of the Wind Fish before approaching the Egg. At the exterior entrance, play the Ballad before entering. Follow the Library directions for that save, defeat the Nightmare forms, and defeat Dethl. Let the ending sequence and credits finish before powering off or changing the save.
The normal ending does not require all 26 shells, all 12 Pieces of Heart, the Color Dungeon, the trading sequence, the Magnifying Lens, or the Camera Shop album. Preserve the save afterward if you want to inspect photographs, verify optional records, or print images.
- Eight Instruments confirmed
- Ballad played at the exterior Egg entrance
- Save-specific Egg maze completed
- Nightmare forms defeated
- Dethl defeated
- Normal ending cinematic and credits viewed
- No Switch-remake-only objectives added
Before you move on
- The Piece of Heart log contains exactly 12 entries: Mabe Village well; Mabe Village Fishing Pond large fish; Koholint Prairie pit area; Mysterious Forest log cave; Ukuku Prairie bomb cave; Yarna Desert cave after Lanmola; Cemetery four-grave cave reached through the bottom-right grave with Bomb and Hookshot; Tal Tal Heights underwater cave east of Angler’s Tunnel; Kanalet Castle moat; Animal Village cave; eastern Tal Tal Mountain Range cave; and the Turtle Rock exterior route.
- The Secret Seashell log contains exactly 26 entries, including both exact-count Seashell Mansion rewards and the Face Shrine, Eagle’s Tower, Kanalet Castle, Tal Tal Mountain, and Ancient Ruins locations.
- The five-shell Mansion reward was collected at exactly five shells, and the ten-shell Mansion reward was collected at exactly ten shells.
- The Level-2 Sword was obtained only after all 26 shell locations were collected.
- Eight dungeon Heart Containers and all 12 Pieces of Heart are recorded separately.
- The Color Dungeon is complete, the gravestone sequence is logged correctly, Magic Powder was obtained beforehand, and the clothing choice is recorded.
- The trading sequence reaches the Magnifying Lens, using Dog Food and Hibiscus as the USA and Europe DX item names, and the current save’s Library clue has been read.
- The Camera Shop album is checked, with the opening-photo variant recorded if pursuing the full album; printer output is separately marked if available.
- The eight Instruments, final Nightmare sequence, Dethl, normal ending, and credits are complete.
- The checklist contains no Switch-remake Fairy Bottles, figurines, Chamber Dungeons, expanded Piece of Heart total, or 50-shell target.
References for this chapter
- Link’s Awakening Heart Pieces (Game Boy)
- Link’s Awakening Heart Pieces
- Color Dungeon - The Legend of Zelda: Link’s Awakening Walkthrough
- The Legend of Zelda: Link’s Awakening DX - Guide and Walkthrough - Game Boy Color - By CPFace
- The Legend of Zelda: Link’s Awakening DX - Guide and Walkthrough - Game Boy Color - By Coffee
- The Legend of Zelda: Link’s Awakening DX Items
- Link’s Awakening Walkthrough - Key Cavern - Game Boy Color
Finishing up
All eight Instruments of the Sirens have been collected.
The Wind Fish’s Egg has been opened by playing the Ballad of the Wind Fish at the Egg entrance.
The save-specific maze has been solved and the final Nightmare, including Dethl, has been defeated.
The Wind Fish awakening, Koholint’s disappearance, Link’s survival scene, and the credits have been displayed.
The pre-Egg save remains available for optional cleanup. The no-Game-Over Marin scene is an optional bonus, not a separate main-campaign requirement.
Optional: the Color Dungeon, Secret Seashells, Pieces of Heart, Camera Shop photographs, and printer output have been completed if selected.
Choose your next gameScreenshots & video
Game imagery for reference. Follow the written chapters above for the route and strategies.
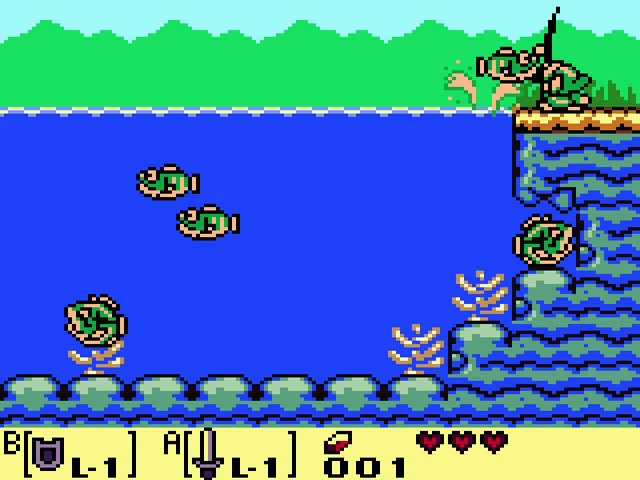
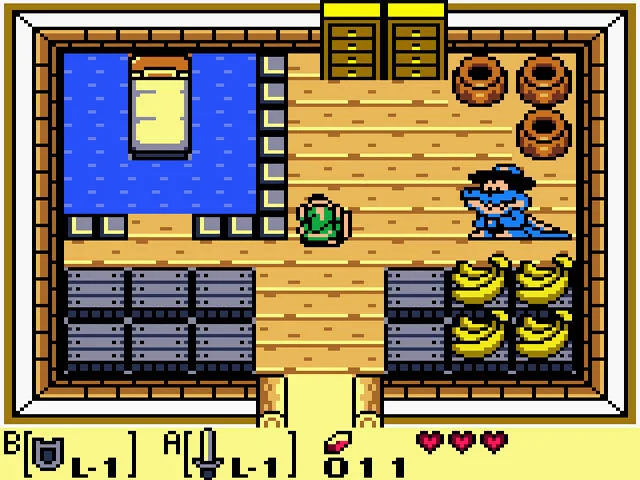
Sources & references
Our original guide draws on the references below. Check the edition at the top of this page before following controls or unlock requirements.
- The Legend of Zelda: Link’s Awakening DX Instruction Manual
- Link’s Awakening Walkthrough – Tail Cave – Game Boy Color
- The Legend of Zelda: Link’s Awakening – Begin Your Adventure
- The Legend of Zelda: Link’s Awakening DX - Guide and Walkthrough - Game Boy Color - By Coffee
- The Legend of Zelda: Link’s Awakening DX - Guide and Walkthrough - Game Boy Color - By CPFace
- Bottle Grotto - The Legend of Zelda: Link's Awakening Walkthrough
- Link's Awakening Walkthrough - Bottle Grotto - Game Boy Color
- Chapter 4: Bottle Grotto
- The Legend of Zelda: Link’s Awakening DX Manual - Game Boy Color
- Link’s Awakening Walkthrough - Key Cavern - Game Boy Color
- The Legend of Zelda: Link’s Awakening DX – Guide and Walkthrough – Game Boy Color
- The Legend of Zelda: Link’s Awakening DX - Complete Guide (With Maps) - Game Boy Color - By GuideWriter1984
- Slime Key Location, Five Golden Leaves and Kanalet Castle Bridge
- Color Dungeon - The Legend of Zelda: Link’s Awakening Walkthrough
- Color Dungeon - Zelda Dungeon Wiki
- Stone Hinox - Zelda Wiki
- Link’s Awakening Walkthrough – Angler’s Tunnel – Game Boy Color
- Angler’s Tunnel – The Legend of Zelda: Link’s Awakening Walkthrough
- Link's Awakening Walkthrough - Catfish's Maw - Game Boy Color
- Trading Sequence - The Legend of Zelda: Link’s Awakening Walkthrough
- Zelda: Link's Awakening: Trading Sequence - All Trade Items and Locations
- Link’s Awakening Walkthrough - Face Shrine - Game Boy Color - Zelda Dungeon
- Zelda Link’s Awakening: Face Shrine Map, Compass and Powerful Bracelet
- The Legend of Zelda: Link’s Awakening DX - Guide and Walkthrough - Game Boy Color - By Dev
- Link’s Awakening Walkthrough - Eagle’s Tower - Game Boy Color
- Eagle’s Tower – Zelda Dungeon Wiki
- Zelda: Link’s Awakening: How To Defeat Evil Eagle – Eagle’s Tower Boss
- Link’s Awakening Walkthrough - Turtle Rock - Game Boy Color
- Trading Sequence - Zelda Universe
- Link's Awakening Trading Sequence - Zelda Dungeon Wiki
- The Legend of Zelda: Link's Awakening DX - Zelda Dungeon Wiki
- Chapter 17: Wind Fish's Egg - Zelda Universe
- Wind Fish’s Egg - The Legend of Zelda: Link’s Awakening Walkthrough
- The Legend of Zelda: Link’s Awakening DX - Guide and Walkthrough - Game Boy Color - By Artemis251
- Wind Fish’s Egg - Zelda Dungeon Wiki
- The Legend of Zelda: Link’s Awakening DX - Boss Guide - Game Boy Color - By ApolloGod
- Link’s Awakening Heart Pieces (Game Boy)
- Koholint Prairie — Zelda Dungeon Wiki
- The Legend of Zelda: Link’s Awakening DX Items
- Link's Awakening Photographs — Zelda Dungeon Wiki
- Photographs — The Legend of Zelda: Link's Awakening Walkthrough
- Secret Seashells — Zelda Universe
- Color Guard - Zelda Dungeon Wiki
- Link’s Awakening Enemies Guide - Game Boy and DX Bestiary
- Link’s Awakening Walkthrough: The Awakening - Game Boy Color - Zelda Dungeon
- Link’s Awakening Heart Pieces
About the game & collecting notes
- Platform
- Game Boy Color
Step-by-step campaign walkthrough for The Legend of Zelda: Link’s Awakening DX on Game Boy Color hardware, covering the eight Instrument dungeons, required item progression, the trading sequence and Magnifying Lens route, the Wind Fish’s Egg maze, the normal ending, and optional DX content including the Color Dungeon, the verified 12 Pieces of Heart, 26 Secret Seashells, Camera Shop photographs, and Game Boy Printer support.
Darryl Polo
Darryl Polo loves tinkering with emulation and revisiting retro games. He enjoys exploring how old favorites play on different setups and sharing what he learns along the way. At Joking Joystick, he writes about the games, hardware, and small discoveries that keep the hobby fun.
Our editorial standardsFound a step that needs another look? Help us improve this guide.