
The Legend of Zelda: Echoes of Wisdom — Complete Campaign Walkthrough (Nintendo Switch, original 2024 release)
A start-to-finish Nintendo Switch campaign guide for The Legend of Zelda: Echoes of Wisdom. Follow Zelda from the opening escape through Suthorn Ruins, the Gerudo Desert and Jabul Waters routes, Hyrule Castle, the three late-game goddess regions, the Eternal Forest, Null’s Body and the canonical ending. Optional upgrades, side quests and post-clear cleanup are clearly separated from required story progress.

Find a copy
The Legend of Zelda: Echoes of Wisdom Nintendo Switch
We may earn a commission if you buy through these links, at no extra cost to you. As an Amazon Associate I earn from qualifying purchases.
Opens retailer search results. Check the model, edition, seller, availability and current price before buying.
Before you begin
You play as Princess Zelda in The Legend of Zelda: Echoes of Wisdom for Nintendo Switch.
The central mechanic is the Tri Rod, which records and creates Echoes of objects and enemies. Echoes solve environmental puzzles, provide traversal tools and fight alongside Zelda.
This guide follows the required campaign route from the prologue to Null’s defeat and the ending credits.
Each chapter identifies prerequisites, required objectives, route landmarks, boss methods and recovery advice. Optional rewards are labeled separately from story progression.
The guide targets the original 2024 Nintendo Switch release and does not mix in remake, remaster or alternate-edition mechanics.
Set yourself up for the run
Install the current official update if convenient, but do not assume an update changes the original campaign route.
Learn the actual control prompts shown in-game for the Tri Rod, Echo list, Bind, Reverse Bond, Swordfighter Form and map functions; button assignments can be changed in the system options.
Complete the opening prologue and jail escape to obtain the Tri Rod and initial Echoes before attempting the first overworld route.
Save before major dungeons, boss approaches and the final point of no return. Null’s Body cannot be saved from inside, so the final preparation save must be made before entry.
Keep healing Smoothies or equivalent recovery items available, but do not delay required story progress to complete optional side quests or collectibles.
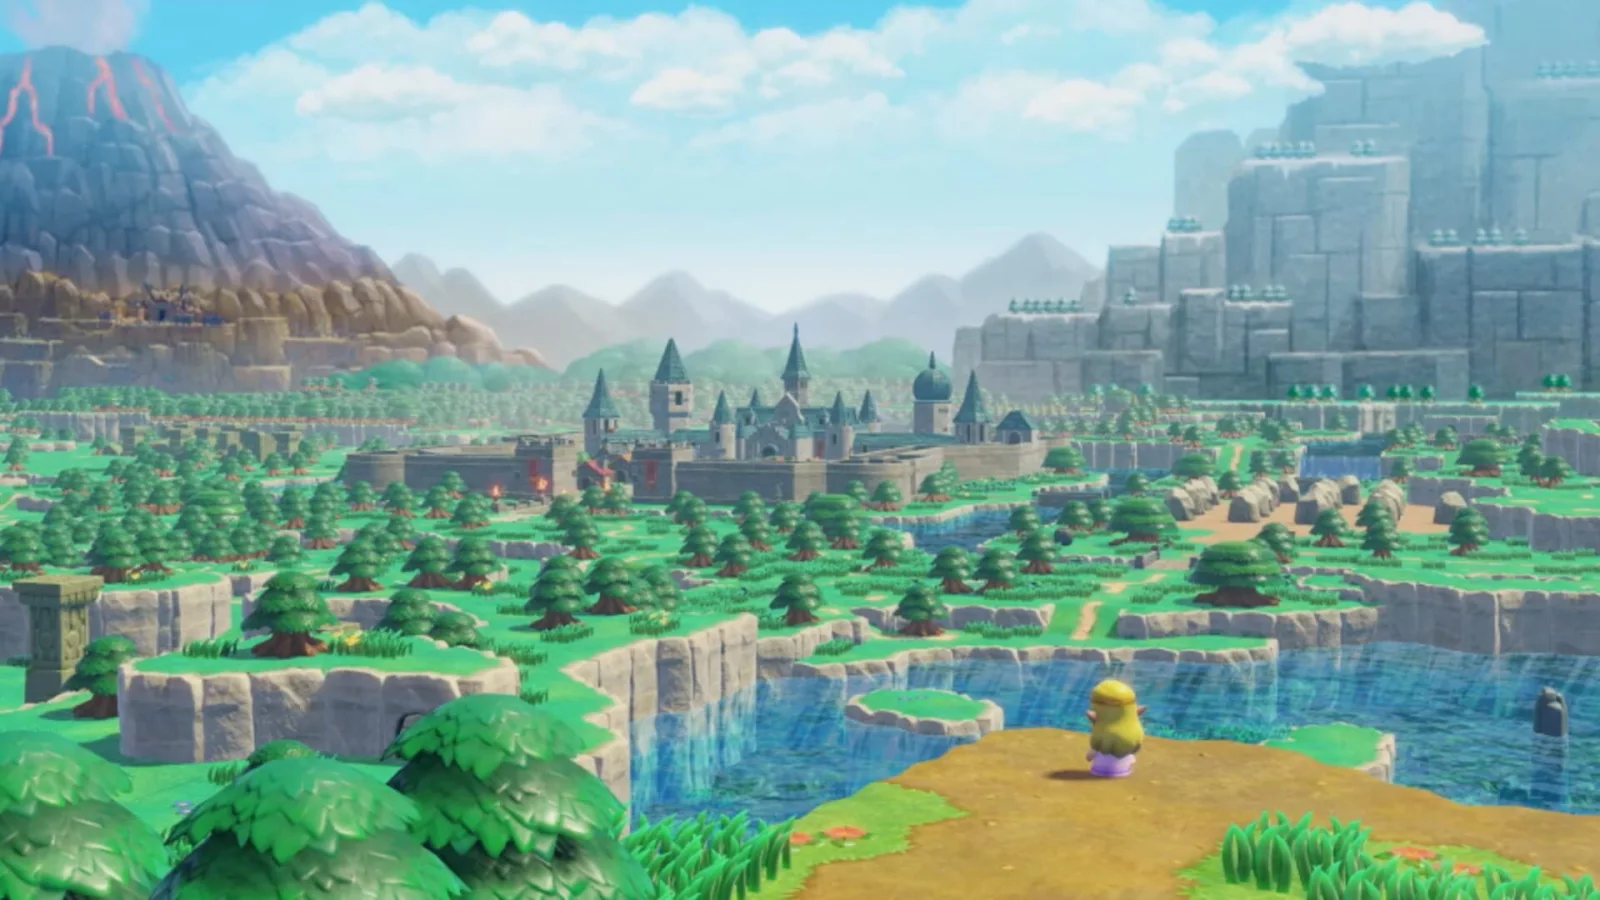
Prologue and Controls — Getting the Tri Rod and Basic Echo
The opening starts with a playable Link sequence in Suthorn Ruins, including a short Ganon fight, before control changes to Zelda. After escaping the expanding rift, Zelda is taken to Hyrule Castle and imprisoned by the impostor king. Tri then lends her the Tri Rod. Learn the Table Echo, escape the cell, pass the guards with furniture and sound distractions, meet Impa, and use shrub, bed and boulder Echoes to cross the castle waterways. This chapter ends when the current carries Zelda to Suthorn Beach. Bind, the first dungeon, pressure-switch puzzles and the main Still World rift sequence belong to later sections and are not required here.
1. Finish Link’s opening combat tutorial and defeat Ganon
Start a new game and follow the linear route through Suthorn Ruins as Link. The game introduces movement, sword attacks, jumping and the other combat actions through prompts. Keep moving forward through the corridors and defeat the monsters blocking the way. This sequence is deliberately forgiving, so follow the on-screen instructions rather than searching for optional paths.
At the top of the ruins, Ganon attacks. He can charge across the room with his trident and throw slow-moving fireballs. Move sideways when he prepares the charge, then strike after he passes. When he launches a fireball, avoid it or bat it away with the sword. Continue attacking during his recovery windows until the fight ends. The resulting rift swallows Link and begins the story’s main crisis.
- Complete the playable Link section.
- Defeat the opening Ganon encounter.
- Continue until control changes to Zelda.
2. Escape the collapsing ruins and reach Hyrule Castle
When Zelda becomes playable, collect the item left behind by Link and immediately follow the glowing guide away from the expanding rift. The route is a short chase through collapsing rooms. Do not stop to search for collectibles; if the dark edge catches Zelda, the section restarts from a nearby point, so simply run along the indicated route.
After Zelda reaches the outside cliff, the guards escort her to Hyrule Castle Town. You may walk around town briefly, but there is no required task there. Enter the castle from the rear, go to the throne room and speak with the king. Watch the scene involving the king, General Wright and Minister Lefte. The rift behind the throne replaces them with impostor Echoes, and Zelda is sent to the underground jail.
- Escape the expanding rift in the ruins.
- Enter Hyrule Castle and reach the throne room.
- Finish the impostor-king scene and arrive in the jail cell.
3. Receive the Tri Rod and leave the first jail cell
Wait in the cell until Tri appears and lends Zelda the Tri Rod. This is the first Echo lesson. Face the shimmering four-legged table and press ZR to learn the Table Echo. To summon the learned object, open the Echo list with L or Right on the directional pad, select Table, then press Y.
Place a table beside the wooden bench beneath the broken section of wall. Summon additional tables to make a climbable stack, then jump across the top and pass through the opening into the neighboring cell. Walk through its unlocked door. If an Echo is badly placed, stand near it and press ZR to erase it; holding ZR removes active Echoes from the field. Tri’s power limits how many or which Echoes can be active at once, but Echoes are not consumable ammunition, so there is no need to hoard a finite stock of Table Echoes.
- Receive the Tri Rod from Tri.
- Learn the Table Echo with ZR.
- Use summoned tables to cross the broken wall and leave the cell.
4. Sneak through the Hyrule Castle jail corridors
The room to the left contains guards. If one spots Zelda, she is returned to the jail checkpoint, so use the environment instead of trying to rush through. Summon a table to climb onto the shelving and walk over the first guard. Drop down on the far side and use ZR on a shimmering wooden box to learn the Wooden Box Echo.
Use wooden boxes as temporary barriers near the next pair of guards. Place them so the patrols’ paths or sight lines are blocked, then move through while the guards are turned away. Do not search for a lockup key in this section; the route is a stealth escape, not a key-retrieval objective.
Further ahead, climb the ladder and cross the cabinet tops to reach the shimmering Hyrule Castle Pot. Learn its Echo. In the last guarded areas, throw a pot away from Zelda to create a noise distraction. While the guards investigate, move past them. Repeat the distraction if a patrol returns before Zelda reaches the next doorway.
- Learn the Wooden Box Echo.
- Cross the shelving without being detected.
- Learn the Hyrule Castle Pot Echo.
- Use thrown pots to distract the remaining guards.
5. Meet Impa and learn the traversal Echoes
Continue until Zelda meets Impa. The disguise scene follows automatically, and Impa gives Zelda the log that records the map, Main Quests and Side Quests. Proceed upstairs and continue the dialogue until The Mysterious Rifts is added as the first Main Quest.
In the next room, learn the Decorative Shrub Echo. Place shrub copies in the gap beside the shelves to form a bridge, then cross to the far side. Near the exit, face the shimmering Old Bed and press ZR to learn the Old Bed Echo. Create a short staircase or ramp with beds and use it to cross the final gap to the open window.
This is the prologue’s environmental Echo lesson. It demonstrates that Echoes can serve as platforms and bridges, but it does not require a pressure switch, rock puzzle or Zelda combat encounter. Bind is also not taught here, so do not wait for a Bind prompt during this escape.
- Receive the disguise and quest log from Impa.
- Start The Mysterious Rifts.
- Learn Decorative Shrub and Old Bed Echoes.
- Use shrubs and beds to reach the castle exit.
6. Cross the castle waterways and reach Suthorn Beach
Outside the castle, descend through the nearby well to enter the side-view waterways. Use a table or bed Echo to climb the first ledge. Continue downward and learn the Boulder Echo from the shimmering boulder. Push or place a wooden box in the water to make a temporary platform, then use the available objects to move through the room.
At the final wooden boxes, place a boulder Echo on top to weigh them down and open a route through the water. Swim around the obstruction and continue until Zelda reaches the room where the rift begins expanding again. When the water starts rushing, jump into it instead of trying to fight the current. The current carries Zelda out of the waterways and onto Suthorn Beach, where the next chapter begins.
- Enter the castle waterways through the well.
- Learn the Boulder Echo.
- Use boxes and a boulder to pass the water obstacle.
- Jump into the rushing current and arrive at Suthorn Beach.
Before you move on
- Zelda has received the Tri Rod from Tri.
- Table, Wooden Box and Hyrule Castle Pot Echoes have been learned during the jail escape.
- Zelda has met Impa, received the disguise and quest log, and started The Mysterious Rifts.
- Decorative Shrub, Old Bed and Boulder Echoes have been used to cross the castle exit route.
- Zelda has entered the waterways, ridden the rushing current and arrived at Suthorn Beach.
References for this chapter
Hyrule Outskirts — First Overworld Route and Echo Basics in the Field
After escaping Hyrule Castle, Zelda reaches Suthorn Beach, crosses Suthorn Prairie, visits Suthorn Village, and enters Suthorn Forest. This stretch teaches the practical field uses of Echoes: throwing Rocks at enemies, building ramps and bridges with Old Beds, climbing with Tables and Trampolines, and using Ignizol to light a torch. Activate the first Waypoint east of Suthorn Village, investigate Impa’s marked house without trying to enter its rift, clear the forest camp if desired, and enter the northeast portal. In the Still World, follow the short path to Suthorn Ruins, the first dungeon.
Leave the starting cave and collect the first combat Echoes
After Zelda reaches Suthorn Beach, use the Tri Rod on the nearby Rock to learn the Rock Echo. Walk outside and throw a Rock at the Zol rather than approaching it. Once the Zol is defeated, copy its Echo. Continue right and use Rocks against the Sea Urchins blocking the beach route, then copy a Sea Urchin if you defeat one. Rocks are useful for immediate attacks and for dropping onto objects from above; they are not reliable as bridges or permanent platforms.
On the southern side of the beach, an optional Piece of Heart sits on a raised ledge. Reach it by climbing from the right and placing Old Bed Echoes in a compact staircase or ramp. Beds can also bridge the broken approach to the cave on the higher northern ledge. If older creations disappear, replace them closer together rather than attempting to maintain a long, widely spaced line.
- Learn Rock Echo.
- Defeat and copy Zol.
- Clear the Sea Urchins blocking the beach route.
- Optional: collect the southern Piece of Heart with Old Bed Echoes.
Clear Beach Cave and enter Suthorn Prairie
Use Old Beds to reach the cave entrance on the northern ledge. Remove the nearby Sea Urchins first so they do not interrupt your jumps. Inside Beach Cave, throw a Rock at a Keese, then copy the Keese Echo. In the next section, stand above the wooden boxes and drop a Rock or Boulder onto them. Breaking the boxes opens the route to an optional Piece of Heart.
Exit through the right side of the cave into Suthorn Prairie. Before going to the village, climb the ledge to the right with Table and Old Bed Echoes. The chest there contains 50 rupees. This detour is optional, but the money can help if you intend to buy the Piece of Heart sold in Suthorn Village.
- Reach Beach Cave with Old Bed Echoes.
- Learn Keese Echo.
- Break the cave boxes from above if collecting the Piece of Heart.
- Optional: collect the 50-rupee chest in Suthorn Prairie.
Visit Suthorn Village and learn the Trampoline Echo
Follow the path east from Suthorn Prairie to Suthorn Village. In the southwest building, copy the Meat Echo. Near the center of town, beside the Item Shop, copy the Trampoline Echo. The Trampoline is a repeatable vertical-movement tool: place it below Zelda and jump onto it to bounce toward a higher ledge. Use Beds for longer ramps and the Trampoline when you need a direct upward boost.
The village has no mandatory introductory quest that sends you to a new overworld marker. Impa’s marked destination comes from the earlier story sequence. You can optionally buy the village shop’s Piece of Heart for 80 rupees and drop into the well for a chest containing five Floral Nectar. Neither activity is required to reach the first dungeon. When leaving through the east exit, copy the Sign Echo if you want to complete your Echo collection later.
- Learn Meat Echo in the southwest building.
- Learn Trampoline Echo near the Item Shop.
- Optional: buy the 80-rupee Piece of Heart.
- Optional: collect five Floral Nectar from the well.
- Optional: copy the Sign Echo at the eastern exit.
Activate the first Waypoint and learn Ignizol’s utility
Immediately east of Suthorn Village, interact with the first Waypoint. This is the fast-travel point for the route; it is activated directly, not through an NPC quest. Continue east along the path and cross the pond. A chest near the water contains five Electro Apples, and a nearby upper ledge can be reached with Beds or the Trampoline for an optional rupee reward.
Continue along the forest path until you find the cave containing Ignizol. Defeat an Ignizol with Rocks, then copy the Ignizol Echo. In the next room, create Ignizol beside the torch to light it. Opening the chest awards the Fairy Bottle. This is the key early utility lesson: some Echoes attack independently, while others interact with the environment. Ignizol supplies fire; Rocks provide weight and impact; Tables, Beds, and Trampolines provide climbing surfaces.
- Activate the Waypoint east of Suthorn Village.
- Optional: collect five Electro Apples.
- Learn Ignizol Echo.
- Light the torch and obtain the Fairy Bottle.
Cross Suthorn Forest and open the Still World route
Continue through the forest and copy the Rope Echo when you meet a Rope enemy. Enter the cave along the route and defeat a Caromadillo with Rock or Sea Urchin Echoes. After copying Caromadillo, use it to break the wooden boxes blocking the path to the optional Piece of Heart. Outside, the nearby Spear Moblin is a useful ranged-Echo target, although defeating it is not required for the story.
Follow the map toward the house Impa marked earlier. The building is covered by a rift, so do not waste time searching for an entrance or a village quest that unlocks it. Continue toward the forest’s northeast area. Clear the Spear Moblin camp if you want its chest, which contains ten bunches of Refreshing Grapes. A southern side cave contains a Peahat Echo and is optional. Activate or revisit the Waypoint before proceeding to the far northeast, where Tri opens the portal into the Still World.
- Learn Rope Echo.
- Optional: defeat Caromadillo and collect the cave’s Piece of Heart.
- Confirm that Impa’s marked house is blocked by a rift.
- Optional: clear the Moblin camp for ten Refreshing Grapes.
- Enter the northeast Still World portal.
Cross Stilled Suthorn Forest and reach Suthorn Ruins
Inside the Still World, follow the platforms forward and avoid or defeat the floating Tecuum enemies. In the first cave, deal with the Dark Keese and activate the floor switch to open the way. Continue through the next section and defeat the Dark Zol blocking the exit. Outside, use Old Beds or other basic climbing Echoes to reach the upper-right ledge if you want the five-rupee chest.
From there, continue northwest through the Stilled Suthorn Forest. The route leads to the large structure at the far northwest: Suthorn Ruins. Enter the dungeon to begin the next chapter. No Tri Rod upgrade is required for this route; the early area is designed around the basic Echoes learned on the beach, in the village, and in the forest.
- Pass the first Still World cave and its floor switch.
- Defeat or avoid the Dark Zol encounter.
- Optional: collect the five rupees on the upper-right ledge.
- Reach and enter Suthorn Ruins.
Before you move on
- Suthorn Village has been reached, and Meat Echo and Trampoline Echo have been learned.
- The Waypoint east of Suthorn Village has been activated.
- Ignizol Echo has been learned and used to light the forest cave torch, awarding the Fairy Bottle.
- The forest route has been followed past the rift-covered house and northeast area.
- The Still World portal has been entered, Stilled Suthorn Forest has been crossed, and Suthorn Ruins has been reached.
First Dungeon — Suthorn Ruins: Route, Key Items, and Seismic Talus
Suthorn Ruins is the first main dungeon in The Legend of Zelda: Echoes of Wisdom for Nintendo Switch. The dungeon teaches Bind, introduces Strandtula and Ignizol puzzles, awards Swordfighter Form after the Link Echo encounter, and requires both a Small Key and Big Key before Seismic Talus. The Dungeon Map, Heart Pin, rupee chests and Radiant Butter are optional. The required route ends with Seismic Talus, the Heart Container, Tri’s level increase, Might Crystals and the repaired-rift exit. After leaving, Minister Lefte takes Zelda to Lueburry’s House, opening the choice between the Jabul Waters and Gerudo Desert story routes.)
Reach Suthorn Ruins and activate the Waypoint
Enter the rift in southeastern Suthorn Forest and cross Stilled Suthorn Forest. Follow the available path through the Still World until you reach Suthorn Ruins. Activate the Waypoint immediately inside the entrance. This gives you a convenient return point if you need to leave for recovery or want to make a manual save before the boss route.
Suthorn Ruins is the first main dungeon, so the early rooms teach mechanics that recur later. Basic furniture Echoes such as Beds or Tables are useful for climbing, while Strandtula becomes important for several vertical sections. No optional accessory or side quest is required to enter or clear the dungeon.
- Cross Stilled Suthorn Forest.
- Enter Suthorn Ruins.
- Activate the entrance Waypoint.
Learn Bind and collect the Dungeon Map
Go north from the entrance. In the first room, Tri teaches Bind when Zelda approaches the large boulder. Bind the boulder, move it down into the pit, and release it. Step on the exposed floor switch to open the door on the right.)
In the next room, use Bind on the boulder again and place it across the gap between the water platforms. Walk over it and climb toward the room with the buried chest. Pull the chest out of the sand with Bind to receive Radiant Butter. This reward is optional and does not affect dungeon completion.
Return to the previous room and descend the ladder revealed beneath the boulder. In the side-scrolling section, defeat a Strandtula and learn the Strandtula Echo. Create a Strandtula so its web reaches the upper opening, then climb the web to the chest containing the Dungeon Map. Use another Strandtula web, Beds or another suitable climbing Echo to leave through the right side.)
- Use Bind on the opening boulders.
- Learn the Strandtula Echo.
- Collect the Dungeon Map if desired.
- Leave the side-scrolling room through the right side.
Reach the upper floor and solve the Ignizol puzzle
Cross the next gap with Beds, Tables or Strandtula webs. In the following room, defeat the enemy in the lower-left area to learn Ignizol. Ride the lift upward and defeat the Darknut near the top of the stairs. Rock Echoes can damage it, and Ignizol is also useful against its armor. Learn the Darknut Echo after the fight if possible.)
Go left and descend the ladder into the side-scrolling brazier room. Place an Ignizol near the unlit brazier at the bottom-left. Climb to the right and use another Ignizol on the stacked wooden boxes. The fire spreads through the boxes and lights the remaining brazier. Once all required braziers are lit, the exit opens.
After resurfacing, activate the upper Waypoint. Four statues stand near the locked door; one carries a metal shield. Bind the shield and pull until it comes free. The door opens. The nearby chest containing 50 rupees is optional. Continue north toward the Link Echo encounter.
- Learn Ignizol.
- Defeat or bypass the Darknut and learn its Echo if possible.
- Light both required braziers.
- Pull the shield from the statue.
- Activate the upper Waypoint.
Defeat the Link Echo and obtain Swordfighter Form
The Link Echo blocks attacks from the front with his shield. Use Bind to pull the shield away, then summon a strong combat Echo such as Darknut while Zelda circles behind him. You can also place an Echo behind Link and keep moving so he cannot maintain his guard against every attack.)
Link becomes faster and more aggressive after taking enough damage. Continue moving, replace defeated Echoes and use Bind again if the shield returns. After the Link Echo falls, collect the Mysterious Sword. This unlocks Swordfighter Form and its Energy Gauge.
Immediately use Swordfighter Form to cut through the purple-black barrier blocking the next route. The form is required here, but avoid spending the gauge on unnecessary enemies because you will need Swordfighter Form again for the purple barrier in the lower dungeon route.
- Pull away or bypass Link’s shield.
- Defeat the Link Echo.
- Collect the Mysterious Sword.
- Use Swordfighter Form to cut the purple barrier.
Pass the lower route and obtain the Small Key
In the underground section, drop to the bottom and use Bind on the large boulder. Move it into the depression in the floor. Climb back up the left side, cross the gap and use a Strandtula web to reach the chest containing the Heart Pin. The Heart Pin is optional; on difficulties where recovery hearts appear, it increases their frequency, but recovery hearts do not appear on Hero difficulty.)
Exit through the lower-right route and climb toward the first floor. Activate the Waypoint near the large boss door. Enter the western room and defeat the three Deku Babas. Bind can pull their heads away, while Keese or Peahat Echoes can attack them from safer positions. Swordfighter Form is required to cut the purple barrier on the left.
The western side room contains an optional 50-rupee chest. To reach it, Bind the statue behind the bars, walk up the slope while maintaining the connection, and place the statue on the switch. Return to the Deku Baba room and go north. Pull the Deku Baba behind the grate with Bind or defeat it with an Echo. Open the revealed chest to obtain the required Small Key.)
- Collect the Heart Pin only if desired.
- Defeat the three Deku Babas blocking the route.
- Obtain the Small Key.
- Treat the rupee chest as optional.
Use the Small Key, learn Reverse Bond, and collect the Big Key
Return to the central hall and unlock the eastern door with the Small Key. In the statue room, move the misplaced statue in the upper-right area so the four statues form the intended square arrangement. The gate opens, allowing you to descend into the final side-scrolling section.)
Ride the moving platform to the right. Tri teaches Reverse Bond in the next room. Target the moving platform above Zelda with Bind, release the initial Bind input, then hold the follow command shown by the game so Zelda moves with the platform. Repeat this across the room until you reach the upper exit. The chest on the upper-right route contains 20 rupees and is optional.)
At the top, solve the Big Key chest puzzle. Create a step with a Table or Bed so Zelda can gain height beside the statue. Bind the statue, climb onto the Echo while maintaining the connection, and place the statue on the raised switch. When the gate opens, collect the Big Key. This key is required for the boss door.
- Use the Small Key on the eastern door.
- Align the four statues.
- Learn and use Reverse Bond.
- Collect the Big Key.
Defeat Seismic Talus
Return to the central hall and activate the Waypoint near the large boss door. Unlock the door with the Big Key. Seismic Talus has a glowing purple orb that changes position during the battle. Bind can pull the orb out directly, while suitable combat, flying or projectile Echoes can also damage it. Keep Zelda moving to avoid the Talus’s slams, hands and spinning attacks.)
During the first phase, the orb is at the base of the Talus. Pull it away with Bind or attack it with Echoes until the stone body collapses and exposes the orb. Summon Echoes to damage the exposed orb, using Swordfighter Form briefly if enough energy remains.
During the second phase, the orb moves to the Talus’s shoulder. Use a flying or projectile Echo to reach it, or wait for a clear angle and pull it away with Bind. In the final phase, the Talus turns red and moves faster; the orb appears on its head. Wait for a ground-pound opening, then use Bind or an appropriate Echo to remove it. Continue damaging the exposed orb until Seismic Talus is defeated. There is no fixed three-hit sequence; the number of attacks depends on the damage dealt by your chosen Echoes and Swordfighter Form.)
- Target the orb at the base.
- Damage the exposed orb.
- Target the shoulder orb with a flying, projectile or Bind strategy.
- Target the head orb after the Talus turns red.
- Defeat Seismic Talus.
Collect the rewards and continue the campaign
After Seismic Talus falls, collect the Heart Container to increase Zelda’s maximum health. Tri repairs the rift, gains a level and awards Might Crystals. Use the repaired-rift portal to leave the dungeon.)
Outside, Minister Lefte leads Zelda to Lueburry’s House. This completes the immediate Suthorn-region story sequence and advances the search for the King, the Commander and Link. After the conversation, the campaign opens the next major choice: investigate Jabul Waters or travel to the Gerudo Desert.
The Heart Container, Tri’s level increase, Might Crystals and repaired-rift exit are the required completion rewards. The Dungeon Map, Heart Pin, Radiant Butter and rupee chests are optional. If you missed an optional chest or Echo, continue the story first and return through the overworld when the game allows access.
- Collect the Heart Container.
- Confirm Tri’s level increase and Might Crystals.
- Leave through the repaired-rift portal.
- Reach Lueburry’s House with Minister Lefte.
- Confirm that the Jabul Waters and Gerudo Desert objectives are available.
Before you move on
- Suthorn Ruins has been cleared and Seismic Talus has been defeated.
- The Heart Container has been collected and Zelda’s maximum health has increased.
- Tri has advanced to the next level and the Might Crystals have been awarded.
- The repaired-rift exit portal has been used.
- Minister Lefte has led Zelda to Lueburry’s House.
- The next campaign objectives involving Jabul Waters and Gerudo Desert are available.
Echo Mastery — Might Crystal Upgrades and Reliable Echo Combos
After completing Suthorn Ruins, visit Lueburry’s House to unlock Swordfighter Form upgrades. The machine there uses Might Crystals to improve the Sword of Might and increase the Swordfighter energy gauge; later, it also upgrades the Bow of Might and Bombs of Might after Zelda obtains those weapons. The Great Fairy in Lake Hylia provides a separate, optional accessory-slot service. This chapter replaces the nonexistent Tri Rod upgrade path with three practical Echo exercises: stacking platforms, combining an environmental Echo with Bind, and controlling an enemy before using Swordfighter Form. These techniques prepare Zelda for the two-region route that follows Suthorn Ruins without requiring optional collectibles or maximum upgrades.
Go to Lueburry’s House and unlock the Might Crystal machine
After defeating Seismic Talus in Suthorn Ruins, leave through the dungeon’s portal. Minister Lefte directs Zelda toward Lueburry’s House, so follow that scene rather than returning to Suthorn Village to search for a Tri Rod vendor. Lueburry’s House is in Suthorn, beside the prairie ponds. Speak with Lueburry and let the conversation about the unusual crystals finish. The five crystals received after the dungeon are identified as Might Crystals at this point.
Examine the machine in the back corner of the house. Its available services improve Swordfighter Form, not the Tri Rod. Early in the campaign, the useful choices are Sword of Might power and the length of the Swordfighter energy gauge. The Bow of Might and Bombs of Might do not appear in the machine until Zelda obtains those weapons later in the Gerudo Sanctum and Eldin Temple story routes. There is no permanent branching choice that can block campaign progress, so spend crystals on the upgrade that matches your play style.
A practical early priority is the Sword of Might if you frequently enter close combat. Choose the energy gauge instead if you mainly use Swordfighter Form to cross purple barriers or want longer attack windows. Do not wait for every crystal before continuing. Story rewards and exploration provide more crystals, and the campaign can be completed without maxing every Swordfighter upgrade.
- Leave Suthorn Ruins through the portal after defeating Seismic Talus.
- Speak with Lueburry at his house.
- Examine the upgrade machine.
- Install an affordable Sword of Might or energy-gauge upgrade if available.
- Do not look for a Tri Rod capacity upgrade at Lueburry’s House.
Use the Great Fairy only for optional accessory slots
The Great Fairy Shrine is on a small island in Lake Hylia, southeast of Hyrule Castle. Reach the island, enter the cave, and speak with the Great Fairy. Her service increases Zelda’s accessory limit. It does not add Echo slots, increase Tri’s triangle capacity, extend Echo duration, or upgrade the Swordfighter gauge.
Zelda begins with one accessory slot. The four additional slots cost 100, 300, 500, and 1,000 Rupees respectively, allowing up to five equipped accessories. Buy a slot only when you can afford it without delaying a shop purchase or another immediate need. After buying one, open the equipment menu and place an accessory in the new slot; an unused slot has no effect.
This visit is optional for the main campaign. The Great Fairy Shrine also contains a Might Crystal chest and later connects to The Great Fairy’s Request, but neither is required for the first upgrade visit. Treat the shrine as a useful preparation stop rather than part of the Lueburry upgrade route.
- Reach the Great Fairy Shrine in Lake Hylia if you want the optional service.
- Buy an accessory slot only if you have enough Rupees.
- Equip an accessory in every purchased slot.
- Do not expect the Great Fairy to improve Echo capacity.
Practice one: build a safe vertical route with sequential Echoes
Find a low, safe ledge near a Waypoint. Summon an Old Bed, Table, or another stable object Echo against the wall, then place a second copy on or beside the first to make a climbable route. Climb onto the lower object, jump to the upper object, and finish the ascent. Place the next support before the current one disappears; do not wait until Zelda is already airborne.
Repeat the exercise with a Trampoline Echo when the ledge has enough overhead space. The Trampoline is useful for gaining height quickly, but a bed or table is easier to control in narrow passages. If the arrangement is poor, step back, dismiss the unhelpful Echo, and rebuild from the ground instead of trying to recover from a bad jump.
Perform the same climb in reverse. This teaches the timing needed for longer routes where Zelda must create a second support while the first remains active. The exercise is not a named side challenge and does not award a special completion item; it is a practical skill check for rifts and dungeon rooms.
- Create a lower support Echo.
- Place the next support before committing to the jump.
- Reach the ledge without falling.
- Repeat the route in reverse.
- Dismiss and rebuild failed arrangements rather than spending time improvising midair.
Practice two: combine an environmental Echo with Bind
Find a pressure switch, loose block, narrow passage, or similar object puzzle in the overworld. First use an object Echo such as a Rock or Box to alter the space: block a hazard, create a step, or hold down a switch. Then use Bind on the movable object and walk around it to pull it into its final position.
For a switch, approach from the side that gives Zelda room to walk while the object follows. Drag the object fully onto the center of the plate, release Bind, and wait briefly to confirm that it stays in place. If the route is elevated, create a bed or table platform first so Zelda can reach the correct side before using Bind.
This exercise teaches that Echoes and Bind solve different parts of the same puzzle. The Echo supplies the object or platform; Bind handles precise positioning. Keep an eye on Tri’s triangle display because active Echoes share the available capacity. If there is not enough capacity for the next platform or blocker, dismiss an unnecessary Echo before continuing.
- Use an object Echo to change the room.
- Reach the correct side with a platform Echo if necessary.
- Use Bind to position the object accurately.
- Release Bind and confirm the switch remains active.
- Dismiss an unnecessary Echo before the next placement if capacity is low.
Practice three: distract an enemy before entering Swordfighter Form
Choose a basic enemy in an open area and begin outside its attack range. Summon a combat Echo, such as a Spear Moblin or Peahat, to the side or behind the target rather than directly in front of Zelda. Let the enemy turn toward the Echo, then move into the opening and use Swordfighter Form for a short attack sequence.
When the enemy recovers, disengage instead of trading hits. Swordfighter Form consumes a limited energy gauge, so activate it for a confirmed opening rather than leaving it active while searching. Collect dropped energy when it is safe, and use a potion or other recovery item only when the next encounter justifies the expense.
Against shielded, armored, airborne, or resistant enemies, do not assume one combat Echo will solve the fight. Create distance with a Box, Rock, or platform, change the attack angle, or wait for the enemy to expose itself. A blocker-plus-attacker setup is safer than surrounding Zelda with expensive Echoes. The objective is controlled positioning, not defeating a particular enemy.
- Summon a combat Echo from outside attack range.
- Make the enemy turn or reposition.
- Use Swordfighter Form only during the opening.
- Retreat when the enemy recovers.
- Use barriers, height, or movement against resistant enemies.
Before you move on
- Lueburry has explained Might Crystals and the machine in his house has been examined.
- At least one affordable Swordfighter Form upgrade has been installed, or the player has confirmed that more Might Crystals are needed.
- The player can cross a low ledge using sequential or overlapping platform Echoes.
- The player can hold a switch or position a loose object with an Echo and Bind.
- The player can distract an enemy with an Echo, enter Swordfighter Form for a short attack, and retreat before the enemy recovers.
- The player understands that the Great Fairy’s service affects accessory slots only and is optional for campaign progress.
References for this chapter
- Searching for Everyone — The Legend of Zelda: Echoes of Wisdom Guide — Thonky
- Zelda: Echoes of Wisdom: How to Upgrade Swordfighter Form — Nintendo Life
- Might Crystal Locations — Zelda: Echoes of Wisdom
- Items: Effects & Locations — Zelda: Echoes of Wisdom
- How to Increase Accessory Slots — Zelda: Echoes of Wisdom
Gerudo Desert and Gerudo Sanctum — Rift Route, Dungeon and Mogryph
After Suthorn Ruins, Gerudo Desert and Jabul Waters can be completed in either order. This chapter follows Gerudo Desert from the Oasis and Gerudo Town through Dohna’s rescue, the three required smaller-rift objectives, the Stilled Desert Temple Ruins, Cryptic Cavern, and the complete Gerudo Sanctum dungeon. Rescue all five groups of Tri’s friends before entering the Sanctum; this repairs the major desert rift and raises Tri to Level 3. Inside the Sanctum, collect both Small Keys, the Dungeon Map, the Bow of Might, the Hawk and Elephant Statue Echoes, and the Big Key before facing Mogryph. Mogryph’s required opening is a statue placed in the path of its underground charge. After victory, collect the Heart Container and five Might Crystals, then finish the Gerudo Town celebration. Elusive Tumbleweeds and Mango Rush remain optional.
1. Enter Gerudo Desert and activate the Oasis Waypoint
From the Waypoint near Lueberry’s House, travel west into Gerudo Desert. Continue past the Gerudo soldiers fighting monsters and follow the open route to the palm-lined Oasis. Activate the Oasis Waypoint immediately so you can return quickly for the palace sequence, the smaller rifts, and the Sanctum approach.
From the Oasis, travel southwest toward the large rift surrounded by ruined walls. Speak with the nearby Gerudo guard. A scream will come from the ruins; follow it and defeat the rift monsters surrounding Dohna, the Gerudo captain. Flying Echoes or ranged attacks are useful against the Dark Keese, while a sturdy combat Echo can handle the Dark Aruroda. Speak with Dohna after the fight.
- Enter Gerudo Desert from the Hyrule Field side.
- Activate the Oasis Waypoint.
- Rescue Dohna at the large rift and speak with her afterward.
2. Visit Gerudo Town and receive the three-rift objective
Travel west to Gerudo Town and enter Gerudo Palace with Dohna. Speak with Chief Seera and Facette. Facette remains suspicious of Zelda and does not authorize entry into the Sanctum. After the conversation, follow the instruction to return to the Oasis.
Dohna is waiting near the Oasis. Speak with her to mark the three required objectives: Southern Oasis Ruins, Southern Gerudo Desert, and Ancestor’s Cave of Rest. These objectives must be completed before the palace story can continue.
- Reach Gerudo Town and enter Gerudo Palace.
- Speak with Seera, Facette, and Dohna.
- Return to the Oasis and receive all three smaller-rift objectives.
3. Complete the three smaller Gerudo rifts
At Southern Oasis Ruins, help the soldiers by defeating every monster emerging around the rift. At Southern Gerudo Desert, speak with the thirsty Gerudo warriors and provide Dohna with a Cactus Smoothie. If necessary, take the Chilly Cactus ingredients to the Oasis Smoothie Shop and have the smoothie prepared there.
For Ancestor’s Cave of Rest in the northern desert, enter the cave beside the marked rift. Use Bind to move the large boulder and reach the deeper passage. Defeat a Holmill and learn the Holmill Echo, then continue through the side-view section. Move the second blocking boulder with Bind and use Ignizol Echoes to relight both braziers beside the ancestral tomb. Speak with the Gerudo outside when the objective is finished.
- Defeat the monsters at Southern Oasis Ruins.
- Give Dohna a Cactus Smoothie at Southern Gerudo Desert.
- Relight both ancestral braziers in Ancestor’s Cave of Rest.
- Confirm all three smaller-rift objectives are complete.
4. Rescue the five groups in Stilled Desert Temple Ruins
Return to Gerudo Palace and speak with Seera. The conversation is interrupted by news that a larger rift has swallowed Gerudo warriors. Warp to the Oasis, travel northeast to the Desert Temple Ruins, and enter the newly opened rift.
Rescue all five groups of Tri’s friends. From the entrance, follow the northern path, cross the tree branch, and descend into the side-view cave with Platbooms. Learn Platboom if needed and ride one to the first energy mass. Exit the cave and climb the steep terrain toward the tree to reach the second group, then move right and climb the sandy ledge for the third.
For the fourth group, climb to the upper desert area and use Echo platforms to reach the rocky ledge. Move the large boulder blocking the energy mass. Return toward the beginning and locate the tall red stone pillar with the fifth group on top. Use Platboom, flying Echoes, or a constructed bridge to reach it. Once all five groups are free, the rift is repaired.
The real Facette returns with the rescued warriors, exposing the palace Facette as an impostor. After the scene, Tri’s friends provide enough power to raise Tri to Level 3. Seera then authorizes the restoration of Gerudo Sanctum.
- Enter Stilled Desert Temple Ruins through the eastern desert rift.
- Rescue all five groups of Tri’s friends.
- Finish the Facette impostor scene.
- Confirm Tri has reached Level 3 before entering the Sanctum route.
5. Clear Cryptic Cavern and reveal Gerudo Sanctum
Return to the large rift southwest of the Oasis and speak with the guard west of it. Enter Cryptic Cavern. In the opening room, hit the eye switch with a Rock Echo or another object. Learn Wind Cannon, then use Bind to move the physical cannons out of the passages.
Continue through the enemy rooms and learn useful route Echoes, including Pathblade and Gibdo. Collect the Small Key after the Pathblade section and use it on the locked door. In the lower passages, use Old Beds or other platforms to cross gaps. Aim Wind Cannon gusts at sand piles to clear the upper routes; for elevated sand, bind the cannon from the side and climb while the gust removes the pile.
Defeat Gibdo Lv. 2 and enter the room on the right. Bind the large plug and pull it from the wall. The sand drains away, revealing the Gerudo Sanctum entrance outside. Leave Cryptic Cavern and enter the Sanctum.
- Learn Wind Cannon and Pathblade in Cryptic Cavern.
- Collect and use the Small Key.
- Defeat Gibdo Lv. 2.
- Pull the plug and expose the Gerudo Sanctum entrance.
6. Enter Gerudo Sanctum and collect the first Small Key
Inside the Sanctum, follow Link up the ladder into the opening wind-cannon room. Climb the right wall while avoiding the gusts. At the top, use Bind to move the boulder in front of the wind cannon on the left, then cross to the left side and climb the newly accessible ladder.
Activate the central Sanctum Waypoint. Go west into the Flying Tile room and let the tiles break or avoid them before returning to the central room. Go east and Bind the lever to hold the blocks open. Quickly cross the conveyor belt and use an Echo platform if needed to reach the opening before it closes.
In the next room, Bind either side of the unusual wall to pull it open and reveal the passage. Open the chest to obtain the first Small Key. Return through the opened route and continue into the rooms containing Snake Statues and Mothulas. Defeat the Mothulas with a ranged Echo or Swordfighter Form, then proceed west and descend through the conveyor-belt room. Destroy or bypass the boxes, descend the ladder, and continue downward.
- Activate the Sanctum Waypoint.
- Collect the first Small Key from the pulled-open wall room.
- Defeat or bypass the Mothulas.
- Descend to the tablet and statue-clue section.
7. Follow the tablet clues and reach the outside route
In the lower tablet room, read the clue describing two distinct tribute statues. Bind the wall on the right to open a passage. Clear the sand with Wind Cannon and read the revealed tablet: one statue is blue, has large tusks, and a long nose. This identifies the Elephant Statue Echo, but do not place it yet.
Return to the tablet room and take the western route to the Poe room. Defeat the Poe with a ranged Echo such as Mothula, then learn the Poe Echo and open the chest for the Dungeon Map. Leave through the southern exit and follow Link into the outdoor Sanctum area.
Use the tower mechanism to rotate the ladder into position. Climb to the top of the Sanctum, defeat the Mothula, and use Wind Cannon to clear the sand and reveal the Monster Stone chest if desired. Descend along the right side and cross the ReDead corridor with ranged attacks, Swordfighter Form, or careful movement. Bind the handle hidden behind the cactus to rotate the next tower, then climb to the top and learn the Hawk Statue Echo.
- Read both statue clues.
- Defeat the Poe and collect the Dungeon Map.
- Reach the roof and obtain the Hawk Statue Echo.
- Keep the Elephant Statue Echo for the central statue puzzle.
8. Obtain the Bow of Might and the second Small Key
Return to the Sanctum’s right-side entrance. Solve the timed lever room by placing platforms over the quicksand and avoiding the Sand Piranha. Continue into the tight room with Gibdos and a ReDead, then move the blocking statue with Bind and activate the Waypoint beyond it.
Enter the miniboss arena and defeat Echo Link. He uses a bow and moves quickly around sand piles and bottomless gaps. Bind him briefly to hold him in place while close-range combat Echoes attack. During the second phase, three Echo Links appear and fire spreading arrow shots; keep moving, bind an opening, and attack the real target until the fight ends.
Afterward, climb the ladder and use Swordfighter Form’s Bow of Might to destroy the Beetle Mound blocking the eastern route. Continue upward and activate the next Waypoint. In the flame-pillar room, place Boulders to block the fire and reach the Elephant Statue Echo and chest containing the second Small Key.
- Activate the Waypoint before Echo Link.
- Defeat both phases of Echo Link.
- Receive and use the Bow of Might to clear the Beetle Mound.
- Collect the second Small Key from the Elephant Statue room.
9. Complete the statue and three-torch puzzles
Warp back to the Waypoint before Echo Link and return to the quicksand room. Use the second Small Key on the locked door. In the next room, Bind the off-color wall even though it has no visible handle, then enter the torch puzzle room.
Light the upper-right torch with Ignizol. Bind the central flamethrower and rotate it toward the lower torch. For the final torch, make platforms in the lower-left area and remove or drop the Wind Cannon that blocks the route. Use Old Beds or another platform Echo to position an Ignizol and light the last torch. The final tablet appears and identifies the second tribute as a winged creature: the Hawk Statue Echo.
Return to the central tablet room. Place the Elephant Statue Echo on the blue-tusked statue marker and the Hawk Statue Echo on the winged-statue marker. The door opens into the sand-drain chamber.
- Use the second Small Key on the quicksand-route door.
- Light all three torches.
- Read the final winged-statue clue.
- Place Elephant and Hawk Statue Echoes on the correct markers.
10. Drain the sand and obtain the Big Key
Enter the opened chamber and Bind the large plug to drain the sand. Go into the adjoining room. The Big Key chest is behind a rotating-ring puzzle. First use Bind on the outer ring and rotate it until its opening faces downward.
Use the rotating device in the southwest corner to turn the inner ring. Align its opening downward as well, matching the connected gaps so the path through the sand is restored. If the alignment is lost, adjust the outer ring with Bind, then use the corner device again for the inner ring.
Open the large chest to obtain the Big Key. Climb the northeastern stairs, activate the Waypoint near the boss approach, and unlock the Big Key door. Make sure healing Smoothies and a strong combat Echo are ready before entering.
- Drain the sand by pulling the plug.
- Align the outer and inner rings with their openings downward.
- Collect the Big Key.
- Activate the boss-approach Waypoint and open the Big Key door.
11. Defeat Mogryph
Mogryph is the Gerudo Sanctum boss. At the start, it attacks with broad sand swipes and may destroy nearby Echoes with its roar. Keep moving around the arena and do not rely on a single summoned Echo surviving the exchange.
When Mogryph burrows underground, watch its movement and prepare one of the arena statues. Place a statue or durable statue Echo directly between Zelda and the boss’s charge path. Mogryph will collide with it, become stunned, and expose the damage window. Use Swordfighter Form or several combat Echoes to attack while it is stunned.
After taking enough damage, Mogryph turns sections of the arena into quicksand. Stay on the firm, lighter-colored sand and avoid being pulled under. It also rises into the air to launch sand-filled whirlwinds and dives toward Zelda; keep moving rather than trying to trade hits. Wait for another underground charge, place a statue in the path, and repeat the collision-and-attack cycle until Mogryph is defeated.
- Use a statue to stop each underground charge.
- Attack only during Mogryph’s stunned openings.
- Stay on firm sand after the arena changes.
- Avoid the sandstorm and dive attacks until the next charge cycle.
12. Collect the rewards and finish the Gerudo story transition
After Mogryph falls, collect the Heart Container. Tri awards five Might Crystals for the dungeon victory, and the Gerudo Desert rift is fully repaired. The Tri level increase occurred earlier when the five groups of friends were rescued; do not wait for a second level-up after the boss.
Exit the Sanctum and return to Gerudo Town with Dohna. Speak with Dohna and Chief Seera during the celebration to complete A Rift in the Gerudo Desert. Gerudo Desert campaign progression is now complete. Depending on whether Jabul Waters has already been cleared, the next required destination is either Jabul Ruins or the Hyrule Castle sequence after both flexible-region dungeons are finished.
- Collect the Heart Container.
- Receive five Might Crystals from Tri.
- Confirm the Gerudo Desert rift is repaired.
- Complete the Gerudo Town celebration with Dohna and Seera.
13. Optional: complete Elusive Tumbleweeds
Speak with the Gerudo woman in the northwest part of Gerudo Town to begin Elusive Tumbleweeds. Find the tumbleweed south of town and use Bind to carry it intact. Do not strike it or handle it normally, because it will crumble.
Carry it back to the quest giver for two Might Crystals. This side quest is optional and does not unlock Cryptic Cavern, Gerudo Sanctum, or any required boss encounter.
- Accept Elusive Tumbleweeds in Gerudo Town.
- Carry an intact tumbleweed with Bind.
- Return it for the two Might Crystal reward.
14. Optional: play Mango Rush at the Oasis
The Tough Mango Plant Lab is the pink tent beside the Oasis. Mango Rush is optional and is not required for the Sanctum. Standard Seeds require collecting at least 40 of 50 mangoes to unlock Vibrant Seeds. Vibrant Seeds contain thorns; collecting at least 50 of 60 earns the first-clear Golden Fan, while collecting all 60 awards three Might Crystals on the first clear.
Ultimate Seeds are a later activity and are not available before the Hyrule Castle progression. Their rewards, including the Dancing Outfit and Piece of Heart, are optional cleanup goals rather than Gerudo campaign requirements.
- Locate the Tough Mango Plant Lab at the Oasis.
- Treat Standard and Vibrant Mango Rush as optional activities.
- Do not delay the Sanctum while waiting for Ultimate Seeds.
Before you move on
- The Oasis and Sanctum Waypoints are active.
- Southern Oasis Ruins, Southern Gerudo Desert, and Ancestor’s Cave of Rest are complete.
- All five groups of Tri’s friends are rescued in Stilled Desert Temple Ruins.
- Tri has reached Level 3 after the major Gerudo rift is repaired.
- Cryptic Cavern is cleared, the plug is removed, and Gerudo Sanctum is accessible.
- Inside Gerudo Sanctum, the Dungeon Map, both Small Keys, Bow of Might, Hawk Statue Echo, Elephant Statue Echo, and Big Key have been obtained.
- Mogryph is defeated using the statue-stun charge cycle.
- The Heart Container and five Might Crystals from the Sanctum victory are collected.
- Dohna and Seera’s celebration in Gerudo Town has finished, completing A Rift in the Gerudo Desert.
- Elusive Tumbleweeds, Mango Rush, extra chests, Pieces of Heart, Stamps, and other regional collectibles remain optional cleanup.
References for this chapter
- Walkthrough: Gerudo Sanctum — Zelda Dungeon Wiki
- Gerudo Sanctum — Thonky’s The Legend of Zelda: Echoes of Wisdom Guide
- Zelda: Echoes of Wisdom: Gerudo Sanctum Chest and Dungeon Walkthrough — Nintendo Life
- Zelda: Echoes of Wisdom: A Rift in the Gerudo Desert Main Quest — Nintendo Life
- A Rift in the Gerudo Desert — Echoes of Wisdom Walkthrough — Zelda Central
- The Legend of Zelda: Echoes of Wisdom Gerudo Sanctum Walkthrough — The Escapist
- Gerudo Sanctum — Zelda Dungeon Wiki
Second Dungeon — Jabul Ruins Route, Puzzle Order and Vocavor Preparation
Jabul Ruins is the water dungeon in the Jabul Waters story sequence. It can be your second or third dungeon because Gerudo Sanctum and Jabul Ruins are available in either order after Suthorn Ruins. The dungeon’s central room contains five switches: pink, orange, blue, green and yellow. Activating them raises the water level and eventually lets Zelda ride the central geyser to the boss door. The main tools are Water Block, Bind, Bombfish, underwater movement and, for one switch, Swordfighter Form. The Big Key is found on the green-route side of the dungeon, while the yellow switch opens the final route back to the central chamber. Vocavor is fought in a side-view underwater arena. Remove the blue growths from its back, then attack while it is stunned. During the second part of the fight, water drains from sections of the arena, so use flying Echoes or Swordfighter Form when Chompfin cannot reach the boss. Defeating Vocavor awards a Heart Container, five Might Crystals and a Tri level increase.
Reach Jabul Ruins and activate the entrance Waypoint
Complete the Jabul Waters story sequence and enter the rift leading to Stilled Jabul Waters. Follow the Water Block route through the Still World until you reach the ruins. Water Block is the most useful Echo here: stack it to make steps, bridge gaps and reach ledges above the water. Crawltula or Platboom can also help with vertical movement, but neither replaces Water Block for the dungeon’s intended routes.
Activate the Waypoint just inside the ruins. Continue forward and the floor will collapse, dropping Zelda into a side-view underwater passage. Use Bind to move the large boulders blocking the route. Swim around the whirlpool-producing creature rather than trying to fight it in this introductory section. Move to the right, clear the final obstruction, then resurface and climb back toward the main dungeon entrance.
- Enter Jabul Ruins through the Jabul Waters rift.
- Activate the first Waypoint.
- Keep air bubbles nearby during the underwater approach.
Activate the pink switch and open the lower routes
After resurfacing, climb to the upper side of the entrance area and activate the Waypoint there. Enter the central chamber and step on the pink switch. This starts the dungeon’s water-level mechanism and opens the routes to the remaining four switches.
The orange and blue routes can be completed in either order. The orange route is on the lower-right side of the central room; the blue route is on the lower-left. Do not expect the dungeon to follow a single mandatory button order. The important objective is to activate all five switches so the central geyser rises far enough to reach the boss level.
- Press the pink switch.
- Identify the orange lower-right route and blue lower-left route.
- Use the central room as the return point after each switch.
Complete the orange route and collect the Dungeon Map
Take the lower-right ladder from the central chamber. The side-view section contains the Dungeon Map chest along the route. Continue through the water and surface areas, using flying Echoes against Octoroks and Water Block to reach safer heights above Chompfins. A Tangler or Bombfish can clear the wooden obstruction near the upper part of the route.
Cross the tightropes and enter the Sand Crab room. Defeat the enemies blocking the far side, then step on the orange switch. The water level in the central room rises again. Drop through the nearby hole and climb back to the central chamber. The rupee chest and other treasure on this route are optional; they are not needed to open the boss path.
- Collect the Dungeon Map.
- Defeat or bypass the Sand Crab room’s enemies to reach the orange switch.
- Press the orange switch and return to the central chamber.
Complete the blue route and light the four torches
Take the lower-left ladder from the central chamber. This route becomes dark underwater. Tangler Lv. 2, if available, can illuminate the area, and the blue coral also provides temporary light. Collect air bubbles as you move and use a water-capable Echo against underwater enemies.
At the upper-left end, enter the room with four torches. One torch is submerged. Dive, use Bind to lift it to the surface, and then light the unlit torches with Ignizol or another fire-producing Echo. When all four are lit, the passage opens. Step on the blue switch, then use the hole and ladder to return to the central room.
- Use Bind to raise the submerged torch.
- Light all four torches.
- Press the blue switch and return to the central chamber.
Raise the geyser, get the Big Key and activate green and yellow
After the pink, orange and blue switches are active, the central geyser becomes high enough to reach the upper level. Ride it upward and take the upper route toward the green-switch section. In the side-view water area, use Bombfish to destroy wooden barriers and move platforms or boulders with Bind. The large chest at the lower part of this route contains the Big Key. The Golden Egg chest is optional.
Continue through the underwater enemy rooms until you reach the green switch. Because the switch is underwater, place a Boulder, pot or statue Echo on it to hold it down. Return through the opened passage and use Bind to move the plank and large rock blocking the way back to the central room.
Use the remaining upper route to reach the five-tower current room. Jump across the moving water and stack Water Blocks to reach elevated towers. The submerged tower can be activated by diving and using Swordfighter Form to strike it. A Flying Tile or Tornando can help with distant towers if you have those Echoes. After all five towers are active, proceed through the opened room and press the yellow switch. Return to the central chamber, where the geyser should now reach the boss level.
- Collect the Big Key before attempting the boss door.
- Hold the green switch down with a heavy Echo.
- Activate every tower in the current room.
- Press the yellow switch.
- Confirm that all five central-room switch markers are active.
Prepare for Vocavor
Activate the Waypoint near the final approach and heal before entering the boss room. Water-based Echoes such as Chompfin are useful during the underwater portions of the fight. Bombfish can also remove Vocavor’s blue back growths, while Bind gives Zelda a direct way to pull them away after the boss finishes an attack. Swordfighter Form is useful when the boss becomes exposed or moves into a position where an Echo cannot reach it.
The arena contains air bubbles. Do not remain underwater after your air is nearly gone; route Zelda toward a bubble while waiting for the next attack window. There is no need to spend optional dungeon treasure before the fight, but a clean save or recovery point before the boss is sensible if your current game provides one.
- Heal before the boss door.
- Have Chompfin, Bombfish or another reliable ranged Echo ready.
- Know the locations of the arena’s air bubbles.
Defeat Vocavor by removing its back growths
Vocavor begins underwater and attacks with moving whirlpools, tail projectiles and body charges. Avoid the whirlpools, then target the blue growths on its back. After an attack, the boss provides a short opening; use Bind to pull off one or more growths, or send Chompfin or Bombfish into the back. Do not waste attacks on the armored body while the growths remain intact.
When the blue growths have been removed, Vocavor is stunned and its vulnerable body is exposed. Use Swordfighter Form or your strongest available Echoes during this short damage window. The boss then restores its protection, so repeat the cycle: evade an attack, remove the blue growths and attack only while Vocavor is stunned.
Later, sections of the arena lose their water. Vocavor can move between water and dry pockets, making Chompfin less dependable when the boss is out of reach. During this portion, flying Echoes such as Albatrawl can attack from the air, and Swordfighter Form works when Vocavor is flipped or exhausted after its larger whirlpool attack. Continue targeting the blue growths rather than the shell. When the final stun ends, Vocavor is defeated.
- Remove the blue back growths before attempting heavy damage.
- Use air bubbles during underwater sections.
- Switch to flying Echoes or Swordfighter Form when the arena drains.
- Collect the Heart Container after the battle.
Before you move on
- The Dungeon Map and Big Key are collected.
- The pink, orange, blue, green and yellow switches are active, and the central geyser reaches the upper level.
- The Big Key opens Vocavor’s boss door.
- Vocavor is defeated and the Heart Container is collected.
- Tri increases by one level and awards five Might Crystals after the dungeon sequence.
- The Jabul Waters rift is repaired and the story advances outside the ruins, with General Wright freed and the next main objective appearing.
Open-World Navigation: Shortcuts, Waypoints and Resource Management
Waypoints are the main fast-travel network in Echoes of Wisdom. Activate them whenever you pass one, especially near settlements, rifts, dungeons, caves, and regional entrances. Gather ingredients during normal travel and turn them into Smoothies at Business Scrub shops; keep healing and energy-recovery drinks ready instead of hoarding every ingredient. Might Crystals are separate, fixed discoveries rather than a renewable crafting resource. Take them to Lueberry’s House to improve Swordfighter Form, including its sword, bow, bombs, and energy capacity. This chapter’s route is a travel-and-preparation routine, not a requirement to clear every collectible before continuing the campaign.
Register every Waypoint before leaving a region
A Waypoint is the glowing pedestal used for fast travel. Walk up to it and interact with it to add the location to the map. Afterward, open the map, select an activated Waypoint, and use the travel command to warp there. You cannot use a location that has not been registered first.
Whenever you enter a new area, make Waypoints the first thing you look for. Check settlement outskirts, roads that split around cliffs, the approaches to rifts, and the ground outside dungeons. Some Waypoints are not directly on the obvious path, so inspect nearby ledges and side routes before beginning a long detour.
After completing a main quest or dungeon, reopen the map before choosing your next objective. Newly opened routes often expose a Waypoint that is more valuable than manually retracing the road from the previous story location.
- Register the Waypoint near each settlement you reach.
- Activate Waypoints near dungeons, rift entrances, caves, and regional crossings.
- Confirm that each new location appears on the map before moving on.
Use a settlement-to-region travel loop
Treat Hyrule Castle Town, Suthorn Village, and the other settlements you have already visited as return points. Warp to the nearest registered Waypoint, complete the nearby errand or exploration loop, then warp back rather than crossing the whole overworld again. This is especially useful after a dungeon, when new side quests and upgrades may become available in towns.
For open roads, summon the Carrot Echo to call a horse and move quickly through accessible terrain. Do not force the horse into caves, rifts, steep ledges, or narrow passages. When a route ends at a height difference, switch to an Echo suited to the terrain instead of searching for a longer road. Travel is fastest when Waypoints handle long distances and Echoes handle the final climb or crossing.
When a story objective sends you to a new region, activate the closest Waypoint on the way in. If the entrance is guarded by a rift or a quest trigger, register the point first whenever the game allows it, then continue with the objective.
- Begin each regional trip from the closest activated Waypoint.
- Use the Carrot Echo only on open, navigable ground.
- Register a new Waypoint before entering a nearby cave, rift, or side-quest area.
Mark gathering routes instead of nonexistent resource nodes
Echoes of Wisdom does not use a conventional crafting-material node system with named respawn points. Ingredients come from ordinary exploration: cut grass, break pots and boxes, lift rocks, defeat enemies, open chests, complete quests, and play certain minigames. Therefore, mark three repeatable gathering routes on your own map rather than treating any location as a guaranteed respawn node.
A practical early loop runs through the fields and paths around Suthorn Village, where common ingredients can be collected while travelling between the village and nearby Waypoints. A second loop runs through Gerudo Desert and Gerudo Oasis, where desert ingredients and the oasis Smoothie Shop are close together. A later loop can use the Faron Wetlands and the routes around Scrubton, gathering plants and drops while visiting the regional Waypoints.
Collect ingredients as part of normal movement. Do not make repeated long trips for one unconfirmed drop. If you need more ingredients, revisit a route after other exploration or story progress instead of assuming that a specific patch will always contain the same item.
- Mark Suthorn Village and its surrounding fields as an early gathering loop.
- Mark Gerudo Oasis and nearby desert paths as a desert gathering loop.
- Mark Faron Wetlands and the Scrubton routes for later ingredients.
- Do not label Might Crystals as renewable materials.
Blend ingredients at Smoothie Shops
Business Scrub Smoothie Shops let you combine two ingredients into a Smoothie for a small rupee fee. The result can restore hearts, recover Swordfighter energy, increase movement speed, grant elemental protection, or provide another temporary effect. The first time you make a Smoothie, the shop can also begin its recipe-related side quest chain.
Before a dungeon or difficult rift, make at least one dependable healing Smoothie. If you expect to use Swordfighter Form heavily, carry an energy-recovery drink as well. For regions with fire, ice, or other environmental hazards, prepare a drink with the relevant resistance when you have the ingredients.
You do not need to discover every recipe for campaign progress. Use common ingredients for routine healing and reserve rare ingredients for recipes, quests, or effects that you actually need. Once a recipe has been made, the shop can offer that drink for purchase, but buying finished drinks is usually more expensive than blending them yourself.
- Visit a Smoothie Shop after a substantial gathering loop.
- Carry healing Smoothies before entering a dungeon or dangerous rift.
- Prepare an energy or hazard-resistance drink when the next region calls for it.
- Do not waste rare ingredients on random recipes immediately before a quest.
Spend Might Crystals at Lueberry’s House
Might Crystals are fixed discoveries and quest rewards, not ordinary enemy drops that can be farmed indefinitely. They are used at the machine inside Lueberry’s House to upgrade Swordfighter Form. Depending on the upgrades currently unlocked, crystals can improve the Sword of Might, Bow of Might, Bombs of Might, or Zelda’s maximum Swordfighter energy.
After completing Suthorn Ruins and returning to Lueberry’s House, inspect the machine whenever you have collected new crystals. Revisit after later major story milestones because additional Swordfighter equipment and upgrade choices become available. Energy is a useful early priority because it lets Swordfighter Form remain active longer; after gaining the bow and bombs, balance energy with the weapon upgrades that match your combat habits.
If you are short on crystals, search newly accessible caves, chests, rifts, side quests, and minigame rewards. The map’s collectible display can help track collected Might Crystals and reveal whether you have overlooked marked discoveries.
- Return to Lueberry after Suthorn Ruins and after later major milestones.
- Spend available Might Crystals on the upgrades currently offered.
- Prioritize energy early if Swordfighter Form runs out too quickly.
- Search newly opened content instead of repeatedly defeating ordinary enemies for crystals.
Prepare and recover before high-risk travel
Before entering a new rift, dungeon, or enemy-heavy route, activate the nearest Waypoint, refill your hearts, and review your Smoothie stock. Select dependable combat Echoes before crossing the area rather than relying on an unfamiliar Echo copied at the entrance. If Swordfighter Form will be important, confirm that you have an energy-recovery option or access to energy pickups in the route ahead.
If an exploration attempt goes badly, warp back to the nearest settlement or Waypoint instead of repeating a long approach while low on health. Resting in a bed or bed Echo can restore hearts, and Smoothies provide a faster emergency option. After upgrading at Lueberry’s House or restocking at a Smoothie Shop, return through the Waypoint network.
This routine is optional preparation, not a story gate. You can continue the main campaign without clearing every Might Crystal, learning every recipe, or activating every Waypoint in Hyrule. Keep the network and supplies current in the regions you have actually reached, then continue the campaign when the next objective is ready.
- Nearest available Waypoint is active before the area entrance.
- Health, healing Smoothies, and any needed energy or resistance drinks are ready.
- Lueberry’s current Swordfighter upgrades have been checked.
- Combat Echoes are selected before entering the danger area.
Before you move on
- Every settlement, dungeon approach, rift entrance, and major route in the regions already visited has its accessible Waypoint registered on the map.
- Three personal gathering loops are marked: Suthorn Village and its fields, Gerudo Oasis and the surrounding desert, and the Faron Wetlands or Scrubton routes.
- The map’s collectible display has been checked when searching for overlooked Might Crystals.
- Lueberry’s House has been revisited after the latest major story milestone, and all currently affordable Swordfighter Form upgrades have been purchased.
- The inventory contains at least one healing Smoothie and, when appropriate, an energy-recovery or environmental-resistance drink.
- No Tri Rod charge-crafting requirement is being pursued; Echo progression, Smoothies, and Swordfighter upgrades are being handled through their actual game systems.
References for this chapter
- The Legend of Zelda: Echoes of Wisdom — Nintendo Switch games
- The Legend of Zelda: Echoes of Wisdom — Nintendo official news announcement
- Zelda: Echoes of Wisdom Walkthrough — Nintendo Life
- Zelda: Echoes of Wisdom: How to Upgrade Swordfighter Form — Nintendo Life
- Zelda: Echoes of Wisdom: All Might Crystal Locations — Nintendo Life
- Zelda: Echoes of Wisdom: All Smoothie Recipes List — Nintendo Life
- Searching for Everyone — The Legend of Zelda: Echoes of Wisdom Guide — Thonky
- Recipes, Please! — The Legend of Zelda: Echoes of Wisdom Guide — Thonky
- List of Ingredient Locations — The Legend of Zelda: Echoes of Wisdom Guide — Thonky
- Waypoint database — Gamer Guides
Hyrule Castle, Still Missing and the Late-Game Goddess Routes
After clearing Gerudo Sanctum and Jabul Ruins, return to Lueburry’s House to begin the Hyrule Castle crisis. Enter the Bottom of the Well, cross Stilled Hyrule Castle Town, complete the castle stealth and key route, and defeat the Echo of Ganon. After the castle rift is repaired, speak with the King to begin Lands of the Goddesses. This chapter then gives the complete Eldin Volcano and Holy Mount Lanayru routes, including Eldin Temple, Volvagia, Lanayru Temple, and Skorchill. The Faron Wetlands route remains in ch10, followed by Faron Temple in ch08; do not mark Gohma, Farore’s Sanction, or all three goddess objectives complete until those chapters are finished. Eternal Forest becomes available only after Eldin, Faron, and Lanayru are all registered.
Start Still Missing and enter Stilled Hyrule Castle Town
Clear both Gerudo Sanctum and Jabul Ruins, then finish Searching for Everyone. Return to Lueburry’s House in Suthorn Forest. General Wright and Minister Lefte will leave for Hyrule Castle. Follow them north toward Hyrule Castle Town until the expanding rift swallows much of the town and the surrounding area.
Go to the west side of Castle Town and drop into the Bottom of the Well. Continue through the well until Tri creates a portal. Enter it to reach Stilled Hyrule Castle Town, then travel north through the Still World. Dark enemies fill the route, so use dependable combat Echoes and avoid unnecessary fights. Activate the Waypoint when you reach it, then cross the floating water and ponds toward Hyrule Castle.
The route does not require Tri Shards, a Forbidden Archives objective, or allied-settlement recruitment. Those are not part of this Nintendo Switch campaign route. Rescuing the Hero Link becomes available after the castle sequence, but it is separate from the goddess-region objectives.
- Gerudo Sanctum and Jabul Ruins are complete.
- Searching for Everyone has finished.
- The Bottom of the Well portal leads to Stilled Hyrule Castle Town.
- The Hyrule Castle approach Waypoint is active.
Clear Hyrule Castle’s stealth route and collect its keys
Enter Hyrule Castle and climb toward the throne room. Defeat or bypass the Darknut Lv. 2, then approach the stilled King. Move the throne to reveal the ladder beneath it and descend into the underground section. Continue until Bind lets you pull away the wall and enter the guard area.
This section is stealth-focused. Stay behind cover and move while the guards are looking away. If Zelda is spotted, she is sent to a small combat room; defeat the dark enemies there and use the returning warp. In the room with Wooden Boxes and Decorative Shrubs, use Bind to move the objects and expose the ladder behind the shrub. In the final guard room, use Echoes to climb onto the shelves, throw a Hyrule Castle Pot to distract the guard, and move right.
Continue through the underground rooms until you reach the dungeon Waypoint. For the Small Key, take the left route, defeat or bypass the Dark Tektites, and descend into the underwater room. Follow the north side, use air bubbles to manage breathing, and reach the eastern pillar. Place an Echo on the switch, then glide down with a Mothula or another flying Echo to reach the Small Key chest. Warp back to the Waypoint if you want to avoid repeating the underwater route.
From the Waypoint, go right and descend through the locked door with the Small Key. Use Strandtula Echoes to cross the narrow gaps beside the Gustmasters. In the combat room, distract the Ball-and-Chain Trooper with an Echo and use the room’s rocks while dealing with the Darknuts. Open the upper chest to obtain the Big Key. A Frog Ring in the area is optional. Return to the large locked door and use the Big Key.
- The King’s throne has been moved.
- The stealth section is complete.
- The Small Key is obtained from the underwater room.
- The Big Key is obtained from the upper combat room.
Defeat the Echo of Ganon and begin Lands of the Goddesses
After opening the Big Key door, continue through the final rooms until the castle Echoes summon Ganon. This is an Echo of the Ganon encountered during the opening sequence, not the game’s final Null encounter. During the first phase, avoid the trident swings and attack after Ganon finishes an attack. Swordfighter Form is useful when the boss is exposed, while combat Echoes let you keep pressure from farther away.
In the next phase, Ganon throws the trident and warps around the room. Attack during the brief opening after he relocates and before the trident returns. Blazing Bats may appear; avoid them or let them collide with the room’s walls, where they can restore Swordfighter energy. During the final phase, use Swordfighter Form to strike the large energy ball back at Ganon. Continue the volley until it hits him, then attack while he is stunned.
After Ganon falls, let Tri repair the Castle Town rift and allow the following scenes to finish. Return to the throne room when directed and speak with the King. This completes Still Missing and starts Lands of the Goddesses. The three regional routes may be completed in different orders, but Faron is intentionally covered elsewhere: follow ch10 for Faron Wetlands and then ch08 for Faron Temple.
- Ganon in Hyrule Castle has been defeated.
- The Castle Town rift has been repaired.
- The King has returned to the throne room.
- Lands of the Goddesses is active.
Complete Eldin Volcano and enter Eldin Temple
Travel west from Hyrule Castle toward Kakariko Village, then leave the village north onto the Eldin Volcano Trail. Follow the trail west through the cave with Beetles and Beetle Mounds. At the Lizalfos camp, defeat the enemies, learn Lizalfos if needed, and activate the Waypoint. Continue upward past the damaging air geysers and enter the next cave.
Inside the cave, defeat or learn the Ghirro Echo. Use Ghirro to float across the gap and extinguish the flames blocking the climb. Exit, climb the outer wall, and travel northeast to Goron City. Enter the city’s rift and clear Stilled Goron City by rescuing the four groups of Tri’s friends. Enter the large Goron vase from above and use Bombfish to break the cracked boulders. Search the southwest, north-central, and northwest sections for the remaining groups. When the rift repairs, Darston explains that the Goron elders are still missing.
Leave Goron City and enter Lizalfos Burrow near the Lava Lake. Defeat the Lizalfos and Lizalfos Lv. 2 enemies, then help Darston clear the Dark Lizalfos in the deeper room. Travel to the north side of the Lava Lake and learn Lava Rock. Place or Bind Lava Rocks on the geysers to cross to Rock-Roast Quarry in the northwest. Inside the quarry, Bind the real Rock Roasts and carry them to the Gorons at the entrance. Bring the second roast to Elder Gol so he wakes and leaves.
Warp back to Goron City and speak with the elders and Darston. In the chief’s room, use Bind on the portrait or statue blocking the wall to reveal the Crater Shortcut. Cross it with Mothula, Lava Rocks, air geysers, and the existing platforms. Darston breaks the final boulder, allowing Tri to open the large rift into Stilled Eldin Volcano. Cross the Still World with Lava Rock and Old Bed Echoes, activate the Waypoint, then use a flying Echo and the wind geyser near the northwest lava pool to reach Eldin Temple.
In Eldin Temple, keep Lava Rock, Mothula, Bombfish, Strandtula, and a way to block hot air ready. Obtain the first Small Key near the upper wind-geyser route, then use it to open the lava-rise section. Collect the second Small Key after the Fire Wizzrobe and purple-barrier routes. In the lower side-scrolling section, open the Big Key chest and immediately climb out as the lava rises; use Old Bed or other platform Echoes when a ladder breaks. Follow the northwest route with Bombfish, Strandtula, Mothula, and Lava Rocks to reach the boss door.
Volvagia sends a curving green orb followed by fireballs. Keep moving to avoid both attacks. When the green orb appears around Volvagia’s neck, use Bind to pull it back and stun the boss, then attack with Swordfighter Form. If Volvagia lands in lava, use ranged combat Echoes instead of approaching. Repeat the Bind-and-attack cycle through the later fire patterns. After victory, collect Din’s Sanction, the Heart Container, and the five Might Crystals, then warp out and complete the Goron City celebration with Darston.
- Stilled Goron City is repaired.
- Lizalfos Burrow and Rock-Roast Quarry are complete.
- The Crater Shortcut is open.
- Eldin Temple and Volvagia are complete.
- Din’s Sanction, five Might Crystals, and the Heart Container have been received.
Complete the Faron route separately, then reach Holy Mount Lanayru
Do not mark the goddess-region sequence complete after Eldin alone. Follow ch10 to complete A Rift in the Faron Wetlands, including Heart Lake, Blossu’s House, Deku Scrub Lockup, the Membership Card, and Stilled Faron Wetlands. Then follow ch08 to clear Faron Temple and defeat Gohma. This chapter does not repeat either route.
For the northern route, leave Hyrule Castle westward and follow the road north. Speak with the guard observing the rift near Holy Mount Lanayru, then enter the Hebra Mountain Passage. Use Bombfish to clear the entrance, Water Block or climbing Echoes to ascend, and further Bombfish to clear blocks around the vertical moving platforms. Move the large boulder right, clear the lower blocks, move it back left, and ride the lift to Hebra Mountain.
Cold conditions damage Zelda unless she uses suitable protection or stays near a heat source. A Brazier or Ignizol can be Bind-carried across the snow. Travel east to the Waypoint and Condé’s house. Examine the shovel and let the conversation finish; Condé clears the snow blocking the nearby cave. Enter the cave, melt the ice on the required route, and meet Condé near the rift. Tri then opens Stilled Hebra Mountain Cave.
In the Still World, melt the ice containing Tri’s friends. Search south of the entrance, the northeastern higher ground, the sideways trees to the north, and the upper area where a Dark Spear Moblin guards the last group. Return to Condé, climb out of the cave, and continue along the mountain. Cross frozen-water sections with Old Beds or other safe platforms, use flying Echoes with the wind, defeat or bypass Freezards with fire-based ranged Echoes, and block cold air with a Boulder when riding the final lift. Continue through the snowball route until Condé follows the figure he believes is his brother, opening the way toward Holy Mount Lanayru and Lanayru Temple.
- Faron Wetlands is complete only if ch10 has been followed.
- Faron Temple is complete only if ch08 has been followed and Gohma is defeated.
- The Hebra Mountain Passage is open.
- Condé’s house scene has finished.
- Stilled Hebra Mountain Cave is repaired.
- The route to Holy Mount Lanayru is available.
Clear Lanayru Temple and verify the chapter’s actual completion state
Enter Lanayru Temple after the Holy Mount Lanayru route is complete. The opening rooms use Bind and elemental orb positioning. Carry the red orb to its pedestal without dropping it or letting it strike obstacles so warm air melts the ice. Use a fire Echo against the Ice Octos, then descend through the underground rooms. In the Small Key route, use a Boulder to block cold air, carry the orb across the safe opening, dive for the key, and manipulate the orb’s state to create the route to the locked door.
For the Big Key route, use the temple’s warm and cold orb states in sequence. Carry the fire orb to the northern pedestal to thaw the lower rooms, use Bind on the underwater boulder switch, and manipulate the blue orb so the water freezes where needed. Use an Armos Echo and Zelda together on the paired switches, move ice blocks to carry the orb across the cold room, then pass another orb through an Ignizol flame. After the icicles melt, place the cold orb, activate the yellow switch, and let the snowball strike the large switch so the Big Key chest opens.
After obtaining the Big Key, activate the Waypoint outside the boss door and enter Skorchill’s arena. Skorchill’s ice helmet is vulnerable to fire Echoes such as Fire Keese or Fire Wizzrobe. Hit the helmet three times to remove the armor, then attack the exposed boss with Swordfighter Form or combat Echoes. When Skorchill changes to a fire helmet and uses fireballs and a fiery whirlwind, switch to an ice Echo. Repeat the opposite-element method through the final mixed phase.
Defeat Skorchill, collect Nayru’s Sanction, the Heart Container, and five Might Crystals, then warp out and complete Condé’s concluding conversation. At this point this chapter can confirm Eldin and Lanayru as complete. Farore’s Sanction, Gohma, and the complete three-region objective remain pending until ch10 and ch08 are completed. Eternal Forest becomes available only after Eldin Temple, Faron Temple, and Lanayru Temple have all been registered and their regional conclusions have played. If the Eternal Forest scene does not appear after the Faron sequence is also complete, check the quest log and confirm each temple’s post-boss conversation has finished.
- Skorchill is defeated.
- Nayru’s Sanction, five Might Crystals, and the Heart Container have been received.
- Din’s Sanction and Nayru’s Sanction are recorded.
- Farore’s Sanction is recorded only after ch08 is complete.
- Gohma is defeated only after following ch08.
- Eldin and Lanayru are complete; Faron remains a cross-reference until ch10 and ch08 are complete.
- Eternal Forest is available only after all three goddess-region routes are registered.
Before you move on
- Hyrule Castle and Still Missing are complete.
- The Echo of Ganon in Hyrule Castle has been defeated.
- Volvagia and Skorchill have been defeated in this chapter.
- Din’s Sanction and Nayru’s Sanction are present.
- Eldin and Lanayru regional conclusions have played.
- Ch10 has been completed for Faron Wetlands.
- Ch08 has been completed for Faron Temple and Gohma.
- Farore’s Sanction is present only after the Faron Temple sequence.
- All three goddess-region quest conclusions have played.
- The main quest points Zelda toward Eternal Forest.
References for this chapter
- Walkthrough: Hyrule Castle (Echoes of Wisdom) - Zelda Dungeon Wiki
- Walkthrough: Eldin Volcano (Echoes of Wisdom) - Zelda Dungeon Wiki
- Walkthrough: Eldin Temple (Echoes of Wisdom) - Zelda Dungeon Wiki
- Walkthrough: Lanayru Temple (Echoes of Wisdom) - Zelda Dungeon Wiki
- Echoes of Wisdom Walkthrough Guide - Zelda Dungeon
Faron Wetlands — Stilled Rifts, Deku Scrub Lockup and Faron Temple Approach
Begin this chapter only after clearing Hyrule Castle, completing Still Missing and accepting Lands of the Goddesses. The Faron Wetlands route is one of the three late-game goddess-region objectives, alongside Eldin Volcano and Holy Mount Lanayru, and its order is flexible. Enter from the east side of Lake Hylia, visit Scrubton and The Sweet Spot, then repair the Heart Lake and Blossu’s House rifts. The second repair triggers the Deku Scrub Lockup, where Zelda temporarily loses the Tri Rod and must escape with Bind and stealth. After Blossu gives Zelda the Membership Card, enter The Sweet Spot, cross the Stilled Faron Wetlands, use Drippitune to remove the six-brazier flame barrier, power the three electrical crystals and reach Faron Temple. The dungeon and its Gohma boss belong to chapter ch08, not this chapter.
Enter Faron Wetlands after Hyrule Castle and Still Missing
Do not treat Faron as an early route. Travel here after the Hyrule Castle and Still Missing sequence has led to Lands of the Goddesses. Once that quest is active, the Faron rifts can be completed. The three goddess regions can be tackled in different orders, so this chapter works whether Eldin Volcano or Holy Mount Lanayru has already been cleared or not.
From the east side of Lake Hylia, climb the waterfall using Water Block, Beds or another reliable platforming Echo. Continue east across the upper route until the Faron Wetlands entrance appears. Activate the Waypoint near the northwest approach, then continue into the jungle. A soldier and nearby Deku Scrubs provide the opening information for A Rift in the Faron Wetlands.
Rain in this area indicates a nearby Drippitune. Defeat it and learn the Drippitune Echo immediately. You will need Drippitune later to remove a flame barrier inside the final regional rift. A fire Echo such as Ignizol is also useful throughout the wetlands because spiderwebs block several routes. Hoarder, Buzz Blob and other local Echoes are useful but optional for campaign progress.
Follow the large rift to the carved building called The Sweet Spot. The guards refuse entry because Zelda does not yet have a Membership Card. Leave the entrance and travel south to Scrubton. Activate Scrubton’s Waypoint, then speak with the Deku Scrubs, especially the pair eating spiderweb cotton candy. They explain that a member at Heart Lake may know how to obtain a card.
- Hyrule Castle and Still Missing are complete.
- Lands of the Goddesses is active.
- The Faron Wetlands and Scrubton Waypoints are activated.
- The Drippitune Echo has been learned.
- The Sweet Spot guards have explained the Membership Card requirement.
Repair the Stilled Heart Lake rift
Travel southwest from Scrubton to Heart Lake and activate its Waypoint. Speak with the Deku Scrub at the lake, then enter the nearby rift after Tri opens it. Five groups of Tri’s friends must be rescued before the rift closes.
Start in the upper section. Burn the spiderwebs and web-covered vegetation with Ignizol, Fire Keese or another fire-based Echo. Search the newly opened ledges and the area below the climbable wall; several groups are reached from different elevations, so do not leave after finding only the first one.
Move to the western pond and dive into the underwater section. Use Zora’s Flippers to swim through the passage. When a cracked block blocks the route, place a Bombfish near it and use Bind to hold or pull the Bombfish into position before it explodes. Continue through the water and deal with the Bio Deku Baba or bypass it while reaching the remaining groups.
After all five groups are safe, Tri seals the rift and awards two Might Crystals. Return to the normal wetlands and speak with the Scrubs. The couple at Heart Lake keeps its own card, but they identify Blossu as another member in the southern part of Faron. This conversation is the story flag that sends Zelda toward the next rift.
- All five groups in Stilled Heart Lake are rescued.
- The Heart Lake rift is sealed.
- Tri awards two Might Crystals.
- The Scrubs identify Blossu as the next lead.
Find Blossu and repair Stilled Blossu’s House
Warp to Scrubton or Heart Lake, then travel toward the southern and eastern side of the wetlands. Follow the river and high grass until you reach Blossu and the other Deku Scrubs beside the rift covering Blossu’s house. Optional caves on the route contain rewards such as rupees or a Piece of Heart, but none is required to reach Blossu.
Enter Stilled Blossu’s House. Burn the purple webs with a fire Echo and defeat or bypass the Deku Babas. Use Water Block, Strandtula or another dependable climbing method in the side-view cave sections. Follow the upper ledges, ladders and cave passages until you have searched all branches. Bombfish clears cracked blocks where they obstruct the route.
There are five groups of Tri’s friends in this rift. The first is reached near the opening web, others are placed around the upper rock wall and nearby ground, and the remaining groups are inside the cave and on the exterior route beyond it. Check each newly opened ledge before moving on so that the rift does not remain incomplete because one group was overlooked.
When all five groups are rescued, Tri seals the rift and awards two Might Crystals. The loss of the webs causes the Deku Scrubs to turn against Zelda, and she is taken to the Deku Scrub Lockup in Scrubton. This arrest is mandatory main-story progression.
- Blossu’s House rift is entered.
- All five groups in Stilled Blossu’s House are rescued.
- The rift is sealed and two Might Crystals are received.
- Zelda has been taken to the Deku Scrub Lockup.
Escape the Deku Scrub Lockup with Bind and stealth
The Deku Scrubs confiscate Zelda’s belongings, including the Tri Rod. Echoes cannot be summoned during the main escape, but Bind remains available. From the starting cell, use Bind to pull the Lockup Key through the bars, collect it and unlock the cell door.
The guards in the next rooms send Zelda back to the cell if they spot her. Use wooden crates as moving cover: Bind a crate, keep it between Zelda and the guard, and advance only when the patrol is facing away. In rooms without useful crates, hide among pots or other objects until the guard passes. There is no combat solution for this section, so move in short stages rather than rushing.
You will reach a room containing stacked Deku totems and an optional Piece of Heart. Build a temporary staircase beside the totems by Binding nearby beds, tables, torch stands or shrubs, then climb to the reward. Continue through the stealth route after collecting it, or pass it if you are focused only on the campaign.
Further on, Zelda finds the guard using the Tri Rod as a cotton-candy stick. After the scene, the rod and the rest of Zelda’s belongings are returned. The escape is not quite over: use restored Echoes to frighten or defeat the guards in the following room, then proceed through the eastern door and drop into the well. Use Bombfish to destroy the blocking crates and follow the passage to the ladder. A Might Crystal can be collected with a Platboom or similar climbing Echo, but it is optional. Climb out to complete the Lockup escape.
Blossu waits outside and gives Zelda the Sweet Spot Membership Card. If the card is not received, speak with Blossu again after leaving the Lockup; the Lockup sequence must be fully completed first.
- The Lockup Key is pulled through the cell bars with Bind.
- The guard patrol rooms are cleared through stealth.
- The optional Lockup Piece of Heart has been collected or deliberately skipped.
- The Tri Rod and other equipment have been recovered.
- The well route is completed and Zelda exits the Lockup.
- Blossu has given Zelda the Sweet Spot Membership Card.
Enter The Sweet Spot and open the final regional rift
Return to The Sweet Spot north of Scrubton and show the Membership Card to the two guards. Enter the building and deal with the enemies that appear during the scene. Approach the large rift so Tri can open the portal to the Stilled Faron Wetlands.
Cross the opening floating platforms and web bridges. Burn spiderwebs with a fire Echo to create routes, and use Beds, Water Blocks or other platforming Echoes where gaps interrupt the path. Chests and several local Echoes are optional. Defeating the Electric Keese in this area and learning its Echo is strongly recommended because the next required puzzle uses electrical power.
Activate the Waypoint when you reach it. Continue along the web bridges and through the enemy groups until you reach the chamber with six lit braziers and a wall of flames. Summon Drippitune there. Its rain extinguishes the braziers and removes the flame barrier; an ordinary fire Echo cannot solve this obstacle.
Enter the cave beyond the barrier and climb through the side-view route. A Beamos may appear along the way. Defeating it and copying its Echo is optional. Continue until you reach the upper room containing three electrical crystal switches.
- The Membership Card is accepted at The Sweet Spot.
- The Stilled Faron Wetlands rift is entered.
- The local Waypoint is activated.
- A reliable fire Echo and Drippitune are available.
- The Electric Keese Echo or another electrical Echo has been learned.
Power the crystals and reach Faron Temple
In the upper electrical room, use Electric Keese or another electrical Echo to power the three crystal switches. Position the Echo so its electrical attack reaches each crystal; if the target is distant, charge the Tri Rod before releasing the Echo. Power all three crystals to open the exit. The objective is the three-switch room, not a general requirement to activate every electrical object in the surrounding region.
Leave the room and follow the route through the upper wetlands. Continue past the remaining platforms and enemies until you reach the large chest outside the temple approach. A plant takes the chest during the scene. This confirms that the Stilled Faron Wetlands crossing has been completed and that Zelda has reached the Faron Temple entrance.
Activate the nearby Waypoint and save before entering the temple if desired. The temple entrance may present more than one approach, but all routes lead into the separate Faron Temple dungeon. Stop this chapter at the entrance. Do not include the dungeon’s Small Keys, Big Key, plant mini-boss or Gohma here; those instructions belong to chapter ch08.
- Drippitune has extinguished the six braziers.
- The flame barrier and cave route are open.
- All three electrical crystal switches are powered.
- The final exterior route is crossed.
- The Faron Temple entrance and nearby Waypoint are available.
Before you move on
- Hyrule Castle and Still Missing were completed before this chapter began.
- Lands of the Goddesses was active when the Faron route started.
- The Heart Lake and Blossu’s House rifts were sealed.
- Zelda escaped the Deku Scrub Lockup and recovered the Tri Rod.
- Blossu gave Zelda the Membership Card, and The Sweet Spot accepted it.
- The Stilled Faron Wetlands rift was crossed.
- Drippitune extinguished the six braziers.
- The three electrical crystal switches were powered.
- The Faron Temple entrance and nearby Waypoint are open.
- The Faron Temple dungeon itself remains reserved for chapter ch08.
References for this chapter
Faron Temple — Dungeon Route, Manhandla and Gohma
Enter Faron Temple only after Lands of the Goddesses is active and the Faron Wetlands route has carried Zelda through Heart Lake, Blossu’s House, Deku Scrub Lockup, the Membership Card sequence, The Sweet Spot, and Stilled Faron Wetlands. The temple uses several entrances, dark rooms, electric-crystal puzzles, weighted platforms, Armos switches, water passages, and two Manhandla encounters. The first Manhandla has two heads and retreats when defeated. The second has four heads and leaves the Big Key. For both fights, damage each head until it is stunned, then attack the small red circle on its stem while avoiding poisonous gas. Gohma is the dungeon boss. Electrify the three green crystals on its legs, stun it, and attack its eye. Finish the Farore scene, collect the Heart Container, receive Farore’s Sanction, five Might Crystals, and Tri’s level increase, then confirm that the Faron rift has been sealed.
Reach Faron Temple and open its main route
Faron Temple is part of Lands of the Goddesses, not an early independent dungeon. In Faron Wetlands, complete the Heart Lake and Blossu’s House rifts, escape Deku Scrub Lockup, and receive the Sweet Spot Membership Card from Blossu. Enter The Sweet Spot and follow the Stilled Faron Wetlands route until the temple area is revealed. Learn or carry an electric Echo before entering; Electric Keese and Buzz Blob are especially useful later.
Activate the Waypoint outside the temple. The front entrance is initially blocked, so take the left exterior route across the platforms and climb the ladder. In the side-view room, use Strandtula to climb where necessary. Place two heavy objects on the first weighted platform, cross to the other side, and activate the switch. This opens the main entrance and gives you a reliable return route through the central hall. The Warm Peppers chest on the upper path is optional.
- Complete the Faron Wetlands approach and obtain the Membership Card.
- Activate the Waypoint outside Faron Temple.
- Use heavy Echoes on the weighted platform and open the main entrance.
Collect the Dungeon Map and an early Small Key
Enter the large central room and take the right-hand route through the Beamos and Armos area. Cross the moving platforms to reach the room with three green electric targets. Use Buzz Blob, Electric Keese, or another electric Echo to activate them. When the door opens, enter the upper-left room, collect the Dungeon Map, and activate the switch before returning to the central hall.
Use the left side of the central hall to reach the grass room and find the concealed passage into the dark room. Activate its Waypoint immediately. Move northwest past the Deku Baba and climb the ladder. In the side-view section, charge a heavy Echo and send two boulders through the bars onto the scale. Press the switch, climb upward, and take the Small Key from the chest. Keep this key for required doors rather than spending it on optional treasure.
- Activate the three electric targets and collect the Dungeon Map.
- Activate the first dark-room Waypoint.
- Obtain the Small Key behind the barred scale puzzle.
Find another Small Key and defeat the first Manhandla
From the upper section, follow the route south and outside. On the exterior path, move the blocking statue with Bind to reveal another entrance. Inside, activate the three electric targets with an electric Echo and collect the Small Key from the revealed chest. Return to the central hall and unlock the rear door with a Small Key.
The first miniboss is a two-headed Manhandla. Do not call it Diababa. Each head can be damaged with Swordfighter Form or attacking Echoes. Continue attacking a head until it is stunned; only then strike the small red circle on its stem to damage the actual weak point. Repeat this process for the other head. Manhandla lunges, fires projectiles, and releases poisonous gas from its body, so attack from an angle and retreat when the gas spreads. After both heads are defeated, Manhandla retreats and provides no Big Key yet.
- Collect the Small Key from the exterior electric-crystal room.
- Unlock the required rear door.
- Defeat both heads of the first Manhandla by stunning each head and striking its red stem weak point.
- Avoid Manhandla’s poisonous gas.
Use the lower entrance and solve the Armos rooms
After the first Manhandla, leave through the exterior route and dive into the water opening. Activate the lower Waypoint and go left into the statue-switch room. Place two Armos Echoes so they walk over the switches at roughly the same time. If the timing is difficult, use one Armos Echo for one switch and hold the other statue with Bind, releasing it when the moving Armos reaches its switch.
Return through the dark room and use the water route to reach the locked door on the right. The Golden Egg behind this door is optional. There are three Small Keys in the temple but only two required locked doors, so do not open this optional door until the required route is secure. Continue outside, burn the small webs with Ignizol, and enter the next temple section. Solve the second Armos-switch room with two Armos Echoes, then pass the Electric Wizzrobe and Baby Gohma rooms.
- Solve the first lower Armos-switch puzzle.
- Treat the Golden Egg as optional and reserve keys for progression.
- Burn the exterior webs and enter the next temple section.
- Solve the second Armos-switch puzzle.
Reach the four-headed Manhandla and claim the Big Key
In the dark room beyond the Electric Wizzrobe, light the braziers if you want a permanent light source, burn the web in the southwest corner, and descend the ladder. In the underwater section, move boulders and the blocking Armos with Bind. Use Water Block or another underwater Echo to reach the necessary ledges. Surface in the next dark room and activate its three green crystals with an electric Echo.
Enter the scale-and-switch room. Remove the rocks from the scales, place an Armos Echo on each side, and adjust their movement so both floor switches are pressed together. The left room contains a Small Key. Use the opened shortcut or warp back to the nearby Waypoint, then take the upper route. Place heavy Echoes on the scale to raise the opposite side, climb with Water Block or Strandtula, unlock the required door, and activate the Waypoint before the next miniboss.
The second Manhandla has four heads. Damage each head until it is stunned, then strike the small red circle on that head’s stem. The green heads can be attacked normally. The purple heads are more resistant; Bombfish is useful because a head may swallow it, causing a stun. Manhandla can summon a Drippitune and still releases poisonous gas, so keep moving and avoid standing in front of multiple heads. Defeat all four heads and open the chest that appears to obtain the Big Key.
- Move through the underwater section and activate the three green crystals.
- Collect the Small Key in the scale room.
- Open the upper route and activate the nearby Waypoint.
- Defeat all four heads of the second Manhandla using the stun-then-red-circle sequence.
- Collect the Big Key from the reward chest.
Defeat Gohma and seal the Faron rift
Use the Waypoints to return to the boss approach, then unlock Gohma’s door with the Big Key. Gohma begins on the wall with three green crystals attached to its legs. Target the crystals and send electric Echoes such as Electric Keese, Electric Wizzrobe, or Buzz Blob into them. When the crystals are electrified, Gohma falls and becomes stunned. Move in and attack the exposed eye with Swordfighter Form, the sword, attacking Echoes, or a combination of them.
Gohma alternates between wall and floor behavior. On the wall it can fire a laser, create webs, and release Gohma Eggs, so keep moving and clear obstructing webs when necessary. During the floor phase, maintain distance from its legs and wait for another opening to electrify the green crystals. You can also damage the eye with an arrow in Swordfighter Form when it opens, but the three-crystal method is the dependable route. Repeat the stun-and-eye-attack cycle until Gohma is defeated.
Collect the Heart Container and allow the post-battle sequence to finish. Farore grants Farore’s Sanction, Tri gains one level, and five Might Crystals are awarded. Return to The Sweet Spot or Scrubton after the rift-sealing sequence. The Deku Scrubs return to their normal smoothie routine, and A Rift in the Faron Wetlands is complete.
- Electrify Gohma’s three green leg crystals.
- Avoid the wall laser, webs, eggs, and close-range attacks.
- Attack Gohma’s eye whenever the boss is stunned.
- Collect the Heart Container.
- Receive Farore’s Sanction, five Might Crystals, and Tri’s level increase.
- Confirm that the Faron rift is sealed and the Deku Scrubs have returned to their normal routine.
Before you move on
- The two-headed Manhandla has been defeated.
- The four-headed Manhandla has been defeated.
- The Big Key has been collected and used on Gohma’s door.
- Gohma has been defeated by stunning it through the green crystals and attacking its eye.
- The Heart Container has been collected.
- Farore’s Sanction has been received.
- Five Might Crystals and Tri’s level increase have been awarded.
- The post-battle sequence has finished and the Faron rift has been sealed.
- The Deku Scrubs around The Sweet Spot or Scrubton have returned to their normal smoothie routine, confirming completion of A Rift in the Faron Wetlands.
Penultimate Preparation — Eternal Forest, Link’s Rescue, and the Point of No Return
After Eldin Temple, Lanayru Temple, and Faron Temple are complete, return to Hyrule Castle and speak with the king to begin The Prime Energy and Null. Follow the revealed route into the Eternal Forest, learn the Ancient Orb Echo, and place Ancient Orbs on all six pedestals to open the path to the Great Deku Tree. Descend into the Ancient Ruins, enter the Stilled Ancient Ruins, and cross its mixed-region platforming route to the Echo of Zelda and Link’s crystal. Defeat the Echo of Zelda, then shoot the crystal with an arrow to free Link. This is the last point at which you can freely prepare. Complete optional quests, visit Lueburry, stock smoothies, and make a manual save before returning Link’s weapons. Giving Link the Sword of Might, Bow of Might, and Bombs of Might and choosing to proceed opens Null’s Body. Swordfighter Form, normal saving, and ordinary overworld travel are unavailable inside the final dungeon.
1. Finish the three goddess temples and activate the final quest
Complete Eldin Temple, Lanayru Temple, and Faron Temple, receiving Din’s Sanction, Nayru’s Sanction, and Farore’s Sanction. The order does not matter, but all three temple objectives must be finished before the final route can advance.
After the last temple, return to Hyrule Castle and speak with the king in the throne room. The conversation begins The Prime Energy and Null and identifies the Eternal Forest as the next destination. The forest can be visited earlier, but its final route remains unavailable until this quest is active.
Travel to the Eternal Forest northwest of Hyrule Castle, or warp to the Waypoint near the forest if you activated it during the Hebra route. Once inside, follow the foggy circular path north until you reach General Wright and the guards. The map is difficult to read in the fog, so use the forest paths and distinctive clearings as landmarks.
- Eldin Temple is complete.
- Lanayru Temple is complete.
- Faron Temple is complete.
- The Prime Energy and Null is active.
- You can still travel freely through Hyrule.
2. Learn the Ancient Orb Echo and activate the six forest pedestals
Examine the stone monument in the clearing where General Wright is waiting. An Ancient Orb appears beside it. Follow the orb and learn the Ancient Orb Echo. The monument’s six sockets show the general arrangement of the pedestals: one at the top, two in the middle, and three along the bottom.
Place an Ancient Orb Echo on the pedestal directly in front of the monument first. From there, move southwest through the trees to find another pedestal near a Blue Sword Moblin. Continue southwest through the small clearing for the next pedestal. These two locations form the left side of the monument’s triangular pattern.
For the remaining three, follow the southern side of the forest. One pedestal is in the south-central area near a large tree, another is in the southeast corner between the trees, and the last is on the northwest side. The northwest pedestal is blocked by a Deku Baba; defeat or pull the Deku Baba away, then place an Ancient Orb Echo on the exposed pedestal.
The pedestals do not require six different objects. Use the Ancient Orb Echo for each one. If an orb disappears while moving through the fog, return to the monument area and summon another. Once all six are active, return to the stone monument and examine it. The sockets connect into a Triforce-like pattern and a northern route opens.
Follow the newly revealed path north through the thick fog. The Great Deku Tree is in the sunlit clearing at the end. Step onto the platform in front of him, use the stone stairs, and enter the Ancient Ruins. Continue through the torch-lit passage to the inner shrine, where Zelda’s Echo is standing before the Prime Energy.
- The Ancient Orb Echo is learned.
- All six pedestals contain Ancient Orb Echoes.
- The monument displays the completed triangular pattern.
- The northern path is open.
- The Great Deku Tree has opened the way to the Ancient Ruins.
3. Enter the Stilled Ancient Ruins
After the shrine cutscene, Zelda’s Echo leaves through a rift. Follow her into the rift to enter the Stilled Ancient Ruins. If you still need to prepare, you can leave through the light on the starting island. Returning later places you near the Great Deku Tree; walk back through the ruins and re-enter the rift.
The Stilled Ancient Ruins are a chain of floating islands rather than a conventional dungeon. The route generally moves north, but the opening grassland divides into desert and water routes. Both routes lead to the same upper section, so choose the side that suits the echoes you have available.
Keep a platforming echo ready. Old Beds, Clouds, flying echoes, and Water Blocks are all useful here. A strong combat echo can handle the dark versions of enemies while Zelda concentrates on crossing gaps and reaching the next island.
- You have entered the Stilled Ancient Ruins.
- A movement echo such as Old Bed, Cloud, or a flying echo is available.
- You know that the desert and water branches rejoin later.
- The first Waypoint is activated when reached.
4. Cross the mixed-region platforming route
From the starting island, move east and then north across the floating trees and grass islands. Defeat or bypass the Shadow Peahats, Moblins, and Wolfos while continuing upward. In the desert section, use Clouds or another stable platform echo to cross the wide gaps between sandy islands and broken stone structures.
The desert path joins a water section with tall Water Block columns. Swim upward through the columns and create Clouds or other footholds beside them when you need to change direction. Continue across the higher grass islands and pale stone pillars. Additional Water Blocks help carry Zelda upward near a glowing green object.
Proceed into the red-brick area beneath a pale stone slab. Lay Clouds between the separated blocks, then enter the blue ice section. Dark Freezards attack down the lanes; use the ice blocks as cover and avoid standing in their direct line of fire. After the ice, cross the shallow green-water wetland. Dark Buzz Blobs and a dark Giant Goponga Flower occupy this area, so let a combat echo draw attention away from Zelda.
Follow the route south past the flower and then east into the volcanic section. Use Lava Rocks on the first geysers where the route requires them. In later lava pools, either place Lava Rocks to create safe surfaces or use a flying echo and the steam vents to rise. Defeat or bypass the Dark Fire Lizalfos and Dark Zirro, then use the vents and a flying echo to move west between the upper ledges.
Activate the second Waypoint when you reach the lavender stone platform. From there, continue north through the irregularly assembled terrain. Use Clouds across gaps, climb the stacked platforms, and follow the route toward the stone-and-grass terrace with stairs and palm trees. The final approach rises to a ring-shaped stone arena with Link suspended in a pink crystal overhead.
- The desert or water branch has been crossed.
- The ice area and wetland have been passed.
- The volcanic section and steam vents have been cleared.
- The second Waypoint is active.
- The upper stone-and-grass terrace and Link’s crystal are visible.
5. Defeat the Echo of Zelda and free Link
The Echo of Zelda remains near the top of the ruins and moves around the edge of the arena, using dark portals and summoning dark echoes. The fight has three escalating phases. During each phase, let a strong combat echo occupy the summoned enemies while Zelda watches for a clear line to the Echo of Zelda.
Swordfighter Form with the Bow of Might is a reliable way to hit the boss while she is floating. Preserve energy for repeated arrow attacks, and restore it with a potion or smoothie if necessary. A Lynel Echo is especially effective against the summoned enemies, but use another durable or high-damage combat echo if you do not have one.
When enough damage has been dealt, the Echo of Zelda falls to the arena floor. Move in and attack before she recovers. Later phases add stronger dark enemies, so avoid being surrounded and replace defeated echoes rather than chasing the boss through hazards. Repeat the ranged attacks and grounded punishments until the Echo of Zelda is defeated.
After the fight, move to the grassy ledge beneath Link’s crystal. Switch to Swordfighter Form, equip the Bow of Might, and fire an arrow into the crystal. The shot breaks the crystal and frees Link, completing Rescuing the Hero Link. Speak with Link and allow the following conversation to finish before making your final preparations.
- The Echo of Zelda has been defeated.
- The crystal above the arena has been reached.
- An arrow has broken Link’s crystal.
- Link is standing free beside Zelda.
- Swordfighter Form is still available before the final handoff.
6. Complete optional preparation before the point of no return
Once Link is free, Zelda can return to the overworld. This is the final preparation window. Visit Lueburry’s House and spend available Might Crystals on Swordfighter Form upgrades. Prioritize the Sword of Might and Energy Gauge if you use direct combat; the Bow of Might and Bombs of Might are useful but are not required to open Null’s Body.
Visit the Great Fairy to expand accessory capacity if you have delayed that service. Stock healing smoothies and at least one energy-restoring option. Equip defensive or energy-saving accessories and place a dependable combat echo, a flying or traversal echo, and a platform echo where they are easy to select.
Eastern Temple, Wrecked Ship, Hidden Ruins, and Slumber Dojo are optional. Complete them now only for their rewards or challenge progress. They are not required to enter Null’s Body or defeat Null. Side quests, Stamp Rally progress, Dampé’s Automatons, Pieces of Heart, Echo collection, and remaining Might Crystals are also optional campaign cleanup.
Use both save slots deliberately if you want a backup. Make a manual save immediately before the final conversation with Link and keep the other slot from being overwritten if it contains an earlier recovery point. Do not rely only on autosaves.
- Desired Might Crystal upgrades are purchased.
- Healing and energy recovery are stocked.
- Useful accessories are equipped.
- Optional activities are complete or deliberately postponed.
- A manual preparation save is preserved.
- A second save slot is available as a recovery backup.
7. Hand Link his weapons only when ready
Return to Link after all preparation is finished. Tri asks Zelda to give Link the Sword of Might, Bow of Might, and Bombs of Might. Choose “I’m not ready yet” if you want to leave and complete more activities. Zelda can return to the overworld and come back to this point later.
When ready, hand Link his weapons and choose to proceed. Link opens the route into Null’s Body. From that point, Zelda cannot return to settlements or use normal overworld travel, Swordfighter Form is unavailable, and the save option is disabled inside the final dungeon. If you reload after entering, the game returns you to the pre-handoff preparation state rather than providing an ordinary internal save.
The chapter is complete when Link is free, the optional preparation window has been used or intentionally skipped, and an untouched manual save remains available immediately before the weapons are handed over.
- Link has his weapons only when you are ready to begin the finale.
- The preparation save remains untouched.
- You understand that Swordfighter Form is unavailable in Null’s Body.
- You understand that saving and normal overworld access are unavailable inside Null’s Body.
- The entrance to Null’s Body is open.
Before you move on
- Eldin Temple, Lanayru Temple, and Faron Temple are complete.
- The Prime Energy and Null is active.
- All six Eternal Forest pedestals contain Ancient Orb Echoes and the northern path is open.
- The Great Deku Tree has allowed Zelda into the Ancient Ruins.
- The Stilled Ancient Ruins route has been crossed to the upper arena.
- The Echo of Zelda has been defeated.
- An arrow has shattered Link’s crystal and the Rescuing the Hero Link quest is complete.
- Desired upgrades, smoothies, accessories, and optional activities have been handled or deliberately postponed.
- A manual preparation save remains available before the final weapons handoff.
- Link is free and the player is ready to enter Null’s Body.
Final Dungeon — Null’s Body Route and Puzzle Sequence
Null’s Body is the final dungeon of The Legend of Zelda: Echoes of Wisdom. It begins after the Stilled Ancient Ruins sequence, when Zelda frees Link and returns his weapons. Before agreeing to enter, finish any preparation you still want to do in Hyrule: once Zelda enters, Swordfighter Form is unavailable, the dungeon cannot be exited normally, and saving is disabled inside. Null’s Body has no dungeon chests or conventional item reward. The route consists of dark-enemy encounters, a Buzz Blob switch puzzle, moving platforms, a Mothula glide, updrafts, an Old Bed climb, and a final Bind puzzle that moves Link to a switch. After Zelda and Link reunite, the large drop leads directly to Null, so use that room to organize Echoes and recovery items before proceeding.
Prepare before entering Null’s Body
Complete shopping, Smoothie preparation, side quests, Echo collection, and accessory setup before speaking to Link at the end of the Stilled Ancient Ruins. The last save opportunity is before Zelda gives Link back the weapons of might. After entering Null’s Body, the save option is disabled, and reopening the game returns you to the point immediately before that transition rather than creating a normal dungeon save.
Swordfighter Form is unavailable throughout Null’s Body. Choose a dependable combat Echo before entering; a Lynel Echo is a strong option if you have one, but any powerful Echo that you can summon reliably is usable. Carry healing Smoothies and equip a defensive accessory if available. Null’s Body has no treasure-chest progression, so there is no dungeon item to reserve space or power for later.
- Save before giving Link his weapons back
- Prepare Smoothies and other healing
- Select a reliable combat Echo
- Equip a useful defensive accessory
- Finish optional preparation before entering
Clear the opening dark-enemy gauntlet
Follow Link through the first rooms. When the door closes and Tecuum trigger the enemy sequence, summon combat Echoes while letting Link fight from a distance. Keep moving around the room and replace defeated Echoes rather than standing in the path of the dark enemies. A Lynel Echo can clear the waves quickly, while several cheaper Echoes can distract enemies and give Link time to attack.
The final wave includes a Dark Lynel. Maintain room to retreat, avoid being trapped against a wall, and resummon your combat Echo whenever it is defeated. You do not need to defeat enemies with Zelda’s direct attacks; the objective is simply to survive the gauntlet and eliminate the Dark Lynel. When the enemies are gone, use the upper door that opens.
- Opening rooms cleared
- Dark enemy waves defeated
- Dark Lynel defeated
- Upper exit taken
Activate the separated-path orb
Zelda and Link are separated in the next room, with Zelda on the right-hand side. Stand near the edge of the platform and create a Buzz Blob Echo on the distant side. Use Bind to grab the Buzz Blob, then carry it upward to the orb. The Buzz Blob activates the orb, opening the locked doors for both routes.
Proceed into the next enemy room and clear Zelda’s side first with your strongest practical Echo. Link is fighting on the other side of the bars. Once Zelda’s side is safe, send an Echo through or across the bars to help attack the enemies on Link’s side. The room opens only after the dark enemies on both routes have been dealt with, so do not leave immediately after clearing your own side.
- Buzz Blob created on the far side
- Buzz Blob carried to the orb
- Both routes opened
- Enemies on both sides defeated
Use the moving platforms to reach the left passage
Go down the stairs into the underground moving-platform section. Bind the first moving platform and use Reverse Bond so its movement carries Zelda across. After reaching the lower area, jump onto the second moving platform and ride it all the way to the left instead of trying to cross the gap early.
When the upper moving platform is accessible, Bind it and activate Reverse Bond again. Allow its movement to carry Zelda upward and toward the left. Continue through the left exit. If you miss a platform, return to a stable surface and wait for its next pass; forcing a jump is more likely to drop Zelda back into the lower section.
- First moving platform crossed with Bind and Reverse Bond
- Lower platform ridden left
- Upper platform used to climb through the gap
- Left passage reached
Cross the flying and updraft rooms
Use a Mothula Echo to fly across the next major gap. The Mothula can also help with the following traversal, so keep it available rather than replacing it with an unnecessary combat Echo. Continue toward the upper-left portion of the room and use the available updrafts to glide across the next gap. Summon the flying Echo before entering the current, then steer through the rising air rather than trying to jump across normally.
After the updraft section, create Old Bed Echoes to form a climbable staircase and reach the upper exit. The bed route is the verified solution for the final climb in this section. Do not substitute a long chain of temporary platforms unless necessary; the beds provide a stable route and leave Tri energy available for the rooms ahead.
- Mothula gap crossed
- Updraft section completed
- Upper-left route reached
- Old Bed staircase created
- Upper exit taken
Move Link to the switch and reunite
In the next room, Link is visible behind bars but cannot reach the upper route by himself. Create a staircase with boxes or beds, or use Bind on Link to pull him upward as Zelda climbs. Move him toward the far-right side of the room, where a black barrier blocks the route to the switch.
Keep Link positioned near the barrier, then release Bind when he is on the correct ledge. Link will cut through the black obstruction and step on the switch. This opens the passage and allows Zelda to reach his side. Follow him through the next rooms until the two characters are together again.
- Link moved to the upper route
- Link positioned near the black barrier
- Barrier destroyed
- Switch activated
- Zelda and Link reunited
Use the final staging room before the boss drop
Follow Link into the large room with the central hole. Do not jump immediately. This is the final staging area before Null’s arena and the last practical moment to organize Zelda’s combat setup. Confirm that the intended combat Echo is selected, restore health with a Smoothie if needed, and make sure healing items are accessible.
There is no separate dungeon reward after this room. The hole leads into the final encounter, and the dungeon cannot be exited normally once entered. If Zelda is defeated inside Null’s Body, the game’s disabled-save behavior returns her to the pre-entry transition rather than to a standard dungeon checkpoint. When health and supplies are ready, jump into the hole to begin the final boss sequence.
- Zelda and Link reunited in the large final room
- Health restored as needed
- Combat Echo selected
- Healing items accessible
- Ready to jump into Null’s arena
Before you move on
- The last pre-entry save was made before Zelda gives Link his weapons back.
- The opening dark-enemy gauntlet, including the Dark Lynel, is complete.
- The Buzz Blob has activated the orb and both separated enemy routes are cleared.
- The moving-platform route has been crossed with Bind and Reverse Bond.
- The Mothula, updraft, and Old Bed traversal sequence is complete.
- Link has destroyed the black barrier, activated the switch, and reunited with Zelda.
- Zelda is standing in the large final room beside the central drop, prepared to enter Null’s arena.
Final Boss — Patterns, Phase Breaks and Echo Vulnerabilities
Null is the final boss at the end of Null’s Body. The battle has three practical phases: an arena section where Zelda uses Bind to pull Null’s arms so Link can sever them, an underwater pursuit where Zelda manages oxygen while attacking tentacles, and a longer return to the arena with more arms, summoned bosses and overlapping hazards. The reliable rule never changes: avoid the current hazard, Bind the next exposed arm, let Link cut it, then attack Null’s body while it is stunned. Strong combat Echoes provide damage while Zelda concentrates on Bind and positioning. Bring healing items and, if available, use Zora’s Scale for the underwater section. Remember that Null’s Body disables saving after entry, so the last safe save is before entering the final dungeon. The fight is complete only after Zelda uses Bind on the exposed Prime Energy segment and the Link-assisted finishing sequence resolves.
1. Make the last preparation before entering Null’s Body
Heal completely before entering the final dungeon. Carry several reliable healing Smoothies or potions, because the battle is long and the later arena cycles combine several hazards. A strong combat Echo is useful for keeping pressure on Null while Zelda focuses on Bind. For the underwater phase, prepare an Echo that functions well in water, such as Chompfin or Lizalfos Lv. 3.
Equip Zora’s Scale if you have it. It slows the loss of air underwater, giving you more time to avoid whirlpools and reach the next bubble. Zora’s Flippers also make the underwater pursuit easier to control. These preparations are optional, but they reduce the amount of damage and oxygen pressure during the second phase.
Make your final save before entering Null’s Body. Once you enter the final dungeon, the save option is disabled. If you close the game or reload, the game returns you to the point immediately before Zelda gives Link back his weapons and enters Null’s Body. Do not rely on making a second save inside the dungeon.
- Fill your health before entering Null’s Body.
- Bring several healing Smoothies or potions.
- Prepare a strong combat Echo and an underwater-capable Echo.
- Equip Zora’s Scale or other useful accessories if available.
- Make the final save before entering Null’s Body.
2. Phase one: use Bind to let Link sever Null’s arms
Null opens the fight in the large arena with several arms extending toward Zelda. Its first attacks include ground strikes and tracking shockwaves. Keep moving away from the line of the incoming shockwave. When the attack ends, target an exposed arm with Bind and pull it away from Null. Maintain the Bind connection until Link reaches the restrained arm and cuts it.
Repeat this process for every arm in the opening cycle. Zelda is not meant to destroy the arms with ordinary attacks. The progress condition is pulling them far enough for Link to strike. Once the required arms have been severed, Null collapses and its body becomes vulnerable. Summon your strongest combat Echoes and place them near the exposed body. Attack during this opening, then move away before Null resumes its assault.
Null retreats into the walls several times during this phase. Arms will emerge from different sides of the arena and continue launching shockwaves. Keep Zelda moving through the open space, identify the next arm, and use Bind as soon as the attack leaves a safe opening. Do not stand still while holding an arm if another shockwave is approaching; release Bind, dodge, and reacquire the arm afterward.
Later, the arms can create damaging purple miasma pools on the floor. Route around the pools rather than trying to cross them to reach an arm. When Null’s rounded body begins pursuing Zelda across the arena, keep your distance, avoid the miasma, and wait for the next arm opportunity. After enough arm-pulling cycles and body damage, a cutscene moves Zelda into the underwater section.
- Dodge the tracking shockwave before using Bind.
- Pull each exposed arm until Link can sever it.
- Attack Null’s body only after the arms in that cycle are removed.
- Avoid purple miasma pools and the pursuing body.
- Prioritize the arm objective over ordinary summoned enemies.
3. Phase two: manage oxygen while attacking Null’s tentacles
The second phase is a side-on underwater pursuit. Zelda continuously loses air, so do not wait until the meter is nearly empty. Swim through air bubbles whenever the route provides one, and avoid the whirlpools created by Dark Vocavor. Large whirlpools can pull Zelda away from the boss or force her into a dangerous position, so approach them from a safe angle and keep moving.
Null exposes tentacles during the pursuit. Release a water-capable Echo such as Chompfin near the tentacles, then use Bind when a tentacle is within reach. Your Echoes can damage the tentacles while Zelda concentrates on staying out of the currents. When Null’s body collapses or becomes exposed, direct your Echoes toward the body and deal damage until the tentacles return.
Dark Vocavor continues to create whirlpools, and Dark Biri may appear later in the section. Avoid fighting every additional enemy. The objective is to keep oxygen available, survive the currents, pull or damage the tentacles, and attack the body during its openings. Heal during a calm stretch of water rather than inside a whirlpool or while surrounded by summoned enemies.
Repeat the tentacle-and-body cycle until Null opens a portal and retreats. Follow Null through the portal to return to the main arena. The underwater section ends when Zelda rejoins Link; there is no separate reward or item to collect before the final phase.
- Touch air bubbles before the oxygen meter becomes critical.
- Avoid Dark Vocavor’s whirlpools.
- Use Chompfin or another effective underwater Echo.
- Attack tentacles first, then damage Null’s exposed body.
- Ignore enemies that do not block the route or the tentacle objective.
- Follow Null through the portal when it retreats.
4. Phase three: repeat the arm strategy while surviving summoned bosses
Null returns to the arena with a larger set of arms and faster transitions. The required action remains the same: dodge the current attack, use Bind on each exposed arm, and hold it until Link cuts it. When every arm in the current cycle has been removed, summon strong Echoes and damage Null’s exposed body. Do not chase the boss into a hazard simply to extend the damage window.
The first set of summoned threats can include Seismic Talus and Mogryph. Seismic Talus spins through the center of the arena, while Mogryph sends sandstorm attacks from different directions. Keep Zelda near open floor and use broad movements rather than hiding in a corner. The summoned bosses are distractions unless they directly trap Zelda; the arms remain the main progression target.
Null later retreats into the walls and combines arm attacks with Dark enemies. Let Link and your Echoes handle enemies when possible while Zelda searches for the next arm. When Null returns to the arena, it can summon Ganon or Skorchill. Ganon charges from multiple positions, while Skorchill can split and bounce around the room. Keep moving, pull arms during openings, and avoid spending time trying to defeat every summon.
In the last cycles, Gohma can add webs to the floor while other bosses remain active. Burn webs that block the route with a fire-based Echo, then return to Bind. Hazards can overlap, so it is better to pause Echo placement and move to safety than to remain in range trying to maintain maximum damage. Heal before Zelda reaches critical health, especially if several summoned attacks are active at once.
- Pull every exposed arm during each arena cycle.
- Avoid Seismic Talus, Mogryph, Ganon and Skorchill attacks.
- Use Echoes to occupy enemies while Zelda handles Bind.
- Burn Gohma webs when they restrict movement.
- Stay out of corners and overlapping hazard zones.
- Heal before the final cycle becomes dangerous.
5. Complete the Prime Energy finishing sequence
After the final arm cycle, Null is knocked down and its Prime Energy segment becomes exposed. Use Bind on the exposed segment. Zelda and Link will pull together, and the game will provide the required on-screen interaction. Complete that interaction rather than moving away or attempting to resume ordinary combat.
If the Bind target is not available, the previous arm cycle has not fully resolved. Wait until Link finishes his attack, then look for the exposed Prime Energy segment. Reacquire it with Bind and continue the Link-assisted pull. The boss fight ends when the segment is removed and the finishing scene completes.
Do not treat the first victory animation as the campaign completion point. Wait for the post-battle story scenes to finish and confirm that the game transitions into the ending sequence. Null’s defeat leads to the restoration of the rifts, Tri’s farewell, Zelda and Link’s return to Hyrule Castle Town, the final staff roll and character epilogue images.
- Wait for the Prime Energy segment to become exposed.
- Use Bind on the segment.
- Complete the Link-assisted on-screen interaction.
- Wait for the concluding cutscene before closing the game.
- Confirm that the staff roll and epilogue sequence begin.
Before you move on
- Every required arm-pulling cycle has been completed and Null’s Prime Energy segment has been removed.
- The Link-assisted finishing sequence resolves and the final boss cutscene begins.
- The rifts are restored and Zelda and Link return to Hyrule Castle Town.
- The final staff roll starts, followed by the character epilogue images.
- The game reaches the ending sequence instead of returning Zelda to the pre-boss area.
References for this chapter
- The Legend of Zelda: Echoes of Wisdom — Nintendo Official Site
- Zelda: Echoes Of Wisdom: How To Defeat Null
- Walkthrough: Null's Body (Echoes of Wisdom) — Zelda Dungeon Wiki
- Walkthrough: Eternal Forest (Echoes of Wisdom) - Zelda Dungeon Wiki
- Chapter 8: Eternal Forest Rift — The Legend of Zelda: Echoes of Wisdom Walkthrough & Guide — GameFAQs
Ending Sequence — Credits, Epilogues and Post-Credits Checks
Defeat Null, complete the automatic ending scenes, and let the credits finish. Echoes of Wisdom does not create a separate post-credits story chapter or a permanently changed version of Hyrule. After the ending, the game returns you to the title screen, and the completed save receives a star. Loading that starred file places Zelda back at the point before the final dungeon, allowing you to continue optional exploration. The completed file also expands the Notebook and map information used for cleanup, while the Great Deku Tree can identify regions containing Echoes you have not yet learned. The star confirms the main campaign clear; collecting every Echo, Heart Piece, Stamp and Might Crystal remains optional completion.
1. Defeat Null and complete the automatic ending sequence
Finish the final encounter with Null. When the last phase is complete, use Bind on the exposed golden triangular object and follow the on-screen button prompt until the battle ends. The game then takes control for the concluding story scenes involving Zelda, Link, Tri and the other characters. There are no dialogue choices that branch the ending, so continue normally whenever control returns.
Do not treat the final hit as the completion checkpoint. The campaign conclusion consists of the battle followed by the automatic scenes and credit roll. Keep the software running while those scenes play. The story clear is represented by reaching the credits and then returning through the game's normal title-screen flow.
- Null has been defeated.
- The automatic conclusion scenes have played.
- The credits have begun.
2. Let the credits finish before checking the file
Allow the credits to run to their conclusion. There is no separate post-credits dungeon, story route or choice that must be selected to obtain a different ending. The game presents its final scenes and credits, then returns you to the title screen rather than leaving Zelda in a permanently altered postgame Hyrule.
If you want to preserve the full ending presentation, do not close the software during the final scenes or credit roll. Once the title screen appears, use the ordinary Continue or Load option to inspect the file used for the campaign. The file does not become a free-roaming save in a world after Null; returning to the last pre-final-dungeon state is the intended behavior.
- The final scenes have ended.
- The complete credit roll has finished.
- The title screen is visible again.
3. Confirm the campaign-clear star
Select the save through the title screen's normal Continue or Load flow and check the file information. A file that has completed the campaign displays a star. This star is the practical completion marker for defeating Null and finishing the ending sequence.
Loading the starred file does not replay the ending automatically or place Zelda after the restoration of Hyrule. Instead, it returns you to the saved point before entering the final dungeon. That is expected and does not mean the game failed to record the victory. If the star is absent, first make sure you selected the same file used for the final battle and allowed the ending to reach the title screen; then repeat the final encounter if necessary.
- The correct campaign file is selected.
- A star is visible beside that save file.
- The starred file loads without starting a new game.
4. Resume exploration from the pre-final-dungeon state
After loading the starred file, use the map and ordinary travel systems to return to Hyrule's regions, settlements, caves, rifts and dungeons. You can now clean up side quests, collectibles, optional Echoes and other activities that were not required for the story ending. The save is a continuation file for optional work, not a new chronological chapter after Null.
The completed file does not unlock a New Game Plus mode or a large post-credits story campaign. Do not search for a permanent postgame version of the world or assume that a previously blocked story area must become a new explorable zone. The ending presentation shows the resolution, while gameplay resumes from the pre-final-dungeon state so existing optional content remains usable.
- The starred file returns Zelda to the pre-final-dungeon state.
- Map travel and ordinary Hyrule exploration work normally.
- Optional quests and collectibles can be pursued.
5. Check completion counters and missing-Echo guidance
Open the Notebook and map after loading the starred file. The completed file provides additional progress information for collection categories, including the number of Echoes learned and remaining collectible totals such as Pieces of Heart, Stamps and Might Crystals. Use these counters to separate campaign completion from personal 100-percent goals.
For missing Echoes, travel to the Great Deku Tree in the Eternal Forest and speak with him on the completed file. He can indicate the regions where unlearned Echoes remain. Follow those regional hints, revisit the relevant overworld or Still World locations, and learn the missing Echoes when you find them. This guidance is optional and does not affect the star.
The star is not proof that every collection category is complete. Full Echo collection, all Side Quests, every Piece of Heart, all Stamps, Might Crystals, Smoothie recipes, accessories and other rewards are separate cleanup objectives. Record the counters only if you are pursuing those goals; they are not prerequisites for the canonical ending.
- The Notebook and map counters have been checked if optional completion matters.
- The Great Deku Tree has been consulted for missing-Echo regions.
- The star is being treated as a story-clear marker, not a 100-percent marker.
Before you move on
- Null has been defeated and the concluding story scenes have played.
- The full credits have finished and the game has returned to the title screen.
- The campaign save used for the final battle displays a star.
- The starred file loads at the pre-final-dungeon state and permits normal Hyrule exploration.
- The Great Deku Tree and collection counters have been checked if optional cleanup is part of the goal.
References for this chapter
- The Legend of Zelda: Echoes of Wisdom — Nintendo Official Site
- Zelda: Echoes Of Wisdom: Null's Body Walkthrough — Nintendo Life
- Dungeon - Nulls Body - The Legend of Zelda: Echoes of Wisdom Walkthrough - Neoseeker
- Null: Final Boss Strategy - The Legend of Zelda: Echoes of Wisdom Guide
- Is There a Legend of Zelda: Echoes of Wisdom Post-Game? — Siliconera
- Chapter 8: Eternal Forest Rift — The Legend of Zelda: Echoes of Wisdom Walkthrough & Guide — GameFAQs
Postgame Cleanup — Optional Challenges, Collectibles and Completion Targets
After defeating Null and allowing the ending and credits to finish, the completed save receives a star and returns to the late-game save point before Null’s Body. This is the intended cleanup state rather than a separate free-roaming post-credits campaign. Use the starred file to finish optional side quests, Echoes, Stamps, Pieces of Heart, Might Crystals, accessories, outfits, Automatons, minigames and Slumber Dojo challenges. The Slumber Dojo contains 15 stages: milestone rewards are granted at 2, 4, 6, 8, 11 and 14 completed stages, while stage 15, The Titans’ Final Gathering, awards the Green Tunic. There is no single universal 100-percent display, so check the map, Notebook, Adventure Log and reward milestones against the categories you want to complete.
1. Confirm the completed save and understand the cleanup return point
Defeat Null, complete the final scenes and let the credits finish. Return to the title screen, choose Continue and inspect the story file. A star beside the save confirms that the campaign has been cleared. After loading it, Zelda returns to the late-game point before entering Null’s Body. This is normal: the game does not create a permanently altered post-credits version of Hyrule.
Use this starred file to revisit towns, caves, rifts and regions. After the ending, the map and Notebook provide useful progress information for categories such as Pieces of Heart, Stamps, Might Crystals and Echoes. The Deku Tree can also identify regions containing Echoes you have not learned. Do optional work from this cleanup state, and save before entering Null’s Body again because the final sequence restricts normal saving.
- The ending scenes and credits have finished.
- The story save displays a completion star.
- Continue loads the intended pre-Null’s-Body cleanup point.
- The map, Notebook and Adventure Log are available for cleanup tracking.
2. Clear all 15 Slumber Dojo stages in Kakariko Village
Travel to the Slumber Dojo in southwestern Kakariko Village and speak with the Dojo Master. The complete activity contains 15 timed combat stages, not 14. Clear stages 1 through 15 for the complete Dojo set. Stages unlock as you progress through the campaign and complete earlier challenges, so return after clearing additional dungeons if the next dream is unavailable.
The milestone rewards are issued at 2, 4, 6, 8, 11 and 14 completed stages. These milestones include Heart Pieces, the First Mastery accessory, the Heirloom Katana, the Second Mastery accessory and the Final Mastery accessory. The 14-stage milestone is not the end of the activity. Stage 15 is The Titans’ Final Gathering, the final boss-rush challenge, and its normal clear awards the Green Tunic.
For ordinary clears, choose a durable combat Echo suited to the enemies in the room and keep Zelda positioned away from overlapping attacks. Replace defeated Echoes promptly instead of waiting beside the enemy group. Swordfighter Form, Bind and the Echo tactics learned in the corresponding dungeons remain useful in the later stages. Faster clear targets are optional unless you want the additional time-based prizes; they are separate from the requirement to clear all 15 stages.
- Stages 1 through 15 have been cleared.
- The six milestone rewards at 2, 4, 6, 8, 11 and 14 clears have been collected.
- Stage 15, The Titans’ Final Gathering, has been completed.
- The Green Tunic has been claimed.
- Optional fast-clear rewards have been obtained if desired.
3. Complete Dampé’s six-Automaton workshop chain
After Dampé’s workshop becomes available, travel to Dampé Studio in Eastern Hyrule Field and read his journal between requests. Complete all six Automaton side quests in the order they become available. Each project requires the Echoes or special components named by Dampé; place the requested components on the workshop platform, then test the completed Automaton when instructed. The six Automatons are optional for the campaign but are a major optional-completion category.
The requests can depend on story progress, other side quests, minigames and Slumber Dojo rewards. For example, the Roboblin request uses the Heirloom Katana, which is obtained from six completed Dojo stages. The final workshop reward is not automatic after the first Automaton: after all six are built, Dampé makes the Clockwork Bangle available. The accessory improves Automaton winding speed and can be purchased if you want the complete workshop reward set.
If an Automaton breaks, return to Dampé Studio for repairs using rupees or a Monster Stone. Keep the workshop journal as your order tracker, and revisit it after completing a named prerequisite rather than repeatedly checking unrelated towns.
- All six Automatons have been constructed.
- Each Automaton has been tested and is recorded in Dampé’s workshop journal.
- The Clockwork Bangle has been purchased if you want the complete Automaton reward set.
- Broken Automatons have been repaired before final cleanup.
4. Use the Deku Tree to locate missing Echoes
After the campaign clear, speak with the Deku Tree about your Echo collection. If entries remain missing, he identifies the relevant region or regions. Travel to those areas and search caves, enemy camps, dungeon outskirts, rifts, water routes and isolated ledges that you could not previously reach. Use Waypoints to shorten the search route.
When you find the required enemy or object, target it with the Tri Rod and complete the learning prompt. Defeating an enemy without recording its Echo does not fill the Notebook entry. Check the Echoes page after each regional sweep, then return to the Deku Tree until no missing region remains. This is an Echo-collection check, not a replacement for completing side quests or collecting map items.
- The Deku Tree identifies no remaining region with missing Echoes.
- The Echoes page has no empty entries relevant to your completion target.
- Late-game enemies, objects, caves and isolated locations have been checked.
5. Finish the Stamp Rally and collectible sweep
Visit every Stamp Stand and submit completed Stamp Cards to the Stamp Rally character. Stands are distributed across the overworld, caves and remote ledges, so combine this sweep with Waypoint activation and missing-Echo searches. The Stamp Rally has 25 stands, and completing the full set awards the Stamp Suit. Use the map and a regional checklist so you do not confuse a dungeon clear with a complete sweep of the surrounding area.
During the same route, collect remaining Pieces of Heart and Might Crystals, then finish desired accessory, outfit and Fairy Bottle objectives. These rewards are separate from the campaign star. The game does not present one universal 100-percent percentage, so define your target by category: story, side quests, Echoes, Automatons, Stamps, map collectibles, upgrades or all of them.
- All Stamp Stands have been visited.
- The Stamp Suit has been received.
- The map shows no remaining target Stamps, Pieces of Heart or Might Crystals for your chosen goal.
- Desired accessories, outfits and Fairy Bottles have been obtained.
6. Finish side quests and minigame rewards
Review the Adventure Log and complete unfinished side quests in towns, villages and regional settlements. Prioritize quests that award Heart Pieces, Might Crystals, Fairy Bottles, accessories, outfits, Automaton components or access to minigames. Some quests become available only after a dungeon or major story event, so revisit named NPCs after the campaign rather than assuming an area is finished.
The Slumber Dojo, Dampé’s workshop, Stamp Rally and other minigames are optional activities in the existing world. They are not separate postgame chapters, and there is no post-credits dungeon or postgame boss that must be defeated after Null. Treat practical rewards and cosmetic rewards separately when setting your completion standard.
- The Adventure Log contains no unfinished side quests relevant to your target.
- All desired minigame rewards have been claimed.
- No Dampé or Slumber Dojo prerequisite remains incomplete.
- Optional dungeons and side activities have been classified as complete or intentionally skipped.
7. Make the final completion check
Before entering Null’s Body again, save at the latest available point outside the final dungeon. Confirm the story star, map counters, Notebook entries, Adventure Log, Stamp Rally progress, Slumber Dojo rewards and Dampé’s Automaton journal. If you intend to keep exploring, retain this outside-the-dungeon save as your reusable cleanup file.
Defeating Null a second time is optional. The first completed ending already registers the campaign clear and adds the star to the save. Repeat the finale only if you want to view the ending again or prefer to finish with a later story-clear save; it is not required to register optional cleanup.
- The save has a completion star.
- The Echoes, map and Adventure Log show the intended completion status.
- All 15 Slumber Dojo stages are complete if pursuing the full Dojo set.
- The six milestone rewards and stage 15 Green Tunic have been claimed.
- All six Dampé Automatons are built and tested if pursuing full optional completion.
- A reusable save remains outside Null’s Body.
- Null has been defeated at least once and the canonical ending has been viewed.
Before you move on
- The completed save displays a star after the credits.
- The map and Notebook show the remaining collectibles and Echoes for the chosen completion target, or none remain.
- The Deku Tree identifies no missing Echo regions and the Echoes page has no empty entries for the intended target.
- All Stamp Stands and the Stamp Suit are complete if pursuing the full Stamp Rally.
- All 15 Slumber Dojo stages are clear, including stage 15, The Titans’ Final Gathering.
- The milestone rewards at 2, 4, 6, 8, 11 and 14 clears have been collected.
- The Green Tunic from stage 15 has been claimed.
- All six Dampé Automatons are built and tested, with the Clockwork Bangle purchased if desired.
- The Adventure Log contains no unfinished side quests relevant to the completion target.
- Null has been defeated at least once and the canonical ending has been viewed.
References for this chapter
- Slumber Dojo - The Legend of Zelda: Echoes of Wisdom Walkthrough
- The Final Titans' Gathering - Zelda Dungeon Wiki
- Zelda: Echoes Of Wisdom: Slumber Dojo - All Challenges And Rewards
- Slumber Dojo Training Guides - The Legend of Zelda: Echoes of Wisdom Guide
- Null: Final Boss Strategy - The Legend of Zelda: Echoes of Wisdom Guide
- Zelda: Echoes Of Wisdom: Dampé Quest And Automatons Guide
- Zelda: Echoes Of Wisdom: All Accessories, Locations & Effects
- Zelda: Echoes Of Wisdom: Stamp Locations And Map
- 100% Completion - Zelda Dungeon Wiki
Troubleshooting, Recovery and Quick-Retry Strategies
Echoes of Wisdom normally gives you enough recovery options to retry difficult rooms and bosses without restarting the campaign, but its save system has an important limitation: Null’s Body, the final dungeon, cannot be saved from inside. Create your final manual save before entering it, and remember that the completed file returns to the area before the final dungeon after the credits. Use the System menu for ordinary saves, preserve a separate save file only if you are intentionally maintaining a separate playthrough, and rely on normal reloads rather than glitches when a puzzle, enemy or door behaves incorrectly. After defeating Null and finishing the credits, the save receives a star and the map and journal provide useful completion information.
Save from the System menu before a difficult section
Open the pause menu, move to the System screen, and choose Save. Use this before entering a major rift, dungeon, miniboss route or boss approach whenever the game allows it. A manual save gives you a deliberate recovery point instead of making you depend entirely on the most recent autosave.
Echoes of Wisdom provides two save files, but they are separate playthrough slots rather than a built-in copy or backup command. Do not overwrite a second file expecting it to preserve the first file automatically. If you want a safety file, maintain it deliberately at a separate point in the campaign and check the file date and location before saving.
For the final sequence, complete all preparation before entering Null’s Body. After rescuing Link and reaching the entrance, the game warns you that continuing is the point of no return for ordinary exploration. Save before entering. Once inside Null’s Body, saving is disabled, so you cannot create a new manual checkpoint halfway through the final dungeon.
- Use System, then Save, at a safe overworld or pre-dungeon location.
- Treat the two save files as separate campaigns, not mirrored backups.
- Make the final manual save before entering Null’s Body.
Recover after a fall, defeat or failed puzzle arrangement
If Zelda falls, loses all hearts or fails a combat attempt, use Retry when the game presents it. If the available retry point is not useful, return to the title screen and load the most recent suitable manual save or autosave. The correct recovery point may be an area entrance or a broader checkpoint rather than the exact room where the failure occurred, so do not assume that every interior arrangement will remain intact after reloading.
When a puzzle has been disturbed, clear the unwanted Echoes before rebuilding it. Remove stray platforms, beds, objects or enemies, then recreate the main foothold or barrier first. Check whether a switch, door or receptacle has actually registered before adding more objects. If the same jump keeps failing, use a wider or more stable Echo and leave Zelda room to correct her position instead of repeating a fragile arrangement.
For a long route, use the map to return through the nearest available rift or waypoint, then restock hearts and healing items before trying again. Do not restart the campaign merely because a dungeon reloads from its entrance or another larger checkpoint; that behavior can be normal for interior areas.
- Choose Retry or load the newest useful save instead of restarting the file.
- Erase failed Echo arrangements before rebuilding them.
- Use a nearby waypoint or rift and restock before repeating a long section.
Use a consistent boss-retry routine
Before opening a boss door, organize the Echoes you intend to use and place a reliable combat Echo in an easy-to-reach position. Carry a dependable healing option, and enter with enough health to survive an unfamiliar attack pattern. On the first attempt, spend more attention on learning when the boss is vulnerable than on using every powerful resource immediately.
If Zelda is defeated, reload the pre-boss manual save or the most useful recent autosave. Change one part of the plan on each attempt: use a safer Echo, wait for the attack to finish before binding, retreat sooner, or stop attacking when the boss becomes protected. This makes each retry informative and avoids repeatedly reproducing the same failure.
Null’s Body requires special planning because there is no save inside. If you fail against Null, the game’s completed or pre-final-dungeon state is designed to return you to the last usable point before the final commitment. Prepare again outside the dungeon, then re-enter when you are ready for another full attempt.
- Prepare Echoes, healing and health before the boss door.
- Reload the pre-boss or pre-dungeon save after a defeat.
- For Null, plan for a complete retry because the final dungeon has no internal save.
Handle a frozen enemy, missing door state or visual glitch
If an enemy stops responding, a door does not open after its required objective, an Echo vanishes while blocking progress, or the camera and menus stop responding, stop experimenting with the broken state. If the HOME Menu still works, close the software normally and relaunch it. Load the immediate pre-encounter manual save or an earlier autosave, then repeat the room using ordinary movement, Echo creation, Bind and combat.
If the problem is a progression block rather than a freeze, first confirm that the required event actually registered. Check the map and Notebook quest information, leave and re-enter the area if the game permits it, and reload before trying the sequence again. A reload can clear a temporary state problem, but it cannot guarantee recovery from a deliberately altered or damaged save.
Do not use wrong-warps, save-file exploits or modified data on a normal campaign file. Some glitches have been patched across updates, and altered states can leave Zelda or Link in locations where required story triggers cannot occur. If a normal reload does not restore progress, use the oldest unaffected save available rather than overwriting it with another experimental attempt.
- Relaunch and load a pre-encounter save when a state appears frozen.
- Confirm the quest or door objective before repeating the room.
- Avoid glitches and altered save data on the campaign file.
Confirm the ending and continue from the completed file
After defeating Null, continue through the story scenes and let the credits finish. When you return to the title screen, load the completed file rather than assuming that its return point means the ending failed. The save should display a star showing that the campaign has been completed.
The completed file intentionally places Zelda back before the final dungeon rather than creating a permanent post-Null version of the world. This lets you leave the final approach, finish remaining side quests, collect missing Echoes, find Pieces of Heart, Stamps and Might Crystals, and prepare for another ending run if desired. You are not required to defeat Null again merely to keep the star.
After loading the starred file, inspect the map and Notebook for the newly available completion information. The game can show remaining collection and quest progress, and the Great Deku Tree can provide regional guidance for Echoes you have not learned. If the credits were interrupted before the completion marker appeared, load the latest pre-final save and complete the final battle and ending sequence again without closing the software early.
- Finish the final scenes and credits before closing the game.
- Confirm the star beside the save file.
- Use the starred pre-final-dungeon file for optional cleanup and remaining collections.
Before you move on
- A failed room or boss attempt can be retried from an ordinary manual save or recent autosave without restarting the campaign.
- Null’s Body has been entered only after making the final available manual save outside it.
- A frozen or stalled encounter has been handled by relaunching and loading an earlier unaffected save.
- Null has been defeated, the ending scenes and credits have finished, and the completed file shows a star.
- Loading the starred file returns Zelda to the pre-final-dungeon area with map and Notebook completion information available for optional cleanup.
References for this chapter
- Saving - Zelda Wiki
- Walkthrough: Eternal Forest (Echoes of Wisdom) - Zelda Dungeon Wiki
- Dungeon - Nulls Body - The Legend of Zelda: Echoes of Wisdom Walkthrough - Neoseeker
- How to Save The Game - The Legend of Zelda: Echoes of Wisdom - Gfinity Esports
- How to Update The Legend of Zelda: Echoes of Wisdom - Nintendo Support
Finishing up
Defeat Null and allow the concluding scenes and credits to finish.
Confirm that the campaign save displays the completion star after returning to the title screen.
Load the starred file to verify that Zelda returns to the intended pre-final-dungeon cleanup state.
Treat Echoes, Pieces of Heart, Stamps, Might Crystals, side quests, Automatons, accessories, outfits and minigame rewards as optional completion categories unless a separate 100-percent target is specified.
Choose your next gameScreenshots & video
Game imagery for reference. Follow the written chapters above for the route and strategies.
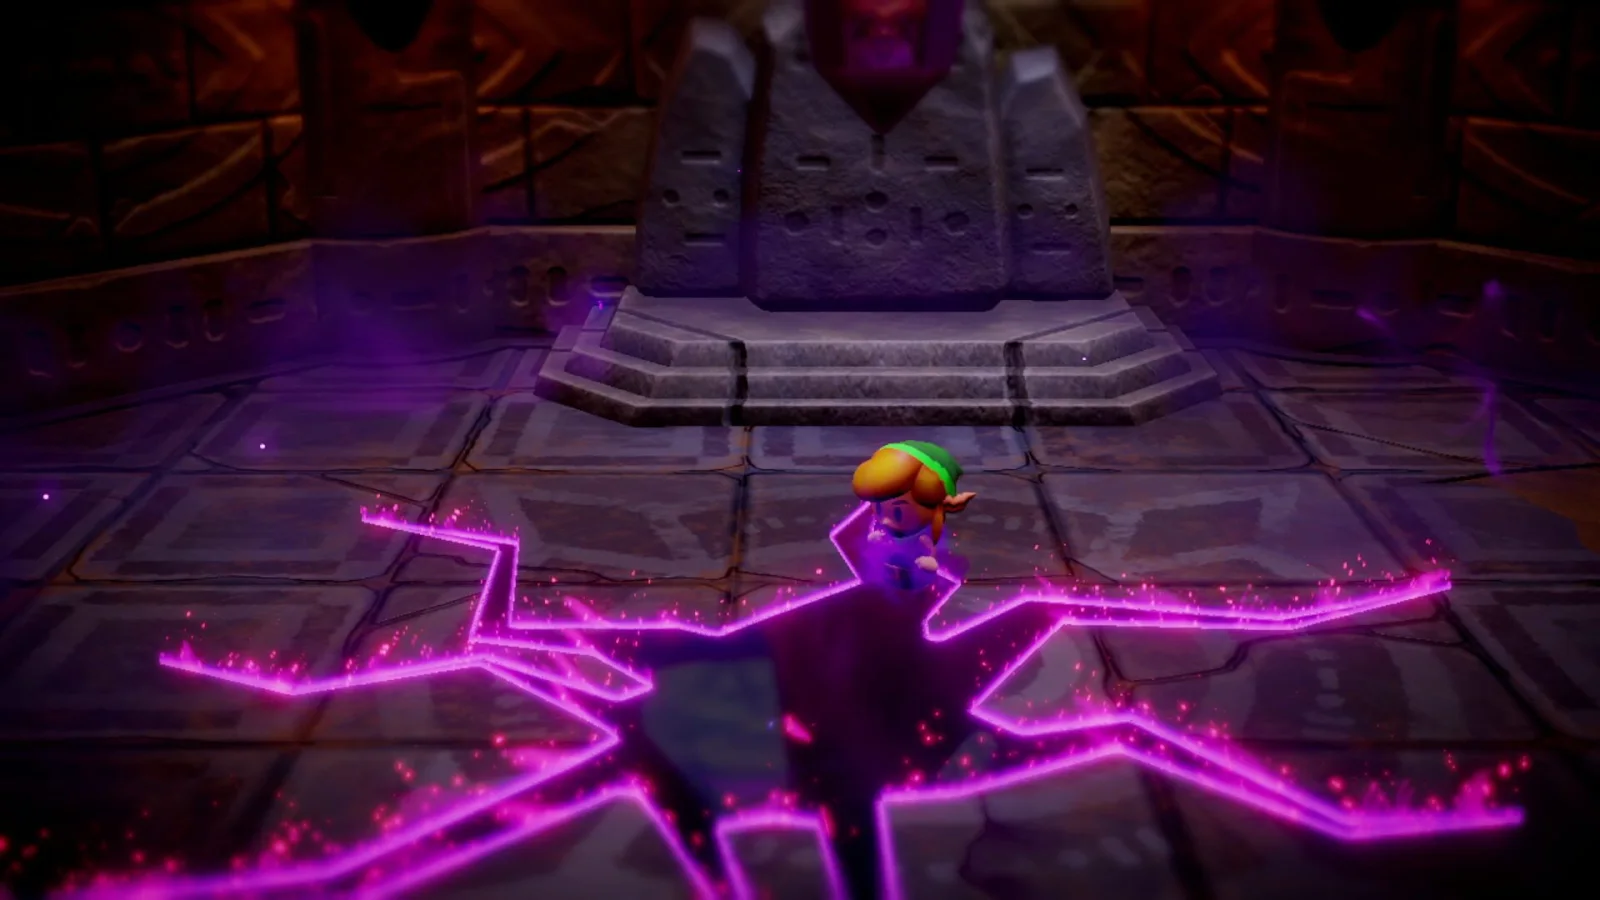
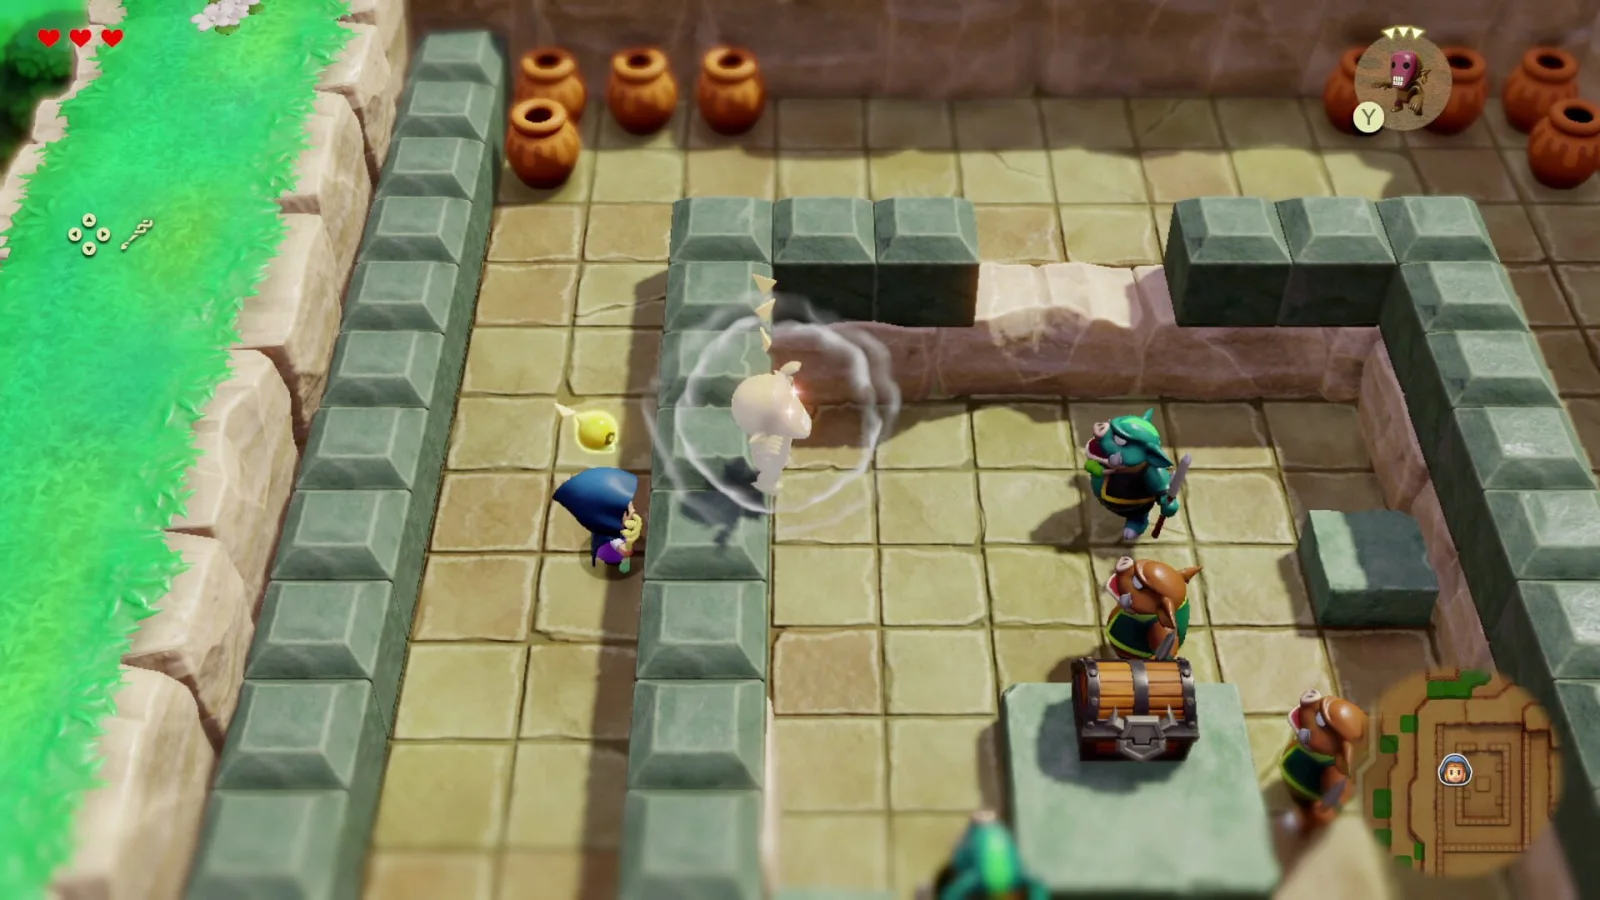
Sources & references
Our original guide draws on the references below. Check the edition at the top of this page before following controls or unlock requirements.
- Prologue: Castle Escape - Echoes of Wisdom Walkthrough
- Zelda: Echoes Of Wisdom: Prologue - Rescuing Zelda & Escape From Jail
- Walkthrough: Suthorn Forest (Echoes of Wisdom)
- The Legend of Zelda: Echoes of Wisdom: Tips & tricks
- The Legend of Zelda: Echoes of Wisdom Walkthrough & Guide - Basic Gameplay
- Zelda: Echoes of Wisdom: The Mysterious Rifts Main Quest Guide
- Zelda: Echoes of Wisdom Walkthrough — Nintendo Life
- Echoes of Wisdom Walkthrough Guide - Zelda Dungeon
- The Legend of Zelda: Echoes of Wisdom — Nintendo Official Site
- Zelda: Echoes Of Wisdom: Suthorn Ruins Dungeon Walkthrough — Nintendo Life
- Walkthrough: Suthorn Ruins — Zelda Dungeon Wiki
- Zelda: Echoes of Wisdom — Suthorn Ruins Dungeon Guide — Gameranx
- Searching for Everyone — The Legend of Zelda: Echoes of Wisdom Guide — Thonky
- Zelda: Echoes of Wisdom: How to Upgrade Swordfighter Form — Nintendo Life
- Might Crystal Locations — Zelda: Echoes of Wisdom
- Items: Effects & Locations — Zelda: Echoes of Wisdom
- How to Increase Accessory Slots — Zelda: Echoes of Wisdom
- Walkthrough: Gerudo Sanctum — Zelda Dungeon Wiki
- Gerudo Sanctum — Thonky’s The Legend of Zelda: Echoes of Wisdom Guide
- Zelda: Echoes of Wisdom: Gerudo Sanctum Chest and Dungeon Walkthrough — Nintendo Life
- Zelda: Echoes of Wisdom: A Rift in the Gerudo Desert Main Quest — Nintendo Life
- A Rift in the Gerudo Desert — Echoes of Wisdom Walkthrough — Zelda Central
- The Legend of Zelda: Echoes of Wisdom Gerudo Sanctum Walkthrough — The Escapist
- Gerudo Sanctum — Zelda Dungeon Wiki
- Walkthrough: Jabul Ruins (Echoes of Wisdom)
- Zelda Echoes of Wisdom — Jabul Ruins Dungeon Walkthrough
- The Legend of Zelda: Echoes of Wisdom — Jabul Ruins Dungeon Guide
- Vocavor — Zelda Dungeon Wiki
- Dungeon - Jabul Ruins — The Legend of Zelda: Echoes of Wisdom Walkthrough
- The Legend of Zelda: Echoes of Wisdom — Nintendo Switch games
- The Legend of Zelda: Echoes of Wisdom — Nintendo official news announcement
- Zelda: Echoes of Wisdom: All Might Crystal Locations — Nintendo Life
- Zelda: Echoes of Wisdom: All Smoothie Recipes List — Nintendo Life
- Recipes, Please! — The Legend of Zelda: Echoes of Wisdom Guide — Thonky
- List of Ingredient Locations — The Legend of Zelda: Echoes of Wisdom Guide — Thonky
- Waypoint database — Gamer Guides
- Walkthrough: Hyrule Castle (Echoes of Wisdom) - Zelda Dungeon Wiki
- Walkthrough: Eldin Volcano (Echoes of Wisdom) - Zelda Dungeon Wiki
- Walkthrough: Eldin Temple (Echoes of Wisdom) - Zelda Dungeon Wiki
- Walkthrough: Lanayru Temple (Echoes of Wisdom) - Zelda Dungeon Wiki
- Walkthrough: Faron Wetlands (Echoes of Wisdom) - Zelda Dungeon Wiki
- Zelda: Echoes Of Wisdom: A Rift In The Faron Wetlands Main Quest
- A Rift in the Faron Wetlands - Echoes of Wisdom Walkthrough
- Chapter 6: Faron Wetlands Rift - The Legend of Zelda: Echoes of Wisdom Walkthrough & Guide
- Walkthrough: Faron Temple (Echoes of Wisdom)
- Zelda: Echoes Of Wisdom: Faron Temple Dungeon Walkthrough
- Gohma Boss Strategy - The Legend of Zelda: Echoes of Wisdom Guide
- Faron Temple - Zelda Dungeon Wiki
- Walkthrough: Eternal Forest (Echoes of Wisdom) - Zelda Dungeon Wiki
- The Eternal Forest Walkthrough — Zelda Central
- The Eternal Forest Walkthrough — Nintendo Life
- How to Defeat Zelda’s Echo — Nintendo Life
- Stilled Ancient Ruins — Thonky
- Beginning the Game — Thonky
- Walkthrough: Null’s Body — Zelda Dungeon Wiki
- Zelda: Echoes Of Wisdom: Null's Body Walkthrough — Nintendo Life
- Zelda: Echoes Of Wisdom: How To Defeat Null
- Walkthrough: Null's Body (Echoes of Wisdom) — Zelda Dungeon Wiki
- Chapter 8: Eternal Forest Rift — The Legend of Zelda: Echoes of Wisdom Walkthrough & Guide — GameFAQs
- Dungeon - Nulls Body - The Legend of Zelda: Echoes of Wisdom Walkthrough - Neoseeker
- Null: Final Boss Strategy - The Legend of Zelda: Echoes of Wisdom Guide
- Is There a Legend of Zelda: Echoes of Wisdom Post-Game? — Siliconera
- Slumber Dojo - The Legend of Zelda: Echoes of Wisdom Walkthrough
- The Final Titans' Gathering - Zelda Dungeon Wiki
- Zelda: Echoes Of Wisdom: Slumber Dojo - All Challenges And Rewards
- Slumber Dojo Training Guides - The Legend of Zelda: Echoes of Wisdom Guide
- Zelda: Echoes Of Wisdom: Dampé Quest And Automatons Guide
- Zelda: Echoes Of Wisdom: All Accessories, Locations & Effects
- Zelda: Echoes Of Wisdom: Stamp Locations And Map
- 100% Completion - Zelda Dungeon Wiki
- Saving - Zelda Wiki
- How to Save The Game - The Legend of Zelda: Echoes of Wisdom - Gfinity Esports
- How to Update The Legend of Zelda: Echoes of Wisdom - Nintendo Support
About the game & collecting notes
- Platform
- Nintendo Switch
A start-to-finish Nintendo Switch campaign guide for The Legend of Zelda: Echoes of Wisdom. Follow Zelda from the opening escape through Suthorn Ruins, the Gerudo Desert and Jabul Waters routes, Hyrule Castle, the three late-game goddess regions, the Eternal Forest, Null’s Body and the canonical ending. Optional upgrades, side quests and post-clear cleanup are clearly separated from required story progress.
Darryl Polo
Darryl Polo writes about emulation and retro games. What changes when an old favorite moves to another setup? That question connects his interest in tinkering with the games that made the hardware worth keeping.
Our editorial standardsFound a step that needs another look? Help us improve this guide.