
The Elder Scrolls IV: Oblivion Remastered — PlayStation 5 (Base-game Main Quest) Walkthrough
Complete, step-by-step campaign walkthrough for the PlayStation 5 release of The Elder Scrolls IV: Oblivion Remastered, covering only the base game's main quest through the canonical ending (Light the Dragonfires). Expansion questlines (Shivering Isles, Knights of the Nine) are deliberately excluded per this edition scope.


Find a copy
The Elder Scrolls IV: Oblivion Remastered Sony PlayStation 5
We may earn a commission if you buy through these links, at no extra cost to you. As an Amazon Associate I earn from qualifying purchases.
Opens retailer search results. Check the model, edition, seller, availability and current price before buying.
Before you begin
You are about to play The Elder Scrolls IV: Oblivion Remastered on PlayStation 5 and follow a focused path: the base-game main quest from the tutorial through the final Light the Dragonfires sequence.
This guide assumes you will not pursue expansion questlines (Shivering Isles, Knights of the Nine) and gives precise, in-game directions to reach the canonical ending while avoiding expanded-content detours.
Follow these chapters in order.
Each chapter lists exact objectives, step-by-step route instructions, reliable in-game landmarks and common failure points.
Save frequently (manual quicksaves are your friend), keep at least three separate save files, and confirm control bindings in the PS5 Settings menu before attempting staged fights or timed sequences.
Set yourself up for the run
Set your PS5 controls: confirm movement, camera, attack, block, cast and journal buttons in Options → Controls.
Enable DualSense vibration/trigger settings if you want tactile feedback but don’t rely on it for timing-based combos.
Create three save files before you leave the Tutorial (one for reloading mistakes, one for branching choices, one for the final run).
Use manual quicksave (not just autosave) frequently before major fights and before entering Oblivion Gates or dungeons.
Choose a starter build that suits the main-quest pacing: a balanced melee/magic hybrid (e.g., Sword + Restoration/Block) or a resilient knight (heavy armor, shield, one-handed).
The main quest contains varied combat types; avoid glass-cannon specialists unless you plan heavy grinding.
Familiarize yourself with the journal and map.
Main-quest waypoints sometimes require you to open your journal, accept 'Find Jauffre' or 'Find the Heir', and use the map marker; don’t expect automatic GPS-style guidance for every step.
Adjust difficulty and leveling preferences early.
Remastered levelling combines original and Skyrim-inspired elements — if you prefer slower enemy scaling, set difficulty lower or avoid repeatedly exploiting skill-leveling loops.
Inventory and healing: carry potions for health, magicka and cure disease.
Keep one backup weapon of a different damage type (e.g., bladed and blunt) to handle enemies with armor weaknesses.
Stash or sell excess loot frequently; Oblivion inventory can become cluttered.
Make sure you have space for quest items before entering dungeons.
If you use trophies/achievements as milestones, enable in-game notifications and track 'Champion of Cyrodiil' or equivalent PS5 trophies as late-game completion checks.
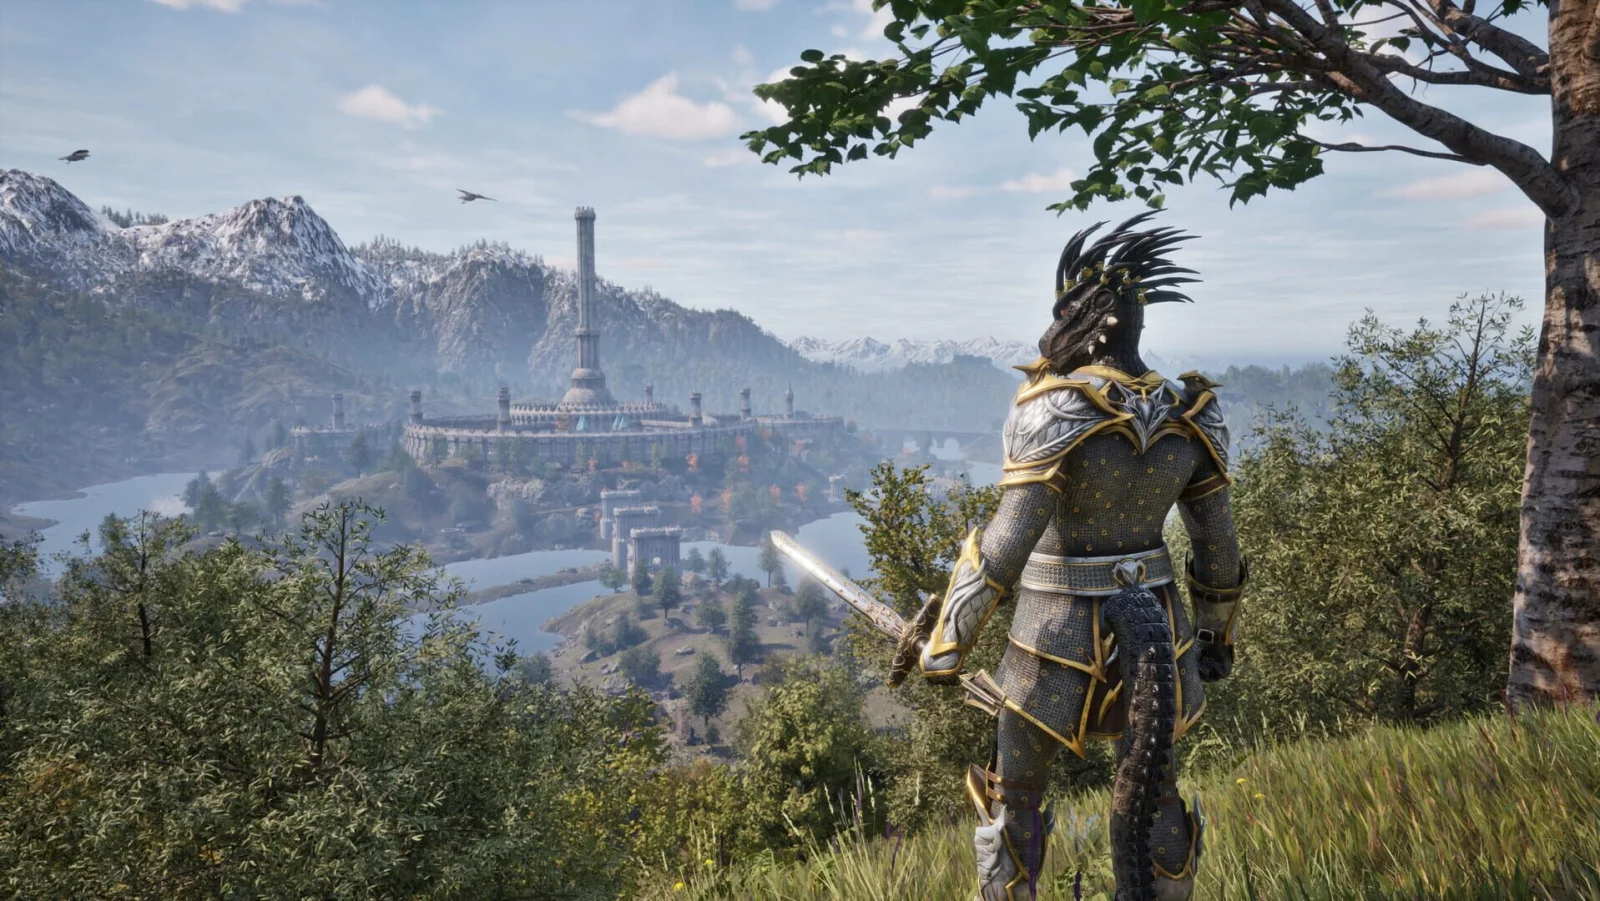
Preparation and Character Setup (PS5 remaster notes)
Set up the PlayStation 5 controls, choose a practical starting direction, and create a save routine before leaving the Imperial Prison. Oblivion Remastered lets you develop many different skills, but enemies scale with your level, so a newcomer should keep a dependable damage method and a way to recover health progressing together. You do not need a perfect build or a fixed class to finish the main quest. Pick a race and birthsign that support your preferred approach, select skills you will genuinely use, and avoid rapidly leveling noncombat skills while neglecting combat ability. Test the controls in the prison, keep several manual saves, sleep when the level-up indicator appears, and check your encumbrance before traveling. The PS5 release includes DualSense vibration and trigger effects, but the game’s published controller list leaves Quest, Help, System, Quicksave, and Quick Load without default button assignments.
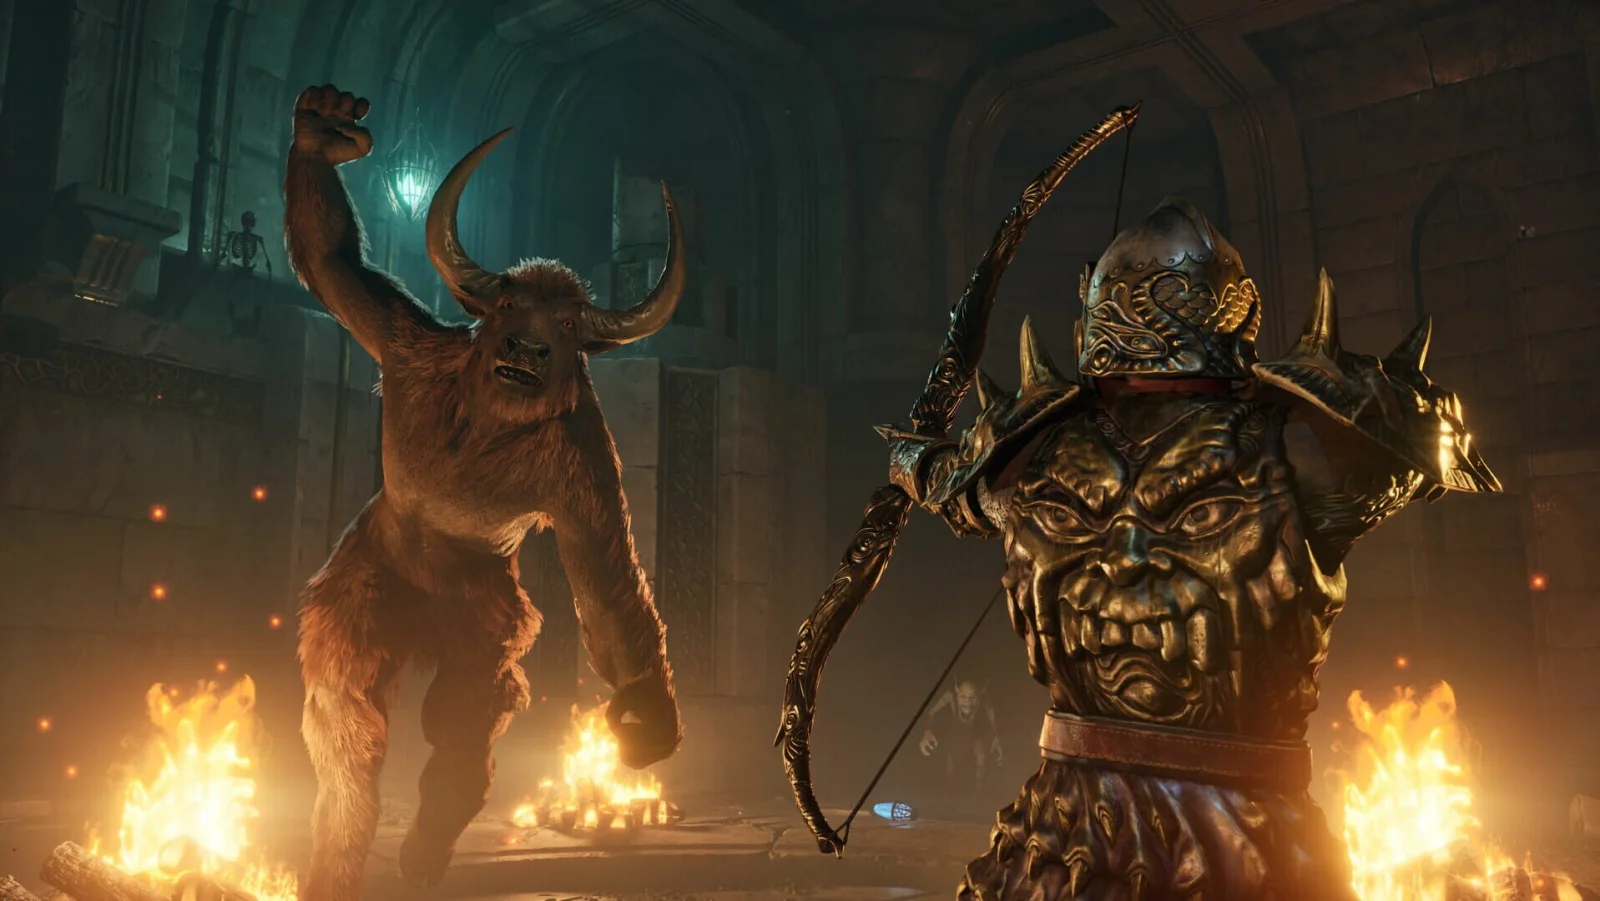
1. Verify the PS5 controller layout in a safe area
Open the game’s system or options menus and review the controller settings before committing to your character. The published PlayStation defaults are Triangle for jump, Circle for sneak, L3 for sprint, X for interact, R2 for attack and power attacks when held, L2 for block, R1 for casting, Square for sheathing, L1 for the HUD Shortcuts display, the touch pad for Wait, and R3 for changing view. The directional pad opens Character with Up, Inventory with Right, Magic with Left, and Map with Down.
Quest, Help, System, Quicksave, and Quick Load have no default button assignment in Bethesda’s published PlayStation layout. Learn the menu route for those functions instead of expecting a dedicated key. Some options, including remapping the touch pad and the Options Menu itself, are not available through the listed controller settings. If you change any available bindings, test them immediately in the prison corridor before entering a fight.
- Test attack, power attack, block, cast, jump, sneak, sprint, interact, and sheathe.
- Confirm how you will reach the Quest and System menus.
- Open the HUD Shortcuts display and place a weapon, healing option, and frequently used spell or consumable there.
2. Configure DualSense, display, and difficulty preferences
The PlayStation 5 product listing confirms support for DualSense vibration and trigger effects. Keep both enabled if the extra feedback helps you read attacks, or disable either feature if trigger resistance or vibration becomes tiring. Adjust camera sensitivity, brightness, field of view, and motion blur before the prison escape. Use the brightness test so the reference symbol is barely visible rather than making interiors excessively bright. Choose Performance or Quality according to whether you prefer smoother play or higher visual fidelity.
Open the Gameplay settings and select a difficulty that matches your experience. The Remastered difficulty choices are Novice, Apprentice, Adept, Journeyman, Expert, and Master. Novice or Apprentice is a reasonable starting point if you want to concentrate on the story and exploration. Adept or Journeyman gives a more demanding but adjustable baseline. You can change the setting later, so do not treat the opening choice as permanent.
- Choose Performance or Quality mode.
- Set brightness and camera options before the first extended combat section.
- Select a difficulty from Novice, Apprentice, Adept, Journeyman, Expert, or Master.
3. Choose a flexible race, birthsign, and combat direction
At character creation, choose a race that complements the way you expect to play, but remember that race does not lock your future skills. Imperials are a comfortable general-purpose choice for weapon users. Nords suit a sturdier close-range plan. Bretons provide useful support for a magic-focused character, while High Elves offer a larger early magicka pool but are less forgiving if surrounded. These are practical tendencies rather than requirements; any race can learn weapons, armor, spells, alchemy, and stealth.
Choose a birthsign after considering both its benefit and its drawback. A combat-oriented sign is easy to manage for a first melee character, while a magicka-oriented sign helps a caster use spells more frequently. Do not choose a sign only because its bonus looks large. A drawback that interferes with your main defense can matter more than the headline advantage. During class creation, favor skills connected to the equipment and abilities you will actually use. The game does not require you to follow a rigid preset class to complete the main quest.
- Choose one primary damage method: melee, ranged weapons, destruction magic, or a deliberate mixture.
- Choose a backup method such as blocking, healing, a bow, or a dependable secondary spell.
- Read the full birthsign description, including its drawback, before confirming it.
4. Keep combat, defense, and recovery skills progressing together
Build around a small group of skills rather than selecting every attractive option. A weapon user can pair Blade or Blunt with Block, Heavy Armor or Light Armor, and Restoration or Alchemy. A caster benefits from an offensive school, Restoration, and a defensive or utility option. A stealth character should still maintain a direct combat fallback because main-quest locations include open battles where sneaking cannot solve every encounter.
Oblivion Remastered awards experience as Major and Minor Skills improve through use, with Major Skills advancing your level faster. A bronze indicator appears at the top right when you are ready to level, but your character level does not increase until you sleep in a bed. Enemies scale with your level, so rapidly improving Mercantile, Speechcraft, Acrobatics, or another noncombat skill while ignoring damage and defense can make later encounters harder. Use the skills you want to develop, but make sure your normal play also improves the abilities that keep you alive.
- Keep at least one reliable attack skill improving naturally.
- Maintain a healing plan through Restoration, potions, or both.
- Avoid deliberately rushing several noncombat skills while combat skills remain weak.
5. Create rotating saves and handle leveling deliberately
Make a manual save as soon as the game allows it. Use three rotating files such as Start-A, Start-B, and Start-C, and keep one additional save before major quest transitions when possible. Bethesda recommends saving often, creating new saves, and keeping multiple files. Autosaves are useful as a safety net, but they should not be your only recovery point. Save before entering an unfamiliar dungeon, before a major objective, and after receiving an important quest item.
When the bronze level indicator appears, find a safe bed and sleep to complete the level-up. The Remastered system grants 12 Virtue Points after advancement. You can place up to 5 points in one attribute and improve up to 3 attributes during a level-up. Increase attributes that support your actual play: Strength helps melee damage and carrying capacity, Intelligence increases total Magicka, Willpower supports Magicka regeneration and magic resistance, Endurance improves health and fatigue recovery, and Agility helps ranged accuracy and evasion. Save before sleeping if you want a safe fallback while learning the system.
Check your inventory before leaving a city or starting a long trip. Your carry weight is five times your Strength, and being over-encumbered prevents fast travel. Sell, store, or discard low-value heavy equipment instead of carrying every weapon and armor piece you find. Put your current weapon, healing option, and preferred spell or consumable in the HUD Shortcuts display, but remember that opening that display does not pause the game. Use it only after creating distance or reaching safety.
- Create and rotate at least three manual saves.
- Sleep in a safe bed whenever the bronze level indicator shows that advancement is available.
- Review Virtue Point allocation instead of spending points without regard to your build.
- Confirm that current inventory weight is below your encumbrance limit before fast traveling.
Before you move on
- The PlayStation controls for attack, block, cast, jump, sneak, sprint, interact, sheathe, HUD Shortcuts, and menu access have been tested.
- You have selected a race, birthsign, and practical combat direction with a primary attack method and a recovery option.
- Start-A, Start-B, and Start-C or equivalent rotating manual saves exist.
- You know that the bronze level indicator requires sleeping in a bed and that the level-up grants 12 Virtue Points.
- Your inventory is below its carrying limit, and your weapon, healing option, and preferred spell or consumable are accessible without searching through the full inventory.
- You have selected a difficulty and display setup that you can comfortably use for the opening prison escape and the first outdoor journey.
References for this chapter
- PlayStation Controller Controls — The Elder Scrolls IV: Oblivion Remastered — Bethesda Support
- How do I level up in The Elder Scrolls IV: Oblivion Remastered? - Bethesda Support
- Tips and Tricks — The Elder Scrolls IV: Oblivion Remastered — Bethesda Support
- The Elder Scrolls IV: Oblivion Remastered Update 1.2 — Bethesda
- Graphics - Settings - The Elder Scrolls IV: Oblivion Remastered - Bethesda Support
- The Elder Scrolls IV: Oblivion Remastered — PlayStation Store product page
- Getting Started in The Elder Scrolls IV: Oblivion Remastered - Bethesda.net
Tutorial and Deliver the Amulet: Imperial Prison to Kvatch
Escape the Imperial Prison, receive the Amulet of Kings from Emperor Uriel Septim VII, finish character creation at the Imperial Sewers exit, and deliver the amulet to Grandmaster Jauffre at Weynon Priory. Speaking with Jauffre completes Deliver the Amulet and begins Find the Heir, which sends you to Kvatch to locate Martin Septim. This chapter covers the required route only; exploration, guilds, and expansion quests are optional and can wait.
Check the PS5 controls and create a safe starting save
Before leaving the opening cell, open the System menu and inspect the Controls page. Bethesda's default PlayStation layout uses R2 for attack and power attacks, L2 for block, Triangle for jump, Circle for sneak, X for interact, R1 for spellcasting, Square for sheathing, and L1 for the HUD Shortcuts radial. The D-pad opens Character, Inventory, Magic, and Map from Up, Right, Left, and Down respectively. The Quest journal has no default button in the listed layout, so assign one if you want immediate access, or open it through the menu. The exact buttons can differ if you change bindings.
Use a manual save before the first serious combat section, then keep separate saves rather than overwriting your only file. The HUD Shortcuts radial is useful for weapons, spells, and potions, but the game does not pause while it is open, so do not spend time browsing it while an enemy is attacking.
- Verify attack, block, jump, sneak, interact, spellcasting, inventory, map, and quest access.
- Place a healing potion, weapon, or spell in an easy shortcut slot.
- Create a manual save before moving deep into the prison.
Escape the Imperial Prison with the Blades
Follow the Blades through the prison passages. Search unlocked rooms and fallen enemies for a weapon, armor, arrows if you use a bow, healing potions, scrolls, and lockpicks. Equip a weapon as soon as you find one. You do not need to clear every enemy in a room if the guards are moving forward, but defeat anything blocking the route or threatening the group.
Use the tutorial fights to learn the basic combat rhythm: attack when an enemy is exposed, hold L2 to block an incoming strike, and counter after the enemy's swing. If your health is low, use a potion between encounters instead of waiting until you are nearly dead. Sneaking and lockpicking are useful skills to practice, but neither is required for the main route. Follow the guards through the prison until the story brings you to the Emperor and his remaining bodyguards.
- Leave the opening area with a usable weapon and some healing supplies.
- Practice blocking and attacking during the prison encounters.
- Keep one manual save separate from autosaves.
Speak with Uriel and accept the Amulet of Kings
Continue with the escort sequence until Emperor Uriel Septim VII speaks to you. When the dialogue reaches its required point, Uriel gives you the Amulet of Kings and tells you to take it to Jauffre at Weynon Priory. The amulet is received before the final sewer escape, not after you emerge into Cyrodiil.
Do not drop, sell, or store the amulet. Follow the Blades through the Imperial Subterrane and the remaining prison passages. During the assassin attack, stay near the guards and use ranged attacks, spells, or short melee attacks against enemies who reach you. The guards can handle much of the scripted fighting, so there is no benefit to rushing ahead into unopened rooms.
- Receive the Amulet of Kings from Uriel Septim VII.
- Remember that Jauffre at Weynon Priory is the required recipient.
- Keep the amulet in your inventory until the handoff.
Finish character creation at the Imperial Sewers exit
After the Emperor's death, continue through the route marked by the Blades until you reach the final sewer section. Search the last accessible rooms for any equipment you want before leaving. At the sewer exit, the game lets you finalize your race, appearance, birthsign, and class or custom skill choices. Select a setup that matches the equipment and playstyle you intend to use, but do not delay the main quest for perfect optimization; any sensible combat, stealth, or magic build can complete this opening section.
Activate the final sewer door only after you are satisfied with the character setup. Once outside, create a manual save. Open the quest journal and select Deliver the Amulet. If you assigned no journal shortcut, use the menu route to reach the quest list. The objective should identify Jauffre at Weynon Priory, near Chorrol.
- Finalize the character at the sewer exit.
- Save immediately after entering the outdoor world.
- Set Deliver the Amulet as the active quest and confirm its marker.
Travel to Weynon Priory and hand over the amulet
Use the active quest marker to reach Weynon Priory. It is near Chorrol, west of the Imperial City. You may travel on foot or fast-travel if the location is already available, but fast travel can be blocked by encumbrance, so drop or sell unnecessary loot first. You do not need to begin side quests or clear nearby dungeons before making this delivery.
At the priory, enter Weynon House rather than searching the chapel first. Jauffre commonly works inside the house, though characters follow schedules. If he is not at his desk, use the game's wait function for a suitable time or follow the active marker. Speak with Grandmaster Jauffre and choose the conversation topic concerning the Amulet of Kings. Confirm the handoff. The quest should complete when Jauffre accepts it, and the amulet should no longer be in your inventory.
Speak with Jauffre again after the delivery if necessary. He explains the next objective and directs you to Kvatch to find Martin Septim. This starts Find the Heir. Make a new manual save after the quest update so you have a clean checkpoint before the next major area.
- Reach Weynon Priory near Chorrol.
- Find Grandmaster Jauffre in Weynon House.
- Give Jauffre the Amulet of Kings.
- Confirm that Deliver the Amulet is complete and Find the Heir has begun.
Set Find the Heir active and proceed to Kvatch
Open the quest list, select Find the Heir, and confirm that the map marker points toward Kvatch. Kvatch is southwest of the Imperial City. Travel there by road or fast-travel if the location is available. The next chapter begins at the Kvatch siege, so carry healing supplies and make a manual save before entering the city's crisis area.
Do not confuse the required handoff with the later Kvatch objective. The dependable main-quest order for this chapter is Imperial Prison, sewer exit and character creation, Weynon Priory, then Kvatch. If Jauffre still has the amulet topic available or the journal still shows Deliver the Amulet after your conversation, do not continue toward Kvatch. Reload the save from before speaking with him and complete the dialogue again.
If Jauffre is temporarily difficult to locate, check the active marker and wait rather than assuming the quest is broken. NPC schedules can move characters between nearby rooms. If the quest marker does not update after the amulet handoff, reload the pre-conversation save before attempting unrelated objectives.
- Find the Heir is the active quest.
- The map directs you toward Kvatch and Martin Septim.
- Create a manual save before entering the Kvatch siege sequence.
Before you move on
- The Tutorial quest has ended and the character is outside the Imperial Sewers.
- The Amulet of Kings is no longer in the player's inventory.
- Deliver the Amulet is marked complete.
- Find the Heir is active and directs the player toward Martin Septim in Kvatch.
- A manual save exists after the Weynon Priory handoff and before the Kvatch siege.
References for this chapter
- PlayStation Controller Controls — The Elder Scrolls IV: Oblivion Remastered — Bethesda Support
- The Elder Scrolls IV: Oblivion Remastered - Guide and Walkthrough — GameFAQs
- Oblivion Remastered Guide: Full Elder Scrolls IV Walkthrough — GameSpot
- Weynon Priory Walkthrough — The Elder Scrolls IV: Oblivion Remastered — Game8
- Tips and Tricks — The Elder Scrolls IV: Oblivion Remastered — Bethesda Support
Breaking the Siege of Kvatch and Finding the Heir
After Jauffre gives you Find the Heir at Weynon Priory, travel to the refugee camp outside Kvatch and speak with Captain Savlian Matius. Enter the nearby Oblivion Gate, climb through the Deadlands to Sigillum Sanguis, and remove the ordinary Sigil Stone to close the gate. This is not the Great Sigil Stone required much later during the Great Gate sequence. Once the portal closes, follow Savlian’s guards into the ruined city and reach the Chapel of Akatosh. Speak with Brother Martin, tell him Jauffre sent you, and ask him to accompany you to Weynon Priory. The Battle for Castle Kvatch is optional and can be completed separately without blocking the main quest.
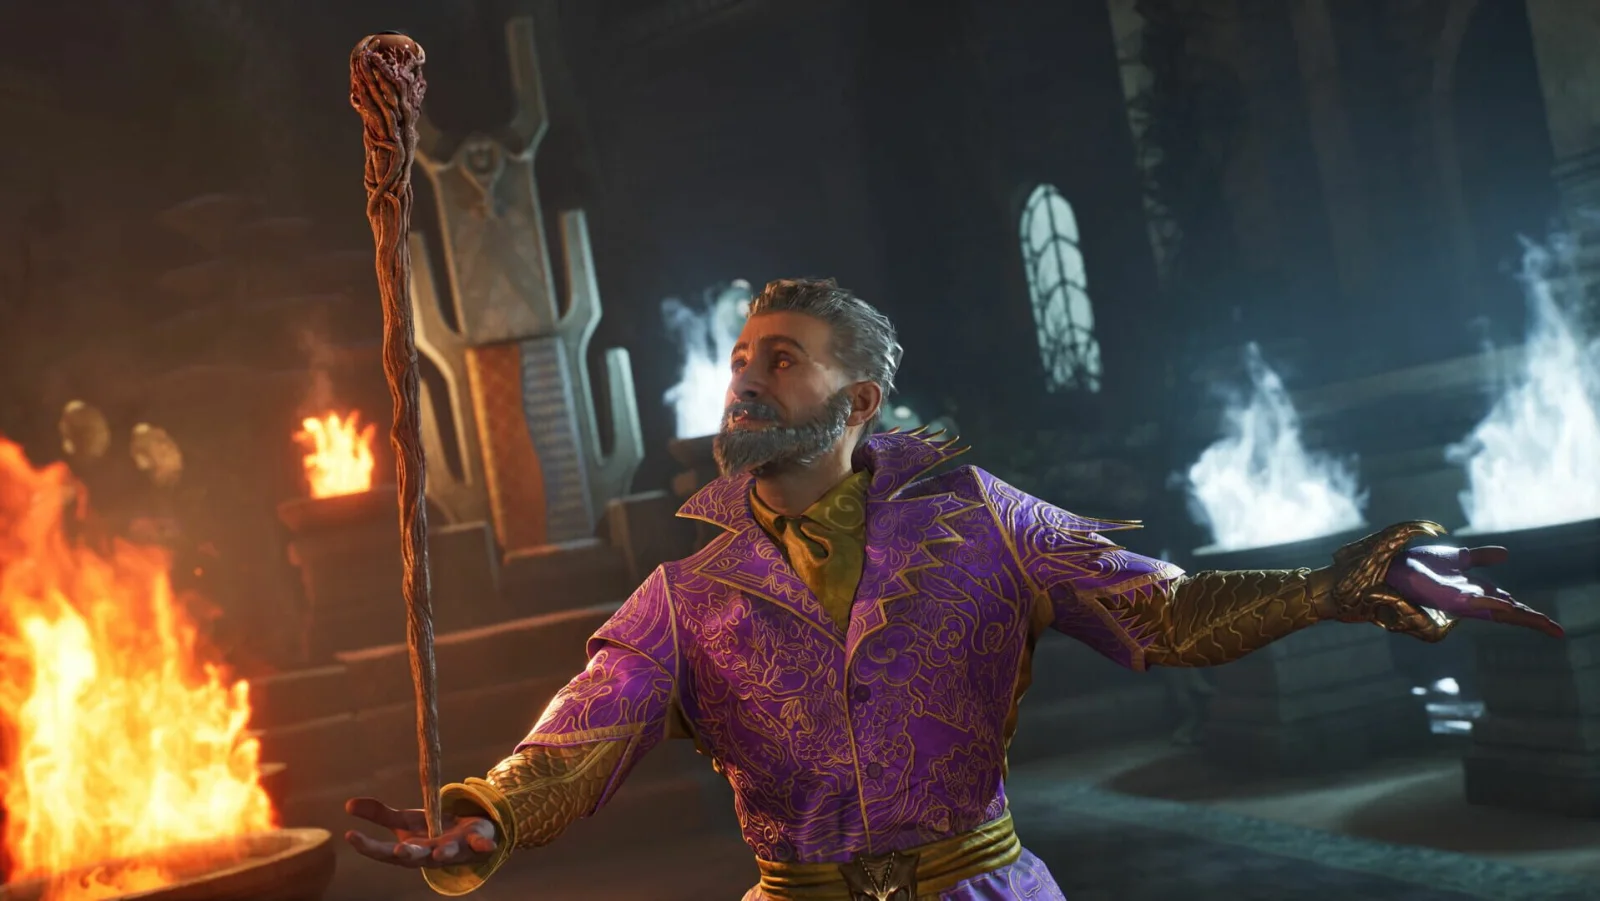
1. Activate Find the Heir and travel to Kvatch
After delivering the Amulet of Kings to Jauffre at Weynon Priory, continue the conversation about the Emperor’s surviving heir. Jauffre identifies Martin Septim, a priest serving at the Chapel of Akatosh in Kvatch, and starts Find the Heir. Open the journal and select Find the Heir so the active marker points to Kvatch rather than an optional quest.
Travel to the Kvatch marker. Fast travel is available if you have already discovered the location; otherwise follow the road toward the city and stop at the refugee camp outside the walls. Make a manual save before speaking with Captain Savlian Matius. Carry healing potions or spells and at least one dependable damage option, but ordinary early-game equipment is sufficient for this section.
- Find the Heir is active in the journal.
- The map marker points to Kvatch.
- A manual save exists before you speak with Savlian.
2. Speak with Captain Savlian Matius
At the guard position outside the ruined city, speak with Captain Savlian Matius. Ask about Kvatch and Martin. Savlian explains that survivors are trapped in the Chapel of Akatosh, but the guards cannot push into the city while the Oblivion Gate remains open.
Agree to help close the gate. The portal is beside the guard position. Enter it when ready. Although the gate is associated with the separate Breaking the Siege of Kvatch quest, closing it is the required action that allows Savlian and his soldiers to advance into the city for Find the Heir.
- Savlian has explained why the guards cannot enter Kvatch.
- You accepted the request to close the Oblivion Gate.
- The Kvatch gate is visible beside the guard position.
3. Reach Sigillum Sanguis and close the gate
Inside the Deadlands, follow the quest marker through the connected areas toward the towers. The route includes bridges, enclosed corridors, hostile Daedra, and traps. You do not need to clear every side room. If several enemies surround you, retreat through a doorway or around a corner, heal, and draw them into a narrower approach rather than fighting in the open.
Continue upward through the tower route until you reach Sigillum Sanguis. The objective is the ordinary Sigil Stone at the top of the chamber. Activate or remove that stone from its receptacle. The Kvatch portal then collapses and returns you to the area outside the city.
This stone is not the Great Sigil Stone from the later Great Gate quest. The Kvatch stone closes this individual Oblivion Gate and is not delivered to Martin as a required artifact. The stone may also provide an enchantment effect, but collecting optional loot is not necessary for progression.
If you die inside the gate, reload the save made before entering. If you become disoriented, return to the last tower or interior door you used and follow the objective marker rather than trying to reach distant structures directly.
- You reached Sigillum Sanguis.
- You removed the ordinary Sigil Stone.
- The Kvatch Oblivion Gate closed and you returned to Cyrodiil.
- You did not mistake this stone for the later Great Sigil Stone.
4. Follow Savlian into Kvatch
After returning from Oblivion, speak with Savlian again if necessary. He and the surviving guards move into Kvatch to reach the chapel. Follow them through the cleared approach and help defeat the Daedra blocking the route.
Stay near the guards, but do not stand in the middle of a group fight where several enemies can stagger you at once. Attack enemies already engaged by the soldiers, use healing when your health drops, and fall back toward the guards if you draw too much attention. The guards can help absorb pressure, but you still need to keep yourself alive to trigger the next dialogue.
Enter the Chapel of Akatosh once the route opens. You do not need to reclaim Castle Kvatch before entering the chapel. The Battle for Castle Kvatch is a separate optional quest and should not replace the active Find the Heir objective.
- The Oblivion Gate is closed.
- Savlian and the guards have entered the ruined city.
- The Chapel of Akatosh is accessible.
5. Find Brother Martin in the Chapel of Akatosh
Inside the chapel, move toward the front area and speak with Brother Martin. Tell him that Jauffre sent you and explain that he is the heir you were ordered to find. Martin initially focuses on the people still in danger, but the chapel conversation establishes his identity and advances the required objective.
Continue the dialogue until Martin agrees to accompany you to Weynon Priory. If the first conversation does not immediately provide the travel option, make sure the gate sequence has finished and that you have spoken with the relevant chapel or Savlian dialogue. Leave and re-enter the chapel after the guards have moved inside, then speak with Martin again.
Do not begin the Castle Kvatch operation merely because Savlian is still marked on the map. Check the journal and make Find the Heir active. Martin in the chapel, rather than Savlian in the city, is the required target for this chapter.
- Martin is present in the Chapel of Akatosh.
- You told Martin that Jauffre sent you.
- Martin agreed to go to Weynon Priory.
6. Escort Martin to Weynon Priory
Leave Kvatch with Martin and travel to Weynon Priory. Fast travel is the safest and simplest option once the destination is available. If you walk, keep Martin nearby and deal with hostile creatures before they draw him into a long fight. Do not leave him behind to pursue unrelated activities.
At the priory, follow the active objective and speak with Jauffre. Martin’s arrival advances the main quest toward the next Weynon Priory stage and the move to Cloud Ruler Temple. Make a new manual save after the conversation updates the journal. This save separates the completed Kvatch rescue from the next main-quest sequence.
- Martin reached Weynon Priory.
- Jauffre spoke with Martin and the journal advanced.
- The next main-quest objective no longer asks you to find Martin in Kvatch.
- A new manual save exists after the handoff.
Before you move on
- Find the Heir is active when you begin the Kvatch sequence.
- The Kvatch Oblivion Gate is closed and its ordinary Sigil Stone has been removed.
- Brother Martin was found in the Chapel of Akatosh.
- Martin agreed to accompany you to Weynon Priory.
- Martin arrived at Weynon Priory and Jauffre’s dialogue advanced the main quest.
- The next objective points toward the Weynon Priory or Cloud Ruler Temple sequence, not toward finding Martin in Kvatch.
- The Battle for Castle Kvatch and the Colovian Signet Ring may remain incomplete because they are optional for this chapter.
Weynon Priory Attack and Cloud Ruler Temple
This chapter begins after Martin has been rescued from Kvatch and is traveling with you to Weynon Priory. The priory is under attack when you arrive. Defeat the Mythic Dawn agents outside, then enter the Chapel and help Jauffre defeat the remaining attackers. Follow Jauffre to the hidden room in Weynon House, where he confirms that the Amulet of Kings has been stolen. Martin and Jauffre then leave for Cloud Ruler Temple. Travel with them or use fast travel after the destination becomes available, attend the Blades’ welcome, and speak with Jauffre to begin The Path of Dawn. The earlier prison escape, Amulet delivery, Kvatch gate, and Martin rescue are not repeated here. The Battle for Castle Kvatch and joining the Blades are optional.
Arrive at Weynon Priory with Martin
Begin this chapter after speaking with Martin at Kvatch and agreeing to bring him to Weynon Priory. Set the active main quest in your journal if the marker is not already tracking the priory. Weynon Priory is west of the Imperial City and near Chorrol; once Martin is accompanying you, fast travel to the priory is allowed. You do not need to return to Kvatch before going there.
Make a manual save before entering the priory grounds. Martin is an important escort NPC during this stage, and a separate save lets you retry the attack if a fight goes badly or an ally is killed. Repair damaged equipment and carry healing items before traveling, but do not delay the objective for unrelated dungeon exploration.
As you enter the settlement, the game announces that Weynon Priory is under attack. Mythic Dawn agents are fighting around the priory buildings. Stay on the grounds and deal with the attackers rather than leaving to search for supplies or beginning another quest.
- Martin is traveling with you from Kvatch.
- The active objective directs you to Weynon Priory.
- A manual save exists before entering the attacked settlement.
Defeat the Mythic Dawn attackers outside
Fight the Mythic Dawn agents around the priory grounds. Start with enemies close to Martin, Jauffre, and the other residents, then clear the remaining attackers near the buildings. Keep your attacks controlled around friendly NPCs; broad spells, summoned creatures, and sweeping weapon attacks can create confusion when several characters are fighting in a small area.
Use the priory buildings as cover if you need to recover. Retreat through a doorway, heal, and re-enter rather than allowing several agents to surround you. If an enemy breaks away toward the chapel, follow it after the outdoor area is under control so that the next stage does not become difficult to read during the battle.
Brother Piner may join the fight if he survives the opening assault. His survival is helpful but is not the objective. Do not wait for every resident to fight perfectly; concentrate on the Mythic Dawn agents and keep Martin safe. When the outside attackers are defeated, move to the Chapel on the eastern side of the priory grounds.
- The Mythic Dawn agents outside the priory have been defeated.
- Martin is alive and remains at the priory.
- The Chapel is the next location to enter.
Protect Jauffre in the Chapel
Enter the Chapel and help Jauffre defeat the remaining Mythic Dawn agents. Jauffre is the priority NPC in this room, so move toward enemies attacking him and interrupt them with your most reliable damage method. If you use a bow or spells, position yourself so that shots do not pass through Jauffre or other friendly characters.
The chapel fight is short, but enemies can be easy to miss if they move behind benches, walls, or the entrance area. Check the full room after the first attackers fall. Wait briefly if necessary for the combat state to clear, then speak with Jauffre inside the Chapel.
Do not search for a crypt, special book, artifact, or hidden quest item during this stage. The required sequence is the priory attack, the Chapel defense, and Jauffre’s investigation of the Amulet’s hiding place.
- Jauffre has survived the Chapel attack.
- All remaining Mythic Dawn agents in the Chapel are defeated.
- Jauffre can be spoken to after the battle.
Follow Jauffre to the hidden room
After the Chapel is secure, speak with Jauffre. He will lead you to Weynon House, the large building on the priory grounds. Follow him rather than searching the priory buildings on your own. If he does not move immediately, finish every available conversation topic and remain near him for a moment; NPC schedules and combat cleanup can delay his movement briefly.
Jauffre takes you upstairs to the hidden room where the Amulet of Kings was kept. Enter the room with him and allow the conversation to finish. The hiding place is empty, and Jauffre explains that the Mythic Dawn has stolen the Amulet. This discovery is the required progression event for the chapter.
The stolen Amulet is not recovered at Weynon Priory. Do not invent a second priory search, a crypt route, or an investigation involving First Edition. Those activities belong to later stages of the main quest. Once Jauffre has explained the theft, the objective changes to taking Martin to Cloud Ruler Temple.
- Jauffre has led you into the hidden room in Weynon House.
- The empty hiding place has been examined.
- Jauffre has confirmed that the Amulet of Kings was stolen.
Escort Martin and Jauffre to Cloud Ruler Temple
Leave Weynon House and speak with Martin and Jauffre if the game has not already updated the objective. Cloud Ruler Temple is in the mountains northwest of Bruma. You may follow them on foot, travel by horse, or fast-travel once the location is available on your map. Prior Maborel’s horse can be used if you accepted that optional assistance earlier, but no particular mount is required.
If you travel with the group, stay close enough to respond to hostile creatures on the road. Martin can fight during the journey, but he is not a permanent companion for unrelated exploration. Do not wander into caves, forts, or side quests while the escort is active. If you fast-travel, create a save before doing so in case the arrival scene does not immediately begin.
At Cloud Ruler Temple, follow Martin and Jauffre to the entrance and allow the Blades’ welcome to play out. After Martin’s introduction, speak with Jauffre about recovering the Amulet of Kings. This conversation begins The Path of Dawn and completes the Weynon Priory stage. Martin may also offer the opportunity to join the Blades; joining is optional, although it grants access to the order’s facilities and equipment.
- Martin and Jauffre have reached Cloud Ruler Temple.
- The Blades’ welcome has finished.
- Speaking with Jauffre has started The Path of Dawn.
Before you move on
- Martin arrived at Weynon Priory with you and the Mythic Dawn attack was defeated.
- Jauffre was protected in the Chapel and showed you the empty hidden room in Weynon House.
- Jauffre confirmed that the Amulet of Kings was stolen.
- Martin and Jauffre reached Cloud Ruler Temple, the Blades’ welcome occurred, and speaking with Jauffre started The Path of Dawn.
References for this chapter
- Weynon Priory Walkthrough — The Elder Scrolls IV: Oblivion Remastered — Game8
- Weynon Priory — The Elder Scrolls IV: Oblivion Walkthrough — GameBanshee
- Find the Heir — The Elder Scrolls IV: Oblivion Walkthrough — GameBanshee
- Extended Look at The Elder Scrolls IV: Oblivion Remastered — Bethesda Game Studios
The Path of Dawn and Dagon Shrine Lead-up
Investigate the Mythic Dawn in the Imperial City, recover all four Mythic Dawn Commentaries, and decode their hidden message. The route runs from Baurus at Luther Broad’s Boarding House to Tar-Meena, First Edition, the Elven Gardens Sewers, and the Tomb of Prince Camarril in Green Emperor Way. When the tomb’s red runes activate around midday, they reveal the Mythic Dawn shrine near Lake Arrius Caverns. This chapter ends after you reach the cavern entrance and make a preparation save; the Mysterium Xarxes and Great Sigil Stone belong to Dagon Shrine, the next main-quest chapter.
1. Start the investigation at Luther Broad’s Boarding House
Activate The Path of Dawn and travel to Luther Broad’s Boarding House in the Elven Gardens District of the Imperial City. Baurus is sitting at the bar. Speak with him, then sit in the seat he indicates. This begins his surveillance operation and prevents you from immediately disrupting the scene.
Baurus goes into the basement while the suspected follower continues through the building and toward the Elven Gardens Sewers. Follow the suspect rather than running ahead or attacking him in the boarding house. Continue through the route until he reveals his Mythic Dawn identity and attacks you.
Defeat the agent and search his body for Mythic Dawn Commentaries 1. The agent is Astav Wirich. Return to Baurus and show him the book. Baurus sends you to Tar-Meena at the Arcane University. Keep Volume 1 in your inventory; Bethesda Support specifically notes that storing or dropping it can prevent the remastered quest from advancing.
- Baurus has sent you to Tar-Meena.
- Mythic Dawn Commentaries 1 is in your inventory.
- The Path of Dawn is active in the journal.
2. Speak with Tar-Meena and obtain Volume 2
Go to the Arcane University and find Tar-Meena in the Library. Ask about the Mythic Dawn and show her Volume 1. Continue the conversation until she explains that the Commentaries are a four-volume set used to locate the cult’s hidden shrine.
Tar-Meena gives you Mythic Dawn Commentaries 2 and directs you to First Edition in the Imperial City’s Market District. If the dialogue does not advance, confirm that Volume 1 is still in your inventory, exhaust Baurus’s and Tar-Meena’s available dialogue, then wait 24 in-game hours and speak with Tar-Meena again.
Do not search for the shrine yet. You need the remaining volumes and the information connected to them before the location can be revealed.
- Tar-Meena has given you Volume 2.
- First Edition is your next destination.
- Volume 1 and Volume 2 are together in your inventory.
3. Recover Volume 3 from First Edition
Travel to First Edition in the Market District and speak with the shopkeeper, Phintias. Ask about the Mythic Dawn Commentaries. He explains that Volume 3 is being held for Gwinas, the customer who reserved it.
You can raise Phintias’s disposition sufficiently and purchase the book from him, or use the intended customer route. Speak with Phintias, then wait about one hour inside or near the shop for Gwinas to arrive. Let Gwinas receive the book and begin walking away before you speak with him.
Ask Gwinas about the Mythic Dawn and explain that the cult assassinated the Emperor. He becomes alarmed, gives you Volume 3, and provides information about his planned meeting to obtain Volume 4. This is the cleanest route because it avoids attacking either Gwinas or Phintias. If Gwinas leaves the shop, follow the quest marker and finish the conversation there.
- Phintias has explained that Gwinas reserved Volume 3.
- You possess Mythic Dawn Commentaries 3.
- Gwinas has provided the lead for the Volume 4 meeting.
4. Follow Baurus and obtain Volume 4 in the Sunken Sewers
Return to Luther Broad’s Boarding House in the Elven Gardens District. Baurus should now be outside. Speak with him and agree to follow him to the sewer entrance. Stay close while he leads you through the Elven Gardens Sewers; if he falls too far behind, the encounter can become difficult to manage.
At the Sunken Sewers, Baurus gives you a choice between entering the meeting area or watching from a nearby overlook. Save before choosing. The observation position is generally safer because it gives you room to react and offers a better chance of keeping Baurus alive.
The Mythic Dawn agent Raven arrives with two guards. Attack Raven first, because he is the strongest opponent and may equip better armor during the fight. Work with Baurus and focus your attacks on the same target. If you use stealth, you can instead enter the meeting area, pickpocket Volume 4 from Raven, and retreat; this avoids a full fight but requires reliable Sneak and Pickpocket skills.
Once Volume 4 is secured, you may leave through the sewers. The Sunken Sewers key opens the route toward the Talos District Sewers. If the goblins overwhelm you, retreat along Baurus’s route and return to the surface through the Elven Gardens. Killing every cultist in the surrounding sewer areas is optional.
- Baurus has led you to the Sunken Sewers.
- Mythic Dawn Commentaries 4 is in your inventory.
- Baurus survives, or you have escaped after securing the book.
5. Decode the four Commentaries
Return to Tar-Meena with all four Commentaries. She explains that the books contain a hidden message and asks you to study them. You can decode it yourself, but the useful instruction is: Green Emperor Way, where tower touches midday sun.
If Tar-Meena does not provide the next dialogue immediately, wait 24 in-game hours and speak with her again. Bethesda Support confirms that waiting can help the quest stage update. You can also inspect the first letters of the paragraphs in the four books to reconstruct the clue.
Travel to Green Emperor Way in the Imperial City. The target is the Tomb of Prince Camarril in the cemetery, near the western side of the district. The map marker should identify the correct tomb once the clue has been processed.
- Tar-Meena has explained the hidden message, or you have decoded it.
- The quest points to Green Emperor Way.
- You can identify the Tomb of Prince Camarril.
6. Activate the tomb and reveal the shrine
Stand in front of the Tomb of Prince Camarril and wait until the midday window. The red runes activate approximately from 11:48 a.m. to 12:30 p.m. When they glow, interact with them. If nothing happens, wait until the following day and try again during the same window.
The activated runes reveal the Mythic Dawn shrine on the world map near Lake Arrius Caverns. The shrine is in the region north of Cheydinhal. Fast travel to a nearby discovered location if available, or travel overland using the new marker. The objective is to reach the marked cavern, not to obtain a Great Sigil Stone here.
If the map marker does not appear, return to Tar-Meena, ensure all four Commentaries are accounted for, and confirm that the red runes were activated rather than merely examined. Do not substitute another tomb or rely on a general search around Cheydinhal.
- The Tomb of Prince Camarril’s runes have activated.
- Lake Arrius Caverns or the Mythic Dawn shrine appears on the map.
- The Path of Dawn has advanced to the shrine location.
7. Save before entering the next quest area
Reach the entrance to Lake Arrius Caverns and create a manual save. Bring health potions, magicka recovery if you cast, and equipment suited to enclosed combat. The next section contains Mythic Dawn cultists, including melee fighters and spellcasters, but there is no requirement to clear the cavern before entering the shrine.
The Path of Dawn concludes as the investigation leads you into the Mythic Dawn’s hidden base. The following Dagon Shrine quest concerns infiltrating the cult, dealing with Harrow, disrupting the ceremony, and recovering the Mysterium Xarxes. The Great Sigil Stone belongs to a later main-quest objective and should not be listed as a completion requirement for this chapter.
Enter only when ready to continue. A separate save lets you retry the infiltration without repeating the Commentary investigation.
- You have a manual save at Lake Arrius Caverns.
- All four Commentaries are accounted for.
- You are prepared to begin Dagon Shrine and recover the Mysterium Xarxes.
Before you move on
- Mythic Dawn Commentaries 1, 2, 3, and 4 are accounted for.
- Tar-Meena’s clue has led you to the Tomb of Prince Camarril.
- The red runes have activated and revealed the Mythic Dawn shrine near Lake Arrius Caverns.
- You have reached Lake Arrius Caverns and created a manual save before continuing.
- The next task is Dagon Shrine, where you will infiltrate the Mythic Dawn base and recover the Mysterium Xarxes.
References for this chapter
- The Elder Scrolls IV: Oblivion Remastered Launch Announcement — Bethesda.net
- The Elder Scrolls IV: Oblivion Remastered Available Now — Bethesda
- Why won’t the Path of Dawn quest update after showing Baurus the Mythic Dawn book? — Bethesda Support
- Oblivion Remastered Guide: Full Elder Scrolls IV Walkthrough — GameSpot
- The Path of Dawn Walkthrough: Mythic Dawn Book Solution — Game8
Dagon Shrine and the Mysterium Xarxes
Travel to Lake Arrius Caverns north of Cheydinhal and enter the Mythic Dawn’s hidden shrine. You may surrender your equipment and infiltrate the ceremony under Harrow’s supervision, or reject the disguise and fight through the compound. Mankar Camoran escapes to Paradise with the Amulet of Kings, leaving the Mysterium Xarxes behind. Take the book, recover surrendered equipment if necessary, escape through the shrine’s alternate route, and return to Cloud Ruler Temple. Report to Jauffre, then give the book to Martin. The chapter is complete when the journal advances to Spies; Blood of the Daedra is a later quest and is not part of this chapter.
1. Prepare for Lake Arrius Caverns
Activate Dagon Shrine in the journal and travel to Lake Arrius Caverns, north of Cheydinhal in the Jerall Mountains. Make a manual save before entering. Bring healing supplies, a dependable weapon or spell, and enough carrying capacity to recover your equipment if you choose the undercover route.
This is a Mythic Dawn hideout rather than an Oblivion Gate. The required item is the Mysterium Xarxes. Do not search the caverns for a Great Sigil Stone, a Daedric Artifact, or the Amulet of Kings as a loot objective. The Amulet is present during the ceremony, but Mankar Camoran takes it when he escapes.
- Set Dagon Shrine as the active quest.
- Save before entering Lake Arrius Caverns.
- Bring healing supplies and a reliable damage option.
- Leave inventory space for the Mysterium Xarxes.
2. Choose an infiltration or combat route
Follow the cavern passage until you reach the Mythic Dawn’s Doorkeeper near the brazier. Speak with him and proceed into the compound. He directs you toward Harrow, who controls access to the inner shrine.
For the infiltration route, allow Harrow to confiscate your equipment and accept the Mythic Dawn robe. Stay with him and follow the route through the compound toward the ceremony. Keep a manual save from before the handover so you can retry the sequence if you become lost or cannot locate your belongings later.
For the direct route, refuse to cooperate and fight through the cultists. Use doorways and narrow passages to limit how many enemies can attack at once. You do not need to clear every room or collect every item; your objective is to reach the shrine cavern and witness the ceremony. If Harrow is killed during the assault, search his body for the key or other items needed to pass the locked section.
- Speak with the Doorkeeper.
- Reach Harrow inside the compound.
- Choose infiltration or direct combat.
- If surrendering gear, keep a pre-handover save.
3. Reach the ceremony and let Mankar escape
If you are undercover, follow Harrow through the Shrine Antechamber toward the large cavern containing the Shrine of Dagon. If you entered by force, continue through the opened or unlocked sections until you reach the same chamber.
Allow the ceremony to proceed. Mankar Camoran addresses the Mythic Dawn, then uses the ritual to escape to Paradise with the Amulet of Kings. The Amulet is not recovered during this quest. Wait for the objective to change before moving away from the ceremony area.
Ruma Camoran may ask you to prove your loyalty by killing Jeelius with the sacrificial dagger. Killing Jeelius is optional. If you want to rescue him, interact with him at the altar instead; this exposes your identity and makes the cult hostile, but it does not prevent completion. Whether you fight immediately or remain undercover, the required objective is to take the Mysterium Xarxes after Mankar is gone.
- Reach the Shrine of Dagon ceremony.
- Allow Mankar’s escape to finish.
- Do not expect to recover the Amulet of Kings here.
- Choose whether to kill or rescue Jeelius.
4. Take the Mysterium Xarxes
After Mankar disappears, move to the altar or dais and take the Mysterium Xarxes from the stand. This is the central quest item and the reason Martin sent you to the shrine. If you remained undercover, taking the book or openly interfering with the ceremony causes the Mythic Dawn to turn against you.
If you rescued Jeelius, expect a fight as you leave. If you killed him, the immediate escape may be less chaotic, but you still need to move through the compound and return to the caverns. Do not wait for every cultist to reposition; take the book and start toward the exit route.
If the book is difficult to see, use the active objective marker and inspect the central altar rather than searching side rooms. Confirm that the Mysterium Xarxes appears in your inventory before committing to the escape.
- Take the Mysterium Xarxes from the shrine altar.
- Confirm the book is in your inventory.
- Prepare for the Mythic Dawn to become hostile.
- Begin moving toward the Living Quarters.
5. Escape the shrine and recover your equipment
You cannot simply retrace the undercover approach through the ceremony area. From the shrine, take the stairs into the Shrine Living Quarters and follow the corridors toward the other side of Lake Arrius Caverns. Fight only the enemies blocking your route, using doors and corners to break up groups.
Continue through the living quarters and antechamber until you reach the passage leading back toward the cavern entrance. Look for the nearby handle or lever and activate it to open the secret door. This reconnects the interior route with the entrance-side cavern system.
If you surrendered your possessions, recover them before leaving. Depending on how the escape unfolded, Harrow or the confiscated-equipment location may be near the entrance-side route. Search carefully and re-equip your weapon, armor, potions, and lockpicks before exiting. If you cannot immediately find the equipment, use the quest marker and inspect the route around the compound entrance rather than abandoning the quest.
If you become lost, return to the last large room you recognize and follow the compass marker. If the enemies overwhelm you, retreat through a door, heal, and re-enter rather than trying to defeat the whole compound at once.
- Reach the Shrine Living Quarters.
- Follow the route toward the far side of Lake Arrius Caverns.
- Activate the handle or lever that opens the secret door.
- Recover surrendered equipment if you used the infiltration route.
- Exit Lake Arrius Caverns with the Mysterium Xarxes.
6. Report to Jauffre and deliver the book to Martin
Return to Cloud Ruler Temple after leaving the caverns. Speak with Jauffre first and report that Mankar escaped with the Amulet of Kings but left the Mysterium Xarxes behind. Jauffre directs you to Martin for the next handoff.
Speak with Martin and give him the Mysterium Xarxes. Martin keeps the book for study, and the Dagon Shrine objective completes. Create a manual save after the dialogue finishes.
The next main-quest stage is Spies. If the journal does not update, make sure the Mysterium Xarxes is in your inventory, speak with Jauffre, and then speak with Martin again. Do not start looking for a Daedric Artifact at this point; Blood of the Daedra comes later, after Spies, and is outside this chapter.
- Return to Cloud Ruler Temple.
- Report to Jauffre.
- Give the Mysterium Xarxes to Martin.
- Confirm Dagon Shrine is complete.
- Confirm Spies has started or is the next journal objective.
- Save after the handoff.
Before you move on
- The Mysterium Xarxes has been taken from the Shrine of Dagon.
- Mankar Camoran has escaped to Paradise with the Amulet of Kings.
- You have left Lake Arrius Caverns with the book.
- Any surrendered equipment you intend to keep has been recovered.
- You reported to Jauffre at Cloud Ruler Temple.
- You delivered the Mysterium Xarxes to Martin.
- The journal has advanced to Spies, with no Blood of the Daedra artifact handoff required in this chapter.
References for this chapter
- Dagon Shrine Walkthrough | The Elder Scrolls IV Oblivion Remastered
- Oblivion Remastered Guide: Full Elder Scrolls IV Walkthrough — GameSpot
- GameBanshee Dagon Shrine Walkthrough
- Dagon Shrine Walkthrough | Elder Scrolls 4 Oblivion Remastered
- Celebrating the Launch of The Elder Scrolls IV: Oblivion Remastered
- What content is included with the different versions of The Elder Scrolls IV: Oblivion Remastered?
Spies, Blood of the Daedra, Bruma Gate and Optional Aid for Bruma
After returning the Mysterium Xarxes during Dagon Shrine, investigate the Mythic Dawn spies near Cloud Ruler Temple and Bruma. Resolve the encounter at the runestone, search Jearl’s house and basement for Jearl’s Orders, and report the evidence to Jauffre. Saveri Faram’s status depends on how the encounter unfolds, so follow the updated journal rather than assuming she survived or died. Once Spies is complete, give Martin one qualifying Daedric Artifact for Blood of the Daedra; the artifact is consumed permanently. Bruma Gate is optional route content, not a prerequisite for Defense of Bruma. If you choose to complete it, close the gate outside Bruma and report to Jauffre. Allies for Bruma is also optional and recruits reinforcements for the later defense. Finish this chapter with Spies and Blood of the Daedra complete, while Bruma Gate and Allies for Bruma are either completed or deliberately skipped.
Start Spies and resolve the runestone encounter
After returning the Mysterium Xarxes to Martin during Dagon Shrine, speak with Jauffre in Cloud Ruler Temple and ask about the reported spies. He directs you to Captain Steffan in the West Wing. Speak with Steffan, then activate Spies in the journal and follow the marker to the runestone on the road near the temple and Bruma.
Wait near the runestone until the evening period indicated by the quest. Make a manual save before waiting. The encounter normally involves Jearl and Saveri Faram, but their positions and behavior can vary. If both appear and become hostile, defeat both, then remain in the area long enough for the journal to update.
If only Jearl appears, kill Jearl and collect any available keys, including Jearl’s Key or the Basement Key. Do not infer Saveri’s status solely from her absence. The next journal update and Jauffre’s dialogue determine whether Saveri must still be found. If the encounter confirms that Saveri was killed, do not later search for her as though she were alive.
- Spies is active.
- Steffan’s information has been received.
- The runestone encounter has been resolved.
- Jearl is dead.
- Available keys and quest items have been collected.
- Saveri’s status will be determined from the updated objective rather than assumed.
Search Jearl’s house and take Jearl’s Orders
Travel to Bruma and speak with Captain Burd about Jearl. Tell him that Jearl was a Mythic Dawn agent and follow the resulting permission or objective to investigate Jearl’s residence. If Burd does not provide the expected dialogue, confirm that the runestone encounter has ended and that Jearl is dead before speaking with him again.
Enter Jearl’s house and locate the basement entrance. Use Jearl’s Key or the Basement Key if the doors are locked. Follow the basement passage to the room containing Jearl’s Orders. Take the document from the table and verify that the journal advances; merely entering the basement is not sufficient.
The connected Bruma Caverns are not required for this investigation. Leave after collecting the orders and return to Cloud Ruler Temple. This evidence step remains necessary even when Jearl and Saveri were both defeated at the runestone.
- Burd has acknowledged the investigation.
- Jearl’s house has been entered.
- The basement has been reached.
- Jearl’s Orders are in your inventory.
- The journal objective has advanced to reporting to Jauffre.
Report to Jauffre and finish Spies
Return to Cloud Ruler Temple and show Jearl’s Orders to Jauffre. Read the new objective before leaving. The game may confirm that both spies are dead, or it may direct you to locate Saveri Faram as the remaining target.
If Saveri was killed during the runestone encounter, follow the journal’s confirmation and do not search for a second living target. Speak with Jauffre again when the objective asks you to report that both spies are dead. Jearl’s death alone does not complete Spies; the house, orders, and report are still required.
If only Jearl was present earlier and the journal sends you after Saveri, follow the active marker to her current location or schedule near Bruma. Wait at the marked area if necessary, defeat Saveri, then return to Jauffre. Continue speaking with him until the quest completes and the journal advances to the main-quest artifact objective.
If the journal and NPC dialogue disagree, reload the manual save from before the runestone encounter if possible. On PlayStation 5, use ordinary save and reload recovery rather than attempting console commands. Allow dialogue and journal updates to finish before fast-travelling away.
- Jearl’s Orders have been delivered to Jauffre.
- The updated Saveri objective has been read.
- Saveri has either been confirmed dead or defeated through the active objective.
- Jauffre has confirmed the investigation’s completion.
- Spies is complete.
Give Martin a qualifying Daedric Artifact
After Spies is complete, speak with Martin in the Great Hall of Cloud Ruler Temple to begin Blood of the Daedra. Martin requires a true Daedric Artifact awarded by a Daedric shrine quest. Ordinary enchanted equipment, Daedra ingredients, and miscellaneous shrine items do not satisfy the requirement.
The quest may suggest Azura’s Star, but any qualifying artifact accepted by the quest can be used. Choose carefully because Martin consumes the artifact permanently during the handoff. If you want to preserve a favorite reward, complete another qualifying Daedric quest and use that artifact instead. The Wabbajack is one possible expendable choice, while Azura’s Star is also valid.
Return to Martin with the artifact in your inventory and complete the conversation. Confirm that the item has disappeared and that Blood of the Daedra has advanced. Make a manual save after the handoff rather than relying on an autosave.
- Spies is complete.
- Blood of the Daedra is active.
- A qualifying Daedric Artifact is in your inventory.
- Martin has accepted it.
- The artifact has been permanently consumed.
- The journal confirms completion of the artifact objective.
Optionally complete Bruma Gate
Bruma Gate is optional route content. It is not required before Defense of Bruma, and skipping it does not prevent the later main-quest defense once the required artifact quests are complete. If you want to close another gate, speak with Jauffre or follow the Bruma Gate objective, then travel to Bruma’s East Gate and meet Captain Burd and the guards outside the marked portal.
Save before entering. Inside, prioritize the Sigil Stone over optional exploration. Follow the quest marker through the gate’s chambers toward the tower, defeat the Sigil Keeper when the route requires it, take the Sigil Key, and use it to reach Sigillum Sanguis. Activate the ordinary Sigil Stone to close the gate.
Return to Bruma and speak with Burd so the local objective is acknowledged, then report the result to Jauffre if the journal requests it. This stone is an ordinary Sigil Stone and must not be confused with the Great Sigil Stone obtained later during the Great Gate sequence. If Burd disappears or the gate cannot be interacted with, save and reload, travel away and back, or wait several in-game days before retrying.
- You have deliberately chosen whether to do Bruma Gate.
- If chosen, Burd has been met outside Bruma.
- The optional gate has been entered.
- The Sigil Keeper’s key has been obtained if required by the route.
- The ordinary Sigil Stone has closed the gate.
- Burd and Jauffre have received any requested reports.
- If skipped, no unresolved Bruma Gate objective is being mistaken for a main-quest prerequisite.
Choose whether to complete Allies for Bruma
Allies for Bruma is also optional. It recruits support from other cities for the later Defense of Bruma battle, but it is not mandatory for completing the base-game main quest. You may recruit several cities, recruit none, or stop after selected rulers have confirmed that aid will be sent.
If you choose to help, speak with each marked count or countess about Aid for Bruma. A ruler may require the nearby city gate to be closed first. Enter the marked gate, reach its Sigillum Sanguis, take the ordinary Sigil Stone, return to the city, and speak with the ruler again to confirm the reinforcements. Follow the active quest marker because the relevant city and remaining objectives are tracked individually.
Do not treat closing a city gate as the end of the recruitment step. The ruler must confirm that aid will be provided. Conversely, do not mistake this optional recruitment work for the required artifact quests. When finished, leave Allies for Bruma complete, partially pursued for later, or deliberately skipped.
- You have chosen whether to pursue Allies for Bruma.
- Each selected city ruler has been consulted.
- Each required city gate has been closed.
- Each selected ruler has confirmed that aid will be sent.
- The optional quest is complete, paused for later, or skipped.
Make the transition save and verify the required endpoint
Return to Cloud Ruler Temple after finishing Spies and Blood of the Daedra, with any optional Bruma work either complete or consciously skipped. Repair equipment, restock healing and magicka supplies, and create a manual save named Before Bruma Defense or Before Blood of the Divines. This save remains useful regardless of whether you recruited allies or closed Bruma Gate.
The required endpoint for this chapter is not completion of Bruma Gate. Confirm that Spies is complete, Martin has accepted and consumed one qualifying Daedric Artifact, and Blood of the Daedra has advanced or finished in the journal. The journal should now direct you toward the remaining main-quest artifact work, such as Blood of the Divines or Miscarcand.
When you later return with the Great Welkynd Stone, allow Martin and Jauffre to finish their conversation before initiating another dialogue. Bethesda Support specifically identifies interrupted post-Miscarcand dialogue as a possible cause of Defense of Bruma failing to progress. If a later objective stalls, reload a save from before the transition, travel away and back, or wait several in-game hours.
- Spies is complete.
- Blood of the Daedra is complete.
- Martin consumed the chosen artifact.
- Bruma Gate is either complete or deliberately skipped.
- Allies for Bruma is either complete, paused, or deliberately skipped.
- A transition save exists.
- The journal points toward the next required artifact quest rather than unresolved spy objectives.
Before you move on
- Jearl was defeated during the runestone investigation.
- The correct Saveri branch was followed: she was either confirmed dead at the encounter or located later through the updated objective.
- Jearl’s house and basement were searched.
- Jearl’s Orders were taken from the basement table.
- Jearl’s Orders were delivered to Jauffre.
- Saveri was not searched for again after the game confirmed that she was already dead.
- If Saveri survived the first encounter, she was found, defeated, and reported to Jauffre.
- Jauffre confirmed that Spies was complete.
- Martin accepted and consumed one qualifying Daedric Artifact.
- Blood of the Daedra is complete.
- Bruma Gate was completed only if you chose the optional route.
- Allies for Bruma was completed for the chosen cities or deliberately skipped.
- A transition save exists before the next required artifact quests.
- The journal has no unresolved Spies or Blood of the Daedra objective and is ready for Blood of the Divines or Miscarcand.
References for this chapter
- The Elder Scrolls IV: Oblivion Remastered Launch Announcement — Bethesda.net
- Spies Walkthrough — GameBanshee
- Spies Walkthrough — Game8
- Blood of the Daedra Walkthrough — Game8
- Bruma Gate Quest Support — Bethesda Support
- Defense of Bruma - Quest - Oblivion Remastered Support — Bethesda Support
- Allies for Bruma Walkthrough — Game8
Blood of the Divines and Miscarcand: Sancre Tor Armor and the Great Welkynd Stone
Complete Blood of the Divines and Miscarcand after Martin has assigned both artifact searches. Bruma Gate may be completed before these quests for a smoother personal route, but it is optional and is not a prerequisite for either quest or for Defense of Bruma. Jauffre sends you to Sancre Tor, where four cursed Undead Blades must be defeated so their freed spirits can cleanse the Shrine of Tiber Septim. Recover the Armor of Tiber Septim and deliver it to Martin. He then sends you to Miscarcand for the Great Welkynd Stone. Follow the pressure-plate and wall-block route through the Ayleid ruin, take the stone from Morimath, defeat the King of Miscarcand, and use the opened escape route. Return the stone to Martin, then allow Martin and Jauffre to finish their conversation about the Great Sigil Stone without interruption. The next required stage is Defense of Bruma once Blood of the Daedra, Blood of the Divines, and Miscarcand are complete. Allies for Bruma can provide additional support but is also optional.
Start Blood of the Divines without treating Bruma Gate as mandatory
Begin this chapter after Blood of the Daedra and the preceding Cloud Ruler Temple dialogue have advanced. The game can make Blood of the Divines and Bruma Gate available during the same general part of the main quest. You may complete Bruma Gate first if you want that optional quest out of the way, but it is not a technical prerequisite for Blood of the Divines and is not required for Defense of Bruma. Allies for Bruma is likewise optional.
Speak with Jauffre at Cloud Ruler Temple and ask about the next ritual component. He explains that Tiber Septim’s armor is kept in Sancre Tor and gives you the key needed to enter the catacombs. Set Blood of the Divines as the active quest, make a manual save, and prepare a weapon that can harm ghosts. A silver or enchanted weapon is a dependable choice. Bring healing supplies and leave enough carrying capacity for the armor and dungeon loot.
- Blood of the Daedra is complete.
- Jauffre has assigned Blood of the Divines.
- Bruma Gate is either complete as optional content or deliberately skipped.
- You received the Sancre Tor key.
- You made a save before entering Sancre Tor.
Enter Sancre Tor and free the first cursed Blades
Travel to Sancre Tor using the active quest marker. Use the key on the catacomb entrance, then work through the Entry Hall and its connected areas. The ruin contains ghosts, wraiths, and other undead, so avoid being surrounded in open rooms and use doorways to control the fight.
The four cursed Undead Blades are Rielus, Casnar, Alain, and Valdemar. Defeat each Undead Blade, then allow the corresponding ghost to appear. Speak to the freed spirit when the game presents the interaction. The first spirit explains that the others must also be released before the Shrine of Tiber Septim can be opened.
Sancre Tor branches through areas including the Hall of Judgement, Prison, and Catacombs. If the quest marker appears to lead backward, return to the Entry Hall and take an unexplored branch rather than repeatedly searching the same rooms. You do not need to clear every side chamber; the objective is to free all four Blades.
- Rielus has been defeated and his ghost appeared.
- Casnar has been defeated and his ghost appeared.
- Alain has been defeated and his ghost appeared.
- Valdemar has been defeated and his ghost appeared.
- The journal confirms that all four cursed Blades have been freed.
Let the four spirits cleanse the shrine
After the fourth Undead Blade is defeated, return to the Entry Hall and follow the quest marker toward the Tomb of the Reman Emperors and the Shrine of Tiber Septim. The freed ghosts must gather at the shrine and kneel. Do not attack them, leave Sancre Tor, or assume that the barrier has opened merely because the four Blade fights are complete.
Wait until the spirits finish their movement and the enchantment blocking the shrine disappears. Enter the shrine and take the Armor of Tiber Septim. This is the required Blood of the Divines objective; ordinary armor cannot substitute for it.
Save after collecting the armor, exit Sancre Tor, and return to Cloud Ruler Temple. Give the armor to Martin and check the journal for the quest completion update before starting the next artifact search.
- All four spirits reached the shrine.
- The spirits completed their cleansing ritual.
- The barrier at the shrine disappeared.
- You recovered the Armor of Tiber Septim.
- Martin accepted the armor and Blood of the Divines is complete.
Recover from a missing or stalled Sancre Tor ghost
If only three spirits are present at the shrine, return to the Entry Hall and check the area where the missing Undead Blade was defeated. The remaster can exhibit delayed or stalled ghost movement. Wait for one in-game hour, then check the shrine again. If the ghost still has not arrived, wait longer or move between the relevant area and the Entry Hall after making a save.
If the spirit remains absent or appears dead, reload a save from before that Undead Blade was defeated and repeat the encounter. Keep the fight away from the ghost’s intended route, then watch until the spirit begins moving. If the problem persists, reload a save from before entering Sancre Tor. PlayStation 5 does not provide console commands for bypassing the quest stage, so a clean earlier save is the reliable recovery method.
- You checked the missing spirit’s last known area.
- You waited in-game and rechecked the shrine.
- You tried a save from before the relevant Undead Blade encounter.
- You preserved an earlier Sancre Tor save instead of relying on the blocked state.
Accept Miscarcand from Martin before entering
After Martin accepts the armor, continue his dialogue until he assigns Miscarcand and asks for the Great Welkynd Stone. Set Miscarcand as the active quest and confirm that its map marker is present before traveling. Do not deliberately take the Great Welkynd Stone during earlier free exploration. The ruin can be discovered early, but obtaining the quest item outside the intended stage can complicate progression.
Travel to Miscarcand, save at the entrance, repair or replace worn equipment, and leave inventory space. Ordinary Welkynd Stones and Varla Stones are optional Ayleid loot. They are not substitutes for the Great Welkynd Stone required by Martin.
- Martin assigned Miscarcand.
- Miscarcand is active in the journal.
- You saved before entering the ruin.
- You have room for the Great Welkynd Stone.
Open the pressure-plate and wall-block route in Miscarcand
Enter Miscarcand and follow the quest marker through the first level. In the large chamber, use the pressure plate to open the southern route, then pass through into Sel Vanua. If you see optional loot or a Varla Stone cage, ignore it until the main route is secure.
In Sel Vanua, activate the wall block in the first major room. Follow the newly opened route around the chamber and use the next wall block to open the way toward Morimath. The ruin contains goblins and undead; retreat through doorways if several enemies converge, and avoid spending healing supplies on optional rooms.
The precise visual layout is easier to follow by using the quest marker after each gate opens. If a route seems closed, search the adjacent chamber for the pressure plate or wall block rather than trying to force a locked door.
- The southern route opened after using the pressure plate.
- The first wall block in Sel Vanua was activated.
- The second wall block opened the route to Morimath.
- Morimath is accessible.
Take the Great Welkynd Stone and defeat the King of Miscarcand
In Morimath, follow the route to the chamber containing the Great Welkynd Stone. Defeat nearby enemies and heal before removing the stone. Taking it triggers the King of Miscarcand and additional undead, so do not grab the artifact while badly wounded or surrounded.
Defeat the King of Miscarcand before relying on the exit. Use the broad chamber and its stairs to create distance, interrupt his attacks in melee, or retreat along the route while using ranged attacks and spells. The king’s appearance is tied to taking the Great Welkynd Stone, not to finding an ordinary Welkynd or Varla Stone.
After the fight, take the Miscarcand Key from the king if it is available. The key helps open the escape route, while the Great Welkynd Stone is the required quest item.
- You removed the Great Welkynd Stone from its pedestal.
- The King of Miscarcand appeared.
- The King of Miscarcand was defeated.
- You collected the Miscarcand Key if it was available.
Escape Miscarcand and complete the required handoff
Use the newly opened route from the Great Welkynd Stone chamber. Step on the pressure plate in the next room, pass through the opened secret passage, and use the Miscarcand Key where required. Follow the corridor back toward the first level and continue to the exterior exit. Optional rooms can be skipped on the way out.
Return to Cloud Ruler Temple and give the Great Welkynd Stone to Martin. Then do not immediately interrupt him. Martin and Jauffre must finish their conversation about the Great Sigil Stone. Bethesda specifically identifies interrupting this exchange as a cause of Defense of Bruma failing to advance.
When the conversation ends, check the journal. Defense of Bruma requires Blood of the Daedra, Blood of the Divines, and Miscarcand. Bruma Gate is not required, and Allies for Bruma is optional, although Allies for Bruma can provide reinforcements. If the next stage does not start, reload the save from before returning to Cloud Ruler Temple, let the conversation finish completely, then walk from Cloud Ruler Temple to Bruma and enter the Chapel of Talos. Fast travel away and back or wait several in-game hours if the city’s scripted activity has not appeared.
- You exited Miscarcand with the Great Welkynd Stone.
- Martin accepted the stone.
- Martin and Jauffre finished their Great Sigil Stone conversation.
- Blood of the Daedra, Blood of the Divines, and Miscarcand are complete.
- The journal advanced to Defense of Bruma or its next related objective.
Before you move on
- Blood of the Divines was completed by delivering the Armor of Tiber Septim to Martin.
- Miscarcand was completed by delivering the Great Welkynd Stone to Martin.
- The four Sancre Tor spirits completed their shrine ritual.
- Martin and Jauffre finished their post-Miscarcand conversation without interruption.
- The journal advanced to Defense of Bruma or its next related objective.
- Bruma Gate and Allies for Bruma were treated as optional rather than mandatory.
References for this chapter
- Defense of Bruma - Quest - Oblivion Remastered Support — Bethesda Support
- Blood of the Divines Walkthrough - The Elder Scrolls IV: Oblivion Remastered - Game8
- Miscarcand Walkthrough - The Elder Scrolls IV: Oblivion Remastered - Game8
- Blood of the Divines Walkthrough — GameBanshee
- Miscarcand Walkthrough - GameBanshee
- Oblivion Remastered Guide: Full Elder Scrolls IV Walkthrough — GameSpot
Defense of Bruma and the Great Gate
Begin Defense of Bruma after Blood of the Daedra, Blood of the Divines, and Miscarcand are complete. Bruma Gate and Allies for Bruma are optional support content; either may be completed beforehand, but neither belongs in the required prerequisite list for this chapter. After Martin and Jauffre finish their post-Miscarcand conversation, speak with Martin about the battle plan, then meet Countess Narina Carvain in Castle Bruma. Follow her to the Chapel of Talos, prepare your equipment, and tell her when you are ready. Escort Martin and the assembled forces to the Oblivion Gate east of Bruma, protect him while three lesser gates open, and remain outside until the Great Gate appears. Enter it immediately when the journal gives that instruction. The next chapter covers the timed Great Gate route and the Great Sigil Stone.
1. Verify the required quests and make a preparation save
Use this chapter after Blood of the Daedra, Blood of the Divines, and Miscarcand are complete. These are the required preceding quests for Defense of Bruma. Bruma Gate is optional support content, not a prerequisite for this chapter. Allies for Bruma is also optional; completing it recruits additional soldiers and can make the defense safer, but you may proceed without completing it.
If you have already completed Bruma Gate or Allies for Bruma, their support will be reflected in the forces available during the battle. If either quest is still unfinished, you may pursue it now as an optional route choice, or leave it for later. Do not stop the main-quest route on the assumption that Bruma Gate must be completed first.
After returning the Great Welkynd Stone from Miscarcand, allow Martin and Jauffre to finish their entire conversation about the Great Sigil Stone. Do not immediately initiate dialogue with Martin while they are speaking. Bethesda Support specifically identifies interrupting this exchange as a possible cause of Defense of Bruma failing to advance. If the quest is already stuck, reload a save from before returning to Cloud Ruler Temple and let the conversation finish before speaking with Martin.
When the conversation has ended, speak with Martin about the battle plans. He sends you to Countess Narina Carvain in Bruma. Before entering Castle Bruma, create a manual save named Before Bruma Defense. Repair your main weapon and armor, replenish healing and magicka recovery, and place your most reliable damage or defensive ability where it can be selected quickly. Keep this save separate from autosaves and later battle saves.
The defense becomes a poor time to test an unfamiliar build or carry a nearly full inventory. Bring enough healing to survive repeated Daedra attacks, but do not delay the quest because you lack optional loot or a particular weapon.
- Blood of the Daedra is complete.
- Blood of the Divines is complete.
- Miscarcand is complete.
- Bruma Gate is understood to be optional, whether complete or unfinished.
- Allies for Bruma is understood to be optional, whether complete or unfinished.
- Martin and Jauffre finished their post-Miscarcand conversation.
- You spoke with Martin about the battle plans.
- A manual Before Bruma Defense save exists.
- Your equipment and recovery supplies are ready.
2. Start the defense in Bruma
Travel to Castle Bruma and speak with Countess Narina Carvain. Tell her about Martin’s battle plan. She agrees to meet him at the Chapel of Talos. Follow her through the city with Captain Burd and her guards instead of leaving Bruma or starting another quest.
At the Chapel of Talos, remain nearby and allow the meeting between Narina and Martin to finish. Do not interrupt the conversation by opening dialogue, leaving the area, or beginning unrelated activities. When the war council ends, speak with Narina again.
Narina gives you the opportunity to delay the battle while you gather more help or prepare. Use that option if you still need repairs, supplies, or optional Allies for Bruma support. When you are ready, choose the dialogue that begins the battle. The chapel bell rings, Martin and the troops leave Bruma, and the defense sequence becomes active.
If the quest does not progress after the meeting, do not repeatedly interrupt the same NPCs. First check that Martin and Jauffre’s earlier conversation was completed, then consider fast-traveling away from Bruma and returning, waiting several in-game hours, or reloading Before Bruma Defense.
- Narina agreed to meet Martin.
- The Chapel of Talos meeting finished.
- You spoke with Narina after the meeting.
- Optional reinforcements were gathered only if desired.
- You selected the option to begin the battle.
3. Escort Martin and the troops to the Oblivion Gate
Leave Bruma with Martin and the assembled forces. Follow the group through Bruma’s east gate and along the road toward the Oblivion Gate outside the city. Stay close enough for the scripted march and battlefield setup to continue. Do not sprint far ahead, wander into the wilderness, or abandon Martin while the army is deploying.
At the battlefield, Martin addresses the soldiers. After his speech, the first lesser Oblivion Gate opens and Daedra begin attacking. Your objective is to keep Martin alive while the Mythic Dawn opens three lesser gates and then the Great Gate. The lesser gates are part of the outdoor sequence; do not enter or close them.
Fight from behind or along the edge of the allied formation. Let the soldiers absorb some of the pressure while you deal with threats that reach Martin or isolated guards. Prioritize dangerous spellcasters and powerful Daedra attacking the central group. Do not chase enemies far from the battlefield, because the defense advances through the scripted gate sequence rather than by clearing every creature.
Use blocking against heavy melee attacks and retreat behind friendly soldiers when your health or magicka becomes low. Heal, recover, and return to the battleline. Avoid careless area attacks near allied guards, since striking them can create a bounty or make them hostile. Your goal is to preserve Martin and survive until the Great Gate opens, not to collect every Daedra corpse.
- Martin reached the battlefield.
- The allied force assembled outside Bruma.
- Martin completed his speech.
- The first lesser gate opened.
- You remain near Martin and the main formation.
- Martin is still alive.
4. Hold the battlefield until the Great Gate opens
Continue defending the area as the second and third lesser gates open. Keep Defense of Bruma selected in the journal so the current objective remains visible. Enemy pressure increases with each gate, so use the soldiers as a moving defensive line instead of fighting alone in open ground.
When a spellcaster or powerful Daedra reaches Martin, deal with that threat before pursuing enemies elsewhere. If several enemies surround you, back toward the guards while blocking, heal once the pressure drops, and return to Martin’s position. Preserve Before Bruma Defense and do not overwrite it while the event is still progressing normally.
The Great Gate appears after the required outdoor sequence advances. When the journal reports that it has opened and instructs you to enter before the forces are overwhelmed, stop fighting optional enemies and move directly toward the large gate. Do not close a lesser gate first, and do not leave the battlefield to explore around Bruma.
If Daedra fail to spawn or the gates stop opening, Bethesda recommends fast-traveling away from Bruma and returning, or waiting several in-game hours. If that does not restore the event, reload a save from before the defense began. If Martin remains in robes instead of battle equipment and the quest does not advance, reload to before the post-Miscarcand transition and allow Martin and Jauffre to complete their conversation without interruption.
Do not treat entering the Great Gate as a victory over the defense. It is the handoff to the next quest stage, and the outdoor battle remains incomplete until the Great Gate route is resolved.
- The second and third lesser gates opened.
- The Great Gate opened.
- The journal ordered you to enter it.
- Martin remained alive.
- You kept the pre-defense recovery save available.
5. Enter the Great Gate immediately
When the Great Gate opens, enter it at once. This begins the separate Great Gate stage. The Daedric siege engine is moving toward Bruma, so optional exploration and unnecessary fights can jeopardize the objective. Ignore containers and enemies that are not blocking your way.
Follow the active objective into the gate and do not attempt to clear every area. Heal while moving when necessary and fight only when an enemy blocks a doorway, interaction, or route. If you can safely create an interior save after entering, do so, but retain Before Bruma Defense as your main recovery point.
This chapter ends when you enter the Great Gate. Do not claim the Great Sigil Stone has been secured yet. The next chapter covers the interior route, the World Breaker controls, the Sigil Key, Sigillum Sanguis, and the timed return to Bruma.
If you die inside, reload the interior save if it is usable. Otherwise reload Before Bruma Defense, allow the outdoor sequence to reach the Great Gate again, and run inside as soon as it opens.
- You entered the Great Gate immediately after it opened.
- The separate Great Gate stage is active.
- You did not stop for optional exploration.
- The Great Sigil Stone remains an objective for the next chapter.
- You have a usable recovery save.
Before you move on
- Blood of the Daedra is complete.
- Blood of the Divines is complete.
- Miscarcand is complete.
- Bruma Gate may be complete or unfinished because it is optional.
- Allies for Bruma may be complete or unfinished because it is optional.
- Martin and Jauffre finished their post-Miscarcand discussion.
- The Defense of Bruma meeting at the Chapel of Talos finished.
- The outdoor battle progressed through the lesser-gate waves.
- The Great Gate opened.
- You entered the Great Gate and transferred to the separate Great Gate route.
- The Great Sigil Stone has not yet been counted as complete in this chapter.
Close the Great Gate and Return to Martin’s Cloud Ruler Temple Meeting
The Great Gate opens during Defense of Bruma after the preceding ritual-component quests have advanced. Enter immediately and reach Sigillum Sanguis before the Daedric siege engine reaches Bruma. Inside, use the World Breaker Guard route, activate the Gate Control to open the war gate, pass through the World Breaker and Vaults of End Times, and reach the final chamber. Activate the Great Sigil Stone there to close the gate. The Great Sigil Stone serves its purpose inside the gate; it is not collected afterward or delivered to Martin. When the gate collapses, an ordinary Sigil Stone may be discharged onto the Bruma battlefield. After the transition, follow the journal to meet Martin at Cloud Ruler Temple.
1. Prepare before entering the Great Gate
The Great Gate opens during Defense of Bruma after the battle outside Bruma has progressed through the lesser portals. Wait for the objective to instruct you to enter the Great Gate, then make a manual save immediately before crossing the portal. This is the most useful recovery point because a failed attempt can be retried without repeating the outdoor battle.
Entering the Great Gate starts a fifteen-minute real-time deadline. The siege engine is moving toward the portal, and allowing it to reach Bruma causes the defense to fail. The timer is real time rather than the in-game clock. Have your preferred weapon, spell, healing items, and any movement or resistance effects ready before entering. Once inside, prioritize the route over loot and fights that do not block progress.
Do not leave the Great Gate to search for supplies after the timer begins. The battlefield is not the place to pause for preparation. If you fail the run, reload the manual save and try again while bypassing more enemies.
- Defense of Bruma has opened the Great Gate.
- Great Gate is the active quest.
- A manual save exists immediately before entry.
- Healing and primary damage options are ready.
2. Enter World Breaker Guard and reach the connected route
Cross into the Great Gate and move toward the World Breaker Guard tower indicated by the objective marker. The remastered route uses the left-side tower in the opening area; use the marker if the tower’s position is difficult to identify from your approach. The siege engine is visible beyond the opening area, so do not stop to clear every Daedra.
Inside World Breaker Guard, activate the Ascension Call if it is available, then use the central lift to gain height. Continue upward over the ramps and platforms. The correct route is vertical: if you are returning to rooms you have already crossed, look for another lift, ramp, or upper-level doorway rather than searching the lower floors.
At the top, leave through the door to the Plane of Oblivion. Cross the exposed route and enter the next World Breaker Guard structure. Keep moving across the connected towers and bridges. Some enemies can be ignored once they are no longer blocking a doorway or mechanism. Heal while moving or in a brief safe position instead of stopping for a full fight.
- You entered the marker-directed World Breaker Guard tower.
- You activated the Ascension Call or required lift mechanism.
- You climbed to the upper exit.
- You crossed into the connected World Breaker Guard route.
3. Open the war gate with the Gate Control
Continue through the connected tower route until you reach the World Breaker Guard beside the closed war gate. This is not necessarily the first tower you enter, so do not assume that the opening structure contains the required control. Follow the objective marker and use the doors and platforms that lead toward the blocked passage.
Enter the tower beside the closed gate and climb to the level containing the Gate Control. Activate the control using the on-screen interact prompt. The large war gate opens, creating the route toward the World Breaker and the Vaults of End Times.
If the barrier remains closed, you are probably using a lift or control from an earlier tower. Return to the tower immediately beside the blocked gate and search its upper level for Gate Control. Once the passage opens, leave through it without detouring for optional containers or side rooms.
- You reached the World Breaker Guard beside the closed war gate.
- You activated Gate Control.
- The war gate visibly opened.
- The route beyond the barrier is accessible.
4. Cross the World Breaker route and enter the Vaults of End Times
Pass through the opened war gate and follow the objective marker through the World Breaker section. Use the marked doors, ramps, lifts, and tower connections. The route is designed to move between elevated structures, so watch your footing near broken bridges and exposed platforms. If a Daedra is not blocking the path, run past it.
Enter the Vaults of End Times and continue through the citadel. Watch for traps and moving hazards, particularly on narrow approaches and around the ramps. Do not explore side chambers while the timer is active. The objective is the final chamber, not a complete dungeon clear.
The route leads to the upper section and the entrance to Sigillum Sanguis. A Sigil Keeper may provide the key needed for the locked entrance; if so, defeat the keeper and search the body. Depending on your available skills, the entrance may also be opened by lockpicking or an Open spell. The key is only access to the final area and is not the Great Sigil Stone.
- You passed through the World Breaker section.
- You entered the Vaults of End Times.
- You reached the upper route toward Sigillum Sanguis.
- You obtained the required key or opened the entrance by a legitimate alternative.
5. Activate the Great Sigil Stone before the siege engine arrives
Enter Sigillum Sanguis and follow the ramps upward toward the final chamber. Continue past enemies whenever the route is clear. If you need to recover health or magicka, use a quick potion or spell in a safe corner, then resume the climb. Do not stop for optional loot while the timer is running.
At the top, interact with the Great Sigil Stone. This activation is the objective that closes the Great Gate. The stone has served its purpose inside Sigillum Sanguis; it is not a normal item handoff that you later take to Martin. Do not expect to collect it after returning to Bruma.
The gate must be closed before the fifteen-minute real-time deadline expires. If the siege engine reaches the portal first, reload the save made before entering and repeat the route. Improve the second attempt by avoiding unnecessary combat, skipping side rooms, and moving directly between the marked doors and mechanisms.
- You reached Sigillum Sanguis before the deadline.
- You activated the Great Sigil Stone.
- The Great Gate began closing.
- You did not wait for or plan a Great Sigil Stone handoff to Martin.
6. Confirm the battlefield transition and follow the next journal objective
After activating the Great Sigil Stone, the game transitions you back to the Bruma battlefield as the Great Gate collapses. The siege engine is destroyed in the collapse. An ordinary Sigil Stone may be discharged onto the battlefield afterward; this is separate from the Great Sigil Stone used to close the gate. You may take the ordinary stone if you want its enchantment, but it is not required to complete Great Gate.
Do not search your inventory for the Great Sigil Stone or attempt to deliver it to Martin. The required action was its activation inside Sigillum Sanguis. Once control returns, let the battlefield transition finish and avoid leaving before the quest state updates.
Open the journal and confirm that Great Gate has advanced or completed. The next main-quest direction should send you to meet Martin at Cloud Ruler Temple. Keep the pre-entry save until this objective appears normally, then make a new manual save after the transition. This gives you a safe recovery point before continuing into the next main-quest stage.
- The Great Gate closed successfully.
- You returned to the Bruma battlefield.
- The siege engine’s collapse and battlefield transition completed.
- Any ordinary Sigil Stone on the battlefield is treated as optional.
- The journal directs you to meet Martin at Cloud Ruler Temple.
- You created a post-transition manual save.
Before you move on
- The Great Gate opened during Defense of Bruma.
- You entered the marker-directed World Breaker Guard route.
- You reached the World Breaker Guard beside the closed war gate.
- You activated Gate Control and opened the war gate.
- You passed through the World Breaker and Vaults of End Times.
- You reached Sigillum Sanguis before the fifteen-minute real-time deadline expired.
- You activated the Great Sigil Stone inside Sigillum Sanguis.
- The Great Gate closed and the siege engine was destroyed during the battlefield transition.
- You did not attempt to give the Great Sigil Stone to Martin.
- The journal directs you to meet Martin at Cloud Ruler Temple.
Gathering the Final Items for Paradise
Martin can open the portal to Camoran’s Paradise after the ritual’s four components have been handled: a Daedric artifact, the Armor of Tiber Septim from Sancre Tor, the Great Welkynd Stone from Miscarcand, and a Great Sigil Stone obtained during the Great Gate sequence. The first three are delivered to Martin through their associated quests. The Great Sigil Stone is not handed to Martin; you activate it inside the Great Gate to close that gate, then return to Cloud Ruler Temple and speak with Martin. Confirm progression through completed quest entries, the active journal objective, and Martin’s dialogue rather than by checking for four items in your inventory. Before opening the Paradise portal, make a dedicated save, repair your gear, clear unnecessary weight, and carry healing and more than one dependable way to deal damage. Paradise does not provide a normal return to Cyrodiil until its main objective is resolved.
1. Check the quest stages instead of searching for four items
Travel to Cloud Ruler Temple and speak with Martin after the preceding main-quest objective has advanced. The ritual progresses through quest stages and dialogue. An item simply appearing in your inventory is not enough to prove that the story has registered it, especially if you acquired a quest item before Martin assigned its objective.
The relevant components are a qualifying Daedric artifact, the Armor of Tiber Septim, the Great Welkynd Stone, and a Great Sigil Stone. Blood of the Daedra handles the artifact, Blood of the Divines handles the armor, and Miscarcand handles the Great Welkynd Stone. Defense of Bruma and Great Gate handle the Great Sigil Stone. An ordinary Sigil Stone from a regular Oblivion Gate is not a substitute.
After the Great Welkynd Stone is returned, let Martin and Jauffre finish their conversation about the Great Sigil Stone before opening dialogue with Martin yourself. Bethesda specifically warns that interrupting this exchange can prevent Defense of Bruma from progressing. If the conversation has already been interrupted, reload a save from before returning to Cloud Ruler Temple with the stone when possible.
- Blood of the Daedra is complete or Martin has accepted the qualifying artifact
- Blood of the Divines is complete or Martin has accepted the Armor of Tiber Septim
- Miscarcand is complete or Martin has accepted the Great Welkynd Stone
- Defense of Bruma and Great Gate have advanced or completed
- The Great Sigil Stone was activated inside the Great Gate; it is not checked by a later handoff to Martin
2. Finish the Daedric artifact requirement
Martin requires one qualifying Daedric artifact for the ritual. The particular artifact is not fixed, so choose a Daedric shrine reward that you can permanently surrender. Complete the relevant shrine quest, return to Cloud Ruler Temple, and use Martin’s dialogue to give him the artifact.
The artifact is consumed by the ritual. Do not surrender a unique weapon or tool that you still intend to use unless you have deliberately chosen it for this purpose. If Martin does not offer the hand-in dialogue, select the active main-quest entry and verify that the shrine quest reward is an eligible artifact rather than an ordinary enchanted item.
- A qualifying Daedric artifact has been obtained
- The artifact has been given to Martin
- Blood of the Daedra has advanced or completed
- The sacrificed artifact is no longer available as equipment
3. Complete Blood of the Divines at Sancre Tor
After accepting the artifact, Martin directs you toward the blood of Tiber Septim, represented by the Armor of Tiber Septim. Speak with Jauffre at Cloud Ruler Temple to receive the information and access needed for Sancre Tor. Travel to the marked ruin and enter the catacombs.
Sancre Tor requires more than reaching a marked chest. Follow the dungeon route and defeat the cursed Undead Blades. Each released spirit contributes to removing the enchantment around the shrine. Once all four Blade encounters have been resolved, proceed to the Tomb of the Reman Emperors and take the Armor of Tiber Septim.
Return to Cloud Ruler Temple and give the armor to Martin. Keep the armor until the hand-in is registered, and confirm that Blood of the Divines advances before moving on. Bruma Gate is optional and does not need to be inserted here as a prerequisite.
- Jauffre has advanced the Sancre Tor objective
- All four cursed Undead Blade encounters have been resolved
- The Armor of Tiber Septim has been recovered
- Martin has accepted the armor and Blood of the Divines has advanced
4. Retrieve the Great Welkynd Stone from Miscarcand
Begin Miscarcand through Martin’s dialogue before taking the Great Welkynd Stone whenever possible. Travel to the Ayleid ruin and follow the active marker through its connected chambers. Use the switches and wall controls that open the route between the ruin’s sections; ordinary Welkynd Stones and Varla Stones do not satisfy this objective.
The Great Welkynd Stone is in the deeper section of Miscarcand. Heal and prepare before taking it, because removing the stone triggers the King of Miscarcand and additional undead. Deal with the king and the surrounding enemies, then follow the exit route and return to Cloud Ruler Temple.
Give the Great Welkynd Stone to Martin and wait for the resulting dialogue with Jauffre to finish. If you took the stone early, keep a save from before the pickup if one exists. The quest can sometimes fail to recognize an out-of-order acquisition cleanly, and the safest console-free recovery on PS5 is to reload before the early pickup.
- Miscarcand is active in the journal before taking the quest stone
- The Great Welkynd Stone has been taken from its chamber
- The King of Miscarcand encounter has been resolved
- Martin has accepted the Great Welkynd Stone
5. Complete Defense of Bruma and activate the Great Sigil Stone
After the three earlier components are registered, Martin explains that the final ritual component must come from a Great Gate. Complete the required Defense of Bruma setup, including the meeting involving Countess Narina Carvain and Martin at the Chapel of Talos. Allies for Bruma can provide additional support, but it is optional rather than a prerequisite.
Remain with the battlefield defense until the Great Gate opens. Protect Martin and follow the journal instruction to enter that gate immediately. Inside, prioritize the route over optional loot: reach the controls that open the war gate, obtain the necessary key, cross the connected towers, and reach Sigillum Sanguis before the Daedric siege engine completes its advance.
Activate the Great Sigil Stone at the top of the tower. This closes the Great Gate and returns you to the battlefield. The stone is used in that sequence; it is not a component that Martin later accepts into his inventory. After the return, speak with Martin at the point directed by the journal and allow his dialogue to advance the main quest.
If the Bruma battle does not start, the gates do not open, or Daedra fail to spawn, make a separate save, travel away and return, or wait several in-game hours. Bethesda also recommends walking from Cloud Ruler Temple to Bruma rather than fast-traveling after delivering the Great Welkynd Stone. If the problem persists, reload a save from before the affected quest began.
- Blood of the Daedra, Blood of the Divines, and Miscarcand are complete
- Defense of Bruma has begun
- The Great Gate has opened and has been entered
- The Great Sigil Stone has been activated inside the Great Gate
- The Great Gate objective has completed and Martin’s post-battle dialogue has advanced
6. Create the Before Paradise save and prepare equipment
Once the Great Gate objective is complete, return to Cloud Ruler Temple and speak with Martin. When his dialogue indicates that the ritual can proceed, create a manual save named Before Paradise. Keep it separate from autosaves and from ordinary rotating saves.
Repair weapons and armor, store or sell unnecessary loot, and carry a dependable healing method. Bring a close-range option for confined passages and a ranged weapon or spell for enemies that are dangerous to approach. Carry backup ammunition, magicka recovery, or another damage method if your main approach depends on a single resource.
There is no mandatory armor set, spell school, weapon type, or character level for entering Paradise. The practical requirement is readiness for a sustained story section with multiple fights. Make sure your equipment is usable at its current condition and that you have enough recovery supplies to avoid relying on a lucky run.
- Martin indicates that the ritual is ready
- A protected manual Before Paradise save exists at Cloud Ruler Temple
- Weapons and armor are repaired
- Healing supplies and a backup attack method are available
- Unneeded loot has been stored or sold
7. Perform the final readiness check before opening the portal
Do not require all four components to remain in your inventory. The Daedric artifact, Armor of Tiber Septim, and Great Welkynd Stone are normally handed to Martin during their associated quests. The Great Sigil Stone is different: it is activated inside the Great Gate to close that gate, and the completion of the Great Gate objective is the meaningful progression check.
Use the journal and Martin’s current dialogue together. The journal should no longer direct you to recover one of the earlier components or enter the Great Gate, and Martin should offer to open the portal. Speak with him only after confirming the manual save and loadout.
When you enter the portal, Paradise becomes a committed story section. You cannot normally return to Cyrodiil until its main objective is resolved, so finish shopping, repairs, storage, and optional errands beforehand. Expansion questlines are outside this chapter and are not needed for the base-game main quest.
- Blood of the Daedra, Blood of the Divines, and Miscarcand are complete
- The Great Gate objective is complete and the Great Sigil Stone was activated there
- The journal no longer requests one of the four ritual components
- Martin confirms that the portal can be opened
- The Before Paradise save is preserved
- The character has repaired gear, healing supplies, and a dependable backup combat option
Before you move on
- Blood of the Daedra, Blood of the Divines, and Miscarcand are complete in the journal.
- Defense of Bruma and Great Gate have advanced or completed.
- The Daedric artifact, Armor of Tiber Septim, and Great Welkynd Stone were accepted during their associated quest stages.
- The Great Sigil Stone was activated inside the Great Gate and the gate closed; no later handoff to Martin is expected.
- Martin at Cloud Ruler Temple confirms that the Paradise ritual is ready.
- A manual Before Paradise save exists outside the autosave rotation.
- Weapons and armor are repaired, healing supplies are stocked, and a dependable backup combat option is available before opening the portal.
References for this chapter
- The Elder Scrolls IV: Oblivion Remastered Launch Announcement — Bethesda.net
- Defense of Bruma - Quest - Oblivion Remastered Support — Bethesda Support
- The Elder Scrolls IV: Oblivion Remastered - Guide and Walkthrough — GameFAQs
- Oblivion Remastered Guide: Full Elder Scrolls IV Walkthrough — GameSpot
- Blood of the Divines Walkthrough — GameBanshee
Paradise: Finding and Confronting Mankar Camoran
After Martin Septim has the items needed to open the portal, save at Cloud Ruler Temple and enter Mankar Camoran’s realm, Gaiar Alata. Follow the route through the Savage Garden and Flooded Grotto until you meet Kathutet, who guards the Bands of the Chosen. Defeat him or complete his task involving the trapped Xivilai Anaxes, then use the bands to enter the Forbidden Grotto. Work with Eldamil to pass the Dremora checkpoint and have him remove the bands. Continue through the Terrace of Dawn to Carac Agaialor, Mankar’s palace. Ruma and Raven Camoran lead you inside; defeat both of them and Mankar, then take the Amulet of Kings from Mankar’s body. Paradise collapses after the amulet is recovered and returns you to Cloud Ruler Temple, where you must give the amulet to Martin before starting Light the Dragonfires.
Prepare at Cloud Ruler Temple and enter Paradise
Complete inventory management before speaking to Martin Septim. Create a manual save named Before Paradise, repair or replace your main equipment, and carry dependable healing supplies. Magicka potions, restore-fatigue items, and resistance effects are useful but not mandatory. Keep at least one ranged option available for enemies that are difficult to reach in close quarters.
Speak with Martin when he is ready to open the portal. Confirm the dialogue that begins the quest, then enter the portal at Cloud Ruler Temple. You arrive in Gaiar Alata, the realm commonly called Paradise. The area is quest-contained, so do not enter until you are ready to continue through several connected areas without normal travel back to Cyrodiil.
- Before Paradise save created
- Combat equipment and healing supplies prepared
- Portal entered after all preparation is complete
Obtain the Bands of the Chosen from Kathutet
Follow the stone route through the Savage Garden toward the quest marker. The exact approach can vary depending on where you explore, so use the active marker and look for the path leading toward the Dremora named Kathutet. Speak with him when he stops you. He offers either a fight or a service involving the trapped Xivilai Anaxes.
The direct option is to defeat Kathutet and loot the Bands of the Chosen from his body. If you choose the service, follow the marker to Anaxes’s cave and activate the two nearby supports or logs that hold the obstruction in place. Return to Kathutet afterward to receive the bands. Do not leave this area without confirming that the Bands of the Chosen are in your inventory.
Continue to the Flooded Grotto once you have the bands. Do not equip them immediately unless the door requires them. Restore your health before entering the next section, because the bands impose a fire vulnerability while worn and cannot be removed normally after the Forbidden Grotto sequence begins.
- Kathutet defeated or Anaxes task completed
- Bands of the Chosen obtained
- Health restored before entering the grotto
Enter the Forbidden Grotto and cooperate with Eldamil
Use the quest marker to find the door to the Forbidden Grotto. When the door reports that there is no apparent way to open it, equip the Bands of the Chosen from your armor inventory and activate the door. The bands are the required key for this transition.
Inside, proceed until Eldamil stops you. Tell him that you intend to kill Mankar Camoran and accept his plan to disguise you as a prisoner. Follow him to the cage and enter when instructed. The cage is lowered near the lava while Eldamil deals with the Dremora overseer Orthe; wait for Eldamil to raise it again before leaving the cage.
After the cage sequence, follow the route away from the lava and continue toward the next grotto section. Eldamil meets you again and removes the Bands of the Chosen. Accept his offer to accompany you if you want his assistance, but his presence is not required to defeat Mankar. If you refuse the prisoner plan, the alternative is to fight through the checkpoint and obtain Orthe’s key; this is more dangerous and is unnecessary when Eldamil’s plan is available.
- Bands equipped to open the grotto door
- Eldamil’s prisoner plan accepted
- Cage sequence completed safely
- Bands removed by Eldamil
Cross the remaining grotto and reach the Terrace of Dawn
After Eldamil removes the bands, continue through the next section of the Forbidden Grotto. From the cage area, use the open route away from the lava and follow the marker through the chambers. At forks, avoid the northern route if you are following Eldamil’s plan unless the objective specifically sends you there; that direction leads toward a more difficult Dremora confrontation.
Meet Eldamil again at the far side of the grotto. Continue through the marked exit into Paradise, then follow the uphill route through the Terrace of Dawn. This section is more open, so enemies may approach from the front or sides. Pull them toward a doorway, slope, or other narrow position if several attack together.
The path eventually reaches Carac Agaialor. Save if the game allows a manual save at the transition, then approach the palace entrance. Ruma and Raven Camoran meet you outside and lead you inside. Follow them rather than searching for an alternate entrance.
- Forbidden Grotto exit reached
- Terrace of Dawn crossed
- Carac Agaialor entrance reached
- A palace-area recovery save made if possible
Defeat Ruma, Raven, and Mankar Camoran
Inside Carac Agaialor, proceed to Mankar’s audience chamber. Mankar speaks from his throne while Ruma and Raven take position nearby. When the conversation ends and the group becomes hostile, move away from the center of the room if you are being surrounded. Use pillars, the entrance, and the room’s open space to separate targets rather than fighting all three in a tight cluster.
Defeat Ruma and Raven first if they are pressuring you, then turn your attention to Mankar. Use the attack type your character handles most reliably; the game does not require a particular weapon, spell school, or damage element. If your build depends on casting, keep a weapon or potion available in case an interruption prevents you from using spells. Heal before your health becomes critical because there is no need to rush the fight.
When Mankar is defeated, search his body and take the Amulet of Kings. Mankar’s Staff and Mankar’s Robe are optional loot. They are not required for the base-game main quest, so do not delay the escape while searching the palace for unrelated items. Taking the amulet is the required action that allows Paradise to collapse.
- Ruma defeated
- Raven defeated
- Mankar Camoran defeated
- Amulet of Kings taken from Mankar’s body
Let Paradise collapse and return the amulet to Martin
After taking the Amulet of Kings, allow the collapse sequence to proceed. The quest returns you to Cloud Ruler Temple; you do not need to retrace the route through the Forbidden Grotto. If the game does not transition after the required enemies and Mankar’s body have been handled, verify that the amulet is in your inventory and wait briefly near the body before reloading the latest safe save.
When control returns at Cloud Ruler Temple, speak with Martin and give him the Amulet of Kings. This advances the main quest to Light the Dragonfires and begins the final Imperial City sequence. Create a manual save named Post-Paradise after the handoff.
If the cage transition repeatedly drops you into the lava or the palace fails to load correctly, reload the Before Paradise save or another save made before entering the affected area. Do not overwrite every earlier save with a broken autosave. On PS5, changing graphics modes may help with some reported transition problems, but reloading a sound pre-area save is the dependable recovery method.
- Returned to Cloud Ruler Temple
- Amulet given to Martin
- Journal advances to Light the Dragonfires
- Post-Paradise save created
Before you move on
- Ruma Camoran, Raven Camoran, and Mankar Camoran are defeated.
- The Amulet of Kings has been removed from Mankar’s body and is in the player’s inventory.
- Paradise collapses and the player returns to Cloud Ruler Temple.
- Martin receives the Amulet of Kings.
- The journal advances to Light the Dragonfires and a Post-Paradise save exists.
References for this chapter
- Celebrating the Launch of The Elder Scrolls IV: Oblivion Remastered
- Extended Look at The Elder Scrolls IV: Oblivion Remastered
- Paradise Walkthrough | The Elder Scrolls IV Oblivion Remastered
- Oblivion Remastered Guide: Full Elder Scrolls IV Walkthrough — GameSpot
- Oblivion Remastered Paradise Walkthrough
- The Elder Scrolls IV: Oblivion Remastered Trophy Guide & Roadmap
Light the Dragonfires — Final Sequence in the Imperial City
After defeating Mankar Camoran in Paradise, return to Cloud Ruler Temple and give the Amulet of Kings to Martin Septim. Travel with him to the Imperial City Palace, present his claim to High Chancellor Ocato, and follow the escort through the Daedric assault. In the Temple District, Mehrunes Dagon cannot be defeated through ordinary combat. Keep moving with Martin, use the circular route around the district to avoid unnecessary fighting, and reach the Temple of the One. Inside, Martin uses the Amulet, transforms into the Avatar of Akatosh, and ends the invasion. Completion is confirmed when Light the Dragonfires is marked complete and control returns or the completed ending presentation is underway. Create a separate post-quest save afterward.
1. Return to Cloud Ruler Temple and prepare
When Paradise ends, Mankar Camoran is defeated, and you recover the Amulet of Kings, the game returns you to Cloud Ruler Temple. Speak with Martin Septim and choose the dialogue that gives him the Amulet. This begins Light the Dragonfires and changes your objective to accompanying Martin to the Imperial City.
Make a manual save before leaving the temple. This is the most useful recovery point for the final sequence because Martin must move through several scripted transitions. Carry health potions and, if you use magic, magicka potions. Repair hammers can help if your equipment is badly damaged, but no special item or side quest is required. You do not need to close every remaining Oblivion Gate before starting this quest; the final objective is to get Martin to the Temple of the One.
- Martin has received the Amulet of Kings.
- Light the Dragonfires is active in the journal.
- A manual save exists before travelling to the Imperial City.
2. Present Martin to High Chancellor Ocato
Fast travel to Green Emperor Way in the Imperial City. Follow the active objective to the Palace district. If Captain Steffan is outside the Palace, speak with him as directed, then enter the Palace and stay with Martin as he proceeds inside.
Continue to the Elder Council Chambers. Wait for Martin to enter the chamber before speaking with High Chancellor Ocato. Ocato must hear Martin’s claim to the Imperial throne before the next attack begins. If the conversation does not advance, do not leave the Palace or repeatedly change areas. Step away from Ocato, allow Martin to catch up, and speak with Ocato again once Martin is present.
- Martin is inside the Imperial Palace with you.
- You have reached the Elder Council Chambers.
- High Chancellor Ocato has heard Martin’s claim.
3. Survive the Palace and Green Emperor Way assault
A soldier interrupts the council scene with news that the Imperial City is under attack. Daedra begin appearing around the Palace and Green Emperor Way. Stay close enough for Martin and the escort to continue, but avoid blocking doorways, stairs, and narrow passages.
You do not need to defeat every enemy personally. Let the Imperial guards absorb some of the pressure while you remove enemies threatening the route. Prioritize dangerous spellcasters, summoners, and opponents who repeatedly stagger you. Use corners and doorways to reduce the number of attackers reaching you at once, and heal before your health becomes critical. Do not stop to loot if Martin has begun moving.
- The final Daedric assault has started.
- Martin has left the council area.
- The escort is moving toward the Temple District.
4. Follow Martin into the Temple District
Remain with Martin as the escort leaves the Palace area and travels toward the Temple District. If he stops to fight, defeat or distract the enemies immediately around him, then wait for him to resume moving. Do not chase enemies down side streets, leave the district, or spend time closing the newly opened Oblivion Gates.
Mehrunes Dagon appears in the Temple District as a gigantic Daedric figure. This is a scripted encounter, not a conventional boss battle. After Dagon appears, Martin explains that the Dragonfires cannot be relit normally while Dagon is in Tamriel and that you must reach the Temple of the One. Follow the updated objective rather than attacking Dagon.
- Martin has reached the Temple District.
- Mehrunes Dagon’s appearance has triggered.
- The journal directs you to the Temple of the One.
5. Get past Mehrunes Dagon and reach the Temple
Once the objective updates, move quickly toward the Temple of the One. Dagon is not meant to be defeated by normal weapons or spells. His attacks can kill you quickly, so sheathe your weapon if that makes sprinting easier and avoid stopping to trade blows.
Use the circular route around the Temple District rather than approaching directly through Dagon’s immediate attack space. Follow the open path around the district and take the safest opening toward the Temple entrance. The exact position of Dagon and the surrounding Daedra can make one side more dangerous than another, so prioritize a clear route over a fixed turn-by-turn alley instruction.
Martin should follow the escort. If he is knocked down, give him a moment to recover. When you reach the Temple entrance first, stop nearby and allow Martin to arrive. Enter when he is close enough to follow; do not leave the district or start another quest.
- You have not tried to defeat Dagon as a normal enemy.
- Martin is near the Temple of the One entrance.
- You have remained inside the active final sequence.
6. Let Martin complete the Dragonfire ritual
Enter the Temple of the One with Martin. Once inside, stay out of his path and do not attack him. Martin moves toward the centre of the Temple, addresses you, and uses the Amulet of Kings. The Amulet is consumed, Martin sacrifices himself, and he transforms into the Avatar of Akatosh. The Avatar then confronts Mehrunes Dagon and ends the invasion.
The important actions are scripted after Martin reaches the centre. Do not push Martin, use area attacks near him, repeatedly speak to him, or leave the Temple during the dialogue and transformation. Wait through the confrontation and the concluding presentation until the game returns control or clearly proceeds into the completed ending presentation.
- Martin has reached the centre of the Temple.
- The Amulet of Kings has been used.
- Martin has transformed into the Avatar of Akatosh.
- The final presentation has finished or player control has returned.
7. Confirm completion and create a final save
After the transformation and final presentation, open the journal and confirm that Light the Dragonfires is marked complete. This is the required quest-state check. The Champion of Cyrodiil trophy may also unlock, but a trophy notification is not required to validate the save.
Create a new manual save in a clearly identifiable slot such as Post-Light the Dragonfires. The base-game main quest is complete at this point. You may continue exploring Cyrodiil, but Shivering Isles, Knights of the Nine, Imperial Dragon Armor, guild stories, and other optional activities are separate and are not needed for this chapter’s completion goal.
- Light the Dragonfires is marked complete.
- Martin’s transformation has occurred.
- Player control has returned or the completed ending presentation is underway.
- A post-quest manual save exists.
Before you move on
- Light the Dragonfires is marked complete in the journal.
- Martin has used the Amulet of Kings and transformed into the Avatar of Akatosh.
- The final confrontation and transformation presentation has concluded.
- Player control has returned or the completed ending presentation is underway.
- A post-quest save can be loaded with the base-game main quest finished.
- No expansion questline was required.
References for this chapter
- Light the Dragonfires Walkthrough — The Elder Scrolls IV: Oblivion Remastered
- Oblivion Remastered Guide: Full Elder Scrolls IV Walkthrough — GameSpot
- Oblivion Main Quest Walkthrough — GamesRadar
- PSA: Paradise & Light the Dragonfires Game Breaking Bugs — GameFAQs
- The Elder Scrolls IV: Oblivion Remastered — Full Walkthrough with Light the Dragonfires Segment
Epilogue, Imperial Dragon Armor and Post-Main-Quest Checks
The base-game main quest is complete when Martin Septim’s final act finishes during Light the Dragonfires and control returns to the player. The Champion of Cyrodiil trophy is a useful PS5 confirmation, but the decisive in-game check is that the final sequence has concluded. Create a protected Post-Light the Dragonfires save before starting any Shivering Isles, Knights of the Nine, or other out-of-scope content. Imperial Dragon Armor is an optional epilogue reward: speak with Chancellor Ocato at the Temple of the One, wait two in-game weeks, then collect the set from the armory in the Imperial City Prison District. The reward includes boots, cuirass, gauntlets, greaves, and helmet; the game supplies the light or heavy version according to your armor skills.
1. Complete Light the Dragonfires and verify the ending
During Light the Dragonfires, stay with Martin as he moves from the Imperial Palace area toward the Temple of the One. Daedra will appear in the Imperial City, but you do not need to defeat Mehrunes Dagon yourself. Keep hostile enemies away from Martin, heal when necessary, and continue along his route instead of chasing enemies into side streets. If a Daedra blocks the route, defeat it quickly or draw it away from Martin so the escort can continue.
When Martin reaches the Temple of the One, remain nearby and let the scripted dialogue and transformation play without leaving the area. Do not fast-travel, reload, or interrupt the sequence while characters are speaking or the cinematic is starting. Martin’s final act resolves the main crisis and concludes the base-game story.
When control returns, open the journal and confirm that Light the Dragonfires is no longer active. The Champion of Cyrodiil trophy should also unlock on PS5, although trophy notifications can sometimes be delayed by account synchronization. Treat the completed quest and returned player control as the primary completion checks, with the trophy as an additional confirmation.
If the final cutscene does not play or the quest fails to advance, reload a manual save made before the Temple of the One sequence and retry. Make sure the game is updated first. Bethesda’s Remastered Update 1.2 specifically lists a fix for the Light the Dragonfires cutscene not playing.
- Martin’s final transformation has played.
- Light the Dragonfires is recorded as complete.
- Control has returned to the player.
- The Champion of Cyrodiil trophy has appeared, or the completed quest has been independently confirmed.
2. Create the protected base-game completion save
Make a new manual save immediately after the ending sequence. Name it Post-Light the Dragonfires or use another unmistakable name, and keep it in a separate slot from ordinary exploration saves. Create at least one additional manual copy if you intend to continue playing.
This save is the endpoint for a base-game-only run. The Remastered edition includes Shivering Isles, Knights of the Nine, and other downloadable content, but none of those quests are required for the main story. Preserve the completed save before accepting an expansion quest, entering an expansion starting area for its introduction, or allowing an expansion opening to begin.
Do not use an empty journal as proof that no expansion was started. Journal entries can change, be completed, or be removed, so the reliable scope check is the sequence of actions: finish Light the Dragonfires, create the protected save, and only then begin any out-of-scope content on a separate save.
- A manual save exists after Light the Dragonfires.
- The protected save is separate from later exploration saves.
- No expansion content is begun before the protected endpoint is created.
3. Start the optional Imperial Dragon Armor reward
If you want the epilogue reward, travel to the Temple District in the Imperial City after the final sequence and speak with Chancellor Ocato at the Temple of the One. His post-crisis conversation recognizes your service, names you Champion of Cyrodiil, and orders a suit of Imperial Dragon Armor to be forged.
This reward is optional. The base-game main quest is already complete when Light the Dragonfires finishes, so failing to speak with Ocato does not invalidate the campaign completion. Keep the protected save untouched before beginning this optional step.
- Ocato’s post-crisis conversation has been completed.
- The Imperial Dragon Armor reward has been ordered, if desired.
- The protected completion save remains available.
4. Wait two in-game weeks and collect the armor
The armor requires two full in-game weeks to be forged. You may wait in place or spend the time on unrelated base-game activities. If you use the Wait command, fourteen 24-hour waits provide the required period. After the time has passed, check the journal and activate the Imperial Dragon Armor quest if a marker is available.
Travel to the Imperial City Prison District and enter the Imperial Legion Compound armory. The reward is placed on the table opposite the entrance once it is ready. Collect the Imperial Dragon Boots, Cuirass, Gauntlets, Greaves, and Helmet.
The game provides a light or heavy version based on your armor skills rather than treating the armor as a required story item. If the version matters to your character, make a separate save before collecting the set and inspect the result before overwriting that save.
- Two in-game weeks have passed since Ocato ordered the armor.
- The quest marker points to the Imperial Legion Compound armory, if shown.
- All five Imperial Dragon Armor pieces have been collected, if the optional reward was pursued.
5. Retain the endpoint and continue safely
For the requested guide scope, completion is confirmed by the finished Light the Dragonfires quest, Martin’s final act, returned player control, and the protected post-ending save. Imperial Dragon Armor is an optional reward and should not be treated as a prerequisite for the main-quest ending.
Use a separate manual save for later side quests, Shivering Isles, Knights of the Nine, or other downloadable-content activities. This preserves an unambiguous base-game endpoint without relying on the current contents of the journal as historical proof.
If PlayStation Plus cloud storage is enabled, allow the completed save to synchronize after creating it, but cloud storage is optional and is not required for progression. Keep the local manual save even if synchronization succeeds.
- Light the Dragonfires is complete.
- Martin’s final act has occurred and control has returned.
- A protected Post-Light the Dragonfires save exists.
- Imperial Dragon Armor is collected only if the optional reward was wanted.
- Any later expansion or exploration progress is stored separately.
Before you move on
- Martin’s final transformation has occurred.
- Light the Dragonfires is marked complete.
- Control has returned to the player.
- The Champion of Cyrodiil trophy has unlocked, or the completed quest and ending sequence have been confirmed without relying solely on the notification.
- A protected manual save preserves the completed base-game state before any out-of-scope expansion content begins.
- If pursued, the Imperial Dragon Armor quest was ordered by Ocato, two in-game weeks passed, and the five-piece set was collected from the Imperial Legion Compound armory.
References for this chapter
Finishing up
The quest Light the Dragonfires is marked complete after Martin Septim transforms into the Avatar of Akatosh and the final sequence returns control to the player.
A protected manual save exists after the main-quest ending for post-main-quest play.
The walkthrough’s stated scope is complete: the base-game main quest ends with Light the Dragonfires; Shivering Isles, Knights of the Nine, and other optional content are outside scope.
Choose your next gameScreenshots & video
Game imagery for reference. Follow the written chapters above for the route and strategies.
Sources & references
Our original guide draws on the references below. Check the edition at the top of this page before following controls or unlock requirements.
- PlayStation Controller Controls — The Elder Scrolls IV: Oblivion Remastered — Bethesda Support
- How do I level up in The Elder Scrolls IV: Oblivion Remastered? - Bethesda Support
- Tips and Tricks — The Elder Scrolls IV: Oblivion Remastered — Bethesda Support
- The Elder Scrolls IV: Oblivion Remastered Update 1.2 — Bethesda
- Graphics - Settings - The Elder Scrolls IV: Oblivion Remastered - Bethesda Support
- The Elder Scrolls IV: Oblivion Remastered — PlayStation Store product page
- Getting Started in The Elder Scrolls IV: Oblivion Remastered - Bethesda.net
- The Elder Scrolls IV: Oblivion Remastered - Guide and Walkthrough — GameFAQs
- Oblivion Remastered Guide: Full Elder Scrolls IV Walkthrough — GameSpot
- Weynon Priory Walkthrough — The Elder Scrolls IV: Oblivion Remastered — Game8
- The Elder Scrolls IV: Oblivion Remastered - PS5 Games - PlayStation
- The Elder Scrolls IV: Oblivion Remastered: Find The Heir Quest Guide
- Find the Heir — Elder Scrolls Wiki
- Weynon Priory — The Elder Scrolls IV: Oblivion Walkthrough — GameBanshee
- Find the Heir — The Elder Scrolls IV: Oblivion Walkthrough — GameBanshee
- Extended Look at The Elder Scrolls IV: Oblivion Remastered — Bethesda Game Studios
- The Elder Scrolls IV: Oblivion Remastered Launch Announcement — Bethesda.net
- The Elder Scrolls IV: Oblivion Remastered Available Now — Bethesda
- Why won’t the Path of Dawn quest update after showing Baurus the Mythic Dawn book? — Bethesda Support
- The Path of Dawn Walkthrough: Mythic Dawn Book Solution — Game8
- Dagon Shrine Walkthrough | The Elder Scrolls IV Oblivion Remastered
- GameBanshee Dagon Shrine Walkthrough
- Dagon Shrine Walkthrough | Elder Scrolls 4 Oblivion Remastered
- Celebrating the Launch of The Elder Scrolls IV: Oblivion Remastered
- What content is included with the different versions of The Elder Scrolls IV: Oblivion Remastered?
- Spies Walkthrough — GameBanshee
- Spies Walkthrough — Game8
- Blood of the Daedra Walkthrough — Game8
- Bruma Gate Quest Support — Bethesda Support
- Defense of Bruma - Quest - Oblivion Remastered Support — Bethesda Support
- Allies for Bruma Walkthrough — Game8
- Blood of the Divines Walkthrough - The Elder Scrolls IV: Oblivion Remastered - Game8
- Miscarcand Walkthrough - The Elder Scrolls IV: Oblivion Remastered - Game8
- Blood of the Divines Walkthrough — GameBanshee
- Miscarcand Walkthrough - GameBanshee
- Defense of Bruma - GameBanshee
- Great Gate Walkthrough | The Elder Scrolls IV Oblivion Remastered
- Great Gate
- The Elder Scrolls IV: Oblivion Remastered - Reference Guide - PlayStation 5
- Extended Look at The Elder Scrolls IV: Oblivion Remastered
- Paradise Walkthrough | The Elder Scrolls IV Oblivion Remastered
- Oblivion Remastered Paradise Walkthrough
- The Elder Scrolls IV: Oblivion Remastered Trophy Guide & Roadmap
- Light the Dragonfires Walkthrough — The Elder Scrolls IV: Oblivion Remastered
- Oblivion Main Quest Walkthrough — GamesRadar
- PSA: Paradise & Light the Dragonfires Game Breaking Bugs — GameFAQs
- The Elder Scrolls IV: Oblivion Remastered — Full Walkthrough with Light the Dragonfires Segment
- How to Get Imperial Dragon Armor: Epilogue Walkthrough — Game8
- Imperial Dragon Armor — GameBanshee Walkthrough
- What do I do if an Achievement or Trophy is not unlocking in The Elder Scrolls IV: Oblivion Remastered? — Bethesda Support
About the game & collecting notes
- Platform
- Sony PlayStation 5
Complete, step-by-step campaign walkthrough for the PlayStation 5 release of The Elder Scrolls IV: Oblivion Remastered, covering only the base game's main quest through the canonical ending (Light the Dragonfires). Expansion questlines (Shivering Isles, Knights of the Nine) are deliberately excluded per this edition scope.
Darryl Polo
Darryl Polo loves tinkering with emulation and revisiting retro games. He enjoys exploring how old favorites play on different setups and sharing what he learns along the way. At Joking Joystick, he writes about the games, hardware, and small discoveries that keep the hobby fun.
Our editorial standardsFound a step that needs another look? Help us improve this guide.