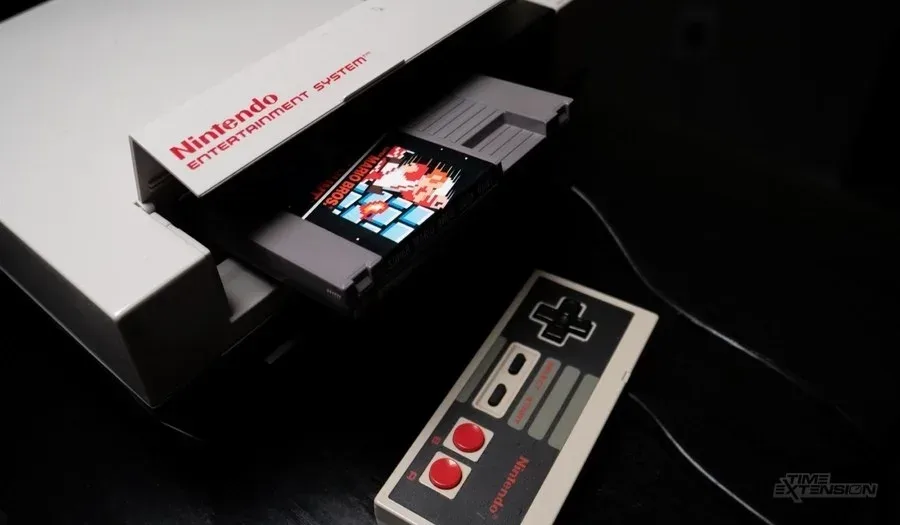
Tetris (NES, Nintendo) — NTSC NES Strategy: Stacking, Rolling and the Kill Screen
Practical, hands-on strategy for the original 1989 Nintendo NTSC NES cartridge. Learn how the Nintendo rotation and input systems work, build resilient stacks, use DAS, hypertapping and rolling to survive level transitions, clear B‑Type, and understand the documented crash/kill‑screen conditions discovered by modern research.

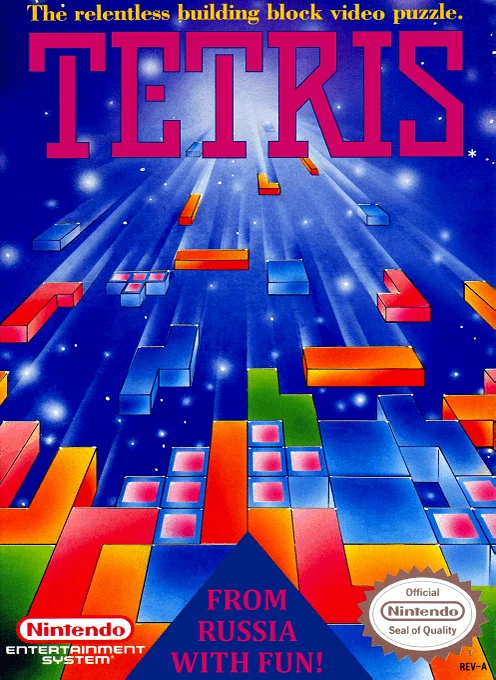
Find a copy
Tetris Nintendo Entertainment System
We may earn a commission if you buy through these links, at no extra cost to you. As an Amazon Associate I earn from qualifying purchases.
Opens retailer search results. Check the model, edition, seller, availability and current price before buying.
Before you begin
You’re using the original Nintendo (NTSC) NES cartridge of Tetris (1989).
This edition uses the Nintendo Rotation System, no hold, no modern hard-drop, a six-frame autorepeat rate after a 16-frame DAS delay on NTSC hardware, and a gravity curve that reaches one row per frame at level 29 — all of which shape how you must stack and move pieces.
This guide focuses only on the unmodified Nintendo NTSC release, not Tengen, PAL, Famicom BPS, training patches, or later remakes.
Follow the chapters in order if you’re new to classic Tetris mechanics: begin with edition and controls, then stacking, rotation, recovery, scoring, progression, DAS, hypertapping, rolling, level-29 survival, the documented late-level crash behavior, and finally B-Type completion and practice planning.
Each chapter gives practical subgoals, drills, recovery decisions, and completion checks that can be verified during play.
Set yourself up for the run
Use an unmodified North American NTSC Nintendo cartridge or an emulator configured to exact NTSC timing; verify the title screen lists Nintendo (1989).
Set controller mapping to the standard NES pad: D‑pad for left/right/down, A/B as rotate if you prefer, Start to pause.
There is no hold and no modern hard drop in this edition.
If using an emulator for practice, disable turbo macros and ensure frame timing matches NTSC (~60.0988 FPS) to get authentic DAS and gravity.
Practice with the next‑piece preview visible.
Measure your baseline: play an A‑Type session from level 0 until you feel DAS limits (typically approaching level 19–29).
Record where you begin to rely on manual tapping vs.
DAS.
This establishes realistic milestones.
Prepare short practice blocks (15–30 minutes) focusing on one skill per session: flat stacking, DAS charging, soft‑drop recovery, hypertap/rolling drills.
Take frequent breaks to avoid hand strain when learning hypertapping/rolling.
Choose the Nintendo NES version and learn the controls
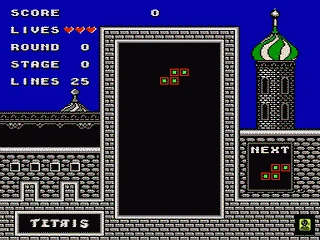
This chapter targets Nintendo’s North American NTSC NES release of Tetris, the Nintendo-published 1989 cartridge. It is not Tengen Tetris, the Japanese BPS Famicom version, a PAL release, a training ROM, or a later port. Learn the original controller layout: Left and Right move pieces, Down performs soft drop, A rotates clockwise, B rotates counter-clockwise, Select hides or restores the single NEXT preview, and Start pauses or begins play. This version has no hold slot, hard drop, modern SRS wall kicks, or lock delay. Normal starting levels are 0 through 9; holding A while pressing Start adds ten, giving access to levels 10 through 19. B-Type uses a selected level and height and ends after 25 cleared lines. NTSC DAS gives an immediate shift, then waits 16 frames before repeating every 6 frames. DAS charging is inactive during ARE and line-clear delay. A charge carried from active play can be redirected during ARE, but neither ARE nor the line-clear animation creates a new charge or provides the same redirection opportunity.
1. Verify the Nintendo NTSC NES edition
Use the Nintendo-published North American NES cartridge titled Tetris, or a verified dump of that release. The target edition is the NTSC Nintendo version released in North America in 1989. Its menu presents A-Type and B-Type play, and its gameplay uses the Nintendo right-handed rotation system.
Do not substitute Tengen Tetris. Tengen’s unlicensed NES release has different menus and gameplay behavior. Also exclude the Japanese BPS Famicom version, PAL software, later ports, and training or modified ROMs that change movement timing, gravity, level selection, scoring, or other engine behavior. When using an emulator, verify the ROM’s region and identity against a trusted database, disassembly, or known-good dump instead of relying only on a filename.
For authentic practice, use an ordinary NES-style controller with turbo and macros disabled. A training ROM may be useful for drills, but altered input timing or added features do not represent the original NTSC cartridge. Video settings and emulator frame pacing should also be stable, because frame timing matters for DAS and high-speed practice.
- Nintendo-published North American NTSC NES Tetris
- Not Tengen, BPS Famicom, PAL, training, or modified software
- Standard controller input with turbo and macros disabled
2. Learn movement, soft drop, and the NEXT display
Press Left or Right to shift the active piece one column. A direction press produces an immediate shift. If you continue holding that direction, NTSC delayed auto shift, or DAS, begins after a 16-frame initial delay. Repeated shifts then occur every 6 frames while the direction remains held. Begin holding early when a piece must travel several columns; do not expect the immediate response or rapid repeat of a modern game.
Press Down to accelerate the piece’s descent. This is soft drop, not hard drop: Down does not instantly send the piece to its landing position through a separate modern-style command. There is also no hold function. Once a piece appears, place it using Left, Right, Down, A, and B alone.
The NEXT display shows one upcoming piece. Press Select during play to hide it, and press Select again to restore it. Keep NEXT visible while learning because this single preview is your main planning aid. Use it to decide whether the next piece can safely fill a prepared well or whether the current stack should remain flexible.
Press Start during play to pause. Press Start again to resume. In the menus, use the Control Pad to move between TYPE, LEVEL, and HEIGHT selections, then use Start or the appropriate confirmation input shown by the screen to begin. The exact gameplay controls remain unchanged regardless of whether NEXT is visible.
- Left and Right move the active piece
- Down performs soft drop
- There is no hold or hard drop
- NEXT shows one upcoming piece
- Select hides or restores NEXT during play
- Start pauses and resumes the game
3. Rotate with A and B under NES rules
Press A to rotate the falling piece 90 degrees clockwise. Press B to rotate it 90 degrees counter-clockwise. The Nintendo NES edition uses the right-handed Nintendo Rotation System. It does not use modern SRS wall-kick tables, so a rotation can fail when the rotated piece overlaps a wall, the floor, or settled blocks.
The O piece does not need to rotate. I has two useful orientations. J, L, and T have four orientations. S and Z can be rotated, but their NES states and positions do not behave like modern SRS versions. In particular, do not expect a blocked rotation to push the piece sideways or upward automatically.
Rotate before the piece reaches the stack whenever possible, then make the final lateral adjustment. At low levels, deliberately cycle through both A and B on each piece type so you learn the resulting positions. Practise near both walls and above uneven stacks, but leave enough room to avoid topping out while testing. At high gravity, there may be too little time to repair a late rotation, so the useful habit is to decide the orientation early and use soft drop only after the destination is clear.
- A rotates clockwise
- B rotates counter-clockwise
- The Nintendo Rotation System has no modern SRS wall kicks
- The O piece does not need rotation
- Test both rotation directions at low speed
4. Select A-Type, B-Type, level, and height
At the setup screens, use the Control Pad to choose TYPE, LEVEL, and HEIGHT. A-Type is the endurance mode. B-Type has a fixed target of 25 cleared lines and begins with a selectable arrangement of garbage blocks according to the chosen HEIGHT. Press Start to begin after making the selections.
For A-Type, the normal starting-level choices are 0 through 9. To start in the faster range, highlight the desired level, hold A, and press Start. The game adds ten to the highlighted value, so highlighting 0 starts at level 10 and highlighting 9 starts at level 19. This is a starting-level shortcut; it does not add ten to the level later during the run.
For B-Type, select both LEVEL and HEIGHT before starting. LEVEL determines the falling-speed setting for the game, while HEIGHT determines the initial garbage arrangement. B-Type does not use the normal A-Type rising-level progression during its 25-line attempt. Build enough room to survive the opening garbage, then clear lines until the counter reaches 25. The ending presentation depends on the selected conditions, but the gameplay completion requirement is the 25-line clear.
For a first B-Type attempt, use a low height and a level at which you can place pieces without panic. Raise HEIGHT gradually after you can clear 25 lines consistently. Do not confuse B-Type’s fixed target with A-Type’s ongoing endurance objective.
- Use the Control Pad for TYPE, LEVEL, and HEIGHT
- A-Type normally starts from levels 0 through 9
- Hold A while pressing Start to start ten levels higher
- B-Type lets you select LEVEL and HEIGHT
- B-Type targets 25 cleared lines
5. Practise authentic NTSC timing
Begin with A-Type level 0 or 1 and B-Type height 0. Test one-column taps, held Left and Right, both rotation buttons, Down for soft drop, Select for NEXT, and Start for pause. Confirm that you can place pieces without searching for a hold button, ghost piece, or hard drop. These checks should become automatic before moving to faster starting levels.
NTSC timing is approximately 60 frames per second. PAL NES Tetris uses different timing, including a shorter DAS startup and faster repeat interval, and its gravity curve reaches one-row-per-frame speed at a different level. PAL practice therefore does not reproduce the timing of the North American NTSC cartridge. Emulator settings, turbo functions, macros, and modified ROM patches can create the same problem even when the screen resembles the original.
Remember the difference between active DAS and delay periods. During active gameplay, holding Left or Right advances the DAS counter. During ARE, the entry period between pieces, the game does not build a new charge. During line-clear delay, charging is also inactive. If a charge was already built during active play, it can be redirected during ARE for the next piece, but pressing a direction during ARE does not create a fresh charge. The line-clear animation does not provide the same redirection window.
Your setup chapter is complete when you can identify the Nintendo North American NTSC release, distinguish it from Tengen, BPS, PAL, and modified versions, select A-Type and B-Type, start A-Type from both ordinary and ten-level-higher settings, select B-Type LEVEL and HEIGHT, rotate in both directions, use soft drop, hide and restore NEXT, pause and resume, and explain why hold and hard drop are unavailable.
- Practise on NTSC timing when possible
- Do not use turbo, macros, or altered-DAS ROMs
- Understand that ARE and line-clear delay do not charge DAS
- Understand that only an existing charge can be redirected during ARE
- Verify starting levels 0 through 19
- Complete the full controller test before advanced practice
Before you move on
- You can identify Nintendo’s North American NTSC NES Tetris and distinguish it from Tengen, BPS Famicom, PAL, and modified releases.
- You can select A-Type or B-Type and use the Control Pad to choose the setup options.
- You can start A-Type at levels 0 through 9 normally and reach levels 10 through 19 by holding A while pressing Start.
- You can select B-Type LEVEL and HEIGHT and understand that B-Type targets 25 lines at its selected level.
- You can use Left, Right, Down, A, B, Select, and Start without expecting hold or hard drop.
- You understand NTSC DAS timing and the difference between active charging, inactive ARE and line-clear delay, and redirecting an existing charge during ARE.
Build a stack that survives bad pieces
Nintendo Tetris for the NTSC NES rewards a low, flexible surface more than a beautiful setup that depends on one future piece. Keep the stack broad, leave open routes for rotations, and use the single NEXT preview to choose placements that preserve several repairs rather than forcing a Tetris. A right-side well is a strong default because it leaves most of the center available for ordinary pieces and gives the I piece a clear vertical target, but the well is only useful while its entrance remains reachable. The NES randomizer is not a seven-piece bag, so an I drought can last long enough to punish a tall waiting wall. Burn singles or doubles when the alternative is a rising peak, covered well, or hole that requires one exact piece. The goal of this chapter is not to prevent every bad sequence; it is to keep enough low, open structure that bad sequences remain playable.
1. Keep the surface low, broad, and repairable
Treat the top of the stack as a working surface. After each lock, compare neighboring columns and ask where the next two or three pieces could go. Prefer placements that leave several shallow contours over a placement that creates one tall tower or a deep pocket. A low stack gives you more time and more lateral options before a piece reaches the lower rows, especially as gravity increases.
Keep the highest occupied cells comfortably below the spawn area whenever possible. This is a practical safety margin, not a guaranteed survival threshold. The Nintendo rotation system has no modern wall-kick table and no lock delay, so a tall peak can remove the space needed to rotate or redirect a piece. If one side rises, lower it with a single or double before continuing to build on the other side.
Do not protect a future Tetris after the setup has become dangerous. A Tetris is valuable for scoring, but survival comes first. Clearing one or two lines to reduce height can preserve the next several placements and lets you rebuild the well from a safer floor.
- Favor broad, low surfaces over isolated towers.
- Lower dangerous peaks before they approach the entry area.
- Use singles and doubles when they prevent a top-out.
2. Use a right-side well without making it a trap
A common NTSC NES arrangement leaves the far-right column open and builds a mostly level surface across the other nine columns. This right-side well is a useful default because J, L, T, S, and Z pieces can usually be worked through the center, while a vertical I can eventually fill the open column for a Tetris. Keep the well open from the bottom upward and avoid raising a wall beside it higher than the rest of the stack.
The well is a resource, not an obligation. If the entrance becomes covered, the surrounding surface rises, or the next pieces cannot safely reach it, stop preserving the setup and burn lines. A failed attempt to maintain the well can leave a taller, more difficult structure than the one you were trying to avoid.
A centered opening can be practiced when both sides of the stack are equally low, but it divides the working area and becomes awkward if one side rises. Use it as a situational alternative rather than assuming it is always superior. The safest well is the one that remains open, reachable, and surrounded by low columns.
- Keep the chosen well open and reachable.
- Do not build a tall wall beside the well while waiting for I.
- Abandon or repair a damaged well before it creates a larger dependency.
3. Read NEXT and avoid one-piece dependencies
The Nintendo NES version shows one upcoming piece and has no hold function. Before locking the current piece, inspect NEXT and decide whether it can lower a peak, fill a shallow notch, reopen the well, or complete a line. Plan around the piece actually displayed rather than assuming that an I, T, or particular rotation will arrive soon.
A dependency is a damaged area that one exact piece or orientation must repair. Examples include a deep two-column notch, a hole beneath an overhang, or a high wall that can only be reduced by a vertical I. Once you identify a dependency, place neutral pieces on the safest low side instead of making the damaged area deeper or taller.
When a piece has several safe locations, choose the placement that leaves the most future options. With no hold, a favorable piece cannot be stored for later, so preserving open floor is more important than saving a visually perfect shape.
- Look at NEXT before committing to the current piece.
- Avoid creating holes that need one exact future piece.
- Use safe, flexible placements instead of relying on hold-style planning.
4. Handle S and Z sequences by filling contours, not staircases
S and Z pieces are easiest to manage when they fill a shallow height difference already present in the surface. Use them to connect two nearby levels, but avoid placing repeated S and Z pieces into the same rising staircase. That pattern often produces holes or a peak that cannot be reached by the next piece.
During an S/Z-heavy sequence, prioritize keeping the field broad. If a single or double removes the rising side, take the clear even when it interrupts a future Tetris. Repair a small cavity immediately when possible; building several pieces above it usually turns a minor defect into a dependency.
Make rotations while the piece still has room. This edition uses the right-handed Nintendo Rotation System, with stricter rotation behavior than modern Guideline Tetris and no modern wall kicks. If a rotation is blocked by the wall or stack, do not expect the game to nudge the piece into place.
- Use S and Z pieces to fill shallow contours.
- Avoid repeated zigzags in one column.
- Rotate before the piece becomes trapped against the stack or wall.
5. Survive an I-piece drought
The original NES randomizer is not a modern seven-piece bag, so the I piece may be absent for a substantial sequence. When it does not appear, stop treating the well as sacred. Keep the surrounding surface low and use singles or doubles to prevent a tall wall from forming beside the opening.
Do not dig a deep trench while waiting. A shallow open column can accept a later vertical I; a deep hole may require several exact placements and can force you to stack above empty space. If the I finally arrives but the vertical entry is unsafe, place it horizontally to flatten the surface or clear lines. Turning an I into a smaller clear is often better than forcing a Tetris that cannot be entered cleanly.
Practice this by mentally declaring the I unavailable for a sequence of pieces. The target is not a perfect board; it is retaining a playable surface without creating a high waiting wall.
- Keep the stack low during an I drought.
- Do not excavate a deep well that requires one exact repair.
- Use a horizontal I when the vertical route is blocked or unsafe.
6. Run practical stacking drills
For a flat-stacking drill, begin at a comfortable A-Type level and play 20 pieces without deliberately forcing Tetrises. Try to keep the highest occupied area well below the spawn region and record every hole, tall peak, or placement that leaves only one repair. The useful measurement is how many options remain after each lock, not the score from the exercise.
For a drought drill, treat the I piece as unavailable for two separate ten-piece practice sequences. Keep a right-side opening or another shallow repair area, but burn lines whenever the surrounding columns rise. Repeat with the opening centered only if both sides remain low; stop the variation when it creates a high split or restricts access.
For a covered-well drill, create only a small obstruction and attempt to reopen the column over the next six to eight pieces when the sequence permits it. Use singles, doubles, and ordinary placements. Do not count an impossible sequence as a failure of technique: the exercise is successful when the opening is restored without replacing it with a taller peak. If the obstruction reaches the spawn area, abandon the drill and practice lowering the stack instead.
- Complete a 20-piece flat-stacking run with few dependencies.
- Survive two ten-piece I-drought exercises without building a tall wall.
- Practice reopening a small obstruction while accepting line burns when necessary.
Before you move on
- You can play 20 pieces while keeping the surface broadly low and avoiding repeated one-piece dependencies.
- You can handle an extended I drought by flattening the field instead of building a high waiting wall.
- You can identify when a right-side opening is still reachable and when preserving it is making the stack worse.
- You can lower a three-row spike or repair a small covered well with ordinary placements and line burns when the piece sequence permits.
- You can explain why a failed rotation cannot be rescued with modern SRS wall kicks and why NES DAS practice must account for its entry and line-clear timing.
Rotate and place every tetromino
Nintendo’s North American NES Tetris uses the right-handed Nintendo Rotation System, not modern SRS. J, L, and T have four rotation states; I, S, and Z use two effective shapes; O remains a two-by-two square. The game has no hold, hard drop, lock delay, or modern wall-kick table. A rotation succeeds only when the resulting piece fits within the field and does not overlap settled blocks. Rotate early, keep the destination open, and treat each piece’s fixed geometry as a placement constraint rather than expecting a late spin to rescue a bad position.
Recognize the NES rotation rules
This chapter targets Nintendo’s North American NTSC NES release from 1989. It does not apply to Tengen Tetris, the PAL release, the Famicom BPS game, Game Boy Tetris, or later Guideline versions. Nintendo NES Tetris uses the right-handed Nintendo Rotation System and provides one next-piece preview, but no hold piece or hard drop.
J, L, and T each have four distinct orientations. I, S, and Z have two effective orientations: horizontal and vertical. Repeated rotations can use different internal states, but they do not create the four distinct shapes found in modern SRS. O has one occupied shape and does not meaningfully change when rotated.
The NES version does not use modern wall kicks. When you rotate, the game checks whether the resulting occupied squares fit inside the ten-column field and avoid settled blocks. If the test fails, the rotation fails instead of shifting the piece around a wall, floor, or overhang. There is also no modern lock delay, so do not expect repeated rotation attempts to hold a piece in place after it reaches the stack.
- Confirm that the game is Nintendo NES Tetris, not the Tengen cartridge.
- Remember that there is no hold, hard drop, lock delay, or SRS kick table.
- Judge a spin by the final occupied squares, not by the apparent outline alone.
Memorize the spawn orientations
All seven tetrominoes enter horizontally in fixed starting states. J, L, and T enter with their broad side arranged horizontally; their fourth block points into the lower part of the starting shape. The J and L are mirror images, while the T has its projecting block beneath the center of its horizontal bar.
The I piece enters horizontally as a four-cell line. Its vertical state is useful for filling a prepared column, but the piece must have enough open space for the NES rotation geometry. If the I is allowed to drift against a wall or beneath a low ceiling before you rotate it, the turn can fail even when the eventual column appears visually available.
S and Z enter in horizontal zigzag states and switch to their vertical zigzag states. Their offsets are directional, so an S placement that works beside a left-hand step may not work in the same apparent gap on the right. O enters as a two-by-two square and should be positioned by moving it, not by trying to improve it through rotation.
- Identify the starting silhouette before moving the piece.
- Rotate I, S, and Z while they still have open space around them.
- Reserve a two-by-two landing area when the next piece is O.
Place each tetromino without relying on kicks
J and L are useful for filling shallow steps and the ends of a flat stack. Use J to place its short leg against a suitable side or step, and use L in the mirrored situation. If the piece must rotate beside a wall, perform the rotation while it is still clear of the wall; do not expect the game to move it sideways after a failed turn.
T is easiest to use on a flat surface or in a shallow three-column notch whose entrance is open. A sideways T can repair a small uneven section, but the rotation must be completed before the surrounding blocks prevent the new shape from fitting. Do not treat ordinary T placements as modern T-spin setups: without kicks, many familiar SRS positions are unreachable.
Use a horizontal I to complete four nearly full rows when the well is prepared. For a vertical I, move it toward an open lane first, rotate it before it reaches the stack, then guide it down the lane. A late rotation beside a wall or low roof is one of the most common NES misdrops.
Use horizontal S and Z pieces to bridge compatible two-column steps. Their vertical states can fill staggered gaps, but only when the offset is on the correct side. If the required square would become sealed above a hole, clear or flatten the area instead of forcing the placement. Place O on a level two-by-two surface or use it to raise a side deliberately; it cannot change shape to repair a one-column defect.
- Rotate before entering a tight gap, not after contact with the stack.
- Use J and L as mirrored tools for shallow steps.
- Reserve vertical lanes for I pieces before the piece reaches the floor.
- Match S and Z to the direction of the step instead of treating them as interchangeable.
Understand legal tucks and failed rotations
A legal tuck in NES Tetris is simply a rotation that fits at the piece’s current position. It is not a special kick. For example, a J, L, or T can rotate into an open three-column cavity if every square in the new orientation is clear and the piece has not descended into a blocking shelf. The same attempt fails when even one required square overlaps the wall, floor, or settled stack.
The fixed rotation geometry matters most near the bottom and sides. A piece may appear to have room for its visible blocks while the rotated arrangement still overlaps a neighboring block. When that happens, move the piece into open air, rotate there, and then shift it toward the destination. If the destination cannot be reached safely, choose a less ambitious placement and preserve a clear surface.
Because there is no lock delay, do not use rotation attempts as a stalling method. Complete the necessary turn during the descent, then use left or right movement to place the piece. At higher levels, a failed rotation close to the stack often becomes an unavoidable misdrop.
- A tuck is a clean fit, not a wall-kick maneuver.
- Rotate in open space whenever the destination is tight.
- If a spin fails, abandon the forced placement and protect the stack.
Practice every piece at increasing speed
Begin on A-Type level 0, where you can see the piece and compare the result with your intended placement. For ten pieces, practice placing J, L, and T into an open three-column cavity without sealing its entrance. Repeat with the cavity on the opposite side so you learn both mirrored directions. The exercise is about entering, rotating, and exiting cleanly; it is not a demand to force every piece into the same hole.
Next, practice I pieces beside both walls. Move each I into a clear lane, rotate it vertical, and place it without relying on a kick. Alternate S and Z pieces across left- and right-facing steps, then deliberately preserve two-by-two spaces for O pieces while keeping the rest of the stack low.
After the placements are reliable, raise the starting level and shorten the time available for each decision. Practice rotating during the early descent and shifting afterward, rather than waiting until the piece touches the stack. A successful session means you can identify the usable orientation, perform the turn without a kick, and switch to a safer landing when the intended cavity is blocked.
- Place J, L, and T into open three-column cavities on both sides.
- Rotate I in clear space before entering a vertical lane.
- Use S and Z in matching staggered gaps and preserve O-sized surfaces.
- Repeat the drills at faster starting levels without relying on late rotations.
Before you move on
- You can name the usable orientations of all seven tetrominoes without consulting a modern SRS diagram.
- You can explain why a blocked NES rotation fails instead of expecting a wall kick.
- You can place J, L, and T into open three-column cavities from both sides of the field.
- You can rotate an I into a clear vertical lane before it reaches the stack.
- You can distinguish the directional offsets of S and Z and preserve a suitable landing area for O.
- You can recover from a blocked rotation by choosing an open placement rather than repeatedly forcing the same spin.
Dig out holes and repair misdrops
Recovery in Nintendo’s 1989 NTSC NES Tetris is damage control: lower the tallest column, keep the next landing area broad, and reopen access to a buried hole before the stack reaches the spawn zone. Because this version has no hold, hard drop, wall kicks, or lock delay, you must work with the piece currently falling and rotate while there is still clearance. Burn singles or doubles when they reduce a dangerous peak, even if that breaks a future Tetris. Preserve a four-column well only while it remains reachable and the surrounding stack is low. The sequences in this chapter are conditional patterns, not guaranteed repairs; the exact board determines whether a rotation and landing are legal.
1. Classify the mistake before placing the next piece
After each lock, identify the highest column, the lowest open route into the damaged area, and whether the next piece can reach that route without colliding during rotation. A shallow hole beneath a low, open stack is usually a delayed repair. A covered well beside a tall spike is urgent because the next few pieces may build above it and remove the remaining entry route.
Judge the board by recoverability rather than by its potential Tetris score. Nintendo NES Tetris gives you one next-piece preview but no hold, hard drop, wall kick, or lock delay. You cannot defer a bad current piece or rotate after it has locked. If the next placement lowers the peak or creates a broad shelf, it is often correct even when it does not preserve four open cells for an I piece.
- Locate the tallest column and the lowest reachable hole.
- Check whether the next piece can approach the damaged area before it becomes blocked.
- Treat a covered well beside a high spike as an urgent recovery position.
2. Burn lines when height or access is the immediate threat
Take a single or double when it removes the tallest part of the stack, exposes a buried column, or creates a flat landing surface. This is especially important when the stack is approaching the top rows or when a well can no longer be entered from above. A smaller clear that restores access is better than adding another piece to protect a Tetris that may never be reachable.
Keep a four-column well when the stack is low, the well is open from the top down, and the next pieces can be placed without raising the surrounding columns excessively. Abandon it when its mouth is sealed, when the adjacent columns are several cells higher, or when forcing the setup requires another overhang. The line-clear multiplier rewards Tetrises, but it does not compensate for a position that cannot accept the pieces needed to reach one.
- Prefer a clear that lowers the highest peak or exposes a route.
- Preserve a Tetris well only while its mouth and bottom remain reachable.
- Do not add an overhang solely to protect a future Tetris.
3. Reopen a covered side well with a legal shelf
For a covered right-side well, first look for a placement that lowers the obstruction or creates a one-cell channel beside it. A horizontal J or L can sometimes cap a step while leaving the lower side open, but this depends on the exact column heights. Place it only if its cells rest on existing blocks or the floor without creating a taller new peak.
S and Z pieces can bridge uneven two-column surfaces, but they are not universal hole fillers. Their right-handed Nintendo Rotation System states and the absence of wall kicks mean a turn that would succeed in modern SRS Tetris may fail here. Rotate while the piece still has horizontal clearance, then inspect whether the landing leaves a channel or merely seals the pocket. If the pocket cannot be reached, use the lowest safe shelf and plan a later line burn instead of stacking directly above the obstruction.
- Create a channel only when every cell of the placement has a legal landing.
- Rotate early; do not depend on a wall or floor kick.
- If the hole remains unreachable, lower the surrounding stack before attempting another repair.
4. Flatten a three-cell spike without making a taller one
When one column rises about three cells above its neighbors, first search for a J or L placement that spans the step and leaves the short end on the lower side. The correct orientation depends on which side is high and whether the piece can enter without striking the stack. The objective is to reduce the height difference, not necessarily to clear a line immediately.
A T can sometimes fill a central notch and cap the spike, but only if the required rotation has open space and the resulting cells do not create a new peak. S or Z may cross a step when its lower cells match the existing contour. If none of these placements produces a broad, low surface, use the safest available piece to avoid increasing the spike, then burn the first line that lowers it. Never assume a particular tetromino guarantees a repair.
- Choose the orientation that reduces the largest height difference.
- Confirm the rotation path is clear before the piece descends beside the spike.
- Reject a repair that simply transfers the peak to a neighboring column.
5. Use soft drop only after the route is decided
Press Down to accelerate a piece toward a destination you have already chosen. In this NES release, soft drop is a faster descent, not a hard drop and not a source of extra lock time. Use short inputs when guiding a piece into a low pocket or onto an uneven shelf, while keeping horizontal movement and rotation under control.
At higher gravity, decide the horizontal destination first, then descend. Holding Down while still searching for a route can carry the piece past the opening before you have completed the required lateral movement. Since there is no lock delay, a piece that reaches its landing position locks without the modern grace period for extra movement or rotation.
- Move and rotate before accelerating the descent.
- Use short soft-drop inputs near the intended landing.
- Do not expect soft drop to permit a last-second rotation after contact.
6. Practise three conditional recovery patterns
Pattern one: a two-cell hole sits beneath an overhang while a three-cell spike borders it. If J or L can legally span the spike without sealing the hole, place it across the step and use the next suitable flat piece to make a single or double. If the overhang blocks the rotation, stop trying to enter the hole and lower the spike from the open side instead.
Pattern two: one block covers the mouth of a side well, but the surrounding surface is only one step uneven. If S or Z can bridge that contour and leave a one-cell channel, place it there; follow with J, L, or T only if the next piece can enter the channel legally. Clear as soon as the channel is exposed. If the bridge would seal the well, choose a lower placement and prepare a line burn.
Pattern three: a three-cell center bump has low columns on both sides. If T can rotate into the notch with unobstructed clearance, use it to reduce the bump. If the turn is blocked, flatten one side with J or L, then use the next piece across the remaining step. Take a single or double when it lowers the bump rather than continuing to stack on top of it. These patterns teach decision-making; they are not guaranteed sequences for every board.
- Verify the intended rotation and landing before committing.
- Stop a pattern when the board differs from its required contour.
- After the repair, rebuild from the broadest low surface instead of immediately restoring the old well.
Before you move on
- You can identify the tallest column, the lowest open route, and the urgency of a hole within one piece.
- You can choose a safe single or double when it lowers the stack or restores access, even when a Tetris setup is available.
- You can test whether a J, L, T, S, or Z placement is legal without relying on modern wall kicks.
- You can use soft drop to finish a planned placement without treating it as a hard drop or lock-delay extension.
- In practice, you can flatten a three-cell spike or reopen a covered well on several different board contours, while abandoning the attempt when the required rotation or landing is blocked.
References for this chapter
Score Tetrises and plan a maxout
Nintendo's North American NTSC NES Tetris uses the original Nintendo scoring system: 40, 100, 300, and 1,200 base points for a single, double, triple, and Tetris. The game multiplies those values by the level factor, using the level after the line clear. Soft drops provide only a small, non-multiplied bonus and are affected by a scoring bug, so they should support safe placement rather than determine your scoring plan. Tetrises are the main route to a high score because they produce 1,200 times the level factor while clearing four rows at once, but a safe single or double is preferable to a dangerous well. The displayed score maxes out at 999,999. That visible maxout is separate from the late-level crash behavior caused by internal score-processing, interrupt, and game-state timing conditions.
Use the Nintendo NES scoring table
This chapter targets the Nintendo-published North American NES cartridge released in 1989. It does not apply the Tengen NES scoring system, the PAL timing version, the Famicom Bullet-Proof Software release, or modern Guideline Tetris. In the Nintendo NES version, the base line-clear values are 40 points for a single, 100 for a double, 300 for a triple, and 1,200 for a Tetris.
The line-clear value is multiplied by the level factor. At level 0, the factor is 1: a single is worth 40, a double 100, a triple 300, and a Tetris 1,200. At level 1, the factor is 2: the values become 80, 200, 600, and 2,400. At level 9, the factor is 10: the values are 400, 1,000, 3,000, and 12,000. In formula form, the values are 40, 100, 300, or 1,200 multiplied by level plus one.
Nintendo NES Tetris uses the level after the line clear when selecting the multiplier. This matters when a clear completes the ten lines needed for a level increase. A clear that crosses that threshold receives the new level factor, so the level shown before the piece locks is not always the factor used for the points.
- Single: 40 multiplied by level plus one
- Double: 100 multiplied by level plus one
- Triple: 300 multiplied by level plus one
- Tetris: 1,200 multiplied by level plus one
- Use the post-clear level when checking a threshold clear
Make Tetrises the scoring backbone
A Tetris is not merely four times a single at the same level. Its 1,200-point base value is 30 times the 40-point single base value. It also clears four rows in one placement, so it is the most efficient normal way to convert a safe stack into score. For that reason, build around an open one-column well, usually at the right edge, while keeping the other nine columns low and reasonably even.
Do not protect the well so rigidly that the rest of the field becomes dangerous. If an S, Z, J, or L piece creates a tall column, a hole, or a covered well, clear a single or double to lower the field and restore access. The points lost by abandoning one Tetris setup are usually less important than surviving long enough to create the next one.
At lower levels, use the extra time to establish a clean surface and take safe Tetrises. As gravity increases, especially around level 19 and beyond, reduce the height of the stack before chasing another four-line clear. A Tetris that requires several difficult lateral moves is less valuable than a simple single or double that leaves the next piece playable.
- Keep the well open only while the surrounding stack remains stable.
- Prefer a low, broad surface over a perfect but fragile Tetris setup.
- Burn singles or doubles before a high stack removes your movement options.
- Remember that Tetrises are worth 1,200 times the level factor, not four times a single.
Treat soft-drop points as incidental
The NES version awards soft-drop points based on the final continuous soft drop that leads to the piece locking. Earlier soft drops during the same piece are not counted in the ordinary scoring behavior. The amount does not receive the line-clear level multiplier, and the original implementation contains a bug in how the soft-drop value is added to the packed decimal score. As a result, the displayed bonus can be unintuitive and is not a dependable scoring route.
Use Down when the piece is already aligned and needs to reach its landing position sooner, or when delaying would create a height problem. Do not choose a risky placement merely to increase the soft-drop bonus. A misplaced piece can cost an entire Tetris setup, while the drop bonus is small compared with a line clear at any meaningful level.
There is no modern hard drop in this release. Scoring practice should therefore emphasize quick visual decisions, controlled soft drops, and safe placements rather than repeated Down inputs for points.
- Soft-drop points do not scale with the line-clear level multiplier.
- Only the final continuous soft drop leading to the lock is normally scored.
- The soft-drop bug makes the exact bonus unreliable.
- Use Down for placement and survival, not as a primary scoring method.
Build a maxout plan
The visible score counter stops at 999,999. Reaching that display value is the conventional NES Tetris maxout. There is no single required line count because the total depends on starting level, Tetris rate, smaller clears, soft-drop activity, and how long the run survives. A level-0 game has more time to build a stack but uses smaller early multipliers; a higher starting level gives stronger scoring immediately but offers less safe setup time.
For a practical maxout attempt, score efficiently before the fastest gravity becomes dominant. At early levels, establish a repeatable well and take Tetrises whenever the stack remains low. Record your score at level transitions so you can distinguish a scoring-efficiency problem from a survival problem. If your score is behind pace, do not compensate by forcing every I piece into a Tetris. Preserve the field and wait for another clean opportunity.
Near level 19 and later, the objective changes from maximizing every clear to preserving playable height. Take a single or double when it removes a dangerous overhang, restores the well, or prevents a top-out. A run that reaches the later levels with a stable stack can still add more score; a run that protects a Tetris setup until the stack is too high may end before earning anything from it.
- Track score at level transitions.
- Use early levels for efficient, low-risk Tetrises.
- Accept smaller clears when they protect the stack.
- Treat 999,999 as the display target for a standard maxout.
Keep maxout behavior separate from crash research
The 999,999 display cap is not an automatic crash trigger. Late-level crash research concerns the interaction of internal score processing, long-running calculations, the NES interrupt handler, and other game-state routines. The earliest known opportunity is associated with the transition into level 155 under specific conditions, but reaching level 155, reaching 999,999, or performing any particular clear does not guarantee a crash on every run.
Research and demonstration runs may use modified ROMs, patches, emulation tools, or altered score behavior. Do not transfer results from those versions directly to an original Nintendo NTSC cartridge. For ordinary scoring, the useful rule is simple: pursue the visible maxout through efficient Tetrises and safe recovery, not by attempting to reproduce crash conditions.
If you are documenting an unusually high-level run, record the cartridge or ROM identity, hardware or emulator configuration, score display, level transitions, and line-clear circumstances. This lets you distinguish a normal maxout from a modified-score experiment or a late-level game-state crash.
- 999,999 is a visible score maxout, not an automatic crash.
- Level 155 is a researched crash opportunity, not a guaranteed failure point.
- Modified ROM findings may not apply to the original NTSC cartridge.
- For normal play, measure success by score, survival, and verified game version.
Before you move on
- You can calculate the Nintendo NES single, double, triple, and Tetris values at levels 0, 1, and 9.
- You know that a Tetris is worth 1,200 times the level factor and that the factor uses the post-clear level.
- You can explain when to abandon a Tetris setup for a safer single or double.
- You understand that soft-drop points are minor, non-multiplied, and affected by an implementation bug.
- You can reach or identify a displayed 999,999 maxout without confusing it with crash behavior.
- You can identify whether a scoring claim belongs to Nintendo NES Tetris rather than Tengen, PAL, Famicom BPS, or a modern port.
Practice transitions from beginner speed to level 19
Train A-Type in deliberate speed bands instead of treating level 19 as a single wall. This chapter targets Nintendo Tetris for the North American NTSC NES, not Tengen Tetris, PAL Tetris, Famicom BPS, or a modern guideline version. The selected starting level determines the opening gravity and the first transition threshold. After that first transition, the game normally advances one level for every ten additional cleared lines. NTSC gravity is 5 frames per row at levels 10–12, 4 at 13–15, 3 at 16–18, and 2 at 19–28. Build a low field, decide destinations early, preserve DAS charge during active play, and use ARE to redirect an existing charge rather than trying to charge a fresh counter during the delay. Line-clear delay does not charge or redirect DAS. Level 19 is a serious control milestone, but it is not an automatic ending or crash point.
1. Select the correct A-Type starting level
Choose A-Type from the title menu, then select the starting level on the LEVEL screen. The visible selector covers levels 0 through 9. To begin at levels 10 through 19, highlight the desired lower digit, hold A, and press Start. For example, highlight 9 and press Start while holding A to begin at level 19. This method belongs to Nintendo’s NES release and should not be confused with the different menus or timing of Tengen Tetris, PAL Tetris, or later ports.
Use level 0 or level 3 for basic placement work, level 5 for faster decision practice, level 9 for a bridge into serious speed, and level 19 for a controlled high-speed test. Do not make level 19 your only practice speed. Slower starts expose covered holes, uneven stacking, late rotations, and unnecessary direction changes before the shorter falling window makes those mistakes difficult to repair.
Keep the NEXT display visible while learning. Select can hide or restore it during play, but hiding the preview removes useful planning information and should be reserved for a deliberate challenge rather than normal progression practice.
- Confirm that the cartridge or ROM is Nintendo Tetris for NTSC NES.
- Use levels 0, 3, 5, and 9 to build control before attempting level 19.
- Hold A while pressing Start if you want the corresponding level from 10 through 19.
- Keep NEXT visible during ordinary practice.
2. Track the real A-Type transition rules
The first transition is not governed by one universal ten-line threshold. For a selected starting level S, the first level increase occurs after the earlier of these two line counts: S multiplied by 10, then adding 10; or the greater of 100 and S multiplied by 10 minus 50. After that first increase, the level normally advances after each additional ten cleared lines.
This produces familiar examples. A level 0 start reaches level 1 after 10 lines. A level 5 start reaches level 6 after 60 lines. A level 9 start reaches level 10 after 100 lines. A level 10 start reaches level 11 after 100 lines, while a level 16 start reaches level 17 after 110 lines. The game’s LEVEL indicator is the safest practical confirmation because the first threshold depends on the starting value.
For a level 19 start, the same transition logic applies to the selected starting level, not to the lower digit used to access it. Do not assume that every practice attempt will have the same transition line count merely because the menu input looked similar. Record the actual starting level and the line total when the LEVEL display changes.
Treat each transition as a preparation checkpoint. If the stack is high, one side is jagged, or the well is covered, clear a safe single or double rather than forcing a Tetris. Entering a faster band with a clean field is usually more valuable than preserving a damaged four-line setup.
- Record the selected starting level and the line count at the first transition.
- Use the LEVEL display instead of assuming every transition occurs after exactly ten lines.
- Lower a dangerous stack before the transition when a Tetris setup is unstable.
3. Build a level-0-to-9 foundation
Start at level 0 and practise in ten-piece blocks. Keep the surface low, preserve a reachable well, and place each piece where it creates the fewest future dependencies. The goal is not to force a Tetris whenever an I piece appears. The goal is to complete each block without creating an avoidable hole, an isolated overhang, or a column that rises far above the rest of the field.
Repeat the same starting level until you can reach its first transition with a stable playfield. When you fail, identify the first irreversible mistake rather than blaming the final top-out. Common causes include covering a hole, building a tall side without a recovery plan, rotating after the piece has descended too far, or holding a direction beyond the intended column.
Move to level 5 only when level 0 placement is repeatable. Then use level 9 as a bridge. Level 9 drops one row every 6 frames, so begin deciding the destination before the piece reaches the middle of the field. Preselect the target side, rotate early when needed, and use a short correction rather than repeated late reversals.
- Reach the first level-0 transition with a low, mostly flat field.
- Repeat the exercise at level 5 without relying on emergency placements.
- Reach level 9 while preserving an open well and avoiding self-created holes.
4. Practise the intermediate speed bands
The NTSC gravity bands are level 10–12 at 5 frames per row, level 13–15 at 4 frames, level 16–18 at 3 frames, and level 19–28 at 2 frames. Practise these bands separately instead of jumping directly from level 9 to level 19. Begin at level 10 and play in five-line or ten-piece sets. Decide the target side before the piece reaches the middle, then use charged horizontal movement for long travel and brief taps for final alignment.
At levels 13–15, stop treating a Tetris as mandatory. If the stack is uneven or the well is covered, take a safe single or double and rebuild the surface. A smaller clear that prevents a three-column spike is a successful decision, not a failure of scoring strategy.
At levels 16–18, rotate earlier and reduce unnecessary corrections. A piece that needs several last-second direction changes is usually safer in a less ambitious location. Use Tetris frequency as a consistency measure only after you can preserve a low field through the entire speed band.
- At level 10, decide most destinations before the piece reaches mid-field.
- At levels 13–15, clear lines without allowing one column to approach the spawn area.
- At levels 16–18, choose safe singles or doubles when the Tetris setup is compromised.
5. Practise DAS charge preservation and ARE redirection
On the NTSC NES release, pressing left or right produces an immediate shift, followed by delayed auto shift if the direction remains held. The charge is created while the piece is actively falling. Entry delay, commonly called ARE, does not build a fresh DAS charge from zero. However, an existing charge from the previous active piece can be redirected during ARE, allowing the next piece to begin moving promptly when it appears. The line-clear delay is different: it does not charge DAS and does not provide the same redirection window.
Practise this without chasing a score. During active play, hold toward a known destination long enough to establish charge, then release or change direction as the piece approaches the intended column. During the following ARE, hold the direction for the next target to redirect the retained charge. When the next piece appears, watch whether it begins traveling promptly. Use a short tap for final alignment instead of holding through the destination.
Repeat the drill in both directions and with three-column and six-column destinations. Add rotation only after the travel route is reliable. A useful ten-piece exercise alternates left and right targets while keeping the stack flat. At level 10, learn the timing comfortably; at levels 15 and 19, repeat the same drill so you can feel how the shorter falling window changes when to rotate, release, and correct.
- Create DAS charge during active play rather than during ARE or line-clear delay.
- Use ARE to redirect an existing charge toward the next destination.
- Practise three-column and six-column movements in both directions.
- Release before the target column and use a short correction for final alignment.
6. Make level 19 a controlled-speed test
Level 19 begins the NTSC two-frames-per-row band, which continues through level 28. It is substantially less forgiving than levels 16–18, but reaching it does not guarantee a crash and does not require you to stop practising there. Begin with short attempts whose only goal is to survive ten pieces while keeping the stack below the spawn area.
Use a Tetris-ready well only while the surrounding surface remains low and open. If the well is covered or the stack develops a tall side, clear lines immediately rather than spending several pieces repairing the setup. At this speed, a planned single or double can be the correct choice even when an I piece may arrive later.
Extend practice from ten pieces to twenty pieces, then to one-minute sessions. A useful milestone is reaching level 19 repeatedly with comparable stack height and deliberate placements. Tetris frequency may be recorded as a pressure benchmark, but it is not a universal requirement. Survival, clean transitions, preserved DAS charge, and repeatable decisions matter first. Keep the hands relaxed, pre-charge during active play when the destination is known, use ARE to redirect that existing charge, and avoid frantic direction reversals.
- Reach level 19 with the stack below the spawn area.
- Survive ten pieces at level 19 without a preventable top-out.
- Extend the session while preserving deliberate movement and a usable well.
- Use scoring efficiency as a secondary measure after stack control is reliable.
Before you move on
- You can start at levels 0, 5, and 9 and reach the first transition with a low field and no repeated self-created holes.
- You can explain why the first transition depends on the selected starting level and why later transitions normally use ten-line increments.
- You can complete repeatable level 10–15 practice while choosing survival clears when a Tetris setup becomes unsafe.
- You can create DAS charge during active play and redirect an existing charge during ARE in both directions.
- You can reach level 19 and survive a controlled ten-piece session without frantic corrections or a preventable top-out.
References for this chapter
Move pieces with delayed auto shift
Nintendo’s North American NES Tetris uses slow delayed auto shift rather than modern instant movement. A Left or Right press moves one column immediately when possible. Holding that direction builds a 16-frame DAS counter; after the first automatic shift, another column moves every 6 frames. The counter can remain charged after release and can be redirected during the entry delay, but ARE and line-clear animation do not charge it from empty. The most reliable high-speed technique is to charge against a wall or stack obstruction, release at the destination, and redirect the stored charge before the next piece becomes active. These methods matter because the game has no hard drop, lock delay, or wall kicks, and NTSC gravity reaches one row per frame at level 29.
Learn the NTSC movement rhythm
Use the original Nintendo Tetris cartridge for the North American NTSC NES release. Pressing Left or Right produces one immediate one-column shift if the piece can move. Continue holding the same direction and the game counts 16 frames before the first automatic repeat. After that shift, the counter is effectively six frames from the next repeat, so the piece moves one column approximately every six frames while the direction remains active.
The NES is specified to run at about 60.1 frames per second, making the repeat interval roughly one-tenth of a second. This is not the same as modern guideline movement: there is no hold piece, hard drop, lock delay, or wall-kick table. Decide the destination early, especially from level 19 upward, where gravity allows only two frames per row and leaves little time for an uncharged cross-field move.
Do not confuse a tap with a charged move. A tap gives the immediate shift; a fresh directional press during active play starts or resets the counter. Releasing the direction does not automatically erase the counter, so a successfully charged piece can retain useful movement timing after you let go.
- Confirm that the game is Nintendo Tetris for the North American NTSC NES, not Tengen, PAL, or a modified training ROM.
- Practise one-column taps at level 0 or 1.
- Hold one direction long enough to see the delayed repeat, then count the shorter interval between later repeats.
- Do not use turbo, macros, or emulator auto-repeat settings.
Preserve and redirect a DAS charge
The common description of pre-charging needs an important qualification: in this NES version, DAS does not continue charging during ARE or the line-clear animation. Those phases are useful for redirecting a charge that already exists, not for building one from zero. If the previous piece finished with a charged counter, press the opposite direction during the entry delay to redirect that stored charge without spending active-piece frames on a new charge.
A practical sequence is: move the current piece toward its target, release the direction when it reaches the desired column, and avoid pressing Left or Right again during active play unless you intentionally want to reset the counter. During the following entry delay, choose the direction needed by the next piece. When that piece becomes active, it can begin with the retained charge instead of waiting through a fresh 16-frame startup.
This technique is most valuable when the next piece must travel several columns. It is less important for pieces that can be placed near their spawn position. If the planned destination changes, do not keep forcing the old direction simply to preserve DAS; a safe placement is worth more than a charged counter.
- Charge a direction during active play, release it, and observe that the next directional action is not automatically treated as a brand-new charge.
- Redirect an existing charge during the entry delay without expecting the delay itself to increase the counter.
- Repeat the drill toward both sides of the playfield.
Use wall charge deliberately
A blocked horizontal move is a reliable way to reach full DAS charge. The obstruction may be the left or right boundary, or a stack ledge that prevents the tetromino from shifting farther. If you hold toward that obstruction, the counter remains at its maximum instead of being consumed by successful shifts. A new tap toward a side that is already blocked also sets the counter to full charge.
To practise, move a piece against the left wall and keep holding Left while it descends. Before the piece locks, release the direction and place it safely. The next piece can then be redirected during entry so it starts with a full charge toward the side you need. The same idea works with a one-cell or taller stack ledge, but the timing window is narrower: holding too early can move over the intended ledge, while holding too late may let the piece land before the charge is established.
Wall charge is not a permanent reserve. A fresh opposite-direction press during active play changes the movement state, and an incorrect new press can destroy the timing you intended. Treat the charge as something to preserve until the next piece, not as a resource that survives every active input.
- Reach the left wall and hold into it before the piece locks.
- Repeat at the right wall with a flat piece.
- Practise charging against a low stack ledge only after the wall version is consistent.
- Verify that a blocked tap produces a full charge, rather than assuming every tap does so.
Drill three-to-five-column travel
Start A-Type at a low level with the stack below the middle of the field. Before each piece reaches the lower half, identify whether it must travel three, four, or five columns. Use an already charged direction when available. If the counter is empty, begin holding early enough to survive the 16-frame startup rather than waiting until the piece is close to the floor.
Run ten-piece sets with no requirement to score Tetrises. The first goal is accurate horizontal arrival. Place J, L, and T pieces with one planned rotation, then repeat with I pieces, whose long body can collide with a raised stack while moving. Use Down only to accelerate descent; it does not replace horizontal planning.
At levels 19–28, repeat the exercise with a low stack because gravity is two frames per row. At level 29 and above, practise only simple destinations and charged movement first. DAS alone cannot cross the field quickly enough for every situation at one-row-per-frame gravity, so do not treat failure to reach a distant column as a control mistake.
- Complete ten low-level placements with three-to-five-column targets.
- Repeat while adding one planned rotation to J, L, and T pieces.
- Practise I-piece travel separately because its width makes ledge collisions more likely.
- Keep the stack low enough that the piece still has room to rotate.
Recover without destroying the charge
When a piece is heading toward the wrong side, release the current direction before making a correction. A single opposite-direction tap gives an immediate one-column response if the path is open, but that fresh press also changes the DAS counter. After the correction, either place the piece immediately or deliberately begin a new charge; do not mash Left and Right while hoping one side will eventually repeat.
Use a recovery drill with a two- or three-column step on one side of the stack. Send one piece to the step, then switch to the opposite side for the next piece. Practise the sequence first at level 5, then at level 10 or higher. If a line clear is available, take it when necessary to lower the stack, even if it breaks a planned DAS setup.
The correct priority is placement safety: preserve a charge when doing so costs nothing, but never sacrifice a safe single or double merely to keep the counter. A clean, low stack gives the next piece more time and more legal movement options.
- Correct one misdirected piece with a deliberate release and opposite tap.
- Rebuild the charge after a correction instead of alternating directions repeatedly.
- Repeat the drill after a line clear and note that the animation does not charge DAS from empty.
- Stop if controller strain develops; speed is not useful if inputs become unreliable.
Before you move on
- You can distinguish the immediate one-column shift, the 16-frame startup, and the six-frame repeat interval on the NTSC release.
- You can create a full charge by holding into a wall or stack obstruction.
- You can preserve a charge after releasing the D-pad and redirect it during the entry delay without claiming that ARE itself charges DAS.
- You can move a newly active piece three to five columns with a prepared charge and place ten consecutive low-level pieces without unnecessary direction changes.
- You can explain why the drills must be retested for PAL, Tengen, emulator timing variations, and modified ROMs.
References for this chapter
Hold the controller for hypertapping
Hypertapping is a manual technique for moving pieces laterally faster than the Nintendo NES version’s delayed auto shift. It uses repeated press-release inputs on the D-pad, not turbo, macros, or emulator automation. The technique is most useful when high gravity leaves too little time for normal auto shift to carry a piece several columns. It does not change the piece’s falling speed, rotation behavior, lock timing, or wall interaction. Learn it at low speed, keep the stack low, and stop if your hand or forearm becomes uncomfortable. There is no universal grip or tap rate: controllers, polling behavior, hand size, and coordination all affect the result.
Confirm the version and understand the purpose
Use the North American Nintendo Tetris cartridge for the NTSC NES, not Tengen Tetris, the PAL release, the Famicom BPS version, or a modern Guideline game. The Nintendo manual identifies A-Type as the endurance mode and lists the A and B buttons as clockwise and counter-clockwise rotation controls. The NTSC release uses delayed auto shift for horizontal movement: a directional press moves the piece once, then a held direction waits before repeating. Hypertapping is a way to generate additional distinct directional presses during that movement window.
The technique is valuable because high gravity can leave very little time for a piece to travel. At level 29, the NTSC gravity table reaches one row per frame, so a piece may lock before ordinary auto shift can move it far enough. Hypertapping can help with that horizontal travel, but it does not provide extra descent time, alter the rotation system, or create modern wall kicks. Choose the destination and orientation first; use the technique only to complete the required horizontal movement.
- Use the original North American Nintendo NES edition for accurate practice.
- Treat hypertapping as manual press-release input, never as turbo or a macro.
- Keep the stack low while learning so a failed attempt is recoverable.
Choose a comfortable grip
The simplest grip uses the thumb or index finger over the required side of the D-pad. Press lightly, release fully, and press again. Some players use a thumb flick, while others use the side or tip of the index finger to create a quicker rebound. There is no required grip. The correct grip is the one that produces separate, repeatable inputs without making the controller twist in your hands.
Support the controller with your palms, legs, or a stable surface instead of squeezing it tightly. Practise Left and Right separately because the two directions may feel different depending on the controller. Keep the fingers that operate A and B relaxed until you can move consistently. If you experience pain, numbness, cramping, or persistent fatigue, stop the session. Hypertapping is not harmless or comfortable for everyone, and forcing speed is more likely to create misdrops than useful movement.
- Use light pressure and release the D-pad between presses.
- Test both directions instead of assuming one grip works equally well on each side.
- Stop immediately for pain, numbness, cramping, or lingering discomfort.
Learn distinct press-release inputs
Start an A-Type game at a low starting level. Choose a clear, low stack and avoid difficult overhangs. Hold Left or Right briefly to observe the normal first movement, then release. Next, make two or three deliberate presses in the same direction. Watch the piece rather than trying to move as fast as possible. Your first goal is to make the inputs visibly separate and predictable.
When the basic rhythm is reliable, practise short bursts lasting only a few seconds. Move a piece two or three columns, release the D-pad, and finish the placement normally. Repeat in the opposite direction. If a press becomes a hold, the game may continue with normal delayed auto shift instead of treating it as another manual input. If the piece moves farther than intended, reduce force and lengthen the release between presses. Do not chase a particular taps-per-second number; there is no rate that works identically across players and controllers.
- Complete ten short bursts without rotating or misplacing the piece.
- Repeat the exercise toward both walls.
- Increase speed only after each press produces predictable movement.
Add rotation in a separate step
Once horizontal bursts are controlled, combine them with one planned rotation. Start with J, L, or T pieces at a low level. Decide the orientation before the piece reaches the stack, press A or B once, then use a short directional burst to move toward a prepared flat area. Keep the sequence simple: rotate, move, release, and place. Do not strike the D-pad and rotation button together until you can reliably separate them.
Practise destinations on both sides of the field. A rushed D-pad press can overlap with A or B and produce an unwanted rotation. The NES rotation rules are stricter than modern SRS, so hypertapping cannot rescue a placement that is blocked by the wall or stack. If the piece needs several last-second corrections, abandon the risky placement and choose a safer burn or flat landing. Survival is more important than demonstrating the technique on every piece.
- Rotate a J, L, or T once and move it into a planned destination.
- Practise left-side and right-side placements separately.
- Use a visible next piece and a low stack while learning.
Progress from low speed to high gravity
Use short practice sets rather than one long endurance attempt. Begin with ten-second directional bursts at a low level. Rest, then repeat while adding one rotation. After that, start at a faster level and perform only a few controlled placements. Between sets, relax the hand and check whether releases remain distinct. If the rhythm becomes tense or inaccurate, return to the slower drill instead of forcing more speed.
At levels 19 through 28, use hypertapping only when ordinary movement or pre-charged DAS is insufficient. At level 29 and above, the one-row-per-frame gravity makes preparation especially important: keep the stack low, avoid destinations requiring long travel, decide the rotation early, and use short bursts immediately when needed. If the piece cannot reach a safe location, accept that the placement may be lost rather than repeatedly striking the D-pad and creating an unintended rotation or side movement. Hypertapping improves one movement option; it does not guarantee survival.
- Perform three accurate ten-second bursts without pain or loss of control.
- Complete five consecutive placements that combine one rotation with controlled movement.
- Use hypertapping selectively at high gravity instead of relying on it for every piece.
Before you move on
- You can move a piece several columns with distinct press-release inputs in either direction.
- You can rotate a J, L, or T piece and hypertap it into a planned destination without an accidental extra rotation.
- You can perform several short practice sets while keeping the hand relaxed and stopping before discomfort develops.
- You can explain when ordinary movement or pre-charged DAS is enough and when hypertapping is worth the added execution risk.
- You understand that level 29 gravity makes horizontal movement difficult, but hypertapping is not a guarantee of survival.
Learn the modern rolling grip
Rolling is a physical controller technique used in competitive Nintendo NES Tetris to generate rapid repeated left or right inputs. One hand keeps a finger lightly positioned over the chosen D-pad direction while the other hand drums across the back or underside of the controller, pushing it into that stationary finger. The method can produce more frequent lateral inputs than held DAS and is generally less dependent on the arm tremor used for hypertapping, but it is not effortless, injury-proof, or identical on every controller. Learn it gradually, use an unmodified controller or faithful replica, and keep turbo, autofire, and macros disabled. Rolling improves horizontal movement only; it does not add modern wall kicks, hard drop, hold, or extra time before a piece locks.
Set up the controller and choose a comfortable support
Use an original NES controller or a responsive, faithful digital replica. Place yourself so the controller can move slightly when the drumming hand strikes its back or underside. You may hold it freely, brace part of it against your palm, or support it lightly against your leg or another stable surface. The correct support is the one that lets the controller bounce toward the stationary D-pad finger without requiring a tight grip.
Choose one direction first. Put a thumb or finger lightly over the direction you want to practise. The finger should be close enough to register a press when the controller moves into it, but relaxed enough that it does not constantly hold the direction down. Hand size, controller shape, button stiffness, and orientation all affect the best position.
- Practise one direction before attempting left-right alternation.
- Keep the controller stable without squeezing it tightly.
- Disable turbo, autofire, macros, and any input-assistance features.
Create the rolling motion
Reach the back or underside of the controller with the opposite hand. Drum across it with two or more fingertips in sequence, similar to tapping a tabletop. Each strike nudges the controller toward the finger resting on the D-pad. The D-pad finger remains comparatively still while the controller moves into it, creating separate directional inputs without requiring the finger to lift and strike repeatedly.
Start slowly. Use two or three fingers and aim for five clean inputs rather than maximum speed. The movement should be small and controlled. If the controller swings, the finger loses contact, or several strikes fail to register, reduce the force and change the angle of the controller. A fast motion that produces missed inputs is less useful than a slower, repeatable roll.
- Produce five separate inputs without moving the D-pad finger rapidly.
- Use a relaxed wrist and small finger movements.
- Stop immediately if you feel pain, numbness, tingling, or loss of control.
Practise away from active gameplay
Before using rolling during a serious game, practise in short intervals with no pressure to place pieces. Roll for about 10 seconds, rest for 20 to 30 seconds, and repeat several times. Try a different controller angle or support if the inputs are inconsistent. Some players use a grip associated with Cheez, while other players adapt the method to their own hand position or controller. There is no mandatory grip that works identically for everyone.
Rolling became prominent in modern competitive NES Tetris through players including Cheez, and its physical approach is related to broader multi-finger techniques associated with players such as Fly. That history does not establish one required grip or make the technique the property of a single player. Focus on clean input registration and comfort rather than copying a famous player’s exact hand placement.
- Complete three controlled 10-second intervals.
- Test at least two supports or controller angles.
- Take regular breaks instead of extending a painful session.
Connect rolling to horizontal piece movement
Start an A-Type game at a low level. Use rolling only to move a piece horizontally; it does not rotate the piece or change its falling speed. Roll toward the desired wall, release the direction, then rotate with A or B after the piece reaches the intended side. Separating travel from rotation makes accidental drift easier to identify.
Once that sequence is reliable, combine a short roll with one rotation during the same descent. Begin with J, L, and T pieces because they make it easier to see whether the piece arrived at the intended column before rotating. Add I pieces later, since an I often needs a long horizontal journey and a carefully chosen orientation. Do not roll every piece automatically. Use a normal tap or DAS for a one- or two-column correction and reserve rolling for long travel, high gravity, or an urgent recovery.
- Move a piece several columns without overshooting.
- Practise rightward and leftward rolls separately.
- Release the direction before making the final rotation or correction.
Respect original NES timing and rotation limits
Rolling changes how quickly you can issue horizontal inputs, but it does not change the rules of the Nintendo NES version. The game has no modern hold function, no modern hard drop, and no modern SRS wall-kick table. A rotation can still fail when the piece overlaps a wall or stack, so rolling cannot rescue an impossible rotation.
At normal gravity, practise the sequence of roll, release, rotate, and settle. At higher levels, decide the destination before the piece reaches the bottom because the available movement window becomes very short. Keep the stack low while learning. If you continue drumming while trying to rotate, the piece may drift into a wall or lock one column away from the intended slot. Practise controlled short rolls before attempting rapid cross-field movement.
- Perform one roll followed by one clean rotation.
- Repeat the sequence with J, L, T, and then I pieces.
- Increase the starting level gradually instead of beginning at level 29.
Build endurance and integrate rolling into games
After the basic motion is reliable, use 20-second and then 30-second intervals. Try slow-fast cycles: roll at a controlled pace for five seconds, increase speed for five seconds, then return to the controlled pace. The objective is consistent registration, not a universal number of taps per second. Controller response and hand technique vary too much for one target rate to apply to every player.
Finish practice with a low-level A-Type game. Use ordinary taps or DAS for simple placements and roll only when a piece must cross several columns or when gravity makes ordinary movement unreliable. If accuracy declines, stop the session. Rolling can distribute work across several fingers, but it is not automatically safe or injury-free. Change the grip, controller support, or session length rather than forcing the same motion through discomfort.
- Maintain accurate inputs during a 20- to 30-second interval.
- Place several pieces without accidental rotations or direction changes.
- Use rolling selectively instead of relying on it for every placement.
- End practice with no lingering pain, numbness, or loss of hand control.
Before you move on
- You can roll in both directions for at least 20 seconds while maintaining consistent input.
- You can move a piece several columns, release the direction, rotate, and place it without accidental drift.
- You can distinguish when a short tap or DAS movement is better than rolling.
- You can use rolling during a low-level A-Type game without allowing it to disrupt simple placements.
- You can complete repeated practice sessions without pain, numbness, or declining hand control.
References for this chapter
- Learn NES Tetris
- The Definitive Guide to ROLLING - Tetris’s Most Game Breaking Technique
- A Deeper Dive into the New Rolling Technique in NES Tetris
- Tetris (NES video game)
- CheeZ - Liquipedia Tetris Wiki
- NES Tetris DAS, Hypertapping and Rolling: How the Kill Screen Died
- How Gen Z is pushing NES Tetris to its limits
Survive the traditional level-29 kill screen
In the original North American Nintendo NES release, level 29 begins the maximum ordinary gravity setting: pieces fall one row per frame. This is not an automatic crash or programmed ending, but it leaves very little time to move and rotate each piece. Enter the transition with a low, broad field, an open center, and no repair that depends on one specific future piece. Charge directions during active play, then redirect an existing charge during ARE, or entry delay. ARE and line-clear animation do not build a fresh DAS charge; line-clear animation also does not redirect the existing counter. Ordinary DAS cannot reliably carry a newly spawned piece across the entire field before it lands, so direct placements, conservative singles and doubles, hypertapping, or rolling become important. Level 29 is the original cartridge’s traditional kill screen, while level 39 is a later competition setting rather than the normal NTSC speed transition.
Enter level 29 with a repairable field
Use the final pieces before the transition to lower the stack, remove covered holes, and flatten dangerous peaks. Do not carry a tall Tetris setup into level 29 simply because an I piece might produce more points. A low, broad surface gives the next pieces more legal landing choices when they begin falling immediately.
Keep the center and spawn area open. A one-column well near the right side can support Tetrises, but it is useful only while the surrounding surface remains low and reachable. Abandon the setup if it creates a high tower or forces every future placement to depend on an I piece. Enter level 29 with a field that can accept several different tetrominoes.
- Lower the highest column before the transition.
- Keep the center and spawn area open.
- Remove covered holes and isolated towers.
- Choose a flexible field over a fragile Tetris setup.
Understand the level-29 gravity window
On the NTSC Nintendo NES version, the gravity table reaches one row per frame at level 29 and remains at that value afterward. The 20-row playfield means a piece descending through an empty well can reach the floor in roughly 20 frames, although the usable window changes with the spawn position, stack height, rotations, and early collisions.
A held direction moves the piece once immediately, then waits through the NTSC DAS startup before repeating. The commonly documented timing is a 16-frame initial delay followed by one-column shifts every 6 frames. At level 29, ordinary DAS therefore gives little time for a newly spawned piece to travel from the center to a distant wall. A reachable slot on the spawn side is often safer than an ideal slot on the opposite side.
- Treat every piece as an immediate placement problem.
- Expect ordinary DAS to provide limited cross-field travel.
- Choose a reachable destination before the piece descends into the stack.
- Do not mistake the gravity increase for an automatic game-over condition.
Charge during play and redirect only during ARE
Build DAS charge while the current tetromino is active by holding a direction when you know the next useful movement will go that way. A blocked directional input can also preserve or complete the charge instead of wasting a shift, which is why experienced players sometimes deliberately touch a wall or ledge during a placement. This is a timing aid, not a replacement for choosing a legal destination.
During ARE, release or change the held direction to point an already charged counter toward the next piece. ARE and line-clear animation do not charge a fresh counter. Inputs during line-clear animation do not redirect the existing counter either, so do not treat the flashing rows as an additional setup window. The useful sequence is active-play charging, then ARE redirection before the next piece appears.
For practice, place one piece while charging toward a wall or ledge, then use the ARE between pieces to reverse the intended direction. Repeat with both directions. The goal is to make the next piece move promptly without assuming that holding a direction during a pause creates DAS readiness from zero.
- Build charge during active play.
- Redirect an existing charge during ARE only.
- Do not rely on ARE or line-clear animation to create a new charge.
- Do not use line-clear animation as a redirection window.
- Use wall contact as a timing aid, not a guaranteed solution.
Rotate early and choose the nearest safe landing
At level 29, rotate before the final descent whenever the destination requires another orientation. The original NES game does not use modern SRS wall-kick tables, so a late rotation can fail when the rotated piece overlaps the wall, stack, or floor. A safe central placement is usually preferable to a distant cavity that demands several late inputs.
J, L, and T pieces are easiest to manage when their flat side can rest on a broad surface. Rotate while there is still room, then make the shortest possible horizontal adjustment. Direct I pieces toward the well early; if the well is covered or too far away, use the I piece to lower a dangerous peak or accept a smaller clear rather than forcing a cross-field Tetris.
The O piece does not need rotation. Use it to preserve a broad surface, fill a shallow depression, or keep the center usable. Do not spend scarce movement time trying to rotate it.
- Perform necessary rotations before the final descent.
- Avoid modern wall-kick assumptions.
- Route I pieces to reachable wells only.
- Use O pieces to preserve a flat, flexible surface.
Keep the center open and burn lines for survival
New pieces enter near the center, so avoid building a tall central column or a narrow spike that demands an immediate repair. A slightly inefficient placement that preserves the spawn area is often better than keeping a perfect Tetris well while the rest of the field rises.
Singles and doubles are valid level-29 recovery tools. If the stack is climbing, clear the first safe lines instead of waiting for an I piece. Filling the well temporarily is acceptable when it lowers the highest blocks or opens the center. Rebuild the well only after the field has enough room for another mistake.
Do not treat every four-line opportunity as mandatory. A Tetris that leaves a covered hole or central tower can be worse than a single that removes the immediate threat. At maximum gravity, survival depends on maintaining a playable surface, not preserving a scoring pattern at any cost.
- Keep the spawn area usable.
- Clear dangerous peaks immediately.
- Accept singles and doubles when they lower the field.
- Restore the well only after the surface is stable.
Use hypertapping or rolling for distant targets
Hypertapping replaces reliance on the 16-frame DAS startup with rapid press-and-release inputs on the D-pad. Begin at lower speeds, then practise at level 19 before attempting level 29. Start with short bursts that move a piece several columns without rotation. Once the movement is reliable, combine the burst with an early J, L, or T rotation and a controlled final adjustment.
Rolling uses one hand to keep a finger lightly positioned on the D-pad while fingers from the underside of the controller drum against its back, pushing the controller upward into the stationary finger. The grip varies with the controller and requires adaptation. Practise for 10 to 30 seconds at a time, alternate slow and fast cycles, and stop if the hand, wrist, or forearm becomes painful.
Neither method has a universal safe speed or guaranteed success rate. Controller construction, hand size, input polling, and technique affect the result. Turbo controllers, macros, and modified input devices change the training target and should not be used when practising for an unmodified cartridge.
- Learn manual movement at lower speeds first.
- Practise movement before adding rotation.
- Use short hypertapping or rolling intervals with breaks.
- Train with an unmodified controller when authentic practice matters.
Recover immediately after a misdrop
If the first level-29 piece misses its intended slot, abandon the old plan. Place it in the lowest legal position that avoids creating a new tower, even if this fills the well. Use the next piece to lower the tallest column, then take the first safe single or double. Do not spend several pieces trying to recreate a Tetris setup that the misdrop has already made unreachable.
When the field reaches the upper rows, prioritize any line clear that creates visible space. Do not wait for the exact piece needed to restore the original pattern. A recovery may take several pieces, and its legality depends on the actual board and upcoming sequence; no fixed repair pattern is guaranteed.
After the game, identify the failure: excessive transition height, a destination too far from spawn, an uncharged direction, a late rotation, or an inconsistent tap or roll. Rehearse that situation at level 19 or another lower speed before returning to level 29.
- Place a misdrop low instead of forcing the original plan.
- Lower the tallest column before restoring the well.
- Take immediate safe clears when available.
- Repeat the failed situation at a lower speed before retrying.
Measure progress with repeatable drills
First, reach level 19 consistently with a low stack and no emergency top-outs. Then practise level-29 starts with a simple target: survive five pieces using active-play DAS charging, ARE redirection, and direct placements while keeping the center open. Increase the goal to ten pieces, then to one safe line clear.
Add a recovery drill by temporarily filling the well and reopening it through singles or doubles. Practise both left-side and right-side destinations so you do not depend on one route. For hypertapping or rolling, move pieces to both sides without rotation, then combine the movement with J, L, and T placements.
The completion standard is repeatability, not a particular tap frequency. You should be able to identify a reachable destination, preserve or redirect DAS readiness during the correct phase, make the required manual movement, and keep the field playable after an imperfect piece. Level 29 remains dangerous, but these habits turn it from an abrupt wall into a demanding survival section.
- Reach level 19 consistently before serious level-29 attempts.
- Survive five level-29 pieces using charged DAS and ARE redirection.
- Complete one safe level-29 line clear without immediate top-out.
- Recover a covered well or tall spike with singles or doubles.
- Move pieces left and right manually without turbo or macros.
Before you move on
- Reach level 29 with the highest blocks below the spawn area and the center open.
- Survive at least five pieces at level 29 using DAS charged during active play and redirected during ARE.
- Complete one safe level-29 line clear without immediately topping out.
- Recover from a covered well or tall spike using singles or doubles, then restore a usable flat surface.
- If using hypertapping or rolling, move pieces across the field consistently with manual inputs and no turbo or macros.
- Understand that level 29 is the original NTSC maximum-gravity section, while level 39 is a competition setting rather than the cartridge’s normal speed transition.
Understand level 155 crash triggers and Blue Scuti level 157
The original Nintendo NTSC NES release has no scripted final level. At extreme levels, its score-update routine can take longer than the available frame-processing time. When rendering or interrupt work occurs while that update is incomplete, the game can resume under assumptions that no longer hold, producing corrupted execution, a freeze, or other crash symptoms. The earliest prominent NTSC opportunity is a single-line transition into level 155 while the unmodified game is still displaying a capped score of 999,999. Reaching level 155 alone does not guarantee failure. Willis Gibson, known as Blue Scuti, entered level 155 with a triple on December 21, 2023, missed that earliest opportunity, and later crashed an unmodified NES Tetris run at level 157 after clearing a single. Later triggers depend on the line-clear type, level transition, board and piece state, score timing, and exact execution. The October 2024 human rebirth demonstration was different: Michael Artiaga reached level 255 and returned to level 0 on a modified crash-resistant version. Treat crash research, original-cartridge runs, modified training versions, TAS results, and rebirth demonstrations as separate categories.
1. Confirm the original Nintendo NTSC edition
This chapter applies to Nintendo’s North American NES Tetris release from 1989, using NTSC timing. It does not apply directly to Tengen Tetris, PAL NES Tetris, the Famicom BPS release, Tetris Gym, training cartridges, score-modified patches, or modern ports. Timing and code differences can change the earliest vulnerable level and the conditions that follow.
For an original-cartridge investigation, document the cartridge, console, controller, display, and region before starting. For emulation, verify that the ROM is the Nintendo NTSC release and that the emulator is using accurate NTSC timing. Disable turbo, macros, input recording, score patches, crash-resistant patches, and training overlays unless the run is explicitly labeled as modified.
Begin recording before the title screen if the result is intended as evidence. Keep the title screen, score progression, level transitions, final clear, and damaged display in the same recording. This distinguishes an original-ROM crash from an emulator mismatch, cartridge fault, freeze, or altered ROM behavior.
- Use Nintendo NES Tetris, not Tengen, PAL, Famicom, or a modern release.
- Document the cartridge or ROM identity and NTSC hardware or emulator timing.
- Do not treat modified-ROM, turbo, macro, or training results as original-cartridge evidence.
2. Separate the visible score cap from crash behavior
On the unmodified Nintendo NES release, the visible score reaches 999,999 and remains capped there. That display behavior is not itself the crash and does not mean that every later clear immediately fails. The game still performs score-update work during play, so the capped display must be considered separately from the processing required to handle another clear.
This distinction is essential when comparing research footage. StackRabbit demonstrations, competitive training versions, and other high-level tools may alter scoring or repair crash conditions so that players and programs can continue beyond the original game’s normal failure points. Those versions are useful for practice and analysis, but their score display, timing, and late-level outcomes are not automatically evidence of what an unmodified cartridge would do.
If a supposed original-ROM run displays scores beyond the normal six-digit cap, stop and identify the modification before using the footage to support a crash claim. Likewise, a run that freezes without a documented level transition and line clear should not be labeled a confirmed level-triggered crash.
- Confirm that the normal display remains capped at 999,999.
- Treat the display cap and internal score-update work as separate facts.
- Label StackRabbit, Tetris Gym, crash-resistant, and score-modified footage separately.
3. Understand why level 155 is the earliest prominent opportunity
The best-known early NTSC trigger is a single-line clear that transitions the game into level 155 while the unmodified scoring behavior is still active. At very high levels, the score-update routine can take longer than the available frame-processing time. When rendering or interrupt work occurs while that game-state update is incomplete, the program can resume under assumptions that no longer hold, producing corrupted execution, a freeze, or other crash symptoms.
Describe this as a timing and game-state failure, not as a simple one-byte score overflow. The level transition, the line-clear type, the capped-score situation, and the timing of the interrupted update all matter. Level 155 identifies the earliest prominent danger zone; it does not independently force the game to crash.
For the classic earliest test, record the level before the clear, the number of lines cleared, the displayed score, and the result immediately afterward. A single clear into level 155 is the relevant condition. A double, triple, or Tetris into that level is a different event and should not be reported as the same trigger. If the game continues, the earliest level-155 opportunity was avoided or did not produce a failure, and later condition-dependent opportunities may remain.
- Target and document a single-line transition into level 155.
- Keep the normal 999,999 display and unmodified scoring behavior.
- Do not describe level 155 alone as a guaranteed crash.
4. Identify Blue Scuti’s level-157 crash correctly
Willis Gibson, known as Blue Scuti, reached the first widely recognized human crash of an unmodified NES Tetris run on December 21, 2023. He did not take the earliest prominent level-155 route: he entered level 155 with a triple rather than the single clear associated with that opportunity. He continued playing and later crashed at level 157 after clearing a single line.
The failure produced the damaged presentation associated with late-game NES Tetris crashes, including unexpected colors and a corrupted or broken level display. These effects are symptoms of the program leaving its intended execution path, not a normal ending screen. The exact appearance can vary because the failure is condition-dependent.
Use Blue Scuti’s result as a historical example, not as a universal recipe. A single clear at level 157 was the condition in his relevant run, but the result should not be generalized to every ROM revision, emulator, controller setup, or late-game board. The record must include the edition, level transition, clear type, score display, and visible failure state.
- Use the exact date December 21, 2023.
- Remember that Blue Scuti entered level 155 with a triple and crashed later at level 157.
- Treat corrupted colors and level text as crash symptoms, not a programmed victory screen.
5. Record later triggers as condition-dependent events
After the first level-155 opportunity, later crashes depend on more than the level number. The line-clear type, the transition into the next level, the score-update workload, the piece and board state, and exact frame timing can all affect whether the game continues or fails. Community research therefore uses condition tables rather than a single fixed final level.
When testing an original cartridge, record every relevant clear near the suspected crash region. Note the level before and after the clear, the number of lines removed, the displayed score, the piece involved, the input state if known, and the video timestamp. Preserve the screen immediately before and after the event. Do not summarize the result as “level 156 always crashes” or “level 157 is the final level.”
If the game avoids a trigger, later behavior can include additional visual corruption, unstable late-level execution, or eventual progression toward the level counter’s high-end rollover. These possibilities belong to a separate research category from Blue Scuti’s crash. A run that reaches a later level without failing has not disproved the crash research; it has followed a different condition path.
- Record each late-game line-clear condition, not just the final level.
- Separate original-ROM results from TAS, AI, and crash-resistant training-ROM results.
- Do not claim that level 155, 157, or any later level guarantees failure.
6. Distinguish crash, rollover, and rebirth evidence
A crash occurs when the program leaves normal Tetris execution and the game freezes, corrupts its display, or otherwise stops behaving as intended. A rebirth is different: after the level counter reaches its upper range, it can roll back to level 0, returning the game to the slowest level range. Reaching level 255 and returning to level 0 is therefore not the same achievement as triggering a level-155-or-later crash.
In October 2024, Michael “dogplayingtetris” Artiaga became the first human player widely reported to achieve rebirth, reaching level 255 and returning to level 0 on a modified crash-resistant version. That run demonstrated the rollover route, but it was not completion of an ordinary unmodified cartridge. Tool-assisted work has also explored original-ROM behavior beyond the usual crash region, but TAS results should not be merged with human cartridge evidence.
For a credible crash report, show the title screen, the complete score and level progression, the final line clear, the damaged display, and the hardware or emulator details. State whether the software was an original cartridge dump, an unmodified cartridge, a crash-resistant patch, a training ROM, or a tool-assisted setup.
- Define crash and rebirth as different outcomes.
- Identify whether the run used original or modified software.
- Preserve enough video and setup information for independent verification.
Before you move on
- You can explain why a single-line transition into level 155 is the earliest prominent NTSC crash opportunity.
- You can distinguish the visible 999,999 score cap from the internal score-update work relevant to the timing problem.
- You can describe the failure as a timing and game-state problem rather than reducing it to a one-byte overflow.
- You can identify Blue Scuti’s December 21, 2023 level-157 crash and explain that he missed the level-155 single-clear opportunity by entering with a triple.
- You can distinguish original-cartridge crashes from modified-ROM, AI, TAS, and rebirth demonstrations.
- You can document a late-game result with the level, clear type, score display, hardware or ROM version, and visible failure state.
References for this chapter
- Nintendo NES Tetris bugs and mechanics explained
- Celebrating the first NES Tetris game crash
- 34 years later, a 13-year-old hits the NES Tetris kill screen
- 13-year-old gamer becomes the first to beat the unbeatable Tetris
- Teen achieves first NES Tetris rebirth, proves endless play is possible
- October 2024 report on NES Tetris rebirth history
Clear B-Type and build a practice routine
Nintendo Tetris for the North American NTSC NES uses B-Type as a fixed 25-line challenge. Choose Game B, select a starting level from 0 through 9, and choose Height 0 through 5 for the opening garbage. Holding A while pressing Start on the level-selection screen adds 10 to the selected gameplay level, allowing Level 10 through Level 19. B-Type does not advance its level during play. Height 0 starts with an empty field; Heights 1 through 5 begin with progressively more garbage rows. Clear safely rather than waiting for perfect Tetrises, keep the surface low, and repair dangerous columns before they reach the spawn area. Learn low-height clears first, then raise speed and height separately. The standard maximum ending challenge is Level 9, Height 5. Level 19, Height 5 is a faster separate challenge; its ending and completion bonus use the corresponding original Level 9 selection, so it also produces the Level 9 Nintendo-character presentation at Height 5. Completion requires 25 cleared lines followed by the ending sequence; topping out ends the attempt first.
Select B-Type, level, and height
At the title menu, choose Game B and continue to the level-setting screen. Select a direct starting level from 0 through 9, then select Height 0 through 5. The selected B-Type level remains fixed for the attempt; unlike A-Type, it does not rise after groups of cleared lines.
To start in the high-speed range, highlight the desired level from 0 through 9, hold the A button, and press Start. The game adds 10 to the gameplay level. For example, selecting Level 9 and using this input starts the falling speed at Level 19. This is an original Nintendo NES feature, not a Tengen, PAL, Famicom BPS, training-ROM, or modern-port setting.
The B-Type objective is to clear 25 lines. If the blocks reach the top of the playfield first, the attempt ends. Height 0 begins with an empty field. Heights 1 through 5 add progressively higher starting garbage; the documented amounts are 0, 3, 5, 8, 10, and 12 garbage rows for Heights 0 through 5.
- Confirm that Game B is selected.
- Use Level 0 or 1 and Height 0 for initial practice.
- Hold A while pressing Start to add 10 to the selected gameplay level.
- Remember that B-Type speed remains fixed throughout the game.
- Treat Level 19 as a faster setting, not as a level that will advance during the attempt.
Repair the opening garbage before building higher
When using Height 1 or higher, inspect the starting field before placing the first piece. Find the lowest line that can be completed without creating a tall column or sealing the only useful opening. The immediate goal is to make the surface workable, not to preserve a perfect Tetris setup.
Clear a single or double as soon as it lowers a dangerous section. Waiting for an I-piece while the highest column rises is usually a poor trade in B-Type, because one failed setup can end the attempt before the 25-line target. Use flat pieces to level the garbage and place awkward pieces where they create the fewest future dependencies.
Keep at least one reachable route through the field. Do not fill the only open column if doing so creates a roof over the remaining garbage. After every clear, reassess the new surface because removing a line can expose, cover, or reshape the gaps you planned to use.
- Inspect the garbage before placing the opening piece.
- Prefer a safe single or double over a dangerous wait for an I-piece.
- Preserve at least one reachable route through the opening garbage.
- Reassess the field after every line clear.
Use a survival-first 25-line plan
Treat the attempt as five groups of five lines: 5, 10, 15, 20, and 25. After each group, mentally inspect the full surface. Keep the stack low and reduce sharp peaks before they become emergencies. A right-side well can support Tetrises, but it is optional; use it only while the surrounding columns remain low and reasonably flat.
When an I-piece arrives and the well is prepared, a four-line clear is efficient. Do not make the entire field depend on receiving one. If the stack develops a three- or four-high spike, take an available single or double when it lowers the field. In B-Type, survival and reaching 25 lines matter more than maximizing the score.
After a line clear, choose the next placement from the new board rather than from the old plan. A former well may have shifted, and a previously safe gap may now be covered. Keep flexible surfaces for J, L, T, S, and Z pieces instead of building a narrow structure that only one future piece can repair.
- Review the field at 5-line intervals.
- Use Tetrises when naturally available, not as a reason to overbuild.
- Accept singles and doubles when they prevent a height spike.
- Base each placement on the post-clear surface.
Raise speed and height separately
First clear B-Type at Level 0 or 1, Height 0 without repeated opening errors. Then keep the level low and raise the height one step at a time. This isolates garbage management from reaction speed. If a higher-height attempt fails during the first few pieces, return to the previous height and practise opening repairs instead of increasing speed immediately.
For speed training, return to Height 0 and move through progressively faster levels. Once a speed is dependable, combine it with Height 1 through 3. Level 9, Height 5 is the familiar maximum standard challenge using the normal level selection. Level 19, Height 5 is a separate extreme-speed milestone reached through the A-button level-selection input.
The high-speed input affects gameplay speed by adding 10 to the selected level, but the B-Type ending and completion bonus use the corresponding original level selection from 0 through 9. Thus, a run started from highlighted Level 9 with A held begins at gameplay Level 19, while its ending is calculated as the Level 9 ending. At Height 5, that means the Nintendo-character presentation with the complete Height 5 sequence. Do not describe Level 19, Height 5 as producing a distinct Level 19 ending.
- Stabilize Height 0 before adding garbage.
- Stabilize a faster level before combining it with Height 3 or higher.
- Treat Level 9, Height 5 and Level 19, Height 5 as separate speed milestones.
- Remember that Level 19 uses the corresponding original Level 9 ending and bonus calculation.
- Do not mistake the ending presentation for an additional gameplay objective.
Practise movement and recovery
Use the same controller and display setup for serious attempts and practice. At a low level, run ten-piece drills with J, L, and T pieces. Hold a direction during the entry period, release before reaching the target column, and rotate only after confirming the lateral position. This develops control of delayed auto shift without turbo or macros.
Create a controlled two- or three-high bump and practise repairing it with the next suitable pieces. Use soft drop only after deciding the destination. This NES release has no hold function or modern hard drop, so every placement must be planned with the current piece and the single NEXT preview.
At faster levels, practise pre-charged movement and short directional taps. If a well becomes covered, lower the tallest column and reopen a reachable gap instead of forcing an I-piece into an inaccessible position. Recovery depends on the exact board and upcoming pieces; no single repair pattern is guaranteed.
- Complete ten-piece movement drills without accidental overtravel.
- Repair a small bump while keeping the stack below the spawn area.
- Practise pre-charged movement and short taps without turbo or macros.
- Use the NEXT preview to avoid creating one-piece dependencies.
Build a weekly routine and verify completion
Use two focused B-Type sessions each week. In the first, play several Level 0–3 games at Heights 0–2 and concentrate on opening garbage, flat stacking, and safe line clears. In the second, play faster Height 0 games, then combine the fastest dependable level with a moderate height. Add short A-Type sessions for endurance, DAS pre-charging, and high-speed placement.
If you use hypertapping or rolling, practise in short intervals and stop if it causes pain, fatigue, or loss of control. The aim is repeatable placement, not a particular technique. Keep a record of the selected menu level, the resulting gameplay level, height, whether the A-button high-speed input was used, the number of lines cleared, and the first cause of failure.
A completed B-Type game is verified when 25 lines have been cleared and the game advances to its ending sequence. Confirm the result from the line total and ending presentation, then record the selected level, resulting gameplay speed, height, and whether the high-speed input was used. A high score without the ending sequence is not a completed B-Type clear.
- Play low-height games for stacking and garbage-repair practice.
- Add speed only after the current level is dependable.
- Practise controller techniques briefly and comfortably.
- Verify that 25 lines have been cleared and the ending sequence begins.
- Record menu level, gameplay level, height, high-speed selection, result, and failure cause.
Before you move on
- Clear B-Type at Level 0, Height 0 and confirm that 25 lines are cleared and the ending sequence begins.
- Clear B-Type at progressively higher heights while keeping the stack below the spawn area.
- Clear the standard Level 9, Height 5 challenge.
- Attempt Level 19, Height 5 by selecting Level 9, holding A, and pressing Start.
- For a Level 19, Height 5 clear, verify the Level 9 Nintendo-character ending with the Height 5 presentation.
- Verify that 25 lines have been cleared and the ending sequence begins, rather than relying on score alone.
- Maintain a practice record listing menu level, gameplay level, height, high-speed selection, successful clears, and failure causes.
Finishing up
A-Type survival: repeatedly reach level 19 and survive a meaningful level-19 session with a low, playable stack and deliberate placements; reaching level 20 is optional rather than required.
B-Type completion: clear a 25-line B-Type run at a chosen starting level and height, record those settings, and repeat until the clear is reliable.
Technique mastery: create and preserve an NTSC DAS charge during active play, redirect an existing charge during entry delay, and use it to move newly active pieces several columns; separately demonstrate controlled hypertapping or rolling in short, pain-free manual drills without requiring a universal tap rate.
Crash awareness: identify the condition-dependent late-level crash behavior of the original NTSC cartridge, including why the single-line transition into level 155 is an early crash opportunity, without treating any level number as an automatic crash.
Choose your next gameScreenshots & video
Game imagery for reference. Follow the written chapters above for the route and strategies.
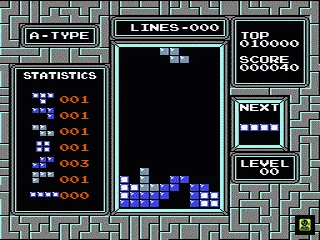
Sources & references
Our original guide draws on the references below. Check the edition at the top of this page before following controls or unlock requirements.
- Nintendo Tetris Instruction Manual
- Tetris (NES)
- Nintendo Rotation System - Tetris Wiki
- Tetris NES Disassembly
- Tetris (NES) — StrategyWiki
- Nintendo Rotation System - TetrisWiki
- Tetris — Nintendo NES Manual PDF
- Tetris (NES, Nintendo) / ROM map - Data Crystal
- Tetris · Puzzle Genome Atlas
- Applying Artificial Intelligence to Nintendo Tetris
- Tetris/Rotation systems - StrategyWiki
- Scoring - TetrisWiki
- Maxout - TetrisWiki
- Nintendo NES Tetris bugs and mechanics explained
- DAS
- DASのテクニック (2): DASをチャージする - NES Tetris Japan Portal
- NES – Classic Tetris Europe – Hypertapping
- Learn NES Tetris
- Tetris (NES video game)
- Tetris Players Have Discovered A New Technique
- The Definitive Guide to ROLLING - Tetris’s Most Game Breaking Technique
- A Deeper Dive into the New Rolling Technique in NES Tetris
- CheeZ - Liquipedia Tetris Wiki
- NES Tetris DAS, Hypertapping and Rolling: How the Kill Screen Died
- How Gen Z is pushing NES Tetris to its limits
- Rules – Classic Tetris World Championship
- 13-year-old gamer becomes the first to beat the unbeatable Tetris
- Celebrating the first NES Tetris game crash
- 34 years later, a 13-year-old hits the NES Tetris kill screen
- Teen achieves first NES Tetris rebirth, proves endless play is possible
- October 2024 report on NES Tetris rebirth history
- Tetris — NES FAQ by Pegboy
- Tetris — NES Files Manual and Scoring Reference
About the game & collecting notes
- Platform
- Nintendo Entertainment System
Practical, hands-on strategy for the original 1989 Nintendo NTSC NES cartridge. Learn how the Nintendo rotation and input systems work, build resilient stacks, use DAS, hypertapping and rolling to survive level transitions, clear B‑Type, and understand the documented crash/kill‑screen conditions discovered by modern research.
Darryl Polo
Darryl Polo loves tinkering with emulation and revisiting retro games. He enjoys exploring how old favorites play on different setups and sharing what he learns along the way. At Joking Joystick, he writes about the games, hardware, and small discoveries that keep the hobby fun.
Our editorial standardsFound a step that needs another look? Help us improve this guide.