
Super Mario Odyssey (Nintendo Switch) — Complete Campaign Walkthrough (Standard Edition)
Step-by-step campaign walkthrough for Super Mario Odyssey (Nintendo Switch, Standard Edition). Follow a verified kingdom-by-kingdom route from Bonneton to Bowser’s final fight, then the post-story Mushroom and Moon sequences. Practical objectives, boss tactics, capture usage, and concrete checks to finish the main story and unlock the core postgame challenges.

Find a copy
Super Mario Odyssey Nintendo Switch
We may earn a commission if you buy through these links, at no extra cost to you. As an Amazon Associate I earn from qualifying purchases.
Opens retailer search results. Check the model, edition, seller, availability and current price before buying.
Before you begin
You are starting a globe-trotting 3D platform adventure where Power Moons fuel the Odyssey and unlock the next story destinations.
Use Cappy and captured enemies to reach new areas, bypass hazards, solve puzzles, and defeat many bosses.
This guide follows the original Nintendo Switch release through the main campaign: Cap Kingdom, Cascade, Sand, the Lake/Wooded branch, Cloud and Lost, Metro, the Snow/Seaside branch, Luncheon, Ruined, Bowser’s Kingdom, Moon Kingdom, and the post-story Mushroom Kingdom.
Lake and Wooded Kingdoms can be completed in either order, as can Snow and Seaside Kingdoms. Follow the active Odyssey objective and use each kingdom’s travel prompt rather than treating those branches as a fixed order.
The campaign completion check is Bowser’s defeat, the Moon Kingdom escape and ending sequence, and access to Mushroom Kingdom. Dark Side and Darker Side are optional postgame challenges.
Set yourself up for the run
Choose a controller setup that makes ordinary Cappy throws, jumps, dives, ground pounds, long jumps, wall jumps, and captures comfortable. Motion gestures are optional; button inputs are sufficient for the campaign.
Use the Odyssey’s displayed Power Moon requirement as the immediate travel goal. You do not need to clear every kingdom’s Moon list before leaving.
The campaign has two flexible branches: Lake and Wooded Kingdoms can be completed in either order, and Snow and Seaside Kingdoms can also be completed in either order. Follow the kingdom currently offered by the Odyssey.
Use the map and Moon List to separate story objectives from optional rewards. Hint Toad, Talkatoo, regional shops, Moon Rocks, and most challenge rooms can wait for revisits.
Activate Checkpoint Flags near difficult arenas, preserve regular coins for useful purchases or Hint Toad, and return to the Odyssey after each story reward to confirm the next destination.
Controls, Cappy and Core Mechanics
Before leaving the first kingdoms, practice Mario’s movement and Cappy’s basic functions in a safe area near the Odyssey. Cappy can attack, collect, activate objects, provide a temporary platform, and capture compatible targets. Captures replace Mario’s normal movement with the captured target’s abilities, but their duration and failure conditions differ by target. Use the map’s Power Moon list to track discovered objectives, then return to the Odyssey to see how many Moons are required for the next voyage. Motion gestures can improve some actions, but button inputs are sufficient for the main campaign and are usually easier to repeat consistently.
Choose a reliable controller setup and practice ordinary throws
Play with the controller arrangement that gives you the best control over Mario’s movement. Joy-Con, Pro Controller, and handheld play support the campaign. Cappy’s ordinary throw is assigned to the controller’s throw button, and the same action can also be performed with a motion gesture. If motion aiming feels inconsistent, use the button input and concentrate on positioning Mario before throwing.
In a safe area, throw Cappy straight ahead, throw while moving, and hold the throw button to keep Cappy suspended briefly. Recall him before walking into a hazard. A normal throw can strike enemies, collect nearby coins, hit switches, knock objects away, and remove some enemies’ hats. Do not assume that every target accepts Cappy: some enemies, characters, objects, and scripted targets are immune or require a different interaction.
- Throw Cappy at a harmless nearby enemy and recall him.
- Hold Cappy in place long enough to recognize his hovering position.
- Use a throw to hit an object or enemy without jumping into it.
Learn capture control and plan the exit before entering danger
To capture a compatible target, throw Cappy at it when it is not protected or otherwise immune. Mario then controls that target and uses its movement set or special ability instead of his normal moves. A captured object or enemy may swim, stretch, fly, fire projectiles, break barriers, or interact with machinery. Read the visual prompts and test the target’s ability in a safe position before crossing a large gap.
Captures are temporary, but there is no single rule that explains every way they end. Mario can deliberately release many captures, and control can also end when the target is defeated, destroyed, caught by a hazard, or removed by a scripted transition. Some targets have their own limits or special failure behavior. Taking damage should not be treated as a universal release condition; if a capture survives a hit, continue controlling it only if the route remains safe. Before capturing anything near a cliff, identify where Mario will stand after release.
- Capture one compatible target and test its unique ability.
- Release it deliberately in a safe location.
- If a target rejects Cappy, look for an unprotected target or a different interaction rather than repeatedly throwing at it.
Build the movement chain used throughout the campaign
Mario’s core movement includes the regular jump, double and triple jumps, wall jump, ground pound, backflip, long jump, roll, and dive. Press the jump button to jump. While running, combine crouch with jump to perform a long jump across a broad gap. In midair, use crouch to ground pound; this can activate starburst switches, break suitable surfaces, and give Mario a recovery option when he needs to descend quickly. A crouch-and-throw input while rolling or airborne performs the game’s roll or dive actions according to the current situation.
Use wall jumps in shafts and narrow passages by jumping toward a wall and jumping again as Mario contacts it. Use a dive after a jump when Mario is slightly short of a ledge. The dive is not a substitute for checking the landing: aim toward solid ground, then prepare to grab a ledge or bounce from Cappy if the route allows it.
- Perform a long jump from a running start.
- Ground pound a safe patch of ground or a visible switch.
- Wall jump between two close walls.
- Use a midair dive to correct a short landing.
Extend jumps with cap jumps and directional throws
For a cap jump, throw Cappy toward the destination and hold the throw button so he remains in place. Jump onto Cappy to gain extra height or distance. If Mario is already airborne, dive toward the hovering cap to extend the jump farther. This is one of the most useful combinations in the campaign because it can replace a risky blind long jump and is repeatedly useful in boss arenas and capture puzzles.
Cappy can also be directed upward or downward, and a spin throw can sweep around Mario. The button method for a spin throw is to rotate Mario with the movement stick and throw Cappy during the rotation; motion gestures provide another way to perform related throws but are optional for ordinary story progress. Stop Mario before attempting a precise upward or downward throw near a ledge.
- Hold Cappy in front of Mario and perform a cap jump.
- Combine a jump, held Cappy, and dive toward the cap.
- Use a spin throw to clear several nearby enemies or activate surrounding objects.
- Practice an upward and downward throw while standing still.
Check the Odyssey requirement before leaving a kingdom
The Odyssey requires a specified number of Power Moons before it can travel to the next destination. The requirement is shown at the Odyssey, so return to the ship whenever you want to confirm how many more Moons are needed. Story objectives, boss rewards, and several nearby tasks usually provide enough Moons without clearing the whole kingdom.
Do not confuse the travel requirement with the kingdom’s complete Moon total. Optional Moons can remain uncollected and can be pursued on later visits after new routes, Moon Rocks, and post-story objectives become available. If the ship will not depart, check the number shown at the globe and deposit the Moons you have collected by interacting with it.
- Return to the Odyssey and read the current travel requirement.
- Deposit collected Moons at the Odyssey globe when prompted.
- Leave optional or currently inaccessible Moons for a later visit if the travel requirement is already met.
Use the map and Moon list to organize progress
Press Minus to open the map. From the map, press Y to open the Power Moon list, then use the available kingdom navigation to review entries for the current area and other visited kingdoms. The list records Moon objectives and helps distinguish collected entries from those still outstanding. Map markers do not represent every possible Moon, especially when an objective is hidden, becomes available later, or belongs to a challenge that is not yet revealed.
Use Hint Toad or Talkatoo only after checking nearby landmarks and the list yourself. Hint Toad can identify a Moon location for coins, but a hint does not replace the Odyssey’s travel requirement. Keep a simple note of the story Moons you have earned and the next destination requirement; this prevents wasting time on optional challenges when the ship already has enough fuel.
- Open the map with Minus.
- Press Y to inspect the Power Moon list.
- Compare the list with the number shown at the Odyssey.
- Check nearby landmarks before spending coins on a hint.
Spend coins without blocking useful purchases
Gold coins are used for shop purchases and can also restore health when collected. Regional coins are restricted to the kingdom where they were found and are used for kingdom-specific outfits, souvenirs, and other shop items. Outfits generally do not grant permanent abilities, although some costume doors and optional objectives require a particular outfit.
Keep a reserve of gold coins before an unfamiliar boss or difficult route. Buy a costume when a visible door or objective clearly requires it, but do not spend freely on vanity items while you are still learning the route. The campaign is advanced by collecting and depositing Power Moons, not by completing every shop collection.
- Keep extra gold coins before entering a boss arena.
- Check the stated costume requirement before buying an outfit.
- Remember that regional coins cannot be spent in another kingdom.
Before you move on
- You can throw and recall Cappy reliably without moving Mario into danger.
- You can capture a compatible target, test its ability, and release it safely.
- You can perform a long jump, ground pound, wall jump, roll, dive, and cap jump.
- You can use a button-based spin throw and understand that motion gestures are optional alternatives.
- You can open the map with Minus, open the Moon list with Y, and compare it with the requirement displayed at the Odyssey.
- You understand that captured targets have different abilities and different failure or release conditions.
- You know to reserve coins for clearly required costumes or useful services instead of treating every purchase as campaign progress.
References for this chapter
Cap Kingdom (Bonneton) — The Opening Hub
Cap Kingdom is the prologue tutorial rather than a normal Power Moon stop. After Bowser’s opening attack, Mario reaches Bonneton, meets Cappy, learns basic Cappy throws and capture, and crosses the bridge to Top-Hat Tower. Capture a frog inside the tower to climb its vertical rooms, then defeat Topper at the summit by removing his hats and stomping his exposed head twice. After the fight, use the Spark Pylon to travel to Cascade Kingdom. Do not search for required Power Moons here during this first visit: the game’s first story Moon is obtained after reaching Cascade Kingdom and beginning the Odyssey recovery objective. Cap Kingdom’s broader Moon content becomes available when you return later.
Meet Cappy and complete the opening capture tutorial
After the opening scene, follow the white Bonneter ghost through the hills toward the settlement. Cappy joins Mario near the end of the bridge and explains the basic cap throw. Throw Cappy at nearby objects and enemies as the prompts indicate. Use ordinary throws to strike targets, activate objects, and clear small obstacles; hold the throw button when the game demonstrates a sustained cap throw so Cappy remains active briefly in front of Mario.
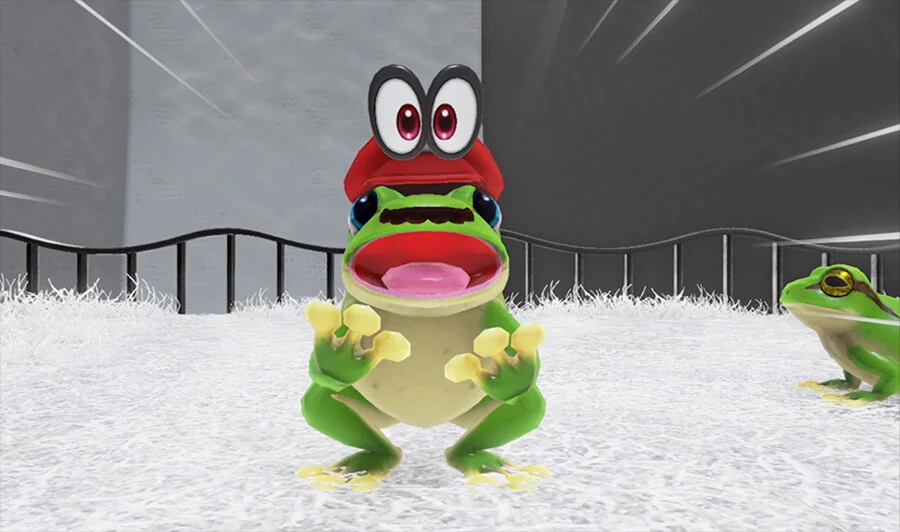
Continue along the street until the capture lesson begins. Throw Cappy at the nearby frog to take control of it. The frog’s important ability is its high jump, which lets it reach ledges that Mario cannot reach with ordinary jumps. Move through the short lesson, then release the capture when you need to return to Mario. The game’s capture tutorial is the required opening interaction; there is no Klepto sequence in this Cap Kingdom route.
- Cappy has joined Mario.
- The capture tutorial is complete.
- The frog’s high jump has been used successfully.
Raise the bridge and enter Top-Hat Tower
Follow the road toward Bonneton’s central area and continue to the lever near the bridge leading to Top-Hat Tower. Throw Cappy at the lever to raise Sometimes Bridge. Cross it and use Cappy on the yellow hat-shaped door to enter the tower.
Before entering, activate the checkpoint flag outside Top-Hat Tower. The flag changes to Mario’s emblem when it is active and provides a convenient return point after a fall or defeat. You may clear nearby small enemies and objects for coins, but none of those actions is required for story progress.
- Sometimes Bridge is raised.
- The yellow hat door is open.
- The Top-Hat Tower checkpoint flag is active.
Capture a frog inside the tower and climb upward
Inside Top-Hat Tower, cross the initial white platforms and water section until you reach the group of frogs. Throw Cappy at one frog to capture it. Use the frog’s high jump to work upward through the tower, aiming for the next ledge or platform after each bounce. Follow the tower’s route around its interior rather than trying to reach the upper levels with Mario alone.
Goombas appear on some sections. Avoid them if the landing is awkward, or defeat them by coming down on top of them. Continue upward through the gold-ring and ledge sections. Near the upper room, jump out of the frog and return to Mario, then open the exit door. A chest near the exit contains a Life-Up Heart; collect it if you want additional health before the boss. Leave the tower and touch the upper checkpoint flag before entering the central summit arena.
- The frog has been captured inside Top-Hat Tower.
- The tower’s upper exit has been reached.
- The summit checkpoint flag is active.
Defeat Topper at the summit
Step onto the white plaza to begin the Topper fight. Topper starts with three hats stacked around his head. Throw Cappy at him to knock the hats away. The loose hats slide around the arena and can damage Mario, so keep moving around the outside and use Cappy to intercept a hat that approaches. When all of Topper’s hats have been removed, his head is exposed; jump on it once to damage him.
Topper then hides in one of the hats. Hit the hats with Cappy until Topper is revealed, then continue throwing Cappy to remove his hats again. Once his head is exposed a second time, jump on it again to finish the fight. If Mario is hurt, strike a loose hat when it releases a Heart, but do not pursue a Heart through an unsafe collision. The boss arena itself acts as the retry area, so a defeat does not require repeating the entire tower climb.
- All of Topper’s hats are removed during the first phase.
- Topper is stomped once.
- Topper is found after hiding and is stomped a second time.
Use the Spark Pylon to leave Cap Kingdom
After Topper is defeated and the scene finishes, return to the upper tower area and locate the Spark Pylon. Throw Cappy at it to transform Mario into an electric spark, then steer along the electrified wire toward Cascade Kingdom. This is the required end of the opening Cap Kingdom chapter.
The initial Cap Kingdom visit does not require collecting a Power Moon. The Odyssey is not yet functioning as the normal kingdom-travel hub, and the first story Moon appears after Mario reaches Cascade Kingdom and begins repairing the Odyssey. When Mario arrives in Cascade Kingdom, follow the new objective toward the damaged Odyssey instead of returning to Bonneton to search for early Moon markers.
- Topper has been defeated.
- The Spark Pylon has been activated.
- Mario has arrived in Cascade Kingdom and can begin the Odyssey recovery objective.
Before you move on
- Mario has reached Bonneton, Cappy has joined him, and the opening capture tutorial is complete.
- Sometimes Bridge and the yellow hat door have been used to enter Top-Hat Tower.
- A frog has been captured inside the tower and used to reach the summit.
- Topper has been defeated with two successful head stomps.
- The Spark Pylon has carried Mario to Cascade Kingdom.
- The next active story objective is to recover the Odyssey and obtain the first story Power Moon in Cascade Kingdom.
Cascade Kingdom (Fossil Falls) — Platforming and Dinosaurs
Cascade Kingdom introduces the central capture and traversal mechanics while restoring the Odyssey. Use the first Chain Chomp to uncover Our First Power Moon, then follow the upper route and use a Big Chain Chomp to open the 2D passage toward Fossil Falls Heights. Before the boss, destroy the western rock wall with another Chain Chomp and collect Chomp Through the Rocks. Madame Broode’s battle requires repeated captures of her golden Chain Chomp, Chain Chompikins: remove its hat, capture it, and launch it into her three times. Her Multi Moon counts as three Power Moons. With the first Moon, Chomp Through the Rocks, and the Multi Moon, you have the five Moons needed to leave for Sand Kingdom. The T-Rex and most other Cascade rewards are optional on this visit.
Uncover Our First Power Moon
After arriving in Cascade Kingdom, move forward from the Odyssey landing area toward the first Chain Chomp. Avoid its lunge, then throw Cappy at it to capture it. Pull back to stretch the chain and aim the Chomp at the shiny rock near the waterfall. Release it to smash the rock and reveal Our First Power Moon.
Collect the Moon, then return to the Odyssey and throw Cappy at the globe. The ship will show the number of Moons still needed before it can travel onward. On the first visit, plan to collect five Moons rather than searching for every available reward.
- Capture the first Chain Chomp.
- Destroy the shiny rock near the waterfall.
- Collect Our First Power Moon and power the Odyssey once.
Open the upper route with the Big Chain Chomp
From the Waterfall Basin area, cross the stone bridge and continue past the spiky enemies. Follow the route toward the group of Chain Chomps. Capture the large Chain Chomp and use its extended lunge to smash the rock wall blocking the green Warp Pipe.
Enter the Warp Pipe for the short 2D Mario section. Move through the passage, watching the Goombas and gaps, then exit from the pipe at the upper end. You will emerge near the higher part of Fossil Falls. Activate the Fossil Falls Heights checkpoint before continuing.
- Reach the Chain Chomp group beyond the bridge.
- Break the wall blocking the green Warp Pipe.
- Complete the 2D section.
- Activate Fossil Falls Heights.
Collect Chomp Through the Rocks before the boss
Near Fossil Falls Heights, look for the group containing the smaller Chain Chomps and the large Chain Chomp. Capture the Chain Chomp on the western or left side of the group. Aim it at the nearby rock wall and release it to reveal Chomp Through the Rocks.
This Moon is the extra Power Moon needed for the standard campaign route. Do not rely on the Multi Moon alone: Our First Power Moon is worth one, Madame Broode’s Multi Moon is worth three, and Chomp Through the Rocks supplies the fifth Moon required for departure.
- Capture the western Chain Chomp near the upper route.
- Break the nearby rock wall.
- Collect Chomp Through the Rocks.
- Confirm that two regular Moons are recorded before the boss.
Use the T-Rex only for optional cleanup
The sleeping T-Rex is found near the upper Fossil Falls area. Throw Cappy at its head to capture it, then use its attack to smash heavy rubble. This can open optional routes and reveal later rewards, but the T-Rex is not required for the initial boss route or for leaving Cascade Kingdom.
If the T-Rex is damaged or dismissed, return to its resting place and capture it again. Because it moves slowly and can take damage from hazards, use it for nearby rubble rather than forcing it through narrow platforming sections.
- Capture the T-Rex if you want optional rewards.
- Do not delay the campaign for the T-Rex; it is not required for departure.
Reach Madame Broode’s arena
From Fossil Falls Heights, use the Chain Chomps to destroy the larger rock barrier leading toward the summit. Move across the exposed bridge and ledges, using normal jumps and long jumps to clear gaps. A midair dive can extend a jump when you are already committed to a safe landing.
Break the final obstruction and enter the arena. If you fall during the approach, warp back to Fossil Falls Heights and repeat only the upper route. Before triggering the fight, break nearby gray rocks by kicking them; some contain Hearts that can restore lost health.
- Destroy the barrier above Fossil Falls Heights.
- Reach Madame Broode’s arena.
- Use available Hearts before starting the fight if necessary.
Defeat Madame Broode and Chain Chompikins
Madame Broode sends her golden Chain Chomp, Chain Chompikins, toward Mario. Keep moving around the arena and jump over its charge. When Chain Chompikins returns, throw Cappy once to knock off its hat. Throw Cappy at it a second time while it is uncovered to capture it.
While controlling Chain Chompikins, pull back to stretch its chain and aim at Madame Broode. Release the Chomp to strike her. After the hit, immediately move away from Madame Broode’s swipe and wait for Chain Chompikins to become available again. Repeat the two-throw capture and launch sequence three times.
If you are hit, keep circling instead of standing beneath Madame Broode. Break a gray rock for a Heart when you need recovery, but avoid approaching it while Chain Chompikins is charging. After the third successful impact, collect Multi Moon Atop the Falls. It counts as three Power Moons for the Odyssey.
- Jump over Chain Chompikins’ charges.
- Hit it once to remove its hat.
- Hit it again to capture it.
- Launch Chain Chompikins into Madame Broode three times.
- Collect Multi Moon Atop the Falls.
Confirm the five-Moon requirement and travel to Sand Kingdom
After the boss, return to the Odyssey and throw Cappy at the globe when prompted. Your total should include Our First Power Moon, Chomp Through the Rocks, and the three Moons represented by Multi Moon Atop the Falls. That gives the five Power Moons required for the first departure from Cascade Kingdom.
Choose Sand Kingdom from the Odyssey’s travel menu. If the ship does not accept the departure yet, check the Cascade Moon list and collect another available Moon; however, the route in this chapter provides the required five without needing optional T-Rex rewards, regional coins, or later Moon Rock content.
- Our First Power Moon is recorded.
- Chomp Through the Rocks is recorded.
- Multi Moon Atop the Falls is recorded as three Moons.
- The Odyssey has five Cascade Power Moons.
- Sand Kingdom is available as the next destination.
Before you move on
- Our First Power Moon is recorded in the Cascade Kingdom Moon list.
- Chomp Through the Rocks is recorded in the Cascade Kingdom Moon list.
- Madame Broode is defeated and Multi Moon Atop the Falls is collected.
- The Odyssey has the five Power Moons required for the first Cascade departure.
- Sand Kingdom is selectable from the Odyssey globe.
- Optional T-Rex rewards, regional coins, and later Moon Rock rewards remain unnecessary for this chapter.
References for this chapter
- Fossil Falls Campaign Walkthrough — Super Mario Odyssey Walkthrough & Guide
- Cascade Kingdom: Fossil Falls — Super Mario Odyssey Walkthrough & Guide
- Cascade Kingdom — Super Mario Odyssey Walkthrough & Guide
- List of Power Moons in the Cascade Kingdom — Super Mario Wiki
- Multi Moon Atop the Falls — Cascade Kingdom Story Walkthrough
Sand Kingdom (Tostarena) — Exploration and Poison Pools
Complete the Sand Kingdom campaign by collecting Atop the Highest Tower, defeating Hariet at the Inverted Pyramid, then entering the underground temple beneath the pyramid to defeat Knucklotec. The kingdom stays frozen after Hariet’s defeat; defeating Knucklotec ends the freezing condition and completes the required Sand Kingdom story. Use Bullet Bills for long poison crossings, Moe-Eye sunglasses to reveal hidden platforms, and Knucklotec’s own fists as the weapon in the final fight. Optional Moons, regional coins, Jaxi activities, shop purchases, and later Moon Rock objectives can wait until a return visit.
1. Reach Tostarena Town and activate the nearby checkpoints
From the Odyssey, follow the route down into Tostarena Town. Activate the town checkpoint as soon as you reach it. The town contains the Crazy Cap shop, local residents, a Jaxi stand, and the main routes into the ruins and desert. You do not need to buy a costume or complete the town’s optional tasks for the campaign.
The Sand Kingdom is frozen when you first arrive. Several activities and routes are limited by the ice, so do not attempt a full exploration sweep yet. Keep moving north from town toward the Tostarena Ruins and the tall tower marked by the story objective.
- Activate Tostarena Town and any nearby checkpoints.
- Do not spend regional coins on optional souvenirs or outfits yet.
- Follow the story marker toward the Tostarena Ruins.
2. Complete Atop the Highest Tower
Enter the ruins north of town and use the available Bullet Bill to cross the hazardous sand and reach the tower route. Continue upward through the ruin platforms. When a Moe-Eye becomes available, throw Cappy at it to capture it. While controlling the Moe-Eye, use its sunglasses ability to reveal platforms and paths that are otherwise invisible.
Search the revealed route for all five Moon Shards. The shards are spread around the ruin section, including elevated platforms and paths over the poisonous purple liquid. Do not attempt to cross the poison directly. Use the visible platforms revealed by the Moe-Eye, then release the capture when you need Mario’s normal movement again.
After the fifth shard, the Power Moon Atop the Highest Tower appears. Collect it. This advances the Sand Kingdom story and opens the route toward the Inverted Pyramid.
- Capture the Moe-Eye and activate its sunglasses ability.
- Collect all five Moon Shards in the ruin section.
- Collect Atop the Highest Tower before moving to the pyramid.
3. Reach the Inverted Pyramid and defeat Hariet
Follow the newly opened route to the Inverted Pyramid. The interior includes platforming sections and a 2D section reached through a green Warp Pipe. Move carefully through the moving platforms, Bullet Bill sections, and gaps until you reach the upper arena.
Hariet attacks by throwing explosive bombs. Knock the bombs back toward her with Cappy. A redirected bomb can damage her and leave her open to a stomp. Do not rush her before the counterattack is available. After each hit, she changes position and throws more bombs, so keep circling the arena and avoid standing near an explosion.
Repeat the bomb-counter and stomp sequence three times. Collect the Multi-Moon Showdown on the Inverted Pyramid after the battle. Hariet’s defeat does not yet thaw the kingdom; the cold remains because Knucklotec is still active below the desert.
- Use Cappy to redirect Hariet’s bombs.
- Stomp Hariet only after a successful bomb counter.
- Collect Showdown on the Inverted Pyramid after the third hit.
4. Enter the Underground Temple beneath the pyramid
After Hariet’s defeat, travel to the large opening in the sand beneath the Inverted Pyramid. The Jaxi stand in Tostarena Town can help cross the open desert, but dismount before narrow platforming sections. Enter the opening to begin The Hole in the Desert.
The temple contains icy platforms, Goombas, narrow ledges, and poison below. Capture Bullet Bills whenever a gap is too long for a normal jump. Fly across the poison and steer toward the next solid platform. If a Bullet Bill expires, land on the nearest safe surface and capture another rather than trying to cross the hazard with ordinary jumps.
Use the temple checkpoint when you reach it. It provides the practical restart point if you fall during the final approach or lose the boss attempt.
- Find the underground opening beneath the Inverted Pyramid.
- Use Bullet Bills for extended poison crossings.
- Activate the temple checkpoint before entering the boss arena.
5. Defeat Knucklotec in the Deepest Underground
Knucklotec attacks with two large fists. When a fist rises and targets Mario, stand near one of the ice patches on the arena floor. Move away at the last moment so the fist slams into the ice. The impact stuns the fist, allowing Cappy to capture it.
Fly the captured fist into Knucklotec’s face. Steer in a shallow curve rather than taking a perfectly straight path, because the other fist fires ice projectiles that can block or slow you. Release the capture after the hit and immediately return to dodging.
Knucklotec becomes more aggressive after each successful hit. His fists can charge across the arena, falling icicles create additional danger, and he can clap his hands together to crush Mario between them. Run perpendicular to charging fists, watch the shadows for falling icicles, and move away from the space between the hands when he begins the clap. Then bait another fist onto an ice patch and repeat the capture counter.
Three fist impacts defeat Knucklotec. Collect The Hole in the Desert Multi-Moon. The freezing condition ends after this victory, and the Sand Kingdom returns to its normal desert state.
- Lure a fist onto an ice patch before capturing it.
- Avoid the other fist’s ice projectiles while flying toward the boss.
- Escape the center of the arena during the clap attack.
- Strike Knucklotec three times and collect The Hole in the Desert.
6. Return to the Odyssey and continue the campaign
After the Knucklotec battle, Mario returns to the Odyssey area with the story Multi-Moon. Add the Moon to the Odyssey and check the kingdom map for the total Power Moon requirement for your next destination. The story route does not require clearing every Sand Kingdom Moon.
You can leave immediately or return later for optional objectives. Jaxi challenges, regional coins, Crazy Cap purchases, timer challenges, hidden rooms, and Moon Rock Moons are separate from the required campaign. Use the map’s Moon list and checkpoint flags to organize a later cleanup visit instead of searching the desert at random.
- Knucklotec has been defeated.
- The Hole in the Desert has been collected and added to the Odyssey.
- The Sand Kingdom is no longer frozen.
- Optional Moons and regional-coin purchases remain available for later.
Before you move on
- Atop the Highest Tower has been collected.
- Hariet has been defeated and Showdown on the Inverted Pyramid has been collected.
- Knucklotec has been defeated and The Hole in the Desert has been collected.
- The Sand Kingdom’s freezing condition has ended.
- The Odyssey can use the collected story Moon, and the map shows the available onward-travel requirement.
- Optional Sand Kingdom Moons remain listed separately and are not required for this campaign chapter.
References for this chapter
- Super Mario Odyssey — Nintendo Official Game Site
- Super Mario Odyssey — Nintendo Official Game Site: Explore the Kingdoms
- Tostarena Campaign Walkthrough — Super Mario Odyssey Walkthrough & Guide
- Sand Kingdom — Super Mario Odyssey Walkthrough & Guide
- Boss list and strategies — Super Mario Odyssey Walkthrough & Guide
- Knucklotec — Super Mario Wiki
- Sand Kingdom — Super Mario Odyssey Walkthrough
Lake Kingdom (Lake Lamode) and Wooded Kingdom (Steam Gardens) — Puzzles and Verticality
Lake Kingdom’s campaign objective is Broodals Over the Lake, reached through the underwater Water Plaza route. Use Zippers, bubbles, Cheep Cheep captures, and the Water Plaza’s flower trampolines to reach Rango. In Wooded Kingdom, complete Road to Sky Garden, Flower Thieves of Sky Garden, Path to the Secret Flower Field, and Defend the Secret Flower Field. Uproots solve the tall Iron Road sections and defeat Torkdrift, while Sherms clear the route and destroy the Bowser-emblem targets blocking the Secret Flower Field. Torkdrift’s battle uses three flower-sucking drones in each phase; destroy them with the Uproot, then strike the exposed underside or glass dome when the machine flips. Optional Moons, Deep Woods, regional coins, and Moon Rock content can wait until after the campaign route is complete.
1. Cross Lake Kingdom and reach the Water Plaza
From the Odyssey, follow the shoreline toward the lake structures. Use Cappy on the Zipper along the lakebed to open the seam and enter the underwater route. In the first sections, collect air bubbles or return to the surface before Mario’s air meter is depleted. Throwing Cappy at an air bubble can collect it from a short distance.
Capture a Cheep Cheep before crossing the open basin. The Cheep Cheep moves freely underwater and is the safest way to travel through the large lake, around submerged obstacles, and toward the Water Plaza. If the capture ends, immediately look for a bubble or surface route rather than attempting a long swim as Mario.
Enter the Water Plaza dome and follow the interior route upward. Use the P-Switches and Bouncy Flowers to open the vertical path. The underwater dome includes the Moon Shards in the Lake route and other puzzle rooms, but those optional or preparatory Moons are not all required for the boss. Continue upward until the Water Plaza Terrace is accessible.
- Open the lakebed Zipper with Cappy.
- Use bubbles or the surface to restore Mario’s air.
- Capture a Cheep Cheep for the open-water crossing.
- Use the Water Plaza switches and Bouncy Flowers to climb.
2. Activate the Water Plaza Terrace checkpoint
Follow the upper Water Plaza route across the Bouncy Flowers and platforms. Release the Cheep Cheep before entering the dry climbing sections, then continue to the Water Plaza Terrace Checkpoint Flag. Activate it before entering the arena so a failed attempt returns you close to Rango.
Lake Kingdom’s story objective is the Rango battle. The kingdom’s normal departure requirement is eight total Power Moons, so collect additional nearby Moons if the Odyssey still shows that more are needed. The Rango Multi-Moon counts toward the total.
- Reach the Water Plaza Terrace.
- Activate the Checkpoint Flag.
- Check the Odyssey’s displayed Moon requirement before leaving.
3. Defeat Rango
Rango throws a bladed hat that returns toward him. Avoid the throw, then strike the hat with Cappy. It flips over and becomes a Bouncy Flower. Jump on it and use Mario’s shadow to line up over Rango, then ground-pound his head.
Rango retreats into his hat and bounces around the arena after each hit. Keep moving and avoid the returning hat. When he resumes throwing, repeat the Cappy counter. His hat arcs change during later rounds, but the response remains the same: flip the hat, bounce from it, and ground-pound Rango.
Rango requires three successful head attacks. Collect the Broodals Over the Lake Multi-Moon after the third hit. Warp back to Water Plaza Terrace if you lose the fight; the underwater approach does not need to be repeated.
- Flip Rango’s thrown hat with Cappy.
- Use the hat as a Bouncy Flower.
- Ground-pound Rango’s exposed head three times.
- Collect Broodals Over the Lake.
4. Enter Wooded Kingdom and clear Iron Road
The Lake and Wooded Kingdoms form a campaign branch, so the game may send you to either one first. In Wooded Kingdom, travel from the Odyssey toward Iron Road and activate the checkpoints as you climb.
Capture an Uproot whenever one is provided. Stretch upward through tall shafts and around the vertical machinery, releasing the stretch at the ledge you need. Near Iron Road: Halfway Point, follow the route through the gray blocks and falling girders until the large Poison Piranha Plant blocks the way.
Throw Cappy at the Poison Piranha Plant to make it hold Cappy and stop spitting poison. Use the opening to approach and jump on it. Repeat the Cappy stun and jump attack until it is defeated, then collect Road to Sky Garden.
- Activate the Iron Road checkpoints.
- Use Uproots to climb the vertical shafts.
- Stun the giant Poison Piranha Plant with Cappy.
- Collect Road to Sky Garden.
5. Climb Sky Garden Tower and defeat Spewart
Follow the flower path from the Road to Sky Garden area toward Sky Garden Tower. Use the flower speed boosts to cross the ramp and capture Uproots in the tower’s vertical sections. Continue upward and activate the Sky Garden Tower Checkpoint Flag before entering the boss arena.
Spewart sprays purple poison across the floor. Throw Cappy through the poison to clear a path, then hit Spewart with Cappy to knock away his hat. Ground-pound his exposed head while he is stunned. When he spins around the arena, stay near a clean outer area and avoid the poisoned trail.
Return to the clear portion of the arena when Spewart resumes spraying. Clear only the path needed to reach him, then repeat the hat hit and ground pound. Three successful head attacks defeat him. Collect the Flower Thieves of Sky Garden Multi-Moon.
- Reach and activate Sky Garden Tower.
- Clear Spewart’s poison with Cappy.
- Knock off Spewart’s hat and ground-pound him three times.
- Collect Flower Thieves of Sky Garden.
6. Open the route to the Secret Flower Field
After Spewart’s defeat, return toward the Iron Road entrance. Find a Sherm and capture it. Use the cannon to destroy the dirt and rock blocking the route, then continue through the opened machinery section.
At the elevated flower-field route, aim the Sherm at the launcher marked with Bowser emblems. Destroy all four rotating targets around the launcher. The obstruction clears and the path toward the Secret Flower Field becomes available.
Continue to the flower-field entrance and activate the Secret Flower Field Entrance Checkpoint Flag. The Power Moon named Path to the Secret Flower Field is obtained by using the Sherm to destroy those four Bowser-emblem targets. Drop through the opening after collecting it.
- Capture a Sherm near the Iron Road route.
- Clear the blocked passage.
- Destroy all four rotating Bowser-emblem targets.
- Collect Path to the Secret Flower Field.
- Activate the Secret Flower Field Entrance checkpoint.
7. Defeat Torkdrift with the Uproot
Drop into the Secret Flower Field and capture the nearby Uproot. Walk underneath Torkdrift and stretch upward into its vacuum dome to begin the fight. Torkdrift can only be damaged through the Uproot during this encounter.
At the start of each phase, Torkdrift sends out three flower-sucking drones that circle the machine. Each drone is protected by a block cluster. Stay beneath the boss and extend the Uproot into the center of each cluster to destroy the drone. Watch for the laser’s targeting mark on the ground and move away before the shot lands.
After all three drones are destroyed, Torkdrift flips over and exposes its underside and glass dome. Stretch the Uproot upward into that exposed weak point to deal damage. After the hit, red shockwave rings travel across the floor. Release and extend the Uproot to hop over the rings, or move to a clear gap between them.
Torkdrift repeats the drone phase, flip, dome strike, and shockwave pattern for three total damage rounds. Destroy the three drones each time, strike the exposed dome when the machine flips, and collect Defend the Secret Flower Field! after the final hit.
- Capture the Uproot in the Secret Flower Field.
- Destroy all three flower-sucking drones in a phase.
- Strike Torkdrift’s exposed underside or glass dome after it flips.
- Avoid the laser targeting marks.
- Hop over or move between the red shockwave rings.
- Repeat the sequence for three successful damage rounds.
- Collect Defend the Secret Flower Field!
8. Leave both kingdoms and recover from failure
Return to the Odyssey after finishing the required story objectives. Lake Kingdom normally needs eight total Power Moons, while Wooded Kingdom’s campaign travel requirement is shown directly on the Odyssey and is commonly sixteen total Power Moons for this branch. Use the displayed requirement as the final authority if you collected Moons in a different order.
If Rango defeats Mario, warp to Water Plaza Terrace and re-enter the arena. If Spewart defeats Mario, warp to Sky Garden Tower. If Torkdrift defeats Mario, warp to Secret Flower Field Entrance, capture the nearby Uproot again, and drop into the arena. These checkpoints prevent you from repeating the earlier routes.
Deep Woods, regional coins, Moon Rock Moons, shop purchases, and side rooms are optional for the campaign. Revisit them after the Odyssey has moved on or after additional kingdom areas become available.
- Confirm the Odyssey accepts the required Moon total.
- Use the boss checkpoints after failed attempts.
- Leave optional Deep Woods and side content for later.
- Travel onward after both kingdom objectives are complete.
Before you move on
- Rango is defeated and Broodals Over the Lake is collected.
- The Water Plaza route has been cleared and the Odyssey accepts the required Lake Kingdom Moon total.
- The giant Poison Piranha Plant is defeated and Road to Sky Garden is collected.
- Spewart is defeated and Flower Thieves of Sky Garden is collected.
- The Sherm route clears the four Bowser-emblem targets and Path to the Secret Flower Field is collected.
- Torkdrift’s three flower-sucking drones are destroyed in each phase.
- Torkdrift is struck through its exposed underside or glass dome after each flip.
- Defend the Secret Flower Field! is collected.
- The Odyssey’s travel prompt confirms that the current total is sufficient for the next destination.
- The Water Plaza Terrace, Sky Garden Tower, Iron Road, and Secret Flower Field checkpoints remain available for revisits.
References for this chapter
- Super Mario Odyssey — Nintendo Official Game Site: Explore the Kingdoms
- Lake Kingdom: Lake Lamode — Super Mario Odyssey Walkthrough & Guide
- Lake Lamode Campaign Walkthrough — Super Mario Odyssey Walkthrough & Guide
- Wooded Kingdom: Steam Gardens — Super Mario Odyssey Walkthrough & Guide
- Defend the Secret Flower Field! — Wooded Kingdom Story Walkthrough
- Torkdrift — Super Mario Wiki
- Boss list and strategies — Super Mario Odyssey Walkthrough & Guide
Cloud Kingdom & Lost Kingdom — Arena Combat and Story-Trigger Areas
Cloud Kingdom is a compact interruption on the route to Metro Kingdom. Defeat Bowser in the Nimbus Arena by stunning and capturing his boxing hat, then use the captured Fist Cap to punch him into the arena’s spiked railing three times. After the crash, Lost Kingdom begins with Cappy being stolen by Klepto. Rescue Cappy by manipulating the seesaw stairs, then collect 10 Power Moons to repair the Odyssey. Tropical Wigglers, Trapeetles and ground-pound switches provide the safest early routes across the poison-filled island. The first visit has no conventional kingdom boss after Klepto; once the Odyssey is repaired, select Metro Kingdom to continue the campaign.
1. Reach the Nimbus Arena
After leaving Wooded Kingdom, follow the Odyssey’s route until the trip is interrupted and Mario lands in Cloud Kingdom. Walk forward across the compact cloud platforms toward the circular Nimbus Arena. There is no large exploration route before the battle, so use the approach to get comfortable with jumping, changing direction in midair and throwing Cappy while moving.
Enter the arena and keep Mario near its center when Bowser is not attacking. The outer railing surrounds the battle area, and careless long jumps can leave you with little room to react. Your objective is to defeat Bowser three times, not to collect Cloud Kingdom items during this first visit.
- Reach the circular Nimbus Arena.
- Use the central area as your default position.
- Prepare to fight Bowser rather than search Cloud Kingdom.
2. Stun and capture Bowser’s boxing hat
Bowser begins by sending his boxing hat toward Mario. Throw Cappy at the hat to stun it and flip it over. When the hat is vulnerable, jump into it to capture it. Mario then becomes the Fist Cap, gaining the punches needed to damage Bowser.
Move toward Bowser while avoiding the arena hazards. When Bowser throws a normal punch, sidestep or jump clear, then continue advancing with the captured Fist Cap. If he sends several punches, keep moving around the attack pattern instead of stopping in front of him. When you reach Bowser, attack repeatedly to drive him into the spiked railing.
- Hit Bowser’s boxing hat with Cappy.
- Capture the stunned hat to become the Fist Cap.
- Approach Bowser only after the hat is secured.
- Punch Bowser into the railing.
3. Handle the later Bowser phases
After the first hit, Bowser adds purple decoy hats. Ignore the purple hats and target the real white boxing hat. Stun the correct hat with Cappy, capture it, and repeat the approach. Bowser also jumps between positions and leaves orange fire rings behind him. Jump over the rings or move away from their path before continuing.
Brick bombs can be destroyed with a Fist Cap punch, clearing space and sometimes preventing them from blocking your route. After the third successful attack, Bowser retaliates with a tail spin. When he closes his arms and prepares to swing, stop attacking and back away or jump over the tail. Once the spin ends, finish the current exchange if necessary.
If Mario loses all health, return to the arena and repeat the same sequence. Prioritize identifying the real hat and avoiding the fire rings over rushing toward Bowser. The battle ends after Bowser has been punched into the railing three times, triggering the crash into Lost Kingdom.
- Select the white hat instead of a purple decoy.
- Avoid orange fire rings during Bowser’s jumps.
- Destroy brick bombs when they obstruct the route.
- Evade the final tail spin before resuming attacks.
- Defeat Bowser with three successful Fist Cap attacks.
4. Rescue Cappy in Lost Kingdom
The Odyssey crash-lands on Forgotten Isle in Lost Kingdom. Walk forward along the dirt path until the game explains that the damaged Odyssey needs 10 Power Moons. Continue toward the nearby raised stair route. Klepto then steals Cappy, temporarily removing Mario’s ability to throw, capture or recall the hat.
Use the first seesaw stairs to raise Mario to the higher side. Ground-pound the starburst switch on the raised section to change the nearby stair formation, then repeat the maneuver on the next set of stairs. Continue upward toward Swamp Hill. When you reach the seesaw stairs where Klepto is perched, climb to the high side. Klepto moves to the lower end; ground-pound the starburst switch so the platform shifts and knocks Klepto down. Cappy is released and normal hat abilities return.
If you fall into poison or a pit, use the nearby checkpoint to retry the short approach. Do not attempt to fight Klepto with ordinary jumps; the required action is to use the seesaw mechanism and its ground-pound switch.
- Follow the dirt path until Cappy is stolen.
- Use the seesaw stairs to reach Swamp Hill.
- Ground-pound the starburst switch beneath Klepto.
- Recover Cappy before attempting capture puzzles.
5. Collect 10 Power Moons and repair the Odyssey
After recovering Cappy, capture a nearby Tropical Wiggler. Hold the capture control while moving to stretch its body across gaps and over poison. Release the Wiggler only when Mario is positioned over solid ground. Use this ability to reach visible moons, leaf-shaped regional coins and platforms separated by the swamp.
Return to the early Trapeetle area for another reliable route. Capture a Trapeetle and position its flight so it crashes through glowing stone blocks. Ground-pound the marked starburst switches on the changing stair platforms to create access to elevated ledges. These routes provide straightforward moons without requiring risky poison crossings.
The Lost Kingdom map contains more than the campaign minimum, so you do not need to clear every available objective. Prioritize visible moons and capture-based puzzles. Check the Odyssey’s Power Moon requirement as you go; once the Lost Kingdom total reaches 10, return to the Odyssey and interact with it. The repair sequence begins, and the game presents Metro Kingdom as the next destination.
- Use a Tropical Wiggler to cross poison-separated gaps.
- Use Trapeetles to break glowing stone blocks.
- Ground-pound stair switches to alter the route.
- Reach 10 Power Moons in Lost Kingdom.
- Return to the Odyssey and select Metro Kingdom.
Before you move on
- Bowser has been hit into the Nimbus Arena railing three times.
- The Cloud Kingdom crash sequence has sent Mario and the Odyssey to Lost Kingdom.
- Klepto has been knocked down and Cappy is available again.
- The Lost Kingdom total has reached 10 Power Moons.
- The Odyssey repair sequence has started.
- Metro Kingdom is available as the next campaign destination.
Metro Kingdom (New Donk City) — Human NPCs and Musical Sequence
Restore New Donk City by defeating Mechawiggler, recruiting Pauline’s drummer, guitarist, bassist, and trumpeter, restarting the Underground Power Plant, and completing the New Donk City Festival. Human New Donkers are not ordinary capture targets, so speak to them instead of throwing Cappy. The required festival route is a 2D Donkey Kong-style climb with barrels and four ? Blocks beneath an 8-bit Donkey Kong. Enter the pipe at the top and speak with Pauline to receive the kingdom’s second story Multi Moon.
Reach New Donk City Hall and the Mechawiggler arena
From the Odyssey, use the nearby spark pylon to reach the City Outskirts, then follow the streets toward New Donk City Hall. The Heliport is to the right of the City Hall Plaza. Reach it by climbing the stairs and either wall-jumping up the girders or capturing the spark pylon.
Continue through the upper route. Cross the girders and moving platforms, pass the Mini Goombas and Urban Stingbies, and use the available spark pylon to climb toward the roof. The route leads to the top of City Hall, where Mechawiggler begins the boss encounter and knocks Mario down to the city streets.
- Activate the nearby checkpoints as you pass them so a failed attempt does not send you back to the Odyssey.
- Use long jumps, cap throws, and wall jumps to correct short gaps on the girders instead of trying to cross every platform at full speed.
Defeat Mechawiggler with a captured Sherm
A Sherm is available in the battle area. Throw Cappy at it to capture the tank, then aim its cannon at Mechawiggler’s glowing body sections. Each successful hit darkens one weak point. Keep moving while aiming, and shoot or avoid the electrical spheres that Mechawiggler launches from its body.
After its weak points have been damaged, Mechawiggler becomes aggressive and charges across the ground. Watch for the electrical marker that indicates where it will emerge, then move away from that line. When it returns to the walls, capture another Sherm if necessary and continue targeting the glowing sections. Finish the second damage cycle to defeat it and collect the Multi Moon, New Donk City’s Pest Problem.
- Use the Sherm for every damage phase; ordinary jumps and Cappy hits cannot damage Mechawiggler.
- During a charge, move away from the marked attack path rather than trying to jump over the boss at the last moment.
- Collect the Multi Moon before proceeding. The city changes to its daytime state afterward.
Recruit Pauline’s four musicians
After the city becomes bright, speak with Mayor Pauline at New Donk City Hall Plaza. She asks Mario to find four musicians. The drummer is in the plaza, just to the right of the City Hall entrance. Speak to him to recruit him and receive Drummer on Board!.
The guitarist is in the park near the Main Street Entrance checkpoint. Travel there by spark pylon from the city route and speak to him for Guitarist on Board!. The bassist is on the distant rooftop in Mayor Pauline Commemorative Park, east of City Hall. Reach the park using the spark pylon route and speak to him for Bassist on Board!.
The trumpeter is on the roof of a triangular building across from City Hall. Use the nearby spark pylon, ground-pound the switch, and cross the temporary black-and-white platforms before they disappear. You can also approach from the upper City Hall route. Speak to the trumpeter for Trumpeter on Board!.
These musicians are human New Donkers. Do not rely on capturing them; speak to each one when the interaction prompt appears. After all four are recruited, return to Pauline at the plaza.
- Confirm that all four musician Power Moons have been awarded.
- If you lose the temporary-platform route to the trumpeter, return to the switch and activate it again.
Enter the Underground Power Plant
After the band is assembled, Pauline sends Mario to restore the city’s power. Go west of City Hall and locate the large manhole cover. Before the objective is active, a taxi can block this entrance; after Pauline gives the task, capture the manhole with Cappy and move it aside, then drop through the opening.
In the first plant section, poison covers the lower route. Throw Cappy at the large green rotating platforms to activate them, then ride their safe surfaces across the gaps. Use the platforms to avoid the poison rather than attempting to cross it on foot. Poison Piranha Plants can spit hazardous puddles; throw Cappy into one to occupy its mouth, or clear poison globs with Cappy before they land.
Continue through the plant until you reach the generator room.
- Do not step into the poison as a shortcut; use the rotating platforms and the safe ledges.
- If Mario falls, use the pipe to re-enter the section and repeat the platform route.
Defeat the Big Poison Piranha Plants and restore power
The generator room contains two Big Poison Piranha Plants surrounded by poison. Throw Cappy directly at a plant’s head. Cappy becomes trapped in its mouth and weighs the head down, creating the opening for Mario to jump on it. Stomp the exposed plant, then repeat the process until it is defeated. Keep moving around the safe parts of the room and clear incoming poison when it threatens your landing area.
Defeat both plants. A Power Moon appears and unlocks the generator switch. Collect the Power Moon, then ground-pound the now-accessible switch to restore New Donk City’s power. Return to Pauline at City Hall Plaza and accept her invitation to the New Donk City Festival.
- Both Big Poison Piranha Plants must be defeated before the generator switch becomes usable.
- The Power Moon from the plant room is Powering Up the Station; collecting it is the sign that the switch has been unsealed.
Complete A Traditional Festival!
Enter the auditorium and begin the festival. The required route is a 2D platforming section modeled after the original Donkey Kong. Move right and climb the ladders while watching the barrel patterns. Jump over barrels or change levels when a barrel occupies your path; avoid rushing because a missed jump can send Mario back to the previous section.
At the upper part of the course, find the four ? Blocks beneath the large 8-bit Donkey Kong and hit all four. The route then opens to a pipe. Enter it, reach Pauline on the stage, and speak with her to receive the Multi Moon for A Traditional Festival!. A hidden 8-bit pipe during the festival leads to an optional Power Moon and is not required for the campaign.
- All four ? Blocks beneath the 8-bit Donkey Kong have been activated.
- Pauline awards the festival Multi Moon after you reach her at the stage.
- The festival can be replayed later by speaking with the appropriate New Donker in the City Hall auditorium.
Before you move on
- New Donk City’s Pest Problem has been collected after defeating Mechawiggler, and the city has changed to daytime.
- Drummer on Board!, Guitarist on Board!, Bassist on Board!, and Trumpeter on Board! have all been collected.
- Powering Up the Station has been collected, both Big Poison Piranha Plants are defeated, and the generator switch has been activated.
- A Traditional Festival! has been completed: the four ? Blocks beneath the 8-bit Donkey Kong were hit, Mario reached Pauline, and the festival Multi Moon was awarded.
- The Metro Kingdom mission list shows the festival objective as complete. The Odyssey can continue once its travel requirement is satisfied, allowing progression toward Snow Kingdom or Seaside Kingdom.
References for this chapter
- Super Mario Odyssey — Nintendo Store Product Page
- Metro Kingdom — Super Mario Wiki
- Mechawiggler — Super Mario Wiki
- A Fresh Start for the City — Super Mario Wiki
- Underground Power Plant — Super Mario Wiki
- A Traditional Festival! — Super Mario Wiki
- List of Power Moons in the Metro Kingdom — Super Mario Wiki
Snow Kingdom (Shiveria) & Seaside Kingdom (Bubblaine) — Underwater and Blended Biomes
Snow Kingdom’s required Shiveria route consists of four barrier objectives: Icicle Barrier, Ice Wall Barrier, Gusty Barrier, and Snowy Mountain Barrier. The Ice-Dodging Goomba Stack is a separate optional Power Moon inside the Icicle room, not a fifth barrier or a race prerequisite. Clear the four barriers, capture the nervous Shiverian racer, and win the Bound Bowl Grand Prix. In Seaside Kingdom, activate the Stone Pillar, Lighthouse, Hot Spring, and canyon seals. Cheep Cheeps make long underwater passages safer, while Gushens provide the vertical movement and water spray needed for the seal routes and Mollusque-Lanceur. After all four seals are active, wash the lava from the boss’s head with a Gushen and stomp the exposed weak point three times.
Enter Snow Kingdom and reach Shiveria
Travel from the Odyssey toward the objective marker and follow the snowy path to the Above the Ice Well Checkpoint Flag. Clear the loose snow covering the circular opening with Cappy, then drop through the opening into Shiveria Town. Activate the town checkpoint before entering the barrier rooms.
Mario can move normally on the snowy surface, but ice makes stopping and turning less predictable. Use shorter jumps when approaching ledges and avoid the cold water outside Shiveria; staying in it causes damage. If a barrier attempt fails, warp back to a nearby checkpoint instead of repeating the entire approach.
- Enter Shiveria Town through the snow-covered opening.
- Activate the nearby Checkpoint Flags.
- Locate the four barrier doorways around the town seal.
Complete the four required Shiveria barriers
The four required barriers are Icicle Barrier, Ice Wall Barrier, Gusty Barrier, and Snowy Mountain Barrier. They can be completed in any order. Each room contains a primary barrier objective that awards a Power Moon and contributes to opening the racecourse.
Icicle Barrier is the rightmost room. Follow the Goomba route and use the falling icicles as temporary steps. To reach the barrier Moon, lure the large icicles onto the cracked floor points by moving under their shadows and quickly stepping away. The Ice-Dodging Goomba Stack is optional: stack four Goombas near the start and use the raised switch to reveal that separate Moon. Do not count it among the four required barriers.
Ice Wall Barrier is the upper-right room. Collect all five Moon Shards while avoiding the Bitefrost enemies. The resulting Moon is the required Ice Wall Barrier objective. Gusty Barrier is the lower-left room. Capture a Ty-Foo, turn its wind toward the movable wooden block, and reposition the block and staircase as needed. At the end, use the Ty-Foo to clear the Spinies and obtain the Gusty Barrier Moon.
Snowy Mountain Barrier is the remaining room. Follow the main route to the Bouncy Flower and use the updrafts to reach Rango. His rematch still requires three hits. Give yourself room on the ice, throw Cappy at a spiked hat to make it safe, then bounce from the hat onto Rango. Repeat twice more to receive the Snowy Mountain Barrier Moon.
- Complete the Icicle Barrier.
- Complete the Ice Wall Barrier.
- Complete the Gusty Barrier and clear the Spinies with Ty-Foo.
- Complete the Snowy Mountain Barrier and defeat Rango three times.
- Treat Ice-Dodging Goomba Stack as optional.
Capture the racer and win the Bound Bowl Grand Prix
After the four barriers are complete, the seal opens the route to Snowline Circuit. Enter the hole in the floor and go to the waiting room. Find the nervous Shiverian who is unable to race and capture him with Cappy; Mario cannot enter the race directly.
Return to the race area and speak with the organizers for the practice round. On the track, time each bound so the racer gains speed rather than losing momentum. Use the banked slopes to turn, and avoid landing in loose snow. If an early mistake leaves you far behind, restart the attempt rather than trying to recover from a large deficit.
Win the Grand Prix to receive The Bound Bowl Grand Prix Multi Moon. This completes Snow Kingdom’s required campaign route. Other Snow Kingdom Moons, including the optional Ice-Dodging Goomba Stack and later challenges, can be postponed.
- Enter Snowline Circuit after all four barriers are cleared.
- Capture the nervous Shiverian racer.
- Complete practice if needed.
- Win the Bound Bowl Grand Prix.
Begin Seaside Kingdom and prepare Cheep Cheep and Gushen routes
In Bubblaine, follow Bowser’s trail toward the Glass Tower and activate the Beach House Checkpoint Flag. Mollusque-Lanceur is draining the kingdom’s Sparkle Water, and four seals must be restored before the boss can be reached.
Capture a Gushen near the beach. Its upward jet provides vertical movement, while its forward jet provides horizontal speed. Its water supply is limited, so touch a pool or the sea to refill it before a long ascent. Capture a Cheep Cheep near the underwater entrances for extended horizontal swimming. Mario’s normal underwater air supply is limited, so surface at safe openings when necessary.
- Activate the Beach House Checkpoint Flag.
- Find the four seal objectives on the map.
- Keep a Gushen available for vertical routes and a Cheep Cheep for long underwater passages.
Activate the Stone Pillar, Lighthouse, Hot Spring, and canyon seals
For the Stone Pillar Seal, capture a Gushen west of the central beach and jet upward to the elevated stone pillar. Collect the seal Moon and activate its nearby switch.
For the Lighthouse Seal, use the well on the island northeast of the lighthouse to enter the underwater passage. Capture a Cheep Cheep, avoid the Maw-Rays by changing height or using the openings in the walls, and continue to the Green Pipe. The pipe leads to the lighthouse top, where the seal Moon and switch are located.
For the Hot Spring Seal, travel east from the lighthouse diving area, use the Rocket Flower route to reach the island, and capture a Gushen. Spray away the lava covering the nearby area, then dive to the bottom of the pool and collect the Hot Spring Seal Moon.
For the Seal Above the Canyon, travel south to the Rolling Canyon area and follow the canyon to its end. Avoid the rolling spiked hazards and clear the crates blocking the final section. The seal Moon is beyond them. The five-Goomba stack used to reach Goombette on the cliff is optional and is not required for the seal.
- Activate the Stone Pillar Seal.
- Activate the Lighthouse Seal.
- Activate the Hot Spring Seal.
- Activate the Seal Above the Canyon.
- Do not mistake the optional Goombette route for the canyon seal objective.
Defeat Mollusque-Lanceur and confirm campaign progress
Once all four seal switches are active, return to the Glass Tower. Capture a nearby Gushen and approach the boss over the water. Dodge the initial spike balls, then rise above Mollusque-Lanceur’s head and spray downward until the lava covering it is removed. Land on the exposed head to deal the first hit.
Between hits, the boss spins around the arena and throws spiked shells. Keep moving laterally and approach from an open angle rather than crossing directly through a projectile line. When the Gushen’s water runs low, touch the sea to refill it before attempting another ascent. In later phases, the projectiles move faster and the spinning attack is more dangerous, but the counter remains the same: rise above the head, wash away the lava, and stomp.
Repeat the wash-and-stomp sequence three times. The resulting Multi Moon resolves the Sparkle Water crisis and completes Seaside Kingdom’s required story objective. Optional races, Moon Rock rewards, purple coins, and side Moons may remain.
- Wash the lava from Mollusque-Lanceur’s head.
- Stomp the exposed head three times.
- Collect the resulting Multi Moon.
- Confirm that the four seal objectives and the boss objective are cleared.
Before you move on
- The four required Snow Kingdom barriers are complete: Icicle Barrier, Ice Wall Barrier, Gusty Barrier, and Snowy Mountain Barrier.
- The optional Ice-Dodging Goomba Stack may remain incomplete without blocking the route.
- The nervous Shiverian has been captured and the Bound Bowl Grand Prix has been won.
- The Stone Pillar, Lighthouse, Hot Spring, and Seal Above the Canyon objectives are complete in Seaside Kingdom.
- Mollusque-Lanceur has been defeated and the Sparkle Water crisis has been resolved.
- The required Snow and Seaside story rewards have been collected, allowing the campaign to continue.
- Optional Power Moons, races, Moon Rock challenges, purple coins, and the Goombette canyon objective may remain.
References for this chapter
- Shiveria Campaign Walkthrough — Super Mario Odyssey Walkthrough & Guide
- Bubblaine Campaign Walkthrough — Super Mario Odyssey Walkthrough & Guide
- Snow Kingdom: Shiveria — Super Mario Odyssey Walkthrough & Guide
- Boss list and strategies — Super Mario Odyssey Walkthrough & Guide
- Super Mario Odyssey — Nintendo Official Game Site: Explore the Kingdoms
Luncheon and Ruined Kingdoms — Chaotic Terrain and Boss Prep
Luncheon Kingdom’s campaign route leads from Peronza Plaza through the cheese-rock fields, Meat Plateau, Volcano Cave, and Mount Volbono. Defeat Spewart, collect Under the Cheese Rocks, reach the giant pot through Big Pot on the Volcano: Dive In!, complete Climb Up the Cascading Magma, and defeat Cookatiel. Lava Bubble captures are essential for crossing pink lava and reaching the boss. Ruined Kingdom is a short detour caused by Bowser damaging the Odyssey. The optional chest Moon can be taken from the starting area, but the required objective is Battle with the Lord of Lightning! Defeat the Ruined Dragon by pulling the gold swords from its head and ground-pounding the exposed weak point three times. Afterward, finish Bowser’s Kingdom’s four story missions and deposit 8 local Power Moons to unlock Moon Kingdom.
1. Enter Luncheon Kingdom and reach Peronza Plaza
From the Odyssey, follow the marked route toward Peronza Plaza. Pink lava damages Mario, so capture a nearby Lava Bubble whenever the route crosses a lava field. While captured, move through the pink lava and enter Bubble Cannons when the path requires a long launch. Eject onto solid ground before reaching a wall, ledge, or other obstacle that cannot be crossed as a Lava Bubble.
Activate the checkpoint flags along the route. Optional regional coins and side rooms can wait; the story path provides the landmarks needed for progression. Continue toward the elevated arena above the plaza. The first required encounter here is Spewart’s rematch, not a multi-Broodal battle.
- Reach Peronza Plaza.
- Activate the Peronza Plaza checkpoint flag.
- Use Lava Bubble captures for long pink-lava crossings.
2. Defeat Spewart at the plaza
Enter the arena and wait for Spewart to begin spraying poison. The liquid spreads across the floor, so keep moving around the clear sections and jump over the expanding hazard. Do not chase Spewart through poison. Wait until the spray ends and he is exposed, then throw Cappy at him to remove the poison covering his body.
Once the poison is cleared, jump on Spewart’s head. Repeat the pattern three times. The arena contains breakable food objects that can provide regular hearts if you need recovery. After the fight, collect The Broodals Are After Some Cookin'. This Power Moon is the first required Luncheon story reward.
- Defeat Spewart.
- Collect The Broodals Are After Some Cookin'.
- Use the newly opened route toward the cheese-rock area.
3. Break the cheese rocks and reach the giant pot
From the plaza arena, follow the opened path toward the cheese-rock barriers. Find the Hammer Bro that throws frying pans and capture it with Cappy. Use the frying pans to destroy the cheese blocks blocking the route. Clear the upper section and pull the lever to collect Under the Cheese Rocks.
Continue toward the Meat Plateau. Cross pink lava as a Lava Bubble and use the Bubble Cannons whenever the route rises beyond normal jumping distance. At the top of the plateau, capture the large piece of meat. Cookatiel carries Mario to the giant stew pot, where the objective becomes Big Pot on the Volcano: Dive In!
Remain a Lava Bubble while moving through the stew. Cross the floating ingredients and use their surfaces as stepping points until you reach the Power Moon. Collecting it changes the kingdom’s route and sends Mario back toward the volcano approach.
- Collect Under the Cheese Rocks.
- Reach the Meat Plateau checkpoint.
- Capture the large meat.
- Collect Big Pot on the Volcano: Dive In!.
4. Climb the volcano and defeat Cookatiel
After the Meat Plateau objective, follow the changed route toward the western volcano cave rather than trying to return by the earlier upper path. Use Lava Bubbles to cross the lava channels and enter the Bubble Cannons. Inside the cave, stay in the Lava Bubble capture and climb the cascading magma route. Light the unlit lantern at the end of the passage to collect Climb Up the Cascading Magma.
At the summit, enter the nearby Bubble Cannon as a Lava Bubble to reach Cookatiel’s arena. The stew is pink lava, so Mario cannot safely swim through it as normal Mario. Remain a Lava Bubble while moving around the pot and avoid the ingredients and spiked objects Cookatiel drops.
When Cookatiel begins vomiting a rising stream of pink lava, follow the stream upward as a Lava Bubble. Avoid the obstacles in the stream and jump from the top onto Cookatiel’s head. Repeat the lava-stream attack three times. Later cycles use more difficult routes, so wait for a clear opening instead of taking a risky shortcut. Collect Cookatiel Showdown! after the final hit.
- Collect Climb Up the Cascading Magma.
- Reach Cookatiel’s arena through the Bubble Cannon.
- Defeat Cookatiel.
- Collect Cookatiel Showdown!.
5. Enter Ruined Kingdom and reach the dragon arena
Bowser damages the Odyssey immediately after the Luncheon sequence, forcing Mario to land in Ruined Kingdom. The opening area is small and mainly serves as a route to the boss. The optional Moon In the Ancient Treasure Chest is on a ledge to the left of the starting stairs; walk along the narrow shiny ledge to reach it.
For required progress, climb the broken stair route and remove the swords embedded in the ground with Cappy. The final sword reveals the Spark Pylon. Activate it to travel to the Tower of Crumbleden and begin Battle with the Lord of Lightning!. You do not need to collect three separate regular Moons before starting the fight; the boss’s Multi Moon is the required repair reward.
- Reach the Ruined Kingdom starting area.
- Optionally collect In the Ancient Treasure Chest.
- Remove the swords blocking the upper route.
- Activate the Spark Pylon to the dragon arena.
6. Defeat the Lord of Lightning
The Ruined Dragon begins by firing lightning toward marked areas of the arena. Move away from the glowing danger zones. It then strikes the floor and sends lightning across the arena; jump over the spreading electrical wave rather than trying to outrun it along the ground.
After the lightning pattern, approach the dragon’s head when the attack leaves an opening. Gold swords are embedded around its head and in the arena. Throw Cappy at each sword and pull them free. Remove every sword in the current cycle. The swords form a crown; once they are gone, the exposed section of the dragon’s forehead becomes vulnerable.
Reach the glowing weak point and ground-pound it once. The dragon resumes its attacks with more lightning hazards and additional swords in later cycles. Repeat the full sequence of dodging, removing every sword, and ground-pounding the exposed head three times. If Mario is defeated, restart from the Ruined Kingdom checkpoint and use the Spark Pylon to return to the arena; Luncheon Kingdom does not need to be replayed.
- Avoid the marked lightning strikes.
- Jump over the floor-spreading lightning.
- Remove all gold swords during each cycle.
- Ground-pound the exposed head three times.
- Collect Battle with the Lord of Lightning!.
7. Repair the Odyssey and unlock the next route
Collect the Multi Moon after the Ruined Dragon falls. Battle with the Lord of Lightning! is the sole Ruined Kingdom story mission, and its Multi Moon repairs the Odyssey. The optional chest Moon and other Ruined Kingdom Moons are not required for this repair.
Return to the Odyssey and travel to Bowser’s Kingdom. Complete the four story missions there: Infiltrate Bowser’s Castle!, Smart Bombing, Big Broodal Battle, and Showdown at Bowser’s Castle. Their story rewards total 8 Power Moons when deposited into the Odyssey. Moon Kingdom becomes available after those 8 Bowser’s Kingdom Power Moons have been banked.
If you leave Bowser’s Kingdom before finishing all four story missions, return there and collect the remaining story rewards. Optional Bowser’s Kingdom Moons can supplement the total if necessary, but extra Luncheon and Ruined Kingdom content is not needed. Check the Odyssey’s globe after depositing the required Bowser’s Kingdom Moons; Moon Kingdom should then be selectable.
- The Luncheon story Moons are recorded.
- Cookatiel has been defeated.
- Battle with the Lord of Lightning! is recorded.
- The Odyssey is repaired.
- Eight Power Moons from Bowser’s Kingdom have been deposited.
- Moon Kingdom is selectable on the Odyssey map.
Before you move on
- The Luncheon Kingdom list records The Broodals Are After Some Cookin', Under the Cheese Rocks, Big Pot on the Volcano: Dive In!, Climb Up the Cascading Magma, and Cookatiel Showdown!.
- Cookatiel has been defeated and its story Moon has been collected.
- The Ruined Kingdom list records Battle with the Lord of Lightning!.
- The Ruined Dragon has been defeated and the Odyssey is repaired.
- The four Bowser’s Kingdom story missions have been completed, or enough local Bowser’s Kingdom Moons have been collected to total 8 deposited Moons.
- Moon Kingdom is selectable from the Odyssey globe.
References for this chapter
- Super Mario Odyssey Walkthrough & Guide: Luncheon Kingdom: Mount Volbono
- Super Mario Odyssey Walkthrough & Guide: Ruined Kingdom: Crumbleden
- Luncheon Kingdom: Power Moon Locations
- Ruined Kingdom: Power Moon Locations
- Luncheon Kingdom
- Ruined Kingdom
- Bowser’s Kingdom – Super Mario Odyssey Wiki
- Power Moon requirements by kingdom
Bowser’s Kingdom Approach — Gearing Up and Final Moons
Bowser’s Kingdom is the final full kingdom before the Moon Kingdom. Its first-visit route is linear, linking courtyards and rooftops with Spark Pylons and introducing the Pokio capture. Complete Infiltrate Bowser’s Castle!, Smart Bombing, Big Broodal Battle, and Showdown at Bowser’s Castle! in that order. The kingdom’s travel requirement is 8 Power Moons, but these four story rewards provide exactly 8: the first two are single Moons, while the latter two are Multi Moons worth three each. After RoboBrood is defeated, confirm that the Odyssey has accepted the total and select Moon Kingdom. If the map shows fewer than 8 because a story reward was not collected, return to the relevant checkpoint and claim it before searching for optional Moons.
Arrive at Bowser’s Kingdom and prepare for the castle route
The normal campaign route reaches Bowser’s Kingdom after the Ruined Kingdom. At the Odyssey, activate the nearby checkpoint before moving through the entrance. The first visit prevents ordinary departure until RoboBrood is defeated, so follow the story route rather than trying to leave immediately.
Practice the movement you will use throughout the kingdom: long jump, midair Cappy throw, dive, ground pound, and wall jump. The key capture is Pokio. Its beak attaches to plaster walls and other suitable surfaces, allowing it to climb across gaps and moving wall sections. Point toward the next safe surface, poke into it, adjust Mario’s position, and release only when the next landing is secure.
Optional Power Moons and regional coins can be ignored during the initial climb. They are useful for exploration, but none is needed if the four story rewards are collected. Activate checkpoint flags as you pass them so a failed attempt does not restart the entire approach.
- The Odyssey has arrived in Bowser’s Kingdom.
- The starting checkpoint is active.
- You can perform a long jump, Cappy-assisted dive, ground pound, and wall jump.
- You understand that Pokio climbs by attaching its beak to surfaces.
Complete Infiltrate Bowser’s Castle!
Use the Spark Pylon from the starting area to reach the Third Courtyard. Capture Pokio where the route requires it and climb the plaster wall to reach the rooftops. Continue across the courtyard until you reach the Stairface Ogre near the rear section.
Stay outside the ogre’s immediate stamping range. Let it complete a stomp, move in during the recovery, and attack its exposed upper body with a jump or ground pound. Retreat before the next stomp and repeat the pattern. When the ogre is defeated, collect Infiltrate Bowser’s Castle! and continue through the opened route.
This is the first single Power Moon in the kingdom’s required sequence. Do not treat nearby optional Moon locations as mandatory objectives.
- The Third Courtyard route is open.
- The Stairface Ogre has been defeated.
- Infiltrate Bowser’s Castle! has been collected.
Collect the five shards for Smart Bombing
Proceed toward the Second Courtyard and enter the bomb-filled section. Your objective is to collect all five Moon Shards. Pokio is useful for reaching elevated surfaces and for dealing with obstacles around the bomb routes.
Keep moving around incoming bombs instead of standing in their direct path. Use Pokio’s beak to push or redirect bombs when they block a route or are needed to break a target. Search the upper and lower sections of the area before leaving; the objective completes only after all five shards are collected.
When the Power Moon appears, collect Smart Bombing. This is the second single Power Moon in the required sequence.
- All five Moon Shards have been collected.
- Smart Bombing has been collected.
- The route toward the Main Courtyard is open.
Defeat Topper and Hariet in Big Broodal Battle
Follow the opened route to the Main Courtyard arena. Topper and Hariet appear together, so keep moving around the outer part of the arena and avoid standing between them. Deal with whichever boss gives you the safer opening rather than forcing an attack while both are active.
For Topper, use Cappy to remove his hats, then ground-pound his exposed head. After the hit, retreat from his spinning movement and repeat the hat-removal cycle. His later phases use more hats and cover more space, so wait until the spinning attack has ended before approaching.
Hariet throws explosive bombs and uses a fast aerial movement pattern. Stay away from the blast zones, let the explosives finish, and approach during her recovery. Attack only when she is exposed, then retreat before the next bomb pattern.
Defeating both Broodals completes Big Broodal Battle. This reward is a Multi Moon and counts as three Power Moons toward the kingdom’s requirement.
- Topper has been defeated.
- Hariet has been defeated.
- Big Broodal Battle has been collected.
- The Multi Moon has been added to the kingdom total.
Climb to Beneath the Keep and enter the RoboBrood arena
Continue through the Main Courtyard and capture Pokio for the long plaster-wall climb. Moving wall sections require patience: wait for a wall to align, attach the beak to the next safe section, and release only when Mario can land securely. Do not rush a poke across a gap that has not fully opened.
Activate the Inner Wall checkpoint and continue upward to the Beneath the Keep checkpoint. Capture the Spark Pylon to reach the rooftop. The story scene then leads directly into the RoboBrood battle.
- Pokio has carried you through the plaster-wall route.
- The Inner Wall checkpoint is active.
- The Beneath the Keep checkpoint is active.
- The rooftop arena has been reached.
Defeat RoboBrood’s four Broodal domes
At the start of the battle, stay mobile while RoboBrood stomps and fires bombs. Wait for the mech to launch a Pokio, then capture it. Use Pokio’s beak to poke the incoming firework bombs back toward RoboBrood’s armored legs. The first successful bomb cracks the armor; the next breaks the leg armor and topples the mech.
When RoboBrood falls, climb the wooden body with Pokio. Reach the exposed glass dome and repeatedly poke it, or release Pokio and ground-pound the dome as Mario. The first exposed dome belongs to Spewart. After RoboBrood rises, repeat the bomb-return sequence for the second dome, Rango.
After the second dome, RoboBrood adds the Rainbow Charge. Its legs show the attack effect before it rushes across the arena. Move to the side and roll or jump away rather than trying to pass through it. Rainbow coils appear on the ground during these later phases. Knock them away with Cappy or destroy them with Pokio, a bomb, or RoboBrood’s own movement when they obstruct your route.
The third leg sequence causes RoboBrood to kneel; climb the available wooden leg route and defeat Hariet’s dome. The fourth sequence makes the mech fall forward; wait for it to settle, climb the accessible body or legs, and defeat Topper’s dome. All four domes must be cleared to finish the battle.
Collect Showdown at Bowser’s Castle! after RoboBrood is destroyed. This is the second Multi Moon and counts as three Power Moons.
- A Pokio has been captured during the battle.
- Firework bombs have been returned into RoboBrood’s armored legs.
- Spewart’s dome has been defeated.
- Rango’s dome has been defeated.
- Rainbow Charges have been avoided.
- Hariet’s dome has been defeated.
- Topper’s dome has been defeated.
- Showdown at Bowser’s Castle! has been collected.
Confirm the 8-Moon requirement and travel onward
The Odyssey requires 8 Power Moons from Bowser’s Kingdom before Moon Kingdom travel is accepted. The required story sequence supplies exactly that amount: Infiltrate Bowser’s Castle! is one, Smart Bombing is one, Big Broodal Battle is a three-Moon reward, and Showdown at Bowser’s Castle! is another three-Moon reward.
Return to the Odyssey and check the travel display. If Moon Kingdom is available, select it. If the display is below 8, check the kingdom’s mission list for an uncollected story reward before hunting optional Moons. Optional Bowser’s Kingdom Moons are only a backup for a missing or unclaimed reward, not a normal requirement after completing the four missions.
- All four required story rewards are collected.
- The kingdom total shows at least 8 Power Moons.
- The Odyssey displays Moon Kingdom as an available destination.
Before you move on
- Infiltrate Bowser’s Castle! is complete.
- Smart Bombing is complete.
- Big Broodal Battle is complete and its Multi Moon is collected.
- RoboBrood has been defeated through all four dome targets: Spewart, Rango, Hariet, and Topper.
- Showdown at Bowser’s Castle! is complete and its Multi Moon is collected.
- Bowser’s Kingdom’s total has reached 8 Power Moons from the required story rewards.
- The Odyssey displays Moon Kingdom as an available destination.
- No additional optional Bowser’s Kingdom Moon is required when all four story rewards are properly collected.
Moon Kingdom — Final Approach to the Wedding Hall
Moon Kingdom, whose greater location is Honeylune Ridge, is the final story kingdom reached before the Wedding Hall. Its surface uses low gravity: Mario jumps higher, falls more slowly, and travels farther, so make controlled jumps and use the Ringing-Bells Plateau and Quiet Wall checkpoints before entering the Underground Moon Caverns. The cavern returns to normal gravity and uses a sequence of capture-based obstacles involving Parabones, Sherms, Hammer Bros, Tropical Wigglers, Banzai Bills, Moe-Eye, and Chargin' Chucks. Reach the cavern exit, defeat Madame Broode in her rematch, then activate Ever-After Hill and enter the Wedding Hall. This chapter ends at the Wedding Hall door, before the Bowser battle.
Cross Honeylune Ridge and reach Quiet Wall
When Mario arrives at the Odyssey, do not use ordinary kingdom movement as your timing reference. Honeylune Ridge has low gravity, so Mario rises higher, hangs in the air longer, and covers more distance during jumps and long jumps. Begin with short jumps across the first craters and platforms until the altered fall speed feels familiar. A ground pound or dive can correct your position, but commit to those moves only after judging the extra airtime.
Follow the main route north toward the distant Wedding Hall. The path passes rolling hazards, broad gaps, and a raised plateau. Activate the Ringing-Bells Plateau checkpoint before continuing. Optional Power Moons, regional coins, the Sphynx, and the rabbit can be left for later; none is required to begin the cavern route.
Continue across the surface toward the tall cliff and the Quiet Wall area. Use the available Rocket Flower and the route's ramps to cross the larger gap, then activate the Quiet Wall checkpoint beside the deep entrance. Enter the large opening in the cliff to begin the Underground Moon Caverns. Unlike the surface, this interior area uses normal gravity, so reset your jump timing as soon as Mario lands inside.
- Practice several low-gravity jumps before attempting the longest gaps.
- Activate the Ringing-Bells Plateau checkpoint.
- Activate the Quiet Wall checkpoint.
- Enter the Underground Moon Caverns.
- Leave optional surface Moons and regional coins for a later visit if desired.
Use Parabones and Sherms to open the first cavern section
Mario drops into the cavern near Bowser statues and a lava route. The right-hand Bowser statue conceals an optional Power Moon; moving it is not needed for story progress. Drop to the lower platform and capture a Parabones. Use its flight to cross the first lava stretch while avoiding the lava geysers and incoming Sherm shots. Keep the Parabones moving rather than hovering over one hazard, because the lava route combines vertical geysers with projectile fire.
On the far side, reach the elevated Sherm and capture it. Aim the tank's shots at the steel cage containing the Life-Up Heart if you need recovery, then destroy the cage around the Spark Pylon. The heart is optional, but collecting it before the longer cavern sequence is useful. A second Parabones carries Mario to the key located in a hole in the lava near the caged pylon. Enter the hole from above, collect the key, and return to the Keyhole Pedestal.
After the key opens the route, use the Sherm to clear the remaining cage and activate the Spark Pylon. If you fall during this opening section, restart from the latest available checkpoint rather than trying to cross the lava without the intended captures.
- Treat the right Bowser statue and its Moon as optional.
- Capture a Parabones to cross the first lava section.
- Capture a Sherm and destroy the pylon cage.
- Use another Parabones to collect the key from the lava hole.
- Return the key to the Keyhole Pedestal.
- Use the Spark Pylon to advance.
Cross the moving platforms and capture obstacles
At the next section, ground-pound the switch to start the moving platform. Ride it over the lava and stay near its center when possible. Hammer Bros appear along the route. Capturing one lets Mario throw hammers at the dirt and rock walls that can crowd him toward the edge, although careful jumps can also pass some of these barriers. If the platform carries you past a wall before it is destroyed, wait for a safe opening rather than jumping blindly into the lava.
Ground-pound the next switch to begin the following moving-platform section. Tropical Wigglers occupy the route and can be captured to stretch around the large fence and reach the far side. Extend the Wiggler around corners instead of trying to force Mario through the barriers. The nearby regional coins are optional and should not take priority over staying on the platform.
Proceed to the Banzai Bill section. Capture a Banzai Bill and steer across the lava, using its acceleration to clear the long gap while avoiding Bullet Bills and solid barriers. The treasure chest, cannon-top Moon, and other side-route pickups are optional. Follow the main path to the next switch and Spark Pylon. A checkpoint is available before this Banzai Bill stretch, so repeated failures return Mario close to the section rather than to the start of the cavern.
- Ground-pound both platform switches.
- Use a Hammer Bro to clear obstructing walls when convenient.
- Use a Tropical Wiggler to navigate around the large fence.
- Capture a Banzai Bill for the long lava crossing.
- Ignore side-route Moons unless you are deliberately collecting them.
- Use the checkpoint before the Banzai Bill section after a failure.
Cross the invisible bridge and rolling-boulder paths
After the Banzai Bill area, ground-pound the switch near the Moe-Eye. This creates a temporary invisible bridge. Capture the Moe-Eye and use its shades to see the bridge while moving across it. Stay on the visible route and do not pause after the switch activates; the bridge is temporary. The side branch with regional coins is optional.
Take the Spark Pylon to the final cavern section. A Chargin' Chuck is surrounded by breakable stone blocks. Capture it and charge through the blocks and the first set of rolling boulders. Continue along the narrow path, watching the rhythm of the boulders before committing to the next charge. A second Chargin' Chuck can clear the later boulder passage if the first capture ends.
Reach the final Spark Pylon after the boulder paths. A checkpoint before the first Chargin' Chuck provides the main recovery point for this section. If Mario falls, use the checkpoint and repeat only the boulder route. The pylon carries Mario to the arena where Madame Broode blocks the cavern exit.
- Activate the switch near Moe-Eye.
- Capture Moe-Eye and use its shades to see the temporary bridge.
- Capture Chargin' Chuck to break through the rolling boulders.
- Use the checkpoint before the first Chargin' Chuck after a failure.
- Ride the final Spark Pylon to Madame Broode's arena.
Defeat Madame Broode and enter the Wedding Hall
Madame Broode's rematch uses the same basic Chain Chomp method as the earlier battle, but the Chain Chomp wears multiple hats that must be removed before it can be captured. Keep moving around the arena while Madame Broode sends the Chain Chomp toward Mario. Throw Cappy at the hats until the Chain Chomp is exposed, then capture it.
While controlling the Chain Chomp, pull its chain away from Madame Broode to build tension. Aim the stretched Chain Chomp at her and release it so it slams into her. After the hit, avoid the returning Chain Chomp and repeat the hat-removal and capture process. Madame Broode also throws the Chain Chomp toward Mario, but the attack has limited reach; keep space between Mario and the boss and move laterally rather than standing directly in front of her.
Three successful Chain Chomp hits defeat Madame Broode. A checkpoint before the Chargin' Chuck section makes the cavern route repeatable if the fight is lost. After the victory, leave the arena and activate the Ever-After Hill checkpoint on the surface. Follow the path up to the Wedding Hall. The next chapter begins when Mario enters the hall and starts the Bowser battle; do not expect this chapter to cover that encounter.
- Remove all protective hats from the Chain Chomp.
- Capture the exposed Chain Chomp.
- Pull the chain away from Madame Broode and release it toward her.
- Repeat the attack until Madame Broode is defeated.
- Activate the Ever-After Hill checkpoint after leaving the cavern.
- Reach and enter the Wedding Hall to hand off to the Bowser chapter.
Before you move on
- Mario has crossed Honeylune Ridge and activated the Quiet Wall checkpoint.
- Mario has used the cavern route to pass the Parabones, Sherm, moving-platform, Banzai Bill, Moe-Eye, and Chargin' Chuck sections.
- Madame Broode has been defeated in the Underground Moon Caverns.
- The cavern exit has been cleared.
- The Ever-After Hill checkpoint has been activated.
- Mario has reached and entered the Wedding Hall.
- The guide has stopped before the Bowser battle and its later escape sequence.
References for this chapter
Bowser — Final Campaign Battle and Rescue Sequence
Complete Bowser’s Kingdom’s four story rewards before traveling to Moon Kingdom. Infiltrate Bowser’s Castle! is worth 1 Power Moon, Smart Bombing is worth 1, Big Broodal Battle is worth 3, and Showdown at Bowser’s Castle! is worth 3, giving the exact 8-Moon total required for the Odyssey to reach Moon Kingdom. In the Wedding Hall, strike Bowser’s white hat with Cappy, capture it, and use its boxing attacks. Survive shockwaves, tail sweeps, fire, duplicate hats, and flaming shells for three successful knockbacks. After Bowser is defeated, capture him during the collapse and follow the escape route. Break the barriers, clear the 2D section, destroy the four surrounding pillars, smash the central cube, and jump into the Spark Pylon. The ending sequence and credits then lead to the postgame Mushroom Kingdom.
Complete the exact Bowser’s Kingdom requirement
Before leaving Bowser’s Kingdom, confirm that all four story rewards are collected. Infiltrate Bowser’s Castle! gives 1 Power Moon after defeating the Stairface Ogre. Smart Bombing gives 1 after assembling the five Moon Shards. Big Broodal Battle gives 3 after defeating Topper and Hariet together. Showdown at Bowser’s Castle! gives 3 after defeating RoboBrood. These rewards total 8 Power Moons exactly.
Return to the Odyssey and check the travel prompt or kingdom map. Moon Kingdom should become available once those four story rewards are in your total. Optional local Moons are not normally required. Collect additional Bowser’s Kingdom Moons only if one of the four story rewards was missed, or if you left the required sequence before completing it.
Select Moon Kingdom from the Odyssey. Follow the marked route across the lunar surface toward the cathedral. The path includes checkpoints and several capture-based sections, but no optional Moon or special outfit is required to reach the Wedding Hall.
- Collect Infiltrate Bowser’s Castle! for 1 Power Moon.
- Collect Smart Bombing for 1 Power Moon.
- Collect Big Broodal Battle for 3 Power Moons.
- Collect Showdown at Bowser’s Castle! for 3 Power Moons.
- Confirm the four rewards total 8 Power Moons.
- Confirm Moon Kingdom is selectable from the Odyssey.
Start the Wedding Hall battle
Enter the cathedral at the end of the Moon Kingdom route. The Wedding Hall door begins the final Bowser battle. A recovery Heart is available near the approach, so use it if Mario has taken damage during the route.
Bowser throws his white hat into the arena. Hit the white hat with Cappy to flip it over, then run into the overturned hat to capture it. The captured hat gives Mario boxing gloves. Ordinary jumps and Cappy throws do not damage Bowser directly during this fight; use the captured hat’s punches instead.
Keep space between Mario and Bowser while waiting for the next attack. When the capture ends, repeat the process: strike the real white hat with Cappy, then run into it to capture it again.
- Enter the Wedding Hall.
- Strike Bowser’s white hat with Cappy.
- Capture the overturned white hat.
- Use the captured hat’s punches to attack Bowser.
Survive the first cycle and score the first knockback
Bowser jumps around the arena and creates shockwaves when he lands. Jump over the expanding rings. The Moon’s low gravity gives Mario more airtime, but do not jump too early or land before the final ring has passed.
He also throws large boulders or brick-like projectiles. Dodge them, or punch them with the captured hat when they are directly in your path. When Bowser stops moving, close the distance and punch him repeatedly with the hat.
Bowser eventually turns for a tail sweep. Jump over the complete sweep rather than trying to run underneath it. Once the tail has passed, continue punching until Bowser is knocked backward into the arena barrier. This completes the first successful hit.
- Jump over every shockwave ring.
- Dodge or destroy the thrown boulders.
- Jump over the tail sweep.
- Punch Bowser into the arena barrier once.
Handle fire, duplicate hats, and the remaining cycles
After the first hit, Bowser can stand in the arena and sweep fire across the floor. Jump over the moving flames and remain airborne until the sweep has passed. Do not try to cross the fire at ground level.
In the next hat sequence, several purple duplicate hats appear with the real white hat. The duplicate hats disappear when struck by Cappy and may produce recovery Hearts, but the white hat is the one Mario must overturn and capture. Watch the hat’s appearance and position instead of running into the first hat you see.
Bowser next throws flaming shells. These are more dangerous than the ordinary boulders and should be avoided rather than punched. After the shells, he may throw ordinary boulders before becoming vulnerable. Once he stops, punch him and prepare for additional tail sweeps, including consecutive sweeps in later cycles.
Repeat the hat capture and boxing sequence until Bowser is knocked into the barrier three times. The final cycle uses more duplicate hats and flaming projectiles, so prioritize survival over immediately reaching Bowser.
- Jump over the fire sweep.
- Identify and capture the real white hat.
- Avoid flaming shells.
- Survive the later tail sweeps.
- Complete three total barrier knockbacks.
Capture Bowser and begin the escape
After the battle, move toward Peach as the Wedding Hall collapses. When Bowser becomes available as a capture, throw Cappy at him and take control. Mario cannot complete the escape route on foot.
As Bowser, punch through large blocks and walls, use claws to break debris, and use fire breath to clear obstacles from a distance. Continue forward rather than stopping to fight every hazard. Falling rocks and collapsing platforms can damage Bowser or remove the ground beneath him.
When you reach the 2D mural section, use fire breath to destroy blocks and form a route through the structure. Keep moving because sections of the mural and the surrounding platforms collapse. Jump promptly when the path ends and continue through the exit.
- Reach the post-battle capture opportunity.
- Capture Bowser.
- Break through the cavern barriers.
- Use fire breath in the 2D section.
- Keep moving across collapsing platforms.
Destroy the four pillars and the central cube
After leaving the mural, continue through the final walls until you enter a broad chamber with four large pillars around a central cube or blocky structure. The floor has unstable tiles, and falling debris marks impact locations before rocks land.
Move around the chamber in a steady circuit and attack the base of each pillar. Do not remain on cracked tiles longer than necessary. Each pillar must be broken so it falls inward toward the central structure. If you destroy only three, the escape cannot finish.
Once all four pillars have fallen, move to the center and attack the exposed central cube or structure. Continue striking until it breaks. A Spark Pylon appears underneath it. As Bowser, jump into the Spark Pylon to leave the collapsing cavern and trigger the final rescue sequence.
- Break the first surrounding pillar.
- Break the other three pillars.
- Confirm all four pillars have fallen inward.
- Destroy the central cube or structure.
- Jump into the revealed Spark Pylon as Bowser.
Finish the campaign and verify postgame access
The Spark Pylon completes the playable escape. Let the rescue scenes continue through the ending and credits. Defeating Bowser in the Wedding Hall alone is not enough; the Bowser capture, cavern escape, four-pillar chamber, central-cube destruction, and final Spark Pylon are part of the required campaign sequence.
After the credits, continue the completed save. The Odyssey can travel to Mushroom Kingdom, where Peach’s Castle and postgame activities become available. Mushroom Kingdom Moon collection, Toadette’s achievement rewards, Moon Rocks, Dark Side, Darker Side, and further costumes are optional.
If Moon Kingdom was unavailable before departure, return to Bowser’s Kingdom and check the four story rewards individually. The required tally is 1 plus 1 plus 3 plus 3, not an approximate total. An extra local Moon is needed only when a story reward was missed or the required sequence was abandoned before completion.
- Complete the Bowser escape through the Spark Pylon.
- Watch the ending sequence and credits.
- Continue the completed save.
- Confirm Mushroom Kingdom is accessible from the Odyssey.
- Treat Dark Side, Darker Side, and extra Moon collection as optional postgame content.
Before you move on
- Infiltrate Bowser’s Castle! is collected for 1 Power Moon.
- Smart Bombing is collected for 1 Power Moon.
- Big Broodal Battle is collected for 3 Power Moons.
- Showdown at Bowser’s Castle! is collected for 3 Power Moons.
- The four Bowser’s Kingdom story rewards total 8 Power Moons.
- Bowser has been knocked into the Wedding Hall barrier three times.
- Mario has captured Bowser during the Moon Kingdom collapse.
- The cavern and 2D escape sections have been cleared.
- All four surrounding pillars have fallen onto the central structure.
- The central cube or structure has been destroyed.
- The final Spark Pylon has been activated as Bowser.
- The ending sequence and credits have played.
- Mushroom Kingdom is accessible after continuing the completed save.
References for this chapter
- Super Mario Odyssey — Nintendo Official Game Site
- Bowser’s Moon Wedding - Moon Kingdom - Story Walkthrough
- Boss list and strategies — Super Mario Odyssey Walkthrough & Guide
- Bowser’s Kingdom: Bowser’s Castle - Super Mario Odyssey Walkthrough & Guide
- Moon Kingdom Walkthrough - Samurai Gamers
- Mario’s Itinerary — Super Mario Odyssey Guide
Mushroom Kingdom (Post-Story) — Peach’s Castle and Story Wrap-Up
Mushroom Kingdom becomes available after you defeat Bowser, complete the Moon Kingdom escape and finish the ending sequence. It is optional postgame content rather than another story kingdom: there are no required objectives here, and you can leave immediately through the Odyssey. Start at Peach’s Castle, speak with Archivist Toadette, then work through the local Power Moons and challenges using the kingdom map. Toadette’s rewards come from achievements completed throughout the entire game, while the local list covers activities around the castle, Goomba Woods, Mushroom Pond and the surrounding grounds. The castle roof also provides access to Yoshi, whose fruit-eating challenges award additional Power Moons. Use the Odyssey and Checkpoint Flags to move between kingdoms whenever an achievement requires progress elsewhere.
Confirm the post-story unlock and reach Peach’s Castle
Complete the final Moon Kingdom sequence after defeating Bowser. Once the ending sequence has finished and control returns, Mario is in the Mushroom Kingdom near the Odyssey. Open the map and confirm that Mushroom Kingdom is selectable. This is the post-story area becoming available; it is not a pre-Bowser destination and does not contain another mandatory campaign objective.
From the Odyssey, follow the main path toward the fountain and Peach’s Castle. Activate the Peach’s Castle Main Entrance Checkpoint Flag on the approach, then enter the castle. Go upstairs toward the throne area and speak with Archivist Toadette. She records achievements completed across the entire save and gives Power Moons when their requirements have been met.
- The Moon Kingdom ending sequence is complete.
- Mushroom Kingdom is selectable on the map.
- The Peach’s Castle Main Entrance Checkpoint Flag is active.
- Archivist Toadette has been located upstairs inside the castle.
Claim Toadette’s available achievement rewards
Talk to Toadette whenever she is visibly ready to award a reward. Her achievements are not limited to Mushroom Kingdom. They can track milestones such as rescuing Peach, visiting kingdoms, collecting Power Moons, finding 8-bit Moons, completing Timer Challenges, meeting Captain Toad, visiting Peach in other kingdoms, growing seeds, winning races and completing other activities.
Use the Mushroom Kingdom Power Moon list on the map to distinguish Toadette’s achievement rewards from local Moons. If Toadette has no new reward, read the remaining achievement requirements instead of repeatedly searching the castle. The required action may be in another kingdom, and returning to Toadette after completing it is what redeems the reward.
- All currently available Toadette rewards have been claimed.
- The remaining achievement requirements have been read.
- Toadette’s list is not being confused with the local Mushroom Kingdom Moon list.
Clear the castle interior and roof route
Inside the castle, inspect the area around the central staircase, throne and upper walls for local objectives. The interior contains ground-pound puzzles and other hidden rewards. Check the local map list after each successful activity so you can tell which entries have been completed.
Leave the castle and use the scarecrow west of the building. Throw Cappy at it to create the staircase to the roof. On the roof, collect the accessible Moon and then look on the east side for a Yoshi egg. Break the egg with Cappy to capture Yoshi. Yoshi can eat the red-and-yellow fruit scattered around the castle grounds and Goomba Woods. Reaching the relevant fruit totals awards three local Power Moons; if Yoshi disappears, return to the roof and capture him again.
- The castle interior has been checked against the local Moon list.
- The west-side scarecrow has been used to reach the roof.
- The Yoshi egg on the roof has been opened.
- Yoshi fruit objectives have been started or completed.
Work the central grounds and garden areas
From the castle, sweep the central grounds in sections instead of searching randomly. Check the fountain, the paths around the moat, the castle roof access, the nearby towers and the surrounding trees. Activate every Checkpoint Flag you pass because they provide fast return points and contribute to achievement progress.
Continue toward the garden and hedge maze. The rabbit in the maze awards a Moon when caught. Nearby seeds can be carried to the garden’s planters; plant each seed and return later after it has grown. The flower garden, dog activity, sheep pen and Captain Toad are separate objectives, so use the map list to track them individually rather than assuming one activity completes the others.
- The fountain and moat paths have been searched.
- The hedge-maze rabbit has been handled.
- Available seeds have been planted in the garden.
- Checkpoint Flags along the route are active.
Complete Goomba Woods, Mushroom Pond and challenge activities
Travel north to Goomba Woods and capture Goombas to build the required tower for the Goombette objective. If a Toad blocks a nearby passage because he is afraid of Goombas, approach while controlling a Goomba so he moves aside. Search the woodland edges for seeds, fruit and local ground-pound or capture puzzles.
Travel southwest to Mushroom Pond and activate its Checkpoint Flag. This area contains the scooter Timer Challenge, Picture Match through the nearby captured rocket, pond collectibles and the Koopa races. These are optional postgame challenges, but they count toward the local Moon total and may satisfy Toadette achievements. For Picture Match, study the reference image before placing the disappearing facial pieces. For the scooter challenge, use the scooter to reach the scarecrow quickly; attempting the route on foot is slower and may fail the timer.
- The Goomba Woods objectives have been checked.
- Mushroom Pond’s Checkpoint Flag is active.
- The scooter challenge and Picture Match have been attempted.
- The Koopa’s Regular Cup has been completed before attempting the Master Cup.
Use the Odyssey as the postgame hub
When you finish a route, return to the Odyssey and use the map to revisit any earlier kingdom. Mushroom Kingdom does not require a Moon payment to leave, and its local activities can be postponed while you complete Toadette requirements elsewhere. Checkpoint Flags make it faster to resume unfinished objectives when you return.
After completing a major milestone in another kingdom, return to Peach’s Castle and speak with Toadette again. Continue until no currently completed achievement remains unclaimed. For a broader collection goal, compare the Mushroom Kingdom Moon list with the total shown on the map; local Power Moons, Toadette rewards, challenge rewards and special revisit objectives are tracked separately.
- The Odyssey successfully travels to earlier kingdoms.
- Unfinished local Moons remain visible on the Mushroom Kingdom map.
- Toadette has been rechecked after major achievements.
- Optional postgame activities are being distinguished from campaign completion.
Before you move on
- The Moon Kingdom finale and ending sequence have been completed.
- Mushroom Kingdom is selectable from the Odyssey map.
- Peach’s Castle has been entered and Archivist Toadette has been consulted.
- The castle interior, roof, central grounds, Goomba Woods, garden and Mushroom Pond have been checked against the local Power Moon list.
- The Yoshi egg on the castle roof has been opened and the fruit objectives are available.
- The Odyssey can travel to previously visited kingdoms, and Toadette’s completed achievement rewards have been claimed.
- The save is now in the optional post-story phase rather than awaiting another campaign objective.
References for this chapter
Postgame Challenge — Dark Side and Darker Side (Optional Endgame)
Dark Side and Darker Side are optional post-story challenges in the original Nintendo Switch release of Super Mario Odyssey. Complete Bowser’s Moon Wedding, then deposit 250 total Power Moons into the Odyssey to unlock Dark Side, also called Rabbit Ridge. Its main mission is a no-checkpoint boss rush against Topper, Hariet, Spewart, Rango, and RoboBrood. Afterward, additional challenge rooms, Hint Art, and a total of 24 Power Moons become available. Deposit 500 total Power Moons after completing the main game to unlock Darker Side, also called Culmina Crater. Its only mission, Long Journey’s End, is a long cross-kingdom gauntlet with just one checkpoint near the beginning. Finish by climbing the grayscale New Donk City Hall and collecting the final Multi Moon. Neither area is required to rescue Peach or unlock Mushroom Kingdom.
1. Complete the campaign and reach the unlock thresholds
Finish Bowser’s Moon Wedding on the Moon Kingdom first. After the ending, Mushroom Kingdom is available as a post-story travel hub, and the Odyssey can be used to revisit every accessible kingdom. Dark Side does not unlock from the Moon total alone; the main game must also be completed.
Collect and deposit 250 total Power Moons into the Odyssey to unlock Dark Side. The total is shared across the save file, so Moons from every kingdom count. At 500 total Power Moons, Darker Side unlocks as well. These are cumulative totals, not separate requirements for one kingdom.
- Bowser’s Moon Wedding is complete.
- Mushroom Kingdom and the post-story Odyssey map are available.
- The save has at least 250 Power Moons for Dark Side or 500 for Darker Side.
2. Farm reliable Power Moons before attempting the challenges
Use the map’s kingdom lists to find easy unclaimed objectives before repeatedly attempting difficult bonus rooms. Good targets include simple NPC requests, races, Koopa Freerunning courses, Moon Rock objectives, Captain Toad rewards, and straightforward puzzle rooms. Once a kingdom’s Moon Rock has been activated after the story, its newly revealed objectives are useful sources of additional Moons.
Dark Side itself contains 24 Power Moons, including the Arrival at Rabbit Ridge! Multi Moon, but you do not need to clear every Dark Side room to unlock Darker Side. Purple coins are regional currency for costumes and purchases; they do not count toward either the 250- or 500-Moon threshold. Buy regional outfits only when a particular shop or objective requires one.
- Prioritize easy objectives in kingdoms with many revealed Moons.
- Activate Moon Rocks and check the newly revealed map markers.
- Track Power Moons separately from Purple Coins.
3. Reach Rabbit Ridge Tower and clear the Dark Side boss rush
Travel to Dark Side from the Odyssey and follow the route through two spark pylons to Rabbit Ridge Tower. Enter the tower to begin Arrival at Rabbit Ridge! The fights occur in this order: Topper, Hariet, Spewart, and Rango. Their patterns resemble their later main-story encounters, but the Moon’s low gravity changes jump timing. Use the arena’s intended counters, remove hazards before attacking when possible, and avoid spending health on hurried hits.
After Rango, continue to the upper section. A heart appears before the Warp Pipe leading to the roof. Capture a Hammer Bro there; RoboBrood does not provide Pokios in this rematch. Use the Hammer Bro’s hammers to break the robot’s defenses and expose the Broodal domes, then repeat until RoboBrood is defeated.
Rabbit Ridge Tower has no normal checkpoints. If Mario loses all health, he respawns outside the tower by the spark pylon, and every defeated boss returns. Treat each attempt as practice: learn one boss’s rhythm, then aim to complete the full sequence once your health conservation is consistent.
- Defeat Topper, Hariet, Spewart, and Rango in that order.
- Capture a Hammer Bro for the RoboBrood battle.
- Defeat RoboBrood and collect the Arrival at Rabbit Ridge! Multi Moon.
4. Complete Dark Side’s optional challenge rooms
After the tower mission, return to the Dark Side overworld and use the marked entrances for the additional rooms. Breakdown Road removes Cappy assistance and requires careful jumps and Banzai Bill manipulation. Other rooms test invisible-road movement, Yoshi’s traversal, and restricted versions of earlier kingdom challenges. Do not assume that familiar routes work unchanged; each room is built around a limitation or altered capture rule.
Dark Side also contains Hint Art. Record each image with the Switch capture function, then visit the named kingdom and compare the image against landmarks before ground-pounding the indicated location. Captain Toad’s Dark Side reward is another straightforward objective available during or after the tower route. Leave the hardest rooms until after easier kingdom Moons have been collected.
- Revisit the Dark Side overworld after completing Rabbit Ridge Tower.
- Use the room’s provided capture or its stated restriction rather than forcing normal movement.
- Collect Hint Art and solve it in the indicated kingdom when convenient.
5. Enter Darker Side and reach the underground checkpoint
At 500 total Power Moons, travel to Darker Side, also called Culmina Crater. The opening surface area leads to a frog capture section. Capture the frog and use its high jumps to cross the platforms and enter the large Warp Pipe. This pipe is the only checkpoint for nearly the entire mission, so reach it before attempting risky shortcuts.
Beyond the pipe, defeat the Yoofoe or bypass it and continue through the underground route. Defeating the Yoofoe produces a Life-Up Heart. A second Life-Up Heart can be obtained later from the Sphynx detour on the flower-path section; answer its question with Mushroom Kingdom. These hearts are optional but strongly recommended because the course has no ordinary checkpoints after the entrance pipe.
- Confirm the Odyssey has accepted at least 500 Power Moons.
- Reach the large underground Warp Pipe before taking unnecessary risks.
- Take the early Life-Up Heart and the Sphynx heart when the detours are safe.
6. Clear the gauntlet section by section
Proceed through the course in its intended sequence. Cross sinking platforms and poles, then long-jump across the moving hills and capture a Lava Bubble for the lava pools. Watch the Moonsnakes and enter the lava cannon. As an Uproot, climb the moving platforms while avoiding Burrbos, then survive the freezing-water and Fuzzy section. Capture Yoshi and use the tongue against the conveyor-belt walls before pressing the P Switch and following the flower path.
Next, use Pulse Beams to clear rocks, then climb the moving wall blocks. Capture Glydon and ride the updrafts while avoiding Urban Stingbies. Use Volbonan poles to cross the lava and reach the fog-covered platform section. Ride the Pulse Beam platform, avoid Burrbos, capture Pokio, and use the wooden pendulums to reach the 8-bit spiral. Hit the four required blocks, then enter the painting of captured Bowser.
As Bowser, break through the boulder corridors. In the narrow tunnel, alternate between destroying incoming boulders and clearing the blocks that obstruct the route. At the upper boulder generators, watch the different trajectories instead of charging blindly. Drop through the coin-ring opening, use the spark pylons that spell THANK YOU, and enter the final Warp Pipe.
- Complete the Lava Bubble, Uproot, Yoshi, Glydon, Pokio, and Bowser sections.
- Use the Sphynx and Yoofoe hearts if you need additional health.
- Reach the final Warp Pipe without exhausting all health.
7. Climb New Donk City Hall and verify completion
The final pipe returns Mario to the Moon’s surface near a grayscale New Donk City Hall. Capture one of the frogs behind the building and use its jumps to begin the ascent. Continue upward using the building’s platforms and frog jumps until you reach the roof. Collect the Long Journey’s End Multi Moon at the top.
Collecting this Multi Moon completes Darker Side’s only mission and awards the Invisibility Cap. The area remains optional postgame content, and Dark Side or Darker Side can be revisited after completion.
- Collect the Long Journey’s End Multi Moon.
- Confirm that the Invisibility Cap is awarded.
- Verify that the Darker Side mission is recorded as complete on the save.
Before you move on
- Bowser’s Moon Wedding and the main campaign are complete.
- Dark Side is accessible at 250 total Power Moons.
- Arrival at Rabbit Ridge! is complete if the Dark Side boss rush has been attempted.
- Darker Side is accessible at 500 total Power Moons.
- Long Journey’s End is complete and its Multi Moon has been collected at the top of the grayscale New Donk City Hall.
- The Invisibility Cap is available as the Darker Side completion reward.
References for this chapter
- Arrival at Rabbit Ridge! — Super Mario Wiki
- Long Journey’s End — Super Mario Wiki
- Dark Side — Super Mario Odyssey Wiki
- Darker Side — Super Mario Odyssey Wiki
- Super Mario Odyssey: Dark Side and Darker Side Power Moon Locations — Nintendo Life
- How to beat the Darker Side challenge in Super Mario Odyssey — GamesRadar+
Efficient Moon and Coin Collection Strategy
Power Moons are campaign fuel, not a requirement to clear every kingdom completely. At the Odyssey, check the displayed number needed for the next destination, then collect nearby story Moons and straightforward objectives until that requirement is met. Use the map’s Power Moon List to track collected entries and organize later cleanup by checkpoint, subarea, or capture rather than by number. Talkatoo gives names and clues for several uncollected Moons when available, while Hint Toad can mark a currently obtainable Moon on the map for 50 regular coins. Regional Coins are a separate currency used at that kingdom’s Crazy Cap shop. For a campaign-focused run, prioritize travel requirements and story objectives, buy only clearly useful items, and return after new story events or Moon Rocks reveal additional objectives.
Check the Odyssey’s travel requirement before searching
Return to the Odyssey whenever you finish a story objective or reach a convenient checkpoint. The ship displays how many additional Power Moons are needed to travel to the next story destination. This is your immediate campaign target; it is not a demand to collect every Moon listed for the current kingdom.
Collect the story Power Moons placed along the main route first. These usually come from the kingdom’s required objectives, major encounters, and the direct tasks that restore or advance the Odyssey. Add nearby visible Moons if they are on the way, but do not cross the entire kingdom for a difficult puzzle when the ship already has enough fuel.
Once the displayed requirement is satisfied, board the Odyssey and select the newly available destination. Optional Moons remain available for later collection, and returning to a previous kingdom is a normal part of the game rather than evidence that the first visit was incomplete.
- Read the number of additional Moons shown at the Odyssey.
- Finish story objectives before beginning broad optional exploration.
- Leave when the next destination is available unless a nearby Moon is especially convenient.
Use the Power Moon List as a record, not a route
Open the map with the minus button, then use the listed control to open the Power Moon List. The list can show the kingdom’s Moon entries, collected progress, and clues already revealed by the game’s hint characters. On Nintendo Switch, the map screen uses the Y button for the list; use the on-screen prompt if your control layout differs.
After each visit, note the kingdom, the number collected, and the areas you still want to search. Separate your notes into story objectives, nearby overworld Moons, and revisit-dependent Moons. This prevents a difficult race, shop task, or hidden room from interrupting the main route.
Do not follow Moon numbers as though they were stage order. Numbered entries are useful for matching a guide or checking progress, but they can send you between distant regions repeatedly. Instead, group objectives around checkpoint flags, shops, subareas, Moon Rocks, and capture locations.
- Open the Moon List from the map after collecting important objectives.
- Record unfinished areas rather than trying to memorize every location.
- Travel by nearby checkpoint and district, not strictly by Moon number.
Ask Talkatoo for names before paying for help
Talkatoo is the yellow bird used for in-game Moon clues. When he is available in a kingdom, speak to him and read the name he provides. A name such as a race, timer challenge, seed, note, treasure chest, or local landmark usually identifies the type of objective and narrows the search area.
Use the clue to inspect the matching landmark or checkpoint before spending regular coins. Talkatoo does not solve the objective; he gives information that you still have to interpret and complete. If the name points to a challenge you have not unlocked yet, continue the kingdom’s story and return later.
Talkatoo’s clues are limited to uncollected objectives available through his hint system. Once a useful clue has been exhausted, rely on the Moon List, visible map markers, Moon Rocks, or a direct guide for the remaining entries.
- Read the Moon name carefully before searching.
- Look first at the named landmark or nearby checkpoint.
- Treat Talkatoo’s clue as a direction, not as a location marker.
Use Hint Toad for one stubborn Moon at a time
In a completed or revisited kingdom where Hint Toad is present, talk to him and pay 50 regular gold coins to mark a currently obtainable Power Moon on the map. The marker identifies where the objective is located; it does not collect the Moon or explain every step of the local puzzle.
After receiving the marker, open the map, place a waypoint if useful, and warp to the nearest checkpoint. Search the marked area for the actual interaction: it may be a hidden ground-pound spot, a local capture, a subarea entrance, a race, or a shop-related objective. If the Moon remains inaccessible, continue story progress or check whether a required capture or outfit is missing.
Use Hint Toad during cleanup rather than as your first action in every kingdom. Early campaign Moons are generally found along the story route, while Hint Toad is most valuable when only isolated overworld objectives remain.
- Keep at least 50 regular coins available before requesting a marker.
- Confirm the marked area from the nearest checkpoint.
- Solve the marked objective yourself after locating it.
Keep regular coins and Regional Coins separate
Regular gold coins are the currency used for services such as Hint Toad and for many Crazy Cap purchases. Regional Coins have the kingdom’s distinctive color and symbol and are spent separately in that kingdom’s Crazy Cap shop. One currency cannot substitute for the other.
For the main campaign, Regional Coin purchases are usually optional. Some outfits open special interactions or optional Moon objectives, while stickers and souvenirs are decorative. Check the shop’s inventory when you reach a new kingdom, but do not assume that buying every item is necessary to power the Odyssey or defeat Bowser.
When a specific NPC, door, or Moon objective calls for a local outfit, buy that item and return to the named location. Otherwise, save Regional Coins for an objective you have deliberately chosen rather than spending them simply because the shop is available.
- Identify whether a purchase requires regular or Regional Coins.
- Treat most Regional Coin shop purchases as optional during the campaign.
- Buy a special outfit only when its target interaction is known.
Schedule revisits around new unlocks
Return to a kingdom when story progress changes it, a new capture makes a route possible, a Moon Rock becomes active, or a previously inaccessible subarea can now be entered. Moon Rocks reveal additional Moon objectives after the relevant story progress, making them efficient cleanup targets during a later visit.
On each revisit, begin at the nearest checkpoint and clear one local cluster before moving across the map. Combine Moon Rock objectives with nearby Talkatoo clues, Hint Toad markers, shop tasks, and capture-based puzzles so one trip produces several results.
For a campaign-only run, stop a kingdom visit once the Odyssey can continue and keep a short note of unfinished districts. For broader collection, finish one kingdom’s list at a time and verify each result in the in-game list rather than relying on memory.
- Revisit only when a new unlock or objective justifies the trip.
- Clear one checkpoint district before crossing to another.
- Use the Moon List to confirm completion after every cleanup session.
Before you move on
- The Odyssey’s displayed Power Moon requirement has been satisfied before each campaign departure.
- The Power Moon List confirms collected objectives instead of relying only on handwritten notes or visible map markers.
- Talkatoo clues and Hint Toad markers have been used selectively for remaining difficult objectives.
- Regular gold coins and Regional Coins are tracked as separate currencies, and no optional shop purchase is being mistaken for campaign progress.
- After a story event or Moon Rock unlocks new objectives, a return visit is organized by checkpoint and verified against the Moon List.
Boss and Mini-boss Tactics (Kingdom-by-Kingdom)
Most required boss fights in Super Mario Odyssey follow a repeatable pattern: avoid the current attack, use Cappy to control the arena’s special enemy or object, then damage the exposed boss. Activate nearby Checkpoint Flags before entering an arena, collect available hearts, and return directly to the fight after a failed attempt. The campaign’s required boss sequence includes Topper, Madame Broode, Hariet, Knucklotec, Rango, Spewart, Torkdrift, Bowser, Mechawiggler, Mollusque-Lanceur, Cookatiel, Lord of Lightning, the later Broodal fights, RoboBrood, Madame Broode’s Moon Kingdom rematch, and the final Bowser battle. RoboBrood requires a four-cycle Pokio assault: firework bombs topple the mech, Pokio climbs its wooden body, and Mario ground-pounds one Broodal dome per cycle.
Topper in Cap Kingdom
Enter Top-Hat Tower and reach the arena at the top. Topper begins protected by a stack of hats. Hit the hats with Cappy or jump on them to remove them, while staying near the arena’s outer edge so the bouncing hats do not trap Mario in the center.
When Topper spins across the floor, jump over the stack and its extended hit area. Once his head is exposed, stomp him. After the hit, he hides inside one of the remaining hats. Avoid the moving hats until Topper reappears, then repeat the hat-removal and stomp sequence until he is defeated.
- Remove Topper’s hats with Cappy or jumps.
- Jump over his spinning attack.
- Stomp Topper whenever his head is exposed.
Madame Broode in Cascade Kingdom
Madame Broode sends Chain Chompikins toward Mario. First strike the golden Chain Chomp with Cappy to remove its hat, then hit it again to capture it. Pull the control direction away from Madame Broode until the chain is stretched, then release to launch Chain Chompikins into her.
After each impact, Madame Broode becomes more aggressive and may interfere with the capture. Keep moving until she gives Mario room to pull the chain, then repeat the launch. Avoid her jumps and landing shockwaves rather than trying to attack during them.
- Remove Chain Chompikins’ hat and capture it.
- Pull the chain away from Madame Broode and release it into her.
- Repeat the collision three times.
Hariet and Knucklotec in Sand Kingdom
Against Hariet at the Inverted Pyramid, watch the landing locations of her bombs. Throw Cappy at a bomb to return it toward her. When the hit stuns Hariet and removes her protective hat, jump on her head. During her flying-saucer phase, keep moving away from the falling bombs and wait for another safe return opportunity.
In the underground arena, lure Knucklotec’s fists toward Mario, then move aside as a fist punches into the floor or wall. Throw Cappy at the stopped fist to capture it and steer it into Knucklotec’s face. During the ice-breath attack, move sideways across the arena instead of retreating in a straight line. Repeat the fist attack until the Multi Moon appears.
- Return Hariet’s bombs with Cappy and stomp her when stunned.
- Capture a stopped Knucklotec fist and steer it into his face.
- Move laterally during the ice-breath attack.
Rango, Spewart, and Torkdrift
Rango throws his spiked hat around the arena. Strike the hat with Cappy to turn it into a spring, then jump on it to launch Mario over Rango. Use the airborne height to stomp Rango’s head. After each hit, his hat spins around the arena with its spikes extended; avoid it until the attack ends. The same method works in Lake Kingdom and the later Snow Kingdom rematch, although the snowy arena makes careless running more dangerous.
Spewart fills the arena with purple poison. Clear the poison with Cappy while remaining on safe ground, then hit Spewart with Cappy when he pauses and jump on his exposed head. When he retreats into his hat and spreads poison in lines, clean a route through the sludge and wait for the next opening. This method applies to both the Wooded Kingdom and Luncheon Kingdom encounters.
Torkdrift can only be damaged reliably with an Uproot. Capture an Uproot near the Secret Flower Field, stretch upward into the three flower drones surrounding Torkdrift, and destroy them to remove the machine’s protection. When the dome is exposed, stretch into it before Torkdrift recovers. Later attacks add outward-moving shockwaves, so jump over them and repeat the drone-and-dome sequence.
- Bounce from Rango’s overturned hat and stomp him.
- Clear Spewart’s poison before attempting the head attack.
- Use an Uproot against Torkdrift and destroy the drones before striking the dome.
Bowser in Cloud Kingdom
During Hat-to-Hat Combat, jump over the shockwaves created by Bowser’s ground pounds. When he throws his white boxing-glove hat, hit it with Cappy to turn it over, then capture it. As the captured hat, punch Bowser and drive him into the arena’s outer fence.
Bowser also throws large objects and may attack with a tail sweep. Use the captured hat’s punches to break dangerous objects when practical, and jump over the tail sweep. Repeat the hat-capture and fence-impact sequence three times.
- Jump over Bowser’s ground-pound shockwaves.
- Capture the overturned boxing-glove hat.
- Punch Bowser into the arena fence three times.
Mechawiggler in Metro Kingdom
Capture a Sherm near New Donk City Hall. Use its cannon to destroy the glowing plasma globes along Mechawiggler’s body. Aim ahead of the machine as it moves rather than firing at its current position, and keep the Sherm moving so incoming attacks do not corner it.
After the exposed globes are destroyed, continue firing when Mechawiggler pauses. If it disappears through or around the buildings, reposition in the open area and reacquire the glowing targets. Repeat the damage cycle until the machine is defeated.
- Capture a Sherm.
- Destroy Mechawiggler’s glowing plasma globes.
- Reposition in open space when the machine leaves the immediate area.
Mollusque-Lanceur and Cookatiel
In Seaside Kingdom, capture a Gushen and use its water burst to rise toward Mollusque-Lanceur’s exposed underside. Change height to avoid the tentacles and return to open water if Mario is knocked out of the capture. Strike the vulnerable underside, then recapture a Gushen and repeat.
Cookatiel is fought as Lava Bubble Mario. Follow the visible lava routes and use the jets and pink liquid paths to climb toward its exposed head. Prioritize reaching a stable lava pool before attacking. Later paths are narrower and may contain gaps, so wait for a complete route rather than forcing a jump from an unsafe position.
- Use Gushen height to reach Mollusque-Lanceur’s underside.
- Recapture a Gushen immediately after losing it.
- Use Lava Bubble routes to reach Cookatiel’s head three times.
Lord of Lightning in Ruined Kingdom
The Ruined Kingdom boss is Lord of Lightning. Watch the arena floor for markers that show where lightning will strike, and move away before each impact. Approach the glowing metal stakes attached to the dragon’s head from the side, then throw Cappy at a stake and pull it free.
After enough stakes are removed, the cracked weak point on the dragon’s forehead is exposed. Ground-pound the weak point, then retreat before the next lightning pattern begins. Preserve an escape route from the arena edge, because the dragon’s movement and shockwaves can push Mario toward the drop.
- Move away from the marked lightning strikes.
- Remove the glowing head chains or stakes with Cappy.
- Ground-pound the exposed forehead weak point.
Hariet and Topper in Bowser’s Kingdom
At the Big Broodal Battle, both Hariet and Topper are present. Avoid standing between them when their attacks overlap. Against Hariet, return her bombs with Cappy and stomp her after the hit removes her protection. Against Topper, remove his hats, jump over his spinning attack, and stomp his exposed head.
After one Broodal is defeated, use the additional space to isolate the other. Activate the checkpoint near the arena before starting so a failed attempt does not require repeating the castle approach.
- Defeat both Hariet and Topper.
- Use the established bomb, hat, spin, and stomp counters.
- Activate the nearby checkpoint before entering the arena.
RoboBrood in Bowser’s Kingdom
RoboBrood begins by firing large firework bombs. Wait for the Pokio to be released near the mech, then capture it. Use Pokio’s beak to poke the returned firework bombs into RoboBrood’s armored legs. The bombs damage the armor; continue redirecting them until the mech topples and exposes its wooden body.
While RoboBrood is down, use Pokio to climb the exposed wood. Poke into the wooden surfaces to gain height, then reach the top and attack the exposed Broodal dome. Ground-pound the dome to defeat the current pilot. RoboBrood stands up again, so repeat the full bomb, topple, climb, and dome sequence four times: first Spewart, then Rango, then Hariet, and finally Topper.
The later cycles add metal strips across parts of the wooden body, making the climb less direct. RoboBrood also releases rainbow coils or rings. Avoid them while climbing; if one blocks a route, Pokio can poke it away, a firework bomb can destroy it, or RoboBrood can step on it. After the second dome defeat, watch for the rainbow-colored feet that signal the Rainbow Charge. Move well away from the mech’s line, then roll or sidestep out of its path as it charges. Resume the bomb setup after the charge ends and do not remain underneath the mech’s feet.
- Capture the Pokio released near RoboBrood.
- Poke firework bombs into the armored legs until RoboBrood topples.
- Climb the exposed wooden body and ground-pound the dome.
- Defeat all four domes: Spewart, Rango, Hariet, and Topper.
- Avoid the Rainbow Charge and clear or bypass the rainbow coils.
Madame Broode and Bowser in Moon Kingdom
Madame Broode ambushes Mario in the Moon Kingdom’s underground route. Use the same Chain Chompikins method as in Cascade Kingdom: knock off its hat, capture it, pull away from Madame Broode, and release the stretched chain to launch the Chomp into her. Avoid her landing shockwaves and repeat until the path to the Wedding Hall opens.
The final Bowser battle uses the same boxing-glove capture as the Cloud Kingdom fight, but the attack patterns are more aggressive. Hit Bowser’s white hat with Cappy, capture it, and punch Bowser after he finishes an attack. Jump over fiery shockwaves, avoid thrown projectiles and decoy hats, and jump over the tail sweep before resuming the counterattack. Knock him into the wall three times.
After Bowser is defeated, capture him during the collapsing Moon Caverns escape. As Bowser, break the obstacles blocking the route and follow the path with Peach and Tiara. If Mario falls during this scripted escape, retry from the current Moon Kingdom checkpoint rather than restarting the campaign.
- Defeat Madame Broode in the Moon Kingdom.
- Capture Bowser’s boxing-glove hat and knock him into the wall three times.
- Capture Bowser during the escape and complete the route with Peach and Tiara.
Recovery and fast retries
Before each story arena, activate the nearest Checkpoint Flag and inspect the surrounding platform for a heart. If Mario loses all health, use the checkpoint’s warp or restart location and follow the shortest marked route back to the arena. Avoid optional rooms and collectibles during a retry.
If a required capture is lost, back away from the boss and locate the capture’s respawn point rather than attempting ordinary attacks that cannot damage the boss. In multi-boss fights, move to an open side of the arena to separate the enemies. After winning, collect the Multi Moon and allow the story transition to finish before leaving; some next objectives and travel prompts appear only after the reward is collected.
- Activate a checkpoint before each boss attempt.
- Recover the required capture instead of forcing normal Mario attacks.
- Collect the Multi Moon and confirm that the next story objective has appeared.
Before you move on
- The required campaign boss sequence has been cleared: Topper, Madame Broode in Cascade Kingdom, Hariet, Knucklotec, Rango in Lake Kingdom, Spewart in Wooded Kingdom, Torkdrift, Bowser in Cloud Kingdom, Mechawiggler, Rango in Snow Kingdom, Mollusque-Lanceur, Spewart in Luncheon Kingdom, Cookatiel, Lord of Lightning, Hariet and Topper in Bowser’s Kingdom, RoboBrood with all four Broodal dome defeats, Madame Broode in Moon Kingdom, and the final Bowser battle.
- RoboBrood was defeated by completing four bomb-topple, Pokio-climb, and dome-ground-pound cycles for Spewart, Rango, Hariet, and Topper.
- Bowser was captured during the Moon Kingdom escape sequence.
- The scripted Moon Kingdom ending finished and the game returned to the Odyssey after the story climax.
- Mushroom Kingdom is available as a destination, confirming that the main campaign has advanced beyond the final battle.
References for this chapter
- Super Mario Odyssey — Nintendo Official Game Site
- Boss list and strategies — Super Mario Odyssey Walkthrough & Guide
- Bowser’s Castle Campaign Walkthrough — Super Mario Odyssey Walkthrough & Guide
- Bosses — Super Mario Odyssey Walkthrough & Guide
- Super Mario Odyssey Walkthrough v1.00 — Neoseeker Walkthroughs
- RoboBrood Boss Guide — Samurai Gamers
- RoboBrood — Super Mario Wiki
- Bowser’s Moon Wedding — Super Mario Wiki
Final Campaign Completion Checklist and Next Steps
The main campaign is complete only after the Moon Kingdom chapter has brought Mario to the Wedding Hall, Bowser has been defeated, the escape route has been completed, and Mario reaches the final Spark Pylon. The ending sequence then carries Mario and his companions back to the Odyssey, followed by the credits and post-story access to Mushroom Kingdom. You do not need every Power Moon, Regional Coin, outfit, souvenir, or achievement reward for the campaign ending. Afterward, use the kingdom Moon lists to plan optional collection goals. Dark Side opens at 250 total Power Moons after the story, and Darker Side opens at 500. Mushroom Kingdom access after the ending is the clearest practical confirmation that the completed campaign state has been reached.
1. Confirm that the Moon Kingdom approach is complete
The preceding Moon Kingdom chapter should bring Mario through Honeylune Ridge and the Underground Moon Caverns to the Wedding Hall. From the Moon Kingdom starting area, follow the main route north to the Wedding Hall entrance, then continue into the final arena. The Wedding Hall is the final story location, and its mission, Bowser’s Moon Wedding, is the game’s last main-story mission.
At this point, do not detour into optional Moon searches unless you deliberately want them. The required campaign objective is to enter the Wedding Hall and trigger the final Bowser encounter. Optional Moon Kingdom list entries, races, regional coins, and bonus rooms can be handled after the story.
- Mario has reached the Wedding Hall in Moon Kingdom.
- The Bowser battle begins when the Wedding Hall sequence sends Mario into the arena.
- You are treating optional Moon Kingdom collectibles as separate from the campaign route.
2. Defeat Bowser in the Wedding Hall arena
Complete the multi-phase Bowser battle using the arena’s capture opportunities. Evade his incoming attacks, then use the captured Bowser’s punches to break through obstacles and damage Bowser during the vulnerable exchanges. Follow the on-screen movement prompts when the capture is active; ordinary Mario jumps are not the main method for winning this fight.
If you lose, restart from the Wedding Hall checkpoint and repeat the battle. You do not need to replay the full Moon Kingdom approach after a failed attempt. Once Bowser is defeated, remain in the sequence instead of returning to the Odyssey map or treating the boss victory as the complete ending.
- Bowser has been defeated in the Moon Kingdom arena.
- The game continues directly into the collapsing-cavern escape sequence.
- You have not stopped at the boss victory as the final completion check.
3. Finish the escape and reach the final Spark Pylon
Continue immediately into the escape sequence. Mario must capture the unconscious Bowser and use Bowser’s heavy punches to destroy the blocks and other barriers in the collapsing caverns. Move through the route while avoiding falling Moon Rocks, broken platforms, and gaps. The objective is not to collect every item in the caverns; stay on the forward route and use Bowser’s attacks whenever the path is blocked.
Keep advancing until the final large Spark Pylon is uncovered. Use it as part of the scripted escape while Mario is still controlling Bowser. This final Spark Pylon is distinct from the ordinary travel pylons used elsewhere: reaching it completes the escape set piece and starts the closing wedding sequence. Do not quit after breaking the final obstruction, because the pylon and the following cutscene are part of the required progression.
- The collapsing-cavern escape has been completed.
- Mario has used Bowser to clear the required barriers.
- The final Spark Pylon has been reached and activated.
- The wedding aftermath sequence begins.
4. Watch the ending and verify post-story access
Let the post-Bowser sequence continue through the wedding aftermath and the final departure. After the closing sequence and credits, the Odyssey lands in Mushroom Kingdom near Peach’s Castle. The rest of Mushroom Kingdom is not available for ordinary exploration before the rescue is complete; its availability after the ending is therefore a useful practical confirmation that the main story has been finished.
Open the Odyssey map after control returns and select Mushroom Kingdom. Travel there, reach Peach’s Castle, and confirm that Mario can explore the grounds and access the kingdom’s post-story activities. You do not need to complete Toadette’s achievement records, collect the castle’s optional Moons, or finish any Mushroom Kingdom challenge for the campaign goal.
- The wedding aftermath and credits have played.
- Mushroom Kingdom is selectable from the Odyssey map.
- Peach’s Castle and its grounds are accessible.
- Post-story characters and optional objectives are available.
5. Save the completed campaign state
Save after reaching Mushroom Kingdom and, if desired, reload the file to confirm that the kingdom remains available. The main campaign does not require a perfect Moon total, a complete Regional Coin collection, every costume, every souvenir, or every achievement Moon. The reliable completion standard is the combined sequence: Wedding Hall reached, Bowser defeated, escape completed, final Spark Pylon activated, ending viewed, and Mushroom Kingdom unlocked.
Do not expect the aggregate Moon total alone to identify every remaining objective. Open an individual kingdom’s Moon list to distinguish collected story rewards, optional challenges, shop Moons, Moon Rock discoveries, races, and revisits. Nintendo describes Power Moons as the resource used to power the Odyssey, but collection beyond the story requirements is optional for this chapter.
- The completed post-story state has been saved.
- Mushroom Kingdom remains available after reloading.
- You are not using 100 percent collection as the campaign requirement.
6. Choose optional postgame goals
For Dark Side, continue collecting Power Moons until the Odyssey has received 250 total after the main story is complete. Efficient targets include visible Moon Rock rewards, short bonus rooms, Sphynx challenges, Koopa Freerunning races, checkpoint races, Hint Toad locations, and shop Moons when you are already visiting a Crazy Cap store. Track progress by kingdom so you do not repeatedly search areas that are already cleared. Dark Side is optional postgame content and unlocks Rabbit Ridge after the 250-Moon requirement is met.
For Darker Side, continue to 500 total Power Moons. Revisit kingdoms with unfinished Moon Rock entries and use each local Moon list to target races, bonus rooms, Hint Art, Sphynx objectives, shop purchases, and post-story challenges. Darker Side is a separate high-difficulty endgame area, not another required story chapter. Its final challenge is unlocked after the 500-Moon requirement is met.
For broader completion, maintain separate lists for Power Moons, Regional Coins, costumes, souvenirs, captures, music, and achievement rewards. These categories have different completion conditions, so an overall Moon total is not a substitute for checking the relevant kingdom or collection list.
- Dark Side appears after 250 total Power Moons and the completed campaign.
- Darker Side appears after 500 total Power Moons and the completed campaign.
- Optional collection progress is tracked by kingdom and category.
- You understand that neither Dark Side nor Darker Side is required for the rescue ending.
Before you move on
- The Moon Kingdom route has brought Mario to the Wedding Hall.
- Bowser has been defeated in the Wedding Hall arena.
- The collapsing-cavern escape has been completed with captured Bowser.
- The final Spark Pylon has been reached and activated.
- The wedding aftermath and credits have played.
- Mushroom Kingdom is selectable from the Odyssey map.
- Peach’s Castle and its grounds are accessible.
- The post-story state can be saved and reloaded.
- The 250- and 500-Power-Moon thresholds are recognized as optional next steps.
References for this chapter
- Super Mario Odyssey — Nintendo Official Game Site: Explore the Kingdoms
- Super Mario Odyssey — Nintendo Official Game Site
- Super Mario Odyssey — Nintendo Store Product Page
- Super Mario Odyssey — Super Mario Wiki
- Bowser’s Moon Wedding — Super Mario Wiki
- Spark Pylon — Super Mario Wiki
- Mushroom Kingdom — Super Mario Wiki
- Moon Kingdom — Super Mario Odyssey Wiki
- Dark Side — Super Mario Odyssey Wiki
- Darker Side — Super Mario Odyssey Wiki
- Super Mario Odyssey: Dark Side and Darker Side Power Moon Locations — Nintendo Life
Finishing up
Defeat Bowser in the campaign’s final Bowser fight and complete the subsequent Moon sequence.
Confirm the cutscene and Odyssey departure that signal the story ending.
Confirm the Mushroom Kingdom becomes available from the Odyssey map and you can visit Peach’s Castle — this marks post-story access from the main campaign completion.
Verify the in-game completion tally: the kingdom Moon lists update as you collect; ensure the story-critical moons listed in each kingdom’s objective group are complete.
Optional full-campaign check: after the story, you can aim to reach 250 Power Moons to unlock the Dark Side and 500 Power Moons to unlock the Darker Side if you plan to attempt those postgame challenges.
Choose your next gameScreenshots & video
Game imagery for reference. Follow the written chapters above for the route and strategies.
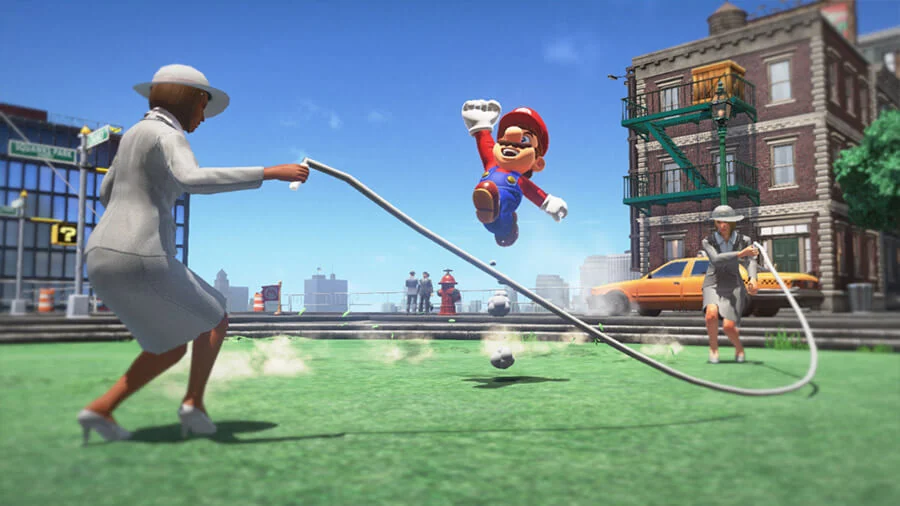
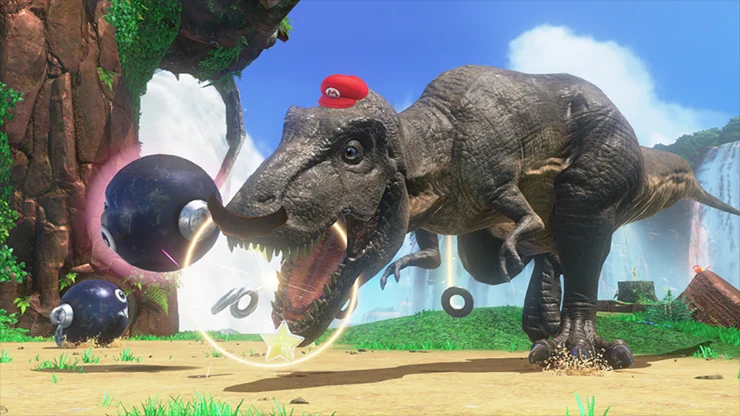
Sources & references
Our original guide draws on the references below. Check the edition at the top of this page before following controls or unlock requirements.
- Mario and Cappy — Nintendo Official Game Site
- Super Mario Odyssey — Nintendo Official Game Site: Explore the Kingdoms
- Super Mario Odyssey — Nintendo Store Product Page
- Super Mario Odyssey — Adventure Guide and Walkthrough
- Super Mario Odyssey Power Moon Locations and Walkthrough
- Prologue — Super Mario Odyssey Walkthrough & Guide, GameFAQs
- Super Mario Odyssey — Cap Kingdom Walkthrough, Samurai Gamers
- Super Mario Odyssey — Nintendo Official Game Site
- Fossil Falls Campaign Walkthrough — Super Mario Odyssey Walkthrough & Guide
- Cascade Kingdom: Fossil Falls — Super Mario Odyssey Walkthrough & Guide
- Cascade Kingdom — Super Mario Odyssey Walkthrough & Guide
- List of Power Moons in the Cascade Kingdom — Super Mario Wiki
- Multi Moon Atop the Falls — Cascade Kingdom Story Walkthrough
- Tostarena Campaign Walkthrough — Super Mario Odyssey Walkthrough & Guide
- Sand Kingdom — Super Mario Odyssey Walkthrough & Guide
- Boss list and strategies — Super Mario Odyssey Walkthrough & Guide
- Knucklotec — Super Mario Wiki
- Sand Kingdom — Super Mario Odyssey Walkthrough
- Lake Kingdom: Lake Lamode — Super Mario Odyssey Walkthrough & Guide
- Lake Lamode Campaign Walkthrough — Super Mario Odyssey Walkthrough & Guide
- Wooded Kingdom: Steam Gardens — Super Mario Odyssey Walkthrough & Guide
- Defend the Secret Flower Field! — Wooded Kingdom Story Walkthrough
- Torkdrift — Super Mario Wiki
- Forgotten Isle Campaign Walkthrough — Super Mario Odyssey Walkthrough & Guide
- Repairing the Odyssey — Lost Kingdom Story Walkthrough
- Lost Kingdom — Super Mario Odyssey Wiki
- Metro Kingdom — Super Mario Wiki
- Mechawiggler — Super Mario Wiki
- A Fresh Start for the City — Super Mario Wiki
- Underground Power Plant — Super Mario Wiki
- A Traditional Festival! — Super Mario Wiki
- List of Power Moons in the Metro Kingdom — Super Mario Wiki
- Shiveria Campaign Walkthrough — Super Mario Odyssey Walkthrough & Guide
- Bubblaine Campaign Walkthrough — Super Mario Odyssey Walkthrough & Guide
- Snow Kingdom: Shiveria — Super Mario Odyssey Walkthrough & Guide
- Super Mario Odyssey Walkthrough & Guide: Luncheon Kingdom: Mount Volbono
- Super Mario Odyssey Walkthrough & Guide: Ruined Kingdom: Crumbleden
- Luncheon Kingdom: Power Moon Locations
- Ruined Kingdom: Power Moon Locations
- Luncheon Kingdom
- Ruined Kingdom
- Bowser’s Kingdom – Super Mario Odyssey Wiki
- Power Moon requirements by kingdom
- RoboBrood — Super Mario Wiki
- Bowser’s Castle Campaign Walkthrough — Super Mario Odyssey Walkthrough & Guide
- Bowser’s Kingdom: Bowser’s Castle - Super Mario Odyssey Walkthrough & Guide
- Bowser’s Moon Wedding — Super Mario Wiki
- Underground Moon Caverns — Super Mario Wiki
- Moon Kingdom: Honeylune Ridge Walkthrough — GameFAQs
- Honeylune Ridge Campaign Walkthrough — GameFAQs
- Bowser’s Moon Wedding - Moon Kingdom - Story Walkthrough
- Moon Kingdom Walkthrough - Samurai Gamers
- Mario’s Itinerary — Super Mario Odyssey Guide
- Mushroom Kingdom: Peach’s Castle — Super Mario Odyssey Walkthrough & Guide
- Super Mario Odyssey: Mushroom Kingdom Power Moon Locations
- Mushroom Kingdom — Super Mario Odyssey Wiki
- Arrival at Rabbit Ridge! — Super Mario Wiki
- Long Journey’s End — Super Mario Wiki
- Dark Side — Super Mario Odyssey Wiki
- Darker Side — Super Mario Odyssey Wiki
- Super Mario Odyssey: Dark Side and Darker Side Power Moon Locations — Nintendo Life
- How to beat the Darker Side challenge in Super Mario Odyssey — GamesRadar+
- Super Mario Odyssey Walkthrough & Guide — GameFAQs: Map Screen
- Super Mario Odyssey — Super Mario Wiki: Talkatoo
- Super Mario Odyssey Starter Guide
- Bosses — Super Mario Odyssey Walkthrough & Guide
- Super Mario Odyssey Walkthrough v1.00 — Neoseeker Walkthroughs
- RoboBrood Boss Guide — Samurai Gamers
- Super Mario Odyssey — Super Mario Wiki
- Spark Pylon — Super Mario Wiki
- Mushroom Kingdom — Super Mario Wiki
- Moon Kingdom — Super Mario Odyssey Wiki
About the game & collecting notes
- Platform
- Nintendo Switch
Step-by-step campaign walkthrough for Super Mario Odyssey (Nintendo Switch, Standard Edition). Follow a verified kingdom-by-kingdom route from Bonneton to Bowser’s final fight, then the post-story Mushroom and Moon sequences. Practical objectives, boss tactics, capture usage, and concrete checks to finish the main story and unlock the core postgame challenges.
Darryl Polo
Darryl Polo loves tinkering with emulation and revisiting retro games. He enjoys exploring how old favorites play on different setups and sharing what he learns along the way. At Joking Joystick, he writes about the games, hardware, and small discoveries that keep the hobby fun.
Our editorial standardsFound a step that needs another look? Help us improve this guide.