
Super Mario Land 2: 6 Golden Coins — Complete Campaign Walkthrough (Game Boy, USA/Europe Rev B)
Step-by-step guide to finish the original Game Boy release of Super Mario Land 2: 6 Golden Coins. Covers the mandatory introductory Gate Course, controls and power-ups, the required routes through all six zones, each zone guardian, optional secret exits and life-recovery methods, Mario’s Castle, the three Wario phases, failure recovery, and a concrete completion check.

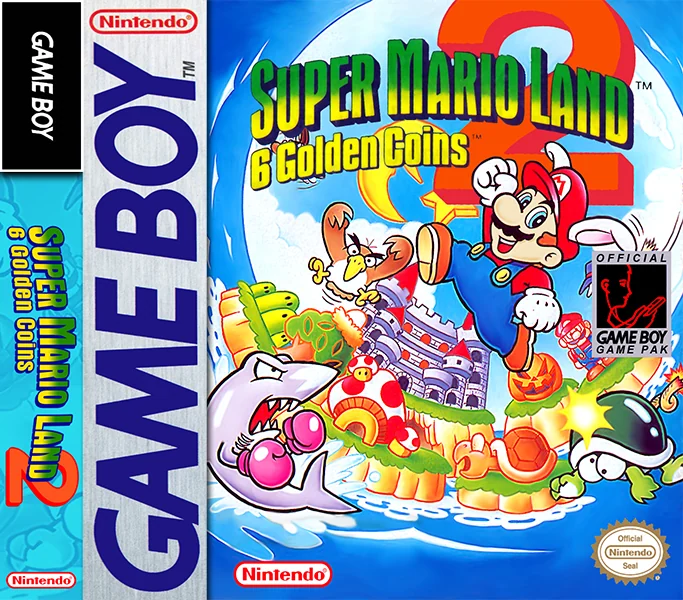
Find a copy
Super Mario Land 2: 6 Golden Coins Game Boy
We may earn a commission if you buy through these links, at no extra cost to you. As an Amazon Associate I earn from qualifying purchases.
Opens retailer search results. Check the model, edition, seller, availability and current price before buying.
Before you begin
This guide covers the original Nintendo Game Boy release of Super Mario Land 2: 6 Golden Coins, using the USA/Europe release information supplied for this edition.
Begin by clearing the mandatory introductory Gate Course. After it, the campaign is open-ended: complete the six main zones in any order, and defeat each zone guardian to recover one Golden Coin.
After all six Golden Coins are recovered, Mario’s Castle opens. Clear its single long course, defeat Wario in all three forms, and let the ending sequence play.
The walkthrough distinguishes required stages from optional secret courses, explains the original Game Boy controls and power-ups, and provides recovery advice for deaths and Game Overs.
Set yourself up for the run
Use the original Game Boy version of Super Mario Land 2: 6 Golden Coins. The guide is written for the original release rather than DX, colorized, remake, or other altered versions.
The researched manual confirms the basic controls: A jumps, B runs and carries shells, Down enters suitable pipes, and Up during a jump enters upside-down pipes. Holding B while jumping produces the manual’s long leap.
The original release uses Super Mario, Fire Mario, Bunny Mario, and Invincible Mario. It does not use the first Super Mario Land’s Superball Flower.
Ring midway bells before difficult sections. Their checkpoint state is temporary and is lost when the Game Boy is powered off.
Build a modest life reserve before attempting Mario’s Castle, which has no midway checkpoint.
If a Game Over occurs, check the map: recovered Golden Coins return to their guardians and must be reclaimed.
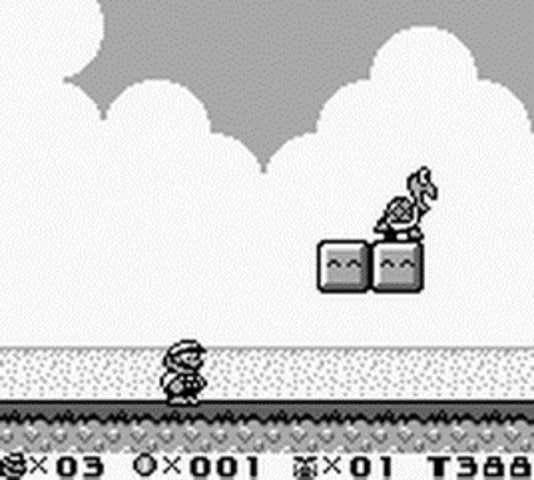
Controls, HUD and Basic Movement
Super Mario Land 2: 6 Golden Coins begins with the mandatory Gate Course, also called the Introductory Level. Clear its normal exit to unlock the overworld; this opening course cannot be replayed afterward. Once the map is available, learn the original Game Boy controls: A jumps, B runs, carries shells and throws fireballs as Fire Mario. Holding B during a jump creates the manual’s long leap, while pressing Up during a jump produces extra height and enters upside-down pipes. Down crouches, enters suitable pipes and performs a Spin Jump during a jump when Mario is Super or Fire. The HUD shows remaining Marios, ordinary coins, defeated enemies and time. Ordinary coins are separate from the six Golden Coins awarded by zone guardians. Midway bells provide temporary checkpoints, but their positions are lost when the Game Boy is powered off.
Clear the mandatory Gate Course first
After selecting a save file and starting the game, Mario enters the Gate Course, also called the Introductory Level. This is a required teaching stage rather than one of the six main zones. Move right through the basic ground-platforming sections and use the early obstacles to practice short jumps, running and enemy stomps.
Continue to the normal Goal at the far end and enter it. Do not look for a secret exit or treat the Bonus Bell above the Goal as the required finish. Reaching the normal Goal completes the Gate Course and unlocks the Mario Land overworld. The Gate Course is the only standard course that cannot be selected again after completion, so use this first attempt to test the controls instead of deliberately leaving it unfinished.
- Enter and complete the Gate Course.
- Use its normal Goal to unlock the overworld.
- Do not confuse the optional Bonus Bell with the required Goal.
- Remember that the Gate Course cannot be replayed afterward.
Select a save file and understand the starting options
Press Start at the title screen to open the game-select screen. Press Left or Right to choose Pipe A, Pipe B or Pipe C, then press Down to start that file. These are three separate save slots, and the screen displays the number of stages cleared for each one. The game automatically saves as stages are completed, so choose the intended pipe before beginning a campaign.
Pressing Select on the game-select screen starts Easy Mode, in which Mario is small. Use it only if you want the easier ruleset. It is not needed for ordinary play. After the Gate Course is cleared, the overworld lets you select available stages. Completed stages remain selectable for practice and for missed bonus opportunities.
- Choose Pipe A, B or C deliberately.
- Check the displayed cleared-stage total before loading a file.
- Use Select on the file screen only when you intend to activate Easy Mode.
- Proceed to the overworld after clearing the Gate Course.
Use the Control Pad for movement, crouching and pipes
Left and Right move Mario and steer him in the air. Down makes Mario crouch and enters certain pipes when he is correctly positioned. To enter an upside-down pipe, jump while pressing Up as Mario reaches the opening. Up also gives a normal jump extra height, so use it when a platform is above Mario’s ordinary jump arc.
Movement changes in special environments. Underwater, press A repeatedly to swim upward. On the moon, A produces slow, exaggerated jumps. In outer space, holding A moves Mario upward. These areas do not use ordinary ground-jump timing, so pause at the beginning of each one and learn how quickly Mario responds.
- Use Left and Right for ground and aerial direction.
- Press Down to crouch or enter suitable pipes.
- Press Up during a jump for extra height or an upside-down pipe.
- Tap A repeatedly underwater.
- Use the altered A-button movement on the moon and in outer space.
Jump with A and extend jumps with B
Press A to jump. Use an ordinary A jump for nearby enemies, low ceilings and short gaps. Holding B as you press A produces the long leap described in the instruction manual. This is useful for broad gaps, but it carries Mario farther and makes the landing harder to correct, so begin from stable ground and identify the landing platform first.
Mario can steer during a jump, but do not rely on a last-second reversal beside a pit. The screen reveals only a limited distance ahead. Stop at unfamiliar terrain, allow the next section to scroll into view, and then choose a short jump, a higher jump using Up or a B-assisted leap. Learn the timing in the Gate Course and early overworld stages before using long jumps over hazards.
- Use A alone for short, controlled jumps.
- Press Up during a jump when extra height is needed.
- Hold B while jumping only when the gap requires more distance.
- Reveal unfamiliar terrain before committing to a long leap.
Run, carry shells and attack with B
Hold B while moving to make Mario run. Running helps with long jumps but makes stopping more difficult, so walk near narrow platforms, low ceilings and enemies occupying the landing area. To pick up a Koopa shell, hold B as Mario touches it. Continue holding B to carry it, then release the button to throw it. Leave room before releasing a shell in a cramped passage.
When Mario has the Fire Flower, pressing B throws a fireball. Fire Mario can defeat many enemies from a distance, although some enemies are immune. When Mario is Super Mario or Fire Mario, pressing Down during a jump performs a Spin Jump. Use it to break certain blocks, collect items or attack enemies that can be struck safely, but remember that some blocks cannot be broken this way.
- Hold B to run, but slow down before narrow landings.
- Hold B as Mario touches a Koopa shell to carry it.
- Release B to throw a carried shell.
- Press B as Fire Mario to throw fireballs.
- Press Down during a jump as Super Mario or Fire Mario to Spin Jump.
Recognize the power-ups and special forms
A Mushroom changes Small Mario into Super Mario and gives him an additional damage state. A Fire Flower changes him into Fire Mario, who throws fireballs with B. A Carrot changes him into Bunny Mario. After jumping, hold A in the air to descend slowly; pressing A repeatedly slows the descent further. Bunny Mario is primarily a controlled-descent form rather than a projectile attacker.
A Star makes Mario invincible for 15 seconds. Use that time to pass an enemy group or defeat targets without stopping, but do not treat it as protection from pits or other non-enemy hazards. Aqua Mario and Space Mario describe environmental movement states rather than collectible power-ups: underwater Mario rises by repeated A presses, while moon and outer-space movement follows their altered jump rules.
- Use the Mushroom as a damage buffer.
- Use Fire Mario’s fireballs when the target is vulnerable.
- Use Bunny Mario’s held-A descent for controlled floating.
- Treat the Star as temporary enemy protection only.
- Adjust movement separately in water, moon and outer-space sections.
Read the HUD and preserve progress
The bottom of the gameplay screen shows remaining Marios, ordinary coins, defeated enemies and remaining time. The defeated-enemy counter matters because defeating 100 enemies causes an item to appear. Ordinary coins are used for rewards through the map’s casino system. Neither ordinary coins nor the enemy counter replaces the six Golden Coins required for the castle.
The six Golden Coins are awarded by the guardians at the ends of the six main zones. They are progression items, not regular stage coins. If a Game Over occurs, the recovered Golden Coins return to their guardians and must be collected again. Previously completed ordinary stages remain cleared, so check the overworld and reclaim only the missing zone progress.
- Watch remaining Marios, ordinary coins, defeated enemies and time.
- Do not confuse ordinary coins with Golden Coins.
- Remember that a Game Over returns recovered Golden Coins to their guardians.
- Use the overworld to identify which zone guardians must be defeated again.
Use bells without confusing them with the exit
A Midway Bell placed within a stage gives Mario a temporary restart point after losing a life. Ring it before difficult later sections whenever the route is safe. The checkpoint is not stored in battery-backed save data, so turning off the Game Boy removes the bell’s restart position.
Near the end of a completed stage, the Bonus Bell hangs above the normal Goal. Reaching the Goal completes the stage; touching the Bonus Bell instead opens a bonus game for a power-up or extra life opportunity. The Bonus Bell is helpful but optional, and missing it does not prevent stage completion.
- Ring the Midway Bell before a dangerous later section.
- Do not power off if you need to preserve that temporary checkpoint.
- Use the normal Goal to complete the course.
- Treat the Bonus Bell and its bonus game as optional.
Build a repeatable movement rhythm
For ordinary ground sections, walk into position, use a short A jump for nearby targets and reserve B-assisted jumps for gaps that clearly require distance. If an enemy blocks a landing, wait for it to move, approach from farther back or use Fire Mario. Clear one obstacle at a time rather than chaining several blind jumps.
Protect powered-up states by avoiding low-value collisions. If Mario loses Fire Mario or Super Mario, stop taking aggressive routes until another safe power-up is available. In water, sap, moon and space sections, pause to observe the altered movement before crossing a hazard. The goal is to reach each stage’s checkpoint and exit with enough lives to continue the six-zone campaign.
- Reveal hazards before moving into a new screen section.
- Plan the landing before pressing A.
- Use B-assisted jumps only when their extra distance is necessary.
- Revert to cautious movement after losing a power-up.
- Reach the exit while preserving lives for the next stage.
Before you move on
- You can select a save pipe, identify its cleared-stage total and distinguish Normal Mode from Easy Mode.
- You have cleared the mandatory Gate Course through its normal Goal and reached the overworld.
- You understand that the Gate Course cannot be replayed after completion.
- You can move, crouch, enter ordinary pipes and enter upside-down pipes with Up during a jump.
- You can perform a normal A jump, a higher jump using Up and a long B-assisted jump without routinely overshooting.
- You can run with B, carry and release a Koopa shell and throw Fire Mario’s fireballs.
- You can perform a Spin Jump with Down while Super Mario or Fire Mario is airborne.
- You can describe the Mushroom, Fire Flower, Carrot and Star without confusing them with the first game’s Superball Flower.
- You can read the HUD as remaining Marios, ordinary coins, defeated enemies and time.
- You understand that Midway Bells are temporary checkpoints and the Bonus Bell is optional.
- You know that the six Golden Coins come from zone guardians and return to them after a Game Over.
Power-ups, Items and How to Use Them
Super Mario Land 2: 6 Golden Coins uses four collectible power-ups in the original Game Boy release: the Mushroom, Fire Flower, Carrot and Star. The Mushroom creates Super Mario and gives him a damage buffer; Fire Mario throws bouncing fireballs; Bunny Mario can slow his descent and hover; and the Star grants 15 seconds of invincibility. The game also changes Mario's movement automatically in water, on the moon and in outer space, but Aqua Mario and Space Mario are environmental states rather than items. Use question blocks, Midway Bells and bonus-game prizes to prepare for difficult sections. Ordinary coins, Moneybags, Hearts and bonus rewards are optional aids, not substitutes for the six Golden Coins guarded by the zone bosses.
1. Identify the four collectible power-ups
Small Mario is the unpowered starting form. A damaging enemy or hazard costs a life while Mario is small, and Small Mario cannot break blocks with a Spin Jump. The most important early habit is to check nearby question blocks before entering a difficult section rather than rushing past them. A Mushroom changes Mario into Super Mario, allowing him to survive one ordinary damaging hit and revert to Small Mario instead of losing a life. Super Mario can also break suitable blocks from below and perform a Spin Jump during a jump by pressing Down on the Control Pad.
A Fire Flower changes Mario into Fire Mario. Press B to throw a fireball; the fireball travels and bounces along the ground, defeating many ordinary enemies. It is not universal protection: the instruction manual specifically warns that some enemies cannot be destroyed by fireballs. Fire Mario can still Spin Jump, so retain the form when a stage gives you both a narrow enemy corridor and breakable blocks above the route.
A Carrot changes Mario into Bunny Mario. Bunny Mario cannot Spin Jump, but he can control his descent much more precisely than the other forms. Jump normally, then hold A while Mario is airborne to descend slowly. Repeatedly pressing A slows the descent further, allowing Mario to cross wider gaps or line up with platforms below. Holding A on the ground makes Bunny Mario jump continuously, so release the button when you need to stop hopping and position yourself carefully.
A Star creates Invincible Mario for 15 seconds. During that period, contact with enemies is safe and enemies can be defeated by touching them. The effect is temporary, so move through the nearby enemy group immediately instead of stopping to collect every coin. The Star is an emergency route-clearing tool, not a form that can be carried into another stage.
- Mushroom: creates Super Mario and provides one ordinary-hit buffer.
- Fire Flower: creates Fire Mario and enables bouncing fireballs with B.
- Carrot: creates Bunny Mario and enables controlled floating, but not Spin Jumps.
- Star: grants 15 seconds of invincibility.
2. Use the correct original Game Boy controls
Press A to jump. To make a higher leap, hold B while jumping; the manual does not describe holding A as the normal long-jump command. Hold B while moving to run faster. When Mario is Fire Mario, B also throws fireballs, so running and firing share the button and must be timed deliberately. Press Down during a jump while Super Mario or Fire Mario to perform the Spin Jump.
Use short, controlled jumps near enemies, spikes and moving platforms. Running jumps are useful for wide gaps, but do not assume that a longer button hold automatically produces a safer landing. Bunny Mario is the exception: once airborne, holding or tapping A changes the descent and can keep him above a hazard. In water, on the moon and in outer space, movement changes automatically; Aqua Mario swims upward by repeatedly pressing A, while Space Mario jumps slowly on the moon and rises in outer space when A is held.
- A jumps; holding B during the jump produces a higher leap.
- B runs and throws fireballs when Mario has the Fire Flower.
- Down during a jump activates the Spin Jump only for Super Mario and Fire Mario.
- Aqua and Space movement rules apply only in their environmental sections.
3. Check question blocks before committing to danger
Question blocks can contain coins, Mushrooms, Fire Flowers, Carrots, Stars or Moneybags. A Mushroom is most useful when Mario is small, while a Fire Flower or Carrot is worth saving for the section where its special ability matters. If a block produces an item in a safe area, do not collect it automatically when you already have the same or a stronger form; a Mushroom collected while Mario has Fire or Bunny power reduces him to the lesser powered state rather than improving him.
Verified opening examples show why the item layout must be read stage by stage. In the Introductory Level, one of the first two question blocks near the Koopa Troopa contains a Mushroom. Later, after the first Midway Bell, the second block from the right in a row of question blocks contains a Fire Flower. In Tree Base, a Fire Flower appears near the first Spikey and another is available below the higher route after the Midway Bell. In Macro Zone, a Carrot can be reached near the fireplace area by revealing hidden blocks; with that Carrot, Mario can glide to an alcove near the checkpoint bell containing a 1-Up.
These examples establish the useful pattern—early blocks often provide a recovery item, while a stronger form may appear before a more dangerous enemy or platforming sequence—but they do not prove that every zone's opening stage uses the same placement. Search visible blocks and test suspicious empty spaces, especially before a vertical climb, narrow enemy corridor or long gap.
- The Introductory Level provides an early Mushroom and a later Fire Flower.
- Tree Base provides Fire Flowers around its early and midpoint hazards.
- Macro Zone can use a Carrot route to reach an optional 1-Up near a checkpoint.
- Do not treat ordinary coins or Moneybags as Golden Coins.
4. Use Midway Bells and bonus games to rebuild safely
A Midway Bell is a checkpoint. Ringing it means that a later death can restart Mario from that point instead of the beginning of the stage. The checkpoint is not permanent battery-backed progress: the manual states that bell information is lost when the Game Boy is powered off. Ring every Midway Bell you pass, even when Mario is already powered up, because it reduces the distance you must repeat after a mistake.
Reaching the goal bell completes the stage and may open a bonus game. Depending on the bonus, prizes can include a Mushroom, Fire Flower, Carrot, 1-Up or 3-Up. Hearts found during stages also function as extra lives, and a Moneybag from a question block is worth 50 ordinary coins. These rewards improve your life reserve and may restore a useful form, but none is required for campaign progression.
The HUD tracks remaining Marios, ordinary coins, defeated enemies and remaining time. Defeating 100 enemies causes an item to appear, according to the manual. Use this as a secondary benefit rather than a reason to take unnecessary risks.
- Ring every Midway Bell before a difficult second half.
- Remember that checkpoints are lost when the system is powered off.
- Use bonus-game prizes and Heart items to build an extra-life reserve.
- Watch the life counter before entering a boss stage.
5. Recover after hits and deaths
When a powered-up Mario is hit, the transformation is lost before a life is lost: Fire Mario or Bunny Mario returns to a lesser state, and Super Mario returns to Small Mario. Do not spend a Fire Flower on harmless opening enemies if a difficult corridor or boss approach follows. The attack ability is also an extra layer of protection, so preserve it for the section where it removes the most danger.
If Mario loses a life, he restarts at the stage beginning or at the Midway Bell already activated in that stage. The active transformation is not something to rely on after death; rebuild from the next Mushroom, Fire Flower or Carrot before attempting the same hazard again. If a boss approach provides a reliable Fire Flower, replaying that short opening route is safer than entering the boss room small and trying to trade hits.
A Game Over is more serious than an ordinary death. The manual states that when the game is over, all Golden Coins recovered from Wario's guards are returned to those guards. If this happens, revisit the required zone bosses and recollect the coins before the castle gate can be opened again.
- After a hit, identify whether Mario is Fire, Bunny, Super or Small before continuing.
- After a death, use the checkpoint and rebuild the strongest practical form.
- Avoid spending a useful offensive form on low-risk enemies.
- After a Game Over, verify the Golden Coin tally before attempting Mario's Castle.
Before you move on
- You can identify the Mushroom, Fire Flower, Carrot and Star and explain each form's main advantage.
- You know that A jumps, B runs and throws fireballs, and Down during a jump performs the Spin Jump for Super Mario or Fire Mario.
- You can use Bunny Mario's airborne A control without expecting a Spin Jump.
- You know the verified early item examples in the Introductory Level, Tree Base and Macro Zone.
- You ring Midway Bells, use bonus prizes and collect Hearts to protect your life reserve.
- You understand that power-ups and extra lives are optional aids; campaign completion still requires six Golden Coins, Mario's Castle and the final Wario encounter.
Tree Zone — Routes, Hazards and Boss (Zone 1)
Tree Zone is the large tree in the southwest corner of the original Game Boy world map. Its required route begins with Roots Stage and Tree Trunk Stage, then splits into Leaf Stage on the left and Bee Hive Stage on the right before reaching Owl Stage at the canopy. The Tree Zone Secret Stage, reached through a hidden exit in Tree Trunk Stage, is optional and does not award the Golden Coin. The main dangers are narrow branches, sticky tree sap, spike pits, moving platforms and enemies emerging from the honeycomb background. Take the midway bells, use the available power-ups, and wait for platforms or Heavy Zed to reach a useful position instead of jumping immediately. In the final room, Kurosu attacks by hovering and swooping. Stomp the bird while it descends or use Fire Mario's fireballs, then avoid the next pass. Three stomps defeat Kurosu and release the Tree Zone Golden Coin from its egg.
Enter Tree Zone and clear Roots Stage
Choose the large tree in the southwest of the world map. In Roots Stage, move right across the exposed roots and climb the first small staircase of hidden blocks. The first block is above the thin platform near the opening; continue revealing the next blocks to reach the optional 1-Up Heart. Drop back to the main route rather than attempting a blind leap from the top.
Continue across the roots and watch for Bopping Toadies, Ragumo and Spikeys. Spikeys can be stomped in this game, but let them roll toward Mario before jumping so you do not land beside them. A second hidden-block staircase near a small bump leads to another optional 1-Up Heart. After the checkpoint bell, cross the large raised hill instead of falling into the lower root passage.
Near the end, use the hidden blocks beside the last Spikey to form an overhead route. This path carries coins and avoids several enemies. If you prefer a safer fallback, reveal the nearby Star block and use the invincibility period to cross the remaining enemies. Before entering the goal, check beside the door for another hidden block and a possible 1-Up Heart. The bonus bell is optional.
- Take the midway bell before the upper root section.
- Check lower landings before dropping from a root platform.
- Use the overhead hidden-block route or the Star to reduce enemy exposure.
Cross Tree Trunk Stage and choose the normal exit
Tree Trunk Stage takes place in the tree sap. Enter the sap pools and wall streams deliberately: movement is slower and jumps have little height, but holding A keeps Mario moving upward. Avoid the Moofish swimming through the sap and watch the ceiling spikes when jumping between sap columns.
Early in the stage, the three blocks above the first Moofish contain a power-up in the middle block. Enter the small sap chamber on the right for a 1-Up Heart, then descend to the lower-left portion of the sap area for another power-up block. After the pipe, Noko Bombettes walk along the floor. Stomping one turns it into a bomb, so either leave it alone or retreat immediately after the stomp.
Ring the midway bell and follow either route toward the normal goal. The lower route contains a Carrot and a relatively accessible 1-Up Heart, but the Carrot is mainly useful for gliding over the later spike bed. The upper route uses more sap columns and includes a more awkward 1-Up. Both routes rejoin near the end; use the sap to reach the final bell and enter the normal Goal Door.
- Hold A while rising through sap columns.
- Do not stand beside a Noko Bombette after stomping it.
- Use the normal Goal Door for required progression.
Optional Tree Zone Secret Stage
The hidden exit in Tree Trunk Stage requires Bunny Mario. Near the final split, use the Carrot's hovering ability to reach the out-of-the-way ledge and pipe, then enter the Secret Goal Door. The secret course is a short mushroom-themed stage with Koopa Troopas and several optional power-ups and 1-Up Hearts.
Completing it changes the Tree Zone map background by adding blooming flowers. It does not provide the Tree Zone Golden Coin and is not needed to open the later castle. If you miss the hidden exit or do not have Bunny Mario, return to Tree Trunk Stage and use the normal Goal Door.
- Have Bunny Mario before attempting the hidden ledge.
- Treat the secret course as optional.
- Return to the normal Tree Trunk exit if the secret route is impractical.
Complete Leaf Stage and Bee Hive Stage
After Tree Trunk Stage, the map opens the two branch courses. Complete both before entering the canopy route. Leaf Stage is the left branch. Cross the leaves carefully, taking the power-up near the beginning and using the rising platform to reach higher leaves. Piranha Plants and Venus Fire Traps occupy several pipes; wait until they retract before crossing. Some small platforms fall if Mario stands on them too long, so use them as stepping stones rather than resting places.
The final Leaf Stage section uses falling platforms and a moving platform leading to the bonus bell. The bell is optional; reaching the Goal Door completes the course. Bee Hive Stage is the right branch. Beebees emerge from honeycomb openings, while Skeleton Bees can revive after being stomped. Bigbees near the ceiling cannot be defeated normally, so pass beneath them when they move upward. Grubbies cannot be safely stomped, and fireballs do not solve every bee encounter, so prioritize timing and movement over clearing the room.
In the three-pipe block chamber, enter the middle pipe. Work through the lowest row first, then the middle row, leaving the power-up block until you can collect it safely. On the right side, leave the upper-right block until last because it contains a Star. Use the Star to cross the next enemy section, then take the midway bell. Near the end, reveal the hidden block beside the visible Empty Block to reach the bonus bell and exit.
- Wait for plants and Bigbees to move away before crossing.
- Use the center pipe in the Bee Hive block chamber.
- Do not rely on fireballs against Skeleton Bees, Bigbees or Grubbies.
Climb Owl Stage and reach Kurosu
Enter Owl Stage from the top of the Tree Zone map. The opening contains a power-up block on a looping platform, followed by Para-Goombas and gaps. Use Heavy Zed, the friendly owl, as a moving lift: stand on its back and let it carry Mario to the higher platform. Do not jump away until the next landing is clearly reachable.
Continue across the moving clouds and block rows. Ring the midway bell, then use the looping platform and later moving platforms to collect the Carrot or 1-Up if the route is safe. If you are Bunny Mario, hovering can cross some gaps directly; otherwise follow the pipe route, which includes a Star in the block room. After the Star, cross the clouds and Para-Goombas and enter the pipe at the far right.
The timer gives enough room to wait for a platform cycle. The most reliable approach is to stop on solid blocks, let Heavy Zed or a cloud come toward Mario, and then make one controlled jump. A missed jump usually costs a life, so do not attempt a long leap merely to collect coins.
- Use Heavy Zed as a lift instead of jumping across the whole gap.
- Take the midway bell before the final cloud section.
- Enter the far-right pipe to reach the boss room.
Defeat Kurosu and claim the Tree Zone Golden Coin
Kurosu begins on its egg and moves through a predictable pattern. It hovers near the upper side of the room, descends and then swoops across the arena in a U-shaped pass. Stay near a side of the room, watch the descent, and jump over the bird as it reaches the low point. The safer stomp opportunity is during the slow descent before the full swoop rather than at the fastest part of the pass.
A successful stomp briefly stuns Kurosu. Move away and prepare for the next descent instead of trying to remain underneath it. Three stomps defeat the boss. If Mario reaches the room as Fire Mario, fireballs can also damage Kurosu whenever it is low enough; six fireballs are required. Continue jumping to avoid the bird after each shot, because a fireball can briefly alter its movement.
After the final hit, the egg releases the Tree Zone Golden Coin and the game places it in the castle-door display. If you lose the fight, replay the Owl Stage and preserve the Fire Flower or Carrot from the route where possible. The Tree Zone stages can be revisited, but the boss course is the only required source of this zone's coin.
- Watch Kurosu's descent before committing to a stomp.
- Use three stomps or six Fire Mario fireballs.
- Confirm the Golden Coin leaves the egg and appears on the castle door.
Before you move on
- Roots Stage and Tree Trunk Stage are cleared on the Tree Zone map.
- Leaf Stage and Bee Hive Stage are cleared, opening the route to Owl Stage.
- Owl Stage is completed and Kurosu is defeated.
- The Tree Zone Golden Coin has appeared from Kurosu's egg and is shown in the castle-door display.
- The optional Tree Zone Secret Stage is not necessary for completion and may remain uncleared.
Space Zone — Low-Gravity Jumps and Platforming (Zone 2)
Reach Space Zone by completing Hippo Stage through its upper Goal Door. The zone contains two required stages: Moon Stage, where reduced gravity makes Mario jump higher and stay airborne longer, and Star Stage, an autoscrolling field of Angry Stars and Tosenbos. Use short, controlled jumps near spikes, wait for safe openings instead of rushing, and ring the midway bell in Star Stage. The Moon Stage Secret Goal opens an optional shooting-star course with extra lives and coins but is not required. Before Tatanga’s battle, take the final power-up block. During the fight, crouch to avoid the two-projectile pattern, then stomp Tatanga when he swoops down. Three stomps or six Fireballs defeat him and award the Space Zone Golden Coin.
1. Reach Space Zone through Hippo Stage’s upper Goal Door
On the world map, go to the large Hippo in the northwest area, north of Tree Zone. This entrance stage has two exits. Only the upper Goal Door sends Mario onward to Space Zone; the lower door returns him to the map, so reaching the lower exit does not unlock the next Space Zone stage.
Move right until the Hippo blows a large bubble. Touch the bubble to enter it, then hold A to rise. The upward movement has a slight delay, so begin holding A before Mario needs to climb. Steer through the open spaces and avoid the flying Toruio, floating Unibos and swimming Blurps. Any contact can burst the bubble or damage Mario.
If you fall into the water or lose a bubble, continue right until you find another Hippo statue and use its next bubble. Do not attempt to cross the upper route with blind jumps. The final bubble carries Mario to the upper Goal Door. Confirm that Moon Stage is available after the stage ends.
- Enter Hippo Stage from the northwest Hippo on the map.
- Use the upper Goal Door, not the lower door.
- Confirm that Moon Stage becomes available in Space Zone.
2. Cross Moon Stage’s low-gravity surface
Moon Stage changes Mario’s jumping behavior: jumps are higher and slower, and Mario spends longer in the air. Hold A for wide gaps and high platforms, but release it or tap it for short adjustments beside spikes. Start steering toward the next landing area early; late corrections are less reliable than in a normal stage.
Proceed right past the Bomubomu living cannons. They can fire cannonballs horizontally or diagonally, so wait for a shot to pass before committing to a jump. Cross the first spike fields with one long, deliberate jump rather than several small hops. After the spikes, use the raised blocks and rock formations as landing points, and watch for the Poro orbiting nearby blocks.
A power-up block appears after one of the early spike sections. Take the Super Mushroom or Fire Flower if the route is safe. Near the hand-shaped rock formation, hidden blocks can lead to a 1-Up Heart and Moneybags. These rewards are optional; do not risk a life for them if Mario is small or the Poro is blocking the landing.
Continue right through more spike fields, Bomubomu and Poro hazards. At the midway bell, ring it before attempting the upper secret route. The normal progression continues beyond this area and eventually reaches the Goal Door. Use the high moon-platform route to make the final jump, then enter the normal Goal Door to continue to Star Stage.
- Use long jumps only for measured gaps.
- Use short taps around spikes and Poros.
- Take the midway bell before the final section.
- Enter the normal Goal Door to unlock Star Stage.
3. Optional: open the shooting-star secret course
After the midway bell, look for a Poro orbiting what appears to be empty space near the ringed planet in the background. The Poro indicates a hidden block. Strike that block, then use the additional hidden blocks above it to form a route across the upper part of the stage.
Cross the small platforms carefully. The low-gravity jump is useful here, but holding A too long can send Mario over a platform. Continue across the upper route to the Secret Goal. Reaching it unlocks the shooting-star course, an optional bonus stage with extra coins and several 1-Up Hearts.
The secret course is not needed for Star Stage or Tatanga’s Golden Coin. If Mario falls from its upper platforms, he may be forced into a lower passage that bypasses most of the bonus area. Use small jumps and take the normal exit when the priority is campaign progress. Afterward, return to Moon Stage’s map route and complete the regular Goal Door if Star Stage is still locked.
- Find the hidden-block route after the midway bell.
- Treat the Secret Goal and shooting-star course as optional.
- Do not confuse the Secret Goal with the normal Goal Door.
4. Survive Star Stage’s autoscrolling minefield
Enter Star Stage powered up if possible. The stage scrolls automatically from left to right. If Mario stays against the left edge while an obstacle approaches, he can be crushed. Keep pace with the screen, but do not run directly into the next cluster of hazards.
Angry Stars are invulnerable obstacles. Some remain fixed while others move horizontally or vertically. Use A to adjust Mario’s height gradually. In open areas, move toward the upper part of the screen when it is clear; in narrow passages, make small vertical corrections instead of holding A continuously and colliding with the ceiling or floor hazards.
Tosenbos are dangerous while inflated. When they deflate, they cannot be defeated, but they are temporarily harmless. Wait for an opening and pass through without trying to attack them. The stage provides a Mushroom during the route, followed later by rows of question blocks and the midway bell. Ring the bell as soon as it is safe so a death does not send Mario back to the beginning of the stage.
Near the end, look for the final power-up block before the pipe. Take the Mushroom or Fire Flower, then enter the pipe to reach Tatanga. Do not rush into the pipe while damaged if the power-up is still available.
- Keep moving with the autoscroll.
- Avoid contact with all Angry Stars.
- Pass Tosenbos only when they are deflated or when a clear gap opens.
- Ring the midway bell.
- Take the final power-up before entering Tatanga’s pipe.
5. Defeat Tatanga and secure the Space Zone Golden Coin
Tatanga uses a repeated projectile pattern before swooping across the room. One rocket travels horizontally, while the other drops and can track Mario before firing upward. Jumping during this sequence can place Mario into one of the two attack paths. The safer response is to crouch and wait for the projectile pattern to finish while watching Tatanga’s movement.
When Tatanga commits to a swoop across the arena, jump and stomp him as he passes. Do not chase him after the stomp; land, return to a safe position and wait for the next attack cycle. Repeat this timing three times. If Mario retained the Fire Flower from the final block, six Fireballs can defeat Tatanga instead. Fireballs let Mario attack without waiting for every stomp opportunity, but continue crouching or repositioning to avoid the rockets.
After the third stomp or sixth Fireball, wait for the victory sequence to complete. The Space Zone Golden Coin is awarded as part of the boss result and is placed with the other coins used to open Mario’s Castle. If Mario dies before the victory sequence, retry from the stage’s available checkpoint rather than assuming the coin was awarded.
- Crouch during Tatanga’s two-projectile pattern.
- Attack only when Tatanga begins his swoop or use Fireballs from a safe distance.
- Defeat Tatanga with three stomps or six Fireballs.
- Confirm the Space Zone Golden Coin is present after the victory sequence.
Before you move on
- Hippo Stage was completed through the upper Goal Door.
- Moon Stage and Star Stage were cleared.
- Tatanga was defeated with three stomps or six Fireballs.
- The Space Zone Golden Coin was awarded and appears among the six coins required at Mario’s Castle.
- The Space Zone boss marker is completed and Mario can return to the world map.
References for this chapter
- Hippo Stage - Super Mario Land 2: 6 Golden Coins Walkthrough
- Moon Stage - Super Mario Land 2: 6 Golden Coins Walkthrough
- Super Mario Land 2: 6 Golden Coins Walkthrough — StrategyWiki Space Zone
- Super Mario Land 2: 6 Golden Coins — Guide and Walkthrough
- Super Mario Land 2 - 6 Golden Coins - Manual - GB
Macro Zone — Large-Scale Platforms and Mid-Air Timing (Zone 3)
Macro Zone shrinks Mario and sends him through four main stages: an anthill, the house plumbing, the kitchen and fireplace, and the attic. The first stage contains an optional secret exit that leads to a short forced-scrolling sky stage. Clearing that secret stage opens a shortcut directly to the attic, allowing you to skip the plumbing and kitchen stages, but it is not required. The normal route is Anthill, Plumbing, Kitchen and Fireplace, then Attic. Watch for black toxic water, ants with different attacks, swimming hazards, conveyor belts, fire, spikes and books. Fire Mario is particularly useful because fireballs defeat several enemies and open fireball-only blockades. The zone ends with Rikki, a fast rat who moves through the floor, walls, ceiling and three pipes. Jump on him three times to claim the Macro Zone Golden Coin.
Clear Macro Zone 1 and reach the normal route
Enter the first stage from the Macro Zone map and proceed right through the anthill. The enemies include ordinary ants, spiked ants, rock-throwing ants and cannon ants, so do not rush into groups. Stop at platform edges, let projectiles or patrols pass, then cross with a controlled jump. The black water below the platforms is an instant-death hazard regardless of Mario’s current power-up, so treat every gap as a lethal fall rather than a damage opportunity.
When you reach the moving platform beneath a low wall, stay crouched while it carries Mario through the passage. Standing up can make him fall from the platform. Continue right after the platform sequence and ride the final moving platform to the stage bell. The route through this stage is enough to unlock Macro Zone 2 and does not require the secret exit.
- Use short, deliberate jumps around the different ant types.
- Treat black water as instant death.
- Crouch while the moving platform passes under the low wall.
- Ring the stage bell at the end of the anthill.
Take the optional anthill shortcut only if you can preserve Fire Mario
After the midway bell, find the section with five Question Blocks. The secret route is above this area: hidden blocks form a path to a pipe. The pipe entrance is blocked by blocks that can only be destroyed with fireballs, so you need Fire Mario before committing to the shortcut. A Fire Flower can be found in the lower route near this section, allowing you to prepare if you reached the area without one.
Enter the pipe after clearing the fireball-only blocks to reach the secret stage. This stage scrolls automatically and contains dangerous drops, so keep moving with the screen and make each landing quickly. A column of breakable blocks can be drill-kicked to reach a coin chamber, and additional rewards are available if you retain Fire Mario. These rewards are optional. Successfully clearing the secret stage opens a path directly to Macro Zone 4, letting you bypass the plumbing and kitchen stages. If the scrolling stage costs too many lives, return to the standard route instead.
- The secret route is optional.
- Bring Fire Mario to destroy the blocked pipe entrance.
- Do not confuse the secret stage with the required Macro Zone stages.
- Clearing the secret stage unlocks a shortcut to the attic stage.
Cross Macro Zone 2 through the plumbing
The normal second stage leads through the house’s oversized pipes and water sections. Continue right through the pipes, watching for Cheep-Cheeps, Blurps, Piranha Plants and Venus Fire Traps. Fire Mario is valuable here because fireballs can defeat the fish and remove plants that make pipe entrances dangerous. If you enter a water section without an attack power-up, use short swimming movements and approach enemies from the side rather than rising directly into them.
A Star can be collected in the section before the midway bell, and another Star opportunity appears shortly after the checkpoint. These can produce extra lives if you move quickly, but they are optional and are not worth a death. Near the final water section, look for the lone Cheep-Cheep and jump against the left side to reveal hidden blocks leading to a higher coin area. The coin room is optional; the visible route continues to the ending bell.
- Use Fire Mario to handle fish and pipe enemies when possible.
- Swim in short bursts instead of making large uncontrolled movements.
- Treat the Star chains and hidden coin area as optional rewards.
- Continue right to the stage bell.
Cross the kitchen and climb the fireplace
Macro Zone 3 moves through the kitchen, where conveyor belts carry Mario toward gaps, enemies and burning stove sections. Let the conveyor’s movement settle your position before jumping. Clear enemies when there is room, then make one controlled jump at a time across the stove and other gaps. The third pipe along the conveyor route leads to an optional coin room. Later, Fire Mario can destroy blocks blocking a side chamber containing a money bag; neither detour is required.
Near the fireplace, hidden blocks can provide access to a Magic Carrot and a higher route. Bunny Mario’s glide is useful for reaching an optional 1-Up alcove near the midway bell, but the regular path remains fully sufficient. Inside the chimney, jump between the ledges rather than holding forward continuously. Land securely, identify the next ledge, and then jump. Ring the bell near the top before continuing toward the attic route.
- Let conveyors carry Mario into position before jumping.
- Use Fire Mario for optional blocked chambers and enemy control.
- The Magic Carrot and 1-Up route are optional.
- Climb the fireplace with controlled ledge-to-ledge jumps.
Cross Macro Zone 4 and reach Rikki’s room
The attic stage uses books, spikes, enemies and conveyor belts. Several conveyors carry Mario toward spikes, so stay on the safe side and avoid attacking while the belt is pushing you into danger. Move past enemies before committing to a jump whenever possible. The stage is dangerous but does not use the same bottomless toxic-water threat as the anthill.
Some 1-Ups are carried away by a witch when revealed. Chase one only if the route is clear; the witch can pass through solid matter, and pursuing it into spikes is a poor trade. A Magic Carrot appears during the stage and can make the final approach easier, but it is not required. Reach the door to Rikki’s room with Super Mario, Fire Mario or Bunny Mario if possible so one mistake does not immediately end the attempt.
- Stay away from the spike-facing side of each conveyor.
- Do not pursue a witch-carried 1-Up through an unsafe route.
- Use the Magic Carrot as an optional advantage.
- Enter Rikki’s room with a damage buffer when possible.
Defeat Rikki and collect the Macro Zone Golden Coin
Rikki is constantly mobile. He runs across the floor, climbs the walls, travels along the ceiling, drops from above and enters or exits any of the three pipes. Avoid waiting directly beside a pipe, because Rikki can emerge there with little warning. Keep Mario near the center when practical and watch which surface Rikki chooses before moving into position.
The reliable attack is a jump onto Rikki while he is crossing the floor. Reposition before attacking if Mario is near a wall, pipe or corner; a missed jump is much harder to recover from when there is no room behind you. After a successful hit, Rikki briefly enters a recovery animation. A quick second jump may connect, but resetting toward the center and waiting for another floor pass is safer. Three successful jump attacks defeat him.
After the final hit, wait for Rikki to disappear and collect the Golden Coin. The coin is required progress toward opening Mario’s Castle. The anthill secret stage, coin rooms, money bags and extra lives are optional. If you fail the boss, replay the attic stage and approach the room again; the safest improvement is to avoid pipe camping and attack only during readable floor passes.
- Stay away from the three pipes unless you are actively repositioning.
- Attack Rikki with jumps while he crosses the floor.
- Do not attack from a wall or narrow edge.
- Land three successful hits.
- Collect the Macro Zone Golden Coin after the fight.
Before you move on
- Macro Zone 1 is cleared and the normal path reaches Macro Zone 2, or the optional secret stage has been cleared to open the shortcut to Macro Zone 4.
- The plumbing, kitchen and fireplace stages are cleared if using the normal route.
- The attic stage is cleared and Rikki is defeated with three successful jump attacks.
- The Macro Zone Golden Coin appears and is added to Mario’s progress toward the six coins required for Mario’s Castle.
References for this chapter
Pumpkin Zone — Timed Hazards and Tunnel Sections
Pumpkin Zone’s required route is Bat Course, Graveyard Course, Haunted House Course, and Witch’s Mansion Course. The original Game Boy stages use chained Spiked Balls, falling spikes, flashing or disappearing blocks, Boos, water passages, cauldrons, pipes, shelves, and ambush enemies. Use bells as recovery landmarks, preserve Super Mario for Graveyard Course’s breakable underwater blocks, and take the normal goal in the first three courses. Secret Courses 4 and 5 are optional. Witch’s Mansion Course ends with Sabasa (the Witch), who guards Pumpkin Zone’s Golden Coin. Defeat Sabasa with three head stomps or six Fire Mario fireballs, then confirm that the Pumpkin Coin enters Wario’s Castle.
1. Clear Bat Course and use the upper route near Kurokyura
At the start, move right past the Masked Ghoul and take the Mushroom from the nearby Question Block if you need protection. Enter the pipe and proceed through the underground passage. The chained Spiked Balls move along fixed paths, so pause at each opening and cross after the hazard has moved away instead of trying to run through the entire section. The course’s timed obstacles are not a conventional upward- or downward-conveyor sequence in this original Game Boy release; treat the moving chains, falling hazards, and narrow ledges as the timing tests.
In the flashing-block room, remember that Boos advance when Mario is not facing them and stop when he faces them. Climb the blocks carefully and collect the 1-Up Heart from the upper Question Blocks only if the route is safe. Continue downward through the pipe on the right and ring the Midway Bell. This bell is the important recovery landmark for the remainder of the course.
After the bell, advance past Venus Fire Traps, Falling Spikes, Masked Ghouls, and more chained Spiked Balls. When the path divides, the upper route is usually safer; use the lower route for coins only after checking the Piranha Plants. Near Kurokyura, wait for one of the released Minikyura bats to approach, then bounce on it to reach the upper ledge and the 1-Up Heart. Return to Kurokyura’s level, defeat or pass it safely, and continue right to the Bonus Bell. The normal bell exit sends you to Graveyard Course.
- Ring the Midway Bell after the first underground section.
- Use a Minikyura bat as a bounce only when its path is clear.
- Take the normal Bonus Bell exit for required Pumpkin Zone progress.
2. Cross Graveyard Course and preserve Super Mario for the underwater blocks
Move right past the opening Beros and Karakaras. The Karakaras rise and fall in zigzag patterns, so stomp them only when their approach is clear. Avoid jumping directly beneath Beros. The upper rooftop route is generally safer than the ground route, especially around the Fireball Boy and the Piranha Plants.
Before leaving the opening area, enter the pipe near the Beros if you need a Mushroom or Fire Flower. Continue over the Kyororos and ring the Midway Bell before the downward pipe. In the water section, avoid the Cheep-Cheeps and take the pipe at the far side. In the Boo room, face the ghosts to hold them back, then turn away only after they are positioned away from your intended route.
Keep Super Mario for the later breakable blocks. If you are Fire Mario or Bunny Mario and take a Mushroom, you become Super Mario, which is useful because the required lower passage depends on the Spin Jump. Move through the pipe network, descend from the middle pool in front of the white wall, and proceed slowly beneath the Beros, Falling Spikes, and Blurps. At the far end, Spin Jump through the blocks and use the exit pipe. Take the normal Goal Door to continue to Haunted House Course.
Secret Course 4 is optional. To reach it, enter the lower water route near the later part of the stage, pass beneath the hazards, Spin Jump through the final breakable blocks, and use the hidden Goal Door. It offers bonus items but is not needed for Sabasa or the Pumpkin Coin.
- Ring the Midway Bell before entering the lower water route.
- Remain Super Mario through the final breakable blocks.
- Use the normal Goal Door unless you deliberately want Secret Course 4.
3. Complete Haunted House Course with short, controlled jumps
Proceed right through the haunted-house course and treat each disappearing or invisible platform as a timing puzzle. Ghost Goombas and Boos are easier to manage when you avoid unnecessary contact. Face a Boo to stop its advance, then turn away only after you have enough room to jump. Use short jumps to test each landing rather than committing to a long jump across an unseen gap.
Continue past the Midway Bell and the Piranha Plant section. When the disappearing blocks appear, wait long enough to learn their pattern, then cross from the center of one platform to the next. Do not stand at an edge while waiting for a block to reappear. After this area, follow the large decline to the normal Goal Door. That exit is the required route to Witch’s Mansion Course.
The alternate exit is optional and requires Bunny Mario. From the long platform before the decline, run right and float across the gap into the corridor with ghostly enemies. Follow that corridor to the Secret Goal Door for Secret Course 5. If the immediate objective is Sabasa, stay on the main route and take the Goal Door at the bottom of the decline.
- Use short test jumps around disappearing blocks.
- Keep Boos in front of Mario by facing them when the corridor is tight.
- Follow the decline and use the normal Goal Door for required progress.
4. Traverse Witch’s Mansion Course and reach Sabasa’s room
At the start of Witch’s Mansion Course, move past the Pikku, Piranha Plant, Boos, and cauldron area. Enter the early pipe if you need the optional item room; it contains a power-up and a 1-Up Heart. Return to the main route and cross the cauldrons above the flames. Do not sprint through the section: check the spacing between the cauldrons and wait for a safe landing before moving to the next one.
Ring the Midway Bell after the first cauldron section. Continue past the chained Spiked Balls and the Rerere broom enemies, then enter the specimen-jar and shelf area. Use the shelves and bottle-like platforms carefully, because the Masked Ghouls can approach from awkward angles. The pipe network contains coins and optional hidden blocks, including a Moneybag and a possible Fire Flower. If a pipe seems blocked, check for a hidden block rather than repeatedly jumping into the pipe opening.
After exploring only as much as you need, return to the upper route and use the pipe beyond the Boo to enter Sabasa’s room. The stage is short, but the pipe arrangement can cause unnecessary backtracking if you enter every opening. A conservative route is to take the early item room when needed, ring the bell, cross the broom section, then continue through the specimen-jar area to the far-right boss pipe.
- Use the early item room if you need a power-up or extra life.
- Ring the Midway Bell after the first cauldron section.
- Check for hidden blocks around blocked pipe entrances.
5. Defeat Sabasa and collect Pumpkin Zone’s Golden Coin
The Pumpkin Zone guardian is Sabasa (the Witch). The boss room has ceiling spikes and several cauldrons. Sabasa appears on the left or right, launches a fireball, and then teleports. A projectile can pass toward Mario or strike a cauldron; when a cauldron is heated, its lid can launch upward. Do not stand on a lid once it has been activated, and avoid being pushed toward the ceiling spikes.
For the safest stomp method, stay near the middle or a clear margin while watching for Sabasa to materialize. Move underneath her position and jump so Mario lands on her head as she appears. Immediately move away from the cauldrons and ceiling hazards rather than trying to remain in place for another hit. Sabasa teleports after a successful hit, so reset your position and wait for the next appearance instead of chasing her across the room.
Fire Mario can attack from a safer distance. Use fireballs when Sabasa is visible, then prepare for her teleport and the following fireball pattern. The ranged method requires six successful fireball hits. The stomp method requires three successful head stomps. Do not trade contact damage for a faster attempt; losing Super or Fire Mario makes the remaining cycles more dangerous.
After the third stomp or sixth fireball, Sabasa is defeated. The Pumpkin Zone Golden Coin leaves the cauldron and enters the gate at Wario’s Castle, and an X appears over Pumpkin Zone on the map. The four required stages remain replayable, while Secret Courses 4 and 5 remain optional.
- Stay clear of the ceiling spikes and any heated cauldron lid.
- Stomp Sabasa as she materializes, then retreat and reset your position.
- Defeat Sabasa with three stomps or six Fire Mario fireballs.
- Confirm that the Pumpkin Zone Golden Coin enters Wario’s Castle.
Before you move on
- Bat Course, Graveyard Course, Haunted House Course, and Witch’s Mansion Course are cleared.
- Sabasa has been defeated with three head stomps or six Fire Mario fireballs.
- Pumpkin Zone’s Golden Coin has entered the gate at Wario’s Castle.
- The Pumpkin Zone map shows its completed X marker.
- Secret Courses 4 and 5 were treated as optional rather than required campaign stages.
Mario Zone — Classic Platforming Challenges (Zone 5)
Mario Zone is the right-side region of the world map, shaped like Mario. Its required route has four stages: Gear Stage, Rubber Ball Stage, Crane Stage, and Block Stage. The levels emphasize rotating gears, bouncing balls, chain-mounted sprockets, cranes, Bullet Bills, and circular saw hazards. Mario Zone has no separate secret stage, so the normal route is enough to reach the boss. Preserve Super or Fire Mario when it is safe to do so, but do not take dangerous detours for optional coins or bonus bells. Block Stage ends with the Three Little Pigs. Defeat all three to obtain Mario’s Golden Coin, the fifth coin placed at the castle gate.
Enter Mario Zone and prepare for mechanical hazards
Select the Mario-shaped zone on the east side of the world map. The required route proceeds through four stages in order. Unlike several other zones, Mario Zone has no separate secret stage, so concentrate on reaching each stage’s goal and keeping your lives for Block Stage.
At the beginning of Gear Stage, the first question block can provide a Super Mushroom or Fire Flower. Take it if you need protection, but do not assume a particular item will always appear. In this zone, many platforms rotate, bounce, move along chains, or carry Mario automatically. Watch one cycle before jumping instead of treating a platform as fixed ground.
- Enter the normal four-stage route.
- Take the opening power-up when it is safe.
- Watch moving platforms before committing to a jump.
Clear Gear Stage across the rotating machinery
Move right to the opening question block, then climb the gears near the right wall. Continue upward and use the spinning gear on the left to reach the next section. A vertical Yashichi blade patrols the route; let it pass, then move to its right and enter the pipe.
The next room has Spiked Balls below the gears. Stay on the upper gears rather than dropping to the floor. Continue right across the rotating platforms and avoid standing too long on one gear, because its rotation can carry Mario off the safe surface. When the horizontal Tatenoko blade moves left, jump past it and land on the gear or block beyond it.
After the next pipe, reach the Carrot question block. Bunny Mario can hold the jump button to float across the spike-filled gap and ring the Midway Bell. In the following room, move across the gears and blocks, then wait for the lower blade to pass before climbing. A hidden block in the gap contains a 1-Up Heart. The later Fiery Blocks and Bricks form an optional coin passage; Fire Mario can break the Fiery Blocks with fireballs, but you can skip the passage and continue upward.
At the top, hit the Carrot block if you want Bunny Mario. Float down through the coin area while avoiding the Spiked Balls, then ring the Bonus Bell to finish. The bonus game is optional; the stage is complete once Mario reaches the goal.
- Use the upper gears above the Spiked Balls.
- Ring the Midway Bell after the Carrot block.
- Skip the coin passage if it threatens your power-up or life.
- Reach the final bell.
Use the bouncing balls in Rubber Ball Stage
Continue right through the spherical torso section. Cannon Pigs and Paragoombas occupy the early route, so approach from a distance and jump only when the landing area is clear. After the pipes, find the teddy bear riding a bouncing ball. Defeat the bear or pass it safely, then use the ball to cross the spikes. Make small directional adjustments and avoid jumping away before the next solid platform is within reach.
After the Midway Bell, reach the barber-striped vertical poles. Climb one shaft only after checking whether its upper area contains an enemy or item. Continue right until the second teddy bear and ball. Use this ball for the final spike crossing and prioritize reaching the exit over the optional Bonus Bell. Bunny Mario or a carefully timed jump can reach the bonus, but missing it does not affect the Golden Coin.
- Cross the first spike section on the bouncing ball.
- Pass the Midway Bell before the second ball.
- Treat the Bonus Bell as optional.
- Reach the exit without taking a risky final jump.
Cross Crane Stage while managing Bullet Bills
Ride the black sprockets along their chains and watch the Bullet Bill cannons. Let a Bullet Bill pass before transferring to the next sprocket. Near the floor rollers, stomp the soldier enemy if you have a safe opening; leaving it active can make the moving floor harder to cross.
The Midway Bell is above the Bullet Bill near the roller section. Continue right to the crane. Jump into the crane when its grab path is available and let it carry Mario across the gap. The candy-striped route below is also usable if you prefer to walk rather than wait for the crane.
Near the end, stacked Bullet Bill cannons guard the route. Use the crane above them to reach the final bell. Do not jump blindly from a moving sprocket; let the sprocket carry Mario into a predictable position, then make one controlled transfer.
- Wait for Bullet Bills to pass before changing platforms.
- Deal with the roller enemy before it corners Mario.
- Use the crane or lower striped route across the gap.
- Use the upper crane to bypass the stacked cannons.
Finish Block Stage and reach the Three Little Pigs
Move right through the revolving balls and Bullet Bill hazards. At the large incline, take the upper route for the direct path to the boss. The upper section contains a power-up block and the Midway Bell. The lower passages beneath the sawblades lead to an optional coin bag; use them only if you can pass the saws confidently.
Continue right past the Shooting Pigs, Goombas, Bullet Bills, and Buzzsaw Rollers. When a roller approaches, wait for a gap instead of running into it. After the final circular hazard and Goomba, enter the pipe to the boss room.
- Take the upper route for the shortest boss approach.
- Ring the Midway Bell near the top of the incline.
- Skip the lower coin detour if preserving lives is the priority.
- Enter the boss pipe with your power-up intact if possible.
Defeat the Three Little Pigs
The pigs appear one at a time from their houses, and each requires three successful head stomps. The first pig rolls across the floor and becomes faster after taking damage. Keep enough room to jump over it, land on its head, and move away immediately rather than waiting beside it.
The second pig bounces across the room and also speeds up after each hit. Watch its jump, then stomp it as it descends. The third pig jumps higher and changes shape as it takes damage, making its head harder to reach. Use a full jump and reposition after every hit; do not attempt repeated contact while it is still moving unpredictably.
If Mario has Fire Mario, fireballs provide a safer ranged option and can damage the pigs without requiring every hit to be a stomp. Fire Mario is helpful but not required. Once all three pigs are defeated, Mario receives the Mario Golden Coin.
- Stomp or fire at the first pig three times.
- Wait for the second pig to descend before striking.
- Use full, deliberate jumps against the higher third pig.
- Confirm that the Mario Golden Coin appears after the fight.
Before you move on
- Mario Zone’s four required stages are cleared and its map marker shows completion.
- The Three Little Pigs are defeated at the end of Block Stage.
- The Mario Golden Coin appears and is placed at the castle gate.
- Mario now has the fifth Golden Coin if the other four main-zone coins are already collected.
- The castle remains locked until all six Golden Coins, including Turtle Zone’s coin, have been obtained.
Turtle Zone — Submerged Segments and Patrolling Foes (Zone 6)
Enter Turtle Zone through the giant turtle on the small floating island. Clear Cheep Cheep Course, Sunken Ship Course and Whale Course in that order to reach Pako, the zone’s guardian. The zone emphasizes underwater movement, sharks, pufferfish, Bullet Bills, falling ceiling spikes and narrow passages. Sunken Ship Course also contains a Small Mario secret exit leading to Secret Course 6; it is optional and does not replace the normal route to Whale Course or provide the Golden Coin directly. Preserve Fire Mario when possible, but remember that sharks and some other aquatic enemies are immune to fireballs. In the final underwater battle, Pako releases invincible smaller copies called Poko. Defeat Pako with three head stomps or six Fire Mario fireballs to receive Turtle Zone’s Golden Coin.
Enter Turtle Zone and prepare for the underwater route
On the world map, travel to the small floating island where the giant turtle waits. Enter the turtle to reach Turtle Zone. The required route has three courses: Cheep Cheep Course, Sunken Ship Course and Whale Course. Secret Course 6 is reached through a hidden exit in Sunken Ship Course and is optional.
Fire Mario is valuable in this zone because many aquatic enemies can be removed with fireballs. Do not rely on it against sharks, which are immune to fireballs. In water, make small directional corrections rather than holding a direction continuously. When several enemies occupy a passage, wait for a clear lane instead of attempting a long jump or swim through the group.
- Enter the giant turtle on the floating island.
- Plan to clear Cheep Cheep Course, Sunken Ship Course and Whale Course.
- Keep Fire Mario when practical, but remember that sharks cannot be defeated with fireballs.
Clear Cheep Cheep Course and use the islands as recovery points
Enter Cheep Cheep Course and move into the water. Swim right past the Cheep-Cheeps until you reach the first small island and its question block. The Mushroom is useful if you entered as Small Mario. A higher optional section can be reached with Bunny Mario, but skip it if preserving your current state is more important than collecting extra items.
Continue through the water while watching for Cheep-Cheeps, pufferfish and Large Sharks. Stay near the surface where possible. This lets you jump onto the small islands, correct a bad position and avoid being trapped beneath a moving enemy. Sharks should be passed by changing position early; do not wait until one is already beside Mario.
Ring the bell after the long swim. Beyond it, use the islands to break the course into short crossings. A Fire Flower is available from a question block in this portion, so take it if the approach is safe. Near the narrow pillar section at the end, use the low pillar as a landing point, jump to the pillar on the left and jump upward to reveal the hidden Moneybag block. This reward is optional.
Return to the water and follow the course toward the final split. For the normal exit, use the upper route and continue to the doorway. Do not confuse this exit with a secret course entrance; Cheep Cheep Course is simply the first required stage of the zone.
- Use islands and the surface to recover from bad underwater positioning.
- Ring the midway bell after the first long swim.
- Avoid sharks rather than trying to attack them.
- At the narrow pillars, check above the left pillar for the optional Moneybag.
- Take the normal upper route to finish Cheep Cheep Course.
Navigate Sunken Ship Course and complete the normal pipe route
Sunken Ship Course takes place inside an abandoned submarine. Enter the water and proceed through corridors containing Honebon, sharks, Unibo, Bullet Bill cannons, falling ceiling spikes and other underwater hazards. Treat each cannon opening as a timing landmark: wait for the current Bullet Bill to clear the lane before swimming across. Honebon and sharks are poor targets for fireballs, so movement is more important than attacking.
Follow the route upward until Mario reaches the dry upper section. A Star is available before the staircase, and the staircase contains several Koopa Troopas. The Star can make this section safer, but do not attempt repeated bounces unless the steps are clear and Mario has room to recover. Ring the bell near the upper section before entering the maze route.
After the bell, use the pipes to work through the submarine’s connected maze. The left-side pipes lead to useful optional supplies, including a Fire Flower for Small Mario and a 1-Up. Continue exploring until you reach the pipe that returns to the required route. The normal route eventually brings Mario to the rising platforms near the end. Ride them upward, then jump away before they carry Mario into the ceiling spikes. Enter the doorway to complete Sunken Ship Course and unlock the path to Whale Course.
- Use Bullet Bill cannons and the rising platforms as route landmarks.
- Ring the midway bell before the pipe maze.
- Take the left-side maze pipes first if you need the Fire Flower or 1-Up.
- Use the required pipe route rather than stopping at an optional supply room.
- Jump away from the rising platforms before they reach the ceiling spikes.
Optional: reach the Small Mario secret exit and Secret Course 6
The alternate exit in Sunken Ship Course is available only to Small Mario. From the early underwater section, continue past the Unibo and Bullet Bill cannon, then swim upward through the vertical passage. At the top, move left toward the Koopa Troopa and narrow passage. If Mario is not already Small Mario, the enemy can be used to take controlled damage, but position yourself so the passage remains accessible afterward.
As Small Mario, pass through the narrow gap and enter the hidden pipe. The following underwater section contains spikes and invincible aquatic enemies. Because Small Mario cannot absorb another hit, move in short steps and wait for hazards to pass before committing to each opening. Reach the door at the far end to unlock Secret Course 6 on the Turtle Zone map.
Secret Course 6 is a bonus stage. It is not required to reach Whale Course, defeat Pako or collect Turtle Zone’s Golden Coin. If your goal is campaign completion, return to Sunken Ship Course and use the normal pipe-maze exit instead.
- Reach the hidden passage as Small Mario.
- Enter the concealed pipe and survive the underwater hazard section.
- Unlock Secret Course 6 only if you want the optional stage.
- Use the normal exit separately to continue toward Whale Course.
Cross Whale Course and reach Pako’s arena
Whale Course takes place inside the whale and combines dry footing, water pockets, suspended sticky material and narrow passages. Move carefully around the large ribs and tusks. They are damaging obstacles, not platforms. Align Mario with the center of each opening before crossing, especially where the ceiling or floor narrows the route.
The suspended sticky material changes Mario’s movement rhythm. Use short jumps rather than sprinting into the next obstacle. In the water pockets, let Bony Fish, Goomdivers or other moving enemies pass before swimming through. A Fire Flower appears during the course, so reclaim Fire Mario if the route allows it. Clear nearby enemies before attempting a vertical climb; long jumps through a crowded underwater section are more dangerous than waiting.
Continue through the final obstacle groups and enter the pipe at the end of the course. This pipe leads to Pako’s underwater arena. The Moneybag hidden in Whale Course is optional and is not needed for the boss or Golden Coin.
- Treat ribs, tusks and lowered spikes as damaging obstacles.
- Use short jumps through the sticky material.
- Clear or wait out nearby aquatic enemies before climbing.
- Enter the final pipe to reach Pako.
Defeat Pako and claim Turtle Zone’s Golden Coin
Pako is the Turtle Zone guardian. Although he is visually an octopus-like enemy, use Pako as his proper name. The battle takes place underwater, where Pako moves through the arena and releases smaller copies called Poko. Poko are invincible and cannot be defeated, so avoid them instead of trying to clear the room.
For the standard attack, position Mario above Pako and stomp his head when he rises into a reachable lane. After each hit, swim away and reset your position. Do not remain directly over Pako, because the Poko can close the space while Mario is trying to line up a second attack. Repeat the head stomp three times.
Fire Mario has an alternative method. Six successful fireball hits defeat Pako, although Poko and the arena’s underwater movement still need to be avoided. Fireballs are most useful when Pako is moving across an open lane; do not chase him into a corner crowded with Poko. After the third head stomp or sixth fireball, Pako is defeated and Turtle Zone’s Golden Coin appears on Wario’s Castle door.
- Avoid Poko; the smaller copies are invincible.
- Stomp Pako’s head three times, or hit him with six Fire Mario fireballs.
- Confirm that Turtle Zone’s Golden Coin appears on Wario’s Castle door.
- Verify that all six Golden Coins are displayed before entering Mario’s Castle.
Before you move on
- Cheep Cheep Course is cleared.
- Sunken Ship Course is cleared through its normal exit.
- Whale Course is cleared and Pako is defeated.
- Turtle Zone’s Golden Coin is displayed on Wario’s Castle door.
- All six Golden Coins are present before entering Mario’s Castle.
- Secret Course 6 remains optional and is not required for campaign completion.
References for this chapter
- Super Mario Land 2: 6 Golden Coins Walkthrough — StrategyWiki Turtle Zone
- Sunken Ship Course — Super Mario Wiki
- Sunken Ship Stage — Thonky Super Mario Land 2 Walkthrough
- Super Mario Land 2: 6 Golden Coins — Guide and Walkthrough by Snow_Dragon
- Super Mario Land 2: 6 Golden Coins — Game Boy instruction manual
Secrets, Shortcuts, and Conserving Lives
Super Mario Land 2’s secret exits, hidden blocks, and bonus games are optional, but they can make the six-coin campaign much safer. The best recovery targets are the Ant Nest’s hidden 1-Ups, Hippo Zone’s concealed life rooms, and Macro Zone’s Star chain. Macro Zone also contains the clearest shortcut: its secret exit opens a route directly to the final stage, allowing you to bypass the plumbing and conveyor-belt levels. Ringing a bell creates a restart point for the current attempt, although that checkpoint is lost when the Game Boy is turned off. The only mandatory progress is defeating the boss of each main zone and collecting all six Golden Coins; secret stages and extra items are never required to open Mario’s Castle.
Use secret exits only when their reward justifies the risk
Secret exits open bonus stages or shortcuts on the world map, but they do not award a Golden Coin. You can ignore them and still complete the campaign. Attempt one when you need a power-up, extra lives, or a safer route to a later stage; otherwise, take the normal bell or door and preserve the life.
The most useful shortcut is in Macro Zone Level 1, the anthill. After the checkpoint, find the section with five question-mark blocks. Above them are four hidden blocks that form a staircase. Climb those blocks to the pipe, then use Fire Mario to destroy the blocks covering its entrance. Enter the pipe to reach the secret exit. Completing that secret stage opens a direct route to Macro Zone’s final stage, letting you bypass Levels 2 and 3. The tradeoff is that you must preserve Fire Mario, and the secret stage has forced scrolling with dangerous drops. If you lose the power-up or the staircase attempt becomes unsafe, finish the normal route instead.
- Treat every secret exit as optional until the zone boss is defeated.
- Save Fire Mario for the Macro Zone Level 1 pipe if you want the shortcut.
- Do not sacrifice a life for coins when the normal exit is already reachable.
Build lives in Tree Zone’s Ant Nest
Tree Zone’s Ant Nest is a reliable place to recover extra lives. Early in the stage, locate the Fire Flower and search directly above it for a hidden 1-Up block. Jump from a lower nearby platform so the life falls toward a surface you can reach; do not try to catch it over the drop if the landing is unclear.
Later, a question-mark block contains another 1-Up. The direct route requires timed jumps across two falling platforms, but there is a safer alternative: jump through the wooden beam and land on top of it, then collect the life from above. Near the upper-right portion of the stage, a further hidden 1-Up is above a falling platform. Hit the hidden block, jump immediately, and land on the next ledge. This is the least reliable of the three, so skip it if the next platform is not already positioned for the landing.
Between two visible blocks in the upper part of the Ant Nest is a hidden Carrot block. Bunny Mario is useful for reaching coins beneath the leafy platforms, but the Carrot is not needed to clear the stage or obtain the Tree Zone Golden Coin. The stage’s normal ending still requires a run-and-jump to the bell, so leave yourself room for that final approach.
- Take the first Ant Nest 1-Up only when you can see the recovery platform.
- Use the wooden-beam route for the question-block life if the falling platforms are moving out of position.
- Skip the upper-right life if collecting it would require a blind jump.
- Treat the hidden Carrot as an optional mobility tool.
Use Hippo Zone’s concealed rooms before entering Space Zone
Hippo Zone is a short access stage rather than one of the six Golden Coin zones. To reach Space Zone, ride the bubbles blown by the Hippo and keep pressing A to rise. Aim for the upper bell; taking the lower exit does not unlock the route to Space Zone and forces you to repeat the stage.
The stage also contains several optional life rewards. After the first Hippo, use one of its bubbles to float up and left toward a hidden question-mark block containing a 1-Up. You can also dive into the water shortly after the first Hippo and travel left to find a concealed cave. The cave contains two extra lives and a coin. Another lower passage requires Fire Mario: descend to the bottom, find the small opening, and use a fireball on the blocking section to enter the life room. If Mario is no longer powered-up, abandon this attempt rather than taking damage to recover the route.
There is also a hidden 1-Up above the narrow platforms in the coin pattern after the first Hippo. In the regular route, stand below the spiked obstacle and jump to reveal the block. These rewards are useful before the Space Zone, but none is required for access.
- Reach the upper Hippo bell to unlock Space Zone.
- Keep Fire Mario for the blocked lower life room.
- If you lose Fire Mario, finish the stage rather than forcing the passage.
- Use the upper hidden 1-Up when the lower cave is too dangerous.
Turn Macro Zone Stars into a controlled life refill
Macro Zone Level 2 contains a repeatable Star opportunity for a powered-up Mario. In the small room before the checkpoint, locate the block containing the Star. Collect it and move through the following enemy groups without pausing in hazardous gaps. Defeating enemies while invincible can produce extra lives.
After the checkpoint, the first room contains another Star in a box that can be reached with a drill kick while the first invincibility period is still active. Clear the landing area before attempting the kick, then continue across enemies rather than detouring into unfamiliar pipes. The chain is optional: if the scrolling section or a gap threatens to end the attempt, take the ordinary route and preserve the stage checkpoint.
At the end of the level, a hidden-block staircase can also provide a safer way to reach the bell. In the final water section, near the lone Cheep Cheep, jump while hugging the left wall to reveal a hidden block. Continue revealing blocks until you reach the upper platform and coin area. From there, jump toward the bell; if the landing is missed, use the revealed blocks to climb back to it.
- Activate the checkpoint before attempting the second Star.
- Prioritize safe landings over extending invincibility.
- Use the hidden-block staircase to reach the Macro Zone bell if the direct jump is uncomfortable.
Protect the Golden Coins by managing the life counter
The six Golden Coins come from the six main zone bosses. Hidden hearts, ordinary coins, secret stages, coin rooms, bonus-game prizes, and extra lives are all optional. Ringing the bell at a stage’s end grants access to a bonus game, which is a useful way to seek a power-up or additional lives before a difficult stage.
The manual warns that a Game Over returns the recovered Golden Coins to Wario’s guards. If that happens, the castle will no longer be ready for entry; defeat the relevant zone bosses again and reclaim the coins. Before attempting Mario’s Castle, use the Ant Nest, Hippo Zone, Macro Zone Star route, or bonus games to build a reserve. Do not keep farming after you have enough lives for the next boss, because every optional detour still carries a chance of losing the run.
Ringing a mid-stage bell gives you a restart point for future attempts at that stage. The checkpoint is not retained after the Game Boy is turned off, so complete the stage or keep the system powered if you are relying on it.
- Confirm that all six Golden Coins have been recovered before approaching Mario’s Castle.
- Use optional life routes only when they are safer than simply retrying the next stage.
- If a Game Over occurs, recollect every missing Golden Coin from its zone boss.
- Remember that stage checkpoints disappear when the system is turned off.
Before you move on
- All six Golden Coins have been recovered from the six main zone bosses.
- Mario’s Castle is open; no secret stage is required for access.
- Optional life routes have been used only when they can be reached without a reckless sacrifice.
- Any secret exit pursued has been completed or safely abandoned before it costs a life.
- If a Game Over occurred, every returned Golden Coin has been reclaimed.
- A mid-stage bell is not being treated as permanent save data after the system is powered off.
References for this chapter
- Game Boy Instruction Manual: Super Mario Land 2: 6 Golden Coins
- Super Mario Land 2: 6 Golden Coins — Walkthrough
- Super Mario Land 2: 6 Golden Coins Walkthrough — StrategyWiki Macro Zone
- Super Mario Land 2: 6 Golden Coins — Guide and Walkthrough
- Super Mario Land 2: 6 Golden Coins — Game Boy secrets and tips
Opening Mario’s Castle — Confirming Progress and Entry
Mario’s Castle opens after Mario defeats the guardians of Tree, Space, Macro, Pumpkin, Mario, and Turtle Zones and recovers all six Golden Coins. The castle is one continuous, checkpoint-less course. A normal death sends Mario back to the castle entrance, while a Game Over returns the recovered Golden Coins to Wario’s guardians. Before entering, build a life reserve and begin with Super Mario, Fire Mario, or Bunny Mario when practical. The opening route contains eight rooms of lava, statues, Furizos, Propeller Lifts, Mechanical Fists, Skull Platforms, Bone Lifts, and falling Karamenbos. These are followed by three Floating Face areas containing one, two, and two enemies. Every Floating Face must be defeated before its area’s exit pipe opens. Reaching Wario’s first battle room means the castle opening has been cleared for that attempt, but it does not create a checkpoint.
Confirm that Mario’s Castle is unlocked
Return to the world map and check the castle gate. The gate opens only after the six Golden Coins have been recovered by defeating the guardians at the ends of Tree Zone, Space Zone, Macro Zone, Pumpkin Zone, Mario Zone, and Turtle Zone. Secret courses, ordinary coins, bonus games, extra lives, and completed regular stages do not substitute for a Golden Coin.
If the gate is still closed, revisit the zone whose guardian remains undefeated. Clear that zone’s final course, defeat its guardian, and return to the map. Once all six coins have been recovered, the castle gate becomes available. The six coins are the required campaign progress; optional secret goals are not needed to enter the castle.
- The castle gate is open.
- The guardians of all six zones have been defeated.
- All six Golden Coins have been recovered.
Prepare for a checkpoint-less course
Mario’s Castle is a single continuous course with no halfway bell or room checkpoint. A normal death returns Mario to the castle entrance, so every failed attempt requires another run through the opening rooms. Gather extra lives in previously cleared stages, bonus games, or other safe locations before committing to the castle.
Enter as Super Mario whenever possible. Fire Mario is useful against ordinary enemies, and Bunny Mario can make some jumps more forgiving, but neither form preserves progress after a death. Power-ups found inside the castle change Mario’s current form only; they do not mark a restart point.
- A useful reserve of spare lives is available.
- Mario begins as Super Mario, Fire Mario, or Bunny Mario when practical.
- You understand that castle power-ups are not checkpoints.
Cross the opening Furizo and statue room
Move right and observe the swinging Furizos before advancing. Let the first hazard swing away, then pass through the opening. The next Furizo travels close to the floor; jump over it, or wait until it moves left and run right when the route is clear. Do not attempt to walk underneath it unless the spacing is plainly safe.
The first ? Block contains a Fire Flower. Take it if the surrounding hazard is clear. Continue past the small Piranha Plant statues and their flame shots, then cross the lava gaps. A large Piranha Plant statue is followed by smaller statues; watch their projectiles rather than assuming every statue fires on the same rhythm. Pass the final Furizo and the small swinging hazard, then enter the pipe on the right.
- The low Furizo was crossed with a controlled jump or clear opening.
- Flame shots were passed during safe windows.
- The right-hand pipe was reached without falling into lava.
Use the stairway item and Propeller Lifts
After the pipe, climb the stairs while avoiding the flame from the Piranha Plant statue. Continue to the upper ? Block and collect the Super Mushroom or Fire Flower if the approach is safe. Enter the next room and use the Propeller Lifts to cross the lava.
If Mario is tall, crouch beneath the low overhangs. On the second lift, jump onto the wall or adjoining surface before the lift carries Mario too far. Crouch under the next obstruction, then jump onto the upper platform when the route opens. Near the end, leave the final lift on the left before the next wall pushes Mario away. Continue left and enter the pipe.
- The stairway power-up was collected when safe.
- Mario crouched beneath low ceilings while tall.
- The lifts were abandoned before walls forced Mario into the lava.
Avoid Mechanical Fists and cross Skull Platforms
In the next room, floor switches activate Mechanical Fists from the ceiling. Jump over the floor brick beneath the first window, then the brick beneath the second window, and then the brick beneath the left half of the third window. If a fist activates, keep moving forward through its cycle; the route behind Mario cannot be treated as a safe reset.
After the fists, cross the lava on Skull Platforms. They crumble shortly after Mario lands, so commit to the next jump immediately. Use short, controlled jumps and avoid waiting for a better position. When the crossing is complete, enter the pipe on the left.
- The three Mechanical Fist trigger bricks were avoided.
- Mario kept moving across the Skull Platforms.
- The left-side pipe was reached after the lava crossing.
Cross the Bone Lifts and Karamenbo room
Climb the next stairs and collect the Super Mushroom or Fire Flower before exiting through the pipe on the right. The following room contains Bone Lifts above lava. Some fall when stepped on, while others rise toward the ceiling spikes. Move quickly from lift to lift and use low jumps so Mario does not collide with the spikes. Enter the pipe on the right when the crossing is complete.
The next room contains Karamenbos that drop from above. Do not run beneath one while it is descending. Wait until it begins moving upward, then pass through the opening and continue to the right-hand pipe.
- The second castle power-up was taken when safe.
- Low jumps were used beneath the ceiling spikes.
- Each Karamenbo was passed after it began moving upward.
Clear the three Floating Face areas
The next part contains three separate Floating Face areas. The first area has one Floating Face, the second has two, and the third has two more. Every Floating Face must be defeated before the exit pipe in that area opens. Stomp each one twice, then move through the pipe after the room is clear.
Approach from the side and watch the enemy’s bounce direction. Jump over it when it commits to a charge, then land on its top rather than attempting to pass through its body. When two Floating Faces approach from opposite sides, retreat or jump past one so both enemies are moving from the same side before attempting another stomp. This reduces the chance of being trapped between them.
After the fifth Floating Face is defeated, continue through the remaining pre-boss route and take the available power-up if needed. Enter the pipe leading to Wario’s first battle room. Reaching that room confirms that all eight earlier rooms and all three Floating Face areas have been cleared for the current attempt; it does not establish a checkpoint.
- The single Floating Face in the first area was defeated.
- Both Floating Faces in the second area were defeated.
- Both Floating Faces in the third area were defeated.
- The pipe to Wario’s first battle room was reached.
Recover correctly after a death or Game Over
A death during Mario’s Castle sends Mario back to the castle entrance. The cleared rooms and defeated Floating Faces are not preserved as a mid-course restart, so repeat the route and use the hazards you have already learned to conserve lives.
If the remaining lives are exhausted and a Game Over occurs, the six recovered Golden Coins are returned to Wario’s guardians. The castle gate closes again until the six zone guardians are defeated once more. After a Game Over, check the map, recover the required coins again, rebuild a life reserve, and begin another complete castle attempt. Secret courses and bonus rewards are still optional.
- You know that an ordinary castle death restarts at the entrance.
- You know that a Game Over returns the Golden Coins to their guardians.
- You know that optional secrets are not required to reopen the castle.
Before you move on
- The Mario’s Castle gate is open with all six Golden Coins recovered.
- All eight pre-boss rooms have been cleared.
- All three Floating Face areas have been cleared.
- All five Floating Faces have been defeated: one in the first area, two in the second, and two in the third.
- Mario has reached Wario’s first battle room.
- The player understands that the castle has no checkpoint and that a Game Over returns the Golden Coins to their guardians.
Mario’s Castle — Final Rooms and Wario Boss Fight
After defeating the six zone guardians and collecting all six Golden Coins, enter Mario’s Castle from the central map gate. The castle is a single long course with no midway checkpoint: a normal death returns Mario to the castle entrance, while a Game Over returns the collected Golden Coins to their guardians. Preserve lives and avoid unnecessary damage before the final rooms. The route passes lava, swinging hazards, flame-spitting Piranha Plant statues, Propeller Lifts, Mechanical Fists, Skull Platforms, Bone Lifts, Karamenbos, and three groups of Floating Faces. In the final battle, Wario has three phases: regular Wario, Bunny Wario, and Fire Wario. Each phase requires three head-stomps, for nine stomps total. Fire Mario’s fireballs do not damage Wario here; every successful hit must be a stomp. After the ninth stomp, allow the ending sequence to play.
1. Confirm the gate and prepare for one uninterrupted course
The castle gate opens only after the six Golden Coins have been recovered from the six zone bosses. Secret courses, bonus stages, ordinary coins, and extra lives are optional, but a spare-life reserve is strongly advisable because Mario’s Castle has no midway checkpoint.
If Mario dies anywhere in the castle, the next life begins at the entrance. A Game Over is more serious: the recovered Golden Coins are returned to their guardians, so the castle gate closes until the required bosses are defeated again and all six coins are recollected. Enter with the strongest useful state available, but remember that the castle supplies additional power-ups along the route.
- All six Golden Coins are displayed at the castle gate.
- You have several spare lives before entering.
- You understand that a castle death restarts the entire course.
2. Cross the opening lava and statue room
Move right and take the first Fire Flower from the Question Block. Use it for safety against enemies, but do not rush into the swinging hazards. Duck beneath or jump over the first two when their paths leave an opening. Continue past the small flame-spitting Piranha Plant statues, watching the projectile timing before committing to each jump.
Cross the lava gaps one at a time. The large Piranha Plant statue launches a larger flame, while the following line of five small statues has lava between them. The second and fourth small statues do not spit flames, making those positions useful pauses before the next jump. Continue past the remaining lava and swinging hazards, then enter the pipe on the right.
- The opening Fire Flower was collected or consciously preserved.
- The statue row was crossed without rushing through multiple lava gaps.
- You reached the right-side pipe.
3. Ride the Propeller Lifts over lava
Climb the stairs, avoid the flame from the statue, and collect the Question Block power-up near the upper stairs before entering the left pipe. The next room is a sequence of Propeller Lifts over lava. Board each lift only when its path gives you a secure landing, and crouch while tall Mario is beneath low walls.
On the second lift, jump onto the wall at the left before the lift carries Mario past it. Crouch under the next low obstruction, then jump onto the overhead platform when the route rises. For the final transfers, crouch beneath the wall and jump off to the left before the next wall pushes Mario away from the exit. Enter the pipe at the left end of the room. Do not make blind long jumps between lifts; let each lift carry Mario close to the next landmark.
- Low walls were crossed while crouching when necessary.
- The overhead platform was used as a landing point.
- You reached the left-side exit pipe without falling into the lava.
4. Avoid the Mechanical Fists and cross the Skull Platforms
In the next room, the floor contains switches that activate the Mechanical Fists above. Avoid the floor brick beneath the first window, then jump over the floor brick beneath the second window, and finally jump over the floor brick beneath the left half of the third window. If a fist activates, keep moving through the danger rather than turning around; the entry pipe is not a reliable retreat once the room is triggered.
The Skull Platforms over the lava crumble shortly after Mario lands on them. Jump from one to the next and continue left without stopping to fight unless an enemy blocks the route. Enter the pipe on the left, climb the stairs, pass the non-firing Piranha Plant statue, and take the next Question Block power-up before entering the right-side pipe.
- The three Mechanical Fist switches were avoided where possible.
- The Skull Platforms were crossed without standing still.
- You reached the next pipe with the route continuing to the Bone Lift room.
5. Cross Bone Lifts and clear every Floating Face
The Bone Lift room alternates between platforms that fall into the lava and platforms that rise toward the ceiling spikes. Jump between them promptly. Leave a lift when it begins carrying Mario toward either hazard, and enter the pipe on the right once the crossing is complete.
The following room contains Karamenbos that drop from the ceiling. Wait for each one to begin moving upward before passing beneath it. Continue through the right-side pipe, then defeat the Floating Face in the next room by stomping it. The pipe remains blocked until that enemy is defeated.
Two more rooms follow. The first contains two Floating Faces and the next contains another two. Defeat every face in each room before using the right-side pipe. A final Question Block supplies a Super Mushroom or Fire Flower; then enter the pipe to begin Wario’s fight.
- The Bone Lifts were crossed before they fell or rose into the spikes.
- Each Karamenbo was allowed to rise before you passed underneath.
- All five Floating Faces across the three rooms were defeated.
6. Defeat regular Wario with three head-stomps
Regular Wario runs quickly from side to side and periodically jumps before landing with a ground-stomp. A Crystal Ball travels along the ceiling and drops when Wario lands. Do not stand beneath its path, and do not remain on the floor when Wario is about to land because the impact briefly interferes with Mario’s movement.
Wait for Wario to commit to a run or landing, then jump onto his head. The throne area gives you a useful height reference, but reposition after every stomp instead of trying to stay close to him. Fire Mario’s fireballs do not damage Wario in this battle, so use head-stomps only. Three successful stomps end the regular phase and send Wario to the next room.
- The Crystal Ball was tracked as well as Wario.
- All damage was dealt by landing on Wario’s head.
- Regular Wario received three successful stomps.
7. Defeat Bunny Wario with three more stomps
Move right after the first phase and collect the Carrot. Wario takes the same power and becomes Bunny Wario. He floats across the room, then descends toward the floor and creates the same landing danger with the Crystal Ball.
Do not chase Bunny Wario while he is high in the air. Wait for his descent, then use the Mario statue as a height reference if needed and stomp him as he comes down. Bunny Mario’s controlled descent can help line up the attack, but move away immediately after contact so Wario cannot catch Mario from the side. Repeat this pattern until Bunny Wario has received three head-stomps.
- The Carrot was collected before entering the second phase.
- Bunny Wario was attacked during his descent rather than chased in mid-air.
- The second phase ended after three successful stomps.
8. Defeat Fire Wario and watch the ending
In the final room, a Super Mushroom appears before Wario’s last transformation. Do not collect it if you are still Bunny Mario or Fire Mario; keeping the current power can make the final phase easier. Move right to trigger Fire Wario, who throws large fireballs and jumps across the room.
Stay mainly in the open central or left portion of the room. The lower ceiling on the right makes the fireballs harder to avoid and can trap Mario when Wario crosses the room. Watch the fireball, jump over it, and wait for Wario to land before stomping his head. Fire Mario fireballs cannot damage Wario here, so continue using only head-stomps. Fire Wario requires three successful stomps. After the ninth total stomp, Wario returns to normal and the ending begins; let the sequence play rather than resetting immediately.
- The final Super Mushroom was left untouched when preserving Bunny Mario or Fire Mario was preferable.
- Fire Wario’s large fireballs were avoided in the open part of the room.
- All three phases were defeated, totaling nine head-stomps.
- The ending sequence appeared after Wario was defeated.
9. Recover from failure without confusing a death with a Game Over
A single castle death is recoverable: Mario returns to the castle entrance and can attempt the course again with the Golden Coins still secured. Reuse the opening power-up, avoid optional fights, and treat the Mechanical Fists, Skull Platforms, Bone Lifts, Karamenbos, and Floating Faces as separate timing tests.
If the life counter reaches Game Over, check the map before returning to the castle. The collected Golden Coins will have returned to their guardians, although previously cleared ordinary stages remain completed. Defeat the required zone bosses again, recollect the six coins, and reopen the gate before making another castle attempt.
- A normal death was treated as a full castle restart.
- After a Game Over, the map was checked for returned Golden Coins.
- The gate was reopened with all six coins before the successful run.
Before you move on
- All six Golden Coins were collected from the six zone guardians.
- Mario’s Castle was cleared from its entrance through the Floating Face rooms.
- Regular Wario, Bunny Wario, and Fire Wario each received three head-stomps.
- Wario was defeated without relying on Fire Mario fireballs.
- The ending sequence appeared after the final phase.
- If a Game Over occurred, all six Golden Coins were recollected before the successful castle run.
Boss Patterns and Recovery Tactics (All Zones)
The six zone guardians use readable attack cycles rather than hidden tricks. Watch one complete pattern, keep room to retreat, and attack only after the boss commits to a movement that exposes its head. Kurosu, Tatanga, Rikki, Sabasa, and Pako each require three stomps or six Fire Mario fireballs. The Three Little Pigheads fight one at a time, and each pig requires three stomps or six fireballs. Mario’s Castle has no checkpoint: a death returns you to the entrance. Defeat every required Floating Face before entering the final pipe sequence, then defeat regular Wario, Bunny Wario, and Fire Wario with three head stomps in each phase. Fire Mario fireballs cannot damage Wario. A Game Over returns collected Golden Coins to their guardians, although previously cleared ordinary stages remain completed.
Use the same safe routine in every zone boss room
At the start of a boss fight, spend one attack cycle observing the arena. Identify where Mario can stand without being trapped against a wall, cauldron, pipe, or overhead obstruction. Do not chase a boss around the room. Instead, wait for a swoop, descent, charge, or appearance animation that leaves its head within jumping range. Make a short jump, land the stomp, and immediately move back to open space.
Head stomps are the universal close-range method. When Fire Mario is available, fire from a position that still leaves room to dodge; do not stand still simply because the boss is within range. Kurosu, Tatanga, Rikki, Sabasa, and Pako each take three stomps or six fireballs. Each of the Three Little Pigheads also takes three stomps or six fireballs. After a successful hit, reset your position instead of attempting a second hit during an uncertain recovery animation.
- Watch one full attack cycle before attacking.
- Keep a landing space and a retreat route open.
- Use Fire Mario’s range without becoming stationary.
Tree Zone: Kurosu
Kurosu waits high on one side of the room, then descends and swoops across Mario’s level. Stand near the middle or in a position that gives you room to move in either direction. The safer stomp window is during the controlled descent just before the fast swoop. Jump onto Kurosu when it is low, then move away immediately so the returning flight cannot catch Mario.
If you have Fire Mario, shoot when Kurosu comes low and jump over its approach when necessary. Do not pursue it into a corner. Three stomps or six fireballs defeat Kurosu, and the Tree Zone Golden Coin appears in the boss’s egg.
- Wait for Kurosu to descend.
- Avoid chasing it into a corner.
- Collect the Tree Zone Golden Coin after the final hit.
Space Zone: Tatanga
Tatanga moves across the upper part of the low-gravity arena and attacks with horizontal blasts and falling fireballs. Watch the projectile spacing before committing to a jump. Short, deliberate movement is safer than holding the jump button through the whole attack. If a fireball drops into Mario’s lane, crouch or move into the open side of the room rather than jumping blindly.
The reliable stomp opportunity comes when Tatanga sweeps low across the room. Move toward the opposite side, jump, and use the reduced gravity to descend onto the spacecraft as it crosses Mario’s position. Fire Mario can shoot Tatanga when the boss is low, but avoid firing from a corner where a projectile can remove every escape route. Three stomps or six fireballs defeat Tatanga.
- Use short low-gravity jumps.
- Crouch or move around falling fireballs when possible.
- Attack during Tatanga’s low sweep.
Macro Zone: Rikki
Rikki uses the three pipes, the floor, walls, and ceiling to keep moving. Do not stand directly beside a pipe, because Rikki can emerge there with little warning. Watch above Mario as well as in front of him. When Rikki travels between pipes or drops from the ceiling, use a short jump rather than a long running leap. A light jump is also useful when Rikki charges along the floor.
After a stomp, return toward the center and wait for the next approach. If Rikki disappears into a pipe, do not follow immediately; use that pause to check the other pipes and prepare for its reappearance. Three stomps or six Fire Mario fireballs defeat Rikki.
- Watch all three pipes and the ceiling.
- Do not stand beside a pipe.
- Use short jumps during Rikki’s crossings.
Pumpkin Zone: Sabasa, the Witch
Sabasa disappears, reappears, launches a fire bolt, and relocates. Wait until Sabasa has materialized and the fire bolt has been launched before attempting a stomp. Jump from the side of the room rather than standing directly below the witch. If using Fire Mario, shoot from a position that leaves space for Sabasa’s next appearance and projectile.
Three cauldrons occupy the arena. Standing on a cauldron is not automatically dangerous, but a fire bolt striking the base can send its lid upward. If Mario is on that lid, he can be launched toward the ceiling spikes. Move off the cauldron when a fire bolt is aimed at its base, then attack Sabasa after the projectile has passed. Three stomps or six fireballs defeat Sabasa.
- Attack after Sabasa materializes and fires.
- Watch the fire bolt’s impact point.
- Leave a cauldron before its lid is launched.
Mario Zone: the Three Little Pigheads
The Three Little Pigheads appear one at a time from their houses. The first pig rolls across the floor, so stay near a side with enough room to jump over its return path. The second pig makes longer jumps after taking damage; wait for it to land before attacking. The third pig jumps higher, so use the higher jump input and avoid standing directly beneath its landing point.
Each Pighead requires three stomps or six Fire Mario fireballs. Finish the current pig before the next one appears. Fireballs are especially useful because the fight contains three consecutive opponents, but continue moving between shots so a rolling or jumping pig cannot pin Mario against the wall. After the third Pighead is defeated, the Mario Zone Golden Coin appears.
- Defeat the rolling Pighead before the jumping Pigheads.
- Expect longer jumps from the second Pighead.
- Use higher jumps against the third Pighead.
Turtle Zone: Pako and the Poko
Pako fights underwater and releases smaller Poko that home toward Mario. The Poko are invincible, so do not waste attacks trying to remove them. They are hazards, but they can also serve as temporary stepping points if Mario needs extra height to reach Pako. Use that option only when the route is clear; otherwise, let a Poko pass and wait for Pako to move into an open lane.
The hanging barriers can block a direct route to Pako’s head. Wait until Pako moves toward a side with a clear vertical path, then rise from the water and stomp. Retreat after each hit so the next Poko does not collide with Mario during the recovery animation. Fire Mario can defeat Pako with six fireballs, while three head stomps also finish the fight.
- Treat Poko as invincible hazards.
- Use Poko as stepping points only when necessary.
- Wait for a clear route through the overhead barriers.
Cross Mario’s Castle without a checkpoint
Mario’s Castle is one checkpoint-less course. A death returns Mario to the castle entrance, so learn the positions of the swinging obstacles, flame-spitting statues, lava platforms, Mechanical Fists, Skull Platforms, Bone Lifts, and Karamenbos instead of expecting a midway restart. Preserve a useful power-up when it is safe to do so, but do not take a risky detour solely to keep it.
The final approach contains three consecutive rooms with five required Floating Faces in total. Defeat the face or faces in each room before entering the next pipe. The pipe remains closed until the required enemies are cleared. Treat this as part of the route, not as an optional bonus section.
- Expect every castle death to restart the course at its entrance.
- Clear the mechanical and lava sections methodically.
- Defeat all five Floating Faces before using the final pipes.
Defeat Wario’s three phases
Regular Wario uses a butt-stomp. His landing shakes Mario and causes the crystal balls overhead to fall, so avoid standing beneath a ball when Wario comes down. Keep enough distance to see the landing, then jump onto Wario’s head and move away before the next stomp. Three head stomps end the first phase.
Bunny Wario retains the butt-stomp and can float around the room. If Mario still has Bunny Mario, use the float to remain away from Wario’s landing path, then descend onto his head after Wario commits to a jump or landing. The nearby Mario statue can help Mario reach a safer height. Three more head stomps advance the fight.
Fire Wario throws large fireballs and jumps across the room. Avoid the cramped lower-ceiling area when possible, keep moving through the open portion of the room, and use run-jumps to clear the fireballs or Wario’s approach. Fire Mario fireballs do not damage Wario. The third phase also requires three head stomps, for nine Wario stomps across the complete fight.
- Avoid the crystal balls dropped by Wario’s landings.
- Use Bunny Mario’s float if the power-up was retained.
- Do not use Fire Mario fireballs against Wario.
- Land three head stomps in each phase.
Recover after a death or Game Over
After a normal zone-boss death, replay the approach and correct the specific mistake that caused the hit. If the route provides a Mushroom, Fire Flower, or Carrot, recover it before entering the boss room when doing so does not create extra risk. Entering a boss room as Small Mario is survivable, but do not force a stomp when waiting for a safer cycle would preserve the attempt.
After a castle death, replay the entire course from its entrance. If Mario receives a Game Over, the collected Golden Coins return to their guardians, even though the ordinary zone stages remain completed. Mario must defeat Kurosu, Tatanga, Rikki, Sabasa, the Three Little Pigheads, and Pako again to reopen the castle. This is different from an ordinary boss death, which does not erase the other collected coins. The six-coin requirement and castle structure are established by the original Game Boy progression.
- Identify the exact hazard that caused each failed attempt.
- Recover a useful power-up when the route offers one safely.
- Restart the castle from its entrance after a castle death.
- After a Game Over, reclaim all six Golden Coins before re-entering the castle.
Before you move on
- Kurosu, Tatanga, Rikki, Sabasa, the Three Little Pigheads, and Pako have each been defeated.
- Each single guardian was defeated with three stomps or six fireballs where applicable.
- Each of the Three Little Pigheads was defeated with three stomps or six fireballs.
- All five Floating Faces across the three consecutive castle rooms have been defeated.
- Mario completed the castle course from its entrance without relying on a checkpoint.
- Regular Wario, Bunny Wario, and Fire Wario each received three head stomps.
- The ending sequence appears after Fire Wario is defeated.
References for this chapter
- Super Mario Land 2: 6 Golden Coins — Game Boy instruction manual
- Super Mario Land 2: 6 Golden Coins Guide and Walkthrough — GameFAQs
- Super Mario Land 2: 6 Golden Coins Boss Guide — GameFAQs
- Super Mario Land 2: 6 Golden Coins Walkthrough — StrategyWiki Tree Zone
- Super Mario Land 2: 6 Golden Coins Walkthrough — StrategyWiki Space Zone
- Super Mario Land 2: 6 Golden Coins Walkthrough — StrategyWiki Macro Zone
- Super Mario Land 2: 6 Golden Coins Walkthrough — StrategyWiki Pumpkin Zone
- Super Mario Land 2: 6 Golden Coins Walkthrough — StrategyWiki Mario Zone
- Super Mario Land 2: 6 Golden Coins Walkthrough — StrategyWiki Turtle Zone
- Three Little Pigheads — Super Mario Wiki
- Wario’s Castle — Super Mario Land 2: 6 Golden Coins Walkthrough
Optional: Clean Run, Extra Challenges and Speed Tips
The required campaign is to defeat Kurosu, Tatanga, Rikki, Sabasa, the Three Little Pigheads, and Pako, collect their six Golden Coins, enter and clear Mario’s Castle, defeat all three Wario phases, and watch the ending. Secret exits, Secret Courses 1 through 6, ordinary coins, bonus-game rewards, extra lives, and no-death goals are optional. The six secret-exit stages are Tree Trunk Stage, Moon Stage, Manhole Stage, Graveyard Stage, Ghost House Stage, and Sunken Ship Stage. Manhole Stage is the useful exception: its secret exit unlocks Secret Course 3, and clearing that course opens the shortcut to Attic Stage, the final Macro Zone stage. Use ordinary Goals for the safest direct route, and build a life reserve before attempting the checkpoint-less castle.
Separate required progress from optional completion
The direct campaign route does not require a fixed zone order. Defeat Kurosu in Tree Zone, Tatanga in Space Zone, Rikki in Macro Zone, Sabasa in Pumpkin Zone, the Three Little Pigheads in Mario Zone, and Pako in Turtle Zone. Each guardian awards one Golden Coin. After all six coins are recovered, Mario’s Castle becomes accessible. Enter the castle, clear its long course, defeat Wario through all three phases, and remain through the ending sequence. The six Golden Coins, the castle, Wario, and the ending are the only objectives needed for the normal campaign clear.
A secret exit is an alternate Goal marked by a star above the door. In this original Game Boy release, the six zone secret exits are Tree Trunk Stage to Secret Course 1, Moon Stage to Secret Course 2, Manhole Stage to Secret Course 3, Graveyard Stage to Secret Course 4, Ghost House Stage to Secret Course 5, and Sunken Ship Stage to Secret Course 6. Mario Zone has no secret exit, while Pumpkin Zone contains two.
Secret Courses are optional stages. They can provide extra exploration, power-ups, coins, and lives, but they do not replace the normal route to a zone guardian. Only Secret Course 3 affects forward map progression. Clearing it opens a shortcut to Attic Stage, the final Macro Zone stage before Rikki. The ordinary Macro Zone route remains available, so even this shortcut is helpful rather than mandatory.
- Required: six Golden Coins from Kurosu, Tatanga, Rikki, Sabasa, the Three Little Pigheads, and Pako.
- Required: Mario’s Castle, all three Wario phases, and the ending sequence.
- Optional: six secret exits, Secret Courses 1 through 6, ordinary coins, bonus rewards, extra lives, and clean-run goals.
Find the six secret exits safely
In Tree Trunk Stage, keep Bunny Mario for the upper route near the end of the sap-filled section. Do not enter the normal Goal immediately. Continue upward through the sap, use the elevated route, and float toward the pipe that leads to the star-marked exit. If Bunny Mario is lost, take the normal Goal unless you are deliberately making another attempt. The secret route is optional and does not affect Tree Zone’s guardian.
In Moon Stage, continue through the low-gravity section until the smiling planet near the end. Use the hidden blocks and follow the coin trail upward and to the right. The star-marked secret-exit door is above the regular Goal; entering it unlocks Secret Course 2. If the route becomes unsafe, drop to the lower path and use the regular Goal instead.
In Manhole Stage, preserve Fire Mario if possible. After the midway bell and the later moving-platform sections, reach the upper pipe blocked by Fiery Blocks. Reveal the hidden blocks needed to stand above the pipe, destroy the Fiery Blocks with fireballs, and enter the pipe. Continue to the right and enter the door with the star above it. This unlocks Secret Course 3. Do not fire carelessly in the surrounding block section, because opening the wrong gap can expose the spikes below.
In Graveyard Stage, take the lower route through the later water section and continue toward the alternate pipe and star-marked Goal. In Ghost House Stage, stay on the upper route near the end and reach the alternate Goal above the normal exit area. Both stages are in Pumpkin Zone and each unlocks a different optional Secret Course. Take the normal Goal if the alternate route costs a life.
In Sunken Ship Stage, become Small Mario before attempting the narrow secret route. Use the upward shaft, move left through the passage that the larger forms cannot enter, and take the pipe leading to the star-marked Goal. This unlocks Secret Course 6. The normal Turtle Zone route remains sufficient to reach Pako, so do not sacrifice a needed power-up or life merely to force this exit.
- Tree Trunk Stage: preserve Bunny Mario for the upper sap route.
- Moon Stage: follow the hidden-block and coin trail above the regular Goal.
- Manhole Stage: use Fire Mario to open the Fiery Blocks above the pipe.
- Graveyard Stage: use the lower water route.
- Ghost House Stage: use the upper route near the end.
- Sunken Ship Stage: use Small Mario for the narrow passage.
- Only Secret Course 3 opens a forward shortcut.
Use Secret Course 3 as a controlled shortcut
After entering Secret Course 3 from Manhole Stage, prepare for an autoscrolling platforming section. Stay on the visible platforms, avoid jumping early from the front edge, and watch the screen’s movement before committing to the next landing. The course includes empty blocks, flimsy lifts, bricks, Fiery Blocks, and a Goal door. A Fire Flower or Mushroom may appear along the route, but the priority is staying on-screen rather than collecting every item.
Complete Secret Course 3 through its normal Goal. Once it is cleared, the overworld displays a shortcut toward Attic Stage. This is the final Macro Zone stage, so the shortcut lets you approach Rikki without replaying the other required Macro stages. The shortcut does not award a Golden Coin by itself; Rikki still must be defeated for Macro Zone’s coin.
If Secret Course 3 causes repeated deaths, return to the ordinary Macro Zone route rather than treating the shortcut as mandatory. The game’s six-zone structure allows the player to complete the required zones without clearing the optional secret courses. A reliable ordinary route is better than losing lives to a shortcut that saves only part of the zone.
- Enter Secret Course 3 from Manhole Stage’s star-marked Goal.
- Clear the autoscrolling course through its normal Goal.
- Use the resulting shortcut to reach Attic Stage if it improves your Macro Zone route.
- Defeat Rikki separately to obtain the Macro Zone Golden Coin.
Build a life reserve before Mario’s Castle
Ring the Bell near the end of a regular stage whenever the approach is safe. Completing the stage after ringing it starts a bonus game that can award power-ups or extra lives. Do not risk a life for a difficult bell landing when the regular Goal is already within reach. The bonus game is preparation, not campaign progress.
Use familiar completed stages for additional lives or power-ups. Choose routes you can repeat consistently, and avoid blind drops, enemy-heavy detours, or uncertain secret-stage attempts immediately before entering the castle. If the life counter is low after recovering several coins, revisit a safe completed stage and return to the map rather than beginning the final course underprepared.
To leave a completed stage while preparing, pause with Start and use Select to return to the overworld. Mario’s Castle has no checkpoint, so a death sends Mario back to the castle entrance. If a Game Over occurs, the recovered Golden Coins return to their guardians, although ordinary stages that were already cleared remain completed.
- Ring the Bell only when doing so is safe.
- Use repeatable stages for preparation rather than risky detours.
- Return to the overworld between attempts when necessary.
- Enter Mario’s Castle with enough lives for repeated full-course attempts.
Attempt a clean or low-damage run
A clean run is a player-imposed challenge, not an in-game requirement. You may define it as no deaths, no damage, no Game Over, or no castle deaths. Record which standard you are using before starting, because these goals measure different things. The ending still counts as a campaign completion after the six Golden Coins, Mario’s Castle, Wario, and the ending sequence, even if Mario previously lost lives or took damage.
Choose a zone order that reduces mistakes. Start with guardians and stages whose hazards you already understand, and preserve Super Mario, Fire Mario, or Bunny Mario for sections where that form gives a clear safety advantage. On moving platforms, wait for a stable landing instead of forcing a jump at the edge. In narrow passages, clear the nearest enemy before advancing. Against a guardian, observe an attack cycle, strike during the opening, and retreat rather than trading contact damage.
After a death, identify the specific failure: a rushed enemy, a missed platform, a lost power-up, or an unnecessary secret detour. Change that behavior on the next attempt. The most important recovery rule comes after collecting Golden Coins: avoid a needless Game Over, because the recovered coins are returned to their guardians and those guardian fights must be repeated.
- Treat no-death and low-damage goals as optional.
- Define the clean-run standard before beginning.
- Correct the cause of each death instead of repeating the same approach.
- Protect the Golden Coins by avoiding an unnecessary Game Over.
Use conservative speed-routing principles
For the fastest reliable campaign route, enter each required zone, clear the ordinary stages, defeat the guardian, and take the normal Goal whenever a secret route is uncertain. Skip Secret Courses, distant coin groups, and optional bonus rooms unless you need a power-up or extra life. The safest shortcut is the one you already know well; a risky alternate route is slower if it costs a life and forces a replay.
Hold B to run across clear ground, then release it before blind drops, moving platforms, narrow ledges, and ceiling hazards. Short pauses are preferable to uncontrolled run-jumps. Keep a useful power-up when approaching a boss or a long hazard section, even if preserving it costs a few seconds. For secret exits, attempt the route only when the required form is already available and the alternate Goal is visible or well understood.
Keep the challenge tied to the original Nintendo Game Boy release. Do not base a clean run on emulator save states, rewinds, frame advance, modified physics, colorized editions, remakes, or later ports. No exact completion time is required for the campaign, and a faster route is not a higher completion state unless you have chosen speed as your own optional challenge.
- Use ordinary Goals for the fastest dependable six-coin route.
- Take a shortcut only when its hazards are familiar.
- Preserve power-ups before guardian stages and the castle.
- Avoid emulator- or remake-specific techniques.
Before you move on
- All six Golden Coins have been recovered from Kurosu, Tatanga, Rikki, Sabasa, the Three Little Pigheads, and Pako.
- Mario’s Castle has been entered and cleared from its entrance without relying on a checkpoint.
- All three Wario phases have been defeated and the ending sequence has appeared.
- For optional completion, Tree Trunk Stage, Moon Stage, Manhole Stage, Graveyard Stage, Ghost House Stage, and Sunken Ship Stage have each yielded their star-marked secret exits.
- Secret Course 3 has been cleared if the Macro Zone shortcut is being counted as an optional routing goal.
- For a clean-run challenge, record separately whether the campaign avoided a Game Over, avoided deaths in Mario’s Castle, avoided all deaths, or avoided damage; none of these conditions is required for the ending.
References for this chapter
- Super Mario Land 2: 6 Golden Coins Walkthrough — Thonky Game Guides
- Manhole Stage — Super Mario Land 2: 6 Golden Coins Walkthrough
- Secret exit — Super Mario Wiki
- Secret Course 3 — Super Mario Wiki
- Moon Course — Super Mario Wiki
- Super Mario Land 2: 6 Golden Coins — Guide and Walkthrough by Snow_Dragon
- Super Mario Land 2: 6 Golden Coins — Guide and Walkthrough
- Super Mario Land 2: 6 Golden Coins — Game Boy instruction manual
Wrap-Up: Completion Checklist and Post-Game Notes
The original Game Boy campaign is complete when Mario has recovered the six Golden Coins from Kurosu, Tatanga, Rikki, Sabasa the Witch, the Three Little Pigheads, and Pako; cleared the single checkpoint-less course inside Mario’s Castle; defeated regular Wario, Bunny Wario, and Fire Wario with three head stomps in each phase; and watched the ending sequence. Secret courses, ordinary coins, bonus games, extra lives, and no-death goals are optional. A Game Over returns the recovered Golden Coins to their guardians, while completed ordinary stages remain recorded in the save file.
1. Confirm the required six Golden Coins
Before entering Mario’s Castle, return to the overworld and inspect the castle gate. All six slots must contain Golden Coins. The required guardians are Kurosu in Tree Zone, Tatanga in Space Zone, Rikki in Macro Zone, Sabasa the Witch in Pumpkin Zone, the Three Little Pigheads in Mario Zone, and Pako in Turtle Zone. Defeating each guardian places that zone’s Golden Coin at the castle gate. Once all six are present, the gate opens and the castle course becomes available.
You do not need to clear every ordinary stage, complete secret courses, collect a particular number of ordinary coins, win every bonus game, or gather every extra life. Those activities are useful for practice and preparation, but none is required to open the castle. If one coin is missing, identify the corresponding zone on the gate and return to that zone’s guardian course. Previously cleared ordinary stages remain recorded, so you do not need to replay an entire zone from its beginning merely to recover access to its boss.
- All six Golden Coins are visible at the castle gate.
- The guardians are Kurosu, Tatanga, Rikki, Sabasa the Witch, the Three Little Pigheads, and Pako.
- Optional stages and rewards are not being mistaken for castle requirements.
2. Understand saving, deaths, and Game Over recovery
The original Game Boy game records completed-stage progress in the selected save slot. This saved progress is separate from a bell checkpoint inside an individual stage. Ringing a bell allows a later attempt to begin from that position, but the checkpoint is temporary. Turning off the Game Boy removes the active checkpoint.
Mario’s Castle is one long, multi-room course without an internal checkpoint. A death inside the castle sends Mario back to the castle entrance. If Mario reaches a Game Over, the recovered Golden Coins are returned to Wario’s six guardians. The completed ordinary stages remain recorded, but the guardian fights must be cleared again to recover the missing coins. After a Game Over, inspect the castle gate before trying the castle again and reclaim every absent coin.
- You have a useful reserve of lives before entering the castle.
- You know that a bell checkpoint disappears after powering off.
- You understand that a Game Over returns the recovered Golden Coins to their guardians.
- You know that completed ordinary stages remain cleared.
3. Prepare for the checkpoint-less castle course
Build a life reserve through completed stages, bonus games, or the casino before starting the castle. Do not risk a dangerous detour solely to preserve one particular power-up. Reaching the entrance with enough lives for repeated attempts is more valuable than entering with a fragile power-up state.
The opening rooms combine swinging spiked balls, Furiko obstacles, Piranha Plant statues that fire horizontally, and lava gaps. Watch a swinging hazard complete a cycle before jumping. When several statue shots cover the passage, wait for a gap instead of rushing beneath them. Keep moving after crossing a lava platform so you are not caught by the next obstacle.
The middle route uses Propeller Lifts, Mechanical Fists, Skull Platforms, Bone Lifts, and Karamenbos. Crouch beneath low overhangs while riding the Propeller Lifts, and jump away before a wall pushes Mario into lava. In the Mechanical Fist room, jump over the trigger tiles rather than stepping on them. Skull Platforms crumble shortly after Mario lands, so cross them without stopping. Bone Lifts may sink into lava or rise toward ceiling spikes; use short jumps and leave each lift promptly. Karamenbos drop from above, then rise slowly. Wait for one to begin rising before passing underneath it.
The final castle rooms contain Floating Faces. The first room has one, followed by rooms containing two each. Stomp every Floating Face in the current room before trying the pipe on the right; the pipe opens only after the required enemies are defeated. A final power-up block appears before the boss pipe. Enter the boss room only after you are comfortable with the route, because a death returns you to the castle entrance.
- You can pass the opening hazards without rushing.
- You recognize Propeller Lifts, Mechanical Fists, Skull Platforms, Bone Lifts, and Karamenbos.
- You defeat every required Floating Face before using its exit pipe.
- You are treating the castle as one continuous course rather than a stage with a saved midpoint.
4. Defeat regular Wario
The first phase requires three head stomps. Wario runs rapidly across the room and sometimes jumps. When he lands, the impact briefly stuns Mario and causes the Crystal Ball moving along the ceiling to fall. Stay out of the landing point and do not stand below the Crystal Ball’s path.
Hold position in an open part of the room and wait for Wario to commit to a jump. Move away from where he will land, let the impact and falling Crystal Ball resolve, then jump onto his head during the opening. Do not trade contact damage or try to attack from the side. After the third stomp, Wario leaves for the next room.
- Regular Wario has taken three head stomps.
- You are avoiding both the landing impact and the falling Crystal Ball.
- You are not relying on Fire Mario fireballs to damage Wario.
5. Defeat Bunny Wario
Move right after the first phase and collect the Carrot before entering the next battle. Wario becomes Bunny Wario and floats across the room before descending. His landing can produce the same ground impact and falling Crystal Ball hazard, so watch both his position and the ceiling.
Remain near the open central area when possible. Do not chase directly beneath Wario while he is airborne. As he descends, move away from his landing point, then use the opening after he touches down to jump on his head. The Mario statue can provide a useful launch point when Wario is too high for a normal jump. Repeat the attack three times. Bunny Wario must be defeated by head stomps.
- You collected the Carrot before the second phase.
- Bunny Wario has taken three head stomps.
- You are avoiding his descent, ground impact, and the falling Crystal Ball.
6. Defeat Fire Wario and watch the ending
After the second phase, continue right toward the final battle. A Super Mushroom appears before the room, but do not take it unless you specifically need to change Mario’s state; the final phase is easier when you preserve a form that suits your movement. Wario uses a Fire Flower and becomes Fire Wario, firing large fireballs while jumping around the room.
Keep away from the cramped right side, where the low ceiling makes the projectiles harder to avoid and can leave Mario trapped when Wario jumps. Watch each fireball, move or jump clear, and wait for Wario to provide a safe approach. Land three head stomps. Fire Mario fireballs do not defeat Wario; the complete battle requires three stomps in each of the three phases, for nine successful stomps total.
After the final stomp, leave the game running and watch the ending sequence. Wario returns to normal, abandons the castle, and Mario’s castle is restored. The appearance of the ending sequence confirms that the six-coin campaign has been completed.
- Fire Wario has taken three final head stomps.
- Regular Wario, Bunny Wario, and Fire Wario are all defeated.
- Mario’s castle is restored.
- The ending sequence has appeared.
7. Troubleshoot missing progress and separate optional goals
If the castle remains closed, inspect the castle gate and determine which coin is absent. Return to the corresponding guardian course rather than searching for a hidden castle switch. The six required guardians are Kurosu, Tatanga, Rikki, Sabasa the Witch, the Three Little Pigheads, and Pako. If a Game Over occurred, all six Golden Coins may need to be reclaimed, but completed ordinary stages do not need to be cleared again.
If a castle death sends Mario to the entrance, that is normal because the course has no checkpoint. If a bell checkpoint disappears after a reset or power-off, that is also normal. If completed stages fail to remain after restarting, verify that you are using the intended save slot and that the cartridge and hardware are functioning correctly.
After the ending, optional goals include finding secret exits and courses, replaying stages for ordinary coins, using bonus games or the casino to gain extra lives, improving the number of cleared stages shown on the save screen, and attempting a no-death castle run. Secret courses, ordinary coins, bonus rewards, extra lives, and clean-run challenges are not required for the campaign ending.
- Any missing Golden Coins have been recovered from the appropriate guardians.
- The complete castle course, all three Wario phases, and the ending are confirmed.
- Optional collection and challenge goals remain separate from campaign completion.
Before you move on
- The castle gate contains all six Golden Coins recovered from Kurosu, Tatanga, Rikki, Sabasa the Witch, the Three Little Pigheads, and Pako.
- Mario has cleared the complete checkpoint-less course inside Mario’s Castle.
- Regular Wario, Bunny Wario, and Fire Wario have each been defeated with three head stomps.
- Mario’s castle has been restored and the ending sequence has appeared.
- Secret courses, ordinary coins, bonus rewards, extra lives, and no-death goals remain optional.
Finishing up
All six main-zone guardians have been defeated and their Golden Coins are displayed at Mario’s Castle.
Mario’s Castle has been entered and its single course has been cleared from the entrance to the Wario battles.
Normal Wario, Bunny Wario, and Fire Wario have each been defeated, and the ending sequence has played.
Secret courses, ordinary coins, bonus-game prizes, extra lives, and no-death challenges are optional and are not required for the campaign ending.
Choose your next gameScreenshots & video
Game imagery for reference. Follow the written chapters above for the route and strategies.
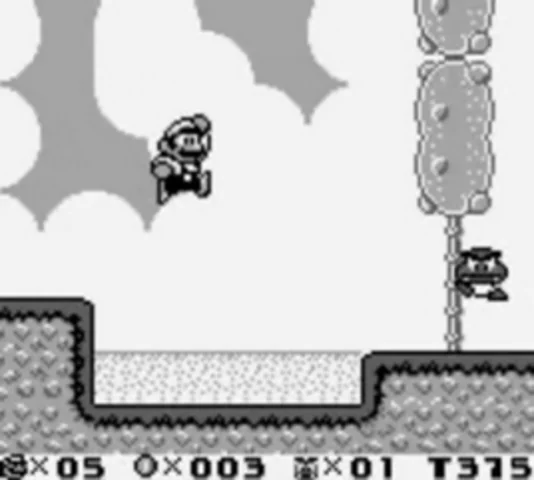
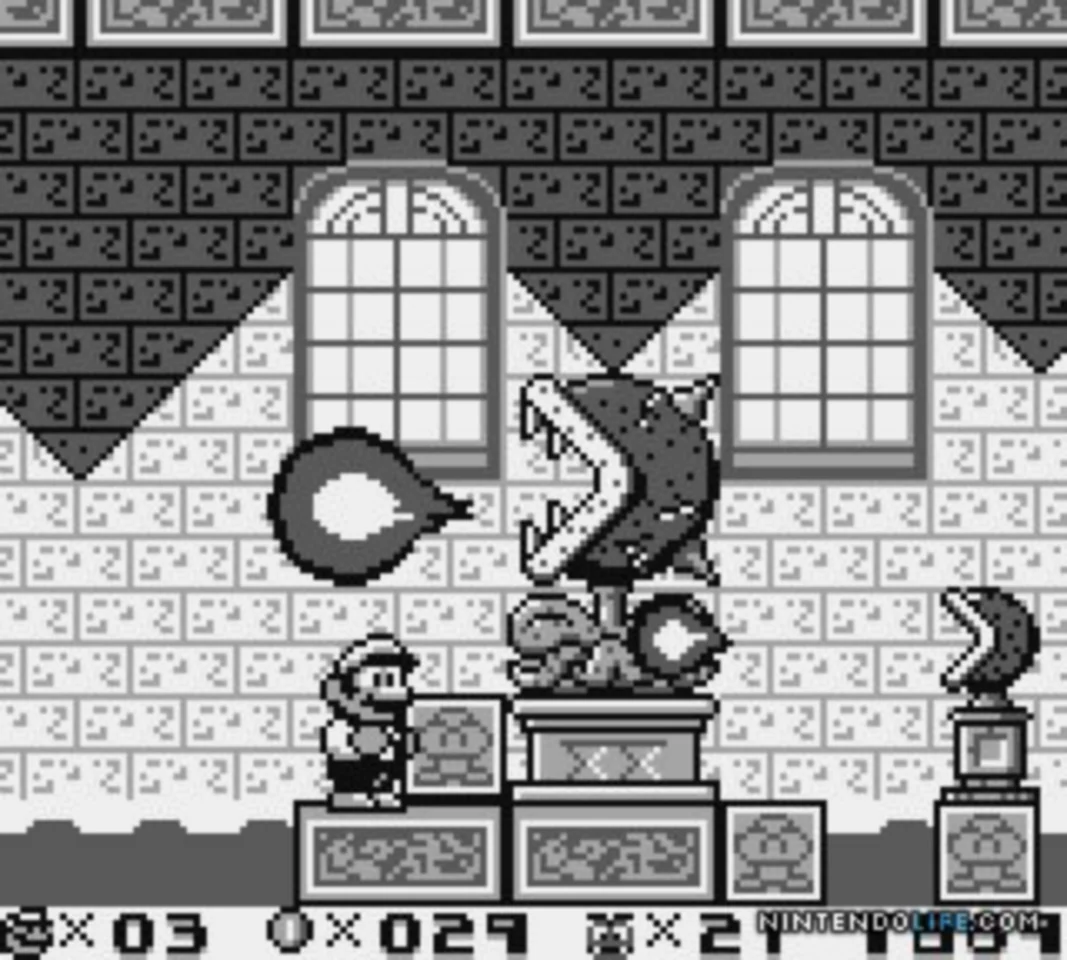
Sources & references
Our original guide draws on the references below. Check the edition at the top of this page before following controls or unlock requirements.
- Game Boy Instruction Manual: Super Mario Land 2: 6 Golden Coins
- Gate Course — Super Mario Wiki
- Super Mario Land 2 - 6 Golden Coins — Super Mario Wiki
- Super Mario Land 2: 6 Golden Coins — Guide and Walkthrough
- Super Mario Land 2: 6 Golden Coins Walkthrough — StrategyWiki Macro Zone
- Super Mario Land 2: 6 Golden Coins Walkthrough — StrategyWiki Tree Zone
- Roots Stage — Super Mario Land 2: 6 Golden Coins Walkthrough
- Owl Stage — Super Mario Land 2: 6 Golden Coins Walkthrough
- Super Mario Land 2: 6 Golden Coins Guide and Walkthrough — GameFAQs
- Hippo Stage - Super Mario Land 2: 6 Golden Coins Walkthrough
- Moon Stage - Super Mario Land 2: 6 Golden Coins Walkthrough
- Super Mario Land 2: 6 Golden Coins Walkthrough — StrategyWiki Space Zone
- Super Mario Land 2 - 6 Golden Coins - Manual - GB
- Super Mario Land 2: 6 Golden Coins — Guide and Walkthrough by Snow_Dragon
- Super Mario Land 2: 6 Golden Coins — Game Boy instruction manual
- Bat Course — Super Mario Wiki
- Graveyard Course — Super Mario Wiki
- Witch’s House Stage — Super Mario Land 2: 6 Golden Coins Walkthrough
- Super Mario Land 2: 6 Golden Coins Walkthrough — StrategyWiki Pumpkin Zone
- Gear Stage — Super Mario Land 2: 6 Golden Coins Walkthrough
- Super Mario Land 2: 6 Golden Coins Walkthrough — StrategyWiki Turtle Zone
- Sunken Ship Course — Super Mario Wiki
- Sunken Ship Stage — Thonky Super Mario Land 2 Walkthrough
- Super Mario Land 2: 6 Golden Coins — Walkthrough
- Super Mario Land 2: 6 Golden Coins — Game Boy secrets and tips
- Wario’s Castle — Super Mario Land 2: 6 Golden Coins Walkthrough
- Super Mario Land 2: 6 Golden Coins/Wario’s Castle — StrategyWiki
- Super Mario Land 2: 6 Golden Coins Boss Guide — GameFAQs
- Super Mario Land 2: 6 Golden Coins Walkthrough — StrategyWiki Mario Zone
- Three Little Pigheads — Super Mario Wiki
- Super Mario Land 2: 6 Golden Coins Walkthrough — Thonky Game Guides
- Manhole Stage — Super Mario Land 2: 6 Golden Coins Walkthrough
- Secret exit — Super Mario Wiki
- Secret Course 3 — Super Mario Wiki
- Moon Course — Super Mario Wiki
- Wario’s Castle — Super Mario Wiki
About the game & collecting notes
- Platform
- Game Boy
Step-by-step guide to finish the original Game Boy release of Super Mario Land 2: 6 Golden Coins. Covers the mandatory introductory Gate Course, controls and power-ups, the required routes through all six zones, each zone guardian, optional secret exits and life-recovery methods, Mario’s Castle, the three Wario phases, failure recovery, and a concrete completion check.
Darryl Polo
Darryl Polo loves tinkering with emulation and revisiting retro games. He enjoys exploring how old favorites play on different setups and sharing what he learns along the way. At Joking Joystick, he writes about the games, hardware, and small discoveries that keep the hobby fun.
Our editorial standardsFound a step that needs another look? Help us improve this guide.