
Streets of Rage 2 (Sega Genesis, USA) — Complete Campaign Walkthrough
Step-by-step walkthrough for the original Sega Genesis (USA) release of Streets of Rage 2. This guide covers controls, character selection and moves, stage-by-stage routes and boss tactics through the final confrontation with Mr. X, plus co-op strategy, advanced techniques and completion checks to reach the standard campaign ending and credits.

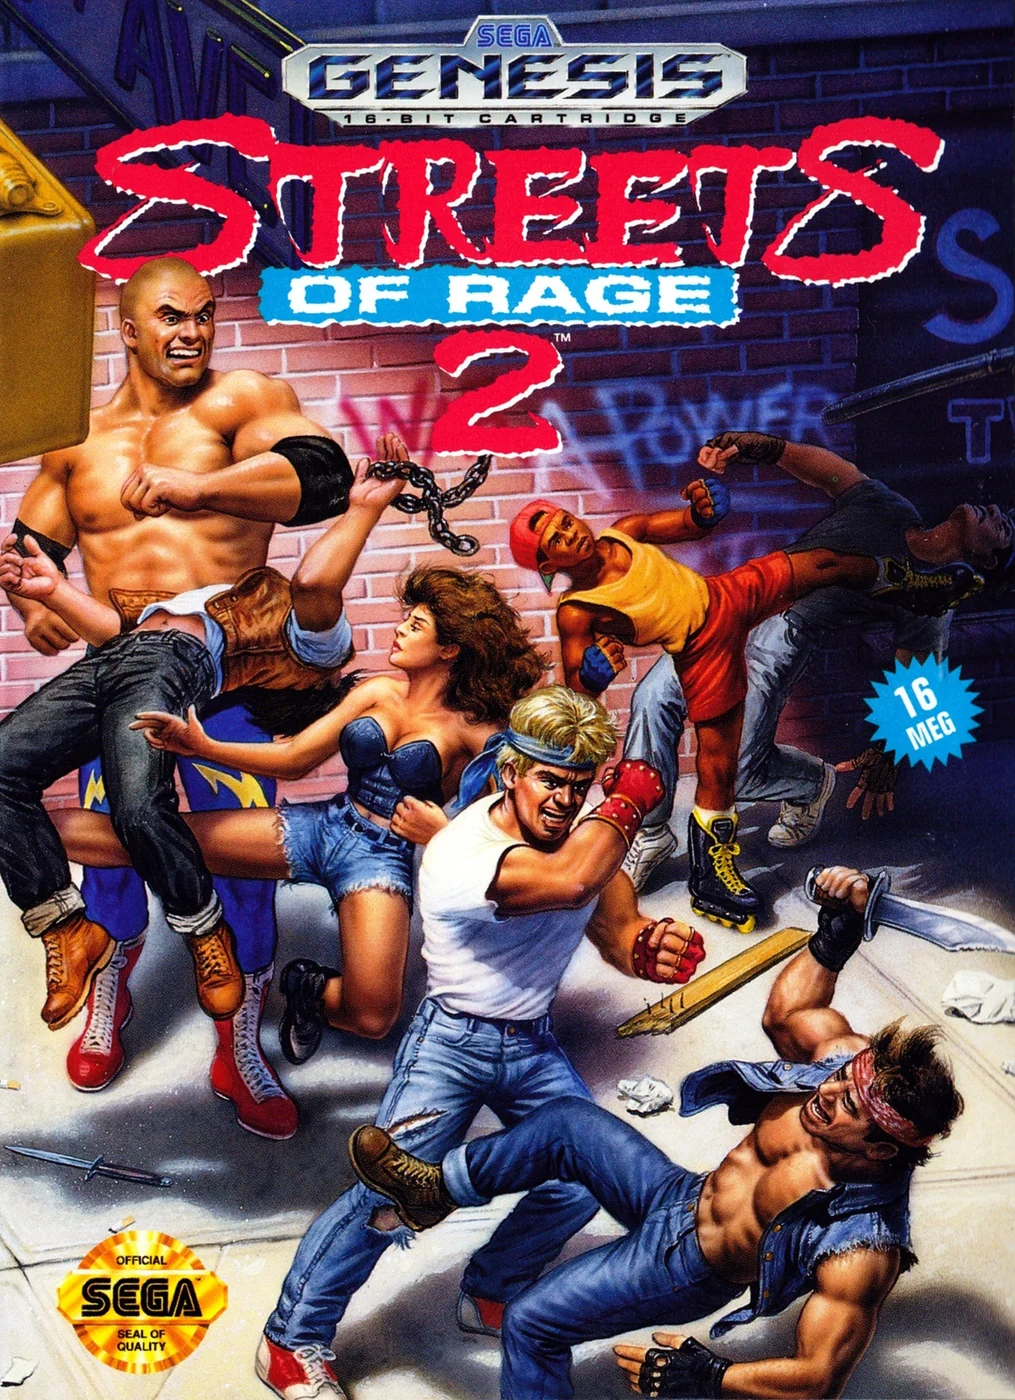
Find a copy
Streets of Rage 2 Sega Genesis / Mega Drive
We may earn a commission if you buy through these links, at no extra cost to you. As an Amazon Associate I earn from qualifying purchases.
Opens retailer search results. Check the model, edition, seller, availability and current price before buying.
Before you begin
You’re about to clear the original Streets of Rage 2 campaign on the Sega Genesis (USA) release.
This guide assumes you want a practical, stage-by-stage route: where to move, what threats to prioritise, how to use each fighter’s specials and unique moves, and concrete boss tactics so you can reach the ending without relying on trial-and-error.
Play the way that suits you: some characters trade raw power for speed while others soak damage and punish.
Read the preparation checklist before starting, follow each stage’s objectives in order, and use the completion checklist at the end to confirm you reached the standard campaign ending and credits.
Set yourself up for the run
Choose your controller layout: Genesis pads map well to Streets of Rage 2’s three-button scheme.
If you use a modern controller, adapter or emulator, map Genesis A to Special, B to Attack and item pickup, and C to Jump.
Pick a character based on playstyle: Axel for balanced combos and a strong circular attack, Blaze for flexible movement and throws, Max for heavy-hitting grabs and throws, and Skate for high mobility and hit-and-run play.
Decide before Round 1 — character consistency makes boss patterns easier to learn.
Learn the two core move types: normal attack chains and Specials that consume health.
Practice Blitz attacks and directed Specials separately: double-tap a horizontal direction followed by Attack for a Blitz, and press a direction with Special for a directed Special.
Know weapon rules: pipes, knives, ninja knives, swords and bombs are limited resources that can be dropped, thrown or lost during scene transitions.
Apples and chickens restore health, while 1UP items grant an extra life. Collect them only after creating a safe opening.
Set difficulty and continue expectations before starting. The original Genesis manual provides two Continues per game.
Two-player mode increases pressure and changes the active-enemy allowance; do not assume enemy counts simply double.
If you want a clean no-continue run, choose a comfortable difficulty and treat Continues as emergency resources rather than standard practice.
If playing co-op, agree on roles: one player can draw aggro while the other handles a safe pickup or attacks from a separate vertical lane.
Expect different stage structures rather than a repeated two-area template: some rounds have several scenes, some include a lift endurance section, and the final stage has a lobby, elevator and final-boss sequence.
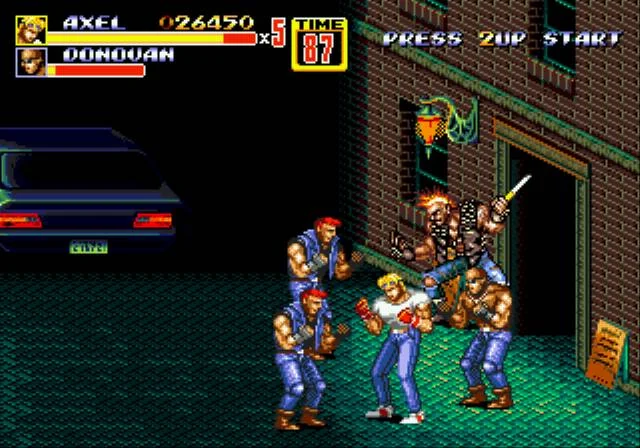
Core Controls, Moves and Health Rules
Learn the original North American Sega Genesis control layout, the difference between normal attacks, Blitz attacks and specials, the basic grapple system, Skate’s unique run and the limited supply of weapons and recovery items. These instructions apply to the 1992 Genesis release of Streets of Rage 2, not later remakes or ports.
Use the original Genesis control layout
On the original Genesis release, the standard three-button layout is A for Special Attack, B for normal Attack and item pickup, and C for Jump. The directional pad moves your fighter and shifts between the foreground and background lanes. Start pauses the action and is also used to begin play or join a two-player game when the second controller is connected.
A three-button Genesis pad is the recommended controller because every action is immediately available. The original cartridge is built around the Genesis A, B and C inputs rather than a modern remapping menu. If you use an emulator, adapter or modern controller, assign its buttons to those three Genesis functions. A two-button controller cannot provide Special, Attack and Jump simultaneously without a separate remapping method; do not assume that pressing Start will reliably substitute for the missing action during combat. With only two physical buttons, choose Attack and Jump for ordinary play, but you will lose convenient access to either the Special or some combined-button techniques.
The same A, B and C functions apply to both controllers in two-player mode. Before starting a serious attempt, test all three actions on the character-select or opening screen so a bad adapter mapping does not cost a life in the first fight.
- A performs the Special Attack.
- B performs the normal Attack and picks up nearby items.
- C jumps.
- Use a three-button Genesis-compatible pad whenever possible.
- Treat a two-button setup as incomplete unless your adapter or emulator supplies a usable remap.
Practise the normal attack, grapple and throws
Press B repeatedly while standing at the enemy’s height to perform the character’s normal attack string. The exact sequence differs among Axel, Blaze, Max and Skate, but the general rule is the same: stop attacking or move away before the final hit leaves you exposed to another enemy. Keep the D-pad neutral when you want the standard combo; hold a direction when you need to alter the attack or reposition.
Move directly into a nearby enemy and press B to grapple. While holding an enemy in front, press B for the character’s grapple attacks. Holding away from the enemy and pressing B performs a throw, which is one of the safest ways to remove a single threat from a crowded group. Pressing C while grappling lets most characters vault over the opponent; press B after the vault for the follow-up attack. Max handles grapples differently and cannot vault over an enemy in the same way, so use his heavy throws and direct attacks instead.
Press B and C together for the character’s rear attack when an enemy is closing from behind. This input also throws a held weapon. If an enemy launches you with a throw, pressing Up and C before landing can recover safely, provided the move and timing allow a recovery. Do not confuse this defensive input with the regular jump button.
- Use repeated B presses for the normal combo.
- Grapple at close range, then use B and a direction to throw.
- Use C during a grapple for a vault when playing a character who supports it.
- Press B and C together for the rear attack or to throw a held weapon.
- Try Up plus C after being thrown to reduce knockdown risk.
Separate Blitz attacks from directed Specials
A Blitz, also called a rush attack, uses a quick double-tap of the same horizontal direction followed by B. For example, tap Right twice and then press B. This is an attack input, not a Special, and it does not consume health. Each character’s Blitz has a different animation and purpose: some close distance, some knock enemies away and some are better for escape than damage.
The directed Special uses the direction and the Special button together. Hold or press a horizontal direction with A to perform the character’s moving Special. This is separate from the Blitz input and does consume health. The manual and established Genesis move references describe the moving and standing Specials as different attacks, so do not practise the draft’s incorrect double-tap-direction-plus-B input as a directed Special.
Use the standing Special by pressing A without a direction. It is the emergency crowd-control attack. Special attacks consume part of the current health bar; the moving Special charges health when used, while the standing Special’s health cost is tied to connecting according to established Genesis gameplay references. If your health is too low, the game prevents the Special. Save A for a surround, a dangerous knockdown sequence or a boss attack that you cannot otherwise avoid. Spending it on one weak enemy can leave you unable to escape the next group.
- Double-tap a horizontal direction, then press B for the Blitz attack.
- Press A with a direction for the moving or directed Special.
- Press A alone for the standing Special.
- Remember that Specials consume health and may become unavailable at low health.
- Use Specials to escape danger, not as a routine replacement for normal attacks.
Learn which characters can run
All four fighters can walk, jump, grapple, throw and use Blitz attacks, but only Skate has a true running movement in the original Streets of Rage 2. Double-tap a horizontal direction with Skate to begin running. His speed makes him effective at hit-and-retreat tactics, crossing behind an enemy and reaching a dropped weapon before another enemy does.
Axel, Blaze and Max do not gain Skate’s run from the same input. Their double-tap direction followed by B produces a Blitz attack instead. Use their walking speed, jump attacks, grapples and character-specific Blitz attacks to control distance. If you repeatedly double-tap while playing one of them, you may accidentally rush into an enemy rather than disengaging.
Keep your fighter aligned with the enemy’s lane before attacking. A strike can miss if you are slightly above or below the target, while the enemy can still hit you. Lane movement is especially important when trying to pick up a weapon or food during a wave.
- Double-tap horizontally to run with Skate.
- Do not expect Axel, Blaze or Max to run.
- Use lane alignment before committing to a combo or grapple.
- Use Skate’s speed to disengage rather than running blindly into the next group.
Pick up, throw and preserve weapons
Stand next to a weapon and press B to pick it up. Press B to use a held pipe, sword or close-range knife. Press B and C together to throw a weapon. A thrown knife or bomb is useful for interrupting a distant enemy, while a pipe or sword is usually better kept for close groups and narrow sections.
The original game’s weapon categories include the pipe, ninja sword, knife, ninja knife and bomb. The pipe has useful reach and knockback. The ninja sword is a powerful crowd-clearing weapon. Knives work at close range and can be thrown, while ninja knives serve a similar role. Bombs are best thrown into a cluster rather than held while enemies surround you. A bottle is not part of the standard Streets of Rage 2 Genesis weapon set, so do not rely on bottle mechanics from another beat-em-up or a different series entry.
Weapons are limited resources. A held weapon can be dropped when you are hit, when you grapple or when you pick up another weapon. Dropped weapons also disappear after being dropped repeatedly, and established walkthrough references describe a three-drop limit for the weapon supply. Use a pipe or sword on the most dangerous enemy in a group instead of wasting swings on targets already falling. Food restores health; weapons do not. Break nearby containers and defeat immediate threats before standing still over an apple or chicken, then collect the food when the recovery will matter.
- Press B beside a weapon to pick it up.
- Use B to swing a pipe, sword or knife.
- Use B and C together to throw a weapon or perform the rear attack.
- Treat bombs as thrown crowd-control weapons.
- Preserve pipes and swords for dense groups or dangerous reinforcements.
- Collect food when needed, but do not confuse it with a weapon pickup.
Before you move on
- You can identify A as Special, B as Attack and pickup, and C as Jump.
- You can perform a normal B attack chain, grapple, directional throw, jump attack and rear attack.
- You can distinguish double-tap direction plus B for Blitz from direction plus A for a directed Special.
- You can explain that Specials consume health and reserve them for crowd control or dangerous interruptions.
- You can make Skate run and know that the other three characters do not have a true run in this release.
- You can pick up, swing and throw the pipe, sword, knife and bomb weapons used by the Genesis game.
- You understand that weapons can be dropped or exhausted and that apples and chickens are health items.
- You have tested the complete three-button layout before beginning the campaign.
Character Selection: Axel, Blaze, Max and Skate — strengths and practical uses
The original North American Sega Genesis release gives you four playable characters with different movement, power and crowd-control strengths. Axel is the safest all-rounder, Blaze combines speed with strong space control, Max is slow but extremely powerful at close range, and Skate is the fastest but least forgiving. Choose according to how you want to handle groups, then use short attack strings, throws and rush attacks instead of standing still in the middle of a crowd.
Controls shared by all four characters
On the original Genesis pad, Button A performs the health-consuming Special Attack, Button B performs normal attacks and picks up items, and Button C jumps. Press Button B repeatedly to build a normal attack sequence. Press Forward twice and then Button B to perform the character’s rush or Blitz attack. Press Button B and Button C together for the character-specific rear attack. These inputs are the original Genesis controls, not a remapped modern-port layout.
Move close to an enemy without attacking to initiate a grapple. From a front grapple, Button B performs the character’s hold attack; holding away and pressing Button B throws the opponent. Pressing Button C while grappling vaults over an opponent for characters that can perform the maneuver, after which Button B produces a powerful slam. Max cannot vault over a grabbed enemy, so finish his hold or throw instead of waiting for a jump-over opportunity.
Each character has a standing special and a moving special. The standing special is safer when you are already surrounded because it clears nearby enemies, but it still consumes health when it connects. The moving special costs health when used, so treat it as an emergency escape or a way to interrupt a dangerous approach rather than as your default attack. If you do not have enough health, the game prevents the special from activating.
- Use B for ordinary attacks, C for jumping, and A for specials.
- Use Forward, Forward, B for the rush attack.
- Use B plus C for the rear attack, but do not expect the rear attack to function normally while holding a weapon.
Choose Axel for the most forgiving first campaign
Axel is the balanced choice for a first clear. His reach, power and movement are broadly even, and his kicks give him useful space against enemies approaching from the front. He does not have a true 360-degree command input in the original Genesis game. Instead, his standing special is Dragon Wing, a sweeping attack that hits enemies around him, while his moving special is Dragon Smash, a forward sequence of punches ending in an uppercut. His rush attack is the Grand Upper, which advances into the target and knocks enemies down.
Use Axel’s normal attacks to stop one enemy, then throw that enemy away before the next opponent reaches you. When a group begins closing from the front, use Grand Upper to cut into the formation and create a knockdown. Use Dragon Wing when enemies are already pressing from several directions or when one opponent is about to attack from behind. The safest rhythm is two or three normal attacks, a throw or Grand Upper, then a step back toward open space.
Do not automatically finish every normal attack sequence if doing so leaves Axel surrounded. His attacks are strongest when you use them to control where enemies fall. A practical starter sequence is B, B, grapple, throw, retreat. Against a charging heavy enemy, wait until it commits, then use Grand Upper or a jump attack rather than trying to trade several ordinary hits.
- Use Axel’s Grand Upper as the main forward interrupt.
- Use Dragon Wing as a close-range crowd-clearing emergency, not as a replacement for spacing.
- Keep enemies in front of Axel and throw isolated targets away from the next group.
Use Blaze for throws and flexible crowd control
Blaze is quick and adaptable. Her normal attacks are less forceful than Max’s, but her movement and throw options make her effective when you can separate enemies. Her rush attack cuts through targets in front of her. Her standing special is the Somersault Kick, which clears enemies in multiple directions, and her moving special is the Energy Ball, a forward attack that can pass through enemies lined up ahead of her.
Blaze’s rear attack is a leg sweep. It can hit enemies behind her and also cover the front, making it useful when two enemies approach from opposite sides. Press Button B and Button C together while she is not holding a weapon. If she is carrying a weapon, the shared rear-attack input throws the weapon instead of producing the sweep.
Use Blaze’s aerial attack to cross over a slow enemy or escape a front-line threat, but do not jump repeatedly into a dense group. When one enemy is isolated, attack briefly, grapple, throw, and move away. When several enemies are approaching, keep walking along the open side of the screen and use the leg sweep or Somersault Kick only when the group is close enough to threaten your escape route.
- Use throws against isolated targets rather than holding an enemy while others surround you.
- Use Blaze’s leg sweep when you are being attacked from both directions.
- Use Energy Ball for a line of enemies and Somersault Kick when the danger is already close.
Pick Max when power and grappling matter most
Max is the slow professional wrestler. He has the highest power and stamina profile but poor speed and jumping ability, so he should not chase every enemy. Let opponents approach, stop them with his long attacks, and convert a safe grapple into a throw or wrestling attack. His rush attack is a sliding tackle that clears enemies without sending them flying. His rear attack is the Mule Kick. His standing special spins with his fists extended, while his moving special shoulder-barges forward and then rolls.
Max’s main advantage is the damage and control gained after a grapple. Grab only when the nearby lane is clear enough to complete the attack. If another enemy is already beside you, throw the held opponent away instead of attempting a longer wrestling sequence. Max cannot vault over a grabbed enemy, so do not press Jump expecting the same follow-up available to the other characters.
Keep Max near the middle of the active fighting area. If he is pushed against an edge, his low movement speed makes it difficult to escape before a second enemy arrives. Use the sliding tackle to approach or interrupt, then stop and fight rather than continuing into an unseen group.
- Let enemies enter Max’s range instead of chasing them.
- Finish safe grapples with a throw or wrestling attack before another enemy reaches you.
- Use the sliding tackle to regain position, not to travel blindly through a crowd.
Choose Skate for hit-and-run movement
Skate is the fastest and weakest of the four characters. He is the only character in this original release who can run by double-tapping Forward on the D-pad. His rush attack is a headbutt, his rear attack is a backflip, his standing special is a spinning break-dance kick, and his moving special is the Corkscrew Kick.
Skate should attack the outside edge of a group, knock one target down or throw it away, and immediately run to open space. Do not remain between two enemies simply because he can move quickly; speed helps only if you leave before both sides recover. His lower power and stamina make prolonged trades dangerous.
A safe Skate pattern is run toward a separated target, use a short B attack string, grapple or knock the target away, then run past the remaining enemies. His jumping mobility is useful for crossing over slow enemies, but avoid jumping directly at knife users or enemies that can intercept aerial attacks. His rear attack is valuable when an enemy reaches Skate from behind, provided he is not carrying a weapon.
- Double-tap Forward to run, using the run to disengage as well as to attack.
- Use short attack strings and reposition before enemies recover.
- Avoid trading hits with heavy enemies; Skate wins by choosing when and where to engage.
Chain normal attacks, throws and specials without losing position
For every character, begin with ordinary attacks and watch the enemy’s reaction. If the target is staggered and isolated, grapple and throw it away. If the target is advancing or several enemies are closing, use the rush attack to interrupt and create a knockdown. If enemies are already surrounding you, move toward the clearest side first; activate the standing special only when normal movement or a throw will not restore space.
Do not spend a moving special merely to begin an encounter. It consumes health even when used as a travel attack. Save it for a dangerous approach, a boss recovery window, or a moment when retreat is blocked. After any special, immediately check whether enemies remain behind you and whether your health still permits another emergency special.
The universal beginner rhythm is normal attack, grapple or rush attack, reposition, then repeat. Axel and Blaze are the easiest characters for learning this rhythm. Max rewards patience and prediction, while Skate rewards early disengagement and precise positioning. Weapon use changes the rules: grabbing, being knocked down, or using the rear-attack input can cause a held weapon to be dropped or thrown, so do not carry a weapon into a planned grapple sequence unless you are prepared to lose it.
- Use ordinary attacks for routine enemies and specials for emergencies or high-value interruptions.
- Throw enemies away from the next threat rather than toward it.
- Check your position immediately after every rush attack or special.
- If carrying a weapon, remember that grapple and rear-attack inputs can discard it.
Before you move on
- You can choose Axel for balanced play, Blaze for adaptable crowd control, Max for power and grappling, or Skate for speed and hit-and-run tactics.
- You can perform the shared Genesis inputs: A for Special, B for Attack, C for Jump, Forward twice plus B for the rush attack, and B plus C for the rear attack.
- You can clear a basic encounter using a short normal string, a throw or rush attack, repositioning, and a special only when ordinary movement cannot restore space.
- You understand that the original Genesis game has four playable characters and that Skate is the character with the double-tap-forward run.
Fightflow: crowd control, enemy priority and mid-combat recovery
Streets of Rage 2 is safest when you control enemy positions instead of rushing toward every target. Keep opponents in front of you, remove threats that can attack from a distance or interrupt movement, and use throws, jump attacks and weapons to create space. Specials are emergency tools: they can break a surround, but they reduce health and should not replace ordinary crowd control.
1. Keep the crowd on one side
Move with short horizontal advances and small vertical adjustments. The D-button controls both left-right movement and movement toward the front or rear of the playfield, so use those lanes to line up your character with an enemy before attacking. Your immediate goal is to prevent opponents from standing on both sides of you.
Do not automatically push to the edge of the screen. A wall removes your retreat route and makes it easier for a grappler or fast attacker to connect while another enemy blocks your escape. When the camera stops scrolling, use the available floor space: attack briefly, step away from the group, then re-enter from an angle that keeps the remaining enemies together.
If enemies reach opposite sides of your character, stop attacking and move toward the clearer gap. Jumping can help pass over a nearby opponent, but it is not a substitute for creating horizontal space because another enemy may be waiting on the landing lane.
- Keep most active enemies in front of your character.
- Leave open floor behind you before beginning a long attack string.
- Move toward the safer gap as soon as enemies split to both sides.
2. Eliminate ranged and interrupting threats first
Knife-throwing enemies should usually be dealt with before a slow heavy opponent. A knife can interrupt a combo from outside your immediate attack range, forcing you to absorb damage while you are focused on someone else. Close the distance through an open lane, use a jump attack or forward-moving attack to interrupt the thrower, and then return to the heavier enemy.
Treat projectile-firing machines and other ranged attackers the same way. Do not stand still trading punches with a nearby target while repeated shots cross the screen. Approach from a different vertical lane, strike the ranged enemy, and use a knockdown or throw to stop it from immediately resuming its attack.
Do not chase a ranged enemy into a corner occupied by another attacker. If the approach is blocked, draw the close enemy toward the centre first, then circle back to the ranged target when you have room to attack.
- Prioritize knife throwers over slow enemies when both are active.
- Interrupt projectile enemies instead of ignoring repeated shots.
- Avoid crossing into a second enemy’s attack lane just to reach a ranged target.
3. Separate grapplers and fast rushers
Grapplers are dangerous because one mistake can become a throw while other enemies continue to advance. Meet a grappler with a short attack as it enters range, then use the automatic grab opportunity when you are close enough. A throw removes the grabbed enemy from your immediate space and can knock down another opponent if you direct it into the group.
Fast rushers should be stopped before they reach your flank. If one is lining up a charge, move vertically to spoil its approach and then answer with a short attack or jump kick. Avoid holding a long attack string while a rusher is approaching from outside your view; the extra hits are not worth losing awareness of the second threat.
When a grappler and a rusher arrive together, interrupt the faster attacker first if it is about to reach your side. Once it is knocked down or thrown, deal with the grappler while the screen is briefly less crowded. Reposition after every throw instead of immediately starting another attack.
- Use throws to break up two-enemy approaches.
- Stop long combos when a fast attacker is approaching from another lane.
- Reposition after a throw before committing to the next target.
4. Use weapons to control space
A pipe, sword or similar close-range weapon is most useful when enemies are approaching from one direction. Swing it to keep opponents outside grabbing distance, especially in a narrow section where vertical movement is limited. The weapon gives you control, but it does not make you invulnerable; keep watching for attacks from the rear or from another lane.
A knife is often better as a thrown interruption than as a weapon to carry through an entire encounter. Throw it at a distant or advancing target when that hit will prevent an attack, then return to bare-handed movement or pick up another item during a lull. Use the attack button to pick up nearby items, and use the appropriate attack-and-jump input to throw a held weapon when you need to clear space.
Protect a useful weapon by avoiding unnecessary grabs. In this game, initiating a move that requires a grab makes you drop the weapon. Being hit, knocked down or thrown can also make you lose it. If the weapon is currently stopping a wave, finish the immediate threat with weapon swings before attempting a grab-based attack.
- Swing a close-range weapon when enemies are grouped in front of you.
- Throw a knife when it interrupts a distant or advancing threat.
- Do not initiate a grab-based move while preserving a weapon is more important.
5. Make breathing room before collecting items
Food, weapons and other pickups should be collected after a knockdown, throw or clear pause. Do not walk toward food while an enemy is still recovering close enough to interrupt you. Strike or throw the nearest threat, draw the remaining enemies toward one side, and approach the item through the open lane.
If a pickup is near a screen edge, clear the enemies before taking it. The edge is the worst place to pause because a second attacker can arrive from behind while you are focused on the item. When a weapon is already on the floor, leave it there during the first part of the encounter if carrying it would make you vulnerable to an immediate hit. Return for it after the wave has been reduced.
If you are hit while moving toward an item, abandon the pickup and restore your position first. Health is more valuable than a risky attempt to collect food under pressure.
- Knock down or throw the nearest enemy before taking food.
- Keep the group away from the item’s approach lane.
- Collect weapons during a lull rather than during an active surround.
6. Use specials as emergency resets
The stationary special is for emergencies such as an imminent grab, enemies reaching both sides, or a fast attacker about to combine with a grappler. According to the original gameplay rules, it drains health when it successfully hits an enemy. Therefore, do not use it casually against one isolated target if a normal attack or throw will solve the situation.
The directed special is more useful when you must move through danger or break a surround, but it always consumes health when activated. Use it only when the movement or damage will clearly improve your position. Do not spend it merely to continue an ordinary combo that has already put the enemies under control.
After any special, stop attacking for a moment and rebuild your spacing. Check which enemies remain, move away from the nearest grab range and then resume with a short attack or throw. A special that clears one side of the screen can still leave another enemy close enough to punish you when the animation ends.
If your health is too low, the game may prevent special attacks. Do not depend on a special as your only recovery plan; preserve a retreat lane, use throws and take food only after the immediate pressure has been reduced.
- Reserve the stationary special for a surround or imminent grab.
- Remember that the directed special consumes health on activation.
- Reposition immediately after the special instead of rushing back into the crowd.
- Use ordinary attacks and throws whenever the group is already under control.
Before you move on
- You can clear a mixed group by stopping ranged attackers first, then separating grapplers and fast rushers without repeatedly using specials.
- You can recover from a mistake by moving toward open space, using a throw or emergency special when necessary, and returning with enemies kept on one side.
- You can preserve a pipe, sword or other useful weapon through a wave by avoiding unnecessary grab-based moves and recognizing that hits or knockdowns may make you drop it.
- You can collect food or weapons only after creating a safe approach lane rather than pausing inside an active surround.
Round 1 — City Street: safe route, weapon pickups, first boss approach
Round 1, called Downtown in the original Genesis route, proceeds through the opening street, the bar, the alley behind it and Barbon’s arena. Advance in controlled groups instead of constantly walking right. Collect the hidden extra life and recovery items after nearby enemies are safe, defeat Jack and Electra, clear Barbon’s support enemies, then defeat Barbon to enter Round 2. The route is fixed and has no alternate branch. The item descriptions below follow the standard one-player Normal arrangement; two-player games and other difficulty settings can change enemy groups and item contents.
1. Collect the opening extra life and control the street
At the beginning of the round, move into the bottom-left corner and press the attack button. A hidden extra life is revealed there. Collect it before advancing if the opening enemies are not already on top of you. Missing it does not block progress, so do not take damage trying to uncover it while the first group is active.
Move right in short advances and keep your character near the middle of the playfield. The opening Galsias and Signals are manageable, but Signals can slide into you or attempt a throw. Staying away from the extreme upper and lower edges gives you room to move vertically when enemies approach on different lines.
After the current group is defeated, break the nearby mailbox, boxes and other containers. In the standard one-player Normal arrangement, the early street section provides money, an apple, a knife and a pipe. Treat the apple as a recovery resource rather than an automatic pickup. If you collect the knife, use it on an ordinary enemy nearby and return to open space instead of chasing the dropped weapon into an active group.
Do not stop to collect an item while a Signal is beginning a slide or a knife carrier is positioned directly in front of you. Clear the immediate threat first, then return for the pickup. This is especially important when enemies approach from both sides after the screen scrolls downward.
- Reveal and collect the bottom-left extra life if it can be done safely.
- Advance only after the current enemy group is under control.
- Leave the early apple available until it restores meaningful health.
- Avoid collecting weapons during a Signal slide or a knife attack.
2. Use the street weapons and defeat Jack
Continue through the sloping street and sewage section. A Donovan or another enemy may provide a pipe, and the street containers provide additional money, an apple and a knife. A pipe is useful before Jack because its reach lets you interrupt ordinary enemies before they enter grab range. Pick it up only after the nearest attackers have been knocked down.
Knife-carrying Galsias deserve priority over ordinary grunts. Stay slightly above or below a knife user, wait for the throw or close slash to finish, and then use a jump attack, pipe swing or short normal combo. Do not stand directly in front of the enemy while trying to retrieve a dropped item.
Near the parked car, defeat the surrounding Galsias and Donovans before moving farther right. Jack then appears as the first sub-boss. A chicken is hidden beneath the upper road sign in this section. Leave it in place until Jack and the surrounding enemies have caused enough damage for the recovery to matter.
Jack uses close knife slashes and throws knives from a distance. With a pipe, stand just outside his stabbing range, strike as he approaches, and continue applying pressure after a knockdown so he has less opportunity to create space. Without a weapon, use a short attack string and move vertically away when he recovers. If Jack drops a knife, pick it up only after the area immediately around it is safe. Defeating Jack opens the route into the bar.
- Use a pipe against Jack when it can be collected safely.
- Defeat knife carriers before breaking nearby containers.
- Save the parked-car chicken for meaningful damage.
- Do not allow Jack to control the fight from long range.
3. Clear the bar before engaging Electra
Inside the bar, defeat the first Donovan, Signal and Galsia group before breaking furniture. Tables and chairs provide score items and recovery items. The early furniture section includes an apple, and later furniture near Electra provides another apple. Search the furniture after enemies are controlled rather than standing beside it while a Signal remains active.
Signals can slide from farther away, so do not wait beside a table for an enemy to approach. Clear the room first, then return for the items. If an item is exposed while an enemy is still approaching, leave it on the floor and create distance before collecting it.
At the far end of the bar, the bartender retreats and Electra appears. Her whip has long horizontal reach, and the tip is electrically charged: it can shock and damage you. Do not trade punches while standing at the end of her swing. The electric effect is part of the original Genesis encounter, not a remake-only behavior.
Move slightly above or below Electra’s line, wait for the whip swing to finish, then close in for a brief normal combo or a throw. Retreat immediately instead of remaining in front of her for a second exchange. Max can slide beneath a committed whip swing when the spacing is favorable. Other characters should rely on vertical movement, a carefully timed jump attack or an approach immediately after the swing has committed.
If Electra blocks, stop extending the attack string. Circle around her and wait for a committed swing or recovery moment. Use a special if Electra or another enemy traps you against the screen edge. Otherwise, preserve it for the alley or Barbon’s arena, where a two-sided attack can leave less room to escape.
- Search the bar furniture after the enemies are controlled.
- Keep the apples available until they restore useful health.
- Respect Electra’s long reach and electrically charged whip tip.
- Approach above or below her line, attack briefly and retreat.
- Use a special to escape a corner rather than merely speeding up a safe exchange.
4. Clear the alley and prepare Barbon’s arena
After Electra is defeated, continue into the alley behind the bar. Galsias and Donovans appear before the final boss position. Move far enough to trigger the next group, then stop and defeat it before advancing again. This keeps ordinary enemies from attacking from behind while Barbon becomes active.
Two trash cans near the boss approach include a chicken in the standard one-player Normal layout. Clear the surrounding enemies before breaking the cans. If your health is high, leave the chicken available until the support enemies or Barbon have caused enough damage for the recovery to matter.
Approach the boss area carefully. Barbon does not need to be attacked immediately. Defeat the first Galsias and Donovans that appear, then wait for the arena to settle. When Barbon removes his waistcoat, a Galsia and a Signal can join the encounter. Eliminate those support enemies before focusing on Barbon. If they pin you against an edge, use a special to create space rather than trying to fight through a pincer.
- Break the final trash cans only after nearby enemies are defeated.
- Keep the alley chicken available if recovery may be needed.
- Clear Barbon’s support enemies before committing to the boss.
- Maintain an open lane for vertical movement.
5. Defeat Barbon with bait-and-punish movement
Barbon uses close punches, a roundhouse kick, grabs, throws and blocking. Do not stand directly in front of him and attempt a long uninterrupted combo. Stay just outside his immediate striking range, move slightly up or down as he approaches and punish the recovery after a missed punch or kick.
Use short normal attack strings and retreat. If you have a pipe, strike from its reach and back away instead of standing beside Barbon while trying to recover from a missed swing. A throw can work when you approach from a safe vertical angle, but do not repeatedly walk straight into him because his grab comes out quickly.
The roundhouse is easiest to avoid by moving vertically away from its line or by jumping over it when the approach is clear. Avoid predictable jump-ins, since Barbon can catch them with the kick or a grab. If he throws you, regain control as soon as possible, create distance and return to the bait-and-punish pattern rather than immediately attacking from the same position.
Use the special when Barbon corners you, when a surviving Signal creates a two-sided attack or when you need immediate room to recover. Otherwise, save it. When Barbon is defeated, the game ends Round 1 and transitions to Round 2. The original Genesis route has no alternate branch from this sequence.
- Bait Barbon’s punch or kick, then punish the recovery.
- Retreat after a short combo instead of forcing a long string.
- Avoid predictable jump-ins and direct approaches.
- Use the special to escape a corner or stacked attack.
- Confirm the transition to Round 2 after Barbon falls.
Before you move on
- The opening extra life was collected, or you confirmed that it was missed.
- Jack was defeated near the parked-car section and the route entered the bar.
- The bar enemies and Electra were defeated without repeatedly standing in the whip’s full reach or electric tip.
- The alley support enemies were cleared and the chicken under the trash cans was used if recovery was needed.
- Barbon was defeated and the game transitioned to Round 2.
- Any special expenditure was limited to escaping a corner, surviving a stacked attack or securing the boss fight.
References for this chapter
- STREETS OF RAGE 2 — Sega Genesis Official Instruction Manual
- Sega Genesis — Streets of Rage 2 Manual
- Streets of Rage 2 — Guide and Walkthrough by Loopy
- Streets of Rage 2 — Guide and Walkthrough — Genesis, CLNG1983
- Streets of Rage 2 — Guide and Walkthrough — Genesis, CNash
- Downtown — Streets of Rage Wiki
Round 2 — Bridge Construction: truck ambushes, biker waves and Jet
Round 2 is Bridge Construction, the second stage of the original Sega Genesis version of Streets of Rage 2. The route moves from the opening bridge to a truck interior and then back onto an unfinished bridge for the Jet fight. Keep room above and below your character, control bikers before collecting items, and save health-consuming specials for situations where normal attacks, throws and movement cannot create an escape.
1. Take the opening weapons without getting pinned
Move right from the start and break the first group of barrels. They contain two money bags, a gold bar and a knife. Pick up the knife only after the immediate enemy wave is under control; stopping to collect it while a rider is crossing the screen can cost more health than the weapon saves.
Continue toward the next barrels, which contain a pipe and an apple. Keep your character near the middle of the playable bridge rather than pressing against the top or bottom edge. This gives you room to change lanes when a biker crosses or a foot soldier approaches from behind.
Use short attack strings, throws and jump attacks, then return toward the center after knocking an enemy down. Do not chase one target all the way to the edge while another enemy is still entering the screen.
- Break the opening barrels for the knife, money bags and gold bar.
- Break the next barrels for the pipe and apple.
- Keep enough space above and below your character to change lanes.
2. Deal with motorcycles and bomb throwers
Riders may drive across the screen, jump off to fight, or throw bombs while passing. A motorcycle can be knocked down with a jump kick, but move away after the rider falls because the abandoned bike explodes. Do not stand in the vehicle's path waiting for a normal attack; jump over or away from the crossing motorcycle and attack after it has passed.
Bomb-throwing bikers deserve immediate attention. Their bombs can be picked up and thrown, but the fuse makes this unreliable unless the area is already clear. The safer response is to move vertically away from the landing point, let the explosion finish, and then close in. If a biker carries a knife or another throwable weapon, bait the approach by moving just outside attack range, then answer with a jump kick or a forward rush attack.
On the original Genesis controls, the forward rush is performed by tapping the direction toward the enemy twice and pressing the attack button. Max's slower movement makes this less suitable as a panic escape, so use it deliberately to interrupt an approach or improve spacing.
- Jump kick riders and leave the exploding motorcycle behind.
- Move away from bombs instead of trying to pick them up during an active attack wave.
- Use the double-tap forward rush attack to close distance or interrupt a dangerous approach.
3. Clear Blade's section and prepare for the truck
Continue right through the biker groups without fighting at the extreme edge. When Blade appears near the end of the bridge, remove ordinary enemies that are already active before committing to him. A pipe gives useful reach, while a knife can interrupt an approach from farther away, but do not keep attacking in one direction if another biker is entering behind you.
The barrels in this section contain a chicken and a gold bar. Break them after the area is safe. If your health is still high, leave the chicken available for the confined truck fight. If you are carrying the pipe, use it for quick interruption swings, but do not risk taking damage merely to preserve it.
- Control the active ordinary enemies before focusing Blade.
- Break the bridge-end barrels for the chicken and gold bar.
- Carry the pipe into the truck when safe, but do not sacrifice health for the weapon.
4. Defeat Hakuyo, then activate the truck bikers and Ryokurou
Inside the truck, the bikers displayed along the wall are inactive at first. Walk right and concentrate on Hakuyo, the first martial-arts enemy. His jump kick is the main danger in the confined space, so keep a small vertical offset and attack after he lands instead of repeatedly jumping toward him.
Once Hakuyo is defeated, the wall bikers become active and Ryokurou, the second martial-arts enemy in this encounter, joins the fight. This is the stage's tightest choke point. Move toward one side, defeat or throw the nearest attacker, and pass through the opening instead of remaining between both groups. If one of the bikers is carrying the pipe, take it only after you have created enough space to complete the pickup safely.
The truck containers provide money bags and an apple. Use the apple when recovery is needed rather than automatically collecting it at full health. A normal combo or throw should be your first answer to a surround. Use the health-consuming special only when several enemies are already connecting or your escape route is blocked; spending specials repeatedly here can leave you vulnerable before Jet.
- Ignore the inactive wall bikers until Hakuyo is defeated.
- Remember that Ryokurou joins after Hakuyo, along with the activated bikers.
- Fight toward one side so you can create an exit from the truck.
- Use the truck apple as reserved recovery rather than an automatic pickup.
5. Cross the unfinished bridge and collect the hidden life
After leaving the truck, advance in short sections. Trigger the next group, retreat a short distance, and make enemies approach through the same lane. This prevents threats from closing in on both sides at once. If you have a knife, throw it at a dangerous approach and continue bare-handed rather than standing still to retrieve it.
At the beginning of the unfinished-bridge section, move to the upper-left corner, behind the truck, and press the attack button to reveal the hidden extra life. This is the stage's concealed 1-UP location. Continue right and break the construction barriers as required. One barrier conceals a money bag and the next conceals an apple; leave the apple available until damage is taken.
The final bridge has a narrow-looking steel structure, but the walkable route remains continuous. Use vertical movement to make standard attacks miss, then return to the enemy's line only to strike. Donovan, Garcia and Signal-type enemies appear along the bridge and around the approach to Jet. Clear the nearest support enemy or knock it away before moving on, but do not chase one target so far that another enemy closes behind you.
Just before Jet's arena, check the nearby barrier items for a chicken and a money bag if you need them. Avoid spending a special merely to finish a routine group, especially if you are planning to use the chicken after the fight begins.
- Advance and retreat in controlled increments after leaving the truck.
- Collect the hidden extra life in the upper-left corner behind the truck by pressing the attack button.
- Check the money bag and apple hidden in the construction barriers.
- Control Donovan, Garcia and Signal-type enemies before they surround you near Jet.
- Check the chicken and money bag near the boss entrance when needed.
6. Control the support enemies, then defeat Jet
Jet is safer when the surrounding enemies are not left unchecked. As Donovan, Garcia and Signal-type enemies appear near the boss approach, keep them in view and preserve a clear lane to retreat. Defeat the closest support enemy when there is a safe opening, or knock it away with a throw, rush attack or jump kick. Do not stand between Jet and a support enemy, and do not let yourself become pinned against the top or bottom edge.
Once the nearby support enemies are cleared or controlled, stay near the center rather than waiting at an edge. When Jet makes a horizontal charge, meet the approach with a jump kick if the spacing is favorable, then land moving away. If the kick misses, do not chase him across the arena; reset your position and wait for another pass.
When Jet rises vertically, prepare for his diving attack. Watch his position and move away from the projected landing area. After he lands, attack during the recovery with a jump kick, a short normal combo or a forward rush attack. If he is grounded close enough to grab, use the grapple and your safest throw or follow-up, then retreat before his next aerial pass.
The special is an emergency interruption. Activate it when a swoop is about to connect, a support enemy has closed off your escape, or Jet has trapped you against an edge. Do not use it as a repeated damage plan. Defeating Jet completes Round 2 and advances the game to Round 3, Amusement Park.
- Keep an escape lane open while clearing or controlling the support enemies.
- Stay mobile and avoid waiting at the arena edge.
- Use jump kicks against favorable horizontal charges and punish Jet after a dive.
- Grab and throw Jet only while he is grounded.
- Use a special to escape a confirmed hit or corner trap rather than simply speeding up the fight.
Before you move on
- Jet is defeated and the game transitions from Bridge Construction to Round 3, Amusement Park.
- Before Jet's arena, verify that you checked the upper-left hidden-life location behind the truck, the barrier items containing a money bag and apple, and the chicken and money bag near the boss entrance.
- Confirm that Donovan, Garcia and Signal-type enemies near the final bridge and boss approach were cleared or controlled without losing your escape lane.
- The original Genesis route has no alternate Stage 2 branch or alternate boss ending.
- A successful clear does not require spending a special in the truck or Jet fight; preserve health-consuming specials for situations where normal attacks, throws and movement cannot create an escape.
Round 3 — Amusement Park: pirate ship, Alien House and Zamza
Round 3 of the original North American Sega Genesis release is the Amusement Park stage. The fixed route goes through the park entrance, arcade, three Pirate Ship combat sections, a second park area and the Alien House. Vehelits is the mid-stage hazard encounter, followed by one ninja encounter, a recovery item and then Zamza. Keep enemies in front of you, preserve the pipe or sword when practical, and enter the final arena with enough room to retreat from Zamza’s claws, slides and rolling attack.
Clear the park entrance and take the first pipe
Move right in short advances from the opening bench. The sleeping Galsia wakes as you approach, followed by more Galsias, Donovans and bikers. One biker carries a pipe. Defeat or stun the surrounding enemies before picking it up, then use the pipe’s reach to control ordinary enemies without standing directly inside their attack range.
A nearby container also provides a knife, but the pipe is generally the safer choice in this opening because it lets you attack from farther away. Fight around the middle of the available space instead of pressing against the right edge. If the pipe is knocked away, do not chase it through an active group. Use short attack strings and throws until the enemies are controlled, then retrieve it.
- Advance gradually through the opening park area.
- Take the biker’s pipe only after controlling the surrounding group.
- Prioritize knife carriers and other immediate threats.
- Keep an escape lane behind your character.
Control the arcade entrances
Enter the arcade slowly. Signals, Donovans, Galsias and enemies near the Bare Knuckle arcade machines appear in groups as you move through the area. When two Signals are active, avoid standing directly between them. Move vertically to separate their attack lines, then throw or strike the closer Signal before the second can support it.
Use a short normal attack string, then reposition. Extending a combo while another enemy is approaching is riskier than giving up a few hits. Break the nearby arcade machines after the active group is safe, then collect their contents while watching both sides of the screen. The machines provide score items and recovery supplies, including an apple later in the section. Use the health-consuming special only when a Signal or another enemy has boxed you in.
- Walk slowly through the arcade.
- Separate Signals with vertical movement and throws.
- Break arcade machines only after the active group is controlled.
- Reserve specials for surrounds or unavoidable pressure.
Cross Pirate Ship 1 and Pirate Ship 2
The Pirate Ship is a sequence of fixed combat areas, not a moving-platform or gap-jumping section. In the first ship section, remove the knife-carrying Galsia early. The other Galsias, Signals and Donovans can be handled one at a time if you avoid rushing into the next group. Keep the pipe if it survives, but do not stand over it while enemies are still active.
In the second ship section, enemies drop from above onto the deck. Let each drop finish before committing to an attack. Donovans and a Yakuza follow, so move vertically when the Yakuza attacks from range and approach after the projectile has passed. Avoid jumping forward into a fresh drop. Wait until the enemy is fully present, then use a ground string, throw or weapon hit.
- Treat both ship areas as fixed combat spaces.
- Defeat the knife-carrying Galsia early.
- Let overhead enemy drops finish before attacking.
- Use vertical movement to avoid ranged attacks.
Collect the Pirate Ship 3 extra life and handle its ninjas separately
Pirate Ship 3 contains an extra life in a crate. Defeat the nearby Galsias and Donovans before opening or collecting it so you do not pause inside an active crowd. Continue through the fixed combat sequence while watching the upper entry points rather than charging toward the right side.
Two ninja encounters occur in separate sequence on Pirate Ship 3. Trigger only one at a time. The first ninja carries a sword; try to disarm him and keep the sword until that encounter is finished. The second ninja carries a kunai and should be approached only after the first ninja has been defeated, so you are not managing two weapon attacks together.
Ninjas can block or evade predictable forward jump attacks. Follow their vertical position and use short ground attacks, throws or a standing jump attack after they commit to a jump or weapon action. If a projectile is about to connect, use a special as an emergency escape. Do not confuse these Pirate Ship encounters with the single ninja encounter later in the Alien House.
- Collect the Pirate Ship 3 extra life after nearby enemies are controlled.
- Trigger the first Pirate Ship 3 ninja separately.
- Try to take and preserve the first ninja’s sword.
- Defeat the first ninja before triggering the second.
- Use vertical spacing instead of repeated forward jump attacks.
- Keep the Pirate Ship ninjas distinct from the later Alien House ninja.
Clear the second park section before entering the Alien House
The second park section begins with Galsias and Donovans. Near the end, Jack and an Electra-type enemy appear with support. Trigger this group from the left side when practical, then separate the enemies with throws. Electra’s anti-air attack makes repeated forward jumps dangerous, while Jack’s knife can interrupt you while you are concentrating on another target. Defeat Electra early if she is repeatedly covering the group with flying attacks, but do not let Jack and the remaining enemies close your escape lane.
A chicken is available at the start of the Alien House. If health is low, take it during a safe opening. If health is adequate, leave it until the first nearby Alien House enemies are controlled so it remains available for recovery. In two-player mode, give it to the player who needs it most rather than taking it automatically.
- Keep Jack and the Electra-type enemy from occupying the same space.
- Fight the later group toward the left side when possible.
- Use the chicken according to health needs.
- Enter the Alien House without wasting health on unnecessary jumps.
Take the Alien House sword and survive Vehelits
The Alien House is foggy, and enemies can appear from the lower part of the playfield. Defeat the first Galsia, then damage the nearby alien egg and wait for its explosion to finish before taking the sword. The sword has useful reach and damage, so preserve it through the following Signals, Donovans, Galsias and ambushes. Move along the upper or lower depth of the screen instead of staying on one line where enemies can surround you.
Clear the ordinary enemies before approaching Vehelits’s trigger area. The lower part of the Vehelits section contains an extra life. Collect it only after the surrounding enemies are controlled and Vehelits is not positioned for an immediate collision. Do not pause over the item while the creature is moving toward you.
Vehelits moves through the scene, and contact with its head knocks the player down. Track its height and use a standing jump attack after it commits to a movement. Do not jump forward into it. A hit can send Vehelits rebounding toward you, so attack from a controlled position and leave room to react. If you drop the sword, leave it on the ground until Vehelits is defeated if retrieving it would expose you to another collision.
- Take the Alien House sword after the first egg encounter.
- Clear ordinary enemies before activating Vehelits.
- Track Vehelits vertically and use standing jump attacks during committed movement.
- Do not jump forward into Vehelits.
- Collect the lower-area extra life only when the area is safe.
Defeat the single post-Vehelits ninja and collect the recovery item
After Vehelits, continue into the next Alien House combat section. One ninja encounter occurs here before the recovery item and the final approach to Zamza. Do not describe this as a second pair of ninjas: the two sequential ninja encounters belong to Pirate Ship 3, while the Alien House has one ninja after Vehelits.
The ninja drops from above with a sword. Stay slightly below the landing line and attack as the ninja comes down, then reposition instead of chasing upward. If your sword survived Vehelits, use its reach without standing directly in front of the ninja’s slash. Take the dropped weapon only when the immediate area is safe.
After the ninja is defeated, continue to the next item area and collect the recovery item when needed. Do not rush through the nearby props or enemies merely to reach the boss door. If the recovery item is not immediately necessary, leave it available until the surrounding enemies have been cleared. A special is appropriate only as an emergency escape from a surround or dangerous weapon attack.
- Defeat the one ninja encounter after Vehelits.
- Use vertical spacing and attack as the ninja lands.
- Take the sword only when the area is safe.
- Collect or reserve the following recovery item according to health needs.
- Do not invent or expect a second post-Vehelits ninja encounter.
Clear the explosive props before Zamza
The egg-like props before Zamza explode shortly after being damaged. Strike one and move away immediately, then wait for the blast to finish before approaching the next prop or any item nearby. Do not stand beside a damaged egg while watching for an enemy; the explosion can catch you during that pause.
If enemies are active around the props, draw them away first and clear them from a safer part of the room. Once both explosive props have finished detonating, collect any remaining item and move into the boss area with the center of the arena available for retreat.
- Damage explosive props one at a time when possible.
- Move away immediately after striking one.
- Wait for each explosion to finish before collecting nearby items.
- Enter Zamza’s arena with room on both sides.
Defeat Zamza and advance to Round 4
Keep Zamza near the center of the arena so you retain room to retreat. He blocks many direct frontal attacks and can punish predictable jumps with his clawed anti-air attack. Let him approach, then use short attacks during the recovery after a missed uppercut, completed slide, failed grab attempt or finished jump. Do not stand directly in front of him while repeating a long attack string.
Move away from the rolling attack instead of trading hits. A standing jump can evade or punish a slide when the opening is clear, but use it defensively rather than jumping forward from far away. If Zamza corners you, use a special to escape only when normal movement cannot create space. If the sword is available, use controlled slashes during his recovery rather than chasing him after he moves away.
Axel and Blaze can use brief ground strings followed by retreat. Max should rely on his damage and grabs only after Zamza has clearly finished an attack because his slower movement makes mistimed approaches costly. Skate can draw Zamza across the arena with his mobility, then turn back for a short punish. Use the recovery item if health is low. When Zamza falls, the game transitions to Round 4, the Stadium stage, whose boss is Abadede.
- Keep Zamza away from the arena edges.
- Punish missed uppercuts, slides, jumps and failed rushes.
- Avoid predictable forward jump attacks.
- Retreat from the rolling attack.
- Use emergency specials only when ordinary movement cannot escape.
- Confirm the transition to Round 4 after Zamza is defeated.
Before you move on
- The park entrance, arcade, Pirate Ship 1, Pirate Ship 2, Pirate Ship 3, second park section and Alien House have been cleared.
- The Pirate Ship 3 extra life was collected if it could be reached safely.
- The Alien House sword was taken and preserved when practical.
- Vehelits and the surrounding ordinary enemies were defeated.
- The lower-area extra life in the Vehelits section was collected when safe.
- Both sequential Pirate Ship 3 ninja encounters were defeated, with the first ninja’s sword taken when practical.
- The single post-Vehelits ninja encounter was defeated.
- The recovery item after the post-Vehelits ninja was collected or deliberately reserved for the boss approach.
- Both egg-like explosive props were cleared and allowed to finish detonating before the boss approach.
- Zamza was defeated and the game advanced to Round 4.
Round 4 — Stadium Approach, Lift and Abadede
Round 4, also called Ball Park, begins outside the stadium and continues through the stadium entrance, a sequence against Ko-Shu, Sug. Q, Metal. M and Big Ben, a descending lift endurance section, and the final ring-side arena with Abadede. The stage is dangerous because knife carriers, Signals, whip users and heavy enemies can attack from different distances. Advance in short sections, keep the active fight near the middle of the screen, and use weapons, throws and emergency specials to prevent a corner trap.
Clear the approach without giving up your retreat space
The opening approach contains Signals, Galsias and knife-carrying Brashes. A pipe is available in the first trash can, and the later containers include an apple and a money bag. These items are useful, but do not break containers while an enemy is already attacking. First knock down or draw the group away, then return for the item.
Stop advancing whenever a new group enters. Let enemies move toward the center rather than walking continuously toward the right edge. Signals can slide, grab and throw, so attack them before they reach grappling distance if a knife carrier is also present. Knife enemies are the first priority because their thrown or rushing attacks can interrupt you while you are fighting a slower opponent.
Use a jump kick or a short grounded combo to close on a knife carrier, then throw or knock the enemy down. If a knife is thrown, move up or down along the playfield or jump over it when there is sufficient room. Keep enough space behind you to turn around if another group enters from the left.
- Stop when each new enemy group appears.
- Prioritize knife carriers and Signals over slower punks.
- Open containers only after the immediate group is controlled.
- Keep the fight away from both screen boundaries.
Defeat Ko-Shu and preserve the available pipes
Ko-Shu appears near the end of the outdoor approach. Let him finish entering before attacking, and avoid standing directly underneath him. If ordinary punks are still active, draw them away from Ko-Shu and clear them first so you are not trapped between a heavy attacker and a minor enemy.
The punks in this section can provide additional pipes. Pick up a pipe only after the surrounding enemies are knocked down or pushed away. Use short, deliberate swings, then move back toward the center. If the pipe is dropped, do not chase it through an active group; bare-handed attacks, a grapple and a throw are safer than taking a hit while trying to recover a weapon.
- Allow Ko-Shu's entrance to finish before committing.
- Clear nearby punks before focusing on him.
- Use pipes as brief crowd-control tools rather than standing still with one.
Work through the stadium entrance and the whip users
Inside the stadium, the first containers provide a money bag and a knife. Further containers hold money bags, followed by another group of containers containing an apple and a money bag. The rewards are optional, so collect them only after the current group is down. A knife can help against a heavy enemy, but it is not worth crossing an active whip attack to obtain it.
Sug. Q and Metal. M are Electra-type enemies whose whips control a long horizontal distance. Do not linger at the end of the whip's reach. Either stay clearly outside it until the attack finishes or move inside the opponent's range and strike during recovery. A jump kick, short attack string or grapple can work once you are close, but retreat immediately after the hit rather than continuing a long exchange.
If both whip users are active, keep them separated by moving vertically and concentrating on the one nearest to you. In two-player mode, do not stand on the same horizontal line and attack both from one side; this makes it easier for one whip to catch both players.
- Treat the stadium containers as optional rewards.
- Do not hover at the tip of a whip's range.
- Separate Sug. Q and Metal. M before committing to an attack.
- Retreat after a short attack or throw.
Handle Big Ben without trading prolonged damage
Big Ben arrives after the stadium entrance groups. He is a heavy enemy who can withstand ordinary pressure and use close-range attacks, including his fire-breathing attack. Do not stand directly in front of him and repeat a long attack string. Approach with a jump kick, a brief grounded attack or a successful grapple, then move away before he can counter.
A front grapple should be followed immediately by a throw rather than a prolonged hold. If you use a weapon, strike from the side and reposition after each safe hit. Keep Big Ben away from the boundary so that his forward pressure does not pin you. In two-player mode, one player can draw him toward the center while the other attacks from behind, but do not throw him directly into your partner.
- Use short attacks against Big Ben.
- Throw promptly after a secure grapple.
- Avoid fighting him at the extreme edge.
- Keep both players from standing directly beside one another.
Survive the descending lift
After the stadium fights, the characters descend on a lift while enemies drop onto the platform in successive waves. The enemies include ordinary punks, Karate Master-type fighters and later multiple heavy attackers. The lift is an endurance section, so the goal is not to rush upward or chase every landing point; it is to keep an escape lane open while reducing the closest threat.
Stay near the middle of the platform and face the newest enemy. Use throws to remove one attacker from the crowd, then turn toward the opposite side. Jump kicks are useful against an isolated enemy approaching from a distance, but repeated jumping becomes dangerous when several enemies are already close because you can land beside a grab or attack.
Use a special when enemies have boxed you in or when two threats are about to attack from opposite sides. Specials consume health, but escaping a chain of grabs is usually more valuable than preserving the health cost. Do not stand at the far left or right edge unless you are deliberately moving past an enemy and immediately returning toward the center.
- Fight from the middle of the lift.
- Remove the closest attacker before switching sides.
- Keep one side open as an escape route.
- Use a special to break a surround when necessary.
Defeat Abadede in the ring-side arena
The lift ends at a hidden ring-side arena. A crate in this area contains a chicken; leave it in place if your health is safe and collect it only when you need recovery. Abadede is the boss and can interrupt extended attacks, so do not stand directly in front of him and repeatedly press Attack.
Abadede commonly approaches with a heavy forward attack. Move vertically along the playfield or jump away rather than backing straight into the boundary. After he passes your position or finishes an attack, step in for a short combo or grapple and throw him immediately. Then disengage and reset the spacing. The reliable pattern is evade, punish briefly, retreat, and repeat.
If he jumps or uses a heavy close-range move, do not challenge it with a long grounded string. Wait for the attack to finish, then strike from the side. Axel's circular special and the other characters' emergency specials are best reserved for escaping a corner or a surround; using them repeatedly at the start of the fight can leave too little health for recovery.
In two-player mode, keep Abadede between the players without standing shoulder to shoulder. One player can draw his approach while the other lands a rear attack, but both players should retreat after the hit. Abadede's defeat completes Round 4 and starts Round 5, Cargo Ship.
- Save the arena chicken if you do not need it immediately.
- Evade Abadede vertically or by jumping instead of backing into the edge.
- Use short attacks and immediate throws after clear openings.
- Reserve specials for corner escapes or emergency crowd control.
- Retreat together after two-player attacks.
Before you move on
- The outdoor stadium approach is clear, including the Ko-Shu encounter.
- Sug. Q and Metal. M have been defeated inside the stadium.
- Big Ben has been defeated before the lift section.
- The descending lift encounter ends and the characters reach the ring-side arena.
- Abadede is defeated.
- The game transitions to Round 5, Cargo Ship, confirming that Round 4 is complete.
Round 5 — Aboard Ship: Byatcko, Wayne and R.Bear
Round 5 follows a fixed cargo-ship route through Lower Deck 1, Lower Deck 2 and the Upper Deck. Clear each active enemy group before advancing, keep vertical room for knife attacks and bombs, and use pipes or swords whenever they let you control enemies from outside grab range. Byatcko guards the first stair transition, Wayne appears at the end of the second lower-deck section, Mach leads the upper-deck encounters, and R.Bear is the required boss. Defeating R.Bear automatically advances the campaign to Round 6.
1. Clear Lower Deck 1 and reach the first stairs
At the start of the ship, a knife-carrying Galsia approaches. Do not rush toward him. Hold your ground or make only a small adjustment so he enters your attack range without dragging you into the next group. Jump attacks can help against the knife, but the safer general rule is to attack from a slight vertical offset and avoid standing directly in front of the blade.
Continue right in short advances. Donovan-type enemies and a pipe-carrying enemy appear before a heavier fat enemy drops into the area. Keep the pipe if you can, but do not fight over it while several enemies are active. Stand near the middle of the available space, use the pipe to stop the closest threat, and make sure the fat enemy cannot approach from your blind side. The nearby door-like structure limits the retreat area, so defeat the active group before moving beyond it.
The following lower-deck set contains regular punks and another karate-master drop-in. Watch the shadow or landing position when an enemy descends from above, then attack as it enters range rather than walking underneath it. Advance in small steps so enemies trigger one at a time where possible. Reach the stairs only after the lower-deck group has been defeated; the Genesis version has no alternate ship route or boss skip.
- Defeat or disarm the opening knife Galsia before entering the next group.
- Keep the middle of the screen available as a retreat lane.
- Use the pipe against the fat enemy and nearby support enemies when safe.
- Trigger descending karate masters from a controlled position.
- Reach the first stairs only after the current group is clear.
2. Defeat Byatcko and continue to Wayne
After the stairs, a kickboxer and Galsia arrive together. The kickboxer is easier to handle before it has attacked, so approach carefully and use a grab or short attack string when a clear opening appears. If the Galsia interrupts the exchange, prioritize creating space instead of insisting on the grab. A special is appropriate only when you are about to be trapped or hit repeatedly.
Byatcko is the karate-master sub-boss at the first stair-area transition. He uses fast palm strikes and jump kicks, so do not stand directly in front of him for a long combo. Maintain a small vertical offset, let him commit to an approach, then punish after the strike or jump has passed. If he jumps toward you, move out of the landing line rather than meeting him head-on. Short attacks followed by repositioning are more reliable than trying to lock him in place.
Once Byatcko is defeated, the route opens into Lower Deck 2. Continue right through the regular enemies and the next kickboxer encounter. Raven, the kickboxer-type enemy, has long-reaching kicks and can block, so approach from an angle and attack only after he has committed. Wayne appears at the end of this section as a stronger Barbon-type enemy. Bait his punch or kick, step away from the attack, and counter during recovery. Do not repeatedly attack into his guard, and do not rely on a grab that he can quickly reverse.
- Control the first kickboxer before the Galsia can interrupt you.
- Identify the first sub-boss as Byatcko, not Barbon or Wayne.
- Move vertically to avoid Byatcko’s palm strike and jump kick.
- Use spacing against Raven’s long kicks and blocking.
- Bait Wayne’s attacks and punish the recovery instead of attacking into his guard.
- Defeat Wayne before entering the Upper Deck.
3. Take the sword and defeat Mach
The Upper Deck begins with regular Donovan- and Galsia-type enemies. Clear the immediate group before opening the nearby crates. A sword is available in this section, and it is one of the most useful tools for the remainder of the stage. Pick it up only after the enemies around it are controlled so you do not take a hit while reaching for it.
Advance slowly with the sword. Mach, the Jet-type opponent, is difficult to hit while airborne and can punish a careless chase. Remove the enemies nearest your back first, then wait for Mach to land or approach. Strike when he enters the sword’s reach and retreat before he can recover into another kick or takedown. Do not follow him across the screen while ninjas or regular enemies remain active.
If the sword is knocked away, move vertically or retreat until the active group is separated, then retrieve it. Fighting directly over a dropped weapon is usually worse than finishing one enemy with normal attacks. A later ninja can provide another sword, so losing the first weapon does not make the stage unwinnable.
- Clear the nearby group before collecting the sword.
- Use the sword’s reach against Mach and other close-range enemies.
- Remove enemies behind you before pursuing a Jet-type opponent.
- Attack Mach after he lands or commits to an approach.
- Create space before retrieving a dropped weapon.
4. Cross the bomb and ninja section
Bikers positioned in the background throw bombs into the deck area. A landed bomb remains dangerous, so stop attacking beside it and move vertically away from its landing point. Wait for the explosion before returning to the enemy group. Do not let the bomb force you into the edge of the screen, where a ninja or punk can attack while you are watching the projectile.
Ninjas appear during the same upper-deck stretch. They move quickly, can change vertical position, and may carry a sword or knife. Keep near the center of the visible area, attack the closest enemy, then reposition when a bomb lands. If you are using a sword, favor one or two controlled strikes over a long stationary sequence. The weapon is valuable, but survival and an escape lane matter more than preserving it at any cost.
The stage’s enemy triggers can be managed by advancing in small steps. Do not run through the entire deck while a bomber or ninja remains behind you. Clear the current wave, check the space around your character, and then move right to trigger the next group. Near the end of the deck, clear the remaining fat enemy and regular support enemies before entering the boss area. Use available food only after the surrounding enemies are under control.
- Move away from live bombs before resuming attacks.
- Keep vertical space available for both bombs and ninjas.
- Clear enemies behind you before advancing into the next trigger.
- Use the sword in short, controlled attacks rather than standing still.
- Collect food only after the current group is safe.
5. Defeat R.Bear with reach and retreat
The boss area begins with support enemies before R.Bear is fully isolated. Defeat the closest threat to your back first, then return to the boss. A fat enemy may share the confined space, so avoid allowing both opponents to stand on opposite sides of you. If a chicken is available and your health is low, take it only after creating enough room to collect it safely.
R.Bear is a fast boxer who uses jabs, uppercuts, a rushing punch, a jumping body-drop and a close grab that leads to repeated headbutts. Do not jump directly toward him, because the uppercut can punish that approach. Keep a short gap, let him commit to a punch or rush, step away from the attack, and strike during the recovery. After a short attack string, retreat immediately rather than remaining beside him.
The sword is especially useful because it lets you attack from outside his preferred grab range. Match your vertical position to his, slash when he approaches, and move away before he can recover. If you lose the sword, use brief normal attacks and reposition instead of attempting a long combo. A standing special can interrupt a dangerous close-range situation, but it consumes health and should be reserved for a surround, a failed escape or an incoming grab that you cannot otherwise avoid.
Support Galsias can sometimes be thrown into R.Bear to damage or interrupt him. Use this only when the space behind you is clear and no bomb or second enemy is about to reach you. R.Bear is difficult to grab consistently, so treat throws as an opportunity rather than the main plan. When his health is empty, the game automatically begins the transition to Round 6.
- Clear the support enemies without allowing yourself to be surrounded.
- Take the chicken only after the boss area is safe enough to reach it.
- Avoid jumping directly toward R.Bear.
- Bait punches, rushes and body-drops, then punish the recovery.
- Use the sword’s reach and retreat before R.Bear can grab you.
- Use a special only as an emergency escape tool.
- Confirm the automatic transition to Round 6 after R.Bear is defeated.
Before you move on
- The Lower Deck 1 enemies have been cleared and the first stairs have been reached.
- Byatcko has been defeated at the first stair-area transition.
- Wayne has been defeated at the end of Lower Deck 2.
- Mach, the upper-deck support enemies, the bomb-throwing bikers and the ninjas have been cleared.
- The final support enemies before R.Bear have been defeated or controlled.
- R.Bear’s health bar is empty and the game automatically begins Round 6.
- The fixed Genesis Round 5 route was completed without an alternate branch or boss skip.
Round 6 — Beach and Jungle Base: Heavy Enemies and the Souther/Stealth Fight
Round 6 of the original North American Sega Genesis release starts on the Beach and continues through the crooked Jungle Base road. The route uses ninjas, Signals, bikers, motorcycle bombs, heavy enemies and Electra-type enemies to wear down your resources before the final fight. Souther is the primary target in the boss encounter, with Stealth-type Jetpacker support. Defeating Souther ends the encounter and causes the remaining Stealth support to fall as well. Factory machinery, conveyors and the cargo elevator belong to Round 7, not this stage.
1. Clear the Beach opening while keeping ninjas in front of you
Advance across the Beach in short steps. The opening groups include ordinary punks, Donovans and ninjas. Treat the armed ninja as the immediate threat, because its thrown weapon can interrupt an approach while another enemy is close.
Fight near the middle of the active screen and avoid scrolling forward while a ninja is still behind you or outside your attack range. Use grounded attack strings, throws and brief retreats instead of repeatedly jumping into the group. Ninjas can evade, circle and interrupt careless jump-ins, so let them commit to an approach before counterattacking.
In two-player mode, remain on the same general side of the active enemies. Splitting to opposite edges makes it easier for a ninja to get behind one player while the other is occupied. If a partner is knocked down, clear space first rather than beginning a long combo beside the fallen character.
- Defeat the opening punk, Donovan and ninja groups before advancing.
- Prioritize any armed ninja that can attack from outside normal grab range.
- Keep room behind you for a retreat.
2. Break up the three-kickboxer Beach encounter
The final Beach group contains three kickboxer-type enemies. Their long kicks, blocking and anti-air attacks make frontal button-mashing unreliable. Approach so that the three do not occupy the same horizontal line, then fight near the left or middle of the screen where you still have room to retreat.
Allow one kickboxer to enter range, interrupt with a short grounded string or a safe throw, and move away before the other two close in. If one begins a long kick sequence, step vertically or wait for the recovery instead of trading directly. Jump attacks should be occasional rather than your main plan, since these enemies can answer with anti-air attacks.
Use a health-consuming special only if the group has actually trapped you or removed your escape lane. If you can still move freely, preserve the special for the Jungle Base biker waves or the final boss. The next section offers recovery, so surviving without taking a needless trade is more valuable than forcing a fast finish.
- Confirm that the final Beach group has three kickboxer-type enemies.
- Do not let all three surround you at the screen edge.
- Save the special when a normal retreat remains possible.
3. Reach the early Jungle Base recovery item safely
At the beginning of Jungle Base, an early sandbag area contains a roast chicken. Do not stop to collect it while the nearby fighter or Signals are still attacking. Defeat the active group, then return to the item if your health justifies using it. If you are still healthy, leave it available for the next difficult wave.
Continue right in measured advances. A fighter may enter from above as the screen scrolls, so keep your character grounded and ready to attack the landing area instead of jumping forward blindly. Break only the sacks that are safe to reach; some contain score items rather than recovery, and opening every sack during combat exposes you to interruption.
The stage timer is not a reason to rush into the next trigger. Clear the visible enemies, move back toward the center, and only then advance the screen.
- Locate the early Jungle Base chicken near the sandbag area.
- Defeat the nearby enemies before collecting it.
- Leave the chicken untouched if using it immediately would waste the recovery.
4. Handle bikers and the Big Ben-type heavy on the crooked road
The road section introduces ordinary bikers together with a Big Ben-type heavy. A biker is most dangerous when another enemy approaches from the opposite side, so use vertical movement to avoid standing directly in its path. Attack after the rider has passed, stopped or been knocked down.
A throw is useful when a biker is safely within grab range, but do not chase one across the screen while another enemy is entering. Keep the heavy in front of you and use short attack strings. Big Ben-type enemies can interrupt extended pressure and punish you if you remain directly in front of them after a hit.
Max can make better use of grabs and throws, while Skate should circle and re-enter rather than trade blows. Axel and Blaze should favor compact strings followed by a retreat. If the biker and heavy overlap and leave no route out, use a special to break free rather than trying to absorb the collision.
- Keep incoming bikers visible and avoid being attacked from both sides.
- Attack after a biker’s forward movement commits.
- Use short strings and reposition after striking the Big Ben-type enemy.
5. Avoid motorcycle bombs and preserve the late items
Further along the road, motorcycles enter in repeated attacks. Some riders drive directly at you while others drop bombs from the background. Watch where each bomb lands and move vertically or retreat before the blast. Do not wait beside an armed bomb, especially near the screen edge where a rider can pin you during the escape.
After the motorcycle pressure, sandbag areas provide useful items, including a knife and an apple. Defeat the active bikers before opening the sacks. The knife is useful for ordinary enemies and can create space, but do not chase Electra-type enemies recklessly while holding it. Their reach and aerial movement make controlled grounded attacks and carefully timed jump kicks safer.
The next groups combine Electra-type enemies with biker pressure. Keep both sides of the screen in view and avoid focusing so completely on an Electra that a biker reaches you from behind. Move vertically to line up attacks, then retreat when enemies begin entering from both sides.
A later sandbag area near the boss approach provides additional recovery, including another chicken opportunity. Clear the active enemies before breaking or collecting it. This is the best time to decide whether you need the food for the boss rather than opening it during an ambush.
- Move away from motorcycle bomb impact areas before attacking.
- Clear bikers before collecting the knife, apple or later food.
- Reserve the late chicken for the boss if your health is already falling.
6. Focus on Souther in the final encounter
The final encounter places Souther in the arena with Stealth-type Jetpacker support. The number and behavior of the supporting enemies can vary with the mode and encounter setup, so do not rely on a fixed universal count. Souther is the primary target: when Souther is defeated, the Stealth support also falls and the encounter is complete.
Souther uses claw attacks, a sliding attack, jumping or somersaulting movement, an uppercut and a grab-and-slam. Approach only after one of these actions has committed. Use a short grounded string or a safe throw, then create space. Repeated jump-ins are risky because Souther can answer with anti-air attacks and leave you exposed to a Jetpacker dive.
Keep Souther and the Stealth support in the same general area whenever practical. If a Jetpacker moves off-screen, do not chase it across the arena while Souther remains active. Watch the upper part of the screen for a return, stop extending your combo when a dive or diagonal charge begins, and move away from the landing path before counterattacking.
Use the health-consuming special when Souther and the support overlap and a normal retreat would leave you trapped. Otherwise, save it for a confirmed escape. The objective is to maintain control and damage Souther consistently, not to divide your attention equally between every enemy.
- Identify Souther as the primary boss target.
- Watch for Stealth-type Jetpacker dives and diagonal charges.
- Punish Souther only after a committed attack or clear recovery.
- Verify that defeating Souther ends the encounter and brings down the Stealth support.
7. Use a controlled co-op formation and confirm the stage transition
In two-player mode, one player can draw Souther’s attention while the other watches the Jetpacker support, but keep the enemies in the same broad area. Carrying them to opposite edges creates cross-screen attacks and makes it harder to rescue a pinned partner.
If one player is grabbed or knocked down, the other should use a throw, weapon strike or short attack to create space rather than beginning a long combo. Give the late chicken to the player who needs it most, and avoid dropping a weapon directly in the partner’s escape path.
When Souther is defeated, the Stealth support falls with him and the game advances to Round 7, the Factory and Elevator stage. That transition confirms completion of Round 6. Do not search this round for conveyors, factory machinery or a cargo elevator; those are objectives for the following stage.
- Souther is defeated.
- The remaining Stealth-type support falls as part of the encounter’s completion.
- The game advances to Round 7.
- Factory conveyors and the cargo elevator are left for Round 7.
Before you move on
- The Beach opening is cleared.
- The final Beach fight with three kickboxer-type enemies is cleared.
- The early Jungle Base chicken has been collected or deliberately saved.
- The fighter, Signal, biker, heavy, motorcycle and Electra-type waves are defeated.
- The knife, apple and later recovery items have been collected safely when needed.
- The final arena’s primary boss is identified as Souther, with Stealth-type Jetpacker support.
- Souther is defeated first or otherwise made the decisive target.
- The Stealth support falls when Souther is defeated.
- The game transitions to Round 7, confirming completion of Round 6.
Round 7 — Freight Elevator / Munitions Plant: Close Quarters and Robot Bosses
Round 7 of the original North American Sega Genesis release is divided into a conveyor-belt factory, a confined cargo-elevator ascent and a rooftop battle against Molecule and Particle. Move through the factory carefully, secure the optional 1-UP from the breakable barrel between conveyor belts, defeat the required Buoh and Dallala encounter, then preserve enough health and space for the elevator waves. On the rooftop, attack the robots after their commitments and retreat as soon as either machine begins its self-destruct sequence.
Cross the factory conveyors under control
Move right through the factory while watching the direction of each conveyor belt. The belts affect enemies as well as your character, so they can separate attackers or carry a dropped weapon away from you. Fight near the middle of the available space and avoid advancing into the far-right edge while enemies are still entering. Leave room to step vertically and retreat when attackers drop from the upper railings.
The first breakable bins contain an Apple and a Money Bag. Defeat the nearby enemies before opening them, then collect the Apple when the recovery is useful. Buffet, the falling Fat Guy, enters along this route. Avoid his landing point, wait for his jump or forward attack to finish, and punish him with short attacks rather than standing directly in front of him for a long combo.
Bikers appear near the upper railings. Some remain above the main fighting area and throw bombs, so watch the floor for the landing point and move vertically instead of retreating in a straight line. Keep ground enemies in front of you while the bombs are active. Further breakables provide a Money Bag, Gold Bar and Apple. A Biker later drops down with a Pipe; collect it only after the nearby enemies are under control.
Use the Pipe’s reach against the Dominatrix and Ninja groups that follow. Strike from outside the nearest enemy’s immediate range, then reposition before the belt carries you into another attacker. Ninjas move quickly, can circle around you and may carry weapons, so do not chase a Pipe or another dropped item while an enemy is still close enough to interrupt the pickup.
- Use the conveyor belts to separate enemies without fighting at the extreme edge.
- Collect the early Apple and Money Bag only after controlling the first group.
- Watch the upper railings for bomb-throwing Bikers.
- Take the Pipe after the drop-down Biker and nearby enemies are no longer a threat.
- Do not chase a weapon across a moving belt during an active enemy attack.
Find the factory 1-UP and defeat Buoh and Dallala
Continue through the remaining conveyor encounters. Preserve the Pipe when possible because its reach is useful against Dominatrixes and Ninjas. If a Ninja drops a Knife or Sword, wait until the surrounding enemies are down or displaced before picking it up. A weapon is valuable here, but taking damage during a hurried pickup can cost more health than the weapon saves.
Near the end of the factory section, two bins slide toward you on the conveyor. One contains a Chicken. Clear the active enemies, then take the Chicken immediately if your health is low. If you are still healthy, leave it available for the sub-boss or elevator preparation rather than consuming it automatically.
The hidden 1-UP is in a breakable barrel positioned between conveyor belts during the factory portion, before the cargo elevator and independently of the Buoh and Dallala encounter. Clear the enemies around that section first, break the barrel safely, and collect the extra life if you want the additional attempt. Do not confuse this barrel with the nearby food containers, and do not wait until after the elevator begins to search for it. Missing the 1-UP does not prevent progression.
The required factory sub-boss encounter is against Buoh and Dallala. Buoh is the fast Ninja-type fighter, while Dallala is an Electra-type whip user. Do not chase one across the screen while the other remains free. Move vertically to make Dallala’s whip harder to line up, then punish Buoh after he commits to a jump or close approach. Use short attack strings, throws and Blitz attacks when there is a clear opening.
Use the defensive Special when both enemies close around you or a whip attack would otherwise pin you. If the Pipe survives, use it to create space instead of standing still and trying to hit both sub-bosses through repeated swings. The route continues only after Buoh and Dallala are defeated. Take the Chicken before entering the lift if you need the health; otherwise, preserve it for the confined section.
- Check the moving bins for the separate Chicken.
- Break the barrel between the conveyor belts and collect the optional hidden 1-UP.
- Defeat Buoh, the Ninja-type sub-boss.
- Defeat Dallala, the Electra-type sub-boss.
- Confirm that the factory enemies are clear before entering the cargo elevator.
Survive the cargo-elevator waves
Treat the cargo elevator as a confined endurance arena. Fight from a lower side of the platform when possible, but do not press completely into a corner. Preserve an escape lane so you can move around a grab, slide, bomb or incoming attack. The platform has no pit that removes enemies, so every threat must be controlled or defeated before the elevator continues upward.
Signals and other punks arrive first. Face the newest attacker, then turn quickly when another enemy approaches from behind. As the elevator rises, a Jetpacker descends onto the platform. Prioritize him once he is within reach because an airborne attacker combined with ground enemies can break your spacing. Jump attacks, Blitz attacks and weapon swings are safer than standing directly underneath him and committing to a long grounded string.
The next difficult group includes Ninjas and Karate Masters. One Ninja carries a Sword. Separate the carrier from the other enemies before picking it up, then use the Sword’s reach against later arrivals. Do not cross the entire platform for the weapon while another enemy is close enough to knock you down.
Two Kickboxers and Bikers follow. Keep the Bikers from driving you into the Kickboxers’ long-reaching attacks, and move away as soon as bombs are thrown. Later waves add ordinary punks, a Fat Guy and Knife Punks. Remove Knife Punks promptly when they approach from either side, then use throws or short Sword attacks to stop the Fat Guy from forcing you toward an edge.
Near the end of the ascent, Soya appears as the required Jack-type sub-boss. Deny him a clear knife or forward-lunge lane by moving vertically, then attack after he commits to an approach. Do not let Soya occupy one side while another enemy closes behind you. If the group surrounds you, spend a Special to escape rather than absorbing several hits. In two-player mode, stay close enough to rescue a pinned partner without standing in the same attack lane.
- Fight from a lower side while preserving an escape lane.
- Defeat the Jetpacker promptly after he descends.
- Secure the Sword only after the Ninja wave is under control.
- Prioritize Knife Punks and enemies approaching from behind.
- Treat Soya as the required Jack-type sub-boss near the end of the lift.
- Use the saved Chicken when the elevator damage makes the recovery worthwhile.
Reach the rooftop and defeat Molecule and Particle
When the elevator reaches the rooftop, finish any remaining regular enemy before committing to the robot battle. Preserve the Pipe or Sword if one remains, but do not risk a weapon pickup during an active attack. Keep both robots visible whenever possible; focusing on one while the other leaves your view can expose you to a laser, flail strike or sudden approach.
Molecule and Particle move quickly with rocket-assisted hops and close-range flail attacks. At range, watch for the laser and step out of its line instead of waiting in place. At close range, do not remain beside a robot long enough for its spring-mounted flail to sweep into you. Attack after a missed jump, tackle or extended flail strike, then move away before the second robot closes the gap.
Use short grounded strings, jump attacks, Blitz attacks and weapon swings. Grapples can work when a robot is clearly vulnerable, but they are not a dependable primary strategy. If a grapple succeeds, complete the throw or follow-up quickly. Holding the robot too long can trigger its electric counterattack, so disengage rather than trying to maintain control indefinitely.
Keep the robots from attacking from opposite sides by moving vertically and briefly lining them up. Focus damage on the robot that has just landed or completed an extended attack, then disengage. If both robots close around you, use a Special as an emergency escape rather than forcing a normal combo.
When one robot is defeated, immediately move away from its body. The defeated machine self-destructs at its position and can damage you after its health is gone. Wait for the explosion to finish, then face the remaining robot and repeat the recovery-and-retreat method. Do not continue attacking during either self-destruct animation. Round 7 is cleared only after Molecule and Particle have both been defeated and the game advances to Stage 8, Mr. X’s Office.
- Avoid laser lines at range and flail sweeps at close range.
- Attack after a robot misses a jump, tackle or extended flail strike.
- Use weapons and brief attacks before relying on grapples.
- Retreat immediately when either robot is defeated.
- Wait for both self-destruct explosions to end.
- Confirm that the game advances to Stage 8, Mr. X’s Office.
Before you move on
- The factory portion is complete after the conveyor encounters are cleared, the optional barrel 1-UP has been collected if desired, and Buoh and Dallala have been defeated.
- The lift portion is complete when its successive enemy waves have been cleared, including the required Soya encounter, and the platform reaches the rooftop.
- Round 7 is cleared only after Molecule and Particle have both been defeated and their self-destruct explosions have ended.
- The game then advances to Stage 8, Mr. X’s Office, confirming that the Munitions Plant and Freight Elevator chapter is complete.
Round 8 — Syndicate Stronghold: final approaches, minibosses and safe item collection
Round 8 is the fixed final stage of the original Sega Genesis version. The route begins in Mr. X’s stronghold, leads through Bear Jr. and a boss elevator with Vulture, Nail, and Z. Kusano, then reaches the final room where Shiva and Mr. X wait. Move left through each locked encounter, use the available food deliberately, and enter the final room with enough health and at least one emergency special if possible.
1. Clear the opening corridor before moving left
Round 8 begins inside Mr. X’s stronghold and scrolls from right to left. The first encounter contains a robot, two Donovans, and a Galsia. One Donovan carries a pipe. Do not rush past this group: the screen locks while the enemies are active, and the robot explodes when defeated, so step away from its body before the blast reaches you.
Use the pipe to control the opening group if you can pick it up safely. Short swings against enemies in front of you are safer than chasing a Donovan across the screen. If the weapon is knocked away, create space before retrieving it. The pipe is valuable, but carrying it through every later encounter is not required; spend it when it prevents a dangerous crowd from forming.
- Defeat the robot, both Donovans, and the Galsia before advancing.
- Move away immediately after the robot is defeated.
- Pick up the pipe only after the nearby enemies are controlled.
2. Fight Bear Jr. and preserve the apple
Bear Jr. drops into the corridor after the opening enemies. He uses the same general boxing style as R. Bear, with quick punches, strong reach, and dangerous close-range pressure. Keep moving vertically along the playfield instead of standing directly in front of him. Let him approach, answer with a short attack string, and retreat before he can counter with a punch or grab.
Avoid repeated jumping attacks. R. Bear and Bear Jr. can punish careless aerial approaches, and the confined corridor gives you little room to recover. Throws are useful when Bear Jr. has clearly committed to an attack, but do not force a grab while he is active. A food item is found in the vases in this section. Leave the apple alone until you actually need the recovery, preferably after Bear Jr. has been weakened or defeated.
- Keep Bear Jr. away from the extreme edge of the screen.
- Use short attacks and retreat instead of mashing through his guard or counters.
- Save the apple until health recovery is genuinely useful.
3. Enter the boss elevator with a weapon plan
After Bear Jr. is defeated, the route continues to the boss elevator. The elevator is a sequence of locked fights rather than a single boss room. Ordinary enemies appear first, and the first boss rematch is Vulture, the Barbon-type opponent. Keep the player near the middle of the platform whenever possible. This gives you room to switch sides when an enemy drops in and reduces the chance of being trapped against an edge.
The elevator rises between encounters and restores part of your health. Treat those pauses as recovery opportunities, but do not waste health by walking into enemies as they arrive. If you still have the pipe, use it on clustered ordinary enemies or to interrupt Vulture’s approach. If the pipe is nearly gone, throw it into a group and continue bare-handed rather than risking repeated drops while surrounded.
- Stay near the elevator’s center until an attack forces you to reposition.
- Use the recovery between elevator sections to stabilize your health.
- Do not pick up a dropped weapon while an enemy is already within striking range.
4. Defeat Vulture, then prepare for Nail
Vulture appears after the first group of ordinary enemies. Treat him as a close-range heavy opponent. Stand just outside his attack range, let him commit to a forward attack, then punish the recovery with a short combo or a thrown weapon. Do not continue attacking after knocking him down if another enemy remains active; move away first and make the screen safe.
As the elevator moves again, another Galsia and Donovan appear. Clear them before Nail arrives. Nail is the Zamza-type boss and fights in a confined space, where his claw attacks and sudden movement can catch a player standing on the same horizontal line for too long. Attack from slightly above or below Nail, then move diagonally away after your combo. This spacing makes it harder for him to immediately answer with a claw strike or grapple.
- Bait Vulture into a committed attack before counterattacking.
- Clear the ordinary enemies between Vulture and Nail.
- Fight Nail off the extreme left and right edges of the elevator.
5. Survive the Z. Kusano section
The next elevator section begins with another Galsia and Donovan. On higher difficulty settings, additional support enemies can join these encounters, so prioritize the enemy that is closest to your current position rather than chasing the boss-type opponent immediately.
Z. Kusano is the Abadede-type wrestler and is the final boss rematch before the door to Mr. X’s room. Wrestlers can break out of careless attack strings, so use brief combinations and throw him only when he is clearly vulnerable. Once the ordinary enemies are down, pressure Z. Kusano near one side of the platform, but leave yourself enough room to retreat from a charge or clothesline. A standing special is appropriate when several enemies overlap or when Z. Kusano is about to pin you against the edge; do not spend every special merely to speed up the fight.
- Remove nearby support enemies before committing to Z. Kusano.
- Use short attacks and clear throws rather than forcing long combos.
- Keep enough space to retreat from a wrestler charge.
6. Clear the final hallway and enter the final room prepared
After Z. Kusano, the elevator reaches the final area. Mr. X remains in the background while Galsias and Donovans attack first. Defeat this last group before the Shiva sequence begins. Keep moving so the backup enemies do not form a wall around you, but do not chase one enemy so far that another reaches your back.
This is the final preparation point. Use a visible food item if entering the boss sequence at critical health would make one mistake fatal. Preserve at least one usable special if possible, because it can create breathing room when Shiva or the final backup enemies trap you. A weapon is helpful but not mandatory; if the pipe has been dropped or exhausted, use bare-handed attacks and vertical spacing rather than risking damage while trying to recover it.
There is no alternate major route in the original Genesis campaign. Once the final group is cleared, the game proceeds to Shiva, followed by Mr. X. In two-player mode, stay on different vertical lines when possible so both players do not occupy the same escape lane or accidentally push one another into the incoming crowd.
- Defeat the final Galsias and Donovans before Shiva enters.
- Recover with food only when it materially improves your chance of surviving the final sequence.
- Keep a special available for crowd control or an emergency escape if possible.
- Confirm that the screen transitions to Shiva; this marks the end of the stronghold approach.
Before you move on
- The opening robot, two Donovans, and Galsia are defeated.
- Bear Jr. is defeated and the route continues to the boss elevator.
- The elevator sequence is cleared in order: Vulture, Nail, then Z. Kusano, with the intervening support enemies defeated.
- The final Galsias and Donovans are cleared and the game transitions to Shiva.
- After Shiva, Mr. X begins the final fight. The campaign is complete only when Mr. X is defeated and the ending sequence and credits begin.
Final Room — Shiva, Mr. X and the ending sequence
Stage 8 ends with a fixed Genesis sequence: clear the stronghold’s final enemy and recurring-boss encounters, defeat Shiva, then defeat Mr. X. The final fights reward patience more than constant pursuit. Keep room to move, attack Shiva after his committed advances, and use the vertical depth of Mr. X’s room to avoid his gunfire and close-range gun-butt attack.
1. Treat the whole Stage 8 approach as preparation
The final confrontation comes after the stronghold’s elevator and recurring-enemy sections. Stage 8 can place heavy pressure on your remaining lives and health before Shiva appears, so do not spend specials casually in the last ordinary waves. Use throws, jump attacks and weapons to create space, and take food when it is safe rather than trying to rush past it.
The recurring encounters before the final boss are part of the fixed Genesis route. They are not alternate endings or optional branches. If you enter the last area carrying a weapon, preserve it for a crowded wave or for opening space against support enemies; do not assume that it will remain available through every transition.
- Enter the final boss section with room to retreat.
- Save at least one special for a corner escape if possible.
- Use food and weapons before advancing past the point where they can be safely collected.
2. Fight Shiva by making him commit first
Shiva is the penultimate opponent and is designed to punish long, predictable close-range pressure. Stay near the center of the room, move slightly up or down to change lanes, and let Shiva advance. When he finishes a dash, jump-in or missed close attack, answer with a short attack string, a jump kick or a character-specific blitz, then move away before he can counter.
Do not repeatedly attack into his guard. Shiva can block normal pressure and can answer careless specials or blitz attempts. If your first attack is blocked, disengage and reset the spacing. A safe single hit followed by movement is more reliable than trying to force a full combo every time.
- Keep Shiva away from the corner whenever possible.
- Attack after a missed or completed approach.
- Stop attacking when he is clearly blocking.
3. Recognize Shiva’s dangerous attacks
Shiva’s forward dashing kick can cross space quickly and is especially dangerous when you are already near a wall. Move vertically or retreat along the lane rather than trying to meet the attack with a standing strike. Once he has passed and is recovering, close in for a brief punish.
At close range, Shiva can use fast martial-arts attacks and his flame-based defensive special. Avoid grabbing him automatically: a failed or unsafe grab attempt can put you directly in range of the counterattack. If he has you pinned or a support mistake leaves you unable to escape, use your defensive special to break free. The health cost is preferable to absorbing a full sequence against the wall.
- Evade the dashing kick instead of challenging it head-on.
- Punish after Shiva lands or finishes a committed attack.
- Use a special as an emergency escape, not as routine damage.
4. Finish Shiva without changing your risk level
When Shiva is low on health, continue the same bait-and-punish pattern. Do not chase him into the corner just because one more combo might finish the fight. Use a jump kick, a short grounded string or a blitz when you have a clear lane, then return to a mobile position.
The original Genesis encounter is fought on a normal playable floor; there is no platform-rise sequence that requires separate timing. Keep your character on the main floor and avoid jumping merely to follow Shiva. If you lose a life, begin the next attempt by creating distance and reading his first approach instead of immediately attacking.
- Do not pursue a blocking Shiva into the corner.
- Use safe single attacks when his health is nearly empty.
- Confirm that Shiva is defeated before moving into Mr. X’s room.
5. Use the full depth of Mr. X’s room
Mr. X begins with his Tommy gun and uses it both to shoot and to strike at close range. His gun-butt attack is dangerous when you stand directly in front of him, so do not treat close distance as automatically safe. Move above or below his horizontal line, wait for the shot or approach to finish, then close in from an offset lane.
A practical pattern is to occupy one side of the room, let Mr. X or a Galsia approach, and then move around the nearest threat rather than backing straight into the edge. Land a short attack string or a throw when Mr. X is exposed, then retreat diagonally. The aim is to make him miss while preserving an escape route.
- Change lanes before Mr. X fires across your position.
- Avoid standing directly in front of the gun at close range.
- Leave retreat space after every attack.
6. Control the Galsias without losing the boss fight
Mr. X sends Galsias into the room in waves. Do not spend the entire fight trying to clear every support enemy before damaging Mr. X. Knock down or throw the closest Galsia, use a weapon to open a lane, and return to Mr. X while the room is briefly clear. Throwing one support enemy into another can create the space needed to escape a corner.
Prioritize the enemy that blocks your movement or approaches from behind. If Mr. X is aiming across the room, changing lanes is usually safer than finishing a slow combo on a Galsia. In two-player mode, one player can briefly draw the support enemies away while the other attacks Mr. X, but regroup if both players are pushed to opposite edges.
- Deal with the nearest movement-blocking Galsia first.
- Use throws to create space as well as damage.
- Return to Mr. X after opening a lane instead of chasing distant adds.
7. Recover correctly after a mistake
If Mr. X catches you with the gun-butt attack or a Galsia pins you, do not immediately retaliate from the same position. Move away after recovery, change vertical lanes and use a special if the surrounding enemies make normal movement unsafe. When you re-enter after losing a life, clear the nearest Galsia first and wait for a readable Mr. X shot or approach before committing.
Weapons can help, but do not stand still trying to preserve one while enemies surround you. A dropped weapon is less important than keeping a lane open. If a weapon disappears, return to bare-handed spacing and continue the same bait-and-retreat pattern.
- Re-establish spacing before attacking after a knockdown.
- Use a special to escape a genuine crowd trap.
- Discard a weapon rather than taking multiple hits to protect it.
8. Confirm the campaign ending
Continue repeating the angle-attack and retreat pattern until Mr. X is defeated. The final story sequence then plays automatically: Adam is rescued, the heroes leave the stronghold, and the credits begin. The original USA Genesis Streets of Rage 2 campaign has one canonical main ending; there is no alternate Mr. X decision sequence in this release.
For completion purposes, do not stop at the victory animation. Watch until the ending sequence transitions into the credits. That is the concrete confirmation that the main campaign has been cleared.
- Shiva is defeated.
- Mr. X is defeated after the support waves are managed.
- The ending sequence plays and the credits begin.
- Record the character, difficulty, lives and continues if keeping a personal completion log.
Before you move on
- The Stage 8 approach and recurring encounters are cleared.
- Shiva is defeated in the penultimate fight.
- Mr. X is defeated in the final room.
- Adam’s rescue ending plays and the credits roll.
- For a no-continue personal challenge, verify that no Continue option was selected during the run.
References for this chapter
- STREETS OF RAGE 2 — Sega Genesis Official Instruction Manual
- Streets of Rage 2 — StrategyWiki Enemies
- Streets of Rage 2 — Guide and Walkthrough by Loopy
- Streets of Rage 2 — Guide and Walkthrough — Genesis, CLNG1983
- Streets of Rage 2 — Move List — Genesis — Truncated
- The PrinceWatercress Blog: PrinceWatercress plays Streets of Rage 2 — Part 4 of 4
Two-Player Co-op: roles, friendly collisions and shared resources
The original North American Sega Genesis version of Streets of Rage 2 supports a two-player cooperative campaign through the same eight-round route used by one player. Choose 2 PLAYERS at the title screen, or allow Player 2 to join a one-player game from Controller Port 2. Co-op uses the normal character roster and boss sequence, but the larger active enemy allowance makes careless positioning more dangerous. The team succeeds by controlling separate lanes, protecting retreat space and sharing limited pickups intelligently. Completion requires the active playthrough to defeat Shiva and Mr. X, then reach the ending and credits; both players do not need to remain alive for that ordinary completion check.
1. Start a standard co-op campaign
At the title screen, select 2 PLAYERS with both Genesis controllers connected. Each player then chooses Axel, Blaze, Max or Skate. The one-player option also permits Player 2 to join during an active game by pressing Start on Controller 2, although beginning with 2 PLAYERS is cleaner when you are planning roles and resource priorities from Round 1.
Co-op follows the normal Streets of Rage 2 route: City Street, Bridge Construction, Amusement Park, Stadium, the ship, Jungle Base, the factory and the final stronghold. There is no separate co-op route or alternate co-op ending. Optional same-character codes documented by specialist Genesis guides are not needed for a normal campaign and should not be confused with the ordinary character-selection process.
Agree before starting on the difficulty, character choices and whether you are tracking a no-continue or two-player-survival record. The original game permits attacks to damage the other player, so cooperation requires deliberate spacing rather than simply attacking wherever an enemy appears.
- Select 2 PLAYERS for a full co-op start, or press Start on Controller 2 to join a one-player game.
- Choose characters whose movement and attack ranges complement each other.
- Treat friendly fire as an active hazard throughout the campaign.
- Follow the fixed eight-round route to the final stronghold.
2. Use an anchor-and-support formation
Assign one player as the anchor. The anchor stays near the main enemy group, draws attacks and prevents enemies from reaching the team’s rear. The support player attacks from an offset vertical lane, handles threats approaching from the side and collects a weapon or food only after the immediate group is under control.
Max is a natural anchor because his grabs and heavy attacks control space well, although he is slower when an enemy escapes. Skate is a useful support character because his mobility lets him reposition quickly. Axel and Blaze can fill either role and should switch duties when the next encounter favors speed, reach or crowd control.
Two-player games allow more active enemies than one-player games. Specialist Genesis move documentation lists six active enemies for two-player play compared with five for one-player play. That additional pressure is a reason to stay together, not to split across the screen. Advance only when both characters have a retreat lane and are ready for the next enemy trigger.
- Keep the anchor between the main group and the team’s retreat space.
- Let the faster player collect distant items only after the active threat is controlled.
- Regroup before crossing a screen transition or activating the next enemy group.
- Do not separate far enough for one player to be surrounded alone.
3. Fight in different vertical lanes
Stand slightly above and below the enemy group instead of occupying the same horizontal line. This gives both players useful attack angles, reduces repeated friendly-fire hits and leaves room for the characters to retreat in opposite directions if the formation breaks.
Friendly fire can result from ordinary attacks, jump attacks, throws, weapon attacks, weapon throws and special moves. If one player has an enemy grabbed, the other should not rush through the grab position with a full attack string. Wait for the throw or attack to finish, then close the gap from above or below.
Check the landing area before jumping. A jump attack that lands on the partner can interrupt the rescue or push both players into a corner. When throwing an enemy, choose an empty lane rather than sending it through the other character. This matters most near walls, pits, moving hazards and boss arenas where a single collision can remove the only safe escape route.
Health-consuming specials are useful when a character is surrounded, but overlapping specials are wasteful and can hurt the partner. Use one emergency special to create space, then retreat and re-form instead of immediately spending the second player’s health as well.
- Use separate vertical lanes whenever possible.
- Do not attack through a grabbed enemy or a partner’s close-range combo.
- Aim throws and weapon releases away from the other player.
- Reserve specials for real crowd-control emergencies.
4. Rescue a pinned partner from the side
When one player is grabbed, repeatedly knocked down or trapped against the edge, the free player should attack the enemy blocking the escape route. Approach from the open vertical lane and use a short combo, throw or weapon strike to create a gap. Do not charge directly into the entire cluster, because the rescue attempt can hit the trapped character or leave both players vulnerable to a second grab.
As soon as the gap opens, the pinned player should move toward the center of the screen rather than trying to finish every nearby enemy. The free player should retreat with them and help rebuild the formation. If both characters remain at one edge, enemies can alternate attacks and prevent either player from standing safely.
Use a special only when a normal strike or throw cannot create space quickly enough. Repositioning costs no health, while a special reduces the user’s available health. After a successful rescue, pause the advance long enough for both players to face the same direction and identify the next threat.
- Remove the enemy blocking the escape route instead of striking randomly into the crowd.
- Give the rescued player room to stand and move toward center screen.
- Retreat together after the rescue.
- Do not spend both players’ specials on the same minor threat.
5. Coordinate the original weapon set
The original Genesis weapon set includes the lead pipe, katana or sword, knife, ninja knife or kunai and bomb. The manual explains that weapons can be knocked from the player’s hands, dropped during a grab and lost when proceeding to the next scene. It also states that a weapon disappears after being dropped repeatedly, so avoid careless tossing when a weapon is useful for the rest of the encounter.
Give one player responsibility for the weapon while the other controls the approach. A pipe or katana can clear a lane, while a knife or kunai can be used at close range or thrown from a safer distance. Bombs should be picked up and thrown back promptly; do not carry one through the group while waiting for a perfect opening.
In a narrow corridor or boss arena, announce the throw direction before releasing a knife, kunai or bomb. Never throw a weapon across the partner’s lane. If the partner must cross first, wait, drop the weapon safely or let the other player move to the opposite vertical lane.
Against a boss, give the weapon to the player with the clearer attack angle. The second player should control support enemies, draw the boss toward the weapon user or attack after the boss turns. Staggered pressure is safer than having both characters swing in the same position.
- Use the pipe, katana/sword, knife, kunai or bomb without crossing the partner’s lane.
- Call out throws in narrow spaces and boss rooms.
- Keep the weapon holder away from corners and grab-heavy groups.
- Remember that weapons can be knocked away, dropped or lost at a scene transition.
6. Share food and manage separate lives
Food restores the health of the player who collects it. Once nearby enemies are knocked down or separated, let the lower-health player take the apple or chicken. Do not stop in the middle of an uncontrolled wave to negotiate a pickup; first make enough space that collecting the item will not cost more health than it restores.
Extra lives belong to the player who collects them rather than creating a shared team pool. If one player has fewer remaining lives, give that player the safer route to the 1UP when practical. Do not force a dangerous cross-screen dash while enemies are active, because losing health or a life for an unsafe pickup defeats its purpose.
Track both life stocks before every boss. If one player is near a game over and the other has several lives remaining, the healthier player should take the lead in risky rescue attempts while the weaker player stays behind the anchor and avoids unnecessary specials. Breakable containers and visible recovery items should be collected only after the immediate wave is controlled.
- Let the lower-health player collect safe food.
- Remember that the player who collects a 1UP receives it.
- Track each player’s life stock separately.
- Do not cross an active enemy group solely to claim a recovery item.
7. Adapt boss fights and finish the campaign
Co-op does not require completely different boss patterns, but it does require disciplined spacing. One player should draw the boss’s attention while the other attacks from an offset position or controls support enemies. When the boss changes target, switch roles instead of continuing to attack from the same side.
Against mobile bosses, preserve a clear retreat lane. Against grapplers, do not stand directly in front of the boss together. During the Shiva fight, one player can provoke his approach while the other punishes a recovery opening, then both disengage before the next dash or jump. During the Mr. X fight, one player should watch the recurring punks while the other looks for safe openings around the gunfire and gun-butt attacks.
If one player loses all lives, the surviving player can continue the active campaign alone. The ordinary co-op completion goal is met when the surviving playthrough defeats Shiva and Mr. X, reaches the closing sequence and allows the credits to appear. Both characters remaining active through the final fight is required only for a personal two-player-survival challenge.
Do not assume two characters make the final room safe. Preserve an escape lane, avoid overlapping specials and use throws or short attacks only when the boss is positioned so the partner will not be struck by the follow-up.
- Alternate pressure when the boss changes target.
- Keep one player available to manage support enemies.
- Maintain an escape lane during the Shiva and Mr. X fights.
- If one player games over, let the survivor continue rather than abandoning the run.
- Confirm the ending sequence and credits before recording the campaign as complete.
Before you move on
- Both players can clear ordinary enemy groups while maintaining separate vertical lanes and avoiding repeated friendly-fire hits.
- The team uses an anchor-and-support formation, regroups before screen transitions and rescues a pinned player from the side.
- Food goes to the lower-health player when safe, while 1UPs are assigned with each player’s separate life stock in mind.
- The pipe, katana/sword, knife, kunai and bomb are used or thrown without crossing the partner’s lane.
- For ordinary co-op completion, the active playthrough reaches the final round, defeats Shiva, defeats Mr. X and displays the ending sequence and credits, even if the other player has already lost all lives.
- For a personal two-player-survival record, verify that both characters remained active through the final battle.
- For a no-continue record, verify that neither player selected Continue; otherwise record the number of continues used.
References for this chapter
Advanced techniques, directed specials and weapon optimisation
The original Sega Genesis version of Streets of Rage 2 separates no-cost Blitz attacks from health-consuming Special Attacks. Learn the Blitz input first, use throws to break up groups, and save pipes, swords and knives for dangerous waves or boss approaches. Five optional hidden 1-UP opportunities can strengthen a campaign attempt: one in Round 1, one in Round 2, two in Round 3, and one in Round 7.
Master the no-cost Blitz attacks first
Tap the D-pad twice in the same direction, then press Button B. This performs a Blitz attack when the character is not holding a weapon. If a weapon is equipped, the input throws the weapon instead, so finish using it or drop it before attempting the command.
Axel performs Grand Upper, Blaze performs Vertical Slash, Max performs Power Slide, and Skate performs Super Dash or Dynamite Head Butt. These attacks do not consume health, making them useful for interrupting a closing group or opening an escape lane. Axel’s Grand Upper clears enemies directly ahead. Blaze’s Vertical Slash cuts through pressure in front of her. Max’s Power Slide carries him through a close formation despite his slower movement. Skate’s rush attack crosses space quickly, but check the landing area before committing because he can carry himself into another attacker.
Use a Blitz before enemies occupy both sides of your character. Against one stunned enemy, a regular combo, grab or weapon swing is usually safer. If a normal attack comes out instead, the directional taps were too slow, the attack button was pressed early, or a weapon was still equipped. If you are facing away from the intended travel direction, turn first and then enter the command.
- Tap one direction twice, then press Button B.
- Remove or drop a weapon before attempting a Blitz.
- Use Blitz attacks to interrupt, cross space or create an escape lane before spending health on a Special.
Use directed Specials deliberately
Press a direction together with Button A to perform the directed offensive Special. Axel uses Dragon Smash, Blaze uses Kikousho, Max uses Thunder Tackle, and Skate uses Corkscrew. Pressing Button A without a directional input performs the stationary Special: Axel’s Dragon Wing, Blaze’s Embukyaku, Max’s Knuckle Bomb or Skate’s Double Spin Kick.
The stationary Special provides defensive invulnerability and is useful for avoiding a projectile, weapon attack or immediate contact even when it does not hit an enemy. It consumes health only when it connects. The directed offensive Special is different: it consumes health whenever it is used, including when it fails to hit, and it does not provide the same defensive protection. Treat a missed directed Special as a real resource loss.
Use a directed Special when several enemies are lined up, when a fast attacker is about to pin you against the screen edge, or when a boss has committed to a vulnerable approach. Dragon Smash clears enemies directly ahead but leaves Axel exposed from behind. Kikousho is strongest with a clear line in front of Blaze. Thunder Tackle forces space through a close formation but can carry Max into another enemy. Corkscrew moves Skate through a threat, so confirm the landing position before pressing it.
Do not spend a directed Special on one ordinary enemy already within grab range or trapped in hit-stun. Use a normal attack, throw or weapon swing and keep the health cost available for a larger wave or emergency escape.
- Press a direction with Button A for the directed offensive Special.
- Press Button A alone for the stationary defensive Special.
- Expect health loss from every directed Special, including a miss.
- Use Specials for interruption, crowd control or defense rather than routine damage.
Turn grabs into crowd control
Walk into an enemy to grab it when the opponent is stunned, recovering from a knockdown or committed to an attack. From the front, press Button B for the character’s hold attack. Press away from the enemy with Button B to perform a throw. Press Button C while holding an enemy to vault over it and change sides. Max cannot vault over an opponent; he uses his own holding-jump techniques instead.
Choose the throw direction based on the formation. Throw into an approaching enemy when the impact can knock down or interrupt another threat. Throw away from the group when you need to open a retreat lane. A thrown enemy can also strike another attacker, but move immediately after the throw so an enemy entering from behind does not catch you during recovery.
A grab gives you temporary control, not a permanent reset. Against a heavy enemy, use a hold attack only when the surrounding space is clear. If several enemies are active, finish the throw and move vertically or retreat before attempting another grab. Jumping attacks can create the stun needed for a grab, but avoid landing directly between two active enemies.
- Walk into a stunned or committed enemy to initiate a grab.
- Throw into a group for interruption or away from it to create space.
- Move immediately after the throw instead of standing over the fallen enemy.
- Use a heavy hold attack only when other enemies cannot interrupt it.
Optimise pipes and swords for dangerous sections
Pipes and swords provide long forward reach and are particularly valuable in narrow corridors, enemy drop-in scenes and boss approaches. Adjust your vertical position while swinging instead of standing perfectly aligned with the target. Enemies that miss because they are slightly above or below you can still be struck by the weapon’s reach.
A pipe is a reliable general-purpose weapon, while the katana has greater reach and damage. Keep either weapon for a heavy enemy, a clustered wave or a boss whenever the scene allows it. Do not throw a fresh weapon at the first ordinary enemy unless the throw will interrupt several targets or prevent immediate cornering. A thrown weapon can stop a projectile user or a line of enemies, but you then lose its repeated close-range swings.
You can lose a weapon when an enemy knocks it away, when you grab an enemy, when you pick up another weapon, or when the scene changes. The manual also warns that a weapon disappears after being dropped two or three times. Preserve one by using it on high-value targets, not by refusing to swing it. Before a boss, attack during recovery rather than throwing the weapon at the beginning of the encounter.
- Use pipes and swords in chokepoints and against heavy targets.
- Change vertical position while swinging to make enemy attacks miss.
- Throw only for a clear interruption, multi-target hit or emergency escape.
- Expect weapons to be lost at scene transitions and after repeated drops.
Use knives for quick interruption
Knives are useful for stopping ordinary rushers and knife carriers before they reach grab range, but they are less forgiving than a pipe or sword when enemies approach from both sides. Pick one up when the immediate wave is entering from one direction, strike briefly, then move vertically or retreat before another enemy reaches your back.
Throw a knife through a group when the projectile can interrupt the lead attacker or create room to escape. Do not remain in a prolonged knife exchange with a heavy enemy. The standard knife is distinct from the ninja Kunai, and Blaze has a character-specific close-range knife attack that the other fighters do not share. Do not assume every character handles every knife-type weapon identically.
Treat a knife as a temporary control tool. Use it to remove one dangerous enemy, interrupt a knife user or buy enough room to return to bare-handed attacks. If the screen becomes crowded, survival and positioning matter more than recovering a dropped knife.
- Use knives to interrupt exposed rushers and knife users.
- Throw through a group when keeping the knife would leave you surrounded.
- Distinguish the standard knife from ninja Kunai behavior.
- Remember that Blaze’s close-range knife attack is character-specific.
Collect the five hidden 1-UP opportunities safely
These five extra lives are optional recovery aids, not requirements for advancing through the campaign. Clear the active enemies in each location before searching. A hidden-life attempt is not worth taking damage if the group is still attacking, especially on a higher difficulty.
Round 1: immediately after the stage begins, move to the bottom-left corner of the opening street area. Press Button B while positioned there to collect the concealed life. Enemy reinforcements appear afterward, so be ready to move away from the corner as soon as the pickup is collected.
Round 2: after the truck encounter is finished, return toward the truck and search the upper-left area behind it. Press Button B at the concealed pickup position. Do not search while the truck enemies are active; clear the encounter first, then return to the location.
Round 3 has two separate hidden-life opportunities. In Pirate Ship 3, break the crate containing the visible 1-UP. The neighboring crate contains an apple. Clear the nearby enemies before breaking the containers, then collect the life only when the area is safe. Later, in the Alien House during the Vehelits encounter, move to the lower area below Vehelits’s neck joint and press Button B to collect the concealed life. This is separate from the Pirate Ship pickup and is hidden by the scenery rather than displayed as a normal item.
Round 7: during the factory conveyor section, search for the breakable barrel positioned between the conveyor belts. Break that barrel to reveal the hidden 1-UP, then collect it with Button B. This pickup is found before entering the cargo elevator and is not tied to defeating Buoh and Dallala. Clear the enemies around the belts first, because the conveyor movement and incoming attackers can push you into danger while you search.
- Round 1: search the bottom-left of the opening street section.
- Round 2: after the truck encounter, search behind the truck in the upper-left area.
- Round 3 Pirate Ship 3: break the crate containing the 1-UP.
- Round 3 Alien House: search below Vehelits’s neck joint.
- Round 7: break the barrel between the factory conveyor belts before entering the elevator.
- Clear each enemy group before attempting an optional life pickup.
Before you move on
- You can perform each character’s Blitz input without activating the Special.
- You can identify Button A as Special, Button B as attack and Button C as jump on the Genesis pad.
- You can distinguish a stationary defensive Special from a directed offensive Special and explain their different health behavior.
- You can grab an enemy, choose a throw direction and reposition immediately afterward.
- You can carry a pipe or sword through a dangerous approach and choose between swinging, throwing and retreating.
- You have safely checked all five optional locations: Round 1 bottom-left, Round 2 behind the truck, Round 3 Pirate Ship 3 crate, Round 3 Alien House below Vehelits and Round 7 barrel between the factory conveyor belts.
Recovery: smart continues, life management and comeback routes
Use ordinary lives to learn dangerous encounters, then spend continues only when you have a concrete plan for the next attempt. In the original North American Sega Genesis release, a continue lets you resume from the current stage, not the exact screen or boss room where you died. You then select a character again, and your score is reset to zero. Treat each continue as a complete replay opportunity rather than a checkpoint.
1. Know what the Game Over screen actually restores
When your available fighters are gone, the game displays the Game Over and Continue choices. The original instruction manual states that two continues are available per game. If you select Continue, the game resumes from your present stage, then shows the character-selection screen so you can choose the fighter for the next attempt.
This is not a boss checkpoint. If you lost your final life during a boss fight, expect to replay the current stage from its beginning rather than returning directly to the arena. You must clear the stage route again, including its ordinary enemy groups and any mid-stage encounters, before making another attempt at the boss.
Continuing also resets your score to zero. A continue therefore preserves your campaign position but not your score, boss-room position, or the momentum of the failed run. Confirm the displayed Continue count before selecting it, especially if you are trying to complete the game on one credit.
- Remember that the original manual gives you two continues per game.
- Expect to replay the current stage from its beginning.
- Choose Continue only after checking the remaining count.
- Record that your score will reset to zero.
2. Spend ordinary lives on information
A lost life should identify a specific problem. If a knife user caught you during recovery, keep more horizontal distance on the next life and approach from a diagonal rather than walking directly toward the projectile. If a heavy enemy grabbed you, interrupt its approach with a jump attack, weapon strike, or short attack string instead of committing to a long combo at close range.
Do not rush through the opening sections merely because you have already seen them. Use the replay to arrive at the dangerous area with more health and with your emergency special still available. Safe basic attacks are usually preferable to trading health for speed against enemies you already know how to defeat.
Food should be collected when it prevents a likely death, not automatically whenever it appears. If you are nearly full, leave a recovery item in place until the surrounding enemies are defeated, then return for it if the screen still permits access. A special is most valuable when it breaks a corner trap, interrupts a large group, or prevents a boss attack from finishing you.
- Name the attack or position that caused the death.
- Change one decision on the next life instead of repeating the same approach.
- Keep food available until nearby enemies are under control.
- Save a special for a genuine emergency when possible.
3. Create space before re-entering a bad formation
Some sections allow you to move back toward the previous screen or to use the open part of the current screen as breathing room. When that is possible, retreat only far enough to separate the threats. The goal is to stop a fast attacker from reaching you at the same time as a knife user or heavy enemy, not to run blindly into the previous area.
Watch the edges while backing away. Do not retreat into a corner, a pit, a moving hazard, or an area where an enemy is already waiting off-screen. If enemies continue to pursue, turn and defeat the nearest threat before attempting more movement. A reset is useful only if it creates space for a controlled re-entry.
When you move forward again, attack one side of the group rather than stepping into its center. Defeat or knock down the closest enemy, pass through the opening, and keep moving so the formation cannot close around you. This approach is safer than standing still to finish every enemy while others recover nearby.
- Backtrack only where the current section allows useful room.
- Check for hazards and off-screen enemies before retreating.
- Re-enter from one side of the formation.
- Keep moving after opening a path.
4. Replay economically after a boss-room death
A boss-room death costs more than the life itself because the next attempt requires a full stage replay. Make that replay deliberate. Use low-risk attacks on early groups, avoid unnecessary weapon trades, and do not spend all of your health or specials simply to save a few seconds. Your target is a stable arrival at the boss, not a fast arrival with no resources.
Use weapons to remove enemies that are especially dangerous in groups, but do not assume every weapon must be carried to the boss. A weapon that clears a crowded section may be more valuable there than after the boss appears. Conversely, if the stage places a strong weapon or useful recovery item near the final approach, avoid wasting it during an easy earlier wave.
At the start of the rematch, observe the boss for an exchange before committing to a full combo. Identify whether the failed attempt came from excessive reach, a grab, an aerial attack, or an add entering from behind. Then alter your spacing or target priority instead of simply attacking faster.
- Replay early areas with conservative attacks.
- Enter the boss room with health and at least one emergency option when possible.
- Use weapons where they solve the greatest threat.
- Apply one specific adjustment learned from the failed fight.
5. Change characters only to solve a problem
The post-continue character-selection screen is an opportunity to adjust your plan, but switching is not automatically better. Choose Axel if you want a balanced approach, Blaze if responsive attacks and throws fit the section, Max if you can control distance and exploit his power, or Skate if mobility and quick repositioning are the main issue.
Make the switch for a reason. If you repeatedly get trapped before reaching the boss, a faster character may help you escape pressure. If you reach the boss reliably but cannot punish its recovery, a character with stronger close-range damage may suit the rematch. If the previous character handled the route well and the defeat came from one avoidable mistake, keeping that character may be safer than learning new spacing late in the campaign.
After switching, do not force the old character’s attack rhythm onto the new fighter. Relearn reach, movement, jump distance, and throw positioning during the first section of the replay.
- State what failure the new character is meant to solve.
- Keep the previous character if the route was already reliable.
- Relearn spacing before attempting advanced combos.
6. Reserve a continue for a meaningful late attempt
A practical recovery plan is to preserve one continue for Stage 8 or for the stage that consistently defeats you. This is not a guarantee of success. It simply provides another complete attempt when the later stages demand better resource management and boss familiarity.
If you lose all lives late in the game while a continue remains, use it when you understand what must change. Replay immediately if the failed run revealed a specific enemy wave, hazard, or boss attack that you can now handle differently. If the run failed because of repeated rushing, poor spacing, or unplanned special use, take a moment before choosing Continue and decide on a concrete replacement strategy.
If both continues are spent, the campaign ends and you must start again. Treat that outcome as a route review: note where health was lost, which items were wasted, and whether the chosen character suited the problem section.
- Keep one continue available when approaching the final stages.
- Use a continue when you have a concrete adjustment to test.
- Do not treat two continues as a guaranteed clear.
- Review resource losses before beginning the next full run.
Before you move on
- When you select Continue, verify that the game returns you to the current stage and then presents character selection.
- Replay the stage from its beginning rather than assuming the previous boss-room position was preserved.
- For a normal campaign clear, defeat Mr. X after any recovery attempts and allow the ending sequence and credits to play.
- For a personal no-continue record, confirm that Continue was never selected.
- For a regular completion record, note the character used and how many of the two continues were spent.
Extra runs, no-continue attempts and speed/score considerations
Use separate goals for survival, no-continue completion, speed and score. Learn one character, stabilize the campaign in sections, collect fixed extra lives only when their surrounding encounters are safe, and protect enough health and lives for Round 8. The Round 7 1-UP is an optional barrel pickup between conveyor belts before the cargo elevator, not a post-boss trash-bin objective.
1. Establish a repeatable baseline run
Begin on the difficulty you intend to master and use the same character during route practice. Axel is a balanced choice, Blaze is flexible with throws and weapons, Skate rewards mobility, and Max deals heavy damage but demands better spacing. For a first no-continue attempt, choose the character whose normal attack, throw, jump attack, Blitz input and special are automatic for you.
Treat the first successful clear as a route record rather than a speed record. After each attempt, note the exact round, enemy group or boss that cost health or a life. A no-continue run improves fastest when repeated mistakes are removed before movement is accelerated.
- Use one character consistently during route practice.
- Record the round and encounter responsible for every death.
- Keep the same difficulty and controller layout between attempts.
2. Build toward a no-continue clear
Practice in blocks instead of attempting a full run every time. Stabilize Rounds 1 through 3, then Rounds 4 through 6, and finally Rounds 7 and 8. Once each block is dependable, combine them. This prevents the final rounds from being practiced only after a damaged, low-life opening.
Spend a special to prevent a life loss, not merely to shorten a routine group. Good uses include escaping a corner, interrupting enemies entering from both sides, or recovering after a missed throw. Standing and directed specials are useful emergency tools, but health expenditure makes careless repetition costly. Keep an emergency option available for a dangerous crowd instead of spending specials on every ordinary group.
When a run fails, classify the cause as route knowledge, poor spacing, a missed recovery item, impatience or a boss mistake. Change one habit on the next attempt instead of changing character, difficulty and strategy simultaneously.
- Reach the midpoint without using Continue before attempting full clears.
- Keep an emergency special available for dangerous crowds.
- Practice bosses until you can win after entering with less than perfect health.
3. Route the five fixed 1-UP opportunities safely
Five fixed extra-life opportunities can support a long survival route, but none is mandatory. In Round 1, after the opening enemies are under control, move to the bottom-left area and press the attack button to reveal the hidden life. Do not attempt this while the first group is still active.
In Round 2, after leaving the truck encounter, move toward the upper-left of the unfinished-bridge section. Clear the nearby enemies before checking the corner for the hidden 1-UP. The pickup is useful, but losing a life while forcing it defeats its purpose.
Round 3 has two separate opportunities. On Pirate Ship 3, break the crate containing the 1-UP after the nearby group is controlled. Two ninja encounters follow on the original Genesis route, so do not rush toward the crate while those enemies are active. Take the sword when it is safe and use vertical spacing to prevent both ninjas from attacking together.
Later in Round 3, during the Vehelits encounter in the Alien House, move to the lower part of the screen to collect the hidden life once the nearby enemies are controlled. The foreground can obscure the pickup, so approach deliberately rather than searching while Vehelits is moving through the area.
Round 7 adds the fifth planned opportunity during the factory conveyor section. The 1-UP is inside a barrel positioned between conveyor belts, before the cargo elevator begins. It is not a trash-bin pickup and should not be postponed until after the Buoh and Dallala encounter. Break the barrel only after the surrounding enemies are controlled and the conveyor route gives you room to retreat. If the active group makes the approach dangerous, skip the life and continue; a forced pickup can cost more than it provides.
- Learn the Round 1 bottom-left, Round 2 upper-left, Pirate Ship 3 crate and Vehelits-area locations.
- In Round 7, check the barrel between conveyor belts before entering the cargo elevator.
- Do not confuse the Round 7 barrel pickup with a Chicken or a post-Buoh/Dallala objective.
- Never force a fixed life pickup through an uncontrolled enemy wave.
4. Improve clear time without gambling the campaign
Speed comes from removing hesitation between safe encounters, not from charging through active spawns. Move toward the next group as soon as the current group is defeated, but pause at dangerous transitions until the next wave is visible. Use a pipe or sword when it clears several enemies efficiently; abandon it when carrying it interferes with movement or recovery.
Skip cash, gold and other score items near boss doors or crowded edges. A brief delay costs less than a failed pickup attempt that causes a life loss. For bosses, use a repeatable punish cycle: bait the committed attack, move out of its path, land a short combo or throw, then reset your position. This is usually faster over a complete campaign than trading damage for a quicker individual knockout.
Do not add all five 1-UP stops automatically to a speed route. Include only pickups that require little travel and no dangerous detour. The Round 7 barrel is valuable for a survival route, but it should be skipped in a time attempt if the conveyor encounter is not already stable.
- Reduce travel pauses only after enemy spawns are understood.
- Skip unsafe score items near transitions and boss entrances.
- Measure clear time after the no-continue route is stable.
- Keep optional 1-UP detours out of speed attempts unless they are demonstrably safe.
5. Keep score, speed and survival as separate goals
A survival run prioritizes health, lives and safe positioning. A score run adds deliberate collection and efficient defeats, but it should still avoid needless damage. A speed run skips optional pickups and uses the shortest dependable route. Do not combine all three goals until each works independently.
On the original Genesis release, selecting Continue resets the score to zero. A campaign completed after Continue is still a campaign completion, but it is not a clean score attempt. Record the character, difficulty, final score and number of Continues so later results remain comparable.
For a speed record, use the same difficulty and route each time. For a score record, collect safe items and preserve lives through the later rounds rather than extending dangerous fights. Never chase a score item through an active boss approach, and do not treat collecting all five fixed 1-UPs as a requirement for completion, score or speed.
- Restart or separately classify a score run after selecting Continue.
- Use a consistent route and difficulty for time comparisons.
- Record character, difficulty, score, time and Continues used.
- Mark fixed 1-UPs as optional route choices, not mandatory objectives.
6. Protect the Round 8 reserve
Enter Round 8 with as many lives and as much health as your route can preserve, but do not waste earlier lives trying to make the reserve look perfect. The stronghold is the final sustained test: recurring enemies, confined encounters and the Mr. X sequence punish panic more than they punish a slightly slower approach.
Practice Round 8 separately before serious full-run attempts. Learn where to retreat, where a weapon can clear a group, which enemies must be removed first and when a special is worth its health cost. Treat the five fixed 1-UPs as tools for building a reserve during practice, not as a checklist that justifies unsafe play.
In the final stage, prioritize survival and positioning over score collection. Defeat Shiva and Mr. X, then allow the standard ending and credits to appear. If no Continue was selected, record the result separately as a no-continue clear.
- Reach Round 8 without relying on an emergency late Continue.
- Practice the stronghold and final room as their own training block.
- Use the five fixed 1-UPs only when their surrounding screens are controlled.
- Confirm the ending and credits before recording the campaign as complete.
Before you move on
- A no-continue campaign is complete when Mr. X is defeated, the ending and credits appear, and Continue was never selected.
- A survival route may include the optional fixed 1-UPs from Round 1, Round 2, Pirate Ship 3, the Vehelits section of Round 3 and the Round 7 factory barrel between conveyor belts before the cargo elevator. None is required to finish the campaign.
- A score attempt should record the final score, character, difficulty and Continue status. Selecting Continue resets the score in the original Genesis rules.
- A speed attempt should use a consistent route and difficulty, omit unsafe pickup detours and still confirm the ending and credits.
- Maintain separate records for best survival clear, best no-continue clear, best score and best time.
References for this chapter
Final checklist and how to confirm you have the campaign ending
The original North American Sega Genesis campaign is complete after Stage 8 is cleared, Shiva and Mr. X are defeated, the closing story presentation appears, and the credits roll. Hidden items, weapons, food, and extra lives are optional aids rather than completion requirements. For cooperative play, the campaign only needs to reach the ending on that playthrough; both players do not have to remain active in the final room.
1. Reach the actual end of Stage 8
Continue through Stage 8, the Syndicate Stronghold, until the final boss sequence begins. Reaching the building, clearing an elevator section, defeating a returning boss, or collecting the last visible item is not enough. The stage must be completed all the way through the final room.
The stronghold contains recurring opponents and several late-stage groups before the final confrontation. Clear them carefully, but do not treat any hidden food, weapon, 1-Up, or other item as mandatory. These pickups can improve your chances, yet the campaign has no item-collection requirement and does not branch based on whether you found them.
Keep a weapon or health reserve when doing so is safe, but do not take unnecessary damage trying to carry an item through a crowded transition. The final sequence first presents Shiva, followed by Mr. X. Shiva can block, counter close attacks, grab, and attack from the air, so use short attack strings and reposition after a safe exchange rather than committing to a long stationary combo.
When Shiva rushes or jumps, move vertically or away from his line instead of continuing to attack into the approach. After he whiffs or finishes a jump attack, step in for a short punish, then restore your spacing. If you lose a life here, the campaign is not yet complete; continue until the final sequence is cleared.
- Stage 8: Syndicate Stronghold has been reached.
- The late-stage enemy groups and returning bosses have been cleared.
- Shiva has appeared as the penultimate boss.
- The Mr. X encounter has started.
2. Defeat Mr. X and allow the transition to continue
Mr. X uses his machine gun and applies pressure while other enemies interfere. Keep moving vertically or diagonally so you are not lined up with his shots, and avoid standing directly in front of him while he is ready to fire. Jumping or changing lanes can help you escape a shot, but do not jump blindly into an approaching henchman.
Remove a nearby henchman when it blocks your escape route, then return your attention to Mr. X. Short combos, jump attacks, and throws are safer than staying in front of the gun for an extended exchange. If enemies surround you, use a health-consuming special as an emergency escape rather than spending it automatically during routine attacks.
The required result is Mr. X’s defeat, not merely reducing his health or seeing the fight enter its final animation. Let the defeat animation finish and allow the game to leave active combat. Do not reset the console, reload a save state, or power off immediately after the apparent victory.
- Mr. X’s defeat animation has completed.
- The game has left active combat.
- The system has been left running for the post-battle sequence.
3. Watch the complete closing presentation and credits
After the final battle, the game displays its normal closing story presentation. The heroes’ victory, Adam’s rescue, and their departure are part of the campaign ending, not an optional attract-mode scene. Leave the game running until this presentation has finished and the credits appear.
A screenshot showing Mr. X defeated proves that the boss was beaten, but it does not by itself confirm that the campaign ending was allowed to play. The strongest completion evidence is a photograph or recording that shows the closing presentation or the credits after the final battle.
Streets of Rage 2 on the original Genesis has one standard campaign ending. Do not import the partner-betrayal choice from the first Streets of Rage. The separate Duel mode is also not an alternate campaign ending, and a cooperative playthrough should be recorded separately from a Duel match.
- The post-battle story presentation has appeared.
- The ending sequence has not been interrupted by a reset or power-off.
- The credits have rolled.
- The result is identified as Streets of Rage 2 rather than the first Streets of Rage.
4. Record a standard single-player or co-op clear
For an ordinary completion record, note the character used: Axel, Blaze, Max, or Skate. Also record the selected difficulty, whether the run was single-player or two-player cooperative, and how many Continues were used. The original game does not create a modern completion profile that reliably stores all of these details for you.
A Continue does not invalidate a normal campaign clear. Once the playthrough reaches the closing presentation and credits, it counts as completed even if lives were lost earlier or a Continue was selected. Hidden items, optional weapons, food, and extra lives likewise affect survival but are not required for the clear.
In two-player mode, both players do not have to remain active in the final room. One player may lose all lives or otherwise stop participating while the other continues. If that playthrough reaches the closing presentation and credits, record it as a cooperative campaign completion, while noting the player who finished the final sequence and whether the other player was still active.
- Character or characters recorded.
- Difficulty recorded.
- Single-player or two-player status recorded.
- Continue count recorded.
- For co-op, the status of each player in the final room is noted without treating continued activity as mandatory.
- The ending and credits appeared.
5. Apply no-continue rules separately
If your goal was a no-continue or single-credit clear, inspect the whole run rather than only the final stage. The relevant condition is that Continue was never selected after a Game Over. Losing individual lives does not automatically disqualify the attempt.
For cooperative records, state whether either player selected Continue. If either player used one, do not label the result a no-continue clear under a rule that applies to the complete co-op playthrough. If the rule set permits a different treatment, write that rule down before comparing attempts.
If you are unsure whether Continue was selected, call the result a normal completion instead of claiming a no-continue run. Keep the campaign result separate from optional goals such as finding every useful pickup, finishing with a chosen number of lives, or avoiding deaths.
- For a no-continue claim, Continue was never selected.
- Deaths and remaining lives were recorded honestly.
- Co-op Continue usage is recorded for both players.
- The ending and credits appeared after the final fight.
6. Preserve proof of completion
Once the credits are visible, save a screenshot or recording if you want evidence for a personal log or community submission. Include the ending presentation or credits rather than only the final boss arena. Add the character, difficulty, player count, Continue count, and release information to the record.
A complete result should state that Stage 8 was cleared, Shiva and Mr. X were defeated, the closing presentation played, and the credits rolled. If those conditions are met, the original North American Sega Genesis campaign is complete, regardless of whether optional hidden items were collected or both co-op players remained active at the finish.
- Proof shows the ending presentation or credits.
- The character and difficulty are identified.
- Player count and Continue usage are identified.
- The release is identified as the original North American Sega Genesis version.
Before you move on
- Stage 8: Syndicate Stronghold has been cleared.
- Shiva has been defeated.
- Mr. X has been defeated.
- The closing story presentation has played.
- The credits have rolled.
- The clear record states character, difficulty, player count, and Continue usage.
- For co-op, the record states whether both players remained active, without treating that as required.
- If required, the record confirms that Continue was never selected.
- Optional hidden items and weapons are not being counted as mandatory objectives.
Finishing up
You have reached the standard campaign ending when you clear all eight stages, defeat Shiva and Mr. X in Stage 8, and allow the closing sequence and credits to roll.
Confirm that the final combat sequence has ended and the credits are visible; defeating an earlier Stage 8 boss or seeing Mr. X fall is not by itself the complete verification.
If you were attempting a no-continue or single-credit run, verify that Continue was never selected during the playthrough.
In co-op, completion requires the campaign to reach the ending on that playthrough; both players do not need to remain active in the final room if one player has already lost their character.
Record the character or characters, difficulty, player count and Continue usage for your personal result. Optional hidden 1UPs, food and weapons do not affect whether the campaign is complete.
Choose your next gameScreenshots & video
Game imagery for reference. Follow the written chapters above for the route and strategies.
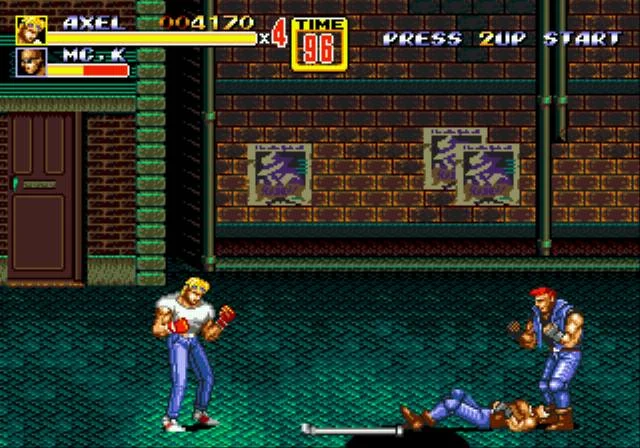
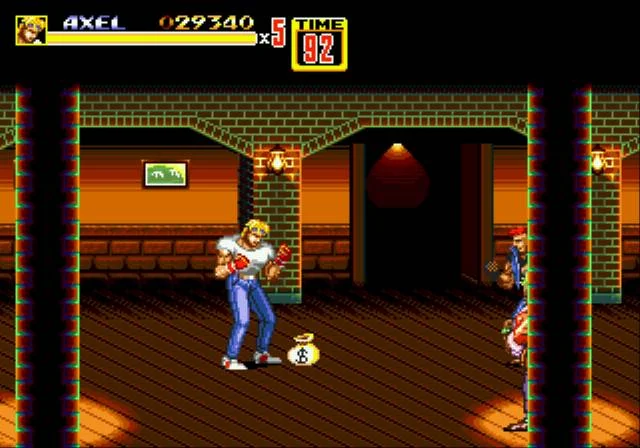
Sources & references
Our original guide draws on the references below. Check the edition at the top of this page before following controls or unlock requirements.
- STREETS OF RAGE 2 — Sega Genesis Official Instruction Manual
- Sega Genesis — Streets of Rage 2 Manual
- Streets of Rage 2 — Guide and Walkthrough — Genesis, CNash
- Streets of Rage 2 — Guide and Walkthrough by Loopy
- Streets of Rage 2 — Move List — Genesis — Truncated
- Streets of Rage 2/Characters — StrategyWiki
- Streets of Rage 2 — StrategyWiki Gameplay
- Streets of Rage 2 — Guide and Walkthrough — Genesis, CLNG1983
- Downtown — Streets of Rage Wiki
- Streets of Rage 2 — Guide and Walkthrough — Xbox 360 — atro_city
- Streets of Rage 2 FAQs, Walkthroughs, and Guides for Genesis
- Streets of Rage 2 — Streets of Rage Wiki
- Amusement Park — Streets of Rage Wiki
- Streets of Rage 2 — StrategyWiki Enemies
- Munitions Plant — Streets Of Rage Wiki
- The PrinceWatercress Blog: PrinceWatercress plays Streets of Rage 2 — Part 4 of 4
- High Score achievement in Streets of Rage 2
- Streets of Rage 2
About the game & collecting notes
- Platform
- Sega Genesis / Mega Drive
Step-by-step walkthrough for the original Sega Genesis (USA) release of Streets of Rage 2. This guide covers controls, character selection and moves, stage-by-stage routes and boss tactics through the final confrontation with Mr. X, plus co-op strategy, advanced techniques and completion checks to reach the standard campaign ending and credits.
Darryl Polo
Darryl Polo loves tinkering with emulation and revisiting retro games. He enjoys exploring how old favorites play on different setups and sharing what he learns along the way. At Joking Joystick, he writes about the games, hardware, and small discoveries that keep the hobby fun.
Our editorial standardsFound a step that needs another look? Help us improve this guide.