
Sonic the Hedgehog (Sega Genesis, USA / Europe) — Complete Campaign Walkthrough
Step-by-step campaign guide to finish the original 1991 Sega Genesis release of Sonic the Hedgehog (USA / Europe). Covers controls, zone-by-zone routes, boss strategies, Special Stage access for the six Chaos Emeralds, underwater recovery, and a concise completion checklist so you can beat the Final Zone and see the game's alternate ending.

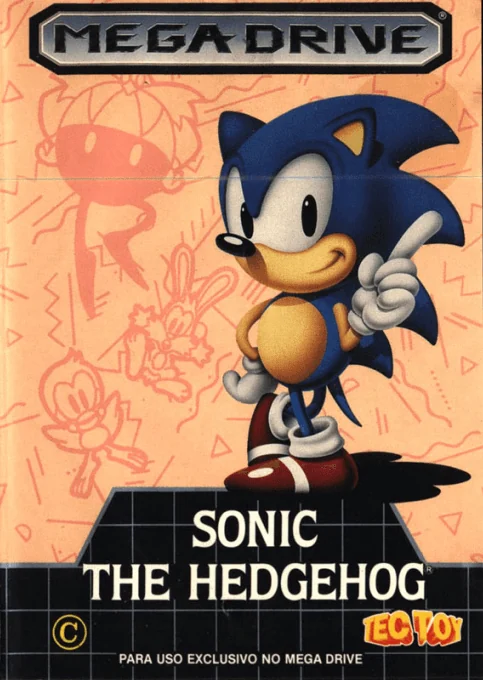
Find a copy
Sonic the Hedgehog Sega Genesis / Mega Drive
We may earn a commission if you buy through these links, at no extra cost to you. As an Amazon Associate I earn from qualifying purchases.
Opens retailer search results. Check the model, edition, seller, availability and current price before buying.
Before you begin
You are playing the original 1991 Sega Genesis / Mega Drive edition of Sonic the Hedgehog.
This guide covers the original cartridge-style game structure: no built-in Spin Dash, no permanent campaign save, and Special Stages entered through Giant Rings after eligible Acts.
Follow the controls and Zone routes to finish the main campaign, then use the optional Special Stage guidance if you want all six Chaos Emeralds and the alternate ending.
The route sections give practical directions for each Act, hazard-management advice, boss or escape-encounter strategies, and recovery methods for common failures such as lost Rings and drowning in Labyrinth Zone.
Optional chapters cover Special Stage entry and maze navigation, movement technique, boss patterns, and a final completion checklist.
Set yourself up for the run
Use a three-button Sega controller mapping: D-pad for movement, Jump mapped to A, B, or C on the original Genesis controller.
Confirm which button is assigned to Jump before you start.
Use Left and Right to move and accelerate, Down while running for the ground Spin Attack, and A, B, or C for the jump and mid-air Spin Attack.
Know the Ring rule: a normal hit with at least one Ring scatters the Rings; another ordinary hit with zero Rings costs a life. Pits, crushing, drowning, and similar hazards can be immediately lethal.
Touch Lampposts before difficult sections. They record the current score and time for an Act restart, but they do not save the game or preserve Rings.
Special Stages: finish Act 1 or Act 2 of one of the first five Zones with at least 50 Rings still held, then jump into the Giant Ring at the goal.
Giant Rings do not appear in Act 3, Scrap Brain Zone, or Final Zone in the original Genesis release.
The original cartridge has no persistent campaign save. A Continue provides another set of lives after Game Over, but it does not function as a permanent save or restore a Lamppost checkpoint.
Special Stage attempts can also provide Continues through their Ring totals. Do not describe ordinary act clears as awarding Continues.
This guide targets the original Genesis/Mega Drive game logic and layouts; do not apply features from remakes or later releases, such as the Spin Dash or built-in save progress.
Labyrinth Zone reduces Sonic’s mobility underwater. Plan each long passage around large air bubbles and use safe platforms rather than chasing scattered Rings.
Collect extra lives when they are safely on the route, but do not take dangerous detours for score, Ring, or life bonuses.

Core Controls, HUD, and Survival Basics
The original 1991 Sega Genesis version of Sonic the Hedgehog relies on directional movement, jumping, rolling, and momentum. Rings protect Sonic from ordinary attacks, Lampposts provide temporary restart points within an Act, and every Act has a ten-minute limit. Learn these rules before attempting the full route through the Zones. The original cartridge has no permanent save system and does not include the Spin Dash introduced in later Sonic games.
Use the original Genesis control scheme
Press Left or Right on the D-pad to move Sonic. Holding a direction lets him accelerate, while pressing the opposite direction reduces his momentum. Sonic does not stop instantly when the D-pad is released, so approach ledges, enemies, springs, and narrow platforms with his current speed in mind.
Press A, B, or C to jump. Sonic curls into a ball in the air and can defeat many enemies by landing on them. While Sonic is running along the ground, press Down to make him roll into the Spin Attack. Rolling can defeat certain enemies and break some weak walls, but it is not the same as charging a stationary dash.
Press Up while Sonic is standing still to look upward and press Down while standing still to crouch or look downward. Neither input makes Sonic climb a slope. Use ordinary running momentum, slopes, loops, springs, and ramps to gain speed. Do not hold Down and press a jump button while stationary expecting a Spin Dash; that move is not available in this original release.
Press Start to pause during an Act. Pausing does not save the game. The Genesis version has no built-in save states or permanent checkpoint file, so every life and Continue belongs to the current play session.
- Use Left and Right to control movement and momentum.
- Use A, B, or C to jump.
- Use Down while moving to perform the ground Spin Attack.
- Use Up or Down while stationary only to look or crouch.
- Do not attempt to charge a Spin Dash.
Read the HUD and respect the Act timer
The upper portion of the screen displays SCORE, TIME, and RINGS. SCORE increases from collecting Rings, defeating enemies, and completing Acts. TIME measures the current Act, and the ten-minute limit applies separately to each Act. If the timer reaches TIME OVER before Sonic reaches the goal or completes the required boss sequence, he loses a life.
The life display shows Sonic’s remaining chances. It is not a health meter. Losing a life sends Sonic back to the start of the Act or to the most recently activated Lamppost, depending on whether a checkpoint was reached. If all available lives are lost, the Game Over or Continue sequence appears.
Collecting 100 Rings awards an extra life. Extra-life monitors also award one life when broken. These rewards are useful, but never take a dangerous detour for a life monitor if the detour risks a pit, crushing hazard, or difficult enemy collision.
There is no required score or completion time for normal progression. Faster completion and more Rings increase the score bonuses shown after the Act, but the score does not unlock later Zones. Rings and lives are not carried into the next Act as permanent resources.
- Watch TIME when waiting for moving platforms or exploring alternate routes.
- Treat the life display as your remaining attempts.
- Remember that 100 Rings award an extra life.
- Do not confuse score bonuses with permanent progression.
- If the Continue screen appears, press Start before its timer expires.
Understand Rings, damage, and recovery
Rings protect Sonic from most ordinary enemy and attack collisions. If Sonic has at least one Ring and suffers a normal hit, his Rings scatter around him and he becomes briefly invulnerable. Scattered Rings disappear quickly, so recover them only when they are directly reachable on safe ground.
After Sonic has been reduced to zero Rings, another ordinary damaging hit costs a life. Enter difficult sections with at least one Ring whenever possible, but do not treat Rings as protection from every hazard. Falling into a bottomless pit, being crushed, drowning in Labyrinth Zone, or contacting certain lethal obstacles can cost a life even when Rings were held.
A Shield monitor can absorb one ordinary hit without making Sonic drop his Rings. It does not protect against pits, crushing, drowning, or every environmental hazard. An Invincibility monitor protects against many attacks temporarily, but it does not make careless jumps or crushing situations safe.
When a hit scatters your Rings, move toward stable ground first. If another enemy, spike group, moving block, or narrow ledge lies between Sonic and the scattered Rings, leave them behind. A lost Ring is preferable to turning a survivable hit into a life loss.
- Keep at least one Ring before an enemy or hazard section.
- Reach stable ground before attempting to recover scattered Rings.
- Remember that pits, crushing, and drowning can bypass ordinary Ring protection.
- Use Shields and Invincibility as temporary assistance rather than complete immunity.
Activate Lampposts and restart intelligently
Lampposts are checkpoints placed throughout many Acts. Touch one to activate it. Its top changes to show that it has recorded the checkpoint. If Sonic later loses a life during that Act, he returns to the most recently activated Lamppost instead of replaying from the Act entrance.
A Lamppost is only a temporary restart point. Sonic returns without the Rings he was carrying, and the game restores the score and time recorded when that Lamppost was activated. Items and enemy positions should not be treated as permanently cleared, so pause briefly after restarting and study the first hazard before moving forward.
Touch a Lamppost before a difficult platforming section or boss approach whenever possible. If the restart begins close to a hazard, use controlled movement rather than repeating the same full-speed jump that caused the death. The checkpoint is a learning tool, not a save file that preserves the entire state of the Act.
- Touch each Lamppost before a difficult sequence.
- Confirm that its top changes after activation.
- Expect the current Ring total to be lost after restarting there.
- Remember that the checkpoint restores its recorded score and time, not a permanent game state.
Handle Game Over, Continues, and the Act results screen
Losing a life within an Act uses one of Sonic’s current lives and normally returns him to the latest activated Lamppost. If no Lamppost was activated, the Act restarts from its beginning. This is the ordinary death-and-restart rule.
If all lives are lost while a Continue is available, press Start on the Continue screen before the timer expires. A Continue restarts the current Act with a fresh set of lives. It does not restore the latest Lamppost position, does not preserve the checkpoint’s recorded score or time, and does not act as a permanent save. If no Continue is available, the game ends and the run must be started again.
At the end of a normal Act, touch the goal signpost. The sign spins and the Act is cleared. The following results display awards score bonuses, including Time Bonus and Ring Bonus where applicable. These are points only: the next Act begins with a fresh Ring counter, and remaining lives are not converted into a permanent resource.
A Giant Ring can appear above and behind the goal after completing Act 1 or Act 2 with at least 50 Rings in the first five Zones. Jump into it after the signpost spins to enter a Special Stage. Act 3, Scrap Brain Zone, and Final Zone are not reliable places to plan Special Stage access in the original Genesis game. Special Stages are optional for ordinary completion, but collecting all six Chaos Emeralds changes the ending.
- Reach and touch the goal signpost.
- Allow the results display to finish before moving on.
- Treat Time Bonus and Ring Bonus as score only.
- Use a Continue to restart the current Act with fresh lives, not from the last Lamppost.
- For Special Stage access, finish Act 1 or Act 2 in the first five Zones with at least 50 Rings and jump into the Giant Ring.
- Do not rely on Act 3, Scrap Brain, or Final Zone for a Giant Ring.
Before you move on
- You can move Sonic left and right, control momentum, jump, crouch, and use the ground Spin Attack without attempting a Spin Dash.
- You can identify SCORE, TIME, RINGS, and the remaining-life display during an Act.
- You know that the ten-minute timer causes TIME OVER and costs a life if the Act is not completed.
- You understand that a normal hit with Rings scatters them, while a later ordinary hit at zero Rings costs a life.
- You know that pits, crushing, and drowning can kill Sonic even when Rings are held.
- You have activated a Lamppost and understand that an ordinary death returns Sonic there with Rings lost and the checkpoint’s recorded score and time restored.
- You understand that a Continue restarts the current Act with fresh lives rather than restoring the last Lamppost.
- You can clear an Act by touching its goal signpost and distinguish score bonuses from actual progression.
- You understand that Special Stage access requires at least 50 Rings at the end of Act 1 or Act 2 in one of the first five Zones, while Act 3 and late-game areas are not dependable access points.
Green Hill Zone — Act 1 to Boss (Safe Speed Learning)
Green Hill Zone teaches the movement habits used throughout the original Sega Genesis game: control Sonic's momentum, use slopes and springs without committing to blind jumps, and preserve rings instead of chasing every pickup. Acts 1 and 2 offer a Special Stage if you finish with at least 50 rings. Act 3 has no Giant Ring and ends with the Egg Wrecker boss.
Act 1: Build speed without losing control
Move right from the starting area and collect the visible ring groups. Use the opening slopes and ramps to gain momentum, but release the urge to run at maximum speed whenever the ground rises sharply or the landing area is hidden. In the original Genesis game, Sonic has no Spin Dash, so speed comes from running, slopes, ramps, and springs rather than charging in place.
Jump over the early Motobugs and avoid attacking enemies when a simple jump will keep you safer. When a Newtron is positioned above the route, do not jump into it blindly. Either pass beneath it or wait until its attack has been committed before moving through. A ring is worth taking only when the landing area is safe.
Use the early spring to reach the higher path when you can see where Sonic will land. Continue across the grassy platforms and bridges, watching for Choppers rising from the water and gaps at the edges of the terrain. At later spring and cliff sections, line up Sonic before bouncing. Hold the direction of the platform you want rather than changing direction at the last moment.
Finish by moving right to the signpost. Do not drop from a safe upper route merely to collect rings below it. If you lose rings, survival and reaching the goal are more important than rebuilding the exact total.
- Keep at least one ring before enemy-heavy sections.
- Use springs to reach visible safe ground, not to launch blindly into the next screen.
- Touch the signpost to complete Act 1.
Act 1: Use the Special Stage opportunity
If Sonic has at least 50 rings when Act 1 ends, a Giant Ring appears immediately after the goal signpost. Jump into it to enter the Special Stage. The ring total is checked when the act ends, so losing rings after touching the signpost does not change eligibility. If you have fewer than 50 rings, finish the act normally rather than risking a life for a small ring cluster.
The Special Stage is a rotating maze. The controls change the maze's movement: Up accelerates its rotation, Down slows it, and the reverse function changes its direction. Colored blocks obstruct the Chaos Emerald, while Goal blocks end the stage and return Sonic to the main game. Move cautiously near Goal blocks and prioritize opening a route to the emerald instead of collecting every ring.
- End Act 1 with 50 or more rings if you want a Special Stage.
- Enter the Giant Ring after the signpost appears.
- Avoid Goal blocks inside the rotating maze.
Act 2: Choose stable platforms over the lowest route
Act 2 introduces larger drops, spike pits, springs, and temporary platforms. Begin by collecting the safe ring groups, then follow the rising terrain instead of immediately dropping to the lowest available path. The upper route is not mandatory, but it generally gives you more time to see hazards and reduces the chance of being trapped below a ledge.
When you reach breakable blocks, treat them as temporary platforms. Jump onto them from stable ground, cross promptly, and do not wait in place while several blocks disappear beneath Sonic. In the lower sections, inspect the next platform before accelerating. A controlled jump is safer than a full-speed leap when spikes or a gap are partly hidden by the terrain.
Use springs to climb back toward the higher path when the route provides them. Some lower detours contain extra rings or other rewards, but they also expose Sonic to spike beds, pits, and awkward recoveries. Abandon a ring group if an enemy occupies the landing point. There is no reward for entering the next hazard with a larger ring total if the attempt costs a life.
Reach the signpost with 50 or more rings if you want another Special Stage attempt. If you already obtained the emerald available from your previous attempt, you may finish the act normally and preserve your remaining lives for the boss.
- Cross breakable blocks without stopping on them.
- Look beyond the bottom of slopes for pits and spikes.
- Finish Act 2 with at least 50 rings for the second Green Hill Special Stage opportunity.
Act 3: Treat the stage as preparation for the boss
Act 3 does not provide a Giant Ring, so there is no reason to preserve 50 rings for Special Stage access here. Collect safe ring groups near the beginning and keep at least one ring when approaching enemy or spike sections. If you are hit, do not dive after the scattered rings through a dangerous area; take the safest route forward and rebuild only when the next pickup is secure.
The act uses familiar Green Hill terrain but leaves less room for recovery near the end. Slow down before spike rows, narrow ledges, and spring sequences. When a spring launches Sonic upward, hold the direction of the intended landing and avoid a last-second reversal. Move right through the final approach until the open boss arena begins.
Try to enter the arena with several rings. They do not damage Robotnik, but they let Sonic survive a mistake during the fight. If a life is lost, replay the act's opening carefully rather than rushing to recover the previous attempt.
- Do not expect a Giant Ring in Act 3.
- Enter the boss arena with rings whenever possible.
- Use controlled jumps near the final springs and ledges.
Defeat Robotnik's Egg Wrecker
The Egg Wrecker fight takes place on a flat arena with two raised platforms. Robotnik moves horizontally while a wrecking ball swings beneath the Egg Mobile. The ball is the main hazard; contact with it damages Sonic, especially when it passes through the center of its swing.
Move toward one side of the arena and stay near the far edge beneath a raised platform while the wrecking ball is approaching or returning. When Robotnik has moved toward the opposite side and the ball is swinging away from your position, jump onto the nearby platform and use a Spin Attack jump to strike the Egg Mobile. The attack target is the machine itself, not a separate exposed core.
After the hit, land on the platform or run underneath the arena toward the opposite side. Do not try to attack again while the wrecking ball is returning across your position. Wait for another complete swing and repeat the same bait-and-jump pattern. Patience is safer than forcing a hit because a failed jump can cost rings or a life.
Eight successful hits defeat the Egg Wrecker in the original Genesis version. If Sonic loses his rings, stay at the edge and continue waiting for the ball to move away; a second mistake while Sonic has zero rings costs the life. Once the eighth hit connects, Robotnik flees and the game advances to Marble Zone.
- Use the raised platforms as launch points.
- Stay near an outer edge while the wrecking ball is dangerous.
- Jump into the Egg Mobile only after the ball swings away.
- Land safely and wait for the next cycle.
- Defeat the machine with eight successful hits.
Before you move on
- Green Hill Acts 1, 2, and 3 have each been completed at a signpost.
- The Egg Wrecker has been defeated after eight successful hits.
- The game advances from Green Hill Zone to Marble Zone.
- For the optional emerald route, at least one Act 1 or Act 2 ended with 50 or more rings and Sonic entered the Giant Ring.
- No Special Stage is required to clear Green Hill Zone or continue the main game.
Marble Zone — Navigating Lava and Switch Puzzles
Marble Zone is the first major test of deliberate platforming in the original Sega Genesis release. The safest approach is to stop before each moving hazard, watch its cycle, and use blocks as platforms or switches rather than rushing through the lava sections. Acts 1 and 2 are the only Marble Zone acts that can lead to a Special Stage, provided Sonic finishes with at least 50 Rings and jumps through the Giant Ring above the exit sign. Act 3 leads directly to the Zone boss.
Act 1: Build your Ring total on the surface
Move right through the opening area and collect the visible Rings while avoiding or jumping over Caterkillers. If you attack one, roll into its exposed head from the front; do not jump onto its spikes. At the first large slope, wait for the moving platform below to descend, then enter the recess beneath the slope. Three Ring monitors are located there, providing 30 Rings if all are collected. This is the most reliable early boost for a Special Stage attempt.
Continue right across the rounded platforms that ignite when Sonic stands on them. Land and jump again promptly instead of waiting on their surface. Take the Shield monitor ahead when possible. It protects against one damaging hit, although it does not prevent death from lava, a pit, or crushing hazards. Before entering the underground section, prioritize keeping the Rings you already collected over risky detours.
- Collect the three Ring monitors beneath the first major slope if you can reach them safely.
- Cross the fire-triggered platforms without standing still.
- Take the Shield before entering the underground passage when it is available.
Act 1: Hold the spike switch open with the marble block
In the underground passage, move cautiously through the vertically sliding transparent pillars and the hanging spike traps. When you reach the floor button that raises the spikes, do not rely on standing on the button while trying to pass. Push the marble block onto the button so it remains depressed. This keeps the spikes raised while Sonic moves underneath them.
Continue through the retracting spike section and touch the checkpoint on the left. The Shield near this area is useful if the earlier one was lost. Farther on, ceiling blocks drop as Sonic approaches, forming a temporary bridge across the lava. Let each block settle before jumping to the next one rather than trying to cross the entire gap in one movement.
Near the upper part of this section, look for the hanging spike chain and the opening leading up and left. The hidden tunnel contains a large Ring group and a 1-Up. It is optional: take it only if the jump onto the chain and the return route are under control. Afterward, backtrack and continue upward past the moving marble ledges, falling weight, and spiked chain. The exit is beyond the final fire platforms and Caterkillers.
- Push the block onto the button before passing under the raised spikes.
- Touch the checkpoint before attempting the lava bridge.
- Treat the hidden Ring and 1-Up tunnel as optional rather than risking a life for it.
Act 2: Use the block as a raft and outrun the lava
Enter the underground section and activate the button that lowers the transparent column. Push the nearby marble block into the lava and stand on it to cross. At the lava cascade, climb up and right for a Ring group and a Shield if you need protection, then continue left while avoiding the wall-mounted devices that shoot fireballs.
You will reach a long row of blocks obstructing the route. Push or jump through them to reach the lower corridor. Once Sonic lands there, move quickly because a rising wall of lava follows from behind. The next swinging platforms can be crossed carefully, but avoid the red springboard that launches Sonic toward the lava. Use the button, collect the nearby Shield if available, and ride the next marble block across the lava.
- Activate the column switch before entering the first lava crossing.
- Remain on the marble block while it carries Sonic across the lava.
- Start moving immediately after dropping into the corridor beneath the breakable blocks.
Act 2: Secure Rings without forcing the dangerous detours
The second marble block is lifted by bursts of lava. Remain still on the block while the eruption raises it, then jump only when the next platform is reachable. A hidden side tunnel near the far end contains additional Rings and a 1-Up, but taking it requires returning across the lava. Use it only when you have enough Rings and lives to justify the extra exposure.
Jump from the final lava rise to the purple ledge and climb to the checkpoint. The route ahead contains fireballs, Caterkillers, bee-like Badniks, and another slope with a lower alcove. The alcove provides extra Rings, but enemies can make the return awkward, so do not enter merely to chase a few items if you already have 50 Rings. Break through the blocking blocks by jumping on them, then use the nearby Shield or Invincibility monitor if present.
Near the end, large lava bursts emerge from openings in the wall. Move through them only after observing their timing. An Invincibility monitor near the wall can make this section safer, but Invincibility still does not protect against falling into a pit or being crushed. Finish through the rapidly falling spike section and reach the signpost. If Sonic has at least 50 Rings when the act ends, jump into the Giant Ring above and beyond the signpost. Otherwise, take the safe act clear and continue.
- Use the second marble block’s lava eruptions to gain height instead of jumping prematurely.
- Do not take the hidden 1-Up detour if the return crossing is likely to cost a life.
- Confirm the Ring total before touching the Act 2 signpost.
Act 3: Follow the long route and use the hidden shortcut
At the start, skip the recess beneath the first slope and move right for the Ring group before descending into the later underground area. Avoid the crossing fireball devices, then advance over alternating falling blocks and chained weights. A Shield is available after this sequence if you can pass the moving pillars safely.
Drop through the green-gray blocks that collapse under Sonic. Move left immediately and press the button that lowers the pillar. Head right, ride the block over the lava, and stop at the first eruption. Wait for the single block to extend from the wall, use it as a step to the purple platform, and continue right.
The two falling spike chains lead to a hidden tunnel containing a 1-Up. Continue through the tunnel instead of immediately climbing back out; it provides a shortcut to another falling chain. Wait until the chain rises, then jump onto it when it descends and ride it upward. Continue up the steps, watching for individual wall spikes, then cross the chained weights and bats. Near the surface, jump over fireballs as they descend, touch the checkpoint, and cross to the two purple ledges before the boss arena.
- Press the pillar switch after dropping through the collapsing blocks.
- Use the hidden tunnel after the two falling spike chains to shorten the route.
- Touch the final checkpoint before crossing to the boss ledges.
Defeat Robotnik in the Marble Zone boss arena
Robotnik’s Marble Zone machine moves between two purple ledges over a lava pit. The device beneath his Egg Mobile releases spreading flames onto the ledge he approaches. Begin on the opposite ledge and watch his movement. When he comes within jump range, strike the machine from above, then immediately retreat to the other ledge before the spreading flames cover your position.
Repeat the pattern: wait on the safer ledge, jump onto Robotnik when the attack window opens, then move away from the flame attack. Do not remain underneath the Egg Mobile after a hit. If you lose your Rings, make survival the priority and wait for the flames to clear instead of attempting a hurried jump across the lava. The boss requires eight successful hits.
After the machine is destroyed, continue right through the released-animal sequence and activate the enclosure control. The game then advances to Spring Yard Zone. That transition confirms completion of Marble Zone Act 3.
- Enter the arena with at least one Ring whenever possible.
- Attack from above when Robotnik approaches a ledge, then retreat before the spreading flames reach it.
- Land eight hits and complete the released-animal sequence to advance.
Before you move on
- Marble Zone Act 1 is complete when Sonic touches its signpost; with at least 50 Rings, jump through the Giant Ring beyond the signpost before continuing.
- Marble Zone Act 2 is complete when Sonic reaches its signpost; use the same 50-Ring Giant Ring rule for the optional Special Stage.
- Marble Zone Act 3 is complete only after Robotnik’s Marble Zone machine is destroyed and Sonic completes the released-animal sequence.
- For the optional Emerald route, record whether a Special Stage was entered after Act 1 or Act 2. If the attempt is missed, continue the main game; later Marble Zone acts cannot supply another Giant Ring.
Spring Yard Zone — Bumpers, Moving Blocks, and Timing
Spring Yard Zone is the third zone in the original 1991 Sega Genesis release. Its springs, pinball bumpers, moving platforms, spike balls, Rollers, switches, and narrow ledges punish blind speed. Use the upper route when the landing is clear, drop to lower ground deliberately when it is safer, and preserve rings in Acts 1 and 2 if you want to enter a Special Stage. Act 3 ends with the Egg Stinger boss, fought on a bridge of destructible blocks.
Act 1: Reach the first bumper section safely
At the start, collect the two rings above Sonic and move right through the opening enemies. Use the red spring to reach the raised platform, then continue right and touch the next spring. For the following bumper sequence, avoid unnecessary directional input. Sonic will rebound through the bumpers and land near a platform containing rings.
Collect the platform rings, then approach the large group of moving platforms. Let the platforms descend toward the lower part of the section before stepping off. When you reach the ground, follow the slope right and jump over the yellow spring rather than landing on it if the approach is crowded. Continue right and collect the four rings above the route.
Follow the next slope while watching for the spiked balls. At the bottom, collect the ring groups only when the rotating spike hazard is moving away. Touch the Star Post on the right, then use the yellow spring to travel upward. At the upper spring, hold right as Sonic rises; this can carry him through a hidden wall into a ring-filled passage. Take the rings, exit, and use the spring and moving platforms to climb.
- Collect the opening rings before entering the bumper sequence.
- Wait for the large moving platforms to descend before dropping to the ground.
- Touch the Star Post before taking the upper spring route.
- Do not cross rotating spike hazards merely to collect one exposed ring.
Act 1: Use the upper platforms, then take the hidden lower passage
At the top of the moving-platform section, go right and climb onto the platform above. Continue across the upper ledges, defeating the enemy only when you have room to land safely. Cross the two pits with controlled jumps and avoid the spiked balls; falling into the lower section is acceptable if you land on solid ground.
Use a spring to reach the higher platform on the right, defeat the two Crabmeat enemies, then drop into the lower passage. Break the ring box, jump over the nearby springs, and enter the small opening. Hit the switch to open the wall, then move right to the signpost.
If you have at least 50 rings when you touch the signpost, a Giant Ring appears. Jump into it for a Special Stage. This opportunity is available at the end of Act 1, but it is optional; reaching the signpost is the required objective. If the route has cost you too many rings, ignore the Giant Ring and finish the act.
- Use the moving platforms to gain height rather than forcing long jumps.
- After dropping into the lower passage, jump over the springs before entering the small opening.
- Activate the switch before trying to pass through the wall.
- Enter the Giant Ring only if it appears and you are pursuing a Chaos Emerald.
Act 2: Take the opening drop for rings and a stable route
Move right from the start until you reach the first bumper. Instead of bouncing from it, allow Sonic to fall through the gap without pressing a direction. This places him on a slope with a large ring group. Continue through the slope and jump toward the platform on the right. Defeat the enemies there, then climb to the nearby elevated platform and collect its rings.
Proceed right across the two pits. Jump over the spiked balls and collect the ring line only when the landing area is clear. At the far side, use the red spring to reach the platform on the right. Cross the moving platforms, then fall through the large gap at the far right. At the bottom, use the spring while holding right to enter the hidden room.
Inside the room, use the spring to collect the vertical ring line and land on the platform. Run right down the slope. Sonic will fall into another gap and rebound from a bumper; aim for the moving platform to the right. Ride it upward, take the platform with four rings, and continue right to the Star Post while avoiding the two spiked balls.
After touching the Star Post, jump over the next spiked ball and return to the exterior route. Cross the pit containing a spiked ball, then continue to the yellow spring. Rather than allowing it to launch you into the upper route, drop through the gap below. Follow the bottom passage right to the signpost. With 50 or more rings, jump into the Giant Ring for the optional Special Stage.
- Drop through the first bumper gap instead of bouncing upward.
- Use the hidden room to build the ring total without taking the more hazardous upper route.
- Touch the Star Post before the final exterior section.
- Drop through the final gap to reach the signpost efficiently.
Act 3: Follow the switches and preserve the Shield
At the start, move right and drop through the first gap. Collect the Shield in the lower section, then use the red springs to reach the higher platform. Take the ring box and enter the interior passage. Dodge the spike balls, exit outside, and avoid the rotating spike hazard before climbing with the moving platforms.
Use the upper platforms to reach the left-side platform and spring. Ride the moving platform, then continue right to the switch. Activate it to open the route and proceed through the passage. Outside, jump over the two pits containing moving spike balls, then climb the next series of moving platforms.
When you reach the upper-left platform, use the moving platforms to travel right and touch the Star Post. Continue to the pit and allow Sonic to fall through it; the slopes will carry him upward. Hold right during the jump so Sonic lands inside the opening. Move through the interior passage, activate the switch, and follow the opened route outside. Collect the available ring boxes and Shield if they are still present.
Use the red spring without forcing a direction. It should send Sonic through a bumper toward a moving platform. From there, ride the platforms upward. At the right wall, jump and hold right to enter the secret room containing a 1-Up and another Shield. Leave the room, move left to the platform edge, and jump into the gap to land near the next Star Post. Touch it, then cross the large gap by jumping on the tops of the moving platforms. Stay centered on each platform so Sonic does not slide off. The platform at the far side leads directly to the boss.
- Take the early Shield before entering the first interior passage.
- Activate both switches before attempting to pass their blocked routes.
- Touch the late Star Post before the long moving-platform crossing.
- Use the secret room for the 1-Up and Shield if the approach is safe.
- Jump on top of the moving platforms during the final crossing.
Defeat the Egg Stinger on the collapsing bridge
The Egg Stinger fight takes place on a bridge made from ten orange blocks over a bottomless gap. Robotnik flies above the bridge, then descends to grab and destroy a block. This downward movement is the reliable attack window. Stand on a nearby block, wait for the machine to come down, and jump into the Egg Mobile to damage it.
After each attack, move away from the spike and preserve a solid section of bridge beneath Sonic. The Egg Stinger destroys the block it grabs, so do not remain directly under Robotnik or fight from the center if that leaves no retreat. Work from one side of the bridge while keeping several intact blocks behind you.
The boss requires eight hits. As the bridge becomes shorter, attack promptly whenever Robotnik descends, but do not trade a hit for a jump that lands over the gap. If Sonic is hit and loses his rings, prioritize staying on the remaining blocks; the boss arena is too dangerous for reckless attempts to recover scattered rings. When the Egg Stinger is destroyed, move right to the animal capsule and break it to clear the zone.
- Wait for the Egg Stinger to descend before attacking.
- Keep intact blocks behind Sonic as a retreat route.
- Do not stand beneath the retractable spike.
- Land every attack on a remaining bridge block.
- Deliver eight hits, destroy the animal capsule, and continue to Labyrinth Zone.
Before you move on
- Spring Yard Zone Acts 1, 2, and 3 display their act-clear results.
- Act 1 or Act 2 was completed with 50 or more rings and the Giant Ring was entered if pursuing the optional Special Stage objective.
- The Egg Stinger was defeated with eight successful hits.
- The animal capsule after the boss was broken.
- The game advanced from Spring Yard Zone to Labyrinth Zone.
Labyrinth Zone — Underwater Rules and Air Management
Labyrinth Zone has three acts. Acts 1 and 2 are underwater platforming stages built around switches, currents, moving platforms, rising and lowering water, and large air bubbles. Act 3 uses a gray, polluted version of the same environment and ends with an escape-style Robotnik encounter rather than a conventional stationary boss arena. Robotnik flees upward in the Egg Mobile while the passage fills with water and traps. The required objective is to reach the top and survive the climb; you may strike Robotnik during the escape, but defeating him is optional for progression. After the Act is cleared, the game advances to Star Light Zone. Underwater air is the main survival concern. A large bubble from a vent restores Sonic’s air supply, while small decorative bubbles do not provide a dependable refill. When the drowning countdown begins, stop exploring and go directly to the nearest known air vent. Rings are useful protection against enemies and traps, but they do not replace air management.
Learn the air system before committing to Act 1
At the beginning of Labyrinth Act 1, move right past the early enemies and the swinging ball-and-chain. Take the Shield if you can reach it without being struck, then enter the water on the left side of the hazard. The Shield can absorb a damaging hit, but it does not prevent drowning or protect Sonic from being crushed.
Drop into the lower section, activate the switch, and wait beside the bubble vent. A large bubble eventually rises from the vent; touch that bubble to restore Sonic’s underwater air. Do not leave merely because you see several small bubbles. They are visual effects and are not a dependable replacement for the large breathing bubble. If the drowning countdown begins, stop collecting Rings and go directly to the nearest vent.
- Reach the first switch before exploring deeper water.
- Wait for a large bubble at each important vent.
- Treat the drowning countdown as an immediate route warning, not as spare time for collecting Rings.
Open the Act 1 passages in order
After the first refill, continue right to the next switch. Activating it opens the ceiling, allowing Sonic to leave the first submerged chamber. Collect the nearby Rings only if the jump is safe, then use the upper route to reach the next pool.
In the next submerged section, refill at the bubble vent before dropping through the gap. Activate the switch in the lower chamber to open the side passage, then return to the higher switch and use the opened door. The resulting current tunnel carries Sonic forward. When the current releases him onto a ledge, do not remain on the rising platform if spikes are closing above it. Step off and descend to the lower bubble vent instead. This is one of the dangerous crush points in the zone, and a Shield does not save Sonic from a crushing collision.
- Activate the lower switch before trying to force through a closed wall.
- Leave the current-tunnel landing platform before it rises into the spikes.
- Refill at the lower vent even if the air meter is not yet critical.
Cross the Act 1 conveyor and water-level section
Move through the spiked ball-and-chain section and climb onto the upward-moving conveyor platforms. Jump from platform to platform as the ceiling hazards approach; staying on one platform too long can crush Sonic against the spikes above. Reach the switch at the right, then pass the Burrobots and activate the checkpoint.
Continue along the lower route and activate the switch that opens the next door. The water level changes while Sonic passes the retracting harpoons, creating a temporary opportunity to move upward. Climb the steps and use the cork platform after the water rises. Ride it to the higher platform on the left rather than trying to jump directly through the hazard area.
In the following water section, refill before crossing the moving ledges. Use the conveyor platforms to rise, then jump to the right-hand platform and move past the fire-spitting face enemies. Activate the switch at the far right promptly because the water is rising. Proceed through the opened door, refill if needed, and climb the stairs to the final switch. That switch opens the ceiling; jump through, cross the upper platform, and touch the signpost.
- Use moving conveyor platforms instead of swimming through the spike route.
- Do not stand beneath a cork while the water level is changing.
- Touch the Act 1 signpost only after reaching a safe platform with enough air.
Use Act 1 or Act 2 for an optional Special Stage
If Sonic reaches the end of Act 1 with at least 50 Rings, a Giant Ring appears at the goal area after the signpost. Jump into it for a Special Stage. This is optional, and surviving the Act is more important than preserving every Ring. If damage scatters your Rings near spikes or a deep shaft, continue toward the next air source rather than turning around to recover them. The same 50-Ring opportunity exists at the end of Act 2, but not at the end of Act 3 in the original Genesis game.
- Finish Act 1 with at least 50 Rings if attempting the Special Stage.
- Enter the Giant Ring only after the signpost has been activated.
- Do not plan on obtaining a Special Stage from Labyrinth Act 3.
Follow the safer sequence in Act 2
Act 2 begins with a short surface route followed by a waterslide. Ride the slide and allow the spring to send Sonic into the water. Take the Invincibility item if it lies directly along the route, then collect a large bubble from the nearby vent. Move left for the Ring boxes, refill again at the vent on the right, and then travel right through the Ring trail and swinging ball-and-chain hazards.
When the current carries Sonic into the next room, refill before using the red spring. The spring sends Sonic upward toward the platforms. Use the platform route to reach the Ring box that conceals a switch, then activate that switch. Cross to the checkpoint and use the Invincibility item if it is safely available. Drop into the lower route, activate the switch that opens the floor, and descend beside the bubble vent.
Continue down the stairs, activate the lower switch, and head left. The floor at the far-left wall drops when Sonic stands on it. Follow the lower passage to the right and wait for the large bubble from the vent before climbing the stairs. At the top, crouch or wait while the projectile enemy fires its four spikes, then pass it when the lane is clear. Use the conveyor platforms to cross the gap and jump to the platform on the right. Continue right to the signpost. If Sonic has at least 50 Rings, enter the Giant Ring for the optional Special Stage.
- Refill before using the spring and before descending the lower shaft.
- Expose and activate the switch hidden behind the Ring box.
- Wait out the four-spike projectile attack instead of jumping into it.
- Use the conveyor platforms to reach the final right-hand platform.
Take the deliberate route through Act 3
Act 3 begins with two waterslides and a sequence of small platforms. Land on the second platform, then move left to collect the Ring box and activate the switch. Return right, jump the gap, and enter the newly opened waterslide route. At the next switch, activate it to make the floor slide down, then descend into the water.
In the submerged section, activate the switch on the right. A floor moves into position on the left, opening the next drop. Take the large bubble at the vent, pass the spikes, and refill again at the next bubble group before climbing the stairs. Move cautiously around the swinging ball-and-chain hazards. At the upper platform, use the left-hand moving platforms to cross the spike area, taking another bubble before continuing. Climb out of the water and move right to the conveyor.
Ride a conveyor platform downward until the switch below is reachable. Activate it to reverse the conveyor direction, then ride the reversed belt to the platform on the right. Enter the waterslide, touch the checkpoint, and proceed to the cork platforms. When the water rises, jump from the left cork to the right cork and use it to reach the higher platform. Climb the stairs as the water rises, then continue up the next stair sets. Take the Shield on the left if it is safe.
At the top, Robotnik appears in the Egg Mobile and begins retreating upward through the flooded passage. This is the Act 3 boss encounter, but it functions as an escape climb rather than a normal arena fight. The water continues rising while spikes, projectiles, and narrow platforms restrict your movement. Keep climbing toward the top instead of waiting below Robotnik. You can jump into the Egg Mobile when a safe opening places Sonic beneath it, and successful hits are useful, but defeating Robotnik is not required. Reaching the top and surviving the route completes the Act, after which the game advances to Star Light Zone.
- Activate the opening switch before leaving the first platform sequence.
- Use a large bubble before each long underwater passage.
- Reverse the conveyor with the switch before trying to reach the right-hand platform.
- Use the two corks after the water rises instead of attempting a blind jump.
- During the final climb, prioritize reaching the top over attacking Robotnik.
- Treat Robotnik’s Egg Mobile as an escape-style boss encounter; hitting or defeating him is optional for progression.
- Expect the game to advance to Star Light Zone after Act 3.
Before you move on
- Clear Labyrinth Zone Act 1 by reaching and touching the signpost, then pass the Act results screen.
- Clear Labyrinth Zone Act 2 by reaching its signpost and passing the results screen.
- If attempting an Emerald, finish Act 1 or Act 2 with at least 50 Rings and enter the Giant Ring at the goal.
- Clear Labyrinth Zone Act 3 by surviving its final conveyor, waterslide, cork, and staircase route.
- When Robotnik appears in the Egg Mobile, continue climbing through the rising-water escape passage. Strike him if a safe opening appears, but do not treat defeating him as mandatory.
- Reach the top of the Act 3 route and survive the escape encounter; this completes Labyrinth Zone even if Robotnik gets away.
- Confirm that the next playable Zone is Star Light Zone.
- If Sonic loses Rings underwater, prioritize the next large bubble and the required route over Ring recovery.
Star Light Zone — Nighttime Construction Site and Boss Tactics
Star Light Zone is a fast nighttime construction area built around ramps, loops, fans, moving platforms, seesaws, iron balls and large drops. The safest general rule is to favor visible upper routes instead of committing to blind downhill sections. Acts 1 and 2 can lead to Special Stages if you finish with at least 50 rings, but Act 3 is the boss act and has no Giant Ring opportunity. The boss uses three seesaws and explosive balls; use those objects to launch attacks rather than trying to strike Robotnik recklessly.
Act 1: take the opening hidden-room reward
Move right from the start and roll through the suspicious wall section rather than dropping immediately into the lower route. The hidden room contains 30 rings and an Invincibility monitor. Take both if you can do so without falling, then use the springboards to return to the main route.
The invincibility effect makes the opening safer, but do not use it as a reason to hold right through every drop. Star Light contains several blind edges where Sonic can run off the visible route. When the landing area is hidden, jump early and aim for a platform you can see. If two routes are available, the upper route is usually safer because many lower paths end in long drops or place Sonic close to badniks.
- Roll through the opening hidden wall if you can reach it safely.
- Collect the 30 rings and Invincibility monitor in the hidden room.
- Jump across blind drops instead of holding right through them.
Use ramps, springs and moving platforms deliberately
Continue through the open construction sections by using springs and moving platforms to connect the upper ledges. Approach each platform with enough control to see where it will carry Sonic. A fast roll is useful on a known slope, but it is dangerous when the next landing is off-screen.
Star Light's Orbinauts are best avoided unless you have a safe attack angle or invincibility. Their surrounding projectiles make a direct jump hazardous. Wait for an opening, roll underneath when there is room, or take a small detour instead of trading rings for a risky hit. The walking Bomb obstacles also cannot be safely treated like ordinary enemies: when one activates, move away and let its explosion finish before crossing the area.
- Use springs only when the landing route is visible.
- Avoid jumping into Orbinaut projectiles.
- Back away from activated Bomb obstacles and cross after the explosion.
Handle the seesaws as launch devices
When you reach a seesaw with an iron ball on one end, stand on the opposite end to raise the side with the ball. Jump or move onto the seesaw only after checking the next platform. The goal is to use the seesaw's launch to reach a safe ledge, not to preserve maximum running speed.
If the iron ball is positioned on the side where you need to land, wait for a better position rather than forcing the jump. A poor launch can send Sonic below the main route or into spikes. In Act 2, the same rule applies through the longer construction sections: line up the next landing first, then commit to the seesaw. Higher ledges generally reduce exposure to enemies and bottomless drops.
- Stand opposite the iron ball when preparing a launch.
- Look at the next landing before stepping onto a seesaw.
- Wait when the ball or Sonic's launch path would send you toward a hazard.
Finish Acts 1 and 2 while preserving Special Stage access
If you are collecting Chaos Emeralds, count your rings before activating the goal sign. Finishing Act 1 or Act 2 with at least 50 rings causes a Giant Ring to appear after the goal sign. Touch the sign, then jump into the Giant Ring before moving too far away. This sends Sonic to a Special Stage; when that stage ends, normal play resumes at the next act's starting point.
Do not sacrifice a life for a distant ring group. Star Light has enough open terrain that it is tempting to chase every ring, but a fall costs more than a small collection adds. Use the upper route, take rings that lie along safe landings, and preserve your current ring total through the final platforming section. There is no Giant Ring opportunity after Act 3, so a missed Act 1 or Act 2 attempt cannot be recovered in the boss act.
- Reach an Act 1 or Act 2 goal with at least 50 rings if pursuing a Special Stage.
- Jump into the Giant Ring after the goal sign appears.
- Do not expect a Giant Ring in Act 3.
Act 3: approach the boss carefully
Act 3 uses the same ramps, fans, platforms and seesaws but leads directly to Robotnik. Collect rings that are safely on your route, but prioritize reaching the boss over exploring side paths. Entering with at least one ring gives protection from one mistake; entering with more rings is preferable because the boss arena has no convenient recovery supply after a death.
A Star Post is positioned immediately before the boss. If you lose a life, you restart there, but you cannot return to the preceding act to collect rings or shields. This makes the first attempt a useful pattern-learning run, but it also means that careless damage before the fight leaves you with no way to rebuild your protection.
- Reach the boss with rings whenever possible.
- Treat the final platforming section as preparation for the fight, not a speed challenge.
- Remember that a boss retry begins at the nearby Star Post without recoverable rings or shields.
Defeat Robotnik's seesaw machine
The arena contains three seesaws. Robotnik flies overhead and drops explosive balls onto them. You have two reliable attack methods. First, stand on the opposite side of a seesaw when a bomb lands; the seesaw can launch Sonic upward into Robotnik's Egg Mobile. Second, after a bomb lands, jump onto the seesaw so the bomb is thrown upward toward Robotnik before it explodes. The second method keeps Sonic lower and is usually easier to repeat when the Egg Mobile is not directly above you.
Watch the bomb's landing side before moving. If it lands on the left end, use the right end to create the launch, and reverse the positions when it lands on the right. Do not jump immediately at Robotnik while the bomb is still descending; wait until the seesaw gives you a clear trajectory. After each attack, return to a stable platform or seesaw and wait for the next drop instead of chasing the Egg Mobile across the arena.
Robotnik requires eight successful hits. If you lose your rings, stop trying to force the next attack. Stay on the safer side of a seesaw, let the next bomb arrive, and use the predictable launch pattern. After the eighth hit, exit to the right to complete Star Light Zone and proceed to Scrap Brain Zone.
- Use the three seesaws to launch Sonic or Robotnik's bombs.
- Move to the side opposite the bomb before triggering the launch.
- Defeat Robotnik with eight successful hits.
- Exit right after the boss is destroyed to confirm the zone clear.
Before you move on
- Star Light Act 1 ends at its goal sign, with a Giant Ring available only if the act was finished with at least 50 rings.
- Star Light Act 2 is cleared in the same way, with its own possible Giant Ring opportunity at 50 or more rings.
- Star Light Act 3 is complete after Robotnik's seesaw machine takes eight hits and Sonic exits to the right.
- If pursuing the optional emerald ending, confirm that desired Special Stage attempts were made at the end of Act 1 or Act 2 before moving on.
- The next normal stage after the completed Star Light boss sequence is Scrap Brain Zone.
References for this chapter
Scrap Brain Zone — Industrial Gauntlet and Final Approaches
Scrap Brain Zone is the sixth and penultimate Zone in the original Sega Genesis version of Sonic the Hedgehog. Acts 1 and 2 are industrial platforming stages built around switches, spinning wheels, moving platforms, conveyors, fire, saws, electrical hazards, and crushing machinery. Act 3 leaves the factory and uses a flooded ruin layout resembling Labyrinth Zone. Scrap Brain has no boss of its own: Act 2 ends with Robotnik dropping Sonic into Act 3, and Act 3 ends at a spring that sends Sonic directly to Final Zone. Giant Rings are unavailable in Scrap Brain, so all Special Stage attempts must be completed in earlier Zones.
Prepare before entering Scrap Brain
Finish any remaining Chaos Emerald attempts before entering Scrap Brain. In the original Genesis release, completing Scrap Brain with 50 or more rings does not create a Giant Ring, and Final Zone has no Special Stage entrance either.
Treat the Zone as a survival section rather than a speed run. Keep rings when they are directly on the route, but do not take a dangerous detour for a small ring cluster. A fall into a pit, crusher, or deep water hazard costs a life even when rings would otherwise protect Sonic from a normal enemy hit.
Enter with as many lives and continues as practical. Scrap Brain contains no ordinary Zone boss, but its machinery and Act 3 water route can consume attempts quickly.
- Complete desired Special Stage attempts before Scrap Brain.
- Keep a few rings for enemy and machinery mistakes.
- Do not expect a Giant Ring after any Scrap Brain Act.
Scrap Brain Act 1: use the switches and moving platforms
At the start, move right to the switch beside the large spinning wheel. Hit the switch to reverse the wheel, then enter its opening. Sonic will be carried into the lower section. When you reach the three downward gaps, stay against the left side and wait for the moving platforms to clear each opening before dropping.
At the bottom, continue right to the spring, then jump over it rather than landing on it. Cross the following gaps while watching the crushing cylinders. After the gaps, reach the red platform area and immediately jump to the higher platform before the lower platform disappears.
Continue right through the moving platforms and fire vents. At the large gap crossed by moving platforms, use the upper platforms rather than the lower spinning ones when possible. Ride across until a platform on the right becomes available, then step off before it collapses.
When you reach the wall with ring boxes, collect them only if the area is safe. Take the higher route, then reverse direction through the opening as required by the layout. Continue across the upper platforms, defeat or bypass the two enemies blocking the path, and touch the signpost to clear Act 1. There is no Giant Ring after it.
- Reverse the opening wheel with the switch.
- Drop through the three gaps only when platforms clear the openings.
- Jump to disappearing platforms quickly.
- Use upper moving platforms across the large gap.
- Touch the Act 1 signpost.
Scrap Brain Act 2: follow the switches and take the conveyor shortcut
Begin by riding the first spinning wheel and jumping to the next wheel when their rotations line up. From the second wheel, jump to the higher platform, then move right to the switch. Activating it extends a bridge. Cross the bridge and enter the opening at the far side to be carried downward.
In the lower section, use the platforms to climb left and return to solid ground. Enter the opening, then cross the conveyor while avoiding the spinning saw. After the drop, move right past the conveyor belts and descending saws. Duck when a saw approaches at head height, and do not fall through the opening and closing bridges unless the route requires it.
After the upward passage and spinning platforms, continue to the next conveyor section. Instead of crossing the entire conveyor route, drop through the gap and hit the spring below. It sends Sonic up a slope near the far end, bypassing much of the machinery.
Continue right beneath the electrical post, then work through the fire, bombs, and crushing platforms until reaching the switch. Hit it to extend a platform, ride or jump onto the higher route, and move right to the wall. Turn back and follow the sequence of required drops through the pits and openings. At the bottom, head right through the final enemies and fire to reach the signpost.
Touch the signpost. Robotnik then appears and causes the platform to collapse, dropping Sonic into Act 3. This scene is required progression, not a boss fight.
- Activate the bridge switch near the start.
- Avoid the saw on the first conveyor.
- Use the lower spring shortcut instead of crossing every conveyor.
- Activate the switch that creates the upper platform.
- Touch the Act 2 signpost and accept the forced drop.
Scrap Brain Act 3: manage air in the flooded ruins
At the start, hit the nearby switch and board the sliding platform to the left. When it finishes moving, continue left and drop through the gap. In the flooded section, move left to the switch and activate it to open the floor. Drop into the water and descend to the lower ground.
Take a bubble from the nearby bubble set before moving right. Reach the next switch and activate it to open the ceiling, then climb the stairs. At the top, collect another bubble near the spring, move right to the next switch, and activate it to open the passage.
Drop through the next opening, collect a bubble, and touch the checkpoint post. Continue right to the switch, but take the nearby bubble before pressing it. The switch opens the ceiling; climb the stairs and follow the upper passage to another bubble set. Take a bubble before entering the opening that carries Sonic through the tunnel.
After the tunnel, take the large bubble at the next bubble set and move right. Climb the long staircase while avoiding the fire hazards. Do not stop unnecessarily on the stairs: the route is an air-management test, and the next safe area is at the top. At the top, move left and touch the checkpoint post.
Drop into the water on the left, take a bubble, and move left to the switch. Activate it to open the door, then enter and climb the higher platform and stairs. Press the switch on the right to open the upper passage. Collect the bubble to the left, climb the stairs on the right, and move left at the top to hit the spring.
The spring launches Sonic through the ceiling and directly into Final Zone. Scrap Brain Act 3 has no Goal Plate or signpost, so do not continue searching for one after reaching the final spring.
- Activate the opening switch and use the sliding platform.
- Collect bubbles before long underwater sections.
- Touch both checkpoint posts when passing them.
- Use each switch before climbing its newly opened passage.
- Hit the final spring to enter Final Zone.
Finish the Zone and prepare for Final Zone
Scrap Brain is complete when the final spring in Act 3 launches Sonic into Final Zone. There is no Scrap Brain boss. The next stage is the single-room final confrontation with Robotnik.
Final Zone contains no rings, so do not expect rings collected in Scrap Brain to serve as a stockpile for the final battle. The useful preparation is learning the final boss pattern and preserving lives or continues, not taking extra risks for late rings.
If you are practicing, identify the hazard that caused each failure. In Acts 1 and 2, the usual problems are rushing switches, misjudging moving platforms, and being pushed into saws or electrical hazards. In Act 3, the usual problems are missing bubbles, activating switches without first securing air, and taking unnecessary underwater detours.
You have completed this chapter when the Final Zone room appears after the Act 3 spring. Stop looking for a Giant Ring and proceed to the Final Zone boss instructions.
- Clear Scrap Brain Acts 1 and 2.
- Reach the final spring in Act 3.
- Confirm that Final Zone has loaded.
- Stop searching for a Scrap Brain Special Stage entrance.
Before you move on
- Scrap Brain Act 1 is cleared by touching its signpost after the wheel, platform, fire, conveyor, and crusher sections.
- Scrap Brain Act 2 is cleared by touching its signpost after the switch and conveyor route.
- Robotnik's Act 2 cutscene drops Sonic into Act 3; it is not a boss encounter.
- Scrap Brain Act 3 is completed by using the switches, bubble sets, checkpoints, stairs, and final spring.
- The final spring launches Sonic directly into Final Zone.
- All desired Special Stage attempts were completed before entering Scrap Brain.
Final Zone — Egg Crusher and Endgame Route
Final Zone is the short concluding section after Scrap Brain Zone Act 3. Sonic first crosses a flat approach corridor, then enters the Egg Crusher room. The arena contains four crusher pistons and an energy-orb attack, but no Rings, monitors, or checkpoint. Defeat Robotnik by identifying the piston containing him and striking it eight times. The Egg-O-Matic retreat afterward is optional and does not add a second required boss phase.
1. Cross the Final Zone approach corridor
After clearing Scrap Brain Zone Act 3, Final Zone begins with a short, flat corridor leading toward the Egg Crusher room. Treat this as an approach section rather than a normal platforming Act: it does not provide a ring route, checkpoint, monitor, or Special Stage entrance. Move right until Sonic reaches the boss arena, then prepare for a fight with no mid-battle recovery.
The arena contains four large piston positions. The boss area itself has no Rings, monitors, or checkpoint, so damage cannot be recovered during the encounter. Enter with as many lives and continues as possible if you are still learning the pattern. The original Genesis game does not provide a Spin Dash; use ordinary running and jumping, with a jump or Spin Attack used to hit the correct piston.
If you are pursuing the alternate Emerald ending, every Chaos Emerald must already be collected before entering this section. Final Zone cannot be used to enter a Special Stage or recover a missed Emerald. Finish eligible Special Stage attempts earlier in the game, then proceed through Scrap Brain and this final approach.
- Clear Scrap Brain Zone Act 3.
- Cross the short flat corridor into the Egg Crusher room.
- Expect no Rings, monitors, checkpoint, or Special Stage entrance in the boss area.
- Confirm that any desired Chaos Emeralds were collected earlier.
2. Use the right-side alcove as your waiting position
At the start of the fight, move to the alcove on the right and use it as your defensive reference point. Robotnik operates four pistons, and two pistons move during each crusher sequence. One of them contains Robotnik. Your goal is to identify that occupied piston and hit it; striking an empty piston does not damage the boss.
Watch the pistons as they move rather than jumping immediately. If the piston containing Robotnik is the one nearest Sonic’s waiting position, move out and jump into its underside when it reaches a safe attack height. If Robotnik is in another piston, remain protected near the right-side alcove and allow the sequence to finish. This approach avoids unnecessary crossings and reduces the chance of being caught beneath a crusher.
Do not stand directly below a descending piston. The machine can crush Sonic, and there are no Rings to absorb an ordinary hit. Move into attack range only after you have identified Robotnik’s position and have a clear jump.
- Move to the right-side alcove before committing to an attack.
- Identify the piston containing Robotnik.
- Attack the occupied piston, not an empty one.
- Never wait directly beneath a descending piston.
3. Avoid the energy orbs
After the crusher movement, the red device on the wall releases energy orbs that travel toward Sonic. The orbs leave gaps between them, and the safest route is through the largest visible gap rather than trying to outrun the entire pattern. Watch their spacing before moving and make only the adjustment needed to place Sonic between the projectiles.
Stay calm during this part of the cycle. A short movement or controlled jump is safer than crossing the whole arena. Avoid jumping into a piston while the orbs are active, and do not chase Robotnik during the projectile sequence. Once the orbs have passed, return to the right-side waiting position and prepare to read the next piston cycle.
The battle is most manageable when treated as a repeatable rhythm: wait in the alcove, identify Robotnik’s piston, strike once, retreat, pass through the safest orb gap, and repeat. The game does not require rapid consecutive attacks.
- Watch for the gaps between the energy orbs.
- Use the largest clear gap available.
- Make small, deliberate movements during the projectile attack.
- Return to the right-side waiting position afterward.
4. Repeat the attack until eight hits register
The Egg Crusher requires eight successful hits. Count only attacks that connect with the piston containing Robotnik. A jump against an empty piston is not progress. After each confirmed hit, retreat and let the machine reset instead of attempting to force another attack in the same opening.
If you miss, do not immediately jump again. Move back toward the right-side alcove, let the pistons rise, and identify Robotnik’s new position during the next cycle. Patience is more valuable than speed because a mistimed jump can end the life instantly in this ringless arena.
If Sonic is crushed or struck by an energy orb, the encounter restarts from the beginning after the life is lost. There is no Final Zone checkpoint and no ring supply to rebuild. Repeat the same process on the next attempt: identify the occupied piston, land one safe hit, evade the orbs, and continue until all eight hits are complete.
- Land eight confirmed hits on Robotnik’s occupied piston.
- Retreat after each successful strike.
- Restart the pattern from the beginning after a death.
- Do not search the arena for nonexistent recovery items.
5. Let the Egg-O-Matic retreat resolve
After the eighth successful hit, the Egg Crusher is defeated. Robotnik then attempts to flee in the Egg-O-Matic. Sonic may jump into the fleeing vehicle and strike it, but this is optional. Failing to hit the Egg-O-Matic does not cancel the victory and does not create another required boss phase.
If you want to attempt the optional hit, move right and use a normal jump when the vehicle comes within reach. Do not take unnecessary risks after the Egg Crusher has already been destroyed. Whether Robotnik is struck or escapes, the game proceeds to the ending sequence.
- Confirm that the Egg Crusher has been destroyed after eight hits.
- Treat the Egg-O-Matic pursuit as optional.
- Do not restart because Robotnik escapes after the required boss is defeated.
6. Confirm the ending and Emerald result
The required campaign completion check is the appearance of the ending sequence and credits after the Final Zone encounter. The game ends after Robotnik’s retreat sequence; there is no additional collapsing-facility escape section to complete.
If all six Chaos Emeralds were collected before Final Zone, the ending presents the alternate Emerald result. If an Emerald was missed, it cannot be obtained here. Begin another run and prioritize Special Stage entrances at the ends of eligible Acts 1 and 2 earlier in the game, keeping at least 50 Rings when approaching the Giant Ring.
- Defeat the Egg Crusher with eight successful hits.
- Allow the post-boss retreat sequence to finish.
- See the ending sequence and credits.
- For the alternate ending, collect all six Chaos Emeralds before entering Final Zone.
Before you move on
- The Egg Crusher has received eight successful hits.
- Robotnik has begun his Egg-O-Matic retreat.
- The ending sequence has appeared.
- The credits have appeared, confirming required campaign completion.
- If pursuing the alternate ending, all six Chaos Emeralds were collected before Final Zone and the Emerald result is shown.
Special Stages — Entry, Maze Navigation, and Emerald Recovery
In the original 1991 Sega Genesis release of Sonic the Hedgehog, a Special Stage becomes available after Sonic completes Act 1 or Act 2 with at least 50 Rings and jumps into the Giant Ring beside the goal. The Special Stage is a rotating maze containing one Chaos Emerald. There are six Special Stages, and the original game does not offer a menu for selecting one. The first six eligible entries use Special Stages 1 through 6 in order, whether or not Sonic collected the Emerald in an earlier attempt. After those first six entries, later eligible entries return to the first Chaos Emerald that has not yet been collected. This gives a failed attempt a possible recovery route, provided enough Act 1 or Act 2 opportunities remain.
1. Plan the Emerald run before Scrap Brain
Use Act 1 or Act 2 of Green Hill Zone, Marble Zone, Spring Yard Zone, Labyrinth Zone, or Star Light Zone as your normal entry opportunities. The original Genesis version does not provide a dependable Giant Ring entrance in Scrap Brain Zone, and Final Zone has no Special Stage entrance. This gives you ten practical opportunities before the late-game sections, although you do not need to use every one if your attempts succeed.
Keep at least 50 Rings until Sonic reaches the goal signpost. A Ring total collected earlier in the Act does not help if damage reduces the total below 50 before the finish. Entering a Special Stage is optional for ordinary completion, but collecting all six Chaos Emeralds is required for the alternate ending presentation.
The sequence is fixed. Eligible entry 1 sends Sonic to Special Stage 1, entry 2 sends him to Special Stage 2, and so on through entry 6. This remains true even when Sonic touches a Goal block and leaves without the Emerald. Beginning with a later eligible entry, the game selects the first Emerald still missing from the collection. Therefore, missing Stage 2 does not permanently remove that Emerald during the run, but it may take several later opportunities before the sequence reaches it again.
- Use Act 1 or Act 2 in one of the first five Zones.
- Reach the goal with at least 50 Rings still displayed.
- Track which Emeralds have actually been collected, not merely which Special Stages have been entered.
- Avoid relying on Scrap Brain or Final Zone for a late recovery attempt.
2. Enter the Giant Ring
Finish the eligible Act normally and touch the goal signpost while holding 50 or more Rings. After the signpost activates, a large gold Giant Ring appears at the goal area. Jump into it before the Act results screen takes over. The manual describes this as the route into the Secret Zone, the original game's name for the Special Stage area.
If the Giant Ring is absent, check the three likely causes: Sonic finished with fewer than 50 Rings, the stage was Act 3, or the stage was Scrap Brain. Do not assume that reaching 50 Rings at any earlier point guarantees access. The requirement is checked at the end of the eligible Act. A missed Giant Ring cannot be recreated by replaying the same completed Act within the current life; continue to the next available Act opportunity instead.
The ring does not allow Emerald selection. It sends Sonic to the next stage dictated by the game's sequence. After an unsuccessful attempt, return to the campaign and secure another eligible Act when possible.
- Touch the signpost with 50 or more Rings.
- Jump into the Giant Ring immediately after it appears.
- Do not expect an entrance from Act 3 or Final Zone.
- Treat Scrap Brain as unavailable for a dependable Special Stage recovery.
3. Control the rotating maze
Sonic moves through a maze that continually rotates around him. Use short Left and Right inputs rather than holding one direction through several rotations. Release the direction often so you can identify the next floor, opening, bumper, or hazard before Sonic is carried into it. The normal jump button lets Sonic leap from surfaces and helps correct a bad landing.
Up panels increase the maze's rotation speed, Down panels slow it, and Reverse panels change the direction of rotation. These are control tools, not objectives. Use Down when the maze is moving faster than you can read. Use Reverse only after checking where the next safe surface will be, because changing the rotation can send Sonic toward a Goal block or away from the Emerald chamber.
Bumpers redirect Sonic along an arc. Approach them with the landing area in view instead of touching one blindly. Jump Stands provide temporary support; when Sonic crosses a row of transparent stands, they become solid and help prevent him from falling back through the route. Use them to stabilize near longer passages and Emerald chambers.
- Use brief directional taps and pause to read the maze.
- Use Down to regain control when rotation becomes too fast.
- Use Reverse deliberately rather than automatically.
- Check where a bumper will send Sonic before touching it.
4. Avoid Goal blocks and open the Emerald barrier
Goal blocks are exit hazards, not markers for the Emerald. Touching one ends the Special Stage without awarding its Chaos Emerald. When a passage divides, scan for the route that continues safely; visible Ring formations often indicate the intended path, especially in the longer stages. Do not rush toward a bright or apparently direct opening if it contains a Goal block.
The Chaos Emerald is enclosed by colored blocks. Repeatedly touch the blocks on one side of the enclosure to change their colors and remove them. Work on one section instead of bouncing around the entire barrier. Once a gap is large enough, enter immediately and touch the Emerald. Clearing every block is unnecessary.
Rings inside the Special Stage are optional. Collecting 50 Rings awards a Continue, and 100 Rings awards an extra life, but those rewards should not take priority over the Emerald. The stage ends successfully when Sonic touches the Emerald.
- Treat every Goal block as an immediate failure hazard.
- Use Ring formations as route clues where available.
- Break one side of the Emerald barrier instead of attacking it randomly.
- Enter the opening as soon as it is safe.
5. Use practical guidance for all six stages
Special Stage 1 begins with a drop toward an opening, followed by a larger room with multiple exits. Choose the safe neighboring route rather than the opening guarded by Goal blocks. At the Emerald chamber, clear one side of the surrounding blocks and jump through the opening.
Special Stage 2 has dangerous lower openings near the beginning and central sections. Stay on the safer upper or main surfaces, avoid drops that lead toward Goals, and clear the outer blocks around the Emerald before working inward.
Special Stage 3 is a broad room with the Emerald near the center and Goal hazards around the outside. Stay near the central area, use bumpers or Reverse panels only to recover your position, and avoid drifting into the outer openings.
Special Stage 4 is a long route with misleading openings. Follow Ring formations when the path branches. Ignore openings that lead toward Goals, cross the transparent Jump Stands to create stable support, and then work on one side of the Emerald barrier.
Special Stage 5 uses another extended sequence of route choices. Continue through the openings marked by Rings, use Up, Down, or Reverse only when the rotation becomes difficult to control, and use the Jump Stands to remain beside the Emerald chamber.
Special Stage 6 is a large Emerald room with several Goal hazards around the outside. Clear the outer barrier blocks on one side, open a direct passage toward the center, and collect the Emerald without circling the room.
- Avoid Goal-marked openings even when they look shorter.
- Follow Ring trails through the longer stages.
- Stay central in the large-room stages.
- Open one barrier section and take the Emerald promptly.
6. Recover after a failed Special Stage
If Sonic touches a Goal block, the current attempt ends without awarding that Emerald. The next eligible Giant Ring does not repeat the immediately failed Special Stage if it occurs among entries 1 through 6; the game advances to the next numbered stage. For example, failing Special Stage 2 means the next attempt is Special Stage 3, not another attempt at Stage 2.
After the first six entries have been used, later eligible entries return to the first Emerald that has not been collected. If Sonic has Emeralds 1, 3, 4, 5, and 6 but missed Emerald 2, the next later opportunity can return to the missing Emerald rather than beginning a permanently lost sequence. The exact recovery depends on how many eligible Giant Ring opportunities remain and which Emeralds have been collected.
For a normal game clear, simply continue the campaign after a failed attempt. For a deliberate all-six-Emerald run, restarting from Green Hill is optional but preferable if the failure occurred early and you want a clean, low-risk sequence. Restarting is not mandatory: a player can continue the same run and recover a missed Emerald through later Act 1 or Act 2 entries. Do not claim that replaying the same earlier Act immediately repeats the failed stage.
- Remember that entries 1 through 6 advance from Special Stage 1 to Special Stage 6 regardless of success.
- Use later eligible entries to reach the first Emerald still missing.
- Continue the current run if enough opportunities remain.
- Restart only when a fresh, controlled all-six attempt is preferable.
Before you move on
- For each successful attempt, verify that Sonic touches the Chaos Emerald and that it appears in the Emerald collection display.
- For the optional alternate ending, confirm that all six Chaos Emeralds are collected before defeating the Final Zone boss.
- If an early attempt fails, either continue collecting later eligible entries and watch for the first uncollected Emerald to return, or restart for a cleaner attempt.
- The main game remains completable without any Emeralds; Special Stages are optional and affect the ending presentation rather than required Zone progression.
- Do not count a Special Stage as recovered merely because it was entered. The Emerald must be collected before the stage ends.
Boss Strategy Summary — Each Robotnik Fight
The original Sega Genesis version of Sonic the Hedgehog gives each Robotnik encounter a different hazard pattern. Green Hill, Marble, Spring Yard, and Star Light use conventional eight-hit battles. Labyrinth Act 3 is an escape-style Egg Mobile encounter: Sonic can attack Robotnik during the climb, but defeating him is optional because reaching the top of the rising-water shaft completes the Act. Final Zone is a separate eight-hit Egg Crusher battle with no rings available in the arena. Carry rings into every conventional fight when possible, observe the hazard cycle before attacking, and prioritize a safe landing over an extra hit.
General Boss Preparation
Carry as many rings as you can into a boss room, but do not risk a life for a small ring group immediately before the fight. A ring protects Sonic from one damaging collision and scatters when he is hit. A later collision while he has no rings costs a life, so the protection is temporary rather than permission to ignore hazards.
At the beginning of each conventional fight, identify the solid floor, platforms, lava, pits, spikes, or destructible sections. Watch one complete attack cycle before committing to a jump. In most of these encounters, one controlled jump creates one attack opportunity. Land on stable ground, reposition away from the next hazard, and wait for the following opening instead of forcing consecutive hits.
If rings scatter, collect only those that remain on a safe route. Chasing a ring beneath a machine, over lava, or across a collapsing platform can turn one mistake into a lost life. The safest recovery is usually to survive the next attack cycle first and then collect nearby rings when the boss has moved away.
- Enter conventional boss rooms with rings whenever possible.
- Identify the safest landing area before attacking.
- Use one controlled attack per opening and reset Sonic's position afterward.
- Recover scattered rings only when doing so does not cross an active hazard.
Green Hill Zone: Egg Wrecker
The Egg Wrecker is Robotnik's Egg Mobile with a wrecking ball hanging beneath it. The fight takes place over a flat floor with raised platforms that provide useful jump positions. The ball swings beneath the machine and damages Sonic on contact, so the target is the Egg Mobile itself, not the weight.
Wait until Robotnik's approach gives Sonic a clear path around the swinging ball. Jump from the ground or a platform and strike the underside of the Egg Mobile as it passes overhead. After landing, move to a clear section of ground or another safe platform. Do not remain beneath the machine while the wrecking ball is returning through the arena.
If a hit scatters your rings, let the next pass finish before deciding whether to recover them. Rings that fall beneath the ball are not worth a second collision. Eight successful Spin Attacks destroy the Egg Wrecker and complete Green Hill Zone Act 3.
- Aim for the Egg Mobile, never the wrecking ball.
- Jump when the ball leaves a safe path to the machine.
- Move away after landing instead of attempting an uncontrolled second jump.
- Defeat the Egg Wrecker with eight hits.
Marble Zone: Egg Scorcher
The Egg Scorcher fights over two stone footholds separated by lava. Robotnik uses a fireball cannon below the Egg Mobile and alternates attacks across the available platforms. The arena is too limited for careless movement, so always know which foothold will remain safe after the next fire attack.
When Robotnik moves into position to fire, use the opening to jump into the Egg Mobile, then move to the opposite safe foothold. Avoid jumping merely because the machine is nearby; the fireball pattern and lava leave little room to correct a long leap. Wait for the flames to clear before committing to the next attack.
If your rings scatter, stay on the foothold you currently occupy when possible. Recover nearby rings only after the fire attack has ended and the route does not require crossing the lava. A missed attack is preferable to a desperate jump into the center. Eight Spin Attacks defeat the Egg Scorcher.
- Keep a solid foothold beneath Sonic before every jump.
- Watch which platform is being targeted by the fireball.
- Move across only after the flame pattern has cleared.
- Defeat the Egg Scorcher with eight hits.
Spring Yard Zone: Egg Stinger
The Egg Stinger is the Egg Mobile equipped with a retractable spike underneath. Robotnik uses the spike to remove sections of the bridge, gradually reducing the safe floor. The danger is not only the spike itself; standing still can leave Sonic on a section that is about to disappear.
Watch which part of the bridge Robotnik is targeting. After the spike completes its downward movement, jump onto the body of the Egg Mobile, avoiding the spike beneath it. Immediately move toward the remaining intact floor after landing. Do not wait at the center for a perfect attack if the bridge is being dismantled.
If rings scatter, remain on the safest intact section and recover only rings that are already within reach. Crossing beneath the machine while the spike is active is usually more dangerous than finishing the next cycle without restoring your ring total. Eight hits destroy the Egg Stinger.
- Track the section of bridge being removed.
- Attack after the spike finishes its downward movement.
- Keep moving toward intact floor as the arena shrinks.
- Defeat the Egg Stinger with eight hits.
Labyrinth Zone Act 3: Egg Mobile Escape
Labyrinth Act 3 ends with a Robotnik encounter, but it is not a normal stationary eight-hit boss room. Robotnik retreats in the Egg Mobile through a narrow shaft while the water rises behind Sonic. The required objective is to climb the route and reach the top before drowning or being killed by the traps.
Move upward as soon as the path opens. Use the available platforms, springs, switches, and stair sections to gain height while avoiding spikes, fireballs, spears, swinging hazards, and other obstructions. Keep Sonic moving toward the exit instead of waiting near Robotnik. Air management matters throughout the climb, so do not take a detour for scattered rings if it costs time or places Sonic below a safe platform.
Attacks on Robotnik are possible during the escape, and repeated successful hits can damage the Egg Mobile. They are optional, however; Sonic does not need to defeat the Egg Mobile to clear the Act. If you miss an attack, continue climbing rather than turning back or treating the encounter as a conventional damage race. If Sonic falls, recover onto the next available platform and resume the ascent. Reaching the top of the rising-water shaft completes Labyrinth Zone Act 3 and sends the game to Star Light Zone.
- Treat the encounter as an escape-style Robotnik sequence.
- Climb continuously while managing air and avoiding traps.
- Attack the Egg Mobile only when the route remains safe; the attacks are optional.
- Reach the top of the shaft to complete the Act.
Star Light Zone: Egg Spiker
The Egg Spiker drops explosive iron balls onto the seesaws in the arena. A bomb landing on a seesaw launches Sonic toward the spikes, so the safe position changes according to which seesaw Robotnik targets. Avoid standing in the center where either launch can catch you.
Watch the bomb's destination before choosing a side. Stand near the safe end of the other seesaw, then use the explosion's launch to reach the Egg Mobile. The goal is to bounce on Robotnik, not to touch the bomb or remain on the endangered seesaw. After the attack, return to a safe end and wait for the next drop.
Do not jump blindly after missing an attack. Let the seesaws settle, identify the next target, and make one deliberate launch. If rings scatter, preserve your position first; recover them only when the route does not pass through the bomb or spikes. Eight successful hits defeat the Egg Spiker.
- Identify the bomb's target before choosing a seesaw.
- Stand near a safe end rather than the center.
- Use one explosion launch for one attack, then reset.
- Defeat the Egg Spiker with eight hits.
Final Zone: Egg Crusher
Scrap Brain Zone does not have a separate conventional boss room before Final Zone. After the required Scrap Brain progress, Sonic enters Final Zone for the final confrontation. No rings are available in this arena, so rings carried from the previous Act cannot protect Sonic here. Preserve lives and continues before entering rather than expecting to refill rings during the fight.
Robotnik operates the Egg Crusher through hydraulic pistons. On each cycle, two pistons extend from the ceiling and floor; one contains Robotnik and the other is a hazard. Watch the movement and identify the occupied piston. When its crushing motion has finished, move beneath the correct machine and jump onto Robotnik, then retreat before the next piston movement.
Electrical balls are released from the overhead generators after the piston sequence. Move clear of their paths and wait for the next opening instead of standing beneath a piston. Because there are no rings, any damaging collision ends the attempt immediately. Eight successful hits destroy the Egg Crusher. After the final hit, allow the ending sequence and credits to play; there is no separate escape route to navigate.
- Enter Final Zone expecting no rings.
- Identify the occupied piston on every cycle.
- Avoid the electrical balls before preparing for the next attack.
- Defeat the Egg Crusher with eight hits.
- Wait for the ending sequence or credits after the final hit.
Before you move on
- The Egg Wrecker, Egg Scorcher, Egg Stinger, and Egg Spiker have each been defeated with their distinct eight-hit patterns.
- Labyrinth Zone Act 3 has been completed by climbing the rising-water route and reaching the top. Defeating the Egg Mobile during the escape is optional, not required.
- Scrap Brain has been completed and Final Zone has been entered as the final boss room.
- The Egg Crusher has received eight successful hits and the ending sequence or credits have appeared.
- For the optional alternate ending, all six Chaos Emeralds were collected during earlier Act 1 or Act 2 Special Stage opportunities before reaching Final Zone.
References for this chapter
Advanced Movement and Risk Management (Original-Edition Techniques)
The original Sega Genesis release rewards controlled momentum rather than constant acceleration. Use slopes, ramps, springs and short braking inputs to decide when to preserve speed, when to slow down, and when a safer ring route is worth more than a faster finish. These techniques apply to the original 1991 Genesis edition, not later ports that add features such as Spin Dash or saving.
Build momentum deliberately instead of forcing speed
Sonic the Hedgehog on the original Genesis has no Spin Dash. From a standstill, Sonic must accelerate by running, rolling down slopes, or using level machinery such as springs and ramps. Hold Left or Right on open ground to build speed, then release the direction before a blind landing or hazard. Releasing acceleration is safer than assuming Sonic must keep running at maximum speed.
While Sonic is already moving on the ground, press Down to curl into a ball and roll. Rolling is useful for carrying momentum down a slope and for attacking suitable enemies, but pressing Down while standing does not create a later-series Spin Dash. If a section gives you a long downhill slope, enter it with room to run, stay aligned with the surface, and let the terrain provide the burst of speed.
- Use open ground or a downhill slope to accelerate.
- Use Down to roll while moving, not to charge a stationary Spin Dash.
- Release acceleration before blind landings, narrow ledges and hazard clusters.
Use slopes to control your launch and landing
A downhill slope can carry Sonic into a jump with much more forward momentum than a flat run. That helps clear gaps and reach high routes, but it also makes the landing harder to correct. Before jumping from a ramp, look at the platform or terrain where Sonic is expected to land. If the landing contains spikes, a Badnik or a narrow ledge, slow down before the ramp rather than committing to maximum speed.
When running uphill, expect Sonic to lose momentum. Do not assume that holding Right will preserve the same speed over the crest. If there is enough room, rolling can help maintain movement up a slope, but only use it when the upper surface is clear. In Green Hill and Spring Yard, check what lies beyond loops, ramps and bumpers before allowing a fast approach to carry Sonic into an unseen collision.
- Read the landing area before using a downhill ramp.
- Reduce speed before narrow platforms or spike-lined exits.
- Expect uphill sections to reduce momentum and plan another acceleration point after the crest.
Time springs and bumpers around their landing zones
Springs launch Sonic in a fixed direction, but the launch is safe only when the destination is clear. Approach while checking the space above and beyond the spring. A vertical spring may send Sonic toward an enemy, spike or moving platform; a horizontal spring may push him directly into another hazard. Do not judge a spring only by whether it reaches a higher platform. Judge where Sonic will arrive and whether he can land safely.
Use a spring when it improves both position and safety. If nearby platforms or hazards move on a cycle, wait long enough to identify a clear opening. In Spring Yard, bumpers and springs can redirect Sonic repeatedly, so enter those areas without maximum speed when the landing is uncertain. After a bounce, reorient before holding a direction for a long time. A controlled landing is more valuable than preserving every bit of momentum.
- Identify the spring’s launch direction before touching it.
- Check the landing zone, not just the spring itself.
- Observe moving platforms and hazards before committing to a bounce.
- After a bumper launch, reorient before accelerating again.
Choose safety over speed when rings are the objective
For a Special Stage attempt, the practical target is reaching the end of Act 1 or Act 2 with at least 50 rings and then jumping into the Giant Ring that appears after the goal sign. This changes the best route. A slightly slower upper path with visible ring lines is better than a fast lower route if the lower route includes spikes, pits or difficult enemy jumps. Act 3 does not provide the normal Giant Ring opportunity, so do not sacrifice a safe ring run for speed in a late act.
You do not need every ring. Once you are safely above 50, protect the total. Avoid risky jumps for isolated rings, especially when missing would send Sonic into a pit or force a damage exchange. If damage scatters your rings, recover only those safely within reach. Chasing a ring through a hazard commonly costs the Special Stage opportunity and may cost a life as well.
A checkpoint does not replace the ring requirement. It can help recover your position after a life loss, but the act must still be completed with the required ring total for the Giant Ring attempt. Plan the route around visible ring groups and safe platforms rather than relying on a last-second collection rush near the goal.
- Count your rings before committing to a risky shortcut.
- Prefer ring-rich routes in Acts 1 and 2 when preparing for a Special Stage.
- After reaching 50 rings, stop taking unnecessary hazards for extra rings.
- Remember that the Giant Ring appears after the goal sign, not before it.
- Do not assume a checkpoint preserves the required ring total.
Protect momentum without letting it control you
Speed is valuable because it can carry Sonic over enemies and through loops, but speed is not automatically protection. A fast approach can hide a spike, place Sonic too close to a wall or make a jump impossible to correct. Use short releases of the direction button before blind corners and normal jumps when you need to inspect the next section.
When Sonic is airborne, avoid large last-second reversals unless the landing is clearly safe. Small corrections are usually enough to move toward a platform. A strong reversal can send Sonic backward into the hazard he just cleared or move him away from a narrow landing. If the route becomes unfamiliar, prioritize solid ground with at least one ring over maintaining maximum forward speed.
- Release acceleration before blind corners and unseen landings.
- Make small airborne corrections rather than repeated full reversals.
- Treat speed as a tool for clearing hazards, not as a substitute for seeing them.
Apply conservative movement in Labyrinth Zone
Labyrinth Zone requires a different risk calculation. Water reduces Sonic’s mobility, and spikes, currents and narrow passages punish aggressive movement. Do not carry the high-speed Green Hill approach into underwater sections. Move in short bursts, identify the next solid platform and keep the route near known air-bubble locations whenever possible.
If Sonic loses rings underwater, do not dive through a dangerous passage solely to recover them. Reach the nearest air source first. A safe route with fewer rings is preferable to a fast movement attempt that ends in drowning. Springs and currents can alter Sonic’s position suddenly, so pause after each launch or push and reorient before holding a direction again.
Air bubbles restore breathing time, but they do not make Sonic invulnerable. Collect one before the warning sequence becomes critical, then continue toward the next safe platform or the surface. If the route ahead is unclear, prioritize air and stable footing over rings or speed.
- Locate the next air bubble or surface route before committing to a long underwater passage.
- Use short movement inputs around spikes and currents.
- Recover air before attempting to reclaim scattered rings.
- Never rely on speed to escape an underwater mistake.
Before you move on
- You can accelerate from flat ground, build speed on a slope, and deliberately reduce momentum before a hazard without relying on Spin Dash.
- You can roll while moving and understand that pressing Down while standing does not charge Sonic.
- You can use a spring or bumper only after checking its launch direction and landing area.
- You can finish an Act 1 or Act 2 route with at least 50 rings by choosing safer ring paths instead of the fastest visible route.
- You can reach the goal sign with 50 or more rings and jump into the Giant Ring that appears afterward.
- You can enter Labyrinth’s underwater sections by locating air sources first and recover from lost rings without taking an unnecessary drowning risk.
Completion Checklist, Optional 100% Tasks, and Save/Replay Advice
Complete the original North American and European Sega Genesis release by clearing Green Hill, Marble, Spring Yard, Labyrinth, Star Light, and Scrap Brain, then defeating Robotnik in Final Zone. The six Chaos Emeralds are optional for the ordinary clear, but collecting all six changes the ending. Because the original cartridge has no normal save file or chapter-select system, treat each attempt as one continuous run. Missed Emeralds are not automatically lost: after the first six Special Stage entries, later eligible entries can return to an Emerald that has not yet been collected.
1. Verify the required game clear
The normal completion requirement is to clear every required Act in Green Hill, Marble, Spring Yard, Labyrinth, Star Light, and Scrap Brain, then defeat Robotnik in Final Zone. Scrap Brain Act 3 leads into Final Zone, so reaching the final approach does not by itself prove that the game is finished.
Final Zone is the Egg Crusher encounter. It provides no Rings, monitors, checkpoint, or alternate recovery route. Preserve as many lives and continues as possible before entering it. In the boss room, identify the piston containing Robotnik, avoid the electrical-ball attack, and land eight successful hits. After the eighth hit, allow Robotnik's retreat and the ending sequence to play instead of resetting immediately.
The ending and credits are the clearest completion check. Act-clear bonuses, final score, remaining Rings, and time bonuses do not determine whether the main game has been completed.
- Green Hill through Scrap Brain have been cleared, including Scrap Brain Act 3.
- Robotnik has been defeated in Final Zone with eight successful hits.
- The ending sequence and credits have appeared.
2. Separate the normal clear from the Emerald objective
The Chaos Emeralds are an optional completion goal. To enter a Special Stage, finish Act 1 or Act 2 of one of the first five Zones with at least 50 Rings, then jump into the large Gold Ring that appears beyond the Act goal. There are six Special Stages and six Emeralds in this original Genesis release.
Act 3 does not provide the normal Giant Ring opportunity. Scrap Brain and Final Zone should not be treated as dependable Emerald sources, so schedule Special Stage attempts during Acts 1 and 2 of earlier Zones. If you reach an eligible goal with fewer than 50 Rings, finish the Act normally and use a later opportunity rather than risking a life trying to force access.
Once the Giant Ring appears, move through the goal and jump into the ring before it disappears. The ring starts the next Special Stage in the sequence. Score and time bonuses are secondary; reaching the goal safely with 50 Rings is the priority.
- You have at least 50 Rings when finishing an eligible Act.
- The eligible Act is Act 1 or Act 2, not Act 3.
- You jump into the Giant Ring after the goal.
3. Recover if a Special Stage goes badly
A failed Special Stage does not permanently remove its Emerald from the current run. The first six entries use Special Stages 1 through 6 in order, even if one of those stages ended at a Goal marker before the Emerald was collected. After the initial six-stage sequence, later entries can return to the first Chaos Emerald that remains uncollected.
For example, failing Special Stage 2 does not make Emerald 2 unreachable. The next entry is still the next stage in the sequence. After the first six entries have been used, another eligible Giant Ring can eventually send Sonic back to the missed Emerald. This requires additional successful Act 1 or Act 2 finishes with at least 50 Rings, so keep track of which Emeralds were collected and do not assume the very next Giant Ring repeats the failed stage.
Restarting after an early failure is still the safest method for a deliberate all-six run, especially for a newcomer. That is a reliability choice, not a rule that makes recovery impossible. If you continue the same run, preserve later 50-Ring opportunities and use the sequence cycle to repair the missed result.
- Record which Emerald is obtained after each Special Stage.
- Do not assume touching a Goal marker permanently removes the missed Emerald.
- Reach additional eligible Giant Rings if you want to cycle back to an uncollected stage.
4. Practice without a save menu
The original Genesis cartridge does not provide an ordinary save file, chapter select, or dedicated Special Stage replay menu. Turning the console off ends the current run. Practice must therefore be built into new attempts rather than based on returning directly to a late Zone.
Green Hill Act 1 and Act 2 are practical places to rebuild Rings and rehearse Special Stage entry because their layouts are less hazardous than Labyrinth or Scrap Brain. Take a conservative route, avoid unnecessary enemy contacts, and do not chase every Ring if doing so risks a pit or spike collision. The objective is to reach the goal with 50 Rings, not to maximize the Act score.
Inside a Special Stage, Sonic is carried through a continuously rotating maze. Use the directional controls to guide him and make small corrections rather than holding a direction for too long. Touch an in-stage Up panel to increase the maze's rotation speed, a Down panel to reduce it, and a Reverse panel to change the rotation to the opposite direction. The original Genesis controller has no R button or shoulder-button command that reverses the maze. Bumpers and jump stands alter Sonic's path, while colored blocks around the Emerald must be worn down by repeated contact. Treat flashing Goal markers as hazards: touching one ends the stage without granting an Emerald. Prioritize opening a safe route to the Emerald over collecting every Ring.
- Use early eligible Acts to rehearse Special Stage entry.
- Reverse the maze only by touching an in-stage Reverse panel.
- Avoid Goal markers and do not expect an R-button function on the original controller.
- Do not expect a cartridge save, chapter-select screen, or instant Special Stage retry.
5. Prepare the final attempt and confirm the alternate ending
For a first Final Zone clear, preserve at least one continue when possible. Continues and lives are more useful than end-of-Act score bonuses, and Rings do not carry from one Act into the next. Entering Final Zone with no Rings is unavoidable, so preparation is about preserving attempts rather than stockpiling protection for the boss room.
If you are pursuing the alternate ending, collect all six Chaos Emeralds before defeating Robotnik. Finish the Emerald work during earlier eligible Acts whenever possible, then proceed through Scrap Brain without treating it as a new Special Stage source. If one Emerald was missed, use the later sequence cycle while eligible opportunities remain; do not wait until Final Zone, where no Giant Ring appears.
After the Final Zone boss is defeated, watch the complete ending. The ordinary ending confirms the basic game clear, while the alternate Emerald presentation requires all six Chaos Emeralds. If the Emerald result is not shown, begin another continuous run and target the Special Stage that previously caused the problem.
- A spare continue remains before Final Zone when possible.
- All six Chaos Emeralds have been collected before the final boss for the alternate ending.
- The ending presentation and credits match the intended completion goal.
Before you move on
- Normal completion: every required Act is cleared, Robotnik is defeated in Final Zone, and the ending and credits play.
- Optional Emerald completion: all six Chaos Emeralds are collected before the final boss and the alternate ending is shown.
- Replay readiness: note failed Special Stages, use early eligible Acts for future 50-Ring attempts, and approach Final Zone with a spare continue when possible.
Finishing up
You have cleared Acts 1, 2, and 3 of Green Hill, Marble, Spring Yard, Labyrinth, Star Light, and Scrap Brain.
You have defeated the Egg Crusher in the separate Final Zone and watched the ending sequence and credits. This confirms standard campaign completion.
Optional: you have collected all six Chaos Emeralds through earlier eligible Special Stages and then received the alternate Emerald ending after defeating the Final Zone boss.
If a life or Continue challenge is being tracked, record it separately as a personal goal; it is not required for campaign completion.
Choose your next gameScreenshots & video
Game imagery for reference. Follow the written chapters above for the route and strategies.
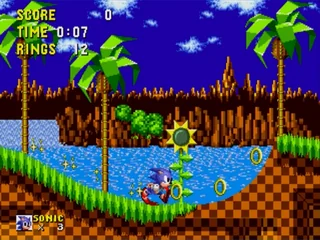
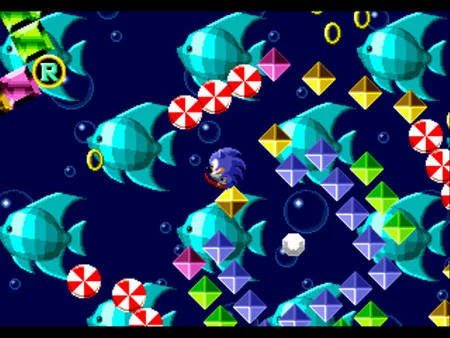
Sources & references
Our original guide draws on the references below. Check the edition at the top of this page before following controls or unlock requirements.
- Sonic the Hedgehog — Sega Genesis manual
- Sonic the Hedgehog — Official Sega In-Game Manual
- Sonic the Hedgehog — Guide and Walkthrough — Genesis — GameFAQs
- Sonic the Hedgehog — Guide and Walkthrough — Genesis — GameFAQs
- Sonic the Hedgehog/Special Stage - StrategyWiki
- Sonic 1 Maps - The Sonic Center
- Green Hill Zone — Zone: 0
- Zone: 0 - Sonic 1 Downloads and Original Manual Scans
- Sonic the Hedgehog - Guide and Walkthrough - Genesis - GameFAQs
- Egg Wrecker — Sonic Wiki Zone
- Sonic the Hedgehog Mega Drive Complete Walkthrough
- Sonic the Hedgehog — Sega Genesis Classics Manual
- Sonic the Hedgehog — Marble Zone reference
- Zone 0: Spring Yard Zone
- Egg Stinger — Sonic Wiki Zone
- Sonic the Hedgehog - Guide and Walkthrough - Genesis - By WWalker - GameFAQs
- Sonic The Hedgehog Maps - Genesis Labyrinth Zone maps
- Zone: 0 - Sonic 1 - Labyrinth Zone
- Sonic The Hedgehog — Genesis (USA) Manual
- Sonic the Hedgehog — Guide and Walkthrough for Genesis by Whammychip
- Star Light Zone — Sonic the Hedgehog — Zone: 0
- Sonic the Hedgehog — FAQ, Genesis, by MManos
- Scrap Brain Zone — Sonic Wiki Zone
- Final Zone — Sonic Wiki Zone
- Egg Crusher — Sonic Wiki Zone
- Egg Scorcher — Sonic Wiki Zone
- Egg Mobile (boss) — Sonic Wiki Zone
- Egg Mobile (Tunnel Retreat) — Sonic Wiki Neoseeker
- Sonic HQ - The Ultimate Sonic Source: Sonic the Hedgehog Zones and Special Zone
- Special Stage (Sonic the Hedgehog) (16-bit)
- Sonic the Hedgehog (1991)
About the game & collecting notes
- Platform
- Sega Genesis / Mega Drive
Step-by-step campaign guide to finish the original 1991 Sega Genesis release of Sonic the Hedgehog (USA / Europe). Covers controls, zone-by-zone routes, boss strategies, Special Stage access for the six Chaos Emeralds, underwater recovery, and a concise completion checklist so you can beat the Final Zone and see the game's alternate ending.
Darryl Polo
Darryl Polo loves tinkering with emulation and revisiting retro games. He enjoys exploring how old favorites play on different setups and sharing what he learns along the way. At Joking Joystick, he writes about the games, hardware, and small discoveries that keep the hobby fun.
Our editorial standardsFound a step that needs another look? Help us improve this guide.