
Sonic the Hedgehog 2 (Sega Genesis) — World (Rev A) Complete Campaign Walkthrough
Step-by-step campaign walkthrough for Sonic the Hedgehog 2 (Sega Genesis, World Rev A). Covers controls, core moves (including the spindash), every primary zone route, how to reach and clear the half-pipe Special Stages to collect all seven Chaos Emeralds, the Death Egg final encounter, recovery strategies and a completion checklist so you can finish the main game and optionally unlock Super Sonic.


Find a copy
Sonic the Hedgehog 2 Sega Genesis / Mega Drive
We may earn a commission if you buy through these links, at no extra cost to you. As an Amazon Associate I earn from qualifying purchases.
Opens retailer search results. Check the model, edition, seller, availability and current price before buying.
Before you begin
This walkthrough is written for the original Sega Genesis release identified as Sonic the Hedgehog 2 (World) (Rev A).
It assumes you are playing the standard 1-player campaign and want concrete, practical directions for every required zone and boss, plus the optional Special Stages and Chaos Emeralds.
Follow the ordered zone routes and the mechanical advice in the next sections.
Practice the core moves, especially the Spin Dash, because controlled momentum is essential in the later platforming sections and boss approaches.
Set yourself up for the run
Controller and Buttons: Test the Genesis controller, emulator mapping or platform controller settings before starting.
The original cartridge uses the D-pad for movement, A, B or C for jumping, Down while moving to roll, and Down plus repeated A, B or C presses while stationary to charge the Spin Dash.
Practice holding Down to curl and using the Spin Dash until you can launch reliably from a standstill without running into nearby hazards.
Star Post / Special Stage readiness: collect at least 50 rings, touch an unused Star Post, then jump into the Star Circle that appears above it.
Plan ring collection before checkpoints so you can deliberately trigger Special Stages rather than entering one accidentally.
Lives and Rings stockpile: collect safe rings and extra-life monitors, but prioritize survival over risky detours. Reaching 100 or 200 rings awards an extra life.
Special Stages reset the normal-stage ring counter when you return to the entry Star Post, so rebuild rings before another attempt.
Two-player considerations: in one-player Sonic and Tails mode, Player 1 controls Sonic while Tails follows under computer control; a second controller can control Tails in the appropriate mode.
The original cartridge has no modern save-state, rewind, or in-game controller-remapping features. Those conveniences belong to the emulator, console menu or later release being used.
Familiarize yourself with water, spikes, crushing ceilings, bottomless drops and timed machinery. Slow down before blind jumps and use normal jumps when precision matters more than speed.
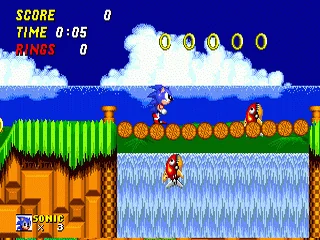
Start, Options and First Steps
Set up Sonic the Hedgehog 2 on the original Sega Genesis, choose the correct single-player character option, learn the Genesis controls and resource systems, then clear Emerald Hill Zone Act 1 using a safe route that teaches momentum, springs, loops and Star Posts.
Open the original Options screen before starting
At the title screen, press Down twice to highlight Options, then press Start. This is the cartridge’s own Options menu, not a controller-configuration screen. On the original Genesis release, use Up and Down to highlight an option and Left or Right to change its setting. If you are using an emulator or a modern controller, configure its button mapping outside the game so the directional pad, A, B, C and Start inputs reach the Genesis software correctly.
The first option is Player Select. Choose Sonic and Tails for the standard one-player game, Sonic alone for a game without the following Tails character, or Tails alone if you specifically want to control Tails. In Sonic and Tails mode, Player 1 controls Sonic and a second controller can control Tails. With one controller, Tails follows Sonic and can collect rings or attack enemies, but he is not required for progression.
The second option changes the item contents of monitors in two-player VS competition; it is not a single-player difficulty setting. The third option is Sound Test. Use Left or Right to change the selected sound or music number. Press B or C to play the selected music or sound effect. Press A to advance the selection number by 10 in hexadecimal. Press Start to return to the title screen. Starting a one-player game uses the Player Select setting you chose in Options.
- From the title screen, press Down twice and then Start.
- Set Player Select to Sonic and Tails, Sonic alone or Tails alone.
- Do not look for an in-game controller-remapping menu on the original cartridge.
- Treat the VS Mode Items setting as a two-player option, not a single-player rule.
- In Sound Test, use Left or Right to change the number, B or C to play it, and A to advance by 10 in hexadecimal.
Confirm the Genesis controls and pause behavior
The directional pad moves Sonic or Tails left and right. Holding a direction increases movement speed. Press Down while moving to perform the rolling Spin Attack, which turns the character into a rolling ball and lets you attack many enemies. Press A, B or C to jump. A jump curls the character into a ball, allowing attacks from above or below. Press Start to pause the act and press it again to resume.
To perform the Spin Dash, stop moving, hold Down, then press A, B or C repeatedly to charge. Release Down to launch forward. Use this when starting from rest, climbing a short slope or regaining speed after a careful platforming section. Do not charge blindly beside spikes or enemies: the launch is fast, but it does not replace normal jump timing.
Practice once on safe ground before entering Emerald Hill. Run a short distance and press Down to roll. Then stop, hold Down, tap a jump button several times, and release Down. Notice that charging requires Sonic to remain still; pressing Down while already moving produces a roll instead.
- Directional pad moves and accelerates.
- Down while moving performs the rolling Spin Attack.
- A, B or C jumps; Start pauses and resumes.
- For a Spin Dash, hold Down while stopped, press a jump button repeatedly, then release Down.
Understand rings, lives, the timer and continues
A new game begins with three lives. Rings are your damage buffer. If Sonic is hit while carrying at least one ring, the rings scatter and the hit normally does not cost a life. With zero rings, the next damaging contact costs a life unless another protection effect applies. Recover scattered rings only when the area is safe; chasing them into a second hazard is usually worse than continuing with a small ring total.
Collecting 100 rings awards an extra life, and collecting 200 rings awards another. One-Up monitors also provide lives. The act timer allows up to ten minutes. Letting it expire costs a life, so do not spend an entire act searching for optional routes or monitors.
A Continue is awarded each time the score reaches 100,000 points. If the last life is lost, the Continue screen appears; press Start before its timer reaches zero to resume from where the run ended. Continues are limited resources, not an unlimited retry system, so prioritize checkpoints and safe progress over risky attempts to increase the score.
- Start with three lives.
- Keep at least one ring whenever possible.
- 100 rings and 200 rings each award an extra life.
- Remember the ten-minute act limit.
- A Continue is awarded at 100,000 points.
Begin Emerald Hill Act 1 with controlled momentum
Start Emerald Hill Zone Act 1 and move right through the opening grassland. Collect the opening rings, then deal with Coconuts in the tree and the flying Buzzer. Jump over them or attack while curled into a ball; do not stop directly beneath Coconuts while its projectiles are falling.
A moving platform appears to the right. Ride it to the ledge with the Shield monitor, break the monitor and continue right. Drop toward the bridge, watching for Mashers below it. Jump over the fish enemies and continue past the next Coconuts and Buzzer combination. When the lowering and rising platform appears, wait for a safe opening rather than forcing a landing.
Reach the ledge with the yellow spring and jump on it. While airborne, move right to collect the floating rings. After landing, jump over the Masher toward the Super Ring monitor if you want the extra ten rings, then use the nearby spring. A Power Sneakers monitor follows; take it if you can do so without colliding with the Coconuts above the route.
- Collect the opening rings before fighting the first enemies.
- Use the moving platform to reach the Shield monitor.
- Jump over Mashers and avoid standing beneath Coconuts.
- Use the yellow spring to reach the floating rings and monitor route.
Use the loops and first Star Post as training points
Continue right through the half-loop and use the spring to reach the moving platform beside the loop. Ride or jump from it to the upper path, where an Invincibility monitor can be collected. Drop back into the twisting loop and climb the next half-loop. A Super Ring monitor and a Masher are above this section; collect the rings only after lining up a safe jump. Defeat or bypass the Masher, clear the Coconuts on the next ledge and run down the slope to the first checkpoint.
A Star Post saves your position when you touch it. If you lose a life, the game restarts you at the last Star Post rather than at the beginning of the act. Your previous time is retained, but your previous rings are not. If you have 50 or more rings when you touch a Star Post, a spinning Star Circle appears around it. Jump into the circle to enter the Special Stage.
Use the Special Stage entry only when you deliberately want the attempt. After visiting the Special Stage from a particular Star Post, that post cannot send you again immediately. You must collect 50 more rings and reach another Star Post.
- Touch the first Star Post before attempting risky jumps.
- Treat the post as a reset point, not as ring storage.
- With 50 or more rings, jump into the Star Circle only when ready for the Special Stage.
- Remember that the same post cannot immediately be reused for another Special Stage entry.
Finish Act 1 without forcing the upper route
After the first checkpoint, use the spring to enter the loops, then stop when you reach the yellow spring that leads upward. Bounce to the higher spring and the next ledge. From there, use the spring to collect nearby rings and jump across the moving platforms one at a time. The route leads to another loop containing a checkpoint and rings.
Bounce from the yellow spring on that loop to the following half-loop. The Act 1 goal sign is directly to the right. If a jump looks uncertain, slow down and use a normal jump instead of a full Spin Dash. Emerald Hill is designed to teach momentum, but arriving alive is more valuable than taking every high route or collecting every monitor.
Touch the goal signpost and wait for the results screen. This confirms Emerald Hill Zone Act 1 is complete. You do not need 50 rings, every monitor or a Special Stage for this chapter’s objective. On a later attempt, use the route you learned to reach a Star Post with enough rings for a Chaos Emerald attempt.
- Use the springs and moving platforms after the first checkpoint.
- Do not force a Spin Dash into a narrow jump.
- Touch the goal signpost and confirm the results screen appears.
- Remember the checkpoint and Star Circle locations for later Emerald attempts.
Before you move on
- Player Select is set intentionally and you can identify the Genesis buttons for movement, jumping, rolling, Spin Dash charging and pausing.
- You understand that the game starts with three lives, that 100 and 200 rings award extra lives, and that 100,000 points awards a Continue.
- You can use the Sound Test correctly: Left or Right changes the selection, B or C plays it, and A advances by 10 in hexadecimal.
- You have completed Emerald Hill Zone Act 1 and seen the results screen.
- You have touched at least one Star Post and understand what position, time and rings it preserves.
- You can reach the Act 1 goal while keeping at least one ring for protection instead of taking every risky detour.
References for this chapter
Core Moves: Running, Rolling, and the Spindash
Sonic the Hedgehog 2 on the original Sega Genesis rewards controlled momentum rather than constant acceleration. Learn when to run, jump, roll, and charge the Spin Dash so you can recover speed without losing control in tight platforming sections.
Read the Genesis controls correctly
Use the Directional Pad to move Sonic left and right. Holding Left or Right makes him run, and releasing the direction lets you reduce or stop his movement. Press any of the three face buttons, A, B, or C, to jump. Sonic curls into a ball during a jump, allowing him to defeat enemies and break certain objects by striking them from above or from the side.
Press Start to begin a selected game and to pause or resume an active game. The original Genesis version does not use a modern in-act options overlay. There is no homing attack, air dash, Insta-Shield, or other later-series movement ability here; your essential actions are running, jumping, rolling, and using the Spin Dash.
- Directional Pad: move left or right
- A, B, or C: jump
- Start: pause or resume
Build speed without surrendering control
Hold Right to run toward the next section, then release the direction when you need to brake. Sonic preserves momentum on slopes, so downhill terrain can accelerate him even when you are not holding a direction. Use that momentum for loops, ramps, and long straightaways, but do not carry full speed blindly into a platform arrangement you have not read.
While Sonic is moving, press Down to curl into a rolling ball. A roll attacks enemies from the side and can carry Sonic beneath some low obstacles. Rolling is especially effective on a downhill slope: enter the slope with forward momentum, press Down, and let the terrain carry Sonic forward. Release Down or press the opposite direction when you need to regain normal running control.
- Use running speed for open ground and loops.
- Release the Directional Pad before a precision jump.
- Roll into enemies only when the landing or exit is safe.
- Do not confuse a moving roll with a stationary Spin Dash charge.
Perform the Spin Dash from a standstill
To charge the Spin Dash, bring Sonic to a stop, hold Down on the Directional Pad, and press A, B, or C repeatedly while continuing to hold Down. Sonic stays crouched and spins in place as the charge builds. Release Down to launch Sonic forward in the direction he is facing.
The stationary setup matters. If Sonic is still running when you press Down, he performs a roll instead of charging in place. Practice on a flat, open stretch: stop completely, hold Down, tap one of the action buttons several times, then release Down. Make sure Sonic is facing the intended direction before beginning the charge.
- Stop completely before charging.
- Keep holding Down while tapping A, B, or C.
- Release Down to launch.
- Face the intended direction before releasing the charge.
Use the Spin Dash to recover momentum
The safest everyday use is restarting from rest. If Sonic stops before a slope, enemy, or long straightaway, a charged Spin Dash gets him moving immediately without requiring a long running approach. It is also useful after a missed jump leaves Sonic on a lower platform and you need to rebuild speed before trying the route again.
A charged Spin Dash can attack enemies and carry Sonic through some gaps when the launch point and landing area are clear. Use a shorter charge when you need control and a stronger charge only on a clear route. Do not begin charging at the edge of a platform. Sonic can launch farther than expected, and a missed landing may leave no lower ground for recovery.
- Use a short charge when you need control.
- Use a stronger charge on a clear straightaway or slope.
- Check the landing area before launching from a ledge.
- Face the route before releasing Down.
Practice three reliable situations
First, practice from a standstill. Find a flat stretch, stop Sonic, hold Down, tap an action button once or twice, and release Down. Repeat with more taps so you can feel how the charge affects the launch. The goal is to begin moving without accidentally jumping or turning around.
Next, charge into a slope. Stop at the bottom, face uphill, charge the Spin Dash, and release Down to begin climbing. Once Sonic is moving, release the Directional Pad and let the slope determine his movement. This teaches you to combine an initial burst with terrain rather than holding Right constantly.
Finally, practice before a key jump. Charge on safe ground, release Down, and wait until Sonic reaches the intended approach before jumping. Some gaps are safest with a normal running jump, while others can be crossed by maintaining a ground roll. Judge the landing first instead of using the Spin Dash automatically.
- Standstill: charge and launch on flat ground.
- Slope: use the Spin Dash to begin climbing.
- Pre-jump: choose between a normal running jump and a rolling launch.
- Repeat the drill until you can launch without changing direction accidentally.
Know when not to Spin Dash
The Spin Dash is powerful, but it is not a universal solution. Narrow platforms, moving platforms, vertical shafts, and sections with blind drops usually require normal walking and jumping. A fast launch can send Sonic past a safe landing or into an enemy that would have been easy to avoid at walking speed.
Use a normal jump when you need to adjust your position in the air, land on a small platform, or wait for a moving obstacle. If a route contains springs, switches, or platforms that must be approached from a particular side, slow down and read the setup before attacking it. In unfamiliar areas, survival is more valuable than preserving maximum speed.
- Slow down for narrow or unfamiliar platforms.
- Prefer a normal jump when landing position matters.
- Do not charge beside an unseen drop.
- Do not expect the Spin Dash to replace careful platforming.
Before you move on
- You can stop Sonic, hold Down, tap A, B, or C repeatedly, and launch the Spin Dash in the intended direction.
- You can roll into a vulnerable enemy while moving and return to normal movement without losing control.
- You can distinguish a moving roll from a stationary Spin Dash charge.
- You can use a short Spin Dash from flat ground and a stronger launch on a clear slope.
- You can choose between a normal running jump and a Spin Dash launch based on the width of the gap and the precision of the landing.
- You can complete a flat-ground, slope, and pre-jump practice sequence without relying on later-series mechanics.
Special Stages and Chaos Emeralds
In the original Sega Genesis version of Sonic the Hedgehog 2, you can enter a Special Stage by passing a Star Post with at least 50 Rings and then jumping into the Star Circle that appears above it. The Special Stage is a three-section half-pipe course. Collect enough Rings to pass each checkpoint, avoid Bombs, and complete all three sections to earn the next Chaos Emerald. The seven stages are played in a fixed order, and your normal-stage Ring total is reset when you return to the Zone.
1. Prepare at least 50 Rings before a Star Post
Collect 50 or more Rings during a normal Zone Act before reaching a Star Post. The game checks your Ring total as you pass through the post, so losing Rings to an enemy or hazard immediately beforehand can cancel the Special Stage opportunity.
Carry a few extra Rings whenever possible. A total of exactly 50 is enough, but having more gives you protection against a small mistake before the checkpoint. Do not confuse this requirement with finishing the Act while holding 50 Rings; Special Stage access is created at the Star Post during the Act.
A Star Post that you have already passed is still a normal checkpoint, but it cannot send you to another Special Stage after it has already done so. If you enter a Special Stage from that post and fail, collect another 50 Rings and use a different post later in the Act or in a later Act.
- Reach a Star Post with at least 50 Rings.
- Keep enough distance from nearby enemies and hazards to avoid losing the requirement before touching the post.
- Track which Star Posts have already sent you to a Special Stage.
2. Activate the Star Circle and enter promptly
Pass through the Star Post while carrying the required Ring total. A rotating Star Circle appears above the post. Jump into the Star Circle while it is open to leave the Zone and enter the Special Stage.
The Star Circle remains available only briefly. If your approach is too fast, brake before the post or make a short jump after passing it. Aim for the rotating circle rather than jumping randomly near the post. Missing the circle does not consume the Special Stage opportunity by itself; continue the Act and try to use the post again only if it has not already sent you to a Special Stage.
- Confirm that the Star Circle is visibly rotating above the post.
- Jump through the Star Circle before it disappears.
- Do not assume that touching the same post later will work if it has already sent you to a Special Stage.
3. Understand the half-pipe controls and hazards
The Special Stage places Sonic, and normally Tails as his partner, on a curving half-pipe. The characters run forward automatically. Use Left and Right on the directional pad to steer across the width of the course. The Spin Jump remains available, and jumping can help clear Bomb formations that block the route from side to side.
The course bends, dips, and rises, so do not treat it as a flat straight lane. Watch the next formation as it approaches and make small steering corrections. Running off one edge makes the character leap toward the opposite side, which can be useful for repositioning but is dangerous if you use it without checking the landing line.
Bombs are the main hazard. Touching one removes 10 Rings from the Special Stage total. A Bomb can therefore ruin an otherwise successful section, especially when it is placed beside a valuable Ring formation. If Bombs surround the course, jump over the formation rather than forcing Sonic through one side.
- Use the directional pad for measured left and right movement.
- Stay low and central while learning an unfamiliar formation.
- Jump over Bomb groups when steering around them would cause a collision.
4. Pass all three Ring checkpoints
Each Special Stage is divided into three sections. The screen displays the Ring requirement for the section you are entering or currently attempting. Collect enough Rings before reaching the next checkpoint to continue. The requirement is based on the stage and on whether the game is treating the run as solo or as a Sonic-and-Tails pair, so do not rely on a quota from a different character setup.
Prioritize safe Ring groups over complete collection. You do not need every Ring in the course; you need to meet the displayed requirement at each checkpoint. Take the clearest line through a formation, then reposition for the next one. If a large group is protected by Bombs, leave it alone unless the remaining route clearly leaves enough Rings to pass.
The later Special Stages use harder layouts and more demanding Ring requirements. In the first stage, learn the relationship between the displayed target and the next checkpoint. In later stages, begin steering toward the next safe Ring line before the current formation has completely passed.
- Read the current target before committing to a Ring formation.
- Reach the first, second, and third checkpoints with the required totals.
- Abandon dangerous Ring groups when the safer route still provides enough Rings.
5. Complete the stage and claim the next Emerald
If you miss a checkpoint requirement, the Special Stage ends and no Chaos Emerald is awarded. If you complete the third section, the game presents the Chaos Emerald reward and advances your progress to the next Special Stage.
There are seven Chaos Emeralds in the original Genesis game. Normal gameplay always gives them in sequence: you must clear the first Special Stage before the second becomes available, then the second before the third, and so on. A convenient Star Post does not let you skip ahead to a later stage.
After the reward screen, the game returns you to the Star Post in the Zone where you entered. You resume normal gameplay at that location, but your normal-stage Ring total is reset to zero in this original Genesis release.
- Complete all three sections rather than merely reaching the first or second checkpoint.
- Wait for the Chaos Emerald reward to appear before resuming the Act.
- Confirm that normal gameplay has resumed at the original Star Post with zero Rings.
6. Plan the next attempt after returning
Once you return to the Zone, continue toward the Act goal or collect Rings for another attempt. You need another 50-Ring reserve before reaching a Star Post that has not already been used for Special Stage access.
Earlier Star Posts give you more remaining level to collect Rings and try again. Later posts may be safer because less level remains after them, but a failed attempt there can leave fewer opportunities in that Act. If you are pursuing all seven Emeralds, treat every Star Post as a limited entry opportunity and avoid spending one casually when you are not prepared.
If you fail a Special Stage, resume normal play and use another eligible post. The game does not award partial credit for reaching one or two checkpoints; only completing all three sections grants the Emerald.
- Rebuild your Ring total after returning to normal gameplay.
- Use another eligible Star Post for the next numbered Special Stage.
- Do not expect a partial Emerald reward after an unsuccessful run.
Before you move on
- You pass an eligible Star Post while carrying at least 50 Rings.
- A Star Circle appears above the post and you enter it by jumping into the circle.
- You steer through the half-pipe, avoid Bombs, and meet the displayed Ring requirement at all three checkpoints.
- The Chaos Emerald reward appears after the third section.
- Normal gameplay resumes at the entry Star Post with the normal-stage Ring counter reset.
- For optional full completion, repeat the process until all seven Chaos Emeralds have been awarded in sequence.
Emerald Hill Zone — Routes, Secrets and the Boss
Emerald Hill Zone is the opening area of the original Sega Genesis version of Sonic the Hedgehog 2. Use its broad slopes, loops and springs to learn controlled momentum, but slow down before enemy groups and raised-platform sections. Act 1 and Act 2 share the same general style, while the Act 2 boss ends the zone. Robotnik’s Drill Car is defeated by jumping onto its upper section during its approach, then moving away before it can damage you again.
1. Establish a safe rhythm in Act 1
Move right from the starting point and collect the easily reachable rings along the ground. Do not make a difficult jump solely to obtain a small ring group. Emerald Hill’s opening terrain is designed to let you run across slopes, loops and short rises, so ordinary running is usually safer than repeatedly charging a Spin Dash.
Let Sonic remain on the ground through the first broad slopes and loop sections. Jump when an enemy, gap or raised platform requires it, rather than jumping continuously. Buzz Bombers can attack from above, while Coconuts can fire from positions that punish blind forward movement. Slow briefly before these enemies, watch their position, then pass underneath or jump over them when the route is clear.
Use the first Star Post you reach as a checkpoint and a natural division between practice sections. If you lose a life later, repeat the immediate area with controlled movement instead of trying to recreate the whole act at maximum speed.
- Take safe opening rings without risking a life for one pickup.
- Use normal running through open slopes and loops.
- Slow before Buzz Bombers, Coconuts and unfamiliar rises.
- Treat Star Posts as checkpoints and route markers.
2. Choose upper and lower routes without forcing jumps
Emerald Hill’s terrain often separates into higher and lower lines. The upper line can provide extra rings, monitors and a smoother run, but it is optional. If a raised platform is already within a clean jump, take it; if the jump would require stopping beneath an enemy or launching across an uncertain gap, remain on the lower route and continue right.
Look for side openings, short vertical climbs and passages formed by the zone’s terrain. These are the useful alternate routes in Emerald Hill. They commonly lead to ring groups, item monitors or a way back to the main path. The exact route is easier to recognize by watching the shape of the ground than by trying to reach every high platform. A missed upper route is not a failure: continue right and use the lower line to recover.
Springs and loop entrances are best used when you can see where they will place Sonic. Do not Spin Dash blindly into a spring just because it is nearby. The launch may send Sonic into an enemy or leave him without enough time to correct his landing.
- Take upper paths only when the jump is clear.
- Use the lower route as a safe recovery line.
- Check side openings for optional rings and monitors.
- Do not chase an upper route after the approach has become unsafe.
3. Practice the Spin Dash in open terrain
The Spin Dash is most useful here when Sonic has stopped at the base of a slope or needs to regain momentum after avoiding an enemy. Hold Down while stationary, press an action button repeatedly to charge, then release Down to launch to the right or left. A short charge is usually sufficient in Emerald Hill.
Practice on a broad, unobstructed stretch rather than near a spring or enemy. Charge from rest, release along the slope and observe how far Sonic travels. This teaches the distance without forcing you to use the move in a dangerous section. Once Sonic is already moving through a loop or corkscrew, ordinary running is generally easier to control.
Before a tight platform arrangement, release the Spin Dash early and return to normal movement. Full-speed launches are useful for recovering momentum, but they do not replace careful jumping.
- Charge from rest on open ground.
- Use the Spin Dash to recover speed after stopping.
- Release before tight platforms, springs or enemy groups.
- Use normal jumps when the landing position matters more than speed.
4. Clear Act 2 with measured jumps
Act 2 retains Emerald Hill’s flowing slopes and speed sections but gives you more chances to lose control around elevated ground, springs and narrow platforms. Continue following the main route to the right. When the ground rises into a vertical section, stop at a safe edge and identify the next platform before jumping. Jumping from the proper ledge is more reliable than launching from the lower ground and hoping to reach the target.
Rings, monitors and high platforms remain optional. Take a shield or extra-life monitor when it is safely on the route, but do not cross a dangerous gap for an item that is not required. After a Star Post, regard the next stretch as its own practice segment. If a jump repeatedly costs rings, approach it slowly, watch the platform cycle and use a normal jump instead of a maximum Spin Dash.
As you near the end of Act 2, preserve at least a few rings if possible. The boss arena is safer with a damage buffer, even though the fight can be completed with careful movement.
- Pause before elevated spring and platform sections.
- Prioritize safe shields and extra-life monitors over risky ring groups.
- Use Star Posts to divide Act 2 into manageable sections.
- Enter the boss area with rings whenever possible.
5. Defeat Robotnik’s Drill Car
The Act 2 goal leads directly to Robotnik’s Drill Car battle. Robotnik drives across the arena and approaches Sonic with the drill pointed forward. The machine’s body and drill are harmful, so running into its side is not an attack. Keep moving on the ground and watch the vehicle’s distance rather than jumping as soon as it appears.
When the Drill Car approaches, jump onto the upper portion of the machine. A successful overhead contact damages Robotnik. Immediately move away after the hit so Sonic does not remain in contact with the vehicle as it continues through the arena or turns around for another pass. If the machine is far away, do not chase it; staying near the center or on the open side of the arena gives you more time to react.
Repeat the approach-and-clear pattern until the Drill Car has taken eight hits. The fight rewards patience: wait for a clean approach, jump over or onto the vehicle at the correct height, then reset your position. If Sonic is hit, collect any remaining rings immediately and return to a defensive rhythm instead of attempting a desperate instant counterattack.
- Keep moving while watching the Drill Car’s approach.
- Attack only from above.
- Move clear immediately after each successful hit.
- Defeat the machine with eight hits.
- Avoid chasing the vehicle when it is too far away.
6. Open the capsule and confirm completion
After the eighth hit, Robotnik retreats and the animal capsule appears. Break the capsule to release the captured animals, then let the results transition finish. The game proceeds to Chemical Plant Zone after the Emerald Hill sequence is complete.
If the boss defeats you, restart the attempt by preserving rings during Act 2 and entering the arena without uncontrolled momentum. There is no need to replay optional upper paths; use the safest route you know, collect a few rings and concentrate on reading the Drill Car’s approach.
- Robotnik’s Drill Car is destroyed.
- The animal capsule appears and is broken.
- The results transition completes.
- Chemical Plant Zone appears next.
Before you move on
- Emerald Hill Act 1 has been cleared and its results screen has appeared.
- Emerald Hill Act 2 has been cleared and the Drill Car battle has been reached.
- Robotnik’s Drill Car has received eight successful hits and has retreated.
- The animal capsule has been opened.
- Chemical Plant Zone appears after the results transition, confirming that Emerald Hill Zone is complete.
References for this chapter
Chemical Plant Zone — Pipelines, Fast Sections and Recovery
Chemical Plant Zone contains two acts. Act 1 introduces the factory’s tubes, moving blocks, springs and blue chemical hazards. Act 2 adds the rising Mega Mack section, where stick platforms, stair blocks and careful timing matter more than maximum speed. Keep at least one ring whenever possible, use the final Star Post before the boss if you are preparing for a Special Stage, and attack the Chemical Plant boss while its canister is being filled.
Act 1: Use the opening slopes and moving blocks carefully
Move right through the opening platforms, collecting the first ring groups without jumping blindly into the next ledge. The route alternates between low ground, sloped passages and raised platforms. Keep moving through the loops, but slow down whenever a red spring or a narrow landing is directly ahead. A short Spin Dash is useful on a broad flat surface or at the bottom of a slope; release it before a tight platform arrangement.
After the first loop and spring sequence, continue across the raised route and collect the ring box when it is safe. You will reach a Spiny and then a block that travels around a square path. Drop onto the moving block and wait until it carries you toward the upper-right side. Jump off only when the next platform is close enough for a normal jump. Do not try to force the gap while the block is moving away.
Continue through the loop chain and the tube section. A Spiny is positioned near the next chute, so either roll into it from the ground or wait for a clear jump. The chute carries you through the route; use the nearby red spring for the elevated rings, then collect the ring box before dropping to the lower passage.
- Keep at least one ring before entering each unfamiliar platform section.
- Use normal jumps when a moving block or tube requires a precise landing.
- Charge a Spin Dash only where there is room to release it without striking a wall or hazard.
Finish Act 1 through the descending block staircase
After the chute and ring box, continue into the section with four blocks. Let the blocks move into a staircase-like arrangement before descending. If you step down while the blocks are still shifting, Sonic can fall into the chemical below. Wait for a usable route, then cross without stopping on the blue chemical projectiles.
The blue chemical hazards can remove your rings, leaving you vulnerable to the next collision. Jump over them when possible instead of charging through at full speed. Continue right through the final low passage and touch the goal sign to clear Act 1.
- Wait for the four blocks to form a usable staircase.
- Jump over blue chemical hazards rather than relying on speed.
- Reach the goal with rings intact if you plan to use this act for resource recovery.
Act 2: Climb the pipes and rotating platforms
Act 2 begins with a short ring group and a drop into a lower route that launches Sonic upward toward another ring group. Collect these rings if the landing is safe, then continue right to the staircase blocks. One block rises when touched while another rotates around its support, so climb only after observing their movement.
When the rising staircase carries you upward, jump to the left-hand platform as the route requires. Use the low red spring to cross the gap, then use a controlled Spin Dash up the slope and onto the rotating tube. Jump off when the tube reaches the upper platform. A tube cover farther ahead drops with Sonic when you stand on it; use the red spring afterward to reach the upper rings and ring box.
Drop through the following loops and move across the tube platforms. Wait until each platform reaches its lower position before transferring to the next one. Two sections of floor move in and out; cross only while they are extended. Falling here is a life-threatening drop, so do not rush the transfer.
- Observe each staircase or rotating tube before committing to a jump.
- Use the Spin Dash on the open slope, not inside a narrow vertical passage.
- Treat retracting floor sections as timing hazards, not speed sections.
Reach the rising Mega Mack section
Continue through the tube cover and red spring, then follow the lower route until the first Star Post. A Grabber and ring box are on the raised platforms nearby. Collect the box before approaching the Grabber, then roll or jump onto the enemy only when it is safe. If it catches Sonic, break free using the Genesis controller’s action inputs rather than remaining trapped.
Proceed through the paired yellow springs and the next block staircase. At the lower ledge, wait for the stick platform moving across the Mega Mack. Ride it until it meets the second stick, then transfer to the new platform and remain aboard until it reaches the far side. Move right into the next staircase and prepare for the liquid to begin rising.
- Collect the nearby ring box before dealing with the Grabber.
- Transfer between stick platforms only when they meet.
- Use the first Star Post as a recovery point and possible Special Stage entry.
Escape the rising Mega Mack
Mega Mack is hazardous liquid, not a normal swimming area. Once it rises, climb continuously through the staircase and moving-block sequence. Take the nearest safe platform rather than stopping for rings placed at the edge of a jump. The final set of four moving blocks carries Sonic back above the liquid; climb them as soon as their positions make the next step reachable.
After returning above the liquid, continue to the next stick platform and make the same mid-route transfer when it meets the second stick. At the following moving-floor section, avoid the retracting floor pieces and jump directly toward the tube platform when it is positioned safely. Ride the tube toward the upper-right ledge, then use the launcher and continue to the next Star Post.
From that Star Post, follow the loops and descend to the lower ledge with the red spring. Wait for the final stick platform, ride it to the end, then jump across the last ledges and proceed into the boss arena. If you are carrying at least 50 rings and want a Special Stage, use the Star Post before entering the boss area.
- Climb immediately when Mega Mack begins rising.
- Prioritize the next solid platform over ring pickups during the escape.
- Use the final Star Post before the boss if you are planning a Special Stage attempt.
Defeat the Chemical Plant boss
The boss arena has a central yellow platform with side platforms that flip or retract over the Mega Mack. Stay near the center whenever Robotnik is preparing to drop chemical. Falling into the Mega Mack costs the life immediately, so do not chase rings or the boss onto an outer platform unless you have a clear landing.
Robotnik’s machine fills its overhead canister from the liquid below. This filling phase is the safe attack window: jump onto the machine and bounce off it for damage while the side platforms are extended. Retreat toward the center before the canister finishes and the chemical is released. When the canister is full, avoid the falling chemical and wait for Robotnik to move into the next filling cycle.
The boss requires eight successful hits. A conservative pattern is to land one or several controlled hits during the filling phase, then return to the center and wait. Keep at least one ring before every attempt. After the final hit, run right and jump onto the animal capsule to open it and complete Chemical Plant Zone.
- Stay near the center when the chemical is released.
- Attack while the canister is being filled and the side platforms are extended.
- Defeat the boss with eight hits, then run right and jump onto the capsule.
Before you move on
- Both Chemical Plant acts are cleared and the game advances to Aquatic Ruin Zone.
- The Chemical Plant boss has been defeated with eight successful hits.
- The animal capsule at the right side of the boss arena has been opened.
- If pursuing a Special Stage, the desired Star Post was used before entering the boss arena and the required ring total was preserved.
Aquatic Ruin, Casino Night, Hill Top and Mystic Cave — Water, Pinball, Lava and Cavern Routes
The campaign progresses in this order: Aquatic Ruin → Casino Night → Hill Top → Mystic Cave → Oil Ocean. Aquatic Ruin rewards a cautious surface route and careful use of pillars and lodged arrows. Casino Night is safer when you control your bounces instead of holding right. Hill Top combines lava, seesaws, collapsing routes and vertical platforming. Mystic Cave is the most hazardous section of this chapter, with collapsing wood, spikes, vines, moving crates and crushing pillars. Optional ring collection and Star Posts are useful, but survival and forward progress take priority.
1. Complete Aquatic Ruin Acts 1 and 2
Move right through the forest and ruins, using the upper route whenever a lower path drops into extended underwater sections. Aquatic Ruin's gray arrow shooters flash red before firing, so wait for the arrow or jump over the firing line rather than running directly past the column. Large gray pillars rise when approached; land on them to break through and continue. Grounder enemies can emerge from wall sections, so slow down near suspicious blocks instead of charging through every passage.
Each act contains underwater areas, but neither act requires you to remain submerged for long. If you fall into the water, look for bubbles rising from the floor and collect one before exploring for rings. Sonic moves slowly underwater, and taking damage does not prevent drowning. In Act 2, watch swinging platforms before jumping and use red springs to return to dry ground. If you miss a platform, abandon optional rings and reach the nearest bubble or ledge.
At the Aquatic Ruin boss, Robotnik strikes one of two pillars with his hammer. The impact fires an arrow toward the opposite pillar. Stand on a rising pillar, jump away as the hammer strike begins, and attack Robotnik from the pillar or from an arrow that has already lodged in place. Never touch an arrow while it is still moving. If you fall, use a lodged arrow as a temporary step, but remember that it will not remain forever. Repeat the setup until the pillar machine is destroyed, then continue right through the animal-release sequence into Casino Night.
- Prefer the upper route when the lower route leads underwater.
- Watch for flashing red eyes on arrow shooters.
- Collect bubbles before exploring underwater areas.
- Use lodged arrows as footholds, never freshly fired arrows.
- Defeat the pillar machine and confirm the transition to Casino Night Zone.
2. Control Casino Night Acts 1 and 2
Casino Night is built around flippers, bumpers, springs, moving blocks, elevators and conveyor belts. Do not hold right continuously. Use short directional corrections while Sonic is bouncing so you can aim for the next platform or flipper. Orange flippers launch Sonic when touched; green flippers redirect him like pinball paddles. In pressure-spring tunnels, hold the jump button while Sonic is on the spring to build a stronger launch, then release when the next landing is aligned.
Wait for blue moving blocks and elevators instead of forcing a jump into a crushing gap. The crab-like enemy with a bumper is safest when attacked from behind with a roll or Spin Dash. Slot machines are optional. They can award rings, but Robotnik results can remove rings, so skip them when you are protecting 50 or more rings for a Special Stage. If you fall into a lower route, continue right rather than repeatedly trying to regain the upper path.
The Egg Claw boss drops a red mine whenever it stops above Sonic. Stay on the floor near one curved wall and charge a Spin Dash. When the machine stops over you, release the Spin Dash up the wall, jump into the machine from the side or upper portion, then steer back toward the floor. Avoid the electric underside and move away before the mine reaches the ground and splits into damaging fragments. Repeat the wall attack until the Egg Claw is destroyed, then exit right into Hill Top Zone.
- Use directional corrections between bounces.
- Charge pressure springs before releasing them.
- Treat slot machines as optional when preserving rings.
- Attack the Egg Claw from the side or above, never through its electric underside.
- Confirm the transition from Casino Night to Hill Top.
3. Cross Hill Top Act 1
Hill Top shifts the emphasis from speed to accurate jumps. At the opening, ride the platform suspended from a vine and jump off before it reaches the end of its movement; the opening drop is fatal. Lava is common but normally damages Sonic rather than instantly killing him, so keep a ring buffer and do not linger in it. Red enemies with gray spikes launch the spike when Sonic approaches. Bait the launch, then attack the exposed enemy or pass it safely.
Use the vertically moving pillars to cross lava gaps. Small rock mounds can be destroyed by jumping on them, but breaking them is optional. At seesaws, land on the side without the red ball, then move across the seesaw to gain height. Do not touch the red ball itself. When a vine platform carries you across a gap, jump off before the platform leaves the safe ledge.
In the Act 1 cave, a section closes while the floor shifts. Move right and wait for the lava level to fall and the platform to rise before continuing. Do not rush the moving platform. Continue through the upper ledges and springs until the goal sign, then begin Hill Top Act 2.
- Jump off vine platforms before their ride ends.
- Use seesaws from the side without the red ball.
- Cross lava with moving pillars and springs.
- Wait for the Act 1 cave platform to rise.
- Reach the Act 1 goal sign.
4. Complete Hill Top Act 2 and defeat the Egg Scorcher Mark II
Act 2 contains a rising-lava cave. Climb the platforms toward the top-right exit without stopping on low ledges. An Invincibility monitor in the right wall can help if you are struggling, but it is optional; the key requirement is to keep climbing while the lava rises. Watch for ceiling enemies that drop spikes, and look up before making full-height jumps near narrow passages.
In the later cave, use the vine platforms to cross the lava lake. Jump between platforms deliberately and do not assume the next vine is safe until it has reached a stable position. Springs and curved walls provide the route upward. If you fall into a lower pocket, check for a spring before treating the drop as a lost life; some lower pockets contain a recovery route or an optional 1-Up. Continue right through the final springs and activate the Star Post before the boss if you can do so without sacrificing your ring supply.
The Egg Scorcher Mark II fights from two lava pits. Robotnik rises from one side, fires a flame in the direction he is facing, and exposes himself briefly. Jump onto the machine after the flame has been fired, then land away from the ledges. When he retreats into the lava, two fireballs ignite the ledges on his side, so do not remain where he disappeared. The side he uses after the first cycle can vary. Repeat one controlled hit per opening until the machine is destroyed, then proceed right to Mystic Cave Zone.
- Climb immediately when lava begins rising.
- Use the right-wall Invincibility monitor only as an optional aid.
- Time jumps between vine platforms.
- Avoid ledges ignited by the boss's retreating fireballs.
- Defeat the Egg Scorcher Mark II and continue to Mystic Cave.
5. Navigate Mystic Cave Act 1
Mystic Cave's orange wooden ledges collapse shortly after Sonic touches them. Move across them without stopping. At the first route split, the lower path is practical and can contain a shield. Green hanging vines often shift a wooden walkway into position; grab the bottom of the vine, wait for the walkway to settle, then jump onto it. Blue glow-worm enemies extend from the ceiling and can be hit only on the head, so approach slowly and watch for their movement.
Jump over spike pits and use the red spring to reach higher ledges. When another route split appears, favor the upper path if it avoids a moving pillar. After the Star Post, use the vine and wooden bridge to descend, then climb using the horizontally moving platforms. A short wall releases spiked blocks one after another; jump onto the safe tops in sequence. If you fall, leave the area far enough for the blocks to reset before trying again.
Pass under the green moving pillar when it rises, then use the vine to descend. Avoid standing between moving crates and the floor. Later, Spin Dash up the curved wall, activate the Star Post on the ledge, and use the spring and ceiling vine to extend the wooden walkway. The final pair of moving pillars can crush Sonic, so cross only when they rise. Drop for the rings if safe, bounce back up, and reach the Act 1 goal.
- Cross collapsing wood immediately.
- Use vines to move walkways into position.
- Attack glow worms only when their heads are exposed.
- Reset spiked blocks by leaving the screen if necessary.
- Cross the final crushing pillars when they rise.
6. Complete Mystic Cave Act 2
Mystic Cave Act 2 follows the lower route reliably. Grab the opening vine, drop down instead of forcing the moving platforms, and use the next vine to open the way. Pass the crushing pillar and lightning bug carefully; the lightning bug is dangerous while flashing, so wait for its vulnerable movement before attacking or passing. Use the Invincibility monitor in the lower pit if convenient, but avoid the nearby spikes.
Spin Dash up the curved walls and take the vine down toward the moving crates. Move around the crates counterclockwise rather than entering the center blindly. When leaving the Invincibility area, wait for one crate to pass, then run through the opening before the next crate closes it. Continue under ceiling spikes and crushing pillars. At a vine-controlled walkway, wait until the walkway stops before jumping onto it; falling into some gaps is fatal.
The deep drop associated with the unused Hidden Palace route is not an accessible destination in the original Genesis campaign. Do not attempt to use it as a shortcut. Follow the normal Act 2 path, including the lower gap with the optional 1-Up and spring, then pass the rotating spiked ball on its central ledge. Use the yellow spring or vine to climb, collect the shield if needed, and take the lower route at the next split. Spin Dash beneath the tight pillar only when lightning bugs are clear, then drop to the Star Post and continue right.
At the Egg Digger arena, the ceiling shakes and rocks and spikes fall before Robotnik descends. Rocks are harmless, but spikes are not. Wait for Robotnik to lower the drill machine, then jump on the top of the horizontally moving machine as it travels across the floor. Avoid attacking from underneath unless necessary, because falling spikes can catch Sonic there. After the machine retreats into the ceiling, reset in the center and repeat the attack during the next horizontal pass. When the Egg Digger is destroyed, continue right through the animal-release sequence and confirm that the game advances to Oil Ocean Zone.
- Use the lower route instead of forcing difficult upper crossings.
- Wait for flashing lightning bugs to become vulnerable or move away.
- Move around the crate formation rather than through its center.
- Do not attempt the inaccessible original-campaign Hidden Palace shortcut.
- Attack the Egg Digger from above while it moves horizontally.
- Confirm the transition from Mystic Cave to Oil Ocean.
Before you move on
- Aquatic Ruin Act 1 and Act 2 are complete when their goal signs appear and the game advances to Casino Night Zone.
- Aquatic Ruin's boss is complete when Robotnik's pillar machine is destroyed and the animal-release sequence begins.
- Casino Night Act 1 and Act 2 are complete when both goal signs appear and the game advances to Hill Top Zone.
- The Egg Claw is defeated when the boss machine is destroyed and the post-boss exit carries Sonic into Hill Top Zone.
- Hill Top Act 1 and Act 2 are complete when the goal signs appear and the game advances to Mystic Cave Zone.
- The Egg Scorcher Mark II is defeated when its lava-pit machine is destroyed and the game proceeds through the animal-release sequence.
- Mystic Cave Act 1 and Act 2 are complete when both goal signs appear and the game advances to Oil Ocean Zone.
- The Egg Digger is defeated when Robotnik's drill machine is destroyed and the post-boss transition confirms completion of Mystic Cave.
- Optional progress remains separate from the campaign: a Star Post entered with at least 50 rings can lead to a Special Stage, but no Chaos Emerald is required to complete this chapter's required zone progression.
Oil Ocean and Metropolis — Environmental Threats and Block Puzzles
Oil Ocean Zone has two acts and a boss, while Metropolis Zone has three full acts before its boss. Both zones punish blind speed, but they are manageable when you treat their moving platforms, fans, launchers and timed blocks as repeated patterns. Preserve at least one ring whenever possible, use Star Posts as recovery points, and prefer a safe landing over an ambitious shortcut.
1. Cross Oil Ocean Act 1 without getting trapped in the oil
Start by moving right across the gold-colored floors, but do not linger on them. These platforms can collapse, so collect the nearby rings and leave before the floor gives way. The pink Octus enemies fire energy balls horizontally; a normal jump over the enemy or projectile is safer than trying to maintain a roll through an uncertain landing.
When you reach an oily depression, jump out rather than attempting to run through it at full speed. Oil reduces your control and prevents some normal actions. Fans over gaps can lift Sonic across when they are active, so approach the gap, watch the fan cycle, and cross while holding right. If you fall into the oil, keep jumping and steer toward solid ground. Sonic can remain afloat temporarily, but sinking too far costs the life.
- Leave collapsing gold floors promptly.
- Use a normal jump around Octus enemies and oily depressions.
- If you fall into oil, keep jumping while searching for a ledge.
2. Use vent covers, fans and elevators as timed platforms
Green vent covers launch upward at intervals. Stand on a cover only when the spikes beside it are clear, then use its upward movement to reach the next ledge. Do not touch the open vent after the cover has been fired upward. A nearby side ledge can contain a large ring group, but take it only if the jump is safe; surviving the route is more valuable than recovering a few missed rings.
Oil Ocean repeatedly alternates between elevators, fans and short oil slides. Let an elevator finish its movement before jumping to the next surface. On an oil slide, steering options are limited, so prepare for the landing rather than trying to brake during the slide. After the first long slide, you reach a Star Post. If you have enough rings and want the next Special Stage, make the entry jump deliberately; otherwise continue right and keep your rings for survival.
- Wait for a vent cover to rise before jumping from it.
- Cross fan gaps during the useful part of the fan cycle.
- Prepare for oil-slide landings instead of trying to stop mid-slide.
3. Finish Oil Ocean Act 1 and Act 2 with controlled movement
After the Star Post, three vent covers form a short staircase with spikes between them. Jump from one cover to the next only after each has risen. At the final cover, the higher route is safer because it gives a better view of the next gold ledge. Use a charged Spin Dash only on broad, open ground; ordinary jumps are more controllable near spikes, elevators and narrow ledges.
Act 2 repeats the zone's main ideas with more launchers, breaking bridges, fans, elevators and green checkered launch devices. Do not hold forward blindly when a launcher sends Sonic through a chain of devices. Watch where the sequence releases you, then correct your position as soon as Sonic lands. When an oil slide carries you downward, look for the next solid platform and avoid jumping into a blind gap. Continue right until the boss entrance rather than searching for a separate mid-act encounter.
- Use the upper route after the three vent covers when it is safely reachable.
- Brake before narrow landings after a launcher or slide.
- Remember that Oil Ocean's boss is at the end of Act 2.
4. Defeat the Oil Ocean boss safely
Robotnik's machine rises from the oil for an attack window. When it is safely exposed, jump onto the machine and strike it, then return to one of the side platforms before it submerges. Do not remain over the oil after the attack window closes. Repeating the jump-and-return rhythm is safer than trying to stay beside the machine for several hits.
When Robotnik submerges, move near the middle of a side platform and duck to avoid the hook that travels over the platform. The laser attack is different: when the laser fires, jump because it shocks the floor. Return to the platform after the shock passes, then wait for Robotnik to rise again. Continue this cycle until you have landed eight hits.
After the eighth hit, run right to the animal capsule and break it to complete Oil Ocean. If you lose your rings, prioritize staying on a platform rather than chasing them over the oil.
- Jump onto the machine only while it is safely exposed.
- After Robotnik submerges, duck near the middle of a side platform for the hook.
- Jump when the laser fires because it shocks the floor.
- Repeat the cycle for eight hits, then run right to the animal capsule.
5. Treat Metropolis Act 1 as a mechanical timing stage
Metropolis Zone has three acts, not two. Begin Act 1 by slowing down around conveyors, rotating platforms, crushers and the large mechanical enemies. Let a moving platform complete a cycle before committing to the jump. If a shaft is narrow or has a low ceiling, use short jumps and ordinary movement instead of a Spin Dash. A Spin Dash is useful on open floors when you need to regain speed, but it can launch Sonic into a ceiling, crusher or blind drop in enclosed passages.
When you meet transport tubes, enter them only after clearing the enemy guarding the entrance. Moving blocks and conveyor belts often provide the intended route upward; ride them rather than forcing a jump through several hazards at once. Keep a ring buffer for mistakes, and do not take a high detour unless you can see the landing platform.
- Observe moving machinery for one complete cycle when possible.
- Use short jumps in narrow shafts and under low ceilings.
- Do not trade a safe route for a risky high path merely for rings.
6. Clear Metropolis Act 2 and prepare for the long final act
Act 2 adds more transport tubes, moving platforms, crushers, yellow bumpers and spike stars. A useful landmark is the series of conveyors and bumper shafts: ride the conveyor upward, avoid the spike stars, then use the rotating tube and curved wall to reach the next moving platform. Near the upper sections, a bridge button extends a path, but the nearby spike star makes an immediate jump dangerous. Move onto the bridge only after checking the hazard's position.
The spear blocks are one of the most important timing sections. Their spears activate in a repeating order, so wait on a safe block and move only when the next block is not about to thrust upward. Metropolis Act 2 ends at a goal sign and has no boss. Do not assume the zone is finished when the act ends; Act 3 begins immediately afterward.
- Avoid jumping toward bumper shafts while spike stars are active.
- Use the spear-block sequence rather than rushing across it.
- Expect another complete act after the Act 2 goal sign.
7. Navigate Metropolis Act 3 using safe landmarks
Act 3 opens with rotating wheels carrying a bridge. Use the nearby platforms or steam pistons to reach it, then wait for the crab on the next ledge to move before jumping over it and entering the transport tube. Further on, collect the Invincibility if it is safely reachable, but still slow down for the two crushing black pistons; invincibility does not make careless positioning safe against every obstacle.
Ride the nuts upward while watching the spike stars. When a floor section has spears thrusting upward, wait until the pattern opens, jump off the nut and cross quickly. On the long bridge between rotating wheels, avoid standing in the center where the machinery can crush Sonic. Later, cross the conveyor belts and use the yellow bumpers to reach the spear-block section over the lava pit. Touch the Star Post if you can do so safely, then climb one block at a time. Observe the next block before landing so you do not arrive as its spear activates.
After the spear blocks, use the spring and moving platform to cross the gears. Drop to the intermediate ledge for the Star Post and ring item if you can reach it safely, then return to the upper route through the transport tube. Near the end, ride the nuts slowly and keep holding right where spike stars are triggered by turning back. Wait for the mantis on the upper ledge to face away, pass it under the low ceiling, enter the final tube and touch the last Star Post. Ride the final moving platform right; falling below it is fatal. The boss arena is at the end of this route.
- Do not rush the crushing pistons even with temporary invincibility.
- Cross spear blocks one platform at a time.
- Use the final Star Post before taking the moving platform to the boss.
8. Defeat the Metropolis boss by handling its phases
Robotnik's machine begins with seven white orbs orbiting it. The orbs protect the body, so do not repeatedly attack the machine from the side during this opening. Robotnik travels across the floor, and Sonic must jump over both the machine and its orbiting orbs. Stay near a corner when possible so you have room to build a running jump, but do not jump early enough to land back in the machine's path.
After Robotnik has been cleared twice, he moves to the center and sends the orbs outward. The corners are the safe areas during this phase; remain in a corner while the orbs sweep across the room. When the orbs return to the machine with its underside exposed, jump from below and strike the unprotected body, then retreat immediately. One orb becomes a smaller Robotnik-like target after the hit. Destroy that target and repeat the same cycle until the protective orbs are gone.
For the final opening, Robotnik moves to the side and fires lasers horizontally. Stay below the machine when possible and strike it from underneath during the exposed window. If Sonic is hit, recover a ring before attempting another attack. Once the machine is defeated, run right to break the animal capsule. The game then advances to Sky Chase Zone, confirming that Metropolis is complete.
- Clear both Robotnik passes without clipping the orbiting orbs.
- Use the corners while the orbs sweep across the room.
- Attack from below only when the machine's underside is exposed.
- Break the animal capsule after the boss to trigger the transition.
Before you move on
- Oil Ocean Act 1 and Act 2 are complete, and the Oil Ocean machine has been defeated with eight hits.
- Metropolis Acts 1, 2 and 3 are complete, including the boss with the orbiting protective orbs.
- The animal capsule after the Metropolis boss has been broken.
- The game has advanced to Sky Chase Zone, confirming completion of this chapter's required progression.
- For the optional Chaos Emerald route, use a reachable Star Post with at least 50 rings only when the Special Stage attempt is worth the risk; this is not required to clear Oil Ocean or Metropolis.
References for this chapter
- Sonic The Hedgehog 2 Instruction Manual, Sega Genesis Mini official manual
- Sonic the Hedgehog 2 — Guide and Walkthrough — Genesis — WWalker
- Sonic the Hedgehog 2: Guide and Walkthrough, Genesis, by Gold_Mage
- Sonic the Hedgehog 2 — Boss Guide — Genesis
- Sonic the Hedgehog 2 — Guide and Walkthrough by BostonFuse51
Sky Chase and Wing Fortress — Aerial Movement and Platform Precision
Sky Chase Zone is a short, automatic Tornado escort in which Sonic rides while Tails pilots. It has one act, no conventional boss, no normal Star Posts and no end-of-act ring or time bonus. After the Tornado is damaged, Sonic lands on Wing Fortress and must cross the game's final full platforming stage alone. Wing Fortress is one act with lethal drops, fans, rotating bars, conveyors, launchers, Clucker enemies and a laser-machine boss. Preserve rings in Sky Chase, then trade speed for careful positioning in Wing Fortress.
1. Treat Sky Chase as an automatic escort
Sky Chase advances at its own scrolling speed. Holding Right does not make the Tornado travel faster, so use directional input only to place Sonic safely on the plane and the jump button to clear approaching enemies. Avoid unnecessary Spindashes: excessive speed can leave Sonic too far ahead of Tails and cause a fatal fall.
Stay near the middle of the Tornado when the path is clear. Make short jumps over airborne enemies instead of crossing the whole screen. If Sonic is hit, immediately look for replacement rings; the zone is brief, but entering Wing Fortress with a ring is preferable to reaching it empty-handed.
- Do not hold Right expecting to accelerate the Tornado.
- Use short jumps and small positional corrections.
- Avoid Spindashing unless there is a clear reason to attack or reposition.
- Try to finish with at least one ring.
2. Read the airborne hazards
Aircraft Badniks approach at different heights. Jump over them when the approach is uncertain rather than forcing a stomp. The egg-shaped flying enemy drops bombs below itself, so move away from the drop line before jumping toward it. The bird-riding turtle enemy can be avoided; defeating the bird may leave the turtle usable as a temporary platform, but that is optional and not needed to finish the zone.
The fortress visible in the background is scenery during the escort. Do not try to enter it early or search for a hidden route. Continue through the enemy formations until the Tornado is shot down and the landing sequence begins.
- Watch the space below bomb-dropping enemies.
- Avoid attacks that leave Sonic exposed to a second enemy.
- Do not search the background fortress for an entrance.
- Remember that Sky Chase has no conventional boss fight.
3. Land on Wing Fortress immediately
When the Tornado is hit, jump onto the red fortress platform as soon as it becomes available. This is the transition from Sky Chase to Wing Fortress. Sonic is on his own after landing; Tails no longer catches him or carries him through missed jumps. From this point onward, a fall below the fortress costs a life.
Move right only after confirming the next platform or ledge. The opening machinery can throw Sonic forward, so do not hold a direction blindly after being launched. Collect nearby rings, but do not take a risky detour merely to reach one.
- Jump from the damaged Tornado to the fortress walkway.
- Treat every bottomless drop as fatal.
- Stop to identify the next landing after launchers or moving machinery.
- Do not expect Tails to provide recovery assistance.
4. Use the opening fan shortcut only when stable
The early Wing Fortress route contains a Clucker and a higher platform with a shield. If you can safely defeat or bypass the Clucker, jump to the higher platform, collect the shield if it is still available, and jump again so the nearby fan carries Sonic upward. This skips part of the lower bar-and-platform route. The shortcut is optional; missing it is not a failure.
If you remain on the lower route, use short jumps from bar to bar. Land toward the center of each rotating bar, then wait for the next platform to move into a usable position. Do not try to compensate for a bad landing with a Spindash near an edge.
- Approach the first Clucker cautiously.
- Use the upper fan route only from a secure platform.
- If the shortcut is missed, continue through the lower rotating-bar route.
- Keep the shield if doing so does not require a dangerous detour.
5. Cross the fortress machinery and use the Star Post
Continue through the Cluckers, side-mounted guns and rotating platforms. The fortress guns cannot be destroyed, so watch the firing pattern and pass when the bullets leave a safe lane. When Sonic reaches the section with X-marked tiles on the side of the ship, use the jump button to release from one tile and aim for the next. The following conveyor section contains retracting platforms; wait for a platform to rise fully before committing to the jump.
A Star Post appears during the Wing Fortress route. Touch it normally to establish the checkpoint. If Sonic is carrying at least 50 rings, the star ring appears above the post; jump into it to enter the next available Special Stage. This is the final zone in the original campaign where ordinary Star Post Special Stage access is available, so use the opportunity if you still need Emeralds. Returning from the Special Stage places Sonic back at the post with rings reset.
- Dodge fortress guns instead of trying to destroy them.
- Release from X-marked tiles only when the next tile is aligned.
- Wait for retracting platforms to rise before jumping.
- Use the Star Post for Special Stage access if collecting Emeralds.
6. Handle conveyors, launchers and vertical platforms
After the checkpoint, keep Sonic centered on conveyor belts and watch the next landing rather than holding Right continuously. Some sections use launchers that throw Sonic between platforms. Let the launcher complete its movement, then make the next jump only when the receiving platform is visible. A launcher is not a branch into an alternate level; it is part of the required route.
Vertical-moving platforms and narrow ledges follow the conveyor sections. Ride each platform to a useful height, jump to the broad platform ahead, and leave it promptly when a new hazard enters the screen. Fans can either lift Sonic toward a higher route or push him away from a landing, so approach them from the side with room to correct.
- Counter conveyor movement with measured directional input.
- Do not jump before the receiving platform is visible.
- Use launchers as transport, not as invitations to explore blindly.
- Leave moving platforms before their next cycle creates a dangerous position.
7. Enter the laser chamber with resources intact
Continue across the final mechanical platforms and launchers. Wing Fortress has one act, so there is no separate goal-post sequence before the boss. The route funnels Sonic into an enclosed chamber surrounded by laser barriers. Arrive with a ring or shield whenever possible; the chamber offers little room to recover after a hit.
Do not spend a life attempting an optional item-box route if the main path is already open. The priority is reaching the laser machine with enough control and ring protection to learn its cycle.
- Do not search for a normal goal post.
- Enter the chamber with at least one ring when possible.
- Do not take a lethal detour for an optional item.
- Prepare for a confined fight with limited recovery space.
8. Defeat the Wing Fortress laser machine
The boss releases moving platforms with spikes underneath. Jump only onto their safe upper surfaces; touching the undersides causes damage. Use the platforms to gain enough height to reach the laser machine mounted above the arena. The target is the machine, not Robotnik.
The machine closes while it tracks Sonic, then opens and charges its vertical laser. During that brief charging window, jump from a moving platform and strike the exposed machine. Immediately reposition to avoid the vertical beam, then repeat the cycle. Wait when the machine is closed rather than jumping into its protected housing.
Eight successful hits destroy the laser machine. After the final hit, follow the opened route and the post-boss sequence into Death Egg Zone. Do not expect a conventional animal-release goal sequence here; the game continues directly toward the final battles.
- Stay on the tops of the moving platforms.
- Attack only while the laser machine is open and charging.
- Move away before the vertical beam reaches Sonic.
- Land eight successful hits.
- Continue into Death Egg Zone after the post-boss transition.
Before you move on
- Sky Chase has finished without a conventional boss fight or normal Star Post sequence.
- Sonic has landed on Wing Fortress and crossed the opening fan or lower rotating-bar route.
- Sonic has passed the Cluckers, fortress guns, X-marked tiles, conveyors and moving platforms.
- The Wing Fortress Star Post has been reached, with Special Stage access used if desired.
- The laser machine has been struck eight times and destroyed.
- The post-boss transition has begun and the game has entered Death Egg Zone.
References for this chapter
- Sonic The Hedgehog 2 Instruction Manual, Sega Genesis Mini official manual
- Sonic the Hedgehog 2 — Sky Chase Zone StrategyWiki reference
- Sonic the Hedgehog 2 — Guide and Walkthrough — Genesis — Church5SiX1
- Sonic the Hedgehog 2 — Boss Guide — Genesis
- Sonic the Hedgehog 2 Guide and Walkthrough, GameFAQs
Death Egg Zone — Approach and Final Act Navigation
Death Egg Zone is the final one-act area of the original Sega Genesis version. It contains a short entrance corridor, the eight-hit Mecha Sonic battle, a brief passage after that fight, and the twelve-hit Death Egg Robot battle. There are no rings, Star Posts or checkpoints in the zone, so every collision, bottomless fall or failed boss attempt costs a life. Prepare before leaving Wing Fortress, then use conservative patterns rather than trying to rush either boss.
Prepare before entering the Death Egg
The Death Egg begins immediately after the Wing Fortress sequence. Once Sonic reaches the station, there is no normal platforming route for collecting rings or building an extra life. Do not expect a checkpoint before the bosses, and do not expect rings to appear after a mistake. If you lose a life, you return to the beginning of the Death Egg Zone and must defeat the bosses again.
The best preparation is to arrive with several lives and a practiced Wing Fortress finish. Preserve any lives you can, but do not delay the final approach looking for a resource route that does not exist. In this original Genesis release, the Death Egg is a short final gauntlet rather than a conventional multi-act zone.
- Enter expecting one act only.
- Expect no rings anywhere in the zone.
- Remember that there is no checkpoint between Mecha Sonic and the final boss.
- Treat every hit and bottomless fall as fatal.
Cross the entrance corridor
At the start, move right through the short corridor. A Spin Dash can carry Sonic into the first room quickly, but a normal run is safer if you are still learning the entrance. The corridor does not contain a meaningful alternate route or a ring supply, so the objective is simply to reach the Mecha Sonic arena with Sonic under control.
Do not begin charging a Spin Dash as you enter the room unless you already know your stopping point. Mecha Sonic appears on the right side, and an uncontrolled roll can place Sonic against the boss’s rear spikes. Stop, watch the boss’s first movement and attack only when the front of its face is exposed.
- Move right into the first room without searching for rings.
- Avoid entering the arena in an uncontrolled roll.
- Keep Sonic away from the spikes on Mecha Sonic’s back.
Defeat Mecha Sonic safely
Mecha Sonic requires eight successful hits. The safest repeatable pattern begins when it drops into the arena on the right. Jump onto the front of its face several times while avoiding the spikes on the back of its head. Do not land on or touch the rear spikes; with no rings available, that mistake ends the life immediately.
After the opening face attacks, Mecha Sonic curls into a spiked ball and races across the floor. It cannot be attacked safely while curled up. Jump over the rolling form and move toward the opposite side of the room. When Mecha Sonic uncurls and exposes its face again, repeat the front-of-head attacks. Four hits during the first exposed sequence and four during the second are a useful target, but prioritize survival if the boss begins moving before you can finish a sequence.
The later movement can include fast passes across the room and, in some passes, thrown spikes. Do not chase the boss across the floor. Wait for the attack to finish, stay clear of its back and use a short jump against the exposed front when the opening is obvious. A Spin Dash can help with movement, but it is not a safe substitute for positioning because contacting the spikes is fatal.
- Defeat Mecha Sonic with eight hits.
- Strike the exposed front of the face, not the spiked rear.
- Jump over the curled spiked-ball attack.
- Wait for Mecha Sonic to uncurl before attacking again.
- Do not force a hit when the boss is already beginning another charge.
Use the passage after Mecha Sonic
When Mecha Sonic is destroyed, continue right. Doctor Robotnik runs ahead and enters the Death Egg Robot. This passage is short and does not restore rings or create a checkpoint. Keep moving until the large robot rises from the floor, then settle into the arena instead of attacking immediately.
The final fight begins with the robot walking toward Sonic. Learn the available space on both sides of the room. The safest method uses the far edges to control where the targeting reticle places the robot’s landing and to keep the launched arms away from Sonic.
- Continue right after Mecha Sonic is defeated.
- Do not wait for a checkpoint that never appears.
- Let the Death Egg Robot complete its entrance before attacking.
Bait the Death Egg Robot’s landing
The Death Egg Robot takes twelve hits. Its vulnerable area is the chest or central casing, not the head and not the hands. The hands, legs and jetpack are dangerous, so a jump that clips one of those parts kills Sonic instantly.
For the safest cycle, allow the robot to walk toward you and then launch into the air. A targeting reticle follows Sonic. Run toward one edge of the arena and let the reticle lock onto that position. As the lock completes, move away from the marked spot so the robot lands at the edge rather than directly on Sonic. When it descends and bends forward, jump into the exposed chest or casing for one hit. Aim high enough to avoid the hands, then move away immediately.
Do not wait for the entire reticle graphic to disappear. The important warning is the lock-on state, indicated by the reticle changing to its locked appearance. Moving after the lock has been established causes the robot to land at the place it selected while Sonic escapes to the opposite side.
- Wait for the robot to launch and display the targeting reticle.
- Lead the reticle toward an edge of the arena.
- Move away after the lock is established.
- Strike the exposed chest or central casing as the robot bends forward.
- Avoid the head, hands, legs and jetpack.
Escape the arms and repeat twelve times
After the robot lands, its spiked arms can launch across the arena. Immediately move to the opposite side from where the robot landed. If it lands at the far edge and Sonic runs to the other far edge, the arms are much easier to avoid. Do not remain beside the robot after scoring a hit, and do not try to cross in front of the hands while they are extended.
Once the arms have passed, wait for the next launch and repeat the same sequence: guide the reticle toward an edge, move away after lock-on, jump into the exposed chest during the landing, then retreat from the arms. The battle is deliberately slower than a normal eight-hit boss. Count your successful chest hits if that helps you maintain patience, but do not sacrifice a safe cycle merely to finish faster.
It is possible to attack during parts of the robot’s walking motion, but those hits require precise timing around the hands and are unnecessary for completing the game. The edge-to-edge reticle method is the recommended recovery plan for a newcomer. After the twelfth hit, the robot is destroyed and the Death Egg begins to collapse.
- Retreat after every chest hit.
- Stay at the opposite edge while the spiked arms travel across the room.
- Repeat until twelve hits have registered.
- Run right when the final escape route opens.
Complete the escape and verify the ending
After the Death Egg Robot is defeated, keep moving right through the opening escape route. Do not stop to search for rings or return to the arena. Sonic exits the exploding Death Egg and falls toward the surface before Tails catches him with the Tornado in the normal ending sequence.
If all seven Chaos Emeralds were collected earlier, the ending presentation includes Super Sonic flying alongside the plane. That Emerald condition is optional for clearing Death Egg Zone; defeating the Death Egg Robot and reaching the ending is the required campaign completion.
- Leave the collapsing Death Egg by continuing right.
- Confirm that the ending sequence begins.
- For optional completion, confirm that all seven Chaos Emeralds were collected and that Super Sonic appears in the ending.
Before you move on
- The one-act Death Egg Zone has been entered from Wing Fortress.
- Mecha Sonic has been defeated with eight successful attacks.
- The Death Egg Robot has been defeated with twelve successful chest or casing attacks.
- Sonic has escaped the collapsing Death Egg and the ending sequence has begun.
- Optional: all seven Chaos Emeralds were collected and Super Sonic appears alongside Tails’ plane in the ending.
Final Battle: Death Egg Robot — Patterns, Safe Windows and Winning Moves
Death Egg Zone is the final zone in the original Sega Genesis version of Sonic the Hedgehog 2. It contains two consecutive boss fights: Mecha Sonic first, followed immediately by Doctor Robotnik’s Death Egg Robot. The zone supplies no rings, monitors, or checkpoint recovery, so normal Sonic must avoid every hit. After Mecha Sonic is defeated, use the Death Egg Robot’s targeting reticle and landing animation to create controlled chest attacks. The original Genesis Death Egg Robot requires twelve successful hits to destroy.
Enter Death Egg Zone prepared for two consecutive bosses
Death Egg Zone begins with a short passage leading into the Mecha Sonic battle. It is not a conventional platforming act: there are no rings to collect and no new checkpoint or monitor to restore your resources. After Mecha Sonic is defeated, continue to the right and the Death Egg Robot fight begins without an opportunity to refill rings.
If you are using normal Sonic, treat the entire sequence as a one-hit challenge. A hit removes all remaining rings, but because there are no rings in Death Egg Zone, there is no protection available once the fights begin. Preserve as many lives as possible before entering the zone and regard the first attempts as practice for the boss patterns rather than opportunities to attack recklessly.
- Expect Mecha Sonic before the Death Egg Robot.
- Do not search for rings, monitors, or a checkpoint in Death Egg Zone.
- Normal Sonic or Tails cannot absorb a mistake in the final sequence.
Defeat Mecha Sonic without taking unnecessary risks
Mecha Sonic is fought in the first room. The reliable target is his head and face, while his spikes are dangerous. When he lands and exposes his face, jump on it to deal damage, then move away before he curls into a ball and launches across the room. Jump over the rolling attack rather than trying to contest it from the ground.
Repeat the face attacks after each safe opening. Avoid standing directly beneath Mecha Sonic when he drops from above, and do not chase him into a corner while he is moving as a spiked ball. Eight successful hits defeat Mecha Sonic and open the route to Robotnik’s final machine.
Because there are no rings, a single contact ends the current life. If Mecha Sonic hits you, the attempt cannot be recovered; restart the sequence and use the next run to prioritize recognizing his landing and rolling cues.
- Attack Mecha Sonic’s face when it is exposed.
- Jump over his spiked rolling attack.
- Defeat Mecha Sonic with eight successful hits before proceeding.
Identify the Death Egg Robot’s vulnerable target
The Death Egg Robot’s vulnerable area is the exposed chest or stomach on the front of its body. Its head, feet, arms, and spiked hands are hazardous. Do not jump toward the robot while the hands are extended across the chest. Wait for a moment when the hands are beside the body or when the robot has just completed a landing and its chest is reachable.
A normal jump is the safest attack method. Approach with enough forward movement to reach the chest, but avoid holding a charged Spin Dash unless you already control the stopping distance precisely. A normal jump gives you more ability to retreat if the robot changes from a walking pattern to a hand-launch pattern.
If the robot’s hands or body block the chest, skip that opening. Surviving an attack cycle is more valuable than forcing a contact that may strike a spike.
- Aim for the exposed chest or stomach.
- Treat the head, feet, arms, and spiked hands as hazards.
- Use a normal jump when learning the fight.
- Skip blocked openings instead of forcing a hit.
Use the targeting reticle to control the landing
During one of its attack patterns, the Death Egg Robot rises and a targeting reticle follows Sonic. Move toward one side of the arena while the reticle tracks you. Do not remain in the center and wait for the robot to land directly over you. The goal is to make the robot commit to your position, then move away before it reaches the floor.
When the reticle has settled on your position, cross toward the opposite side. The robot should land behind you or near the side you just left. As it completes the landing and bends forward, look for a chest opening. If the hands are not covering the target, jump into the chest for one hit and immediately continue moving away.
The landing is an opportunity, not a requirement. If your crossing leaves you too close to the robot, remain safe and wait for the next cycle. A missed attack costs time; a contact with a spike costs the life.
- Move toward an edge while the reticle tracks Sonic.
- Cross away after the targeting has settled.
- Attack only when the chest is exposed after the landing.
- Keep moving after a successful bounce.
Avoid the launched hands and changing attack patterns
After a chest opening, the Death Egg Robot can launch its spiked hands across the arena. Retreat immediately after attacking instead of staying beneath the machine for a second bounce. The hands are aimed at Sonic’s position when they launch, so continuing to run away from the robot gives you room to avoid them.
Watch the hands rather than the robot’s face. Once a hand leaves an arm, do not try to attack through it. Jump over or move away from the incoming hand only when necessary, then return to the edge of the arena. The robot will recover and begin another movement or targeting sequence.
The robot can also expose its chest while walking or while changing position. These opportunities are more dangerous because the hands may still be active. Take one controlled hit when the chest is clearly open, then retreat. Do not attempt to chain attacks simply because the robot remains nearby.
- Retreat as soon as a chest hit connects.
- Watch for the hands launching from the robot.
- Avoid attacking while a hand is crossing the arena.
- Prefer one safe hit over several risky attempts.
Repeat the pattern for twelve successful chest hits
The original Sega Genesis Death Egg Robot requires twelve successful hits. Count only clear contacts with the exposed chest. Bouncing from an arm, hand, head, or another armored section does not count as reliable damage and may cost a life.
A steady cycle is more dependable than trying to finish quickly: guide the targeting reticle toward an edge, cross after it settles, attack the exposed chest after the landing if the approach is safe, retreat from the launched hands, and reset your position. Repeat this process until twelve hits have registered.
Do not assume the final hit will immediately protect you from the robot’s remaining animation. Continue moving until the robot is visibly destroyed. If you lose track of the count, continue treating every new opening cautiously rather than jumping into the machine to test whether it is nearly defeated.
- Count twelve confirmed chest hits.
- Use the same reticle, landing, attack, and retreat cycle.
- Do not rush the last few openings.
- Continue avoiding hazards until the destruction animation begins.
Use Super Sonic as an optional advantage
If Sonic has collected all seven Chaos Emeralds, collect at least 50 rings before entering the ringless final sequence and jump to transform into Super Sonic. The transformation increases Sonic’s speed and jump height and allows him to withstand ordinary damage while rings remain. Rings drain continuously, however, so the form is not permanent protection.
Super Sonic must be activated before the no-ring Death Egg section if you intend to use him there. The final arena does not provide a replacement ring supply. Starting with only the minimum 50 rings leaves little room for delays, missed jumps, or repeated attempts, so enter with a larger ring reserve whenever the preceding route allows it.
Super Sonic makes mistakes more forgiving, but the robot’s chest and hands remain dangerous. Continue using the same strategy: lure the reticle toward an edge, cross after lock-on, hit the chest during a safe landing or walking opening, and retreat before the hands can connect.
- Collect all seven Chaos Emeralds before using Super Sonic.
- Transform with at least 50 rings before entering the ringless final sequence.
- Remember that Super Sonic’s rings drain continuously.
- Keep using the chest-and-retreat method even while transformed.
Before you move on
- Mecha Sonic has been defeated in the first Death Egg Zone room.
- The Death Egg Robot has received twelve confirmed chest hits and has been destroyed.
- The destruction sequence begins, Sonic escapes the Death Egg, and the ending plays rather than a continue screen appearing.
- For optional completion, all seven Chaos Emeralds were collected and Super Sonic was activated before the ringless final sequence.
References for this chapter
- Sonic The Hedgehog 2 Instruction Manual, Sega Genesis Mini official manual
- Sonic the Hedgehog 2 — Guide and Walkthrough — Genesis — Church5SiX1
- Sonic the Hedgehog 2 — Boss Guide — Genesis
- Death Egg Zone, Sonic the Hedgehog 2 Strategy Guide
- Sonic the Hedgehog 2 — Guide and Walkthrough — Genesis — WWalker
Recovery, Continues and Handling Mistakes
Use lives, rings, Star Posts and Continues as a practice budget. In the original Sega Genesis version of Sonic the Hedgehog 2, Star Posts divide each act into restartable sections, while Continues provide another set of lives after a Game Over. A checkpoint does not make the act safe, and a Continue does not restore the rings or lives you lost. The best recovery plan is to identify the hazard that caused the failure, practice it from the nearest Star Post, and farm earlier zones only when you genuinely need more resources.
1. Understand what a life loss changes
A normal hit while carrying rings scatters those rings and gives Sonic a brief chance to recover. If Sonic is hit with no rings, falls off the screen, is crushed, drowns, or reaches zero on the act timer, he loses a life immediately. Rings do not protect against those instant-death hazards.
After a life loss, Sonic returns to the beginning of the current act unless he has activated a Star Post. If a Star Post was activated, the restart is at that checkpoint rather than at the act entrance. The checkpoint is a practice point, not a saved game: the act is still in progress, and you must reach its goal or boss again.
The restart does not preserve the ring total you had before dying. Treat the new attempt as a fresh passage through that section. Collect safe rings on the way, but do not take a dangerous detour simply to recreate the previous total.
- Touch every Star Post on the main route, even when you are not preparing for a Special Stage.
- After dying, identify whether the cause was an enemy, a fall, a timed hazard, crushing, drowning, or a missed jump.
- Expect to rebuild your ring buffer after restarting from a checkpoint.
2. Preserve lives during normal progression
Keep at least one ring before blind drops, narrow platforms, moving crushers and unfamiliar enemy placements. A ring gives you a chance to survive a normal collision, but it does not make a bottomless pit, crushing wall or drowning section safe. In an unfamiliar area, slow down, defeat the immediate enemy if practical, and then regain speed from solid ground.
Use the Spin Dash to recover momentum from a standstill, not as an automatic answer to every obstacle. In cramped platform sections, normal running and jumping give you better control. A full-speed roll can carry Sonic into a second enemy, a low ceiling or a gap that requires a deliberate jump.
If a hit scatters rings in a safe area, collect the nearest ones and continue. Do not reverse into a hazard for a distant ring. Surviving with a small ring count is better than losing a life while trying to restore a large total.
- Pause briefly on stable ground to read the next obstacle before accelerating.
- Use normal jumps where a Spin Dash would remove too much control.
- Enter a boss with enough rings to survive one ordinary mistake, but prioritize learning the attack pattern over collecting a large total.
3. Use Casino Night for controlled rebuilding
Casino Night Zone is a useful preparation area because its early routes contain visible ring groups, item monitors and bumper sections. If you need rings for an upcoming Special Stage or want to improve your chances before continuing toward the late zones, replay Casino Night rather than repeatedly risking lives in Wing Fortress or Death Egg.
On a recovery run, collect the obvious rings and move through the pinball sections deliberately. Aim for the next platform or flipper instead of holding a direction and accepting an uncontrolled bounce. The slot-machine area can produce many rings, but it can also launch Sonic into an unsafe position. Leave a risky setup if the alternative is losing a life.
A ring total of 50 or more at a Star Post creates the Special Stage entrance. Use this only when you are ready to concentrate on the half-pipe stage. Completing the Special Stage awards the next Chaos Emerald; failing it ends the attempt and returns you to the originating Star Post. The failed attempt does not cost a life, but you lose the opportunity to earn that Emerald on that entry.
- Favor visible rings and safe platforms over dangerous bonus routes.
- Use Casino Night to prepare for a specific Special Stage attempt, not to chase every possible ring.
- If the route has already supplied enough rings, finish the act instead of continuing to gamble in the bumpers.
4. Decide when to use a Continue
The Genesis manual states that a Continue is awarded when your score reaches 100,000 points. When you lose your last Life, the Continue screen appears if you have one available. Press Start before the countdown ends to resume play from the point where the run ended, with a new set of lives. Your score is reset, and the Continue does not restore the rings lost during the previous attempt.
Use a Continue when the failed run reached a useful late checkpoint or taught you the exact sequence that caused the failure. The additional lives are valuable when you can now repeat a known route with improved timing. If you are still losing lives near the beginning of an act because of careless movement, do not treat the Continue as permission to repeat the same mistake. Rebuild your route in an earlier zone and return when the opening is stable.
A Continue does not complete an act, restore a boss, or move you to the next zone. You still have to replay the necessary section from the resumed point and clear the act normally.
- Use a Continue when you understand the failure and have a practical adjustment.
- Restart or farm earlier when your route is unstable from the beginning.
- Do not assume a Continue restores rings, score, or completed zone progress.
5. Practice late-game bottlenecks from Star Posts
When Wing Fortress repeatedly ends a run, use the Star Post restart to study the section immediately after it. On the first attempt, move slowly enough to identify the order of platforms, springs, collapsing surfaces and enemies. On the next attempt, repeat the same actions with only a small increase in speed. Change one decision at a time so you know which adjustment solved the problem.
If you restart with few or no rings, do not deliberately throw away the life merely to obtain a better starting total. Continue from the checkpoint and collect only safe pickups. The checkpoint's main value is the repeated access it provides to the difficult section, not the promise of a favorable ring setup.
Before Death Egg Zone, stop searching for optional routes or a late ring farm. The final area has limited recovery room and is better approached with practiced movement and the lives you already possess. A conservative route that reaches the final arena is more valuable than a risky shortcut that might save a few seconds.
- Use the first practice attempt to observe, not to maximize speed.
- Identify a safe landing point after every moving-platform or spring sequence.
- Do not spend a life on an unverified shortcut when the main route is already known.
6. Make the final attempt deliberate
For a serious completion attempt, follow a simple priority order: survive, activate Star Posts, preserve rings before hazards, and use the safest route you know. Do not abandon a strong run to chase an optional ring cluster when you already have enough rings for the next objective.
If you are collecting Chaos Emeralds, schedule Special Stage attempts in acts where reaching 50 rings is consistent. A failed Special Stage costs the Emerald opportunity for that entry, but it does not require sacrificing a life. After returning to the Star Post, continue the act carefully instead of immediately taking another dangerous detour.
After a life loss in a final act, reproduce the safe method learned during practice. When you defeat the Death Egg Robot, allow the game to proceed to the ending sequence. Seeing the ending after the final battle confirms completion of the main campaign.
- Enter late zones with a practiced route rather than relying on raw speed.
- Use earlier zones for ring preparation and late zones for execution.
- Confirm main-game completion by defeating the Death Egg Robot and viewing the ending.
Before you move on
- You know that a Star Post restarts the current act from that checkpoint after a life loss.
- You can decide whether to continue, restart, or farm earlier based on the location and cause of failure.
- You have a reliable Casino Night route for rebuilding rings before Special Stage attempts.
- You can practice a late-game bottleneck without deliberately wasting lives.
- You have defeated the Death Egg Robot and watched the ending, confirming the main completion goal.
Optional Completion: Collecting All 7 Chaos Emeralds and Becoming Super Sonic
In the original Sega Genesis release of Sonic the Hedgehog 2, collect all seven Chaos Emeralds by clearing the seven half-pipe Special Stages in sequence. During a normal Act, carry at least 50 rings through a Star Post, then jump into the Star Circle that appears above it. Each successful Special Stage awards the next Chaos Emerald in order. After all seven Emeralds are collected, Sonic can become Super Sonic automatically when he has at least 50 rings and jumps during a normal Act. Super Sonic is faster, jumps higher and is protected from ordinary enemy contact, but rings drain continuously, so the form ends when the counter reaches zero.
1. Set up a reliable Emerald run
Select Sonic alone if collecting the Emeralds is your priority. The original Genesis game allows Sonic and Tails together, Sonic alone or Tails alone. Special Stage ring targets are lower when Sonic is alone than when Sonic and Tails are together, making solo Sonic the most dependable choice for a first complete Emerald run.
The Emeralds are not permanently assigned to particular Zones. The first successful Special Stage awards the first Emerald, the next successful attempt awards the second, and so on through the seventh. You cannot skip ahead by entering a later Zone. If you fail a Special Stage, the current stage remains unfinished and must be cleared before the sequence advances.
- Choose Sonic alone from the original game's character options if possible.
- Track successful Emerald awards from one through seven.
- Do not assume a specific Zone contains a specific Emerald.
2. Activate a Star Post entry
Collect at least 50 rings in a normal Act, then pass through a Star Post. When the requirement is met, a Star Circle appears around the top of the post. Jump into the rotating stars before they disappear to enter the Special Stage.
A Star Post is both a checkpoint and the entrance marker for the bonus stage. If you miss the Star Circle, continue through the Act and look for another Star Post rather than taking unnecessary damage while trying to turn around. The original campaign provides repeated opportunities across its Acts, so a missed entrance does not end the Emerald run.
Entering the Special Stage removes the ordinary Act ring total. When the Special Stage ends, whether by success or failure, Sonic returns to the Act at the entry checkpoint with no normal rings. Plan to rebuild the 50-ring requirement before attempting another entry.
- Have 50 or more rings before touching the Star Post.
- Pass through the post instead of jumping over it.
- Confirm that the Star Circle appears above the post.
- Jump into the stars promptly.
- Expect your normal ring total to be reset after the Special Stage.
3. Clear the three Special Stage sections
Each Special Stage is a forward-moving half-pipe divided into three sections. At the start of each section, the game displays the number of rings required. Move Sonic left and right across the pipe to collect ring formations and avoid bombs. You must meet the displayed target at the end of every section to continue.
The ring requirements are cumulative. Rings collected in an earlier section remain part of the total used for the next target, so safe extra rings early in the course can make the following section easier. Do not chase a small group if reaching it puts Sonic directly into a bomb or forces a late jump.
Bombs remove rings when touched. Losing 10 rings can turn a successful-looking run into a failure at the next target, so survival is more important than collecting every available ring. Start near the center while learning the layout, then move toward a side or the upper part of the half-pipe only when the next formation is clear. Jump over a bomb line when the route is obvious, but do not jump blindly into a high ring formation that hides another bomb.
The seven Special Stages become progressively harder. The exact targets shown on screen should always take priority over memorized numbers, especially if Tails is present, because the requirements increase when Sonic and Tails enter together. Clear all three sections to receive the next Chaos Emerald and return to the Act.
- Read the displayed target at the start of every section.
- Preserve the cumulative ring total from earlier sections.
- Avoid bombs even when that means missing a few rings.
- Clear all three sections to receive the Emerald.
- Use the on-screen target rather than a fixed number remembered from another character setup.
4. Recover after a failed attempt
A failed Special Stage does not award an Emerald and does not advance the sequence. The same uncompleted Special Stage must be cleared on a later attempt. Return to normal gameplay, rebuild at least 50 rings and use another available Star Post entrance.
Do not treat the loss of the entry rings as permanent campaign damage. The Emeralds already collected remain recorded, and only the current Special Stage needs to be retried. If a difficult attempt costs a life, use an earlier Act with reliable ring groups and safer routes before trying again.
The half-pipe courses are fixed in the original Genesis game. When practicing, remember the position of each bomb group relative to bends, rises, drops and ring lines. Moving early is more reliable than waiting until a bomb is almost on top of Sonic.
- Rebuild at least 50 rings after returning to the Act.
- Retry the same uncompleted Special Stage until it is cleared.
- Do not count a failed attempt as an Emerald.
- Use safer earlier Acts if you need another ring supply.
5. Complete the seven-Emerald sequence
Repeat the Star Post entry and Special Stage process until all seven Chaos Emeralds are displayed in the game's Emerald collection display. You can collect them gradually while progressing through the campaign, or concentrate on early Acts where ring routes and checkpoints are easier to learn.
Emerald collection is optional for reaching the normal ending. You may complete the Zones and defeat Doctor Robotnik without any Emeralds. However, the Emeralds are required for Super Sonic and for the game's enhanced ending presentation.
If you are protecting lives, do not force a Special Stage entrance after taking damage or losing most of your rings. Finish the Act safely when necessary, then prepare another attempt. The sequence advances only after a Special Stage is successfully cleared.
- All seven Emeralds are visibly recorded.
- The seventh Emerald was awarded after clearing the seventh Special Stage.
- Do not confuse reaching a new Zone with collecting an Emerald.
- Remember that Emerald collection is optional for the basic ending but required for Super Sonic.
6. Transform into Super Sonic
After all seven Chaos Emeralds have been collected, enter a normal Act and gather at least 50 rings. In the original Sega Genesis release, Sonic transforms automatically when he jumps while holding the required ring total. There is no separate transformation menu and no need to press a jump button a second time.
This automatic behavior is specific to the original version covered here. Later ports and remasters can change the activation input, so do not apply their double-jump instructions to the World Rev A Genesis release.
Super Sonic runs faster, jumps higher and is protected from ordinary enemy and spike contact while rings remain. He is not safe from every hazard: bottomless pits and drowning can still kill him. Rings drain continuously during the transformation, so standing still, taking detours or entering a long section without ring pickups shortens the available time.
Because jumping activates the form automatically, avoid jumping while you are merely trying to cross a small obstacle if you want to preserve normal Sonic. Once Super Sonic is active, collect safe ring groups whenever possible and keep moving toward the Act goal.
- All seven Chaos Emeralds are collected.
- Sonic has at least 50 rings in a normal Act.
- Jump once to transform automatically.
- Do not wait for a second jump-button input.
- Watch the ring counter because rings drain continuously.
- Avoid bottomless pits and drowning hazards.
7. Prepare Super Sonic for the finale
If you want to use Super Sonic in the endgame, activate the form during a regular Act before the final Death Egg sequence. Do not wait until the final approach to look for a new Special Stage entrance. The Death Egg section is not a dependable place to prepare a fresh Emerald attempt or rebuild a transformation setup.
A practical plan is to collect the Emeralds before the late campaign, then enter a regular Act with more than the minimum 50 rings. Jump only when you are ready to transform, and use the faster movement to pass difficult sections without spending time on unnecessary exploration. Keep collecting rings where the route makes it safe, since the counter continues to drain even when Sonic is not taking damage.
Super Sonic can make late-game platforming and the final boss less punishing, but it does not remove the need for accurate jumps. A fall still costs a life, and running out of rings returns Sonic to normal. Defeat the Death Egg Robot and let the ending sequence play to complete the main campaign with the optional Emerald objective satisfied.
- Activate Super Sonic during a regular Act before the Death Egg sequence.
- Enter the late game with a useful ring buffer rather than exactly 50 rings.
- Continue avoiding pits, drowning and other fatal hazards.
- Defeat the Death Egg Robot.
- Allow the ending sequence to appear.
Before you move on
- All seven Chaos Emeralds are displayed as collected.
- Sonic has transformed automatically after jumping with at least 50 rings in a normal Act.
- The Death Egg Robot has been defeated.
- The ending sequence has appeared.
- If Super Sonic was used for the finale, the ring counter remained above zero until the intended section or boss encounter was completed.
References for this chapter
- Sonic The Hedgehog 2 Instruction Manual, Sega Genesis Mini official manual
- Sonic the Hedgehog 2: Guide and Walkthrough, Genesis, by Crazyreyn
- Sonic the Hedgehog 2: Guide and Walkthrough, Genesis, by Gold_Mage
- Sonic the Hedgehog 2 — Guide and Walkthrough — Genesis — WWalker
- Special Stage (Sonic the Hedgehog 2), Sonic Wiki Zone
- Sonic the Hedgehog 2 Special Stage Walkthrough, Mega Drive Champs
Hidden Routes, Star Posts and Common Shortcuts
Star Posts are the safest way to divide an act into practice sections and the only normal launch points for Sonic 2’s Special Stages. The original Genesis game also contains alternate lines in several zones, but a shortcut is useful only when it leads to a known reward or bypasses a documented hazard. Learn the safe route first, then add detours for rings, lives or Special Stage attempts.
1. Activate Star Posts deliberately
Touch every Star Post you pass, even when you are not carrying 50 rings. Once activated, it becomes the restart point for that act if you lose a life. You return to the latest activated post instead of restarting from the beginning, although your rings are not preserved. Use this to divide a difficult act into manageable sections: first reach the post safely, then practice the hazards beyond it.
If you have 50 or more rings when you touch a Star Post, a ring of stars appears above it. Jump into that ring to enter the next available Special Stage. The entry is optional, so do not jump into it merely because it appears. If you are preparing for an Emerald attempt, stop moving long enough to confirm that the ring of stars is present, then make a controlled jump rather than rushing through the post.
After returning from a Special Stage, you resume at the Star Post with zero rings. The post has already been used for that Special Stage and cannot immediately send you back into another attempt. Continue through the act, collect another 50 rings and use a later Star Post instead. This makes checkpoint order important when you are pursuing all seven Chaos Emeralds.
- Touch each Star Post to establish a restart point.
- Use a 50-ring Star Post only when you are ready to enter the next Special Stage.
- After a Special Stage, rebuild rings and look for another unused Star Post.
2. Search alternate paths in Emerald Hill without forcing them
Emerald Hill is the best zone for learning how alternate routes are presented. Main routes often divide at slopes, loops, springs and raised ledges. When you see a route above the ground path, preserve enough momentum to reach it, but do not launch blindly toward an unseen drop. A normal jump is safer than a Spin Dash when the landing area is narrow or partly off-screen.
Use the loop and corkscrew sections as route checks. If Sonic enters with enough speed, he will remain on the intended track and collect rings along the way. If he enters too slowly, he may fall to a lower line. The lower route is usually recoverable in Emerald Hill, so do not waste a life repeatedly attempting a high path after missing its entrance. Continue right, activate the next Star Post and try the alternate line on a later attempt.
When a spring sends Sonic upward, hold your position briefly and watch where the next platform or ledge appears. Some apparent dead ends are simply lower routes that reconnect farther right. The practical reward for exploring Emerald Hill is usually extra rings, monitors or a safer bypass, not a required objective. Treat every life monitor as optional until you can reach it and return without crossing an unscouted gap.
- Use normal jumps near narrow ledges and hidden drops.
- Let a missed upper route go rather than spending a life forcing the same approach.
- Return to the main path if the alternate route does not show a clear landing.
3. Take the Chemical Plant Act 2 shortcut before the Mega Mack climb
Chemical Plant Act 2 has a documented alternate line that avoids much of the difficult rising Mega Mack section. Do not wait until the rising chemical has already trapped you. Before the main climb, take the upper route when the stage gives you that choice. Build speed, use a Spin Dash and jump left toward the platform containing the black spring. The spring launches Sonic into the shortcut line and can bypass the most troublesome part of the lower sequence.
The exact approach is easier to learn from the visual landmarks than from speed alone: first reach the upper route, then identify the black spring platform before committing to the chemical shaft. If Sonic lands too far right or drops into the lower path, stop trying to reverse direction in midair. Use the ordinary moving blocks and platforms to climb out instead. The main route remains completable if the shortcut is missed.
Once you are in the rising Mega Mack section, move with purpose. Jump from one solid moving block to the next, avoid unnecessary detours and leave the chemical as soon as the exit appears. Later platforms above the Mega Mack also punish careless falls, so the shortcut is valuable because it removes exposure to the hazard, not because it makes the entire act risk-free.
- Activate the nearby Star Post before practicing the shortcut.
- Look for the upper branch before entering the main Mega Mack climb.
- Use Spin Dash momentum and jump left toward the black spring platform.
- If the shortcut fails, finish through the normal moving-block route.
4. Use Casino Night’s marked secret walls
Casino Night contains secret wall openings that are easier to identify than most hidden passages in the game. Look for wall sections marked with Sonic and Tails lettering and two vertical neon lights. These openings can lead to side rooms, ring supplies and a hidden 1-Up. Approach them from the side with enough room to jump or roll through, but do not sacrifice a life trying to enter a wall that lacks the identifying markings.
The pinball geometry can also function as a route choice. Aim for a visible platform or bumper rather than allowing repeated random rebounds. If a spring lane throws Sonic toward an unseen pit, steer toward a lower platform and regain control. Casino Night is a good place to collect rings for a later Special Stage, but do not spend so long in slot-machine sections that the act timer becomes the main hazard.
- Identify the Sonic-and-Tails wall markings before attempting a secret opening.
- Prefer a visible landing platform over a risky high bounce.
- Leave the bonus area if the timer or ring loss becomes more dangerous than the reward.
5. Treat late-game shortcuts as optional
Metropolis, Oil Ocean, Sky Chase, Wing Fortress and Death Egg contain hazards that can turn exploration into an instant death. In these zones, use an alternate platform only when its landing and exit are visible. A small timing adjustment on a conveyor, moving platform or rising hazard is generally safer than searching for a completely concealed route.
Before testing a detour, activate the latest Star Post and collect the safe rings on the main line. If the alternate path leads to a known monitor, ring group or life, make one controlled attempt. If it leads only to an unexplored gap, return to the main route. This is especially important in Wing Fortress and Death Egg, where a missed jump may not provide a recovery platform.
- Secure the latest Star Post before testing a late-game detour.
- Choose a known reward or hazard bypass over an unexplained opening.
- Preserve rings and lives for forward progress instead of chasing every shortcut.
Before you move on
- You can identify the latest activated Star Post and know where a life loss will restart the act.
- You have entered a Special Stage from an unused Star Post without confusing the star ring with an ordinary checkpoint effect.
- You can reach Chemical Plant Act 2’s upper branch and recognize the black spring shortcut before the main Mega Mack climb.
- You have used a marked secret wall in Casino Night only when the Sonic-and-Tails lettering and paired neon lights identify it.
- You can distinguish a detour that offers rings, a life or a hazard bypass from one that merely saves time.
- You complete the late-game zones by choosing visible, recoverable platforms rather than testing every suspicious opening.
Completion Checklist, Postgame Options and Speedrunning Tips
Use this chapter to verify a completed Sega Genesis run of Sonic the Hedgehog 2, prepare another attempt at the Chaos Emeralds, and improve your routes without importing features from later ports. The normal ending requires defeating both encounters in Death Egg Zone and watching the escape sequence. The enhanced ending requires all seven Chaos Emeralds.
Confirm the main campaign is complete
The original Sega Genesis campaign ends in Death Egg Zone, a single final act with no regular stage hazards, rings, checkpoints, or recovery items. Move through the opening corridor to the first arena and defeat Mecha Sonic. After that fight, Sonic automatically chases Doctor Robotnik through the connecting passage and enters the second arena for the Death Egg Robot battle.
Treat the two fights as one continuous final challenge. If Sonic loses a life, the attempt restarts at the beginning of Death Egg Zone rather than at a checkpoint between the bosses. Preserve any remaining lives before entering the zone, because there are no rings to absorb a hit and no item boxes with which to rebuild your margin.
The Death Egg Robot advances, jumps off-screen to try to crush Sonic, fires its arms, and can deploy explosives when Sonic is positioned behind it. Stay near the front of the machine, watch the landing, and attack only when the robot's movement gives you a safe opening. After the final hit, allow the destruction and escape sequence to play. The normal ending shows Sonic falling from the exploding Death Egg before Tails catches him with the Tornado. The sequence and credits are the clearest confirmation that the run is finished.
- Mecha Sonic defeated.
- Death Egg Robot defeated.
- The Death Egg escape sequence played.
- The credits or ending display appeared.
- No additional zone is required after Death Egg Zone in the original Genesis campaign.
Check the optional Chaos Emerald completion
A standard completion does not require any Chaos Emeralds. For the optional enhanced ending, the game must have awarded all seven Emeralds through the Special Stages. Fewer than seven Emeralds still allows Sonic to finish the campaign, but it does not provide the Super Sonic ending state.
After obtaining all seven, collect at least 50 rings during a normal act. Jump while controlling Sonic to transform into Super Sonic. The transformation consumes rings continuously, so do not activate it casually if you intend to carry it into the final battles. Death Egg Zone has no rings, which means the ring total you bring through the end of Wing Fortress determines how long Super Sonic can remain active there.
If you want Super Sonic available for the final fights, transform before entering Death Egg Zone and reach the end of Wing Fortress with enough rings left to sustain the form. The ending then depicts Super Sonic flying alongside the Tornado instead of ordinary Sonic being caught by it.
- All seven Chaos Emeralds were collected.
- At least 50 rings were gathered before transforming.
- Super Sonic appeared during normal play.
- The ending shows Super Sonic beside the Tornado.
Use the original Genesis postgame features correctly
The original cartridge does not have a modern stage-select hub, save slots, or a menu that automatically unlocks every completed zone for replay. After the ending, reset the game or return to the title screen and begin a new run. That is the ordinary way to retry the campaign, practice a route, or make another Emerald attempt.
The Genesis release does include an Options screen with Player Select, a two-player option, and Sound Test. Sound Test is useful for hearing tracks, but it is not a normal campaign-progress record and does not preserve a completed run after power-off. The original game also contains a hidden level-select feature accessed through a specific Sound Test input sequence; this is a secret shortcut, not a postgame reward. Use it only when deliberately practicing or testing stages, and do not confuse it with a standard feature of the campaign.
Later ports, collections, and remasters can change the Options layout, add stage-select conveniences, or alter how practice tools are accessed. If you are playing the original Sega Genesis release, follow its cartridge menus rather than instructions written for the 2013 remaster or Sonic Origins.
- Reset or return to the title screen after the ending.
- Start a new 1 Player run for a normal replay.
- Use the Genesis Options screen for Sound Test access.
- Treat level select as a hidden shortcut, not as a completed-game unlock.
- Do not assume a later port's replay menu exists on the original cartridge.
Farm rings for another Emerald or Super Sonic attempt
Choose an act you already know instead of trying to learn a new route while carrying a large ring total. Casino Night Zone can supply many rings through its enclosed routes and bumpers, but the pinball sections can also launch Sonic into hazards. Collect along a controlled path, leave when the route becomes unpredictable, and do not spend a life chasing a few extra rings.
Oil Ocean Zone can also provide useful ring lines during replay, but its environmental hazards make careless farming costly. The goal is not to maximize the displayed total at every opportunity. Build a safe reserve, pass a Star Post, and enter the Special Stage only when you can approach the post under control. If a Special Stage attempt fails, use a familiar earlier act to rebuild rather than repeatedly gambling lives in an unfamiliar section.
For Super Sonic, schedule the Emerald collection before the final campaign push. Once all seven are secured, gather the transformation rings in an act with a reliable route and activate the form only when you are prepared to spend rings continuously.
- Select a familiar ring route.
- Keep enough rings to reach the planned Star Post safely.
- Avoid risky pinball launches and hazardous oil detours.
- Enter each Special Stage deliberately.
- Reserve a ring supply for Super Sonic rather than spending it casually.
Apply practical speed and efficiency habits
Use the spindash when Sonic is stopped or has lost momentum on a safe, open stretch. It reduces the time needed to regain speed, but it is not a replacement for normal jumping. Release it cautiously near narrow platforms, springs, enemies, and blind drops. In technical sections, a measured jump is usually faster than a failed high-speed attempt followed by a death and replay.
Favor a known upper route when it is already safe, but do not force an unfamiliar shortcut during a serious run. Slow before a blind drop, identify the landing platform, and then commit. This is especially valuable in late zones, where a missed jump can cost an entire life rather than merely a few rings.
At every boss, learn the repeated attack cycle and use the same safe opening consistently. Attack during the opening, retreat before the next hazard, and avoid improvising once the pattern is understood. The final bosses are most reliable when approached as a sequence of controlled responses rather than as a race to land hits as quickly as possible.
- Use spindash to recover momentum on safe ground.
- Use normal jumps for precision platforming.
- Favor practiced routes over speculative shortcuts.
- Slow down before blind drops and narrow platforms.
- Attack bosses during repeatable openings.
Before you move on
- Main completion: Mecha Sonic and the Death Egg Robot are defeated in Death Egg Zone, followed by the escape sequence and ending.
- Optional enhanced completion: all seven Chaos Emeralds are collected, Super Sonic is activated, and the ending shows Super Sonic beside the Tornado.
- Replay preparation: after the ending, a fresh 1 Player run is started with a known ring-farming route and planned Special Stage entries.
- Edition check: Genesis Options and Sound Test behavior are used for the original Sega Genesis release, without assuming menus from a remaster or collection.
Finishing up
Main completion: clear Emerald Hill Zone Acts 1-2, Chemical Plant Zone Acts 1-2, Aquatic Ruin Zone Acts 1-2, Casino Night Zone Acts 1-2, Hill Top Zone Acts 1-2, Mystic Cave Zone Acts 1-2, Oil Ocean Zone Acts 1-2, Metropolis Zone Acts 1-3, Sky Chase Zone, Wing Fortress Zone and Death Egg Zone.
Defeat the boss at the end of every boss-bearing zone: Emerald Hill, Chemical Plant, Aquatic Ruin, Casino Night, Hill Top, Mystic Cave, Oil Ocean, Metropolis and Wing Fortress. Sky Chase has no conventional boss; its completion is confirmed when the sequence delivers Sonic to Wing Fortress.
Defeat Mecha Sonic and then the Death Egg Robot in Death Egg Zone, escape the collapsing Death Egg and watch the ending sequence or credits.
Optional full completion: clear all seven Special Stages in sequence and collect all seven Chaos Emeralds.
Super Sonic check: after collecting all seven Chaos Emeralds, collect at least 50 rings during a normal Act and jump; in the original Genesis release Sonic transforms automatically. Rings drain continuously while transformed.
Special Stage verification: enter from an eligible Star Post with at least 50 rings, complete all three ring-target sections and confirm the Chaos Emerald reward before resuming normal play.
Final performance check: confirm every required act and every boss-bearing zone listed above has been cleared, then verify the Death Egg ending.
Choose your next gameScreenshots & video
Game imagery for reference. Follow the written chapters above for the route and strategies.
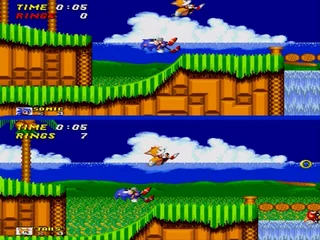

Sources & references
Our original guide draws on the references below. Check the edition at the top of this page before following controls or unlock requirements.
- Sonic The Hedgehog 2 Instruction Manual, Sega Genesis Mini official manual
- Sonic The Hedgehog 2 Instruction Manual, Sega Genesis manual transcription
- Sonic the Hedgehog 2 — Guide and Walkthrough, Genesis — Kirby021591
- Sonic the Hedgehog 2 — Guide and Walkthrough — Genesis, by CChan
- Sonic the Hedgehog 2 — Guide and Walkthrough — Genesis — WWalker
- Sonic the Hedgehog 2/Controls — StrategyWiki
- Special Stage (Sonic the Hedgehog 2), Sonic Wiki Zone
- Sonic the Hedgehog 2: Guide and Walkthrough, Genesis, by Gold_Mage
- Sonic 2 Maps — The Sonic Center
- Sonic The Hedgehog 2 Maps — Sega Genesis — Sonic Galaxy.net
- Sonic the Hedgehog 2/Chemical Plant Zone — StrategyWiki
- Sonic the Hedgehog 2 — Guide and Walkthrough by BostonFuse51
- Egg Poison — Sonic Wiki Zone
- Sonic the Hedgehog 2 - FAQ - Genesis - By MManos
- Sonic the Hedgehog 2: Guide and Walkthrough, Genesis, by Crazyreyn
- Sonic the Hedgehog 2 — Boss Guide — Genesis
- Sonic the Hedgehog 2 — Sky Chase Zone StrategyWiki reference
- Sonic the Hedgehog 2 — Guide and Walkthrough — Genesis — Church5SiX1
- Sonic the Hedgehog 2 Guide and Walkthrough, GameFAQs
- Death Egg Zone, Sonic the Hedgehog 2 Strategy Guide
- Sonic the Hedgehog 2 Special Stage Walkthrough, Mega Drive Champs
- Sonic 2 Maps — The Sonic Center
- Death Egg Zone (Sonic the Hedgehog 2), Sonic Wiki Zone
- Sound Test, Sonic Wiki Zone
- Sonic the Hedgehog 2 — Guide and Walkthrough, GameFAQs
About the game & collecting notes
- Platform
- Sega Genesis / Mega Drive
Step-by-step campaign walkthrough for Sonic the Hedgehog 2 (Sega Genesis, World Rev A). Covers controls, core moves (including the spindash), every primary zone route, how to reach and clear the half-pipe Special Stages to collect all seven Chaos Emeralds, the Death Egg final encounter, recovery strategies and a completion checklist so you can finish the main game and optionally unlock Super Sonic.
Darryl Polo
Darryl Polo loves tinkering with emulation and revisiting retro games. He enjoys exploring how old favorites play on different setups and sharing what he learns along the way. At Joking Joystick, he writes about the games, hardware, and small discoveries that keep the hobby fun.
Our editorial standardsFound a step that needs another look? Help us improve this guide.