
Sonic 3 & Knuckles (Sega Genesis, World) — Complete Campaign Walkthrough
Step-by-step walkthrough for the original Sega Genesis/Mega Drive lock-on experience created by attaching Sonic the Hedgehog 3 to Sonic & Knuckles. Covers setup, controls, emerald access, every regular Zone in campaign order—including Sky Sanctuary—character-specific boss routes, recovery from failure, and concrete checks for standard, Doomsday, and full Emerald completion.

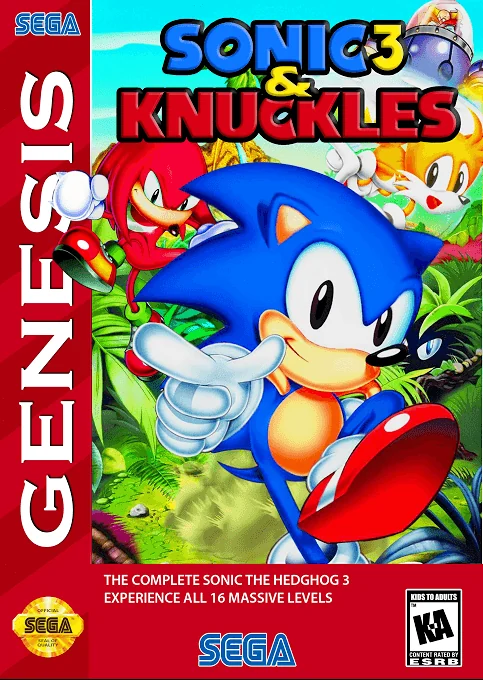
Find a copy
Sonic 3 & Knuckles Sega Genesis / Mega Drive
We may earn a commission if you buy through these links, at no extra cost to you. As an Amazon Associate I earn from qualifying purchases.
Opens retailer search results. Check the model, edition, seller, availability and current price before buying.
Before you begin
This walkthrough is written for the original Sega Genesis/Mega Drive lock-on experience created when Sonic the Hedgehog 3 is attached to Sonic & Knuckles to form Sonic 3 & Knuckles (World edition).
Follow the chapters in order to progress through every required Zone, beat each boss, and reach the game's actual ending.
If you have only one cartridge you can still use the Sonic & Knuckles cartridge by itself, but the locked-on combined campaign is the focus here.
You will find practical, in-level directions for hazards, recommended approaches to each boss, how and when to attempt Special Stages for Chaos Emeralds, and how the Super Emerald shrine and additional Special Stages work when the cartridges are combined.
The guide explains character-specific options (Sonic, Tails, Knuckles) and recovery tactics after mistakes so you can complete the campaign reliably. It distinguishes Sonic's seven-Chaos-Emerald requirement for The Doomsday Zone from the separate seven-Super-Emerald objective that unlocks Hyper Sonic and the enhanced ending.
Set yourself up for the run
Hardware: if you own both cartridges, confirm Sonic the Hedgehog 3 sits into the top lock-on slot of the Sonic & Knuckles cartridge before inserting into the console.
If you only have one cartridge, you can still play that cartridge alone (see chapter 1).
Controller basics: Genesis controllers use A/B/C.
Learn jump, spin/roll, and spin dash (charge and release).
Practice short hops, rolling into a spin dash, and air control before attempting speed-based sections.
Know each character’s core moves: Sonic — best all-rounder and uses Super or Hyper form depending on Emerald progress; Tails — can fly/hover briefly and can become Super Tails after the Super Emerald set; Knuckles — can glide and climb walls, and is playable in Sonic 3 zones when locked on.
Use the character whose skills suit the upcoming Zone.
Familiarize yourself with Star Posts and Giant Rings: Star Posts act as mid-checkpoints; Giant Rings, Super Rings and Star Post behavior open Bonus or Special Stages used to collect Emeralds.
Practice reaching Star Posts consistently.
Decide goal priority: main-campaign completion (finish credits) versus full Emerald completion.
For Sonic’s Doomsday route, collect all seven Chaos Emeralds. You may enter the shrine afterward, but the shrine changes the Emeralds into gray Super Emerald targets. Completing all seven Super Emeralds is optional for access to Doomsday and is instead the route to Hyper Sonic and the enhanced ending.
If using an emulator or modern re-release, verify you’re playing the original Genesis mapping and that lock-on behavior or Special Stage access works as expected for the edition you have.
Keep spare lives and rings in mind: for Special Stages you usually need to reach Giant Rings or Super Rings. Enter with a safe ring margin so you can recover from mistakes.
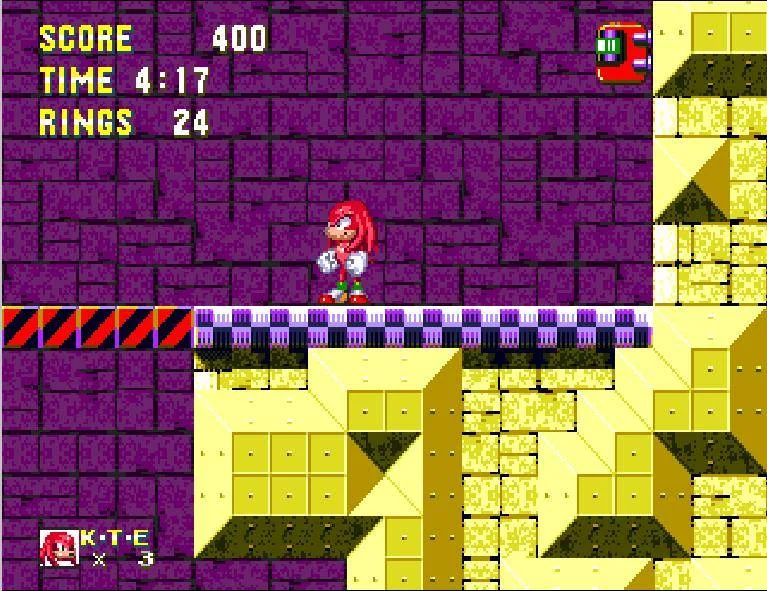
Lock-on Setup, Game Modes and What Changes
The original Genesis or Mega Drive cartridges support three distinct configurations: Sonic 3 by itself, Sonic & Knuckles by itself, and the combined Sonic 3 & Knuckles lock-on game. The combined arrangement is the full campaign, beginning in Angel Island Zone and continuing through Death Egg, with The Doomsday Zone as an additional Sonic finale when the seven-Chaos-Emerald requirement has been met. This chapter covers the original physical cartridges and their original lock-on behavior, not later collections, remakes, or ports.
Assemble the physical lock-on cartridge
Turn the Genesis or Mega Drive completely off before inserting, removing, or reseating either cartridge. Do not change the cartridge arrangement while the console is powered on.
Insert Sonic & Knuckles into the console's cartridge slot. This is the lower cartridge and must connect directly to the console. Lift the hinged connector cover on top of Sonic & Knuckles, then insert Sonic 3 into that upper connector in the same orientation used for a normal Genesis cartridge. Press both cartridges down evenly until they are seated.
Do not insert Sonic 3 into the console first and try to place Sonic & Knuckles above it. The lock-on connector is built into Sonic & Knuckles, so Sonic & Knuckles must be attached to the console and Sonic 3 must occupy its upper slot.
Switch on the console only after both cartridges are installed. After the Sega logo, the title presentation should identify the game as Sonic 3 & Knuckles. If the screen is blank, garbled, or shows only one cartridge's game, turn the console off before checking the cartridge fit or contacts. Never pull either cartridge while the power is on.
- Power off before changing cartridges.
- Install Sonic & Knuckles in the console slot.
- Lift the flap on top of Sonic & Knuckles.
- Insert Sonic 3 into the upper connector.
- Confirm that the Sonic 3 & Knuckles title screen appears.
Play Sonic 3 alone
Insert only Sonic 3 into the console for its standalone campaign. The regular Zone order is Angel Island, Hydrocity, Marble Garden, Carnival Night, IceCap, and Launch Base. Each Zone contains two Acts, with the second Act ending in that Zone's boss encounter.
Sonic 3 alone does not provide Knuckles as a selectable campaign character and does not continue into Mushroom Hill. It contains its own Chaos Emerald Special Stages and Bonus Stages, but the later Sonic & Knuckles Zones and combined Super Emerald system are unavailable in this configuration.
Use Sonic 3 alone when you want to play the original first portion as a self-contained game. It is not a continuation file for a separate Sonic & Knuckles cartridge.
- Only Sonic 3 is installed.
- Angel Island is the opening Zone.
- Launch Base is the final regular Zone in this configuration.
- Knuckles is not selectable.
- Mushroom Hill and the combined Super Emerald quest are unavailable.
Play Sonic & Knuckles alone
Insert only Sonic & Knuckles into the console to begin at Mushroom Hill. Its regular route continues through Flying Battery, Sandopolis, Lava Reef, Hidden Palace, Sky Sanctuary, and Death Egg, with character-specific routes and boss encounters.
Sonic and Knuckles are the available campaign characters in this configuration. Tails is not selectable, and the game does not begin at Angel Island or act as a continuation of a Sonic 3 save file.
Standalone Sonic & Knuckles contains its own Giant Rings, Special Stages, Hidden Palace shrine sequence, and character endings. It is still a separate campaign from the full combined adventure. To play all regular Zones in one extended run, use the physical lock-on arrangement.
- Only Sonic & Knuckles is installed.
- Mushroom Hill is the opening Zone.
- Sonic and Knuckles are selectable.
- Angel Island through Launch Base are not included.
- Tails is unavailable.
Start the combined campaign
With Sonic & Knuckles connected to the console and Sonic 3 inserted into its upper connector, start a one-player game and select the desired character and save slot. The combined campaign begins in Angel Island and carries the selected character through both cartridges.
The regular Zone sequence is Angel Island, Hydrocity, Marble Garden, Carnival Night, IceCap, Launch Base, Mushroom Hill, Flying Battery, Sandopolis, Lava Reef, Hidden Palace, Sky Sanctuary, and Death Egg. The Doomsday Zone is an additional Sonic finale after Death Egg, not one of the ordinary two-Act Zones.
The lock-on arrangement adds Knuckles to the Sonic 3 Zones and allows Tails to continue into the Sonic & Knuckles Zones. Knuckles can glide, climb walls, and break through character-specific barriers. Tails can fly and reach some vertical areas by a different route. Sonic follows the standard route and can receive the additional Doomsday sequence when the Chaos Emerald condition is satisfied.
Launch Base transitions directly into Mushroom Hill in the combined game. Emeralds are not required merely to trigger that transition. Keep using the combined game's save data; a standalone Sonic 3 file and a standalone Sonic & Knuckles file are not one continuous campaign.
- The title screen identifies Sonic 3 & Knuckles.
- The combined campaign begins in Angel Island.
- Knuckles is available in the Sonic 3 portion.
- Launch Base transitions into Mushroom Hill.
- The route continues through Death Egg.
Understand the Chaos Emerald and Super Emerald systems
The combined game contains seven Chaos Emerald Special Stages, normally reached through hidden Giant Rings in the regular Acts. For Sonic, collecting all seven Chaos Emeralds is the requirement for access to The Doomsday Zone after the Death Egg sequence. The requirement is based on having collected the complete Chaos Emerald set; collecting all seven Super Emeralds is not a replacement for it.
Mushroom Hill contains a special concealed-room sequence that leads to the Emerald shrine. At the beginning of the Zone, Knuckles closes the hidden room. Follow the nearby route to the switch, return to the room, reopen it, and enter the flashing Super Ring inside. This scripted Super Ring is different from the ordinary Giant Rings found throughout the Acts.
At the shrine, every Chaos Emerald already collected is converted into a gray Super Emerald target. Any Emerald not collected remains an empty pedestal. Completing the associated Blue Sphere Special Stage restores that target as a Super Emerald. If all seven Chaos Emeralds had been collected before entering the shrine, Sonic remains eligible for The Doomsday Zone even if the conversion is followed by fewer than seven completed Super Emerald stages. An incomplete Super Emerald set does not remove that Doomsday eligibility.
The seven Super Emeralds are an optional enhancement objective. Completing all seven unlocks Hyper Sonic, Hyper Knuckles, or Super Tails for the appropriate character and produces the enhanced ending state. It is not necessary for ordinary Sonic completion, and it does not substitute for the seven-Chaos-Emerald condition for Sonic's Doomsday route.
Tails completes the combined campaign through Death Egg and does not use Sonic's Doomsday sequence. Knuckles follows his separate late-game route and has his own character-specific completion objective. Treat the Emerald goals separately: seven Chaos Emeralds are required for Sonic's Doomsday access, while seven Super Emeralds provide the enhanced forms and enhanced ending.
- Use ordinary Giant Rings to enter Chaos Emerald Special Stages.
- Do not confuse the Mushroom Hill scripted Super Ring with an ordinary Giant Ring.
- Collect all seven Chaos Emeralds for Sonic's Doomsday eligibility.
- At the shrine, collected Chaos Emeralds become gray Super Emerald targets.
- Missing Chaos Emeralds leave empty shrine pedestals.
- An incomplete Super Emerald set does not block Doomsday if all seven Chaos Emeralds were collected beforehand.
- Collect all seven Super Emeralds separately to unlock the enhanced forms and ending.
- Finish the selected character's appropriate late-game route and view the credits.
Before you move on
- Sonic & Knuckles is seated in the Genesis or Mega Drive cartridge slot and Sonic 3 is seated in its upper connector.
- The game identifies itself as Sonic 3 & Knuckles.
- The selected combined file begins in Angel Island.
- Launch Base transitions into Mushroom Hill without an Emerald requirement.
- The campaign proceeds through Flying Battery, Sandopolis, Lava Reef, Hidden Palace, Sky Sanctuary, and Death Egg.
- The Mushroom Hill concealed room can be reopened with its nearby switch, revealing the scripted Super Ring.
- The shrine displays collected Chaos Emeralds as gray Super Emerald targets and leaves missing positions empty.
- For Sonic, all seven Chaos Emeralds were collected before the Death Egg finale. This is the condition that qualifies access to The Doomsday Zone in the original lock-on game.
- Sonic completion is confirmed by defeating Death Egg's final sequence, entering The Doomsday Zone when the seven-Chaos-Emerald condition is met, defeating the Final Weapon, and viewing the credits.
- Tails completion is confirmed by finishing Death Egg and viewing the credits.
- Knuckles completion is confirmed by finishing his character-specific late-game route and viewing the credits.
- Full Emerald completion is confirmed separately by collecting all seven Super Emeralds and unlocking the appropriate enhanced form and ending state.
References for this chapter
Controls, Core Techniques and Survival Basics
Learn the original Sega Genesis controls for Sonic 3 & Knuckles and use each character’s movement strengths to cross hazards safely. Build speed on open ground, attack from a jump or roll, and treat every Star Post as a recovery point rather than a reason to rush. The guidance below applies to the original Genesis lock-on game, not to later ports with remapped controls or added movement abilities.
Set up the Genesis controls before moving
Use the Directional Pad to move left and right, crouch, and look up or down. Press any of A, B, or C to jump. Start pauses and resumes the game. In the original Genesis release, the three action buttons perform the same basic jump and Spin Dash functions, although later collections may assign them differently.
Press Down while standing or moving slowly to crouch. While crouching, press A, B, or C to begin charging the Spin Dash. Continue pressing an action button while holding Down to build power, then release Down to launch. Charge only where you can see the landing area; releasing beside a pit or hazard commits you to a fast ground launch before you can react.
Holding Up or Down while standing still can move the camera slightly to inspect nearby space. Use this before stepping onto a screen edge or committing to a vertical route, but do not remain stationary near an active enemy.
- Directional Pad: movement, crouching, and looking up or down.
- A, B, or C: jump.
- Down plus A, B, or C: charge the Spin Dash.
- Start: pause or resume.
Use jumps, rolls, and Spin Dashes as separate tools
A jump turns the character into a spinning attack. Jump into ordinary enemies from above or from the side rather than running directly into them. The spinning attack normally destroys standard enemies, but spiked bodies, projectiles, and harmful environmental objects can still cause damage. If you are carrying rings, a normal hit scatters them, giving you a short opportunity to recover some before continuing.
Press Down while moving to roll. Rolling keeps momentum on slopes and can defeat many ground enemies, but it is harder to steer once committed. Stop rolling before a blind drop, narrow ledge, or moving platform. Use a Spin Dash for a powerful launch through open ground, curved walls, weak barriers, and long gaps where the landing is visible.
Sonic can press a jump button again while airborne to perform the brief Insta-Shield. It extends his contact range and can help against enemies or boss targets that are slightly too high for a normal jump. The Insta-Shield is not a permanent shield and is unavailable while Sonic is carrying a shield, because shield-specific double-jump abilities replace it.
- Jump into enemies when there is room to recover from a missed attack.
- Roll through slopes and ordinary ground enemies, then stop before blind hazards.
- Use a Spin Dash only when the launch lane and landing area are visible.
- Use Sonic’s Insta-Shield as a short attack extension, not as protection from every hazard.
Fly with Tails and place him carefully
Tails uses the same running, jumping, rolling, and Spin Dash controls as Sonic. After jumping, press a jump button again while he is airborne to start propeller flight. Hold the button to remain airborne and use the Directional Pad to steer. Flight gradually loses effectiveness, so begin from a stable platform and plan the landing before Tails descends too far.
In a Sonic-and-Tails game, Tails can carry Sonic during flight and reach elevated routes that Sonic cannot reach alone. On the original Genesis version, a second controller is used to control Tails directly in that arrangement. Do not assume that a modern port’s single-player Tails-assist controls exist in the original cartridge game.
Use flight to cross a gap or line up with a platform, not to scout indefinitely over a pit. Release the flight button early near ceilings, walls, and moving platforms so Tails has time to descend under control. His spinning tails can damage enemies during flight, but touching a hazard while poorly aligned still causes damage.
- Jump, then press a jump button again to begin Tails’ flight.
- Steer with the Directional Pad and release early for a controlled landing.
- Use the second controller for direct Tails control when playing Sonic and Tails together on Genesis.
- Plan the destination before flying over a pit or moving hazard.
Glide and climb with Knuckles
Knuckles jumps lower than Sonic and Tails, so do not approach tall ledges as if he had the same jump arc. Press a jump button once to jump, then press and hold it again in the air to begin gliding. While gliding, Knuckles travels horizontally in the direction he is facing and gradually descends. Aim his fists at ordinary enemies, but avoid gliding blindly into spikes or projectiles.
If Knuckles glides into a suitable wall, he grabs it automatically. Press Up or Down to climb and press a jump button to leave the wall. Not every wall is climbable, so test solid vertical surfaces rather than assuming every background wall is usable. If a wall grab fails, prepare to land or redirect instead of repeatedly holding the glide button toward the same hazard.
Gliding is useful for crossing gaps and reaching Knuckles-only routes, but it is not a substitute for a normal jump. Begin descending before the target ledge so that you arrive with enough control to land. Knuckles can also break through many barriers simply by walking into them, while Sonic generally needs a Spin Dash for comparable barriers.
- Jump, then press and hold jump again to glide.
- Aim the glide at a solid wall when you need to climb.
- Use Up and Down while attached to climb.
- Press jump to leave the wall before reaching an unsafe edge.
- Expect Knuckles to require alternate routes because of his lower jump.
Treat Star Posts as recovery points
Run through every Star Post you see. It activates when passed and becomes the return point after a life is lost. A restart returns you to the last activated post with no rings, so immediately collect nearby rings and rebuild a buffer before attempting the section that caused the death. If no Star Post has been activated, the restart returns you to the beginning of the Act.
Star Posts can also be involved in entering Bonus Stages when the appropriate ring condition is satisfied. They do not directly open the hidden Special Stages used to collect Chaos Emeralds; those are entered through Giant Rings concealed in the Acts. When hunting Emeralds, use a Star Post as a safe progress marker, then explore nearby alternate routes for a Giant Ring rather than assuming the post itself is the entrance.
After activating a post, pause briefly to identify the next enemy, platform cycle, crusher, or pit. The checkpoint shortens recovery but does not make the following screen safe. If the post is next to a hazard, pass through it cleanly and continue rather than stopping inside the danger zone.
- Pass through every Star Post before taking an optional route.
- After activation, identify the next hazard instead of sprinting blindly.
- After a death, rebuild rings before repeating the dangerous maneuver.
- Search for Giant Rings separately when attempting Special Stages.
Preserve rings through unfamiliar sections
Rings are your buffer against most ordinary damage. Enter a difficult room with at least one ring whenever possible, and collect scattered rings only after the hazard has finished moving. A normal hit with rings usually scatters them, but falling into a bottomless pit, being crushed, or suffering certain environmental hazards can kill you immediately regardless of your ring total.
Slow down at springs, moving platforms, crushers, fire, water sections, conveyors, and narrow ledges. Use a jump when you need to change direction in midair; rolling is better for maintaining ground momentum than for making precise corrections. On a first attempt, choose visible solid ground over a fast route whose landing you cannot see.
Shields are valuable because they protect against many ordinary hits without scattering rings, but they do not make pits and crushing objects safe. If you lose a shield or all your rings, prioritize reaching the next Star Post. Avoid spending the last part of a stage attacking optional enemies or chasing a high-speed path when a cautious route is available.
- Enter hazards with at least one ring whenever possible.
- Wait for moving obstacles to complete a cycle before crossing.
- Prefer visible solid ground during a first attempt.
- Remember that rings and shields do not prevent every instant-death hazard.
- After losing rings, focus on the next checkpoint and safe recovery.
Before you move on
- You can move, jump, roll, and launch a Spin Dash without confusing crouching with charging.
- You can activate a Star Post, identify the next hazard, and continue without immediately spending your rings.
- You understand that Star Posts are checkpoints and Bonus Stage triggers, while Giant Rings are the relevant entrances for Special Stages.
- As Tails, you can start flight after a jump and land on a chosen platform; when paired with Sonic on Genesis, you know that direct Tails control uses the second controller.
- As Knuckles, you can glide into a wall, climb it with Up and Down, and exit safely with jump.
- You can complete a hazardous room while keeping at least one ring or deliberately identify a checkpoint before taking a risky route.
- You know which hazards can defeat you despite carrying rings or a shield.
Special Stages, Chaos Emeralds and Super Emeralds
Sonic 3 & Knuckles uses several different ring-based entrances. Giant Rings found inside Acts lead to Blue Sphere Special Stages, while activated Star Posts lead to optional Bonus Stages. The concealed-room Super Ring in Mushroom Hill is a separate shrine entrance that changes the status of the Emeralds and opens the additional Super Emerald stages. The seven Chaos Emeralds are the important requirement for Sonic’s Doomsday Zone access. Completing the seven Super Emerald stages is optional for ordinary progression and provides the enhanced character forms and enhanced ending presentation, but it does not replace the seven-Chaos-Emerald requirement.
Recognize the three kinds of stage entrance
A Giant Ring is a large gold ring hidden in an Act. Entering one sends the character to a Blue Sphere Special Stage. There is no 20-ring requirement for entering a Giant Ring. These rings may be above the main route, behind breakable scenery, inside a side room, or at the end of a character-specific path. If you are hunting Emeralds, explore branches after checkpoints and look for unusual openings, high platforms, and routes that require a character’s special ability.
A Star Post uses a different system. Touch one while carrying at least 20 rings, then jump into the small stars that appear above it while they are still visible. This opens a Bonus Stage. The amount of rings held when the Star Post is activated determines which Bonus Stage appears in the combined game. The 20-ring figure is only the entry threshold; it is not the amount needed to obtain an Emerald.
The flashing Super Ring in Mushroom Hill is different from both entrances. At the start of Mushroom Hill Act 1, allow the opening event to close the concealed room. Move back to the nearby switch, activate it to reopen the room, and enter the room to use the flashing ring. This transfers the character to the Emerald shrine. Do not confuse this ring with an ordinary Giant Ring found during normal level exploration.
- Use Giant Rings to enter Blue Sphere Special Stages.
- Touch a Star Post with at least 20 rings to create its Bonus Stage entrance.
- Jump into the stars above the activated Star Post.
- Reopen the concealed Mushroom Hill room before entering the flashing Super Ring.
Use Bonus Stages for supplies, not Emeralds
Bonus Stages are optional resource areas. Depending on the stage type, they can provide rings, shields, extra lives, and other items. They do not award Chaos Emeralds or Super Emeralds. If your objective is Emerald collection, leave a Bonus Stage after taking useful supplies and continue looking for Giant Rings rather than expecting the Bonus Stage to advance the Emerald display.
The combined campaign can use the Gumball Machine, Slot Machine, and Glowing Sphere Bonus Stages. In the Gumball Machine stage, use the springs and crank carefully because used springs disappear. In the Slot Machine stage, collect safe rings while avoiding dangerous result blocks. In the Glowing Sphere stage, use the magnetic spheres to climb while watching for hazards below and above your landing position.
The 50-ring reward is separate from the Star Post entrance condition. Collecting 50 rings inside a Bonus Stage awards a credit for continuing after a game over. A Star Post activated with 20 rings can therefore open a Bonus Stage, but you still need to collect 50 rings inside the stage to obtain that continue reward. Do not describe 50 rings as the minimum for creating the Star Post entrance.
- Treat Bonus Stages as supply opportunities.
- Use 20 rings as the Star Post activation threshold.
- Aim for 50 rings inside a Bonus Stage when the route is safe.
- Do not expect Bonus Stages to award Emeralds.
Clear Blue Sphere Special Stages reliably
The Special Stage is a rotating field containing blue spheres, red spheres, rings, and yellow bumper spheres. The objective is to touch every blue sphere. A blue sphere turns red after being touched, and active red spheres end the attempt if contacted. Rings are safe to collect, but they do not replace the requirement to clear every blue sphere.
When several blue spheres form a square or rectangle, travel around the outside edge and close the perimeter. Completing the loop changes the enclosed blue spheres into rings, creating a safe area and often increasing the ring total. This is safer than cutting through the middle of a group. Yellow bumpers can launch the character into red spheres, so approach them only when you can see where the bounce will land.
The Sonic 3 portion of the combined campaign provides the seven Chaos Emerald stages. After the shrine sequence has changed the Emeralds into Super Emerald targets, the additional layouts associated with Sonic & Knuckles provide the Super Emerald stages. A successful stage awards the Emerald represented by the stage’s current shrine pedestal.
- Touch every blue sphere without hitting an active red sphere.
- Use perimeter routes around square and rectangular groups.
- Convert enclosed blue groups into rings before entering a dangerous area.
- Watch yellow bumpers for their launch direction.
Collect the seven Chaos Emeralds first
Each successful Chaos Emerald Special Stage awards one Chaos Emerald until the seven-emerald set is complete. Check the Emerald display after every success. If an early attempt is missed, keep playing and search later Acts for another Giant Ring. A failed attempt does not remove Emeralds already earned, and one missed stage does not require restarting the campaign.
The seven Chaos Emeralds unlock the normal Super forms for the characters that support them in this version. Sonic can become Super Sonic and Knuckles can become Super Knuckles. Tails does not receive Super Tails from the Chaos Emeralds alone; his enhanced form requires the complete Super Emerald set. Transformations consume rings during play, so enter a transformation with a substantial ring supply and remember that the counter drains continuously while the form remains active.
For Sonic, all seven Chaos Emeralds are required to access The Doomsday Zone after the Death Egg finale. This requirement remains true after visiting the shrine. Entering the shrine can change the Emeralds into gray Super Emerald targets, but it does not create a replacement route in which seven Super Emeralds alone satisfy the Doomsday condition.
- Track the seven Chaos Emerald icons after every successful stage.
- Search later Acts if an earlier Giant Ring attempt was missed.
- Do not expect Chaos Emeralds alone to unlock Tails’s enhanced form.
- Keep all seven Chaos Emeralds accounted for if pursuing Sonic’s Doomsday route.
Use the Mushroom Hill shrine and its pedestals
At the beginning of Mushroom Hill Act 1, let the opening sequence close the concealed room. Return to the nearby switch and activate it to reopen the room. Inside, enter the flashing Super Ring to reach the Emerald shrine. This is the required route for accessing the additional Super Emerald stages in the combined campaign.
The shrine shows empty pedestals for Chaos Emeralds that have not yet been collected. Jumping onto an empty pedestal starts the corresponding Chaos Emerald Blue Sphere stage. Completing that stage fills the missing Chaos Emerald and changes its pedestal into a gray, inactive Super Emerald target.
After a pedestal becomes gray, jump onto it to start the corresponding Sonic & Knuckles Blue Sphere stage. Completing that stage activates the Super Emerald. You can return to the shrine later, and failing a Special Stage does not erase Emeralds that were already collected. If you entered the shrine with an incomplete Chaos Emerald set, recover the missing Chaos Emeralds first; their pedestals must become gray before their Super Emerald stages become available.
- Allow the concealed room to close during the opening Mushroom Hill event.
- Return to the switch and reopen the room.
- Enter the flashing Super Ring.
- Use empty pedestals to recover missing Chaos Emeralds.
- Use gray pedestals for the corresponding Super Emerald stages.
Understand the Super Emerald objective and the ending conditions
Completing all seven Super Emerald stages unlocks Hyper Sonic for Sonic, Hyper Knuckles for Knuckles, and Super Tails for Tails. These enhanced forms are optional for ordinary Zone completion. They also require rings during use, so the form will end when the ring supply is exhausted. Collecting all seven Super Emeralds changes the final presentation and enables the enhanced ending state associated with the complete Emerald collection.
The Super Emeralds do not replace the seven Chaos Emeralds for Sonic’s Doomsday access. To enter The Doomsday Zone in the original Genesis or Mega Drive lock-on campaign, Sonic must have collected all seven Chaos Emeralds. If the shrine has been visited, those Emeralds may be represented as gray targets and later reactivated as Super Emeralds, but the Super Emerald count is an enhancement objective rather than an alternative access condition.
An incomplete Super Emerald set does not prevent Sonic from reaching Doomsday when all seven Chaos Emeralds have been collected. Conversely, completing the Super Emerald set should not be treated as sufficient proof that the Doomsday requirement has been met unless the seven Chaos Emeralds were also collected. For a normal campaign, Emerald collection is optional for reaching the regular character endings; the seven-Chaos-Emerald check applies specifically to Sonic’s additional Doomsday finale.
- Collect all seven Chaos Emeralds for Sonic’s Doomsday access.
- Use the shrine to recover missing Chaos Emeralds if necessary.
- Restore all seven Super Emeralds only if pursuing the enhanced forms and ending state.
- Do not treat seven Super Emeralds as a substitute for seven Chaos Emeralds.
- Remember that ordinary campaign completion does not require every Emerald.
Before you move on
- Confirm that each intended Chaos Emerald was earned through a cleared Blue Sphere Special Stage.
- Confirm that the Mushroom Hill concealed room was reopened with its nearby switch.
- Confirm that the flashing Super Ring was used to reach the shrine.
- Recover missing Chaos Emeralds through empty pedestals.
- Use the resulting gray pedestals to attempt the Super Emerald stages.
- Confirm all seven Super Emeralds are active if pursuing Hyper Sonic, Hyper Knuckles, Super Tails, and the enhanced ending state.
- For Sonic’s Doomsday route, verify that all seven Chaos Emeralds were collected; do not use the Super Emerald count as a substitute check.
- Remember that Super Emerald collection is optional for regular Zone completion.
- Confirm that any desired enhanced form is available before relying on it during the finale.
Zone 1 — Angel Island Zone (Act 1 & 2) — safe routes and boss
These directions use the conservative Sonic route for the original Genesis Sonic 3 layout and the combined Sonic 3 & Knuckles version. Tails can follow the same route and may reach some upper platforms more easily by flying. Knuckles has altered routes and different access points, particularly in Act 2, so do not expect every listed shortcut or item location to match his campaign. Angel Island contains several Giant Rings, but the route priority is reaching the two acts' checkpoints and bosses alive.
Act 1: take the low route and reach the first Giant Ring
Move right past the monkey enemy, then jump on the blue-gray boulder to break it. Use the hidden spring in the ground and the spring in the nearby tree to reach the ledge with the Super Ring and Speed Shoes. Drop back down and continue right. Jump over the yellow spring because it throws you backward. When the rhinoceros-like enemy charges, roll or Spin Dash through it rather than trying to land directly on its body.
After the two spikes, drop from the collapsing overhang instead of taking the swinging vines. Spin Dash left through the boulder below the overhang to enter the first Giant Ring room. If you are collecting Chaos Emeralds, enter the Special Stage now. After returning, continue right through the loops but slow down before the ramp beside the pond. Running over the ramp at full speed can launch you past the pond and make you miss the Water Shield below it. Take the Water Shield, then jump across the shallow water and spikes.
- First Act 1 Giant Ring: below the collapsing overhang, reached by dropping down and Spin Dashing left.
- Water Shield: in the pond beneath the ramp after the first Giant Ring.
- Avoid the yellow spring near the opening because it reverses your progress.
Act 1: build momentum through the tree
Push the large boulder left when it blocks the ground, then jump onto the exposed floor to break through into the small item chamber. Take the red spring and pass through the loop, but stop afterward. Turn around and Spin Dash back through the slope and loops to build speed. You need substantial momentum to run up the inside of the large tree; if a normal run does not work, charge a Spin Dash before entering the loops.
A Star Post is on the elevated ledge beside the loops. Activate it before attempting the tree. The machine that appears after the tree is not yet the Act 1 fight. Wait for the additional machines and the fire sequence, then move right to the Star Post. When the ceiling spikes extend, do not stand underneath them. Wait for them to retract and Spin Dash beneath them. Drop into the depression afterward; the floor gives way and leads to a lower passage. Spin Dash left through the boulders and use the red spring to reach the next Giant Ring.
- Activate the Star Post beside the loops before trying the tree.
- Use backtracking and a charged Spin Dash if you cannot run up the tree.
- The machine encountered immediately after the tree is a preview of the mid-boss, not the fight itself.
- Second Act 1 Giant Ring: below the ceiling-spike section, reached through the lower passage and red spring.
Act 1: cross the collapsing platforms and collect the Fire Shield
After the second Special Stage, stay on the lower route. Jump to the collapsing bridge over the water and cross it without stopping. Defeat or avoid the ground enemy, jump onto the boulder, and use the moving platform to reach the overhang. The stationary flower-like enemy fires mines horizontally; approach from a jump or wait for its shots before passing.
Cross the next collapsing overhangs quickly and use the moving platform beside the loop to reach the upper ledge. A Lightning Shield is available there, but continue to the spring and boulder area. From the boulder, jump to the left overhang and take the Fire Shield guarded by the flower enemy. If an overhang collapses under you, leave the screen and return; these platforms can reappear. The Fire Shield is especially useful against the upcoming flamethrower, although it does not make you immune to contact with the machine.
- Cross each collapsing bridge or overhang in one committed movement.
- Take the Fire Shield when possible before the Act 1 mid-boss.
- If an overhang drops you, retreat off-screen and approach again rather than restarting immediately.
Act 1 mid-boss: defeat the flying pod
Run right from the Fire Shield area into the flat arena. The flying pod lowers on one side, fires a flamethrower, then moves across the arena and repeats. With the Fire Shield, the flame stream cannot hurt you, but touching the pod still causes damage. Jump into the pod when it is low enough to strike it, then land and prepare for its next pass.
The pod requires six hits. Without a Fire Shield, wait until the flame stream has finished or jump over it, then attack only when the pod settles low enough. Do not trade contact hits if you have lost your rings. When the pod is destroyed, the Act marker descends. Let it touch the ground to complete Act 1.
- Six hits defeat the Act 1 mid-boss.
- The Fire Shield blocks the flamethrower but not direct contact.
- Act 1 ends when the marker lands after the pod is destroyed.
Act 2: use the opening tunnel and waterfall route
Spin Dash through the opening boulder and follow the twisting tunnel. At the exit, hold Down so the route carries you into the first Giant Ring room. Enter the Special Stage if you need an Emerald, then leave the room and drop into the water. The blue caterpillar enemy can be damaged safely only on its head; striking another part causes damage.
Break the boulder at the bottom of the lake to reveal the spring. Use it to reach the moving platforms on the waterfall, then ride those platforms upward to the upper ledge and the nearby 1-Up. Do not take the swinging-vine route unless you deliberately want the higher path. Ride the platforms back down. At the bridge above the lake, jump right, Spin Dash through the two boulders, and take the Water Shield between them.
Continue through the shallow water while avoiding the floating spiked logs and floor spikes. At the curved wall, Spin Dash up it instead of using a spiked log as a boost. Follow the next curved wall and boulder into the underwater passage, then reach the room with the gray button. Press the button to drain the water, return through the opened route, and activate the Star Post.
- First Act 2 Giant Ring: immediately beyond the opening twisting tunnel.
- Attack the blue caterpillar only on its head.
- Use the lower waterfall route and avoid being diverted onto the swinging vine.
- Press the gray button before attempting the drained passage.
- Water Shield: between the boulders after the waterfall route.
Act 2: cross the flipping bridges and reach the final Giant Ring
After the Star Post, continue to the bridge whose tiles flip or ripple. Drop through it when the surface opens, then drop through the next bridge as well. In the water, collect the Super Ring if it is safe, Spin Dash through the boulders, take the Water Shield if needed, and bounce out. The next lake contains mostly spikes with only small safe areas. Treat the nearby 1-Up as optional; do not risk a life for it if your rings are low.
From the safe ground, wait until you are ready, then cross the collapsing bridge in one run. Continue right past the enemies and drop into the later pond. Spin Dash up the pond's right side while holding Right. Slightly above the waterline, you will pass through the right wall into the final Angel Island Giant Ring room. Return to the pond, then climb the appearing and disappearing ledges.
Use the springs and the ledges to cross the waterfall again. A side room contains Super Rings and a Water Shield, but it is optional. Take the upper route and prepare for the last waterfall crossing. The final collapsing bridge does not return once it has fallen, so do not trigger it until you are positioned to cross immediately.
- Drop through the two flipping bridges instead of trying to remain on their surfaces.
- Final Angel Island Giant Ring: through the right wall above the later pond.
- Treat the spike-bed 1-Up and side item room as optional.
- Cross the final waterfall bridge only when you are ready to continue.
Act 2: survive the airship chase
Near the final Star Post, use the curved wall and a charged Spin Dash to reach the Fire Shield in the tree. The approach requires momentum and cannot be made reliably by jumping from the Star Post. Activate the Star Post, then enter the tunnel and continue right.
When the large airship begins dropping bombs, hold Right continuously and do not press Down. Rolling slows you and allows the bombs to catch up. The Fire Shield does not protect against the bombs, so distance is your defense. If you fall behind, recover speed immediately rather than stopping to fight enemies. After the airship leaves, continue through the burning forest to the waterfall boss arena.
- The Fire Shield in the tree is optional but valuable for the boss.
- Hold Right during the bomb chase and avoid rolling.
- The Fire Shield does not block the airship bombs.
- The Star Post before the chase is the primary retry point.
Act 2 boss: defeat Robotnik's fireball ship
Robotnik first appears on the left and drops two fireballs that destroy the bridge. Do not attack during this opening sequence. The platform is isolated after the bridge is destroyed, so falling is fatal even if you still have rings.
The ship then disappears behind the waterfall and reappears at the left or right side of the island. Attack when it is clearly over the platform. It drops two fireballs after appearing; they may fall vertically or travel diagonally across the island. With the Fire Shield, aim for about three safe hits during an appearance when the ship is not positioned beyond the edge. Without the shield, use fewer attacks, jump over fireballs traveling across the platform, and never jump toward a ship that is already drifting off the island.
Robotnik's ship requires eight hits. After the final hit, the animal prison appears upside down above the arena. Strike the button beneath it to free the animals and finish Angel Island Zone.
- Do not attack during the opening bridge-destruction sequence.
- Keep away from the island edge when the ship appears at either side.
- Eight hits defeat Robotnik's fireball ship.
- Strike the button beneath the upside-down prison after the boss to free the animals.
Before you move on
- Act 1 is complete after six hits defeat the flying pod and the Act marker lands.
- Act 2 is complete after eight hits defeat Robotnik's fireball ship and the button beneath the upside-down animal prison is struck.
- After the Act 2 completion sequence, Knuckles activates the switch that drops the player toward Hydrocity Zone in the normal Sonic/Tails progression.
- For Knuckles, use the character-specific Angel Island route rather than treating the Sonic/Tails item and platform sequence as universal.
Zone 2 — Hydrocity Zone — traversal underwater and timed hazards
Hydrocity Zone is built around short underwater sections, moving machinery, and currents that become dangerous when approached too quickly. The safest approach is to use large air bubbles before long swims, ride the level’s platforms and fans instead of fighting water movement, and treat Star Posts as places to stabilize before exploring side passages. The original Genesis Sonic the Hedgehog 3 release and the Hydrocity portion of the original Sonic 3 & Knuckles lock-on game use the same basic Zone layout and bosses.
1. Enter Act 1 and manage the opening water section
After falling into Hydrocity Act 1, move right and activate the switch on the upper route. Use the grab bars that appear, then release them with a jump or attack button when you need to drop. Continue through the submerged passage rather than trying to rush across the lower water immediately.
Air bubbles rise from fixed points in the underwater sections. When a large bubble appears, touch it to refill your air. Do not rely on small bubbles during a dangerous crossing. If you have a Water Shield, it removes the drowning concern and is especially useful in this Zone, but it does not protect against spikes, crushing walls, or enemy contact.
The early underwater enemies can interfere with jumping and make it harder to reach the next bubble. Avoid them instead of trying to destroy every one. Keep at least a few rings before entering the deeper passages; a single hit underwater can cost both rings and valuable time.
- Activate the opening switch before dropping into the main underwater route.
- Use a large air bubble before committing to a long passage.
- Avoid underwater enemies when bypassing them is safer than attacking.
2. Reach the first Act 1 Giant Ring
Continue through the opening passage and collect the Water Shield if it is available. After dealing with the submerged enemies, follow the bars and passage until you reach the first Star Post. Proceed briefly, then drop down and follow the lower slope to another Star Post.
At the second Star Post, move to the left. The first Act 1 Giant Ring is inside the concealed passage there. This is easy to miss because the main route continues to the right and encourages a fast run. The ring is optional for reaching the goal, but entering it gives access to a Chaos Emerald Special Stage if you complete the stage successfully.
If you miss the passage, do not reverse direction through dangerous water without an air supply. Continue to the next safe section or accept that the ring is lost for this attempt. A failed Special Stage also returns you to the level rather than ending the campaign.
- Collect or deliberately skip the Water Shield before the first long underwater stretch.
- Touch the early Star Posts before searching for the hidden passage.
- Look left from the second Star Post for the first Act 1 Giant Ring.
3. Find the second Act 1 Giant Ring and reach Big Shaker
Continue through the loop and surface sections until you reach the switch that activates the fans. Climb the treadmills and use the spring to gain height. At the upper section, move left into the concealed passage to find the second Act 1 Giant Ring.
The conservative method is to wait for the treadmill and fan movement to place you near the upper ledge rather than making repeated jumps over open water. If a current pushes you sideways, aim for the next solid platform; swimming against it for too long wastes air and can send you into a Turbo Spiker or another hazard.
After the upper machinery, follow the main path toward the Act 1 boss. Take the final Star Post if you pass it, then enter the arena with at least one ring whenever possible. The Giant Rings are optional, so do not sacrifice a life attempting a hidden passage after your air or ring supply is already low.
- Activate the fans before attempting the upper treadmill route.
- Search left in the upper fan section for the second Act 1 Giant Ring.
- Use the last Star Post as a recovery point before the boss approach.
4. Defeat Big Shaker
Big Shaker moves through the water-filled arena and eventually settles on the central pole. The reliable attack window is when the machine is in the middle and its body is reachable. Jump onto the exposed body to score a hit, then immediately prepare for the next movement cycle.
When the rockets and pole begin rotating, the water is churned into a whirlpool. Keep making short, controlled jumps and avoid being dragged into the outer hazards. Do not chase the machine around the arena while the whirlpool is active; waiting for it to return to the central position is safer than forcing an attack.
Big Shaker requires six successful hits. After taking damage, it resumes its movement pattern, so repeat the same process rather than attempting several uncontrolled jumps in a row. If you lose your rings, stop trying to recover every dropped ring. Surviving the next cycle is more important than retrieving a ring near the missiles or the edge of the pool.
- Attack Big Shaker only when it is settled on the central pole.
- Use short jumps during the whirlpool instead of running around the edge.
- Land six hits, then exit the arena and proceed to Act 2.
5. Cross Act 2’s crushing-wall opening
Act 2 begins with a fast sequence of walls that move toward the player. Spin Dash through the breakable walls and keep moving when the crushing walls advance. The safest priority is reaching the next open section, not stopping to collect rings placed near the moving barriers.
After the opening, use the rotating pillar and air fans to climb. Follow the slopes and pass the Star Post before entering the next machinery section. When another pillar and fan route appears, climb it and continue through the breakable walls. If you have an Invincibility monitor in the side passage, it can make the nearby enemies less troublesome, but it is not required for progress.
Hydrocity Act 2 contains several underwater drops and currents. Refresh your air before descending, and use the current to reach the next ledge instead of resisting it in open water. When the route reaches a spring or a solid platform, leave the water promptly so you are not trapped by an enemy while looking for air.
- Spin Dash through the opening walls before they close the route.
- Touch the Act 2 Star Post before exploring side passages.
- Refresh air before every long descent or current-driven crossing.
6. Find both Act 2 Giant Rings
The first Act 2 Giant Ring is reached after the initial wall and fan machinery. Continue through the slopes and breakable walls until you reach the moving-platform section. As Sonic, ride the platforms to the left and jump through the fake wall into the concealed passage. Tails can fly to this area more directly. Enter the Giant Ring if you are attempting the Chaos Emeralds.
The second Act 2 Giant Ring is earlier than the Knuckles interruption. Before Spin Dashing through the walls that lead to Knuckles, go left across the bridge. Use the eastern moving pillar to climb, then jump through the fake wall at the upper part of the route. The hidden passage contains the second ring.
Both rings are optional, and the level can be completed without them. Make a manual decision before entering each side route: if your air supply is low, reach the next solid platform or Star Post first. Returning through underwater machinery after missing a bubble is more dangerous than continuing toward the goal.
- For the first ring, use the moving platforms and fake wall after the fan sections.
- Before the Knuckles encounter, cross the bridge and climb the eastern moving pillar for the second ring.
- Do not explore a side passage with critically low air.
7. Defeat Egg Vortex and leave Hydrocity
After Knuckles opens the route, continue through the rising-water machinery and reach the final Star Post before the boss. Egg Vortex uses a large propeller beneath Eggman’s vehicle to create a tall water vortex and drops depth-charge bombs into the arena.
The bombs are both a hazard and part of the attack opportunity. When one explodes, it creates a vertical water plume. Use the plume to rise toward Egg Vortex and strike the vehicle when it is within jump range. After the hit, move away from the next bomb and prepare for the following cycle.
Do not stand directly beneath the machine while the propeller is stirring the water, and avoid being trapped against the side of the arena. Tails can use flight to adjust his position, but should not hover beneath the propeller for an extended time. Egg Vortex takes eight hits.
If you lose your rings, stop trying to collect them through an active bomb or vortex cycle. Move to a safe side of the arena, wait for the next plume, and attack only when the boss is reachable. Once Egg Vortex is destroyed, complete the short exit sequence and confirm that the game transitions to Marble Garden Zone.
- Reach the final Star Post before entering the Egg Vortex arena.
- Use the water plumes from the bombs to reach the boss.
- Land eight hits and confirm the transition to Marble Garden Zone.
Before you move on
- Hydrocity Act 1 is complete when Big Shaker is destroyed and the game begins Act 2.
- Hydrocity Act 2 is complete when Egg Vortex is destroyed and the character exits toward Marble Garden Zone.
- Optional Emerald progress is confirmed when you have entered the desired Giant Rings before leaving each act. Missing a Giant Ring does not block the campaign, but it removes that opportunity from the current run.
References for this chapter
Zone 3 — Marble Garden Zone — traps, lava and platform puzzles
Marble Garden Zone is built around slopes, drilling machines, pulley handles, moving blocks, collapsing floors, arrow machines, chained spiked balls, mud pits and rising platforms. Use the machinery instead of forcing jumps, activate every checkpoint, and take the conservative route whenever the stage offers a choice. Sonic, Tails and Knuckles share Act 1, but Knuckles follows a different Act 2 route and fights a different boss.
Act 1: slopes, drilling machinery and the upper route
At the beginning, let the opening slopes carry you downward, but watch each landing instead of holding right blindly. Drop through the opening on the right, collect the visible rings and continue down the next slopes. A short hop or roll helps you avoid landing directly on the enemies at the bottom.
Continue through the early spring and moving-platform section. When you reach the chained spiked ball, wait for the large ball to swing away before passing underneath or jumping over it. The chain itself is not the damaging part; the spiked ball is what must be avoided. Spin Dash through the nearby pole and continue right.
When the first drilling machine appears, do not try to destroy it. Wait for it to drill through the ceiling. The resulting change lowers the platforms on the right and opens the intended route. Outside, jump over the mud pit and reach the blue wheel set into the ground. Spin Dash against the wheel to raise the platforms, then use them to climb.
Ride the blue flying spinner across the large gap. Steer with the directional buttons and use the ring trail as a guide, but avoid overcorrecting near the walls. After landing, follow the signs and continue through the next machinery section. Moving platforms and blocks may need a moment to reach a usable position, so wait rather than jumping into a gap.
When an arrow-shooting face blocks the route, jump on or strike the light on its forehead three times. This changes the nearby floor or opens the passage. Move through the new opening, activate the Star Post, and then continue through the revealed platforms and walls. The checkpoint is especially useful because the final approach leads directly into Tunnelbot.
- Control your landings after the opening slopes.
- Wait for the chained spiked ball to swing away before passing.
- Allow the early drilling machine to open the route.
- Spin Dash against the blue wheel to raise the platforms.
- Use the blue flying spinner to cross the large gap.
- Hit required arrow-machine lights three times.
- Activate the Star Post before taking optional detours.
Act 1 mini-boss: Tunnelbot
Enter the Tunnelbot arena after the final pole. The machine drills into the ceiling and starts an earthquake, causing debris to fall. Stay away from the pointed falling stalactites, which are the main hazard during this phase. When Tunnelbot returns from the ceiling with its vulnerable underside exposed, jump into that underside for a hit and move away immediately.
Repeat the ceiling and return pattern until Tunnelbot has taken six hits. Do not stay beneath the machine during the earthquake phase. If you lose your rings, prioritize survival and the next safe opening rather than trying to collect every scattered ring.
Knuckles has a lower jump than Sonic and Tails. During the ceiling phase, a temporary raised platform appears and gives him enough height to reach Tunnelbot when a normal jump is insufficient. Use that platform instead of attempting repeated short jumps from the floor.
After the sixth hit, pass the Act 1 signpost and open the animal capsule. If you lose a life later in the stage, the last activated Star Post sends you back to the relevant section. Reuse the machinery and checkpoint route rather than rushing into the same hazard.
- Enter the arena with at least one ring whenever possible.
- Avoid the pointed falling debris during the ceiling phase.
- Attack Tunnelbot only when its underside is exposed.
- Use the temporary raised platform when playing Knuckles.
- Defeat Tunnelbot in six hits and pass the Act 1 signpost.
Act 2: pulley handles, wheels and collapsing sections
At the beginning of Act 2, Spin Dash through the first pole and climb the steep slope. Grab the pulley handle to be carried upward. At the top, jump left to the next handle and ride it higher. Move right across the upper platform, Spin Dash through the next pole and enter the room where Robotnik briefly appears.
Use the higher platform and continue right. When the floor lowers near the blocked pole, let it carry you onto the steep slope instead of trying to jump back up. A spring sends you toward another slope. At the bottom, use the spinning top to break through the floor, then cross the trio of platforms and pass the chained ball.
Jump over the spring and Spin Dash against the blue wheel. The wheel creates two platforms that let you reach the upper machinery. When another arrow machine controls a floor or passage, hit its forehead light three times and follow the opening immediately.
Continue through the moving platforms, pulley handles and wheels. A spinning top can carry you through one section, but avoid steering into the nearby enemy. In another section, letting the top collide with the enemy drops you onto the lower route. Activate the next Star Post before the longer loops and platform sequence.
For Sonic and Tails, follow the standard route through the springs and moving platforms. Tails can fly to recover from a missed jump, but he still has to activate the wheels, arrow machines and moving floors that control progress. Do not fly past a mechanism and assume the route will open automatically.
Knuckles eventually reaches a section where his lower jump cannot clear a face mechanism by the normal route. Backtrack to the outdoor area and find the hanging pole beside the upward-pointing arrow. Glide onto the pole and climb. Follow the arrows by gliding between the climbable walls, taking care around the chained ball.
After the Knuckles route rejoins the machinery, activate the Star Post, use the wheel-created platforms and trigger the face switches. Move quickly through the moving-floor section before the scenery shifts. Use the rising platform to reach the final handle, then touch the last Star Post before entering the boss area.
- Use both opening pulley handles.
- Let lowered floors and spinning tops carry you to the next section.
- Trigger every required wheel and arrow machine.
- Activate a checkpoint before the later loops and platform sequence.
- Use the hanging-pole and wall-climb route when Knuckles cannot make the normal jump.
- Keep moving through the moving-floor and collapsing-ground sections.
- Touch the final Star Post before the boss.
Star Posts, Bonus Stages and Giant Rings
A Star Post records a checkpoint when touched. If you pass it while carrying at least 20 rings, a temporary circle of stars appears above the post. Jump into that circle before it disappears to enter a Bonus Stage. The ring total at the instant you touch the Star Post determines the Bonus Stage type: 20–34 rings selects the Slot Machine, 35–49 rings selects the Glowing Spheres stage, and 50 or more rings selects the Gumball Machine.
There is no 50–65 upper band for this rule. Any total of 50 rings or more selects the Gumball Machine, so do not wait for a particular maximum or expect higher totals to cycle to another Bonus Stage type. If you have 20 or more rings, use the stars when the jump is safe; missing the entrance does not prevent normal progress through Marble Garden.
The 50-ring figure has a separate meaning inside Bonus Stage play. Collecting at least 50 rings during a Bonus Stage can provide a continue-related reward according to the stage's reward conditions. That is not the minimum for activating the Star Post stars, and it does not describe Giant Ring access.
Giant Rings are hidden level entrances to Special Stages. They are separate from Star Posts and do not require a specific ring total. In Act 1, one route uses the blue spinner to break a barrier before returning to the spinner area and dropping into a concealed passage. In Act 2, a Giant Ring is reached through a hidden passage connected to the early pulley and wheel route. Other hidden passages appear around the arrow-machine and moving-platform sections.
Treat Giant Rings as optional for ordinary stage completion, but use them when collecting Chaos Emeralds or practicing Special Stages. Do not sacrifice a life for a hidden entrance if the current priority is simply reaching Carnival Night Zone.
- Touch Star Posts to establish retry points.
- Carry at least 20 rings when touching a Star Post to create the Bonus Stage entrance.
- Remember that 20–34 rings selects Slot Machine.
- Remember that 35–49 rings selects Glowing Spheres.
- Remember that 50 or more rings selects Gumball Machine.
- Treat the 50-ring continue reward as separate from Bonus Stage entry.
- Enter Giant Rings directly from their hidden level passages.
- Do not confuse Star Post Bonus Stage access with Special Stage access.
Act 2 boss: Sonic and Tails
Sonic and Tails fight the Egg Drillster Mark II, an Eggman drilling machine that begins with a ground phase and then moves into an aerial pursuit. When the machine descends within jumping range during the ground phase, jump onto its exposed safe target area for a hit and retreat before the drill or thrusters catch you. Avoid forcing an attack if the machine is moving away or setting up its next pass.
During the aerial phase, Tails carries Sonic. Wait for the machine to pass within reach and attack the machine's head rather than the drill or thrusters. Sonic should use the clean horizontal passes and avoid chasing a poor angle. If Sonic falls, Tails can recover him, but losing the ring buffer makes the next pass much more dangerous.
When playing Tails, use his spinning tails to attack during a clear pass as the machine crosses the screen. Do not rush underneath while it changes direction. Keep a safe distance after each hit and wait for another predictable approach.
The boss requires eight hits. If you lose your rings, prioritize a clean attack opportunity over immediate retaliation. After the final hit, strike the plunger on the descending Prison Egg so the capsule opens. The transition then carries Sonic or Tails into Carnival Night Zone.
- Take ground-phase hits only when the machine is within a safe jump.
- As Sonic, attack the head while Tails carries him.
- As Tails, attack during a clear horizontal pass.
- Avoid the drill and thrusters.
- Defeat the machine in eight hits.
- Strike the Prison Egg plunger after the boss is defeated.
- Confirm the transition into Carnival Night Zone.
Act 2 boss: Knuckles
Knuckles fights Egg Robo's Chain Machine in a separate enclosed arena. At the start of each pattern, two chains rise from the floor and the machine rides along them. Watch the chain positions before jumping, then attack Egg Robo when the machine passes within reach. Move away after the hit rather than chasing it across an active chain.
When the chains disappear, prepare for a new pair to appear from another position. Do not stand directly beneath a location where a chain is about to emerge. Knuckles's shorter jump makes controlled positioning more reliable than repeated high-speed attacks. Glide only when you have identified a safe landing side.
The boss requires eight hits. If you lose your rings, wait for the next predictable exposure instead of trying to attack through the chains. After the final hit, go right and open the animal capsule. Knuckles then enters Carnival Night Zone without fighting the Sonic and Tails version of the Marble Garden boss.
- Watch the chain positions before committing to a jump.
- Attack Egg Robo when the machine is exposed on a chain.
- Retreat instead of chasing the boss across an active chain.
- Use gliding for controlled repositioning.
- Defeat Egg Robo's Chain Machine in eight hits.
- Open the animal capsule and confirm the Carnival Night Zone transition.
Before you move on
- Tunnelbot is defeated in Marble Garden Act 1.
- The Act 1 signpost appears and the animal capsule is opened.
- Act 2's pulley, wheel, arrow-machine and collapsing-ground sections are completed.
- Sonic or Tails defeat the Egg Drillster Mark II after its ground and aerial phases.
- Knuckles completes the alternate Act 2 route and defeats Egg Robo's Chain Machine.
- The appropriate animal capsule is opened after the Act 2 boss.
- The character reaches Carnival Night Zone.
- Any Star Post Bonus Stage entered in Marble Garden was activated with at least 20 rings.
- The Bonus Stage type matched the ring band carried at the Star Post: 20–34 Slot Machine, 35–49 Glowing Spheres, or 50 or more Gumball Machine.
- Any Giant Ring used for a Special Stage was entered directly from its hidden level passage.
References for this chapter
- Sonic the Hedgehog 3 — Guide and Walkthrough — Genesis — By Raph136
- Sonic & Knuckles - Sonic 3+Knuckles FAQ/Walkthrough - Genesis - By peach_freak
- Sonic & Knuckles — Guide and Walkthrough — Genesis — By Gold_Mage
- Sonic & Knuckles — Bonus Game Guide — Genesis — By FoxMcCloud0482
- SONIC 3 & KNUCKLES Manual
Zone 4 — Carnival Night Zone — moving scenery and rhythm hazards
Carnival Night Zone is the fourth Zone in the original Sega Genesis Sonic 3 and Sonic 3 & Knuckles campaign. Sonic and Tails must clear Bowling Spin in Act 1, solve the famous red-and-white barrel in Act 2, and defeat Egg Gravitron before the cannon sends them toward IceCap Zone. Knuckles uses shorter character-specific routes and has no normal Act 2 boss. Star Post Bonus Stages and Giant Ring Special Stages are separate systems. In the combined game, passing a Star Post with at least 20 rings creates a Star Circle; 20–34 rings selects Slot Machine, 35–49 selects Glowing Spheres, and 50 or more selects the Gumball Machine.
Act 1: use the lower, stable route through the carnival machinery
Move right through the opening balloons and bumpers, checking each landing before committing to a bounce. A careless bumper launch can send you into a ceiling hazard, enemy, or spike-lined gap. When the route divides, use the lower and wider path unless the upper path is clearly open and you can see its landing surface.
At the rotating pillars, wait for a safe cycle instead of jumping immediately. Stay near the center of each broad surface and move only when the next pillar is visible. Bats can strike while you are exposed, so do not linger on top of a pillar. After the fourth pillar, break through the floor and activate the Star Post below.
A Star Post checks your ring total when you touch it. With 20–34 rings, the Star Circle leads to the Slot Machine Bonus Stage. With 35–49 rings, it leads to the Glowing Spheres Bonus Stage. With 50 or more rings, it leads to the Gumball Machine Bonus Stage. These are optional and are not required to clear Carnival Night. The separate 50-ring continue reward is earned inside a Bonus Stage; it is not the minimum needed to activate every Star Circle.
- Use visible landing areas rather than following ring trails blindly.
- Touch the early Star Post before attempting risky upper routes.
- Carry at least 20 rings when you deliberately want a Bonus Stage.
- Remember that 50 or more rings selects Gumball in the combined game.
Cross the barrels, anti-gravity pads, and cannons
After the first Star Post, cross the rotating barrels and break through the barrier. Drop to the magnetic wheel and continue right. When a rotating barrel spans a spike pit, jump onto it and ride it across instead of attempting a blind leap.
At the fork, take the right-hand route and use the blue clam bumper to cross the spikes. The following corridor contains three rotating barrels that can crush you. Enter one barrel section at a time, wait for an opening, and then move forward. Do not rush simply because the stage is scrolling.
Use the rising platform after the barrel corridor, but jump away before it reaches the spikes or its dangerous endpoint. Cannons should be entered only after checking their launch direction and the visible landing area. If you lose your rings, stop searching for optional rewards and prioritize the next Star Post.
- Ride rotating barrels over spike pits.
- Pass the three-barrel corridor one section at a time.
- Leave rising platforms before they reach their hazard.
- Check cannon direction before entering.
Optional Act 1 Giant Ring and route to Bowling Spin
Near the later part of Act 1, activate the Star Post after the rotating-barrel and narrow-hazard sections. Walk into the wall immediately to its right to enter a concealed room containing a Giant Ring. Entering the Giant Ring starts a Special Stage attempt for a Chaos Emerald. This ring is optional; missing it does not block the boss or the next Act.
After the Special Stage, or after skipping the room, return to the main route. Use the platform to the left and make it rise by jumping on it. When it is high enough, cross over the spikes into the corridor leading to Bowling Spin. Sonic and Tails should use a controlled jump. Knuckles can glide across once the platform reaches the required height.
Touch the nearby Star Post before trying the hidden room. That checkpoint reduces the cost of a failed Special Stage attempt or a death during the platform sequence. Do not confuse the concealed Giant Ring with the Star Circle above a checkpoint: the Giant Ring leads to a Special Stage, while the Star Circle leads to a Bonus Stage.
- Activate the nearby Star Post first.
- Check the wall immediately right of the later Act 1 Star Post.
- Raise the left platform before crossing the spikes.
- Treat the Giant Ring as optional progress.
Defeat Bowling Spin in Act 1
Bowling Spin occupies an elevator-like room whose yellow and green blocks form the temporary floor. Its spinning, spiked top rebounds around the room and destroys blocks. Do not try to damage the top directly. Jump into Bowling Spin's machine to make its vulnerable mechanism extend, then allow the spinning top to rebound into that exposed section.
Stay on a block with enough room to jump away. Watch the top's rebound, strike the machine when it is reachable, and move immediately after making contact. As blocks disappear, standing still can leave you without a safe platform. If you are hit, land on any remaining block and recover a ring only after the top has moved away.
Bowling Spin takes four successful hits in the original game. Once it is destroyed, Act 2 begins. If the floor becomes sparse, focus on creating the next safe opening rather than chasing a dropped ring.
- Strike the machine to expose its vulnerable mechanism.
- Let the spinning top damage the exposed mechanism.
- Keep moving as the floor blocks disappear.
- Land four successful hits to finish the Act 1 boss.
Act 2: cross the flooded machinery and solve the barrel
Act 2 adds longer vertical sections and a flooded passage. Follow the broad route toward the Star Posts instead of forcing the highest path. Water slows movement and makes bumper control less forgiving, so leave the flooded area as soon as the route permits. Avoid electric enemies and spikes, and treat any Bubble Shield as a useful bonus rather than a reason to take a dangerous detour.
Some upper passages and Giant Rings are optional. Explore them only after touching a Star Post. When a switch or barrier blocks the forward route, use the nearby rolling surface or spinning mechanism to reach it, then return to the main path. If you lose your rings, abandon the speed line and aim for the next checkpoint.
The red-and-white barrel is mandatory on the Sonic and Tails route. Stand on top of it and use Up and Down on the directional pad to make it bob. Press Up as it rises and Down as it falls, continuing the alternating rhythm until it reaches enough height or low position for the opening to clear. Keep the character centered and avoid random jumping. Computer-controlled Tails can interfere, so step away from him when possible. Move through the opening as soon as there is sufficient clearance, because the ten-minute Act timer continues running.
- Use broad, safe paths through the flooded machinery.
- Touch a Star Post before searching optional routes.
- Stand on the barrel before using Up and Down.
- Pass through immediately when the opening is clear.
Defeat Egg Gravitron and leave Carnival Night
After the barrel room and final machinery, activate the last Star Post before Egg Gravitron. The machine drops a green spiked projectile, then uses an electrical field while it moves into position. Wait for the projectile to move away and for the electrical protection to clear. The safest attack window is when Egg Gravitron lowers to retrieve the projectile; jump into the machine during that opening.
Retreat after each attack and watch the projectile's path again. Do not chase Egg Gravitron around the arena. Keep at least one ring before each attempt, and after taking a hit, prioritize survival over recovering a ring beside the boss. Sonic and Tails need eight successful hits.
When Egg Gravitron is destroyed, open the animal capsule and enter the cannon at the right. The cannon sends Sonic or Tails toward IceCap Zone, confirming Carnival Night completion.
Knuckles follows different passages in both Acts. His Act 1 route uses gliding and wall-climbing shortcuts but still reaches Bowling Spin. The boss is handled by the same exposed-mechanism and spinning-top method, although Knuckles' shorter jump makes the rotating pillar useful as a stepping point.
Knuckles' normal Act 2 route avoids the flooded Sonic and Tails section and has no intended boss. At the apparent dead end near the moving anti-gravity pad, glide across when it moves left and climb the right wall. Break through the barrier, continue past the blue clam and rotating bumpers, and reach the cannon using the lower rotating barrels. Time the cannon launch to land on the ledge on the right, then activate the Star Post.
Continue down the hill through the tunnel and one-way vacuum tubes. You will drop into a chamber containing three large ring pickups. Continue through the next vacuum tubes to the animal prison, open it, and step onto the teleporter. The teleporter sends Knuckles to IceCap Zone. Reaching Egg Gravitron as Knuckles requires an unintended route or special manipulation and is not part of the normal character path.
- Attack Egg Gravitron when it lowers to retrieve its projectile.
- Retreat after every hit instead of chasing the machine.
- Defeat Egg Gravitron with eight hits on the Sonic and Tails route.
- Open the capsule and enter the cannon as Sonic or Tails.
- As Knuckles, open the animal prison and use the teleporter.
- Confirm the transition into IceCap Zone.
Before you move on
- Carnival Night Act 1 is complete when Bowling Spin is destroyed and the game transitions to Act 2.
- Carnival Night Act 2 is complete for Sonic or Tails when Egg Gravitron is destroyed, the animal capsule is opened, and the cannon launches the character toward IceCap Zone.
- Carnival Night Act 2 is complete for Knuckles when the alternate route reaches the animal prison, the capsule is opened, and the teleporter sends him to IceCap Zone.
- Optional Special Stage progress begins by entering a Giant Ring; missing every Giant Ring does not prevent Carnival Night completion.
- For a Bonus Stage attempt, touch a Star Post while carrying at least 20 rings and then jump into its Star Circle.
- The Star Circle result is determined by the checkpoint ring total: 20–34, 35–49, or 50 or more rings.
References for this chapter
Zone 5 — IceCap Zone (Acts 1 and 2)
IceCap Zone is built around momentum, slippery surfaces, long slides, vertical cave routes and sudden drops. Sonic uses the famous snowboard opening in Act 1, while Tails begins in the cavern after the opening drop and avalanche sequence. Knuckles enters through his separate teleporter route and follows altered passages. Treat speed as a tool rather than a requirement: build momentum on safe slopes, but slow down before blind drops, moving ice blocks and narrow ledges. Optional Giant Rings are hidden in side passages, so activate Star Posts before exploring for them.
Act 1 with Sonic: control the snowboard and enter the cavern safely
Sonic begins IceCap Act 1 on a snowboard. During this opening, concentrate on staying near the middle of the route rather than making sharp movements to collect every Ring. The board follows the downhill terrain automatically, and jumping is mainly useful when the track requires it. Landing near the edge can send Sonic into a wall or a pit, while the central line is normally the safest route.
At the bottom, Sonic collides with the wall and the avalanche covers him. Jump to escape the snow, then spin through the ice blocks blocking the way forward. Once inside the cavern, treat the next Star Post as the immediate objective rather than trying to preserve maximum speed. Spin-jump through ordinary enemies and avoid rolling across unfamiliar slopes, because the slippery ground can carry Sonic farther than expected.
When a large ice block or moving wall begins its cycle, wait for it to move and pass through during the open window. Do not force a closing gap without a Ring. Activate the first Star Post before exploring nearby passages.
- Only Sonic uses the snowboard opening.
- Keep Sonic near the center of the snowboard route and jump only when the terrain requires it.
- After the avalanche, jump out of the snow and spin through the ice blocks.
- Activate the first cavern Star Post before attempting optional routes.
Act 1 with Tails and Knuckles: use the correct opening routes
Tails does not ride the snowboard in the original Genesis Sonic 3 & Knuckles campaign. He enters the cavern route directly after the opening drop and avalanche sequence. Begin by moving through the cavern, breaking the ice covering frozen objects when necessary, and activate the nearby Star Post before searching for a Giant Ring. Tails can use flight to reach some elevated platforms, but do not fly blindly into the top of the screen because several upper passages lead back toward hazards or dead ends.
Knuckles uses a separate teleporter route from Carnival Night Zone. He appears in the IceCap cavern rather than following Sonic's snowboard opening. His glide and wall-climb open alternate passages, including routes that Sonic and Tails cannot use, but the same survival priorities apply: activate the visible Star Posts, approach frozen ledges cautiously and use the main route if an optional climb begins costing lives.
The three characters therefore converge on the cavern-style IceCap Act 1 layout, but they do not share the same starting sequence. Do not restart Tails or Knuckles expecting to repeat Sonic's snowboard section.
- Start Tails in the cavern route, not on the snowboard.
- Expect Knuckles to arrive through the Carnival Night teleporter route.
- Use Tails' flight and Knuckles' climb as route options, not as requirements for ordinary Act completion.
- Activate checkpoints before exploring character-specific passages.
Act 1: use the vertical cave routes and reach the Giant Rings
IceCap Act 1 contains long slopes and vertical sections that can appear to loop. If a slope seems to return you to the same area, look for a jumpable opening or a higher platform rather than repeatedly holding the same direction. Springs and moving platforms often lead upward, but the lower route is acceptable when the priority is reaching the Act end safely.
A reliable Sonic or Tails Giant Ring route begins after a Star Post in the cavern. Use the spring, move right, ignore the nearby switch, and check the wall for a hidden passage. The passage contains a Giant Ring. The switch and frozen objects can make the area look like a required puzzle, but the Giant Ring is reached through the concealed passage. Enter it only after confirming that the checkpoint is active.
Another Act 1 Giant Ring is hidden beside the long descending slope. As the character travels down the apparently endless slope, check the right-hand wall for a false section before the platform on the left. Jump into the right wall to reveal the passage. If the opening is missed, return to the main route instead of repeatedly attempting blind jumps. The Giant Ring is optional; missing it does not block Act completion.
Knuckles has altered access through his climbing route. If a wall passage is clearly designed for a climb, use it to inspect optional areas, but do not assume that Sonic or Tails can follow the same line. The safest first completion route is the visible path toward the next checkpoint and Act boss.
- Look for the hidden passage to the right after the spring and frozen-switch area.
- Check the right wall during the long descending slope for the second route.
- Use Knuckles' climb only where the wall and route clearly support it.
- Do not spend a life forcing a Giant Ring detour after losing the correct momentum.
Act 1 boss: defeat Big Icedus after the ice-block attack
At the end of Act 1, Big Icedus descends into the outdoor arena and surrounds itself with ice blocks. It then flies across the screen in a U-shaped pass. The blocks protect the machine and damage the character on contact, so do not jump into the ring of ice while the boss is shielded.
The safest opening comes after Big Icedus throws the ice blocks upward. The machine drops lower during this part of the pattern, allowing a jump attack on its body. Strike once, land away from the falling blocks and prepare for the next pass. Six successful hits defeat Big Icedus. Tails can use flight to reach the boss more easily, while Knuckles' shorter jump makes the same opening less forgiving.
Keep at least one Ring before entering the arena. If hit, move across the open floor and wait for the next clear attack window instead of chasing the boss beneath falling blocks. If the character loses all Rings, prioritize survival until the next opening rather than attempting a desperate contact attack. The most recently activated Star Post determines the normal restart point after a death, so activate the final post before exploring any nearby optional route.
- Wait until the ice blocks are launched before attacking.
- Avoid touching the ice-block shield or landing beneath falling blocks.
- Use Tails' flight carefully rather than hovering into the boss's protected sides.
- Count six successful hits, then remain still until the Act-clear transition begins.
Act 2: take the lower route through the snow and water
Act 2 moves between exposed snowfields and underground passages. The upper route is faster, but the lower route gives more room to react and is preferable on a first completion attempt. Use slopes to gain speed, then release the direction before a sharp drop so the character does not slide off the next ledge. When entering a water section, carry a Ring and locate an air pocket before committing to a long swim.
Frozen ledges have less traction than ordinary ground. Start jumps earlier than usual and avoid stopping at the very edge. After a spring launch, wait until the landing platform is visible before steering. Some springs place the character beside an enemy or hazardous drop, so holding forward immediately is not always safe.
Knuckles follows more of the cavern route and can use his glide and wall-climb to reach alternate passages. These abilities help with exploration but do not remove the need for air, Rings or checkpoints. If a character-specific passage requires a blind fall, use the main route instead; the Giant Rings are optional and later opportunities remain.
- Use lower passages when learning Act 2.
- Find an air pocket before entering a long underwater section.
- Begin jumps early from frozen ledges and verify the landing before steering.
- Keep at least one Ring before approaching a moving platform over water.
Act 2: reach a Giant Ring without sacrificing the checkpoint
One dependable Act 2 Giant Ring route begins near the Star Post by the Robotnik boxes. Return toward the Star Post and use the nearby dropping platform to descend. A concealed passage below contains the Giant Ring. Because the checkpoint is close, this is the preferred attempt for Sonic or Tails.
A second route uses the purple spring boards to return to the surface. Run through the loops and reach the spring boards at the end; Tails can fly to them, while Sonic and Knuckles must carry enough speed to jump onto them. A group of Rings appears above this section. Continue right and inspect the hidden passage for the Giant Ring. This route is more demanding, so skip it if the spring-board approach is costing lives.
Knuckles also has character-specific Giant Ring access in IceCap Act 2. One of his optional routes is in an early water section, where a concealed room can be reached from the floating-platform path. Other Giant Rings are placed near later water sections and near the end of the Act. Use Star Posts as landmarks and do not assume that a passage accessible to Knuckles is available to the other characters.
A Star Post only establishes a checkpoint and, when entered with the appropriate Ring total, can provide access to a Bonus Stage. It does not award an Emerald by itself. A Giant Ring must actually be entered to begin a Special Stage.
- Use the dropping platform near the Robotnik boxes for the safest Act 2 Giant Ring attempt.
- Treat the purple spring-board route as optional if momentum control is unreliable.
- Explore Knuckles' water-route Giant Rings only after activating the nearby checkpoint.
- Confirm that the Giant Ring was entered before counting the Special Stage attempt.
Act 2 boss: attack Egg Froster after the underside blast
Egg Froster hovers across the arena and fires cold blasts from three positions: horizontally from one side, horizontally from the other side, or downward from the underside. Watch the weapon before jumping. The opening is created after the underside cannon has fired, when Egg Froster is close enough for a jump attack from the front.
The suspended platform beneath the boss has spikes on its underside. Use it only when its position is safe, and do not stand beneath the machine while the downward blast is available. After several hits, the platform breaks. Egg Froster then descends, making front attacks easier, while the rear becomes dangerous because of the leaking gas around the platform equipment.
On slippery ground, use short directional corrections after each hit instead of holding a direction across the arena. If you lose your Rings, stop attacking until the next clear opening. One Ring is enough to survive a normal collision, but a second mistake without a Ring ends the attempt. Continue attacking after each underside blast until Egg Froster is defeated, then move carefully until the Act-clear transition and the launch into Launch Base Zone begin.
- Identify whether the next blast is left, right or downward before jumping.
- Attack after the underside blast rather than approaching during the firing animation.
- After the platform breaks, attack from the front and avoid the leaking rear equipment.
- Wait for the Act-clear transition and confirm the move into Launch Base Zone.
Before you move on
- Sonic has completed the snowboard opening, cavern route and Big Icedus encounter in IceCap Act 1.
- Tails has entered the cavern route directly and has completed Act 1 without being instructed to use the snowboard.
- Knuckles has entered IceCap through his teleporter route and completed his altered Act 1 path.
- IceCap Act 2 has been completed and Egg Froster has been defeated.
- The game has displayed the Act-clear transition and advanced to Launch Base Zone in the combined Sonic 3 & Knuckles campaign.
- Any desired IceCap Giant Ring has been entered successfully; merely touching a Star Post does not award a Chaos Emerald.
- If an attempt failed, the next life restarted from the latest activated Star Post rather than from the beginning of the entire game.
- For optional Emerald progress, confirm the Special Stage result after entering a Giant Ring before returning to the main level.
References for this chapter
- Sonic the Hedgehog 3 — Guide and Walkthrough — Genesis — CChan
- Sonic & Knuckles - Sonic 3+Knuckles FAQ/Walkthrough - Genesis - By peach_freak
- IceCap Zone — Sonic Wiki Zone
- Big Icedus — Sonic Wiki Zone
- Teleporter (object) — Sonic Wiki Zone
- Sonic the Hedgehog 3 — IceCap Zone reference and walkthrough
- Sonic The Hedgehog 3 Large Ring Guide
Zone 6 — Launch Base Zone — finish Sonic 3 part and trigger the transition
Launch Base Zone is the sixth Zone in the combined Sonic 3 & Knuckles campaign and the last Zone inherited from Sonic 3. The Act 1 miniboss varies by character. In Act 2, Sonic and Tails fight Egg Cannon and then Egg Rocket; after Egg Rocket, they open the capsule and transition directly into Mushroom Hill. Knuckles takes a different route, fights Egg Rocket first, and then defeats Big Arms before the capsule-and-cutscene transition. Chaos Emeralds and Super Emeralds are not required to leave Launch Base.
1. Cross Act 1’s launch machinery conservatively
Launch Base Act 1 uses vertical machinery, rotating platforms, hanging handles, baskets, springs, pipes, and projectile hazards. Move right until the route begins climbing, then use the rotating platforms and handles to cross each gap. When a handle carries you over open space, stay attached until it reaches the far side. Jumping away early can drop you into the lower machinery or onto spikes.
Several sections use baskets and pole-mounted lifts. Enter a basket from the side, let it carry you to the next level, and jump only when the destination platform or opening is clearly visible. Wall-mounted launchers and flying enemies can attack while you wait, so move in short bursts when the platform is stationary.
Sonic should use spin jumps against isolated enemies rather than rolling blindly into launchers. Tails can fly over some machinery, but short flights are safer than attempting to cross an entire section in the air. Knuckles can glide and climb through alternate passages, although the normal route is often easier to control. Use standard platforms whenever they provide a secure route.
- Reach the Act 1 miniboss area without looking for a separate Act 1 boss sequence.
- Keep at least one ring before entering the final machinery section.
- Activate the Star Post near the miniboss when it is safely accessible.
2. Defeat the Act 1 Twin Hammer miniboss
The Twin Hammer machine has rotating arms with spiked balls. Wait for an arm to move away, jump onto the exposed body, and land a spin-jump hit. Move back to open floor immediately because the returning spike balls can strike after the attack. Do not stand underneath the machine while both arms are circling.
The machine rises after taking hits. Do not chase it with a long jump; wait for it to descend into reach. If you are hit, use the invincibility period to recover nearby rings before attacking again. Continue the attack-and-retreat pattern until the encounter ends.
Knuckles faces the more demanding Act 1 setup with two Twin Hammer machines. Concentrate on one machine at a time, but do not leave the arena after destroying the first. Both machines must be defeated to clear the encounter. Attack from the side when possible, retreat toward open floor, and avoid standing between the two machines because their swinging arms can cover both escape directions. The second machine is easier to manage once the first is gone.
- The correct Twin Hammer setup for the selected character is cleared.
- Knuckles has defeated both machines in his two-machine encounter.
- Act 2 begins without treating the Act 1 miniboss as the campaign finale.
3. Navigate Act 2’s baskets, pipes, and flooded machinery
Act 2 opens with a basket ride and continues through springs, slopes, handles, moving platforms, and machinery rooms. Ride the opening basket downward, follow the springs to the higher route, and activate the early Star Post. When a face-like switch removes a bridge, drop through the opened gap and follow the lower passage instead of trying to jump across the missing section.
The act contains flooded machinery and long pipe sections. Enter a visible pipe opening from the side or drop into it when the water level makes the entrance clear. Some pipes transport you to item boxes or alternate platforms. If you miss one, use lower platforms and springs to recover rather than forcing a jump back toward the original opening.
During the long lower sections, stand near the center of moving platforms when they pass launchers or rotating mechanisms. Before the boss approach, collect safe ring groups and activate the final Star Post. Do not take a dangerous side route for a single ring box if it contains spikes or a moving arm. Reaching the boss with fewer rings is better than losing a life before the encounter.
- The final safe Star Post before the boss approach is active.
- You have at least one ring before entering the first Act 2 boss arena.
- You know whether you are following the Sonic/Tails route or the Knuckles route.
4. Sonic and Tails: defeat Egg Cannon, then Egg Rocket
Sonic and Tails fight Egg Cannon first. A platform extends from the wall while a large metal ball is launched from above or below it. Watch the launch position before jumping. If the ball comes from above, stay below the platform until it passes, then jump onto the platform and strike the exposed machine. If the ball comes from below, stand on top of the platform and attack when the machine is exposed.
The platform retracts after each opening, so make one or two attacks and return to stable ground. The launch position alternates, meaning the safe position changes during the battle. If you lose rings, collect only those that remain near the center of the arena instead of chasing rings toward the edges. Egg Cannon takes eight hits to defeat.
After Egg Cannon, continue to Egg Rocket. The rocket rises from below or descends from above at the sides of the platform. Its cockpit is vulnerable when the machine rises from below, but the orbiting spiked ball and rocket exhaust can damage you. Jump in only when the cockpit is exposed, land a hit, and retreat before the machine or the spiked ball reaches you. Nine hits are required, with the machine breaking apart as it takes damage.
Egg Rocket is the final Sonic/Tails boss in Launch Base in the original Genesis Sonic 3 & Knuckles lock-on release. Big Arms is not fought by Sonic or Tails in this configuration. After Egg Rocket is destroyed, remain on the platform, open the capsule that appears, and wait for the transition cutscene. Mushroom Hill follows after the cutscene rather than immediately after the last hit.
- Egg Cannon is defeated first.
- Egg Rocket is defeated second.
- Sonic or Tails does not fight Big Arms in the original combined Genesis lock-on route.
- The capsule is opened and the transition cutscene plays before Mushroom Hill loads.
5. Knuckles: defeat Egg Rocket, then Big Arms
Knuckles skips Egg Cannon and reaches Egg Rocket first. His battle takes place in a different section, but the main pattern is the same: the rocket rises or descends at the sides, its cockpit is the vulnerable target, and the orbiting spiked ball limits careless jumps. Use short glides only when they help reach the cockpit, then release the glide and return to the floor. Knuckles must also account for the spiked ball beginning in a less convenient position during some approaches.
After Egg Rocket is destroyed, EggRobo takes control of Big Arms. The machine uses large swinging arms with spiked ends. Stay on the floor while watching the swing. When an arm moves away and the central body is exposed, jump onto the body for one hit, then retreat immediately. The returning arm can cover the same space where you landed, so do not remain under the machine or attempt a long series of attacks without checking the next swing.
If the machine rises, wait for it to return to a reachable height instead of chasing it with a risky jump. Keep moving toward open floor after every attack. If you lose rings, use the boss checkpoint and recollect any rings that remain in the arena before attempting another attack. Patience is safer than trying to chain hits while both arms are moving.
Big Arms is the final Launch Base boss in Knuckles’ combined-game route. Once it is defeated, EggRobo drops a bomb that destroys the platform. Knuckles falls away from Launch Base, and the game proceeds through the capsule and transition sequence into Mushroom Hill.
- Knuckles reaches Egg Rocket without fighting Egg Cannon.
- Egg Rocket is defeated before Big Arms appears.
- Big Arms is attacked only during safe central-body openings.
- The post-boss bomb sequence and transition into Mushroom Hill play.
6. Confirm the combined-game transition
The boss order depends on the character and the original lock-on configuration. Sonic and Tails fight Egg Cannon followed by Egg Rocket, then open the capsule and continue into Mushroom Hill. Knuckles fights Egg Rocket followed by Big Arms, then continues through the bomb, capsule, and transition sequence. This is different from standalone Sonic 3, where Big Arms is part of Sonic and Tails’ final Launch Base sequence.
After the transition scene and score display, Mushroom Hill Zone Act 1 becomes the next playable stage. If Sonic or Tails receives the standalone ending immediately after Egg Rocket, the game is not behaving like the original combined cartridge route, or a different release is being used. In the correct lock-on campaign, the capsule and cutscene lead onward instead of ending the campaign.
Chaos Emeralds are not required to trigger the Launch Base-to-Mushroom Hill transition. Super Emeralds are also unnecessary. Emerald collection affects transformations, later endings, and Sonic’s optional Doomsday route, but it does not unlock the normal next Zone.
- Sonic or Tails has defeated Egg Cannon and Egg Rocket, or Knuckles has defeated Egg Rocket and Big Arms.
- The correct capsule and transition sequence has played.
- Mushroom Hill Zone Act 1 becomes playable.
- No Chaos Emerald or Super Emerald requirement has been imposed on the transition.
Before you move on
- Launch Base Act 1 is cleared and the appropriate Twin Hammer encounter is defeated.
- In the original combined Genesis lock-on version, Sonic or Tails defeats Egg Cannon and then Egg Rocket.
- In the original combined Genesis lock-on version, Knuckles skips Egg Cannon and defeats Egg Rocket followed by Big Arms.
- The capsule and correct post-boss transition sequence play.
- Mushroom Hill Zone Act 1 becomes playable.
- The player understands that Chaos Emeralds and Super Emeralds are optional for triggering the Launch Base transition.
Zone 7 — Mushroom Hill Zone (Sonic & Knuckles) — route, shrine entrance and bosses
Mushroom Hill Zone is the first Zone after Launch Base in the original Genesis Sonic 3 & Knuckles lock-on campaign. Clear both Acts to reach Flying Battery Zone. The opening flashing Super Ring is a special scripted entrance to Hidden Palace’s emerald shrine, not an ordinary Giant Ring. The shrine detour is optional for normal progression, but it can begin the Super Emerald quest and, when Chaos Emeralds are missing, provide access to the corresponding Sonic 3 Special Stages.
Reopen the concealed room and use the scripted Super Ring
At the beginning of Act 1, move right until Knuckles comes out of a concealed room, closes it and activates the nearby switch. Turn around, return to that switch and activate it to reopen the entrance. Move left into the room and touch the flashing, multicolored Super Ring.
This entrance is different from the regular Giant Rings used for Sonic 3 Special Stages. In the original lock-on game, the first Super Ring in Mushroom Hill sends you to Hidden Palace’s emerald shrine. Do not expect it to behave like an ordinary Zone ring or like a Bonus Stage entrance.
The shrine shows the Master Emerald and seven emerald positions. Any Chaos Emeralds already collected are transferred to the shrine as inactive gray Super Emeralds. Empty positions represent Chaos Emeralds that are still missing. Jumping onto a gray Super Emerald starts its Sonic & Knuckles Blue Sphere Special Stage; completing it restores that Super Emerald’s color. Jumping onto an empty position starts the corresponding Sonic 3 Special Stage, allowing you to recover that missing Chaos Emerald. This makes the opening detour useful even when the Chaos Emerald collection is incomplete.
If you have no Chaos Emeralds, the shrine can still be visited, but there is no gray Super Emerald to power up yet. Leave through the same arrival point and continue Mushroom Hill. The shrine is not required to clear either Act.
- Wait for Knuckles to close the concealed room.
- Return to the nearby switch and reopen it.
- Enter the flashing scripted Super Ring.
- Use gray positions for Super Emerald stages and empty positions for missing Chaos Emerald stages.
- Leave through the arrival point if no useful stage is available.
Take the safe Act 1 route
After leaving the shrine room, go right and use the yellow spring to reach the upper route. Follow the loop to the wall, jump onto the overhead bar and let it carry you upward. Continue through the next spring and loop until you reach the pull-up machine. Hold Down to climb it and step onto the platform above.
Follow the slope toward the mushrooms. Use them to reach the higher platform, then approach the swinging platform beside the gap. Wait until it rises toward the far side before jumping. Hold right during the crossing. Tails can fly across if the swing timing is uncomfortable, and Knuckles can glide to make the gap more forgiving.
A concealed wall on the upper route hides a Super Ring. It is optional; enter it only if you are pursuing emeralds. Afterward, return to the main route, drop into the lower passage and use the spring in the wall to recover the upper path. Activate the Star Post before continuing. Treat the checkpoint as the priority over repeated attempts at hidden rooms.
- Use Down on the pull-up machine.
- Wait for the swing to rise before crossing.
- Use the lower passage as a recovery route.
- Activate the Star Post before the mid-boss.
Reach and defeat the Act 1 lumber machine
From the checkpoint, continue through the lower passage and springs. When a spring sends you upward, hold right to enter the concealed room if you want the optional Super Ring. If you miss it, continue; none of the hidden rings is needed for Zone progress.
Return to the main route, use the spring and loop, then drop into the directed pit. The mushrooms launch you back toward the upper ledge. Pass through the concealed wall, continue across the bars and activate the next Star Post before the boss arena.
The Act 1 boss is the lumber machine, also called Hey Ho. It moves between trees and cuts them with its axe, sending pieces of wood across the arena. Stay clear of the falling or flying wood and avoid the flame beneath the machine. When it lowers far enough after cutting a tree, jump into its exposed side for a hit, then move away before the next attack. A Flame Shield prevents damage from the flame but is not required. Six successful hits defeat the machine. If it finishes cutting one tree, the battle simply continues at another tree.
- Do not force a hidden Super Ring attempt.
- Avoid the axe, wood fragments and flame.
- Attack only when the machine is low and exposed.
- Land six hits to finish Act 1.
Start Act 2 and use the first optional Super Ring
Act 2 begins with Knuckles beside a switch. He activates it and creates a gust that lifts you into the autumn-colored section. Move right to the pair of blue mushrooms and stand on the right mushroom. Its launch sends you toward a red spring on the left. If you miss, return to the mushroom and try again rather than dropping into the dangerous lower area.
The red spring sends you through another spring and loop into a concealed wall. Walk through it to reach an optional Super Ring. Enter it for an emerald stage, then exit to the right and return to the main route.
Follow the curved path to the bar and use it to descend. Move right to the Star Post, then use the wall spring to reach the higher platform. When the red spring launches you toward the mushroom sets, jump toward the wall on the right instead of allowing the mushrooms to throw you away. The concealed wall there leads to another optional Super Ring.
- Use the right blue mushroom for the high launch.
- Retry the red-spring alignment if necessary.
- Activate the Act 2 Star Post.
- Treat concealed Super Rings as optional objectives.
Cross the wind section and reach the final checkpoint
After the second optional ring room, return to the path and use the pull-up machine. Hold Down until it reaches the upper position. A wind-producing enemy waits nearby. Do not jump off while it is blowing; wait for the gust to stop, then pass or defeat it. The airflow can push you from a platform without direct contact.
Continue through the red springs to the swinging platform. Wait for a favorable arc and jump to the higher platform on the right. Approach the spring at the next gap carefully instead of running into it at full speed. The following springs lead to another concealed wall and Super Ring.
After leaving that room, use the spring and loop sequence to reach the wall-running section. Pass the enemy and inspect the concealed wall for another optional ring. Return to the pull-up machine, climb to the top and jump right toward the mushroom launch. Activate the final Star Post before the boss route.
- Wait for the wind enemy to stop blowing.
- Time the swinging-platform jump.
- Approach the gap spring slowly.
- Activate the final Star Post.
Defeat the Act 2 running machine
The Act 2 boss begins with a satellite-like object protruding from the ground. Jump on it repeatedly to score opening hits and expose Robotnik’s running machine. Robotnik then drives away to the right, turning the encounter into a chase.
Follow him while watching the ground. Mines appear along the route and can be jumped over, run beneath when there is room, or avoided by slowing down. Attack when the machine is within jumping range, but do not trade a hit for contact with a mine or the machine’s body. The opening satellite sequence counts toward the total, so the number of chase attacks required depends on how many hits you landed before Robotnik retreated.
The boss requires eight hits in total. After the final hit, Robotnik crashes into a tree. Continue through the opening, destroy the animal capsule and allow the transition to finish. Flying Battery Zone loads next for Sonic and Tails, with Tails accompanying Sonic when he is present.
- Use the satellite for opening hits.
- Chase Robotnik to the right.
- Avoid mines before attempting attacks.
- Deliver eight total hits.
- Destroy the animal capsule after the crash.
Recover after failure and confirm the Zone clear
After a death, use the most recently activated Star Post as your recovery point. On the next attempt, collect safe rings along the main route and postpone Super Ring attempts until the springs, swings and pull-up machines are familiar. Losing a hidden ring attempt never blocks the Act exit.
If you are collecting every Super Emerald, keep track of which gray shrine positions have been completed and which Chaos Emeralds remain missing. The opening Super Ring can be used to reach the shrine and select the appropriate empty or gray position, but the normal route through Mushroom Hill remains available whether or not you enter Hidden Palace.
Mushroom Hill is complete when the Act 2 running-machine boss is defeated, the animal capsule has been destroyed and Flying Battery Zone loads. Entering the shrine is not a completion requirement; it is an optional emerald objective and a recovery point for incomplete Chaos Emerald progress.
- Use the latest Star Post after a death.
- Rebuild a ring supply before optional routes.
- Track gray and empty shrine positions separately.
- Destroy the Act 2 capsule.
- Confirm that Flying Battery Zone loads.
Before you move on
- Knuckles has closed the concealed room at the beginning of Act 1.
- The nearby switch has reopened the room.
- The flashing Super Ring has been entered if the emerald or shrine objective is being attempted.
- The Act 1 lumber machine has been defeated with six hits.
- The Act 2 running machine has been defeated with eight total hits.
- The animal capsule after the Act 2 boss has been destroyed.
- Flying Battery Zone loads.
- For the optional emerald objective, the Hidden Palace shrine has been checked and remaining empty or gray positions have been identified.
References for this chapter
- Sonic & Knuckles - Sonic 3+Knuckles FAQ/Walkthrough - Genesis - By peach_freak
- Sonic 3 & Knuckles — Guide and Walkthrough — GameFAQs
- Hey Ho — Sonic Wiki Zone
- Special Stage (Sonic 3 & Knuckles) — Sonic Wiki Zone
- Sonic & Knuckles Sega Genesis Instruction Manual
- Sonic & Knuckles/Walkthrough — StrategyWiki
Zone 8 — Flying Battery Zone — moving contraptions and aerial hazards
Flying Battery Zone is Zone 8 in the combined Sonic 3 & Knuckles campaign and the second Zone of Sonic & Knuckles. Its two Acts take place inside and around Eggman’s airship, using ceiling handles, magnetic machinery, corkscrew lifts, flame emitters, moving platforms, fake prison capsules and narrow projectile corridors. Act 1 ends with Gapsule. Act 2 contains the Laser Prison and Barrier Eggman sequence before the final Egg Hanger battle. In the original Sega Genesis lock-on version, the Laser Prison is not defeated through ordinary attacks: survive the shrinking room until the cannon damages the ship and the barriers fail. The Barrier Eggman name refers to this boss phase, not to an additional independent machine before Egg Hanger.
Act 1: board the airship and use the ceiling handles
At the start of Act 1, step onto the launch device outside the airship. It carries the character upward and into Flying Battery. Once inside, move right across the first platforms and use the ceiling handles to cross flame emitters, gaps and narrow machinery sections. Handles are safer than jumping directly through a flame jet, but do not remain over a hazard longer than necessary.
Some handles lower the character through the floor. Hold on until the movement finishes, then identify the next solid platform before jumping. If you miss a landing, check below for a recovery ledge instead of immediately holding right into an unseen drop. Flying Battery frequently provides lower platforms, but blind forward jumps can turn a recoverable mistake into a bottomless fall.
Sonic should use short spin jumps around stationary robots and side-firing projectiles. Tails can fly back to a missed platform, but low ceilings make extended flight dangerous. Knuckles can glide to selected walls and climb them; confirm that a wall is climbable before committing, because spikes and solid scenery interrupt many apparent shortcuts.
- Use ceiling handles to cross flame emitters and gaps.
- Let lowering handles complete their movement before jumping away.
- Look for recovery platforms below a missed landing.
- Keep at least one ring before entering unfamiliar machinery rooms.
Act 1 machinery: corkscrews, magnets and prison capsules
Corkscrew lifts carry the character through vertical shafts. Stand near the middle of a lift and watch its destination. Jump off before it reaches a wall, ceiling or crusher. Magnetic sections move spike balls and small enemies toward the ceiling. When the magnetic field changes, make sure you are not beneath a descending spike ball, and do not stand over a hazard that is about to rise toward you.
Technosqueeks and Blasters patrol narrow routes and can fire across the floor or walls. If a projectile is already crossing your path, stop or retreat rather than jumping into it. In a tight corridor, pass one enemy at a time or wait for the projectile pattern to clear. Prison capsules are not all beneficial: some release rings, some release enemies and some act as springs or decoys. Treat an unopened capsule as a possible hazard until its contents appear.
The safest first-playthrough route follows broad platforms and obvious openings. Higher ledges and momentum-based jumps can shorten the Act, but they are optional. Preserve rings before the final climb and use a Star Post to establish a recovery point before attempting Gapsule.
- Leave corkscrew lifts before they meet crushing surfaces.
- Watch the magnetic ceiling before standing beneath a spike ball.
- Wait for projectiles instead of jumping blindly through them.
- Treat prison capsules as unknown until opened.
- Use the final Star Post as the restart point for Gapsule.
Act 1 boss: Gapsule
The apparent end-of-Act capsule becomes Gapsule when activated. Jump onto the yellow button on top of the machine. Its arms swing around the arena, then the eyes flash when it has selected your position. Move or jump away from the button at that moment. The swinging arm will strike the button and damage Gapsule instead of hitting you.
Return to the button after the arm completes its swing and repeat the bait-and-evade pattern. Gapsule requires six self-inflicted strikes. Do not attack the spiked arms directly, and do not remain on the button after the targeting cue appears. If you lose your rings, stay on the floor while the arm finishes its movement, collect any safe replacement rings and then set up the next activation.
After the sixth strike, wait for the machine to stop moving before approaching the released animal capsule. Opening the capsule completes Act 1 and starts Act 2.
- Stand on Gapsule’s yellow button to activate it.
- Move away when the eyes flash and the arm locks onto your position.
- Repeat the pattern for six self-inflicted hits.
- Open the defeated capsule to finish Act 1.
Act 2: repeat the machinery route with more hazards
Act 2 reuses the Zone’s handles, magnetic ceilings and moving platforms while adding more flame emitters, projectiles and crushing arrangements. Use ceiling handles to bypass flame jets. When a handle lowers you through a floor, wait for the next safe surface rather than jumping early into the machinery below.
In low-ceiling rooms, a short spin jump is safer than a full running leap. If robots fire from opposite sides, move toward the nearest opening only after its projectile has passed. Tails can hover over some floor hazards but should not remain beneath ceiling spikes. Knuckles can climb selected walls, although his lower jump height makes the intended platforms more reliable than forced shortcuts.
Near the end of the Act, prioritize stable platforms and ring groups over speed. A Flame Shield helps against fire, but it does not protect against spikes, crushers, projectiles or bottomless pits. A Lightning Shield can be useful for collecting nearby rings and, for Sonic, reaching otherwise high objects, but attacking the Laser Prison cannon does not change the original Genesis encounter.
- Use handles instead of jumping directly through flame jets.
- Avoid full jumps in low-ceiling projectile corridors.
- Use Knuckles’ climb only on confirmed climbable walls.
- Collect rings before entering the Act 2 boss sequence.
Laser Prison and Barrier Eggman: survive the original Genesis encounter
The Act 2 boss sequence begins in a confined room. Eggman operates a ceiling-mounted laser while barriers close the available space. This confinement is commonly called the Laser Prison; the boss phase is also called Barrier Eggman because Eggman remains behind the barrier while the cannon attacks from above. These names describe the same original encounter, not two separate machines that must be defeated one after another.
In the original Genesis Sonic 3 & Knuckles game, ordinary attacks do not destroy the laser or end the encounter. Even if Sonic reaches the cannon with a special jump or Tails attacks it while flying, the fight continues. Concentrate on survival. Watch the firing cue, move out of the laser’s line and cross the room after the beam has discharged. Do not jump continuously without watching the cannon, because a blind jump can place you directly beneath the next shot or against the closing barrier.
The room becomes smaller as the sequence continues. Keep moving through the space that remains, but do not hug the barrier or stand directly under the cannon. After the ship has taken enough damage, the mechanism malfunctions, the barriers fail and Eggman flees. This automatic malfunction is the required resolution of the Laser Prison and Barrier Eggman encounter.
- Treat Laser Prison and Barrier Eggman as the named phases of one Act 2 encounter.
- Do not expect ordinary attacks to destroy the cannon in the original Genesis version.
- Move away from the firing line before the laser discharges.
- Survive until the mechanism malfunctions and the barriers deactivate.
After Barrier Eggman: escape the collapsing ship
Once the barriers fail, chase Eggman through the opening and pass the nearby Star Post. The ship begins to break apart and the floor rises through the escape route. Move right through the machinery without stopping beneath a rising floor or low ceiling. Use short Spin Dash bursts only on clear, level ground; stop before unfamiliar platforms so you can identify the next landing.
Ride moving platforms only as far as necessary, then jump to fixed ledges. Leave a platform before it meets a wall, ceiling or crusher. Watch for magnetic spike balls and flame emitters in the vertical sections. The Star Post after the Laser Prison gives you a useful recovery point, so a death here does not require replaying Act 1 or the confinement sequence.
The escape leads to the final Act 2 arena. Preserve any rings collected after the checkpoint rather than spending them on risky shortcuts. Reaching the arena with even one ring is preferable to entering ringless, because Egg Hanger’s arms and flames can otherwise cause an immediate death.
- Pass the Star Post after the Laser Prison sequence.
- Keep moving while the floor rises through the escape route.
- Leave moving platforms before they reach crushing surfaces.
- Watch for magnetic spike balls in the vertical machinery.
- Reach Egg Hanger with at least one ring if possible.
Act 2 boss: Egg Hanger
Egg Hanger has two spiked arms that hook onto horizontal bars above the arena. Its cockpit becomes vulnerable when the machine swings down within jumping distance. Stand near the center or in an open side area, watch which direction the machine approaches from and jump into the cockpit when the swing brings it low. Move away immediately after the hit so the returning arm does not catch you.
After the initial swing, the machine hangs beneath the bars and travels across the arena. Do not remain directly underneath it while the flame weapon is active. Wait for the machine to rise or swing into a reachable position, attack the cockpit once and return to open floor. The machine requires eight cockpit hits.
With Sonic or Tails, the main danger is jumping over the machine at the wrong time and contacting the spiked arms or flames. A Flame Shield prevents damage from the flames but not from the arms. With Knuckles, the original Genesis encounter is still piloted by Eggman rather than an Eggrobo; this is an edition-specific implementation oversight. The attack pattern is more demanding, with heavier flame coverage and fewer comfortable openings, so Knuckles should wait for a clear swing instead of forcing repeated attacks.
After the final hit, wait until the arms and their spikes have disappeared before moving beneath the defeated machine. Open the animal capsule to complete Flying Battery Zone. The campaign then transitions to Sandopolis Zone.
- Attack the cockpit, never the spiked arms.
- Jump in for one hit when Egg Hanger swings low.
- Move away immediately after each successful hit.
- Use extra patience with Knuckles’ heavier flame coverage.
- Wait for the defeated arms to disappear before opening the capsule.
- Confirm the transition to Sandopolis Zone.
Before you move on
- Both Acts of Flying Battery Zone are complete.
- Gapsule has been destroyed after six self-inflicted arm strikes.
- The Laser Prison confinement has been survived until the machine malfunctions.
- The Barrier Eggman phase has ended with the barriers deactivated and Eggman fleeing.
- Egg Hanger has been defeated with eight cockpit hits.
- The defeated animal capsule has been opened.
- The game has transitioned from Flying Battery Zone to Sandopolis Zone.
- The route has been completed without a sequence break or advanced speedrunning technique.
Zone 9 — Sandopolis Zone — pits, quicksand and puzzle rooms
Sandopolis Zone has two acts. Act 1 is an outdoor desert filled with sand slides, quicksand, scorpions, moving sandstone blocks and handgrips. Act 2 takes place inside a pyramid, where black levers open timed doors and ceiling handles control the darkness and ghosts. Use the conservative route, preserve rings before each checkpoint, and treat the Giant Ring detours as optional unless you are pursuing the Emeralds.
Act 1: Leave the opening sand and use the moving blocks
Sonic, Tails or Knuckles begins by falling into sand. Jump repeatedly to escape, then continue right to the first descending sandfall. Jump up through it rather than trying to run along the lower sand. At the top, deal with the first scorpion carefully. Keep your distance until its stinger is no longer aimed at you, then spin through it when it turns away, or bypass it by pushing the nearby sandstone block onto its track and riding the block across the gap.
When you reach the first descending pillar and sand slide, let the pillar move down before crossing. Follow the slides to the yellow spring, then backtrack briefly to climb the nearby sandfall for a Super Ring. Continue right and use the ceiling handgrip to swing across the wide quicksand pit. Jump off only when the grip reaches the far side. The overhang can collapse, so do not remain on it unnecessarily.
- Jump out of the starting sand immediately.
- Use sandstone blocks as moving platforms over wide quicksand pits.
- Approach scorpions from behind or wait until their stingers are retracted.
- Avoid sinking deeply into lower quicksand, where sand worms and bottomless sections can cost a life.
Act 1: Reach the first Giant Ring and the final checkpoint
After the first large loop, ride the moving platforms and push the next sandstone block onto its track. A half-circle platform carries you upward. Continue through the sandfalls and past the Star Post, then slide down into the quicksand. Jump to the right immediately so you do not fall through the lower section. A spiked pillar pushes through this area; wait for it to move away, jump through the sandfall, and drop onto the route when the pillar has passed.
Push the next sandstone block right. When its track drops to a lower level, jump at the end of the track toward the half-circle platform. Ride upward, pass the scorpion, and climb the sandfall to reach a Giant Ring. If you miss this jump, continue right; the main route reconnects, and sacrificing a life for a second attempt is optional rather than necessary.
After the Giant Ring area, use the sliding stone blocks to climb the sand slide without touching the slide itself. Continue through the upward-moving sandfalls, avoid the spikes between them, and use the handgrip to cross. The route eventually reaches another Star Post, more handgrips and a long descent. Keep moving right through the final quicksand and sandfall sections until the pyramid rises in the background.
- Activate every Star Post on the main route.
- Jump immediately after landing in the Act 1 quicksand section following the first major Star Post.
- Do not return through a difficult detour solely for a missed Giant Ring.
- Arrive at the pyramid with at least one ring and preferably a larger reserve.
Act 1 boss: Send the Guardian into the left quicksand pit
The Guardian emerges when the pyramid rises. It is not defeated by repeated head attacks. Jumping on its head only knocks it backward and makes it briefly reform. Your objective is to move it toward the quicksand pit on the far left.
Stand near the left edge of the arena and let the Guardian approach. When it jumps, use a jump onto its head to push it back. If necessary, step into the quicksand and jump repeatedly to stay afloat while the Guardian follows you. Keep enough distance that it jumps toward the pit instead of landing on top of you. When it falls into the quicksand, it is destroyed and Act 1 ends automatically.
If the Guardian hits you, collect the scattered rings first and resume the lure pattern. Do not chase it across the arena or repeatedly attack while it is away from the pit. After the encounter, the game carries you into the pyramid for Act 2.
- Use head jumps to position the Guardian, not to damage it permanently.
- Keep the Guardian moving toward the left quicksand.
- Jump repeatedly while standing in the quicksand so you do not sink before the Guardian follows.
- Confirm the encounter is complete when the Guardian falls into the pit and the pyramid sequence begins.
Act 2: Keep the pyramid lit and use the timed levers
Move right at the start of Act 2 and grab the first ceiling light handle. Light handles can be reused and restore the pyramid to full brightness while removing the ghosts. They are not ordinary switches, so use every handle you pass even if the room is still bright. If the pyramid begins to darken, stop exploring side rooms and move directly toward the next handle.
Black levers open stone doors, but they slowly return to their original positions. Push a lever fully, then move through the opened door without stopping. The first important detour is just after the opening quicksand: push the lever, bounce from the orange spheres, climb the sandfall and run left beneath the door before it closes. This room contains a Lightning Shield. It is optional for ordinary completion, but it makes the first Act 2 Giant Ring route possible and gives you a safer double jump.
After the animal prison is opened, the ghosts begin appearing. Grab the light handle above the spikes, push the next lever and descend the sand slides. If you are pursuing the nearby Giant Ring, use the Lightning Shield’s double jump to climb against the left-moving slide, then follow the upper route to the ring. If you miss the jump, the slide sequence repeats; keep jumping at the intersection where the slides cross and head toward the right-hand route. For a normal clear, continue through the lower route and prioritize the next handle and Star Post.
- Use light handles before the pyramid reaches full darkness.
- Push black levers all the way before running through their doors.
- Take the Lightning Shield only if you want the difficult early Act 2 Giant Ring or extra protection.
- Do not remain in a dark room searching for collectibles while large ghosts are active.
Act 2: Survive the rising sand and reach the final Giant Ring
After the middle Star Posts, continue through the doors, half-circle platforms, sandfalls and handgrips. Several sections require speed because the doors close and the ghosts return if you linger. When you reach the stopper that starts the rising-sand sequence, let the sand carry you upward while moving through the available side corridors. Do not stay beneath moving pillars with spikes; jump over them as soon as the sand raises you to their level.
The first rising-sand section temporarily stops, allowing you to reach a black lever and open the next door. After the next stopper, the sand rises continuously. Stay toward the left where possible, grab the light handle briefly, then move right through the corridor. Push the levers above the moving pillars before the sand carries you into the ceiling. Once the sand finally stops, use the half-circle platforms and the next handgrips to descend safely.
Near the end, pass the Star Post and slide through two sand slides. A launch sends you upward to a light handle. Backtrack up the curved wall, use the moving pillars and bounce spheres to reach the next lever, then move quickly through the partially sand-filled room. Jump the gap and pass through the closing door. Behind it is the final Giant Ring in the zone, along with a light handle and lever. Missing it does not prevent completion. Afterward, return through the door, drop to the Star Post, push the lever and descend to the boss chamber.
- During rising sand, move continuously and do not wait beneath spiked pillars.
- Use the light handles as soon as they are on the route.
- Treat the final Giant Ring as optional; do not lose a life attempting to force the closing-door jump.
- After the final Star Post, use the lever and drop through the rapidly closing door to reach the boss.
Act 2 boss: Defeat the Egg Golem
The Egg Golem advances from the right side of the chamber. Its body and chest are covered with spikes, so do not attack from the floor. Wait for the foreground arm to extend toward you. Jump onto the safe portion of that arm, avoid the spikes at its end, and jump from the arm onto the upper body. The hit removes part of the stone covering and exposes Eggman’s cockpit.
During the brief opening, strike the exposed cockpit, then land back on the extended arm or retreat to the floor without touching the chest spikes. A cautious player should aim for one cockpit hit per arm extension. Faster players may get additional hits, but survival is more important because the golem continues advancing and can eventually press you against the left wall.
The laser eye above the golem may activate. If you are already on the arm, prioritize the cockpit opening. If the eye fires, move away from the projected line and wait for the next foreground-arm extension. Eight successful hits to the exposed cockpit defeat the Egg Golem. If you lose your rings, stop forcing attacks, watch the arm pattern and use the next safe extension to resume.
- Jump only onto the extended foreground arm.
- Avoid the arm’s spikes and the spikes across the chest.
- Strike the exposed cockpit, not the armored body.
- Use one hit per opening if the arena feels unsafe.
- Confirm completion when eight cockpit hits destroy the Egg Golem and the transition to Lava Reef Zone begins.
Before you move on
- The Guardian has fallen into the left quicksand pit and the pyramid has opened.
- Sandopolis Act 2 has been completed inside the pyramid.
- The Egg Golem has taken eight successful cockpit hits and has been destroyed.
- The post-boss transition has begun and Lava Reef Zone is available.
- Optional Emerald progress: note whether the early Act 2 Giant Ring, the late Act 2 Giant Ring, or any Act 1 rings were missed and revisit the zone through replay or level-select practice if available on the player's setup.
Zone 10 — Lava Reef Zone — lava, rising platforms and Death Egg approach
Lava Reef Zone is the final major platforming area before Hidden Palace. Sonic and Tails complete the active volcano, defeat Heat Arms, cross the missile-and-lava-fall gauntlet, and fight Egg Inferno using its own mines. Knuckles shares the Heat Arms encounter but follows a separate Act 2 route with pipes, climbing passages, flame throwers and a Knuckles-only Giant Ring. He has no normal Egg Inferno battle: after exiting Lava Reef, Knuckles passes through a short Hidden Palace transition and reaches Sky Sanctuary, where Mecha Sonic is the required final encounter of his campaign.
Act 1: cross the active volcano without wasting the Fire Shield
At the beginning of Act 1, let the opening fall carry you downward while watching for collapsing ledges. On the lower route, spin dash through the breakable rock and roll beneath the falling stalactites. At the first switch-operated door, stop and activate the switch before crossing the next section.
A Fire Shield is the most useful protection in Lava Reef because it prevents damage from lava and fire-based hazards. The first lava lake is crossed with small rock platforms that sink if you remain on them too long. Jump from one rock to the next without waiting, then aim for the solid ledge on the far side. Without a Fire Shield, treat every rock as a temporary foothold and keep moving.
When you reach the drilling machinery, wait for its cycle instead of jumping into the opening immediately. The drill exposes a route but can leave a dangerous gap. Move through after the machine has cleared the passage. Falling debris, rotating hazards and fire-breathing enemies are safer to handle from a controlled position than while running blindly at full speed. Sonic and Tails can generally follow the main route; Knuckles has a separate opening and should use the character-specific directions below rather than trying to force Sonic's path.
- Look for and preserve a Fire Shield before the deeper lava sections.
- Cross sinking rocks immediately instead of pausing on them.
- Wait for the drill to clear its opening before crossing.
Heat Arms: target the central hand first
The Act 1 boss is Heat Arms. Two cannon-ended tendrils appear at the sides of the arena and fire projectiles. Each tendril can be destroyed with four hits, but destroying them is optional. The encounter ends when the central hand is defeated.
The required target is the large central hand. It follows your position, then stops and slams downward. Move away from the impact point, wait for the hand to settle, and jump onto its vulnerable surface without touching the spikes. The hand requires six hits. Retreat after each attack instead of trying to remain underneath it for a second hit.
Sonic and Tails can usually reach the hand during its low position. Knuckles has a lower jump, so attack when the hand comes down and use the cleanest available approach rather than attempting to strike the cannon tendrils from above. If you ignore the tendrils, keep moving across the arena and watch their projectile angles. Losing a ring while attempting an optional target is not worthwhile.
When the central hand takes its sixth hit, Heat Arms is defeated even if one or both tendrils are still present. The volcano then cools and the route changes into the blue crystal cavern of Act 2.
- Identify the boss as Heat Arms.
- Treat both cannon-ended tendrils as optional four-hit targets.
- Make the central hand the priority target.
- Attack after the hand slams down; six hits are required.
- Do not confuse destroying a tendril with completing the boss fight.
Sonic and Tails Act 2: use the blue cavern's traps as timing challenges
Sonic and Tails begin Act 2 on the main route. Move right past the first flame thrower and wait for its short inactive interval before jumping through. At the switch and door, use the switch to open the normal route. Some overhead platforms and springs lead to a Fire Shield, so take that detour if you can reach it safely. The shield protects against flame throwers and lava, but it does not make Sonic or Tails immune to crushing, spikes, the boss machine or the boss's mines.
Moving blocks and platforms form the main vertical challenge. Use wide platforms as recovery points and do not jump toward a flame jet while it is firing. Tails can correct a missed landing by flying, but do not fly upward into a flame thrower or a moving block. Sonic should use short, controlled jumps rather than long leaps across uncertain gaps.
Late in the act, the route passes beneath the Death Egg and approaches the transition into the boss section. A walkway collapses after the Knuckles scene, sending the character downward. Hold the direction of the main route during the fall so you land on the walkway above the lava instead of drifting into a pit.
- Observe flame-thrower cycles before crossing.
- Use the Fire Shield detour when it is safe to reach.
- Treat broad platforms as reset points during vertical sections.
- Hold toward the main route during the fall after the walkway collapses.
Sonic and Tails: cross the missile platforms and lava fall
Eggman reactivates the volcano after the Knuckles scene. The screen begins scrolling while missiles target the platforms. A crosshair marks the platform that will be struck. Leave a marked platform before the second missile hits it; do not wait for the explosion and do not stop for rings if the next landing is more important.
Continue through the collapsing ledges over the abyss. The ledges disappear shortly after you step on them, so jump onward rather than waiting for a better opening. A Star Post appears before the lava-fall section. Activate it before continuing, because a life loss afterward returns you to this checkpoint rather than to the start of Act 2.
In the lava fall, small platforms descend with the lava. Jump from one platform to the next and favor the next visible landing over a long leap toward the far side. If you lose the Fire Shield, preserve at least one ring and make short jumps. The shield prevents lava damage, but it does not protect against falling into a bottomless pit or colliding with the Egg Inferno.
- Leave each crosshair-marked platform before the second missile lands.
- Cross collapsing ledges promptly.
- Activate the Star Post before the descending lava platforms.
- Prioritize the next safe landing over ring collection.
Sonic and Tails: defeat Egg Inferno with the mines
At the bottom of the lava fall, Eggman appears in the Egg Inferno submersible. Direct attacks cannot damage it. Eggman launches three iron mines that land on the lava floor and slide with the moving platforms. The mines damage the submersible when they collide with it.
The arena tilts toward the Egg Inferno, pulling the platforms and mines toward the machine. With a Fire Shield, concentrate on jumping over the mines and avoiding the submersible. The shield protects against the lava, not against the machine or the mines. Without a Fire Shield, stay on the moving platforms and use short jumps to transfer between them as the floor shifts.
After three mine impacts, the floor briefly levels and the Egg Inferno retreats before repeating the pattern from the opposite side. Four complete three-mine cycles and two additional impacts are required, for fourteen mine impacts in total. Do not try to hurry the battle by attacking Eggman; survival and positioning are the entire strategy.
When the submersible is destroyed, stay on the central platform. The surrounding lava remains dangerous during the victory sequence. When the prison capsule descends low enough, jump onto its plunger to open it. The lava cools after the capsule is opened, allowing you to walk right into Hidden Palace.
- Do not attack Egg Inferno directly.
- Use the iron mines as the only source of boss damage.
- Survive fourteen mine impacts in total.
- Stay on the central platform after the submersible is destroyed.
- Open the prison capsule by hitting its plunger when it is low enough.
Knuckles Act 1: use the alternate route and reach Heat Arms safely
Knuckles starts Act 1 in a different section. Move right past the falling stalactites and the crushing spike platform, then descend the stairs while avoiding the rotating spiked balls. At the drilling machine, wait until it has finished drilling and the screen stops shaking. Return right, glide over the opened hole and climb the stairway with flame vents.
At the top, activate the switch and continue through the false wall and opened door. This joins the main route after the first spin-dash section. From there, follow the normal Act 1 path through the lava and machinery until the Heat Arms arena. Knuckles may use a glide to cross some gaps, but do not substitute a glide for a required switch or door.
During Heat Arms, the central hand remains the required six-hit target. Knuckles cannot reach every tendril position as easily as Sonic, so ignore the optional cannon-ended tendrils unless a safe hit is obvious. Strike the hand after its slam and retreat immediately. After the hand is destroyed, continue to Knuckles's separate Act 2 entrance.
- Wait for the drill to clear the hole before crossing.
- Use the switch at the top of the flame-vent staircase.
- Join the main route through the false wall.
- Defeat the central hand with six hits.
Knuckles Act 2: follow the pipe-and-climbing route
Knuckles begins Act 2 on the same general opening as Sonic, but his lower jump prevents access to the high Fire Shield route used by Sonic and Tails. Activate the first switch, pass through the door and cross the bridge surrounded by rotating spiked balls. Move carefully beyond it so the moving blocks do not crush you.
When the high moving platforms are out of reach, continue right instead. Jump over the power-up boxes and use the exploding rock as a cue to break through the hidden wall on the right. Enter the bright orange pipe. When it ejects Knuckles, regain control and move left through the breakable rock to the spring area. Use the springs to reach the Fire Shield on the ledge if possible, then drop into the lower tunnel and continue right.
Pass the flame thrower, exploding rocks and moving block, then cross the next rotating-spike bridge. Use the springs to reach the Star Post. After activating it, continue through the door and spin dash through the poison-gas machines. Ride the conveyor and use the wall-climb passages to keep moving through the lower machinery.
A Knuckles-only Giant Ring is hidden in a passage connected to the conveyor section. It is optional for clearing the campaign, but it is the last special-ring opportunity on this route. After the conveyor section, enter the next orange pipe and climb past the flame throwers. A Fire Shield makes this section much safer; without one, wait for each flame jet to stop, climb or glide past it, and accept that ring loss may be safer than forcing a jump.
- Do not attempt to reach Sonic's high moving platforms with a normal jump.
- Use the orange pipe after breaking the hidden wall.
- Activate the Star Post before the long flame-thrower section.
- Treat the Knuckles-only Giant Ring as optional.
- Use the Fire Shield to reduce flame-thrower risk.
Knuckles: finish Lava Reef without Egg Inferno
Continue through the remaining flame throwers, moving blocks, spiked balls and breakable barriers. When a route opens outside, glide across the large gap toward the narrow opening on the far side. If you fall into the lower section, climb back up the stairs instead of treating the fall as an automatic death. Break through the final barriers and exit Lava Reef.
Knuckles does not fight Egg Inferno in the normal original Genesis campaign. His Act 2 route bypasses the missile-and-lava-fall boss sequence and ends by exiting the Zone. Do not use the Sonic-and-Tails fourteen-mine checklist as a requirement for Knuckles.
The next area is a short Hidden Palace transition. Walk right through the mostly empty passage, avoid the occasional spikes and jump onto the pink teleporter. This sends Knuckles to Sky Sanctuary. The teleporter is the required transition; there is no separate Lava Reef boss for Knuckles after Heat Arms.
- Cross the final outdoor gap with a controlled glide.
- Break through the last barriers to leave Lava Reef.
- Do not search for an Egg Inferno fight as Knuckles.
- Use the Hidden Palace teleporter to reach Sky Sanctuary.
Knuckles in Sky Sanctuary: defeat Mecha Sonic and Super Mecha Sonic
After the Hidden Palace teleporter, collect the three starting rings in Sky Sanctuary. Eggman appears and the story leads into the Mecha Sonic encounter. The first phase is fought on the platform near the spikes. Mecha Sonic uses fast ground movement, slides, charges and bouncing attacks, so stay mobile and keep a ring whenever possible.
Attack Mecha Sonic on the head when he is exposed near the safe side of the arena. Avoid jumping into his body during a charge or bounce. Eight successful hits end the first phase. If you die, the most recent Sky Sanctuary checkpoint is the recovery point; repeat the opening setup and rebuild a ring buffer before attempting the boss again.
Mecha Sonic then reaches the Master Emerald and becomes Super Mecha Sonic. During the yellow powered-up state, he is invulnerable. Stay near the lower-right side by the Master Emerald while watching for the two main attacks: a swooping charge across the arena and a hovering attack that fires three large energy spheres aimed at your position. Run to the opposite side to make the spheres miss, then return to the Master Emerald side.
When Super Mecha Sonic returns to his normal color and moves toward the Master Emerald, attack during the brief approach before he lands on it. Do not touch him after he has landed and powered up again. One or two hits may be possible during a clean opening, but survival is more important than forcing extra damage. Repeat the pattern until the final boss is defeated. This Mecha Sonic sequence, rather than Egg Inferno, is the required final battle for Knuckles's route.
- Enter Sky Sanctuary after the Hidden Palace teleporter.
- Keep at least one ring during the first Mecha Sonic phase.
- Defeat the first phase with eight head hits.
- Do not attack Super Mecha Sonic while he is yellow.
- Run across the arena to avoid the three energy spheres.
- Attack only during the brief normal-color opening near the Master Emerald.
- Complete the Super Mecha Sonic battle to finish Knuckles's campaign.
Before you move on
- Sonic or Tails has cleared Lava Reef Act 1 by defeating Heat Arms's central hand with six hits.
- Sonic or Tails has activated the late Star Post, crossed the missile-targeted platforms and completed the descending lava-fall section.
- Sonic or Tails has destroyed Egg Inferno with fourteen mine impacts, opened the prison capsule and entered Hidden Palace.
- Knuckles has cleared the alternate Act 2 route without an Egg Inferno battle, exited Lava Reef and used the Hidden Palace teleporter.
- Knuckles has reached Sky Sanctuary, defeated Mecha Sonic's first phase with eight hits and completed the Super Mecha Sonic battle.
- Any missed Giant Ring or Special Stage can be left for replay; none is required to clear Lava Reef or complete the character route.
Zones 11–12 — Hidden Palace and Sky Sanctuary — shrine, story transition and character routes
Sonic 3 & Knuckles contains two different Hidden Palace destinations. The first is the Emerald Shrine reached from a concealed room in Mushroom Hill Act 1. It is the optional Super Emerald hub and also allows unfinished Chaos Emerald Special Stages to be completed. The second is the short playable Hidden Palace Zone after Lava Reef, where Sonic or Tails fights Knuckles before moving into Sky Sanctuary. Knuckles uses a shorter Hidden Palace transition and finishes his campaign in Sky Sanctuary against Mecha Sonic and Super Mecha Sonic. The shrine changes collected Chaos Emeralds into gray Super Emerald targets, but seven Super Emeralds do not replace the requirement to have collected all seven Chaos Emeralds for Sonic’s Doomsday route.
Open the Mushroom Hill shrine entrance
After Launch Base Zone, start Mushroom Hill Zone Act 1 and follow the opening path until Knuckles appears from a concealed room and closes the entrance. This is the intended route to the Emerald Shrine in the original Genesis lock-on game.
Turn around and return to the nearby switch. Activate it to reopen the concealed room, then enter and touch the large flashing ring inside. The ring changes colors before transporting you away. This scripted Super Ring is different from an ordinary Giant Ring and does not lead to an ordinary single Emerald Special Stage.
The ring transports Sonic, Tails or Knuckles to the Emerald Shrine. You can visit the shrine with no Chaos Emeralds, with only part of the set, or after collecting all seven. The available tasks depend on the condition of the seven shrine positions.
- Launch Base Zone is complete.
- Mushroom Hill Act 1 has begun.
- Knuckles has closed the concealed room.
- The nearby switch has reopened the room.
- The flashing Super Ring has been entered.
Read the shrine’s emerald positions
The shrine has seven emerald positions. An empty position represents a Chaos Emerald that has not yet been collected. Jump onto an empty position to enter its Sonic 3-style Special Stage. Completing that stage awards the Chaos Emerald and changes the position into a gray Super Emerald target.
A gray Super Emerald represents a collected Chaos Emerald whose follow-up Blue Sphere stage has not yet been completed. Jump onto the gray emerald to enter the Sonic & Knuckles-style Blue Sphere stage. Complete that stage to turn the gray target into a colored Super Emerald.
A colored Super Emerald is finished. The shrine can therefore contain empty positions, gray targets and completed colored Super Emeralds simultaneously. Check the positions before choosing a stage so you know whether you are pursuing a missing Chaos Emerald or an unfinished Super Emerald.
- Empty positions are treated as unfinished Chaos Emerald stages.
- Gray positions are treated as unfinished Blue Sphere stages.
- Colored positions are treated as completed Super Emeralds.
- The intended stage type has been identified before entering it.
Understand conversion and Sonic’s Doomsday condition
Entering the shrine converts Chaos Emeralds already collected during the campaign into gray Super Emerald targets. This does not create a replacement set of Chaos Emeralds. It changes their active shrine state and opens the corresponding Blue Sphere stages.
If any Chaos Emeralds were missing when the shrine was first entered, their positions remain empty. Jump onto each empty position and complete its Sonic 3-style Special Stage. The resulting gray target can then be challenged in its Blue Sphere stage. The shrine therefore supports finishing both the Chaos Emerald and Super Emerald objectives, but they remain separate objectives.
Sonic’s Doomsday condition is based on collecting all seven Chaos Emeralds. If all seven were collected before entering the shrine, Sonic retains access to The Doomsday Zone even while the shrine displays those emeralds as gray Super Emerald targets. Completing the seven Super Emerald stages is not an alternative Doomsday requirement.
If the shrine was entered before the Chaos Emerald set was complete, finish every remaining empty-position Chaos Emerald stage before expecting the Doomsday route to be available. Super Emerald progress does not substitute for missing Chaos Emerald progress.
Completing all seven Super Emerald stages is an optional enhancement objective. It unlocks Hyper Sonic, Hyper Knuckles or Super Tails and produces the enhanced ending state. Do not treat the Super Emerald set as a replacement for the seven-Chaos-Emerald condition.
- Collected Chaos Emeralds have become gray Super Emerald targets.
- Any empty positions have been completed as Chaos Emerald stages.
- The seven-Chaos-Emerald requirement is tracked separately from Super Emerald progress.
- The seven Super Emeralds are being pursued as an enhancement and ending objective.
Attempt or postpone the shrine stages
The shrine stages may be attempted in any order. In the Sonic 3-style stages, collect blue spheres while avoiding red spheres and hazards. In the Blue Sphere stages, plan routes before committing to a group of red spheres, and convert blue-sphere groups into rings when doing so makes the remaining route safer.
If a stage is failed, its shrine position remains unfinished. Leave through the shrine’s return point and continue the campaign, then use another Super Ring when you are ready to try again. You do not need all seven Super Emeralds to complete Mushroom Hill, the playable Hidden Palace Zone, Sky Sanctuary or Death Egg.
Do not confuse the scripted Mushroom Hill Super Ring with ordinary Giant Rings in the main Zones. Ordinary Giant Rings provide direct access to individual Special Stages. They do not perform the shrine conversion sequence.
- Failed stages remain unfinished rather than permanently completed.
- The shrine exit has been used to return to the campaign.
- Super Emerald completion has been kept separate from required Zone progression.
- Ordinary Giant Rings have not been treated as shrine entrances.
Complete the playable Hidden Palace Zone as Sonic or Tails
The playable Hidden Palace Zone follows Lava Reef Zone. Sonic or Tails moves right through a compact palace area containing stairs, springs, teleporters, vertical passages and spikes. Use the springs to gain height, and keep at least one ring before the boss area if possible. A Star Post appears before the encounter, so take a moment to collect nearby rings rather than rushing into the arena empty-handed.
Knuckles is the boss. He uses standing attacks, spin dashes and glides. Do not attack while he is crossing the room in a spin dash. Wait until he becomes stationary, jump on him once, and move away before he recovers. When he glides across the room, avoid his fists and wait for a safe landing or exposed position before attacking. Patient single hits are safer than attempting repeated contacts.
After the battle, follow Knuckles into the Emerald chamber. Eggman steals the Master Emerald, and Knuckles is electrocuted when he tries to stop him. The floor collapses and drops the characters into the area below. Knuckles breaks through the wall; follow him to the teleporter and enter it to begin Sky Sanctuary.
Knuckles does not fight himself in this route. The playable Hidden Palace boss is fought by Sonic or Tails.
- Lava Reef Zone is complete.
- The later playable Hidden Palace Zone has been entered.
- Sonic or Tails has defeated Knuckles.
- Eggman has taken the Master Emerald.
- The teleporter to Sky Sanctuary has been entered.
Cross Sky Sanctuary as Sonic or Tails
Sky Sanctuary is one act that climbs through several vertical sections. At the opening, wait for Knuckles to activate the bridge. Cross it, then use poles, springs, clouds, teleporters and moving platforms to continue upward. When a landing is missed, look for a lower cloud or platform before committing to a fall. Preserve rings before each boss because the three encounters are separated by more platforming rather than a single continuous arena.
The first encounter is Mecha Sonic piloting the Egg Wrecker. Its wrecking ball swings across the arena and can cover the ground or rebound after striking a wall. Stay toward the side opposite the ball, watch its return path, and jump onto the exposed Egg Wrecker only when the ball has moved safely away. Retreat immediately after the hit. Do not stand beneath the vehicle while the ball is still swinging; wait for a clear opening rather than trying to trade contacts.
After the Egg Wrecker is defeated, use the rising warp point and continue through the next section. The second encounter is Mecha Sonic piloting the Egg Bouncer. Several ball-like pods orbit the vehicle. Jump onto the exposed central machine when the pods briefly draw in or when their wide orbit leaves a clear approach. Each successful hit removes a pod and causes a balloon-shaped Mecha Sonic copy to detach. The Egg Bouncer rises out of reach while the copy floats toward you. Destroy the copy with a jump or spin-based attack, then prepare for the vehicle to return.
Once the pods have been removed, the Egg Bouncer uses laser shots from the side of the arena. Stay near a boundary, watch the firing line, and attack only during the opening between laser patterns. The final hit ends the encounter. Collect rings and use the next warp point before continuing upward.
The third encounter is the direct Mecha Sonic battle, with no Egg Wrecker or Egg Bouncer. Mecha Sonic rolls, slides across the floor and launches into the air. Keep moving around the arena and do not attack while its body is protected by a rolling or airborne approach. Strike after it finishes a movement and becomes exposed, then immediately return to a safe position. A single hit followed by retreat is more reliable than repeated attacks. If you lose your rings, prioritize surviving the next pass and attack only after the robot’s movement ends.
After the direct Mecha Sonic battle, the sanctuary begins to collapse. Follow the rising spiral route and enter the Death Egg. This transition is required for Sonic or Tails to continue into the normal combined-campaign ending route.
- Knuckles has extended the opening bridge.
- Mecha Sonic piloting the Egg Wrecker has been defeated.
- Mecha Sonic piloting the Egg Bouncer has been defeated.
- The direct Mecha Sonic battle has been completed.
- The collapse sequence has transferred Sonic or Tails to Death Egg Zone.
Finish Knuckles’s shorter route
Knuckles reaches Hidden Palace through a brief transition rather than the full Sonic and Tails route. Move right down the steps and enter the teleporter. There is no normal Hidden Palace boss for Knuckles and no extended palace section to clear.
At the start of Knuckles’s Sky Sanctuary route, allow Eggrobo’s grab sequence to occur. Knuckles cannot prevent the opening capture. Mecha Sonic destroys Eggrobo, and Knuckles begins the battle with three rings.
Fight the normal Mecha Sonic form while preserving at least one ring. Avoid the rolling attack and strike when the robot is exposed or standing still. Do not attack from behind because the spines cause damage. Spin Dash attacks are useful when Mecha Sonic pauses, but retreat after each contact.
After taking enough damage, Mecha Sonic moves toward the Master Emerald and becomes Super Mecha Sonic. During the powered phase, avoid contact while the transformation remains invulnerable. Move away from swoops and energy attacks, then attack only during the brief periods when Super Mecha Sonic’s power fades and it must recharge. Do not chase it during an invulnerable pass.
Knuckles’s standard campaign ends in Sky Sanctuary after Super Mecha Sonic is defeated. He does not normally continue into Death Egg Zone in the original Genesis lock-on route.
- Knuckles has completed the short Hidden Palace transition.
- The opening Eggrobo sequence has finished.
- The normal Mecha Sonic battle is complete.
- Super Mecha Sonic has been defeated.
- Knuckles’s Sky Sanctuary ending has appeared.
Confirm the separate completion objectives
The shrine objective is complete when all seven shrine positions display colored Super Emeralds. This unlocks the enhanced character forms and enhanced ending state, but it is separate from ordinary Zone progression.
For Sonic, standard route completion means clearing playable Hidden Palace, defeating the Egg Wrecker, the Egg Bouncer and the direct Mecha Sonic encounter in Sky Sanctuary, then entering Death Egg Zone. Sonic’s additional Doomsday finale requires that all seven Chaos Emeralds have been collected. If the shrine was entered, those emeralds may be displayed as gray Super Emerald targets, but the Super Emerald set does not substitute for the seven-Chaos-Emerald condition.
For Tails, normal completion continues through playable Hidden Palace, Sky Sanctuary and Death Egg. Tails does not normally enter The Doomsday Zone. For Knuckles, completion means clearing the short Hidden Palace transition, defeating Mecha Sonic and Super Mecha Sonic, and reaching the Sky Sanctuary ending.
Treat the Emerald Shrine, playable Hidden Palace Zone, Sky Sanctuary, Death Egg and optional Super Emerald objective as separate checks. Completing one character’s route does not complete the other character routes.
- The Mushroom Hill shrine and playable Hidden Palace Zone have been treated as different locations.
- All seven Chaos Emeralds have been collected if Sonic’s Doomsday route is intended.
- All seven Super Emeralds are colored if the enhanced forms and enhanced ending are intended.
- Sonic or Tails has defeated Mecha Sonic in the Egg Wrecker.
- Sonic or Tails has defeated Mecha Sonic in the Egg Bouncer.
- Sonic or Tails has defeated the direct Mecha Sonic form and entered Death Egg Zone.
- Sonic has completed The Doomsday Zone only after satisfying the seven-Chaos-Emerald condition.
- Knuckles has defeated Mecha Sonic and Super Mecha Sonic and reached his Sky Sanctuary ending.
Before you move on
- The Mushroom Hill Act 1 concealed room was reopened and its flashing Super Ring was entered.
- The shrine’s Chaos Emerald and Super Emerald state was checked.
- Empty positions were used for missing Chaos Emerald stages when necessary.
- Collected Chaos Emeralds appeared as gray Super Emerald targets after shrine conversion.
- All seven Chaos Emeralds were collected if Sonic’s Doomsday route was intended.
- All seven Super Emeralds are colored if enhanced forms and the enhanced ending are intended.
- The playable Hidden Palace Zone after Lava Reef was completed.
- Sonic or Tails defeated Knuckles and witnessed Eggman’s theft of the Master Emerald.
- Sonic or Tails defeated Mecha Sonic piloting the Egg Wrecker.
- Sonic or Tails defeated Mecha Sonic piloting the Egg Bouncer.
- Sonic or Tails defeated the direct Mecha Sonic form and entered Death Egg Zone.
- Sonic completed The Doomsday Zone only after the seven-Chaos-Emerald condition was satisfied.
- Knuckles completed the short Hidden Palace transition, defeated Mecha Sonic and Super Mecha Sonic, and reached his Sky Sanctuary ending.
- The shrine, playable Hidden Palace Zone, Sky Sanctuary route, Death Egg transition and optional Super Emerald objective were checked separately.
References for this chapter
- Sonic 3 & Knuckles — Guide and Walkthrough — GameFAQs
- Sonic & Knuckles - Sonic 3+Knuckles FAQ/Walkthrough - Genesis - By peach_freak
- Sonic & Knuckles/Walkthrough — StrategyWiki
- Sky Sanctuary Zone (Sonic & Knuckles) - Sonic Wiki Zone
- Egg Bouncer — Sonic Wiki Zone
- Sonic & Knuckles Sega Genesis Instruction Manual
Zone 13 — Death Egg and The Doomsday Zone — final bosses and emerald-dependent finale
After completing Sky Sanctuary, Sonic and Tails enter Death Egg Zone for the final standard campaign sequence. Clear Act 1 and defeat Red Eye, then clear Act 2 and defeat Death Ball, Giant Eggman Robo and Eggman’s escaping machine. Tails ends his campaign after Death Egg. Sonic also completes the standard route there unless he has collected all seven Chaos Emeralds, in which case The Doomsday Zone follows. In the original Genesis Sonic 3 & Knuckles lock-on game, Doomsday access is based on having collected all seven Chaos Emeralds. Visiting the Hidden Palace shrine converts those collected Emeralds into gray Super Emerald targets, but this conversion does not create a new alternative condition or cancel Sonic’s Doomsday eligibility. The seven Super Emeralds are an optional enhancement objective that unlocks Hyper Sonic and the enhanced ending. Knuckles follows a separate route that ends in Sky Sanctuary after the Super Mecha Sonic battle and does not normally enter Death Egg.
Enter Death Egg after Sky Sanctuary
Complete Sky Sanctuary before Death Egg begins. In the normal original lock-on campaign, Sonic and Tails continue from Sky Sanctuary into Death Egg. Knuckles does not follow them through the standard route; his playable campaign concludes in Sky Sanctuary after the Super Mecha Sonic encounter.
Death Egg contains gravity changes, electric floors, conveyor belts, rockets, narrow platforms and collapsing surfaces. Stop at the edge of each new machine or platform section and watch its cycle before moving. Holding a direction through a moving hazard often carries you directly into spikes or an electric field.
Use every available Star Post and enter boss rooms with rings whenever possible. A Lightning Shield is useful because it attracts nearby rings and protects against some electrical hazards, but no shield is required. If you lose a life, the original cartridge uses its ordinary checkpoint, life and continue system. It does not provide a permanent boss-practice menu.
- Complete Sky Sanctuary before beginning Death Egg.
- Use Sonic or Tails for the standard Death Egg route.
- Activate Star Posts and preserve rings before each boss.
Clear Death Egg Act 1 and defeat Red Eye
Progress through Act 1 by allowing gravity tubes, moving platforms and conveyor mechanisms to finish their cycles. Cross electric-floor sections in short movements rather than running blindly. In the six-light room near the end of the Act, strike each yellow light until all six are red; the exit opens after the puzzle is completed.
Red Eye begins with eight orbiting spheres protecting its central eye. Stand toward one side of the arena and wait for the orbiting pattern to bring the eye into jumping range. Hit the eye, then use the rebound to return toward safety while the destroyed sphere releases expanding projectiles. Repeat this pattern until all eight spheres have been removed.
The exposed eye then uses two moving platforms and a sweeping laser. Jump from a platform to strike the eye, then move away immediately. After each hit, the eye fires its laser and moves across the arena before resetting. Wait for the boss to settle and attack only during the next clear opening.
Red Eye takes eight hits to remove the protective spheres and eight additional hits after the eye is exposed, for sixteen successful hits total. If a hit costs your rings, retreat and wait for another opening rather than attempting a quick follow-up.
- Solve the six-light room by turning all six lights red.
- Destroy the eight orbiting spheres.
- Hit the exposed eye eight times.
- Complete sixteen successful hits in total.
Clear Death Egg Act 2 and defeat Death Ball
Act 2 adds more gravity sections, electric bridges, conveyor belts, rockets and tilting platforms. Let tilting platforms settle before crossing them. When entering a gravity tube, check where its exit will place you and avoid entering while a spike or electric field is aligned with the landing point.
Death Ball is surrounded by a rotating shield and cannot be damaged by jumping into it or using a normal Spin Dash. Instead, allow the machine to release spiked mine tanks. Use an anti-gravity device at the right moment so a tank is pulled toward the machine with its pointed side facing the boss.
A reliable method is to wait until a tank is near the correct horizontal position, then enter the gravity device so the tank travels across the arena and strikes Death Ball. If the tank stops or misses, move away from it because it can explode and release smaller spikes. Do not chase the boss directly; the mine tanks are the intended weapon.
Death Ball requires eight successful mine-tank impacts. After the eighth hit, the machine is destroyed, but Death Egg Act 2 continues into the Giant Eggman Robo sequence.
- Wait for spiked mine tanks to be released.
- Use the anti-gravity device to align a tank with Death Ball.
- Make sure the tank strikes with its pointed side.
- Land eight successful impacts.
Defeat Giant Eggman Robo
The Giant Eggman Robo begins with six attacking fingers. Move into the gap between the hands and wait for a finger to descend. Spin Dash or jump into the finger as it lands, then immediately move away before the next finger drops. Each finger requires three hits, for eighteen finger hits altogether.
Once all six fingers are destroyed, the robot’s chest becomes the main target. Strike the nose to open the chest compartment and expose the Master Emerald. Hit the exposed Emerald once, then retreat to create space for the beam that follows. When the beam passes, attack the opening again and repeat the pattern.
The chest phase requires eight successful Emerald attacks. Keep moving after each hit because the nose can release fire while the compartment closes. Do not remain beside the Emerald waiting for another immediate attack.
After the chest phase, Eggman escapes in a smaller machine while the floor collapses behind Sonic or Tails. Stay ahead of the collapsing surface and attack the escaping machine when you catch up. Eight successful hits complete this chase. Defeating the machine completes the standard Death Egg boss sequence.
- Destroy all six fingers.
- Land three hits on each finger, eighteen hits total.
- Open the chest with a nose attack.
- Strike the exposed Master Emerald eight times.
- Defeat the escaping machine during the collapsing-floor chase.
Check Sonic’s Doomsday eligibility
Sonic receives the standard Death Egg ending if he did not collect all seven Chaos Emeralds before finishing the campaign. This is a valid completion of the regular route, but it does not include The Doomsday Zone.
In the original lock-on game, Sonic’s Doomsday access requires that all seven Chaos Emeralds have been collected. This remains the relevant completion condition even if Sonic later enters the Hidden Palace shrine. The shrine changes the Emeralds’ active state into gray Super Emerald targets for the optional Super Emerald stages; it does not provide a replacement condition and does not undo the earlier collection of the seven Chaos Emeralds.
If all seven Chaos Emeralds were collected before shrine conversion, Sonic remains eligible for Doomsday even if he completes fewer than seven Super Emerald stages afterward. Do not require seven Super Emeralds for access, and do not treat an incomplete post-conversion Super Emerald set as a reason to deny the Doomsday route.
Collecting all seven Super Emeralds is still worthwhile. It unlocks Hyper Sonic and produces the enhanced ending, but it is an additional reward objective rather than a substitute for the seven-Chaos-Emerald requirement. Tails does not enter Doomsday, and Knuckles does not normally enter Death Egg.
- Confirm that all seven Chaos Emeralds were collected before the final Death Egg sequence.
- Treat shrine conversion as a state change into gray Super Emerald targets, not a replacement requirement.
- Do not require all seven Super Emeralds for Doomsday access.
- Collect all seven Super Emeralds only if the Hyper Sonic form and enhanced ending are desired.
Survive The Doomsday Zone
The Doomsday Zone is an automatic space-flight stage available only on Sonic’s eligible route. Sonic remains transformed throughout it. Rings continually drain, so collect the visible ring groups and avoid unnecessary contact with asteroids and projectiles. The stage has no conventional platforming route; vertical positioning and ring management are the main concerns.
Keep Sonic near the center of the screen during the opening flight and make small vertical adjustments around incoming asteroids. When ring formations appear, move toward them without holding a direction for too long. A long uncontrolled movement can place Sonic directly into the next obstacle.
The first Doomsday boss is a missile-launching machine. Sonic cannot damage it by simply ramming the body. Move toward the front of the machine until it launches a group of three homing missiles. Guide the missiles so they curve back into the machine’s head, then move away from the impact area. Repeat the setup until eight missiles strike the head.
Being hit by a projectile or missile pushes Sonic backward, so recover your forward position before the next volley. The boss must be defeated quickly because the transformation’s ring supply is limited. Prioritize a safe missile setup over chasing the machine’s body.
- Collect rings during the opening flight.
- Use small vertical movements around asteroids and projectiles.
- Guide the homing missiles back into the machine’s head.
- Land eight missile hits.
Defeat Final Weapon and finish Sonic’s route
After the first Doomsday machine is destroyed, Final Weapon appears in a smaller Eggman-shaped form. Asteroids and ring formations return, so continue collecting rings while following the machine. Approach from a safe line and avoid staying directly above or below it after an attack.
Final Weapon can release bombs and blue mines depending on Sonic’s approach. Make one controlled contact with the exposed body, allow Sonic to bounce away, then reposition for the next attack. Do not repeatedly collide with the machine while it is surrounded by a hazard.
Eight successful direct attacks defeat Final Weapon. If rings are low, collect the next visible ring group before attempting another hit. The encounter loops through its attack patterns, so there is no need to force an attack during an unsafe position.
After Final Weapon is defeated, Sonic secures the Master Emerald and the ending begins. Allow the ending and credits to play. A standard Sonic completion ends after Death Egg. A Doomsday completion confirms the seven-Chaos-Emerald finale, while the Hyper Sonic ending additionally confirms completion of all seven Super Emerald stages.
- Maintain rings during the second space chase.
- Avoid Final Weapon’s bombs, mines and asteroids.
- Land eight direct attacks on Final Weapon.
- Watch the applicable ending and credits to completion.
Recover after a failed final attempt
A death in Death Egg or Doomsday follows the original cartridge’s normal checkpoint, life and continue rules. If you activated a Star Post before the boss approach, the retry may begin near that checkpoint; otherwise, replay the remaining part of the Act. The original Genesis release does not offer a permanent boss-select or practice screen.
For Red Eye, wait at the arena edge and attack only when the eye descends into range. For Death Ball, let the mine tanks accumulate and use the anti-gravity device rather than trying to damage the shield directly. For Giant Eggman Robo, destroy fingers only after they land, then leave room for the chest beam before attacking the exposed Master Emerald.
For Doomsday, use the opening ring formations as movement markers. During the first boss, guide missile groups toward the head instead of trying to ram the machine. During Final Weapon, collect rings between deliberate body attacks. If Sonic reaches the Death Egg ending without having collected all seven Chaos Emeralds, the route cannot be changed at the final boss; the Emerald objective must be completed earlier in the campaign.
- Use ordinary checkpoints, lives and continues after failure.
- Expect to replay part of Death Egg after a death.
- Complete the seven-Chaos-Emerald condition before reaching the ending.
- Prioritize ring collection and controlled movement in Doomsday.
Before you move on
- Sky Sanctuary has been completed before Death Egg begins for Sonic or Tails.
- Death Egg Act 1 has been cleared and Red Eye has been defeated.
- Red Eye’s eight sphere hits and eight exposed-eye hits have both been completed, sixteen hits total.
- Death Ball has been defeated with eight successful mine-tank impacts.
- All six Giant Eggman Robo fingers have been destroyed with three hits per finger.
- The Giant Eggman Robo chest phase and collapsing-floor chase have been completed.
- For standard Sonic completion, the Death Egg ending and credits have been viewed.
- For Sonic’s Doomsday route, all seven Chaos Emeralds were collected before the final Death Egg sequence.
- If the shrine was entered, the Emeralds changed into gray Super Emerald targets, but this did not replace the completed Chaos Emerald condition.
- Fewer than seven Super Emeralds after shrine conversion does not invalidate Doomsday access when all seven Chaos Emeralds had already been collected.
- The first Doomsday machine was defeated with eight redirected missile hits.
- Final Weapon was defeated with eight direct attacks in its exposed form.
- For the enhanced Sonic objective, all seven Super Emeralds were collected and the Hyper Sonic ending was viewed.
- The applicable ending and credits have been viewed.
- Tails’s normal completion ends at Death Egg, while Knuckles’s normal completion ends at Sky Sanctuary after Super Mecha Sonic; neither endpoint substitutes for Sonic’s Doomsday completion.
References for this chapter
- Sonic & Knuckles - Sonic 3+Knuckles FAQ/Walkthrough - Genesis - By peach_freak
- Sonic the Hedgehog 3 — Boss Guide — Genesis
- Death Egg Zone — Sonic Wiki Zone
- Red Eye — Sonic Wiki Zone
- Death Ball — Sonic Wiki Zone
- Giant Eggman Robo — Sonic Wiki Zone
- Sky Sanctuary Zone (Sonic & Knuckles) - Sonic Wiki Zone
- Sonic & Knuckles original manual
After-action: endings, completion checklist and optional extras
Treat Sonic, Tails, and Knuckles as separate campaigns. Sonic and Tails finish through Death Egg Zone, while Knuckles finishes in Sky Sanctuary against Super Mecha Sonic. Sonic can additionally enter The Doomsday Zone only after collecting all seven Chaos Emeralds. Entering the Hidden Palace shrine converts those collected Emeralds into gray Super Emerald targets; restoring all seven Super Emeralds unlocks Hyper Sonic and the enhanced ending, but it does not replace the Chaos Emerald requirement for Doomsday access.
Confirm the selected character’s standard ending
Record Sonic, Tails, and Knuckles as separate campaign completions. Viewing one character’s credits does not complete the other two routes.
Sonic follows the combined route through Angel Island, Hydrocity, Marble Garden, Carnival Night, IceCap, Launch Base, Mushroom Hill, Flying Battery, Sandopolis, Lava Reef, Hidden Palace, Sky Sanctuary, and Death Egg Zone. Defeat the Death Egg finale and watch the ending and credits. If Sonic collected all seven Chaos Emeralds, the game continues to The Doomsday Zone after the Death Egg sequence; this additional finale is not required for the ordinary Death Egg completion record.
Tails follows the combined campaign into Death Egg Zone and must defeat the Giant Eggman Robo as part of the final sequence. Tails does not end in Knuckles’s Sky Sanctuary route. Watch the Tails ending and credits after completing Death Egg.
Knuckles has a shorter, character-specific campaign. His route ends in Sky Sanctuary, where he fights Super Mecha Sonic. After defeating that encounter, watch the Knuckles ending and credits before recording the campaign as complete.
- The character used for the run has been recorded separately.
- Sonic defeated the Death Egg finale and viewed the ending and credits.
- Tails defeated the Giant Eggman Robo and viewed the ending and credits.
- Knuckles defeated Super Mecha Sonic in Sky Sanctuary and viewed the ending and credits.
- No character’s credits were counted as completion of another character’s campaign.
Understand Sonic’s Chaos Emerald requirement
For the original Genesis lock-on game, Sonic must have collected all seven Chaos Emeralds to access The Doomsday Zone. This is the required emerald condition. The Super Emeralds do not substitute for it.
If Sonic reaches Mushroom Hill with all seven Chaos Emeralds and enters the flashing Super Ring that leads to the shrine, the collected Chaos Emeralds are converted into gray Super Emerald targets. The game is still tracking the completed Chaos Emerald condition, but the Emeralds are no longer available as ordinary Super Sonic power until the Super Emerald progression is completed.
After conversion, restoring all seven Super Emeralds unlocks Hyper Sonic and the enhanced ending presentation. It does not create a separate alternative route to The Doomsday Zone. Do not record a run with seven Super Emeralds but without the required seven Chaos Emeralds as eligible for Doomsday access.
If Sonic collected all seven Chaos Emeralds before entering the shrine, an incomplete Super Emerald set does not cancel the Chaos Emerald condition. Sonic can still reach The Doomsday Zone after completing Death Egg, even if fewer than seven Super Emeralds have been restored.
- All seven Chaos Emeralds were collected for a Sonic Doomsday attempt.
- The player understands that seven Super Emeralds are not an alternative prerequisite.
- Shrine conversion was recorded as a change to the Emerald state, not as a replacement of the Chaos Emerald requirement.
- An incomplete Super Emerald set was not incorrectly treated as blocking Doomsday after all seven Chaos Emeralds had already been collected.
Enter the Hidden Palace shrine only when ready
In Mushroom Hill Act 1, continue through the opening sequence until Knuckles closes the concealed room and activates the nearby switch. Return to that switch, use it to reopen the passage, then enter the flashing Super Ring inside the room.
This ring sends the character to the shrine in Hidden Palace. It is different from an ordinary Giant Ring used to enter a standard Special Stage. The shrine displays the Master Emerald and seven Super Emerald positions. Collected Chaos Emeralds appear as gray Super Emerald targets, while missing positions remain unresolved.
Entering the shrine begins the Super Emerald progression. For a player who wants to preserve ordinary Super Sonic or Super Knuckles during the rest of the campaign, do not enter this ring casually. Once the conversion has begun, focus on restoring the Super Emeralds through the Sonic & Knuckles-style Blue Sphere stages.
The shrine is optional for ordinary character completion. It is not needed to finish Death Egg as Sonic or Tails, and it is not needed for Knuckles to finish Sky Sanctuary. It is useful for the separate Hyper-form and enhanced-ending objective.
- The concealed Mushroom Hill room was reopened with the nearby switch.
- The flashing Super Ring was entered deliberately.
- Collected Chaos Emeralds appeared as gray Super Emerald targets.
- The player understood that shrine entry begins the Super Emerald progression.
- The shrine was not mistaken for a required part of ordinary Zone progression.
Restore all seven Super Emeralds as an optional objective
Use additional Giant Rings in the Sonic & Knuckles portion of the combined campaign to return to the shrine and enter the remaining Super Emerald stages. Each successful Blue Sphere stage restores one inactive gray target to an active Super Emerald.
Continue until all seven Super Emeralds have been restored. Failed stages do not complete the target, so return through another available Giant Ring when possible and retry the missing stage. Keep this objective separate from the ordinary Zone route and from the seven-Chaos-Emerald requirement.
Collecting all seven Super Emeralds unlocks Hyper Sonic for Sonic, Hyper Knuckles for Knuckles, and Super Tails for Tails in the original game. These forms are optional for completing Death Egg or Sky Sanctuary. For Sonic, the full set also changes the Doomsday transformation and produces the enhanced ending state, but the underlying seven-Chaos-Emerald condition remains necessary for access.
Do not describe the seven Super Emeralds as a replacement for the Chaos Emeralds. The correct order of conditions is: collect all seven Chaos Emeralds to establish Sonic’s Doomsday eligibility; then, optionally, restore all seven Super Emeralds for the Hyper form and enhanced ending.
- All seven Super Emerald targets were restored.
- The available enhanced form was confirmed for the character used.
- The Super Emerald objective was recorded separately from standard campaign completion.
- The player did not count seven Super Emeralds alone as sufficient for Sonic’s Doomsday access.
Complete The Doomsday Zone with Sonic
After Sonic defeats the Death Egg finale, the game checks the seven-Chaos-Emerald condition. If all seven Chaos Emeralds were collected, Sonic enters The Doomsday Zone. This remains true whether he avoided the shrine or entered it and restored none, some, or all of the Super Emeralds.
With the Chaos Emerald condition met but without all seven Super Emeralds, Sonic enters as Super Sonic. With all seven Super Emeralds restored as well, he enters in the enhanced Hyper Sonic state and receives the enhanced ending presentation. The Super Emeralds affect the form and ending state; they do not replace the Chaos Emerald access condition.
The Doomsday Zone is an auto-scrolling space pursuit. Keep moving with the screen and collect ring lines whenever the path is safe. Rings drain while Sonic is transformed, so avoid unnecessary collisions and do not spend time searching for alternate routes.
The Final Weapon attacks with missiles and other moving hazards. Watch for its exposed vulnerable sections, move into the opening, strike the target, then return toward the safer ring path. Continue alternating between ring collection, hazard avoidance, and attacks until the Final Weapon is destroyed.
Watch the complete Sonic ending and credits. Record the run as standard Sonic completion if it ended at Death Egg, or as Sonic Doomsday completion if the seven-Chaos-Emerald condition opened The Doomsday Zone. Record the Super Emerald total separately.
- Sonic had collected all seven Chaos Emeralds.
- The Death Egg finale was defeated.
- The Doomsday Zone was entered.
- The Final Weapon was destroyed.
- The Sonic ending and credits were viewed.
- The transformation was recorded as Super Sonic or Hyper Sonic according to the Super Emerald total.
Test optional lock-on cartridges safely
Power off the Genesis before changing cartridges. Insert Sonic & Knuckles into the console, open the flap on top of that cartridge, place Sonic 3 into the lock-on slot, press both cartridges firmly into place, and then power on. Confirm the title screen before starting.
This arrangement produces the combined Sonic 3 & Knuckles campaign, including the continuous Zone sequence, Knuckles in the Sonic 3 Zones, the Sonic & Knuckles Zones, and the Super Emerald system. Sonic the Hedgehog locked onto Sonic & Knuckles instead opens the Blue Sphere content, while Sonic the Hedgehog 2 enables Knuckles in the Sonic 2 stages.
The Sonic 1 and Sonic 2 lock-on configurations are optional cartridge features and are not part of Sonic 3 & Knuckles campaign completion. They should not be used as evidence that the combined campaign was cleared.
Never insert, remove, or reseat cartridges while the Genesis is powered on. If the wrong title appears, switch the console off, reseat the cartridges, and restart.
- The Genesis was powered off before every cartridge change.
- Sonic 3 was seated in the Sonic & Knuckles lock-on slot for the combined campaign.
- The title screen confirmed Sonic 3 & Knuckles.
- Optional Sonic 1 and Sonic 2 lock-on content was kept outside the completion record.
Use Level Select and Debug only for practice
Level Select and Debug can help rehearse a boss, inspect a character-specific route, or locate a missed Giant Ring. Their codes and behavior vary between standalone Sonic 3, standalone Sonic & Knuckles, and the combined Genesis lock-on arrangement, so use only a method verified for the original configuration.
Practice tools can bypass the normal Zone order, alter object behavior, or place the character into a stage without completing the preceding route. They are therefore useful for training but do not prove a normal campaign clear.
For an ordinary completion record, restart or resume a normal campaign and follow the intended character route. Defeat the required final encounter, reach the ending, and view the credits without treating Level Select or Debug as campaign progress.
- Practice tools were used only for rehearsal or exploration.
- The final run followed the normal character-specific progression.
- The required final encounter was defeated through ordinary gameplay.
- The ending and credits came from the normal campaign route.
- Level Select and Debug were not counted as ordinary completion.
Before you move on
- Standard Sonic completion: complete Sonic’s route through Death Egg Zone, defeat the required Death Egg finale, and view the ending and credits.
- Standard Tails completion: complete Tails’s route through Death Egg Zone, defeat the Giant Eggman Robo, and view the ending and credits.
- Standard Knuckles completion: complete Knuckles’s route through Sky Sanctuary, defeat Super Mecha Sonic, and view the ending and credits.
- Sonic Doomsday completion: collect all seven Chaos Emeralds, complete the Death Egg finale, enter The Doomsday Zone, defeat the Final Weapon, and view the Sonic ending and credits.
- Sonic shrine progression: enter the Hidden Palace shrine through the Mushroom Hill flashing Super Ring and track the conversion of collected Chaos Emeralds into gray Super Emerald targets.
- Super Emerald completion: restore all seven Super Emeralds through the Blue Sphere stages and confirm Hyper Sonic, Hyper Knuckles, or Super Tails as applicable.
- Enhanced Sonic completion: meet the required seven-Chaos-Emerald condition, restore all seven Super Emeralds, defeat the Death Egg finale and Final Weapon, and view the enhanced Sonic ending.
- Do not require seven Super Emeralds as a substitute for the seven Chaos Emeralds.
- Do not require both an untouched set of Chaos Emeralds and a completed Super Emerald set; the Chaos Emerald condition is the access requirement, while the Super Emerald set is the enhancement objective.
- Record Sonic, Tails, and Knuckles separately rather than treating one character’s ending as a substitute for another’s.
- Optional cartridge testing: power off before connecting Sonic & Knuckles with Sonic the Hedgehog or Sonic the Hedgehog 2.
- Practice testing: use Level Select or Debug only to rehearse stages, then complete the final campaign through normal progression.
References for this chapter
- Sonic & Knuckles Sega Genesis Instruction Manual
- Sonic & Knuckles - Sonic 3+Knuckles FAQ/Walkthrough - Genesis - By peach_freak
- Sonic & Knuckles - Guide and Walkthrough - Genesis - By WWalker
- Sonic & Knuckles - FAQ - Genesis - By CPredator
- The Doomsday Zone - Sonic Wiki Zone
- Super Emerald - Sonic Wiki Zone
- Sky Sanctuary Zone (Sonic & Knuckles) - Sonic Wiki Zone
- Sonic & Knuckles - Wikipedia
Finishing up
Finish the selected character's required campaign route and view the credits. Sonic's standard completion ends after the Death Egg finale, while collecting all seven Chaos Emeralds enables The Doomsday Zone. Entering the shrine converts collected Chaos Emeralds into gray Super Emerald targets, but completing all seven Super Emeralds is not an alternative requirement for Doomsday access. Tails completes Death Egg, and Knuckles completes his character-specific Sky Sanctuary route. Restoring all seven Super Emeralds unlocks the appropriate enhanced form and enhanced ending presentation.
Choose your next gameScreenshots & video
Game imagery for reference. Follow the written chapters above for the route and strategies.
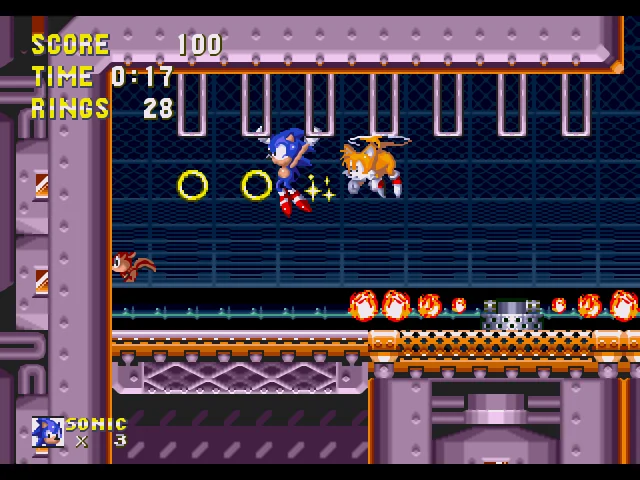
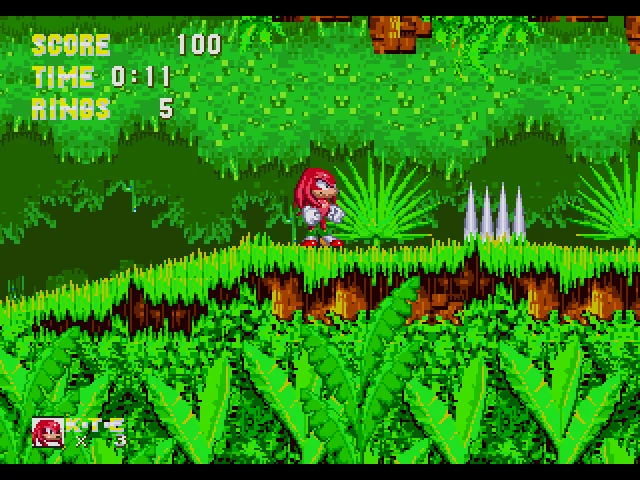
Sources & references
Our original guide draws on the references below. Check the edition at the top of this page before following controls or unlock requirements.
- Sonic & Knuckles Sega Genesis Instruction Manual — Manuals.plus
- Sonic & Knuckles Sega Genesis Instruction Manual
- Sonic & Knuckles - Sonic 3+Knuckles FAQ/Walkthrough - Genesis - By peach_freak
- The Doomsday Zone - Sonic Wiki Zone
- Sonic 3 & Knuckles — Sonic Wiki Zone
- Super Emerald - Sonic Wiki Zone
- SONIC 3 & KNUCKLES Manual
- Sonic 3 & Knuckles — Guide and Walkthrough — GameFAQs
- Sonic & Knuckles - Guide and Walkthrough - Genesis - By WWalker
- Special Stage
- Sonic 3 & Knuckles — Guide and Walkthrough, Angel Island Zone section
- Sonic the Hedgehog 3 — Boss Guide — Genesis
- Sonic the Hedgehog 3/Zones — StrategyWiki
- Angel Island Zone — Sonic Wiki Zone
- Sega Genesis Sonic the Hedgehog 3 Instruction Manual
- Sonic the Hedgehog 3 — Guide and Walkthrough — Genesis — By Raph136
- Sonic the Hedgehog 3 — Guide and Walkthrough — Genesis — CChan
- Hydrocity Zone — Sonic Wiki Zone
- Big Shaker — Sonic Wiki Zone
- Sonic & Knuckles — Guide and Walkthrough — Genesis — By Gold_Mage
- Sonic & Knuckles — Bonus Game Guide — Genesis — By FoxMcCloud0482
- SEGA Mega Drive Sonic 3 & Knuckles instruction manual
- Sonic 3 & Knuckles — Carnival Night Zone, Zone: 0
- Carnival Night Zone, Sonic Wiki Zone
- Bowling Spin, Sonic Wiki Zone
- Egg Gravitron, Sonic Wiki Zone
- Star Circle, Sonic Wiki Zone
- IceCap Zone — Sonic Wiki Zone
- Big Icedus — Sonic Wiki Zone
- Teleporter (object) — Sonic Wiki Zone
- Sonic the Hedgehog 3 — IceCap Zone reference and walkthrough
- Sonic The Hedgehog 3 Large Ring Guide
- Egg Rocket (boss) — Sonic Wiki Zone
- Big Arms — Sonic Wiki Zone
- Launch Base Zone — Sonic Wiki Zone
- Hey Ho — Sonic Wiki Zone
- Special Stage (Sonic 3 & Knuckles) — Sonic Wiki Zone
- Sonic & Knuckles/Walkthrough — StrategyWiki
- Flying Battery Zone — Sonic Wiki Zone
- Laser Prison — Sonic Wiki Zone
- Egg Hanger — Sonic Wiki Zone
- Barrier Eggman — Sonic Wiki, Neoseeker
- Sonic 3 & Knuckles — Guide and Walkthrough, PC version
- Sonic & Knuckles — Flying Battery Zone guide
- Zone: 0 — Sandopolis Zone walkthrough
- Sandopolis Zone — Sonic Wiki Zone
- Heat Arms — Sonic Wiki Zone
- Egg Inferno — Sonic Wiki Zone
- Lava Reef Zone — Sonic Wiki Zone
- Sky Sanctuary Zone (Sonic & Knuckles) - Sonic Wiki Zone
- Egg Bouncer — Sonic Wiki Zone
- Death Egg Zone — Sonic Wiki Zone
- Red Eye — Sonic Wiki Zone
- Death Ball — Sonic Wiki Zone
- Giant Eggman Robo — Sonic Wiki Zone
- Sonic & Knuckles original manual
- Sonic & Knuckles - FAQ - Genesis - By CPredator
- Sonic & Knuckles - Wikipedia
About the game & collecting notes
- Platform
- Sega Genesis / Mega Drive
Step-by-step walkthrough for the original Sega Genesis/Mega Drive lock-on experience created by attaching Sonic the Hedgehog 3 to Sonic & Knuckles. Covers setup, controls, emerald access, every regular Zone in campaign order—including Sky Sanctuary—character-specific boss routes, recovery from failure, and concrete checks for standard, Doomsday, and full Emerald completion.
Darryl Polo
Darryl Polo loves tinkering with emulation and revisiting retro games. He enjoys exploring how old favorites play on different setups and sharing what he learns along the way. At Joking Joystick, he writes about the games, hardware, and small discoveries that keep the hobby fun.
Our editorial standardsFound a step that needs another look? Help us improve this guide.