
Silent Hill 2 (PS5 Remake, 2024) — Complete Campaign Walkthrough
Step-by-step campaign routing for the PS5 remake of Silent Hill 2 (Bloober Team, 2024). This guide covers the entire main story through the final boss and endings, key item routing, boss strategies, puzzle approach, missable collectibles, and New Game+ ending unlocks so you can finish the campaign and pursue 100%.

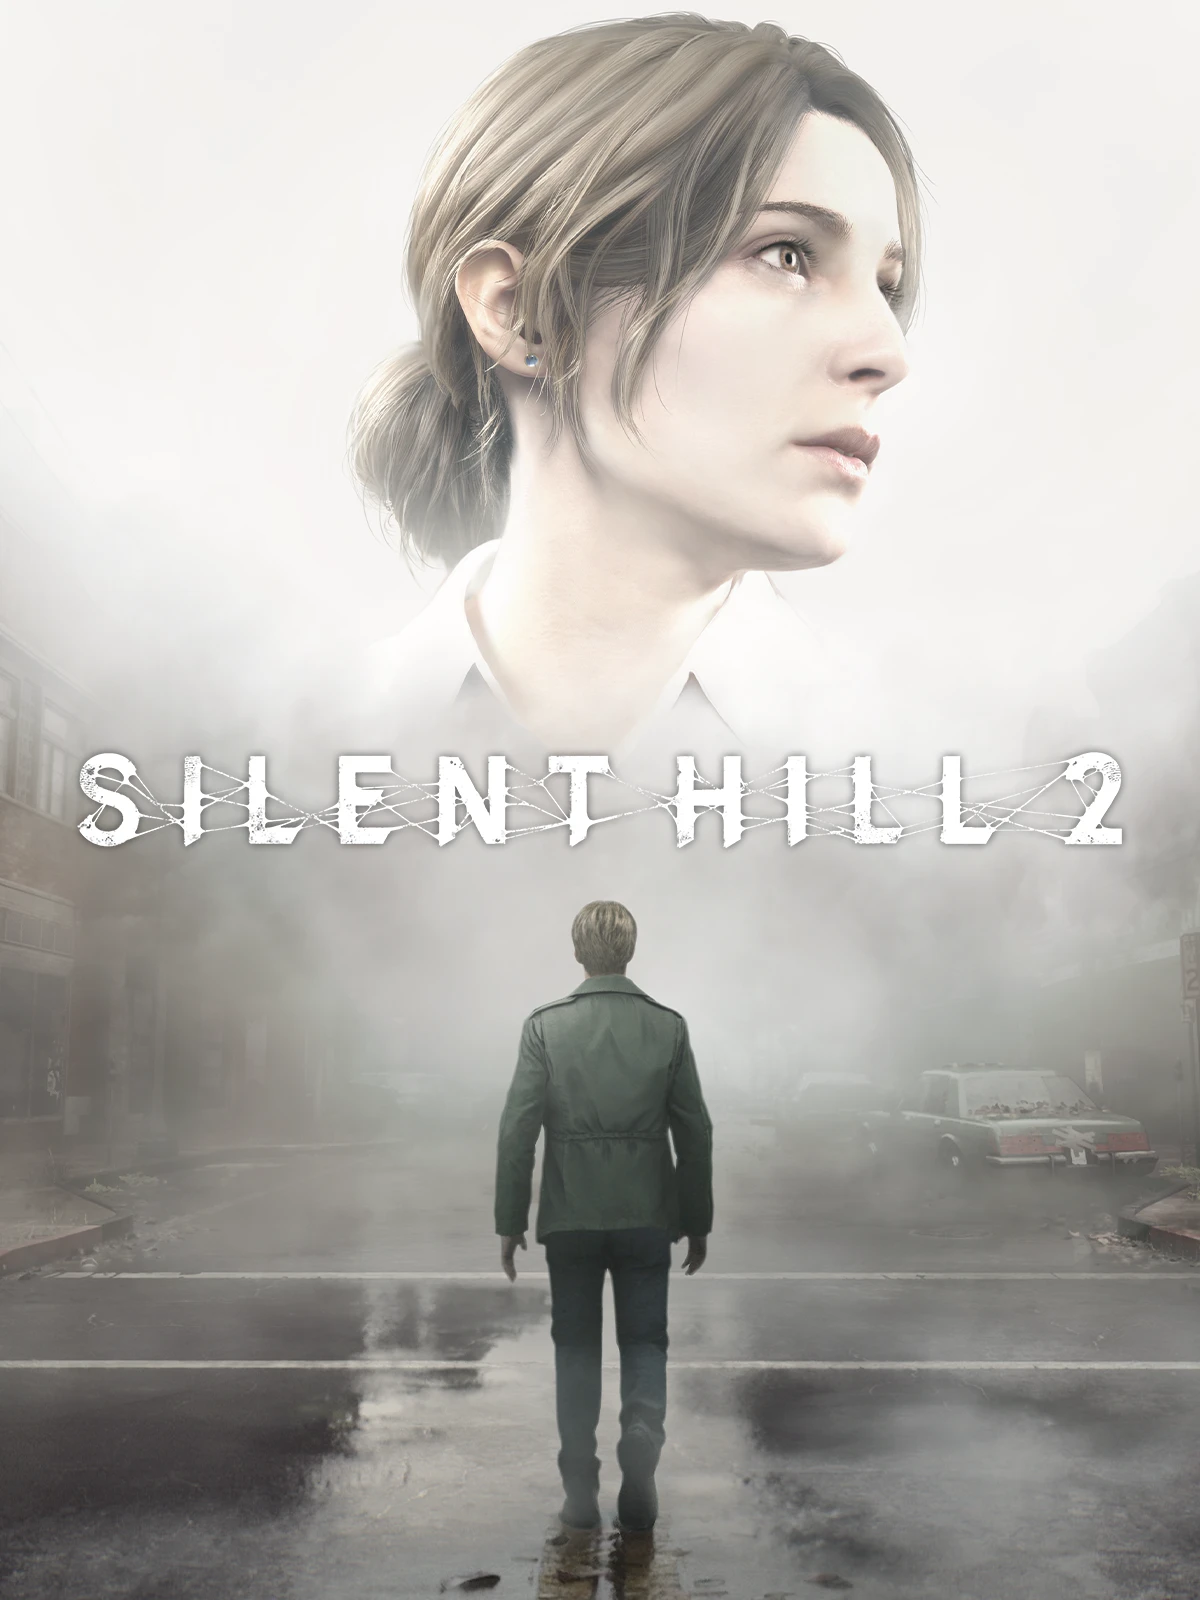
Find a copy
Silent Hill 2 Sony PlayStation 5
We may earn a commission if you buy through these links, at no extra cost to you. As an Amazon Associate I earn from qualifying purchases.
Opens retailer search results. Check the model, edition, seller, availability and current price before buying.
Before you begin
You are James Sunderland.
This guide routes the 2024 PS5 remake from South Vale through the final boss and ending sequences, with required progression, puzzle solutions, boss methods, missable collectibles and optional New Game+ branches.
Treat each listed transition as a possible lockout, but do not assume every area becomes permanently inaccessible immediately after leaving it. Follow the specific save warnings in each chapter.
Set combat and puzzle difficulty independently before starting.
Use multiple manual-save slots before one-way transitions, ending branches and major boss encounters.
Puzzle solutions and item placements belong to the 2024 remake; do not substitute routes from the 2001 release.
Set yourself up for the run
Choose combat and puzzle difficulty independently.
Reserve multiple manual-save slots for area sweeps, pre-transition backups and ending branches.
Use the map to mark locked doors, unexplored rooms and save points.
Conserve ammunition, but do not imply that every enemy must be avoided or that every area is permanently closed as soon as it is exited.
For collectibles, use the remake-specific totals of 68 Memos, 26 Strange Photos and 26 Glimpses of the Past, with separate New Game and New Game+ checklists.
For endings, remember that Leave, Maria and In Water are first-playthrough endings; Rebirth, Dog, UFO, Bliss and Stillness are New Game+ routes, and Stillness requires In Water on the profile.
Start — Eastern South Vale and first steps
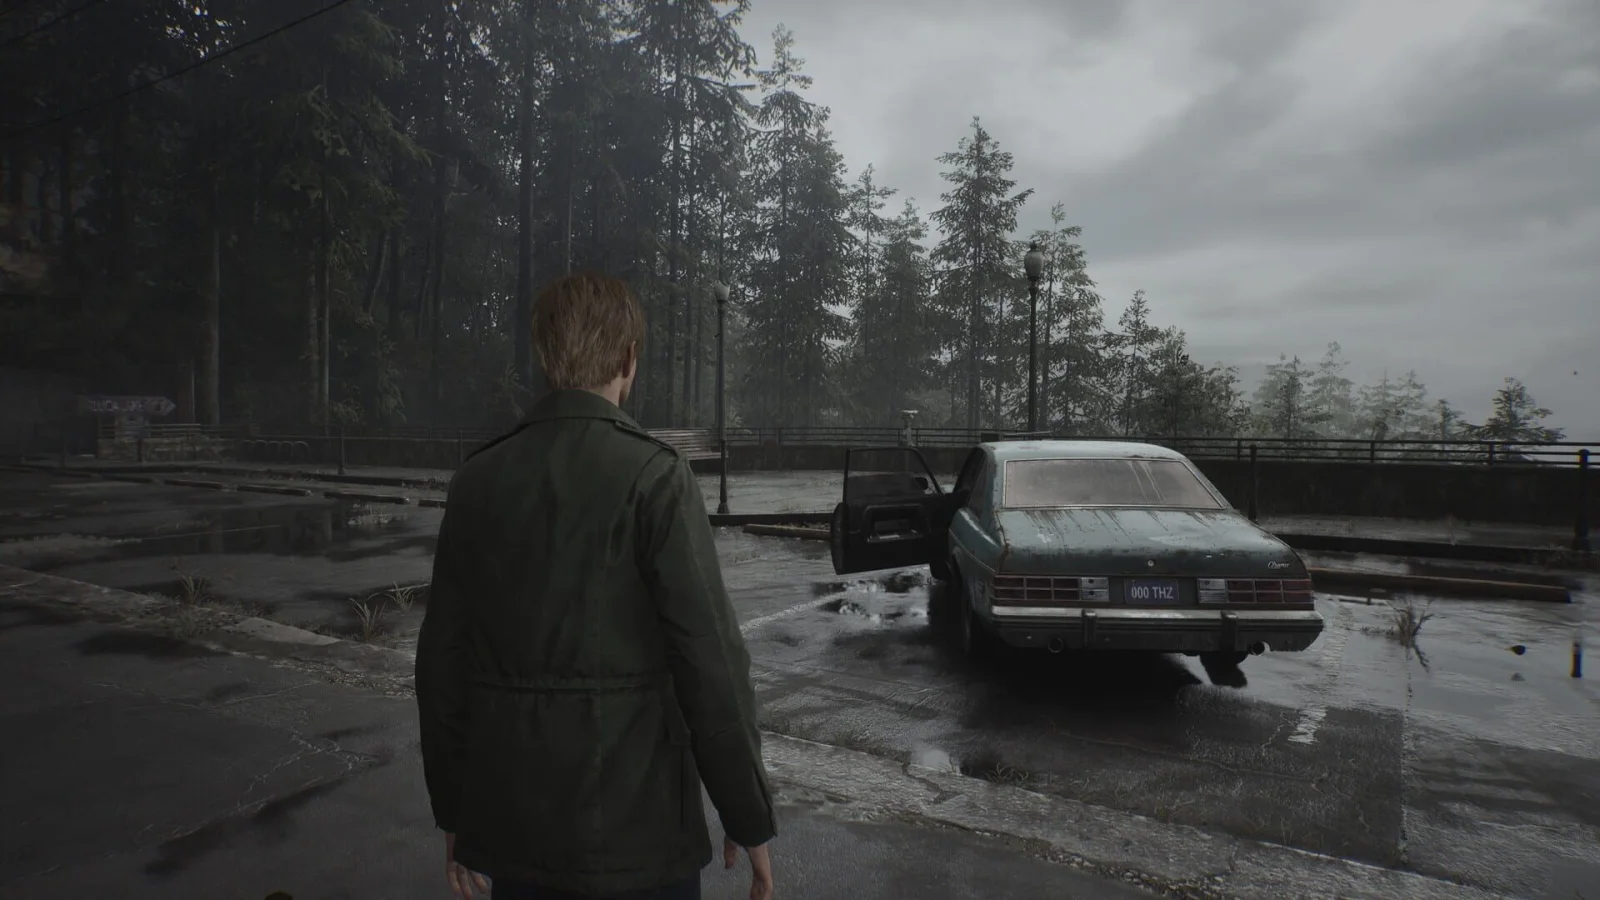
Begin at the roadside restroom, take the Map of South Vale from the blue car, and descend through the forest to Silent Hill. Follow the route through Silent Hill Ranch, Best Auto Parts, Wiltse Road, the Flower Shop, Lindsey Street, and the garage where James receives the radio and Wooden Plank. Explore Eastern South Vale before entering Wood Side Apartments: collect the Neely’s Bar Coin, both Broken Vinyl Record pieces, Vinyl Glue, and the Jukebox Button. Optional exploration includes the Grand Market supplies and the area’s early collectibles. Repair the jukebox, use its key to reach the back alley, take the Wood Side Apartments Key beside the greenish-blue car, and run north to the apartment entrance.
1. Collect the map and cross the forest
After the opening scene at the roadside restroom, walk to the nearby blue car and take the Map of South Vale from the driver’s seat. The map is your main navigation tool. Mark locked doors, blocked streets, save points, and unexplored buildings yourself so you know which routes still matter. Save whenever you find a red square save point; the first one is inside the well at the end of the forest path.
Turn around and walk back along the road until James turns around, then return to the junction and descend the steps into the forest. Follow the trail to the well, interact with the red square inside it, and continue through the steel gate. Cross the graveyard and leave through the next gate toward Silent Hill Ranch.
- Map of South Vale collected from the blue car.
- Optional No Turning Back Now trophy action completed by walking back until James turns around.
- First save made at the red square inside the well.
- Forest and graveyard crossed.
2. Open the ranch route and obtain the first weapon
Follow the road through Silent Hill Ranch until the fence blocks the route. Circle around Best Auto Parts and enter through the broken window. Search the desk with the lit lamp and take the Auto Parts Key from its drawer. Return to the locked fence door and use the key.
After passing the fence, inspect the blocked tunnel under the road for the first Glimpse of the Past before continuing through the highway tunnel and along Wiltse Road. When James reaches town, the Map of the east side of South Vale and Map of the west side of South Vale are added automatically.
Enter the Flower Shop and read the message on the counter if you are collecting memos. Follow the bloody trail through the intersection and down Lindsey Street. At the blocked end of Vachss Road, inspect the gate for a Glimpse of the Past, then follow the trail between the houses. Crawl through the garage opening only after finishing the accessible exploration you want to do; the route closes behind you.
Continue through the wall gap to the save point. Check the kitchen drawer for a Health Drink, then enter the partly open apartment at the end of the corridor. Take the radio from the armchair. After the cutscene, James receives the Wooden Plank and faces the first Lying Figure. Use melee attacks, step away from its acid attack, and do not waste ammunition unless the enemy is preventing your escape. After the fight, collect the Syringe from the box on the desk, break the window, and climb outside. Keep the radio on: static warns that monsters are nearby.
- Auto Parts Key used at the ranch fence.
- East and west South Vale maps received automatically at Wiltse Road.
- Flower Shop Message and Vachss Road Glimpse checked if collecting everything.
- Radio and Wooden Plank acquired.
- Syringe collected after the first enemy if desired.
3. Reach Neely’s Bar and collect the record components
Exit to Martin Street. Inspect the blood spot by the fence for a Glimpse of the Past, then take the Matchbook beside the corpse and the Martin Street Note farther along the road. A save point is in the fenced yard nearby. Search the green SUV’s rear window for a Health Drink if needed.
Before entering Neely’s Bar, visit Texan Cafe on Katz Street. Open the cash register by turning its key and pressing the lower-right button to obtain the Neely’s Bar Coin. A Lying Figure may enter after the register opens; fight it only if it blocks your exit.
Enter Neely’s Bar at the corner of Neely and Sanders Streets. Save inside, read the note on the counter, and inspect the covered jukebox to receive one Broken Vinyl Record. Then go north toward Groovy Music, stopping at Big Jay’s Cafe if you want its note and supplies. In Groovy Music, read the record-store note, break the window into the rear room, and take the second Broken Vinyl Record and Vinyl Glue. Combine both record pieces with the glue in your inventory to make the Glued Up Vinyl Record.
- Martin Street Glimpse and notes checked if collecting everything.
- Neely’s Bar Coin collected from Texan Cafe.
- First Broken Vinyl Record taken from the covered jukebox.
- Second Broken Vinyl Record and Vinyl Glue taken from Groovy Music.
- Glued Up Vinyl Record created.
4. Find the Jukebox Button in Saul Street Apartments
From Groovy Music, explore west Katz Street before moving south. To the right of the Wood Side Apartments entrance, inspect the blue dumpster for a Glimpse of the Past. Check the message board beside the entrance for the Texan Cafe Flyer and search the nearby fence corner for the Strange Photo titled So many people here! At the western barricade, take the Barrier Note and inspect the barricade for another Glimpse of the Past.
Continue toward Saul Street. The Strange Photo titled I’ve been happy! is in the shop window beside the Dance Company. Follow the notes and bloody trail west to the motor home, collecting the Old Map, the three Saul Street Notes, and the Motor Home Note. Enter Saul Street Apartments and push the shelf blocking the second doorway on the right. In the office, take the Apartment Key from the key rack and read the note on the desk.
Go upstairs. Crawl through the floor vent to Apartment 7 and collect the Tenant’s Note. Use the Apartment Key on Apartment 5, pass through the wall opening into the neighboring apartment, and leave through the window to reach the exterior stairs. Climb up and enter Apartment 9 through its window. Go into the bathroom and inspect the hole in the wall until James obtains the Jukebox Button. Exit to the roof and climb down to the street.
- West Katz Street memo, Strange Photo, and two Glimpses checked if collecting everything.
- Saul Street notes and Motor Home Note collected if collecting everything.
- Apartment Key obtained from the Saul Street Apartments office.
- Jukebox Button obtained from Apartment 9’s bathroom.
5. Open Grand Market and repair the jukebox
Before returning to Neely’s Bar, search Sanders Street. Beside the semi-truck, inspect the corpse and take the Sanders Street Note and Code Note. Grand Market is optional and contains healing items and handgun ammunition. Its keypad code depends on puzzle difficulty: 4442 on Light, 4444 on Standard, or 4446 on Hard.
Return to Neely’s Bar and interact with the jukebox. First rotate the green cylinder, move the red arm so it connects to the cylinder, move the cylinder away again, and lower the blue cog. Rotate the green cylinder twice so the record tray is accessible. Insert the Glued Up Vinyl Record, install the Jukebox Button in slot 2, and place the Neely’s Bar Coin in the coin slot. Press C followed by 2 to play the record and receive the Neely’s Bar Key.
- Sanders Street Note and Code Note checked if collecting everything.
- Grand Market searched if supplies are needed.
- Jukebox mechanism repositioned in the correct order.
- Glued Up Vinyl Record, Jukebox Button, and Neely’s Bar Coin used.
- Neely’s Bar Key received.
6. Take the Wood Side Apartments Key and enter the next area
Use the Neely’s Bar Key on the locked door beside the counter. Push the trolley against the wall, climb through the opening near the ceiling, and search the back room. The Back Room Letter is on the desk, and a Health Drink is available in the first-aid cabinet after landing.
Leave through the back alley. Optional Health Drinks are available in the red SUV and a nearby parked car. Continue to the open metal door at the end of the alley and inspect the bloody clothes beside the greenish-blue car. Take the Wood Side Apartments Key.
The weather changes and several Lying Figures appear. Do not stop to clear the ambush unless one blocks the route. Run north to Katz Street, turn left, and continue to the Wood Side Apartments entrance. Use the key to enter. The area transition prevents a normal return to Eastern South Vale, so finish your collectible sweep and optional supply gathering before crossing the threshold.
- Back Room Letter and available Health Drink checked.
- Wood Side Apartments Key taken from the bloody clothes beside the greenish-blue car.
- Eastern South Vale collectible sweep completed if required.
- Wood Side Apartments entered.
Before you move on
- James has the Map of South Vale, the radio, and the Wooden Plank.
- The Neely’s Bar Coin, both Broken Vinyl Record pieces, Vinyl Glue, and Jukebox Button have been used or combined as required.
- The Neely’s Bar jukebox has been repaired and the Neely’s Bar Key has been received.
- The back-room route has been opened and the Wood Side Apartments Key has been collected beside the greenish-blue car.
- The Wood Side Apartments entrance has opened and the next area has loaded.
- If pursuing 100% collectibles, the Eastern South Vale tally is 18 memos, 2 Strange Photos, and 5 Glimpses of the Past.
References for this chapter
Wood Side Apartments — learning apartment exploration
Clear Wood Side Apartments before taking the Handkerchief in Apartment 201. Collect the building maps, Administration Note, flashlight, Chute Courtyard Key, 2F Hallway Key, Golden Apple Handle, handgun, Apartment 212 Key, both Strange Photos, the Glimpse of the Past, all three coins and the three area memos. The Golden Apple Handle is found in Apartment 108 and used in Apartment 208. Solve the Apartment 206 safe according to puzzle difficulty, then complete the Coin Cabinet to obtain the Apartment 201 Key. Make your final collectible save before picking up the Handkerchief in Apartment 201, because that action locks the remaining Wood Side Apartments routes and leads into Blue Creek Apartments.
Secure the lobby and the first apartment objective
Enter Wood Side Apartments through the main entrance and take the Wood Side Apartments maps from the notice board at reception. Save at the red save point behind the reception desk. Keep this as a separate manual save so you can return to the start of the building if you miss a collectible or want to retry an optional trophy.
In the reception back room, uncover and inspect the Coin Cabinet. It cannot be solved yet because the three coins are scattered through the building. Check the storage areas for supplies, then leave the reception area and inspect the locker beneath the nearby staircase to collect the Administration Note.
Go upstairs to the second floor and enter Apartment 202, identified by its open door and bright light. Take the flashlight from the dress form. A Mannequin attacks immediately after the pickup. Back into the hallway or another space with room to move, then defeat it or create enough distance to continue. Take the Chute Courtyard Key from the drawer behind the dress form and search the kitchen cabinet for the available health item.
- Take the Wood Side Apartments maps.
- Save behind reception.
- Inspect the Coin Cabinet.
- Collect the Administration Note.
- Take the flashlight in Apartment 202.
- Collect the Chute Courtyard Key.
Open the eastern first-floor route and collect the Golden Apple Handle
Return to the first floor and use the Chute Courtyard Key on the double doors beside reception. In the courtyard, push the garbage container beneath the open window and climb into Apartment 112. Search the bedroom dresser and table for supplies and the newspaper article, then leave through the apartment door.
Follow the corridor toward the metal bars and attempt to take the key beyond them. The girl prevents James from reaching it. Return through the courtyard to the lobby; the previously blocked eastern hallway is now accessible from the reception side. Follow it to the bars and collect the 2F Hallway Key.
Before leaving this section, check Apartment 109 for ammunition if you want the supplies, and Apartment 107 for its optional health item and drawing. On the way back toward the lobby, enter Apartment 108. Rotate the left wardrobe handle downward and collect the Golden Apple Handle that falls to the floor. This is the correct pickup location in the remake; Apartment 208 is where the handle is used, not where it is obtained.
Return through the lobby’s newly opened western corridor and enter Apartment 102. Take the Strange Photo titled Valentine’s Day from the dining trolley near the window. This is one of the two Wood Side Apartments Strange Photos.
- Use the Chute Courtyard Key.
- Enter Apartment 112 through the courtyard window.
- Trigger the barred-key scene.
- Collect the 2F Hallway Key.
- Optional: search Apartments 109 and 107.
- Collect the Golden Apple Handle in Apartment 108.
- Collect Strange Photo: Valentine’s Day in Apartment 102.
Reach Apartment 208 and open the Apartment 206 safe route
Use the 2F Hallway Key on the locked second-floor doors. Enter Apartment 213 and inspect the scratched wall in the bedroom to obtain the area’s Glimpse of the Past. From the living room, squeeze through the wall opening into the rear corridor and continue to Apartment 217. Take the handgun from the red shopping cart and collect ammunition before leaving.
Return toward Apartment 213. After the intervening event, a body is seated in front of the television and the Apartment 212 Key is on the stand beside it. Use that key on Apartment 212, cross its balcony into Apartment 210 and take Strange Photo: Career’s humble beginnings from the last window sill in the living room.
Leave Apartment 210 through its front door and use the fire-escape lever to lower the staircase shortcut. Apartment 207 is optional, but shooting all 11 balloons spelling WELCOME HOME earns the Let’s NOT Party! trophy. Make a save before attempting it and reload afterward if you want to conserve handgun ammunition.
Enter Apartment 208. Insert the Golden Apple Handle into the wardrobe’s left-hand mechanism, then push the opened wardrobe aside and crawl through the gap into Apartment 206. The room locks behind James, so the safe is the required way out.
- Collect the Glimpse of the Past in Apartment 213.
- Collect the handgun in Apartment 217.
- Collect the Apartment 212 Key.
- Collect Strange Photo: Career’s humble beginnings in Apartment 210.
- Optional: shoot all 11 balloons in Apartment 207.
- Use the Golden Apple Handle on the wardrobe in Apartment 208.
Solve the Apartment 206 safe and obtain the second-floor stair key
Read the poem behind the safe and use the flashlight to locate the three numbered drawings around the room. Match the drawings to the poem’s directional clues. The combination depends on puzzle difficulty: Light uses Right 15, Left 11, Right 13. Standard and Hard use Right 13, Left 7, Right 11. Confirm the sequence after the final dial movement.
Take Coin [Man] and the Steel Key from the safe. Use the Steel Key to leave Apartment 206, then enter Apartment 205 across the hall. Collect the 2F Small Staircase Key from the chair in the centre of the room. A save point is located near the northern staircase; use it before starting the third-floor route.
- Read the safe poem.
- Use Right 15, Left 11, Right 13 on Light.
- Use Right 13, Left 7, Right 11 on Standard or Hard.
- Collect Coin [Man].
- Collect the Steel Key.
- Collect the 2F Small Staircase Key in Apartment 205.
Clear the third floor and recover Coin [Woman]
Use the 2F Small Staircase Key on the northern stairwell door. On the third floor, pass through Apartments 311 and 309. Before entering the next apartment, turn into the small side room near Apartment 310 and open the desk drawer to collect the Strange Note.
Enter Apartment 310, cross its balcony and enter Apartment 312. Take the Sinister Note from the wall beside the locked entrance. Search the apartment, then use the opening in the laundry area to crawl into the adjoining laundry room. Take the Canned Juice from the table and use it on the garbage chute in that room.
Return to the northern staircase and go down to the first floor. Re-enter the courtyard beneath the chute and collect Coin [Woman] from the ground after the cutscene shows it dropping. Do not leave the coin behind; it is required for the Coin Cabinet.
- Collect the Strange Note near Apartment 310.
- Collect the Sinister Note in Apartment 312.
- Collect the Canned Juice.
- Use the Canned Juice on the garbage chute.
- Collect Coin [Woman] in the courtyard.
Recover Coin [Snake] and solve the Coin Cabinet
Go to Apartment 116 at the end of the northern first-floor corridor. Investigate the bathroom to trigger Eddie’s scene, then climb through the broken window into the pool courtyard. Several Lying Figures occupy the area. Use the pool stairs and take Coin [Snake] from the baby stroller. Fight only when necessary and create space before committing to melee attacks.
Return to the reception back room and place the coins in the cabinet. On Light, the three successive rows are Man, empty, Woman, empty, Flower; Sword, empty, Woman, empty, Snake; then Snake, empty, Grave, empty, Man. On Standard, use Man, empty, Woman, empty, Flower; empty, Sword, empty, Woman, Flower; then empty, empty, Man, Grave, Snake. On Hard, use Man, empty, empty, Grave, Snake; Grave, Sword, Flower, empty, empty; then empty, Man, Woman, empty, Snake. Flip the coins when the displayed face requires it.
After the three poem stages, place any coin in the upper slot to complete the puzzle. Take the Apartment 201 Key from the opened cabinet. Save before proceeding to Apartment 201.
- Trigger Eddie’s scene in Apartment 116.
- Collect Coin [Snake] from the pool stroller.
- Place all three coins in the Coin Cabinet.
- Use the arrangement for the selected puzzle difficulty.
- Complete the final upper-slot action.
- Collect the Apartment 201 Key.
Perform the final collectible sweep, then enter Apartment 201
Before entering Apartment 201, confirm that the building sweep is complete: Administration Note, Strange Note, Sinister Note, Valentine’s Day, Career’s humble beginnings and the Glimpse of the Past in Apartment 213 should all be recorded. Confirm that you have obtained Coin [Man], Coin [Woman] and Coin [Snake], and collect any supplies you want from the accessible rooms.
Make a separate manual save before using the Apartment 201 Key. Enter Apartment 201 and interact with the Handkerchief on the desk to trigger the scene. When the scene ends, pick up the Handkerchief from the floor. This second interaction is the Wood Side Apartments lockout: afterward, the remaining building routes cannot be revisited.
Open the red door in Apartment 201 and continue into the Otherworld route leading to Blue Creek Apartments. The Pyramid Head sequence that follows is an escape sequence. Keep moving, maintain distance and avoid wasting handgun ammunition on an enemy the game does not require you to defeat here.
- Confirm all 3 Wood Side Apartments memos.
- Confirm both Strange Photos.
- Confirm the Glimpse of the Past.
- Confirm all three coins were obtained and used.
- Make a final save before the Handkerchief.
- Interact with the Handkerchief after the Apartment 201 scene.
- Open the red door and continue to Blue Creek Apartments.
Before you move on
- The Wood Side Apartments maps, Administration Note, Strange Note and Sinister Note are collected.
- The flashlight and handgun have been obtained.
- The Golden Apple Handle was collected in Apartment 108 and used in Apartment 208.
- Coin [Man], Coin [Woman] and Coin [Snake] were obtained and used at the Coin Cabinet.
- The Apartment 206 safe was opened with the code for the selected puzzle difficulty.
- Both Strange Photos and the Glimpse of the Past in Apartment 213 are collected.
- The Apartment 201 Key was obtained.
- A final manual save was made before picking up the Handkerchief.
- The Handkerchief was picked up after its scene, the red door was opened and James continued toward Blue Creek Apartments.
Blue Creek Apartments — the clock, three hands, and the Pyramid Head encounter
Blue Creek Apartments is an Otherworld complex built around Apartment 212’s grandfather clock. Recover the Hour Hand from Apartment 307, the Minute Hand from Apartment 210, and the Second Hand from Apartment 202. Install them in that order to open the H, M, and S doors. The required positions are Hour 9, Minute 2, and Second 3, which corresponds to 9:10:15. Search the apartments as you go: this area has two Strange Photos and two Glimpses of the Past, but no memos in the verified collectible route. After opening the S door, survive the timed Pyramid Head encounter and leave through the metal doors into Western South Vale.
Secure the maps and establish Apartment 212 as your checkpoint
Exit the starting apartment and take the handgun ammunition from the armchair in the hallway. Continue to the bulletin board and collect the Blue Creek Apartments maps. The maps are especially useful here because the building repeatedly routes you through courtyards, broken walls, exterior galleries, staircases, and apartment connections rather than through one continuous corridor.
Proceed down the hallway and defeat or bypass the Lying Figure. Some of these Otherworld variants release a poisonous cloud when they die, so move away before attempting to collect nearby items. Break through the damaged wall to enter Apartment 206, then continue through the connected apartment and hallway. Take note of Apartment 202, whose door bears the letter M; it is locked until you obtain the Minute Hand.
Continue to Apartment 212. Take the Health Drink from the kitchen drawer, activate the save point, and uncover the grandfather clock. Read the poem and inspect the writing near the clock if you want to solve the positions without using the direct answers. Apartment 212 is your main recovery point. Save here before each clock route, particularly if you are collecting the area’s optional supplies and collectibles.
- Collect the Blue Creek Apartments maps.
- Save at the Apartment 212 save point.
- Note Apartment 202, Apartment 210, and the first-floor S door on your map.
- Remember that the verified area collectible list contains no memos.
Reach Apartment 307 and recover the Hour Hand
Leave Apartment 212 through the courtyard gallery. The H-marked Apartment 210 is visible but cannot be opened yet. Enter Apartment 203, deal with the Mannequin, and break through the damaged wall into Apartment 205. Continue through the apartment, then use the open window to reach the exterior route and climb to the third floor.
Crawl through the opening into Apartment 303 and proceed toward Apartment 307. Search the kitchen drawers and cabinets for ammunition and healing items if you need them. The hallway bodies are not all harmless; some Lying Figures and Mannequins activate as you pass. Apartment 307 contains a radio hanging over a table and a pipe that is missing its valve.
Leave Apartment 307 through the courtyard route and enter Apartment 305 through the window. Take the Apartment 306 Key from the small table. Turning the valve in Apartment 305 triggers enemies, so either create room and fight or move quickly toward Apartment 306. Unlock Apartment 306, defeat or evade the enemies inside, and crawl through the vent into Apartment 304.
Find the second valve on the wall in Apartment 304. Turn it, then take the valve with you. Return to Apartment 307 using the route near Apartment 303; the direct route through the earlier opening is no longer the reliable path. Insert the valve into the pipe beside the radio and turn it until the radio drops. Pick up the Hour Hand.
Leave through the courtyard gallery and use the lever to lower the stair section. Return to Apartment 212, install the Hour Hand, and set it to 9. Confirm the setting. The H door, Apartment 210, is now open.
- Collect the Apartment 306 Key.
- Take the valve from Apartment 304.
- Use the valve in Apartment 307 to drop the radio.
- Collect the Hour Hand.
- Set the Hour Hand to 9 in Apartment 212.
Use Apartment 210 to obtain the Minute Hand and Winged Key
Enter Apartment 210 through the H-marked door. Break through the damaged wall into the bathroom and search the toilet to obtain the Minute Hand. Leaving the bathroom changes the route, so do not expect to return through the same opening. Move through the newly available exit and prepare for a Lying Figure variant.
Take the Pigeon Figurine from the cabinet shelf. Then enter Apartment 209 and reach the bathroom area. Break the shower glass and collect the Malformed Figurine Part. Continue toward Apartment 211; use the breakable wall if the normal entrance is blocked. Search the bedroom for the Wooden Swan Head, which is guarded by Mannequins, then combine the head with the Malformed Figurine Part to create the Swan Figurine.
Return to Apartment 210 and place the Pigeon Figurine and Swan Figurine on the seesaw. Position the Swan Figurine two spaces to the left of the center position. When the seesaw balances, collect the Winged Key.
Use the Winged Key on the nearby door and drop through the hole into Apartment 110. Inspect the ruined cabinet immediately ahead to obtain Glimpse of the Past #7. Continue through the opening toward Apartment 109 and trigger the scene with Angela. Afterward, take Angela’s Knife and the Key of Resilience from the nightstand. Inspecting the knife can affect ending tracking, so avoid examining it if you are deliberately preserving a particular ending route.
Leave Apartment 109 and use the Key of Resilience on the locked double doors near the Apartment 111 side of the first floor. This opens the route toward Apartment 101 and the S-marked doors. Before returning upstairs, enter the stairwell and collect Strange Photo #5, “Forever together,” from the floor behind the stairs.
- Collect the Minute Hand from Apartment 210’s bathroom.
- Collect the Pigeon Figurine, Malformed Figurine Part, and Wooden Swan Head.
- Combine the two swan components.
- Balance the seesaw and collect the Winged Key.
- Inspect the ruined cabinet in Apartment 110 for Glimpse of the Past #7.
- Collect Angela’s Knife and the Key of Resilience.
- Collect Strange Photo #5 in the first-floor stairwell.
Set the Minute Hand and solve Apartment 202’s moth lock
Use the newly opened first-floor route to reach the stairway and return to Apartment 212. Install the Minute Hand and set it to 2 on the clock face, which represents 10 minutes. Confirm the setting. Apartment 202, marked M, is now open.
Enter Apartment 202 and examine the moth displays. You must inspect the moths in the main room, break through the damaged wall, move the wardrobe or cabinet as required, and examine the additional display in the rear section. Count the symbols shown across the displays: the standard arrangement totals 8 crescents, 5 circles, and 2 skulls.
Use the combination that matches your puzzle difficulty. On Light difficulty, enter 582. On Standard difficulty, enter 373. On Hard difficulty, enter 522. If you prefer to solve it yourself, the Standard formulas are crescent minus circle, skull plus circle, and circle minus skull, producing 3-7-3. The solution is tied to the current puzzle difficulty, so do not rely on a single code without checking your settings.
Enter the unlocked bedroom and reach into the hole marked by the green trail to obtain the Second Hand. Return to Apartment 212. The room has changed, and the bedroom now contains a Health Drink and Strange Photo #6, “How the time flies.” Collect the photo before using the clock. Install the Second Hand and set it to 3 on the clock face, meaning 15 seconds. After the clock chimes, inspect the monster body on the second-floor stairwell landing to obtain Glimpse of the Past #8.
- Set the Minute Hand to 2, or 10 minutes.
- Open Apartment 202.
- Use 582 on Light, 373 on Standard, or 522 on Hard.
- Collect the Second Hand from the rear bedroom.
- Collect Strange Photo #6 in Apartment 212.
- Set the Second Hand to 3, or 15 seconds.
- Collect Glimpse of the Past #8 on the second-floor stairwell landing.
Open the S door and survive Pyramid Head
Return to the first floor and enter the double doors marked S. This begins the Pyramid Head encounter. He cannot be defeated in this fight; your objective is to survive until the encounter ends. Keep moving around the arena, avoid allowing the Great Knife to pin James against a wall, and use the available space to maintain distance.
You can fire a few handgun shots while retreating to shorten the encounter, but do not stand still trying to deal damage. When Pyramid Head becomes more aggressive and destroys portions of the arena’s cover, rely on movement and dodge timing rather than attempting a prolonged melee exchange. If you are low on health, prioritize healing before entering the room and use the arena supplies during the fight when necessary.
The encounter ends after its timed progression, signaled by the siren and the change in Pyramid Head’s behavior. Do not continue wasting ammunition once the warning indicates the sequence is ending. Afterward, search the arena for any remaining supplies, then follow the opened route through the large metal doors. Continue through the next doors to exit Blue Creek Apartments and enter Western South Vale.
Keep a manual save from Apartment 212 or before the S-door sequence if you are pursuing the collectible route. Once the transition into Western South Vale occurs, treat Blue Creek Apartments as closed for practical purposes and assume that missed collectibles require a reload or another playthrough.
- Enter the S-marked double doors after setting all three hands.
- Survive the Pyramid Head encounter rather than trying to defeat him.
- Use the siren and encounter change as the signal that the fight is ending.
- Leave through the large metal doors into Western South Vale.
Before you move on
- The Hour Hand is installed at 9 and Apartment 210 is open.
- The Minute Hand is installed at 2, or 10 minutes, and Apartment 202 is open.
- The moth lock has been solved using the code for the selected puzzle difficulty.
- The Second Hand is installed at 3, or 15 seconds, and the S door is open.
- Glimpses of the Past #7 and #8 have been collected.
- Strange Photos #5 and #6 have been collected.
- The Pyramid Head encounter is complete and James has left through the metal doors into Western South Vale.
Western South Vale — unlocking the town proper
After leaving Blue Creek Apartments, James reaches Rosewater Park and meets Maria. Western South Vale is a large outdoor section with optional side buildings, supplies, collectibles and New Game+ items before the route eventually leads through Jacks Inn, Katz Street, Heaven’s Night, Moonlight Grove and the Reverie Theater to Brookhaven Hospital. The Garage Jack Lever is optional: it opens the garage opposite Jacks Inn and provides supplies plus a Strange Photo, but it is not required to reach the hospital. The required puzzle is the Jacks Inn safe, whose Gate Key opens the motel exit. On Light and Standard puzzle difficulty the code is 0451; on Hard it is 0533. After the gate, survive the monster escape by following the route through the houses and garages. There is no Pyramid Head boss encounter in this chapter, so conserve ammunition for the numerous Lying Figures and Mannequins instead of searching for a boss trigger.
1. Leave Blue Creek Apartments and meet Maria at Rosewater Park
When you exit Blue Creek Apartments, make a manual save at the nearby save point and search the immediate cars and benches for healing items and handgun ammunition. Follow the road toward Rosewater Park. The park is the first major landmark in this district, and its pier contains the story scene where James meets Maria.
After the meeting, Maria follows James through the western side of the park. Search the park before leaving if you want supplies or collectibles. The Strange Photo titled So Far from Home is near a bench by the western gate after Maria joins you. A syringe, health items and handgun ammunition are also available around the park. If you are pursuing the Maria ending, protect Maria during enemy encounters and use the optional interactions listed later in this chapter; if you are avoiding that ending, do not deliberately seek those interactions.
- Save after leaving Blue Creek Apartments.
- Meet Maria at the end of the Rosewater Park pier.
- Collect the park supplies and the So Far from Home Strange Photo if required.
- Mark locked streets and inaccessible buildings on the map instead of repeatedly checking them.
2. Explore Nathan Avenue, Octantis Fuels and Pete’s Bowl-O-Rama
Leave Rosewater Park and explore Nathan Avenue before going to Jacks Inn. The Silent Hill Historical Society is locked at this stage, but the road outside contains supplies and the Bloody Note near a corpse at the western end of Nathan Avenue. Pete’s Bowl-O-Rama is optional. Inside, collect the available supplies, use the save point in the employee room, and inspect the pizza leftovers on the counter if you are collecting Glimpses of the Past.
The Garage Jack Lever is behind Octantis Fuels, under the green car in the station’s rear lot. Picking it up triggers a group of enemies, including Lying Figures, a Creeper and a Mannequin. Either clear a safe path or retreat toward the street rather than fighting in the cramped rear lot. Take the lever to the garage opposite Jacks Inn and use it on the jack at the rear entrance. Crawl inside, let Maria enter if you want the Maria-ending interaction, then collect the supplies and the Made It! Strange Photo beside the raised car. The garage is optional and does not unlock the motel gate.
- Search Nathan Avenue and collect the Bloody Note if pursuing collectibles.
- Visit Pete’s Bowl-O-Rama for its save point, supplies and optional Glimpse of the Past.
- Take the Garage Jack Lever from beneath the green car behind Octantis Fuels.
- Open and search the garage opposite Jacks Inn if desired.
- On New Game+, inspect the safe in Pete’s Bowl-O-Rama and enter 1887 for the Rusted Key.
3. Enter Jacks Inn and reach room 107
Go to Jacks Inn and save on the car in the inner courtyard. The motel gate is locked, so enter reception and read the Reception Desk Note on the bulletin board. It directs you to room 107. Room 107 is upstairs and cannot be reached directly: first break the window of room 108, enter room 108, then break through the damaged wall into room 107.
Search room 107 for the Toolbox Memo and the available health and ammunition. Return to room 108 afterward. Maria has found another outfit in the closet, and the game gives you an optional response. If you are following the Maria-ending route, respond to her question about the dress. If you are not targeting Maria, you can ignore the interaction. Return to reception only after you have searched the accessible motel rooms.
- Save in the Jacks Inn courtyard.
- Read the Reception Desk Note in reception.
- Enter room 108 through its broken window.
- Break through into room 107 and collect the Toolbox Memo.
- Return to room 108 and complete or skip Maria’s optional conversation.
4. Solve the Jacks Inn safe and rescue Maria
Use the Toolbox Memo to solve the reception safe. On Light and Standard puzzle difficulty, the memo gives the sequence 0451. On Hard puzzle difficulty, the combination is 0533. Enter the digits in order and take the Gate Key. The key is the required item for leaving the motel; the Garage Jack Lever is not a substitute for it.
After opening the safe, follow the objective to Maria’s room. A Mannequin has attacked her. Defeat the enemy, then search the storage room that becomes accessible for a Health Drink. Return to the courtyard and use the Gate Key on the locked gate. Make a separate save before opening the gate if you intend to replay this section for ending variations. Passing through the gate is required for the main story and also counts as one of the Maria-ending interactions.
- Open the Jacks Inn safe with 0451 on Light or Standard, or 0533 on Hard.
- Collect the Gate Key.
- Defeat the Mannequin attacking Maria.
- Search the newly accessible storage room.
- Save, then use the Gate Key on the motel gate.
5. Cross Munson Street and collect optional New Game+ items
After passing through the gate, search the nearby streets for supplies before following the main route. Baldwin Mansion cannot be entered during this visit, but its entrance area contains the White Chrism in New Game+. Take it from the table near the entrance if you are collecting the Rebirth-ending items. On Katz Street, find the backyard gate marked with a dog-bone symbol. In New Game+, enter the yard and take the Broken Key Part from the doghouse. Combine it with the first Broken Key Part from the Pet Store in Eastern South Vale to create the Dog Key.
If you are pursuing the Maria ending, speak with Maria in front of Baldwin Mansion. Otherwise, continue without seeking optional dialogue. Do not spend time trying to open the mansion or other doors that remain locked. The path forward is along Katz Street, where a cutscene occurs after the road ends at a chasm.
- Collect White Chrism in New Game+ near Baldwin Mansion.
- Collect the New Game+ Broken Key Part from the doghouse on Katz Street.
- Combine both Broken Key Parts into the Dog Key when both are available.
- Speak with Maria at Baldwin Mansion only if following her ending route.
6. Survive the monster escape and obtain the Steel Pipe
When the road ends, a group of Lying Figures attacks. James and Maria retreat through a nearby gate. A cutscene replaces the Wooden Plank with the Steel Pipe, which has greater reach and is useful against isolated enemies. This is not a boss fight. The objective is to escape the neighborhood, not to kill every enemy.
Follow the route through the connecting streets while staying toward the right side whenever the path branches. A lit shed marks the direction of travel. A Mannequin waits inside one shed, so enter ready to dodge or use a quick attack. Continue through the open green garage and move toward the next lit shed and fence. Supplies are placed along this route, but collect them only when the nearby enemies are not blocking your exit. Once James moves the plank at the final fence, the escape sequence ends and Maria allows entry into Heaven’s Night.
- Obtain the Steel Pipe during the escape sequence.
- Keep moving instead of fighting the entire enemy group.
- Use the lit sheds and open green garage as route landmarks.
- Reach the final fence and move the plank to escape.
7. Search Heaven’s Night, Moonlight Grove and the Reverie Theater
Heaven’s Night is a temporary safe section with supplies and optional ending interactions. Search the kitchen, dressing room and corridor for a syringe, handgun ammunition and a Health Drink. The Strange Photo Ready to Kill It! is in the dressing room. After the cutscene in the main club, inspect the four posters, the nurse outfit, the whiskey bottle and the lost-and-found bin if you are following the Maria-ending route. These interactions are optional for ordinary progression.
Leave through the back route and enter Moonlight Grove through the gate. Follow Maria to the special place and complete the scene there. Before leaving, search the southern side of the park for the Church Entrance Strange Photo and a Health Drink. Exit through the northern route and enter the Reverie Theater through the high open window.
Inside the theater, collect the handgun ammunition near the drop point and search the lobby restrooms if needed. Push the wardrobe to clear the exit, then enter the auditorium for the cutscene. The Best Flavor! Strange Photo is on a seat armrest behind Eddie. Continue upstairs through the projection rooms, move the ladder when necessary, descend to the lobby and leave the theater. James reunites with Maria outside.
- Search Heaven’s Night for supplies and the Ready to Kill It! Strange Photo.
- Inspect all listed Heaven’s Night objects only if pursuing the Maria ending.
- Collect the Church Entrance Strange Photo in Moonlight Grove if required.
- Enter the Reverie Theater through the high window.
- Collect Best Flavor! behind Eddie and exit through the theater lobby.
8. Follow Carroll Street into Brookhaven Hospital
After leaving the theater, search the accessible parts of Katz Street and Carroll Street for ammunition and healing items. The northern Brookhaven Hospital parking lot contains additional supplies, including ammunition near dumpsters and a Health Drink in an ambulance. A syringe is available near the hospital entrance, and more handgun ammunition can be found near the southern dead end of Carroll Street.
When you are ready to continue, follow Laura south and enter Brookhaven Hospital. There is no Pyramid Head sequence in Western South Vale, so do not hold ammunition for an encounter that does not occur here. The chapter is complete once James crosses into the hospital and the next area loads. Before entering, verify any collectibles or New Game+ items you wanted from the streets, because later progression eventually closes off earlier routes.
- Search the Brookhaven parking lot and Carroll Street for supplies.
- Confirm any desired western-area collectibles are collected.
- Do not expect or search for a Pyramid Head boss encounter here.
- Follow Laura into Brookhaven Hospital.
- Make a new manual save after the hospital transition.
Before you move on
- James has met Maria at Rosewater Park and passed through the Jacks Inn gate using the Gate Key.
- The Garage Jack Lever has been collected and the optional garage searched, or deliberately skipped.
- The motel Mannequin encounter is complete and the storage room has been checked.
- The Katz Street monster escape is complete and James has obtained the Steel Pipe.
- Heaven’s Night, Moonlight Grove and the Reverie Theater have been traversed.
- James has followed Laura along Carroll Street and entered Brookhaven Hospital.
References for this chapter
- Silent Hill 2 Remake - Western South Vale Walkthrough
- Silent Hill 2 Remake Endings
- Silent Hill 2: South Vale Walkthrough - All Collectibles: Glimpses of the Past, Memos, Strange Photos
- Silent Hill 2 Remake Walkthrough: Route, Bosses, Missables and All Endings
- West Side of South Vale Walkthrough - Silent Hill 2 Remake (2024)
Brookhaven Hospital — the first major indoor hub
Brookhaven Hospital requires three bracelets, the Director’s Office hand and safe puzzles, and a rooftop sequence that leads to Flesh Lip. The X-ray radiographs and viewer are optional clue items: the Room D1 lock always uses Right 4, Left 37, Right 12 on Light, Standard, and Hard. You must still open Room D1 and take the Filthy Bracelet because all three bracelets are required for the Director’s Office hand. Save in Reception, Room C3, the Director’s Office, and before using the Rooftop Key. The real-world hospital contains 13 Memos, 2 Strange Photos, and 5 Glimpses of the Past. The chapter ends when Flesh Lip is defeated and James is carried into Otherworld Brookhaven Hospital.
1. Enter Brookhaven Hospital and restore power to the elevator
Take the Brookhaven Hospital maps from the booklet holder in the lobby. Enter Reception, collect the Key Locker Note from the noticeboard, and save in the Reception Office. Break the glass into Examination Room 3 and search the connected examination area for the Nurse’s Memo. Use the three framed lobby photographs and the memo to determine the key-locker combination: 287 on Light, 724 on Standard, and 152 on Hard. Open the locker and take the Basement Key.
Unlock the basement stair door and take the Hospital Basement Map. Follow the route through the Pump Room and Generator Room, then search the Boiler Room for the Empty Fuel Can. In Laundry Storage, move the trolley beneath the high opening and climb into the Laundry Room. Use the Empty Fuel Can on the fuel tank to obtain the Filled Fuel Can, return to the generator, and activate it. Collect nearby supplies and ride the elevator to 2F.
- Brookhaven Hospital maps
- Key Locker Note
- Nurse’s Memo
- Basement Key
- Hospital Basement Map
- Filled Fuel Can
- Reception save
2. Search 2F, take the Shotgun, and reach Medical Records
Maria rests in Room C5 after the elevator sequence. Room C3 contains a save point. If you are tracking the Maria ending, check on Maria whenever the game permits, but do not mistake C5 for the save room.
Search the Nurses’ Station area and use the crawlspace near the station to reach Room L3 and the Observation Room. Take the Strange Photo titled Her Drawings. Return toward the main 2F route and inspect the Laundry Room bin for Glimpse of the Past 11. Enter the Director’s Office and examine the hand, safe, and patient material, but leave both puzzles unfinished until all three bracelets are collected.
In Room C1, pull down the wall poster to reveal the Interview Transcript. In Room M1, interact with the bed for Glimpse of the Past 12. Search the Women’s Locker Room, interact with the teddy bear to obtain the Bent Needle, and take the Shotgun from the open locker. Then enter the Nurses’ Lounge and take the L1 Room Key from the table.
Use the L1 Room Key on Room L1. Push the trolley beneath the opening, climb through, and follow the utility route. James falls into the wall passage and reaches Medical Records on 1F. Take the Scribbled Note, interact with the typewriter for Glimpse of the Past 13, and collect the Marked Bracelet from the red book. A Mannequin appears after the bracelet is taken, so move into open space before fighting.
- Room C3 save
- Strange Photo: Her Drawings
- Glimpses of the Past 11 and 12
- Interview Transcript
- Bent Needle
- Shotgun
- L1 Room Key
- Scribbled Note
- Glimpse of the Past 13
- Marked Bracelet
3. Open the Inner Ward and gather the remaining bracelet materials
Return to 2F and take the northwestern stairwell to 3F. Break the window of Exam Room 5 and take the 1F Inner Ward Key. The nearby X-Ray Room contains the X-Ray Memo and Radiograph of a Pelvis. Both the radiograph items and the viewer puzzle are optional. You may collect them for the clue route, but they are not required to open Room D1 because the lock combination is fixed on every puzzle setting.
Return to 1F and use the Inner Ward Key. Search Examination Room 1 for the Strange Photo titled At Least She Was There. Enter the Doctors’ Lounge and take the Keypad Combination Note from the bulletin board. Continue through the Dayroom and Pharmacy to reach the Garden and Pool area.
In the Pool Shower Room, take the Medical Tube. Combine it with the Bent Needle, then use the resulting tool on the clogged drain in the Pharmacy to obtain the Maintenance Key. Use the Maintenance Key on the pool hatch, turn the valve to drain the pool, and enter the empty pool. Break the wall marked with the crying-eye symbol to obtain the Bloodstained Bracelet.
Search the Kitchen or Pantry area on 1F for the Mold Remover only if you intend to complete the optional X-ray clue route. Return to 2F and enter the Nurses’ Station. Use 3578 on Light or Standard, or 7456 on Hard. Enter the Treatment Room and take the Treatment Room Note and Moldy Radiograph from the bathtub. Combine the Moldy Radiograph with the Mold Remover to create the Cleaned Up Radiograph. If you are skipping the viewer, these radiographs can be left uncollected.
- 1F Inner Ward Key
- Strange Photo: At Least She Was There
- Keypad Combination Note
- Medical Tube
- Maintenance Key
- Bloodstained Bracelet
- Nurses’ Station code: 3578 Light/Standard or 7456 Hard
- Optional Mold Remover
- Optional Moldy Radiograph
- Optional Cleaned Up Radiograph
4. Open Room D1 and retrieve the mandatory Filthy Bracelet
Return to the X-Ray Room on 3F only if you want to use the optional clue route. Place the available radiographs on the viewer and align the images with the markings. The completed viewer reveals 4, 37, 12, but solving the viewer is not required. The radiographs, Mold Remover, and Cleaned Up Radiograph are all optional because the Room D1 combination does not change with puzzle difficulty.
To open Room D1 directly, operate the lock Right to 4, Left to 37, and Right to 12, then confirm. This works on Light, Standard, and Hard. Enter Room D1 and inspect the bed beneath the sheet to take the Filthy Bracelet. Room D1 is mandatory even when the X-ray clue route is skipped, because the Filthy Bracelet is one of the three items needed for the Director’s Office hand puzzle.
- Room D1 opened
- D1 lock entered as Right 4, Left 37, Right 12
- Filthy Bracelet collected
- Optional: all four radiographs aligned on the viewer
5. Solve the Director’s Office puzzles and reach the rooftop
Return to the Director’s Office on 2F and place the bracelets on the hand from top to bottom: Bloodstained Bracelet, Marked Bracelet, Filthy Bracelet. Rotate them until the displayed values read 92, 45, and 71. The hand releases the Director’s Storage Room Key.
Use the key on the storage room opposite the office save point and take the Safe Button. Rearrange the books in the storage room to reconstruct the lion image and learn the astrological-symbol cipher. Insert the Safe Button into the safe and enter the hand values through the symbols. On Light and Standard, the resulting symbol sequence is the one mapped by the completed book arrangement; the same hand values are used across difficulties. The safe contains the Rooftop Key and Safe Note.
Save in the Director’s Office before using the Rooftop Key. Use the northwestern stairwell to reach the roof. Search the catwalk and inspect the broken fence for Glimpse of the Past 14. Enter the small rooftop room and take Page From A Diary. When you try to leave, the Pyramid Head sequence triggers and James falls back into 3F.
- Three bracelets placed in the correct order
- Director’s Storage Room Key
- Safe Button
- Director’s Office safe solved
- Rooftop Key
- Glimpse of the Past 14
- Page From A Diary
- Manual save before rooftop transition
6. Finish the hospital, defeat Flesh Lip, and confirm the Otherworld transition
After the rooftop scene, James returns to 3F. Enter Room I3 and inspect the blood-stained wall for Glimpse of the Past 15. Search the Hydrotherapy Room and nearby corridors for health items and ammunition, then follow the route toward Laura. If you are collecting, confirm that the real-world hospital total is 13 Memos, 2 Strange Photos, and 5 Glimpses of the Past before committing to the boss sequence.
During Flesh Lip’s first phase, keep moving and watch the ceiling. Its metal cage protects much of its front, so direct fire into the cage is inefficient. Shoot exposed limbs when the creature hangs overhead. When it drops low and pauses, use the Steel Pipe if you have a safe opening, or fire from an exposed side rather than into the metal plate.
In the second phase, Flesh Lip moves across the floor and uses broad arm swings, spinning attacks, and a stunning sound wave. Maintain distance, dodge instead of trading damage, and fire from the unprotected side. The Shotgun is useful when the boss commits to an attack. Collect arena supplies before the fight ends because the area cannot be revisited after the transition.
Defeating Flesh Lip triggers the sequence in which another creature seizes James and carries him into Otherworld Brookhaven Hospital. That forced transition is the completion point for this chapter.
- Glimpse of the Past 15
- Hospital collectible sweep completed if applicable
- Flesh Lip defeated
- Arena supplies collected
- James carried into Otherworld Brookhaven Hospital
Before you move on
- The Basement Key, Shotgun, L1 Room Key, Inner Ward Key, Maintenance Key, Rooftop Key, and all three bracelets have been obtained.
- Room D1 has been opened with Right 4, Left 37, Right 12, and the Filthy Bracelet has been collected.
- If using the optional clue route, the radiographs have been aligned on the viewer and the same 4-37-12 combination has been revealed. The viewer is not required for completion.
- The Director’s Office hand puzzle and safe are solved, and the Rooftop Key has been used.
- If pursuing collectibles, Brookhaven’s 13 Memos, 2 Strange Photos, and 5 Glimpses of the Past are recorded before leaving the real-world hospital.
- Flesh Lip is defeated and James has been carried into Otherworld Brookhaven Hospital.
Otherworld Hospital and town — corrupted spaces and puzzles
After Brookhaven Hospital shifts into its Otherworld form, James must cross several newly opened hospital routes to obtain the Lapis Eye Key, unlock the Chained Box, recover the -1 Elevator Button, and find the Copper and Lead Rings. The Chained Box has three locks, and each lock closes a different branch of the hospital, so complete the western, southern, and eastern collectible sweeps before using the corresponding key or code. On Light or Standard puzzle difficulty, the two codes are 1622 and 9659. The area contains 9 memos, 2 Strange Photos, and 1 Glimpse of the Past. After placing both rings on the Lady of the Door, collect the highly missable Ominous Note before descending, survive the chase, take the Hospital Entrance Key from Reception, and leave Brookhaven.
1. Enter Otherworld Brookhaven and reach the Chained Box
Begin in the transformed hospital’s small room north of the Dayroom. Go through the double doors and take Memo 38, Evaluation Card, Patient #3141, from the wheelchair. Search nearby for supplies, then use the save point at the end of the corridor before entering the elevator.
Ride to 2F and inspect the covered Chained Box in the lobby. A save point is nearby. This box is the area’s central landmark. Do not use any of its locks until you have completed the collectible sweep for the route that lock will close. Start by taking the western route through the Nurses’ Station, Treatment Room, Storage, and Nurses’ Lounge. The knife-wielding Nurses and hiding Mannequins can make narrow rooms dangerous; use doorways as firing bottlenecks or run through when the route is clear.
- Collect Memo 38 in the Dayroom.
- Use the first-floor save point before taking the elevator.
- Mark the Chained Box and nearby second-floor save point.
- Search the western hospital route before opening any Chained Box lock.
2. Get the Instrument of Force and Key of Bliss
From the western side of 2F, take the stairs to 3F. Enter the X-Ray Room and collect Memo 39, The Procedure, from the table. Continue to Exam Room 4 and take the Instrument of Force from the medical table beside the dummy in the surgical chair.
Break through the damaged wall into Room D2 and use the ladder in Room D1 to descend to the first-floor Kitchen. Move through the Kitchen, Pantry, Cafeteria, and Storage/Medical Records. In the small room northwest of Medical Records, crawl through the wall gap and take the Key of Bliss from the hole in the wall. Return to 3F using the same ladder.
Back in Exam Room 4, use the Instrument of Force on the dummy’s right arm, then use the Key of Bliss on its eye socket. James receives the Lapis Eye Key. Do not use it on the Chained Box yet: using it closes the western route, so confirm that you have finished searching this branch first.
- Collect Memo 39 in the X-Ray Room.
- Collect the Instrument of Force in Exam Room 4.
- Collect the Key of Bliss northwest of Medical Records.
- Use both items on the dummy to receive the Lapis Eye Key.
- Finish the western-route sweep before using the Lapis Eye Key.
3. Complete the southern route and record the 1622 lock code
Return to 2F and take the southern route through the Restroom. Follow the chain across the route, then go west to Room L1 and continue to Room M3. Break the damaged wall into Room M2 and collect Memo 40, Calendar Page, from the floor beneath the hospital bed.
The clues produce 1622 on Light or Standard puzzle difficulty: one year from the memo, six pills in the sink, two o’clock on the clock in Room M1, and two flashes of the light viewed through the hole. Before entering the code, return through the southern rooms and inspect Room M5 for Glimpse of the Past 16, the handprint drawing on the wall. This collectible is missable because entering 1622 locks the southern route.
Once the entire southern branch is clear, enter 1622 on the Chained Box’s left combination lock. If you are playing a different puzzle difficulty, use the solution appropriate to that setting rather than assuming this code applies unchanged.
- Collect Memo 40 in Room M2.
- Inspect the handprint drawing in Room M5 for Glimpse of the Past 16.
- Finish all southern-route exploration before entering 1622.
- Enter 1622 on the left lock on Light or Standard difficulty.
4. Complete the eastern route and reveal the 9659 keypad code
From the Chained Box, take the eastern corridor. Break through the southern wall into the Laundry Room and move the trolley so James can climb into Room L3. Continue to the Observation Room. On the floor in front of the static television, collect the Director’s Office Key; Memo 41, Patient’s Note, is on the nearby bed table.
Use the hole from the Observation Room to reach Room C5 and take Strange Photo 14, No one knows, from the bedside-table drawer. Return to the main route, unlock the Director’s Office, and collect Memo 42, Manic Scribble, from the cabinet. Climb the ladder in the office to Room I7 and collect Memo 43, Nurse’s Note, from the small table.
Follow the red cable beyond the treatment stretcher to the generator and restore power. Crawl through the nearby opening into the locked restroom and collect Memo 44, Director’s Note. Return to Room I7 and interact with the powered treatment stretcher to reveal 9659. Collect every eastern-route item before entering the code, because using 9659 closes this branch. Then enter 9659 on the Chained Box’s right keypad.
- Collect the Director’s Office Key and Memo 41 in the Observation Room.
- Collect Strange Photo 14 in Room C5.
- Collect Memo 42 in the Director’s Office.
- Collect Memo 43 in Room I7.
- Power the generator and collect Memo 44 in the locked restroom.
- Reveal 9659 at the treatment stretcher.
- Finish the eastern-route sweep before entering 9659.
5. Open the Chained Box and recover both rings
After the western, southern, and eastern routes are complete, use the Lapis Eye Key, enter 1622 on the left lock, and enter 9659 on the right keypad. The box opens and a scene gives James the -1 Elevator Button. Insert the button into the elevator and descend to the basement.
Move through the basement rooms until you reach the Pump Room. Take the Copper Ring from the crate. Maria rejoins James after this pickup. Use the stairs to return to 1F. If you have spent significant healing items or ammunition, save before continuing through the first-floor route.
Enter the Pool Room and take Strange Photo 15, They mustn’t know, from the bench at the back. Continue through the shower area to the Doctors’ Lounge and interact with the fallen freezer to obtain the Lead Ring. In the adjacent Locker Room, collect Memo 45, Dissociated Notice, from the bench.
The Pharmacy’s decorative box is optional. If you open it, answer the radio quiz with 2, 3, 1. These correspond to 67, Wiltse Road, and Miriam. The box provides supplies, but a wrong answer cannot be retried, so leave it unopened if you are not certain.
- Open the Chained Box with the Lapis Eye Key, 1622, and 9659.
- Obtain the -1 Elevator Button from the opening scene.
- Collect the Copper Ring in the basement Pump Room.
- Collect Strange Photo 15 in the Pool Room.
- Collect the Lead Ring in the Doctors’ Lounge freezer.
- Collect Memo 45 in the Locker Room.
- Optionally open the Pharmacy box with 2, 3, 1.
6. Use the rings, collect the final memo, and leave the hospital
Return to 2F and approach the Lady of the Door. Place the Copper Ring and Lead Ring on the door to unlock the final route. Before descending all the way, move down one stair landing and collect Memo 46, Ominous Note, from the floor. It is highly missable; continuing too far down the stairs can remove your opportunity to pick it up.
After the scene, a chase begins. Do not stop to clear every enemy. Run through the available corridors, turn when the route requires it, and continue until James reaches the elevator. After the following scene, go to the Reception Office and use the save point.
Take the Hospital Entrance Key from the top of the book on the desk. Use it at the hospital entrance to leave Brookhaven. This is the area’s point of no return, so verify the collectible checklist before using the key.
- Place both rings on the Lady of the Door.
- Collect Memo 46 on the first stair landing.
- Run through the chase to the elevator.
- Save in the Reception Office.
- Take the Hospital Entrance Key from the book.
- Use the key at the hospital entrance.
Before you move on
- Memo 38, Memo 39, Memo 40, Memo 41, Memo 42, Memo 43, Memo 44, Memo 45, and Memo 46 have been collected if pursuing the area’s complete memo total.
- Strange Photo 14, No one knows, and Strange Photo 15, They mustn’t know, have been collected.
- Glimpse of the Past 16 has been inspected in Room M5.
- The Lapis Eye Key, -1 Elevator Button, Copper Ring, Lead Ring, and Hospital Entrance Key have been obtained.
- The Chained Box has been opened with the Lapis Eye Key, 1622, and 9659 on Light or Standard puzzle difficulty.
- The two rings have been placed on the Lady of the Door, and the Ominous Note was collected before the chase.
- James has used the Hospital Entrance Key and exited Brookhaven Hospital, transitioning to Otherworld South Vale.
Return to Western South Vale — revisiting and unlocking new routes
After the Otherworld South Vale tunnel, James returns to Rosewater Park for a final story visit with Angela. Reach the marked statue, investigate the ground after the scene, and take the Historical Society Key. Before leaving, you can detour to Jacks Inn Room 106 and inspect the revealed symbol for the All Seems in Order trophy or achievement. Then follow Nathan Avenue west to the Silent Hill Historical Society. This chapter is short but contains an irreversible transition into the museum and its underground route. The Garage Jack Lever, Jacks Inn safe, Gate Key, White Chrism, Dog Key part, Heaven’s Night, Moonlight Grove and Reverie Theater are not part of this revisit; they belong to the earlier Western South Vale chapter. The required objective here is to obtain the Historical Society Key and descend through the museum until the Spiral-writing Key opens the next route.
1. Return through the tunnel to Rosewater Park
After completing the Otherworld South Vale sequence, continue through the tunnel. James emerges in Rosewater Park. Open the map and look for the marked destination rather than returning to the earlier motel route. The relevant path is toward the park’s western side: go left from the entrance, climb the stairs, and pass through the metal gate leading toward the Jennifer Carroll statue.
This is a story route, not a second sweep of the earlier Western South Vale area. Do not spend time searching for the Garage Jack Lever or reopening Jacks Inn’s safe. Those objectives were completed during the first nighttime visit and are not required here. Save before approaching the marked statue if you want a safe recovery point before the museum section.
- Exit the tunnel into Rosewater Park.
- Follow the map marker to the Jennifer Carroll statue.
- Save before triggering the Angela scene if you want a nearby reload point.
2. Trigger Angela’s scene and take the Historical Society Key
Approach the Jennifer Carroll statue to begin the scene with Angela. When control returns, inspect the ground directly in front of the statue. A box is revealed there; interact with it to obtain the Historical Society Key. This is the mandatory progression item for the chapter.
Do not leave the park without taking the key. The game does not require another Jacks Inn puzzle or a replacement for the Gate Key at this point. Once the Historical Society Key is in your inventory, leave through the park entrance and return to Nathan Avenue.
- Complete the Angela scene at the Jennifer Carroll statue.
- Inspect the ground in front of the statue.
- Take the Historical Society Key.
3. Optional Jacks Inn Room 106 interaction
If you are pursuing the All Seems in Order trophy or achievement, stop at Jacks Inn while traveling west along Nathan Avenue. Enter Room 106 and inspect the symbol revealed behind the tear in the wallpaper. This interaction is optional for campaign progression and does not provide the Historical Society Key.
After inspecting the symbol, leave the motel and continue west. The motel’s reception safe is not part of this chapter’s route, so do not use the earlier 0451 or 0533 solution here. Those codes belong to the first Western South Vale visit.
- Visit Jacks Inn Room 106 only if pursuing All Seems in Order.
- Inspect the revealed symbol behind the torn wallpaper.
- Return to Nathan Avenue.
4. Follow Nathan Avenue to the Silent Hill Historical Society
From Rosewater Park, follow Nathan Avenue west. The Historical Society is at the far end of the road. Search the street for supplies if needed, but treat the museum entrance as the chapter’s point of no return for this district. Once you enter and begin descending, you are committed to the Historical Society and its underground continuation.
The museum entrance has a save point nearby. Use it before exploring the exhibits. The revisited Western South Vale segment contains one Strange Photo, titled The new clock, inside a display case in the exhibition hall to the left of the main hall. There are no memos or Glimpses of the Past listed for this chapter’s revisited section.
- Follow Nathan Avenue west to the museum.
- Use the save point near the Historical Society entrance.
- Collect Strange Photo: The new clock from the display case in the left exhibition hall.
5. Search the Historical Society and collect the New Game+ item
Explore the exhibition halls before descending. The required route continues through the stairs at the rear of the museum. In New Game+, inspect the black goblet set into a wall niche in the main exhibition hall to collect the Obsidian Goblet. It is an optional New Game+ ending item, not a requirement for the main campaign.
Descend the stairs all the way down. At the bottom, search the desk area for available supplies, then continue through the door and corridor. A hole at the end of the route leads down into the next section. The descent is mandatory; there is no alternate surface route around the museum.
- Search the museum exhibits before descending.
- In New Game+, take the Obsidian Goblet from the wall niche.
- Descend the rear stairs and continue to the hole at the corridor’s end.
6. Escape the well, obtain the Spiral-writing Key and solve the keypad
After dropping into the circular well, turn around and move counterclockwise around the wall. Break the third wall section on the left; this one conceals the door out of the well. Follow the flooded corridor, deal with the Lying Figure, climb the stairs and enter the door on the right.
In the next area, locate the small red-lit room and take the Spiral-writing Key from the floor. Picking it up traps James inside a room containing creatures and a keypad. The keypad solution is randomized from the three unstained illuminated buttons: 2, 3 and 9. Try the six possible orders until one works: 239, 293, 329, 392, 923 or 932.
Once the door opens, return to the floor gates and use the Spiral-writing Key. Drop through the opened gate to continue toward Toluca Prison. This completes the chapter’s required route; there is no return to Western South Vale after the descent.
- Break the third wall section on the left inside the well.
- Take the Spiral-writing Key from the red-lit room.
- Solve the keypad with the six permutations of 2, 3 and 9.
- Use the key on the floor gates and descend toward Toluca Prison.
Before you move on
- The Historical Society Key has been collected from the box in front of the Jennifer Carroll statue.
- The optional Room 106 symbol at Jacks Inn has been inspected if the All Seems in Order trophy or achievement is being pursued.
- Strange Photo: The new clock has been collected from the Historical Society exhibition hall.
- The Obsidian Goblet has been collected from its New Game+ wall niche if the run is targeting the Rebirth ending.
- The Spiral-writing Key has been taken, the keypad room has been escaped, and the floor gate has been opened for the descent toward Toluca Prison.
Toluca Prison — scales, cell blocks, and the route to the Labyrinth
After falling through the Historical Society, James enters Toluca Prison through the Canteen. Establish the Armory and Yard as save points, collect the prison map, then use the scales to open four animal-marked routes in sequence: Headless Serpent, Hornless Ox, Eyeless Boar and Wingless Dove. Each route provides another weight or key item needed for the next section. The prison’s required progression includes the Witness Room generator, Armory Key, Hunting Rifle, Block D Key, Shiv Key, Upper Floor Key, Warden’s Office typewriter and basement cell controls. Collect the prison’s missable Memos, Glimpses of the Past and Strange Photos before using the Execution Lever, because the gallows sequence locks out the earlier prison routes. Match the gallows poems and choose a justified prisoner; the exact arrangement is randomized by difficulty and run. After the correct noose drops James into the morgue, descend through the holes and elevator, then stop when he reaches the Labyrinth route. Abstract Daddy is not part of this chapter and begins in Chapter 09.
1. Enter Toluca Prison and establish the Armory and Yard as supply points
After using the Spiral-writing Key at the Historical Society, James falls into the Toluca Prison Canteen. Turn around for a Health Drink, then check the wooden tables on the right for Glimpse of the Past 1 before speaking to Eddie. After the scene, leave through the double doors and enter the room directly ahead. This is the Armory. Collect the Toluca Prison map, Memo 1, Gun Cabinet Notice, Handgun Ammo and Rifle Rounds, then use the save point. The Hunting Rifle is visible in its locked cabinet and becomes available after the first prison route.
Go to the Chapel and take the Heaviest Weight from the altar. Search the Vestry for supplies and read the available document if you are completing the prison’s memo sweep. From the Chapel, enter the main cell-block area and collect Glimpse of the Past 2 in Cell A3. Check A5, B1, B3 and A8 for supplies; break the wall from B3 to reach A8. The Yard contains another save point and the scales. From this point onward, return to the Yard after every route and save before taking a newly acquired weight.
- Collect Glimpse of the Past 1 in the Canteen.
- Collect the prison map and Gun Cabinet Notice in the Armory.
- Take the Heaviest Weight from the Chapel altar.
- Collect Glimpse of the Past 2 in Cell A3.
- Save at the Armory or Yard before starting the scales route.
2. Open the Headless Serpent route and recover the Medium Weight
At the scales, leave the Starter Weight on the left pan and place the Heaviest Weight on the right pan. The Starter Weight is the first weight already present at the scales; it is not the Lightest Weight found later in the basement. This arrangement opens the Headless Serpent door leading toward Death Row.
Follow the route to Cell E4 and collect Memo 2, Family Photo. Continue to the Witness Room and save before operating the generator. The switch sequence depends on puzzle difficulty. On Light, use 4, 5, 2, 1, 3. On Standard, use 6, 4, 5, 1, 3, 2. On Hard, use 4, 5, 2, 1, 3, 6, 7. These positions are counted from left to right. When the switches are raised and the dial reaches the required red zone, operate the main breaker to open the Death Chamber.
Take the Medium Weight from the electric chair. After the alarm sequence, return through the cell block and break through Cell E1. Search Cell E13 for Strange Photo 1, Four Months to Go. Continue through the gap near Cell E10 to reach the Witness Checkpoint area and take the Armory Key. Return to the Armory, unlock the cabinet and collect the Hunting Rifle. Save before returning to the Yard.
- Open the Headless Serpent route with Starter left and Heaviest right.
- Collect Memo 2 in Cell E4.
- Solve the Witness Room generator for the selected puzzle difficulty.
- Take the Medium Weight from the Death Chamber.
- Collect Strange Photo 1 in Cell E13.
- Take the Armory Key and remove the Hunting Rifle from its cabinet.
3. Open the Hornless Ox route and recover the Heavy Weight
At the Yard, place the Starter and Heaviest Weights on the left pan and the Medium Weight on the right pan. This opens the Hornless Ox door near Cell A1. Follow it upstairs to the second-floor cell blocks. Collect Memo 3, Guard’s Letter, along the corridor, then reach the Guardroom and take the Block D Key from the desk.
Use the Block D Key to enter Block D and search Cell D5. Collect Memo 4, Threatening Note, and take the Shiv Key from the medical container. Use the Shiv Key on Cell C4, then crawl through the opening and pipes. Collect Memo 5, Paranoid Note, from the pipe route and Memo 6, Crumpled Note, from the Changing Room bench.
Enter the Showers and collect Glimpse of the Past 3 along the right-hand side of the room. At the rear wall, search the hole repeatedly until James obtains the Heavy Weight. Enemies activate when the weight is taken. Retreat through the route you used to enter, using doors and corners to separate enemies instead of trying to clear the entire room. Return to the Yard when the route is safe enough to traverse.
- Open the Hornless Ox route with Starter and Heaviest left, Medium right.
- Collect Memo 3, Memo 4 and the Shiv Key.
- Collect Memo 5 and Memo 6 in the crawlspace and Changing Room route.
- Collect Glimpse of the Past 3 in the Showers.
- Take the Heavy Weight and retreat before spending unnecessary ammunition.
4. Open the Eyeless Boar route and obtain the Upper Floor Key and Light Weight
Return to the Yard and put the Starter Weight on the left pan. Place the Medium, Heavy and Heaviest Weights on the right pan. This opens the Eyeless Boar door across from Cell B3. Enter the Boar Section and search the Warehouse for Strange Photo 2, Old Man’s Always Prepared.
Continue to the Visitation Room and collect Memo 7, Prisoner’s Letter, from the last booth. Climb through the broken window beside the memo and follow the corridor around the Break Room. Collect Glimpse of the Past 4 in the southwest section near the stacked furniture. Proceed through the Infirmary, separating the Bubble Heads and using the shotgun if several enemies converge in the room.
Search the Infirmary’s rear room for the Upper Floor Key and Memo 8, Unfinished Report. Use the key on the locked stairway near the Break Room and climb to the Warden’s Office. Interact with the typewriter repeatedly until the drawer opens and gives you the Light Weight. The interaction is based on repeated use of the game’s prompt rather than a normal keyboard-entry puzzle; continue until the drawer releases the item. Save in the nearby room, then return to the Yard.
- Open the Eyeless Boar route with Starter left and Medium, Heavy and Heaviest right.
- Collect Strange Photo 2 in the Warehouse.
- Collect Memo 7 and Glimpse of the Past 4.
- Take the Upper Floor Key and Memo 8 in the Infirmary.
- Open the Warden’s Office drawer and take the Light Weight.
5. Open the Wingless Dove route and recover the Lightest Weight
At the Yard, put the Medium Weight on the right pan and all other available weights on the left pan: Starter, Light, Heavy and Heaviest. This opens the Wingless Dove door at the bottom of the stairs in the main section. Enter the basement and follow the cell-block route until you reach the large control room.
Crawl through the opening to the panel opposite Cell F15. Use the controls so both F5 and F6 receive power, shown by their green indicators. Return to the cells and enter F6. Take the Lightest Weight from the floor and collect Memo 9, Confession, from the wall. The cell locks temporarily and an attack or banging event begins outside. Wait for the event to finish rather than repeatedly trying to force the door.
Leave F6, enter F9 and break through the wall. Use the ladder in F10 to return to the main section and then the Yard. If enemies block a narrow corridor, retreat through the nearest doorway and let them reposition. You do not need to defeat every prison enemy to complete this route.
- Open the Wingless Dove route with Medium right and the other available weights left.
- Power both F5 and F6 at the basement control panel.
- Take the Lightest Weight from Cell F6.
- Collect Memo 9 after the cell event ends.
- Use F9 and F10 to return to the main section.
6. Complete the scales and gallows, then descend toward the Labyrinth
Return to the Yard and place every weight into the scales. For the final arrangement, put the Lightest, Light and Heavy Weights on the left pan. Put the Starter, Medium and Heaviest Weights on the right pan. When the pointer faces the sword marker, take the Execution Lever. Make a separate save before inserting it into the gallows, because using the lever begins the prison’s final progression and prevents a normal return to the earlier cell blocks.
Insert the Execution Lever into the gallows mechanism. Match each beginning verse with its correct ending, then identify a prisoner whose crime was justified by the displayed circumstances. There are two acceptable innocent or justified choices, and the order of the poems can vary with difficulty and run. Do not rely on a fixed noose number from another playthrough. Choose the noose marked with the Roman numeral of one justified prisoner. A wrong choice drops James into a hostile underground detour; escape through that room, return to the Yard and try the gallows again. This is not a permanent ending selection.
After the correct choice, James falls into the morgue. Follow the descent, jumping through the prompted holes, then enter the elevator. At the bottom, save and continue along the route until James reaches the Labyrinth entrance or map transition. Stop the prison chapter there. Do not begin the Angela encounter, Abstract Daddy pursuit, television sequence or machinery-room battle in this chapter; those belong to Chapter 09.
- Complete the final scale arrangement: Lightest, Light and Heavy left; Starter, Medium and Heaviest right.
- Take the Execution Lever and create a separate save before using it.
- Match the gallows poems and select a justified prisoner’s noose.
- Complete the morgue descent and elevator sequence.
- Reach the Labyrinth entrance or map transition without starting the Abstract Daddy encounter.
Before you move on
- The Armory contains the prison map, and the Hunting Rifle has been removed from its cabinet.
- The Heaviest, Medium, Heavy, Light and Lightest Weights have been recovered, with the Starter Weight already present at the scales.
- The Headless Serpent, Hornless Ox, Eyeless Boar and Wingless Dove routes have all been opened.
- The prison collectible sweep is complete: 9 Memos, 4 Glimpses of the Past and 2 Strange Photos.
- The final scale arrangement grants the Execution Lever.
- The gallows puzzle has been completed and James has descended through the morgue and elevator.
- James has reached the Labyrinth entrance or map transition. Abstract Daddy has not been counted as a prison completion requirement.
References for this chapter
The Labyrinth — underground maze, traps and environmental puzzles
Begin this chapter after the Toluca Prison elevator. Save before entering the newspaper-covered apartment, defeat Abstract Daddy through its opening fight, three television encounters and final arena, then follow the maze to the Labyrinth Center. Use the rotating cube to clear the Rotten, Desolate/Flooded and Ruined Areas in order. The Rotten Area requires the Lighter Wick, Iron Key, Lighter Gas and Broken Lighter; combine them and burn the suspended cage rope. The Desolate/Flooded Area requires the Small Key and Wirecutter, while Pyramid Head there is a hazard to evade rather than a boss to defeat. Before entering the Ruined Area, take Strange Photo 21 from the scratched-symbol cube route. Survive the three timed apartment encounters, escape Pyramid Head, take the Great Knife through the strange wall, and descend through James’s grave to Eddie. After defeating Eddie, collect Strange Photo 22 behind the Toluca Lake building, optionally wait in the boat for the Scourge of Toluca Lake trophy, and row to Lakeview Hotel.
1. Enter the Labyrinth and defeat Abstract Daddy
After the Toluca Prison elevator stops, use the Save Point in the corridor. Follow the passage and enter the apartment whose doorway is covered with newspaper sheets. Pick up the Health Drink and Shotgun Shells if you need them, then pass through the apartment and take the left-hand door to trigger the encounter with Abstract Daddy.
For the opening phase, turn away from the boss and use the looping corridors to maintain distance. Its main physical threat is a forward grab, and its sound-wave attack can briefly stun James. Use the Hunting Rifle from range when you have a clear line, but keep moving instead of standing in one corridor. Once enough damage has been dealt, Abstract Daddy retreats and the television sequence begins.
Follow the maze until Angela appears, then move through the apartment route. The first television is in the next sequence of rooms. Destroy it, immediately leave through the newly opened wall gap, and keep moving when Abstract Daddy reappears. Continue through the corridors until you reach the second television, destroy it, and follow the collapsing route to the third. Breaking the third television opens the way to the final arena. Collect nearby ammunition only when the path is safe.
Enter the final arena through the giant fan. Begin with rifle shots if you have room, then switch to the Shotgun as Abstract Daddy closes the distance. Circle around the boss, wait for its lunge, dodge past it, and use one or two close-range blasts during the recovery window. Repeat rather than trying to trade hits. After the boss falls, follow the passage through the maze until James reaches the Labyrinth Center. The encounter is not complete until the final arena fight has ended.
- Use the Save Point after the prison elevator.
- Defeat Abstract Daddy in the opening phase.
- Destroy all three televisions during the chase.
- Defeat Abstract Daddy in the final arena.
- Save again at the Labyrinth Center.
2. Clear the Rotten Area and repair the lighter
At the Labyrinth Center, cross the main area and enter the downstairs room for the Maria scene. Return to the rotating cube and align it with the upward-facing triangle and cross symbol. Enter the cube, follow the upper corridor, and take the left-hand door into the Rotten Area.
Follow the route to the room containing the suspended cage and a Save Point. Before progressing, take the western path to a breakable wall. Smash it and examine the broken noose beyond it to obtain the Labyrinth’s Glimpse of the Past. Return to the cage room and follow the bloody markings through the apartments. Avoid unnecessary fights with Mandarins when the corridors allow you to run past them.
Search the southern route behind the cut bed for the Lighter Wick. Continue through the nearby rooms to the office-cubicle area and take the Iron Key from the desk drawer. Use the Iron Key on the locked door along the eastern passage. Squeeze through the opening beyond the boiling bathtub and follow the corridor to its valve. Turn the valve, return to the bathtub, and take the Broken Lighter.
Continue through the eastern rooms and search the refrigerator filled with rotten flesh for the Lighter Gas. Combine the Broken Lighter, Lighter Gas and Lighter Wick in the inventory to create the Lighter. Return to the suspended cage and use the Lighter on its rope. The cage falls and opens a hole in the floor. Before dropping through, finish the Rotten Area’s supplies and collectible sweep; the jump returns you to the Center and prevents a return to this branch.
- Examine the broken noose for the Glimpse of the Past.
- Collect the Lighter Wick, Iron Key, Lighter Gas and Broken Lighter.
- Turn the valve before taking the Broken Lighter.
- Combine all three lighter components.
- Use the completed Lighter on the suspended cage rope.
- Search the branch before jumping through the cage opening.
3. Navigate the Desolate/Flooded Area and obtain the Wirecutter
Back at the cube, align it with the symbol showing the double cross and two lower circles, then enter the middle route to the Desolate Area. Save at the entrance. Move through the northeastern rooms, squeeze through the walk-in-closet opening and descend ladder II to the Flooded Level.
Follow the flooded passage until the Small Key is visible through an opening, then continue around to ladder I and climb to the handcuffed gate. Take the available side route, descend ladder III and follow the lower flooded path to the Small Key. Return to ladder I, use the Small Key on the handcuffs, turn the valve to raise the gate, and proceed through the opened route.
Push the cart to reach the crawlspace and descend ladder IV. Follow the new Flooded Level passage until the wired fence is visible. Continue around the detour and enter the octagonal area where Pyramid Head patrols. Do not fight him. Use the left-side route and climb ladder VI to reach the upper room containing Strange Photo 20, “Whole world ahead of us.” Return to the lower level after collecting it.
From the octagonal area, take the red-lit route and break through the wall to reach ladder V. Climb into the upper section and follow the corridor to the power box containing the Wirecutter. You can unlock a nearby door to return toward the save point, but progression requires returning to the octagonal area. Expect additional enemies there; run past them when possible, return to the wired fence, and use the Wirecutter on the obstruction.
Squeeze through the cut opening, descend, collect nearby supplies if safe, and jump through the final hole to return to the Labyrinth Center. Do not make this jump until the Small Key route, Strange Photo 20 and Wirecutter route are complete, because the drop closes access to the Desolate/Flooded branch.
- Find the Small Key after descending ladder III.
- Open and raise the handcuffed gate.
- Avoid fighting Pyramid Head in the octagonal area.
- Collect Strange Photo 20 from the ladder VI route.
- Take the Wirecutter from the power box reached through ladder V.
- Cut the wired fence before using the final hole.
4. Complete the rotating-cube sweep before entering the Ruined Area
When you return to the Labyrinth Center, do not enter the final branch immediately. Rotate the cube to the scratched-out symbol and enter it. Go downstairs and collect Strange Photo 21, “Your Best Buddy!” from the floor. This route is unavailable once the Ruined Area has been entered.
If you want additional supplies, rotate the cube to the upside-down version of the scratched-out symbol for the short hidden corridor. You can also use the previously visited Desolate symbol to open another optional supply corridor. These openings are not required for story progression, but they should be checked now for a collectible-focused run.
After the sweep, rotate the cube to the downward-facing triangle and cross symbol. Enter the cube, descend, follow the corridor and take the door on the right to enter the Ruined Area. Save before committing to this branch if you have a suitable manual-save slot.
- Collect Strange Photo 21 before entering the Ruined Area.
- Check the optional cube routes if supplies are needed.
- Use the downward-facing triangle-and-cross opening for the final branch.
- Create a manual save before the Ruined Area if possible.
5. Survive the Ruined Area and reach Eddie’s arena
The Ruined Area contains three apartment arenas. In the first, collect the visible supplies before opening the red door. The fight is timed, so you may either defeat the Nurse and Lying Figures or survive until the exit opens. Clearing the enemies opens the route sooner, but conserving resources is also valid.
The second apartment begins its fight as you enter. Deal with the Nurse, Lying Figure and Mannequins only as necessary, using the rooms and wall gaps to avoid being surrounded. The third apartment contains Mandarins and a Spider Mannequin. The right-hand room provides a safer position for attacking the Mandarins, but you can also evade the group and wait for the timed exit. Search all three apartments for healing items and ammunition before leaving.
A Save Point appears after the third apartment. Use it, then follow the corridor until Pyramid Head appears. Turn around and force your way through the writhing-body passage. Enter the door at the end for the Maria scene. Afterward, leave the room and take Pyramid Head’s Great Knife from the Center where the rotating cube stood.
Carry the Great Knife through the strange wall that previously blocked the route. Drop it after passing the writhing bodies; do not attempt to carry it through the rest of the chapter. Climb the ladders to the underground cemetery, collect the available supplies, and save. Jump through the leftmost grave marked with James’s name. Follow the stairs and bloody doorway to Eddie’s cutscene, then move through the next door to begin the boss fight.
- Search the three timed apartments before leaving them.
- Use evasion when conserving ammunition is more important than kills.
- Save after the third apartment.
- Escape Pyramid Head through the writhing-body corridor.
- Take the Great Knife and drop it after passing the strange wall.
- Save in the cemetery before jumping through James’s grave.
6. Defeat Eddie, collect the lake photo and row to Lakeview Hotel
Eddie’s fight has three phases. In the first, he moves quickly around the meat locker, fires from concealment and can strike James at close range. Stay near the outer perimeter, listen for his footsteps and the sound of the revolver hammer being cocked, then use the Handgun or Hunting Rifle when he exposes himself. Move after each attack instead of remaining in one position.
After taking damage, Eddie shoots the pipes and fills the room with fog. Visibility drops, so sound becomes more important than sight. Keep your distance and listen for his approach. When he closes in for a melee attack, use the Shotgun as he commits to the swing, then reposition. Heal before entering critical condition rather than trying to finish him while injured.
In the final phase, the meat-carriage conveyor activates and Eddie becomes slower. Continue using the carcasses for protection and choose either long-range shots from a safe angle or close Shotgun attacks after he commits to an attack. If you lose track of him, stop chasing blindly and locate him by sound before firing.
After Eddie is defeated, leave the meat locker and reach the Toluca Lake dock. Save at the wooden spool. Before boarding the boat, walk around the building and check behind the steps for Strange Photo 22, “Road trip!” This is the last collectible associated with this route. If you are pursuing the Scourge of Toluca Lake trophy, sit in the boat without progressing for ten minutes before rowing. Otherwise, row toward the distant light until the Lakeview Hotel arrival sequence begins.
- Track Eddie by footsteps and the revolver hammer during phase one.
- Use the Shotgun when Eddie attacks through the fog.
- Survive the conveyor-belt phase.
- Collect Strange Photo 22 behind the Toluca Lake building.
- Wait ten minutes in the boat for Scourge of Toluca Lake, if required.
- Row to the Lakeview Hotel arrival sequence.
Before you move on
- Abstract Daddy has been defeated after the three television encounters and final arena.
- The Rotten Area has been cleared, its Glimpse of the Past was examined, the lighter was assembled and the suspended cage was lowered.
- The Desolate/Flooded Area has been cleared with the Small Key and Wirecutter, and Strange Photo 20 was collected if pursuing collectibles.
- Strange Photo 21 and the optional cube routes were checked before entering the Ruined Area if pursuing a complete collectible run.
- The three Ruined Area arenas, Pyramid Head escape, Great Knife passage and cemetery sequence are complete.
- Eddie has been defeated through all of his phases.
- Strange Photo 22 was collected behind the Toluca Lake building if pursuing collectibles.
- James has boarded and crossed Toluca Lake, and the Lakeview Hotel arrival sequence has begun.
Lakeview Hotel — vertical exploration and the return to horror set-pieces
Cross Toluca Lake and enter Lakeview Hotel’s garden, collecting the hotel maps, supplies, and optional collectibles before beginning the three-figurine route. Search the public floors for the Sunrise Wing Key, solve the Reading Room bookshelf and Room 202 mirror puzzles to obtain Snow White, then collect the fireplace materials and defeat the Mandarin to reach Cinderella. Combine the Can Opener, Paint Can, and Light Bulb to solve the Room 205 vanity mirror and obtain the Employee Elevator Key. Store nearly all equipment before entering the employee elevator, clear the employee section, and retrieve the Little Mermaid from Venus Tears Bar. Recover your equipment, solve the lobby music box, and use the 3F Corridor Key to reach Room 312. Finish collectibles and New Game+ preparations before playing the videotape, because doing so begins the Otherworld hotel sequence and closes access to the earlier hotel areas.
1. Enter Lakeview Hotel and clear the public first-floor route
After crossing Toluca Lake, take the Lakeview Hotel Garden Map from the stand near the dock and enter the garden. Treat this opening garden and dock section as normal progression: collect supplies, inspect the eastern fountain if you are following a collectible checklist, and take the Rotten Apple from the eastern garden bench if you want that option for the Room 202 puzzle. The western garden contains additional supplies and a locked gate that will be opened later with the Boltcutters.
In New Game+, do not use or examine the Blue Gem during this opening step. The UFO interaction is handled later in the chapter so that the route is not duplicated. Continue into the hotel and take the Lakeview Hotel maps from the wall. Save at reception, then collect the Room 312 Key and Ornamental Key from the key cabinet behind the desk.
Visit Cafe Toluca and take the optional Room 102 Key from behind the bar. Break through the wall into Lost and Found. In a standard run, collect the Lost & Found Note; in New Game+, Lost Memories occupies this location instead and is the relevant replacement collectible. Go downstairs to the Utility Room for the cleaning-staff memo, then cross the Lake Shore Restaurant and complete Laura’s scene.
After Laura leaves, search the newly accessible east wing for supplies and the Strange Photo in Room 104 if you are completing the hotel collectible list. Enter the southern Utility Room and take the Sunrise Wing Key from the desk. Search accessible rooms now, but do not waste time trying to force the later locked routes before obtaining their keys.
- Take the Garden Map and hotel maps.
- Save at reception.
- Collect the Room 312 Key and Ornamental Key.
- Collect the standard Lost & Found Note or New Game+ Lost Memories item.
- Take the Sunrise Wing Key.
- Complete the first-floor collectible sweep before moving on.
2. Solve the Reading Room and Room 202 puzzles for Snow White
Use the Sunrise Wing Key to enter the second-floor Reading Room. Collect all four books: The One Who Soared, Stalwart to the End, Pride Before the Fall, and Revelations: A New Understanding. Place them on the bookshelf to match the symbols shown in the opposite painting. For the Light and Standard arrangements, the positions from top-left to bottom-right are Revelations: A New Understanding, The One Who Soared, Stalwart to the End, and Pride Before the Fall. Follow the visible symbols if your puzzle presentation differs.
The bookshelf opens the hidden room containing the vanity mirror and three photographs. You cannot complete the vanity mirror yet because the required red bulb is obtained later. Leave through the Cloakroom and enter the Hall. Take the Room 202 Key from the couch, then pick up the Ripe Apple from the small table if you want that choice available.
Enter Room 202 and take the Mirror Shard from the bed. Place the shard into the broken mirror, then rotate and fit the remaining pieces until the reflection is complete. Put either the Ripe Apple or Rotten Apple on the plate in front of the mirror. The apple choice contributes to ending-related behavior, so select the one that matches your planned route rather than assuming the choice is cosmetic.
After the puzzle finishes, enter Room 201 and take the Snow White Figurine. A Spider Mannequin ambush occurs during the return route. You do not need to defeat the entire group. Move back through the Cloakroom and Hall, using wider spaces to avoid being surrounded. Search Room 212 for its Glimpse of the Past before leaving the second-floor area if you are collecting everything.
- Collect all four Reading Room books.
- Place them in the correct bookshelf arrangement.
- Take the Room 202 Key, an apple, and the Mirror Shard.
- Complete the mirror and apple puzzle.
- Take Snow White from Room 201.
- Check Room 212 for the area collectible.
3. Open the fireplace, defeat the Mandarin, and solve Room 205
Go to the third-floor Conference Room and take the Room 107 Key and cleaning-staff memo attached to the fireplace. The fireplace itself is locked. Search the third-floor Utility Room for the Boltcutters, then use the emergency exit to return to the second floor.
Reach the balcony outside Room 217. A red book rests on the cracked skylight. Depending on the situation, the glass may break as you approach; otherwise shoot the skylight to drop the book into the restaurant. Travel through Rooms 215 and 214 to return to the first floor, then search the fallen book in the Lake Shore Restaurant for the Can Opener.
Take the Boltcutters into the garden and open the locked western gate. Remove the Light Bulb from the fish statue in the fountain. Return to the hotel, enter Room 107, and use its garden access. Search the pavilion at the back of this garden for the Fireplace Key. Return to the third-floor Conference Room and use it on the fireplace to obtain the Cinderella Figurine.
The Mandarin appears after the fireplace sequence. Keep your distance, use firearms during clear openings, and avoid standing directly below it when it attacks from the ceiling. When it drops lower or exposes itself, move laterally rather than backing into furniture. Heal before becoming trapped in a corner, then continue through the opened route after the fight.
Push through to Room 317 and cross the balcony to Room 318 for the Paint Can. Combine the Paint Can with the Can Opener, then combine the opened paint with the Light Bulb to make the Red Light Bulb. Return to the hidden room behind the Reading Room bookshelf and insert it into the vanity mirror. Enter the phrase shown for your riddle difficulty: DARK WISH on Light, DEED DONE on Standard, or LOVE LUST on Hard. Take the Employee Elevator Key from the briefcase.
- Take the Room 107 Key and Boltcutters.
- Drop the book from the Room 217 skylight.
- Collect the Can Opener, Light Bulb, and Fireplace Key.
- Take Cinderella from the fireplace.
- Defeat the Mandarin and collect the Paint Can.
- Create the Red Light Bulb.
- Solve the Room 205 briefcase and take the Employee Elevator Key.
4. Store equipment and clear the employee section before using the pump valve
Save in the Employee Elevator room before entering the elevator. The elevator accepts only one person’s weight, so place weapons, ammunition, healing items, maps, and other carried equipment into the steel cabinet. Mary’s Letter, Mary’s Photo, and the Handkerchief can remain with James. Enter the elevator only after confirming that the items you may need later are stored safely.
In the Employee Section, take the employee map from the Break Room wall. Search the Pantry for the Glimpse of the Past and complete the rest of the section’s collectible sweep before using the Pump Valve in the Venus Tears Kitchen. The three gemstones and their box are optional for progression because the Break Room safe code is fixed at 7414, but the gemstones may be collected for optional exploration and the kitchen contains the Bread-related trophy interaction.
The Blue Gemstone is in the Freezer Room. The Green Gemstone is in the Kitchen, reached through the vent route, and the Red Gemstone is in the Manager’s Room, reached by pushing the wardrobe in the TV Room. If you solve the gemstone box in the Manager’s Office, place Blue in the lower-left slot, Green in the upper-left slot, and Red in the upper-right slot to match the wall painting. This does not replace the safe code.
Return to the Break Room and open the safe with 7414. Take the Video Tape and Basement Key. Use the key to descend, enter the Maintenance Room through the wall opening, and take the Pump Valve. Use it to reach the Boiler Room, then take the Venus Tears Bar Key from the red pipe.
Carry the Pump Valve into the Venus Tears Kitchen and use it to open the route into Venus Tears Bar. This action closes access to much of the employee section, so do not use it until you have collected the Pantry Glimpse, the Strange Photo behind the bar route, and any optional supplies or gemstones you want. Take the Little Mermaid Figurine beside the jukebox. James is unarmed during this section, so avoid unnecessary fights and use space to run past enemies.
- Save before the Employee Elevator.
- Store all non-personal equipment.
- Take the employee map and Pantry Glimpse.
- Collect optional gemstones and solve the box only if desired.
- Open the safe with 7414 and take the Video Tape and Basement Key.
- Take the Pump Valve and Venus Tears Bar Key.
- Finish employee-section collectibles before using the valve in the kitchen.
- Take the Little Mermaid Figurine.
5. Recover your equipment and solve the lobby music box
Return to the Employee Elevator room on the second floor and remove your stored equipment from the cabinet. Confirm that your weapons, ammunition, healing items, and maps are back in the inventory before leaving. Go to the first-floor lobby and use the Ornamental Key on the music box.
Place Snow White in the left slot, Little Mermaid in the top slot, and Cinderella in the right slot. Rotate the circular plates so each continuous track connects its figurine to the matching door, then press the test button. Use the visible track connections rather than relying on a fixed rotation sequence, because the starting positions can differ.
After the tracks are aligned, turn the three keys in the order shown by the puzzle. On Light difficulty, use 7, 2, 1. On Standard, use 7, 5, 1. On Hard, use 1, 1, 1. The order is Snow White, Little Mermaid, then Cinderella. If you make an incorrect attempt, use the reset control and start again. Press the gold button after the correct sequence to receive the 3F Corridor Key.
Make a manual save after solving the music box if you are preparing a New Game+ ending route. This is a useful branch point before the final public-hotel sequence, but it does not replace the separate pre-312 save needed for route-specific items.
- Retrieve all stored equipment.
- Place Snow White left, Little Mermaid top, and Cinderella right.
- Align and test the three music-box tracks.
- Enter the correct difficulty-specific key sequence.
- Take the 3F Corridor Key.
- Create a branch save if planning multiple ending routes.
6. Finish the hotel sweep, handle New Game+ items, and play the videotape
Before entering Room 312, complete the hotel collectible sweep. Check Lost and Found, Room 104, Room 212, the Pantry, and Venus Tears Bar for the area’s memo, Strange Photo, and Glimpse of the Past entries. Search optional rooms for supplies as needed, but do not spend rare New Game+ items unless you are deliberately pursuing their endings.
If you are pursuing the UFO ending in New Game+, examine the Blue Gem at the Lakeview Hotel pier after crossing Toluca Lake, when the alien sound cue occurs. Do not use the gem in the opening garden route again; that would duplicate the same hotel-stage instruction. Later, after opening the third-floor corridor, examine the Blue Gem once more in Room 312 before playing the videotape. This final interaction triggers the UFO route.
The Dog Key can be used in the Observation Room after the third-floor corridor is opened if you are pursuing the Dog ending. For the Bliss ending, use White Claudia in Room 312 according to that route before playing the videotape. Keep any Rebirth or Stillness items reserved for the ending plan you are following, because item-based routes can take priority over ordinary behavioral ending preparation.
Make a final manual save before entering Room 312. Use the 3F Corridor Key, check the Observation Room if appropriate, and enter Room 312. If you are not using a special New Game+ route, play the Video Tape. The videotape begins the Otherworld hotel sequence and closes access to the earlier public and employee sections, so all desired hotel collectibles, optional supplies, and ending preparations must be complete first.
- Save before the final Room 312 approach.
- Complete all desired Lakeview Hotel collectibles.
- In New Game+, examine the Blue Gem at the hotel pier only for the UFO route, then examine it in Room 312 before the videotape.
- Use the Dog Key or White Claudia only if following those specific routes.
- Use the 3F Corridor Key.
- Play the Video Tape and confirm that the Otherworld hotel sequence has begun.
Before you move on
- Snow White, Cinderella, and Little Mermaid are in the inventory or have been placed in the music box.
- The Employee Elevator sequence is complete and all stored equipment has been recovered.
- The lobby music box is solved and the 3F Corridor Key is in inventory.
- The desired Lakeview Hotel memos, Strange Photos, Glimpses of the Past, supplies, and New Game+ preparations are complete.
- For the UFO route, the Blue Gem was examined at the hotel pier and again in Room 312 before the videotape.
- The Video Tape has been played in Room 312 and the Otherworld hotel sequence has begun.
Ruined Hotel and final approach — final puzzles and buildup
This chapter begins after the Room 312 videotape has transformed Lakeview Hotel into its ruined form. The intact hotel’s music-box, mirror, employee-elevator, Lost and Found, Dog Key, Blue Gem and other pre-videotape objectives belong in Chapter 10. Once control returns, search the damaged hotel for its final collectibles, supplies and the New Game+ Toluca Postcard safe. Decide whether to kill the three weakened enemies, save before the twin Pyramid Head battle, choose an egg door, then cross the final corridor and defeat the final boss. Keep separate saves before the Manager’s Office safe, the Pyramid Head battle and the final corridor so you can retry normal ending routes without replaying the hotel.
1. Begin in the Ruined Hotel and search the third floor
After viewing the videotape in Room 312 and completing the following story sequence, James wakes in the ruined Lakeview Hotel. Begin by checking the damaged third-floor rooms rather than following the first obvious route. The room layout has changed, and several supplies are placed in drawers, bathrooms and broken sections of the corridors.
From the starting area, pass through Rooms 314 and 313 toward the eastern hallway. Search Room 313 for handgun ammunition and check the other accessible rooms for health items and shells. In Room 302, move the cart away from the bathroom entrance and collect Strange Photo 25, “Still Can’t Get It Right,” from the sink.
After collecting the photo, push the cart to the broken floor in front of Room 304 and drop to the second floor. This descent is the required route forward. Do not expect to return to the intact hotel or recover items left behind before the videotape; those checks belonged in Chapter 10.
- Begin only after the Room 312 videotape sequence.
- Search the accessible third-floor rooms for supplies.
- Collect Strange Photo 25 in Room 302’s bathroom.
- Push the cart and drop through the broken floor near Room 304.
- Do not repeat intact-hotel objectives here.
2. Clear the second floor, basement and final hotel collectibles
On the second floor, search Room 207 and the nearby rooms for supplies before entering the Restroom and Reading Room. A save point is available in the Reading Room. Interact with the portable cassette player on the couch to collect Glimpse of the Past 26.
Continue through the Cloakroom and Hall. Use the opening above the Nurse’s Office to enter it, then follow the route toward the elevator. Check the office and adjoining rooms for ammunition and healing items before descending. The elevator takes James to the flooded basement.
Move through the flooded basement and search the Venus Tears Bar when you reach it. There is another save point in the bar. Check Liquor Storage for ammunition and supplies, then climb the stairs when the route opens. The stairs trigger the next story sequence, so make your collectible sweep before using them.
When you reach the first-floor route and later pass through the final door toward the boss sequence, collect Strange Photo 26, “SHAPE FORCES THE MIND,” at the beginning of the metal catwalk. This is the last Strange Photo in the Ruined Hotel chapter. The chapter also contains Burned Note, the final ordinary memo, in the Manager’s Office.
- Collect Glimpse of the Past 26 in the Reading Room.
- Use the Reading Room or Venus Tears Bar save point.
- Search the flooded basement and Liquor Storage.
- Collect Burned Note from the Manager’s Office.
- Collect Strange Photo 26 at the start of the final metal catwalk.
3. Decide whether to kill the three weakened enemies and open the New Game+ safe
On the first floor, three weakened enemies—a Lying Figure, a Mannequin and a Bubble-Head Nurse—will not attack immediately. You may leave them alone or kill them. Killing all three adds an In Water tendency point; sparing them avoids that modifier and also conserves ammunition. This choice does not independently guarantee an ending, because earlier actions and item interactions also contribute to the normal ending result.
Search the Manager’s Office and collect the Burned Note from the desk. In New Game+, the office safe contains the Toluca Postcard. Use the Key of Sorrow in the safe’s key slot, then enter the combination as right to 3, left to 1, right to 4. The code is 314.
The Toluca Postcard is required for Stillness. Stillness also requires that an In Water ending has already been recorded on an earlier completed run. If you are pursuing Stillness, make a manual save before opening the safe. If you want to preserve a route for Rebirth, the four Rebirth items should already have been gathered during the earlier chapters; do not repeat those collection instructions here. Likewise, Dog, UFO and Bliss preparations must already be completed before entering Room 312.
- Choose deliberately whether to kill or spare the three weakened enemies.
- Collect the Burned Note in the Manager’s Office.
- In New Game+, use the Key of Sorrow on the safe.
- Enter the safe combination as right 3, left 1, right 4.
- For Stillness, verify that In Water was completed on a previous run.
- Keep a fallback save before opening the safe.
4. Save before and defeat the twin Pyramid Heads
Proceed through the Manager’s Office and TV Room, then use the red door. After the long passage, you will reach a large save point marked by a red square pattern. Create a manual save here before entering the double doors. This is the best late-game fallback for retrying the boss and normal ending choices.
The battle pits James against two Pyramid Heads that share one health pool. Damage either target while continuously circling the arena. Keep enough room to retreat from spear swings, lunges and thrown attacks, and avoid being pinned against a wall. Firearms are safer than melee because the enemies’ reach makes close-range attacks difficult to recover from.
Use the handgun for controlled damage, switch to the shotgun when a target is close, and use the rifle when you have distance and a clear firing window. Heal before the fight if James is already badly injured, but reserve enough ammunition and healing for the final boss. When the shared health bar is depleted, collect the Rust-Colored Egg and Scarlet Egg from the defeated Pyramid Heads.
- Create a manual save at the large pre-boss save point.
- Remember that both Pyramid Heads share one health pool.
- Keep moving and avoid being trapped against arena walls.
- Collect both eggs after the battle.
- Reserve healing and strong ammunition for the final boss.
5. Choose an egg door and handle the final corridor
Place one egg in each of the two doors after the Pyramid Head battle. The door you use affects the normal ending tendency: the Rust-Colored Egg supports Leave and In Water, while the Scarlet Egg supports Maria. This choice is only one part of the ending system and cannot erase the influence of earlier actions.
After choosing a door, run down the long corridor. Mary’s extended monologue plays as James advances. Listening until the monologue ends supports Leave and In Water. Reaching the exit before it finishes supports Maria. Treat this as a final adjustment to an ending route rather than a guaranteed result by itself.
At the beginning of the metal catwalk beyond the corridor, collect Strange Photo 26 if you have not already done so. Search the catwalk and surrounding route for handgun ammunition, shotgun shells, rifle rounds and a syringe, then climb the stairs. Keep the pre-corridor save intact until the ending and trophy have been confirmed.
- Place both eggs in the two doors.
- Use the Rust-Colored Egg door for Leave or In Water tendencies.
- Use the Scarlet Egg door for Maria tendencies.
- Listen to the full monologue for Leave or In Water.
- Move through the corridor promptly for a Maria-focused route.
- Collect the final catwalk Strange Photo before climbing the stairs.
6. Defeat the final boss and confirm the run
Enter the final arena with healing items and reserved ranged ammunition. Keep the boss in view, stay in open space and reposition after every attack instead of standing still to trade damage. Watch for the long-reaching tentacle attack, moth swarms and the sound-based stun. Dodge away from the attack line, then fire during the recovery window.
The later phase restricts the arena and leaves less room for error. Continue circling whenever possible, heal before James reaches critical condition, and avoid spending every strong weapon in the opening phase. If you die, reload the pre-corridor or Pyramid Head save and change your resource use rather than restarting the entire campaign.
After the final boss is defeated, allow the ending sequence to play. Confirm the ending scene or its corresponding trophy before overwriting the save. A completed Ruined Hotel chapter requires the intended collectibles and New Game+ items to be secured, the selected weakened-enemy and egg-door choices to be made, the twin Pyramid Heads to be defeated, the corridor route to be completed and the final boss to be beaten.
- Enter the final arena with healing items and reserved ammunition.
- Keep moving and avoid corners during both phases.
- Reload the pre-corridor save after a failed attempt.
- Watch the ending sequence through to completion.
- Confirm the ending or trophy before deleting alternate-route saves.
Before you move on
- The Room 312 videotape has been viewed and the Ruined Hotel route has begun.
- Strange Photo 25, Glimpse of the Past 26, Burned Note and Strange Photo 26 have been collected if pursuing the collectible route.
- The three weakened enemies were killed or spared according to the selected ending plan.
- The Toluca Postcard was collected from the New Game+ safe if pursuing Stillness.
- Both Pyramid Heads were defeated and both eggs were placed in the doors.
- The intended egg door and final corridor behavior were used.
- The final boss was defeated and the ending scene or corresponding trophy registered.
- The pre-corridor save remains available for alternate normal-ending attempts.
Final Boss fight and main endings (Leave / Maria / In Water)
The PS5 remake’s first-playthrough endings are Leave, Maria, and In Water. None is designated as canonical, and none is selected by one isolated action. The result is influenced by cumulative behavior throughout the campaign, including James’s health, combat choices, inspections, Maria’s treatment, selected puzzle answers, the hotel apple, the egg door, and the final hallway conversation. Preserve separate saves before the twin Pyramid Heads and before the egg-door branch. The instructions below describe reliable tendencies rather than guarantees. Rebirth, Dog, UFO, Bliss, and Stillness are separate New Game+ routes and are not selected by these ordinary ending behaviors. Stillness also requires a previously completed In Water ending.
1. Preserve the late-game branch saves
At the Ruined Hotel save point before the twin Pyramid Head battle, create a manual save in a separate slot. Do not overwrite it. This preserves the battle and the remaining hotel ending choices while allowing you to replay the final section.
After defeating the twin Pyramid Heads, create another manual save before placing the Rust-Colored Egg or Scarlet Egg in the matching doors. This is the most useful branch for testing the ordinary endings, but it cannot erase behavior accumulated earlier in the campaign. A late save cannot undo Maria interactions, inventory inspections, combat behavior, health management, or earlier puzzle choices.
Completed endings are recorded on the overall profile rather than only on the individual manual save. After the ending and credits have finished, return to the title screen without overwriting the branch save, then reload and pursue another route. The save strategy reduces repeated late-game combat, but it does not guarantee that every ending can be changed by one final decision.
- Keep a save before the twin Pyramid Heads.
- Keep a second save before the egg-door choice.
- Never overwrite the branch saves after an ending attempt.
- Treat each reload as a late adjustment to an already accumulated route.
2. Defeat the twin Pyramid Heads and select the egg door
The twin Pyramid Heads attack from opposite sides of a confined arena. Keep moving through the open portions of the room, watch both enemies before committing to an attack, and avoid being trapped against a wall. Fire after a missed swing or lunge, then reposition before reloading. Shotgun and handgun ammunition are practical choices; melee attacks are possible but expose James to heavy damage.
The encounter ends through a scripted sequence rather than a normal final kill. Afterward, place the Rust-Colored Egg in its matching door when pursuing Leave or In Water tendencies. Place the Scarlet Egg in its matching door when pursuing Maria tendencies. The door choice contributes to the result but cannot override the rest of the campaign.
- Circle through open space instead of backing into corners.
- Attack after recovery animations and move away immediately.
- Use the Rust-Colored Egg door for Leave or In Water tendencies.
- Use the Scarlet Egg door for Maria tendencies.
3. Build a Leave route
Leave favors a cautious route focused on Mary and James’s survival. Inspect Mary’s Photo and/or Letter periodically, keep James healed instead of leaving him in the danger state, and avoid unnecessary combat when practical. During the first Pyramid Head encounter, prioritize survival and do not deliberately attack him. At the Coin Cabinet puzzle, choose Snake. At the prison gallows, choose one of the answers representing an innocent person rather than James.
At Lakeview Hotel, use the Rotten Apple in the mirror puzzle, choose the Rust-Colored Egg door, and listen to Mary’s entire monologue in the long hallway before the final boss. Limit optional Maria attention and avoid inspecting Angela’s Knife if you are trying to keep the route centered on Leave.
These actions are tendencies, not a guaranteed checklist. Earlier Maria-focused behavior or extended reckless play can still alter the final result, so use the route consistently from the beginning rather than trying to repair it only after the twin Pyramid Heads.
- Favor survival and avoid unnecessary fights.
- Inspect Mary’s Photo and/or Letter periodically.
- Choose Snake and an innocent gallows answer.
- Use the Rotten Apple and Rust-Colored Egg door.
- Listen to the complete hallway monologue.
4. Build a Maria route
Maria requires sustained attention throughout West South Vale, Brookhaven Hospital, and the Labyrinth. When she joins James, explore the optional locations that create Maria interactions, including the Auto Shop Garage, the motel conversation, and the area near Baldwin Mansion. At Heaven’s Night, interact with the available points of interest before leaving. The Jacks Inn gate is part of progression; do not treat merely passing through it as the entire Maria route.
At Brookhaven Hospital, check on Maria at the available story points, including the visit after obtaining the first patient bracelet and the later visit after obtaining the Rooftop Key. Protect her during combat and avoid allowing her to take unnecessary damage. In the Labyrinth, return to her room at the available opportunities, including the opportunity after her death when the route allows James to re-enter.
Choose Woman in the Coin Cabinet puzzle, choose a guilty-person answer representing James at the gallows, use the Ripe Apple in the hotel mirror puzzle, and take the Scarlet Egg door. Leave the long hallway before Mary’s complete monologue finishes. Avoid inspecting Mary’s Photo, Mary’s Letter, or Angela’s Knife if you want to minimize competing Leave and In Water tendencies.
- Complete the optional West South Vale Maria interactions.
- Inspect the available Heaven’s Night objects.
- Check on Maria at both available Brookhaven story points.
- Return to Maria’s Labyrinth room when possible.
- Choose Woman, a James-related gallows answer, Ripe Apple, Scarlet Egg, and leave the hallway early.
5. Build an In Water route
In Water favors reckless and self-destructive behavior while retaining attention on Mary. Inspect Mary’s Photo and/or Letter periodically, inspect Angela’s Knife during the campaign, and allow James to remain in the danger state for extended periods when it is safe to do so. Fight more enemies, stomp defeated enemies, and attack Pyramid Head during the first encounter rather than simply waiting for the sequence to end. These behaviors influence the route but are not mandatory guarantees.
Choose Man in the Coin Cabinet puzzle and choose an innocent-person answer at the gallows. Read the message addressed to James above the jukebox in Otherworld Neely’s Bar. At the hotel, use the Rotten Apple, take the Rust-Colored Egg door, and listen to Mary’s complete hallway monologue. Killing the three weakened enemies in the Ruined Hotel can also favor In Water, but do not rely on that late choice if the earlier route strongly favored Maria or Leave.
Avoid extensive optional Maria interactions and do not repeatedly return to her Labyrinth room if you are trying to minimize Maria influence. Keeping James injured only during the final boss is not enough to reliably force In Water.
- Use a reckless combat and health-management pattern.
- Inspect Angela’s Knife during the campaign.
- Choose Man and an innocent gallows answer.
- Read the Otherworld Neely’s Bar message.
- Use Rotten Apple, Rust-Colored Egg, and the full hallway monologue.
- Consider defeating the weakened Ruined Hotel enemies.
6. Defeat the final boss and verify the result
During the final fight, keep moving around the arena and prioritize avoiding attacks over constant damage. Watch Mary’s position, dodge sideways or diagonally when she advances, and fire during recovery openings. In the airborne portion, use the visual cue above James to anticipate where she will descend, then continue moving to avoid the moth swarms. In the final portion, keep Mary in view, dodge her forward attack, and punish the recovery window rather than standing still to reload.
Carry healing items unless your established In Water route intentionally depends on extended danger-state play. The final fight is a survival encounter, not a separate ending puzzle. Once Mary falls, complete the required final interaction and watch the entire ending sequence and credits before reloading.
If the result is not the intended one, reload the preserved branch and change several aligned late-game actions. Changing only the egg door, apple, or hallway timing may not overcome the cumulative values established earlier. After each completed result, check that the ending or associated trophy has registered before beginning another branch.
- Keep moving and attack during recovery windows.
- Use the airborne visual cue to avoid Mary’s descent.
- Keep the final-phase lunge in view and dodge before firing.
- Heal for survival unless intentionally maintaining the In Water route.
- Watch the complete ending and verify profile registration.
Before you move on
- The twin Pyramid Heads have been defeated.
- Mary has been defeated and the complete ending sequence has played.
- The intended Leave, Maria, or In Water ending has registered on the profile or its associated trophy has unlocked.
- The pre-twin-Pyramid-Head and pre-egg-door saves remain intact if another branch is planned.
- For all three ordinary endings, use consistent campaign behavior rather than relying on one final choice.
- New Game+ endings are being tracked separately, with Stillness attempted only after an In Water ending has been recorded.
New Game+ — how it works and unlocking extra endings (Rebirth, Dog, UFO, Bliss, Stillness)
After completing the campaign, start New Game+ from the title screen to access the Chainsaw and the exclusive items for Rebirth, Dog, UFO, Bliss and Stillness. Stillness requires a previously recorded In Water ending; Rebirth, Dog, UFO and Bliss do not require all three standard endings. Collect the relevant items during one New Game+ run, then make a manual save at Lakeview Hotel reception after solving the music-box puzzle and receiving the 3F Corridor Key. From that branch, Dog, UFO and Bliss end the run at immediate hotel interactions, while Rebirth and Stillness require separate routes through the Ruined Hotel. The Pete’s Bowl-O-Rama safe opens with 1887 and contains both the Rusted Key and the Cryptic Letter. Lost Memories is a different item found in Lakeview Hotel Lost & Found, replacing the normal Lost & Found Note. Keep Rebirth and Stillness as separate final-area branches: collect Lost Memories for Rebirth, or open the Ruined Hotel safe with the Key of Sorrow and take the Toluca Postcard for Stillness.
1. Unlock New Game+ and create the shared branch save
Complete the campaign and allow the ending sequence to finish. From the title screen, choose New Game+ rather than starting an ordinary new file. This mode adds the Chainsaw, the ending-specific items and the extra memo used by the New Game+ routes. The Chainsaw is stuck in a pile of logs opposite the Silent Hill Ranch sign near the beginning of the run. Take it before continuing along the road; it is needed later to open the green car containing the Key of Sorrow.
Stillness is the only New Game+ ending with a previous-ending requirement. Complete a run that records In Water on the profile before attempting Stillness. You do not need to record Leave, Maria and In Water before attempting Rebirth, Dog, UFO or Bliss. The game tracks completed endings on the profile, so a suitable manual save can be reloaded after each ending without erasing the previous result.
Progress through Lakeview Hotel until you solve the music-box puzzle and receive the 3F Corridor Key. Before collecting Lost Memories from the Lost & Found room, create a manual save at the reception area. This is the most useful shared branch point. Dog, UFO and Bliss can be completed immediately from this point, while Rebirth and Stillness require continuing into the Ruined Hotel. Keep an additional save if possible so the branch cannot be overwritten accidentally.
- Complete the campaign and return to the title screen.
- Record In Water before attempting Stillness.
- Start a genuine New Game+ file.
- Take the Chainsaw near the Silent Hill Ranch sign.
- Save at Lakeview Hotel reception after receiving the 3F Corridor Key and before taking Lost Memories.
2. Gather the Rebirth items and keep the Stillness route separate
In the graveyard near the start of the game, search the northeastern shoreline for the lone grave and take Crimson Ceremony from in front of it. In Western South Vale, pass through Jack’s Inn and search the table near the entrance to Baldwin Mansion for White Chrism.
At the Silent Hill Historical Society, enter the main exhibition hall with the Pyramid Head painting. Turn around and check the wall niche for the Obsidian Goblet. The fourth item, Lost Memories, appears on a shelf in the Lakeview Hotel Lost & Found room during New Game+. It replaces the ordinary Lost & Found Note in that room; it is not the same item as the Cryptic Letter from Pete’s Bowl-O-Rama.
For Rebirth, reload the Lakeview reception save before entering Lost & Found if necessary. Continue through the hotel, take Lost Memories, play the videotape in Room 312 and finish the campaign through the final boss. Do not open the Ruined Hotel Manager’s Office safe for the Toluca Postcard on this branch. The postcard is the item route for Stillness and should be collected during a separate reload.
- Take Crimson Ceremony from the northeastern graveyard shoreline.
- Take White Chrism from the table near Baldwin Mansion.
- Take the Obsidian Goblet from the Historical Society exhibition hall niche.
- Take Lost Memories from Lakeview Hotel Lost & Found.
- Keep the Toluca Postcard out of the Rebirth branch.
- Defeat the final boss after collecting all four Rebirth items.
3. Assemble the Dog Key and trigger Dog
In Eastern South Vale, enter the Pet Center beside Big Jay’s and pass behind the counter into the back storage room. Take the first Broken Key Part. In Western South Vale, after passing Jack’s Inn, find the first Katz Street house with the dog-bone symbol on its gate. Enter the yard and take the second Broken Key Part from the doghouse. Combine both parts in the inventory to create the Dog Key.
Continue through Lakeview Hotel until the third-floor corridor beside Room 312 is accessible. Use the Dog Key on the Observation Room door next to Room 312. The Dog ending begins immediately, so you do not need to play the videotape or fight the final boss. Reload the Lakeview reception save afterward if you are using one New Game+ run for multiple endings.
- Take Broken Key Part 1 from the Pet Center storage room.
- Take Broken Key Part 2 from the Katz Street doghouse.
- Combine both parts into the Dog Key.
- Use the Dog Key on the Observation Room door beside Room 312.
- Reload the shared branch save for another ending.
4. Use the Blue Gem at all four UFO locations
In Eastern South Vale, break the left display window of The Silent Jewellers beside the Pet Center and take the Blue Gem. Select it from the Key Items menu at each required location. A successful activation makes the gem glow more brightly and is accompanied by the appropriate sound cue.
Use the Blue Gem on the roof of Saul Street Apartments beside the eye graffiti on the rear of the vent. Use it again at the northeastern end of the Rosewater Park pier before meeting Maria. After crossing Toluca Lake, use it immediately after stepping off the boat at the Lakeview Hotel pier.
The fourth activation is in Room 312. With the previous three uses complete, examine the Blue Gem there before playing the videotape. This immediately triggers the UFO ending. Reload the Lakeview reception save before entering Room 312 if you want to preserve the branch for another route.
- Take the Blue Gem from The Silent Jewellers.
- Use it beside the eye graffiti on the Saul Street Apartments roof.
- Use it at the Rosewater Park pier before meeting Maria.
- Use it at the Lakeview Hotel pier after the boat crossing.
- Use it in Room 312 after the first three activations.
- Reload the branch save before triggering UFO if another ending is planned.
5. Open the Pete’s Bowl-O-Rama safe and prepare Bliss
During New Game+, enter Pete’s Bowl-O-Rama in Western South Vale. The safe behind the counter opens with combination 1887. The safe contains both the Rusted Key and the Cryptic Letter. Take both items before leaving. Do not search for the Cryptic Letter in a separate locker; it is obtained from the same safe as the Rusted Key.
At Brookhaven Hospital, reach the Garden and take the Small Chest from the gazebo. Combine the Small Chest with the Rusted Key in the inventory to obtain White Claudia. The Cryptic Letter is not combined with the chest and is not required for the item combination.
At Lakeview Hotel, enter Room 312 with White Claudia in your inventory. Use White Claudia there, then play the videotape. The Bliss ending triggers from this sequence. Because the ending begins at Room 312, reload the Lakeview reception save before using the item if you want to attempt Dog, UFO, Rebirth or Stillness from the same New Game+ run.
- Open the Pete’s Bowl-O-Rama safe with 1887.
- Take both the Rusted Key and Cryptic Letter from that safe.
- Take the Small Chest from the Brookhaven Hospital Garden gazebo.
- Combine the Small Chest and Rusted Key to obtain White Claudia.
- Use White Claudia in Room 312, then play the videotape.
- Reload the shared branch save before triggering Bliss if another ending is planned.
6. Collect the Key of Sorrow and finish the separate final-area branches
At the beginning of New Game+, take the Chainsaw from the logs opposite the Silent Hill Ranch sign. After entering Wiltse Road and passing through the tunnel, locate the green car. Smash its rear window with the Chainsaw and take the Key of Sorrow from the back seat. The key only appears for the Stillness route after an In Water ending has been recorded on the profile.
During the Ruined Hotel section, enter the Manager’s Office and use the Key of Sorrow on the safe’s key lock. Set the combination to 314 by turning right to 3, left to 1 and right to 4. Take the Toluca Postcard and examine it in the inventory. Finish the campaign through the final boss to receive Stillness. If the four Rebirth items are also present, the Toluca Postcard takes priority for this branch, so treat Rebirth and Stillness as separate attempts for a clean route.
For an efficient order, use the Lakeview reception save after collecting all earlier New Game+ items. First open the Observation Room with the Dog Key. Reload and use the Blue Gem in Room 312 for UFO. Reload again, use White Claudia in Room 312 and play the videotape for Bliss. Reload once more, enter Lost & Found and take Lost Memories for Rebirth, then complete the hotel and final boss. Finally, reload the shared save, progress into the Ruined Hotel, open the Manager’s Office safe with the Key of Sorrow and 314, examine the Toluca Postcard and finish for Stillness.
The Bowl-O-Rama items do not create an additional ending by themselves. The Rusted Key is used to make White Claudia with the Small Chest, while the Cryptic Letter is a separate New Game+ memo obtained from the same safe. Lost Memories remains the Rebirth item and replaces the standard Lakeview Lost & Found Note.
- Record In Water before attempting the Key of Sorrow route.
- Take the Key of Sorrow from the green car on Wiltse Road.
- Open the Ruined Hotel Manager’s Office safe with 314.
- Examine the Toluca Postcard before finishing the Stillness branch.
- Use the Lakeview reception save to branch Dog, UFO, Bliss, Rebirth and Stillness.
- Use Lost Memories for Rebirth and the Toluca Postcard for a separate Stillness attempt.
- Confirm that the Pete’s Bowl-O-Rama safe provided both the Rusted Key and Cryptic Letter.
Before you move on
- New Game+ is available from the title menu after completing the campaign.
- In Water is recorded on the profile before the Stillness attempt.
- The Chainsaw and Key of Sorrow were collected in New Game+.
- Crimson Ceremony, White Chrism, Obsidian Goblet and Lost Memories were collected for Rebirth.
- The Pete’s Bowl-O-Rama safe was opened with 1887 and yielded both the Rusted Key and Cryptic Letter.
- The Small Chest was combined with the Rusted Key to create White Claudia.
- The Dog Key was assembled and used on the Lakeview Hotel Observation Room.
- The Blue Gem was activated at all four required locations and triggered UFO.
- White Claudia was used in Room 312 before the videotape to trigger Bliss.
- Rebirth was completed with Lost Memories and without collecting the Toluca Postcard for that branch.
- Stillness was completed with the Key of Sorrow, safe code 314 and the Toluca Postcard.
- A Lakeview Hotel reception manual save remains available before the ending branches.
References for this chapter
Collectibles and 100% routing
The PS5 remake has 120 collectible objectives: 68 Memos, 26 Strange Photos, and 26 Glimpses of the Past. Archivist, Pieces Unarranged, and Echoes require the relevant category to be completed in one playthrough. Use a remake-specific checklist because the 2001 release has different layouts and placements and lacks Strange Photos and Glimpses of the Past. Standard New Game and New Game Plus use different Memo routes: the standard run contains the Lost & Found Note in Lakeview Hotel, while New Game Plus replaces it with Lost Memories and adds the Cryptic Letter to Pete’s Bowl-O-Rama safe. In New Game Plus, the safe opened with 1887 contains both the Rusted Key and Cryptic Letter. Do not combine the standard Lost & Found Note with the New Game Plus entries into one 69-Memo checklist. Sweep each area before its real lockout, preserve backup saves until the next transition is confirmed, and complete the intact and Ruined Lakeview Hotel sections before entering the final approach.
1. Set up separate checklists and recovery saves
Create three lists: Memos 1 through 68, Strange Photos 1 through 26, and Glimpses of the Past 1 through 26. Record the area, floor, room, and a nearby landmark for every entry. Use a guide written for the 2024 PS5 remake; the original 2001 game has different layouts and collectible placements, and it does not contain Strange Photos or Glimpses of the Past.
Use separate manual-save slots for normal progress, the current area sweep, and the last major transition. Keep the previous-area save until you have entered the next section and confirmed that the checklist is complete. Glimpses of the Past are not tracked in the inventory, so a save file cannot tell you which environmental interaction was missed. Collectible progress also does not carry into a fresh New Game Plus checklist.
- Maintain independent Memo, Strange Photo, and Glimpse lists.
- Label every entry with its remake area and landmark.
- Keep a current-sweep save and a pre-transition backup.
- Mark environmental Glimpses immediately after their interaction plays.
2. Sweep the campaign in order and stop at genuine lockouts
Use this checklist order: Eastern South Vale, Wood Side Apartments, Blue Creek Apartments, Western South Vale, Brookhaven Hospital, Otherworld Hospital, Otherworld South Vale, the Western South Vale revisit, Silent Hill Historical Society, Toluca Prison, the Labyrinth, Toluca Lake, Lakeview Hotel, and the Ruined Hotel. Blue Creek Apartments contains Strange Photos and Glimpses, but it is not a separate ordinary Memo section in the main Memo list; do not interpret that absence as a missed Memo.
Within each area, advance only far enough to open the next required room, stairwell, courtyard, service passage, or puzzle route. Then sweep every newly accessible branch before continuing. Check desks, counters, shelves, drawers, bedrooms, bathrooms, offices, stair landings, dead ends, breakable windows, crawl spaces, and rooms opened by puzzle items. Pick up or activate each collectible before triggering the next major transition.
The important transition checks include entering Wood Side Apartments, completing each apartment building, the hospital shift into Otherworld, the Otherworld South Vale sequence, leaving the Western South Vale revisit for the Historical Society, descending into Toluca Prison, leaving the Labyrinth for Toluca Lake, and changing Lakeview Hotel into the Ruined Hotel. Do not erase a backup merely because a minor objective ends; confirm that the game has actually moved you into a new area or permanently closed a route.
- Finish Eastern South Vale before entering Wood Side Apartments.
- Check Wood Side and Blue Creek before their final exits.
- Track Brookhaven, Otherworld Hospital, and Otherworld South Vale separately.
- Sweep Western South Vale during both visits.
- Give the Historical Society, Prison, Labyrinth, Toluca Lake, Lakeview Hotel, and Ruined Hotel separate checklist sections.
3. Collect Memos and Strange Photos as soon as their landmarks open
Memos are inventory notes that count toward Archivist. Other readable notes do not automatically count, so record a Memo immediately after pickup and compare the inventory total with the written room list before leaving. The total alone cannot identify which location was missed.
Strange Photos are small pickup objects and count toward Pieces Unarranged. Early examples include the photo beside the Wood Side Apartments entrance, Apartment 102 and Apartment 210 in Wood Side, the 1F stairwell and Apartment 212 in Blue Creek, the Rosewater Park bench, the garage reached with the Garage Jack Lever, Heaven’s Night, Moonlight Grove, and the Reverie Theater. Brookhaven has photos in the Observation Room and Examination Room. Otherworld Hospital has photos in Room C5 and near the pool.
Later, check the Toluca Prison Death Row cell and Warehouse, the Labyrinth’s Desolate Area and Center routes, and the Toluca Lake area behind the steps before boarding the boat. In Lakeview Hotel, check Room 104 and the Venus Tears Bar. The Ruined Hotel contains the final room photo and Strange Photo 26 at the beginning of the metal catwalk leading toward the final boss. Treat the catwalk photo as a mandatory final-sweep item before proceeding.
- Mark every Memo at pickup and verify it enters the inventory.
- Record each Strange Photo by room or landmark, not only by number.
- Check both normal and Otherworld versions of areas where the list specifies them.
- Collect the catwalk photo before entering the final approach.
4. Track every Glimpse of the Past outside the inventory
Glimpses of the Past are environmental interactions that trigger a short memory effect. They are not stored like Memos and do not provide a dependable inventory total, so mark each one immediately on an independent 1-to-26 list. A room sweep is not complete until the interaction itself has been activated.
Check the story state when a prompt is missing. Some Glimpses occur only after a puzzle step, a hole drop, an Otherworld transition, or a later return to a room. Blue Creek, for example, has a Glimpse tied to the ruined cabinet after the drop into Apartment 110 and another on the stairway after the clock sequence opens the relevant route. Do not substitute a location from the original game when a remake interaction is absent.
The final Glimpse is not on the metal catwalk. After the videotape changes Lakeview Hotel into its Otherworld form, reach the second-floor Reading Room and inspect the listed object there. Keep this separate from Strange Photo 26, which is the catwalk pickup.
- Mark every Glimpse immediately after the interaction plays.
- Confirm whether the room is in its normal, Otherworld, or revisited state.
- Recheck rooms whose interactions appear only after a puzzle or story event.
- Confirm the final Glimpse in the Otherworld Lakeview Hotel Reading Room.
5. Keep the standard Memo route separate from New Game Plus
In a standard New Game run, collect the Lost & Found Note in Lakeview Hotel. This is the mode-specific entry needed for the standard 68-Memo Archivist route.
In New Game Plus, the Lost & Found Note is replaced by Lost Memories, one of the Rebirth-ending items. To maintain the 68-entry Memo target, visit Pete’s Bowl-O-Rama in Western South Vale and open the safe behind the counter with code 1887. The safe contains both the Rusted Key, used for the Bliss route, and the Cryptic Letter, the New Game Plus Memo that replaces the missing standard entry for Archivist purposes. There is no separate locker pickup for the Cryptic Letter.
Record the Cryptic Letter as a Memo and the Rusted Key as a New Game Plus ending item. Do not count Lost Memories, the Rusted Key, or another ending item as an additional Memo. Do not count the standard Lost & Found Note and New Game Plus Cryptic Letter together in one playthrough; each mode has its own applicable 68-entry route.
- Standard New Game: collect the Lost & Found Note in Lakeview Hotel.
- New Game Plus: open the Pete’s Bowl-O-Rama safe with 1887.
- Confirm that the safe produced both the Rusted Key and Cryptic Letter.
- Record the Cryptic Letter on the Memo checklist and the Rusted Key on the ending-item checklist.
- Do not require the standard Lost & Found Note and New Game Plus Cryptic Letter in one run.
- Keep Rebirth and Bliss items separate from the Memo checklist.
6. Finish the hotel sweep and verify all three trophies
Before watching the Room 312 videotape, finish every collectible available in the intact Lakeview Hotel for the current mode. In a standard run this includes the Lost & Found Note. In New Game Plus, the Lost & Found Note is absent and the applicable Memo route uses the Cryptic Letter from the Pete’s Bowl-O-Rama safe instead. Create a backup save before the hotel transition, but do not treat that save as the end of the collectible route.
After the videotape changes the hotel, sweep the Ruined Hotel rooms and corridors before committing to the final sequence. Collect the Ruined Hotel Memo, the Room 302 Strange Photo, and any remaining Glimpses assigned to the Otherworld hotel. Then reach the beginning of the metal catwalk and collect Strange Photo 26 before continuing toward the final boss.
A successful compatible run has 68 applicable Memos, 26 Strange Photos, and 26 Glimpses of the Past. Archivist, Pieces Unarranged, and Echoes should all register from that same run. If one category is short, reload the nearest confirmed save if the missed area remains reachable; otherwise, complete the category again on another playthrough.
- The applicable Memo route reaches 68 entries.
- Standard New Game uses Lost & Found Note in Lakeview Hotel.
- New Game Plus uses Cryptic Letter from the Pete’s Bowl-O-Rama safe and does not contain Lost & Found Note.
- In New Game Plus, the 1887 safe produced both the Rusted Key and Cryptic Letter.
- All 26 Strange Photos are recorded, including the Ruined Hotel catwalk photo.
- All 26 Glimpses are confirmed independently from the Memo and Photo lists.
- The final hotel Reading Room Glimpse and metal catwalk Strange Photo were both checked.
- Archivist, Pieces Unarranged, and Echoes register from the applicable single playthrough.
Before you move on
- The checklist is labeled Standard New Game or New Game Plus.
- The run contains 68 applicable Memos, using Lost & Found Note in standard New Game or Cryptic Letter in New Game Plus.
- In New Game Plus, the Pete’s Bowl-O-Rama safe was opened with 1887 and produced both the Rusted Key and Cryptic Letter.
- All 26 Strange Photos are recorded, including the Ruined Hotel catwalk photo.
- All 26 Glimpses of the Past are confirmed independently from the Memo and Photo lists.
- Normal, Otherworld, revisited, Labyrinth, Lakeview Hotel, and Ruined Hotel variants were swept in the correct story order.
- The final hotel Reading Room Glimpse and metal catwalk Strange Photo were both checked.
- Archivist, Pieces Unarranged, and Echoes register from the applicable single playthrough.
References for this chapter
Bosses and combat mastery — patterns, counters and resource economy
The PS5 remake’s major encounters reward controlled movement, deliberate positioning and ammunition conservation. Save before each arena, heal before entering, and fight only when the encounter requires it. The first Pyramid Head sequence in Blue Creek Apartments is a timed survival encounter rather than a normal kill fight. Flesh Lip changes from a ceiling-mounted cage target into a fast ground attacker. Abstract Daddy combines combat with a mandatory television-smashing chase. Eddie’s meat-locker battle has three visibility and arena phases. The two Pyramid Heads share one health pool, while Mary uses three combat phases before the final blow begins the ending sequence.
1. Establish a safe combat rhythm before major encounters
Create a manual save before entering a room that clearly leads to a boss arena. Enter with a healthy life bar, a loaded weapon and at least one healing item available. If an attempt leaves you low on health or ammunition, reload the pre-arena save instead of accepting a poor setup. Some arenas may provide supplies based on your inventory, but do not depend on receiving replacement ammunition.
Against ordinary monsters, let the enemy commit to an attack before dodging sideways or diagonally. After the attack misses, use a short melee sequence or a controlled firearm burst, then reposition. Avoid fighting in doorways, against walls or beside furniture that blocks the camera. The radio warns that a monster is nearby, but optional encounters can often be bypassed to preserve supplies for mandatory bosses.
Use the steel pipe when a target is safely staggered and the room gives you an escape route. Use the handgun for controlled ranged damage and reserve the shotgun and hunting rifle for bosses whose exposed windows are brief or whose later phases are dangerous. Reload after creating distance, never while standing directly in front of a recovering enemy.
- Save before every boss arena.
- Enter with healing supplies and a loaded weapon.
- Use melee against safe openings and firearms when distance or armor makes melee unreliable.
- Do not spend strong ammunition on enemies that can be bypassed.
2. Survive the timed Pyramid Head encounter in Blue Creek Apartments
After completing the Blue Creek Apartments clock sequence and entering the S-shaped door, James reaches a large cage-filled arena. This Pyramid Head cannot be defeated. The encounter is timed, and dealing damage can shorten the sequence, but the objective remains survival rather than emptying your inventory.
Circle the arena instead of backing into a corner. Keep Pyramid Head in view, watch the reach of the Great Knife, and dodge sideways when he commits to a swing or lunge. The metal cages do not provide permanent protection and are destroyed as the encounter becomes more aggressive, so treat them as temporary obstacles rather than cover. If you choose to attack, use the handgun or occasional pipe strikes only when you can immediately create distance. Do not spend shotgun shells or rifle rounds to force an early finish.
When the required progression condition is reached, the siren signals the end of the encounter. Continue through the apartment route and make a separate save at the next safe opportunity.
- Keep moving around the arena until the scripted siren and progression occur.
- Use the handgun only if you want to shorten the sequence.
- Reserve shotgun shells and rifle rounds for later mandatory fights.
- Do not wait behind cages as though they provide permanent protection.
3. Defeat Flesh Lip by targeting exposed parts, then surviving its ground phase
Flesh Lip’s Brookhaven Hospital battle begins with the creature concealed above the ceiling. Watch for broken ceiling tiles, falling debris and the sound of movement before it drops. The metal cage protects the main body, so firing directly into it wastes ammunition. When Flesh Lip hangs from the ceiling, target the exposed arm or legs that support it. When it drops close to the floor, approach only after its movement pauses and strike the cage with the steel pipe, or fire at body sections not protected by the metal plate.
Continue moving laterally so the creature cannot land directly on James. Once enough damage breaks the cage, Flesh Lip changes into a fast ground-based form with wide mechanical-arm swings, spinning attacks and a sound-wave attack that can briefly stun James. Keep distance during this phase, dodge the sweeping attacks and use the shotgun or another firearm against the exposed front and sides. Its back remains protected by a metal plate, so reposition rather than firing into the rear.
Collect nearby ammunition and health before the battle ends; supplies in the arena may not be reachable afterward. Heal before a stun or multi-hit attack reduces James to critical health.
- Shoot the supporting arm or exposed legs during the ceiling phase.
- Strike the cage with the pipe only during a safe ground pause.
- Do not waste bullets on the protected cage or rear plate.
- Use distance and firearms after Flesh Lip changes form.
- Collect arena supplies before the fight ends.
4. Complete Abstract Daddy’s three-stage Labyrinth encounter
Abstract Daddy’s fight begins in the Labyrinth with a combat section. Create space by leading it around a loop or a room with a central wall. Its main physical attack is a forward lunge, and it can also emit a sound wave that briefly stuns James. Allow the lunge to pass, dodge away from the impact line and fire during the recovery window. The hunting rifle is effective at range; the shotgun is useful when the boss closes the distance. Do not remain in a dead end.
After sufficient damage, the encounter changes into a chase. Do not waste ammunition during this section. Follow the route through the shifting Labyrinth and look for static televisions. When you reach a television, smash it with the steel pipe. The first television brings Abstract Daddy back into the route, so escape through the nearby opening and continue following the path. Repeat the process for the second and third televisions. Angela’s movements and the sudden changes in the Labyrinth help identify the intended direction, but do not stop to fight during the chase.
After the third television is destroyed, follow the newly opened passage through the fan to the final arena. Abstract Daddy returns for the last combat phase. Maintain distance, wait for its lunge, dodge clear and fire during recovery. One or two shotgun blasts between attacks are safer than holding position for a long burst. If ammunition runs out, dodge the lunge and use the pipe from the side or rear, but expect the fight to take longer.
- Use a looped room or central wall during the opening combat phase.
- Save ammunition while chasing Abstract Daddy.
- Destroy all three static televisions with the pipe.
- In the final arena, dodge each lunge before firing or striking.
5. Defeat Eddie by listening through the meat locker’s three phases
Eddie’s arena contains hanging meat carcasses and limited visibility. In the first phase, he moves through the room, fires his revolver and changes position after shooting. Use the carcasses as visual cover, but keep enough room to dodge around them. Listen for footsteps and the sound of Eddie cocking his weapon. Fire with the handgun or rifle when he is visible, or close the distance and use melee after he has fired.
When Eddie shoots the pipes, the room fills with denser fog and the second phase begins. Visibility is reduced, and Eddie relies more on sudden melee attacks. Stand still briefly and listen for footsteps, the weapon cocking or an approaching attack. Dodge as Eddie commits, then punish the recovery with the shotgun or a short melee sequence. Do not assume a hanging carcass will block a melee strike; his close-range attacks can pass through the meat.
The third phase begins when Eddie activates the machinery that moves the hanging carcasses. He becomes slower but remains dangerous. Stay close enough to track his repositioning without cornering yourself. Dodge as he commits, fire after he finishes a burst and use the shotgun when he appears nearby. If the arena becomes too open, prioritize movement and sound over immediate damage.
- Use carcasses as visual cover during the first phase.
- Listen for the revolver cocking and Eddie’s footsteps.
- Switch to close-range punishment during the fog phase.
- Do not rely on carcasses to stop melee attacks.
- Keep moving when the machinery starts and cover becomes less reliable.
6. Handle the two Pyramid Heads without being surrounded
Near the end of the Otherworld Lakeview Hotel, two Pyramid Heads carrying spears enter the arena. Their attacks include close spear thrusts and thrown spears. The pair share one health pool, so attack whichever one gives you the clearest opening rather than trying to divide damage evenly. Keep both enemies within the camera’s view and circle the arena instead of backing into a corner.
Fire one or two controlled rifle or shotgun shots, then move before either Pyramid Head can close the gap. The handgun is safer for conserving stronger ammunition, although the fight takes longer. If you use the pipe, wait for one to commit to a thrust, dodge behind it and land only one or two strikes before retreating. Do not stay between both enemies, where a second spear attack can connect while you are recovering.
Health and ammunition may be available around the arena. Use them only after creating enough distance to avoid being struck while collecting or healing. Keep some firearm ammunition and healing for Mary, who follows after the hotel’s final approach.
- Remember that both Pyramid Heads share one health pool.
- Keep both enemies visible as often as possible.
- Dodge spear thrusts and thrown spears before returning fire.
- Use melee only after a committed attack misses.
- Retain health and ammunition for the final boss.
7. Defeat Mary in three phases and complete the campaign combat route
Make a separate manual save before entering the final boss sequence. Mary begins above the ground and can transform into a swarm of moths before reappearing elsewhere. At close range she uses tentacle attacks and can grab James; she can also send moth swarms across the arena and use a sound attack that briefly stuns him. Keep moving around the arena, maintain distance and strike the swarm with the pipe or shoot it when it blocks your route. The rifle is useful while the arena remains open, while the shotgun is effective during a clear close-range opening.
After taking enough damage, Mary changes the arena and James drops into an underground section. Watch the ceiling for sparks that indicate where she will descend. Move away from that position, then search the corridors for the opening where Mary hangs exposed. Fire with the handgun or shotgun when she is vulnerable, then relocate before the next descent. Pick up wall-side supplies only when Mary is not actively attacking.
In the last phase, Mary returns to the ground and advances with rapid leg attacks. She can still become a moth swarm, lunge forward and stun James with a roar. Keep the arena open, dodge the lunge and fire from range whenever possible. After Mary is defeated, approach her and deliver the final blow with a weapon. The ending sequence begins afterward; allow the cinematic and post-ending results to finish before deciding whether to reload for another ending.
- Save separately before the final approach.
- Use distance during Mary’s opening phase and track her reappearance.
- Watch ceiling sparks during the underground phase.
- Dodge the final-phase lunge and moth-swarm repositioning.
- Approach only after Mary is down, then perform the final blow with a weapon.
Before you move on
- The timed Blue Creek Apartments Pyramid Head encounter ends without exhausting the strongest ammunition.
- Flesh Lip, Abstract Daddy, Eddie, the two Pyramid Heads and Mary are defeated.
- Abstract Daddy’s three television objectives have been completed during the Labyrinth chase.
- You can identify the safe response for each major encounter: evade the first Pyramid Head, target Flesh Lip’s exposed parts, destroy Abstract Daddy’s televisions, use sound and cover against Eddie, keep both Pyramid Heads visible, and maintain distance from Mary.
- Mary is defeated and James delivers the final weapon blow, after which the ending sequence begins, confirming completion of the campaign combat route.
Post-campaign — trophies, ending checklist and replay planning
After each completed ending, let the ending sequence and credits finish, then verify the individual trophy and the profile-level ending tracker before preserving the save. The remake has eight endings: Leave, Maria, In Water, Rebirth, Dog, UFO, Bliss and Stillness. Party Like It’s 2001 tracks five endings only—Leave, Maria, In Water, Rebirth and Dog. UFO has its own Tinfoil Hat trophy but is not part of that five-ending tracker. The Platinum requires Party Like It’s 2001 and the rest of the trophy list; Bliss and Stillness are additional endings without individual trophies. Use manual saves before Lakeview Hotel’s final branches, because there is no post-story free roam or chapter select. A practical plan is one New Game campaign for exploration and a behavior-based ending, followed by New Game+ for the Chainsaw, item-based endings, cleanup and challenge trophies. Stillness requires a previously completed In Water ending; the other New Game+ endings have their own item or interaction requirements.
1. Verify the completed ending and preserve the campaign save
Allow the ending sequence and credits to finish before judging whether the route registered. Then check the PS5 trophy list for the appropriate ending trophy: Making Peace for Leave, Vicious Circle for Maria, Only Way Out for In Water, Defy Even Death for Rebirth, The Goodest Boi for Dog, or Tinfoil Hat for UFO. Bliss and Stillness do not have individual ending trophies.
Check Party Like It’s 2001 separately. Its five tracked endings are Leave, Maria, In Water, Rebirth and Dog. UFO does not advance this tracker, even though it has its own trophy. If an individual trophy or the five-ending tracker fails to update, reload the relevant final save and complete that ending again before beginning another run. Keep the finished campaign save in a separate slot and do not overwrite any late-game branch save you may still need.
- Finish the complete ending sequence and credits.
- Check the individual ending trophy.
- Confirm Party Like It’s 2001 only against Leave, Maria, In Water, Rebirth and Dog.
- Check Tinfoil Hat separately if UFO was completed.
- Archive the finished campaign save before selecting New Game+.
2. Plan the first playthrough around one behavior-based ending
Leave, Maria and In Water are the three behavior-based endings available in a standard New Game and can also occur in New Game+. Their outcome is cumulative rather than controlled by one final-room action, so a save immediately before the final boss cannot reliably replace every earlier decision. Choose one route at the start and follow its tendencies throughout the campaign.
For Maria, interact with Maria whenever the game permits, protect her during encounters, and revisit her room in the Labyrinth when the route allows it. For Leave, emphasize James’s recovery, examine Mary-related items, maintain James’s health and avoid excessive focus on Maria. For In Water, repeatedly examine Angela’s knife, allow James to remain at critical health at times and follow the darker behavior pattern. These are reliable tendencies, not a single guaranteed switch, so avoid mixing incompatible routes late in the game.
- Choose Leave, Maria or In Water as the first-run target.
- Use a route checklist from Eastern South Vale onward.
- Create a separate save before the final Lakeview Hotel sequence.
- Do not expect a final-room reload to erase earlier ending behavior.
3. Begin New Game+ and collect replay-only equipment
After completing the campaign, choose New Game+ from the main menu. New Game+ restarts the story rather than opening chapter select or free roam. Near Silent Hill Ranch, opposite the ranch sign, take the Chainsaw from the logs. This unlocks Lumberjack and is useful for the no-ranged-kills run required by As Close as You Like. Do not fire ranged weapons at enemies during that challenge; puzzle and environmental shots are treated differently from enemy kills, but avoiding guns entirely is the safest approach.
New Game+ adds the route items for Rebirth, Dog, UFO, Bliss and Stillness. Collect them as you progress and create separate manual saves before the late Lakeview Hotel branches. Stillness is gated by a previously completed In Water ending. Rebirth, Dog, UFO and Bliss do not require all three behavior-based endings first.
- Start New Game+ only after preserving the first completed campaign save.
- Take the Chainsaw at Silent Hill Ranch.
- Reserve one New Game+ run for the no-ranged-kills challenge if needed.
- Record an In Water ending before attempting Stillness.
- Keep separate saves for item-ending branches.
4. Resolve the New Game+ endings with branch saves
For Rebirth, collect Crimson Ceremony from the graveyard, White Chrism near Baldwin Mansion, the Obsidian Goblet in Silent Hill Historical Society and Lost Memories in Lakeview Hotel’s Lost & Found. Once all four are held, complete the game normally. Make a branch save before taking Lost Memories if you still need a behavior-based ending or Stillness route from the same run.
For Dog, collect both Broken Key Parts, combine them into the Dog Key and use it on the Observation Room door beside Room 312. For UFO, collect the Blue Gem and examine it at the four required locations: the Saul Street Apartments roof, Rosewater Park’s pier before meeting Maria, the Lakeview Hotel pier after crossing Toluca Lake and Room 312. The fourth use immediately produces the UFO ending.
For Bliss, open the New Game+ safe in Pete’s Bowl-O-Rama with code 1887, obtain the Rusted Key, collect the Small Chest in Brookhaven Hospital’s garden, combine them to receive White Claudia and use it in Room 312 before playing the videotape. For Stillness, use the Key of Sorrow to open the Ruined Hotel Manager’s Office safe, enter 314 and take the Toluca Postcard, then finish the game. The Toluca Postcard route takes priority over Rebirth if both sets of items are carried.
- Collect all four Rebirth items before the final Rebirth branch.
- Create the Dog Key and use it at the Observation Room door.
- Activate the Blue Gem at all four UFO locations.
- Use White Claudia in Room 312 before the videotape for Bliss.
- Complete In Water before attempting Stillness.
- Do not combine Rebirth and Stillness items without a branch save.
5. Clean up collectibles and missable trophies by area
There is no chapter select or post-story free roam, and many trophies become unavailable after leaving their areas. For a collectible run, track each category separately: 26 Strange Photos, 68 Memos and 26 Glimpses of the Past. The collectible trophies require their respective sets in a single playthrough, so items from separate campaigns do not combine. Save before one-way transitions and compare your tally against an edition-specific room-by-room list before moving on.
Use a New Game checklist and a New Game+ checklist appropriate to the mode. New Game+ changes memo and item placements and adds its own route material, so do not assume the ordinary Lakeview Lost & Found Memo and the New Game+ Lost Memories or Cryptic Letter route belong to one universal list. If a collectible is missed and a suitable pre-exit save exists, reload it immediately; otherwise schedule a dedicated replay rather than relying on post-campaign cleanup.
- Track Strange Photos, Memos and Glimpses separately.
- Confirm each area before crossing its final one-way transition.
- Use a pre-exit save to repair a missed collectible whenever possible.
- Keep New Game and New Game+ collectible lists separate.
- Do not expect collectible progress to merge between playthroughs.
6. Perform the final Platinum and eight-ending audit
The PS5 version has 44 trophies, including the Platinum. For the Platinum, confirm Party Like It’s 2001 for Leave, Maria, In Water, Rebirth and Dog; the separate UFO trophy Tinfoil Hat; the three collectible trophies; I Saw That Town for completing New Game+; Radio Silence; As Close as You Like; Faster Than Fog; and the remaining combat, exploration and miscellaneous trophies. The Platinum does not require Bliss or Stillness, and neither has an individual ending trophy.
For full ending completion, separately record Leave, Maria, In Water, Rebirth, Dog, UFO, Bliss and Stillness. A practical order is a first campaign for exploration and one behavior-based ending, then New Game+ for the Chainsaw, Rebirth, Dog, UFO, Bliss and Stillness branches, with targeted reloads where possible. Check the trophy list and tracker after every ending before deleting or overwriting the relevant save. Keep any unresolved branch at the final Lakeview Hotel save until its result is confirmed.
- Party Like It’s 2001 confirms Leave, Maria, In Water, Rebirth and Dog only.
- Tinfoil Hat confirms UFO separately.
- All three collectible trophies are unlocked.
- I Saw That Town and the challenge trophies are complete or assigned to a replay.
- The eight-ending list records Leave, Maria, In Water, Rebirth, Dog, UFO, Bliss and Stillness.
- Every unresolved ending branch has a surviving save or a defined replay plan.
Before you move on
- The PS5 trophy list contains Making Peace, Vicious Circle, Only Way Out, Defy Even Death and The Goodest Boi.
- Party Like It’s 2001 confirms the five tracked endings: Leave, Maria, In Water, Rebirth and Dog.
- Tinfoil Hat confirms UFO separately.
- The Strange Photos, Memos and Glimpses of the Past trophies are unlocked, or each missed area has a surviving repair save.
- I Saw That Town confirms a completed New Game+ run and the Chainsaw was collected.
- The full ending record contains Leave, Maria, In Water, Rebirth, Dog, UFO, Bliss and Stillness if eight-ending completion is the goal.
- Bliss and Stillness have been viewed if desired, but they are not counted as Platinum requirements.
- Any remaining combat, challenge or exploration trophies have been unlocked or assigned to a specific replay.
Finishing up
Campaign completion means defeating the final boss and watching one complete ending sequence.
The remake contains eight endings: Leave, Maria, In Water, Rebirth, Dog, UFO, Bliss and Stillness. No ending is established as canonical.
For New Game+, record In Water before attempting Stillness; the other item-based endings do not require completing every base ending first.
For a collectible run, verify the applicable single-playthrough checklist before the relevant lockout, using 68 Memos, 26 Strange Photos and 26 Glimpses of the Past as the target totals.
Use preserved saves to retry branches, but do not imply that a late save can erase ending values accumulated earlier in the campaign.
Choose your next gameScreenshots & video
Game imagery for reference. Follow the written chapters above for the route and strategies.
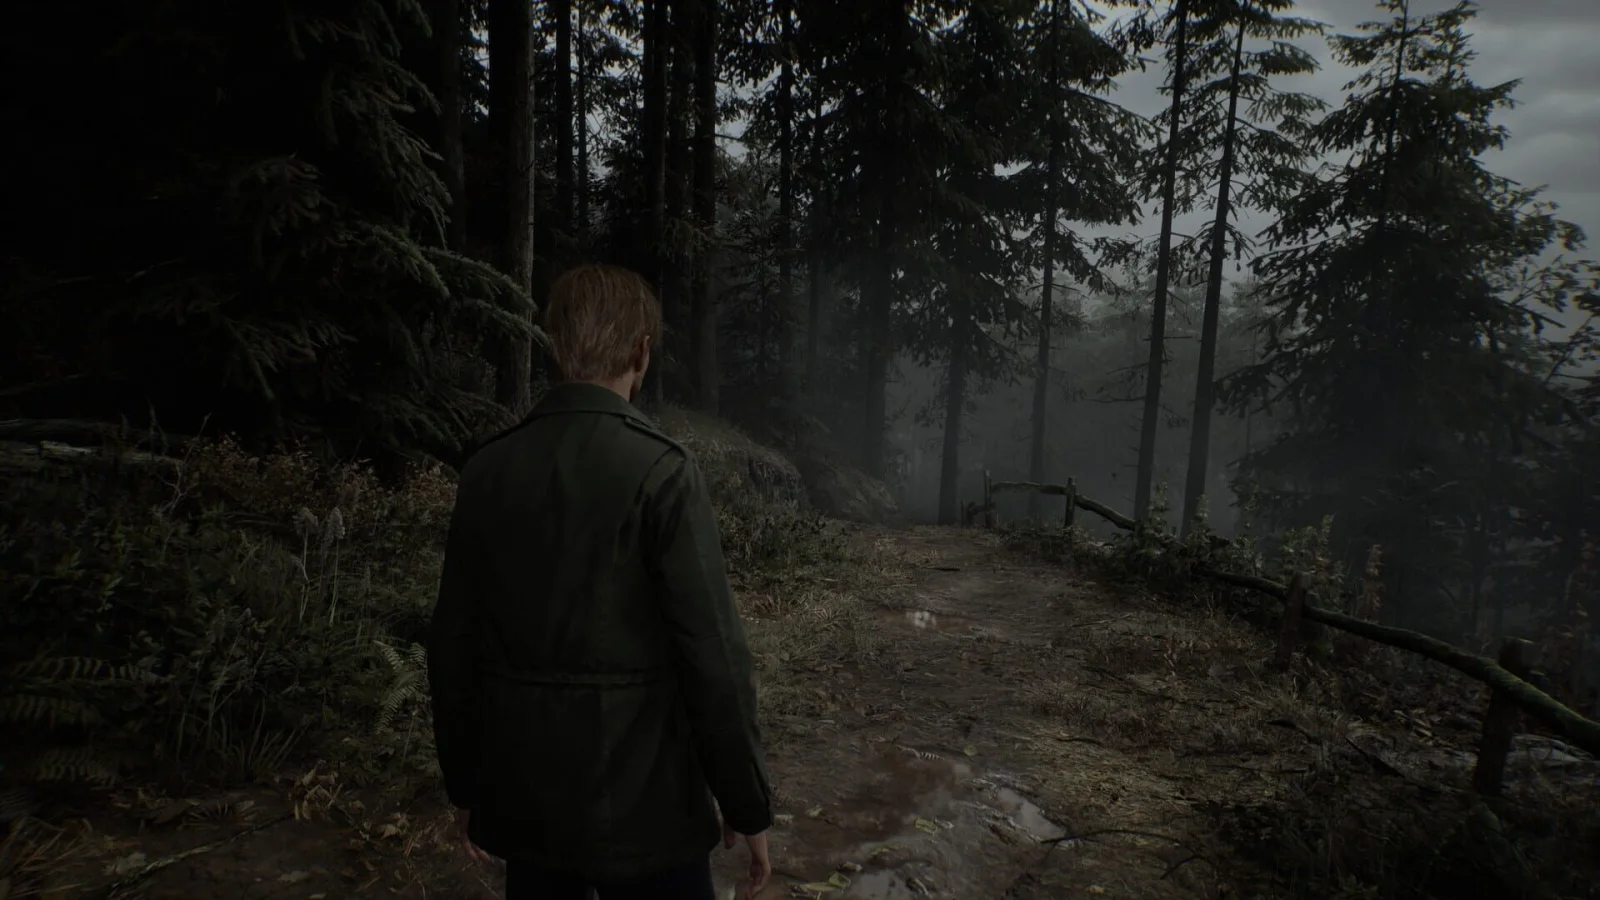
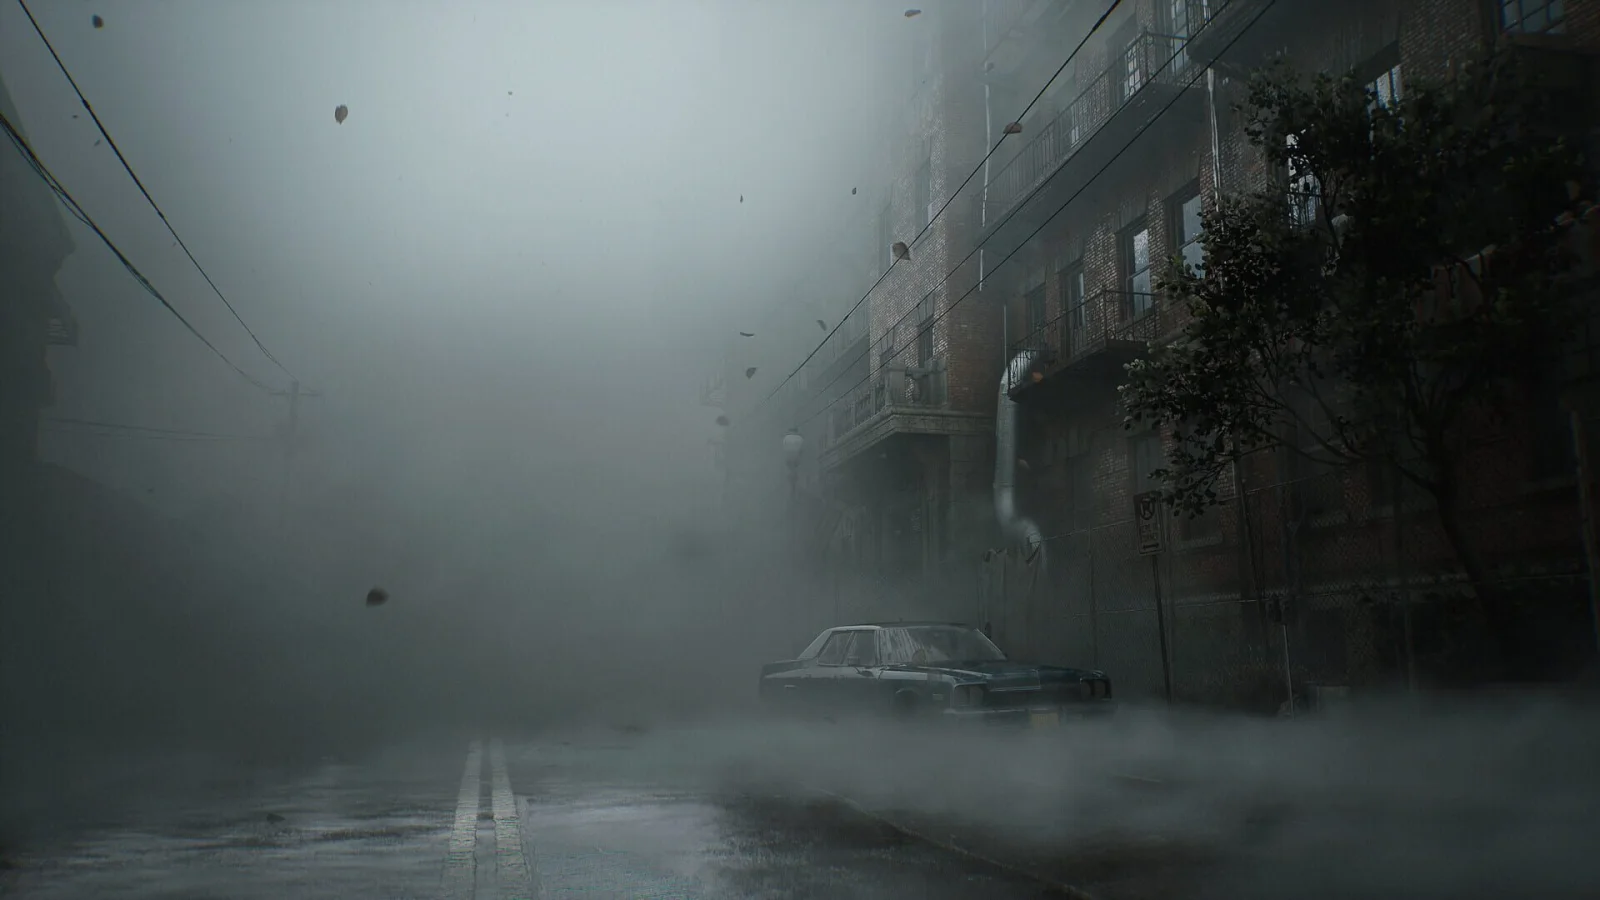
Sources & references
Our original guide draws on the references below. Check the edition at the top of this page before following controls or unlock requirements.
- Silent Hill 2 Remake - Eastern South Vale Walkthrough
- Silent Hill 2 Remake South Vale (East) Collectible Locations
- Eastern South Vale Walkthrough | Silent Hill 2 Remake
- Silent Hill 2 Remake Walkthrough: Route, Bosses, Missables and All Endings
- SILENT HILL 2 Remake Releases October 8th
- Silent Hill 2 Remake - Wood Side Apartments Walkthrough
- Silent Hill 2 Remake Wood Side Apartments Collectible Locations
- Silent Hill 2 Remake - Blue Creek Apartments Walkthrough
- Silent Hill 2 Remake Clock Puzzle Solution
- Bluecreek Apartments - Silent Hill 2 Walkthrough & Guide
- Silent Hill 2 Remake - Western South Vale Walkthrough
- Silent Hill 2 Remake Endings
- Silent Hill 2: South Vale Walkthrough - All Collectibles: Glimpses of the Past, Memos, Strange Photos
- West Side of South Vale Walkthrough - Silent Hill 2 Remake (2024)
- Silent Hill 2 Remake - Brookhaven Hospital Walkthrough
- Silent Hill 2: Brookhaven Hospital Walkthrough - All Collectibles: Memos, Glimpses of the Past, Strange Photos
- Silent Hill 2 Remake All Puzzle Solutions Guide
- Brookhaven Hospital Walkthrough Guide Silent Hill 2 Remake
- Silent Hill 2 Remake - Otherworld Hospital Walkthrough
- Silent Hill 2 Remake Brookhaven Hospital (Otherworld) Collectible Locations
- Silent Hill 2 Remake Memos
- Silent Hill 2 remake Brookhaven Hospital walkthrough: All Patient Bracelet locations
- Silent Hill 2 Remake - Western South Vale Revisited Walkthrough
- Silent Hill 2 Remake West South Vale Walkthrough & All Collectibles
- Silent Hill 2 Remake — Toluca Prison Walkthrough
- Silent Hill 2: Toluca Prison Walkthrough — All Collectibles
- Silent Hill 2 Remake — Toluca Prison Collectible Locations
- Silent Hill 2 Remake — Weights and Scales Puzzle Guide
- Silent Hill 2 — Guide and Walkthrough: Toluca Prison
- Silent Hill 2 Remake - Labyrinth Walkthrough
- Silent Hill 2 Remake Labyrinth Collectible Locations
- Silent Hill 2 Guide: “Labyrinth” Walkthrough & All Collectibles
- Silent Hill 2 Remake: All Trophies, Achievements
- Silent Hill 2 Remake - Lakeview Hotel Walkthrough
- Silent Hill 2 Remake Lakeview Hotel Collectible Locations
- Silent Hill 2: Blue Gem Location and Where to Use It
- Silent Hill 2 Remake New Game Plus Collectible Locations
- Silent Hill 2 Remake – Ruined Hotel Walkthrough
- Silent Hill 2: ultimate replay guide — PlayStation
- Silent Hill 2 Remake All Endings Guide
- Silent Hill 2 Remake Walkthrough
- Silent Hill 2 Remake Unlockables
- Silent Hill 2 Remake Strange Photos
- Silent Hill 2 Remake Glimpses of the Past
- Silent Hill 2 Remake All Glimpses of the Past Locations
- Silent Hill 2 Remake Collectible Guide - 100% Walkthrough
- Silent Hill 2 Remake Bosses
- How to beat Abstract Daddy in Silent Hill 2
- Silent Hill 2 Remake: How to defeat the Abstract Daddy
- Silent Hill 2 Guide: Toluca Prison Walkthrough and All Collectibles
- Silent Hill 2 Remake Trophy Guide & Roadmap
- Silent Hill 2 Remake Trophies/Achievements
- SILENT HILL 2 Trophies — PS5
About the game & collecting notes
- Platform
- Sony PlayStation 5
Step-by-step campaign routing for the PS5 remake of Silent Hill 2 (Bloober Team, 2024). This guide covers the entire main story through the final boss and endings, key item routing, boss strategies, puzzle approach, missable collectibles, and New Game+ ending unlocks so you can finish the campaign and pursue 100%.
Darryl Polo
Darryl Polo writes about emulation and retro games. What changes when an old favorite moves to another setup? That question connects his interest in tinkering with the games that made the hardware worth keeping.
Our editorial standardsFound a step that needs another look? Help us improve this guide.