
Shining Force II (Sega Genesis, USA) — Complete Campaign Walkthrough
Step-by-step campaign guide for the original North American Sega Genesis release of Shining Force II. This walkthrough covers the complete normal campaign from Granseal through Zeon, including recruitment, required story items, promotion choices, dungeon routes, boss strategies, the return to Grans Island, and the exact post-credit procedure for the optional secret Battle 44. It distinguishes normal campaign completion from the separate post-ending challenge and does not claim that the secret battle creates a second ending or a post-game save.

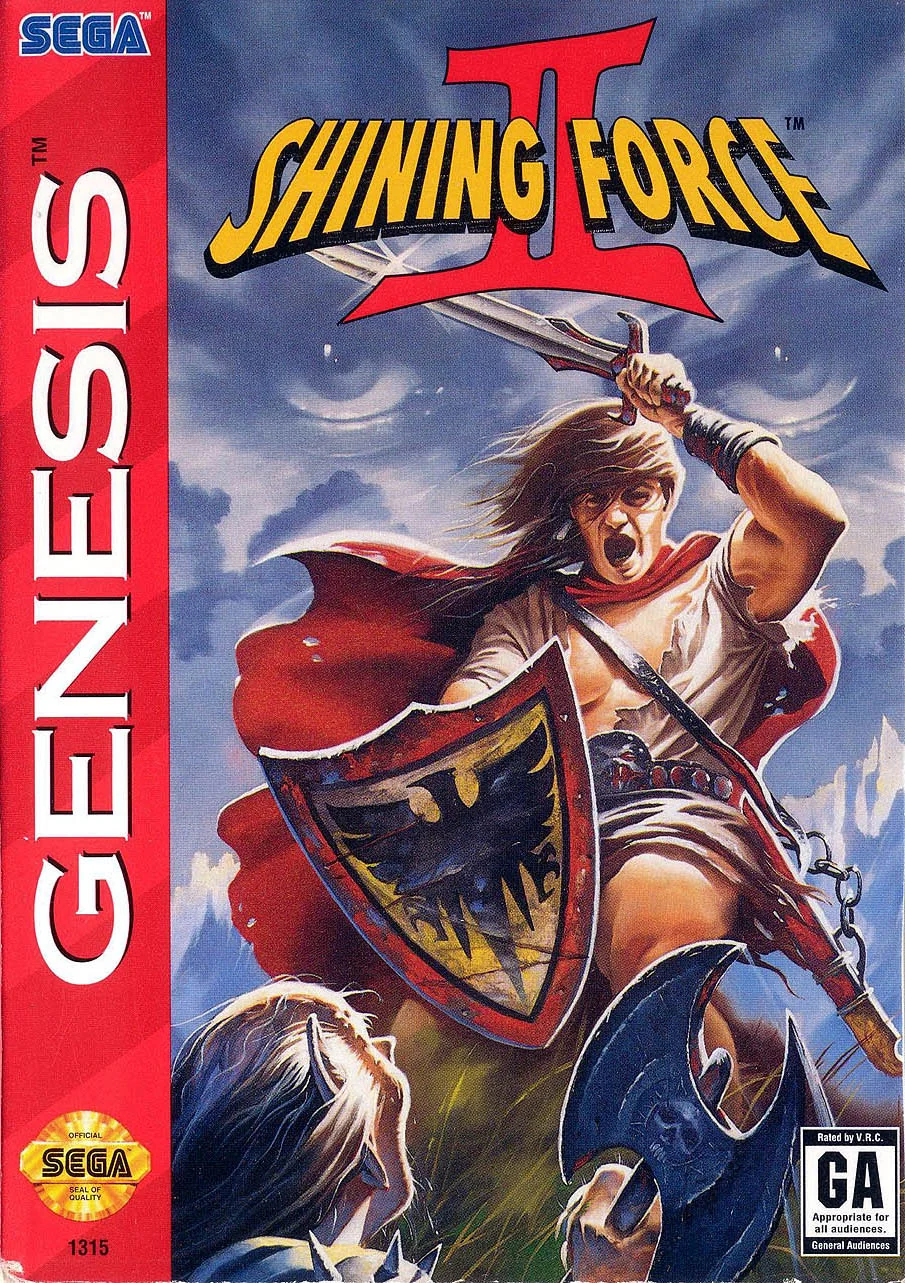
Find a copy
Shining Force II Sega Genesis / Mega Drive
We may earn a commission if you buy through these links, at no extra cost to you. As an Amazon Associate I earn from qualifying purchases.
Opens retailer search results. Check the model, edition, seller, availability and current price before buying.
Before you begin
This guide is written for the original Sega Genesis North American release of Shining Force II.
Follow the ordered route from Granseal through Parmecia, the Nazca Ship return, the Grans Island endgame, and the normal final battle against Zeon.
The normal campaign ends with Zeon’s defeat and the ending sequence. Battle 44 is an optional post-credit challenge, not a second story ending.
Use separate saves before major battles and before the final sequence. The original release does not provide a conventional post-game town save after the ending or secret battle.
Required progress, optional recruitment, unique items, promotion choices, and recovery points are identified separately so that optional misses do not appear to block the main campaign.
Set yourself up for the run
Create and label at least two separate save files before starting major battles or story events.
The Genesis cartridge/virtual console saves can be overwritten; keep backups at towns you visit frequently.
Familiarize yourself with turn-based flow: each unit moves then performs one action (attack, spell or item).
Battles reset to the nearest town if Bowie is defeated.
Use towns' recovery to reset after losses.
(See official manual and gameplay summaries for basic mechanics.)
Aim to promote characters at level 20 where applicable.
Some characters have two promotion paths; one path requires a special hidden item.
Plan promotions for your long-term party members in advance.
Build a balanced front line (strong swords, axes, and knights), a dependable healer, reliable ranged attackers (archers/throwers), and at least two magic users split between offensive and support spells.
Stock up on basic healing items and tier-appropriate weapons/armor in towns before entering long dungeon stretches.
Save money for key weapons or class-specific equipment when they become available.
Recruitment matters: many useful allies are optional and require visiting towns or triggering events.
Talk to NPCs repeatedly after major story beats and re-check town buildings (inns, shops, libraries) to trigger joins.
Use land effect and terrain to your advantage—position infantry and heavy armor on high-defense terrain and magic users on safe backlines.
If unfamiliar with land effect, consult the in-depth section in the guide.
When grinding or training, fight monsters close to (but not above) your party’s level to gain steady EXP without wasting healing resources.
Avoid over-leveling a single character at the expense of party breadth.
If you plan to seek every recruit and optional item, follow the walkthrough’s visit-order; some locations become inaccessible after progressing the main story.
Opening — Granseal and the Ancient Tower Prologue
The North American Sega Genesis opening begins with a cutscene in which Slade steals the Jewel of Light and the Jewel of Evil from an ancient shrine, weakening the seal on Zeon. Playable control then shifts to Bowie in Granseal. Complete the school and castle scenes, collect the early supplies, defeat the six Gizmos in the first battle, recruit Jaha during the departure sequence, and win the battle on the road to Yeel. The later playable jewel events are not part of this opening visit; they occur after the party reaches Galam and returns to the Ancient Tower.
Opening scene: identify the two jewels
The game first shows Slade entering an ancient shrine and removing the Jewel of Light and the Jewel of Evil. The theft weakens the seal holding Zeon and establishes the main threat of the campaign.
This is a story cutscene, not an exploration event in the first version of Granseal. Do not search the opening town for a shrine or expect Slade to join here. The later playable jewel sequence occurs after the party is arrested in Galam, escapes with Slade’s help, and returns to the Ancient Tower.
- The opening Slade cutscene has played.
- The jewels are identified as the Jewel of Light and the Jewel of Evil.
- Slade has not yet joined the Force, which is correct at this point.
1. Leave Bowie’s house and report to school
After naming Bowie and selecting the difficulty, leave the house and speak with Bowie’s mother. Go to the school, the large building in the northeastern part of Granseal near the church.
Inside the school, speak with Sarah. When she moves aside, go downstairs and search the container in the basement to obtain a Medical Herb. Return upstairs and speak with Sir Astral. Then sit beside Chester. A guard will arrive and summon Astral because of the king’s condition.
When Sarah asks Bowie to accompany her to the castle, accept. Sarah and Chester join the Force as part of this required sequence.
- The school basement Medical Herb is collected.
- Sarah and Chester have joined Bowie.
- Astral has been summoned to the castle.
2. Enter the castle and collect the first supplies
Travel north from the school to Granseal Castle. Sarah’s plan gets the group inside. Before going to the king’s bedroom, enter the castle’s western side room and open the three chests. They contain a Medical Herb, an Angel Wing, and an Antidote.
Return to the main castle area. Go up the left staircase, enter the room above, and use the staircase on the right to reach the king’s bedroom. Watch the scene involving Astral, King Granseal, and the castle officials. Afterward, follow Astral toward the Ancient Tower.
- The three castle chests have been opened, or their contents have been deliberately left behind.
- The king’s bedroom scene has played.
- Astral has gone toward the Ancient Tower.
3. Collect the Mithril behind the Ancient Tower
Before entering the Ancient Tower, walk around to its rear. The search location is between the tower’s two rear windows. Walk north as far as the narrow path allows, then use the search command to collect a piece of Mithril.
This Mithril is optional for immediate combat, but it is a unique resource used later by the Dwarven blacksmith. Collect it now because the area changes after the story advances. Return to the front entrance after searching and enter the tower.
- The first hidden Mithril behind the Ancient Tower has been collected.
- The party has entered the Ancient Tower.
4. Win Battle 1: Granseal Tower
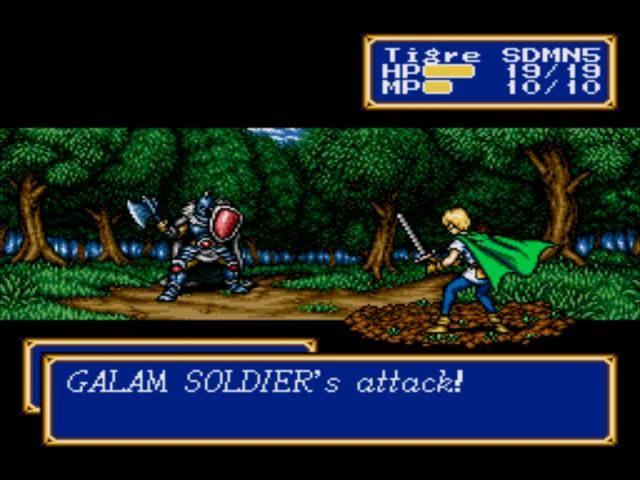
Battle 1 contains Bowie, Sarah, and Chester against six Gizmos. There is no separate boss unit; all six Gizmos must be defeated. Keep the party close enough for Sarah to heal, but do not send Bowie far ahead. If Bowie is defeated, the battle is lost.
Focus attacks on one Gizmo at a time instead of spreading damage. Bowie should help hold the front line, Chester can attack from behind or from a safer angle, and Sarah should heal whenever an ally could be defeated by the next enemy attack. When the party is healthy, Sarah can attack an exposed Gizmo.
If the battle turns dangerous and Bowie is still able to act, Egress is a safe way to leave and recover in town before trying again. Repeating the battle for experience is optional.
- All six Gizmos have been defeated.
- Bowie survived the battle.
- The post-battle castle scenes continue normally.
5. Complete the castle aftermath and prepare to leave
Return through the castle to the king’s bedroom and watch Astral remove the possessing Gizmo. The story then sends the Force to investigate Hawel in Yeel.
Before leaving Granseal, go to the harbor. Search the barrels at the dock for the Quick Chicken, then enter the boat and search the lower-deck barrels for a Medical Herb. These items are optional, but the Quick Chicken is useful because it increases movement when used.
Visit the weapon shop and spend money on practical upgrades. A Short Sword for Bowie and a Short Spear for Chester are reasonable early purchases if affordable. Do not exhaust your funds on excess consumables; the next town and later story events provide additional recovery opportunities.
When the departure sequence is complete, Jaha joins the Force. Confirm that Bowie, Sarah, Chester, and Jaha are present before entering the next field battle.
- Astral’s exorcism scene has played.
- The Quick Chicken has been collected if desired.
- The boat’s lower-deck Medical Herb has been collected if desired.
- Jaha has joined before the party proceeds toward Yeel.
6. Win Battle 2 and optionally visit the South Shrine
Leave Granseal to begin Battle 2 on the route toward Yeel. The enemies are four Oozes and two Huge Rats. Defeat the Oozes first if they are exposed, then concentrate on the Huge Rats. Jaha is useful for dealing physical damage to the tougher rats, while Sarah should remain behind the front line and heal before an ally reaches critical health.
After the battle, you may travel south to the South Shrine approach before going to Yeel. Search the lowest-hanging mountain section near the shrine’s cave entrance to obtain another hidden Mithril. This visit is optional for immediate story progress, but the Mithril is worth collecting. If you skip it now, it can be obtained later during the return to Grans Island, although that requires backtracking.
Then go to Yeel. The next progression point is the investigation of Hawel, reached by leaving Yeel through its upper exit. The following chapter covers the battle outside Hawel’s house and the forced route to Galam.
- Battle 2 outside Granseal has been won.
- The optional South Shrine Mithril has been collected, or its later recovery has been noted.
- The party has reached Yeel and is ready to investigate Hawel.
Before you move on
- The opening cutscene showing Slade stealing the Jewel of Light and Jewel of Evil has played.
- Bowie, Sarah, Chester, and Jaha are in the Force.
- The school basement Medical Herb and the three castle supplies were collected or deliberately left behind.
- The hidden Mithril behind the Ancient Tower was collected.
- Battle 1 against six Gizmos was completed.
- The castle exorcism scene played and the Force was sent to investigate Hawel in Yeel.
- Battle 2 outside Granseal was completed.
- The South Shrine Mithril was collected, or the player has recorded that it can be recovered later.
- The party is in Yeel and ready to leave through the upper route toward Hawel’s House.
Escape & New Granseal — Early Recruitment and Town Checks
Begin in Yeel after Battle 2 and any optional South Shrine visit are complete. Travel to Hawel’s House, recruit Kazin, win the battle outside the house, escape Galam prison with Slade, return through ruined Granseal, obtain the Jewel of Evil in the Ancient Tower, sail to Parmecia, rescue the trapped worker at North Cliff, and establish New Granseal. Finish by checking the new town, recruiting Peter, collecting useful one-time items, and leaving east toward Ribble.
Start in Yeel and reach Hawel’s House
This chapter begins in Yeel. Battle 2 outside Granseal and any optional South Shrine visit should already be finished, so do not repeat those events. Enter the first house and search the vase for a Healing Seed. It is optional, but useful before the next battle.
Find Kazin near the upper part of town and speak with him. He explains that Hawel is his master and leads the Force toward Hawel’s House. Leave Yeel through the upper exit. Battle 3 begins on the road.
Battle 3 contains Oozes, Huge Rats, and a Huge Bat. Keep the Force together while advancing. Let durable physical units take the front positions, keep Sarah protected behind them, and use Kazin to finish weakened enemies from a safe distance. Heal before allowing the final enemy to fall if several characters are injured.
- Confirm that Battle 2 and any optional South Shrine visit are complete.
- Search Yeel’s first house for the Healing Seed.
- Speak with Kazin.
- Leave Yeel through the upper exit.
- Win Battle 3 on the road to Hawel’s House.
Complete Hawel’s House and win Battle 4
Enter Hawel’s House after Battle 3. The Galam soldiers have attacked Hawel because of his knowledge of the Ground Seal and the two jewels. After Hawel dies, Kazin joins the Force. Search both chests in the house for an Antidote and a Healing Drop before leaving.
Battle 4 starts outside the house. The enemy group includes Huge Bats, Galam Soldiers, and Galam Archers. Move as one group and remove the nearest physical attackers before exposing Kazin or Sarah. Galam Archers should be approached carefully because they can continue attacking while the front line is occupied. Use Kazin’s Blaze against clustered or weakened enemies, but do not let him advance without protection.
The Force must win Battle 4 to continue. If Bowie is defeated, the battle is lost and the game returns the party for recovery and a retry; the arrest and prison sequence does not begin after a defeat. Once Bowie survives and the enemy force is cleared, the story proceeds to the forced arrest and Galam prison.
- Complete Hawel’s House and confirm Kazin has joined.
- Take the Antidote and Healing Drop from the two chests.
- Win Battle 4 outside Hawel’s House with Bowie alive.
- Allow the forced arrest after victory.
- Continue to Galam prison.
Escape Galam prison and clear the castle battle
Inside the prison cell, search the table before moving on to obtain the Chirrup Sandals. Speak with the prisoners and move beside Jaha to advance the escape scene. Slade opens the cells and reveals a hidden passage after the party tries to leave by the normal route.
After dropping into Slade’s passage, search the upper wall before continuing. This search gives another piece of Mithril. Follow the tunnel out, climb the stairs, and use the priest if the party needs healing or a save before Battle 5.
Battle 5 takes place inside Galam Castle. Galam Mages are the main magical threat, so eliminate them when the battlefield allows it while keeping Sarah and Kazin behind the tougher units. The Galam Knight is the key target; defeating it ends the battle. Afterward, Slade retrieves the Jewel of Light and gives it to Bowie. The jewel fuses to Bowie, and Slade officially joins the Force.
Before leaving Galam, enter the item shop and search the accessible chests for two Medical Herbs. Check the weapon and item shops as well. Replace outdated equipment where affordable, especially weapons for Chester, Kazin, Sarah, and any other units still using starting gear.
- Search the prison table for Chirrup Sandals.
- Let Slade reveal the escape passage.
- Search the passage wall for Mithril.
- Heal or save at the priest if needed.
- Defeat the Galam Knight in Battle 5.
- Confirm that the Jewel of Light is attached to Bowie.
- Confirm that Slade has joined the Force.
- Collect the two Medical Herbs in Galam’s item shop.
Return to ruined Granseal and recruit Kiwi
Leave Galam through the southern route. Battle 6 begins outside the town. Advance in a compact formation and remove nearby Galam Soldiers and Knights before the party spreads out. Keep Sarah behind the front line and use Kazin’s Blaze on safe targets. Do not send Slade or Kazin deep into the enemy formation alone.
After Battle 6, return to ruined Granseal. Enter the small house near the dock with the vase and barrel and speak with the tortoise inside. The game lets you name him; Kiwi is the default North American name. This is where Kiwi joins. His recruitment occurs in the damaged version of Granseal, not in New Granseal.
Inspect the ruined area for the Mithril in the hole near the castle steps if it was not collected during the story sequence. Then enter the castle and follow the events involving Astral, Lemon, King Granseal, and Princess Elis. Heal and equip the Force before entering the Ancient Tower.
- Win Battle 6 outside Galam.
- Return to damaged Granseal.
- Recruit Kiwi in the small house near the dock.
- Collect the ruined-castle Mithril if it remains available.
- Follow the castle events into the Ancient Tower.
- Confirm that Kazin, Slade, and Kiwi are members of the Force.
Clear the Ancient Tower and search the ship
Battle 7 takes place in the Ancient Tower. The enemies include Galam Knights, Archers, a Galam Mage, a Dark Cleric, and Dark Smokes. Clear threats that can reach the party quickly, then work toward the enemy casters. Dark Smokes have high attack and can use magic, so avoid leaving several wounded characters within their reach. Kiwi can help absorb some physical damage, but protect him from magical attacks.
After the battle, the story awards the Jewel of Evil and the earthquake forces the party to leave Grans Island. Before departure, search the small hole created by the earthquake near the castle exterior to collect the Mithril if it has not already been taken.
Proceed through the ruined school to the pier and board the ship. Search before speaking to the old man who completes the departure. The right-side barrels contain the Quick Chicken, and the lower ship barrels contain a Medical Herb. The Quick Chicken is optional for progress, but it is a one-time stat item, so keep it until you decide which character should receive it.
- Win Battle 7 in the Ancient Tower.
- Confirm that the Jewel of Evil has been obtained.
- Search the earthquake hole for Mithril.
- Search the ship before departure.
- Take the Quick Chicken.
- Collect the ship’s Medical Herb if available.
- Speak with the old man and depart for Parmecia.
Rescue the worker at North Cliff and establish New Granseal
After the ship reaches Parmecia, the party is directed to North Cliff to rescue a trapped worker. Battle 8 contains Witches, Green Oozes, Goblins, and Hunter Goblins. Keep the Force together while advancing toward the trapped man. Witches are the main magical threat, so remove them when they can reach Sarah, Kazin, or wounded front-line units.
Use the terrain and obstacles to limit the number of enemies that can attack at once. Protect the trapped worker while moving forward, but do not divide the party so widely that a Witch can isolate a healer. Winning the battle rescues the worker and opens the settlement sequence.
Return to the settlement after the battle. The ship is dismantled and New Granseal is established. The North Cliff tunnel remains blocked by rocks during this visit. Do not attempt to force that passage; clearing it requires a later story objective.
- Reach North Cliff after landing on Parmecia.
- Win Battle 8.
- Rescue the trapped worker.
- Return to the settlement.
- Confirm that New Granseal has been established.
- Note that the northern tunnel remains blocked.
Inspect New Granseal and recruit Peter
Enter New Granseal and visit the castle before leaving town. Go to the Tactical Base and search the eagle shield at the rear to obtain Warrior Pride. This promotion item is optional for immediate progress, but keep it rather than selling it. In the room to the left of the throne room, search the top barrel for Cheerful Bread.
Leave the castle and inspect the houses outside it. Collect the available one-time items: Angel Wing, Antidote, Healing Seed, and Healing Drop. Visit the weapon and item shops and buy basic upgrades for under-equipped front-line characters. Use the priest and inn so the Force is healed and the game is saved before the next road battle.
Complete the event involving Peter, the phoenix. Peter joins the Force during the New Granseal sequence, but he cannot be controlled in battle yet. He becomes controllable only after the later Volcanon event, so do not count him as an active unit for the immediate journey to Ribble.
Finish the remaining castle conversations. The Minister gives Bowie 100 gold after the New Granseal events. Spend it on essential equipment rather than filling every inventory slot with consumables. When the party is healed, equipped, and saved, leave New Granseal by the eastern route. The next chapter begins with the journey toward Ribble.
- Search the Tactical Base eagle shield for Warrior Pride.
- Take Cheerful Bread from the top barrel left of the throne room.
- Collect Angel Wing, Antidote, Healing Seed, and Healing Drop from the houses.
- Check the shops, priest, and inn.
- Complete Peter’s recruitment event.
- Confirm that Peter is present but not yet controllable.
- Receive the Minister’s 100 gold.
- Heal, equip, and save.
- Leave east toward Ribble.
Before you move on
- The chapter began in Yeel after Battle 2 and any optional South Shrine visit were complete.
- Yeel’s Healing Seed was collected or intentionally skipped.
- Battle 3 to Hawel’s House was won.
- Hawel’s House was visited, both chests were searched, and Kazin joined.
- Battle 4 was won with Bowie alive, and the forced Galam arrest followed.
- If Battle 4 was lost during the playthrough, the party recovered and successfully retried it.
- Chirrup Sandals and the prison-passage Mithril were collected.
- Battle 5 was completed, the Jewel of Light fused to Bowie, and Slade officially joined.
- The two Medical Herbs in Galam’s item shop were collected or intentionally skipped.
- Battle 6 outside Galam was completed.
- Kiwi was recruited from the small house near the dock in ruined Granseal.
- The Ancient Tower battle was completed and the Jewel of Evil was obtained.
- The earthquake Mithril was collected or intentionally skipped.
- The ship was searched before departure, including the Quick Chicken and available Medical Herb.
- Battle 8 at North Cliff was completed and the trapped worker was rescued.
- New Granseal was established and the northern passage was confirmed blocked.
- Warrior Pride, Cheerful Bread, Angel Wing, Antidote, Healing Seed, and Healing Drop were collected or deliberately skipped.
- Peter joined but was correctly left as an uncontrollable unit until Volcanon.
- The Minister awarded 100 gold.
- The party was healed, saved, equipped with essential upgrades, and left east toward Ribble.
South Parmecia — Field Routes, Dungeons and Early Bosses
After leaving New Granseal, travel through Ribble, the Cavern of Darkness, Polca and Bedoe. Once Luke and the raft are available, take the eastern river route to the Ancient Tunnel area below Ribble. Win the eastern desert battle, meet Petro’s grandfather, clear the Ancient Shrine battle and collect both chests, including the Wooden Panel. Return to Ribble, use the panel at the tree and take the Achilles Sword. Only then sail south to defeat the Kraken, visit Hassan, bring Rohde through the western desert battle and defeat Taros. The Caravan becomes available afterward, allowing the campaign to continue toward the Dwarven Mine and Elven Town.
1. Leave New Granseal and reach Ribble
Begin after the New Granseal departure and follow the road toward Ribble. Keep the Force together in the opening field battle. Vampire Bats can bypass the slower front line and reach Sarah or Kazin, so remove nearby bats before chasing enemies near the map edge.
Use Chester, Jaha, Bowie and the other durable fighters as a moving front line. Keep Sarah one or two spaces behind them and place Kazin where he can cast without standing on the front edge. Spread experience among several characters rather than relying only on Bowie or Peter; later battles include ranged enemies and spellcasters that punish an unbalanced group.
In Ribble, May joins during the town visit. Speak with the villagers to learn about the ruins beneath the tree and the Achilles Sword. Optional searches include Mithril in the grey sandpit and Bright Honey in the lower-left house’s vase. Keep unique items rather than selling them. The Power Ring is also optional and comes from the associated Ribble battle if the recipient has room for the drop.
- Leave New Granseal and win the route battle.
- Keep the Force together against Vampire Bats.
- Recruit May in Ribble.
- Learn about the tree ruins and Achilles Sword.
- Retain unique optional items.
2. Cross to the Cavern of Darkness
Leave Ribble by the eastern route, cross the upper bridge and turn west toward the Cavern of Darkness. The lower bridge is an optional detour for another Mithril piece; return to the main route afterward.
Inside the cavern, advance in a compact formation. Dark Dwarves are tougher than the earlier Goblins, and Vampire Bats can reach the rear line. Move the strongest fighters into the cave first, then bring Sarah and Kazin forward once nearby enemies are committed. Avoid splitting the Force between side passages.
The Hobgoblin is the battle leader. Clear enemies that can immediately reach the healer or spellcasters, then advance on the Hobgoblin with Bowie and the front line. After victory, open the chest for the Silver Tank and continue to Polca Village.
- Cross the upper bridge toward the cavern.
- Collect the optional Mithril near the lower bridge if desired.
- Defeat the Hobgoblin.
- Take the Silver Tank.
- Reach Polca Village.
3. Complete Polca and Bedoe
In Polca, search the earth-built house for Protect Milk and speak with the fallen creature on the west side. Finish the conversation about Creed, then leave through the upper-right exit for the mountain route to Bedoe.
The mountain map restricts movement. Keep the Force connected instead of sending fast units ahead. Death Archers and Evil Clouds can attack before the melee line arrives, so let the front line claim accessible spaces while Sarah and Kazin remain behind it.
In Bedoe, visit King Bedoe and then go to Mount Volcano to speak with Volcanon. This makes Peter controllable in battle. Return to Bedoe, speak with the baby bird outside the King’s level and talk to the birds on the third floor. Leave town and walk through the bushes on the left side outside Bedoe until the baby bird falls onto the party. Complete this event before leaving the area permanently; it prepares the later birdman recruitment.
Return to Polca. Gerhalt joins before the village battle. The Master Mage is the leader. Move as a group, protect Sarah from Zombies and Death Archers, and attack the Master Mage when Bowie or another durable unit can reach it safely. After victory, speak with the mayor in the upper-left house and agree to take Oddler. Leave Polca; Luke joins and the raft becomes available. Re-enter Polca if you want to buy Luke a Long Sword.
- Search Polca for Protect Milk.
- Complete the fallen creature’s Creed conversation.
- Visit Volcanon at Mount Volcano.
- Trigger the baby bird event outside Bedoe.
- Recruit Gerhalt.
- Accept Oddler.
- Obtain the raft and recruit Luke.
4. Take the eastern route to the Ancient Tunnel
After Luke joins, sail south through the river system. At the fork, take the eastern branch. When the mountains block the raft, disembark on the southern shore and walk around the mountains to trigger the eastern desert battle. This is the required route to Petro’s grandfather and the Wooden Panel; do not sail directly to the Kraken yet.
The battle contains Golems, Zombies, Archers, Evil Clouds, a Master Mage and Black Monks. Desert terrain reduces movement, so keep low-movement units together. Prioritize the Master Mage, Archers and enemies that can reach Sarah or Kazin. Let Bowie, Peter and the sturdier fighters occupy Golems while the rest advances behind them.
After winning, enter the ruins or cave to the east and speak with Petro’s grandfather until he agrees to travel with you. Open the chest beside him and take the Steel Sword. Return to the raft and sail back toward the river intersection. Enter the cave leading to the Ancient Tunnel route below Ribble. Petro’s grandfather opens the way to the Ancient Shrine.
The Ancient Shrine battle is the Wooden Panel battle. Advance carefully through the narrow approach, watching the Gargoyles’ movement and the Arrow Launchers’ range. The Arrow Launcher beneath the upper treasure chest is the victory target, but clear nearby enemies that can surround Bowie or attack Sarah before committing to it. After victory, the locked door toward Grans Island remains unavailable at this point; it is not the exit you need.
Collect both chests before leaving. Take the Wooden Panel from the upper chest and the Power Water from the other chest. The Wooden Panel is the required item for Ribble’s tree, while the Power Water is optional. Return to the raft after confirming both chests are empty.
- Sail through the eastern river branch.
- Disembark and win the eastern desert battle.
- Meet Petro’s grandfather.
- Take the Steel Sword.
- Return to the raft and enter the Ancient Tunnel route below Ribble.
- Clear the Ancient Shrine battle.
- Collect the Wooden Panel from the upper chest.
- Collect the Power Water from the second chest if desired.
5. Return to Ribble and take the Achilles Sword
Sail north to Ribble. Walk to the tree and stand directly in front of the hollow, not underneath the branches or beside the trunk. Open the item menu and use the Wooden Panel. The panel does not open the locked door in the Ancient Shrine.
Enter the passage beneath the tree and take the Achilles Sword from the chest in the hidden ruins. Retain the sword for Bowie and do not treat it as optional equipment. It is the required weapon for damaging Taros. Equip it to Bowie before continuing if he has room for it.
- Return to Ribble after the Ancient Shrine battle.
- Stand in front of the tree hollow.
- Use the Wooden Panel from the item menu.
- Enter the opened ruins.
- Take and retain the Achilles Sword for Bowie.
6. Defeat the Kraken and reach Hassan
Return to the raft and sail south past the Ancient Shrine. Take the southern route to trigger the Kraken battle. The Kraken has a Head, two Arms and multiple Legs. The Head is the victory target, but the Arms and Legs can make the approach dangerous.
Keep ground units near the center of the raft and draw one side’s limbs into attack range before shifting to the other side. Flying units such as Peter and Luke can reach targets beyond the raft, but do not send both away while Sarah or the ground line is exposed. Remove limbs threatening the healer, then concentrate attacks on the Kraken Head. After the Head falls, the battle ends.
After victory, sail or travel southeast to Hassan. Optional searches include two Mithril pieces, one near the left fence and one in the southern barrels, plus a Running Pimento in the pub barrels. These do not block progress. Speak with Rohde in the large house after the Achilles Sword has been obtained. Rohde follows the story route but is not a normal active combat recruit at this stage.
- Sail south after collecting the Achilles Sword.
- Defeat the Kraken Head.
- Reach Hassan.
- Speak with Rohde.
- Collect Hassan’s optional Mithril and Running Pimento if desired.
7. Cross the western desert and defeat Taros
Leave Hassan with Rohde accompanying the story route and take the western path. Win the desert battle before Taros Shrine. Soul Sowers, Master Mages and Arrow Launchers deserve early attention because they can attack from range. Keep the Force connected across the desert and avoid sending low-movement characters beyond healing range.
Enter Taros Shrine after the battle with Bowie carrying the Achilles Sword. Taros cannot be damaged by ordinary weapons; Bowie must attack him with the Achilles Sword. Use the rest of the Force to clear nearby enemies and protect Bowie. Keep Sarah close enough to heal but do not crowd every character into the same area, since Taros can punish clustered units with his attacks.
Once Taros is defeated, the Caravan becomes available and Rohde becomes its driver. Take the Healing Water from the shrine chest before leaving. Return to Hassan, where Rick joins near the entrance and improved weapon stock becomes available. Restock healing items and save in Hassan before continuing toward the Dwarven Mine.
- Bring Rohde through the western desert route.
- Win the desert battle before Taros Shrine.
- Enter Taros Shrine with Bowie carrying the Achilles Sword.
- Defeat Taros with Bowie’s Achilles Sword.
- Obtain the Caravan.
- Confirm Rohde is serving as its driver.
- Collect the Healing Water.
- Return to Hassan and recruit Rick.
- Save in Hassan before proceeding.
Before you move on
- Ribble has been visited and May has joined.
- The Cavern of Darkness and Hobgoblin battle are cleared.
- Polca’s Creed conversation is complete, Gerhalt has joined, Oddler has been accepted and Luke has joined with the raft.
- Peter became controllable after the Volcanon visit.
- The baby bird event outside Bedoe was triggered.
- The eastern desert battle is complete.
- Petro’s grandfather was found and escorted to the Ancient Shrine route.
- The Ancient Shrine battle was cleared and both chests were collected, including the Wooden Panel.
- The Wooden Panel was used at the front of Ribble’s tree.
- The Achilles Sword was collected and retained for Bowie.
- The Kraken Head was defeated.
- Hassan was visited and Rohde followed the party toward Taros.
- The western desert battle and Taros Shrine battle are complete.
- Taros was defeated by Bowie using the Achilles Sword.
- The Caravan is available, Rohde is its driver, Rick has joined and the party can continue toward the Dwarven Mine and Elven Town.
References for this chapter
Mid-Game Dungeons — Dwarven Mine, Creed’s Mansion and North Cliff
After Taros, return to Hassan, confirm that the Caravan is available, and recruit Rick. Follow the route through the sick dwarf cave, Elven Town, Harpy Pool, Devil’s Tail and Creed’s Mansion. Search the wood fire in the sick dwarf cave for the Dry Stone; it is used much later to open the optional bridge to Dwarven Town, not to obtain the Cannon. Rescue Elric, trigger his hidden passage, defeat the chessboard force and Willard, choose one of Creed’s four initial recruits, then bring the fairy back to the sick dwarf for the Cannon. Return to New Granseal for Astral, Dynamite and Janet, then use the Cannon and Dynamite at North Cliff. Stop after Rohde permanently joins and the passage to North Parmecia is open.
Return to Hassan and visit the sick dwarf cave
After the Taros battle and the Caravan recovery, return to Hassan. Rick joins the Force there, giving you the required mounted unit for this stage. Restock healing supplies and use the Caravan to follow the rocky river route west from Hassan. Several walkthroughs warn that taking the wrong approach can repeat an earlier field battle, so stay along the upper cliff edge until you reach the rocky stream and the small cave.
Enter the cave and speak with the dwarves. Examine the wood fire or remains of the campfire to obtain the Dry Stone. This is the point that matters for the item route: the Dry Stone is acquired during this early cave visit, not in Elven Town. It is not needed for the Cannon or North Cliff. Later, after the return to Grans Island, it opens the river bridge to the optional Dwarven Town and its mithril blacksmith.
The sick dwarf remains unhealed at this stage. Do not expect the Cannon now. Keep the Dry Stone in the Caravan or an accessible inventory slot, then leave the cave and continue west toward the hidden Elven Town.
- The Caravan is available after Taros.
- Rick joined in Hassan.
- The sick dwarf cave was entered.
- The wood fire was examined and the Dry Stone was obtained.
- The Dry Stone was retained for the later optional Dwarven Town bridge.
- The Cannon was not expected during this first cave visit.
Enter Elven Town and continue west
Cross the rocky river and look for the lighter patch of forest that conceals Elven Town. Enter the village before following the westward route. Heal and shop if needed. The village contains optional items including a Vigor Ball, Fairy Powder, Secret Book and mithril; none is required for the main route. The hidden Fairy Woods battle is also optional, and its battle chests cannot be collected normally in the original US release.
The Dry Stone does not come from the Elven Town fire. If you are following the required item route, verify that it was already obtained in the sick dwarf cave. The Stone’s later use is at the unusual river section north of Galam, where it creates the bridge to optional Dwarven Town.
Leave Elven Town through the western exit. Keep Sarah, Kazin and other fragile units behind a compact line of durable melee characters. Flying enemies, witches and ranged attackers can reach exposed rear units, so advance in a group rather than sending one character ahead.
- Elven Town was visited after the sick dwarf cave.
- The optional Vigor Ball, Fairy Powder, Secret Book and mithril were collected only if wanted.
- The optional Fairy Woods battle was not mistaken for required progress.
- Dry Stone ownership was confirmed from the earlier wood fire.
- The party left west toward Harpy Pool.
Win the route battle and rescue Elric
Complete the required field battle west of Elven Town. Protect the rear with a front line, eliminate flying or long-range attackers before they reach your healers, and use healing items rather than exposing a weakened spellcaster. If Bowie falls, the battle is lost; return to Hassan or another safe recovery point, restore the party and retry. The US manual confirms that the leader’s defeat returns the force to its last save location.
Continue to Harpy Pool. Oddler hears a cry for help, leading to the required rescue battle. Defeat the harpies and their supporting enemies, then Elric joins the Force. A Healing Drop near the pool is optional.
After Elric joins, leave the pool area and enter it again. The return triggers Elric’s hidden-passage event and opens the route toward Creed’s Mansion. Simply winning the rescue battle is not enough to reveal the passage.
- The western route battle was won.
- The Harpy Pool rescue battle was completed.
- Elric joined the Force.
- The optional Healing Drop was collected if desired.
- The party left and re-entered Harpy Pool.
- Elric opened the hidden passage.
Cross the passage and clear Devil’s Tail
Follow the passage revealed by Elric. Hidden side paths contain optional items such as a Brave Apple, Medical Herb, Angel Wing and mithril. Collect them if useful, but do not confuse these searches with the required objective.
Enter the Devil’s Tail battle and defeat the enemies blocking Creed’s Mansion. The Protect Ring is an optional drop associated with a Dark Madam; preserve an inventory slot if you want to receive it. The battle itself is mandatory because it places the party at the mansion entrance.
After victory, inspect the northern mountain indentation for optional mithril, then enter Creed’s Mansion. Heal before proceeding if you have not already used the nearby recovery opportunity.
- The hidden passage was entered.
- The Devil’s Tail battle was won.
- The optional Protect Ring was obtained if wanted.
- Optional hidden chests were collected if desired.
- Creed’s Mansion was entered.
Complete Desktop Kingdom and defeat Willard
At Creed’s Mansion, the party is miniaturized and sent into Desktop Kingdom. Speak with King Ponpei to enter the chessboard battle. The battle ends when the King is defeated; do not waste turns pursuing every piece if the King can be reached safely. Keep healers and spellcasters away from Queens and Evil Bishops, and avoid allowing the Force to become surrounded on the narrow board.
After the chessboard victory, take the Cotton Balloon from the chest that appears. It is the item that allows the party to leave the miniature area safely. Continue through the exit route and defeat Willard. Both the chessboard battle and Willard are required before the Creed recruitment choice.
After Willard falls, speak with Creed and choose one of Karna, Tyrin, Randolf or Eric. Only one joins during this visit; the others can be recruited later. When the party leaves, the fairy accompanies the Force, which is essential for the next Cannon event.
- King Ponpei was spoken to.
- The chessboard battle was won by defeating the King.
- The Cotton Balloon was collected and used.
- Willard was defeated.
- One Creed recruit was selected.
- The fairy followed the party out of Creed’s Mansion.
Return with the fairy and obtain the Cannon
Travel back to the sick dwarf cave with the fairy. This return visit is mandatory for North Cliff progression. The fairy heals the sick dwarf, and the dwarves give Bowie the Cannon afterward. The first cave visit only provides the Dry Stone and access to the later healing event; it does not provide the Cannon.
Make sure the Cannon is accessible to the active party or Caravan before leaving. Save after receiving it. The Dry Stone and Cannon have different purposes: the Dry Stone opens the optional Dwarven Town bridge, while the Cannon is one of the two items required to clear North Cliff.
- The fairy was brought back to the sick dwarf cave.
- The sick dwarf was healed.
- The dwarves gave Bowie the Cannon.
- The Cannon was retained.
- The Dry Stone remained available for the later optional Dwarven Town bridge.
- A safe save was made before New Granseal.
Get Dynamite and Janet in New Granseal
Enter New Granseal and speak with Astral at the castle. Then speak with the man beside the weapon shop. With Astral acting as advisor and the Cannon available, he gives you Dynamite. Both items are needed together at North Cliff.
Before leaving town, Janet appears and joins so she can accompany Elric. Confirm her recruitment, heal the Force and place the Cannon and Dynamite where they can be accessed. Janet is useful but is not a prerequisite for the North Cliff battle itself.
- Astral was consulted.
- Dynamite was obtained after the Cannon was available.
- Janet joined the Force.
- The Cannon and Dynamite were retained.
- The party was healed before North Cliff.
Clear North Cliff and confirm Rohde
Travel to North Cliff and win the battle guarding the blocked cave. Prioritize Dark Bishops and Dark Snipers because they combine ranged pressure, magic and support. Keep Bowie protected, advance as a group and avoid sending fragile characters into the enemy formation alone. One Dark Bishop carries Blizzard as an optional battle reward.
After the battle, use Dynamite and the Cannon at the rock obstruction. Rohde operates the equipment, clears the passage and permanently joins the Force as a Brass Gunner. His earlier appearance around Hassan is not the permanent recruitment event.
Save after Rohde joins. Stop at the opened passage. The next chapter begins beyond North Cliff with the North Parmecia route, including Ketto, Pacalon, Tristan, Moun, Nazca and the crash-site progression.
- The North Cliff battle was won.
- Blizzard was obtained if desired.
- Dynamite and the Cannon cleared the rock obstruction.
- The passage to North Parmecia opened.
- Rohde permanently joined as a Brass Gunner.
- The chapter ended before entering the later North Parmecia route.
Before you move on
- The chapter began after Taros with the Caravan and Rick available.
- The sick dwarf cave was visited.
- The wood fire was examined and the Dry Stone was obtained.
- Dry Stone ownership was confirmed after the cave visit and before leaving the southern Parmecia route.
- Elven Town was visited.
- The required western route battle was cleared.
- Elric was rescued and joined.
- The party left and re-entered Harpy Pool, triggering the hidden passage.
- The Devil’s Tail battle was completed.
- The chessboard battle and Willard battle were completed.
- The Cotton Balloon was collected and used.
- One Creed recruit was selected and the fairy followed the party.
- The fairy healed the sick dwarf and the dwarves provided the Cannon.
- Astral was consulted in New Granseal.
- Dynamite was obtained and Janet joined.
- The North Cliff battle was completed.
- The Cannon and Dynamite removed the obstruction.
- Rohde permanently joined as a Brass Gunner.
- The chapter ends at the opened North Cliff passage, ready for the North Parmecia chapter.
References for this chapter
North Parmecia — Ruins, Nazca Desert and Elven Areas
Begin at the already-opened passage beyond North Cliff. Do not repeat the North Cliff battle or the rock-clearing event from the previous chapter. Follow the northern route through the tunnel, Ketto, Pacalon, Pangoat Valley, Tristan, Mitula Shrine, Moun, and the Nazca Ship. Required progress includes defeating Zalbard and Cameela, recruiting Taya, Frayja, Jaro, and Gyan, obtaining the Arm of Golem for Claude’s later recruitment, collecting the Sky Orb, and activating the Nazca Ship. Skreech and the remaining Creed recruits are optional.
Enter the northern tunnel
Start from the passage that is already open after the previous chapter’s North Cliff events. Enter the cave and proceed through the northern tunnel battle. The victory target is the Dark Soldier. Dark Snipers and Dark Bishops can punish characters who move too far ahead, so keep the Force in a compact formation and let the enemy approach your front line.
After the battle, open the chest in the upper-left area for the Fairy Tear if you want it. This post-battle chest can be collected normally. The North American Genesis release does not support searching during battles, so do not waste time trying to reach chests placed on inaccessible battle terrain. Save and heal before continuing north to Ketto.
- The northern tunnel battle is complete.
- The Fairy Tear has been collected if desired.
- The party is healed and saved before entering Ketto.
Restore Ketto’s shops
Ketto’s Weapons Seller and Priest are outside their usual buildings. Find the Weapons Seller behind the far-right house by moving through the bushes toward the small piece of land beside the water. Speak with him to restore the weapon shop. Locate the Priest near the church if you need healing or a save.
Check Ketto’s containers and supplies, including Healing Water and Bright Honey. Upgrade important weapons, but keep enough gold for the stronger equipment sold later in Pacalon and Tristan. When ready, heal and save before taking the road toward Pacalon.
- The Weapons Seller has been found and the shop is open.
- The Priest has been located.
- Ketto’s Healing Water and Bright Honey have been checked.
- The party is healed and saved before departure.
Reach Pacalon and recruit Higins
Follow the road from Ketto into the required battle toward Pacalon. Higins joins during this sequence after the battle is won, so confirm that he is in the Force before entering the castle. Dark Snipers and Dark Bishops make the opening dangerous for Sarah, Kazin, and other fragile characters. Advance as a group and use your strongest front-line units to screen the rear.
The battle can also provide the Black Ring. Leave an item slot open on likely recipients and inspect inventories immediately after victory if you want to keep it. The ring is optional; Higins’s recruitment is the required result of this route.
- The road battle is complete.
- Higins has joined.
- The Black Ring has been recovered if desired.
- The party is healed before exploring Pacalon.
Inspect Pacalon and cross Pangoat Valley
Speak with Pacalon’s king and inspect the castle and town before leaving. Check the blue carpet below the throne room for the Pegasus Wing, and search the apparent wall near the upper-left treasury room for Mithril. Another Mithril piece can be found by searching the pointed mountain peak along the route north. Medical Herbs, Fairy Powder, and Cheerful Bread are also available during this visit.
Leave Pacalon by the northern route and complete the field battle on the way to Tristan. Continue to Pangoat Valley for the separate bridge battle. These are two different encounters. On Pangoat Bridge, advance across the narrow terrain with the Force together and prioritize the Wizard, which is the battle’s victory target. Wyverns and ranged enemies can reach the rear quickly, so do not send a lone character ahead to rescue the trapped girl.
Continue to Tristan after the bridge battle. Search the mountain passages around town for Healing Seeds and Protect Milk, then heal, save, and organize the Force before entering Mitula Shrine.
- The Pacalon king has been spoken to.
- The Pegasus Wing and available Mithril have been checked.
- The field battle between Pacalon and Tristan is complete.
- The Pangoat Bridge battle is complete.
- Tristan’s supplies have been collected if desired.
- The party is healed and saved before Mitula Shrine.
Clear Mitula Shrine and recruit Taya
Complete the approach battle at Mitula Shrine with a controlled formation. Wyverns, Worms, Master Monks, and Orc Lords can surround exposed characters, so keep healers protected and avoid splitting the Force. The chest floating on an island in this battle cannot be collected in the original North American release because it requires in-battle searching. Treat the Shining Ball inside as unavailable on this edition.
Enter the inner shrine for the Zalbard battle. Zalbard uses Bolt, so spread fragile units instead of clustering them within easy spell range. Remove or isolate the Master Monk early when possible, then close on Zalbard with durable attackers while Sarah or another healer maintains the front line. If the battle goes badly, use Egress when available or reload the Tristan save rather than continuing with depleted resources.
After victory, speak with Mitula. Search the left side of the shrine for the Critical Sword, then enter the nearby side room and examine the statue to recruit Taya. Defeating Zalbard does not recruit her automatically. Also check the shrine for the Power Water, Healing Seed, and Mithril.
- The Mitula Shrine approach battle is complete.
- Zalbard has been defeated.
- Mitula’s conversation has occurred.
- The statue has been examined and Taya has joined.
- The Critical Sword, Power Water, Healing Seed, and Mithril have been checked.
- The inaccessible US-version battle chest has not been treated as required.
Leave Tristan and check for Skreech
Leave Tristan through the normal route after completing the shrine events. Skreech appears during the departure sequence only if the earlier Bedoe bird event was completed. If he does not appear, continue normally; his absence does not block the campaign. Reload only if optional recruitment is part of your goal.
- The party has left Mitula Shrine.
- Skreech has joined if the Bedoe prerequisite was completed.
- A save has been made before returning to Pacalon.
Return to Pacalon and open Moun
Return to Pacalon, enter the throne room, and speak with Frayja. He accompanies the Force toward Moun but does not become a permanent member immediately. When you leave the castle, Geshp starts a required battle. Defeat the Devil Soldier to end the encounter rather than taking unnecessary risks against every enemy.
Continue north into the next battle. Jaro defects during the encounter and joins after the Bow Master, the victory target, is defeated. Use fliers, ranged attacks, or a cautious advance to reach the target without exposing Sarah or weak spellcasters. Continue northwest to Moun. Frayja uses his key to open the gate and becomes a proper Force member after the events inside the town.
- Frayja has been spoken to in Pacalon.
- The Pacalon battle is complete with the Devil Soldier defeated.
- Jaro has joined after the road battle.
- Moun’s gate has been opened by Frayja.
- Frayja is now a permanent Force member.
Complete Moun and collect the Arm of Golem
Complete the battle inside Moun. The Shaman is the victory target, but Bow Masters, Necromancers, Cerberuses, Pegasus Knights, Devil Soldiers, and Mud Men can threaten the rear. Advance behind durable units and remove ranged enemies when they become exposed.
After victory, follow the survivor event into the underground hideout. Zynk guides the Force there. Search the barrels and vases for the Running Pimento and Angel Wing, then speak with Gyan to recruit him. Speak with Zynk again before leaving so he accompanies the Force toward Grans.
Before exiting through the west gate, search the upper-left area of Moun. Walk onto the relevant upper-left square and examine it so the Arm of Golem appears, then search again to collect it. Store the arm in Bowie’s inventory or the Caravan. It is not used to activate the Nazca Ship; it is needed later to recruit Claude in the hidden cave after the return to Grans Island.
- The Moun battle is complete.
- Gyan has joined.
- Zynk is accompanying the Force.
- The Running Pimento and Angel Wing have been checked.
- The Arm of Golem has appeared and been collected.
- The party is healed before the Nazca battle.
Defeat Cameela and activate the Nazca Ship
Leave Moun through the west gate and travel northwest to the bird-shaped Nazca site. Cameela’s battle includes mobile fliers, Bow Masters, Cerberuses, Dragonewts, Mud Men, a Necromancer, and a Shaman. Keep a steady formation, allow nearby enemies to approach, and protect the healers before sending attackers toward Cameela. Prioritize enemies that can reach the rear quickly, then surround Cameela with durable units.
Leave an empty item slot on the character who is expected to defeat Cameela. In the North American Genesis release, the Sky Orb is received through that character’s inventory after the battle. The Wish Staff is optional, but the Sky Orb is required progression.
After victory, enter the opening in the bird’s head and take the Nazca Cannon from the chest. The Cannon and Sky Orb are separate items. Enter the cockpit and use the Sky Orb to activate the ship. The ship then begins its automatic journey toward Grans Island, so save before the battle or before activating the cockpit if possible.
- Cameela has been defeated.
- The defeating character had an empty item slot.
- The Sky Orb is in the inventory or Caravan.
- The Nazca Cannon has been collected inside the ship.
- The Sky Orb has been used at the cockpit.
- The automatic departure scene has played.
Optional Creed recruitment before departure
Before activating the Nazca Ship, return to Creed’s Mansion if you want the remaining Creed recruits. Speak with the three characters who were not selected during the earlier choice; they can now join. This detour is optional and does not replace the required Sky Orb and cockpit events.
Once optional recruitment is complete, return to the Nazca Ship and use the Sky Orb at the cockpit. Activating the ship moves the story to Grans Island and closes this convenient recruitment window.
- Creed’s Mansion has been revisited if optional recruitment is desired.
- The remaining available Creed characters have joined.
- The party has been reorganized and saved where possible.
- The ship has been activated with the Sky Orb.
Before you move on
- The already-opened northern passage has been entered without repeating the previous North Cliff sequence.
- The northern tunnel battle is complete and the Fairy Tear has been collected if desired.
- Ketto’s Weapons Seller and Priest have been located.
- Higins has joined after the road battle to Pacalon.
- Pacalon, the mountain route, Pangoat Bridge, and Tristan have been visited.
- Zalbard has been defeated and Taya has joined from the shrine statue.
- Skreech has joined if the Bedoe prerequisite was fulfilled.
- Frayja and Jaro have joined during the route to Moun.
- The Moun battle is complete, Gyan has joined, and Zynk is accompanying the Force.
- The Arm of Golem is stored safely for Claude’s later recruitment.
- Cameela has been defeated and the Sky Orb has been received.
- The Nazca Cannon has been collected from inside the ship.
- The Sky Orb has been used at the cockpit and the automatic departure to Grans Island has begun.
- The optional Creed recruits have been collected before departure if desired.
Return to Grans Island — Story Climax Preparation
After Cameela falls and the Sky Orb powers the Nazca Ship, the Force returns to Grans Island and must complete Battles 35 through 39 before the final dungeon route can begin. Follow the crash-site path through the Dojo, Roft, Claude’s Cave, Prism Flowers, Red Baron, Galam, Geshp, Yeel, and the Hydra battle south of Yeel. Optional recruits, Mithril forging, and equipment searches can be handled during this route, but none is required for the normal ending. End this chapter when Battle 39 is won and the jewel-opened entrance to the South Shrine is reached. Do not search the Holy Sword yet; Chapter 11 begins there and covers the Force Sword, Evil Axe, Evil Lance, and Devil’s Head entrance.
Finish the Nazca Ship sequence and save after the crash
Defeat Cameela in the Nazca Ship battle and make sure the Sky Orb is obtained. Leave an item slot available on the character who is expected to receive the drop, then check the Caravan if the item does not appear immediately. Enter the eye of the Nazca Ship, proceed to the cockpit, and use the Sky Orb on the controls. The ship carries the Force back toward Grans Island, where Prism Flowers shoot it down.
Before launching the ship, you may return to Creed’s Mansion and speak with the three characters who were not selected earlier. These remaining Creed recruits are optional. If you postpone them, the Magic Tunnel later provides a way to return to Parmecia and Grans, so they are not prerequisites for the return route or the ending.
After the crash, leave the wreck and travel southwest to the small monastery, commonly called the Dojo. Save there before beginning the route battles. This is the first useful recovery point after the Nazca sequence.
- Cameela has been defeated.
- The Sky Orb has been collected and used at the Nazca Ship controls.
- The Nazca Ship has crashed on Grans Island.
- Any remaining Creed recruits have been taken or intentionally skipped.
- A save exists after the crash and before the Dojo route.
Search the Dojo area and recruit Sheela
Inside the Dojo, search the vase for a Brave Apple, then use the priest for healing and saving. Before leaving, walk along the left side of the building toward the nearby trees and search the solitary tree to obtain the second Vigor Ball.
Continue toward the waterfall. The event with Astral allows Sheela to join the Force. Sheela joins as a promoted Master Monk, so the second Vigor Ball is not needed for her. Keep the item for another eligible character or leave the promotion decision for later.
After Sheela’s event, search the area on the right side of the route for Mithril. Mithril is optional equipment material. Keep it in the Caravan if you do not plan to return to the Dwarven Blacksmith immediately.
- The Brave Apple has been collected if desired.
- The second Vigor Ball has been searched from the solitary tree.
- Sheela has joined or has been intentionally skipped.
- The nearby Mithril has been checked.
- The party is healed before leaving the Dojo.
Win Battle 35 and enter Roft
Travel from the Dojo toward Roft and begin Battle 35. The Bow Rider is the battle’s named target, and the enemy force also includes Chaos Wizards, Griffins, Mist Demons, Dragonewts, Mud Men, a Shaman, and Purple Worms. The Heat Axe is associated with this battle, so check the victor’s inventory and the Caravan after the fight.
Keep Bowie behind a compact front line. Let durable units absorb the first approach, then move ranged attackers and spellcasters into safe positions. Eliminate enemy spellcasters and the Bow Rider when practical, but do not send one fast unit deep into the formation where Griffins and ranged attacks can surround it.
After winning, enter Roft and heal before continuing. The town is required for Petro’s event and the next recruitment window.
- Battle 35 has been won.
- The Heat Axe reward has been accounted for.
- Bowie survived the battle.
- The Force has been healed in Roft.
Handle Roft, Claude’s Cave, and optional backtracking
In Roft, search the chest below the weapon shop for a Healing Drop and the chest to the left for Blizzard. Speak with Petro and complete the event in his house. After Petro’s death, Zynk becomes available. Zynk is optional and does not affect the normal ending.
Follow the coastal path south across the bridges to Claude’s Cave. Claude joins only when the Arm of Golem is used for him. If the Arm is not available, do not treat his refusal as a progression failure. The cave contains a panel near its lower section that opens the old Magic Tunnel. Use it when you need to return to Parmecia or Grans for the Arm of Golem, missed Mithril, or the remaining Creed recruits.
Once optional backtracking is finished, return to the coastal route. Claude, Zynk, and the remaining Creed recruits are not required for Battle 36 or the ending.
- Roft’s Healing Drop and Blizzard have been checked.
- Zynk has joined or has been intentionally skipped.
- Claude has joined if the Arm of Golem was obtained.
- The Magic Tunnel panel has been used if backtracking is necessary.
- A save exists before Battle 36.
Clear Prism Flowers and Red Baron
Proceed to Battle 36 against the Prism Flowers. Their attacks travel along horizontal and vertical lines, so avoid leaving fragile units aligned with an active flower when the map permits. Advance behind durable units, use ranged attacks to reduce exposed targets, and keep healers away from the front edge.
The North American Genesis version does not provide the battle chest associated with the Prism Flowers encounter. Do not spend turns trying to reach it. Winning the battle is the required objective.
Battle 37 follows against Red Baron. His force includes Chaos Wizards, Hellhounds, Mist Demons, Bow Riders, Minotaurs, an Executioner, and Evil Bishops. Keep the Force together, remove spellcasters and Bow Riders as they become reachable, and protect Bowie from a sudden flanking attack. Do not leave the route assuming the South Shrine can already be completed; the Geshp, Yeel, and Hydra sequence still remains.
- Battle 36 against Prism Flowers has been completed.
- The inaccessible Genesis battle chest has been ignored.
- Battle 37 against Red Baron has been completed.
- The party has recovered before continuing south.
Optional Dwarven Town visit, then Galam and Battle 38
After Red Baron, use the Dry Stone at the unusual dent in the river to open the route to Dwarven Town. This visit is optional for story progression. The town contains Mithril-related forging and useful equipment searches, but forging costs money and is not needed to reach the normal ending. Save before committing Mithril if you want to preserve your choices.
Continue to Galam. Check the treasury for Healing Water and search the bushes outside the northern gate for Evil Shot if desired. Then take the route toward Yeel and begin Battle 38 against Geshp.
Burst Rocks appear during the Geshp battle. Avoid attacking or crowding them unnecessarily while the Force advances. Keep Bowie and the healers behind the main line, defeat dangerous spellcasters when they become accessible, and focus on Geshp once the approach is secure. The battle is required before Yeel can be used for the next event.
- Dwarven Town has been visited only if optional forging or equipment is wanted.
- Galam’s Healing Water and Evil Shot have been checked if desired.
- Battle 38 against Geshp has been won.
- The Force is healed before entering Yeel.
Complete Yeel and win Battle 39 against Hydra
Yeel initially appears deserted. Enter the bar and play the piano. This opens the hidden stairway in the church. Follow the church event into the underground passage, speak with the people there, and complete Chaz’s recruitment event. Chaz is optional for the ending, but the Yeel event itself is required.
Search the underground area for the Quick Chicken and Evil Knuckles if wanted. Before leaving town, speak with Lemon in the hole if you want him to join immediately. If you skip him, he remains available during the later Devil’s Head sequence, so Lemon is not a prerequisite for the South Shrine or normal ending.
Stock the Caravan and active party with healing and revival supplies, then leave Yeel and travel south to Battle 39. The Hydra is the victory target, supported by a Chaos Wizard, Hellhound, Cyclopses, Minotaurs, White Dragons, an Evil Bishop, and Dark Gunners. Establish a defensive line before advancing. Remove spellcasters and ranged attackers, keep the healer protected, and surround the Hydra with durable units while attacking from safe positions. The battle may also provide the Evil Ring and Holy Thunder, so check item space afterward.
When Hydra is defeated, the route opens toward the South Shrine. Heal and make a separate save at the shrine entrance or immediately after reaching it. Do not descend to search the Holy Sword in this chapter.
- The piano in Yeel has been played.
- The church passage and underground event have been completed.
- Chaz has joined or has been intentionally skipped.
- Lemon has joined or has been intentionally postponed.
- Battle 39 south of Yeel has been won by defeating Hydra.
- The Evil Ring and Holy Thunder rewards have been checked.
- A save exists at the jewel-opened South Shrine entrance.
Before you move on
- Cameela has been defeated and the Sky Orb has powered the Nazca Ship.
- The ship has crashed on Grans Island and the Force has reached the Dojo.
- The Dojo Brave Apple, second Vigor Ball, Sheela event, and nearby Mithril have been checked.
- Battle 35 to Roft has been won and the Heat Axe reward has been accounted for.
- Roft has been visited and Zynk has joined or been intentionally skipped.
- Claude’s Arm of Golem requirement and the Magic Tunnel backtracking option have been checked.
- Battles 36 and 37, Prism Flowers and Red Baron, have been completed.
- The optional Dwarven Town visit and Mithril forging have been handled if desired.
- Galam has been visited and Battle 38 against Geshp has been won.
- The Yeel piano, church passage, and underground events have been completed.
- Chaz has joined or has been intentionally skipped.
- Lemon has joined or has been intentionally postponed until Devil’s Head.
- Battle 39 south of Yeel has been completed by defeating Hydra.
- The Force has reached the jewel-opened South Shrine entrance.
- A reloadable save exists before entering the shrine and before Chapter 11’s Holy Sword sequence.
- The Force Sword, Evil Axe, Evil Lance, and Devil’s Head entrance have not been incorrectly claimed as completed in this chapter.
References for this chapter
- Shining Force II North American Manual
- RPGClassics Shining Force II walkthrough — Return to Grans and The Holy Sword sections
- RPGClassics.com - Shining Force II Walkthrough: The Holy Sword
- Shining Force II Strategy Guide — Genesis — Moogie
- Shining Force II — Guide and Walkthrough — Genesis — Dark_Sphere
Final Dungeons — Ancient Tower & Holy Sword Shrine
Begin this chapter immediately after Battle 39, once the Jewel event has opened the Holy Sword Shrine route. Recover the Force, collect the Force Sword, optionally take the shrine and tower equipment, open the Devil’s Head with the Force Sword, then cross the Ancient Tower. Battle 40 against Odd Eye and Battle 41 against the Reaper are mandatory. Lemon is optional and has no bearing on this route.
1. Recover before entering the Holy Sword Shrine
Start from the completed Battle 39 result. Do not repeat the Yeel church sequence, the Chaz conversation, Lemon’s recruitment, or the Hydra battle here; those events belong to the preceding chapter. The shrine entrance should already be open through the Jewel story event.
Before entering, heal and revive the Force at Galam or Yeel. Restock Healing Drops, Healing Waters and Healing Rains where available, and check that Bowie has an empty inventory slot. The shrine and Ancient Tower lead into two difficult battles with no normal town visit between them.
Lemon may be in the Caravan, in the Force, or absent. His recruitment is optional and does not prevent the Holy Sword Shrine, the Force Sword, the Devil’s Head, Ancient Tower, Odd Eye or the normal ending. Do not return to Yeel to repair a Lemon event that you never triggered.
- Battle 39 is complete.
- The Jewel event has opened the Holy Sword Shrine entrance.
- The Force is healed and revived.
- Bowie has an available inventory slot.
- Healing supplies are stocked.
2. Collect the Power Water and Force Sword
Enter the opened shrine route and follow the passage to the lower shrine area. Before committing to the sword room, return west and south as needed to reach the chest containing Power Water. This item is optional; the North American Genesis release uses Power Water for this chest, not Blizzard.
Proceed to the room with the sword embedded in the rock. Stand beside the sword and use the manual Search command with Button A. Do not rely on walking into it or on the automatic search command. The manual search removes the sword from the rock and gives Bowie the Force Sword.
Confirm that Bowie received the Force Sword before leaving the room. If the interaction does not work, reposition him beside the sword and use Button A again. The Force Sword, rather than Lemon’s presence or any optional equipment, is the required item for opening the Devil’s Head.
- Search the shrine chest for Power Water if desired.
- Stand beside the embedded sword.
- Use manual Search with Button A.
- Confirm that Bowie has the Force Sword.
3. Take the Evil Axe and Evil Lance
After obtaining the Force Sword, return upstairs in the shrine. The obstruction that previously blocked the upper chest has moved. Search that chest to obtain the Evil Axe. It is cursed and optional; leave it behind if you do not want to manage cursed equipment, but do not confuse it with the Force Sword, which is required.
Leave the shrine and travel north toward the former Granseal area. Go around the large hole where Granseal stood and enter the small structure containing the Devil’s Head. Before opening the statue, circle around its exterior and search behind it to obtain the Evil Lance. The lance can be collected only while the Devil’s Head remains closed.
The Evil Lance is also optional. If you do not want it, you can proceed directly to the statue. Save and heal before opening the head if your current location permits it; the Ancient Tower begins immediately after this event.
- Search the newly accessible upper shrine chest for the Evil Axe if desired.
- Reach the Devil’s Head near the former Granseal site.
- Search behind the closed statue for the Evil Lance if desired.
- Keep the statue closed until the optional lance is collected.
4. Open the Devil’s Head and cross the Ancient Tower
Stand in front of the Devil’s Head and use the Force Sword with Button A. The statue opens and reveals the Ancient Tower route. Enter only after checking that Bowie, the healers and the main attackers are ready; there is no reason to spend scarce healing items before this point if the party is already recovered.
The maze route is fixed. Go upward as far as possible, turn right, and continue up the stairs. At the junction, take the northern path. Descend the stairs on the right, continue north through the next junction, and ignore the branch there. At the top, go west and climb the stairs.
After climbing, turn south immediately and descend. Turn north, pass around and beneath the three sets of stairs, then take the southern branch at the junction with two stairways. Use the slide to the west, circle around, and climb the stairs on the right. Continue north, take the slide to the left, climb the final stairs and enter the door.
The door leads to Battle 40. Keep Bowie near a healer and avoid sending the party so far ahead that injured units cannot retreat. The next battle changes the battlefield, so preserving a compact formation is safer than occupying every available space.
- Use the Force Sword on the Devil’s Head.
- Follow the northern stair route first.
- Use the southern branch and western slide later in the maze.
- Reach the door to Battle 40 with Bowie protected.
5. Defeat Odd Eye in Battle 40
Battle 40 is won by defeating Odd Eye. Move northeast at the start. Parts of the floor disappear during the battle, forcing the Force to use an S-shaped route around the gaps. Do not scatter units across the center or leave Bowie isolated on a section that will vanish.
Eliminate dangerous support enemies before committing to Odd Eye. Dark Gunners and Chaos Wizards can damage units from range, while Evil Bishops can restore defeated enemies. Demon Masters are also high-priority targets because their magic can punish a slow advance. Use durable front-line characters to draw attacks, while archers, flying units and spellcasters attack from safer positions.
Keep healers behind the front line and avoid clustering fragile characters where one area spell can hit several of them. If Odd Eye advances before the support group is cleared, retreat toward a defensible section rather than allowing him to split the Force. Once the surrounding threats are under control, surround Odd Eye with strong physical attackers and keep Bowie within healing range.
The Counter Sword and Fairy Tear are optional battle rewards. The required result is Odd Eye’s defeat and Bowie’s survival. If Bowie falls or the battle is lost, reload the latest save or retry from the available recovery point; the campaign cannot proceed normally until this battle is won.
- Move northeast before the battlefield changes.
- Avoid spreading the Force across the central floor.
- Defeat ranged attackers, spellcasters and healers early.
- Keep Bowie within healing range.
- Defeat Odd Eye in Battle 40.
6. Recover with Creed and defeat the Reaper
After Odd Eye, continue north and climb either staircase. Speak with Creed, who now functions as a priest. Raise every defeated character, heal the entire Force and save before continuing. This is the essential recovery point between Battle 40 and Battle 41.
Battle 41 is won by defeating the Reaper. Hydras, Demons, Chaos Warriors, Demon Masters, Chaos Dragons and a Blue Shaman occupy the route. Columns conceal some enemies, and the stairs create narrow lanes. Send durable units forward, keep healers several spaces behind them, and use flying units or ranged attackers to work around bottlenecks.
Prioritize the Demon Masters and Blue Shaman when they become reachable. The Demon Masters can use powerful Freeze magic, while the Blue Shaman can restore enemy units. Remove nearby Hydras and Demons before allowing the Reaper to close with the main group. Keep the Force together enough for healing support, but leave enough spacing to reduce the effect of area attacks.
The Holy Staff is an optional reward associated with this battle. After defeating the Reaper, return to Creed, raise fallen characters, heal again and save. This second Creed save is the proper handoff point for the next chapter’s Battle 42 against King Galam and Battle 43 against Zeon.
- Use Creed to raise and heal after Odd Eye.
- Save before entering Battle 41.
- Target Demon Masters and the Blue Shaman early.
- Defeat the Reaper.
- Return to Creed and save again before Battle 42.
Before you move on
- Battle 39 and the preceding Jewel event are complete.
- The Holy Sword Shrine entrance is open.
- Bowie has obtained the Force Sword through manual Search.
- The Evil Axe has been collected if desired.
- The Evil Lance has been collected before opening the Devil’s Head if desired.
- The Devil’s Head has been opened with the Force Sword.
- Odd Eye has been defeated in Battle 40.
- Creed has healed and revived the Force after Battle 40.
- The Reaper has been defeated in Battle 41.
- The Force has returned to Creed for a second recovery and save.
- The chapter is ready to hand off to Battle 42 against King Galam.
- Lemon’s recruitment has not been treated as a required condition.
Boss-Specific Strategies and Recovery
Chapter 11 leaves the Force with a recovery save after Creed and Battle 41. Continue from that preparation into Battle 42 against King Galam, then use Egress at the opening of Battle 43 to recover before the fight with Zeon. Defeating Zeon completes the required North American Genesis campaign; the post-credit Battle 44 is separate optional content covered in chapter 12.
Prepare for Battle 42
Begin this chapter with the recovery and save from Creed already completed in chapter 11. Do not repeat the Odd-Eye sequence, Creed’s services or Battle 41 here. Before entering Battle 42, confirm that Bowie is fully healed, that the active Force has reliable front-line fighters, and that at least two characters carry healing or revival items.
Use the Caravan to adjust the active party and distribute supplies. Keep healing items on more than one character so a single defeat does not remove the Force’s only emergency option. Put healers and spellcasters behind durable units, and avoid placing Bowie at the front of the formation. If the party has fliers or ranged attackers, reserve them for reaching exposed casters and the Blue Shaman rather than sending them ahead alone.
Battle 42 is a required story battle against King Galam. The enemy roster consists of King Galam, three Reapers, two Chaos Warriors, two Demon Masters, two Evil Beasts, two Horsemen, one Blue Shaman, one Chaos Dragon and one Devil Griffin. The listed roster is the load-bearing information; the battle can become more dangerous if enemies reach the Force from several directions at once.
- The Creed recovery save from chapter 11 is available.
- Bowie is healed and protected from unnecessary attacks.
- Healing and revival items are distributed across several characters.
- The active party has a stable front line and protected support units.
- The Caravan has been checked before entering Battle 42.
Clear the approach in Battle 42
At the beginning of the King Galam battle, move toward the northeast side of the map while keeping the Force together. Deal with the enemies that approach from the central area before committing to the northern group. Advancing too quickly with only one or two characters allows the Demon Masters, Reapers and mobile physical attackers to isolate a healer or mage.
After the central approach is under control, finish the enemies on the northeast side. Use terrain and the map’s narrow approaches to make enemies attack your strongest units first. Do not allow several characters to stand in a tight cluster when a Demon Master is within casting range. Spread the Force enough to limit area-magic damage while keeping every injured unit within reach of a healer.
The Demon Masters are the priority threats when you choose to defeat the entire group because their magic can damage fragile characters before those characters get a turn. Reapers are also dangerous because their attacks can inflict confusion. The Blue Shaman should be dealt with before the final attack on Galam, especially if it is within range of a wounded enemy. If you are minimizing risk rather than collecting experience, clear a safe path to Galam, remove the Blue Shaman and concentrate on the boss instead of chasing every enemy across the map.
- The central enemies are handled before the party advances too far northeast.
- Demon Masters are defeated or kept outside effective casting range.
- Reapers are prevented from reaching isolated support units.
- The Blue Shaman is targeted before Galam is left near defeat.
- The Force remains close enough for healing and revival support.
Defeat King Galam
Once the northeast approach is safe, move the strongest melee units toward King Galam and surround him where possible. Keep Bowie behind the protective line until the surrounding threats are controlled. Galam is the battle’s victory target, so do not sacrifice Bowie to gain one extra attack if the boss can retaliate before Bowie is healed.
Use several reliable attackers rather than relying on one character to finish the boss. Rotate a damaged front-line unit backward before the enemy turn and replace it with another durable fighter. Have a healer restore the withdrawn unit while ranged attackers or spells continue damaging Galam. If Galam advances toward the Force before the surrounding enemies are cleared, stop pursuing the remaining troops and concentrate on him while preserving Bowie’s safety.
The battle ends when King Galam is defeated. Battle 43 follows after a short story sequence. There is no ordinary church, town visit or free-roaming recovery interval between the two battles, so do not expect a normal opportunity to use Creed after winning here.
- A protected group reaches Galam instead of sending Bowie forward alone.
- Several attackers are available to damage the boss in succession.
- Wounded fighters are rotated out before the enemy turn.
- Bowie survives the battle.
- King Galam is defeated and the story proceeds directly toward Battle 43.
Use Egress at the opening of Battle 43
When Battle 43 against Zeon begins, act with Bowie immediately if he is able to cast. Select Egress before moving him toward the enemy or allowing the opposing force to surround him. Egress returns the Force to the last safe recovery point, giving access to the church and Caravan commands even though the story does not provide a normal interval between Galam and Zeon.
After returning, raise fallen characters, cure status conditions, inspect equipment, restock healing items and make a new ordinary save. Check Bowie’s equipment especially carefully because his survival is required for the battle to count as a victory. Re-enter the Zeon battle only after the Force is restored.
If Bowie is defeated or otherwise unable to act before Egress is selected, that attempt cannot use this recovery method. Reload the Battle 42 or Creed-area save and repeat the sequence. If the first Zeon attempt fails after Egress, reload the ordinary save made during the recovery visit and try a different formation or target order.
- Battle 42 is complete and Battle 43 has begun.
- Egress is cast before Bowie is exposed to enemy attacks.
- Fallen characters are raised after returning to the recovery point.
- Status conditions, equipment and supplies are checked.
- A new ordinary save is made before re-entering the Zeon battle.
Defeat Zeon by removing his support
Zeon’s battle includes Zeon, five Pyrohydras, three Demon Masters, two Arch Demons, two Zeon Guards, one Blue Shaman, one Devil Griffin and one Horseman. Zeon cannot move from his starting position, but his Demon Breath can punish a clustered Force and he may attack more than once. Advance cautiously instead of sending the whole party directly into his range.
Clear the support units from one side of the field before crossing toward the other side. Prioritize Demon Masters and Arch Demons whenever they can cast into the group. Keep the Force spread enough to reduce area-magic damage, but do not separate healers from the fighters they must support. Pyrohydras are durable; defeat them as the line advances rather than allowing them to surround the back row.
The Blue Shaman is a high-priority target. Leaving it alive while Zeon is near defeat can allow recovery through Healing Rain. Use fliers, ranged attacks or a protected melee unit to reach it without opening the entire formation. The Zeon Guards are also dangerous at range, so approach them from a position that does not expose several characters to their attacks at once.
After the support enemies are gone, attack Zeon in controlled turns. Send one durable attacker into range, withdraw that character when its HP becomes unsafe, heal it and replace it with another attacker. Keep Bowie out of danger until the final attack is certain to defeat Zeon. The required victory is Zeon’s defeat with Bowie alive.
- The Force advances cautiously instead of clustering around Zeon.
- Demon Masters and Arch Demons are controlled before they can repeatedly cast.
- The Blue Shaman is defeated before Zeon is left at critical HP.
- Zeon’s Guards and Pyrohydras are handled without exposing the back row.
- Zeon is defeated with Bowie alive.
Hand off after the normal ending
Zeon’s defeat completes the main campaign. Allow the closing scenes and credits to finish. Chapter 15 handles the normal ending, the lack of a conventional completed overworld save and the safest long-term save-management plan, so do not treat the post-credit screen as a new ordinary town or campaign state.
The optional Battle 44 trigger is separate from the required ending. After the credits, the final jewel screen appears with the Jewel of Light and Jewel of Evil. Chapter 12 provides the detailed trigger and strategy. Do not press a button merely because the jewel screen appears; wait for the continuation message described there.
Battle 44 is a single optional boss-rush encounter. Its documented opposition includes Dark Smoke, Cameela, Geshp, King from the chessboard battle, King Galam, Odd Eye, Red Baron, Willard, Zalbard, Zeon and Prism Flowers. It does not replace the normal ending, create a second campaign route or provide a conventional post-game overworld.
- Zeon is defeated and the normal ending begins.
- The ending scenes and credits are allowed to complete.
- Chapter 15 is used for final save-management guidance.
- Battle 44 is attempted only after the normal ending.
- Chapter 12 is used for the detailed post-credit trigger and bonus-battle tactics.
Before you move on
- The Battle 42 preparation save from chapter 11 is available.
- Battle 42 against King Galam is cleared with Bowie surviving.
- Battle 43 begins and Egress is cast before Bowie is endangered.
- The Force is revived, cured, restocked and saved after the Egress recovery.
- The Blue Shaman and major enemy casters are controlled before Zeon is finished.
- Zeon is defeated with Bowie alive.
- The normal ending and credits complete.
- The player hands off to chapter 15 for normal-ending save management and to chapter 12 for the optional Battle 44 trigger.
References for this chapter
Post-Game, Epilogue and Save Management
The normal campaign of the original North American Sega Genesis release is complete when Zeon is defeated, the closing Granseal scenes are viewed, and the credits finish. The game does not create a conventional completed town save or return the Force to the overworld. Battle 44 is optional bonus content that can be attempted from the final jewel screen, but its exact trigger, enemy lineup, tactics, and completion result belong in ch12.
1. Finish the required campaign before considering the game complete
The required story route ends with the final Ancient Tower sequence, Battle 42 against King Galam, and Battle 43 against Zeon. Defeat Zeon and allow the post-battle scenes to continue. The normal ending is not complete merely because the final battle result appears; the closing scenes and credits still need to play.
The Force Sword route is part of the completed campaign covered by the preceding chapters. If you have reached the final battles through the South Shrine and Devil’s Head sequence, the required jewel and Force Sword objectives have already been handled. Battle 44 does not replace this route, unlock a different ending, or count as a prerequisite for the ordinary ending.
- Confirm that the Force Sword route has been completed.
- Clear Battle 42 against King Galam.
- Defeat Zeon in Battle 43.
- Allow the closing story scenes and credits to play.
2. Preserve the final ordinary save before the last battles
Make your protected save at the last available ordinary priest before the King Galam and Zeon sequence. This is the useful recovery point for the normal ending because it preserves the Force’s roster, equipment, levels, promotions, supplies, and party choices before the linked final battles begin.
Do not wait until after the credits to create this backup. The ending sequence does not return you to a normal town or priest menu where you can establish a conventional completed save. If you have more than one save slot, keep an additional earlier file for missed recruits, optional items, or promotion decisions that cannot be recovered from the final save.
Before leaving the priest, check the Member list, equipment, healing supplies, and revival options. Resolve any changes you want to make now. If you intend to attempt the optional bonus battle later, do not overwrite this protected file while experimenting with the final party.
- Save at the final ordinary priest before King Galam and Zeon.
- Keep an earlier campaign save if optional content may need recovery.
- Check the active Force, equipment, healing items, and revival options.
- Leave the protected pre-final save untouched.
3. View the normal ending completely
After Zeon is defeated, continue through the post-battle scenes instead of resetting or turning off the console. The ending returns to Granseal for the closing story material. Let those scenes finish and watch the credits through to the final display with the two jewels.
Once the credits have completed and the final jewel screen has appeared, the normal campaign completion requirement has been met. This is the correct point to record the game as finished for the main story. You do not need to enter Battle 44 to validate the normal ending.
- Zeon is defeated.
- The post-Zeon Granseal scenes are viewed.
- The credits finish completely.
- The final jewel display appears.
- The normal campaign is recorded as complete before any optional challenge.
4. Understand the post-credit save limitation
The original Genesis game does not create a stable post-credit overworld state. After the ending, it does not place Bowie back in a town with access to a priest, shops, recruitment conversations, or ordinary exploration. There is therefore no conventional completed-game save that can be loaded to continue roaming through Grans Island or Parmecia.
The same limitation applies to the optional Battle 44 sequence. Treat the protected pre-final priest save as the durable recovery point for both the normal ending and any later bonus-battle attempts. If the bonus challenge is abandoned or fails, reload that ordinary save rather than expecting a post-credit checkpoint.
- Do not expect a completed town save after the credits.
- Do not expect a playable post-game overworld.
- Keep the pre-final priest save as the main retry point.
- Use an earlier file for missed recruits, items, or alternate promotions.
5. Hand off the optional Battle 44 attempt to ch12
Battle 44 is optional and begins only after the normal ending has been completed. From the final jewel screen, remain there until the continuation message appears, then follow the exact button instruction and battle procedure given in ch12. This chapter intentionally does not repeat the secret battle’s enemy lineup, target priorities, recovery method, or completion result.
Do not reset during the wait if you intend to attempt the bonus battle. Also do not treat the bonus encounter as a second campaign route or alternate ending. It is a self-contained post-credit challenge, and the normal ending remains complete whether you attempt it or stop after the credits.
- Complete the normal ending first.
- Remain on the final jewel screen if pursuing Battle 44.
- Use ch12 for the exact trigger and bonus-battle instructions.
- Keep the protected pre-final save available for retries.
- Do not count Battle 44 as required main-story progress.
Before you move on
- The Force Sword route is complete.
- Battle 42 against King Galam has been cleared.
- Zeon has been defeated in Battle 43.
- The post-Zeon Granseal scenes have been viewed.
- The credits have finished and the final jewel display has appeared.
- An untouched ordinary save exists from before the King Galam and Zeon sequence.
- The normal campaign is marked complete independently of Battle 44.
- If the optional challenge is desired, the player has been handed off to ch12 for its exact trigger and tactics.
- No conventional post-credit overworld save is expected or required.
- An earlier save remains available for optional recruitment, item, or promotion recovery.
Secret Final Battle — Triggering and Strategy
Battle 44 is an optional post-credit challenge in the original North American Sega Genesis release of Shining Force II. It does not replace the normal ending, unlock a second story route or create a post-game overworld. Complete the campaign through Zeon first, then let the ending and credits play without resetting. At the final screen showing the Jewels of Light and Evil, wait until the continuation message appears and press C. The Force then enters Battle 44 against the game’s major late-game enemies. Because there is no normal save opportunity after entering this encounter, make and preserve a save before the final Zeon sequence.
1. Finish the required normal campaign first
Complete the return to Grans Island and the final Ancient Tower route before attempting the bonus battle. In the shrine area, obtain the Force Sword by examining the sword after the required jewel events have opened the route. The Force Sword is needed to open the Devil’s Head and reach the standard endgame battles; it is not an extra item that must be found after Zeon.
At the Devil’s Head, stand at the statue’s mouth and use the Force Sword from the item menu. Clear the Ancient Tower battles, including the Odd Eye encounter, the King Galam battle and the normal final battle against Zeon. The floor-collapse hazard belongs to the Odd Eye battle in the Ancient Tower, not to Battle 44, so follow the changing route there but do not expect the same mechanic in the post-credit fight.
- The Force Sword has been obtained.
- The Devil’s Head has been opened with the Force Sword.
- The Ancient Tower sequence is complete.
- Zeon has been defeated in the normal final battle.
- A save from before the final sequence is preserved.
2. Trigger the bonus battle after the credits
After defeating Zeon, allow every ending scene and the complete credit sequence to finish. Do not reset the Genesis, turn the game off or attempt to leave the ending. The game reaches a final screen displaying the two jewels. Leave the game on that screen until the continuation message appears. Guides describe the message as “And more...”; the delay is several minutes, so wait rather than assuming the game has frozen.
When the message is visible, press the Genesis C button. This transfers the Force directly into Battle 44. The trigger is post-credit only: there is no separate conversation, shrine visit, promotion, jewel flag or pre-Zeon item that activates the battle. The normal ending has already been completed before this prompt appears.
- The normal Zeon battle is finished.
- The ending scenes and credits have played to completion.
- The final two-jewel screen is visible.
- The continuation message has appeared.
- C is pressed only after the message is displayed.
3. Identify every enemy before choosing targets
Battle 44 contains twelve enemies: Dark Smoke, King, Willard, Zalbard, Cameela, two Prism Flowers, Red Baron, Geshp, Odd Eye, King Galam and Zeon. The encounter combines the major Greater Devils and several other late-game bosses. The game identifies Zeon as the boss, but the battle is won only after the entire enemy force has been defeated.
The Prism Flowers are stationary, so they may not approach the Force like the mobile enemies do. Treat their fixed attack positions as part of the map’s threat layout. The battle is one encounter rather than a documented sequence of scripted phases. Do not plan around summons, floor collapse or a guaranteed turn-by-turn event order.
- Dark Smoke is accounted for.
- King and Willard are accounted for.
- Zalbard, Cameela and Red Baron are accounted for.
- Geshp, Odd Eye and King Galam are accounted for.
- Both Prism Flowers and Zeon are accounted for.
4. Build a party that can survive a long boss rush
Bowie must be in the Force and cannot be allowed to fall. Fill the remaining eleven positions with a mixture of durable front-line characters, healers and ranged or magical attackers. Two reliable healers are strongly preferable to placing the entire recovery burden on Sarah, Karna, Frayja or another single character. Master Monks can provide both healing and close-range damage, while sturdy promoted fighters can hold dangerous approach lanes.
Use your strongest available weapons and repair cracked equipment before beginning the final sequence. Give several characters healing items so that a single threatened priest does not end the attempt. A practical composition can include Bowie, Peter or another powerful front-line fighter, Slade, one or two durable knights or axe users, two healers, and several ranged or spell-based attackers. This is a role recommendation, not a mandatory roster; the original game permits many different Force combinations.
- Bowie is equipped with a strong weapon and has room to retreat.
- At least two characters can heal or restore fallen allies.
- Several characters can attack from outside adjacent range.
- The party has spare healing items.
- The pre-final save remains untouched.
5. Open with a compact formation
On the first turn, inspect the map and use the Map option before moving far forward. Keep the Force close enough that healers can reach the front line, but do not stack every character into one cluster. Place durable units in front, leave healers behind them, and keep ranged attackers on routes where they can contribute without becoming the first targets.
Advance toward the nearest reachable group instead of sending one character deep into enemy territory. A lone attacker may trigger several counterattacks or leave the healer outside movement range. End turns with damaged units behind a healthy replacement whenever possible. Bowie should remain inside the formation rather than serving as an isolated scout.
- The Force is not split into distant groups.
- Durable units make first contact.
- Healers are behind the front line but remain within reach.
- Bowie is not isolated.
- Ranged attackers have safe firing lanes.
6. Remove immediate support threats before distant bosses
When several enemies can reach the same area, concentrate on the threat that can damage or disable multiple characters first. Enemy casters and ranged enemies should not be ignored while the Force chases a distant boss. Use ranged attacks and magic to weaken them, then finish one target before spreading damage to another. This reduces the number of enemy actions available on the next turn.
A Prism Flower should be destroyed early if its fixed position covers the Force’s approach or rear line. If it does not threaten the current route, clear mobile enemies first and return to it when the Force can approach without exposing a healer. Keep the two healers separated enough that one area spell or ranged attack cannot injure both at once.
- The most immediate caster or ranged threat is identified.
- The Force does not walk past a dangerous support unit without a reason.
- A Prism Flower blocking the route is removed.
- The healers are not standing on the same exposed line.
7. Attack the remaining bosses one at a time
After the first group is under control, move toward the remaining enemies in a controlled line. Focus the Force’s attacks on one enemy until it falls instead of leaving several bosses badly wounded and active. Check enemy HP and position before committing a fragile attacker. If a front-line character is too damaged to survive the next enemy phase, retreat that unit and replace it with someone healthy.
Leave Zeon until the nearby threats are manageable unless his position blocks the safest route. Preserve Bowie’s healing access and avoid using him for unnecessary counterattacks. Save offensive MP for dangerous targets, but do not hoard healing MP so aggressively that a wounded unit remains exposed. Emergency healing items are appropriate when a priest cannot reach the injured character.
- The Force is not dividing damage across every boss.
- Wounded front-line units are rotated out.
- Bowie retains a safe route to healing.
- Zeon is approached only when support threats are controlled.
- The party can survive another enemy phase before the final attack.
8. Handle failure and completion correctly
If Bowie falls or the Force loses Battle 44, reload the preserved save from before the normal final battle. Defeat Zeon again, watch the ending and credits, wait at the jewel screen for the continuation message, and press C again. Do not expect to return to a town from the bonus battle and do not use Egress as a planned escape; there is no priest or normal save point after entry.
Defeating every enemy produces the game’s post-battle completion result, commonly displayed as “Game Over.” This is the endpoint of the bonus challenge. It does not produce a normal save, a post-game overworld, a second story ending or another campaign chapter. Keep the pre-final save if you want to replay Battle 44 with a different Force.
- A pre-Zeon or pre-ending save is retained.
- A failed attempt can be retried by replaying the ending trigger.
- All twelve Battle 44 enemies are defeated.
- The game displays its final completion result.
- No post-game overworld or normal save is expected afterward.
Before you move on
- The normal campaign is complete through the standard Zeon ending.
- The Force Sword route and Devil’s Head opening were completed before the final battles.
- The ending and credits were allowed to finish.
- The continuation message appeared on the final two-jewel screen and C was pressed.
- Battle 44 was entered as an optional post-credit encounter.
- Dark Smoke, King, Willard, Zalbard, Cameela, both Prism Flowers, Red Baron, Geshp, Odd Eye, King Galam and Zeon were defeated.
- The game displayed its post-battle completion result, commonly “Game Over.”
- A pre-ending save remains available for another attempt or a different party setup.
References for this chapter
- The Ultimate Shining Force 2 Guide: Game Walkthrough: Part 5 — Secret Final Battle
- The Ultimate Shining Force 2 Guide: Miscellaneous Secrets
- Shining Force II Strategy Guide — Genesis — Moogie
- Shining Force II — Guide and Walkthrough — Genesis — Dark_Sphere
- Shining Force II — Guide and Walkthrough — Genesis — AlaskaFox
- Shining Force II North American Manual
- Shining Force II Secret Battle Save and Retry Discussion
Key Recruitment Windows — Finding and Triggering Joins
Shining Force II uses several recruitment patterns. Some allies join automatically during story scenes, some require a conversation before leaving a town, and others need an earlier rescue or a key item. The safest routine is to save in a town before a major departure, speak to every named character, complete the next story battle, then check the town or headquarters roster before continuing. This checklist applies to the original North American Sega Genesis release.
Complete the Granseal and Galam checks
Bowie, Sarah and Chester join during the opening sequence. After the first battle, try to leave Granseal and speak with Jaha when he stops the party. Visit Hawel’s house to trigger Kazin’s recruitment, then complete the Galam sequence and speak with Slade in the jail area after the battle. Do not leave Galam until Slade is listed in the Force.
After Galam attacks Granseal, search the lower-right house in the affected town area and speak with the small creature inside. Name him to recruit Kiwi. This is the correct Kiwi window; he is not recruited in New Granseal. Save after checking the headquarters roster.
- Confirm Jaha before leaving the first Granseal sequence.
- Visit Hawel’s house and confirm Kazin.
- Finish the Galam battle and speak with Slade in the jail.
- Return to the attacked Granseal area and recruit Kiwi.
Handle New Granseal, Volcanon, Ribble and Polca
After New Granseal is established on Parmecia, Peter joins the story party but initially acts as a guest. Visit God Volcanon before deciding that Peter is unavailable; after that visit, Peter becomes controllable.
In Ribble, complete the town’s introductory events and speak with the mayor. Then find May near the church and talk to her. Merely entering Ribble does not recruit her. In Bedoe, complete the rescue involving the young bird. That earlier action is required for Skreech’s later recruitment.
Return to Polca after the Bedoe sequence to obtain the raft. Gerhalt joins during this visit. After the raft event, leave Polca with the party. Luke joins at this documented raft-departure trigger; do not require a second Polca re-entry or a Hassan conversation for him. Save before departing so the join can be checked immediately.
- Visit God Volcanon and verify Peter is controllable.
- Speak with Ribble’s mayor, then May near the church.
- Complete the young-bird rescue in Bedoe.
- Return to Polca, recruit Gerhalt, obtain the raft and leave town.
- Confirm Luke joins as the party departs Polca.
Recruit Rick and complete Rohde’s full sequence
After the Taros battle and after obtaining the Caravan, return to Hassan. Rick joins there. This Hassan trigger belongs to Rick, not Luke, and it should not be confused with Rohde’s earlier temporary accompaniment.
Rohde requires the Achilles Sword before he will accompany the Force to the Taros Shrine. Use Bowie to defeat Taros with that sword, obtain the Caravan, and continue the story until the dwarves can provide the Cannon. The Cannon is obtained after the relevant dwarf event is resolved.
Return to New Granseal with the Cannon. Speak with Astral first. Then speak with the inventor or man beside the weapon shop to receive the Dynamite. If the Dynamite is not offered, confirm both the Cannon and the Astral conversation before trying again.
Take the Cannon and Dynamite to North Cliff and clear the blocked passage through the required battle and event. Rohde then uses the Cannon, becomes a Brass Gunner, and permanently joins the Force. His earlier status as a noncombatant helper is not the final recruitment.
- Obtain the Achilles Sword and bring it to Rohde.
- Defeat Taros and obtain the Caravan.
- Return to Hassan after the Caravan and recruit Rick.
- Obtain the Cannon from the dwarves.
- Speak with Astral in New Granseal, then collect the Dynamite.
- Return to North Cliff and confirm Rohde becomes a permanent Brass Gunner.
Recruit Elric, Janet and the Creed’s Mansion characters
On the route toward Creed’s Mansion, complete the Harpy Pool battle and rescue Elric. He joins after the battle. Later, speak with the king in New Granseal while Elric is in the Force, then attempt to leave town. Janet joins during that departure event.
At Creed’s Mansion, choose one of Eric, Tyrin, Karna or Randolf. The other three are not permanently lost. Continue the story until the party obtains the Sky Orb, then return to Creed’s Mansion and speak with the three characters who were not selected. Recruit all of them before advancing beyond the next late-game travel sequence.
Make a save before the initial choice and another after the return visit. A complete roster requires all four names, not just the one selected at the first visit.
- Rescue Elric at Harpy Pool.
- Leave New Granseal with Elric present after speaking with the king and recruit Janet.
- Choose one Creed character initially.
- Obtain the Sky Orb, return to Creed’s Mansion and recruit the remaining three.
- Verify Eric, Tyrin, Karna and Randolf are all in the headquarters roster.
Finish the northern and Moun recruitment windows
Higins joins after the Ketto battle; speak with him when the battle ends. Taya is hidden in Mitula Shrine. Explore the shrine’s rear rooms and examine the statue that transforms into her. The main shrine conversation alone is not enough.
When leaving Tristan, Skreech joins only if the earlier Bedoe bird rescue was completed. If he is absent, the missed requirement is the Bedoe event, not a second Tristan conversation.
After Zalbard, follow the Pacalon and Moun story events. Frayja joins during the approach to Moun, and Jaro defects during the battle immediately before Moun. After entering Moun, follow Zynk to the underground survivor area and speak with Gyan there.
Zynk first accompanies the party from Moun. To make him permanent, visit Roft and complete the Petro event. When Petro dies, Zynk joins the Force. Do not leave Roft without viewing that event if you want the complete roster.
- Speak with Higins after the Ketto battle.
- Examine the transforming statue in the hidden part of Mitula Shrine for Taya.
- Confirm the Bedoe rescue before attempting Skreech in Tristan.
- Allow Jaro’s defection event to finish.
- Speak with Gyan in Moun’s underground area.
- Visit Petro in Roft and complete the death scene so Zynk joins permanently.
Use the late optional routes correctly
Sheela is at the Monk Dojo southwest of the Nazca ship crash site. Enter the dojo and follow the path to its interior area, then speak with her. She joins without a separate item requirement.
Claude requires the Arm of Golem. Take the arm from Moun, then travel through the ancient tunnel south of Roft to the isolated golem. Use the arm on Claude there. The recruitment does not occur in a generic Ancient Ruins conversation.
In Yeel, examine the piano in the northeastern house and choose to play it. This opens the hidden church route. Speak with Chaz, follow the underground conversation, then speak with him again so he joins. Before leaving Yeel, examine the hole and speak with Lemon. Walk toward the town exit; Lemon calls the party back and asks to join. If his Yeel scene is skipped, he can appear later during the Force Sword sequence, but the Yeel recruitment is the safer checkpoint.
- Enter the Monk Dojo and recruit Sheela.
- Take the Arm of Golem from Moun to Claude in the ancient tunnel south of Roft.
- Play Yeel’s piano and complete the church and underground conversations for Chaz.
- Speak with Lemon in the hole, leave town, and accept his joining request.
Before you move on
- For the complete original Genesis roster, confirm all 30 names: Bowie, Sarah, Chester, Jaha, Kazin, Slade, Kiwi, Peter, May, Gerhalt, Luke, Rohde, Rick, Elric, Eric, Tyrin, Karna, Randolf, Janet, Higins, Taya, Skreech, Frayja, Jaro, Gyan, Zynk, Sheela, Claude, Chaz and Lemon.
- Confirm that Peter is controllable after visiting God Volcanon, rather than merely present as a guest.
- Confirm that Luke joined during the departure from Polca and that Rick joined in Hassan after Taros and the Caravan.
- Confirm Rohde is permanently listed as a Brass Gunner after the Cannon and Dynamite North Cliff sequence.
- Confirm all four Creed’s Mansion characters are present after the Sky Orb return visit.
- Confirm Zynk is permanent after Petro’s event in Roft and that Claude joined after using the Arm of Golem in the ancient tunnel.
- Make a town or headquarters save after the final recruitment check and before beginning the endgame sequence.
- If a name is missing, reload the earliest save before the relevant town departure, item handoff, battle, or event and repeat the conversations in order.
References for this chapter
- Shining Force II Strategy Guide — Genesis — Moogie
- Shining Force II - Guide and Walkthrough - Genesis - By SineNomine
- Shining Force II — Guide and Walkthrough — Genesis — AlaskaFox
- The Ultimate Shining Force 2 Guide: Character Locations Quicklist
- The Ultimate Shining Force 2 Guide: Important Items
- RPGClassics — Shining Force II Character Guide
- RPGClassics Shining Force II Walkthrough
- Shining Force II — Character Guide by tskisoccer
Promotions, Classes and Long-Term Party Planning
Promotion becomes available when an eligible character reaches level 20. The priest changes the character to an advanced class and resets the displayed level to 1, but the character keeps the statistical progress already earned. You may delay promotion as far as level 40, the maximum unpromoted level, but level 20 is the practical choice for a first campaign because it provides earlier access to stronger weapons, movement types and class abilities. Special promotion items must be reserved before you commit a character to a normal class.
Check the promotion level and make a backup save
Take an eligible character to a church and speak with the priest after reaching level 20. The Promote command remains available at later levels, up to level 40 before promotion. Waiting can provide additional pre-promotion growth, but it also delays access to advanced equipment and abilities. For a normal playthrough, promote at level 20 unless you are deliberately optimizing a character’s growth or waiting for a specific special item.
Promotion changes the displayed level to 1. It does not erase the character’s previous development, and the character continues gaining experience in the new class. Spell learning uses the game’s promotion-level calculations rather than simply treating a late promotion as dozens of extra pre-promotion levels, so delaying promotion is not required to obtain a stronger late spell list. Save at the church before making a class choice that cannot be reversed.
- Confirm the character is level 20 or higher.
- Check whether the character is eligible for a special promotion.
- Save before selecting Promote if you are uncertain about the class choice.
- Equip or store replacement weapons before entering the next battle.
Know the normal class paths
The standard promotion routes are Swordsman to Hero for Bowie; Priest to Vicar for Sarah and Karna; Knight to Paladin for Chester, Rick and Eric; Warrior to Gladiator for Jaha and Randolf; Mage to Wizard for Kazin and Tyrin; Thief to Ninja for Slade; Ranger to Bow Knight for May; Birdman to Bird Battler for Luke and Skreech; Phoenix to Phoenix for Peter; Wolf Man to Wolf Baron for Gerhalt; Archer to Sniper for Elric and Janet; and Tortoise to Monster for Kiwi. Some characters join already promoted and therefore do not use a second promotion.
May is the Ranger in this group, so she does not use the Silver Tank. The Silver Tank belongs to the Archer route and can be used by Elric or Janet to become Brass Gunner. Rohde is already a Brass Gunner and cannot be promoted again. Frayja, Sheela, Jaro, Zynk, Claude and Lemon also join in advanced or otherwise fixed classes and have no normal priest promotion available.
- Use May as a Ranger-to-Bow-Knight candidate, not as a Silver Tank candidate.
- Use the Silver Tank only for Elric or Janet if you want a Brass Gunner.
- Remember that a character who joins already promoted cannot be promoted again.
Reserve the five special item types
The special promotion choices are Warrior Pride for Jaha or Randolf to Baron; Silver Tank for Elric or Janet to Brass Gunner; Secret Book for Kazin or Tyrin to Sorcerer; Vigor Ball for Sarah or Karna to Master Monk; and Pegasus Wing for Chester, Rick or Eric to Pegasus Knight. Each individual item can be used once, and a character can be promoted only once. There are two Vigor Balls in the North American Genesis release, so both Sarah and Karna can take the Master Monk route if you obtain both.
A special item must be outside the caravan depot when you visit the priest. It does not have to be held by the intended recipient: any current Force member’s personal inventory is sufficient. When the priest offers the special promotion, accept it only after confirming that the displayed recipient and class are correct. If Chester has already become a Paladin, for example, he cannot later become a Pegasus Knight.
- Warrior Pride: Jaha or Randolf to Baron.
- Silver Tank: Elric or Janet to Brass Gunner.
- Secret Book: Kazin or Tyrin to Sorcerer.
- Vigor Ball: Sarah or Karna to Master Monk; two copies exist.
- Pegasus Wing: Chester, Rick or Eric to Pegasus Knight.
- Keep the intended item in a character inventory, not in the caravan depot.
Collect and protect the special items
Warrior Pride is hidden in the tactical base at New Granseal; search the Eagle Banner. The Pegasus Wing is hidden in Pacalon Castle: follow the blue carpet from the throne room toward the outer wall and search on the carpet’s right side. The Silver Tank is in the Cavern of Darkness, in the chest on the right after the battle on the route toward Mount Volcano.
The Secret Book is in the large building in the secret Elven Town; search the bookcases on the top floor. One Vigor Ball is in a hidden chest beneath the trees in the upper-left of the secret Elven Town. The second is at the dojo on Grans, near Sheela’s pool: go straight down from the pool to the lone tree and search on its right side. Do not sell these items or place them in the depot while deciding.
- Search the Eagle Banner in New Granseal.
- Search Pacalon Castle’s blue-carpet area for the Pegasus Wing.
- Open the Cavern of Darkness chest containing the Silver Tank.
- Search both confirmed Vigor Ball locations if planning two Master Monks.
- Search the secret Elven Town bookcases for the Secret Book.
Choose special classes by party role
Baron gives a Warrior greater mobility and access to swords in addition to axes. Choose Jaha or Randolf based on the one you intend to use long term; the item cannot make both Barons. Brass Gunner provides a durable ranged option and can attack without relying on the same bow equipment as an Archer, but its movement can make it arrive late to battles. Use the Silver Tank on an Archer you will actually keep in the final Force.
Sorcerer changes the mage’s spell role rather than simply improving every existing spell. Kazin or Tyrin gains summon-style magic, but the route gives up the ordinary Wizard’s elemental spell progression. Master Monk combines healing with strong physical combat, making Sarah or Karna a frontline-capable healer. Pegasus Knight ignores terrain penalties and is useful on rough maps, but the recipient loses the normal Paladin route and must remain an unpromoted Knight until the wing is used.
- Keep a dependable healer if your only priest becomes a Master Monk and is often attacking.
- Do not choose Sorcerer without accepting the change from ordinary elemental magic.
- Leave the intended Pegasus Knight unpromoted until the Pegasus Wing is secured.
- Use a special item on a character planned for the final party, not merely on the earliest eligible recruit.
Build the post-promotion Force
After each promotion, visit the shop before the next major battle and replace obsolete equipment. Newly promoted level-1 units need safe experience, but do not let one strong character take every defeat. Give controlled kills to healers, mages, ranged attackers and any late recruit you plan to use. Keep the promoted party spread across roles: Bowie, at least one reliable healer, an offensive magic user or summon user, ranged damage, durable frontliners and a unit capable of handling difficult terrain.
Promotion itself does not require every character to reach level 20 at the same time. Promote the units that need better equipment first, then rotate others into easier battles. Characters who join already promoted should be evaluated by their existing class and level rather than delayed or sent to a priest for a second promotion.
- Re-equip every promoted unit before the next story battle.
- Keep healing, magic, ranged attacks and frontline durability represented.
- Train newly promoted units in battles where they can act safely.
- Make a church save after finalizing the party’s major promotion choices.
Before you move on
- Every intended unpromoted character has been promoted at level 20 or later, unless a deliberate unpromoted strategy is being used.
- The intended special recipients were still in their original eligible classes when promoted.
- The Pegasus Wing was used before promoting the chosen Knight to Paladin.
- The Silver Tank was reserved for Elric or Janet rather than May.
- The Secret Book, Warrior Pride and Vigor Ball choices match the final party’s desired roles.
- Both Vigor Balls have been collected if two Master Monks are planned.
- The active Force has reliable healing, magic or summons, ranged damage, frontline durability and suitable movement coverage.
- A church save exists after the final promotion plan and equipment loadout are confirmed.
Magic, Spell Lists and Support Tactics
Magic is one of the safest ways to control difficult battles in the original Sega Genesis release of Shining Force II. Keep a dependable healer protected behind the front line, use offensive spells against clustered or difficult targets, and treat disabling spells as tools for buying safe turns. MP is limited during long sequences, so match the spell level to the actual threat instead of spending the strongest version on every enemy.
Build the force around a healer and a magic specialist
Keep at least one dedicated healer in the active force for most of the campaign. Sarah is the earliest dependable choice, while Karna, Frayja and Sheela can fill the role later. Heal is the basic single-target recovery spell. Aura becomes more valuable when several allies are injured or when an enemy area attack has damaged the group. Aura 4 restores the whole force, making it an excellent answer to widespread damage, but do not spend that much MP when one injured fighter can be handled by ordinary Heal.
Pair the healer with a character whose main purpose is magic rather than close combat. Kazin, Tyrin and Chaz use the Wizard spell family, while Taya is a Sorcerer and Kazin or Tyrin can enter the Sorcerer class through promotion. Sorcerer spells are a separate progression: after promotion, the character begins learning the Sorcerer list according to the character's current promoted level. Do not assume a Wizard spell list will continue unchanged after that promotion.
Slade and Bowie can also learn useful magic, but their magic should normally supplement their physical roles. Slade is especially useful as a mobile fighter with utility magic, while Bowie should remain available for leadership, combat and Egress. Treat these characters as flexible backups rather than replacements for a dedicated healer or primary caster.
- Deploy Sarah, Karna, Frayja or Sheela when reliable healing is needed.
- Deploy at least one Wizard or Sorcerer when the battle contains clustered enemies or dangerous armor.
- Check a character's promoted class before planning around a spell they may no longer learn.
Spend Heal, Aura and Detox according to the damage pattern
Use Heal 1 for ordinary single-target injuries. Heal 2 and Heal 3 are useful when a unit has taken substantial damage but does not need full recovery. The original Genesis spell data lists Heal MP costs of 3, 5, 10 and 20 for levels 1 through 4. Heal 4 restores all HP to one target, so save it for a badly injured key unit when returning to an abbey or using a healing item is not practical.
Aura costs 7, 11, 15 and 20 MP at its four levels. Use Aura 1 or Aura 2 when several adjacent allies need recovery, and use Aura 3 after a serious area attack or when the larger affect area prevents multiple separate Heal casts. Aura 4 restores all HP to the force. Because its cost is high, do not use it merely to top off one character who could be healed with Heal 1.
Detox begins as a poison cure and later gains the ability to remove stun and curse. Its range and affected area also improve at higher levels. Cast it immediately when a status effect has disabled the only healer, a critical attacker or a unit trapped in enemy range. If the affected character can safely withdraw and an Antidote or Fairy Powder is available, conserve MP; otherwise, removing the condition is usually more important than saving the spell points.
- Use Heal for one injured ally instead of Aura whenever possible.
- Reserve high-level Aura for multiple injured characters or severe group damage.
- Use Detox when poison, stun or curse threatens the battle plan.
Use attack spells against formations, not isolated weak enemies
Blaze, Freeze, Bolt and Blast become more useful as their levels improve their range, damage or area. Before casting, allow a durable frontline unit to draw several enemies toward one position. Then move the caster to the edge of spell range and attack the group without exposing the caster to an immediate melee counterattack. Check the target area carefully before confirming the spell; a strong cast that hits only one weak enemy is often a poor use of MP.
Freeze is a practical early offensive spell, while Bolt becomes especially valuable when its later levels can reach multiple enemies. Wizard and Sorcerer spell lists differ, so plan around the spells the chosen character actually receives. Sorcerers use spells such as Dao, Apollo, Neptune and Atlas, and their progression is not interchangeable with Blaze, Freeze or Bolt. Use the lower level of a spell against a nearly defeated enemy and save expensive levels for durable targets, grouped enemies or threats that cannot be reached safely with normal attacks.
Do not measure a spell only by its listed damage. A cast that removes one enemy before it can act may be better than a larger attack against several enemies who were already harmless. Conversely, if the target is isolated and a physical attacker can defeat it safely, conserve MP for the next cluster or boss encounter.
- Group enemies around a durable unit before using area magic.
- Use low-level attack spells on isolated targets and stronger levels on serious threats.
- Verify the caster's current class and spell list before relying on a particular element.
Use disabling spells to create safe turns
Sleep can stop a dangerous enemy from acting, while Muddle can disrupt an enemy's behavior. Slow lowers an enemy's agility and defense, making it useful against a fast attacker or a target that must be finished by physical units. These spells are not guaranteed to work on every enemy, so treat them as opportunities rather than the foundation of the entire battle plan.
Dispel is a specialized answer to enemy magic. It silences or prevents the targeted enemy from using spells; it does not reduce all incoming magical damage for the party and does not replace good positioning. Use it on a dangerous enemy caster when reaching that caster immediately would expose your force. If several enemy spellcasters are present, silence the one with the most threatening range or area spell first, then advance on the others.
Enemy spellcasters should generally be priority targets when they can reach your back line. Attack them with a mobile fighter, a ranged weapon, or a spell that can reach them without placing your own caster in melee range. If direct access is blocked, use Slow, Sleep or Dispel where appropriate and move the main force behind a durable unit.
- Use Sleep or Muddle to stop a dangerous enemy, not a harmless one.
- Use Slow to buy time against fast enemies and improve the chance of a physical finish.
- Use Dispel specifically against enemy magic users.
Protect casters with formation, terrain and retreat space
Place the healer and offensive caster behind one or two durable units at the start of a battle. Favor land-effect tiles when they are available, but do not advance a fragile caster merely to claim a better tile. The front line should move far enough to attract attacks while leaving the back row out of immediate enemy range.
Keep at least one retreat square behind each fragile caster. After casting, the unit should be able to withdraw rather than remain adjacent to the target. Use a fighter, centaur, bird or other mobile ally to block an enemy route toward the back row. A blocker does not always need to attack; occupying the correct square can force an enemy to spend its turn moving.
Spread the healer, offensive caster and ranged attackers when enemy area magic is present. Avoid placing the entire support group in one compact cluster unless Aura recovery requires it and the enemy caster has already been neutralized. If a battle becomes unsafe, Bowie can cast Egress to return the force to the last saved safe location. Egress is reserved for Bowie and is a retreat method, not a substitute for saving before a major battle.
- Leave a retreat square behind fragile spellcasters.
- Use durable units to block routes to the back row.
- Spread vulnerable units when enemy area magic is available.
- Use Bowie's Egress before the force is overwhelmed or MP is exhausted.
Use Power Water and support items on long-term members
Power Water permanently raises one character's attack by a small random amount within the game's item range. Use it on a character who will remain useful for much of the campaign, such as Bowie or a dependable physical attacker. It is less efficient on a temporary recruit or a character whose main contribution is healing or spellcasting, although a physically oriented promoted class can justify the investment.
Other stat items follow the same principle. Protect Milk raises defense, Quick Chicken raises agility, Running Pimento raises movement, Cheerful Bread raises HP, Bright Honey raises MP and Brave Apple raises level. Movement deserves special caution because promotion can reset movement to the promoted class's normal value. Do not consume unique items merely to solve a routine early battle; use them when the recipient's long-term role is clear.
Rings and staffs may provide support or spell effects when used. Inspect their descriptions before a difficult battle and preserve rare equipment until its purpose is understood. A support item can provide emergency utility, but the carrier still needs protection. If the carrier is defeated before using it, the item has not helped the formation.
- Use Power Water on a long-term physical attacker.
- Reserve rare stat items until the recipient's role is established.
- Account for promotion when investing in movement-related items.
- Inspect support equipment before entering a difficult map.
Before you move on
- Your active force normally includes a reliable healer and an offensive, Sorcerer or disabling magic specialist.
- You can choose between Heal and Aura based on the number and condition of injured allies.
- You know which characters use Wizard spells and which use the separate Sorcerer progression.
- Before difficult battles, you have a plan for blocking enemy routes and preserving retreat space.
- You identify enemy spellcasters before they can freely attack the back row.
- Your Power Water and other stat items have been assigned to characters you expect to use through the late game.
High-Value Items and Equipment — Where to Spend Your Money
Treat gold, Mithril, promotion items, and story objects as long-term resources. Buy equipment for characters you regularly deploy, keep enough money for upcoming weapon shops and optional Mithril forging, and never sell an item tied to a named event. The Dwarven Town and blacksmith are optional for completing the normal campaign, but careful preparation can make the late game easier.
Set a spending rule in every town
Visit the weapon shop before spending your newly earned gold elsewhere. Compare each weapon with the equipment already carried by your active Force, then buy only when the improvement is meaningful. A shop can allow a purchase even when the selected character cannot equip the weapon, so confirm both the recipient and the class requirement before accepting it.
Prioritize a clear attack increase, a ranged weapon, or a weapon with extended reach. Do not buy every item simply because it is the newest one displayed. Keep enough money for the next major shop and, if you intend to use the Dwarven Blacksmith, reserve 5,000 gold for each forging attempt. The blacksmith charges 5,000 gold in addition to one piece of Mithril.
Shining Force II does not have weapon durability or repair costs. Healing items are still useful during long routes, but do not fill every inventory slot with them when a town, priest, or Egress can provide recovery. Carry a practical supply of Healing Herbs, Healing Seeds, Healing Drops, Healing Waters, or other appropriate recovery items, then direct the rest of your money toward equipment that will remain useful.
- Upgrade the weakest weapon on an active attacker before a major dungeon.
- Favor range or extended reach when it keeps a unit out of immediate danger.
- Confirm that the intended character can equip an item before completing a purchase.
- Keep 5,000 gold available for every planned Mithril forging attempt.
Buy upgrades for characters you actually deploy
A weapon upgrade normally gives the most immediate value to frontline fighters because it improves their regular attacks throughout a battle. Bowie, Jaha, Slade, and other melee characters are good recipients when they are part of your regular Force. If a character is currently stored in the Caravan, delay the purchase unless you are preparing that character for immediate use.
For archers and gunners, a stronger bow, shot, or cannon can be more valuable than a small armor increase because ranged attacks let them contribute without standing beside an enemy. Spears and other extended-reach weapons are also valuable for knights and similar classes because they can attack from behind an ally instead of occupying the most exposed tile.
Avoid purchasing several copies of a weapon unless multiple active characters can use them immediately. Store older equipment in the Caravan before selling it. A reserve character may join later, or a promoted character may need a spare weapon when you change the party lineup.
- Replace the oldest weapon on an active attacker first.
- Favor meaningful attack power, range, or reach over a minor upgrade.
- Keep useful older weapons until reserve characters have been checked.
- Do not spend heavily on characters you do not plan to deploy.
Preserve story items and unusual equipment
Do not sell an item whose name or description suggests that it belongs to a shrine, mechanism, vehicle, cave, or named character. The Wooden Panel is used in Ribble to open the route to the Achilles Sword. Keep it until that sequence is complete.
The Sky Orb is obtained after the Cameela battle and is needed for the Nazca Ship sequence. The Cannon and Dynamite are used together to clear the rocks at North Cliff. The Cannon is obtained after the fairy cures the sick dwarf, while Dynamite is obtained by returning to New Granseal, speaking with Astral, and then talking with the man beside the weapon shop. Neither item is ordinary equipment.
The Arm of Golem is found in Moun and is needed for Claude to join. The Cotton Balloon is received after the Desktop Kingdom chess battle and is required to leave that miniature area safely. Keep the Jewel of Light and Jewel of Evil for the Holy Sword Shrine sequence; they are involved in the event that leads to the Force Sword. Do not consume, discard, or sell any of these objects. Once the Caravan is available, store unusual items there to protect them from accidental sale while keeping them available for their events.
- Keep the Wooden Panel until the Achilles Sword route is complete.
- Keep the Sky Orb until the Nazca Ship has completed its required sequence.
- Keep the Cannon and Dynamite until the North Cliff rocks are cleared.
- Keep the Arm of Golem until Claude has joined or you have confirmed he is no longer needed.
- Keep the Cotton Balloon until you have left Desktop Kingdom.
- Preserve both jewels through the Holy Sword Shrine and Force Sword event.
Reach Dwarven Town and use Mithril carefully
The Dwarven Town is optional for normal campaign completion. After you have the Dry Stone, travel to the river northwest of Galam. Look for the narrow section where the river has a visible indentation or dent on both sides. Stand at that river landmark and use the Dry Stone to create the bridge to Dwarven Town. This is the correct landmark; do not search only on the direct north side of Galam.
Collect the town’s available equipment and supplies, then visit the Dwarven Blacksmith if you want custom weapons. Each forging attempt consumes one Mithril and costs 5,000 gold. The result is not selected from a normal shop list, so save before committing a rare piece. If the result is not useful for your active Force, reload that pre-forging save rather than spending another Mithril immediately.
The Genesis version has fifteen known Mithril pieces placed throughout the campaign, including hidden field locations, chests, and environmental search points. Never sell Mithril. The blacksmith’s weapons are optional optimization; ordinary shop weapons and the Force Sword are sufficient for a normal clear. Use Mithril first on characters who will remain in the final Force rather than on temporary or reserve members.
Possible valuable results include the Gisarme for Slade, the Levanter for Bowie if you do not intend to rely exclusively on the Force Sword, the Mist Javelin or Holy Lance for an active knight or Pegasus Knight, the Ground Axe or Rune Axe for an axe user, and Giant Knuckles or Misty Knuckles for a regularly deployed Master Monk. These are planning examples, not mandatory requirements, and the blacksmith’s output is random.
- Keep the Dry Stone until you have crossed to Dwarven Town and completed any desired visits.
- Use the Dry Stone at the narrow river indentation northwest of Galam.
- Never sell Mithril.
- Reserve 5,000 gold for each forging attempt.
- Save before committing Mithril and gold.
- Forge weapons for regular Force members before reserve characters.
Use permanent items and promotion resources deliberately
Use Power Water, Protect Milk, Quick Chicken, Running Pimento, and similar permanent stat-boosting items on characters who will remain in your final Force. A frequently deployed attacker, healer, or durable frontline unit usually gains more practical value than a temporary recruit. Save rare battle items and special damaging effects for difficult battles, dangerous spellcasters, or emergencies instead of using them to finish an easy encounter slightly faster.
Promotion items are not ordinary shop supplies. Before promoting a character, confirm the intended class and any special promotion route. Hidden promotion items can permanently change a character’s role, so record where each one is stored and keep it in the Caravan until the decision is made. Promotion itself is normally available at level 20, but the exact timing is a party-building choice rather than a requirement to spend every item immediately.
- Use stat boosters on permanent members of the final Force.
- Save rare offensive items for difficult battles or emergency damage.
- Confirm the desired promotion path before using a special promotion item.
- Store unused promotion items safely in the Caravan.
- Keep a separate save before spending a unique promotion item.
Before you move on
- Active attackers have current weapons, with ranged or extended-reach options assigned where useful.
- A reserve of gold remains for the next major shop and any planned 5,000-gold blacksmith fee.
- All Mithril pieces, promotion items, and unusual chest rewards are recorded and safely stored.
- The Wooden Panel, Sky Orb, Cannon, Dynamite, Arm of Golem, and Cotton Balloon have not been sold before their associated events are complete.
- Both jewels have been preserved through the Holy Sword Shrine and Force Sword route.
- If using Dwarven Town, the Dry Stone has been used at the river indentation northwest of Galam and any desired forging has been completed.
- Before the final sequence, Bowie has obtained the Force Sword and a separate pre-final-sequence save exists.
References for this chapter
- The Ultimate Shining Force 2 Guide: Mithril Locations
- The Ultimate Shining Force 2 Guide: Item Lists
- Shining Force II — Guide and Walkthrough — Genesis — Dark_Sphere
- RPGClassics.com - Shining Force II Walkthrough: The Holy Sword
- Shining Force II Strategy Guide — Genesis — Moogie
- Shining Force II North American Manual
Optional Content — 100% Recruitment and Hidden Items
The original North American Sega Genesis release has a 30-character roster, several missable recruitment events, four characters connected to Creed’s Mansion, and unique hidden items spread across towns, battle maps, fields and tunnels. None of this is required for the normal ending, but a completion file needs careful timing. Save before major departures, confirm each joining scene, and keep unique items in the Caravan or with a character who will remain available.
1. Check the early towns before leaving them
After Granseal is damaged by Galam, enter the house near the former animal area and speak with Kiwi. Name him when prompted and verify that he appears in the Force roster. In New Granseal Castle, search the shield on the wall in the training base to obtain Warrior’s Pride. Keep it for a Warrior’s alternate promotion rather than selling it or treating it as a normal item.
After Elric has been recruited from the Harpy rescue, return to New Granseal and speak with the King. Leave town with Elric in the Force; Janet’s joining scene occurs during this departure. If she does not appear, reload the save made before speaking with the King and repeat the departure with Elric present. Janet is optional for the campaign but required for the complete roster.
- Kiwi has joined after the Galam occupation.
- Warrior’s Pride was searched from the training-base shield in New Granseal Castle.
- Janet joined after the King conversation and departure with Elric present.
2. Recruit May, Gerhalt, Luke and Skreech in the correct windows
In Ribble, speak with the mayor before attempting to recruit May. Then find May near the southern side of town by the church and speak with her. She joins only after the mayor conversation has established that the Force means no harm.
Visit Bedoe and return to Polca for the Gerhalt and Luke events. Keep these separate from Skreech’s prerequisite. Skreech is not triggered in Polca. After Peter has become a full-time member, speak with King Bedoe and Volcanon, go to the upper level and talk to the birds, then return to ground level. Walk through the bushes to the left of Bedoe’s entrance until the chick falls onto Bowie. This saves the young bird. Later, after the Mitula events, leave Tristan; the grown Skreech then appears and joins the Force. If the Bedoe rescue was not completed, Skreech will not join in Tristan.
- May joined after the Ribble mayor conversation.
- Gerhalt joined after the Bedoe visit and return to Polca.
- Luke joined during the Polca raft sequence.
- The Bedoe bird event occurred: upper-level birds were spoken to and the chick fell onto Bowie.
- Skreech joined when leaving Tristan after the Mitula events.
3. Secure Rick, Rohde and the Mithril in Hassan
After the Taros Shrine sequence, enter Hassan and confirm Rick’s joining scene. Rohde helps with the Caravan and the North Cliff operation, but he becomes a permanent Force member only after the rocks blocking the passage are cleared. Speak with him again after the clearing event and verify that he is listed in the roster.
While in Hassan, search the dock barrels for Mithril and search the opening or chest behind the left-side wall for a second Mithril. The abandoned bar contains a Running Pimento. These are optional rewards, but the Mithril is useful for later Dwarven Town forging and the Pimento can improve a slow character’s movement.
- Rick joined after Taros.
- The North Cliff rocks were cleared and Rohde became permanent.
- Both Hassan Mithril pieces were collected if pursuing item completion.
- The Running Pimento was collected if desired.
4. Complete the Harpy, Creed and Desktop Kingdom events
At the Harpy Pool, rescue and speak with Elric. His joining scene also opens the route toward Creed’s Mansion. Search the connected passage and mansion rather than rushing directly to the exit. The area contains the Running Ring, a Brave Apple and Mithril among its hidden rewards.
Creed offers one of Eric, Karna, Randolf or Tyrin during the initial Desktop Kingdom sequence. Choose one and confirm that the character has joined before leaving. This first choice does not permanently remove the other three. Once the return route is available, go back through the tunnel to Creed’s Mansion and speak with the remaining characters. Guides differ on the most convenient timing, but the safe practical window is after the party has opened the later Parmecia travel route; returning after the Sky Orb sequence is also supported. Recruit all three before beginning the final sequence if the goal is one save containing the entire roster.
The four Creed recruits arrive well below the level of the established party. Recruiting all four is a roster objective, not an efficient training plan. Leave them in the Caravan until later battles can provide safe experience, and do not weaken the main party before a required boss simply to level every Creed character.
- Elric joined after the Harpy rescue.
- The Running Ring, Brave Apple and mansion or passage Mithril were collected if desired.
- One Creed character was selected and joined initially.
- The other three Creed characters were recruited after returning through the available route.
5. Finish the Mitula, Ketto, Moun and Grans recruitments
After rescuing Mitula, enter Mitula’s Sanctuary and examine the statue in the shrine’s rear room. The statue transforms into Taya, who joins the Force. Search the sanctuary’s chests for its Mithril and other rewards before leaving.
Higins is obtained after the battle outside Ketto. He is not recruited by a town conversation: win the battle, allow Astral to remove the possession, and confirm the automatic joining scene afterward. If he is absent from the roster, reload before the battle and complete the post-battle dialogue.
During the route to Moun, Jaro joins during the appropriate battle. After the Moun events, search the northwestern part of town for the Arm of Golem. Later, take the Arm of Golem through the ancient tunnel connecting Grans and Parmecia and give it to Claude in his golem chamber. Claude joins only when the item is in the inventory and the correct interaction is completed; the location should not be described as a generic Magic Tunnel visit without identifying the Grans–Parmecia tunnel.
After the Nazca Ship crash returns the party to Grans Island, visit Sheela’s Dojo. Follow the wooded path beside the dojo, speak with Sheela near the pool, and allow the Astral conversation to finish. Sheela joins there. Search the dojo area and the isolated tree near the pool for the second Vigor Ball, and search the interior for the Mithril and Brave Apple.
- Taya joined from the sanctuary statue.
- Higins joined after the battle outside Ketto.
- Jaro joined during the route-to-Moun battle.
- The Arm of Golem was taken from Moun.
- Claude joined in the ancient Grans–Parmecia tunnel.
- Sheela joined at the dojo after the Nazca crash.
- The second Vigor Ball and dojo Mithril were collected if desired.
6. Complete the late optional roster
Gyan joins in the underground refuge beneath Moun after the Moun events. Zynk becomes permanent in Roft after the Petro-related scene; enter Roft and let the event finish before advancing toward the later Galam and Geshp sequence. If Zynk leaves during that progression, reload a save from before the Roft visit.
Claude requires the Arm of Golem as described above. Chaz becomes available late in Yeel: return after the late-game events, play the piano, enter the opened area and speak with him. Lemon joins during the Yeel or Devil’s Head sequence, depending on which late event path has been triggered. Lemon is part of the full roster and also joins automatically in the final story progression if the relevant scene is allowed to complete.
- Gyan joined beneath Moun.
- Zynk joined in Roft after Petro’s event.
- Claude joined after receiving the Arm of Golem.
- Chaz joined after the Yeel piano event.
- Lemon joined during the late Yeel or Devil’s Head sequence.
7. Search the hidden promotion items and Mithril
The major promotion items are Warrior’s Pride in New Granseal Castle, Secret Book and the first Vigor Ball in Elven Town, Silver Tank in the Cavern of Darkness, Pegasus Wing in Pacalon Castle, and the second Vigor Ball in the tree near Sheela’s Dojo. Search the specified shield, bookshelf, chest, wall, cave chest and tree rather than relying on normal chest-opening prompts. These items are one-use promotion tools; store them safely and do not sell them.
For a Mithril-focused file, search the prison escape passage in Galam, the earthquake hole in Granseal, Ribble’s sand pit, the eastern Parmecia mountains, both Hassan locations, the southeast Elven Town chest, Creed’s Passage, Devil’s Tail, Pacalon Castle, the mountains on the route to Tristan, Mitula’s Sanctuary and Sheela’s Dojo. The exact route can be spread across several visits, but make a save before leaving a region whose access may later change.
Do not over-prioritize forging every Mithril weapon before required battles. Blacksmith results and equipment needs can consume money and time; finish the story party’s essential weapons first, then use spare Mithril for experimentation. Save before a forging attempt if the result matters to the completion file.
- Warrior’s Pride, Secret Book, both Vigor Balls, Pegasus Wing and Silver Tank were secured or intentionally used.
- Unique items were not sold or consumed accidentally.
- The listed Mithril locations were searched where accessible.
- A save was kept before major departures and blacksmith decisions.
8. Recover from a missed recruit or item
If May is missing, reload before the Ribble mayor conversation and speak with the mayor before May. If Skreech is missing, reload before the Bedoe event and complete the upper-level bird conversation followed by the bush rescue; then continue to Tristan after Mitula’s rescue. If Janet is missing, reload before speaking with the King in New Granseal and leave with Elric present. If Zynk is missing, reload before the Roft event and allow Petro’s scene to finish.
If a Creed character was not selected initially, return through the available tunnel after the later travel route opens. If the last recoverable save is already beyond a hidden item or optional recruitment window, the normal campaign remains completable. Continue with the available Force, record the missing content, and use a prior save or a separate replay for a true 100% file. Do not restart the campaign merely because one optional item was missed unless the goal specifically requires every hidden object.
- The joining dialogue appeared before advancing.
- The Caravan and Force headquarters roster were checked after each recruitment window.
- A separate save was kept before major town departures and continent transitions.
- Any missed optional content was recorded before continuing.
Before you move on
- The Force roster contains Bowie, Sarah, Chester, Jaha, Kazin, Slade, Kiwi, Peter, May, Gerhalt, Luke, Rohde, Rick, Elric, Eric, Karna, Randolf, Tyrin, Janet, Higins, Taya, Skreech, Frayja, Jaro, Gyan, Sheela, Zynk, Claude, Chaz and Lemon.
- All four Creed characters are present on the same save.
- The Bedoe rescue and later Tristan joining scene confirm Skreech’s recruitment.
- The Caravan contains Warrior’s Pride, Secret Book, both Vigor Balls, Pegasus Wing and Silver Tank unless an item has been intentionally used for promotion.
- The Mithril checklist has been searched, including both Hassan locations, Creed’s Passage, Pacalon Castle, Mitula’s Sanctuary and Sheela’s Dojo.
- Any intentionally used promotion item or missed optional reward is recorded in a separate note.
- The normal campaign, Force Sword route, required story battles, Zeon battle and normal ending are complete before attempting optional post-credit Battle 44.
References for this chapter
- Shining Force II — Character Guide by tskisoccer
- Shining Force II — Guide and Walkthrough — Genesis — AlaskaFox
- Shining Force II — FAQ by saintly
- RPGClassics Shining Force II Item Locations
- RPGClassics — Shining Force II Mithril Locations
- RPGClassics — Shining Force II Character Guide
- Shining Force II Strategy Guide — Genesis — Moogie
Appendix: Quick Reference — Towns, Dungeons, and Event Flags
Use this appendix to track the load-bearing locations, progression items, recruitment windows, mandatory battles, and recommended save points in the original North American Sega Genesis release of Shining Force II. The normal campaign ends with Zeon’s defeat and the completed ending sequence. Battle 44 is optional post-credit content and should be attempted only after the Force Sword route, required story battles, and normal ending are complete.
Granseal, Galam, and the two jewels
Complete the opening Granseal and Ancient Tower events, recruit the early members of the Force, and follow the story through Yeel and Galam. Visit the church before important battles and save after major story scenes rather than relying only on the defeat-return option.
During the Galam prison sequence, examine the table to obtain the Chirrup Sandals. Follow Slade through the hidden passage and examine the concealed wall to obtain the Mithril there. Continue through Galam Castle Battle 5 and its following scenes. Slade receives the Jewel of Light from the knight and gives it to Bowie during the post-battle events.
During the later Ancient Tower sequence, complete Battle 7, the Kidnap of Elis battle. When King Galam takes Princess Elis and the scene continues, Bowie takes the Jewel of Evil from King Galam. This is the second story jewel in the North American release. The two playable jewel events do not occur during the opening shrine scene.
The US Genesis release permits searching while walking around towns and dungeons, but it does not provide normal Search access during battles. Battle-map chests that require in-battle Search therefore cannot be collected legitimately in this edition. The chest in the Prism Flowers battle is a notable example.
- Finish the opening Granseal and Ancient Tower sequence.
- Complete Galam Castle Battle 5 and receive the Jewel of Light.
- Complete Ancient Tower Battle 7 and take the Jewel of Evil from King Galam during the following scene.
- Take the Chirrup Sandals from the Galam Jail table.
- Take the hidden Mithril from the Galam prison passage.
- Save after the jewel events.
New Granseal and the first North Cliff visit
After the escape and relocation, use New Granseal as the main preparation point. Check headquarters, the church, shops, and the Caravan. Revisit the town after important battles if a character or NPC has not appeared, because some conversations depend on the current story state rather than a single automatic visit.
Visit North Cliff when the route first opens and complete its initial battle. The rocks remain blocked at this stage. The passage cannot be cleared until the story provides both the Cannon and Dynamite later in the campaign.
Before a long route, heal at the church, replace weak equipment, and save. Optional recruitment checks, including the Bedoe bushes for Skreech if the required rescue was completed, can be handled during the appropriate window but are not required for Zeon or Battle 44.
- Inspect New Granseal’s headquarters, church, shops, and Caravan.
- Complete the first North Cliff battle.
- Record that the rocks are still blocking the passage.
- Check optional recruitment areas before advancing if desired.
- Save at New Granseal before each extended route.
Ribble, Ancient Shrine, Hassan, and Taros
At Ribble, speak with Petro’s grandfather until he takes the Force to the Ancient Shrine. Enter the Ancient Tunnel route south of Ribble and complete the required battle. Take the Wooden Panel from the upper chest. Return to Ribble and stand in front of the marked tree. Use the Wooden Panel from the item menu to open the tree and enter the ruins beneath it.
Take the Achilles Sword and equip it to Bowie before the Taros sequence. Continue through the raft route, defeat Kraken, and reach Hassan. Show the Achilles Sword to Rohde, then complete the Taros Shrine sequence and defeat Taros. The Ancient Caravan becomes available after this progression and is required for later storage, travel, and party management.
After Taros, make the initial visit to the cave containing the sick dwarf. Talk with the dwarves and examine the wood fire in the cave to obtain the Dry Stone. This pickup occurs before the later fairy-return event and before leaving the southern Parmecia route. Do not wait for the fairy to cure the dwarf before collecting it.
Later, after the Creed’s Mansion sequence, bring the fairy back to the sick dwarf. The fairy cures the dwarf, and the dwarves then provide the Cannon. The Cannon and Dynamite are the items used to clear North Cliff; they are separate from the Dry Stone, which is reserved for the later river crossing to optional Dwarven Town.
- Take the Wooden Panel from the Ancient Tunnel route.
- Use the Wooden Panel on Ribble’s tree from the item menu.
- Collect and equip the Achilles Sword.
- Complete the Kraken and Hassan route.
- Show the Achilles Sword to Rohde.
- Defeat Taros and obtain the Ancient Caravan.
- During the initial sick-dwarf cave visit, examine the wood fire and take the Dry Stone.
- Later return with the fairy to cure the dwarf and receive the Cannon.
- Save at Ribble before the Ancient Tunnel and at Hassan or the Caravan before the Taros route.
Creed’s Mansion, North Parmecia, and Nazca
At Creed’s Mansion, choose which characters remain with the Force. This choice affects optional later recruits but does not prevent the normal ending or Battle 44. If you want the characters left behind, return after the Nazca Ship has been activated and the story allows the revisit.
Complete the required North Parmecia route through the ruins, elven areas, Nazca, and the associated battles. Defeat Cameela and obtain the Sky Orb from the resulting event. Use the Sky Orb at the Nazca Ship controls to activate the ship. Save before the one-way transition and again after the crash site.
Optional return visits can cover Creed’s recruits, Claude, Chaz, Lemon, Sheela, Zynk, and other late joins. The load-bearing checks are the Creed sequence, the Sky Orb, ship activation, and crash-site transition.
- Make the Creed’s Mansion choice deliberately.
- Complete the required North Parmecia route.
- Defeat Cameela and obtain the Sky Orb.
- Activate the Nazca Ship.
- Save before boarding and after the crash site.
- Return for optional recruits only if desired.
Return to Grans and mandatory battle order
Before returning to Grans Island, make a church save and preserve another ordinary save if possible. Confirm that the jewels, Caravan, Dry Stone, and required equipment remain accessible. After the Nazca crash, follow the Dojo and Roft route rather than detouring into optional content.
Complete Battle 36 against the Prism Flowers, then Battle 37 against Red Baron. Keep units out of the Prism Flowers’ horizontal and vertical firing lines and advance as a group. After Red Baron, find the indented section of river near Galam where the banks narrow inward. Use the Dry Stone that was collected earlier from the sick-dwarf cave. This opens the route to Dwarven Town.
Dwarven Town is an optional detour. It provides supplies, a priest, unique items, and the Dwarven blacksmith, but neither the town nor forged Mithril equipment is required for the normal ending or Battle 44. Save before commissioning Mithril equipment because the blacksmith’s result is not guaranteed to be the weapon you want.
Continue the mandatory route to Galam and defeat Geshp in Battle 38. In Yeel, play the piano, enter the church passage, and complete the tunnel events involving Chaz and Lemon. Leave Yeel and defeat Hydra in Battle 39. The late mandatory order is Prism Flowers, Red Baron, Geshp, Yeel, then Hydra, with Dwarven Town as an optional detour.
- Save before returning to Grans Island.
- Confirm that the Dry Stone was collected earlier from the sick-dwarf cave’s wood fire.
- Defeat Prism Flowers in Battle 36.
- Defeat Red Baron in Battle 37.
- Use the existing Dry Stone at the indented river section to open the optional Dwarven Town route.
- Defeat Geshp in Battle 38.
- Complete Yeel’s piano and church-passage events.
- Defeat Hydra in Battle 39.
Holy Sword Shrine, Force Sword, and final battles
After Hydra, enter the South Shrine and follow the route opened by the two jewels. In the lower area, stand beside the embedded Holy Sword and use the Search or Check action with the action button. Bowie removes the sword from the stone and it becomes the Force Sword. Simply standing beside it is not enough. Make sure Bowie has an available inventory slot before taking the sword.
After the sword is removed, return upstairs and open the newly accessible chest for the Evil Axe. At the Devil’s Head, work around the outside of the statue and search the rear area for the Evil Lance before opening the statue. Both weapons are optional and are not required for the normal ending.
Use the Force Sword at the mouth of the Devil’s Head to open the final route. Complete the Odd Eye battle, the Ancient Tower battle against Reaper, the King Galam battle, and Battle 43 against Zeon. Creed is available for recovery after Battle 41, so use that opportunity to heal, revive defeated characters, restock supplies, and save before King Galam.
At the beginning of Battle 43, Bowie can use Egress while he is still able to act. This returns the Force for revival, church healing, saving, and another attempt. If Bowie is defeated, the battle is immediately lost; Egress must be used before that happens.
- Enter the Holy Sword Shrine after Hydra.
- Take the Force Sword by checking the embedded sword.
- Collect the Evil Axe if desired.
- Search behind the Devil’s Head for the Evil Lance before opening its mouth.
- Use the Force Sword on the Devil’s Head.
- Complete the Odd Eye, Reaper, and King Galam battles.
- Use Egress at the beginning of Battle 43 if recovery is needed.
- Defeat Zeon in Battle 43 while keeping Bowie alive.
Normal ending, Battle 44, and final verification
After defeating Zeon, allow the normal ending and credits to finish. The normal campaign is complete when the ending reaches the screen showing the two jewels. Do not reset if you intend to attempt Battle 44. Leave the game running at the jewel screen until the continuation message appears, then press C to enter the optional battle.
Battle 44 is one bonus encounter rather than a second campaign or a sequence of documented boss phases. Its lineup is Dark Smoke, Cameela, Geshp, King, King Galam, Odd Eye, two Prism Flowers, Red Baron, Willard, Zalbard, and Zeon. The win condition is to defeat Zeon. The encounter does not replace the normal ending and does not create a conventional post-game overworld save.
Because there is no ordinary priest or stable post-credit save point, preserve the final ordinary save before starting the King Galam and Zeon sequence. If Battle 44 is lost or abandoned, reload that save and complete the ending again before retrying the continuation trigger.
- Watch the complete normal ending and credits.
- Reach the two-jewel screen.
- Wait for the continuation message.
- Press C after the message appears to enter Battle 44.
- Defeat the complete Battle 44 lineup, including Zeon.
- Keep the pre-final ordinary save for retries.
- Count the campaign as complete only after the Force Sword route, required story battles, normal ending, and optional Battle 44 goal have each been verified.
Before you move on
- The Jewel of Light was received after Galam Castle Battle 5.
- The Jewel of Evil was taken from King Galam during the later Ancient Tower sequence after Battle 7.
- The Wooden Panel opened Ribble’s tree.
- The Achilles Sword was collected and used for Taros and Rohde.
- Taros was defeated and the Ancient Caravan became available.
- During the initial sick-dwarf cave visit, the Dry Stone was collected from the wood fire.
- After Red Baron, the existing Dry Stone was used to open the optional Dwarven Town route.
- The fairy later cured the sick dwarf and the dwarves provided the Cannon.
- The Nazca Ship was activated with the Sky Orb.
- Prism Flowers were defeated in Battle 36.
- Red Baron was defeated in Battle 37.
- Geshp was defeated in Battle 38.
- Yeel’s piano and church-passage events were completed.
- Hydra was defeated in Battle 39.
- The Force Sword was obtained by checking the sword in the Holy Sword Shrine.
- The Devil’s Head was opened with the Force Sword.
- The Odd Eye and Ancient Tower routes were completed.
- King Galam was defeated in Battle 42.
- Zeon was defeated in Battle 43.
- The full normal ending and credits reached the two-jewel screen automatically after the final battle sequence finished normally during that playthrough. Caveat: the game’s ending screen itself does not display a separate checklist of every earlier battle, so verify the campaign route from the ordinary save and chapter records as well as the ending screen. If a saved playthrough has already reached the jewel screen after completing the final sequence, the normal ending is confirmed even though the screen does not separately list Battles 36 through 43. [EDITORIAL NOTE: This caveat does not alter the gameplay requirement; it only clarifies what the game visibly confirms.] See sources for the ending trigger and battle order.
References for this chapter
- Shining Force II North American Manual
- Shining Force II Strategy Guide — Genesis — Moogie
- Shining Force II — Guide and Walkthrough — Genesis — AlaskaFox
- Shining Force II — Guide and Walkthrough — Genesis — Dark_Sphere
- RPGClassics Shining Force II Item Locations
- The Ultimate Shining Force 2 Guide: Game Walkthrough: Part 5 — Secret Final Battle
- The Ultimate Shining Force 2 Guide: Miscellaneous Secrets
Finishing up
The main campaign is complete when Battle 43 against Zeon is won and the normal ending and credits finish.
The optional secret challenge is complete only after the post-credit jewel screen displays the continuation message and Battle 44 is defeated.
Do not expect a normal town screen or conventional post-game save after the credits or Battle 44. Preserve an ordinary save before the final sequence for retries.
The Force Sword is required for the normal route through the Devil’s Head and final dungeon; it is not a separate post-credit key for Battle 44.
Optional recruits and hidden items are completionist goals only unless a chapter explicitly identifies them as required for story progression.
Choose your next gameScreenshots & video
Game imagery for reference. Follow the written chapters above for the route and strategies.
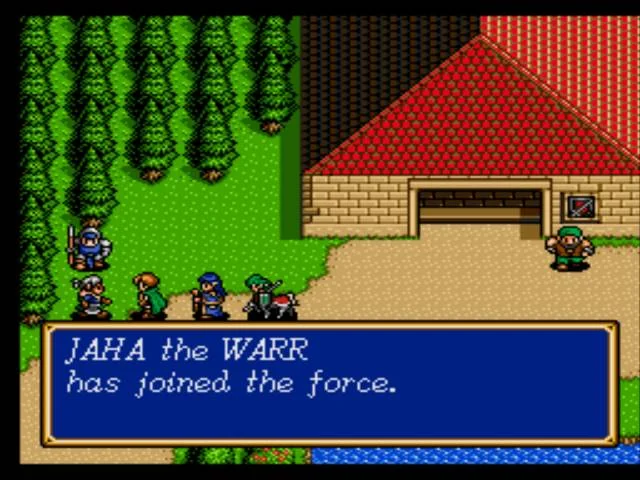
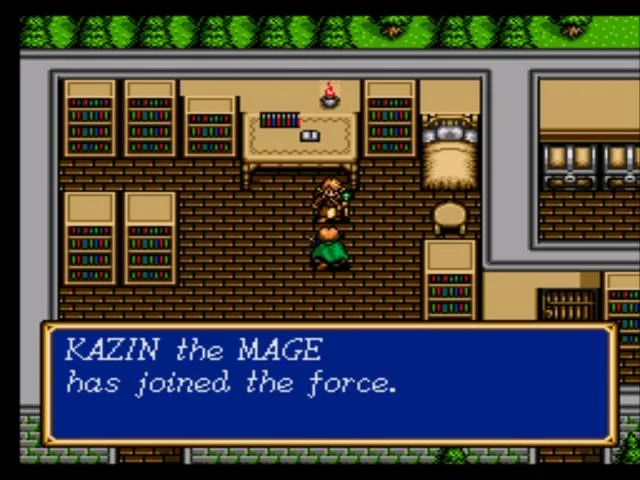
Sources & references
Our original guide draws on the references below. Check the edition at the top of this page before following controls or unlock requirements.
- RPGClassics Shining Force II walkthrough — Return to Grans and The Holy Sword sections
- Shining Force II — Guide and Walkthrough — Genesis — AlaskaFox
- Shining Force II Strategy Guide — Genesis — Moogie
- Shining Force II North American Manual
- Shining Force II - Game Script - Genesis - By SineNomine
- Wooden Panel and the Kraken — Battles 14–16 — Shining Force
- Shining Force II — Guide and Walkthrough — Genesis — Dark_Sphere
- Shining Force II - Guide and Walkthrough - Genesis - By SineNomine
- RPGClassics — Shining Force II Walkthrough — The Nazca Ship
- RPGClassics.com - Shining Force II Walkthrough: The Holy Sword
- The Ultimate Shining Force 2 Guide — Return to Grans Island, Battle 42 and Zeon
- Shining Force II — FAQ/Walkthrough, final battles
- Battles in Shining Force II — Battle 42 and Battle 43 rosters
- Shining Force II Secret Battle Save and Retry Discussion
- The Ultimate Shining Force 2 Guide: Game Walkthrough: Part 5 — Secret Final Battle
- The Ultimate Shining Force 2 Guide: Miscellaneous Secrets
- The Ultimate Shining Force 2 Guide: Character Locations Quicklist
- The Ultimate Shining Force 2 Guide: Important Items
- RPGClassics — Shining Force II Character Guide
- RPGClassics Shining Force II Walkthrough
- Shining Force II — Character Guide by tskisoccer
- The Ultimate Shining Force 2 Guide: How do I use the promotion items?
- The Ultimate Shining Force 2 Guide: Promotion Items
- The Ultimate Shining Force 2 Guide: Spell Lists
- Shining Force II Spell List
- Shining Force II Items and Stat-Boosting Items
- The Ultimate Shining Force 2 Guide: Boosting Items
- The Ultimate Shining Force 2 Guide: Mithril Locations
- The Ultimate Shining Force 2 Guide: Item Lists
- Shining Force II — FAQ by saintly
- RPGClassics Shining Force II Item Locations
- RPGClassics — Shining Force II Mithril Locations
About the game & collecting notes
- Platform
- Sega Genesis / Mega Drive
Step-by-step campaign guide for the original North American Sega Genesis release of Shining Force II. This walkthrough covers the complete normal campaign from Granseal through Zeon, including recruitment, required story items, promotion choices, dungeon routes, boss strategies, the return to Grans Island, and the exact post-credit procedure for the optional secret Battle 44. It distinguishes normal campaign completion from the separate post-ending challenge and does not claim that the secret battle creates a second ending or a post-game save.
Darryl Polo
Darryl Polo loves tinkering with emulation and revisiting retro games. He enjoys exploring how old favorites play on different setups and sharing what he learns along the way. At Joking Joystick, he writes about the games, hardware, and small discoveries that keep the hobby fun.
Our editorial standardsFound a step that needs another look? Help us improve this guide.