
Resident Evil Village Gold Edition (PS5) — Complete Campaign Walkthrough
Complete, step-by-step campaign walkthrough for the PS5 Gold Edition of Resident Evil Village, covering the original main campaign through its ending plus the Winters' Expansion story (Shadows of Rose), Third‑Person Mode notes, Mercenaries additions and Trauma Pack unlocks. Practical routes, boss tactics, merchant priorities and completion checks for a single-run clear on Standard difficulty.


Find a copy
Resident Evil Village Gold Edition Sony PlayStation 5
We may earn a commission if you buy through these links, at no extra cost to you. As an Amazon Associate I earn from qualifying purchases.
Opens retailer search results. Check the model, edition, seller, availability and current price before buying.
Before you begin
You are about to play Resident Evil Village Gold Edition on PS5.
This guide assumes a fresh start on Standard difficulty and walks you from the opening prologue through every story area required to reach the game's ending, then continues with the Winters' Expansion (Shadows of Rose) content included in the Gold Edition.
Follow the routes, merchant priorities and boss tactics to conserve resources and avoid backtracking that could block collectibles or upgrades.
The Gold Edition bundles the base game, Winters' Expansion and the Trauma Pack. Resident Evil Village VR Mode is a separate free PS VR2 add-on and is outside this guide's campaign scope.
This guide shows what is required to finish the main campaign, how the bundled content changes unlocks such as Village of Shadows access, and gives explicit, practical steps for each major area and boss so you can progress confidently on PS5.
Set yourself up for the run
Install the Gold Edition and ensure Winters' Expansion and Trauma Pack content are present in the PS5 library before starting.
Update the game to the latest patch.
Familiarize yourself with the DualSense controls: adaptive-trigger aim weight and haptic feedback are useful for recoil and scripted chases.
Check accessibility options (auto-aim, aim assist) if you prefer reduced difficulty.
Set difficulty to Standard for this walkthrough.
If you choose Hardcore or Casual, adjust the guide's ammo and upgrade suggestions accordingly.
Plan your merchant (the Duke) purchases: prioritize inventory space (case/stock), a reliable shotgun upgrade, and at least one weapon damage upgrade early.
Save Lei for critical upgrades rather than purely cosmetic items.
Enable manual saves at safe rooms frequently.
Before attempting any major boss or locked exit, make a manual save so you can reload without replaying long sections.
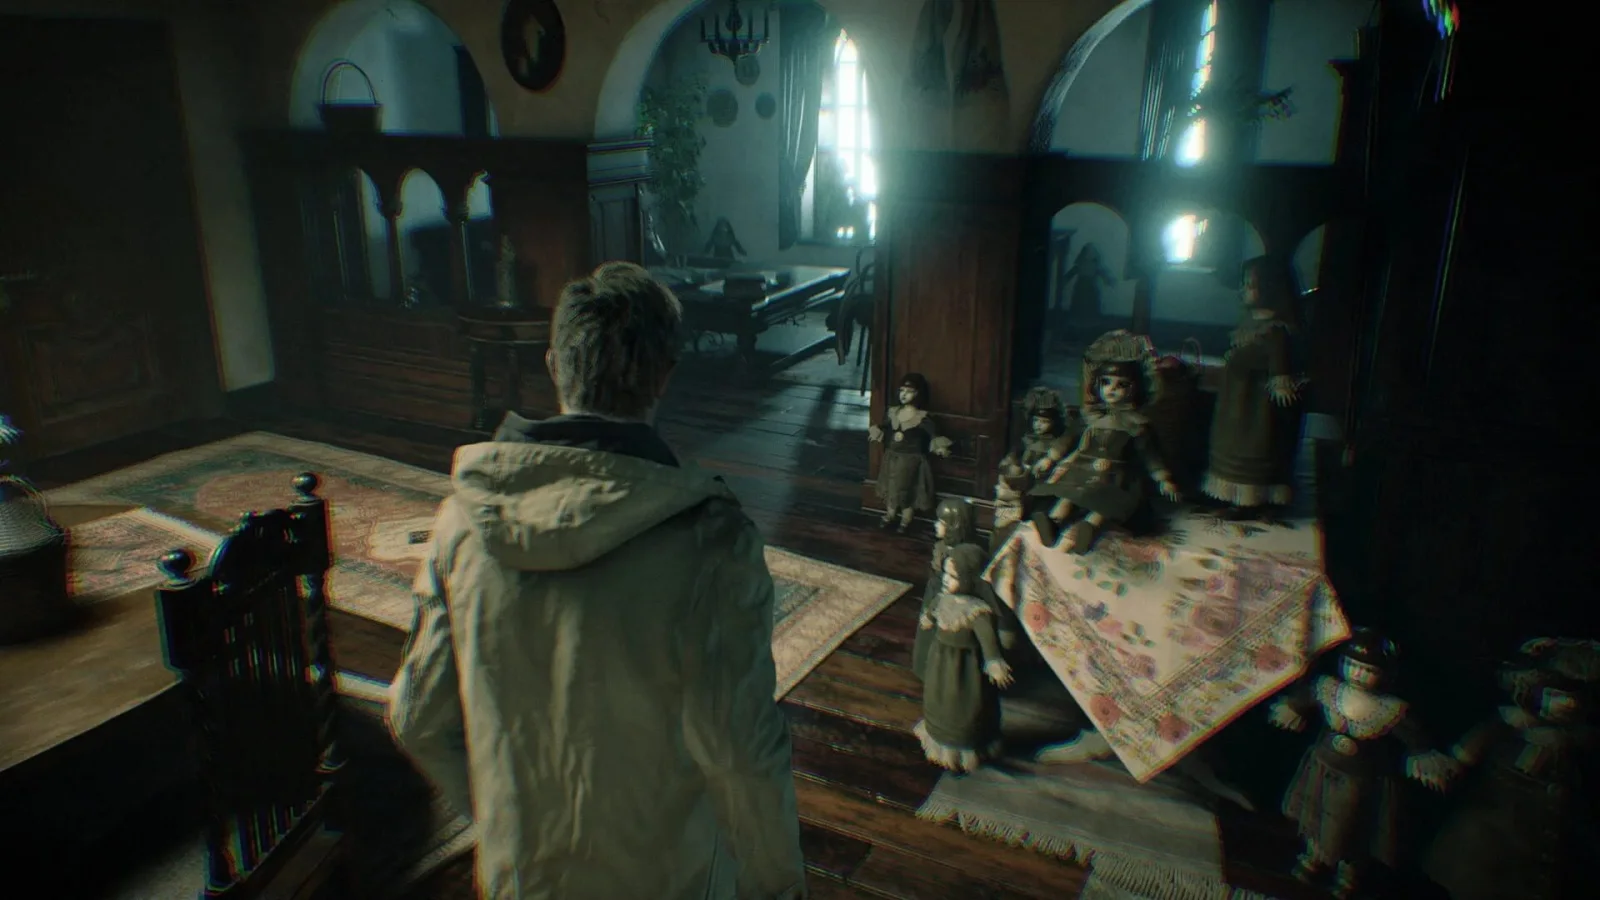
Preparation: Gold Edition setup and PS5 checks
Before starting Resident Evil Village on PS5, confirm that the base game, Winters’ Expansion and Trauma Pack are installed rather than assuming every component is ready. Gold Edition includes the main game, Winters’ Expansion and Trauma Pack. Winters’ Expansion adds Shadows of Rose, Third-Person Mode and Mercenaries Additional Orders. Resident Evil Village VR Mode is a separate free PS VR2 add-on that must be downloaded separately and is not needed for this guide. Configure controls, camera, subtitles, brightness and DualSense effects before beginning. Standard is a sensible first-campaign difficulty, while Casual suits a story-focused run. Use typewriters for deliberate manual saves, protect recent save files, and reserve Lei for practical Duke purchases such as case space, weapon upgrades, recipes and useful supplies.
1. Confirm the PS5 edition and required add-ons
From the PS5 Games home screen, highlight Resident Evil Village and press the Options button. Use the available game-data, add-on or storage-management entry to inspect installed content. You can also open Game Library, select Your Collection, highlight Resident Evil Village and scroll to the Add-Ons section. PlayStation’s download instructions place separately downloadable add-ons in this area.
For this guide, verify three things: the PS5 version of Resident Evil Village, Winters’ Expansion and Trauma Pack. Gold Edition contains the base game, Winters’ Expansion and Trauma Pack. Winters’ Expansion supplies Shadows of Rose, Third-Person Mode and Mercenaries Additional Orders. The Trauma Pack supplies its bonus items and the Village of Shadows access option.
Do not count Resident Evil Village VR Mode as a required Gold Edition installation. VR Mode is a separate free PS VR2 add-on that requires the PS5 game and must be downloaded separately. It is not required for the standard campaign, Third-Person Mode, Shadows of Rose or Mercenaries Additional Orders. If you own a PS VR2 and want that mode later, install it separately through its PlayStation Store entry.
After downloading or redeeming an add-on, launch the game only after the installation finishes and the title screen is available. Check the main menu and Bonuses or Extra Content areas for the expected features. If Shadows of Rose or the Third-Person option is absent, return to the PS5 Add-Ons section and confirm that Winters’ Expansion is installed on the account being used.
- The installed game is the PS5 version.
- Winters’ Expansion is installed.
- Trauma Pack is installed or redeemed on the active PSN account.
- The game has finished updating before the campaign begins.
- Shadows of Rose and Third-Person Mode appear in the relevant game menus.
- VR Mode is not treated as a required Gold Edition component.
2. Configure controls, display and accessibility before New Game
Open Options from the title screen before selecting New Game. Review the control type, camera movement speed, aim behavior and horizontal or vertical camera direction. Choose the layout that feels natural, then test aiming, guarding, reloading and running during the opening section without changing settings repeatedly.
Enable subtitles if you want dialogue and important story lines represented in text. Adjust brightness in a dark scene so doors, pickups and floor hazards remain visible without making the image gray and flat. Review any available camera or display options and choose comfort over maximum speed; fast camera movement can make precise handgun shots harder for a new player.
DualSense vibration and adaptive trigger effects are optional feedback settings. Leave them enabled if you like weapon resistance and impact feedback, or disable them if they interfere with aiming or cause fatigue. These settings alter feel, not progression, weapons or puzzle requirements.
- Control layout and camera direction have been tested.
- Camera movement speed is comfortable for aiming.
- Subtitles and brightness are configured.
- DualSense vibration and trigger effects have been chosen deliberately.
3. Select a suitable first-run difficulty
Choose Standard for a balanced first campaign. It gives a newcomer room to learn enemy behavior, village routes, boss arenas and the Duke’s economy without making every missed shot especially punishing. Choose Casual if your priority is the story or if survival-horror resource management is unfamiliar.
Reserve Hardcore and Village of Shadows for a later attempt unless you specifically want a demanding first run. The Trauma Pack’s Village of Shadows feature grants access to the difficulty; it does not lower enemy damage, improve supplies or simplify boss mechanics. Treat immediate access as an unlock, not a recommendation for an unprepared playthrough.
A manageable first completion also teaches which weapons, recipes and upgrades suit your play style. After the credits, decide whether New Game+ or a higher difficulty is the better follow-up.
- Standard or Casual is selected for the first completion.
- Village of Shadows is reserved for a prepared attempt.
- The selected difficulty matches the intended story or challenge experience.
4. Use manual saves as recovery points
Resident Evil Village uses automatic checkpoints as well as manual saves at typewriters. When you reach a typewriter, save before a major area transition, an unfamiliar combat encounter, a large Duke purchase or a puzzle that consumes a key item. This gives you a deliberate recovery point if a later decision leaves you short on ammunition, healing or Lei.
Keep more than one recent manual save when practical. A separate save before a boss or major purchase is more useful than repeatedly overwriting one file. Automatic checkpoints can recover a recent death, but they should not replace manual saves before dangerous sections.
Saving preserves your current state; it does not refill ammunition or undo supplies already spent. Use manual saves to protect a sensible inventory and purchasing position, not to justify wasting healing items.
- A manual save is created at the first available typewriter.
- Recent saves are not all overwritten by one file.
- A pre-boss or pre-purchase save is retained when practical.
5. Establish a practical Duke plan
The Duke provides weapon upgrades, crafting recipes, ammunition, healing supplies, item-case expansions and cooking services. Early Lei should normally support the weapon you use most, an item-case expansion when available, and recipes or consumables that address your actual shortages. More case space has lasting value because it lets you keep ammunition, materials and key supplies instead of discarding them while exploring.
Food ingredients are useful rather than decorative. When the Duke offers a cooking recipe, its completed dish can provide a lasting benefit, so consider food a legitimate investment when you have the required ingredients. Delay low-priority purchases if you still need case space, weapon upgrades, recipes or an emergency supply of healing items.
Before selling treasure, inspect whether it is marked as combinable. Selling a component separately can lose the value of a completed combination. Sell ordinary treasure when you need Lei, but keep ammunition, healing items and crafting materials until you understand the next area’s demands. The Duke’s stock changes as the story advances, so inspect his full inventory whenever he reappears.
- Lei is reserved for weapon, case, recipe, food or survival priorities.
- Food ingredients are treated as useful upgrade materials.
- Combinable treasures are checked before sale.
- A small emergency reserve of healing and ammunition materials is retained.
Before you move on
- PS5 Game Library or the game’s add-on management screen confirms the base game, Winters’ Expansion and Trauma Pack are installed or redeemed.
- The main menu or bonus menus expose the installed expansion features; Shadows of Rose and Third-Person Mode are not treated as available until they appear in-game.
- Resident Evil Village VR Mode has not been incorrectly treated as a required Gold Edition component. PS VR2 installation is optional and separate.
- Difficulty, controls, camera settings, subtitles, brightness and DualSense preferences have been tested and saved.
- A manual save exists at the first available typewriter, with a recent backup save retained when practical.
- Lei and inventory space have been reserved for useful Duke purchases rather than exhausted on low-priority items.
References for this chapter
- Resident Evil Village Gold Edition Announced | Capcom News
- How to download your games and add-ons from PlayStation Store — PlayStation Support
- Main Menu | Resident Evil Village Official Web Manual
- Resident Evil Village Official Web Manual — Inventory
- Resident Evil Village Official Web Manual — Key Items and Treasure
Prologue and Opening Escape
Complete the Winters residence sequence, search the crash site and cabin, then enter West Old Town. Obtain the Knife, LEMI, Bolt Cutters and M1897 shotgun in that order while collecting the first healing and ammunition materials. The first Lycan can be bypassed, and the larger village ambush is meant to be survived rather than cleared. Reach the Church and save before continuing through the village. The Duke does not appear during this chapter, so keep Lei and crafting materials for later purchases.
1. Finish the residence, crash site and forest cabin
Take Rose upstairs when control begins and follow the scripted events until Ethan wakes near the overturned vehicle. Turn around before leaving the crash site and pick up the Mission Briefing file on the ground. Follow the tracks and lights into the forest, then crouch beneath the fence to reach the cabin.
Search the cabin’s basement when the route leads downstairs. Inspect the object at the far end to trigger the scare, then return upstairs and leave through the opening in the wall. There are no essential weapons in the cabin, so do not waste time searching interactive furniture after the route is clear.
- Pick up the Mission Briefing file beside the overturned vehicle.
- Search the cabin basement before leaving.
- Crouch beneath the fence and exit through the hole in the cabin wall.
2. Enter West Old Town and collect the Knife and LEMI
Follow the path past the castle view into West Old Town. The first farmer’s house contains no required weapon, but you can mark its locked drawer for a later return. Continue into the neighboring building and pass through to the yard; the nearby outhouse can be opened now if you are tracking completion challenges.
Enter the old man’s house. Take the Knife from the table near the kitchen doorway, then turn around and cut open the yellow-marked wooden crate by the entrance for a First Aid Med. Check the curtain at the back to begin the cutscene. The old man gives Ethan the LEMI and handgun ammunition during this sequence.
- Collect the Knife from the kitchen table.
- Use it on the yellow-marked crate for the First Aid Med.
- Receive the LEMI and handgun ammunition during the old man’s cutscene.
- Do not spend time trying to open the locked drawer without a Lockpick.
3. Survive the first Lycan and retrieve the Bolt Cutters
After the cutscene in the cellar, Ethan faces the first Lycan in the backyard. You may shoot it, block its attacks, or run past it. If conserving ammunition, retreat through the opening into the old man’s house and take the Bolt Cutters from the shelves in the room where the old man was hiding.
Before using the cutters, enter the nearby small house and take the Herb and Chem Fluid. Combine them in the crafting screen to make another First Aid Med. On reaching the village, the game also grants the Handgun Ammo recipe: two Gunpowder and two Rusted Scrap produce fifteen rounds. Materials do not occupy case slots, but Chem Fluid is used in several later recipes, so craft only what you need.
- Get past or defeat the first Lycan.
- Collect the Bolt Cutters from the old man’s house.
- Take the Herb and Chem Fluid from the nearby house.
- Craft a First Aid Med if you have not already done so.
- Use Gunpowder and Rusted Scrap for Handgun Ammo only when ammunition is needed.
4. Open East Old Town and search the radio barn
Use the Bolt Cutters on the chained gate and cross the bridge into East Old Town. Enter the first building, take the Handgun Ammo behind the radio and push the shelf against the entrance. Search upstairs for Chem Fluid and additional handgun rounds.
When a Lycan enters, concentrate on the one coming down the stairs rather than firing at enemies outside the windows. Afterward, move the shelf, leave through the opened route and unlock the gate around the building. This gives you a safer loop for the coming ambush.
- Use the Bolt Cutters on the chained gate.
- Collect the ammunition behind the radio.
- Search upstairs for Chem Fluid and handgun ammunition.
- Unlock the side gate before moving toward the next house.
5. Take the M1897 before the main ambush
Approach the next house from the north side and barricade the entrance as soon as you enter. Upstairs, collect the M1897 shotgun, Herb, Gunpowder and handgun ammunition. Search the adjoining room for more Gunpowder and handgun rounds. The M1897 is your strongest early close-range weapon, but its shells are limited.
If Lycans enter, slash or shoot the flour sacks to create a temporary cloud that interrupts them. Drop through the hole into the lower passage and collect the Rusted Scrap before leaving. Use the shotgun only when an enemy blocks your escape or reaches melee range.
- Collect the M1897 from the ambush house.
- Take the Herb, Gunpowder and handgun ammunition nearby.
- Use flour clouds to create escape openings.
- Collect the Rusted Scrap in the lower passage.
- Keep shotgun shells for close threats instead of isolated targets.
6. Outlast the Lycan ambush and reach the Church
After leaving the lower passage, run to the next house and enter from its north side. Barricade the door, collect the Shotgun Ammo, Herb and crate contents, then use the explosive barrel when several Lycans break through. Climb the ladder if the ground floor becomes crowded.
A large hammer-wielding Lycan joins the fight. Avoid it rather than attempting to defeat it on a first run. Move between buildings, use obstacles and explosive barrels to create space, and fire only when an enemy blocks the route. The sequence ends through a scripted attack after you survive long enough.
Once control returns, follow the route through the Maiden of War area, Chapel and Graveyard toward the Church. Use the typewriter inside the Church to save. The Duke is not present yet, so keep your Lei and materials for the first merchant visit later.
- Collect the Shotgun Ammo and Herb if the house is safe to search.
- Use the explosive barrel against a grouped wave.
- Avoid fighting the large hammer-wielding Lycan.
- Reach the Church and save at the typewriter.
- Keep Lei for the Duke’s later appearance.
Before you move on
- Ethan has the Knife, LEMI, Bolt Cutters and M1897.
- The first two crafting recipes are available: First Aid Med and Handgun Ammo.
- You have survived the Lycan ambush and reached the Church.
- The Church typewriter is available for a reliable save.
- You have preserved enough Lei and ammunition for the first Duke encounter later in the campaign.
References for this chapter
Village Hub — central routes, the Duke’s shop and optional side areas
Treat the Village as a route that opens in stages. On the first visit, follow the required path from the Maiden of War statue to the church, collect the Maiden Crest, cross the Fallow Plot and reach Luiza’s House for the Demon Crest. The Duke is not available during this opening village section; the first merchant encounter comes after the mine, just before Castle Dimitrescu. After escaping the castle, the Altar becomes the main Village hub and the Duke’s permanent return point. Use the second visit to obtain the M1911, Jack Handle and Well Wheel, then clear wells, locked houses and treasure routes only when their tools are available. Spend Lei on case capacity and the weapon you actually use, keep combinable treasures intact, and reserve animal ingredients for the Duke’s Kitchen.
Complete the first Village route without searching for the Duke
After the opening Lycan attack, use the Maiden of War statue and central square as your landmark. Search the nearby houses for visible ammunition, gunpowder, rusted scrap, herbs and Lei, but do not attempt to clear every Lycan. Enemies that are not guarding a required doorway or item can usually be bypassed by sprinting around buildings and using unlocked doors as breaks in pursuit.
Follow the open route toward the church. The church contains the Maiden Crest on its altar, a typewriter and a file that directs Ethan toward Luiza’s House. Cross the Fallow Plot, enter the survivors’ area and continue to Luiza’s House. During the sequence there, obtain the Truck Key and inspect it for the Screwdriver. Use the Screwdriver on the shrine outside to obtain the Demon Crest, then place both crests in the castle gate. This completes the required first Village objective.
There is no Duke shop in the opening village streets. The first merchant encounter occurs after Ethan escapes the mine and reaches the Vineyard area on the approach to Castle Dimitrescu. Therefore, keep the Lei found during the opening section; there is no benefit to repeatedly searching for a vendor before the castle route opens.
- Collect the Maiden Crest from the church altar.
- Search the church and nearby houses before crossing the Fallow Plot.
- Obtain the Screwdriver and Demon Crest at Luiza’s House.
- Do not expect a Duke shop during the opening Village visit.
Use the first Duke visit for capacity and a focused loadout
When the Duke appears after the mine, save if needed and reorganize the case before entering Castle Dimitrescu. Buy the first available case expansion when it is affordable. Extra space is usually the strongest early purchase because the case must hold weapons, ammunition, healing items, explosives and crafting materials during the castle section.
Upgrade one dependable handgun rather than distributing Lei across every weapon. Power is useful for reducing ammunition consumption, while magazine capacity helps if you are still learning enemy movement. Keep the M1897 shotgun when you obtain it in the Village, but do not buy unnecessary ammunition simply to fill empty slots. Handgun ammunition crafting is available from the beginning and uses Gunpowder and Rusted Scrap; the Duke sells additional recipes later, including the Pipe Bomb recipe after the castle sequence.
The Samurai Edge from the Trauma Pack is optional. It does not replace the need to maintain a practical handgun and shotgun plan, and it is not a reason to spend all early Lei on ammunition or upgrades.
- Buy case capacity before cosmetic or luxury purchases.
- Choose one handgun for regular upgrades.
- Keep Lei available for the next case expansion and urgent weapon upgrades.
- Craft handgun ammunition only when the materials or combat situation justify it.
Return to the Village through the Altar after Castle Dimitrescu
After leaving Castle Dimitrescu, the Duke establishes himself at the Altar, the open hub beside the ceremony route. A typewriter is nearby. Speak to him before exploring, sell completed valuable treasures, and check the newly revealed map markers. The Altar is the correct starting point for the second Village visit, not the original central plaza.
Take the eastern gate from the Altar back toward the Maiden of War statue. Search the streets again because story progress has opened new routes and exposed supplies. The church and graveyard can now be revisited, but several locked doors and wells still require tools obtained during this same return trip. Use the map to distinguish unexplored rooms from areas that are merely inaccessible.
Do not treat every newly visible enemy as a required fight. Lycans and stronger variants may occupy optional lanes, but the useful objective is to reach the Workshop and the red-chimney-house route. Fight when an enemy blocks a narrow doorway or guards a valuable item; otherwise, preserve shotgun shells and healing for later encounters.
- Visit the Duke at the Altar after the castle.
- Save at the nearby typewriter.
- Check the map for newly opened routes and treasure markers.
- Bypass optional enemies when they do not block progress.
Get the M1911, Jack Handle and Well Wheel before clearing wells
From the Maiden of War area, follow the route toward the Workshop. Use the code 070408 on the locked cabinet inside to obtain the M1911 and the Jack Handle. The M1911 is a stronger replacement option for the LEMI, but switching is not mandatory if you have already invested in the LEMI; choose one handgun and avoid paying to maintain both unless you have surplus Lei.
Use the Jack Handle on the tractor blocking the passage through West Old Town. Continue through the Iron Insignia gate and enter the small shed area beyond it to obtain the Well Wheel. Once the wheel is in your inventory, return to accessible wells rather than trying to interact with them earlier. The well near the Maiden of War statue contains the Wooden Animal Head, while the well near Luiza’s House provides Pipe Bombs. Other wells become reachable as later routes open.
Continue to the red-chimney house after clearing the tractor route. The house contains the Four-Winged Key and completes the required second-visit objective. The Duke will then update his stock and map information at the Altar.
- Open the Workshop cabinet with 070408.
- Take the M1911 and Jack Handle.
- Use the Jack Handle on the tractor.
- Collect the Well Wheel beyond the Iron Insignia gate.
- Reach the red-chimney house and obtain the Four-Winged Key.
Manage treasures, ingredients and case space
Keep anything described as combinable until all parts have been joined. A completed treasure generally sells for more than its separate components. Sell items described only as valuable when you need Lei, but do not sell weapon parts that you may still want to install or animal ingredients intended for cooking.
Animal meat, fish and poultry are used by the Duke’s Kitchen for permanent bonuses. Store them in the case until cooking becomes available at the Altar. The Kitchen is more useful than selling a small amount of meat early, especially for a first campaign.
Key items and treasures are tracked in their own inventory categories, so they do not need to be discarded to make room for ammunition. If the case is full, combine compatible stacks, install weapon parts, move large weapons to create a cleaner layout and craft only what you need. Discard ordinary crafting materials only as a last resort; never discard a required key item or a combinable treasure.
- Inspect every treasure description for combination status.
- Keep meat, fish and poultry for the Duke’s Kitchen.
- Use the separate key-item and treasure categories correctly.
- Enter the next major area with healing, ammunition and at least one explosive option.
Before you move on
- The Maiden Crest and Demon Crest were collected and used to open the route toward Castle Dimitrescu.
- The Duke has been visited after the mine and the case has been reorganized around one main handgun and the M1897 shotgun.
- After the castle, the Duke at the Altar has been visited and the second Village route has been opened.
- The Workshop cabinet was opened with 070408, yielding the M1911 and Jack Handle.
- The tractor was moved, the Well Wheel was collected, and the red-chimney house was reached for the Four-Winged Key.
- Combinable treasures remain intact, animal ingredients have been retained, and accessible wells have been cleared only after obtaining the Well Wheel.
References for this chapter
- 2 · The Village (1st visit) · Lycan Ambush · Luiza’s House, RE Guide
- 5 · The Village (2nd visit) · The Red-Chimney House, RE Guide
- Resident Evil Village — Duke merchant locations and services
- Resident Evil Village — Find the house with the red chimney
- Resident Evil Village — Inventory, map and Duke guide
Castle Dimitrescu — entry, courtyard and first major puzzles
Enter Castle Dimitrescu after opening the gate with the Maiden and Demon Crests. Escape the initial capture, use the Maroon Eye to reach the castle’s first daughter encounter, then collect Sanguis Virginis and use it in the Wine Room to obtain the Courtyard Key. From there, drain the Hall of Ablution, take Dimitrescu’s Key, survive the following pursuit and collect the Mask of Sorrow. The castle remains open for further mask routes after this section, so search accessible side rooms and use the Duke’s room as a preparation point.
Enter the castle and open the first route
After opening the gate beyond the village church with the Maiden Crest and Demon Crest, follow the path through the forest and enter Castle Dimitrescu. The first interior area is the Hall of the Four. After the cutscene, interact with Ethan’s trapped hand and follow the only available path through the fireplace opening.
At the end of the passage, take the Maroon Eye Ring from the statue. Open the inventory, inspect the ring and examine it again to remove the Maroon Eye. Return to the Hall of the Four, go through the Main Hall and climb to the second floor. Use the Maroon Eye on the face-shaped Prioress Door.
The Duke’s room and a typewriter are available near the early castle route. Use them before committing to the next sequence. Keep ordinary crafting materials and healing items, and sell crystal valuables only if you need Lei or inventory space. Do not spend shotgun ammunition simply to clear every enemy in a room.
- Enter the Hall of the Four and complete the escape route through the fireplace.
- Inspect the Maroon Eye Ring and use the Maroon Eye on the Prioress Door.
- Save and reorganize supplies at the Duke’s room before entering the dungeon route.
Survive the first daughter encounter and obtain Sanguis Virginis
Opening the Prioress Door triggers an attack by one of Dimitrescu’s daughters. Run through the Dressing Room and tear away the boards blocking the hidden passage. Continue through the crawlspace and the linear dungeon route. Avoid unnecessary fights with Moroaică when the corridor is open; kill only enemies that block the exit or make a retreat unsafe.
The daughter eventually attacks in a room with broken windows. Her body is vulnerable when the outside air reaches her, so keep her near the open window and fire while she is exposed. Use the handgun for controlled shots and the shotgun when she closes distance. If she retreats from the window, reposition rather than chasing into a cramped corner. Once enough damage is dealt, she freezes and disintegrates.
Proceed into the Kitchen after the fight and take the Sanguis Virginis bottle from the large bowl. Follow the newly accessible route back toward the Main Hall. Before leaving this section, collect nearby supplies and check that you have room for a key item.
- Reach the first daughter’s open-window arena.
- Damage her while she is exposed to outside air and avoid prolonged melee range.
- Collect Sanguis Virginis from the Kitchen.
Use the wine to reach the Courtyard
Return to the Main Hall and climb to the second-floor Wine Room. Place Sanguis Virginis on the wall pedestal. The hidden section opens, revealing a small chest containing the Courtyard Key. Take the gunpowder and other visible supplies before leaving if your inventory allows.
Go back downstairs through the Dining Room and unlock the double doors at the rear with the Courtyard Key. The Courtyard is a junction rather than a required extermination area. Search the perimeter for supplies, but bypass Moroaică whenever a clear route is available. Keep track of the locked door that requires Dimitrescu’s Key; it cannot be opened yet.
When ready, enter through the double doors in the southeast part of the Courtyard. Follow the stairs and corridor toward the Hall of Ablution. Pick up the Castle Map if it is still on the wall, then enter the statue room.
- Place Sanguis Virginis in the Wine Room pedestal.
- Take the Courtyard Key from the revealed chest.
- Unlock the Dining Room doors and enter the Courtyard.
- Use the southeast Courtyard doors to reach the Hall of Ablution.
Solve the Hall of Ablution and take Dimitrescu’s Key
Read the inscription in the Hall of Ablution before rotating the statues. Set the three men so they face the man on horseback. Turn the horseman so he faces the woman in the robe. Set the woman in the hat and the woman in the robe so they face each other. When the relationships match, the pool drains.
Descend through the opening and follow the flooded underground passage. Enemies are placed in narrow corridors, so use headshots to stagger anything directly in your way and continue moving. At the end, ride the elevator to the balcony and enter Lady Dimitrescu’s chamber. Take Dimitrescu’s Key from the wall.
Use the key on the nearby locked door. Ethan is forced into another dungeon section and loses his hand during a scripted sequence. Activate the lever, then use the surrounding space to keep Lady Dimitrescu away from the switch. When she moves past, return to the lever and operate it again. Continue through the opened route, use Dimitrescu’s Key where required and take the Mask of Sorrow from the statue. Ride the elevator up to return toward the Courtyard.
- Drain the Hall of Ablution pool using the statue relationships.
- Reach Lady Dimitrescu’s chamber and collect Dimitrescu’s Key.
- Use the lever sequence to open the escape route.
- Collect the Mask of Sorrow and ride the elevator upward.
Before you move on
- The Maroon Eye has opened the Prioress Door and the first daughter has been defeated.
- Sanguis Virginis has been used in the Wine Room, and the Courtyard Key is in the inventory or has opened the Courtyard doors.
- The Hall of Ablution pool is drained.
- Dimitrescu’s Key and the Mask of Sorrow have been collected.
- Ethan has returned to the upper castle route with the remaining mask paths still available. The castle can be searched further before placing all four masks in the Hall of the Four.
Castle interior — upper floors, tower puzzles and Lady Dimitrescu sequence
After obtaining the Dimitrescu Key, complete the castle’s upper-floor route: recover the Mask of Pleasure, defeat Cassandra in the Armory, solve the Opera Hall piano, defeat Daniela in the Library, collect the Mask of Joy, solve the Atelier bell puzzle, and take the Mask of Rage from the rooftops. Before placing the four masks in the Hall of the Four, finish optional castle exploration, including the Azure Eye and Silver Ring treasure, the castle labyrinth, the F2 Rifle, files, breakables and other pickups. The mask puzzle is a point of no return for castle cleanup: facing the exit door, place Mask of Sorrow, Mask of Pleasure, Mask of Joy and Mask of Rage from left to right. After the door opens, collect the Ornate Dagger, defeat Lady Dimitrescu and leave the castle. The castle cannot be revisited afterward.
1. Recover the Mask of Pleasure and defeat Cassandra
From the Main Hall, use the Dimitrescu Key on the second-floor door to the Hall of Pleasure. Take the Mask of Pleasure from the statue. The floor gives way and Ethan falls into the lower room, leaving the exit barred. Inspect the mounted animal skull, remove it from its display and place it on the statue where the mask was taken. The bars then lift so you can leave with the replacement item.
Follow the route to the Armory. When Cassandra appears, push the shelving aside and throw a Pipe Bomb at the cracked wall. The opening lets cold air into the room, weakening her. Keep her near the opening when possible, use the shotgun for close-range damage and avoid being pinned against the walls. Collect Cassandra’s Crystal Torso after the fight.
- Collect the Mask of Pleasure.
- Remove the mounted animal skull from its display.
- Place the animal skull on the empty statue.
- Open the Armory wall with a Pipe Bomb.
- Defeat Cassandra and collect her Crystal Torso.
2. Solve the Opera Hall piano and defeat Daniela
Return to the Opera Hall and examine the piano. Match each note on the sheet music to the corresponding piano key. The puzzle confirms correct notes as you work, so solve it one note at a time instead of trying to memorize the entire melody. The compartment opens to reveal the Iron Insignia Key.
Use the Iron Insignia Key on the Library door beside the Opera Hall. Daniela attacks inside. Pull the lever mounted on the wooden column to open the skylight. The cold air makes her vulnerable; use handgun or shotgun fire while the opening is active, then pull the lever again when the skylight closes. After Daniela is defeated, enter the Hall of Joy and take the Mask of Joy from the statue.
- Complete the Opera Hall piano puzzle.
- Collect the Iron Insignia Key.
- Use the key to enter the Library.
- Open the Library skylight with the lever.
- Defeat Daniela and collect the Mask of Joy.
3. Ring the five Atelier bells and take the Mask of Rage
From the Hall of Joy, continue to the Atelier. Shoot all five bells. One is near the entrance, another is on a cabinet, one is attached to the moving mechanism behind the wall opening, one is outside the upper window and one is on the chandelier. Shoot the chandelier to set it moving, then hit the bell when it swings into view. Each struck bell remains visibly lit, making it easier to identify the remaining targets.
When all five bells have been rung, the large portrait opens. Climb through the passage to the Attic and collect the F2 Rifle. Search the Attic before leaving, then follow the rooftops and eliminate or bypass the flying enemies as needed. Ride the zip line to the Tower of Rage and collect the Mask of Rage.
- Ring all five Atelier bells.
- Enter the Attic through the opened portrait.
- Collect the F2 Rifle.
- Cross the rooftops and reach the zip line.
- Collect the Mask of Rage.
4. Complete optional castle exploration before the point of no return
Do not place the four masks yet if you still want castle treasures, files, breakables or completion items. Check the map for red rooms and return to them while the castle remains accessible. Use the Iron Insignia Key in the optional dungeon route, open the cracked wall with a Pipe Bomb and swing the hanging brazier into the two torches to access the Azure Eye. Combine the Azure Eye with the Silver Ring before selling them so they count as a completed treasure.
Finish the castle labyrinth near the Duke if you are pursuing its reward, break reachable windows and containers, and collect any files or Goats of Warding you want. The F2 Rifle is in the Attic; do not wait for a separate castle attachment there. The Merchant’s Room and Terrace Room each have a typewriter, and the Duke’s room is useful for reorganizing inventory and making a final save while Lady Dimitrescu is still stalking the castle.
When the map shows no remaining red rooms that matter to your goals, return to the Hall of the Four. Facing the exit door, place the masks from left to right as follows: Mask of Sorrow, Mask of Pleasure, Mask of Joy, Mask of Rage. Spatially, the slots are bottom-left Sorrow, upper-left Pleasure, upper-right Joy and bottom-right Rage. The door opens after all four are correctly placed.
- Check the castle map for red rooms.
- Complete and combine the Azure Eye and Silver Ring treasure if desired.
- Finish the castle labyrinth if desired.
- Collect the F2 Rifle and other optional items.
- Save and reorganize at the Merchant’s Room or Terrace Room typewriter.
- Place Sorrow, Pleasure, Joy and Rage from left to right while facing the exit door.
5. Take the Ornate Dagger and defeat Lady Dimitrescu
Proceed through the opened passage to the Tower of Worship and inspect the coffin. Finish all remaining castle cleanup before taking the Ornate Dagger. Picking it up triggers the final escape sequence, and after Lady Dimitrescu is defeated the castle is no longer available during that playthrough.
In the rooftop arena, aim at the exposed humanoid torso on Lady Dimitrescu’s back rather than the larger creature body. Use the F2 Rifle for distant shots and the shotgun when she lands close enough for reliable damage. Keep moving around the tower, retreat from her forward charge and use the arena’s corners and structures to create distance. When she releases the insect cloud, continue circling the arena and avoid standing still. Explosives can stagger or damage her when she approaches, but do not trade hits merely to use them.
During the later phase, she moves between the tower’s balconies and the central rooftop. Shoot the exposed torso whenever it is visible, then retreat before her charge reaches you. Pick up rooftop ammunition and healing only when she is repositioning; preserve enough healing for mistakes rather than spending it to absorb attacks. After the final sequence, collect Crystal Dimitrescu.
- Complete optional castle exploration before taking the dagger.
- Take the Ornate Dagger from the coffin.
- Target the exposed humanoid torso.
- Retreat from the forward charge and insect cloud.
- Defeat Lady Dimitrescu and collect Crystal Dimitrescu.
6. Leave the castle and prepare for the reservoir
After the boss sequence, collect the Dirty Flask and follow the linear route out of the castle. The exit returns Ethan to the village side of the castle, but the castle itself cannot be re-entered. Keep the Dirty Flask in the key-item inventory because it is required for the next story objective.
At the next Duke location, sell Crystal Dimitrescu and any completed treasure you are ready to convert into Lei. Check the Gunsmithy and improve the weapon you use most often; a handgun power upgrade or shotgun damage upgrade is generally more useful than spending all available Lei on optional food when your ammunition and healing supplies are low. Buy or craft supplies only after checking the case for space.
Use the typewriter near the Duke to save after the merchant visit. Confirm that the Dirty Flask remains in the key-item section and that your intended weapon, ammunition and healing items are ready before proceeding toward the reservoir.
- Collect the Dirty Flask.
- Leave Castle Dimitrescu through the available exit.
- Sell Crystal Dimitrescu and completed treasures as desired.
- Purchase a useful weapon upgrade or essential supplies.
- Save after returning to the village.
- Confirm the Dirty Flask remains in key items.
Before you move on
- The Mask of Pleasure, Mask of Joy and Mask of Rage have been collected, with Mask of Sorrow obtained earlier.
- The Iron Insignia Key was taken from the Opera Hall piano and used to enter the Library.
- All five Atelier bells were rung and the F2 Rifle was collected from the Attic.
- Optional castle treasures, files, breakables and other desired pickups were completed before the dagger sequence.
- The four masks were placed facing the exit door from left to right: Sorrow, Pleasure, Joy and Rage.
- Lady Dimitrescu was defeated and Crystal Dimitrescu was collected.
- The Dirty Flask is present in the key-item inventory after returning to the village.
- A post-castle save was created and the Duke was visited.
References for this chapter
House Beneviento — dollhouse puzzles and psychological sequences
House Beneviento is a weaponless puzzle and evasion section. Reach the house through Beneviento’s Grave, inspect the Mia mannequin for three key items, wash the ring for the 052911 door code, and solve the music box and film projector. Use the Brass Medallion to reach the Old Well, then survive the Baby’s unavoidable chase while retrieving the Relief of a Child and Fuse. Finish by finding Angie three times. Donna’s defeat gives the Four-Winged Unborn Key and Legs Flask, after which Ethan regains his equipment and must cross the hostile garden route back toward the Altar.
Reach House Beneviento and save before surrendering your equipment
From the Altar, take the northern gate with the Four-Winged Key and cross the suspension bridge. Follow the path through Potter’s Field and the garden to Beneviento’s Grave. Place the Family Photo in the red door marked with the instruction to give up your memories, then ride the elevator up and continue to the house. Check the porch before entering; the Goat of Warding there can only be collected while Ethan still has his weapons.
Enter the foyer, pass through the living room and take the elevator to the basement. In the Doll Workshop, try to take the flask from Angie. The lights go out, Ethan loses his weapons and inventory, and the Mia mannequin becomes the focus of the sequence. Use the typewriter in the workshop before beginning the puzzles. There is no normal combat inside the house, so ammunition and weapon upgrades do not help until the escape route after Donna’s defeat.
- Use the Family Photo at Beneviento’s Grave.
- Collect the porch Goat of Warding if desired.
- Save at the Doll Workshop typewriter.
- Expect all weapons and usable items to be unavailable.
Inspect the mannequin and open the workshop door
Examine the mannequin carefully. Remove the Silver Key from the right arm near the shoulder, take the Blood-Covered Ring from the left hand, and pull the Winding Key from the left leg. Also inspect the left eye and the inside of the right-arm socket: their raven and three-closed-eyes symbols are needed for a later door.
Use the Silver Key on the Medicine Room. Turn on the sink and wash the Blood-Covered Ring. Inspect the resulting Wedding Ring in the inventory and rotate it until the engraved date appears: 05-29-11. Enter 052911 on the combination lock on the door through which Ethan originally entered the workshop.
- Take the Silver Key from the right arm.
- Take the Blood-Covered Ring from the left hand.
- Take the Winding Key from the left leg.
- Wash and inspect the ring for 052911.
Solve the music box and projector puzzles
Go back along the corridor. The Storage Room door is now open. Use the Winding Key on the music box and arrange the cylinders so the scratches form one continuous line. If the cylinders are still in their starting arrangement, the completed order from left to right is 2, 4, 1, 5, 3. Wind the box after arranging them to receive the Tweezers.
Return to the mannequin, examine its mouth and use the Tweezers to remove the Film. Take the Film to the Study near the elevator. Arrange the five strips from left to right as follows: plush toy, Village of Shadows book, baby Rose, music box, wedding ring. Play the film. The bookcase moves, revealing a hidden passage. Take the Scissors from the doll at the end and cut the bandages blocking the crawl space. Continue through the passage, answer the ringing telephone, and use the route back to return to the mannequin.
- Set the music-box cylinders to 2, 4, 1, 5, 3.
- Take Tweezers from the opened music box.
- Remove the Film from the mannequin’s mouth.
- Set the projector strips to plush toy, book, baby, music box, ring.
- Take the Scissors from the hidden passage.
Open the medallion door and retrieve the Relief of a Child
Use the Scissors on the bandaged chest of the mannequin to obtain the Brass Medallion. Place it in the empty slot on the three-disc door. Set the other discs to the symbols you inspected earlier: the three closed eyes on the lower disc and the raven symbol on the upper-left disc. Match the raven’s orientation to the one shown in the mannequin’s eye rather than relying on a memorized direction.
Follow the opened stone passage to the Old Well and climb down. Take the Breaker Box Key from the bottom, then return toward the elevator. The Baby appears during this return trip. It cannot be damaged and kills Ethan if it catches him, so loop around the Doll Workshop table or hide in the Medicine Room locker until it moves away. Use the Breaker Box Key beside the elevator. The box gives you the Relief of a Child, not the Fuse.
- Take the Brass Medallion from the mannequin’s chest.
- Match the raven and three-closed-eyes symbols.
- Collect the Breaker Box Key from the Old Well.
- Use the key at the elevator breaker box.
- Take the Relief of a Child.
Use the Relief, retrieve the Fuse and escape the Baby
Carry the Relief of a Child through the Study-side passage and place it in the matching door beyond the Medicine Room. Go downstairs through the Kitchen to the Bedroom. The Fuse is in the breaker box on the bedroom wall. Remove it; the lights go out and the Baby begins the next pursuit.
Run back toward the bedroom when the Baby appears at the stairs. Hide under the bed or in the nearby closet until it moves away, then leave through the front of the room. The direct shortcut may be blocked, so return through the Medicine Room and Doll Workshop. At the elevator, install the Fuse in the breaker box.
For the final pursuit, use the Study as a loop. Lead the Baby around the central furniture, then sprint to the elevator and press the controls to leave. Do not wait in a dead end or attempt to fight; the Baby is invulnerable throughout this section.
- Place the Relief of a Child in the matching door.
- Take the Fuse from the Bedroom.
- Use the bed or closet to break the Baby’s pursuit.
- Install the Fuse at the elevator.
- Loop around the Study furniture before boarding the elevator.
Find Angie three times and leave the house
After returning upstairs, enter the foyer and begin the Angie encounter. The first location is fixed: go upstairs, turn left, and enter the Guest Room. Grab the white wedding-dressed doll to trigger the first stab.
The second and third locations are selected from a limited group. Check the living-room tea nook beside the sofa, the area beneath the window beside the fireplace, the short entrance hall near the front doors, and the area outside the basement elevator. Blood trails and Angie’s movement indicate the current route. Search quickly; waiting too long causes the other dolls to attack. Three successful interactions defeat Angie and Donna.
After the encounter, collect Angie from the floor before leaving. Take the Legs Flask from the pedestal near the front door and confirm that Ethan’s equipment has returned. Donna also provides the Unborn Key, which combines with Ethan’s existing key to form the Four-Winged Unborn Key. The Angie treasure is unavailable after leaving, so do not exit before collecting it.
- Find Angie upstairs in the Guest Room first.
- Search the four possible room areas for later appearances.
- Stab Angie three times.
- Collect Angie and the Legs Flask.
- Confirm the Four-Winged Unborn Key and restored equipment.
Cross the garden route back toward the Altar
The house itself is complete, but the return path contains enemies and optional rewards. In the South Garden, enter the hut during the Moroaică attack to find the W870 TAC shotgun and a Lockpick. Collect the Sun and Moon Ball from the small chest near the graves. Continue north to the well for Madalina’s Head, then search the nearby house and garden for the Luthier’s Key and the Onyx Skull labyrinth if you want the optional treasures.
Return through Potter’s Field and the suspension bridge toward the Altar. The main requirement is to bring the Legs Flask and Four-Winged Key forward. If resources are limited, prioritize the route and avoid unnecessary fights; the next required story destination is the Reservoir area.
- Recover the W870 TAC and Lockpick if desired.
- Collect the Legs Flask and Four-Winged Key.
- Return across Potter’s Field and the bridge.
- Reach the Altar to continue toward the Reservoir.
Before you move on
- The music box has produced the Tweezers and the projector passage has been opened.
- The Brass Medallion door, Old Well, Relief of a Child door and Fuse sequence are complete.
- The elevator has returned Ethan to the upper floor.
- Angie has been found and stabbed three times, Donna is defeated, and the Legs Flask is in the key-item inventory.
- The Four-Winged Unborn Key is assembled and Ethan’s weapons and inventory are restored.
- The route through the garden and Potter’s Field back to the Altar is open.
References for this chapter
Return to the Village — confrontations and new obstacles
After House Beneviento, make a short village loop before entering the Reservoir. Collect Luthier’s Key from the Gardener’s House, open the crypt beside the Church for the Broken Slab, and place it at the grave outside House Beneviento to obtain Beneviento’s Treasure. Then use Luthier’s Key in West Old Town and the Iron Insignia Key at the Waterwheel house. These detours provide a valuable treasure, the F2 Rifle’s High-Capacity Mag, the GM 79 grenade launcher, ammunition, and Lei. Stronger Lycans and large variants now appear on familiar routes, but clearing every patrol is unnecessary. Sell completed treasures, review the Duke’s stock, and enter the Reservoir through the altar using the Four-Winged Unborn Key. Do not delay the Broken Slab detour until after Moreau.
Return through the Garden and collect Luthier’s Key
After defeating Donna Beneviento and leaving House Beneviento, follow the path back toward the Garden. Stop at the Gardener’s House, the small building with the typewriter, and search the room for Luthier’s Key. This is the key item needed for the locked house in West Old Town. If the route has repopulated with enemies, use the shotgun only when a Lycan or large variant blocks a narrow passage; ordinary isolated Lycans can usually be avoided or handled with economical handgun shots.
Before leaving the Garden, check the map for red rooms and collect any remaining visible materials. The map’s blue-room state is useful here because you are making a deliberate return loop rather than advancing immediately. Keep Luthier’s Key in your inventory and continue toward the Church and Graveyard.
- Take Luthier’s Key from the Gardener’s House.
- Check the Garden and nearby buildings for red rooms before leaving.
- Avoid spending shotgun ammunition on isolated ordinary Lycans.
Open the Church crypt and obtain the Broken Slab
Enter the Graveyard beside the Church after returning from House Beneviento. A crypt that was previously sealed can now be opened; an enemy encounter occurs in this area as the event becomes available. Enter the opened crypt and take the Broken Slab. This step must be completed before you proceed into the Reservoir. If the crypt is still closed, make sure you have actually returned from House Beneviento and searched the cemetery area rather than trying to approach the grave directly.
Carry the Broken Slab back through the Garden to the large marked grave outside House Beneviento. Place the slab into the missing section of the grave. A giant axe-wielding Lycan appears in the area. You do not need to defeat it to complete the overall story, so create distance, take the treasure when safe, and retreat toward the Garden if your supplies are low. The resulting Berengario’s Chalice is an optional sellable treasure, not a progression item.
- Open the Church crypt after House Beneviento.
- Take the Broken Slab.
- Place it in the marked grave outside House Beneviento.
- Leave the area if the giant Lycan is consuming too many resources.
Unlock Luthier’s house in West Old Town
Return to the village and use Luthier’s Key on the locked house in West Old Town, near the area where the house’s owners were previously missing. Inside, inspect the clue and use the combination 270917 on the padlock. The date is the number sequence required for this original PS5 release.
The opened case contains the F2 Rifle’s High-Capacity Mag. Take it and combine it with the F2 Rifle if you are carrying that weapon. The room also contains Luthier’s Heirloom, a valuable treasure that should normally be sold to the Duke after confirming it is not needed for a combination. This detour is optional for story completion but is one of the best uses of the newly obtained key.
- Use Luthier’s Key on the West Old Town house.
- Enter 270917 on the padlock.
- Collect the F2 Rifle’s High-Capacity Mag.
- Take Luthier’s Heirloom and sell it later if you are not collecting treasures.
Open the Waterwheel house and collect the GM 79
Go to the small building marked Waterwheel Weapon in the eastern village area. Use the Iron Insignia Key, obtained in Castle Dimitrescu, to open the door. The main reward is the GM 79 grenade launcher, which uses Explosive Rounds or Flashbangs. Take the lockpick inside as well, along with any loose item in the room, then leave once the room is fully searched.
The GM 79 is particularly useful against groups, armored targets, and enemies that are dangerous at close range. Its ammunition is limited, so do not fire explosive rounds at a lone weak Lycan unless you need an emergency stagger. Save the weapon for situations where its area damage or crowd control provides a clear advantage.
- Use the Iron Insignia Key at the Waterwheel Weapon house.
- Collect the GM 79 grenade launcher.
- Take the lockpick and remaining items from the room.
- Reserve grenade rounds for groups or dangerous targets.
Manage the stronger village enemies
The return trip introduces more aggressive Lycan groups, armored enemies, and large variants. The safest general rule is to avoid unnecessary fights. On open roads, sprint past isolated patrols; in narrow passages, use the handgun for ordinary targets and the shotgun for a close-range group or a heavy enemy that blocks your escape. If several enemies gather beside an explosive barrel, use the barrel before spending crafted explosives.
Keep moving after a stagger. A stagger is an opportunity to reposition, not always an invitation to perform a close-range follow-up. Back through a doorway or around a building if the group begins surrounding you. Guarding can reduce damage while you create space, but it is still better to prevent a surrounded position than to rely on repeated guards.
There is no required Lei-farming route before the Reservoir. If the Duke’s next upgrade is unaffordable, first sell completed treasures such as Berengario’s Chalice and Luthier’s Heirloom, then collect the optional items in the newly opened houses. Do not spend time clearing every village patrol for small drops; the ammunition and healing cost can exceed the reward.
- Use the handgun against ordinary isolated Lycans.
- Use the shotgun for groups, heavy targets, and emergency close-range defense.
- Use explosive barrels when multiple enemies are grouped nearby.
- Raise Lei through optional treasures rather than deliberately farming patrols.
Visit the Duke and enter the Reservoir
Return to the Duke near the altar after completing the optional loop. Sell completed treasures, but inspect any item marked as combinable before selling it. If your inventory case is regularly full, an inventory expansion is usually more useful than a small secondary weapon upgrade. Otherwise, improve the damage of the weapon you use most often and buy only the ammunition and healing supplies that fill clear gaps in your stock.
Carry several healing items if possible and retain some explosive resources for the Reservoir and Salvatore Moreau. Do not spend every shotgun shell or grenade round on village stragglers. When ready, go to the altar gate and use the Four-Winged Unborn Key. This is the key created from the Four-Winged Key after the Beneviento sequence. The Six-Winged Unborn Key is not the key for this entry; it is acquired later after the Reservoir section.
Pass through the opened route toward East Old Town and continue into the Reservoir. Once you begin the Reservoir progression, the Broken Slab opportunity is no longer available, so confirm that the crypt and grave detour is complete before crossing the altar gate.
- Sell completed treasures after checking for combinations.
- Buy a useful inventory expansion or a damage upgrade if affordable.
- Keep healing, shotgun ammunition, and explosive resources for the Reservoir and Moreau.
- Use the Four-Winged Unborn Key at the altar gate.
- Confirm the Broken Slab treasure is complete before entering the Reservoir.
Before you move on
- The Gardener’s House has been searched and Luthier’s Key is in the inventory.
- The Church crypt has opened, the Broken Slab has been collected, and it has been placed at the grave outside House Beneviento.
- Berengario’s Chalice has been collected or the optional treasure has been intentionally skipped.
- Luthier’s house has been opened with 270917, and the F2 Rifle’s High-Capacity Mag has been collected if the rifle is in use.
- The Waterwheel Weapon house has been opened with the Iron Insignia Key and the GM 79 has been collected or intentionally skipped.
- The Duke has been visited, combinable treasures have been checked, and supplies have been prepared for the Reservoir.
- The altar gate has been opened with the Four-Winged Unborn Key and the route into the Reservoir is available.
References for this chapter
- Resident Evil Village Official Web Manual — Key Items and Treasure
- Resident Evil Village: How to Get Beneviento’s Treasure
- Resident Evil Village Walkthrough — The Village, Part 4
- Resident Evil 8 Village All Treasure Locations and Solutions
- Four-Winged Unborn Key — Resident Evil Village
- Resident Evil Village Maestros Collection Code Guide
- Waterwheel Weapon House Items — Resident Evil Village
Reservoir and Moreau — drainage puzzles and the boss arena
Use the Four-Winged Unborn Key to enter the Reservoir, collect the Arms Flask and Boat Key, and cross the flooded machinery route while avoiding Moreau's fish form. Activate the colored platform switches to reach the second windmill, take its Crank, restore power at the first windmill, and copy the rotated Gatehouse diagram to drain the reservoir. Before dropping into the boss arena, search the nearby house for Moreau's diary and the M1911 High-Capacity Mag. Mutated Moreau is most vulnerable when the human body protrudes from his mouth. Explosive barrels, mines, pipe bombs, and grenade rounds can force openings, while roofs marked by yellow coverings provide shelter from acid rain. After the fight, collect the Crystal Moreau and combine the Wing Key in Moreau's room before taking the lift back toward the Village.
Enter the Reservoir and reach the boat
From the Altar, use the Four-Winged Unborn Key on the southern gate and follow East Old Town toward the Reservoir. Continue past the Water Mill and the windmill yard. The Water Mill contains the GM 79 if you have not already collected it, but it is optional for immediate story progress.
Enter the underground passage and follow it to Moreau's laboratory. Take the Arms Flask, then continue through the cavern until you find the Boat Key. Use the key at the nearby boat and ride across the reservoir. After the boat sequence, follow the route toward the Gatehouse and meet Chris's group before continuing into the machinery section.
- Use the Four-Winged Unborn Key at the southern Altar gate.
- Collect the Arms Flask and Boat Key.
- Take the GM 79 from the Water Mill if it has not already been obtained.
Cross the flooded machinery route
At the flooded platforms, stay on the wooden walkways and raised machinery. Moreau's fish form patrols the water; falling in triggers a fatal sequence, so wait on solid flooring when it passes and cross only when the next platform is clear. Break nearby barrels and collect supplies, but avoid spending mines, pipe bombs, or grenade rounds on ordinary enemies.
Operate the colored switches as you advance. Pull the blue and orange switches on the approach, then enter the small control shack and activate its three switches in this order: white, blue, orange. Leave the shack, pull the orange switch on the route outside, and sprint across the raised sections before they sink. Push the available mine carts into position to complete the crossing, then break the slime wall and climb toward the crane platform.
Use the yellow lever to raise the wrecked boat. Drop onto it and immediately move toward the next solid platform when Moreau attacks. Shoot or knife any green slime wall that blocks the route, then follow the yellow-marked path to the second windmill.
- Never enter the water during the fish-form chase.
- Control-shack switch order: white, blue, orange.
- Use the raised walkways quickly before they drop.
- Clear slime walls only when they block the route.
Take the Crank and restore power
At the second, northern windmill, climb to the upper platform and break the padlock on the access route. Before operating the machinery, inspect the broken ladder on the far side. Take the Crank from the gear assembly, then use it in the mechanism so the windmill blades form a climbable route.
Climb to the top and ride the zipline back toward the first windmill. Moreau attacks during the return, but the sequence is designed to be crossed rather than fought. At the first windmill, use the Crank on the yellow gears to restore power to the Gatehouse. The Duke and a typewriter are available in this area, making it a good time to save, craft ammunition, and upgrade a weapon before the boss.
- Take the Crank from the northern windmill.
- Use it to create the zipline route.
- Use the Crank again at the first windmill.
- Save and restock at the Gatehouse before solving the sluice puzzle.
Solve the Gatehouse sluice panel
Inspect the colored note beside the control panel. Its orientation is rotated, so match the black fixed square or antenna on the note to the same reference on the panel before copying the colors. Enter the pattern from top to bottom and left to right: blue, white, orange; white, orange, black; orange, blue, blue.
Pull the main lever after entering the pattern. The reservoir drains and the lower route opens. Use the lower exit beside the controls rather than retracing the upper machinery path. Before dropping into the arena, search the nearby house: the desk has Moreau's Diary 1, and the case contains the M1911 High-Capacity Mag.
- Top row: blue, white, orange.
- Middle row: white, orange, black.
- Bottom row: orange, blue, blue.
- Pull the lever after entering all nine positions.
- Collect the M1911 High-Capacity Mag if you use that weapon.
Defeat Mutated Moreau
Move through the drained village until the boss encounter begins. Mutated Moreau's effective target is the human torso protruding from his mouth. When the jaws open, use the shotgun, rifle, or handgun on that torso; shooting the armored outer body is much less efficient. Keep enough distance to see his charge and use the arena's open lanes rather than backing into a corner.
The red explosive barrels are reliable stun tools. Lead Moreau near a barrel, detonate it as he approaches, and immediately fire at the exposed torso. Mines, pipe bombs, and explosive grenade rounds can create similar openings, so save them for this fight if your ammunition is limited. If Moreau covers a path with green slime, destroy the barrier before it traps you. Do not spend the entire fight circling one section: his attacks and the destroyed buildings progressively open more of the arena.
When Moreau climbs onto a roof and begins spraying acid into the sky, stop attacking and run to the nearest covered shelter. Yellow-painted or yellow-corded structures mark safe roofed areas and usually contain supplies. Wait out the rain, reload or heal under cover, then resume the weak-point strategy. Repeat the cycle until Moreau collapses.
- Target the exposed human torso, not the armored exterior.
- Use red barrels, mines, pipe bombs, and explosive rounds to create openings.
- Destroy slime barriers that cut off your escape route.
- Take shelter under a roof during acid rain.
- Keep a clear lane behind you so a charge cannot pin you.
Collect the reward and leave the Reservoir
After the mutation is defeated, collect the Crystal Moreau from the remains and search the arena for supplies you did not reach during the fight. Exit through the northern route into the mineshaft. In Moreau's room, take the Wing Key from the desk and examine it to combine it with your existing key, creating the Six-Winged Unborn Key.
Read the nearby diary if desired, then use the Six-Winged Unborn Key on the gate and take the lift. This returns you toward the Village and advances the campaign to the next major area. The Crank also opens optional Reservoir and Village detours on the return, but those rewards are not required to complete the story section.
- Collect the Crystal Moreau.
- Take and examine the Wing Key in Moreau's room.
- Create the Six-Winged Unborn Key.
- Use the lift to return toward the Village.
Before you move on
- The reservoir has been drained and the Gatehouse route is complete.
- Mutated Moreau has been defeated and the Crystal Moreau collected.
- The Wing Key has been taken from Moreau's room and combined into the Six-Winged Unborn Key.
- The lift has returned Ethan toward the Village, where the campaign continues beyond the Reservoir.
- A save and merchant checkpoint are available before proceeding into the next major section.
Stronghold — Urias and the route to Heisenberg’s Factory
After Moreau’s Reservoir, the Six-Winged Unborn Key opens the eastern route from the Graveyard toward the Stronghold. Complete any optional Village work you still want before entering, because the Stronghold is a heavily one-way combat section and does not return Ethan to ordinary Village exploration until its exit route. Fight through the Forbidden Woods, ruins and Lycan fortress, defeat Urias in the large cavern, and take the Torso Flask from the workshop beyond the arena. The boat route then carries Ethan through the underground waterway and prison before he climbs back into the churchyard. Return to the Altar, sell loot and use the Duke before placing the flasks. The completed Giant’s Chalice opens the Ceremony Site route, which is the transition into Heisenberg’s Factory. Ethan’s Stronghold boss is Urias, not Urias Strajer; Urias Strajer is fought later during Chris’s section.
1. Complete optional Village work before entering the Stronghold
Return to the Graveyard and use the Six-Winged Unborn Key on the eastern gate. Before going through, finish any Village treasures, animal hunts, locked-house searches or collectible work you want to complete. The route beyond this gate leads into the Stronghold and then toward the final Village transition; it is safer to treat the interior as one-way until you reach the exit boat.
A useful optional detour is Otto’s Mill, reached by taking the side route near the signposted path toward the Stronghold. It contains a strong enemy encounter and valuable loot, so skip it if your ammunition is already low. At minimum, visit the Duke before committing and carry a reliable handgun or rifle, a shotgun, healing items and several explosives. The Stronghold is an ammunition-heavy combat area, not a puzzle-focused recovery section.
- Use the Six-Winged Unborn Key at the eastern Graveyard gate.
- Finish desired Village side work before entering.
- Visit the Duke and preserve healing, shotgun ammunition and explosives.
2. Cross the Forbidden Woods and the outer ruins
Follow the path uphill beneath the Good Luck sign. In the Forbidden Woods, use the slope and surrounding elevation to spot Lycans before they close in. Lycan Archers appear among the melee enemies; remove them first when they have a clear line of fire, then advance rather than standing in the open to trade shots.
Continue into the ruins and search crates as you move between encounters. More Lycans attack around the walkways and bridges, including enemies arriving from behind after you advance. Keep moving toward the fortress entrance. Flashbangs are useful for creating a gap, while mines and pipe bombs are better reserved for the larger threat inside unless the outer group surrounds you.
Once you enter the Stronghold proper, look for the typewriter in the entry section and save. Continue through the fortress, collecting visible ammunition and materials without turning every room into a prolonged clear. Armored Lycans and larger enemies become more common, so use headshots when practical and switch to the shotgun only when an enemy reaches close range.
- Prioritize Lycan Archers in exposed positions.
- Search crates while moving forward.
- Save at the Stronghold typewriter before the deeper combat route.
3. Reach the large cavern and defeat Urias
The fortress route eventually opens into a large cavern where Urias attacks. This is Ethan’s Stronghold boss. Do not confuse him with Urias Strajer, the separate boss encountered later during Chris’s campaign.
Circle the arena instead of backing into a wall. Urias uses broad hammer swings, a leaping attack and thrown or summoned threats that punish stationary play. Keep pillars or large rock formations between you and him when you need to reload or heal. Fire at his exposed body after his attacks finish, then relocate before he recovers.
Use flashbangs to interrupt him and mines or pipe bombs to punish his approach. Shotgun blasts are effective at close range but should be used after an attack leaves him exposed, not while he is beginning a swing. Magnum ammunition can shorten the fight, but do not spend every high-damage round here if your inventory is limited. The arena contains additional ammunition and healing; collect it during a safe rotation rather than crossing directly in front of Urias.
When Urias falls, Ethan receives the Up Urs! completion reward and can collect the Crystal Hammer from the remains. Search the arena before leaving, then use the southwest exit.
- Fight Urias as Ethan; this is not the Urias Strajer encounter.
- Keep pillars or rock formations between attacks and reloads.
- Use flashbangs, mines and pipe bombs to create damage windows.
- Collect the Crystal Hammer after the fight.
4. Take the Torso Flask and follow the underground waterway
Leave the arena through the southwest door and follow the passage through the crystal-lined rooms. Collect visible crystal valuables if your inventory has space, then continue down the stairs. At the workshop, take the Torso Flask from the table. This is the fourth flask required for the next story step.
After the scene with Heisenberg, continue down to the waterway and board the boat. Follow the channel until you reach the dock. Ignore the nearby ladder at first. Take the stairs into the prison area, where you can collect supplies and read the document in the far cell. A few Moroaicăs may attack on the way out; fight them only if they block the stairs, then return to the dock and climb the ladder.
The ladder brings Ethan into the previously locked churchyard tomb. Unlock the door and follow the familiar route through the churchyard and Graveyard back to the Altar. This is the intended return route; do not search for a second exit through the Stronghold.
- Take the Torso Flask from the workshop table.
- Search the waterway prison for supplies and the document.
- Use the ladder to return to the churchyard and then reach the Altar.
5. Use the Duke, assemble the Giant’s Chalice and stop before the Factory
At the Altar, visit the Duke before placing the flasks. Sell completed treasures such as the Crystal Hammer if you do not need the Lei immediately for another purchase, restock ammunition and healing, and repair or upgrade the weapons you actually use. Save at the typewriter or through the available save point before committing to the next transition.
Place the remaining flask in the Altar to assemble the Giant’s Chalice. Carry it west to the Ceremony Site and place it on the pedestal. The ceremony opens the underground route toward Heisenberg’s Factory and triggers the transition out of the Stronghold chapter.
After placing the chalice, take the descending platform and follow the underground passage until the game establishes the Factory approach. Stop here if using this chapter as a preparation point. The Stronghold is complete, the fourth flask has been recovered and the next chapter begins with Heisenberg’s Factory; Chris’s burning-Village assault, Urias Strajer, Miranda’s laboratory and the final Duke visit are later events and should not be included in this section.
- Make a final Altar-side Duke visit before placing the flasks.
- Assemble the Giant’s Chalice.
- Place the chalice at the Ceremony Site.
- Reach the Factory approach without entering the later Chris or finale chapters.
Before you move on
- The Six-Winged Unborn Key gate has been opened from the Graveyard.
- Ethan has crossed the Forbidden Woods and Stronghold combat sections.
- Urias has been defeated and the Crystal Hammer collected.
- The Torso Flask has been taken from the workshop.
- Ethan has returned through the waterway prison and churchyard to the Altar.
- The Duke has been checked and the Giant’s Chalice has been assembled.
- The Giant’s Chalice has been placed at the Ceremony Site.
- The underground transition toward Heisenberg’s Factory is open, with the next chapter ready to begin.
References for this chapter
- The Stronghold — Resident Evil Village Walkthrough & Guide — GameFAQs
- Stronghold Walkthrough & Map Guide — Resident Evil Village — GameWith
- 10 · The Stronghold · Otto’s Mill — RE Guide
- Resident Evil Village Walkthrough: Every Area in Order
- Resident Evil Village Walkthrough: The Stronghold — Millenium
Heisenberg's Factory — machinery, assembly lines and heavy combat
The Factory is a largely one-way descent and ascent through Soldat production rooms, conveyor machinery and locked elevator routes. After placing the Giant’s Chalice at the Ceremony Site, enter the factory, locate the Foundry’s Casting Machine and use the Relief, Cog, Ball and Key Molds to open the required routes. Target the red Cadou reactors on ordinary Soldats, save explosives for armored Soldat Panzers, and destroy the red lights in the Grinder Shaft before climbing out. Before using Heisenberg’s Key on the B1 door, complete optional searches and merchant business because that action locks you into the Sturm fight. The final Heisenberg battle has a tank phase followed by an on-foot phase: keep moving, fire continuously at glowing weak points, and use the cannon to interrupt dangerous approaches. After Heisenberg falls, the story moves through Chris’s sequence and the factory cannot be revisited.
1. Enter the Factory and survive the initial descent
Before placing the Giant’s Chalice at the Ceremony Site, finish any Village errands you still want to complete. That action is the main campaign’s point of no return for free exploration. After the cutscene, cross the bridge into the Factory and search the immediate wreckage and shelves for crafting materials before following the only available route downward.
Ethan is dropped into the lower factory and pursued by a propeller-equipped machine. Do not attempt to fight it during this escape. Sprint through the machinery, use openings in the path, and keep moving until the chase ends and you reach the lower production area. Collect supplies after the pursuit rather than stopping in the enemy’s path.
- Complete desired Village exploration before placing the Giant’s Chalice.
- Search the first Factory rooms for materials after the opening chase.
- Run from the propeller machine instead of spending ammunition on it.
2. Reach the Foundry and use the molds in progression order
Follow the lower-floor route until you reach the Foundry and its orange-glowing Casting Machine. The first mold you use is the Relief Mold. It produces the Relief of a Horse, which opens the horse-symbol door and lets you continue through the Factory. Expect locked doors and inactive elevator stops; these are progression gates, not missed paths.
Continue through the newly opened production areas to obtain the Cog Mold, then return to the Casting Machine and create the Large Cog. Install it in the broken machinery where the factory requires it to restore access through the next section. Later, obtain the Ball Mold and use it at the Iron Tower labyrinth to create the Iron Horse Ball. The Key Mold is the final essential mold: use it at the Casting Machine to create Heisenberg’s Key.
The molds are not interchangeable inventory clutter. Whenever you find one, return to the Foundry when the route allows it, make the corresponding item, and use that item at its matching door or machine. The factory’s elevator stops become useful only after you activate the necessary panels and routes.
- Use Relief Mold for the Relief of a Horse.
- Use Cog Mold to create the Large Cog and restore the machinery route.
- Use Ball Mold in the Iron Tower labyrinth.
- Use Key Mold to create Heisenberg’s Key.
3. Handle Soldats and the factory’s moving machinery
Ordinary Soldats have a visible red Cadou reactor in the chest. Aim for that reactor rather than repeatedly shooting their armor. A successful reactor hit can stagger or disable them, creating a safe opening in narrow corridors. Soldat Jets can move between levels and charge with their boosters; when the burners on their backs activate, break line of sight or move to another platform immediately.
Soldat Panzers are armored and take poor damage from ordinary firearms. Use mines, pipe bombs, explosive rounds or another strong explosive attack when a Panzer blocks a required route, particularly if other Soldats are nearby. Detonate explosive barrels only when you are not caught beside them, and use the surrounding rooms or doorways to separate enemies where possible.
The conveyor and machinery sections are safer when approached deliberately. Activate control panels before stepping onto a belt, and look for the next platform or exit before committing to the crossing. If enemies are being carried along a production line, clear the landing area first rather than jumping into a group.
- Shoot Soldat reactors instead of their armor.
- Reserve explosives for Panzers and dangerous groups.
- Break line of sight when Soldat Jets begin a charge.
- Identify the next safe platform before crossing a conveyor.
4. Stop the Grinder Shaft and collect the upper-route items
When the route drops you into the Grinder Shaft, climb the catwalks while dealing with the Soldat Jets. There are red lights powering the grinder. Shoot all of them from the available platforms; the grinder will not stop until every required light is destroyed. Afterward, climb the ladder at the top and pass through the now-safe machinery.
In the maintenance room above the shaft, collect the upper Factory map and check the nearby desk for the development note. Move the wooden cart to reveal the duct and crawl through it to obtain the Ball Mold. Continue through the ventilation route, shoot the red light in the fan before it pulls Ethan into the blades, and then cross the broken walkway.
Complete the Iron Tower labyrinth when you have the Ball Mold. Follow the track and tilt the device so the ball reaches the moving mechanism rather than dropping away from the route. The reward is optional, but the labyrinth is one of the Factory’s best chances to obtain a valuable treasure before the point of no return.
- Destroy every red Grinder Shaft light.
- Shoot the ventilation fan’s red light before it reaches Ethan.
- Collect the Ball Mold from the hidden duct room.
- Complete the Iron Tower labyrinth if you want its treasure.
5. Finish Factory searches before using Heisenberg’s Key
Use the newly opened elevator stops and connected corridors to revisit accessible sections. Check the Factory map for rooms that are still red, and search for ammunition, crafting materials, files and valuable mechanical parts. The factory’s lower and upper areas include items that disappear from access after the later escape, so do not assume you can return after the boss sequence.
The Heisenberg’s Key door on B1 is the immediate lock-in point for Sturm. Before opening it, visit the Duke in the cargo elevator, sell valuables you do not need, craft ammunition if your materials support it, and carry a balanced loadout. A rifle or upgraded handgun handles reactors, the shotgun covers close emergencies, and mines or pipe bombs are valuable for armored enemies and the boss arena.
Do not sell a mechanical part before checking whether it combines with another part to form a completed treasure. Completed treasures are generally worth more than their separate components.
- Use the map to identify unexplored Factory rooms.
- Visit the Duke before entering the B1 boss door.
- Combine mechanical treasure parts before selling them.
- Leave space for healing items, explosives and boss ammunition.
6. Defeat Sturm in the B1 Power Room
Use Heisenberg’s Key on the B1 door only when the Factory search is complete. Sturm charges directly and destroys many of the room’s walls. At the beginning, allow it to clear space while you circle around the remaining cover. When it charges, step aside so it hits a wall or obstruction, then move behind it and shoot the exposed orange core on its back. Shots to the propeller itself are ineffective compared with attacks on the core.
Sturm may charge several times in succession, so do not turn toward its back until you have confirmed that the charge has ended. Mines can interrupt a charge and create extra room, but keep enough distance from the blast. When Sturm vents flame, move behind intact metal cover or leave its line of fire; the flames can remain on the floor and restrict the arena.
Continue baiting charges, attacking the orange core and moving away from fire. After the fight, collect the Complex Mechanical Heart and continue through the newly opened route. Search the post-boss rooms immediately, because this is the final opportunity to collect several Factory items before the escape sequence advances.
- Bait Sturm into walls or machinery.
- Attack the orange core on its back.
- Use cover against the flame attack.
- Collect the Complex Mechanical Heart after victory.
7. Prepare for the tank and start Heisenberg’s vehicle phase
After the story sequence involving Chris, proceed through the scrap area and board the makeshift tank. Search accessible containers before committing to the elevator if they are on your route, then use the tank’s machine gun and cannon to clear the path and open the way into the arena.
During the vehicle phase, keep the machine gun trained on Heisenberg’s glowing red weak points: the exposed areas on his mechanical arms and lower body. Continuous fire is more useful than short bursts. The cannon has a cooldown, so do not waste it on ordinary body shots when Heisenberg is far away.
Use the cannon when he closes for a dangerous charge, when a weak point is difficult to reach, or when you need to interrupt his attack and create distance. If he surrounds himself with metal plates, keep moving and fire through the exposed opening rather than stopping in front of the shield. Guard when a melee strike reaches the tank before you can reposition.
- Search the tank’s starting area before leaving it.
- Keep the machine gun on glowing weak points.
- Use the cannon for interrupts and emergency spacing.
- Guard if a melee attack reaches the vehicle.
8. Finish Heisenberg after the tank is destroyed
The tank phase ends when Heisenberg knocks Ethan out of the vehicle. On foot, keep as much distance as the arena allows and fire at his visible head and glowing weak points with your rifle, shotgun or other high-damage weapon. He has already taken substantial damage during the tank phase, so controlled attacks are safer than attempting to stand beside him and trade hits.
Use the arena’s metal structures as temporary cover. If Heisenberg closes the distance, guard the incoming attack, fire a short shotgun burst if he is exposed, and immediately retreat. Do not attempt prolonged close-range combat with his drilling arms.
Continue attacking until the scripted lift launches Ethan and the tank upward. During that airborne moment, fire the tank’s cannon at Heisenberg to finish the encounter. After the scene, follow the linear route through Chris’s section and the later escape. The Factory chapter is complete when the story has advanced beyond Heisenberg and the game has moved into Chris’s operation.
- Maintain distance during the on-foot phase.
- Shoot Heisenberg’s head and exposed weak points.
- Guard and retreat if he reaches melee range.
- Use the airborne cannon shot to finish the encounter.
Before you move on
- The Grinder Shaft has been stopped and the upper Factory route is accessible.
- The Relief, Cog, Ball and Key Mold progression has been completed, with Heisenberg’s Key created.
- Sturm is defeated and the Complex Mechanical Heart has been collected.
- Heisenberg is defeated, the tank sequence has ended, and the story advances into Chris’s operation.
- The Factory is no longer available for normal exploration, confirming that all desired Factory searches should have been completed before the boss commitment.
Final bosses, the ending sequence and immediate post-credits checks
After completing Heisenberg’s Factory, the game moves into Chris Redfield’s burning-village assault, the Urias Strajer cavern fight and Miranda’s laboratory. Control then returns to Ethan for the last Duke visit before Mother Miranda at the Ceremony Site. Use Chris’s Target Locator on the marked mold barrier, preserve cover and explosives for Urias, and keep Ethan moving through Miranda’s changing forms. After the ending and credits, preserve the completed save, use it through Load Game for New Game+, and verify the Extra Content Shop, Village of Shadows and Gold Edition add-ons. Winters’ Expansion supplements the main campaign with Shadows of Rose, Third-Person Mode and Mercenaries Additional Orders; it does not replace the ending.
1. Begin the finale after Heisenberg’s Factory
The finale starts immediately after Ethan defeats Karl Heisenberg in the Factory. The game switches to Chris Redfield in the burning village, so Ethan’s inventory, Lei, crafting materials and Duke purchases are unavailable during this section. Chris uses a fixed loadout built around the Dragoon, USM-AI, grenades, flash grenades, the Target Locator and limited healing.
Follow the squad’s route through the ruined village. You can fight the Lycans, but do not spend time clearing every enemy if the path is open. Use the Dragoon for enemies blocking the route, and use flash grenades or explosive barrels when several Lycans close in together. Search the green supply containers and side paths you can reach safely for ammunition, grenades and healing before continuing downhill.
At the large mold barrier, wait until the Target Locator is ready. Aim it at the marked growth and hold the targeting position until the artillery strike is confirmed. Enemies can interrupt the lock, so clear enough space first, reposition behind cover if necessary, and repeat the process when the device recharges. The barrier requires three successful strikes. After the opening is created, descend into the cavern; this route is forward-only and does not return you to the ordinary Village hub.
- Confirm this section follows Heisenberg’s Factory, not the earlier Stronghold chapter.
- Use the Target Locator on the marked mold barrier three times.
- Collect reachable Chris-section supplies before entering the cavern.
- Do not expect the Duke, Ethan’s inventory or normal crafting during Chris’s mission.
2. Defeat Urias Strajer as Chris
Urias Strajer is fought in the cavern at the end of Chris’s assault. Keep moving around the arena and avoid standing directly beneath him when he raises his hammer or leaps. Guard when an attack is difficult to evade, then move away before the next swing. The arena is tight, so maintain a route around its outside and avoid letting yourself get pinned against the walls.
When Urias turns, staggers or exposes his back, shoot the tentacle growths with the Dragoon. These are the clearest firearm targets and can interrupt his attacks. The Target Locator becomes usable again after Chris’s support team restores it. Create distance, use a flash grenade if Urias is closing in, and hold the locator on him until the airstrike is confirmed. One successful strike deals major damage, but continue fighting afterward if necessary.
Use explosive barrels and grenades when Urias is near them or recovering from a missed hammer attack. Do not waste every flash grenade before the locator is ready; a flash grenade can create the safe window needed to complete the targeting hold. If you fail, reload the Chris-section checkpoint and repeat the fight while saving one or two emergency healing items.
After Urias falls, pick up the Giant Crystal Mace if you want the optional treasure. Then continue through the cavern toward the Megamycete. The Goat of Warding in this route is optional and does not affect campaign completion.
- Circle the cavern rather than remaining in front of the hammer.
- Shoot Urias’s rear growths when he turns or is staggered.
- Use the recharged Target Locator against Urias when you have space to hold the lock.
- Use flash grenades to create a safe targeting window.
- Collect the Giant Crystal Mace only if you want the optional treasure.
3. Search Miranda’s laboratory and return to the Altar
Continue past the Megamycete to Miranda’s laboratory. This is primarily a story and file-search area rather than another extended combat section. If you are collecting files, search the laboratory thoroughly and read the documents before triggering the required interaction that advances Chris’s route. After the laboratory sequence, control returns to Ethan at the Altar.
The Duke is waiting at the Altar for Ethan’s final preparation stop. Sell any remaining treasures, repair or upgrade the weapons you intend to use, and craft ammunition and healing items from your stored materials. Prioritize dependable damage from the shotgun, rifle, grenade launcher or magnum over minor convenience purchases. Keep enough healing for the final boss rather than spending every Lei on optional items.
Use the typewriter at the Altar to create a separate manual save before leaving. This is the safest recovery point if Mother Miranda defeats you, because you can reload, change your weapon purchases or craft a different ammunition mix without replaying Chris’s mission. The established finale route is Chris’s village and cavern assault, Miranda’s laboratory, Ethan’s last Duke stop and then the Ceremony Site.
- Search Miranda’s laboratory for optional files before advancing.
- Sell remaining treasures and make final weapon upgrades.
- Craft ammunition and healing items at the last Duke visit.
- Create a separate manual save at the Altar typewriter.
4. Defeat Mother Miranda at the Ceremony Site
Follow the Lone Road from the Altar to the Ceremony Site. Mother Miranda changes forms during the battle, but the basic rule remains consistent: keep moving, avoid her committed attacks, and fire during recovery animations. Circle the arena rather than backing into its edges. Guard if an attack reaches you before you can sidestep, then counterattack once the impact ends.
During her grounded form, sidestep the lunges and mold waves. When she becomes a spider-like form, keep her visible and run laterally when she climbs or prepares to leap. In her flying form, wait for her to pause before firing upward. Shoot the smaller fireballs she launches when you have a clear angle, or use the arena’s roots as protection if shooting them would leave you exposed.
When Miranda summons dark mold pillars and a large burning orb, move behind a pillar. The orb’s projectiles can cross the open arena, and Miranda is protected during this attack transition, so do not waste ammunition trying to damage her through it. Resume attacking after the projectile sequence ends.
The darkness phase removes most of the arena’s visibility. Keep moving through open space, listen for Miranda’s approach and fire when her outline or attack becomes visible. A flash round can interrupt the darkness attack if you have one, but sprinting and guarding can also carry you through the phase. The fight then combines her earlier forms, so identify whether she is preparing a leap, charge, projectile attack or mold wave before choosing to shoot.
Near the end, Miranda pins Ethan and creates the final large orb. Follow the displayed prompt and shoot the orb repeatedly with your strongest available weapon until the scripted ending sequence begins. Do not stop after a single shot; continue firing through the prompt until the encounter ends.
- Stay mobile and avoid retreating into the Ceremony Site walls.
- Use the pillars to block Miranda’s burning-orb attack.
- Shoot airborne fireballs only when doing so does not expose Ethan to a charge.
- Use flash rounds or movement during the darkness phase.
- Follow the final on-screen shooting prompt until the boss sequence ends.
5. Let the ending play and preserve completed data
After Miranda’s defeat, allow the remaining story scenes to continue. Chris retrieves Rose, Ethan remains behind with the detonator and the Megamycete is destroyed. The vehicle sequence and credits follow; do not quit during these scenes if you want the normal completion-save prompt.
When the game offers completed data, save it in a protected slot rather than overwriting the manual save you made before Miranda. Resident Evil Village uses this completed data as the starting point for a carried-over run. From the main menu, choose Load Game and select the completed save. This begins New Game+ with eligible weapons, upgrades, Lei and inventory resources carried over, while story progression and key items reset.
If the completed save does not appear, return to the pre-Miranda manual save and defeat her again, then accept the completed-data save prompt. Do not choose a completely new empty file if your purpose is to retain your equipment.
- Mother Miranda is defeated.
- The ending scenes and credits have finished.
- Completed data is saved in a protected slot.
- Loading the completed data begins the carried-over New Game+ route.
6. Verify the post-game menus and Gold Edition content
After the first campaign clear, open Bonuses or the Extra Content Shop from the main menu. Resident Evil Village uses Completion Points earned from in-game challenges for bonus material and additional modes. The official manual places these features under Bonuses, and campaign completion is required for the normal post-game shop progression.
Check that Village of Shadows is selectable. The Gold Edition’s Trauma Pack includes a Village of Shadows unlock option, while the difficulty can also become available through normal campaign progression. The PlayStation Gold Edition listing identifies the package as including the base game, Winters’ Expansion and Trauma Pack, but a physical or cross-generation purchase may still require each add-on to be redeemed or installed on the active PS5 version.
From the PS5 home screen, highlight Resident Evil Village and open its add-ons or manage-content screen. Confirm that Winters’ Expansion is installed for the same PS5 edition you launch. Relaunch the game and check for Shadows of Rose, Third-Person Mode and the expanded Mercenaries content. Third-Person Mode changes the main campaign’s viewpoint; Shadows of Rose is a separate story set years after Ethan’s campaign, and Mercenaries Additional Orders expands the bonus mode rather than altering the main ending.
If an expected item is missing, close the game, confirm the add-on is installed under the correct PSN account and edition, then relaunch. Keep the completed campaign save while troubleshooting. The PlayStation product page lists Gold Edition contents, and the official Capcom announcement identifies the Gold Edition package and its Winters’ Expansion and Trauma Pack components.
- Bonuses or the Extra Content Shop is visible.
- Village of Shadows is available through progression or the installed Trauma Pack unlock.
- The PS5 add-ons screen shows Winters’ Expansion installed.
- Shadows of Rose and expanded Mercenaries content appear in the game menus.
- Third-Person Mode is available after the expansion is recognized.
Before you move on
- Heisenberg’s Factory is complete and Chris’s burning-village assault has been finished.
- Urias Strajer, Miranda’s laboratory and Mother Miranda are complete.
- The ending and credits have fully played.
- A completed campaign save is present.
- Loading that completed save begins New Game+ with carried-over equipment and Lei.
- Bonuses or the Extra Content Shop is available.
- Village of Shadows is selectable through campaign progression or the Trauma Pack unlock.
- Winters’ Expansion is installed and its Shadows of Rose and expanded Mercenaries entries appear.
- Third-Person Mode is available in the options.
References for this chapter
- Resident Evil Village - PS4 & PS5 Games | PlayStation
- Resident Evil Village Gold Edition Announced - Capcom
- Main Menu | Resident Evil Village Official Web Manual
- 12 · Chris: the village and the caverns · Ceremony Site · Village · RE Guide
- Mother Miranda (Ceremony Site) · Village · RE Guide
- Urias Strajer Boss Fight – Resident Evil Village
- The Final Assault – Resident Evil Village Gold Edition Walkthrough & Guide
- Resident Evil 8 Village – How to Start New Game+
Unlocks, New Game+ and Village of Shadows difficulty
A completed Resident Evil Village campaign creates a Completed Story Save. Load that file from the main menu to begin another run with your accumulated equipment, Lei and other inventory progress, while story keys and area progression reset. Village of Shadows normally becomes available after completing the main campaign once, regardless of whether that first clear was on Casual, Standard or Hardcore. Gold Edition also includes the Trauma Pack, whose Village of Shadows unlock grants immediate access once the add-on is installed. Prepare by preserving the completed save, upgrading weapons you will actually use, keeping Lei for late Duke purchases and treating Village of Shadows as a route-management challenge rather than a fight-everything difficulty.
Save the correct file after the first campaign
Complete the final sequence and allow the credits and post-game results to finish. When the game asks whether to save the completed story, choose yes and use a clearly identifiable slot. Keep this file separate from ordinary chapter saves; it is the source file for your next run.
From the main menu, choose Load Game and select the Completed Story Save. The game then starts the opening sequence again and lets you choose the new run’s difficulty. The interface does not necessarily label this process as New Game+, so selecting the completed save is the important step. Do not choose New Game or an unfinished story save if you want your inventory to carry over.
- A Completed Story Save appears in Load Game.
- The completed file is kept in a separate slot from ordinary pre-boss or exploration saves.
- Loading that file starts a fresh story route while retaining the previous run’s inventory progress.
Understand what carries over and what resets
Your carried-over state includes the weapons and attachments you finished with, their upgrades, ammunition, crafting materials, healing items, Lei, treasures, recipes, cooked meals and other inventory progress. Challenge and collectible progress also remains recorded on the profile. This lets you use a developed arsenal on a different difficulty or return to unfinished purchases and challenges.
Story progression is reset. You must obtain the village keys, four flasks and other quest items again, and you must repeat the route through Castle Dimitrescu, House Beneviento, the Reservoir and the Factory. The map is not treated as permanently cleared, and single-run environmental tasks such as Castle Dimitrescu windows and village outhouses must be completed again if they are required for a challenge.
The Duke’s stock and purchase system still matter. Carried-over gear does not make later weapons, attachments, inventory expansions or upgrades free. Before starting, sell only surplus treasures and duplicate supplies, repair or upgrade the weapons you intend to use, and leave enough Lei for inventory space, ammunition and late-game weapon costs.
- Your preferred handgun, shotgun or rifle has the upgrades you can afford.
- You have left free case space for early key items and ammunition.
- You know which key items must be collected again.
- You have retained enough Lei for the Duke’s inventory expansions and later purchases.
Unlock Village of Shadows through normal campaign progress
If the Trauma Pack unlock is unavailable, complete the main campaign once. The first clear can be on Casual, Standard or Hardcore; you do not need to finish the first run on Hardcore specifically. After the completed save is created, select it through Load Game and check the difficulty list for Village of Shadows.
A Standard first run is a practical preparation route because it teaches enemy placements, boss arenas and resource locations without the extreme pressure of the hardest setting. If you intend to attempt Village of Shadows without relying on bonus weapons, finish the first campaign with as much Lei, ammunition and weapon development as possible rather than spending everything immediately before the final fight.
- The main campaign has been completed and its completed save was created.
- Village of Shadows appears among the available difficulties when loading that completed file.
- If it does not appear, verify that you loaded the completed save rather than starting a new ordinary game.
Use and verify the Gold Edition Trauma Pack unlock
The PS5 Gold Edition product listing includes Resident Evil Village, Winters’ Expansion and the Trauma Pack. The Trauma Pack contains the Village of Shadows unlock, which provides immediate access to that difficulty instead of requiring the normal campaign-clear condition.
On the PS5 home screen, highlight the game and use the console’s game-content management option to confirm that Trauma Pack is installed for the same account and edition. If the bundle is owned but the add-on is not present, check the Gold Edition’s add-ons in the PlayStation Store, download the missing content and restart the game. Afterward, inspect the new-game difficulty list; do not rely only on the bundle name displayed in the library.
- Trauma Pack is listed as installed in the PS5 game-content view.
- The game recognizes the add-on and displays Village of Shadows as selectable.
- Winters’ Expansion remains installed separately if you also plan to play Shadows of Rose.
Prepare a practical Village of Shadows loadout
Use a primary firearm that you can keep supplied with ammunition. Handgun damage and capacity are dependable early investments, while shotgun damage is useful for stopping fast or heavily protected enemies at close range. Do not spread Lei across every weapon unless you intend to use each one; concentrating upgrades gives better damage per purchase.
Treat guarding as a resource-saving tool. Cook the Duke’s meals that improve health or reduce damage while guarding when their ingredients are available, and use guard before attempting a risky pass through an enemy group. Headshots are valuable when a clear stagger lets you escape, but killing every enemy is not always efficient. Sprint past groups when the route and encounter rules allow it.
Reserve mines, pipe bombs, flashbangs, grenade-launcher ammunition and magnum rounds for blocked routes, heavy enemies and bosses. Search side rooms for crafting components, but do not spend rare explosives clearing an optional group unless the reward or safe route justifies it. Make manual saves before major bosses and retain a separate completed save so failed experiments do not erase your best New Game+ starting point.
- A main weapon has several meaningful damage upgrades.
- Healing items, crafting materials and Lei remain available for the next Duke encounter.
- You have identified encounters that can be bypassed instead of fought.
- A separate completed save is preserved before beginning the harder run.
Before you move on
- A Completed Story Save remains available in Load Game.
- Loading that file starts a new story with the previous run’s equipment and currency progress.
- Village of Shadows is selectable either through the normal campaign-clear unlock or the installed Trauma Pack.
- The PS5 content-management view confirms Trauma Pack is installed for the current Gold Edition.
- The Duke’s available upgrades, inventory space and remaining Lei match the planned Village of Shadows loadout.
References for this chapter
- Resident Evil Village Gold Edition PS4 & PS5 — PlayStation Store
- Resident Evil Village — Trauma Pack — Steam product page
- Resident Evil 8 Village All Collectible Locations and New Game Plus reference
- Resident Evil Village Walkthrough & Guide — PlayStation 5 — New Game Plus reference
- Resident Evil Village Extras — New Game Plus and Village of Shadows reference
Winters' Expansion overview — what the Gold Edition adds
Resident Evil Village Gold Edition for PS5 contains the base game, Winters' Expansion and the Trauma Pack. The expansion adds Shadows of Rose, Third-Person Mode for Ethan's main campaign, and The Mercenaries Additional Orders. Shadows of Rose is a separate story set sixteen years after Resident Evil Village and follows Rose Winters in a third-person scenario with its own progression, abilities and equipment. Third-Person Mode changes the viewpoint of the main story but not its objectives or enemy behavior; cutscenes still use first-person presentation. The Mercenaries Additional Orders expands the arcade mode with Chris Redfield, Karl Heisenberg and Alcina Dimitrescu, plus additional stages. The original Mercenaries mode must first be unlocked by finishing the main campaign.
Confirm the PS5 edition and install the matching expansion content
On the PS5 home screen, highlight Resident Evil Village, press the Options button and open the game’s installation or content-management screen. Confirm that you are launching the PS5 version and that Winters’ Expansion is installed for that version. The PlayStation Store lists Gold Edition as a PS4 and PS5 product containing Resident Evil Village, Winters’ Expansion and the Trauma Pack. Avoid installing an add-on for one platform version while launching the other.
Start the game after installation and allow any update to finish. The title screen and main menus should expose the expansion features through the existing Village application rather than through a completely separate game. If Shadows of Rose is unavailable, close the game, check Manage Game Content again, and confirm that the add-on’s region matches the account and game version.
- The installed application is the PS5 version of Resident Evil Village.
- Winters’ Expansion is installed for the same PS5 version.
- The title screen loads without an unfinished update or pending content installation.
Play Shadows of Rose as the post-campaign Winters story
Select Shadows of Rose from the main menu when you are ready to begin the expansion scenario. The story takes place sixteen years after the events of Resident Evil Village and follows Rose Winters as she enters a warped realm connected to the consciousness of the Megamycete. It is an additional campaign, not a replacement for Ethan’s ending and not a continuation of Ethan’s inventory or save file.
Treat Rose’s campaign as a separate survival-horror route. Her progression, abilities, weapons and supplies are controlled by the scenario, so do not expect Ethan’s upgrades, Lei, weapon case or crafting stock to carry over. Search rooms before advancing, but spend resources only when they help solve the current encounter or puzzle. The expansion is more tightly directed than the village campaign, and its danger often comes from scripted pursuit, environmental problems and limited combat options rather than from large open-area firefights.
- Shadows of Rose is selectable from the main menu.
- The campaign is started as a new expansion save rather than from Ethan’s campaign file.
- Rose’s equipment and progression are treated as independent from Ethan’s.
Enable Third-Person Mode for Ethan’s campaign
From the main menu, open Options, enter the Camera section and change View Mode from First Person Mode to Third Person Mode. The same setting can be changed during the main story through the pause menu’s Options screen. You can switch perspectives without starting a new campaign or discarding story progress.
Third-Person Mode changes the viewpoint and adds an over-the-shoulder camera while leaving the campaign’s objectives, maps, enemies and progression structure intact. Use the camera reset control if Ethan’s position or a nearby wall obscures your view. Do not expect every presentation scene to remain third-person: the official manual specifies that cutscenes continue to play from a first-person perspective, just as they do in First Person Mode.
- Options is open from the title screen or pause menu.
- Camera → View Mode is set to Third Person Mode.
- You understand that gameplay perspective changes, but story rules and cutscene presentation do not.
Unlock and enter The Mercenaries Additional Orders
Choose The Mercenaries from the main menu after the original Mercenaries mode has been unlocked. Resident Evil Village’s Mercenaries mode becomes available after finishing the main campaign, so a new Gold Edition installation may show the expansion but still keep this mode locked until the credits have been reached. The mode is an arcade combat challenge built around clearing areas, collecting time and ability bonuses, maintaining momentum and reaching the goal.
Winters’ Expansion adds three playable characters: Chris Redfield, Karl Heisenberg and Alcina Dimitrescu. It also adds new stages. Each character has a distinct weapon set and special approach, so begin by learning one character’s movement and ability timing instead of changing characters every attempt. Collect time bonuses early, keep moving between enemy groups and use ability choices to reinforce the character’s strengths. Additional Orders is separate from Ethan’s story and does not alter the campaign’s inventory or difficulty.
- The main campaign has been completed if The Mercenaries is still locked.
- The Mercenaries menu shows the Additional Orders content after unlocking the mode.
- Chris Redfield, Karl Heisenberg and Alcina Dimitrescu are listed as playable additions.
- New stages are available alongside the original Mercenaries content.
Use the content in a sensible order
For the clearest narrative order, complete Ethan’s main campaign before starting Shadows of Rose. Third-Person Mode can be used at any point in the main campaign and can be changed without restarting. The Mercenaries mode is best treated as post-game content because its normal unlock is tied to completing the campaign.
When Shadows of Rose begins, follow its own objective markers and area progression. Do not try to return to Ethan’s village hub, visit the Duke for Ethan’s upgrades or transfer equipment between the two scenarios. Save at available checkpoints, inspect side rooms before crossing a one-way story transition and preserve healing and ammunition for encounters that cannot be bypassed.
- Ethan’s campaign is complete before playing Shadows of Rose if following the intended story order.
- Third-Person Mode is treated as an optional camera setting, not a separate campaign.
- Shadows of Rose is completed with its own resources and progression.
- The Mercenaries Additional Orders are checked after the mode unlocks.
Before you move on
- Winters’ Expansion is installed for the PS5 version of Resident Evil Village.
- Shadows of Rose is selectable from the main menu.
- Options → Camera → View Mode allows First Person Mode and Third Person Mode for Ethan’s campaign.
- After the main campaign is completed, The Mercenaries is available and displays the Additional Orders content.
- Chris Redfield, Karl Heisenberg and Alcina Dimitrescu are available as the three Additional Orders characters.
- The player understands that Shadows of Rose is a separate story set sixteen years after Resident Evil Village and uses independent progression.
References for this chapter
- Resident Evil Village - PS4 & PS5 Games | PlayStation
- Winters’ Expansion PS4 & PS5 | PlayStation Store
- Changing View Modes | Resident Evil Village Official Web Manual
- Features: Third Person Mode | Resident Evil Village Official Web Manual
- Main Menu | Resident Evil Village Official Web Manual
- Resident Evil Village Official Web Manual — Basic Rules: The Mercenaries
- Resident Evil Village Gold Edition Announced | Capcom News
Shadows of Rose — introduction, new mechanics and survival tips
Shadows of Rose is a linear third-person campaign set sixteen years after Resident Evil Village. Its progression has four major blocks: Castle Dimitrescu, House Beneviento, the Winters residence and Eveline sequence, then Deep Stratum and the final Miranda confrontation. Rose starts unarmed, later receives the LEMI and M1897, and develops her mutamycete powers through four RW-Variant Flasks. Flask 1 lets her destroy Sclerotia cores, Flask 2 lets her freeze mold creatures and escape grabs, Flask 3 increases her power gauge, and Flask 4 increases it again during the Winters residence section. Rose cannot guard, so use movement, corners, cores and limited power charges instead of trading hits. Search each accessible room before one-way transitions. Blue areas on the map are fully explored with all items found; once a major area is completed, it cannot be revisited or checked again.
1. Escape the opening castle cells and obtain Rose’s first equipment
Rose begins in the Castle Dimitrescu memory without a weapon or powers. Follow the route through the cells, Treatment Room and Maintenance Storage, collecting the Cell Key and Switch Handle. When the gate opens, kite the Face Eater around the central obstacles and run through the escape corridor rather than attempting to defeat it with no equipment.
After reaching the castle’s upper floors, Michael provides the LEMI and ammunition. Continue through the Main Hall, Dining Room and Kitchen, then use the Bolt Cutters to open the chained Courtyard route. Save at the available typewriter and search side rooms for handgun ammunition, gunpowder, chem fluid and herbs before moving toward the Atelier and roof Workshop.
The first RW-Variant Flask is in the castle Workshop on the roof. It unlocks Rose’s ability to destroy Sclerotia, the red mold cores connected to liquid void. Breaking a core costs no power charge and often clears a route or exposes ammunition. Look for red veins on walls, floors and ceilings to locate these cores.
- Begin by running from the first Face Eater rather than trying to fight it.
- Collect the LEMI and early ammunition from Michael.
- Use the Bolt Cutters to open the Courtyard route.
- Obtain RW-Variant Flask 1 in the Workshop before attempting blocked core routes.
2. Build the power system through the castle and prepare for the point of no return
After Flask 1, return through the castle and destroy cores blocking the Waiting Room, balconies and mask routes. Collect the LEMI High-Capacity Magazine in the Waiting Room and the M1897 shotgun from the Dining Room after obtaining the Triocular Key. The shotgun is valuable against forced encounters, so do not spend every shell on ordinary Face Eaters.
Find RW-Variant Flask 2 in the Armory. It lets Rose freeze mold creatures temporarily and use her power to break free if a Face Eater grabs her. These actions consume power stocks. A Sprig of White Sage restores part of the gauge, while a Bunch of White Sage fills it, so use freezing for blocked corridors or dangerous groups rather than for every optional enemy.
Continue through the Dressing Room, Salon, South East Wing, Hall of Ablution and basement. Solve the mask and painting routes, obtain the Silver Mask, and then search the Guest Room and Terrace Room for supplies before placing it. Taking the Silver Mask closes the basement route. The Gold Mask is the final castle mask; before taking it, finish nearby exploration, crafting and upgrades because the castle cannot be revisited after the next sequence.
In the Execution Yard, survive the Executioner encounter and collect RW-Variant Flask 3 from the opened passage. It raises the gauge to four stocks and restores the reserve. Use cores to control the arena, freeze the Executioner when it closes distance, and shoot its exposed weak points after its attacks. Once the fight and escape finish, Rose falls into House Beneviento and the castle is permanently unavailable.
- Use Flask 1 on cores before spending ammunition.
- Collect Flask 2 in the Armory and Flask 3 in the Execution Yard.
- Fit the LEMI upgrades and collect the M1897 before leaving the castle.
- Craft every required item type before the Gold Mask transition if pursuing Craftsmaster.
- Treat placing the Silver Mask and taking the Gold Mask as warnings to finish castle searches.
3. Complete House Beneviento and the Winters residence sequence
House Beneviento is the second major block and is largely puzzle- and stealth-focused. Save at the Elevator Hall typewriter, then enter the Workshop. The apparent Purifying Crystal is a trap: examining it removes Rose’s weapons, ammunition, healing items, crafting materials and mutamycete powers temporarily. These supplies are not permanently lost; they return when Rose reaches Deep Stratum.
Solve the Workshop sequence by finding the Scissors with the 024466 padlock combination. Use the dolls in the Medicine Room, Storage Room and Workshop dioramas to obtain Jimmy’s Room Key, Doll Pose 3, the Black-haired Doll and the Breaker Box Key. Follow the Fuse Map to the Bedroom. Keep the moving mannequins in view whenever possible, use the Kitchen table and doorways as barriers, and retreat rather than attempting to fight them.
After the miniature doll escape, the route changes to the Winters residence memory. Search the house in the instructed order and examine the memory objects if pursuing the related challenge. The drawer key comes from the photograph sequence in the study. When Eveline floods the house with liquid void, destroy the blocking cores, use White Sage to restore power when required, freeze dolls only when they block the escape, and run for the elevator.
At the Living Room typewriter, collect RW-Variant Flask 4 and the First Aid Med before entering the Foyer. Flask 4 restores Rose’s powers and increases the gauge to five stocks. This is the fourth flask, and it is obtained during the Winters residence section, not in Deep Stratum. Defeat Eveline by hiding behind furniture during her wind blasts, then use Rose’s power after each attack window. Ethan’s intervention sends Rose onward to Deep Stratum.
- Save before entering the House Beneviento Workshop.
- Use 024466 for the Study cupboard.
- Keep the moving mannequins visible and use rooms and furniture to control their approach.
- Recover Flask 4 in the Winters residence Living Room before fighting Eveline.
- Do not expect the castle inventory to remain available during the dollhouse sequence.
4. Recover the inventory, cross Deep Stratum and finish the campaign
Deep Stratum is the fourth progression block. Rose’s LEMI, M1897, ammunition, healing items and crafting materials return after the Winters residence sequence. Save at the first available typewriter, collect the fixed supplies along the opening path and work toward the large Sclerotia core overlooking the ruined village. Use the LEMI for isolated Face Eaters, the shotgun for groups that block narrow routes, and White Sage to keep enough power for emergencies.
Destroy the giant core and descend into the Pit Laboratory. This is the final major supply cache, so search it before taking the Purifying Crystal. Read nearby files and collect ammunition, healing items and White Sage. The Purifying Crystal is the final point of no return: after taking it, the route proceeds through the escape and final confrontation without returning to the village.
Rose gains additional abilities for the Miranda fight, including a dodge, projectile absorption and a powerful mold attack. Absorb Miranda’s incoming projectiles to restore power stocks. Dodge her rushes, use the mold attack to stagger her, then fire the shotgun at close range during the opening. When the arena darkens, keep moving and watch for her emerging attack instead of standing still. Repeat the absorb, stun and shotgun cycle until the fight ends.
After the final prompts and credits, confirm that Shadows of Rose has completed. The campaign does not return Rose to earlier areas, so treat the castle, House Beneviento and Deep Stratum supplies as permanently missable once their transitions occur.
- Confirm the main inventory has returned at Deep Stratum.
- Loot the Pit Laboratory before taking the Purifying Crystal.
- Use absorption to refill power during Miranda’s projectile attacks.
- Use the shotgun after Miranda is stunned rather than firing blindly while she is airborne.
- Allow the final sequence and credits to finish before treating the DLC as complete.
5. Manage resources, crafting and map checks throughout the DLC
Rose cannot guard and is slower than Ethan, so Shadows of Rose rewards hit-and-run play. Face Eaters inside liquid void can drag Rose under and kill her if she does not escape quickly. Run past optional enemies when the route remains open, use corners and doors to break pursuit, and spend power charges only when a core, grab or blocked passage makes them necessary.
There is no Duke, Lei, shop or conventional upgrade economy in this campaign. Rose’s weapons and power options come from fixed pickups and story rewards. Her available weapons are the LEMI, the M1897 and Pipe Bombs. White Sage restores the power gauge, while crafting materials are limited, so keep one healing item for an unknown encounter and do not convert every material into the first recipe available.
If pursuing Craftsmaster, make one First Aid Med, one Handgun Ammo recipe, one Shotgun Ammo recipe and one Pipe Bomb. The achievement checks the four item types rather than a large quantity. Complete this before the castle closes if possible, because the castle contains the campaign’s crafting materials and later areas may not provide a safe replacement opportunity.
Use the map after every objective change. Blue indicates that an area has been completely explored with all items found. Red or otherwise incomplete rooms require another sweep when the route remains open. Check typewriters before masks, lifts, major boss arenas and the Purifying Crystal, because each of those transitions can remove access to earlier rooms.
- Use blue map areas as the exploration standard.
- Do not rely on guarding; Rose has no guard mechanic.
- Preserve White Sage and power charges for forced encounters.
- Craft all four item types if pursuing Craftsmaster.
- Finish side-room searches before one-way transitions.
Before you move on
- Rose completed the four progression blocks in order: Castle Dimitrescu, House Beneviento, the Winters residence and Eveline sequence, then Deep Stratum.
- Rose obtained all four RW-Variant Flasks, with Flask 4 collected in the Winters residence Living Room.
- The castle was searched before the Silver Mask and Gold Mask transitions, and House Beneviento was searched before leaving its sequence.
- The LEMI and M1897 were recovered, with power gauge capacity expanded through the later flasks.
- The Pit Laboratory was looted before taking the Purifying Crystal.
- Miranda was defeated using projectile absorption, dodging, mold power and shotgun damage windows.
- The final prompts and credits were completed.
- First Aid Med, Handgun Ammo, Shotgun Ammo and Pipe Bomb were each crafted if Craftsmaster completion was intended.
References for this chapter
- Resident Evil Village Official Web Manual — Sub-menus and Map Colors
- Resident Evil Village Gold Edition Announced - Capcom
- SoR1 · Castle Dimitrescu · The Three Masks · Village · RE Guide
- SoR2 · House Beneviento · The Winters' memory · Village · RE Guide
- RE Guide — Shadows of Rose Area Order and Point of No Return
- Resident Evil Village: Shadows of Rose Walkthrough and Guide
- Resident Evil Village Achievement Guide — Shadows of Rose Systems and Craftsmaster
Shadows of Rose — Castle and early set pieces
Rose begins Shadows of Rose inside the consciousness of the Megamycete, trapped in a distorted Castle Dimitrescu. This section is resource-limited and has no Duke, Lei, weapon shop, or conventional upgrades. Progress depends on collecting the first three of four RW-Variant Flasks, using Rose’s mold power to break cores or freeze enemies, and obtaining the Bronze, Silver, and Gold Masks. The fourth flask is obtained later, after the House Beneviento section, during the Winters residence chapter. Search each room before taking a mask because the Silver Mask closes the lower castle route and the Gold Mask sends Rose directly to the Special Chambers. Avoid unnecessary fights, use typewriters whenever possible, and save shotgun ammunition, pipe bombs, and healing items for the Executioner encounter.
1. Escape the cells and survive the first chase
Rose starts in the Laboratory without a weapon. Move through the Treatment Room and take the Cell Key from the hook in the southeast room. Use it on Cell 3, follow the triggered sequence back through the Treatment Room, and crawl beneath the body bag to reach the cells.
Continue through the cell passage to Maintenance Storage and take the Switch Handle from the mechanism in the northeast room. Install it in the mechanism in the southwest corner. The gate opens slowly while Face Eaters appear, so circle the room and leave as soon as the passage is available.
The following chase through the cells, Hall of War, Storage, and Wine Cellar is not a normal combat section. Keep moving, avoid the liquid void, and do not stop to search for supplies. Michael’s intervention carries Rose into the Parlor.
- Cell Key collected and used on Cell 3.
- Switch Handle collected and installed.
- Face Eater chase completed without wasting ammunition.
2. Reach the Main Hall and obtain the LEMI
Use the typewriter in the Parlor, then check the Bedchamber and Northern Corridor for the file and healing item before continuing. Move through the Antechamber to the Entrance Hall. The castle exit is blocked, so return into the hall when prompted; Michael then gives Rose the LEMI handgun.
Take the handgun ammunition on the nearby table and continue through the Southern Corridor to the Main Hall. Use the Main Hall typewriter. Examine the central statue and the nearby book to confirm the objective: collect the Bronze, Silver, and Gold Masks for the three empty slots.
Go through the Eastern Corridor to the Kitchen and take the Bolt Cutters from the wooden box. Use them on the chained Dining Room doors, then enter the Courtyard. Search the accessible courtyard edges, but do not expect a shop, Lei, or weapon-upgrade system in this campaign.
- Parlor typewriter used.
- LEMI collected in the Entrance Hall.
- Main Hall mask objective examined.
- Bolt Cutters collected and used.
- Courtyard entered.
3. Get the first flask and the Bronze Mask
From the Courtyard, go up through the Northern Stairwell and enter the Library. Move through the Waiting Room to the Atelier. In the Atelier, climb the stairs, push down the ladder, cross it, and pass through the open portrait into the Secret Passage. Continue upward to the Workshop.
Use the Workshop typewriter before taking RW-Variant Flask 1 from the workbench area. This grants Rose the ability to destroy red sclerotia, the mold cores that block doors, conceal supplies, and cover the castle’s main routes. Return through the castle and break the cores on the staircase, in the Waiting Room, and around the Courtyard. Check the newly opened spaces for ammunition, gunpowder, chem fluid, and the High-Capacity Magazine.
Follow the opened upper-floor route to the Bronze Mask. Search the surrounding room before taking it. Afterward, the Executioner appears in the Private Corridor. Do not try to defeat it here; move through the corridor and use the route toward the Armory.
- RW-Variant Flask 1 collected.
- Core-breaking ability activated.
- High-Capacity Magazine collected if desired.
- Bronze Mask collected.
- Private Corridor Executioner encounter bypassed.
4. Obtain the Monocular Key and open the Silver Mask route
In the Armory, take RW-Variant Flask 2 from the table. Rose can now freeze enemies and break a grab by spending a stock of the mold gauge. Use this sparingly; freezing is most valuable when a Face Eater blocks a doorway or when the Executioner corners Rose.
Return through the Hidden Passage and enter the Dressing Room from the Private Corridor. Take the Monocular Key from the desk. Then pass through the Antechamber, break the core on the Salon door, and use the Monocular Key to open the case containing the LEMI Compensator.
In the Courtyard, use the one-eye door to reach the South East Wing. Enter the Hall of Ablution and solve the statue puzzle by selecting the deaths in this order: hanged, stabbed, drowned, then pierced by arrows. The staircase opens to the lower level.
Before taking the Silver Mask, search the Small Torture Chamber, Main Cellar, Basement, and Isolated Passage. Collect the pipe bomb, chem fluid, gunpowder, white sage, and handgun ammunition. Taking the Silver Mask starts an escape and closes the lower route permanently.
- RW-Variant Flask 2 collected.
- Monocular Key collected.
- LEMI Compensator collected.
- Hall of Ablution solved in the correct order.
- Lower castle fully searched before taking the Silver Mask.
- Silver Mask collected.
5. Return to the Main Hall and solve the Gallery puzzle
After taking the Silver Mask, escape the lower level. Use the central pillars and corners to break line of sight with the Executioner. If a Face Eater blocks the exit, freeze it or use a pipe bomb only when the group prevents escape. The route leads to the Guest Room, where you can use the typewriter and collect Michael’s supplies.
Move through the Guest Balcony and Terrace Room. Take the rusted scrap, gunpowder, and the file that unlocks shotgun-ammunition and pipe-bomb recipes. Then enter the Guest Bathroom and take the Snake Painting.
Return through the South East Wing and Courtyard to the Main Hall. Place the Silver Mask in the statue’s right slot. Take the Snake Painting to the Gallery. Arrange the animal paintings so the predator-and-prey relationships are correct; completing the display opens the chest containing the Triocular Key.
Use the Triocular Key on the locked Dining Room cabinet and take the M1897 shotgun. This is the most useful weapon for the remaining Executioner encounters, so keep its shells rather than spending them on isolated Face Eaters.
- Guest Room typewriter used.
- Shotgun ammunition recipe unlocked.
- Snake Painting collected.
- Silver Mask placed.
- Gallery painting puzzle completed.
- Triocular Key collected.
- M1897 obtained.
6. Take the Gold Mask and prepare for the final castle encounter
Use the Triocular Key on the three-eye door at the top of the Northern Stairwell to enter the Opera Hall. Search the hall and its connected rooms before touching the Gold Mask. Taking the mask triggers a cutscene and sends Rose directly to the Special Chambers, so treat it as the final point of no return in the castle’s ordinary exploration route.
In the Opera Hall, break the cores that open the path to the mask. One core causes a piano to fall and creates a platform; another is above the fireplace; the final core hangs above the mask area. Freeze or bypass Face Eaters while moving between the platforms. Collect the rusted scrap and other supplies before taking the mask.
In the Special Chambers, destroy the exposed cores while moving between safe positions. Use the mold ability to clear dangerous openings, and do not stand in the center of the room when the hazard activates. After the sequence, use the Dungeon typewriter, return to the Main Hall, and place the Gold Mask in the bottom slot.
- Opera Hall searched before taking the Gold Mask.
- Gold Mask route cores destroyed.
- Special Chambers sequence completed.
- Dungeon typewriter used.
- All three masks placed in the Main Hall.
7. Defeat the Executioner and leave the castle
Take the crystal from the completed Main Hall statue. The apparent crystal is revealed to be false, and Rose is sent to the Execution Yard for the castle’s final encounter.
The Executioner’s orange weak point changes during the fight. Target the chest during the first phase, the right leg during the next phase, and the back during the final phase. The M1897 is the strongest weapon for these openings, while pipe bombs can create breathing room when the boss closes distance. Keep moving around the arena and use obstacles to avoid its swings rather than standing in front of it.
Rose’s mold ability can interrupt or create space, but its gauge is limited. Save healing items for genuine damage and do not waste all shotgun shells before the final phase. After the encounter, collect RW-Variant Flask 3 in the northwest passage of the Execution Yard, then follow the exit. Jumping from the cliff ends the castle chapter and prevents a return.
- Executioner’s chest, leg, and back weak points exposed and damaged.
- Execution Yard encounter completed.
- RW-Variant Flask 3 collected.
- Rose has exited the castle and the next story area has loaded.
Before you move on
- Rose has obtained and placed the Bronze, Silver, and Gold Masks in the Main Hall.
- The Gallery puzzle has been solved and the Triocular Key has been used to obtain the M1897.
- The Special Chambers sequence and Dungeon checkpoint have been completed.
- The Executioner has been defeated in the Execution Yard.
- RW-Variant Flasks 1, 2, and 3 have been collected; Flask 4 remains for the later Winters residence section.
- Rose has left the castle and the next Shadows of Rose area has loaded, confirming that the castle chapter is complete.
References for this chapter
- SoR1 · Castle Dimitrescu · The Three Masks · Village · RE Guide
- Resident Evil Village: Shadows of Rose DLC — Bronze Mask Walkthrough
- Resident Evil Village: Shadows of Rose DLC — Silver Mask Walkthrough
- Resident Evil Village: Shadows of Rose DLC — Gold Mask Walkthrough
- RW-Variant Flask 4 — Evil Resource
Shadows of Rose — Beneviento return and dollhouse variations
Rose’s return to House Beneviento is a weaponless puzzle and survival section. First obtain the Scissors with the 024466 locker code, cut the stuffed monkey to recover the Relief of a Child, and collect the Lucy and Catherine dolls. Use them in the Medicine Room to obtain Jimmy’s Room Key, then retrieve the clown doll from Jimmy’s well. Complete the Storage Room display to get the black-haired doll, finish the final Workshop display, and take the Breaker Box Key. The second half is a line-of-sight escape against moving mannequins, followed by a smaller stealth section against hostile dolls. Destroy nearby Sclerotia Cores when they block routes, use White Sage to freeze a dangerous doll, and reload the checkpoint after a failed chase rather than deliberately repeating hazards.
Open the locker and recover the Relief of a Child
After Rose examines the glowing crystal in the Workshop, her weapons and other equipment are removed. Leave the Workshop through the accessible route and enter the Preparation Room, then continue into the Study. Search the Study for the three parts of the combination: the stuffed locker shows 02, the picture on the bookshelf shows 44 when examined from the back, and the cluttered desk shows 66 when viewed from below. Enter 024466 in the locked cupboard to obtain the Scissors.
Return to the Workshop and use the Scissors on the stuffed monkey. Take the Relief of a Child from inside it. Before continuing, search the basement corridor and read Little Girl’s Diary if you are collecting Shadows of Rose files. The diary is a real file collectible; ordinary plaques and puzzle inscriptions are clues, not automatically separate files.
- Enter 024466 in the Study cupboard.
- Use the Scissors on the stuffed monkey in the Workshop.
- Read Little Girl’s Diary in the basement corridor if pursuing the Avid Reader challenge.
Collect Lucy and Catherine, then obtain Jimmy’s Room Key
Take Doll (Pose 1), also called Lucy, from the table in the Workshop. Carry the Relief of a Child to the locked door in the passage and enter the Storage Room. Take Doll (Pose 2), Catherine, from the display there, then return toward the Workshop.
Enter the Medicine Room beside the Workshop. Place Lucy on the left position marked for her and Catherine on the right position marked for her. The display opens a drawer containing Jimmy’s Room Key. Remove both dolls from the display before leaving; they are needed again. Do not try to complete the larger Workshop or Storage Room displays yet, because the remaining dolls have not been collected.
- Take Lucy from the Workshop table.
- Use the Relief of a Child to enter the Storage Room and take Catherine.
- Place Lucy left and Catherine right in the Medicine Room.
- Collect Jimmy’s Room Key and recover both dolls.
Retrieve the clown doll and complete the Storage Room display
Use Jimmy’s Room Key on the locked door reached through the side passage from the Workshop. Descend into Jimmy’s Room and destroy the Sclerotia Core blocking the route. Climb down the well and take Doll (Pose 3), the clown doll, then climb back out.
Return to the Storage Room display. Place Lucy on the raised step so she is holding the pole and bucket over the Rose doll. Place Catherine on the base where she was originally found, facing toward Rose. Place the clown doll on the remaining base so it is holding out the present. The display opens a drawer containing the black-haired doll. Take that doll and recover the other three dolls before leaving.
- Unlock Jimmy’s Room with the key from the Medicine Room.
- Destroy the core and collect the clown doll from the well.
- Storage Room arrangement: Lucy raised with bucket, Catherine facing Rose, clown holding the present.
- Take the black-haired doll and reclaim every placed doll.
Finish the Workshop display and escape the moving mannequins
Return to the Workshop for the final display. Place Lucy on the position marked with her name. Place the black-haired doll on the base to Lucy’s right. Move around to the opposite side and place the clown doll on the left position so it carries the bundle of sticks. Place Catherine on the remaining position so she holds the firewood used to light the pyre. After the scene, take the Breaker Box Key from the display’s remains.
Answer the ringing phone, then follow the message and use the Breaker Box Key on the box beside the elevator. Take the Fuse Map. Save at the typewriter if available, then follow the map from the Study through the Kitchen to the Bedroom. A glowing-eyed mannequin moves whenever Rose looks away. Walk backward while keeping it visible, sprint only around corners or through doorways, and destroy the Sclerotia Core in the Kitchen before entering the Bedroom. Take the Fuse from the wall box.
The return trip is harder: additional mannequins appear in the corridor. Keep them in view whenever possible, use the Kitchen table and doorways as obstacles, and walk backward up the passage toward the Study. A mannequin waits near the Study entrance, so turn toward it before opening the exit door. Place the Fuse in the breaker box and use the elevator.
- Complete the Workshop arrangement: Lucy named position, black-haired doll right, clown left with firewood, Catherine on the remaining position.
- Take the Breaker Box Key and Fuse Map.
- Destroy the Kitchen core, take the Fuse from the Bedroom, and return it to the elevator box.
- Keep the mannequins visible and reload the latest checkpoint after a failed escape.
Survive the small-scale doll section and leave the memory
After the elevator sequence, Rose is reduced in size. Move beneath the table and follow the wooden board into the doll-filled route. These dolls patrol with lights and can severely injure Rose if they spot her. Stay along the edges of rooms, wait for patrols to turn away, and use furniture, boxes and overturned appliances as cover rather than crossing open floors unnecessarily.
Destroy Sclerotia Cores when they block progress. In the Storage Room, use the raised route and plank to reach the core, then drop down only after the patrol has moved. Further along, destroy the core above the passage to drop a birdcage and distract the dolls. In the larger room, hide behind furniture and repeat the same pattern: wait, cross to cover, destroy the next core, and move while the dolls are distracted.
Near the Kitchen, hide behind the overturned washing machine until the patrol turns away. Take the Sprig of White Sage and use it to freeze the doll in the Kitchen, then run through. A mannequin bursts in from another doorway; leave immediately and hide behind the sideboard until the route is safe. Continue through the opened passage to complete the Beneviento memory and trigger the transition to the Winters’ house.
- Use cover and patrol timing instead of trying to fight the dolls.
- Destroy the route-blocking Sclerotia Cores when a safe opening appears.
- Use White Sage to freeze the Kitchen patrol.
- Reach the Winters’ house transition to finish this Beneviento chapter.
Before you move on
- The Study cupboard was opened with 024466 and the Relief of a Child was recovered from the stuffed monkey.
- Lucy and Catherine were used in the Medicine Room to obtain Jimmy’s Room Key.
- The clown doll was collected from Jimmy’s well, the Storage Room display produced the black-haired doll, and the Workshop display produced the Breaker Box Key.
- The Bedroom Fuse was installed in the elevator breaker box.
- Rose survived both the moving-mannequin escape and the smaller doll patrol section, then reached the Winters’ house story transition.
- Little Girl’s Diary was read if pursuing the Shadows of Rose file challenge.
Shadows of Rose — Winters residence, Deep Stratum and final confrontation
Complete the mandatory Winters residence memory before entering Deep Stratum. During the house escape, destroy the blocking Sclerotia Cores, evade the mannequins and reach the Living Room. Collect RW-Variant Flask 4 and the First Aid Med, save at the typewriter, then defeat Eveline with Rose’s power while using furniture as cover. Ethan’s intervention sends Rose into Deep Stratum. Follow the linear village route to the large Sclerotia Core, collect the nearby supplies and descend into the Pit Laboratory. Search the laboratory, water passage and altar area for ammunition, healing and files before taking the real Purifying Crystal. Mother Miranda then begins the final battle. Absorb her projectiles to refill Rose’s power, use the three-charge Megamycete root attack to stun her and fire the M1897 while she is grounded. Survive the darkness and tornado phases, then follow Ethan’s final prompt and use Rose’s power for the finishing attack. Remain through the closing scenes and credits to complete Shadows of Rose.
1. Complete the Winters residence memory and begin the escape
After the house-memory exploration, collect all three files before opening the sideboard drawer: To-do List, Mia’s Letter and Rose’s Half Birthday. Examine the photograph in the study to obtain the Drawer Key, then use it on the sideboard and read Ethan’s letter. Opening the drawer triggers Eveline and starts the escape; the house-memory section cannot be freely revisited afterward.
When control returns in the Study, move through the passage behind it and turn left at the end. Destroy the Sclerotia Core blocking the route, then turn back, climb the stairs and go left into the Medicine Room. Collect the Bunch of White Sage before continuing through the Workshop.
Use Rose’s power to freeze the groups of dolls in the Workshop, then run toward the lift. When the mannequins begin chasing Rose, keep moving, freeze them only when they block the path and destroy the two Cores in the route. Enter the lift as soon as the way is clear. During this memory, Rose’s weapons, ammunition, healing items and carried materials are unavailable; they return when she reaches Deep Stratum.
- Collect the three Winters residence files before opening the sideboard drawer.
- Destroy the blocking Core in the escape passage and the two Cores near the lift.
- Reach the Living Room without wasting time fighting the mannequins.
2. Collect RW-Variant Flask 4 and defeat Eveline
At the Living Room, save at the typewriter. Take RW-Variant Flask 4 from the table along with the First Aid Med. The flask restores Rose’s mutamycete power and adds another stored charge. Enter the Foyer only after saving and collecting both items.
Eveline can only be damaged with Rose’s power. Hide behind the nearest furniture whenever she charges a wind blast. After the blast sequence ends and Eveline is exposed, stand up and use Rose’s power. Follow her relocation points and move between the overturned tables, cabinets, pillars and bannister so the wind attacks cannot hit Rose directly.
As Eveline moves toward the stairs, destroy the two Sclerotia Cores blocking the upper route between attack patterns. Stay behind cover during the longer triple-blast sequences, then attack only after the final blast has ended. Once the last power attack connects, Ethan intervenes and Rose falls into the deeper Megamycete stratum.
- Save before entering the Foyer.
- Use cover for every wind-blast sequence.
- Destroy both upper-route Cores and finish Eveline with Rose’s power.
3. Enter Deep Stratum and destroy the large Sclerotia Core
When control returns, follow the snowy path west and collect the handgun ammunition along the route. At the overlook, the large Sclerotia Core in the distorted village below is the immediate objective. This is a linear route, not a return to the main campaign’s explorable village.
Drop down near the gate and take the Bunch of White Sage. Turn left to collect the First Aid Med beside the overturned truck, then return to the path and proceed north. When Face Eaters appear, back up along the route so they approach from the front. Collect the handgun ammunition around the corner, defeat or bypass the next pair and take the shotgun shells farther along the path.
At the statue, deal with the enemies on the right, then collect the handgun ammunition and Sprig of White Sage on the left. Return to the statue and climb the slope toward the large Core. If the Face Eaters surround Rose, retreat down the slope to reopen the lane. Destroy the large Core, then drop through the ledges into the cave.
- Collect the White Sage and First Aid Med before climbing.
- Use the slope as a retreat route against the Face Eaters.
- Destroy the large Sclerotia Core before entering the cave.
4. Search the Pit Laboratory before taking the Purifying Crystal
Follow the cave to the Megamycete heart and drop into the Pit Laboratory. Search the room thoroughly before leaving. The laboratory contains the final major supply cache, including handgun ammunition, shotgun ammunition, White Sage and a First Aid Med. Read the laboratory papers and books if you are pursuing the Avid Reader challenge.
Take the northern tunnel after the laboratory sweep. After wading through the water, look on the cave floor for the Wearily Scrawled Note. In the next open section, read the book on the altar to obtain the Ritual Text file.
Climb the stairs only after collecting the supplies and files. The real Purifying Crystal is at the top. Take it when ready; doing so triggers the final sequence and removes the opportunity for normal exploration of the laboratory and surrounding cave. Save at the Pit Laboratory typewriter before climbing if you want a reliable retry point.
- Search the Pit Laboratory for ammunition, healing and White Sage.
- Collect the Wearily Scrawled Note and Ritual Text.
- Save before climbing to the Purifying Crystal.
5. Defeat Mother Miranda with the power-and-shotgun cycle
After the cutscenes, Mother Miranda attacks outside the cave. Stay mobile and dodge her dives, wing swings and spider-form attacks. Firearms are inefficient while she is airborne, so do not spend shotgun shells during those openings.
When Miranda launches glowing projectiles, press L1 just before they hit Rose to absorb them and refill mutamycete power. Build three charges, move close to Miranda and push toward her while using the dodge input to launch the Megamycete root attack. The root must emerge beneath or very near her to connect and stun her.
While Miranda is stunned on the ground, fire the M1897 into her head at close range. Disengage when she recovers, then repeat the cycle: absorb projectiles, build three charges, stun her with the root and use the shotgun during the grounded opening. The handgun is a fallback if shotgun ammunition is low, but the M1897 is the efficient damage option during the stun.
- Avoid spending shotgun ammunition while Miranda is flying.
- Absorb projectiles with L1 immediately before impact.
- Use the three-charge root attack only when Miranda is within range.
6. Survive the darkness and complete the scripted finish
Miranda’s darkness phase sends her beneath the arena. Keep moving and use Rose’s powered dodge to avoid the real lunge; do not attack blindly while the arena is dark. When the arena becomes visible, resume the projectile-absorption and root-stun cycle.
During the tornado phase, move between the projectiles and dodge when Miranda lunges or erupts from below. Absorb the projectiles when the timing is safe, then use the Megamycete root attack after building three charges. Continue firing the shotgun only during the grounded stun.
Near the end, Miranda knocks Rose down in a scripted sequence. Ethan lends Rose his remaining power. Approach Miranda, follow the on-screen prompt for the knockout blow and then use R1 when instructed to deliver the final attack. No further Core-destruction objective is required during this battle.
- Keep moving during the darkness phase.
- Dodge through the tornado projectiles instead of standing still to aim.
- Follow Ethan’s prompt and use R1 for the final attack.
7. Watch the ending and confirm completion
After Miranda is defeated, remain in the closing sequence until control is removed. Rose returns to the laboratory for the final scenes, and there is no free-roam continuation of Deep Stratum after the boss.
Let the closing scenes and credits play before leaving Shadows of Rose. Finishing the story is separate from optional expansion challenges such as reading every file, listening to Ethan’s memories or completing difficulty-specific objectives.
If Miranda defeats Rose, reload the Pit Laboratory save if available. Rebuild the fight around projectile absorption and grounded shotgun damage rather than spending ammunition while she is airborne. A depleted inventory before taking the Purifying Crystal is a reason to reload and resupply, not a requirement to restart the entire expansion.
- Mother Miranda is defeated and the final Ethan sequence is complete.
- The closing scenes and credits have played.
- Any separate difficulty or challenge objective has registered if pursued.
Before you move on
- The Winters residence escape is complete and RW-Variant Flask 4 has been collected.
- Eveline has been defeated with Rose’s power.
- The large Deep Stratum Sclerotia Core has been destroyed.
- The Pit Laboratory and cave have been searched before taking the Purifying Crystal.
- Mother Miranda has been defeated and Ethan’s final prompt has been completed.
- The closing scenes and credits have finished.
References for this chapter
- Shadows of Rose - Resident Evil Village Walkthrough & Guide - PS5
- SoR2 · House Beneviento · The Winters' memory · Village · RE Guide
- SoR3 · Deep Stratum · Memories' Edge · Village · RE Guide
- Resident Evil Village Gold Edition PS5 contents - Capcom Support
- Resident Evil Village Gold Edition Announced - Capcom
Third-Person Mode and Mercenaries Additional Orders — options and strategies
Winters’ Expansion adds Third-Person Mode to the main Resident Evil Village campaign and expands The Mercenaries with new stages and playable characters. On PS5, install the expansion first, then open Options, enter Camera, and change View Mode to Third Person. Ethan appears on screen from behind, but story cutscenes still use a first-person presentation. The mode changes perspective rather than the campaign route, enemy behavior or puzzle solutions. The Mercenaries is a separate first-person score-attack mode. Complete every area, defeat enemies within the time limit, collect time and ability orbs, maintain combos and reach the goal after the area objective is finished. Additional Orders adds Bloody Village and Bloody River, Chris Redfield, Karl Heisenberg and Lady Dimitrescu, with later stages and characters tied to Mercenaries progression. Learn the base stages with Ethan, then use each additional character’s gauge and special attack to control crowds instead of standing still and trading damage.
Enable Third-Person Mode on PS5
From the Resident Evil Village title screen, open Options and enter the Camera settings. Select View Mode, then choose Third Person. If View Mode is missing, close the game and confirm that the Winters’ Expansion add-on has finished installing for the PS5 version before checking again. Gold Edition includes this expansion, but the add-on still needs to be present on the console.
Third-Person Mode places Ethan on screen from behind. The official manual states that cutscenes continue to use a first-person perspective, so the change applies to ordinary gameplay rather than every story presentation. It does not provide a new route, alter enemy behavior or change puzzle solutions. Test movement, aiming and camera reset controls in a safe area before committing to a difficult fight.
- Winters’ Expansion is installed for the PS5 game version.
- Options → Camera → View Mode is set to Third Person.
- Aiming, camera sensitivity and camera reset feel comfortable.
Understand what Third-Person Mode changes
Use the wider view to monitor threats around Ethan, check corners and retreat while keeping the character centered. Do not treat the extra visibility as extra protection: enemies, attacks and damage rules remain those of the main campaign. Narrow hallways can place Ethan’s body in the way of your sightline, and some boss attacks may be easier to read in first person. You can return to Options and switch viewpoints for another section or another playthrough.
The mode is separate from Mercenaries. The official PS5 manual specifies that Mercenaries is locked to first-person perspective, so selecting Third Person for the story does not convert its camera. Mercenaries uses its own equipment, shop purchases, abilities and score rules.
- The campaign viewpoint is being distinguished from Mercenaries’ fixed camera.
- No enemy-AI or damage changes are being assumed.
- First person remains available if a corridor or boss fight is easier to read that way.
Start Mercenaries and learn the area loop
Open The Mercenaries from the game’s bonus or extra-content menu. Begin with Ethan on the original stages to learn enemy routes, time-orb locations, ability-orb locations and the position of each area goal. Every stage contains several areas, and each area must be completed. Defeat the required enemies, collect time bonuses while moving through the arena, and approach the goal only after the objective is fulfilled.
Before entering each area, use the shop to buy or sell equipment and upgrade weapons. Choose a dependable damage source first, then spend remaining Lei on ammunition or recovery that supports the current route. Avoid buying an elaborate loadout that leaves you unable to afford the weapon upgrade or ammunition needed for the next area. A combo is maintained by defeating another enemy within the displayed time window; a broken combo lowers the score and reduces the value of later time bonuses.
Ability orbs offer a choice of three abilities. Select improvements that match the weapon or character you are using, and remember that abilities remain active between areas. Additional Orders also permits a limited number of ability-offer randomizations per stage, so use a reroll when all three choices are poor rather than accepting an ability that does not support your plan.
- The area enemy objective is visible before you leave the starting route.
- Time orbs and ability orbs are collected without abandoning the next objective.
- The shop is used between areas instead of spending Lei without a route plan.
- The goal is reached after the area objective is complete.
Use the Additional Orders characters and stages
Additional Orders adds Chris Redfield, Karl Heisenberg and Lady Dimitrescu, along with the Bloody Village and Bloody River stage family. Availability is tied to Mercenaries progression, so improve ranks on available stages when a later stage or character is not yet selectable. The base stages are the best place to learn the mode’s movement and combo rhythm; the Bloody stages demand more route knowledge and stronger control of enemy groups.
Chris gains Onslaught Gauge through kills, with Straight Punch takedowns giving a larger increase. Activate Onslaught when a dense wave or dangerous enemy threatens the route; it improves movement speed, reload speed and attack damage. Target Locator is powerful against grouped enemies, but use it only when you have a clear line of sight.
Heisenberg charges power with hammer attacks and ground slams. Use Magnetic Field to pull enemies into controllable positions, then release charged attacks against groups. His Soldat Jet can rush enemies but self-destructs when it hits a wall, so summon it where it has a clear lane rather than in a cramped corner.
Lady Dimitrescu builds Thrill Gauge through attacks and Lady’s Lipstick. A higher gauge improves movement and nail damage and unlocks additional moves; at maximum, she can summon one of her daughters. Keep moving toward the next time bonus, use her reach to clear enemies blocking exits, and do not save the gauge while a wave is already surrounding you.
- Ethan is used to learn routes before relying on a specialist character.
- Chris’s Onslaught, Heisenberg’s charged attacks and Lady Dimitrescu’s Thrill Gauge are used during dangerous waves.
- The next time bonus and exit route remain more important than standing still for unnecessary kills.
Before you move on
- Options → Camera → View Mode allows Third Person for the main campaign.
- Campaign cutscenes still display their fixed first-person presentation.
- The Mercenaries menu is available under the game’s bonus or extra-content menus.
- The Additional Orders selection eventually includes Chris Redfield, Karl Heisenberg and Lady Dimitrescu.
- Bloody Village and Bloody River become available as the required Mercenaries ranks are earned.
- At least one run reaches the goal after all required areas are cleared and produces a result screen.
References for this chapter
- Features: Third Person Mode | Resident Evil Village Official Web Manual
- Resident Evil Village Official Web Manual — Basic Rules: The Mercenaries
- PlayStation Blog — New RE Village The Mercenaries Additional Orders details revealed
- PlayStation Blog — Resident Evil Village DLC Winters’ Expansion launches October 28
- Prima Games — How to Start The Mercenaries Additional Orders in Resident Evil Village
Completion checklist, trophies and recommended post-game runs
Finish Ethan’s campaign first, preserve both a pre-final-boss save and a completed clear save, then verify New Game+, Extra Content Shop access and the Gold Edition content. Because Village has no ordinary post-ending free-roam chapter, complete optional exploration and one-run trophy conditions before entering the final sequence. Use a first playthrough for learning and exploration, then separate New Game+ or fresh runs for speed, low-spending, low-healing and melee-only objectives. Village of Shadows is best attempted after you have built a strong clear file and unlocked useful bonus equipment. After the main story, complete Shadows of Rose through its credits, then check Third-Person Mode and Mercenaries Additional Orders. Treat the DLC, Mercenaries grades and base-game trophies as separate completion targets.
1. Protect missable objectives before the final point of no return
Resident Evil Village does not return you to normal free exploration after the ending. Before entering the final mine and stronghold sequence, finish any optional village searches, locked-room objectives, files, treasures and challenge actions you still need. Keep separate manual saves at major area transitions and before the final approach so you can retry a restricted run without discarding your main clear.
The commonly missed one-run trophy conditions include opening every outhouse, breaking all Castle Dimitrescu windows, finishing within three hours, spending no more than 10,000 Lei, using no more than four recovery items and completing Knives Out without firearm damage. These are separate objectives, not a reason to compromise a first blind playthrough. Check the Challenges menu during a restriction run; if a relevant counter has already failed, reload an earlier valid save or restart that run.
- Complete optional exploration before the final mine and stronghold sequence.
- Create a manual save before the final boss approach.
- Check the Challenges menu for the counters relevant to your intended trophy run.
2. Complete the main campaign and preserve a final clear save
Visit the Duke before Mother Miranda and make the purchases that support your current objective. For a normal clear, prioritize ammunition, healing and the upgrades you use most. For a later difficulty run, preserve the pre-boss save and avoid spending all remaining Lei until you have confirmed which weapons and bonus items you intend to carry forward.
Defeat Mother Miranda, continue through the scripted ending and allow the credits to finish. When the game presents the completed clear-data save prompt, save it in a separate slot from the pre-boss file. This clear data is the foundation for New Game+ and later cleanup. Do not overwrite the pre-boss file until all endgame trophy checks are complete.
- Mother Miranda is defeated.
- The ending and credits have completed.
- A completed clear save exists separately from the pre-boss save.
3. Verify New Game+, Challenges and bonus content
From the title flow, confirm that New Game+ can be started from the completed clear data. New Game+ is the practical route for cleanup because your carried-over equipment and currency support later objectives, but it does not mean every purchase is free: the Duke still sells weapons, upgrades and supplies at their normal in-game costs.
Open the Challenges menu and the Extra Content Shop. Story challenges and other completed objectives award Challenge Points, which can be spent on bonus content such as special weapons and infinite ammunition after the relevant unlock conditions are met. Use these rewards for a planned Village of Shadows run rather than assuming that simply finishing once grants every special weapon.
- New Game+ is selectable from the completed clear data.
- Your intended weapons, upgrades and Lei are present in the new-run setup.
- The Challenges menu and Extra Content Shop are available.
4. Confirm Gold Edition content and complete Shadows of Rose
On the PS5 home screen, highlight Resident Evil Village, press the Options button and inspect Manage Game Content. Confirm that Winters’ Expansion is installed. Gold Edition includes the base game, Winters’ Expansion and Trauma Pack; the PlayStation Store listing also identifies the Trauma Pack’s Village of Shadows unlock option as included content.
Launch the game and confirm that Shadows of Rose is selectable from the additional-content or story menu. Complete the DLC from its beginning through the final sequence and let its credits run. It is a separate epilogue campaign, not a replacement for Ethan’s ending. Preserve its cleared save or completion state when prompted, then verify its related trophy or story-selection status from the title menus.
- Winters’ Expansion is installed through the PS5 game-content screen.
- Shadows of Rose is selectable from the game menu.
- The DLC credits have completed and its completion state is retained.
5. Use a sensible order for trophy and difficulty runs
The efficient order is: first clear on a comfortable difficulty while learning the route; a cleanup or New Game+ run for files, treasures and missed one-run objectives; a dedicated run for speed, low spending, limited healing or melee-only requirements; then Village of Shadows with the strongest equipment and bonus ammunition available to you.
Village of Shadows can be accessed through normal progression or through the Trauma Pack option included with Gold Edition. It is not the best first blind run: enemy damage, durability and resource pressure make unfamiliar ambushes and boss arenas much less forgiving. A completed New Game+ file lets you plan weapon upgrades, ammunition and healing around the sections that caused the most trouble.
- Keep separate saves for exploration, restricted challenges and Village of Shadows.
- Confirm the required weapon or bonus-ammo unlock before beginning a high-difficulty run.
- Retain the pre-final-boss save until all intended campaign trophies are checked.
6. Finish Mercenaries, Additional Orders and final completion checks
After completing the main campaign, open The Mercenaries from the Extra Content area. Learn the standard stages by maintaining the combo, collecting time bonuses and moving directly between enemy groups. Mercenaries Additional Orders is part of Winters’ Expansion and adds Chris Redfield, Karl Heisenberg and Alcina Dimitrescu as playable characters, along with additional stages. Treat score requirements as a separate arcade-mode goal; campaign upgrades do not replace the need to learn stage routes and character abilities.
For a Gold Edition completion check, confirm all of the following: the main campaign has a completed clear save; New Game+ and the Extra Content Shop are visible; Village of Shadows is accessible; Winters’ Expansion is installed; Shadows of Rose has been completed through its credits; Third-Person Mode is available; and Mercenaries Additional Orders can be selected. To change the main campaign camera, open Options, enter the Camera section and change View Mode to Third Person. Cutscenes still play from a first-person perspective.
- The Mercenaries menu and Additional Orders content are available.
- Options → Camera → View Mode includes Third Person.
- The intended campaign, DLC and Mercenaries trophies are confirmed in the PS5 trophy list.
Before you move on
- A completed main-campaign clear save exists and New Game+ is available.
- The Extra Content Shop and Challenges menus are accessible.
- Winters’ Expansion is installed and Shadows of Rose has been completed through its credits.
- Village of Shadows is accessible, whether through normal progress or the included Trauma Pack option.
- Third-Person Mode is selectable at Options → Camera → View Mode.
- Mercenaries Additional Orders and its added characters and stages are available.
- The PS5 trophy list confirms the specific campaign, DLC and Mercenaries objectives selected for completion.
References for this chapter
- Resident Evil Village - PS4 & PS5 Games | PlayStation
- Resident Evil Village Gold Edition PS4 & PS5 | PlayStation Store
- Features: Third Person Mode | Resident Evil Village Official Web Manual
- Changing View Modes | Resident Evil Village Official Web Manual
- Resident Evil Village Gold Edition Announced | Capcom News
- Resident Evil: Village Printable Trophy Guide & Road Map | PlayStationTrophies.org
- Resident Evil Village Walkthrough & Guide: Challenges and Trophies | GameFAQs
Finishing up
Main campaign completion: defeat Mother Miranda, allow the ending and credits to finish, and preserve the Completed Story Save. Load that file to confirm New Game+ carries over the completed inventory and currency state.
Winters' Expansion completion: finish Shadows of Rose through its ending and credits, then confirm its completed save or completion state is retained in the additional-content menu.
Unlocks and difficulties: confirm the Extra Content Shop is available after the main clear and that Village of Shadows is selectable either through campaign progress or the installed Trauma Pack unlock.
Gold Edition content: verify on PS5 that Winters' Expansion and Trauma Pack are installed for the PS5 version, then confirm Shadows of Rose, Third-Person Mode and Mercenaries Additional Orders appear in-game.
Choose your next gameScreenshots & video
Game imagery for reference. Follow the written chapters above for the route and strategies.
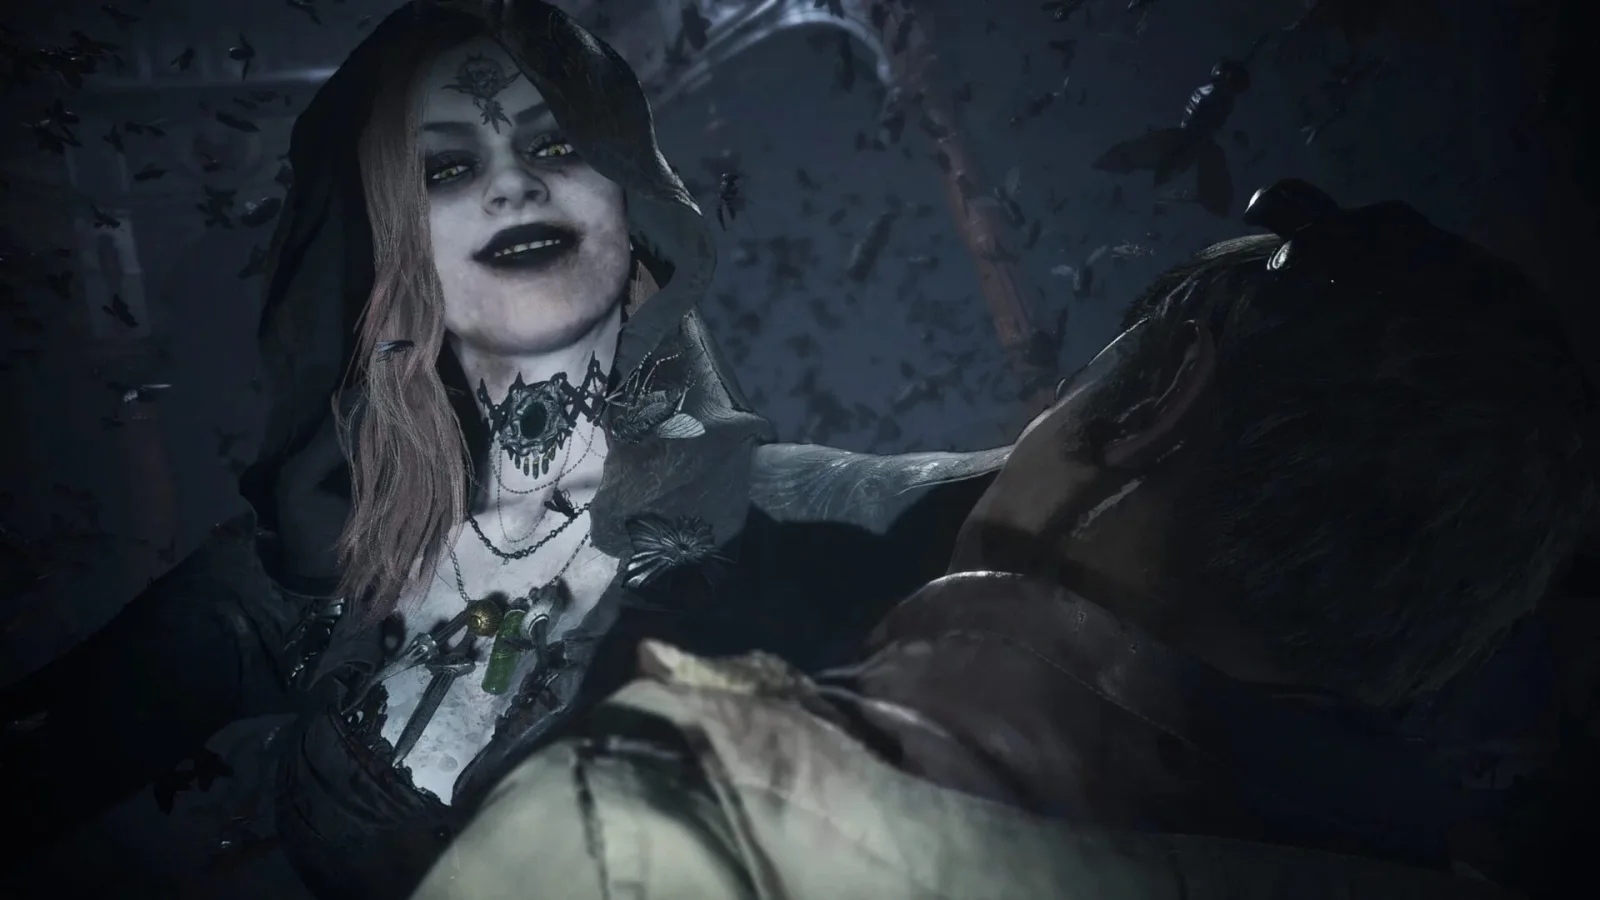
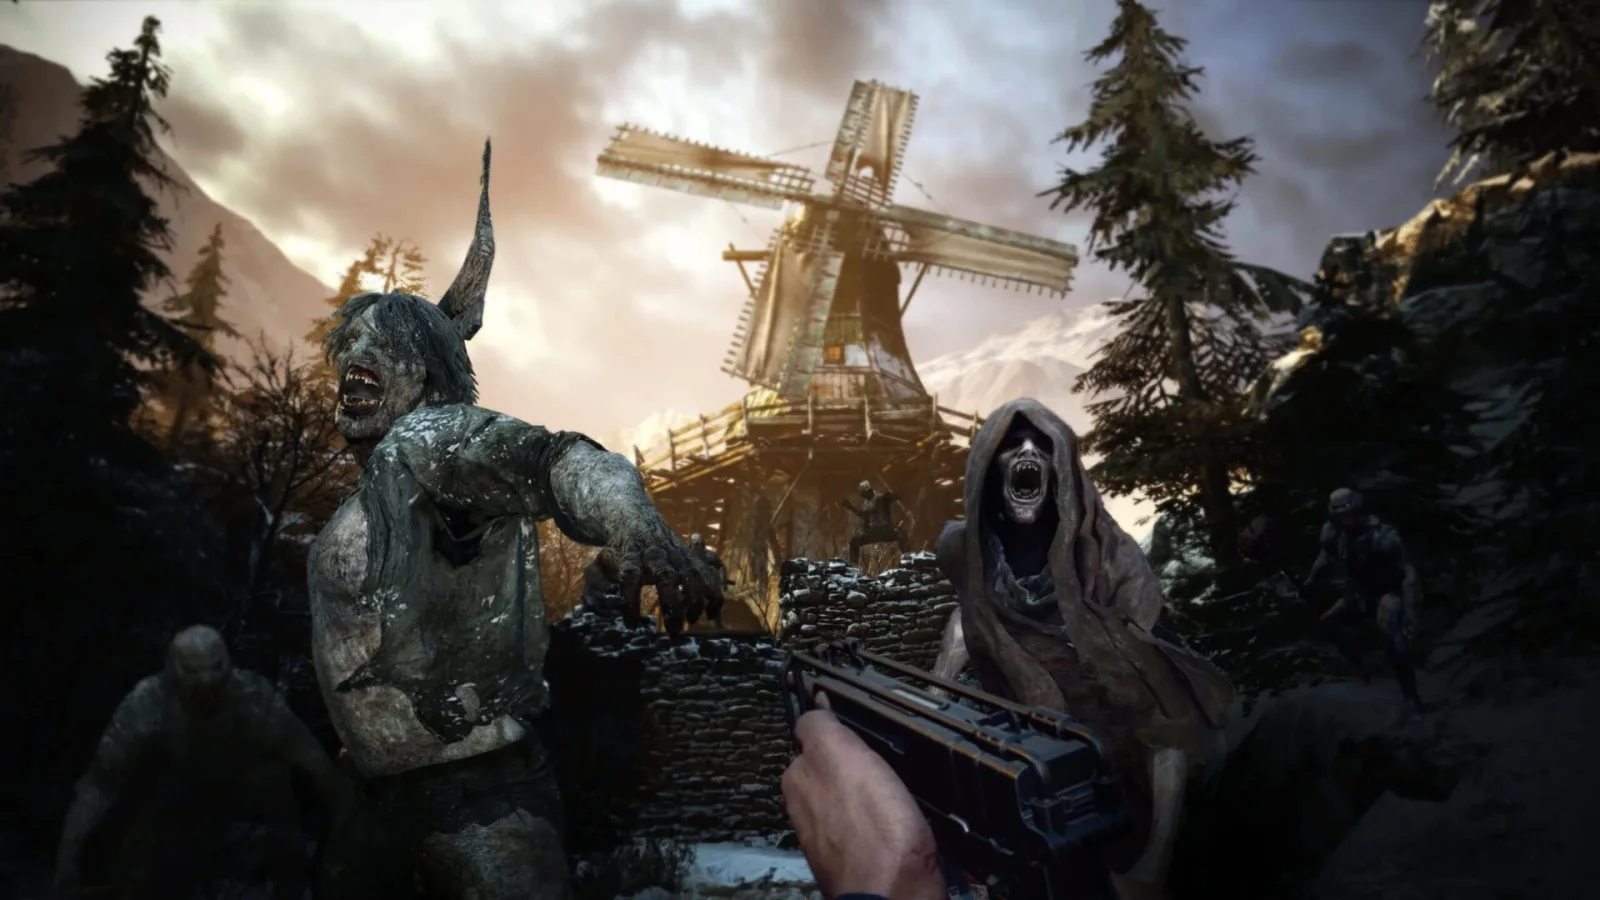
Sources & references
Our original guide draws on the references below. Check the edition at the top of this page before following controls or unlock requirements.
- Resident Evil Village Gold Edition Announced | Capcom News
- How to download your games and add-ons from PlayStation Store — PlayStation Support
- Main Menu | Resident Evil Village Official Web Manual
- Resident Evil Village Official Web Manual — Inventory
- Resident Evil Village Official Web Manual — Key Items and Treasure
- 2 · The Village (1st visit) · Lycan Ambush · Luiza’s House, RE Guide
- The Village (part 1) - Resident Evil Village Walkthrough & Guide
- Resident Evil Village Walkthrough Part 1: From Ethan and Mia's House to Old Town
- 5 · The Village (2nd visit) · The Red-Chimney House, RE Guide
- Resident Evil Village — Duke merchant locations and services
- Resident Evil Village — Find the house with the red chimney
- Resident Evil Village — Inventory, map and Duke guide
- Resident Evil 8 Village Walkthrough
- Resident Evil Village: All Angel Masks Locations and Hall of the Four Puzzle Solution
- Resident Evil Village: How to Get the Courtyard Key — Push Square
- Guide for Resident Evil Village — Castle Dimitrescu — TrueAchievements
- 4 · Castle Dimitrescu · Village · RE Guide
- Resident Evil Village: Tower of Worship walkthrough
- Can you get back into Castle Dimitrescu in Resident Evil Village?
- Resident Evil Village Gold Edition Announced - Capcom
- Resident Evil 8 Village House Beneviento Walkthrough — PowerPyx
- House Beneviento — Resident Evil Village Walkthrough & Guide — GameFAQs
- House Beneviento — Village RE Guide
- RE8 Village: Full House Beneviento Doll Workshop Puzzle Walkthrough — VGC
- Resident Evil Village: How to Get Beneviento’s Treasure
- Resident Evil Village Walkthrough — The Village, Part 4
- Resident Evil 8 Village All Treasure Locations and Solutions
- Four-Winged Unborn Key — Resident Evil Village
- Resident Evil Village Maestros Collection Code Guide
- Waterwheel Weapon House Items — Resident Evil Village
- Resident Evil Village Walkthrough and Guide — The Reservoir
- Resident Evil Village Walkthrough — The Reservoir
- RE Guide Village — Moreau's Reservoir
- Resident Evil Village Boss Fight Guide
- The Stronghold — Resident Evil Village Walkthrough & Guide — GameFAQs
- Stronghold Walkthrough & Map Guide — Resident Evil Village — GameWith
- 10 · The Stronghold · Otto’s Mill — RE Guide
- Resident Evil Village Walkthrough: Every Area in Order
- Resident Evil Village Walkthrough: The Stronghold — Millenium
- 11 · Heisenberg’s Factory · Village · RE Guide
- The Factory - Resident Evil Village Walkthrough & Guide
- Resident Evil Village - Factory Walkthrough
- Resident Evil Village: Unlocking the factory, finding Heisenberg - walkthrough
- Resident Evil Village - PS4 & PS5 Games | PlayStation
- 12 · Chris: the village and the caverns · Ceremony Site · Village · RE Guide
- Mother Miranda (Ceremony Site) · Village · RE Guide
- Urias Strajer Boss Fight – Resident Evil Village
- The Final Assault – Resident Evil Village Gold Edition Walkthrough & Guide
- Resident Evil 8 Village – How to Start New Game+
- Resident Evil Village Gold Edition PS4 & PS5 — PlayStation Store
- Resident Evil Village — Trauma Pack — Steam product page
- Resident Evil 8 Village All Collectible Locations and New Game Plus reference
- Resident Evil Village Walkthrough & Guide — PlayStation 5 — New Game Plus reference
- Resident Evil Village Extras — New Game Plus and Village of Shadows reference
- Winters’ Expansion PS4 & PS5 | PlayStation Store
- Changing View Modes | Resident Evil Village Official Web Manual
- Features: Third Person Mode | Resident Evil Village Official Web Manual
- Resident Evil Village Official Web Manual — Basic Rules: The Mercenaries
- Resident Evil Village Official Web Manual — Sub-menus and Map Colors
- SoR1 · Castle Dimitrescu · The Three Masks · Village · RE Guide
- SoR2 · House Beneviento · The Winters' memory · Village · RE Guide
- RE Guide — Shadows of Rose Area Order and Point of No Return
- Resident Evil Village: Shadows of Rose Walkthrough and Guide
- Resident Evil Village Achievement Guide — Shadows of Rose Systems and Craftsmaster
- Resident Evil Village: Shadows of Rose DLC — Bronze Mask Walkthrough
- Resident Evil Village: Shadows of Rose DLC — Silver Mask Walkthrough
- Resident Evil Village: Shadows of Rose DLC — Gold Mask Walkthrough
- RW-Variant Flask 4 — Evil Resource
- Shadows of Rose - Resident Evil Village Walkthrough & Guide - PS5
- Doll Puzzles Solutions Shadows of Rose | Resident Evil Village
- バイオハザード ヴィレッジ DLC「シャドウオブローズ」攻略
- SoR3 · Deep Stratum · Memories' Edge · Village · RE Guide
- Resident Evil Village Gold Edition PS5 contents - Capcom Support
- PlayStation Blog — New RE Village The Mercenaries Additional Orders details revealed
- PlayStation Blog — Resident Evil Village DLC Winters’ Expansion launches October 28
- Prima Games — How to Start The Mercenaries Additional Orders in Resident Evil Village
- Resident Evil Village Gold Edition PS4 & PS5 | PlayStation Store
- Resident Evil: Village Printable Trophy Guide & Road Map | PlayStationTrophies.org
- Resident Evil Village Walkthrough & Guide: Challenges and Trophies | GameFAQs
About the game & collecting notes
- Platform
- Sony PlayStation 5
Complete, step-by-step campaign walkthrough for the PS5 Gold Edition of Resident Evil Village, covering the original main campaign through its ending plus the Winters' Expansion story (Shadows of Rose), Third‑Person Mode notes, Mercenaries additions and Trauma Pack unlocks. Practical routes, boss tactics, merchant priorities and completion checks for a single-run clear on Standard difficulty.
Darryl Polo
Darryl Polo writes about emulation and retro games. What changes when an old favorite moves to another setup? That question connects his interest in tinkering with the games that made the hardware worth keeping.
Our editorial standardsFound a step that needs another look? Help us improve this guide.