
Resident Evil 7 biohazard — Gold Edition (PS5) Complete Campaign Walkthrough
Step-by-step campaign walkthrough for Resident Evil 7 biohazard Gold Edition on PlayStation 5. This guide covers the full main-story route to the canonical ending on PS5, explains PS5-specific setup, and includes optional coverage for the End of Zoe epilogue, Not a Hero, Banned Footage packs and challenge modes included with Gold Edition.


Find a copy
Resident Evil 7 biohazard Gold Edition Sony PlayStation 5
We may earn a commission if you buy through these links, at no extra cost to you. As an Amazon Associate I earn from qualifying purchases.
Opens retailer search results. Check the model, edition, seller, availability and current price before buying.
Before you begin
You’re about to play Resident Evil 7 biohazard Gold Edition on PlayStation 5.
The Gold Edition packages the full base campaign plus the Banned Footage packs and the End of Zoe epilogue; Not a Hero is provided as a separate free download.
This PS5 guide assumes you are playing the PS5-native update (June 2022 upgrade) and covers how the PS5 changes affect controls, save/load behavior and performance.
I’ll walk you through the main-story objectives in clear, ordered steps so you can progress without missing essential items or getting stuck.
Follow this walkthrough if you want one consistent route from the Baker estate through the final sequence, with checkpoints for recovery if you die, recommended inventory choices, and optional sections for the Gold Edition DLC.
I focus on reproducible, practical directions using the PS5 release — VR is supported only by the original PS4 PSVR mode, which is not the PS5 native experience; VR-specific play requires the PS4 version and the PSVR headset.
Set yourself up for the run
Install the PS5 Gold Edition build or apply the free PS4-to-PS5 upgrade.
If you own a PS4 disc, the PS4 disc must be inserted into a PS5 with a disc drive to use the disc-based upgrade path; digital buyers should claim the upgrade from the PlayStation Store.
(See official Capcom/PlayStation notes.)
Set DualSense options: enable vibration/haptics and adaptive triggers if you prefer stronger immersion; the PS5 update supports DualSense haptics and trigger resistance.
Turn on 3D Audio if you have a compatible headset for better audio cues.
Choose an initial difficulty that matches your comfort.
This guide assumes Normal difficulty for paced survival play; increase difficulty only if you want harder enemy behavior and fewer resources.
Familiarize yourself with inventory management: use safe rooms to store extra supplies, craft only what you need early on, and prioritize handgun ammo, healing items and a shotgun when available.
If you plan to use the PSVR experience, be aware PSVR play requires the PS4 version (use the PS4 disc or PS4 digital copy) and the PSVR hardware; the PS5 native build does not provide the original PSVR mode.
PSVR2 support for Resident Evil 7 is not provided in the PS5 upgrade.
Back up trophies/save data to cloud storage (PS Plus) if you want to safeguard progress before attempting riskier challenge modes.
Keep a notepad or the PS5 Activity tracker handy to note items you cannot use immediately; many puzzles require returning to previous rooms once you acquire a specific tool.
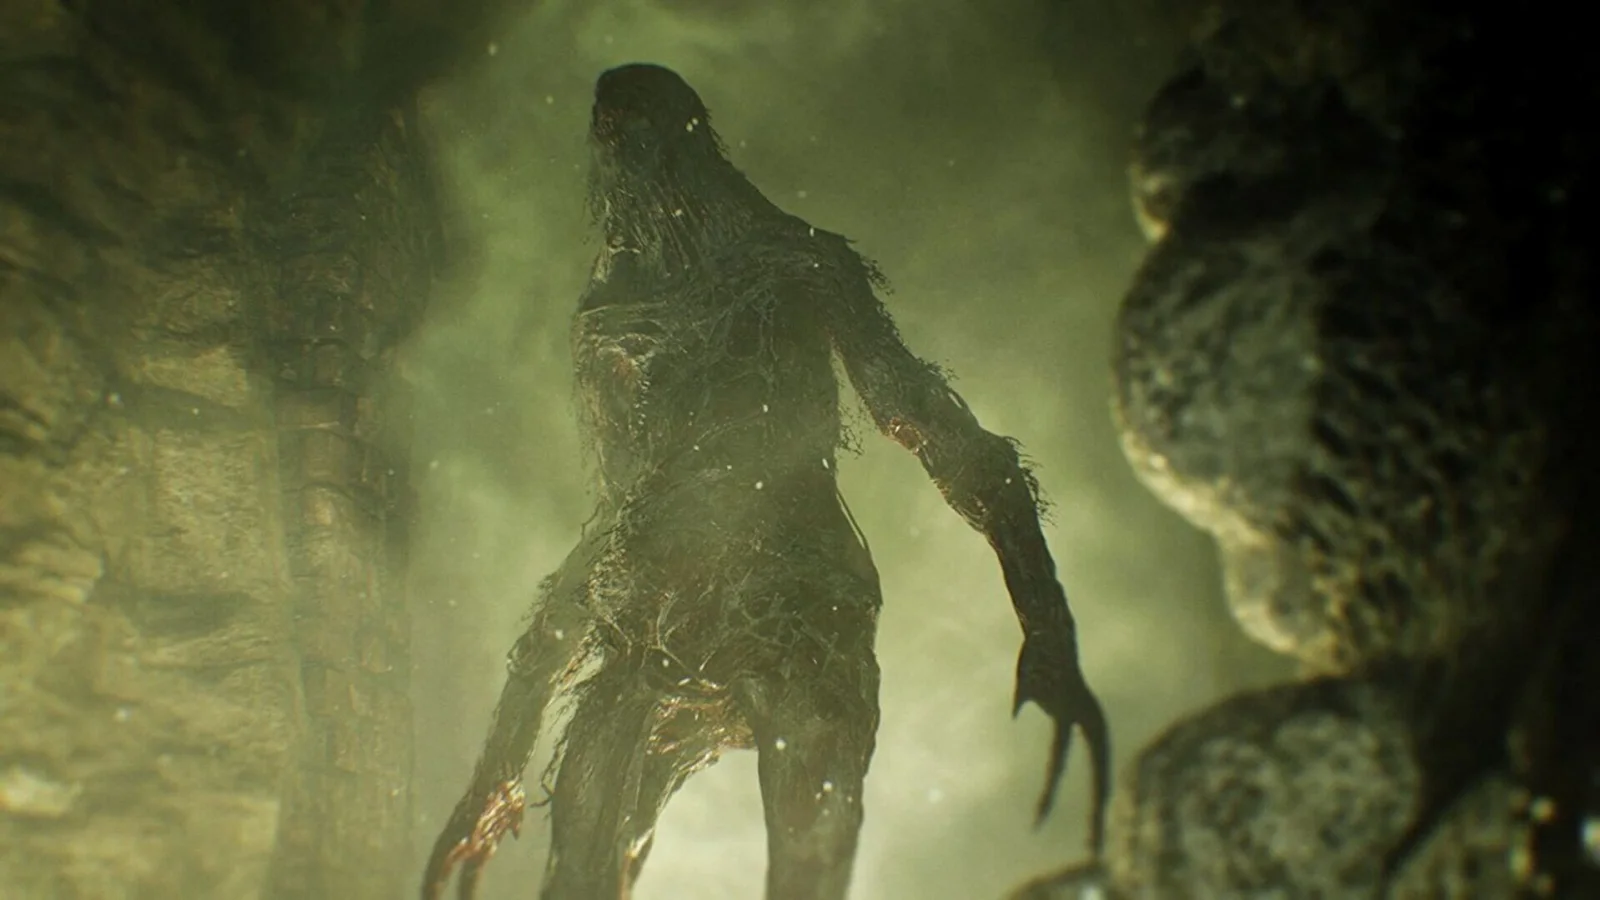
Start-up, saves, controls and PS5-specific settings
Verify that the PS5-native Gold Edition is installed before beginning. The PlayStation 5 version supports DualSense vibration and trigger effects, 3D Audio and enhanced visuals. A physical PS4 disc can be upgraded only on a PS5 with a disc drive, and that disc remains the ownership license for launching the upgraded version. The original VR mode is tied to the PS4 version and compatible PSVR equipment, not the native PS5 build. For the campaign, use cassette recorders for dependable manual saves and item boxes for routing supplies. The first main-house safe room is the Laundry Room, reached through the Pantry hatch after the dinner sequence.
Verify the installed PS5 Gold Edition
From the PS5 home screen or Game Library, highlight Resident Evil 7 biohazard and open the game hub. Use the three-dot menu to inspect the available editions and select Resident Evil 7 biohazard Gold Edition. Confirm that the installed version is labeled PS5 rather than PS4 before starting a new game. The PlayStation Store product page lists both console versions, so the icon alone is not enough to confirm which build is installed.
Gold Edition contains the main campaign, Banned Footage Vol. 1, Banned Footage Vol. 2 and End of Zoe. Not a Hero is free DLC rather than a Gold-exclusive paid episode. If it is not available from the in-game menu, open the game hub’s Add-ons section or the PlayStation Store listing and check that the free download is associated with the same account that owns the game. Do not buy a second copy of Not a Hero.
- The game hub identifies the selected edition as Resident Evil 7 biohazard Gold Edition.
- The installed application is labeled PS5.
- The intended Gold Edition add-ons are downloaded or queued.
- Not a Hero is available as a free add-on if you intend to complete the extra campaign.
Apply the upgrade when using a physical PS4 disc
Insert the PS4 Gold Edition disc into a PS5 equipped with an Ultra HD Blu-ray drive. On the Resident Evil 7 PlayStation Store page, open the three-dot menu, choose the Gold Edition entry and select the available free PS5 upgrade. Capcom specifically notes that the PS4 disc must be inserted for the upgrade option to appear and for the upgraded PS5 version to launch. A PS5 Digital Edition cannot validate a physical disc.
After installation, keep the disc available whenever you launch the PS5 version. If the upgrade offer is missing, confirm that you selected the Gold Edition listing rather than Standard Edition, that the disc region matches the account region where applicable, and that the console is signed into the purchasing account. Do not delete the PS4 installation or saves until you have confirmed that the desired save data is present on the PS5 build.
- Disc owners are using a PS5 with a disc drive.
- The upgrade was selected from the Gold Edition product entry.
- The PS4 disc remains inserted when launching the upgraded game.
- Digital owners have selected the PS5 version from the game hub rather than launching the PS4 application.
Set audio, display and DualSense options
The PS5 version supports DualSense vibration, trigger effects, 3D Audio and enhanced visuals. If you use headphones, open PS5 Settings, then Sound and 3D Audio, and choose the profile that gives you the clearest front-to-back positioning. Resident Evil 7 uses footsteps, enemy noises and environmental sounds as navigation and warning cues, so clarity is more useful than choosing a profile simply because it sounds louder. The PS5 upgrade’s feature set is documented by PlayStation.
Open PS5 Settings, Accessories and Controller to adjust Vibration Intensity and Trigger Effect Intensity. Leave both enabled for the first test if you want the native controller features. During the opening section, aim and fire a weapon when one becomes available so you can judge the recoil and trigger resistance. Reduce or disable trigger effects if repeated aiming feels tiring; doing so does not remove access to any gameplay function. If you use a television rather than headphones, select the appropriate television audio output instead of applying a headset profile.
- The selected audio output matches the device you are actually using.
- 3D Audio has been tested with headphones if you plan to use it.
- Aiming and firing feel comfortable with the chosen trigger intensity.
- Brightness or HDR calibration leaves dark doorways and floor edges visible without making the whole image gray.
Understand saving and checkpoint recovery
Resident Evil 7 uses checkpoint autosaves during progression, but the reliable routine is to make a manual save whenever you reach a cassette recorder. A death reloads the latest available save or checkpoint, which may not preserve every item pickup or room state since your last manual save. Before a risky fight, a puzzle sequence or a long unexplored route, return to the nearest recorder when practical and create a fresh slot or deliberately overwrite the slot you are using. Manual saves are made at tape recorders; on ordinary difficulties, the recorder is immediately usable. Madhouse changes the saving rules and requires cassette tapes, so do not spend those tapes as though you were playing Normal.
Safe rooms are also inventory-management points. Item boxes share their contents across the campaign, so leave spare ammunition, duplicate healing ingredients and temporary items in storage rather than carrying everything. Keep at least one or two open inventory spaces before entering a new section. A full inventory can prevent you from taking a key item, forcing a retreat through territory that may have become dangerous again.
- A manual save exists before leaving the first main-house safe room.
- You know whether the current difficulty uses ordinary saves or Madhouse cassette requirements.
- At least one inventory slot is open before exploring an unfamiliar area.
- A healing item and the ammunition needed for the next objective are carried.
Reach the Laundry Room and establish the first campaign routine
After the Guest House opening and the dinner scene, regain control in the Main House dining area. Follow the immediate route through the kitchen-side rooms until you obtain the Hatch Key. Use it on the hatch in the Pantry, then enter the narrow crawlspace beneath the house. Continue through the passage and climb out at the far end into the Laundry Room. This is the first main-house safe room and contains a tape recorder and item box. The route and room identification are consistent across established walkthrough references.
In the Laundry Room, interact with the tape recorder and make a manual save. On Assisted or Normal difficulty, collect the Main House Map from the room before leaving; its placement and available contents vary on Madhouse, so do not treat the standard-difficulty item list as universal. Check the room carefully for supplies, then put away anything that is not needed for the immediate Main House route. Leave with healing, usable ammunition and room for objective items.
- The Pantry hatch has been opened with the Hatch Key.
- The Laundry Room tape recorder and item box have been located.
- A manual save has been created.
- The Main House Map has been collected when playing Assisted or Normal.
- The inventory has open space before beginning the Main House exploration.
Use restrained crafting and storage
Do not convert every chemical fluid or gunpowder as soon as it appears. Combine only when the result answers an immediate need: healing if your health is low, handgun ammunition when you are short for an unavoidable fight, or another clearly required supply. Keep some flexible materials uncombined because the next section may reward a different recipe more heavily.
When returning to the Laundry Room or another safe room, store duplicate healing items and ammunition that exceed the next objective’s needs. Keep story keys and tools until the game has clearly consumed them or the related area is complete. If you are unsure whether an item is still required, leave it in the item box rather than discarding it; the shared box lets you retrieve it later.
- Crafting has been limited to a clear immediate purpose.
- Excess supplies are in the item box rather than filling Ethan’s inventory.
- Story items have not been discarded prematurely.
- The next departure includes healing, ammunition and free inventory space.
Before you move on
- The native PS5 Gold Edition launches from the correct product entry.
- The required Gold Edition content is installed, and Not a Hero is available if desired.
- DualSense, audio and display settings have been tested for comfort and visibility.
- The Pantry hatch has been used and the Laundry Room has been reached.
- The Main House Map has been collected on Assisted or Normal difficulty.
- A manual save has been created at the Laundry Room recorder.
- The item box contains excess supplies while Ethan leaves with healing, ammunition and open inventory space.
References for this chapter
- Resident Evil 7 biohazard Gold Edition - Upgrading PS4 Disc Version to PS5 – Capcom Support
- PS5 versions of Resident Evil 7, Resident Evil 2, and Resident Evil 3 launch today — PlayStation.Blog
- RESIDENT EVIL 7 biohazard Gold Edition – PlayStation Store
- Main House – Resident Evil Wiki
- Guide for Resident Evil 7: Biohazard – Normal playthrough
- Main House Guide – Resident Evil 7 biohazard – Neoseeker
- Main game (RE7) – Resident Evil Wiki
- Resident Evil 7: Biohazard – PS4 Games – PlayStation
Prologue: The Guest House — First Escape and immediate objectives
Ethan’s opening route introduces movement, blocking, melee combat, saving and resource discipline. Follow the swamp path into the Guest House, search the upper floor, and use the Derelict House Footage tape if you want its fireplace clue and optional lock-pick reward. Pull the fireplace lever, descend to the basement, collect the Bolt Cutters and free Mia. After the first Mia encounter, recover the Fuse from the chained kitchen cupboard, restore power to the stairs and prepare for the unavoidable chainsaw attack. Collect the M19 handgun and ammunition upstairs, defeat Mia in the attic and let the resulting cutscene carry Ethan into the Main House sequence.
1. Enter the Guest House and establish the route
After the opening drive, follow the only clear trail through the swamp and around the abandoned vehicle. There is no required combat on this approach. The path leads to the rear entrance of the Guest House, which closes behind Ethan after he enters. Examine obvious prompts and follow open doors rather than searching every dark corner; the early area is teaching you to use sound, light and structural landmarks to navigate.
The Guest House has no Item Box. Ethan’s starting inventory has limited space, so do not collect every low-value object if doing so would prevent you from carrying key items. Healing is scarce during this section, but the area also contains recovery items that can cover the two Mia encounters. Avoid using medicine merely to restore a small amount of damage unless another fight is about to begin.
- Enter through the rear Guest House door.
- Remember that there is no Item Box in this area.
- Keep inventory space available for the Bolt Cutters, Fuse, Axe and handgun.
2. Search the upper floor and decide whether to play the videotape
Go upstairs to find the first cassette recorder and the Derelict House Footage videotape. Save here if you want a safe restart point before the basement and Mia sequence. The tape is not required to complete the basic campaign route, but it shows the fireplace mechanism and offers an optional lock-pick opportunity that can open the locked kitchen drawer in the present-day Guest House.
To use the tape, return downstairs to the Living Room and place it in the VCR. As Clancy, turn around near the starting area to collect the lock pick, then use it on the blue kitchen cabinet drawer during the tape. This opens the matching drawer when Ethan returns and provides the optional Antique Coin. Continue following the cameramen until the tape ends in the basement. If you are focused only on story progress, you can skip the tape and inspect the fireplace directly.
- Find the cassette recorder and Derelict House Footage tape upstairs.
- Save before entering the basement route.
- Use the tape’s lock pick on the blue kitchen drawer if pursuing the optional coin.
- Return to Ethan’s timeline after the recording ends.
3. Open the fireplace passage and collect the Bolt Cutters
In the Living Room, inspect the fireplace and pull its concealed lever. The fireplace opens a passage into the basement. Climb down the ladder; it breaks behind Ethan, so treat this as a one-way descent until the story route returns you to the first floor.
Move through the flooded passage and avoid wasting time investigating the water. In the Guard’s Area, read the List of Names on the workbench if you are tracking files, then turn it over and read the reverse side as well. Pick up the Bolt Cutters from the same work area and use them on the chain securing Mia’s cell. Approach Mia to trigger the next sequence, then follow her through the Surgical Area and the narrow passage.
- Pull the fireplace lever and descend.
- Read both sides of the List of Names if collecting files.
- Take the Bolt Cutters from the basement workbench.
- Cut the chain on Mia’s cell and follow her through the basement.
4. Survive the first Mia encounter
After Mia disappears in the doll-filled room, use the newly opened passage to reach the first-floor Front Corridor. Search the small table for the Guest House Map and enter the Bathroom to collect the two First Aid Med items. These supplies are more valuable than anything obtained by exploring unnecessary dead ends.
Return toward the basement route when the banging begins. Mia attacks with a knife. Hold the block command as she closes in, then create space instead of standing against a wall. The game supplies the Axe during the encounter. Strike after her attack finishes, then block or circle away when she advances again. You do not need to chase her through cramped corners. After the fight, answer the ringing phone when Zoe calls and tells Ethan to escape through the attic.
- Collect the Guest House Map and the two First Aid Med items.
- Block Mia’s knife attacks and keep room to reposition.
- Use the Axe during the fight rather than attempting an unarmed escape.
- Answer Zoe’s call after Mia falls.
5. Retrieve the Fuse and restore the stairs
Return to the room where Mia fell and pick up the Axe if it remains there. Go through the kitchen-side route to the chained cupboard beside the Kitchen door. Use the Bolt Cutters on the chain and take the Fuse. If you used the videotape lock pick, open the blue drawer for the optional Antique Coin before leaving the kitchen.
Carry the Fuse to the Living Room and place it in the fuse box. This restores power to the red Stairs button on the second floor. When you leave the Living Room, Mia ambushes Ethan with the chainsaw and cuts off his left hand. This injury is scripted and cannot be avoided. After the scene, heal if necessary, then climb to the second floor and press the Stairs button to lower the staircase to the attic.
- Recover the Axe after the first Mia fight.
- Use the Bolt Cutters on the chained kitchen cupboard.
- Take the Fuse to the Living Room fuse box.
- Expect the unavoidable chainsaw injury when returning toward the stairs.
- Activate the Stairs button on the second floor.
6. Prepare for and win the attic fight
Before touching the attic ladder, search the accessible upper rooms. The first room on the right contains the M19 handgun, five handgun rounds and a First Aid Med. The nearby attic table contains another ammunition stack, and the small room off the attic contains a larger stack. Collect these supplies before climbing; the ladder triggers Mia’s chainsaw encounter.
Save at the second-floor cassette recorder before starting the fight. When Mia cuts through the attic hatch, keep moving around the room and use the pillars, crates and corners to avoid being trapped. Aim for her head during recovery windows, fire controlled bursts and block or reposition if she closes the distance. The M19 and its ammunition are intended for this encounter, so do not hesitate to use them. When Mia collapses and the scene begins, the handgun will not carry into the Main House, so there is no reason to conserve it afterward.
- Collect the M19 handgun, ammunition and available First Aid Med.
- Save before climbing the attic ladder.
- Keep moving and aim at Mia’s head when she is exposed.
- Use the handgun freely because it is removed before the next chapter.
7. Confirm completion of the Guest House prologue
After the attic fight, Mia briefly calms before Jack Baker knocks Ethan unconscious. This capture is the intended conclusion of the prologue, not a death caused by poor play. You do not need to find a separate exit or reach the Guest House front entrance.
The chapter is complete when the cutscene transfers Ethan into the Baker family’s Main House sequence. The next section begins with the dinner-table scene and eventually provides the first Item Box in the Main House Laundry Room, expanding inventory management beyond the Guest House’s limited twelve-slot start.
- Finish the attic encounter with Mia.
- Allow Jack’s capture cutscene to trigger.
- Confirm that Ethan has been transferred to the Main House sequence.
Before you move on
- Ethan has entered the Guest House and reached the basement through the fireplace passage.
- The Bolt Cutters have been collected and used to free Mia.
- The first Mia knife encounter is complete and Zoe’s phone call has occurred.
- The Fuse has been removed from the chained kitchen cupboard and installed in the Living Room fuse box.
- The Stairs button has been activated and Ethan has collected the attic handgun supplies.
- The second Mia encounter is complete and Jack’s capture has transferred Ethan into the Main House storyline.
The Baker House — Dining Area, Garage and First Main Hall Access
After escaping the Guest House, explore the accessible rooms of the Baker residence without trying to defeat Jack. Find the Hatch Key in the Main Corridor, use it on the Pantry hatch, and reach the Laundry Room safe room. Save there, collect the Main House Map, and use the Item Box to make room for ammunition, healing and objective items. Return to the corridor to receive the Deputy’s Knife, then enter the Garage, take the G17 Handgun and Car Key, and survive Jack’s vehicle encounter by keeping the car and surrounding space between you and him. Once Jack is down, search the Garage, climb to the upper walkway, remove the Ox Statuette from the framed plaque and move the obstructing shelf. Place the Ox Statuette in the Main Hall door. Return to the Laundry Room to save and prepare for the Dog Head route covered in the next chapter.
1. Search the accessible house rooms and take the Hatch Key
After the dinner sequence, move through the Dining Area and inspect the rooms that are currently open: the Kitchen, Living Room, Pantry and nearby corridor. Open containers, drawers and lockers while you still have a safe route back to the Laundry Room. Prioritize handgun ammunition, Chem Fluid, Herbs and First Aid Meds. Do not combine every crafting ingredient immediately; keeping one or two components separate can make it easier to collect a required key item without discarding supplies.
Proceed toward the far end of the Main Corridor. Jack will begin patrolling and can appear from either direction. The objective is not to fight him. Use the Dining Area, Kitchen and corridor corners to break his sightline, then reach the small table near the corridor end and take the Hatch Key. If Jack closes the direct route, retreat through the room you just cleared and circle back after he moves away.
Take the Hatch Key to the Pantry. Use it on the floor hatch and crawl through the passage beneath the house. Follow the passage to the Laundry Room. This is the first reliable reset point in the Baker residence, so avoid wandering back into the main rooms until your inventory is organized.
- Search the Dining Area, Kitchen, Living Room, Pantry and nearby corridor.
- Take the Hatch Key from the table at the end of the Main Corridor.
- Use the Hatch Key on the Pantry floor hatch.
- Avoid spending ammunition trying to kill Jack during this patrol.
2. Save in the Laundry Room and organize the Item Box
Inside the Laundry Room, use the Tape Recorder to make a manual save. Take the Main House Map from the table and search the room’s containers for supplies. The Item Box is shared with other safe rooms, so anything stored here remains available later; use it to keep your active inventory clear rather than carrying every crafting component.
Carry at least one healing item and retain the ammunition for the weapon you currently have available. The Knife becomes important for opening taped containers and dealing with certain environmental objects, but it is not a dependable answer to Jack or a close-range Molded attack. If the inventory is nearly full, store duplicate healing ingredients or low-priority valuables. Keep key items and anything needed for the next objective accessible.
The Laundry Room is also your safest place to recover from a bad chase. If Jack is waiting outside, do not rush through the doorway. Save, rearrange your inventory, and leave only after listening for his movement or confirming that the corridor is clear. The safe-room interior is not a combat arena, so use the doorway and surrounding rooms to reset the pursuit rather than attempting a desperate melee exchange.
- Make a manual save at the Laundry Room Tape Recorder.
- Take the Main House Map.
- Use the Item Box to create at least several open inventory slots.
- Keep healing and ammunition available for the Garage sequence.
3. Receive the Deputy’s Knife and open the Garage route
Leave the Laundry Room and return to the Main Corridor. Approach the locked Main Hall entrance at the end of the corridor to trigger the next story interaction. The deputy appears at the window and provides the Knife, then directs Ethan toward the Garage. If the interaction does not trigger immediately, move away from the door, return to the corridor and approach it again rather than searching the later areas prematurely.
Use the Knife on the red tape around the Garage control box. Activate the control and enter the Garage. The Knife can also break open certain taped or fragile containers, so inspect the Garage after the immediate threat has been handled, but do not stop in front of Jack to loot while he is attacking.
The Garage has more space than the corridor, which makes it possible to evade instead of trading hits. Keep the vehicle, walls and work areas in mind as landmarks. If Jack cuts off one side, run around the car and use the opposite side to reach the handgun and vehicle objective. Avoid backing into the corners beside the walls or storage objects, where his swings are difficult to evade.
- Trigger the deputy encounter at the Main Hall approach.
- Take the Deputy’s Knife.
- Cut the tape on the Garage control box and activate it.
- Enter the Garage without trying to fight Jack in the corridor.
4. Take the G17 Handgun and Car Key
Once inside the Garage, pick up the G17 Handgun from the floor and take the Car Key from the nearby surface on the standard Easy or Normal route. The handgun is your first reliable firearm for this section. If Jack is already advancing, take the weapon first and create distance before attempting to use the Car Key; do not stand still while navigating the inventory or examining an item.
Use the car as the central loop of the encounter. When Jack blocks your route, move around the vehicle rather than running directly into him. Fire only when you need an opening or when the game’s vehicle interaction gives you a clear opportunity. Headshots can stagger him, but ammunition is limited and the encounter is designed around movement, positioning and the vehicle rather than a conventional permanent kill.
If you take damage, do not heal automatically after one hit. Create distance first, then heal when Jack is separated from you by the car or another obstacle. If the encounter goes wrong, restart from the Laundry Room save and enter the Garage with fewer unnecessary items so the handgun, Car Key and healing supply are easy to select.
- Take the G17 Handgun from the Garage floor.
- Take the Car Key on Easy or Normal difficulty.
- Use the vehicle and open floor space to avoid Jack.
- Heal only after creating enough distance to prevent an immediate follow-up hit.
5. Survive the vehicle encounter and clear the Garage
Use the Car Key on the vehicle when you have a clear approach. The resulting sequence damages Jack and changes the Garage situation, but it does not mean you can safely stop moving immediately. After the crash, move away from the vehicle and keep the G17 ready. Watch Jack’s position and use the car, pillars and open floor to maintain a route around him.
When the vehicle catches fire, continue following the encounter’s prompts and keep your distance from the flames. After the explosion and Jack’s apparent defeat, wait for control to return fully before searching. Check the lockers, filing cabinet, crates and other reachable containers for ammunition, healing and Chem Fluid. The Knife is useful for opening containers, but do not spend time searching if Jack’s attack has not conclusively ended.
If you are low on health after the fight, use a healing item before climbing. If you are low on ammunition, do not spend the remainder firing at the burning wreck or attempting to confirm a kill. The objective is to reach the upper Garage walkway and retrieve the Ox Statuette, not to farm extra damage against Jack.
- Complete the vehicle encounter using movement and the car as cover.
- Confirm the Garage is safe enough to loot before opening containers.
- Collect useful ammunition, healing and Chem Fluid without overfilling the inventory.
- Heal before the climb if the encounter left Ethan badly injured.
6. Retrieve the Ox Statuette and open the Main Hall
Climb the ladder to the upper Garage walkway. Search the walkway for ammunition, then inspect the framed plaque on the shelf. Examine its back and remove the screw to obtain the Ox Statuette. This is the item required for the ornate Main Hall entrance; it is not a Dog Head and should not be taken to any other door.
Move the obstructing shelf or cabinet so the route back to the Garage stairwell is open. Before leaving, check that the Ox Statuette is actually in the inventory and that the G17 and at least one healing item are available. If you are carrying too many optional supplies, leave the Garage and return to the Laundry Room after opening the Main Hall rather than trying to continue with a full inventory.
Return through the corridor to the Main Hall entrance. Place the Ox Statuette into the indentation in the door and enter the Main Hall. Do not continue into the Dog Head, Bathroom or Processing Area route as part of this chapter; those objectives belong to the next progression section. The Main Hall is the chapter’s endpoint and establishes the central hub for the Baker House.
- Climb to the upper Garage walkway.
- Remove the screw from the framed plaque and take the Ox Statuette.
- Move the obstruction so the Garage exit is usable.
- Place the Ox Statuette in the Main Hall door.
- Enter the Main Hall without beginning the later Dog Head route.
7. Return to the Laundry Room and establish the chapter save point
After entering the Main Hall, retrace the cleared corridor route to the Laundry Room. Use the Item Box to store excess crafting ingredients, duplicate healing supplies and any optional valuables. Keep the G17 Handgun, a manageable amount of handgun ammunition, one healing item and the Knife available for the next chapter.
Make another manual save at the Laundry Room Tape Recorder. This creates a recovery point after the Garage and Main Hall unlock rather than forcing you to repeat the vehicle encounter if the next exploration section goes badly. If you used most of your ammunition or healing, leave the safe room only after checking the box and combining supplies deliberately.
Your next objective is to explore the newly available Main Hall and begin the Dog Head route. Do not treat the Main Hall opening as completion of that route: no Dog Head, Scorpion Key, Wooden Statuette, Dissection Room Key or Morgue objective is required for this chapter.
- Return to the Laundry Room after opening the Main Hall.
- Reorganize the Item Box for the next exploration section.
- Make a manual save after the Garage and Ox Statuette sequence.
- Leave the Dog Head and Processing Area objectives for the next chapter.
Before you move on
- The Hatch Key was taken from the Main Corridor and used on the Pantry hatch.
- The Laundry Room has been reached and used as a manual-save and Item Box location.
- The Main House Map and Deputy’s Knife have been collected.
- The G17 Handgun and Car Key have been collected in the Garage on the standard Easy or Normal route.
- The Garage vehicle encounter has been completed and the upper walkway has been reached.
- The Ox Statuette has been removed from the framed plaque and the Garage obstruction has been moved.
- The Ox Statuette has been placed in the Main Hall door and Ethan has entered the Main Hall.
- A second manual save has been made in the Laundry Room after the Main Hall opening.
- The player is ready to begin the Dog Head route in the next chapter; no later Main House puzzle or boss objective is required here.
References for this chapter
- RESIDENT EVIL 7 biohazard Gold Edition – PlayStation Store
- Resident Evil 7 biohazard Gold Edition - Upgrading PS4 Disc Version to PS5 – Capcom Support
- Resident Evil 7: Biohazard — Gold Edition Walkthrough, The Main House
- 2 - Hatch Key, Main Hall, Garage Fight — Resident Evil 7 Biohazard — Super Cheats
- RE Guide — Main House and Processing Area
- Ox Statuette — Resident Evil 7 Biohazard — Evil Resource
Main House — Dog Heads, Processing Area and Morgue
With the Main Hall now accessible, collect the White Dog’s Head from the Living Room clock and the Blue Dog’s Head from the Recreation Room book. Drain the Bathroom tub for the Wooden Statuette, survive Jack’s ambush, and use the statuette to form the hawk shadow that opens the Drawing Room passage. Continue through the Study into the Processing Area, take the Scorpion Key from Meat Storage, and solve the incinerator puzzle to obtain the Dissection Room Key. Use that key to reach the Dissection Room, where Jack moves the Red Dog’s Head into the Morgue. Prepare at the Study before taking it, defeat Jack with firearms, the exposed shoulder growth and the chainsaw, then place all three Dog’s Heads in the Main Hall door and enter the Yard. The Snake Key is a later item obtained only after the D-Series Arm.
Start from the opened Main Hall and collect the White Dog’s Head
Continue from the Main Hall after the Garage and Ox Statuette sequence. If you have not already done so, inspect the grandfather clock in the northeast part of the Main Hall and take its Clock Pendulum. The label identifies the Living Room as its destination. Return to the Living Room and place the pendulum in that room’s grandfather clock. The clock opens and gives you the White Dog’s Head. This is one of the three reliefs required for the back door of the Main Hall.
Return to the Main Hall and place the White Dog’s Head in the three-dog door if you want to clear an inventory slot. The door will remain locked until the Blue and Red Dog’s Heads are installed. Before going upstairs, leave unnecessary supplies in the Laundry Room item box. Keep the handgun, a healing item and enough empty space for the Wooden Statuette and later key items.
- Take the Clock Pendulum from the Main Hall clock.
- Use it on the Living Room clock.
- Collect the White Dog’s Head.
- Optionally place it in the Main Hall three-dog door.
Take the Blue Dog’s Head and Wooden Statuette
Go upstairs to the Recreation Room. Examine the large orange book near the bar and turn through it to find the Blue Dog’s Head. The Mia videotape and files in this room are optional for campaign progress, although they are worth collecting if you are tracking records. Do not attempt to take the shotgun from the nearby display yet unless you have the correct replacement item or are prepared to leave it behind.
Enter the Bathroom and drain the black bathtub. Take the Wooden Statuette. Picking it up triggers Jack’s ambush. Immediately move out of the Bathroom and keep the doorway or adjoining hall open as a retreat lane. You do not need to defeat Jack here. Sprint away once you have room, and avoid allowing him to pin Ethan against the tub, wall or furniture.
- Collect the Blue Dog’s Head from the Recreation Room book.
- Drain the Bathroom tub.
- Take the Wooden Statuette.
- Escape Jack’s Bathroom ambush.
Use the Wooden Statuette to open the Drawing Room passage
Return to the Main Hall and place the Wooden Statuette on the shadow pedestal in the alcove beneath the Sky Hunter painting. Rotate the statuette while watching the projected silhouette on the wall. The correct outline is a hawk; the object’s physical appearance is not the solution clue. Once the shadow matches, the wall opens to a narrow passage.
Crouch through the passage and enter the Drawing Room. Search for supplies, then continue through the Small Workshop route toward the Study. A Molded appears along this path. If it is not blocking the doorway, sprint past it and close the next door. If combat is unavoidable, use controlled handgun shots and keep space to retreat rather than engaging with the knife while trapped in a corner.
The Study is a safe room with a tape recorder and item box. Save there before entering the Processing Area. Leave room for the Scorpion Key, Processing Area supplies and the Dissection Room Key.
- Place the Wooden Statuette on the Main Hall shadow pedestal.
- Match the hawk silhouette.
- Pass through the Drawing Room route.
- Save and reorganize in the Study.
Enter the Processing Area and take the Scorpion Key
From the Study, descend into the Processing Area. Pick up the Processing Area map if it is available in the Tool Storage area, then sweep the rooms for ammunition, Chem Fluid, Gunpowder and the Treasure Photo. The map is optional but makes the return route much easier to follow.
In Meat Storage, take the Scorpion Key from the large piece of meat on the central table. Removing it drops a Molded from the ceiling. Move toward the exit as soon as the enemy appears. Fight only if it blocks your route; the room is cramped and gives you little space to evade an attack.
Use the Scorpion Key on the marked door that provides a shortcut back toward the Main Hall. On Easy and Normal, it also opens Grandma’s Room upstairs, where you can take the Broken Shotgun and read the relief memo. The Broken Shotgun is optional for this chapter, but on those difficulties it can be exchanged for the M37 Shotgun in the Main House display room. On Madhouse, the Scorpion Key is obtained from the Main Hall birdcage instead, so do not search Meat Storage for it on that difficulty.
- Reach the Processing Area through the Study.
- Take the Scorpion Key from Meat Storage on Easy or Normal.
- Use the Scorpion-marked shortcut.
- Optional: collect the Broken Shotgun from Grandma’s Room.
Solve the incinerator puzzle and obtain the Dissection Room Key
Enter the Incinerator Room and read the memo above the sink. Open the chamber labeled Tamara first; her name is the one containing three letter A’s. Leave that chamber open. Next open the chamber marked by the bloody handprint. This combination unlocks the leftmost incinerator.
Take the Dissection Room Key from the opened leftmost incinerator. A Molded emerges as the chamber opens. Retreat through the doorway immediately if the enemy is not blocking you. If you fight, back into the corridor so you can aim and reload without being trapped among the incinerator doors.
Before using the key, return to the Study if you need healing or inventory management. Carry your best available firearm, a healing item and several open slots. Ordinary Molded do not require every shotgun shell you have, and the next sequence begins after the key opens the route to the Dissection Room.
- Read the Incinerator Room memo.
- Open Tamara’s chamber first.
- Open the bloody-handprint chamber second.
- Take the Dissection Room Key from the leftmost incinerator.
- Retreat without being cornered by the Molded.
Reach the Morgue and defeat Jack
Use the Dissection Room Key on the matching door. Collect nearby supplies, then enter the Dissection Room and try to take the Red Dog’s Head. Jack moves it away and places it above the Morgue. The Red Dog’s Head is not obtained from the Deputy’s body during this section; the Snake Key appears there later, after Ethan acquires the D-Series Arm.
Return to the Study and save before entering the Morgue. Make sure you have healing, handgun ammunition or another reliable firearm, and at least two open inventory slots. Enter the Morgue Entry and take the Red Dog’s Head from above the morgue. Jack throws Ethan into the lower room and the fight begins immediately.
At the start, create distance by moving to the left and use firearm shots against Jack’s head. When he drops to one knee and the red growth protrudes from his shoulder, attack that exposed growth with the knife if you are close enough to do so safely. Do not stand directly in front of him while waiting for the opening; circle around the room and use the body bags and raised platforms to prevent him from trapping you.
During the second phase, Jack takes the double chainsaw. Pick up the other chainsaw when the game makes it available. Use its guard to absorb his charges and heavy swings, then counter with a thrust or close-range attack. Restart the chainsaw when its power runs down. Repeat the pattern of creating distance, waiting for Jack’s opening and striking the exposed growth. After the fight, use the chainsaw on the Morgue exit’s securing bolt; the weapon breaks as part of the escape.
If you die, reload the Study save and repeat the route. Recheck your item box before triggering the Red Dog’s Head, and do not spend all healing or close-range ammunition on the Processing Area Molded.
- Use the Dissection Room Key.
- Trigger Jack’s relocation of the Red Dog’s Head.
- Save before taking the Red Dog’s Head in the Morgue.
- Defeat Jack with firearm shots, the exposed growth and the chainsaw.
- Cut open the Morgue exit with the chainsaw.
Install the three Dog’s Heads and enter the Yard
After the Morgue fight, return through the cleared Processing Area. Pick up any useful supplies you left behind, then take the shortcut back to the Main Hall. Place the Red Dog’s Head in the remaining relief slot beside the White and Blue heads. The three-dog door opens.
Walk through the back door and confirm that Ethan has entered the Yard. This completes the Main House, Processing Area and Morgue section. The next campaign area is the Old House. Optional items such as the Broken Shotgun, files, Treasure Photo reward and remaining supplies can be collected before leaving if you still have a safe return route, but none replaces the three Dog’s Heads or the Dissection Room Key.
- Return to the Main Hall after the Morgue fight.
- Install the Red Dog’s Head.
- Open the three-dog door.
- Step into the Yard.
Before you move on
- The White Dog’s Head has been collected from the Living Room clock.
- The Blue Dog’s Head has been collected from the Recreation Room book.
- The Wooden Statuette has opened the hawk-shadow passage.
- The Processing Area has been reached through the Study.
- The Scorpion Key has been collected or, on Madhouse, obtained from the Main Hall birdcage.
- The Dissection Room Key has been taken from the leftmost incinerator.
- Jack’s Morgue encounter is complete.
- The Red Dog’s Head has been placed in the Main Hall door.
- The three-dog door is open and Ethan has entered the Yard.
- The chapter ends before the Old House route; the later Snake Key has not been incorrectly treated as current progression.
Old House: Burner, Crow Key and the Greenhouse route
Prepare at Zoe’s trailer, enter the Old House and assemble the Burner from its Grip and Nozzle. Use short bursts to clear insect nests while avoiding Marguerite during her patrol. Obtain the Stone Statuette, solve the Gallery spider-shadow puzzle and follow the crawlspace to the Crank. Use the Crank on the pulley to raise the exterior walkway, cross to the outhouse and collect the Crow Key. Use it on the upstairs Crow Door, inspect Marguerite’s altar and survive the initial pit encounter. After the fight, return to the altar room as instructed, then go back to the pit when Marguerite’s hand takes the lantern. The newly opened tunnel leads to the Greenhouse; this chapter ends there, before the Greenhouse boss fight and the Lantern reward.
Save at the trailer and prepare for the Old House
Before entering the Old House, use the save point at Zoe’s trailer. Organize the inventory so the Burner or its components, a handgun, a stronger close-range weapon, healing and several empty slots are available. Store spare valuables, excess crafting materials and items that are not needed for the Old House route. The Burner is the key tool for clearing insects and handling the first Marguerite encounter, so do not discard it to make room for low-priority supplies.
Enter the Old House from the yard and take the Old House Map when you reach the interior corridor. Read the nearby notes, particularly the warnings about Marguerite and the locked Crow-marked door. Search containers as you move, but do not fill every inventory slot with ammunition or crafting ingredients. You will collect the Burner parts, the Stone Statuette, the Crank and the Crow Key during this route.
- Save at Zoe’s trailer.
- Carry or make room for the Burner and its fuel.
- Bring healing, firearms and several empty inventory slots.
- Take the Old House Map and read the nearby notes.
Collect both Burner parts and avoid wasting fuel
Find the Burner Grip outside the Gallery, in the exterior refuse container. The Burner Nozzle is in the Water Station area reached through the Old House’s exterior route. Once both parts are in the inventory, combine them to create the Burner. Collect additional Burner Fuel when it is safely available, but do not burn every insect nest simply because it can be destroyed.
Use short bursts to clear swarms from doorways, containers and narrow passages. When Marguerite begins patrolling, fire the Burner at insects that block your escape, then move through a doorway or around a corner. The goal at this stage is to reach the Gallery and solve the next puzzle, not to defeat Marguerite. If she appears, break line of sight and keep moving rather than trying to trade damage in an open room.
- Collect the Burner Grip near the Gallery exterior.
- Collect the Burner Nozzle in the Water Station.
- Combine the parts to create the Burner.
- Use brief bursts against insects and preserve fuel.
Obtain the Stone Statuette and solve the Gallery puzzle
Reach the hidden passage in the Old House’s living-room route and take the Stone Statuette. Bring it to the shadow-puzzle stand in the Gallery. Place the statuette on the stand and rotate it until its projected silhouette forms a spider that matches the outline on the wall. The solution is determined by the shape of the shadow; there is no numeric code to enter.
When the passage opens, crawl through it and continue into the lower section of the Old House. Search only the containers you can carry from without discarding key items. Follow the route until you find the Crank. The Crank is a progression item, not a weapon or a general-purpose tool, so keep it in the inventory until it is used on the exterior pulley.
- Take the Stone Statuette from the hidden living-room route.
- Place it on the Gallery shadow stand.
- Rotate it until the shadow matches the spider outline.
- Follow the opened crawlspace and collect the Crank.
Raise the walkway and collect the Crow Key
Return to the pulley mechanism near the Old House’s exterior route and use the Crank. The pulley raises the walkway, creating access to the small outhouse across the gap. Cross the walkway and enter the outhouse. Open the chest to obtain the Crow Key. Burner Fuel and other supplies may also be present, but leave them behind if taking them would force you to drop the key or prevent you from carrying healing and ammunition.
Return across the raised walkway and go back into the Old House. The Crow Key is required for the upstairs Crow Door. Do not try to use the Crank on that door: the Crank operates the pulley, while the Crow Key opens the marked lock. Before going upstairs, reload your firearms and keep the Burner accessible.
- Use the Crank on the exterior pulley.
- Cross the raised walkway.
- Open the outhouse chest and take the Crow Key.
- Return to the Old House with the key ready.
Trigger and survive the initial Marguerite pit encounter
Take the upstairs route toward the Crow Door. Marguerite attacks before you can proceed normally and Ethan falls into the pit. This is a limited encounter, not the Greenhouse boss fight. When Marguerite leans over the edge, aim for her head and fire a handgun or shotgun. Use the Burner to destroy insect swarms as soon as they gather around you, because the insects can restrict movement and cause damage while you wait for her to reappear.
Avoid spending all of your strongest ammunition during this encounter. Fire during clear windows, then reposition so the swarm does not surround you. If Marguerite drops into the pit, climb out as soon as the route is available rather than lingering in the damaging residue. The objective is to survive the attack and continue to the Crow Door, not to obtain her Lantern here.
- Aim at Marguerite’s head when she looks over the pit.
- Use the Burner against insect swarms.
- Preserve shotgun shells and other high-value ammunition where possible.
- Climb out of the pit promptly when the encounter ends.
Open the Crow Door, inspect the altar and open the Greenhouse route
Use the Crow Key on the upstairs Crow Door and enter the altar room. Examine the altar mechanism with the missing lantern and read the nearby serum documentation. This inspection is required for the progression event; simply reaching the upstairs landing is not enough. Answer the phone if it rings, then leave the altar room and return to the pit created during the Marguerite encounter.
Look down into the pit. Once the required altar inspection has occurred, Marguerite’s hand takes the lantern and a new tunnel becomes available. Descend using the ladder and follow the tunnel until the route reaches the Greenhouse side. Do not begin the Greenhouse fight as part of this chapter. The next chapter starts with preparation for and completion of the mutated Marguerite encounter. If the tunnel does not appear, confirm that the Crow Door was opened and the altar mechanism was examined before returning to the pit.
- Unlock the upstairs Crow Door with the Crow Key.
- Inspect the altar mechanism and read the serum documentation.
- Return to the pit after the altar event.
- Watch for Marguerite’s hand to take the lantern.
- Descend and open the tunnel route toward the Greenhouse.
Before you move on
- The Burner has been assembled and remains available for insect swarms.
- The Gallery spider-shadow puzzle has opened the crawlspace.
- The Crank has been collected and used to raise the exterior walkway.
- The Crow Key has been taken from the outhouse chest.
- The upstairs Crow Door has been opened.
- The altar mechanism and serum documentation have been inspected.
- The initial Marguerite pit encounter has been survived.
- Marguerite’s hand has taken the lantern and the tunnel toward the Greenhouse is open.
- A save has been made before proceeding into the next chapter’s Greenhouse preparation.
Yard, Greenhouse and Molded escalation
The Marguerite tunnel from the previous chapter is already open. Follow it to the Old Yard, unlock the route back toward the Trailer, and prepare before entering the Greenhouse. The Greenhouse is a locked boss arena once you drop through the Potting Room, so carry a firearm, healing, and enough Burner fuel to handle swarms and hives. Defeat mutated Marguerite, take her Lantern, and return it to the Old House altar door. The opened east-wing route leads through the Playroom and Detention Room to the hidden room containing the D-Series Arm. Secure the arm, then return toward the Trailer with the serum ingredient ready for the next chapter.
1. Follow the opened tunnel and establish the Old Yard route
Begin at the pit where Marguerite previously disappeared. The tunnel is already open in this chapter; do not repeat the earlier Crow Door, altar inspection, or Marguerite trigger sequence. Climb down the ladder and follow the passage until it opens into the Old Yard.
In the Old Yard, unlock the gate that creates the route back toward the Trailer and the rest of the estate. This shortcut is important because the Trailer provides an item box and a save point before the Greenhouse fight. Use it immediately if your inventory is crowded, your health is low, or you need to craft ammunition.
The Old Yard is a transition area rather than a mandatory combat-clearing zone. Pick up useful supplies when they are safely accessible, but do not spend valuable ammunition trying to eliminate every insect. Keep the path back to the Trailer in mind so you can retreat before committing to the boss arena.
- Follow the already-open Marguerite tunnel.
- Reach the Old Yard.
- Unlock the shortcut toward the Trailer.
- Save and reorganize before entering the Greenhouse if necessary.
2. Prepare for the Greenhouse encounter
Take the exterior stairs to the Greenhouse upper entrance and enter the Potting Room. Search the room for supplies, then check your inventory before dropping through the opening in the floor. Once Ethan drops into the Greenhouse, the encounter becomes a committed boss sequence; you cannot simply return to the Trailer until Marguerite is defeated.
Carry a handgun or shotgun with usable ammunition, several healing items, and the Burner with enough fuel to clear insects. Enhanced handgun ammunition and shotgun shells are especially useful for Marguerite, but do not empty your entire stock before checking the Greenhouse for additional supplies. Leave at least a few inventory spaces open for ammunition, healing items, and the Lantern.
Do not treat Flame Rounds or the Burner as the main damage solution. Marguerite can be affected by fire, but firearms are the dependable way to finish the fight. The Burner is more valuable for clearing swarms, burning insects from doors or containers, and destroying hives that would otherwise restrict your movement.
- Search the Potting Room.
- Carry a firearm, ammunition, healing, and Burner fuel.
- Leave inventory space for supplies and the Lantern.
- Make a final save at the Trailer before the drop if needed.
3. Defeat mutated Marguerite in the Greenhouse
After the drop, move through the Greenhouse while keeping the stairs, doorways, and open floor available as escape routes. Marguerite attacks from the upper level, walls, ceilings, windows, and openings between floors. Avoid backing into a dead end, and do not chase her blindly when she retreats out of sight.
When Marguerite exposes herself, aim for her head with controlled handgun fire or close shotgun blasts. Her abdomen hive is an obvious target and can be damaged when it is the only exposed area, but it is not a reason to ignore clear head-shot opportunities. If she is crawling on a wall or ceiling, shoot her as she approaches rather than waiting underneath her. Breaking her attack animation gives you time to reposition.
Marguerite can create insect hives and release swarms. Use the Burner in short, controlled bursts to clear insects from your immediate path, then switch back to a firearm. Burn or shoot a hive when it blocks a route or continues producing insects, but do not waste fuel trying to replace firearm damage against the boss. If Marguerite grabs or lunges from an opening, fire immediately, guard if necessary, and retreat toward a wider section of the room.
Use the Greenhouse supplies during the battle instead of spending every item carried from the Trailer at once. Heal before another attack cycle when your health is low, reload while Marguerite retreats, and collect ammunition only when the route is clear. The fight ends when she dissolves. Search the area where she died and collect her Lantern.
- Keep an escape route to the stairs or open floor.
- Use firearms for Marguerite, prioritizing exposed head shots.
- Use the Burner for swarms, insects, and obstructing hives.
- Heal before entering another attack cycle when necessary.
- Collect the Lantern after Marguerite dissolves.
4. Place the Lantern and open the east-wing route
Leave the Greenhouse through the route back to the Old Yard, then use the shortcut to return to the Old House. Go upstairs to the altar-side door with the lantern scale and place Marguerite’s Lantern on it. The door opens into the previously inaccessible east-wing rooms; the Lantern is used as the counterweight and is not a combat item.
Enter the Playroom and continue through the child-themed rooms. Search as you go, but keep enough ammunition and healing for the Molded encounters on the return route. The objective is to reach the Detention Room, not to clear every room of enemies before proceeding.
The route can include Molded in narrow corridors and doorways. If one blocks the only usable path, use a headshot or shotgun blast to create space. Otherwise, guard and retreat through the doorway rather than spending ammunition on enemies that can be bypassed. This is especially important if the Greenhouse fight consumed your shotgun shells or healing.
- Return to the Old House after the Greenhouse fight.
- Place Marguerite’s Lantern on the upstairs altar scale.
- Enter the opened east-wing route.
- Reach the Detention Room while preserving recovery items.
5. Find the hidden room and secure the D-Series Arm
In the Detention Room, examine the dollhouse and look for the marked section of wall behind the bed. Crouch at the opening and move through the hidden passage rather than searching for a conventional door. The hidden room contains a body holding the D-Series Arm, marked D-002.
Take the arm and check the inventory before leaving. The D-Series Arm is a required serum ingredient and the principal progression item for this chapter. There is no additional Greenhouse puzzle or alternate item that must be collected before the story can continue.
On the return trip, expect Molded in the east-wing rooms and corridors. Use doorways as choke points, back away from lunging enemies, and avoid being trapped between two rooms. If ammunition is low, bypass enemies whenever the route remains open. If health is critical, use a healing item before attempting the return rather than risking a death that forces another Greenhouse attempt.
Return through the opened altar route and head back toward the Old Yard and Trailer. The next chapter begins with the D-Series Arm secured and the player ready to regroup for the serum objectives.
- Inspect the Detention Room dollhouse.
- Crouch through the marked opening behind the bed.
- Collect the D-Series Arm from the hidden room.
- Survive the return through the east-wing rooms.
- Reach the Old Yard route with the arm secured.
Before you move on
- The Old Yard shortcut toward the Trailer is unlocked.
- Mutated Marguerite has been defeated in the Greenhouse.
- Marguerite’s Lantern has been placed on the Old House altar scale.
- The east-wing route through the Playroom and Detention Room is open.
- The D-Series Arm, marked D-002, has been collected from the hidden room.
- You have returned toward the Old Yard and Trailer with the arm secured, ready for the next chapter’s serum and Main House objectives.
References for this chapter
- 3 · Yard & Old House · RE7 · RE Guide
- Items — RE7 · RE Guide
- Lantern — Resident Evil 7 Biohazard — Evil Resource
- Resident Evil 7 boss guide: how to beat Marguerite in the greenhouse — PC Gamer
- 7 - Grenade Launcher, Marguerite Boss Fight - Resident Evil 7 Biohazard — SuperCheats
- Secret Detention Room — Resident Evil 7 — Samurai Gamers
- Yard and Old House Guide — Resident Evil 7 biohazard — Neoseeker
Swamp approaches, boathouse and the first multi-area sequence
After obtaining the D-Series Arm, return to the Main House and collect the Snake Key from the deputy’s body in the Dissection Room. Use the Snake Key to enter the Master Bedroom and Kid’s Room, then collect the red and blue keycards needed for Lucas’s Testing Area. Clear the testing route, recover the D-Series Head, and take the Crank to the docks. Raise both walkways and reach the Shed safe room before giving Zoe both D-Series parts. Mutated Jack attacks in the boathouse storage arena; destroy his glowing eyes while moving between levels, then use the Serum during his final attack. Give the remaining Serum to Mia for the canonical ending. Giving it to Zoe creates the alternate ending and adds an unarmed Mia encounter aboard the ship.
1. Return through the Main House and collect the Snake Key
Begin after the D-Series Arm has been recovered from the Old House. Return to Zoe’s Trailer and inspect the refrigerator if you have not already done so. The note there directs Ethan back to the Dissection Room. Use the Main House route and descend to the Processing Area, keeping the Study or another available safe room in mind for inventory management.
Enter the Dissection Room and inspect the headless deputy’s body. Reach into the neck area to take the Snake Key. This key does not appear before the D-Series Arm is obtained, so searching the body earlier will not advance the route. Leave through the Processing Area. You may fight the Molded around the Morgue Entry or sprint past them, but avoid being trapped on the stairs by a crawler.
The Snake Key opens the Master Bedroom and Kid’s Room on the second floor, as well as a shortcut from the Morgue Entry. Enter the Master Bedroom and set its clock to 10:15, matching the other clocks in the house. The bed moves aside and reveals the stairs to the Workshop. Take the red keycard from the workbench and return to the second-floor corridor.
- D-Series Arm already obtained
- Snake Key taken from the deputy’s body
- Master Bedroom clock set to 10:15
- Red keycard collected from the Workshop
2. Use the Kid’s Room route to obtain the blue keycard
Use the Snake Key on the Kid’s Room door. Examine the lamp and activate its hidden switch to lower the attic ladder. Climb into the attic and solve the simple shadow arrangement to open the dollhouse compartment. Take the blue keycard. The Happy Birthday tape and Toy Axe found in this area are optional for immediate progress, although the tape can reveal useful information about Lucas’s later party-room trap.
Return to the Main Hall and go outside toward the Yard gate. Insert both the red and blue keycards to enter Lucas’s Testing Area. Before passing through, use the nearby safe room or Trailer item box to prepare a practical inventory: a shotgun, handgun ammunition, healing items and the Crank if you previously stored it. Leave spare keys, collectibles and low-priority materials behind.
The Testing Area combines tripwires, Molded and confined rooms. Inspect the floor, doorframes and walls before moving through each doorway. Some tripwires can be routed around instead of destroyed. If a tripwire blocks a narrow passage, shoot it only after checking that the blast will not injure Ethan or pull another enemy into the fight.
- Blue keycard collected from the Kid’s Room attic
- Both keycards used at the Yard gate
- Crank located or planned for pickup
- Testing Area inventory prepared
3. Clear Lucas’s Testing Area and recover the D-Series Head
Follow Lucas’s marked route through the Testing Area. Search the Supply Room and adjacent rooms before entering the barn, but conserve powerful ammunition for the larger Molded and later boss encounters. In the barn, keep the enemy in view and use doorways, corners and the upper walkway to avoid being surrounded.
Continue through the Rest Area and Party Room. Lucas temporarily removes Ethan’s inventory before the party-room sequence, so do not treat the empty inventory as a permanent loss. Complete the candle, cake and explosive interactions required by the room. The Happy Birthday tape is optional, but it can show the intended solution and help you avoid unnecessary experimentation.
After the party trap is completed, follow the route to the Monitoring Room. Take the D-Series Head and use the room’s item box and tape recorder to reorganize. Confirm that the Crank is in Ethan’s inventory before leaving. If you stored it earlier, retrieve it now; the dock route cannot be completed without it.
- Testing Area traps completed
- Barn and Party Room route cleared
- Monitoring Room reached
- D-Series Head collected
- Crank carried before leaving
4. Cross the docks and reach the Shed safe room
Leave the Monitoring Room through the exit route and continue toward the docks. Use the Crank on the first pulley to raise the first walkway. Cross to the next section, using the raised bridge and the small hut as fixed visual landmarks. Continue across the boardwalk until you reach the second pulley, then use the Crank again.
After the second bridge is raised, Molded appear around the dock route. A crawler and several ordinary Molded can pressure Ethan on the narrow walkways. You do not need to clear every enemy. If ammunition or healing is low, shoot only the crawler or the Molded directly blocking the path, then sprint toward the Shed while keeping the raised bridges behind you as route markers.
If you decide to fight, use the planks to keep enemies lined up. Handgun shots are sufficient for Molded at a distance, while the shotgun is safer when one reaches close range. Avoid retreating into the open dock area after the ambush begins, because the walkways give enemies more opportunities to surround Ethan. The Shed is the next safe room and contains a tape recorder, item box and useful supplies.
- First dock pulley operated
- Small hut and raised walkway used as route landmarks
- Second dock pulley operated
- Dock ambush bypassed or defeated
- Shed safe room reached
5. Save in the Shed and prepare for the Serum sequence
Use the tape recorder in the Shed to make a manual save before continuing. This is the best practical recovery point for the Mutated Jack fight and the later serum decision. Search the room, craft only useful ammunition or healing, and store spare keys, collectibles and materials that will not help in the upcoming encounter.
Take the D-Series Arm and D-Series Head from the item box if either is not already in your inventory. Keep healing available and bring a shotgun or another dependable close-range weapon. Handgun ammunition is useful for exposed eyes at a distance, while stronger ammunition should be reserved for difficult openings and the final eye.
Go upstairs to the Storage Entry and give Zoe both D-Series parts. She prepares two Serum doses, but Mutated Jack interrupts the scene and throws Ethan into the storage arena. Guard as soon as control returns, because Jack can attack before Ethan has created space.
- Manual save made at the Shed
- D-Series Arm and D-Series Head carried upstairs
- Healing and practical weapons prepared
- Nonessential items stored before meeting Zoe
6. Defeat Mutated Jack in the boathouse storage arena
Mutated Jack moves through a two-level arena with upper walkways, openings and a lower floor. His glowing orange eyes are the effective targets. Do not waste ammunition on ordinary sections of his body when no eye is exposed. Watch his position before crossing between levels, and use the upper walkways to track his approach.
Shoot exposed eyes with handgun ammunition when Jack is distant. Use the shotgun when an eye is close or when Jack has been staggered. Moving between the upper and lower levels creates space, but do not drop into a hole if Jack is already positioned below Ethan. Guard when a slam or swipe cannot be avoided, then move away from walls and corners so his body cannot pin Ethan.
Collect arena ammunition during pauses rather than while Jack is actively attacking. As the visible eyes are destroyed, his attacks and the collapsing arena make movement more dangerous. During the final phase, Jack pins Ethan and exposes a regrown eye near his head. Guard against the downward strikes, then shoot that eye during the opening between attacks.
The encounter ends when the required eye damage has been dealt and Ethan injects Jack with one Serum dose. Complete the injection action when prompted. Reaching the exit without performing the injection does not finish the fight.
- Glowing eyes targeted instead of ordinary body sections
- Both arena levels used to maintain distance
- Final regrown eye destroyed
- Serum injection completed
7. Choose the canonical route and preserve the alternate-ending save
After Mutated Jack is defeated, Zoe gives Ethan the remaining Serum. Give it to Mia for the canonical campaign route. Ethan leaves with Mia, and the subsequent ship sequence does not include the extra unarmed Mia encounter caused by choosing Zoe. This route is also the continuity followed by End of Zoe and Resident Evil Village.
Giving the Serum to Zoe produces the alternate ending route. Mia remains infected and later attacks Ethan on the Wrecked Ship. The unarmed encounter begins in the 2 Engine Room, where a Crowbar is available for the fight. This choice is useful if you need the alternate-ending result, but it is not the canonical route requested here.
Handing the D-Series Arm and Head to Zoe upstairs closes the Baker estate for the remainder of the run. The Guest House, Main House, Old House, Yard and Testing Area are no longer available. If you want both endings, keep the Shed save and reload it before giving the remaining Serum to either character.
- Remaining Serum given to Mia
- Ethan leaves the boathouse on the canonical route
- Shed save retained for the alternate choice if needed
- No further estate exploration required before continuing
Before you move on
- The D-Series Arm was already obtained before returning to the Main House.
- The Snake Key was taken from the deputy’s body in the Dissection Room.
- The Master Bedroom clock was set to 10:15 and the red keycard was collected.
- The Kid’s Room attic route was completed and the blue keycard was collected.
- Both keycards were used to enter Lucas’s Testing Area.
- The Testing Area and Party Room route were completed.
- The D-Series Head was recovered from the Monitoring Room.
- Both dock pulleys were operated and the Shed safe room was reached.
- A manual save was made in the Shed before meeting Zoe.
- Mutated Jack was defeated by destroying his glowing eyes and completing the Serum injection.
- The remaining Serum was given to Mia and Ethan proceeded on the canonical campaign route.
References for this chapter
- 5 · The Boat House · RE7 · RE Guide
- 4 · Back to the Main House & Testing Area · RE7 · RE Guide
- Items — RE7 · RE Guide
- Mutated Jack · RE7 · RE Guide
- Boathouse Guide - Resident Evil 7 biohazard - Neoseeker
- Crowbar (Resident Evil 7 Biohazard) - Evil Resource
- Side modes — RE7 · RE Guide
- RESIDENT EVIL 7 biohazard Gold Edition — PlayStation Store
Wrecked Ship — Mia’s route and the Ethan sequence
The Wrecked Ship section begins with Mia and ends with the Ethan sequence in No. 2 Engine Room. Restore access to the upper decks with the General Purpose Fuse, complete the Old Videotape, then use the elevator shaft, Lug Wrench and Corrosive doors to obtain the Captain’s Cabin Locker Key and P19 Machine Gun. Return to 1F for the Power Cable route, take the fuse back from the stairwell, and repair the elevator. The 2F Guest Room is the main safe room and item box. Before descending to S2, save in the 1F Maintenance Room, collect the optional 1F Backpack if wanted, and preserve Remote Bombs for the Fat Molded and lower-deck corridors. Entering No. 2 Engine Room ends the ship section permanently. If Mia received the serum, she frees Ethan. If Zoe received it, Ethan must guard Mia’s attacks and strike her with the crowbar before following the emergency-exit signs into the swamp.
1. Get the fuse and reach the Old Videotape
After Mia enters the ship from the swamp, follow the interior route until Eveline leads you toward the locked stairwell. Mia begins with almost no ammunition, so do not try to clear every Molded. Run past threats where the corridor allows it and use the Maintenance Room as a temporary escape route if a Molded blocks the southern hall.
Continue east through the 1F corridors to the Laundry Room. Take the General Purpose Fuse from the fuse box at the back of the room. A Molded appears as you approach, so collect the fuse and immediately retreat. Install it in the fuse box beside the locked stairwell. The stairwell opens and lets Mia climb to 3F.
Enter the television room on 3F and play the Old Videotape. During the recording, Mia has a P19 Machine Gun, ammunition, a Survival Knife and Remote Bombs. These flashback supplies do not carry into present-day exploration, so use them when enemies block the route. Follow Alan’s instructions through the ship, use the vent route, descend toward S2 and continue until the tape ends. The recording is required progress, not a way to permanently acquire the weapons.
- Take the General Purpose Fuse from the 1F Laundry Room.
- Install it beside the stairwell and climb to 3F.
- Complete the Old Videotape and return to present-day Mia.
2. Reach 4F and use the elevator shaft
After the videotape, Mia is back on 3F near a cassette recorder. Use it for a manual save if needed, then inspect the broken elevator. Pull open the elevator doors and climb the ladder inside the shaft. At the top, pass through the maintenance opening to the Bridge and check the security monitor if you want to confirm Ethan’s location.
Enter the Captain’s Cabin on 4F and take the Ship Map and Lug Wrench from the desk. The weapon locker is locked for now. Return to the elevator shaft, force open the elevator-car doors and drop into the stalled car. Use the Lug Wrench on the hatch in the car’s roof, then climb down into the elevator. The car gives access to 2F and 1F; choose 2F first.
On 2F, take the Survival Knife from the overturned table near the elevator. The 2F Guest Room is the main safe room for this part of the ship. It contains an item box, a cassette recorder and a Corrosive on the floor near the sofa or bed area. Use the Corrosive on the southern door of the Bunk Room, not on the ordinary northern entrance. Search the opened south half for the Captain’s Cabin Locker Key on the desk beside the collapsed bunk. Take the nearby supplies, then leave before getting trapped by the Crawler Molded that can appear during the return route.
- Take the Ship Map and Lug Wrench from 4F Captain’s Cabin.
- Use the Lug Wrench to enter the stalled elevator car.
- Reach the 2F Guest Room and use its item box or save recorder.
- Use a Corrosive on the south half of the Bunk Room.
- Take the Captain’s Cabin Locker Key.
3. Get the P19 and prepare the lower-deck route
Return through the elevator shaft to 4F. Use the Captain’s Cabin Locker Key on the arms locker to obtain the P19 Machine Gun and a Remote Bomb. A Molded can appear in the elevator corridor after the key is taken, so equip the P19 before leaving the cabin and retreat into the room if you need a safer angle.
On 2F, the Lounge contains a six-picture puzzle. Rotate the three pictures on the right wall until each matches its twin on the left wall. The opened safe contains three Corrosives. These are useful for optional supplies and required doors, so avoid wasting them on unnecessary locks.
The 2F Shaft near the Bunk Room contains a Lockpick in an orange metal box and additional Remote Bombs. The Lockpick can be used later on the 3F Control Room box. If you are collecting optional items, search the Lounge, Shaft and Guest Room before committing to the lower decks.
- Unlock the Captain’s Cabin arms locker.
- Take the P19 Machine Gun and Remote Bomb.
- Solve the Lounge painting puzzle for three Corrosives.
- Collect the Shaft Lockpick if you want the optional ship collectible.
4. Remove the Power Cable and repair the elevator
From the elevator shaft, return to 3F and use a Corrosive on the locked Control Room door. Continue past the videotape route toward the Shower Room and Sick Bay. The Power Cable is attached to the medical apparatus in Sick Bay. Interact with both ends of the cable to remove it.
A Fat Molded emerges from the Shower Room while Mia works. It is slow but durable and can vomit acid across the corridor. The safest general approach is to take the cable and run back toward the elevator rather than spending all ammunition on it. Use a Remote Bomb to create space or knock it down. If you fight, use the P19 against its head and avoid standing directly in front of its stomach. Keep away when it dies because the body can explode.
Return to the elevator shaft and descend to 1F. If you want the optional Backpack, use a Corrosive on the Recreation Room door before leaving the ship. The Backpack adds inventory capacity and cannot be recovered after the ship section ends. Also collect any desired Remote Bombs or Machine Gun ammunition while this route remains open.
Go back to the stairwell fuse box and remove the General Purpose Fuse. The stairwell door reseals when you do this. Carry the fuse to the elevator panel and install it together with the Power Cable. The elevator now reaches S2. Save in the 1F Maintenance Room before descending. This room has the final pre-S2 tape recorder but does not function as an item-box room, so organize inventory in the 2F Guest Room first.
- Reach Sick Bay on 3F.
- Take the Power Cable from the medical apparatus.
- Collect the optional 1F Backpack before leaving the ship’s upper areas.
- Remove the General Purpose Fuse from the stairwell box.
- Install the fuse and Power Cable in the elevator.
- Save in the 1F Maintenance Room.
5. Cross S2 without wasting the supplies needed for escape
Descend to S2 and move through the Workers Access Passages with the P19 ready. Molded can appear in front of Mia while a Crawling Molded attacks from behind, so keep moving and check behind you after every ambush. Remote Bombs are more useful as retreat tools than as opening attacks: place one where an enemy must follow, then create distance before detonation.
In No. 1 Engine Room, avoid prolonged fights when the route is open. Use the machinery and pillars to break line of sight with larger Molded, then continue through the doors. Search side areas only if you have enough healing and ammunition. Before entering No. 2 Engine Room, use any desired Corrosives in the Workers Access passages or Cargo Room for optional supplies and collectibles. These include the lower-deck antique coin container and the Cargo Room Remote Bomb supply.
Do not enter No. 2 Engine Room until you are ready to finish the ship route. Once Mia enters, she cannot return to the upper decks, and the ship section ends after the scene with Ethan.
- Reach S2 and cross the Workers Access Passages.
- Use Remote Bombs to control pursuit rather than emptying the P19 into every enemy.
- Collect desired lower-deck optional items before No. 2 Engine Room.
- Confirm that you are ready to leave the ship permanently.
6. Complete the Ethan sequence and leave the ship
Enter No. 2 Engine Room and approach Ethan after the Eveline scene. The outcome depends on the earlier serum choice. If Ethan gave the serum to Mia, she resists Eveline long enough to free Ethan and push him away. There is no crowbar fight on this route.
If Ethan gave the serum to Zoe, Mia attacks under Eveline’s control. Turn away from her opening attack and pick up the crowbar from the southeast side of the room. Guard her swings, then deliver one crowbar hit after each successful block. Do not attack repeatedly; the safe pattern is guard, one strike, then reset your position. Continue until the scene ends.
After Mia’s route resolves, follow the emergency-exit signs. When the path appears blocked, look for the opening in the fence and crouch through it. Continue along the exterior route and drop into the swamp. This completes the Wrecked Ship chapter and begins the Salt Mine approach.
- Complete the No. 2 Engine Room scene.
- On the Zoe route, use the crowbar with a guard-then-strike pattern.
- Follow the emergency-exit signs.
- Crouch through the fence opening and drop into the swamp.
Before you move on
- The Old Videotape has been completed.
- Mia has obtained the Lug Wrench, Captain’s Cabin Locker Key and present-day P19 Machine Gun.
- The Power Cable and General Purpose Fuse are installed in the elevator.
- The optional 1F Backpack has been collected if desired.
- Mia has descended to S2 and reached No. 2 Engine Room.
- The serum-dependent Ethan and Mia scene has completed.
- The emergency exit has been followed and Mia or Ethan has dropped into the swamp toward the Salt Mine.
References for this chapter
- RESIDENT EVIL 7 biohazard Gold Edition — PlayStation Store
- The Wrecked Ship — Resident Evil 7: biohazard Gold Edition Walkthrough & Guide
- The Wrecked Ship — Resident Evil 7: biohazard Walkthrough & Guide
- 6 · The Wrecked Ship (Mia) · RE7 · RE Guide
- Items — RE7 · RE Guide
- No. 2 Engine Room — Wrecked Ship S2
Late-game: laboratory / final compound approach and resource triage
After escaping the wrecked ship, Ethan crosses the enemy-free swamp and reaches the Mine Office, the last point where the swamp route, Antique Coin rewards and a full Item Box remain available. Prepare carefully before taking the elevator into Lucas’s salt mine. The mine is effectively one-way, with tripwires, Molded ambushes, a mine-cart section, a laboratory where the E-Necrotoxin is created, and a final climb through repeated enemy encounters. The B3 Office is the last Item Box in this chapter and should be treated as the definitive endgame loadout checkpoint. Preserve healing, Remote Bombs and strong ammunition for the two Fat Molded in the Abandoned Mine. After that fight, save at the Exit Passage and confirm that E-Necrotoxin, healing and a loaded weapon are still in your inventory. Stop here and continue with ch09 for the Guest House return and final Eveline sequence.
1. Prepare at the Mine Office before descending
Leave the wrecked ship through the Pressure Gauge Room and follow the exterior route into the swamp. There are no regular enemies in this stretch, so collect visible supplies and inspect the route before climbing into the Mine Office. Once you take the elevator down, the swamp and Mine Office route are no longer available during this run.
Use the Tape Recorder and Item Box before doing anything else. Retrieve useful equipment recovered from the ship, including the P19 Machine Gun and its ammunition if you intend to use it. Check the birdcages and spend any remaining Antique Coins before descending. Depending on previous purchases and difficulty, the available rewards can include Steroids, Stabilizer and the .44 MAG. Do not spend coins automatically if you still need to decide which late-game reward best fits your inventory.
A practical loadout includes a reliable handgun or machine gun, the M21 Shotgun if you have retained it, the .44 MAG when ammunition is available, the Grenade Launcher with selected rounds, Remote Bombs and several healing items. Leave room for mine supplies and do not carry low-value items merely because the Item Box is nearby. Save before using the elevator.
- Save at the Mine Office.
- Spend remaining Antique Coins before descending.
- Collect and organize ship equipment and ammunition.
- Carry healing, Remote Bombs and at least one strong weapon.
- Leave open inventory space for mine pickups.
2. Enter the salt mine and use the mine cart
Ride the elevator into the salt mine only after finishing your preparation. Molded occupy the approach, but you do not need to eliminate every enemy. Sprint through open sections when the route is clear and fight only when an enemy blocks a narrow passage or the elevator controls.
In the first mine passages, inspect ceilings, doorframes and crates for tripwires. Shoot explosive wires from a safe distance before crossing them. When enemies appear from the forward tunnel or spawn behind you, back into a position where both approaches remain visible. Avoid being trapped against the mine walls.
At the mine-cart area, two Molded appear behind Ethan. Move around the cart and push it forward to break through the barricade and damage enemies in its path. Search the nearby tracks, supports and side spaces for supplies, but do not linger if Molded are closing in. Continue toward the laboratory route and preserve powerful ammunition for the heavy encounter later in the chapter.
- Shoot tripwires before entering their blast radius.
- Keep enough space to see enemies approaching from both directions.
- Use the mine cart to break through the barricade and damage pursuing Molded.
- Search the cart area without spending excessive ammunition.
3. Create the E-Necrotoxin and establish the B3 Office loadout
Follow the mine route into the Cultivation Room and continue through the Storage Space. At the laboratory equipment, place the Eveline Tissue Samples in the sample case. The process creates the E-Necrotoxin. The resulting toxin occupies an inventory slot and cannot be stored, so make sure you have room before starting the interaction.
Continue to the B3 Office. This room contains the last Item Box and Tape Recorder available before the final run through the mine. Organize everything here rather than relying on later pickups. Keep the E-Necrotoxin, healing, Remote Bombs and weapons suitable for both ordinary Molded and the two Fat Molded. A machine gun is useful for routine enemies, while the .44 MAG, Grenade Launcher and special ammunition are better reserved for targets that block the route or absorb substantial damage.
Craft healing or ammunition if the required materials are available, but do not fill every slot with items that cannot be used efficiently. Save at the B3 Office before leaving. Once you depart through the South Cavern route, there is no later Item Box in this section.
- Use the Eveline Tissue Samples at the laboratory sample case.
- Pick up the E-Necrotoxin after it is created.
- Save at the B3 Office.
- Keep the toxin, healing, Remote Bombs and strong ammunition.
- Complete crafting and inventory organization before leaving.
4. Cross the flooded cavern and climb through the Molded waves
Reload before entering the Flooded Cavern and place Remote Bombs where they can be selected quickly. Molded appear in the narrow passages and during the upward climb. The objective is to reach the Abandoned Mine with enough resources for the unavoidable Fat Molded encounter, not to clear every enemy in the mine.
Back away from groups and fire only when an enemy blocks the route. Use ramps, stairways and narrow entrances as chokepoints for Remote Bombs. Crawlers should receive priority when they prevent movement, since they can close the distance quickly and are easy to lose in the mine clutter. If the next section is open, run rather than spending ammunition on isolated Molded.
Check side spaces for supplies only after nearby enemies are controlled. If you die during the climb, reload the B3 Office save and adjust the attempt by bypassing more ordinary Molded. Repeating the same fight with fewer resources usually creates a worse position for the Fat Molded encounter.
- Reload before entering the flooded section.
- Use Remote Bombs at chokepoints rather than in open ground.
- Prioritize Crawlers or any enemy physically blocking the route.
- Bypass isolated Molded whenever the path is open.
- Return to the B3 Office save after a failed attempt.
5. Defeat the two Fat Molded and save at the Exit Passage
At the Abandoned Mine, the two Fat Molded encounter begins after the approach sequence. Keep moving around the central structures so the enemies cannot pin Ethan against a wall. Their acid attacks create dangerous areas, so do not stand in pools or remain in a confined corner while reloading.
Use Neuro Rounds, Remote Bombs, the .44 MAG or other high-damage ammunition during clear attack windows. If both enemies approach together, circle the central obstacle and separate them before committing to a long attack. Use a healing item before a second hit can connect; waiting until Ethan is nearly incapacitated makes the next acid attack difficult to avoid. Do not spend every strong round on the first target if the second is already close enough to interrupt you.
After both Fat Molded are defeated, follow the tracks through the opening and continue to the Exit Passage. Collect the Mine Map if desired, then use the Tape Recorder. This is the final save point for the chapter, but it does not provide another Item Box. Before proceeding to ch09, verify that the E-Necrotoxin is still in your inventory, that at least one healing item remains, and that a weapon is loaded.
- Keep moving around the central structures.
- Avoid acid pools and confined corners.
- Separate the Fat Molded before committing to long attacks.
- Use strong ammunition during safe openings.
- Save at the Exit Passage after the encounter.
- Confirm E-Necrotoxin, healing and a loaded weapon before continuing.
Before you move on
- The Mine Office has been searched and the desired Antique Coin rewards have been collected.
- The E-Necrotoxin has been created from the Eveline Tissue Samples in the salt-mine laboratory.
- The B3 Office save has been used after finalizing the endgame loadout.
- Both Fat Molded in the Abandoned Mine have been defeated.
- The Exit Passage Tape Recorder has been used.
- E-Necrotoxin, at least one healing item and a loaded weapon are confirmed in the inventory.
- The player is ready to continue with ch09 for the Guest House return, final Eveline encounter and campaign ending.
References for this chapter
Final confrontation — defeating the last major threat and reaching the ending
Begin at the Exit Passage Tape Recorder after leaving the Salt Mine. Push through the boards and follow the distorted Guest House recreation without wasting ammunition on Mia hallucinations, which cannot hurt Ethan. In the attic, guard against Eveline’s shockwaves while closing the distance; Ethan automatically uses the E-Necrotoxin when he reaches her. During the giant-face phase, retreat and shoot her face and eyes while keeping enough powerful ammunition for the exterior. After Eveline forces Ethan outside, aim at her face while she is exposed. Chris then arrives by helicopter and drops a crate containing the Albert-01. Pick it up and use its ordinary Handgun Ammo on Eveline’s exposed mouth when her tendrils move aside. The serum decision occurred earlier at the Boat House: giving it to Mia produces the requested canonical campaign ending and the End of the Night trophy. Continue through the rescue and helicopter scenes until the main-game credits begin. The Albert-01R is not the weapon supplied during this battle; it is a separate post-completion unlockable placed in the Item Box after any campaign clear.
Start at the Exit Passage save
Load the save made at the Exit Passage Tape Recorder near the end of the Salt Mine route. This is the final dependable preparation point for the campaign. Save before pushing aside the boards, because the returning Guest House contains no Item Box and does not provide another normal resupply stop. What you carry out of the Salt Mine is what you have for this chapter.
Bring at least one healing item, a dependable firearm and whatever powerful ammunition remains from the Mine Office and Salt Mine. Grenade Launcher rounds, 44 MAG ammunition, shotgun shells and Enhanced Handgun Ammo are useful before the final weapon appears. You do not need to abandon the attempt because one category is missing, but avoid entering with no healing or no firearm ammunition at all.
Keep the E-Necrotoxin in the inventory. It is used automatically in a cutscene when Ethan reaches Eveline in the attic; it is not a normal weapon that you manually fire. Leave room for the late weapon and ammunition pickups if your inventory allows it. After entering the Guest House, do not expect to return to the Mine Office.
- Save at the Exit Passage Tape Recorder.
- Carry healing and at least one reliable firearm.
- Keep the E-Necrotoxin in the inventory.
- Reserve space for late ammunition and the Albert-01 if possible.
- Do not plan on returning to the Mine Office.
Cross the distorted Guest House
Push the boards aside and enter the Guest House basement. Move through the Storeroom and continue upstairs into the familiar first-floor section. The building is replaying memories from earlier in the game, but this is a linear route toward Eveline rather than a second chance to solve the original Guest House puzzles.
Continue into the kitchen to advance the sequence. When you reach the front door, Mia’s chainsaw hallucinations block the exit and turn Ethan around. They cannot damage you, so do not shoot them. Turn back, use the stairs and continue through the upper floors. Follow the familiar structure upward to the third-floor hallway and then into the attic.
If you want the last Mr. Everywhere collectible, check the Guest House basement Storeroom before leaving it. The figure is on the shelves near the central column, opposite the sofa. It is optional for finishing the campaign, but the chapter ends after Eveline, so this is the final opportunity during the run.
- Enter the Guest House through the basement.
- Walk into the kitchen to advance the memory sequence.
- Ignore the harmless Mia hallucinations.
- Use the stairs after the front door is blocked.
- Collect the final Mr. Everywhere in the basement if pursuing that achievement.
Advance through Eveline’s attic shockwaves
Eveline stands in the attic and sends out loud, damaging shockwaves that push Ethan backward. You cannot aim during this opening phase. Hold guard as each wave arrives, then sprint forward between waves. Guarding reduces the distance lost; taking the blast without guarding knocks Ethan down and makes the approach take longer.
Keep advancing instead of trying to defeat her from the starting position. The objective is to reach Eveline, not to spend ammunition. When Ethan gets close enough, the game triggers a cutscene in which he injects the E-Necrotoxin automatically.
After the injection, the fight changes. Eveline becomes a giant face that moves through the attic. Back away immediately and keep distance; if the face reaches Ethan, it can kill him. Shoot the exposed face and eyes with your strongest available weapons. The attic’s northwest corner contains additional shotgun shells and Enhanced Handgun Ammo on the standard difficulties, with reduced quantities on Madhouse. Use the supplies if necessary, but remember that the final exterior phase still remains.
- Guard each shockwave while closing the distance.
- Sprint forward during the gaps between attacks.
- Allow the E-Necrotoxin cutscene to trigger.
- Retreat from the giant face instead of letting it reach Ethan.
- Shoot the exposed face and eyes.
- Use the northwest attic ammunition only when needed.
Finish the giant-face phase and survive the transition
During the giant-face phase, continue backing away while firing at the face and eyes. Do not approach it. The face advances through the attic, so damage must be dealt before it reaches Ethan or the far end of the room. Switch weapons rather than standing still to reload if another loaded weapon is available.
When Eveline has taken enough damage, she will moan and extend tentacles to grab Ethan. Move left or right so the scripted grab connects. This capture is required to advance; trying to avoid it can result in death instead of progression. After the grab, Eveline pushes Ethan through the wall and the battle moves outside.
If you die during this phase, reload the Exit Passage save and repeat the Guest House route. There is no new Item Box before the fight, so conserve ammunition by ignoring the hallucinations and use the attic reserve only when your carried supply is genuinely low.
- Keep retreating while attacking Eveline’s face.
- Do not let the giant face reach Ethan.
- Change weapons instead of reloading in a dangerous opening when possible.
- Allow the tentacle grab after sufficient damage.
- Reload the Exit Passage save after a death.
Use the Albert-01 during the exterior phase
Outside the Guest House, Ethan begins on the ground and has limited movement. Aim at Eveline’s face while she attacks. When she grabs Ethan by the leg and lifts him, fire your strongest remaining weapon into her face and eyes. Use the Grenade Launcher or 44 MAG if you still have ammunition, then alternate to the shotgun or another firearm. Reload only when necessary; switching to a loaded weapon is safer during the short damage window.
Chris Redfield then tells Ethan to take the weapon dropped from the helicopter. A crate lands beside Ethan containing the Albert-01. Pick up the Albert-01 immediately. This is the weapon supplied for the final sequence, not the Albert-01R. The Albert-01 uses ordinary Handgun Ammo only and does not use Enhanced Handgun Ammo.
Aim at Eveline’s open mouth and face. Wait for the tentacles to move aside, then fire deliberate shots into the exposed weak point. A few direct hits complete the fight. Do not waste rounds on covered tentacles or the surrounding structure. If the Albert-01 is not in the inventory when prompted, check the crate beside Ethan before continuing the attack.
- Attack Eveline’s face while she is exposed.
- Use remaining heavy ammunition before switching to weaker weapons.
- Pick up the Albert-01 from Chris’s helicopter-dropped crate.
- Use ordinary Handgun Ammo with the Albert-01.
- Wait for the tendrils to clear the mouth before firing.
- Do not confuse the Albert-01 with the unlockable Albert-01R.
Reach the requested ending and confirm completion
After enough Albert-01 shots connect, Eveline collapses and the rescue sequence begins. No separate puzzle is required after the final hit. Do not quit when the camera changes or when Chris and the helicopter appear. Remain through the rescue, helicopter departure and closing scenes until the main-game credits begin.
The serum choice was made earlier in the Boat House. Giving the serum to Mia produces the requested campaign route, in which Ethan and Mia leave together, and awards End of the Night. Giving the serum to Zoe produces Just A Memory Now and changes the Wrecked Ship sequence before the finale. To see the alternate result, load a save from before the serum decision rather than replaying this entire final chapter.
After any campaign clear, the Albert-01R is placed in the Item Box for later runs. It is a separate, stronger handgun that uses Handgun Ammo and Enhanced Handgun Ammo. It is not the gun Chris supplies during the exterior Eveline fight. Confirm completion when the rescue scenes have played and the main-game credits have started or finished.
- Complete the final Albert-01 weak-point shots.
- Remain through the rescue and helicopter scenes.
- Wait for the main-game credits.
- Confirm End of the Night if Mia received the serum.
- Remember that Albert-01R is a post-completion Item Box unlock, not the final-battle weapon.
Before you move on
- Eveline has been defeated with the exterior weak-point sequence completed.
- The rescue, helicopter and closing scenes have played.
- The main-game credits have begun or finished.
- End of the Night is recorded if the serum was given to Mia.
- The Albert-01R is available in the Item Box for later campaign runs.
- The chapter can be retried by loading the Exit Passage save without returning to the inaccessible Mine Office.
End of Zoe — epilogue walkthrough
End of Zoe is a separate story episode included with the Resident Evil 7 Gold Edition PS5 release. It follows Joe Baker as he searches the swamps for a cure for Zoe after the main campaign. Select it from Extra Content after confirming that the DLC is installed. Joe fights primarily with punches, stealth takedowns, throwing spears and stake bombs before obtaining the AMG-78 gauntlet. Follow the route from Joe’s House to the Blue Umbrella base, paddle boat, quarantine area, Abandoned Church, Old House, Yard and Main House. Save before taking the second cure because that action triggers a forced Swamp Man fight. The church sequence temporarily removes Joe’s inventory; the AMG-78 and the stored equipment are recovered later at the Yard. End the episode by defeating Jack in the Main House and administering the cure to Zoe. This episode resolves Zoe’s fate but does not alter the main campaign ending. The Gold Edition listing confirms that End of Zoe is included with the PS5 version.
1. Start the episode and learn Joe’s combat priorities
From the title screen, open Extra Content and choose End of Zoe. If it is missing, check the PS5 game hub’s add-on list and confirm that End of Zoe is installed under the account that owns the Gold Edition. The PlayStation Store lists the episode as PS4 and PS5 content included with Gold Edition.
Joe begins with melee attacks rather than Ethan’s firearms. Crouch behind isolated Molded and use the stealth takedown whenever the route allows it. Against alerted Molded, guard, retreat from grabs and use short attack combinations instead of remaining in front of a larger enemy. Stomp fallen enemies when the prompt appears. Tree branches and scrap can be turned into throwing spears or stake bombs, so do not spend every material immediately.
Leave Joe’s House and follow the swamp path toward the shack. Break through the barrier at the end of the route and search the shack corridor for the Cure for E-Type Infection. Return to Zoe, carry her through the opened route and place her in the boat. The first cure is only a temporary solution, so continue toward the Blue Umbrella base rather than searching for a permanent ending at this point.
- End of Zoe is present in Extra Content.
- The first Cure for E-Type Infection has been collected.
- Zoe has been placed in the boat and the route to the base is open.
2. Reach Medical Storage and escape the first Swamp Man
At the Boat House, place Zoe on the couch and use the cassette recorder before leaving. Continue through the base and camp area. Take the first throwing spear near the camp route before entering water or approaching the alligator sections. Ordinary Molded can usually be stealth-killed, conserving Joe’s health for unavoidable encounters.
Enter Medical Storage and read the orders that explain why the anti-infective synthesis station was moved to the paddle boat. Continue to the fenced path, where the first Swamp Man attacks. Block or evade his regular punches, move away when both hands rise for a grab, and counter after his recovery. His head is the vulnerable target, but this is not a full boss-clear requirement.
When the Swamp Man falls, break through the gate and cross into the river. He gets back up, so do not remain to fight him again. Move through the river route toward the shed and paddle boat. Use throwing spears against alligators when one blocks a necessary crossing; otherwise stay on the banks and avoid unnecessary water combat. The documented route proceeds from Medical Storage to the fenced path, river, shed and paddle boat.
- You have saved at the Boat House recorder.
- The Medical Storage note has established the paddle boat objective.
- You have crossed the gate and escaped the first Swamp Man.
3. Search the paddle boat and prepare for the second Swamp Man
Climb to the paddle boat deck and enter the Steering House. Save at the cassette recorder and collect the nearby healing item. Cross the roof, then return through the alternate stairs to the lower decks. Use stealth takedowns on ordinary Molded. A Claw Molded can be handled with a stake bomb or a charged melee attack if it blocks a narrow stairway.
On the lower level, enter the side route and crawl through the vent. Collect the Champion Effigy and tree branch if you pass them, then clear the rooms around the apparatus platform. The Boxer Effigy is beside the recorder near the cure machinery. Use the Auto Synthesizer System to produce the second Cure for E-Type Infection.
Save before picking up the finished cure. Taking it triggers the Swamp Man’s attack and drops Joe into the paddle-boat hold, so this is the last safe preparation point. During the fight, guard his normal combinations, retreat from the grab and strike after he misses. When he kneels, perform the prompted finisher quickly. He becomes more aggressive during the later phase, including a rushing body attack; avoid it, punish the recovery and complete the second finisher. The fight and its trigger order are confirmed by the walkthrough references.
After the fight, collect the healing items if safe and follow the opened route back toward the Boat House. Approach Zoe to trigger the scene in which the Swamp Man takes her. Enter the boat and follow the pursuit route into the quarantine area.
- The Steering House recorder has been used.
- The second cure has been synthesized.
- You saved before collecting the second cure.
- The paddle-boat Swamp Man has been defeated and Zoe has been taken.
4. Cross quarantine and defeat the cemetery Fat Molded
In Quarantine Area 1, save at the shack before continuing. Move along the walkways and use ladders promptly. In water, hug the banks and equip a spear when an alligator is directly blocking the route. If you fall into a crowded water section, reloading the last save can preserve more resources than trying to kill every alligator.
Use the next safe room before entering Quarantine Area 2. Collect the available stake bomb and craft another only if you have spare materials. Stealth-kill Molded in buildings where possible. Keep spears ready for the four-legged and Claw Molded that appear on the walkways. Optional effigies and extra materials can be collected if your route is safe, but they are not required for completion.
Break through the final barrier to reach the Abandoned Church area and save at the shack. Before entering the church, deal with the cemetery encounter. Use spears or a stake bomb on the ordinary Molded first, then circle the central tomb while fighting the Fat Molded. Avoid its vomit, strike from behind and retreat before it turns. When it collapses, move away because the body explodes. Proceed up the church path and enter the Abandoned Church after saving. The quarantine, cemetery and church order matches the documented route.
- You saved before each major quarantine section.
- The Fat Molded has been defeated or the cemetery route has been cleared.
- You are ready for the scripted inventory loss inside the church.
5. Recover the AMG-78 and restore your equipment
Inside the Abandoned Church, approach Zoe to trigger the Swamp Man reveal. Joe is knocked unconscious and wakes in the swamp with only Zoe’s cure. This inventory loss is scripted; do not waste time searching for the missing equipment.
Run south along the forest path. Molded pursue from behind, but fighting them is unnecessary. When you reach the blocked gate, do not try to force it open with normal punches. Continue to the end of the path and take the AMG-78 from its case. Charge the gauntlet with the aim input, then punch through the gate and cross the swamp to the Old House.
Save at the Old House recorder. Charge the gauntlet before entering the Gallery, Dining Room and Living Room, and defeat the Molded blocking those rooms. Use a charged attack against the Fat Molded near the entrance. Check the barred door for the Champion Effigy if desired, then leave through the front door and cross the bridge to the Yard.
At the Yard, note the two tents. The first tent leads to the Main House and should be left alone for now. Enter the other tent to use the cassette recorder and Item Box. Retrieve your stored equipment, collect nearby supplies and craft stake bombs if you have spare materials. Only after preparing should you return to the first tent and enter the Main House. The tent order and inventory recovery are important because entering the Main House starts the final sequence.
- The AMG-78 has been recovered.
- The Old House route has been cleared.
- Your stored equipment has been retrieved from the Yard Item Box.
- You entered the Main House only after restocking.
6. Defeat Jack and cure Zoe
Before approaching Zoe in the Main Room, collect the two first-aid items on the benches. Examining Zoe starts the final fight, so finish your preparation first. Jack appears as the final Swamp Man and cannot be damaged by ordinary punches, throwing spears or stake bombs. Only charged left punches from the AMG-78 damage him. The boss guidance specifically identifies the charged left punch as the required attack.
Charge the gauntlet away from Jack and release the charged left punch between his attacks. Charging prevents Joe from blocking, and any hit interrupts the charge, so begin charging only after Jack commits to an attack or has moved out of range. For the horizontal tentacle sweep, crouch at the correct moment. For the vertical tentacle attack, step to the side rather than trying to stand in its path. Do not attack while Jack raises his hands in a counter stance; wait for that stance to end.
When Jack drops to one knee, use a fully charged left punch to knock him down and advance the fight. He becomes faster and chains more tentacle attacks afterward, so keep retreating, pre-charge at a safe distance and strike between swipes. Repeat the cycle until the final finisher becomes available. After Jack is defeated, approach Zoe and administer the cure. Let the ending scene and credits play; the episode’s conclusion confirms that Zoe survives and resolves her story.
- You collected the two first-aid items before approaching Zoe.
- Every damaging hit on Jack was a charged left AMG-78 punch.
- Jack has been defeated with the final finisher.
- Zoe has received the cure and the End of Zoe credits have played.
Before you move on
- End of Zoe was selected from Extra Content and its complete ending sequence has played.
- Zoe was cured in the final Main House scene.
- Jack was defeated rather than bypassed.
- The credits for End of Zoe were reached.
- The episode’s ending confirms Joe and Zoe’s survival.
References for this chapter
Not a Hero — Chris Redfield optional campaign (free DLC)
Not a Hero is a separate Chris Redfield campaign set after the main Resident Evil 7 story. It is free for Resident Evil 7 owners and appears as its own episode, with a separate save, fixed pickups and Chris-specific weapons and abilities. Begin in the Salt Mines, reach the Central Cavern and use it as the main save and inventory hub. Complete the red, green and blue shutter routes to obtain the High-Grade Filter, Night Vision Device, RAMROD ammunition and Clown Key. Use the Clown Key on the clown-marked Store Room West door to collect the optional Stabilizer and supplies, then return to the Central Cavern, save and finish any coin purchases before activating the Shield Machine directly at its console. The Shield Machine begins the locked late-game sequence. During the ten-minute bomb escape, prioritize movement over combat, then use RAMROD ammunition to expose Mama Mold’s vulnerability before finishing it with normal weapons and explosives. In the Clinical Lab, stun Mutated Lucas by damaging his head, attack his exposed chest and restore oxygen at the wall tanks when necessary. Defeat Lucas and allow the ending scene and credits to play.
Install and start Not a Hero
Open the PlayStation Store page for RESIDENT EVIL 7 Not a Hero on PS5 while signed in to the account that owns Resident Evil 7. The add-on is free and is separate from the paid Gold Edition content. Select Add to Library or Download, allow the installation to complete, and restart the game if Not a Hero does not appear immediately in the additional-content menu.
Start the episode from its separate menu. Not a Hero uses its own save and inventory. Chris relies on conventional firearms, guarding, deflecting, melee attacks and fixed ammunition pickups rather than Ethan’s normal crafting economy. RAMROD ammunition is especially valuable against Fumers and the two major boss encounters, so do not spend it casually on ordinary Molded.
- Not a Hero is installed on the PS5.
- The episode is launched from its separate additional-content menu.
- A Not a Hero save is being used instead of the Ethan campaign save.
Reach the Central Cavern and prepare the hub
Follow the opening Salt Mine route toward the Central Cavern. The early path is mostly linear. Avoid unnecessary fights when the route is open, and use Chris’s guard or deflect against close attacks when conserving ammunition matters.
At the Central Cavern, use the tape recorder to save and the Item Box to organize your inventory. This room is the hub for the red, green and blue shutter routes. Keep healing, ordinary firearm ammunition and space for key items before entering each route. Antique Coins can be spent at the birdcages, but complete the mine routes and search the optional rooms before deciding how to spend them.
Do not activate the Shield Machine until the three shutter routes are complete and you have collected the supplies and upgrades you want. The console begins the late sequence and should be treated as the point of no return for the mine hub.
- A Central Cavern save exists.
- The Item Box has been used to remove unnecessary documents and spare equipment.
- The Shield Machine has not yet been activated.
Red shutter: obtain the High-Grade Filter
Enter the red shutter and take the lift into the Mining Work Area. Collect the Gear and Crank, then search the room for healing and ammunition before operating the mechanism. Install the Gear, attach the Crank and lower the suspended container.
Lowering the container triggers the large Mama Mold encounter. Do not try to defeat it here with ordinary ammunition. Circle the room, keep moving around the tracks and take the Cell Key from the container when the path is open. If the creature blocks the direct route, loop around instead of trading damage.
Use the Cell Key on the cell door below. After the scene involving the captured soldier, take the High-Grade Filter from the body and return to the Central Cavern. The filter removes the earlier breathing restriction in contaminated areas.
- The Gear and Crank have been used on the pulley.
- The Cell Key has been collected.
- The High-Grade Filter has been taken from the cell.
Green shutter: Night Vision and RAMROD ammunition
Enter the green shutter and move through the Storage Area. Fumers cannot be handled like ordinary Molded. Use a Neuro-stun Grenade to create an opening or retreat until the route is clear. Collect RAMROD ammunition and medical supplies before taking the Night Vision Device in the Backup Power Room.
Continue through the dark lower sections with Night Vision active. In the Sewage area, set the lift switches to up, down, up, then call the lift. Use fire or stun grenades only when Crawlers or Molded physically prevent you from reaching the controls or lift.
On the return path, crouch under turret fire and preserve RAMRODs. They are needed for Fumers, Mama Mold and Mutated Lucas. Return to the Central Cavern after finishing the green route.
- The Night Vision Device has been collected.
- The sewage switches are set up, down, up.
- RAMROD ammunition remains available for the boss encounters.
Blue shutter: collect the Clown Key
Enter the blue shutter and proceed through the Mine Cart Yard. Watch for laser tripwires and floor hazards revealed by Night Vision. Move around traps instead of wasting ammunition on them. If you have the Lock Pick, open the optional container for additional supplies.
Push the mine carts aside to clear the wooden barrier and continue into the Repair Yard. Search the room, then take the Clown Key from the mechanical clown. Molded appear afterward, so keep the route back to the exit clear rather than trying to eliminate every enemy.
Continue through the clown-marked passage toward the Ventilation Room. Search the room for supplies and reload before triggering the scene with the captured soldier. That scene arms Chris’s wrist bomb and begins the ten-minute escape timer.
- The Clown Key has been collected.
- The optional Mine Cart Yard container has been opened if desired.
- The Ventilation Room was searched before the bomb timer began.
Complete the bomb escape and defeat Mama Mold
When the timer starts, follow the direct route back through the Central Cavern and toward the Mining Work Area. Ignore enemies that do not block a door or narrow passage. Use a stun or incendiary grenade only when a Fumer, Crawler group or other enemy prevents progress.
A detour near the Dead End contains optional supplies, including the final Antique Coin and Steroids. Take that detour only if you can complete it without losing control of the route. Continue until falling containers seal Work Sector B and the large Mama Mold appears.
Use one RAMROD on Mama Mold first. This exposes its vulnerability. Follow with shotgun fire, grenades and Chris’s melee attack during its staggered openings. Keep moving around the truck, avoid its charge and vomit attack, and clear or bypass Crawlers without losing time.
After Mama Mold falls, move away from the body because it explodes. Push aside the taped green crate, reach the liquid-nitrogen containers and use the nitrogen to remove the wrist bomb. Continue back toward the Central Cavern.
- Mama Mold was hit with RAMROD ammunition before sustained normal damage.
- The liquid nitrogen removed the wrist bomb.
- The timed escape was completed without unnecessary combat.
Open Store Room West, then activate the Shield Machine
After the bomb is removed, return through the green-shutter route and use the Clown Key on the clown-marked Store Room West door. Search the room and collect the Stabilizer from the small round container, along with any supplies appropriate to your difficulty and inventory needs. The Stabilizer improves Chris’s reload speed and is optional for story completion.
Return to the Central Cavern, save at the tape recorder and complete any desired Antique Coin purchases. Organize your inventory before proceeding. Keep healing, shotgun ammunition, grenades and RAMRODs ready for the final sequence.
When prepared, activate the Shield Machine directly at its console in the Central Cavern. This begins the locked final sequence. Hold defensible positions during the assault, prevent Molded from surrounding Chris and use ordinary weapons on normal enemies. Reserve RAMRODs for Fumers and use grenades or the shotgun against larger threats.
When the area fails, follow the escape route through the floor vent and into the Research Facility. Continue to the Clinical Lab, save there and search the room for ammunition and healing before starting the Lucas encounter.
- The Store Room West door has been opened with the Clown Key.
- The Stabilizer and useful supplies have been collected.
- A final Central Cavern save exists before the Shield Machine is activated.
- The Shield Machine has been activated directly at its console.
Defeat Mutated Lucas and finish the episode
In the Cultivation Lab, break the supply crates before entering the fight. Mutated Lucas takes reduced damage outside his vulnerable areas. Shoot his glowing head with ordinary handgun or shotgun ammunition until he is stunned and his chest opens.
During the opening, switch to RAMRODs and powerful attacks against the exposed chest. Incendiary grenades can help create or extend an opening, but preserve enough resources for later phases. Use the central machinery as cover and avoid standing in front of Lucas’s charges.
During the later phase, spores drain Chris’s oxygen even with the High-Grade Filter. Use the green wall-mounted oxygen tanks before the meter becomes critical, then return to cover and repeat the head-to-chest damage cycle. If Lucas shields his chest with a mutated arm, wait for the obstruction to move instead of wasting ammunition against it.
Continue alternating head damage, exposed-chest attacks and oxygen recovery until Lucas is defeated. Allow the post-fight scene and credits to play. Their appearance confirms completion of Not a Hero.
- Lucas’s head has been damaged enough to expose the chest.
- The exposed chest has received the main damage during each vulnerable phase.
- The ending scene and credits have appeared.
Before you move on
- The Not a Hero ending scene and credits have played.
- Mutated Lucas has been defeated and Chris’s final scene has completed.
- The Store Room West Stabilizer was collected if the optional upgrade was desired.
- The pre-Shield Machine Central Cavern save remains available for optional purchases and missed supplies.
- For missed collectibles or challenge rewards, restart Not a Hero from its separate menu rather than altering the main campaign save.
References for this chapter
- RESIDENT EVIL 7 Not a Hero — PlayStation Store
- RESIDENT EVIL 7 biohazard – PlayStation Store edition listing
- NaH · Not a Hero · Salt Mines and Lab — RE Guide
- Items — RE7 · RE Guide
- Clown Key — Resident Evil 7 Biohazard - Not a Hero — Evil Resource
- Stabilizer — Resident Evil 7 Biohazard - Not a Hero — Evil Resource
- Store Room West - Storage Area — Resident Evil 7 Biohazard - Not a Hero — Evil Resource
- RE7 Not a Hero - Shield Machine Guide — Neoseeker
- Not A Hero — Resident Evil 7: biohazard Walkthrough & Guide — GameFAQs
Banned Footage Vol. 1 and Vol. 2 and Ethan Must Die — challenge modes and optional content
Open these scenarios from Extra Content on the title screen. The PS5 Gold Edition includes Banned Footage Vol. 1 and Vol. 2, while Not a Hero is a separate free scenario. Vol. 1 contains Nightmare, Night Terror, Bedroom and Ethan Must Die; Nightmare and Night Terror are separate selectable modes, not an unlock chain. Vol. 2 contains 21, Daughters and Jack’s 55th Birthday, with Survival and Survival+ accessed through the 21 menu. Complete each required mode independently. For Daughters, use the true-ending route by taking the Pantry Lock Pick, opening the Bathroom drawer for the Small Component, lowering the Kids’ Room attic ladder, reading Lucas’s list on the laptop and then escaping through the veranda to the red tackle box. All six Jack’s 55th Birthday stages are required. Ratcatcher, Miracle Chef, S ranks and the alternate Daughters ending are additional targets.
Open Extra Content and verify the installed modes
From the title screen, choose Extra Content and open Banned Footage Vol. 1 or Vol. 2. Vol. 1 contains Nightmare, Night Terror, Bedroom and Ethan Must Die. Nightmare and Night Terror are separate entries: selecting or completing Nightmare does not unlock Night Terror, and clearing one does not count as clearing the other. Vol. 2 contains 21, Daughters and Jack’s 55th Birthday. The 21 menu also contains the Survival variants.
Each scenario has its own rules, inventory and progression. Campaign weapons, item-box contents and map discoveries do not transfer into these modes. If a listed entry is missing, close the game and check the PS5 game hub’s Manage Game Content screen, then confirm that the owning account has the Gold Edition or the relevant add-on installed.
A useful learning order is Bedroom, Nightmare, Night Terror, Daughters, standard 21, 21 Survival, 21 Survival+, Jack’s 55th Birthday and finally Ethan Must Die. This order is not mandatory, but standard 21 teaches the card effects before the harder Survival variants, and the other modes provide practice with the estate layout before the no-checkpoint challenge.
- Extra Content is visible from the title screen.
- Nightmare and Night Terror are both selectable as separate entries.
- Banned Footage Vol. 1 and Vol. 2 are installed.
- Standard 21, Survival and Survival+ are tracked as separate clears.
Survive Nightmare and Night Terror through five rounds
Nightmare places Clancy in the Processing Area from midnight until 5 a.m. The run contains five escalating rounds. Collect Scrap from compactors and defeated enemies, then spend it at the workbench on weapons, ammunition, healing, skills, traps and other defenses. The four compactors produce Scrap continuously, but you must move over the drops to collect them and they stop producing shortly before a round ends.
Use the Processing Area’s connected lanes as a loop rather than fighting in a dead end. Open the locked areas that provide additional compactors when you can afford the Corrosive, then improve Scrap production before purchasing expensive late-game weapons. Keep an escape route open, pull ordinary Molded toward narrow approaches and avoid crossing an active group for a single pickup.
Jack appears in round 2 and returns in round 5 with a chainsaw. Save traps, a strong firearm or another high-damage option for those rounds. At the end of each wave, reload, collect safe Scrap and heal only when necessary before buying the next upgrade.
Night Terror is a separate, harder mode using the same general five-round structure. Compactors provide less Scrap, enemy pressure is higher and tougher enemy combinations appear earlier, although the mode pays more Scrap between rounds. Select Night Terror directly from Extra Content and clear all five rounds independently; completing Nightmare does not satisfy this requirement.
- Clear all five Nightmare rounds.
- Reserve powerful damage and traps for Jack’s appearances.
- Clear all five Night Terror rounds separately.
- Avoid spending the entire Scrap reserve during the opening rounds.
Escape Bedroom without triggering Marguerite’s reset
Clancy begins handcuffed to the bed in the Master Bedroom. Use the Spoon to free yourself, then inspect the room. Match the three paintings in the correct arrangement to obtain the Sewing Needle. Use the needle on the bedside clock and set it to 5:00, matching the grandfather clock. The bed moves aside and opens the passage onward.
In the storage area, solve the padlock with the Snake, Leaf and Apple symbols. Use the Stove, Solid Fuel and Lighter to remove the insects from the required food, then take the Corkscrew. Combine the two Lantern Hooks to make the Iron Statuette. At the shadow puzzle, use the statuette and Fork to form the required silhouettes, then take the Snake Key and continue to the exit route.
Marguerite periodically checks the room. When she approaches, restore moved paintings, the lantern, the clock and other disturbed objects, then return to bed if necessary. If she finds the room changed, she attacks and resets the puzzle state. The clear registers after Clancy escapes and the ending sequence begins.
Ratcatcher is optional and requires all three rats during one successful run. Pursue it only after learning the normal route, because searching for the rats adds risk and can force a repeat if Marguerite catches you.
- Free Clancy with the Spoon.
- Set the bedside clock to 5:00 with the Sewing Needle.
- Solve the Snake, Leaf and Apple padlock.
- Complete the shadow puzzle and take the Snake Key.
- Escape Bedroom.
- Find all three rats in one run only if pursuing Ratcatcher.
Complete Daughters through the true-ending route
Daughters begins in the Baker house on the night Eveline arrives. After the opening sequence, watch Lucas at the dining table and note the laptop password, 1019. Before giving the Change of Clothes to Eveline, enter the Pantry, drop into the crawlspace and take the Lock Pick. Go to the upstairs Bathroom and use the Lock Pick on the drawer beneath the sinks to obtain the Small Component.
Take the Small Component to the Kids’ Room and place it in the trophy on the right as you enter. The attic ladder lowers. Climb up, use 1019 on Lucas’s laptop and interact again to read Lucas’s list. Only after reading the list should you return to the Laundry Room, take the Change of Clothes and give them to Eveline.
Continue through the resulting objectives. After the encounters involving Lucas, Marguerite and Jack, obtain the Rope in the Garage and return to the Bathroom. Run to the Recreation Room, close the door and secure it with the Rope. Take the Fork from the side room and use it on the two nails holding the board across the window.
Exit through the window and follow the Veranda to the gap at the far end. Squeeze through and open the red tackle box to obtain the White Dog’s Head Relief. Return through the gap, remove the board and enter the Main Hall. Avoid Marguerite if necessary, unlock the front door with the relief, cross the Yard and enter the Trailer. Read the note on the table, then interact with the item Mia is holding on the floor. Eveline’s appearance confirms the true ending.
The Car Key route in the Garage produces the alternate ending. It counts as a separate optional outcome, not as a replacement for the true-ending route.
- Record Lucas’s password: 1019.
- Take the Lock Pick from the Pantry crawlspace.
- Use it on the Bathroom drawer and take the Small Component.
- Place the component in the Kids’ Room trophy and enter the attic.
- Use 1019 on the laptop and read Lucas’s list.
- Give Eveline the Change of Clothes, then obtain the Rope.
- Escape through the Recreation Room and Veranda.
- Take the White Dog’s Head Relief from the red tackle box.
- Use the relief on the Main Hall door and complete the Trailer interaction.
Clear standard 21, 21 Survival and 21 Survival+
21 is Lucas’s blackjack-style game. Standard 21 consists of the story matches and should be completed first to learn the card effects, trump cards and penalty rules. It is a required clear separate from both Survival variants.
Read the visible totals before drawing and track cards already exposed, because the shared deck does not repeat card values. Save useful trump cards for dangerous hands rather than spending every effect in an easy opening round. Defensive cards are especially valuable when a bust would trigger a severe penalty.
After the standard game, select 21 Survival. It requires five consecutive wins, ending with Molded Hoffman. After Survival is completed, select 21 Survival+ separately. It requires ten wins and adds harsher hazards, including the shock apparatus, with Undead Hoffman as the final opponent. Clearing standard 21 or Survival does not count as a Survival+ completion.
- Complete the standard 21 story mode.
- Win five consecutive matches in 21 Survival.
- Win ten matches in 21 Survival+.
- Track card values and preserve strong trump cards for late rounds.
- Confirm all three results separately.
Complete all six Jack’s 55th Birthday stages
Jack’s 55th Birthday is a timed food-delivery mode played as Mia. Search each stage for food and drinks, return them to Jack and use enemy kills, Mr. Everywhere objects and other bonuses to extend the timer. The six stages are Guest House 1, Testing Area 1, Main House 1, Guest House 2, Testing Area 2 and Main House 2.
Each stage begins near an Item Box with preset equipment. Prepare the loadout before leaving the starting area because the clock begins once the stage starts. Favor short delivery loops, collect items that satisfy the immediate requirement and avoid detours that cost more time than they provide. Attack enemies when the time reward justifies the risk; unnecessary fights can consume the time needed for the final deliveries.
A B rank unlocks the next stage. Complete all six stages for the required challenge goal. Miracle Chef is separate and requires feeding Jack all 19 recognized food and drink types. All-stage S ranks and large time-bonus targets are also optional unless pursuing the full trophy set.
- Earn at least B rank to unlock each following stage.
- Complete Guest House 1, Testing Area 1, Main House 1, Guest House 2, Testing Area 2 and Main House 2.
- Prepare equipment before leaving each starting area.
- Track the 19 food and drink types only for Miracle Chef.
- Attempt S ranks separately if required for trophies.
Finish Ethan Must Die as a no-checkpoint route
Ethan Must Die starts Ethan in the Yard with minimal equipment and sends him through a trap-filled version of the Baker property before the Greenhouse fight against Marguerite. There are no checkpoints. Death returns Ethan to the start, while a statue remains at the death location and can provide one random item carried during the failed attempt.
Enemy and trap positions are fixed, but container contents and some rewards vary between attempts. Treat each run as route practice: learn which encounters can be bypassed, use traps against enemies when practical and preserve ammunition for unavoidable fights. Suspicious containers can be traps, so do not open every box automatically when space or health is limited. Blocking is important because a single mistake can end the attempt.
The route moves from the Yard through the altered Main House, basement and Processing Area, Boiler Room and upper rooms before returning through the Living Room, Main Hall and Yard. Before committing to the later upper-house section, reload, heal if necessary and carry a dependable weapon plus a restorative. Once the Greenhouse Key is obtained, return to the Yard and enter Marguerite’s Greenhouse.
In the Greenhouse, keep moving around the structure and use safe openings to damage Marguerite. Turrets and tripwires can help if positioned correctly, but do not assume reaching the Greenhouse is enough. The challenge clears only after Marguerite is defeated and the completion result registers.
- Learn the fixed enemy and trap route while adapting to variable container contents.
- Avoid treating Ethan Must Die as a normal campaign checkpoint run.
- Reach the upper-house point of no return with healing and a reliable weapon.
- Obtain the Greenhouse Key and return to the Yard.
- Defeat Marguerite in the Greenhouse and confirm the clear.
Before you move on
- Nightmare is cleared through all five rounds.
- Night Terror is cleared separately through all five rounds.
- Bedroom is cleared and Clancy escapes.
- Daughters is completed through the true Trailer route after reading Lucas’s list.
- Standard 21 is completed.
- 21 Survival is completed with five wins.
- 21 Survival+ is completed separately with ten wins.
- All six Jack’s 55th Birthday stages are completed.
- Ethan Must Die is cleared after Marguerite is defeated in the Greenhouse.
- Ratcatcher, Miracle Chef, all-stage S ranks and the alternate Daughters ending are tracked separately if pursuing the complete trophy set.
Trophies, completion checklist and post-game clean-up
Resident Evil 7 has no conventional chapter-select menu for the main campaign. Missed Files, Antique Coins, videotapes and one-time actions normally require an earlier manual save or another playthrough, while Mr. Everywhere progress carries across runs. Preserve a save before the Boathouse serum choice so both ending trophies can be obtained without replaying the entire campaign. Use separate tracking for Easy or Normal Antique Coins, Madhouse Antique Coins, Files, Mr. Everywhere statuettes and videotapes. For complete Gold Edition coverage, finish End of Zoe, Not a Hero, Nightmare, Night Terror, Bedroom, Ethan Must Die, standard 21, Survival in 21, Survival+ in 21, Daughters and all six Jack’s 55th Birthday stages. Standard 21, Survival and Survival+ are separate required mode clears. Miracle Chef, Ratcatcher, both Daughters outcomes, the 10-minute birthday bonus and all six Jack’s 55th Birthday S ranks are additional trophy or challenge targets.
Confirm the main-campaign trophy targets before deleting saves
The PS5 trophy list combines automatic story awards with missable actions, collectible groups, difficulty clears and restriction trophies. After the credits, return to the title screen and compare the trophy list with your intended goals before deleting campaign saves. The base-game platinum is separate from the DLC trophy groups, so completing the Gold Edition extras is not required for the base-game platinum.
Track the main collectible groups independently. On Easy or Normal, maintain separate lists for Files, Antique Coins, Mr. Everywhere statuettes and videotapes. Easy or Normal Antique Coins are not the same requirement as the Madhouse Antique Coins, which use a different layout. Mr. Everywhere progress carries across playthroughs, but most other collectible progress is tied to the run in which it was collected.
The game does not provide a conventional chapter-select menu for the main campaign. A missed document, coin, videotape or one-time action usually requires loading an earlier manual save or repeating the relevant portion of the story. Keep a written videotape checklist rather than relying only on the in-game statistics screens.
- Compare the PS5 trophy list with the intended base-game goals.
- Track Files, Easy or Normal Antique Coins, Madhouse Antique Coins, Mr. Everywhere statuettes and videotapes separately.
- Treat the base-game platinum and DLC trophy groups as separate targets.
- Keep a written videotape checklist for the single-playthrough requirement.
Use manual saves because there is no campaign chapter select
Resident Evil 7 does not let you select the Main House, Old House, Ship or Mines from a completed-story chapter menu. Rotate manual saves instead of overwriting one slot: keep a recent save, a save near the start of the current major area and a reserve save before an irreversible transition. This is especially important when pursuing collectibles or one-time action trophies.
Preserve a save immediately before the serum decision in the Boathouse. Give the serum to Mia when pursuing the ending associated with continuing Ethan’s story. After the ending trophy registers, reload the preserved save and give the serum to Zoe for the alternate-ending trophy. Do not overwrite the preserved save until both intended results are confirmed.
Use the same approach for target-shooting opportunities, area transitions that close behind Ethan and major boss attempts. A save made after leaving the relevant area may no longer permit a missed action to be retried efficiently.
- Maintain at least three rotating campaign saves.
- Preserve the save immediately before the serum choice.
- Keep a separate save for collectible progress and another for challenge runs when possible.
- Confirm each ending trophy before overwriting the serum-choice save.
Use a dedicated cleanup run for speed and restriction trophies
If the first playthrough was exploratory, use a focused Easy run for the four-hour, Item Box and healing restrictions. Just Get Me Outta Here requires finishing the campaign within four hours. Resource Manager requires completing the campaign without opening the Item Box more than three times. Walk It Off requires using three First Aid Meds or fewer. These goals can be combined, but only with a prepared route and careful record keeping.
For the speed run, skip unnecessary exploration, run past enemies where the route permits and reload a manual save when a section takes too long. Track Item Box openings and First Aid Med use from the beginning. If a restriction is broken, reload a save from before the violation or restart the run rather than continuing and hoping the requirement will still register.
Do not combine a full collectible sweep with the speed and restriction objectives unless you already know the route. The safest order is an exploratory story run, a focused restriction or speed run, then targeted collectible cleanup from preserved saves or a fresh checklist run.
- Use Easy for the four-hour and restriction run unless another planned route uses a different difficulty.
- Track Item Box openings and First Aid Med use from the beginning of the run.
- Reload a pre-violation save immediately if a restriction is broken.
- Verify the speed and restriction trophies before deleting the run’s save.
Complete Madhouse with its own coin route
Madhouse unlocks after completing the story once. It changes enemy placement, item availability, damage, durability and saving pressure. Manual saves require Cassette Tapes, so plan around recorders and do not treat saving as unlimited. Madhouse also has its own Antique Coin layout and trophy requirement; the Easy or Normal coin list cannot be substituted.
Begin the Madhouse run with a written coin route and mark each coin only after the pickup is secure. If you die before the pickup is safely recorded, collect it again after reloading. The Circular Saw reward from a four-hour clear can make later runs easier, but route knowledge and conservative resource use remain important.
A missed Madhouse coin generally requires returning to an earlier save or repeating the necessary portion of the campaign. There is no completed-story chapter menu that can replace the run.
- Unlock Madhouse by completing the story once.
- Use the Madhouse-specific Antique Coin checklist.
- Plan Cassette Tape saves around difficult areas and boss approaches.
- Confirm the Madhouse coin trophy before removing the run’s backup save.
Clear every included Gold Edition mode from its own menu entry
Open the title screen’s Extra Content or DLC selections and confirm that Banned Footage Vol. 1, Banned Footage Vol. 2 and End of Zoe are available. Not a Hero is a separate free scenario for Resident Evil 7 owners. It should be completed independently even though the PS5 Gold Edition product listing presents it alongside the other available content.
For Banned Footage Vol. 1, clear Nightmare, Night Terror, Bedroom and Ethan Must Die. Nightmare is the Processing Area survival mode, while Night Terror is its separate harder survival target. Bedroom is an escape scenario. Ethan Must Die is a randomized, lethal challenge and should be treated as a standalone completion rather than as another story chapter.
For Banned Footage Vol. 2, complete all three 21 targets separately: first clear standard 21, then clear Survival mode in 21, then clear Survival+ mode in 21. Standard 21 is not automatically complete when Survival or Survival+ is cleared, and Survival or Survival+ is not complete merely because the standard game has been finished. After those three clears, complete Daughters.
Clear all six Jack’s 55th Birthday stages. Stage progression is tied to performance, so record each stage result rather than checking only whether the final stage has been reached. This six-stage completion is separate from Miracle Chef, the 10-minute time-bonus target and the all-S-rank challenge.
- Banned Footage Vol. 1: Nightmare cleared.
- Banned Footage Vol. 1: Night Terror cleared.
- Banned Footage Vol. 1: Bedroom cleared.
- Banned Footage Vol. 1: Ethan Must Die cleared.
- Banned Footage Vol. 2: standard 21 cleared.
- Banned Footage Vol. 2: Survival mode in 21 cleared.
- Banned Footage Vol. 2: Survival+ mode in 21 cleared.
- Banned Footage Vol. 2: Daughters cleared.
- Jack’s 55th Birthday: all six stages cleared.
- End of Zoe and Not a Hero completed separately.
Separate included-mode completion from optional DLC trophies
Do not mistake a mode clear for every trophy associated with that mode. Miracle Chef requires feeding Jack every type of food and drink in Jack’s 55th Birthday. The birthday S-rank trophy requires S rank or better on all six stages; it is not awarded merely for reaching the final stage. The 10-minute time-bonus trophy is another separate target.
Daughters has two outcomes. The bad ending and true ending each have their own trophy, but both are additional outcome targets rather than two required versions of the episode for the basic included-content checklist. Ratcatcher and other Banned Footage challenge trophies should also be tracked separately from simply clearing their associated modes.
Maintain a separate DLC checklist with one line for standard 21, one for Survival in 21 and one for Survival+ in 21. Do the same for Nightmare, Night Terror, Bedroom and Ethan Must Die. This prevents standard 21 from being lost in a checklist that only records the two Survival variants.
- Track standard 21 separately from Survival and Survival+.
- Track Miracle Chef separately from the six Jack’s 55th Birthday clears.
- Track all six Jack’s 55th Birthday S ranks separately.
- Track both Daughters outcomes separately from the basic Daughters clear.
- Track Ratcatcher and other challenge trophies separately.
- Confirm Ethan Must Die, Nightmare, Night Terror, standard 21, Survival and Survival+ individually.
Perform the final verification pass
For the base game, verify the intended story trophies, Easy or Normal and Madhouse difficulty results, Files, Antique Coins, Mr. Everywhere statuettes, videotapes, four-hour clear, Item Box restriction, healing restriction and individual action trophies. If the goal is the platinum, every base-game trophy must be present; DLC trophies do not count toward that base-game award.
For full Gold Edition completion, verify the campaign plus End of Zoe, Not a Hero, Nightmare, Night Terror, Bedroom, Ethan Must Die, standard 21, Survival in 21, Survival+ in 21, Daughters and all six Jack’s 55th Birthday stages. Standard 21, Survival and Survival+ must each have their own completion confirmation.
Then review optional targets separately: Miracle Chef, Ratcatcher, both Daughters outcomes, the 10-minute Jack’s 55th Birthday bonus and S rank or better on all six birthday stages. These targets expand trophy completion but do not replace the required clears for standard 21, Survival or Survival+.
- The intended PS5 base-game trophies are earned, including the platinum if that is the goal.
- Files, Easy or Normal Antique Coins, Madhouse Antique Coins, Mr. Everywhere statuettes and videotapes have been checked with separate tracking methods.
- The serum-choice save has been preserved until both intended ending outcomes and trophies are confirmed.
- Nightmare, Night Terror, Bedroom and Ethan Must Die are individually complete.
- Standard 21 is individually complete.
- Survival mode in 21 is individually complete.
- Survival+ mode in 21 is individually complete.
- Daughters is complete, with both outcomes checked separately if desired.
- All six Jack’s 55th Birthday stages are complete.
- End of Zoe and Not a Hero are complete.
- Miracle Chef, Ratcatcher, both Daughters outcomes, the 10-minute time-bonus target and all six S ranks are recorded as optional goals rather than confused with basic mode completion.
- Useful recovery saves remain backed up before redundant data is deleted.
Before you move on
- The PS5 trophy list shows the intended base-game trophies, including story, collectible, difficulty and restriction trophies.
- Files, Easy or Normal Antique Coins, Madhouse Antique Coins, Mr. Everywhere statuettes and videotapes have been checked with separate tracking methods.
- The serum-choice save has been preserved until both required ending outcomes and trophies are confirmed.
- End of Zoe and Not a Hero are complete.
- Nightmare, Night Terror, Bedroom and Ethan Must Die are individually verified.
- Standard 21 is individually verified.
- Survival mode in 21 is individually verified.
- Survival+ mode in 21 is individually verified.
- Daughters is complete, with both outcomes checked separately if desired.
- All six Jack’s 55th Birthday stages are individually verified.
- Miracle Chef, Ratcatcher, both Daughters outcomes, the 10-minute birthday bonus and all six S ranks are marked separately as optional trophy or challenge goals.
- Recovery saves are preserved before redundant data is deleted.
References for this chapter
- RESIDENT EVIL 7 biohazard Gold Edition – PlayStation Store
- RESIDENT EVIL 7 biohazard – PlayStation Store edition listing
- Resident Evil 7: Biohazard Trophy Guide & Road Map – PlayStationTrophies.org
- Trophies – Resident Evil 7: Biohazard – PlayStationTrophies.org
- Resident Evil 7 Gold Edition Walkthrough – GameFAQs
- Banned Footage Vol. 2: 21, Daughters and Jack’s 55th Birthday – RE Guide
- Resident Evil 7 All Collectible Locations Guide – PowerPyx
- Resident Evil 7 Trophy Guide & Roadmap – PowerPyx
Recovery & troubleshooting: common problems on PS5 and how to recover
Most Resident Evil 7 biohazard Gold Edition problems on PS5 can be handled without deleting saved data. First identify whether the problem concerns the PS5 upgrade, a missing add-on, a license, cloud synchronization, a damaged download, or an in-game progression failure. Disc owners must insert the eligible PS4 Gold Edition disc whenever they launch the upgraded PS5 application, and a PS5 Digital Edition cannot validate that disc-based upgrade. For missing DLC, confirm that the correct PlayStation account and regional game entitlement are being used, restore licenses, then redownload the affected content. Protect saves before reinstalling anything. PS5 saves and PS4 saves are managed separately, while a USB backup of PS5 saved data is part of a full-console backup rather than an individual save export. Use Safe Mode’s non-destructive cache or database tools only after backing up. Contact PlayStation Support for account, Store, download, license, or console problems; contact Capcom for a repeatable Resident Evil 7-specific progression or software fault.
1. Confirm which Resident Evil 7 application and entitlement you are using
Highlight Resident Evil 7 biohazard on the PS5 home screen, press the Options button, and check the available game-version choice. Make sure you are launching the native PS5 application when troubleshooting the upgraded version, not the PS4 application. The two versions can have different saved-data categories and different upgrade behavior.
If you own the physical PS4 Gold Edition, insert that disc into a PS5 with an Ultra HD Blu-ray disc drive. Open the Resident Evil 7 biohazard product page, select the three-dot menu beside the purchase controls, choose Resident Evil 7 biohazard Gold Edition, and look for the free PS5 upgrade while the eligible disc is inserted. The disc remains an ownership check: it must be inserted to launch the upgraded PS5 version. A PS5 Digital Edition cannot validate a disc-based upgrade.
Digital owners should sign in with the PlayStation account that purchased the game. If the product page shows a purchase, download, or version mismatch, do not uninstall the game yet. Record whether the account owns the base game, Gold Edition, or an individual add-on before attempting further repairs.
- The PS5 application is selected when you expect the native PS5 version.
- A disc-based upgrade is being used on a PS5 model with a disc drive.
- The eligible PS4 Gold Edition disc is inserted whenever the upgraded application is launched.
- Digital ownership is being checked on the account that completed the purchase.
2. Restore licenses and redownload missing Gold Edition content
If End of Zoe or Banned Footage Vol. 1 or Vol. 2 is missing, close Resident Evil 7 completely. On the PS5, go to Settings → Users and Accounts → Other → Restore Licenses. Restoring licenses does not delete saved data and can correct missing games or add-ons, padlock icons, and some launch failures.
After restoring licenses, open Game Library → Your Collection and highlight Resident Evil 7. Use the game’s available options to inspect downloadable content, or return to the Resident Evil 7 biohazard product page and open its add-ons section. Download any Gold Edition episode that is shown as owned but not installed. If an add-on is not listed, check the account’s transaction history and confirm that the add-on and the installed game use the same account and regional entitlement.
Not a Hero is a separate free scenario for Resident Evil 7 owners rather than an exclusive Gold Edition episode. If it is absent, locate it through the game’s PlayStation Store page and select the free download option. Wait for the download and installation to finish before checking the game’s additional content menus.
- The game and add-on are tied to the same PlayStation account.
- The installed game and purchased content are from the same regional entitlement.
- Licenses were restored before attempting a reinstall.
- The download and installation have completed before launching the game again.
3. Protect and restore the correct saved data
Do not delete local saves while investigating a missing checkpoint, a damaged-looking file, or a progression blocker. If you have PlayStation Plus, go to Settings → Saved Data and Game/App Settings, then select Saved Data (PS5) or Saved Data (PS4) according to the application you are running. For the native PS5 application, use the PS5 saved-data category. For the PS4 application running on PS5, use the PS4 category.
To make a cloud copy, select Upload or Delete from Console Storage, open the Upload to Cloud Storage tab, select the Resident Evil 7 data, and upload it. To restore an earlier copy, use Download or Delete from Cloud Storage, select the matching PS5 or PS4 category, and compare dates before downloading. For PS5 games, automatic synchronization can update both local and cloud data to the newest state; check the displayed date carefully before replacing a local save. PS4 saves on PS5 generally require a manual download back to console storage.
A PS5 saved-data file cannot be copied individually to a USB drive through the normal save-management menu. A full PS5 backup can include saved data, however, and is found under Settings → System → System Software → Back Up and Restore → Back Up Your PS5. Connect a compatible FAT32 or exFAT USB drive, choose the data to back up, and allow the process to finish. Do not interrupt the backup or restore operation. Before a late-game boss or DLC challenge, keep a current cloud copy and, when possible, an earlier manual save created at a tape recorder.
- PS5 saved data is being managed under Saved Data (PS5).
- PS4 saved data is being managed under Saved Data (PS4).
- Cloud-save dates were compared before downloading or overwriting anything.
- A full USB backup is understood to restore console data rather than act as an individual PS5 save export.
- At least one earlier Resident Evil 7 save remains available before a difficult boss or episode.
4. Repair failed downloads, crashes, and freezes in a non-destructive order
Close the game and restart the PS5. Install any pending system or game update, check available storage, and open Downloads/Uploads to inspect the Resident Evil 7 or DLC download. If a download is stuck, pause and resume it. If that fails, cancel the failed download and start it again from Game Library or the PlayStation Store after checking PlayStation Network service status and testing the console’s internet connection.
If the content belongs to another account on the console, confirm that the purchasing account is signed in and that Console Sharing and Offline Play is enabled where appropriate. Restore licenses again only after confirming ownership; repeated reinstalls will not repair an account that does not own the content.
For continuing crashes or indexing problems, turn off the PS5. Hold the power button again until the second beep, connect the controller by USB, and enter Safe Mode. Select Clear Cache and Rebuild Database, then try Clear System Software Cache first. Rebuild Database can help when system content is not indexed correctly or a deleted game icon remains on the Home screen. Do not select Reset PS5 or Reset PS5 (Reinstall System Software) unless you have a reliable backup and are following PlayStation’s reset instructions, because those options delete user data.
- System and game updates were installed before Safe Mode maintenance.
- The failed download was tested after each individual repair step.
- Clear System Software Cache was attempted before destructive reset options.
- A backup exists before using any Safe Mode option that can erase data.
5. Recover from an apparent in-game progression blocker
If a door, elevator, item, or story event appears unavailable, reload the most recent manual save made at a tape recorder and retrace the immediate objective. Confirm that the required key item was actually collected and that the preceding interaction or cutscene completed. Some Resident Evil 7 doors and events become usable only after a specific story trigger.
Check the map for an unexplored room or a route that was opened but not followed. Return to the nearest safe room, organize the inventory, and approach the objective again rather than repeatedly forcing the same transition. If the problem began after a crash or interrupted load, quit to the title screen before reloading.
If the same blocker appears on several saves, test an earlier save or a new test save. Do not delete the entire save set to repair one slot. A reinstall should be considered only after licenses are verified and saved data has been uploaded or backed up. If the fault remains repeatable on a clean installation, document it for Capcom.
- The suspected item, interaction, and preceding story event have been confirmed.
- The route was tested from an earlier save or a new test save.
- Saved data was protected before reinstalling.
- The issue can be reproduced consistently if support must investigate it.
6. Contact the correct support service with complete evidence
Contact PlayStation Support for account ownership, Store purchases, add-on downloads, license errors, payment problems, console storage, system software, or PlayStation error codes. Contact Capcom for a repeatable Resident Evil 7-specific progression fault, DLC recognition issue that survives license restoration and reinstall, or a crash that occurs only with this game.
Provide the exact PS5 model, whether the game is physical or digital, the disc and account region, the application version being launched, the affected DLC name, the error code or message, and the date and time of the failure. State whether the problem affects the PS5 or PS4 application. Explain the steps that reproduce it and list every troubleshooting action already completed.
Attach screenshots or a short video showing the error, download status, missing add-on, or blocked progression. Do not send passwords, payment details, full account credentials, or unnecessary personal information. Preserve the affected save until support asks for it; deleting the evidence can make a software fault harder to diagnose.
- The error code is recorded exactly, including capitalization and hyphens.
- The PS5 or PS4 application is identified.
- Ownership, region, DLC name, and console model are included.
- Screenshots or video show the failure without exposing private account information.
- The affected save remains preserved.
Before you move on
- The intended Resident Evil 7 application launches: PS5 for the native upgrade or PS4 when that version is deliberately being used.
- A disc-based upgrade launches with the eligible PS4 Gold Edition disc inserted, or digital ownership is recognized on the purchasing account.
- End of Zoe and Banned Footage Vol. 1 and Vol. 2 are installed and accessible when included in the entitlement.
- Not a Hero is installed separately if it is part of the completion plan.
- A current save is uploaded to cloud storage or included in a completed console backup, and an earlier recovery save remains available.
- Resident Evil 7 reaches the title screen and loads a test save without crashing after the final repair step.
References for this chapter
- Resident Evil 7 biohazard Gold Edition - Upgrading PS4 Disc Version to PS5 – Capcom Support
- Resident Evil 7 biohazard Support – Capcom Support
- How to restore licenses on PlayStation console
- How to troubleshoot game downloads from PlayStation Store
- How to use Safe Mode on PS5 consoles and PS4 consoles
- How to back up and restore PS5 console data
- PlayStation Plus cloud storage for PS5 consoles
- How to manage PS5 console storage space
Finishing up
The main campaign is complete when Eveline is defeated, the rescue and closing scenes have played, and the credits begin.
End of Zoe is complete when Jack is defeated, Zoe is cured, and the episode credits have played. Not a Hero is complete when Mutated Lucas is defeated and its credits have played.
For the full Gold Edition-content goal, complete Nightmare, Night Terror, Bedroom and Ethan Must Die from Banned Footage Vol. 1; 21, Survival, Survival+, Daughters and all six Jack’s 55th Birthday stages from Vol. 2; and End of Zoe. Completing Miracle Chef, collecting all Bedroom rats, and viewing both Daughters outcomes are additional challenge or trophy targets unless separately desired.
Gold Edition bundles the base game, Banned Footage Vol. 1, Banned Footage Vol. 2 and End of Zoe. Not a Hero is separate free content available to Resident Evil 7 owners.
Verify the PS5 trophy list separately if trophy completion is desired; trophy completion is broader than the minimum story-and-content completion standard above.
Choose your next gameScreenshots & video
Game imagery for reference. Follow the written chapters above for the route and strategies.

Sources & references
Our original guide draws on the references below. Check the edition at the top of this page before following controls or unlock requirements.
- Resident Evil 7 biohazard Gold Edition - Upgrading PS4 Disc Version to PS5 – Capcom Support
- PS5 versions of Resident Evil 7, Resident Evil 2, and Resident Evil 3 launch today — PlayStation.Blog
- RESIDENT EVIL 7 biohazard Gold Edition – PlayStation Store
- Main House – Resident Evil Wiki
- Guide for Resident Evil 7: Biohazard – Normal playthrough
- Main House Guide – Resident Evil 7 biohazard – Neoseeker
- Main game (RE7) – Resident Evil Wiki
- Resident Evil 7: Biohazard – PS4 Games – PlayStation
- Prologue · Guest House · RE7 · RE Guide
- The Guest House — Resident Evil 7: biohazard Gold Edition Walkthrough & Guide
- 1 - Intro, Guest House, Attic — Resident Evil 7 Biohazard walkthrough
- Resident Evil 7: Biohazard — Gold Edition Walkthrough, The Main House
- 2 - Hatch Key, Main Hall, Garage Fight — Resident Evil 7 Biohazard — Super Cheats
- RE Guide — Main House and Processing Area
- Ox Statuette — Resident Evil 7 Biohazard — Evil Resource
- Items — RE7 · RE Guide
- Morgue Entry — Processing Area, Resident Evil 7 Biohazard
- Resident Evil 7: Biohazard — How To Solve Every Puzzle
- The Old House - Resident Evil 7: biohazard - Gold Edition Walkthrough & Guide
- Yard and Old House Guide — Resident Evil 7 biohazard — Neoseeker
- 3 · Yard & Old House · RE7 · RE Guide
- Marguerite pit · RE7 · RE Guide
- Lantern — Resident Evil 7 Biohazard — Evil Resource
- Resident Evil 7 boss guide: how to beat Marguerite in the greenhouse — PC Gamer
- 7 - Grenade Launcher, Marguerite Boss Fight - Resident Evil 7 Biohazard — SuperCheats
- Secret Detention Room — Resident Evil 7 — Samurai Gamers
- 5 · The Boat House · RE7 · RE Guide
- 4 · Back to the Main House & Testing Area · RE7 · RE Guide
- Mutated Jack · RE7 · RE Guide
- Boathouse Guide - Resident Evil 7 biohazard - Neoseeker
- Crowbar (Resident Evil 7 Biohazard) - Evil Resource
- Side modes — RE7 · RE Guide
- RESIDENT EVIL 7 biohazard Gold Edition — PlayStation Store
- The Wrecked Ship — Resident Evil 7: biohazard Gold Edition Walkthrough & Guide
- The Wrecked Ship — Resident Evil 7: biohazard Walkthrough & Guide
- 6 · The Wrecked Ship (Mia) · RE7 · RE Guide
- No. 2 Engine Room — Wrecked Ship S2
- The Salt Mine - Resident Evil 7: biohazard - Gold Edition Walkthrough & Guide
- 7 · Swamp · Salt Mines · RE7 · RE Guide
- Files · RE7 · RE Guide
- Swamp and Salt Mine Guide - Resident Evil 7 biohazard
- 8 · Finale · Guest House · RE7 · RE Guide
- Eveline · RE7 · RE Guide
- Arsenal · RE7 · RE Guide
- Guest House (Revisit) - Final Area Guide — Neoseeker
- RESIDENT EVIL 7 End of Zoe — PlayStation Store
- EoZ · End of Zoe: from the Swamp to the Main House (Joe) · RE7 · RE Guide
- Bosses · RE7 · RE Guide
- End of Zoe — Resident Evil 7: biohazard Gold Edition Walkthrough & Guide
- RESIDENT EVIL 7 Not a Hero — PlayStation Store
- RESIDENT EVIL 7 biohazard – PlayStation Store edition listing
- NaH · Not a Hero · Salt Mines and Lab — RE Guide
- Clown Key — Resident Evil 7 Biohazard - Not a Hero — Evil Resource
- Stabilizer — Resident Evil 7 Biohazard - Not a Hero — Evil Resource
- Store Room West - Storage Area — Resident Evil 7 Biohazard - Not a Hero — Evil Resource
- RE7 Not a Hero - Shield Machine Guide — Neoseeker
- Not A Hero — Resident Evil 7: biohazard Walkthrough & Guide — GameFAQs
- Resident Evil 7 Daughters: True Ending — GamesRadar+
- Resident Evil 7: Biohazard Trophy Guide & Road Map – PlayStationTrophies.org
- Trophies – Resident Evil 7: Biohazard – PlayStationTrophies.org
- Resident Evil 7 Gold Edition Walkthrough – GameFAQs
- Banned Footage Vol. 2: 21, Daughters and Jack’s 55th Birthday – RE Guide
- Resident Evil 7 All Collectible Locations Guide – PowerPyx
- Resident Evil 7 Trophy Guide & Roadmap – PowerPyx
- Resident Evil 7 biohazard Support – Capcom Support
- How to restore licenses on PlayStation console
- How to troubleshoot game downloads from PlayStation Store
- How to use Safe Mode on PS5 consoles and PS4 consoles
- How to back up and restore PS5 console data
- PlayStation Plus cloud storage for PS5 consoles
- How to manage PS5 console storage space
About the game & collecting notes
- Platform
- Sony PlayStation 5
Step-by-step campaign walkthrough for Resident Evil 7 biohazard Gold Edition on PlayStation 5. This guide covers the full main-story route to the canonical ending on PS5, explains PS5-specific setup, and includes optional coverage for the End of Zoe epilogue, Not a Hero, Banned Footage packs and challenge modes included with Gold Edition.
Darryl Polo
Darryl Polo writes about emulation and retro games. What changes when an old favorite moves to another setup? That question connects his interest in tinkering with the games that made the hardware worth keeping.
Our editorial standardsFound a step that needs another look? Help us improve this guide.